When I’m craving a project that feels both earthy and polished, I reach for clay and let my hands do the brainstorming. These ceramic art ideas are meant to be friendly to beginners but still exciting enough to keep you experimenting.
Handbuilt Mugs With Painterly Underglaze
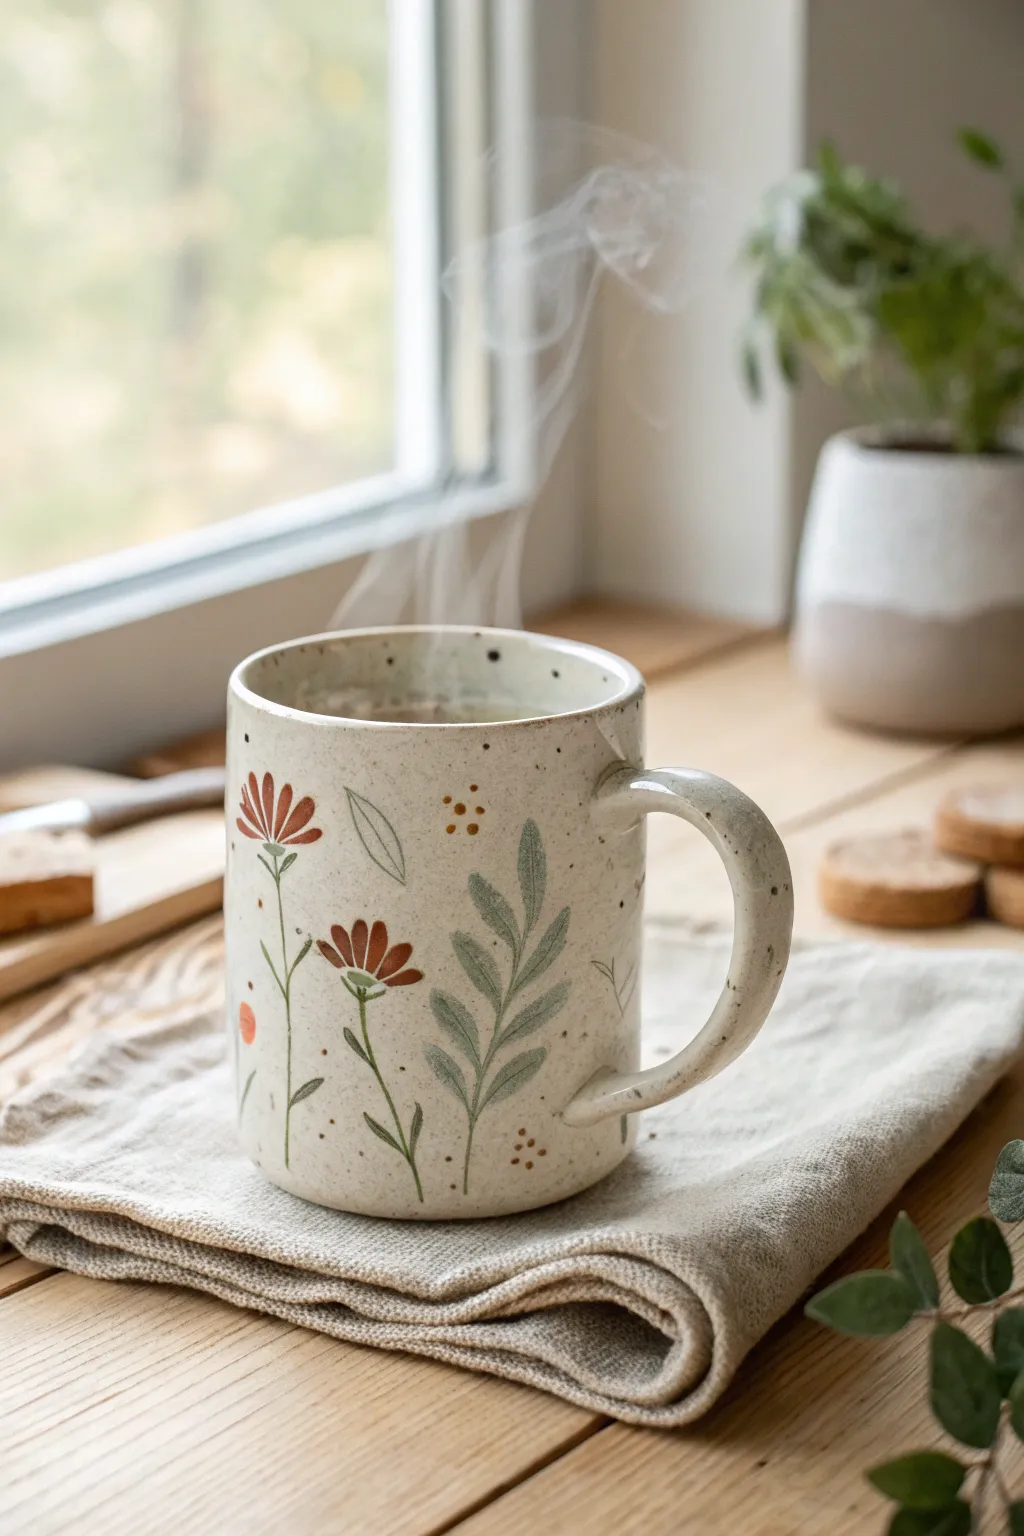
Create a cozy, nature-inspired vessel featuring delicate painted flora on a speckled clay body. This project combines simple handbuilding techniques with illustrative underglaze painting for a finish that feels both rustic and refined.
How-To Guide
Materials
- Speckled stoneware clay (mid-fire)
- Rolling pin and guide sticks (approx. 1/4 inch)
- Circular template or cookie cutter (approx. 4-inch diameter for base)
- Rectangle template (approx. 12×5 inches for body)
- Serrated rib or scoring tool
- Slip (clay mixed with water)
- Fettling knife
- Underglazes: Terra cotta/rust red, olive green, sage green, mustard yellow
- Small round detail brushes (size 0 and 2)
- Clear matte or satin glaze
- Sponge
Step 1: Building the Form
-
Roll out the slab:
Begin by wedging your speckled clay to remove air bubbles, then roll it out into a smooth slab. Use 1/4 inch guide sticks to ensure an even thickness throughout. -
Cut the components:
Using your templates and fettling knife, cut out a rectangle for the mug body and a circle for the base. If you want a slightly tapered look, you can curve the long edge of your rectangle slightly. -
Texture the slab:
Before assembling, you can lightly compress the slab with a rib to smooth out canvas texture. If you want extra speckling, this is a good time to ensure the natural grog is visible. -
Score and slip edges:
Score the short ends of the rectangular slab and the outer edge of the circular base. Apply a generous amount of slip to the scored areas. -
Assemble the cylinder:
Wrap the rectangular slab around the base, joining the short ends together first to form a cylinder. Press the seam firmly. -
Attach the base:
Place the cylinder onto the scored base. Use a modeling tool to blend the clay from the wall down onto the base on the outside, and coil a tiny worm of clay on the inside seam to reinforce the join. -
Smooth the seams:
Use a damp sponge or a flexible rib to smooth over the vertical seam and the bottom join until they are invisible. The form should look continuous. -
Make the handle:
Pull a strap of clay or roll a coil for the handle. Shape it into a ‘C’ or ear shape and let it stiffen slightly until it holds its curve without drooping. -
Attach the handle:
Score and slip the attachment points on both the mug body and the handle. Press firmly to attach, check alignment, and clean up excess slip with a damp brush.
Smudged Underglaze?
If you smudge a line while painting, don’t wipe it while wet! Let the mistake dry completely, then gently scratch it off with a needle tool or stiff brush.
Step 2: Painterly Decoration
-
Leather hard preparation:
Allow the mug to dry to a leather-hard state. The surface should be firm but still cool to the touch. Wipe it gently with a damp sponge to create a smooth ‘canvas’ for your painting. -
Outline delicate stems:
Using a size 0 brush and sage green underglaze, paint thin, wavering vertical lines for the flower stems. Vary the heights to create a natural, organic composition. -
Paint the leaves:
Mix a little olive green with the sage for variety. Paint elongated, leaf shapes branching off the stems. I find a single stroke—pressing down and lifting up—creates the best leaf shape. -
Add floral blooms:
Switch to your terra cotta or rust red underglaze. Paint the flower heads using simple, radiating brushstrokes to mimic petals. Imagine pressing the belly of the brush down to make the petal wider at the base. -
Add details and accents:
Using a tiny dot of mustard yellow, add centers to the flowers. You can also add free-floating dots around the leaves to enhance the whimsical, illustrative feel. -
Bisque fire:
Once the mug is bone dry, bisque fire it to cone 04 (or your clay’s specific bisque temperature). This sets the shape and makes the underglaze permanent. -
Glaze application:
Dip the bisque-fired mug into a clear matte or satin glaze. A glossy glaze works too, but a satin finish complements the soft, painterly quality of the underglaze best. -
Final wipe and fire:
Wipe the foot of the mug cleanly with a sponge to prevent it sticking to the kiln shelf. Glaze fire the piece to the maturity temperature of your clay (likely Cone 5 or 6).
Add Depth
Water down your green underglaze slightly to create a semi-transparent wash for some leaves, then paint opaque veins on top for a layered watercolour effect.
Now you have a charming, handmade mug perfect for your morning ritual or as a heartfelt gift


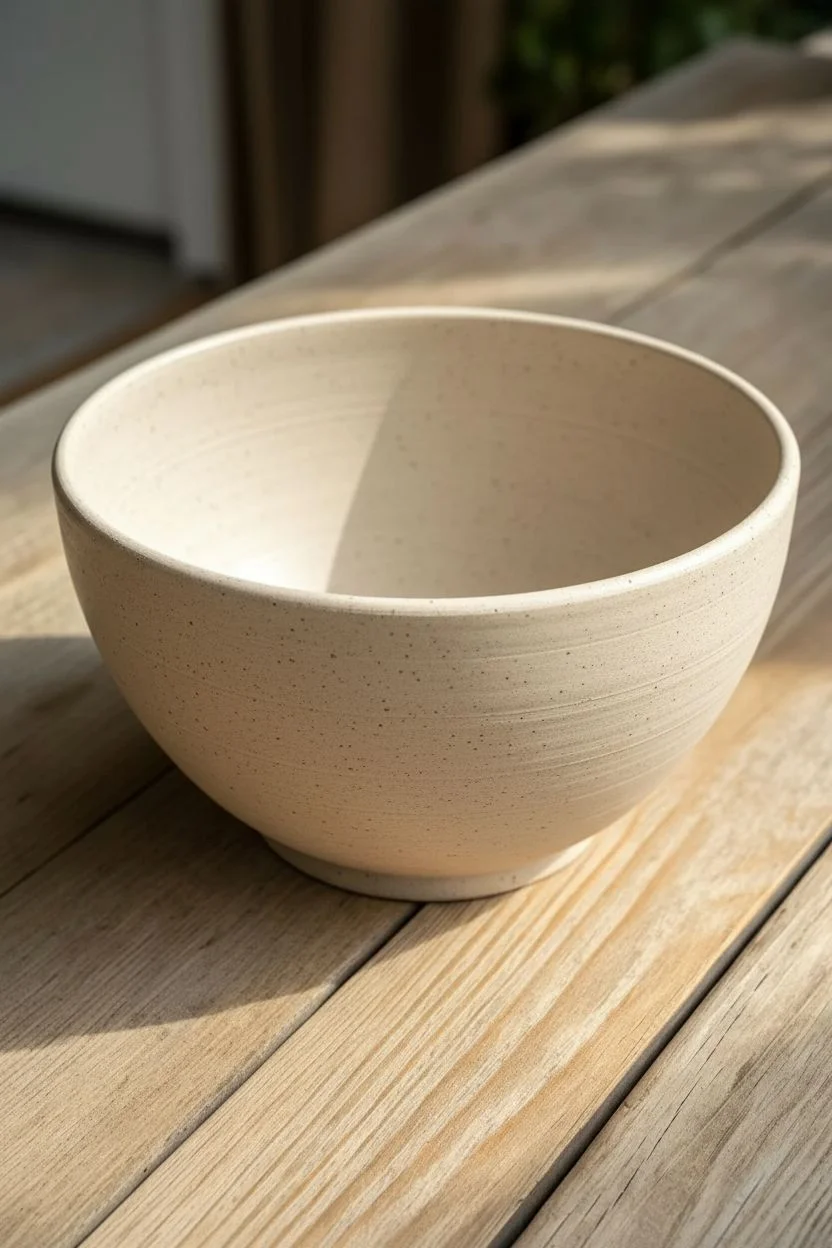
Pinch-Pot Bowls With Dipped Glaze
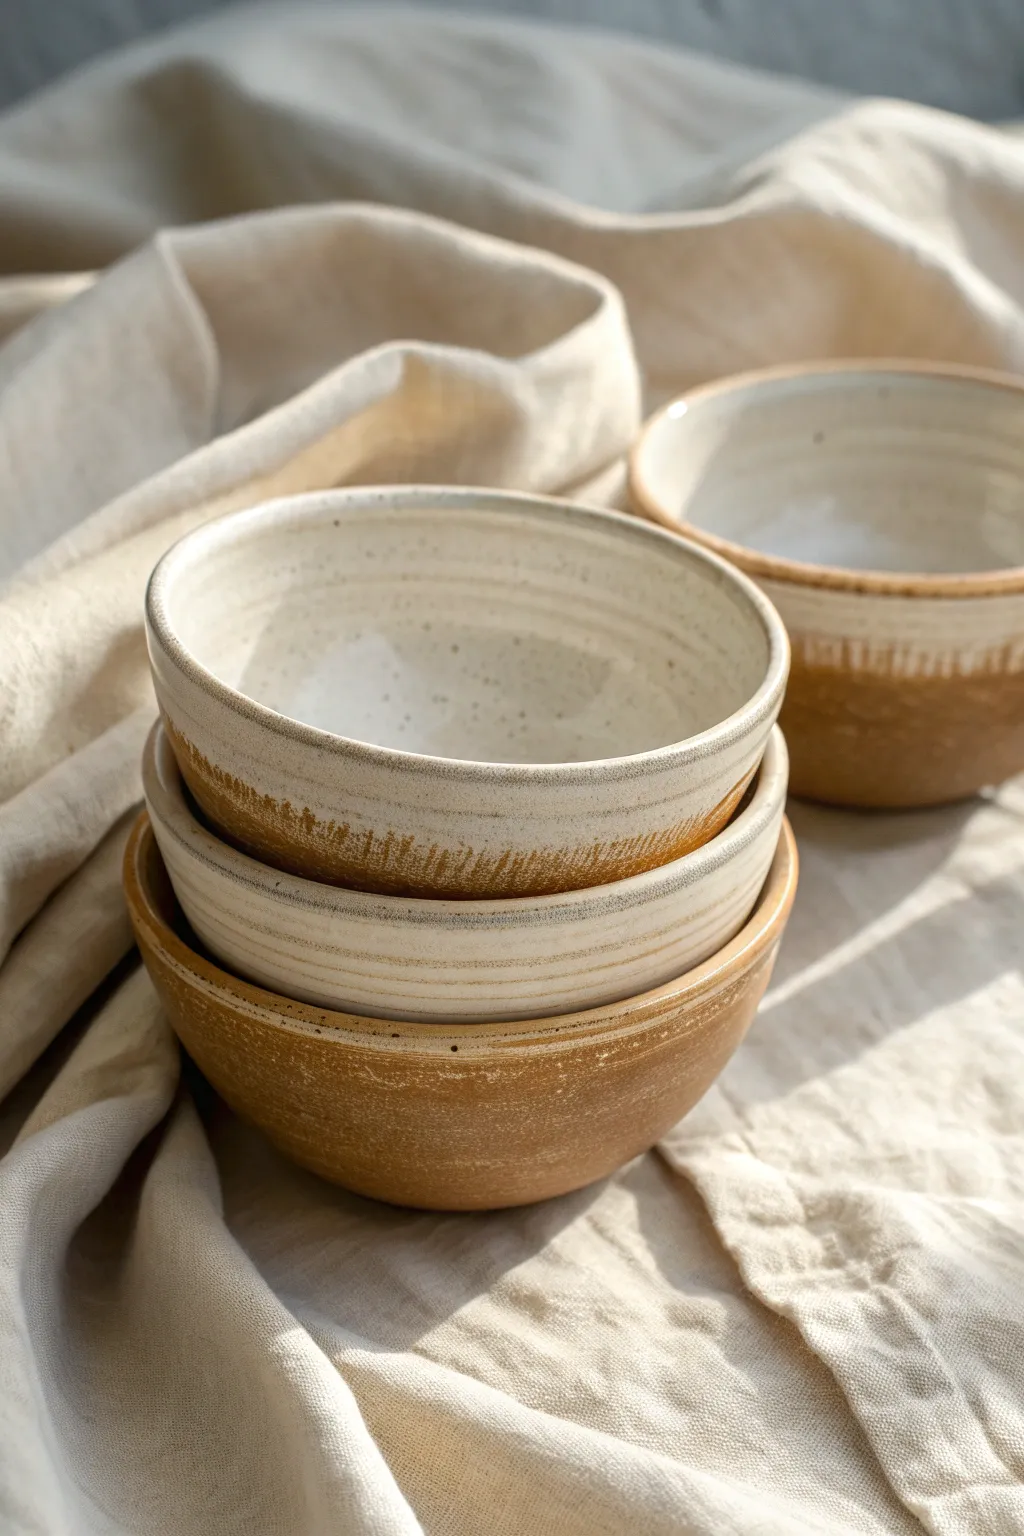
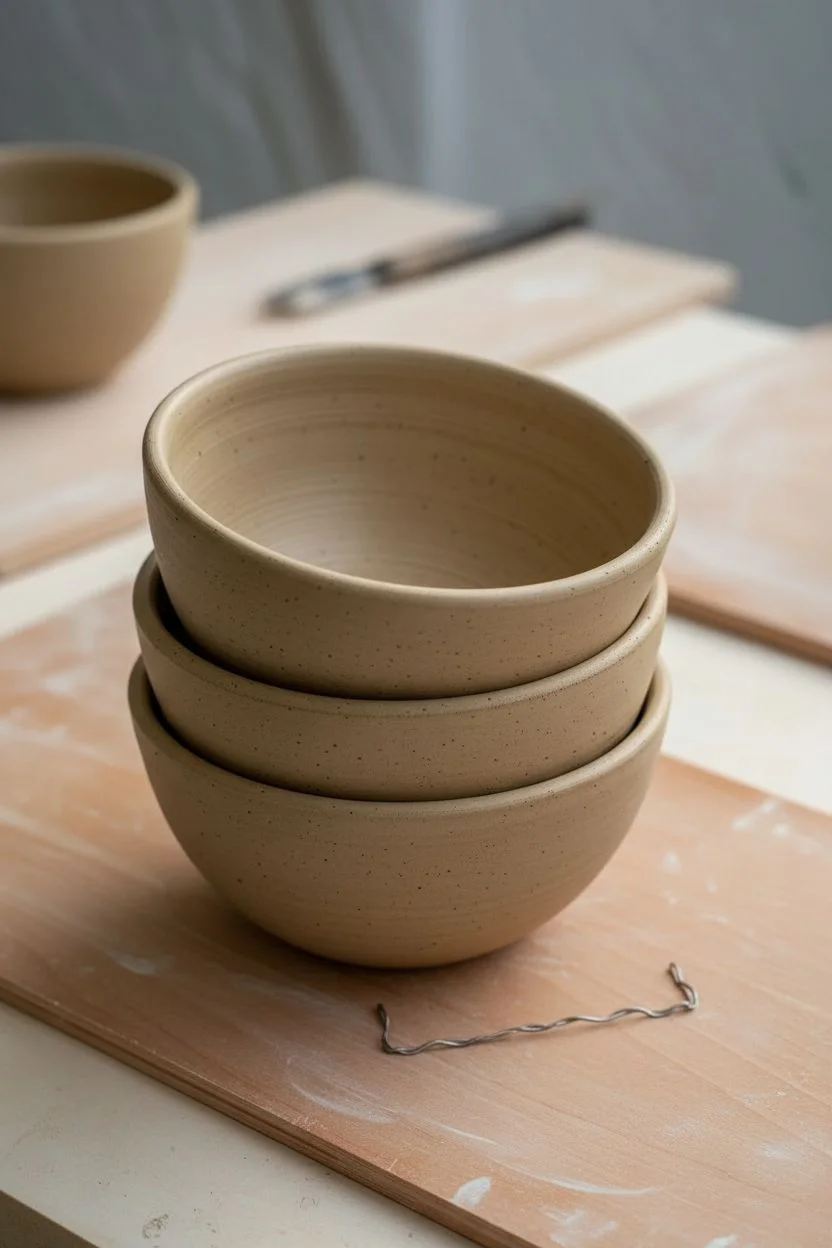
Create a set of beautifully rustic bowls that balance raw, exposed clay with a creamy, speckled glaze finish. This project highlights the natural texture of stoneware by leaving the base unglazed, resulting in a warm, toasted contrast perfect for cozy mornings.
Step-by-Step Tutorial
Materials
- Speckled stoneware clay (mid-fire)
- Potter’s wheel (optional, can be hand-built)
- Rib tool
- Wire cutter
- Sponge
- Trimming tools
- Creamy white dipping glaze
- Wax resist (liquid or crayon)
- Kiln
Step 1: Shaping the Bowls
-
Prepare the Clay:
Begin by wedging your speckled stoneware clay thoroughly to remove air pockets. Divide the clay into equal balls, roughly the size of a large orange, if you plan to make a matching set. -
Center on the Wheel:
Throw the ball of clay firmly onto the center of the wheel head. Using wet hands and steady pressure, center the clay until it spins without wobbling. -
Open the Form:
Press your thumbs into the center of the mound to open it up, leaving about a half-inch of thickness at the bottom for the foot. -
Pull the Walls:
Gently pull the clay upwards and outwards to create a classic bowl shape. Aim for a consistent wall thickness, tapering slightly thinner towards the rim for a delicate feel. -
Refine the Curve:
Use a rib tool on the inside of the bowl to smooth the curve and compress the clay. This step removes throwing lines inside and ensures a strong, even shape. -
Finish the Rim:
Compress the rim with a piece of chamois or a damp sponge to round it off softly. This prevents sharp edges after firing. -
Cut and Dry:
Run a wire cutter under the base to release the bowl. Set it aside on a ware board until it reaches a leather-hard state.
Clean Lines
Masking tape creates a sharper glaze line than wax alone. Apply tape, dip the bowl, let it dry partially, then peel the tape away before firing.
Step 2: Trimming and Bisque
-
Center for Trimming:
Once leather-hard, place the bowl upside down on the wheel. Secure it with clay lugs or a gripping tool to keep it centered. -
Define the Foot:
Using a trimming tool, shave away excess clay from the bottom to create a defined foot ring. This elevates the bowl and gives it a professional profile. -
Smooth the Exterior:
I like to run a slightly damp sponge over any rough trimming marks to smooth the texture while keeping the raw clay feel intact. -
Bisque Fire:
Allow the bowls to dry completely (bone dry). Load them into the kiln and bisque fire them according to your clay body’s specifications (usually Cone 04).
Step 3: Glazing and Final Fire
-
Clean the Bisqueware:
Wipe the fired bowls with a damp sponge to remove any dust, which can prevent glaze from adhering properly. -
Apply Wax Resist:
Paint or draw a line of wax resist around the exterior of the bowl, roughly one-third of the way up from the bottom. Also, wax the entire foot ring. -
Prepare the Glaze:
Stir your creamy white glaze thoroughly. It should have the consistency of heavy cream to ensure an opaque but flowing coat. -
The Dip:
Holding the bowl by the foot, dip it straight down into the glaze until the liquid reaches the waxed line. Hold for 3 seconds, then lift straight up. -
Clean the Drips:
Once the glaze is dry to the touch, use a sponge to wipe away any glaze beads that might have formed on the waxed areas or the foot. -
Interior Pour:
If potential air pockets prevented the inside from coating fully during the dip, pour a small amount of glaze inside, swirl to coat, and pour out the excess. -
Glaze Fire:
Load the glazed bowls into the kiln. Fire to maturity (typically Cone 5 or 6 for mid-fire stoneware) to achieve that glossy, durable finish.
Double Dip
Dip the rim a second time into a different glaze color (like a floating blue or light gray) to create a beautiful, drippy overlap effect at the top.
Enjoy using your new set for everything from morning cereal to evening soups, admiring the beautiful contrast you’ve created.


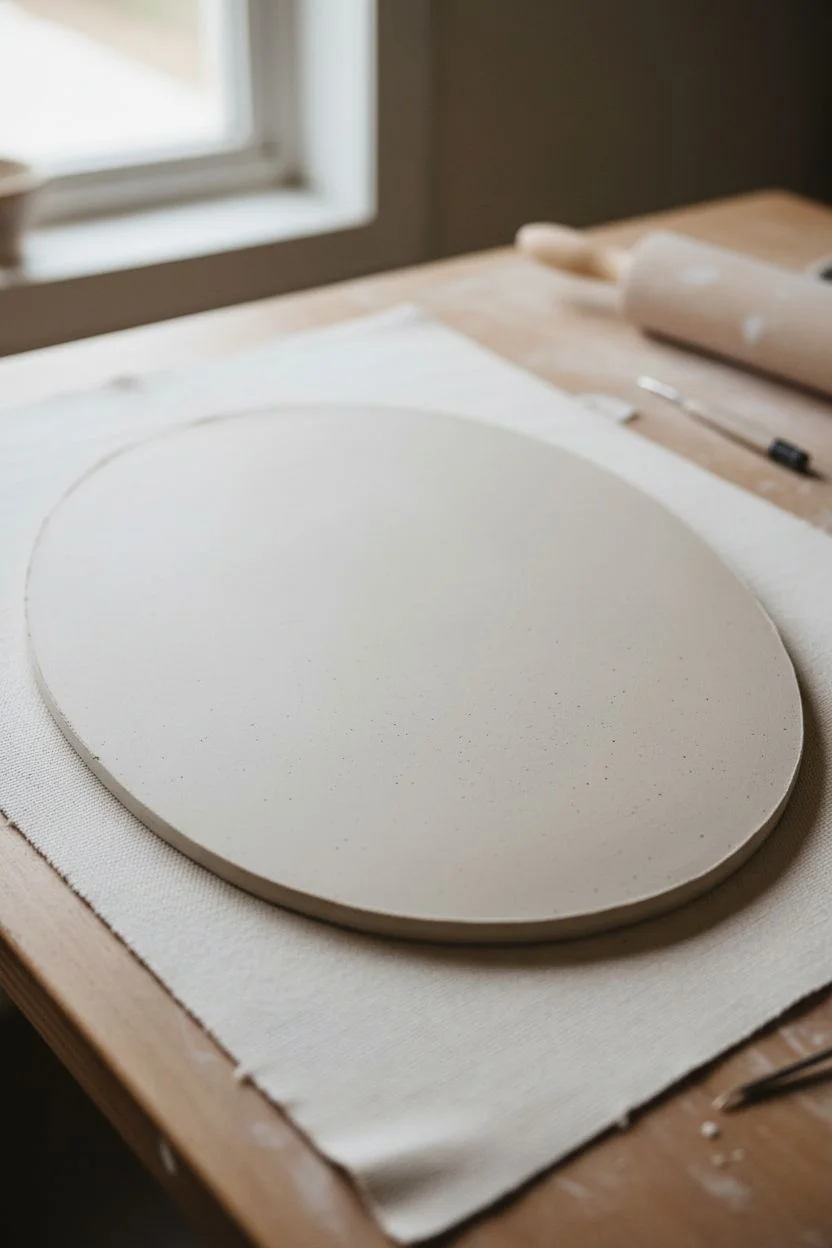
Everyday Plates With Stamped Rim Patterns
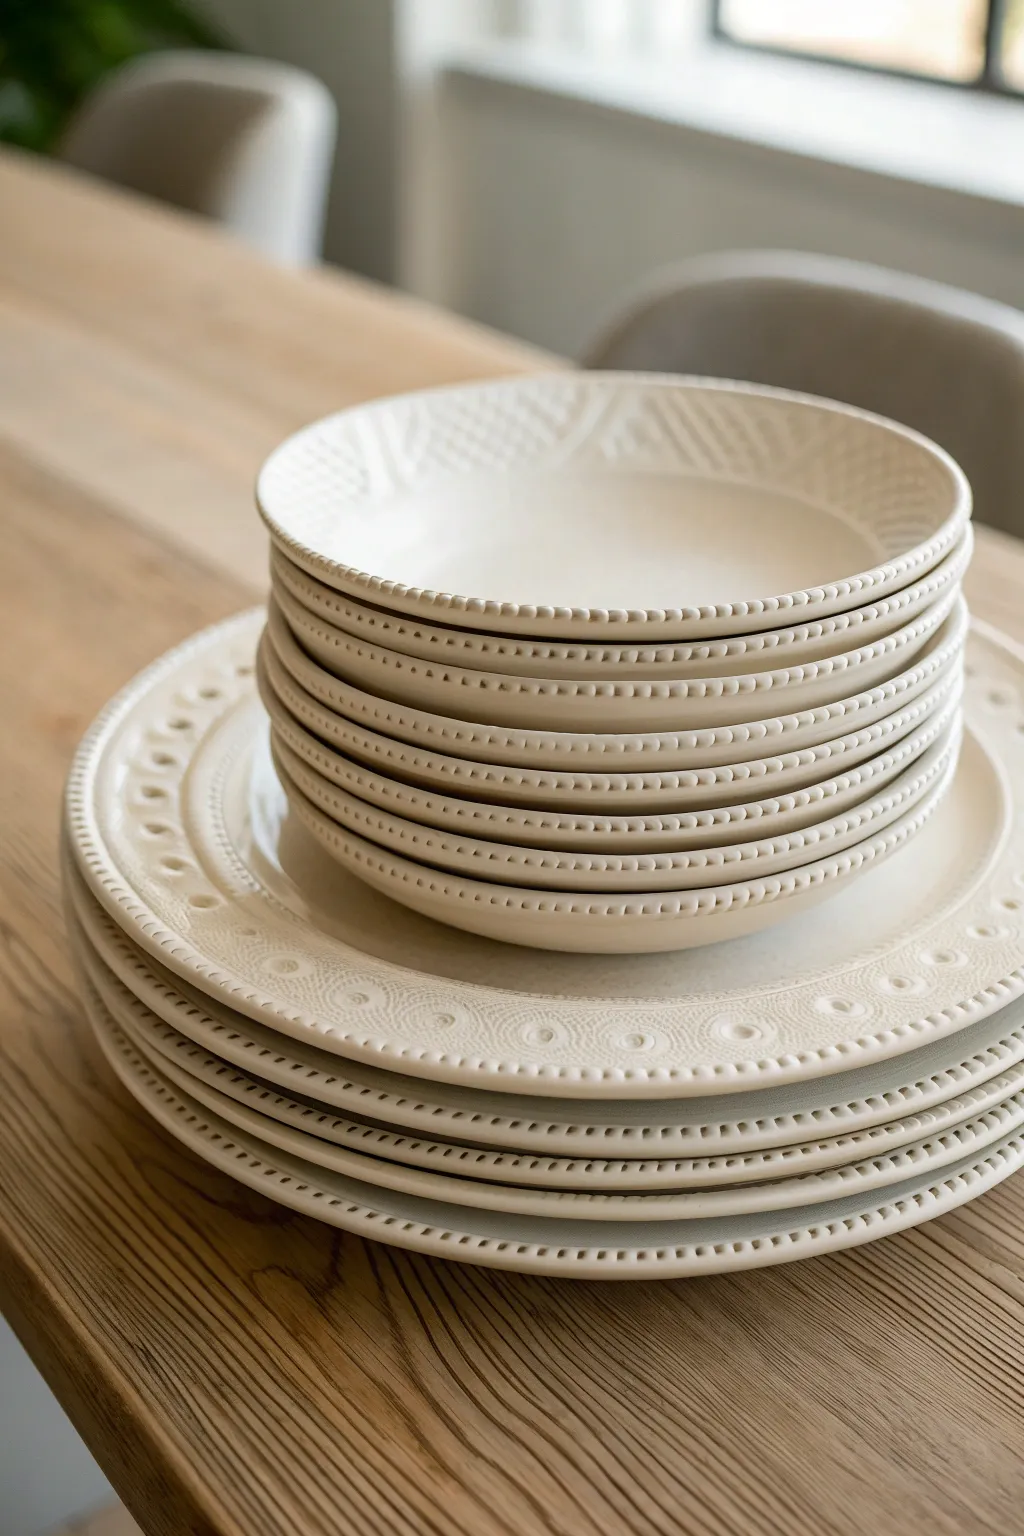
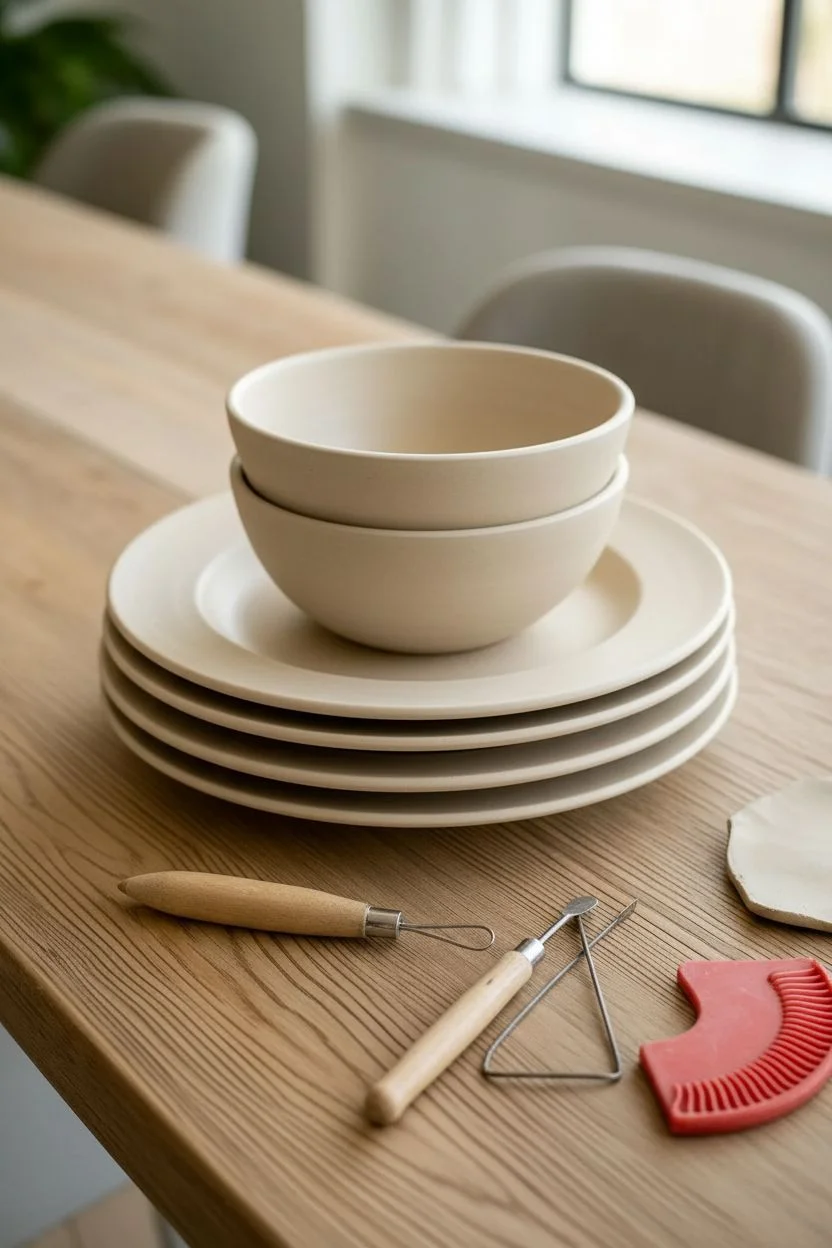
Elevate your daily meals with this elegant, farmhouse-style dinnerware featuring textured, beaded rims and subtle stamped details. The creamy white glaze highlights the tactile relief, giving these handmade pieces a sophisticated yet rustic charm.
Detailed Instructions
Materials
- Light stoneware or porcelain clay body (cone 5/6)
- Slab roller or rolling pin with guide sticks
- GR Pottery Forms or plaster hump molds (dinner plate and bowl sizes)
- Wooden modeling tools
- Various stamp tools (beading tools, circular stamps, texture rollers)
- Small sponge
- Wire cutter
- Rubber kidney rib
- Satin or matte white glaze
- Kiln
Step 1: Forming the Plates
-
Roll the Slabs:
Begin by rolling out a generous slab of your clay to a consistent thickness of about 1/4 inch. If you are making a full stack, work in batches to keep the clay from drying out too quickly. -
Compress the Clay:
Use a rubber kidney rib to smooth and compress the clay slab on both sides. This step aligns the clay particles, preventing future warping in the kiln and creating a flawless canvas for your texture. -
Cut the Circles:
Place your dinner plate mold or a template onto the slab and cut a circle slightly larger than the final form to account for the rim. I like to leave about an extra inch for the decorative edge. -
Shape on the Mold:
Drape the clay circle over your hump mold or press it into a slump mold. Note that using a slump mold (where the clay goes inside) makes stamping the rim easier while the clay is supported. -
Define the Rim:
If using a hump mold, use a damp sponge to gently press the rim outward to create a flat lip. Ensure the transition from the plate well to the rim is smooth and distinct.
Stamp Master Tip
Dust your stamps or texture rollers with cornstarch before pressing them into the clay. This acts as a release agent preventing the tool from sticking and tearing your delicate rim details.
Step 2: Adding Texture & Stamping
-
Create the Beaded Edge:
Using a beading tool or the round end of a small wooden dowel, press creates a continuous line of small indentations along the very outer edge of the rim. Apply consistent pressure to keep the ‘pearls’ uniform. -
Inner Rim Detailing:
For the dinner plates shown, add a second concentric circle of texture about an inch inward from the beaded edge. You can use a patterned roller or individual circular stamps to create the depressed motifs seen in the example. -
Bowl Texturing:
For the bowls, the texture is on the exterior. Before slumping the clay into the bowl mold, gently press a texture mat or rolling pin with a diamond/cross-hatch pattern onto the slab area that will become the bowl walls, leaving the center smooth. -
Refine the Stamping:
Once stamped, small burrs of clay might rise up around the impressions. Wait until the clay is leather hard, then gently wipe with a damp sponge or a soft rib to knock down sharp edges without erasing the detail.
Level Up: Antique Wash
After bisque firing, apply a dark oxide wash into the stamped grooves and sponge off the excess surface. Then apply a clear glaze. This makes the beaded pattern pop with high contrast.
Step 3: Drying and Glazing
-
Slow Drying:
Stacking plates often warp, so dry them slowly. Cover loosely with plastic for the first 24 hours to equalize moisture, then uncover gradually. Weight the centers with small sandbags if you notice lifting. -
Bisque Fire:
Once bone dry, load the pieces into the kiln and bisque fire to cone 04. This prepares the ware to accept glaze. -
Waxing the Foot:
Apply wax resist to the foot ring of each plate and bowl to prevent the glaze from fusing the piece to the kiln shelf. -
Glaze Application:
Dip or spray a satin white or cream glaze. Avoid thick, opaque glazes that might fill in the texture; a glaze that ‘breaks’ over edges is ideal for highlighting the beaded rim. -
Wipe the Rim:
If the glaze looks too thick over your stamped details, gently wipe the high points with a clean, damp sponge. This reveals a bit of the clay body color, enhancing the visual depth of the pattern. -
Glaze Fire:
Fire the kiln to the maturity temperature of your clay and glaze (typically cone 5 or 6 for stoneware). Allow the kiln to cool completely before unloading.
Now you have a stunning stack of custom dinnerware ready for your next gathering


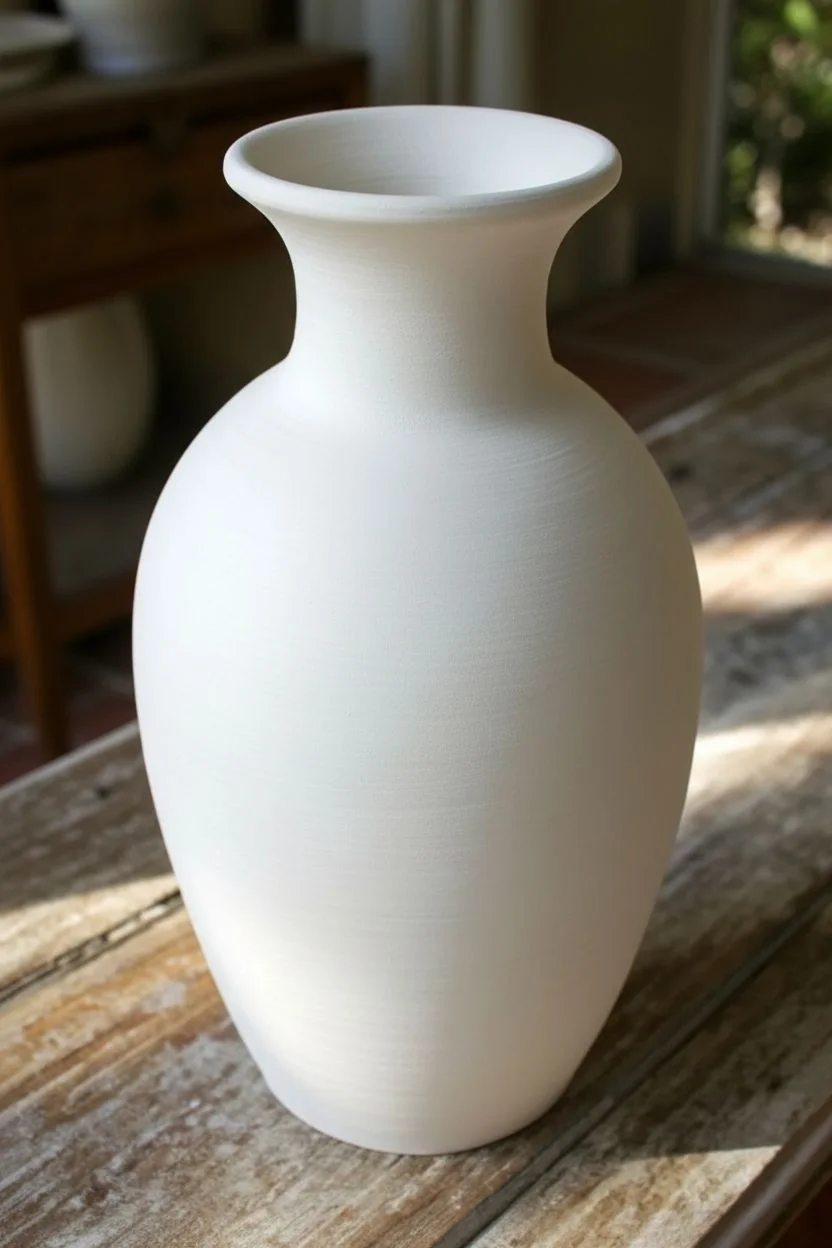
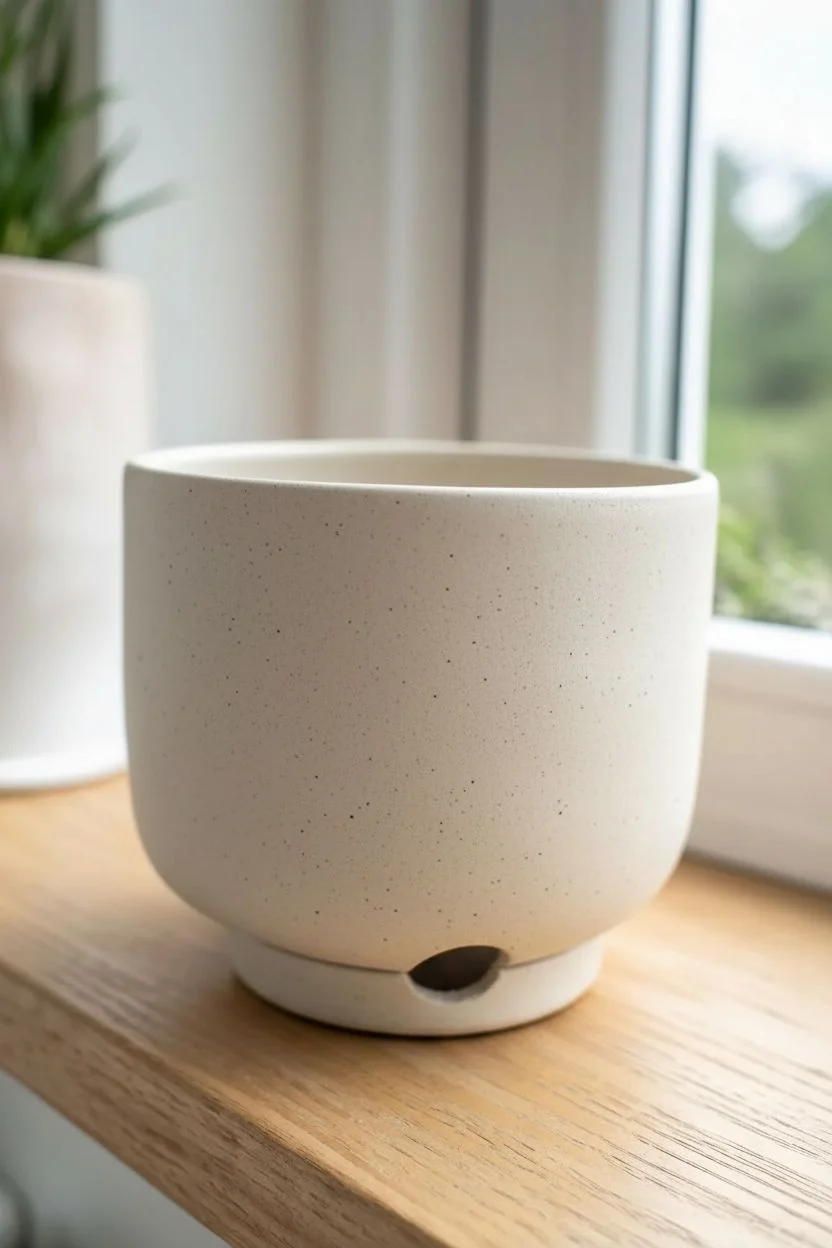
Slab-Built Planters With Clean Lines
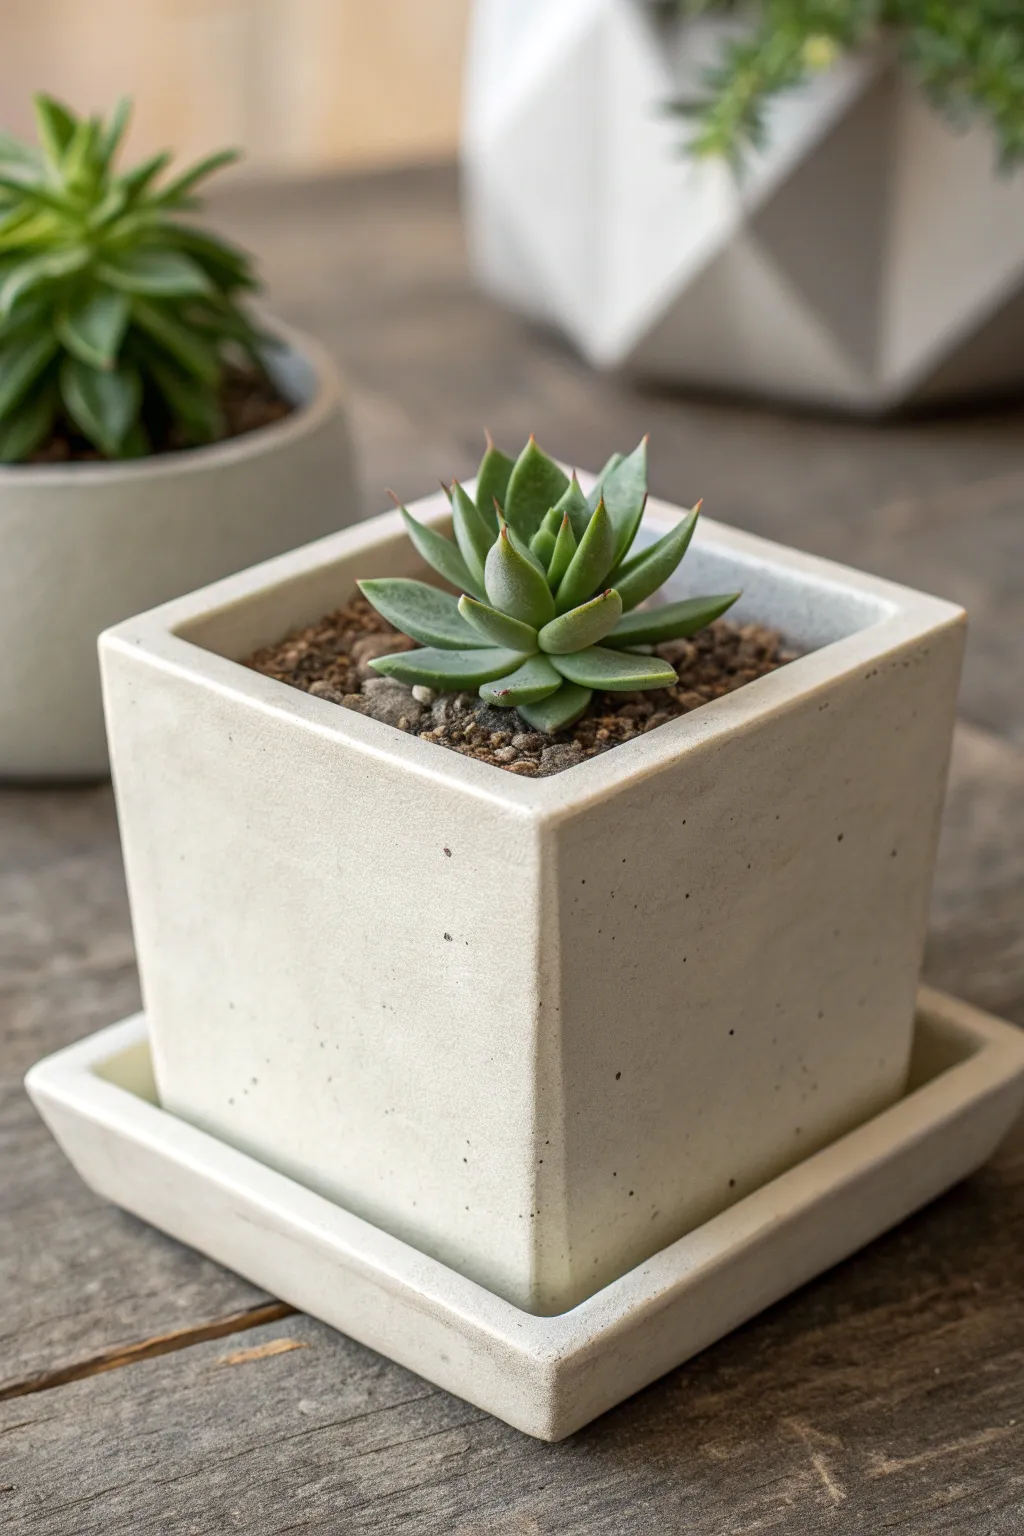
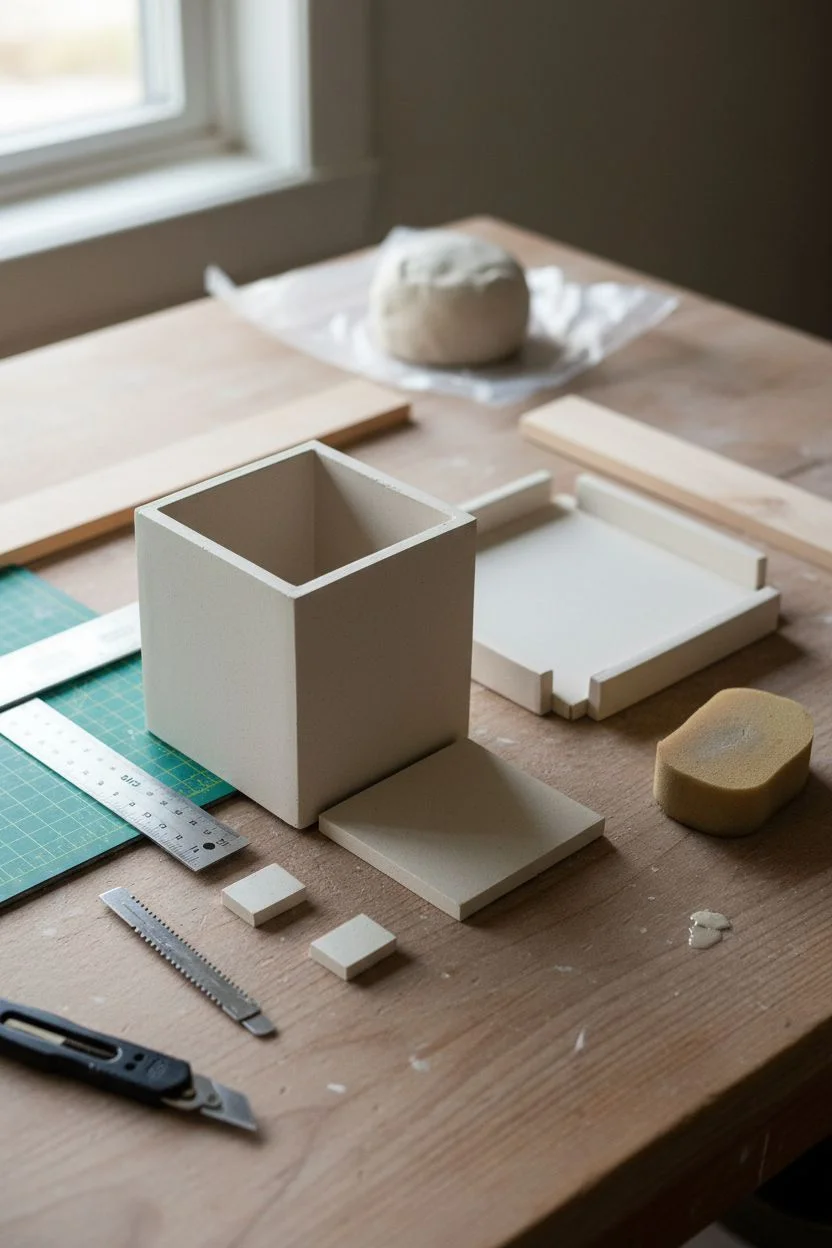
For the modern plant lover, this sleek square planter with a matching saucer offers the ultimate in clean, geometric design. The creamy, slightly speckled finish gives it a polished look that perfectly highlights the sculptural quality of succulents.
How-To Guide
Materials
- Light-colored stoneware clay (smooth or with fine grog)
- Rolling pin
- Two 1/4-inch thick wooden slats (for rolling guides)
- Fettling knife or X-Acto blade
- Ruler or triangle square
- Serrated rib and scoring tool
- Slip (clay mixed with water)
- Sponge
- Matte white or clear speckled glaze
Step 1: Planning and Cutting
-
Roll the Slabs:
Begin by wedging your clay to remove air bubbles. Place the clay between your two wooden guide slats and roll it out until it is perfectly even and smooth. This uniformity is crucial for that sharp, geometric look. -
Rib the Surface:
Before cutting, run a smooth metal or rubber rib over the clay surface in multiple directions. This compresses the clay particles and creates the flawless faces needed for a ‘clean lines’ aesthetic. -
Measure the Walls:
Using your ruler and a sharp blade, cut out four identical squares for the walls. For the size shown, 3.5-inch squares work well. Be precise with your 90-degree angles. -
Measure the Base:
Cut a slightly smaller square for the floor of the pot. It should be the width of your walls minus twice the thickness of your slab, allowing the walls to sit on the outside edge of the base. -
Prepare the Saucer:
Cut a larger square for the saucer base (about 4.5 inches across) and four narrow strips (about 0.5 inches tall) for the saucer rim. -
Let it Leather Hard:
This is the most critical step for straight lines: let all your pieces dry to a stiff leather-hard stage. They should be firm enough to stand up without warping but soft enough to score.
Pro Tip: Sharp Geometry
Use a surfacing tool (like a Surform rasp) once the clay is bone dry to shave down any uneven edges. It acts like sandpaper but keeps planes perfectly flat.
Step 2: Assembly and Refining
-
Bevel the Edges:
For the sharpest corners, cut 45-degree bevels on the vertical edges of your wall pieces where they will join. I find this creates a much stronger, seamless connection than a butt joint. -
Score and Slip:
Rough up all connecting surfaces with your scoring tool and apply a generous amount of slip. Join the four walls together first to form a box, pressing firmly. -
Attach the Base:
Slip and score the bottom edges of your box and the perimeter of the base square. press the base in, or attach the walls on top, smoothing the exterior seam downward. -
Reinforce Interiors:
Roll a very thin coil of soft clay. Press this into the interior corners of the box using a modeling tool or your finger to ensure the seams are watertight and strong. -
Assemble the Saucer:
Repeat the process for the saucer: bevel the strip ends, score, slip, and attach them to the larger base square. Smooth the transition so it looks like one solid piece. -
Create Drainage:
Once assembled, use a small hole cutter or drill bit to create a drainage hole in the center of the main planter pot.
Step 3: Surfacing and Finishing
-
Refine the Corners:
Using a slightly damp sponge, carefully wipe down sharp corners just enough to remove sharpness without losing the geometric definition. Sanding later tends to ruin the straightness, so smooth it now. -
Dry Slowly:
Loosely cover both pieces with plastic for 24 hours to equalize moisture, then uncover to dry completely. This prevents the square shape from warping as it shrinks. -
Bisque Fire:
Fire the bone-dry pieces in the kiln to cone 04 (or your clay’s specific bisque temperature). -
Glaze Application:
Dip or spray the pieces with a matte white or opaque glaze. The example image suggests a glaze with iron speckles; if you don’t have speckled clay, choose a glaze with flecks. -
Wipe the Feet:
Clean the bottom of the saucer and the planter perfectly with a sponge to prevent them from sticking to the kiln shelf. -
Final Firing:
Fire to the maturation temperature of your glaze (typically Cone 5 or 6 for stoneware) and allow to cool slowly.
Troubleshooting: Warping
If your square walls bow inward while drying, place a piece of soft foam inside the pot. It exerts just enough outward pressure to keep the walls straight as they shrink.
Once fired, fill your modern vessel with gritty soil and a striking succulent to complete the look
BRUSH GUIDE
The Right Brush for Every Stroke
From clean lines to bold texture — master brush choice, stroke control, and essential techniques.
Explore the Full Guide
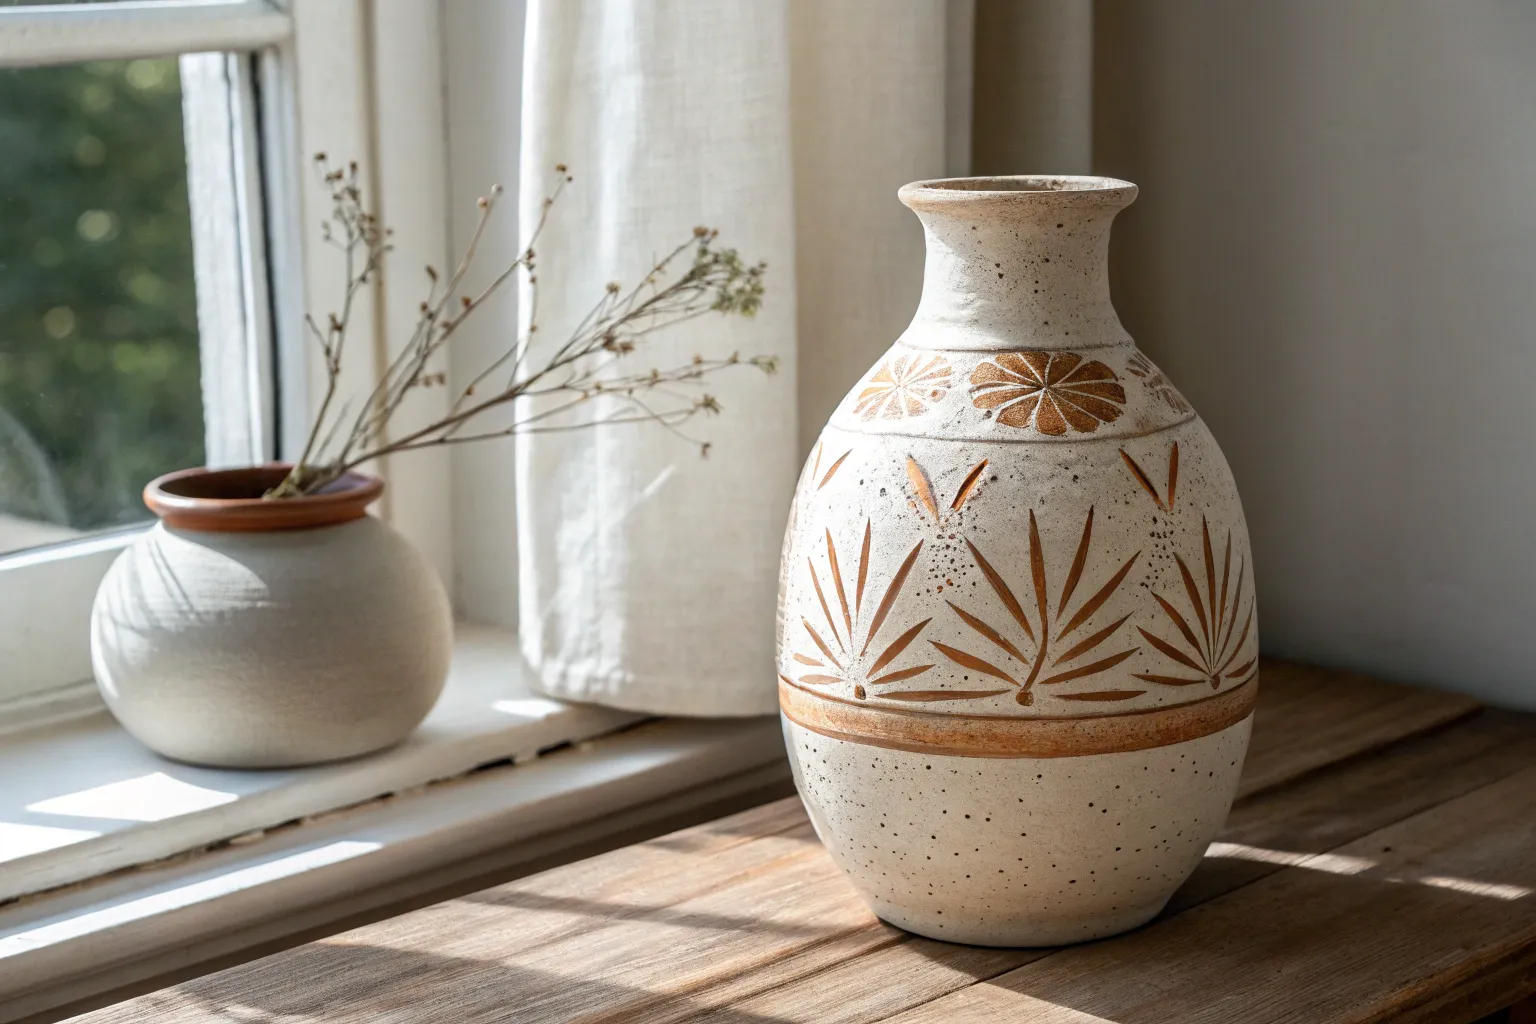
Bud Vases in a Mini Collection
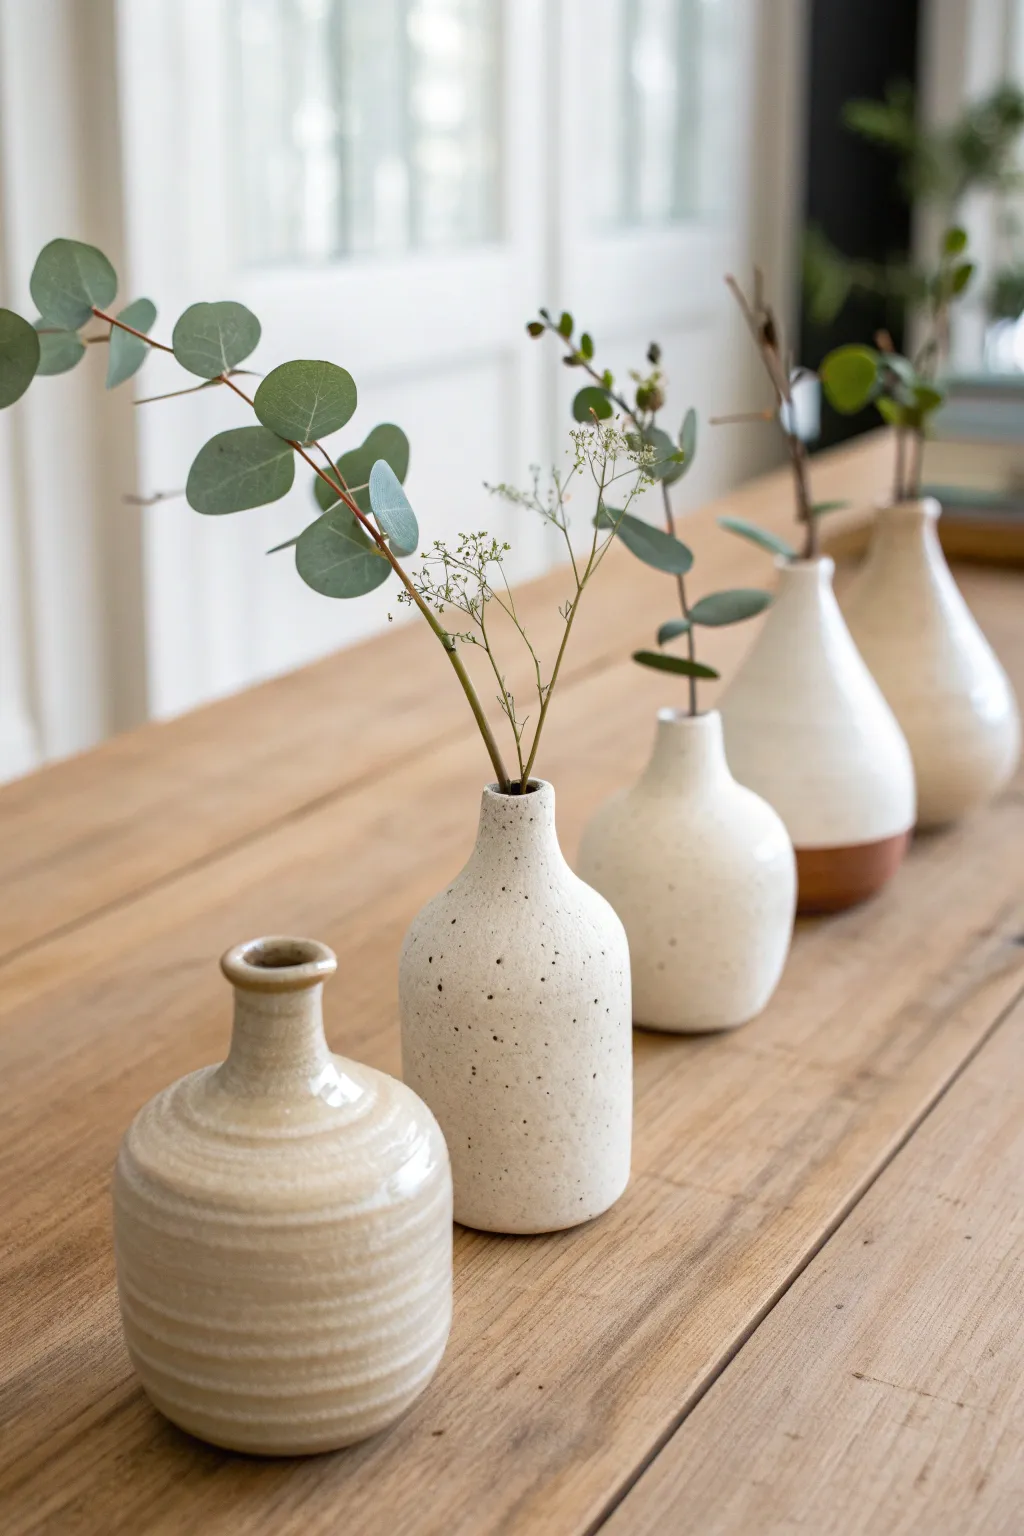
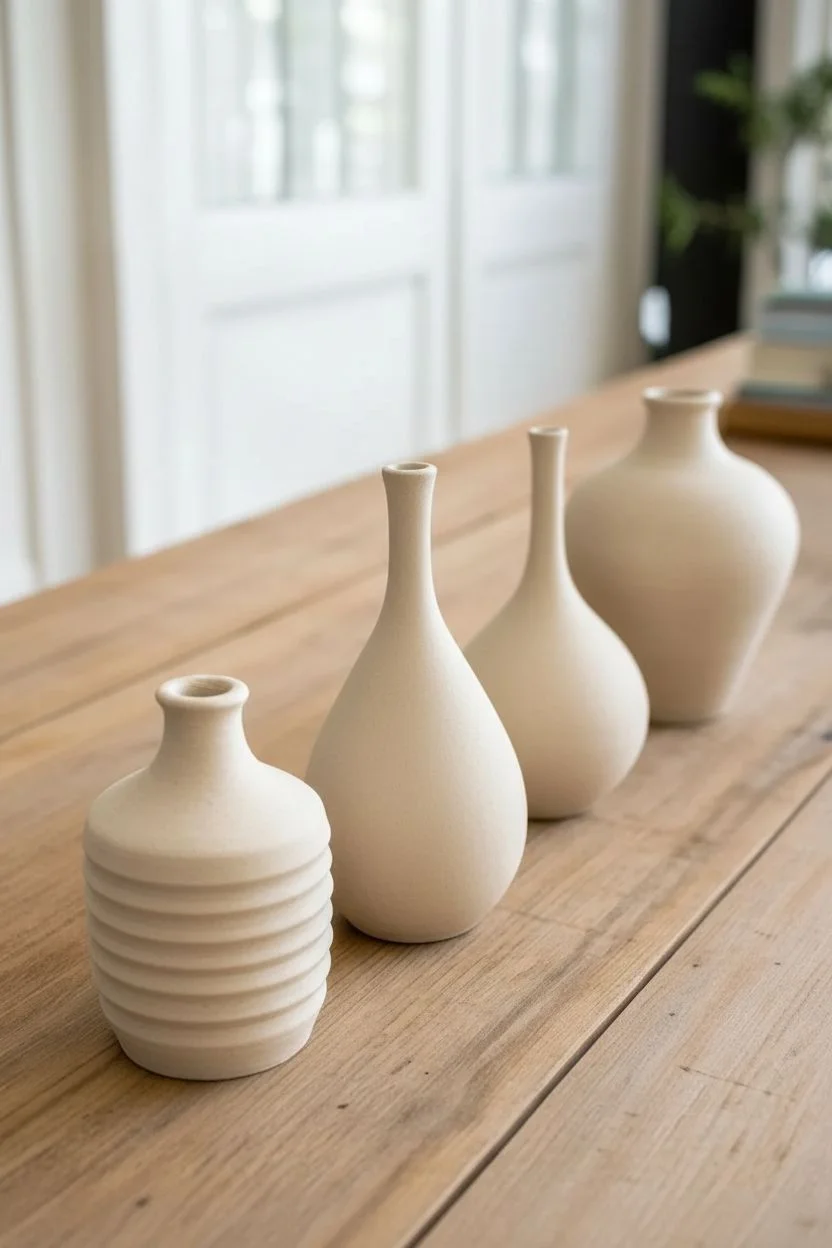
Create a charming set of diverse yet cohesive ceramic bud vases perfect for displaying single stems or dried botanicals. This project explores varied wheel-throwing and glazing techniques to achieve a harmonious mini-collection with textures ranging from speckled matte to ribbed gloss.
Step-by-Step
Materials
- 2-3 lbs stoneware clay (speckled clay recommended for one vase)
- Pottery wheel
- Throwing tools (sponge, needle tool, rib, wire cutter)
- Trimming tools
- Texture rib (serrated or grooved)
- White or cream matte glaze
- Glossy transparent or beige glaze
- Wax resist
- Glaze brushes
- Kiln
Step 1: Throwing the Forms
-
Prep the clay:
Begin by wedging your clay thoroughly to remove air pockets. Divide the clay into five small balls, roughly 0.5 to 0.75 lbs each. Vary the sizes slightly to get different heights in your final collection. -
Center the first ball:
Secure a ball of clay on the wheel head. Using moistened hands and steady pressure, center the clay into a low mound. -
Open and pull:
Open the center down to the base, leaving about a quarter-inch for the foot. Pull up the walls into a narrow cylinder. Since these are bud vases, keep the interior narrow. -
Shape the first bottle:
Collar the neck in significantly to create a narrow opening suitable for a single stem. Use a rib to smooth the belly of the vase into a gentle curve. This will be your standard bottle shape (like the second vase). -
Create the ribbed vase:
For the front-left vase, throw a slightly wider cylinder. Instead of smoothing the walls, use a serrated rib or a steady finger to press spiral grooves into the clay as the wheel spins, creating a tactile, ribbed surface from bottom to top. -
Throw the two-tone vase:
For the vase third back, focus on a smooth, teardrop shape with a very narrow neck. Ensure the surface is perfectly smooth using a metal rib to prepare it for the dipped glazing technique later. -
Make the rounded gourds:
For the remaining two vases, push the clay belly outward more aggressively to create rounder, gourd-like shapes before collaring in the short necks. -
Cut off:
Run a wire tool under each finished piece and carefully lift them off the wheel. Let them dry to a leather-hard state.
Collaring Tip
When narrowing the necks, keep your hands wet and move quickly to prevent the clay from torquing or twisting. If the neck gets wonky, trim the uneven top with a needle tool.
Step 2: Trimming and Bisque
-
Trim the feet:
Once leather hard, center each vase upside down on the wheel (you may need a chuck for the narrow necks). Trim away excess weight from the bottom and crave a clean foot ring. -
Refine the surface:
Sponge smooth any rough textures, but be careful not to erase the intentional ribbing on the first vase. I like to run a finger over the rims to ensure they are soft and rounded. -
Bisque fire:
Load the bone-dry greenware into the kiln and fire to your clay body’s bisque temperature (usually Cone 04).
Step 3: Glazing Design
-
Glaze the speckled vase:
For the center vase made of speckled clay (or plain clay needing speckled glaze), dip the entire piece into a matte white glaze. The iron spots in the clay will bleed through the matte finish. -
Glaze the ribbed vase:
Dip the ribbed vase into a glossy beige or semi-transparent glaze. The gloss will pool in the grooves you created, accentuating the spiral texture. -
Create the dipped look:
For the two-tone vase, apply wax resist to the bottom third of the bisque ware. Dip the top two-thirds into a creamy white gloss glaze to create a crisp line between the bare clay and the glazed top. -
Glaze the remaining forms:
Finish the last two vases with a solid coat of creamy white glaze, perhaps varying slightly between matte and satin finishes to add subtle variety to the group. -
Clean the feet:
Wipe all foot rings perfectly clean with a damp sponge to prevent them from sticking to the kiln shelf. -
Final firing:
Fire the vases to the maturity temperature of your clay and glaze (typically Cone 5 or 6 for stoneware).
Use A Chuck
Since bud vases have tiny openings, trimming them upside-down is hard. Make a clay ‘chuck’ (an hourglass-shaped cylinder) to hold the vase neck securely while you trim the foot.
Arranging these uneven heights together creates a beautiful, sculptural vignette for any table
Trinket Dishes and Ring Holders
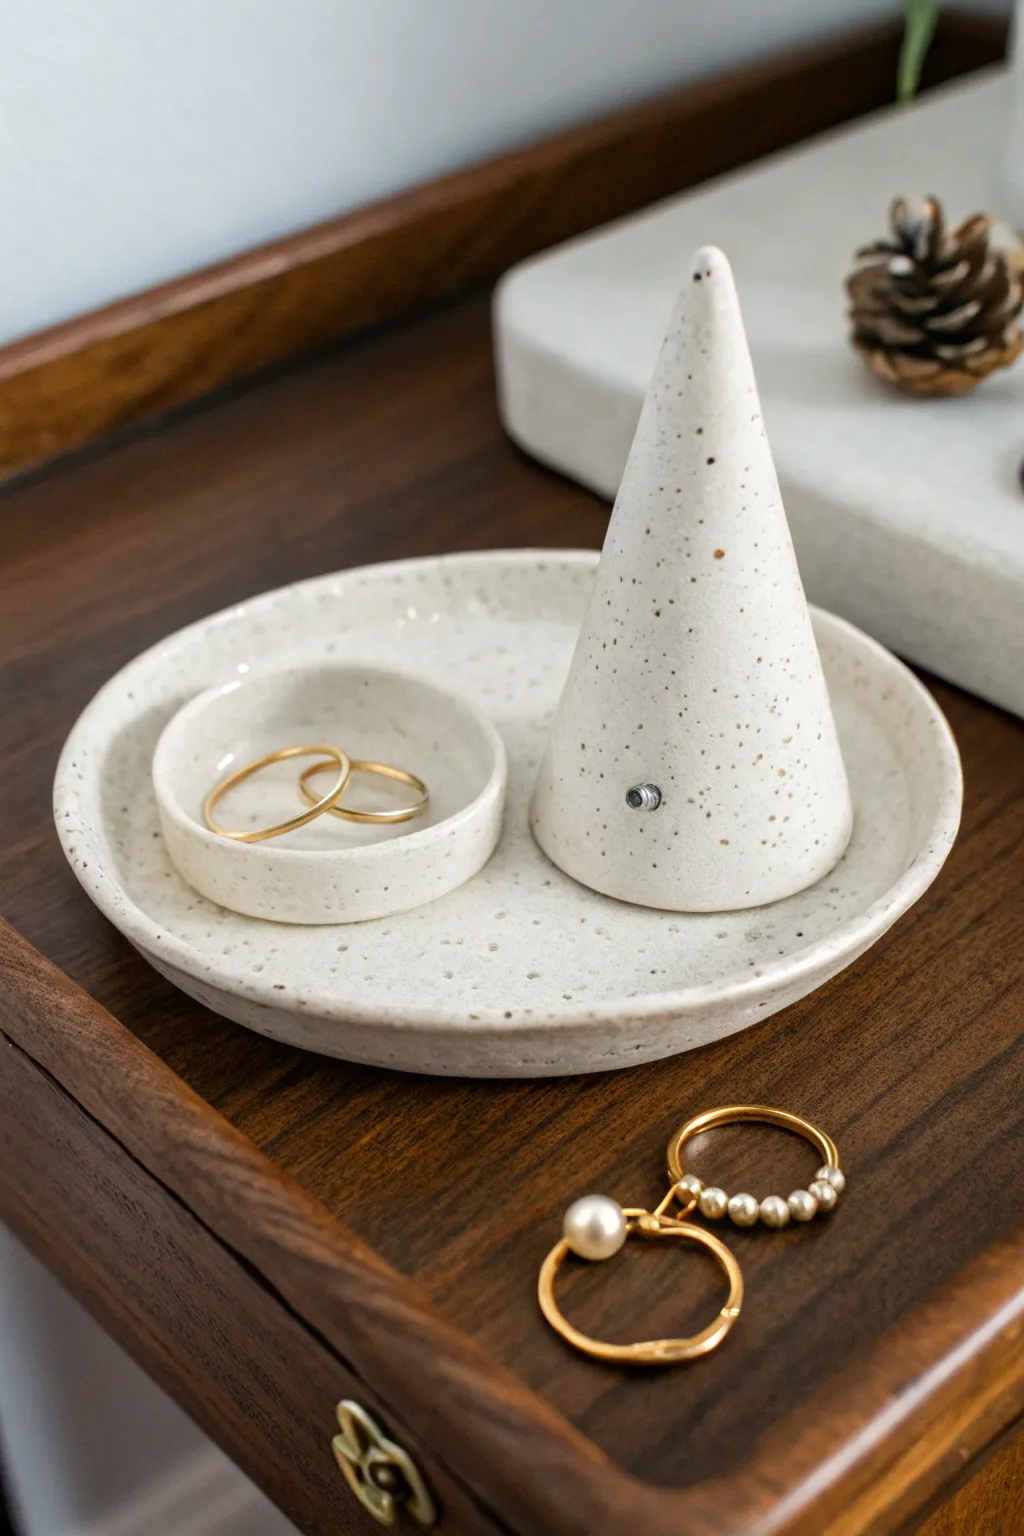
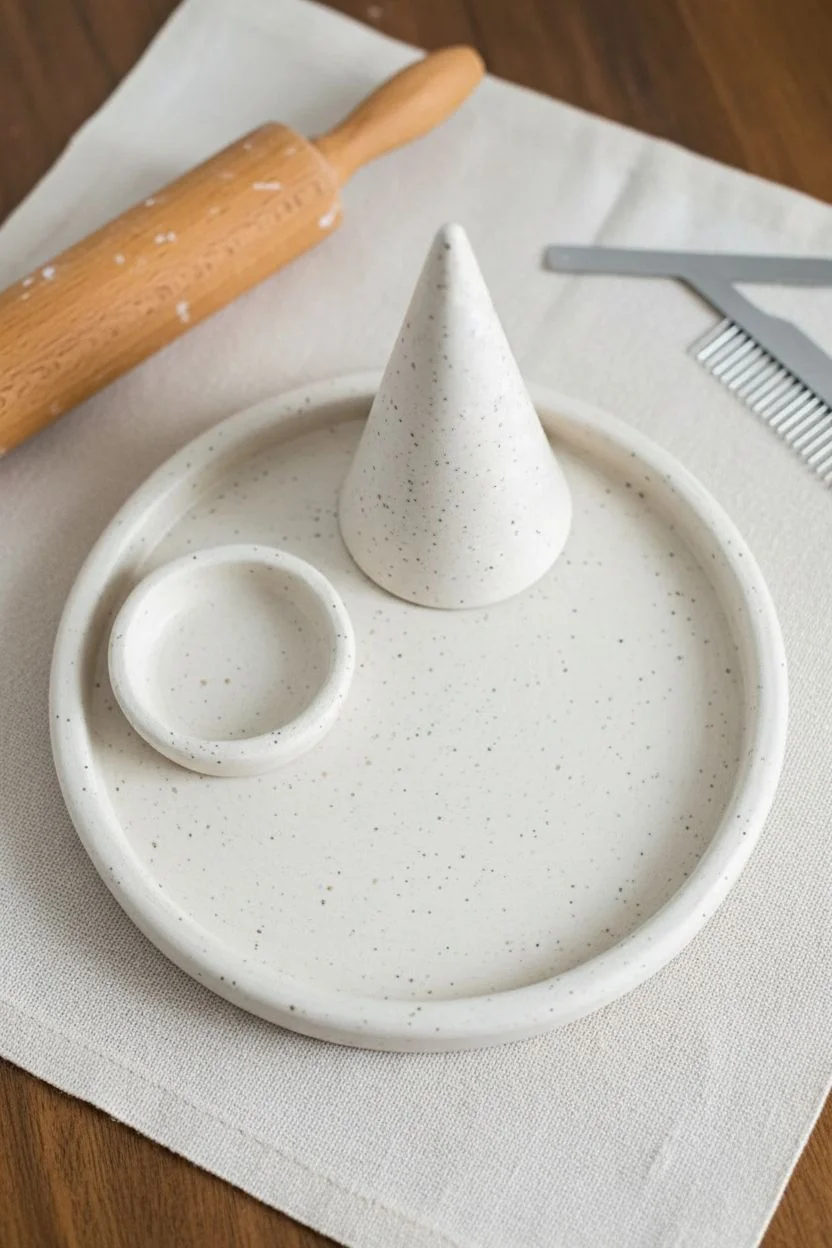
This modern, minimalist jewelry organizer combines a flat tray, a tiny dish for studs, and a sleek cone for rings into one cohesive piece. The speckled white clay body gives it a trendy granite-like appearance that looks beautiful on any nightstand.
How-To Guide
Materials
- Speckled stoneware clay (white with iron flecks)
- Rolling pin
- Canvas mat or cloth
- Circular clay cutters (approx. 5-inch and 2-inch)
- Needle tool or fettling knife
- Flexible metal or rubber rib
- Scoring tool (or serrated rib)
- Slip (watered down clay)
- Sponge
- Clear or matte white glaze
- Kiln
Step 1: Forming the Base Components
-
Roll the slab:
Begin by rolling out a medium-sized ball of speckled clay on your canvas. You want an even slab that is roughly 1/4 inch thick. I find using guide sticks on either side helps keep the thickness perfectly consistent. -
Cut the circles:
Using your circular cutters or a needle tool tracing a template, cut out two circles. You need one large circle (about 5-6 inches) for the base tray and one smaller circle (about 2 inches) for the stud dish. -
Create the heavy base rim:
For the main tray, roll a small coil of clay. Score and slip the outer edge of your large circle, then attach the coil on top of the rim to create a slight lip. -
Smooth the tray:
Use your fingers and a damp sponge to blend the coil seamlessly into the base slab. Smooth everything with a rib tool so the transition is invisible and the rim is slightly raised but gentle. -
Form the small dish:
Take your smaller 2-inch circle. Gently pinch up the edges with your fingertips to create a shallow bowl shape, or attach a very thin coil to the rim just like you did for the large tray.
Uneven Cone?
If your cone looks lopsided, don’t just use your hands. Roll it against a completely flat board or table while slightly leaning it. This creates a machined, perfect taper.
Step 2: Sculpting the Cone
-
Shape the clay cone:
Roll a solid ball of clay into a thick carrot shape. Roll it back and forth on the table, applying more pressure to one end to taper it into a point. -
Refine the cone geometry:
Stand the cone up and tap the base lightly on the table to flatten it. Use a flat wooden spatula or ruler to paddle the sides, making them straight and geometric rather than organic and lumpy. -
Hollow the cone (optional):
If your cone is quite thick (over an inch at the base), use a loop tool to hollow out the bottom slightly. This prevents explosions in the kiln and reduces weight.
Step 3: Assembly and Finishing
-
Plan the layout:
Place the small dish and the cone onto the large tray without attaching them yet. Move them around until you find a balanced composition; usually, off-centering them looks more artistic. -
Score the contact points:
Once decided, use your scoring tool to scratch up the bottom of the cone, the bottom of the small dish, and the corresponding spots on the main tray. -
Apply slip and attach:
Dab a generous amount of slip onto the scored areas. Press the components firmly onto the tray. Give them a tiny wiggle to lock the clay particles together. -
Clean up the seams:
Use a small, damp paintbrush to wipe away any excess slip that squeezed out from under the attached pieces. This ensures a crisp, clean look where the shapes meet. -
Final smooth:
Run a damp sponge over all sharp edges, especially the rims of the dishes and the tip of the cone. Sharp edges become razor-sharp after firing. -
Drying:
Cover the piece loosely with plastic for the first 24 hours to let moisture equalize, then uncover and let it dry completely to the bone-dry stage. -
Bisque fire:
Fire the piece in the kiln to a bisque temperature (usually cone 04 or 06). This prepares the clay for glazing. -
Glazing:
Dip or brush a clear glaze or a semi-transparent milky white glaze over the entire piece. Do not glaze the very bottom that touches the kiln shelf. -
Final firing:
Fire the piece a second time to the maturity temperature of your specific clay body (often cone 5 or 6). This will reveal the beautiful iron speckles through the glaze.
Add Gold Lustre
For a luxe touch, paint a thin rim of gold lustre on the small dish and the cone tip after the final glaze firing, then fire a third time at a very low temperature (Cone 018).
Once cooled, your ring holder is ready to organize your jewelry with effortless style

PENCIL GUIDE
Understanding Pencil Grades from H to B
From first sketch to finished drawing — learn pencil grades, line control, and shading techniques.
Explore the Full Guide
Spoon Rests With Leaf Impressions
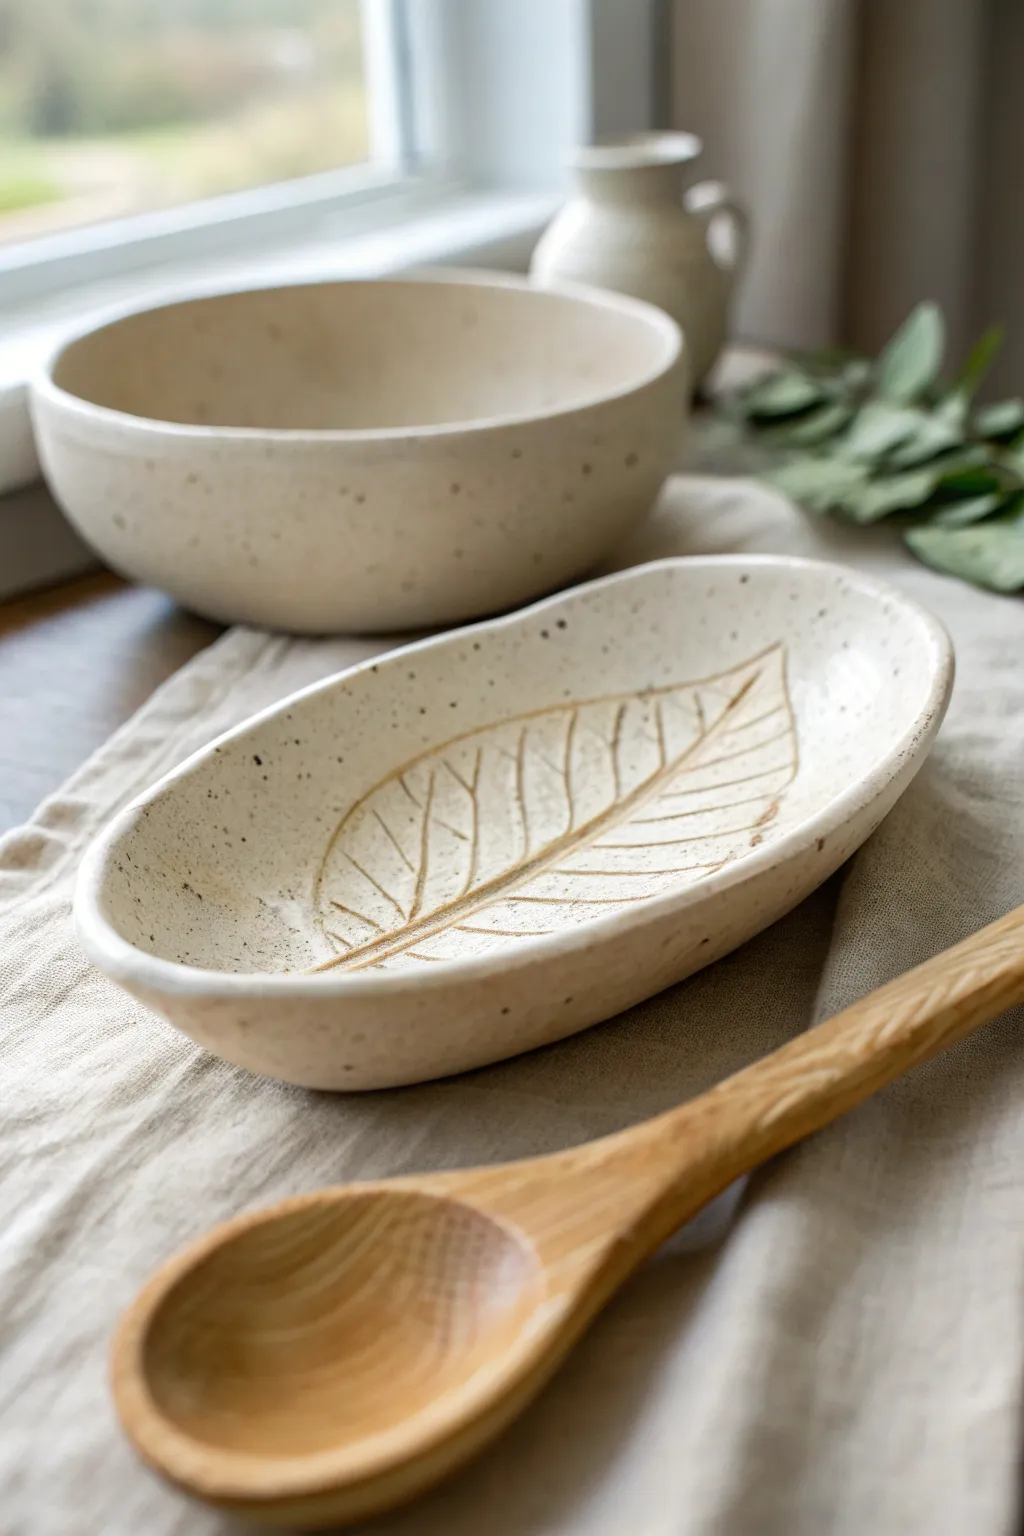
Bring a touch of nature to your kitchen counter with this minimalist ceramic spoon rest. Featuring a speckled clay body and a simple, hand-carved leaf skeleton design, this piece balances rustic charm with functional elegance.
Detailed Instructions
Materials
- Speckled stoneware clay (mid-fire)
- Rolling pin
- Canvas mat or slab roller
- Oval template or paper cutout
- Needle tool
- Semi-soft rib (rubber or wood)
- Sponge
- Loop tool or dull carving stylus
- Form or mold (for shaping the curve)
- Clear matte glaze
Step 1: Slab Preparation
-
Wedge the clay:
Start by thoroughly wedging a ball of speckled stoneware clay to remove any air bubbles. A clear, speckled body is essential for recreating the look in the image. -
Roll the slab:
Roll out the clay onto your canvas mat until it is an even thickness, roughly 1/4 inch thick. Try to roll in multiple directions so the clay particles align strongly. -
Smooth the surface:
Before cutting, take your rubber rib and compress the clay surface on both sides. This smooths out canvas texture and helps prevent warping later.
Uneven Carving Lines?
If your carving tool is dragging or creating jagged edges, the clay is too dry. Mist it lightly with water, wrap it in plastic for an hour, and try again when it’s softer.
Step 2: Shaping and Refining
-
Cut the oval:
Place your oval template on the slab. Using your needle tool, cut cleanly around the shape. If you don’t have a template, you can freehand a long, organic oval shape. -
Soften the edges:
Dip your sponge in water, squeezing it almost dry, and run it gently along the cut rim to round off the sharp edge left by the needle tool. -
Create the curve:
Gently lift the slab and place it over a slump mold or into a shallow bowl to give it a slight upward curve. If you don’t have a mold, you can prop up the edges with bits of foam or rolled towels. -
Establish the form:
Press the clay gently into the mold to ensure the bottom sits somewhat flat while the sides curve up. This ensures the spoon rest won’t rock on the counter.
Step 3: Carving the Leaf
-
Dry to leather hard:
Allow the clay to dry to a leather-hard state. It should be firm enough to hold its shape but soft enough to carve into without chipping. -
Sketch the spine:
Using a very light touch with a needle tool, lightly trace the central line (the midrib) of the leaf down the center of the oval. -
Sketch the veins:
Mark out the diagonal veins branching off the center line. Keep them simple and spaced out; the design in the photo is stylized, not hyper-realistic. -
Carve the main lines:
Using a small loop tool or a dull carving stylus, go over your traced lines with steady pressure. You want to remove small ribbons of clay to create a shallow groove. -
Refine the outline:
Carve a thin outline around the entire leaf shape if desired, connecting the tips of the veins, though the example image keeps the edge open and abstract. -
Clean up burrs:
After carving, you’ll likely have small clay crumbs or ‘burrs.’ Wait until the clay is bone dry to brush these away, or smooth them very gently with a barely damp finger now.
Pro Tip: Depth Control
Don’t carve too deep! A spoon rest needs to be easily washable. Keep grooves shallow so food particles don’t get stuck inside the design later.
Step 4: Finishing Fire
-
Bisque fire:
Let the piece dry completely, slowly, to avoid warping. Fire it to cone 04 (or your clay’s specific bisque temperature). -
Wipe down:
After the kiln cools, wipe the bisque ware with a damp sponge to remove any dust that might interfere with glazing. -
Applying the wash (optional):
To make the leaf veins pop like the image, you can brush a diluted iron oxide wash or brown underglaze into the grooves, then wipe the surface back with a sponge so color remains only in the recesses. -
Glaze application:
Dip or brush a clear matte glaze over the entire piece. I find a matte finish highlights the speckles better than a high gloss. -
Glaze firing:
Fire the piece again to the maturation temperature of your clay (likely cone 5 or 6). Once cool, sand the bottom if necessary to ensure it won’t scratch your table.
Enjoy using your beautiful, custom-made spoon rest during your next cooking adventure
Taper Candleholders in a Matched Set
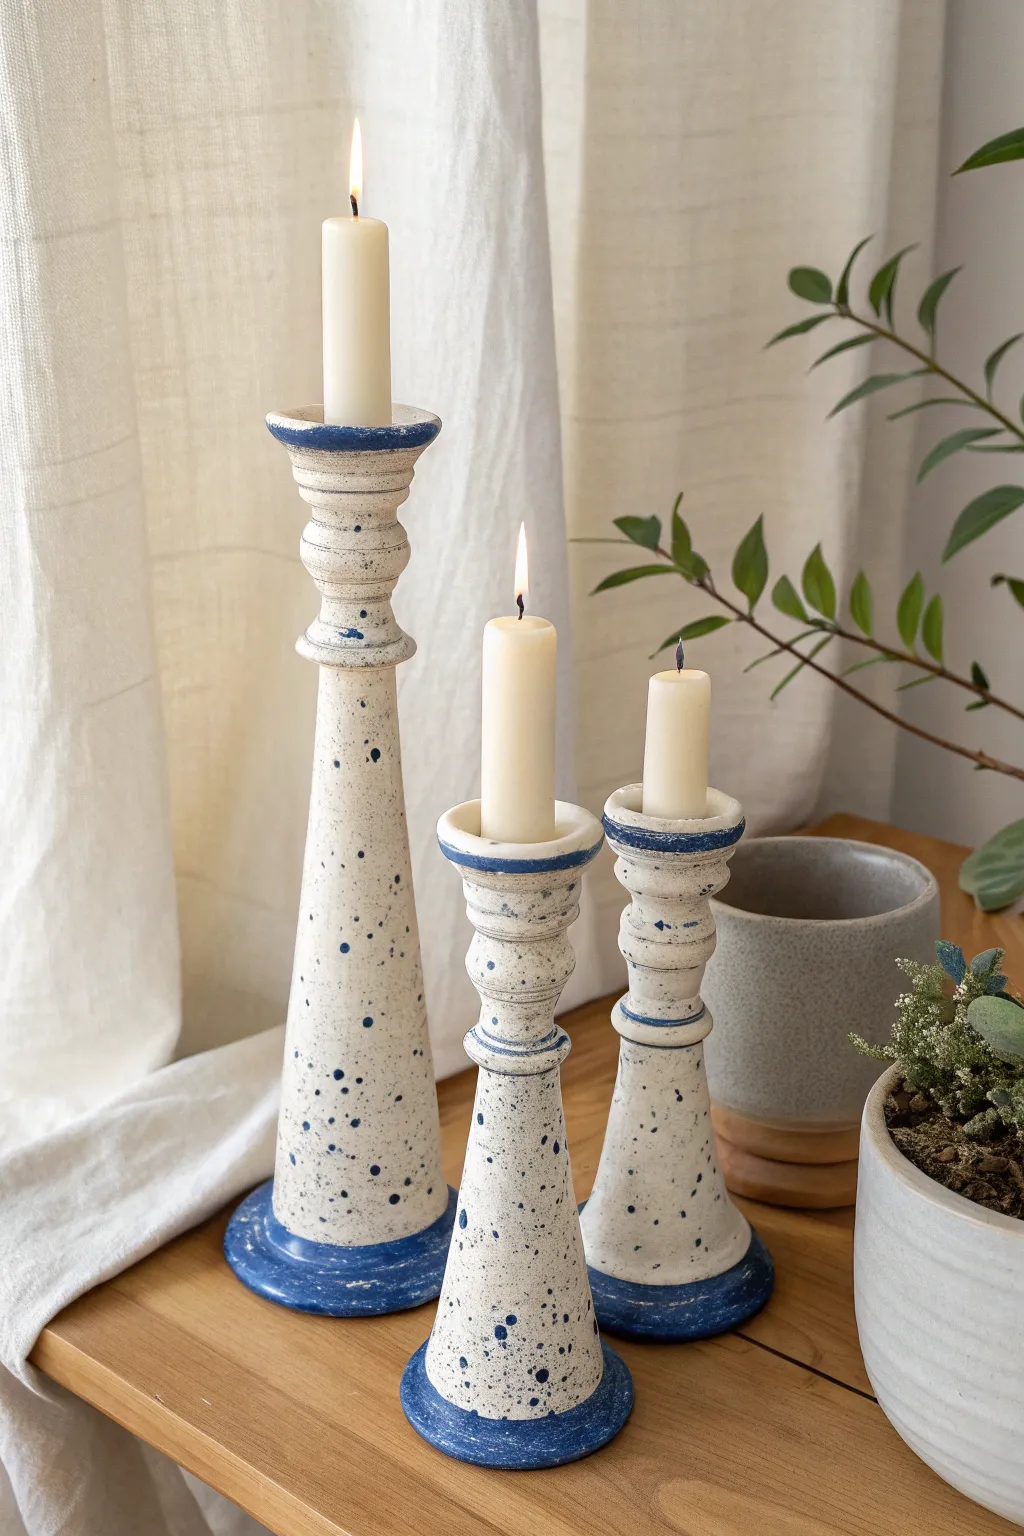
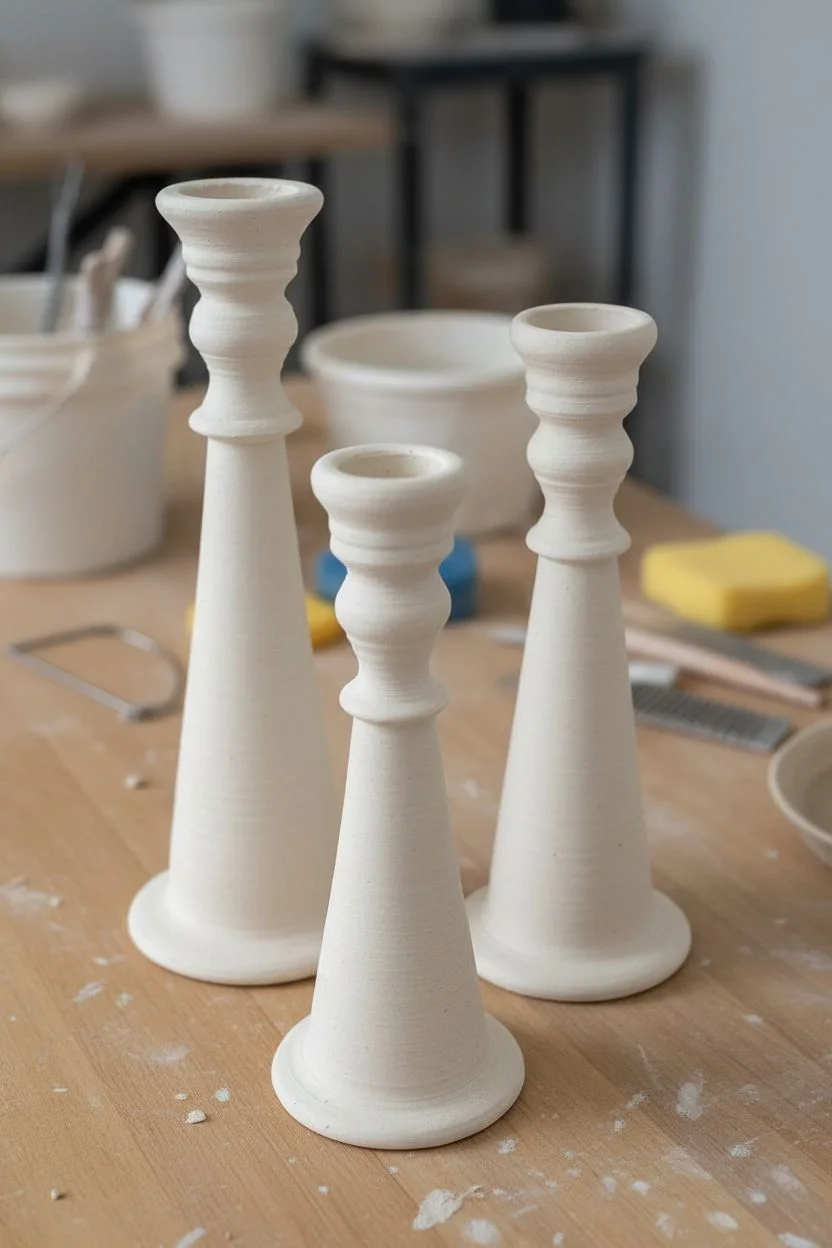
These elegant candleholders combine a classic turned-wood silhouette with the rustic charm of speckled ceramic. With their varying heights and cobalt blue accents, they create a cohesive yet dynamic centerpiece perfect for any mantle or dining table.
Step-by-Step
Materials
- White stoneware clay (preferably with grog for structure)
- Pottery wheel
- Throwing tools (sponge, needle tool, wire cutter)
- ribs (wooden and metal)
- Calipers
- Trimming tools (loop tool)
- Speckled white glaze (or clear glaze + mason stain specks)
- Cobalt blue underglaze
- Small soft brush
- Wax resist
- Kiln
Step 1: Throwing the Forms
-
Center and open:
Begin with about 1.5 to 2.5 lbs of clay, depending on the desired height of the candleholder. Center the clay into a tall, narrow cone. Open the center, leaving a thick floor, but do not pull the opening wider than a taper candle (about 1 inch). -
Pull the cylinder:
Pull the walls upward, aiming for a tall, narrow cylinder that tapers slightly inward as it rises. Keep the base fairly wide for stability. This initial shape is your blank canvas. -
Collar and shape the neck:
Using wet hands, gently collar the top third of the cylinder inward to create the narrow neck area. This compression thickens the wall, so pull specifically from this area to gain more height if needed. -
Define the baluster curves:
Use a wooden rib or your fingers to press into the cylinder, creating the undulating curves typical of a baluster shape. Push out from the inside for the bulbous sections and press in from the outside for the narrow waists. -
Form the candle cup:
At the very top, flare the rim slightly to create the drip catcher. Ensure the internal hole is sized correctly for a standard taper candle; I like to use a dummy candle or a sizing tool here to be precise, as clay shrinks during firing. -
Repeat for the set:
Throw two more forms with slightly different amounts of clay to achieve the graduated heights shown in the example.
Wobbly Wax?
If your candles don’t fit snugly after firing due to shrinkage, drop a small amount of melted wax into the holder’s cup before insertion to secure the candle immediately.
Step 2: Trimming and Refining
-
Dry to leather hard:
Allow the pieces to dry until they are firm enough to handle without deforming, known as leather hard. -
Secure for trimming:
Center a piece upside down on the wheel. You may need to use a chuck (a tall cylinder of clay or bisque) to support the candleholder if the top is too delicate or varying in width. -
Trim the base:
Using a sharp loop tool, trim the bottom skirt to create a distinct, sharp foot ring. This separation adds visual lift and makes glazing easier later. -
Refine the profile:
Clean up any throwing lines or heaviness in the curves. Go over the surface with a damp sponge to smooth it out before bisque firing.
Rustic Speckle Hack
If your glaze isn’t pre-speckled, flick a stiff toothbrush dipped in iron oxide wash over the damp white glaze before firing for that organic, spotted look.
Step 3: Glazing and Finishing
-
Bisque fire:
Fire the pieces to cone 04 (or your clay’s specific bisque temperature). -
Apply wax resist:
Paint a ring of wax resist on the very bottom of the foot to prevent glaze from sticking to the kiln shelf. -
Apply the main glaze:
Dip the entire candleholder into a speckled white glaze. If you don’t have a speckled glaze, use a creamy white glaze; the natural iron spots in some clay bodies will bleed through, or you can splatter iron oxide wash later. -
Clean the accents:
Using a damp sponge, carefully wipe the glaze off the rim of the candle cup and the outer edge of the base foot. You want to expose the raw bisque in these specific bands. -
Paint the blue details:
With a small brush, apply two to three coats of cobalt blue underglaze (or a blue glaze) directly onto the wiped areas at the rim and base. Ensure the blue meets the white glaze cleanly. -
Final wipe:
Check the bottom foot one last time to ensure no glaze has dripped onto the surface that will touch the shelf. -
Glaze fire:
Fire the pieces to maturity (likely cone 5 or 6 depending on your stoneware). Let them cool completely before inserting candles.
Now you have a stunning, handmade set ready to add a warm glow to your home.


Lidded Butter Dishes With a Sculpted Knob
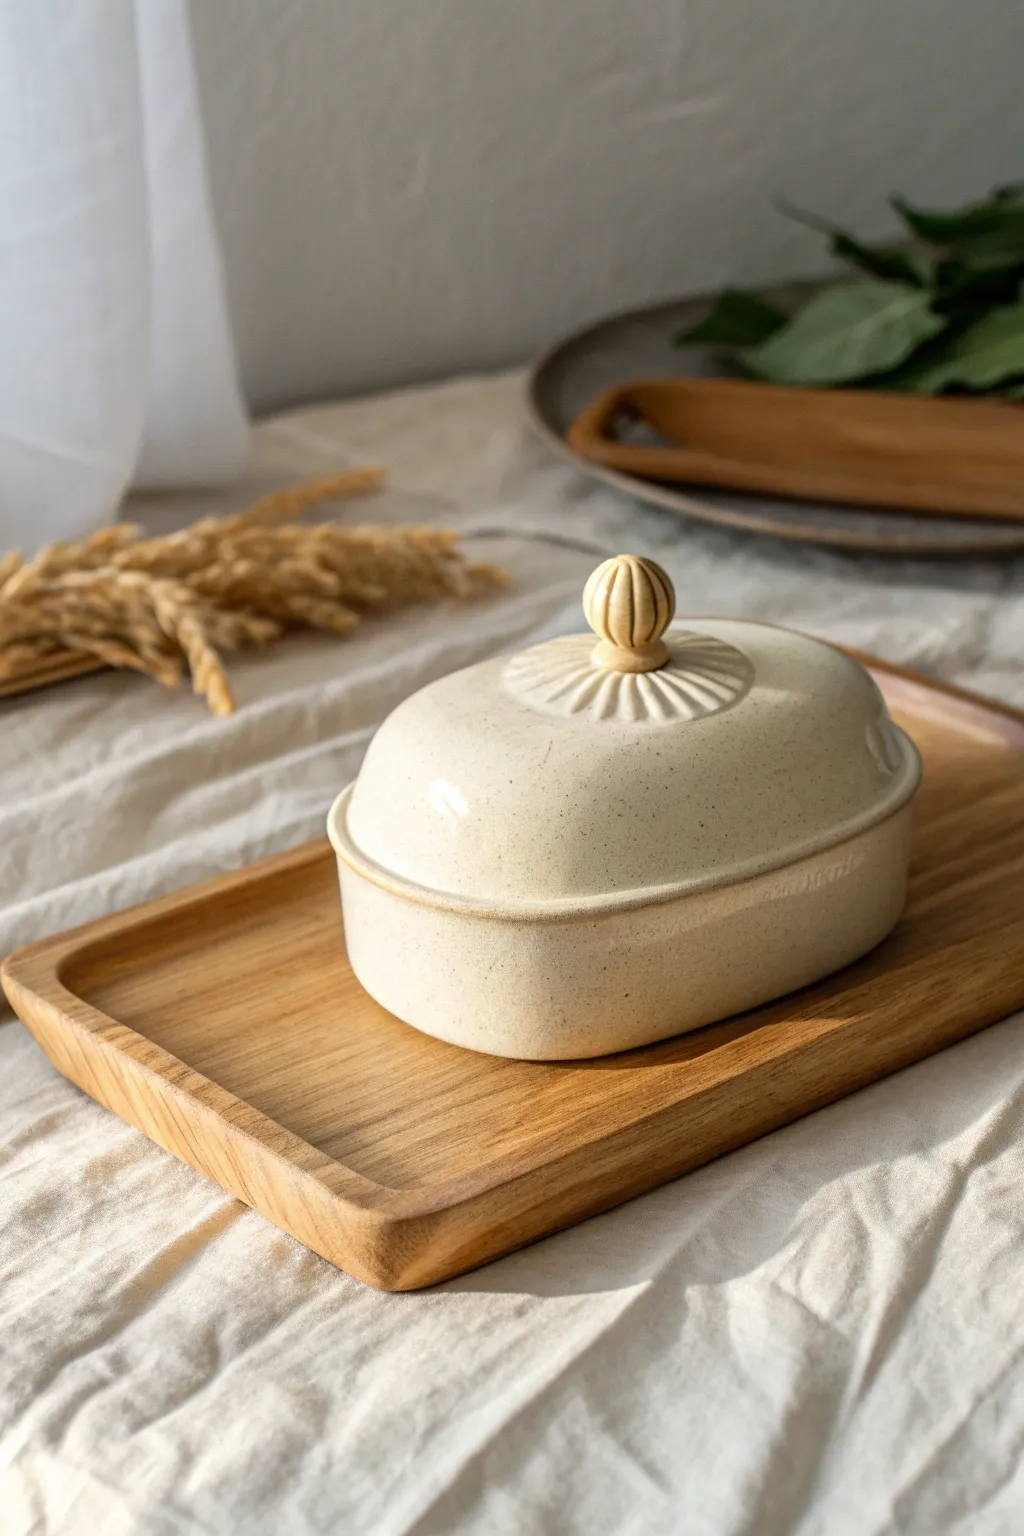
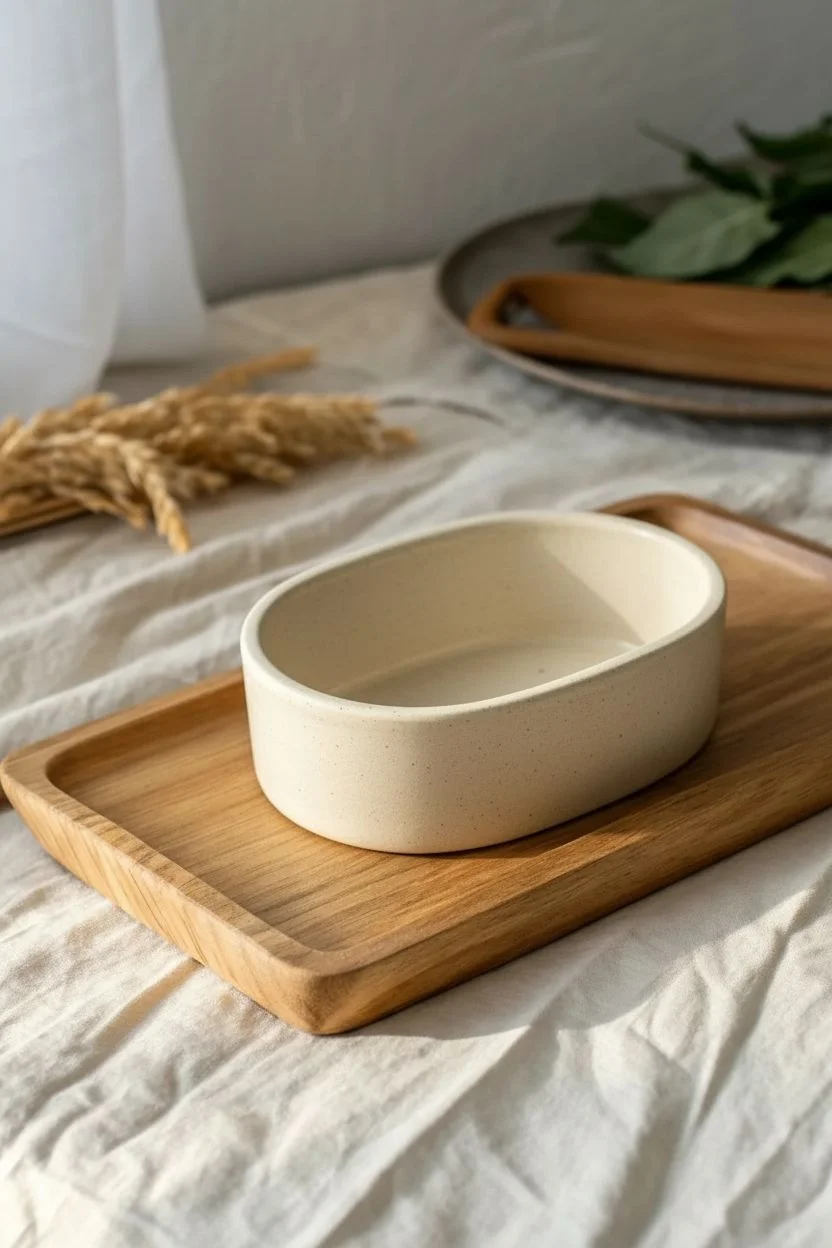
This classic oval butter dish features a warm, creamy glaze speckled with natural texture and a distinctive sculpted knob. The lid showcases gentle radiating fluting that adds elegance without feeling overly ornate, making it a perfect addition to any breakfast table.
Detailed Instructions
Materials
- Stoneware clay (buff or speckled)
- Small oval bisque mold or hump mold
- Pottery knife or needle tool
- Scoring tool and slip
- Rib tool (wooden or silicone)
- Modeling tool for fluting
- Sponge
- Cream semi-matte speckled glaze
- Kiln
Step 1: Farming the Base
-
Roll out the slab:
Begin by rolling out a consistent slab of stoneware clay to approximately 1/4 inch thickness. Compress the clay on both sides with a rib to prevent warping later. -
Cut the oval base:
Using your oval mold as a template, trace and cut out two identical oval shapes. One will be the floor of the dish, and the other will help form the lid. -
Build the walls:
Cut a long strip of clay, about 1.5 to 2 inches wide. This will be the wall of the bottom dish. Measure the circumference of your oval base to ensure the strip is long enough. -
Attach the walls:
Score and slip the edge of your oval base and one long edge of your wall strip. Join them firmly, wrapping the strip around the oval floor. Cut the excess length at a bevel and join the seam thoroughly. -
Refine the rim:
Smooth the join on the inside and outside with a rib. Then, sponge the top rim so it is smooth and level. I like to let this stiffen up to leather hard before working on the lid to ensure a good fit. -
Create the gallery (optional):
If you want the lid to sit inside the rim, add a small coil on the inside wall or carefully trim a ledge. However, for a drop-over style, simply ensure the walls are straight.
Pro Tip: Fluting Depth
Make your fluting slightly deeper than you think is necessary. Glaze tends to fill in textures, so bolder tool marks ensure the design remains visible after firing.
Step 2: Creating the Sculpted Lid
-
Form the dome:
If using a hump mold, drape your second oval slab over it to create a gentle dome shape. If hand-building, pinch the slab gently into a convex curve. -
Add the vertical rim:
To make the lid fit the base, add a short vertical strip (about 1 inch) to the edge of your domed slab, creating a ‘skirt’ that will rest on the bottom dish’s rim. -
Check the fit:
Once the lid has stiffened slightly, test it against the base. It should sit flush. Adjust the shape while the clay is still workable. -
Make the sculpted knob:
Roll a small ball of clay for the knob. Pinch it into a slightly tapered, rounded shape. Using a modeling tool, press vertical indentations all around the knob to create a pumpkin-like ribbed texture. -
Add radiating fluting:
Before attaching the knob, use a rounded modeling tool to press radial lines into the top center of the lid. These should look like rays extending outward from where the knob will sit. -
Attach the knob:
Score the center of the radiating lines and the bottom of your textured knob. Apply slip and press the knob firmly into the center of the sunburst pattern. -
Refine textures:
Clean up any excess slip around the knob base. Use a damp sponge to soften the edges of your fluting so the glaze will break beautifully over the high points.
Troubleshooting: Warping
If your oval lid warps and doesn’t sit flat, try drying the lid *on* the base (with a strip of paper towel between them) so they dry and shrink together as a matched set.
Step 3: Finishing and Glazing
-
Bisque fire:
Allow both pieces to dry slowly under plastic to prevent warping. Once bone dry, fire the pieces in a bisque kiln according to your clay body’s specifications. -
Glaze application:
Dip or brush your cream speckled glaze onto the piece. If dipping, use tongs to dip the lid, ensuring the coating isn’t too thick in the fluted crevices, or the detail might get lost. -
Wipe the contact points:
Carefully wipe the glaze off the rim of the base and the contact rim of the lid. Glaze fusing these two together is a common heartbreak. -
Final firing:
Fire the piece to the maturity temperature of your glaze (typically Cone 5 or 6 for stoneware). Allow the kiln to cool completely before removing your new butter dish.
Now you have a functional piece of art ready to elevate your morning toast routine
Wall Tiles as Mini Ceramic Paintings
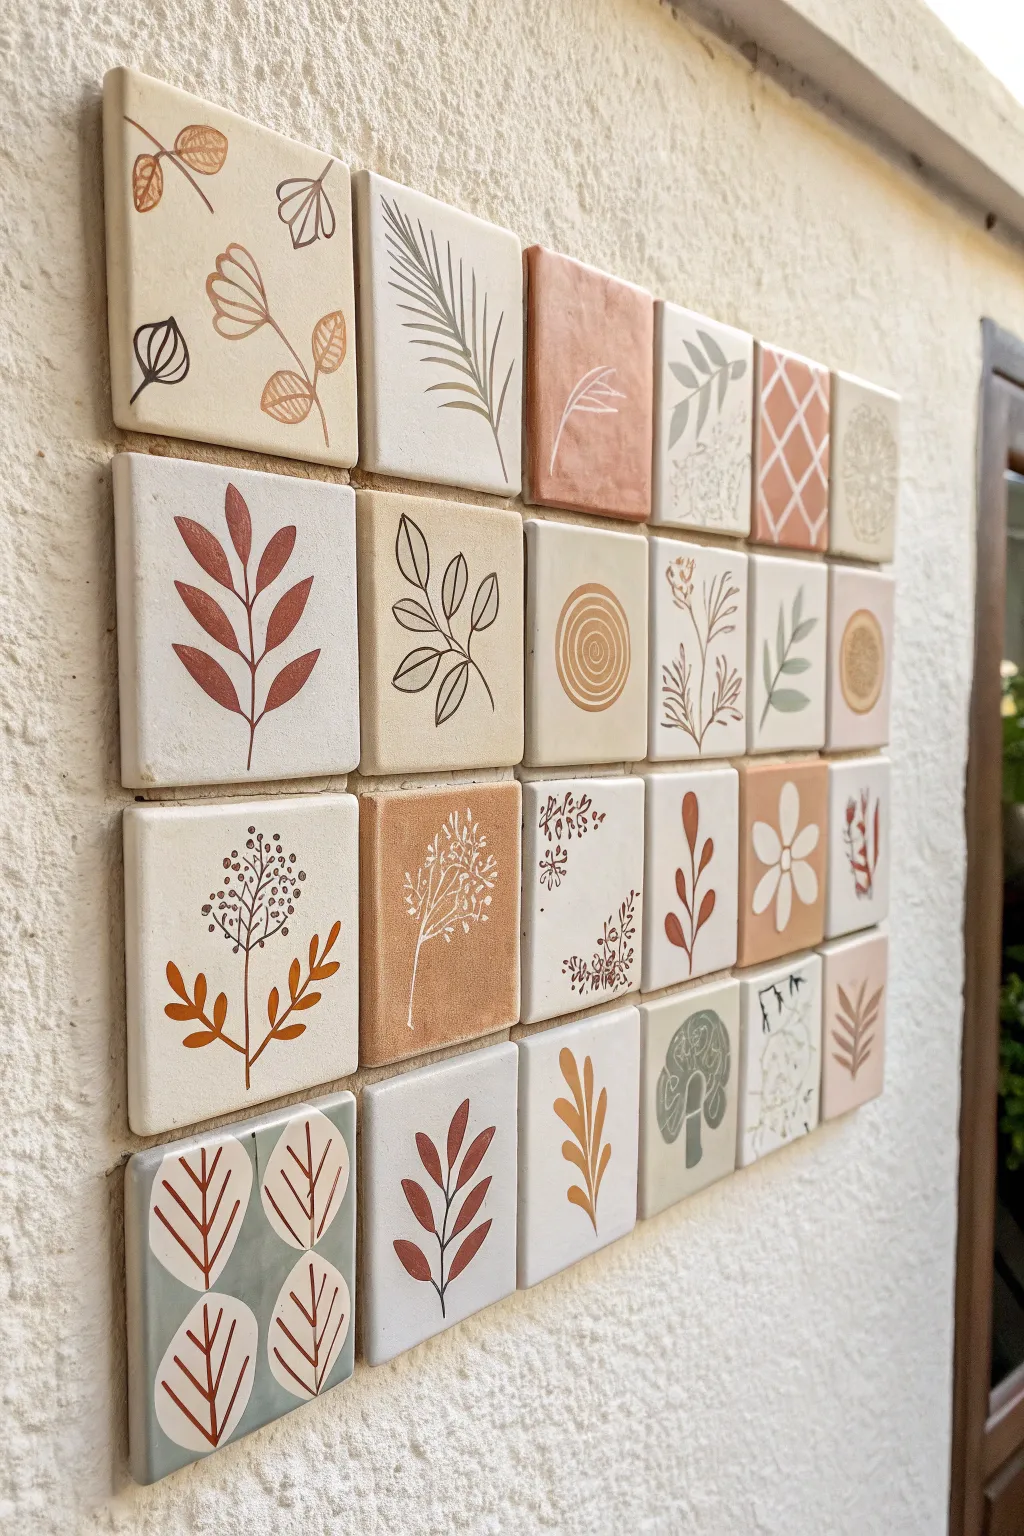
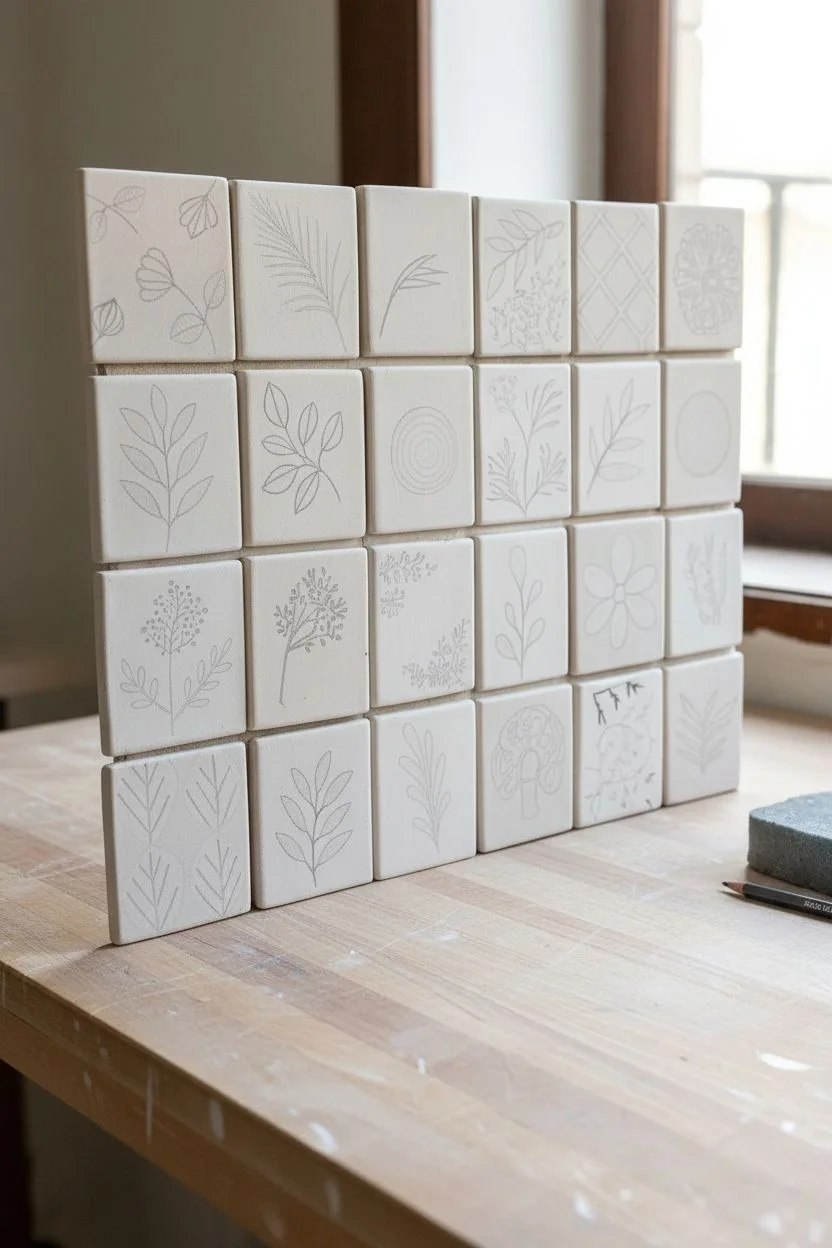
Transform a blank wall into an organic gallery with these hand-painted ceramic tiles featuring delicate botanical motifs. Using a muted, earthy color palette of terracotta, sage, and cream, each tile serves as a miniature canvas for nature-inspired line art and silhouettes.
Step-by-Step
Materials
- Bisque ceramic tiles (4×4 inch squares)
- Underglaze paints (terracotta, sage green, cream, dark brown, white)
- Clear dipping glaze or brush-on clear glaze
- Fine detail brushes (sizes 0 and 00)
- Flat shader brush (size 4 or 6)
- Pencil (HB)
- Tracing paper (optional)
- Ceramic kiln (or access to a firing service)
- Tile adhesive or mounting strips
Step 1: Planning and Sketching
-
Map your grid:
Before touching the clay, plan your grid layout on paper. The example shows a 4-tile high by 6-tile wide arrangement, but customize this to your wall space. Sketch a rough idea for each square to ensure a balanced mix of heavy, filled-in shapes and delicate line drawings. -
Clean the bisque:
Wipe down your bisque tiles with a slightly damp sponge to remove any kiln dust. This ensures the underglaze adheres properly without crawling. -
Lightly pencil designs:
Using an HB pencil, very lightly sketch your botanical designs onto the tiles. Don’t worry about erasing mistakes perfectly; pencil graphite burns off in the kiln, so it won’t be visible on the final piece.
Paint Consistency Check
If your fine lines are jittery or the brush drags, your underglaze is likely too dry. Add a drop of water or print-medium to improve flow.
Step 2: Painting the Motifs
-
Establish background colors:
For tiles that aren’t just raw bisque, apply your base colors first. Use a flat shader brush to paint solid backgrounds like the dusty orange squares or the grey-blue quadrants on the bottom left tile. Apply 2-3 coats for solid opacity. -
Paint delicate stems:
For the thin, vine-like designs, use a size 00 liner brush loaded with dark brown underglaze. Keep your paint consistency like heavy cream—if it’s too thick, the lines will break; too thin, and they will bleed. Pull the brush towards you for smoother lines. -
Create silhouette leaves:
Switch to a size 0 or 2 round brush for the filled-in leaf shapes, such as the terracotta leaves on the white background. paint the outline of the leaf first, then fill it in. I find it helps to rotate the tile rather than contorting my hand. -
Add sgraffito details:
For the solid colored tiles with white lines (like the terracotta square with white veins), apply a thick layer of color and let it dry to a leather-hard state. Then, gently scratch through the top layer to reveal the lighter clay body underneath. -
Layering lighter tones:
On the darker sage or terracotta backgrounds, use white underglaze to paint contrasting botanical shapes. You may need 3 coats of white to ensure it stands out brightly against the dark base. -
Detail work on complex tiles:
For the bottom-left tile with the geometric ovals, paint the background triangles first. Once dry, paint the white oval shapes, and finally, add the terracotta vein lines on top once the white is dry to the touch.
Pro Tip: Variance is Key
Don’t aim for perfect uniformity. The charm comes from varying line weights and subtle color differences between tiles.
Step 3: Glazing and Finishing
-
Bisque fire (optional):
If your underglazes are heavy, a second bisque firing can help set the design, though many modern underglazes can go straight to glaze firing. Check your manufacturer’s instructions. -
Apply clear glaze:
Once the underglaze is completely dry, apply a clear glaze over the entire face of the tile. Dipping provides the most even coverage, but brushing works if you overlap strokes carefully to avoid streaks. -
Wipe the backs:
Crucial step: wipe the bottom and edges of the tiles completely clean of glaze. Any glaze left on the bottom will fuse the tile to your kiln shelf. -
Final firing:
Fire the tiles in the kiln according to the clay and glaze specifications (typically Cone 06 or Cone 6 depending on your materials). -
Arrangement and mounting:
Lay out your finished fired tiles on the floor to finalize the arrangement. Mount them to the wall using tile adhesive for a permanent installation, or heavy-duty mounting strips if you want the flexibility to move them later.
Step back and admire how your individual miniature paintings come together to form a cohesive, textured nature scene
Blue-and-White Sgraffito Bowls for High Contrast
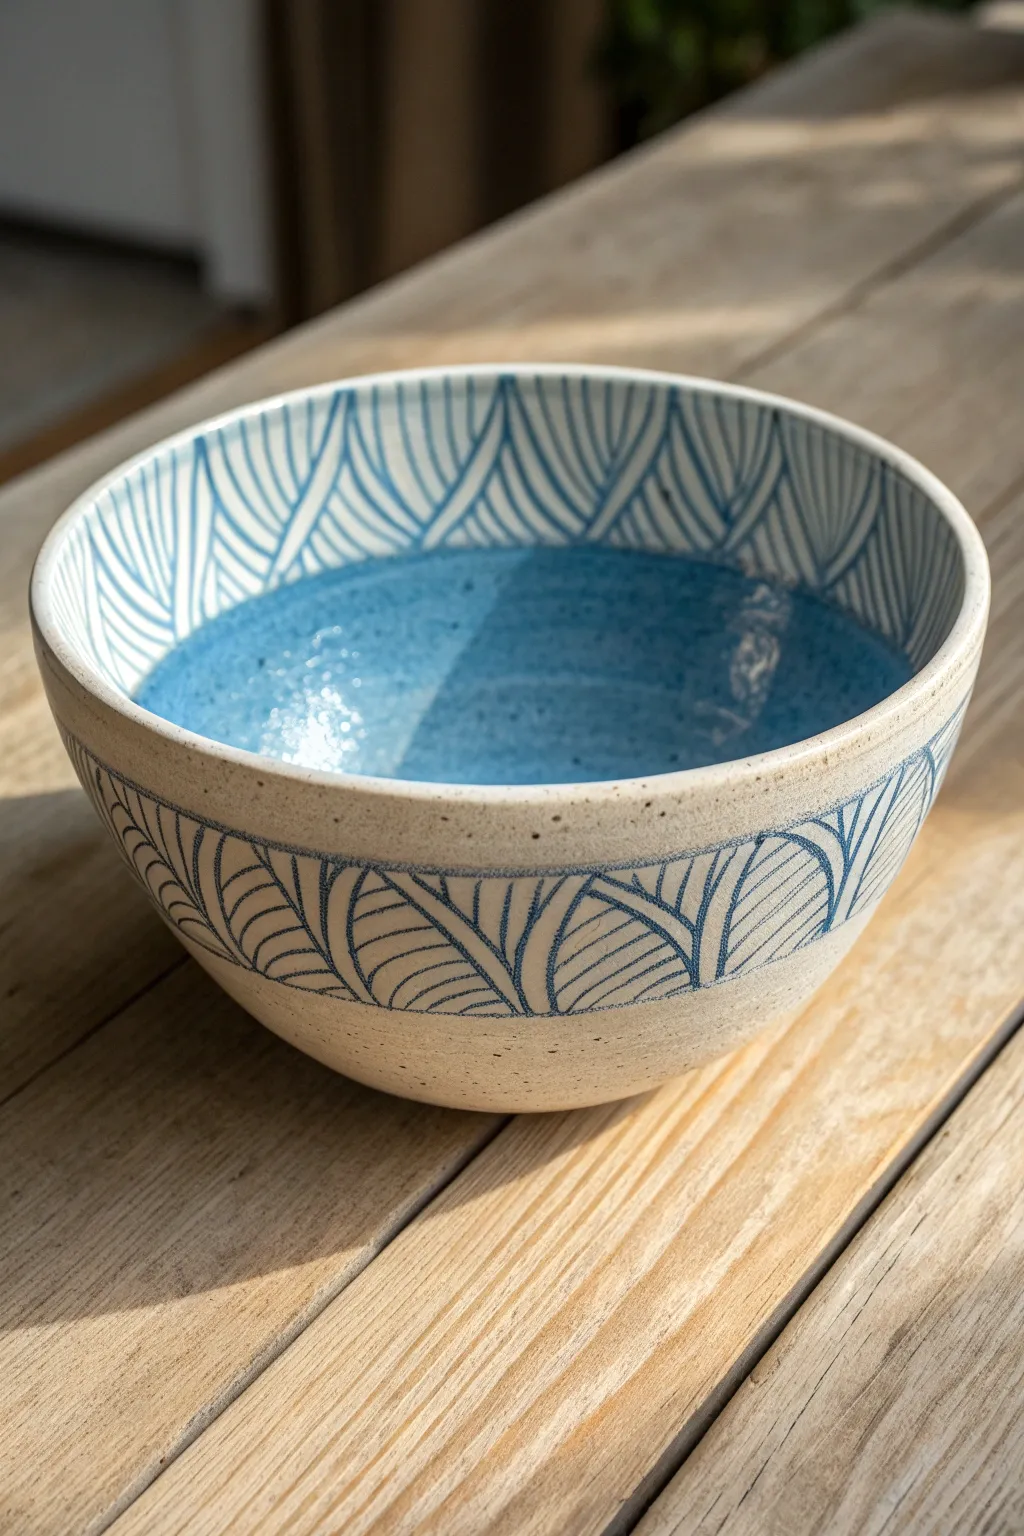
This stunning ceramic project captures the movement of the ocean with rhythmic, carved patterns contrasting against a speckled sandy clay body. By combining bold blue underglaze with delicate sgraffito line work, creates a functional piece of art that feels both modern and timeless.
Detailed Instructions
Materials
- Speckled stoneware clay (mid-range)
- Pottery wheel (or coil/pinch supplies)
- Rib tool (metal or rubber)
- Rich blue underglaze
- Fan brush or soft hake brush
- Sgraffito carving tool (small loop or stylus)
- Clear transparent glaze
- Sponge
- Kiln
Step 1: Forming the Vessel
-
Prepare the Clay:
Begin by thoroughly wedging about 2-3 pounds of speckled stoneware clay to remove air bubbles and ensure consistency. -
Throw the Form:
Center the clay on the wheel and open it up to create a wide, deep bowl shape. Aim for even walls about 1/4 inch thick. -
Refine the Profile:
Use a rib tool to smooth the interior curve and exterior walls, establishing a distinct break or ‘shoulder’ near the rim if desired, though a continuous curve works beautifully too. -
Trim the Foot:
Once the bowl is leather-hard, return it to the wheel to trim a clean foot ring, ensuring the bottom isn’t too heavy.
Chipped Lines?
If your carved lines look jagged or chipped, your clay is likely too dry. Mist the piece lightly and wrap it in plastic for an hour to rehydrate the surface before trying again.
Step 2: Preparing for Design
-
Smooth the Surface:
Wipe the surface gently with a barely damp sponge to remove any trimming crumbs. A smooth canvas is crucial for clean carving. -
Apply Blue Underglaze:
Using a soft fan brush, apply 2-3 even coats of rich blue underglaze to the interior bottom and a wide band around the exterior belly of the bowl. -
Define the Upper Band:
Paint a matching band of blue on the upper interior rim, leaving a small gap of raw clay between the bottom pool of color and this upper ring. -
Drying Time:
Let the underglaze dry until it is no longer tacky to the touch but the clay is still leather-hard. If it’s bone dry, the carving will chip.
Step 3: Carving the Sgraffito
-
Mark Guidelines:
Lightly scratch faint vertical guide lines or ‘Vs’ around the perimeter to space out your wave repeating pattern evenly. -
Carve the Stems:
Using your sharp sgraffito loop tool, carve the main vertical curved lines that act as the spines for your leaf-like waves, cutting through the blue to reveal the white clay. -
Add the Veins:
Carve uniform, rhythmic curved lines branching off the main spines. I find it helpful to always pull the tool towards myself for better control. -
Repeat on Interior:
Replicate this leaf/wave pattern on the interior upper band, creating a sense of visual continuity from inside to outside. -
Clean Up Burrs:
Once dry, lightly brush off any clay crumbs or ‘burrs’ created by carving. Do not rub them while wet, or you’ll smudge the blue. -
Add Detail Banding:
Carve horizontal rings bordering the patterned areas if you want a distinct border for your sgraffito sections.
Level Up: Color Wash
Before the final clear glaze, dab a watered-down teal underglaze into the carved recesses and wipe it back. This adds a subtle secondary color inside the carved lines.
Step 4: Finishing
-
Bisque Fire:
Load the bone-dry bowl into the kiln for a bisque firing (typically Cone 04) to set the shape and underglaze. -
Glazing:
Dip the entire piece into a clear, transparent glaze. This will make the speckled clay pop and seal the surface for food safety. -
Wipe the Foot:
Thoroughly sponge off any glaze from the foot ring to prevent the bowl from fusing to the kiln shelf. -
Final Fire:
Fire the kiln to the maturity temperature of your clay and glaze (likely Cone 5 or 6). Allow to cool completely before unloading.
Now you have a serene, ocean-inspired bowl perfect for serving or display
Mishima Inlay Lines for Crisp Graphic Pattern
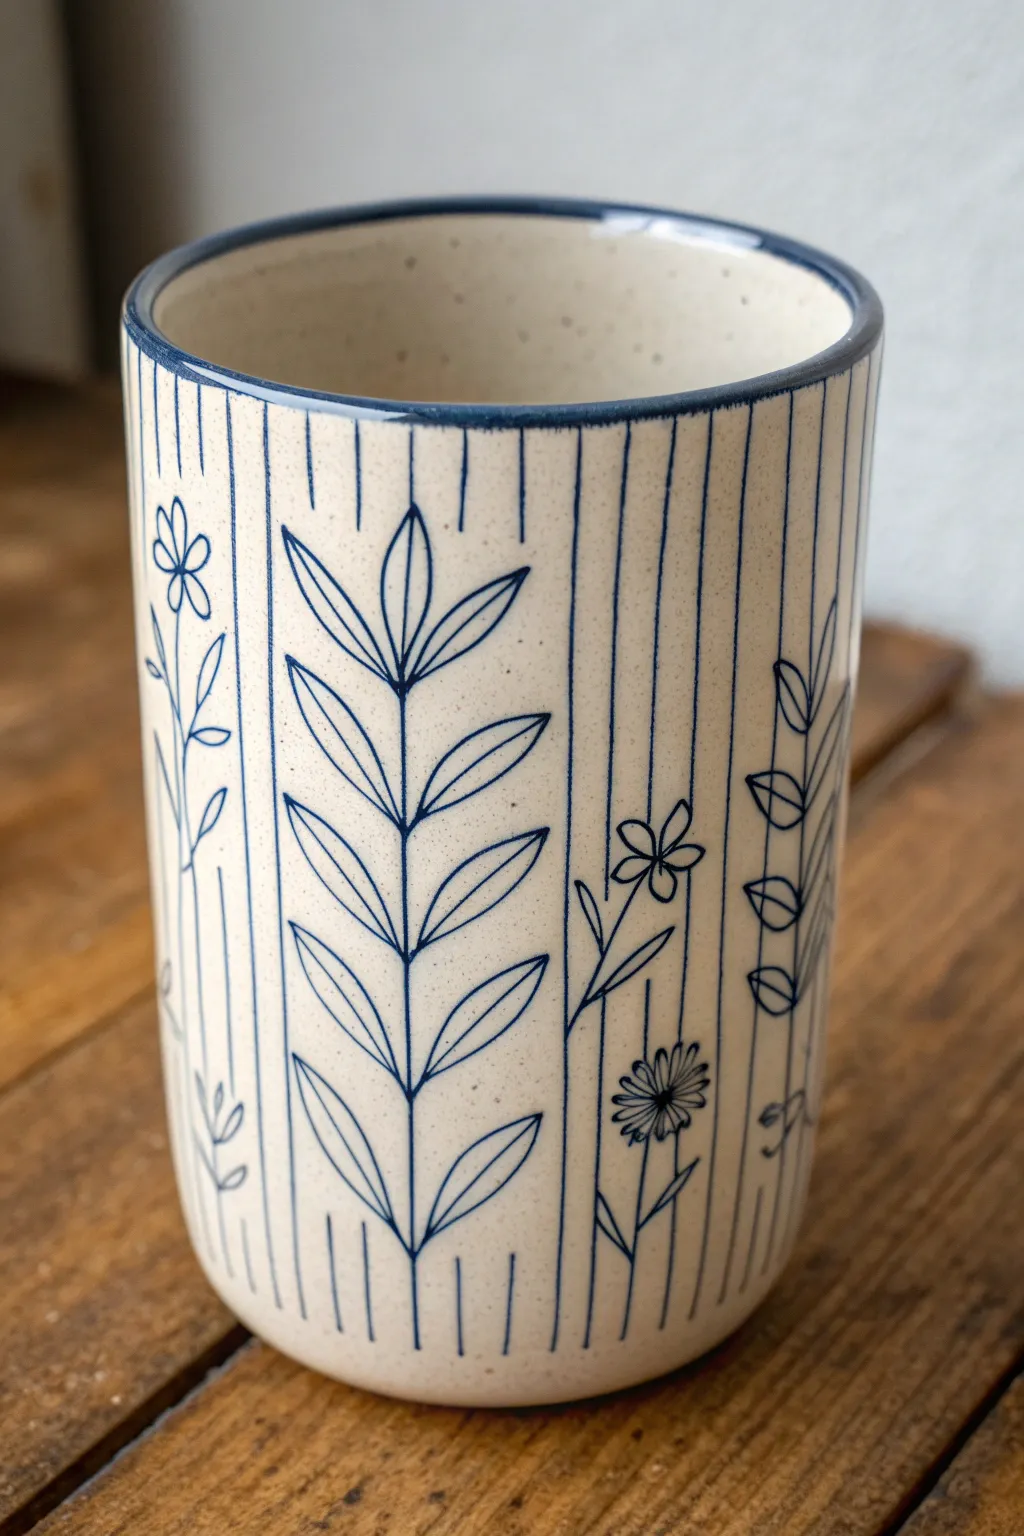
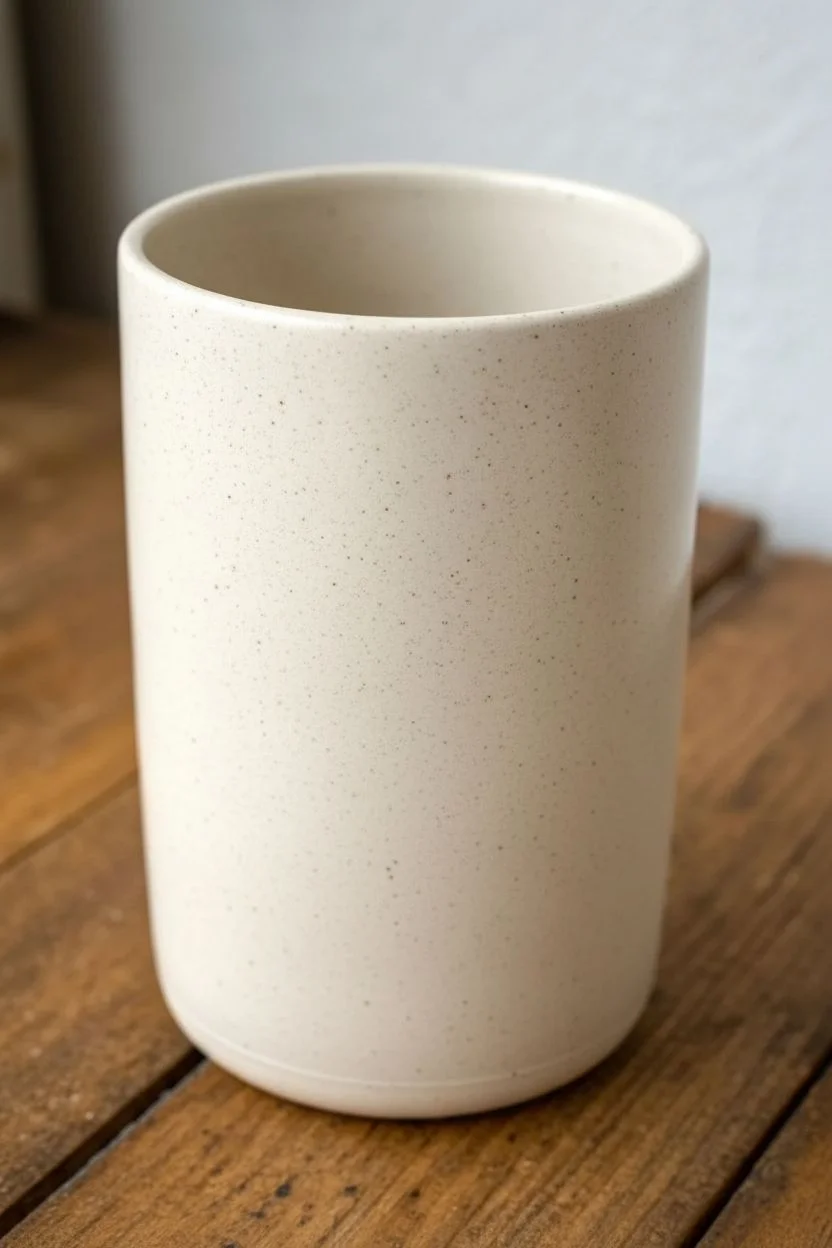
This elegant tumbler showcases the crisp, illustrative power of the Mishima technique, where fine blue lines are inlaid into a creamy, speckled clay body. The result is a smooth, graphic floral design that feels as good as it looks.
How-To Guide
Materials
- Stoneware clay (speckled or buff)
- Pottery wheel
- Throwing tools (sponge, rib, wire)
- Exacto knife or fine needle tool
- Wax resist
- Blue underglaze or slip (cobalt based)
- Small paintbrush
- Metal kidney rib or scraper
- Clear transparent glaze
- Sponge and bucket of water
Step 1: Forming the base
-
Throw the cylinder:
Center your clay on the wheel and pull distinct, tall walls to create a simple cylinder shape. Aim for a height of about 5-6 inches. -
Refine the shape:
Use a rib tool to smooth the outer walls, giving the bottom a gentle curve where it meets the table for a softer profile. -
Leather hard stage:
Let the tumbler dry slowly until it reaches a leather-hard state. It should be firm enough to handle without warping but soft enough to carve into. -
Trim the foot:
Place the tumbler upside down on the wheel and trim the bottom to create a neat foot ring, removing any excess weight.
Step 2: Carving the design
-
Coat with wax:
Apply a generous coat of wax resist over the entire exterior surface of the tumbler. I like to let this dry briefly until it’s no longer tacky to the touch. -
Sketch the grid:
Using a ruler and your needle tool, gently mark vertical guidelines through the wax to divide the surface into panels. -
Carve vertical stripes:
Carve deep, confident vertical lines within alternating panels using your needle tool or fine blade. Ensure you cut through the wax and slightly into the clay. -
Draw the botanical motifs:
In the wider panels, carve your floral designs. Create a central stem with symmetrical, pointed leaves branching upward. -
Add detail elements:
In the narrower panels, carve smaller, simpler flowers or vine elements to break up the vertical stripes. -
Clean the burrs:
Gently brush away any loose clay crumbs (burrs) created by the carving. Be careful not to smudge the wax.
Clean Lines Only
If your lines look fuzzy after wiping, your sponge was too wet. Wring it out thoroughly—it should be damp, not dripping, to avoid pulling color out of the grooves.
Step 3: Inlaying and Finishing
-
Apply the color:
Paint a thick layer of blue underglaze over all the carved lines. Don’t worry about being neat; the wax will protect the uncarved areas. -
Paint the rim:
While you have the blue underglaze out, carefully paint the top rim of the tumbler to frame the design. -
Let it set:
Allow the underglaze to dry completely until it looks matte and chalky. -
Wipe back:
Use a clean, damp sponge to wipe away the excess underglaze. The paint will wipe easily off the wax resist but stay trapped in your carved lines. -
Final clean up:
If any blue haze remains on the wax, give it one final wipe with a clean section of the sponge to ensure crisp contrast. -
Bisque fire:
Load the tumbler into the kiln for a bisque firing (usually Cone 04 or 06) to burn off the wax and set the clay. -
Glaze application:
Dip the entire piece into a clear, transparent glaze. This will seal the clay and make the blue inlay pop. -
Final firing:
Fire the piece to final maturity (e.g., Cone 6 or 10) according to your clay body’s specifications.
Colored Clay Body
Try using a dark brown or reddish clay body with white slip inlay for a dramatic, high-contrast reverse effect on your next floral tumbler.
Now you have a stunning, food-safe vessel with a pattern that is physically embedded into the surface
Watercolor-Style Underglaze Washes
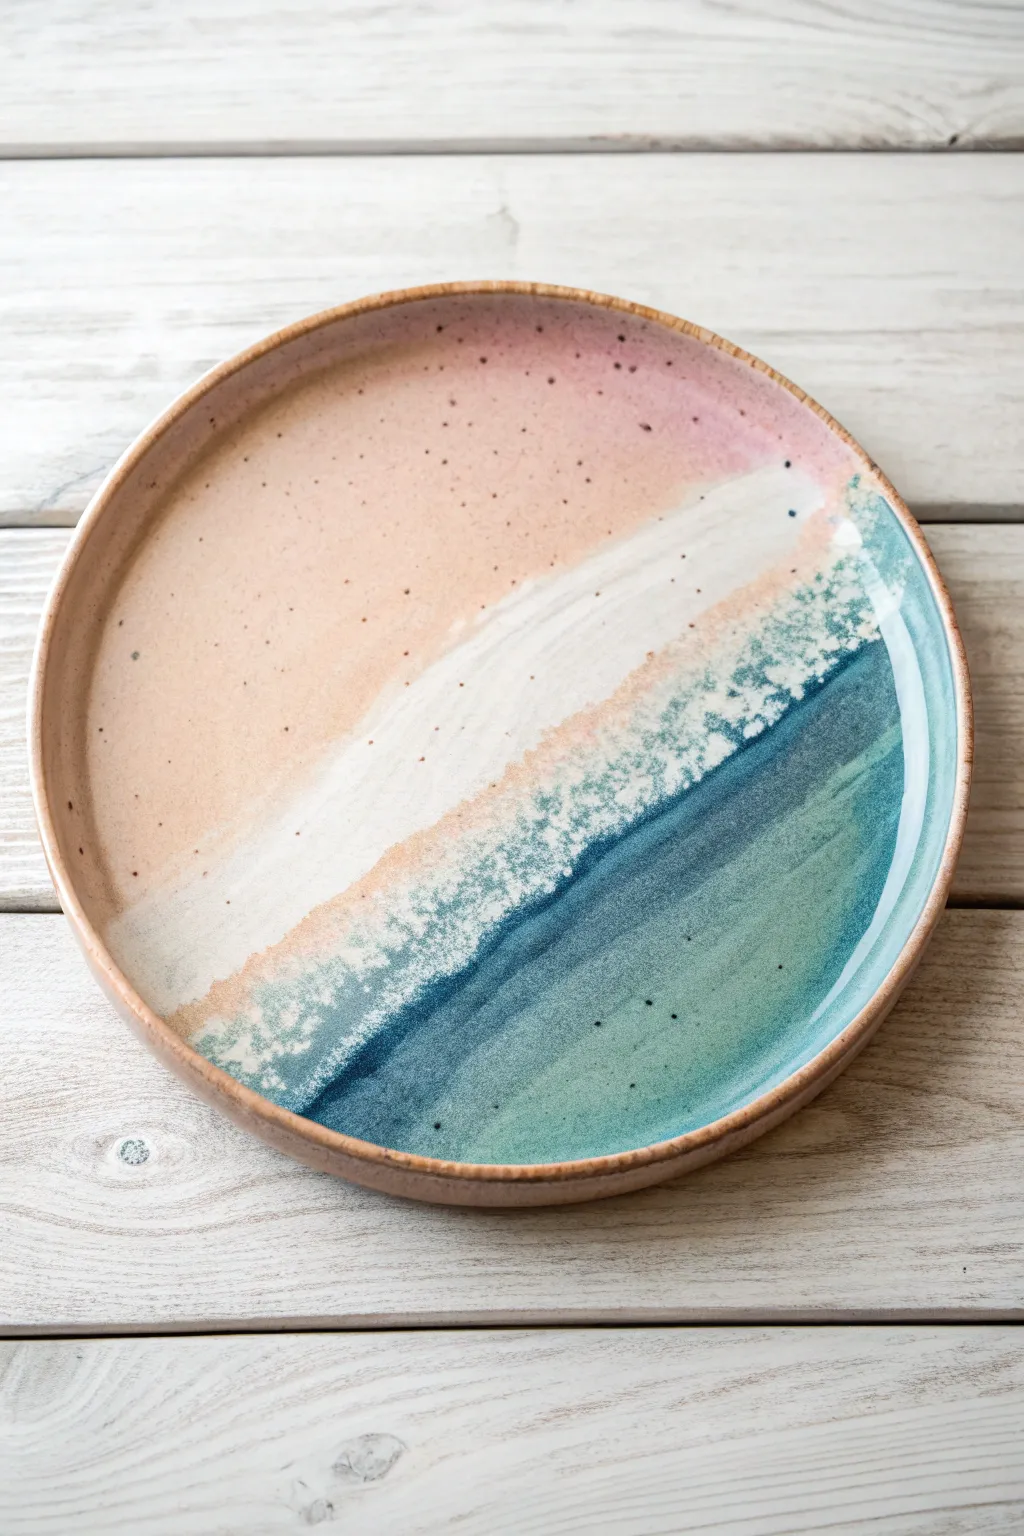
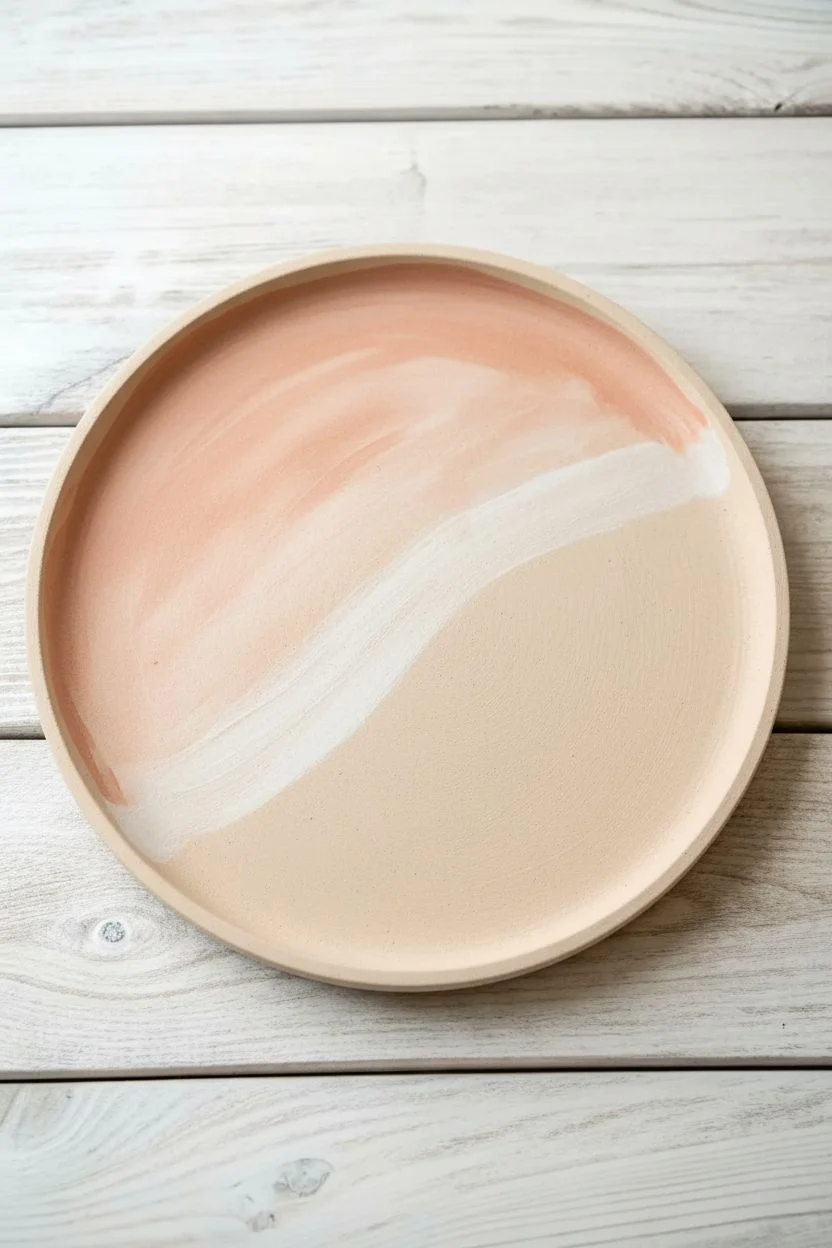
Capture the serene beauty of a shoreline on your next pottery piece using distinct underglaze blending techniques. This project creates a stunning beach gradient, moving from sandy peach shores to crashing white foam and deep teal waters.
Detailed Instructions
Materials
- Bisque-fired ceramic plate (flat rimless or coupe shape works best)
- Underglazes: Peach or Sand, White, Teal, Deep Blue, Light Blue
- Wide hake brush or soft fan brush
- Medium round watercolor brush
- Small stiff-bristle brush (for spattering)
- Water container
- Sponge
- Clear transparent glaze
- Kiln
Step 1: Preparation and Base Layout
-
Clean the Bisque:
Wipe down your bisque-fired plate with a damp sponge to remove any kiln dust or oils from your hands, ensuring a clean surface for adhesion. -
Map the Horizon:
Visualize a diagonal line splitting the plate roughly in half. The top left will be the sand, and the bottom right will be the ocean. -
Apply the Sand Tone:
Using a wide, damp brush, apply a watered-down wash of Peach or Sand underglaze to the top left section. Let the brushstrokes follow the curve of the imagined shoreline. -
Create a Gradient:
While the first layer is still slightly damp, add a little more pigment to the outer rim area to deepen the color, fading it out as you approach the center diagonal.
Control the Flow
Work with a “thirsty” bisque surface. If your brush grabs too much, dampen the bisque slightly with a sponge before painting to help the color glide.
Step 2: Painting the Ocean
-
Lay Down the Deep Blue:
Mix your Teal and Deep Blue underglazes to create a rich ocean color. Apply this to the bottom right section of the plate with broad, sweeping strokes. -
Blend the Shallows:
As you move toward the middle diagonal line, switch to a Light Blue or watered-down Teal. Blend this into the darker blue while it’s wet for a seamless transition. -
Create the Texture:
Don’t worry about perfect smoothness here; leaving visible brush texture adds to the movement of the water.
Step 3: The Crashing Waves
-
Apply the Foam Base:
Load a clean brush with thick White underglaze. Paint a jagged, organic band between the sand and water sections. -
Feather the Edges:
Use a damp brush to gently feather the white paint into the sand color, softening the transition so it doesn’t look like a solid stripe. -
Scumbling Technique:
For the water side of the foam, use a ‘scumbling’ motion—scrubbing the brush slightly—to drag the white pigment over the blue, mimicking churning water. -
Add Sea Spray:
Dip a stiff-bristle brush (like a toothbrush) into watered-down White underglaze. Run your thumb over the bristles to flick tiny speckles over the blue and white boundary. -
Sand Texture Spatter:
Repeat the spattering technique using a dark brown or rust color, but only very lightly over the peach ‘sand’ section to imitate grains.
Colors Too Muted?
Remember that underglazes darken significantly after firing. Don’t over-apply pigment or you’ll lose the watercolor effect; trust the kiln chemistry.
Step 4: Finishing Touches
-
Rim Detail:
Take a small round brush with a light brown or rust underglaze and carefully paint the very edge of the rim to frame the artwork. -
Dry Completely:
Allow the underglazes to dry completely. They should look chalky and matte to the touch. -
Clear Glaze Application:
Dip or brush on a coat of clear transparent glaze over the entire face of the plate. This will brighten the colors and seal the design. -
Final Fire:
Fire the piece in the kiln according to the clear glaze’s firing schedule (usually Cone 5 or 6 for stoneware).
Once fired, you will have a durable piece of functional art that brings the calming vibes of the coast to your table
Raised Coil and Appliqué Florals for 3D Texture
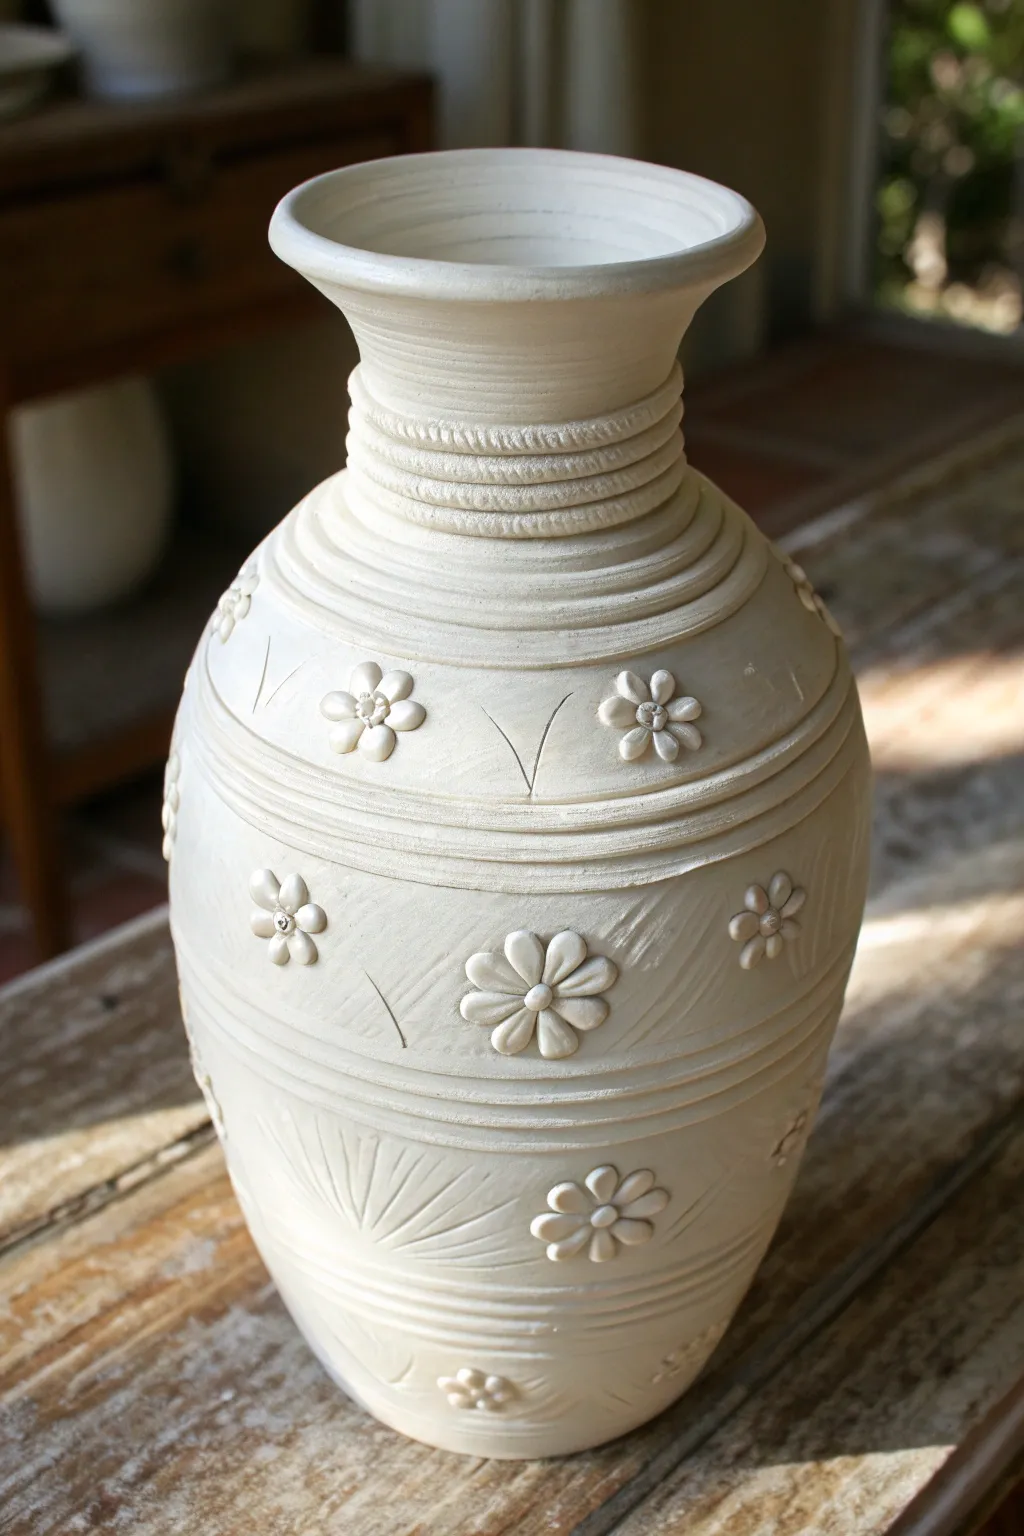
This project combines subtle texture with delicate 3D elements to create a refined ceramic vessel. By layering raised coils and floral appliqués over a smooth body, you’ll achieve a piece that feels both rustic and elegantly detailed.
Step-by-Step Guide
Materials
- White stoneware or porcelain clay body (smooth)
- Pottery wheel (or coil building supplies if hand-building)
- Rib tools (wood and metal)
- Needle tool
- Small carving loop tool
- Slip and scoring tool (serrated rib or toothbrush)
- Sponge
- Modeling tool or small wooden skewer
- Hard bristle brush
Step 1: Forming the Base Vessel
-
Center and open:
Begin with about 3-4 lbs of white stoneware clay on the wheel. Center it firmly and open the vessel, keeping the floor relatively narrow to support the vase’s upright shape. -
Pull the cylinder:
Pull the walls up into a tall cylinder first, ensuring even thickness throughout. Aim for a height of about 10-12 inches depending on your preference. -
Shape the belly:
gently belly out the form from the inside, creating a soft, rounded curve that tapers back in at the shoulder. Don’t go too wide too quickly or the walls might slump. -
Collar the neck:
Collar the clay inward to form a distinct, narrower neck above the shoulder. Flare the rim slightly outward at the very top for a classic vase silhouette. -
Refine the surface:
Use a flexible metal rib to smooth the entire exterior, removing throwing rings from the main body section where the flowers will sit.
Loose Appliqués?
If flowers pop off during drying, you didn’t score deep enough. Re-score aggressively, use vinegar slip, and compress the center point firmly.
Step 2: Adding Texture and Ridges
-
Create neck ridges:
While the wheel is spinning slowly, use the corner of a wooden rib or a modeling tool to press deep, horizontal grooves into the neck area. Create a stacked ring effect. -
Textured bands:
Between two of the smooth neck rings, press a rope texture. You can do this by rolling a small serrated wheel tool against the clay or pressing a small texture stamp repeatedly as it turns. -
Define body sections:
Use your needle tool to lightly score horizontal guidelines around the belly of the vase. These will separate your floral zones. -
Carve dividing lines:
Using a small loop tool, carve deeper grooves over your guidelines to create raised bands that frame the floral sections. I like to smooth the sharp edges of these grooves with a damp sponge immediately.
Step 3: Creating and Attaching Appliqués
-
Make the petals:
Roll tiny balls of clay, about the size of a pea. Flatten them slightly with your thumb to create small, organic petal shapes. You will need five or six per flower. -
Form the flowers:
Arrange the petals in a circle on your work surface. Press a small ball of clay into the center to bond them together. Make roughly 15-20 small flowers. -
Score the attachment points:
Decide on your pattern. Score the surface of the vase where each flower will go, and score the back of each flower. Apply a dab of slip to both. -
Attach the florals:
Gently press the flowers onto the vase. Use a small modeling tool to press the center of the flower into the vase wall—this ensures a strong mechanical bond without smashing the petals. -
Add carved details:
Use a needle tool or sharp sgraffito tool to carve V-shaped stems or leaves directly into the vase body between the appliqués. -
Incise sunburst textures:
On the lower section of the vase, use the needle tool to scratch quick, radiating lines that look like grass or sunbursts to add visual weight to the bottom. -
Clean and refine:
Check for any sharp burrs of clay created by the carving. Brush them away with a soft brush once the clay is leather hard.
Color Wash Effect
After bisque firing, apply a dark oxide wash (like manganese) and wipe it back. This will remain in the crevices and highlight your floral textures.
Allow the vase to dry slowly under plastic to prevent the appliqués from shrinking at a different rate than the body
Slab-Built Patchwork Forms With Cutout Windows
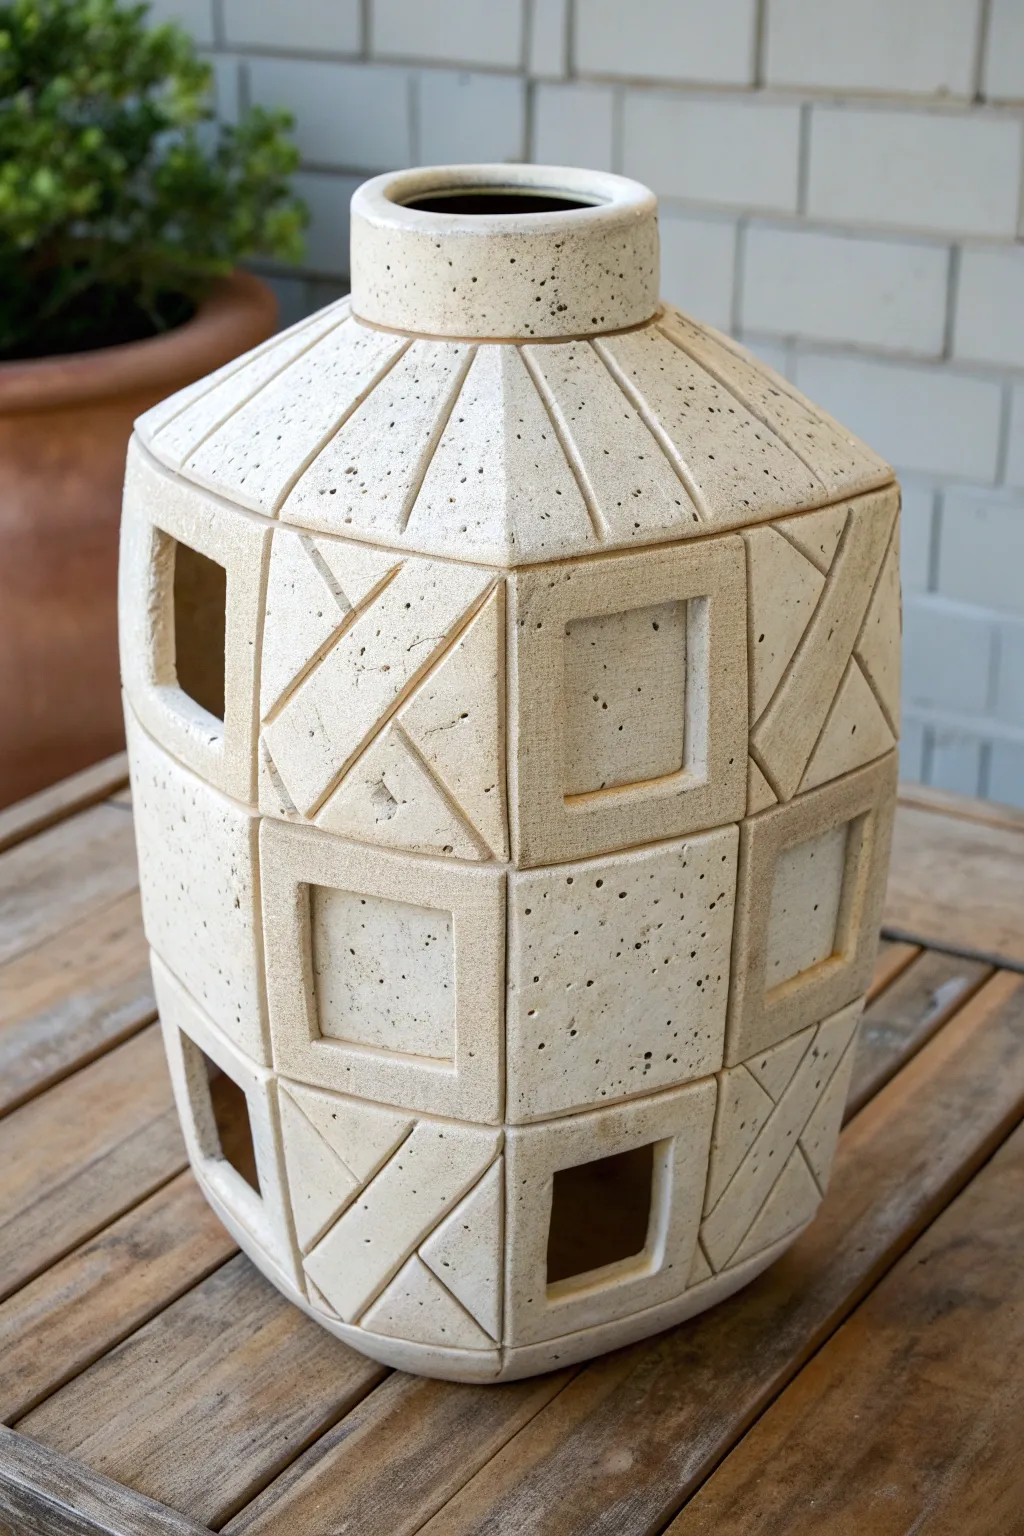
This striking slab-built vessel mimics the look of carved limestone block with its textured surface and geometric relief patterns. The alternating patchwork design features deep cutouts that transform the sturdy form into an architectural lantern perfect for outdoor spaces.
Step-by-Step Tutorial
Materials
- Stoneware clay with grog or speckles (buff or cream)
- Rolling pin with thickness guides (approx. 1/4 inch)
- Square template (paper or cardstock, approx. 3×3 inches)
- Fettling knife or X-Acto blade
- Scoring tool (serrated rib or needle tool)
- Slip (clay mixed with water)
- Ruler or straight edge
- Wooden modeling tools
- Natural sponge
- Paddling tool
Step 1: Preparing the Textured Slabs
-
Roll out the clay:
Begin by rolling out a significant amount of clay into a large slab. Aim for a thickness of about 1/4 to 3/8 inch to ensure the walls are sturdy enough to support the vertical structure. -
Add surface texture:
Before cutting any shapes, create the stone-like texture. Gently roll a rough rock, a textured roller, or scour the surface with a stiff brush to create pitting and organic imperfections across the entire slab. -
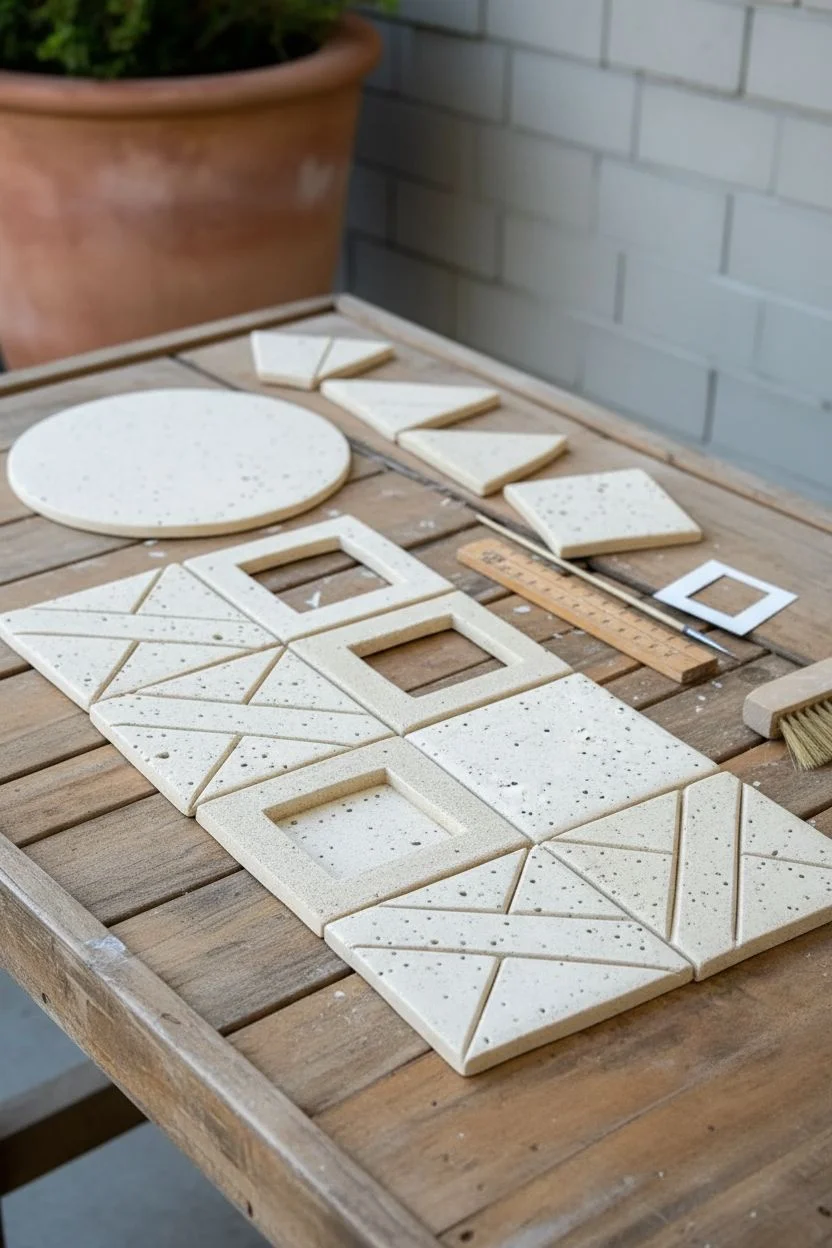
Cut the base tiles:
Using your square template, cut out approximately 12 to 16 identical squares for the main body. You will also need to cut trapezoidal pieces for the tapered shoulder, and a circular slab for the base.
Step 2: Designing the Patchwork Tiles
-
Create the recessed squares:
For the ‘frame’ tiles, cut a smaller square out of the center of a clay tile, but don’t discard it. Instead, take a separate, slightly smaller square of clay and attach it inside the frame, recessed slightly to create depth without making a hole. -
Carve the diagonal lines:
For the geometric tiles, use a ruler to lightly press diagonal markings into the clay. Carve shallow channels along these lines to create raised triangular and diamond relief patterns. -
Cut the windows:
For the open sections, select a few tiles (usually for the top and bottom rows) and cut a neat square window directly out of the center. Smooth the interior edges with a damp sponge. -
Stiffen the tiles:
Let all your prepared tiles sit until they reach soft leather-hard. They need to be firm enough to stand up without slumping but soft enough to score and slip.
Clean Cuts Pro Tip
When cutting the window holes, wait until the clay is stiff leather-hard. If you cut while too wet, the walls will warp; too dry, and the clay will chip or crack.
Step 3: Assembling the Form
-
Construct the bottom row:
Score and slip the vertical edges of your bottom row tiles. Attach them to each other and to the circular base slab, pressing the seams firmly together. -
Reinforce the interior:
Roll thin coils of soft clay and press them into the interior seams where the tiles join. Smear the clay smooth to create a strong bond that invisible from the outside. -
Build upward:
Score the top edge of the first row and the bottom edge of the second row. Place the next set of tiles, staggering the patterns (window, geometric, recessed frame) for visual interest. -
Refine the seams:
On the exterior, don’t smooth the seams away completely. Instead, press a thin tool into the groove to accentuate the ‘block’ look, making it appear like stacked masonry.
Level Up: Lighting
Glaze the interior with a high-gloss white or metallic gold glaze. This will amplify the candlelight reflecting inside the vessel when used as a lantern.
Step 4: Completing the Shoulder and Neck
-
Attach the slanted shoulder:
Take your trapezoidal pieces and attach them to the top rim of the cylinder. Angle them inward to create a tapered roof-like structure. These pieces should also have carved diagonal lines that flow towards the center. -
Form the collar:
Roll a strip of clay for the neck. Form it into a cylinder and attach it to the center opening of the shoulder pieces. It should be vertical and slightly narrower than the body. -
Clean and detail:
Run a damp sponge over all sharp edges, especially around the cutout windows. Use a needle tool to add extra ‘pitting’ texture where the handling might have smoothed it out. -
Dry slowly:
Cover the piece loosely with plastic to ensure even drying. Because the walls vary in thickness due to the relief work, slow drying prevents cracking.
Once fired, the raw clay texture will give this piece a timeless archaeological feel perfect for any garden setting
Whimsical Character Planters Where Plants Become Hair
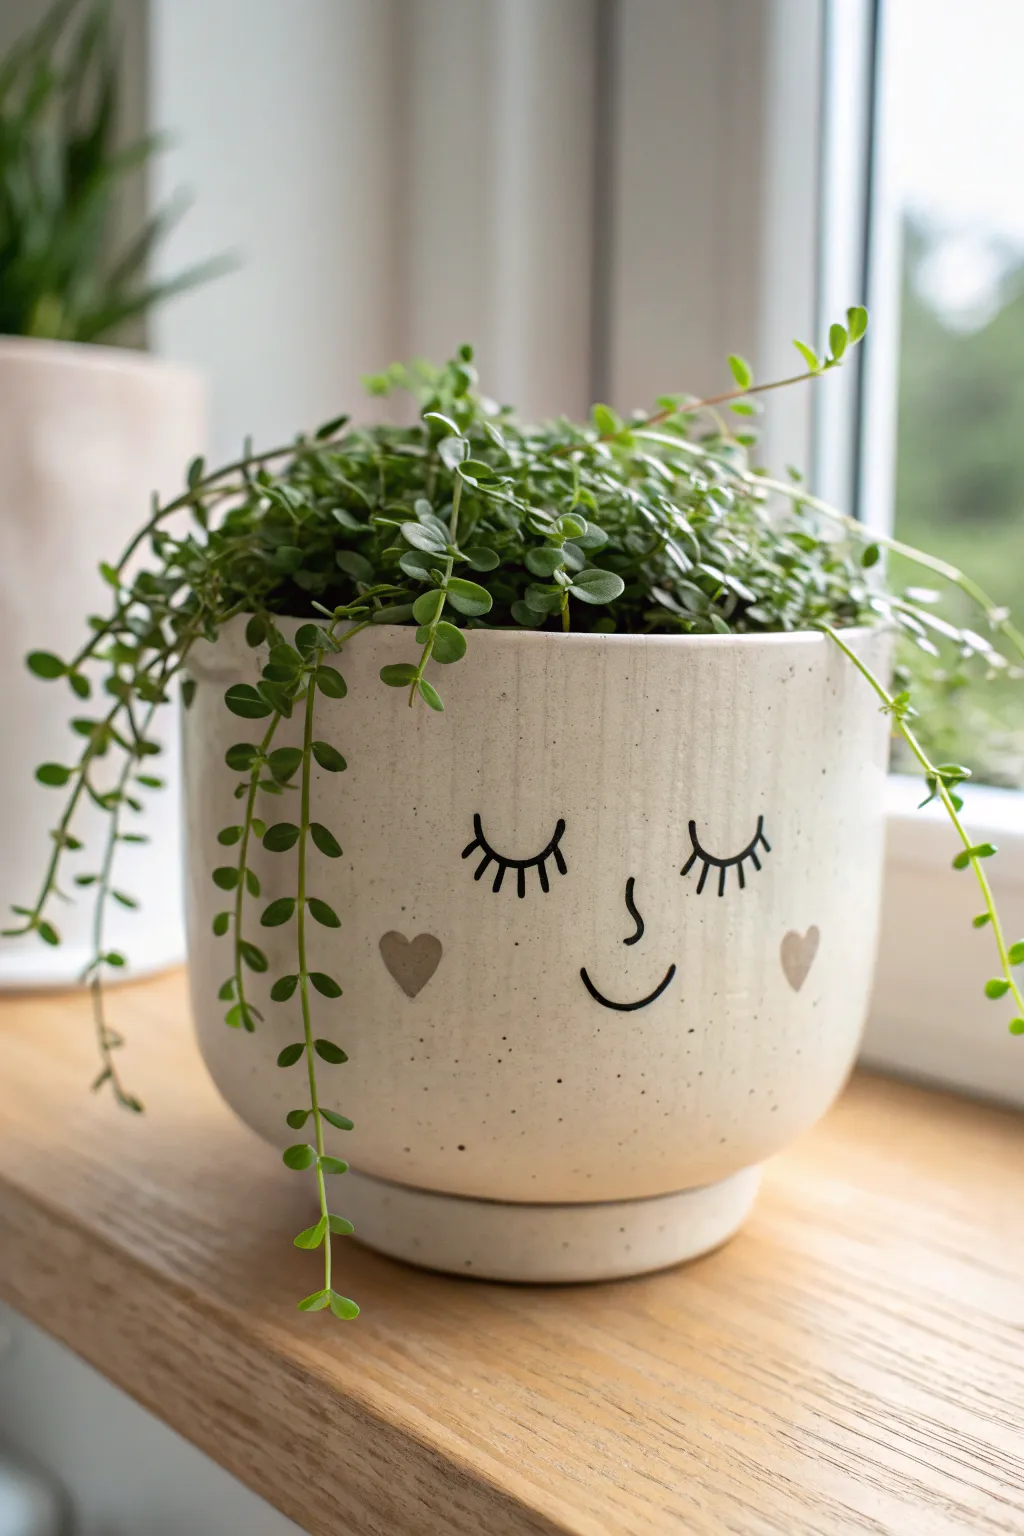
Transform a simple ceramic vessel into a charming personality with this delightful character planter project. Featuring a speckled cream glaze and a sweet sleeping face, this pot turns your trailing vines into a fabulous hairdo.
Detailed Instructions
Materials
- Cone 04-06 bisque-fired ceramic planter/bowl (wheel-thrown or cast)
- Speckled cream or white underglaze/glaze suitable for your clay body
- Black underglaze pencil or fine liner bottle
- Gold or beige overglaze luster or acrylic paint (for hearts)
- Clear dipping glaze (if using underglaze)
- Small round paintbrush
- Pencil
- Potter’s wheel (optional suitable for construction phase)
- Trailing plant like Creeping Jenny or String of Beads
Step 1: Forming the Base
-
Prepare the clay:
Begin with a ball of white stoneware or porcelain clay, wedging it thoroughly to remove air bubbles. -
Throw the cylinder:
Center your clay on the wheel and open it up. Pull the walls to create a straight-sided cylinder, aiming for a slightly wider rim than the base to allow room for root growth. -
Shape the profile:
Using a rib tool, gently curve the bottom edge inward to create a soft, rounded foot rather than a sharp angle. -
Define the rim:
Compress the rim with a chamois or your sponge to ensure it is smooth and comfortable to handle. A slightly rounded lip matches the soft aesthetic of the face. -
Create drainage:
Once the vessel is leather hard, use a hole cutter tool to create a drainage hole in the center of the bottom. -
Bisque fire:
Allow your piece to dry completely before firing it to a bisque temperature (usually Cone 04) to prepare it for glazing.
Glaze Tip
For that trendy speckle without buying special clay, mix granular ilmenite or manganese into your white glaze before dipping.
Step 2: Adding the Personality
-
Plan the face:
Lightly sketch the facial features onto the bisque-fired pot using a standard pencil. The graphite will burn off in the kiln, leaving only your design. -
Positioning tips:
Place the eyes about halfway down the pot’s height. Space them widely to leave room for the nose and mouth in the center. -
Apply the base glaze:
If you are using a speckled glaze that requires dipping, now is the time to dip your pot. If you want the raw clay texture to show through, proceed directly to painting the face. -
Paint the lashes:
Using a black underglaze liner or a very fine brush, trace over your pencil lines for the eyes. Draw a downward curve for the closed lid, then add 4-5 small vertical strokes for eyelashes. -
Add the nose and smile:
Paint a small, simple ‘L’ shape or a tiny loop for the nose. Below that, add a gentle U-shaped curve for the smile. -
Create the cheeks:
Mix a warm beige or gold-toned underglaze. Paint small heart shapes on either side of the smile to give the character rosy cheeks. -
Clear coat application:
If you used underglazes on bare bisque, carefully dip the entire pot into a clear glaze. Ensure you don’t smudge the black lines—I sometimes dab the painted areas first to set them before dipping. -
Clean the foot:
Wipe the bottom foot ring clean of any glaze with a damp sponge to prevent it from sticking to the kiln shelf.
Step 3: Finishing and Planting
-
Final firing:
Fire the glazed piece to the maturity temperature of your clay and glaze (often Cone 6 for stoneware). -
Adding texture (optional):
If you opted for a luster accent on the hearts, apply the gold overglaze now and fire for a third time at a much lower temperature (Cone 018). -
Select your plant:
Choose a trailing plant with small leaves, such as Muehlenbeckia (Wire Vine) or String of Pearls, to act as the ‘hair’. -
Potting up:
Add a layer of gravel for drainage, then potting soil, and finally nestle your plant inside, arranging the vines to spill over the sides.
Hair Stylist
Swap the ‘hair’ seasonally! Try a spiky aloe for a punk rock look or a flowering trailing plant for a floral crown effect.
Place your finished planter on a bright windowsill and enjoy the serene vibes it brings to your space
Hanging Ceramic Wind Chimes With Mixed Shapes
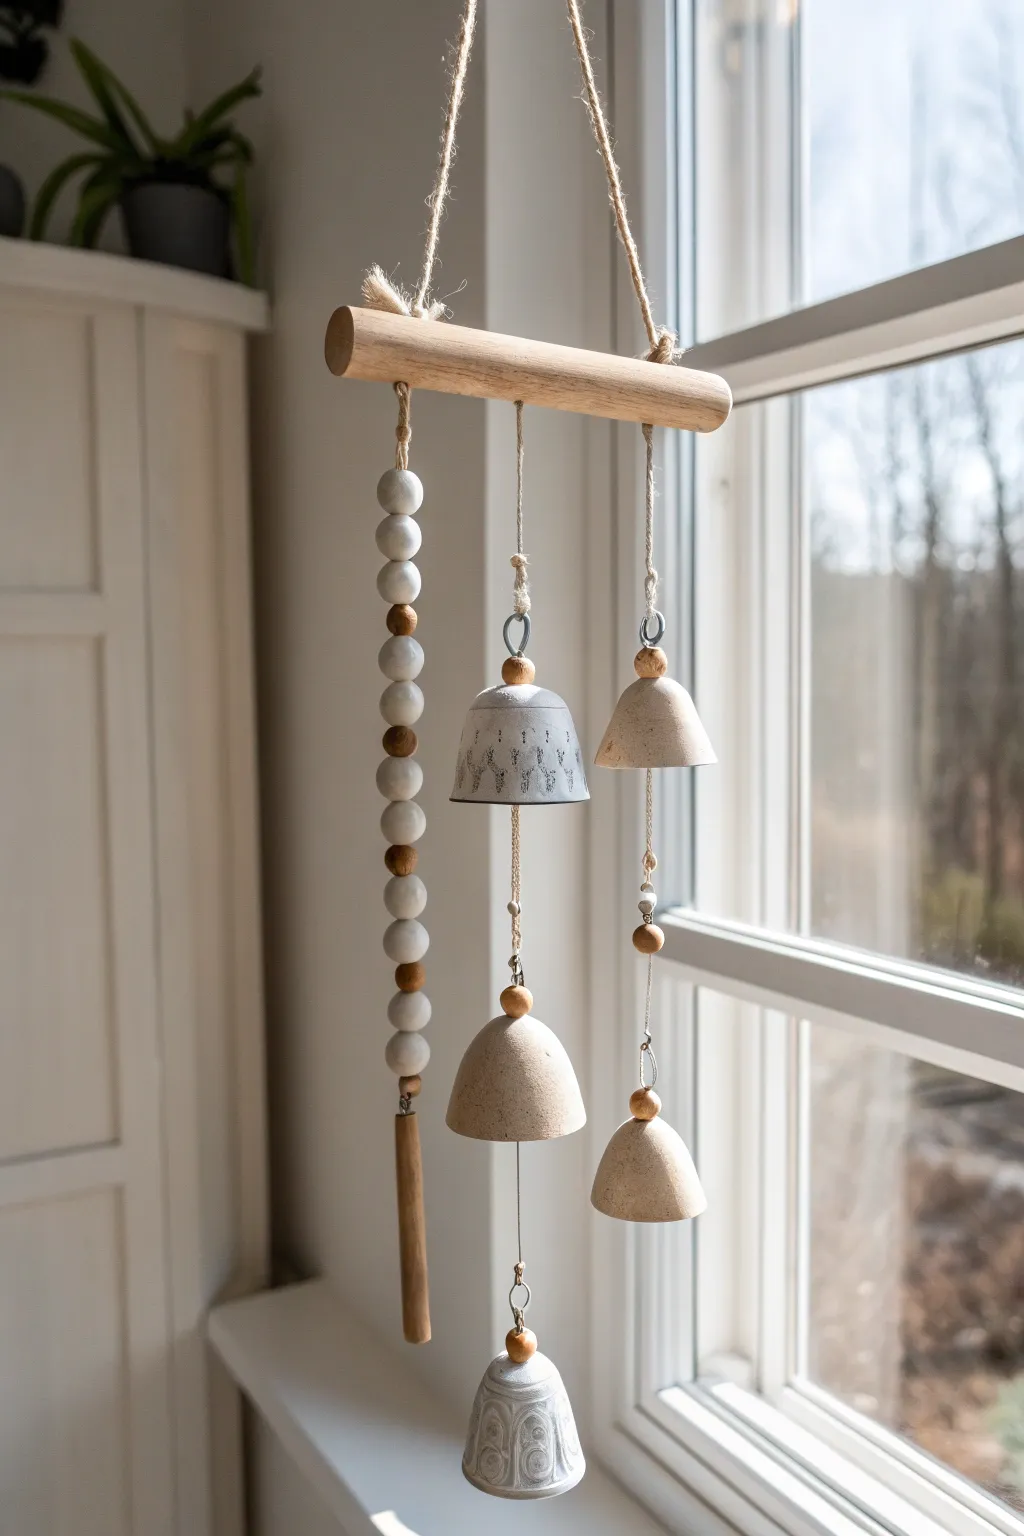

Bring a soothing melody and organic texture to your window with this mixed-media wind chime project. Combining hand-built ceramic bells with natural wooden beads and driftwood creates a harmonious balance of earth tones and gentle sounds.
Step-by-Step
Materials
- White earthenware clay
- Rolling pin and canvas mat
- Circle cutters (various sizes between 3-4 inches)
- Wooden dowel or gathered driftwood branch (approx. 10 inches)
- Jute twine or heavy-duty hemp cord
- Assorted wooden beads (large round white, small round natural)
- Long cylindrical wooden pendant bead
- Metal eyelets or strong wire for bell loops
- Sponge and water
- Pottery carving tools
- Underglaze (dark grey or black)
- Clear matte glaze
- Kiln access
Step 1: Crafting the Ceramic Bells
-
Roll out the slabs:
Begin by rolling out your white earthenware clay on a canvas mat to a consistent thickness of about 1/4 inch. Ensure the slab is smooth and free of air bubbles. -
Cut the shapes:
Use circle cutters or a paper template to cut out five circles. For a varied look like the example, make two slightly larger circles for the patterned bells and three medium ones for the plain bells. -
Form the cones:
Cut a wedge (like a pizza slice) out of each circle—removing about one-third of the circle works well. Bring the two straight cut edges together to form a cone shape. -
Join the seams:
Score the edges you just brought together and apply slip. Press them firmly to join, then smooth the seam inside and out with a damp sponge or rib tool so it becomes invisible. -
Add hanging loops:
Create a small hole at the very apex of each cone. Insert a small loop of high-temp wire or heat-resistant nichrome wire securely into the top, or fashion a clay loop, ensuring the hole remains open for threading later. -
Carve the details:
On the two larger cones (for the center and bottom tier), use a carving tool to scratch vertical lines or abstract leaf patterns into the surface while the clay is leather-hard. -
Decorate and fire:
Once bone dry, apply a dark grey underglaze into the carved lines of the patterned bells, wiping away the excess on the surface with a damp sponge to leave the color only in the recesses. Bisque fire the bells according to your clay body’s instructions. -
Glaze application:
Apply a clear matte glaze to the patterned bells to seal them without adding shine. Leave the plain bells unglazed for a raw, textural contrast, or apply a very thin wash. Fire them a final time.
Knot Slipping?
If your knots slip through the ceramic holes or bead openings, thread the twine through a small washer or a seed bead before tying the main knot to create a larger stopper.
Step 2: Assembly and Suspension
-
Prepare the main bar:
Drill three evenly spaced holes through your wooden dowel or driftwood branch. Sand the wood lightly if needed to remove rough splinters. -
Create the hanger:
Cut a long length of jute twine. Tie each end securely to the outer edges of the wooden bar (you can drill extra horizontal holes for this or just knot it tightly around the ends) to create the main triangle hanger. -
String the left strand:
Cut a piece of twine about 20 inches long. Tie a heavy knot at one end and thread on the long cylindrical wooden pendant. Follow this with a pattern of alternating white and natural wooden beads until the strand is about 12 inches long. Thread the top through the left hole of the dowel and knot securely. -
Start the center strand:
Cut the longest piece of twine (approx. 30 inches). Tie a knot at the bottom and thread the largest, patterned bell. Add a small natural bead immediately above the bell to secure it. -
Build the center layers:
Measure about 4 inches up from the bottom bell, tie a knot to mark the spot, and thread a plain bell followed by a small wooden bead. Repeat this process further up for the top patterned bell. -
Attach center strand:
Thread the top of this tiered bell strand through the center hole on your wooden bar. Adjust the height so the bells hang lower than the bead strand, then knot it off. -
Assemble the right strand:
For the final strand, cut a piece of twine similar in length to the center one. Thread a plain bell at the bottom, secured with a knot. Add a few inches of space, tie a knot, add a wooden bead, and then another plain bell above that. -
Final attachment:
Thread this final strand through the right-hand hole on the dowel. I find it helpful to hold the chime up at this point to check that the visual balance feels right before tying the final hard knot. -
Secure and trim:
ensure all top knots resting on the wooden bar are tight. You can add a dab of craft glue to the knots for extra security. Trim any excess twine tails for a neat finish.
Pro_Tip: Sound Check
Before final assembly, tap your fired bells together. If the sound is too dull, your bells might be too thick. Aim for thin walls (under 1/4 inch) for a crisper ring.
Hang your new creation in a sunny spot where the breeze can gently nudge the ceramics into song


Have a question or want to share your own experience? I'd love to hear from you in the comments below!