
Chalk turns an ordinary patch of pavement into a big, playful canvas in minutes. Here are my favorite chalk art ideas—starting with the classics and sliding into the kind of interactive, photo-ready scenes that make everyone stop and smile.
Rainbow Arches With Bold Blending
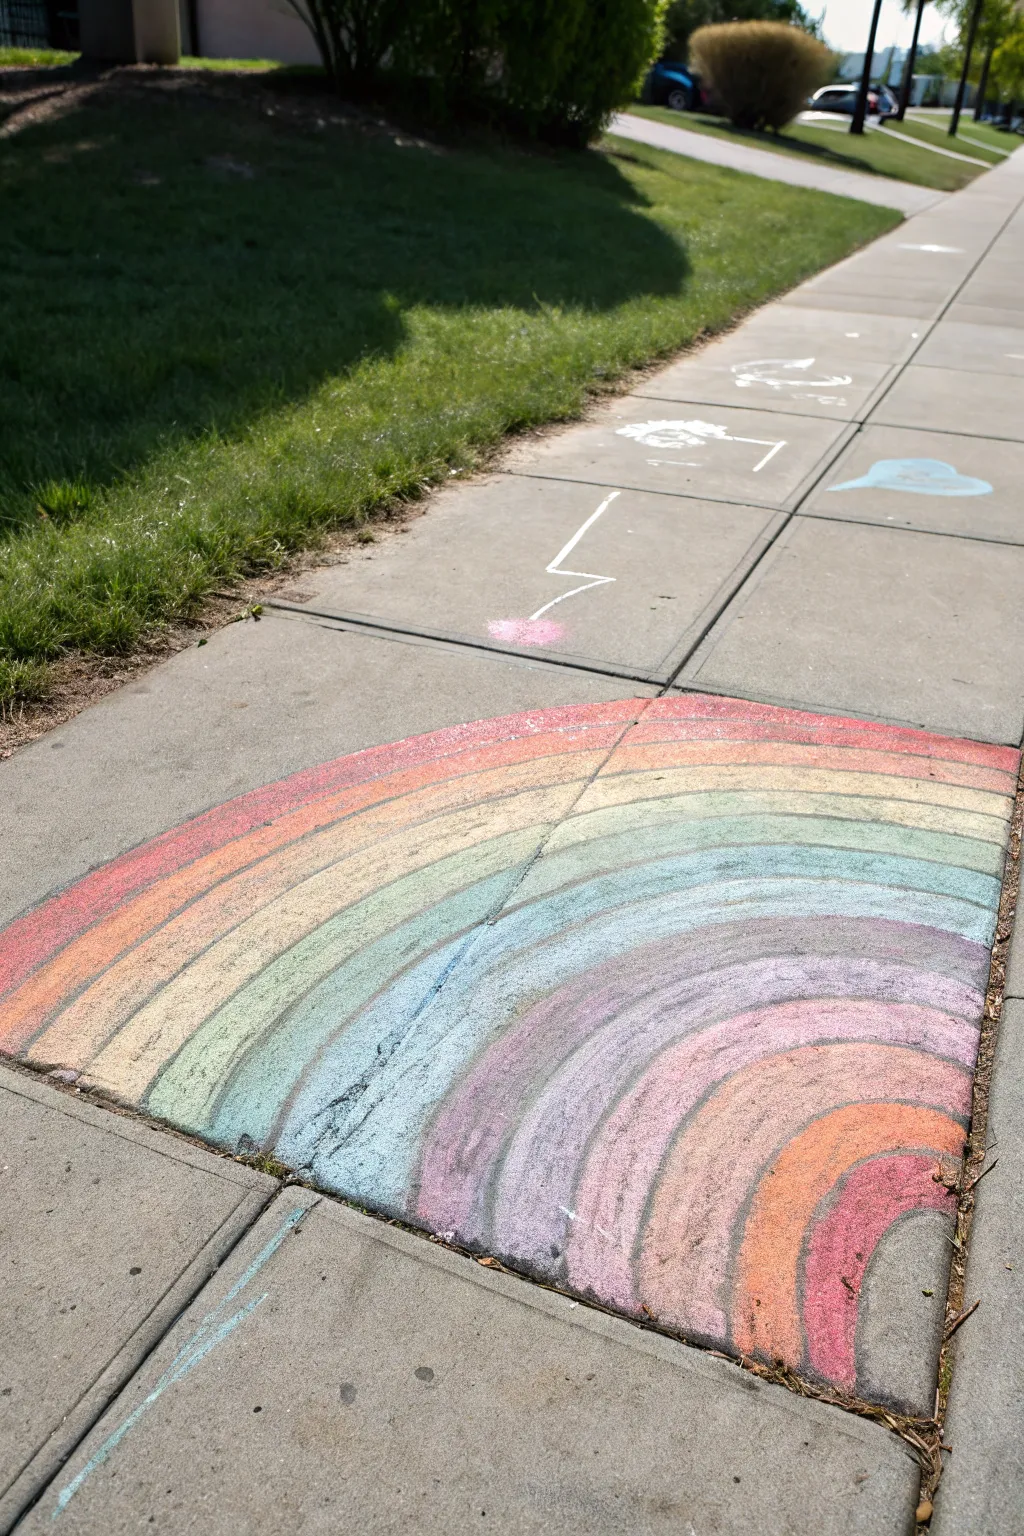
Transform a simple concrete square into a vibrant portal of color with this sprawling rainbow arch design. The beauty of this piece lies in the soft, dusty transitions between hues, creating a glowing effect that brightens up any walkway.
Detailed Instructions
Materials
- Jumbo sidewalk chalk (assorted colors: red, orange, yellow, green, blue, purple, pink)
- Clean rags or old socks for blending
- Concrete sidewalk square (clean and dry)
- Knee pads or a gardening mat (optional for comfort)
- Small spray bottle with water (optional)
Step 1: Planning the Curve
-
Locate your center:
Visualize the center point on one edge of your sidewalk square. This will be the anchor for your arch, though the actual center point might be imaginary and ‘off-canvas’ to create a flatter, wider curve. -
Sketch the outer boundary:
Using a light color like yellow or white, sketch a large, sweeping arc that connects the bottom left corner of the square to the bottom right corner. This defines the maximum height of your rainbow. -
Sketch the inner boundary:
Draw a smaller, concentric arc near the bottom edge of the square. Leave enough space between the two guide lines to fit about 10-12 distinct bands of color.
Step 2: Layering the Colors
-
Start with the outer edge:
Begin at the very top, outer edge of your arch. Apply a thick layer of red or reddish-pink chalk. Press firmly to get good pigment coverage on the rough concrete. -
Add the orange band:
Directly below the red, draw a band of orange. Make sure the colors touch or slightly overlap to make blending easier later. -
Transition to warm yellow:
Draw a yellow stripe next to the orange. I like to make the yellow band slightly wider than the others since it tends to get eaten up by darker colors when blending. -
Introduce the greens:
Lay down a lime green strip, followed by a darker teal or grass green. The two shades of green add a nice depth to the middle of the rainbow. -
Cool down with blues:
Add a sky blue band, followed by a deeper indigo or denim blue. -
Round out the main spectrum:
Apply a purple band. Depending on your space, you might be nearing the bottom of your designated area. -
Create the inner glow:
If you have extra space at the bottom like in the example, reverse the spectrum or add lighter pastel tones like lavender, pink, and peach to fill the remaining semi-circle.
Uneven Coverage?
If the concrete is very rough and showing through, dip the tip of your chalk in water for 5 seconds before drawing. This creates a paint-like paste that fills holes.
Step 3: Blending and Refining
-
Prepare your blending tool:
Wrap a clean rag around your fingers or use an old sock on your hand. The texture of the fabric helps push the chalk dust into the concrete’s pores. -
Blend the red and orange:
Rub the line where the red and orange meet. Use a circular motion or sweep back and forth along the curve to mix them into a seamless gradient. -
Continue blending down:
Move to the orange/yellow border. Use a clean part of your rag (or a new finger) to avoid muddying the yellow with red pigment. -
Merge the cool tones:
Blend the greens into the blues. These colors are forgiving and mix beautifully, so don’t be afraid to smudge them vigorously. -
Soften the inner arches:
Gently rub the pastel inner rings. Since these areas are smaller, use just one finger to maintain control and keep the curve sharp. -
Touch up the edges:
If the blending process made your outer edges messy, take a piece of chalk and redraw the distinct border lines to sharpen the overall shape. -
Clean up the surroundings:
Blow away any loose chalk dust that settled on the surrounding grey concrete to make the colors pop.
Make it Shine
Add ‘sparkles’ or highlights by drawing small white stars or dots randomly across the colored bands after blending. It adds a magical, glimmering finish.
Step back and admire how the blended colors seem to radiate warmth from the ground


Classic Hopscotch With Colorful Patterns
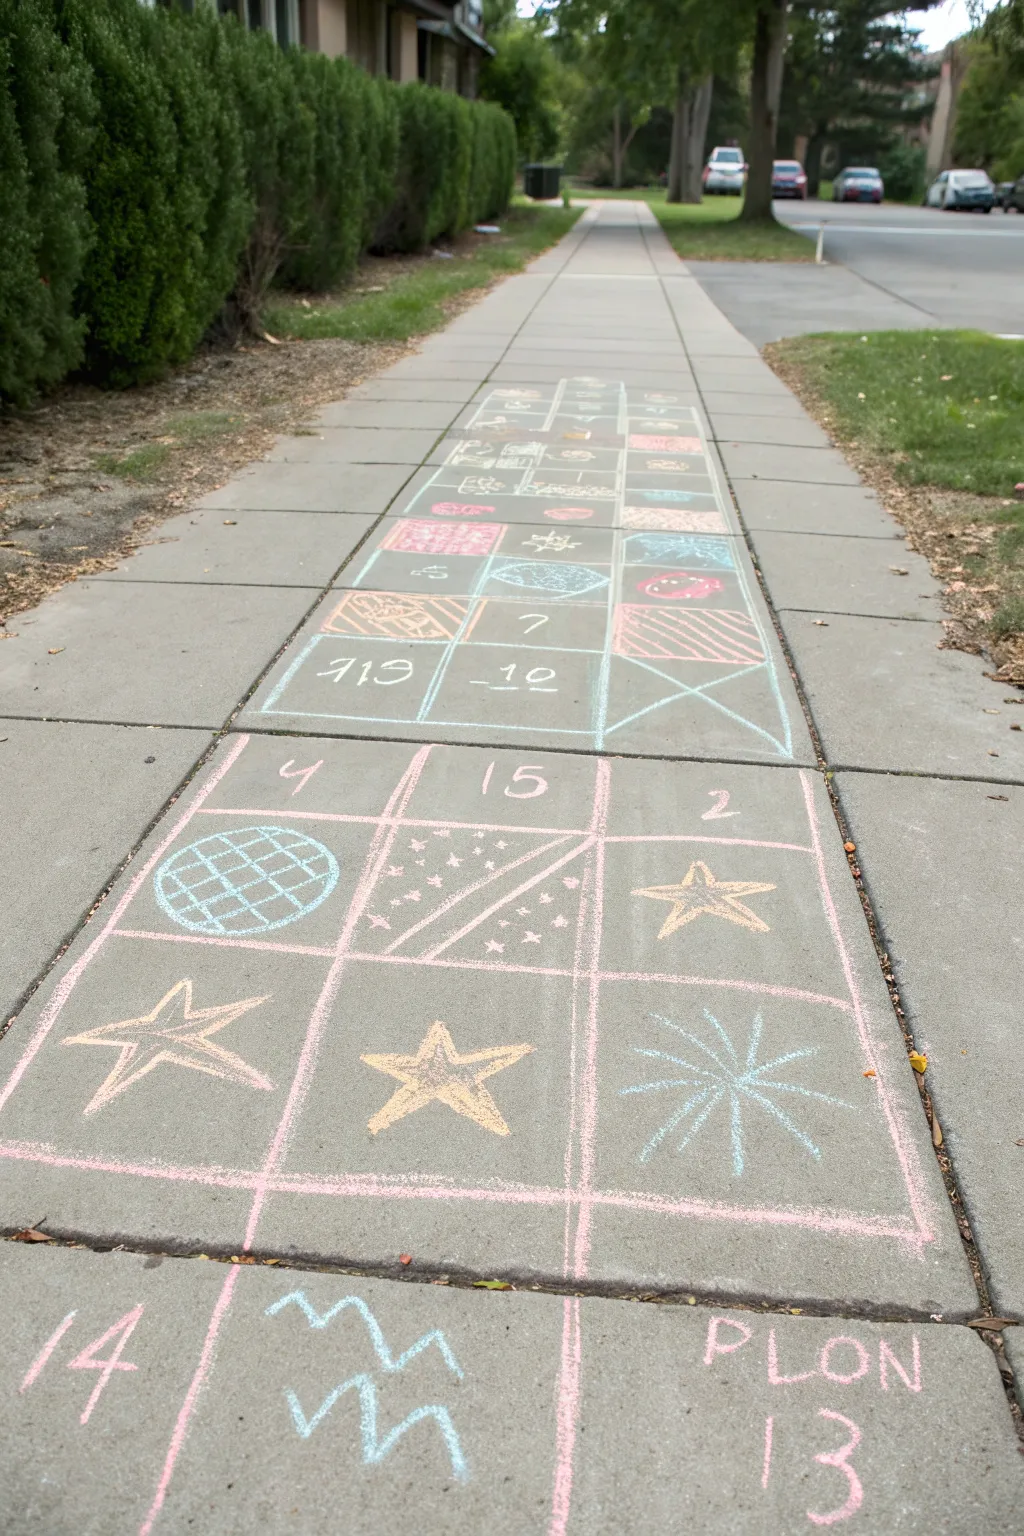
Transform a plain sidewalk into an elongated canvas of fun with this grid-style hopscotch path. Featuring a mix of classic numbers, celestial doodles, and colorful geometric fills, this extended course offers plenty of jumping room for energetic players.
How-To Guide
Materials
- Sidewalk chalk (assorted colors including white, yellow, pink, blue, and green)
- Measuring tape (optional, for even squares)
- Painter’s tape (optional, for crisp lines)
- Broom or brush to clean the surface
- Knee pads (recommended for comfort)
Step 1: Planning the Grid
-
Prep the surface:
Start by sweeping the sidewalk clean of dirt, pebbles, and leaves. A clean surface ensures your chalk lays down smoothly and lasts longer. -
Draw the main outlines:
Using white or light pink chalk, draw a long rectangular grid. The base structure is three squares wide. I find it easiest to draw the two long parallel outer lines first, extending as far down the sidewalk as you wish. -
Section off the rows:
Draw horizontal lines across your parallel rails to create individual rows of squares. Aim for squares that are roughly 12 to 16 inches wide—big enough for a foot to land comfortably. -
Create the vertical dividers:
Now, divide each row into three columns using vertical lines. Drawing these freehand adds charm, but you can use a straight edge if you prefer perfect geometry.
Chalk Blending Trick
To make your filled shapes look smooth and vibrant like paint, rub the chalk dust into the pavement with your fingers or a piece of foam.
Step 2: Adding Numbers and Text
-
Number the start:
At the very bottom of your grid, write a large ’14’ in the left square and ’13’ in the right square using pink chalk. -
Add a text block:
Above the ’13’, write a fun word like ‘PLON’ or a name in block letters. This personalizes the start of the course. -
Number the middle section:
Counting upwards as you move forward, add numbers like ’15’ centered in a square about two rows up. Further up the path, include numbers like ‘7’, ’10’, and ‘2’ scattered in different grid blocks. -
Style the numbers:
Don’t just write them plainly—give them some flair. Add an underline to your ’10’ or write your ’14’ with slanted strokes for energy.
Step 3: Drawing the Symbols
-
Draw the shooting star:
In the bottom right square, create a starburst or firework shape using light blue chalk. Draw a central point and radiate straight lines outward in all directions. -
Create the five-pointed stars:
In the adjacent squares, draw classic five-pointed stars. Use yellow chalk for visibility. Draw one slightly tilted to the left and another upright to keep the visual rhythm dynamic. -
Add the globe grid:
In the left column, draw a circle with light blue chalk. Fill it with a cross-hatch grid pattern to resemble a globe or a stylized waffle. -
Sketch the water waves:
In the bottom center square, draw two zig-zag lines using blue chalk to represent water or a frequency wave. Stack them vertically for a fuller look. -
Draw the diagonal stripes:
Find a central square and draw a diagonal line cutting it in half. Fill one half with small stars or dots, and leave the other half plain or fill with diagonal stripes.
Glow-in-the-Dark Upgrade
Trace over your white grid lines and star shapes with glow-in-the-dark chalk for a magical nighttime hopscotch adventure.
Step 4: Filling the Upper Path
-
Incorporate geometric fills:
As you move further up the path, fill random squares with solid colors or patterns. Try a pink square with a red scribble face, or a square filled with diagonal hatching lines. -
Add abstract shapes:
Draw circles, diamonds, or squiggles in the remaining empty squares. Variety is key here—mix simple line drawings with fully colored shapes. -
Create the finish line:
At the far end of your path, you can taper the grid into a single square or a semi-circle ‘Home’ base to mark the end of the hopscotch journey. -
Reinforce the grid lines:
Finally, go back over your main grid lines with your pink or white chalk. A bold, thick outline helps separate the busy, colorful squares and makes the whole designs pop.
Step back and admire your colorful path before jumping into the first square to test it out


Giant Bubble Cluster With Highlights
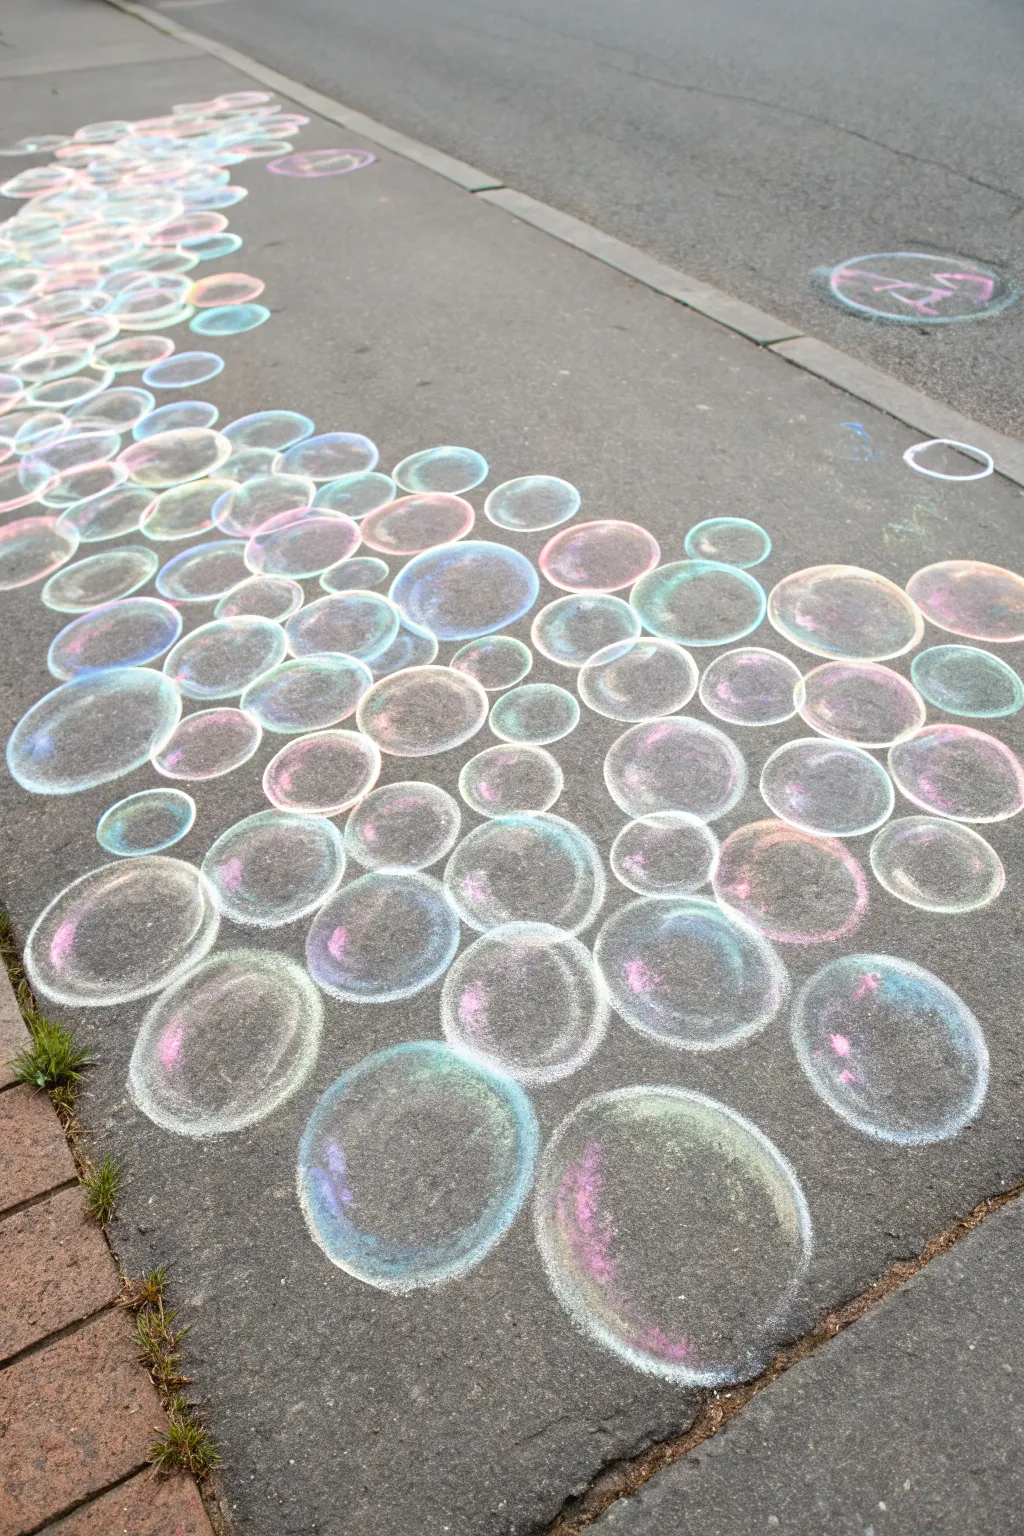
Transform a patch of grey pavement into a whimsical stream of iridescent bubbles that look like they’re lifting right off the ground. By layering soft pastels and adding sharp white highlights, you can achieve a surprisingly realistic transparent effect.
Step-by-Step Tutorial
Materials
- Sidewalk chalk (white is essential)
- Soft chalk pastels (optional, for vibrant blending)
- Cardboard or plastic circle templates (various sizes)
- Blending sponge or cotton rag
- Kneepad or daring cushion (recommended for long sessions)
Step 1: Planning the Flow
-
Establish the path:
Visualize a winding path for your bubbles. They look best when flowing diagonally across the sidewalk slab rather than in straight lines. -
Trace the outlines:
Using your white chalk and circle templates (tupperware lids work wonderfully here), trace outline circles along your chosen path. Overlap them frequently to create depth. -
Vary the sizes:
Ensure you mix gigantic circles with tiny filler bubbles. The gaps between large bubbles are perfect spots for those smaller accents. -
Soften the edges:
Once your outlines are drawn, use your finger or a dry rag to gently smudge the white lines just slightly. This makes the bubble look gaseous rather than solid.
Step 2: Adding Color and Iridescence
-
Select your palette:
Pick three or four colors that mimic soap reflections: teal, electric pink, light purple, and soft yellow work best. -
Apply the first color accent:
Choose one side of a bubble (e.g., the bottom left curve) and draw a thin, curved line of teal just inside the white outline. -
Add a contrasting hue:
On the opposite side of that same bubble (top right), add a stroke of pink. Keep these color strokes thin; most of the bubble should remain the empty grey of the pavement to sell the transparency effect. -
Blend the colors:
Gently rub these color strokes with your finger so they fade into the grey center and the white outline. You want a soft gradient, not a hard stripe. -
Repeat for the cluster:
Continue this process for the rest of the bubbles. I like to switch up the color pairings occasionally—some blue/pink, others purple/yellow—to keep the cluster looking organic.
Uneven Surfaces?
If your sidewalk is rough, avoid pressing too hard on the initial layers. Build color slowly and use a thick blending pad to continually push the pigment down into the pavement’s texture.
Step 3: The Critical Highlights
-
Sharpen the white chalk:
Find a fresh piece of white chalk or rub one side flat against the ground to get a sharp edge. The highlights need to be crisp and opaque. -
Add the main reflection:
Draw a small, curved shape (like a kidney bean or a crescent moon) near the top curve of the bubble, overlapping your color slightly. pressing hard. -
Add a secondary glimmer:
Place a tiny dot or smaller dash on the opposite bottom side. This dual-highlight technique mimics how light refracts through a sphere. -
Enforce overlaps:
Where one bubbles sits ‘on top’ of another, re-trace that section of the white outline firmly. The overlapping line should be solid white to show which bubble is closer to the viewer.
Make Them Pop
For maximum realism, ensure your highlight is always on the same side for every single bubble (e.g., top-left). This mimics a single light source like the sun.
Step 4: Final Touches
-
Clean the negative space:
Check the grey pavement between the bubbles. If it got messy with chalk dust, blow it away or wipe it carefully so the background contrasts with the bright bubbles. -
Add floating stragglers:
Draw a few solo bubbles drifting away from the main group to enhance the feeling of movement.
Step back and view your artwork from a distance to see the illusions really take shape


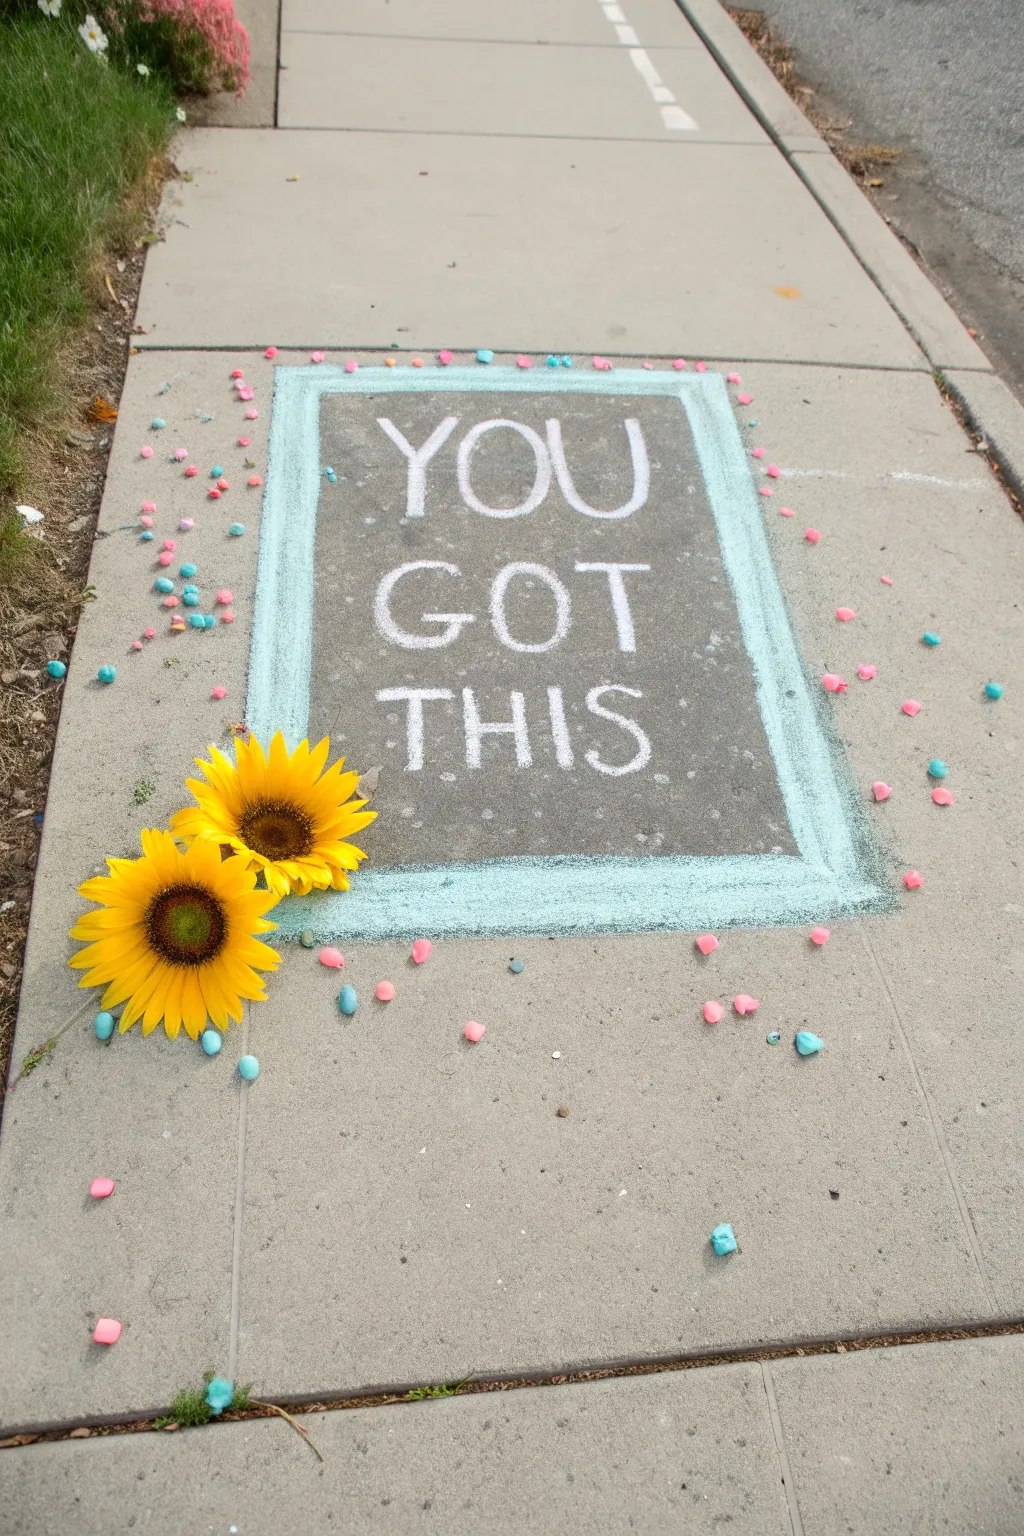
Sunny Quote Lettering With a Burst Border
BRUSH GUIDE
The Right Brush for Every Stroke
From clean lines to bold texture — master brush choice, stroke control, and essential techniques.
Explore the Full Guide
Flower Mandala Sidewalk Medallion
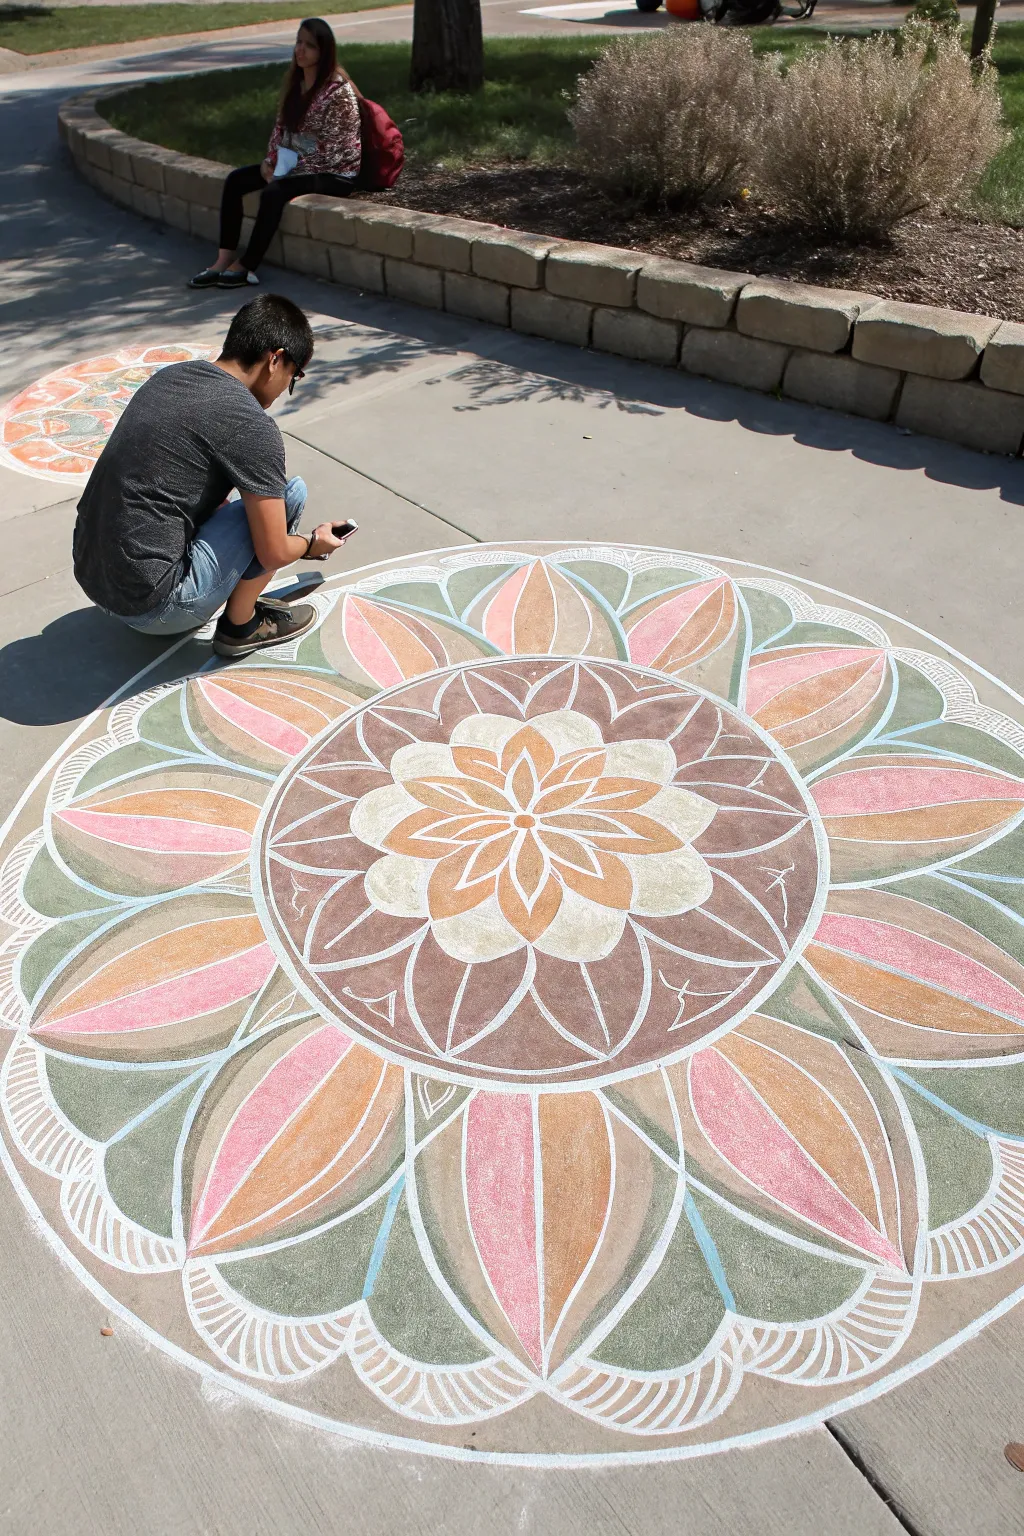
Transform a patch of gray concrete into a vibrant, radiating masterpiece with this intricate flower mandala. Featuring warm earth tones of terracotta, peach, and cream against soft sage greens, this design uses precise geometric layering to create a captivating dimensional effect.
Step-by-Step Guide
Materials
- Sidewalk chalk (jumbo sticks: white, terracotta/rust, peach/pink, sage green, cream/beige)
- Chalk pastels (for finer detail and bold lines)
- String or twine (approx. 4 feet)
- Pivot point (a helper’s finger or heavy tape)
- Measuring tape (optional)
- Knee pads or a gardening cushion
- Soft blending cloth or sponge
Step 1: Setting the Foundation
-
Find your canvas:
Select a large, smooth section of concrete. A smoother surface will allow for crisper lines and better blending than rough aggregate. -
Create a compass tool:
Tie a piece of chalk to one end of your string. This makeshift compass is essential for getting those perfect circles. -
Mark the center:
Choose the exact center point of your mandala. Have a friend hold the string down here, or tape it firmly if you are working alone. -
Draft the guide circles:
Using your string compass with white chalk, draw four concentric circles. The innermost will be for the center flower, the next for the brown petal layer, the third for the large outer petals, and the final largest circle for the scalloped border.
Pro Tip: Blending
For a paint-like finish, use an old carpet scrap or a chalkboard eraser to rub the pigment into the cement. This saturates the color and hides the texture of the pavement.
Step 2: Designing the Core
-
Draw the central rosette:
Inside the smallest circle, sketch an eight-pointed flower. I find it easiest to draw a ‘plus’ sign and an ‘X’ lightly first to space the petals evenly. -
Fill the center petals:
Color these central petals with alternating shades of peach and cream. Use firm pressure to pack the color into the concrete pores. -
Add the second tier:
Draw larger, pointed petals extending from the center flower to the second guide circle. These should sit in the gaps between the inner petals. -
Color the second tier:
Fill a dark, rich terracotta brown into the negative space around the central flower, but leave the second-tier petals empty or filled with a lighter cream for contrast. This creates a bold background. -
Define the outlines:
Go over the outlines of this central section with a sharp white chalk line to make the shapes pop against the dark brown background.
Step 3: Creating the Outer Bloom
-
Sketch the large petals:
Between the second and third guide circles, draw large, sweeping petal shapes. They should look like grand lotus leaves, wide at the base and pointed at the tip. -
Split design coloring:
Divide each large petal in half vertically with a white line. Color the left side vibrant pink/peach and the right side a warm ochre or orange to simulate light hitting the flower. -
Fill the background:
Color the triangular spaces between these large petals with a sage green. This acts as foliage peeking through and cools down the warm color palette. -
Outline the green sections:
Add a secondary white outline inside the green triangles, leaving a small gap, to create a ‘double line’ effect that looks intricate.
Troubleshooting: Uneven Circles
If your string keeps stretching and ruining your circles, switch to a non-stretch cord or a measuring tape. You can drill a small hole in the tape at the desired inch mark for your chalk.
Step 4: The Final Flourishes
-
Add the border scallops:
In the outermost ring, draw repetitive scallop or shell shapes all the way around the perimeter. -
Detail the border:
Fill these scallops with simple white hatch marks or stripes. This lace-like edge frames the entire piece beautifully. -
Clean up edges:
Use a fresh piece of white chalk (or a white pastel for intensity) to re-trace the major dividing lines. Crisp white lines are the secret to that professional medallion look. -
Blend for smoothness:
Take your cloth and very gently pat any areas where the chalk looks too scribbly. Don’t rub hard, or you’ll lose the definition. -
Blow away dust:
Give the whole artwork a strong blow or fan it with cardboard to remove loose chalk dust that might muddy your crisp white lines.
Step back and admire your geometric masterpiece from a high vantage point to really appreciate the symmetry.
Butterfly Stained-Glass Tape Resist
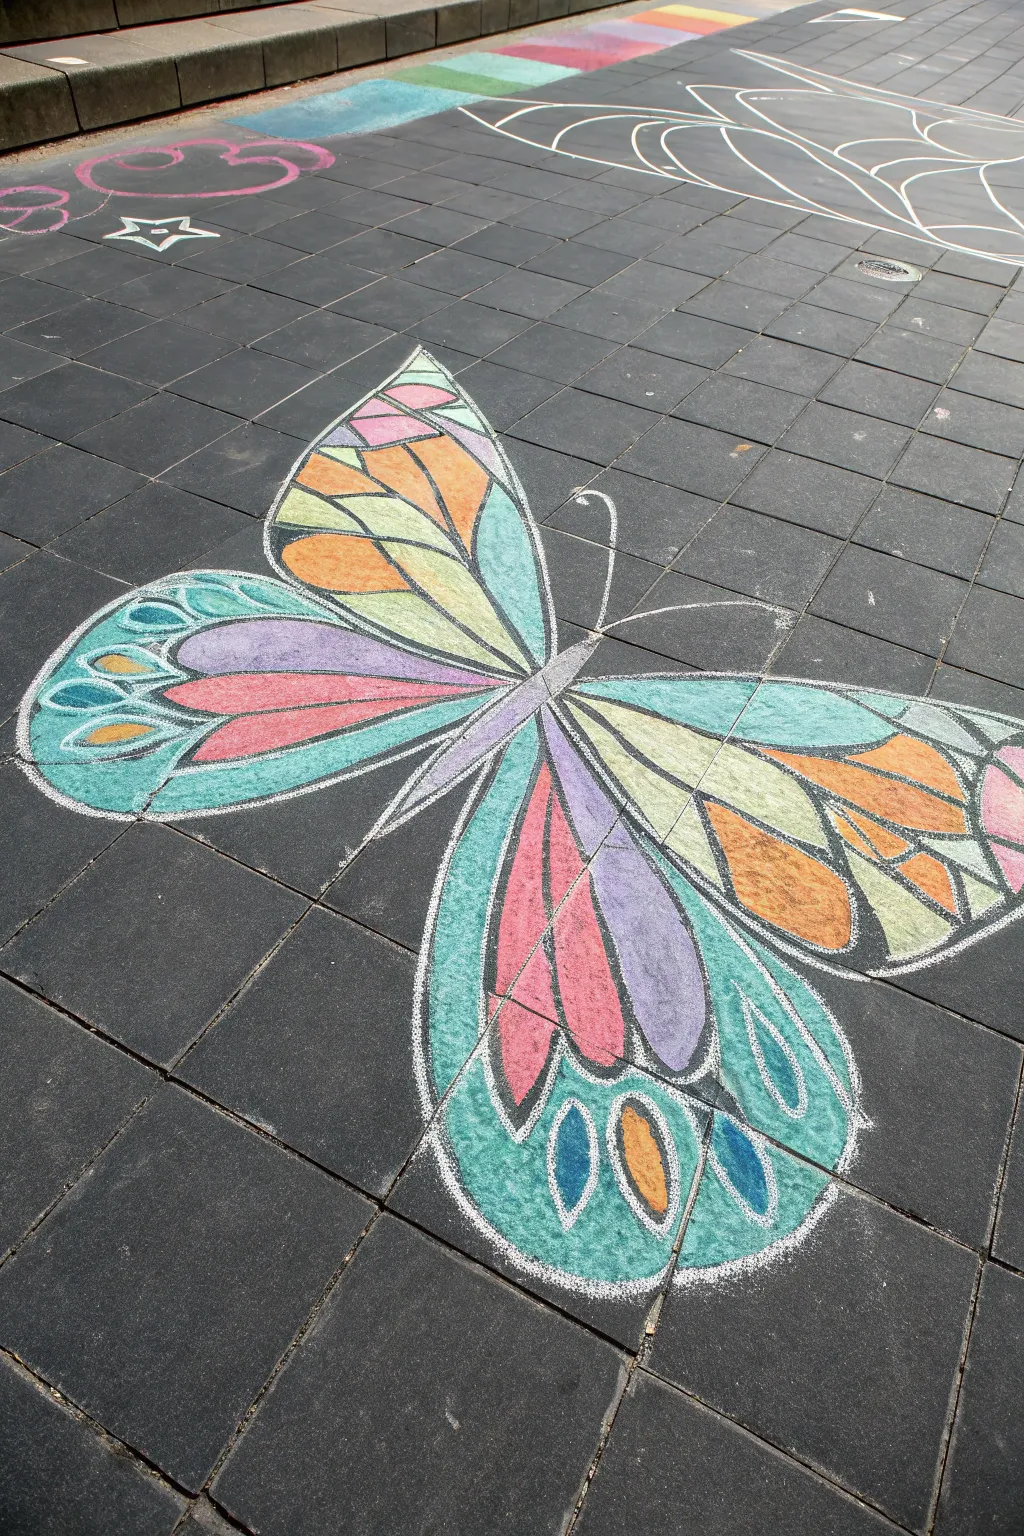
Transform a simple walkway into a vibrant art gallery with this stunning stained-glass butterfly design. By using tape to create crisp, clean lines, you can achieve a sophisticated mosaic effect that pops beautifully against dark pavement.
Step-by-Step Tutorial
Materials
- Painter’s tape or masking tape (1-inch width works best)
- Sidewalk chalk in various bright colors (teal, pink, orange, purple, yellow)
- A clean sidewalk or paved area (darker pavement makes colors pop more)
- A chalk blending tool (optional: piece of foam, carpet scrap, or just your fingers)
- Kneeling pad (for comfort)
- Broom or brush to clean the surface first
Step 1: Preparation & Outline
-
Clean the canvas:
Start by sweeping your chosen area of pavement thoroughly. Any loose dirt or pebbles will prevent the tape from sticking properly, which is crucial for those crisp lines. -
Sketch the center:
Using a light-colored chalk, lightly freehand the butterfly’s body in the center. Draw a long, thin oval shape for the abdomen and thorax. Add two curving antennae at the top. -
Draft the wings:
Sketch the large upper wings first, extending them diagonally upwards. They should be roughly triangular but rounded at the tips. -
Complete the shape:
Draw the lower wings, making them slightly smaller and more rounded, curving downwards. Don’t worry about perfection; organic shapes look great here.
Sticky Situation
If the tape won’t stick to the ground, the surface is likely too dusty or damp. Wait for full sun to dry the pavement, and sweep vigorously before re-taping.
Step 2: Applying the Resist
-
Tape the outline:
Now, apply your painter’s tape directly over your chalk outline. Press it down firmly to ensure a tight seal with the pavement. This will be the bright white ‘grout’ line later. -
Create main sections:
Use long strips of tape to divide the wings into large primary sections. I like to mimic the natural veins of a butterfly wing, radiating outward from the body. -
Add detail shapes:
Inside the larger sections, use smaller pieces of tape to create geometric shapes. Think ovals, teardrops, and triangles to build that mosaic, stained-glass structure. -
Secure the edges:
Walk over the tape or press it firmly with your hand one last time. If the tape lifts while coloring, you’ll lose that sharp definition.
Step 3: Coloring & Finishing
-
Start with the teal:
Begin filling in specific cells with your teal or light blue chalk. Focus on the outer edges and the lower wing tips to match the reference image. -
Add warm tones:
Select a few inner cells for your pinks and reds. Apply the chalk heavily; you want thick coverage rather than a light dusting. -
Incorporate orange and yellow:
Fill the remaining upper wing sections with gradients of orange and yellow to create a sunset effect. -
Finish with purples:
Use purple for the body and inner accents near the center of the wings. This cool tone adds depth to the design. -
Blend the pigment:
Use your fingers or a foam blending tool to rub the chalk into the pavement. This pushes the pigment into the pores of the stone and makes the color solid and opaque. -
Clean up stray dust:
Blow away any loose chalk dust that has settled on top of the tape so it doesn’t smear when you remove the resist. -
The big reveal:
Slowly and carefully peel up the tape. Pull it back at a 45-degree angle to keep the chalk edges sharp and crisp. -
Final touch-ups:
If any chalk crumbled into the empty spaces, gently blow it away or use a clean, dry paintbrush to sweep the lines clear.
Glow Up
For a magical night-time effect, outline your finished butterfly cells with glow-in-the-dark chalk paint or lay glow sticks along the white lines for a photo op.
Step back and admire how the negative space turns a simple drawing into a geometric masterpiece

PENCIL GUIDE
Understanding Pencil Grades from H to B
From first sketch to finished drawing — learn pencil grades, line control, and shading techniques.
Explore the Full Guide
Underwater Scene With Floating Jellyfish
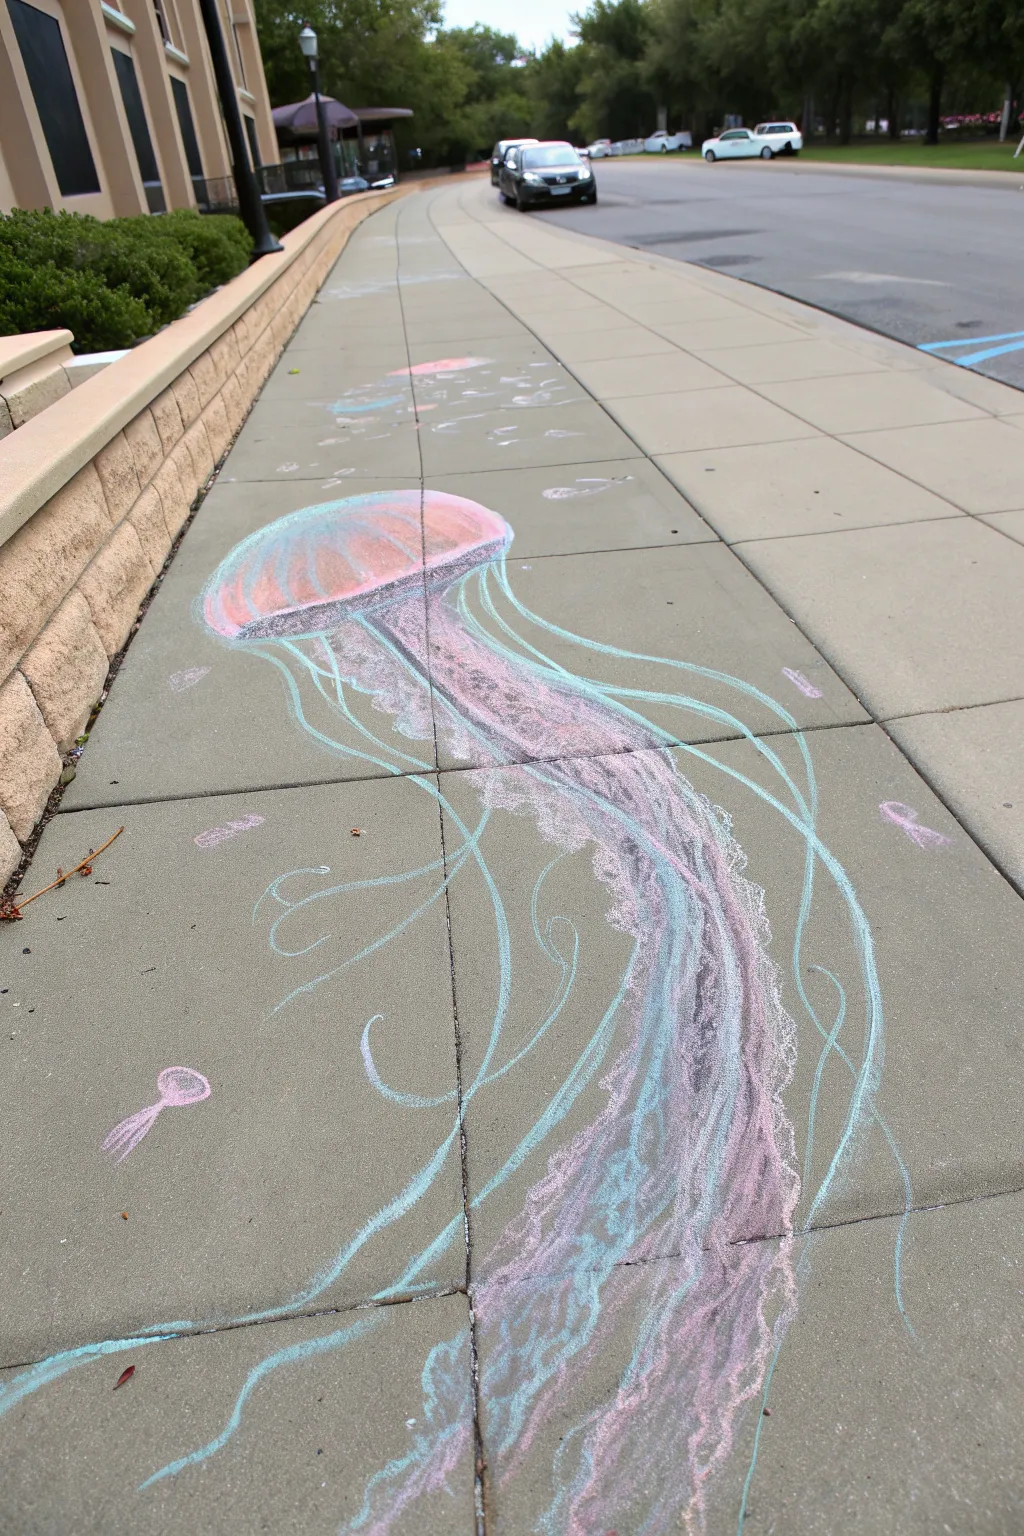
Transform a simple concrete walkway into a dreamy ocean current with this flowing, pastel jellyfish design. Using soft blends of pink, purple, and teal, this large-scale chalk artwork creates a beautiful sense of movement across the pavement.
Detailed Instructions
Materials
- Sidewalk chalk (jumbo size)
- Soft chalk pastels (for detailed shading)
- Colors: Pale pink, magenta, light blue, teal, purple, white
- Blending foam or a cloth rag
- Knee pads or a gardening kneeling mat
Step 1: Drafting the Bell
-
Outline the bell shape:
Start by drawing a large semi-circle or mushroom cap shape near the top of your chosen concrete square. Keep the bottom edge slightly curved inward. -
Add the base layers:
Fill the top of the bell with a soft pale pink chalk, applying it lightly so the concrete texture still peeks through. -
Create dimension:
Along the bottom rim of the bell, layer in magenta and purple chalk to create a shadow and give the shape volume. -
Highlight the form:
Draw vertical, curved lines inside the bell using teal or light blue chalk to suggest the internal structure of the jellyfish. -
Blend the bell:
Using your blending foam or a cloth, gently smudge the pinks and blues together inside the bell. I like to blend in a circular motion to keep the rounded feel.
Smooth Blending Trick
Use a cheap foam paintbrush or a piece of pool noodle to blend large areas. It saves your fingertips from getting raw on the concrete.
Step 2: Creating the Tentacles
-
Sketch the main oral arms:
Draw thick, wavy ribbons extending from the center of the bell downward. These are the main ‘oral arms’ and should look frilly. -
Color the ribbons:
Fill these thick ribbons with a mix of purple and dark pink. Scumble the chalk (scribble lightly) to create a lacy texture. -
Add highlights to the arms:
Run a stick of white or pale pink chalk down the center of these thick ribbons to make them look three-dimensional. -
Draw the long tentacles:
Using the sharp edge of a teal or light blue chalk stick, draw long, sweeping lines that extend far down the sidewalk, crossing over into the next few concrete squares. -
Vary the line weight:
Make some of these teal lines thick near the bell and taper them off to thin wisps at the ends. -
Integrate secondary colors:
Trace alongside some of your teal tentacles with thin white or pale pink lines to add depth and shimmer.
Step 3: Refining and Sealing
-
Enhance the glow:
Take your white chalk and heavily outline the very top curve of the jellyfish bell to make it look like it’s catching light. -
Add background friends:
Sketch a few tiny, simple jellyfish shapes in the distance using just a single color like pink or white to create depth. -
Soften the edges:
Use your finger to gently smudge the long teal tentacles just slightly, making them look like they are drifting in water. -
Clean up the background:
Blow away any loose chalk dust from the gray concrete areas to keep the negative space clean and high-contrast. -
Final bright spots:
Dot a few tiny specks of white chalk around the tentacles to simulate bubbles rising to the surface.
Glow in the Dark
Outline your jellyfish with neon or fluorescent chalk. If you have a blacklight at night, your underwater scene will truly glow.
Step back and admire how your colorful creature seems to float right off the pavement
Chalk Obstacle Course Challenge Squares
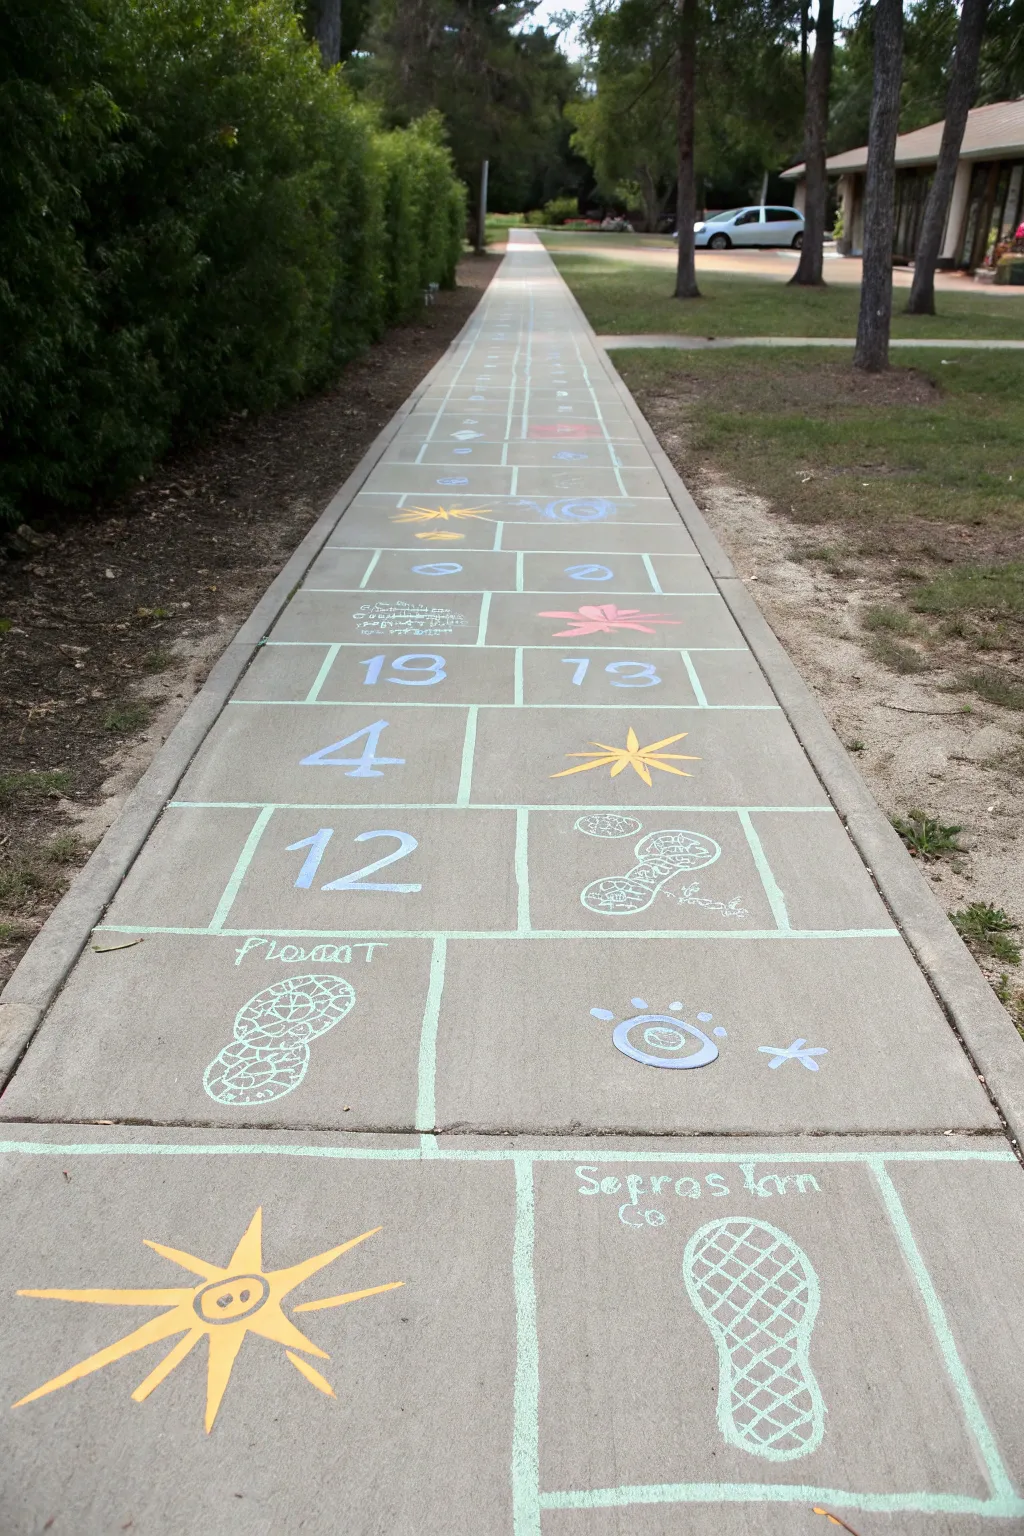
Transform a boring concrete pathway into an expansive interactive game with this massive hopscotch-style obstacle course. Featuring numbered squares, action commands, and whimsical illustrations, this linear layout invites everyone to jump, spin, and play their way down the path.
Step-by-Step Guide
Materials
- Sidewalk chalk in various colors (light blue, yellow, pink, white)
- Measuring tape or yardstick
- Painter’s tape or a long straight edge (optional)
- Broom or leaf blower (for prep)
- Knee pads or a gardening cushion
Step 1: Setting the Grid
-
Prep the surface:
Begin by sweeping the entire length of the sidewalk to remove loose dirt, pebbles, and leaves. Clean concrete ensures your chalk lines stick better and last longer. -
Establish the centerline:
Using your light blue chalk, draw a continuous straight line right down the center of the sidewalk path. If you want it perfectly straight, use a long board as a guide, or just eyeball it for a more organic feel. -
Define the outer boundaries:
Draw parallel lines along the left and right edges of the sidewalk segments to confine your game board. The width should be comfortable for jumping with two feet side-by-side. -
Create the horizontal dividers:
Starting at the near end, draw horizontal lines across your vertical framework to create pairs of squares. Space them roughly 18-24 inches apart so they are easy to hop into. -
Vary the grid pattern:
To break up the monotony, occasionally span a horizontal line across the entire width without a center divider, creating a large single rectangle instead of two small squares.
Chalk Master Tip
Dip your chalk in water for 10 seconds before drawing. This creates a vibrant, paint-like paste that dries opaque and lasts much longer than dry chalk.
Step 2: Adding the Illustrations
-
Start with the sunburst:
At the very start of the course (closest to you), draw a large yellow sun in the bottom-left square. Add a smiley face in the center circle and long, radiating spikes for rays. -
Sketch the shoe print:
In the bottom-right adjacent square, draw the outline of a shoe sole using light blue or white chalk. Fill the inside with a cross-hatch pattern to mimic tread. -
Draw the double footprints:
几 steps up on the left side, draw two oval shapes interconnected, resembling shoe prints pressed together. Fill these with a quick grid texture. -
Create the abstract eye:
On the right side, draw a concentric circle ‘eye’ shape with small radiating dots above it. Add a simple star shape next to it for balance. -
Add a spinning star:
Further up the path, draw a simple six-pointed star in yellow. This visual cue often indicates a ‘spin around’ jump. -
Include floral elements:
Near the top of the visible path, sketch a pink flower shape with five or six petals. I usually keep these simple and bold so they remain visible from a distance.
Step 3: Text and Numbers
-
Add the text command:
Above the first footprint drawing, write ‘Sepros trn’ or simpler instructions like ‘Step’ or ‘Turn’ using light green or white chalk. -
Label the spiral:
Above the double footprint drawing, write a fun command like ‘Pivvot’ or ‘Twist’. Keeping the lettering loose and casual adds to the charm. -
Insert large numbers:
In the middle section of the course, choose two side-by-side squares and write large numbers like ’12’ and ‘4’ in blue. Fill the width of the box to make them easy to read while jumping. -
Add higher numbers:
In the next row up, write numbers like ’19’ and ’13’. Mixing up numbers forces players to think or shout them out as they land. -
Fill the distance:
Continue adding simple shapes, scribbles, or basic geometric patterns into the remaining empty squares stretching into the distance until your path is full.
Creative Twist
Turn it into a fitness challenge! Instead of just numbers, write commands like ‘5 frogs jumps,’ ‘Clap twice,’ or ‘Touch your toes’ in the squares.
Now step back and watch as neighborhood walkers discover your colorful invitation to play


DIY Sidewalk Twister Dots
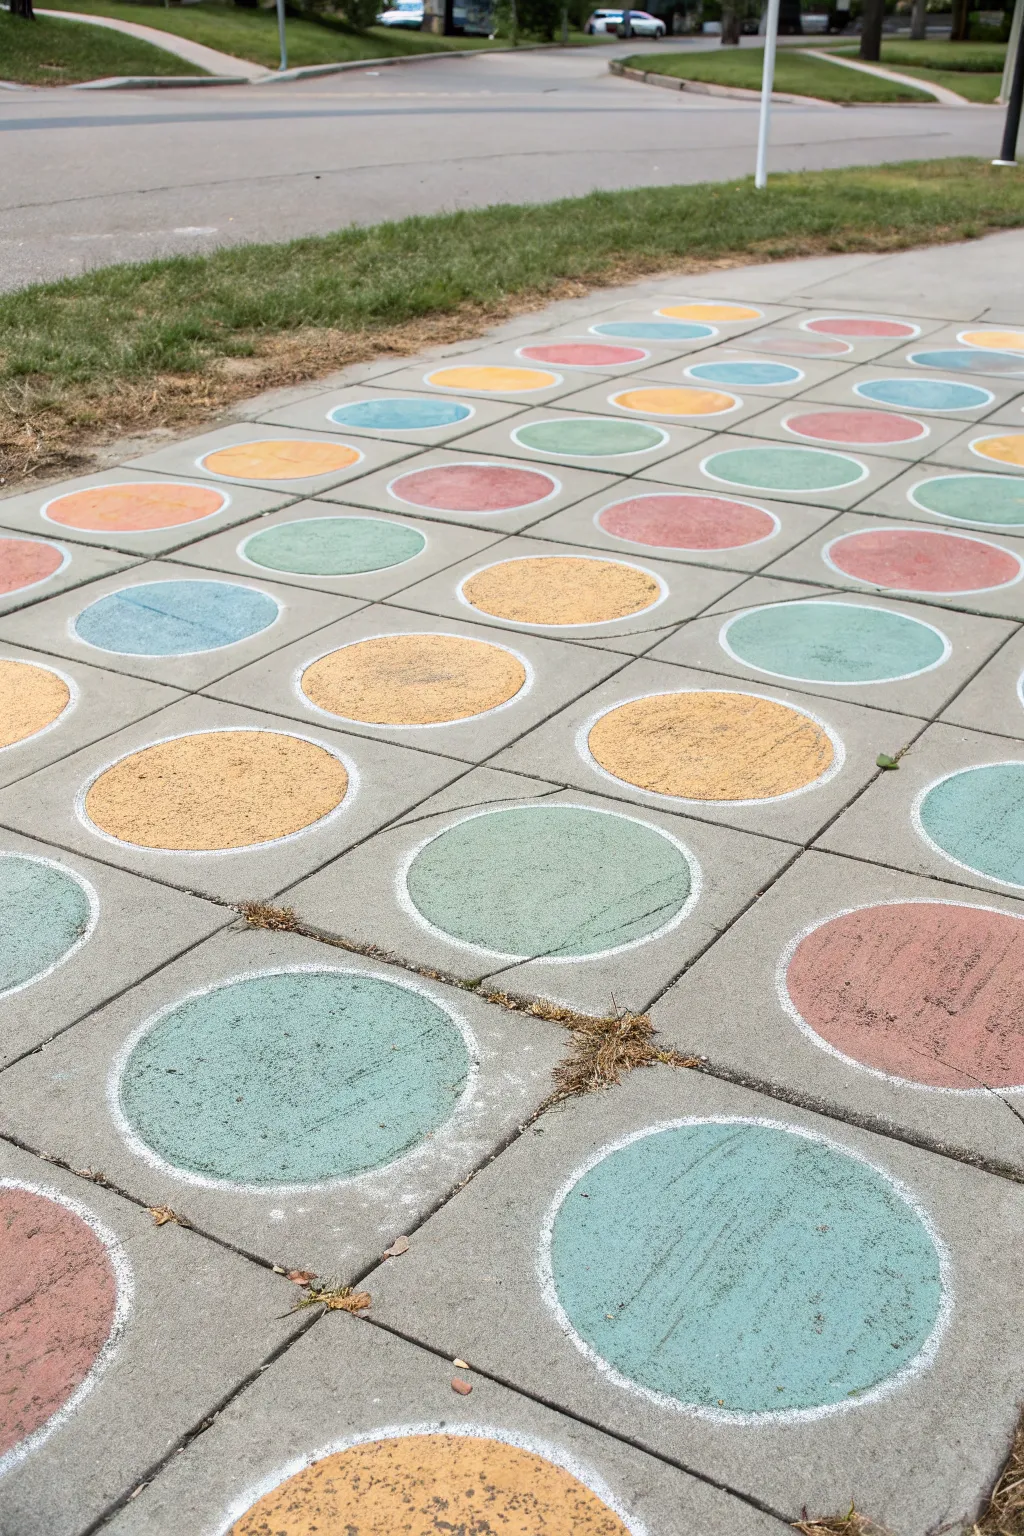
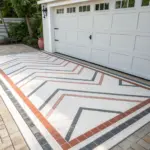
Transform your driveway or walkway into a massive, colorful game board with this simple painting project. The result is a vibrant grid of large, painted circles on concrete pavers that invites kids and adults alike to test their flexibility.
Detailed Instructions
Materials
- Sidewalk chalk (white) for outlining
- Outdoor acrylic patio paint or sidewalk chalk paint (Red, Yellow, Blue, Green/Teal)
- Small bucket of water
- Large round stencil (a bucket lid, pizza pan, or cardboard cutout)
- Wide paintbrush (2-3 inch width) or foam brush
- Broom or leaf blower
- Masking tape (optional)
Step 1: Preparation and Layout
-
Clean surface:
Begin by thoroughly sweeping the area to remove loose dirt, leaves, and grit. If the concrete is very dirty, hose it down and let it dry completely before starting. -
Plan your grid:
Observe the natural cracks or lines in your sidewalk. In the reference image, the concrete is already divided into squares, which makes spacing easy. If you have a solid slab, use a measuring tape to mark out a grid of roughly 2×2 foot squares. -
Select stencil:
Find a circular object to trace that fits comfortably inside your grid squares with a few inches of border on all sides. A bucket lid or a large plate works perfectly for this. -
Outline the circles:
Place your circular template in the exact center of one concrete square. Hold it firmly and trace around the edge with white sidewalk chalk. Repeat this for every square in your designated game area. -
Check alignment:
Stand back and look at your grid of chalk outlines. Make sure they look centered and relatively straight in rows. Adjust any that look off-center now before paint is applied.
Step 2: Painting the Circles
-
Prepare paint colors:
Pour your outdoor acrylics or chalk paints into separate containers. If you are mixing colors to get that nice teal or coral red seen in the image, do that now in sufficient quantities. -
Start with Yellow:
Choose a row to start with. Dip your wide brush into the yellow paint. I prefer to outline the chalk circle first with the paint to get a crisp edge. -
Fill in Yellow:
Fill in the rest of the circle with yellow paint using smooth, even strokes. Aim for solid coverage, but don’t worry if the concrete texture shows through slightly; it adds grip. -
Clean brush:
Thoroughly rinse your brush in the water bucket and dry it on a rag before switching diverse colors to avoid muddying the next hue. -
Apply Teal/Green:
Move to the next assigned spots for green or teal. Outline the chalk circle carefully and then fill the center. Ensure you are following a repeating pattern if you want a traditional game board look. -
Paint Red circles:
Apply the red paint to its designated circles. This color can sometimes be translucent, so apply it generously or plan for a second coat. -
Finish with Blue:
Paint the final set of circles with blue. In the image, some blues are lighter cyan; you can mix white into standard blue to achieve this softer pastel look.
Uneven Concrete?
If your sidewalk is very rough or pitted, use a thick-nap roller instead of a brush to press paint deep into the crevices for better coverage.
Step 3: Finishing Touches
-
Touch up edges:
Once all circles are filled, walk around and inspect the edges. Use a smaller brush to tidy up any wobbly lines or spots where the paint went outside the chalk guide. -
Add white ring (optional):
To make the colors pop like in the photo, you can paint a thin white ring around the colored circles using a steady hand or the original chalk line as a guide. This simulates the look of chalk art. -
Let dry:
Allow the paint to dry completely. Outdoor acrylics usually dry to the touch within an hour, but wait at least 4-6 hours before walking or playing on them. -
Seal (optional):
If you want this to last all summer, you can roll a clear concrete sealer over the dried circles. Otherwise, let it fade naturally over time.
Game Spinner
Make a matching spinner board on a piece of cardboard using the same paint colors so you have a functional controller for your giant game.
Enjoy watching the neighborhood come to life as everyone hops and stretches across your new colorful path


Have a question or want to share your own experience? I'd love to hear from you in the comments below!