When kids paint Christmas, the magic is in the simple shapes, the bold colors, and the tiny “I made this!” details. Here are my favorite children’s Christmas painting ideas that feel festive right away—without needing perfect brush control.
Handprint Christmas Tree Keepsake
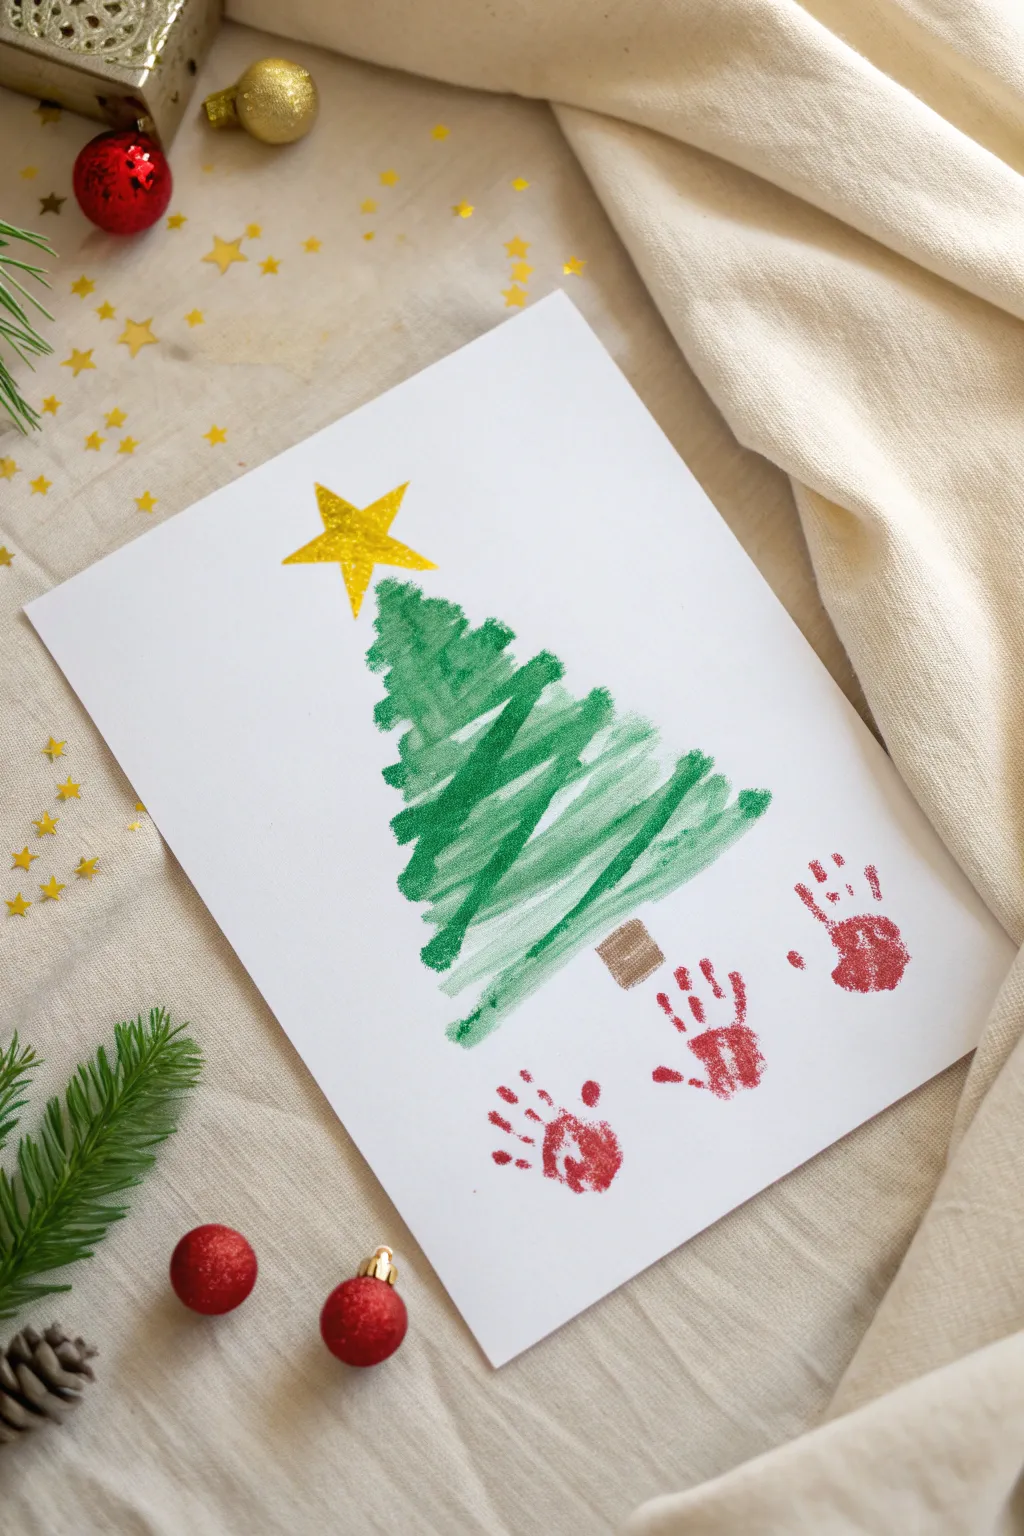
This charming keepsake combines the whimsical strokes of a hand-drawn Christmas tree with the personal touch of little handprints. The contrast between the layered green crayon texture and the bright red paint creates a festive and heartwarming holiday memory.
Step-by-Step Guide
Materials
- White heavyweight cardstock or construction paper (A4 size)
- Green crayons (preferably two shades: one standard green, one slightly darker or lighter)
- Red washable tempera or acrylic paint
- Small paintbrush or foam brush
- Yellow construction paper or gold glitter cardstock
- Scissors
- Glue stick
- Brown marker or crayon
- Paper plate or palette for paint
Step 1: Drawing the Tree
-
Prepare the workspace:
Lay down your white cardstock on a flat, clean surface. Ensure you have plenty of space below where the tree will go, as this is where the handprints will be placed later. -
Start the treetop:
Using a standard green crayon, start near the top center of the page. Draw a small, jagged triangular shape to form the very tip of the tree. -
Add the middle layers:
Continue drawing downward, widening your strokes as you go. Use a quick, back-and-forth scribbling motion to create a textured, layered look rather than coloring in a solid outline. -
Widen the base:
Extend the tree branches further out as you reach the bottom third of the tree area. The shape should be a distinct triangle, roughly filling the center of the page but leaving about 3-4 inches of white space at the bottom. -
Layer the colors:
Take your second shade of green crayon and scribble over the initial layer. Add diagonal strokes going against the grain of your first layer to build depth and make the greenery look fuller. -
Draw the trunk:
Using a brown marker or crayon, draw a small, rectangular trunk at the very center bottom of your green foliage. Fill it in solidly so it stands out against the white paper.
Smudge Savior
If a handprint smudges or smears while lifting, don’t panic. Turn the smudge into a ‘fallen ornament’ or gift by painting a simple square or circle over the error once it dries.
Step 2: Adding the Star
-
Cut out the star:
Sketch a classic five-point star on your yellow or gold glitter paper. It should be proportional to the top of your tree, roughly 1.5 to 2 inches wide. -
Refine the shape:
Carefully cut along your sketched lines. If you want a sharper look, erase any visible pencil marks from the back before proceeding. -
Attach the star:
Apply a generous amount of glue to the back of the star. Press it firmly onto the very tip of your green crayon tree, holding it for a few seconds to ensure it adheres well.
Step 3: Creating the Handprints
-
Prepare the paint:
Squeeze a dollop of red washable paint onto a paper plate. It needs to be wide enough to accommodate a child’s hand. -
Apply paint to the hand:
Using a brush or sponge, coat the child’s palm and fingers evenly. I find brushing the paint on tickles less and gives better coverage than just dipping the hand. -
Place the center print:
Guide the child’s hand to the space directly below the tree trunk. Press down firmly on the palm and each finger to ensure a clear impression. -
Lift carefully:
Lift the hand straight up—not dragging it—to avoid smearing the red paint. -
Add side prints:
Re-apply paint to the hand if necessary. Place two more handprints on either side of the center one, slightly higher or curved to frame the bottom of the tree nicely. -
Let it dry:
Set the artwork aside in a safe, flat place to dry completely. The paint is thicker than the crayon, so give it at least an hour before displaying.
Make It Sparkle
Before the red paint dries, sprinkle a tiny pinch of red or gold loose glitter onto the wet handprints. This adds a magical shimmering effect that catches the light beautifully.
Once dry, frame this adorable piece to capture a frozen moment in time alongside your festive decor


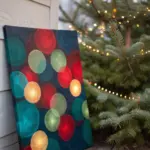
Fingerprint Christmas Lights Garland
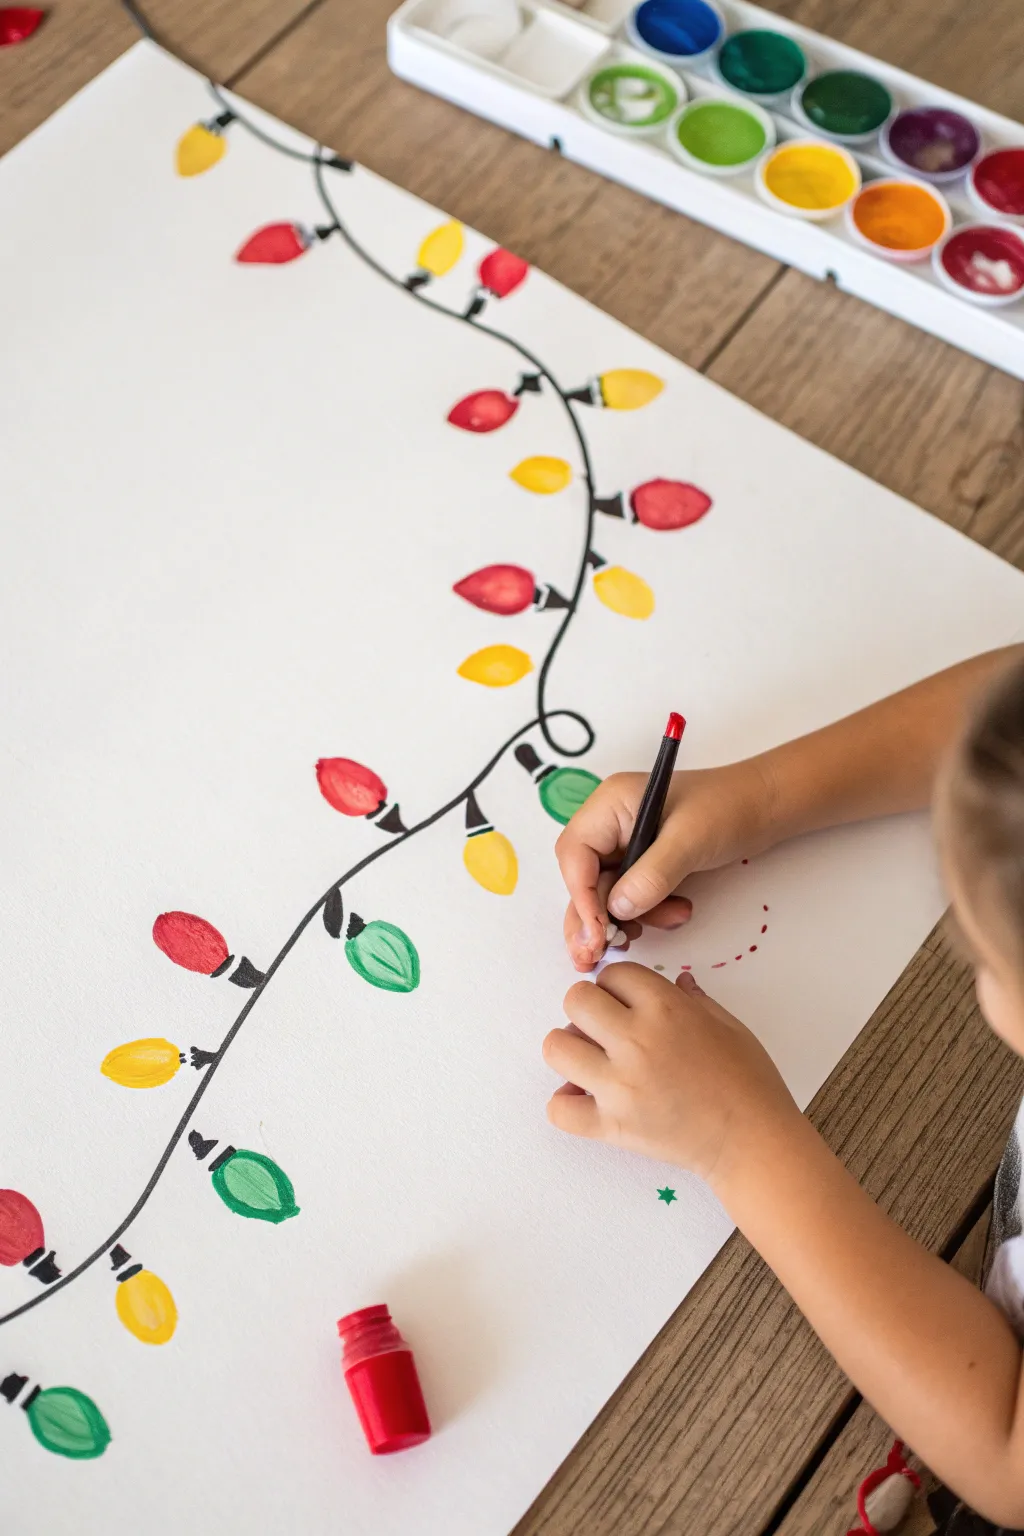
Brighten up your holiday crafting with this charming garland that turns little fingerprints into glowing bulbs. This keepsake artwork captures a moment in time while creating a festive decoration perfect for framing or gifting.
Step-by-Step
Materials
- Large sheet of white paper or poster board
- Washable craft paints (red, yellow, green, blue)
- Black permanent marker or broad-tip felt pen
- Fine-tip black marker or pen
- Paper plate or palette
- Damp paper towels (for messy fingers)
- Pencil (optional)
Step 1: Drawing the Base
-
Plan the path:
Visualize a swooping, curving line across your large paper. You want it to look like a loose, natural string of lights, perhaps looping in a circle or draping across the page diagonally. -
Draw the wire:
Using your broad black marker, draw a continuous, curvy line across the paper. Don’t worry about making it perfect; the little wobbles make it look more realistic. -
Add a loop:
Somewhere along the line, add a simple loop-de-loop to mimic how light strands get tangled. This adds a nice bit of character to the composition. -
Mark the sockets:
Along the black wire, draw small black squares or rectangles every two to three inches. These will be the bases where the bulbs attach. I find spacing them irregularly looks better than perfect precision.
Clean Prints Only
Make sure the child’s finger isn’t sliding when they press down. A straight up-and-down motion creates the crispest bulb shape without smearing.
Step 2: Adding the Bulbs
-
Prepare the palette:
Squeeze dime-sized amounts of your red, yellow, green, and blue paints onto a paper plate or palette. -
Dip the thumb:
Have the child press their thumb firmly into the first color. You want the pad of the thumb fully coated but not dripping wet. -
Test print:
Do a quick test stamp on a scrap piece of paper to ensure you have the right amount of paint for a clear print. -
Stamp the first lights:
Press the painted thumb onto the paper right next to one of the black square sockets. The print should touch the socket so the bulb looks connected. -
Continue the color:
Stamp all the lights for that specific color first. For example, do all your yellow bulbs randomly along the strand before switching colors. -
Switch and clean:
Wipe the thumb clean with a damp paper towel before switching to the next hue. Repeat the process with red, green, and blue until every black socket has a colorful bulb. -
Let it dry:
Allow the paint to dry completely. Since fingerprint paint can be thick, give it at least 15-20 minutes.
Glitter Glow
While the paint is still wet, sprinkle a tiny pinch of fine glitter onto each bulb. Different colored glitters will make the lights truly sparkle.
Step 3: Finishing Touches
-
Add highlights:
Once the paint is dry, use a tiny dab of white paint or a white gel pen to add a small ‘reflection’ mark on each bulb to make them look shiny. -
Connect the details:
Using the fine-tip black marker, draw a tiny line connecting the paint blob to the black socket if there is any gap. -
Draw the filaments:
For extra detail, you can draw a tiny zig-zag line inside the dried lighter-colored bulbs (like yellow) to look like a filament. -
Extra decoration:
If there is empty space around the garland, feel free to add tiny drawn stars or confetti dots with the markers.
Hang this colorful masterpiece on the fridge or wall to enjoy the glow of handmade holiday cheer


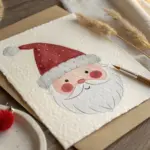
Easy Santa Hat Portrait
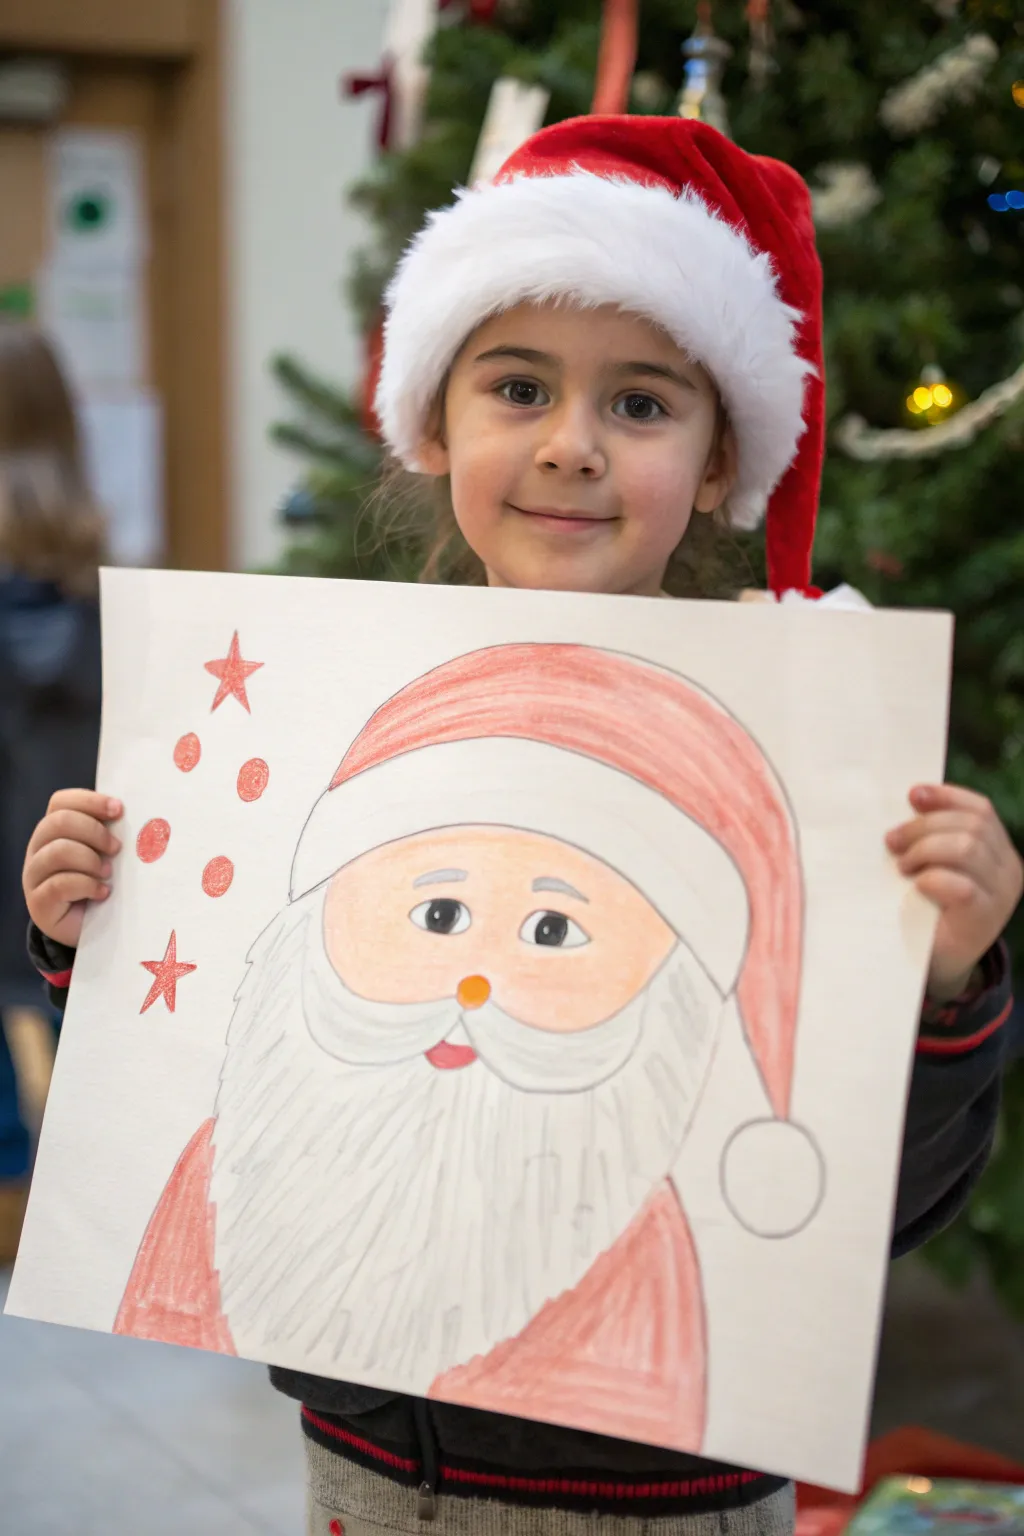
This charming, large-scale portrait captures Santa’s jolly spirit with soft colors and big, expressive eyes. The gentle shading creates a lovely illustrative feel that looks impressive but is actually quite simple to achieve.
Step-by-Step Tutorial
Materials
- Large sheet of sturdy white paper or poster board (A2 or similar)
- Graphite pencil (HB or 2B) for sketching
- Good quality eraser
- Black felt-tip marker or fine liner pen
- Colored pencils (red, peach/flesh tone, light grey, white)
- Small circular object to trace (optional, for decorative dots)
Step 1: Sketching the Outline
-
Face shape:
Begin in the center of your paper by lightly sketching a wide U-shape for Santa’s face. Make sure to leave plenty of room above for the hat and below for the beard. -
Hat brim:
Draw a curved band sitting right on top of the U-shape. This will be the fluffy white brim of his hat. It should curve slightly downward around the forehead to look natural. -
Beard outline:
Sketch a large, flowing beard shape starting from the sides of the hat brim, sweeping down and narrowing slightly at the bottom, then curving back up to the other side. -
Mustache and mouth:
Inside the beard area, just under the face line, draw two large, swooping tear-drop shapes connecting in the middle for a mustache. Add a small U-shape underneath for his smiling mouth. -
Hat body:
Draw the red part of the hat swooping from the top of the brim, curving down towards the right side of the paper. Add a circle at the very end for the pom-pom.
Step 2: Refining the Details
-
Shoulders:
Add curved lines at the bottom corners of the beard to indicate Santa’s shoulders and coat drawing the eye downward. -
Facial features:
Draw two oval eyes in the middle of the face. Add a small circle for the nose resting right on top of the mustache center. Don’t forget two small eyebrows above the eyes. -
Decorative elements:
In the empty space to the left of Santa’s head, sketch two five-pointed stars and a few scattered circles to create a festive background. -
Inking:
Once you are happy with your pencil sketch, carefully go over all your lines with a black felt-tip marker. Use steady, confident strokes. -
Clean up:
Wait a moment for the ink to dry completely, then gently erase all the underlying graphite pencil marks to keep the artwork clean.
Softer Shading
Color in small, circular motions rather than back-and-forth lines. This removes streak marks and makes the red hat look like soft velvet.
Step 3: Coloring and Shading
-
Skin tone base:
Use a peach or flesh-toned colored pencil to fill in the face. Apply the color lightly at first to get an even layer. -
Rosy cheeks:
Layer a little bit of red or pink over the cheek area and blend it gently into the peach tone to give him a cold-weather glow. -
Santa’s coat:
Color the main body of the hat and the shoulders with a bright red pencil. I prefer using slanted, consistent strokes here to give it a soft, textural look similar to the example. -
Beard texture:
For the beard and hat brim, don’t color them solid white. Instead, use a light grey pencil to draw faint vertical lines that mimic strands of hair. -
Mustache definition:
Use the grey pencil to add a little shading under the mustache curls to make them pop out from the beard. -
Eye details:
Color the pupils black, leaving a tiny white spot in each for a sparkle. This brings the character to life instantly. -
Background accents:
Fill in the stars with red colored pencil. For the decorative dots, fill them in solidly with red to balance the composition. -
Final touches:
Review your coloring. If you want the red to be more vibrant, go over the hat and coat a second time with slightly more pressure.
Add Some Sparkle
Once the drawing is done, use glitter glue on the stars and the red berries in the background for a magical festive shimmer effect.
Now you have a wonderful, large portrait that’s perfect for hanging on the door or gifting to grandparents


Reindeer Face With Red Nose
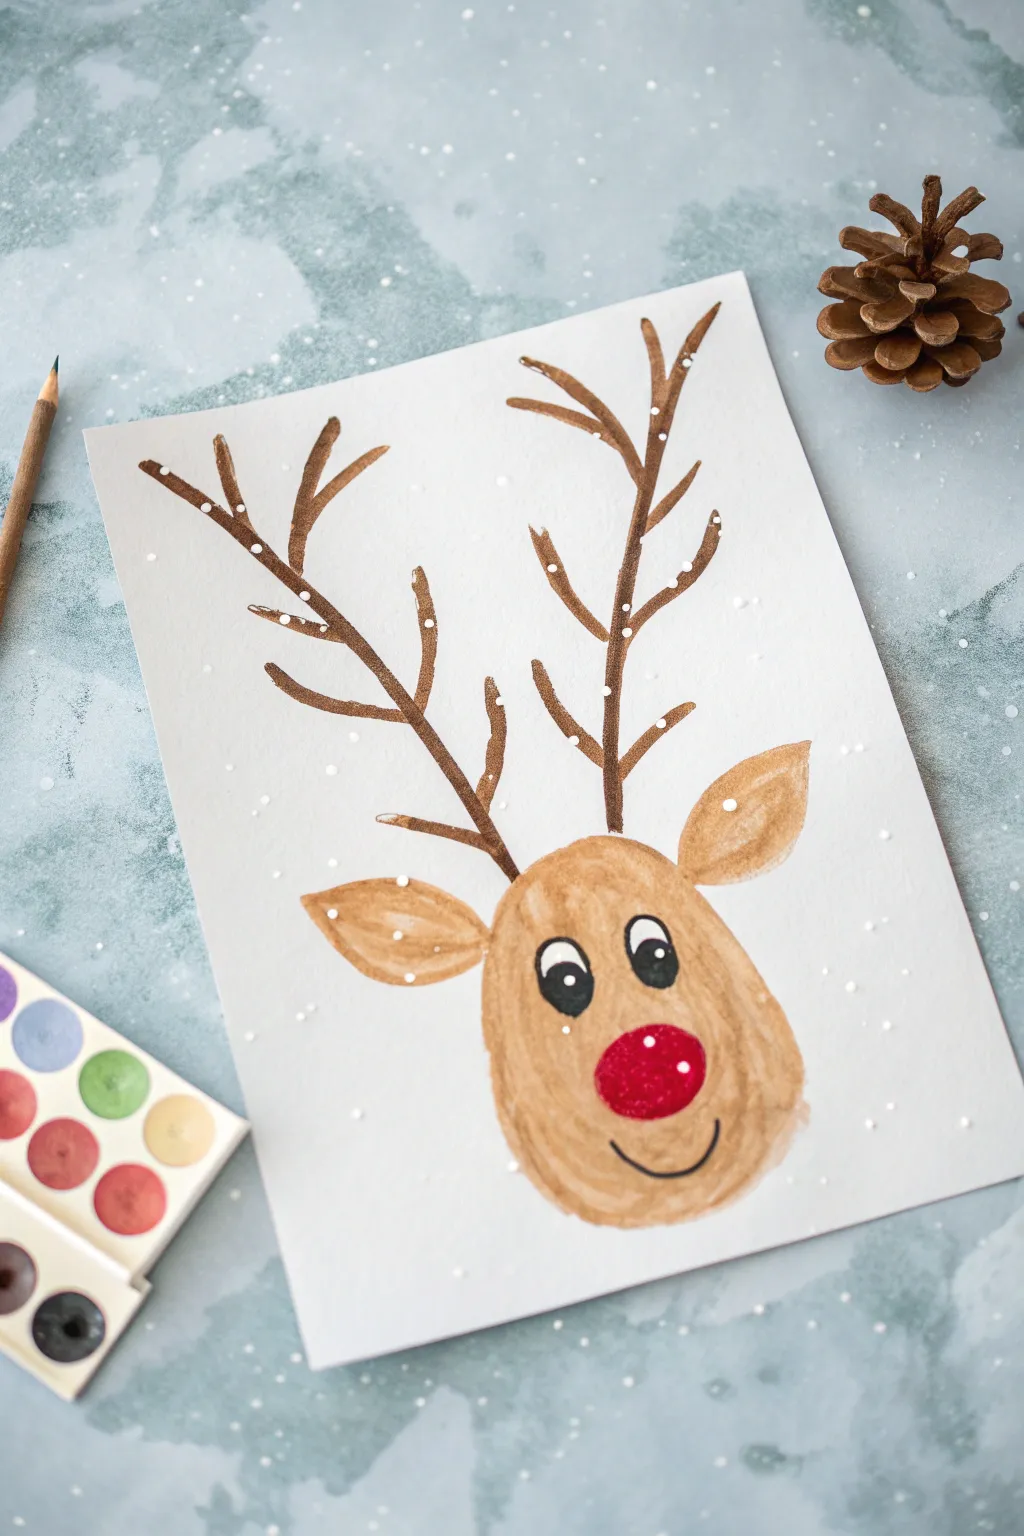
Capture the magic of Christmas with this charming watercolor reindeer featuring soaring antlers and that unmistakable bright red nose. This project uses simple shapes and splatter techniques to create a festive wintry scene perfect for holiday cards.
Step-by-Step
Materials
- White creativity or watercolor paper (heavyweight is best)
- Watercolor paints (pallet set)
- Small round paintbrush (size 2-4)
- Medium round paintbrush (size 6-8)
- Cup of water
- Paper towels
- Pencil (optional for sketching)
- White acrylic paint or gouache (for snow)
- Old toothbrush or stiff brush
Step 1: Painting the Base Shapes
-
Mix your brown:
Load your medium brush with water and pick up a light brown shade. Test the color on a scrap piece of paper first to ensure it’s not too dark; watercolors dry lighter, but we want a soft base. -
Paint the head shape:
In the lower center of your paper, paint a round, slightly oval shape for the reindeer’s head. It should be slightly taller than it is wide. -
Add the ears:
While the head is still wet or just starting to dry, paint two leaf-shaped ears extending from the top sides of the head. -
Soften the edges:
Create a slightly fuzzy texture by dabbing the edges of the ears with a barely damp brush, pulling the color outward just a tiny bit. -
Let it dry completely:
It is crucial to let this base layer dry fully before adding details, otherwise the colors will bleed together muddy.
Step 2: Adding the Antlers
-
Mix a darker brown:
Create a stronger, darker brown color for the antlers. You want these to stand out against the lighter head color. -
Draw the main stems:
Using your smaller brush, paint two long lines curving upward and slightly outward from the top of the head. -
Add the branches:
Paint smaller ‘V’ shaped branches coming off the main stems. Vary the lengths to make them look organic. -
Thicken slightly:
Go back over the bottom parts of the antlers to thicken them where they attach to the head, giving them strength. -
Let dry again:
Wait for the antlers to dry completely so you don’t smudge them with your hand while working on the face.
Muddy Colors?
If the red nose bleeds into the brown face, your base layer wasn’t dry enough. Let it dry fully, then fix edges with opaque paint.
Step 3: Creating the Face
-
Paint the whites of the eyes:
Using white gouache or very opaque white watercolor, paint two ovals near the top center of the face. -
Add the pupils:
Once the white is dry, use black paint and a very fine tip to paint large black circles inside the white ovals, leaving a tiny white speck for a highlight. -
Create the nose:
Load your brush with bright red paint. Paint a prominent round circle in the center of the face, slightly overlapping the bottom of the eyes. -
Add the shine:
I like to leave a tiny unpainted white spot on the nose for a highlight, or add a dot of white paint later if you forget. -
Paint the smile:
Using thin black or dark brown paint, carefully draw a simple ‘U’ curve under the nose for a happy smile.
Sparkle Upgrade
Mix a tiny pinch of red glitter into the paint for the nose, or dust loose glitter over the wet red paint for extra holiday shine.
Step 4: Adding the Snowy Magic
-
Prepare the snow paint:
Dilute a dime-sized amount of white acrylic or gouache with a few drops of water until it is runny but still opaque. -
Load the splatter tool:
Dip an old toothbrush or a stiff bristle brush into the white mixture. -
Create the snowfall:
Hold the brush over your painting and tap the handle against a finger (or flick the bristles) to spray tiny white dots all over the paper. -
Protect the face (optional):
If you want the face clear, you can loosely cover it with a paper towel while splattering, though snow on the nose looks cute too. -
Final heavy flakes:
Use the tip of your small brush to manually place a few larger dots of white paint on the antlers and background for variety.
Now your festive reindeer is ready to guide the sleigh through a winter storm
BRUSH GUIDE
The Right Brush for Every Stroke
From clean lines to bold texture — master brush choice, stroke control, and essential techniques.
Explore the Full Guide
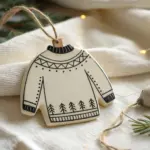
Painted Christmas Ornaments on Branches
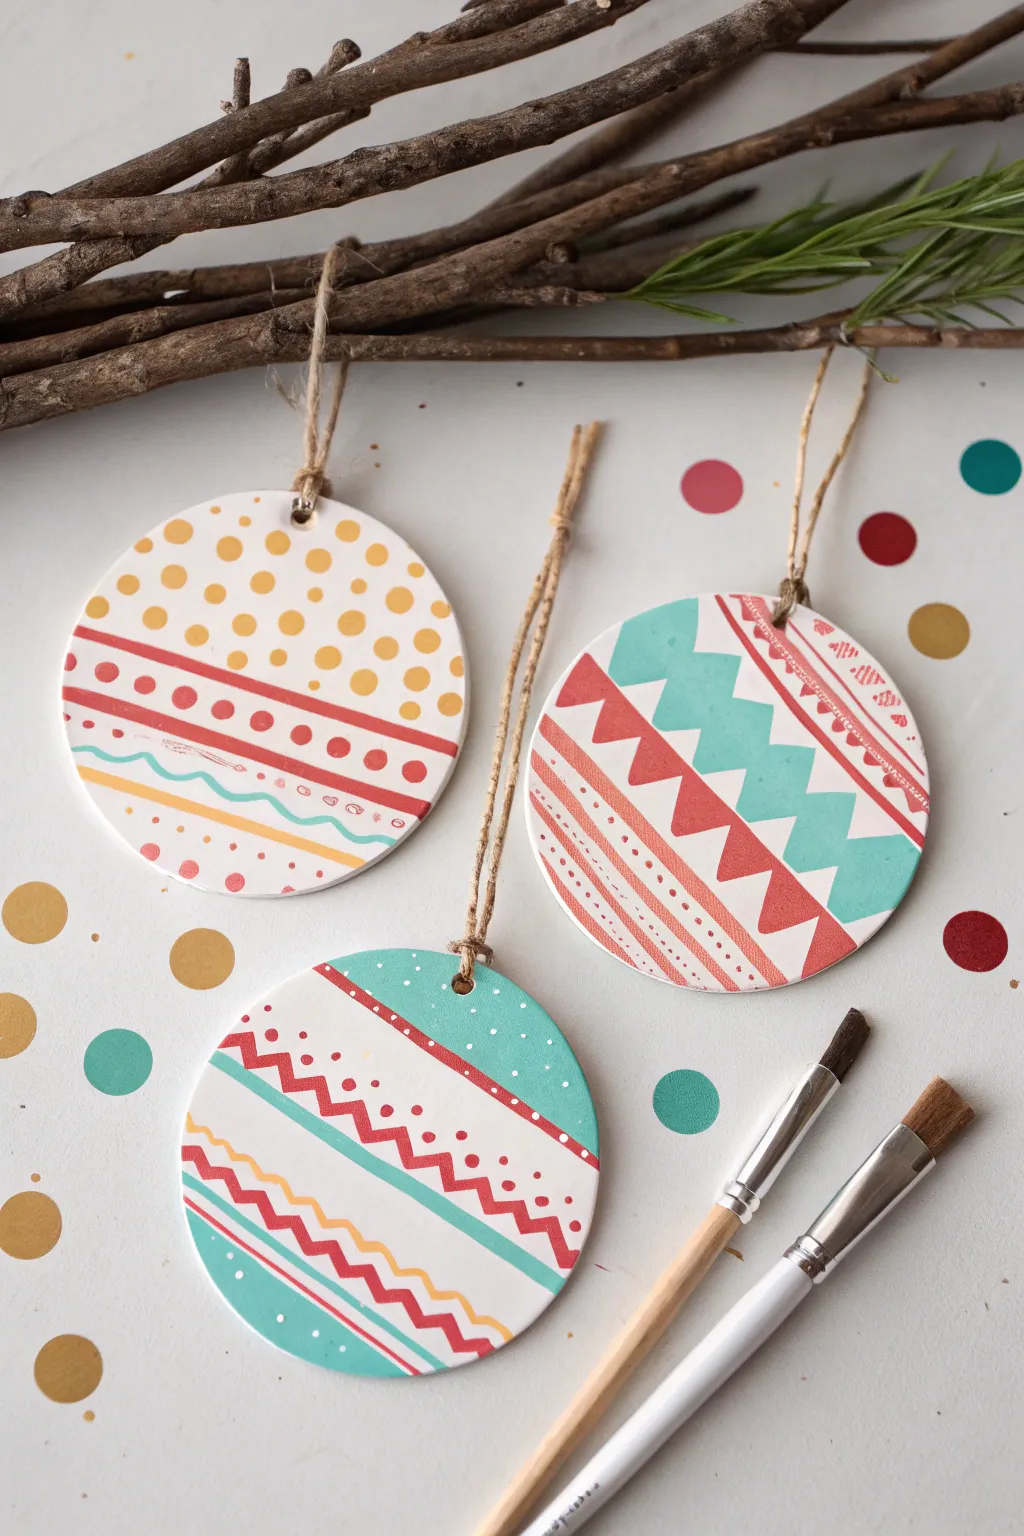
These charming, flat disc ornaments feature simple geometric patterns and a fresh, warm color palette that moves beyond traditional red and green. With just a few basic shapes like dots, zig-zags, and stripes, you and your children can create a cohesive and stylish set that looks lovely hanging from a branch or gift-wrapped package.
Detailed Instructions
Materials
- Unfinished white ceramic or wooden flat disc ornaments
- Jute twine or hemp cord for hanging
- Acrylic craft paints (Teal/Turquoise, Coral Red, Mustard Yellow, White)
- Small flat paintbrushes (sizes 2 and 4)
- Fine-tip round paintbrush (size 0 or 1)
- Water cup and palette (or paper plate)
- Pencil (optional for sketching)
Step 1: Preparation & Base Layers
-
Prepare your surface:
Start with clean, unfinished ornaments. If using plain wood, you might want to give them a coat of white acrylic paint first to make the colors pop, like the ones in the image. Let this base coat dry completely. -
Plan your palette:
Squeeze out small amounts of turquoise, coral red, and mustard yellow onto your palette. These three colors will repeat across all ornaments to keep the set looking unified. -
Map out the first ornament (Polka Dot Style):
For the top left ornament, visualize dividing the circle horizontally. The top half will be dedicated to a polka dot pattern, while the bottom half will feature stripes. -
Paint the yellow dots:
Using the tip of a small round brush or even the back of your brush handle, stamp mustard yellow dots on the upper portion of the ornament. Try to stagger them in rows for a playful look. -
Add the coral band:
Paint a thick horizontal band of coral red just below your dot pattern. Don’t worry if the edges aren’t perfect; a hand-painted look adds charm. -
Detail the stripes:
Below the coral band, use a fine brush to paint a wavy turquoise line. Follow this with a straight yellow line near the bottom edge.
Step 2: Creating the Geometric Triangle Ornament
-
Establish the zig-zag:
For the ornament on the right, the focus is large geometric shapes. Start by painting a large, bold zig-zag line across the center using turquoise paint. -
Fill the alternating triangles:
Once the turquoise zig-zag is defined, fill in the triangular spaces below it with coral red. This creates a strong contrast between the cool and warm tones. -
Add detail lines:
Use your finest brush to add delicate coral lines in the white space above the turquoise zig-zag. I like to add tiny perpendicular dashes to these lines to mimic a stitch pattern. -
Paint bottom stripes:
Finish the bottom curve of this ornament with thin, curved lines in coral red, adding small dots between them for extra texture.
Paint Pen Precision
If using a brush for tiny zig-zags is too frustrating for younger kids, swap the fine brushes for acrylic paint pens. They offer much more control for detailed lines.
Step 3: Designing the Mixed Pattern Ornament
-
Block out color zones:
For the third ornament (bottom center), paint a broad curved section at the very top and very bottom in turquoise. This frames the central design area. -
Add snowflake dots:
While the turquoise paint is drying, use a toothpick or very fine brush to add tiny white dots on top of the turquoise sections to resemble falling snow. -
Create the central zig-zags:
In the white middle section, paint two distinct zig-zag lines using coral red. Space them out so there is room for stripes in between. -
Layer the stripes:
Paint a thick turquoise stripe between the two coral zig-zags. Then, add a thinner yellow wavy line near the bottom turquoise section. -
Final dot details:
Using the very tip of your brush, add tiny coral dots along the upper edge of your turquoise stripe to tie the pattern together.
Natural Texture
Instead of a white base, leave some sections as raw wood. The natural grain creates a beautiful rustic contrast against the bright, modern paint colors.
Step 4: Finishing Touches
-
Let everything cure:
Allow all the ornaments to dry completely. Acrylics dry fast, but give it 20-30 minutes to ensure you don’t smudge your fine lines. -
Attach the twine:
Cut a length of jute twine for each ornament, roughly 6-8 inches long. -
Secure the loop:
Thread the twine through the hole at the top of the ornament. Tie a simple overhand knot at the ends to create a secure loop for hanging.
These handcrafted ornaments are ready to bring a touch of artisan warmth to your holiday decor
Snowman With Sponge Stamps
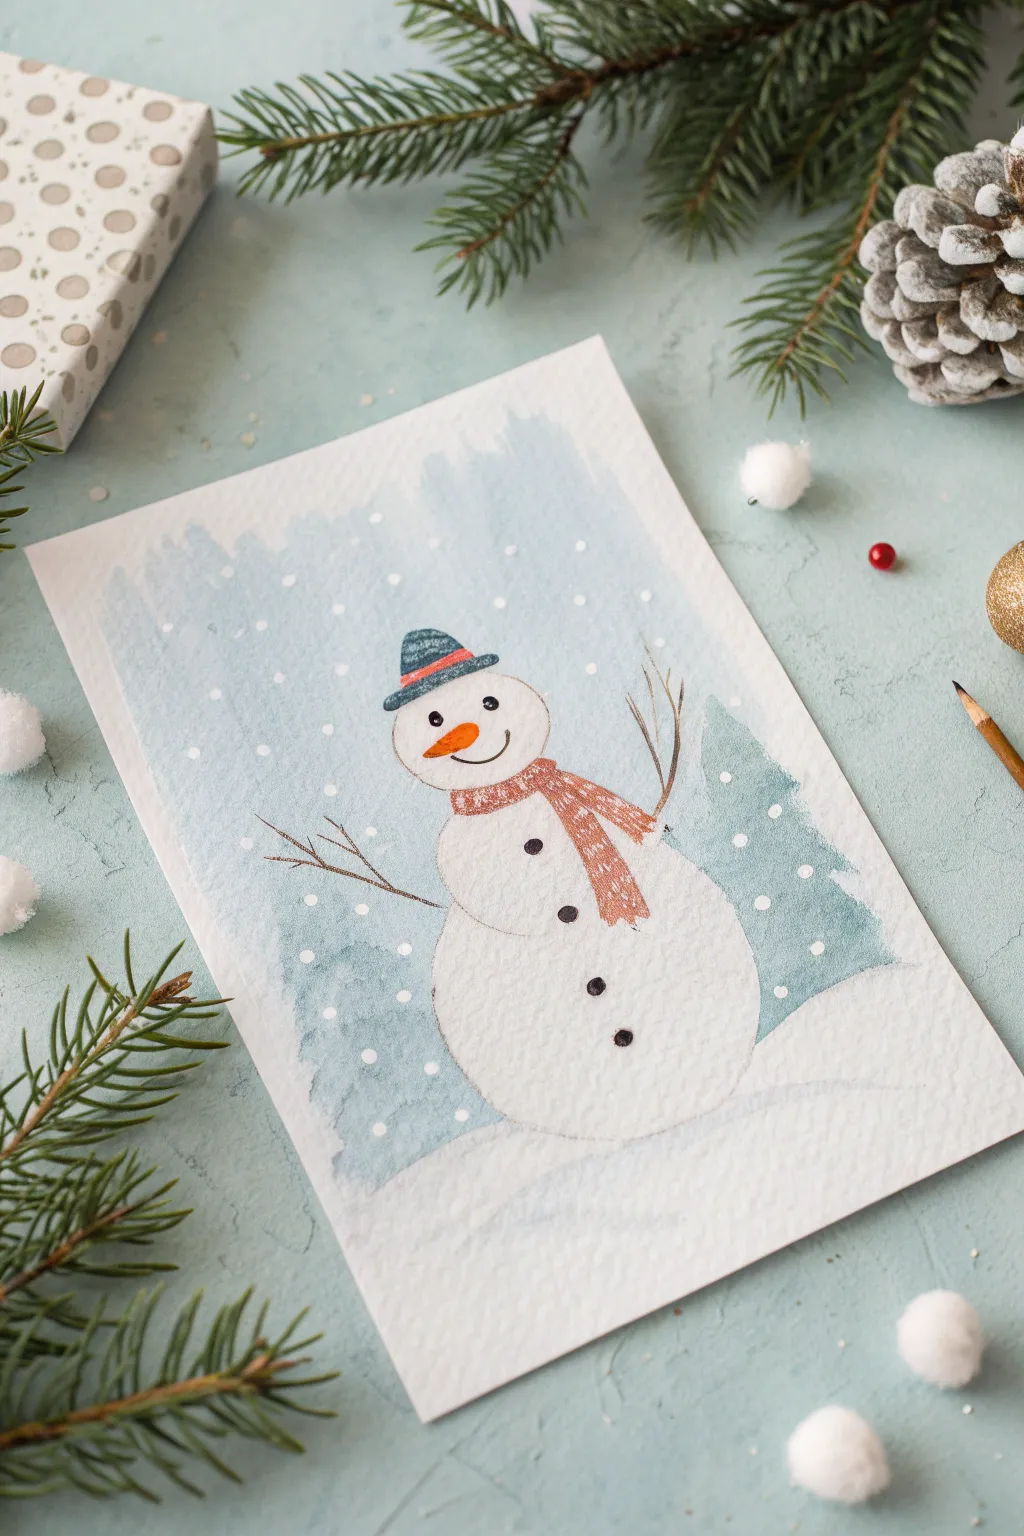
This charming project combines the fun of stamping with delicate hand-drawn details to create a classic winter scene. The textured result looks surprisingly professional but is simple enough for little hands to master.
Step-by-Step Guide
Materials
- Heavyweight watercolor paper or cardstock
- Round synthetic sponges (multiple sizes)
- Light blue, white, and dark green acrylic paints
- Colored pencils or crayons (orange, black, red/brown)
- Small flat paintbrush
- Paper plate or palette
- Water cup and paper towels
Step 1: Setting the Scene
-
Prepare the Background:
Start by mixing a very watery wash of light blue acrylic paint. Using a wide brush, paint a rough, vertical patch in the center of your paper, leaving the edges raw and uneven for an artistic look. -
Let it Dry:
Allow this blue background layer to dry completely. If the paper starts to curl, you can weigh down the corners or tape them to your work surface. -
Mix the Snow White:
Squeeze a generous mesmerizing amount of white acrylic paint onto your paper plate. Dab a medium-sized round sponge into the paint, ensuring the bottom surface is evenly coated but not dripping. -
Stamp the Body:
Press the sponge firmly onto the lower third of the dried blue background to create the large bottom snowball. Lift the sponge straight up to keep the edges clean. -
Stamp the Middle:
Using a slightly smaller round sponge (or the same one with less pressure), stamp a second circle slightly overlapping the top of the first one to form the snowman’s torso. -
Stamp the Head:
Stamp the final, smallest circle on top for the head. It’s okay if the white paint isn’t perfectly opaque; a little texture adds to the snowy effect.
Sponge Savvy
Don’t have round sponges? Cut a kitchen sponge into a circle, or for small snowmen, use the flat end of a wine cork dipped in paint.
Step 2: Adding the Details
-
Paint the Trees:
While the white circles are drying, mix a soft teal-green color. Use a small sponge cut into a triangle shape, or just a brush, to dab simple tree shapes on either side of the snowman. -
Snow Touches:
Dip the end of a paintbrush handle or a cotton swab into white paint and dot random snowflakes across the blue sky area. -
Draw the Face:
Once the white paint is fully dry to the touch, use a black colored pencil or fine marker to draw two small eyes and a curved, happy smile on the top circle. -
Add the Carrot Nose:
With an orange colored pencil, draw a carrot shape pointing toward the left side of the paper, coloring it in solidly. -
Create the Scarf:
Use a reddish-brown pencil to draw a scarf around the neck. Sketch vertical lines to mimic a knit texture, and let the ends of the scarf drape down the snowman’s front. -
Button Up:
Draw three solid black buttons down the center of the snowman’s middle and bottom sections. -
Top It Off:
Sketch a simple hat on the snowman’s head using a blue pencil. Add a colored band and shade it lightly for dimension. -
Stick Arms:
Draw thin, branch-like arms extending from the middle snowball. Use jagged, uneven lines to make them look like real twigs. -
Final Snow Shading:
I like to take a light grey or pale blue pencil and gently shade along the bottom right curve of each snowball to give the snowman a rounded, 3D appearance.
Glittery Magic
While the white paint is still wet, sprinkle ultra-fine iridescent glitter over the snowman’s body to make him sparkle in the light.
Display your frosty friend on the fridge or frame it as a homemade holiday card

PENCIL GUIDE
Understanding Pencil Grades from H to B
From first sketch to finished drawing — learn pencil grades, line control, and shading techniques.
Explore the Full Guide
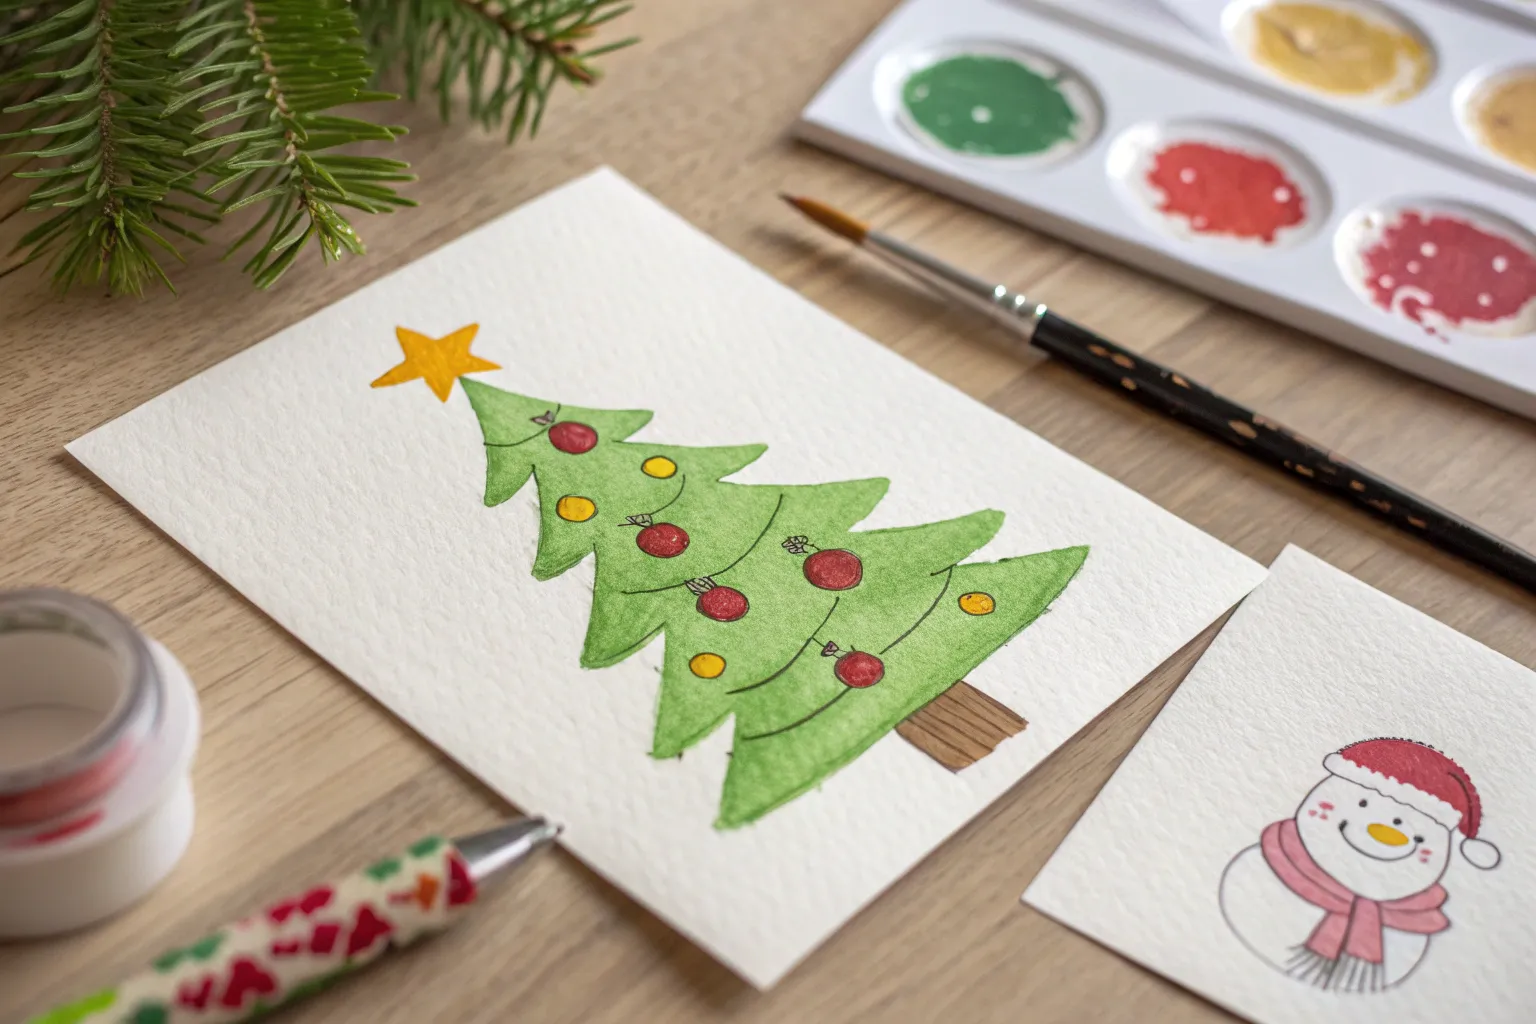
Christmas Tree Card on Folded Paper
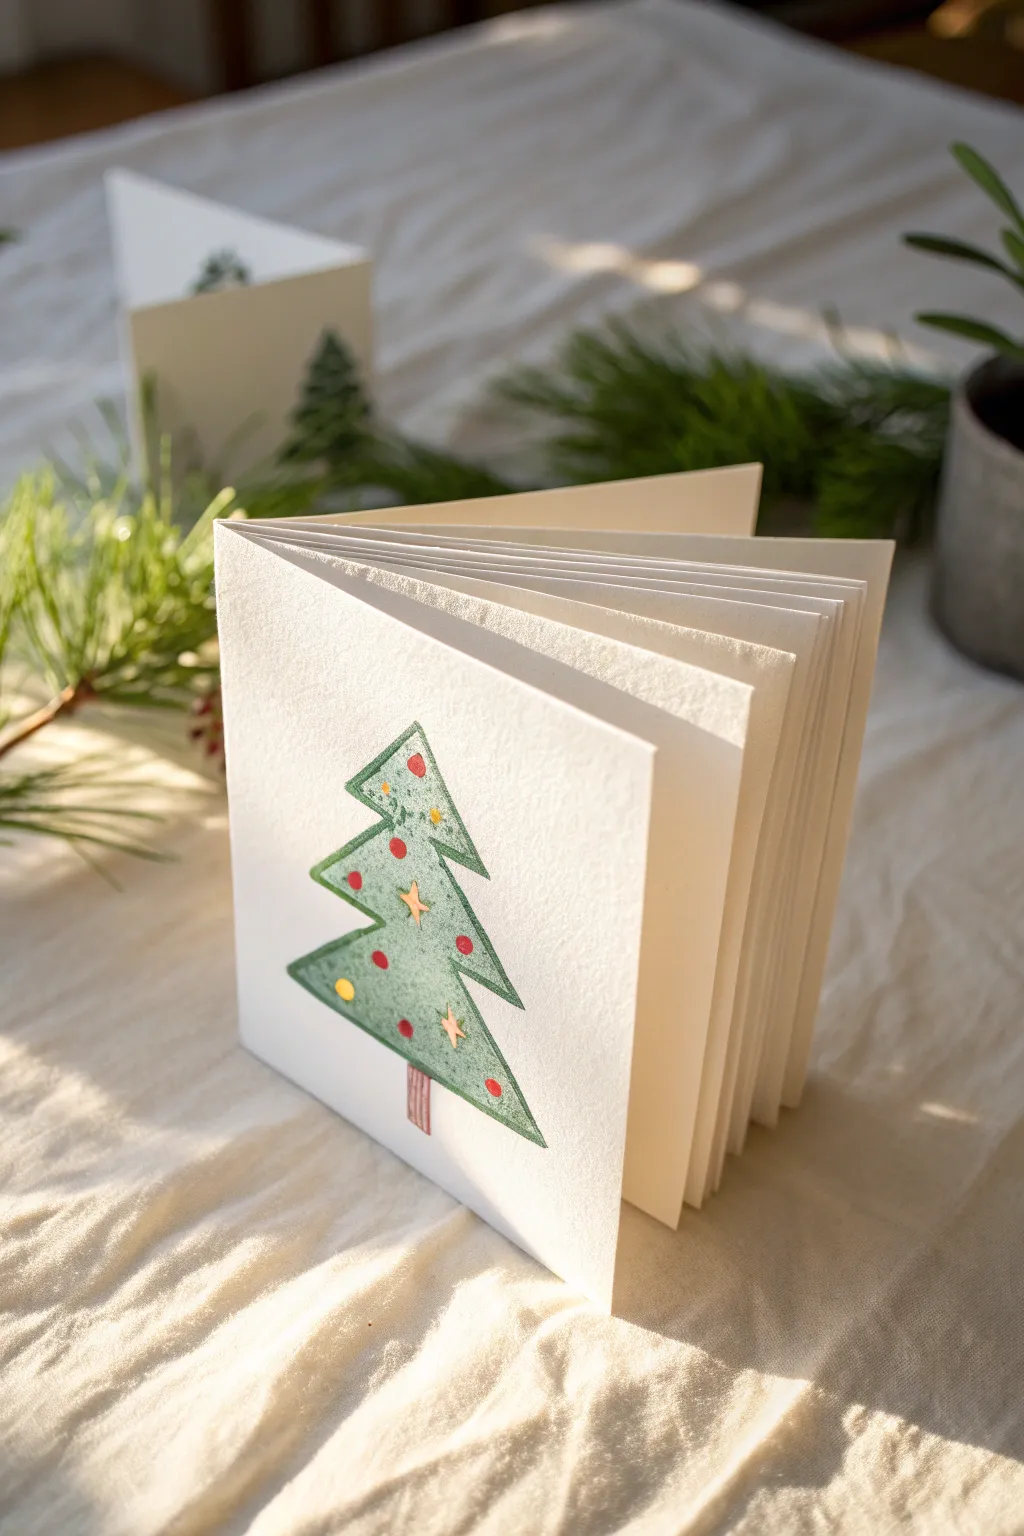
This charming project turns a simple folded card into a sculptural display piece featuring a classic, hand-drawn evergreen tree. With its crisp accordion folds and textured finish, this card stands tall on a mantlepiece, inviting recipients to admire the artwork from every angle.
How-To Guide
Materials
- Heavyweight textured cardstock or watercolor paper (off-white)
- Ruler
- Pencil
- Bone folder (or a clean butter knife)
- Fine-tip black drawing pen or green marker
- Colored pencils or fine-tip markers (green, red, yellow)
- Scissors
Step 1: Preparing the Folds
-
Measure and mark:
Begin with a long, rectangular strip of your heavyweight paper. A good starting size is roughly 6 inches high by 18 inches long. Lightly mark vertical connection points every 4.5 inches along the top and bottom edge using your pencil and ruler. -
Score the lines:
Place your ruler connecting the top and bottom marks. Firmly run a bone folder along the edge of the ruler to create a deep groove in the paper without tearing the fibers. This ensures your folds will be sharp. -
Create the accordion:
Fold the paper along your scored lines, alternating the direction of each fold (mountain, then valley, then mountain) until the entire strip collapses into a single card shape. -
Sharpen the creases:
Once folded, press the entire stack flat under a heavy book for a few minutes, or run the bone folder over the folded edge one last time to crisp it up.
Step 2: Drawing the Tree
-
Outline the trunk:
On the front-facing panel, start near the bottom center. Draw a small, simple rectangle for the tree trunk using a brown or red pencil. -
Sketch the bottom branches:
Using a dark green pencil or thin marker, draw the base of the tree. Extend two angled lines outward from the trunk, then bring them back in slightly to form jagged points. -
Build the middle tier:
Above the first section, draw a slightly smaller triangular tier. Use jagged, zigzag lines for the edges to mimic pine needles rather than straight geometric lines. -
Top the tree:
Draw the final, smallest triangular section at the top, bringing it to a distinct point. Ensure the proportions get smaller as you move up. -
Add texture:
lightly fill in the tree shape with green colored pencil. I like to use circular, scribbling motions to create a fluffy, organic texture rather than solid, flat color. -
Outline for contrast:
Go back over the outer edges of your tree tiers with a darker green or fine black pen to make the shape pop against the white paper.
Crisp Creases
For the sharpest folds, always score on the side that will form the ‘mountain’ (the outside of the fold). This prevents cracking.
Step 3: Decorating the Details
-
Draw ornaments:
Scattered across the green sections, draw small circles for baubles. Use red and yellow to keep the classic palette shown in the photo. -
Add stars:
Draw a few five-pointed stars among the branches. You can outline them in orange or yellow pen and leave the centers white or fill them in gently. -
Highlight the decorations:
If you have a white gel pen, add a tiny dot to each red bauble to simulate a shiny reflection. -
Detail the trunk:
Add vertical stripes to the trunk rectangle using a darker shade of red or brown to give it a wood-grain or candy-cane appearance. -
Clean up:
Eraser any visible pencil guidelines carefully, being careful not to smudge your colored headers. -
Repeat (Optional):
For a truly impressive card, you can repeat similar simple drawings on the inner folds, perhaps showing presents or snowflakes.
Festive Sparkle
Use a tiny dab of clear glue and loose glitter on the star decorations to make the card catch the light when displayed.
This standing card makes a wonderful centerpiece for a holiday dinner table or a lovely surprise in the mail
Tape-Resist Christmas Tree Silhouette
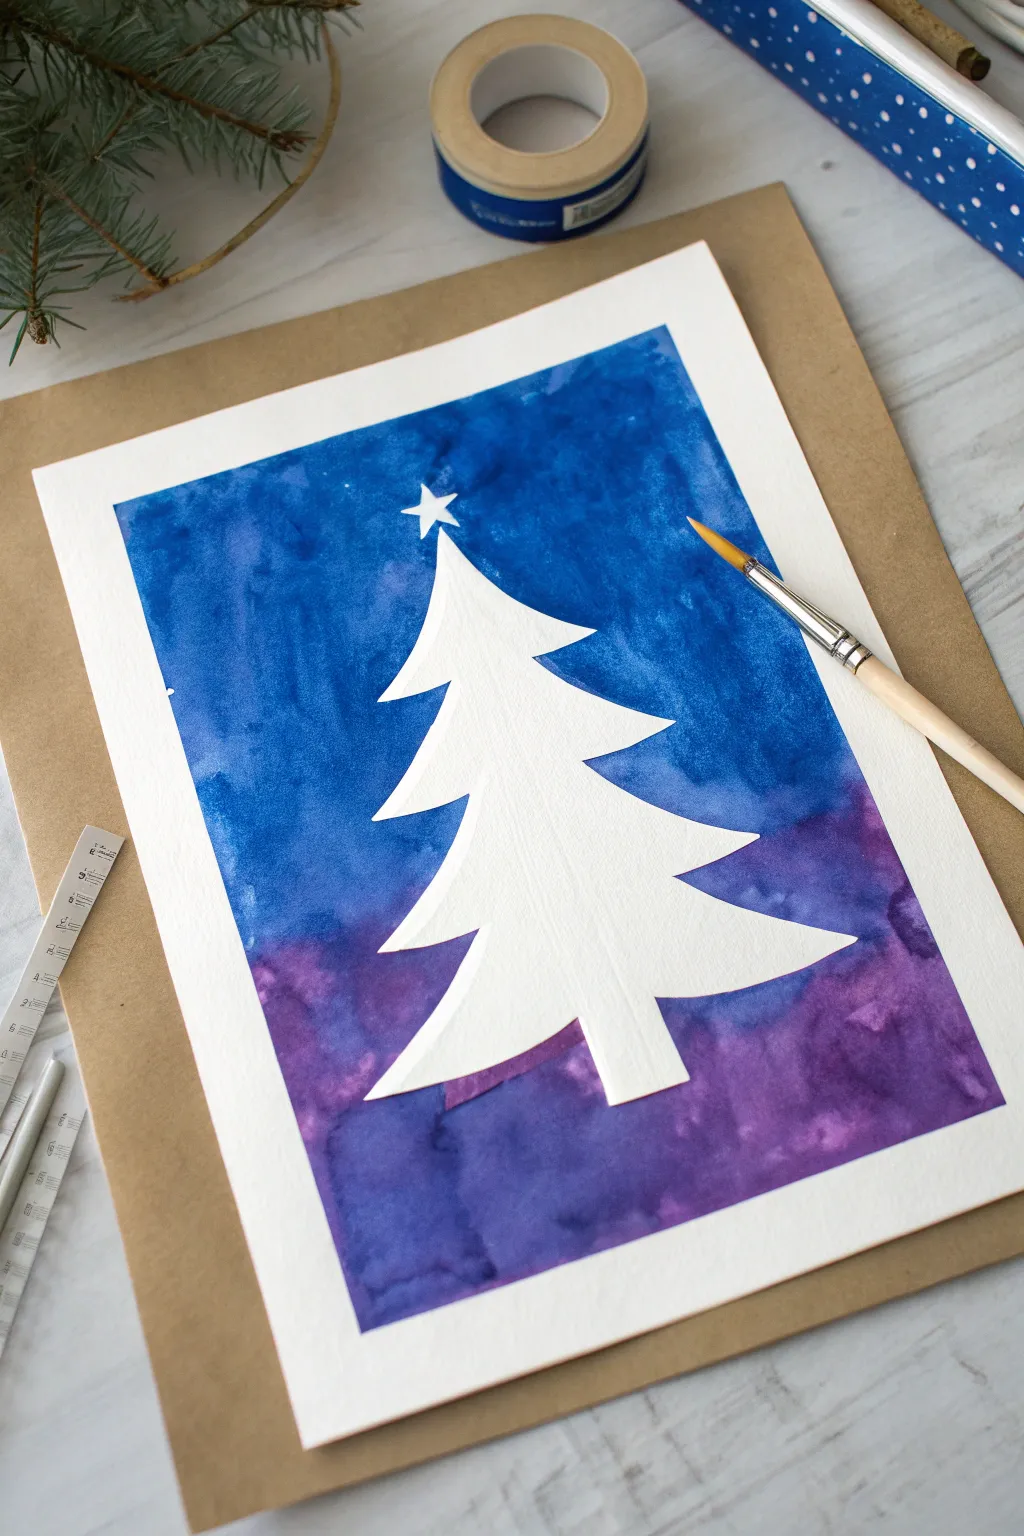
Create a magical winter scene where a bright white Christmas tree shines against a deep, moody night sky. This satisfying tape-resist technique is perfect for kids and adults alike, revealing a crisp silhouette once the paint dries.
Step-by-Step Guide
Materials
- Heavyweight watercolor paper (300gsm is ideal)
- Painter’s tape or masking tape (low-tack)
- Watercolor paints (shades of blue, purple, indigo)
- Medium round paintbrush
- Pencil
- Ruler
- Craft knife or scissors
- Cutting mat (if using a knife)
- Salt (optional, for texture)
- Star sticker or masking fluid (optional)
Step 1: Preparing the Resist
-
Secure the paper:
Tape down all four edges of your watercolor paper onto a flat board or table using painter’s tape. This creates a clean white border and prevents the paper from buckling when wet. -
Draft the tree shape:
Lightly sketch a large triangle in the center of your paper to guide your tree’s placement. Add the jagged branch details along the sides if you want a specific shape, or keep it simple. -
Apply the central masking:
Cover the triangular tree area with strips of masking tape. You can overlap them to cover the whole width of the tree. -
Refine the silhouette:
On top of the tape, draw the final jagged edges of your Christmas tree. Carefully cut along these lines with a craft knife (adult supervision required) and peel away the excess tape from the background, leaving only the perfect tree shape masked off. -
Add the star:
Place a star-shaped sticker at the very top of the tree, or cut a small star from a piece of masking tape and press it firmly into place.
Paint Seeping?
If paint bleeds under the tape, your tape might not be pressed down firmly enough. Run a fingernail or credit card edge over the tape edges before painting to seal them tight.
Step 2: Painting the Galaxy Sky
-
Wet the background:
Using a clean, wet brush, apply a thin layer of clear water to the exposed paper around the tree. This ‘wet-on-wet’ technique helps colors blend seamlessly. -
Start with lighter tones:
Load your brush with a watery blue or light violet. Dab this color randomly into the wet background, letting it bloom and spread naturally. -
Deepen the colors:
While the paper is still damp, drop in darker shades of ultramarine, heavy indigo, and deep purple. Concentrate the darkest colors near the top corners to mimic a night sky. -
Blend carefully:
Gently tilt the paper or use your brush to guide the colors together. I tend to avoid over-brushing here to keep the textures interesting and cloud-like. -
Create texture (optional):
If you want a snowy effect, sprinkle a pinch of table salt onto the wet paint. As it dries, it pushes the pigment away, creating little snowflake bursts. -
Let it dry completely:
This is the hardest part—waiting! Let the paint dry fully until the paper feels room temperature to the touch. If you used salt, brush it off gently once the painting is bone dry.
Step 3: The Big Reveal
-
Peel the tree tape:
Slowly peel up the masking tape covering your tree. Pull the tape away from the paper at a 45-degree angle to ensure a crisp line and prevent tearing. -
Remove the star:
Carefully lift off the star sticker or tape at the top to reveal the white paper beneath. -
Remove border tape:
Finally, peel away the border tape you applied in the very first step. Do this slowly to ensure distinct, professional-looking edges. -
Touch ups:
If any paint seeped under the tape, use a small brush with white gouache or acrylic paint to tidy up the edges of your tree.
Splatter Stars
Before removing the tape, dip a toothbrush in white acrylic paint or gouache. Flick the bristles over the dark sky to create a realistic spray of distant stars.
Hang your winter masterpiece where it can catch the light and show off those deep, moody blues


Fork-Painted Pine Tree Texture
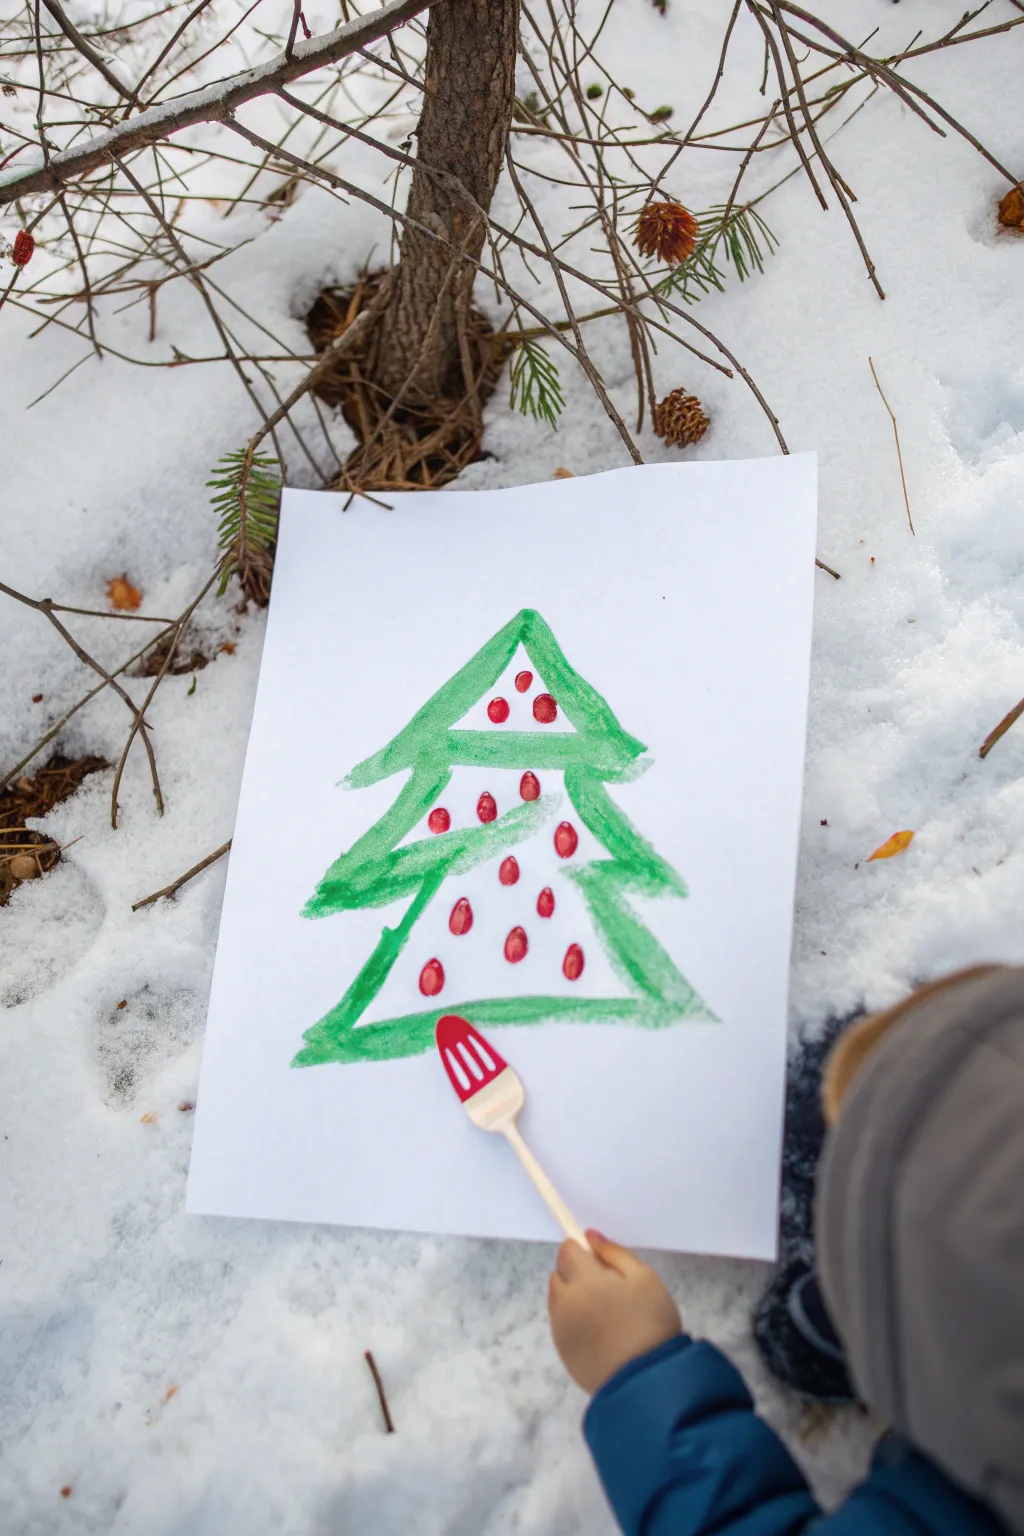
Transform a simple plastic fork into a unique paintbrush to create the textured needles of this festive evergreen tree. This easy process creates a wonderful organic look that captures the prickly feel of pine branches using just a few simple strokes.
Step-by-Step
Materials
- White cardstock or heavy paper
- Green tempera or acrylic paint
- Red finger paint or acrylic paint
- Plastic fork (disposable works best)
- Small paper plate or palette
- Pencil (optional for guidelines)
Step 1: Preparation and Outline
-
Prepare the Palette:
Squeeze a generous dollop of green paint onto your paper plate or palette. Using a wider dish makes it easier to dip the entire head of the fork into the paint later. -
Lightly Sketch (Optional):
If you want a guide to follow, very lightly sketch a large triangle shape on your paper with a pencil. This helps ensure your tree stays centered and doesn’t run off the page as you paint.
Uneven Tines?
If the fork isn’t making clear lines, check if paint is clogged between the tines. Wipe the fork clean with a paper towel and re-dip for distinct scratches.
Step 2: Creating the Tree Texture
-
Dip the Fork:
Take your plastic fork and press the back of the tines into the green paint. You want a good amount of paint on the flat back part and the tips of the tines. -
Start at the Top:
Begin at the top point of your tree. Press the fork down and drag it outwards slightly to the left to form the top left branch. Re-dip the fork. -
Shape the Right Side:
From that same top starting point, press and drag the fork outwards to the right. The two strokes should meet at the peak, forming a small triangle shape. -
Connect the Bottom:
Complete this top triangle section by dragging the fork horizontally across the bottom to connect the two sides. -
Begin the Middle Tier:
Move down to start the second, slightly wider tier of the tree. Start your fork stroke underneath the left corner of the top triangle, extending it further out than the first layer. -
Mirror the Middle:
Repeat this on the right side, starting under the right corner of the top tier and angling outwards. -
Close the Middle Section:
Paint a horizontal line with the fork to close off the bottom of this second tier. Don’t worry if the lines aren’t perfectly straight; the tine marks add character. -
Form the Base Tier:
Create the final, widest section at the bottom. Start well underneath the middle tier’s corners and drag the fork down and out to create a broad base. -
Finish the Tree Shape:
Connect the bottom left and right points with a long, straight drag of the fork across the bottom. This grounds your tree. -
Fill in Gaps:
If your outline looks too thin, you can gently tap the fork tines inside the triangle shapes to add more green texture without ruining the spiky outer edges.
Snowy Sparkle
While the green paint is still wet, lightly sprinkle some silver glitter or salt over the branches to create a glistening sparkly snow effect.
Step 3: Decoration
-
Clean Up or Switch Tools:
Set your green paint aside. You can wipe off the fork handle if you got messy, but for the ornaments, we will use our fingers. -
Prepare Red Paint:
Pour a small amount of bright red paint onto a clean section of your palette. -
Dip Your Finger:
Dip the pad of your index finger into the red paint. You want enough paint to make a solid print, but not so much that it globs up. -
Add the Ornaments:
Press your finger firmly onto the white space inside the green tree outlines. I find that spacing them out randomly looks best. -
Vary the Placement:
Place 2-3 dots in the top tier, roughly 3-4 in the middle, and about 5-6 in the large bottom tier to balance the look. -
Let it Dry:
Allow the green structure and the red dots to dry completely flat. Because the paint might be thick from the fork dragging, this could take an hour or more.
Now you have a charming winter tree painting ready to be displayed on the fridge or given as a card
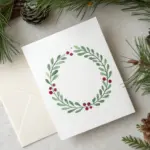
Cotton Swab Wreath Dot Painting
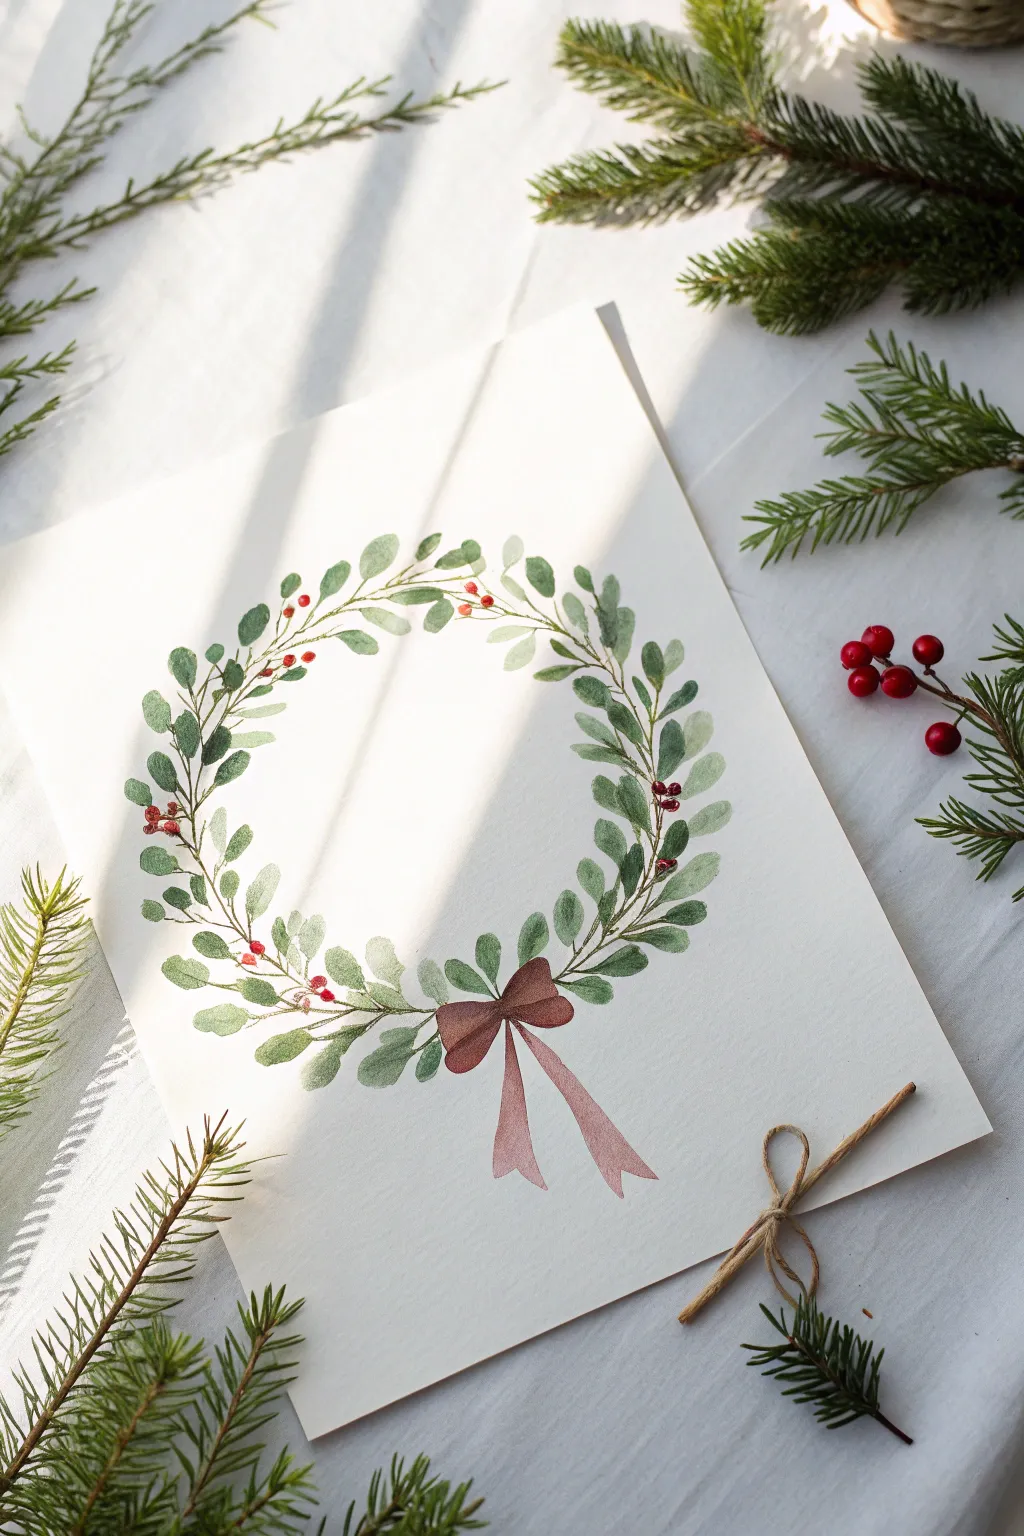
This elegant watercolor project captures the delicate beauty of winter foliage with soft greens and pops of festive red. It’s a wonderful way to introduce children to brush control and color blending while creating a sophisticated piece of holiday art.
Step-by-Step Tutorial
Materials
- Heavyweight watercolor paper (cold press creates nice texture)
- Watercolor paints (various greens, red, and brown)
- Round watercolor brushes (size 4 and size 0 or 2 for details)
- Pencil for light sketching
- Circular object to trace (like a bowl or roll of tape)
- Cup of water
- Paper towel
Step 1: Planning the Shape
-
Trace a guide:
Begin by placing a circular object like a small bowl or masking tape roll in the center of your paper. Very lightly trace around it with a pencil to create a perfect circle guide. -
Sketch the stems:
Along this circle guide, lightly sketch a loose, wavy line that intertwines with the circle. This doesn’t need to be perfect; it just serves as the ‘spine’ for your wreath’s branches.
Step 2: Painting Foliage Base
-
Mix your greens:
Prepare two shades of green on your palette: a lighter, yellowish-green and a deeper, cooler forest green. Having two shades adds depth and realism to the leaves. -
Start the leaves:
Using your size 4 round brush, load it with the lighter green. Start near the top of the circle and paint small, almond-shaped leaves extending from your pencil line. -
Vary the direction:
As you move around the circle, angle your leaves slightly differently. Some should point outward, some inward, mimicking natural growth. I find keeping the wrist loose helps create more organic shapes. -
Add darker leaves:
While the first leaves are still slightly damp or just dry, switch to your darker green. Paint a second layer of leaves interspersed among the lighter ones, filling in gaps along the wreath. -
Connect with stems:
Use the very tip of your brush or switch to the smaller size 2 brush to paint thin brown or dark green stems connecting these leaves back to the main circular spine. -
Build density:
Continue working around the circle until you have a lush ring of foliage. Leave a small gap or space at the very bottom center where the bow will eventually sit.
Muddy colors?
If your greens and reds touch while wet, they turn brown. Wait for the leaves to dry completely before adding red berries.
Step 3: Adding Details
-
Berry placement:
Once the green leaves are fully dry, mix a vibrant red. Look for spots where the greenery feels a bit sparse or balanced areas around the circle to place your berries. -
Paint the berries:
Using the small size 0 or 2 brush, dab small clusters of 2-3 red dots. Vary position so some sit on top of leaves and others tuck behind stems. -
Add berry stems:
With a tiny amount of diluted brown or dark green paint, draw hair-thin lines connecting the berry clusters to the main branch.
Organic variation
Mix a tiny bit of blue into your green for some leaves, and yellow for others, to create a natural variety of tones.
Step 4: The Finishing Bow
-
Outline the bow:
At the bottom opening you left earlier, sketch or paint the loops of a simple bow. Use a diluted reddish-brown color first to get the shape right. -
Fill and shade:
Fill in the bow shape with a more saturated brown-red mix. Add a slightly darker shade to the center knot and the areas where the ribbon overlaps to create dimension. -
Paint the tails:
Extend two ribbon tails downwards from the knot. Let them curve slightly for a natural, flowing look, and finish the ends with a ‘V’ cut shape.
Step 5: Final Touches
-
Review and refine:
Step back and look at your wreath. If any areas look too empty, add a tiny extra leaf or a single berry to balance the composition. -
Erase guides:
Once the painting is completely bone-dry, gently erase any visible pencil lines from your initial circle guide to leave a clean, professional finish.
Hang this lovely creation on the fridge or frame it for a handmade holiday gift
Thumbprint Gingerbread People Lineup
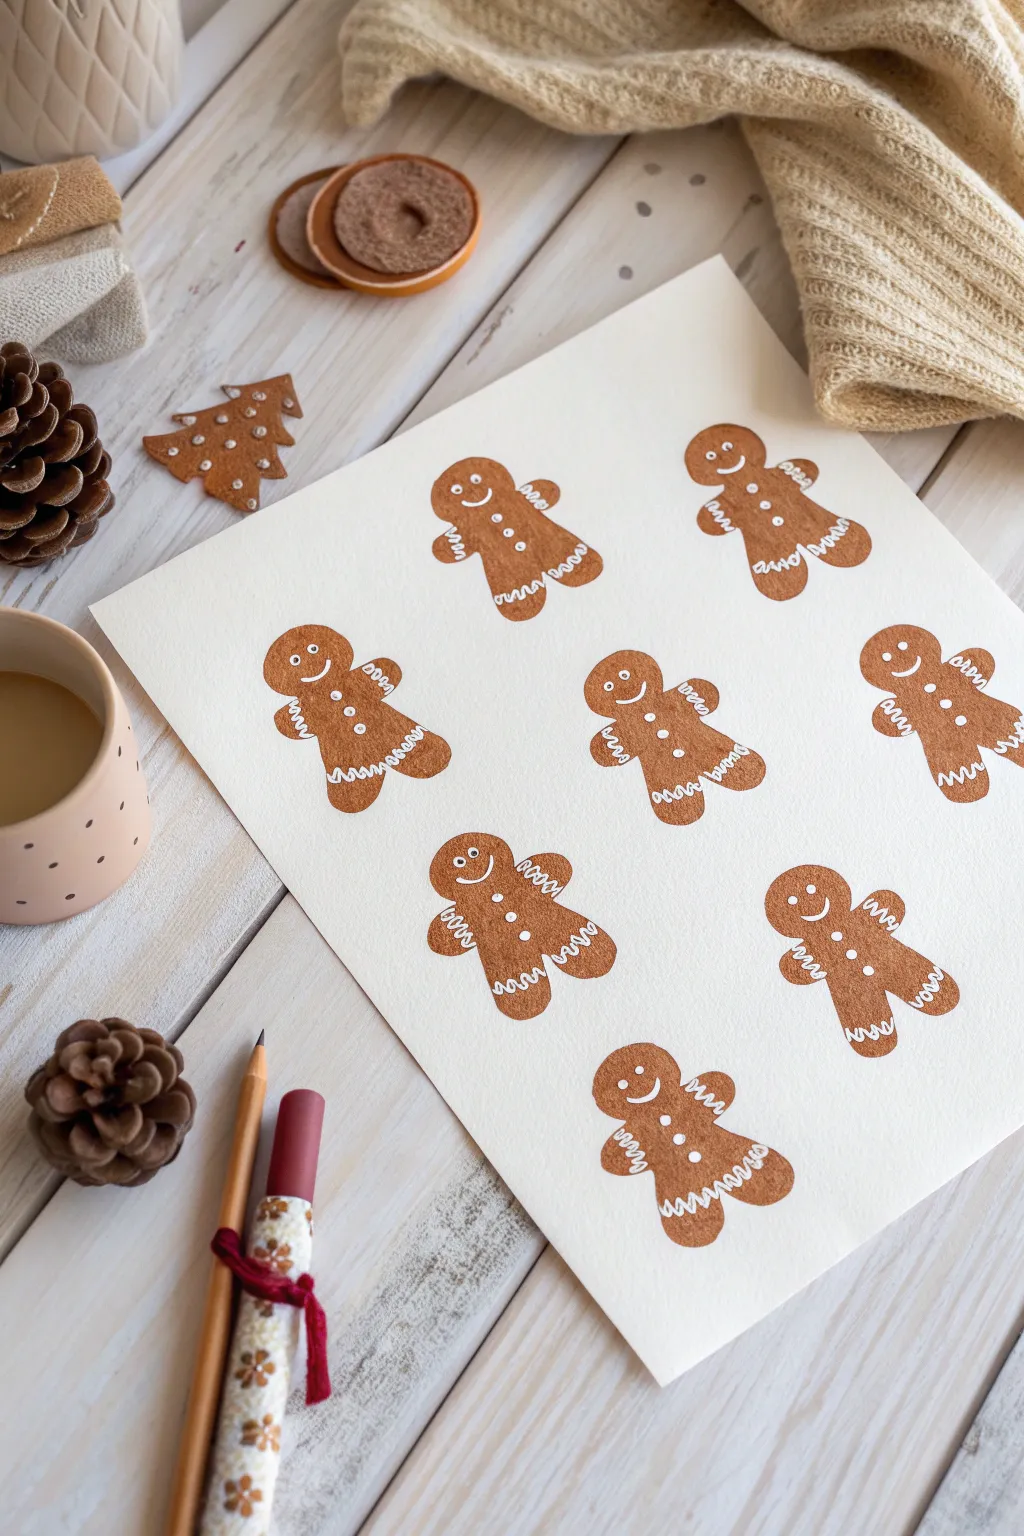
These adorable gingerbread figures have a secret ingredient: your own thumbprints! By combining simple stamping with delicate white pen details, you can create a perfectly uniform yet charmingly handmade holiday pattern.
Step-by-Step Guide
Materials
- Thick white cardstock or watercolor paper
- Brown stamp pad (or brown acrylic paint and a sponge)
- White gel pen (size 08 or 10)
- Fine-tip white paint marker (such as Posca)
- Scrap paper for testing
- Paper towels or wet wipes
Step 1: Stamping the Bodies
-
Prepare your workspace:
Lay your cardstock sheet on a flat, clean surface. Keep your wet wipes nearby—you are going to need them for messy fingers. -
Ink your thumb:
Press your thumb firmly onto the brown stamp pad. You want an even coat of ink, but not so much that it’s pooling in the grooves of your fingerprint. -
Test and align:
Before committing to the final paper, do a quick test stamp on scrap paper to check the ink density. I like to visualize a diagonal grid to keep the spacing pleasing. -
Stamp the heads:
Starting near the top left, press your thumb vertically onto the paper to create the ‘head’ of the first gingerbread person. -
Add the body:
Re-ink your thumb slightly if needed, then press it again right below the head shape, slightly overlapping the bottom edge of the first print to connect them seamlessly. -
Create the lineup:
Continue this two-print process across the page. Aim for staggered rows so the gingerbread people aren’t standing directly on top of one another. -
Add arms and legs:
For the limbs, use your pinky finger or the tip of your index finger. Press four smaller oval shapes extending from the body: two for arms and two for legs. -
Dry completely:
This is crucial. Let the ink dry for at least 15-20 minutes. If the brown ink is even slightly wet, your white pen will smear and turn beige.
Step 2: Adding Sweet Details
-
Test your white pen:
Scribble your white gel pen or paint marker on scrap colored paper to get the ink flowing smoothly. -
Draw the faces:
On the top thumbprint oval, draw two small dots for eyes and a curved, happy smile. Keep the expressions simple for that classic cookie look. -
Add buttons:
Move down to the body print and place two or three vertical dots down the center for the gumdrop buttons. -
Pipe the icing cuffs:
At the end of each arm and leg stump, draw a squiggly ‘icing’ line. This zigzag pattern mimics piped frosting perfectly. -
Refine the squiggles:
Make sure your zigzags stretch all the way across the width of the limb prints for a complete look. -
Add cheeks (optional):
If you want them to look extra sweet, add tiny white semicircles or open parentheses at the corners of the mouth for cheeks. -
Check for consistency:
Scan your lineup. Do all the figures have buttons? Did you miss an arm? Fill in any missing details now. -
Let the white ink set:
Give the white ink a few minutes to dry completely so you don’t smudge your hard work while handling the paper.
Stamp Smart
Use your fingertip, not the flat pad of your finger, for arms and legs. This creates smaller, more proportionate limbs compared to the body.
Cookie Cutter Variation
Turn these into gift tags! Cut around each figure leaving a small white border, punch a hole at the top, and tie with red bakers twine.
Now you have a batch of sweet gingerbread friends that will last much longer than the edible kind
Puffy Paint Snowflake Cards
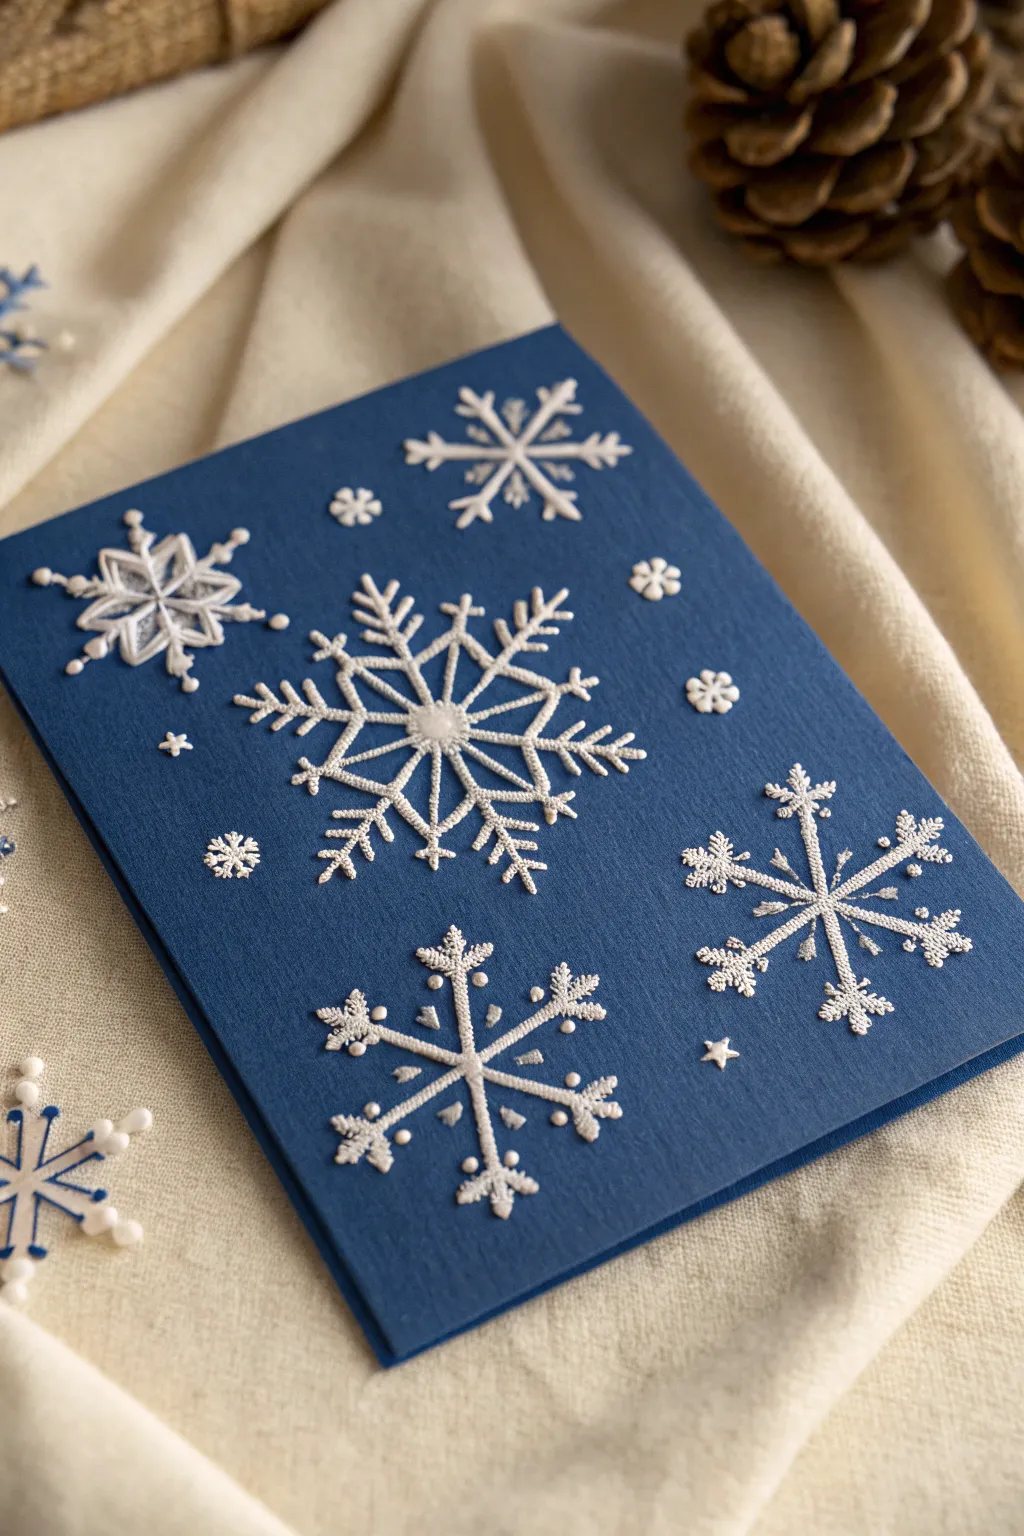
Capture the magic of a fresh snowfall with these elegant deep blue greeting cards. The raised, dimensional texture of white puffy paint creates stunningly realistic snowflakes that feel as crisp as they look.
Step-by-Step Tutorial
Materials
- Deep blue cardstock (heavyweight)
- White puffy paint or dimensional fabric paint (fine tip bottle)
- Pencil (hard lead, e.g., 2H or H)
- Ruler
- Paper towels
- Scrap paper for practice
Step 1: Preparation and Layout
-
Prep your canvas:
Cut your deep blue cardstock to your desired size (A5 folded to A6 works beautifully). Ensure the crease is sharp so the card lays flat while you work. -
Practice your flow:
Before touching the final card, squirt a few test lines of puffy paint onto scrap paper. You want to gauge how much pressure is needed for a steady, even line without air bubbles. -
Mark a center point:
Decide on the placement of your largest snowflake, which will be the focal point. Use a very light pencil dot to mark its center. -
Draft the spines:
Using a ruler and your light pencil, draw three intersecting lines through that center point to create a six-pointed asterisk. Do this for 3-4 other large snowflakes across the card, varying their sizes.
Clean Tip Trick
Keep a paper towel handy. Wipe the nozzle tip after every few strokes to prevent dried clumps from ruining your crisp lines.
Step 2: Painting the Structure
-
Anchor the center:
Place the nozzle of the puffy paint bottle directly on the central pencil mark of your main snowflake and squeeze gently to create a small, raised dot. -
Draw the main arms:
Starting from the center dot, carefully drag the paint outward along your pencil guidelines. Keep the pressure consistent so the lines are uniform in thickness. -
Add secondary lines:
Move to the next largest snowflake outline and repeat the process. It helps to work from the center of the card outward so your hand doesn’t accidentally smudge wet paint. -
Create smaller stars:
For the medium-sized snowflakes, paint simple six-pointed stars without drawing pencil guides first if you feel confident, or quickly sketch them if you prefer precision. -
Form the branches:
Return to your main, large snowflake. paint small ‘V’ shapes or angled lines branching off the main six arms to create that classic crystalline look. -
Detail the tips:
Add tiny dots or tiny perpendicular lines at the very tips of the snowflake arms for extra intricacy.
Step 3: Embellishment and Drying
-
Vary the designs:
On the other large snowflakes, try different branch patterns. Some can have double-branches, while others might look more like fern leaves. -
Fill the gaps:
Look for large empty spaces of blue. Add very small, simple asterisks (just three crossed lines) to represent distant snowflakes. -
Add tiny accents:
Squeeze out tiny, singular dots of paint randomly throughout the empty blue areas to mimic falling snow. -
Create mini-stars:
draw a few tiny five-point stars or small ‘x’ shapes in the remaining negative space to balance the composition. -
Check for gaps:
Inspect your lines. If any line broke during application, gently touch the tip of the bottle to the break and add a tiny drop to reconnect it. -
Let it set:
This is the most crucial step. Place the card in a safe, flat area where it won’t be bumped. Puffy paint takes significantly longer to dry than regular acrylics. -
Patience is key:
Allow the card to dry undisturbed for at least 12-24 hours. Don’t touch it to check dryness until the next day, as the inside stays wet longer than the skin.
Sparkle Upgrade
While the white paint is still wet, gently sprinkle incredibly fine iridescent glitter over the card for a frosty, glistening effect.
Once fully dry, these tactile cards are ready to be written in and sent to loved ones
Watercolor Bleed Christmas Tree Forest
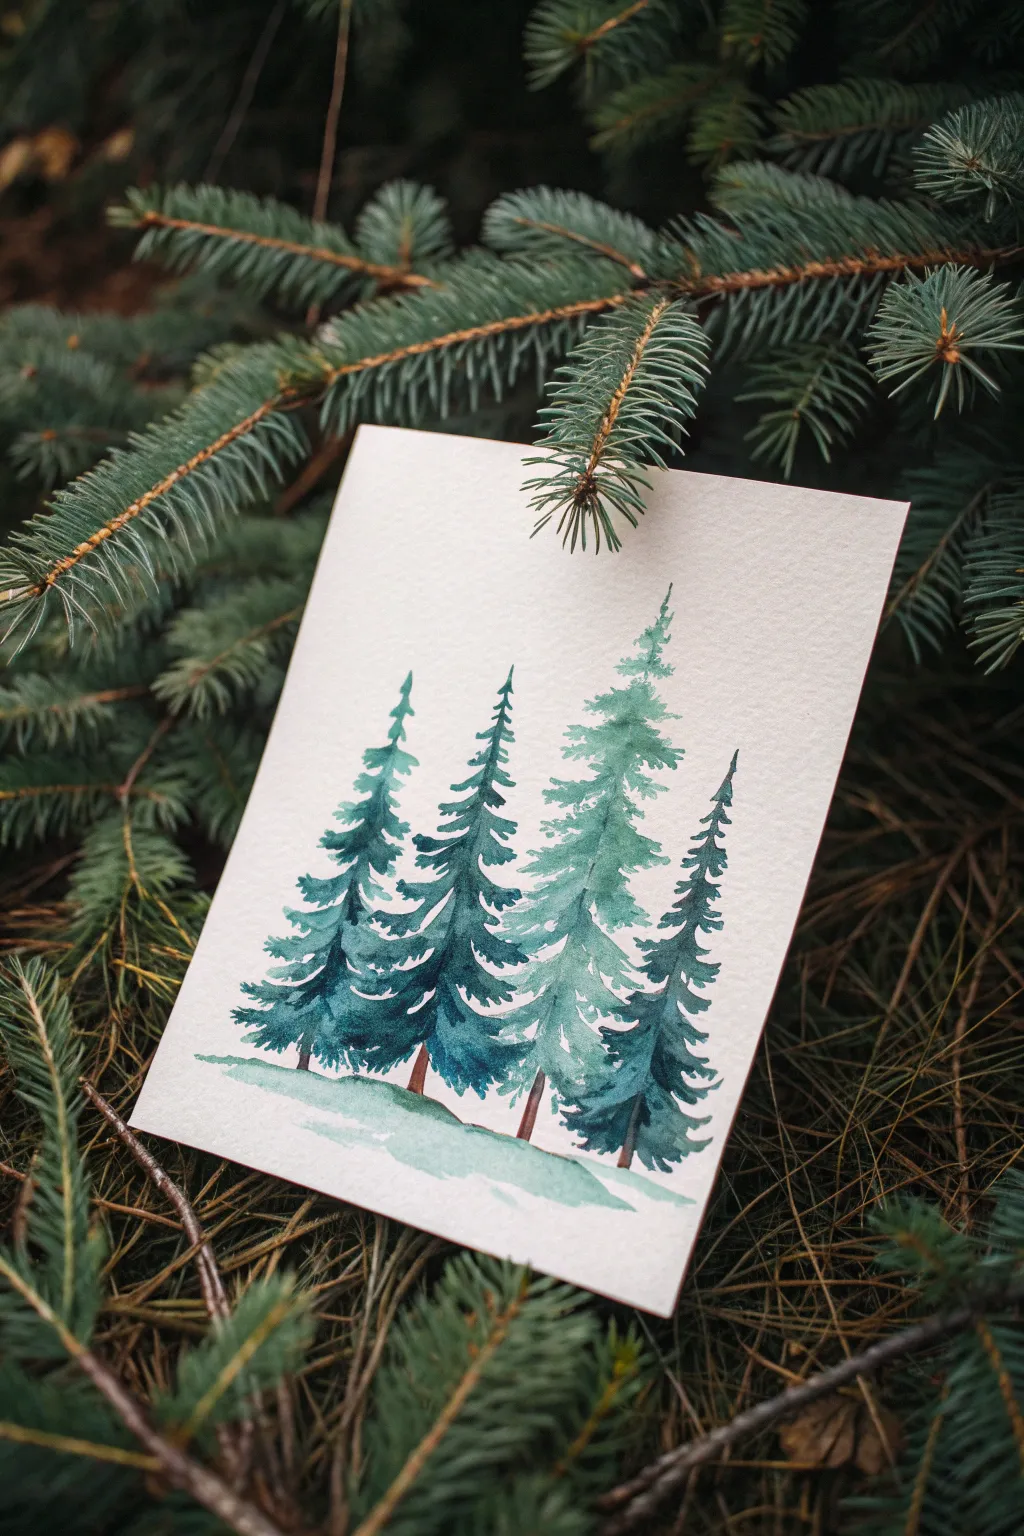
Capture the serene beauty of a winter forest with this simple yet striking watercolor project that relies on patience and layering. By working wet-on-dry and carefully building up your greens, you’ll create a lovely sense of depth perfect for holiday cards or seasonal decor.
Step-by-Step Guide
Materials
- Cold press watercolor paper (300 gsm recommended)
- Watercolor paints (Emerald Green, Sap Green, Payne’s Grey, Burnt Umber)
- Round watercolor brush (size 6 or 8)
- Small detail brush (size 2)
- Jar of clean water
- Paper towels
- Painter’s tape or washi tape
- Drawing board or thick cardboard
Step 1: Preparation and Palette
-
Secure the paper:
Tape down your watercolor paper to a board on all four sides. This prevents the paper from buckling when it gets wet and creates a clean white border if you paint to the edge, though for this centered design, it mostly keeps things flat. -
Mix your base green:
On your palette, create a puddle of a cool, blue-leaning green. I like to mix Emerald Green with a tiny touch of Payne’s Grey to desaturate it slightly so it doesn’t look too artificial. -
Create a lighter variation:
Take some of your base mixture and dilute it with more water in a separate section of your palette. This lighter, more transparent tea-consistency wash will be for the taller, more distant-looking tree in the background.
Step 2: Painting the Trees
-
Start the background tree:
Using the lighter, watery green mix and your round brush, paint a thin vertical line for the trunk of the tallest tree, slightly off-center to the right. -
Build the branches:
Starting from the top of that line, use the tip of your brush to dab small, downward-sloping branches. Keep the strokes loose and disconnected near the top, getting slightly wider as you move down. -
Add texture:
While the paint is still damp, drop in a slightly more concentrated green near the ‘spine’ of the tree to add subtle shadow, but leave the outer edges pale to suggest distance. -
Let it dry completely:
This is crucial. Before adding the darker foreground trees, the first tree must be bone dry to prevent the colors from bleeding into a muddy blob. -
Mix the foreground green:
Prepare a darker, richer mixture now. Add more pigment to your Emerald Green and perhaps a touch of Sap Green for warmth, keeping less water in the brush for a creamy consistency. -
Paint the left tree:
Paint a vertical guide line for the leftmost tree. Start the branches at the top with tiny dabs, using the very point of your brush. -
Create fullness:
As you work down the left tree, press the belly of the brush down harder to create broader, swooping shapes that mimic heavy boughs. -
Paint the center-left tree:
Repeat the process for the second tree from the left. Allow its branches to slightly overlap the first one if you wish, or keep them distinct. Ensure the bottom of this tree sits slightly lower on the page to enhance the perspective. -
Paint the rightmost tree:
Add the final tree on the far right. Make this one the darkest or most detailed, as it sits ‘closest’ to the viewer. Use uneven, jagged strokes to simulate pine needles.
Pro Tip: Loose Wrists
Hold your brush further back on the handle, away from the bristles. This forces your hand to be looser, creating more natural, organic-looking branches.
Step 3: Ground and Details
-
Add the snowy ground:
Wash your brush thoroughly. Pick up a very watery, pale version of your green (or a light blue-grey). Paint a horizontal swipe across the bottom of the trees to ground them. -
Blend the base:
While the ground wash is wet, gently touch the bottom of the green trees so the pigment bleeds slightly into the ‘snow,’ anchoring them to the landscape. -
Add tree trunks:
Using the small detail brush and a mix of Burnt Umber with a dot of blue, paint tiny vertical trunks peeking out at the very bottom of the trees. -
Final touches:
Look for empty spots in the foliage that need filling. You can add a few dark, concentrated dots of green into the center of the wettest areas for contrast on the foreground trees. -
Dry and reveal:
Wait until the painting is completely dry to the touch before carefully peeling off the tape at a 45-degree angle.
Level Up: Snowy Textures
While the paint is still wet on the trees, sprinkle a tiny pinch of table salt over the branches. Once dry and brushed off, it creates beautiful, icy snowflake textures.
Now you have a tranquil forest scene ready to be gifted or framed for the holidays
Symmetry Print Christmas Tree
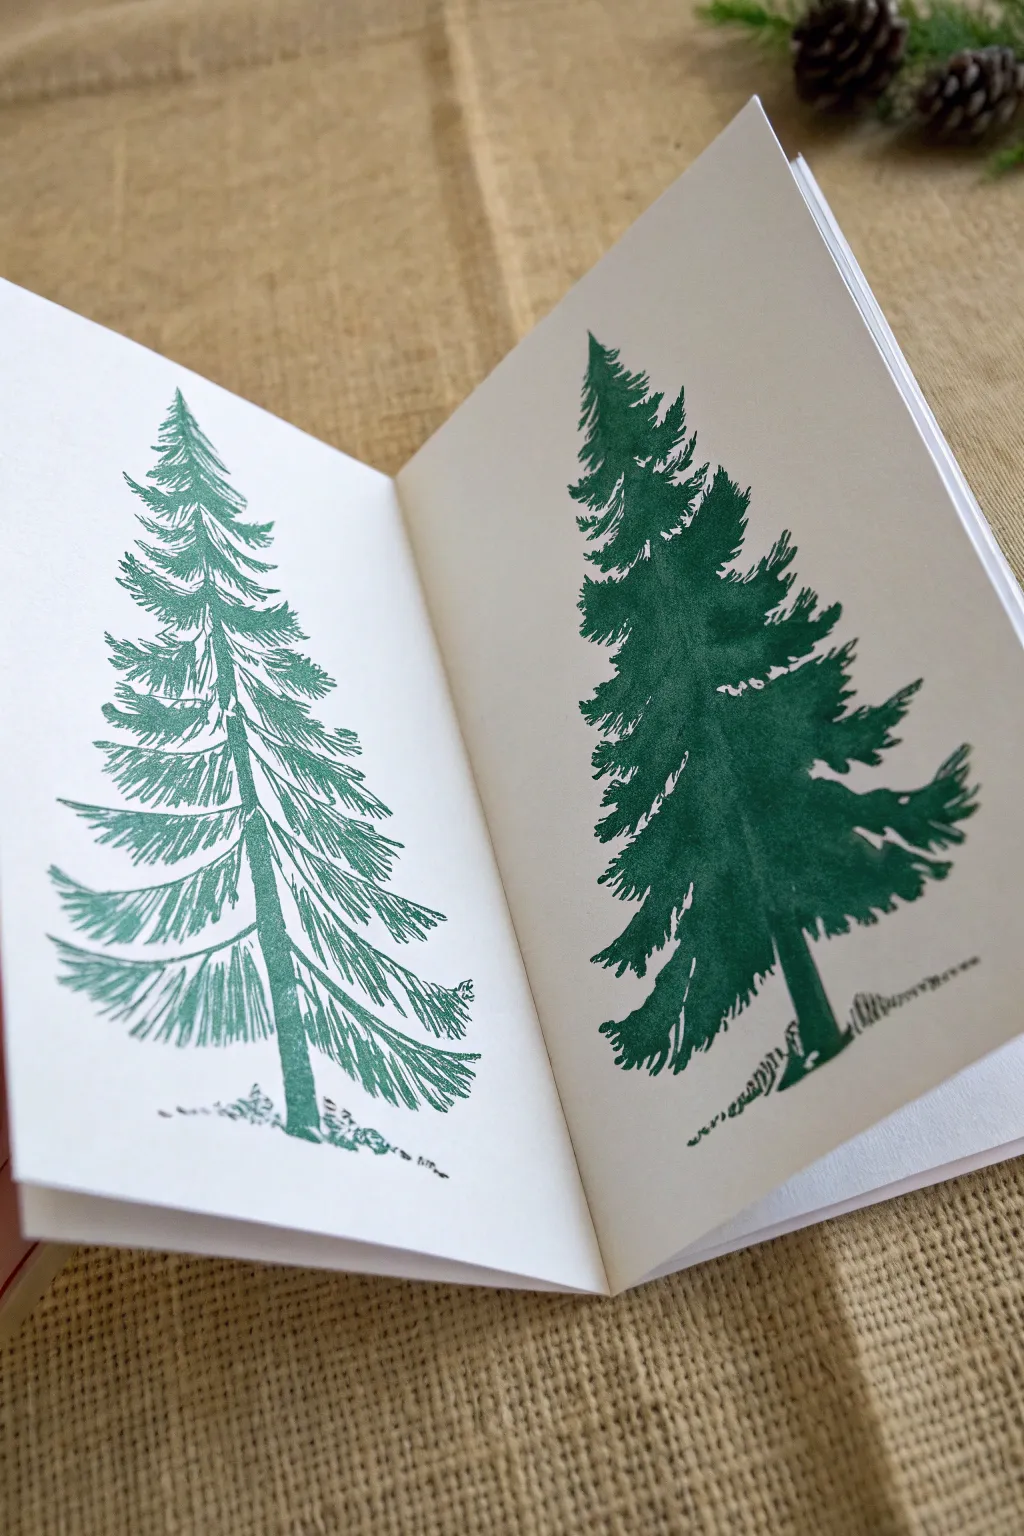
This classic project uses the magic of symmetry to create two distinct artistic versions of a Christmas tree from a single application of paint. The result is a charming pair of trees facing each other, one a bold silhouette and the other a delicate textural print.
Detailed Instructions
Materials
- Heavyweight white drawing paper or cardstock (folded)
- Dark green acrylic paint or block printing ink
- Fine liner pen (black or dark green)
- Medium flat paintbrush
- Water cup
- Paper towels
- Pencil (optional)
Step 1: Preparation and Painting
-
Fold the foundation:
Begin by taking your sheet of white paper and folding it cleanly in half to create a card or booklet shape. Crease the spine firmly, then open it back up so it lays flat on your work surface. -
Outline the shape:
On the right-hand panel of your paper, lightly sketch a simple triangle shape or a faint line down the center to guide where your tree will go. This helps ensure your tree stays centered on the page. -
Apply the paint:
Load your flat brush with a generous amount of dark green acrylic paint. You want the paint to be wet and thick enough to transfer, but not so runny that it drips. -
Paint the tree silhouette:
Working fairly quickly so the paint doesn’t dry, paint a full evergreen tree on the right side. Use quick, upward dabbing motions for the branches to create a prickly, pine needle texture along the edges. -
Add the trunk:
Paint a solid trunk at the bottom, extending slightly below the lowest branches to ground the tree. Make sure the paint coverage is solid throughout the entire shape.
Step 2: The Transfer
-
Fold and press:
While the green paint is still undeniably wet, carefully fold the left side of the paper over onto the painted right side. -
Rub for transfer:
With the paper closed, gently rub the back of the paper with the palm of your hand or a brayer. Apply even pressure over the entire tree area to ensure a good transfer. -
The reveal:
Slowly peel the paper open to reveal your mirrored design. You should now have a solid painted tree on the right and a lighter, distressed texture print on the left. -
Let it dry completely:
This is crucial—set the paper aside and let the paint dry fully. If you try to draw over wet paint, your pen will clog and the paper might tear.
Ink Over Paint
For a mixed-media look, wait for the heavy paint side to dry and then add ink scribbles over it too. This unifies the style of both trees.
Step 3: Inking the Details
-
Assess the print:
Look closely at the print on the left side. It will likely be patchy and faint. This ghost image serves as the perfect guide for your pen work. -
Start the pen outlines:
Using a fine liner pen (I prefer a dark green or black), begin tracing the general shape of the printed tree on the left. Don’t simply outline it; trace the jagged edges of the paint marks. -
Add needle texture:
Fill in the white spaces of the left-hand tree with quick, sharp hatching lines. Mimic the direction of pine needles, angling them outwards and slightly upwards. -
Define the trunk:
Use vertical hatching lines to darken the trunk area on the left tree, giving it a bark-like texture that contrasts with the needles. -
Emphasize shadows:
Add denser ink lines where the branches meet the trunk to create depth and shadow, making the tree look more three-dimensional. -
Ground the scene:
Add a few scribbles of ‘ground’ or grass at the base of both trees to anchor them, so they aren’t floating in whitespace. -
Refine the painted side:
If the original painted side (the right side) has any uneven edges that bother you, you can touch them up slightly with the brush, but leaving the raw painted texture usually looks best.
Paint Dried Too Fast?
If the transfer is barely visible, your paint was likely too dry. Mist the painted tree lightly with water before folding the paper next time.
Enjoy your beautiful winter forest spread across the page
Tin Foil Painted Northern Night Sky
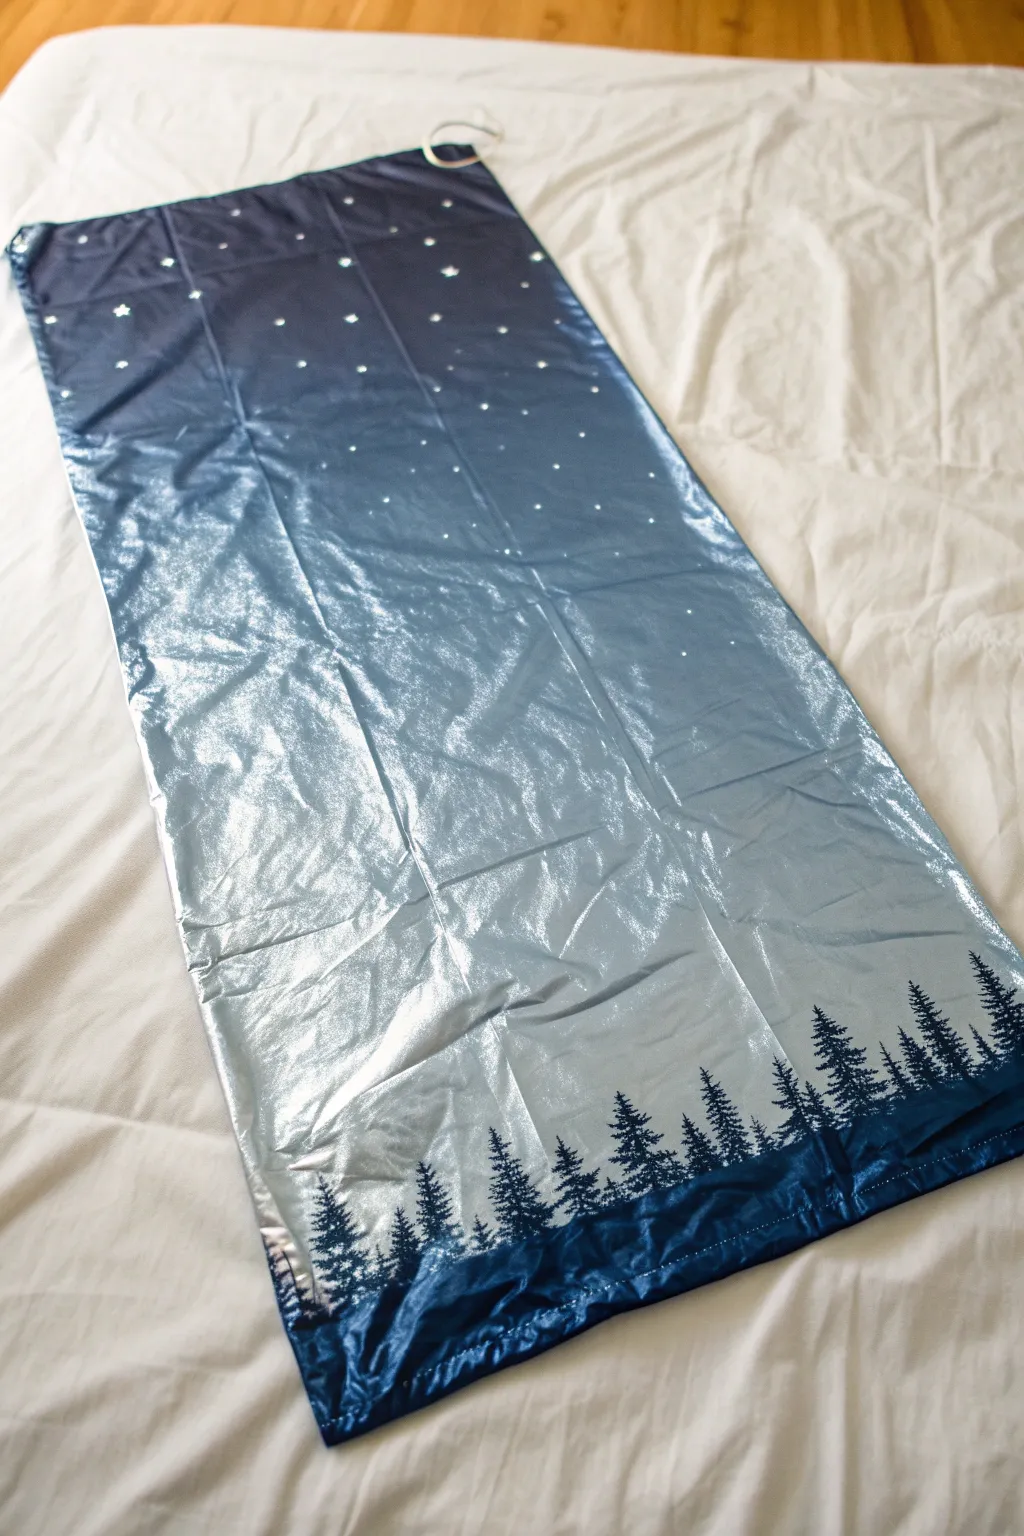
Capture the shimmering magic of a winter evening with this stunning foil painting project. By working on aluminum foil instead of paper, you’ll create a natural glow that makes your gradient sky and starlight truly pop.
How-To Guide
Materials
- Heavy-duty aluminum foil
- Large piece of cardboard or poster board (for backing)
- Tape (masking or painter’s tape)
- Acrylic paints (dark blue, black, white, silver)
- Medium and large flat paintbrushes
- Small round detail brush
- Old toothbrush (optional for spatter stars)
- Paper plate or palette
- Cup of water
- Paper towels
Step 1: Preparing the Canvas
-
Cut the base:
Cut your cardboard or poster board into a long rectangle to serve as the sturdy backing for your artwork. -
Wrap the foil:
Tear off a sheet of heavy-duty aluminum foil that is slightly larger than your cardboard base. Place the foil shiny side up. -
Secure the edges:
Carefully wrap the excess foil around the back of the cardboard and tape it down securely. Smooth out the front surface gently with your hands, but don’t worry about small wrinkles as they add texture.
Paint Sliding Off?
If the paint streaks or won’t stick to the sleek foil, mix a tiny drop of dish soap into your acrylics. This breaks the surface tension and helps it adhere smoothly.
Step 2: Painting the Gradient Sky
-
Mix your base color:
On your palette, mix a small amount of black into your dark blue acrylic paint to create a deep midnight navy shade. -
Paint the top section:
Using a large flat brush, apply the midnight blue paint to the top third of the foil. Use long, horizontal strokes to ensure even coverage. -
Add the mid-tone:
Switch to pure dark blue paint without cleaning your brush thoroughly. Paint the middle section of the foil, blending it upwards into the midnight blue while the paint is still wet. -
Create the horizon:
Mix a little silver or white into your blue paint to lighten it significantly. Paint the lower third of the sky, blending it upwards into the mid-tone blue to create a fading ombre effect. -
Clear for the ground:
Leave the very bottom inch or two of the foil unpainted or extremely lightly painted with silver to represent the snowy reflection. -
Smooth the transition:
Take a slightly damp, clean brush and run it horizontally across the places where colors meet to soften the gradient lines. I like to do this quickly before the acrylics dry completely. -
Let it dry:
Allow the background layer to dry completely. Since foil is non-porous, this may take a bit longer than paper—about 15 to 20 minutes.
Add a glowing moon
Before the blue sky dries, wipe away a small circle of paint with a cotton swab to reveal the shiny foil underneath, creating a natural, glowing moon.
Step 3: Adding Stars and Trees
-
Paint larger stars:
Using a small round brush or the handle end of a paintbrush dipped in white paint, dot a few larger stars near the top of the sky. -
Add star clusters:
For a galaxy effect, dip an old toothbrush in watered-down white paint. Hold it over the top section and run your thumb across the bristles to spray tiny specks of stars. -
Mix the tree color:
Mix dark blue and black paint to create a silhouette color that contrasts with the lighter bottom sky. -
Paint trunk lines:
Using your small round brush, paint vertical lines of varying heights along the bottom edge of the painting to establish where your trees will stand. -
Add branches:
Starting from the top of each trunk line, use short, dabbling strokes to create pine branches that get wider as you move down the tree. -
Fill the forest floor:
Connect the bottoms of the trees by painting a solid uneven line of the dark silhouette color along the very bottom edge to ground the forest. -
Final touches:
If you want extra sparkle, carefully tap a tiny amount of pure silver paint onto the tips of the trees or the centers of the biggest stars.
Hang your masterpiece near a window or light source to see the foil shine through the paint like real moonlight
Collage-and-Paint Decorated Tree Scene
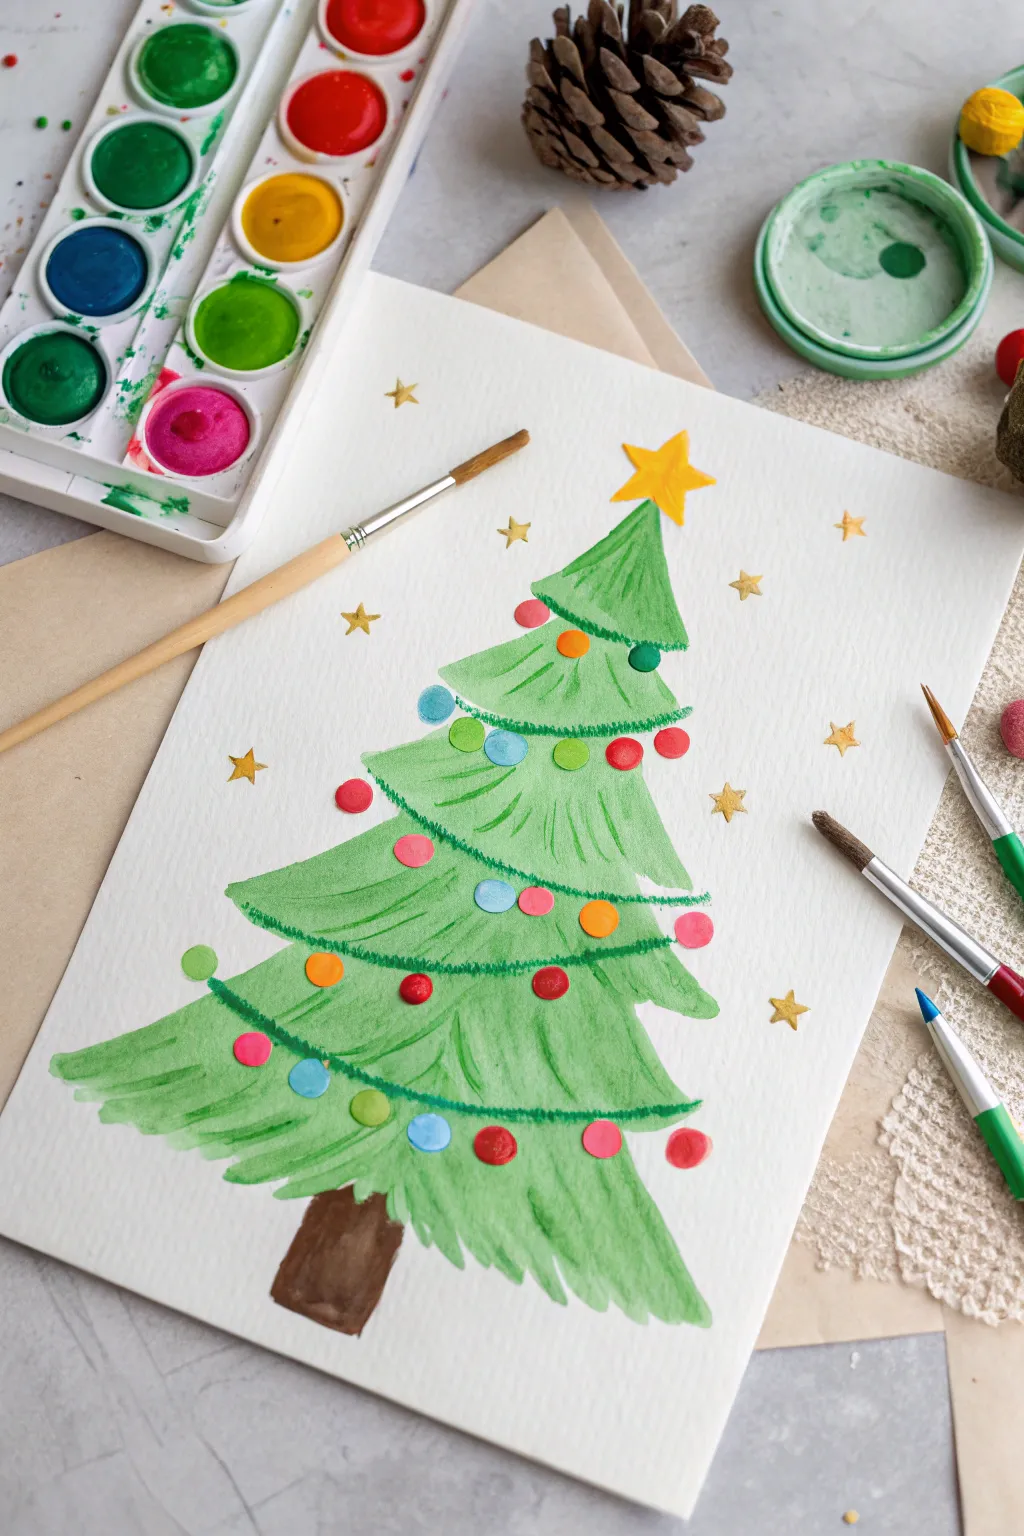
Capture the magic of the season with this cheerful Christmas tree project that combines traditional watercolor techniques with fun, colorful details. The layered branches and bright ornaments create a festive card or wall hanging that is simple enough for children yet charming enough for artists of any age.
Step-by-Step
Materials
- Thick watercolor paper (cold press recommended)
- Watercolor paint set (green, brown, yellow, red, blue, orange, pink)
- Round watercolor brushes (medium #6 or #8, and small detail #2)
- Water cup and paper towels for blotting
- Pencil for light sketching (optional)
- Gold paint or metallic marker for stars (optional)
Step 1: Painting the Tree Base
-
Sketch the shape:
Begin by envisioning a large triangle on your paper. If you like, use a pencil to very lightly mark the top point and the width of the bottom branches to guide your composition. -
Paint the top tier:
Load your medium brush with a grassy green watercolor. Start near the top of your page and paint a small, slightly curved triangle shape for the tip of the tree. -
Create texture:
While the paint is still wet on the top section, use the tip of your brush to drag a few darker green lines downward within the shape to mimic pine needles. -
Add the second tier:
Painting directly below the first section, create a slightly wider, curved trapezoid shape. Let the top edge overlap or touch the bottom of the first tier. -
Continue downwards:
Repeat this process, painting progressively wider sections as you move down the page. Aim for about four to five distinct textured layers of branches. -
Refine the edges:
For a natural look, flick your brush outwards at the bottom corners of each tier to create wispy, upturned branch tips rather than straight lines. -
Add the trunk:
Once the bottom layer of green is semi-dry, use a brown watercolor to paint a sturdy, rectangular trunk at the very base. Let the whole tree dry completely before moving on.
Bleeding colors?
If your red ornaments are bleeding into the green tree, the green paint was too wet. Let the tree layer dry completely (touch dry) before adding decorations.
Step 2: Decorating the Scene
-
Paint the main star:
Using bright yellow paint (or gold if you have it), carefully paint a five-pointed star at the very peak of your tree. -
Draw the garland lines:
Switch to a smaller brush or a darker green pigment. Paint gentle, scalloped lines draping across each tier of the tree to represent tinsel or garland strings. -
Add colorful ornaments:
Dip your clean brush into vibrant colors like red, pink, blue, and orange. Press the tip of the brush firmly onto the paper to create round ‘dot’ ornaments scattered across the branches. -
Vary the sizes:
Try making some ornaments slightly larger and some smaller for visual interest. I usually try to space them out so no two colors are right next to each other. -
Paint the background stars:
Using a gold or yellow ochre shade, paint small stars scattered in the white space around the tree to fill the background. -
Create simple sparkle:
For the smaller background stars, you can just paint simple crosses or tiny dots if five-pointed stars feel too tricky. -
Final touches:
Check your ornaments; if any look too pale after drying, add a second layer of paint to make the colors pop.
Make it Shine
Swap the painted ornaments for real craft supplies! Glue on small sequins, pom-poms, or buttons for a mixed-media 3D effect that kids love.
Now you have a festive, hand-painted tree ready to brighten up your holiday decor


Have a question or want to share your own experience? I'd love to hear from you in the comments below!