
If you’ve got a baby bump in December, you basically have the cutest round little canvas for Christmas belly painting. Here are my favorite christmas belly painting ideas—starting with the classic crowd-pleasers and ending with a few artsy, unexpected twists.
Gingerbread Cookie Sweetness
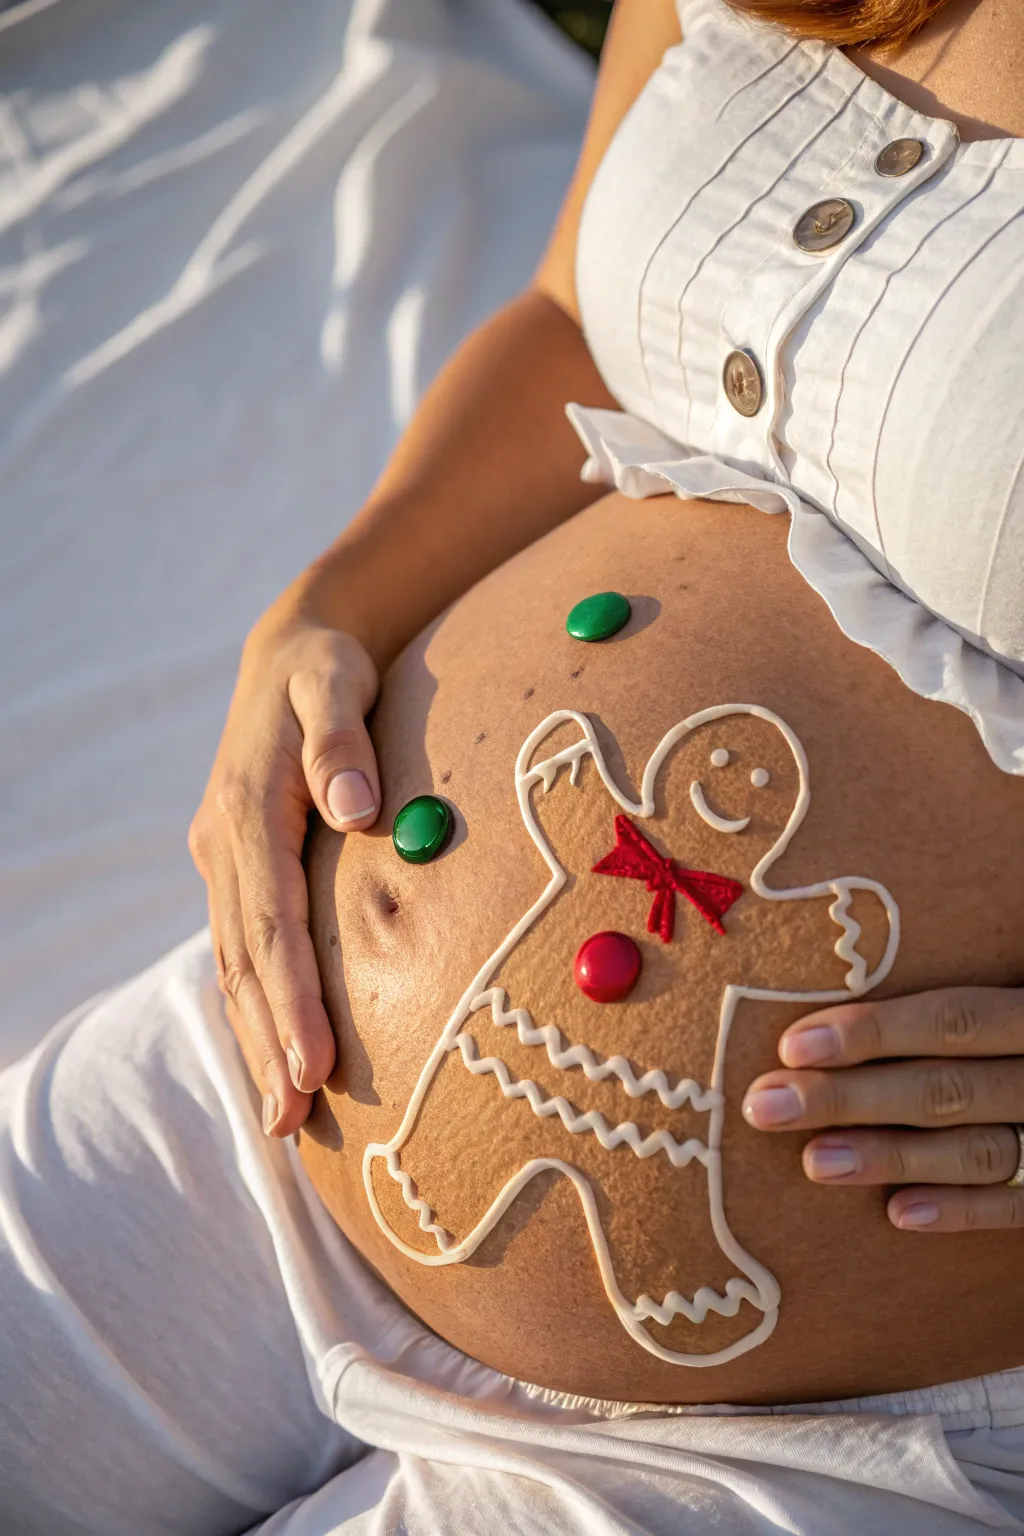
Capture the holiday spirit with this adorable gingerbread man design, painted directly onto the baby bump. Using simple white lines to mimic royal icing and colorful accents, this look turns the belly into the sweetest treat of the season.
Detailed Instructions
Materials
- White body paint (creamy consistency)
- Red body paint
- Small round synthetic brush (size 2 or 4)
- Fine liner brush
- Flat green circular gem or button
- Flat red circular gem or button (x2)
- Skin-safe adhesive (like eyelash glue or prose-aide)
- Wet wipes for cleanup
- Small cup of water
Step 1: Planning the Outline
-
Clean canvas:
Begin by gently wiping the belly with a wet wipe to remove any oils or lotions. This ensures the body paint adheres smoothly and lasts longer. -
Visualize the shape:
Before painting, visualize where the gingerbread man will sit. You want the main body centered on the largest part of the bump to give it that round, cookie-like dimension. -
Start the head:
Load your small round brush with creamy white body paint. Near the upper center of the belly, paint a simple circle for the head. It doesn’t need to be perfect; cookie outlines are naturally a bit wobbly.
Glue Not Sticking?
If the gems won’t stick, ensure the skin is completely dry and free of paint at the attachment point. A tiny dab of spirit gum works wonders for heavier buttons.
Step 2: Drawing the Body
-
Left arm:
From the left side of the neck area, extend a curved line outward and slightly upward to create a stubby arm. -
Complete the arm:
Loop the line around the end of the ‘hand’ and bring it back toward the torso, stopping where the armpit would be. -
Right arm:
Repeat the process on the right side, trying to keep the arms relatively symmetrical, though a little variation adds charm. -
Torso sides:
Paint a line downwards from each ‘armpit’ to define the sides of the gingerbread man’s body. These lines should flare out slightly to follow the curve of the belly. -
Legs:
Continue the lines down to form short, rounded legs. Bring the line up between them to create the crotch area, completing the full outline.
Cookie Crumbs
Use a dry sponge to lightly dab light brown eyeshadow around the edges of the white outline. This creates a ‘baked’ shadow effect for extra realism.
Step 3: Adding the ‘Icing’ Details
-
Squiggly cuffs:
At the wrists and ankles, use the white paint to draw a wavy, squiggly line across the limb. This mimics the decorative piping found on real cookies. -
Waist detail:
Paint two parallel wavy lines across the waist area for added decoration. -
The face:
Switch to a finer brush if needed. Paint two small dots for eyes and a simple U-shape for a happy smile inside the head circle.
Step 4: Color and Texture
-
Painting the bow tie:
Clean your brush thoroughly and load it with bright red body paint. Draw a small bow tie just below the head. Fill it in completely for a vibrant pop of color. -
Adding texture:
I like to go back over the white outline a second time to thicken the lines, making them look raised like real piped frosting. -
Preparing the button:
Apply a small dot of skin-safe adhesive to the back of a large red gem or button. -
Applying the button:
Press the red gem firmly onto the center of the gingerbread man’s chest, below the bow tie. Hold it for a few seconds to let the glue set. -
Floating accents:
To fill the empty space on the belly, apply adhesive to a green gem and another red gem. Place these randomly around the gingerbread man as if they are loose candies.
Enjoy your festive belly art and take a photo to remember this sweet moment


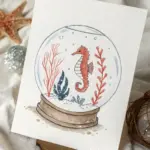
Christmas Snow Globe Scene
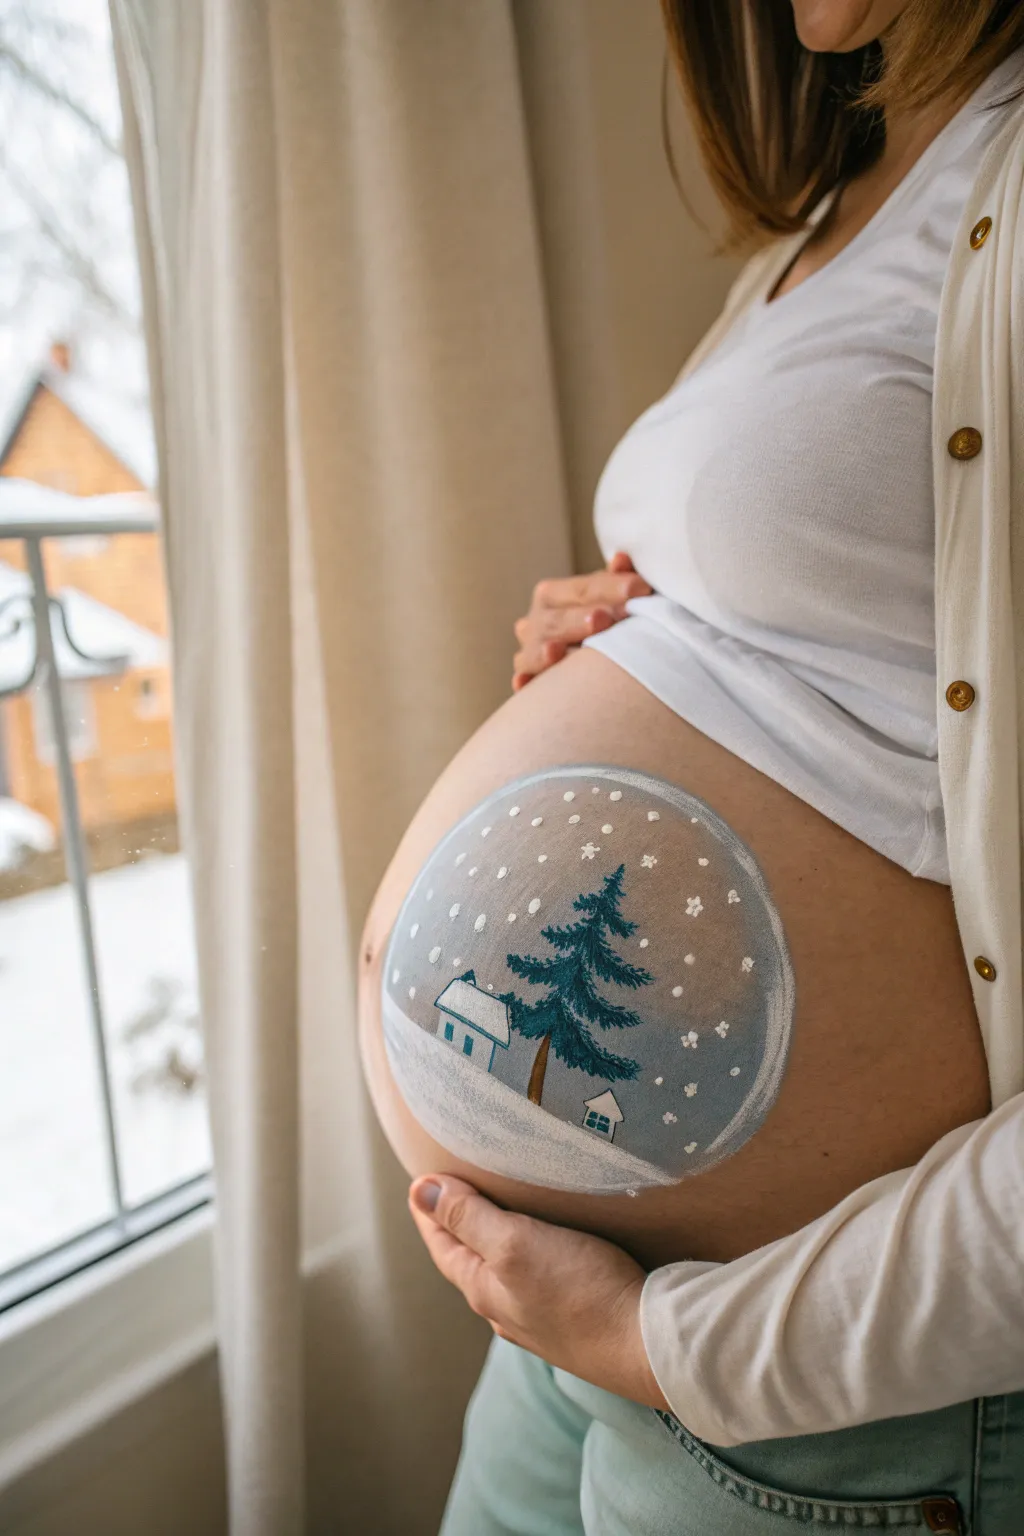
Transform your baby bump into a magical, portable winter scene with this serene snow globe design. Featuring a cozy cottage and a majestic pine tree, this body art captures the quiet beauty of a snowy day right on your belly.
Step-by-Step
Materials
- safe, non-toxic face/body paint (white, light blue, dark blue/teal, brown)
- flat brush (medium size)
- round brush (small and fine detail)
- sponge (makeup grade)
- cup of water
- paper towels
- baby wipes (for cleanup)
- soft pencil or white eyeliner (optional for sketching)
Step 1: Setting the Scene
-
Outline the globe:
Start by defining the shape of your snow globe. Using a light touch with a thin brush and thinned-out white paint (or a white eyeliner pencil), draw a large, perfect circle in the center of the belly. -
Fill the sky:
Load a sponge or large flat brush with a mix of white and a tiny drop of light blue to create an icy sky tone. Gently pat or brush this color into the upper two-thirds of the circle, fading it slightly as you reach the bottom. -
Create the snowy ground:
Switch to pure white paint. Fill the bottom third of the circle with smooth, curved strokes to represent rolling hills of snow. Let the white overlap slightly with the blue sky to soften the horizon line. -
Define the glass edge:
To give the globe a three-dimensional glass effect, use a clean sponge with a bit of white paint. Lightly dab along the inner edge of the circle outline, focusing on the top curve and sides to create a reflection highlight.
Smudgy Edges?
If your circle outline gets messy, wrap a baby wipe around your finger or a Q-tip to neatly erase and reshape the edge before reapplying the white border paint.
Step 2: Painting the Landscape
-
Draft the tree trunk:
Using a small round brush and brown paint, draw a straight vertical line slightly off-center in the snow. This will be the trunk of your main pine tree. -
add pine branches:
Mix a dark teal or forest blue color. Starting from the top of the brown trunk, use short, downward-flicking strokes to create the needle texture. Widen the branches as you move down the tree for a classic triangular shape. -
Highlight the tree:
I like to add depth here by taking a slightly lighter blue shade and adding a few strokes on top of the dark branches. This makes the tree look fuller and more textured. -
Shape the cottage:
To the left of the tree, use a small flat brush and white paint to block out a small rectangular shape for the house wall. Add a small triangle on top for the gable end. -
Add the roof:
Outline the roof of the house with your blue paint. Make the roof thick with white paint afterward to look like a heavy blanket of snow is resting on it. -
Detail the cottage:
Use a very fine brush and the dark blue paint to outline the house lightly and paint two small squares for windows. Add a small blue door if space allows. -
Paint a background house:
If you want extra depth, paint a tiny, simplified version of a second house peeking out from behind the right side of the tree, mostly just showing a snowy roof and a hint of a wall.
Step 3: Magical Details
-
Add snow to the tree:
Dip your fine detail brush into pure white paint. Dab small amounts of ‘snow’ onto the tops of the pine branches, making sure not to cover all the green underneath. -
Falling snow:
Scatter small white dots throughout the blue sky area. Vary the pressure to make some snowflakes look larger and closer, while others are tiny specks in the distance. -
Create starbursts:
Select a few of the larger snowflakes and paint tiny crosses or asterisks over them to turn them into twinkling stars or detailed flakes. -
Refine the perimeter:
Go back over the main outer circle with a steady hand and white paint. Make the line slightly thicker on the bottom curve to emphasize the weight of the snow globe. -
Final highlights:
Add a crisp white highlight line on the upper left or right curve of the globe (inside the blue sky area) to mimic the shine of glass. -
Dry and set:
Allow the paint to dry completely for a few minutes before moving around too much or pulling clothes back down. A light dusting of setting powder can help it last longer if you’re doing a photoshoot.
Add Some Sparkle
While the paint is still slightly tacky, gently press cosmetic-grade silver glitter onto the snow banks and the ‘glass’ highlights for a real shimmering snow globe effect.
Now you have a peaceful winter memory captured beautifully on your bump


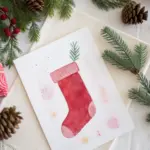
Christmas Stocking With a Surprise
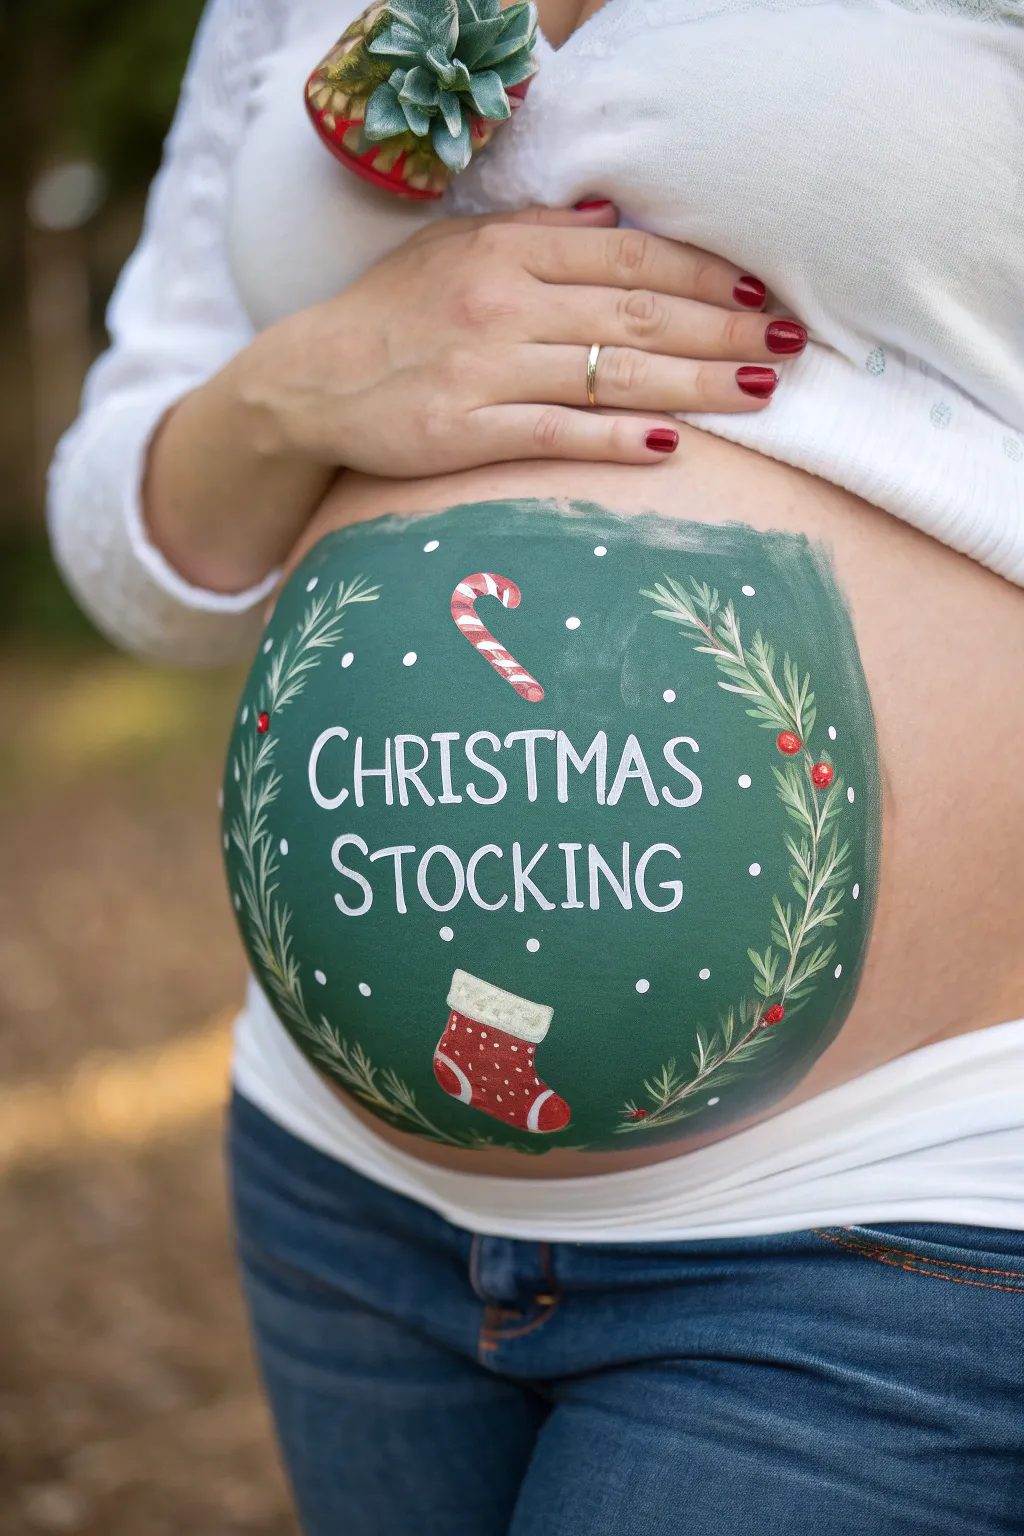
Turn your baby bump into a festive announcement with this chalkboard-style Christmas stocking design. The deep green background really makes the crisp white lettering and holiday red accents pop beautifully for photos.
Step-by-Step
Materials
- Face and body paints (deep green, bright red, white, yellow/gold)
- Wide flat brush for background coverage
- Fine liner brush for details and lettering
- Medium round brush
- Small cup of water
- Paper towels or wipes
- Cosmetic sponge (optional)
Step 1: Setting the Stage
-
Outline the Shape:
Start with your medium round brush and the deep green paint. Draw a large, smooth circle that encompasses most of the belly, ensuring it’s centered. -
Fill the Background:
Using a wide flat brush or a damp cosmetic sponge, fill in the entire circle with the deep green paint. Apply the paint evenly to avoid streaks, aiming for a solid, opaque look. -
Let it Dry:
Allow the green base coat to dry completely before moving on. This prevents the white and red details from mixing with the green and becoming muddy.
Step 2: Adding the Text
-
Plan the Lettering:
Visualize where the words ‘CHRISTMAS STOCKING’ will sit in the center of the circle. You want ‘CHRISTMAS’ slightly arched above the middle and ‘STOCKING’ just below it. -
Paint ‘CHRISTMAS’:
Using a fine liner brush and white paint, carefully letter the word ‘CHRISTMAS’ in all caps. Keep the letters tall and thin for a whimsical look. -
Paint ‘STOCKING’:
Directly underneath, paint the word ‘STOCKING’ in the same white capital style. Try to center it relative to the word above for a balanced composition.
Fixing Smudges
If you make a mistake with the white lettering, wait for it to dry completely. Then, use a small amount of the green base color to carefully paint over the error like an eraser.
Step 3: Festive Icons
-
Draw the Candy Cane:
Above the word ‘CHRISTMAS’, slightly to the left of center, paint a hooked cane shape using red paint. -
Stripe the Cane:
Once the red is tacky or dry, use your fine liner brush with white paint to add small diagonal stripes across total length of the candy cane. -
Paint the Stocking Body:
Below the text, center a classic stocking shape. Use red paint to fill in the foot and leg of the stocking. -
Add Stocking Details:
With white paint, add the fluffy cuff at the top of the stocking. Then, use the tip of your fine brush to add tiny white dots across the red part of the stocking for texture. -
Add Toe and Heel:
Paint a small patch on the toe and heel of the stocking in white or a lighter red to give it some dimension.
Glittery Surprise
While the red berries or the white snow dots are still wet, lightly sprinkle a tiny bit of cosmetic-grade glitter over them to add a magical festive sparkle to the design.
Step 4: Wreath and Snow
-
Paint the Branches:
Using a light hand and a mix of green and white (or a lighter green shade), paint wispy pine branches curving up the left and right sides of the circle. -
Layer the Needles:
Add more definition to the branches by using quick, short strokes to mimic pine needles. Overlap them slightly to create a fullness to the wreath border. -
Add Berry Accents:
Dip the handle end of a brush or use a small round brush to dab small red circles onto the greenery. Group them in pairs or trios to look like holly berries. -
Create Highlights:
Add a tiny white dot to each red berry to make them look shiny and three-dimensional. -
Make it Snow:
Finish the piece by adding small white polka dots scattered randomly across the remaining green background space to create a falling snow effect.
Step back and admire your beautiful, personalized holiday artwork that perfectly celebrates the season.

Mistletoe Over the Belly Button
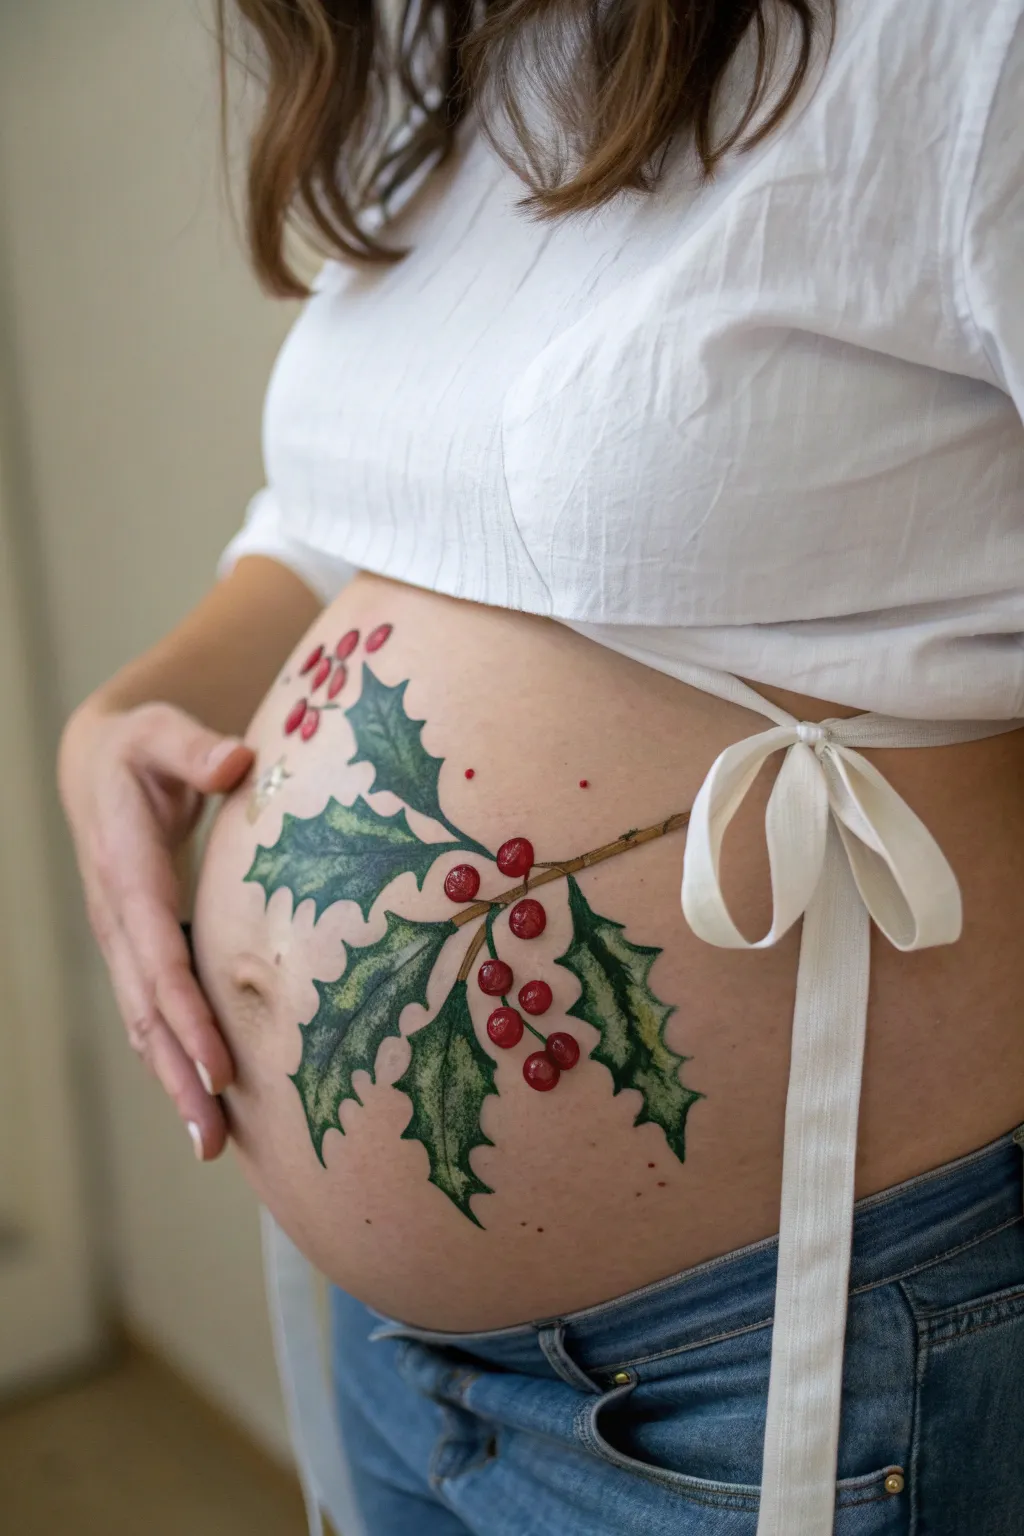
Embrace the festive season with this elegant and naturalistic holly branch design painted directly on your bump. The vibrant green leaves and bright red berries pop beautifully against natural skin tones, creating a classic Christmas look perfect for maternity photoshoots.
How-To Guide
Materials
- Water-activated body paints (Dark Green, Light Green, Brown, Red, White)
- Small round brush (size 2 or 3)
- Medium flat brush or angle brush
- Fine liner brush (size 0 or 00)
- Cup of water
- Paper towels or sponge
- Skin-safe setting spray (optional)
- Baby wipes (for cleanup)
Step 1: Drafting the Branch
-
Map the Composition:
Visualize where the main stem will go. In the reference, it swoops from the upper right side down towards the left hip, crossing just above the belly button. You can use a very faint wash of brown or a makeup pencil to lightly mark this curve first. -
Paint the Main Stem:
Load your small round brush with brown body paint. Paint a thin, slightly jagged line following your visual map. The line doesn’t need to be perfectly smooth; a little texture mimics wood bark. -
Add Secondary Twigs:
branching off the main stem, add smaller twigs extending outward where you plan to place the leaves. Keep these lines delicate and tapering at the ends.
Smudge Fix
If a line goes rogue, wait for it to dry completely. Then, use a damp Q-tip to gently lift the unwanted paint without smearing the surrounding area.
Step 2: Painting the Foliage
-
Outline the Holly Leaves:
Using a dark green paint and your small round brush, outline the signature spiky shape of holly leaves. Each leaf typically has 5-7 sharp points. Place them clustered around your stem, varying their angles for a natural look. -
Base Fill:
Fill in the outlines with a medium green. Don’t worry about perfect coverage yet; we will add texture and depth with highlights. -
Create Depth:
Switch to a darker green or mix a little brown into your green. Paint along the center vein of each leaf and lightly feather outward to create shadows, giving the leaves a slight curve. -
Add Leaf Veins:
With a fine liner brush and dark green paint, draw a crisp central vein down the middle of each leaf and smaller veins branching toward the points. -
Highlight the Greens:
Mix a light green or use white mixed with green. Apply thin strokes to the edges of the leaves and the high points of the leaf curves. This makes them look glossy and waxy.
Step 3: Adding the Berries
-
Place the Berry Clusters:
Load a round brush with bright red paint. identifying where the leaves meet the stem (the axils) or at the end of twigs, press down and rotate the brush to create perfect circles. -
Cluster Formation:
Group the berries in clusters of three or four. Add a few single stray berries floating near the top left for a whimsical touch, as seen in the inspiration photo. -
Shadowing the Fruit:
I like to take a tiny bit of dark red or brown and paint a small crescent shape on the bottom of each berry. This anchors them and makes them look spherical rather than flat. -
The Shine:
Using pure white paint and your finest liner brush or a dotting tool, place a tiny white dot on the upper right side of each berry. This ‘catchlight’ is crucial for that juicy, fresh look.
Winter Sparkle
While the red berry paint is still slightly wet, tap a tiny amount of cosmetic biodegradable glitter onto them for a festive, magical shimmer.
Step 4: Final Details
-
Refine Edges:
Check the points of your holly leaves. If they got muddy during filling, use the liner brush and dark green to re-sharpen those tips. -
Add Texture:
Use a dry brush technique with a tiny bit of white to lightly graze the tops of the leaves, enhancing that frosty, winter texture. -
Set the Design:
Once the paint is completely dry to the touch, lightly mist with a setting spray if you plan on wearing this under loose clothing or want it to last longer.
Enjoy your beautiful, botanical bump art during your holiday celebrations
BRUSH GUIDE
The Right Brush for Every Stroke
From clean lines to bold texture — master brush choice, stroke control, and essential techniques.
Explore the Full Guide
Nutcracker Toy Soldier Belly Art
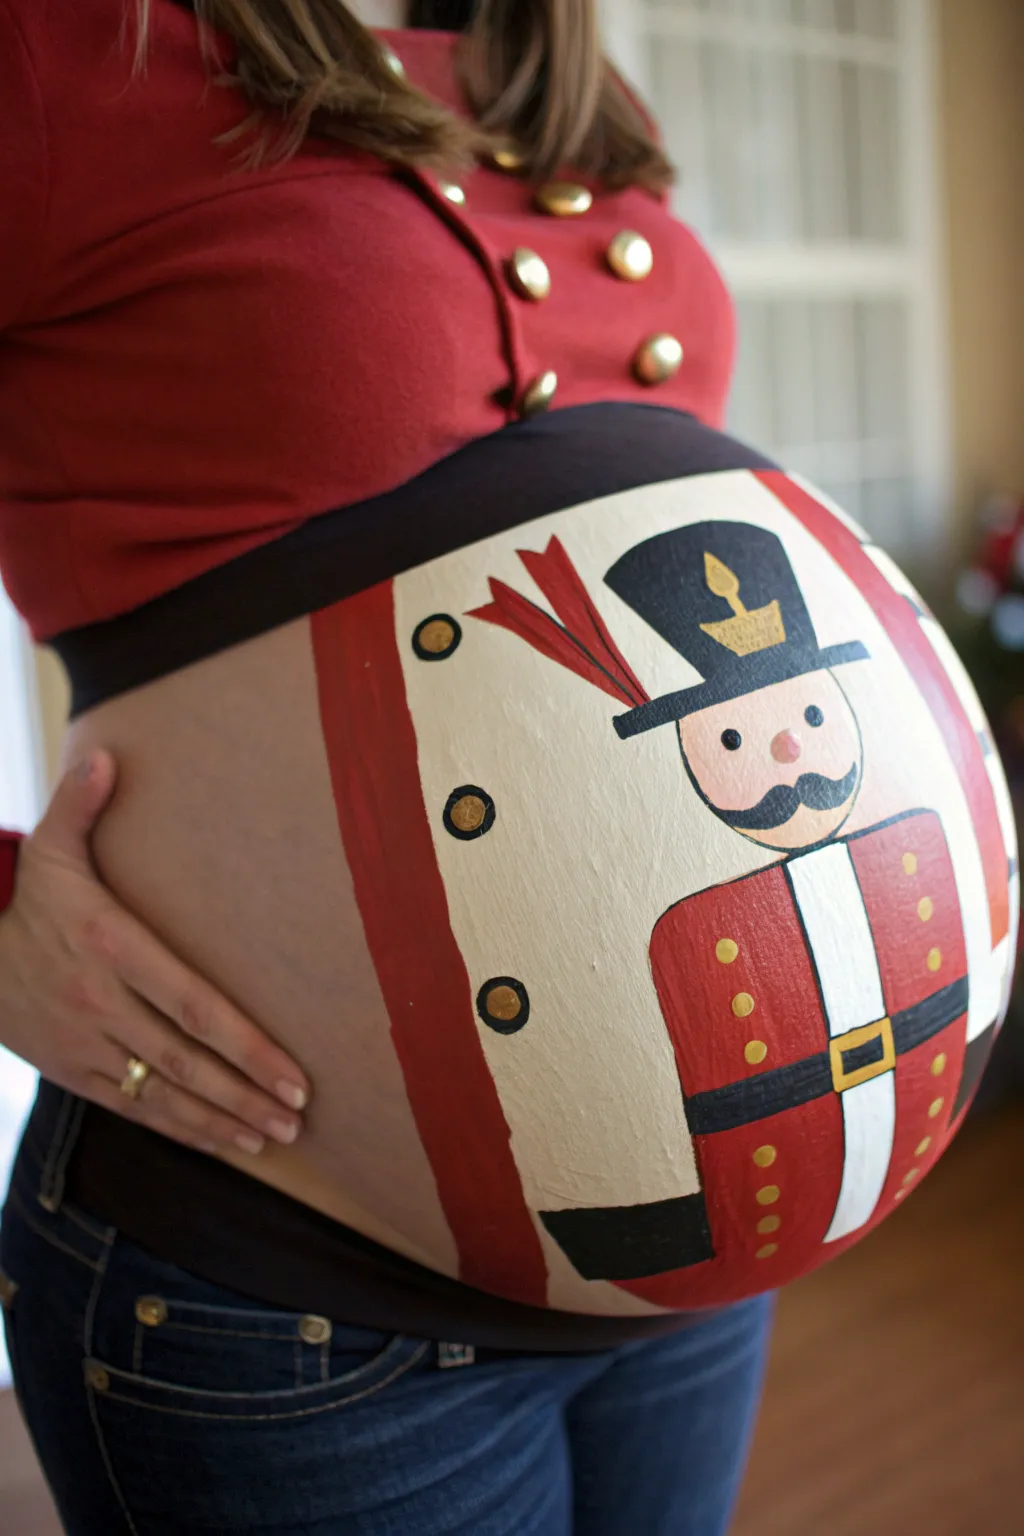
Transform your baby bump into a classic holiday scene with this toy soldier design that perfectly complements a red cardigan. The rounded shape of the belly lends itself beautifully to the character’s face, creating a whimsical and festive photo opportunity.
Detailed Instructions
Materials
- FDA-approved white face/body paint (water-activated or cream)
- Red face/body paint
- Black face/body paint
- Gold face/body paint
- Flesh-tone face/body paint (custom blend)
- Wide flat brush or makeup sponge
- Medium round brush
- Fine detail liner brush
- Small cup of water
- Baby wipes (for cleanup)
Step 1: Base Shape and Background
-
Establish the boundaries:
Visualize a large circle on the center of the belly. Using a medium brush and red paint, sketch two vertical curved lines on the left and right sides to frame the central design area, leaving the middle open for the soldier. -
Fill the background details:
On the far left and right sides (outside the central oval), paint thick red vertical stripes on the skin that will peek out from behind your shirt. These mimic the soldier’s uniform jacket extending around. -
Create the central canvas:
Using a sponge or wide flat brush, load up with white face paint. Fill the entire central oval area between your red frame lines. Apply this layer evenly; you might need a second coat for full opacity once the first is tacky-dry.
Step 2: Drafting the Soldier
-
Map out the head:
Looking at the top third of the white oval, paint a rounded flesh-tone circle for the head. Leave plenty of white space above it for the hat. -
Paint the hat base:
Switch to black paint and a flat brush. Paint a tall, slightly flared rectangle on top of the head for the soldier’s hat (shako). Make sure the brim line curves slightly downward to hug the forehead. -
Add the torso:
Below the head, use red paint to create a blocky, rectangular shape for the soldier’s coat. Round off the shoulders slightly where they meet the neck area. Leave a vertical strip of white running down the center of the red coat for the shirt placket.
Paint Consistency
Professional face paint works like watercolor. If your lines are transparent, add less water. If the paint is clumping or dragging, add a drop more water to your brush.
Step 3: Distinctive Details
-
Gold buttons and accents:
Dip a small round brush into gold paint. Add two columns of small gold circles (buttons) down the front of the red coat. Also, paint a small gold shape on the center of the black hat. -
The belt buckle:
Paint a square gold outline near the bottom center of the coat for the belt buckle. Once the gold is set, use black to fill the belt strip extending horizontally from the buckle. -
Facial features:
With a fine liner brush and black paint, draw two simple dots for eyes. Add a small pink or light red oval for the nose right between them. Add rosy cheeks with a very transparent wash of diluted red paint. -
The signature mustache:
Using black paint and a small brush, carefully paint a curled handlebar mustache directly under the nose. The ends should curl upwards in a classic nutcracker style. -
Hat details:
Add a diagonal red feather/plume to the side of the hat using quick, sweeping strokes with a medium brush. I like to outline the gold hat emblem in thin black lines to make it pop.
Add Some sparkle
Before the black paint on the hat and boots dries completely, tap a little cosmetic-grade glitter over those areas. It gives the uniform a magical, toy-shop shine for photos.
Step 4: Finishing Touches
-
Outer jacket buttons:
Return to the white background area on the far left (the belly skin not part of the character). Paint three large gold circles vertically corresponding to real jacket buttons. -
Defining the gold buttons:
Take your fine liner brush with black paint. Carefully outline the three large gold buttons on the side and create a small inner ‘C’ shape inside each gold dot to give them dimension. -
Final outlines:
Outline the main shapes of the soldier—the hat, the face, and the red coat—with a thin black line to sharpen the image and give it that crisp, toy-like appearance. -
Cleanup:
Use a baby wipe wrapped around your finger to clean up any smudged edges or stray paint marks around the navel or waistline.
Pair this finished painting with a military-style jacket or cardigan to complete the look and get ready for a memorable holiday photoshoot
Minimalist Christmas Stars and Sparkle
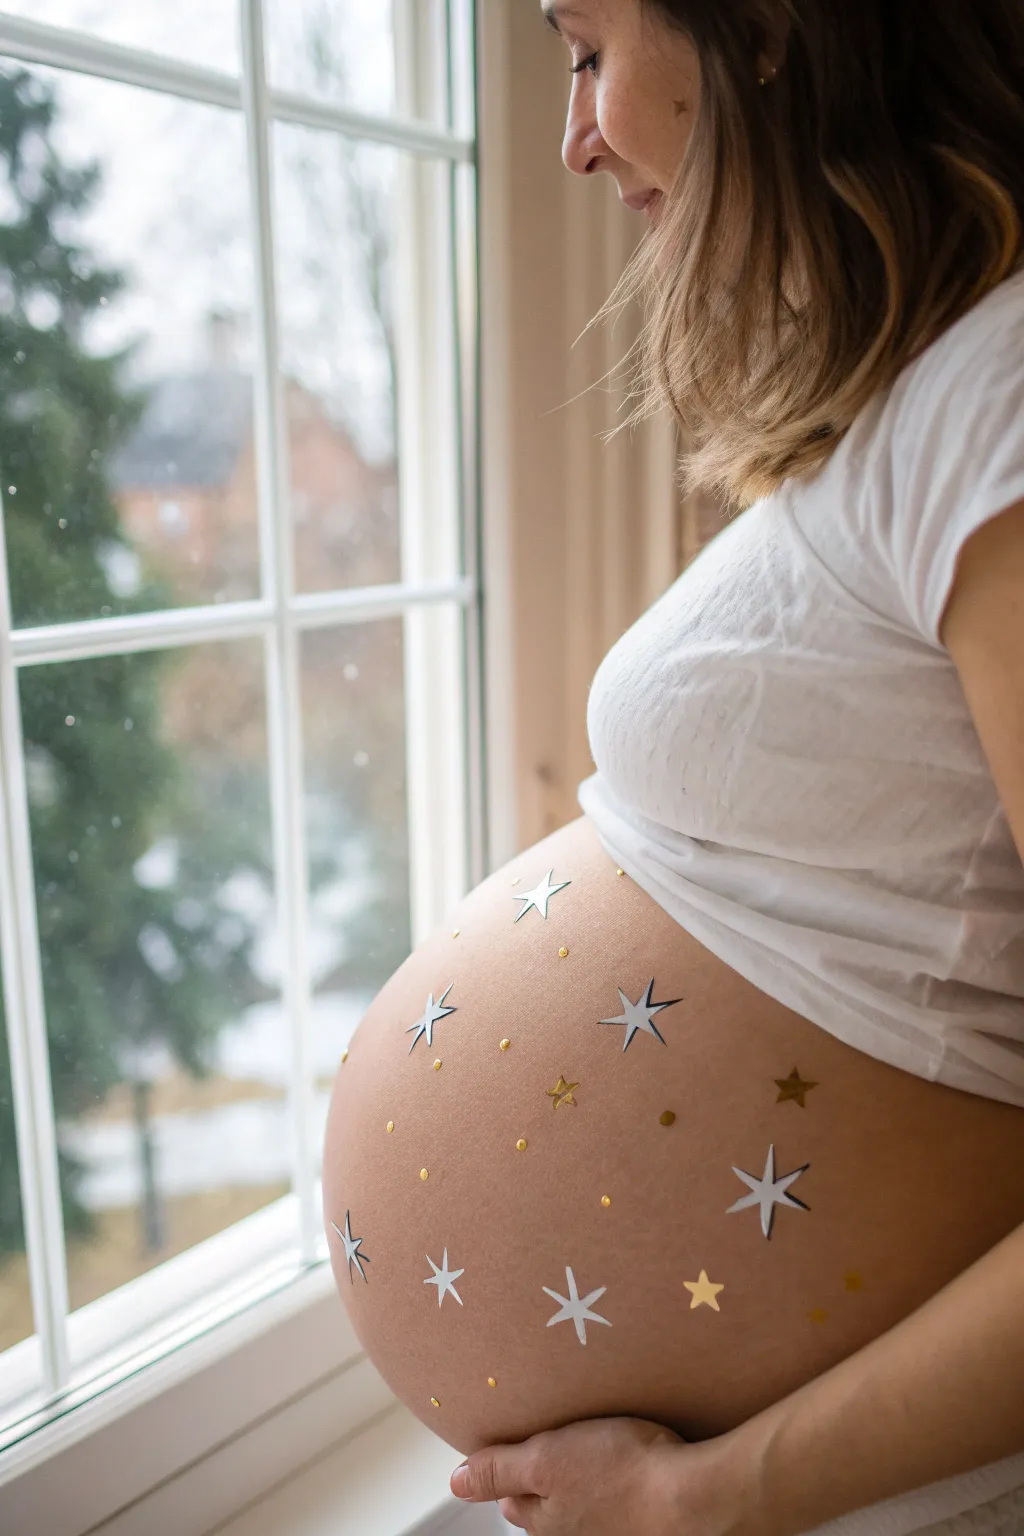
Embrace a minimalist yet magical holiday aesthetic with this mixed-media belly art design. Using skin-safe temporary tattoos and adhesive gems, you can create a dreamy, starry night effect that shines beautifully in natural window light.
Step-by-Step
Materials
- White or silver temporary star tattoos (various sizes)
- Gold foil star stickers or tattoos
- Small gold adhesive rhinestones or skin gems (flat-backed)
- Small gold glitter gel (optional)
- Rubbing alcohol or witch hazel
- Cotton pads
- Warm water
- Soft washcloth or sponge
- Scissors
- tweezers
Step 1: Preparation & Planning
-
Cleanse the canvas:
Begin by gently wiping the belly area with a cotton pad soaked in a little rubbing alcohol or witch hazel. This removes natural oils and lotions, ensuring the stickers and tattoos adhere perfectly for longer wear. -
Select your stars:
Gather your temporary tattoo sheets. You will want a mix of larger ‘hero’ stars—perhaps 4 to 6 large white or silver ones with distinct outlines—and a handful of smaller accent stars. -
Cut them out:
Cut out the individual tattoo designs you plan to use. Trim close to the design edge so you can see exactly where you are placing them without excess paper getting in the way. -
Rough layout:
Before applying anything, hold the cutouts against the skin to test the spacing. Aim for a random yet balanced scattering across the front and sides of the bump, rather than a perfect grid.
Placement Pro Tip
Avoid placing tattoos right in the belly button or where your waistband sits. The constant friction from pants will cause the design to peel or flake off prematurely.
Step 2: Applying the Main Stars
-
Remove protective film:
Peel the clear plastic backing off your first large star tattoo. Be careful not to touch the adhesive side. -
Place the first anchor star:
Position this primary star on a prominent part of the curve, slightly off-center for a more natural look. Press the tattoo paper firmly against the skin. -
Wet the backing:
Take your wet sponge or washcloth and press it against the paper backing. Ensure the entire area is saturated. Hold it steady for about 30 seconds to allow the transfer to release. -
Reveal the design:
Gently slide or peel away the paper backing. If the edge of the star looks like it’s lifting, press the wet cloth back down for another ten seconds. -
Distribute the large stars:
Repeat this process with the remaining large white or silver stars. Scatter them across the belly, ensuring some wrap slightly around the curve towards the hips to add dimension. -
Smooth the edges:
Once dry, gently pat the tattoos with a dry finger to ensure all edges are flat against the skin.
Step 3: Adding Golden Accents
-
Introduce gold stars:
Now, take your smaller gold foil stars. Place these in the open spaces between the larger white stars. Using tweezers can help with precision placement here. -
Apply the gold stars:
Follow the same application method if they are tattoos: remove film, place, wet, and peel. If you are using simple body stickers, press them firmly onto the skin. -
Add tiny sparkle points:
Using tweezers, pick up the small self-adhesive gold gems or rhinestones. These act as distant stars or stardust. -
Create constellations:
Place the gold gems randomly in the negative space. I find it looks best to cluster two or three tiny gems near a large star, then leave some areas more sparse. -
Check for balance:
Step back and look at the design in a mirror. If there are any large empty patches that feel unbalanced, fill them with a single gold dot. -
Final setting:
Once everything is applied, you can lightly mist the area with a makeup setting spray if you have one, though this is optional. It just helps reduce friction with clothing.
Level Up: Cosmic Glow
Brush a tiny bit of cosmetic-grade highlighter powder over the high points of the belly before applying tattoos to give the skin an ethereal, glowing sheen.
Enjoy capturing photos of your twinkling galaxy bump in the soft holiday light

PENCIL GUIDE
Understanding Pencil Grades from H to B
From first sketch to finished drawing — learn pencil grades, line control, and shading techniques.
Explore the Full Guide
Watercolor Christmas Night Sky
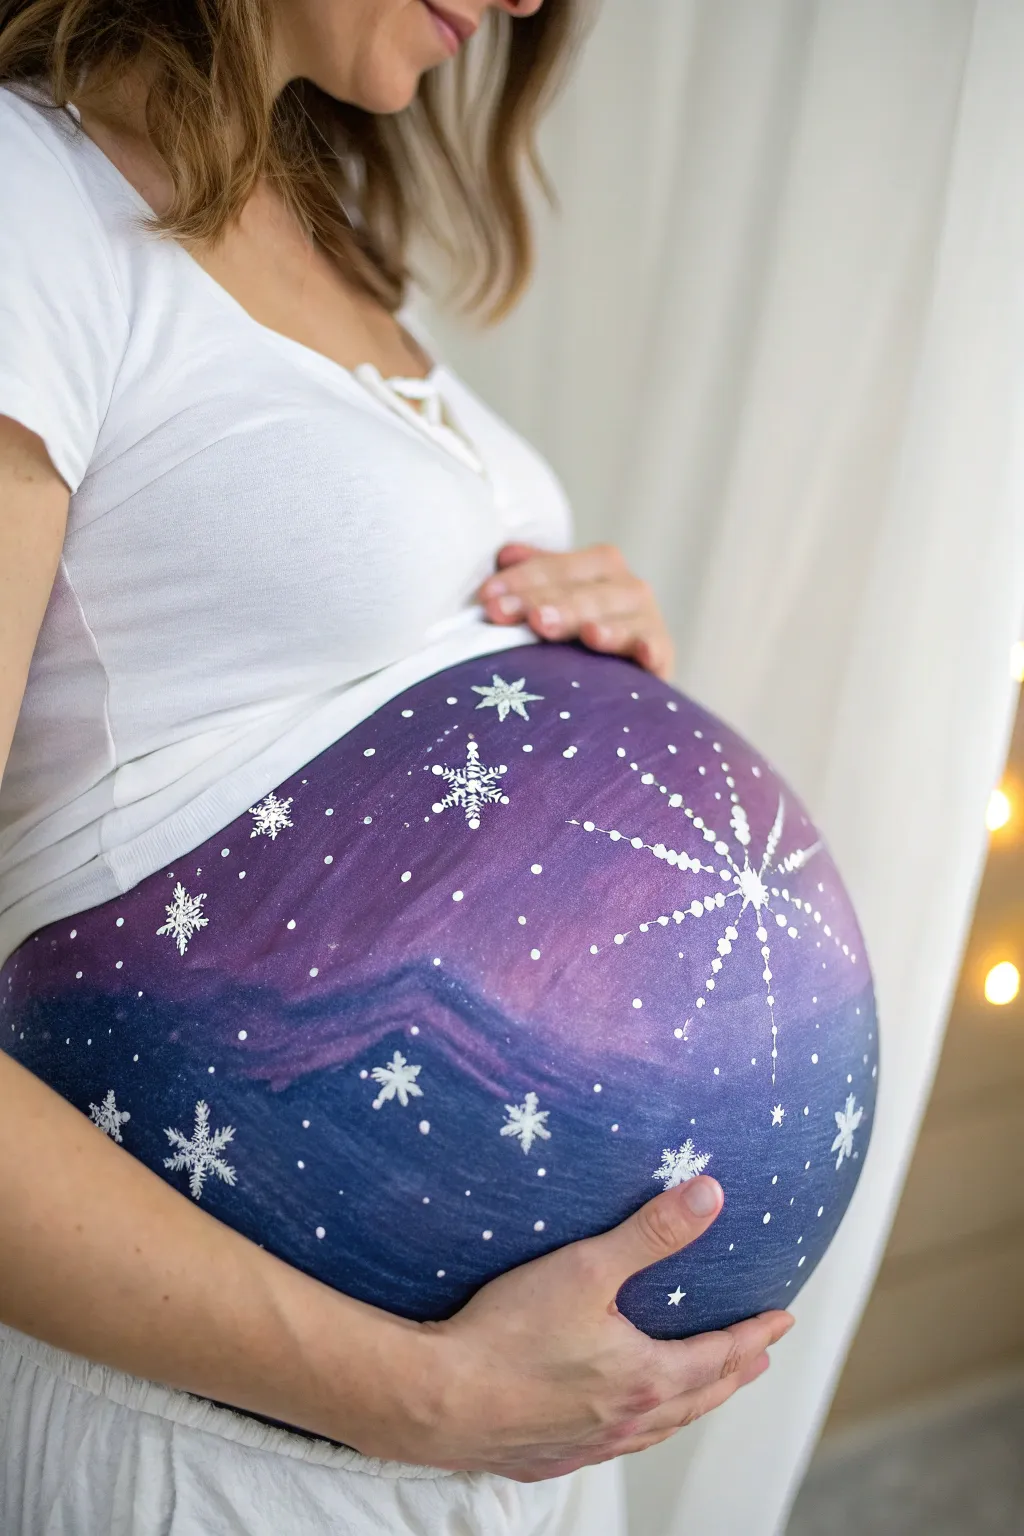
Capture the magic of a silent winter night right on your baby bump with this ethereal watercolor-style design. The deep Indigo blues and soft purples create a stunning backdrop for delicate snowflakes and a brilliant Northern Star, making for a truly memorable maternity photo.
How-To Guide
Materials
- Water-based face and body paints (Royal Blue, Deep Indigo, Purple/Violet, White)
- Large flat brush or body painting sponge
- Medium round brush
- Fine detail brush (size 0 or 1)
- Cup of water
- Paper towels
- Optional: Cosmetic grade glitter
Step 1: Creating the Twilight Gradient
-
Prep the canvas:
Begin with clean, dry skin free of oils or heavy lotions to ensure the paint adheres smoothly and lasts longer. -
Load the sponge:
Dampen your body painting sponge slightly and load it with the Deep Indigo or dark blue paint. You want a creamy consistency, not dripping wet. -
Apply the base:
Start applying the dark blue at the bottom of the belly, stippling (dabbing) gently to cover the lower third of the bump. -
Introduce purple:
Rinse your sponge or flip it to a clean side, load it with the Violet or Purple paint, and apply it to the upper portion of the belly. -
Blend the horizon:
Where the blue meets the purple in the middle, gently dab the sponge back and forth to blend the two colors. The goal is a soft, seamless gradient that mimics the evening sky. -
Add dimension:
Take a little bit of the Royal Blue on a damp sponge and dab gentle, sweeping diagonal streaks through the middle to suggest wispy aurora borealis clouds or varying atmospheric depth. -
Let it set:
Pause for a moment to let this base layer dry completely to the touch. This prevents the white details from turning muddy later.
Step 2: Painting the Winter Wonderland
-
Start the main star:
Load your medium round brush with white face paint. Choose a focal point on the upper right side of the curve for your ‘North Star’. -
Draw the rays:
Paint a central dot, then pull long, thin lines outward from the center—up, down, left, and right—tapering them into fine points as you lift the brush. -
Add star details:
Using the same brush, add smaller diagonal rays between the main four points. Then, add tiny dots along the length of the main horizontal and vertical rays for a twinkling effect. -
Paint large snowflakes:
Switch to your fine detail brush. Paint three or four main six-pointed snowflakes scattered across the dark blue section at the bottom. -
Detail the flakes:
Add tiny ‘V’ shapes to the ends of the snowflake arms to give them that classic crystalline look. I find it helps to rest my pinky finger on the skin for stability while doing this delicate work. -
Scatter medium flakes:
Paint simpler star-shaped flakes (an asterisk shape) in the empty purple areas to balance the composition. -
Create distant stars:
Load the fine brush with watery white paint and gently tap small dots all over the belly to represent distant stars. -
Vary the star sizes:
Go back in and deliberately place a few slightly larger dots near the snowflakes to create depth in your galaxy. -
Add simple sparkles:
Paint tiny four-pointed stars (just a simple cross shape) randomly in the open blue spaces to add extra twinkle without cluttering the design. -
Final touches:
Check for any gaps in the gradient and lightly touch them up if needed, but be careful not to smear your white work.
Patchy Background?
If the base coat looks streaky, your sponge might be too wet. Squeeze it out thoroughly, reload with thicker paint, and stipple over the area again for opaque coverage.
Make It Shimmer
While the paint is still slightly tacky (before it fully dries), gently puff cosmetic glitter onto the ‘North Star’ and the centers of the largest snowflakes for a 3D glow.
Now you have a serene winter masterpiece perfectly framed on your bump, ready for holiday photos
Peekaboo Elf Door on the Bump
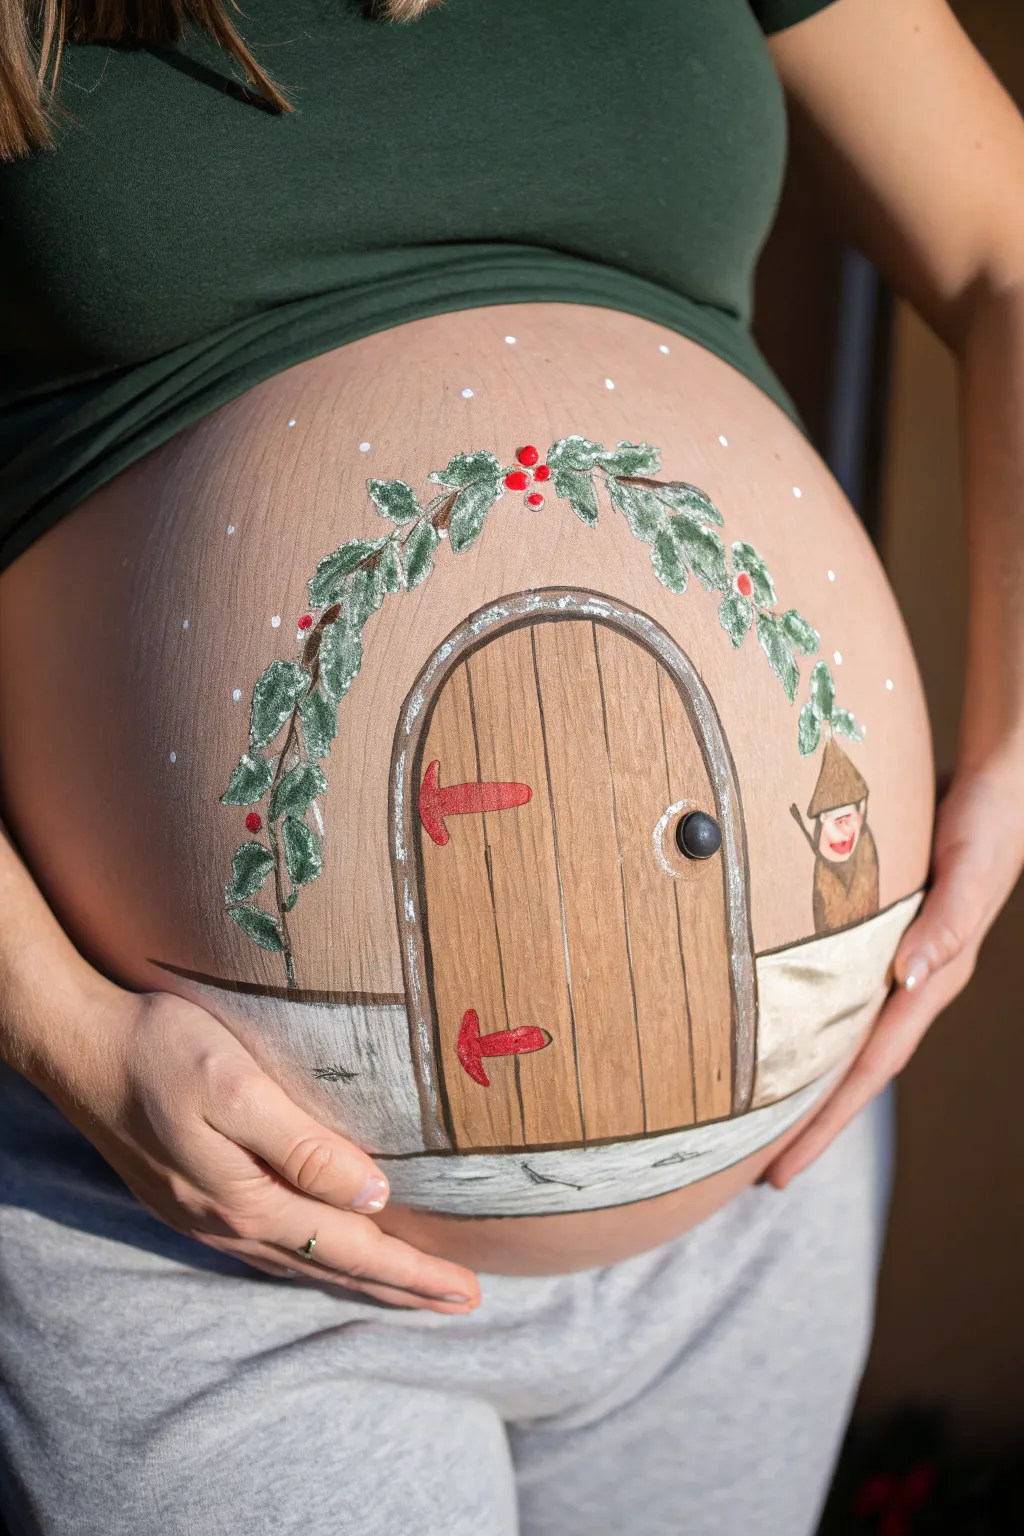
Transform your baby bump into a magical holiday portal with this adorable belly painting design featuring a rustic wooden door and festive holly arch. The cozy scene is complete with a tiny elf friend peeking out, making it a perfect interactive way to celebrate your little one’s upcoming arrival.
Detailed Instructions
Materials
- Water-based face and body paints (brown, white, green, red, black, beige)
- Wide flat brush
- Medium round brush
- Fine detail brush (liner brush)
- Small spray bottle with water
- Cosmetic sponge
- Bio-degradable glitter (optional)
- Baby wipes for cleanup or mistakes
- Mirror (if painting yourself)
Step 1: Setting the Scene
-
Outline the door:
Start by mixing a light brown shade using your body paint. With a medium round brush, draw a large arch shape in the center of the belly. This will serve as the main frame for your magical elf door. -
Create the snowy ground:
Load a wide flat brush or a cosmetic sponge with white face paint. Sweep it horizontally across the bottom of the belly, slightly overlapping the bottom of your door outline to ground the structure in a snowy bank. -
Fill the door color:
Using a wide flat brush and a medium brown paint, fill in the entire arch shape. Use smooth, vertical strokes to mimic the direction of wood grain. Don’t worry about it being perfectly opaque; a little variation adds texture.
Smooth Canvas Tip
Apply a thin layer of moisturizer to the belly about 15 minutes before painting. This helps the paint glide on smoothly without cracking as it dries.
Step 2: Adding Wood Texture
-
Define the planks:
Switch to a fine detail brush loaded with a darker brown or watered-down black paint. Carefully paint thin vertical lines from the top of the arch down to the snowy base to separate individual wooden planks. -
Add wood grain details:
With the same fine brush, add delicate squiggly lines and small knots within each plank section. Vary the pressure on your brush to create thick and thin lines for a realistic wood effect. -
Highlight the frame:
Mix a dark grey or black paint. Outline the entire door arch again, slightly thickening the line to create a stone or heavy wood frame look. Add a thin white highlight line along the inner edge of this frame to give it dimension.
Step 3: Decorative Elements
-
Paint the hinges:
Using bright red paint and a small round brush, paint two horizontal arrow-like shapes on the left side of the door for hinges. Outline them thinly in black to make them pop. -
Install the handle:
Paint a small black circle on the right side of the door for a knob. Add a tiny dot of white paint near the top of the black circle to create a reflection, making the knob look round and shiny. -
Start the holly garland:
Load a medium round brush with dark green paint. press and lift the brush in a pattern following the curve of the door frame to create the base leaves for your garland. -
Add leafy definition:
Go back over your green shapes with a lighter green or white-tipped brush to define the jagged edges of holly leaves. This two-tone effect adds depth to the greenery. -
Place the berries:
Dip the back end of your paintbrush (or a cotton swab) into bright red paint. Stamp clusters of three dots along the garland at the top and sides for holly berries.
Make It Sparkle
While the white snow dots are still wet, gently puff some cosmetic-grade iridescent glitter onto them for a magical, shimmering winter effect.
Step 4: The Special Guest
-
Outline the elf:
To the right of the door, just above the snow line, paint a small triangular shape for a hat and a small circle for a face using beige and brown paints. -
Dress the elf:
Fill in the hat with brown paint to match the rustic theme. Add a small brown body shape below the head so he looks like he’s standing in the snow. -
Detail the face:
Using your finest brush, add two tiny eyes, a smile, and rosy cheeks to the elf face. I find that keeping the features simple makes the character look cuter from a distance. -
Add snow texture:
Take your white paint again and add some texture to the snow bank at the bottom. Add little white caps of snow sitting on top of the door frame and the elf’s hat. -
Final snowy magic:
Using the handle of a brush or a specialized dotting tool, dot random white spots all over the open skin space above the door to create a gently falling snow background.
Now you have a charming winter scene that perfectly captures the anticipation of meeting the little one behind the door


Have a question or want to share your own experience? I'd love to hear from you in the comments below!