
If you’re in the mood for something festive but totally doable, these easy Christmas drawing ideas are my favorite go-to’s for quick wins. I’m keeping everything beginner-friendly, built from simple shapes and clean outlines so you can actually enjoy the process.
Cute Santa Face
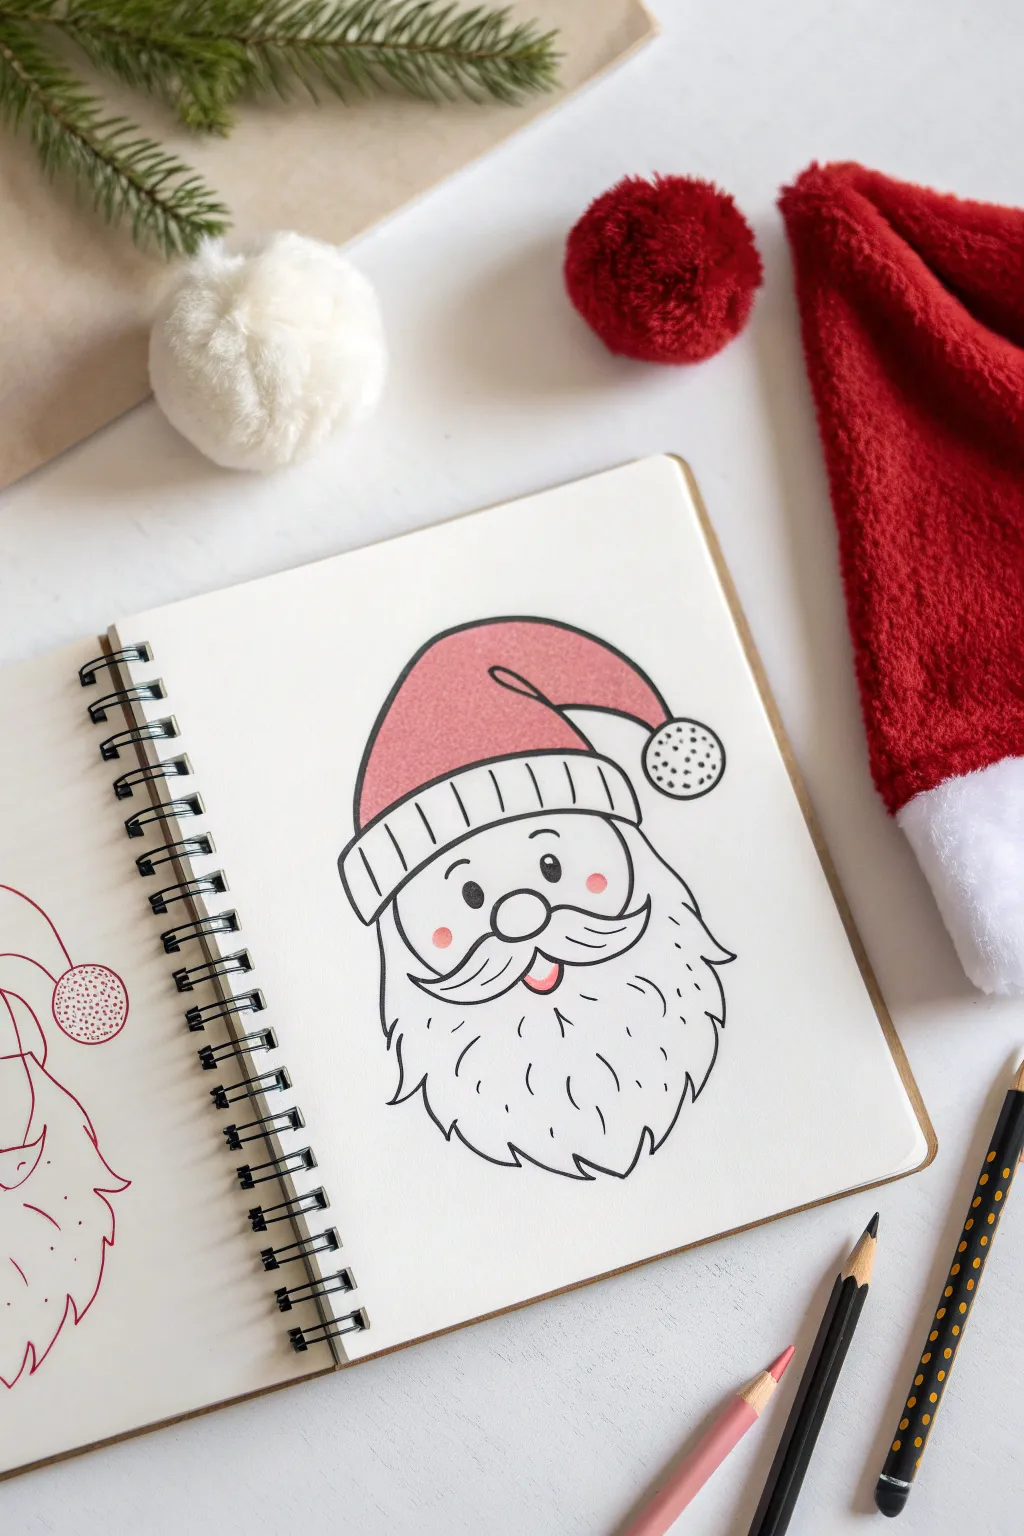
This cheerful Santa illustration captures the magic of Christmas with clean linework and soft pops of color. The style is refreshingly simple, focusing on rounded shapes and a fluffy beard to create a friendly, approachable character perfect for holiday cards.
How-To Guide
Materials
- Spiral-bound sketchbook or heavy drawing paper
- Pencil (HB or H for sketching)
- Eraser
- Black fine-liner pen (0.5mm or 0.8mm)
- Black brush pen or thicker marker (optional for outlines)
- Colored pencils (Light Dusty Pink, Warm Red, Peach/Flesh tone)
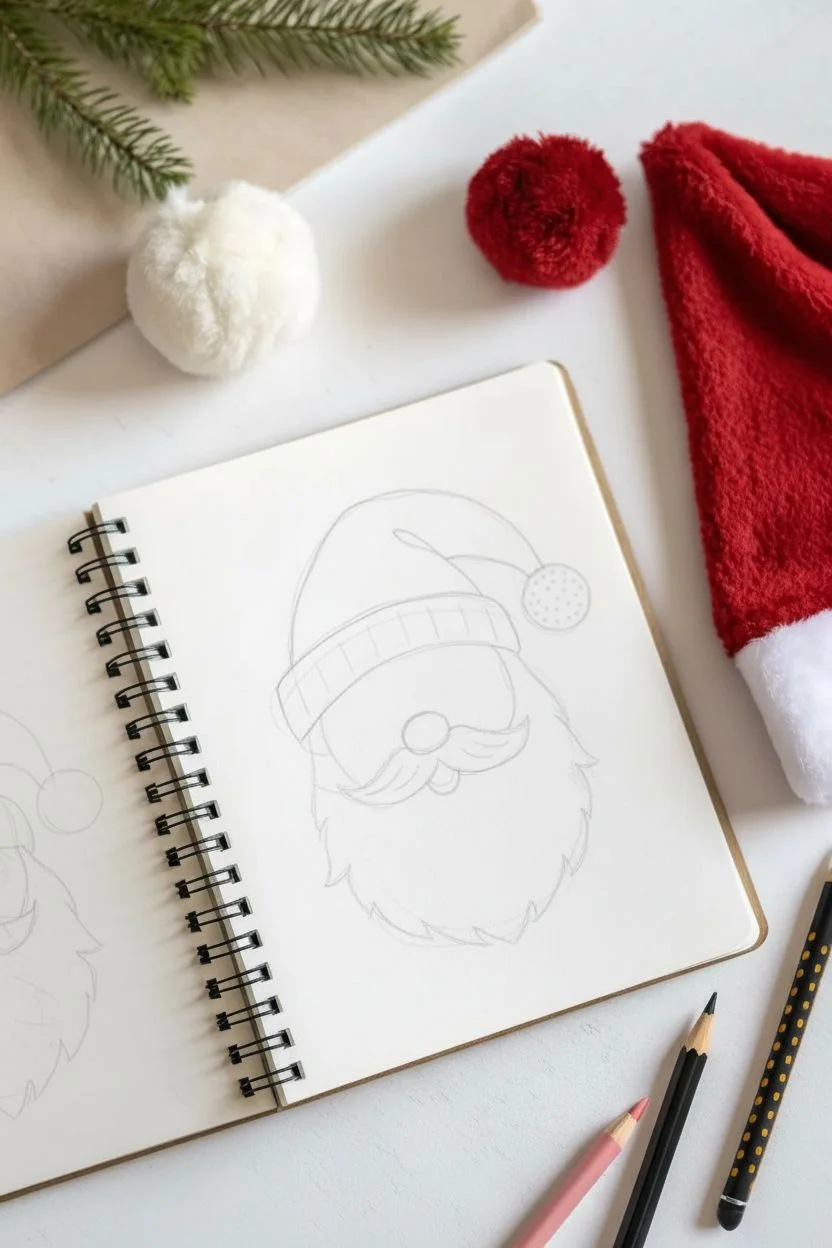
Step 1: Sketching the Basic Shapes
-
Map out the head:
Start by lightly sketching a wide U-shape near the center of your page to define the bottom of Santa’s face and beard area. -
Place the nose:
Draw a distinct circle right in the middle of your U-shape. This will be the nose, which anchors the rest of the features. -
Add the mustache:
From the sides of the nose circle, draw two flowing, curved shapes that swoop out and curl up slightly at the ends, meeting back in the center under the nose. -
Define the face shape:
Above the mustache, draw a curved line connecting the left and right sides of your initial U-shape. This creates the area for his eyes and cheeks. -
Sketch the hat brim:
Draw a rectangular band resting directly on top of the face curve. Make it slightly curved to wrap around the head, and add vertical lines inside it to suggest a ribbed texture. -
Form the hat body:
From the top of the brim, draw a large, curved cone shape that flops over to the right side. -
Add the pom-pom:
At the tip of the hat, draw a perfect circle. Sketch small dots inside to give it a fluffy texture.
Wobbly Lines?
If your inking feels shaky, embrace it! A slightly imperfect line adds hand-drawn charm. You can also thicken the line in wobbly areas to hide unevenness.
Step 2: Adding Details and Inking
-
Draw the facial features:
Inside the face area, add two small ovals for eyes, positioned widely apart. Add small curved eyebrows above them. -
Create the mouth:
Underneath the mustache, draw a small U-shape for an open smiling mouth. Add a tiny curve inside for the tongue. -
Detail the beard:
Outline the main beard shape again, but this time, make the line jagged and fluffy rather than smooth. Add little curved tick marks inside the beard area to suggest hair texture. -
Start the inking process:
Using your black fine-liner, trace over your pencil lines. Start with the nose and mustache to establish the center. -
Refine the line weight:
Here I prefer to go over the outer edges of the hat and beard a second time or use a slightly thicker pen to make the silhouette pop against the white paper. -
Ink the textures:
Carefully ink the vertical lines on the hat brim and the stippled dots on the pom-pom. Keep these lines thinner than the main outline. -
Erase guidelines:
Once the ink is completely dry (wait at least two minutes to avoid smudges), gently erase all underlying pencil sketch marks.
Step 3: Coloring
-
Color the hat:
Take a dusty pink or muted red pencil and fill in the main body of the hat. Apply the color evenly but softly, leaving the texture of the paper visible for a vintage look. -
Add cheek blush:
Using a peach or soft red pencil, draw two small circles on the cheeks just below the eyes. -
Color the mouth:
Fill in the tongue with a pink or light red pencil, keeping the back of the mouth white or very light gray. -
Final touches:
Check the eyes; if you want them to look lively, leave a tiny white spec uncolored as a highlight, or keep them solid black as shown for a classic cartoon feel.
Make it Pop
Leave a tiny gap between the outline and the color fill on the hat. This ‘white halo’ mimics professional print alignment and looks very clean.
You now have a charming Santa portrait ready to brighten up any holiday project


Easy Christmas Tree Triangle Stack
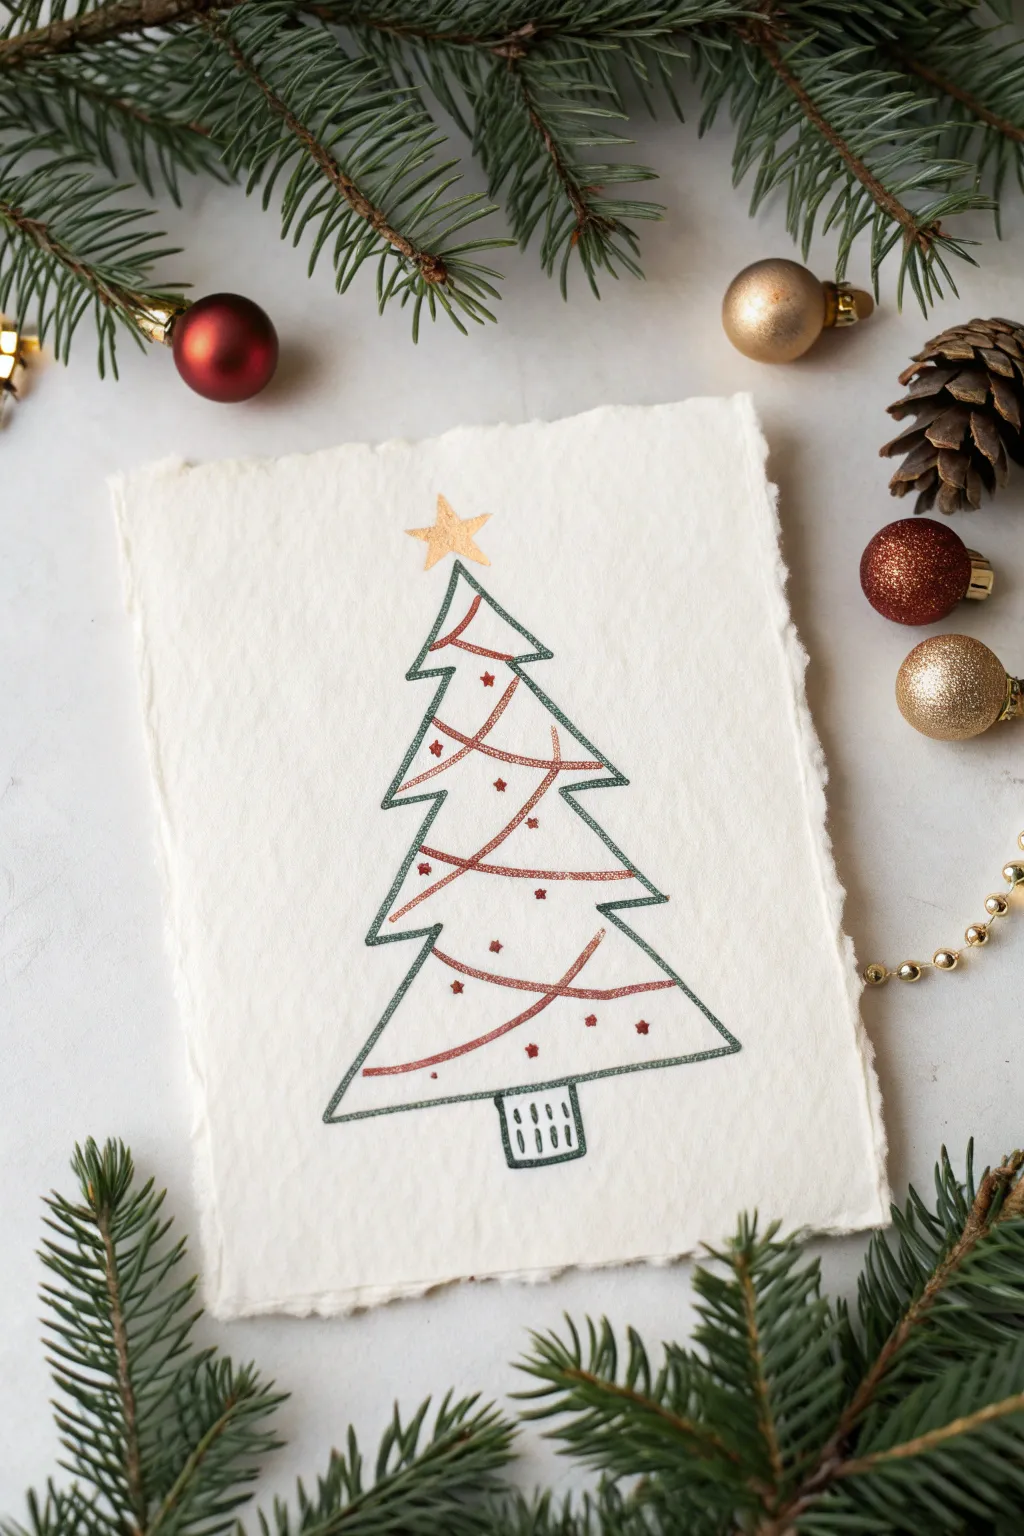
Embrace the imperfect charm of hand-drawn lines with this stylized Christmas tree design. The combination of green and copper metallic inks against textured handmade paper creates a look that feels both rustic and elegant.
Step-by-Step Guide
Materials
- Handmade cotton rag paper (with deckle edge)
- Metallic green gel pen or fine liner
- Metallic copper or bronze gel pen
- Gold star sticker or gold paint pen
- Pencil (optional for sketching)
- Eraser
Step 1: Planning the Shape
-
Paper preparation:
Start with a piece of heavy, textured handmade paper. The rough edges add character, so don’t trim them perfectly straight. -
Central axis:
Visually locate the center of your paper. If you’re nervous about freehanding, you can lightly mark a vertical plumb line with a pencil, but this style thrives on imperfection. -
Marking the height:
Determine where the top point of your tree will be (leave room for the star!) and where the base will end.
Smoother Lines
On rough handmade paper, pens can skip. Move your hand slowly and deliberately to let the ink flow into the paper’s texture without gaps.
Step 2: Drawing the Tree Outline
-
Top triangle:
Using your metallic green pen, draw a small, narrow triangle at the very top. The bottom line of the triangle should curve slightly downward, like a smile. -
Second tier:
Start the next tier slightly inside the bottom corners of the first triangle. Draw two angled lines outward and down, connected by another curved ‘smile’ line. -
Continuing the stack:
Repeat this process for the third and fourth tiers. As you go down, make each tier wider than the last, mimicking the natural shape of a fir tree. -
Final tier:
Draw the largest, bottom-most tier. This should anchor the design, with its bottom edge curving gently. -
Adding the trunk:
At the center of the bottom tier, draw a rectangular trunk using the green pen. Instead of leaving it solid, add vertical lines or a small grid, and round the bottom corners slightly for a softer look.
Add Watercolor
Use a very diluted green watercolor wash inside the tree shape before drawing your lines for a soft, stained-glass effect.
Step 3: Adding Festive Details
-
Drawing the ribbon:
Switch to your copper or bronze metallic pen. Start near the top left of the tree and draw a swooping line that curves diagonally down across the green tiers. -
Double lines:
To give the ribbon weight, draw a second parallel copper line right next to the first one. Don’t worry if they touch or overlap slightly—it adds to the sketched effect. -
Zig-zag pattern:
Continue this ribbon pattern back and forth down the tree, creating a zig-zag that gets wider as it reaches the bottom. -
Tiny ornaments:
Using the same copper pen, draw tiny, five-point stars scattered across the white spaces of the tree tiers. These should be very small, almost like asterisks. -
Top star:
Place a gold star sticker at the very peak of the tree. If you don’t have stickers, draw a simple five-point star using a gold paint pen or the copper ink. -
Drying time:
Let the ink sit for a few minutes. Metallic gel pens can pool slightly on textured paper, so give it time to set before touching.
Now you have a charming, hand-sketched card ready to share with friends


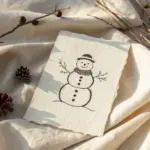
Snowman With Three Circles
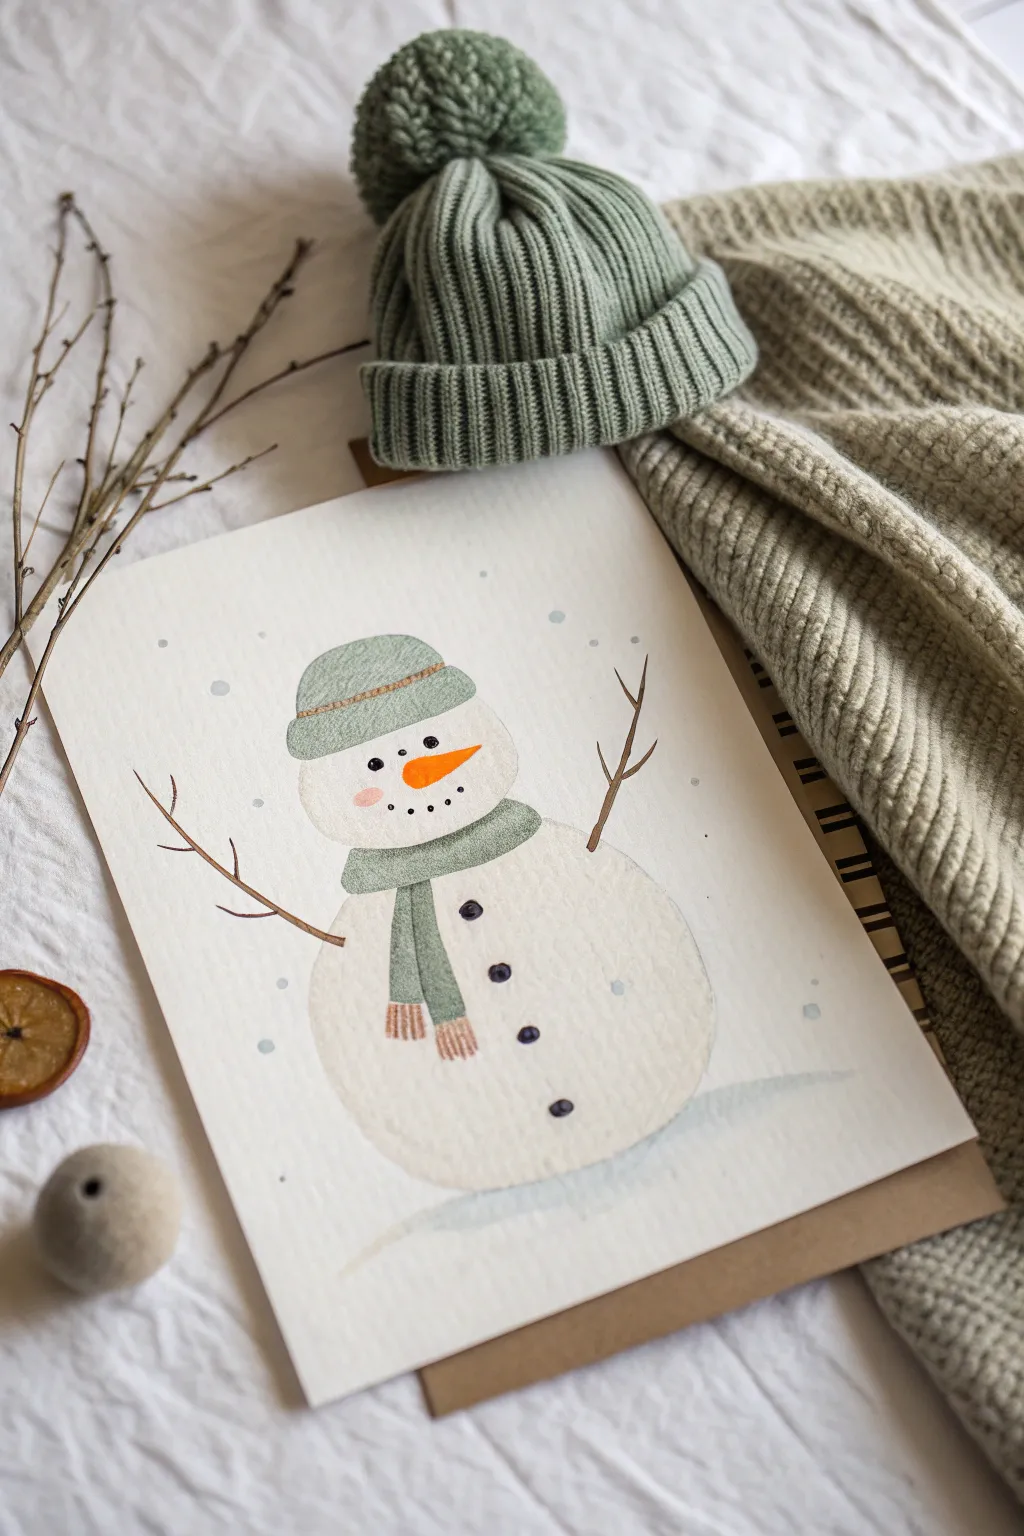
Capture the magic of a fresh snowfall with this adorable watercolor snowman, wrapped up warm in a sage green hat and scarf. The soft, textured edges and minimal palette give this piece a gentle, nostalgic greeting card feel that is perfect for beginners.
Step-by-Step
Materials
- Cold press watercolor paper (A5 size or greeting card blank)
- Watercolor paints (Sage Green, Burnt Umber, Payne’s Grey, Orange, White/Opaque White)
- Round watercolor brushes (sizes 4 and 6)
- Fine detail brush (size 0 or 1)
- Pencil (HB) and kneaded eraser
- Clean water and paper towels
- Mixing palette
Step 1: Sketching the Base
-
Outline the body:
Start by lightly sketching the snowman’s structure using your pencil. Draw a large, slightly flattened circle for the bottom, a medium circle for the torso, and a smaller oval shape for the head. Don’t worry about making them perfect circles; organic shapes look more natural. -
Add accessories:
Sketch a simple beanie shape sitting atop the head, making sure it curves around the forehead. Draw the scarf wrapped snugly around the neck area, letting the ends drape down the front of the torso. -
Mark the arms:
Lightly indicate where the stick arms will go, extending outward and slightly upward from the middle section.
Step 2: Painting the Snowman
-
Wash the body:
Mix a very watery, pale grey using a touch of Payne’s Grey and lots of water. Gently fill the body shapes, keeping the edges soft. I like to leave the center of the balls almost white to create a rounded, highlighted effect. -
Paint the hat base:
Load your size 6 brush with Sage Green watercolor. Paint the main dome of the hat. While it’s still slightly damp, drop in a tiny bit more pigment at the edges for shadow. -
Paint the scarf:
Using the same Sage Green, carefully paint the scarf sections. Ensure the body paint is dry first so the green doesn’t bleed into the white snow. -
Add hat details:
Paint the rim of the hat with a slightly darker mixture of the green to differentiate it from the top part. Let this dry completely.
Muddy Colors?
If your green scarf is bleeding into the white body, stop immediately. Use a clean tissue to blot the mistake and let the white area bone-dry before re-attempting the scarf.
Step 3: Adding Character & Texture
-
Create the face:
Once the head is dry, mix a vibrant orange and paint a carrot nose pointing to the right. Use a fine detail brush and black or dark grey to dot two eyes above the nose and a charcoal smile below it. -
Rosy cheeks:
Mix a very diluted pink or watery red. Gently dab a small circle onto the cheek area for a soft, blushing look. -
Paint the arms:
Switch to your fine liner brush and Burnt Umber. Paint thin, branching twigs for arms on both sides. Vary the pressure to make the branches tapering and natural-looking. -
Buttons:
Paint three small, dark grey or black buttons down the center of the middle snowball. -
Scarf texture:
Using a slightly darker green mixture and a fine brush, add subtle vertical lines or cross-hatching to the scarf to mimic a knit texture. Add tiny brown lines at the bottom edges of the scarf for tassels.
Level Up: Salt Texture
While the paint on the snowman’s body is still wet, sprinkle a few grains of table salt on it. Brush it off when dry for an icy, crystallized texture.
Step 4: Finishing Touches
-
Highlight the hat:
Use opaque white paint or a white gel pen to add a thin, decorative stripe across the hat’s rim for a bit of pattern. -
Snow splatter:
For a magical snowy atmosphere, dilute some white gouache or acrylic. Tap your brush over the paper to create falling snow. Add a few dots of pale blue-grey in the background for depth. -
Grounding shadow:
Mix a watery blue-grey wash. Paint a soft, horizontal shadow underneath the snowman to ground him, so he isn’t floating in space.
Now let your charming little snowman dry completely before gifting it to a friend or displaying it on your mantle

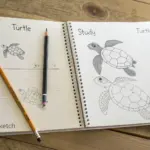
Round Ornament With Simple Patterns
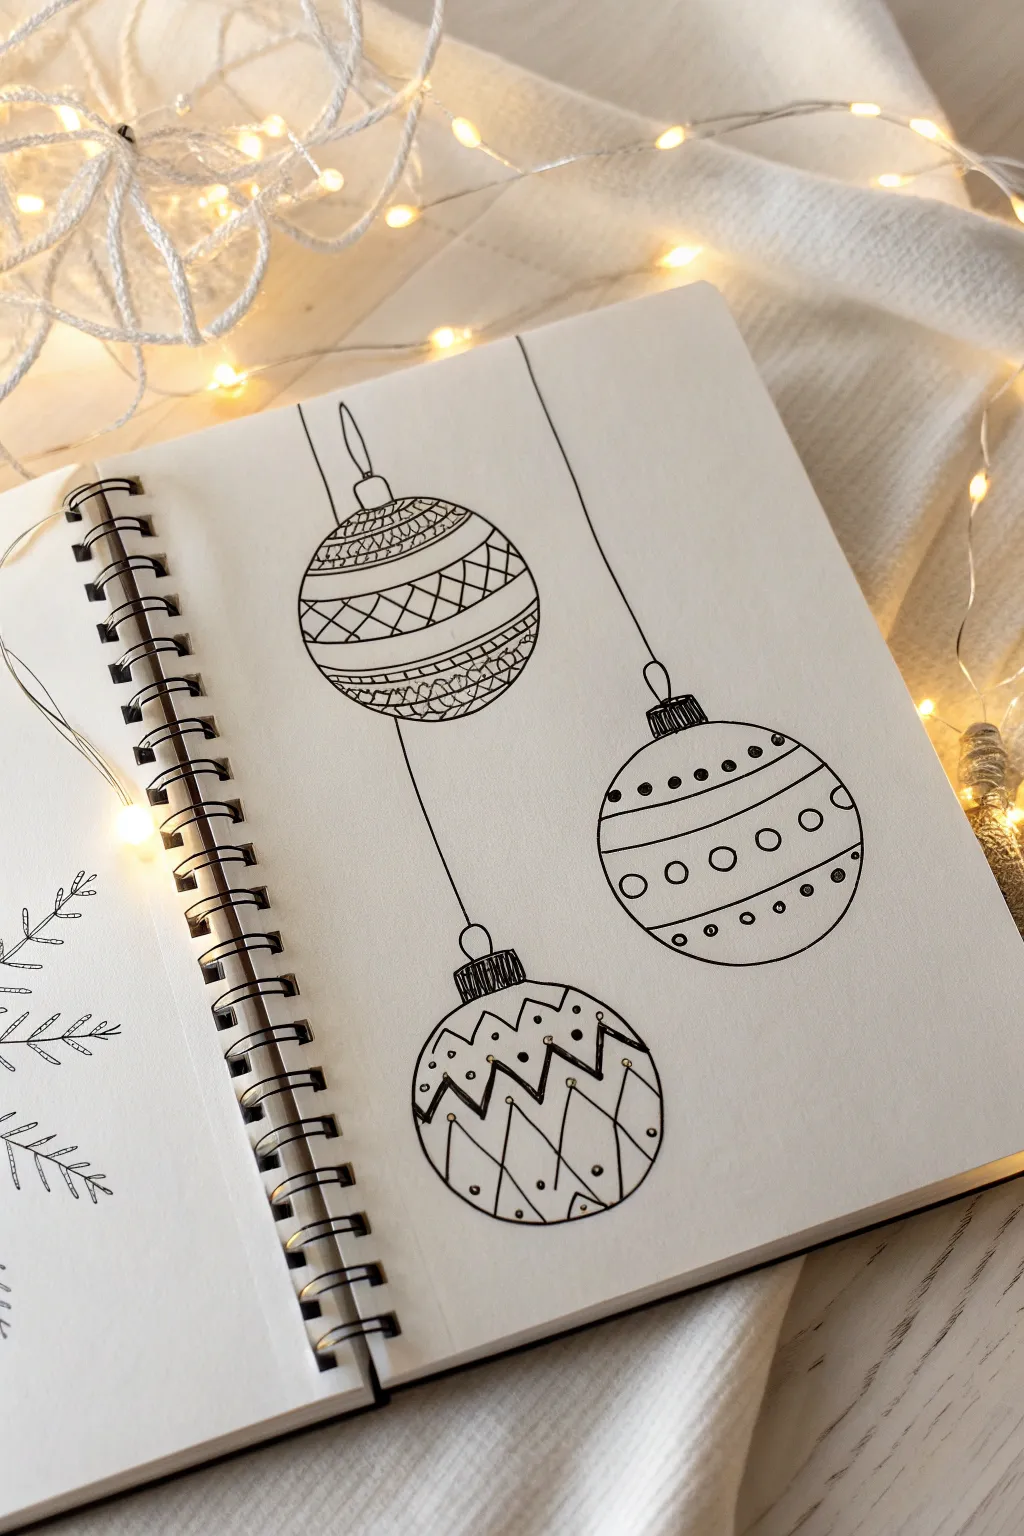
Create a charming trio of patterned Christmas ornaments with this simple yet effective ink drawing. Using clean lines and repetitive geometric shapes, you will build intricate-looking designs that pop against the white page.
Detailed Instructions
Materials
- Spiral-bound sketchbook or drawing paper
- Black fine liner pen (0.3mm or 0.5mm)
- Pencil (HB or 2B)
- White eraser
- Ruler (optional)
Step 1: Sketching the Basics
-
Draw the circles:
Start by lightly sketching three circles in pencil. Position two on the left side (one higher, one lower) and one on the right side, roughly in the middle height-wise. Don’t worry about perfect circles; a little hand-drawn wobble adds character. -
Add the caps:
On top of each circle, sketch a small rectangle or square for the ornament cap. Add a small loop or ring on top of each cap where the string would attach. -
Draw the strings:
Using a ruler or freehand, draw a straight vertical line extending upwards from the loop of each ornament to the top edge of the paper. This anchors them in space so they look like they are hanging.
Step 2: Designing the First Ornament
-
Outline the top shape:
Starting with the top-left ornament, trace over your pencil circle and cap with the black fine liner. Draw small vertical lines inside the cap for texture. -
create bands:
Divide the circle into four or five horizontal sections using slightly curved lines that follow the roundness of the bauble. -
Add zigzags:
In the top band, draw a tight zigzag pattern. In the third band down, repeat this same zigzag texture. -
Fill the center:
For the wide middle band, draw diagonal lines in one direction, then cross them in the other direction to create a cross-hatch or diamond pattern. -
Detail the bottom:
Fill the bottom-most section with small, dense scales or scallops to give it a darker visual weight.
Steadier Curves
When drawing the internal curved bands, turn your sketchbook so your hand moves in a natural arc. It’s much easier to draw a smooth curve by pivoting your wrist.
Step 3: Designing the Second Ornament
-
Outline the middle shape:
Move to the ornament on the right. Ink the main circle outline, the cap, and the string line. -
Stripe pattern:
Draw pairs of horizontal lines across the bauble to create thick bands separated by thin stripes. -
Add dots:
In the top thick band, draw a row of solid black dots. -
Add circles:
In the middle thick band, draw a row of small, open circles. -
Finish with tiny dots:
In the bottom band, place smaller open circles or dots to balance the design. I find that varying the size of dots makes the pattern more interesting.
Metallic Accent
Use a gold or silver metallic gel pen to trace over specific details like the caps or the dots for a festive, shimmering effect.
Step 4: Designing the Third Ornament
-
Outline the bottom shape:
Ink the outline, cap, and string of the final bottom-left ornament. Darken the cap with vertical hatch marks. -
Zigzag center:
Draw two parallel zigzag lines across the middle of the ornament. Darken the top line slightly to make it stand out. -
Top decoration:
Above the zigzag, scatter small dots or stippling to fill the upper space lightly. -
Bottom geometric lines:
Below the zigzag, draw inverted ‘V’ shapes or triangles extending downward. Inside the spaces created, add small vertical dashes or dots for detail.
Step 5: Finishing Touches
-
Erase pencil lines:
Wait a moment for the ink to fully dry, then gently erase all visible pencil marks underneath your designs. -
Reinforce lines:
Look over your drawing. If any outer lines feel too thin, carefully go over them again to thicken the silhouette of the baubles.
Now you have a festive page of custom decorations ready to inspire your holiday cards
BRUSH GUIDE
The Right Brush for Every Stroke
From clean lines to bold texture — master brush choice, stroke control, and essential techniques.
Explore the Full Guide
Six-Arm Snowflake Guide
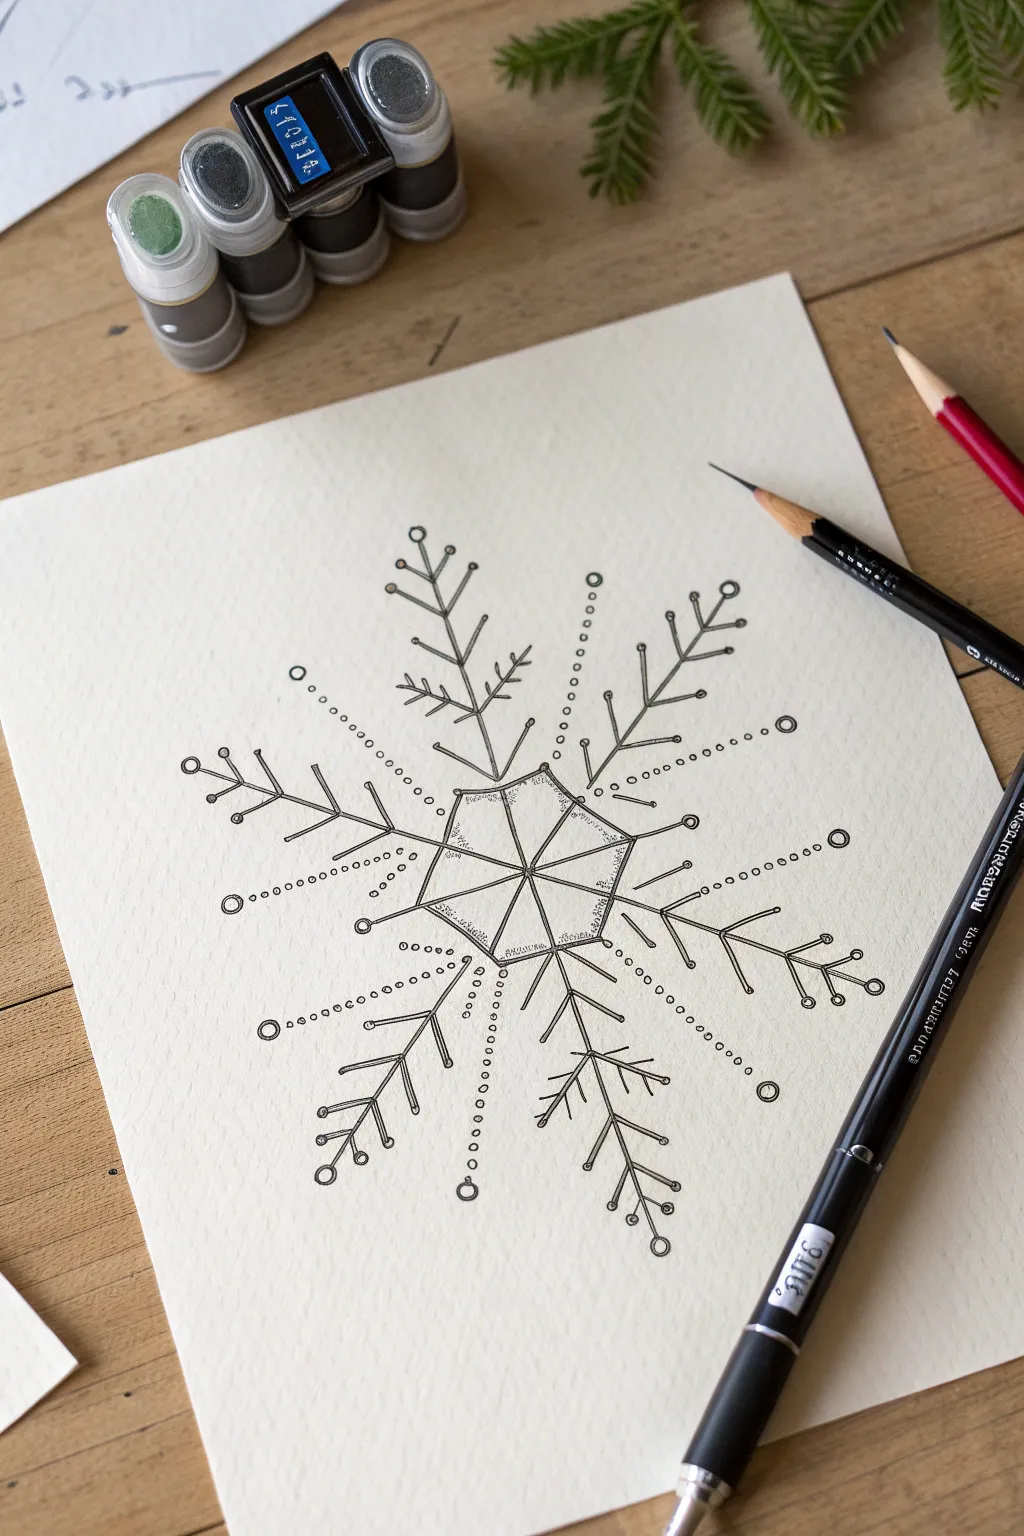
This elegant six-arm snowflake combines geometric precision with delicate stippling for a sophisticated holiday design. The stark contrast of black ink on cream paper gives it a timeless, vintage botanical illustration feel.
Step-by-Step Guide
Materials
- Cream or off-white drawing paper (smooth bristol or hot press watercolor paper)
- HB or H graphite pencil
- Fine liner pens (sizes 0.1mm, 0.3mm, and 0.5mm)
- Ruler or straight edge
- Compass or circle template (optional)
- Eraser
Step 1: Structural Framework
-
Establish the center:
Begin by lightly marking a center point on your paper with your pencil. This will be the anchor for your entire radial design. -
Draw the six main axes:
Using a ruler, draw three intersecting lines through the center point to create a six-pointed star shape. Ensure the angles between them are roughly equal (60 degrees) to keep the snowflake symmetrical. -
Create the central hexagon:
Draw a small hexagon connecting the six lines near the center. Think of this like a spiderweb connecting the main spokes about an inch out from the middle. -
Outline the central gem:
Inside the hexagon you just drew, add slightly curved lines connecting the spokes to create a faceted, gem-like appearance. The lines should look like sections of an umbrella.
Steady Hand Pro Tip
Rotate your paper constantly as you work. Always draw lines by pulling the pen toward your body, rather than pushing away, for smoother strokes.
Step 2: Branch Detailing
-
Sketch the primary branches:
Along each of the six main spokes, sketch three pairs of angled branches pointing outward. These should look like the veins on a leaf or the needles on a pine branch. -
Add terminal details:
At the very tip of each main spoke and each side branch, draw a tiny circle. This softens the sharp geometry of the design. -
Plan the decorative rays:
In the spaces between the six main arms, lightly sketch straight lines radiating from the center. These will become the beaded decorative strands. -
Start the inking process:
Switch to your 0.5mm pen. Carefully trace over the main six spokes and the central hexagon shape, making these your boldest lines.
Step 3: Inking and Refinement
-
Ink the side branches:
Use a slightly thinner nib, like a 0.3mm pen, to ink the angled side branches and the small circles at their tips. This creates a subtle hierarchy in line weight. -
Stipple the center:
Using your finest 0.1mm pen, add tiny stippling dots inside the central hexagon sections. Concentrate the dots near the outer edges of the faceted shapes to create dimension and shading. -
Create the beaded lines:
Remember those lines you sketched between the arms? Instead of tracing a solid line, draw a row of tiny, evenly spaced circles along the path. These act as delicate fillers. -
Detail the larger beads:
At the end of each beaded line, draw a slightly larger circle to anchor the ray. I find keeping the spacing consistent here is key to the balanced look. -
Add secondary bead strands:
Draw shorter strands of tiny circles originating from the central hexagon, placed strategically between the main arms and the longer bead strands.
Level Up: Metallic Pop
Once the black ink is dry, use a silver or gold gel pen to fill in the tiny circles at the tips of the branches for a subtle seasonal sparkle.
Step 4: Final Touches
-
Enhance intersections:
Go back with your 0.1mm pen and add tiny dots or extra weight where the branches meet the main stems. This mimics the natural joints found in ice crystals. -
Let the ink cure:
Allow the ink to dry completely for at least 15 minutes. Smudging wet ink at this stage is the biggest risk to your crisp lines. -
Erase guidelines:
Gently erase all your original pencil marks. Use a kneaded eraser if possible to lift the graphite without abrading the paper surface. -
Check balance:
Step back and look for any gaps. You can add a few stray stipple dots around the central hexagon if the core feels too light.
Now you have a permanent winter crystal that won’t melt away
Classic Christmas Wreath Circle
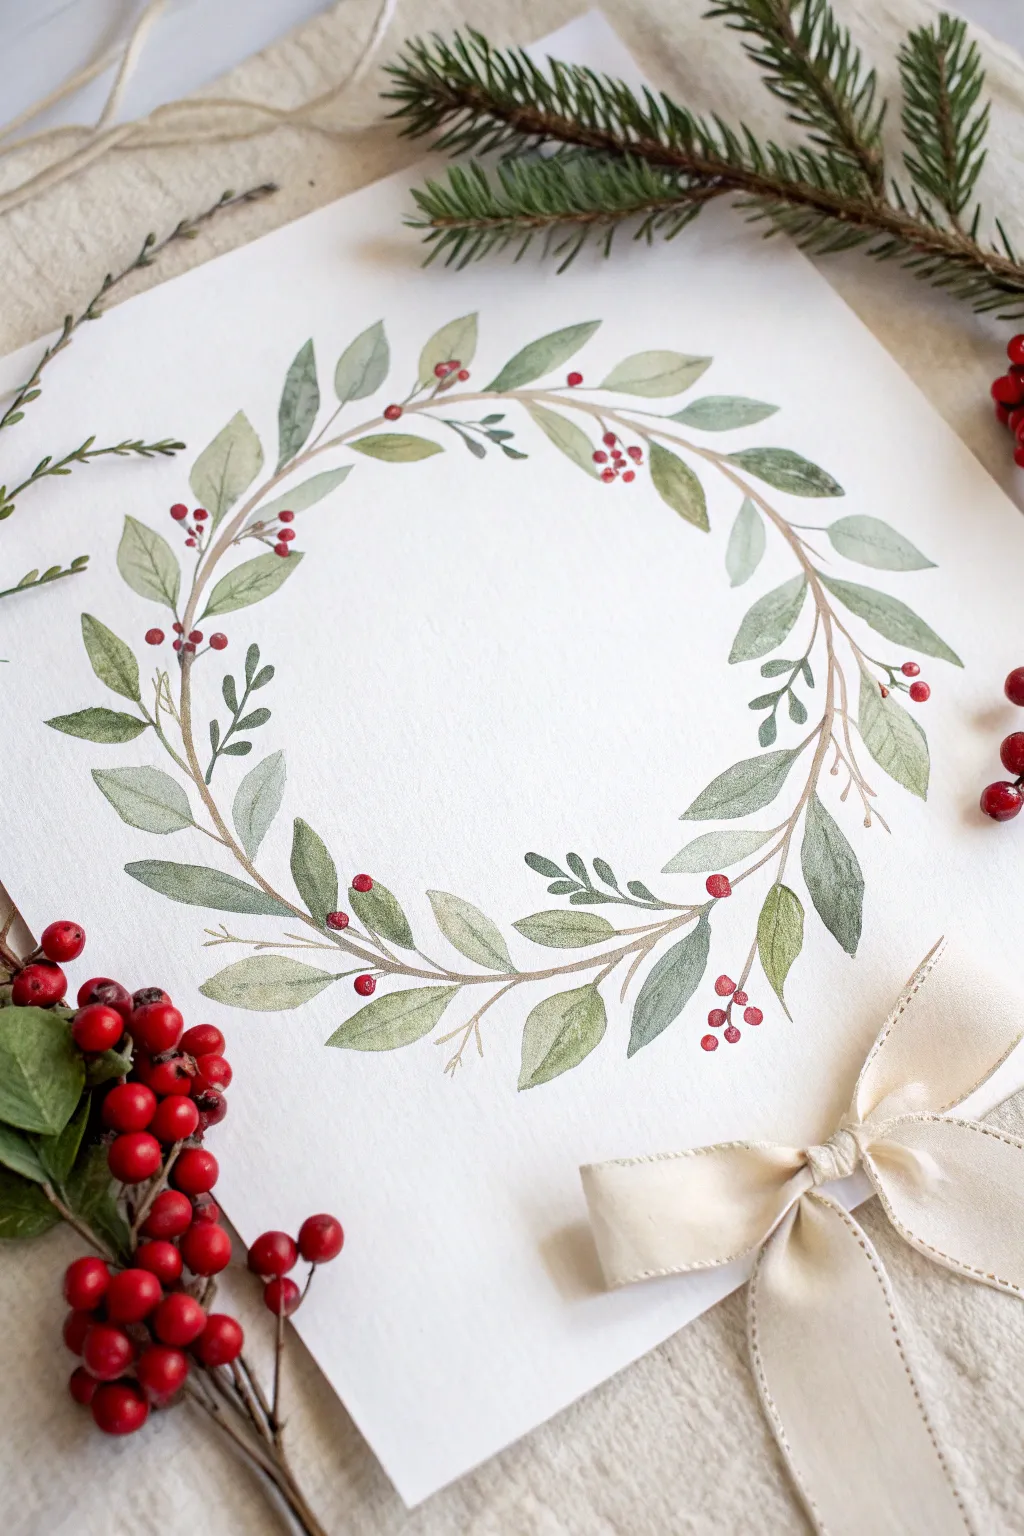
This elegant watercolor wreath captures the quiet beauty of winter foliage with its delicate sage greens and pops of holly red. The loose, organic style makes it a forgiving and relaxing project perfect for handmade holiday cards or framed seasonal decor.
How-To Guide
Materials
- Cold press watercolor paper (300 gsm)
- Watercolor paints (Sap Green, Hooker’s Green, Burnt Umber, Alizarin Crimson)
- Round watercolor brushes (size 2 and 6)
- Pencil (HB or lighter)
- Compass or a round object to trace
- Jar of water
- Paper towels
- Palette for mixing
Step 1: Preparation and Sketching
-
Prepare your paper:
Tape your watercolor paper down to a flat board or table using painter’s tape to prevent buckling when the paper gets wet. -
Draw the guide:
Using a compass or by lightly tracing a bowl, draw a circle in the center of your paper. This will be the spine of your wreath. -
Lighten the guide:
Use a kneaded eraser to gently lift the graphite until the circle is barely visible. You want a guide, not a permanent outline.
Step 2: painting the Base Structure
-
Mix your twig color:
Create a watery mix of Burnt Umber with a tiny touch of Paynes Grey or dark blue to cool it down. It should be transparent and light. -
Paint the main stem:
With your size 2 brush, paint a very thin, broken line following your circle guide. Don’t make it a perfect solid line; let it weave in and out slightly. -
Add secondary twigs:
While the main stem is drying, paint small, thin offshoots branching outward and inward from the circle. These will hold your leaves.
Muddy colors?
If your leaves are bleeding into brown sludge, let your layers dry completely between passes. Patience ensures crisp overlaps.
Step 3: adding the Foliage
-
Mix green variations:
Prepare three puddles of green: a pale watery sage (Sap Green + water), a medium olive, and a darker cool green (Hooker’s Green + a touch of blue). -
Paint the first leaves:
Using the size 6 brush, load up your palest sage green. Paint almond-shaped leaves scattered around the circle, attaching them to your twig offshoots. -
Vary the pressure:
To get a natural leaf shape, press the belly of the brush down to widen the stroke and lift up as you reach the tip. -
Add darker leaves:
While the first layer is still slightly damp (but not soaking), switch to your medium olive green. Paint new leaves overlapping some of the pale ones to create depth. -
Insert cool accents:
Use your darkest cool green to paint smaller, thinner leaves or pine-like needles in the gaps. This contrast prevents the wreath from looking flat. -
Fill the gaps:
Step back and look for empty white spaces. Fill these with very faint, ghostly leaves using extremely watered-down pigment to make the wreath look full.
Add some sparkle
Once fully dry, add tiny dots of metallic gold paint to the center of the berries or on the leaf tips for a festive shimmer.
Step 4: Berries and Details
-
Mix berry red:
Mix a vibrant, saturated red using Alizarin Crimson. I like to add a tiny dot of brown to keep it from looking too candy-bright. -
Paint berry clusters:
With the tip of your size 2 brush, drop in small groups of 2-3 round berries on the stem. Place them randomly, not symmetrically. -
Connect the berries:
Use your finest brush and the brown twig mixture to draw tiny stems connecting the berry clusters back to the main branch. -
Add leaf veins:
Once the green leaves are 100% dry, use a slightly darker green mix and your size 2 brush to paint a thin central vein on the largest leaves. -
Final touches:
Review the composition. If any area feels too heavy, balance it by adding a stray twig or a small leaf on the opposite side.
Allow your painting to dry flat completely before erasing any remaining pencil marks carefully

PENCIL GUIDE
Understanding Pencil Grades from H to B
From first sketch to finished drawing — learn pencil grades, line control, and shading techniques.
Explore the Full Guide
Cozy Christmas Stocking
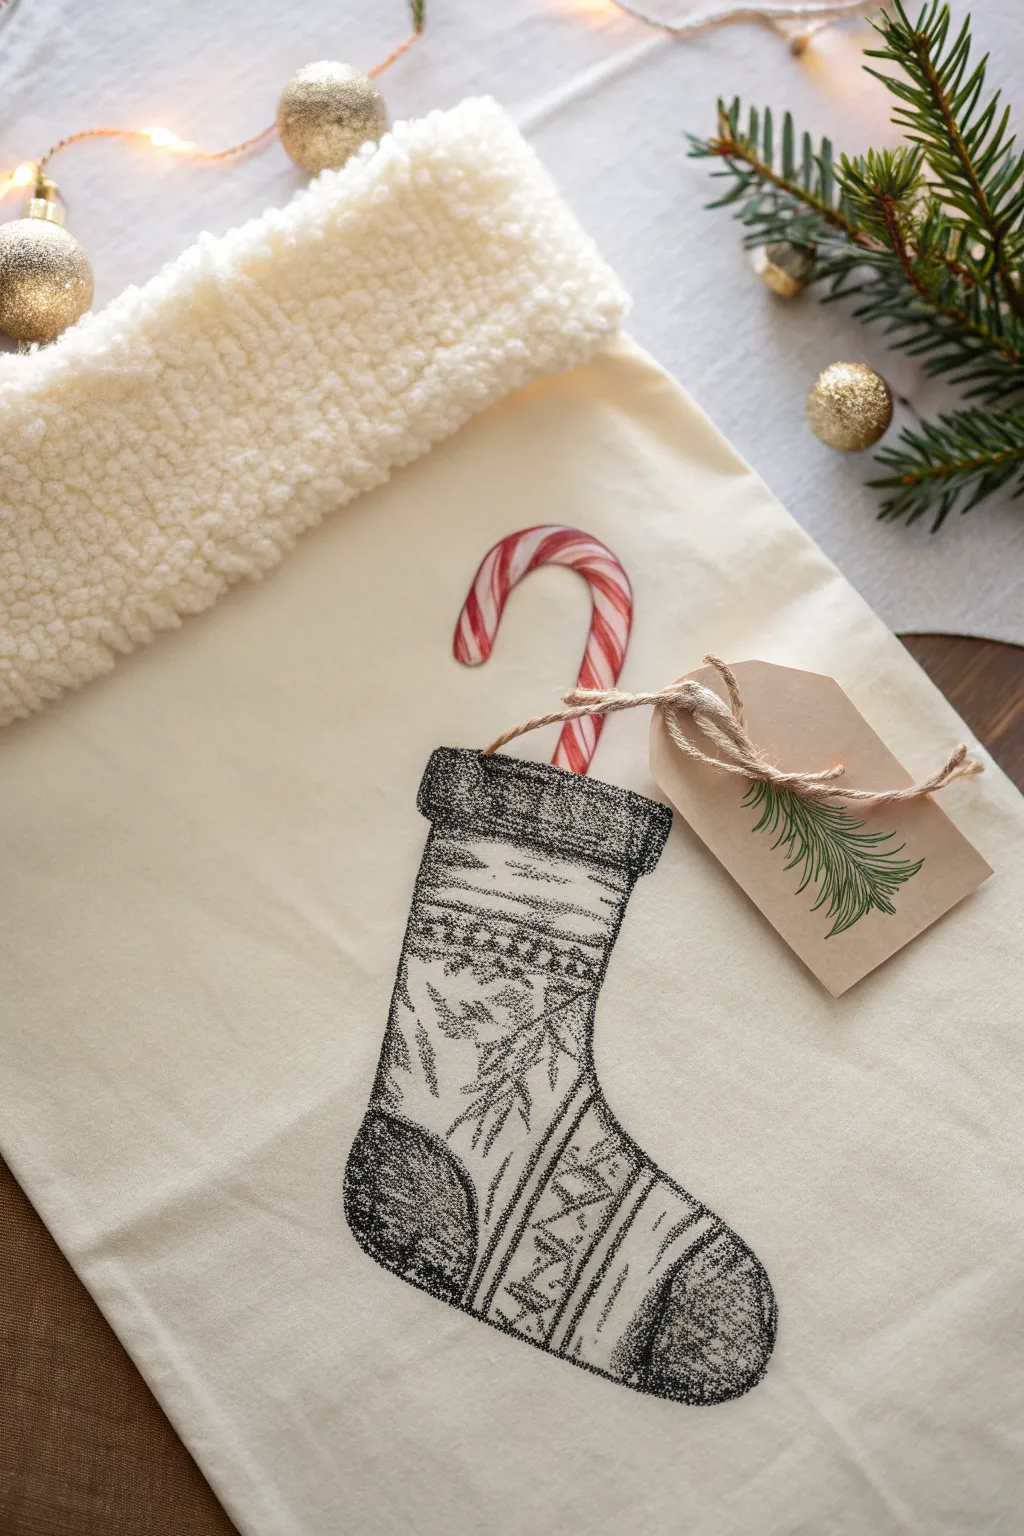
Transform a plain fabric bag into a charmingly cozy gift holder featuring a hand-drawn illustration of a knitted sock and candy cane. The contrast between the fine ink stippling and the bright red candy cane gives this project a sophisticated, vintage sketchbook feel.
Step-by-Step Tutorial
Materials
- Cotton or linen drawstring bag (or plain tote)
- Black fabric fine liner pen (waterproof)
- Red fabric marker or acrylic paint
- Fine detail paintbrush (if using paint)
- Pencil and eraser
- Faux shearling or sherpa fabric strip (approx. 4 inches wide)
- Fabric glue or needle and thread
- Kraft paper gift tag
- Jute twine
- Green marker or pen
Step 1: Drawing the Design
-
Outline the shape:
Begin by lightly sketching the outline of a classic Christmas stocking in pencil on the lower half of your fabric bag. Keep the shape simple with a slight curve for the heel and toe. -
Add the candy cane:
Sketch a candy cane poking out of the top of the stocking. Draw the hook curving to the left, ensuring it looks like it is resting inside the sock cuff. -
Block in pattern zones:
Divide the body of the stocking into horizontal bands with your pencil. These will become the different knitted pattern sections, like the cuff, the main leg, the heel, and the toe. -
Ink the outlines:
Using your black fabric fine liner, carefully trace over your main pencil outlines. Use a slightly broken or sketchy line style rather than a solid heavy line to mimic an ink illustration. -
Stipple the dark areas:
For the heel, toe, and top cuff of the drawn stocking, use a stippling technique. Create density by placing many small dots close together, making these areas look dark and textured like wool.
Ink Bleed Prevention
Place a piece of cardboard inside the bag before drawing. This creates a stable surface and prevents ink or paint from bleeding through to the back layer.
Step 2: Detailing and Color
-
Draw the knit patterns:
Fill in the middle sections with classic knit motifs. Try drawing small ‘V’ shapes for a stockinette stitch, simple zig-zag lines, or small pine tree shapes. -
Shade with hatching:
To give the drawing dimension, add simple diagonal hatch marks along the sides of the stocking. This makes the illustration look rounded rather than flat. -
Color the candy cane:
Use your red fabric marker or red acrylic paint to fill in the stripes of the candy cane. Leave alternating white stripes (the fabric color) for a classic look. -
Add red details:
Carefully add a thin red line within the white stripes of the candy cane for extra realism. Let the ink and paint dry completely before erasing any visible pencil marks.
Level It Up
Embroider over the red candy cane stripes with satin stitch using red embroidery floss. The real texture against the flat drawing creates a cool 3D mixed-media effect.
Step 3: Finishing Touches
-
Prepare the cozy cuff:
Cut a strip of faux shearling or sherpa fabric that matches the width of your bag’s opening. Fold the raw edges under slightly for a cleaner look. -
Attach the cuff:
Apply fabric glue along the top edge of the bag and press the sherpa strip into place, creating a thick, fluffy rim. I prefer to stitch this by hand for durability, but glue works well for display items. -
Create the tag:
On a kraft paper tag, draw a simple pine sprig using a green marker and a black pen for the stem. -
Tie it all together:
Thread a piece of jute twine through the tag and tie it loosely around the ‘neck’ of the illustrated candy cane. Use a small dot of glue to secure the knot to the fabric so it stays in place.
Fill your new custom bag with treats and enjoy the handmade warmth it brings to your holiday decor
Reindeer Face With Antlers
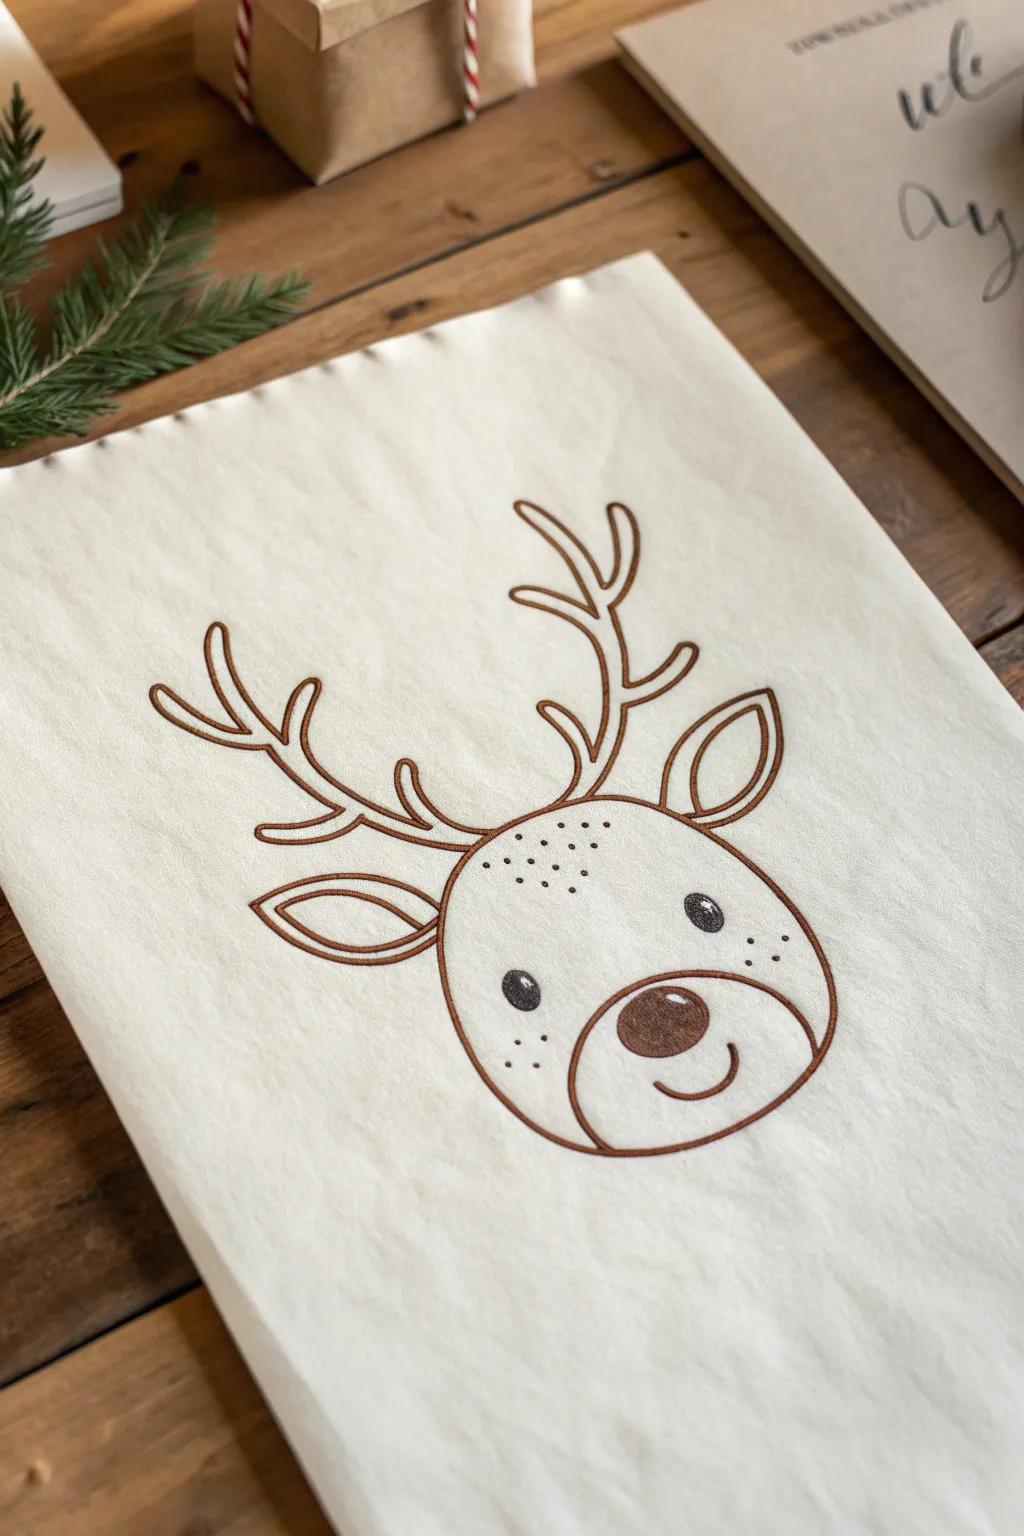
This adorable reindeer face relies on clean, confident lines and simple shapes to create a festive piece of art that feels modern yet classic. The minimalist style, featuring warm brown ink on textured cream paper, makes it perfect for holiday cards or framed seasonal decor.
Step-by-Step Guide
Materials
- Heavyweight cream or off-white drawing paper (textured finish preferred)
- Brown fine-point marker or drawing pen (0.5mm to 0.8mm)
- Pencil (HB for sketching)
- Eraser (kneaded eraser works best)
- Optional: Ruler for centering
Step 1: Planning the Face
-
Rough sketch:
Start by lightly sketching a large circle in the center of your page with a pencil. This doesn’t need to be perfect; it’s just a guide for the reindeer’s head shape. -
Add the snout:
Draw an oval shape inside the bottom half of your main circle. This will become the muzzle area where the mouth and nose sit. -
Position the antlers:
Lightly sketch two curved guidelines extending upwards from the top specific of the head. Make them symmetrical, curving slightly outward.
Rotation Technique
Turn your paper physically as you draw the curved head shape. It’s much easier for your wrist to draw a smooth arc in one natural motion than to contort your hand.
Step 2: Drawing the Features
-
Inking the head outline:
Switch to your brown drawing pen. Trace over your pencil circle, but stop leaving gaps where the ears and antlers will attach. I find it helps to rotate the paper as I draw the curve to keep it smooth. -
Drawing the muzzle:
Draw the bottom arc of the muzzle first, connecting it to the main head outline. Then, draw the upper arc of the muzzle inside the face. -
Adding the nose:
Inside the muzzle area, draw a slightly flattened oval for the nose. Fill it in completely with your brown marker, leaving a tiny sliver of white at the top for a highlight. -
The smile:
Place a simple, small upward-curving line directly beneath the nose to give him a happy expression. -
Creating the eyes:
Draw two solid black oval eyes evenly spaced above the muzzle. Like the nose, leave a tiny white dot in the upper corner of each eye to bring them to life.
Shaky Lines?
If your lines look jittery, try drawing faster. Slow movement often causes more wobbles. Practice confident, quicker strokes on scrap paper first.
Step 3: Ears and Antlers
-
Outer ear shape:
On the left side of the head, draw a leaf-like shape for the ear. Repeat on the right side, trying to keep them at the same height. -
Inner ear detail:
Draw a smaller, similar leaf shape inside each ear to clearly define the inner ear structure. -
Main antler beam:
Starting from the top of the head, draw the main stem of the antler curving upwards and outwards. -
Adding tines:
Add three to four small branches (tines) coming off the main antler stem. Keep the tips rounded rather than sharp for a softer look. -
Repeat for the second antler:
Draw the matching antler on the other side. Don’t worry about perfect symmetry; natural antlers are rarely identical.
Step 4: Finishing Touches
-
Freckles:
In the space between the eyes and the start of the muzzle, add a cluster of small dots using the very tip of your pen. Group them closer near the center and clearer as they fan out. -
Let ink dry:
Wait at least five minutes to ensure the brown ink is completely set. Smudging at this stage is heartbreaking. -
Erase guidelines:
Gently rub your kneaded eraser over the entire drawing to lift away the initial pencil sketch, leaving only the crisp brown lines.
Once the pencil marks are gone, your cheerful reindeer is ready to frame or gift


Mistletoe Bundle With Bow

Capture the delicate beauty of winter flora with this charming botanical illustration featuring mistletoe tied with a dainty pink ribbon. The combination of fine ink lines and soft watercolor washes creates a vintage-inspired look perfect for holiday cards.
Step-by-Step Guide
Materials
- Cold press watercolor paper (A5 size)
- Fine liner pen (black or sepia, 0.1mm and 0.3mm)
- Watercolor paints (Olive Green, Sap Green, Alizarin Crimson, Vermilion, light Pink)
- Round watercolor brushes (size 2 and 4)
- pencil (HB)
- Eraser
- Jar of water and paper towels
Step 1: Planning the Composition
-
Sketch the central stem:
Begin lightly with your pencil. Draw a central, slightly curved vertical line to act as the main spine of your bouquet. It should start about a third of the way up from the bottom of the page. -
Add branching stems:
Radiate three to four smaller lines outward from the central spine. Let them curve naturally upwards and outwards, creating a fan-like shape. -
Place leaf shapes:
Sketch the signature oval-shaped mistletoe leaves in pairs along the stems. Keep the shapes rounded at the top and slightly tapered where they attach to the stem. -
Add delicate filler:
Behind the main mistletoe leaves, sketch faint, thin lines for wispy pine or dried grass sprigs to add texture to the background. -
Position the berries:
Draw small circles in clusters of two or three at the junction where leaves meet the stem. Distribute them evenly but randomly for a natural look. -
Tie the bow:
Sketch a simple bow where all the stems converge near the bottom. Draw two loops and two trailing ribbons, keeping the lines loose and flowing. -
Define the cut stems:
Below the bow, draw the ends of the stems flaring out slightly, showing where they have been cut.
Step 2: Inking the Outline
-
Ink the main leaves:
Using your 0.3mm fineliner, trace over the pencil lines of the main mistletoe leaves. I like to break the line slightly here and there to keep it looking organic rather than rigid. -
Detail the filler sprigs:
Switch to a finer 0.1mm pen to ink the wispy background branches. Use very light, feathery strokes to push these elements visually into the background. -
Outline berries and bow:
carefully outline the round berries and the ribbon bow. Ensure the knot of the bow looks snug against the stems. -
Erase pencil marks:
Wait until the ink is completely dry—give it a full minute or two—then gently erase all visible pencil sketches.
Natural Highlights
Don’t stress about painting perfectly inside the lines. Leaving small white gaps between the ink line and the paint creates a fresh, illustrative style.
Step 3: Adding Color
-
Paint the leaves:
Mix a watery Olive Green. Paint a light wash over the leaves, leaving tiny white slivers near the edges for highlights. While damp, drop a touch of darker Sap Green at the base of each leaf. -
Color the berries:
Using a size 2 brush, paint the berries with a mix of Vermilion and Alizarin Crimson. Leave a tiny white dot unpainted on each berry to create a glossy shine. -
Tint the bow:
Apply a very pale wash of pink to the ribbon loops and tails. Once the first layer is dry, add a slightly darker pink stripe along one edge to suggest shadow and depth. -
Shade the stems:
Run a thin line of brown or dark green along the stems below the bow to ground the bouquet. -
Final touches:
If the wispy background branches look too faint, you can add a barely-there grey wash over them, but often the ink alone is enough.
Add Winter Frost
Once the watercolor is fully dry, use a white gel pen to add tiny dots or lines on the leaves and berries to simulate frost or snow highlights.
Now you have a timeless holiday illustration ready to frame or send as a heartfelt card to a loved one
Jingle Bells With Big Bow
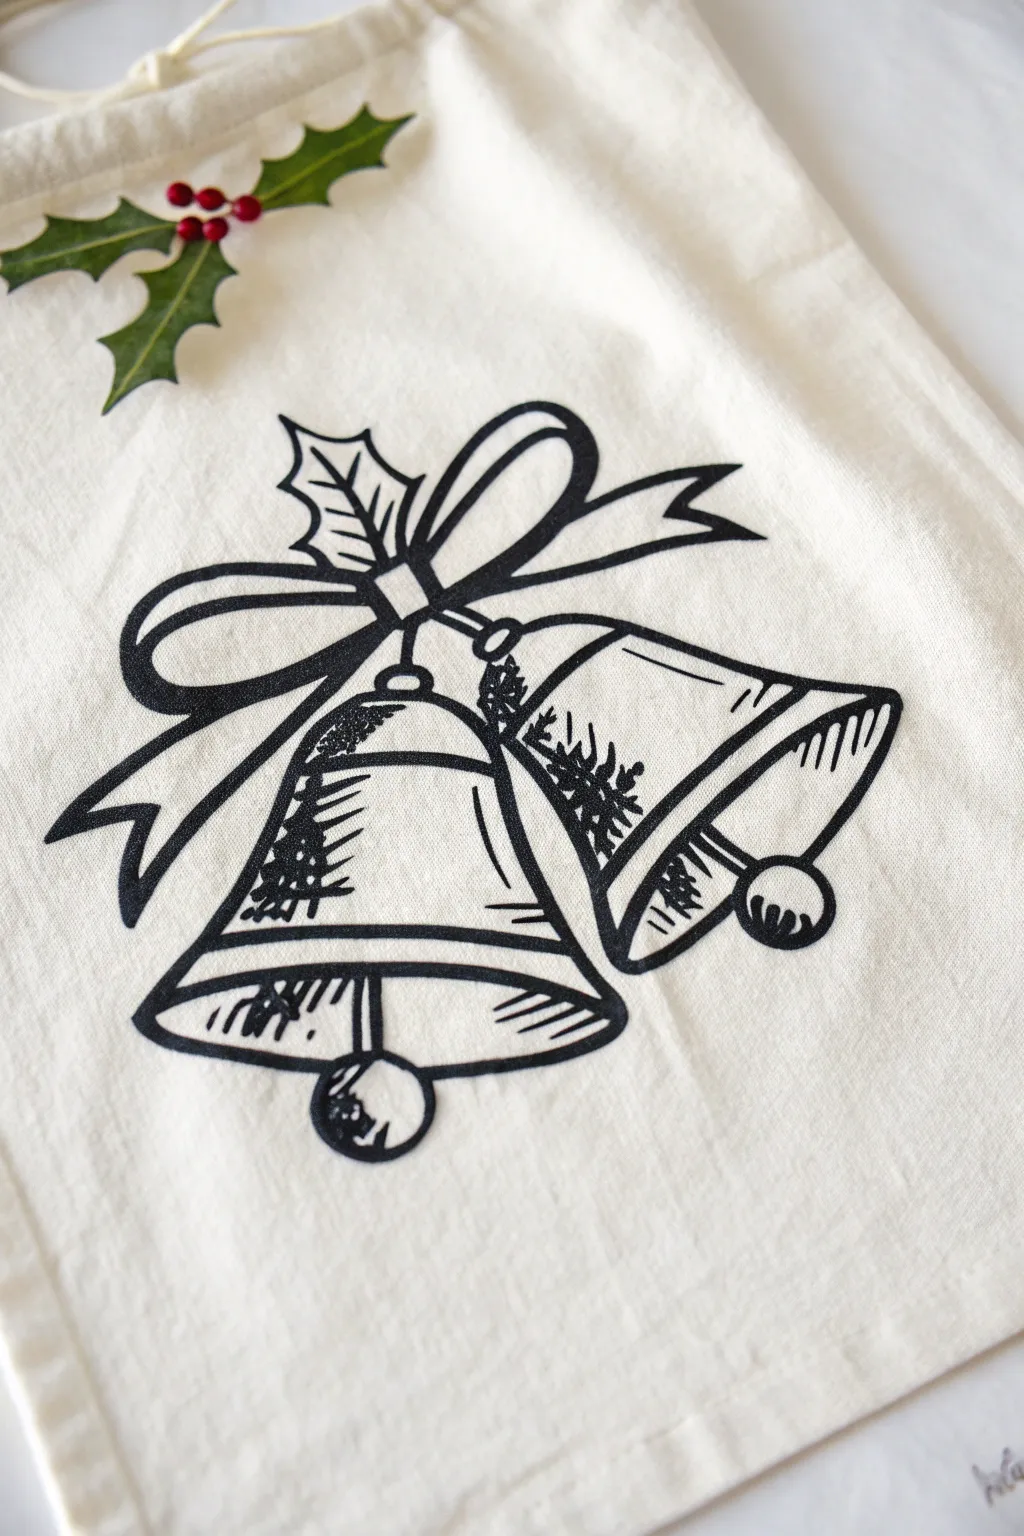
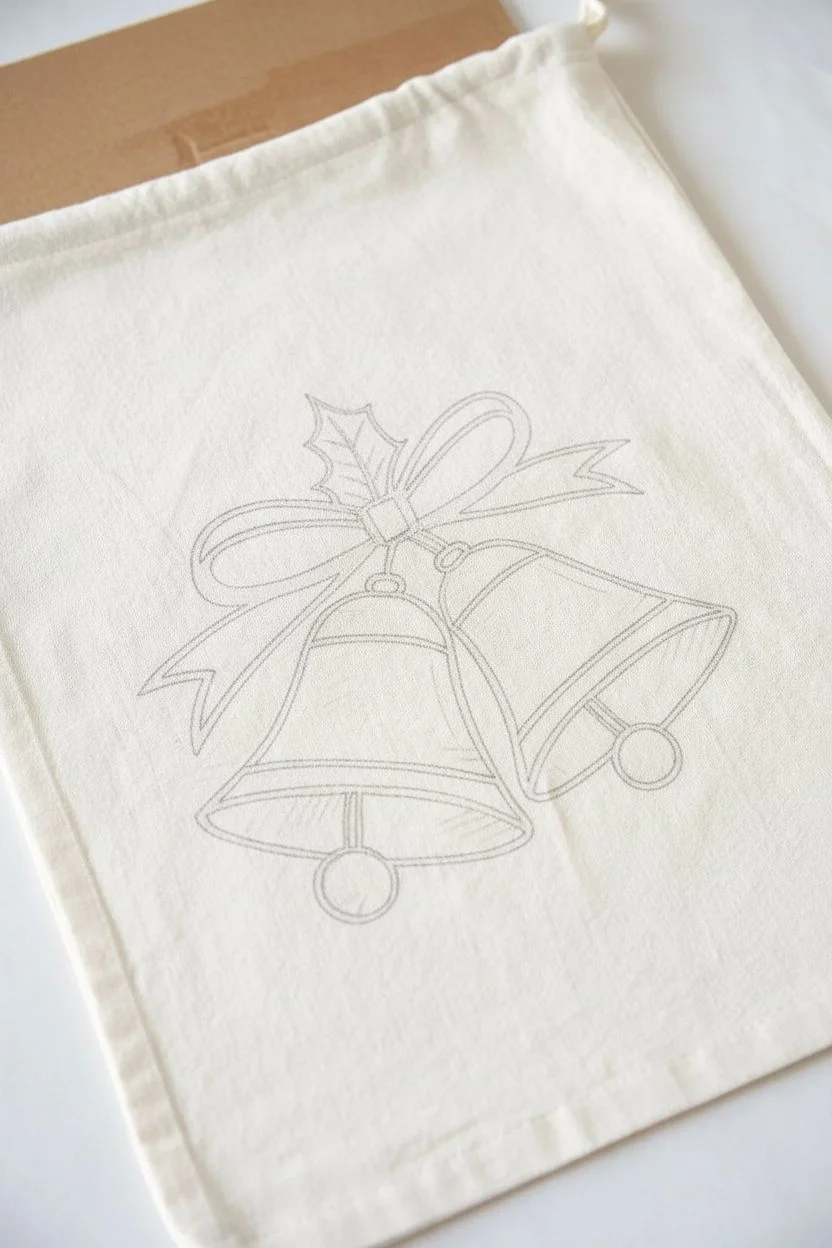
Transform a plain canvas gift bag into a festive keepsake with this bold line-drawing design. The graphic black ink creates a striking contrast against the natural fabric, giving these classic jingle bells a vintage, etched illustration look.
Step-by-Step Tutorial
Materials
- Small canvas drawstring bag (natural or off-white)
- Black fabric marker or fine-tip permanent marker
- Pencil (HB or lighter)
- Eraser
- Piece of cardboard (to fit inside the bag)
- Artificial holly sprig with berries
- Hot glue gun or safety pin
Step 1: Preparation & Sketching
-
Prepare the surface:
Before starting, iron the canvas bag to remove any deep creases that might disrupt your drawing. Slide a piece of cardboard inside the bag; this is crucial to provide a firm drawing surface and prevent ink from bleeding through to the other side. -
Map out the bow:
Using a pencil very lightly, start by drawing the center knot of the bow in the upper middle area of the bag. Sketch two loops extending upwards and outwards from the knot, keeping them relatively symmetrical. -
Add the ribbons:
Draw the ribbon ends trailing down from behind the bow loops. Make them curve slightly outward and finish with a ‘V’ notch at the ends for a classic ribbon look. -
Outline the bells:
Sketch two bell shapes hanging below the knot. The bell on the left should hang slightly straighter, while the one on the right tilts outward. Draw curved lines for the bottom lips of the bells to show their dimension. -
Detail the holly leaves:
Add a small holly leaf shape peeking out from behind the top of the bow knot to complete the composition.
Ink Bleeding?
If the marker spreads into the fabric fibers, switch to a finer tip pen or sketch faster. Slow strokes allow more ink to soak in and spread outward.
Step 2: Inking the Outline
-
Trace the main lines:
Take your black fabric marker and carefully trace over your pencil lines. Focus on the outer contours of the bow and the main silhouettes of the bells first. Keep your hand steady and use a confident, consistent pressure. -
Thicken the ribbon edges:
Go back over the underside of the ribbon loops and the tails to add line weight. Thickening these specific lines gives the drawing a sense of shadow and depth. -
Define the bell rims:
Draw a double line near the bottom edge of each bell to create the rim. Fill the space between these lines with solid black on the sides, but leave the center open or hatched to suggest a metallic sheen. -
Draw the clappers:
Extend a straight line down from the center inside of each bell. At the end of the line, draw a circle for the clapper (the ball part), making sure it sits just below the rim of the bell.
Step 3: Shading & Texturing
-
Hatch the bells:
To create the look of roundness, use short, quick hatching strokes. On the left bell, add cross-hatching on the left side. On the right bell, place the hatching on the right side. This implies a light source coming from the front. -
Add vintage texture:
I like to add some scribbled texture near the tops of the bells and occasionally inside the ribbon loops. This ‘messy’ shading mimics an old-school etched printing style. -
Shade the clappers:
Fill in parts of the circular clappers with black ink, leaving a small white highlight to make them look spherical. -
Detail the bow center:
Add small vertical lines inside the center knot of the bow to show that the fabric is pulled tight. -
Final ink check:
Look over the entire drawing. Reinforce any outer lines that look too thin to ensure the image pops against the fabric texture.
Level Up
Use gold fabric paint to fill in the ‘highlight’ areas of the bells for a touch of sparkle that catches the light under the tree.
Step 4: Finishing Touches
-
Erase pencil marks:
Wait at least 15 minutes for the ink to fully set and dry. Once dry, gently erase any visible pencil guidelines. Be careful not to pill the fabric. -
Attach the greenery:
Take your small sprig of artificial holly. You can either hot glue this near the top drawstring area or pin it in place for a removable decoration. -
Set the ink:
If your specific fabric markers require heat setting, toss the bag in the dryer or iron it (using a pressing cloth) according to the pen manufacturer’s instructions.
Now your custom gift bag is ready to be filled with treats and placed under the tree
Easy Elf With Pointy Hat
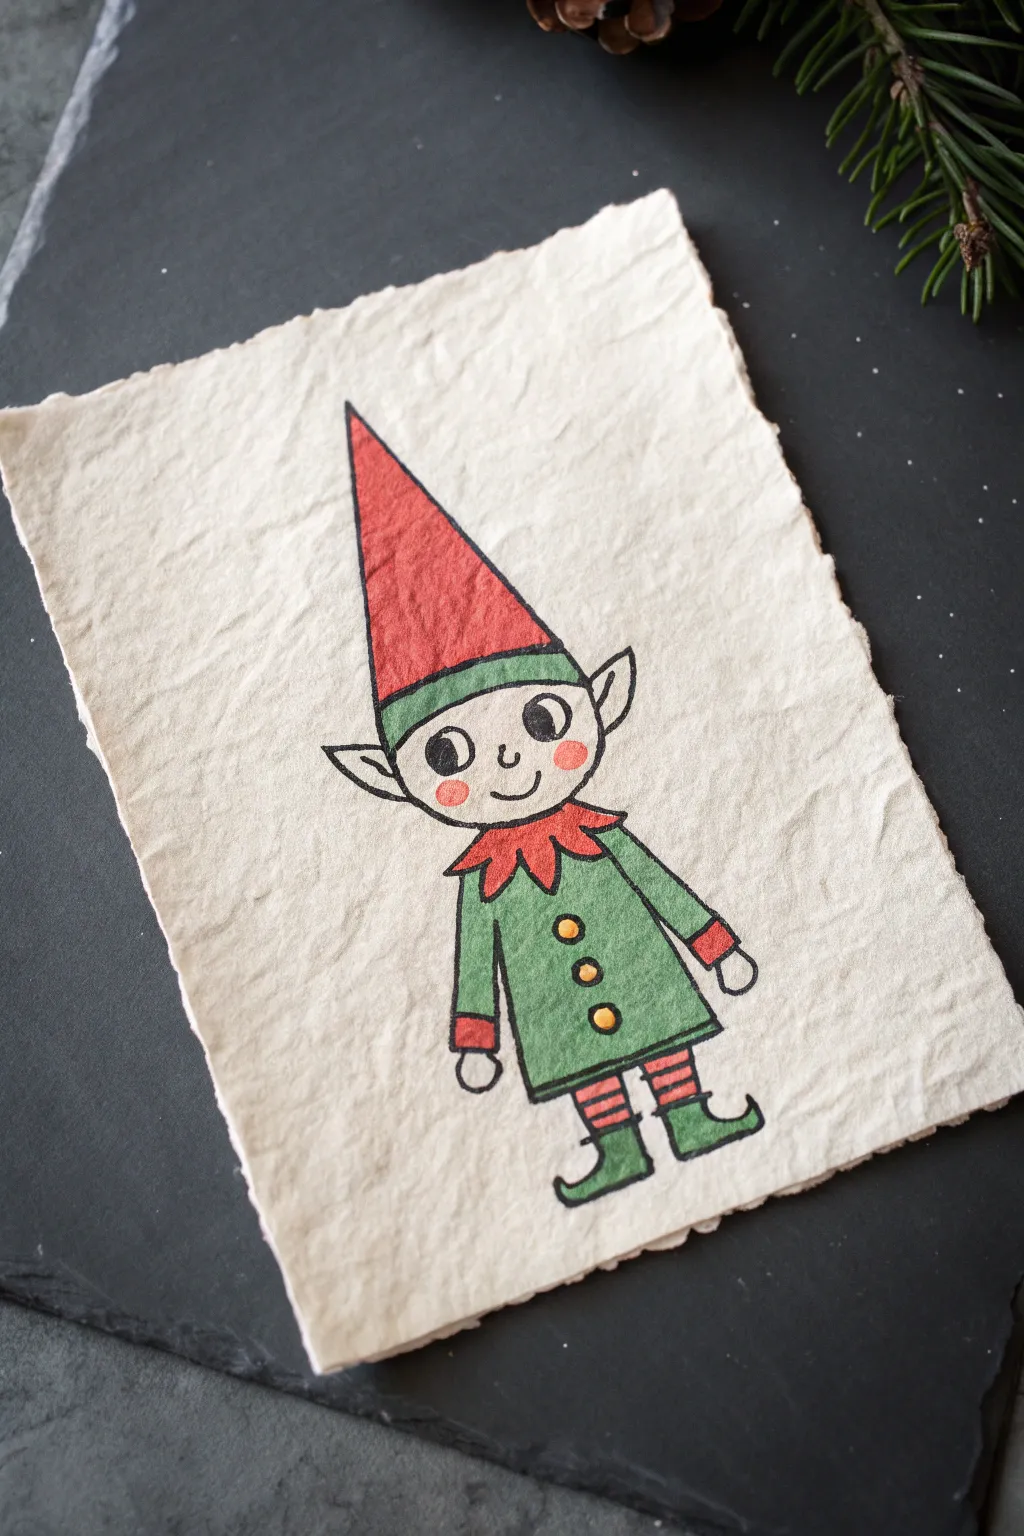
Capture the charm of vintage holiday illustrations with this simple, smiling elf drawing. Using clean lines and classic festive colors on textured paper gives it a delightful, old-world feel perfect for cards or gift tags.
Step-by-Step
Materials
- Textured paper (with deckle edge optional)
- Black fine-liner pen (0.5mm)
- Red marker or watercolor pen
- Green marker or watercolor pen
- Yellow or gold marker
- Pencil and eraser
Step 1: Sketching the Basics
-
Outline the head:
Start by lightly sketching a simple circle for the head in the upper center of your paper. -
Draw the hat base:
Directly on top of the circle, draw a slightly curved band that conforms to the shape of the head; this will be the brim of his hat. -
Add the point:
From the ends of the brim, draw a tall, sharp triangle extending upward, leaning just slightly to the left for character. -
Sketch the face:
Place two pointer ears on the sides of the head. Inside the face, add two large circles for eyes and a small ‘U’ shape for a smile. -
Form the body:
Draw a trapezoid shape extending down from the head to form his tunic. Add a zigzag collar right under the chin. -
Add limbs:
Draw simple rectangular arms hanging at his sides and short legs sticking out from the bottom of the tunic.
Choosing Your Paper
For that authentic vintage look seen in the photo, use handmade cotton rag paper or torn watercolor paper. The rough texture absorbs ink beautifully.
Step 2: Inking the Lines
-
Trace the main shapes:
Using your black fine-liner, carefully go over your pencil lines. I prefer to keep a steady hand here to get clean, crisp outlines. -
Detail the face:
Fill in the pupils of the eyes with black, leaving a tiny white dot in each for a sparkle. Draw a small nose and his smile. -
Refine the clothes:
Add details like the cuffs on the sleeves, three round buttons down the front of the tunic, and stripes on his socks. -
Finish the shoes:
Draw the elf shoes with curled toes. Make sure the tips curl upward dramatically. -
Clean up:
Once the ink is completely dry, gently erase all the underlying pencil sketches so the paper looks fresh.
Bleeding Lines?
If your black ink bleeds when you color over it, switch to a waterproof archival pen or color the sections first and add the black outlines last.
Step 3: Adding Color
-
Color the hat:
Use your red marker to fill in the tall triangle of the hat. Keep the strokes even to avoid streaking. -
Green accents:
Color the hat brim and the main body of the tunic with the green marker. Work carefully around the buttons. -
Red details:
Switch back to red to color the zigzag collar, the sleeve cuffs, and alternating stripes on the socks. -
Golden buttons:
Fill in the three buttons on the tunic with your yellow or gold marker. -
Rosy stick cheeks:
Add two soft pink or light red circles on the cheeks for a blush effect. -
Final touches:
Color the shoes and the remaining sock stripes green to complete the outfit.
Now you have a charming little holiday character ready to decorate your home
Santa Sleigh Side View
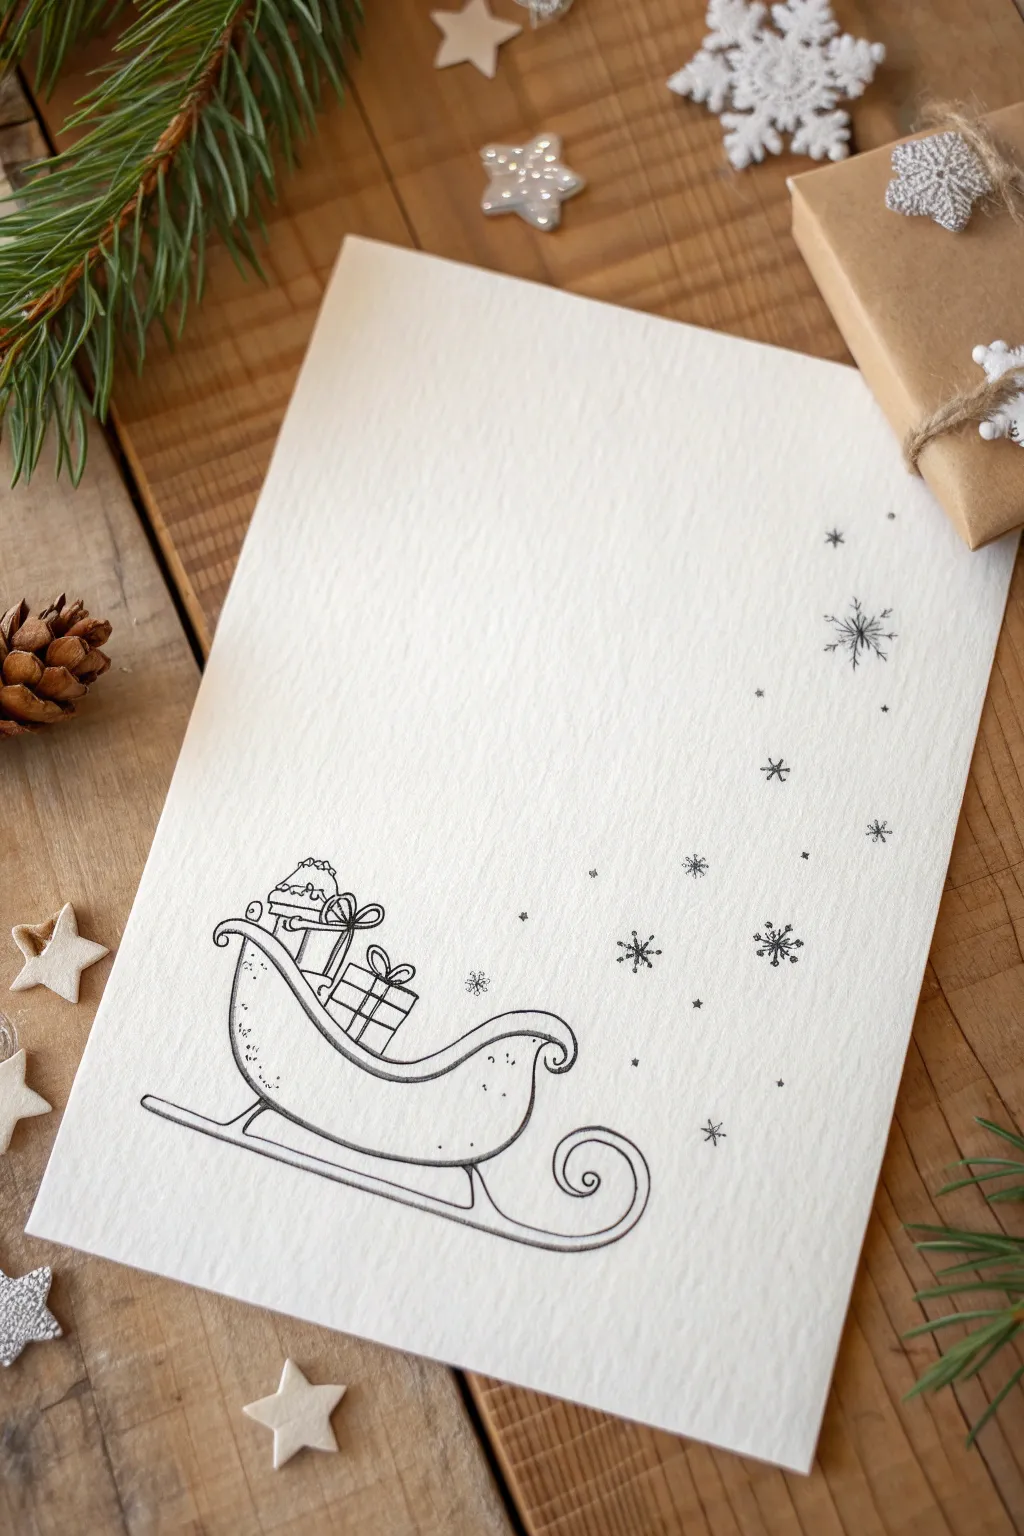
This elegant and minimalist ink drawing captures the magic of Christmas Eve with just a few simple lines and a flurry of snowflakes. The textured paper adds a lovely rustic feel to this black-and-white illustration, making it perfect for a handmade holiday card.
How-To Guide
Materials
- Heavyweight textured watercolor paper or cardstock (off-white or cream)
- Fine liner pen (black, 0.3mm or 0.5mm)
- Pencil (HB for sketching)
- Soft eraser
- Ruler (optional)
Step 1: Sketching the Sleigh
-
Map the base curve:
Begin by lightly sketching the main curve of the sleigh’s body near the bottom left corner of your paper. Draw a ‘U’ shape that is wider and flatter at the bottom, tilting slightly upward at the front. -
Add the front scroll:
At the front (right side) of the sleigh body, curl the line inward to create a small, decorative scroll detail. -
Draw the backrest:
Extend the back line of the sleigh upwards and curve it slightly outward at the top to form the backrest, finishing with a similar but smaller scroll shape. -
Refine the rim:
Draw a secondary line parallel to the top edge of the sleigh body to give the rim some thickness, connecting the front and back scrolls. -
Add the runner blade:
Sketch a long, sweeping horizontal curve underneath the sleigh body for the runner. At the front, loop this line upward into a large, elegant spiral that swirls back towards the sleigh. -
Connect the runners:
Draw two small, angled vertical struts connecting the runner blade to the bottom of the sleigh body.
Uneven Lines?
Don’t worry if your runner curves aren’t perfect arcs. A slightly jittery or organic line actually adds to the vintage, hand-illustrated charm of this specific style.
Step 2: Adding the Gifts
-
Place the first gift:
Sketch a square box sitting in the back of the sleigh. Add a simple ribbon by drawing a vertical and horizontal line crossing in the center. -
Top with a bow:
Draw loops on top of the box for the bow. I usually make these loops slightly floppy to keep the style relaxed and hand-drawn. -
Add a second angled gift:
Draw a second, rectangular gift leaning against the front of the sleigh. Angle it slightly so it looks nestled in. -
Detail the second package:
Draw the ribbon lines wrapping around this second box and add a small, neat bow on top.
Step 3: Inking and Details
-
Outline the main shapes:
Switch to your fine liner pen. Carefully trace over your pencil lines for the sleigh body, runners, and gifts. Use a confident, consistent stroke. -
Add texture to the sleigh:
To give the sleigh some character, add tiny stippling dots along the bottom curve and near the backrest. This suggests shading without harsh lines. -
Draw the snowflake path:
Visualize a gentle curve swooping upwards from the front of the sleigh toward the top right corner. This is where your snow will flow. -
Ink the snowflakes:
Draw a variety of snowflakes along this invisible path. Use simple asterisks (*), small dots, and more complex six-pointed stars for variety. -
Vary snowflake sizes:
Keep the snowflakes smaller near the bottom and let a few get larger and more detailed as they float higher up the page. -
Clean up:
Once the ink is completely dry—give it a good few minutes to be safe—gently erase all underlying pencil marks to leave a crisp, clean illustration.
Sparkle it Up
For a magical finish, add tiny dabs of clear glitter glue or silver gel pen to the centers of the largest snowflakes or on the gift ribbons.
You now have a charmingly simple winter illustration ready to frame or send to a loved one.
String Of Christmas Lights

Capture the cozy glow of the holidays with this delicate Christmas lights doodle. Using simple linework and soft pastel accents, you can create two distinct styles of festive garlands that look lovely in any bullet journal or sketchbook.
Step-by-Step Guide
Materials
- Spiral-bound sketchbook or bullet journal
- Fine-liner pen (black, 0.3mm or 0.5mm)
- Colored pencils or mildliner markers (peach/pink and sage green)
- Pencil (HB for sketching)
- Eraser
Step 1: Planning and Base Lines
-
Light scaffolding:
Begin by lightly sketching two sweeping curves across your page with a pencil. Give each line a gentle, natural droop in the center to mimic gravity pulling on a real string of lights. -
Spacing marks:
Along both curved lines, make tiny tick marks where you want each light bulb to hang. Aim for roughly equal distances, but don’t worry about mathematical precision; a little irregularity adds charm. -
Inking the wires:
Take your black fine-liner and trace over your pencil curves. For the top strand, draw a slightly messier, looped line that mimics twisted wire. For the bottom strand, keep the line sleek and simple.
Step 2: Drawing the Base Sockets
-
Top strand sockets:
On the top ‘twisted’ wire, draw small rectangles at your spacing marks. These should hang directly downwards from the wire. -
Bottom strand sockets:
For the bottom strand, draw similar small rectangular bases, but incorporate a tiny semi-circle at the top where the bulb meets the wire, giving it a more traditional C9 bulb socket look. -
Adding detail:
Fill in these rectangular sockets with solid black ink. This high contrast anchors the delicate colors we will add later.
Highlight Hack
Don’t press hard when coloring the bulbs. A textured, grainy look from colored pencils mimics the frosted glass of vintage bulbs perfectly.
Step 3: Adding the Bulbs
-
Tear-drop shapes:
Attached to the bottom of each black socket, draw the glass bulb shape. Think of an elongated teardrop or a pointed oval. -
Consistent sizing:
Try to keep the bulbs roughly the same size, but vary their angles slightly; having a few tilting left or right makes the strand look more realistic. -
Decorative loops:
Go back to the top strand. Add loopy, vine-like swirls wrapping around the main wire between the bulbs. This creates that tangled, messy look distinct from the straight bottom wire.
Make It Shine
Draw tiny yellow starbursts or simple motion lines around a few of the bulbs to suggest they are flickering or twinkling.
Step 4: Color and Finish
-
Choosing the palette:
Select a soft sage green and a muted peach or pink. This creates a modern, understated holiday aesthetic rather than screaming neon. -
Coloring the bulbs:
Gently fill in the bulbs, alternating between your two chosen colors. I like to leave a tiny sliver of white space on one side of each bulb to represent a highlight or reflection. -
Coloring the loops:
For the top strand ONLY, take your green pencil or marker and trace over those looped vine-like wires you drew earlier to give them a distinct green wire appearance. -
Clean up:
Once the ink and color are fully set, gently erase any visible pencil guidelines. -
Final touches:
If your highlight wasn’t strong enough, use a white gel pen to add a tiny dot or dash to the upper curve of each bulb for that ‘switched on’ glow.
Enjoy your beautifully simple page decoration that brings instant warmth to your journal
Smiling Snow Globe Scene
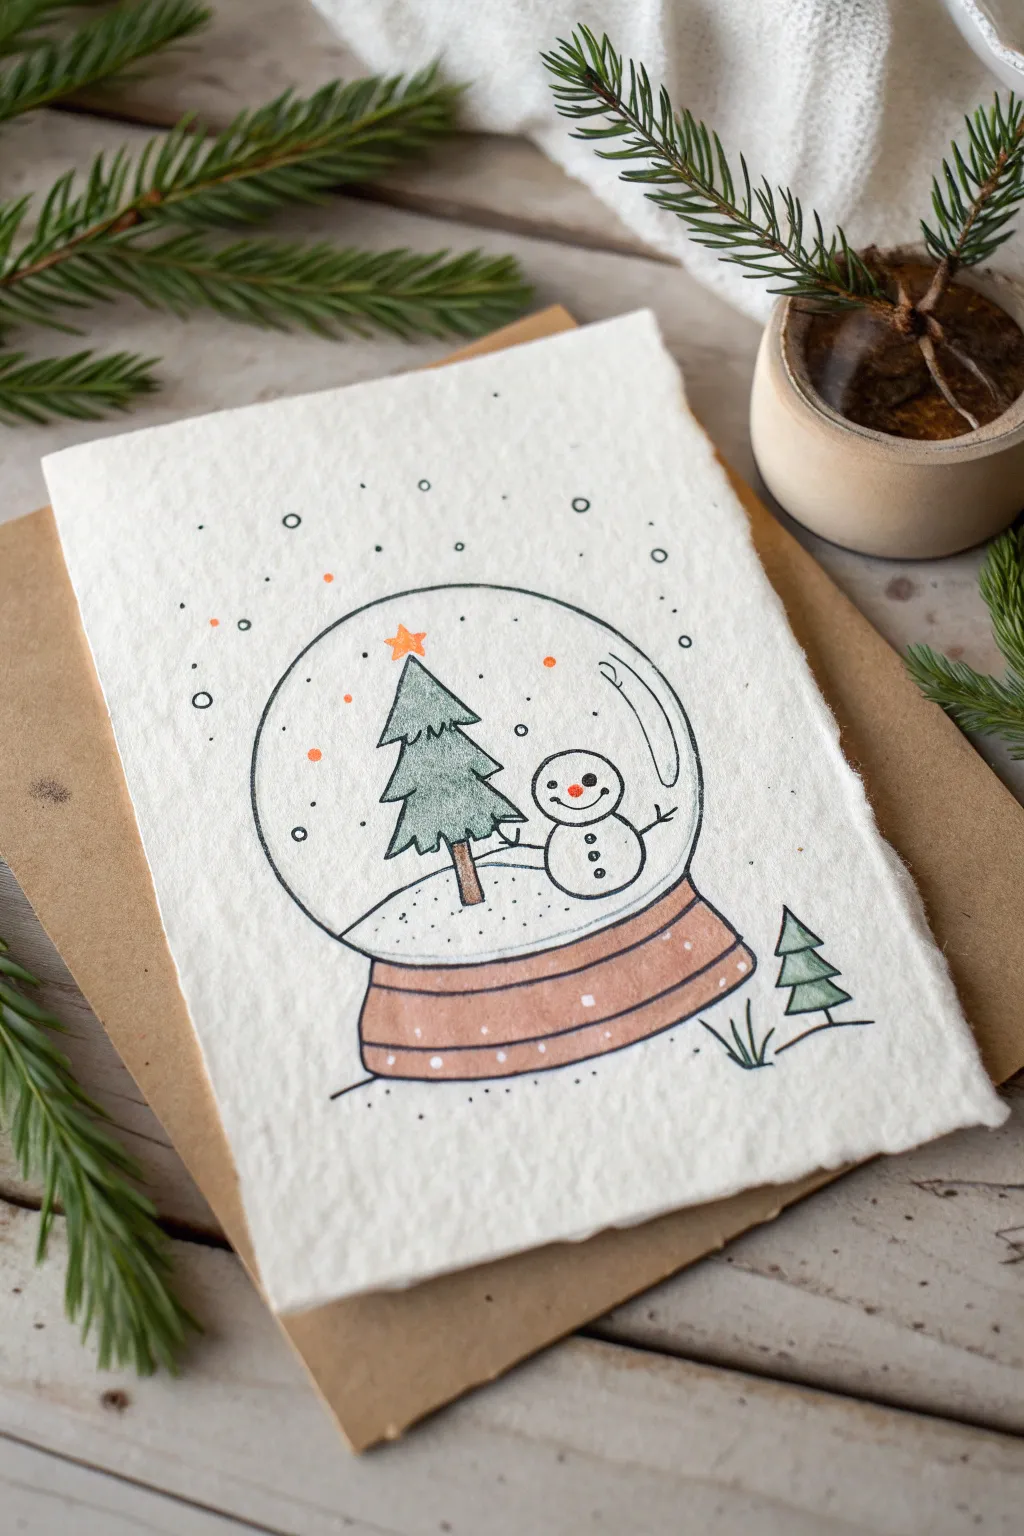
Capture the magic of winter in a jar with this charming hand-drawn snow globe card. Using simple line work and touches of colored pencil on textured paper creates a cozy, rustic feel perfect for holiday greetings.
How-To Guide
Materials
- Textured watercolor paper or handmade cotton paper
- Fine-point black drawing pen (0.3mm or 0.5mm)
- Colored pencils (Sage Green, Rust Brown, Orange)
- White gel pen (optional, for highlights)
- Pencil and eraser
- Circle template or a round object (like a cup) to trace
- Brown kraft cardstock (for the envelope/backing)
Step 1: Drafting the Outline
-
Trace the globe:
Begin by lightly tracing a perfect circle in the center of your textured paper using a pencil and a round object or template. Leave plenty of white space around the edges. -
Add the base:
Draw an oval shape attached to the bottom of the circle for the snow globe’s base. Add a second, slightly wider curved line below it to give the base some thickness and dimension. -
Sketch the interior hill:
Inside the circle, near the bottom, draw a gentle curved line to represent the snowy ground where your figures will stand. -
Position the figures:
Lightly sketch a simple Christmas tree on the left side of the hill—just a triangle stack with a trunk. On the right, sketch two stacked circles for a cheerful snowman.
Step 2: Inking the Design
-
Ink the main lines:
Switch to your fine-point black pen. Carefully trace over your pencil circle, but try not to make it too mechanically perfect; a slightly organic line works well with this textured paper. -
Detail the tree:
Outline the tree with jagged zigzag lines to simulate pine needles. Draw a small star on top. I find it helpful to keep the lines loose here rather than rigid. -
Bring the snowman to life:
Ink the snowman’s body. Add stick arms with tiny fingers, three buttons down the chest, and a smiling face. -
Define the base:
Ink the base of the globe. Draw horizontal curved lines across the base to suggest wood grain or decorative ridges. -
Glass reflection:
Add a few curved strokes near the top right or left inside the glass part of the globe. These ‘glare’ lines are crucial for making it look like transparent glass. -
Erase pencil marks:
Wait a moment for the ink to fully set, then gently erase all your underlying pencil sketches to clean up the drawing.
Paper Choice Matters
Use handmade cotton rag paper or ‘cold press’ watercolor paper. The rough texture breaks up the pencil lines, giving that vintage, rustic look.
Step 3: Adding Color and Texture
-
Color the trees:
Take a sage green colored pencil and gently fill in the tree inside the globe. Use light pressure to let the paper’s texture show through. Do the same for a tiny extra tree outside the globe on the right. -
Warm up the base:
Color the snow globe’s base with a rust or soft brown pencil. You can shade slightly darker on the edges to create a rounded effect. -
Pop of orange:
Use an orange pencil to color the star atop the tree and the snowman’s carrot nose. Add a few orange dots floating in the ‘air’ inside the globe for a whimsical touch that mimics magic dust. -
Create the snow:
With your black pen, add tiny dots inside the globe for falling snow. You can also draw small circles to represent larger flakes. -
Final atmosphere:
Sketch a few loose dots drifting outside the globe into the white space above. Add a tiny horizon line and some grass tufts near the small outer tree to ground the globe.
Shaky Circles?
If you struggle to ink a smooth circle, try drawing it in two swooping halves rather than one continuous motion. Or, embrace the wobble for a sketchy style.
Now you have a cozy, handmade card ready to warm someone’s heart this winter
Minimal One-Line Christmas Tree

This elegant greeting card features a beautifully simple Christmas tree design created with a single, flowing spiral line and topped with a festive gold star. It’s a perfect example of how minimalist art can capture the holiday spirit without needing complex details.
Step-by-Step
Materials
- White cardstock or heavy watercolor paper (5×7 inches)
- Fine-point green marker or rollerball pen (dark forest green)
- Small gold glitter star sticker or cardstock cutout
- Pencil (HB or H)
- Eraser
- Ruler
Step 1: Preparation & Sketching
-
Prepare your card:
Cut your white cardstock to the desired size. A standard 5×7 inch rectangle works beautifully for this design, providing enough negative space around the tree to keep it looking clean. -
Mark the center:
Using your ruler, lightly find the vertical center of the card. Make a tiny, faint mark at the top and bottom to help guide your drawing. -
Define the triangle shape:
Before drawing the spiral, lightly sketch a tall, narrow triangle with your pencil. This invisible guide will ensure your spiral gets progressively wider at the bottom in a symmetrical way. -
Sketch the spiral path:
Very lightly sketch the spiral motion with your pencil first. Start from the top tip of your triangle and loop back and forth downwards. -
Check the spacing:
Step back and look at your pencil sketch. Ensure the loops get slightly wider apart as they go down, or keep them uniform if you prefer that look.
Master the Flow
Practice the spiral motion on scrap paper first. Drawing from your shoulder rather than just your wrist helps create smoother, more elegant curves.
Step 2: Inking the Tree
-
Test your pen:
On a scrap piece of the same paper, test your green pen to ensure the ink flows smoothly and isn’t blotchy. -
Start at the top:
Place your pen tip at the very top point of your sketched triangle. This will be the apex of the tree. -
Begin the spiral:
Draw the first small loop, curving outwards and then inwards. Try to keep your wrist loose to maintain a fluid line. -
Continue downwards:
Trace over your pencil guide, making each subsequent loop slightly larger than the one before it. -
Focus on fluidity:
Don’t worry if your line wavers slightly; these small imperfections add to the hand-drawn charm. Aim for a confident, continuous motion rather than slow, shaky strokes. -
Finish the base:
Create the widest loop at the bottom. I like to let the final line tail off slightly upwards or curve back in to give the tree a grounded feel. -
Let the ink dry:
Wait at least 5-10 minutes for the ink to completely dry. This is crucial to prevent smudging during the next step. -
Erase guidelines:
Gently erase your pencil triangle and sketch lines. Hold the paper taut with one hand to avoid crinkling it while erasing.
Step 3: Adding the Star
-
Select your star:
Choose a small gold star. A dimensional sticker works best for texture, but you can also cut a star from gold glitter paper. -
Position the star:
Ideally, the star should sit right on top of the tree’s apex, slightly overlapping the start of your green line to connect them visually. -
Secure the star:
Press the sticker down firmly. If using a paper cutout, use a tiny dot of craft glue and hold it in place for a few seconds. -
Final inspection:
Check for any stray eraser crumbs or pencil marks and brush them away gently.
Wobbly Lines?
If your line looks too shaky, simply embrace it! Go over the line again loosely to create a sketchy, artistic style intentionally.
You now have a clean, modern holiday card ready to share with friends and family


Have a question or want to share your own experience? I'd love to hear from you in the comments below!