When I paint with toddlers around Christmas, I aim for projects that feel magical but stay toddler-friendly and doable. These ideas are all about big gestures, simple shapes, and that sweet spot of low-mess fun with seriously cute results.
Handprint Christmas Tree
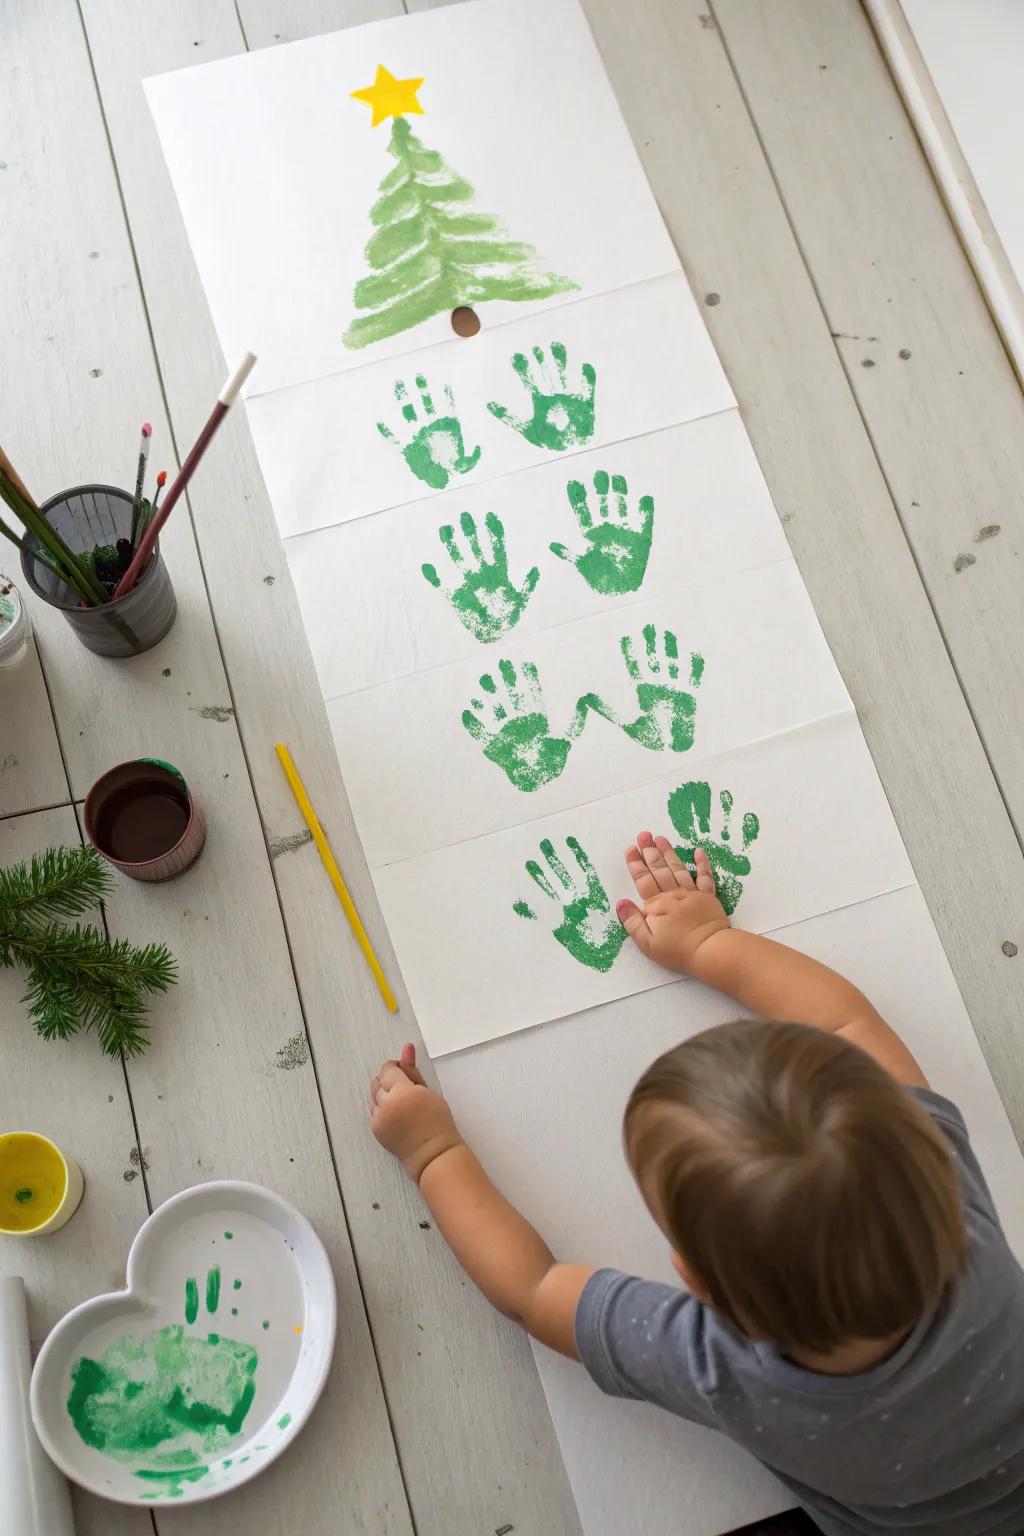
Transform a simple vertical strip of paper into a towering Christmas tree using nothing but green paint and eager little palms. This collaborative artwork builds a festive evergreen shape through a series of layered handprints, topped brilliantly with a painted star.
Step-by-Step
Materials
- Long roll of white butcher paper or easel paper
- Green tempera or finger paint
- Yellow acrylic or tempera paint
- Small paintbrush
- Paper plate or heart-shaped mixing tray
- Masking tape or painter’s tape
- Damp cloth or baby wipes (essential for quick cleanup)
Step 1: Preparation & Setup
-
Cut the paper:
Begin by rolling out a long vertical strip of white paper, roughly three to four feet in length. Cut it cleanly and lay it flat on a wooden floor or a large table. -
Secure the workspace:
Use small pieces of masking tape on the corners to secure the paper to the floor. This prevents the paper from sliding around while your toddler is working. -
Prepare the palette:
Squeeze a generous amount of green paint onto your mixing tray or paper plate. Ensure the puddle is wide enough for a child’s hand to press into comfortably. -
Create fold lines:
For a structured look like the example, you can lightly fold the paper horizontally every 8-10 inches to create diverse sections, though keeping it flat works just as well.
Step 2: Building the Tree Base
-
Coat the hands:
Dip your toddler’s hand into the green paint, or use a brush to coat their palm and fingers evenly to ensure a solid print. -
First bottom print:
Start at the very bottom section of your ‘tree’ area. Guide their hand to press down firmly on the right side, fingers pointing slightly upward and outward. -
Second bottom print:
Re-dip the hand and make a matching print on the left side of the bottom row. Leave a small gap in the middle where a trunk might be imagined. -
Fill the gaps:
I find it helpful to look for light spots in the print immediately; if the paint didn’t transfer well, press their hand down again in the same spot. -
Moving upward:
Move up to the next imaginary row. Place two handprints slightly closer together than the bottom row to begin forming a tapered triangle shape.
Smudged Prints?
If a hand slides and smears the paint, don’t panic. Turn that smudge into a thicker branch by painting over the edges with a brush to give it a jagged, pine-needle texture.
Step 3: Forming the Shape
-
Middle section:
Continue moving up the paper. For the third row up, print the hands so the thumbs or palms are nearly touching in the center. -
Angling the prints:
As you get higher, angle the handprints slightly more vertical rather than horizontal. This helps mimic the drooping branches of a real evergreen. -
The single peak:
Once you have about four rows of pairs, switch to a single handprint or a painted triangle shape at the top to act as the peak of the tree. -
Paint the top branches:
Use a brush to smooth out the very top section into a classic tree triangle shape with jagged edges to simulate pine needles, sitting above the highest handprints. -
Add the trunk:
Dip a thumb or a small brush into brown paint (or mix red and green) to create a small, circular or oval stump at the very base of the bottom branches.
Level Up: Texture
Before the green paint dries, sprinkle some green glitter over the wet handprints. It adds a magical shimmer that mimics frost or snow on the branches.
Step 4: Finishing Touches
-
Clean hands:
Pause to thoroughly wash and dry hands before handling the yellow paint to keep the colors bright and muddy-free. -
Outline the star:
Using a small brush and yellow paint, draw a five-pointed star outline at the very top of your green tree peak. -
Fill the star:
Fill in the star shape with solid yellow paint. You might need a second coat if the green underneath shows through too much. -
Add ornaments (optional):
If desired, use fingertips dipped in red or blue paint to add ‘ornaments’ to the handprint branches once the green is semi-dry. -
Final drying:
Remove the tape relative gently and let the entire banner dry completely flat for several hours to prevent the heavy paint from wrinkling the paper.
Hang your collaborative masterpiece on a door or tall wall to enjoy the festive spirit


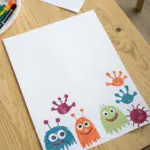
Fingerprint Christmas Lights
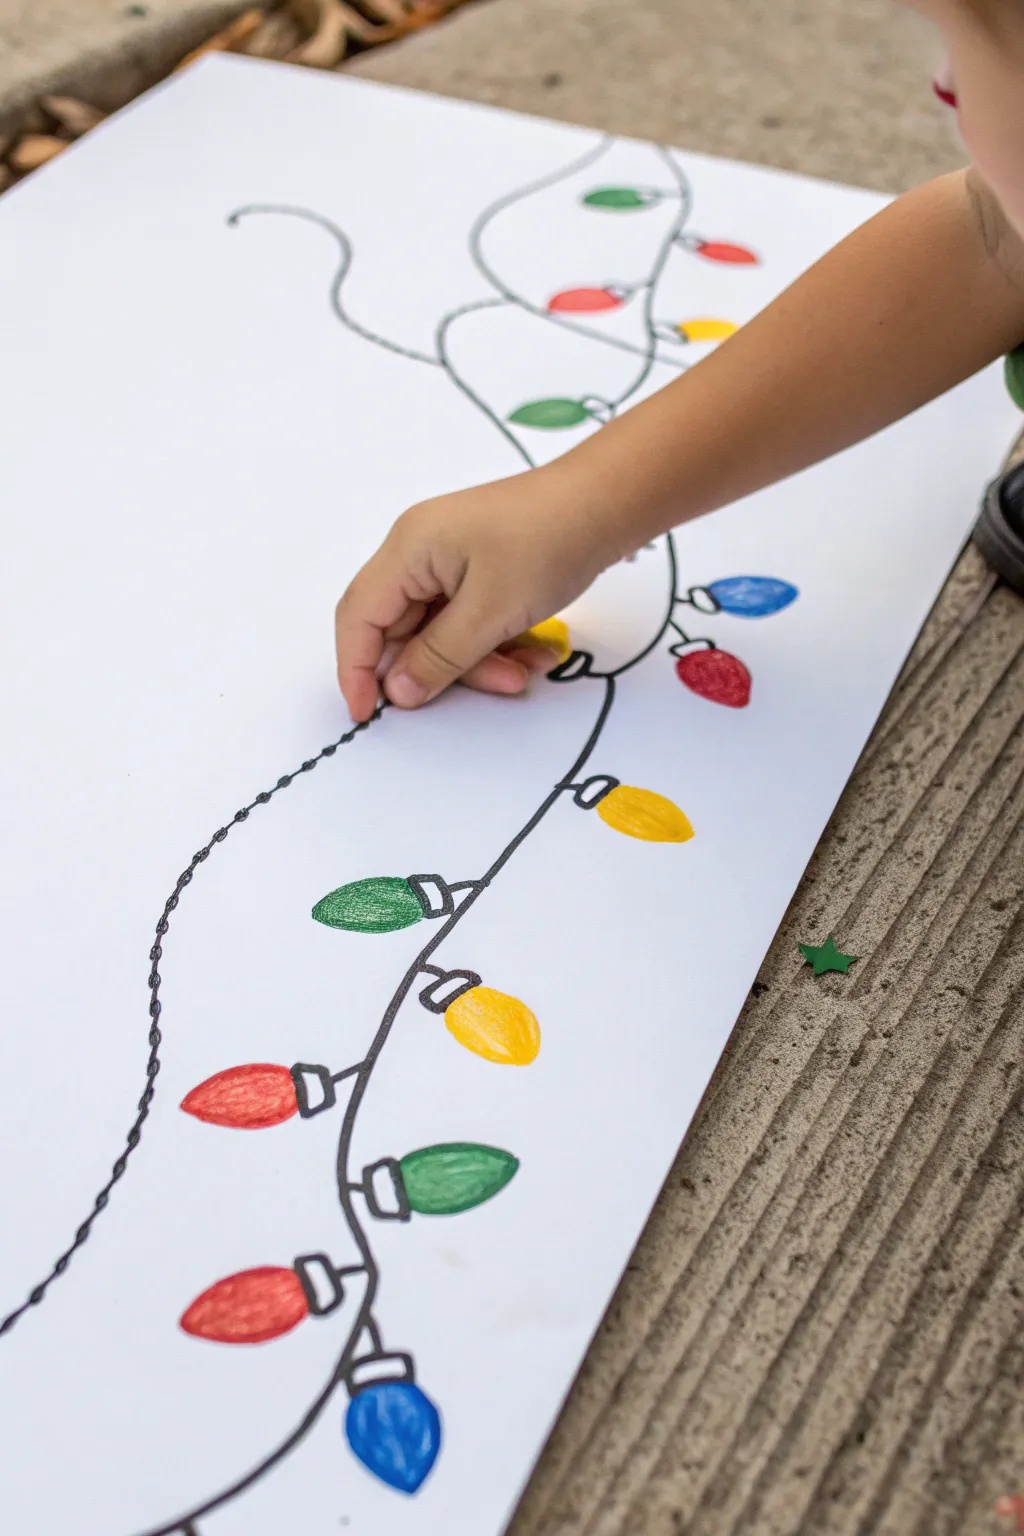
Brighten up your home with this simple yet vibrant craft that turns tiny fingerprints into a festive string of holiday lights. It is a wonderful way to capture a moment in time while creating colorful decor for the season.
Step-by-Step Guide
Materials
- Large sheet of white butcher paper or poster board
- Washable tempera or finger paints (red, green, blue, yellow)
- Black permanent marker (chisel tip works well)
- Paper plate or palette for paints
- Paper towels or baby wipes for clean up
Step 1: Drawing the Base
-
Prepare your canvas:
Lay out a long sheet of white butcher paper on a flat surface. You can tape down the corners if you are working outside or want to prevent slipping. -
Draw the main wire:
Using a black permanent marker, draw a long, looping line across the paper. Let it curve and twist naturally to look like a tangled string of lights. -
Add texture to the wire:
For a more realistic twisted-wire look, you can go back over your initial line and add small loops or a second parallel line that intertwines with the first. -
Sketch the sockets:
along the black wire, draw small rectangles or squares at regular intervals. These will be the sockets that hold the bulbs. -
Detail the sockets:
Add a tiny line inside each rectangle to give it some dimension, making sure they are spaced out enough for the painted prints.
Step 2: Adding the Lights
-
Prepare the palette:
Squeeze small blobs of red, green, yellow, and blue washable paint onto a paper plate. Keep them separated so the colors stay bright. -
Dip the first finger:
Have your toddler gently press their thumb or index finger into the first color. Make sure the pad of the finger is coated but not dripping. -
Print the first bulb:
Press the painted finger firmly onto the paper directly below or above one of the black sockets you drew earlier. -
Create a pattern:
Continue adding prints along the string. I like to encourage a repeating color pattern like red-green-yellow-blue to practice sequencing skills. -
Clean in between:
Keep baby wipes handy to clean off fingers before switching paint colors to avoid muddy looking lights. -
Fill the strand:
Work your way down the entire length of the drawn wire until every socket has a colorful fingerprint bulb attached to it. -
Correct spacing gaps:
If you notice a large gap between sockets, you can always draw a quick extra socket and add a print there. -
Let it dry:
Allow the paint to dry completely. Since these are fingerprints, the paint might be thicker in spots, so give it plenty of time.
Clean Fingers Pro Tip
Keep a damp sponge on a plate nearby. Let your child press their finger on the sponge to ‘wash’ it, then dry on a towel before the next color.
Step 3: Finishing Touches
-
Add shine:
Once the paint is fully dry, you can use a white paint pen or a small brush with white paint to add a tiny ‘reflection’ dot on each bulb. -
Connect any floaters:
If a fingerprint didn’t quite touch the socket, extend the black lines slightly with your marker to connect them seamlessly. -
Final inspection:
Check the whole strand for any smudges or needed touch-ups before displaying your giant collaborative artwork.
Level Up: Glow Effect
Mix a tiny pinch of glitter into the wet paint before printing, or trace the dried bulbs with a glitter glue pen for extra holiday sparkle.
Now you have a charming string of lights that captures a memorable moment in time perfectly


Q-Tip Snowflake Dot Painting
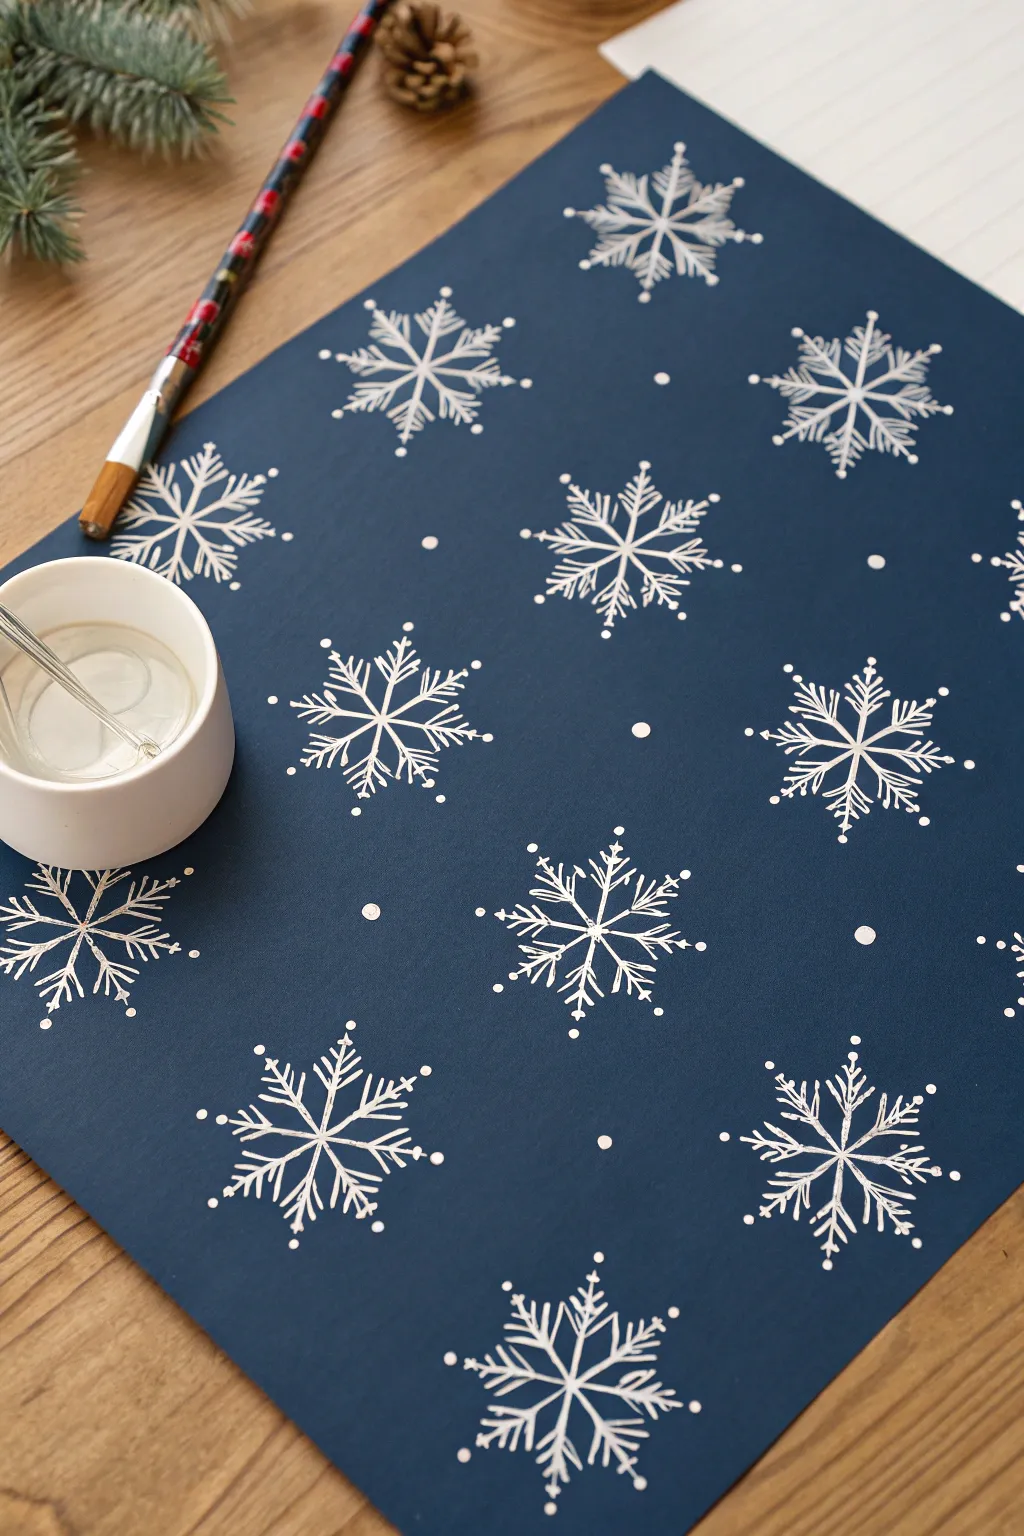
Capture the magic of a silent winter night with this elegant dark blue artwork featuring intricate white snowflakes. The contrast of the crisp white paint against the deep navy background creates a stunning, frosty effect perfect for holiday decor.
Step-by-Step Tutorial
Materials
- Dark navy blue cardstock or heavy construction paper
- White acrylic paint or white gouache
- Fine liner paintbrush (size 0 or 00)
- Small round paintbrush (size 2)
- Small water cup
- Paper palette or paint tray
- Pencil (optional for sketching)
- Ruler (optional for spacing)
Step 1: Preparation
-
Set the Stage:
Begin by clearing a flat workspace and laying down your dark navy blue paper. This deep background is essential for making the white paint pop. -
Prepare the Paint:
Squeeze a small amount of white acrylic paint or gouache onto your palette. If the paint feels too thick, add a drop of water to thin it slightly until it has the consistency of heavy cream; this helps with painting fine lines.
Pro Tip: Steady Hands
Rest your pinky finger on a dry part of the paper while painting the fine lines to stabilize your hand and achieve straighter strokes.
Step 2: Drafting the Snowflakes
-
Plan the Layout:
Visualize where you want your snowflakes to sit. Aim for a staggered pattern rather than a perfect grid to make it feel more organic, like falling snow. -
Mark Centers:
If you’re worried about spacing, use a pencil to very lightly mark a small dot where the center of each large snowflake will go.
Step 3: Painting the Structure
-
Create the Primary Axis:
Dip your fine liner brush into the white paint. For your first snowflake, paint a single vertical line about 2 inches long. -
Form the Cross:
Paint a horizontal line of the same length crossing through the center of the vertical line, creating a plus sign (+). -
Add Diagonals:
Paint two diagonal lines intersecting the center point, creating an ‘X’ shape over the plus sign. You should now have an eight-pointed star shape. -
Repeat the Base Shapes:
Move across your paper and paint these eight-pointed star bases at each of your planned locations. Doing all the bases first ensures consistent sizing.
Level Up: Silver Sparkle
Mix a tiny bit of silver metallic paint into your white, or re-trace just the center details with silver ink for a subtle, shimmering frost effect.
Step 4: Adding Details
-
Branch Out:
Starting near the center of the snowflake, paint small ‘V’ shapes extending outward on each of the eight main arms. These little branches mimic the crystalline structure of ice. -
Add a Second Layer:
Paint a second set of smaller ‘V’ shapes further out on the arms, closer to the tips. This adds density and intricacy to the design. -
Refine the Tips:
I like to gently tap the very end of each arm with the brush tip to create a slightly rounded or pointed finish, depending on the look you prefer. -
Create Smaller Flakes:
In the larger empty spaces between your main snowflakes, paint tiny, simple six-pointed stars or simple crosses to fill the gaps without overcrowding the design.
Step 5: The Finishing Touches
-
The Dotted Effect:
Using the very tip of your round brush (or the handle end of a paintbrush), dip into the white paint and place single dots at the very tips of some snowflake arms for a decorative touch. -
Scatter the Snow:
Look for empty dark blue areas and add random single dots of white paint. These represent distant snowflakes or falling snow. -
Vary Dot Sizes:
Make some dots slightly larger and some microscopic to create depth in your snowy scene. -
Review and Correct:
Step back and look at the composition. If any lines look too faint, carefully re-trace them with more paint to ensure bright, solid opacity. -
Let it Dry:
Allow the painting to dry completely flat for at least 30 minutes before moving it to prevent drips or smudging.
Once dry, this beautiful winter scene makes perfect custom wrapping paper or a lovely framed seasonal print


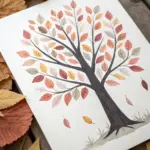
Fork-Painted Evergreen Tree
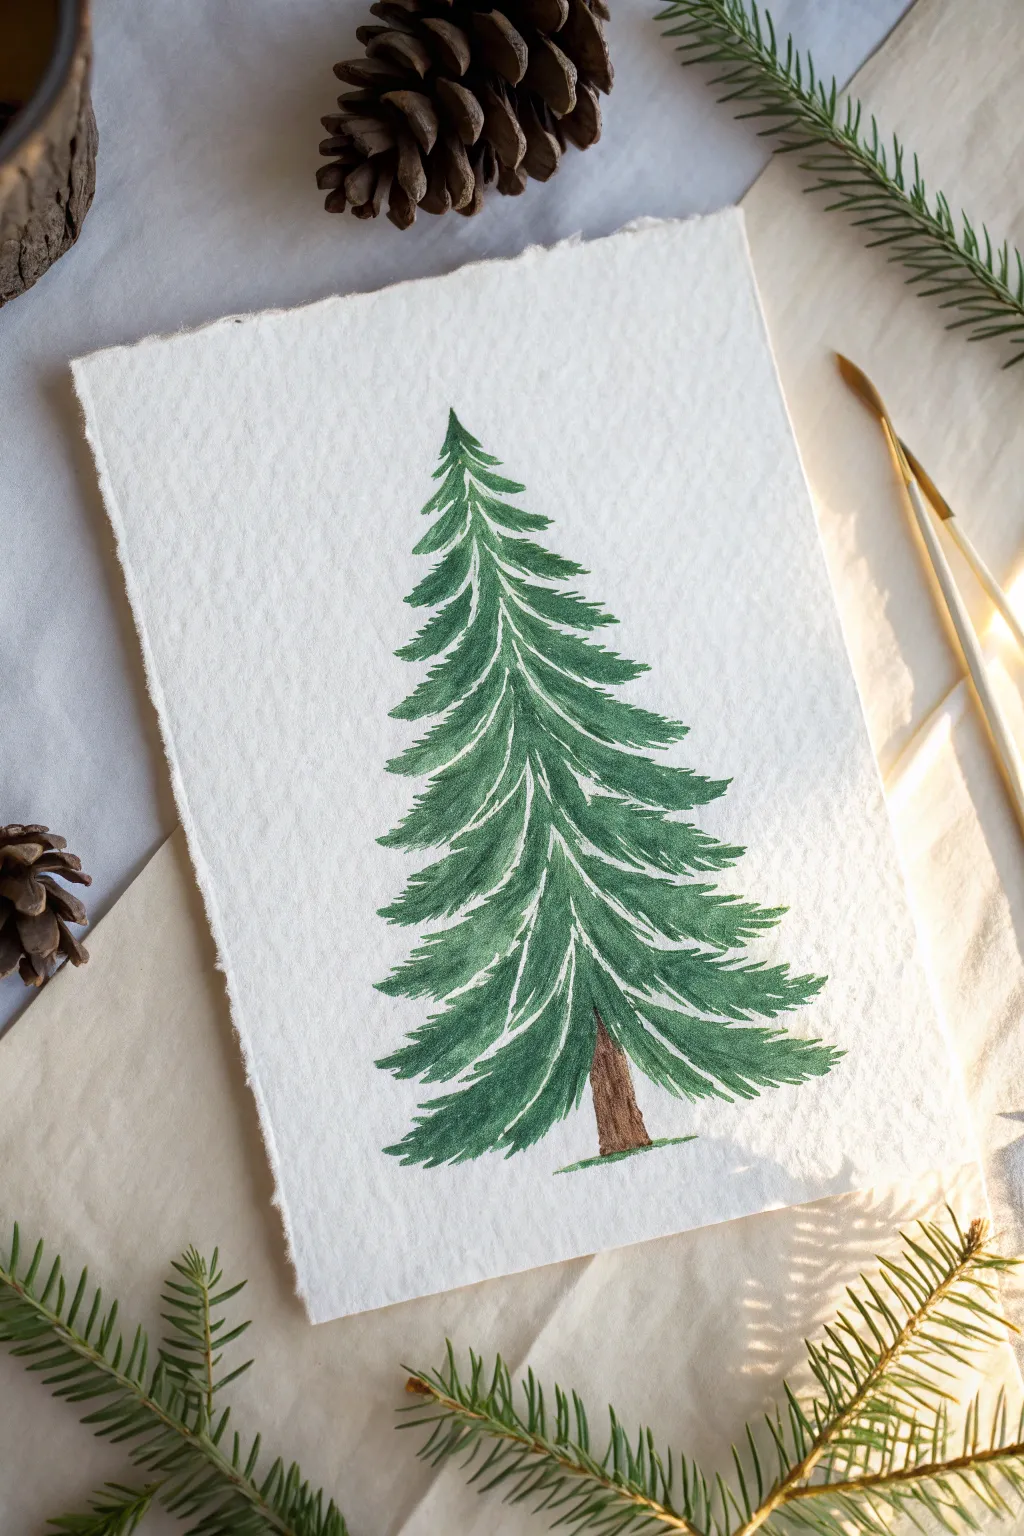
This elegant evergreen captures the magic of a winter forest with sweeping, feathery branches. Using watercolor techniques that mimic the texture of pine needles, this project results in a sophisticated piece perfect for holiday cards or seasonal decor.
Step-by-Step
Materials
- Cold-pressed watercolor paper (heavyweight, textured)
- Watercolor paints (Deep Green, Sap Green, Burnt Umber)
- Round watercolor brush (size 6 or 8)
- Fine liner brush (size 0 or 1)
- Cup of water
- Paper towels
- Masking tape (optional, to secure paper)
Step 1: Preparation & Trunk
-
Prepare your paper:
Start with a high-quality sheet of cold-pressed watercolor paper. The ragged deckle edge shown in the photo adds a lovely rustic touch, so you might want to tear your paper edges by hand against a ruler or leave them natural if using handmade paper. -
Mix the trunk color:
Load your round brush with water and pick up some Burnt Umber. You want a medium consistency—not too watery, but fluid enough to glide. -
Paint the base trunk:
Towards the bottom center of your paper, paint a short, sturdy trunk. Keep it slightly wider at the bottom and let it fade out as you go up, as the upper trunk will be hidden by branches. -
Add trunk texture:
While the brown paint is still slightly damp, dab a tiny bit of darker brown or a more concentrated pigment on one side to suggest shadow and bark texture.
Dry Brush Magic
For realistic pine needles, blot your brush on a paper towel before painting. This ‘dry brush’ technique leaves jagged, textured edges that mimic foliage.
Step 2: Creating the Branches
-
Mix your greens:
Creating depth requires two shades of green. Mix a dark, cool ‘forest green’ and a slightly warmer ‘sap green’ on your palette. Keep them distinct but ready to blend. -
Start at the top:
Using the tip of your round brush, begin at the very peak of the tree. Paint a small, single vertical stroke for the leader branch. -
Form the upper boughs:
Directly below the peak, make small, sweeping strokes outward and slightly downward. Imagine the shape of a curved apostrophe or a comma. -
Build the sweeping motion:
As you move down the tree, lengthen your strokes. The key motion is press-and-lift: press the belly of the brush down near the center of the tree, then flick outward while lifting to create a tapered, needle-like end. -
Leave white space:
This is crucial for the snowy, airy look. Do not paint a solid green triangle. Leave gaps of white paper between your layers of branches to define the shape and let the tree ‘breathe.’ -
Curve the branches:
Ensure your strokes curve upwards slightly at the tips for the swooping effect typical of majestic pines. Avoid straight, stiff lines.
Step 3: Adding Detail & Texture
-
Switch brushes:
Pick up your fine liner brush for more delicate work. This will help create the illusion of individual pine needles. -
Add varying tones:
Dip into your darker green mix. Go back over the damp branches, adding thin lines along the bottom edge of existing boughs. This wet-on-wet technique creates beautiful soft shadows. -
Define the center:
Darken the area near the imaginary center trunk line with your deepest green. This adds volume, making the tree look round rather than flat. -
Feather the edges:
Use the liner brush to add tiny, flicking strokes at the very ends of the large branches. I find this really helps break up any solid clumps of paint. -
Ground the tree:
Using a very dry brush with a tiny amount of green, scratch a horizontallish line right under the brown trunk to simulate grass or moss. -
Let it dry completely:
Allow the paint to fully set. The watercolor will naturally dry a bit lighter, revealing the lovely paper texture beneath.
Snowy Sparkle
Once the painting is bone dry, splatter a tiny amount of opaque white gouache or white acrylic ink over the tree for a fresh snowfall effect.
Now you have a timeless evergreen painting that captures the quiet beauty of the season
BRUSH GUIDE
The Right Brush for Every Stroke
From clean lines to bold texture — master brush choice, stroke control, and essential techniques.
Explore the Full Guide
Reindeer Handprint Antlers
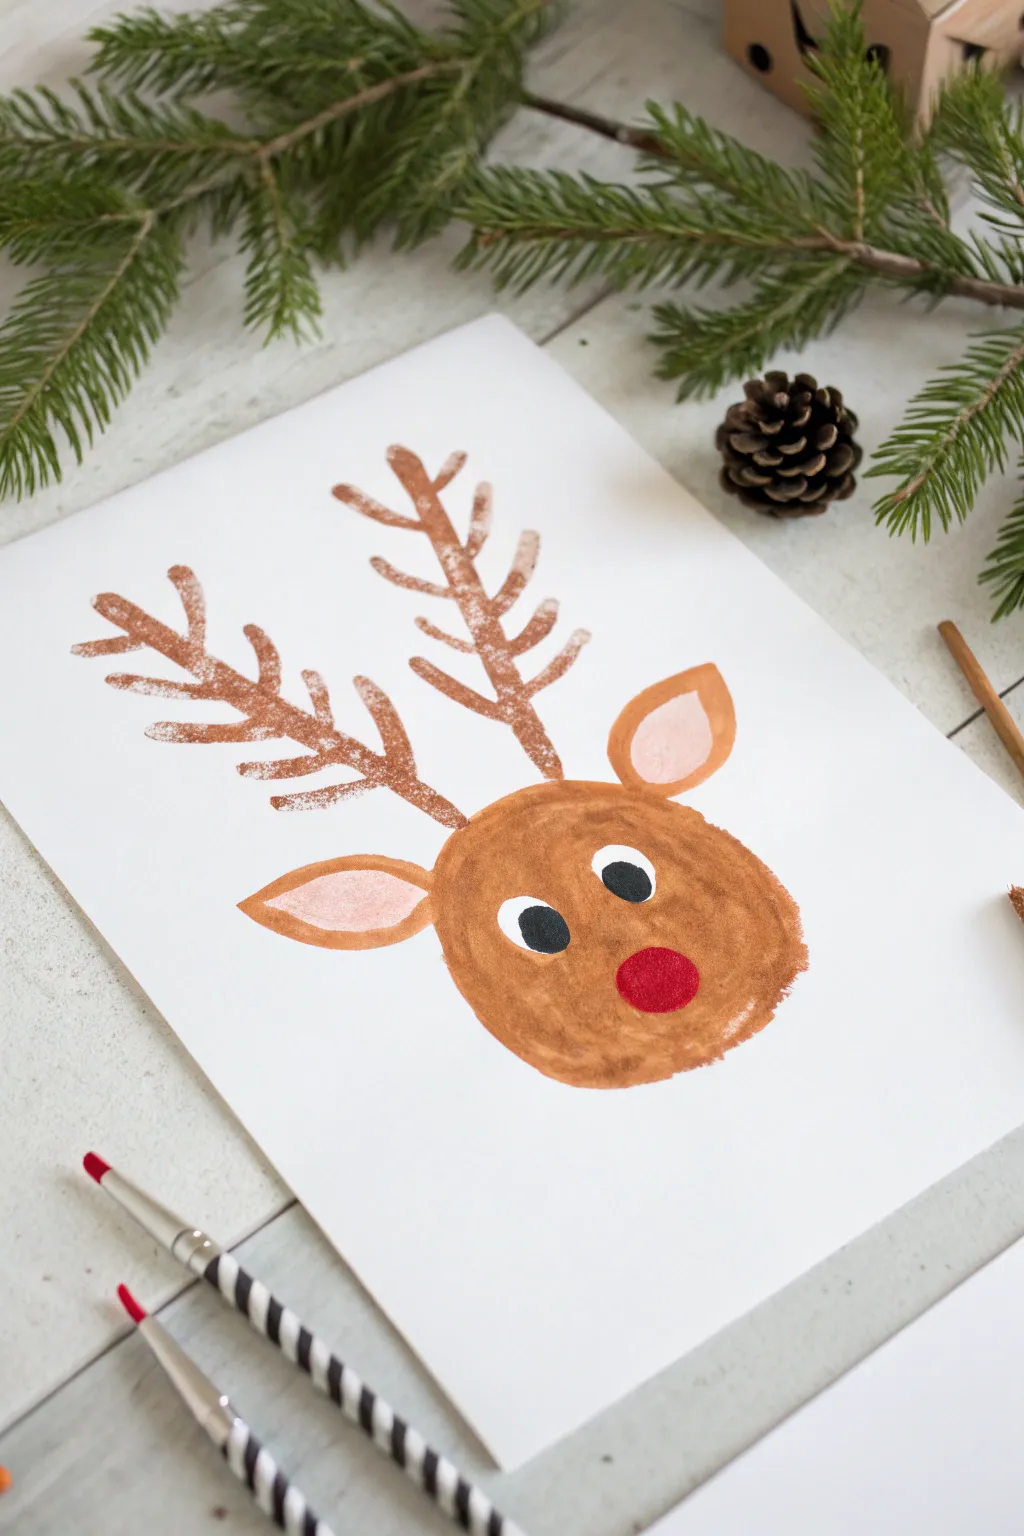
This adorable reindeer painting captures the magic of the season with its simple shapes and charming expression. It features a bold, rounded face and intricate, branch-like antlers that make for a perfect holiday keepsake or gift.
Step-by-Step Guide
Materials
- White heavyweight construction paper or cardstock
- Brown washable tempera or acrylic paint
- Red washable tempera or acrylic paint
- Black washable tempera or acrylic paint
- White washable tempera or acrylic paint
- Light pink paint (or mix red and white)
- Medium flat paintbrush
- Small round detail brush
- Small painting sponge (optional)
- Paper plate or palette
Step 1: Painting the Base Shape
-
Prepare your palette:
Squeeze a generous amount of brown paint onto your paper plate. If the brown is very dark, you might want to mix in a tiny drop of white or yellow to warm it up, giving it that classic reindeer look. -
Create the head outline:
Using a medium flat brush, paint a large, slightly flattened oval in the lower center of your white paper. This will be the main shape for the reindeer’s head. -
Fill in the face:
Fill the oval completely with brown paint. Use curved brush strokes that follow the shape of the head to create a smooth, even texture. I like to make the paint slightly thicker in the center for better coverage. -
Add the ears:
While the brown face is still wet or just starting to dry, paint two teardrop shapes extending from the top sides of the head. These are the ears, pointing outwards and slightly up. -
Paint the inner ears:
Switch to your light pink paint. Carefully paint smaller teardrop shapes inside the brown ears you just created. Leaving a small rim of brown visible around the pink adds a nice dimension.
Paint Not Sticking?
If the white eye paint turns brown because the base layer is wet, wait 15 minutes or use a hairdryer on low heat to set the face first.
Step 2: Adding the Antlers
-
Draft the main beams:
Dip your medium brush into the brown paint again. Paint two long, slightly curved lines extending upward from the top of the reindeer’s head, spacing them out so they fan away from each other. -
Add first branches:
Starting near the bottom of each antler beam, paint short, diagonal lines branching outward. Make these thicker at the connection point and tapering slightly at the ends. -
Create upper tines:
Move higher up the main antler beams and add 2-3 more sets of branching lines on each side. Varying their lengths makes them look more natural and organic. -
Texture the antlers:
For a rustic look, lightly dab your brush with a small amount of paint over the antler lines to create a slightly rough, fuzzy texture rather than perfectly smooth lines.
Step 3: Bringing the Face to Life
-
Start the eyes:
Ensure the brown face paint is dry to the touch before proceeding. Using white paint and a clean brush, paint two medium-sized circles in the upper middle of the face. -
Refine the white circles:
Go over the white circles a second time if the brown paint creates shadows underneath. Solid, bright white eyes make the character pop. -
Add the pupils:
Once the white circles are dry, dip a small round brush into black paint. Paint smaller black circles inside the white ones, looking slightly inward or to the side for a cute expression. -
Paint the nose:
Rinse your brush thoroughly. Dip it into bright red paint and create a lovely round circle in the center of the face, just below the eyes. -
Add nose highlights:
This is completely optional, but you can leave a tiny speck of the paper showing or add a miniscule dot of white to the red nose to make it look shiny. -
Dry completely:
Let the entire painting sit undisturbed until the thickest parts of the paint, usually the nose and eyes, are fully dry.
Make It 3D
Instead of painting the red nose, glue on a large red pom-pom or a shiny red button after the paint dries for a fun tactile element.
Now you have a charming reindeer friend ready to display for the holidays
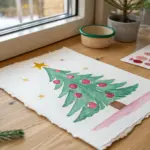
Candy Cane Stripe Painting
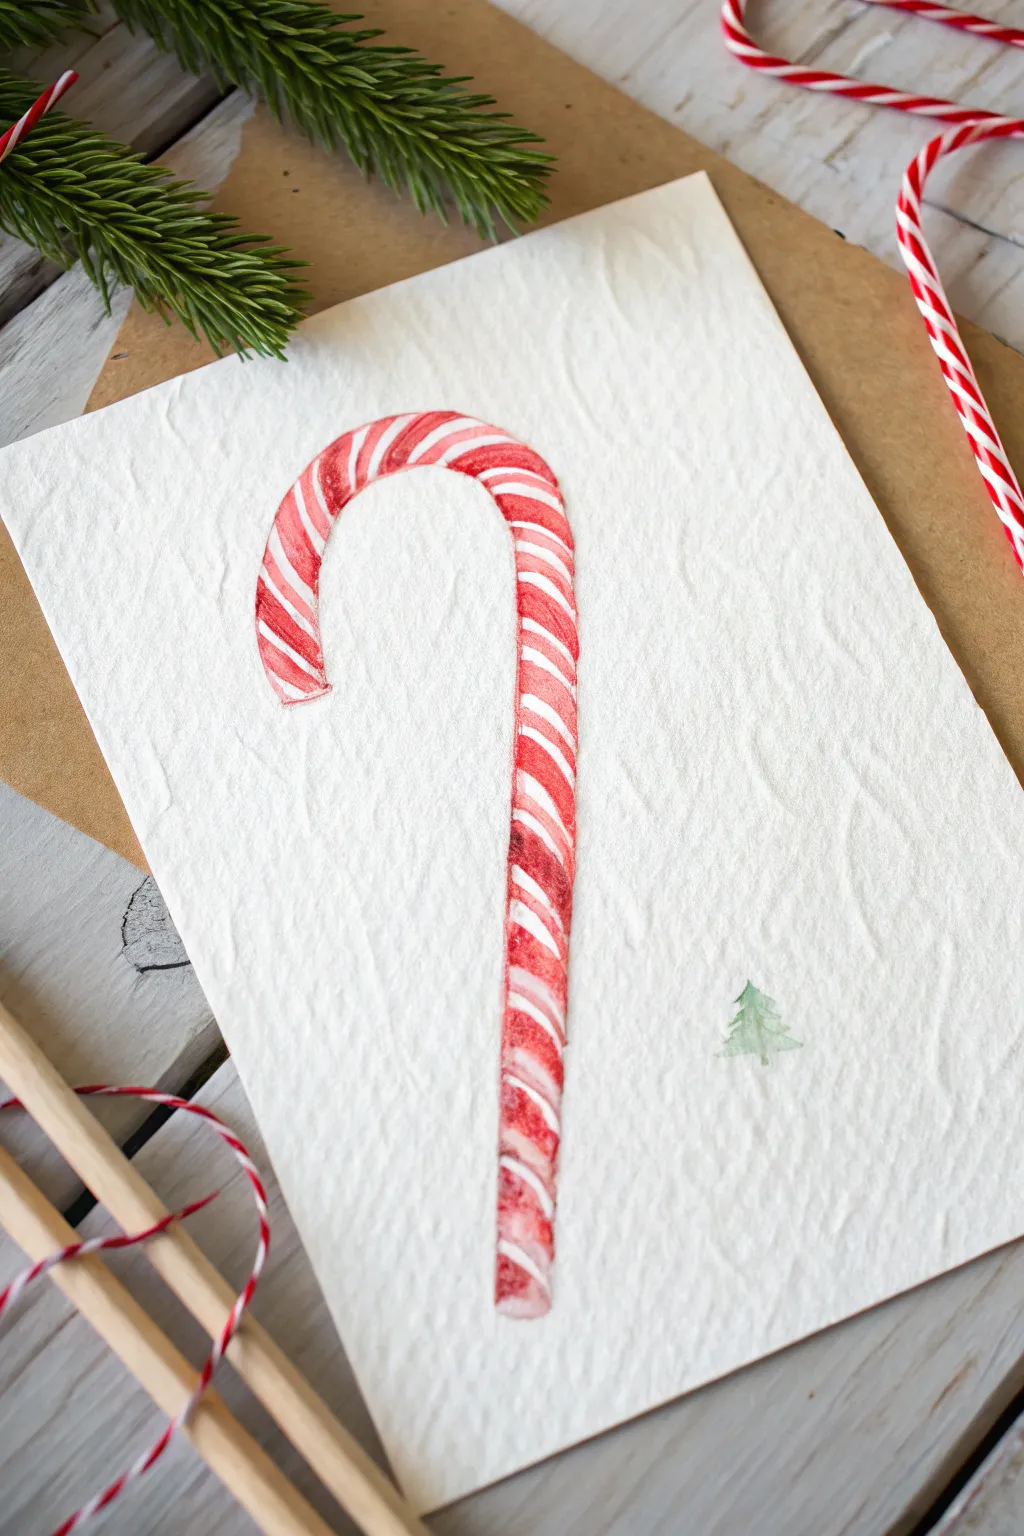
Capture the classic sweetness of the season with this elegant yet simple candy cane painting. Using watercolor on textured paper gives it a lovely, vintage feel that looks beautiful on homemade holiday cards.
Detailed Instructions
Materials
- Heavyweight watercolor paper (cold press or rough texture)
- Red watercolor paint (crimson or cadmium)
- Green watercolor paint (sap green)
- Round watercolor brush (size 4 or 6)
- Small detail brush (size 0 or 1)
- Pencil (HB or H)
- Eraser
- Jar of water
- Paper towel
Step 1: Sketching the Shape
-
Outline lightly:
Begin by lightly drawing the outline of a candy cane in the center of your paper using an H or HB pencil. Keep your lines faint so they won’t show through the translucent watercolor later. -
Define the crook:
Ensure the top curve—the crook—is nice and round. The thickness of the cane should be consistent from the bottom straight edge all the way around to the tip of the hook. -
Mark the stripes:
Lightly sketch diagonal lines across the candy cane shape to mark where your red stripes will go. Vary the width slightly or make them uniform, depending on your preference, but keep the angle consistent. -
Clean up:
Use a kneadable eraser to gently lift up any graphite that looks too dark, leaving just a ghost of an image to guide your painting.
Bleeding Colors?
If red bleeds into white, wait for it to dry 100%. Then, use a damp ‘thirsty’ brush to lift the unwanted red, blotting constantly with a paper towel.
Step 2: Painting the Stripes
-
Prepare your red:
Mix a vibrant red watercolor on your palette. Add enough water so it flows easily but keeps a strong color saturation. -
Start the first stripe:
Using your round brush (size 4 or 6), carefully fill in the first red stripe at the top or bottom. I find starting at the top helps prevent smudging with your hand as you work down. -
Skip and repeat:
Skip the white space and paint the next red stripe. Continue this pattern down the entire length of the cane. -
Adding depth:
While the red paint is still slightly damp, touch the very edge of the right side with a slightly more concentrated red pigment. This creates a subtle shadow effect, making the cane look round. -
Softening edges:
If a stripe looks too harsh, rinse your brush, dry it slightly on a paper towel, and gently run the damp bristles along the edge of the paint to soften it. -
Let it dry:
Allow the red stripes to dry completely. This is crucial before doing any touch-ups so the red doesn’t bleed into the white areas.
Step 3: Final Details
-
Refining the white:
If you inadvertently painted over a white section, you can use a clean, damp brush to ‘lift’ some color out, or use opaque white gouache later to reclaim highlight areas. -
Painting the tiny tree:
Switch to your smallest detail brush (size 0 or 1). Load it with a watery sap green paint. -
Placing the accent:
To the bottom right of the candy cane, paint a very small, simple Christmas tree shape. Use tiny triangular strokes, starting from the top and widening at the bottom. -
Tree texture:
Keep the tree loose and watery; it acts as a subtle signature or accent mark rather than a main focal point. -
Final assessment:
Check the painting for any stray pencil marks. Once the paint is bone dry, gently erase any visible graphite lines around the edges.
Add Some Sparkle
For a magical touch, wait until the paint is dry and trace a thin line of clear glitter glue along one edge of the red stripes to mimic sugar crystals.
Once dry, mount your artwork on a piece of kraft cardstock for a rustic holiday finish

PENCIL GUIDE
Understanding Pencil Grades from H to B
From first sketch to finished drawing — learn pencil grades, line control, and shading techniques.
Explore the Full Guide
Tape-Resist Snowflake Burst
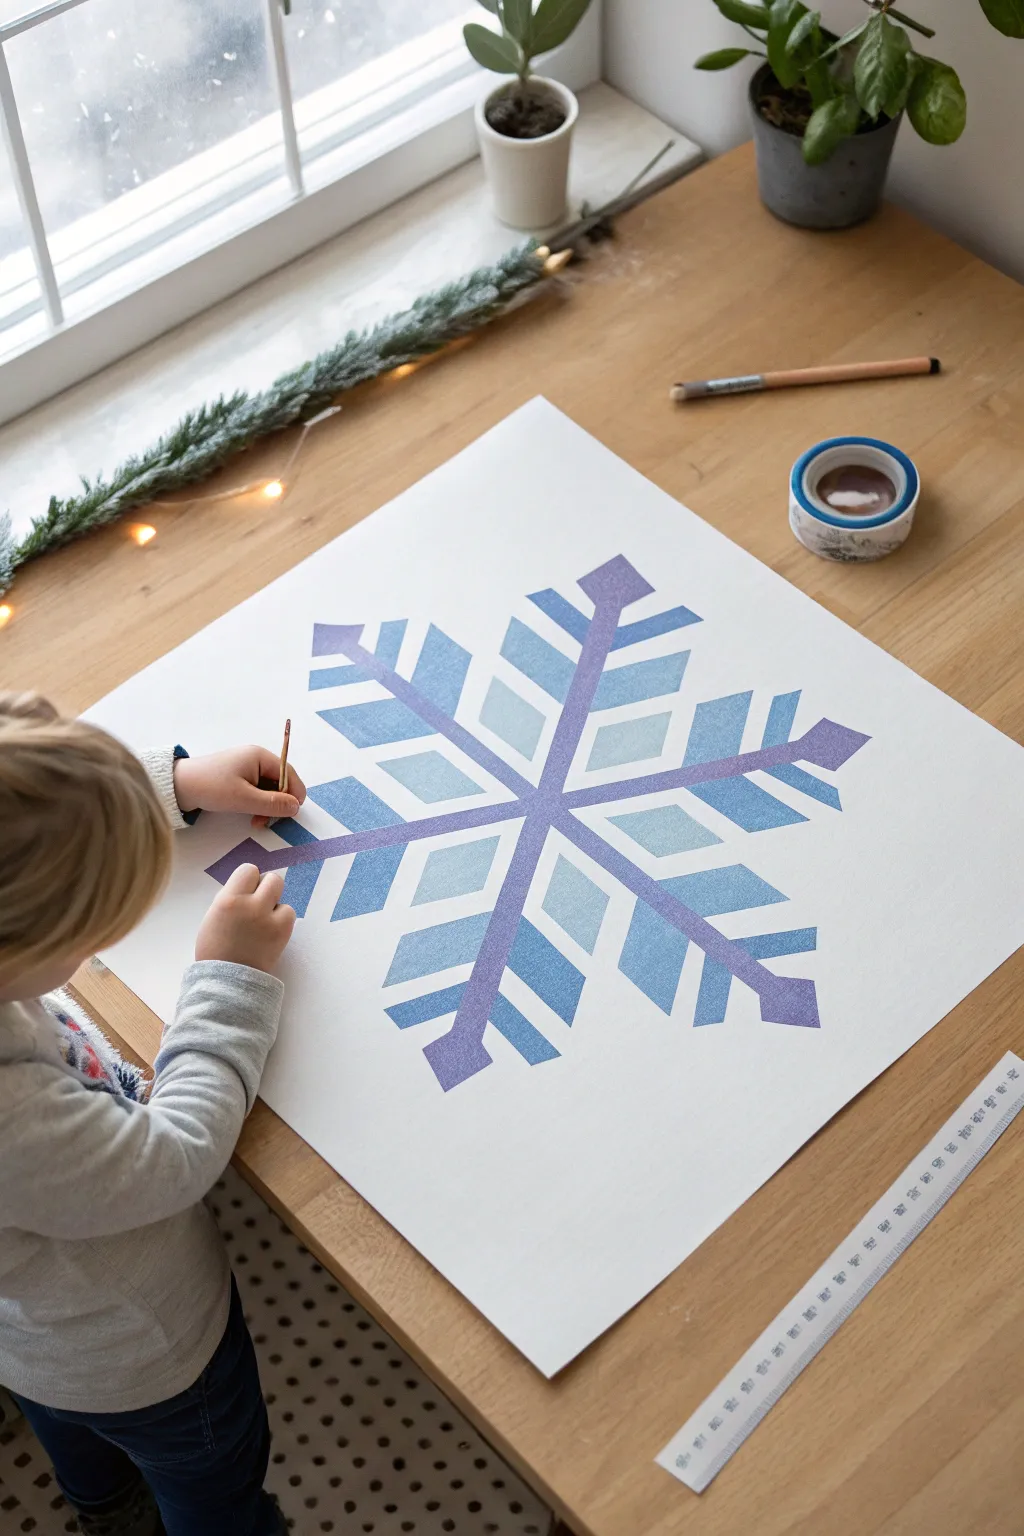
Capture the frosty beauty of winter with this striking tape-resist painting project that combines sharp geometric lines with soft watercolors. The result is a bold, oversized snowflake bursting with icy blues and purples, perfect for hanging up during the holiday season.
Step-by-Step Tutorial
Materials
- Large square sheet of heavy watercolor paper or cardstock
- Painter’s tape (washi tape or low-tack masking tape)
- Watercolor paints or diluted acrylics (blue, periwinkle, purple)
- Medium-sized paintbrush
- Ruler
- Pencil (light H-grade)
Step 1: Setting the Structure
-
Prepare the canvas:
Start with a large, clean square of heavy paper. If you only have rectangular paper, trim it down to a square to make the snowflake symmetry easier to manage. -
Mark the center:
Find the exact center of your paper using a ruler. Make a tiny, faint pencil dot. This will be the anchor point for all your radiating lines. -
Create the main axis:
Place a long strip of painter’s tape vertically across the center dot, creating the top and bottom arms of the flake. Press it down firmly. -
Add diagonal axes:
Place two long strips of tape forming an ‘X’ through the center dot. You should now have six arms radiating from the middle, looking like a star or asterisk.
Bleeding Lines?
If paint seeped under the tape, don’t panic. Use a white paint pen or opaque white acrylic to trace over the lines and cover the mistakes once dry.
Step 2: Designing the Crystal
-
Tape the diamond shapes:
Cut several shorter pieces of tape. On each of the six arms, create diamond-like chevron shapes pointing outward. You do this by connecting the arms with angled pieces of tape. -
Refine the edges:
Continue adding smaller pieces of tape to create the ‘feathery’ look of the snowflake branches. Focus on creating enclosed geometric shapes (triangles, diamonds, and trapezoids) between the tape lines. -
Seal the tape:
Run your fingernail or the back of a spoon firmly along the edges of every piece of tape. This step is crucial to prevent paint from bleeding under our resist lines.
Step 3: Painting the Frost
-
Mix your palette:
Prepare your paints. I like to use three distinct shades: a true blue, a light icy blue, and a soft purple. Keeping them somewhat watery allows for nice blending. -
Paint the first section:
Start filling in the white paper spaces exposed between the tape. Encourage your toddler to fill a single enclosed shape with one color. -
Alternate colors:
Move to the next shape and choose a different shade. For a cohesive look, try painting mirror-image sections on opposite arms the same color, though random placement looks beautiful too. -
Blend wet-on-wet:
If a shape is large enough, try dropping a bit of purple into wet blue paint and letting them swirl together naturally on the paper. -
Fill every gap:
Continue working around the snowflake until every section of white paper between the tape lines is covered in color. Don’t worry about painting on top of the tape itself. -
Let it dry completely:
Set the artwork aside. The paint must be bone-dry before the next step, or the paper might tear. Wait at least an hour or use a hairdryer on a low setting.
Pro Tip: Crisp Edges
Before applying your blue colors, paint a layer of clear water or white paint over the tape edges to seal them. This guarantees perfectly sharp white lines.
Step 4: The Big Reveal
-
Peel the first strip:
Find the end of your last-applied piece of tape. Peel it back slowly at a 45-degree angle, keeping it close to the paper surface. -
Remove main lines:
Work your way backward, removing the smaller detail pieces first, and finally peeling off the long structural strips from phase one. -
Touch up:
If any paint seeped through or a line looks jagged, you can use a tiny brush with white paint or a white gel pen to clean up the edges.
Now you have a stunning, oversized snowflake that captures the geometry of winter without melting away
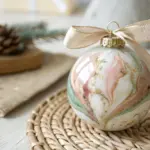
Bubble Wrap Poinsettia Prints
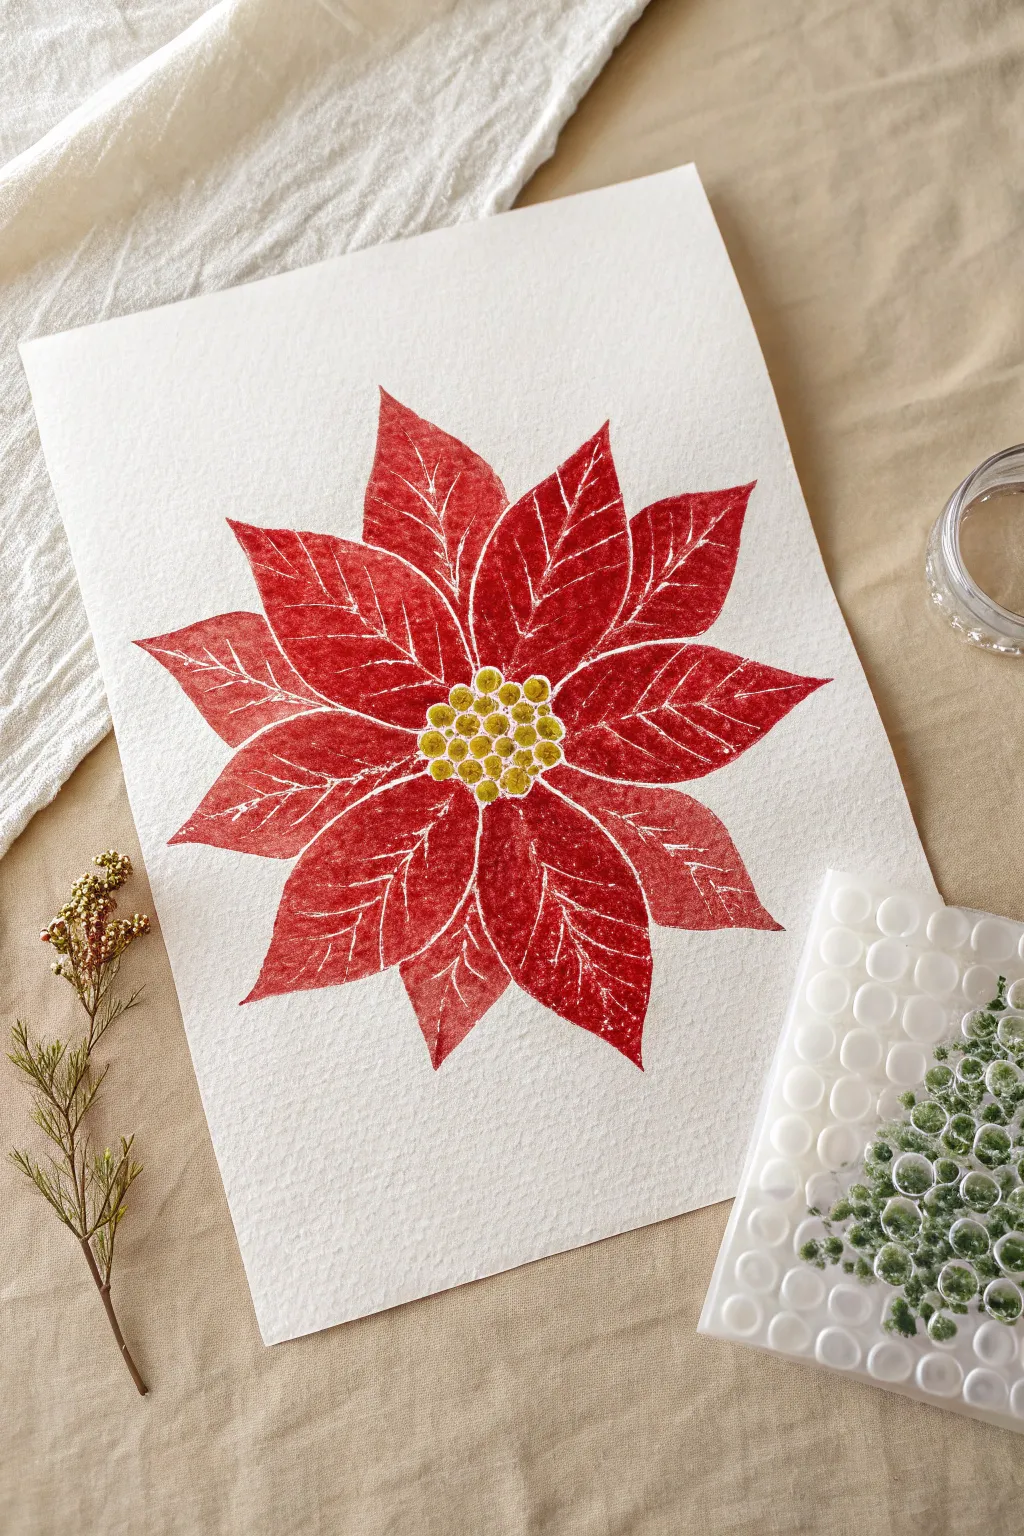
Discover a surprisingly elegant way to capture the festive beauty of a poinsettia using humble bubble wrap. This project transforms simple texture into the velvety red leaves of the holiday’s most iconic flower, complete with delicate white veining and a bright center.
Step-by-Step
Materials
- Thick watercolor paper or cardstock (white)
- Red acrylic or tempera paint
- Yellow acrylic or tempera paint
- Bubble wrap (small bubbles)
- Scissors
- White gel pen, paint pen, or fine brush with white gouache
- Small round sponge dabber or Q-tips
- Paint palette or flat tray
- Pencil
Step 1: Preparation & Shapes
-
Cut leaf shapes:
Cut your bubble wrap into leaf shapes. You will need about two variations: a larger, wider leaf shape for the outer petals and a slightly smaller, more slender shape for the inner petals. -
Check the fit:
Before adding any paint, arrange your bubble wrap cutouts on your paper lightly to ensure you like the composition. A classic poinsettia usually has 5-7 large leaves in a circle. -
Prepare the red paint:
Squeeze a generous amount of red paint onto a flat tray. You want the paint to be spread out thin enough to coat the bubbles without globbing in between them.
Stamp Smart
Don’t overload the bubble wrap with paint. If there’s too much, you lose the circle pattern. Test a print on scrap paper first to get the right amount.
Step 2: Printing the Flower
-
Stamp the outer layer:
Dip your larger bubble wrap leaf into the red paint, bubble-side down. Press it firmly onto the paper to create the first outer petal. -
Continue the circle:
Repeat this process, stamping the large leaves in a circle formation. Leave a small empty circular space in the very center for the yellow details later. -
Stamp the inner layer:
Switch to your smaller bubble wrap cutout. Dip it in red paint and stamp these smaller leaves in the gaps between the larger ones, slightly closer to the center. -
Check coverage:
If any petals look too faint, you can carefully re-stamp over them, but the uneven, textured look is part of the charm. -
Allow to dry completely:
Let the red paint dry fully. This is crucial because if the red is wet, the next steps (white veins and yellow center) will smudge and turn pink.
Add Greenery
Cut a few extra bubble wrap shapes and use green paint to add leaves peeking out from behind the red flower for extra contrast.
Step 3: Adding Details
-
Draw the center vein:
Using a white gel pen or a fine white paint pen, draw a central curved line down the middle of each red leaf. -
Add branching veins:
Sketch smaller veins branching off the center line. Keep your hand loose; these lines look best when they are slightly organic and wiggly. -
Create the cyathia (center):
Dip a small round sponge dabber, the end of a pencil eraser, or a Q-tip into bright yellow paint. -
Stamp the yellow dots:
Stamp a cluster of yellow dots right in the center of your flower where all the leaves meet. -
Highlight the center:
Once the yellow dots are dry, I like to use the white pen to add tiny little circles or highlights inside the yellow dots to give them dimension. -
Final touches:
Look over the piece. If you want more definition, you can lightly outline the very edges of some leaves with your white pen, though leaving them rough looks wonderfully organic.
Hang your textured masterpiece up to bring a splash of festive red to your walls


Salt-Sprinkle Snowy Night Sky
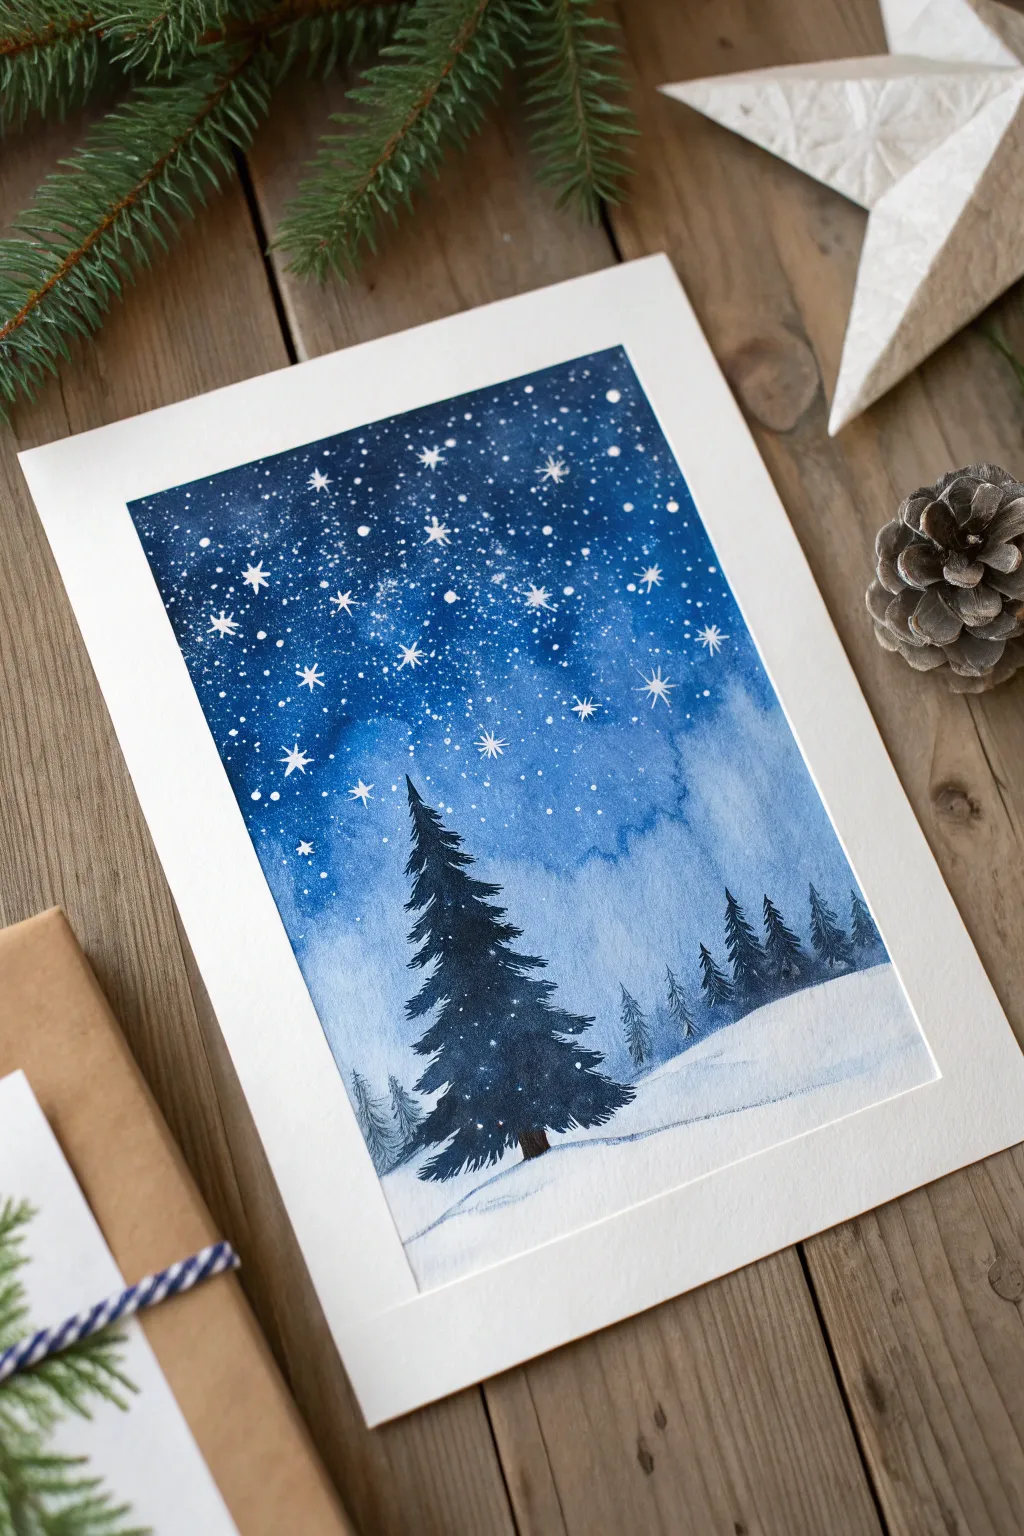
Capturing the magic of a silent winter night, this watercolor project uses simple techniques to create a stunning deep blue sky filled with stars. The contrast between the dark evergreens and the crisp white snow makes for a peaceful and timeless holiday decoration.
Detailed Instructions
Materials
- High-quality watercolor paper (cold press creates nice texture)
- Watercolor paints (Indigo, Prussian Blue, Ultramarine, Black)
- White gouache or white acrylic paint
- Painter’s tape or masking tape
- Large flat brush or wash brush
- Medium round brush (size 6 or 8)
- Small detail brush (size 0 or 1)
- Table salt or sea salt
- Two jars of water (one for rinsing, one for clean water)
- Paper towels
Step 1: Preparing the Sky
-
Secure the paper:
Begin by taping down all four edges of your watercolor paper to a board or table. This creates that crisp white border seen in the final piece and prevents the paper from buckling when wet. -
Wet the sky area:
Using your large flat brush and clean water, thoroughly wet the top two-thirds of the paper where the sky will be. Leave the bottom third dry for the snowy ground. -
Apply the first wash:
While the paper is glistening but not swimming in water, drop in a light wash of Ultramarine blue. Start from the top and let it fade out as you reach the snowy horizon line. -
Deepen the color:
While still wet, mix a concentrated amount of Indigo and Prussian Blue. Apply this to the top of the painting, letting the dark pigment flow downward to create a gradient. The sky should be darkest at the very top. -
Add texture with salt:
While the paint is still wet (this timing is key), sprinkle a pinch of salt over the upper right and left corners. I like to target the darker areas specifically. The salt absorbs the pigment, creating beautiful starry bursts. -
Let it dry completely:
Allow the paper to dry fully. This is crucial. If you touch it while damp, the salt texture will smudge. Once bone dry, gently brush off the salt crystals to reveal the textures underneath.
Step 2: Painting the Forest
-
Mix your tree color:
Create a dark, shadowy color for the trees by mixing Indigo with a touch of Black. You want a very saturated, opaque mixture. -
Paint the background trees:
Using a watered-down version of your dark mix and a medium brush, paint small, simple tree shapes along the horizon line on the right side. Lighter paint makes them look further away. -
Start the main tree:
Load your medium brush with the dark, concentrated Indigo mix. Draw a vertical line for the trunk of the large foreground tree on the left side, stopping before you hit the bottom edge of the paper. -
Build the branches:
Starting from the top of the trunk, use quick, downward strokes to create branches. Use just the tip of the brush at the top, pressing down harder as you move lower to make wider branches. -
Fill the tree silhouette:
Continue adding layers of branches until the tree feels full, ensuring the silhouette is jagged and natural. Leave tiny gaps between branches so the sky peeks through slightly. -
Add the faint ghost trees:
With a very watery, pale blue-grey mix, paint a couple of faint, ghostly trees to the left of the main tree. These should look like they are fading into the snowy mist.
Salt Not Working?
If the salt isn’t creating bursts, the paper was likely too dry or too wet. Aim for a distinct sheen—damp, but no puddles—when you sprinkle.
Step 3: Snow and Stars
-
Shadow the snow:
Clean your brush and use a very watery pale blue. Paint a soft, sweeping line under the trees to suggest a shadow on the snowdrift, softening the hard white edge. -
Splatter the stars:
Mix white gouache with a tiny bit of water until it has a milky consistency. Dip a brush in it and tap the handle against another brush over the sky area to create a spray of fine white dots. -
Hand-paint larger stars:
Switch to your smallest detail brush. Dip it in the thick white gouache and carefully paint a few larger, four-pointed or eight-pointed stars scattered among the splatters. -
Highlight the tree:
Use the detail brush to dab tiny amounts of white gouache onto the tips of the dark fir tree branches, making it look like fresh snow has settled there. -
The final reveal:
Once absolutely everything is dry, slowly peel away the painter’s tape at a 45-degree angle to reveal your clean, crisp edges.
Make It Sparkle
For extra holiday magic, try mixing a tiny bit of silver iridescent medium into your star splatter paint or use glitter glue for the largest stars.
Frame this serene winter scene to bring a quiet moment of beauty into your holiday decor
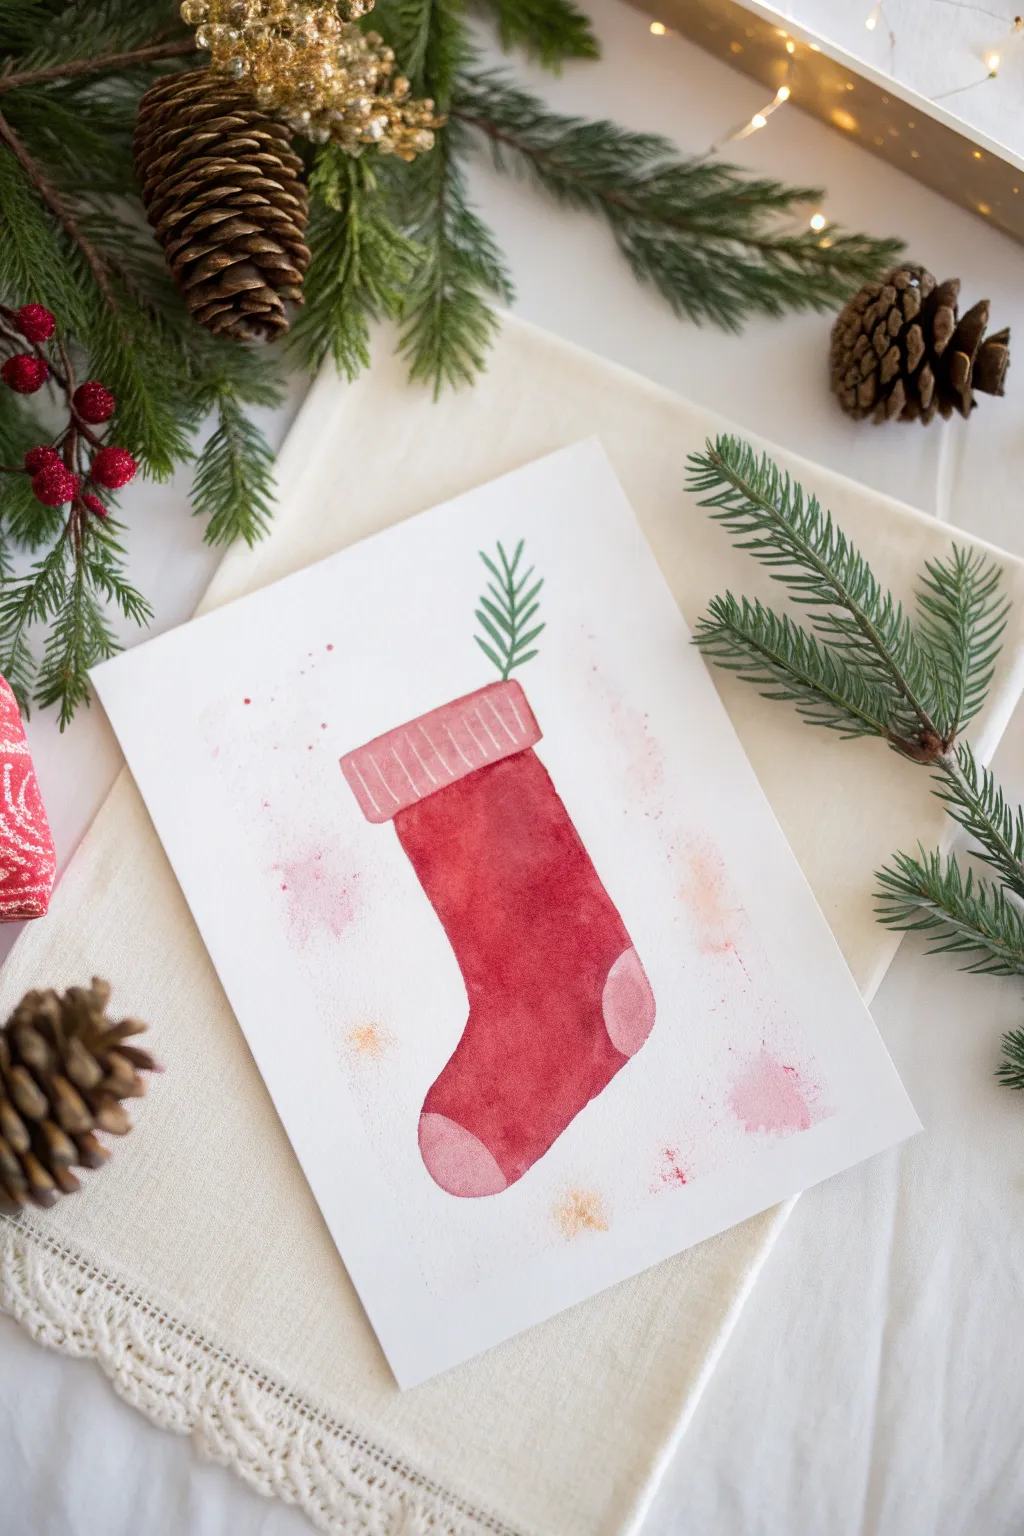
Stencil Silhouette Stocking Painting

Capture the soft magic of the season with this gentle watercolor stocking project. The translucent layers of red and pink create a cozy, vintage feel that looks beautiful framed or given as a holiday card.
Step-by-Step Tutorial
Materials
- Heavyweight watercolor paper (140lb/300gsm)
- Watercolor paints (Alizarin Crimson, deeply saturated red, soft pink)
- Round watercolor brush (size 6 or 8)
- Fine liner brush (size 0 or 1)
- Green watercolor paint (Sap Green or Chromium Oxide)
- Jar of clean water
- Paper towels
- Pencil and gentle eraser
- Artist tape (optional, for securing paper)
Step 1: Sketching the Outline
-
Position your paper:
Start by setting up your workspace with your watercolor paper flat. If you want crisp edges later or strictly prevent buckling, tape the edges down to your table or board. -
Draft the cuff:
Using a very light touch with your pencil, draw a rectangular shape near the top center of your page. Angle it slightly to the left to give the stocking a natural hanging look. -
Draw the stocking body:
From the bottom of the cuff, sketch the main body of the sock. Draw a vertical line down, curve it gently to the left for the ankle, and then swoop out to the right to form the foot. -
Add heel and toe details:
Lightly mark off semi-circle areas for the heel and the toe. These will be painted a lighter shade, so these guidelines are crucial for keeping your colors separated. -
Lighten the lines:
Once you are happy with the shape, take your eraser and gently lift most of the graphite. You want the lines barely visible so they don’t show through the transparent watercolor paint.
Clean Edges Tip
Leave a tiny sliver of white paper dry between the red body and the pink heel. This prevents bleeding and acts as a highlight.
Step 2: Painting the Base Layers
-
Mix your main red:
Load your round brush with water and pick up a generous amount of red paint. I like to dilute it slightly so it isn’t completely opaque—watercolor shines when it’s a bit transparent. -
Paint the main body:
Carefully fill in the main section of the stocking. Avoid the cuff, heel, and toe areas for now. Keep your brush wet enough that the color flows smoothly but doesn’t puddle. -
Add a soft texture:
While the red paint is still wet, you can dab a tiny bit more pigment into the shadowed side (the left edge) to create immediate dimension. -
Let it dry:
Wait for this main red section to dry completely. If you paint next to it too soon, the colors will bleed into the white spaces you saved. -
Paint the heel and toe:
Mix a very watery, pale pink or diluted red. Fill in the heel and toe shapes you marked earlier. The contrast between the deep red body and these lighter accents adds charm. -
Paint the cuff base:
Using that same watery pink mix, fill in the rectangular cuff at the top. This provides a background color for the texture we will add later.
Make it Sparkle
Sprinkle a pinch of salt onto the wet red paint of the stocking body. As it dries, it creates a snowy, crystallized texture effect.
Step 3: Adding Details and Accents
-
Texture the cuff:
Once the cuff is dry, take a slightly darker pink or light red on your fine liner brush. Paint thin vertical stripes across the cuff to mimic a ribbed knit texture. -
Add the greenery:
Mix a natural green shade. Starting from inside the top of the cuff, paint a simple stem rising upward and slightly to the right. -
Paint pine needles:
Using quick, short flicks with your fine brush, add needles to the sides of the green stem. Keep them loose and airy rather than perfectly symmetrical. -
Create a splatter effect:
Load a brush with watery pink or red paint. Hold it over the paper and tap the handle against another brush or your finger. This sends fine droplets around the stocking for a festive, magical atmosphere. -
Add gold touches (optional):
If you want extra sparkle, repeat the splatter technique with a tiny bit of yellow ochre or gold watercolor to mimic twinkling lights. -
Final check:
Review your painting. If the main red looks too flat after drying, you can gently glaze a second layer over the shadowed areas to deepen the color.
Allow your painting to dry fully before erasing any remaining stray pencil marks


Have a question or want to share your own experience? I'd love to hear from you in the comments below!