I love how Christmas rock painting turns a simple stone into a tiny holiday keepsake you can finish in one cozy sitting. If you’re craving cute, festive designs that actually work on real rock shapes, these ideas will give you plenty to paint (and gift).
Classic Santa Face on a Rounded Rock
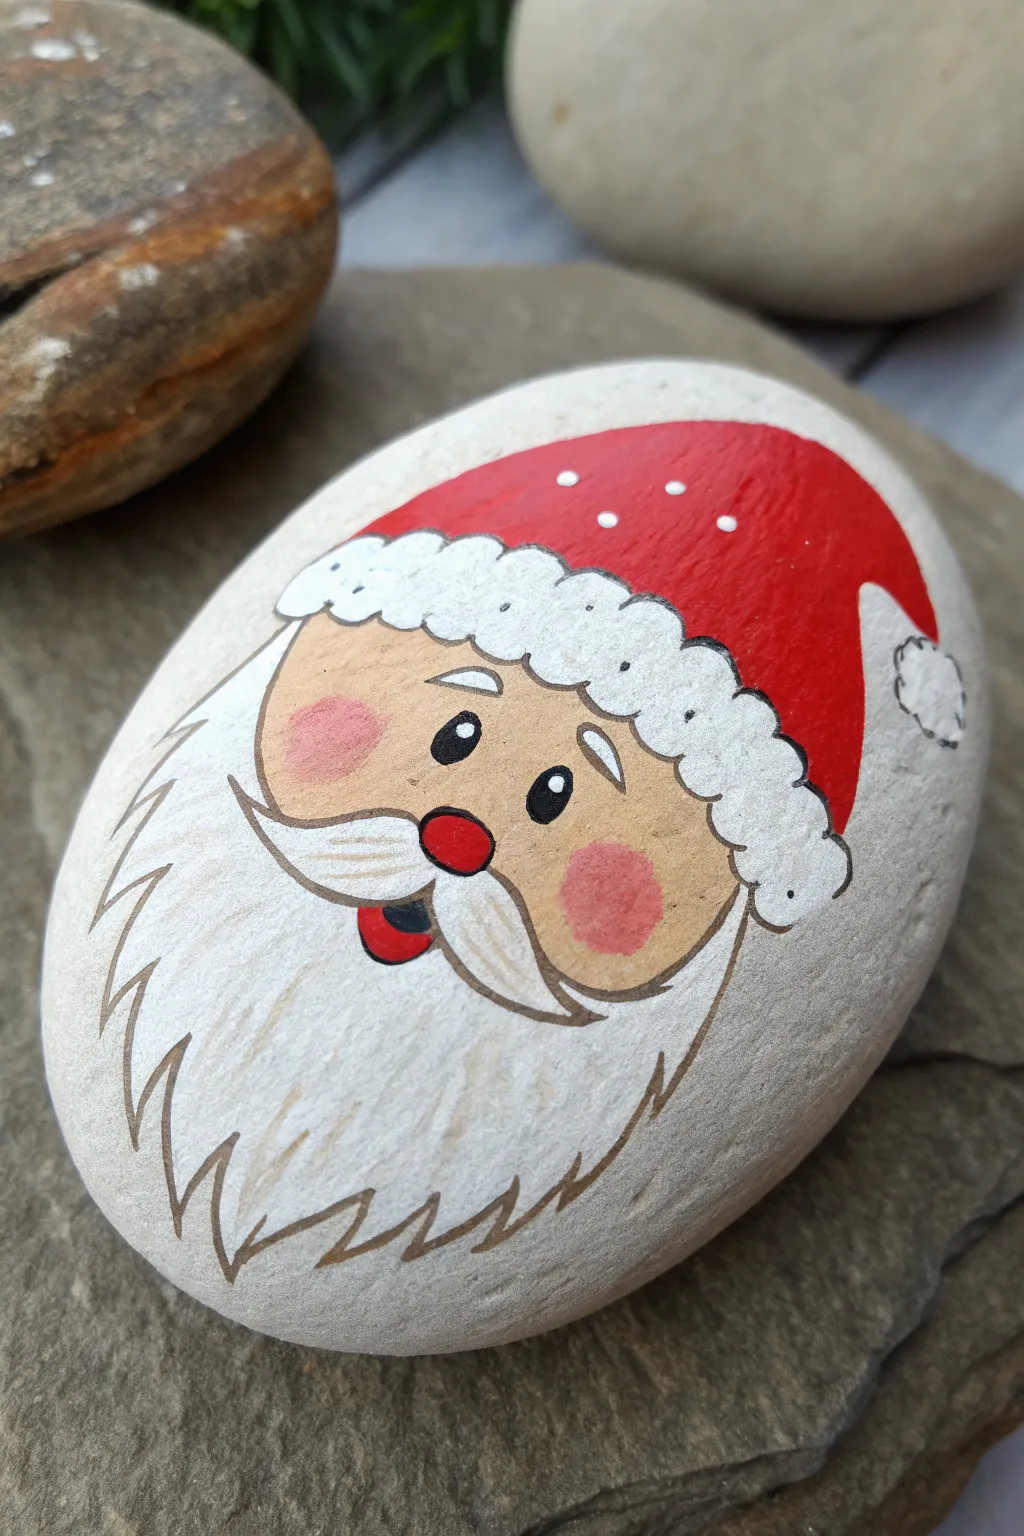
Transform a smooth, rounded stone into a festive masterpiece featuring a charming, illustrative Santa Claus face. With whimsical details like rosy cheeks and a snowy white beard, this rock painting project captures the heartwarming spirit of the season.
Step-by-Step
Materials
- Smooth, oval-shaped river rock (approx. 3-4 inches wide)
- White acrylic paint (base coat and beard)
- Red acrylic paint (hat and nose/mouth details)
- Flesh-tone acrylic paint (Beige or light peach)
- Pink acrylic paint (cheeks)
- Black fine-liner paint pen or permanent marker (0.5mm or 0.7mm)
- White paint pen (fine tip)
- Pencil and eraser
- Small flat brush
- Fine detail round brush (size 0 or 1)
- Matte or satin sealant spray
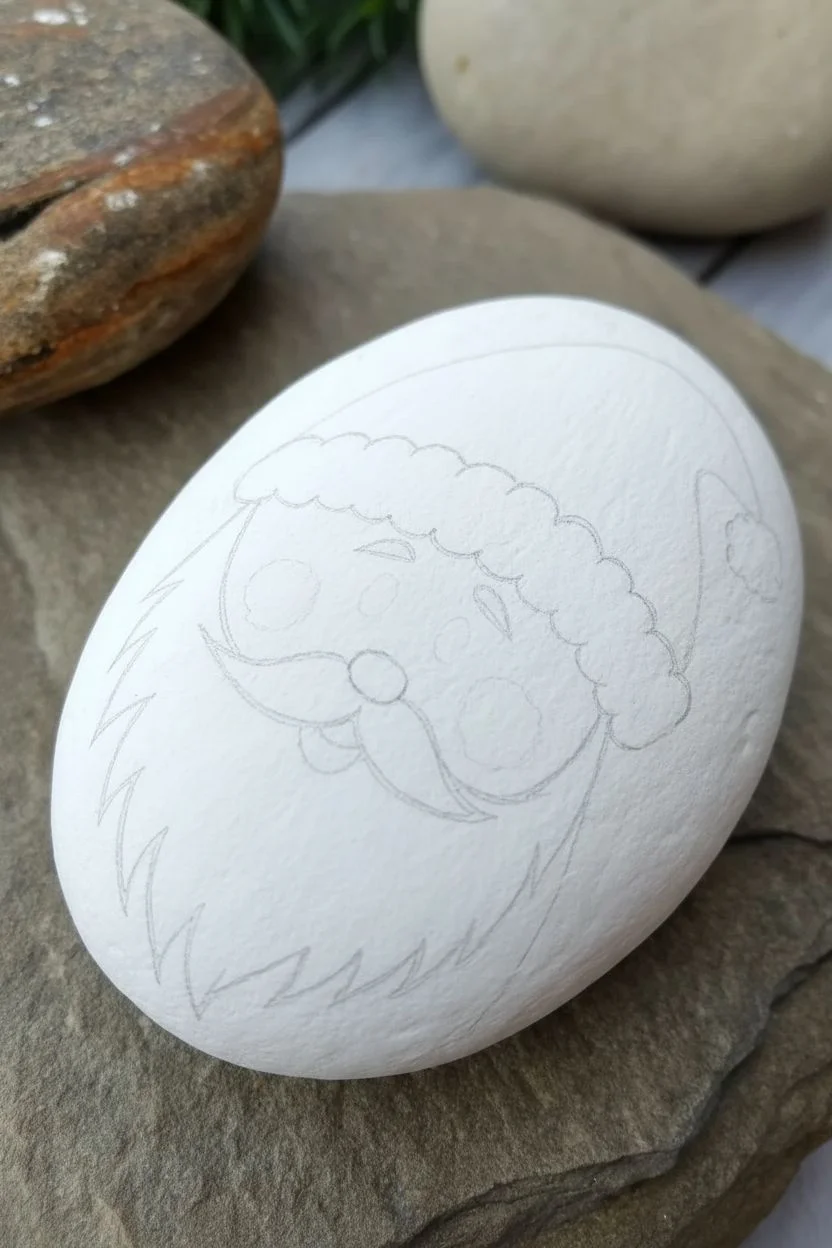
Step 1: Base Prep & Sketching
-
Clean the canvas:
Begin by washing your stone thoroughly with soap and water to remove any dirt or oils. Let it dry completely before starting. -
Apply the background:
Paint the entire surface of the rock with a coat of white acrylic paint. This is your primer. You may need two coats to get a solid, opaque finish. Let this dry fully. -
Sketch the outline:
Using a light pencil, gently sketch the main shapes of Santa’s face. Draw a curved line for the hat brim, a U-shape for the face, and outline the flowing beard and mustache area.
Step 2: Blocking in Colors
-
Paint the face:
Fill in the central U-shape of the face with your flesh-tone acrylic paint. Use a small flat brush for smooth coverage, carefully avoiding the mustache area. -
Add the red hat:
Paint the area above the hat brim with bright red acrylic paint. Extend the color down the right side to create the drooping tip of the hat. -
Define the beard:
Since your background is already white, you can leave the beard area as is, or apply a fresh layer of white paint to make it stand out against the raw stone texture if any showed through the base coat. -
Paint the mouth:
Just under the mustache area, paint a small, dark semi-circle for the open mouth. You can mix a tiny bit of black into your red to make a deep maroon for the inside of the mouth.
Fixing Smudges
If your black outline smudges, wait for it to dry completely, then paint over the mistake with the original background color and re-draw the line.
Step 3: Adding Character Details
-
Create the hat trim:
Using white paint, dab along the brim of the hat to create the fluffy white trim. Do the same for the pom-pom at the end of the hat. -
Paint the nose and tongue:
Paint a small red oval for the nose right in the center of the face. Add a tiny red curve inside the dark mouth area for the tongue. -
Rosy cheeks:
Dilute a small drop of pink paint with water or use a dry-brush technique to softly apply round circles on the cheeks for a blushing look. -
Draw the eyes:
Paint two vertical ovals in black for the eyes, placing them slightly wide apart for a cute expression.
Sparkle Finish
Before sealing, sprinkle a tiny pinch of white iridescent glitter over the white hat trim paint while it’s still wet for a frosty, magical snow effect.
Step 4: Refining & Outlining
-
Outline the features:
Once all paint is 100% dry, use your black paint pen to outline the entire drawing. Go over the hat, the face shape, and the detailed curves of the beard. -
Detail the beard:
Use the pen to add texture lines inside the beard area, following the flow of the hair to give it volume. -
Mustache definition:
Clearly outline the mustache handlebars, ensuring they swoop up to meet the cheeks. -
Hat texture:
Add small scalloped lines or dots along the white hat trim and pom-pom with your black pen to suggest a fluffy texture. -
Final highlights:
Using a fine white paint pen or a toothpick dipped in white paint, add a tiny dot to each black eye for sparkle. Add three small dots to the red hat and a tiny highlight line on the nose. -
Seal the artwork:
Protect your Santa by applying a clear matte or satin sealant spray. Do this outside and let it cure fully.
Now you have a charming holiday keepsake perfect for hiding in a park or gifting to a friend


Cute Reindeer With a Bright Red Nose
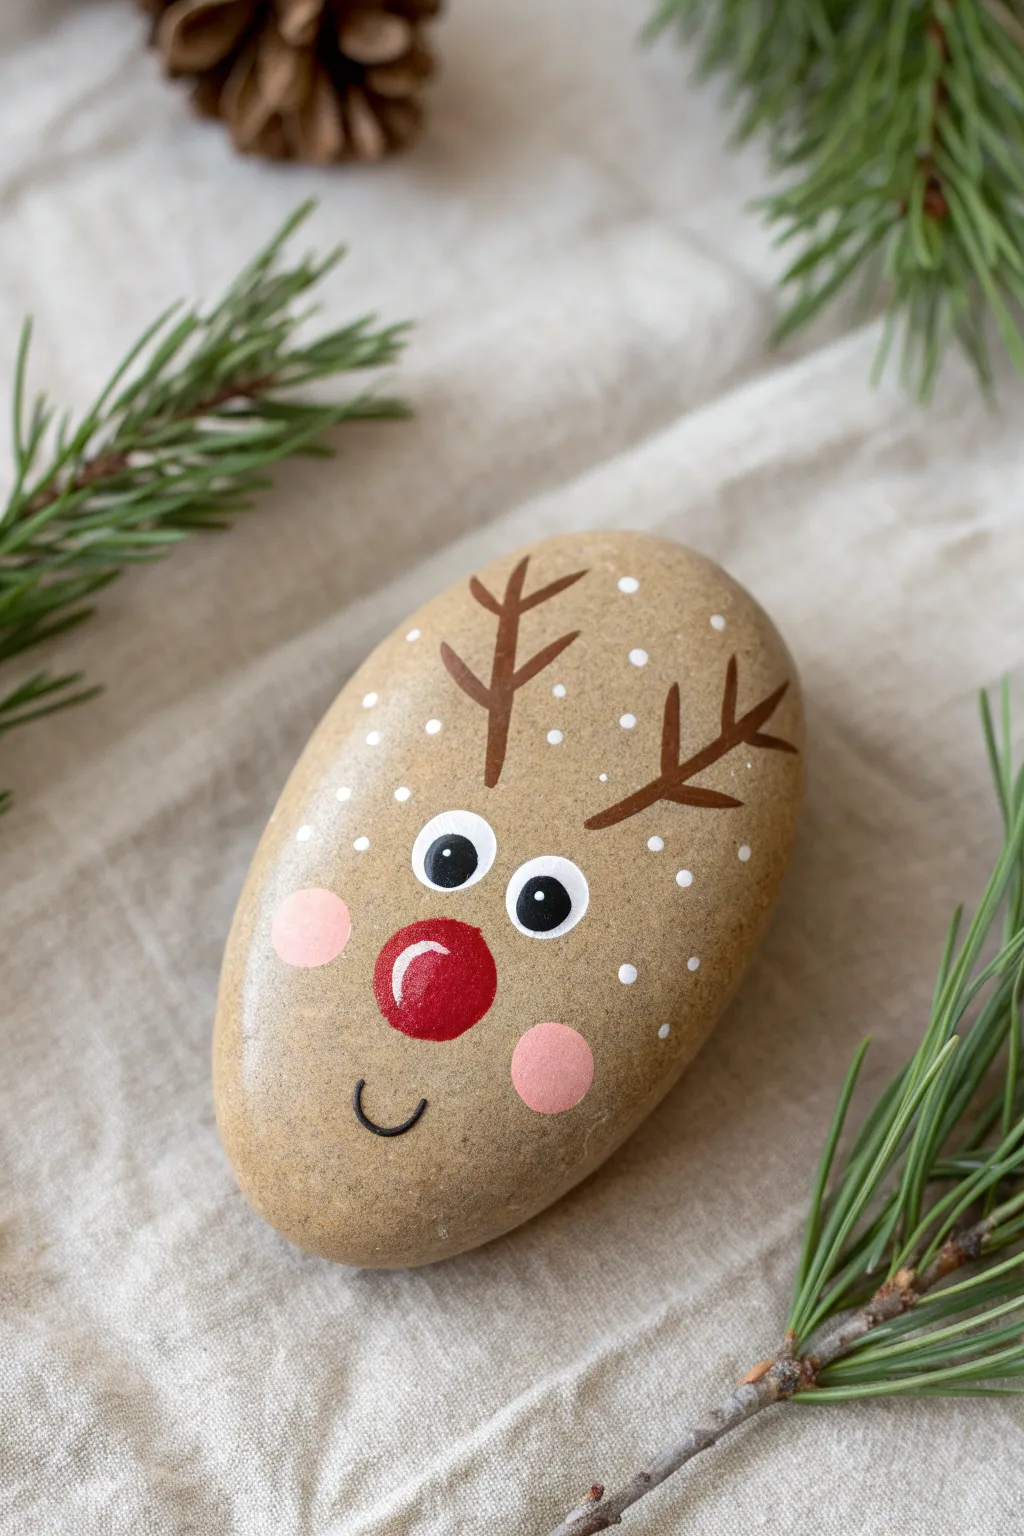
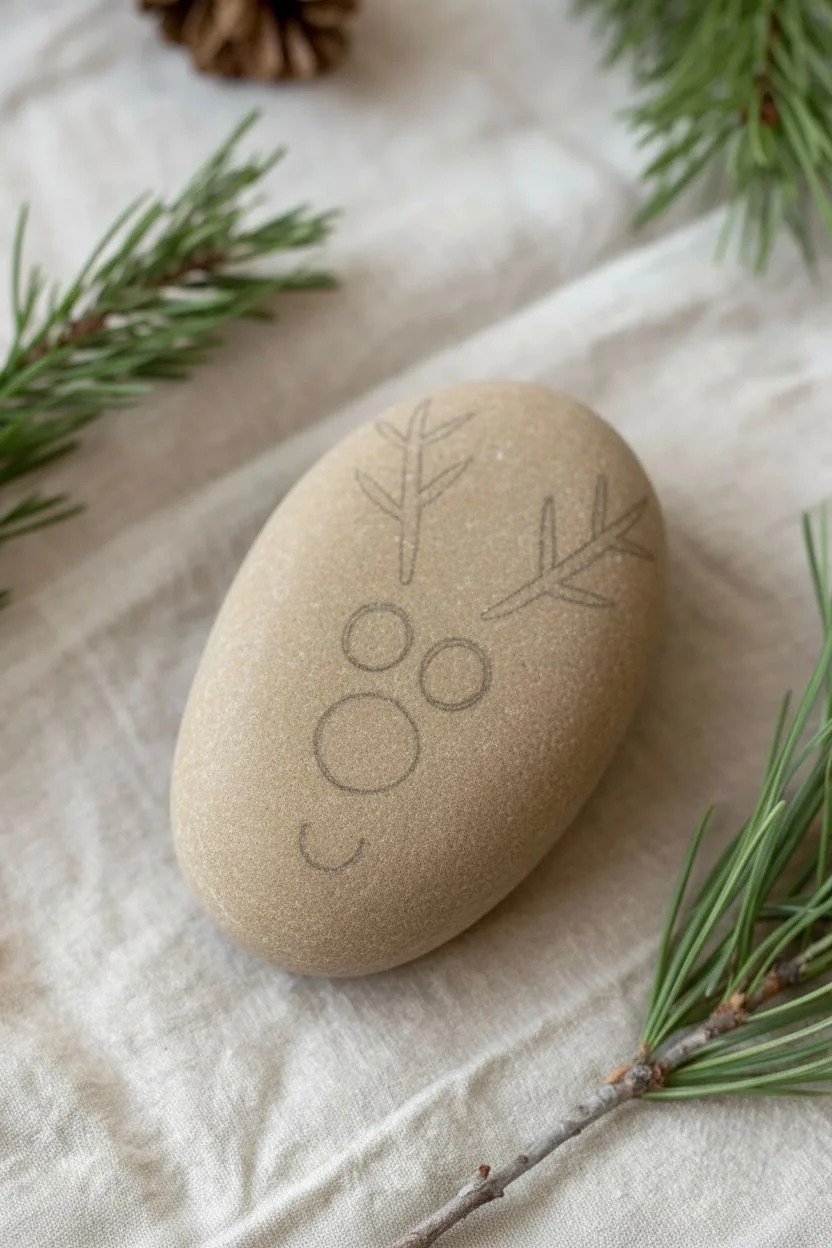
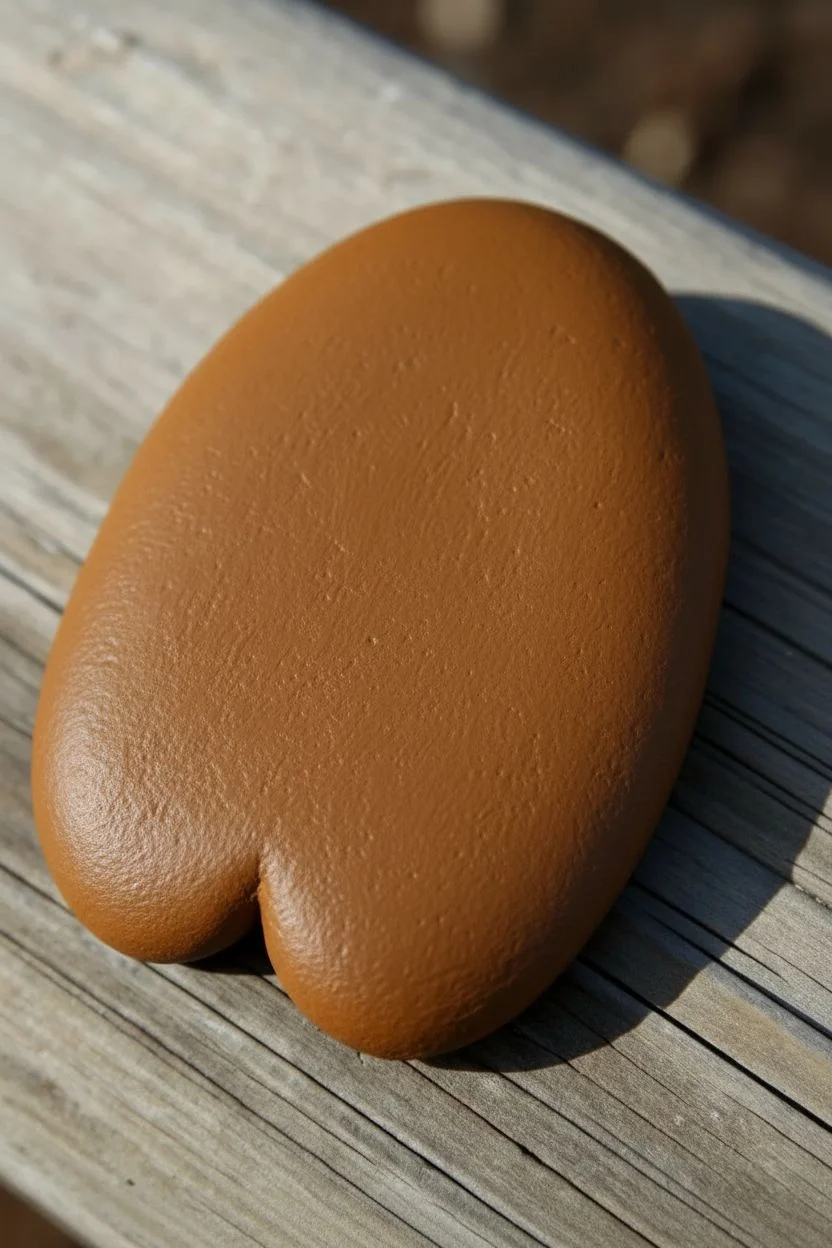
Turn a simple smooth stone into the most festive member of Santa’s sleigh team with this adorable reindeer rock painting project. The natural tan color of the stone serves as the perfect base, requiring minimal effort for maximum holiday cheer.
Step-by-Step Tutorial
Materials
- Smooth, oval-shaped river rock (tan or beige)
- Acrylic paint pens (brown, white, black, red, pink)
- Fine detail paintbrush (optional)
- Pencil with eraser
- Clear sealant (varnish or Mod Podge)
Step 1: Preparation and Sketching
-
Clean the surface:
Begin by washing your stone with warm soapy water to remove any dirt or oils. Let it dry completely before starting, as moisture can trap bubbles under the paint. -
Plan the face:
Using a pencil, lightly sketch where you want the features to go. Find the center of the rock for the nose, then place two circles above it for eyes and the antlers near the top curve.
Stone Selection Tip
Look for a stone that is naturally smooth and unblemished. A slightly flattened oval shape works best to mimic the shape of a reindeer’s head.
Step 2: Painting the Main Features
-
Paint the eyes:
Start with a white acrylic paint pen or a small brush. Fill in two solid white circles that touch each other slightly in the middle. You might need a second coat for opacity once the first dries. -
Add the nose:
Drawing directly below the eyes, paint a large, prominent red oval for the nose. Make it slightly wider than the eyes combined for that classic cute look. -
Draw the antlers:
Switch to a brown paint pen. Start from the top of the forehead area and draw two vertical lines going up. Add small diagonal branches coming off them to create the antler shape. -
Paint the cheeks:
Using a soft pink color, dab two circles on either side of the nose. These should be roughly the same size as the eyes to balance the face. -
Let the base layers dry:
Allow all the colored sections to dry completely. This is crucial so your black outlines and details don’t bleed into the wet paint.
Make it Sparkle
Before the red paint on the nose dries completely, sprinkle a tiny pinch of red ultra-fine glitter on it to make Rudolph’s nose actually shine.
Step 3: Adding Details and Highlights
-
Add pupils:
Once the white eye circles are dry, use a black paint pen or fine brush to add two black cantered dots. Leave room for a highlight later. -
Create the smile:
Draw a small, simple “U” shape curve directly under the nose with your black pen to give him a sweet smile. -
Highlight the eyes:
Dip the very tip of a tool or toothpick into white paint. Place a tiny white dot in the upper corner of each black pupil to bring the character to life. -
Highlight the nose:
Add a small white curved line or dot on the upper left side of the red nose to make it look shiny and round. -
Create snowy texture:
With a fine tip white pen, add tiny dots scattered around the antlers and upper forehead. Vary the spacing to mimic falling snow.
Step 4: Finishing Touches
-
Check for gaps:
I like to take a moment here to look for any spots where the stone shows through the paint too much, touching up with a second layer if needed. -
Allow full cure:
Let the rock sit for at least an hour or two to ensure every layer of paint is hardened. -
Seal the artwork:
Apply a coat of clear varnish or sealer over the entire front of the rock. This protects the paint from chipping and gives the nose a permanent wet look.
Now you have a charming little reindeer friend ready to hide in the garden or decorate your mantle


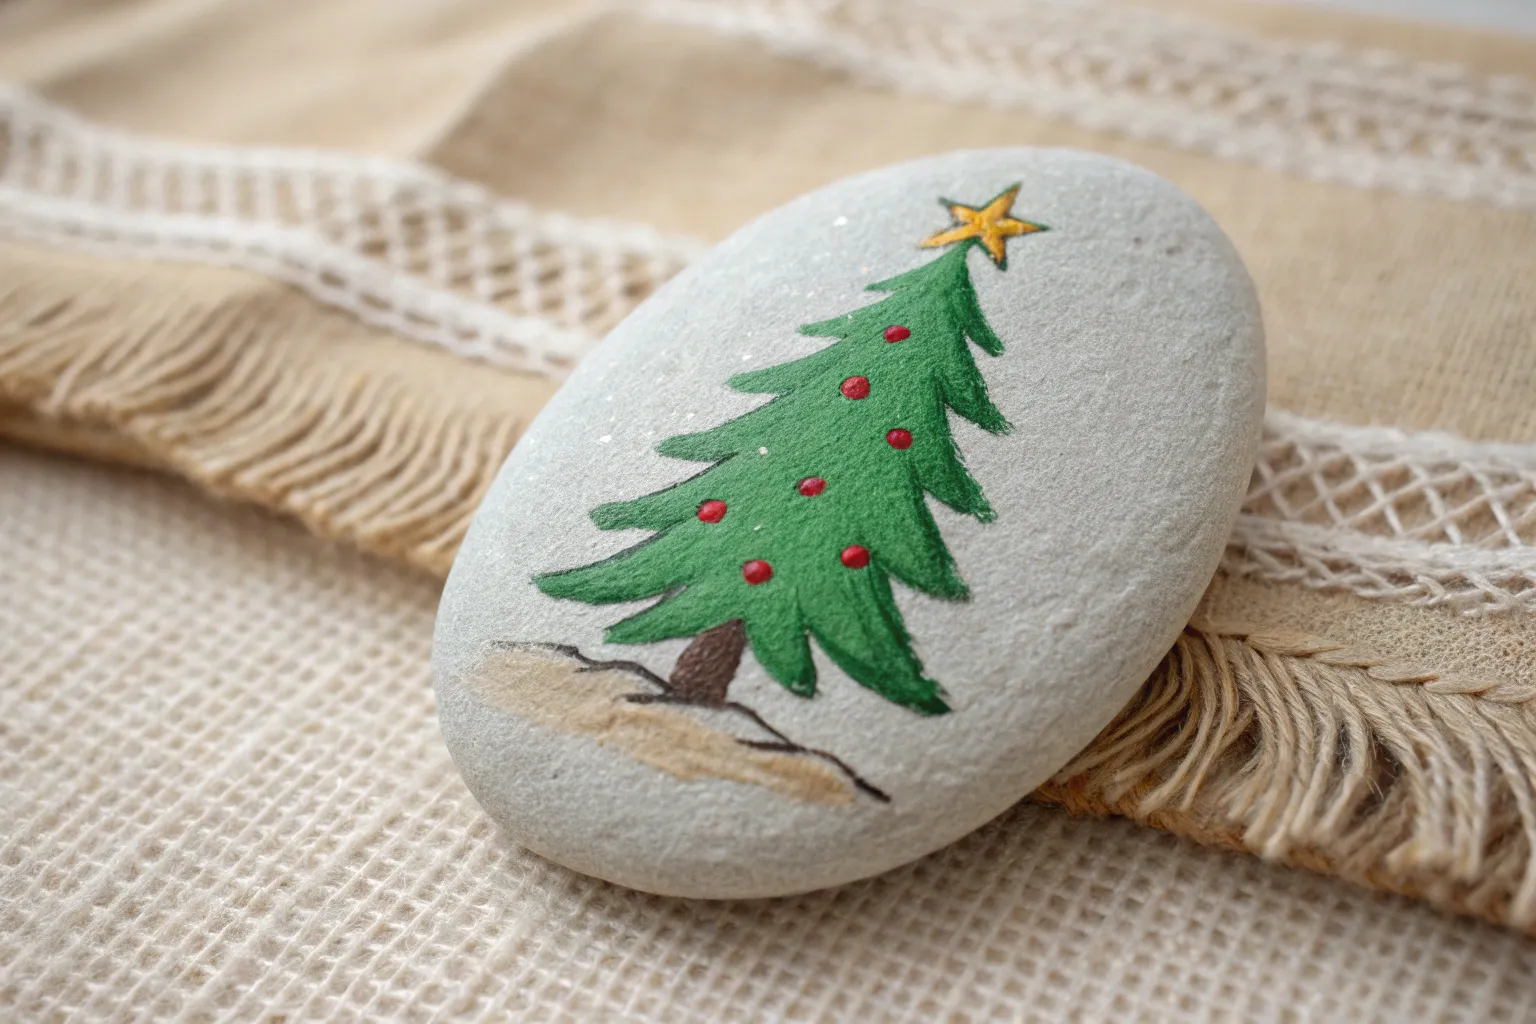
Simple Christmas Tree With Dot Lights
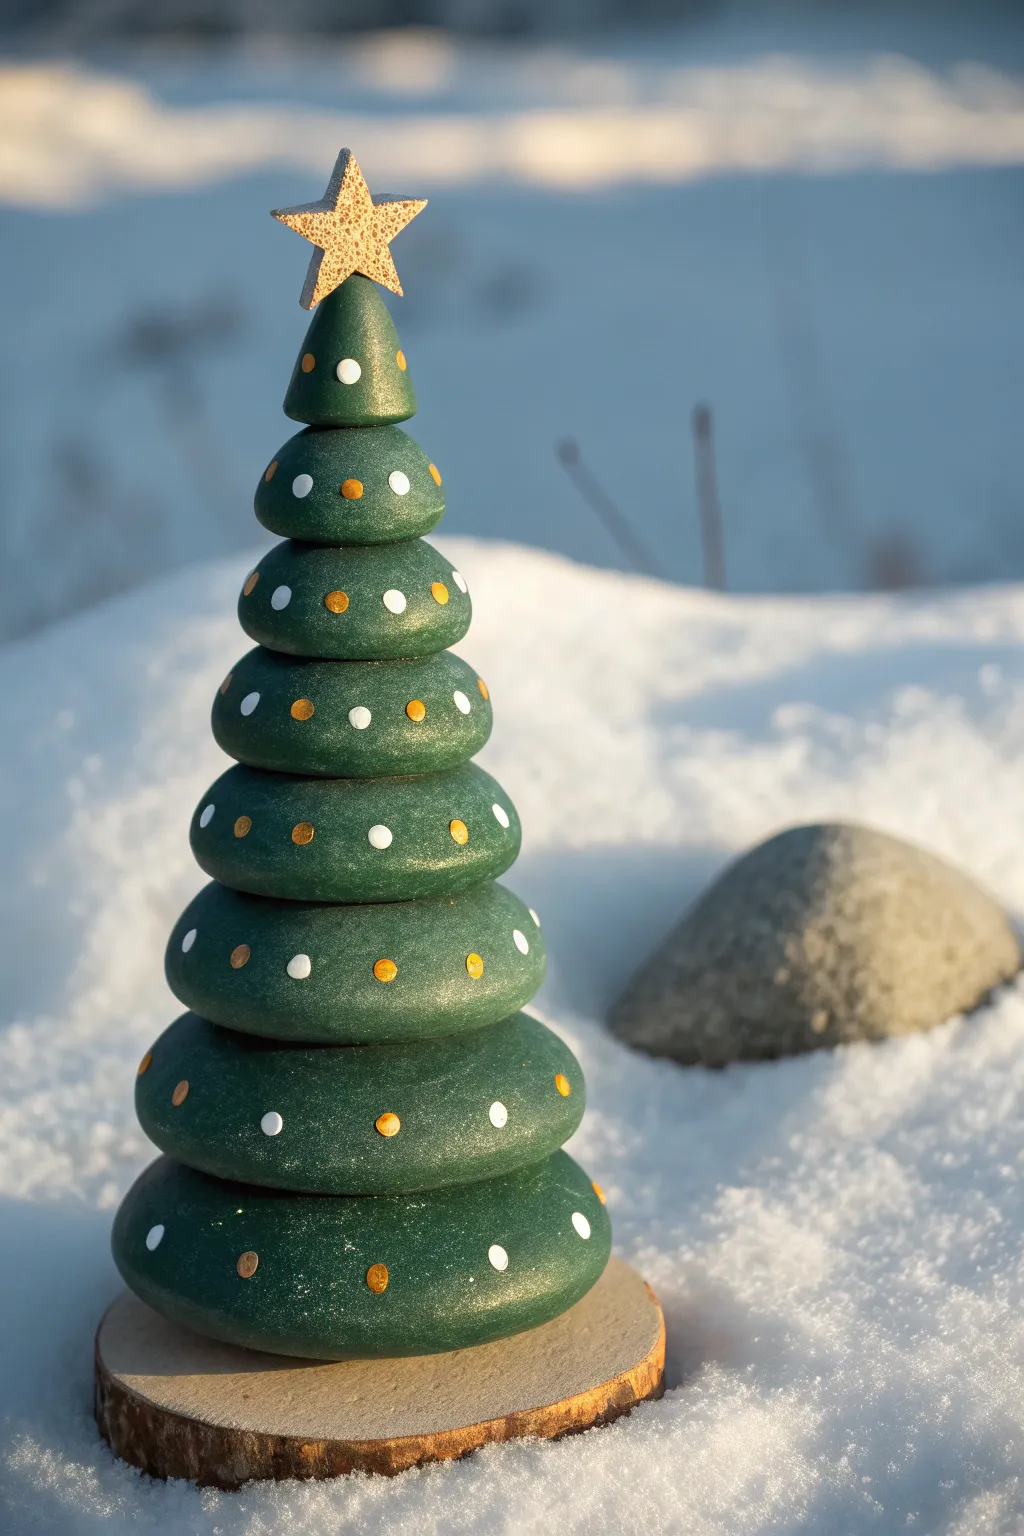
Create a charming, rustic centerpiece using smooth river stones stacked to mimic the tiers of a classic evergreen. The deep green finish and delicate dotwork turn simple pebbles into a whimsical tree topped with a golden wooden star.
Step-by-Step Guide
Materials
- 7-9 smooth, flat river stones (graduated sizes from large to tiny)
- Small wooden star cutout
- Circular wood slice (for the base)
- Acrylic paint: dark forest green, metallic gold, white
- Strong craft glue or E6000 adhesive
- Flat paintbrushes
- Dotting tools or toothpicks
- Sandpaper (optional)
- Clear spray sealant (matte or satin finish)
Step 1: Preparation & Base Coat
-
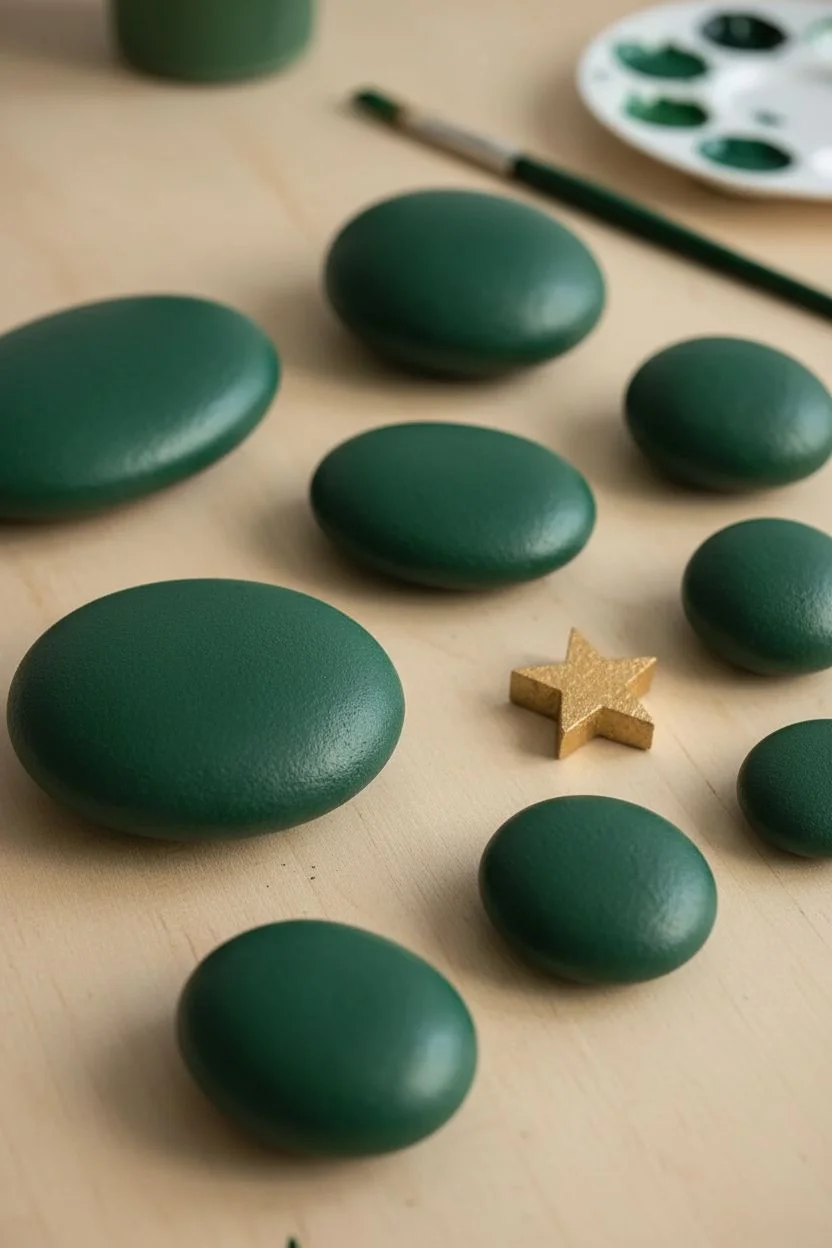
Stone Selection:
Begin by sorting your river stones. You need stacks that create a natural taper, starting with a wide, substantial stone for the bottom and getting progressively smaller until you reach a tiny pebble for the tip. -
Test Stacking:
Before gluing or painting, do a dry run stack. Balance the stones on top of each other to ensure they sit flat and don’t wobble. If a stone is too uneven, I find a quick rub with sandpaper can flatten the contact points. -
Clean the Surface:
Wash all your stones and the wooden star independently with warm soapy water to remove dust and oils. Let them dry completely. -
Base Green Layer:
Using a flat brush, paint the top and sides of every stone with your dark forest green acrylic paint. You don’t necessarily need to paint the very bottom where they will be glued, but ensure the visible edges are covered. -
Second Coat:
Allow the first layer to dry for about 15-20 minutes. Apply a second coat of green to achieve an opaque, rich color without streaks. -
Star Glitter:
While the green stones dry, paint your wooden star cutout with metallic gold paint. For extra texture, you can dab the paint on thick or sprinkle fine glitter into the wet paint.
Wobbly Tree?
If your stones won’t stack flat, use a small ball of epoxy putty between layers. It fills the gaps and acts as a super-strong glue simultaneously.
Step 2: Assembly & Detail
-
Glue the Stack:
Starting with the largest stone and your wood slice base, apple a dot of strong adhesive to the center. Press the largest stone firmly onto the wood. -
Build the Tree:
Continue gluing upward, placing the next largest stone on top of the previous one. Try to center them as best as possible, or slightly offset them for a ‘windswept’ look. -
Secure the Topper:
Glue the final, tiniest stone at the peak. Once that is secure, attach your painted gold star vertically to the back or top of this final pebble. -
Curing Time:
Let the glue cure fully according to the manufacturer’s instructions before starting the detail work to prevent the stack from sliding. -
Prepare Dotting Tools:
Dispense a small amount of white and metallic gold paint onto a palette or paper plate. -
Adding White Lights:
Dip a medium-sized dotting tool (or the back of a paintbrush) into the white paint. Verify the size on a scrap paper first. -
Patterning White:
Apply white dots randomly around the circumference of each stone layer. Space them out generously to leave room for the gold. -
Adding Gold Ornaments:
Using the same dotting technique, fill in the gaps with metallic gold dots. I like to vary slightly by making some gold dots smaller than the white ones for visual interest. -
Snowy Dusting (Optional):
If you want a hint of snow, you can very lightly dry-brush a tiny amount of white paint on the upper ridges of the stones. -
Sealing:
Once all paint is completely dry, take the tree outside and spray it with a clear acrylic sealer to protect the paint and give it a unified sheen.
Make it Sparkle
Add tiny rhinestones to the center of your painted gold dots while the paint is still wet for real lighting reflection.
Place your stone tree on a windowsill or mantelpiece where the light can catch the metallic details


Candy Cane Stripes and Peppermint Swirls
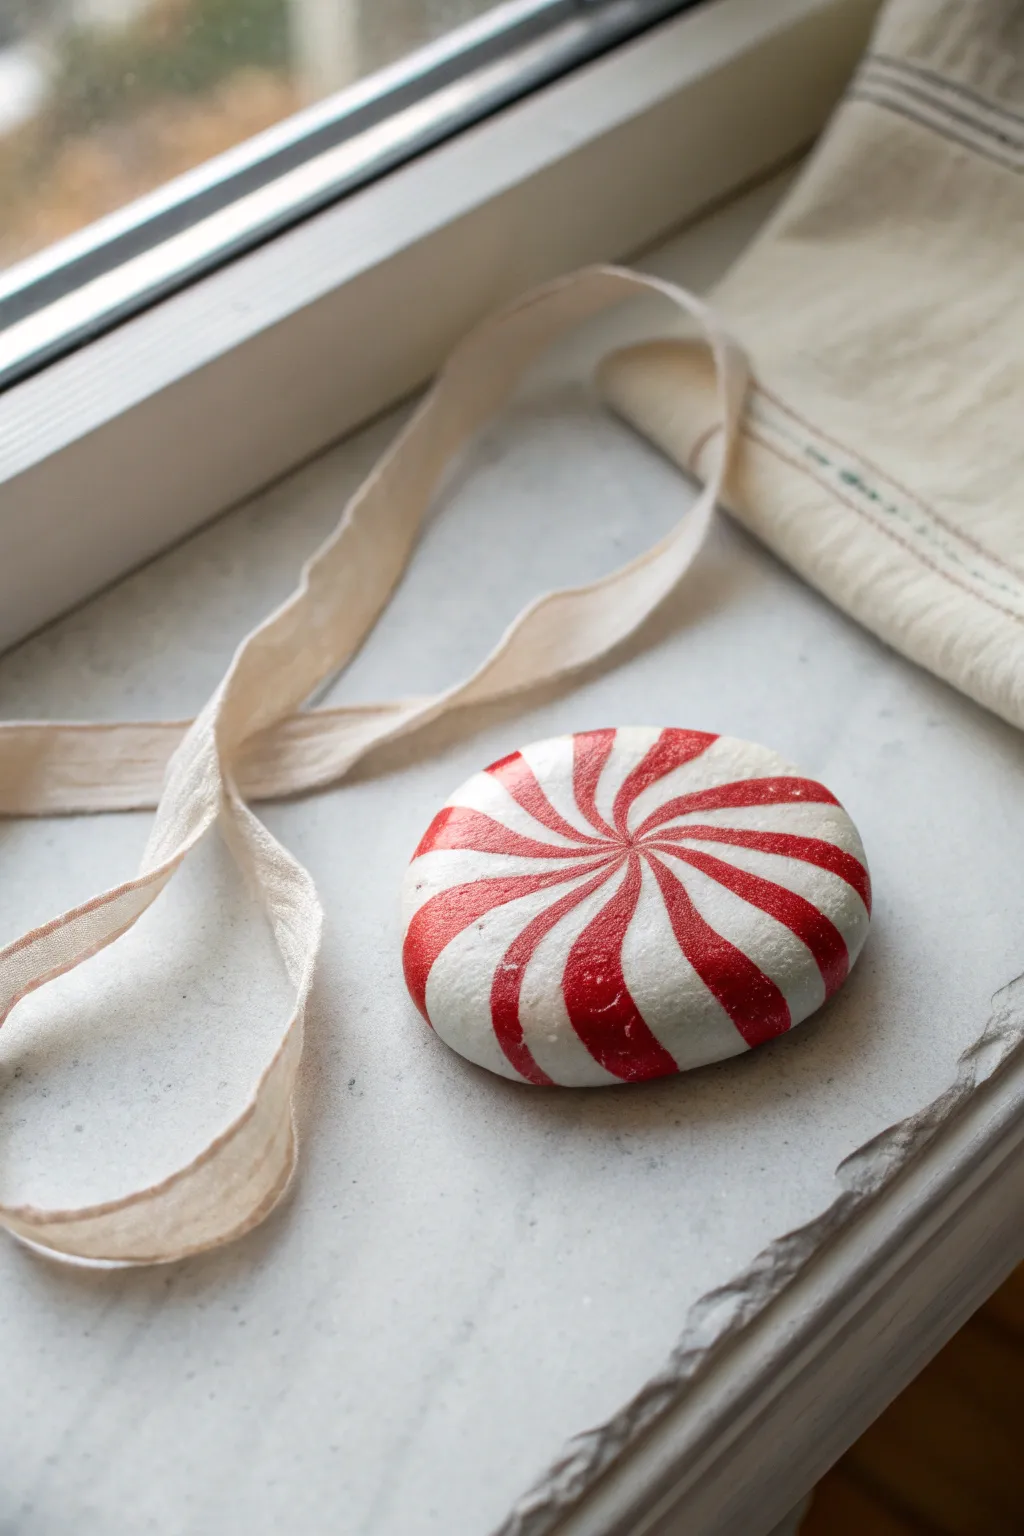
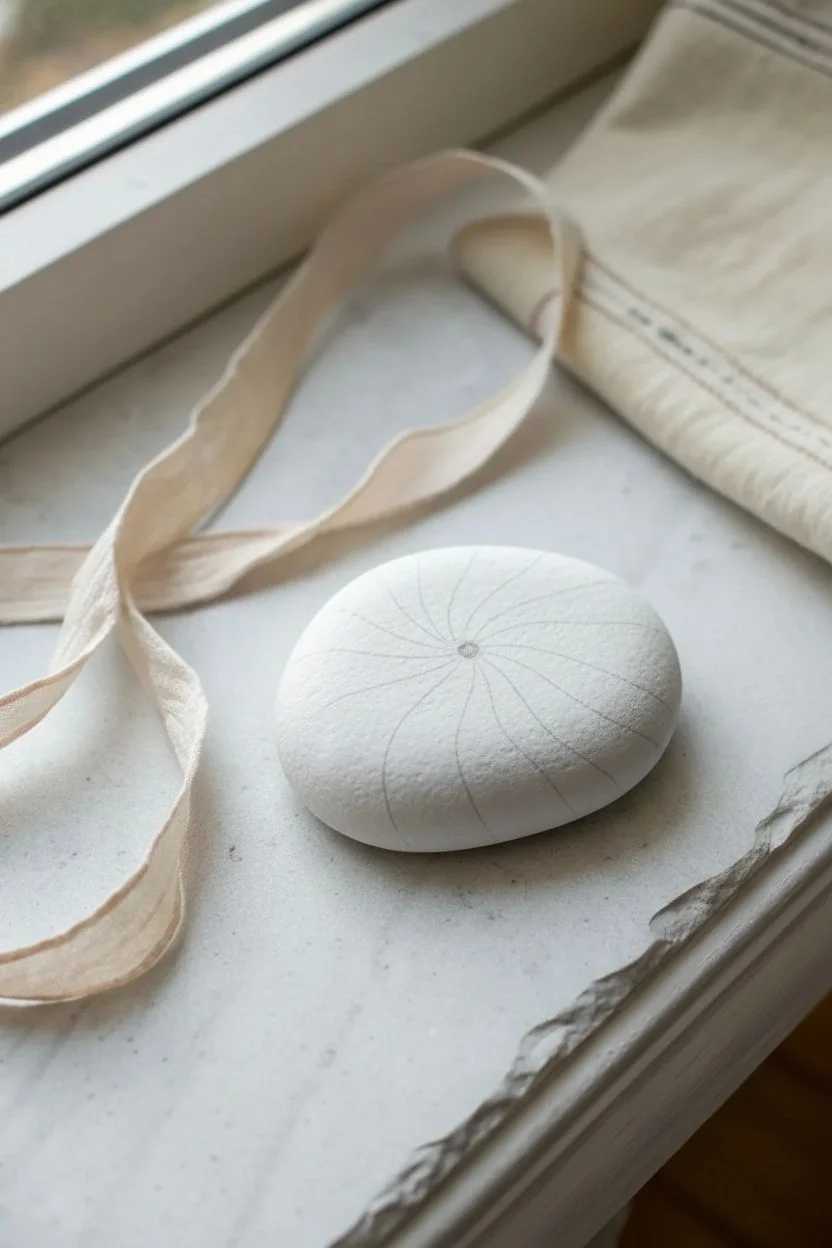
Transform a simple round stone into a sweet holiday treat that looks good enough to eat. This project focuses on achieving crisp, curved lines to create that classic spinning peppermint illusion.
Step-by-Step
Materials
- Smooth, round river rock (flat is best)
- White acrylic paint (or gesso)
- Red acrylic paint (bright cherry red)
- Fine detail paintbrush (liner brush)
- Medium flat paintbrush
- Pencil
- Eraser
- Matte or glossy sealant
Step 1: Preparation & Base Coat
-
Clean Your Canvas:
Begin by scrubbing your rock with warm, soapy water to remove any dirt or oils, then let it dry completely. -
Prime the Surface:
Apply a base coat of white acrylic paint to the entire top surface of the rock. -
Build Opacity:
Let the first layer dry, then add a second or even third coat of white until the stone’s natural color is completely hidden and the surface looks like smooth sugar.
Wobbly Lines?
If you struggle with steady hands, use thin flexible masking tape or washi tape to block off the white sections before painting the red layers.
Step 2: Drafting the Design
-
Find the Center:
Using a pencil, lightly mark a small dot in the approximate center of the rock. -
Sketch the Curves:
Draw curved lines radiating outward from that center dot like pinwheel spokes. I find it easiest to flick my wrist slightly to get a natural curve. -
Create the Wedges:
Draw a second curved line next to each original line to create wedge shapes that start very thin at the center and flare out wider at the edges. -
Check the Spacing:
Review your pencil sketch ensuring you have alternating sections of ‘stripe’ and ‘white space’ that are roughly equal in visual weight.
Glitter Upgrade
While the white paint is still wet, sprinkle ultra-fine iridescent glitter over the stone to simulate a coating of real sugar crystals.
Step 3: Painting the Stripes
-
Load the Brush:
Load a fine liner brush with bright red acrylic paint, thinning it slightly with a drop of water for smoother flow. -
Outline the Shapes:
Carefully trace the pencil outlines of your red wedges, keeping your hand steady to maintain crisp edges. -
Fill the Centers:
Once outlined, fill in the larger parts of the wedges with red paint. -
Refine the Middle:
Use your finest brush tip to carefully bring the red points together at the center dot without letting them bleed into a muddy blob. -
Clean Up Edges:
If you wobble, wait for the red to dry completely, then use a tiny bit of white paint to touch up and sharpen the edges of the stripes. -
Add a Second Coat:
Red paint can be translucent, so apply a second coat over the red stripes to make the color rich and vibrant.
Step 4: Finishing Touches
-
Paint the Sides:
Extend the red stripes down the side of the stone so the candy pattern wraps around, giving it a 3D effect. -
Erase Marks:
Once the paint is 100% bone dry, gently erase any visible pencil marks remaining in the white sections. -
Technique Variation:
For a more realistic textured look, you can lightly stipple the white areas with a dry brush to mimic the sugary texture of a mint. -
Seal the Deal:
Finish with a coat of sealant; a glossy finish makes it look like hard candy, while matte looks more like a soft peppermint puff.
Place your finished peppermint rock in a clear bowl or scatter them on a table for instant festive cheer
BRUSH GUIDE
The Right Brush for Every Stroke
From clean lines to bold texture — master brush choice, stroke control, and essential techniques.
Explore the Full Guide
Penguin in a Santa Hat and Scarf
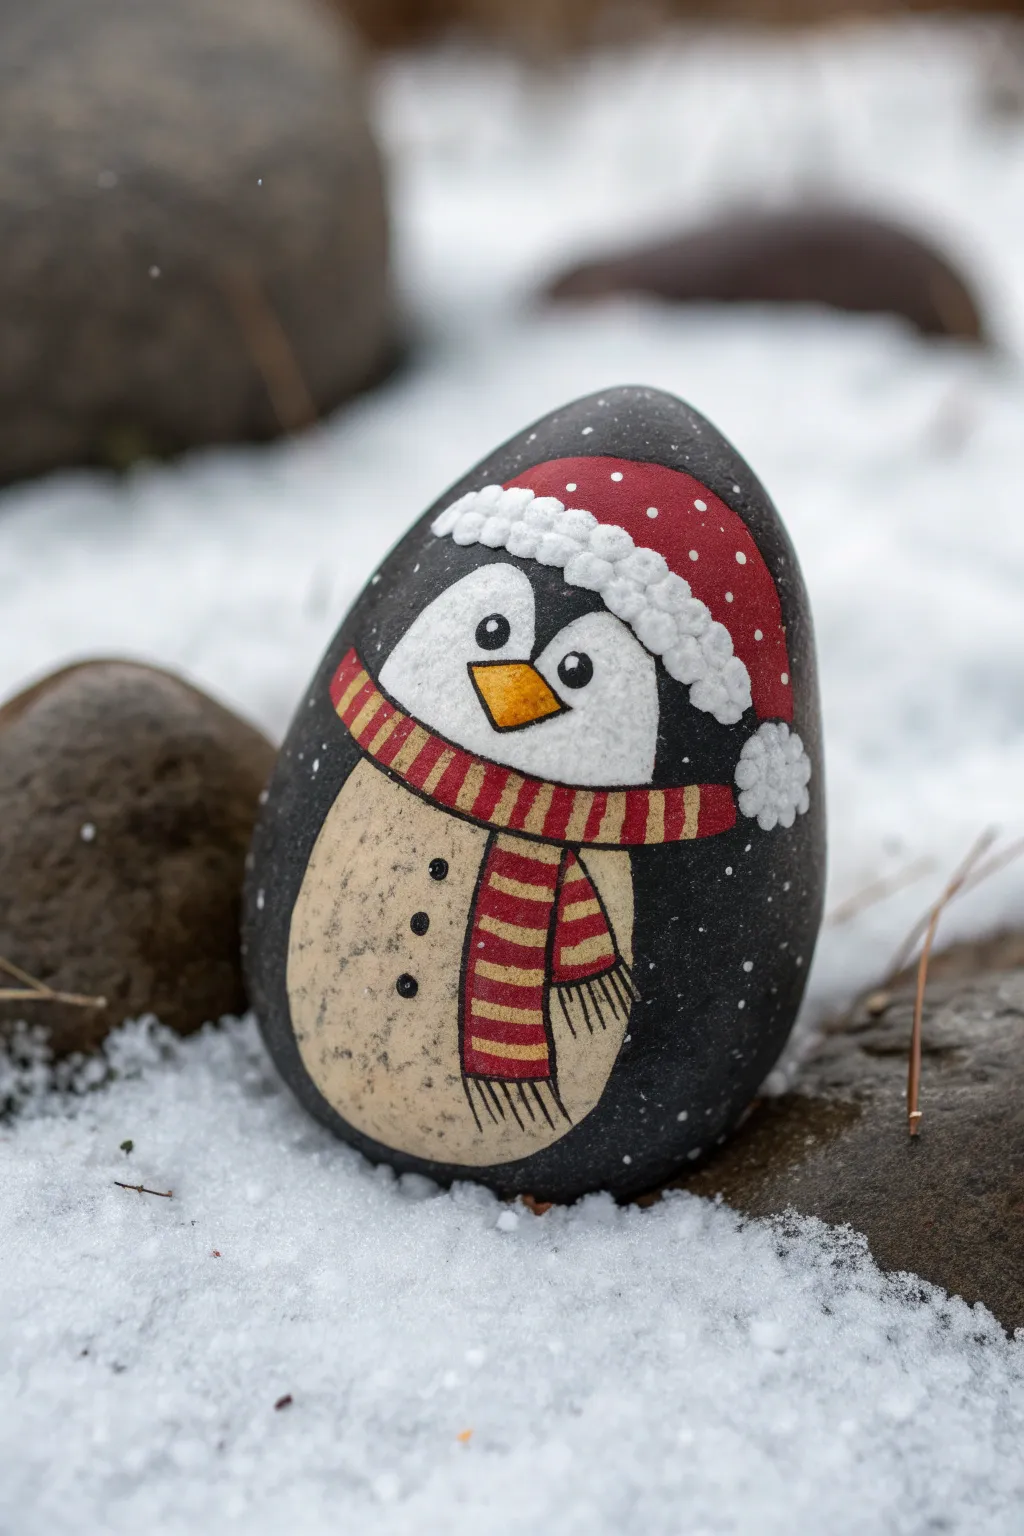
Transform a simple stone into a festive friend with this charming penguin rock painting project. The finished piece features an adorable penguin bundled up in a cozy striped scarf and Santa hat, perfect for leaving as a kind surprise in the snow or tucking into a stocking.
Step-by-Step
Materials
- Smooth, oval-shaped river rock (palm-sized)
- Acrylic paints: Black, Titanium White, Bright Red, Yellow Ochre or Gold, Beige/Light Tan
- Paintbrushes: wide flat brush, small round detail brush, fine liner brush
- Dotting tool or toothpick
- Pencil and eraser
- Posca paint pens (optional, for fine lines)
- Clear acrylic flowing medium or water for thinning
- Spray sealant (matte or satin finish)
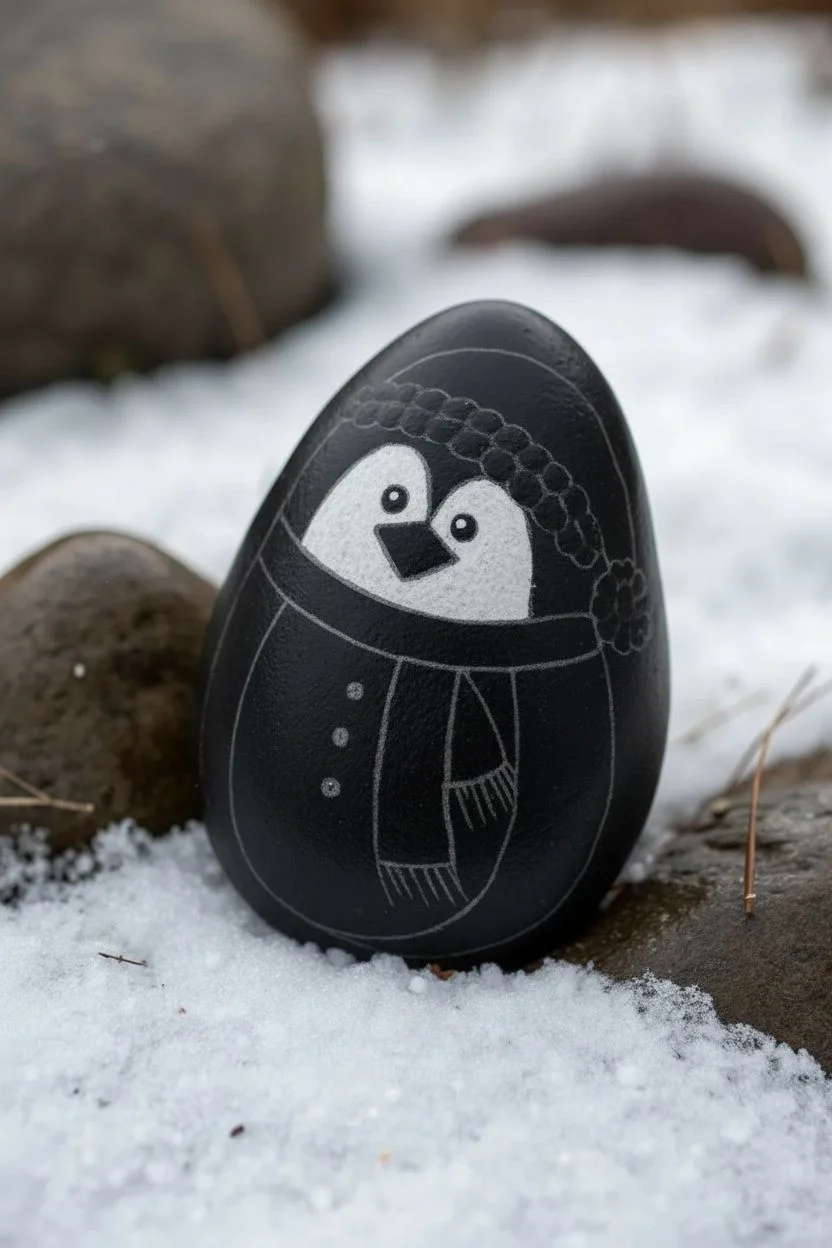
Step 1: Base and Background
-
Clean your canvas:
Before painting, scrub your rock with warm soapy water and let it dry completely. A clean surface ensures the paint adheres properly and doesn’t chip later. -
Paint a solid base:
Coat the entire front surface of the rock with black acrylic paint. You may need two coats to get a solid, opaque finish. Let this dry thoroughly before moving on. -
Sketch the outline:
Using a pencil, lightly sketch the egg-shape of the penguin’s body. Draw the curved line for the white face mask, the oval for the beige belly, and the general placement of the scarf and hat.
Texture Tip
For the hat trim, mix a tiny bit of baking soda into your white paint. It creates a puffy, real 3D texture acting like fleece.
Step 2: Adding the Main Colors
-
Fill the belly:
Paint the large oval belly area with a beige or light tan color. This adds a nice contrast to the stark white of the face and the black background. -
Paint the face mask:
Using titanium white and a small round brush, fill in the heart-shaped face area. Be careful to keep the edges crisp against the black background. You might need a second coat here for brightness. -
Add the hat base:
Paint the main part of the hat with bright red paint, curving it over the top of the penguin’s head. Don’t worry about the white trim yet; just get the red shape down. -
Create the scarf:
Paint a thick red stripe across the neck area for the scarf, letting the ends drape down over the beige belly. Allow the red paint to dry completely.
Step 3: Details and Definition
-
Apply scarf stripes:
Once the red scarf base is dry, use a fine liner brush and yellow ochre (or gold) paint to add thing vertical stripes along the length of the scarf. -
Beak basics:
Paint a small, inverted orange or deep yellow triangle in the center of the white face area for the beak. Outline it thinly with black if you want extra definition. -
Hat trim texture:
Use white paint to create the fluffy trim of the Santa hat. Instead of brushing normally, dab the brush or use a dotting tool to create a ‘stippled’ texture that mimics fluffy wool. -
Add the pom-pom:
Using the same stippling technique, add a round white ball at the end of the hat on the right side. -
Button up:
Dip the handle end of a paintbrush or a large dotting tool into black paint. vertically align three distinct dots down the center of the beige belly.
Level Up: Glittery Snow
While the white ‘snow’ speckles are still wet, lightly dust the black background with fine iridescent glitter for a magical frozen look.
Step 4: Bringing it to Life
-
Paint the eyes:
With a small brush or black paint pen, draw two solid black circles in the white face mask area. Leave enough space between them for a cute expression. -
Add eye sparkle:
This is crucial for cuteness: dip a toothpick in white paint and add a tiny white reflection dot in the upper corner of each black eye. -
Outline work:
Using a very fine liner brush with thinned black paint (or a fine tip black marker), carefully outline the scarf, the beak, and define the separate strands of fringe at the bottom of the scarf. -
Snowy splatter:
For the finishing atmospheric touch, mix white paint with a little water. Dip an old toothbrush or stiff brush in it and flick the bristles to spray tiny white ‘snow’ specks over the black background areas. -
Seal and protect:
Allow the rock to cure overnight. Once fully dry, apply a coat of spray sealant to protect your artwork from the elements, especially if you plan to hide it outdoors.
Now you have a durable little winter companion ready to bring a smile to anyone who finds it
Gingerbread Character With Icing Details
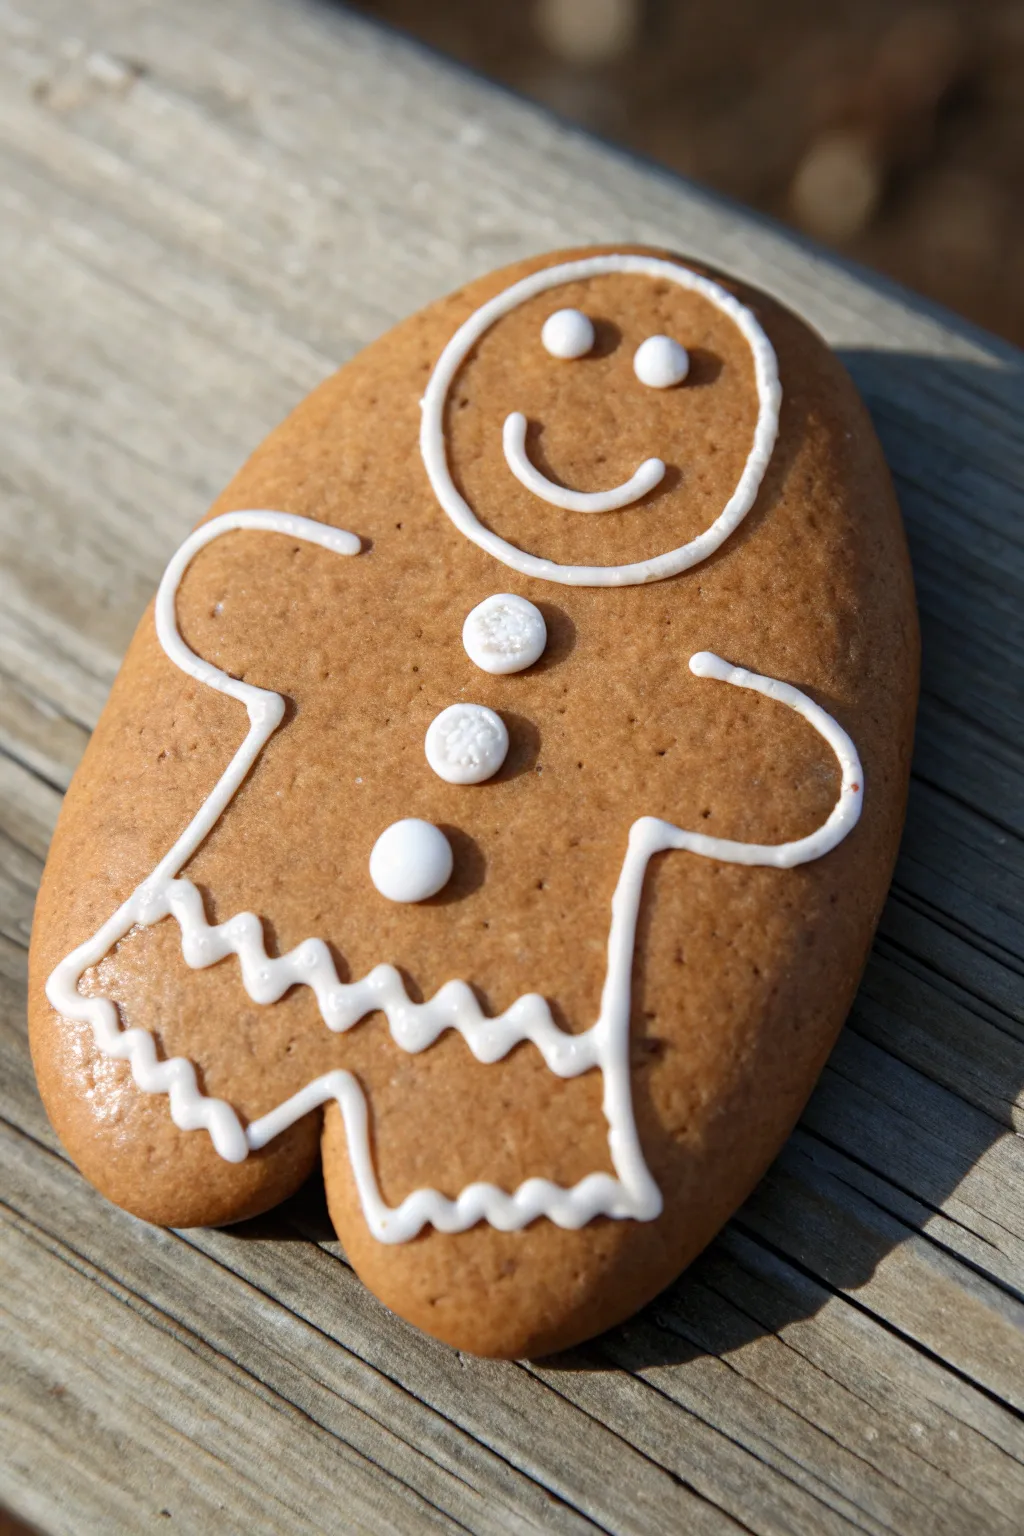
Transform a smooth, oval-shaped stone into a delicious-looking holiday treat without any actual baking. This rock painting project mimics the texture of gingerbread and the crisp look of royal icing for a decoration that looks good enough to eat.
Step-by-Step Guide
Materials
- Smooth, oval river rock (palm-sized)
- Acrylic paint: Warm brown (Gingerbread color), White
- Paintbrushes: Flat shader brush, Thin liner brush (size 0 or 00)
- Pencil (optional)
- Small dotting tool or toothpick
- Spray sealant (matte or satin finish)
- Water cup and paper towels
Step 1: Baking the Base
-
Clean Your Stone:
Begin by washing your rock thoroughly with soap and water to remove any dirt or oils. Let it dry completely before starting, as moisture trapped inside can ruin the paint later. -
Mix the Dough Color:
Create the perfect gingerbread shade by mixing a medium brown with a touch of orange or yellow ochre to warm it up. If it looks too dark, add just a tiny drop of white. -
Apply the Base Coat:
Using a flat shader brush, coat the top surface of the rock entirely with your gingerbread color phase. You might need two layers to get solid, opaque coverage. -
Let it Dry:
Allow the brown base coat to dry completely. It should feel dry to the touch and not tacky before you move on to the detailing steps. -
Add Texture (Optional):
To give the rock a slightly baked texture, you can lightly stipple a slightly lighter shade of brown over the base using a dry brush or a piece of sponge.
Clean Lines Trick
If your hand shakes while painting lines, rest your pinky finger on a dry part of the rock to stabilize your hand as you draw the icing details.
Step 2: Piping the Icing
-
Sketch the Outline:
If you’re nervous about freehanding, use a pencil to very lightly sketch the head circle and the body outline directly onto the brown paint. This acts as your guide for the icing. -
Prepare White Paint:
Thin your white acrylic paint very slightly with a drop of water. You want it to flow smoothly off a liner brush like real icing, but not be runny. -
Outline the Head:
Using your thin liner brush, paint a clean white circle near the top of the rock to form the head. Keep the line thickness consistent. -
Draw the Arms:
Starting from the neck area, paint two curved lines extending outwards and downwards to create simple, stubby arms. -
Create the Body Shape:
Continue the white line down the sides of the rock. Instead of painting straight legs, create a jagged, zig-zag line near the bottom to mimic a bitten edge or a decorative icing skirt. -
Connect the Outline:
Join the jagged bottom lines back up to the side of the body, creating a complete enclosed shape that implies legs without drawing distinct feet. -
Double Check Lines:
Go over your white lines a second time if the brown is showing through. The white needs to be bright and opaque to look like sugar.
Make it Sparkle
While the white paint is still wet, sprinkle ultra-fine iridescent glitter over the ‘icing’ lines to mimic the look of sanding sugar.
Step 3: Adding the Face and Buttons
-
Paint the Eyes:
Dip the handle end of a paintbrush or a large dotting tool into white paint. Press two firm dots onto the face area for the eyes. -
Paint the Smile:
Use your finest liner brush to paint a simple, wide U-shape for the smile. I like to add tiny perpendicular ticks at the ends of the smile for a classic stitched look. -
Create the Buttons:
Paint three distinct white circles down the center of the chest. These will be the gumdrop buttons. -
Add Button Detail:
To make the buttons look more realistic, dab a slightly thicker amount of white paint in the center of the buttons to give them a raised, 3D effect. -
Let the Buttons Dry:
Wait for the thick white paint to dry. If creating a raised texture, this might take a bit longer than the thin lines. -
Final Touches:
Check for any stray marks or see-through spots and touch them up. Clean edges make the ‘cookie’ look crisp. -
Seal the Rock:
Once absolutely dry, take the rock outside and spray it with a matte or satin sealant. Avoid glossy sprays, as real cookies aren’t usually shiny.
Your durable gingerbread friend is now ready to decorate your porch or garden path without fear of crumbs

PENCIL GUIDE
Understanding Pencil Grades from H to B
From first sketch to finished drawing — learn pencil grades, line control, and shading techniques.
Explore the Full Guide
Festive Wreath Frame for a Mini Message
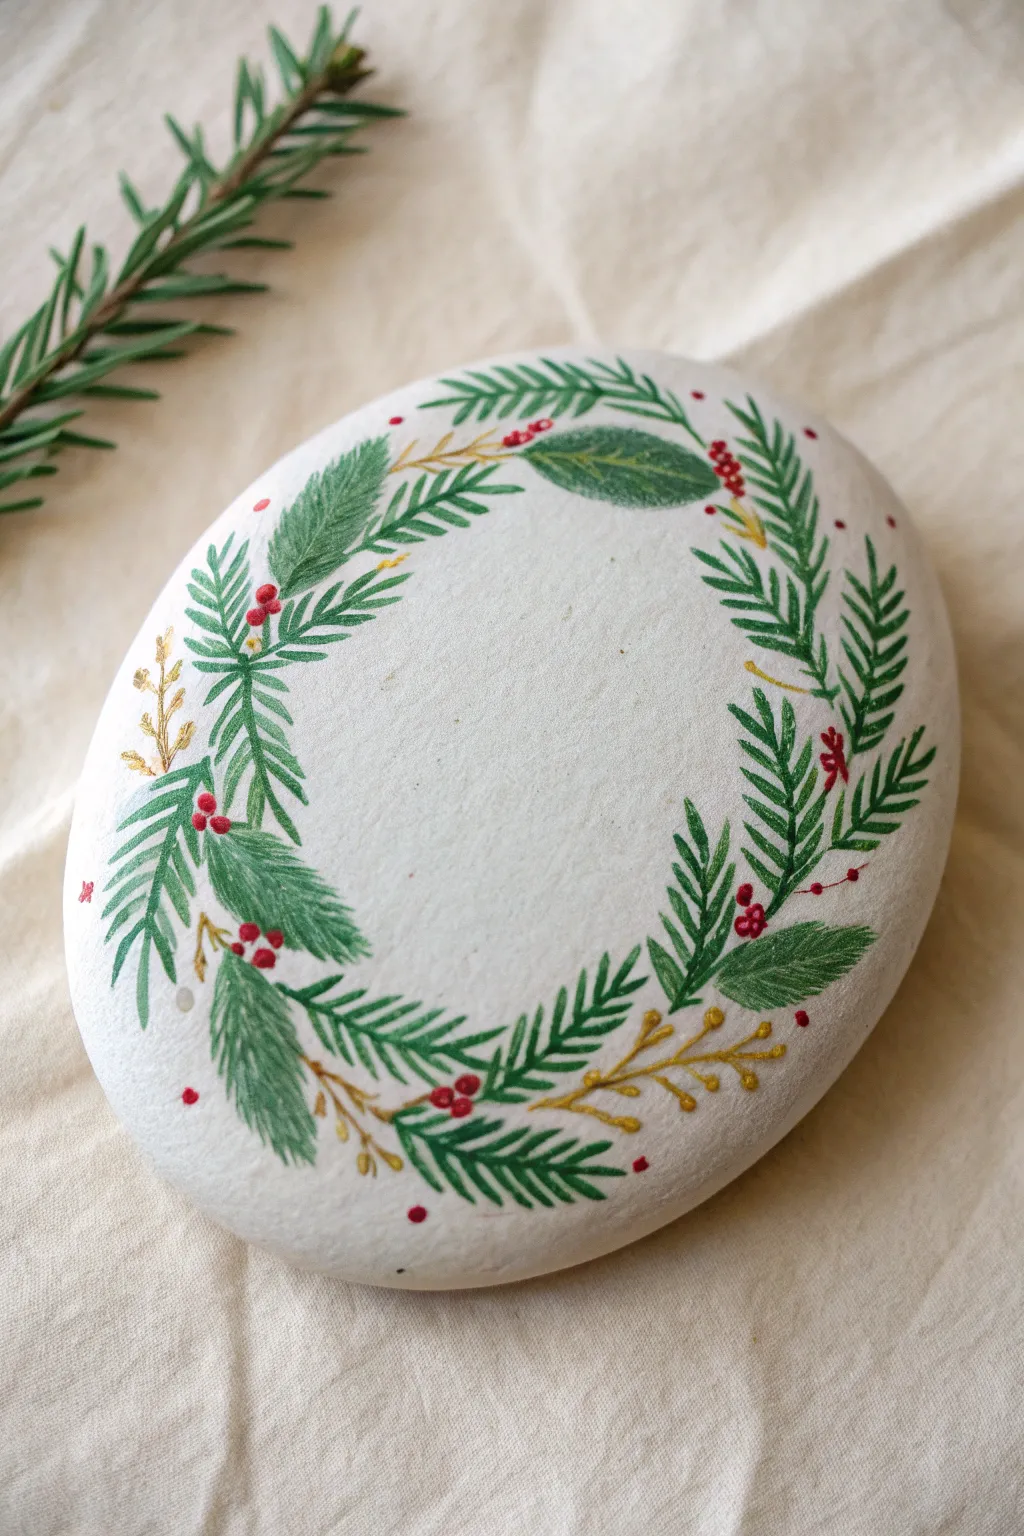
This elegant painted rock features a delicate evergreen wreath encircling a blank center, perfect for adding a personalized holiday greeting or name. The design combines feathery pine needles with touches of gold and bright red berries for a classic festive look.
Detailed Instructions
Materials
- Smooth, round river rock (approx. 4-5 inches)
- White acrylic paint (matte finish) or gesso
- Acrylic paints: Dark green, sage green, bright red, metallic gold
- Fine detail brushes (sizes 0, 00, and 1)
- Small flat brush (for base coat)
- Pencil (optional)
- Sealant (spray or brush-on matte varnish)
Step 1: Preparation & Base
-
Clean the surface:
Begin by washing your rock thoroughly with soap and water to remove any dirt or oils. Let it dry completely before starting to ensure the paint adheres properly. -
Prime the background:
Using your flat brush, apply a coat of white acrylic paint or gesso over the entire top surface of the stone. You want a solid, opaque background, so applying two thin coats is better than one thick, gloopy one. -
Let it cure:
Allow the white base layer to dry fully. If you rush this step, your green paint might mix with the wet white and become muddy. -
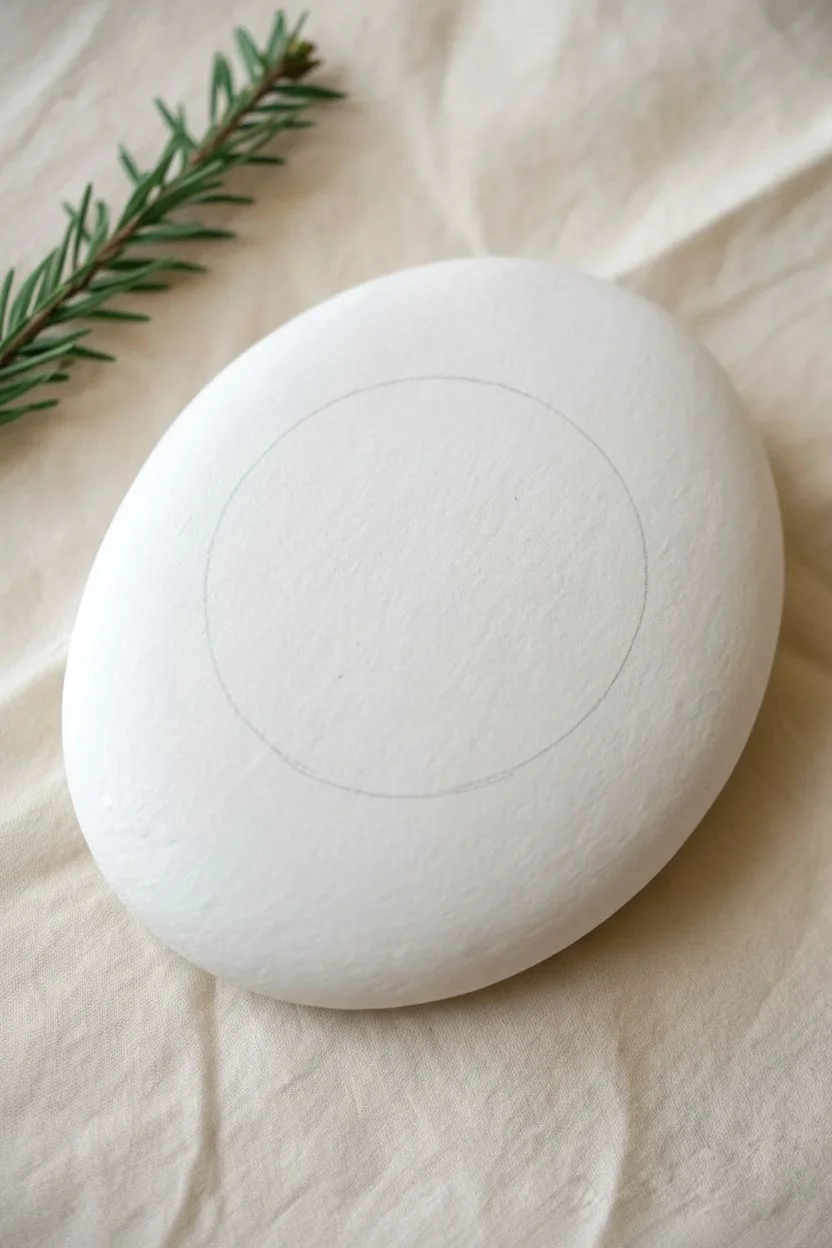
Sketch the circle:
Lightly trace a circle in the center of the rock using a pencil. This will serve as your guide for the wreath shape, ensuring you leave enough open space in the middle for your future message.
Step 2: Leafy Layers
-
Start the pine branches:
Using a size 1 brush and your dark green paint, create long, curved lines that follow the circular guide you sketched. These don’t need to connect perfectly; think of them as the main stems of the pine boughs. -
Add dark needles:
Switch to a finer brush (size 0). Along the dark green stems, paint quick, short strokes flicking outward to create the pine needles. Vary the angle slightly so they look organic rather than uniform. -
Layer in sage green:
Once the dark green is dry to the touch, mix a little white into your green or use a sage color. Paint a few softer, feathery branches in the gaps between the dark ones to create depth and fullness. -
Add the broad leaf:
Near the top right of the wreath, paint a single, broader oval-shaped leaf in a medium green. Add a lighter green vein down the center for detail. -
Incorporate gold sprigs:
Dip your fine brush into metallic gold paint. Add delicate, twig-like sprigs tucked between the green boughs, particularly focusing on the bottom left and right sides for a bit of sparkle.
Fixing Wobbly Lines
If your pine needles look too thick, wait for the green to dry, then create ‘negative space’ by painting thin white lines back over the edges to sharpen them.
Step 3: Berries & Details
-
Dot the berries:
Load a small detail brush or dotting tool with bright red paint. Place clusters of 2-3 small dots periodically around the wreath, often where branches overlap. -
Add scattered accents:
Place tiny single red dots further out from the main wreath shape to give the design a loose, whimsical feel. -
Golden tips:
Add tiny gold dots to the ends of the gold sprigs you painted earlier to simulate seeds or buds. -
Final dry:
Let the entire design dry completely. Acrylics dry fast, but giving it an extra hour ensures you won’t smudge the fine lines during sealing. -
Seal the artwork:
Apply a coat of matte spray varnish or brush-on sealer to protect your design from chipping and to keep the whites looking crisp. -
Add your message:
Once the sealer is dry, the center is ready for you to paint or write a name, a date, or a word like ‘Joy’ in the middle.
Level Up: 3D Texture
Use ‘puff paint’ or dimensional fabric paint for the red berries. This will create raised, rounded beads that stick up off the rock for a tactile element.
This charming wreath creates the perfect frame for a personalized gift or a festive place setting
Hand-Lettered Joy, Peace, and Noel Rocks


These elegant stones capture the classic spirit of the holidays with a clean, minimalist aesthetic. Featuring simple serif lettering, traditional holly motifs, and touches of gold glitter, they make perfect festive paperweights or thoughtful handmade gifts.
Step-by-Step Tutorial
Materials
- Smooth river rocks (flat and oval shapes work best)
- White acrylic paint (matte finish)
- Black fine-liner paint pen or permanent marker
- Red and green acrylic paint
- Gold glitter paint or metallic gold paint pen
- Fine detail paintbrush (size 0 or 00)
- Pencil and eraser
- Clear matte sealant spray or lush varnish
Step 1: Preparation & Base Coat
-
Clean the surface:
Begin by thoroughly washing your rocks with warm, soapy water to remove any dirt or oils. Let them dry completely, ideally in the sun for an hour. -
Apply the white base:
Paint the entire top surface of the rock with matte white acrylic paint. You may need two or three thin coats to achieve a solid, opaque finish that hides the stone’s natural color. -
Allow to dry:
Ensure the white base coat is completely dry before moving on. If the paint feels cool to the touch, it still needs more time.
Paint Pen Clogs?
If your black fine-liner stops flowing over the acrylic paint, wipe the tip on a damp paper towel. Dried acrylic dust can clog the nib quickly.
Step 2: Lettering Design
-
Sketch the layout:
Using a pencil, lightly sketch your chosen words—’JOY’, ‘NOEL’, or a phrase like ‘JOY PEACE’—onto the center of the stone. Keep your lettering centered and balanced. -
Outline the letters:
Carefully trace over your pencil lines with a black fine-liner paint pen or a very steady hand with a detail brush and black paint. -
Thicken the strokes:
Add weight to the vertical strokes of your letters to create a serif font style. I like to go over the lines twice to ensure the black is deep and solid. -
Refine the edges:
Use the very tip of your pen or brush to sharpen the serif ‘feet’ on the letters for a crisp, professional typographic look.
Perfect Circles
For perfectly round berries, use a dotting tool or the flat end of a drill bit dipped in paint. It creates a much cleaner circle than a brush.
Step 3: Adding the Holly
-
Paint the leaves:
Using deep green paint and your fine detail brush, paint small holly leaves near the lettering. For ‘JOY’, place them in the corner; for ‘JOY PEACE’, nestle them between the words. -
Detail the leaf shape:
Make sure to give the holly leaves their characteristic spiky edges rather than smooth oval shapes. -
Add white veins (optional):
If you want extra detail, you can use a tiny amount of white paint to add a faint center vein to the leaves once the green is dry. -
Paint the berries:
Dip the handle end of a paintbrush into red paint and dot it onto the rock to create perfect circular berries. Group them in clusters of two or three at the base of the leaves. -
Highlight the berries:
Once the red paint is dry, add a tiny speck of white to one side of each berry to create a reflection effect.
Step 4: Golden Accents & Finishing
-
Draw the stars:
Using a gold metallic pen or glitter paint, draw five-pointed stars scattered around the negative space. Vary the sizes for visual interest. -
Add small sparkles:
Fill in smaller empty spots with tiny gold dots or asterisk-style stars to mimic twinkling lights. -
Erase pencil marks:
Once you are absolutely certain all paint and ink is 100% dry, very gently erase any visible pencil sketch lines. -
Seal the artwork:
Spray the stones with a clear matte sealant. This protects the white background from getting dirty and keeps your design vibrant for years.
Display these charming stones on your mantel or tuck them into stockings for a handmade surprise


Nativity Silhouette Under a Starry Night Sky
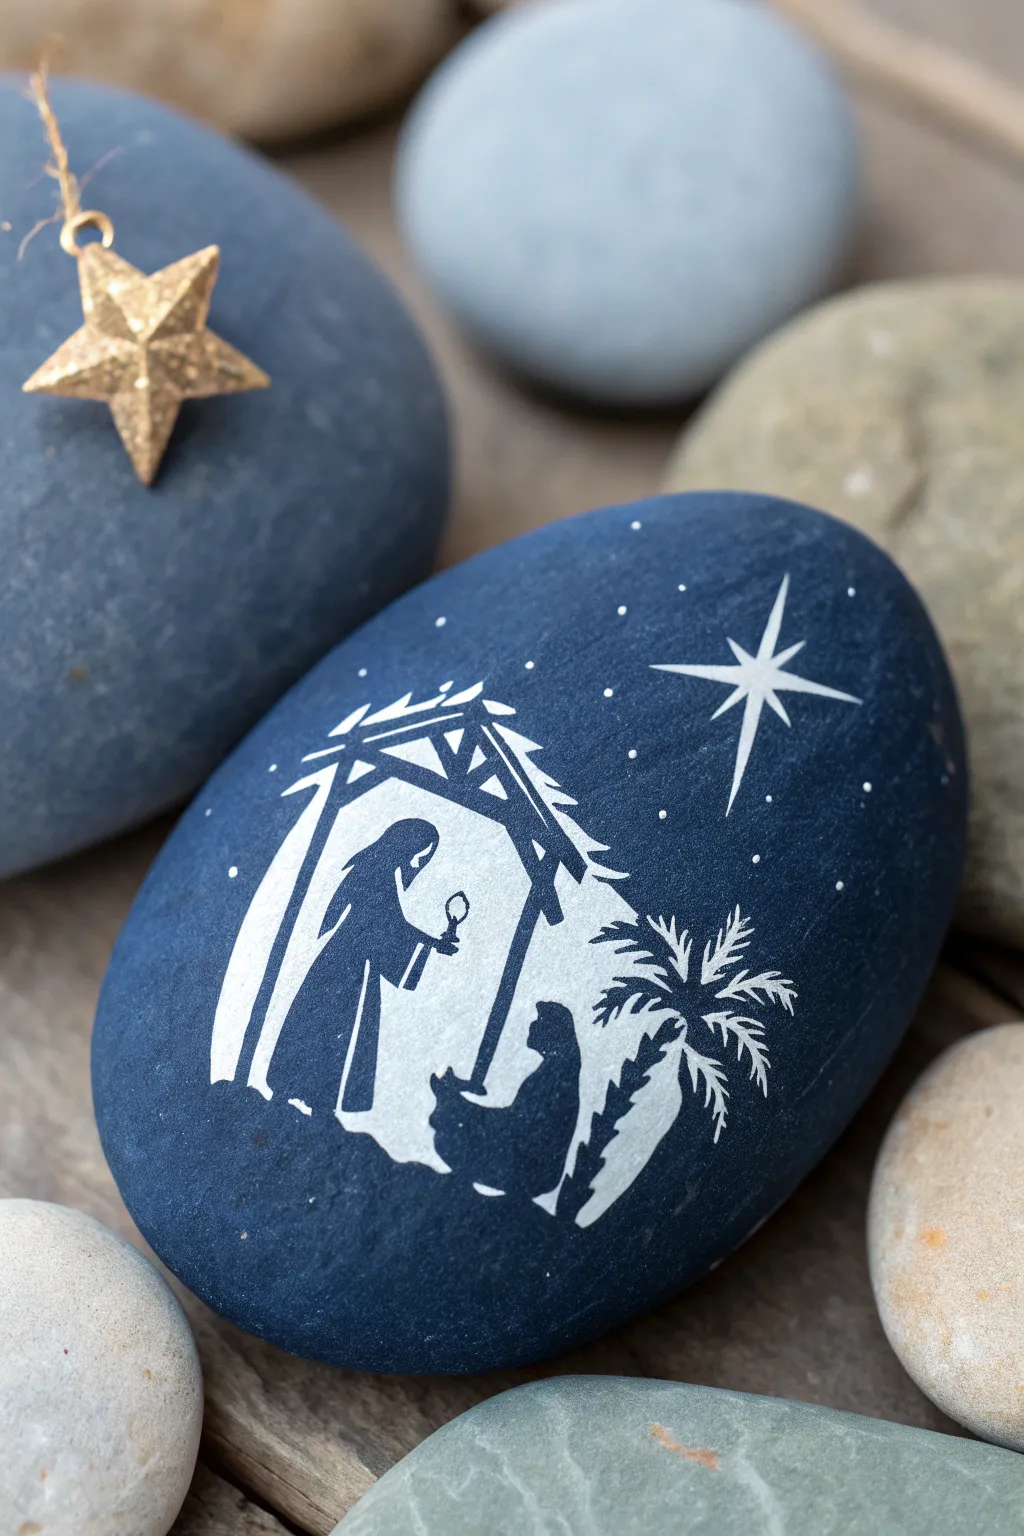
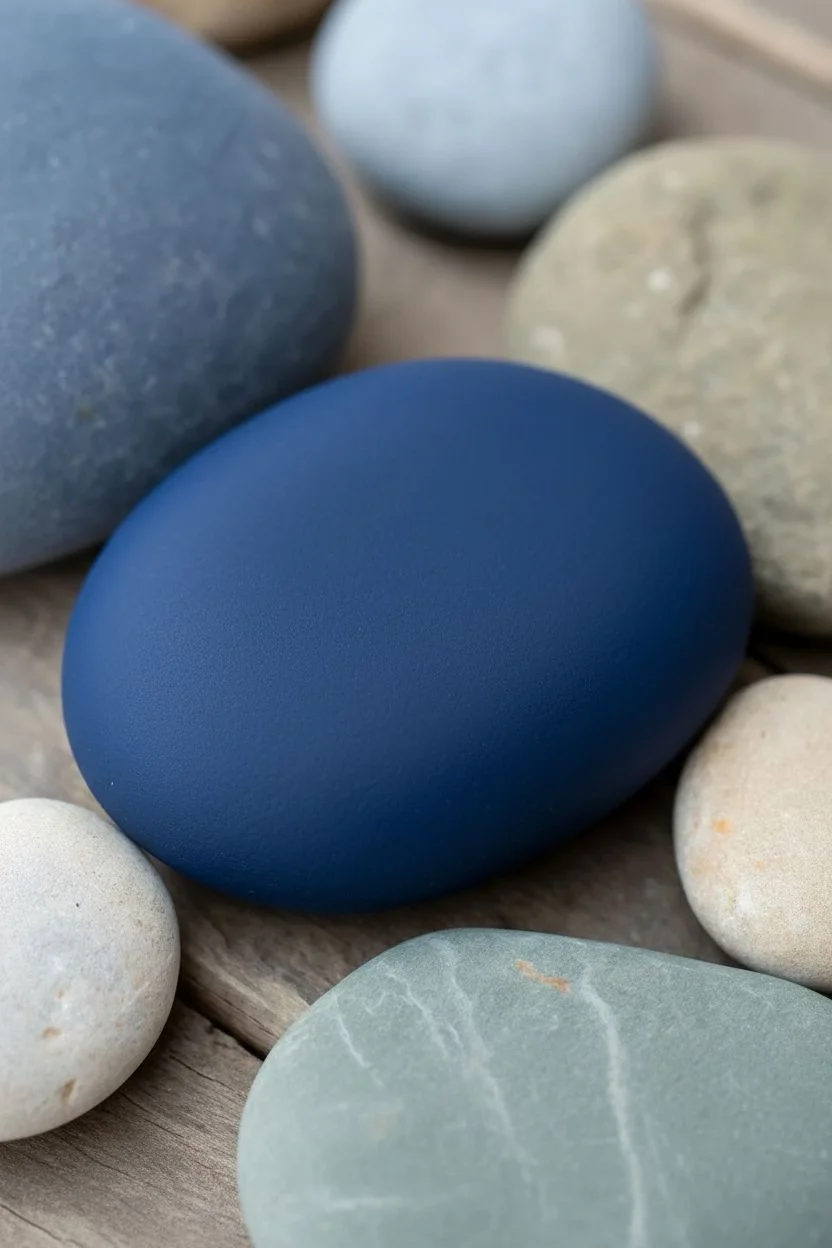
Capture the peaceful reverence of the first Christmas with this elegant silhouette design painted on a smooth river stone. The deep matte blue background provides a striking contrast for the crisp white Nativity scene, creating a sophisticated holiday decoration or keepsake.
Step-by-Step
Materials
- Smooth oval river rock (medium size)
- Deep midnight blue acrylic paint (matte finish)
- White acrylic paint or white paint pen (extra fine tip)
- Wide flat paintbrush
- Detail brush (size 0 or 00)
- Pencil (optional)
- Matte spray varnish or sealer
Step 1: Preparation and Base Coat
-
Clean the stone:
Start by washing your rock with warm soapy water to remove any dirt or oils. Let it dry completely in the sun or with a cloth to ensure the paint adheres properly. -
Apply the first blue layer:
Using a wide flat brush, coat the entire top surface of the rock with deep midnight blue acrylic paint. Work in long, even strokes to minimize texture. -
Dry and repeat:
Allow the first layer to dry until it is no longer tacky. Apply a second coat to ensure complete opacity, so no original rock color shows through the deep blue. -
Final smooth coat:
If I notice any streakiness, I like to add a third, very thin layer of blue to get that perfectly velvety matte finish. Let the base cure fully—drying overnight is safest.
Paint Pen Precision
A fine-tip white acrylic paint pen (0.7mm) is much easier than a brush for beginners! Shake it well and test clear flow on paper before touching the rock.
Step 2: Drafting the Design
-
Sketch the stable:
Using a very light touch with a pencil, outline the basic shape of the stable. Draw a slanted roof on the left side and a support post on the right. -
Outline the figures:
Lightly sketch the silhouette of Joseph standing on the left and a kneeling figure on the right. Keep the shapes simple; you don’t need internal details, just the outer contour. -
Add the palm tree:
On the right side of the stable, sketch a small palm tree with arching fronds to balance the composition. -
Position the Star:
Mark a small dot in the upper right quadrant where the center of the Star of Bethlehem will go.
Make It Shimmer
For a magical touch, mix a tiny amount of silver glitter paint into your white just for the main star, or add a single rhinestone to its center.
Step 3: Painting the Silhouette
-
Paint the stable roof:
Switch to your white paint pen or a liner brush loaded with thinned white paint. Carefully ink the roof rafters, leaving small gaps to suggest texture and roughness. -
Fill the support posts:
Draw the vertical posts of the stable. Use confident, straight lines to define the structure. -
Create Joseph’s form:
Fill in the standing figure on the left. Pay attention to the curve of his robe and hood. Extend his arm slightly to hold the lantern. -
Add the lantern detail:
Paint a tiny line hanging from the hand, ending in a small hollow circle or diamond shape to represent the lantern. -
Paint the kneeling figure:
Fill in the silhouette on the right, ensuring the base connects solidly with the ground line to anchor the figure. -
Form the palm fronds:
For the palm tree, use quick, outward flicking motions with your finest brush or pen tip to create the spiky leaves radiating from the center trunk. -
Define the ground:
Connect the figures and the palm tree with an irregular, wavy line at the bottom to simulate the uneven desert ground.
Step 4: Stars and Details
-
Draw the main star:
Using your dot marker as a guide, draw a long vertical line crossed by a slightly shorter horizontal line. Draw diagonal lines between them that are much shorter to create the four-point star effect. -
Sharpen the star points:
Thicken the center of the star slightly and taper the lines out to very sharp, fine points. -
Add the night sky:
Dip the very tip of a toothpick or detail brush into white paint. Gently dot tiny stars around the main star and above the stable. Vary the pressure to create different sized distant stars. -
Seal the artwork:
Once the white paint is completely dry (give it at least an hour to prevent smearing), spray the rock with a matte varnish to protect your intricate work.
Place this peaceful stone near a candle or on your mantle to enjoy its calm beauty throughout the season
Snowy Cabin With Christmas Lights
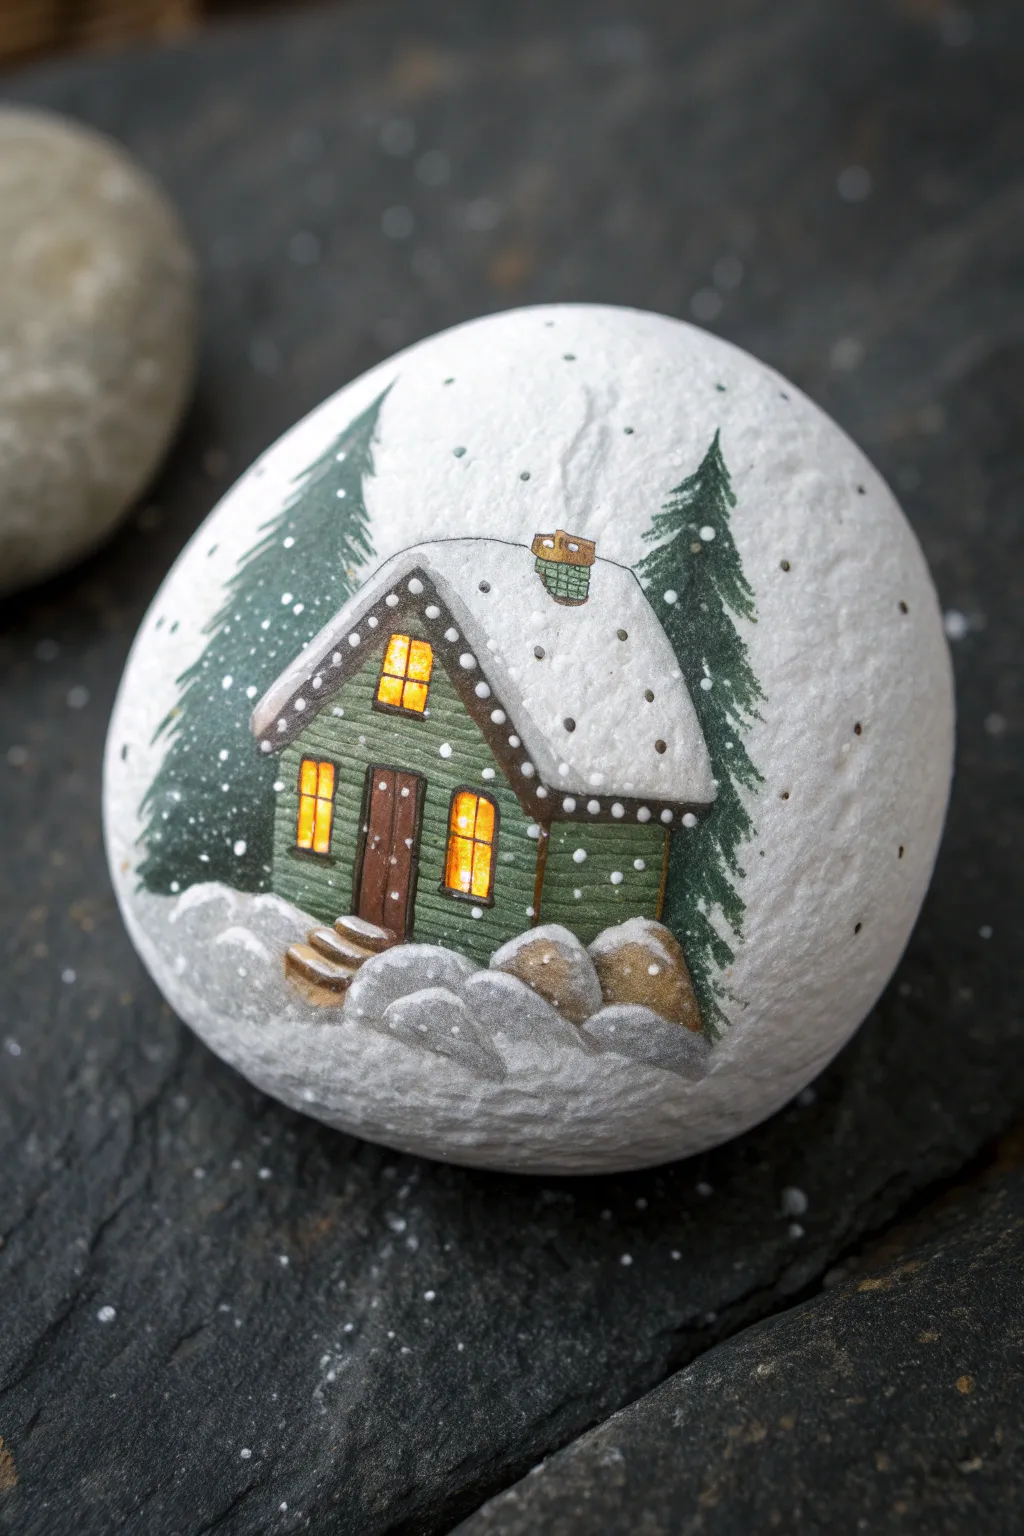
Transform a simple smooth stone into a magical winter retreat with this detailed painting tutorial. The finished piece features a glowing cabin nestled between pine trees, all set against a crisp white snowy background.
Step-by-Step Tutorial
Materials
- Smooth, round river rock (medium size)
- White acrylic paint (priming and snow)
- Forest green acrylic paint
- Dark brown acrylic paint
- Warm yellow or orange acrylic paint
- Light grey acrylic paint
- Fine tip detail brushes (00 and 0 sizes)
- Small flat brush
- Pencil for sketching
- Matte varnish sealant
Step 1: Base and Background
-
Prime the surface:
Begin by coating your rock completely with white acrylic paint. You will likely need two or three coats to get a solid, opaque coverage that hides the original stone color. Allow each layer to dry fully before adding the next. -
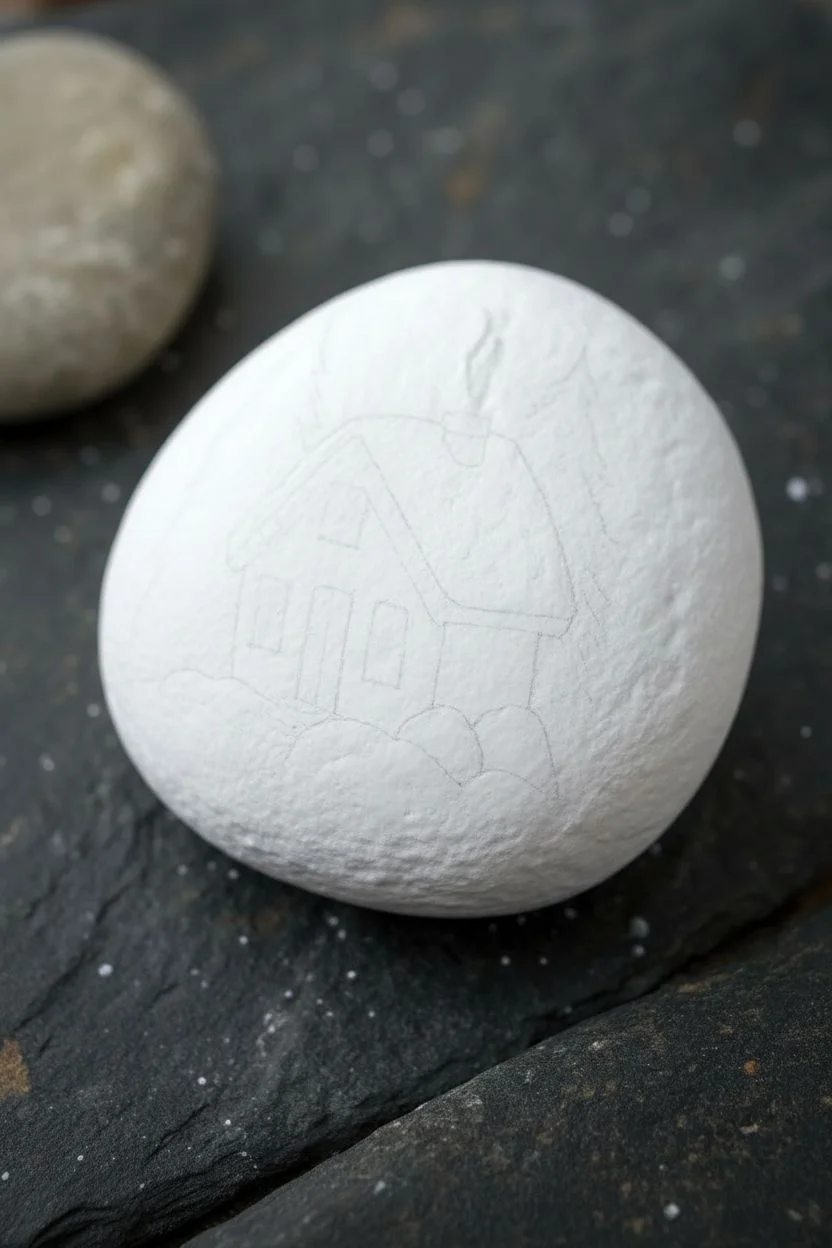
Initial sketch:
Once the white base is bone dry, use a pencil to very lightly sketch the outline of your cabin. Draw a simple square base with a steep triangular roof. Add two triangles on the sides for the pine trees.
Uneven Texture?
If the rock surface is too pitted for fine details, apply a coat of gesso or sandable primer first. Lightly sand it smooth once dry for a perfect canvas.
Step 2: Building the Cabin
-
Paint the cabin shape:
Using your forest green paint and a small flat brush, fill in the main body of the cabin. Avoid the roof area, leaving it white for now. Apply a second coat if the green looks streaky. -
Define the roof:
Mix a tiny drop of grey into white paint to create an off-white shadow. Use this to paint a subtle shadow line right under the edge of the snowy roof, defining its thickness against the green walls. -
Add wood texture:
With a fine detail brush and a slightly darker green (or mix a microscopic dot of black into your forest green), paint thin horizontal lines across the cabin walls to mimic wooden siding. -
Paint the door:
Using dark brown paint, create a rectangular door in the center. Once dry, add a tiny handle and a vertical line for slight wood detailing using a lighter brown shade. -
Create the windows:
Paint two small rectangles for the windows using a warm yellow or orange. This creates the ‘lit from within’ look. I like to make the color brightest in the center to enhance the glow. -
Window frames:
Carefully outline the windows and add the cross-pane details using dark brown paint and your finest brush. -
Roof trim and chimney:
Paint a dark brown trim along the edge of the roofline. Add a small chimney on the roof using brown, adding a touch of green for texture.
Glowing Windows
To make the windows truly glow, paint them white first, let dry, then apply a glaze of transparent yellow. It adds incredible depth.
Step 3: Landscape and Details
-
Paint the trees:
Mix a dark green shade for the trees. Using a feathery, downward stroke, paint the pine trees on either side of the cabin. Start at the top point and widen your strokes as you move down to create the pine shape. -
Add the snowy base:
At the bottom of the rock, paint rounded shapes in the foreground using light grey. These represent snow-covered rocks and drifts. Highlight the tops of these shapes with pure white to make them pop. -
Steps and rocks:
Paint small brown steps leading to the door. Add a few rounded brown stones peeking out from the snow at the base of the house. -
Second snow layer:
Go back over the roof with thick, clean white paint to make the snow look fresh and piled high. Dap small dots of white on the chimney and traces on the pine trees. -
Falling snow:
Dip the very tip of a brush or a toothpick into white paint. Dot tiny snowflakes all over the green cabin walls, the trees, and the background sky area. -
Final highlights:
Add tiny white highlights to the door frame and window ledges to simulate frost catching the light. -
Seal the artwork:
Allow the entire stone to cure for 24 hours. Finish by applying a matte varnish to protect your miniature winter scene from scratches and moisture.
Your miniature winter wonderland is now ready to serve as a festive paperweight or holiday decoration
Christmas Snowflake Mandala in Icy Blues
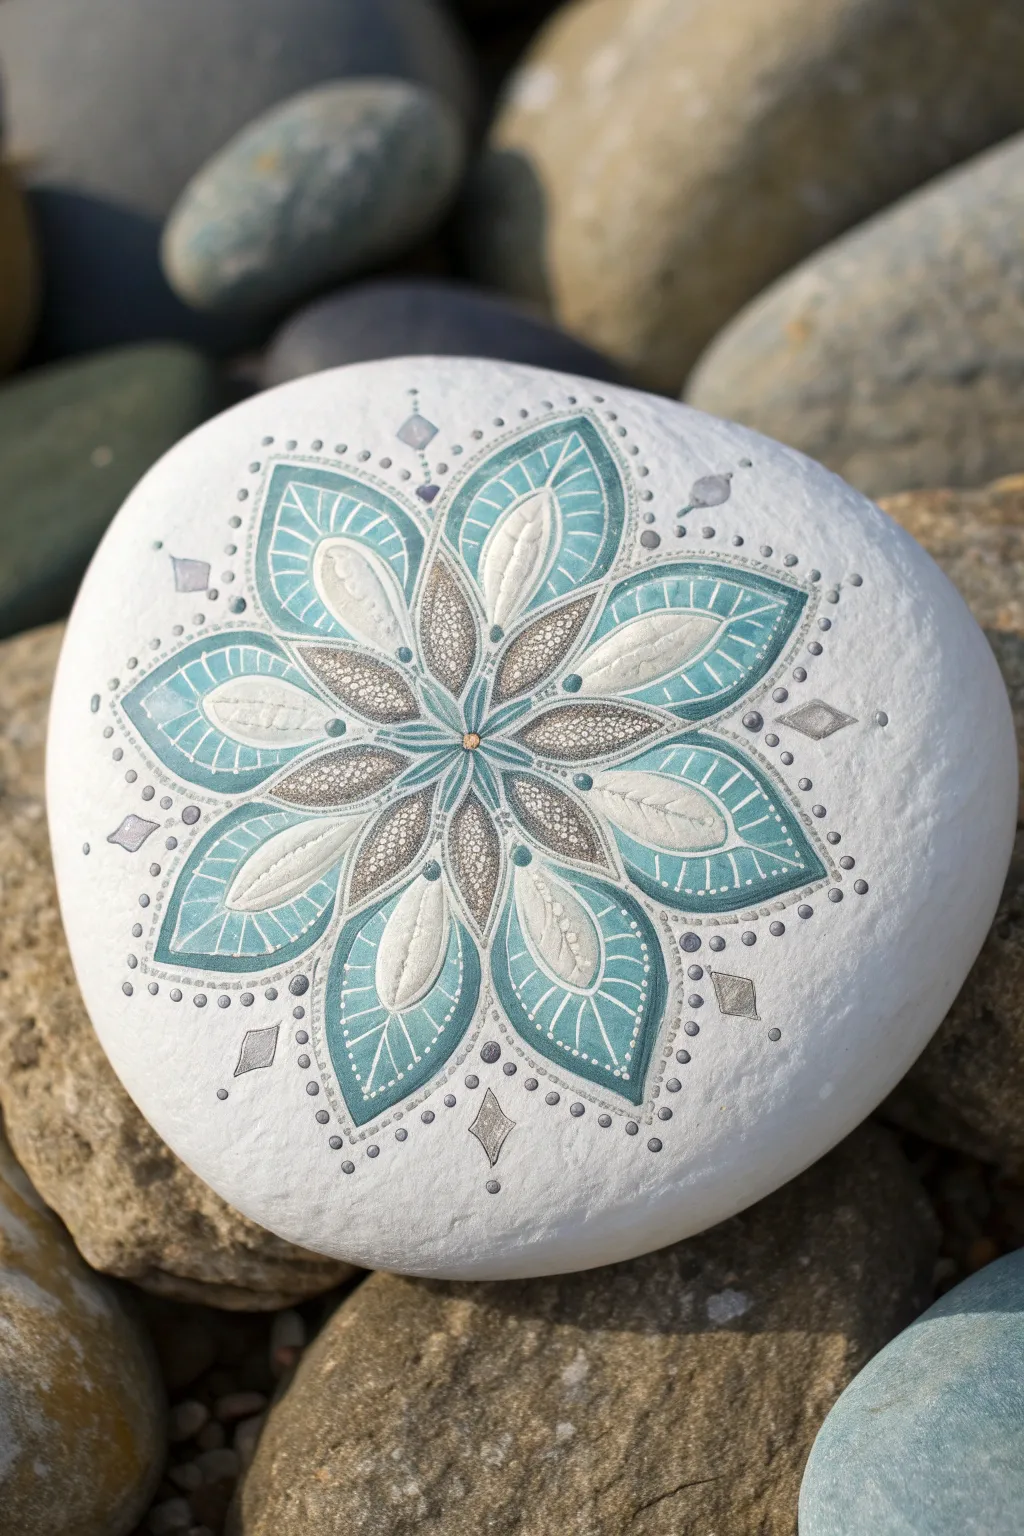
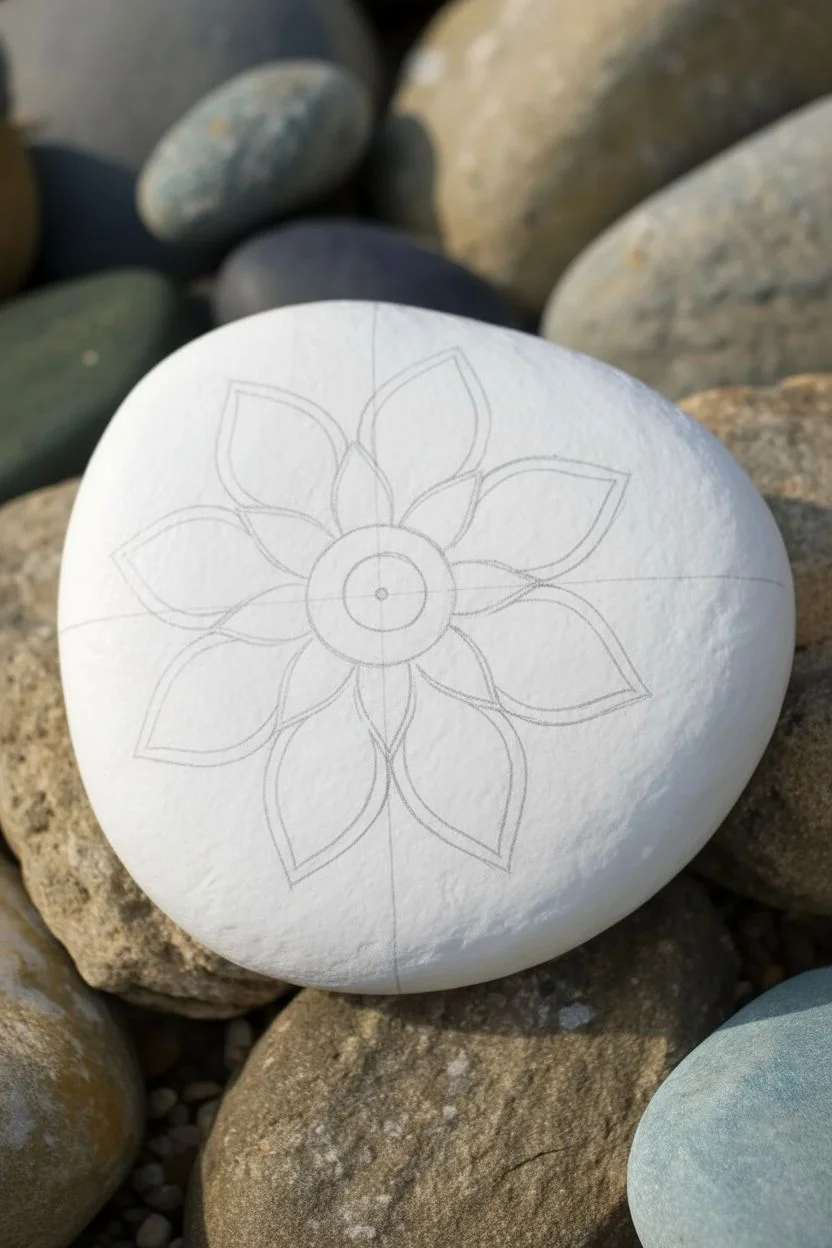
Capture the stillness of winter with this elegant mandala design, featuring cool turquoise tones and shimmering metallic accents. The symmetrical petals radiate outward like a stylised snowflake, creating a serene and sophisticated piece of holiday decor.
Step-by-Step Guide
Materials
- Smooth, round river rock (medium to large size)
- White acrylic paint (matte base coat)
- Acrylic paints: Teal/Turquoise, Slate Grey, Metallic Silver, White
- Pencil (HB or lighter)
- Eraser
- Fine detail brushes (sizes 0, 00, or 000)
- Dotting tools (various sizes)
- Ruler or compass (optional for guidelines)
- Clear acrylic sealer (spray or varnish)
Step 1: Preparation and Base Layout
-
Prime the Surface:
Begin by washing your rock to remove any dirt or oils. Once dry, apply 2-3 coats of matte white acrylic paint to the entire surface. Let each coat dry completely to ensure a smooth, opaque canvas. -
Mark the Center:
Find the approximate center of your rock and mark it lightly with a pencil dot. This will be the anchor point for your entire radial design. -
Sketch Guidelines:
Lightly sketch a circle about an inch in diameter around your center dot. Sketch a larger concentric circle about an inch further out. Draw faint lines extending from the center like a pizza, dividing the circle into 8 equal sections. -
Draw the Petals:
Using your guidelines, sketch eight large, pointed petal shapes radiating from the center. The tips should reach your outer circle, and the sides should curve gently to meet at the center point.
Steady Hands Pro-Tip
Rest your pinky finger on a dry part of the rock while painting. This acts as a stabilizer, preventing shaky lines when doing the ultra-fine veining details.
Step 2: Painting the Core Design
-
Golden Center:
Place a small dot of gold or copper metallic paint right at the center point using a small dotting tool or the back of a brush handle. -
Outline the Petals:
Mix a medium-dark teal shade. Using your finest detail brush, carefully paint the outline of the eight main petals you sketched earlier. Keep your hand steady and rest your wrist on the table for stability. -
Fill the Petal Tips:
Within each petal outline, paint a smaller, inner petal shape using a lighter, watery turquoise. Leave a small gap of white space between this fill and your dark outline. -
Create the Veins:
Using white paint and a very fine brush, paint delicate vein lines inside the turquoise sections. Draw a central spine with small angled ribs branching off, mimicking a leaf or feather texture. -
Add Inner Petals:
Between the bases of your large teal petals, sketch and paint smaller, narrower teardrop shapes pointing towards the center. Fill these with a metallic slate grey or pewter color. -
Texture the Grey Petals:
Once the grey paint is dry, use a tiny dotting tool and white paint to add a stippled texture inside these smaller petals. Keep the dots distinct but close together.
Step 3: Painting the Outer Accents
-
Outer Leaves:
Sketch a set of wider, shorter leaf shapes nestled between the tips of the main teal petals. Outline these in the same dark teal used earlier. -
Fill and Detail:
Fill the outer leaves with the lighter turquoise mix. Once dry, add a solid white teardrop shape in the center of each, giving it a dimensional, layered look. -
Diamond Accents:
In the negative space between the outer petal tips, paint small diamond shapes using metallic silver paint. Orient them so they point outward, extending the starburst effect. -
Dotted Border:
Dip a fine dotting tool into grey or silver paint. Create a ring of tiny dots that frames the entire mandala. Follow the curves of the outer petals rather than making a perfect circle. -
Final Flourishes:
Add tiny white or silver dots at the very tips of the main petals and around the diamond shapes to soften the edges and add sparkle. -
Clean Up Guidelines:
Allow the paint to cure fully—I usually wait at least an hour. Gently erase any visible pencil guidelines, being careful not to rub off any paint. -
Seal the Rock:
Protect your artwork with a layer of clear acrylic sealer or varnish. A satin or gloss finish works best to make the metallic paints shimmer.
Level Up: Glitter Glaze
Mix a tiny pinch of fine iridescent glitter into your final varnish coat. It mimics the sparkle of fresh snow without overpowering the painted details.
Display this frozen masterpiece on a mantelpiece or gift it as a sophisticated holiday paperweight
Plaid and Buffalo-Check Holiday Pattern Rocks
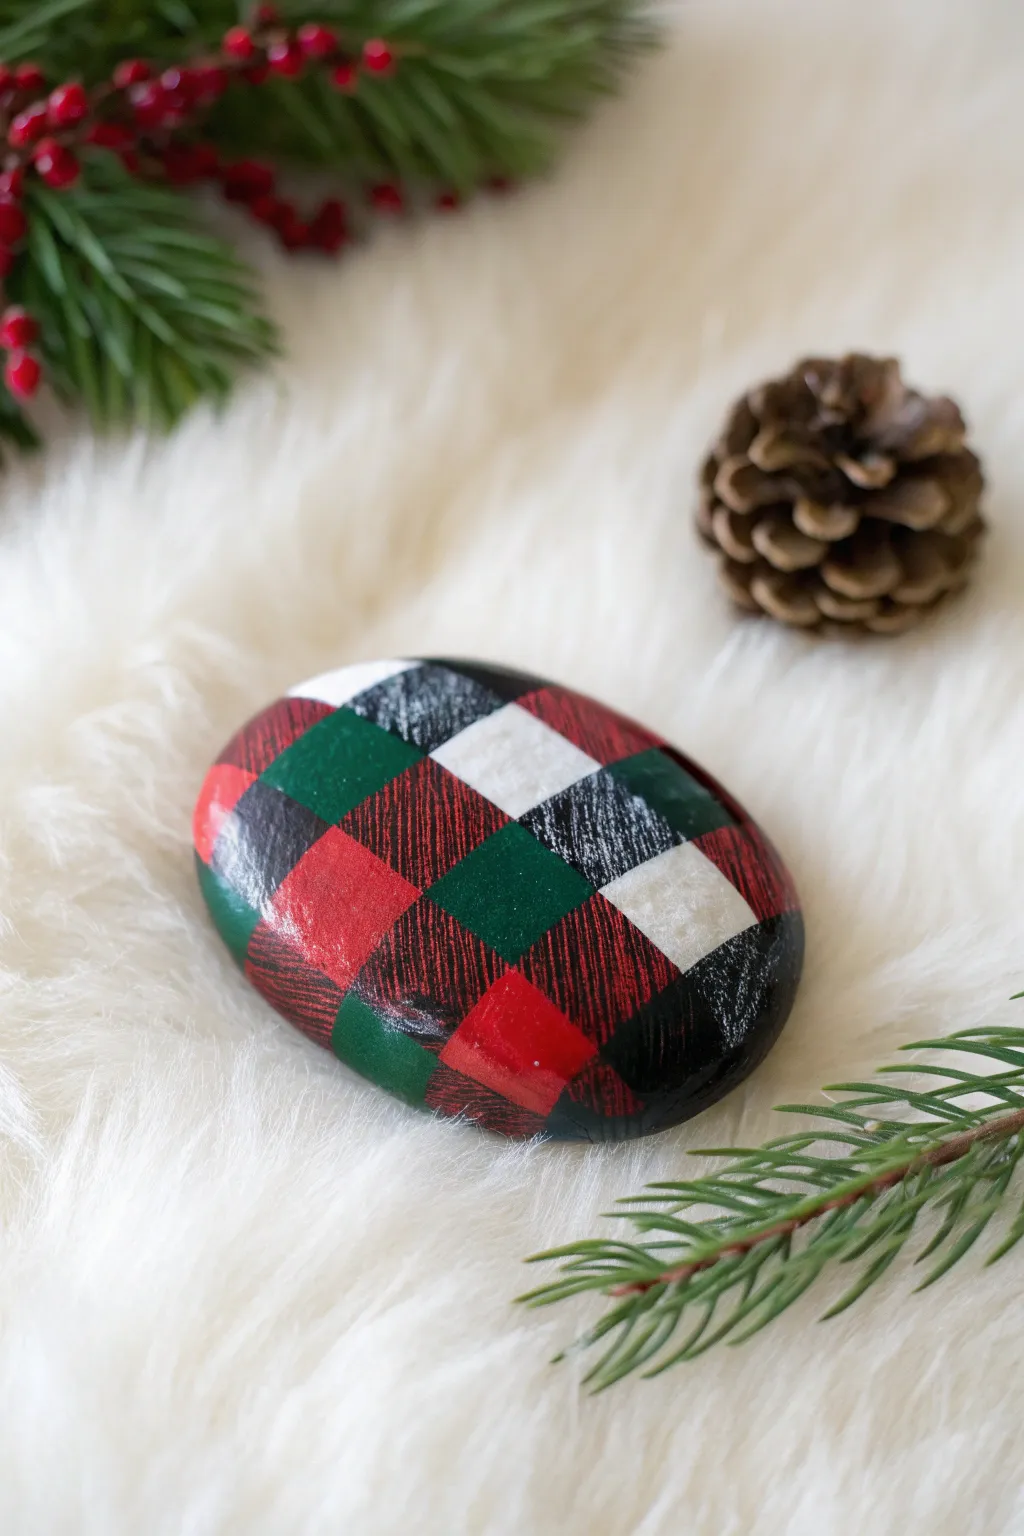
Bring a touch of cozy flannel to your décor with this sophisticated plaid rock painting project. The interlocking squares of forest green, deep red, black, and white create a classic holiday weave that looks impressively complex but is surprisingly simple to achieve.
Step-by-Step
Materials
- Smooth, oval river rock
- Acrylic craft paints (Red, Forest Green, Black, White)
- Flat shader paintbrushes (medium and small)
- Pencil (optional)
- Ruler or straight edge (optional)
- Sealer (gloss or matte finish)
Step 1: Preparation and Base Layer
-
Clean Your Canvas:
Begin by scrubbing your rock with warm soapy water to remove any dirt or oils. Let it dry completely before starting, as moisture can prevent the paint from adhering properly. -
Base Coat:
Paint the entire top surface of the rock black. This acts as the darkest shadow for your plaid and helps the other colors pop. You may need two coats for full opacity.
Wobbly Lines?
If your squares look uneven, don’t stress. The dry-brush texture step is incredibly forgiving and disguises most uneven edges, making them look like natural fabric pulls
Step 2: Creating the Grid
-
Planning the Grid:
Visualize a diagonal grid across your rock. If you are nervous about free-handing, lightly sketch a network of intersecting diagonal lines using a pencil or white charcoal pencil. -
Painting Red Squares:
Using a flat shader brush, paint select squares in bright red. Aim to space them out in a checkered pattern, leaving black space between them. Don’t worry about perfect edges yet, but try to keep the square shape defined. -
Adding Green Squares:
Rinse your brush and switch to forest green. Paint squares adjacent to the red ones. Creating a checkerboard effect is key here; visualize where the stripes of a plaid shirt would intersect. -
Painting White Squares:
Add white squares sparingly. These act as the ‘highlight’ of the fabric pattern. Place them at points where you want the pattern to look lightest, usually intersecting lighter color bands. -
Touch-Up Black Squares:
If your painted squares have encroached on the black areas too much, go back in with black paint to redefine those dark ‘negative space’ squares that anchor the pattern.
Metallic Thread
Add a thin line of gold or silver paint along one grid line direction to mimic the metallic threading often found in festive holiday ribbons
Step 3: Adding Texture and Detail
-
Dry Brushing Technique:
This is the secret to the fabric look. Wipe most of the black paint off a stiff, dry brush until almost no pigment remains. -
Weathering the Red:
Lightly drag the dry brush with black paint vertically over the red squares. The goal is to leave faint, scratchy lines that mimic thread fibers. -
Weathering the Green:
Repeat the vertical dry brushing over the green squares. Keep the strokes light and directional to maintain the illusion of woven fabric. -
Cross-Hatching Effect:
Now, perform the same dry-brushing technique horizontally across the same squares. This cross-hatch pattern instantly transforms flat paint into a woven textile appearance. -
Softening the White:
The white squares need to blend slightly. Use a very lightly loaded brush with grey or thinned black paint to gently scuff the surface of the white squares, so they don’t look like stickers. -
Highlighting Intersections:
Where a red band would theoretically cross a green band, the color deepens. You can mix a tiny bit of black into red or green and dab it where the corners of squares touch to simulate overlap.
Step 4: Finishing Touches
-
Wait for Dryness:
Ensure the textured layers are 100% dry. Because acrylics dry fast, I usually only wait about 15 minutes before checking. -
Clean Up Edges:
Look at the sides of the rock. If the grid looks messy as it wraps around the curve, paint a solid black border or fade the colors out gradually. -
Apply Sealer:
Once fully dry, apply a coat of sealer. A glossy finish gives it a polished, ceramic look, while a matte spray preserves the realistic fabric texture you just created.
Now you have a cozy piece of decor that looks wonderful nestled among pine branches or on a mantel
Ugly Sweater Pattern Christmas Rock Set
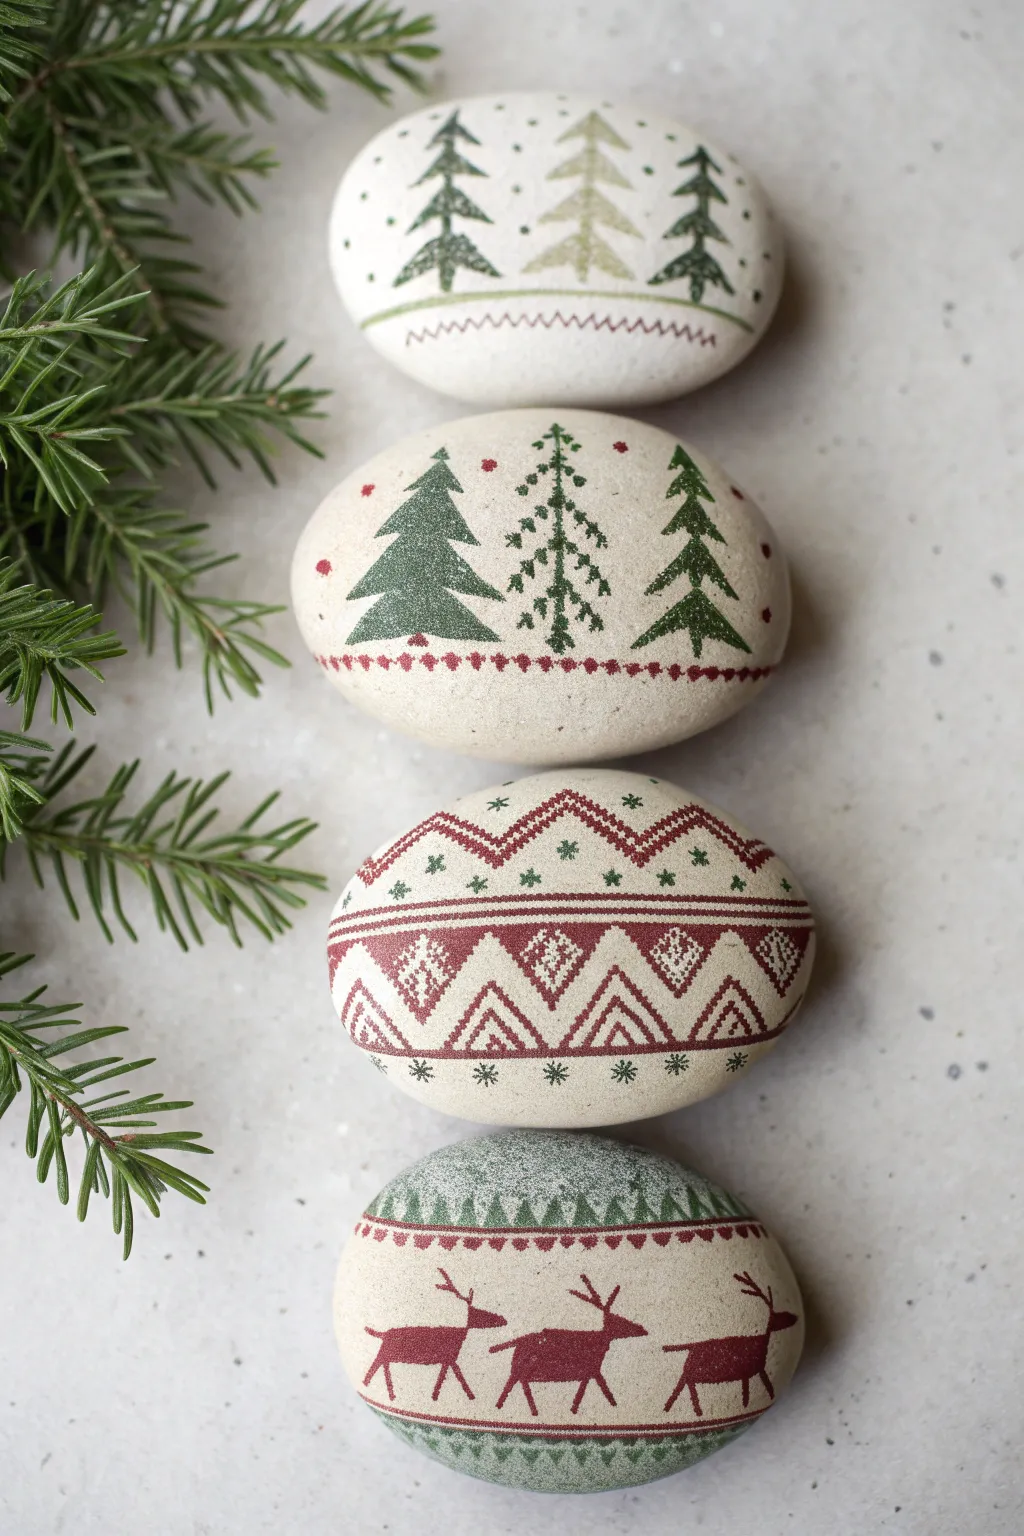
Transform smooth river stones into charming Nordic winter decor with these delicate, sweater-style painted patterns. This set captures the warmth of a classic knit sweater using fine lines, traditional motifs, and a restrained color palette of forest green and cranberry red.
Step-by-Step Tutorial
Materials
- Smooth, flat river rocks (light beige or white preferred)
- Acrylic paints (Forest Green, Cranberry Red, White, Olive Green, Metallic Gold)
- Fine detail brushes (sizes 0, 00, and 000)
- Pencil with a very fine point
- Eraser
- Matte finish sealant or varnish
- Water cup and palette
- Optional: Dotting tool or toothpick
Step 1: Preparation and Base
-
Clean and dry:
Begin by scrubbing your rocks with warm soapy water to remove any dirt or oils. Let them dry completely, preferably in the sun, to ensure the paint adheres properly. -
Prime the surface:
If your rocks are dark or uneven in color, paint a base coat of off-white or light beige acrylic. Apply two thin coats rather than one thick one to avoid brush strokes, letting each dry fully. -
Plan your designs:
Lightly sketch your main horizontal layout lines on each rock using a pencil. For the top rock, mark a central horizon; for the others, mark parallel bands where the patterns will sit.
Wobbly Lines?
If your brush hand is shaky, try resting your wrist on the table or using a paint pen for the straight lines. You can also use masking tape to mask off perfect horizontal bands.
Step 2: Rock 1: The Three Trees
-
Sketch the trees:
On the first rock, lightly outline three simple triangular tree shapes. Make the middle one slightly larger or distinct. -
Paint the evergreens:
Using your smallest brush and Forest Green, fill in the left and right trees. Use short, downward-angled strokes to mimic needle textures rather than painting a solid triangle. -
The middle tree:
Paint the center tree using Olive Green or a metallic gold for subtle contrast. Keep the texture consistent with the others. -
Add the border stitch:
Underneath the trees, paint a squiggly ‘running stitch’ line in dark red to ground the image. -
Snow flurries:
Using a dotting tool or toothpick, add tiny dots of green surrounding the tree peaks to represent falling snow.
Fabric Texture
To make the rocks look truly like fabric, gently dab the wet paint with a dry paper towel or sponge. This lifts a tiny bit of pigment and creates a ‘woven’ texture.
Step 3: Rock 2: The Forest Pattern
-
Draft the trees:
For the second rock, sketch three larger trees. The outer two should be standard evergreens, while the middle one can be a taller, stylized pine. -
Fill the outer trees:
Paint the left and right trees in Forest Green solid, giving them slightly jagged edges for realism. -
Detail the center pine:
For the middle tree, paint a thin vertical trunk line first. Then, add small ‘x’ shapes or cross-stitches up the trunk to create branches, giving it a knitted appearance. -
Red accents:
Add small red dots at the jagged points of the green trees and at the very top of each tree. -
Base border:
Paint a row of small red diamonds along the bottom curve of the rock.
Step 4: Rock 3: The Fair Isle Knit
-
Establish the bands:
This rock relies on precision. Paint two parallel horizontal lines across the middle in dark red to create a central belt. -
Create the zig-zag:
Inside the red belt, paint a white zig-zag line. In the triangular spaces formed by the zig-zag, paint small red diamond shapes. -
Upper stitching:
Above the main belt, paint a smaller red zig-zag line. Above that, stamp small green stars or snowflakes in a row. -
Lower details:
Mirror the pattern below the belt with another row of green snowflakes to complete the symmetrical sweater look.
Step 5: Rock 4: Reindeer Run
-
Paint the background bands:
Paint a thick band of green at the very top and bottom of the rock to frame the scene. I often sponge this slightly for a textured, fabric look. -
The reindeer silhouettes:
In the open middle space, paint three simple reindeer silhouettes in red. Start with a rectangle for the body, thin lines for legs, and a small head with antlers. -
Connecting the herd:
Ensure all reindeer are facing the same direction (right) to create a sense of movement. -
Final border details:
Add a thin line of red triangles just below the top green band and just above the bottom green band to mimic stitching.
Step 6: Finishing Touches
-
Clean up:
Once dry, gently erase any visible pencil lines that weren’t covered by paint. -
Seal the deal:
Apply a coat of matte varnish to protect your work without making it too shiny, preserving the soft, natural look of the stone.
Stack your finished stones near some evergreen sprigs for a festive display.
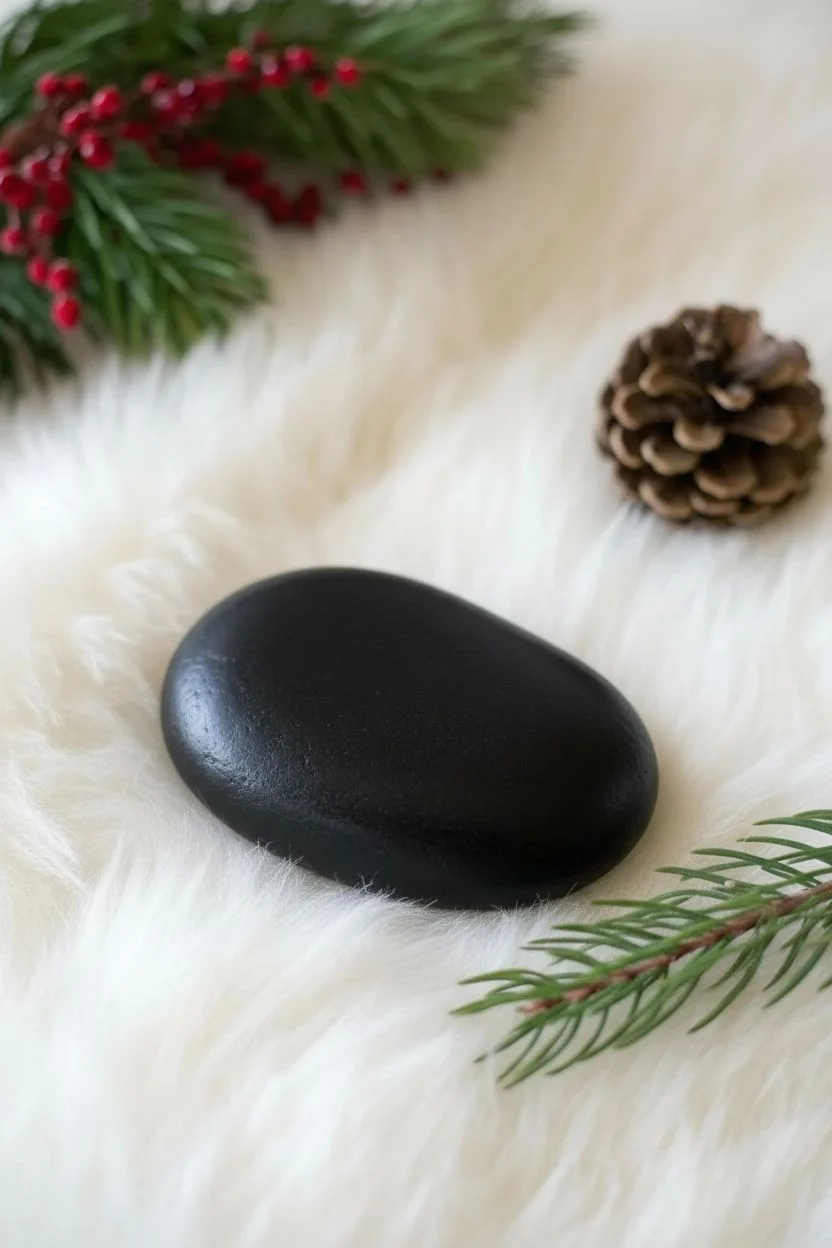
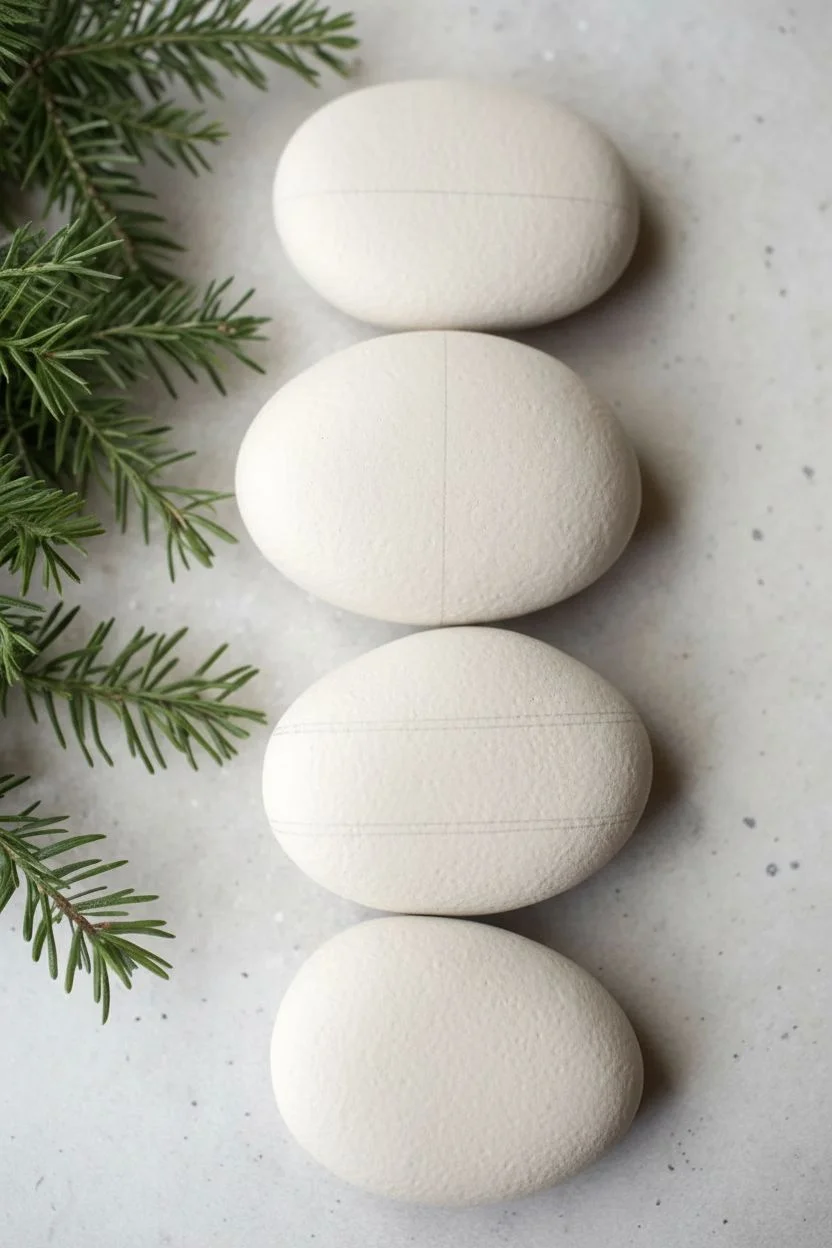
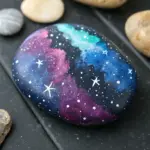
Glow-in-the-Dark Christmas Night Sky Rocks
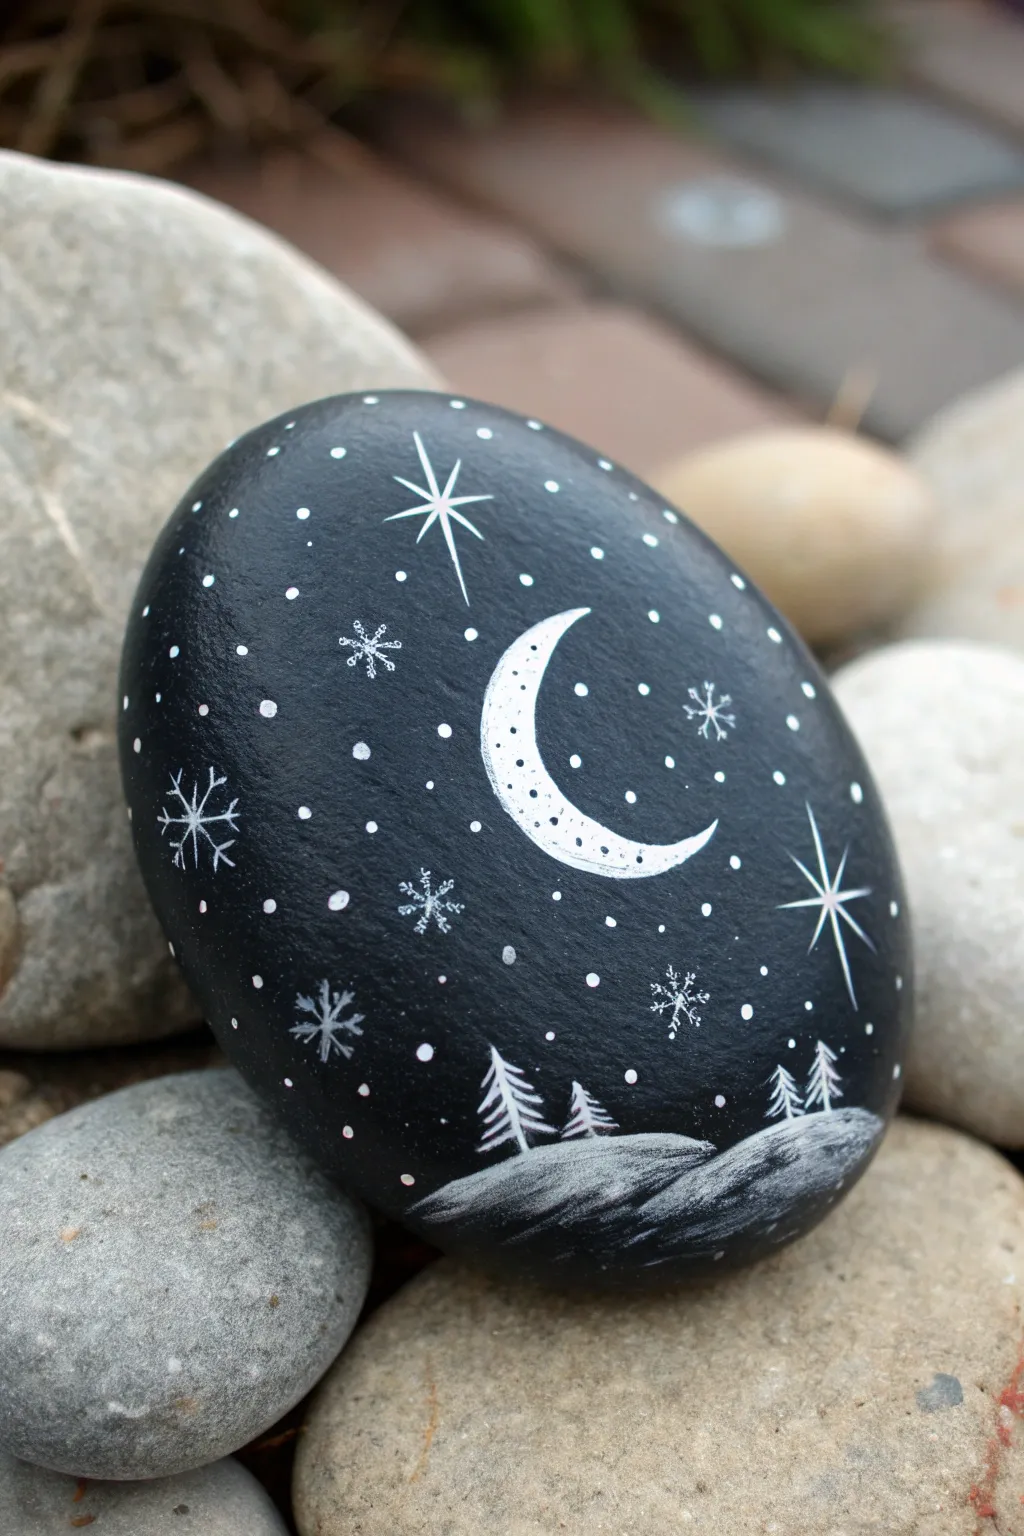
Transform a simple smooth stone into a magical winter vignette featuring a crescent moon and gentle snowfall. This project uses high-contrast black and white acrylics to create a peaceful night scene that looks stunning by day and can surprise you with a soft glow at night if you use special paints.
Step-by-Step
Materials
- Smooth, oval-shaped river rock (cleaned and dried)
- Black acrylic paint (matte or satin finish)
- White acrylic paint (or white glow-in-the-dark paint)
- Wide flat paintbrush
- Fine detail paintbrush (size 0 or 00)
- Dotting tool or toothpick
- Clear acrylic sealer (spray or brush-on)
- Palette or paper plate
- Cup of water and paper towels
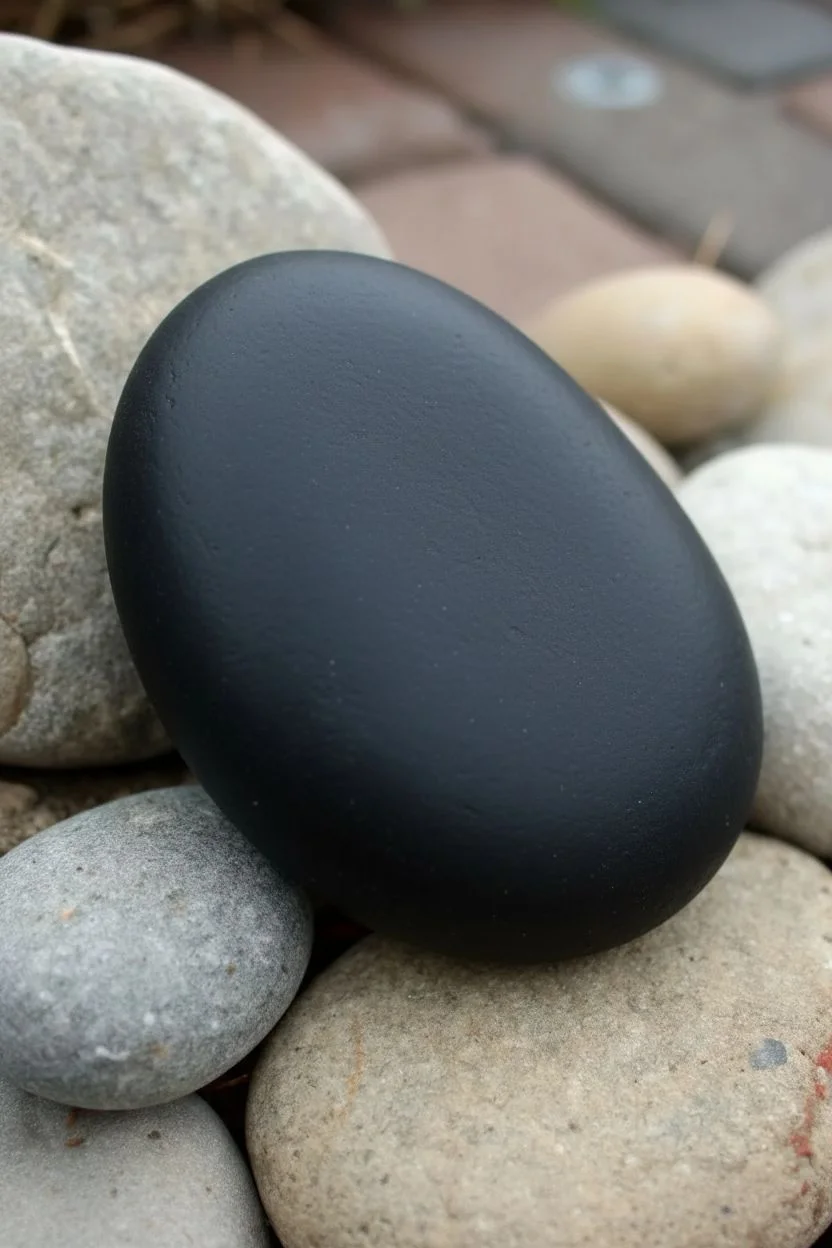
Step 1: Setting the Midnight Scene
-
Prepare the Base:
Begin by washing your stone thoroughly with soap and water to remove any dirt or oils. Let it dry completely before starting to ensure the paint adheres properly. -
Apply the Night Sky:
Using your wide flat brush, coat the entire front surface of the rock with black acrylic paint. You may need to paint the sides as well to create a seamless look. -
Second Coat:
Once the first layer is touch-dry (usually about 10-15 minutes), apply a second coat of black to ensure full, opaque coverage. Let this dry completely before moving to the detailed work.
Oops! Paint too thick?
If your fine lines for snowflakes look clunky, wait for the white to dry, then use black paint to ‘erase’ and thin down the edges for a sharper look.
Step 2: Painting the Foreground
-
Paint the Snowy Hills:
Load your flat brush with white paint. At the very bottom of the rock, paint two overlapping curved mounds to represent snowy hills. Keep the bottom edge slightly rough to look like uneven terrain. -
Add Texture to Snow:
While the white paint is still slightly wet, gently streak a tiny bit of grey or diluted black through the snow mounds to give them dimension and shadow, rather than being perfectly flat white. -
Draft the Trees:
Switch to your fine detail brush. Paint four small vertical lines rising from the snowy hills—two on the left mound and two on the right—to serve as the trunks for your pine trees. -
Flesh Out the Pines:
Using very short, downward-angled strokes, add branches to the trunks. Start narrow at the top and get slightly wider as you move down, creating a classic conical evergreen shape.
Step 3: Celestial Details
-
Create the Crescent Moon:
In the center of the rock, slightly towards the top, use your fine brush to paint a ‘C’ shape. Thicken the middle of the shape to form a crescent moon, tapering the ends to sharp points. -
Texture the Moon:
Once the moon shape is solid white, take a toothpick or a dry brush with a tiny amount of black and tap small dots onto the white surface to mimic craters. -
Paint the North Stars:
Paint a large four-pointed star near the top left and another on the right side. Start with a cross shape, then lengthen the vertical and horizontal lines, turning them into thin spikes. -
Add Snowflakes:
Scatter 4-5 snowflake shapes across the black sky. To do this, paint a simple asterisk (*) shape with the fine brush, keeping the lines as thin as possible. -
Detail the Snowflakes:
Add tiny ‘V’ shapes to the tips of the larger snowflake arms to make them look intricate and crystalline.
Level Up: Cosmic Glow
Mix a small amount of fine silver cosmetic glitter into your sealant for a subtle sparkle, or trace the moon with phosphorescent paint for a real night glow.
Step 4: Finishing Touches
-
Starry Background:
Dip a dotting tool or the blunt end of a paintbrush into white paint. Dot the remaining black space with various sized dots to create a distant field of stars and falling snow. -
Refine Highlights:
I like to go back with fresh white paint and brighten up the moon and the tips of the trees if the black background is showing through too much. -
Dry Time:
Allow the entire artwork to dry for at least one hour. If you used thick globs of paint for the stars, give it a bit longer. -
Seal the Rock:
Apply a coat of clear acrylic sealer given the rock is clean and dry. This protects your artwork from scratches and weather if you plan to place it outside.
Place this little piece of winter magic on a shelf or hide it in the garden to brighten someone’s evening walk
Mini Rock Gift Tags and Place Markers
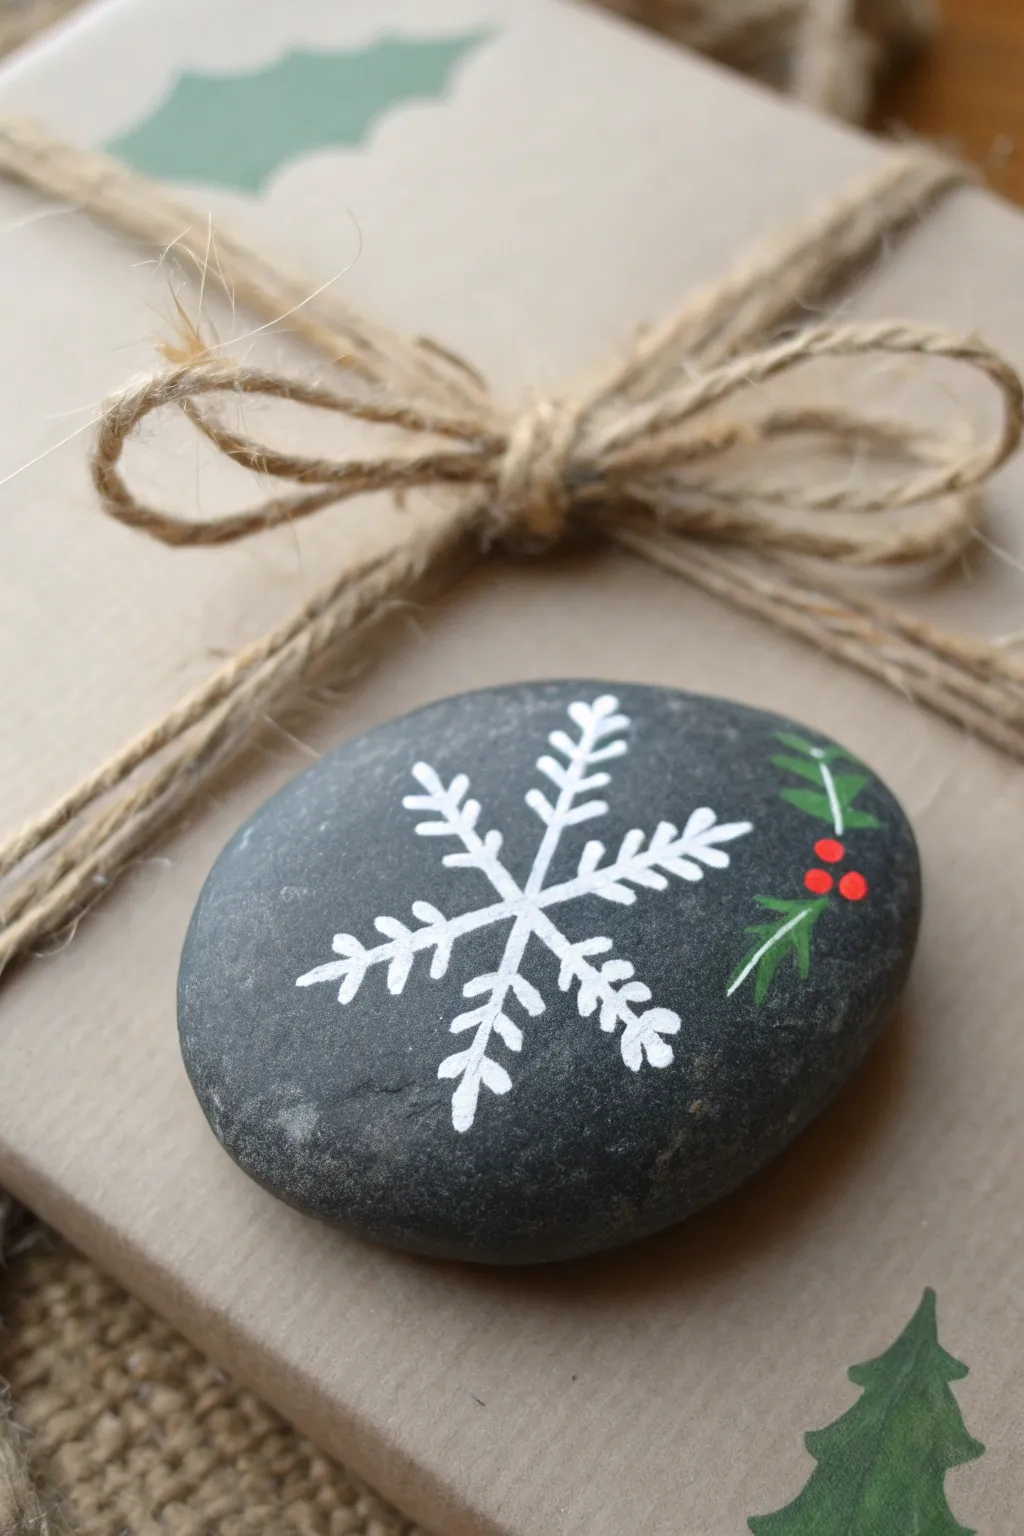
Transform a smooth, dark river rock into a delicate winter accent with this classic snowflake design. The striking contrast of white on grey, accented with a tiny sprig of holly, makes this perfect as a reusable gift tag or a festive table setting marker.
Detailed Instructions
Materials
- Smooth, dark grey river rock (flat and oval)
- White acrylic paint or paint pen (fine tip)
- Green acrylic paint or paint pen
- Red acrylic paint or paint pen
- Fine detail paintbrush (size 0 or 00)
- Soap and water
- Clear matte sealant spray (optional)
Step 1: Preparation
-
Clean the canvas:
Begin by thoroughly washing your rock with warm, soapy water to remove any dirt or oils. Scrub gently with an old toothbrush if needed to get into porous areas. -
Dry completely:
Pat the rock dry with a towel and let it sit for at least 15-20 minutes to ensure all moisture has evaporated from the stone’s pores.
Clean Lines Trick
If your hand shakes, rest your wrist on a heavy book or block placed next to the rock. This anchors your hand for steadier, straighter lines.
Step 2: Painting the Snowflake
-
Mark the center:
Using your white paint pen or fine brush, place a very small dot in the visual center of the rock to guide your lines. -
Draw vertical axis:
Paint a straight vertical line through your center dot, extending about an inch up and down. Keep the line thin and crisp. -
Create the X shape:
Paint two diagonal lines crossing through the center point to create an ‘X’ over the vertical line. Try to keep the angles even so you have six equally spaced arms. -
Dry the base lines:
Let these main structural lines dry for a minute so you don’t smudge them while adding details. -
Add outward branches:
Starting on the top vertical arm, paint small ‘V’ shapes pointing outward from the center. I like to add two or three pairs of V’s per arm depending on the length. -
Repeat for all arms:
Continue adding these V-shaped branches to the remaining five arms. Aim for symmetry, placing them at roughly the same distance from the center on each arm. -
Add tips:
Paint a tiny V at the very tip of each arm to finish the snowflake’s delicate crystalline look. -
Thicken if needed:
Go over the central intersecting point once more if the white looks translucent, ensuring the core of the snowflake is bright and opaque.
Glittery Level Up
While the white paint is still wet, sprinkle ultra-fine iridescent glitter over the snowflake. Shake off the excess once dry for a sparkling frost effect.
Step 3: Adding the Holly Accent
-
Start the stem:
To the right of the snowflake, use a very fine brush with green paint to draw a thin, curved line for the holly stem. -
Paint the leaves:
Draw two or three small, pointed leaf shapes attached to the stem. Give them jagged edges to mimic the spiky texture of real holly leaves. -
Add the spines:
Use a lighter green or white mix to add a whisper-thin vein line down the center of each leaf for dimension. -
Paint the berries:
Dip the handle end of a paintbrush into red paint and gently dot three berries in a cluster where the leaves meet the stem. This ensures perfectly round berries. -
Add highlights:
Once the red berries are dry, add a microscopic dot of white to the top right of each berry to simulate a light reflection.
Step 4: Finishing Up
-
Final drying time:
Allow the entire design to dry completely for at least an hour. Acrylics on stone can take a moment to fully set. -
Seal the artwork:
Work in a well-ventilated area and spray a light coat of matte sealant over the rock. This protects the paint from chipping, especially if used as a gift tag that might get bumped.
Your charming snowflake rock is now ready to add a cozy handmade touch to your holiday wrapping


Have a question or want to share your own experience? I'd love to hear from you in the comments below!