
If you can draw a triangle and a squiggle, you can draw a Christmas tree—promise. Here are my favorite Christmas tree drawing ideas to fit every mood, from super simple to delightfully extra.
Stacked Triangles Christmas Tree


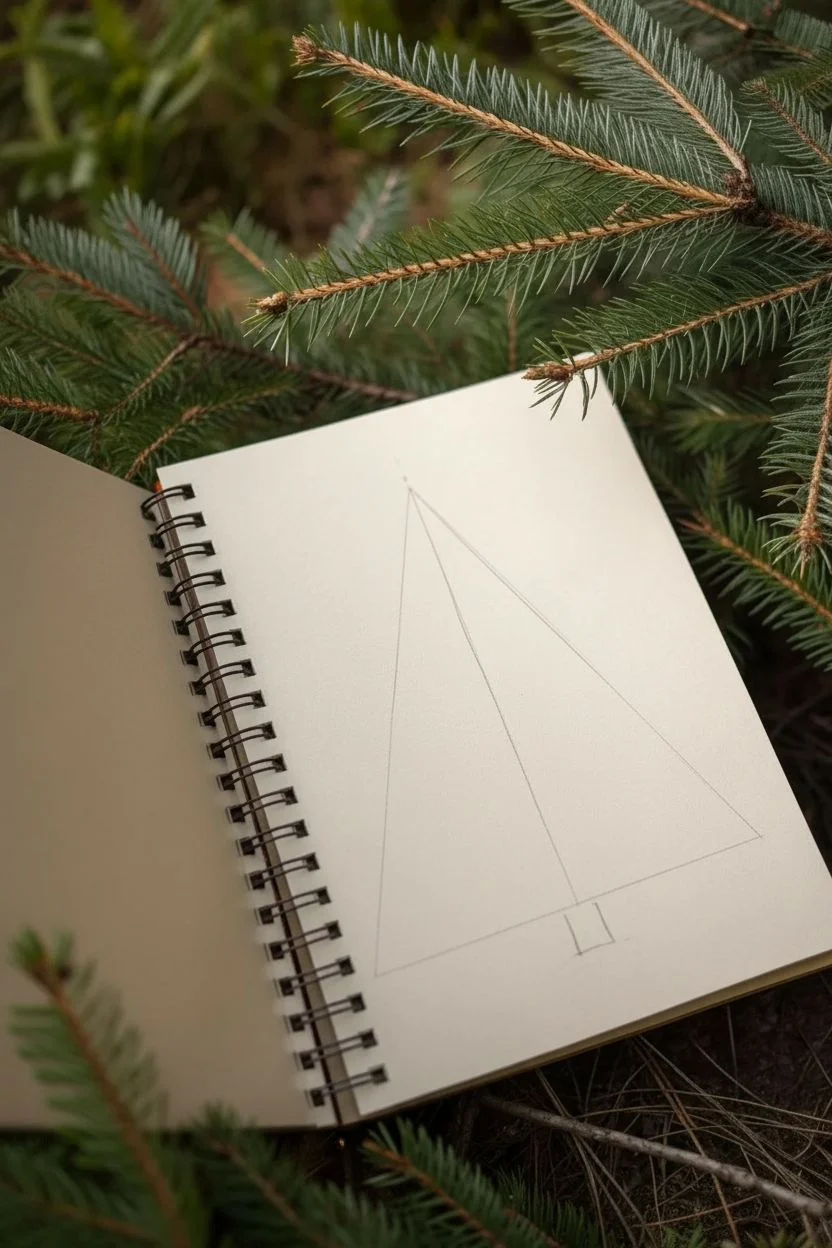
This minimalist project uses stacked triangles and clean lines to create a modern Christmas tree design inside your bullet journal or sketchbook. The result is a crisp, geometric look that breaks down a complex shape into simple, manageable components.
Detailed Instructions
Materials
- Spiral-bound notebook or bullet journal
- Fine-point black pen (0.3mm or 0.5mm)
- Ruler or straight edge
- Pencil (for sketching)
- Small eraser
Step 1: Setting the Structure
-
Draw the main vertical box:
Start by using your ruler to draw a tall, rectangular box on your page that spans about half the height of the paper. This will act as the frame for your entire tree. -
Divide the box into sections:
Measure the height of your rectangle and divide it horizontally into five equal sections. Draw straight horizontal lines across the box to separate these tiers. -
Mark the center line:
Find the exact horizontal center of your box. Make a tiny pencil mark at the top and bottom of the frame to help align your triangles perfectly later on. -
Add date labels (optional):
If you are using this as an advent tracker or calendar, you can write small numbers or dates (like ‘Sepni’, ‘S’, 4, 8, 10, 19) in the top left corner of each section, just inside the border line.
Step 2: Drawing the Base Tree
-
Sketch the top triangle:
In the highest section, draw a triangle using your ruler. The tip should touch the top border line, and the base should rest on the first horizontal divider line. -
Draw the subsequent triangles:
Repeat this process for the next three sections down. Each new triangle’s top point should touch the center of the base of the triangle above it. -
Add the star:
In the very bottom section, freehand draw a five-pointed star. It should be centered below the lowest triangle but floating slightly, not touching the lines.
Uneven Spacing?
If your sections look uneven, use dot grid paper instead of blank paper. Counting the dots makes spacing perfectly equal tiers much easier.
Step 3: Detailing the Interior Patterns
-
Bisect the top triangle:
For the top triangle, draw a single vertical line from the peak straight down to the base to split it in half. -
Create horizontal stripes:
In the second triangle down, draw a vertical center line, then fill the space with closely spaced horizontal lines. -
Draw upward chevrons:
For the third triangle, draw a vertical center line first. Then, draw diagonal lines branching upward from the center line to the outer edges, creating a vein-like pattern. -
Draw downward chevrons:
In the fourth (bottom) triangle, repeat the vein pattern but angle the lines downward this time, so they look like an inverted leaf skeleton. -
Ink the outlines:
Once you are happy with your pencil sketches, go over all your main structural lines with your black pen. Use the ruler to keep everything crisp. -
Ink the details:
Carefully trace over your internal patterns. I like to lift the pen straight up at the end of each stroke to avoid ink pooling. -
Outline the star:
Trace your star carefully. You can double-line it or make the line slightly thicker to give it visual weight at the bottom. -
Erase pencil marks:
Wait until the ink is completely dry to prevent smudging. Then, gently erase all the pencil guidelines, including your initial measurements.
Make it Shine
Use a metallic gold or silver gel pen for the star and date numbers. It adds a festive pop that contrasts beautifully with the black ink.
You now have an elegant, geometric tree ready to track your holiday countdown or simply decorate your journal page


Zigzag Edge Pine Layer Christmas Tree
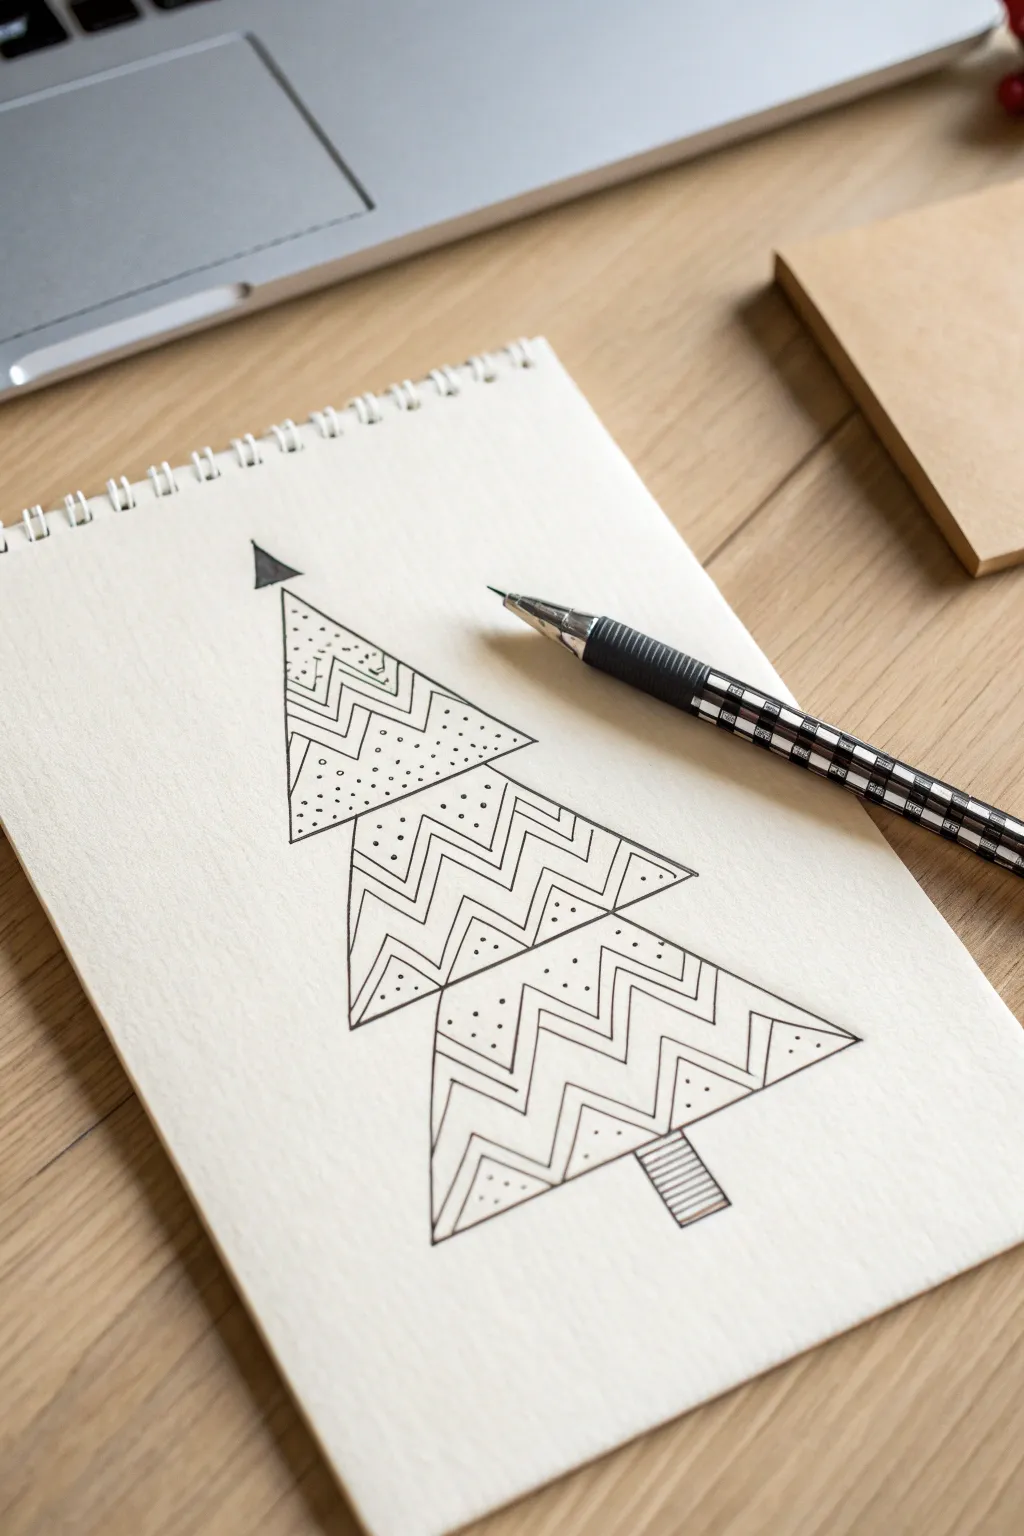

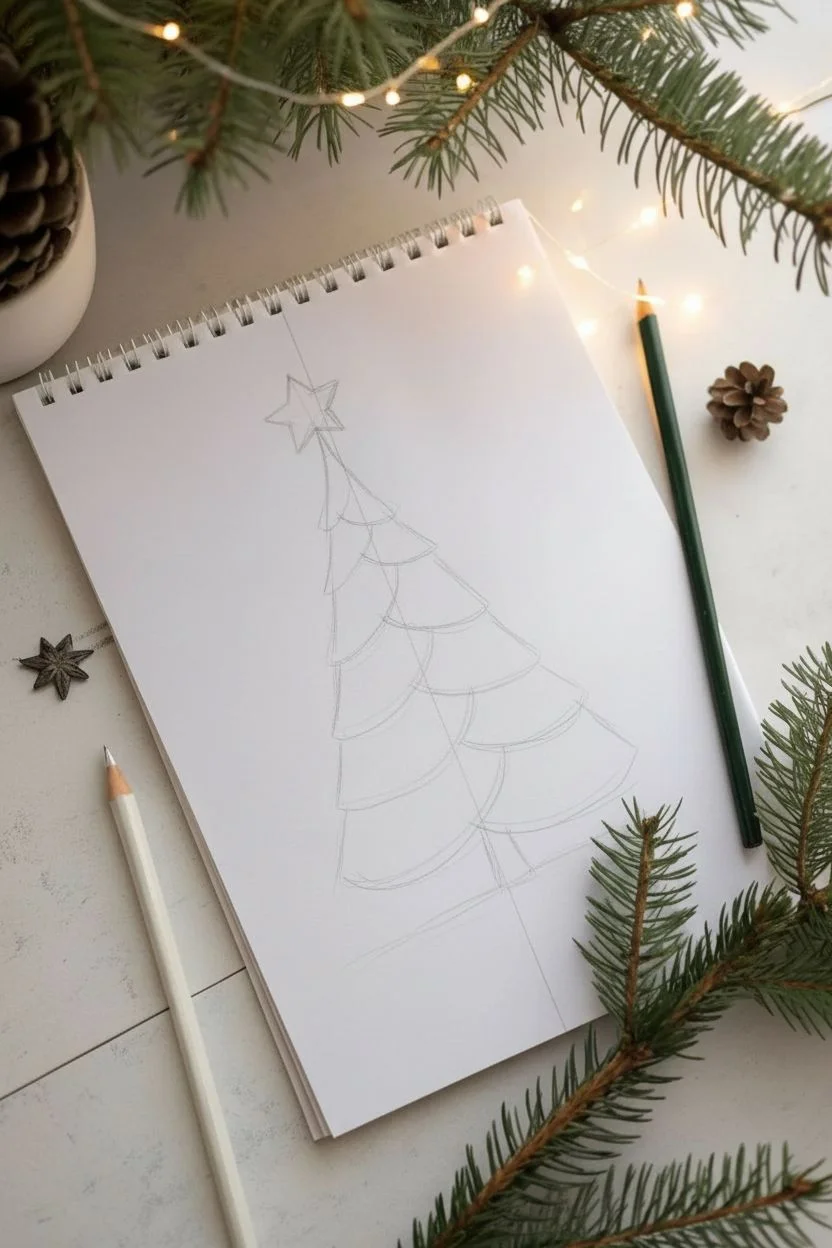
This minimalist Christmas tree design combines clean geometric shapes with playful doodling for a modern, festive look. Using just a few simple patterns, you can build layers of texture that make this simple triangular stack feel intricate and special.
How-To Guide
Materials
- Sketchbook or drawing paper (heavyweight preferred)
- Fine-liner pen (black, 0.5mm or 0.7mm)
- Pencil (HB or 2B)
- Eraser
- Ruler (optional, but helpful for crisp lines)
Step 1: Drafting the Basic Shape
-
Sketch the top layer:
Start near the top of your page. Lightly sketch a medium-sized triangle with your pencil. The base should be slightly wider than the height, giving it a stable look. -
Add the middle section:
Draw a second, slightly larger triangle below the first one. Position the top point of this new triangle so it overlaps just behind the base of the top triangle. The sides should extend further out than the top layer. -
Create the bottom tier:
Repeat the process for the third and final tier. Sketch the largest triangle at the bottom, again overlapping slightly with the section above it. -
Outline the silhouette:
Using your fine-liner pen, trace over your pencil lines to create the final outer shape. Do not trace the top points where the triangles are hidden by the layer above. You want clean, continuous lines for the visible bottom edges. -
Add the trunk and topper:
Draw a small, simple rectangle centered at the bottom for the trunk. At the very top peak of the tree, add a tiny, solid black triangle as a minimalist star. -
Erase pencil guides:
Once the ink is completely dry, gently erase the initial pencil sketches to leave a clean black-and-white outline.
Step 2: Filling in the Patterns
-
Start the zigzag pattern:
We will work section by section. In the top triangle, draw two parallel zigzag lines running horizontally across the middle. Keep the angles sharp and consistent. -
Create the central stripe:
Draw two more parallel zigzag lines just below the first set. This creates a central band of zigzags across the triangle. -
Add vertical dividers:
Inside that central zigzag band, draw short vertical lines connecting the points of the zigzags to create a geometric, striped ribbon effect. -
Repeat for all layers:
Apply this same zigzag band pattern to the middle and bottom tree tiers. Try to keep the spacing relative to the size of the triangle so the bottom ones look slightly grander. -
Texture with dots:
In the empty space above the zigzag band on the top tier, add small stippling dots. Keep them somewhat random but evenly distributed. -
Dot the lower sections:
Repeat the stippling effect in the upper empty space of the middle and bottom tiers. I find that varying the density of dots adds nice shading without needing markers. -
Detail the lower corners:
In the bottom corners of each triangle (below the zigzag band), draw a small internal triangle or chevron shape that follows the angle of the main outline. -
Finish with more dots:
Add a few final dots inside these new corner chevrons to tie the texture together with the upper sections. -
Detail the trunk:
Fill the rectangular trunk with closely spaced horizontal lines to mimic woodgrain or bark texture.
Keep it Steady
Don’t rush the zigzag lines. If you struggle with consistency, lightly pencil a top and bottom guideline for the band before inking.
Make it Pop
Try using a metallic gold or silver gel pen for the stippling dots instead of black ink to give the tree a subtle holiday shimmer.
Now you have a stylish, hand-drawn tree perfect for greeting cards or holiday gift tags


One-Line Continuous Christmas Tree

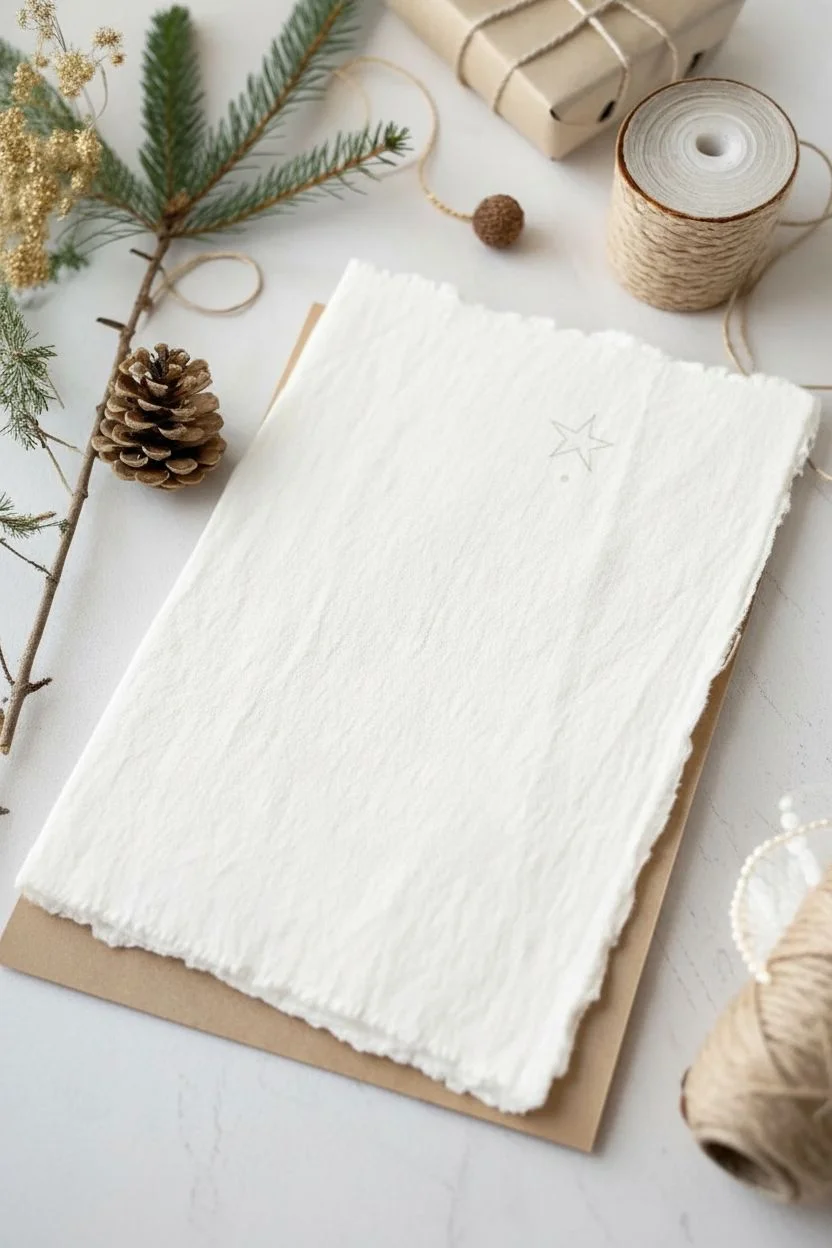
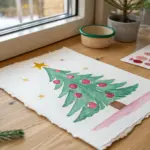
Embrace the beauty of simplicity with this minimalist greeting card design that captures the essence of a Christmas tree in one fluid motion. Using handmade paper and a fine liner, you’ll create a charmingly rustic piece where the texture of the paper does half the work for you.
Step-by-Step Guide
Materials
- White or cream handmade cotton rag paper (approx. 5×7 inches)
- Brown kraft cardstock (for backing)
- Black fine liner pen (0.5mm or 0.8mm)
- Pencil (HB or H)
- Ruler
- Paper tearing ruler or straight edge
- Double-sided tape or glue stick
- Eraser
Step 1: Preparing the Paper
-
Create the deckle edge:
If your cotton rag paper doesn’t already have rough edges, you can simulate them. Place a ruler along the edge of the paper and gently tear the paper towards you against the ruler’s edge to create that soft, fibrous look. -
Size the backing:
Cut your brown kraft cardstock to be slightly larger than your white paper. Aim for about a half-inch border all around so the brown frames the white perfectly. -
Mount the paper:
Apply double-sided tape or a thin layer of glue to the back of the textured white paper. Center it carefully on the kraft cardstock and press down firmly to secure it.
Ink Bleeding Control
Handmade paper is thristy! If your pen bleeds, switch to a pigment liner or micron pen, as they bleed less than gel or rollerball pens on fibrous surfaces.
Step 2: Planning the Tree
-
Mark the center:
Using your pencil very lightly, mark a small dot where you want the top point of the tree to be, leaving room above it for the star. -
Establish the width:
Mark two faint dots near the bottom of the card to determine how wide the base of your tree will be. This triangle visualization helps keep your loops balanced. -
Draw a faint guide line:
Sketch an extremely faint vertical line down the center. This will act as the ‘trunk’ axis to help you keep the loops symmetrical as they zigzag downwards.
Step 3: Drafting the Design
-
Practice the motion:
Before committing to the nice paper, practice the continuous loop motion on a scrap piece. You want a loose, relaxed wrist movement. -
Sketch the star:
Lightly pencil in a five-pointed star at the top. It doesn’t need to be perfect; a hand-drawn look adds character. -
Pencil the loops:
Starting just below the star, lightly sketch the zigzagging loops. Start narrow at the top and gradually widen the loops as you descend, ending with a flat line and a small triangle for the trunk.
Level Up: Gold Accents
After the black ink dries, trace just the inside of the star or only the trunk with a metallic gold gel pen for a subtle festive sparkle.
Step 4: Inking the Final Artwork
-
Ink the star:
Take your black fine liner and trace over your star sketch. Add a tiny dot or asterisk in the center of the star for a decorative touch. -
Add the floating dot:
Draw a small, single black dot between the star and the top of the tree loops. This acts as a visual connector without touching. -
Begin the tree:
Start your pen at the very top loop. Move deliberately but fairly quickly; hesitating can make the line shaky. -
Create the spiral:
Work your way down, looping back and forth. Let the lines cross over naturally in the middle axis. I find that focusing on the outer turning points helps keep the shape conical. -
Finish the shape:
On the final, widest loop at the bottom, extend the line across to the right side to close the visual triangle. -
Draw the trunk:
Without lifting the pen if possible (or reconnecting seamlessly), drop a small line down from the center bottom and form a small open triangle for the stump. -
Let it dry:
Give the ink at least 5-10 minutes to dry completely. Handmade paper is absorbent and can hold ink wetness longer than standard paper. -
Erase guidelines:
Once totally dry, gently erase your pencil marks. Be careful not to rub too hard on the textured paper surface to avoid fuzzing.
Now you have a bespoke, gallery-worthy holiday card ready for a thoughtful message


Simple Spiral Garland Christmas Tree
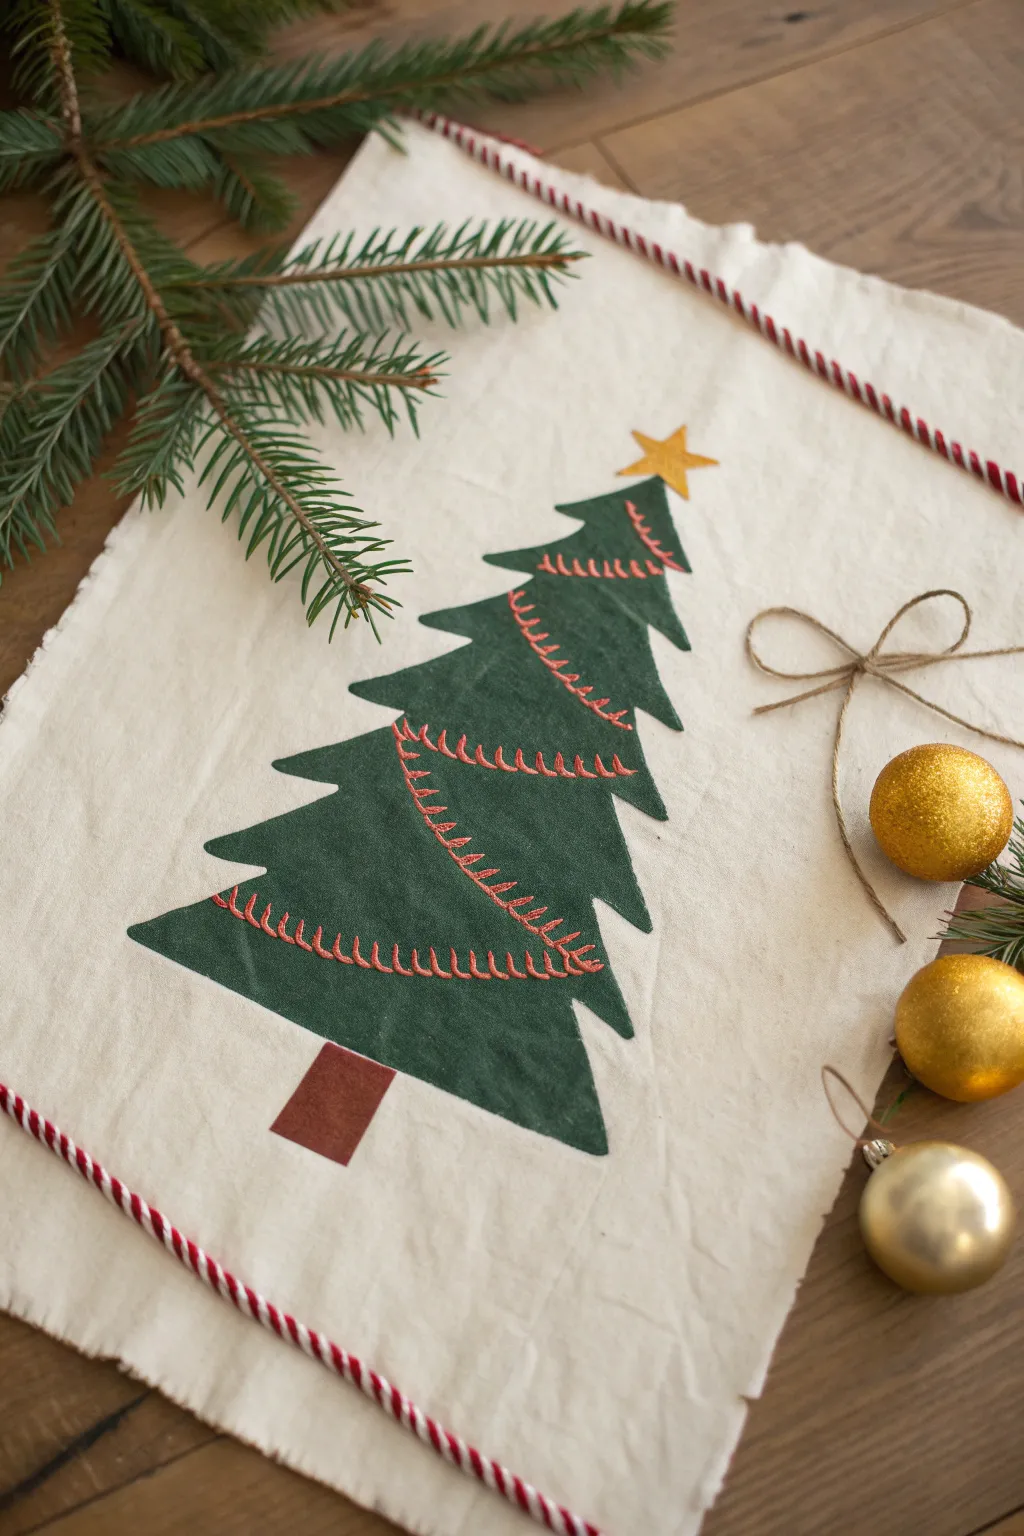
This charming project combines crisp stencil work with the texture of hand embroidery to create a rustic holiday decoration. The focal point is a stylized evergreen tree adorned with a spiral stitched garland, perfectly set on a natural fabric background.
Detailed Instructions
Materials
- Light beige canvas or linen fabric (cut to desired banner size)
- Fabric paint or acrylic paint mixed with textile medium (Forest Green, Brown, Mustard Yellow)
- Freezer paper (for stenciling) or a pre-cut acetate stencil
- Iron and ironing board
- Sponge dabber or stencil brush
- Embroidery floss (terra cotta or rust red)
- Embroidery needle
- Pencil or disappearing ink fabric pen
- X-Acto knife and cutting mat (if making your own stencil)
- Red and white baker’s twine (for finishing)
Step 1: Preparing the Design
-
Prepare the fabric:
Cut your beige canvas or linen to a rectangular shape. For a raw, rustic look like the example, you can fray the edges slightly by pulling a few threads loose on each side. Press the fabric flat with an iron to remove any creases. -
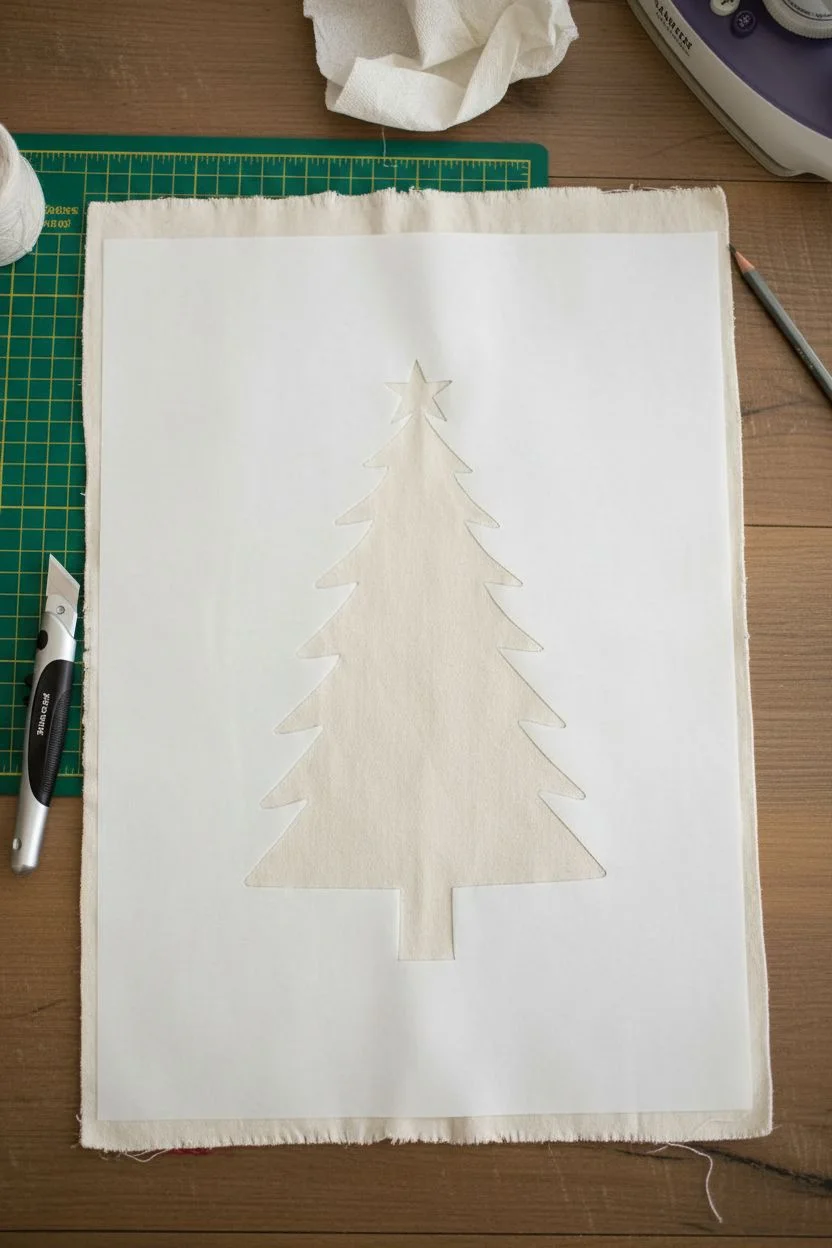
Create the stencil:
Draw or trace a simple, five-tiered Christmas tree shape onto the matte side of freezer paper. The tree should have sharp, slightly upward-curving branches. Include a small rectangle for the trunck and a five-pointed star at the very top. -
Cut the stencil:
Using an X-Acto knife on a cutting mat, carefully cut out the interior shapes (the tree body, trunk, and star), leaving the surrounding negative space intact. This will be your stencil. -
Adhere the stencil:
Place the freezer paper shiny-side down onto the fabric, centering the design. Iron over the paper on a medium heat setting (no steam). The heat will temporarily bond the plastic coating to the fabric, creating a crisp seal preventing paint bleed.
Paint Pro-Tip
For sharper lines, iron your freezer paper stencil again right before painting. Focus heavily on the edges to ensure absolutely no paint seeps under the seal.
Step 2: Painting
-
Paint the foliage:
Dip your sponge dabber into forest green fabric paint. Offload excess paint onto a paper towel—you want a ‘dry brush’ effect for crisp edges. Dab the paint straight down into the tree cutout area, ensuring solid coverage. -
Paint the trunk:
Switch to a small brush or a clean corner of your sponge and apply brown paint to the rectangular trunk area at the base. -
Add the star:
Using mustard yellow or gold paint, fill in the star shape at the apex of the tree. -
Let it dry:
Allow the paint to dry completely. Since fabric paint can be absorbed quickly, I usually give it about an hour to be safe. Once dry, carefully peel away the freezer paper stencil to reveal your crisp design. -
Heat set:
Follow your fabric paint’s instructions to heat set the design, usually by ironing the reverse side of the fabric for a few minutes.
Step 3: Embroidery Details
-
Sketch the garland:
Lightly draw a spiral line winding around the tree using a pencil or disappearing ink pen. Start near the top and swoop down diagonally across the tiers, getting wider as you go down. -
Thread the needle:
Cut a length of rust-red embroidery floss. Use all six strands for a chunky, visible texture that contrasts well with the flat paint. -
Stitch the main line:
Using a basic backstitch or stem stitch, embroider along your drawn spiral line from top to bottom. -
Add the fringe details:
To create the ‘tinsel’ or pine needle look on the garland, stitch small, simple straight stitches radiating outward from the main spiral line. Keep them short and angled slightly downward. -
Secure the back:
Once the garland is complete, knot your thread securely on the back of the fabric and trim any excess tails.
Level Up: 3D Texture
Instead of painting the star, cut a star shape from gold felt or stiff glitter fabric and glue or stitch it to the top of the tree for added dimension.
Step 4: Final Touches
-
Finish the edges:
Revisit your frayed edges if they need tidying. You can run a simple straight stitch with a sewing machine around the perimeter about 1/4 inch from the edge to stop the fraying from going too far. -
Add decoration:
Lay lengths of red and white baker’s twine alongside the banner or attach loops at the top corners if you plan to hang it vertically.
Now you have a beautifully handcrafted piece that mixes modern graphic shapes with traditional stitching warmth.
BRUSH GUIDE
The Right Brush for Every Stroke
From clean lines to bold texture — master brush choice, stroke control, and essential techniques.
Explore the Full Guide
Cartoon Droopy-Tier Christmas Tree
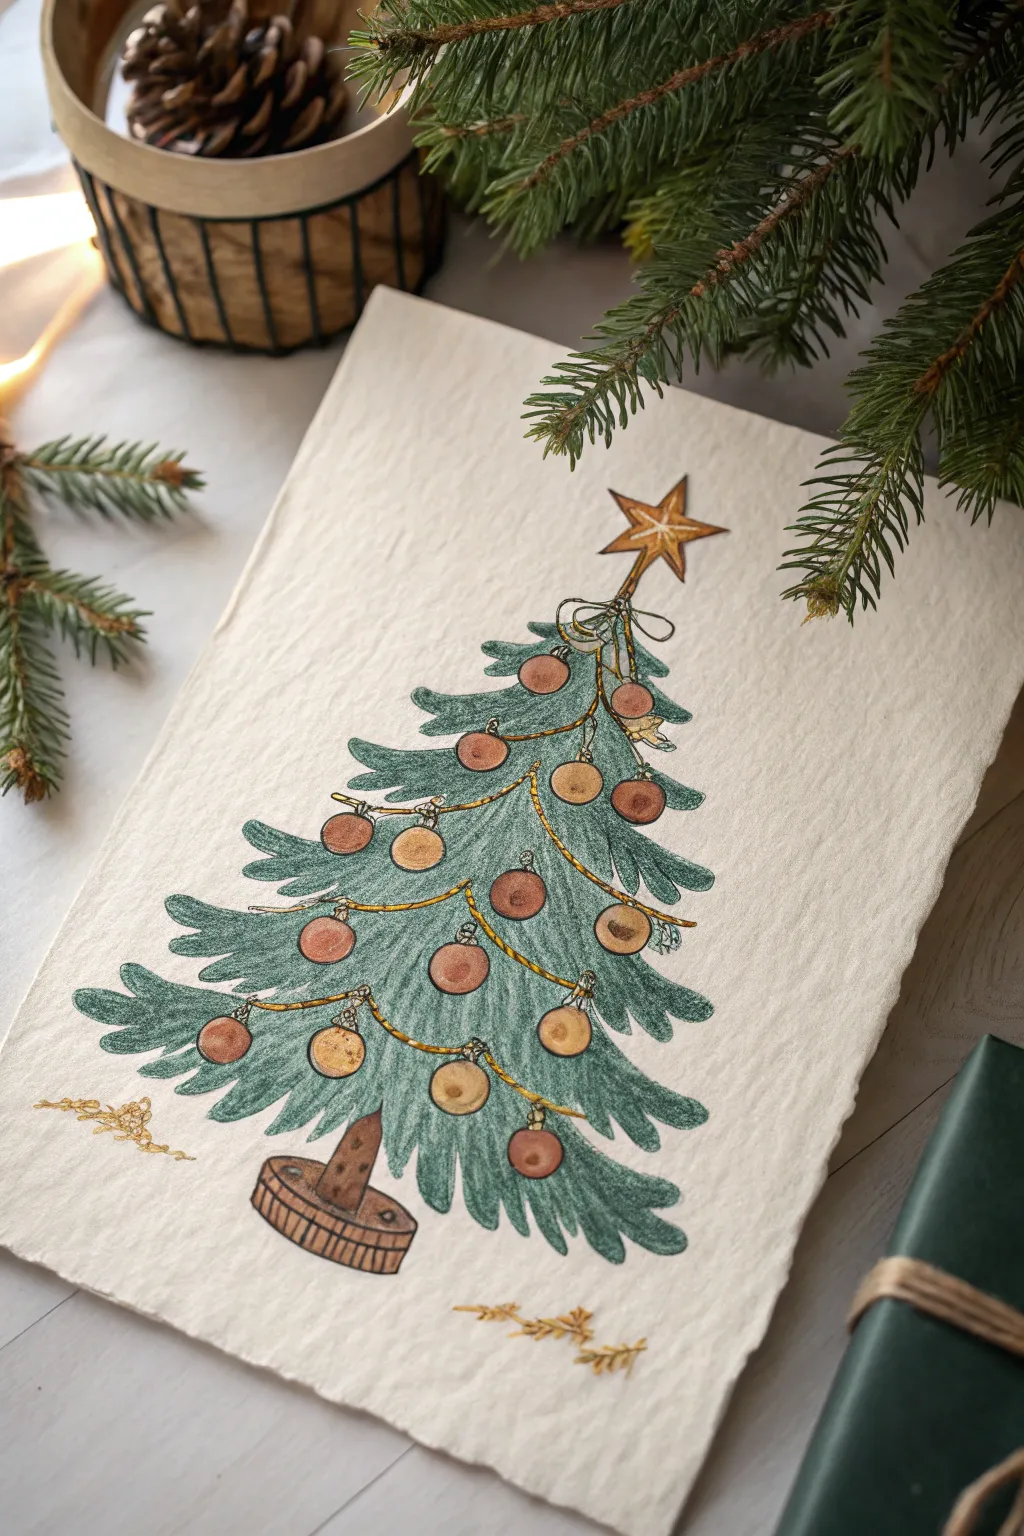
Capture the charm of a classic storybook Christmas with this elegantly whimsical tree drawing. Using a mix of ink and colored pencils on textured paper creates a warm, nostalgic feel perfect for a holiday greeting card.
Step-by-Step Guide
Materials
- Heavyweight textured paper (cold press watercolor or handmade cotton rag)
- Fine liner pen (black or sepia, waterproof)
- Colored pencils (various shades of green, brown, dull red, ochre)
- Gold gel pen or metallic gold paint marker
- Graphite pencil (HB) and eraser
Step 1: Planning the Structure
-
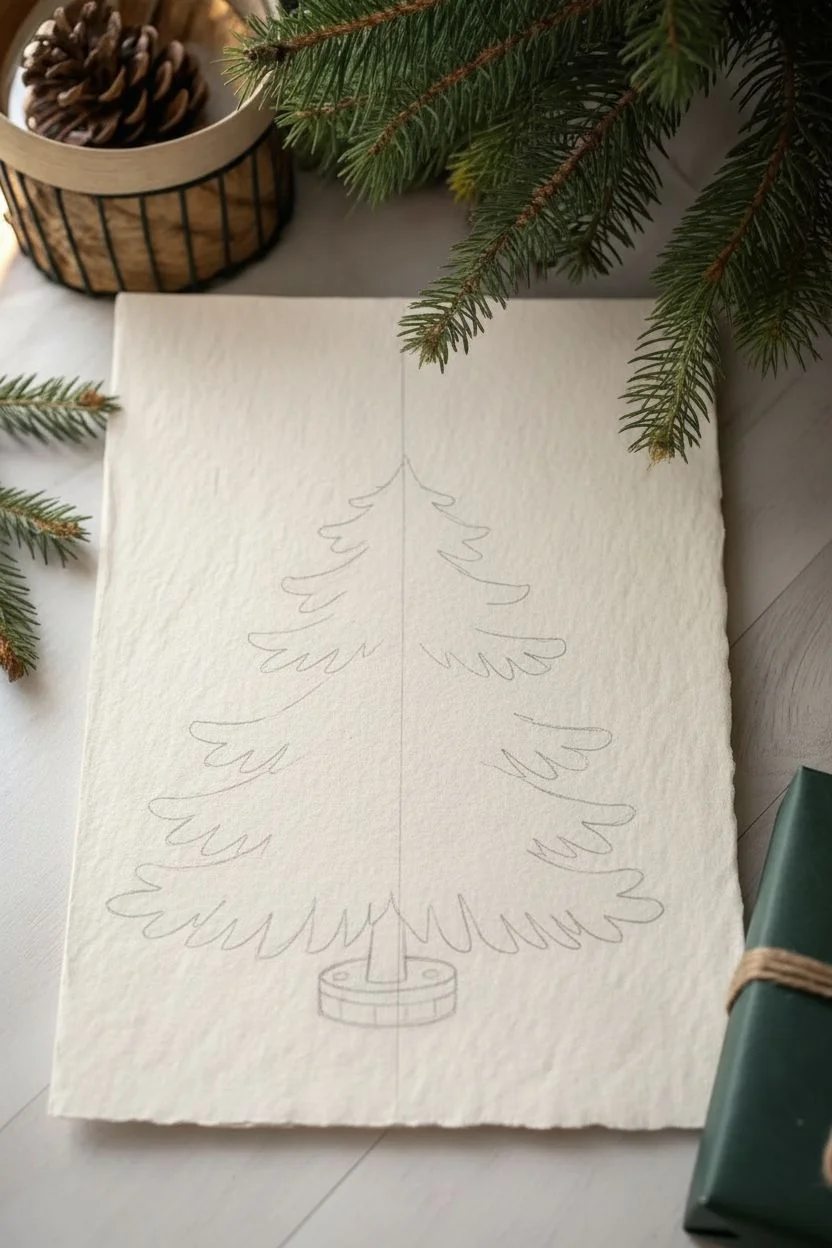
Establish the centerline:
Begin by lightly drawing a faint vertical line down the center of your paper. This will serve as the spine of your tree to keep it balanced but not perfectly symmetrical. -
Draft the tiers:
Sketch the triangular shape of the tree using loose, sweeping curves. Instead of straight lines, let the tiers droop downwards slightly at the ends, giving it that heavy, lustrous evergreen look. -
Add the base:
At the bottom, sketch a simple oval-shaped basket or wooden stand. It should look like a shallow tub that holds the trunk securely.
Step 2: Inking the Outline
-
Refine the branches:
Using your fine liner, go over your pencil sketches. Create jagged, feathery strokes for the tips of the branches to simulate pine needles. Don’t close every shape perfecty; gaps make it look organic. -
Draw the ornaments:
Intersperse circles of varying sizes throughout the branches. Place some ‘sitting’ on the foliage and others tucking slightly behind, varying their size for visual interest. -
Add the topper and extras:
Draw a multi-pointed star at the very top. From the top tiers, sketch thin, draping lines to represent garlands or ribbons cascading down the tree. -
Clean up:
Once the ink is completely dry, gently erase the graphite guidelines, being careful not to rough up the paper texture.
Uneven Tiers?
Don’t panic! Real trees aren’t perfect. If one side looks too heavy, add a large ornament or a swooping garland to the lighter side to visually balance the weight without redrawing.
Step 3: Adding Color & Texture
-
Base green layer:
Take a medium sage green colored pencil and fill in the branches. Use directional strokes that follow the droop of the branches rather than just coloring in circles. -
Deepen the shadows:
Layer a darker hunter green or a cool teal under each tier and near the trunk. This creates depth and makes the lighter outer branches pop forward. -
Color the ornaments:
Fill in the baubles with muted reds, terracottas, and ochres. I like to leave a tiny sliver of white paper uncolored on the top left of each circle to act as a highlight. -
Detail the wood:
Color the trunk and the basket base with varying browns. Use heavier pressure on the sides of the basket to show its roundness.
Paper Choice Matters
Use textured paper like cold-press watercolor or handmade cotton rag. The ‘tooth’ of the paper catches the pencil pigment unevenly for a vintage, grainy look.
Step 4: Metallic Accents
-
Gild the star:
Use your gold gel pen or paint marker to carefully fill in the star topper. -
Trace the garlands:
Go over the ribbon lines you sketched earlier with the gold pen. Allow the line to break occasionally where it might be hidden by needles. -
Add ornament caps:
Draw tiny gold squares or loops at the top of each ornament where it connects to the branch. -
Final foliage sparkle:
add very sparse, tiny dots or flicks of gold on the tips of the darkest green areas to simulate light catching the needles.
Step back and admire your charming, handcrafted holiday illustration
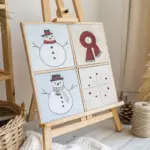
Kawaii Christmas Tree With a Face
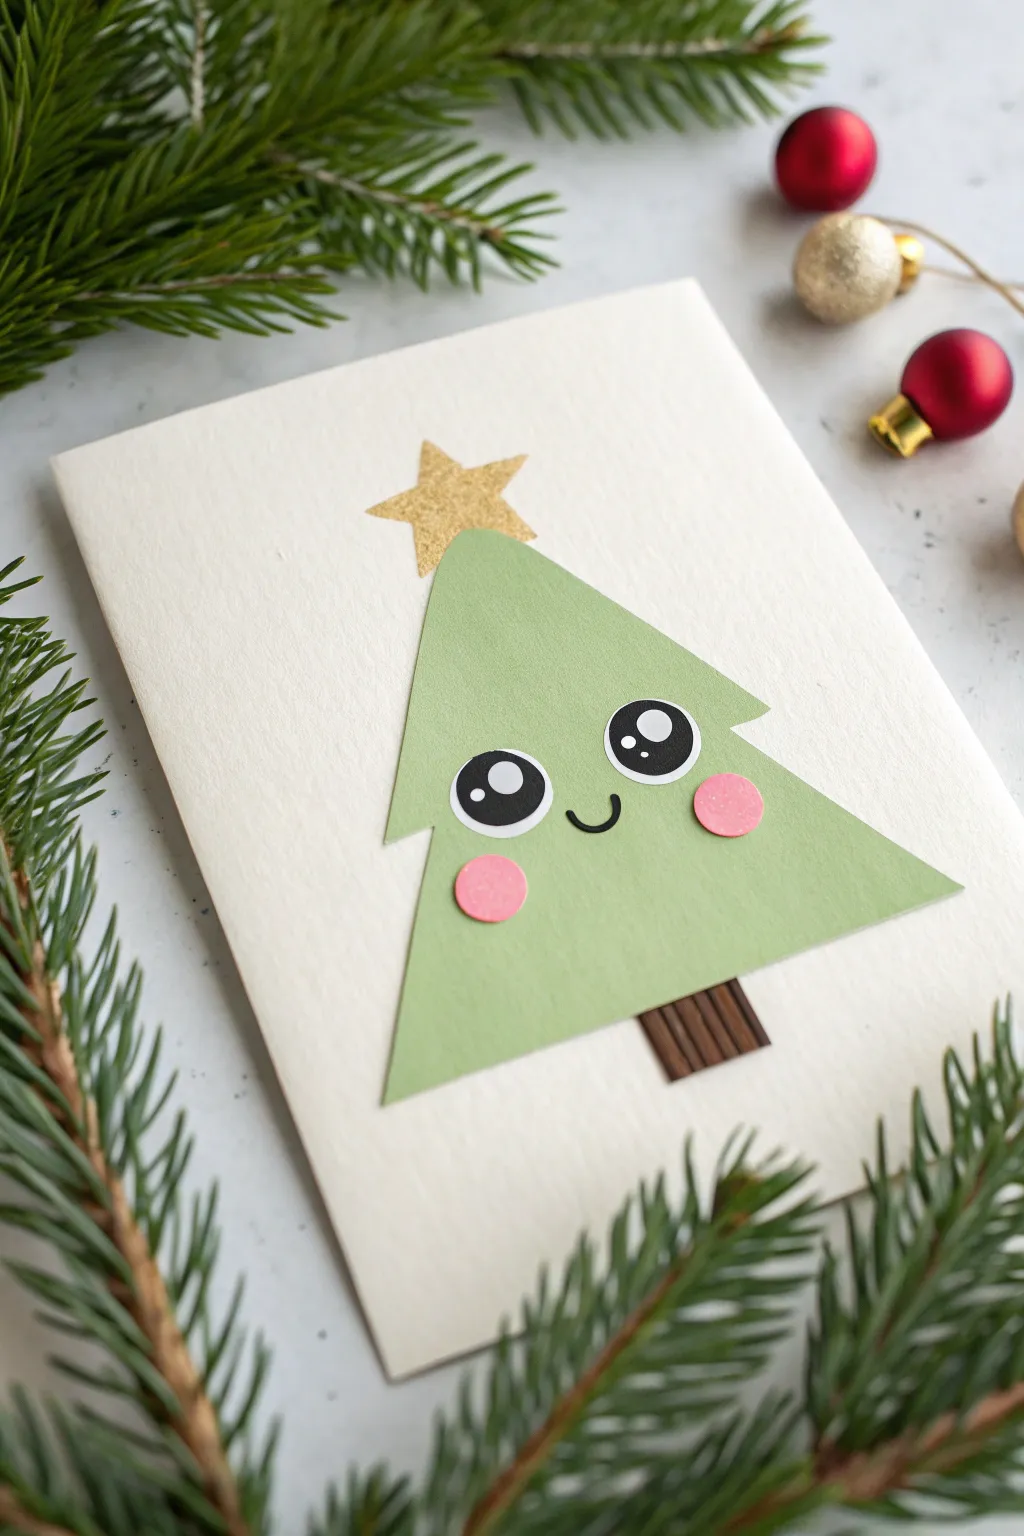
This adorable handmade card features a simple paper-pieced Christmas tree brought to life with a sweet kawaii expression. Using basic layering techniques and cut paper shapes, you can create a charming holiday greeting that feels personal and playful.
Step-by-Step Tutorial
Materials
- Cream or off-white cardstock (A5 folded to A6)
- Light sage green construction paper
- Gold glitter cardstock or paper
- Dark brown cardstock
- Pink construction paper or cardstock
- Black cardstock
- White gel pen or small white paper circles
- Glue stick or double-sided tape
- Scissors
Step 1: Preparing the Base
-
Fold the card base:
Take your cream cardstock sheet and fold it neatly in half to create your card base. Use a bone folder or the back of your fingernail to crease the fold sharply so the card lays flat. -
Cut the main tree shape:
From the sage green paper, cut a simple triangle. For the classic tree look, I like to cut slight jagged notches near the bottom corners to simulate boughs, giving it a stylized pine tree silhouette rather than a perfect geometric triangle.
Step 2: Creating the Face Features
-
Make the eyes:
Cut two medium-sized circles from black cardstock. You can trace a small coin or button to get them perfectly round. -
Add the eye highlights:
To get that sparkling kawaii look, glue two smaller white circles inside each black eye circle—one medium white circle near the top right, and a tiny dot near the bottom left. Alternatively, use a white gel pen to draw these highlights directly onto the black paper. -
Cut the rosy cheeks:
Using the pink paper, cut two small circles. These should be roughly the same size as the completed eye circles to balance the face. -
Create the mouth:
Cut a very thin, small ‘U’ shape from black cardstock for the smile. If cutting such a tiny piece is tricky, you can draw this directly onto the green paper later with a black marker.
Sticky Glue Mess?
If a little glue oozes out from under the paper shapes, let it dry completely until it turns rubbed, then gently rub it away with a clean eraser or your finger.
Step 3: Cutting the Accessories
-
Shape the star:
Cut a classic five-point star from the gold glitter paper. Keep the points slightly rounded for a softer, cuter appearance that matches the kawaii style. -
Prepare the trunk:
Cut a small rectangle from the dark brown cardstock. To add texture simulating wood grain, draw subtle vertical lines on it with a darker brown marker or pen.
Make It 3D
Instead of gluing the tree flat, use foam adhesive squares to mount the green tree shape. This lifts it off the card slightly, adding a fun shadow and pop-up effect.
Step 4: Assembly
-
Attach the trunk:
Glue the brown rectangle to the bottom center of your card front. Position it so that the top edge will be hidden under the green tree. -
Mount the tree:
Apply glue to the back of your green tree shape. Center it on the card, slightly overlapping the top of the brown trunk, and press it down firmly. -
Position the eyes:
Place the two eye circles on the upper middle section of the tree. Don’t glue them yet—adjust their spacing until the expression looks cute. -
Glue the face:
Once happy with the placement, glue down the eyes. Position the little pink cheeks just below and slightly outside the eyes. Finally, place the tiny smile right in the center between the eyes. -
Top with the star:
Glue your gold glitter star to the very peak of the green tree, slightly overlapping the tip so it looks balanced. -
Final press:
Place a heavy book over the finished card for a few minutes. This ensures all the layers adhere flat and prevents the paper shapes from curling at the edges.
Now you have a charming card ready to spread some festive cheer

PENCIL GUIDE
Understanding Pencil Grades from H to B
From first sketch to finished drawing — learn pencil grades, line control, and shading techniques.
Explore the Full Guide
Classic Christmas Tree With Ornaments and Lights

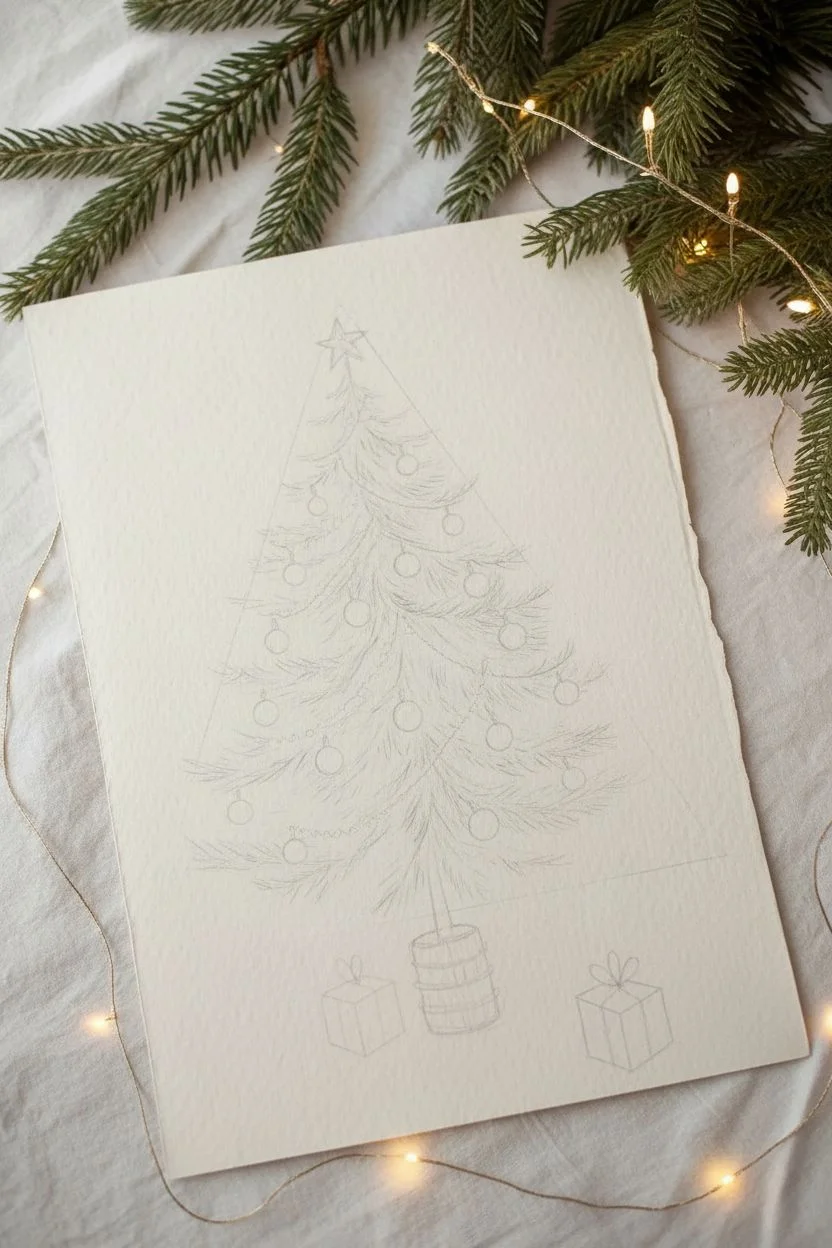
Capture the magic of the holidays with this delicate watercolor and pencil illustration of a classic decorated fir tree. The soft greenery, vibrant red ornaments, and charming hand-drawn details create a nostalgic feeling perfect for custom holiday cards or framed seasonal decor.
How-To Guide
Materials
- Cold press watercolor paper (with deckled edge optional)
- Watercolor paints (Sap Green, Hooker’s Green, Alizarin Crimson, Burnt Umber, Yellow Ochre)
- Colored pencils (Dark Green, Red, Brown, metallic Gold)
- Round watercolor brushes (Size 2 and 6)
- HB Pencil for sketching
- Kneaded eraser
- Fine tip gold paint pen or metallic watercolor
- Cup of water and paper towels
Step 1: Sketching the Composition
-
Outline the tree shape:
Begin by lightly sketching a tall, isosceles triangle in the center of your paper to guide the tree’s height and width. This won’t be visible later, so keep your pencil pressure extremely light. -
Define the branches:
Drawing inside your triangular guide, sketch the jagged, sweeping tiers of the evergreen branches. Start from the top point and work downwards, making the branches wider and slightly more droopy as you reach the bottom. -
Add the trunk and basket:
Draw a thin trunk extending from the bottom foliage into a tapered cylindrical shape for the woven basket stand. Sketch horizontal curved lines across the basket to indicate the wicker texture. -
Sketch ornaments and gifts:
Scatter small circles throughout the branches for the ornaments. I find it helps to place them randomly rather than in perfect rows. Below the tree, sketch two simple cube shapes with bows to represent the wrapped gifts. -
Refine and lighten:
Add a star at the very top. Once satisfied with the layout, gently roll your kneaded eraser over the entire sketch to lift most of the graphite, leaving only faint guidelines for painting.
Step 2: Layering Watercolor Washes
-
First green wash:
Mix a watery pale green using Sap Green and plenty of water. With your size 6 brush, fill in the branch shapes loosely. Don’t worry about individual needles yet; just block in the color and shape. -
Basket base:
Paint the basket stand with a light wash of Burnt Umber. While it’s still slightly damp, drop in a slightly darker brown along the sides to create a rounded, 3D effect. -
Creating the ornaments:
Using a small size 2 brush, carefully fill in the circular ornaments with Alizarin Crimson. Leave a tiny speck of white paper unpainted on the upper left of each sphere to act as a highlight. -
Painting the gifts:
Wash the gift boxes in a very pale, diluted red or dusty pink. Let the paint pool slightly at the bottom of the boxes for natural shading. -
Gold accents:
Paint the star and the ribbons on the gifts with Yellow Ochre. Allow the entire painting to dry completely before moving to the next step.
Needle Direction
Always draw your pencil needles growing outward from the center branch stem. Vary the length of your strokes to make the foliage look natural.
Step 3: Adding Texture and Detail
-
Define pine needles:
Using a sharpened dark green colored pencil, draw short, flicking strokes over your green watercolor base. Follow the direction of the branches, layering these strokes to create the texture of pine needles. -
Deepen the shadows:
Concentrate your colored pencil strokes near the center of the tree and under each branch tier. This added darkness creates depth and volume. -
Refine the ornaments:
Take a red colored pencil and shade the right and bottom edges of each red ornament to enhance their roundness. Draw a tiny hook loop at the top of each bulb with a fine black pen or dark pencil. -
Detail the basket:
Use a dark brown pencil to outline the woven slats of the basket stand, emphasizing the horizontal bands and the vertical trunk. -
Gift wrapping details:
Outline the gift boxes with a brownish-red pencil and draw the loops of the bows to give them definition.
Snowy Tips
For a winter wonderland effect, use white gouache or a white gel pen to add small touches of ‘snow’ on the tops of the branches and the ornament tops.
Step 4: Final Sparkle
-
Adding the garland:
Load a fine brush with metallic gold watercolor or shake your gold paint pen. Draw draped, scalloped lines connecting across the tree branches to create the tinsel garland. -
Enhance the star:
Outline and fill the star at the top with the same gold metallic medium, giving it a solid shine that catches the light. -
Stipple effect:
For extra texture on the garland, I like to gently stipple small dots along the gold lines rather of drawing a straight stroke. This mimics the fuzzy look of tinsel. -
Final assessment:
Step back and check your contrast. If the tree looks too flat, add a few more dark green pencil strokes in the deepest recesses of the branches.
Now you have a charming, handcrafted holiday illustration ready to be gifted or displayed
Christmas Tree Branch Texture With Short Strokes
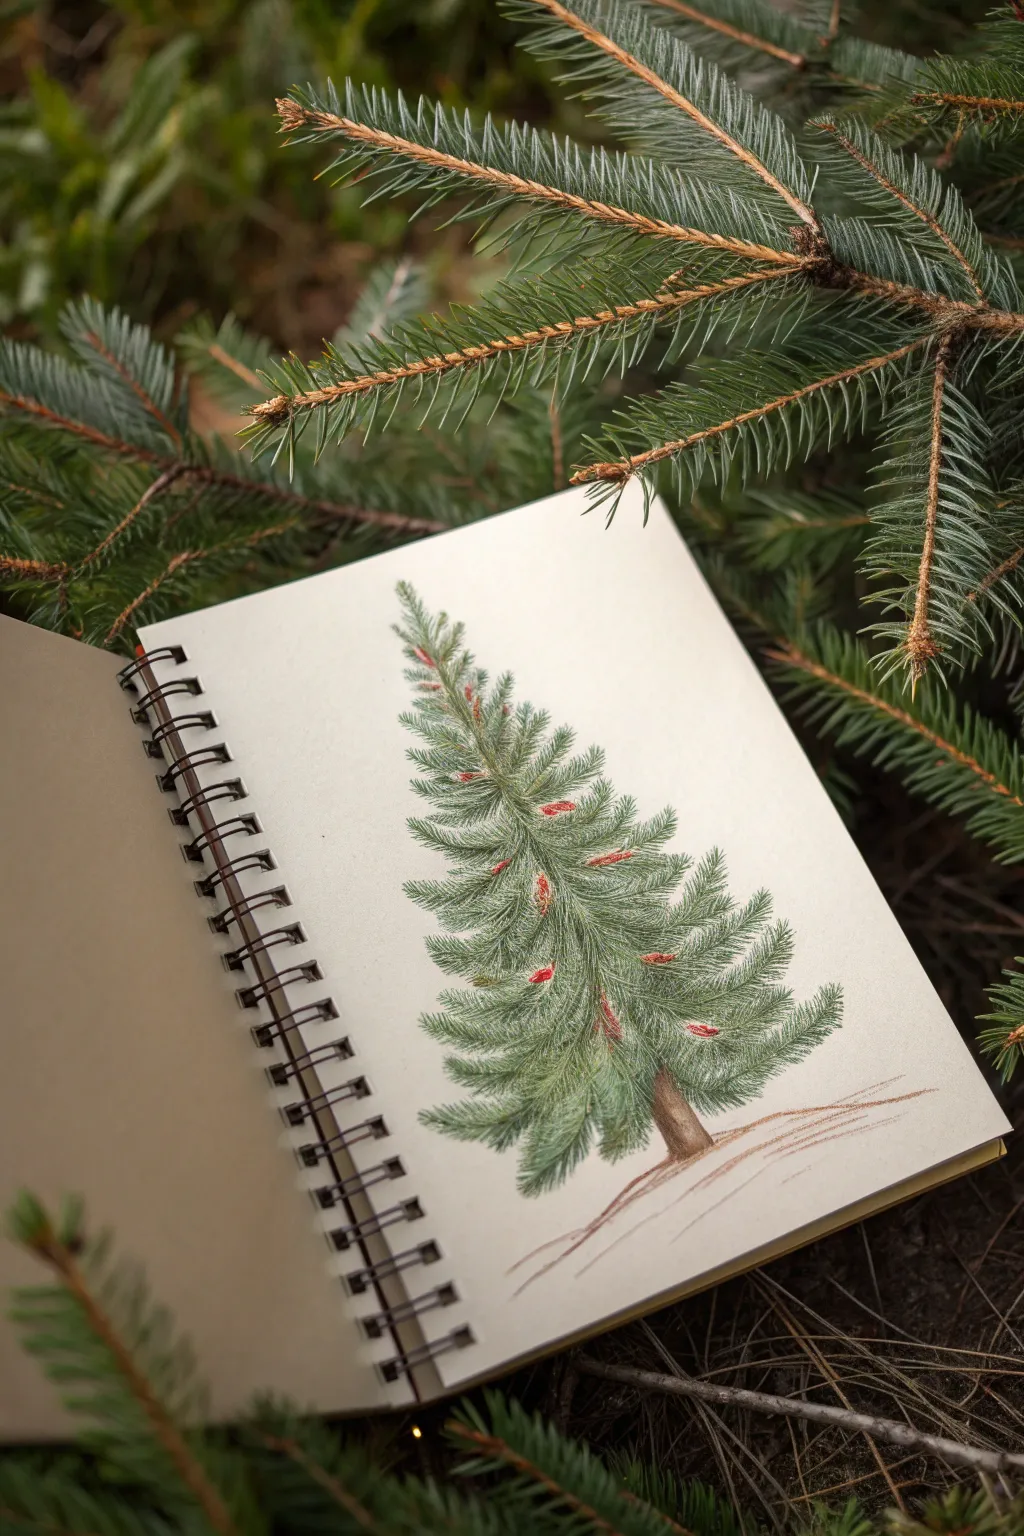
Capture the delicate texture of evergreen needles with this colored pencil study in your sketchbook. By layering short, directional strokes, you can build up a realistic branch structure that feels organic and full of life.
Step-by-Step
Materials
- Spiral-bound sketchbook (cream or toned paper works best)
- Colored pencils (Forest Green, Olive Green, Dark Brown, Red or Burnt Sienna)
- Fine liner or graphite pencil for initial sketching
- Pencil sharpener
- Eraser
Step 1: Constructing the Framework
-
Mark the height:
Begin by lightly marking the top and bottom of your tree on the page with a graphite pencil to establish the overall height. -
Draw the trunk line:
Sketch a faint, slightly curved vertical line to serve as the central trunk. It doesn’t need to be perfectly straight; a little curve adds character. -
Map the branch shape:
Lightly outline the triangular shape of the tree. The bottom should be widest, tapering gently to a point at the top. -
Base the trunk:
Draw the visible base of the trunk at the bottom, making it slightly thicker than the rest of the center line.
Needles Looking Flat?
Ensure your pencil is extremely sharp. Dull points make heavy lines. Rotate your pencil every few strokes to keep a fresh edge for crisp, needle-like marks.
Step 2: Building Texture
-
Start the needle texture:
Using a sharp Forest Green pencil, begin at the top of the tree. Draw short, flicking strokes that angle downward and outward from the center stem. -
Layer top branches:
Continue working down, creating small clusters of needles. Keep these strokes very short and dense near the top of the tree. -
Directional variance:
As you move lower, vary the direction of your strokes. Some should point slightly up, but most should drape downward to mimic the weight of spruce branches. -
Add lighter tones:
Switch to an Olive Green pencil. Add a layer of strokes over and between your darker green marks to create highlights and dimension. -
Preserve the center:
Leave the very center line slightly visible or less dense to suggest the main trunk running through the foliage.
Snowy Effect
Use a white gel pen or opaque white gouache to add tiny dots or lines on the tops of the branches. This creates a fresh, snowy dusting look.
Step 3: Deepening Shadows and Details
-
Darken the depths:
Go back in with your darkest green or even a touch of dark blue-green. Apply pressure in the areas where branches meet the trunk to create deep shadows. -
Define branch tiers:
Use the dark green to subtly separate distinct layers or ‘tiers’ of branches, ensuring the tree isn’t just one solid block of green. -
Color the trunk:
Fill in the exposed base of the trunk with Dark Brown. use vertical strokes to simulate bark texture. -
Ground the tree:
I like to add a few loose, horizontal brown lines extending from the base of the trunk to suggest the ground, rather than having the tree float in space. -
Add red accents:
Take a Red or Burnt Sienna pencil and add small, oblong shapes scattered throughout the branches. These represent small pinecones or winter berries. -
Blend the accents:
Lightly go over the bottom edge of these red shapes with a dark brown to give them volume so they sit naturally within the greenery. -
Final foliage fluff:
Assess the overall shape. Add a few loose green strokes extending past the main outline to give the tree a soft, feathery edge.
Close your sketchbook knowing you’ve preserved a little piece of winter forest forever


Pencil-Shaded Christmas Tree in Monochrome

Master the art of texture with this elegant pencil-shaded Christmas tree, which feels both voluminous and delicate. By using simple layering techniques and controlled shading, you’ll build a realistic conifer shape topped with a glowing star.
Step-by-Step Tutorial
Materials
- Spiral-bound sketchbook or drawing paper
- H or HB pencil (for initial sketching)
- 2B or 4B pencil (for deeper shading)
- White colored pencil or white charcoal (optional, for highlights)
- Blending stump or tortilla (optional)
- Kneaded eraser
- Pencil sharpener
Step 1: Laying the Foundation
-
Establish the centerline:
Start by lightly drawing a vertical line down the center of your page to guide the tree’s symmetry. Keep this line faint so it can be easily erased later. -
Outline the basic shape:
Sketch a tall, narrow triangle around your centerline to define the overall width and height of the tree. The base should curve slightly downward to suggest volume. -
Position the tiers:
Lightly mark horizontal curved lines across the triangle where each layer of branches will sit. Aim for about 5-6 distinct tiers, getting progressively wider toward the bottom. -
Sketch the star:
Draw a five-pointed star at the very peak. Give it a 3D effect by drawing lines from the center of the star out to the tips and the inner valleys, creating facets.
Smudgy Paper?
Place a scrap piece of paper under your drawing hand as you work. This prevents oils from your skin transferring and stops you from accidentally smearing your pencil work.
Step 2: Building the Branches
-
Define the top tier:
Starting just under the star, sketch the outline of the first cone-like branch cluster. Use jagged, slightly irregular lines for the bottom edge to mimic pine needles. -
Work your way down:
Continue drawing the outlines of each tier, letting the one above overlap the one below. The edges should flair out slightly like a skirt. -
Add the trunk:
At the very bottom, draw a short, sturdy trunk. Keep the edges distinct but slightly textured to resemble bark. -
Erase guidelines:
Gently erase your initial vertical centerline and the rigid triangle guide, leaving only your tier outlines.
Make It Snow
Use a white gel pen or opaque white paint to add tiny dots on the tips of the branches or falling in the background for a snowy, winter wonderland effect.
Step 3: Shading and Texturing
-
Shade the star:
Fill in the facets of the star using varied pressure. Shade one side of each point darker than the other to make it look faceted and three-dimensional. -
Start the needle texture:
Using a sharper pencil, draw tiny, quick vertical dashes along the bottom edge of each tier. This ‘fringing’ effect creates the look of specific pine needles. -
Deepen the shadows:
I like to focus heavily on the areas where the tiers overlap. Shade firmly underneath the ‘skirt’ of each tier to create depth, making the layer above pop forward. -
Add volume shading:
Lightly shade the curved body of each tier. Keep the center area lighter to act as a highlight, and darken the sides to enhance the conical roundness. -
Roughen the edges:
Go back over the main outlines and add small, scribbly marks. You don’t want smooth lines; make them look organic and fuzzy like real foliage.
Step 4: Final Touches
-
Shade the trunk:
Fill in the trunk with vertical strokes, darker on the sides and lighter in the middle to show its cylindrical shape. -
Create a ground shadow:
Add a soft cast shadow on the ground extending to the right, anchoring the tree to the surface so it isn’t floating. -
Enhance highlights:
If you have a white pencil, lightly stroke over the lightest central parts of the tiers to boost the contrast against the grey shadows. -
Final contrast check:
Step back and see if your darks are dark enough. Reinforce the shadow directly under the lowest branches for maximum pop.
Now you have a timeless holiday illustration perfect for greeting cards or framed decor
Marker-Style Bold Outline Christmas Tree


This cheerful marker illustration features bold, comic-book-style outlines and vibrant blocks of color, making it a perfect beginner project for practicing line confidence. The jagged, stylized branches give the holiday classic a playful and energetic look that pops right off the page.
Step-by-Step Guide
Materials
- White sketchbook paper (smooth surface ideal for markers)
- Black fine-liner pen or thin marker (0.5mm – 0.8mm)
- Black chisel-tip or thick brush marker (for outer lines)
- Green alcohol marker (light/mint shade)
- Yellow alcohol marker
- Red alcohol marker
- Pink alcohol marker
- Brown alcohol marker
- Pencil and eraser
Step 1: Sketching the Framework
-
Light pencil guide:
Begin by lightly sketching a large triangle in the center of your page to define the tree’s height and width. This will ensure your drawing stays centered and doesn’t run off the paper. -
Add the star:
At the very top point of your triangle, sketch a classic five-pointed star. It doesn’t need to be geometrically perfect; a slightly asymmetrical hand-drawn look adds character. -
Outlining the tiers:
Divide your triangle into four distinct sections or ‘tiers’ using swooping, curved lines. These lines should dip in the middle and curve upwards at the ends, like a shallow letter ‘U’. -
Adding texture:
Along the bottom edge of each tier, sketch a series of jagged, zig-zag lines to represent pine needles. Make the points sharp and varied in size for a natural cartoon effect. -
The trunk:
Draw a simple rectangular trunk peeking out from beneath the bottom tier.
Bleeding Lines?
If your black ink smudges when coloring over it, ensure your outline is fully dry. Alternatively, do the coloring phase first, let it dry, and add the black outlines last.
Step 2: Inking the Details
-
Ornaments placement:
Scatter circles randomly across the tiers of the tree. I like to vary the positions slightly so they don’t look like they are in perfect rows. -
Ornament caps:
Add tiny squares or rectangles on top of each circle to serve as the ornament caps/hangers. -
Initial outline:
Take your thinner black marker (fine-liner) and trace over all your pencil lines. Go slowly to maintain steady lines, especially around the jagged edges of the branches. -
Erase pencil marks:
Wait about a minute for the ink to fully dry, then gently erase all the underlying pencil sketches so the drawing is clean.
Step 3: Adding Color
-
Coloring the greens:
Use your light green marker to fill in the body of the tree. Use long, vertical strokes that mimic the direction of pine needles to keep the texture consistent. -
Filling the ornaments:
Color in the ornaments using alternating red, pink, and yellow markers. Be careful to stay inside the circles. -
Star and trunk:
Color the star bright yellow and the trunk a solid medium brown. If you want a bit of depth, go over the sides of the trunk a second time to darken them slightly.
Add Sparkle
Once the marker ink is dry, use a white gel pen to add tiny highlights on the ornaments and the star for a glossy reflection effect.
Step 4: Bold Final Touches
-
Thickening the perimeter:
Switch to your thicker black marker or chisel tip. Carefully re-trace ONLY the outer silhouette of the entire tree. This varying line weight is key to the sticker-style pop. -
Internal definitions:
Go back to your thinner pen and add small ‘hooks’ or lines inside the ornament colors to simulate a shiny reflection. -
Grounding line:
Draw a thick horizontal line underneath the trunk to ground the object so it doesn’t look like it’s floating.
Now you have a bold, graphic Christmas tree illustration that looks professionally drawn
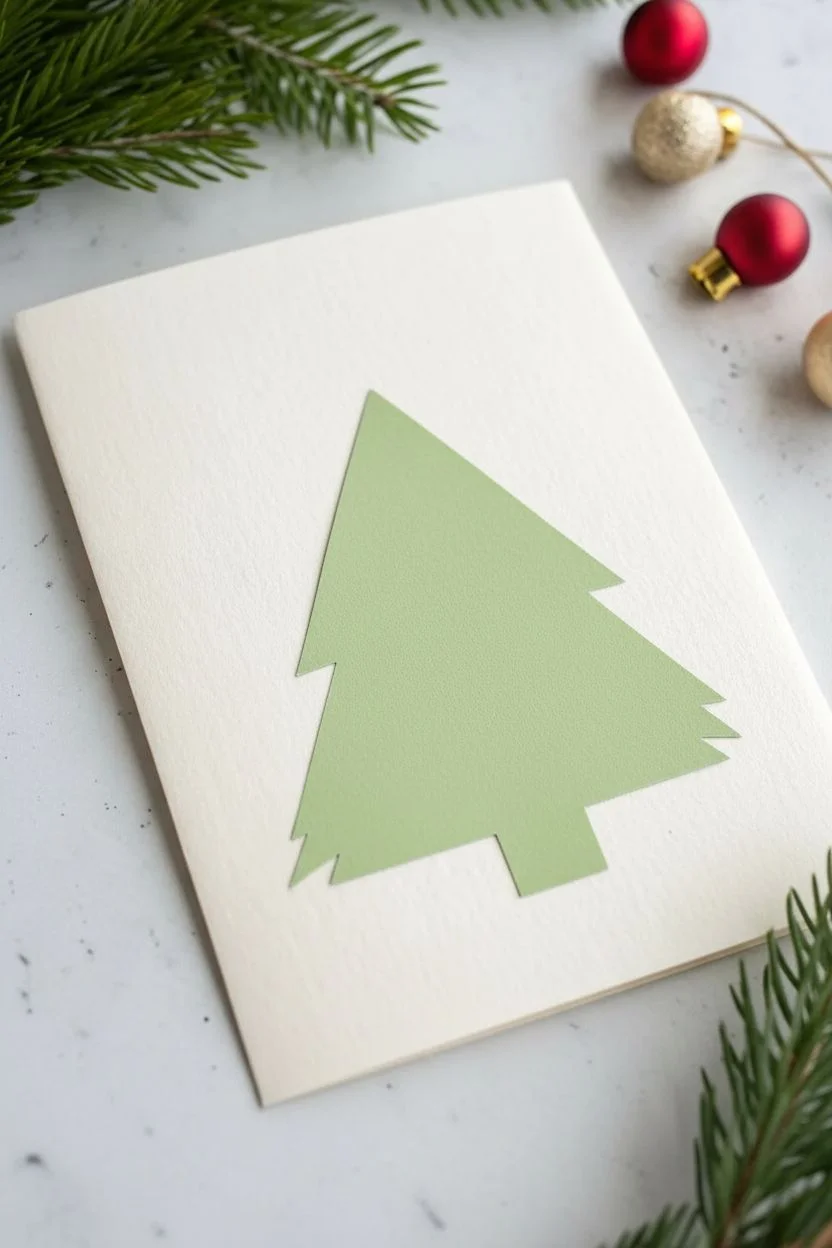
Negative Space Christmas Tree Silhouette
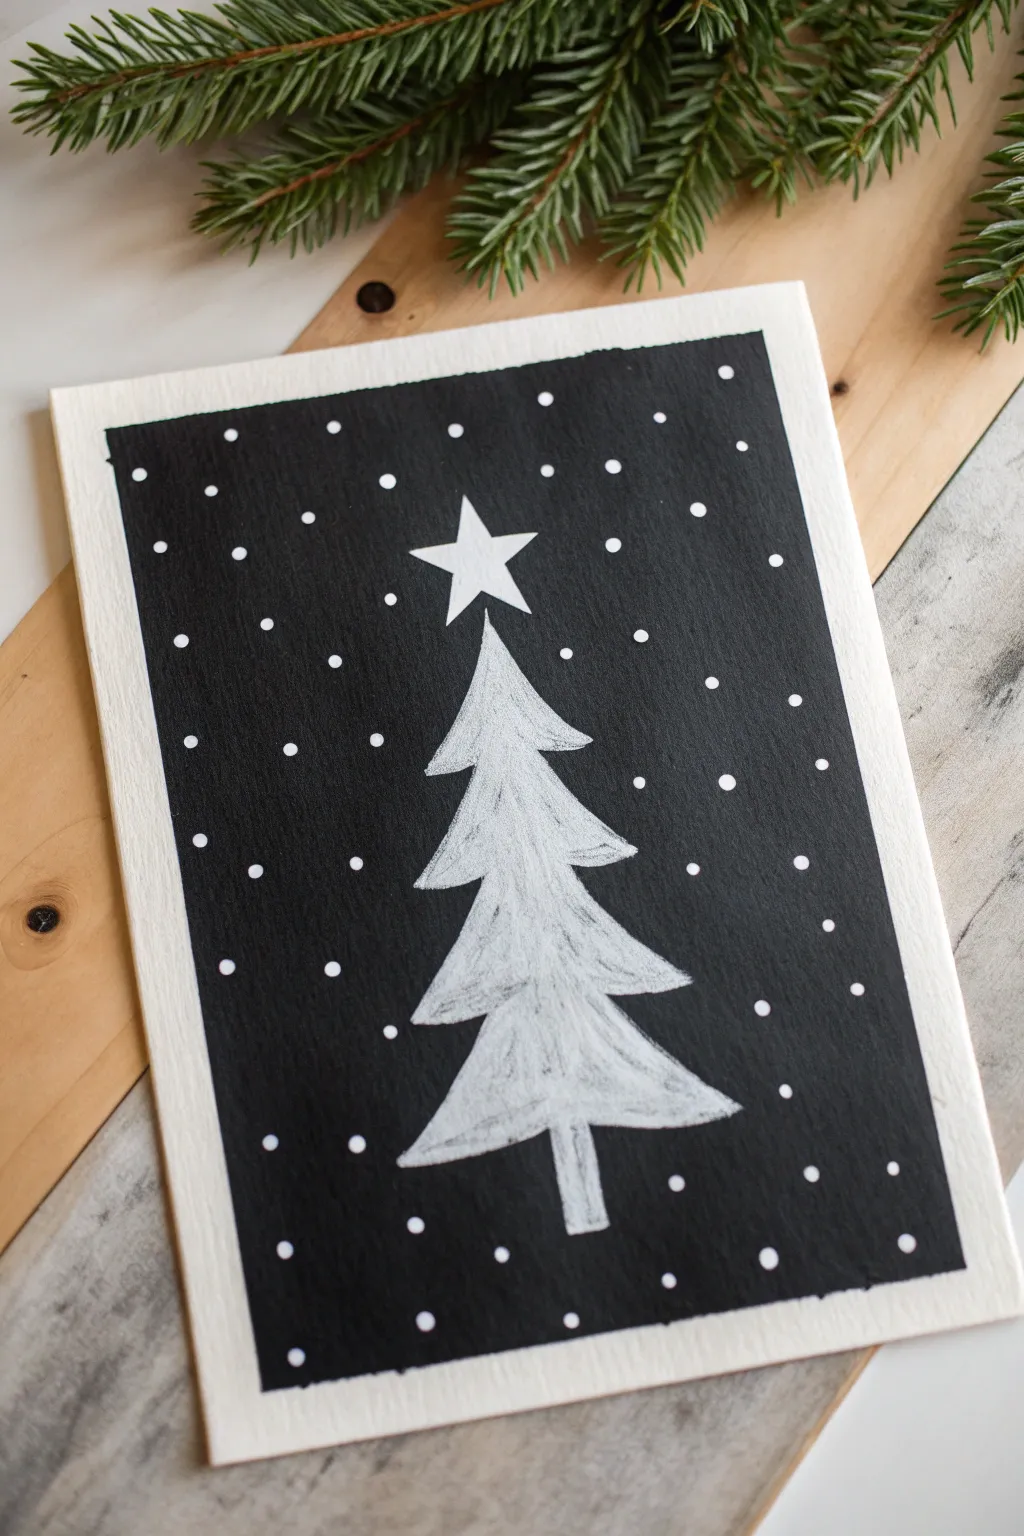
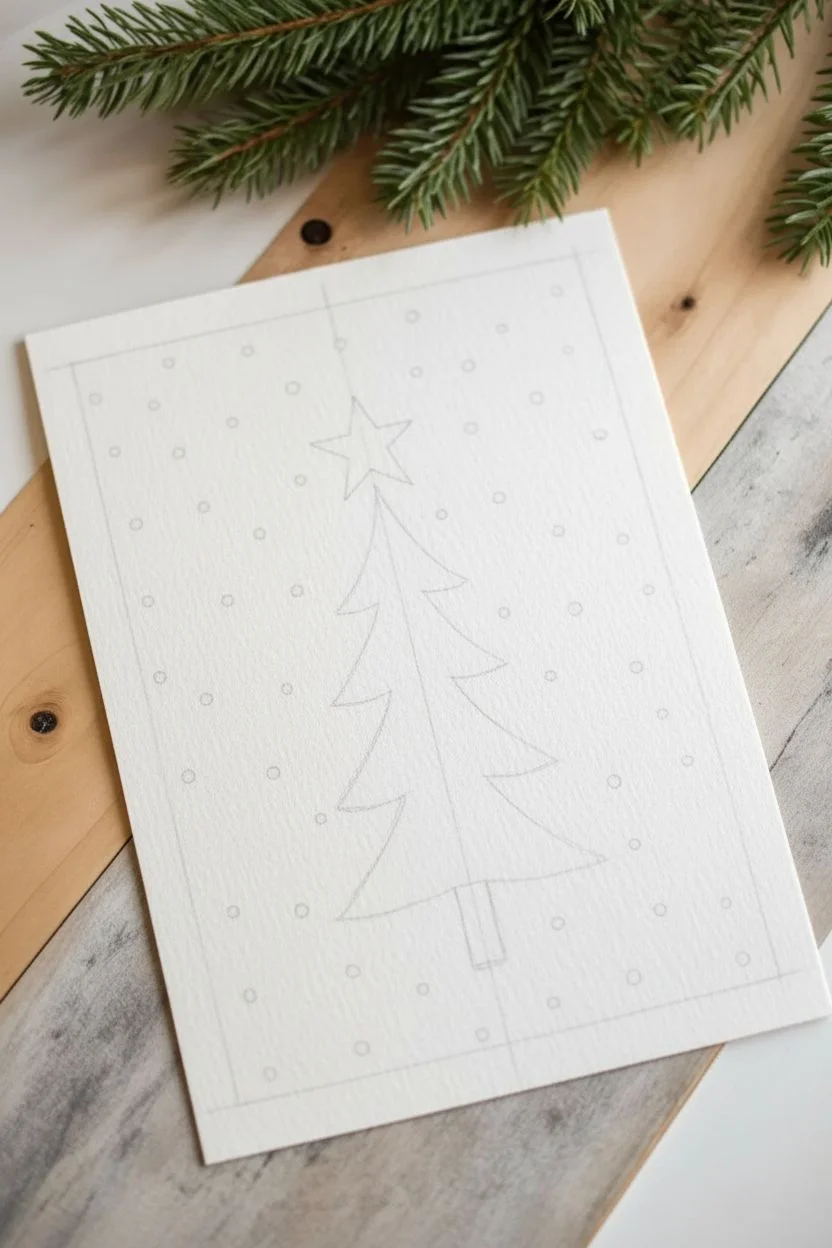
Create a striking contrast with this black and white holiday card design. By filling in the background with deep black ink while leaving the tree shape untouched, you achieve a bold, modern look that makes the white paper shine through like snow.
Detailed Instructions
Materials
- Heavyweight watercolor paper or mixed media cardstock
- Pencil (HB or lighter)
- Eraser
- Black ink, black gouache, or a high-quality black brush pen
- Small round paintbrush (size 2 or 4)
- White gel pen or white acrylic paint pen (optional for touch-ups or extra snow)
- Ruler (optional)
Step 1: Planning the Composition
-
Prepare your paper:
Start with a piece of heavy white paper. If you are making a card, fold your stock now so you know exactly where the front panel boundaries are. -
Mark the borders:
Lightly sketch a rectangular border about half an inch from the edge of the paper. This creates the crisp white frame seen in the example. -
Sketch the tree spine:
Find the center of your framed rectangle and draw a very light vertical line. This will act as the trunk and guide for your tree’s symmetry. -
Outline the star:
At the top of your centerline, sketch a simple five-pointed star. Keep the lines faint so they can be easily erased later if needed. -
Draft the tree shape:
Draw the outline of a Christmas tree starting just below the star. Use jagged, sweeping lines for the branches to give it an organic, hand-drawn feel rather than perfect triangles. -
Add the trunk:
Sketch a small, simple rectangle or slightly tapered shape at the very bottom for the tree trunk. -
Map the snow:
Lightly draw small circles scattered throughout the background area around the tree. Drawing them now preserves the white paper perfectly, which often looks brighter than adding white paint later.
Step 2: Filling the Negative Space
-
Outline the main shapes:
Using your black ink or brush pen, carefully trace around the outside of your star and tree pencil lines. You are defining the edge where the black background meets the white subject. -
Outline the snowflakes:
Carefully trace around the outside of your small snow circles. This can be tedious, but it ensures they remain crisp and bright white. -
Define the border:
Go over the inner edge of your rectangular frame border. Keeping a steady hand here is key for that professional matted look. -
Fill the corners:
Start filling in the large black areas, beginning with the corners and working your way inward. -
Work around the tree:
Continue filling in the background, being extremely careful as you approach your outlined tree and snowflakes. I usually switch to a smaller brush here to get into the tight nooks between branches. -
Check for consistency:
Look for any streaks or light patches in your black ink. Apply a second coat if necessary to get a solid, opaque matte finish. -
Create texture (Optional):
In the example, you can see subtle brush strokes or texture in the tree itself. To mimic this, use a dry, dirty eraser or a very lightly allocated grey pencil to smudge the interior of the white tree slightly, giving it dimension.
Clean Edges Trick
Use painter’s tape or washi tape to mask off the outer border before you start painting. This guarantees straight lines without needing a ruler for the final step.
Step 3: Finishing Touches
-
Let it dry completely:
Allow the ink to dry fully. If you use an eraser too soon, you risk smudging black ink into your pristine white tree. -
Erase pencil guides:
Gently erase any visible pencil marks remaining inside the white star, tree, or border. -
Refine the edges:
If any lines look wobbly, you can touch them up with a white gel pen or a tiny bit of white gouache to crisp up the silhouette.
Make it Sparkle
Once the black ink is dry, add a coat of clear glitter glue over the white tree or the star to give the card a subtle, festive shimmer.
This high-contrast design looks wonderful on a mantelpiece and requires minimal supplies to create a big impact
Snow-Loaded Christmas Tree With White Highlights
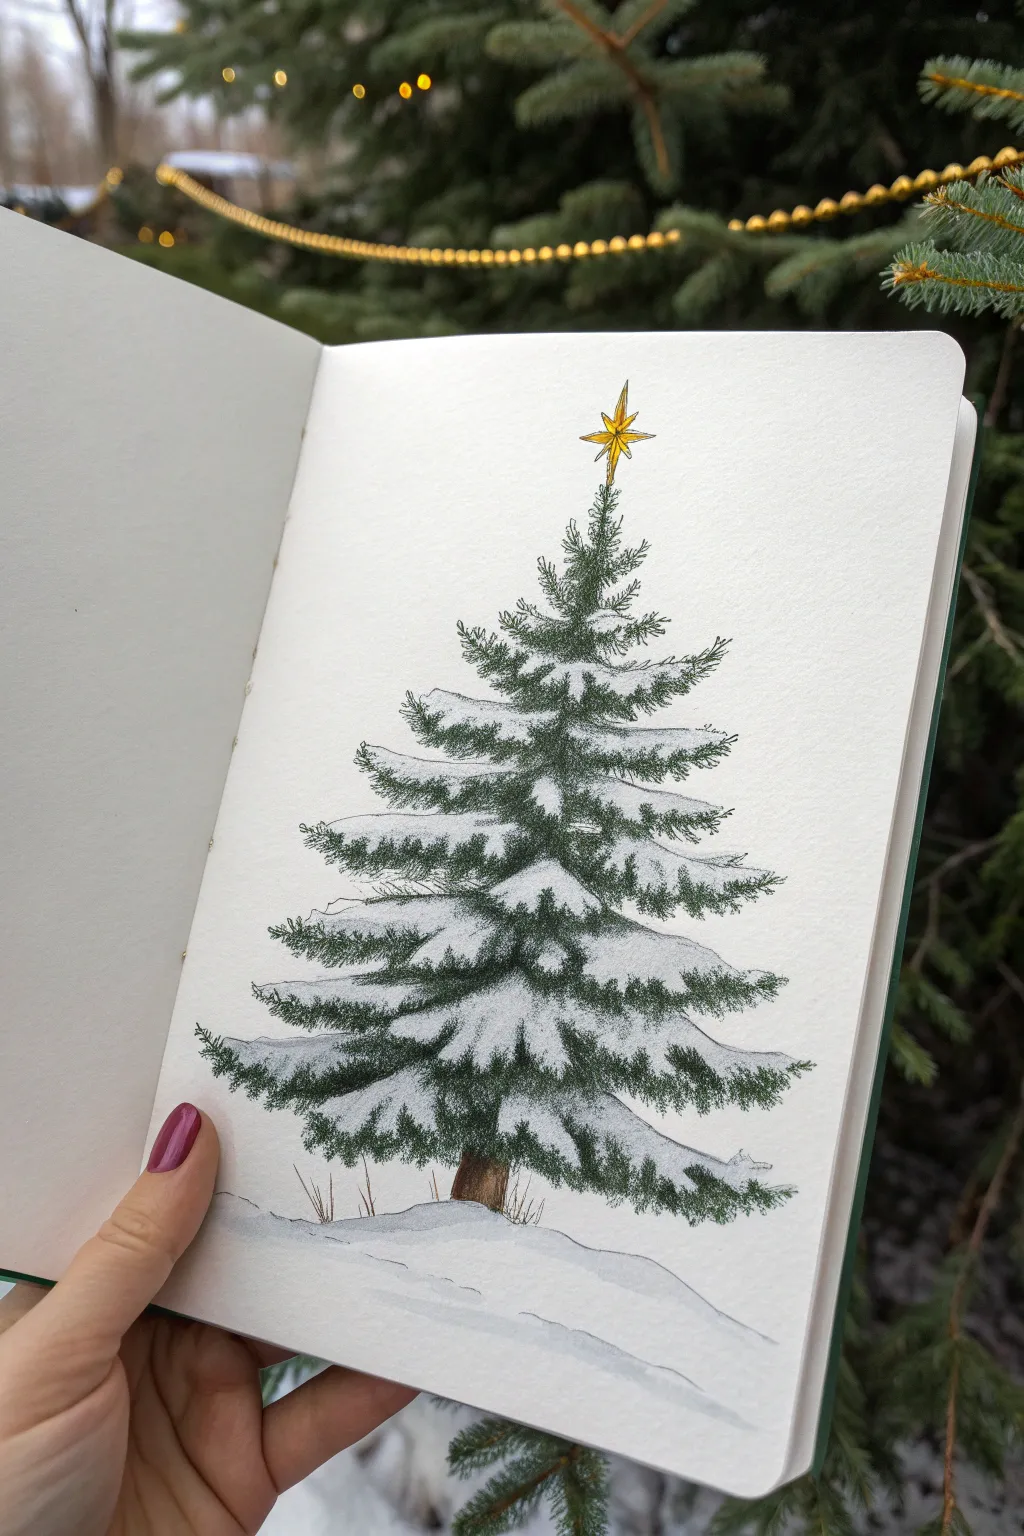
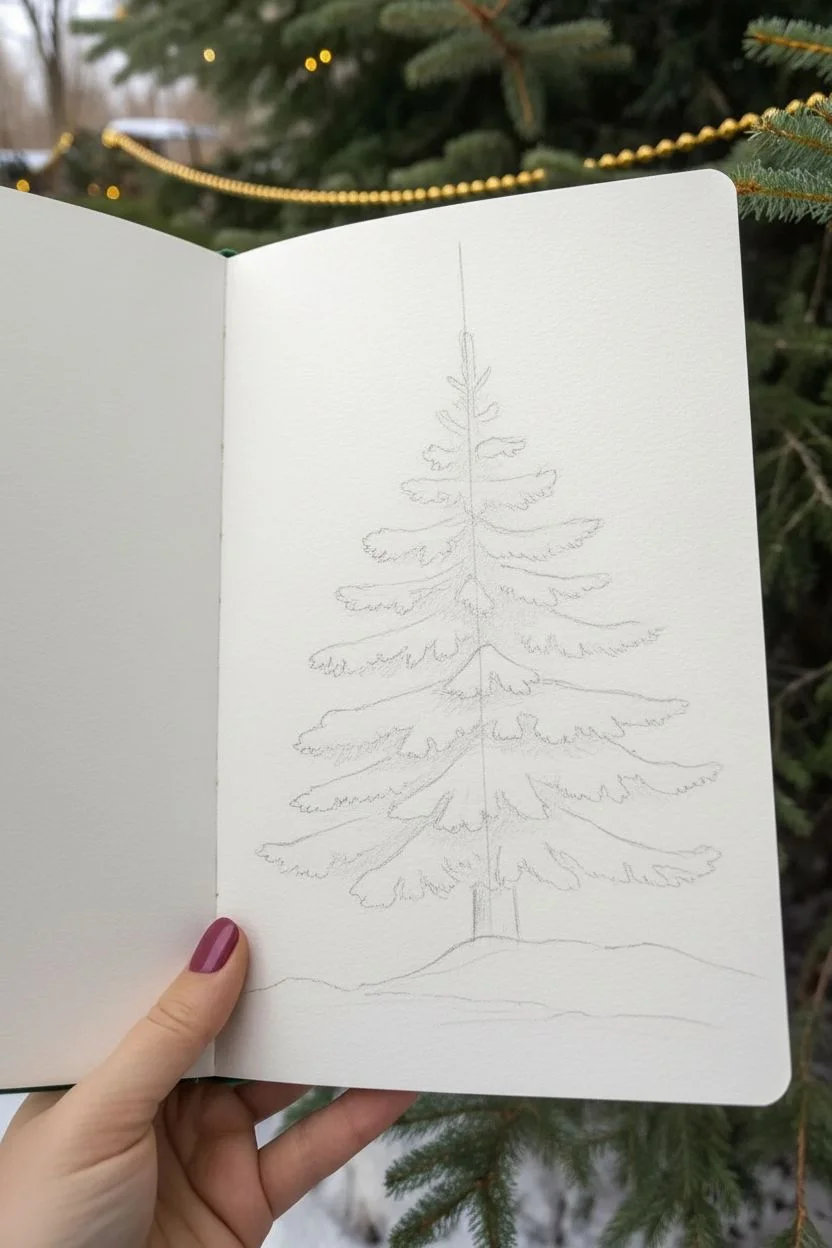
Capture the serene beauty of a winter forest with this detailed illustration of a snow-laden pine tree. The contrast between the deep green needles and the pillowy white snow creates a stunning 3D effect that pops right off the page.
Step-by-Step Tutorial
Materials
- Sketchbook with heavy-weight paper (mixed media or watercolor)
- Fine liner pens (black or dark green, 0.1mm and 0.3mm)
- Watercolor paints (Sap Green, Hooker’s Green, Burnt Umber, Payne’s Grey, Yellow Ochre)
- Small round brush (size 2 or 4)
- White gouache or white gel pen
- Graphite pencil (HB) and eraser
Step 1: Sketching the Structure
-
Outline the trunk:
Begin with a very light pencil line down the center of your page to act as a guide. At the bottom, sketch a short, sturdy trunk base that disappears quickly into the snowbank. -
Mark branch tiers:
Using light triangular shapes, map out the general silhouette of the tree. Start narrow at the top and flare out wider towards the bottom, leaving irregular gaps between layers to make it look realistic. -
Block in snow masses:
Before drawing any needles, use faint pencil lines to draw ‘clouds’ on top of your branch layers. These rounded shapes represent the heavy piles of snow sitting on the boughs.
Muddy colors?
If your green paint is bleeding into the snow areas too much, ensure the ink lines are fully waterproof or wait longer for layers to dry. Use gouache to cover mistakes.
Step 2: Inking the Needles
-
Define the branch undersides:
Switch to your 0.1mm fine liner. Focus only on the areas *underneath* the snow shapes you just drew. Use short, jagged strokes to create the texture of pine needles peeking out from below the white caps. -
Build density:
Go back over your needle areas with a slightly thicker 0.3mm pen or press harder to darken the shadows deep inside the tree. This contrast is what makes the white snow look bright. -
Detail the top and tips:
At the very top and on the outer tips of branches, use tiny, delicate flicks of the pen. These shouldn’t look like solid lines, but rather like individual sprays of needles. -
Add the star:
Draw a six-pointed star at the very apex. Keep the lines crisp and geometric to contrast with the organic tree texture.
Make it sparkle
Once the painting is completely dry, add tiny dots of clear glitter glue or iridescent medium to the snow caps for a frosty, magical morning shimmer.
Step 3: Adding Color
-
Paint the trunk:
Mix a diluted Burnt Umber watercolor wash and paint the visible connection point of the trunk. Let the edges be slightly rough. -
Green underpainting:
Using your green watercolor, carefully fill in the needle areas you inked. I like to keep this wash loose, letting the ink work underneath show through. -
Deepen the shadows:
While the green is still slightly damp, drop in a darker mix of Hooker’s Green and a touch of Payne’s Grey into the deepest recesses of the branches near the trunk. -
Gold star accent:
Paint the star with a bright Yellow Ochre or gold watercolor. Leave tiny slivers of white paper in the center of the star to simulate a shine.
Step 4: Snow and Shadows
-
Shadow the snow caps:
The snow on the tree isn’t purely white paper. Mix a very watery, pale wash of Payne’s Grey or light blue. Paint subtle shadows on the bottom curve of each snow pile to give it volume. -
Ground the tree:
Paint a soft, undulating wash of the same pale grey-blue at the base of the tree to suggest a snowbank. Keep the edges soft and flowing. -
Add wispy grass:
Once the snowbank wash is dry, use a fine brush with diluted brown paint to flick a few thin blades of dry grass poking through the snow at the base. -
Enhance highlights:
Use opaque white gouache or a white gel pen to add crisp highlights on the very tips of the topmost snow piles or to clean up any green paint that strayed into the white areas.
Now you have a tranquil winter scene preserved in your sketchbook to enjoy all season long
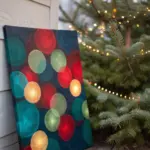
Whimsical Scribble Christmas Tree


Capture the essence of holiday simplicity with this elegant, minimal line-art tree. Using a continuous fluid motion, this design creates a sophisticated greeting card that proves less is truly more.
Detailed Instructions
Materials
- High-quality textured watercolor paper or cardstock (bright white)
- Fine-point black fineliner pen (0.3mm or 0.5mm)
- Fountain pen with black ink (optional, for varying line weight)
- Gold paint pen or metallic gold gel pen
- Pencil (HB or H)
- Soft hi-polymer eraser
- Ruler
- Kraft paper envelope (A6 or similar size)
Step 1: Planning the Layout
-
Paper Preparation:
Begin by cutting your textured watercolor paper to your desired card size. A standard A5 folded to A6 works beautifully for this design, allowing enough white space for the tree to breathe. -
Marking the Center:
Using your ruler and a very light pencil touch, find the vertical center of your card front. Make tiny tick marks at the very top and bottom to guide you. -
Establishing Height:
Decide on the height of your tree. Mark a small dot where the top star will sit and another where the base of the trunk will end, ensuring equal margins above and below. -
Drafting the Spine:
Lightly sketch a vertical line connecting your top and bottom dots. This won’t be part of the final drawing, but it serves as the invisible spine to keep your scribbles symmetrical. -
Setting the Width:
Sketch a very faint triangle shape starting from just below the top dot down to the bottom. This guideline helps ensure your tree widens gradually and evenly as you draw toward the base.
Wobbly Lines?
If your hand feels shaky, speed up! Moving the pen faster creates smoother, more confident lines than trying to draw slowly and perfectly.
Step 2: Inking the Design
-
The Golden Star:
Before correcting any ink, start with the star to anchor the composition. Using your gold paint pen, draw a simple five-pointed star at the very top dot. -
Filling the Star:
Carefully fill in the star shape with the gold ink. I find it helpful to let this dry completely for a minute so I don’t accidentally smudge it while drawing the tree. -
Starting the Scribble:
Switch to your black ink pen. Place your pen tip just underneath the star’s bottom point. Draw a small, tight zig-zag to begin the tree’s tip. -
Widening the Motion:
Continue the zig-zag motion downward, gradually increasing the width of your strokes. Keep your hand loose; the lines shouldn’t be perfectly straight but should have a slight, natural curve. -
Creating the Layers:
As you descend, angle your strokes slightly downward to evoke the feeling of heavy pine boughs. -
Establishing Rhythm:
Try to keep the spacing between the zig-zags relatively even, but allow for small imperfections that add character. -
The Widest Point:
Once you reach the bottom of your guide triangle, make your widest sweep. This long, sweeping line anchors the weight of the tree. -
Drawing the Base:
Lift your pen for a moment. From the center of your lowest branch line, draw a short vertical line downward for the trunk. -
The Tree Stand:
At the bottom of the trunk, draw a quick, loose oval or circular scribble to represent a simple tree stand or the trunk base, mirroring the loose style of the branches.
Step 3: Finishing Touches
-
Drying Time:
Wait at least 15 to 20 minutes to ensure the black ink is completely dry, especially if you used a wetter fountain pen ink. -
Erasing Guides:
Gently erase your vertical center line and triangular guides using a soft eraser. Be careful near the gold star, as metallic ink can smear if rubbed too hard. -
Final Inspection:
Check for any gaps in the ink flow. If you used a fountain pen, the natural variation in line thickness is desirable, so don’t over-correct. -
Pairing:
Place the finished card inside or atop a kraft paper envelope to complete the rustic, organic look shown in the reference image.
Add Some Sparkle
Apply tiny dots of liquid glue along the black ink lines and sprinkle ultra-fine glitter over them for a frosted, snowy effect on the branches.
Send this sophisticated card to a friend who appreciates modern design or frame it as seasonal decor.
Christmas Tree Made of Tiny Stars
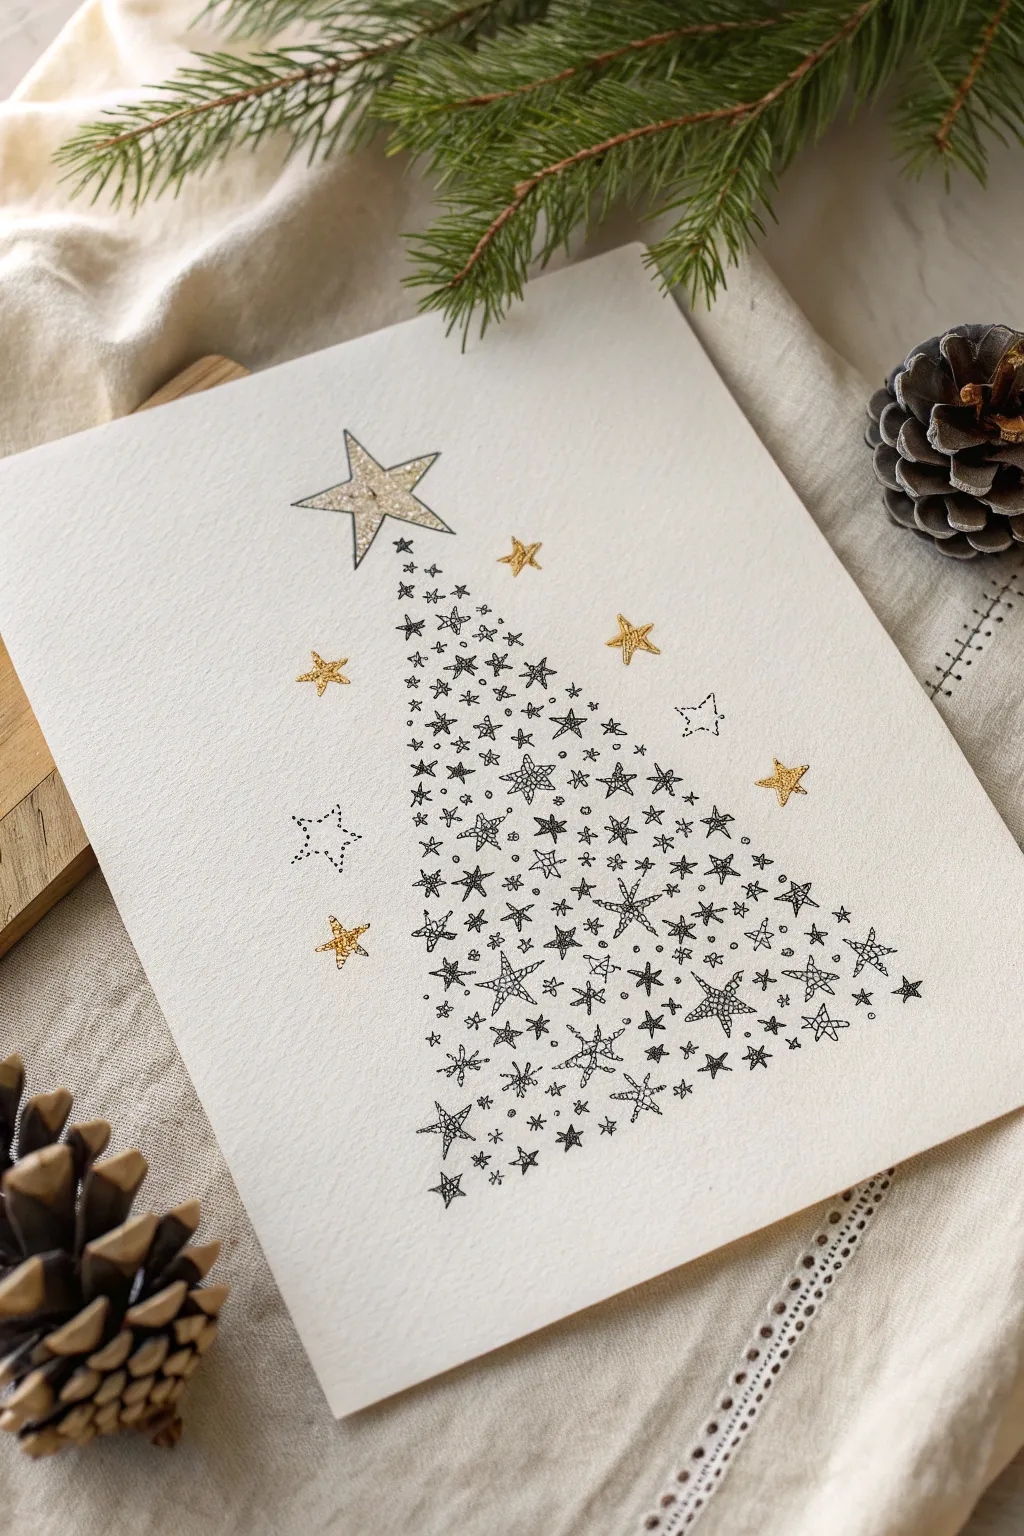
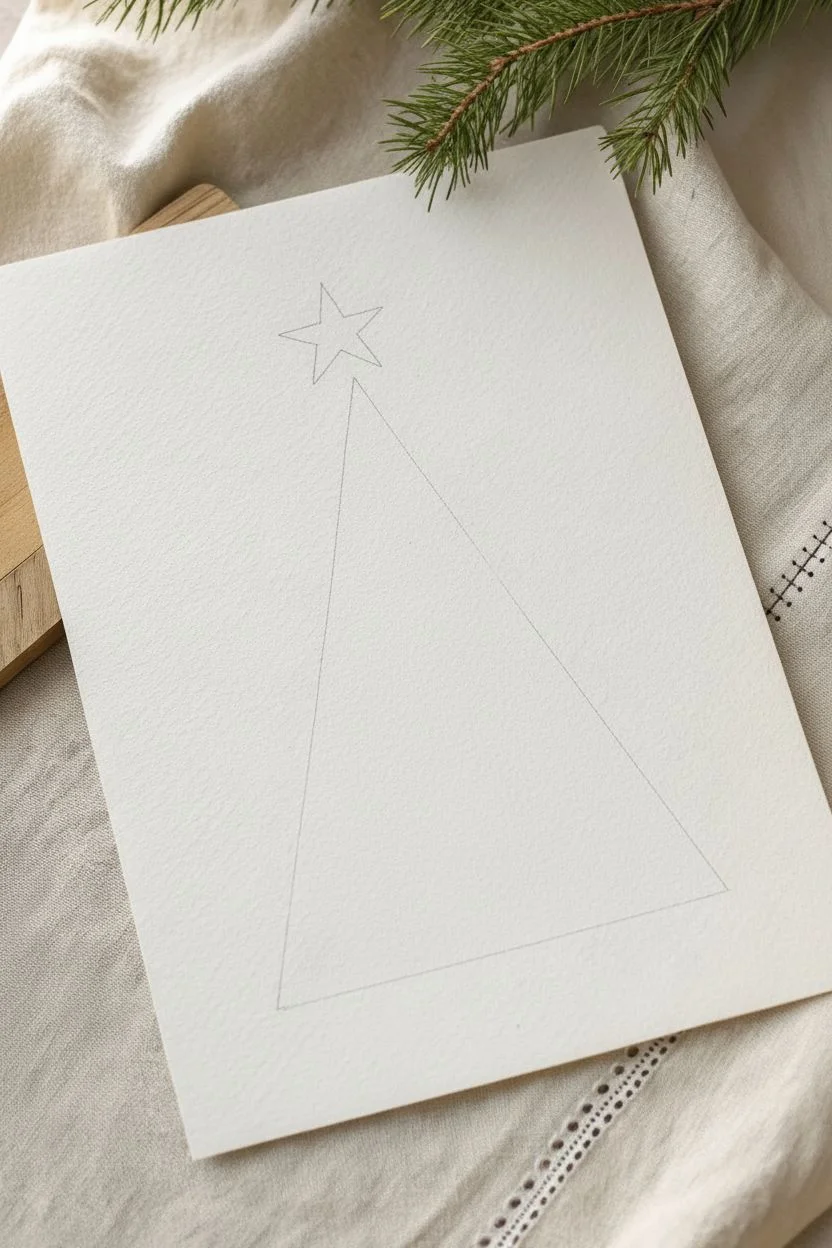
Create a minimalist and elegant holiday card featuring a Christmas tree formed entirely from a galaxy of tiny, hand-drawn stars. This meditative drawing project combines precision black ink with festive touches of gold for a sophisticated, modern look.
How-To Guide
Materials
- High-quality white cardstock or cold-press watercolor paper (A5 size)
- Black fine liner pen (0.1mm or 0.3mm nib)
- Gold gel pen or gold metallic marker (fine tip)
- Pencil (HB or 2H for light guidelines)
- Ruler
- Soft white eraser
Step 1: Planning the Shape
-
Paper preparation:
Begin with a clean sheet of heavy white cardstock or watercolor paper. The texture of cold-press paper adds a lovely organic feel to the final piece. -
Mark the triangle:
Using a ruler and a very light pencil touch, draw a tall, narrow isosceles triangle in the center of your page. This will be the boundary for your star tree. -
Top star placement:
Draw a slightly larger five-pointed star at the very peak of your triangle. This is your tree topper and serves as the anchor for the entire composition.
Uneven Edges?
If your tree edge looks wobbly, don’t panic. Add tiny asterisk-style stars or black dots right along the border to straighten the visual line.
Step 2: Drawing the Stars
-
Outline the topper:
Switch to your black fine liner. Carefully outline the main star at the top. I like to double-line one side of each point to give it a slight 3D shadow effect. -
Start at the peak:
Begin filling the very top of the triangle, just under the main star, with your smallest black ink stars. Keep them tiny and dense here. -
Vary the star styles:
As you work your way down, draw a variety of star shapes. Mix classic five-pointed stars, six-pointed stars, simple asterisks, and tiny cross-hatched stars. -
Change the sizing:
Introduce slightly larger stars as you move toward the base of the tree. The mix of small and medium stars creates visual interest and depth. -
Maintain the edge:
Pay special attention to the pencil guidelines. Place stars right up against the line—and occasionally let a tiny point poke just over it—to define the crisp triangular shape without needing a solid outline. -
Fill the interior:
Continue filling the body of the tree. The spacing does not need to be perfectly uniform; organic clustering looks more natural. -
Add detail to larger stars:
For the medium-sized stars within the tree, add internal details like tiny dots, stippling, or hatched lines to make them stand out from the simpler asterisk shapes. -
Check density:
Pause and look at the tree from a distance. If you see large empty white gaps, fill them with very tiny dots or miniature ‘x’ shapes to balance the visual weight.
Make it Sparkle
Apply a tiny dot of liquid glitter glue to the center of the largest gold stars for actual physical sparkle when the light hits the card.
Step 3: Finishing Touches
-
Erase guidelines:
Once the black ink is completely dry (wait at least 10 minutes to avoid smudges), gently erase your pencil triangle guidelines. -
Add gold floating stars:
Take your gold gel pen and draw 5-7 medium-sized stars floating randomly around the outside of the tree. This adds a magical, festive atmosphere. -
Gold detailing:
Use the gold pen to gently fill in the large topper star. Depending on your preference, you can color it solid or use stippling for a glittery texture. -
Scatter outline stars:
Draw two or three ‘hollow’ stars using dotted lines with black ink around the exterior, mirroring the placement of the gold stars. -
Final assessment:
Review your composition. If the bottom corners of the tree feel weak, add one or two more bold black stars to anchor the shape firmly.
Now you have a stunning, intricate piece of holiday art ready to frame or gift
Pattern-Filled Christmas Tree Doodle
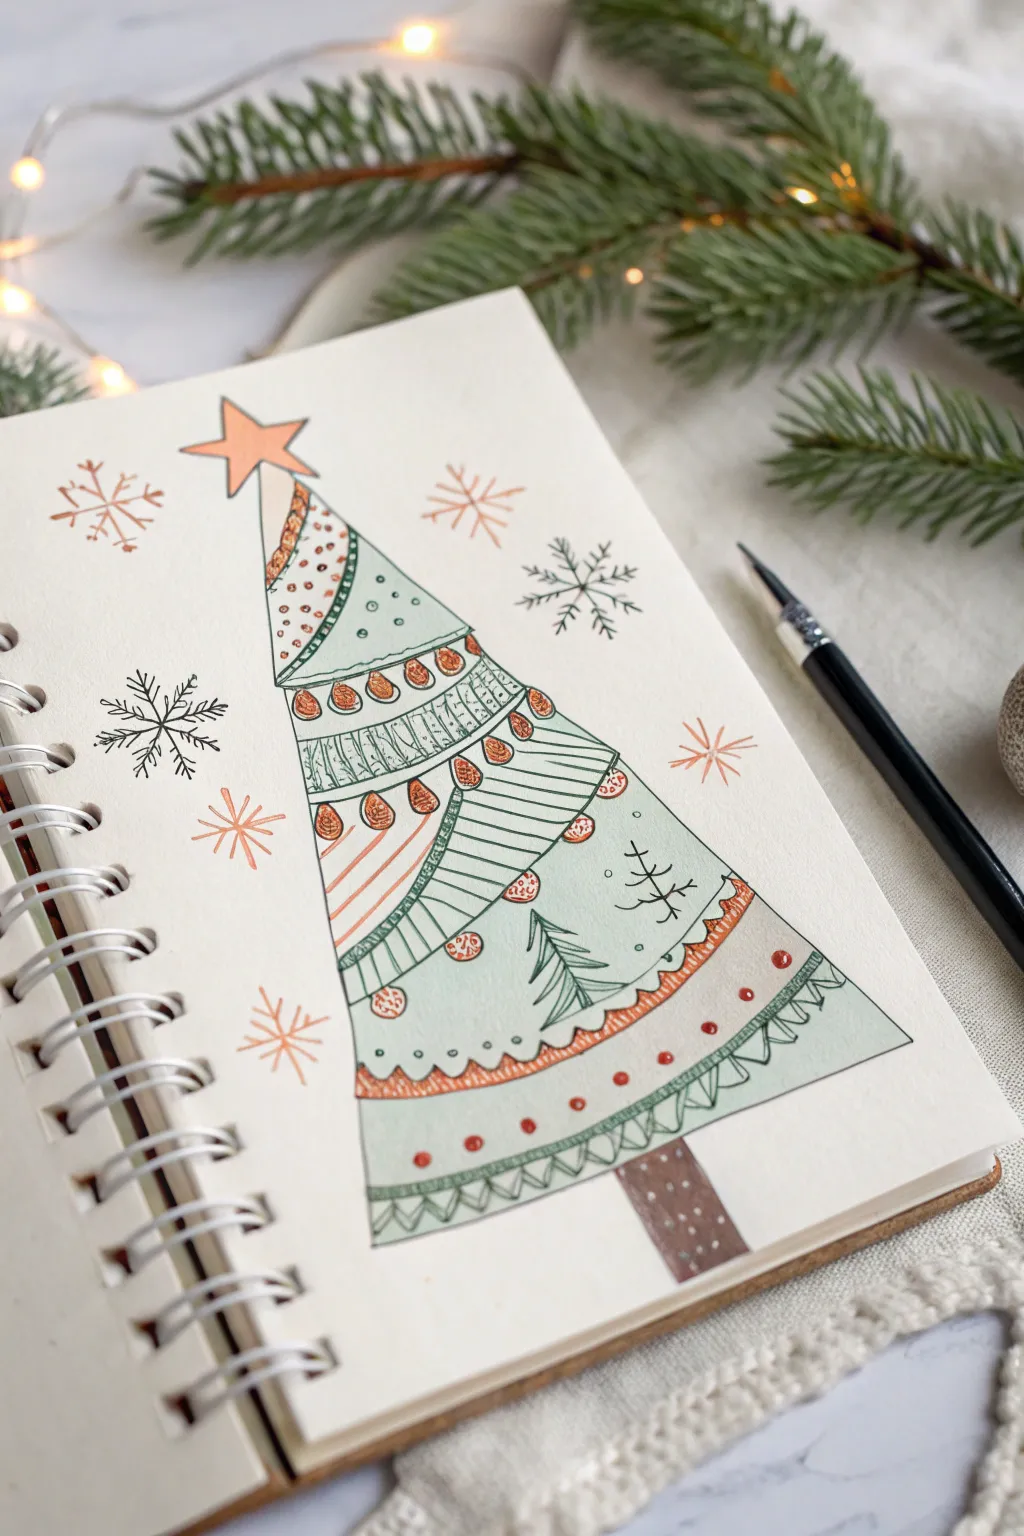

Capture the cozy spirit of the season with this delightful doodle of a stylized Christmas tree. Using simple geometric shapes and repetitive patterns, you’ll create a charming, folk-art inspired illustration perfect for holiday cards or bullet journals.
Step-by-Step
Materials
- Sketchbook with smooth, thick paper (mixed media or heavy drawing paper)
- Fine-point black drawing pen (0.3mm or 0.5mm)
- Fineliner pens or markers in muted teal/mint green
- Fineliner pens or markers in terracotta/burnt orange
- Pencil and eraser for the initial sketch
- Ruler (optional)
Step 1: Planning the Structure
-
Light Sketch:
Start by lightly sketching a tall, narrow triangle in the center of your page to define the overall tree shape. Don’t press too hard, as you’ll want to erase these guidelines later. -
Divide into Layers:
Draw faint, curved horizontal lines across the triangle to divide the tree into about six or seven distinct segments. Curve the lines slightly upward like a smile to give the tree a sense of volume and dimension. -
Add the Base:
At the bottom, sketch a simple rectangular trunk. At the very top, place a tilted five-pointed star.
Keep it Loose
Don’t use a ruler for the final black ink lines. Slight wobbles in your lines add to the charming, hand-drawn aesthetic of this doodle style.
Step 2: Adding Color Blocking
-
Color the Tip:
Using your terracotta marker, color in the star completely. I like to leave a tiny sliver of white space on one edge for a highlight effect. -
Primary Green Sections:
Select your mint or muted teal marker. Fill in the second section from the top, the fourth section (skip one), and the large sixth section near the bottom. This creates an alternating pattern of colored and white bands. -
Secondary Details:
Add smaller pops of color with the terracotta marker. Create a thin band of orange in the lowest section and a few small circular ornaments in the white stripes. -
The Trunk:
Color the rectangular trunk firmly with a brown marker or a darker shade of the terracotta color.
Try Metallic Accents
Use a gold or silver gel pen for the ornaments or the star topper. It adds a festive shimmer that catches the light beautifully.
Step 3: Inking the Patterns
-
Top Pattern:
With your black fine-point pen, outline the star. In the very top triangle of the tree, draw small stippled dots for texture. -
Stripes and Scallops:
On the first green section, draw simple horizontal stripes. Below that, on the white band, draw a row of distinct ‘teardrop’ shapes outlined in black and filled with orange texture. -
Vertical Lines:
Move to the next section down. Draw vertical lines spaced closely together to create a ribbed texture. I vary the pressure slightly to keep it looking hand-drawn. -
Diagonal Accents:
In the next white band, draw diagonal stripes using the orange marker, then outline the section in black ink. Add small orange circles on the left and right edges for balance. -
Main Green Section:
On the largest green section near the bottom, draw two tiny, simple pine trees with stick trunks and branches. Add small dot details around them to fill the empty space. -
Bottom Border:
For the bottom-most green band, draw a zigzag line across the width. Underneath the zigzag, draw vertical hatch marks to create a fringe-like appearance. -
Final Outline:
Go over the main outer edges of the tree with your black pen to crisp up the shape. Outline the trunk and add a few white gel pen dots to it if desired (or leave blank).
Step 4: Atmospheric Details
-
Snowflakes:
Scatter three or four line-style snowflakes around the tree using the black pen. Keep the lines thin and delicate. -
Orange Bursts:
Using the terracotta marker, draw simple starburst shapes (an asterisk with 8 points) floating in the background to balance the composition. -
Clean Up:
Once the ink is completely dry, gently erase any remaining pencil guidelines to leave a clean, crisp illustration.
Enjoy admiring your cozy winter artwork and maybe even create a whole forest of patterned trees
Geometric Christmas Tree With Faceted Shapes
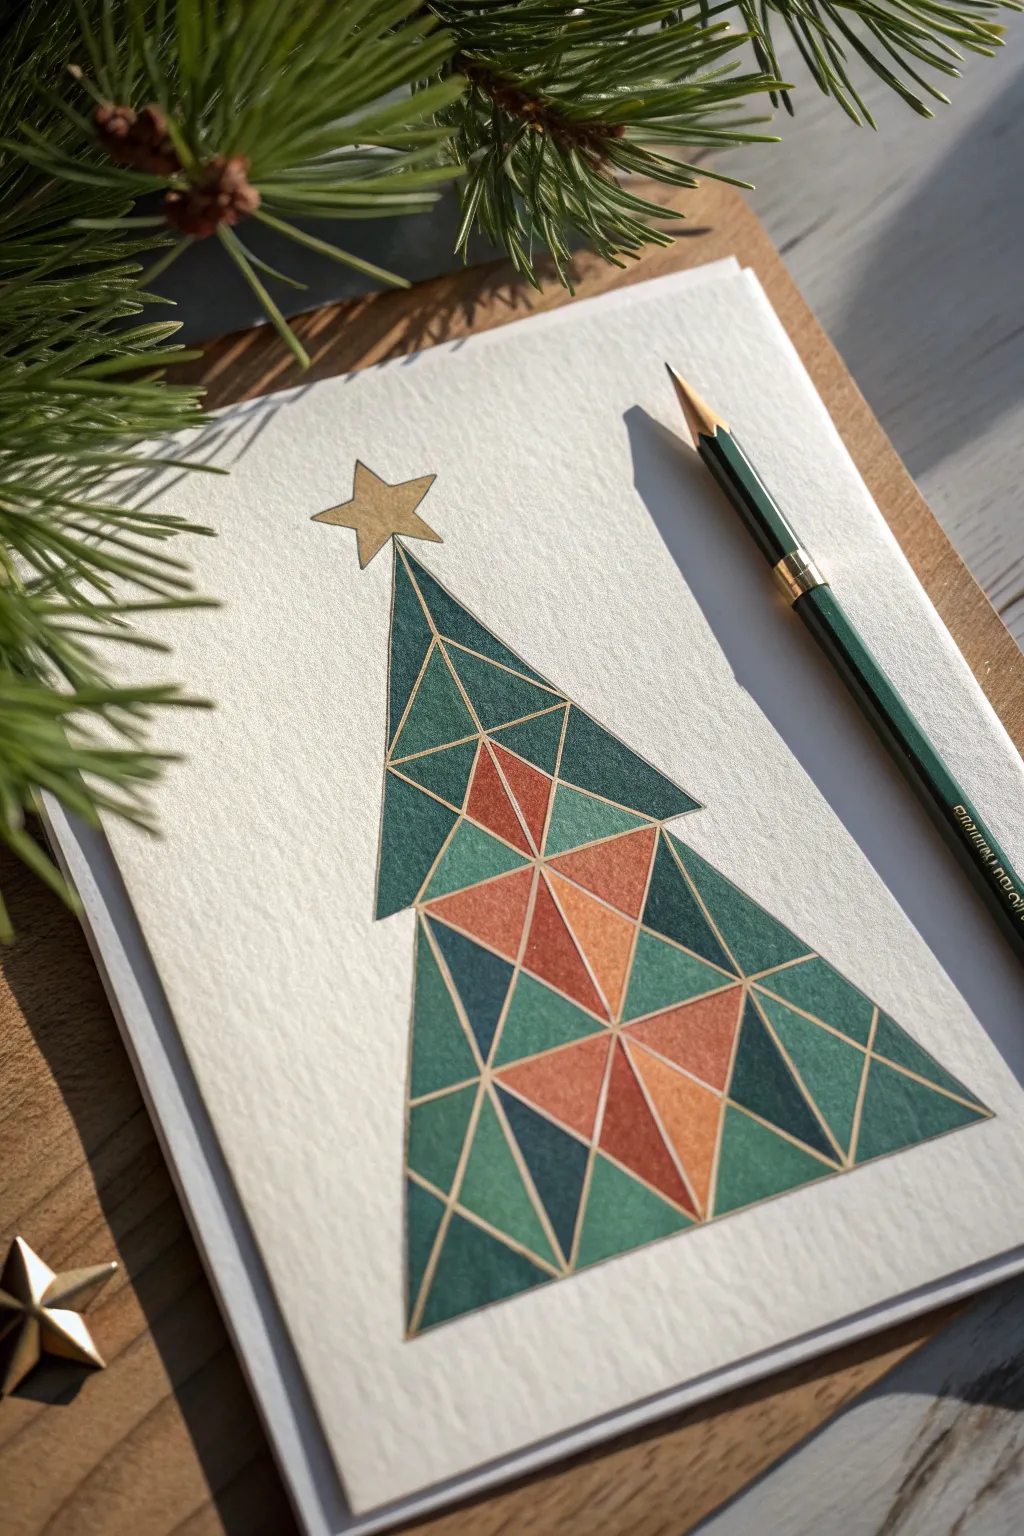
This elegant card design transforms the traditional Christmas tree into a stained-glass masterpiece using clean lines and faceted shapes. The result is a sophisticated, minimalist artwork that balances deep emerald greens with warm, earthy triangles.
Step-by-Step Guide
Materials
- High-quality textured watercolor paper or cardstock (cold press)
- Gold gel pen or fine-point metallic gold marker
- Ruler or straight edge
- Pencil (HB or H for light sketching)
- Eraser
- Colored pencils (dark green, teal, rust/terracotta, light orange)
- Pencil sharpener
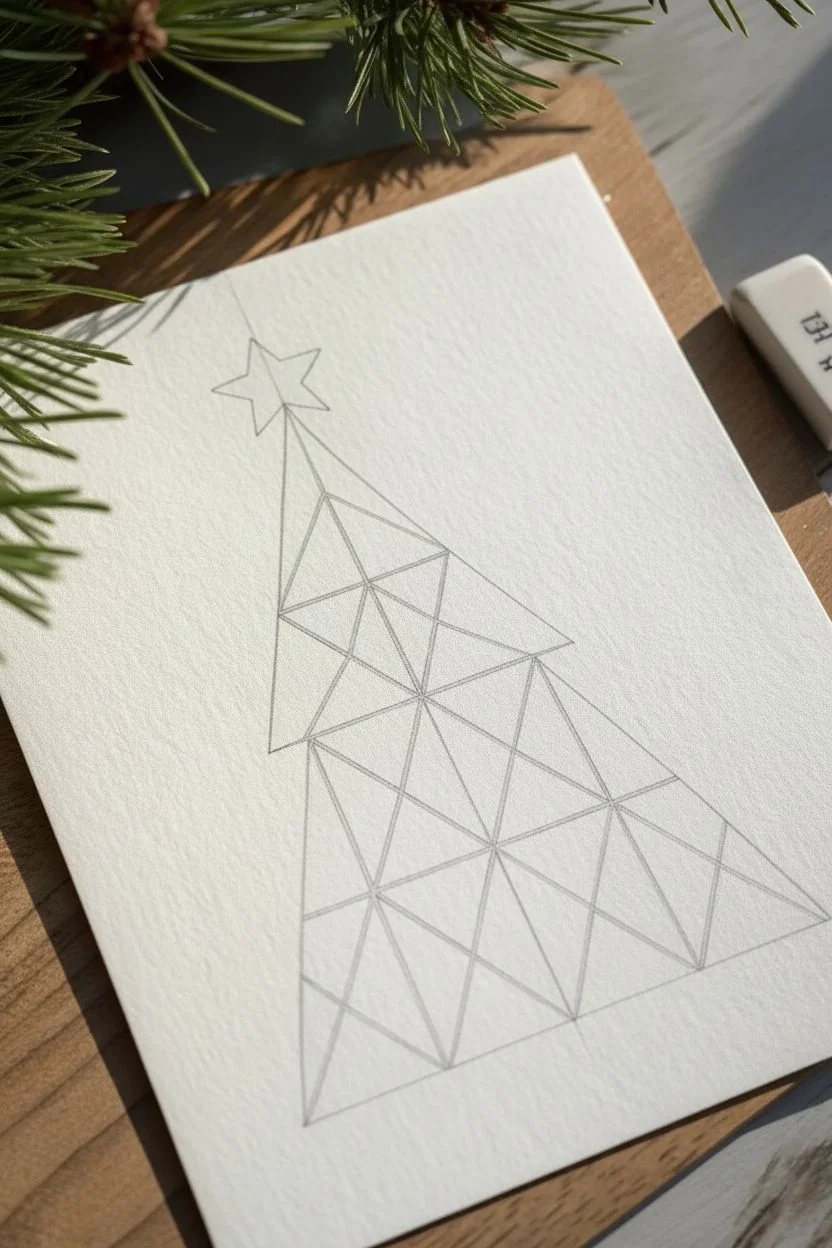
Step 1: Planning the Structure
-
Establish the centerline:
Begin by lightly drawing a vertical line down the center of your paper using your ruler and pencil. This will serve as the spine for your tree and ensure symmetry. -
Outline the main triangle:
Mark the top point of your tree. Then, draw two angled lines downward from this point to create the main triangular silhouette. Don’t close the bottom just yet. -
Create the tiered edges:
Instead of a smooth diagonal line, break the sides into three distinct tiers. Just below the top section, jog the line inward slightly, then continue down. Repeat this once more for the base tier to create that classic fir tree stepped look. -
Draw the geometric grid:
Using your ruler, start dividing the interior of the tree into triangles. I find it easiest to draw lines connecting the ‘steps’ of the tiers to the centerline first. -
Add internal facets:
Subdivide those larger shapes. Draw diagonal lines across the interior triangles to create smaller, sharper facets. Aim for a mix of sizes, but keep the lines straight. -
Top with a star:
Draw a simple five-pointed star at the very peak of the tree. Let it sit slightly separated from the top point of the green section.
Keep it Sharp
Keep your colored pencils extremely sharp. A fine point allows you to get right into the tight corners of the triangles without overlapping the gold lines.
Step 2: Adding the Gold borders
-
Trace the lines:
Take your gold gel pen or metallic marker. Carefully trace over all your pencil lines, using the ruler to keep them perfectly straight. -
Double-check intersections:
Make sure the corners where lines meet are crisp and connected. If your pen skips, go back over it gently. -
Erase pencil marks:
Wait at least 15 minutes for the metallic ink to dry completely. Once dry, gently erase any visible graphite lines underneath the gold.
Step 3: Filling with Color
-
Select your palette:
Choose about four distinct colors: a deep forest green, a blue-green teal, a terracotta rust, and a lighter orange-brown. -
Start with the center warmth:
I like to place the warm rust and orange tones near the center vertical axis of the tree. Select a few central triangles and fill them in with the lighter orange pencil. -
Layer the terracotta:
Color adjacent central triangles with the darker rust color. Vary the pressure: press harder near the gold lines and slightly softer in the center of the shape to create a subtle texture. -
Apply the greens:
Fill the remaining outer triangles with your greens. Alternate between the deep forest green and the teal to create depth and visual interest. -
Blend the edges:
For a smooth, faceted look, ensure you color right up to the gold border. Use a consistent, circular motion to minimize obvious stroke lines. -
Review contrast:
Step back and look at the balance. If two adjacent shapes mimic each other too closely, darken one of them with a second layer of pencil.
Smudge Prevention
Place a scrap piece of paper under your drawing hand while coloring. This prevents the oils from your skin from smearing the gold ink or pencil pigment.
Step 4: Final Details
-
Color the star:
Fill the star with a solid gold color, or use a light tan pencil with a layer of gold pen over it for extra shine. -
Clean up the card:
Brush away any pencil shavings or dust. The textured paper holds onto debris, so a soft brush works best here.
This sophisticated geometric design makes for a perfect holiday card that looks professionally printed
Christmas Tree With Gifts at the Base
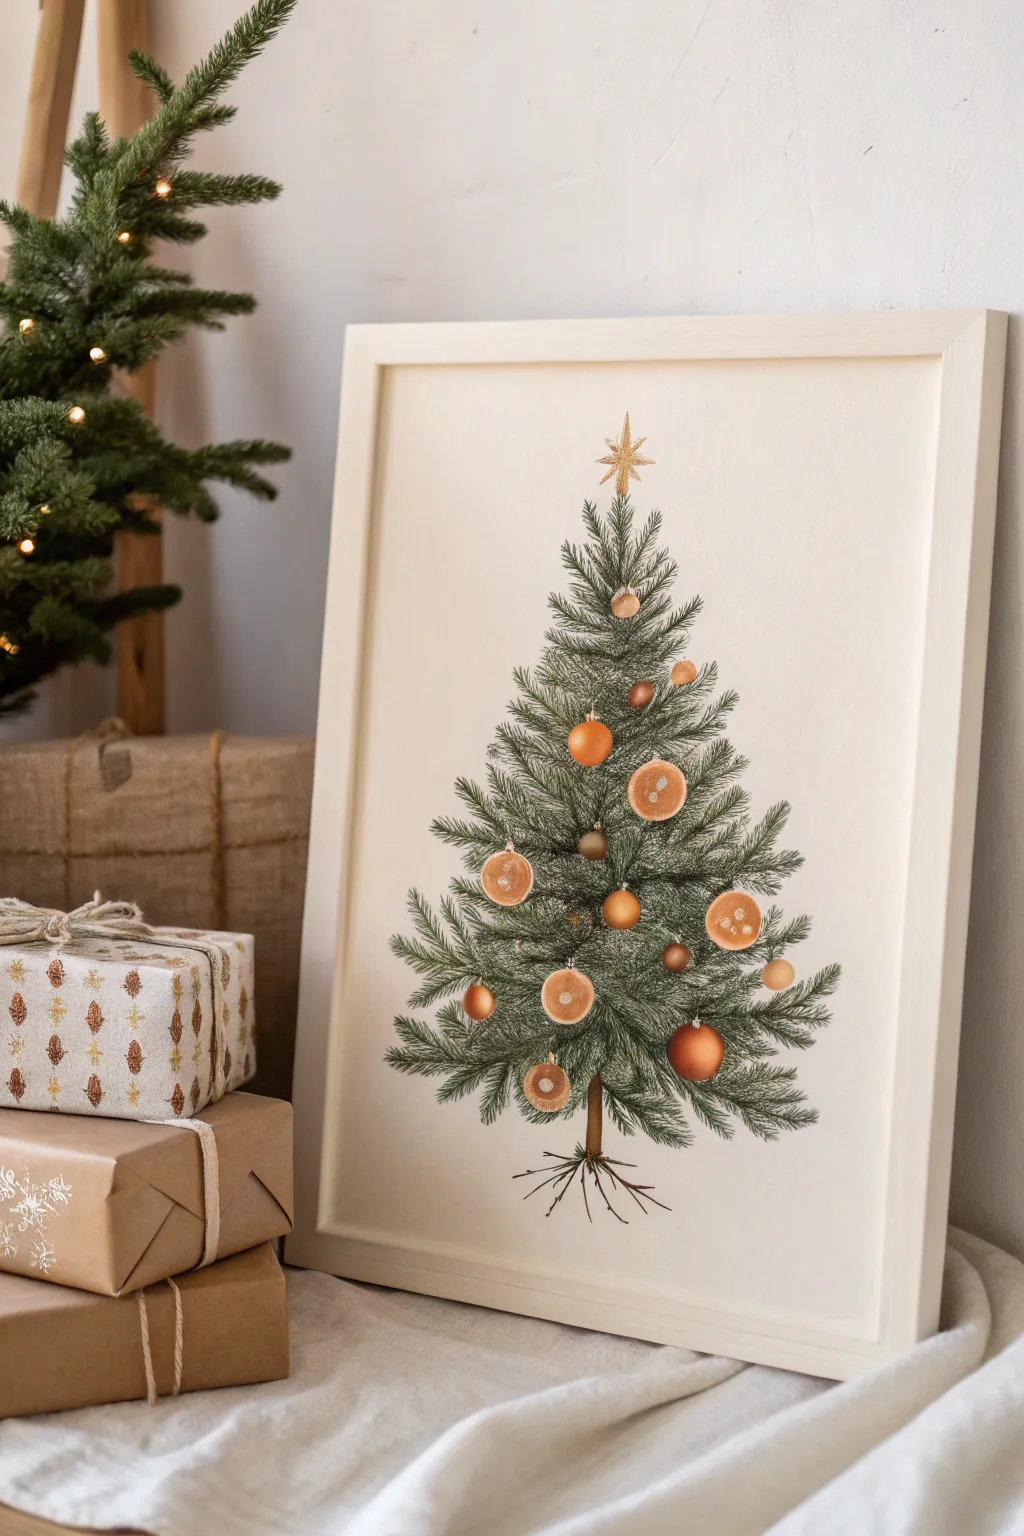
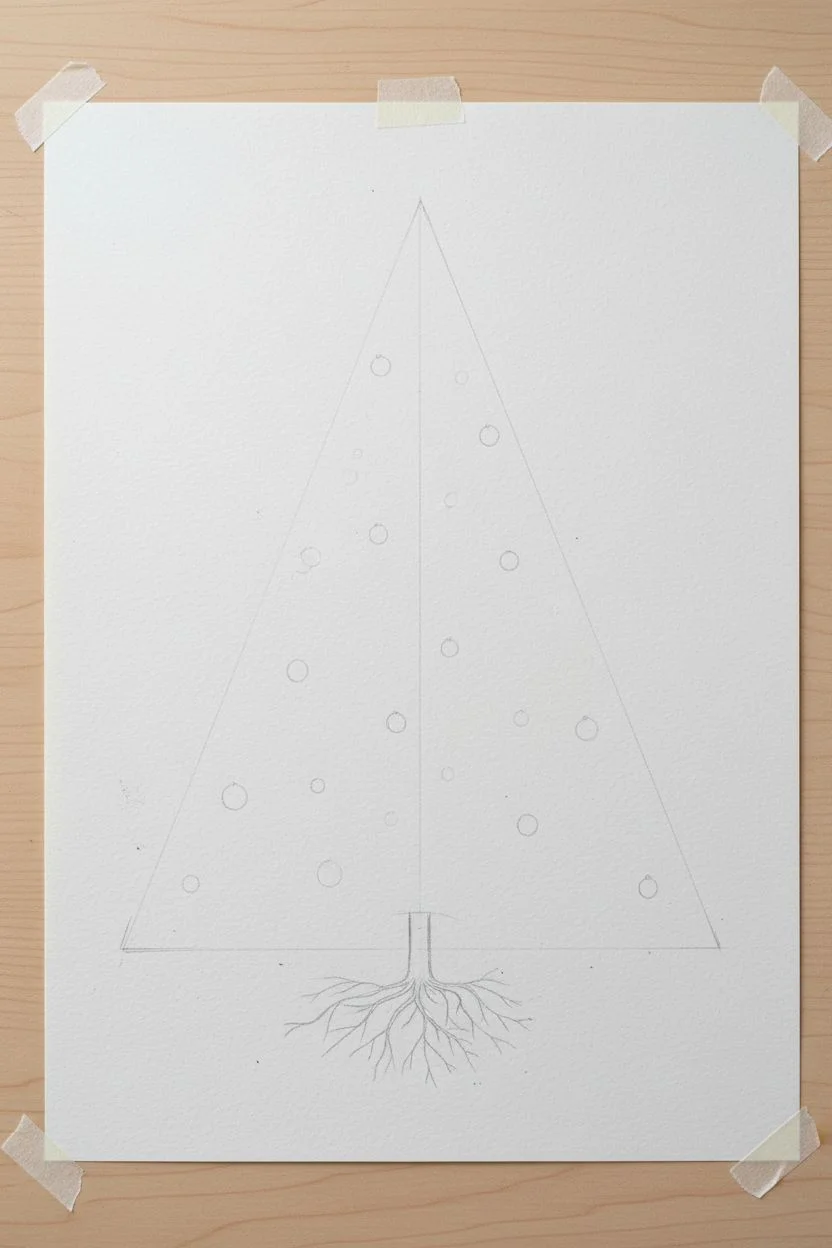
This elegant illustration captures the vintage charm of a botanical print, featuring a realistic spruce tree complete with its root system. Colored in soft, natural hues and adorned with dried orange slices, it makes for a timeless piece of holiday decor.
Detailed Instructions
Materials
- Hot press watercolor paper (smooth finish)
- Watercolor paints (Sap Green, Hooker’s Green, Burnt Umber, Yellow Ochre, Cadmium Orange)
- Fine liner pens (0.1mm and 0.3mm brown or sepia)
- Small round paintbrushes (size 0, 2, and 4)
- White gel pen or white gouache
- HB pencil and eraser
- Ruler
Step 1: Sketching the Structure
-
Establish the centerline:
Begin by lightly drawing a vertical line down the center of your paper with a ruler. This will act as the trunk and ensure your tree stands straight. -
Mark the triangle shape:
Sketch a tall, narrow isosceles triangle to define the outer boundaries of the branches. Leave about three inches of space at the bottom for the roots. -
Sketch the trunk and roots:
Thicken the bottom of the central line to form the trunk. At the base, draw spindly roots fanning out downwards, mimicking the look of an uprooted sapling. -
Placement of ornaments:
Lightly sketch circles scattered throughout the tree shape. Vary the sizes slightly and ensure they are placed randomly to look natural.
Step 2: Painting the Foliage
-
Base green layer:
Mix a watery Sap Green. Using your size 4 brush, paint loose, upward-curving strokes starting from the trunk and extending to your triangle guide lines. -
Building branch density:
While the first layer is still slightly damp, introduce a darker Hooker’s Green. Use the size 2 brush to add distinct needle textures, flicking the brush outward to create sharp tips. -
Adding depth:
Mix a small amount of Burnt Umber into your green to create a deep shadow color. Apply this sparingly near the trunk and under the branch layers to create volume. -
Painting the trunk:
Fill in the trunk and roots with a wash of Burnt Umber. Keep the roots delicate; I find a size 0 brush works best for these fine tendrils.
Natural Texture
For realistic needles, preserve white space. Don’t fill every gap with green; the white paper showing through mimics light filtering through branches.
Step 3: Ornaments and Details
-
Painting orange slices:
For the dried orange slices, use a mix of Yellow Ochre and Cadmium Orange. Paint the circles, leaving a tiny lighter center. -
Detailing the slices:
Once the orange base is dry, use a slightly darker orange mix to paint the radial segments inside the slice, leaving the ‘pith’ lines pale. -
Coloring the baubles:
Paint the remaining round ornaments with a solid wash of gold or metallic bronze paint. If you don’t have metallic paint, a blend of Yellow Ochre and Brown works perfectly. -
Adding the star:
Draw a multi-pointed star at the very top using the yellow-gold mix. Ensure the bottom point connects visually with the apex of the tree. -
Inking the outlines:
Once all paint is completely dry, use a brown fine liner to gently outline the orange slices and add texture to the bark. -
Adding highlights:
Use a white gel pen or a dot of white gouache to add a tiny reflection point on each bauble to make them look spherical and shiny. -
Framing:
Erase any remaining pencil guide lines gently. Place your finished artwork in a simple, light wood frame to complement the organic style.
Muddy Colors?
If your greens look muddy, let the layers dry completely between applications. Wet-on-wet blends well, but too much reworking destroys the crisp needle effect.
Hang your botanical masterpiece near your actual tree for a beautiful echo of the season
Surreal Floating Ornament Christmas Tree


This charming, stylized Christmas tree combines simple geometric shapes with festive watercolor and metallic accents for a modern holiday look. The clean lines and pops of gold make it a perfect addition to your sketchbook or handmade holiday cards.
Detailed Instructions
Materials
- Watercolor paper sketchbook or mixed media paper
- Pencil (HB or H)
- Eraser
- Fine liner pen (light grey or teal/green)
- Watercolor paints (various colors for ornaments)
- Gold metallic paint or gold gel pen
- Fine round paintbrush (size 0 or 2)
- Ruler (optional)
Step 1: Drafting the Shape
-
Establish the curve:
Begin by lightly sketching a long, gently curved vertical line with your pencil to act as the spine of the tree. This gives the tree a slight, playful sway rather than being perfectly rigid. -
Draw the main triangle:
Sketch a tall, narrow triangle around your center line. Instead of straight sides, let the lines bow inward slightly for a concave, elegant silhouette. -
Round the base:
Connect the two bottom points of your triangle with a softly curved line that bows downward, giving the tree volume. -
Divide the sections:
Draw three or four curved lines across the width of the tree. Angle them downward to mimic garland wrapping around the branches.
Step 2: Adding Line Work & Color
-
Outline the tree:
Using a light teal or grey fine liner, trace over your pencil outline. I find a broken or slightly organic line looks better here than a perfectly straight ruler line. -
Add the stars:
With colored pencils or fine-tip markers, draw small five-point stars and tiny dots scattered within the white sections of the tree. Use a variety of colors like red, blue, green, and purple. -
Paint the topper:
Using your gold metallic paint, create a large, five-point star at the very top of the tree interact with the tip. -
Gild the garlands:
Dip your fine brush into the gold paint again. Carefully trace the curved dividing lines you drew earlier, making them bold and distinct. -
Add floating magic:
Paint small gold snowflakes or asterisks floating in the empty space around the tree to create a magical atmosphere. -
Sprinkle gold dust:
Add tiny gold dots around the exterior snowflakes to fill the negative space without overcrowding it. -
Draw the trunk:
Use a brown fine liner or pencil to draw a small, rectangular trunk at the base using vertical hatching lines for texture. -
Erase guidelines:
Wait until all ink and paint is completely dry, then gently erase any visible pencil marks from your initial sketch.
Smudge Prevention
Metallic paints often take longer to dry than standard watercolors. Keep your hand elevated or use a scrap paper guard.
Make it 3D
Once the drawing is dry, apply small dots of glitter glue over the colored stars for tangible texture and extra sparkle.
Now you have a festive, stylized tree that shines beautifully when it catches the light


Have a question or want to share your own experience? I'd love to hear from you in the comments below!