City scenes are such a fun way to paint big atmosphere without getting lost in tiny architectural details. Here are my favorite city painting ideas—from classic skyline silhouettes to playful, stylized street views you can totally make your own.
Sunset Silhouette Skyline
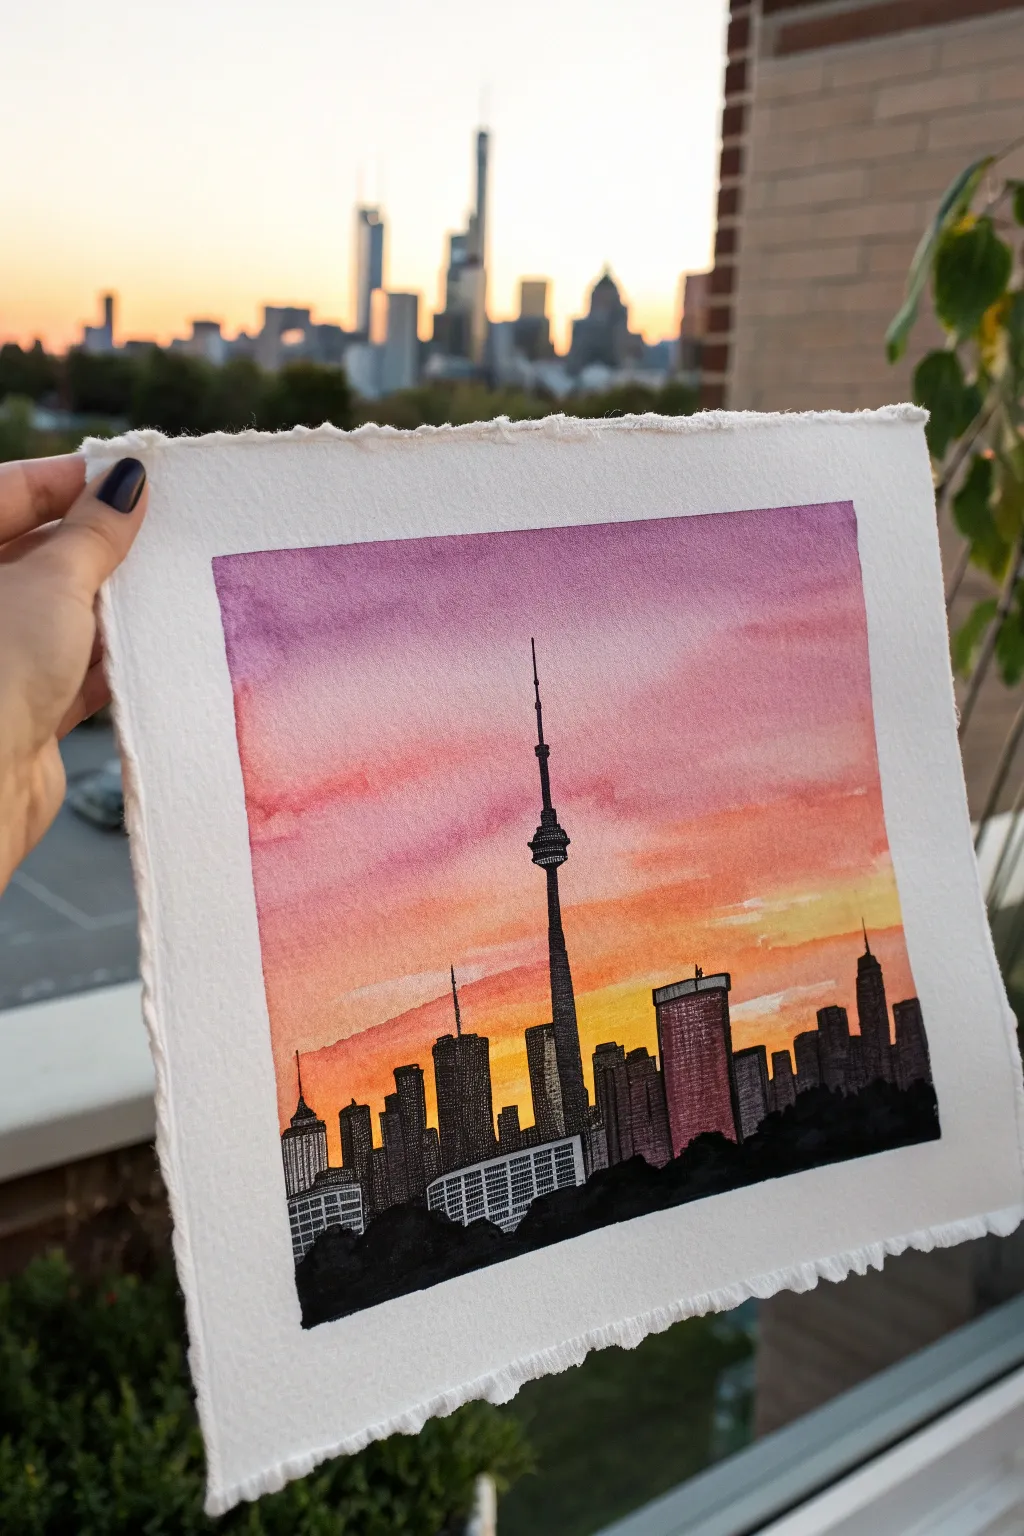
Capture the magic of an urban sunset with this mixed-media project featuring the iconic Toronto skyline. You’ll blend a vibrant watercolor gradient sky with crisp black ink details to create a striking silhouette effect.
Step-by-Step
Materials
- Cold press watercolor paper (approx. 5×7 inches)
- Masking tape or painter’s tape
- Watercolor paints (Purple, Magenta, Orange, Yellow)
- Flat wash brush (1/2 inch or 3/4 inch)
- Fine liner pens (Black, waterproof, sizes 01 and 05)
- White gel pen
- Pencil and eraser
- Ruler
- Jar of clean water
- Paper towels
Step 1: Preparation & Sky Wash
-
Tape the edges:
Begin by taping down all four edges of your watercolor paper to a board or table. This creates a clean white border and prevents the paper from buckling while it’s wet. -
Sketch the horizon:
Lightly draw a horizontal line near the bottom third of the paper. This creates the base for your city, ensuring enough room for the dramatic sky above. -
Wet the sky area:
Using your flat wash brush and clean water, apply an even coat of water to the entire sky area, stopping just at your horizon line. The paper should be glisten, but not hold puddles. -
Apply the purple:
Load your brush with a rich purple watercolor. Paint a horizontal band at the very top of the sky, letting the wet-on-wet technique diffuse the edges downward. -
Blend in magenta:
While the purple is still damp, pick up magenta paint. Apply it just below the purple, brushing back and forth to blend the two colors seamlessly. -
Transition to orange:
Rinse your brush slightly and load it with bright orange. Paint the middle section of the sky, overlapping slightly with the magenta to create soft, peachy transitions. -
Add the yellow glow:
Finish the gradient by applying yellow near the horizon line. Blend it carefully into the orange above, keeping the color brightest right where the buildings will sit. -
Let it dry completely:
Allow the paper to dry fully. It must be bone-dry before you start drawing, or the ink will bleed into the paper fibers.
Step 2: Drafting the Skyline
-
Outline the CN Tower:
With a pencil, lightly sketch the CN Tower in the center. Start with a vertical line closer to the top, adding the ‘pod’ shape and the antenna. Use a ruler if you want perfect vertical alignment. -
Block in major buildings:
Sketch the rectangular shapes of the surrounding skyscrapers. Vary the heights and widths to create visual interest, placing taller buildings near the tower and shorter ones toward the edges. -
Add foreground trees:
Roughly sketch a bumpy, organic line at the very bottom of the page to represent a tree line or park foreground, which anchors the cityscape.
Bleeding Lines?
If your black ink lines look fuzzy, the paper was likely still damp. Wait longer or use a hairdryer on the ‘cool’ setting to ensure the paper is bone dry before inking.
Step 3: Inking & Details
-
Ink the outlines:
Using a size 05 waterproof pen, trace over your pencil lines for the buildings. Outline the needle-thin antenna of the CN tower carefully. -
Fill the treeline:
Use the thicker pen or a brush pen to fill in the bottom treeline completely black. This creates a heavy, solid base for the composition. -
Add building textures:
Switch to a size 01 fine liner. Draw vertical lines, grids, or rows of small dots on individual buildings to mimic windows. I find keeping some patterns simple prevents the drawing from looking cluttered. -
Darken specific buildings:
Select a few buildings in the background or at the far edges and color them in solid black or very dark grey hatching to create depth. -
Highlight the tower:
Add horizontal hatching on the darker side of the CN Tower to suggest roundness, leaving a sliver of paper showing on one side for a highlight. -
Final white touches:
Take your white gel pen and add tiny dots or small lines over the solid black areas to represent lights turning on in the evening. -
Remove the tape:
Wait for the ink to be perfectly dry. Peel the tape away slowly at a 45-degree angle to reveal your crisp, white borders.
Add Sparkle
For a magical twilight effect, flick a stiff toothbrush loaded with white gouache or acrylic over the purple section of the sky to create faint stars.
Now you have a stunning piece of silhouette art that perfectly captures the mood of the city at dusk


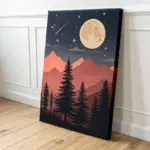
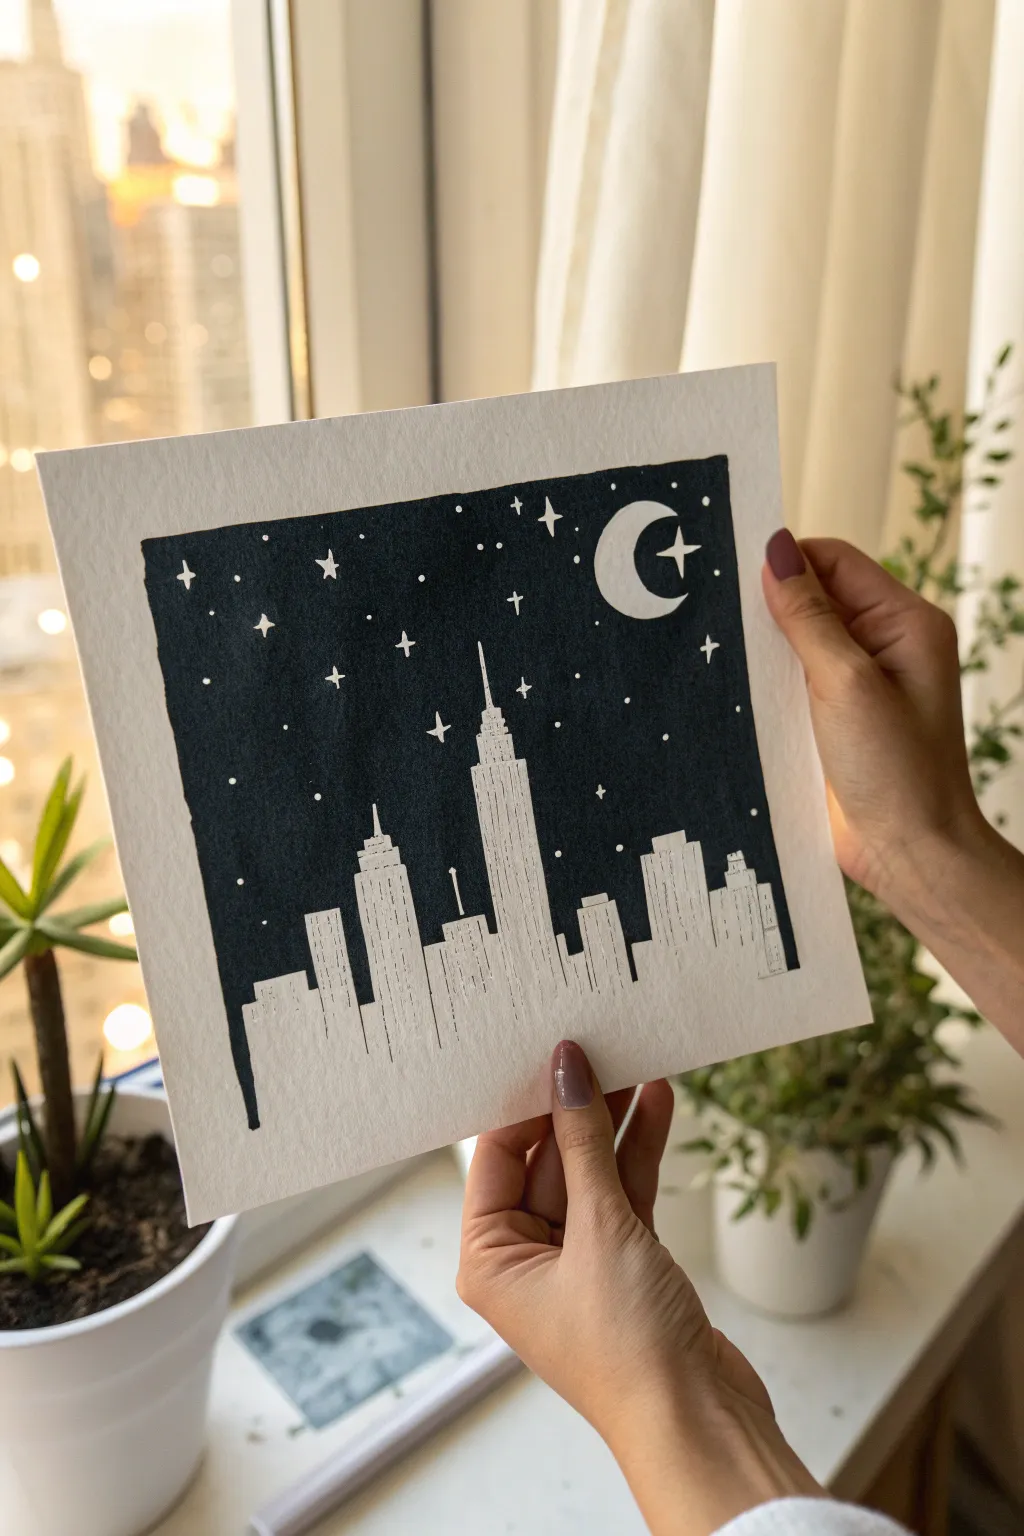
Twilight Skyline With Window Lights
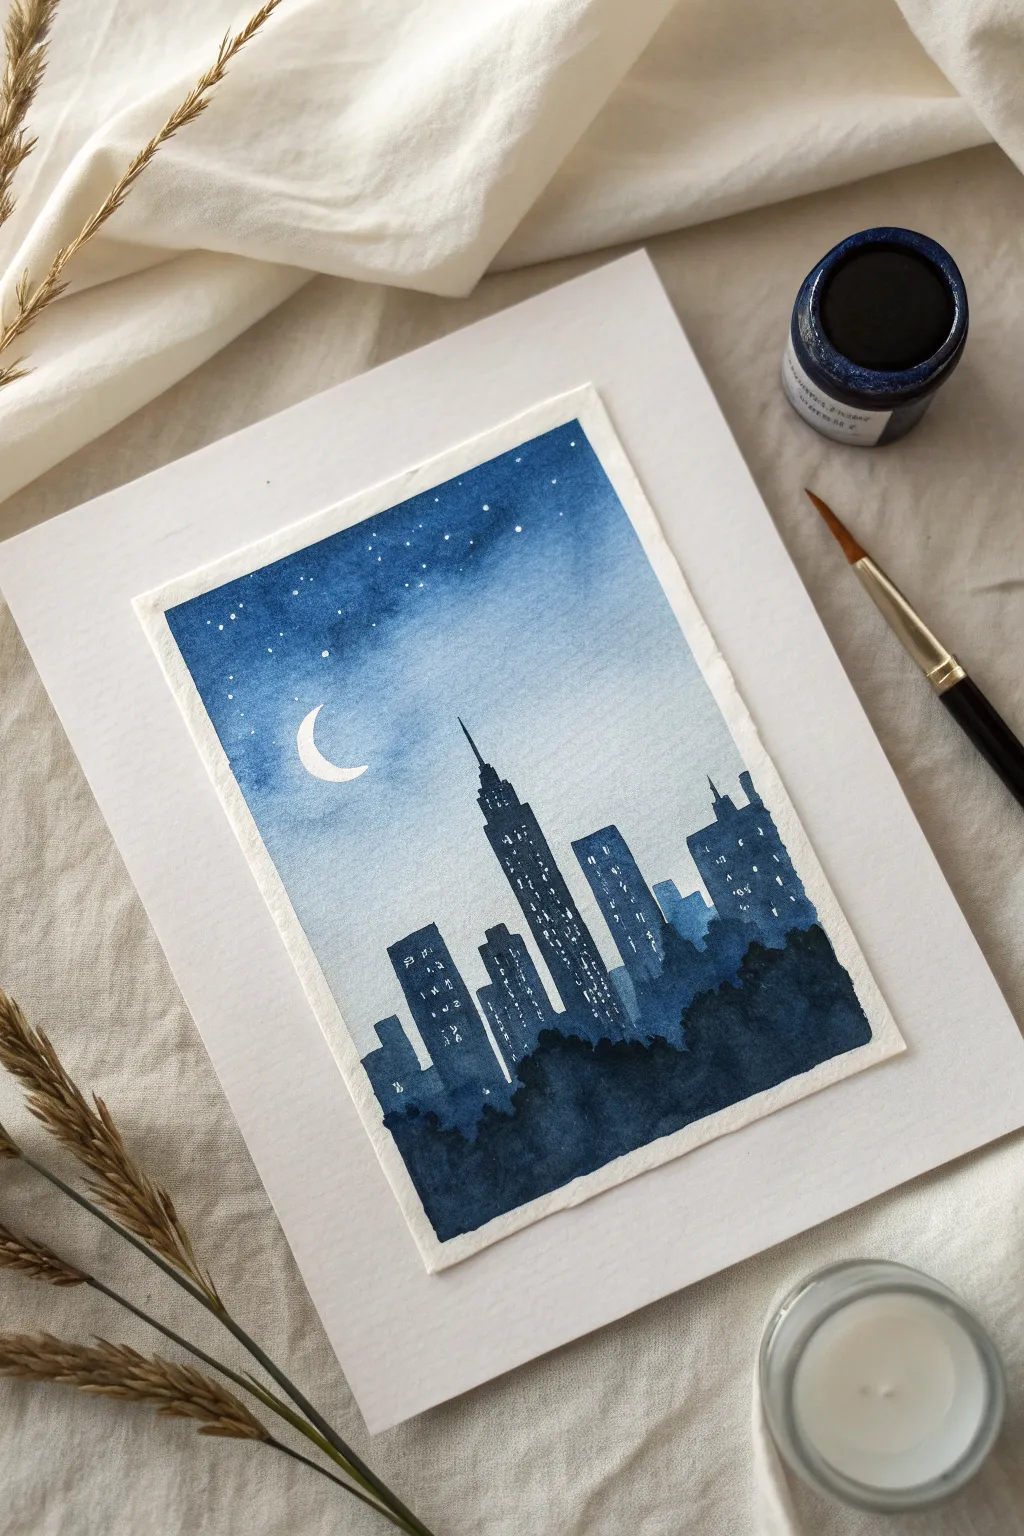
This stunning monochrome watercolor piece captures the serene beauty of a city sleeping under a starlit sky. By mastering simple wet-on-wet gradients and sharp silhouette work, you can create a moody, atmospheric skyline that glows with quiet energy.
Step-by-Step Tutorial
Materials
- Cold press watercolor paper (approx. 5×7 inches)
- Masking tape
- Watercolor paints (Indigo, Prussian Blue, Payne’s Gray)
- White gouache or white gel pen
- Synthetic round brush (size 6 or 8)
- Fine detail brush (size 0 or 1)
- Jar of clean water
- Paper towels
- Pencil and eraser
Step 1: Setting the Scene
-
Tape the borders:
Secure your watercolor paper to a sturdy board or table using masking tape. Press the edges down firmly to ensure crisp, clean borders when you peel it off later. -
Sketch the moon:
Lightly sketch a small crescent moon shape in the upper left quadrant. Keep the pencil lines barely visible so they don’t show through the final wash. -
Prepare your blues:
Mix a generous amount of watery Prussian Blue for the sky. You want enough paint to cover the top two-thirds of the paper without stopping to mix more.
Step 2: Creating the Gradient Sky
-
Apply clean water:
With your larger round brush, brush clean water over the entire sky area, stopping about a third of the way up from the bottom. Avoid wetting the moon shape; paint carefully around it. -
Start the wash:
Load your brush with the Prussian Blue mixture. Start applying it at the very top edge of the paper where the sky should be darkest. -
blend downwards:
Work your way down the paper with horizontal strokes. As you move lower, dip your brush in water to dilute the paint, creating a smooth fade from dark blue to a very pale, nearly white blue near the horizon line. -
Define the moon:
While the paint is wet, carefully refine the shape around your reserved white moon. If paint accidentally flows in, dab it gently with a dry paper towel or clean damp brush. -
Deepen the zenith:
While the top section is still damp, drop in a slightly concentrated mix of Indigo or concentrated Prussian Blue at the very top corners to enhance the night effect. -
Let it dry completely:
This is crucial. The paper must be bone dry before you start the skyline. If it feels cool to the touch, it’s still wet.
Uneven Sky Gradient?
If your gradient looks streak, re-wet the entire sky area gently with clean water and tilt the paper back and forth. Gravity will help smooth out the transition lines naturally.
Step 3: Building the City
-
Mix the silhouette color:
Create a thick, creamy mixture of Indigo and Payne’s Gray. You want this paint to be opaque and dark, not watery. -
Outline the skyscrapers:
Using your fine detail brush, paint the outline of the tallest central skyscraper first. Give it a distinct spire. Add shorter, blockier buildings to the left and right. -
Fill the shapes:
Fill in the building shapes with your dark mixture. Vary the heights to create visual interest, making sure the tops are crisp and straight. -
Layer the foreground:
While the buildings capture focus, paint a jagged, uneven layer of ‘trees’ or lower structures at the very bottom using the darkest concentration of paint to ground the composition. -
Add varied tones:
I like to water down the grey mixture slightly for one or two background buildings to make them look further away, pushing the darker buildings forward.
Make It Glow
Mix a tiny amount of yellow watercolor or gouache into the white paint for the windows. This subtle warmth makes the city lights feel cozy against the cold blue sky.
Step 4: Illuminating the Night
-
Prepare the lights:
Squeeze out a tiny dot of white gouache. You need a very thick consistency so it stands out against the dark buildings. -
Dot the windows:
Using the very tip of your smallest brush or a white gel pen, add rows of tiny dots and dashes on the skyscrapers to represent lit windows. Don’t make them too uniform; random patterns look more like a real city. -
Create the stars:
Dilute a wider pool of white gouache with a little water. load your brush, hold it over the sky area, and tap the handle against another brush to splatter different-sized stars. -
Define the brighter stars:
Pick out a few specific stars with a manual dot of white gouache to create constellations or brighter planets. -
Reveal the border:
Once absolutely everything is dry, slowly peel away the masking tape at a 45-degree angle to reveal your clean white frame.
Now you have a tranquil twilight scene perfect for framing or gifting to a city lover


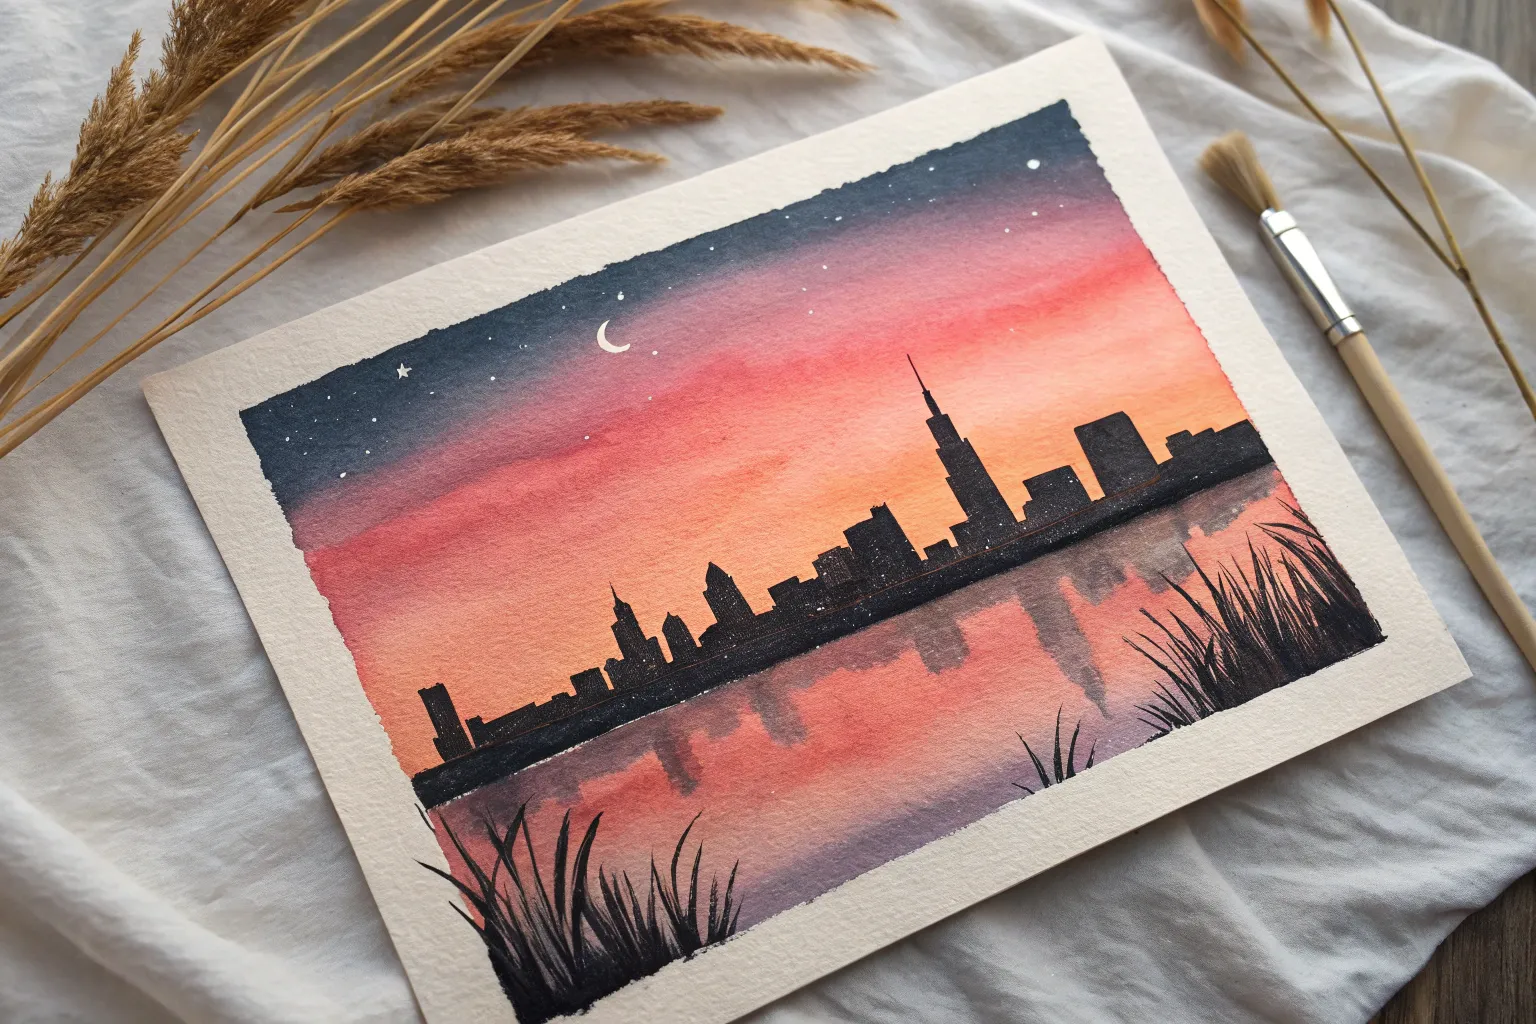
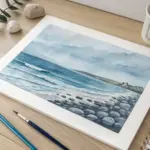
Waterfront Reflections Cityscape
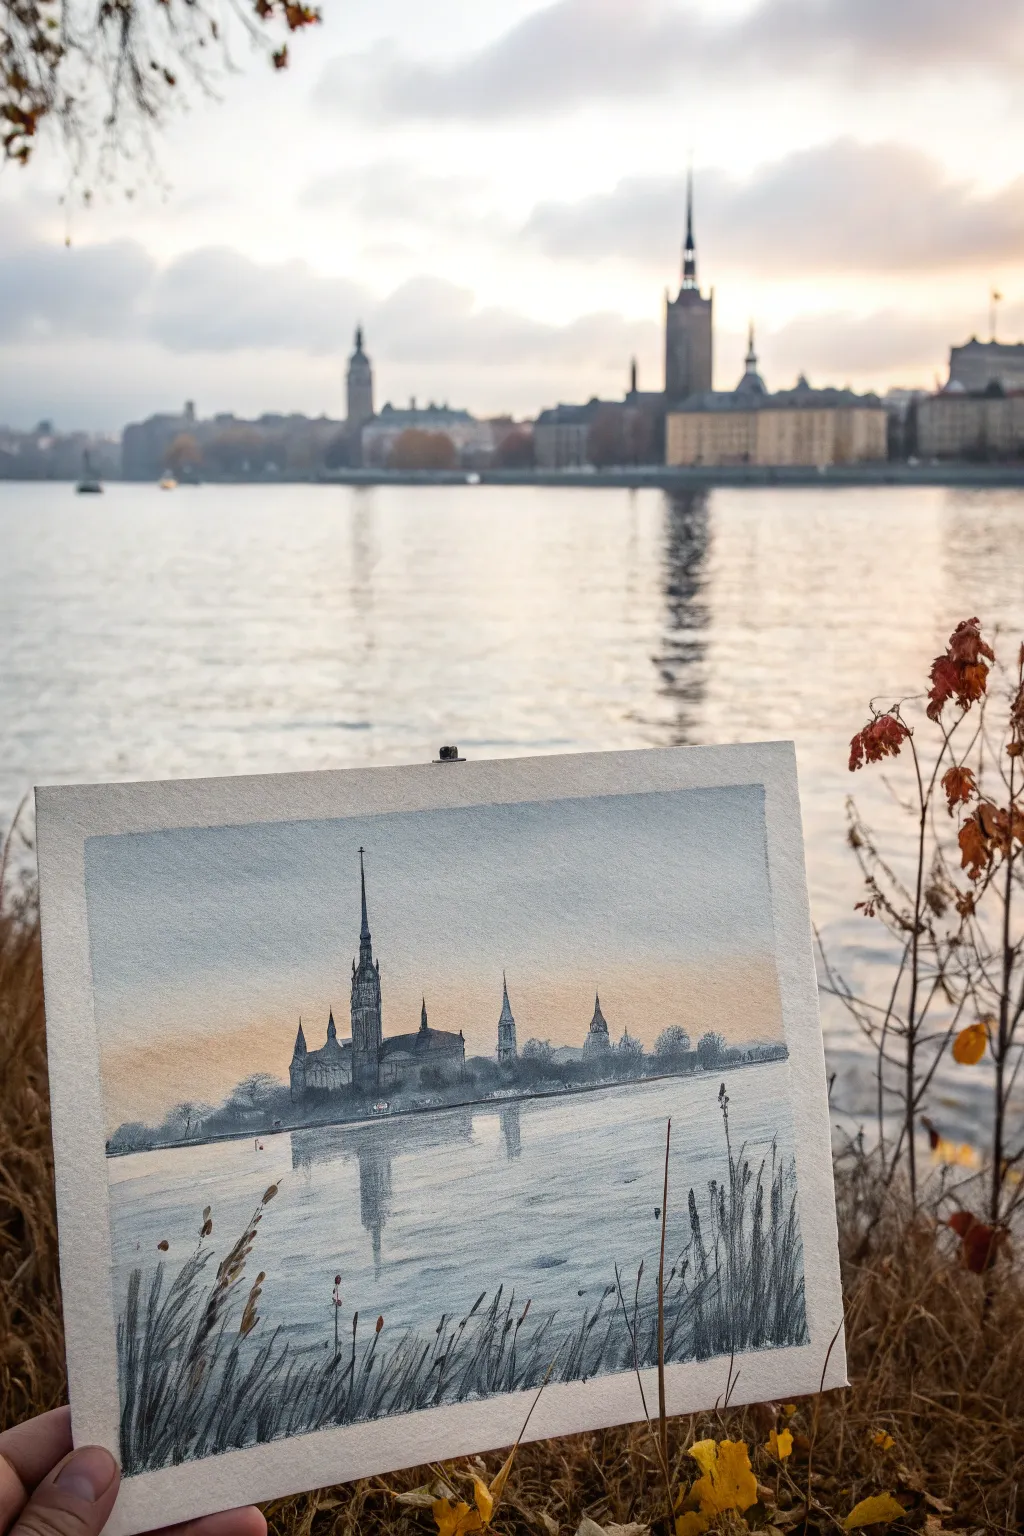
Capture the serene beauty of a harbor city at twilight with this atmospheric watercolor tutorial. You’ll master wet-on-wet washes for the sky and water, contrasting them with sharp architectural silhouettes and delicate foreground grasses.
Detailed Instructions
Materials
- Cold press watercolor paper (300 gsm or heavier)
- Watercolor paints (Payne’s Grey, Yellow Ochre, Burnt Sienna, Indigo, Ultramarine)
- Masking tape
- Drawing board or stiff backing
- Round brushes (sizes 2, 6, and 10)
- Rigger brush or liner brush (for grasses)
- HB pencil
- Two jars of water
- Paper towels
Step 1: Preparation and Sketching
-
Secure the paper:
Begin by taping down all four edges of your watercolor paper to your board. This creates a crisp white border and prevents the paper from buckling during heavy washes. -
Establish the horizon:
Draw a faint, straight horizontal line about one-third of the way up from the bottom of the page. This will be the waterline where the buildings meet the harbor. -
Sketch the silhouette:
Lightly sketch the skyline shapes. Focus on the main central spire and the supporting smaller towers. Don’t worry about tiny windows yet; just get the outline and proportions accurate against the sky.
Wetness Control Pro-Tip
For the buildings to look distant and misty, add a tiny drop of water onto the bottom edge of the wet paint. This pushes pigment up, creating a natural ‘bloom’ texture.
Step 2: Atmospheric Washes
-
Wet the sky:
Using your largest brush and clean water, wet the entire sky area heavily, stopping carefully just above your pencil sketch of the buildings. -
Paint the upper sky gradient:
While the paper is glistening wet, drop in a very diluted wash of Indigo or a cool grey at the very top, letting it fade downwards into nothingness. -
Add the sunset glow:
Near the horizon line (just behind the buildings), gently brush in a band of warmed Yellow Ochre or a touch of dilute Burnt Sienna. Let this bleed upward slightly into the damp paper to create a soft, hazy transition. -
Wash the water:
Once the sky is damp but not soaking, mirror the colors in the water section. Start with a pale grey-blue wash over the entire water area, leaving the space directly under the buildings slightly lighter for reflections. -
Dry generally:
Allow these initial washes to dry completely. The paper must be bone-dry before you paint the sharp building details to avoid unwanted bleeding.
Step 3: Building the Cityscape
-
Mix the shadow color:
Create a rich, dark grey mixture using Payne’s Grey and a touch of Ultramarine Blue. The buildings are backlit, so we are painting them mostly as silhouettes. -
Paint the main silhouette:
Using a size 6 brush, fill in the shapes of the buildings. Keep the edges sharp against the sky. I prefer to vary the darkness of the wash slightly—darker at the base, slightly lighter near the rooftops—to suggest atmospheric perspective. -
Add architectural details:
While the silhouette is drying (or just after), use a size 2 brush and a very concentrated dark mix to add the sharp needle-spires, crosses, and roof textures. -
Soften the base:
Before the bottom edge of the buildings dries completely, take a barely damp clean brush and run it along the waterline. This softens the edge where the city meets the water, preparing it for reflections.
Level Up: Color Harmony
Mix a tiny amount of your sky’s peach/orange tone into the dark grey used for the intricate reeds. This subtle color link unifies the foreground with the background light.
Step 4: Reflections and Foreground
-
Vertical reflections:
With the building paint dry, mix a diluted version of your dark building color. Paint vertical strokes downward from the city into the water. Keep these strokes somewhat loose and broken. -
Horizontal ripples:
Use a dry brush technique with slightly darker paint to drag horizontal lines across the reflections. This cuts through the vertical shapes and makes the water look rippled and fluid. -
Foreground grasses:
Load a rigger or liner brush with a thick mixture of Payne’s Grey and Burnt Sienna. Paint quick, upward flicking motions starting from the very bottom edge to create tall reeds and grasses. -
Vary the grass:
Ensure the grasses vary in height and direction. Some should cross over each other. Add a few tiny seed heads or leaves near the tops for realism. -
Final dry brush texture:
Add a few very faint horizontal dry brush strokes in the foreground water behind the reeds to suggest movement near the shore. -
Remove tape:
Wait until the painting feels cool to the touch (completely dry) before slowly peeling off the masking tape at a 45-degree angle to reveal your crisp border.
Enjoy the peaceful atmosphere your new cityscape brings to the room

Classic Downtown Street Perspective
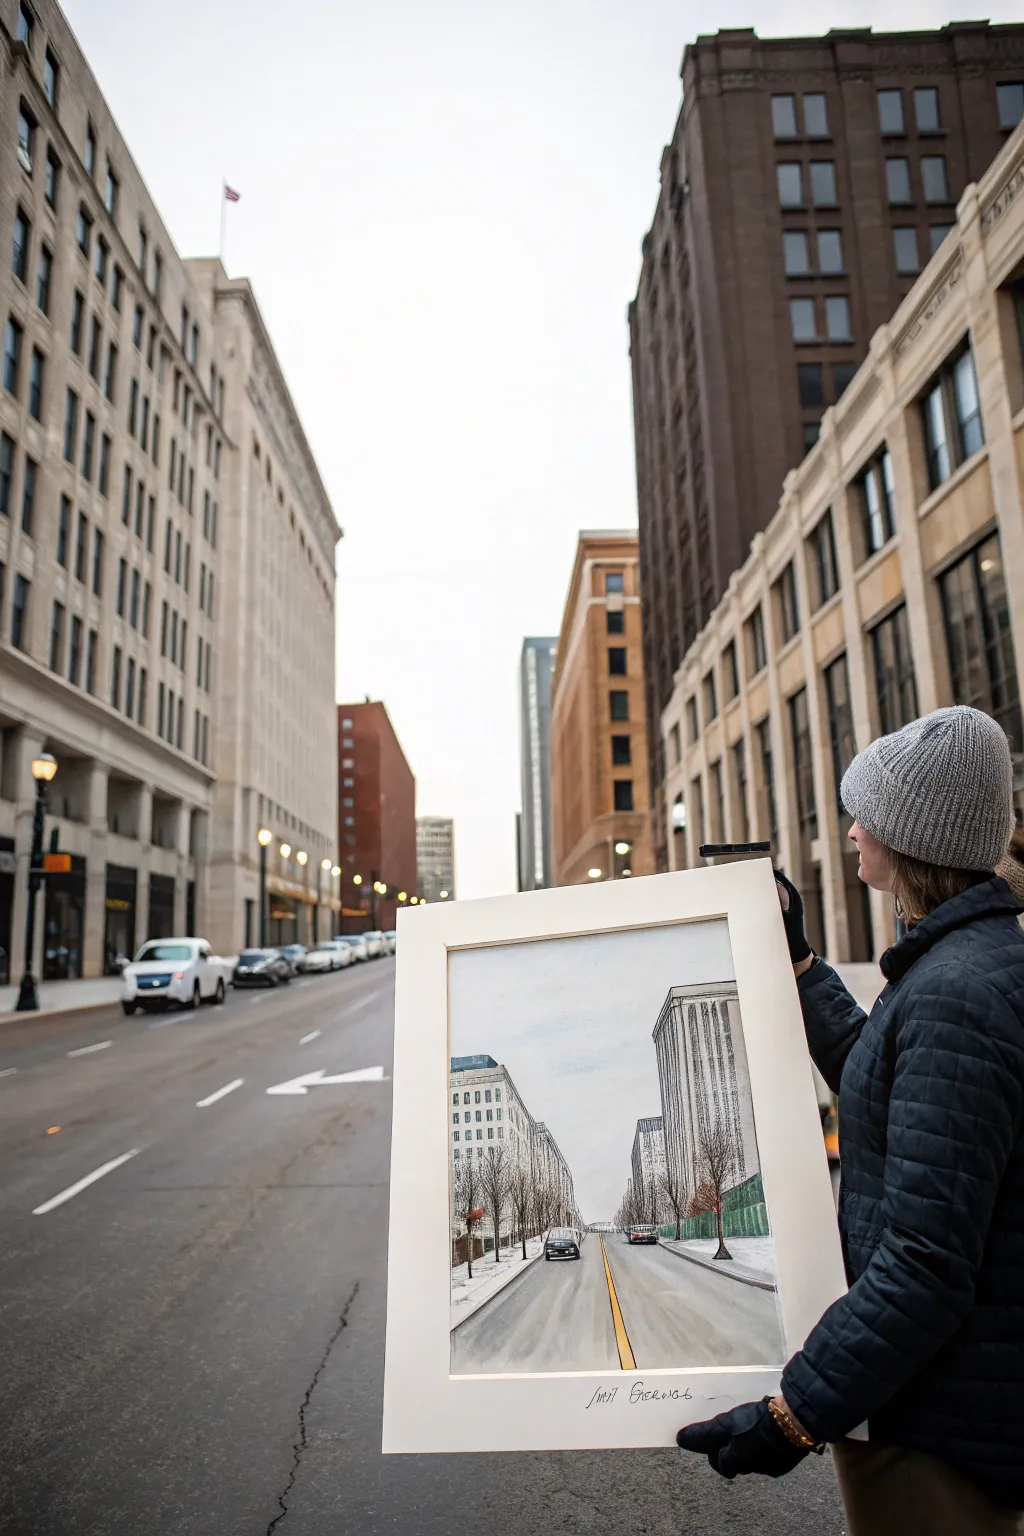
Capture the stately grandeur of downtown architecture with this mixed-media project that combines precise pen work with soft watercolor washes. This piece focuses on a classic one-point perspective composition, rendering tall city buildings in cool grays and earthy tones.
How-To Guide
Materials
- Heavyweight watercolor paper (140lb cold press)
- Pencil (HB or 2H)
- Long ruler or T-square
- Waterproof fine liner pens (0.1mm, 0.3mm, 0.5mm)
- Watercolor paints (Payne’s Gray, Yellow Ochre, Burnt Sienna, Ultramarine Blue)
- Round watercolor brushes (Size 4 and 8)
- Flat shader brush (1/2 inch)
- White or cream mat board for framing
- Masking tape
Step 1: Drafting the Perspective
-
Establish the Horizon:
Tape your watercolor paper down to a rigid surface. Using a pencil and ruler, lightly draw a horizontal line across the lower third of your paper. This is your horizon line. -
Find the Vanishing Point:
Mark a single dot in the center of your horizon line. This ‘vanishing point’ will be the anchor for all your diagonal lines. -
Sketch the Street Guides:
Draw two diagonal lines radiating from the vanishing point toward the bottom corners of the paper to define the width of your street. -
Outline Building Blocks:
Sketch vertical rectangles on either side of the street for the buildings. Their heights should vary, but the tops and bottoms of windows and roofs must align with diagonal guidelines heading back to your vanishing point. -
Add Structural Details:
Sketch in the vertical columns and rows of windows. Keep your pencil marks very light, as graphite can smear when wet.
Step 2: Inking the Architecture
-
Main Outlines:
Switch to a 0.5mm waterproof pen. Carefully trace the major vertical lines of the buildings and the curb lines of the street. Use your ruler for steadiness. -
Window Details:
Using a thinner 0.1mm pen, freehand the smaller details like window frames and distant architectural elements. Drawing these freehand adds a nice organic feel to an otherwise rigid scene. -
Drawing Trees:
Sketch the bare winter trees lining the street using scumbly, irregular lines. Keep the branches thinner near the top. -
Erase Guidelines:
Wait at least 15 minutes for the ink to fully cure, then gently erase all visible pencil marks with a kneaded eraser.
Smudged Ink?
If your waterproof pen smears when you paint, it hasn’t cured long enough. Use a hair dryer on a cool setting for 60 seconds before applying any water.
Step 3: Watercolor Application
-
Sky Wash:
Wet the sky area with clean water first. Drop in a very dilute mix of Ultramarine Blue and a touch of gray, keeping it strongest at the top and fading near the horizon. -
Building Base Tones:
Mix a watery wash of Payne’s Gray. Apply this to the shadowed sides of the buildings, leaving the light-facing sides white or barely tinted. -
Street Color:
Paint the road surface with a flat brush using a cool gray mix. While it’s still damp, I like to drop in darker pigment near the bottom edge for depth. -
Adding Warmth:
Once the gray layers are dry, glaze a very transclucent wash of Yellow Ochre or Burnt Sienna over select buildings to mimic brickwork. -
Tree Shadows:
Use a small round brush to dab darker gray/brown mixed paint at the base of the trees and for the bare branches. -
The Yellow Stripe:
With a steady hand or ruler, paint the double yellow center line using opaque yellow paint or gouache. This pop of color leads the eye directly into the drawing.
Atmospheric Depth
Make distant buildings lighter and bluer than foreground ones. This ‘atmospheric perspective’ trick instantly adds miles of depth to your street scene.
Step 4: Final Touches & Framing
-
Intensify Shadows:
Go back in with your 0.3mm pen or dark paint to deepen the darkest crevices, like open doorways or deep window sills, to increase contrast. -
Add Cars:
Paint tiny car shapes near the vanishing point using dark gray blobs, adding small white highlights with gouache or a gel pen for windshields. -
Matting:
Once completely dry, remove the tape. Cut a white mat board with a window slightly smaller than your painting dimensions. -
Assembly:
Secure the artwork behind the mat using acid-free tape, ensuring the horizon line is perfectly straight.
Hang your finished urban landscape proudly and enjoy the view of the city from your own home
BRUSH GUIDE
The Right Brush for Every Stroke
From clean lines to bold texture — master brush choice, stroke control, and essential techniques.
Explore the Full Guide
Foggy Morning Minimal Cityscape
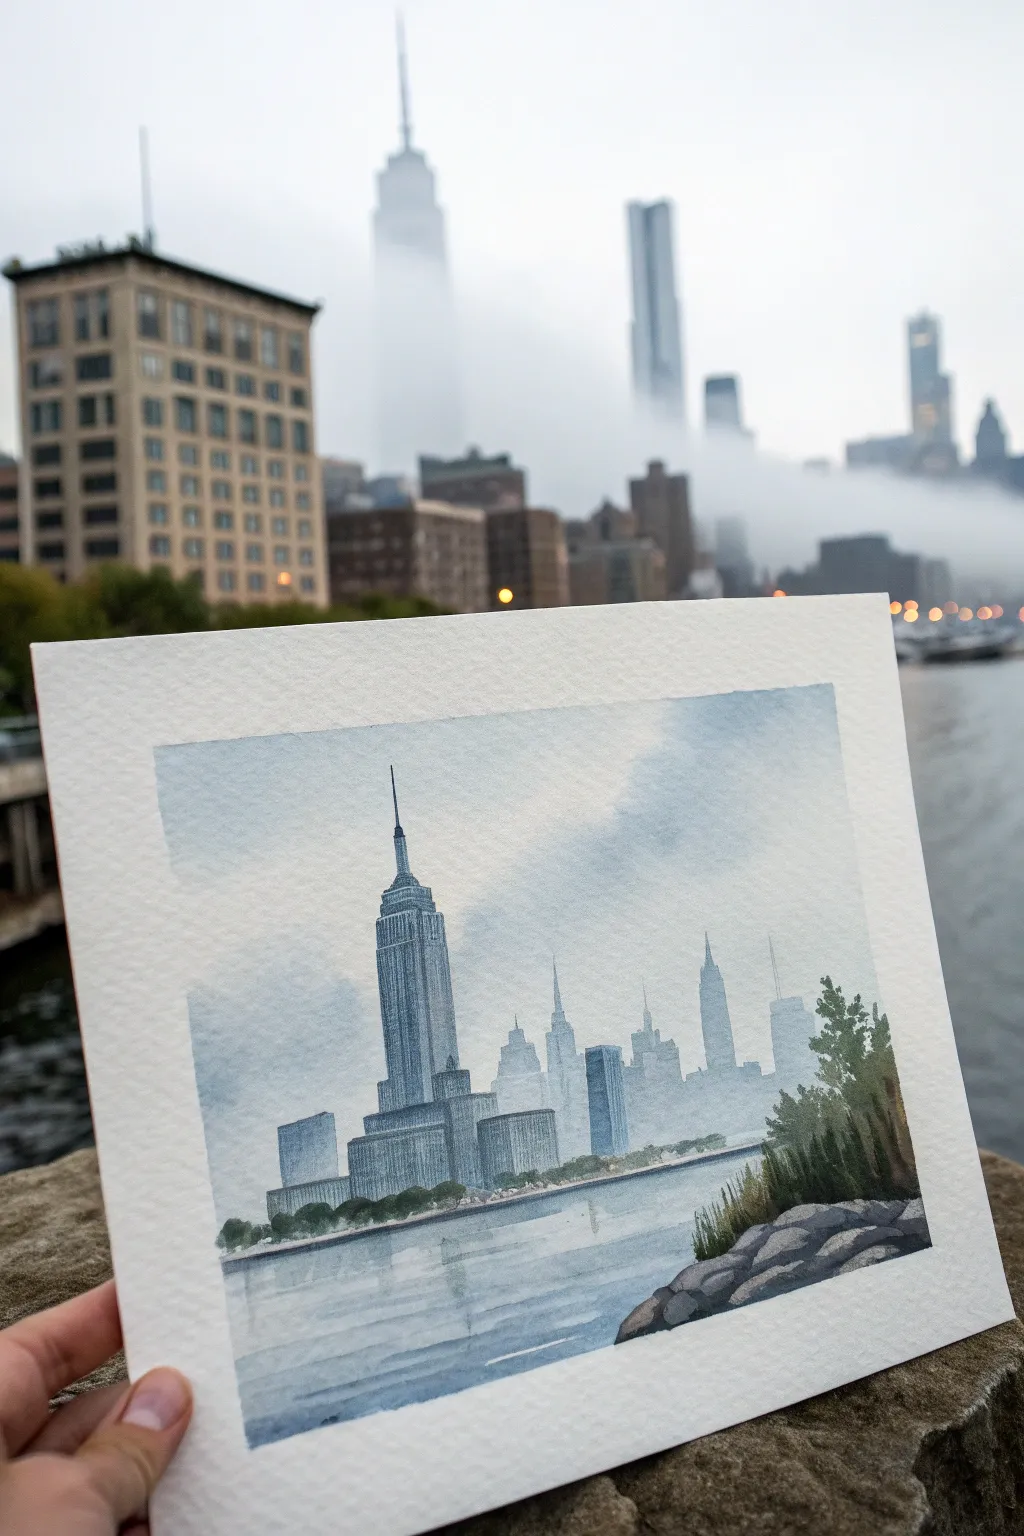
Capture the serene solitude of a city waking up with this atmospheric watercolor tutorial. Using limited blue-grey tones and wet-on-wet techniques, you’ll create a soft, foggy skyline anchored by stark architectural details and a rocky foreground.
Step-by-Step
Materials
- Cold Press Watercolor Paper (140lb/300gsm)
- Watercolor Paints: Payne’s Gray, Indigo, Ultramarine Blue, Burnt Umber, Green Gold
- Flat Wash Brush (3/4 inch)
- Round Detail Brushes (Size 2 and 6)
- Graphite Pencil (HB or lighter) and Eraser
- Masking Tape
- Clean Water and Paper Towels
- White Gel Pen or White Gouache (optional)
Step 1: Sketching and Sky Wash
-
Lightly sketch the skyline:
Begin by taping down your paper to a board. Using an HB pencil, very faintly sketch the horizon line about one-third up from the bottom. Outline the main skyscraper shape—resembling the Empire State Building—slightly off-center to the left. -
Outline background buildings:
Draw the smaller, surrounding buildings in the background. Keep these shapes simple and geometric, varying their heights to create a realistic silhouette. Don’t worry about windows yet. -
Sketch the foreground:
At the bottom right corner, sketch a cluster of jagged rocks and some shrubbery. This will serve as a visual anchor and add depth to your composition. -
Prepare the sky mix:
Mix a very watery wash of Ultramarine Blue with a tiny touch of Payne’s Gray on your palette. You want a pale, cool tone that looks like morning mist. -
Apply the uneven sky wash:
Wet the entire sky area with clean water first. While it’s glistening, drop in your pale blue mix. Let the pigment bloom naturally, leaving some areas lighter to suggest breaking fog or clouds. -
Soften the horizon:
As you bring the sky wash down toward the building outlines, dilute the paint further. The horizon line should look soft and indistinct, not sharp.
Fog Gone Flat?
If your sky looks too flat, lift a little paint with a thirsty brush or clean paper towel while the wash is still damp. This creates soft ‘cloud’ shapes and misty variation.
Step 2: Building the Cityscape
-
Paint the background silhouette:
Once the sky is bone dry, mix a slightly stronger version of your blue-grey. Paint the distant buildings using a flat brush. Keep these shapes flat and uniform in color to push them into the distance. -
Layer the main skyscraper:
For the prominent skyscraper, use a darker mix of Indigo and Payne’s Gray. Paint the main tower, ensuring the edges are crisp this time. The contrast is key here. -
Add architectural texture:
While the main building is damp (not soaking), use a size 2 brush to drag vertical lines of concentrated pigment down the facade. This mimics vertical windows and steel structure without drawing every detail. -
Create secondary buildings:
Paint the mid-ground buildings in shades that fall between the ghostly background and the dark main tower. Variation in value creates the illusion of depth. -
Establish the water’s edge:
Use a darker grey mix to paint the base of the city where it meets the water. Feather the bottom edge of this line slightly so the buildings don’t look like they are floating.
Shift the Mood
Change the time of day by swapping the color palette. Use pale lavenders and pinks for a sunrise glow, or deep purples and oranges for a dramatic sunset silhouette.
Step 3: Foreground and Water
-
Paint the water reflection:
I prefer to re-wet the water area with clean water first. Then, using horizontal strokes, apply the same blue-grey used for the sky, mirroring the colors above. -
Add reflection details:
While the water is still wet, drop in darker vertical streaks directly under the main skyscraper. Let them blur downward to create a soft reflection. -
Paint the foreground rocks:
Mix Burnt Umber with Indigo to get a deep, cold grey-brown. Paint the rock cluster in the bottom right corner, using jagged strokes to capturing their rough texture. -
Add rock shadows:
Once the base rock layer is dry, add shadows on the bottom and right sides of the stones using nearly black paint to give them three-dimensional weight. -
Paint the foliage:
Mix Green Gold with a bit of Indigo for a muted, realistic green. Stipple this color above the rocks to create bushes and small trees. Keep the edges ragged to look like leaves. -
Final highlights:
If you lost the spire tip of the building, carefully redefine it with your smallest brush. Optionally, use white gouache for tiny highlights on the water ripples.
Now you have a moody, atmospheric window into the city that requires no train ticket to enjoy
Neon Night Street Glow
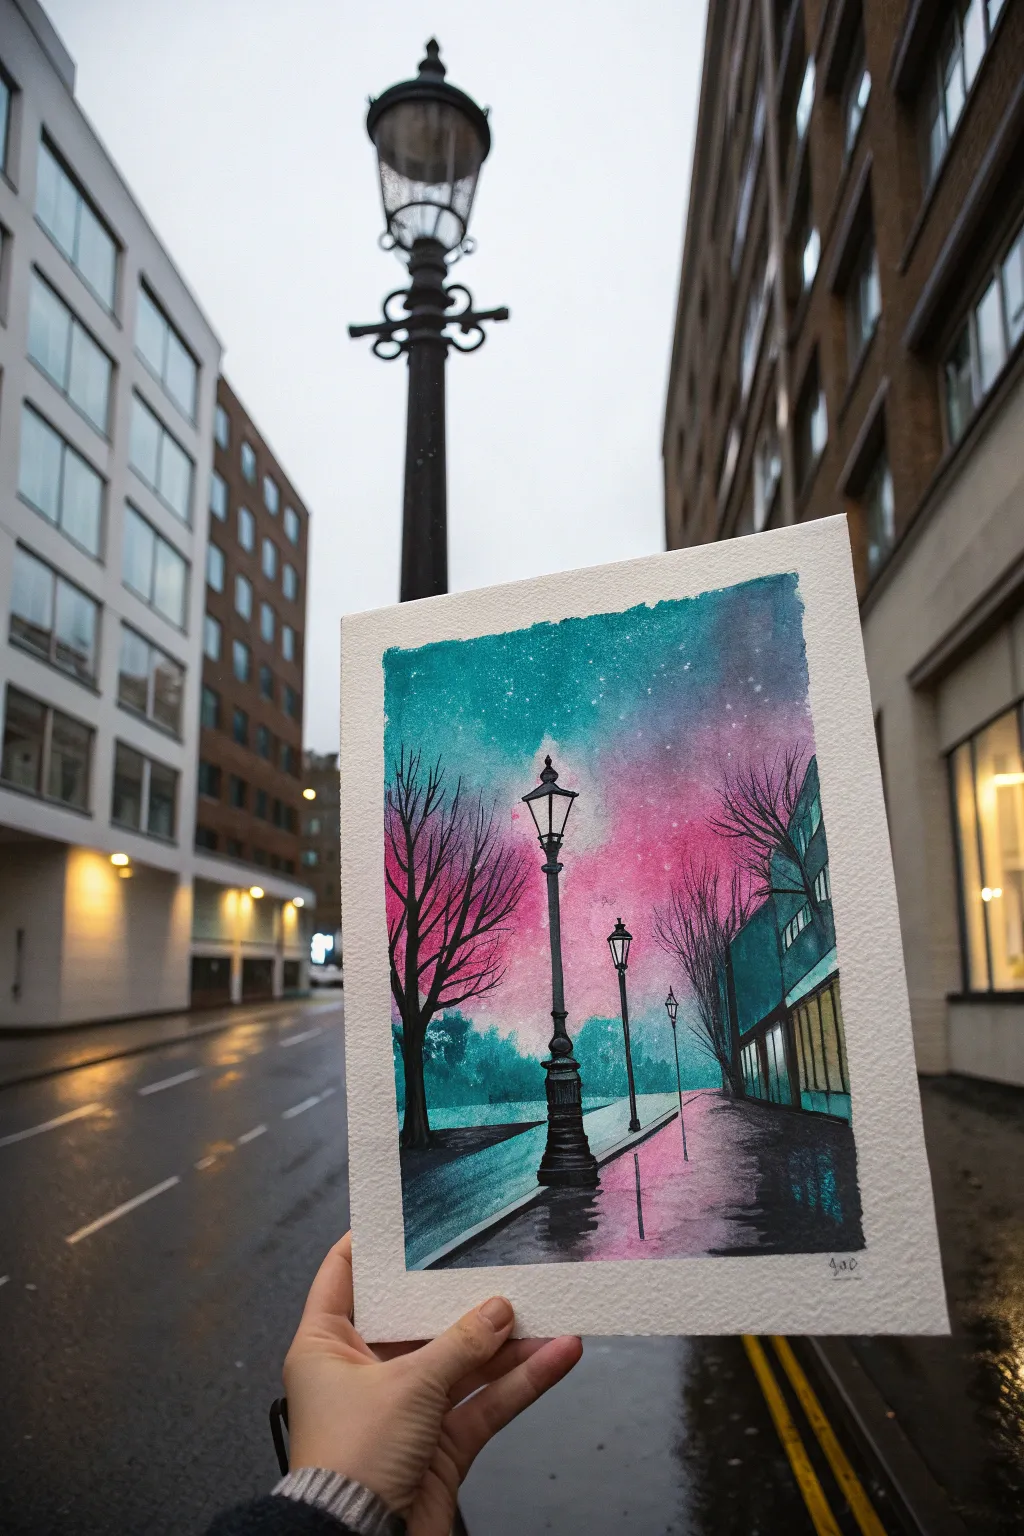
Capture the magic of an urban evening with this vibrant watercolor and ink painting, featuring a striking gradient sky that transitions from deep teal to electric pink. This approachable project focuses on wet-on-wet blending and stark silhouetted details to create a moody, glowing atmosphere.
Detailed Instructions
Materials
- Cold press watercolor paper (300 gsm)
- Watercolor paints (Turquoise/Teal, Magenta/Rose, Indigo, Black)
- White gouache or white gel pen
- Black waterproof fine liner pen (01 or 03 size)
- Black brush pen or India ink
- Round watercolor brushes (Size 4 and 8)
- Masking tape
- Paper towels
- Clean water
Step 1: Creating the Gradient Sky
-
Prepare the Surface:
Begin by taping down all four edges of your watercolor paper to a board. This creates the crisp white border seen in the example and prevents the paper from buckling during heavy washes. -
Wet the Paper:
Using your largest clean brush, apply a generous layer of clean water to the entire upper two-thirds of the paper where the sky will be. -
Apply Teal:
Load your brush with a vibrant turquoise or teal pigment. Start at the very top edge and paint downwards using horizontal strokes, letting the color naturally diffuse into the wet paper. -
Blend in Pink:
Clean your brush and pick up a bright magenta or rose color. Start applying this from the horizon line upwards, meeting the teal in the middle. Where they touch, allow them to blend slightly to create a soft violet transition. -
Add Depth:
While the paint is still wet, drop a small amount of Indigo or darker blue into the top corners to create a vignette effect, drawing the eye toward the center. -
Create Stars:
Before the sky dries completely but after the shine has dulled, tap a brush loaded with diluted white gouache against your finger to splatter tiny stars across the teal section.
Clean Edges Trick
To prevent paint bleeding under the tape, run a bone folder or the back of your fingernail firmly along the tape edge before you start painting.
Step 2: Painting the Foreground
-
Wash the Pavement:
Once the sky is dry, wet the bottom third of the paper. Apply a very light, watered-down wash of the pink used in the sky to the sidewalk area to represent reflected light. -
Add Shadowy Reflections:
While the pavement wash is damp, streak in some horizontal lines of grey or diluted teal to suggest wet pavement reflections and shadows. -
Dry Completely:
Allow the entire painting to dry completely. If the paper feels cool to the touch, it is still wet. Using a hairdryer on low heat can speed this up.
Step 3: Inking the Details
-
Outline the Lamps:
Using a waterproof fine liner, draw the central streetlamp. Start with the lantern shape at the top, then draw the vertical pole extending down to the pavement base. -
Add Perspective:
Draw two smaller, receding streetlamps further down the imaginary road to the right to create depth and perspective. -
Draw the Buildings:
On the right side, sketch the angular shapes of the buildings using your fine liner. You don’t need perfect architectural details; suggestions of windows and rooflines work best. -
Fill the Shadows:
Switch to a black brush pen or a brush with India ink to fill in the darkest areas—the base of the streetlamp, the heavy shadows under the building, and the right-hand corner. -
Create Silhouetted Trees:
With a fine liner or thin brush, paint the skeletal tree branches on the left and right. Keep the lines organic and jagged, reaching up into the pink and teal sky. -
Define the Curb:
Use a straight edge or steady hand to draw the diagonal line of the curb, separating the sidewalk from the street. -
Add Final Highlights:
Use a white gel pen or thick white gouache to add highlights on the streetlamp glass and specific reflective spots on the wet pavement to make them pop. -
Reveal the Border:
Gently peel away the masking tape at a 45-degree angle to reveal your crisp, clean edges.
Level Up: Glowing Lights
Before painting the black lamp posts, dab a tiny bit of lifting fluid or wax where the bulb goes. This keeps the paper white for a vivid light effect.
Now you have a stunning, atmospheric cityscape that glows with color even on the greyest days

PENCIL GUIDE
Understanding Pencil Grades from H to B
From first sketch to finished drawing — learn pencil grades, line control, and shading techniques.
Explore the Full Guide
Monochrome City in One Color Family
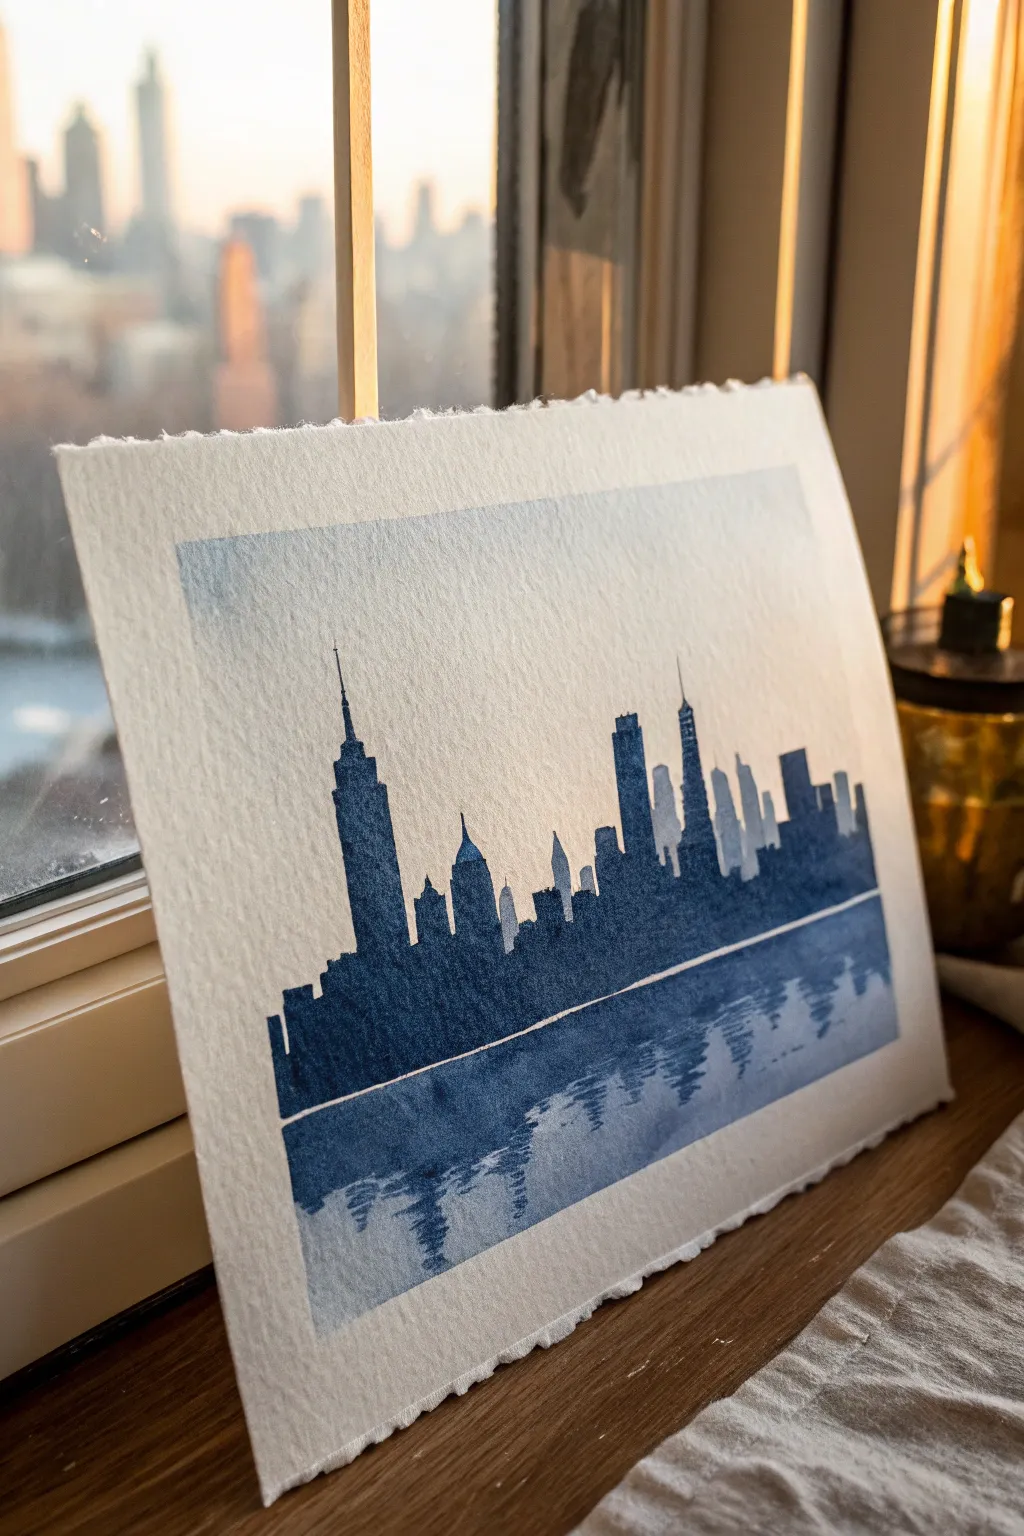
Capture the serene beauty of a city skyline using a single color family to create depth and mood. This watercolor project focuses on silhouettes and wet-on-wet reflections, resulting in a striking piece that looks sophisticated yet is surprisingly beginner-friendly.
Step-by-Step
Materials
- Cold press watercolor paper (300 gsm or heavier)
- Indigo or Payne’s Gray watercolor paint
- Flat shader brush (approx. 1/2 inch)
- Round detail brush (size 2 or 4)
- Painter’s tape or masking fluid (optional)
- Container of water
- Paper towels
- Pencil and ruler
Step 1: Preparation and Sketching
-
Prepare your paper:
Start with a high-quality piece of watercolor paper. If you want the rustic look shown in the example, gently tear the edges of a larger sheet against a ruler to create a soft, deckled edge rather than cutting it with scissors. -
Establish the horizon:
Using a ruler and a very light pencil touch, draw a straight horizontal line across the lower third of your paper. This separates the sky/buildings from the water. -
Outline the skyline:
Lightly sketch the outline of your chosen city. Focus on recognizable shapes—like the stepped spire of the Empire State Building or the triangular top of the Chrysler Building. No need for internal details; we just want the outer silhouette. -
Masking borders (optional):
If you prefer a clean white border around your painting instead of painting to the edge, apply painter’s tape now. For the floating look in the photo, skip this step and paint freely within a central rectangle.
Step 2: Painting the Sky
-
Prepare a light wash:
Dilute your Indigo or Payne’s Gray paint with plenty of water on your palette until you have a very pale, watery tea consistency. -
Apply the sky gradient:
Using your flat brush, wet the sky area above your building sketch with clean water first. Then, load your brush with the pale wash and paint from the top down, letting the color fade slightly as it reaches the tops of the buildings. -
Let it dry completely:
This step is crucial. The sky must be bone dry before you paint the buildings, or the dark paint will bleed up into the clouds. Use a hairdryer on low heat if you’re impatient.
Clean Lines
For the tiny white gap between the city and the water, use a strip of thin masking tape or washi tape while painting. Peel it off at the very end to reveal a perfect, razor-sharp white line.
Step 3: Forming the City Silhouette
-
Mix a saturated tone:
Create a concentrated puddle of your blue pigment. It should be much darker and thicker than your sky wash—think milk consistency. -
Fill in the buildings:
Switch to your round detail brush. Carefully outline the tops of the skyscrapers first to get crisp points and antennas. Then fill in the rest of the building shapes down to the horizon line. -
Vary the values:
To add subtle depth, I sometimes water down the paint slightly for buildings that are meant to look further away, keeping the ‘front’ buildings the darkest. -
Uniform the base:
Ensure the bottom of the skyline forms a solid, straight block of dark color right against your pencil horizon line. Let this layer dry completely.
Sunset Gradient
Instead of a pale blue sky, try a wet-on-wet gradient of pale pink fading into orange behind the blue silhouette. The contrast between warm sky and cool city makes the buildings pop.
Step 4: Creating the Reflection
-
Create a separation line:
For the stylized look in the photo, leave a tiny sliver of white paper unpainted directly under the dark building mass. This negative space acts as a highlight separating land from water. -
Lay the water base:
Mix a mid-tone wash (darker than the sky, lighter than the buildings). Paint a horizontal block of color below the white sliver, extending to the bottom of your image area. -
Add reflection distortion:
While the water layer is still wet, drop in horizontal strokes of your darkest concentrated paint directly under the tallest buildings. -
Blur the edges:
Clean your brush, dry it slightly on a paper towel, and gently drag it horizontally through the wet reflection paint to create a rippled, watery effect. The goal is to mimic the shape of the building above but make it wavy and indistinct. -
Final touches:
Add a few very thin horizontal lines of dark paint in the foreground to suggest ripples on the water’s surface.
Once the paper is fully dry, you can mount your cityscape or frame it to showcase those lovely deckled edges
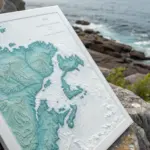
Geometric Block-City Abstraction
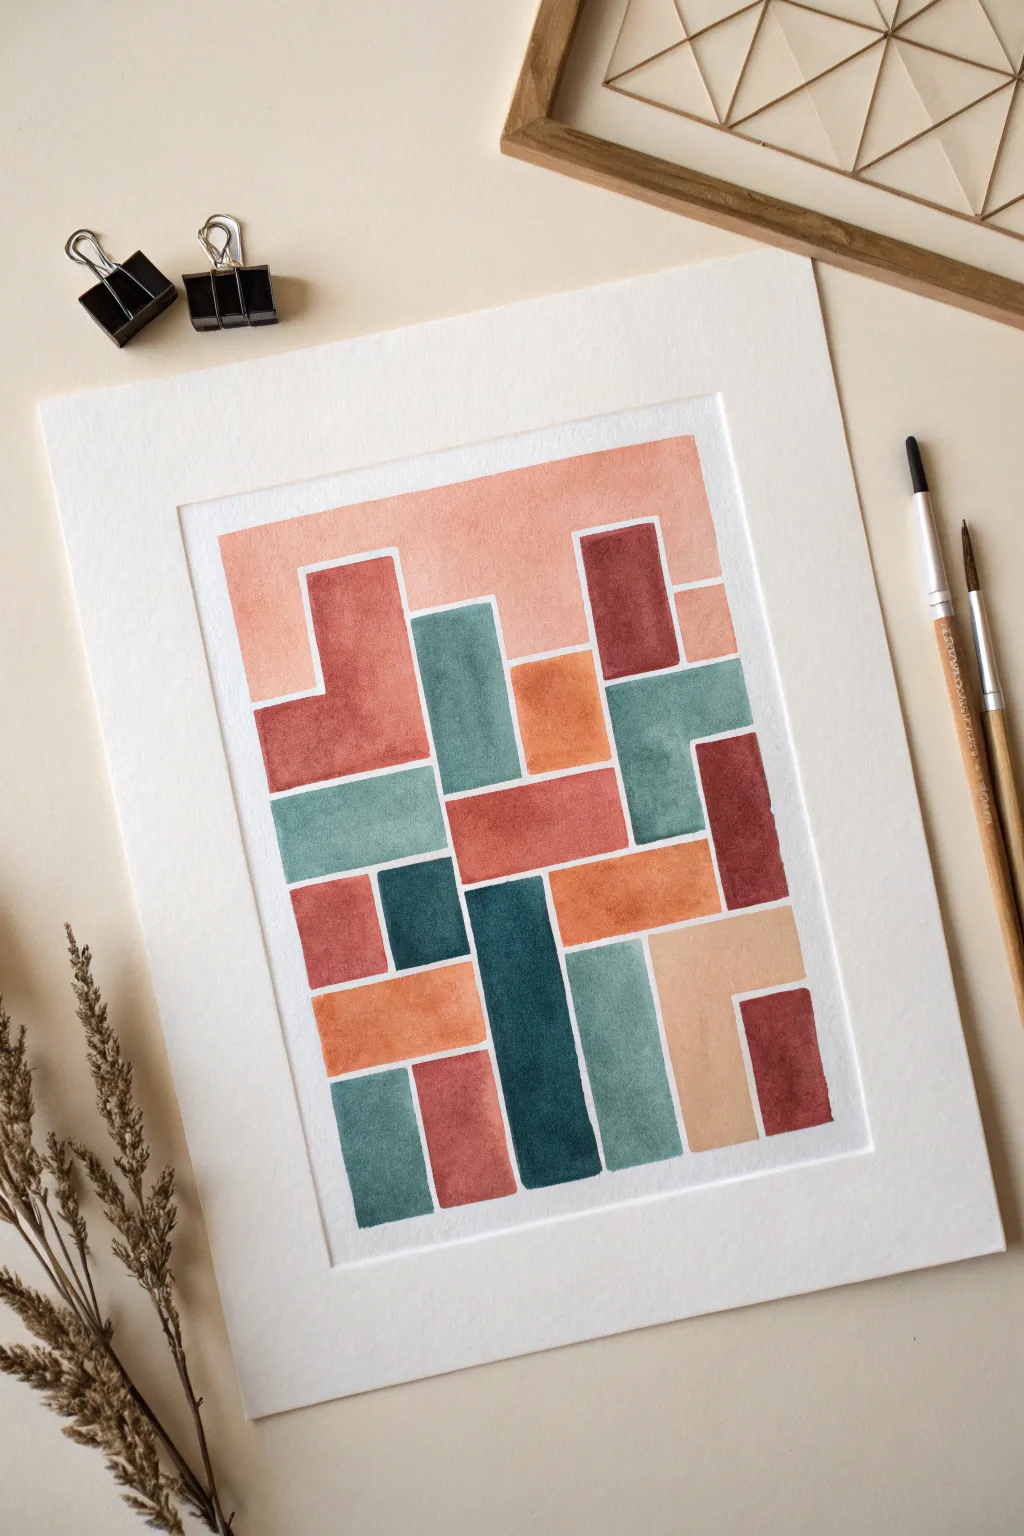
This abstract watercolor piece uses simple geometric forms to evoke the feeling of a cityscape bathed in sunset light. The composition relies on interlocking rectangles and L-shapes separated by crisp white negative space, creating a modern and architectural aesthetic.
Step-by-Step Guide
Materials
- Cold press watercolor paper (140lb/300gsm)
- Watercolor paints (Terracotta/Burnt Sienna, Peach/Flesh Tint, Indigo, Viridian Green, Deep Red/Maroon)
- Flat shader brush (size 6 or 8)
- Round brush (size 4) for details
- Painter’s tape or masking tape
- Ruler
- HB pencil
- Kneaded eraser
- Two jars of water
- Paper towels
Step 1: Planning the Layout
-
Tape the Edges:
Begin by taping down your watercolor paper to a hard board or table. This creates a clean white border around the finished piece and keeps the paper from buckling when wet. -
Map the Grid:
Using a ruler and a very light pencil touch, sketch a large rectangle centered on your paper. This will be the boundary of your painted area. -
Sketch the Skyline:
Inside your main rectangle, lightly draw the varied block shapes. Think of ‘Tetris’ style pieces—create vertical towers, L-shapes, and horizontal blocks that interlock. -
Define the Gaps:
This is crucial: instead of drawing single lines between shapes, draw double lines about 1/16th of an inch apart. These tiny channels will remain unpainted white paper.
Step 2: Mixing the Color Palette
-
Create the Warm Tones:
Prepare three distinct warm shades. Mix a deep maroon, a classic terracotta (burnt sienna with a touch of red), and a light peach wash. I like to test these on a scrap paper to ensure they harmonize. -
Create the Cool Tones:
Mix your cool tones: a deep, nearly indigo blue-green, a mid-tone teal (viridian mixed with a touch of blue), and a lighter, muted seafoam green.
Bleeding Lines?
If paint bleeds into the white gaps, wait for it to dry fully. Then, use a white gouache or acrylic paint pen to carefully redraw the white separating line over the mistake.
Step 3: Painting the Structure
-
Start with the ‘Sky’:
Locate the large block at the very top of your composition. Load your flat brush with the lightest peach tone and fill this area using even, horizontal strokes. -
Anchor the Darkest Shapes:
Switch to your deep indigo/blue-green mix. Identify two or three subtle vertical blocks near the bottom or middle and fill them in carefully. The flat edge of your shader brush is perfect for keeping those edges crisp. -
Add the Terracotta Towers:
Using the mid-tone terracotta, paint the L-shaped block on the left and perhaps one or two smaller rectangles. Try to distribute this color so it isn’t clotted in one area. -
Balance with Mid-Teals:
Fill in the adjacent blocks with your mid-tone teal. Be extremely careful not to paint over your pencil lines; the white gap is what makes this style pop. -
Introduce Deep Reds:
Use the maroon/deep red mix for variety. Paint the tall skinny tower on the right and a small accent block near the bottom corner. -
Fill Remaining Gaps:
Assess the empty whitespace. Fill in the remaining blocks with the lighter seafoam green or peach tones to balance the visual weight of the composition. -
Refine Edges:
If any corners look rounded rather than sharp, use the tip of a small round brush (size 4) with very little water to square them off meticulously.
Add Metallic Flair
Once the watercolor is dry, trace the thin white channels with a fine-tip gold paint pen. The metallic sheen adds an Art Deco city vibe to the geometric shapes.
Step 4: Finishing Touches
-
The Long Dry:
Let the painting dry completely. If the paper feels cool to the touch, it is still damp deep down, so give it extra time. -
Erase Guidelines:
Take your kneaded eraser and gently dab or roll it over the white gaps to lift the pencil lines. Avoid aggressive rubbing, which can smear the paint. -
Remove Tape:
Peel the masking tape away from the paper slowly, pulling at a 45-degree angle away from the painting to reveal your crisp border.
Now you have a stunning, modern interpretation of a skyline ready to display


Thick Texture City Lights
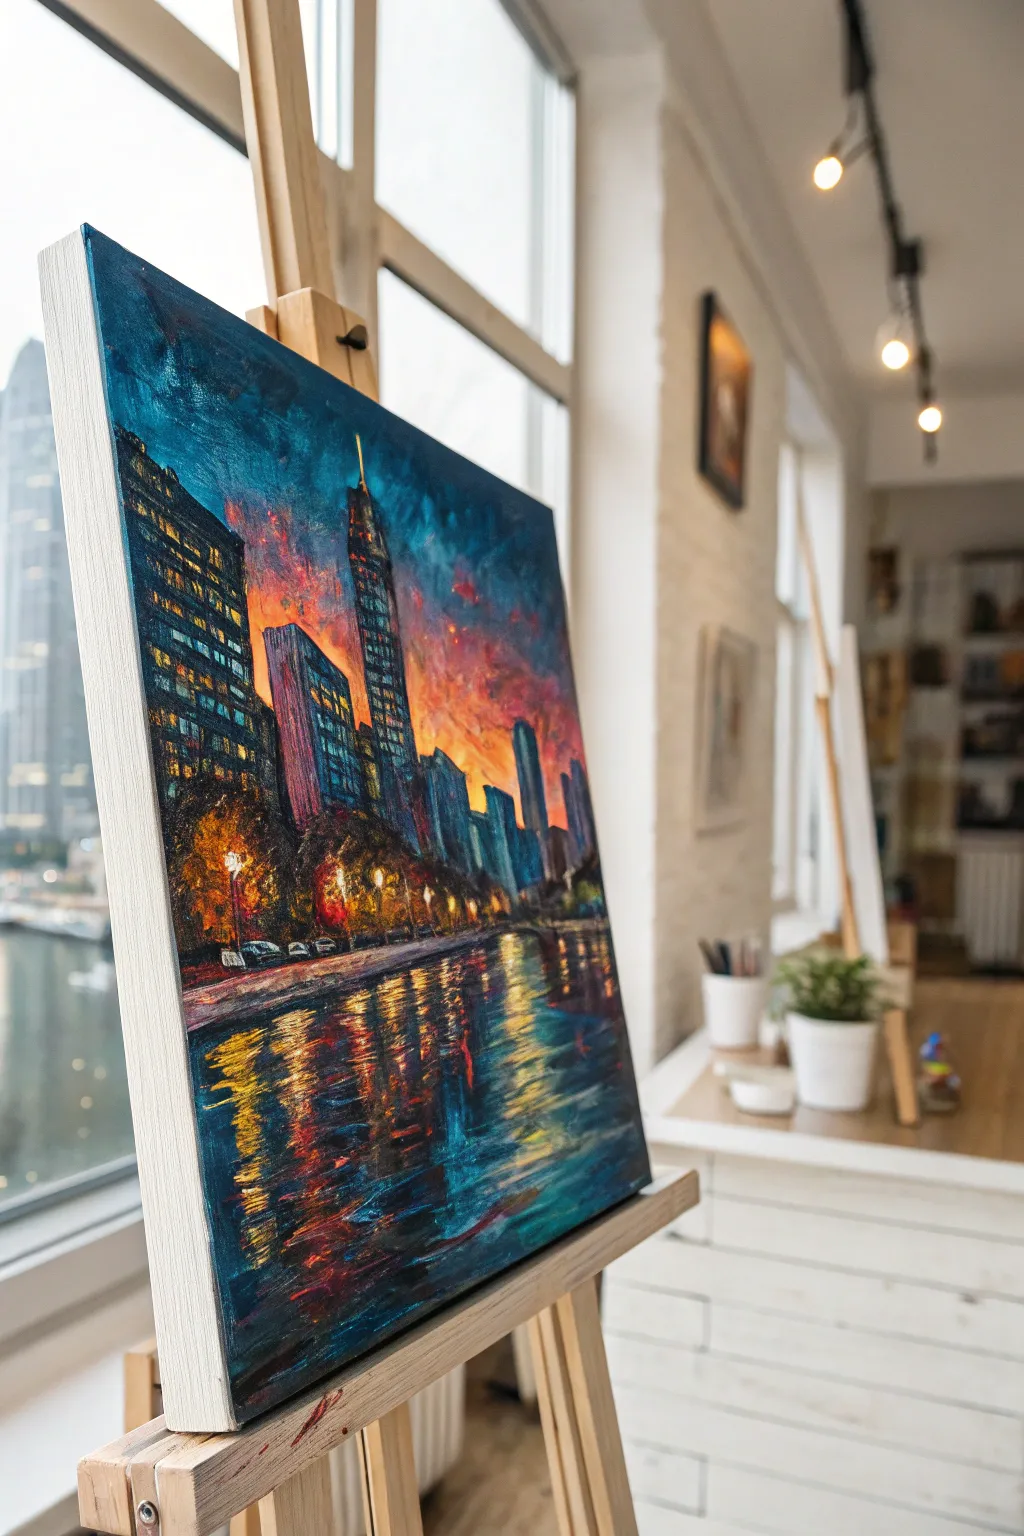
Capture the electric energy of a city at dusk with this vibrant, textured painting. Using thick strokes and bold color contrasts, you’ll create a glowing skyline that dances on the water’s surface.
Step-by-Step
Materials
- Stretched canvas (e.g., 16×20 inches)
- Heavy body acrylic paints or oil paints
- Palette knife set (diamond and trowel shapes)
- Flat brushes (sizes 8 and 12)
- Small round brush (size 2)
- Colors: Phthalo Blue, Prussian Blue, Alizarin Crimson, Cadmium Orange, Cadmium Yellow, Titanium White, Lamp Black, Burnt Umber
- Easel
- Palette
- Water cup or solvent
- Rag or paper towels
Step 1: Setting the Atmosphere
-
Prime the sky:
Begin by blocking in the sky area. Mix Phthalo Blue with a touch of Titanium White for the upper corners, blending downwards into Alizarin Crimson and Cadmium Orange near the horizon line to mimic a setting sun. -
Create a smooth gradient:
While the paint is still wet, use a large clean brush to soften the transition between the blue manufacturing cool tones and the warm sunset hues. The result should look slightly blurry and atmospheric. -
Establish the water base:
Mirror these sky colors on the bottom half of the canvas for the water. Use horizontal strokes here, keeping the water slightly darker Prussian Blue at the very bottom edge. -
Sketch the skyline:
Using a thin wash of Burnt Umber and a small round brush, loosely outline the shapes of the buildings. Include one tall, distinct skyscraper off-center to serve as a focal point.
Step 2: Constructing the City
-
Block in building shadows:
Mix a dark chromatic black using Prussian Blue and Burnt Umber. Fill in the silhouettes of the buildings, leaving the windows empty for now. -
Add structural dimension:
On the sides of the buildings facing the sunset (the ‘light’ side), scumble in some lighter purples or blue-greys to give them 3D form. -
Introduce palette knife texture:
Load a palette knife with thick paint (Phthalo Blue and hints of black). Drag it vertically down the sides of the buildings to create rough, architectural textures. -
Creating illuminated windows:
Using a small flat brush, dab rectangular spots of Cadmium Yellow and Orange onto the buildings. Do not make them uniform; cluster them in groups to look realistic. -
Enhance the focal tower:
Give the tallest skyscraper extra attention by adding a thin highlight of pale cyan along its edge and a sharp spire at the very top.
Muddy Colors?
If reflections look messy, wipe your palette knife clean between every single stroke. Layering wet warm colors over wet cool colors without cleaning creates grey mud.
Step 3: Reflections and Details
-
Paint the tree line:
Along the base of the buildings, stipple a mix of dark greens and browns to create a vague line of trees. Add touches of orange to suggest streetlights illuminating the foliage from below. -
Start the water reflections:
Switch to your palette knife. Pick up pure Cadmium Yellow and drag it horizontally across the dark water area, directly below the light sources. -
Deepen the ripples:
Layer orange and red strokes over the yellow reflections. Keep your knife flat and skip it across the canvas grain to let the dark underlayer peek through—this is crucial for the ‘shimmering’ effect. -
Add cool reflections:
Reflect the blue building masses into the water using vertical, choppy strokes of blue and turquoise, breaking them up with horizontal cuts. -
Define the waterline:
Paint a solid, dark horizontal line separating the city bank from the water. Add a few highlights of white or light grey to show the concrete edge catching the light. -
Street level glow:
Intensify the orange glow at the base of the buildings. I like to use a clean finger to smudge this slightly, creating a hazy ‘bloom’ of light. -
Final impasto highlights:
Load your smallest palette knife with thick Titanium White mixed with a tiny bit of yellow. Apply raised, thick dabs to the brightest street lamps and the most intense water ripples.
Add Life
Use a tiny brush to add small red and white dots along the shoreline road to represent car tail lights and headlights in traffic.
Step back and admire how the thick texture makes your city lights sparkle even in low light
Paper Collage Skyline Scene
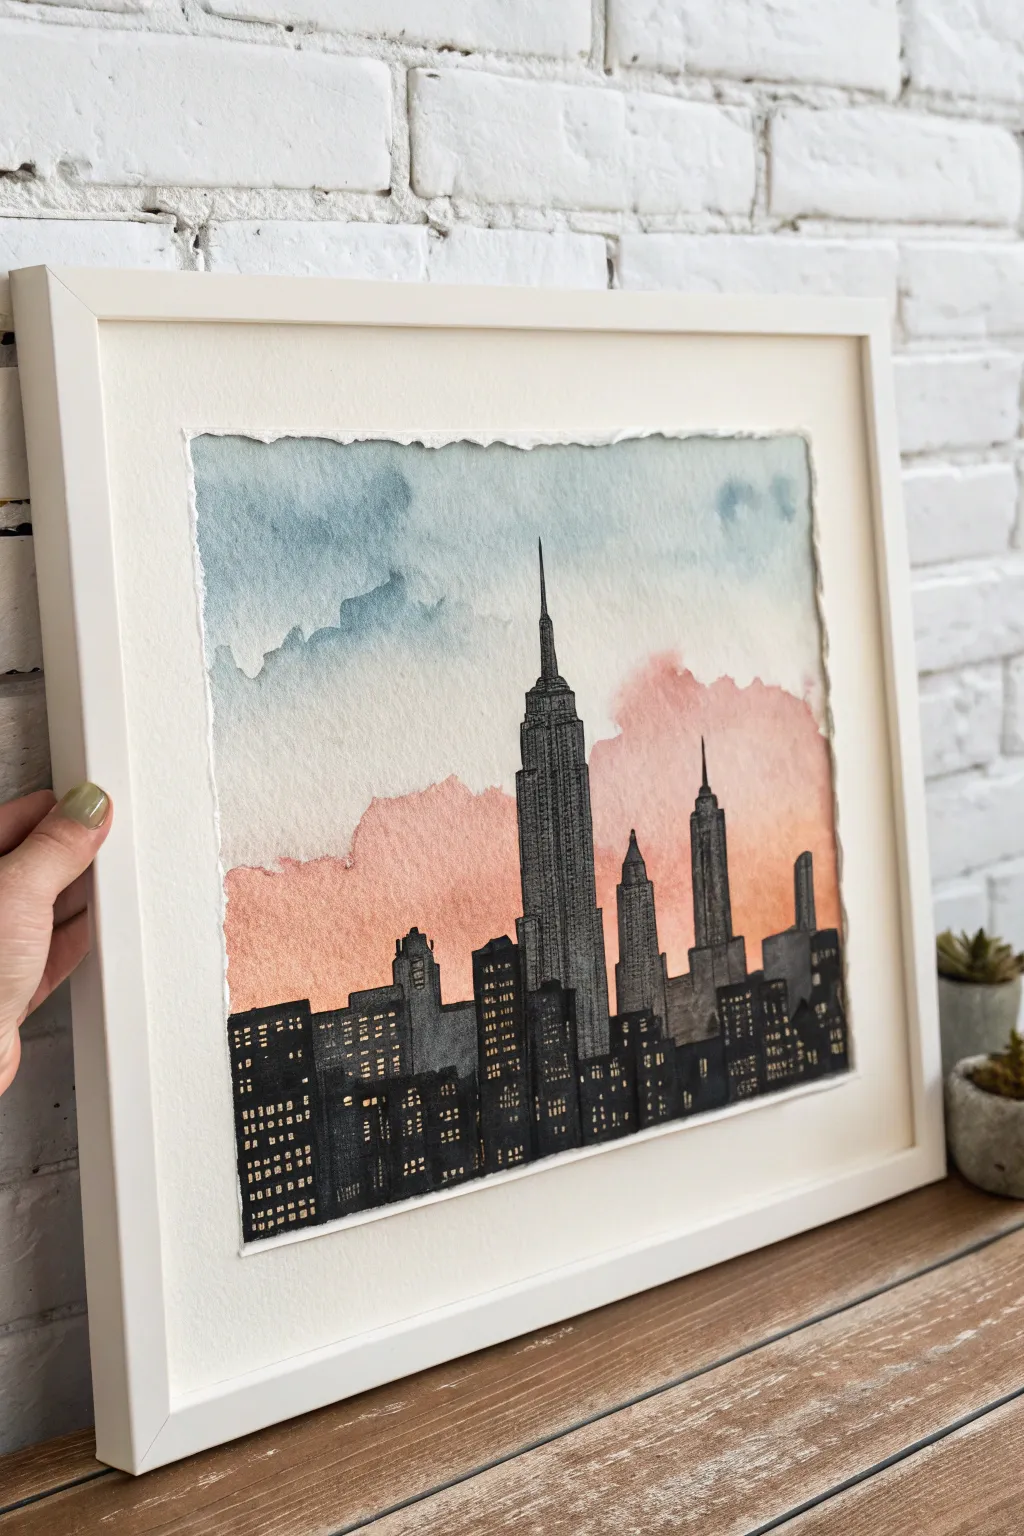
Capture the magic of a city sunset with this elegant mixed-media piece that combines soft watercolor washes with crisp architectural sketches. This project celebrates the contrast between dreamy, loose skies and the rigid structure of iconic skyscrapers, all framed beautifully on textured, deckle-edge paper.
Step-by-Step Tutorial
Materials
- High-quality cotton watercolor paper (rough or cold press)
- Black waterproof fine liner pens (various sizes, e.g., 01, 03, 05)
- Watercolor paints (Indanthrone Blue, Payne’s Grey, Quinacridone Rose or Peach)
- Gold or metallic gel pen (optional for lights)
- Flat wash brush (3/4 inch)
- Round detail brushes (size 2 and 4)
- Ruler
- Pencil and eraser
- Painter’s tape or masking tape
- Two jars of water
- Paper towels
Step 1: Preparing the Foundation
-
Prepare the paper:
Start with a square sheet of high-quality watercolor paper. If your paper doesn’t already have deckle edges (those torn-looking, feathery sides), you can create them. Fold the paper back and forth along a ruler and carefully tear the strip off, or dampen the edge with water before tearing for a softer look. -
Map out the horizon:
Using a pencil, lightly draw a horizontal line across the bottom third of the paper. This will serve as the base for your city skyline. -
Sketch the major landmarks:
Lightly sketch the outlines of the tallest buildings first, specifically the Empire State Building centerpiece and neighboring towers. Don’t worry about windows yet; just focus on the silhouettes and varying heights.
Step 2: Painting the Sky
-
Pre-wet the sky area:
Using your large flat brush and clean water, gently wet the paper area above your pencil skyline loop. The paper should be glistening but not forming puddles. -
Apply the sunset glow:
Load a round brush with a watered-down mix of Quinacridone Rose or a soft peach tone. Dab this color just above the building line, letting it bleed upwards into the wet paper to create a soft, cloud-like diffusion. -
Add the upper atmosphere:
While the paper is still damp, pick up some diluted Indanthrone Blue or a muted blue-grey. Apply this to the top edge of the paper and let it flow downward, stopping before it completely mixes with the pink to avoid creating a muddy purple. -
Refine the clouds:
Lift out pigment with a thirsty (clean, damp) brush or a paper towel if the blue becomes too heavy. You want distinct patches of blue and pink that suggest drifting clouds. -
Let it dry completely:
This is crucial. The paper must be bone-dry before you start the inking phase, or your lines will bleed. Use a hairdryer on a low setting if you are impatient.
Float Mounting Trick
To enhance the floating effect in the frame, attach a piece of foam board smaller than the artwork to the back of your painting before adhering it to the mat board.
Step 3: Building the City
-
Outline the silhouette:
Switch to your waterproof fine liner pens. Starting from left to right, trace over your pencil outlines for the buildings. Use a thicker nib (like an 05) for the main outlines to give them weight. -
Fill the base coats:
Instead of coloring completely with ink, use a very diluted wash of Payne’s Grey watercolor to fill in the building shapes. This gives them a concrete, textured look rather than a flat black appearance. -
Add architectural details:
Once the grey wash is dry, use a ruler and a fine pen (01 size) to draw vertical lines on the skyscrapers. These represent the structural beams and window columns. -
Detail the Empire State Building:
Pay special attention to the central spire effectively. Use short, horizontal hatching marks to create shadows on the side of the building, giving it a 3D cylindrical form. -
Darken the shadows:
Go back in with a slightly more concentrated dark grey watercolor or ink wash. Apply this to the sides of buildings that would be facing away from the light to create depth.
Metallic Magic
Use a metallic gold watercolor pan for the windows instead of yellow. When the light hits the finished piece, the city will literally shimmer like evening lights.
Step 4: Illuminating the Scene
-
Create window grids:
Using your finest pen, draw tiny grids for the windows. You don’t need to draw every single window perfectly; suggestions of grids are often more effective than rigid precision. -
Black out dark buildings:
For the lower, foreground buildings, use black ink to darken significant portions, leaving small squares of white paper untouched to represent lit windows. -
Add golden lights:
If you left white spaces for windows, you can now tint them with a tiny touch of yellow watercolor. Alternatively, use a gold or yellow gel pen to tap small dots of light onto the darker buildings. -
Final contrast check:
Stand back and look at the piece. If the skyline feels too light against the sky, darken the ink lines on the roofs or add another layer of dark wash to the building bodies. -
Mount and frame:
To showcase the beautiful deckle edge, float-mount your painting on top of a backing mat board rather than hiding the edges behind a standard mat window.
Hang your finished skyline in a spot with good lighting to let those little window details really shine
Negative-Space City in White
Contrast is king in this stunning yet simple project, where the cityscape emerges not by drawing it, but by filling in the night sky around it. Using rich black ink against textured paper creates a crisp, striking illustration perfect for framing or gifting.
Step-by-Step Guide
Materials
- Heavyweight textured art paper (cold press watercolor paper or mixed media paper works best)
- Black India ink or high-quality black gouache
- Fine liner pens (sizes 005 and 01)
- Small round brush (size 2 or 4)
- Pencil (HB or lighter)
- Eraser
- Ruler
- Masking tape (optional)
Step 1: Planning the Horizon
-
Define the borders:
Start by lightly ruling a square frame in the center of your paper. Leave a generous margin of white space around the outside to act as a built-in mat for the artwork. -
Draft the skyline:
Using your pencil very lightly, sketch the outline of a city skyline near the bottom third of the square. Focus on varying the heights—include one or two tall skyscrapers (like the Empire State Building silhouette seen here) to anchor the composition. -
Add celestial details:
Sketch a crescent moon in the upper right corner. Then, mark small ‘x’s or dots where you want your larger stars to be. Don’t worry about the tiny stars yet; we will save those for the inking phase.
Step 2: Creating the Night Sky
-
Outline the negative space:
With your finest pen (005), carefully trace the outline of your buildings, the moon, and the larger stars. This creates a barrier so you don’t accidentally paint over the parts that need to stay white. -
Fill the edges:
Switch to a slightly thicker pen (01 or 03) to thicken the line on the ‘sky’ side of your border. This gives you a little buffer zone before you bring in the brush. -
Brush on the black:
Dip your round brush into India ink or black gouache. Carefully fill in the large expanse of the sky. Work slowly near the rooflines and the moon to keep those edges sharp. -
Manage the borders:
Paint right up to the square border you drew in step one. I like to rotate the paper as I work to keep my hand from smudging wet ink. -
Reserve tiny stars:
As you paint the solid black sky, leave tiny pin-prick spots of white paper untouched randomly throughout the black area. These will become your distant, twinkling stars.
Don’t Rush the Ink
India ink dries fast but can pool in paper divots. Tilt the page to check for wet glares before erasing pencil lines, or you’ll get gray smudges.
Step 3: Refining the Architecture
-
Let it dry completely:
Wait until the black ink is totally dry. If you touch it while it’s damp, it will smudge into your pristine white buildings. -
Erase pencil marks:
Gently erase any visible pencil lines from your initial sketch, ensuring the paper is clean before adding texture. -
Texturing the skyscrapers:
Take your finest pen (005) again. Draw very thin, broken vertical lines inside the tall skyscrapers. Keep the lines light and somewhat sparse; you want to suggest windows and height, not color the building gray. -
Adding detail to shorter buildings:
For the smaller buildings, use short vertical dashes or tiny geometric shapes to suggest windows. Vary the density of lines to distinguish one building from the next. -
Detailing the antennas:
Carefully draw thin vertical lines extending from the tops of your tallest buildings into the black sky area. You may need a white gel pen for this if your black ink layer covered the original antenna space, but usually, just extending the black shape slightly works well too.
Add Metallic Magic
Mix a tiny amount of gold mica powder into your black ink for the sky, or use gold watercolor for the moon to give the piece a subtle, magical shimmer.
Step 4: Final Touches
-
Enhancing the stars:
If your reserved white spots for stars got lost or look too messy, use a white gel pen to dot them back in or sharpen the points on your larger stars. -
Clean up borders:
Check the outer edges of your black square. If they look ragged, smooth them out with one final pass of your pen or brush.
Once the final line is dry, you have a striking piece of monochromatic art that celebrates the city at night
Map-Overlay Mixed-Media Cityscape
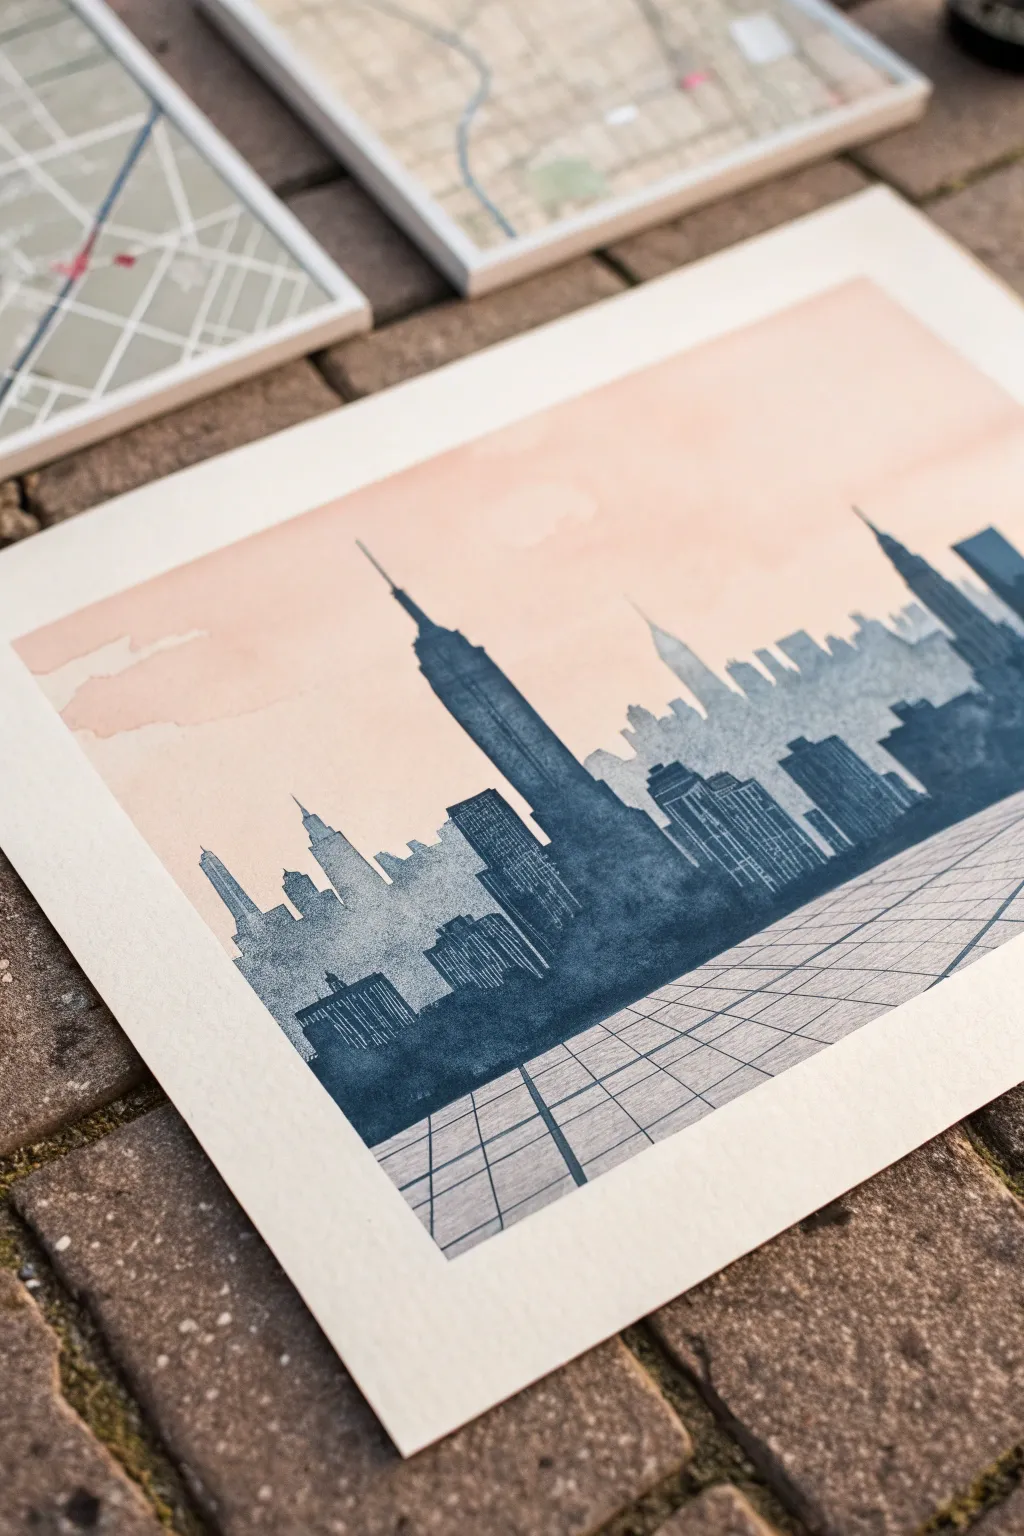
Blend the soft wash of a sunset sky with the crisp, architectural lines of New York City in this striking mixed-media piece. By combining watercolor gradients with precise grid work, you’ll create a modern cityscape that perfectly balances organic flow and industrial structure.
How-To Guide
Materials
- heavyweight watercolor paper (140lb/300gsm)
- watercolor paints (peach, soft pink, payne’s grey, indigo)
- flat wash brush (1-inch)
- fine liner brush (size 0 or 00)
- ruler or T-square
- pencil (HB or H)
- fineliner pen (black or dark grey, 0.3mm)
- masking tape
- painting board
- paper towels
Step 1: Setting the Sky
-
Prep the surface:
Begin by taping your watercolor paper securely to a painting board. This prevents the paper from buckling when we add the large wash for the sky. -
Mix the sunset tones:
Prepare a very dilute wash of peach and soft pink watercolor in your palette. You want the color to be transparent and ethereal, not opaque. -
Apply the wash:
Using the 1-inch flat brush, apply the peach wash across the top two-thirds of the paper. Use broad, horizontal strokes. -
Create cloud effects:
While the paint is still wet, you can lift a little pigment or add slightly concentrated drops of pink to create soft, cloud-like variations. Let this layer dry completely before moving on.
Uneven Wash?
If your sky dries with hard “blooms” or edges, re-wet the entire sky area delicately with clean water and lift out pigment with a dry brush to soften.
Step 2: Drafting the City
-
Establish the horizon:
About one-third up from the bottom, lightly draw a horizon line with your pencil. This will determine where the buildings sit and the grid begins. -
Sketch the silhouette:
Lightly sketch the outline of the skyline. Focus on recognizable shapes like the Empire State Building or Chrysler Building to anchor the composition. -
Layering depths:
Draw a secondary layer of smaller buildings in front of the main skyline. This creates the depth seen in the reference image.
Step 3: Painting the Skyline
-
Mix the shadow color:
Create a deep, moody blue-grey by mixing Payne’s Grey with a touch of Indigo. You want a strong, saturated color that contrasts with the pale sky. -
Paint the background buildings:
Using a smaller round brush, paint the furthest buildings first. Dilute your grey mix slightly so these appear lighter and more distant. -
Paint the foreground:
Once the back layer is dry, paint the main silhouette with your fully saturated dark mix. Be careful around antennas and spires. -
Add architectural details:
While the paint is damp but not soaking, use the fine liner brush to scratch out or lift subtle white lines for windows, or add darker vertical strokes for definition.
Metallic Accent
Use a silver or gold gel pen to trace the grid lines or add tiny lights to the building windows for a subtle, shimmering metallic pop.
Step 4: The Geometric Grid
-
Plan the perspective:
Below the skyline, use a ruler to mark a vanishing point near the center of the horizon line. Draw radiating lines outward toward the bottom edge of the paper. -
Draw cross-lines:
Draw horizontal lines between the radiating lines, spacing them wider apart as they get closer to the bottom edge to simulate perspective. -
Ink the grid:
Go over your pencil grid with a fine liner pen or very steady brush strokes using the diluted grey paint. Keep the lines crisp. -
Fade the transition:
I like to wash a very light glaze of the dark grey over some grid squares near the base of the buildings, helping the city and the floor merge visually.
Step 5: Finishing Touches
-
Sharpen edges:
Review the skyline for any fuzzy edges. Use the fine liner pen to crisp up the tips of the tallest skyscrapers if the watercolor spread too much. -
Final dry:
Ensure the entire piece is bone dry before carefully engaging the masking tape peeling process to reveal clean white borders.
Frame your new cityscape in a minimalist white frame to embrace that modern gallery aesthetic
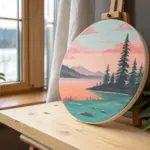
Surreal Floating City Blocks
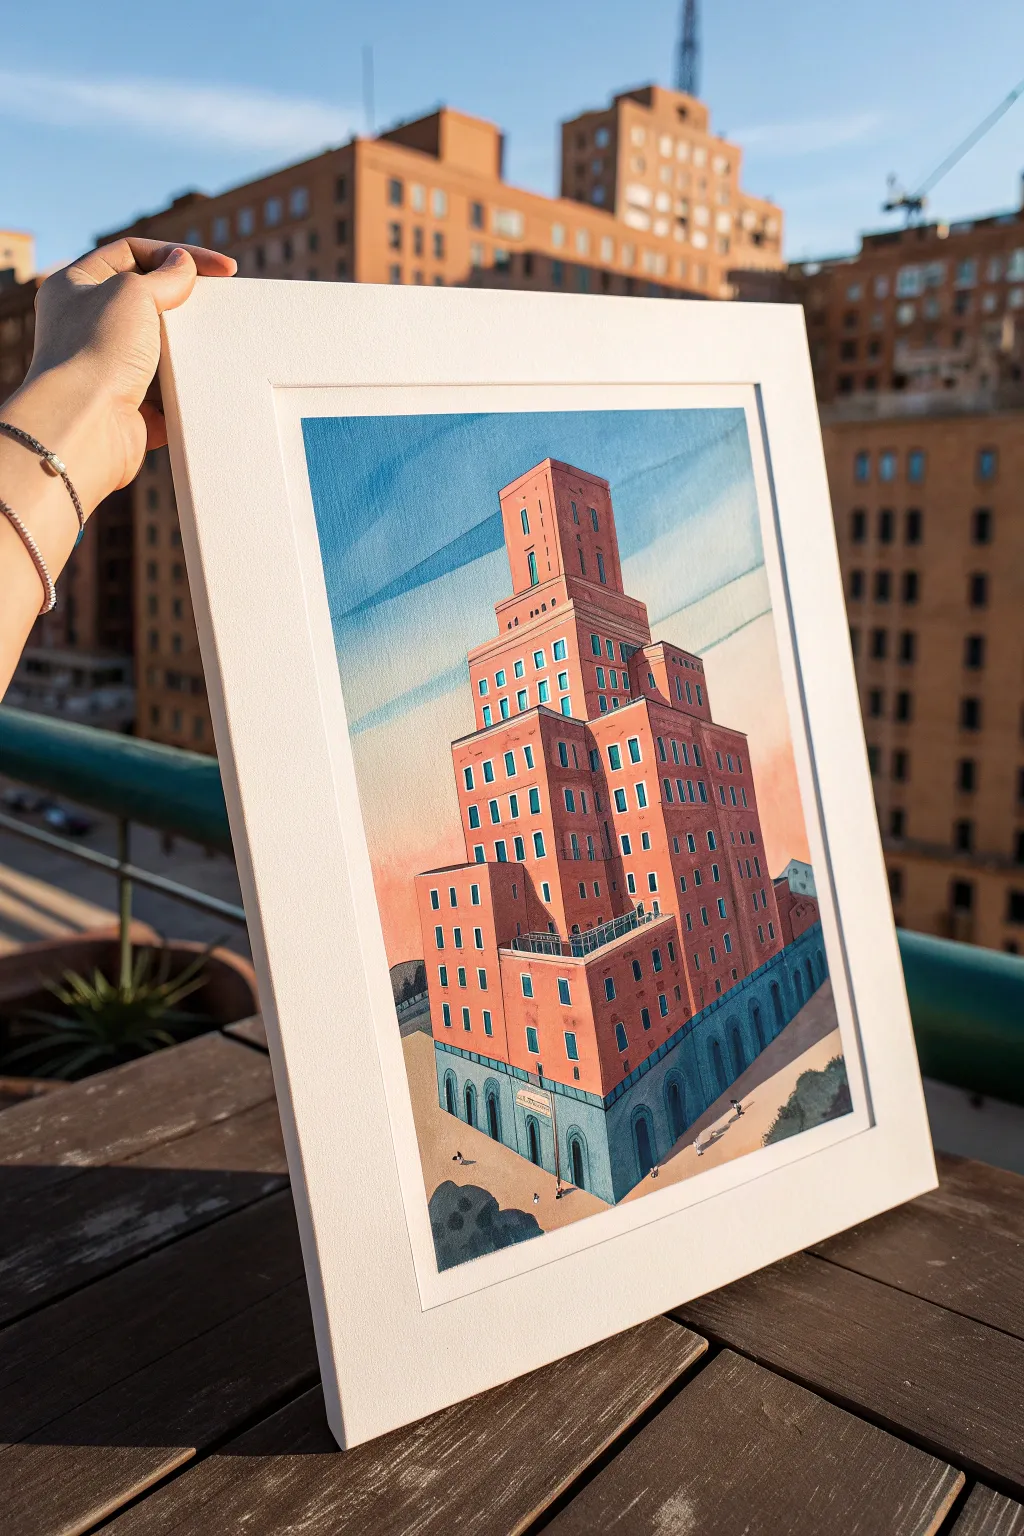
Capture the charm of urban architecture with this stylized painting of a towering pastel skyscraper. This project combines geometric precision with soft watercolor hues to create a building that feels both monumental and dreamlike.
Step-by-Step Guide
Materials
- Cold press watercolor paper (140lb/300gsm)
- Watercolor paint set
- Gouache set (specifically terracotta, teal, and white)
- Pencil (HB or H for light lines)
- Precision ruler
- Fine liner brushes (sizes 0 and 2)
- Flat shader brush (size 6 or 8)
- Masking tape
- Palette for mixing
- Two jars of water
- Paper towels
Step 1: Planning the Structure
-
Establish the horizon:
Tape down your watercolor paper to a board to prevent warping. Using your ruler, draw a very faint horizon line about one-third of the way up the page. -
Draft the base block:
Sketch a large, rectangular 3D block sitting on the ground plane. Use two-point perspective guidelines: vertical lines stay straight, but horizontal lines should angle slightly downward toward invisible vanishing points on the left and right. -
Stack the tiers:
Draw progressively smaller blocks on top of the base. This building features a ‘wedding cake’ style setback, so center each new tier slightly inward, creating terrace spaces on the sides. -
Detail the geometry:
Outline the arched windows on the ground floor base. Then, map out rows of small, rectangular windows on the upper terracotta sections, keeping them aligned in uniform grids.
Step 2: Painting the Sky and Base
-
Wash the sky:
Mix a diluted cerulean blue. Using a large brush, paint the sky area, starting stronger at the top and fading to a very pale pinkish-orange near the horizon to suggest sunset light. -
Add cloud streaks:
While the sky is still slightly damp, lift out pigment or paint faint distinct horizontal streaks using a slightly darker blue to create stylized cloud bands. -
Paint the foundation:
Mix a teal or slate blue shade with a touch of gouache for opacity. Apply this to the bottom-most block of the building, carefully painting around the arched openings if you want them darker later. -
Define the shadows:
Once the teal base is dry, mix a darker version of that color and paint the side face of the base block to establish a light source coming from the left.
Gouache Opacity Trick
If your terracotta watercolor looks too transparent or streaky, mix in a pea-sized amount of white gouache. This creates that solid, flat architectural look.
Step 3: Building the Terracotta Tower
-
Mix the brick tone:
Create a warm terracotta color by mixing burnt sienna with a touch of red and perhaps a little white gouache to make it creamy and opaque. -
Fill the sunlit faces:
Paint the front-facing walls of the upper tiers with this terracotta mix. Work carefully around the small rectangular window spaces you sketched earlier. -
Paint the shadowed faces:
Add a tiny bit of purple or cool blue to your terracotta mix to create a shadow tone. Apply this to the right-side walls of the building to enhance the 3D effect. -
Darken the windows:
Using a fine liner brush and a deep teal or nearly black blue, fill in the small rectangular windows and the arched entryways on the base.
Level Up: Night Mode
Recreate this scene with a dark indigo sky. Use bright yellow gouache for the windows instead of teal to show the building lit up at night.
Step 4: Fine Details & Environment
-
Add window frames:
I find that mixing a bright, light cyan gouache works perfectly here. Paint tiny outlines or sills on the windows to make them pop against the darker glass. -
Detail the railings:
With your finest brush (size 0) and dark grey paint, draw delicate lines for the railings on the terrace setbacks where the building tiers recede. -
Ground the building:
Wash a warm beige or sand color over the ground area. While wet, drop in a few soft grey shadows stretching from the building’s base to the right. -
People and plants:
Add tiny, abstract specks for pedestrians on the sidewalk using dark paint. Paint small, rounded shapes in dark green to represent bushes or trees at the corners. -
Matting and framing:
Once completely dry, carefully remove the tape. Place a white mat board over the image to crop it cleanly, giving it that instant gallery-ready appearance.
Step back and admire your architectural masterpiece, perfect for framing or gifting to a city lover


Have a question or want to share your own experience? I'd love to hear from you in the comments below!