
If you’ve got a handful of smooth stones and a little holiday energy, you’re already halfway to a seriously cute set of Christmas rock painting pieces. I pulled together my favorite designs that feel classic first, then get a little more playful and unexpected as you go.
Cozy Snowman With Scarf and Buttons

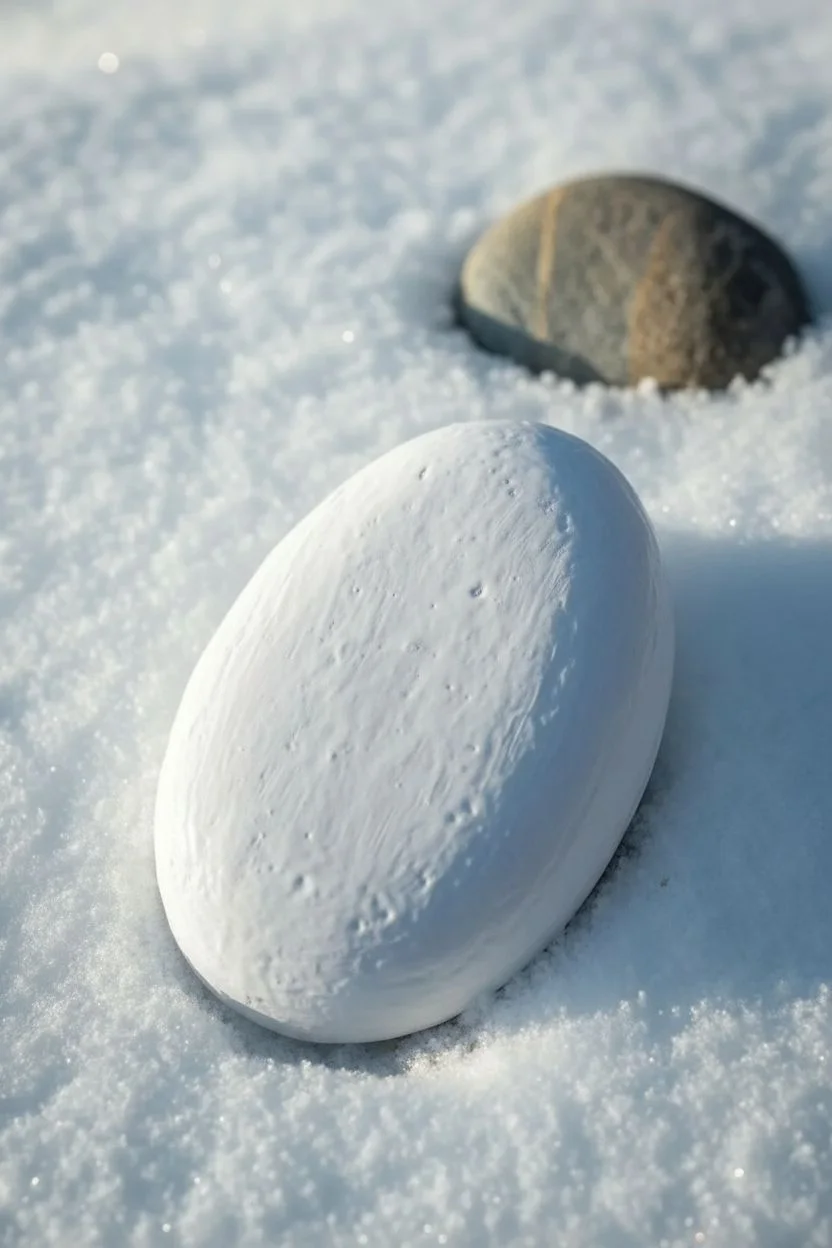
Capture the warmth of the holidays on a cold stone with this delightful snowman design. Featuring a classic striped scarf and a bright carrot nose, this painted rock brings a touch of whimsy to any winter display.
Step-by-Step
Materials
- Smooth oval river rock
- White acrylic paint (titanium white)
- Acrylic paints: orange, black, brown, red, green
- Fine tip paint brushes (liner and round)
- Black fine-liner paint pen or permanent marker
- Mod Podge or spray sealer (matte or gloss)
- Pencil for sketching
- Water cup and paper towels
Step 1: Preparation and Base Coat
-
Clean the stone:
Start by washing your rock with warm, soapy water to remove any dirt or oils. Let it dry completely in the sun or with a hair dryer. -
First white layer:
Paint the entire top surface of the rock with titanium white acrylic paint. Don’t worry if it looks streaky at first. -
Build opacity:
Apply a second and possibly third coat of white paint, allowing full drying time between layers. You want a solid, bright white canvas for your snowman. -
Smooth the surface:
Check for any large brush strokes or bumps. If needed, you can lightly sand the dry paint with very fine sandpaper for a smoother finish.
Uneven Stripes?
If your scarf stripes look wobbly, use a tiny flat brush instead of a round one. Press flat to stamp lines rather than dragging the brush.
Step 2: Sketching the Snowman
-
Outline the head:
Using a pencil, lightly sketch a rounded circle near the top center of the rock for the snowman’s head. -
Add the hat:
Draw a small rectangle on top of the head for the hat brim, and a smaller square shape above that for the crown. -
Define the scarf:
Sketch the scarf wrapped around the neck area. Make one end drape down the front right side and the other slightly shorter on the left. -
Mark the features:
Lightly mark where the eyes, carrot nose, and buttons will go to ensure they are centered and proportional.
Step 3: Painting Details
-
Paint the nose:
Use a small brush and orange paint to fill in the carrot nose. Make it pointy and slightly curved for character. -
Color the hat:
Fill in the hat using green paint. Once dry, add a thin red stripe for the hat band to give it a festive touch. -
Base coat the scarf:
Paint the scarf shape with a light brown or tan color. This will be the background for your stripes. -
Add scarf stripes:
Using a darker brown and a very fine brush, carefully paint thin horizontal stripes across the scarf. I find steadying my hand on the table helps keep the lines straight. -
Paint the fringe:
At the ends of the scarf, use the liner brush and dark brown paint to flick small lines downward to create the look of fringe. -
Add rosy cheeks:
Dilute a tiny drop of red or pink paint with water until it is very sheer. Gently dab two circles on the cheeks for a blushing effect.
Sparkle Finish
While the sealer is still wet, sprinkle a pinch of ultra-fine iridescent glitter over the white areas to mimic fresh, sparkling snow.
Step 4: Fine Line Work
-
Draw the eyes and mouth:
Use a black fine-liner pen or a very steady hand with black paint to make two dots for eyes. Add a series of smaller dots in a curve for a coal smile. -
Add the buttons:
Paint three distinct black circles down the center of the body for buttons. Add a tiny white highlight on each button to make them look shiny. -
Create the arms:
Using thin black lines, draw stick arms branching out from the sides of the body. Add little ‘fingers’ at the ends of the twigs. -
Outline for definition:
Very lightly outline the head and scarf with a thin black pen or diluted brown paint to separate the snowman from the white background. -
Seal the rock:
Once absolutely everything is dry, apply a coat of Mod Podge or spray sealer to protect your artwork from the elements.
Now you have a charming winter companion that will never melt, perfect for gifting or decorating your garden path


Cute Reindeer With a Bright Red Nose
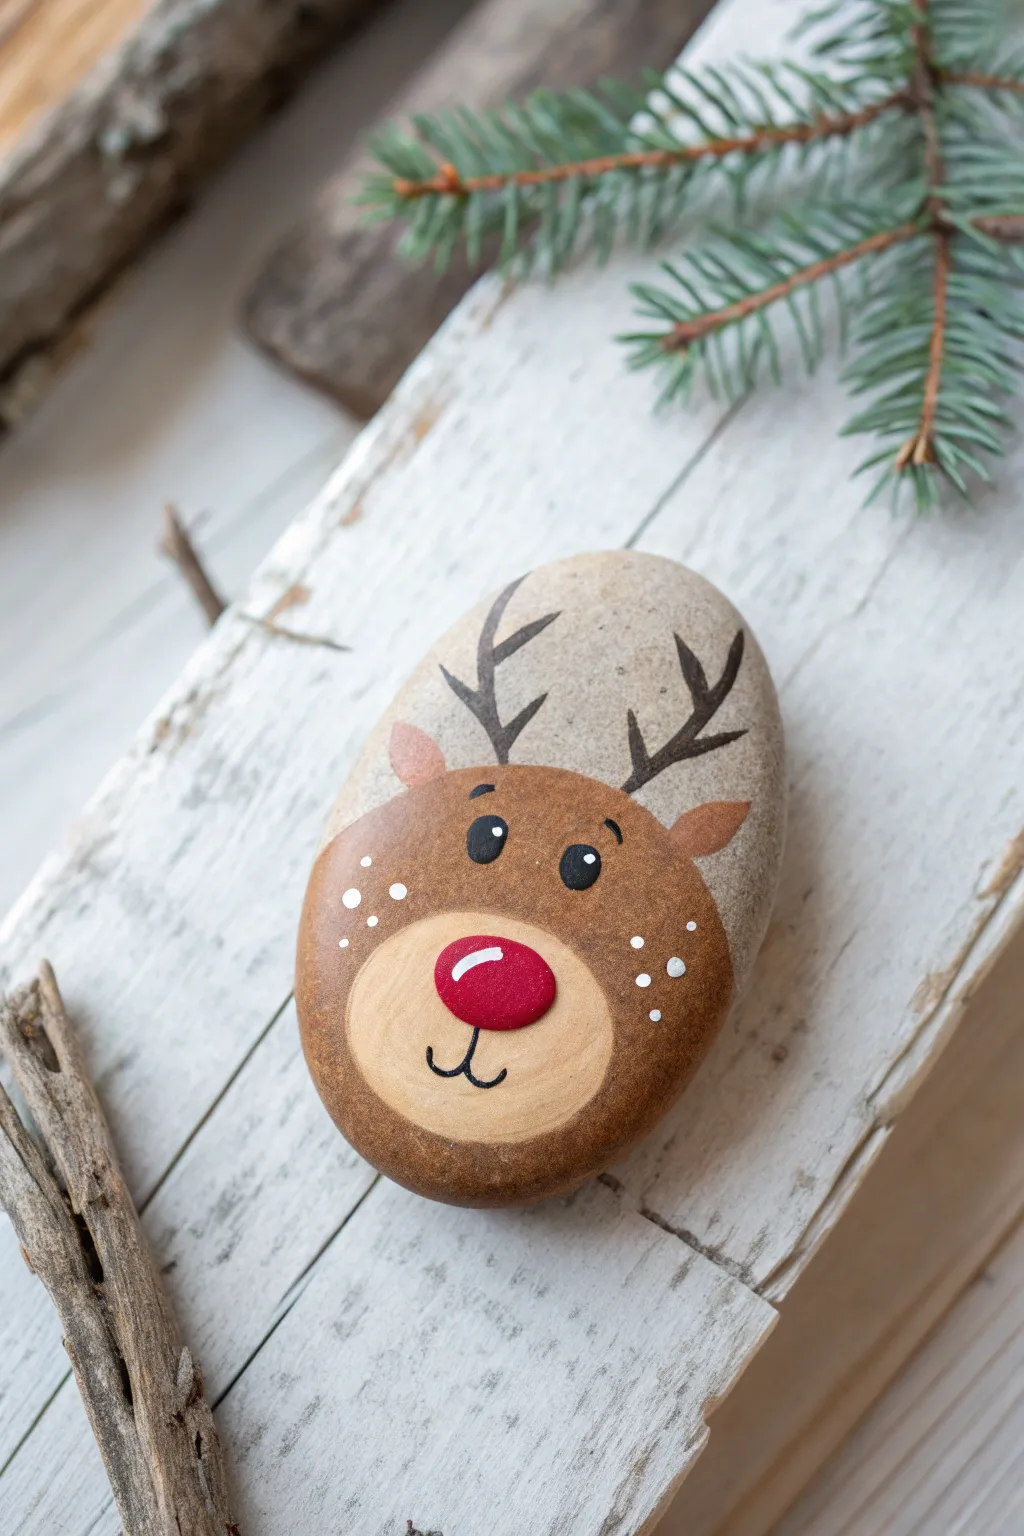

Transform a simple smooth stone into an adorable reindeer face with this festive painting project. The distinct red nose adds a wonderful pop of color and texture, making it a perfect little holiday decoration or gift.
Step-by-Step Tutorial
Materials
- Smooth, oval-shaped river rock (palm-sized is ideal)
- Acrylic paints: Medium brown, light tan/beige, black, white, and bright red
- Paintbrushes: Flat brush for base coats, fine liner brush for details
- Pencil for sketching
- Dotting tool or toothpick
- Clear acrylic sealer (matte or gloss)
- Small palette for mixing paints
Step 1: Preparing the Canvas
-
Clean Your Stone:
Before starting, ensure your rock is completely clean and dry. Wash it with mild soap and warm water to remove any dirt or oils that could prevent the paint from sticking, then let it dry fully. -
Sketch the Outline:
Using a pencil, lightly sketch the main shapes of the reindeer onto the stone. You’ll need a large semi-circle starting from the bottom for the brown face area, leaving the top third of the stone natural for the background. -
Map the Features:
Within the face area, sketch a smaller oval near the bottom center for the snout. Mark positions for the ears on the sides and where the antlers will go at the top.
Paint Transparency?
If your beige snout paint looks streaky or gray over a dark rock, paint the area white first. Let it dry, then paint the beige on top for a true, bright color.
Step 2: Painting the Face
-
Base Coat the Face:
Load your flat brush with medium brown acrylic paint. Fill in the large semi-circle shape you sketched for the reindeer’s head, carefully painting around the snout area you marked off earlier. -
Layering for Coverage:
Acrylics can be translucent, especially on dark rocks. Let the first coat dry completely, then apply a second layer of brown to ensure a solid, opaque color. -
Paint the Snout:
Mix a little white into your brown or use a pre-mixed beige/tan color. Paint the oval snout area at the bottom of the face. This lighter color helps distinct facial features stand out later. -
Add the Ears:
Using the medium brown paint again, add two small, leaf-shaped ears extending from the sides of the head near the top of the brown section. I like to add a tiny touch of tan inside the ears for depth.
Step 3: Adding Details
-
Paint the Antlers:
Switch to your fine liner brush and black paint. Draw two antlers rising from the top of the head into the unpainted stone area. Start with a main branch and add smaller offshoots. -
Create the Eyes:
Using a dotting tool or the back end of a brush handle, place two solid black dots just above the snout area for the eyes. Space them comfortably apart to give him a friendly expression. -
Add Eye Highlights:
Wait for the black eye dots to be touch-dry. Then, using a tiny detail brush or a toothpick, add a very small white spec to the upper right corner of each eye to bring them to life. -
Draw the Mouth:
With your finest brush or an extra-fine black paint marker, draw a small anchor shape (a vertical line curving into a smile) inside the beige snout area. -
The Famous Nose:
Dip a round brush or a large dotting tool into bright red paint. Place a prominent oval right in the center of the snout, above the mouth. Built the paint up slightly to give it a little dimension. -
Nose Highlight:
While the red paint is still slightly wet or just after drying, add a curved white highlight on the upper left side of the nose to make it look shiny and round. -
Paint the Brows:
Paint two tiny, thin black arches floating above the eyes for eyebrows. These small lines add a lot of personality to the expression. -
Cheek Details:
Dip a toothpick into white paint. Gently dot three tiny freckles on the brown fur cheeks on either side of the face.
Try a Dimensional Nose
Make the nose truly pop by using ‘Puffy Paint’ or dimensional fabric paint for the red spot. It dries raised and gives a fantastic tactile 3D effect.
Step 4: Finishing Up
-
Final Cleanup:
Check your edges. If any paint went outside the lines, you can carefully scratch it off if the rock is smooth, or use a damp Q-tip to clean it up before sealing. -
Seal the Rock:
Once absolutely every layer of paint is dry (wait at least 24 hours to be safe), apply a coat of clear acrylic sealer. A spray sealer works best to avoid smearing your fine lines.
Place your finished reindeer on a mantelpiece or hide him in the garden for someone to find


Candy Cane Stripes That Wrap the Rock
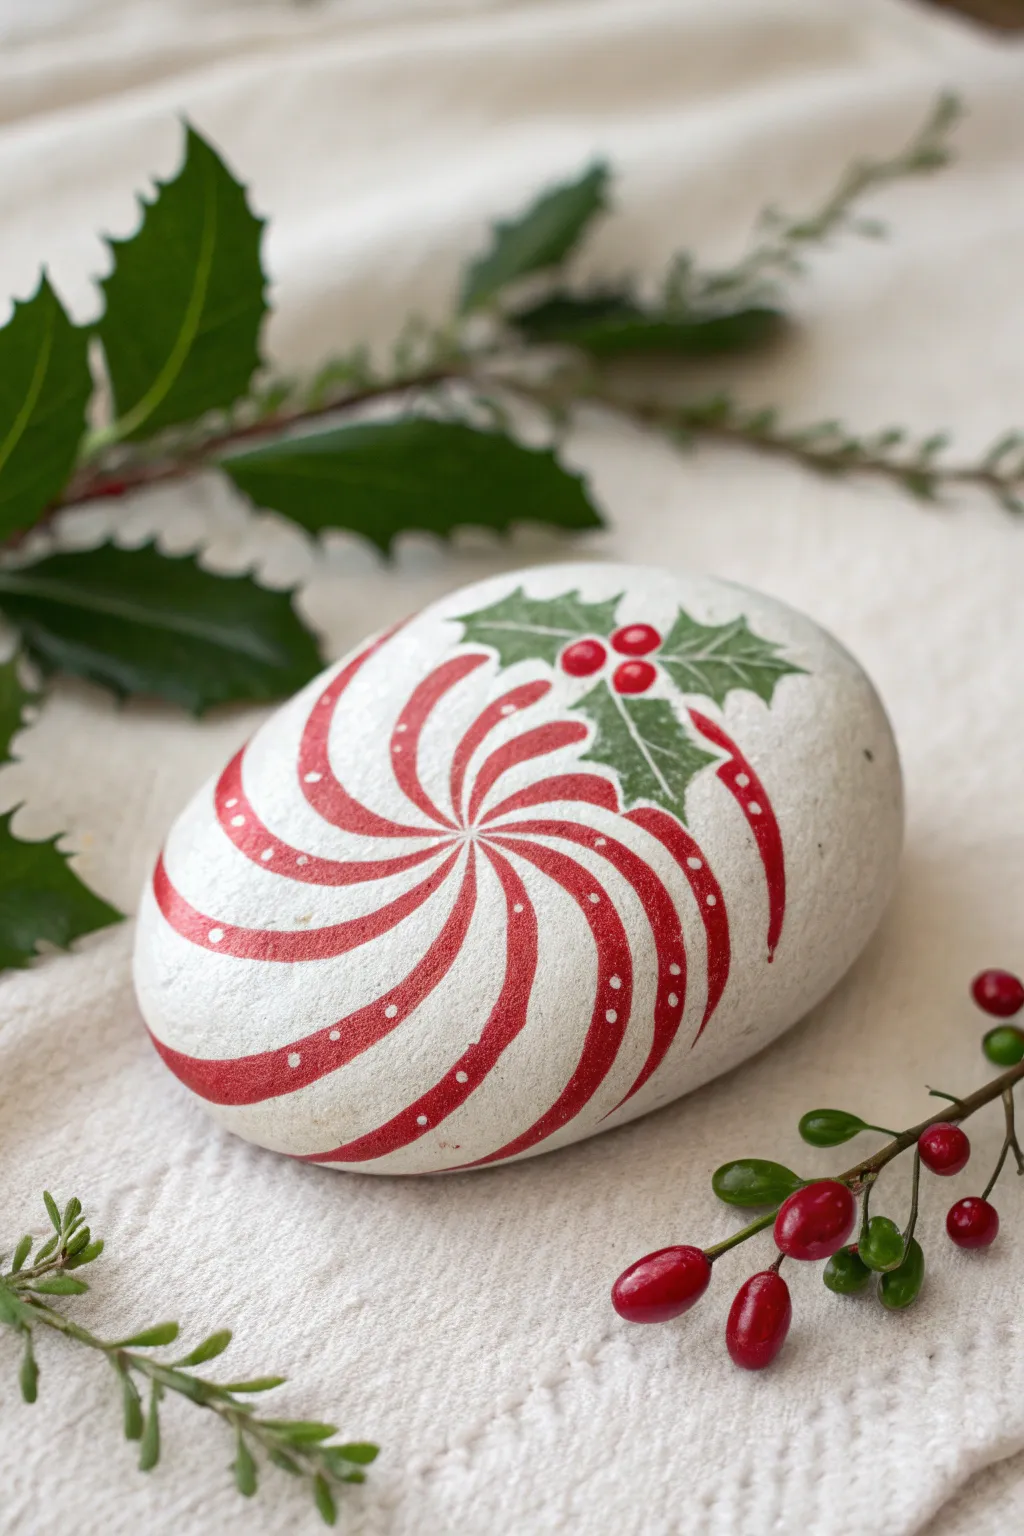
Transform a simple smooth stone into a festive peppermint candy that looks good enough to eat. This design features mesmerizing red and white swirls accented by a classic holly sprig for the perfect holiday touch.
How-To Guide
Materials
- Smooth, oval river rock
- White acrylic paint (heavy body or multi-surface)
- Red acrylic paint (bright candy apple red)
- Dark green acrylic paint
- Fine detail brush (size 0 or 00)
- Medium flat brush
- Pencil
- Dotting tool or toothpick
- Matte or satin varnish
Step 1: Base Preparation
-
Clean the surface:
Begin by scrubbing your rock with warm soapy water to remove any dirt or oil. Let it dry completely before starting, as moisture can ruin the paint adhesion. -
Apply the base coat:
Using your medium flat brush, paint the entire rock with white acrylic paint. You want a solid, opaque background. -
Add a second coat:
Allow the first layer to dry fully to the touch. Apply a second coat of white to ensure no gray rock shows through, creating a crisp, candy-like surface.
Uneven Swirls?
If your spiral bands get too wide or wobble, wait for the red to dry, then use white paint to ‘cut back’ into the shape and correct the line.
Step 2: Drafting the Design
-
Mark the center:
Once the white base is bone dry, lightly mark a small dot in the center of the rock with a pencil. This will be the origin point for your spiral. -
Sketch the holly:
Draw three small circles near the center dot for berries, then sketch two or three jagged holly leaves extending outward from them. Placing these now ensures you don’t paint swirls over the area reserved for the greenery. -
Map the swirls:
Starting from behind your sketched holly, lightly draw curved lines radiating outward to the edges of the rock. Imagine a pinwheel spinning to get that curved motion correct. -
Define the thickness:
Go back over your spiral lines and turn them into thick bands. The red stripes should be roughly the same width as the white spaces left between them.
Step 3: Painting the Colors
-
Paint the red stripes:
Load a fine detail brush with bright red paint. Carefully fill in the spiral bands you sketched, working slowly to keep the edges sharp. -
Tidy the edges:
If your red paint looks streaky, let it dry and apply a second coat. Sharp, clean edges are key to the candy effect. -
Fill in the holly leaves:
Switch to dark green paint. Carefully fill inside your pencil sketches for the holly leaves. Use the very tip of your brush to pull the paint out into sharp points. -
Paint the veins:
Once the green is dry, mix a tiny amount of white into your green to make a lighter shade. Paint a thin center line and delicate veins on each leaf. -
Add the berries:
Paint the three berry circles with bright red. I like to add a tiny white highlight dot on each berry once dry to make them look shiny and round.
Pro Tip: Flow Aid
Mix a drop of water or flow improver into your red paint. It helps the brush glide smoothly for long, uninterrupted spiral strokes.
Step 4: Details & Finish
-
Add the dotted texture:
Dip a small dotting tool or the tip of a toothpick into white paint. Gently stamp a line of tiny, evenly spaced dots running down the center of each red stripe. -
Erase pencil marks:
Check closely for any visible pencil lines. If the paint is fully cured, you can gently erase them, or simply touch them up with a bit of white paint. -
Dry completely:
Let the rock sit for at least an hour or two. Thick layers of acrylics can be deceptive and might still be wet underneath. -
Seal the artwork:
Apply a coat of matte or satin varnish to protect your work from chipping and to unify the sheen of the different paints.
Place this sweet decoration on a mantel or gift it as a festive paperweight.


Simple Christmas Tree With Layered Greens
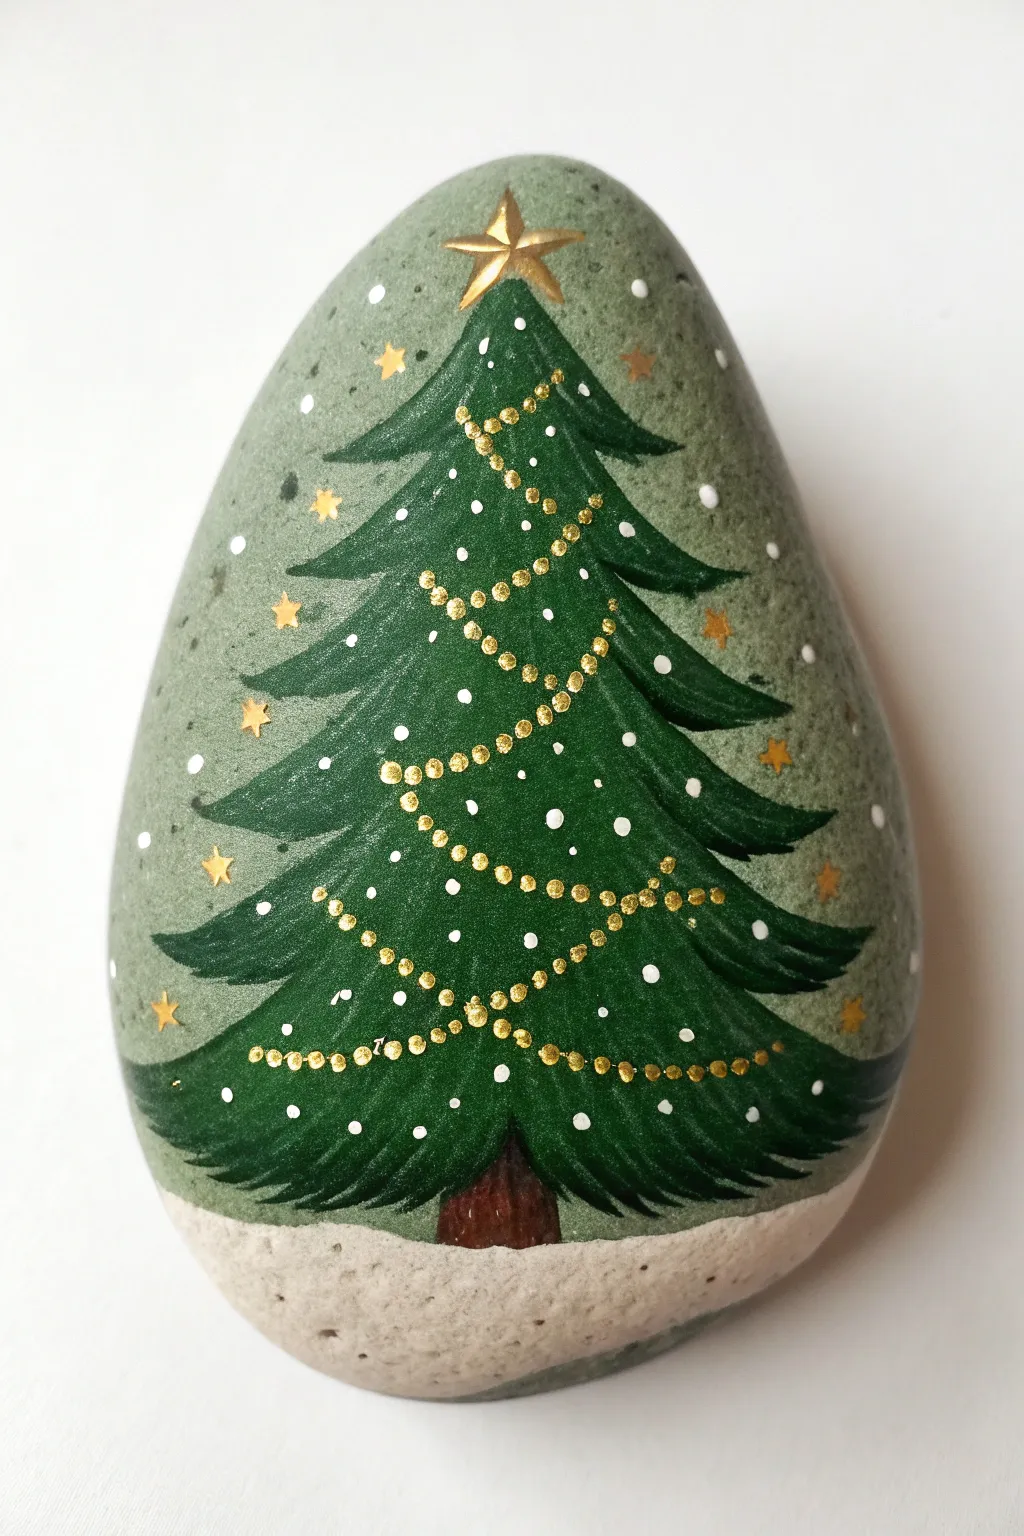
This festive rock painting project features a beautifully layered Christmas tree adorned with delicate golden details on a soft sage green background. By building up the branches with two shades of green, you’ll achieve a lovely depth that makes the tree pop right off the stone.
Step-by-Step
Materials
- Smooth, egg-shaped river rock
- Acrylic paints: Sage green (background), dark forest green, lighter grass green, brown, white
- Gold metallic paint or gold paint pen
- Fine detail paintbrush (liner brush)
- Medium flat paintbrush
- Dotting tool or toothpick
- Clear acrylic sealer (gloss or matte)
Step 1: Preparing the Canvas
-
Clean the stone:
Begin by scrubbing your rock with warm soapy water to remove any dirt or oils. Let it dry completely before starting. -
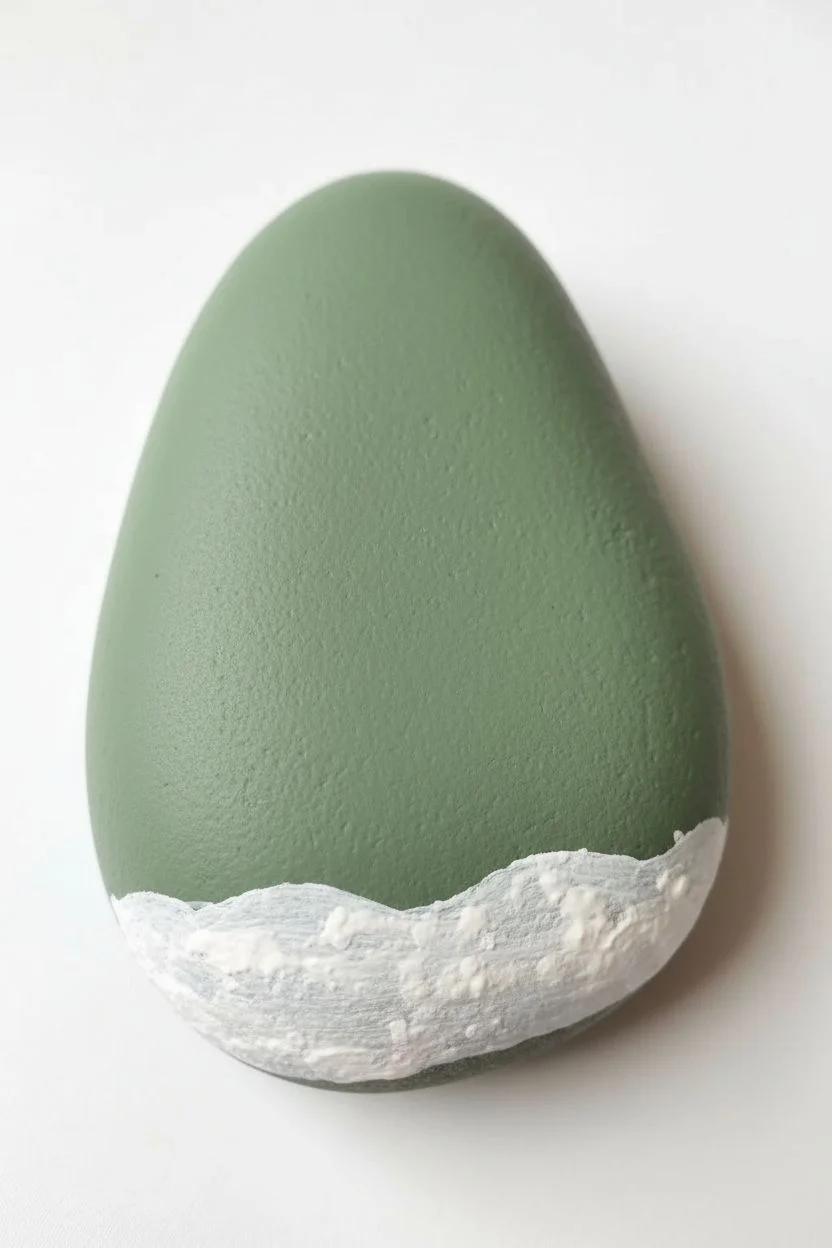
Paint the background:
Using a medium flat brush, coat the entire upper surface of the rock with a muted sage green acrylic paint. You may need two coats for opaque coverage, letting the first layer dry before applying the second. -
Create the snowy base:
Once the green background is dry, use white paint to create a curved snow bank at the very bottom of the rock. Leave the texture slightly natural and bumpy to look like drifted snow.
Step 2: Building the Tree
-
Draft the shape:
Lightly sketch a simple triangle shape with a pencil to guide your tree’s placement, ensuring the tip leaves room for a star at the top. -
Paint the trunk:
At the bottom center of your triangle, paint a small, slightly flared brown rectangle for the tree trunk, resting it just inside the white snow line. -
Layer 1: Dark branches:
Using dark forest green and a small brush, paint the silhouette of the tree. Start from the top and paint downward-sweeping, curved strokes that flare out wider as you go down. Let the edges be jagged and feathery to mimic pine needles. -
Dry completely:
It is crucial to let this dark base layer dry fully so the next colors don’t muddy up. -
Layer 2: Mid-tone highlights:
Mix a little of your lighter grass green with the dark forest green. Paint similar swooping strokes on top of the previous layer, but leave the darkest green visible at the bottom edges of the branches to create shadow depth. -
Layer 3: Bright highlights:
Using just the lighter green now, add fine, thin strokes to the very tops of the branches. This tri-tone layering gives the tree its realistic volume.
Paint Lifting?
If the bottom layer of green lifts while you paint the highlights, stop immediately. The base layer wasn’t fully dry. Let it sit for 20 minutes before trying again.
Step 3: The Golden Details
-
Paint the topper:
With gold metallic paint and a fine brush, paint a five-pointed star at the very peak of the tree. I like to add shading by using a tiny bit of brown on one side of the star arms for a 3D effect. -
Start the garland:
Dip a fine dotting tool or the tip of a toothpick into gold paint. Starting near the top, create a draped garland by placing small dots close together in a swooping line across the tree. -
Continue the drape:
Work your way down the tree, making the garland swoops wider and more dramatic as the tree gets broader. Ensure the dots follow the curve of the drape naturally. -
Add background stars:
Using a small brush, paint tiny gold five-pointed stars scattered randomly in the sage green background sky.
Pro Tip: Dot Consistency
For the garland, reload your dotting tool with gold paint every 3-4 dots. This keeps the beads uniform in size rather than getting smaller and fading out.
Step 4: Finishing Touches
-
Snowy speckles:
Dip a fine dotting tool into white paint and add small dots all over the tree to represent snowflakes caught in the branches. -
Background snow:
Add more white dots of varying sizes to the sage background to create a falling snow effect around the tree. -
Sparkle highlights:
If you want extra magic, add tiny white dots to the center of some gold garland beads to make them look like they are gleaming. -
Seal the artwork:
Allow the rock to cure for at least 24 hours. Finish by applying a clear acrylic sealer to protect your painting from chipping and to give the colors a permanent vibrancy.
Place this beautiful stone on a mantel or gift it to a friend to spread some festive cheer this season
BRUSH GUIDE
The Right Brush for Every Stroke
From clean lines to bold texture — master brush choice, stroke control, and essential techniques.
Explore the Full Guide
Wrapped Present Rock With a Big Bow
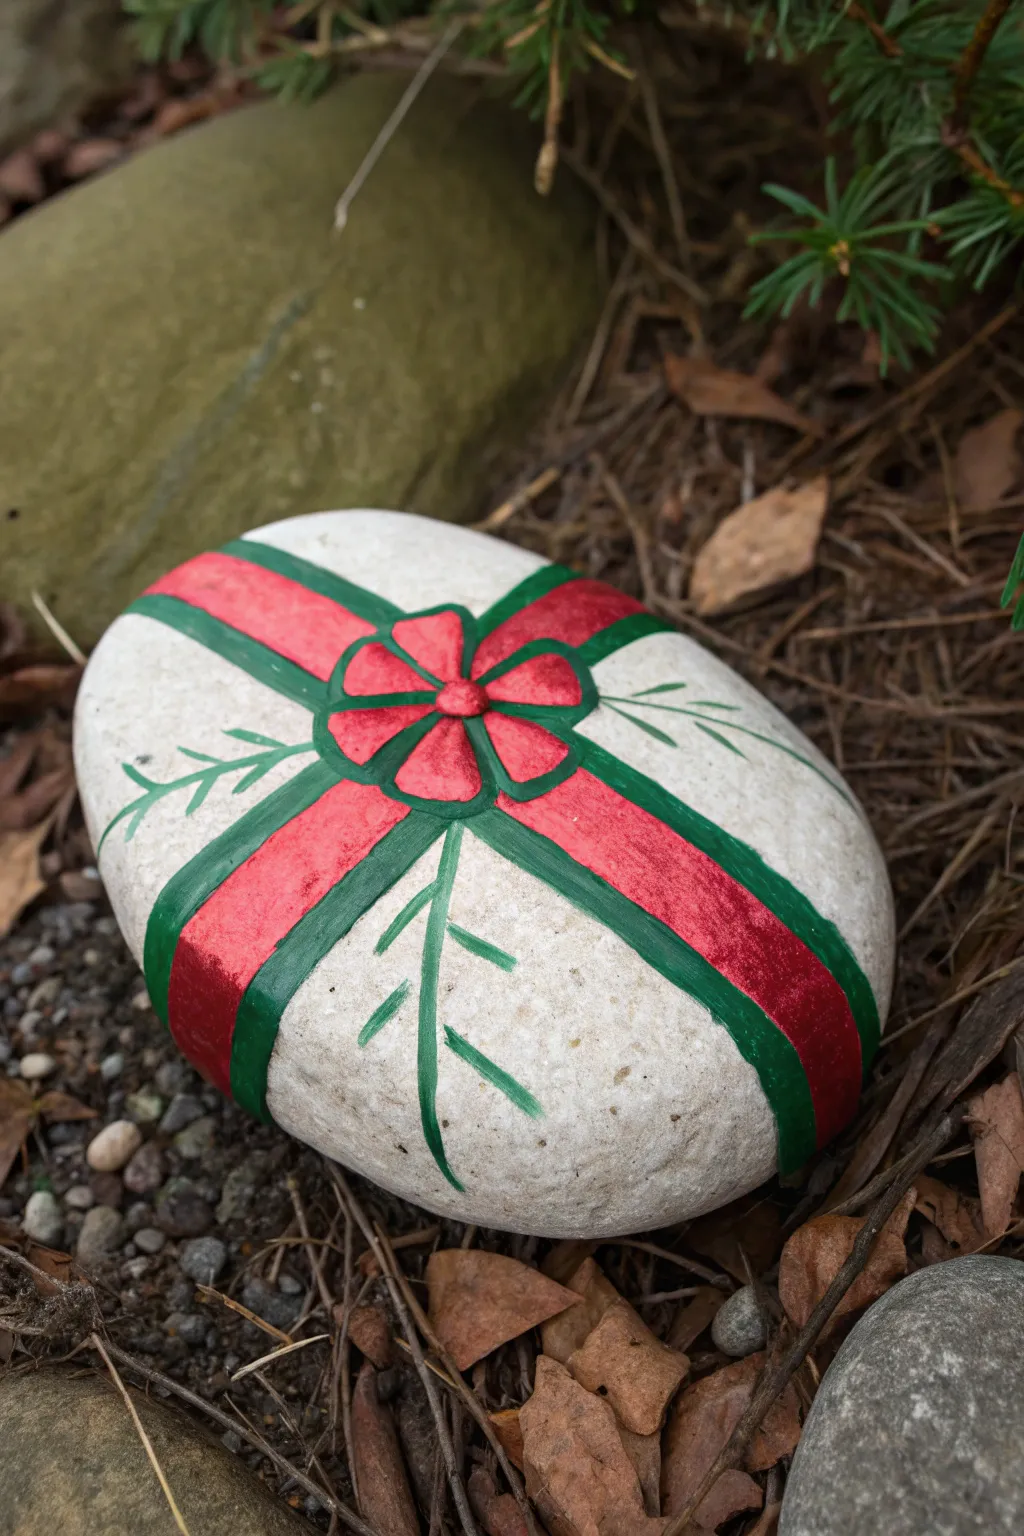
Transform a simple river rock into a festive holiday present that never needs unwrapping. This charming design features a bold red bow with elegant green trim, perfect for hiding in the garden or using as a holiday paperweight.
Step-by-Step Tutorial
Materials
- Smooth, oval-shaped river rock
- White acrylic paint
- Red acrylic paint (bright cherry or holiday red)
- Green acrylic paint (forest or emerald green)
- Medium flat paintbrush
- Small round detail brush (size 0 or 1)
- Pencil
- Clear acrylic sealer (spray or brush-on)
- Water cup and paper towels
Step 1: Preparation and Base Coat
-
Clean the stone:
Begin by scrubbing your rock with warm soapy water to remove any dirt or oils. Let it dry completely before starting, as moisture trapped inside can ruin the paint later. -
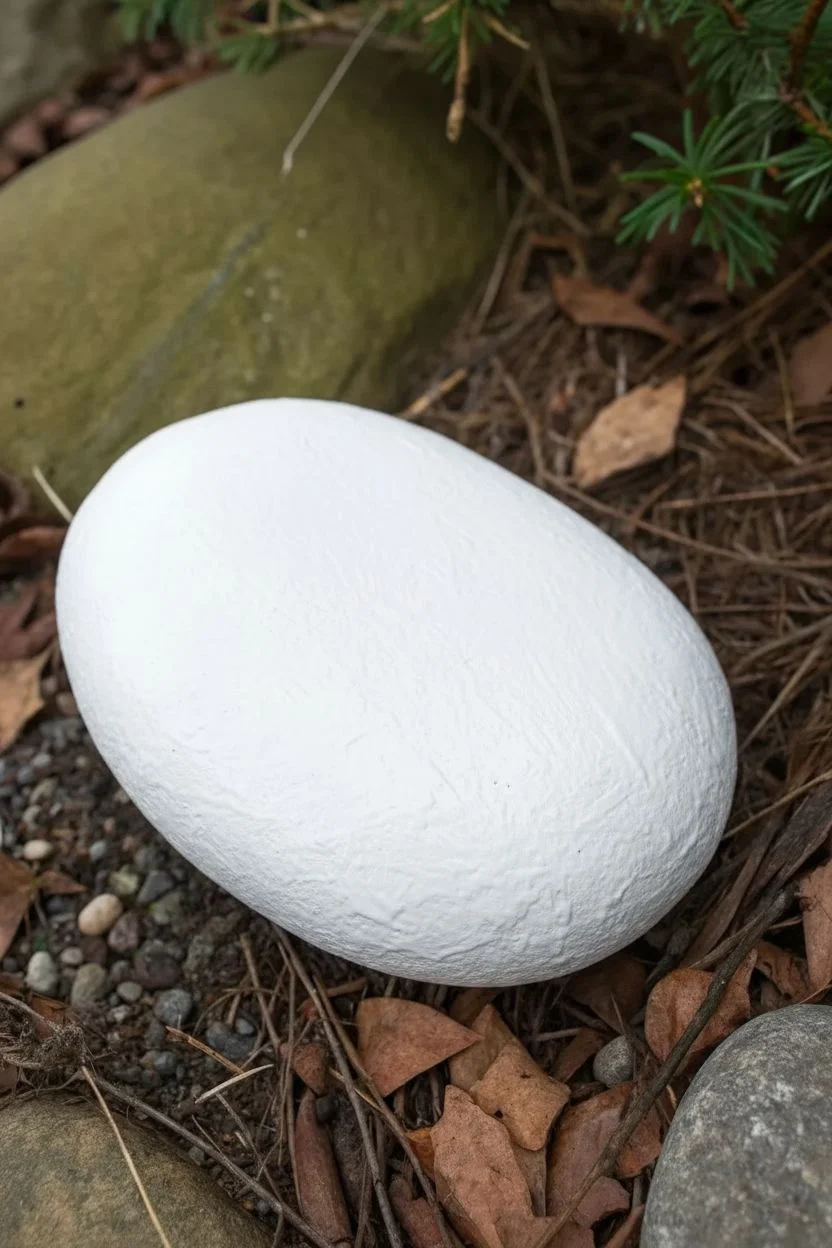
Apply the first base layer:
Using your medium flat brush, paint the entire top surface of the rock white. Don’t worry if it looks streaky at first; acrylics often need layers. -
Build opacity:
Allow the first coat to dry, then apply a second or even third coat of white until you have a solid, opaque background. This ensures your red and green colors will pop.
Step 2: Sketching the Design
-
Pencil in the ribbon:
Lightly draw a cross shape on the rock with a pencil. The lines should intersect near the center but can be slightly offset to look more natural. -
Outline the bow:
At the intersection of your cross, sketch a simple flower-like bow. Draw a small circle in the center, surrounded by five or six loop shapes. -
Add evergreen details:
Sketch a few simple lines radiating out from behind the bow relative to the ribbon. These will become the pine sprigs later.
Wobbly Lines?
Rest your painting hand on the table or even on the rock itself (if dry) to stabilize your hand while painting the thin green outlines.
Step 3: Painting the Ribbon
-
Fill the ribbon center:
Switch to a smaller brush and fill in the main cross shape with red paint. Leave a small gap between the red paint and your pencil lines—this is where the green trim will go. -
Paint the bow loops:
Carefully fill in the flower-shaped bow loops with the same red paint. I find it easiest to start from the center circle and pull the paint outward. -
Detail the center knot:
Paint the small center circle red. If the red looks translucent, let it dry and add another layer for richness.
Pro Tip: Make it Pop
Add a tiny dot of white paint to the center of the red knot and on the curve of the bow loops to create a reflection highlight.
Step 4: Adding the Green Trim
-
Outline the ribbon:
Using your finest detail brush and green paint, carefully trace along the outer edges of the red ribbon stripes. This creates a crisp, finished border. -
Outline the bow:
Continue using the green paint to outline each individual loop of the bow and the center knot. This separation defines the petals clearly against the white background. -
Paint pine needels:
For the sprigs, paint a thin green line for the stem, then use quick, short flicks of the brush to create the needles coming off the stem.
Step 5: Finishing Touches
-
Clean up edges:
If any green lines got too thick or messy, you can use a bit of white paint to touch up the background once the green is fully dry. -
Let it cure:
Allow the rock to sit undisturbed for at least 24 hours to ensure all layers of paint are completely cured. -
Seal the rock:
Apply a clear acrylic sealer over the entire rock. A glossy finish works particularly well here to make the ‘gift wrap’ look shiny and new.
Place your finished rock under the tree or on a festive mantelpiece to enjoy the holiday cheer
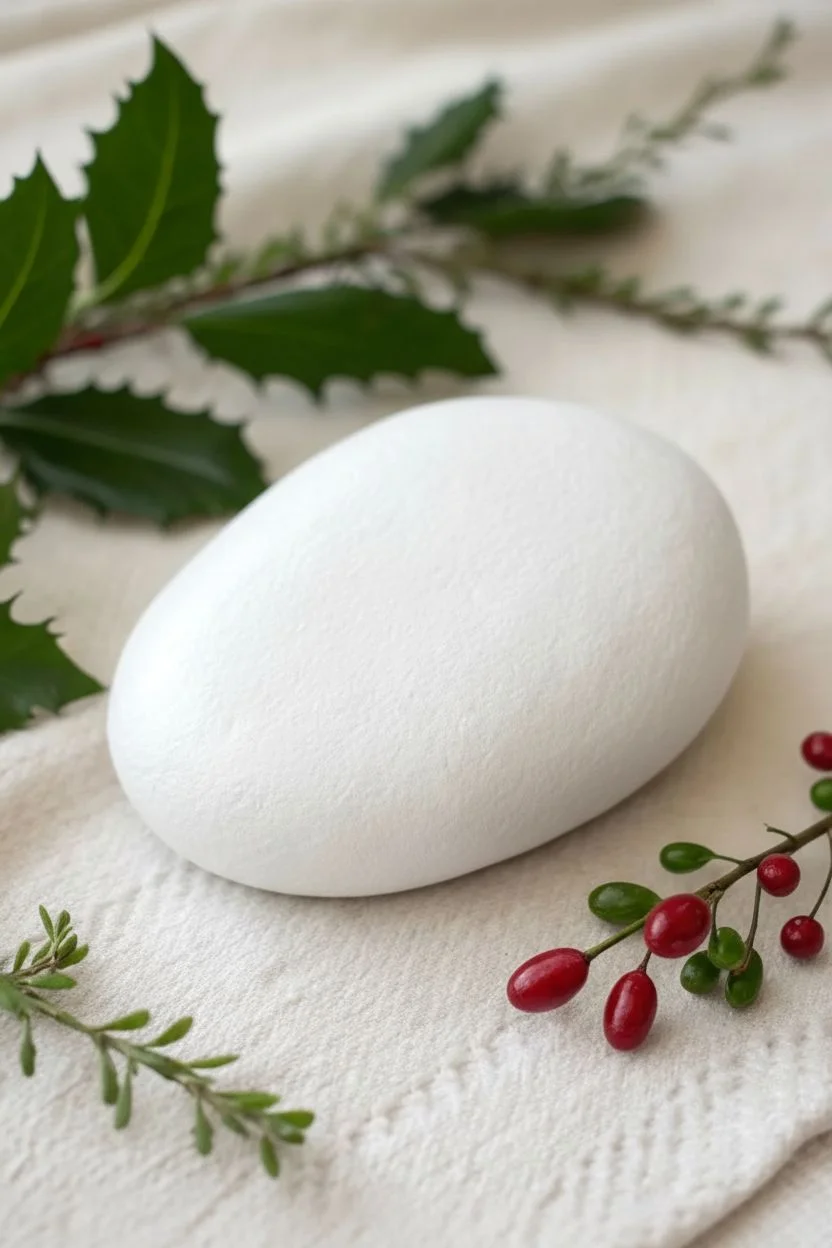
Holly Leaves and Berries on a Snowy Background
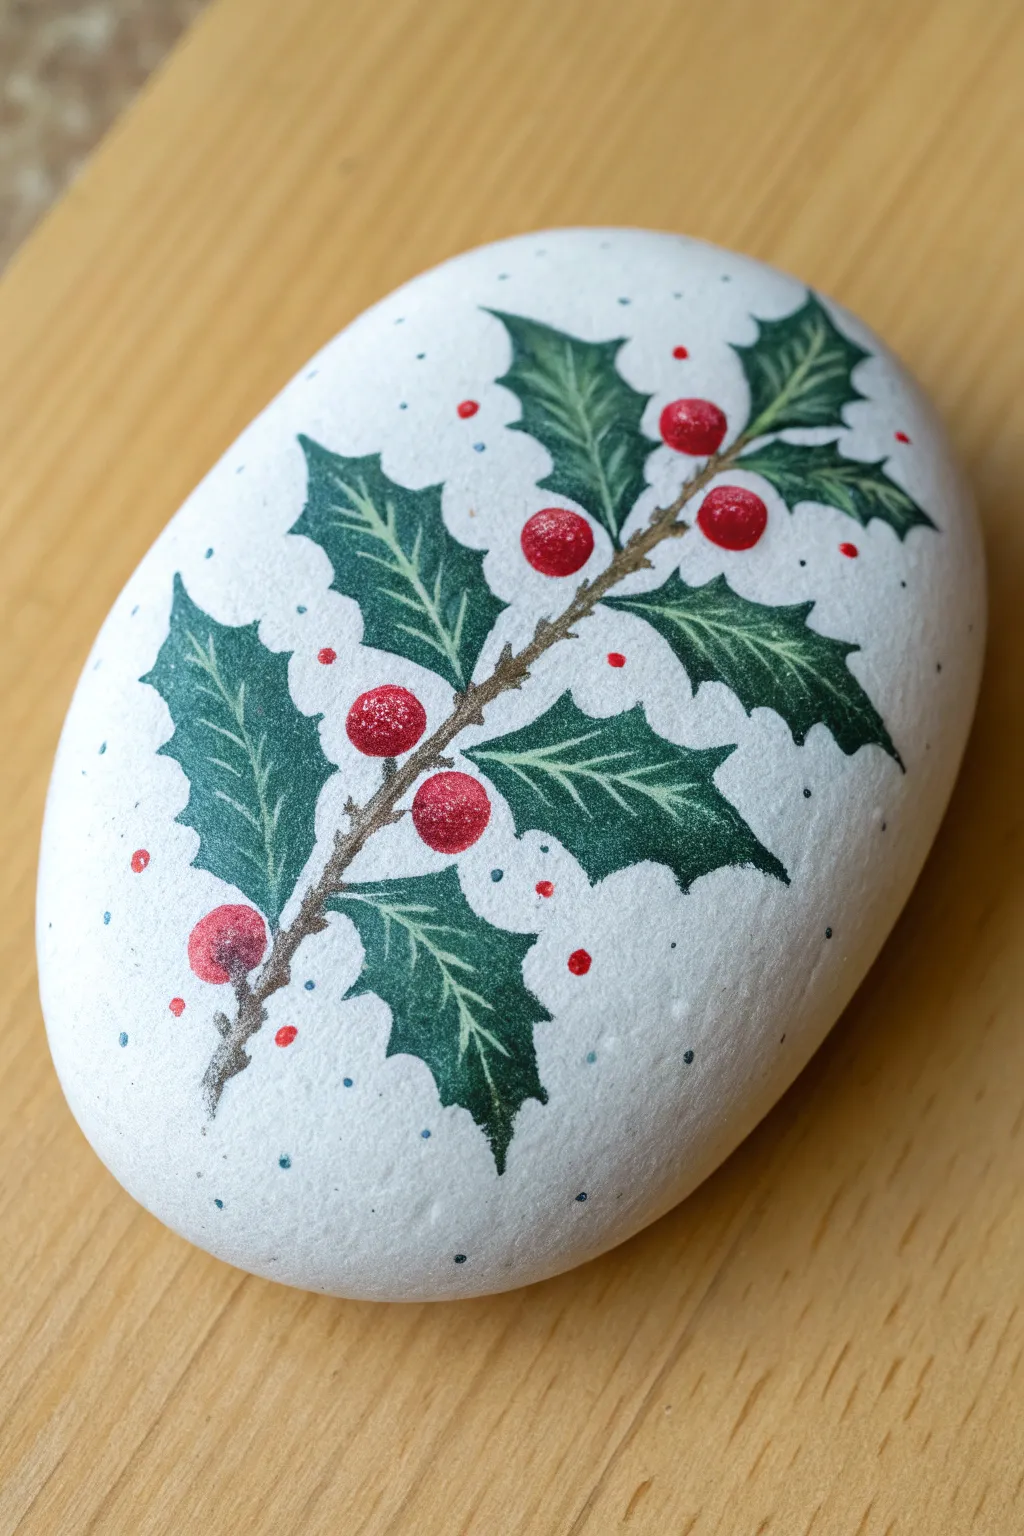
Transform a simple smooth stone into a festive winter scene featuring a delicate holly branch. The crisp white background makes the deep greens and bright red berries pop, creating a classic holiday decoration.
Step-by-Step Guide
Materials
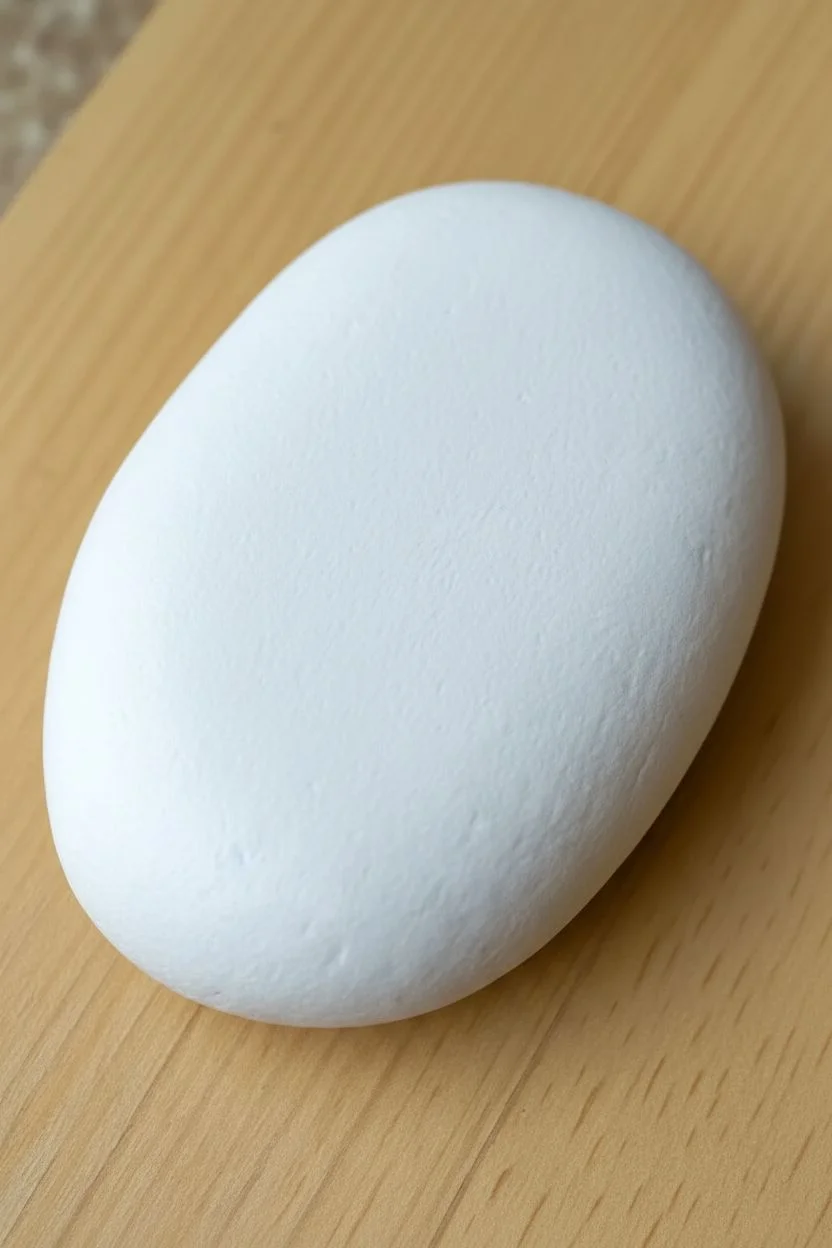
- Smooth oval river rock
- White acrylic paint (matte base)
- Acrylic paints: dark green, light green, dark brown, bright red, light blue
- Fine detail brushes (liners and small rounds)
- Pencil for sketching
- Sealant or varnish (spray or brush-on)
Step 1: Base Preparation
-
Clean the surface:
Begin by washing your stone with warm soapy water to remove any dirt or oils, then let it dry drastically. -
Apply base coat:
Paint the entire top surface of the rock with white acrylic paint. You will likely need two or three thin coats to get a solid, opaque coverage. -
Let it cure:
Wait for the white base to dry completely before touching it with a pencil, or you risk dragging wet paint.
Vein Precision Tip
Thin your lighter green paint with a tiny drop of water. This helps the paint flow smoothly off a liner brush for crisp, uninterrupted vein lines.
Step 2: Sketching
-
Draw the stem:
Lightly sketch a curved line running diagonally across the rock to serve as the main branch. -
Outline leaves:
Sketch the spiky holly leaf shapes branching off the stem. Aim for pairs or alternating placements, keeping the points sharp. -
Place berries:
Draw small circles in clusters of two or three where the leaves meet the stem, or at the branch tips.
Make It Sparkle
For a frosty winter morning look, mix ultra-fine iridescent glitter into your final sealant coat or dust it over wet paint on the berry highlights.
Step 3: Painting the Foliage
-
Base the leaves:
Fill in the leaf outlines with a dark green paint. Don’t worry about the veins yet; just get solid coverage. -
Paint the branch:
Using a thin liner brush and dark brown paint, carefully trace over your stem line, making it slightly thicker at the bottom. -
Add leaf highlights:
Mix a little white or yellow into your green to create a lighter shade. Paint the outer edges of the leaves or one half of each leaf to suggest light hitting them. -
Detail the veins:
With your finest brush and a very light green or off-white mixture, paint a central vein down each leaf and small veins branching out to the prickly tips. -
Refine the stem:
Add tiny twig extensions connecting the berries to the main branch using the tip of your brown brush.
Step 4: Berries & Background
-
Paint the berries:
Fill the berry circles with bright red paint. You may need a second coat to make them truly vibrant against the white. -
Add berry shine:
Once the red is dry, add a tiny dot of white paint to the upper right side of each berry to simulate a glossy reflection. -
Create background texture:
Dip the very tip of a toothbrush or a stiff brush into watery light blue paint and flick it gently for tiny speckles, or dot them manually with a precise tip. -
Add festive confetti:
Using the back end of a small brush, add a few stray red and blue dots around the empty white space for a magical, snowy effect. -
Seal the artwork:
Allow the rock to dry overnight, then apply a clear acrylic sealer to protect your painting from chipping.
Now you have a charming piece of winter decor that fits in the palm of your hand

PENCIL GUIDE
Understanding Pencil Grades from H to B
From first sketch to finished drawing — learn pencil grades, line control, and shading techniques.
Explore the Full Guide
Hand-Lettered Joy Rock With Snowy Flourishes


This elegant project transforms a simple dark stone into a festive piece of decor using high-contrast white ink. The design features whimsical hand-lettering framed by delicate botanical sprigs and scattered snow-like dots for a wintery feel.
Step-by-Step Tutorial
Materials
- Smooth, dark gray or black river rock (flat surface preferred)
- White acrylic paint pen (extra fine tip, 0.7mm)
- White acrylic paint pen (medium tip, 3mm) or white acrylic paint and a small round brush
- Soap and water
- Pencil (optional)
- Clear spray sealant (matte or glossy)
Step 1: Preparation and Base Lettering
-
Clean the surface:
Begin by washing your stone thoroughly with soap and warm water to remove any dirt or oils. Let it dry completely before starting, as paint won’t adhere well to damp stone. -
Plan the layout:
Visualize the center of the rock where the word ‘JOY’ will sit. If you are nervous about freehanding, lightly sketch the letters with a pencil first to ensure they are centered and sized correctly. -
Paint the letter stems:
Using your medium-tip paint pen (or a small brush with acrylic paint), draw the vertical downstrokes of the ‘J’, ‘O’, and ‘Y’. Keep the lines relatively thick and bold. -
Add the curly details:
Switch to a slightly finer touch or the tip of your marker to add the whimsical curls at the bottom of the ‘J’ and ‘Y’, and the connection points of the ‘O’. These should have a loose, hand-written feel. -
Thicken the strokes:
Go back over your letters to thicken the downstrokes, creating a faux-calligraphy look where the vertical lines are heavier than the horizontal connectors. -
Let the lettering dry:
Allow the main text to dry completely for about 10-15 minutes. This prevents smudging when you add the surrounding details.
Smooth Operator
A pitted rock surface ruins fine lines. If you can’t find a naturally smooth stone, paint a base coat of matte black acrylic first to create an even texture.
Step 2: Adding Flourishes and Snow
-
Draw the main curved stems:
Grab your extra-fine tip paint pen. Draw four long, curved lines framing the word ‘JOY’—one above, one below, and two focusing on the sides, creating a rough oval shape around the text. -
Add side leaves:
On the side curved lines, draw small, teardrop-shaped leaves. Keep them simple and filled in with solid white. -
Create the top and bottom sprigs:
For the curved lines above and below the text, draw tiny, short angled lines sticking out from the main stem to create a pine-needle or fern effect. -
Balance the wreath:
Step back and look at your composition. If there are large gaps in the oval ‘wreath’ shape, add small extensions to your stems or an extra leaf to balance it out. -
Add the snowy dots:
Using the very tip of your fine marker, gently press dots into the empty negative spaces around the wreath and text. -
Vary dot density:
I like to cluster a few dots closer to the leaves and scatter them more sparsely as they move toward the edges of the rock, mimicking falling snow. -
Clean up edges:
If any of your lines look shaky, carefully refine them with the fine-tip pen once the first layer is dry to sharpen the edges. -
Final drying time:
Let the entire design cure for at least 30 minutes to ensure the paint creates a hard shell. -
Seal the rock:
Ideally outdoors or in a ventilated area, spray a light coat of clear sealant over the rock to protect the paint from chipping and weather damage.
Add Some sparkle
While the white paint is still wet on the letters, sprinkle a tiny pinch of white iridescent glitter over them to make the word ‘JOY’ shimmer in the light.
Once sealed, this cheerful stone makes a perfect holiday paperweight or a hidden treasure for a neighborhood rock hunt
Gingerbread Person With Icing Details

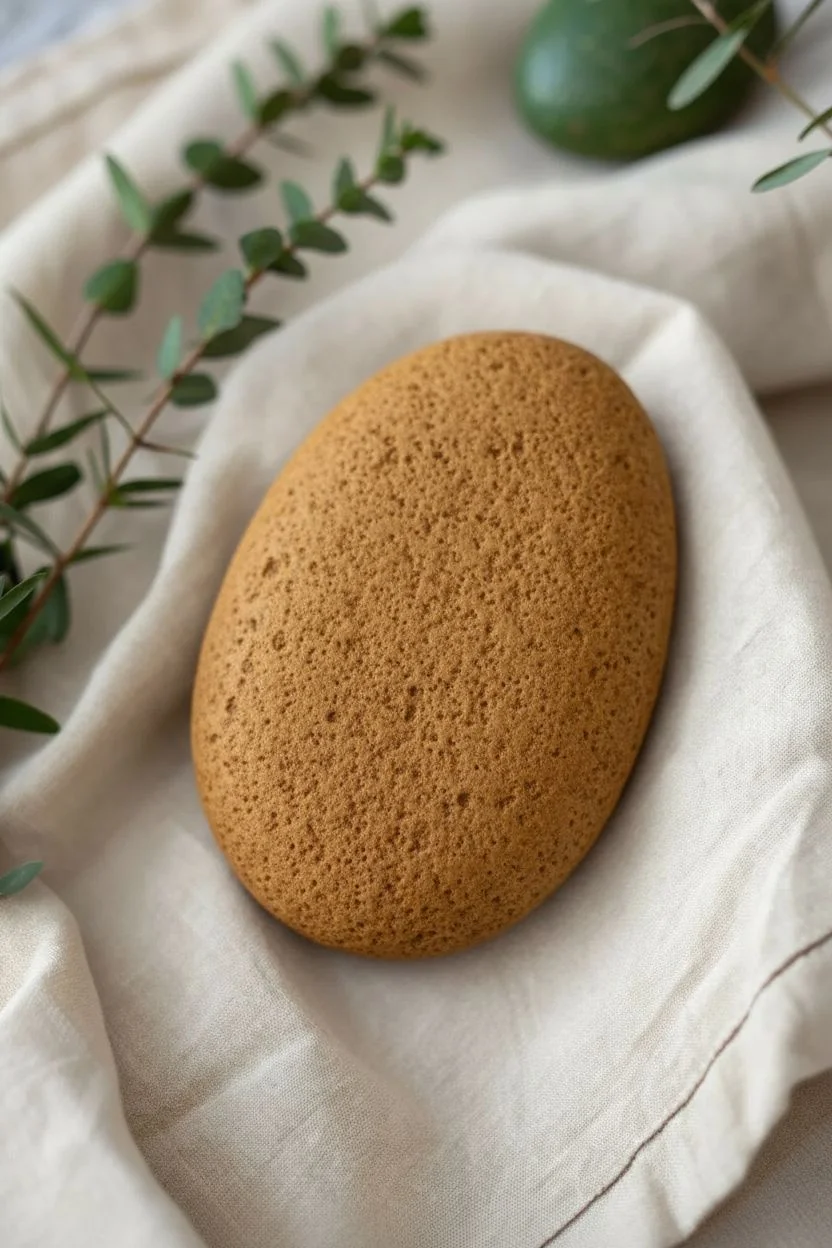
Transform a smooth river stone into a festive cookie without turning on the oven. This charming gingerbread person features realistic golden-brown dough texture and classic white icing details for a sweet holiday decoration.
Detailed Instructions
Materials
- Smooth, oval-shaped river rock
- Acrylic paint (Light Brown/Ochre, Dark Brown, White, Red)
- Small flat brush
- Fine detail liner brush (size 00 or 0)
- Dotting tool or toothpick
- Small sponge or foam pouncer
- Matte finish sealer spray
Step 1: Baking the Base
-
Clean and Prep:
Start by scrubbing your rock with warm soapy water to remove any dirt or oils. Let it dry completely before starting, as moisture can trap bubbles under your paint. -
Base Color Mixing:
Mix a ‘gingerbread dough’ shade by combining a generous amount of light brown or yellow ochre with a small touch of dark brown. You want a warm, toasted color. -
Apply the Base Coat:
Using your flat brush, coat the entire top surface of the rock with your mixed brown paint. Paint slightly down the sides to ensure coverage from all viewing angles. -
Create Texture:
Before the base coat dries fully, dab a small sponge or foam pouncer gently over the wet paint. This eliminates brush strokes and creates a baked, porous texture similar to a real cookie. -
Dry Time:
Allow this base layer to dry completely. Since we are texturing, it might take a little longer than a flat coat—roughly 15-20 minutes.
Step 2: Icing the Details
-
Prepare the Liner:
Load your fine detail liner brush with white acrylic paint. You may need to thin the paint slightly with a drop of water so it flows smoothly like real icing. -
Outline the Head:
Paint a simple circle near the top of the rock for the head. Keep the line steady but slightly rounded at the ends to mimic piped frosting. -
Draw the Arms:
From just below the head, paint two curved lines extending outward and down for the arms. Loop them back in towards the body to create the hands. -
Draw the Legs:
Continue the lines down to form the legs, rounding them off at the bottom for feet, and bring the line back up to meet in the center of the body. -
Detail the Cuffs:
Add squiggly or scalloped lines across the wrists and ankles to look like decorative frosting cuffs. -
Add Decorative Dots:
Using a dotting tool or the tip of a toothpick, add small white dots along the arm and leg cuffs for extra detail. -
Face Details:
Dip your smallest dotting tool in white paint to create two eyes inside the head circle. Paint a simple curved smile underneath.
Shaky Lines?
If your hands are shaky when painting the white icing lines, try resting your pinky finger on the dry part of the rock for stabilization as you paint.
Step 3: Sweet Finishing Touches
-
Painting the Buttons:
Switch to bright red acrylic paint. Use a medium-sized dotting tool or the back of a brush handle to place three vertical buttons down the center of the chest. -
Highlight the Buttons:
I like to add a tiny speck of white or lighter red on the top right curve of each red button once dry. This makes them look like shiny candy. -
Final Cleanup:
Check your white lines. If any look too thin, go over them one last time to build up the opacity so the ‘icing’ looks thick and sweet. -
Seal the Cookie:
Once all paint is bone dry (give it at least an hour), spray the rock with a matte sealer. A glossy sealer would make it look wet, while matte preserves that baked cookie look.
Pro Tip: Puff Paint
Swap the white acrylic paint for 3D puffy fabric paint. This creates actual raised ridges that feel just like real royal icing when touched.
Display your inedible treat in a bowl or use it as a festive paperweight to spread holiday cheer


Nativity Silhouette Under a Starry Sky
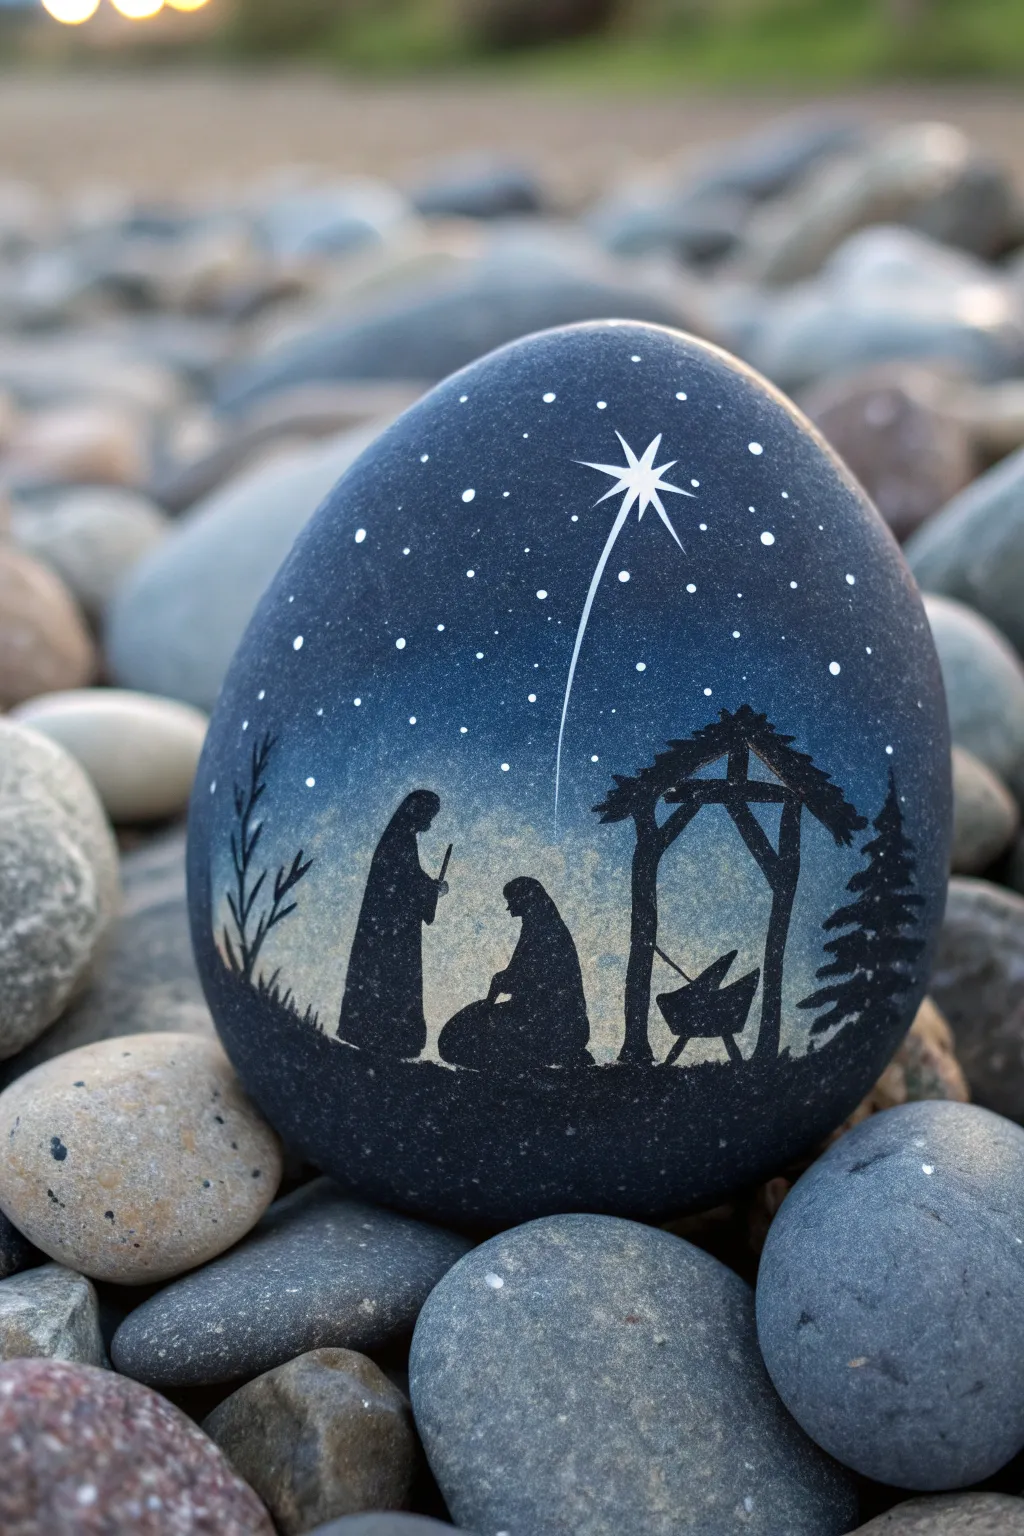
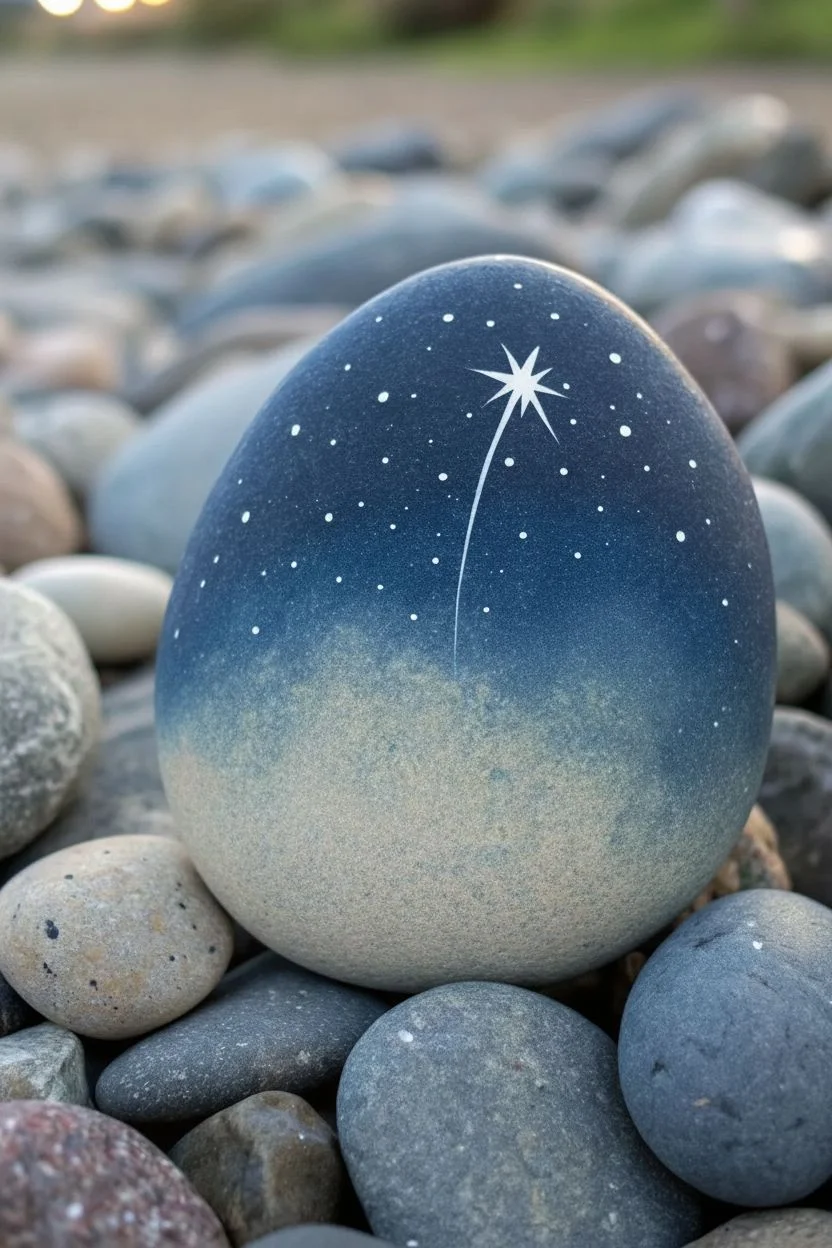
Capture the serene beauty of the first Christmas with this stunning painted rock project. Using simple silhouette techniques against a dreamy night sky gradient creates a deeply peaceful scene that fits perfectly in the palm of your hand.
Step-by-Step Guide
Materials
- Large, smooth oval river rock (dark grey or black base works best)
- Acrylic paints: Dark Navy Blue, Royal Blue, White, Black
- Paintbrushes: Medium flat brush, small detail liner brush (00 or 000 size)
- Sponging tool or small piece of kitchen sponge
- Toothbrush (optional, for stars)
- Spray sealant (matte or gloss finish)
- Pencil (optional)
- Palette or paper plate
Step 1: Preparing the Sky
-
Clean the canvas:
Wash your stone thoroughly with soap and water to remove any dirt or oils. Let it dry completely before beginning. -
Base coat decision:
If your rock is already a nice dark gey, you can leave the edges natural. If not, paint the entire surface with a dark navy blue or black base coat and let it dry. -
Creating the spotlight:
Mix a small amount of white paint with a touch of royal blue to create a misty, pale blue shade. -
Sponging the glow:
Using a slightly damp sponge, dab this pale color onto the lower center of the rock where the figures will stand. This creates the ‘backlight’ effect. -
Blending the gradient:
While the pale center is still tacky, sponge darker royal blue around it, blending outwards into the dark navy edges. The goal is a seamless transition from light center to dark perimeter. -
Adding the stars:
Dip a toothbrush or stiff brush into watered-down white paint. Run your thumb across the bristles to flick tiny speckles across the upper dark section of the rock. -
Painting the North Star:
Using your finest liner brush and pure white paint, draw the large Star of Bethlehem near the top center. Start with a simple cross, then add smaller diagonal rays between the main points. -
Drawing the light beam:
Carefully drag a very thin, curved line of white paint extending from the bottom of the star down toward where the manger will be.
Starry Precision
If you struggle painting tiny stars, dip the tip of a toothpick into white paint and gently touch the rock surface to create perfect, controlled dots.
Step 2: Painting the Silhouette
-
Establish the ground:
Switch to black acrylic paint. Paint a rough, uneven horizon line across the bottom of the rock to serve as the ground. -
The stable structure:
On the right side, paint the silhouette of the stable beams. Use straight, confident lines to create the posts and the roof frame. -
Adding texture:
Dab the brush slightly on the edges of the stable roof to simulate straw or rough wood texture. -
Painting Joseph:
On the left side of the light patch, paint a tall, standing figure hunched slightly forward, perhaps holding a staff. -
Painting Mary:
In the center, paint a kneeling figure facing the manger spot. Keep the shapes simple; distinct features aren’t necessary for a silhouette. -
The Manger:
Between the two figures, under the stable roof, paint the ‘X’ shape of the manger legs and the cradle on top. -
Framing with nature:
Paint a small pine tree silhouette on the far right edge and some barren branches or grass blades on the far left edge to frame the scene. -
Final touches:
Check for any light spots showing through your black silhouettes and apply a second coat of black if needed for opacity. -
Sealing:
Once the paint is fully cured (give it a few hours), spray the rock with a clear sealant to protect it from chipping and weather.
Metallic Magic
Use metallic silver or gold paint for the main Star of Bethlehem to make it shimmer beautifully when the rock catches the light.
Place this beautiful stone on your mantle or gift it as a meaningful keepsake for the holiday season
Mini Christmas Wreath With Bow and Texture Dots
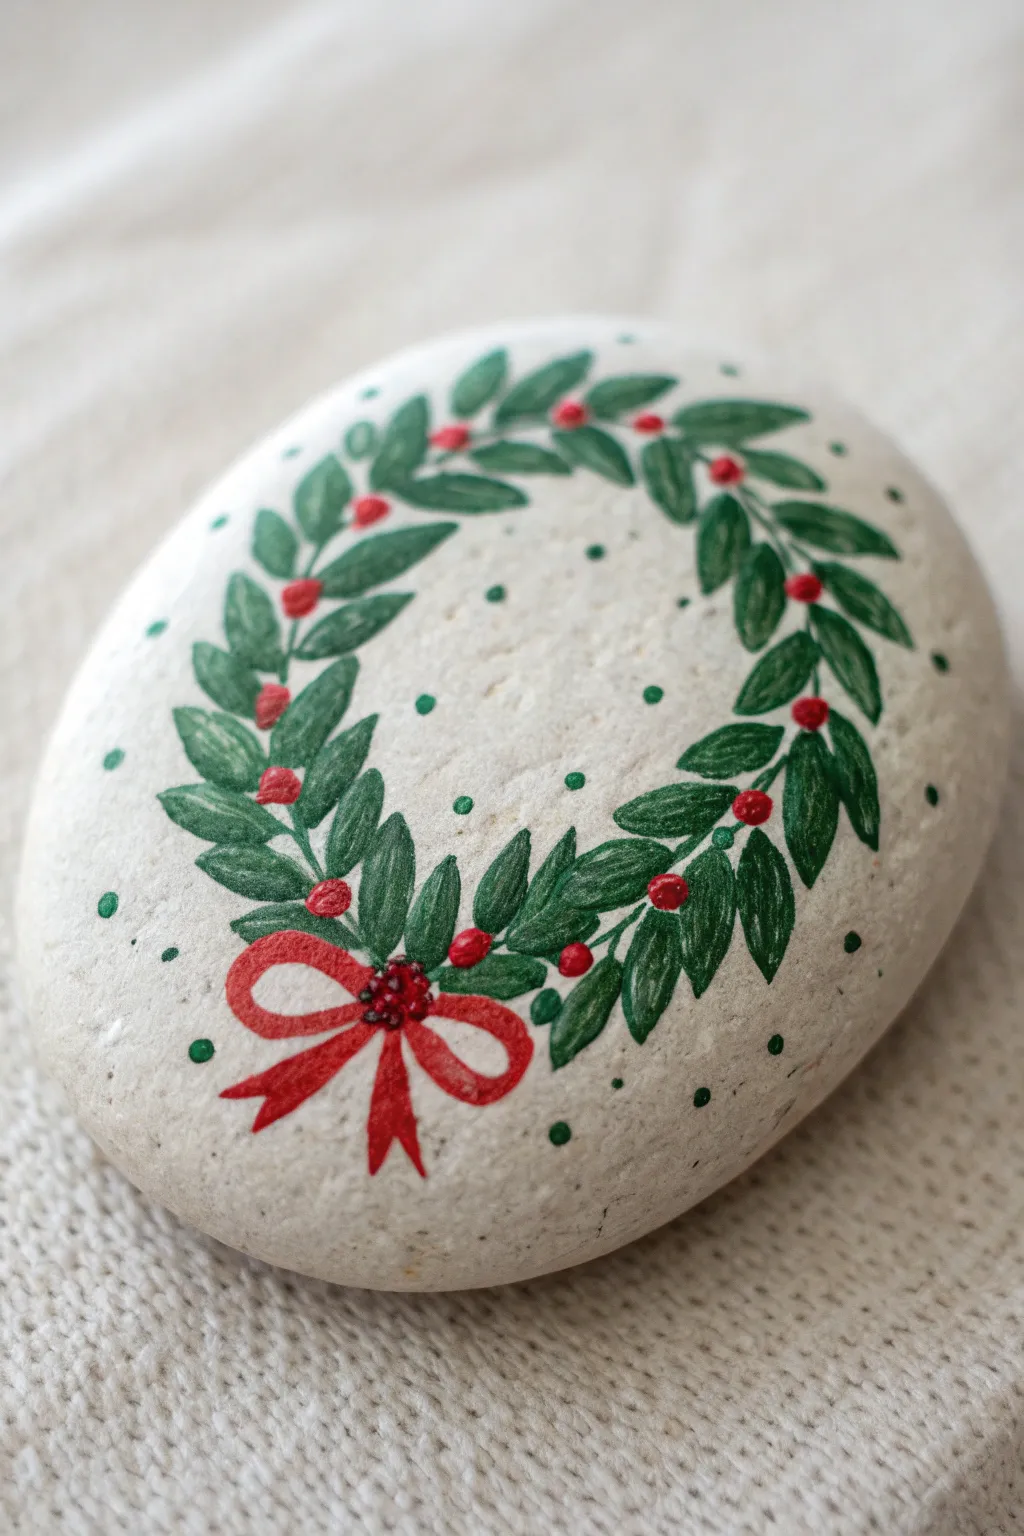
This elegant little project transforms a smooth river rock into a festive keepsake featuring a classic Christmas wreath. The design combines delicate leaf details with playful texture dots for a look that feels both traditional and modern.
Step-by-Step
Materials
- Smooth, flat river rock (white or light beige works best)
- Fine grit sandpaper (optional)
- Acrylic paints: Dark Green, Forest Green, Bright Red, Burgundy, White
- Fine detail brushes (sizes 0 and 00)
- Small dotting tool or toothpick
- Pencil for sketching
- Matte or satin spray sealer
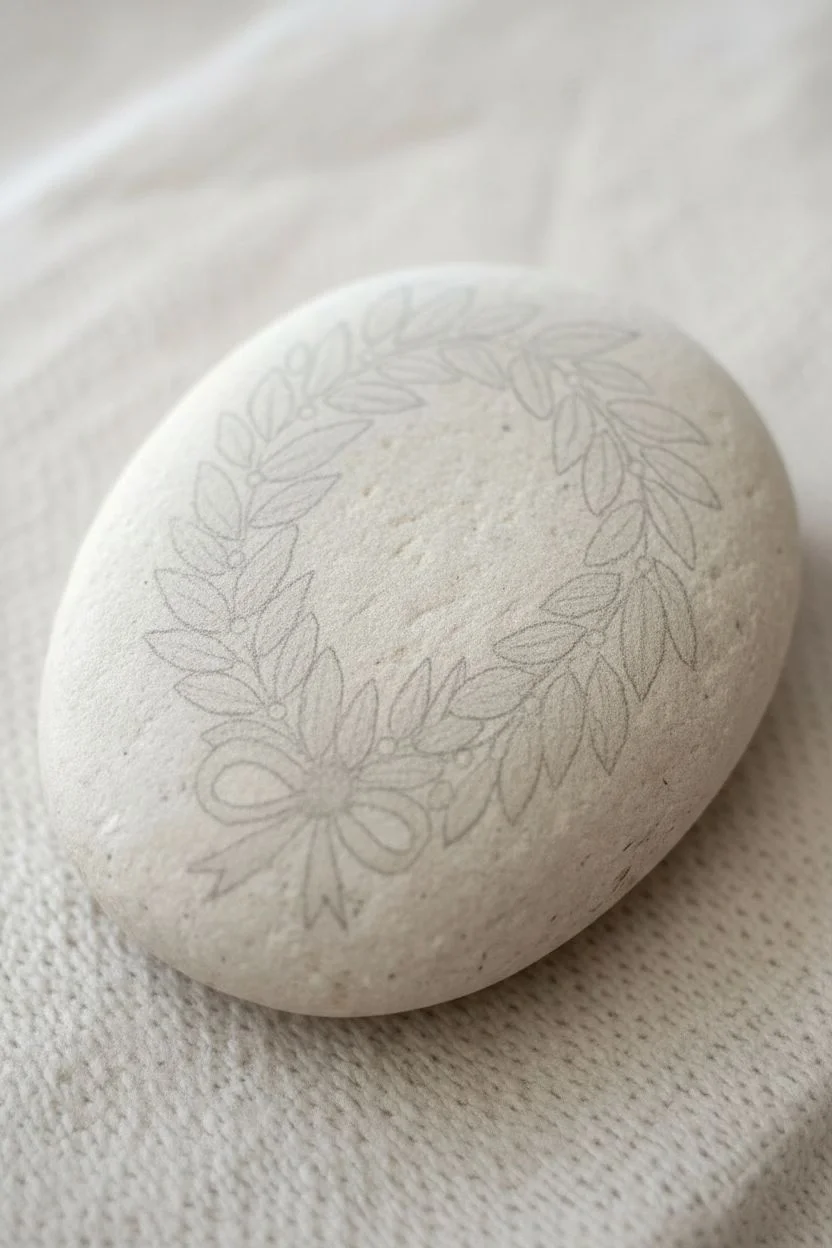
Step 1: Preparation & Sketching
-
Clean and Prep:
Begin by washing your stone with warm soapy water to remove any dirt or oils. Let it dry completely. If the surface feels rough, give it a quick rub with fine grit sandpaper to create a smoother canvas for painting. -
Guide Circle:
Lightly sketch a circle in the center of the rock using a pencil. This will serve as the spine for your wreath. It doesn’t need to be perfect; a faint guideline is all you need to keep the shape symmetrical. -
Sketch the Bow:
At the bottom overlap of your circle, sketch a simple bow shape with two loops and two tails hanging down. This establishes the focal point of the wreath.
Step 2: Painting the Wreath
-
Base Leaves:
Using your fine brush and dark green paint, create pairs of small, pointed oval leaves extending outward from your pencil line. Angle them slightly upwards as you move around the circle towards the top. -
Leaf Spacing:
Leave varying amounts of space between the leaves; you don’t want a solid block of color. The spaces allow the rock’s natural texture to peek through. -
Paint the Bow:
While the green dries, switch to bright red paint. Fill in your sketched bow shape. You may need two thin coats to ensure the red pops against the stone. -
Leaf Details:
Once the green leaves are dry, mix a tiny bit of white into your dark green or use a lighter forest green. Paint a thin line down the center of each leaf to create a vein. -
Highlighting Leaves:
Add very subtle highlights to the edges of a few leaves using your lighter green mix. This gives the wreath visual depth and makes the foliage look fuller.
Brush Control Pro-Tip
For the sharpest leaf tips, gently roll the bristles of your brush into a point on your palette before touching the stone. This keeps the line crisp.
Step 3: Details & Berries
-
Adding Berries:
Dip the tip of a small brush handle or a large dotting tool into bright red paint. Place random clusters of 2-3 berries among the leaves, focusing on areas where the foliage connects. -
Center Bow Detail:
Use a darker burgundy red or mix a drop of black into your red paint. Add tiny dots or shading to the center knot of the bow to give it dimension and texture. -
Bow Dimension:
Add a thin stroke of the darker red along the bottom edges of the ribbon loops and tails to create a shadow effect. -
Background Dots:
Dip a toothpick or very small dotting tool into the dark green paint. Gently stamp tiny dots scattered inside and outside the wreath circle. -
Dot Placement:
Keep the dots random and sparse. They should look like falling confetti or distant pine needles, adding a whimsical texture to the empty space. -
Berry Cleanup:
If your red berries look too flat, add a tiny speck of white paint to the top right of each berry once dry. This ‘reflection’ makes them look round and shiny.
Level Up: Metallic Touch
Swap the background texture dots for metallic gold paint instead of green. This adds a subtle shimmer that catches the light beautifully.
Step 4: Finishing Up
-
Final Check:
Look over the rock for any smudges. If you see pencil marks still visible around the edges, gently erase them once you are certain the paint is 100% dry. -
Sealing:
To protect your artwork, take the rock to a well-ventilated area and apply a clearer sealer. A spray sealer is best here so you don’t smudge the fine dots with a brush.
Place your finished rock as a festive paperweight or hide it in a garden for a neighbor to find.
Ugly Sweater Pattern Rock in Festive Colors
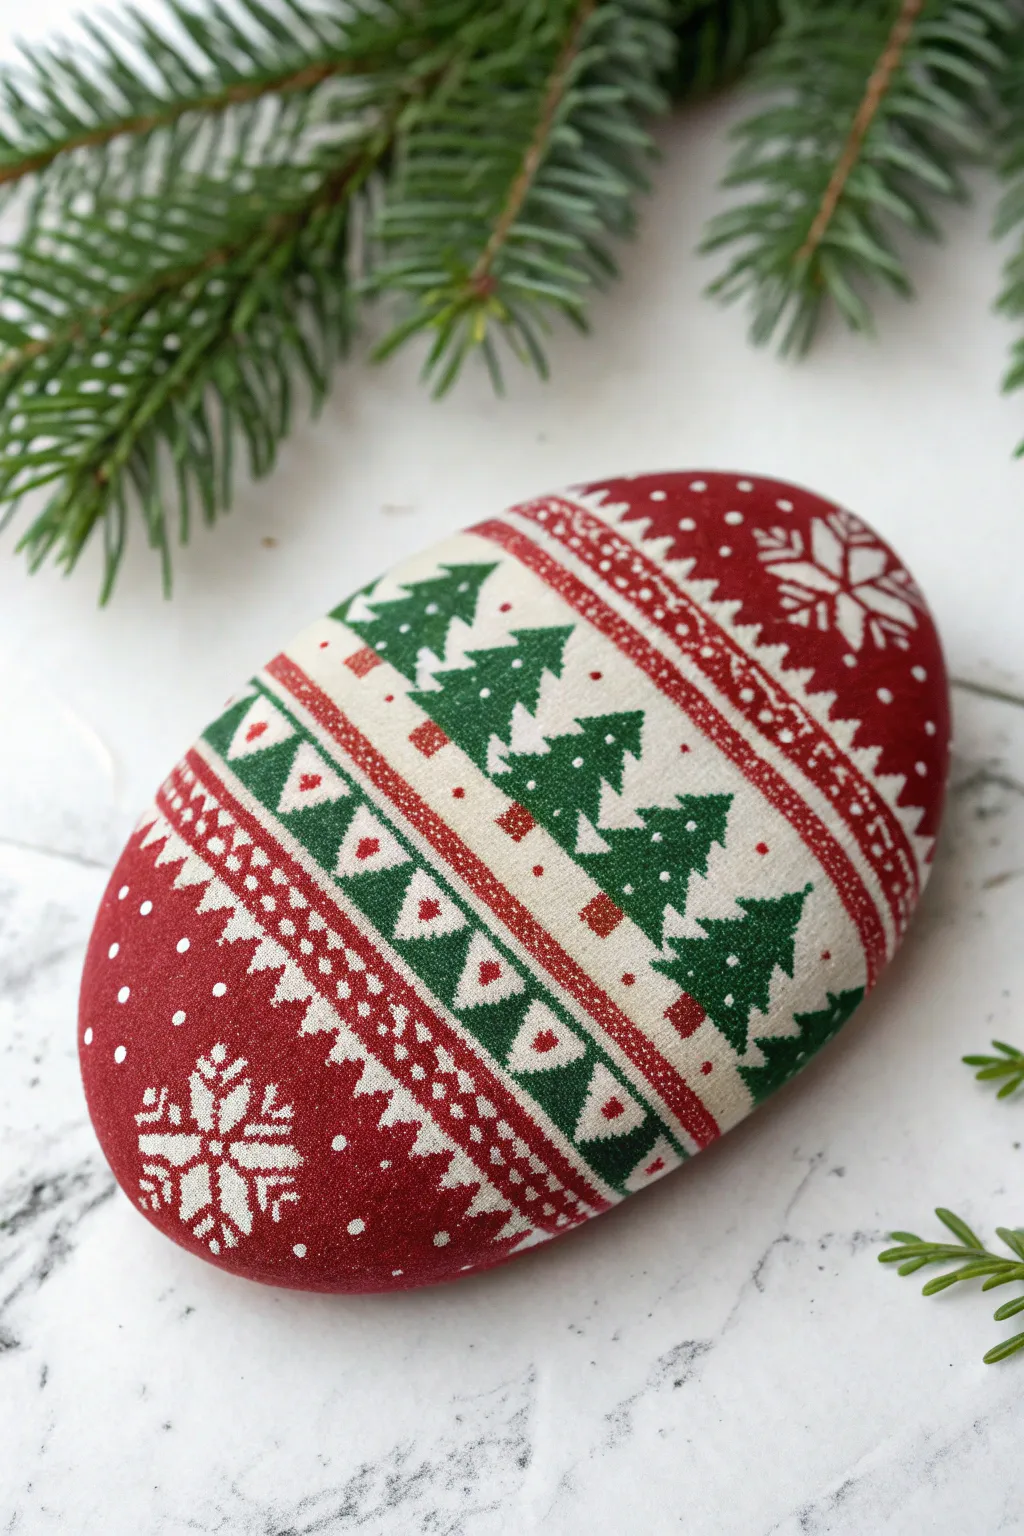
Transform a simple smooth stone into a cozy-looking faux knit masterpiece with this festive rock painting project. The deep reds, forest greens, and cream colors mimic the classic warmth of a traditional Christmas sweater without needing a single knitting needle.
Step-by-Step Tutorial
Materials
- Smooth, oval-shaped river rock
- Acrylic paints: Deep Red (burgundy), Forest Green, Cream (off-white)
- White or light gray primer (gesso)
- Flat brush (medium size)
- Round brush (small/detail size)
- Fine liner brush or stylus tool
- Matte finish sealant spray or varnish
- Pencil for sketching
- Palette or small dish for mixing
Step 1: Base Preparation
-
Clean the canvas:
Wash your rock thoroughly with soap and water to remove any dirt or oils. Let it dry completely before starting to ensure the paint adheres properly. -
Prime the surface:
Apply a coat of white or light gray primer over the entire top surface of the rock. This helps the cream and red colors pop and prevents the dark stone color from showing through. -
Dry thoroughly:
Allow the primer to dry completely. If the coverage looks streaky, add a second thin coat for a solid, uniform base.
Wobbly Lines?
Don’t stress if your lines aren’t perfectly straight! Real knitted fabric has natural imperfections and stretch. Slight wobbles actually make the ‘fabric’ texture look more realistic.
Step 2: Blocking the Colors
-
Determine the layout:
Using a pencil, lightly sketch two curved lines across the middle of the rock to define the central cream band. The band should follow the natural curve of the stone. -
Paint the red sections:
Use your flat brush and deep red paint to fill in the top and bottom sections of the rock, leaving the central band unpainted for now. You may need two coats for a rich, opaque finish. -
Paint the central band:
Fill the middle section with cream paint. Be careful near the edges where it meets the red paint to keep the lines crisp. -
Add narrow transition stripes:
Paint a very thin red stripe horizontally through the cream section, near the top and bottom borders, effectively creating narrow channels where your patterns will sit.
Step 3: Painting the Patterns
-
Create the tree line:
In the widest part of the cream band, use a small round brush and forest green paint to paint a row of simple Christmas trees. Start with a small triangle for the top and add two wider tiers below it. -
Detail the trees:
Once the green trees are dry, add tiny brown squares at the bottom for trunks if desired, or keep them stylized as pure geometric shapes. -
Paint geometric triangles:
Below the tree line, in the lower section of the cream band, paint a row of inverted green triangles. Between each green triangle, paint a small red heart or dot to mimic a Fair Isle pattern. -
Add ‘knit’ stitching details:
This is crucial for the sweater effect: Use a fine liner brush and red paint to add tiny vertical tick marks along the edges of the cream band. These simulate the loops of yarn. -
Create the snowflake motifs:
On the red sections at the very top and bottom of the rock, use cream paint and a fine liner brush to paint large snowflake or star shapes. Start with a cross, add an ‘X’ over it, and detail the ends. -
Fill with ‘snow’ texture:
Dip a stylus tool or the back of a paintbrush into cream paint and dot the empty red spaces around the snowflakes to create a speckled, snowy texture. -
Simulate ribbing:
Along the border where the red meets the cream band, paint a zig-zag or chevron pattern in cream over the red background. This mimics the ribbed border often found on sweaters. -
Add fine dot work:
Using your smallest dotting tool, place tiny cream dots in a line above and below the tree pattern to frame it like a stitched border.
Fabric Texture Trick
Before the final sealant dries, lightly press a coarse piece of fabric (like denim or canvas) onto the tacky surface to imprint a subtle woven texture.
Step 4: Finishing Touches
-
Check for consistency:
Look over your design. If any lines look too smooth or painted, add tiny perpendicular dashes across them to break them up and make them look more like stitches. -
Clean up edges:
Use a small brush with the appropriate background color to tidy up any smudges or uneven lines in your patterns. -
Dry completely:
Let the rock sit undisturbed for several hours or overnight to ensure all layers of paint are fully cured. -
Seal the artwork:
Finish with a matte spray varnish. Avoid glossy finishes, as a matte look is more convincing for a fabric or wool texture effect.
Place your warm and fuzzy-looking rock near the fireplace or on a mantle for a cozy touch of holiday decor


Have a question or want to share your own experience? I'd love to hear from you in the comments below!