When you’re 12, you want drawings that feel a little more grown-up than basic doodles—but still fun and totally doable. These cool drawing ideas are the kind of projects I’d set out in my studio to help you level up fast and feel proud of what’s on the page.
Cool Doodle Icons for Notebooks
Transform a blank notebook spread into a curated collection of bold, graphic icons. This project is perfect for practicing distinctive shapes like lightning bolts, stars, and hearts using clean black ink lines.
Step-by-Step
Materials
- Grid-lined notebook (A5 or similar size)
- Fine liner pen (black, 0.5mm tip)
- Thicker marker pen (black, 0.8mm or 1.0mm tip) for filling
- Pencil (HB)
- Eraser
Step 1: Planning the Layout
-
Open the spread:
Lay your notebook flat so you have access to both the left and right pages. The grid lines will act as your invisible guide for keeping everything neat. -
Visualize the spacing:
Instead of drawing randomly, imagine a rough grid where each icon will sit. You want them to float freely with plenty of white space between them. -
Pencil drafting:
Lightly sketch the shapes first if you are nervous about committing to ink immediately. Keep your pencil pressure very light so it erases easily later.
Step 2: Drawing the Lightning Bolts
-
Classic zig-zag:
Start near the top of the left page. Draw a classic lightning bolt: a diagonal line down, a sharp cut horizontal, and another diagonal down. -
The hollow bolt:
On the right page, draw outline-style bolts. Create the zig-zag shape but close it off at the top and bottom to create a hollow shape. -
Variations on a theme:
Scatter different bolt styles across the top half of both pages. Try making some tall and thin, and others short and stout. I like to add a vertical line through the center of one to give it a 3D effect. -
Grouped energy:
Draw three small, simple zig-zag lines vertically near the bottom right page to represent sparks or energy.
Ink Smudge Alert
Work from top-left to bottom-right (if right-handed) to avoid dragging your hand through wet ink. If you smudge, turn it into a shadow or a new messy doodle.
Step 3: Adding Heavenly Bodies
-
Sparkle stars:
Draw small, four-pointed stars using just crossed lines. Add a few five-pointed outline stars scattered around the middle sections. -
The bursting sun:
On the top left, draw a messy scribbled circle, then add jagged rays bursting outward for an energetic sun doodle. -
Planet doodle:
Draw a flattened oval for a ring, then add a semicircle on top to create a simple Saturn-like planet. -
Radiant star:
Create a focal point star on the left page. Draw a five-pointed star and surround it with small dots and short dashes to make it look like it’s glowing.
Add Pop Color
Use a single neon highlighter (like yellow or pink) to shadow the doodles. Draw a thick line on just the right side of every icon for a cool offset look.
Step 4: Hearts and Gems
-
Simple hearts:
Draw a few classic heart outlines. Keep the curves smooth and the bottom point sharp. -
The geometric diamond:
Draw an upside-down triangle with the top cut off (a trapezoid). Draw a triangle pointing down attached to the bottom. Add lines inside to connect the corners, creating facets. -
Textured heart:
Draw a tilted heart on the bottom right of the left page. Fill the inside with small circles to give it a cheese-like or bubbly texture.
Step 5: Finishing Touches
-
Flower power:
Draw a five-petaled flower silhouette and fill it in completely black for high contrast against the lighter outlines. -
Captain’s shield:
On the top right page, draw a small circle with a star inside, then draw two rings around it to resemble a hero’s shield. -
Small fillers:
Look for empty gaps. Add tiny teardrops, detailed feathers, or small ‘magic’ lines to fill the white space without cluttering it. -
Erase guidelines:
Once the ink is completely dry—give it at least five minutes—gently erase any pencil sketches you made in the beginning.
Now you have a stylish reference page to inspire your next notebook doodles


Comic Superhero Character Design
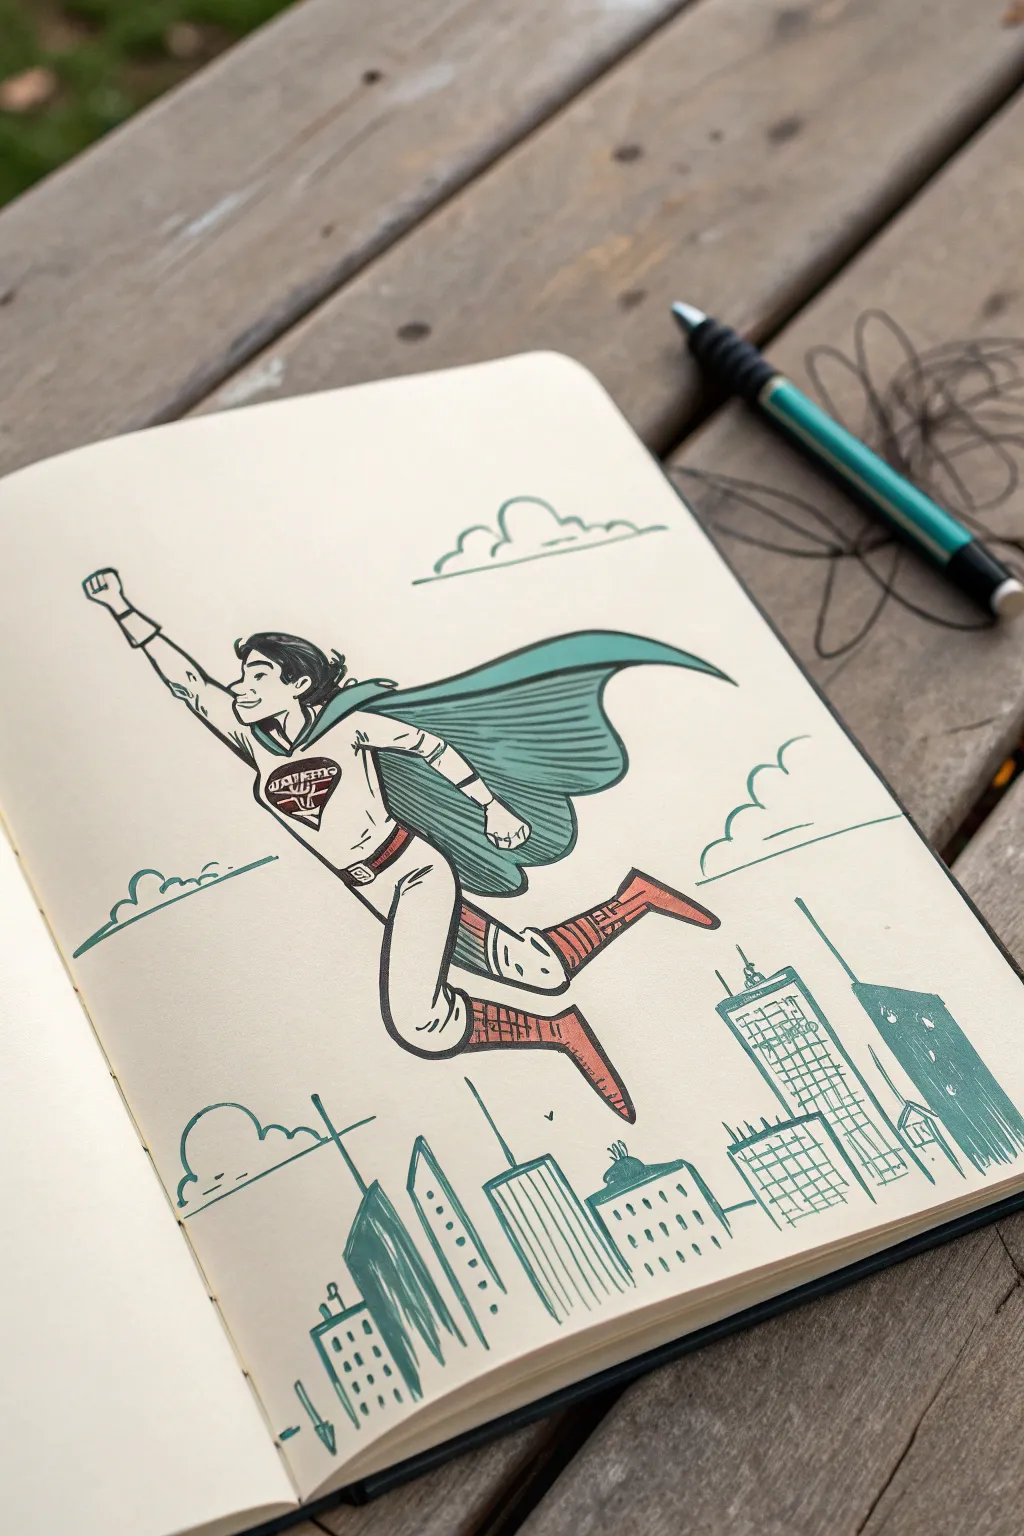
Capture the thrill of flight with this dynamic comic-style illustration featuring a caped hero zooming over a cityscape. Using a limited color palette of teal and brick red creates a stylish, vintage comic book feel that looks great in any sketchbook.
Step-by-Step
Materials
- Sketchbook or heavyweight drawing paper
- Pencil (HB or 2B) for initial sketching
- Eraser
- Fine-point black pen (0.5mm or 0.8mm) or felt-tip marker
- Teal or seafoam green marker (chisel tip works well)
- Brick red or rusted orange marker
- Ruler (optional for buildings)
Step 1: Sketching the Hero’s Pose
-
Basic Framework:
Start by lightly sketching the superhero’s body structure. Draw a tilted oval for the head, a blocky shape for the torso, and stick-figure lines to map out the arms and legs. Draw the left arm reaching forward and up, while the legs should angle backward to suggest motion. -
Fleshing out the Form:
Add volume to your stick figure. Draw cylinders for the arms and legs, making sure the forward hand is a clenched fist. Refine the face profile with a simple nose, jawline, and a confident smile. -
Adding the Costume:
Draw the details of the suit. Create a belt line around the waist and define the boots on the calves. Sketch a chest emblem—a diamond or shield shape works perfectly. -
The Cape and Hair:
Add short, wind-swept hair. For the cape, draw a large, flowing shape billowing out from the shoulders behind the hero. Use wavy lines at the bottom edge to simulate flapping fabric.
Action Lines
Make the hero look faster by adding ‘speed lines’ behind them. Draw 3-4 straight lines trailing off the feet and cape to show the direction of flight.
Step 2: Drawing the Cityscape
-
Skyline Foundation:
Near the bottom of the page, sketch a variety of geometric shapes for buildings. Mix tall, thin rectangles with shorter, wider blocks. Leave plenty of space between the buildings and the hero to emphasize height. -
Building details:
Add simple grid lines to represent windows on the skyscrapers. Draw antennas or spires on a few rooftops to break up the flat tops. -
Atmospheric Clouds:
Fill the empty sky space with a few simple cloud shapes. Draw them as flat-bottomed fluff balls—classic comic style—one near the top right and a couple near the horizon.
Make it Your Own
Design your own logo for the chest emblem! Try using your initials or a simple symbol like a lightning bolt, star, or animal paw print.
Step 3: Inking and Coloring
-
Main Outlines:
Take your black fine-point pen and trace over your pencil lines. Use confident, smooth strokes. Once the ink is completely dry, gently erase the pencil guidelines. -
Adding Ink Texture:
Use thin, horizontal hatching lines on the cape to show folds and shadow. Add a few small ‘motion lines’ near the fist and feet to enhance the feeling of speed. -
Coloring the Cape and City:
Use your teal marker to fill in the cape. Color evenly, following the direction of the fabric folds. Apply the same teal color to several of the buildings below, leaving the windows white or vice versa. -
Red Accents:
Use the brick red marker for contrast. Color the boots, the belt, and the chest emblem. I like to leave small white gaps in the coloring to mimic light reflecting off the material. -
Final Touches:
Add a dashed line of teal on the clouds to give them volume without filling them in completely. Check your drawing for any faint areas to darken with the black pen.
You now have a dynamic comic panel ready for your own story


Dragon With Scales and Smoke
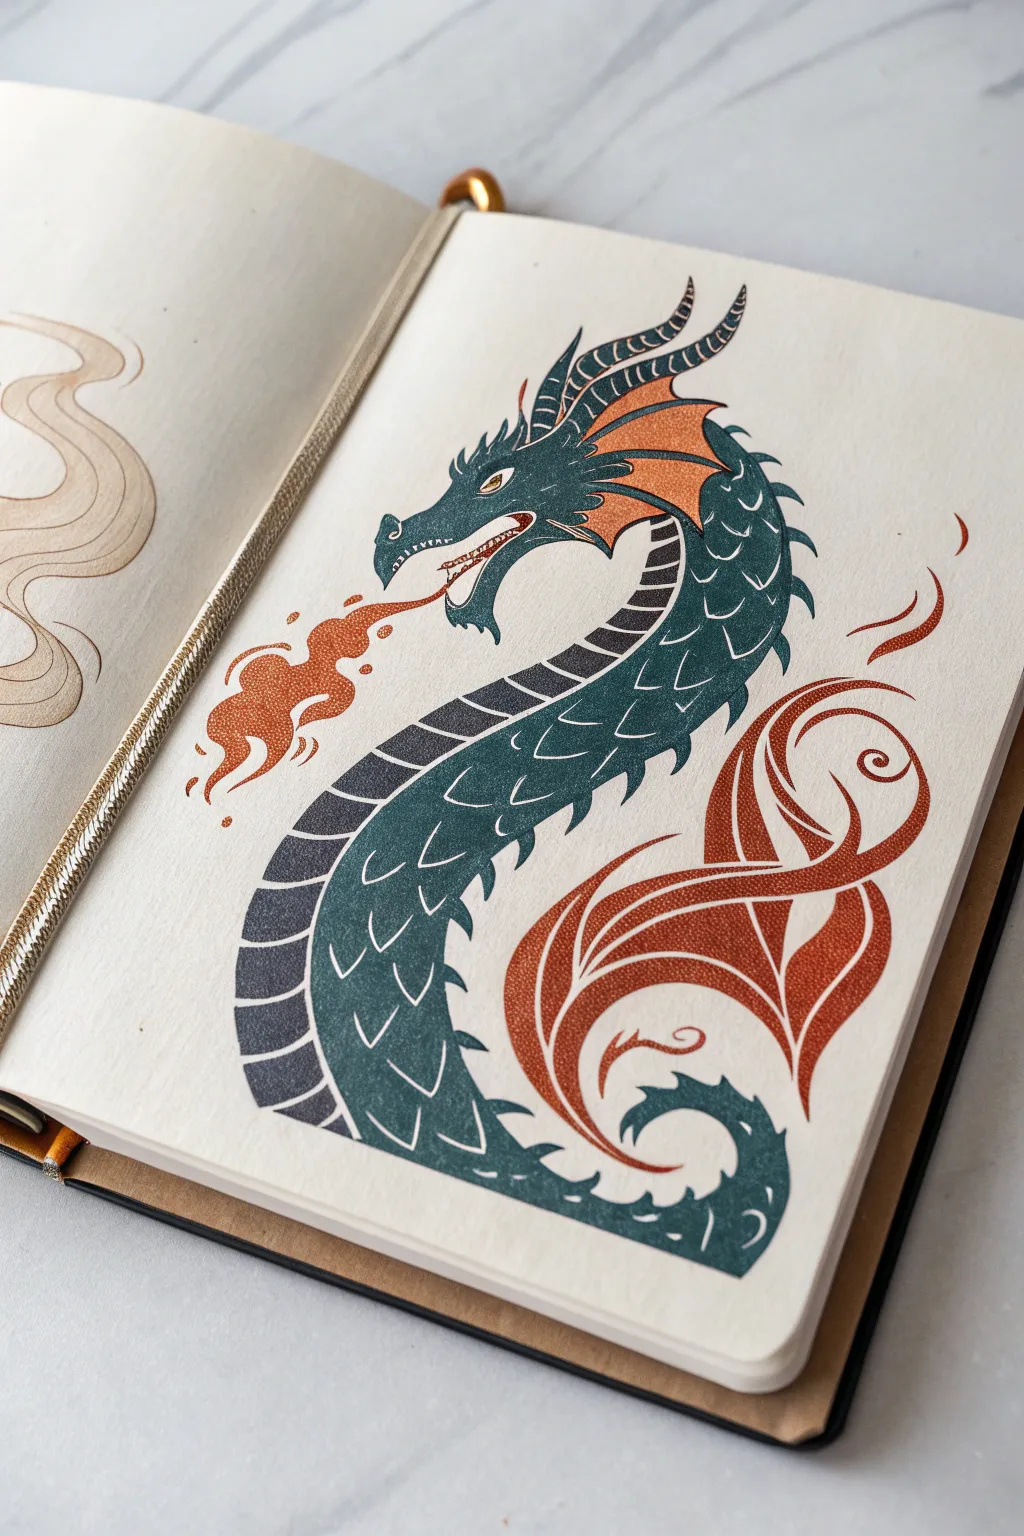
Master the art of mythical creatures with this stylized dragon illustration that twists and turns across the page. With its bold teal scales, fiery orange mane, and swirling decorative smoke, this design looks like it came straight out of an ancient storybook.
How-To Guide
Materials
- High-quality sketchbook or heavy mixed-media paper
- Pencil (HB or H for sketching)
- Eraser
- Fine liner pens (black, 0.3mm and 0.5mm)
- White gel pen (for highlights)
- Teal or dark turquoise marker/colored pencil
- Burnt orange or rust-colored marker/colored pencil
- Dark grey or charcoal marker/colored pencil
Step 1: Drafting the Serpent Shape
-
Map the Curve:
Start by drawing a large, loose ‘S’ shape in the center of your page. This will be the spine of your dragon. The top curve should be tighter for the neck, and the bottom curve wider for the tail. -
Define the head:
At the top of your ‘S’, sketch a sleek, angular head shape. Think of a lizard profile: a long snout that angles down slightly, and a sharper jawline underneath. -
Thicken the Body:
Draw parallel lines on either side of your initial spine line to create the thickness of the dragon’s body. I like to make the neck area slightly thinner and have it widen gradually towards the chest before tapering off again at the tail tip. -
Add the Horns and Fins:
Sketch two long, curved horns sweeping back from the top of the head. Add a spiky crest or fin starting just behind the horns and running halfway down the neck. -
Outline the Wings/Tail Decorative:
Instead of traditional wings, this design features stylized, fluid shapes near the tail. Draw swirling, leaf-like forms that interlock with the tail’s curve, almost like flames or stylized feathers.
Scale Shortcut
Instead of drawing every single scale perfectly, focus on the ones near the outline. Suggest center scales with simple ‘V’ marks to save time.
Step 2: Inking and Detailing
-
Refine the Head Details:
Using your pencil, add the eye, the nostril, and the sharp teeth inside the slightly open mouth. Draw small, curved scales along the snout. -
Section the Belly:
Draw a line running down the length of the dragon’s belly to separate the underbelly from the main scales. Divide this belly strip into horizontal segments like a ladder. -
Scale Patterning:
For the main body, draw rows of ‘U’ shaped scales. Ensure they curve with the body’s movement; as the dragon twists, the direction of the scales should shift slightly. -
Stylized Smoke:
Draw small, bubbly cloud shapes erupting from the dragon’s mouth. Keep them curvy and fluid to contrast with the sharp teeth. -
Start Inking:
Take your fine liner pen and carefully trace over your final pencil lines. Use a slightly thicker line for the outer silhouette and a thinner line for the interior scales.
Smudge Alert?
Place a scrap piece of paper under your drawing hand. This acts as a shield, preventing your palm from smearing the fresh ink or pencil work.
Step 3: Adding Color and Texture
-
Base Teal Color:
Color the main body and the head with your teal marker or pencil. If using heavy pressure, leave tiny slivers of white paper showing through for a textured, vintage look. -
Adding the Orange Contrast:
Use the burnt orange color for the neck fin, the swirling tail decorations, and the smoke breath. This warm color will pop beautifully against the cool teal. -
Darkening the Belly:
Color the segmented belly using the dark grey or charcoal shade. This adds weight and dimension to the creature. -
White Highlights:
Here lies the magic trick: take your white gel pen and draw thin outlines *inside* the teal scales you already colored. This makes each scale distinct. -
Eye and Horn Details:
Add a tiny dot of orange or yellow to the eye. Use the white gel pen to add stripes or highlights to the horns and the edges of the orange fins. -
Final Cleanup:
Wait for all ink and marker layers to completely dry. Gently erase any remaining pencil sketches underneath the color to leave a crisp, clean illustration.
Now your dragon is ready to guard the pages of your sketchbook with style


Cool Monster With Big Personality
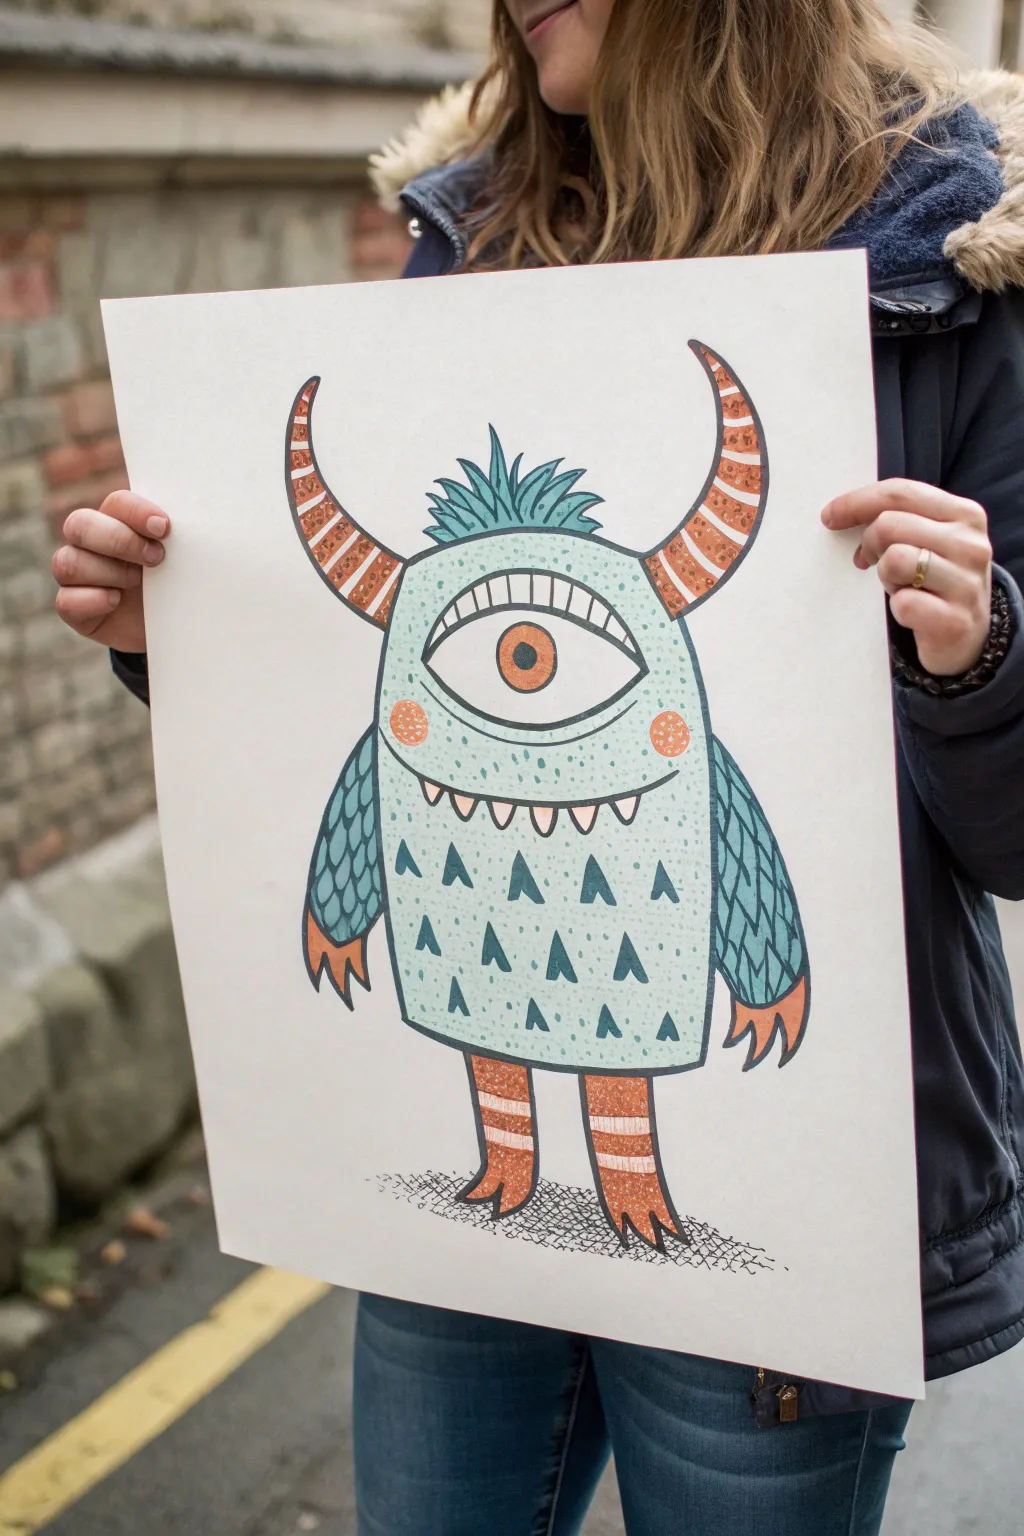
Create a charming monster art print full of personality, featuring a large single eye, striped horns, and fun geometric details. This whimsical character uses limited colors—teal, orange, and black—on off-white paper for a cool, retro-illustration vibe.
Step-by-Step Guide
Materials
- Thick off-white or cream drawing paper (A3 size recommended)
- Pencil and eraser
- Fine-tip black drawing pen (waterproof)
- Thick black marker
- Teal or light blue marker/paint pen
- Orange or terracotta marker/paint pen
- Ruler (optional)
Step 1: Basic Shape & Outline
-
Map out the body:
Start lightly with your pencil. Near the center of your paper, draw a large, soft rectangular shape with rounded corners for the body. It should look a bit like a tall loaf of bread, slightly wider at the bottom than the top. -
Add the horns:
Coming out of the top ‘shoulder’ corners, sketch two large, curved horns. They should curve upwards and slightly inwards, ending in sharp points. Make them nice and thick at the base. -
Draw the arms:
Sketch two arms hanging down the sides. They should be simple, tapering shapes that start at the mid-body and end with three-fingered claws pointing downward. -
Sketch the legs:
At the bottom center, draw two short, sturdy legs. Give them three-toed feet that point outward for a solid stance. -
Create the hairdo:
Right in the middle of the head, between the horns, draw a tuft of spiky hair. Think of it like a little mohawk made of leaf shapes.
Smudged Lines?
Work from top to bottom if you are right-handed (or left to right) to avoid dragging your hand through wet ink. If using paint pens, let the black outline dry completely before coloring nearby
Step 2: Face & Details
-
The giant eye:
Draw a large oval in the upper half of the body. Inside, draw a perfect circle for the iris/pupil. Above the eye, add a thick eyelid line and a row of vertical lines to suggest eyelashes or texture. -
Mouth and teeth:
Draw a long, curved smile line below the eye. Underneath this line, add a row of small V-shapes for pointy teeth. It doesn’t need to be scary; keep the curve gentle. -
Cheeks and skin texture:
Add small circles on either side of the smile for rosy cheeks. Scatter small triangles across the monster’s belly and chest area for a patterned skin effect. -
Arm scales:
Fill the arm shapes with a scalloped pattern (like fish scales or roof tiles) to give them a different texture from the body.
Step 3: Inking & Coloring
-
Ink the main lines:
Go over your pencil lines with a fine-tip black pen. Use a steady hand. For the outer contour of the body, you might want to thicken the line slightly to make the character pop. -
Color the body:
Use your teal marker to fill in the main body shape. Be careful to color around the eye, the teeth, the cheek circles, and the triangle patterns—leave those white for now. -
Fill the arms and hair:
Use the same teal color for the scaly arms and the spiky hair tuft on top. -
Add orange accents:
Take your orange marker. Color in the pupil of the eye, the cheek circles, and the little claws on the hands and feet. -
Stripe the horns and legs:
Draw horizontal stripes on the horns and legs with your pen, then color every other stripe orange, leaving the alternate stripes white. -
Fill the triangles:
Go back to the triangles on the belly. Color them in with a dark teal or go over them firmly with your black pen to make them stand out against the blue body. -
Adding texture dots:
I like to add tiny stippling dots with a fine pen around the eye and on the upper body to give the skin a speckled, organic look. -
Ground the monster:
Finally, use cross-hatching (crisscrossed lines) beneath the feet to create a simple shadow, so your monster isn’t floating in space.
Make It Yours
Change the belly pattern! Instead of triangles, try polka dots, stars, or spirals. You can also swap the teal for lime green or purple for a totally different monster species
Now you have a quirky monster friend ready to hang on your wall
BRUSH GUIDE
The Right Brush for Every Stroke
From clean lines to bold texture — master brush choice, stroke control, and essential techniques.
Explore the Full Guide
Anime-Style Portrait With Expressive Eyes
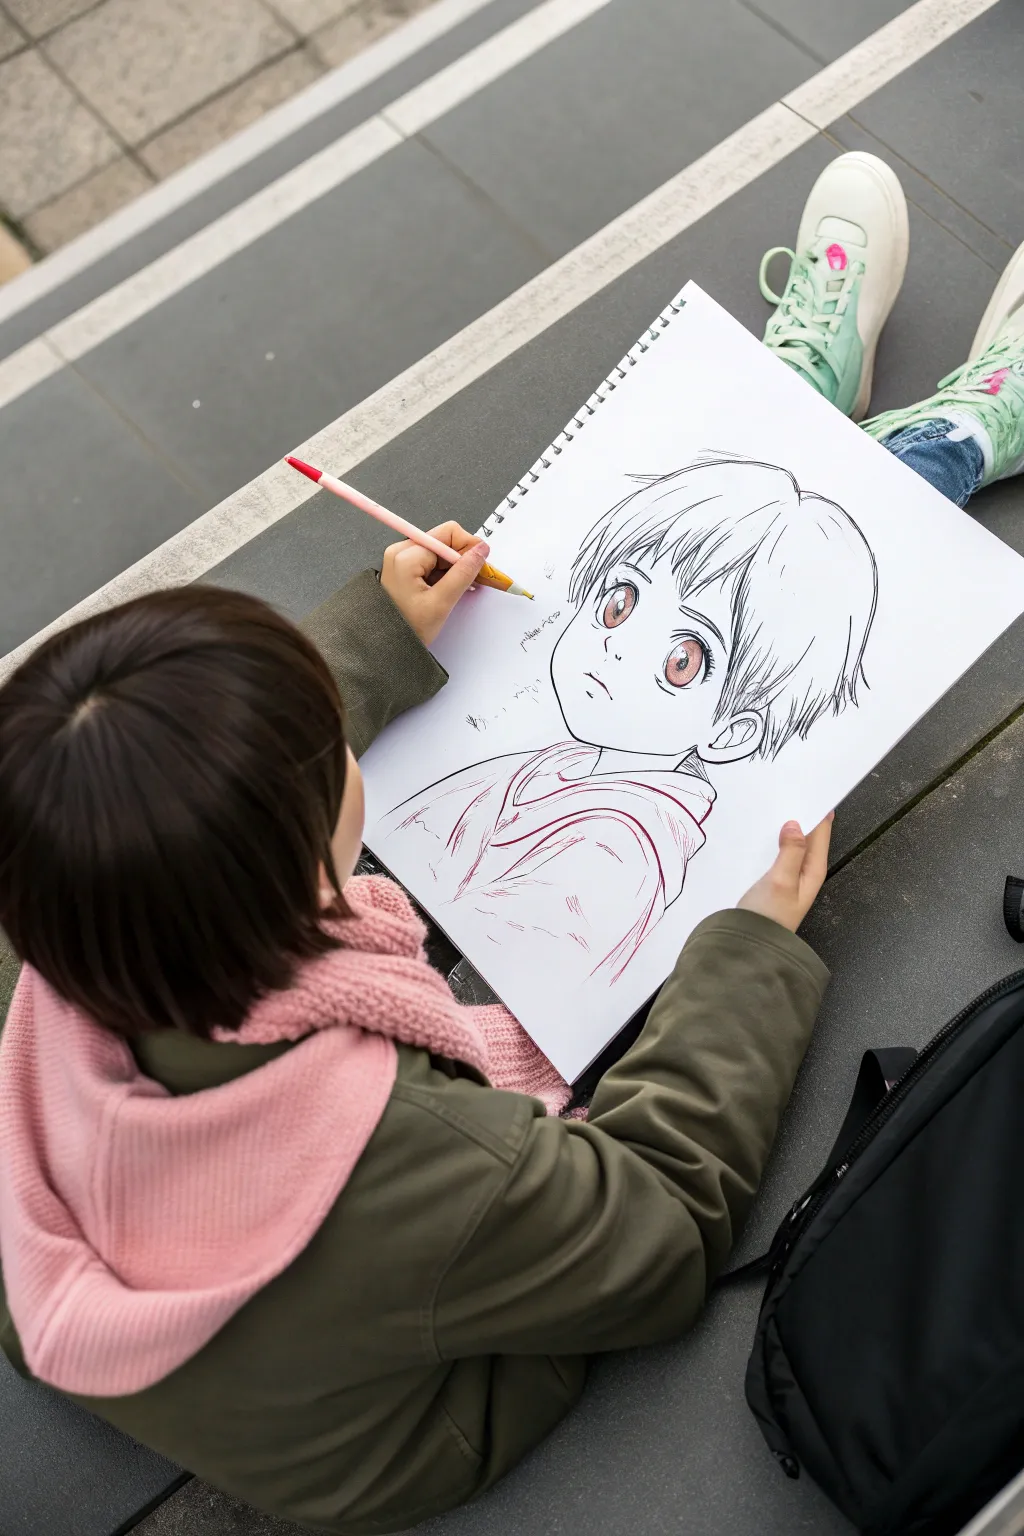
Capture the signature look of anime with this character portrait featuring large, emotive eyes and clean linework. Mixing precise pen outlines with soft colored pencil accents creates a professional manga style right in your sketchbook.
How-To Guide
Materials
- Spiral-bound sketchbook (A4 or similar size)
- HB Drawing pencil
- Fine-liner pen (black, 0.5mm)
- Fine-liner pen (black, 0.1mm for details)
- Colored pencils (light peach, reddish-brown, grey)
- Eraser
- Pencil sharpener
Step 1: Drafting the Head Structure
-
Circle base:
Start by drawing a large circle lightly with your HB pencil in the center of the page. This forms the top of the skull. -
Jawline shape:
From the sides of the circle, bring down two angled lines that meet at a soft point to create the chin. Keep the chin slightly rounded rather than sharp. -
Guidance cross:
Draw a vertical line down the center of the face and a horizontal line about halfway down the head circle. This is where those big eyes will sit.
Eye Sparkle Secret
Make the eyes pop by adding a second, smaller reflection dot on the bottom opposite side of the main highlight.
Step 2: Drawing the Expressive Eyes
-
Eye outlines:
On the horizontal guideline, sketch two large, tall ovals. The tops should be slightly flatter than the bottoms. -
Thickening the lash line:
Darken the upper curve of each eye significantly to represent the upper lash line. Add a tiny tick at the outer corners. -
Iris placement:
Inside each eye, draw a large oval for the iris. Leave a small white circle near the top left of each iris for the ‘catchlight’ or reflection. -
Adding color:
Using a reddish-brown colored pencil, gently shade the top half of the iris darker and let it fade to a lighter shade at the bottom. This gradient makes the eyes look gem-like. -
Pupil detail:
Draw a smaller, dark oval in the center of the iris using your black pen, being careful not to color over the white reflection spot.
Step 3: Hair and Features
-
Nose and mouth:
Place a tiny, subtle dot or dash for the nose just below the eye line. Below that, draw a small, simple curve for the mouth. -
Bangs first:
Start drawing the hair from the top point of the head. Sketch jagged, triangular clumps of hair that fall over the forehead, stopping just above the eyes. -
Outer hair shape:
Outline the rest of the hair around the head, making it slightly puffy and voluminous. Ensure the lines are loose and varied in length. -
Ear placement:
Draw the ear on the side of the head, aligned roughly between the eye line and the nose. Add simple inner ear details.
Level Up: Shadow Play
Use a light grey marker or pencil to add shadows under the hair bangs and below the chin for instant 3D depth.
Step 4: Inking and Clothing
-
Inking the face:
Go over your pencil lines on the face and hair with the 0.5mm black fine-liner. Use quick, confident strokes to keep the lines smooth. -
Fine details:
Switch to the 0.1mm pen for delicate areas like the inner ear strands and individual hairs. -
Sketching the hoodie:
Draw the neckline of a hoodie loosely. Use a different color, like a reddish pencil or pen, to sketch the clothing outlines, keeping the style sketchy and relaxed compared to the crisp face. -
Adding folds:
Add a few wrinkle lines to the fabric to show where the hood drapes over the shoulders. -
Clean up:
Wait for the ink to dry completely, then gently erase the pencil guidelines from the face. I like to brush the eraser crumbs away with a soft brush or clean tissue to avoid smudging.
Now you have a striking anime character gazing right out of your sketchbook
High-Top Shoe Custom Pattern Sketch
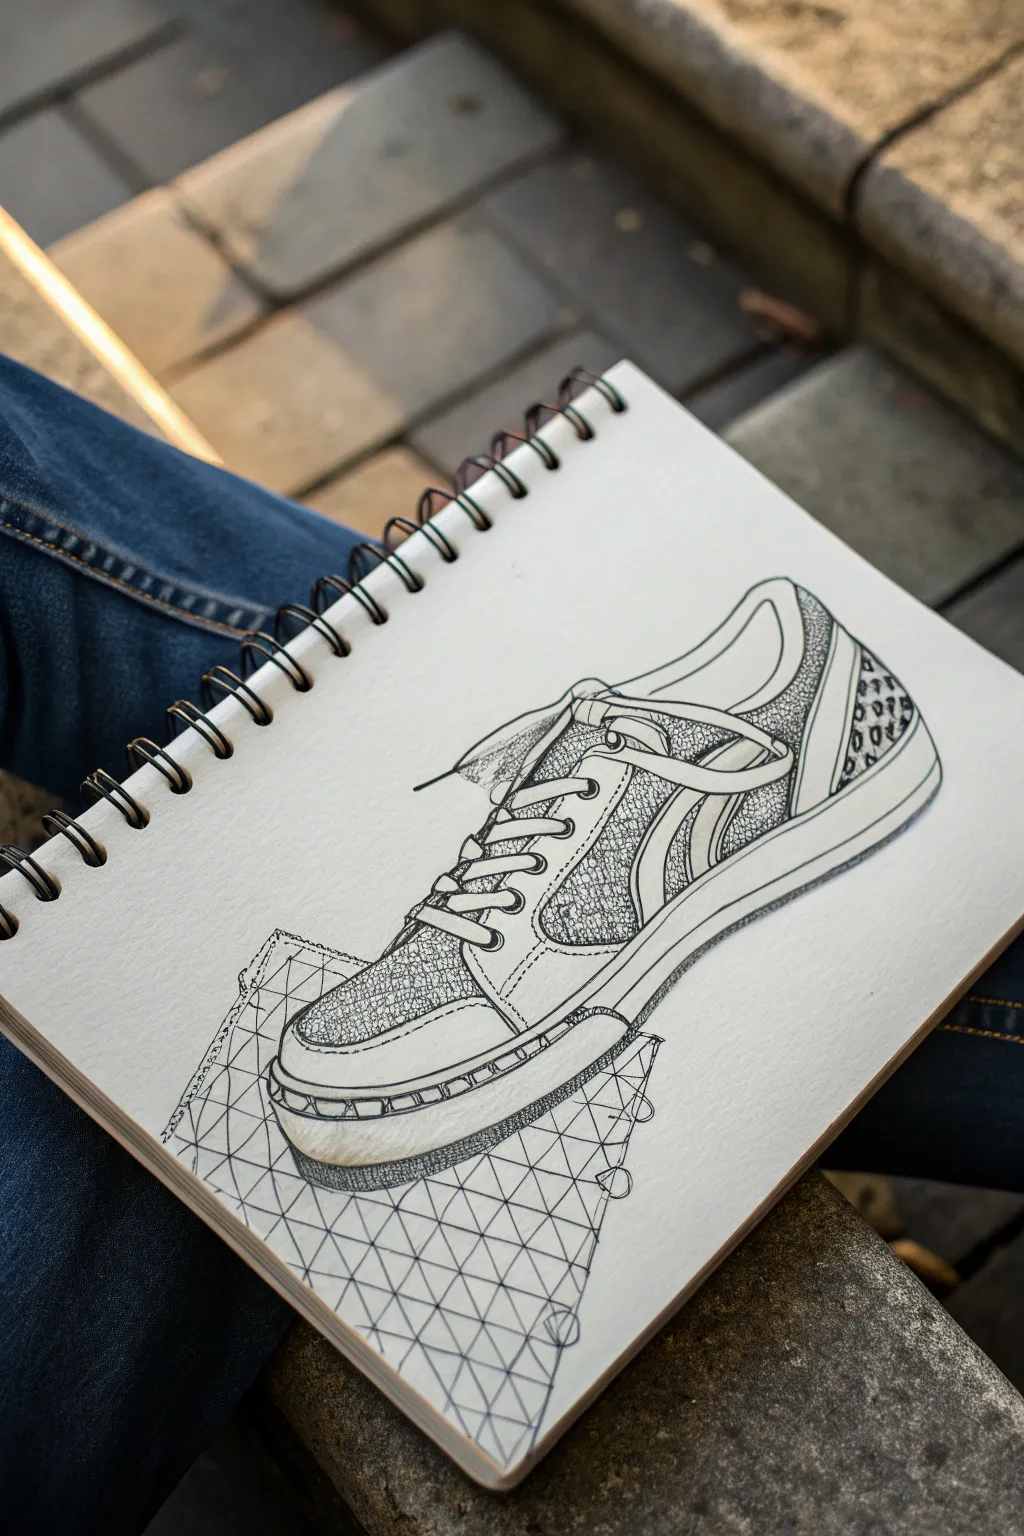
Step into the world of fashion design by sketching a highly detailed sneaker. This project uses fine liner pens to create intricate textures like stippling and cross-hatching to bring a classic shoe design to life.
Step-by-Step Tutorial
Materials
- Spiral-bound sketchbook (smooth paper works best)
- Pencil (H or HB)
- Eraser
- Fine liner pens (sizes 0.1, 0.3, and 0.5)
- Ruler
Step 1: Laying the Framework
-
Outline the silhouette:
Start with a light pencil sketch of the shoe’s overall shape. Focus on getting the curve of the sole and the angle of the opening right before adding any details. -
Block in major sections:
Lightly draw the different panels of the shoe—the toe cap, the side swoosh or stripe, the heel counter, and the tongue area. -
Add lace guides:
Sketch the eyelets and the path the laces will take. Keep the lines loose; laces curve naturally and don’t look stiff. -
Sketch the geometric base:
Underneath the shoe, use your ruler to draw a faint grid or triangle pattern. This adds a cool, graphical element that anchors the shoe in space.
Stippling Patience
Don’t rush the dots! Fast stabbing motions create ‘tails’ instead of round dots. Hold the pen vertical and tap gently for the best texture.
Step 2: Inking the Outlines
-
Trace the main lines:
Switch to a 0.5 pen. Carefully go over your main pencil lines for the sole and the outer shape of the shoe to make them bold. -
Refine the details:
Use a thinner 0.3 pen for interior details like the laces, the stitching lines, and the separation between the shoe panels. -
Ink the geometric mat:
Trace over your ruler grid at the bottom with the 0.3 pen. You can leave some lines intentionally broken or sketchy for an artistic effect. -
Erase pencil marks:
Once the ink is completely dry (give it a minute!), gently erase all your initial pencil guides to clean up the page.
Make it Yours
Design your dream colorway! Scan your black and white drawing into a computer or iPad and digitally color the different panels.
Step 3: Adding Texture & Shading
-
Stippling the toe box:
Using your finest 0.1 pen, start adding tiny dots to the toe area. Group them closer together near the edges for shadow and spread them out towards the center for highlights. -
Texturing the side panels:
For the side panels, create a leather-like texture by making small, tight scribbles or random pebble shapes. Leave the stripe or logo smooth for contrast. -
Pattern the heel:
On the back heel panel, draw a distinct pattern like a leopard print or honeycomb mesh. Keep the shapes small to maintain scale. -
Shade the laces:
Add tiny hatch marks (short parallel lines) mainly on the sides of the laces where they overlap. This makes them look rounded rather than flat. -
Detail the sole:
Add vertical stitching lines along the top edge of the rubber sole. I prefer to make these slightly uneven to look hand-stitched. -
Add deep shadows:
Use the 0.5 pen to darken the very bottom of the sole and the inside of the shoe opening to create depth. -
Ground the object:
Add a cast shadow underneath the shoe onto your geometric grid using diagonal hatching lines. This makes the shoe look like it’s sitting on the surface.
Now you have a professional-looking design sketch ready for your portfolio

PENCIL GUIDE
Understanding Pencil Grades from H to B
From first sketch to finished drawing — learn pencil grades, line control, and shading techniques.
Explore the Full Guide
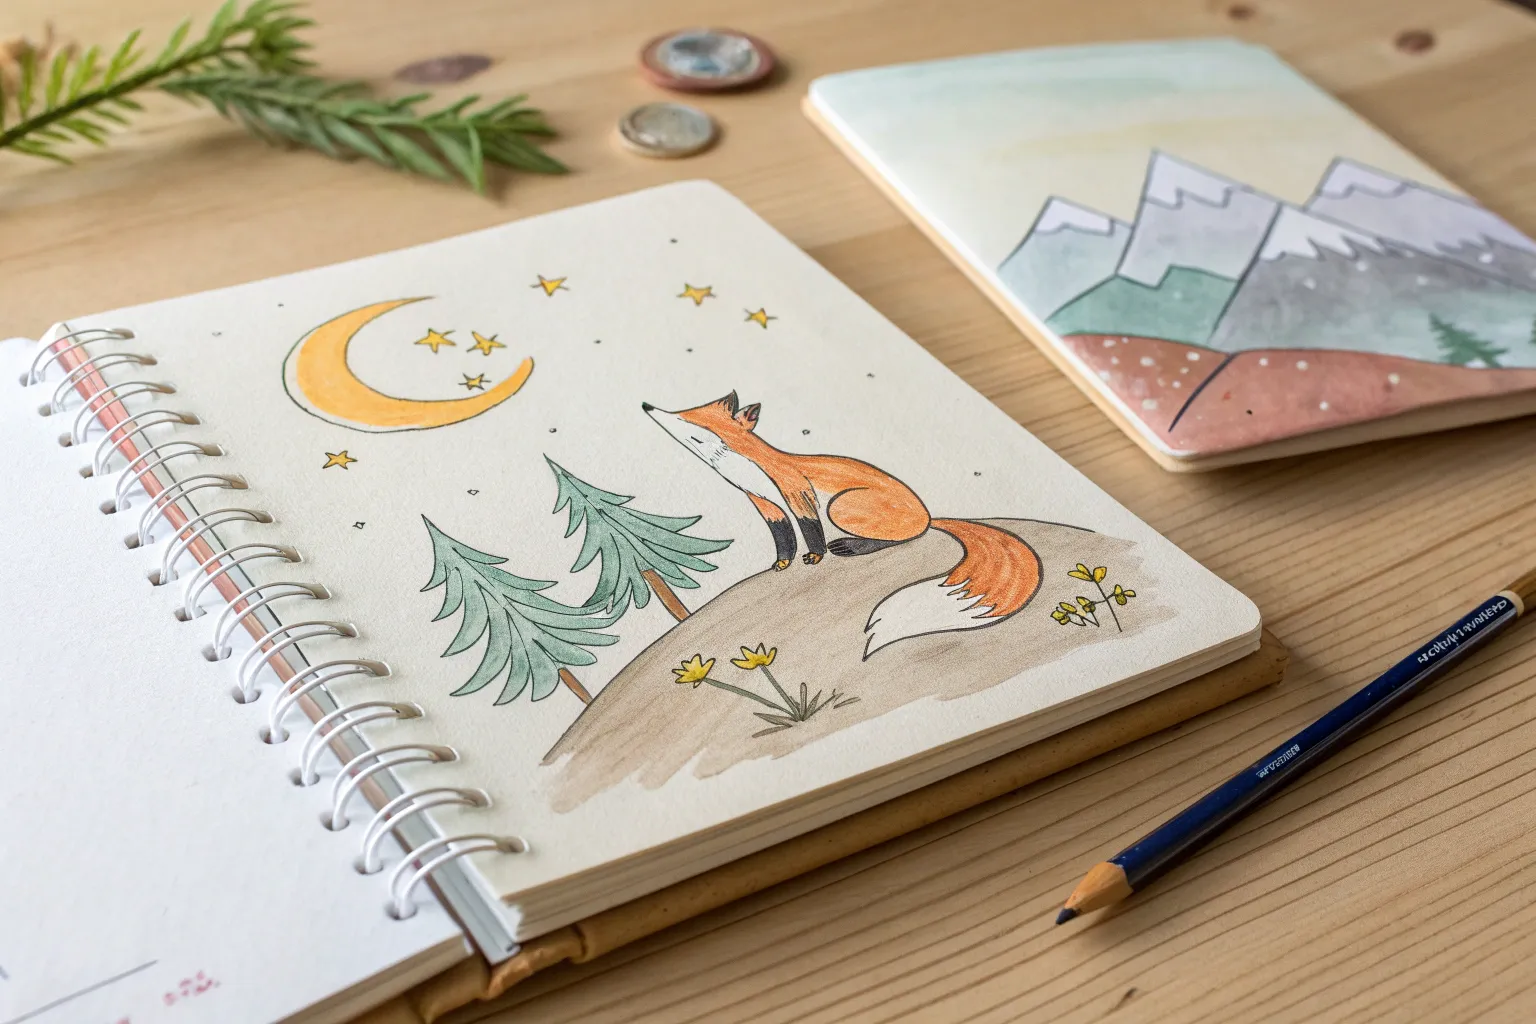
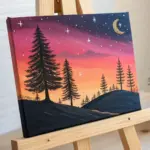
City Skyline at Sunset
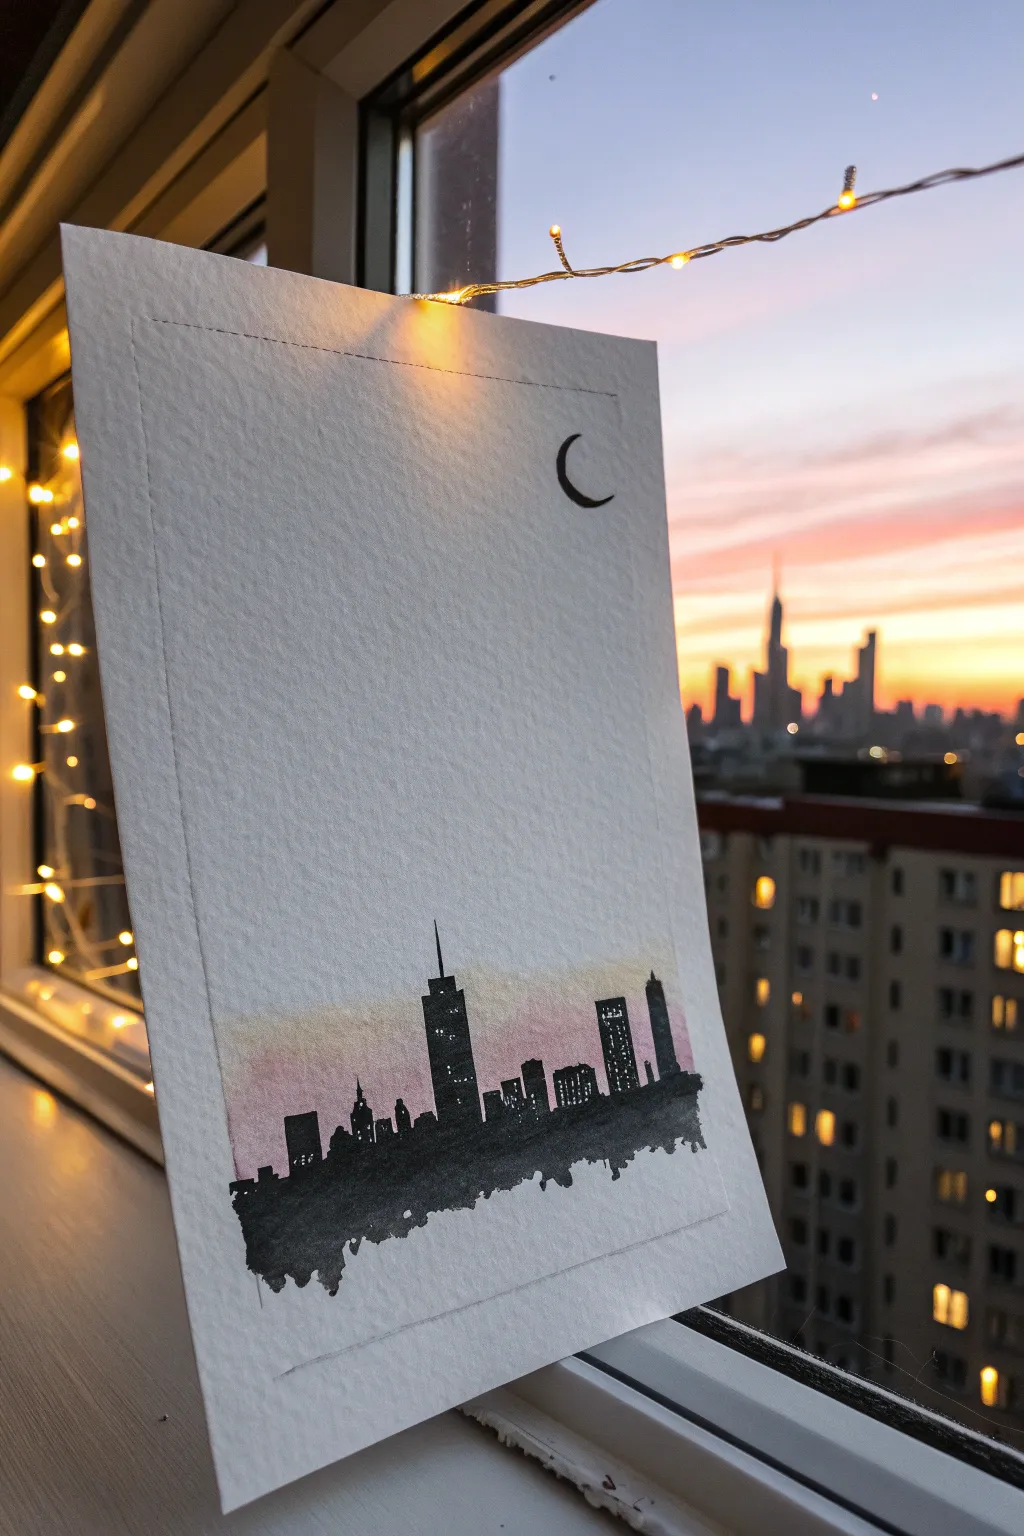
Capture the magic of twilight in the big city with this simple yet striking mixed-media project. By combining a soft watercolor wash with a bold black skyline, you’ll create high-contrast art that looks great hanging in your window.
Step-by-Step Tutorial
Materials
- Thick watercolor paper (cold press texture works best)
- Watercolor paints (pink, orange, yellow)
- Flat paintbrush
- Water cup and paper towels
- Fine-point black drawing pen or pigment liner (0.5mm)
- Painter’s tape or masking tape (optional)
- Ruler
- Pencil
Step 1: Setting the Scene
-
Frame your space:
Start by lightly drawing a rectangular border inside your watercolor paper using a ruler and pencil. This creates a clean frame for your artwork and keeps the edges tidy. -
Draft the moon:
In the upper right corner, gently sketch a small crescent moon shape. Keep the lines very faint so you can easily ink over them later without pencil marks showing through. -
Horizon line:
Draw a faint, straight horizontal line near the bottom third of your framed area. This will be the base for your city.
Bleeding Lines?
If your black ink creates spiderwebs on the paper, the watercolor wasn’t dry enough. Wait longer or use a hair dryer on a low, cool setting to speed up the process.
Step 2: Painting the Sunset
-
Prepare your wash:
Get your paintbrush wet and mix a very diluted, watery pink color. You want the color to be pale and transparent, not thick like poster paint. -
Apply the first layer:
Using the flat brush, paint a horizontal band of pink just above your horizon line. Don’t worry about staying perfectly inside the line below, as the black ink will cover it later. -
Blend in warmth:
While the pink is still slightly damp, rinse your brush and pick up a tiny bit of watery yellow or orange paint. Gently blend this into the top edge of the pink strip to create a soft sunset glow. -
Let it fade:
Use clean water to fade the color upwards into the white of the paper. You want the sky to be colorful near the buildings and disappear into white at the top. -
Dry time:
This is crucial: let the paper dry completely. If you try to draw on wet paper, your ink will bleed and create fuzzy lines.
Step 3: Building the City
-
Outline the tall towers:
Using your black pen, start outlining the tallest skyscrapers. I like to place one main tower slightly off-center to make the composition interesting. -
Add variety:
Draw shorter buildings next to the tall ones. Mix up the shapes—some flat tops, some pointed spires, and some angled roofs. -
Fill the silhouette:
Once you have the outlines, color the entire bottom area black. Be thorough so it looks like a solid silhouette against the light. -
The uneven edge:
Paint or color the bottom edge of the city (below the horizon line) roughly, letting it look like a jagged, artistic brushstroke rather than a straight line. This gives it a cool, unfinished sketchbook vibe. -
City lights:
If you want lights in your buildings, leave tiny white squares uncolored while you fill in the black, or use a white gel pen later to add windows.
City Lights Upgrade
Once the black ink is totally dry, use a white Gelly Roll pen to draw tiny windows on the dark buildings. It makes the city look alive and twinkling.
Step 4: Final Touches
-
Ink the moon:
Carefully trace your pencil moon with the black pen and fill it in solid black to match the buildings. -
Define the border:
Go over your initial pencil border frame with a very light, sketchy pen line. Gaps in the line are okay; they add character. -
Erase pencil marks:
Once the ink is 100% dry (wait a few minutes to be safe), gently erase any visible pencil lines for a crisp finish.
Hang your masterpiece near a window or string lights to echo the real city view
Surreal Floating Islands Landscape
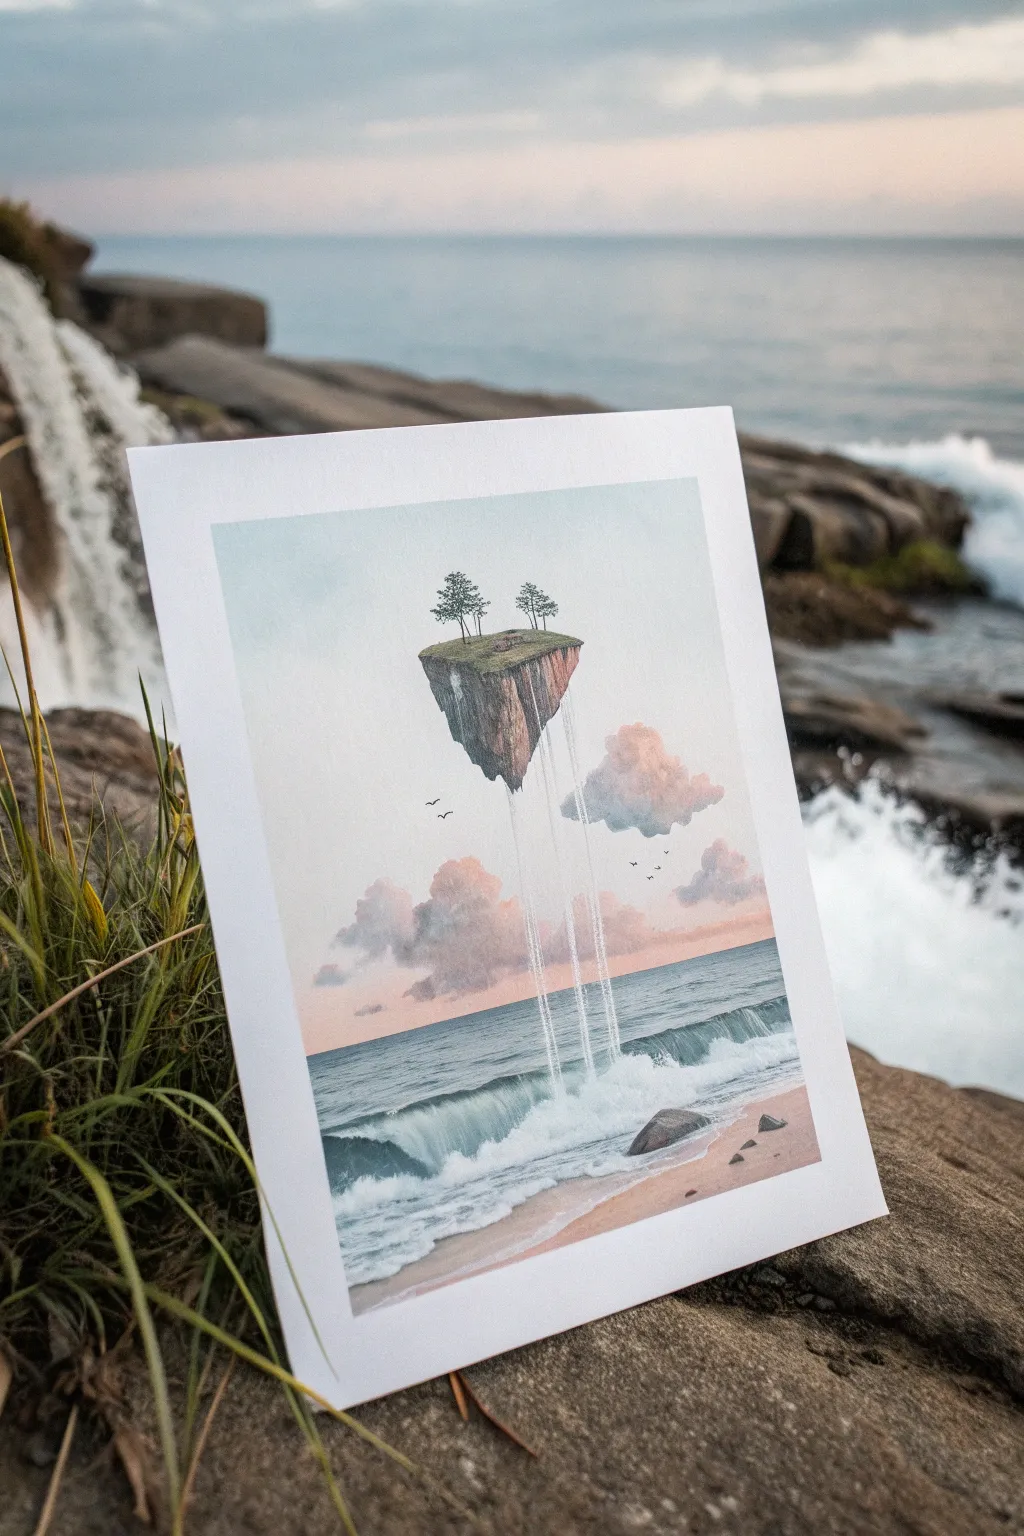
Transport yourself to a dreamlike world with this mixed-media watercolor and gouache landscape painting. You’ll create a magical island that hovers impossibly above a calm beach, complete with cascading waterfalls and soft, cloud-filled skies.
Detailed Instructions
Materials
- Thick watercolor paper (cold press, at least 140lb)
- Watercolor paints (phthalo blue, turquoise, rose madder, yellow ochre, sap green, burnt umber)
- White opacity paint (white gouache or acrylic ink)
- Masking tape
- Pencil (HB)
- Fine liner pens (0.1mm and 0.3mm black)
- Round brushes (sizes 2, 6, and 10)
- Small flat brush (1/4 inch)
- Palette
- Two jars of water and paper towels
Step 1: Setting the Scene
-
Tape the Edges:
Before you start, tape down all four edges of your paper to a board or table with masking tape. This keeps the paper flat when wet and creates that crisp, professional white border shown in the photo. -
Horizon Line:
Using your pencil lightly, draw a straight horizontal line about one-third of the way up from the bottom of the page. This separates the sky from the ocean. -
Floating Mass:
Sketch an upside-down mountain shape hovering in the upper middle of the paper. Keep the top relatively flat for the grass and trees, and make the bottom jagged and rocky. -
Composition Details:
Lightly sketch in the placement of the clouds and tiny trees on top of the island. Don’t press too hard; you want these lines to disappear under the paint later.
Use Gravity
When painting the waterfalls, turn your paper upright or prop it on an easel. The paint will naturally want to flow downward, helping you paint straighter lines.
Step 2: Sky and Sea Gradient
-
Wet-on-Wet Sky:
Brush clean water over the entire sky area, avoiding the floating island. Pick up a very diluted light blue and wash it across the top third. -
Sunset Glow:
While the paper is still damp, introduce a soft pink or rose color near the horizon line. Let it bleed slightly into the blue above for a natural transition. -
Ocean Streaks:
Paint the ocean using a deeper teal or turquoise. Use horizontal strokes with a flat brush, leaving small white gaps for sea foam near the shoreline. Make the color darker near the horizon and lighter as it approaches the sand. -
Sandy Beach:
Mix a little yellow ochre with a tiny touch of brown and lots of water. Paint the bottom right corner as a sandy beach, curving the edge where it meets the water.
Level Up: Cosmic Touch
Instead of a blue daylight sky, paint a dark indigo night sky. Splatter white paint for stars and maybe add a crescent moon behind the floating island.
Step 3: Clouds and Island
-
Fluffy Clouds:
Mix a muted purple-grey using a touch of rose and blue. Paint the underside of the clouds, then soften the top edges with a clean, damp brush to make them look billowy. -
Island Base:
For the rocky underside of the floating island, use burnt umber and grey. Paint vertical, jagged strokes to suggest craggy cliffs. Leave some areas lighter to show depth. -
Grassy Top:
Use sap green to dab textures onto the flat top of the rock. I like to vary the green shades here, adding a bit of yellow for highlights. -
Tree Silhouettes:
Once the island is dry, use your smallest brush or a fine liner pen to draw tiny pine trees. Keep them delicate to emphasize the scale of the massive floating island.
Step 4: Magical Details
-
Waterfalls:
Take your white gouache or acrylic ink. Paint very thin, straight lines falling from the island down into the ocean. Ensure the paint is opaque enough to stand out against the background. -
Splash Zone:
Where the waterfalls hit the ocean, dab small spots of white paint to create the mist and splash effect. This connects the two elements visually. -
Wave Crests:
Add white highlights to the ocean waves, particularly the one breaking near the shore, to give the water movement and energy. -
Birds in Flight:
Using the 0.1mm pen, draw a few tiny ‘V’ shapes in the distance for birds. Place them near the floating island to help guide the viewer’s eye. -
The Reveal:
Wait until the painting is completely bone-dry. Carefully peel off the masking tape at a 45-degree angle to reveal your clean white border.
Take a step back and admire your surreal creation, ready to be framed or gifted to a friend


One-Point Perspective Bedroom Scene
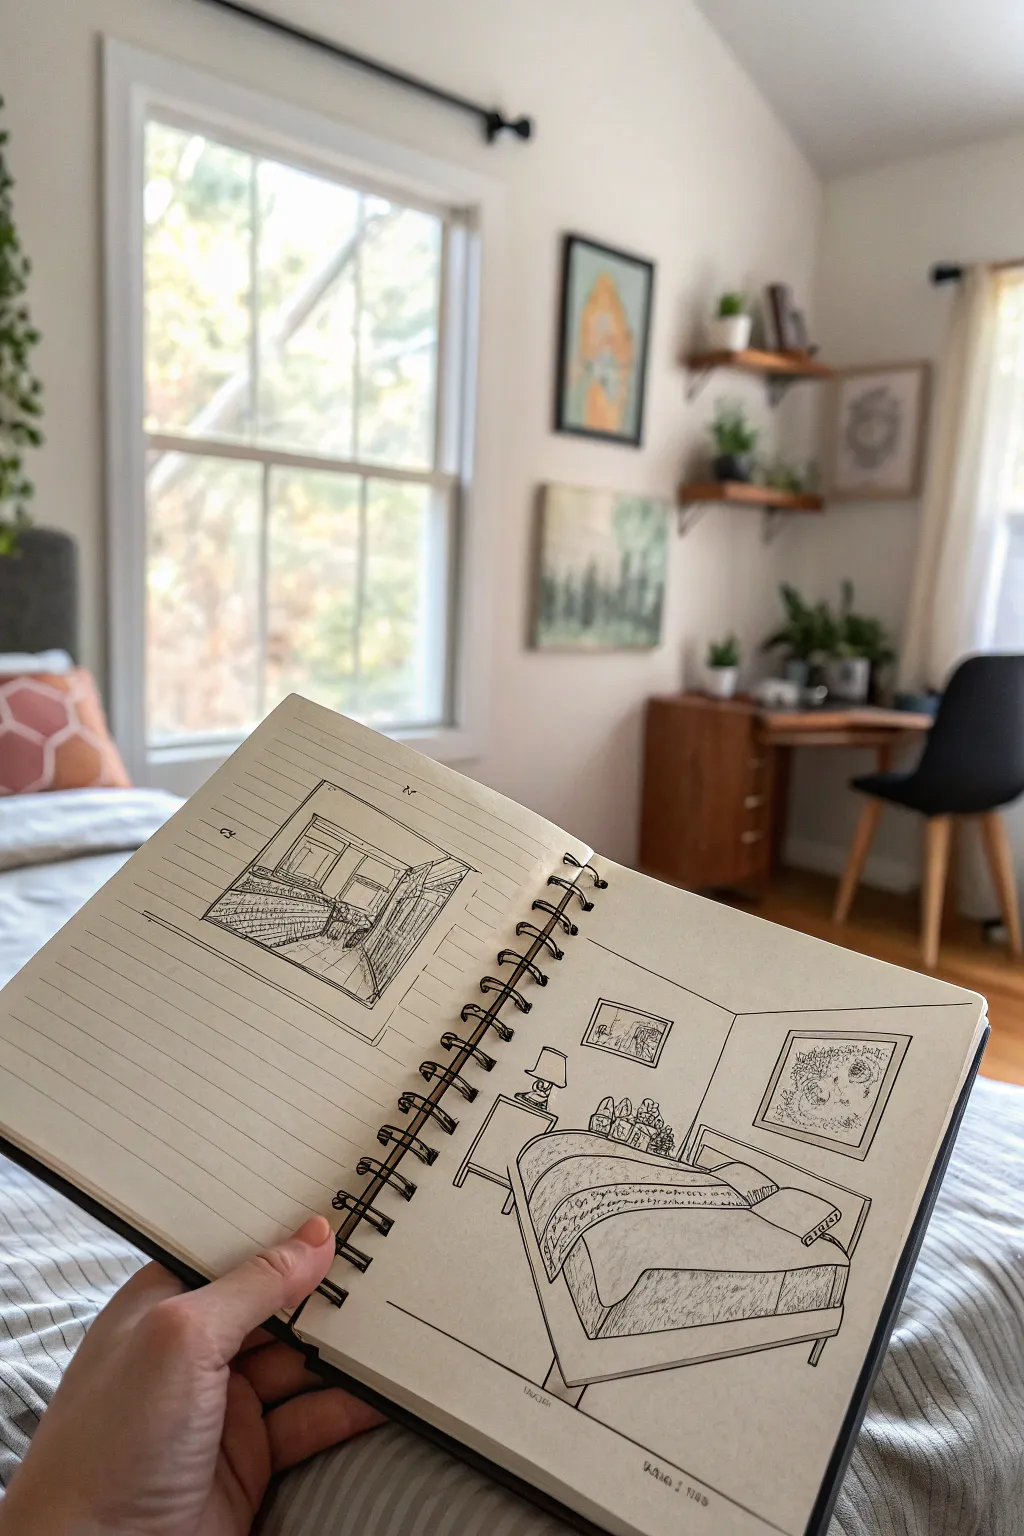
Learn the fundamentals of breathing 3D life into a flat page with this engaging one-point perspective bedroom scene. You’ll create a structured, realistic interior sketch directly in your notebook, complete with cozy details like wall art and a comfy bed.
Step-by-Step Tutorial
Materials
- Spiral-bound sketchbook (medium weight paper)
- Fine-liner pen (0.3mm or 0.5mm, black)
- Pencil (HB or 2B for initial lines)
- Rubber eraser
- Ruler or straight edge
Step 1: Planning and Basic Structure
-
Establish the Vanishing Point:
Start on the right-hand page of your sketchbook. Use your pencil and ruler to lightly draw a horizontal line across the middle of the page (the horizon line), then place a small dot right in the center of that line. This is your vanishing point. -
Draw the Back Wall:
Center a square or rectangle around your vanishing point. This shape represents the flat back wall of the room facing the viewer. -
Create the Room Depth:
Using your ruler, lightly draw diagonal lines extending from the vanishing point through each of the four corners of your back wall square, continuing all the way to the edges of the paper. These are your orthogonal lines that form the ceiling, floor, and side walls. -
Define the Room Boundaries:
Decide where the room ends on the paper and draw vertical and horizontal lines to close off the ceiling, floor, and side walls within your orthogonal guides.
Step 2: Adding Furniture
-
Block in the Bed Frame:
On the floor area, draw a rectangular box shape for the bed. Begin with the face of the bed closest to you, then draw orthogonal lines back toward the vanishing point to give it depth. -
Sketch a Nightstand:
To the left of the bed, add a smaller, simpler box shape for a bedside table. Remember, vertical lines stay vertical, and horizontal lines stay horizontal; only lines moving away from you go to the vanishing point. -
Add Wall Features:
Draw rectangles on the back and side walls for artwork. For pictures on the side walls (like the one on the right in the photo), the top and bottom edges must slant toward the vanishing point.
Straighten Up!
Keep your ruler parallel to the paper’s edge for all vertical lines. If verticals lean, the walls will look like they are falling over.
Step 3: Inking and Detailing
-
Switch to Ink:
Take your fine-liner pen. Carefully trace over the main structural lines of the room—the corners where walls meet the ceiling and floor. -
Draw Wall Art Details:
Ink the frames on the walls. Inside the frames, add wiggly, organic lines to suggest abstract art or landscapes, differentiating them from the straight architectural lines. -
Detail the Bedding:
Soften the rigid box of the bed by drawing a curved line for the duvet cover. Add a pillow at the head of the bed, giving it a fluffy, rounded shape rather than a hard rectangle. -
Add Texture with Hatching:
Use simple hatching (closely spaced parallel lines) on the side of the mattress and the duvet to create shadow and texture. This makes the bed look soft and three-dimensional. -
Accessorize the Nightstand:
Draw a simple lamp base and shade on the nightstand. I like to add a tiny line for the cord or switch to make it feel functional. -
Include Personal Items:
Sketch small shapes on the bed or table to represent clutter or books. In the example, there’s a small group of items on the far side of the bed—keep these abstract but identifiable.
Make It Yours
Customize the artwork frames with doodles of your real hobbies—draw a tiny guitar, a soccer ball, or your favorite video game logo.
Step 4: Finishing Touches
-
Erase Guidelines:
Once the ink is completely dry (give it a full minute so it doesn’t smudge), gently erase all your pencil guides, including the horizon line and vanishing point. -
Refine Line Weights:
Go back over the outermost edges of objects (like the bed frame closest to the viewer) with a slightly heavier line to make them pop forward. -
Create a Thumbnail (Optional):
On the left page, simply draw a mini version of a similar room inside a small square box. Use quick, loose hatching to practice shading without worrying about perfect rulers.
Now you have a mathematically accurate room sketch that captures the depth of a real space
Hand Trace Turned Into a Bird
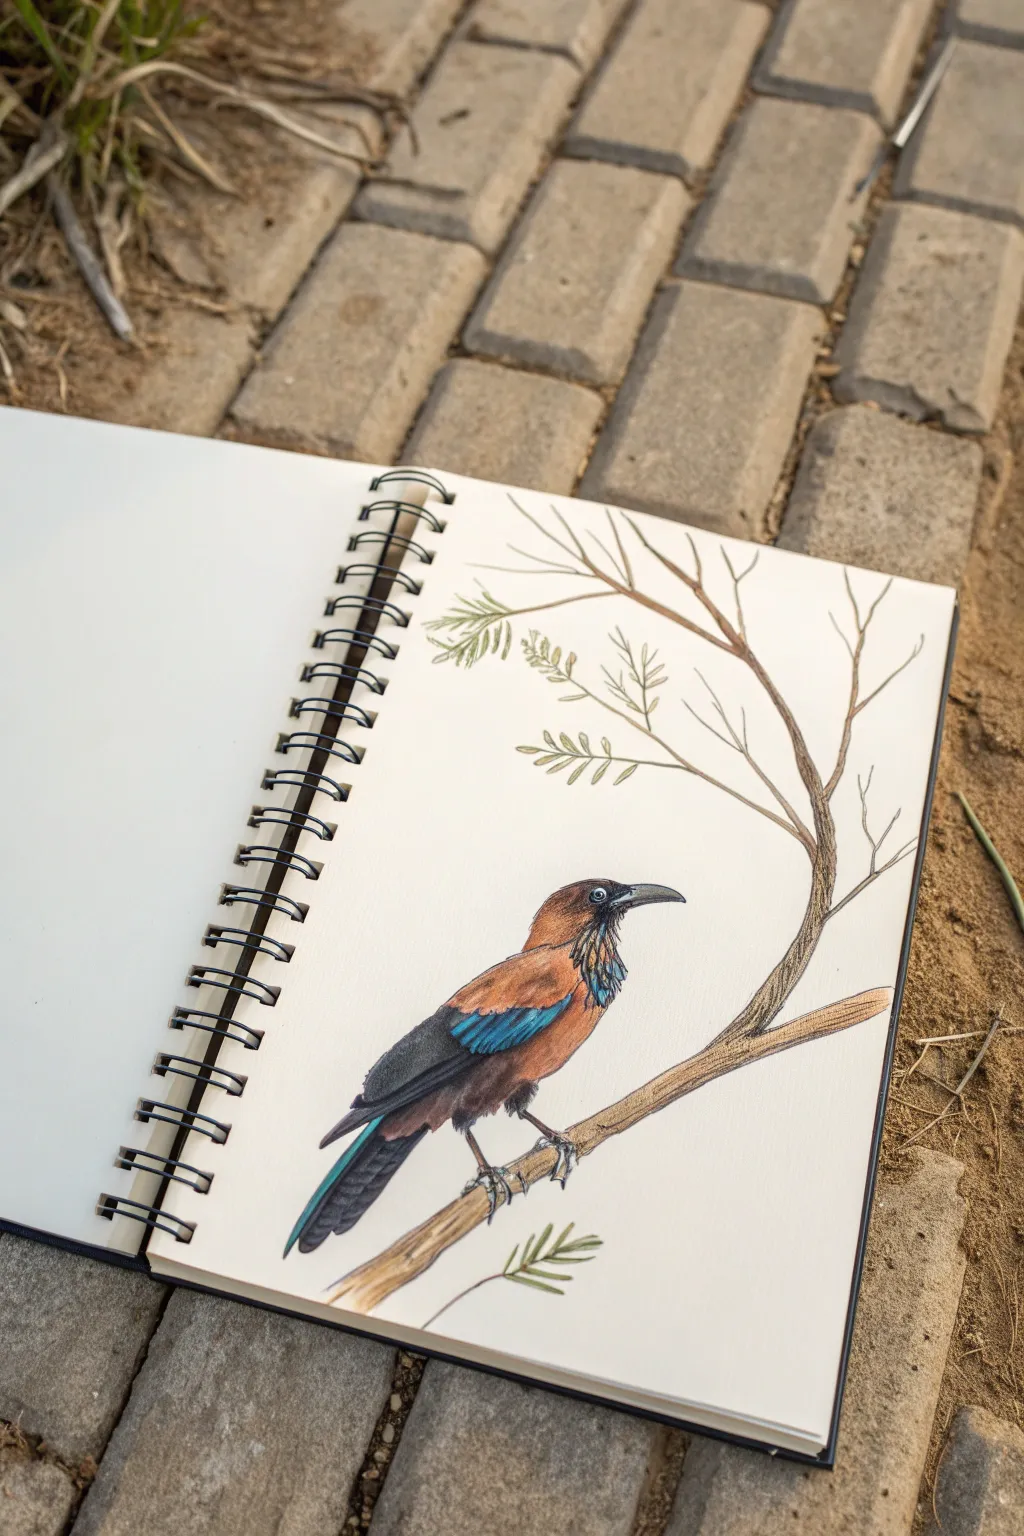
Transform a simple hand outline into a stunning, lifelike bird perched on a branch. This clever technique uses the natural shape of your thumb and fingers to create the bird’s head and tail feathers, resulting in a unique and proportional drawing.
How-To Guide
Materials
- Spiral-bound sketchbook or drawing paper
- HB graphite pencil
- Eraser
- Fine-point black pen or liner (0.3mm or 0.5mm)
- Colored pencils (browns, warm grays, light blue, dark blue, black)
- Pencil sharpener
Step 1: Tracing the Foundation
-
Position your hand:
Place your non-dominant hand flat on the sketchbook page. Extend your thumb out to the side to form the bird’s head and neck. Keep your four fingers together, pointing downwards at a slight angle to simulate the tail feathers. -
Trace the outline:
Using your HB pencil, lightly trace around the outside of your hand. Don’t press too hard, as these lines are just guides. You want a smooth, continuous line that captures the curve of the thumb and the long slope of the fingers. -
Close the gap:
Lift your hand and connect the bottom of the tracing (where your wrist was) with a gently curved line to form the bird’s belly.
Fixing Wonky Lines
If your hand trace looks too much like a hand, don’t worry. Simply extend the tail lines longer or fluff up the belly line with jagged strokes to disguise the finger shapes.
Step 2: Building the Bird
-
Refine the head:
At the tip of the thumb shape, sketch a curved beak pointing slightly downwards. Add a small circle for the eye just behind the beak, placing it high on the head for a realistic look. -
Shape the wing:
Draw an oval-like shape starting from the bird’s shoulder area (near the base of the thumb) extending down towards the tail. This will be the folded wing resting against the body. -
Draw the branch:
Sketch a branch running underneath the bird’s feet. Extend the branch upwards on the right side of the page, adding thinner twigs sprouting off it to fill the empty space. -
Add the feet:
Draw small, clawed feet gripping the branch. The legs should look like they are emerging from the lower belly fluff, wrapping securely around the wood.
Step 3: Inking and Coloring
-
Ink the outline:
Go over your pencil lines with the fine-point black pen. Use short, flicking motions on the bird’s chest and belly to suggest fluffy feathers rather than a solid, hard line. Ink the branch with slightly shaky, organic lines to mimic bark texture. -
Erase pencil guides:
Wait a moment for the ink to dry completely, then gently erase all the initial graphite pencil marks to leave a clean drawing. -
Color the head and chest:
Use a warm brown or chestnut colored pencil for the head and chest area. Layer the color lightly at first, building up intensity near the neck. -
Add blue accents:
With a bright blue pencil, color a patch on the wing and some highlight feathers near the neck. This adds a vibrant pop of color against the brown. -
Darken the wings and tail:
Use a dark gray or black pencil to color the long tail feathers (the finger part of your trace) and the tips of the wings. Press harder at the ends to create depth. -
Texture the feathers:
Take a sharp black pencil and draw tiny lines over the colored areas to mimic individual feather barbs. Pay special attention to the transition between the brown and blue areas. -
Color the branch:
Shade the branch with light brown and tan pencils. Add darker brown shadows on the underside of the branch to give it a 3D cylindrical form. -
Final foliage:
Sketch small, delicate leaves on the upper twigs using a dull green pencil. I like to keep these strokes loose and airy so they don’t distract from the main bird.
Make It Exotic
Turn your bird into a fantasy creature by extending the tail feathers much longer or adding a crest to the head using bright neon colors.
Now you have a majestic bird perched on the page, and no one will guess it started from your own hand
Tessellation Pattern With Custom Creatures
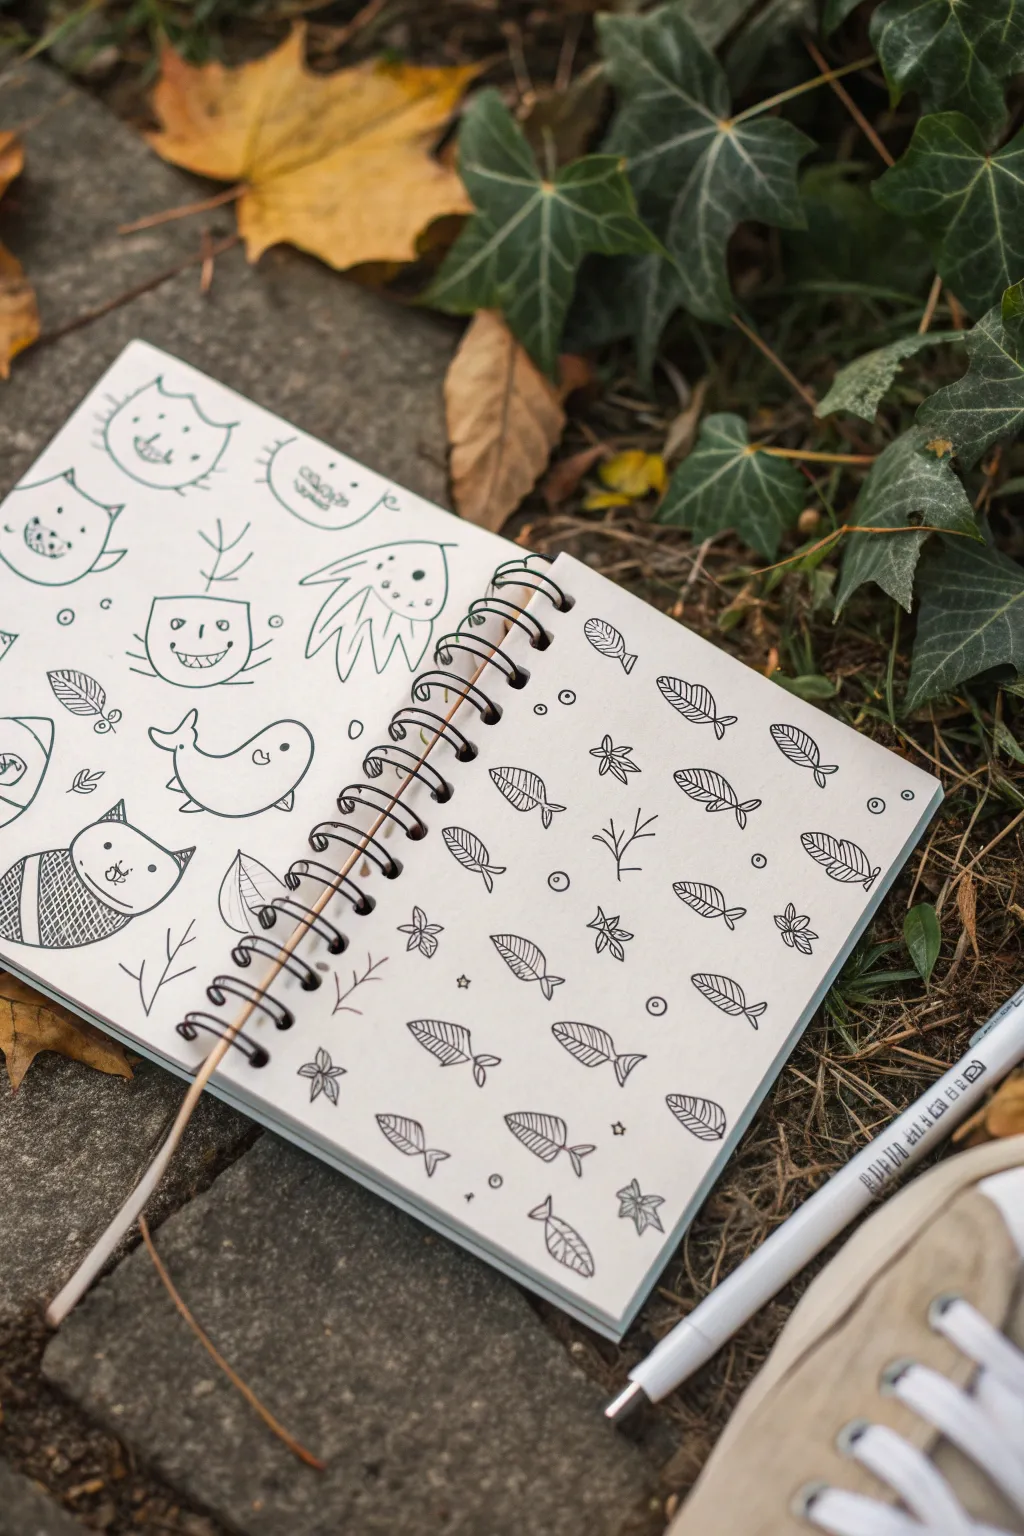
Fill your sketchbook page with a quirky, hand-drawn school of fish using simple lines and repetitive shapes. This relaxing drawing exercise focuses on pattern and rhythm rather than perfect realism, resulting in a charmingly minimalist design.
Step-by-Step Guide
Materials
- Spiral-bound sketchbook (smooth paper)
- Fine-liner pen (black, 0.3mm or 0.5mm)
- Pencil (HB for sketching)
- Eraser
Step 1: Planning the Layout
-
Visualize the flow:
Before putting pen to paper, look at your blank page and imagine diagonal lines running across it. This invisible grid will help your fish look organized but still uniform. -
Sketch placement guides:
Use your pencil to lightly mark small dots or faint dashes where the center of each fish will go. Stagger them slightly, like bricks in a wall, so they aren’t perfectly aligned vertically.
Keep it Loose
Don’t stress about perfect uniform shapes. The charm comes from the hand-drawn wiggle; if a line goes astray, just keep going.
Step 2: Drawing the Fish Bodies
-
Outline the basic shape:
Start with the first fish in the top left corner. Draw a simple leaf or almond shape, angled slightly downward to the right. -
Add the tail:
At the pointed end of your almond shape, draw a small triangle for the tail fin. Keep the lines connected so it looks like one silhouette. -
Repeat across the page:
Move to the next pencil mark and draw the same shape. Try to keep the size consistent, but slight variations add character. -
Vary the direction:
I like to occasionally flip a fish so it’s swimming in the opposite direction or angle to break up the monotony. Notice how some fish in the photo swim left while the majority swim right.
Color Pop
Use a single neon highlighter or pastel marker to color in just the bubbles or just the tails for a cool, modern accent.
Step 3: Adding Details & Texture
-
Draw the gills:
Back at your first fish, draw a curved vertical line inside the body, separating the head area from the body area. -
Fill with stripes:
Fill the body section (between the gill line and the tail) with closely spaced, parallel vertical lines. This hatching technique creates a nice contrast against the white paper. -
Texture the tail:
Add two or three tiny lines inside the tail fin to suggest ribbing. -
Ink the whole school:
Work your way across the page, inking the details on every fish body. The repetition here is quite meditative.
Step 4: Finishing Touches
-
Draw the bubbles:
In the empty spaces between the fish, draw small circles of varying sizes to represent bubbles. Some can be tiny dots, others slightly larger open circles. -
Add nature elements:
In larger gaps, sketch simple branch-like shapes or coral sprigs using thin, stick-figure lines to mimic underwater plants. -
Incorporate tiny stars:
Draw tiny five-pointed stars or asterisks scattered randomly. This adds a bit of magical whimsy to the ocean scene. -
Erase pencil marks:
Wait until the ink is completely dry to prevent smudging, then gently erase your initial pencil guide dots.
You now have a satisfying page of patterned doodles that proves simple shapes can create a complex look


Have a question or want to share your own experience? I'd love to hear from you in the comments below!