There is something utterly magical about capturing the infinite void of the universe on a small piece of paper. Whether you want to sketch cute doodles or surreal cosmic scenes, these space drawing ideas will help you fill your sketchbook with stellar creativity.
The Classic Ringed Planet
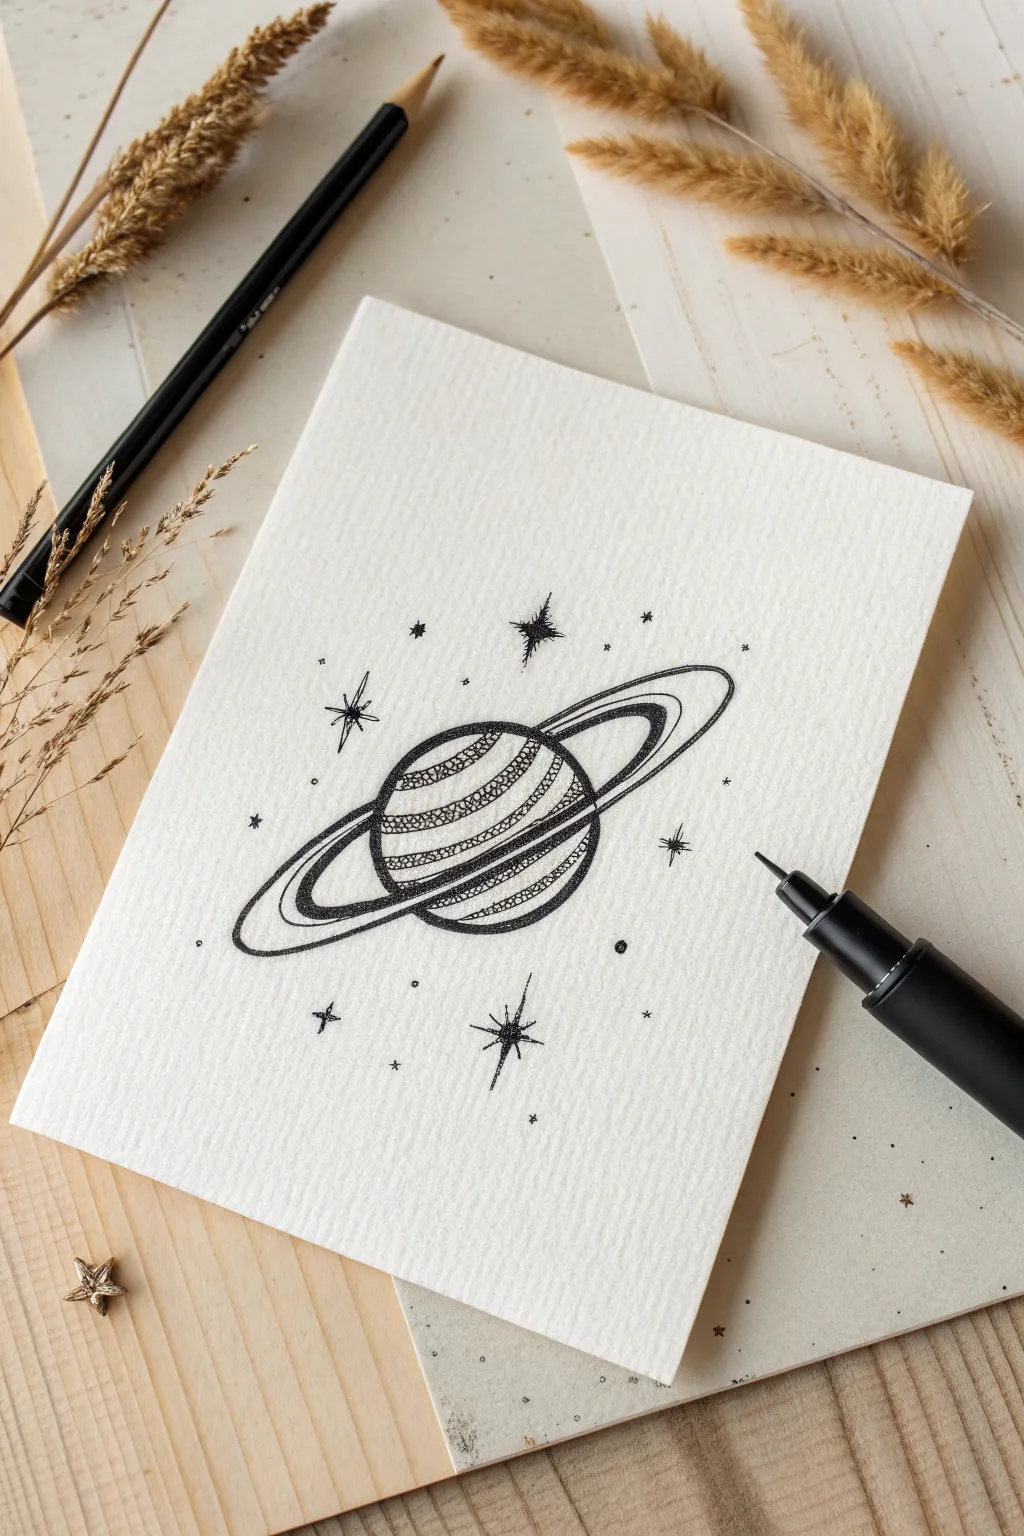
Capture the magic of the cosmos with this minimalist ink drawing. Using simple fine liners and textured paper, you’ll learn to build dimension through stippling and precise line work to create a charming ringed planet.
Step-by-Step Tutorial
Materials
- Cold-press watercolor paper (for texture)
- Pencil (HB or 2H)
- Eraser
- Fine liner pens (sizes 005, 01, and 05)
- Ruler (optional)
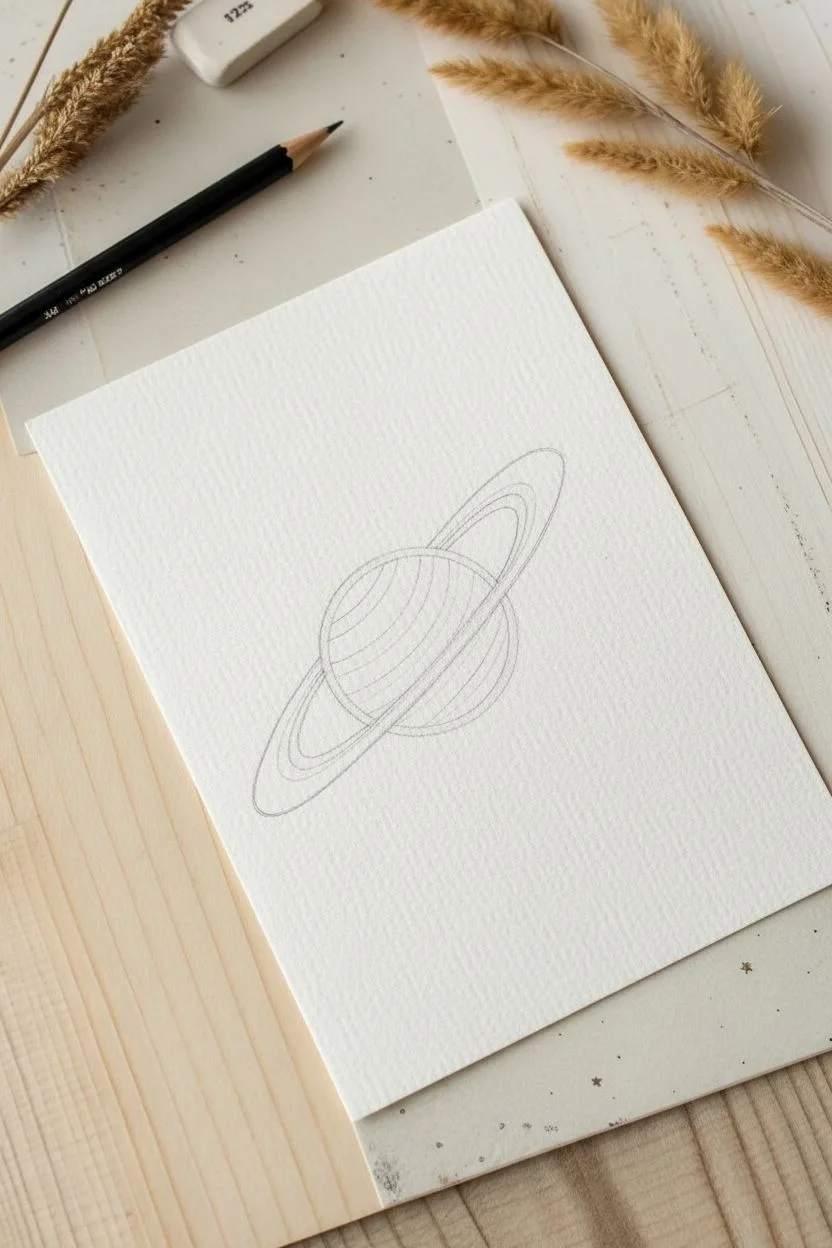
Step 1: Celestial Geometry
-
Planet base:
Lightly sketch a circle in the center of your paper using your pencil. -
Ring placement:
Draw a long, narrow oval superimposed over the circle, tilting it slightly diagonally. -
Ring width:
Sketch a smaller oval inside the first one to define the thickness of the planetary rings. -
Defining depth:
Erase the part of the planet circle that is ‘inside’ the front of the rings, and erase the back of the rings where they go behind the planet. -
Bans mapping:
Lightly sketch curved guidelines across the face of the planet to map out distinct atmospheric bands.
Wobbly Rings?
Draw ellipses using your whole arm, not just your wrist. If a line wavers, simply thicken the line weight slightly along the whole curve to hide the unevenness.
Step 2: Inking the Structure
-
Main outline:
Use a size 05 pen to trace the outer contour of the planet sphere for a bold look. -
Ring outlines:
Switch to a 01 pen to trace the outer and inner edges of the rings carefully. -
Ring details:
Draw continuous concentric arcs inside the rings to suggest grooves, keeping your hand relaxed for smooth lines. -
Cleanup:
Allow the ink to dry completely (wait at least two minutes), then gently erase all pencil marks.
Cosmic Color
Once the black ink is waterproof-dry, added a wash of dilute watercolor over the planet, or use a gold gel pen to highlight the surrounding stars.
Step 3: Texture and Shading
-
Shadow mapping:
Using a 005 pen, begin stippling (making tiny dots) along the bottom right curve of the planet to create a 3D shadow effect. -
Dark bands:
Fill in alternate atmospheric bands with dense stippling, clustering the dots tightly at the edges and spreading them out toward the middle. -
Light bands:
Leave the remaining bands mostly white or with very sparse dots to create high-contrast stripes. -
Hatching accents:
I like to add a few horizontal hatched lines following the curve within the darker bands to enhance the texture. -
Cast shadow:
Darken the small area of the rings where they disappear behind the planet to distinctively separate the foreground from the background.
Step 4: Starry Surroundings
-
Major stars:
Draw three large ‘lens flare’ stars using a cross shape with elongated vertical lines. -
Star centers:
Fill the very center of these large stars with solid black ink or dense hatching. -
Medium stars:
Add several medium-sized four-point stars scattered randomly around the main planet. -
Space dust:
Sprinkle tiny single dots and small hollow circles to fill the remaining negative space. -
Final contrast:
Review your drawing and thicken any main outlines that look too thin compared to the textured fill.
You now have a dreamy piece of space art perfect for a greeting card or framed wall decor


Retro Rocket Ship
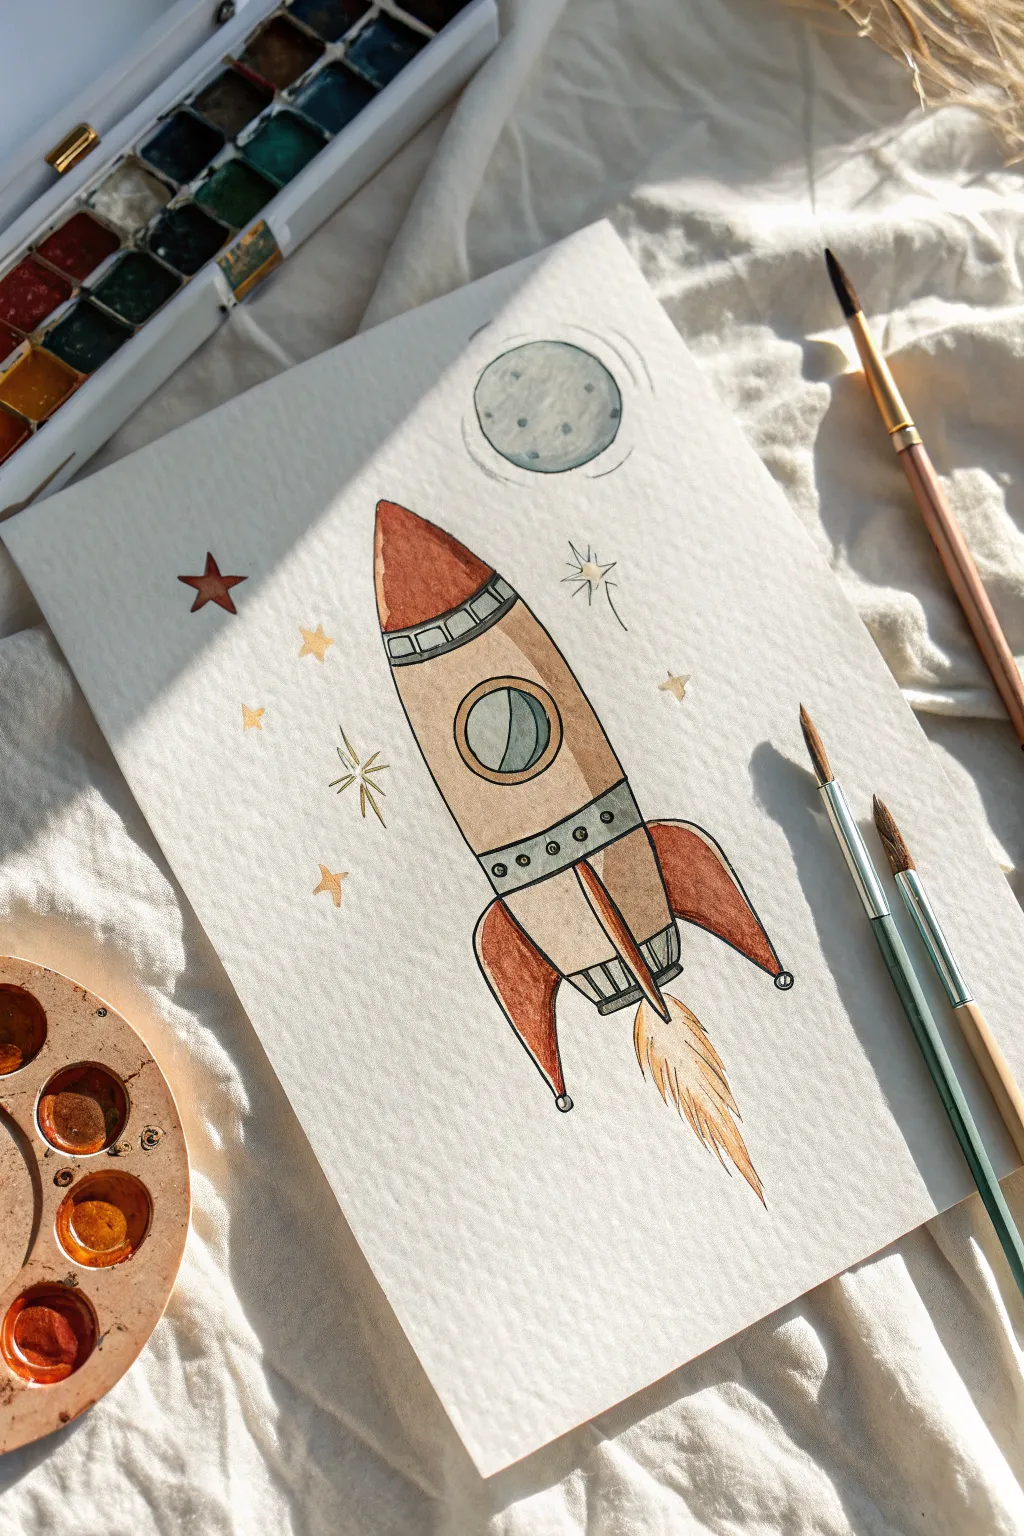
Capture the magic of space exploration with this retro-style rocket ship illustration. Using warm earth tones and simple ink lines, you will create a charming piece that feels like it was lifted from a classic storybook.
Step-by-Step
Materials
- Cold press watercolor paper (300gsm)
- Watercolor paints (pan or tube)
- Round watercolor brushes (size 2 and 6)
- Waterproof black fine liner pen (0.3mm)
- HB Pencil and eraser
- Jar of water and paper towel
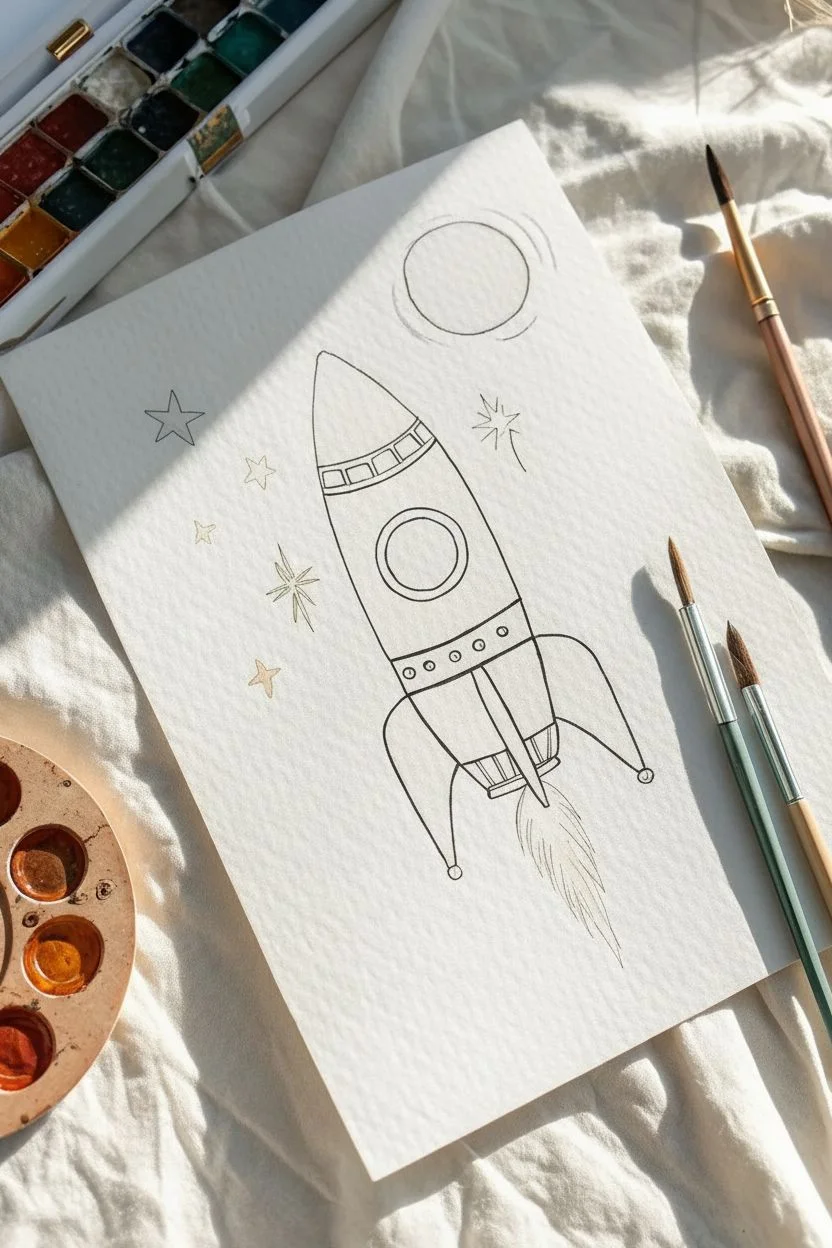
Step 1: Drawing the Schematic
-
Outline the fuselage:
Start with a light pencil sketch. Draw a long, bullet-shaped oval diagonally across your paper to form the main body of the rocket. -
Add structural details:
Sketch a curved line near the top for the nose cone. Add two horizontal bands around the middle and lower section of the rocket body. -
Attach the fins:
Draw three fins at the base. The two on the sides should look like curved triangles, while the center one is viewed straight on, looking like a narrow rectangle. -
Detail the engine and window:
Draw a circular window in the upper third of the body. Add a trapezoid shape at the very bottom for the exhaust nozzle. -
Set the scene:
Sketch a simple circle for the moon in the background. Scatter a few 5-point stars and 4-point ‘twinkle’ shapes around the rocket. -
Ink the lines:
Go over your pencil and carefully trace everything with a waterproof fine liner. Add small circles inside the metal bands to represent rivets. -
Clean up:
Wait until the ink is completely dry to the touch, then gently erase all visible pencil marks to prepare for painting.
Swatch First
Keep a scrap piece of watercolor paper next to you. Test your colors on it before applying them to ensure they aren’t too dark or muddy.
Step 2: Applying Color
-
Paint the fuselage:
Mix a watery light brown or ochre. Paint the main section of the rocket body, carefully working around the window and metal bands. -
Color the details:
Load your brush with a rusty red or burnt sienna color. Fill in the nose cone and the three fins with this vibrant, warm tone. -
Add metallic accents:
Use a diluted grey or a mix of blue and brown to paint the horizontal metal bands and the exhaust nozzle. Keep the wash fairly light. -
Paint the window:
Fill the circular window with a soft grey-blue. I like to leave a tiny sliver of white paper unpainted on one side to act as a glass reflection. -
Ignite the engine:
Using short, flicking brush strokes, paint the flame coming from the exhaust. Start with yellow near the nozzle and blend into orange at the tips.
Step 3: Atmosphere and Depth
-
Paint the moon:
Wash the moon circle with a very pale, watery grey-blue. While it is still wet, drop in tiny dots of darker grey to create soft craters. -
Illuminate the stars:
Paint the star shapes with a bright yellow or gold. For the thin ‘twinkle’ crosses, you can re-trace them with the yellow paint or leave them ink-only. -
Add shadows:
Once the base layer on the rocket is dry, glaze a slightly darker version of the ochre along the right side of the body to create a cylindrical 3D form. -
Deepen the fins:
Add a second layer of rusty red to the right edges of the fins. This shadow gives them dimension and separates them from the body. -
Final touches:
If the ink lines look faded after painting, use your pen to re-darken key outlines or add motion lines near the moon.
Make it Shine
Swap the yellow paint for metallic gold watercolor on the stars and the rivets. This adds a beautiful shimmer when the light hits the paper.
Now your vintage rocket is ready to explore the galaxy on your wall


Minimalist Moon Phases
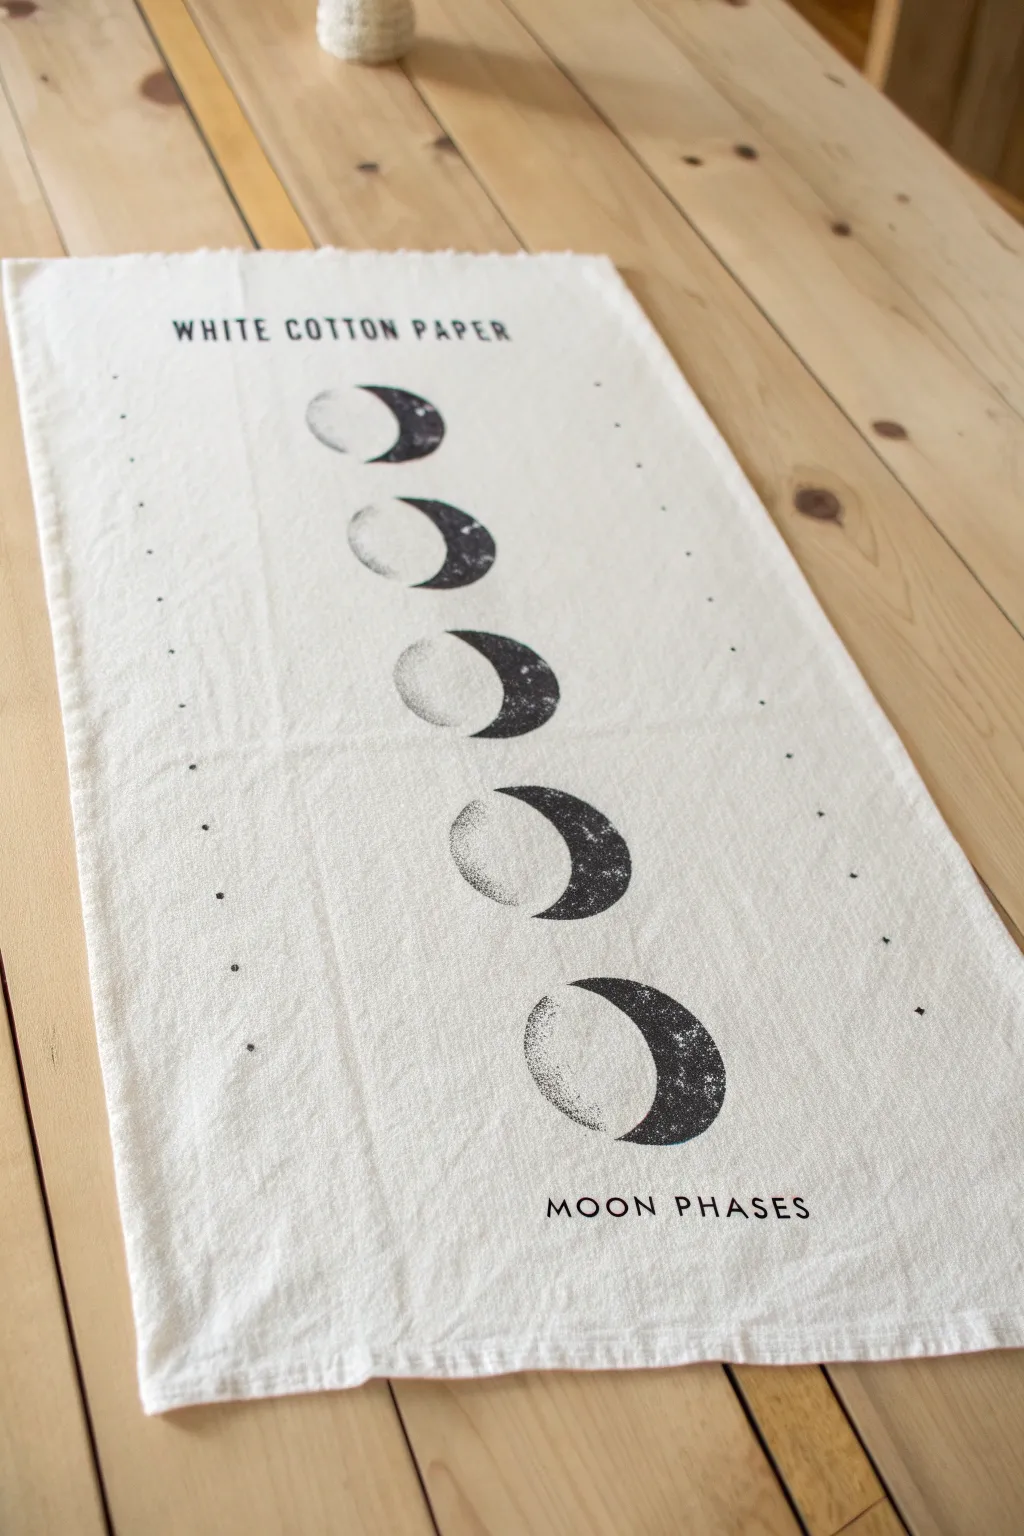
This project combines stark typographic elements with celestial imagery to create a sophisticated, modern table runner. You will use a dry-brush stenciling technique to replicate the grainy, vintage texture of a traditional block print.
Step-by-Step Tutorial
Materials
- Cotton or linen table runner (off-white/cream)
- Black fabric paint (or screen printing ink)
- Mylar stencil sheets or freezer paper
- X-Acto knife and cutting mat
- Stencil brush or sponge dauber
- Ruler and pencil
- Painter’s tape
- Iron (for heat setting)
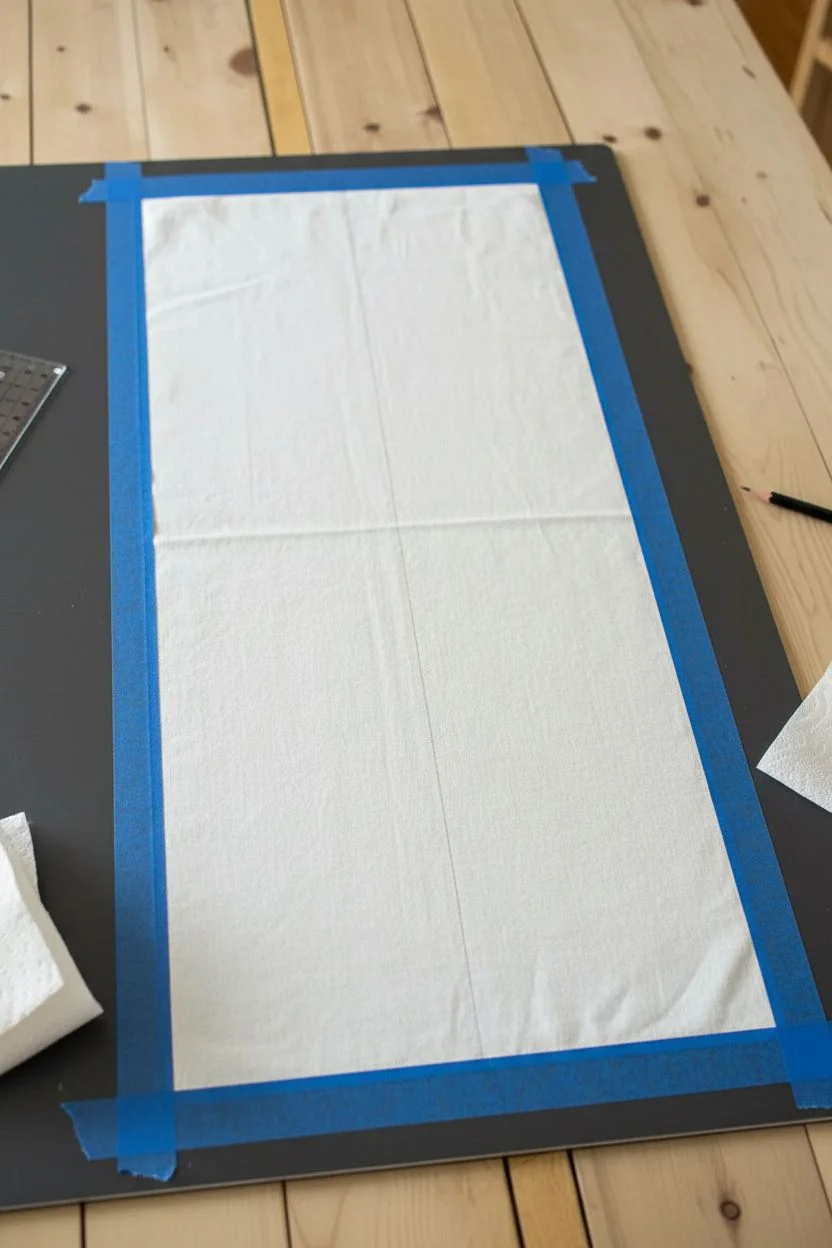
Step 1: Preparation
-
Pre-wash fabric:
Wash and dry your cotton runner to remove any factory sizing and allow for shrinkage before you design. -
Smooth the surface:
Iron the runner completely flat, as wrinkles can cause the stencil to lift and the paint to bleed. -
Secure the workspace:
Lay the fabric on a hard, flat surface and tape down the corners so it doesn’t shift while you work. -
Mark guides:
Using a ruler and a very faint pencil line, mark the vertical center of the runner to help align your moon phases perfectly.
Texture Pro-Tip
Don’t aim for solid black coverage. The beauty of this piece is the ‘noise’ in the print, so apply light layers to let the fabric grain show through.
Step 2: Creating the Stencils
-
Draft the moons:
Draw five identical circles on your stencil material; using a compass ensures your phases are uniform in size. -
Define the phases:
Keep the center circle full, then draw curve lines inside the others to create two gibbous shapes and two crescent shapes. -
Cut the shapes:
Carefully cut out the positive space (the part that will be black) using your X-Acto knife on a cutting mat. -
Prepare the lettering:
Print out ‘WHITE COTTON PAPER’ and ‘MOON PHASES’ in a clean sans-serif font to use as a template, then cut these into stencils as well.
Step 3: Printing the Design
-
Start at the center:
Place the full moon stencil in the exact center of the runner and secure the edges with painter’s tape. -
Load the brush:
Dip your stencil brush into the black paint, then offload almost all of it onto a paper towel; the brush should feel nearly dry. -
Stipple the design:
Apply the paint with a vertical up-and-down tapping motion to create a speckled, grainy texture rather than a solid black blob. -
Print remaining phases:
Move outward to the gibbous and crescent moons, measuring equal distances between each shape, and repeat the stippling process. -
Add the text:
Position your text stencils at the top and bottom; I find using a smaller brush here helps maintain crisper edges on the letters. -
Create border dots:
Dip the back end of a paintbrush handle into the paint and stamp it gently to create the tiny alignment dots along the vertical borders.
Level Up: Cosmic Glow
Mix a small amount of silver fabric glitter or glow-in-the-dark medium into your black paint for a subtle shimmer that mimics moonlight.
Step 4: Finishing Touches
-
Remove tape:
Carefully peel away all stencils and tape immediately after painting, lifting straight up to avoid smearing. -
Dry time:
Allow the runner to air dry flat for at least 24 hours to ensure the ink is fully cured. -
Heat set:
Iron the reverse side of the fabric on a high setting (without steam) for 3-5 minutes to make the design permanent and washable.
Place your finished runner on a wooden table to enjoy that beautiful contrast between the organic moons and the structured text.


Floating Astronaut
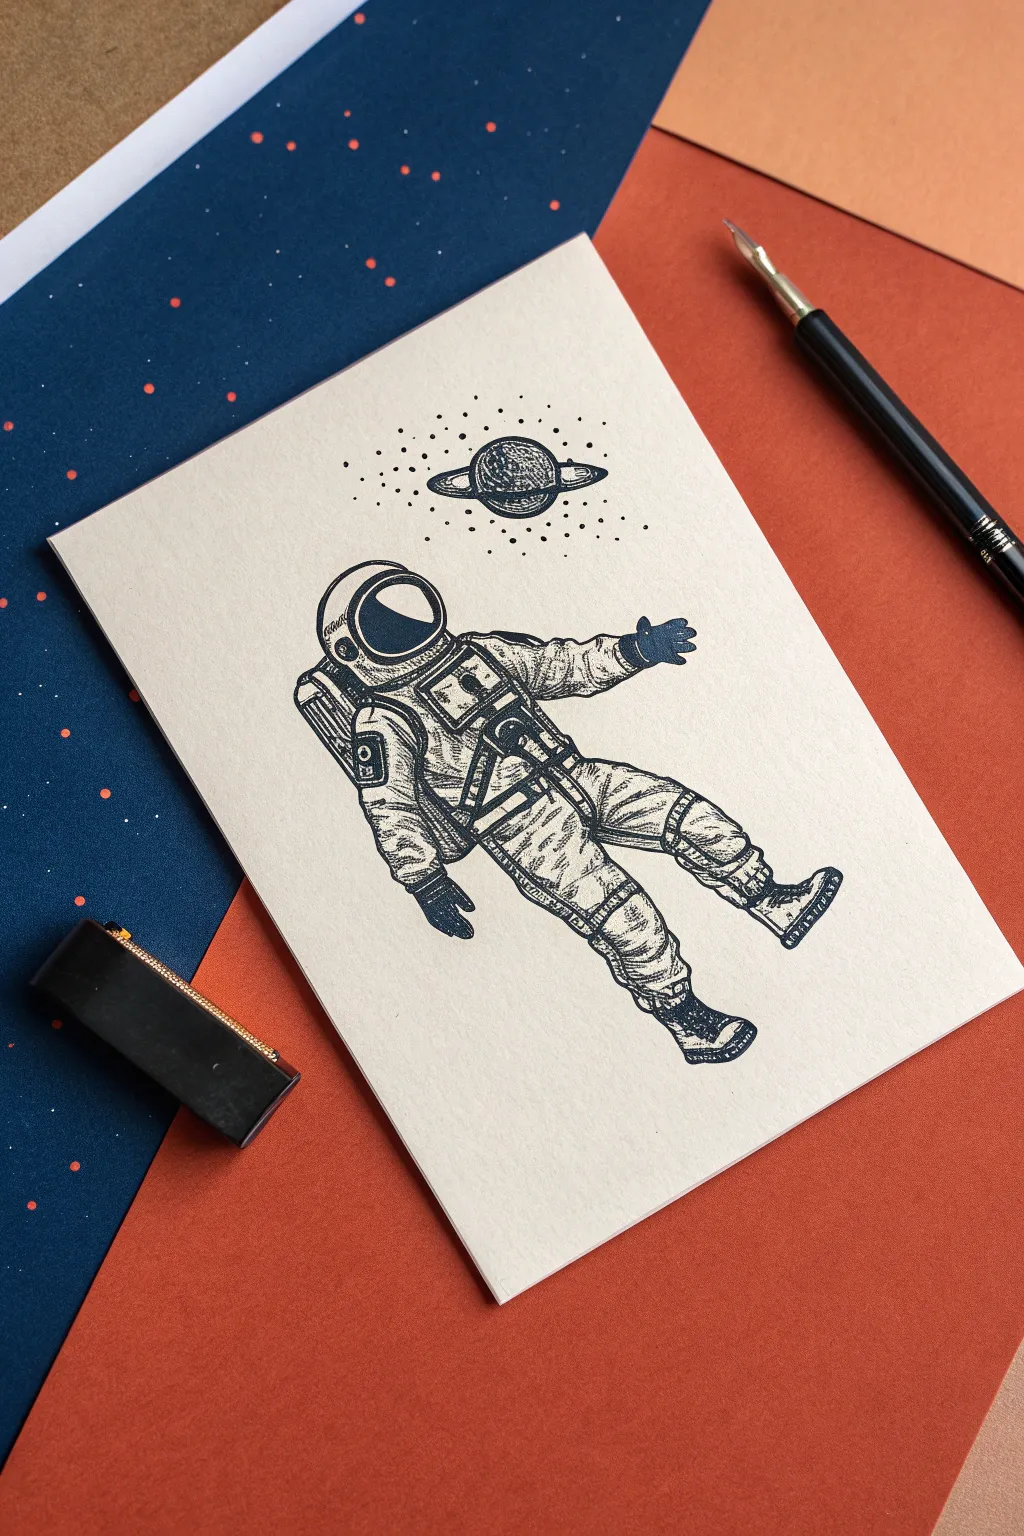
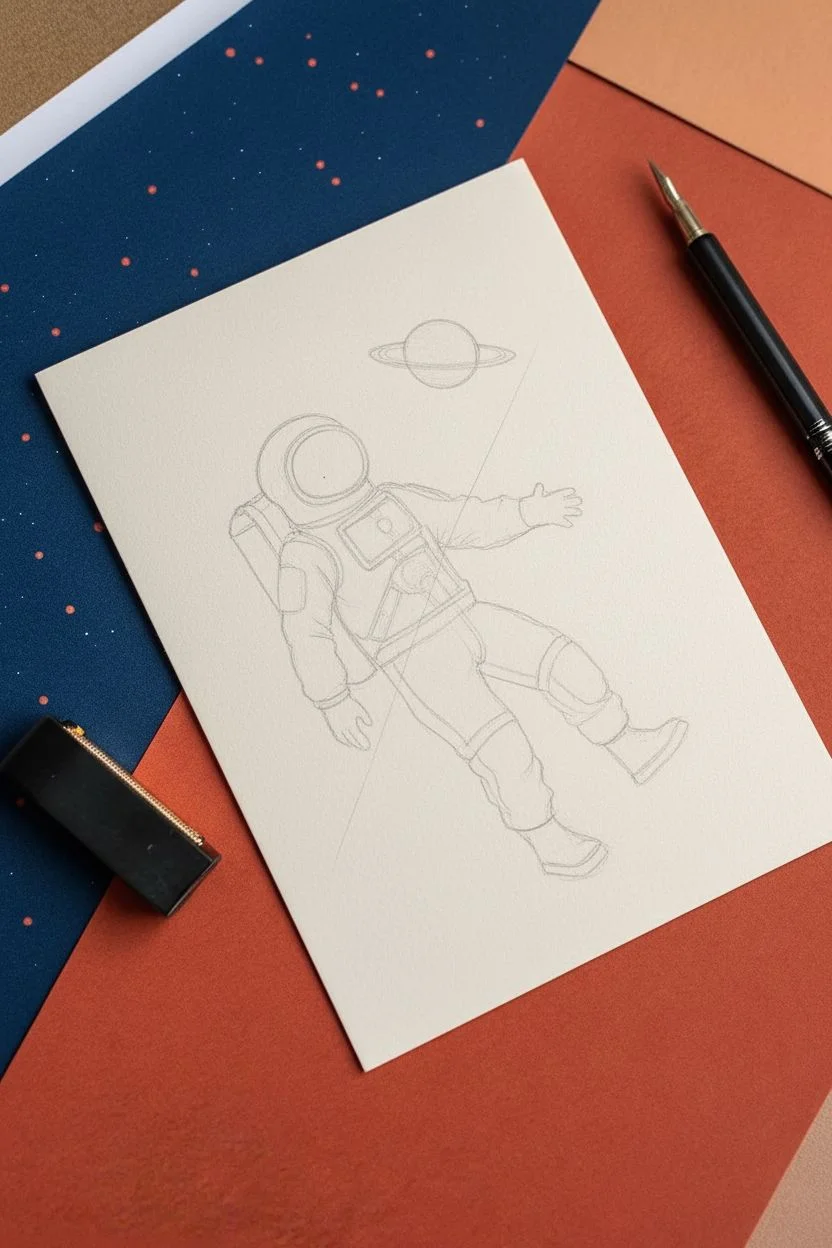
Capture the charm of classic scientific illustrations with this detailed ink drawing. Using hatching techniques and stark contrast, you will transform a simple piece of cardstock into a retro space exploration scene.
Step-by-Step
Materials
- Smooth off-white cardstock or bristol board
- HB pencil for sketching
- Kneaded eraser
- Dip pen with a fine nib (G-nib or mapping nib)
- Black India ink (waterproof)
- Optional: Fine liner pens (0.05, 0.1, and 0.5 mm) if not using a dip pen
Step 1: Structural Sketching
-
Establish the axis:
Lightly sketch a diagonal line across the center of your paper to guide the astronaut’s floating angle, ensuring the figure doesn’t look stiff. -
Block in major forms:
Draw a large circle for the helmet and a rectangular block for the torso. Sketch cylinders for the limbs, positioning the arms slightly raised and the legs dangling for a weightless effect. -
Refine the suit details:
Add the control box on the chest and the bulky life-support backpack peeking out from behind the shoulder. -
Detail the joints:
Sketch the accordion-style ribbed sections at the elbows, knees, and shoulders which are crucial for that vintage space suit look. -
Position the planet:
Above the figure, lightly draw a flattened oval for Saturn’s rings and a circle in the center for the planet body.
Smudge Prevention
working with wet ink requires patience. Place a scrap piece of paper under your drawing hand to act as a barrier, preventing oils or accidental heavy rubbing from smearing your fresh lines.
Step 2: Inking the Outline
-
Commit to the helmet:
Using your dip pen or 0.5mm liner, ink the outer curve of the helmet and the inner rim of the visor. Keep your hand steady for a smooth, mechanical curve. -
Outline the body:
Trace over your pencil lines for the suit. I find that breaking the lines slightly at the wrinkles makes the fabric look more realistic than a solid continuous outline. -
Define the hardware:
Ink the chest unit and the straps, using straighter, more geometric lines to contrast with the organic folds of the suit fabric. -
Fill the blacks:
Identify the heavy contrast areas—specifically the gloves, the soles of the boots, and the visor. Fill these in completely black, leaving a small white crescent in the visor for a reflection.
Step 3: Hatching and Texture
-
Shade the limbs:
Use parallel hatching lines along the underside of the arms and legs to create cylindrical volume. Keep the lines evenly spaced. -
Texture the folds:
Add short, curved hatching marks where the suit bunches up at the waist and crotch area to suggest heavy fabric. -
Detail the ribbed joints:
Carefully draw horizontal lines across the elbow and knee sections. Add a perpendicular line running down the center of these sections to show the highlight. -
Cross-hatching shadows:
Go back over your darkest shadowed areas (like under the backpack and behind the knees) with a second set of lines at a 45-degree angle to deepen the tone.
Level Up: Colored Paper
Try this project on tan or grey toned paper. After the black ink dries, use a white gel pen to add highlights to the visor and the brightest folds of the suit for a pop.
Step 4: Background and Final Polish
-
Ink the planet:
Draw the rings of Saturn using thin, elliptical lines. Use horizontal hatching on the bottom half of the planet sphere to give it a 3D shadow. -
Create the star field:
Using the tip of your nib, create a stippled halo of dots around the planet. Cluster them densely near the planet and spread them out as they move away. -
Let it cure:
Wait for the ink to become completely dry. India ink can look dry before it is, so give it an extra few minutes to be safe. -
Erase and clean:
Gently erase the underlying graphite sketch with your kneaded eraser, revealing the crisp black ink work.
Step back and admire your handiwork, knowing you’ve launched a little piece of art into the world.

PENCIL GUIDE
Understanding Pencil Grades from H to B
From first sketch to finished drawing — learn pencil grades, line control, and shading techniques.
Explore the Full Guide
Friendly Little Aliens
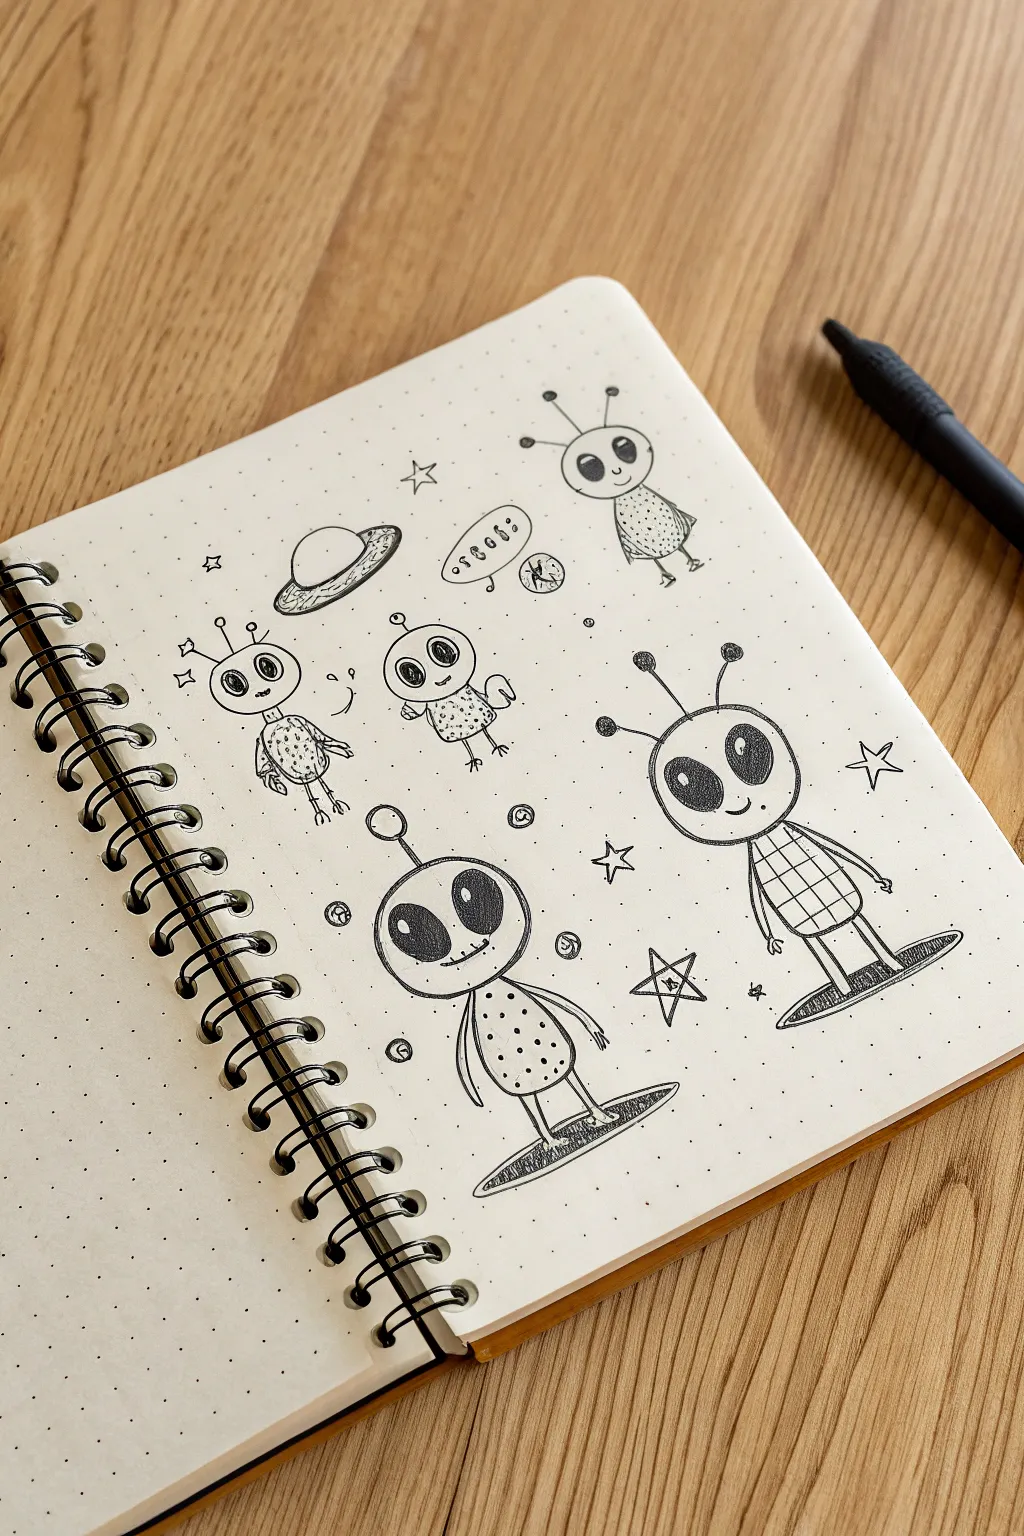
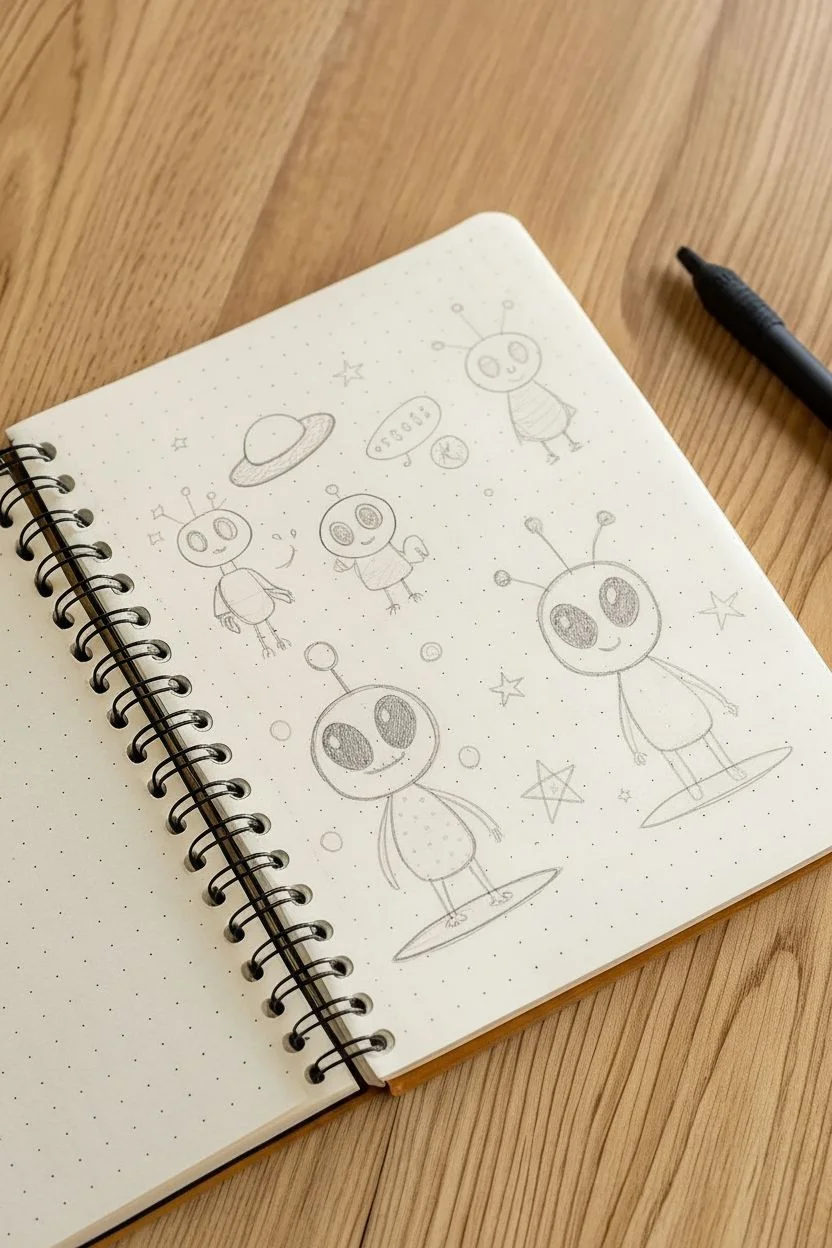
Fill your journal page with a crew of adorable extraterrestrials enjoying a day in the cosmos. Using a dotted grid notebook helps keep these cartoonish characters balanced and neat while maintaining a playful, hand-drawn charm.
Step-by-Step Tutorial
Materials
- Dotted grid notebook or paper
- HB Drawing pencil
- Soft eraser
- Black fine liner pen (size 0.3 or 0.5)
Step 1: Planning the Layout
-
Map out the positions:
Start with your pencil to lightly map out where your five aliens will go. Place two smaller ones near the top and two larger ones standing on surfboards at the bottom to balance the page. -
Sketch the head shapes:
Draw simple ovals and circles for the heads. Make the bottom right head a bit wider and the bottom center head perfectly round. -
Add floating discs:
For the two bottom aliens, sketch thin, flat ellipses under their feet to act as their hovering surfboards.
Step 2: Drawing the Upper Characters
-
Ink the top right alien:
Switch to your black ink pen. Draw the top right alien with a triangular, dress-like body and stick legs. Add delightful texture by stippling little dots all over its body. -
Create the middle left alien:
Draw the character on the middle left. Give this one a round belly with a scribbled texture and stick arms waving upwards. -
Add the tiny center alien:
Sketch the small, baby-like alien in the very center. Keep the body simple and round, and add large eyes looking off to the side. -
Draw the UFO:
Near the top left, draw a simple flying saucer. Use a semi-circle for the dome and a flat oval ring around the base.
Grid Guide
Use the notebook’s printed dots as coordinates. Count 3 dots across for a head or 4 dots down for a body to ensure your aliens stay symmetrical.
Step 3: Inking the Surfing Aliens
-
Outline the spotted alien:
Move to the bottom center figure. Draw a single antenna with a circle tip, and give the body regular polka dots for a patterned look. -
Outline the plaid alien:
For the bottom right character, draw two antennae. I like to draw a grid pattern on its shirt to make it look like plaid fabric. -
Detail the hoverboards:
Ink the discs under their feet. Draw a rim around the edge of the discs to give them some 3D thickness and sketch small motion lines underneath to show they are floating.
Smudge Alert
Wait at least 5-10 minutes before erasing your pencil lines. The solid black eyes take longer to dry, and smearing them can ruin the cute expression.
Step 4: Faces and Final Details
-
Draw the eyes:
This is crucial for the cute look: draw large ovals for eyes on every alien. Inside the ovals, draw two small circles for highlights. -
Fill the pupils:
Color in the rest of the eye with solid black ink, leaving those small highlight circles pure white. This brings them to life instantly. -
Add mouths and antennae:
Give everyone a simple smile. Vary the antennae styles—some with balls on top, some straight, to give each alien personality. -
Insert alien speech:
Draw a speech bubble near the top center. Instead of words, fill it with random scribbles, spirals, and dots to represent alien language. -
Fill the space:
Draw small five-pointed stars, tiny planets, and scattered dots fill the empty negative space between the characters. -
Clean up:
Once the ink is completely dry, gently erase the underlying pencil sketches to reveal your crisp doodle art.
Now your notebook is inhabited by a joyful intergalactic community
Shooting Star Doodles
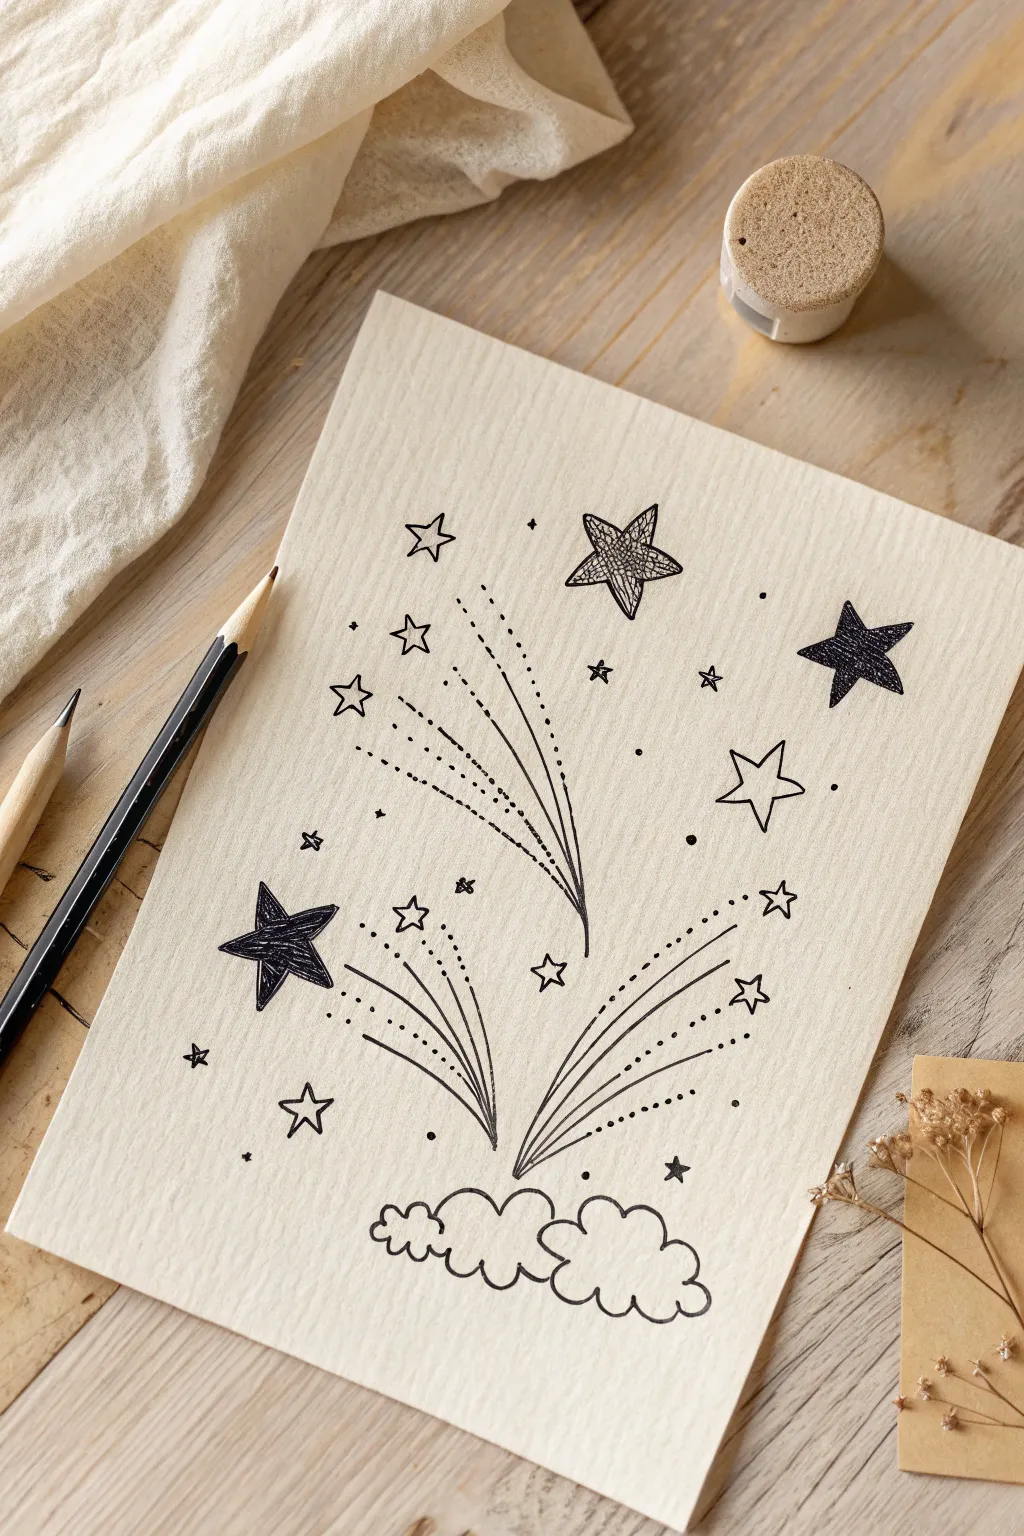

Capture the magic of a meteor shower with this charming pen and ink drawing. With its playful scalloped clouds, varied star textures, and dynamic trails, this project creates a serene celestial scene perfect for a sketchbook page or greeting card.
Detailed Instructions
Materials
- Textured cream drawing paper
- Black fineliner pen (0.5mm)
- HB Pencil
- Eraser
Step 1: Planning the Sky
-
Sketch the clouds:
Start by lightly sketching a wide, bumpy cloud formation at the bottom center of your paper with a pencil. -
Map the movement:
Draw faint curved lines swooping upwards from the clouds in a ‘V’ formation—some curving left, others curving right. -
Place key stars:
Mark the positions of the largest stars at the ends of the trails so you don’t run out of room later.
Step 2: Inking the Foundation
-
Outline the cloud:
Switch to your black fineliner. Ink the cloud using a series of connected, U-shaped scallops. -
Vary the bumps:
Make some cloud bumps larger and others smaller to keep the shape looking organic and fluffy. -
Draw left trails:
Draw smooth, solid curved lines extending from the cloud towards the upper left. -
Add texture:
Draw dotted lines parallel to your solid trail lines to add visual interest and a sense of speed. -
Draw right trails:
Repeat the process on the right side, sketching sweeping curves that reach toward the upper right corner.
Paper Choice Matters
Using paper with a slight grain or tooth adds wonderful character to simple ink drawings. The texture breaks up the lines slightly, giving the artwork a rustic, hand-drawn vintage feel.
Step 3: Drawing the Stars
-
Create a focal point:
Draw a large five-pointed star on the left side and fill it in completely with black ink. -
Add an open star:
Just below the solid star, draw a slightly smaller outline-only star. -
Draw the center star:
Near the top vertical center, draw a large star outline. Instead of shading it, fill it with tight, messy scribbles. -
Balance the right side:
Draw a solid black star in the upper right quadrant to balance the heavy black star on the left. -
Add floating stars:
Scatter several medium-sized outline stars in the open spaces between the main trails.
Fixing Wonky Stars
If you mess up the symmetry of a star outline, don’t panic! Simply fill it in with solid black ink or turn it into a textured ‘scribble’ star to effectively hide the mistake.
Step 4: Magical Details
-
Sprinkle tiny stars:
Fill the gaps with very small stars and simple cross-shaped sparkles. -
Add stippling:
I like to gently tap the pen tip to create clusters of dots around the larger stars for a galaxy dust effect. -
Enhance movement:
Add extra rows of tiny dots following the curves of the shooting star trails to emphasize their upward motion. -
Let it set:
Wait a few minutes for the ink to dry completely, especially the filled-in areas. -
Reveal the magic:
Gently erase your initial pencil guidelines to leave a crisp, clean illustration.
Step back and admire your own little slice of the night sky.
BRUSH GUIDE
The Right Brush for Every Stroke
From clean lines to bold texture — master brush choice, stroke control, and essential techniques.
Explore the Full Guide
Feline in a Flight Suit
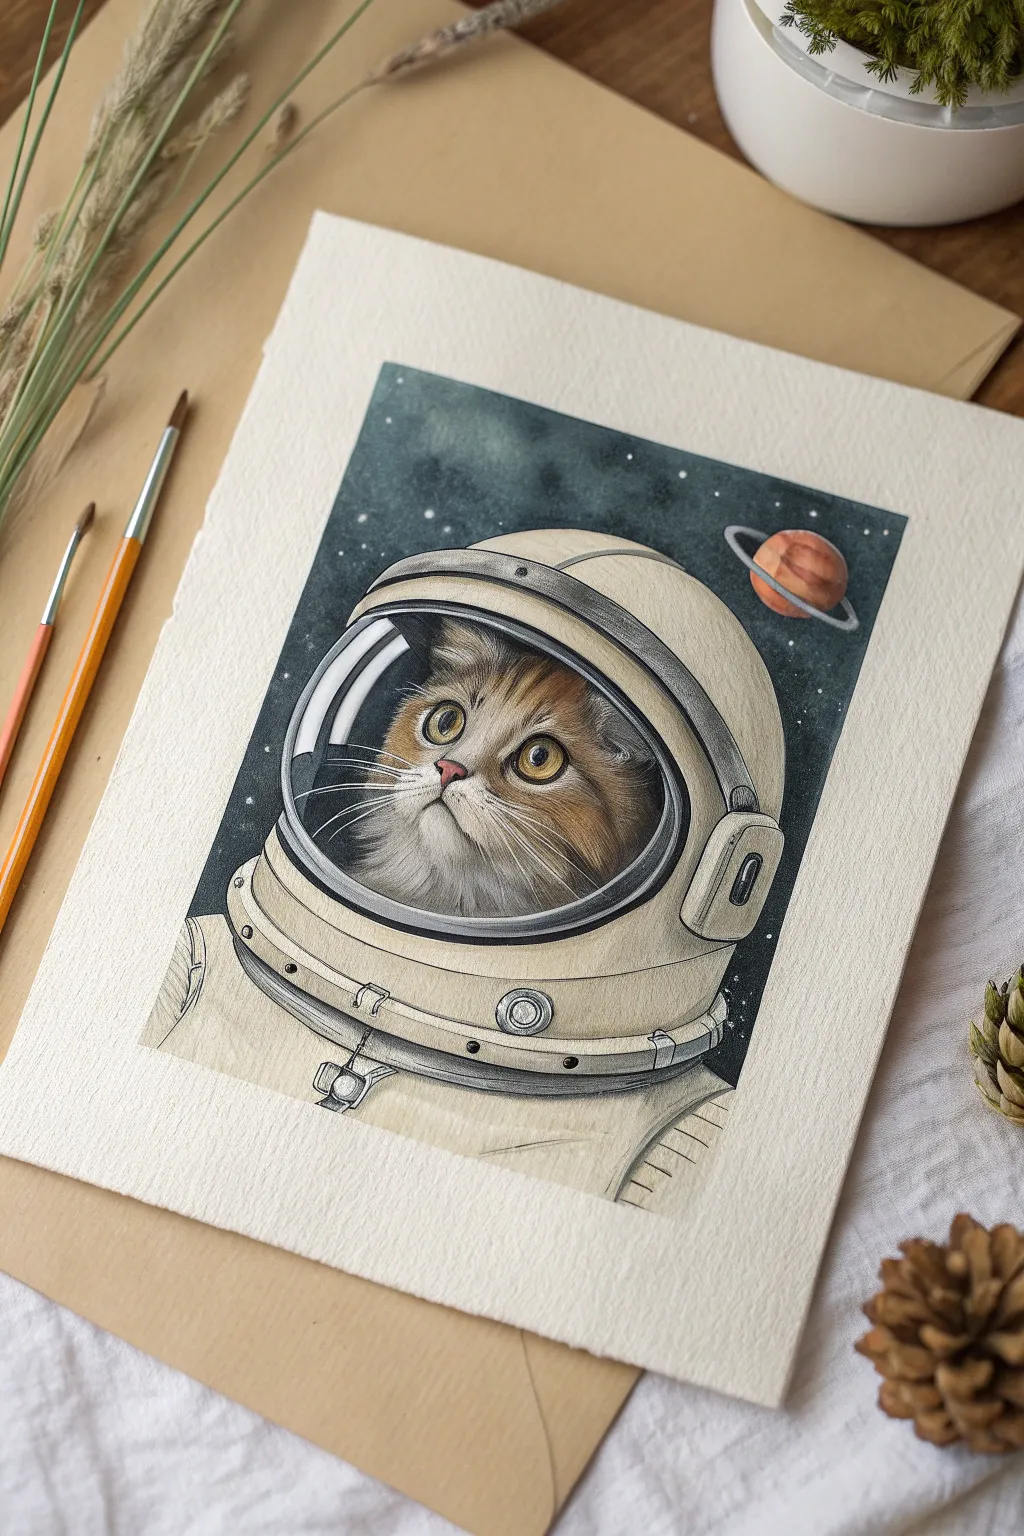
Capture the whimsical charm of a feline explorer venturing into the deep universe with this mixed-media project. We will combine the soft flow of watercolors for the galaxy with precise pencil details to bring the texture of the fur and retro space suit to life.
Step-by-Step Tutorial
Materials
- Cold press watercolor paper (300 gsm)
- Watercolor paints (Indigo, Payne’s Grey, Burnt Sienna, Yellow Ochre, Buff Titanium)
- White gouache or white gel pen
- Masking fluid (optional)
- Round brushes (sizes 2, 6, and 8)
- HB pencil and kneaded eraser
- Fine liner or colored pencils for details
- Masking tape
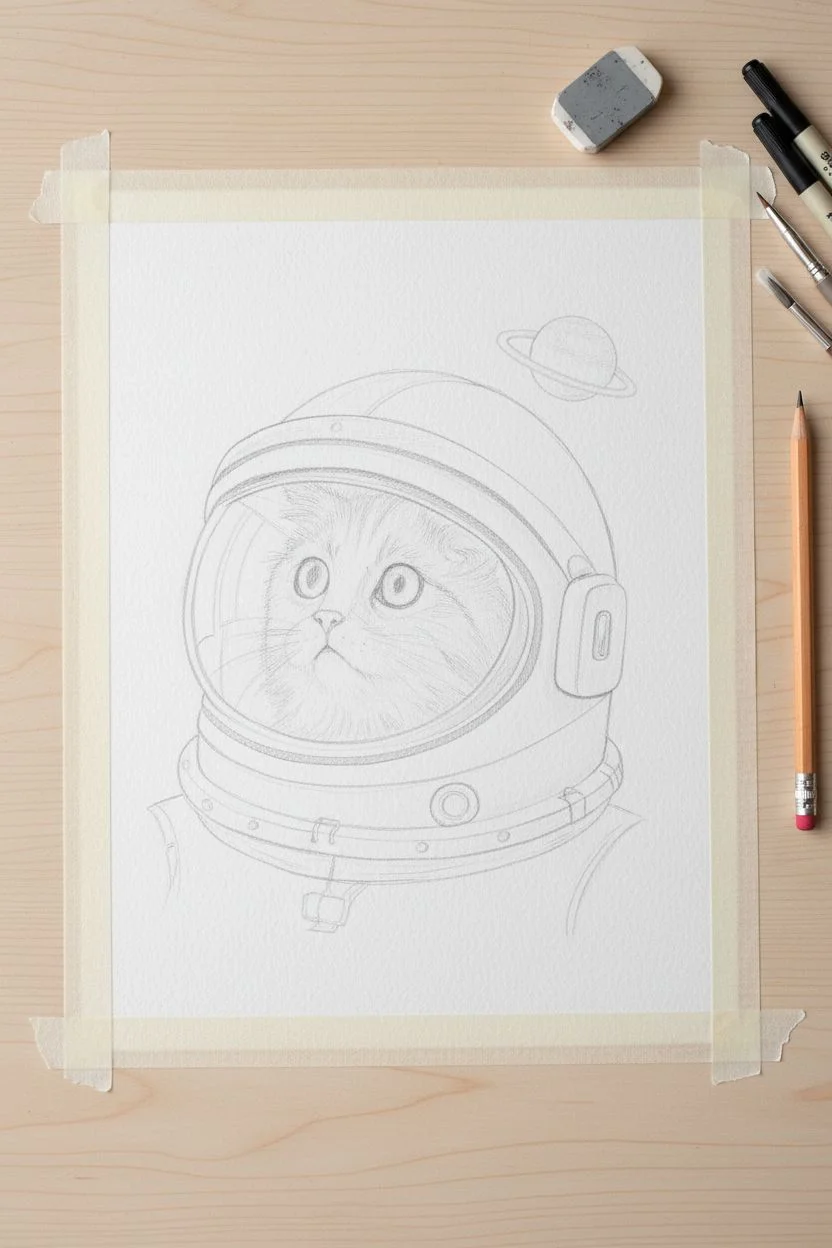
Step 1: Mission Prep: Sketching
-
Secure the borders:
Tape down all four edges of your watercolor paper to a board. This creates the crisp white border seen in the final piece and prevents the paper from buckling. -
Outline the helmet:
Lightly sketch a large, rounded helmet shape in the center. Add the metallic neck ring and the shoulder area of the space suit below it. -
Draft the pilot:
Inside the helmet, draw the cat’s head. Pay attention to the angle; the cat should be looking up and to the left. Sketch the large eyes and the flow of the fur. -
Add cosmic elements:
Draw the visor opening shape carefully, leaving space for the glass rim. In the upper right background, sketch a small, ringed planet.
Step 2: Deep Space Background
-
Protect the subject:
If you have masking fluid, apply it over the helmet and cat to keep them pristine. If not, just paint carefully around the edges in the next steps. -
Mix the void colors:
Create a deep, moody mixture using Indigo, Payne’s Grey, and a touch of Black. The background needs to be dark to make the astronaut pop. -
Paint the galaxy:
Apply the dark wash to the background area. Vary the intensity, letting some areas bloom with more water to create a nebular effect. Avoid painting the planet sketch. -
Planet details:
Once the black is dry, paint the small planet using a diluted terra cotta or soft rust color. Add a thin white or grey line for the rings.
Bleeding Edges?
If the dark space background accidentally runs into your helmet sketch, don’t panic. Blot it immediately with a clean tissue, and later cover the stain with opaque gouache.
Step 3: The Feline Pilot
-
Base fur tones:
Start with a diluted wash of Yellow Ochre and Burnt Sienna for the cat’s fur. Keep the application loose, but leave the muzzle white. -
Fur texture:
Using a size 2 brush and a drier mix of brown, paint short, directional strokes to mimic fur. Layer these strokes around the cheeks and forehead. -
Captivating eyes:
Paint the irises with a bright amber or yellow. I like to drop a tiny hint of green while wet for depth. Once dry, paint the black pupils and outline the eyes. -
Nose and whiskers:
Add a soft pink touch to the nose. Use a white gel pen or very fine gouache brush to flick on the long, white whiskers.
Level Up: Personalize It
Customize the suit by drawing a tiny mission patch on the shoulder area using a fine liner. You can write your own pet’s name inside the patch for a custom portrait.
Step 4: Suit Up & Final Details
-
Helmet shell:
Paint the main helmet area with Buff Titanium or a very watery raw sienna to get that vintage off-white look. Keep it lighter at the top for a highlight. -
Metallic hardware:
Use a grey-blue mix to paint the neck rings, the visor rim, and the side ear-piece. Add a darker line on the underside of these rings to create shadows. -
Visor reflections:
This is crucial for the glass effect: paint a curved, sheer grey shape on the left side of the visor glass, overlapping the fur slightly. It should look transparent. -
Highlighting the glass:
Use opaque white gouache to add sharp, curved reflection lines on the visor glass. This sells the illusion that the cat is behind a helmet. -
Starlight:
Using your white gel pen or a small brush with gouache, dot the dark background with varied sizes of stars. -
The reveal:
Wait until the paper is completely bone-dry, then slowly peel off the masking tape at a 45-degree angle to reveal your clean edges.
Frame your masterpiece and enjoy your adorable traveler floating among the stars
Planets with Personality
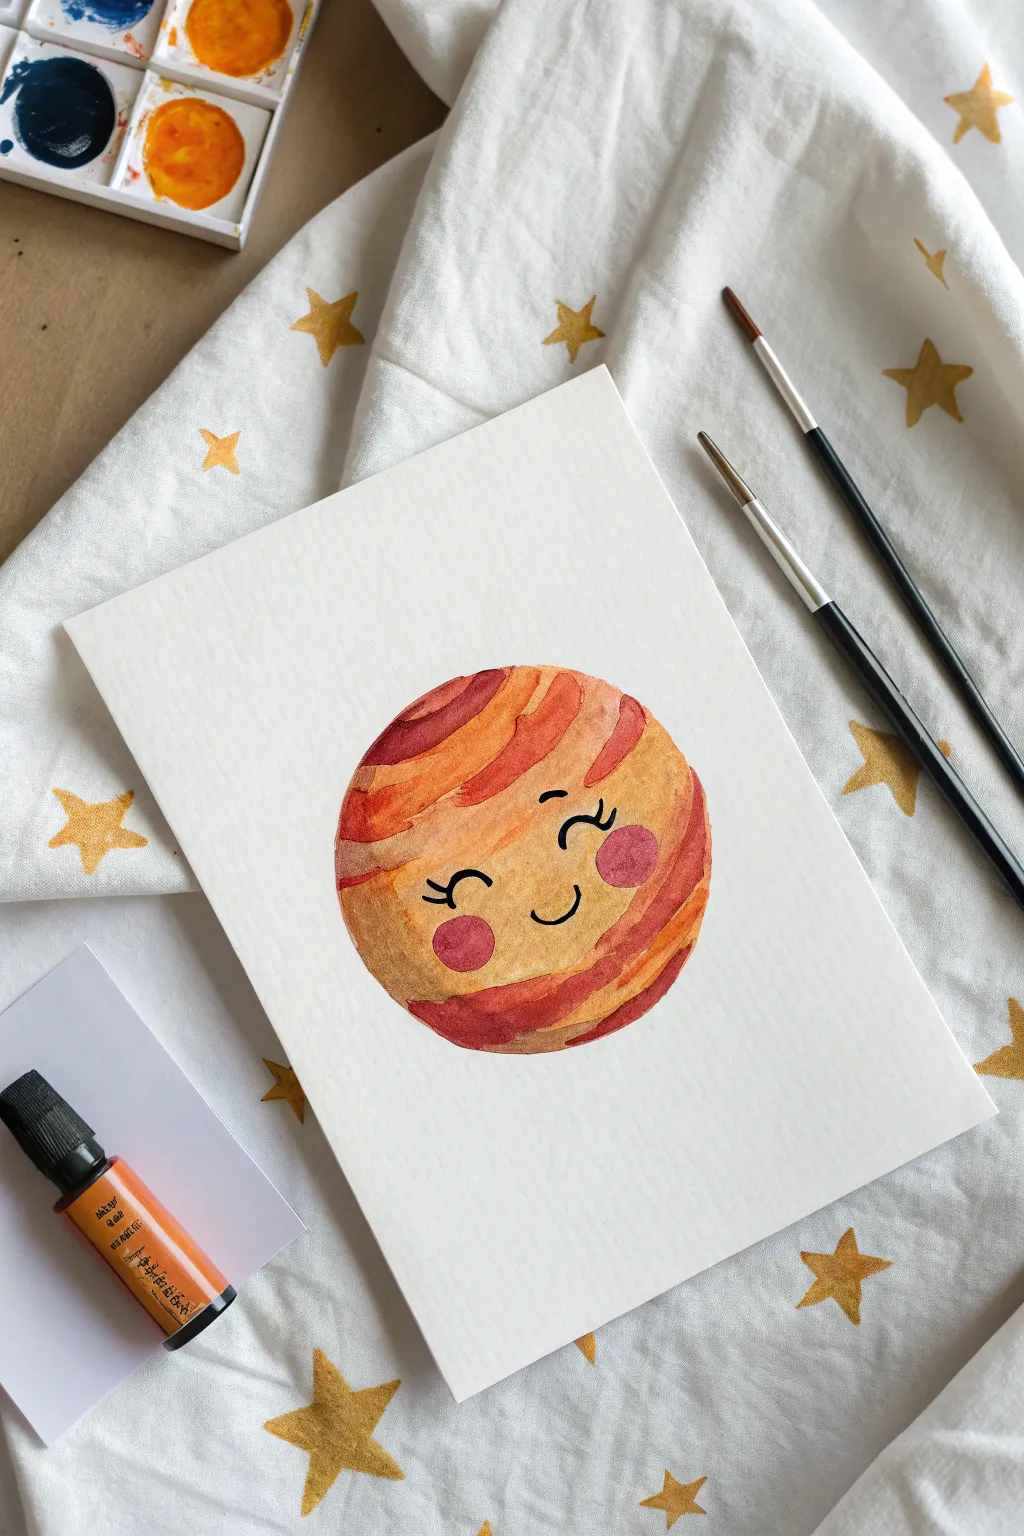
Bring the celestial giant to life with a splash of personality in this charming watercolor project. You will layer warm earthy tones to create planetary texture before adding a sweet, kawaii-style face.
How-To Guide
Materials
- Cold press watercolor paper (300 gsm)
- Watercolor paints (oxides, ochres, oranges, pink)
- Round brushes (size 6 and size 2)
- Black waterproof fine liner pen (0.5mm) or black ink
- Pencil and eraser
- Circular object for tracing (like a jar lid)
- Water cup and paper towel
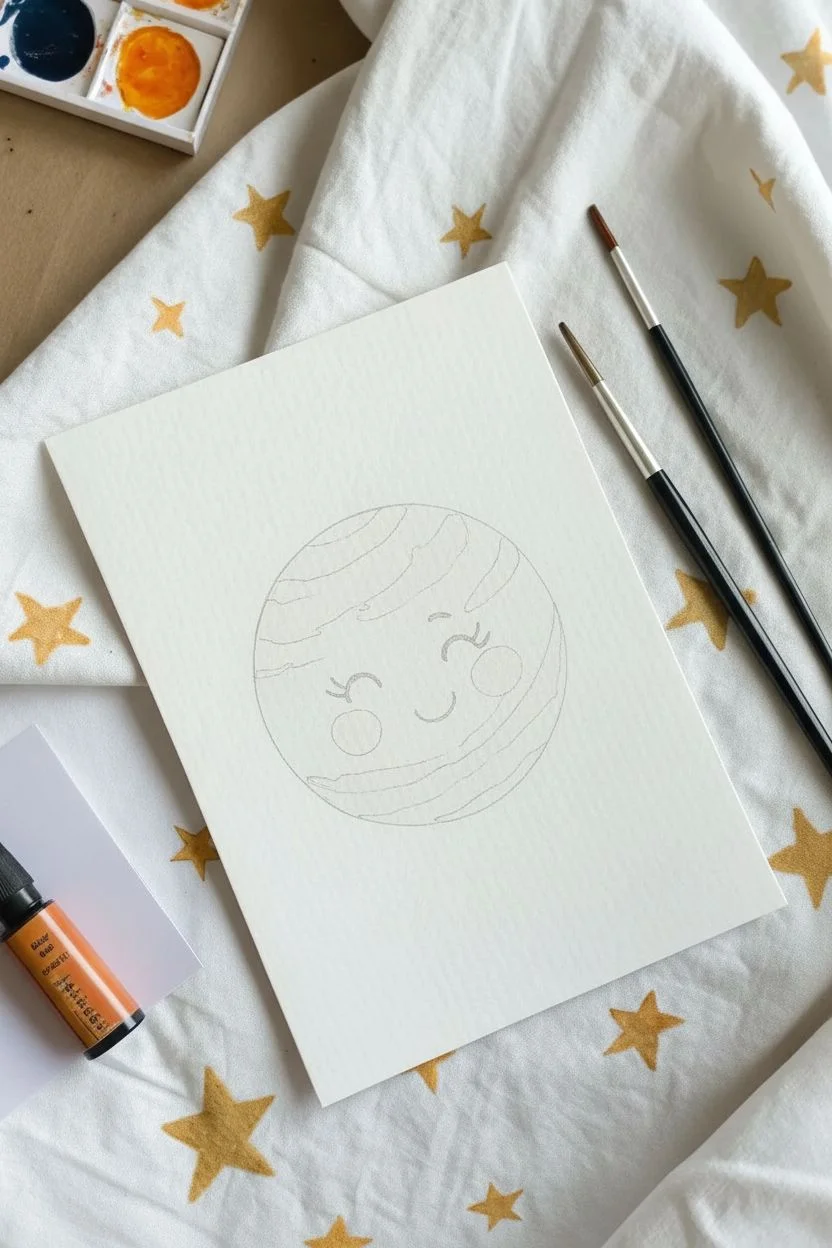
Step 1: Sketching the Base
-
Outline the shape:
Place a circular object like a masking tape roll or jar lid in the center of your paper and trace it lightly with a pencil to get a perfect sphere. -
Map the bands:
Sketch curved lines horizontally across the circle to act as guides for the planet’s gas giant stripes. Curve them downward slightly to simulate a 3D sphere. -
Position the face:
Lightly mark two small arches for eyes and a small curve for the mouth in the middle band to ensure your spacing is centered.
Step 2: Painting the Planet
-
Mix your palette:
Prepare your colors on a palette: a deep rusty red, a bright orange, and a yellow ochre. You want them wet but rich in pigment. -
Start at the top:
Using a size 6 brush, paint the top segment of the planet with the rusty red color, carefully staying within the circle’s outline. -
Add a lighter band:
Rinse your brush and pick up the orange. Paint the band directly below the red one. If they touch and bleed slightly, that creates a nice natural effect. -
Create the face zone:
For the wide middle band where the face will go, use a diluted yellow ochre or very light orange wash to ensure the features will stand out clearly later. -
Continue patterning:
Alternate between your rust, orange, and darker brown shades for the bottom bands, mimicking the storm patterns of Jupiter. -
Add roundness:
While the paint is still damp, dab a little concentrated dark brown paint along the far left and right edges of the stripes to create a shadow effect. -
Texture detail:
I like to drag a nearly dry brush through the wet paint occasionally to create streaks that look like moving gas clouds. -
Let it dry:
Wait for the entire circle to be completely dry to the touch. If the paper feels cold, it is still wet inside.
Muddy colors?
If stripes bleed too much, let each band dry for about 60 seconds before painting the one next to it.
Step 3: Adding Personality
-
Paint the cheeks:
Mix a rosy pink watercolor. Paint two small circles on the middle band, spacing them wide enough to frame the mouth. -
Let cheeks set:
Allow the pink spots to dry fully so the black ink won’t feather into them. -
Draw the eyes:
Using a waterproof fine liner or a very fine brush with black ink, draw two arched semicircles for closed, happy eyes. -
Add lashes:
Flick three small curved lines upward from the outer corner of each eye to create cute eyelashes. -
Draw the smile:
Place a small, simple U-shaped curve directly between the cheeks for the mouth. -
Clean up:
Once you are absolutely certain all ink and paint is dry, gently erase any visible pencil lines from the initial sketch.
Level Up
Use metallic gold watercolor for one of the thin stripes to give your planet a magical, cosmic shimmer.
Now you have a charming celestial friend ready to brighten up your sketchbook


UFO Abduction Beam
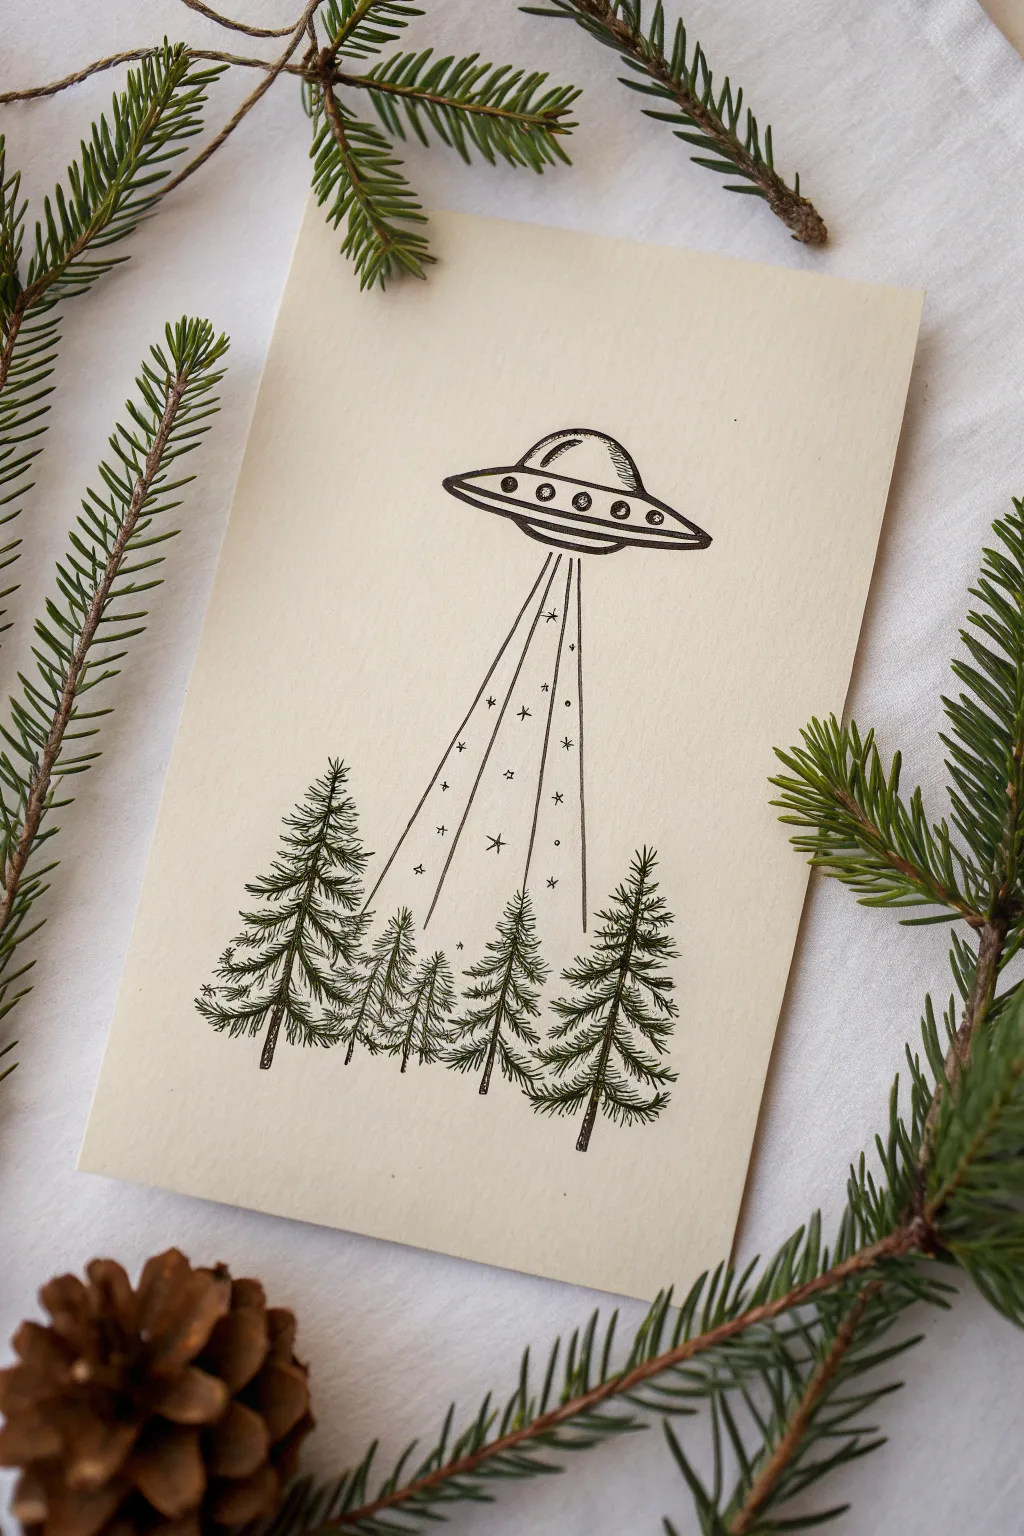
This whimsical pen-and-ink drawing captures a classic sci-fi moment with a cozy, rustic vibe. It combines precise geometric lines for the beam with loose, organic sketching for the forest, creating a perfect contrast on cream paper.
Detailed Instructions
Materials
- Cream or off-white heavy cardstock
- Fine liner drawing pens (sizes 01 and 05)
- HB pencil
- Kneaded eraser
- Clear ruler
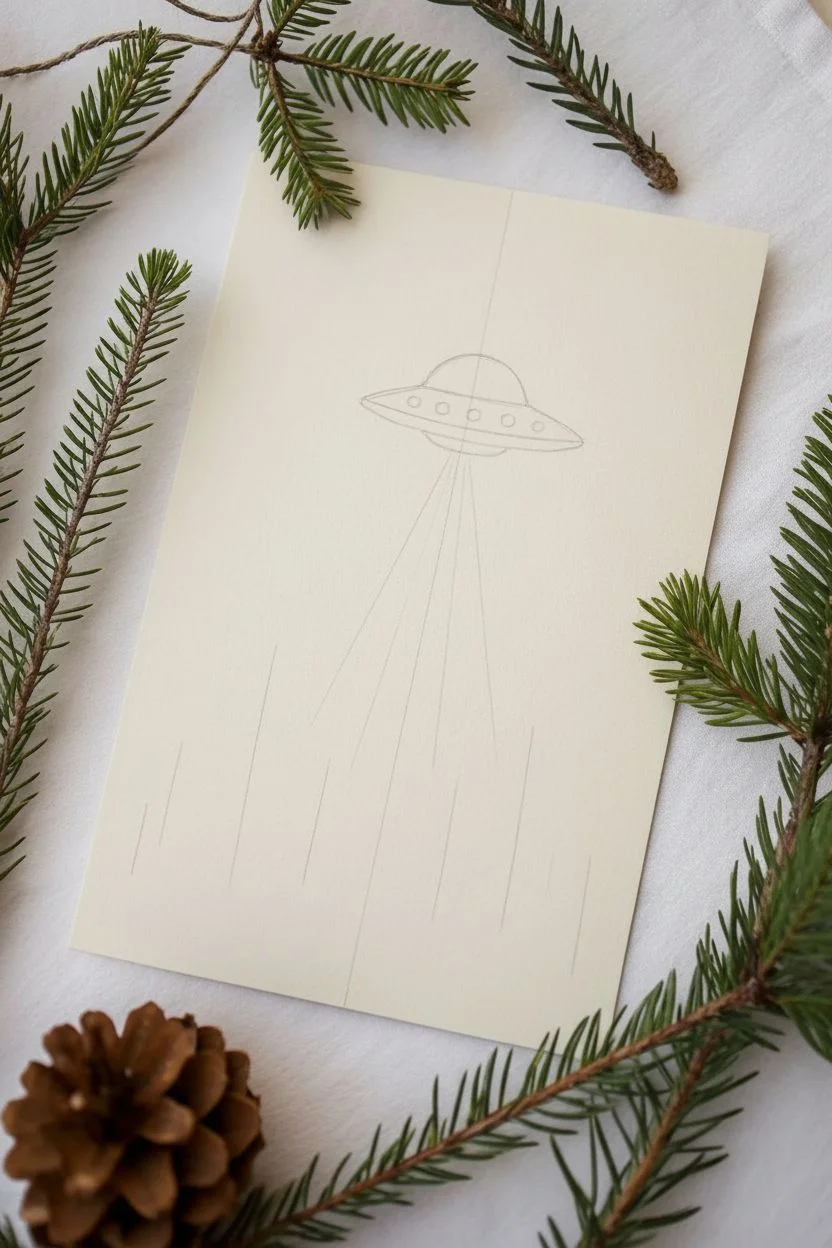
Step 1: Planning the Composition
-
Find the center point:
Lightly sketch a vertical line down the center of your cardstock with your pencil to help align the UFO and the main tree. -
Sketch the saucer shape:
About two-thirds of the way up the paper, lightly draw a flat oval for the spaceship rim and a smaller semi-circle on top for the dome. -
Draft the beam:
Using your ruler, lightly pencil three lines fanning downward from the bottom of the saucer, stopping where you want the treetops to begin. -
Mark tree positions:
Sketch simple vertical lines at the bottom of the page to indicate where the trunks of your pine trees will stand, clustering them slightly.
Ink Texture Tip
For the pine trees, hold your pen further back on the barrel. This reduces your control slightly, creating more organic, natural-looking ‘needles’ instead of stiff lines.
Step 2: Inking the Spacecraft
-
Outline the dome:
Switch to your 05 pen. Trace the upper dome of the UFO, ensuring the line is smooth and confident. -
Define the rim:
Draw the main horizontal oval body of the ship. Add a second, slightly curved line inside the oval to give the rim dimension. -
Add alien details:
Draw small, evenly spaced circles along the band of the saucer to represent lights or windows. -
Create shading:
Use your thinner 01 pen to add small hatching lines on the right side of the dome and the underside of the rim to suggest metallic volume.
Step 3: Drawing the Beam
-
Ink the main rays:
Using the 01 pen and your ruler, carefully trace the three main vertical lines of the abduction beam. -
Add celestial sparkles:
Inside the beam area, freehand small four-pointed stars and tiny dots. Keep them contained strictly within the beam lines. -
Vary star sizes:
I like to mix open halo stars and solid ink dots to create a sense of twinkling movement within the light ray.
Level Up: Galactic Glow
Trace over the ‘abduction beam’ lines and stars with a metallic silver or gold gel pen to make the light appear to shimmer against the matte forest.
Step 4: Sketching the Forest
-
Start the center tree:
Using the 01 pen, start at the top of your central trunk line. making quick, downward zig-zag motions to create the pointed tip of the pine. -
Build the branches:
Continue working down the trunk, making your zig-zag scribbles wider as you go. Keep the strokes loose and scratchy rather than perfect. -
Draw the side trees:
Create the neighboring trees using the same scribbling technique. Make these slightly shorter than the center tree to vary the silhouette. -
Add depth layers:
Draw smaller, partial tree tops peeking out from behind the main trees using tighter, darker scribbles to fill the empty gaps. -
Ground the scene:
Darken the very bottom of the trees with extra ink strokes to give the forest visual weight and ground the drawing.
Step 5: Final Polish
-
Let the ink set:
Wait at least five minutes to ensure the ink is completely bonded to the paper fibers. -
Erase guidelines:
Gently rub the kneaded eraser over the entire image to lift the pencil sketch, leaving only the crisp black ink.
Display your extraterrestrial landscape in a small frame or send it as a greeting card to a sci-fi loving friend
Solar System Mobile
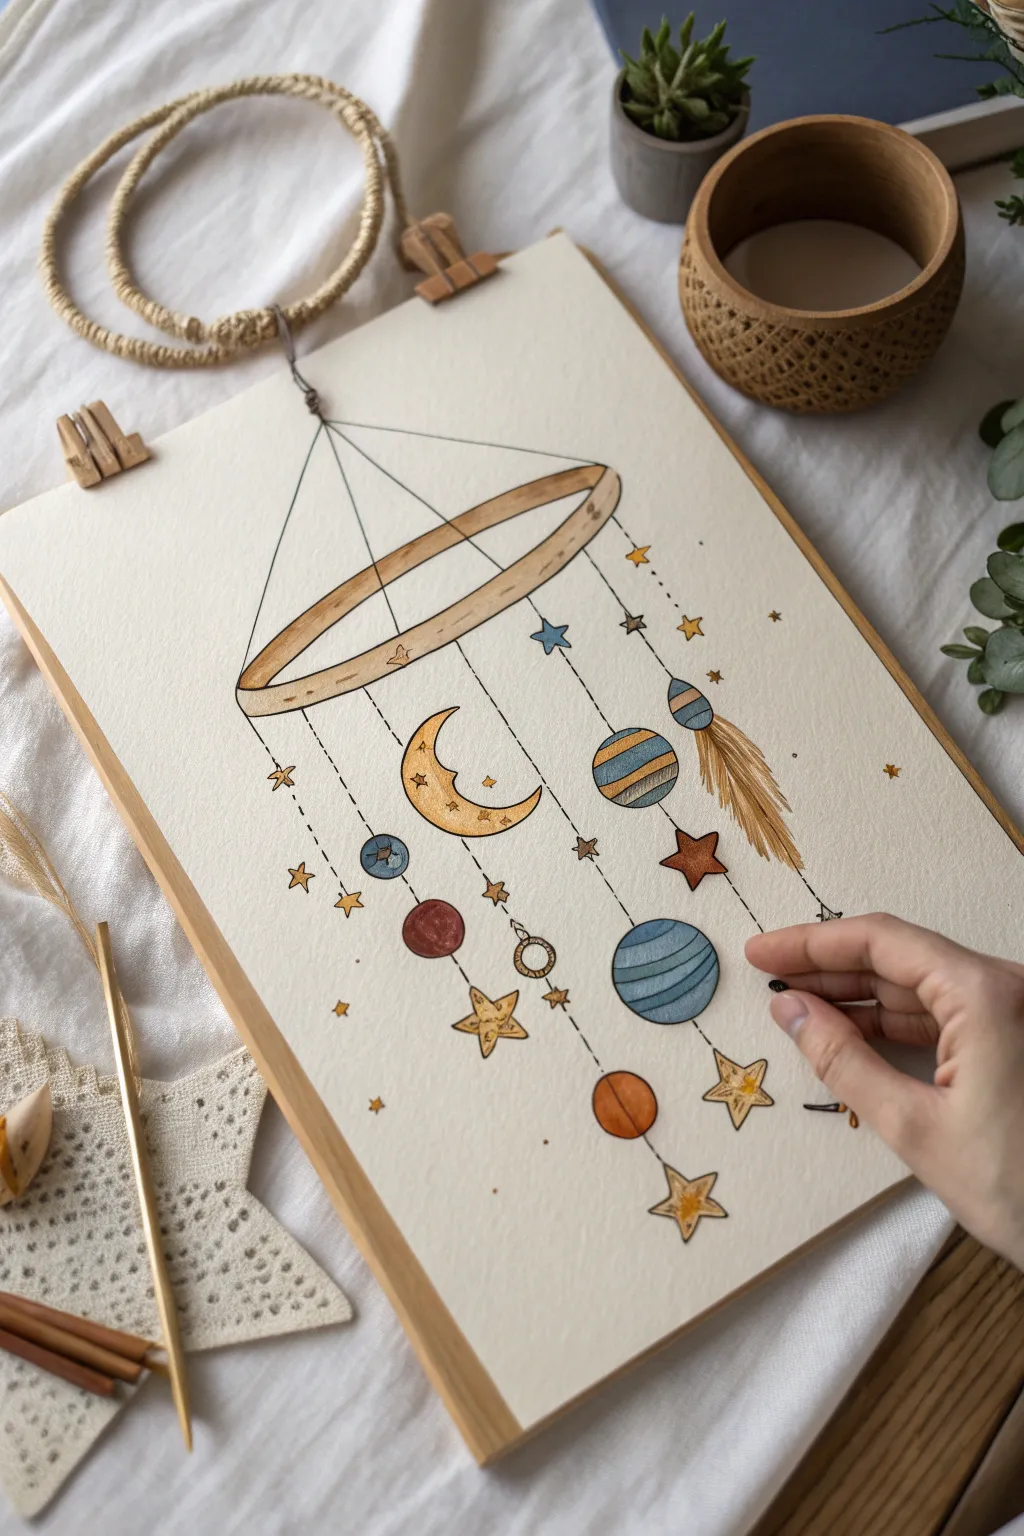
Capture the charm of a nursery-style hanging mobile with this delicate watercolor illustration. You will create a soft, cosmic composition featuring hanging planets, moons, and stars using fine ink lines and muted earth tones.
Step-by-Step Tutorial
Materials
- Cold-pressed watercolor paper (300gsm)
- HB graphite pencil and eraser
- Waterproof fine liner pens (0.1mm and 0.3mm)
- Watercolor paint set (ochre, terracotta, teal, brown)
- Round watercolor brushes (sizes 2 and 4)
- White gel pen or white gouache
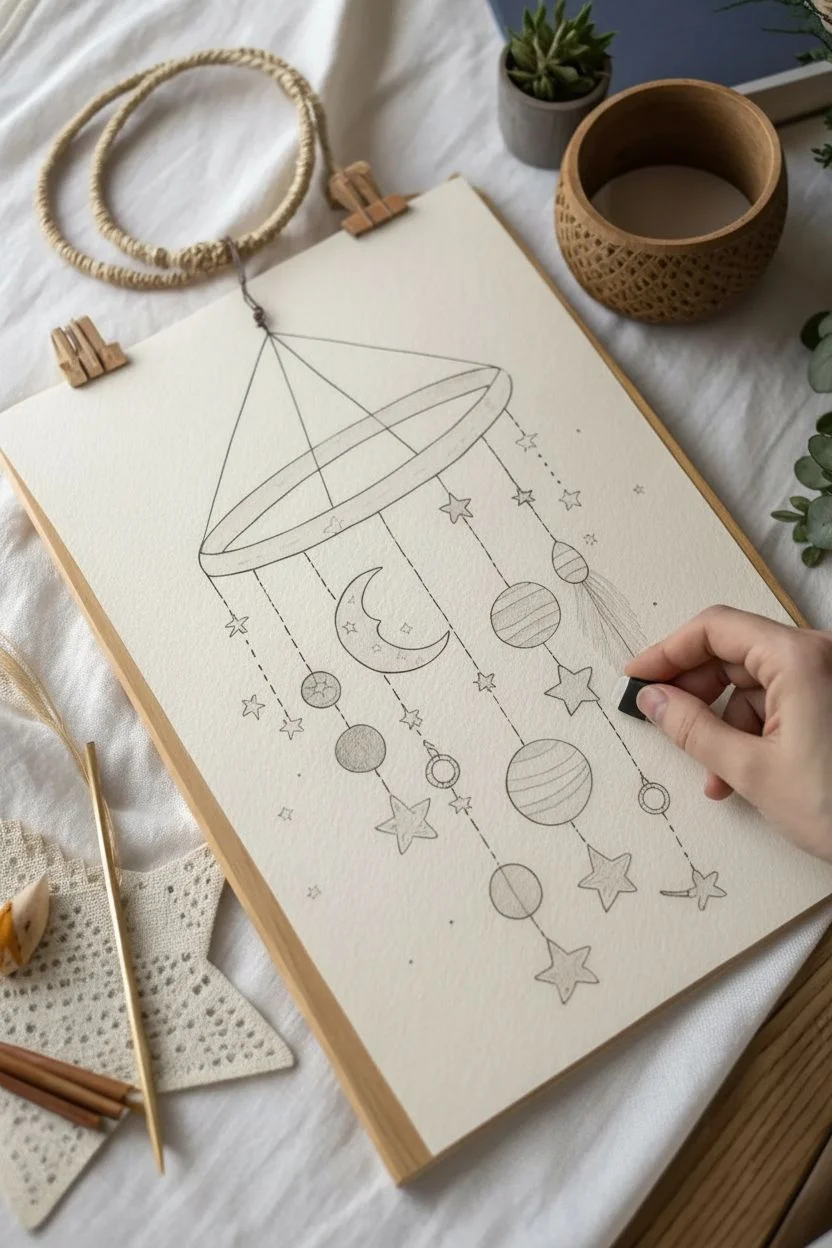
Step 1: Sketching the Structure
-
Draw the hoop:
Start near the top third of your paper. Lightly sketch a large, flattened oval (ellipse) to represent the wooden hoop ring. -
Add dimension:
Draw a second, slightly smaller curve inside the front edge of the oval to give the hoop thickness and a 3D perspective. -
Plot string lines:
Using a ruler lighter hand, drop several vertical lines down from the hoop. Vary their lengths so the objects will hang at different heights. -
Sketch the moon:
On one of the left-side strings, draw a crescent moon shape. Keep the curve gentle and the ends tapered. -
Add planetary bodies:
Draw circles of various sizes at the ends of other strings. Include a striped planet (like Jupiter) and simple spheres. -
Incorporate accents:
Sketch a few small five-point stars scattered along the strings and one teardrop shape on the right side which will become a feather accent.
Step 2: Inking the Outline
-
Outline the main shapes:
Using a 0.3mm waterproof pen, carefully trace the outer lines of the hoop, moon, planets, and stars. -
Create the hanging strings:
Switch to a finer 0.1mm pen. Instead of sold lines, trace over your vertical string guides with small, even dashed lines to mimic thread. -
Add hoop details:
Draw faint wood grain lines on the hoop using the 0.1mm pen to suggest a natural timber texture. -
Erase pencil:
Wait until the ink is completely dry, then gently erase all underlying pencil sketches to leave a clean illustration.
Ink Confidence
Make sure your fine liner is labeled ‘waterproof’ or ‘archival.’ If standard ink touches water, it will bleed and ruin the crisp look of your mobile.
Step 3: Watercolor Application
-
Paint the hoop:
Mix a diluted light brown or tan wash. Paint the hoop, adding a slightly darker brown on the interior rim to show shadow. -
Color the celestial bodies:
Paint the moon and stars with a mustard yellow or ochre. Avoid bright lemon yellow to keep the vintage aesthetic. -
Paint the planets:
Use muted teal and terracotta orange for the planets. I like to let the colors pool slightly at the bottom right of each circle to create natural shading. -
Stripe details:
For the striped planet, alternate between blue and orange stripes, leaving tiny gaps or waiting for layers to dry so colors don’t bleed. -
Paint the feather:
Use a light brown wash for the feather shape. While wet, drop in a touch of darker brown at the tip for a gradient effect.
Level Up: Metallic Pop
Swap the yellow ochre paint for gold watercolor or metallic ink on the stars and moon. It catches the light beautifully and adds a magical touch.
Step 4: Shading and definition
-
Deepen shadows:
Once the base layers are dry, mix slightly darker versions of your colors. particular attention to the right side of the planets and the inner curve of the moon to enhance the 3D form. -
Moon texture:
Dab tiny spots of darker ochre onto the moon to suggest craters and surface texture. -
Feather texture:
Use your finest brush or the brown pen to add delicate diagonal strokes inside the feather shape to mimic barbs. -
Adding highlights:
Finally, use a white gel pen to add small highlight dots on the upper left side of the planets and proper glossy spots on the wooden hoop.
Hang your masterpiece on the wall to add a dreamy, starlit vibe to any room.
Geometric Mountain Fusion
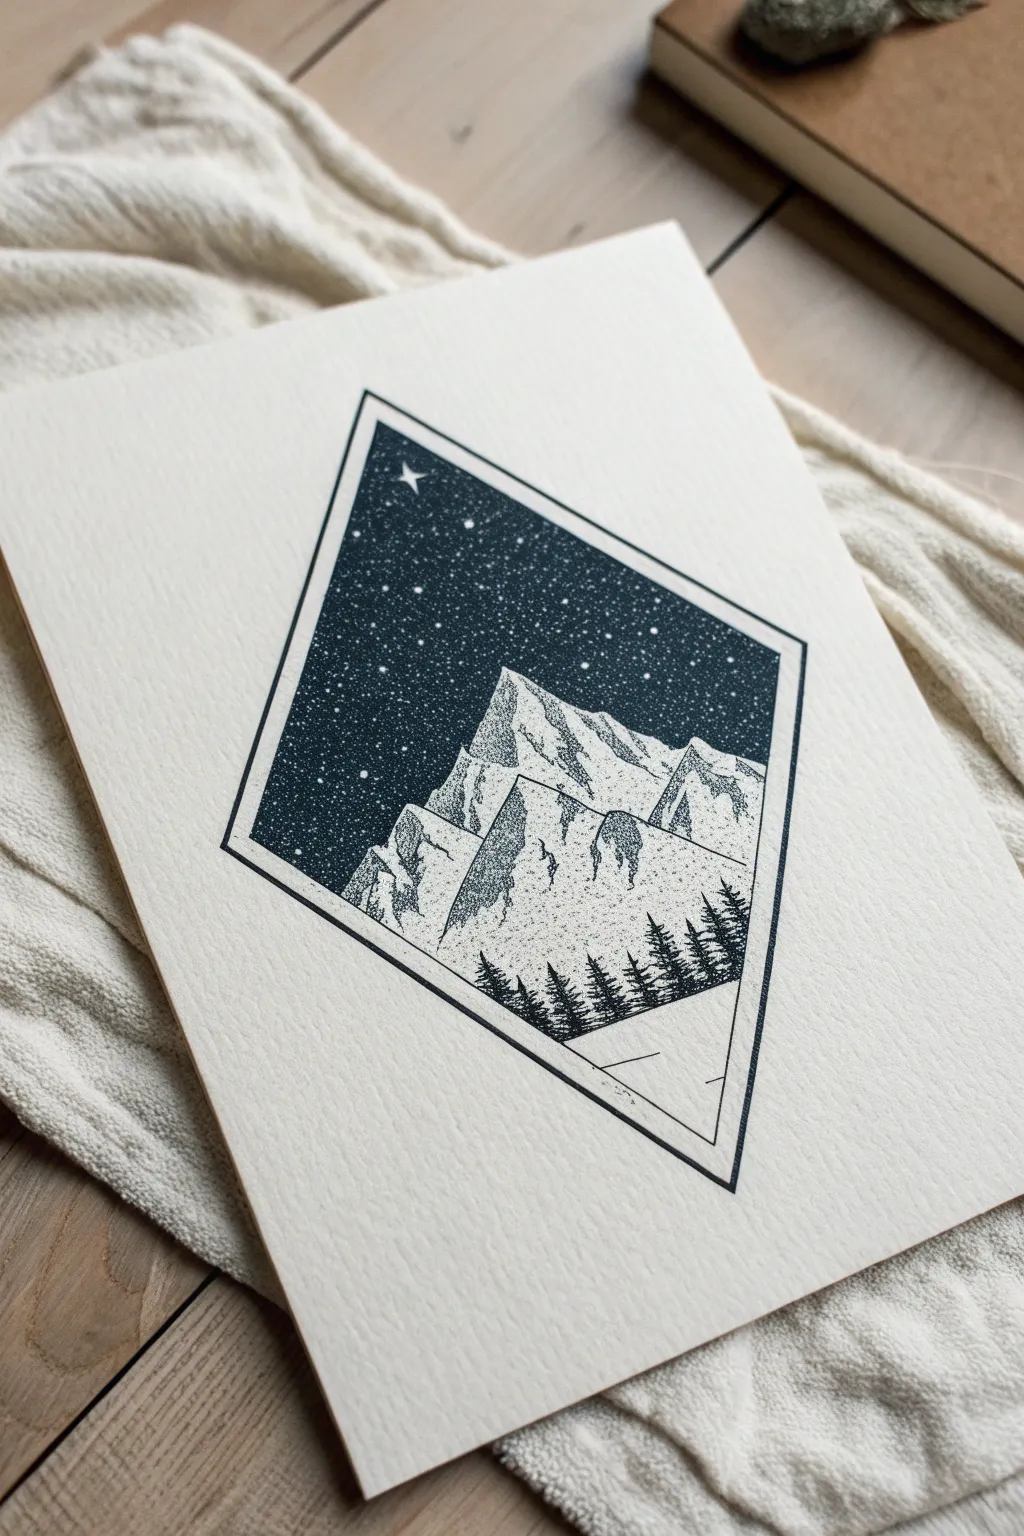
Contrast the rigid clarity of geometry with the organic flow of nature in this striking pen and ink illustration. By combining solid black fills with delicate stippling techniques, you will create a sense of depth and atmospheric perspective that makes the mountains pop.
How-To Guide
Materials
- Heavyweight textured paper (Cold Press or Mixed Media)
- HB Pencil
- Ruler
- Black fine liner pens (sizes 005, 01, 05, and 08)
- White gel pen
- Kneaded eraser
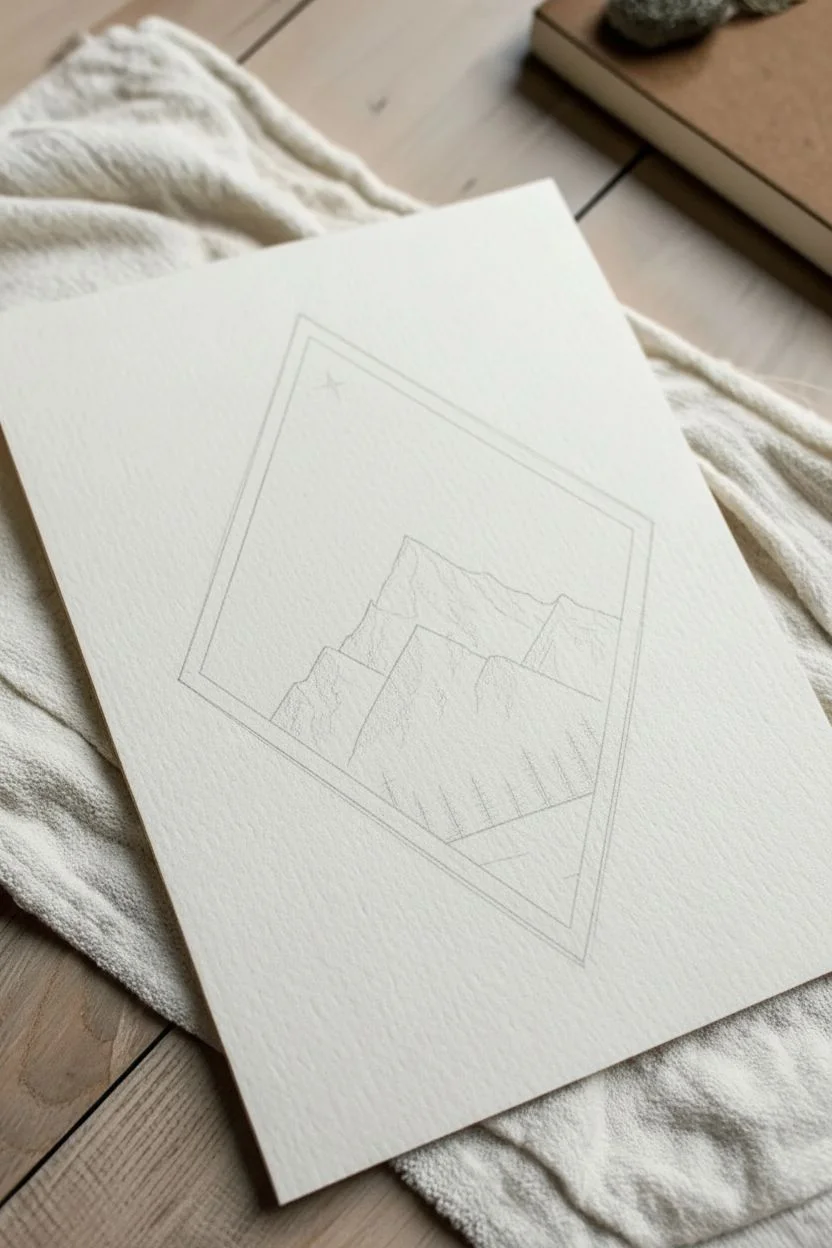
Step 1: Structural Layout
-
Establish the shape:
Use your ruler to draw a tall, vertical diamond (rhombus) in the center of your paper. Make sure the height is roughly double the width for that elegant, elongated look. -
Create the border:
Lightly draw a second, smaller diamond inside the first one, leaving about a quarter-inch gap between the lines to create a frame. -
Sketch the terrain:
Lightly sketch the jagged outline of the mountain peaks within the frame. Allow the highest peak to reach usually high, near the top third of the diamond. -
Add the tree line:
Draw a sloping line across the bottom section of the diamond. Sketch small vertical ticks along this line to indicate where the pine trees will stand.
Pro Tip: Contrast is King
Leave the snow-capped parts of the mountain completely paper-white. Resist the urge to shade everything; the stark white against the black sky creates the drama.
Step 2: Inking the Mountains
-
Outline the peaks:
Using an 01 fine liner, trace over your pencil lines for the mountain ridges. Use a slightly shaky hand here to give the rocks a natural, rugged texture rather than a perfect line. -
Map the shadows:
Visualize a light source coming from the top left. Use your pencil to lightly map out jagged shadow shapes on the right side of each mountain peak. -
Start stippling:
Switch to your finest pen (005). Begin tapping dots into the shadow areas you mapped out. Keep the dots light and sparse near the light source, and cluster them denser as you move into deep crevices. -
Build gradients:
Layer more dots over the darkest areas of the rock face. I like to let the dots fade out into the white of the paper to simulate snow-capped highlights. -
Add rock texture:
Add a few vertical, broken lines down the faces of the mountains to suggest crags and cliffs, blending them into your stippled shading.
Level Up: Breaking Bounds
Make the drawing dynamic by letting the top pointer of the highest mountain or the lowest tree branch break past the inner border line, overlapping the frame.
Step 3: The Forest and Sky
-
Ink the trees:
Using an 05 pen, draw vertical lines for the tree trunks. Use a zig-zag motion to create the pine branches, starting narrow at the top and widening at the base. -
Fill the silhouette:
Color the trees in solid black. Ensure the tops of the trees overlap the bottom of the white mountains to create distinct layers of depth. -
ink the frame:
Use your ruler and an 08 pen to ink the double-line diamond border. Be careful not to draw through the mountain peaks where they touch the edges. -
Fill the night sky:
Using your thickest pen or a black marker, carefully outline the mountain ridges against the sky. Fill in the entire upper sky portion solid black. -
Final drying:
Wait at least 10 minutes for the heavy black ink to dry completely to avoid any smearing during the final touches. -
Create the stars:
Take your white gel pen and tap random dots into the black sky. Vary the pressure to create different star sizes. -
Add the North Star:
Choose one spot in the upper left to draw a larger four-pointed star to serve as a focal point in the heavens. -
Clean up:
Once all ink is fully dry, gently erase any remaining pencil guidelines with your kneaded eraser to reveal the crisp contrast.
Now step back and admire how simple dots and lines have transformed into a vast, starry landscape.
Prehistoric Space Traveler
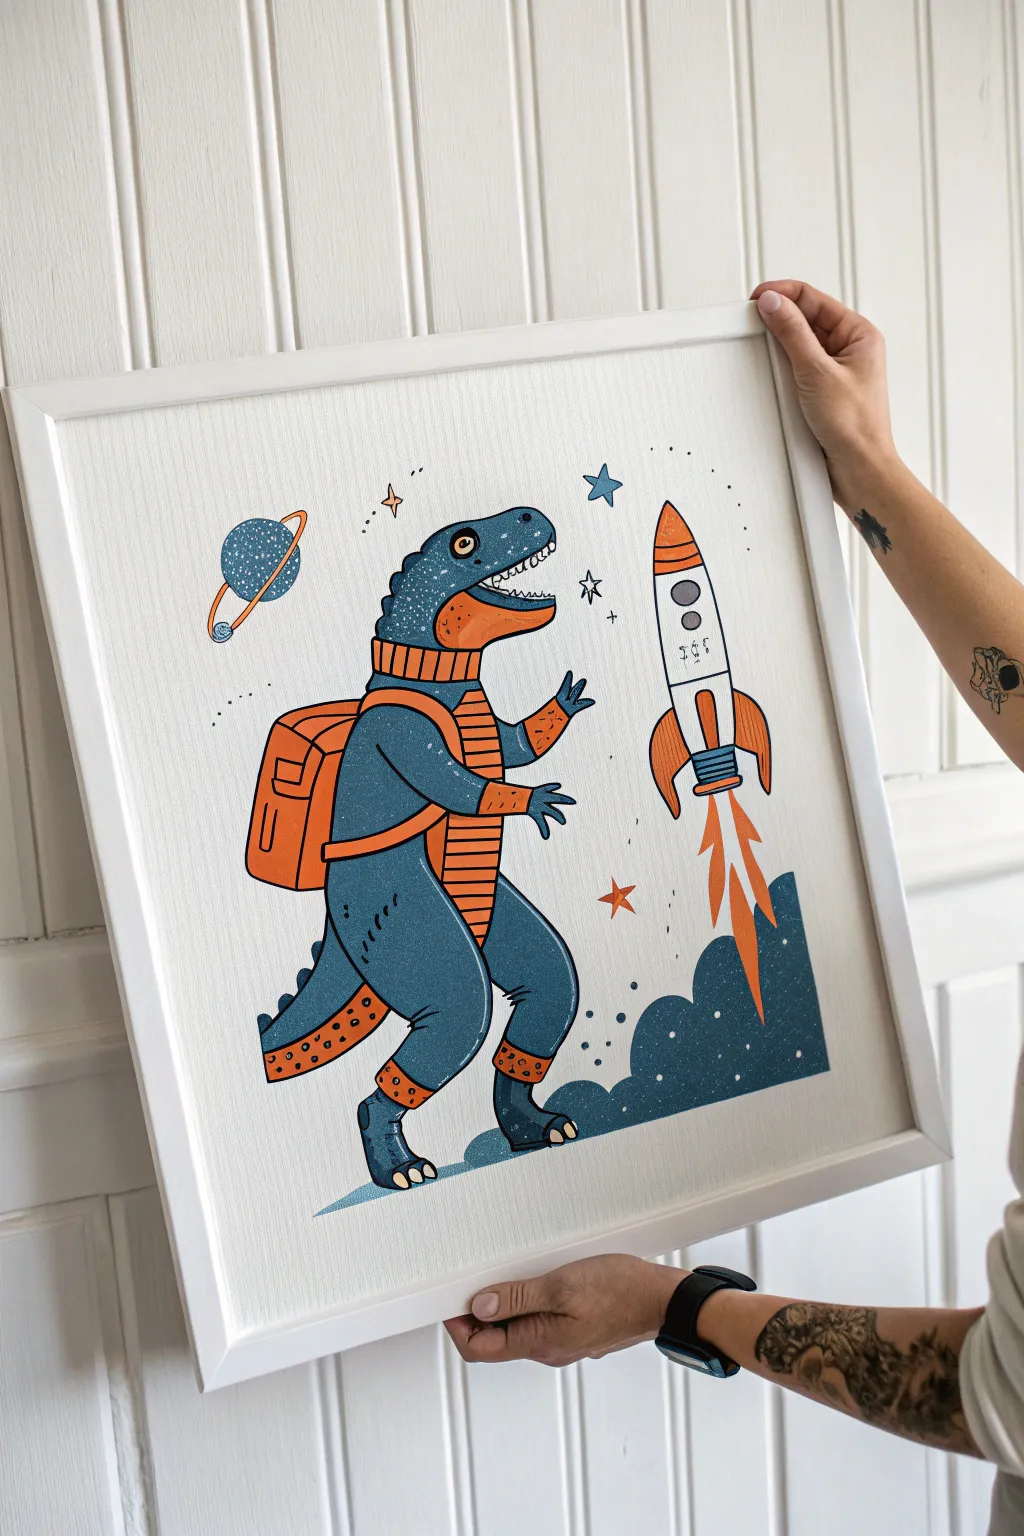
Blast off into creativity with this charming illustration that combines prehistoric might with futuristic exploration. With its clean lines, bold matte colors, and vintage texture, this piece captures the look of a classic screen print perfect for a kid’s room or study.
Step-by-Step Guide
Materials
- Heavyweight mixed-media paper or illustration board
- HB pencil and quality eraser
- Gouache paints or opaque paint markers (Teal, Orange, Navy Blue, White, Grey)
- Fine liner pens (0.3mm and 0.5mm in black or dark navy)
- Small round brushes (if using paint)
- White gel pen
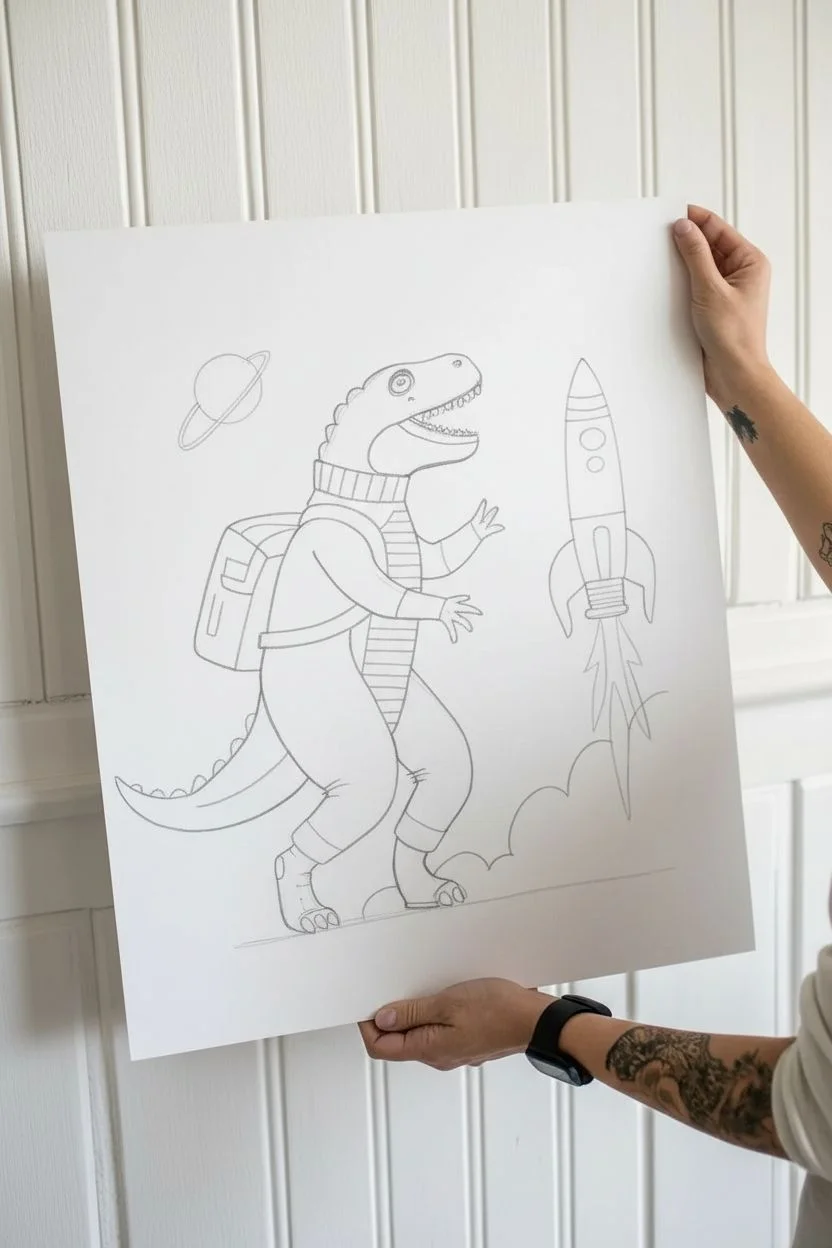
Step 1: Drafting the Scene
-
Basic Shapes:
Start by lightly sketching a large, slightly curved bean shape on the left side of your paper for the dinosaur’s body. -
Head and Tail:
Define the head at the top of the bean shape, giving it a squared-off snout with an open mouth, and extend the bottom into a thick, tapered tail. -
Limbs:
Sketch the chunky legs with rounded feet and add the classic tiny T-Rex arms reaching forward. -
Space Gear:
Draw a thick collar around the neck and a rectangular backpack shape on the dinosaur’s back. -
Suit Details:
Connect the backpack to the front with straps across the chest and add a ribbed belly pad running down the front. -
The Rocket:
To the right, sketch a sleek rocket ship floating vertically, slightly tilted, with three fins at the base. -
Background Elements:
Outline billowing cloud shapes at the bottom right corner and place a ringed planet in the upper left empty space.
Uneven Coverage?
If your gouache or marker looks streaky, let the first layer dry completely, then apply a second coat in the opposite direction for a solid, matte finish.
Step 2: Blocking in Color
-
Dino Skin:
Using your teal or slate blue gouache, fill in the dinosaur’s head, arms, legs, and tail, keeping the paint opaque and flat. -
Orange Accents:
Paint the backpack, neck collar, belly pad, cuff details, and the rocket’s nose cone engaging and bright orange. -
Deep Space Contrast:
Fill the cloud shapes at the bottom with a dark navy blue to ground the composition. -
Rocket Body:
Paint the main fuselage of the rocket with a light grey or off-white, ensuring crisp edges against the white paper background. -
Planet Colors:
Color the planet teal to match the dino, and outline its ring in orange for consistency.
Personal Mission
Customize the mission! Draw a mission patch on the dinosaur’s shoulder or write a funny name like “Rex-1” on the side of the rocket fuselage.
Step 3: Lines and Textures
-
Defining Outlines:
Once the paint is fully dry, use a dark fine liner or a very thin brush with navy paint to outline all major forms. -
Ribbed Texture:
Draw horizontal lines across the orange neck collar and belly pad to create that spacesuit texture. -
Facial Features:
Ink a large round eye with a dark pupil and add small teeth inside the open mouth. -
Rocket Details:
Add two circle windows on the rocket and define the fins with your liner pen. -
Blast Off:
Paint or draw a jagged orange flame shooting out from the bottom of the rocket engine. -
Retro Stippling:
I like to use a white gel pen or a dry brush to speckle tiny dots over the teal skin and navy clouds to mimic a vintage print texture. -
Starry Sky:
Draw various small stars, some as five-point shapes and some as simple dots, scattered around the white background. -
Final Polish:
Add tiny scale details on the dinosaur’s knees and faint motion lines near the tail to suggest movement.
Frame your masterpiece in a simple white frame to let the colors pop and enjoy your prehistoric journey to the stars.
Cosmic Ice Cream Cone
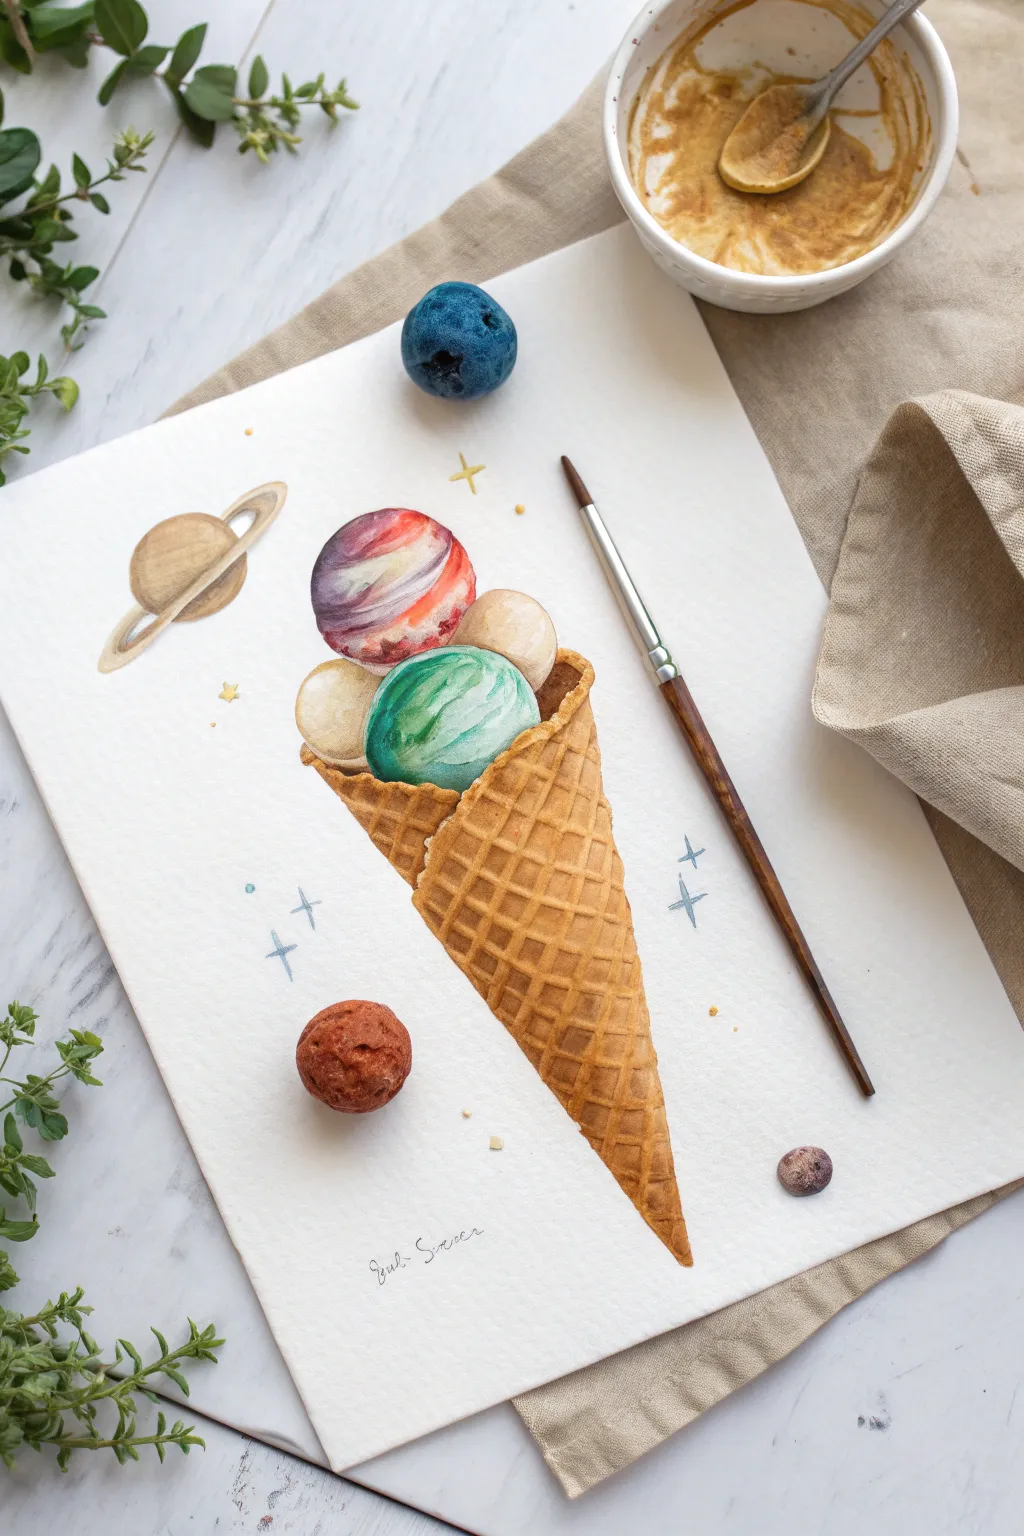
Blend the sweetness of summer with the mysteries of the universe in this whimsical watercolor illustration. You will create a realistic waffle cone topped with scoops of ice cream painted to look like swirling gaseous planets.
Step-by-Step
Materials
- Cold press watercolor paper (300gsm)
- HB pencil and kneaded eraser
- Watercolor paints (Yellow Ochre, Burnt Sienna, Alizarin Crimson, Teal/Turquoise, Indigo)
- Round brushes (size 2 for details, size 6 for washes)
- White gel pen or white gouache
- Clean water and paper towels
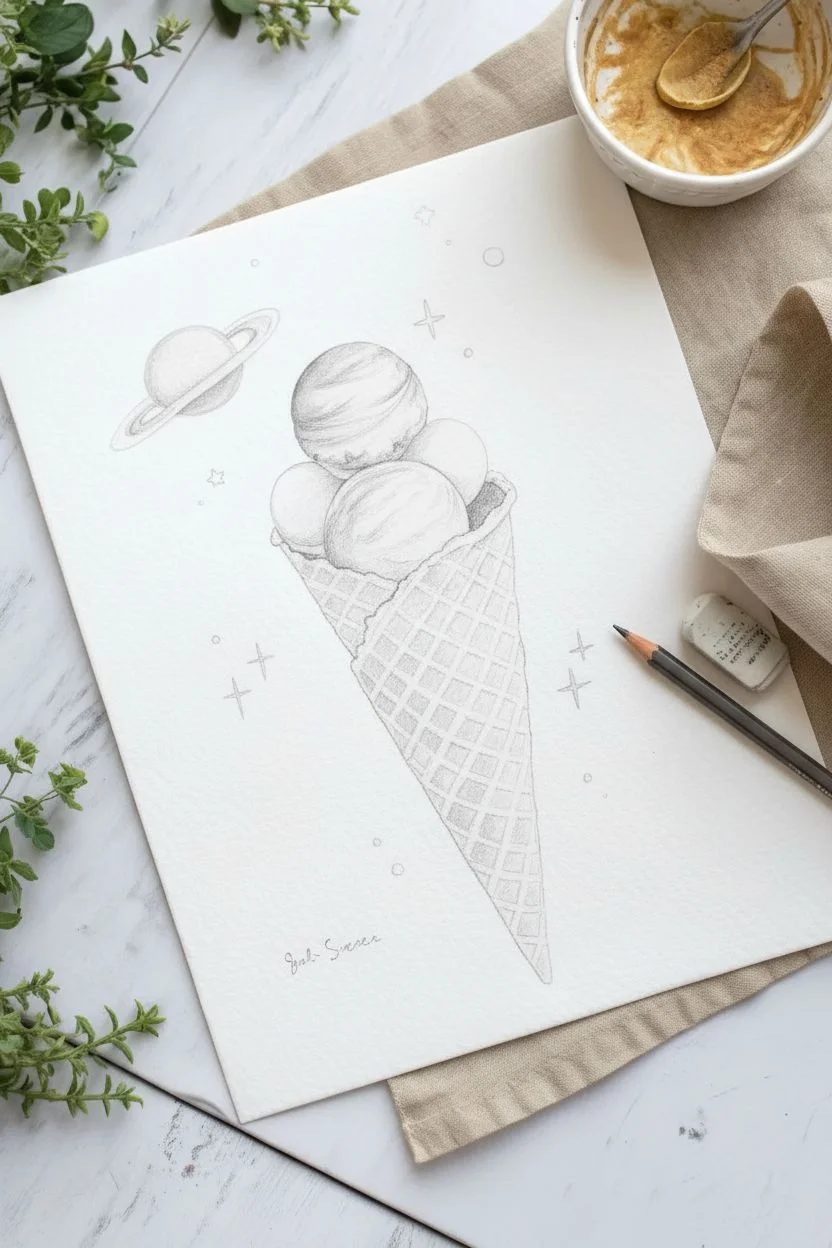
Step 1: Sketching the Shape
-
Outline the cone:
Start by drawing a long, narrow inverted triangle for the cone body. Curve the top edge slightly downward to show the cone’s opening. -
Add the scoops:
Sketch three or four overlapping circles stacked on top of the cone. Make them slightly irregular rather than perfect circles to mimic the texture of scooped ice cream. -
Draw the grid:
Lightly sketch diagonal lines crossing each other on the cone to create the classic waffle pattern. -
Add space elements:
To the left of the scoops, sketch a small planet with a ring (like Saturn). Scattered around the cone, draw tiny four-point stars, diamonds, and small circles.
Bleeding Colors?
To prevent the different ice cream scoops from bleeding into one huge puddle, ensure one scoop is bone dry before painting the one immediately touching it.
Step 2: Painting the Waffle Cone
-
Base wash:
Mix a watery Yellow Ochre with a touch of light brown. Apply this wash over the entire cone shape. -
Building form:
While the base is still damp, drop slightly darker brown pigment along the right edge and the very bottom tip to create a rounded 3D effect. -
Painting the grid:
Once the base is completely dry, mix a concentrated Burnt Sienna. Use your size 2 brush to carefully paint the diagonal grid lines. -
Deepening shadows:
I prefer to go back over the intersections of the grid lines with a slightly darker brown to emphasize the waffle texture. -
Upper rim shadow:
Paint a thin, dark shadow line right where the ice cream scoops meet the cone to ground them.
Level Up: Gold Dust
Mix a small amount of metallic gold watercolor or acrylic ink and use it for the planet rings and the center of the stars for a magical finish.
Step 3: Creating Planetary Scoops
-
Neptune scoop:
For the bottom-center scoop, wet the circle with clean water first. Drop in Teal and Emerald Green, letting them swirl together on the paper to create an atmospheric look. -
Jupiter scoop:
For the top scoop, paint stripes using curved strokes of Alizarin Crimson, Purple, and a touch of Burnt Sienna. Soften the edges with a damp brush so the bands blend naturally. -
Neutral moons:
Paint the smaller side scoops with a very dilute wash of beige or pale gray. Keep these simpler to let the colorful planets stand out. -
Shading the spheres:
Add a crescent of darker pigment to the bottom-right side of every scoop to ensure they look spherical and lit from the same direction.
Step 4: Celestial Details
-
Painting Saturn:
Paint the floating planet with a sandy beige. Use a fine brush to draw the ring in a darker brown, leaving a tiny gap where the ring passes ‘behind’ the planet. -
Starry background:
Use diluted blue or gray paint for the distant stars. Paint small crosses and simple dots scattered randomly around the subject. -
Highlights:
Using a white gel pen or thick gouache, add small specular highlights to the top-left of each ice cream scoop to make them look wet and shiny. -
Final touches:
Add a few tiny white dots to the stars for extra sparkle and clean up any pencil lines with your eraser.
Now you have a delicious piece of galaxy art ready to be framed or gifted!
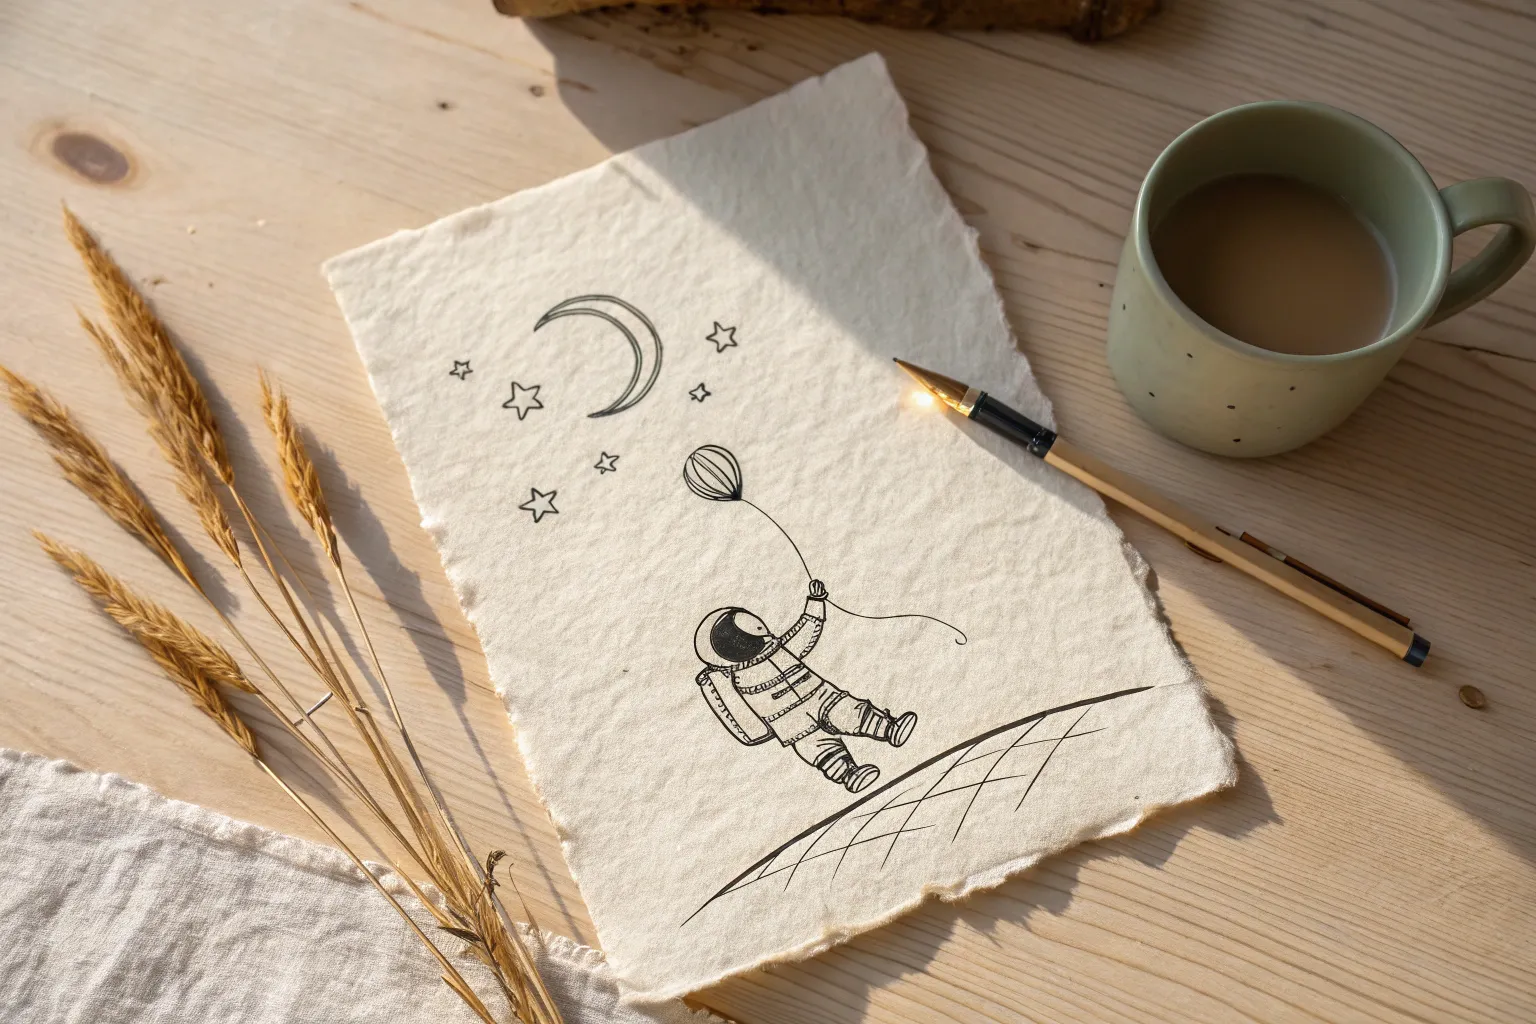
Astronaut Holding Balloon Planets
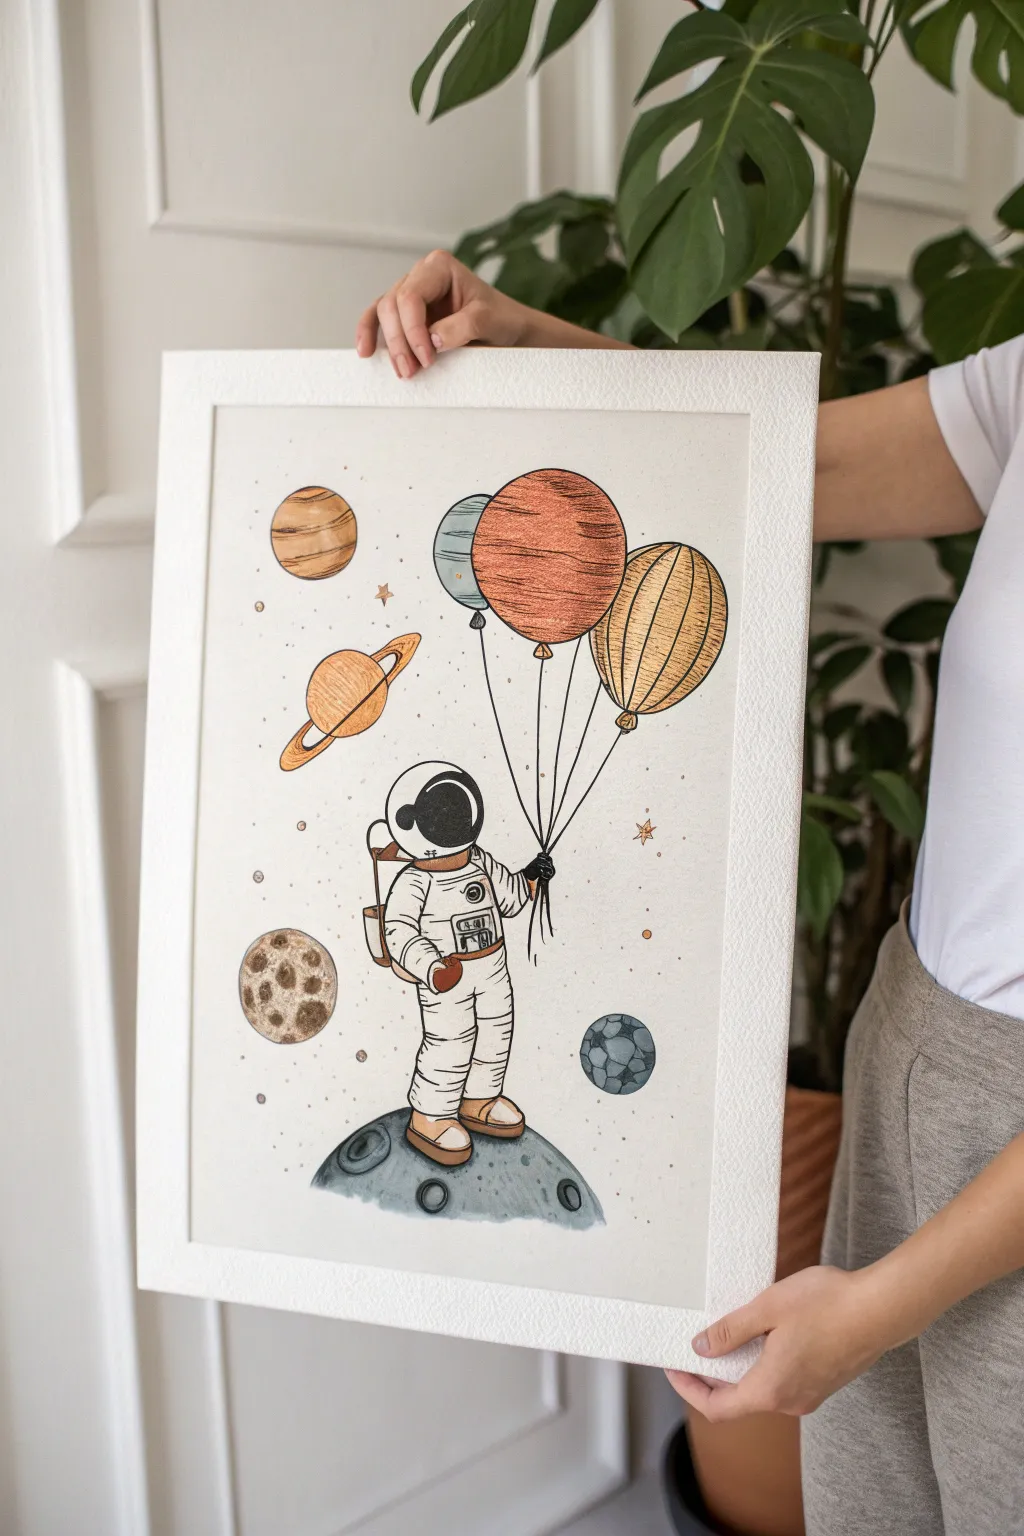

Capture the magic of space exploration with this charming illustration of an astronaut holding planetary balloons. Using fine liners and textured shading, you will create a piece that feels both vintage and playfully surreal.
Detailed Instructions
Materials
- Heavyweight textured drawing paper (A3 or A4)
- HB pencil and quality eraser
- Black waterproof fineliners (0.1mm and 0.5mm)
- Soft-core colored pencils (muted tones)
- Ruler (optional)
Step 1: Sketching the Foundation
-
Set the ground:
Start by lightly drawing a large, gentle arc near the bottom of your page to represent the moon’s surface where the astronaut stands. -
Block in the astronaut:
Sketch a clear oval for the helmet centered on the arc, then add the blocky shape of the spacesuit body, legs, and boots. Keep the pose simple with feet planted wide. -
Position the balloons:
Draw three large overlapping circles high above the astronaut: a large central one, a slightly smaller one to the right, and a small one tucked behind on the left. -
Connect the strings:
Using a ruler or a steady hand, draw three straight lines converging from the bottom of each balloon down to the astronaut’s raised hand. -
Populate the galaxy:
Sketch various celestial bodies in the background, such as a ringed planet on the left and smaller moons or asteroids scattered around the empty space.
Step 2: Inking the Outlines
-
Outline the main shapes:
Use the 0.5mm pen to trace the main contours of the astronaut, the ground, and the outer edges of the balloons. -
Add suit details:
Switch to the 0.1mm pen to draw the intricate details, such as the life-support chest pack, the ribbed texture on the joints, and fabric folds in the suit. -
Define the balloons:
Ink the patterns on the balloons carefully; give vertical stripes to the right balloon and horizontal storm bands to the central planet-balloon. -
Detail the environment:
Draw circular craters on the ground surface and background planets, adding inner rim lines to suggest depth. -
Clean up:
I prefer to wait at least ten minutes for the ink to fully set before gently erasing all underlying pencil sketches to avoid smudging.
Grainy Texture Tip
To get that lovely vintage look seen in the photo, color using the side of your pencil lead rather than the tip. This catches the ‘tooth’ of the paper and creates natural white speckles.
Step 3: Adding Color and Texture
-
Darken the visor:
Fill the helmet visor with solid black ink or a very dark charcoal pencil, leaving a stark white crescent shape for a reflection. -
Shade the suit:
Use a light grey pencil to add shadows to the underside of the arms, legs, and folds of the white suit, keeping it subtle. -
Color the central balloon:
Use a rust or terra-cotta colored pencil for the large middle balloon, using horizontal strokes to mimic the texture of Jupiter. -
Fill the side balloons:
Color the right balloon with a mustard yellow, emphasizing the vertical segments, and use a cool slate blue for the smaller left balloon. -
Texture the ground:
Color the moon surface with cool greys, pressing harder inside the craters to create deep shadows and contrast. -
Complete the background:
Fill in the floating background planets with ochre, brown, and grey tones, ensuring you let the paper’s grain show through for texture. -
Final stardust:
Scatter tiny dots and small four-point stars throughout the empty white space using a yellow or light brown pencil to tie the composition together.
Uneven Circles?
If your hand-drawn planets aren’t perfectly round, don’t worry! Trace the rim of a rounded glass or a roll of masking tape to get crisp, perfect circles for your balloons.
Now you have a dreamy piece of space art ready to frame


Have a question or want to share your own experience? I'd love to hear from you in the comments below!