Painting pumpkins as a couple set is one of my favorite no-carve traditions because the designs get to “talk” to each other. Grab two pumpkins and let them match, flirt, or complete a scene—these ideas are made to look best side-by-side.
Bride and Groom Tux-and-Veil Pumpkins
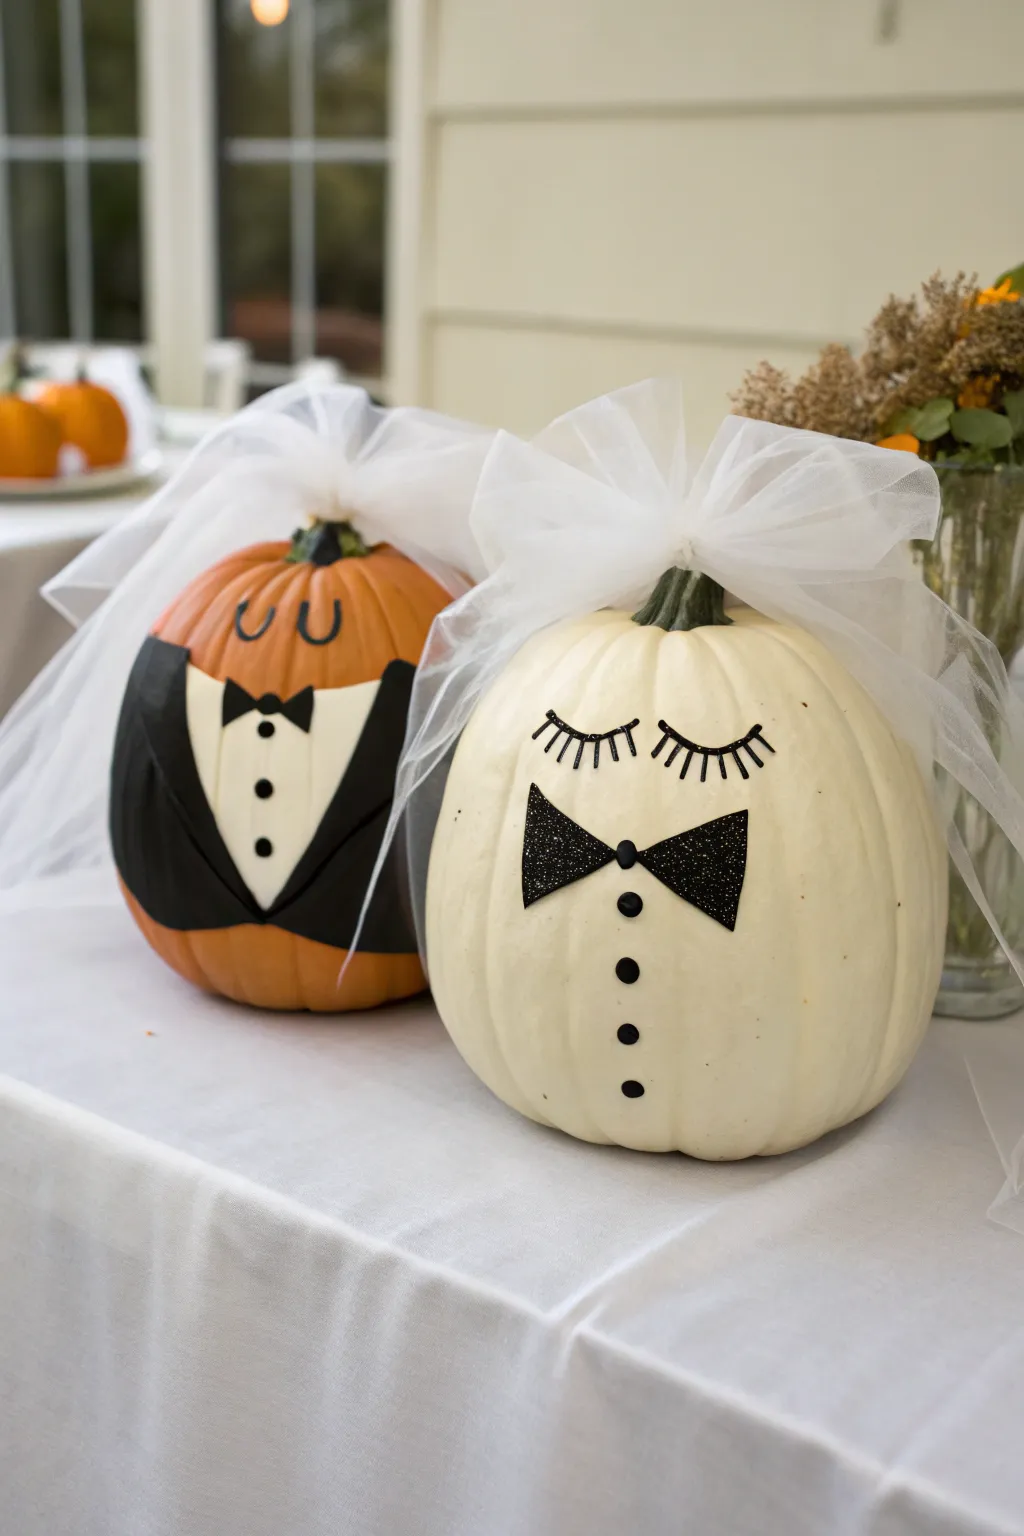
Celebrate love and the harvest season simultaneously with this adorable pumpkin pairing. This project transforms a classic orange gourd into a dapper groom and a pristine white pumpkin into a blushing (or winking) partner, both topped with whimsical tulle veils.
Step-by-Step Tutorial
Materials
- 1 Medium round orange pumpkin
- 1 Medium round white pumpkin (Lumina or similar variety)
- Black acrylic craft paint
- White acrylic craft paint
- Black glitter foam sheet or black cardstock
- Medium flat paintbrush
- Small round detail paintbrush
- Pencil
- Scissors
- Hot glue gun and glue sticks
- 1 Yard of white tulle fabric
- Black permanent marker (fine tip)
- Small black buttons or black adhesive rhinestones
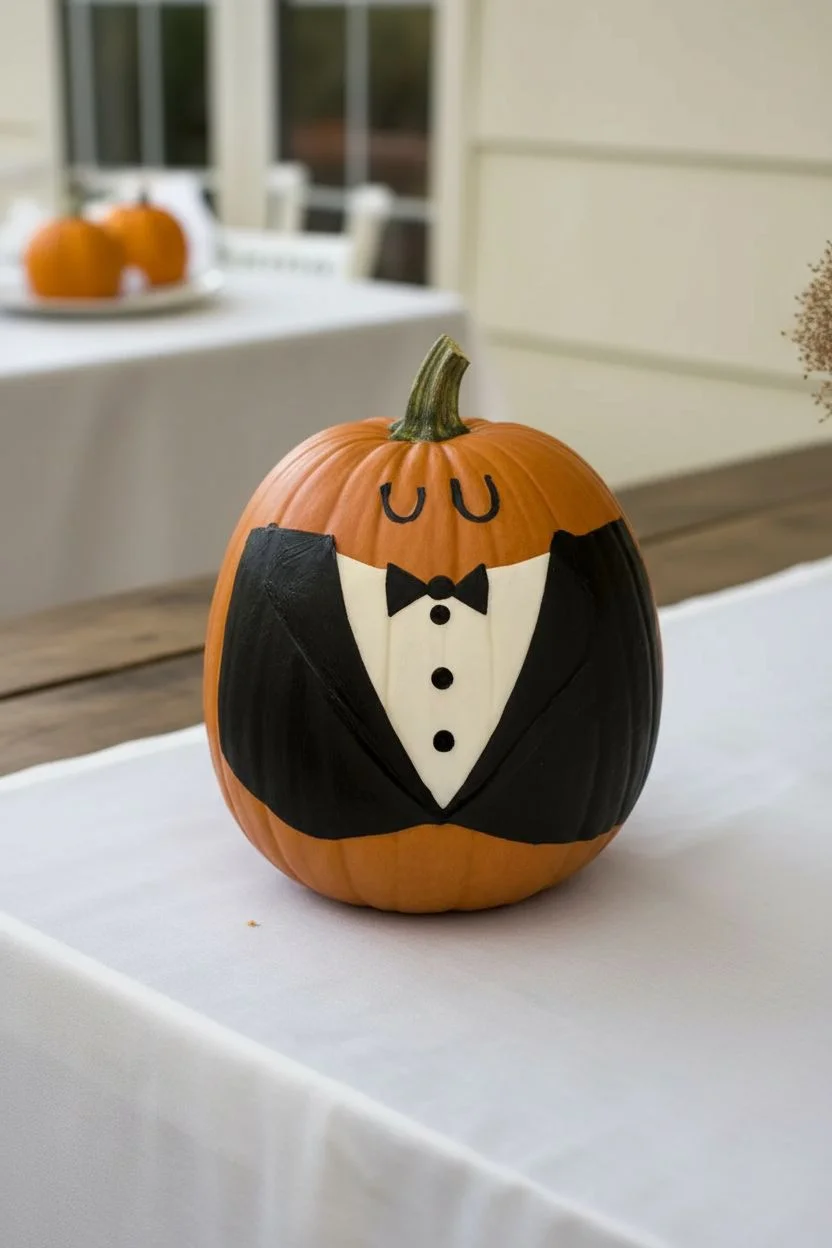
Step 1: Painting the Groom
-
Clean the Surface:
Begin by wiping down both pumpkins with a damp cloth to remove any dirt or field debris. Dry them completely so the paint adheres properly. -
Outline the Tuxedo:
On the orange pumpkin, use your pencil to lightly sketch the “V” shape of the tuxedo opening. Draw a secondary line outside of this V to mark the lapels, curving down towards the bottom of the pumpkin. -
Paint the Jacket:
Using the medium flat brush and black acrylic paint, fill in the area representing the tuxedo jacket. Be careful to stay outside the lines of your central V shape. -
Add a Second Coat:
Once the first layer of black paint is dry to the touch, apply a second coat to ensure solid, opaque coverage without streaks. -
Paint the Shirt:
Switch to white paint and fill in the central V shape to create the dress shirt. Depending on the orange vibrancy, you might need two or three thin coats. -
Draw the Face:
Using a small round brush and black paint, cultivate a happy expression by painting two simple “U” shapes near the top of the pumpkin for closed, smiling eyes. -
Add Buttons:
Dip the back end of a paintbrush into black paint and dot three buttons down the center of the white shirt area. -
Create the Bow Tie:
Paint a small black bow tie just below the tuxedo neckline where the white shirt meets the orange skin at the top.
Clean Lines Hack
Use thin painter’s tape or washi tape to mask off the tuxedo ‘V’ shape before painting. It guarantees a crisp edge between the black jacket and white shirt.
Step 2: Styling the Partner
-
Prep the White Pumpkin:
Since the white pumpkin is already the perfect base color, you can skip the base painting. If it has blemishes, spot correct them with a dab of white paint. -
Cut the Glitter Bow:
Cut a bow tie shape out of your black glitter foam or cardstock. Make it slightly larger than the painted one on the groom for a playful touch. -
Attach the Bow:
Using a small amount of hot glue, secure the glitter bow tie to the upper middle section of the white pumpkin. -
Add the Buttons:
Glue three small black buttons or adhesive dots in a vertical line below the glitter bow tie. -
Paint the Lashes:
With your fine detail brush and black paint (or a permanent marker for easier control), draw two curved lines for eyes above the bow tie. -
Detail the Lashes:
Add several short, vertical strokes extending upward from the eye curves to create long, glamorous eyelashes.
Step 3: The Finishing Veil
-
Cut the Tulle:
Cut your yard of white tulle into two equal strips. The length depends on how long you want the ‘veil’ to drape down the sides. -
Gather the Fabric:
Take one strip of tulle and scrunch it together in the center to create a fluffy, gathered bundle. -
Tie it Off:
Use a small scrap of white string or a clear rubber band to tie the center of the gathered tulle so it holds its shape. -
Attach to Stems:
Apply a dab of hot glue to the top of the pumpkin stem (or just behind it) and press the gathered center of the tulle firmly in place. Repeat for both pumpkins. -
Fluff and Arrange:
Once the glue is cooled, gently pull apart the layers of tulle to fluff them up, creating volume and a soft, bridal look.
Paint Not Sticking?
Provide a ‘tooth’ for the paint by spraying the pumpkins with a clear matte sealant or very lightly sanding the surface before you begin drawing.
Place your charming couple together on a welcome table to greet your guests with style


“Trick” and “Treat” Word Pair Pumpkins
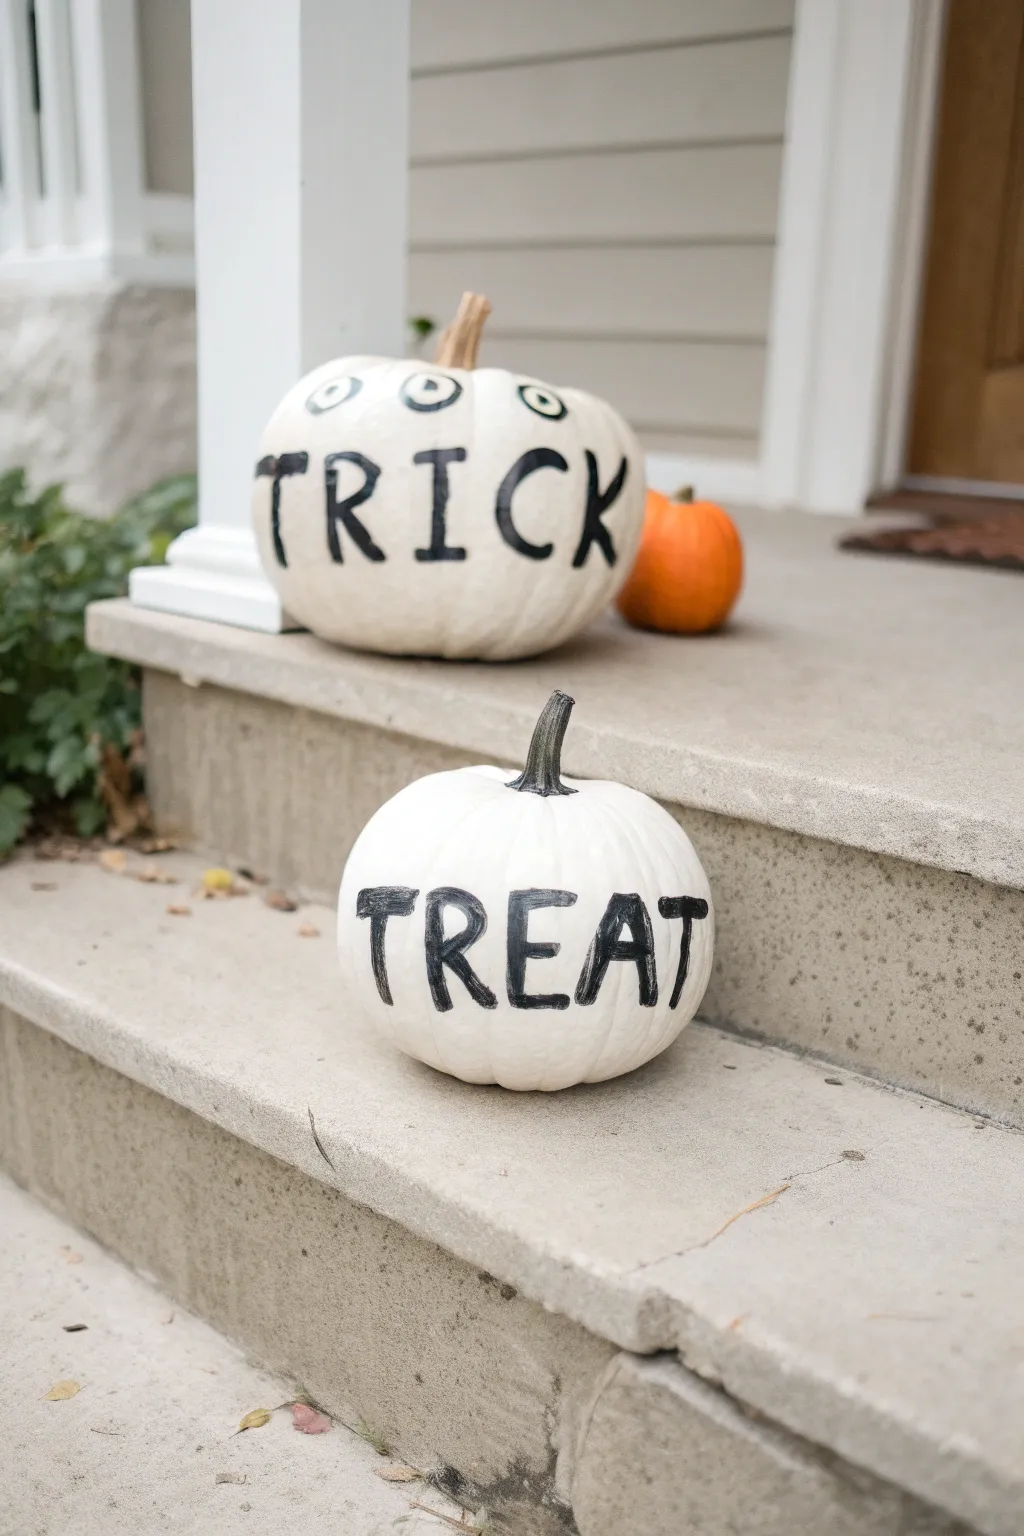
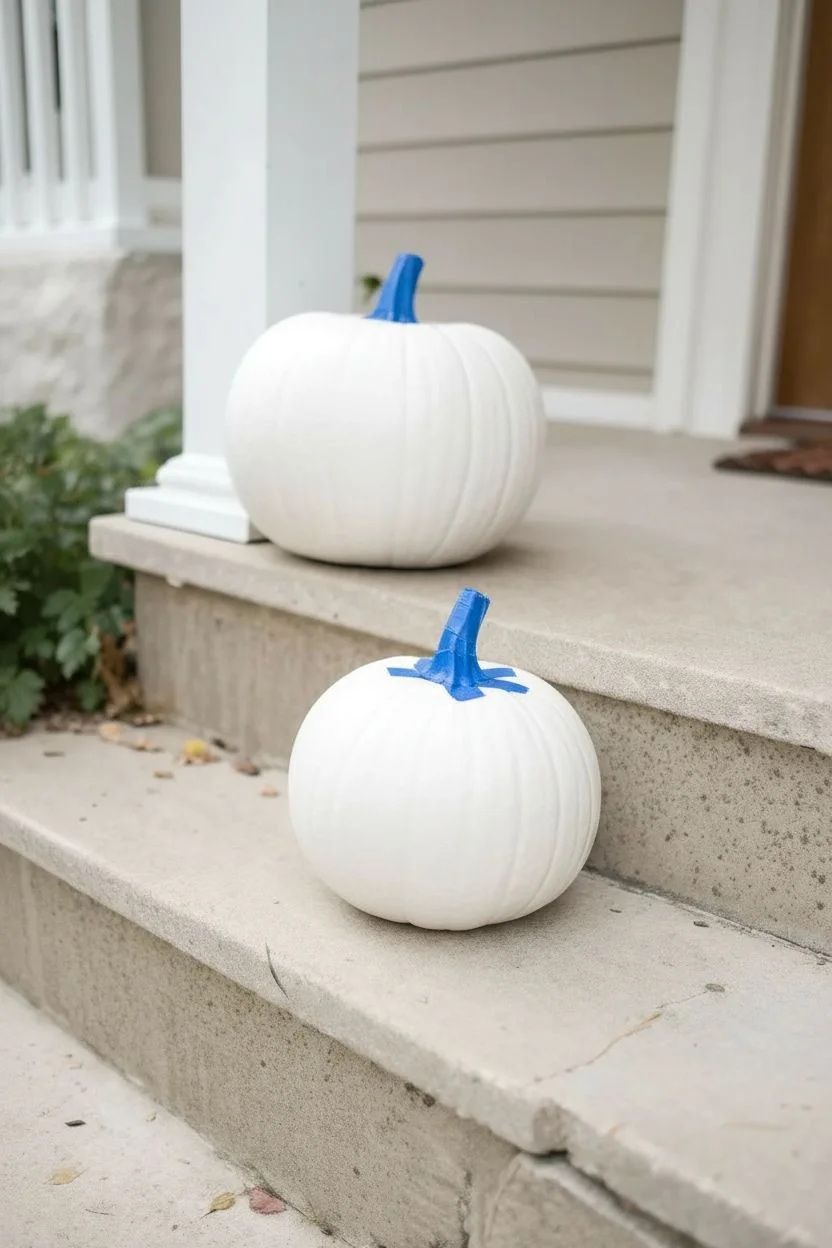
Welcome guests to your doorstep with this playful pair of pumpkins that spells out Halloween’s most famous phrase. Using bright white paint as a canvas, bold hand-lettered text creates a modern, high-contrast look that stands out perfectly on concrete steps.
How-To Guide
Materials
- One medium/large round pumpkin
- One smaller round pumpkin
- White acrylic craft paint or chalk paint
- Large foam brush or wide flat paintbrush
- Black acrylic craft paint
- Medium round paintbrush (size 6-8)
- Small liner paintbrush (size 0-2)
- Pencil
- Paper towels or rag
- Clear matte sealer spray (optional)
Step 1: Base Coat Preparation
-
Clean the pumpkins:
Begin by thoroughly wiping down both pumpkins with a damp cloth to remove any dirt or field debris. Dry them completely with a paper towel. -
Remove stems (optional taping):
If you want to keep the stems natural like in the photo, wrap painter’s tape around the base of the stems to protect them from stray brushstrokes. -
Apply first white coat:
Using a large foam brush or wide flat brush, apply a generous layer of white acrylic paint to the entire surface of the larger pumpkin. -
Paint the smaller pumpkin:
Repeat the process for the smaller pumpkin, ensuring you get paint into the crevices and grooves of the pumpkin skin. -
Allow to dry:
Let the first coat dry completely. This usually takes about 30-45 minutes depending on humidity. I like to set them in a sunny spot to speed this up. -
Apply second coat:
Apply a second coat of white paint to both pumpkins to ensure solid, opaque coverage where no orange shows through. -
Touch up gaps:
Inspect the pumpkins for any thin spots or streaks. Dab extra paint into deep grooves if needed and let everything dry fully before moving on.
Pro Tip: Chalk Paint
Use chalk finish paint for the white base instead of standard acrylic. It adheres better to waxy pumpkin skin and usually requires fewer coats for full coverage.
Step 2: Drafting the Design
-
Plan the spacing:
Look at the larger pumpkin. Visualize the word ‘TRICK’ centered across the front. The word should span the widest part of the pumpkin. -
Sketch ‘TRICK’:
Lightly sketch the letters ‘T-R-I-C-K’ onto the larger pumpkin using a pencil. Keep the font simple and capitalized. -
Add the eye detail:
Above the word ‘TRICK’, sketch three small circles or eye shapes. These whimsical accents add a bit of character to the larger pumpkin. -
Sketch ‘TREAT’:
On the smaller pumpkin, lightly pencil in the word ‘TREAT’. Ensure the letters are slightly smaller to fit the scale of this pumpkin.
Oops! Wobbly Lines?
If you mess up a letter, wait for the black paint to dry completely. Then, use a small brush to paint over the mistake with white, let it dry, and try again.
Step 3: Painting the Typography
-
Load the black paint:
Squeeze a small amount of black acrylic paint onto a palette or paper plate. Load your medium round paintbrush. -
Paint the main strokes:
Carefully trace over your pencil lines for ‘TRICK’. Use firm, deliberate strokes to create the thick parts of the letters. -
Refine edges:
Switch to the small liner brush to clean up the edges of the letters or to sharpen the corners of the ‘T’ and ‘K’. -
Paint the eye accents:
Using the medium brush, paint the outlines of the three eye shapes above ‘TRICK’. Add a small black dot in the center of each circle for the pupil. -
Letter the second pumpkin:
Move to the smaller pumpkin and paint the word ‘TREAT’. Focus on keeping the letter thickness consistent with the first pumpkin for a cohesive look. -
Double-check opacity:
Some black paints can be translucent. If the white shows through the black letters, apply a second layer of black paint once the first is dry to the touch. -
Clean off pencil marks:
Once the black paint is bone dry, gently erase any visible pencil marks that weren’t covered by paint.
Step 4: Finishing Touches
-
Seal the artwork:
If these pumpkins will be sitting outside exposed to elements, lightly mist them with a clear matte sealer spray. -
Final arrangement:
Remove any painter’s tape from the stems. Arrange the pumpkins on your steps, placing the larger ‘TRICK’ pumpkin on the top step and ‘TREAT’ below it.
Now step back and admire your hand-lettered display that is sure to charm every trick-or-treater.


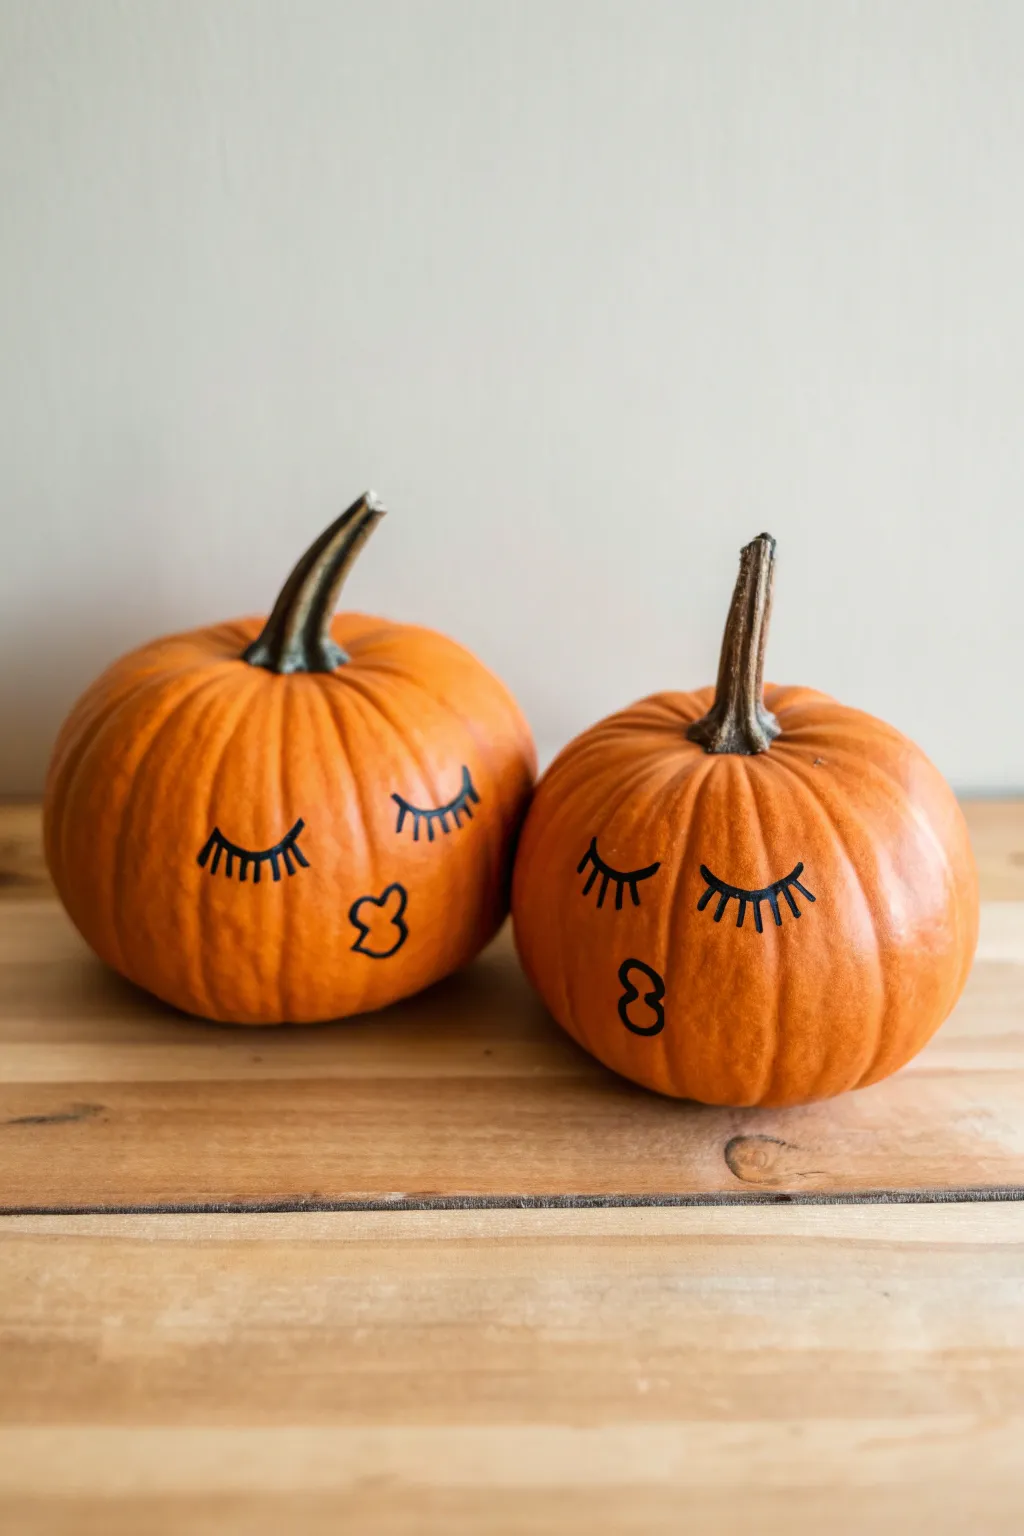
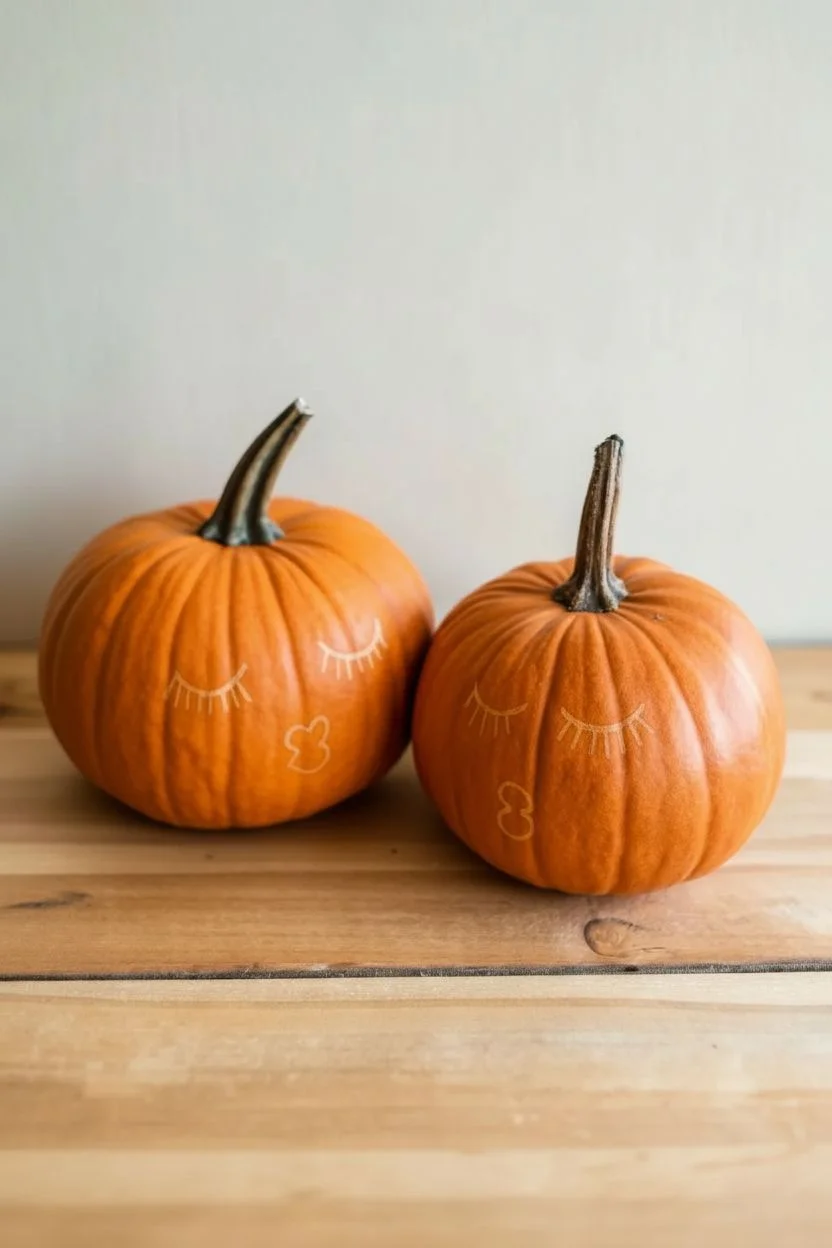
Wink and Kiss Face Pumpkins
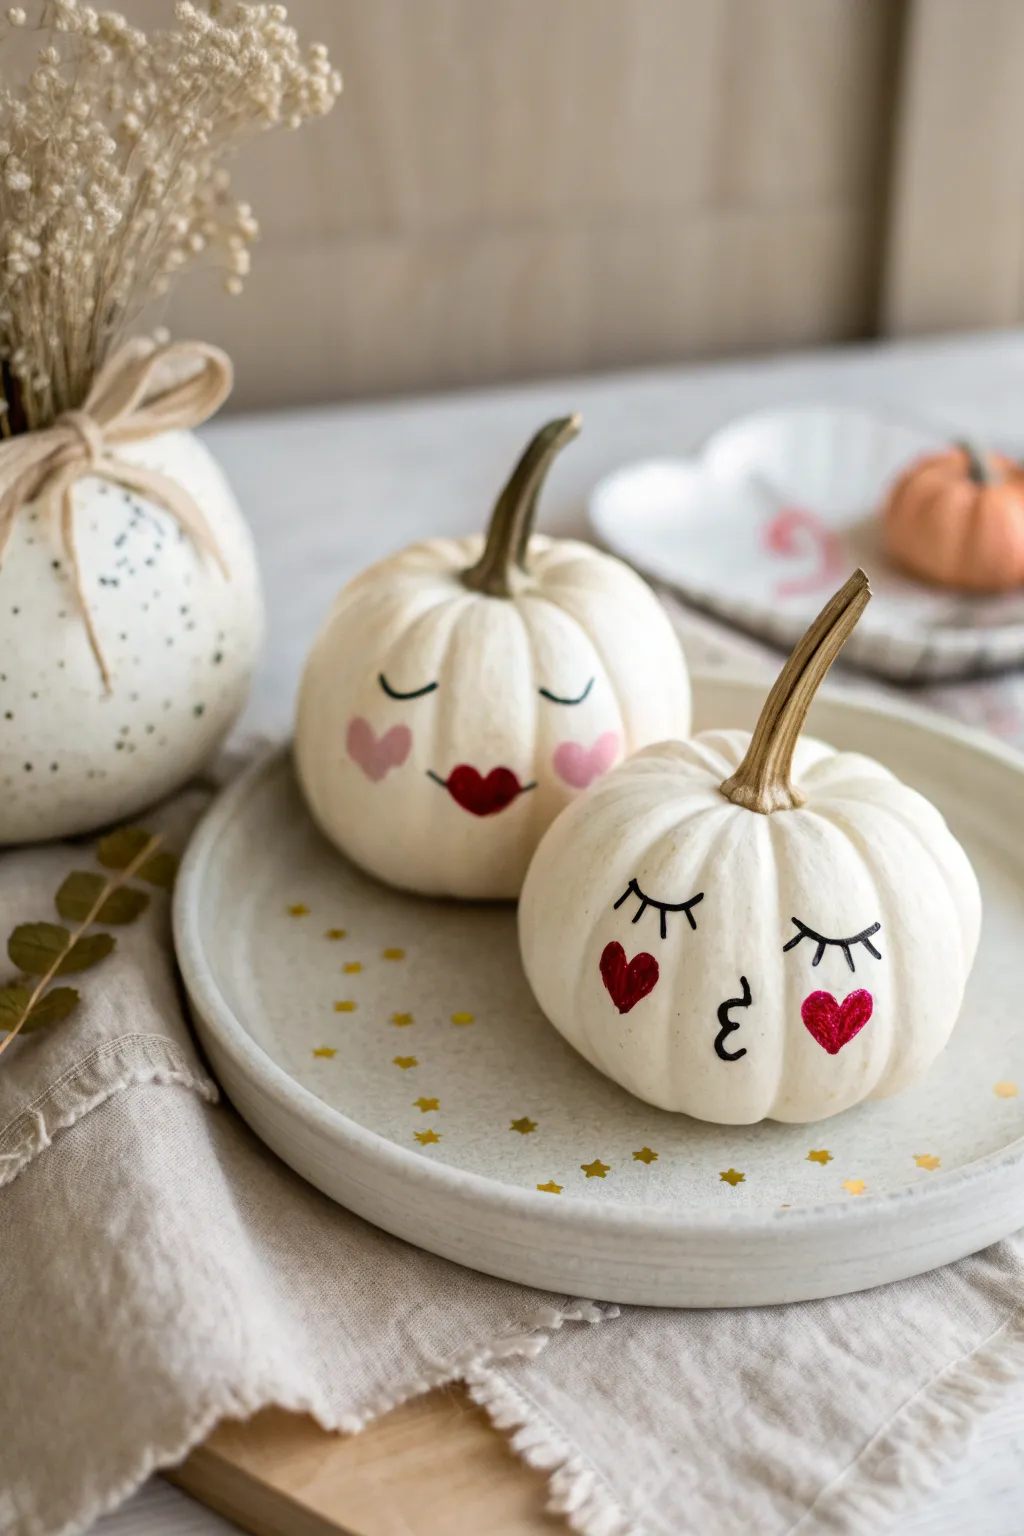
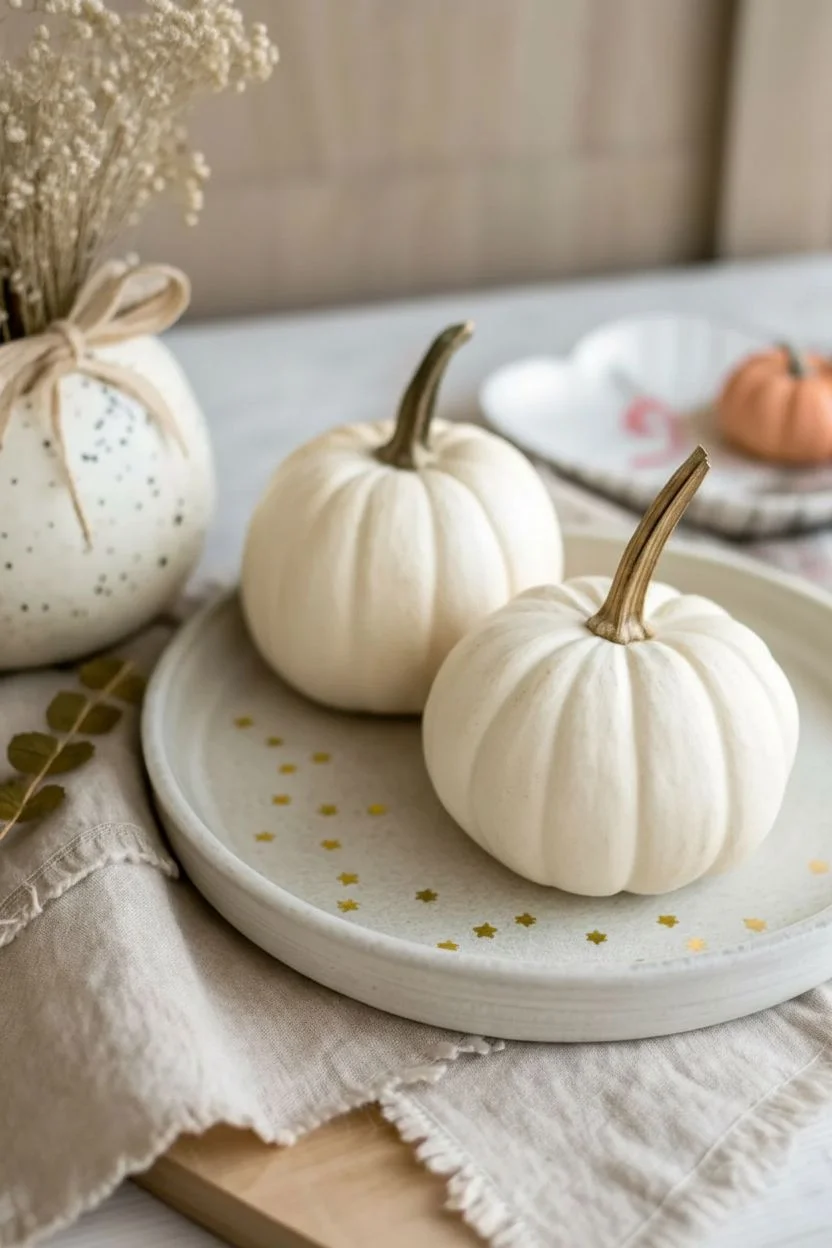
Transform ordinary mini pumpkins into adorable, expressive characters with just a few simple strokes and a loving touch. These sweet winking and kissing faces add a whimsical, romantic vibe to any fall display or Valentine’s centerpiece.
Detailed Instructions
Materials
- Two small white pumpkins (real or faux)
- Black fine-point permanent marker or acrylic paint pen
- Red acrylic paint
- Pink acrylic paint
- Small round paintbrush (size 0 or 1)
- Pencil with a good eraser
- Paper towel or rag
- Clear matte sealer spray (optional)
Step 1: Preparation
-
Clean the Pumpkins:
Before starting, wipe down your pumpkins with a slightly damp cloth to remove any dirt or oils. If using real pumpkins, make sure they are completely dry before drawing on them. -
Choose the Face Side:
Examine your pumpkins to find the smoothest side. Look for a section that is relatively flat and free of deep blemishes or bumps, as this will make detailed drawing much easier.
Fixing Smudges
Made a mistake with the marker? A cotton swab dipped in rubbing alcohol acts like a magic eraser on the smooth pumpkin skin.
Step 2: The Kissing Face Pumpkin
-
Draft the Kissy Lips:
Using a pencil, lightly sketch a small, backwards ‘3’ shape in the lower center of the pumpkin’s face area. This creates the puckered mouth look. -
Sketch the Eyes:
About an inch above the mouth, pencil in two curved lines for closed eyes. For this face, draw shorter, downward-curving arcs to suggest a peaceful, winking expression. -
Add the Lashes:
From the center of your eye arcs, draw three to four straight lines fanning outward to serve as eyelashes. Keep them delicate for a sweet look. -
Trace with Marker:
Once happy with your pencil lines, carefully trace over the eyes, lashes, and mouth using your black fine-point marker or paint pen. Use a steady hand and pull the pen towards you for smoother lines. -
Paint Heart Cheeks:
Dip your small round brush into red acrylic paint. Paint two small, solid hearts on either cheek area, just below the outer edges of the eyes. -
Let Cheeks Dry:
I like to let the red paint dry for about 10–15 minutes before moving the pumpkin, just to ensure I don’t accidentally smudge the hearts.
Step 3: The Sleeping Beauty Pumpkin
-
Draft the Eyes:
On the second pumpkin, sketch two wider, downward-curving arcs for sleeping eyes. Position them parallel to each other. -
Mark the Heart Mouth:
Instead of a line mouth, sketch a tiny heart shape right in the center, slightly lower than the eyes. This will be the lips. -
Outline the Cheeks:
Lightly pencil in heart outlines for the cheeks, similar to the first pumpkin, but perhaps position them slightly lower. -
Inking the Eyes:
Go over your pencil eye lines with the black marker. Keep these lines simple and clean, without adding extra lashes, for a distinct style from the first pumpkin. -
Color the Lips:
Using your small brush and red paint, fill in the small center heart to create ruby red lips. -
Paint Pink Cheeks:
Switch to pink acrylic paint for this pumpkin’s cheeks. Fill in the heart outlines you sketched earlier to give this pumpkin a softer blush. -
Clean Up:
Once the paint is fully dry, gently erase any visible pencil marks that weren’t covered by marker or paint.
Glitter Glam
While the cheek paint is still wet, sprinkle a tiny pinch of fine red or pink glitter over the hearts for a sparkling finish.
Step 4: Finishing Touches
-
Seal (Optional):
If you want your pumpkins to last longer, especially outdoors, give them a light misting of clear matte sealer spray. -
Display Together:
Arrange your duo on a plate or tray, turning them slightly inward so they appear to be interacting with each other.
Now enjoy your charming pair of pumpkin personalities brightening up your table decor


His-and-Hers Pattern Pair: Plaid and Polka Dots
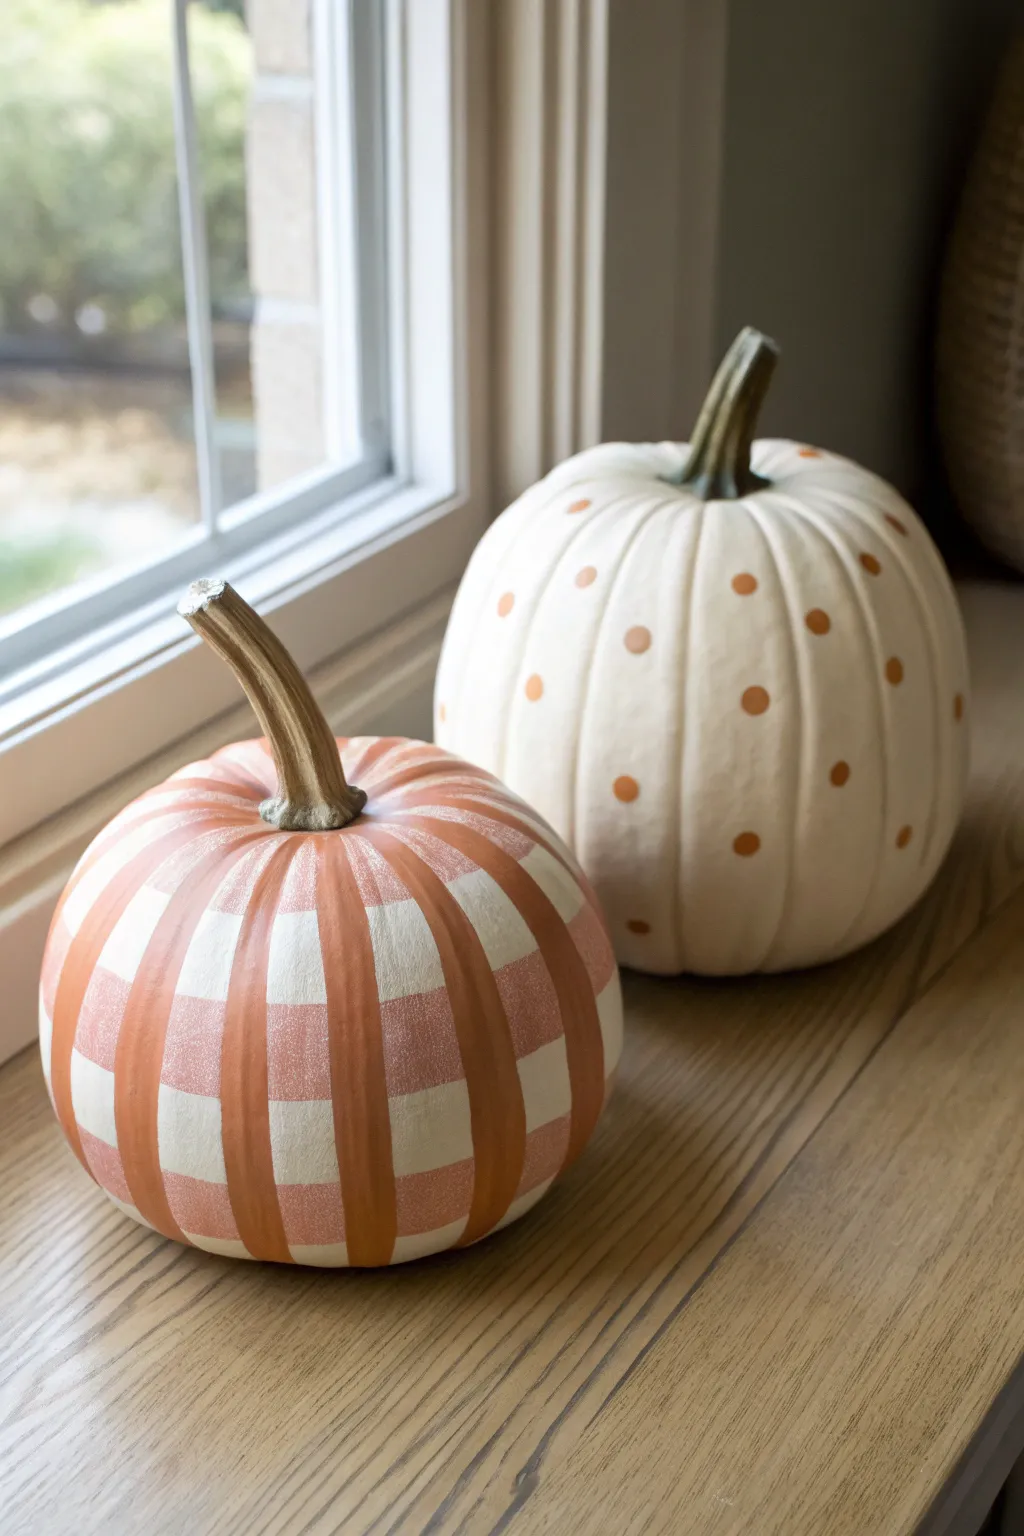
Embrace a cozy autumn aesthetic with this charming duo of painted pumpkins that perfectly balances complexity and simplicity. The set features one intricate faux-fabric plaid design in warm terra cotta and cream, paired with a minimalist cream pumpkin adorned with matching terra cotta dots.
Step-by-Step Guide
Materials
- Two faux or real pumpkins (medium size)
- White or cream matte chalk paint (base coat)
- Terra cotta or warm orange acrylic paint
- Light peach or watered-down orange acrylic paint (for the plaid intersection)
- Artist’s painter’s tape (various widths)
- Small round sponge pouncer (approx. 1/2 inch)
- Flat shader brush (medium width)
- Small detail brush
- Clean rag or paper towel
- Matte clear sealer spray (optional)
Step 1: Prepping the Canvas
-
Clean surface:
Begin by wiping down your pumpkins with a damp cloth to remove any dust or oils. If using real pumpkins, make sure they are completely dry before painting. -
Base coat application:
Apply a solid coat of cream or off-white chalk paint to both pumpkins. Chalk paint works best here because it adheres well to slick pumpkin skins and creates that lovely matte finish shown in the photo. -
Second layer:
Let the first coat dry completely, then add a second layer to ensure no original pumpkin color peeks through. I like to let this dry overnight to ensure a rock-hard foundation for the tape.
Tape Trick
To prevent paint bleeding under your tape on the plaid pumpkin, press the tape edges down firmly with a credit card or spoon edge before you start painting.
Step 2: The Plaid Pumpkin
-
Vertical taping:
Starting at the stem, apply vertical strips of painter’s tape down the pumpkin’s ribs. Follow the natural curves of the pumpkin, leaving equal-sized gaps between the tape strips. -
Painting vertical stripes:
Paint the exposed vertical sections with your terra cotta orange paint. Use a flat brush and consistent downward strokes for a clean look. -
Remove tape:
While the paint is slightly tacky but not wet, carefully peel off the vertical tape. Allow these stripes to dry fully before moving on. -
Horizontal taping:
Now, apply horizontal rings of tape around the pumpkin. This can be tricky on a round object, so you may need to pinch or dart the tape slightly to make it lay flat. -
Painting horizontal stripes:
Paint the exposed horizontal bands. Where the bands cross the white background, use the terra cotta color. -
Creating the check:
This is the crucial step for the plaid effect: Where the new horizontal stripe crosses an existing vertical orange stripe, use a darker shade of orange, or apply a second coat of the terra cotta to create a more opaque ‘intersection’ box. -
Adding texture:
To mimic the fabric look seen in the image, lightly dry-brush the painted sections with a tiny bit of white paint before removing the horizontal tape. This softens the stark lines. -
Final reveal:
Gently remove the horizontal tape strips. You should now have a grid pattern that resembles gingham fabric. -
Touch-ups:
Use a small detail brush to neaten up any edges where paint might have bled under the tape.
Uneven Dots?
If your sponge pouncer is slipping on the curved surface, try using the eraser end of a fresh pencil dipped in paint for smaller, more controllable dots.
Step 3: The Polka Dot Pumpkin
-
Planning the pattern:
Visualize a grid on your second cream pumpkin. You want the dots to be somewhat random but evenly spaced, avoiding perfectly straight lines. -
Loading the pouncer:
Dip your round sponge pouncer into the terra cotta paint. Dab it on a paper towel once to remove excess globs of paint. -
Stamping dots:
Press the pouncer straight down onto the pumpkin surface and lift straight up. Avoid twisting, as this can smear the circle. -
Working around the curve:
Rotate the pumpkin as you work. Place dots in the natural grooves and on the ridges. It looks best if some dots wrap slightly out of view. -
Hand-painting corrections:
If a stamped dot didn’t transfer perfectly because of the pumpkin’s curve, use your small detail brush to fill in the missing edge of the circle carefully. -
Stem detail:
For both pumpkins, inspect the stems. If they got any paint on them, wipe it off now or paint the stems a realistic brownish-green for contrast.
Step 4: Finishing Up
-
Sealing:
Once both pumpkins are fully dry, take them to a ventilated area and apply a light coat of matte clear sealer spray. -
Drying time:
Allow the sealer to cure according to the can’s instructions before placing them on display.
Place your finished duo near a window or on a mantle to enjoy the warm, handcrafted autumn vibe you have created
BRUSH GUIDE
The Right Brush for Every Stroke
From clean lines to bold texture — master brush choice, stroke control, and essential techniques.
Explore the Full Guide
Black Cat and Witch Hat Silhouette Couple
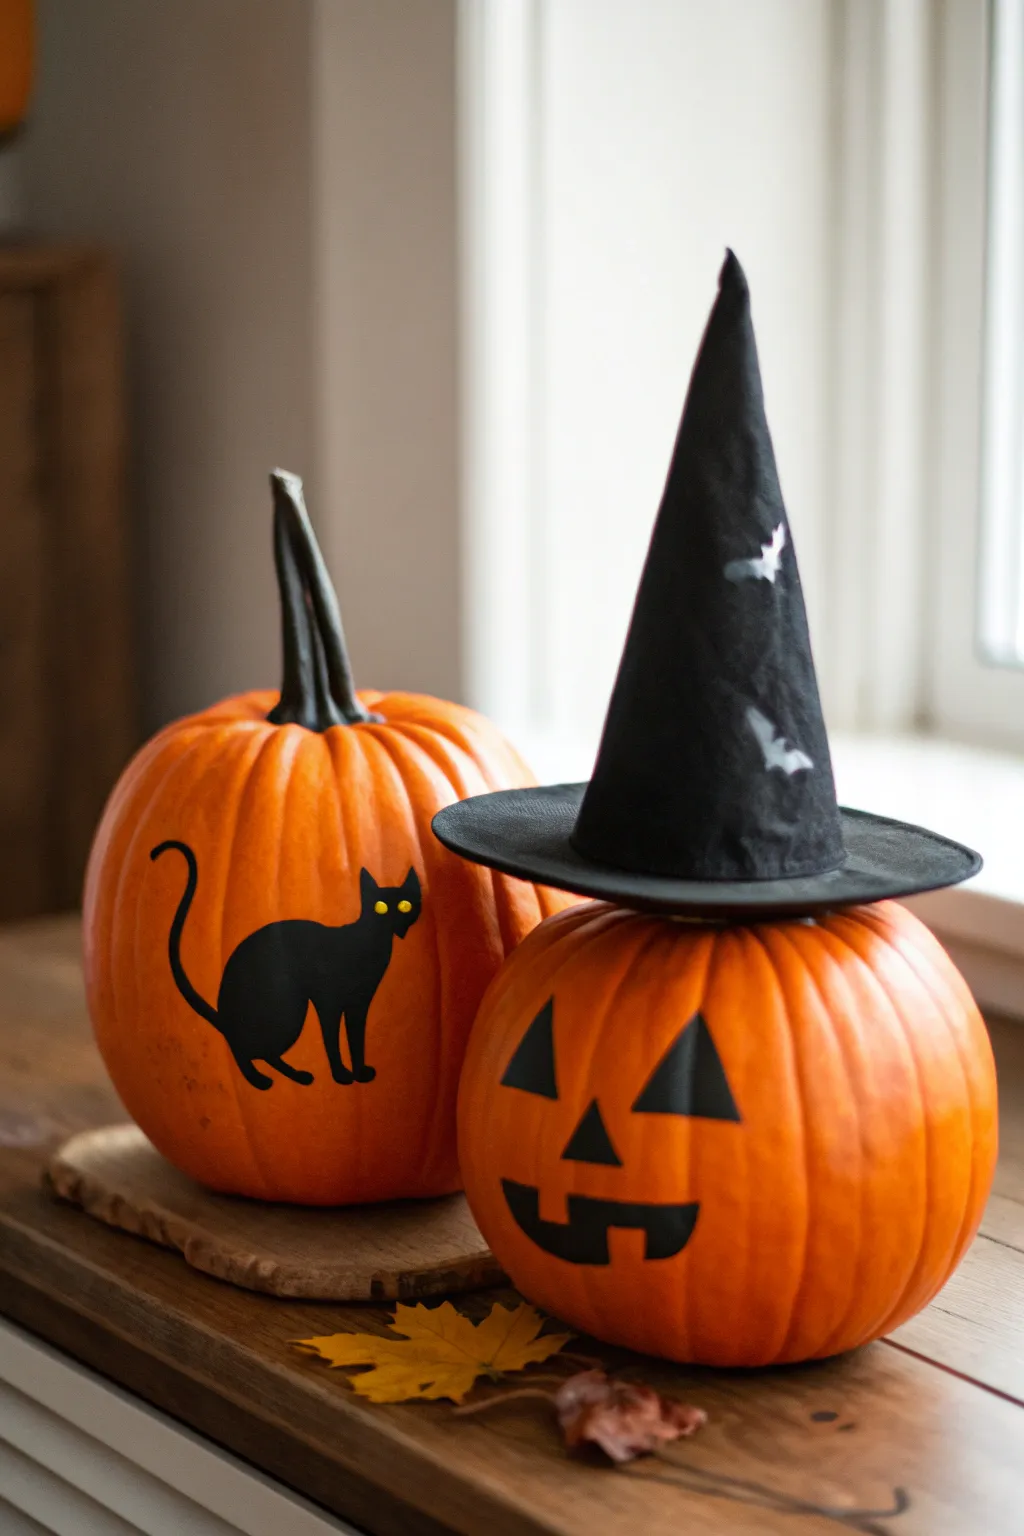
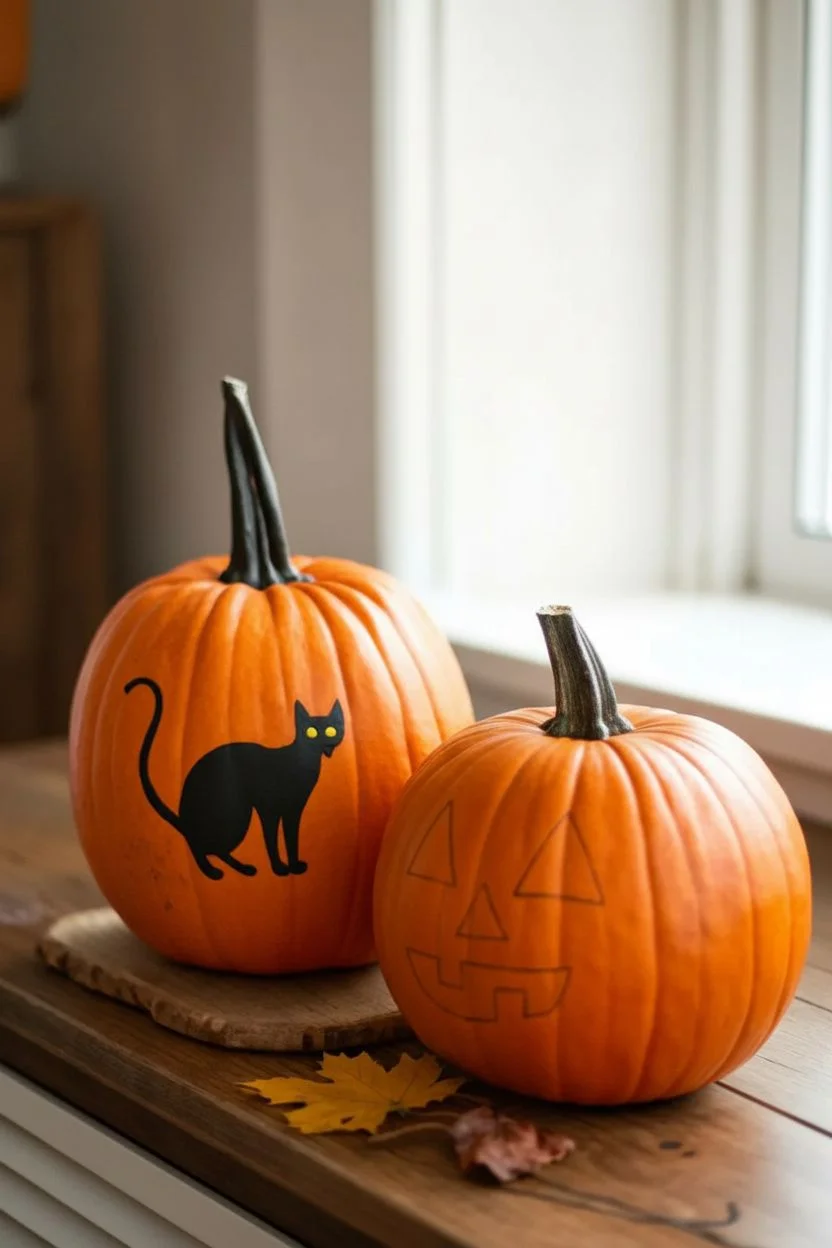
Perfect for a couple’s painting night or just a dynamic duo of decor, this project features two classic icons of the season. One pumpkin showcases a sleek black cat silhouette, while its partner wears a charming jack-o’-lantern face topped with a handmade witch’s hat.
Detailed Instructions
Materials
- Two medium-sized orange pumpkins
- Black acrylic craft paint (matte or satin)
- Small round paintbrush (size 2 or 4)
- Medium flat paintbrush
- Yellow paint or paint pen (for cat eyes)
- Pencil for sketching
- Black felt fabric (stiffened felt is best)
- White fabric paint or silver marker
- Hot glue gun and glue sticks
- Scissors
- Paper plate or compass for circle drawing
Step 1: Painting the Black Cat
-
Prepare the Surface:
Begin by wiping down the left pumpkin with a damp cloth to remove any dirt or oils, as paint adheres best to a clean, dry surface. Let it air dry completely before starting. -
Sketch the Outline:
Using a pencil, lightly sketch the outline of the cat on the side of the pumpkin. Start with an oval for the body, a smaller circle for the head, and two triangles for ears. Don’t forget the long, curved tail. -
Refine the Shape:
Refine your sketch to connect the shapes smoothly. The cat in the image has a distinct arched back and looks over its shoulder, so position the head slightly turned backward. -
Fill in the Body:
Load your medium flat brush with black acrylic paint. Carefully fill in the main body of the cat, using smooth strokes to avoid clumps. -
Detail the Edges:
Switch to your small round brush to paint the delicate areas like the ears, the slender legs, and the curling tail. I find that resting my pinky finger on a dry part of the pumpkin helps stabilize my hand for these finer lines. -
Add the Eyes:
Once the black paint is completely dry to the touch, use a tiny dot of yellow paint or a yellow paint pen to create two small almond shapes for the eyes on the cat’s face. -
Pupil Details:
If you are feeling precise, add tiny black vertical slits inside the yellow eyes for a true feline gaze, though solid yellow eyes work perfectly well too.
Use Stiff Felt
Regular craft felt can be floppy. Buy ‘stiffened felt’ sheets for the hat so the cone stands tall and the brim holds its shape perfectly.
Step 2: Creating the Jack-O’-Lantern Face
-
Plan the Features:
On the second pumpkin, use your pencil to sketch a classic jack-o’-lantern face. Draw two triangles for eyes, a smaller triangle for the nose, and a goofy, toothy grin. -
Paint the Face:
Using the black acrylic paint and your flat brush, fill in the geometric shapes. Focus on keeping the edges crisp and straight to mimic the look of a carved pumpkin. -
Double Coat:
Acrylic paint on pumpkin skin can sometimes be streaky. Apply a second coat of black paint once the first is dry to ensure an opaque, solid black finish.
Step 3: Crafting the Witch Hat
-
Cut the Cone Shape:
Take your black felt. To make the cone for the hat, cut out a quarter-circle shape. The radius of the circle determines the height of the hat; about 8-10 inches works well for a medium pumpkin. -
Form the Cone:
Roll the felt quarter-circle into a cone shape. Adjust it until the base is wide enough to sit comfortably on the pumpkin’s top, then secure the seam with hot glue. -
Cut the Brim:
Place your bound cone on top of the remaining black felt and trace a circle around it, then draw a larger circle about 2 inches further out to create the brim. Cut out this donut shape. -
Attach the Brim:
Slide the brim over the cone or glue it directly to the bottom edge of the cone. Using stiff felt helps the brim stay flat rather than drooping. -
Decorate the Hat:
Using white fabric paint or a silver marker, draw tiny bat silhouettes or white smudges on the side of the cone to give it a spooky, starry texture. -
Final Assembly:
Place the finished hat on the jack-o’-lantern pumpkin. You can secure it with a dab of hot glue if the pumpkin will be outside, or simply balance it on the stem for indoor display.
Smudged Paint?
If you smear black paint outside the lines, use a damp Q-tip to wipe it away immediately. If it’s already dry, scratch it off gently with a fingernail.
Set your pumpkins side-by-side to complete this charming Halloween vignette
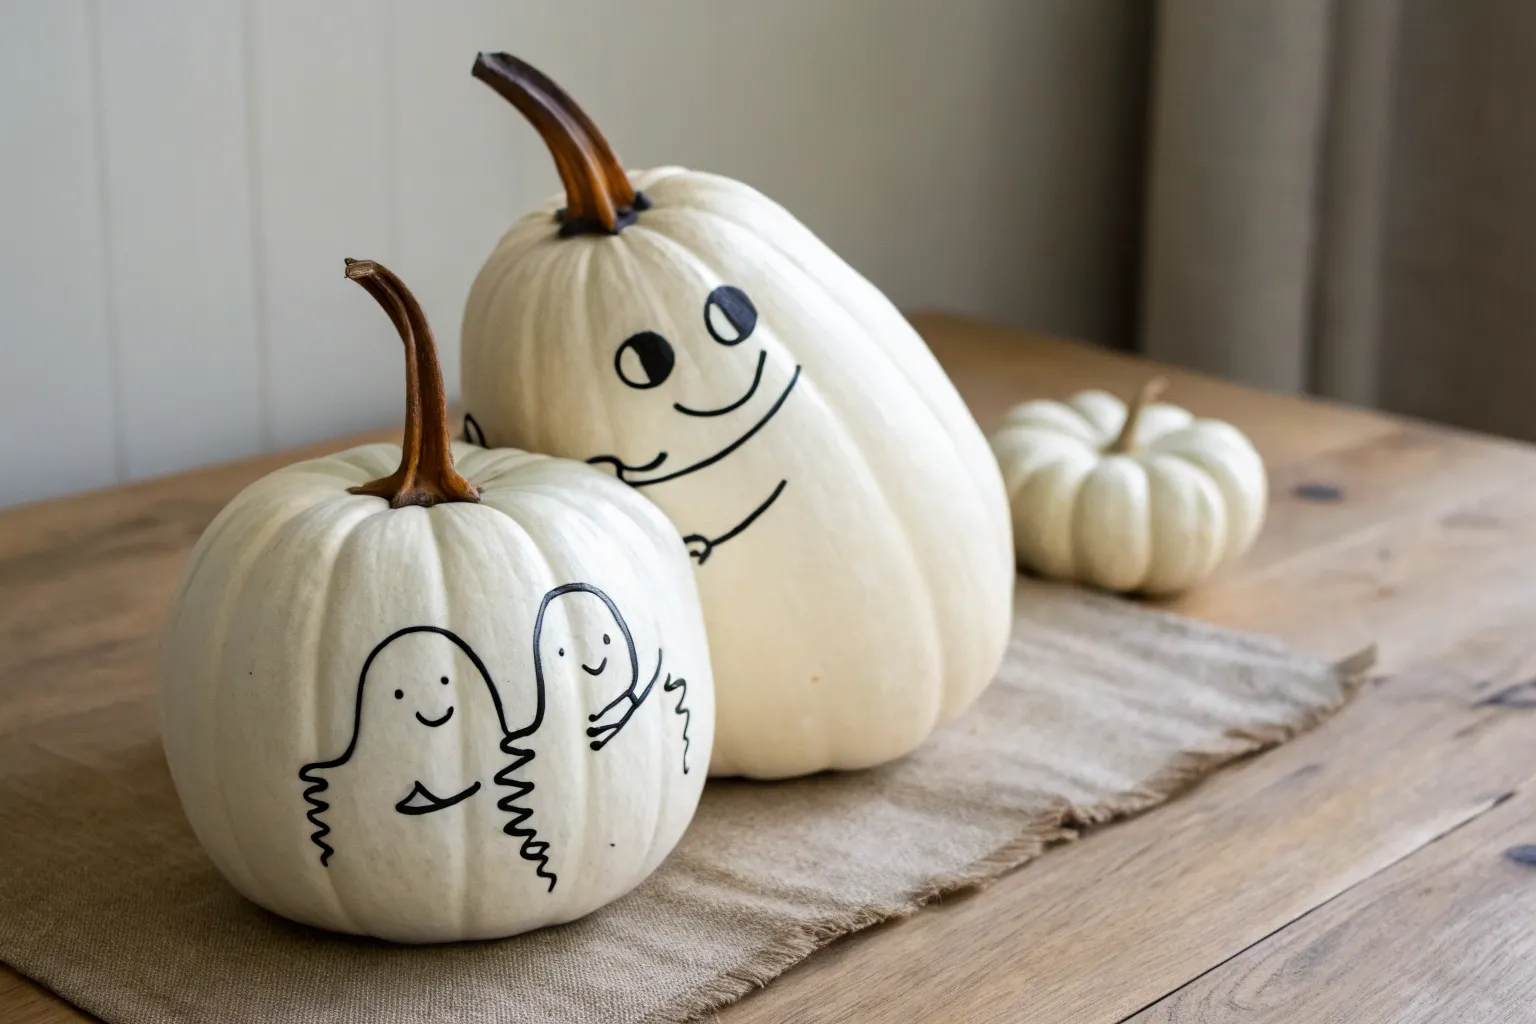
Ghost Couple Holding Hands Across Two Pumpkins
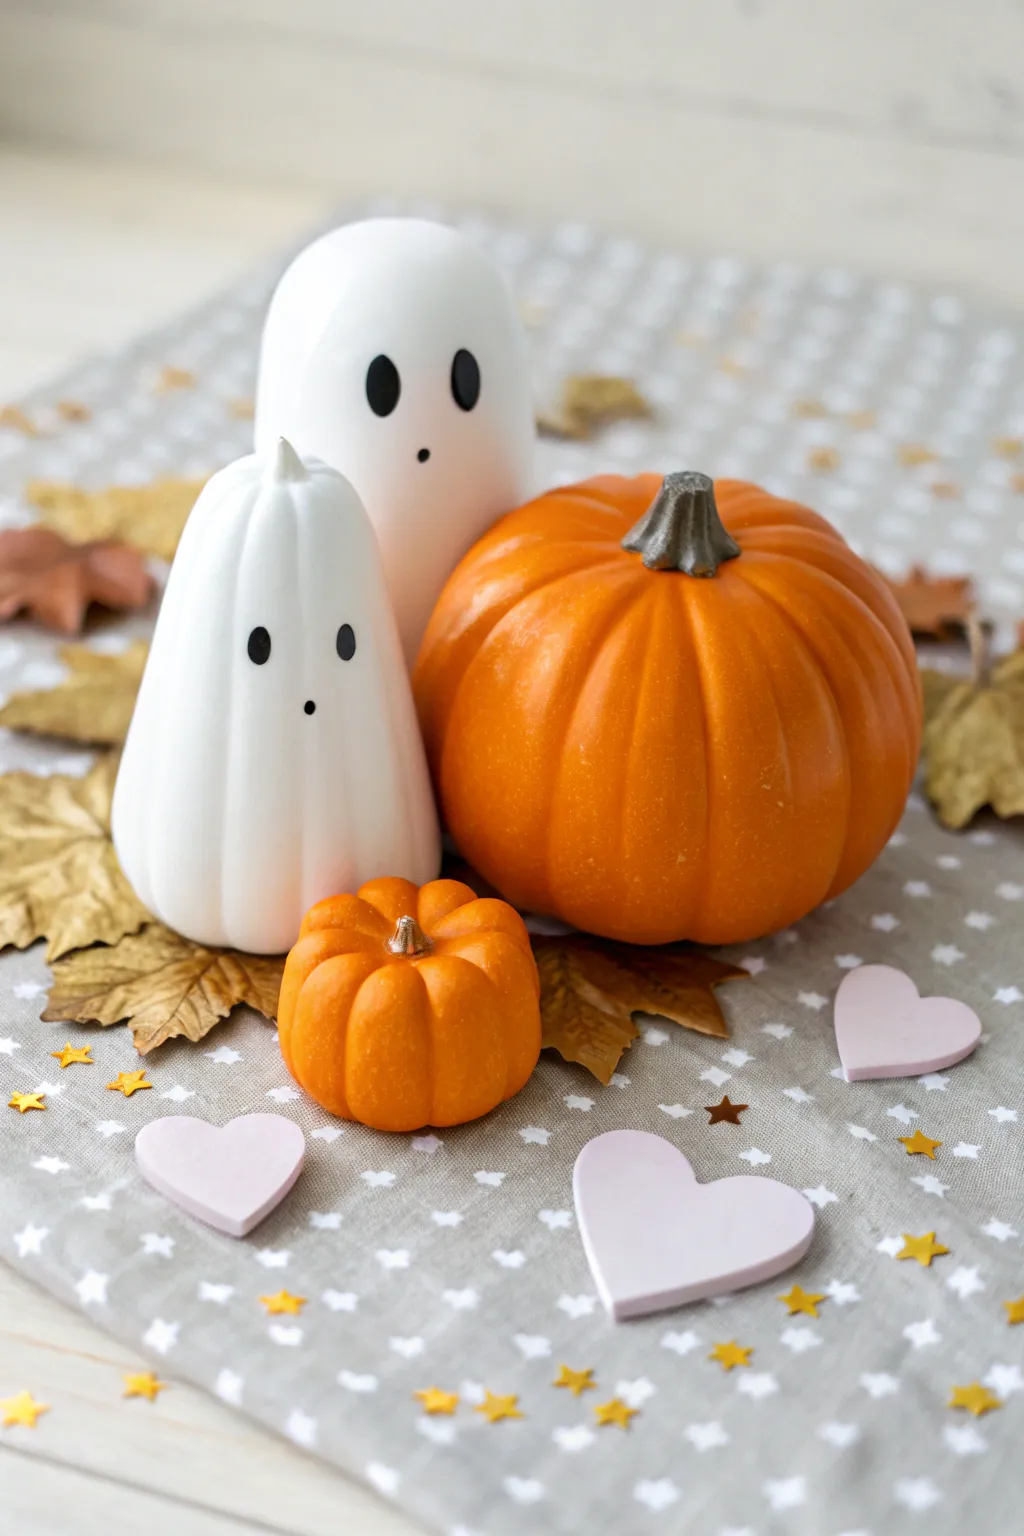
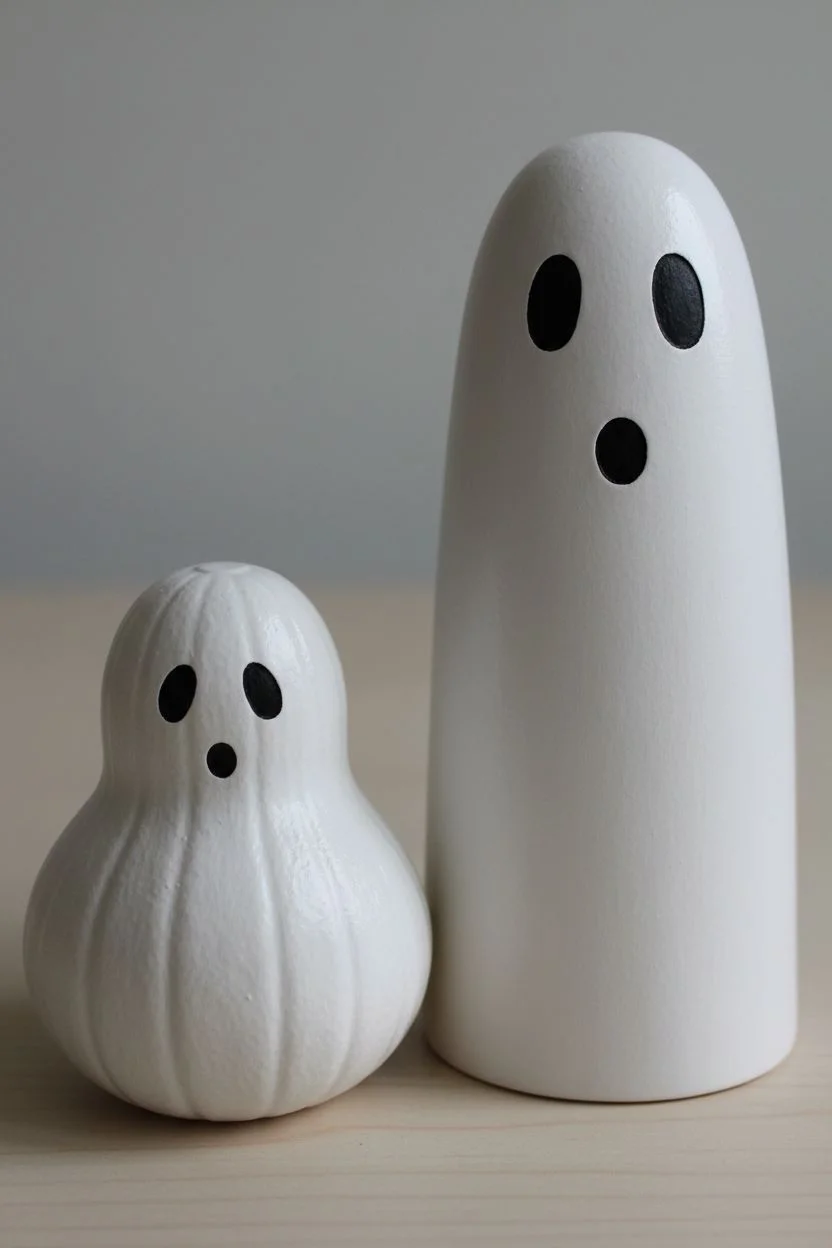
Create this charming Halloween vignette featuring a pair of minimalist white ghosts and vibrant orange pumpkins. This simple, elegant project combines painted gourds or ceramic forms with natural autumn elements for a sweet seasonal display.
Step-by-Step Tutorial
Materials
- One medium faux pumpkin (smooth surface)
- One small ribbed gourd or faux pumpkin (for the small ghost)
- One taller, smooth elongated gourd or ceramic blank (for the tall ghost)
- One miniature faux pumpkin
- Matte white acrylic paint
- Matte orange acrylic paint (if repainting existing pumpkins)
- Black acrylic paint or paint pen
- Gold artificial leaves
- Pink wooden heart cutouts (small)
- Gold star confetti
- Gray fabric with white star pattern (for display base)
- Various sized paintbrushes
- Sealant spray (matte finish)
Step 1: Creating the Ghost Pair
-
Selection & Prep:
Choose your ghost forms carefully. For the smaller ghost, a ribbed gourd shape works beautifully to add texture, while a smooth, taller form is ideal for the larger ghost. Clean the surfaces thoroughly to ensure the paint adheres well. -
Base Coat:
Apply a coat of matte white acrylic paint to both ghost forms. Use a wide, flat brush for even coverage. -
Second Layer:
Once the first coat is dry to the touch, apply a second layer of white paint. This ensures a solid, porcelain-like finish without any underlying color distinct, especially if you are upcycling orange pumpkins. -
Painting the Faces:
Using a small detail brush or a black paint pen, carefull add the faces. For the tall ghost, paint two oval vertical eyes and a small circular mouth positioned lower down. -
Small Ghost Details:
On the ribbed ghost, place the eyes slightly wider apart. Paint simple oval shapes for the eyes and a tiny dot for the mouth to give it a startled, cute expression. -
Sealing the Ghosts:
After the black paint is fully dry, mist the ghosts lightly with a matte sealant to protect the finish.
Step 2: Preparing the Pumpkins
-
Main Pumpkin:
If your medium pumpkin isn’t already a vibrant orange, give it a coat of bright orange acrylic paint. Keep the stem a natural brown or dark green for contrast. -
Miniature Accent:
Prepare the tiny pumpkin similarly. A slightly lighter orange hue here adds nice visual depth to the grouping. -
Stem Detailing:
I like to dry-brush a little dark brown or metallic bronze onto the stems of both pumpkins to highlight their texture and make them look more realistic.
Paint Pen Precision
If you are nervous about using a brush for the faces, a black Posca marker gives you much more control and dries matte.
Step 3: Setting the Scene
-
Base Layout:
Lay down your gray fabric with the white star pattern. Smooth out any wrinkles to create a flat stage for your figures. -
Foliage Foundation:
Arrange a cluster of gold artificial maple leaves on the left side of your display area. These will act as a bed for the smaller ghost. -
Ghost Placement:
Position the tall ghost towards the back center. Place the smaller ribbed ghost slightly in front and to the left, nesting it onto the gold leaves. -
Pumpkin Arrangement:
Set the large orange pumpkin to the right of the ghosts. Place the miniature pumpkin centrally in the foreground, creating a triangular composition. -
Adding Hearts:
Scatter three pink wooden craft hearts around the base. Place two near the front and one off to the right side to soften the Halloween theme. -
Final Sparkle:
Sprinkle the gold star confetti loosely around the entire scene, letting them fall naturally on the fabric and leaves.
Glow-in-the-Dark
Mix a glow-in-the-dark medium into your final coat of white paint on the ghosts for a fun surprise when the lights go out.
Step back and enjoy the sweet, spooky atmosphere you have created with this cozy arrangement

PENCIL GUIDE
Understanding Pencil Grades from H to B
From first sketch to finished drawing — learn pencil grades, line control, and shading techniques.
Explore the Full Guide
Skeleton Couple Dancing Scene

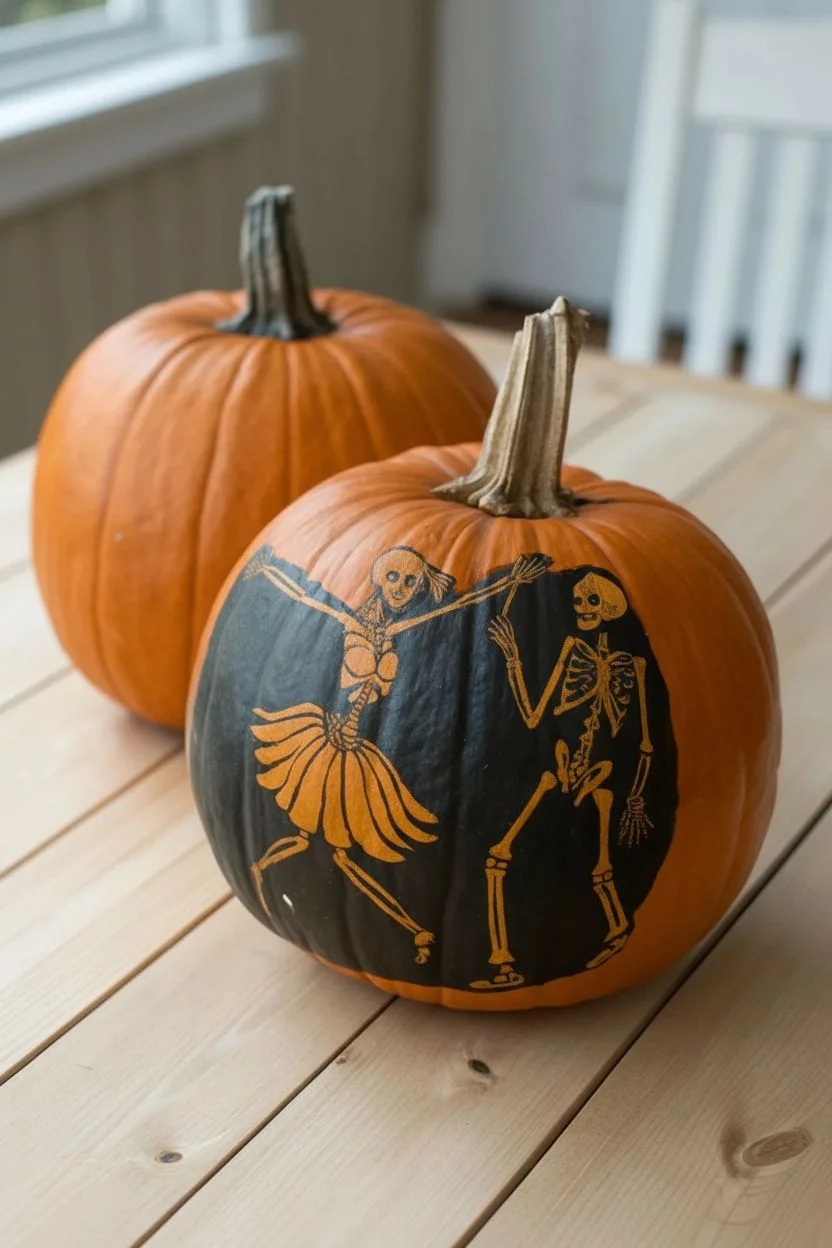
Transform a simple orange gourd into a spooky-sweet masterpiece with this high-contrast painted design. Featuring a dapper skeleton pair cutting a rug against a matte black background, this project combines traditional Halloween imagery with a charming narrative feel.
Step-by-Step Guide
Materials
- Large orange pumpkin (real or faux)
- Matte black acrylic craft paint
- White paint marker (fine point)
- White paint marker (medium point)
- White acrylic paint (optional, for touch-ups)
- Pencil
- Eraser
- Medium flat paintbrush
- Small round paintbrush
- Printed reference image of dancing skeletons (optional)
- Sealer spray (matte or satin finish)
Step 1: Preparation & Background
-
Clean the surface:
Start by thoroughly washing and drying your pumpkin to remove any dirt or waxy residue, ensuring the paint adheres properly. -
Outline the silhouette shape:
Using a pencil, lightly draw a large, rounded shape on the flattest side of the pumpkin. This doesn’t need to be a perfect circle; an organic oval or arch shape works beautifully to frame the scene. -
Sketch the figures:
Inside your penciled frame, lightly sketch the stick-figure positions of your dancing skeletons. Focus on the gesture lines first—the curve of the spine and the angle of the limbs—to capture the movement. -
Refine the sketch:
Flesh out the skeletons by adding the ribcages, skulls, and the tutu on the left figure. Keep the pencil lines light so they are easy to cover. -
Paint the background:
Using your medium flat brush and matte black acrylic paint, carefully fill in the negative space around your sketched skeletons. Paint up to the pencil border you created in step 2. -
Refine the edges:
Go slow near the edges of the skeleton sketches. You want a solid field of black that stops right where the white bones will be. It’s actually easier to paint the black first and leave the orange pumpkin showing where the bones go. -
Let it dry completely:
Allow the black paint to dry fully. If the coverage looks streaks or thin, applying a second coat of black will make the silhouette pop much more.
White Paint Transparency
If the white marker looks gray against the black, don’t force it. Let the first layer dry completely, then apply a second coat. Layering is key for bright white.
Step 2: Painting the Skeletons
-
Start the bone structure:
Once the black background is bone-dry, use your medium-point white paint marker to color in the larger bony areas like the skulls and ribcages. -
Detail the limbs:
Switch to the fine-point white marker to draw the arm and leg bones. Use small dots or dashes at the joints (elbows and knees) to mimic the look of connected bones. -
Paint the tutu:
For the skeleton on the left, use the white marker or a small brush with white acrylic to create the skirt. Draw swooping, tapered strokes extending downward to create the pleats of the tutu. -
Add facial features:
Use a very fine brush with a tiny bit of black paint, or a fine-tip black marker, to draw the eye sockets, nose cavity, and grinning teeth onto the white skulls. -
Highlight the hands:
Carefully draw the finger bones with your finest white tip. Since they are holding hands or gesturing, distinct fingers add a lot of life to the pose. -
Clean up lines:
I find that sometimes the white marker might bleed slightly or look transparent. Go back over the white areas with a second layer for bright, opaque coverage. -
Sharpen the contrast:
If your white lines strayed into the black background, use your small round brush and black paint to neaten the edges and sharpen the silhouette. -
Seal the artwork:
Once everything is perfectly dry (give it at least an hour), spray the painted area with a clear matte sealer to protect against scratches and moisture.
Transfer Trick
Not confident drawing? Print a skeleton image, rub pencil graphite on the back, tape it to the pumpkin, and trace over the lines to transfer the design.
Place your dancing duo on the porch to greet trick-or-treaters with a bony boogie
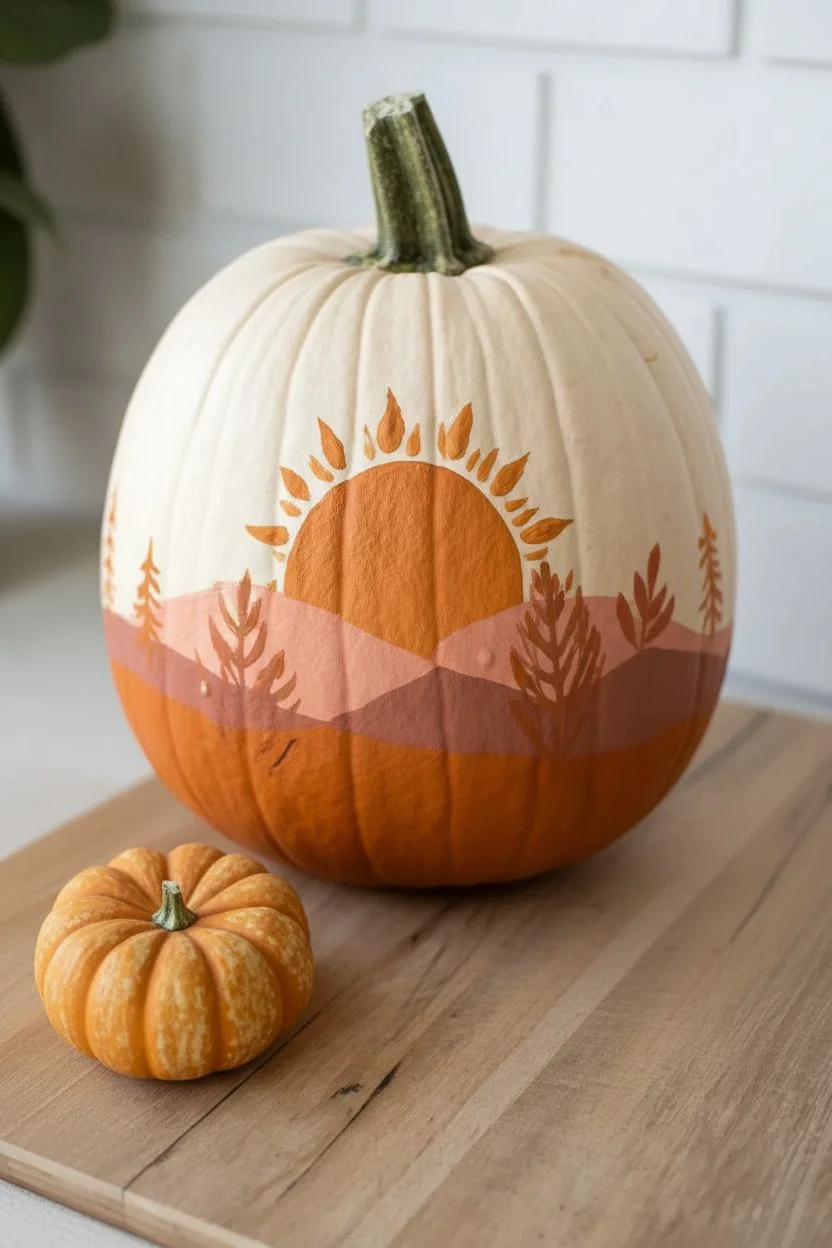
Day and Night Pumpkin Couple
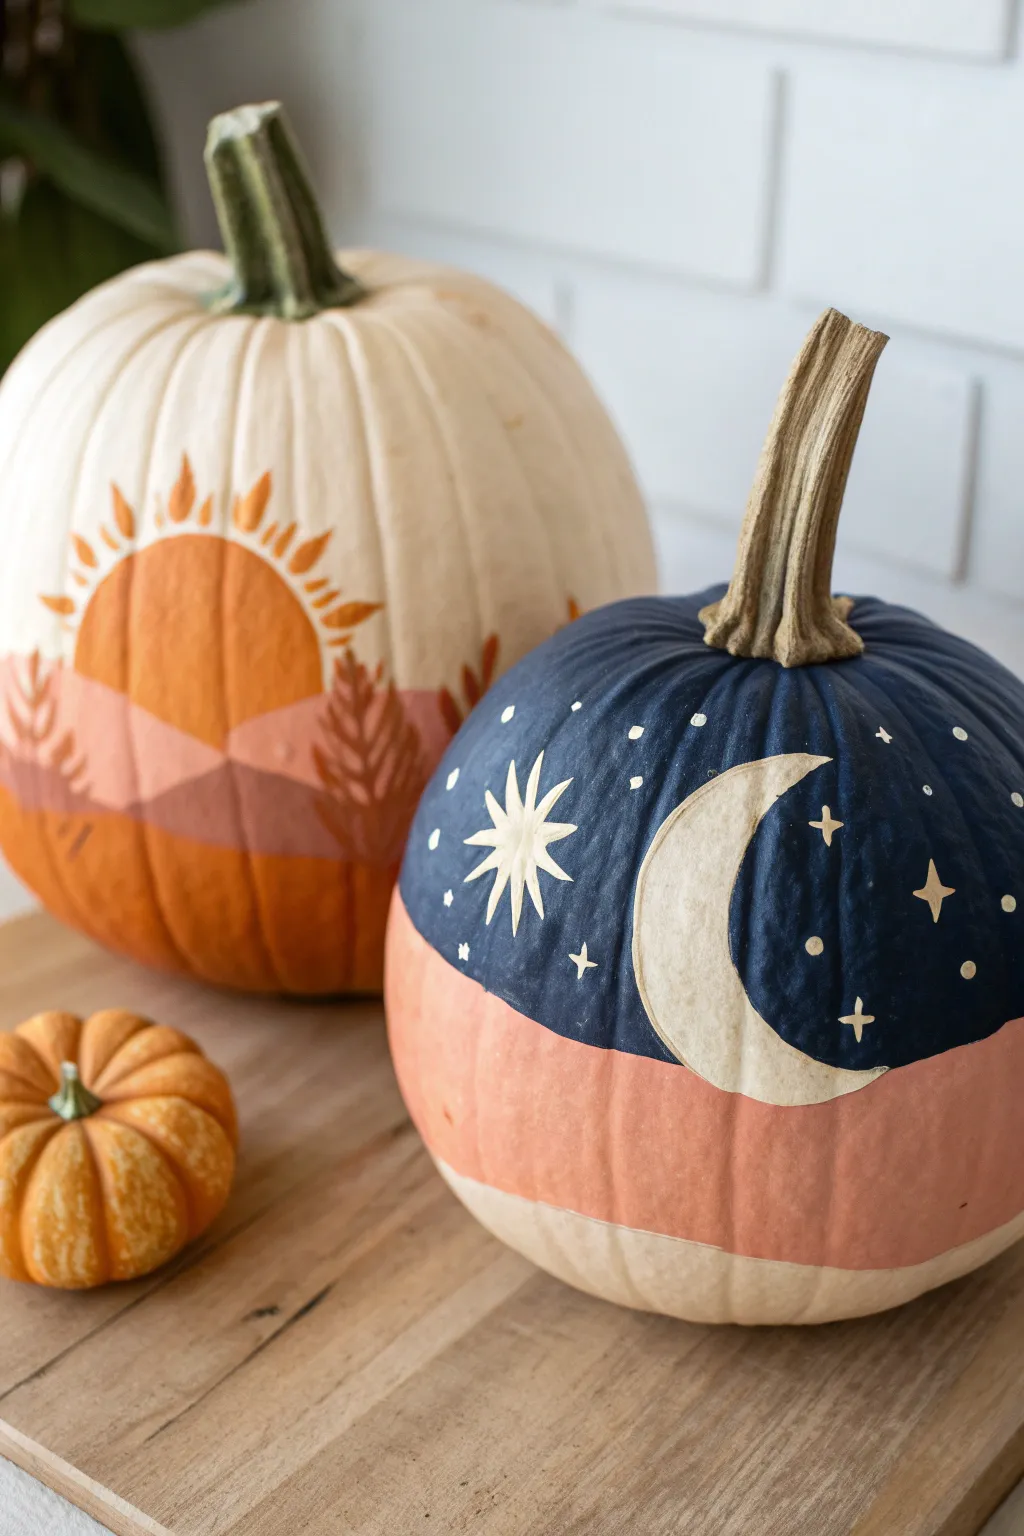
Celebrate celestial harmony with this stunning pair of painted pumpkins illustrating the cycle of day and night. Using a warm, earthy palette and simple geometric shapes, you’ll transform two ordinary gourds into a chic autumnal display.
Step-by-Step Tutorial
Materials
- One large white pumpkin (real or faux)
- One medium/large round pumpkin (to be painted completely)
- Acrylic craft paints: Terracotta orange, dusty rose/peach, unbleached titanium or warm white, navy blue, metallic gold (optional)
- Flat paintbrushes (various sizes)
- Small round detail brush
- Pencil for sketching
- Palette or paper plate
- Cup of water
- Paper towels
Step 1: Painting the Sun (Day Pumpkin)
-
Prep your surface:
Wipe down your white pumpkin with a damp cloth to remove any dirt or dust. If you are using a real pumpkin, ensure it is completely dry before you begin painting. -
Sketch the terrain:
Lightly trace your landscape design onto the lower third of the pumpkin using a pencil. Draw two or three overlapping undulating lines to represent rolling hills or mountains. -
Draw the sun:
Above your hills, sketch a large semi-circle for the rising sun. Around the arc of the sun, lightly mark where your rays will go. -
Paint the sun:
Load a flat brush with your terracotta orange paint. Fill in the semi-circle carefully. You may need two coats for opaque coverage, letting the first coat dry completely in between. -
Add the rays:
Using a smaller brush and the same terracotta color, paint the sun’s rays. Alternate between simple straight strokes and small tear-drop shapes to mimic the organic, boho style shown in the photo. -
Fill in the hills:
Paint the rolling hills using your dusty rose or peach color for the background hill and terracotta for the foreground details. This creates depth and visual interest. -
Add details:
Once the base layers are dry, use a fine detail brush and the terracotta paint to add stylized pine tree silhouettes or leaf shapes rising from the hills on the sides.
Step 2: Crafting the Night (Moon Pumpkin)
-
Block out the sky:
On your second pumpkin, determine a horizon line about halfway down. Paint the entire upper section with a deep navy blue acrylic paint. -
Refine the edges:
Ensure the bottom edge of your navy blue sky is clean and smooth. I like to use a flat edge brush here to get a crisp line. -
Paint the ground:
Below the navy sky, paint a wide band of dusty rose or peach, matching the tone used on your Day pumpkin. Leave the very bottom of the pumpkin its natural color if desired, or paint it a soft cream. -
Sketch the crescent:
Once the blue paint is fully dry to the touch, lightly sketch a crescent moon shape on the right side of the pumpkin using a pencil or white chalk. -
Fill the moon:
Paint the crescent moon shape using an unbleached titanium or warm cream color. Apply carefully to keep the edges sharp against the dark blue background. -
Paint the large star:
On the left side of the blue section, paint a large, stylized eight-point star using the cream paint. Start with a simple cross, then add smaller diagonal strokes in between. -
Add the constellations:
Using your smallest detail brush or even a toothpick, dot the remaining blue space with tiny stars. Create variety by using simple dots, small crosses, and tiny four-point diamonds. -
Final touches:
Check both pumpkins for any patchy areas. Add a second coat to the moon or sun if the background color is peeking through too much. -
Dry and display:
Allow both pumpkins to cure for at least 24 hours before moving them. Arrange them side-by-side to complete the celestial narrative.
Clean Lines Hack
Use painter’s tape or washi tape to mask off the horizon lines on the ‘Night’ pumpkin. This ensures perfectly straight edges between the navy sky and pink ground stripes.
Gilded Galaxy
Mix a tiny amount of metallic gold paint into your cream color for the stars and moon. It will catch the light beautifully and add a magical shimmer to the night scene.
Place these beauties on your porch or mantle to enjoy a serene, artistic take on seasonal decor


Yin-Yang Swirl Couple Pumpkins
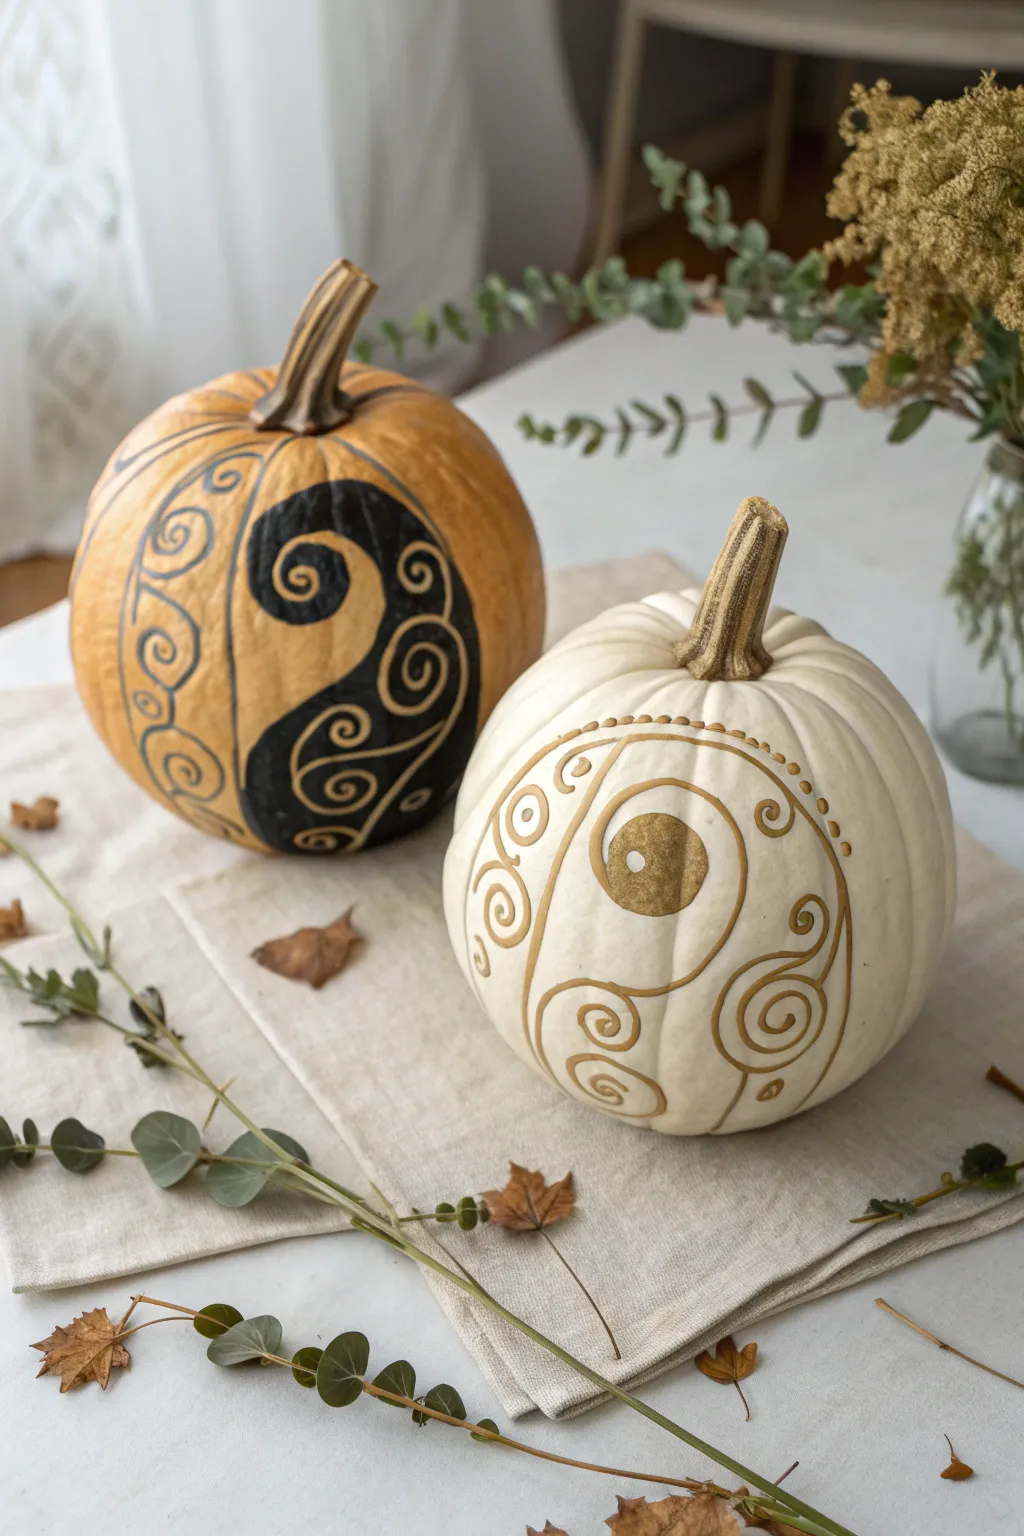
Bring a sense of balance to your fall decor with this elegant couple’s project featuring natural and cream pumpkins decorated with interlocking swirls. The striking contrast between the matte black paint and the metallic gold detailing creates a sophisticated look perfect for a modern autumn centerpiece.
How-To Guide
Materials
- One medium round pumpkin (natural orange)
- One medium round pumpkin (white/cream)
- Black acrylic craft paint (matte finish)
- Gold metallic paint marker (medium tip)
- Gold acrylic craft paint
- Small flat paintbrush
- Pencil
- Damp cloth or paper towel
- Clear matte sealer spray (optional)
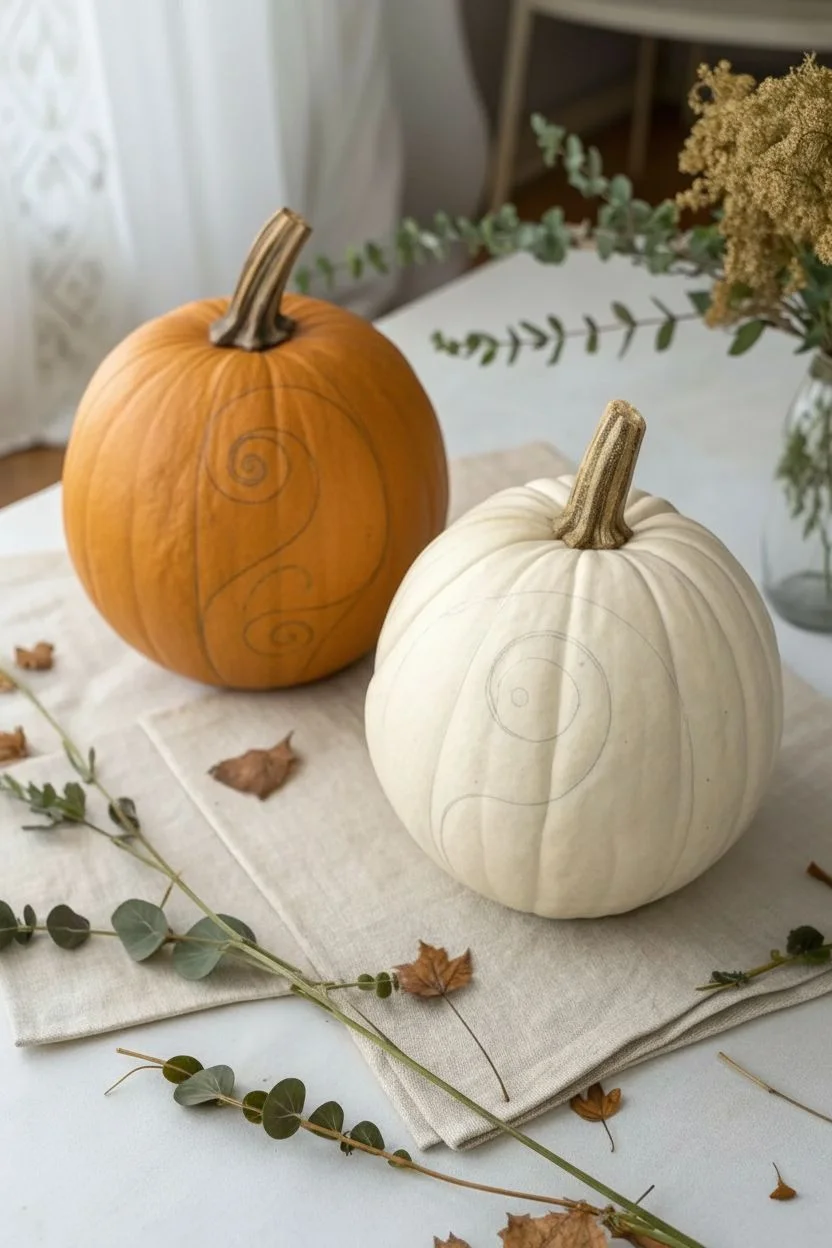
Step 1: Preparation & Planning
-
Clean the surfaces:
Wipe down both pumpkins thoroughly with a damp cloth to remove any dirt or field dust. Dry them completely, as paint won’t adhere well to a damp surface. -
Study the stems:
If your stems have any loose debris or dirt near the base, use an old toothbrush to gently scrub those crevices clean without snapping the stem. -
Sketch the main curve:
On the orange pumpkin, lightly pencil a large, graceful ‘S’ curve. This will form the boundary between the natural orange side and the painted black side, mimicking half of a yin-yang symbol. -
Mirror the design:
On the white pumpkin, use your pencil to draw a similar teardrop or paisley shape that centers the design, essentially mirroring the visual weight of the orange pumpkin’s pattern.
Uneven Lines?
If your gold marker lines look shaky or uneven, thicken the line slightly to hide the wobble, or add small dots over the mistake to turn it into a texture feature.
Step 2: Painting the Orange Pumpkin
-
Outline the black zone:
Using your small flat brush and black acrylic paint, carefully paint along the pencil line of your ‘S’ curve to establish a crisp edge. -
Fill in the shape:
Fill the area inside the curve with black paint. You want this shape to look like a large, dark teardrop wrapping around the side. Apply two coats if necessary for opaque, matte coverage. -
Let it dry completely:
Allow the black paint to dry fully before moving on to the metallic details to prevent smudging. -
Add the gold spiral on black:
Once dry, take your gold paint marker and draw a large spiral starting from the center of the black painted area, winding outward. -
Detail the orange side:
On the natural orange section adjacent to the black curve, use the gold marker to draw smaller, delicate spirals and curved tendrils that hug the black border. -
Enhance the border:
I like to add tiny gold dots or double lines along the border where the black paint meets the orange skin to make the transition look intentional and polished.
Step 3: Painting the White Pumpkin
-
Create the central gold accent:
Dip your brush into the gold acrylic paint and create a solid circle or ‘eye’ in the center of your penciled teardrop shape. -
Outline the main swirl:
Switch to the gold paint marker. Draw a bold double line around the main teardrop shape, leaving some negative space between the lines for a lighter feel. -
Add interior spirals:
Inside the main outlined shape, draw loose, freehand spirals that connect to the border lines, mimicking the filigree style used on the orange pumpkin. -
Decorative dotting:
Along the top edge of your main gold swirl, add a row of small, evenly spaced gold dots using the marker tip. -
Connect the design:
Draw a few stray curls extending outward from the main design toward the bottom of the pumpkin to balance the composition.
Level Up: Metallic Leaf
Swap the gold paint for gold leaf on the solid filled areas. Apply sizing glue, wait for it to get tacky, and press on gold leaf sheets for a high-end shine.
Step 4: Finishing Touches
-
Check consistency:
Place the pumpkins side-by-side. If one looks ‘heavier’ with design than the other, add a few small gold curls to the simpler one. -
Touch up the stems:
For a cohesive look, lightly dry-brush a tiny bit of gold paint onto the varied ridges of the pumpkin stems. -
Seal the artwork:
If these will be displayed outdoors, apply a light coat of clear matte sealer spray to protect the paint from moisture.
Arrange your pumpkins together with some eucalyptus branches or dried leaves to complete this harmonized display
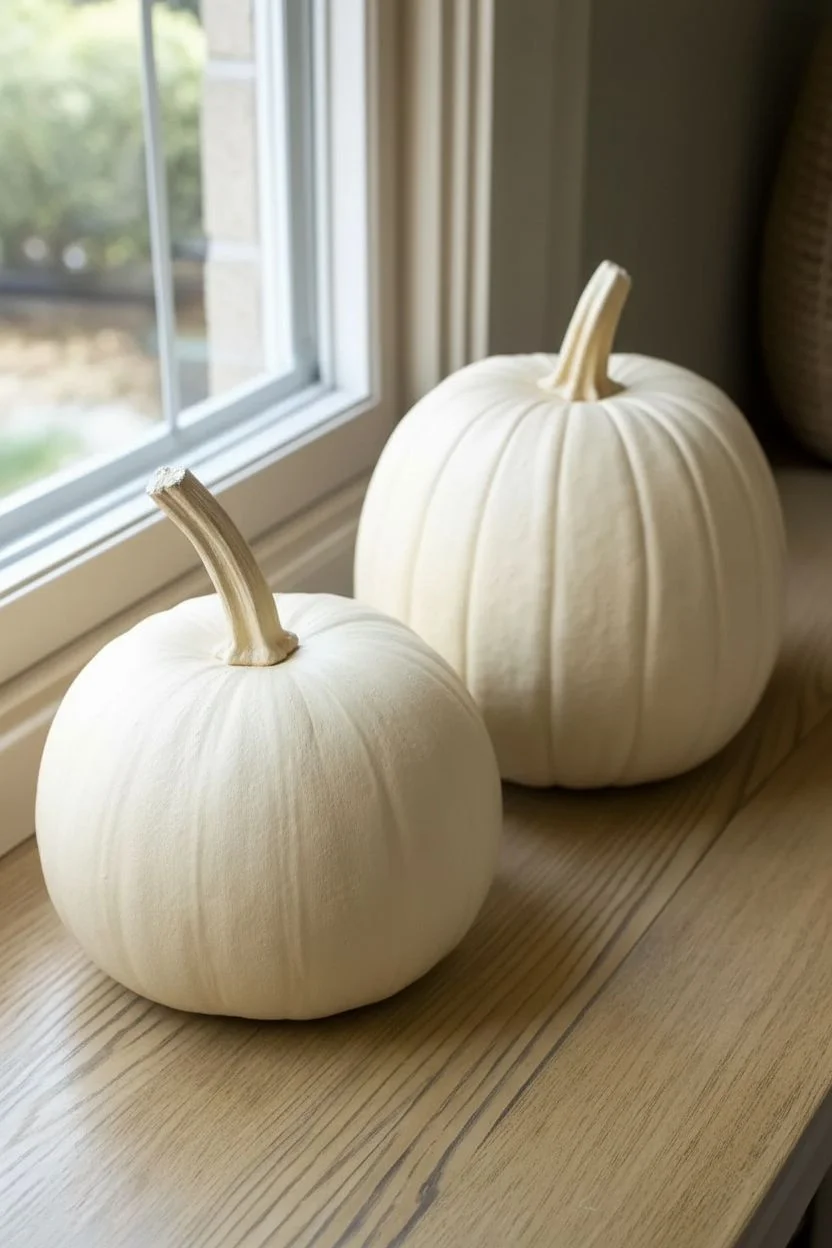
Half-Heart Pumpkins That Make One Heart Together
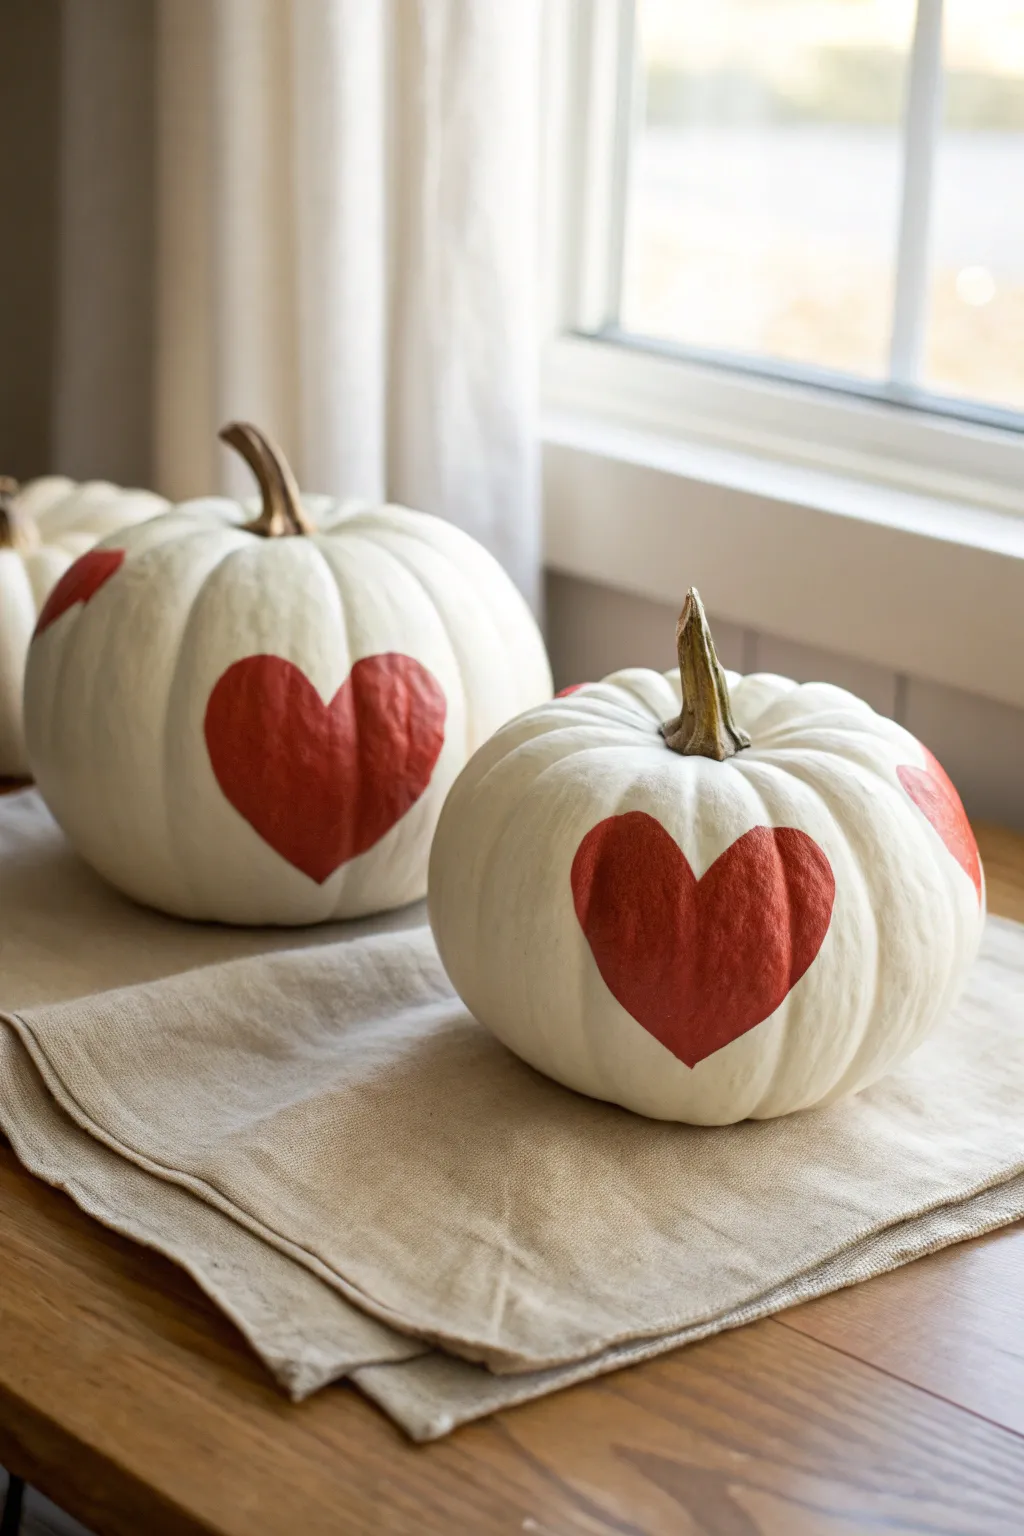
Celebrate love and the autumn season simultaneously with this charming duo of painted pumpkins. Using stark white gourds as a canvas creates a crisp, modern backdrop for bold red hearts that seem to beat right on the surface.
Step-by-Step Tutorial
Materials
- Two medium-sized white pumpkins (real or faux)
- Red acrylic craft paint
- Medium flat paintbrush
- Small round detail brush
- Pencil for sketching
- Damp cloth or paper towels
- Clear matte sealer spray (optional)
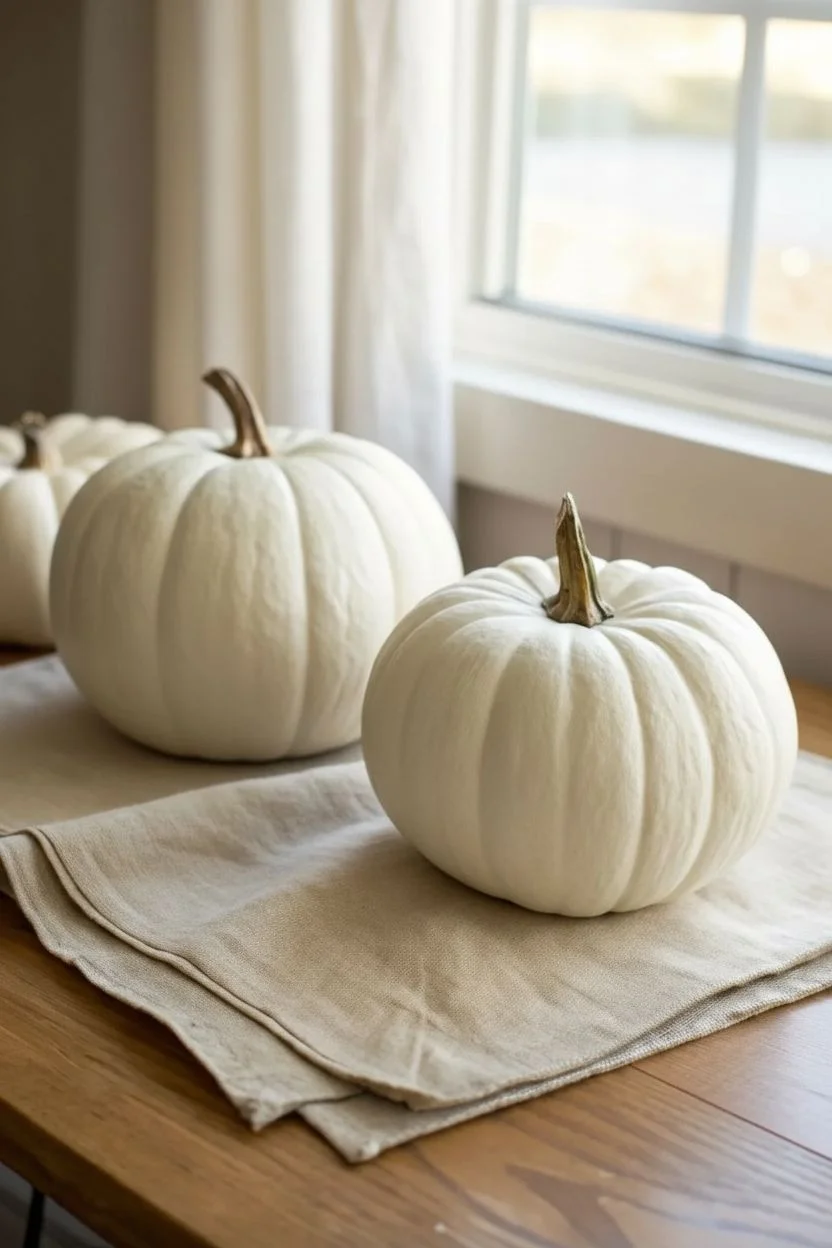
Step 1: Preparation
-
Clean surface:
Begin by wiping down your pumpkins thoroughly with a damp cloth. You want to remove any dirt, dust, or oils that might prevent the paint from adhering properly. -
Dry completely:
Allow the pumpkins to air dry fully. Painting on a damp surface can cause the acrylics to peel later, so patience here is key. -
Plan position:
Set the two pumpkins side-by-side on your table exactly how you plan to display them. This helps you visualize where the hearts should sit relative to each other for the best visual impact.
Paint Slipping?
If the acrylic paint beads up on the pumpkin skin, the surface might be too waxy or polished. Apply a thin coat of matte primer first to give the paint some grip.
Step 2: Drafting the Design
-
Mark center:
Identify the most prominent, smoothest face of each pumpkin. You want a section without deep grooves or blemishes if possible. -
Sketch outline:
Using a pencil, lightly sketch the outline of a heart on the first pumpkin. Keep your pressure very light so you don’t indent the pumpkin skin. -
Refine shape:
Look at the heart shape from a few feet away. Adjust the curves to ensure it looks balanced. The charm of this project is a hand-painted look, so it doesn’t need to be mathematically perfect. -
Sketch second heart:
Repeat the sketching process on the second pumpkin. Try to make this heart roughly the same size as the first one for a cohesive set.
Step 3: Painting the Hearts
-
Outline edge:
Dip your small round detail brush into the red acrylic paint. Carefully trace over your pencil outline to create a crisp, defined edge for your heart. -
Fill interior:
Switch to the medium flat brush for better coverage. Load it with paint and begin filling in the center of the heart. -
Work in sections:
Paint with the vertical grooves of the pumpkin rather than against them. This helps the paint settle naturally into the texture of the rind. -
Let dry:
Allow this first coat to dry for about 15 to 20 minutes. The white background might still show through slightly, which is expected. -
Apply second coat:
Paint a second layer of red over the heart. This opacity is crucial for that bold, sticker-like appearance seen in the finished project. -
Check edges:
Use the small detail brush again to touch up any wobbles on the perimeter. Crisp edges really make this simple design pop against the white.
Sharper Lines
For ultra-crisp edges, use small pieces of painter’s tape to stencil the heart shape before painting. Press the tape firmly into the grooves to prevent bleeding.
Step 4: Finishing Touches
-
Add side hearts (optional):
If you want the design to continue around the pumpkin, you can sketch and paint partial hearts on the sides, as hinted at in the inspiration image. -
Clean errors:
If I slip up, I like to use a damp Q-tip to quickly wipe away wet paint errors. For dried mistakes, you can carefully scrape them off with a fingernail or craft knife. -
Seal the work:
Once the paint is bone dry (give it at least an hour), you can lightly mist the painted area with a clear matte sealer. This protects the paint from scratching. -
Final arrangement:
Place your finished pumpkins together on a neutral cloth or runner to let the red hearts take center stage.
Enjoy displaying your heartfelt creation as a centerpiece or window decoration for the season
Shared Fall Landscape Split Across Two Pumpkins
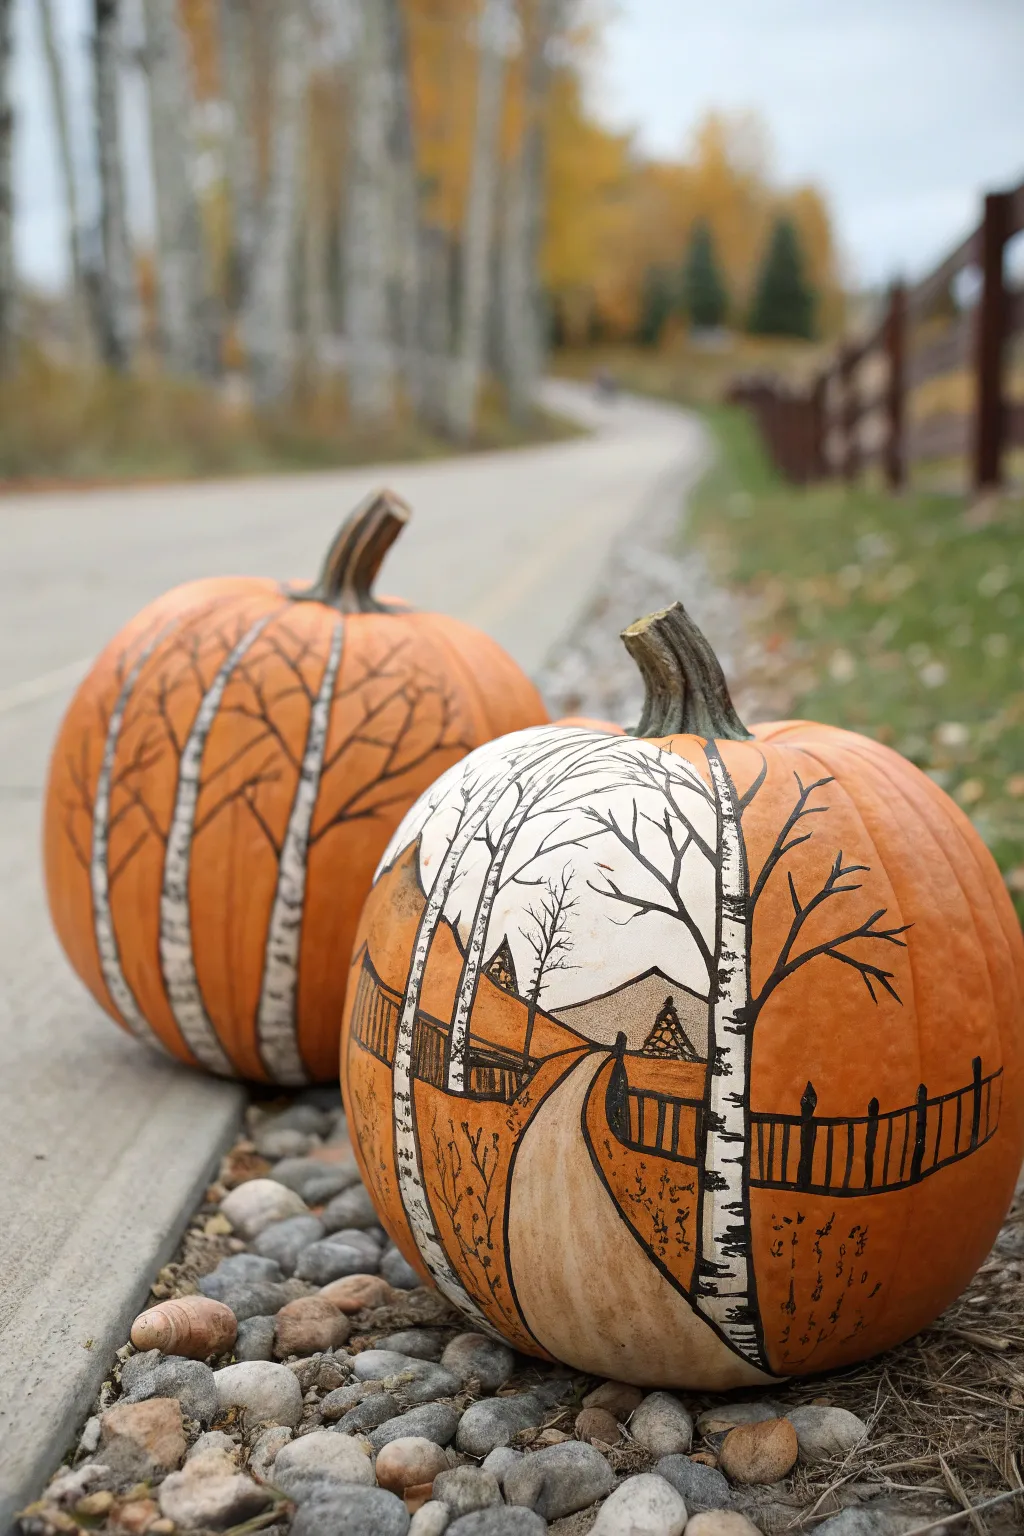
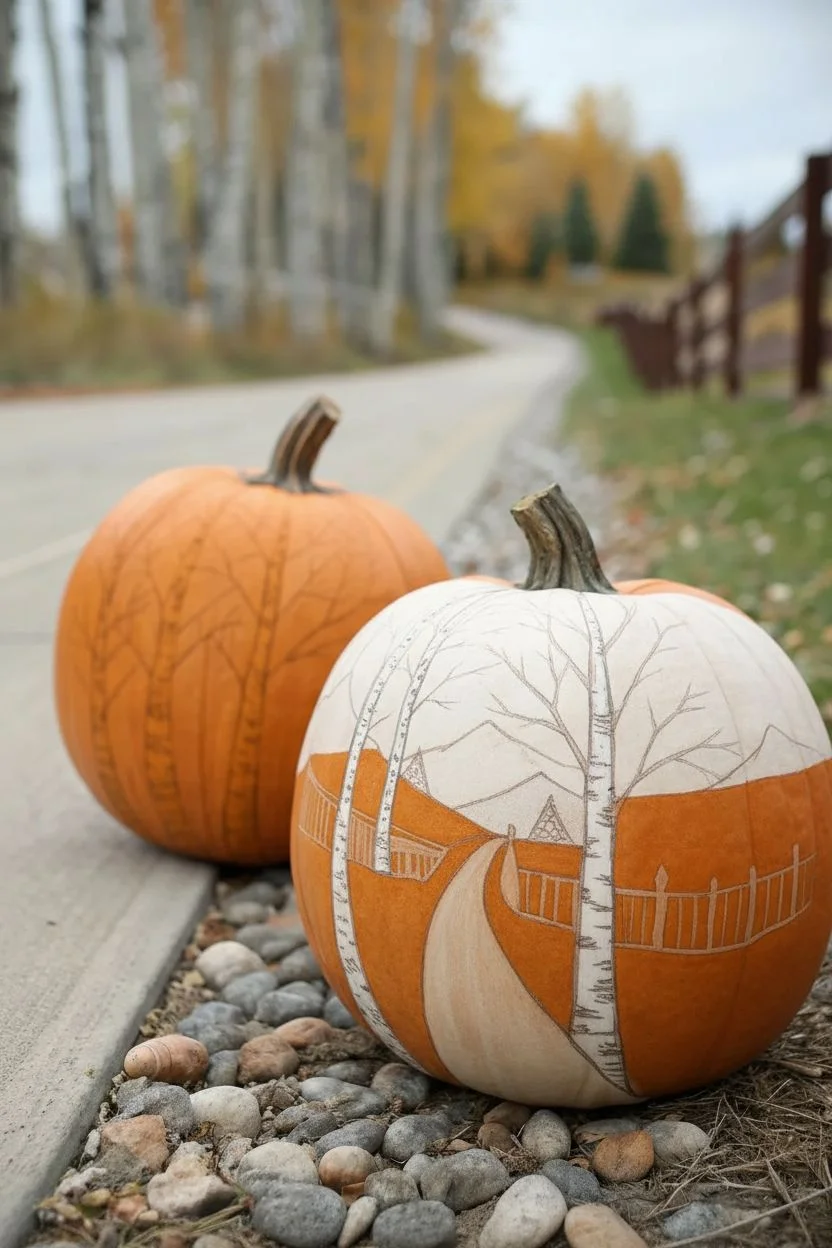
Transform two ordinary pumpkins into a breathtaking autumn landscape that flows seamlessly from one gourd to the next. This shared canvas design features striking white birch trees, a winding country road, and rustic fencing sketched in elegant black ink.
How-To Guide
Materials
- Two medium-sized pumpkins reaching similar heights
- Pencil for sketching
- White acrylic paint
- Beige or light tan acrylic paint
- Black permanent marker (fine and ultra-fine tips)
- Small flat paintbrush
- Fine liner paintbrush
- Damp cloth for clean-up
Step 1: Setting the Scene
-
Select your canvas:
Choose two pumpkins that sit well next to each other. Arrange them so their curves complement one another, deciding which will be the ‘foreground’ (right) and which will be the ‘background’ (left). -
Clean surface:
Wipe the pumpkins down with a damp cloth to remove any dirt or waxy residue, ensuring the paint will adhere properly. -
Map the horizon:
Lightly sketch a horizon line that connects across both pumpkins. On the foreground pumpkin, sketch a winding road that starts wide at the bottom and narrows toward the middle. -
Outline the trees:
Draw vertical columns for the birch trees. Place two or three on the background pumpkin and prominent ones framing the road on the foreground pumpkin. -
Add landscape details:
Sketch the distant mountain peaks inside the sky area on the foreground pumpkin and outline the rustic wooden fence following the road’s curve.
Ink Smudging?
If your marker tip gets clogged with wax or paint, scribble on a scrap piece of paper or wipe the tip gently with an alcohol swab to restore ink flow quickly.
Step 2: Painting the Base Layers
-
Block in the sky:
Using white acrylic paint, fill in the sky area above the mountains on the foreground pumpkin. You can leave the natural orange showing for the ground, or paint purely the specific design elements. -
Paint the birches:
Use the small flat brush to paint the vertical tree trunks solid white. Apply two coats if necessary to ensure the bright white stands out against the orange rind. -
Fill the road:
Mix a small amount of beige or light tan paint and fill in the winding road area. I like to blend the edges slightly for a worn, dirt-road look. -
Dry thoroughly:
Allow all paint layers to dry completely before moving on to the ink work. This prevents the markers from snagging or bleeding.
Add Dimension
Use a diluted grey paint or a grey marker to add subtle shadows on one side of the white birch trees and under the fence rails for a 3D effect.
Step 3: Inking the Details
-
Define the trees:
Using a fine-tip black permanent marker, outline the white birch trunks. Add horizontal striations and small triangular notches to mimic birch bark texture. -
Draw the branches:
Extend thin, bare branches from the tree trunks using the ultra-fine marker. Let them reach naturally into the ‘sky’ area and across the pumpkin’s curve. -
Ink the fence:
Carefully draw the vertical posts and horizontal rails of the fence along the road. Add small details like wood grain or nails for extra realism. -
Detail the landscape:
Outline the mountains and add texture to the ground area with small tufts of grass or fallen leaves using stippling motions. -
Connect the scene:
Place the pumpkins back together and ensure the lines of the road, fence, or hills visually connect. Extend any lines as needed to bridge the gap.
Step back and admire how two separate pumpkins unite to form a single, serene autumn pathway
Minimal Line-Art Couple Portrait Pumpkins
Transform two simple orange pumpkins into an adorable duo sharing a sweet moment with just a few strokes of black paint. This minimal line-art project relies on negative space and expressive lines to create a charming, understated look perfect for a modern autumn display.
Detailed Instructions
Materials
- Two medium-sized orange pumpkins (similar size and shape)
- Black acrylic paint or a black oil-based paint pen (medium tip)
- Fine detail paintbrush (if using loose paint)
- Pencil for sketching
- Eraser
- Damp cloth
- Clear matte sealant spray (optional)
Step 1: Preparation
-
Clean the Surface:
Begin by wiping down both pumpkins thoroughly with a damp cloth to remove any dirt or field dust. The surface needs to be completely dry and clean for the marker or paint to adhere properly. -
Positioning:
Set your pumpkins side by side on your work surface exactly how you want them to be displayed. Rotate them until you find the best ‘faces’—specifically looking for smooth patches of skin without deep blemishes where the eyes and mouth will go. -
Visualize the Connection:
Ideally, tilt or position the pumpkins slightly toward each other so the future faces look like they are leaning in for a kiss. This physical arrangement is key to selling the ‘couple’ effect.
Uneven Pumpkin Texture?
If the pumpkin’s ribs are deep, don’t force a straight line. Break the eye line slightly at the rib valley, or gently distort the curve to make it look straight from the front view.
Step 2: Drafting the Design
-
Sketching the Left Eye:
Starting with the left pumpkin, use a pencil to lightly sketch two curved arcs for the closed eyes. Place them roughly in the middle of the pumpkin’s height. The curves should dip downwards, like shallow ‘U’ shapes. -
Adding Eyelashes:
Sketch short, straight lines radiating downward from the bottom of each eye curve. Aim for about 5-7 lashes per eye to keep the aesthetic minimal and clean. -
Drafting the Left Mouth:
Draw the mouth slightly lower and centered between the eyes. For the left pumpkin, sketch a sideways heart shape or a ‘3’ shape on its side, creating a puckered kissy face. -
Aligning the Right Pumpkin:
Move to the second pumpkin. Before sketching, look at the first pumpkin to ensure the eye level matches. I typically use a ruler or my finger to trace a straight line across to keep the height consistent. -
Sketching the Right Face:
Repeat the sketching process on the second pumpkin: two downward curved arcs for eyes and the radiating lashes. Keep the spacing between the eyes similar to the first pumpkin. -
Drafting the Right Mouth:
Sketch the mouth on the second pumpkin. You can make this one an ‘O’ shape or an upright figure-8 to represent the receiving end of the kiss, or match the puckered ‘3’ shape of the first one.
Pro Tip: Customizing lashes
To make the couple distinct, try drawing one set of lashes pointing down (sleeping/shy) and the other pumpkin’s lashes curving up (happy/excited) for extra personality.
Step 3: Painting
-
Testing the Flow:
If using a paint pen, shake it well and press the tip onto a piece of scrap paper until the ink flows smoothly. If using a brush, thin your black acrylic slightly with water to help it glide over the textured pumpkin skin. -
Tracing the Arcs:
Carefully trace over your pencil lines for the main eye curves first. Use a confident, steady hand. If you are using a brush, use just the very tip to keep the line weight consistent. -
Defining the Eyelashes:
Add the eyelashes with quick, decisive strokes. Start at the eye line and flick the pen or brush downward. Varying the length slightly adds a nice organic touch, but keep them distinct. -
Filling the Mouths:
Trace the outline of the mouth shapes. You can leave them as outlines as shown in the inspiration image, which maintains that airy, illustrative feel. -
Line Weight Check:
Step back and look at both pumpkins together. If some lines look too thin compared to others, carefully go back over them to thicken the strokes slightly, ensuring both faces have the same visual weight.
Step 4: Finishing Touches
-
Cleanup:
Allow the paint or ink to dry completely. This usually takes about 15-20 minutes. Once dry, gently erase any visible pencil marks that weren’t covered by the black lines. -
Final Polish:
Wipe away any eraser crumbs with a soft, dry cloth. Be careful not to scrub hard over the painted areas. -
Sealing (Optional):
If these pumpkins will be displayed outdoors, apply a light coat of matte clear sealant spray to protect the design from moisture.
Place your completed pair on a entryway table or front porch to greet guests with a little romance
Complementary Color Paint-Pour Pair
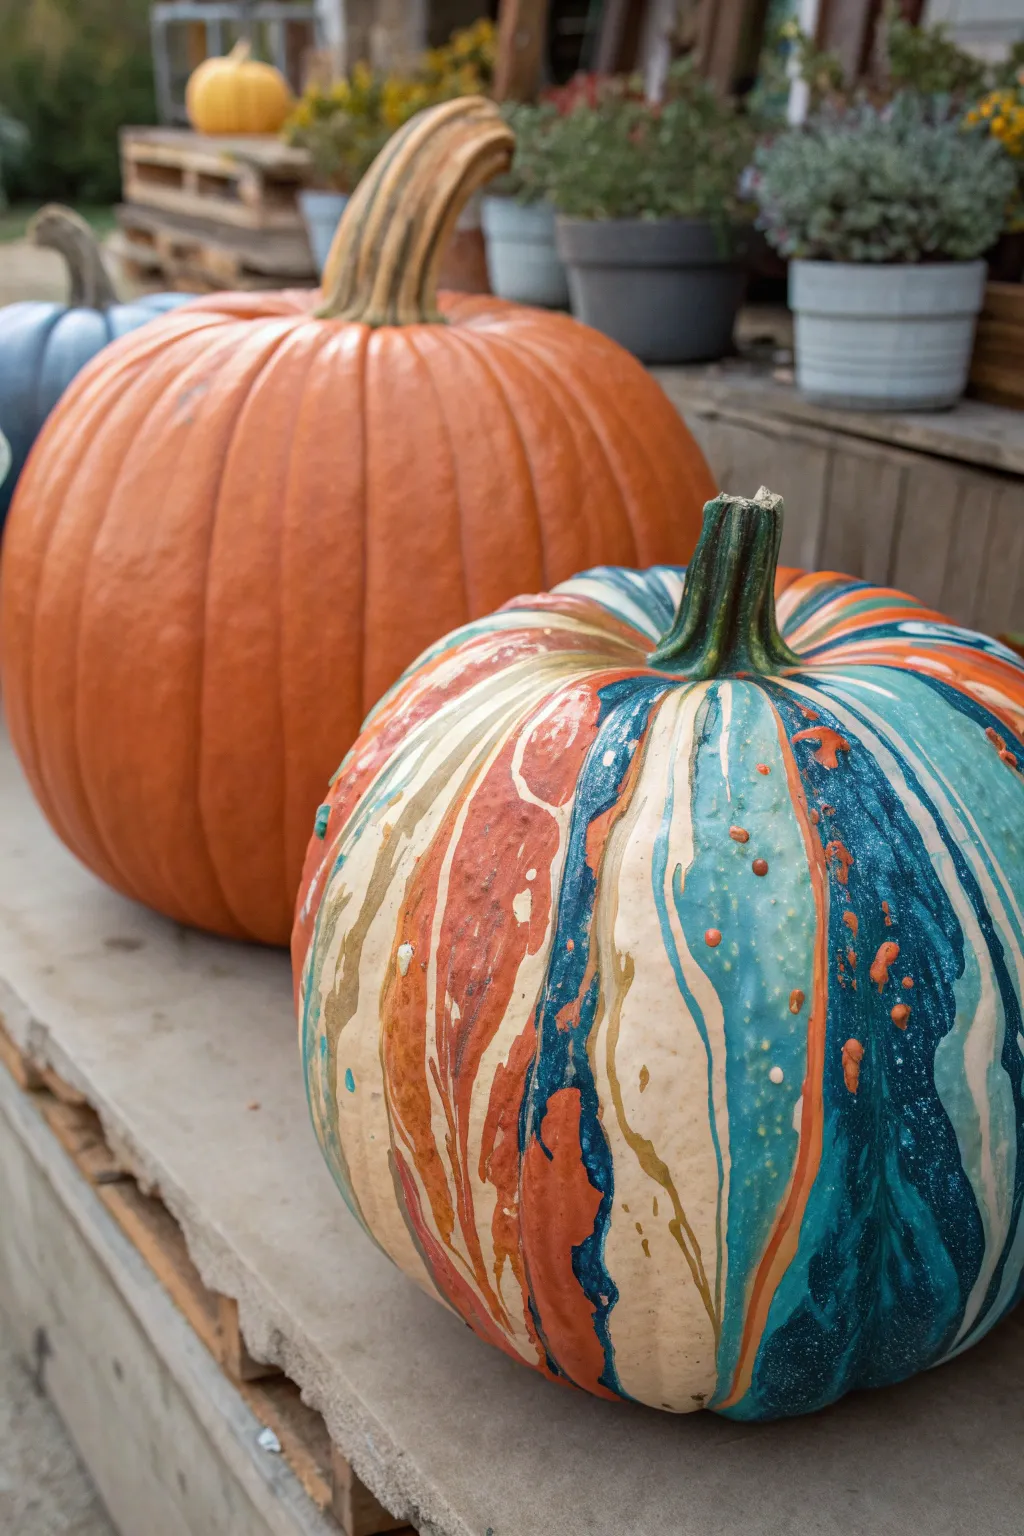
Transform a plain pumpkin into a stunning work of abstract art using the acrylic pour technique. This method creates mesmerizing swirls of teal, rust orange, and cream that look intricate but are surprisingly easy to achieve.
How-To Guide
Materials
- Medium-sized white or cream pumpkin (real or faux)
- Acrylic craft paints (teal, dark indigo, burnt orange, cream, metallic gold)
- Pouring medium
- Small plastic cups (one for each color)
- One larger plastic cup (for the ‘dirty pour’)
- Craft sticks for stirring
- Cardboard box or drop cloth
- Wire cooling rack or overturned bowl
- Clear spray sealant (glossy finish)
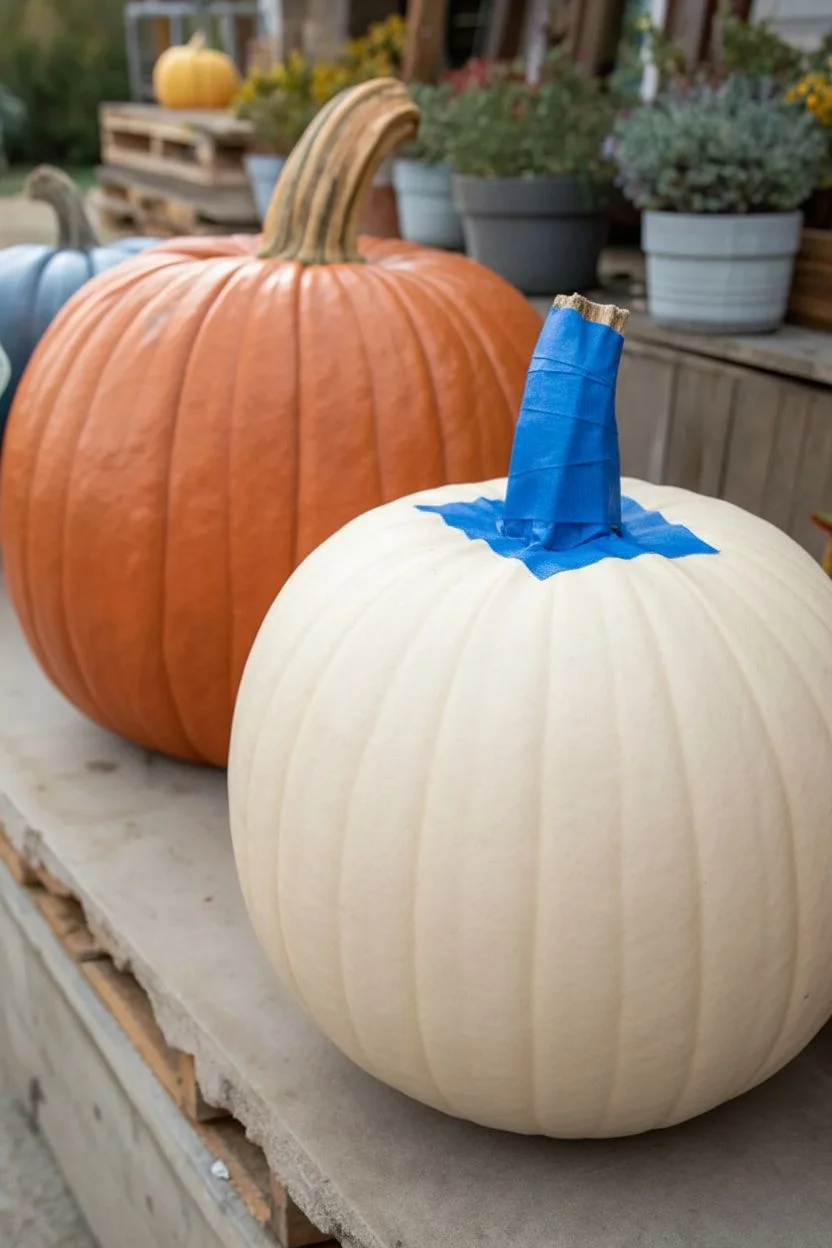
Step 1: Preparation
-
Clean surface:
Begin by wiping down your pumpkin with a damp cloth to remove any dirt or oils. If you are using a real pumpkin, ensure the skin is completely dry before starting. -
Protect your stem:
Wrap the pumpkin’s stem tightly with painter’s tape or masking tape. This keeps the natural stem clean and provides a nice contrast to the colorful paint later. -
Set up the workspace:
Since this is a messy project, place a large cardboard box or drop cloth down. Set up a wire rack or an overturned bowl inside the box to elevate your pumpkin, allowing excess paint to drip off freely.
Step 2: Mixing the Paints
-
Prepare individual colors:
Pour each acrylic paint color into its own small plastic cup. You’ll want about 2-3 ounces of each color depending on the size of your pumpkin. -
Add pouring medium:
Add pouring medium to each cup according to the manufacturer’s instructions, typically a 1:1 ratio. Stir each color thoroughly with a craft stick until the consistency resembles warm honey. -
Check consistency:
Lift your stick from the paint; the stream should flow smoothly without breaking. If it’s too thick, add a tiny drop of water; if too thin, add a bit more paint.
Muddy Colors?
If your colors are blending into brown instead of marbling, your paint is likely too thin or you stirred the ‘dirty pour’ cup. Layer gently and don’t mix.
Step 3: The Pouring Technique
-
Layer the dirty pour cup:
Take your larger empty cup and start layering the colors. Pour a bit of cream, followed by teal, then orange, then dark indigo. Do not stir. -
Continue layering:
Repeat the layering process, adding splashes of metallic gold occasionally, until the cup is nearly full. I like to tilt the cup slightly as I pour to encourage the colors to sit on top of each other rather than mixing into a muddy gray. -
Begin the pour:
Position your filled cup directly over the center of the pumpkin, right next to the taped stem. Slowly start pouring the paint in a circular motion around the top shoulder of the pumpkin. -
Cover the surface:
Continue pouring as the paint cascades down the sides. Move your hand around the pumpkin to ensure all sides get covered with the marble pattern. -
Fill in gaps:
If you missed spots near the bottom, you can use the leftover paint in individual cups to touch up specific areas or tilt the pumpkin slightly to guide the flow.
Add Some Sparkle
While the paint is still wet, sprinkle ultra-fine glitter over specific color veins (like the gold or teal) to add deeper texture and catch the light.
Step 4: Drying and Finishing
-
Let it drip:
Allow the pumpkin to sit undisturbed on the rack for at least 30 minutes so the excess paint finishes dripping off. -
Clean the bottom edge:
Once the dripping slows, run a craft stick or paper towel carefully along the bottom edge of the pumpkin to remove the heavy drips, preventing them from drying into bumps. -
Allow full drying time:
Let the pumpkin dry completely in a well-ventilated area. This usually takes 24 to 48 hours because the paint layer is thick. -
Remove tape:
Carefully peel away the painter’s tape from the stem to reveal the clean, natural wood underneath. -
Seal the art:
Spray the entire painted surface with a clear glossy sealant. This protects the paint from scratching and gives it that polished, wet-look finish seen in the photo.
Now you have a sophisticated centerpiece that looks like it came straight from an art gallery
Retro Splatter Couple With Coordinated Accents
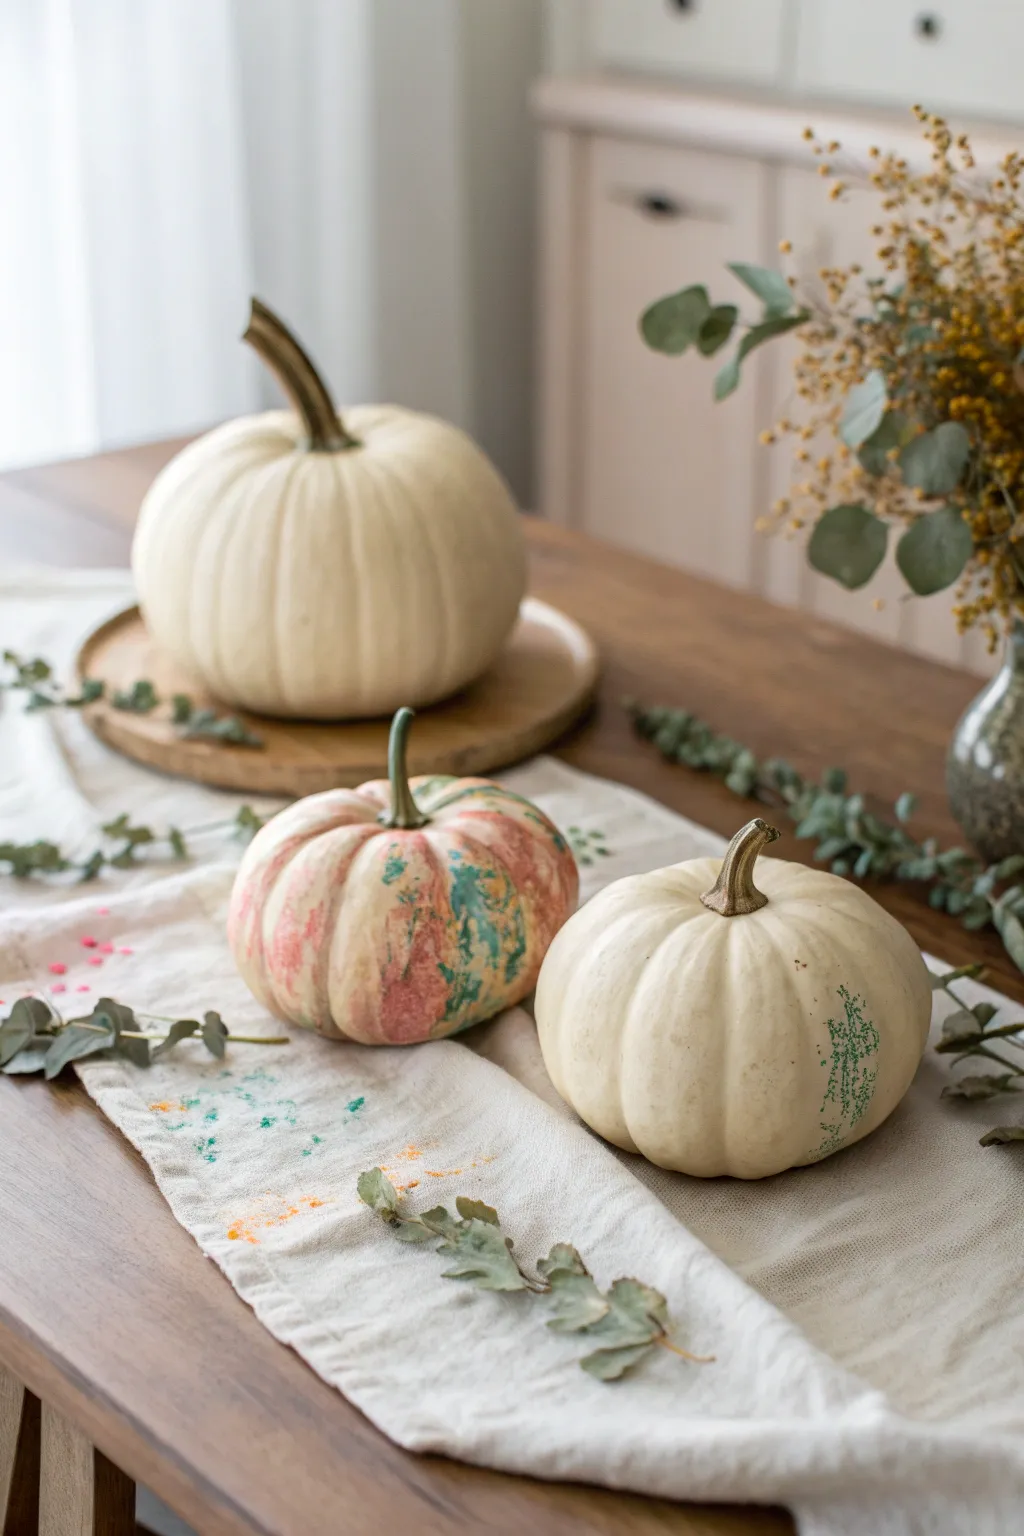
Bring soft, artistic flair to your autumn table with this coordinated pumpkin set featuring delicate splatters and a dreamy marbled effect. The combination of pristine white pumpkins with splashes of muted pink, teal, and sage green creates a modern, retro-inspired aesthetic.
Detailed Instructions
Materials
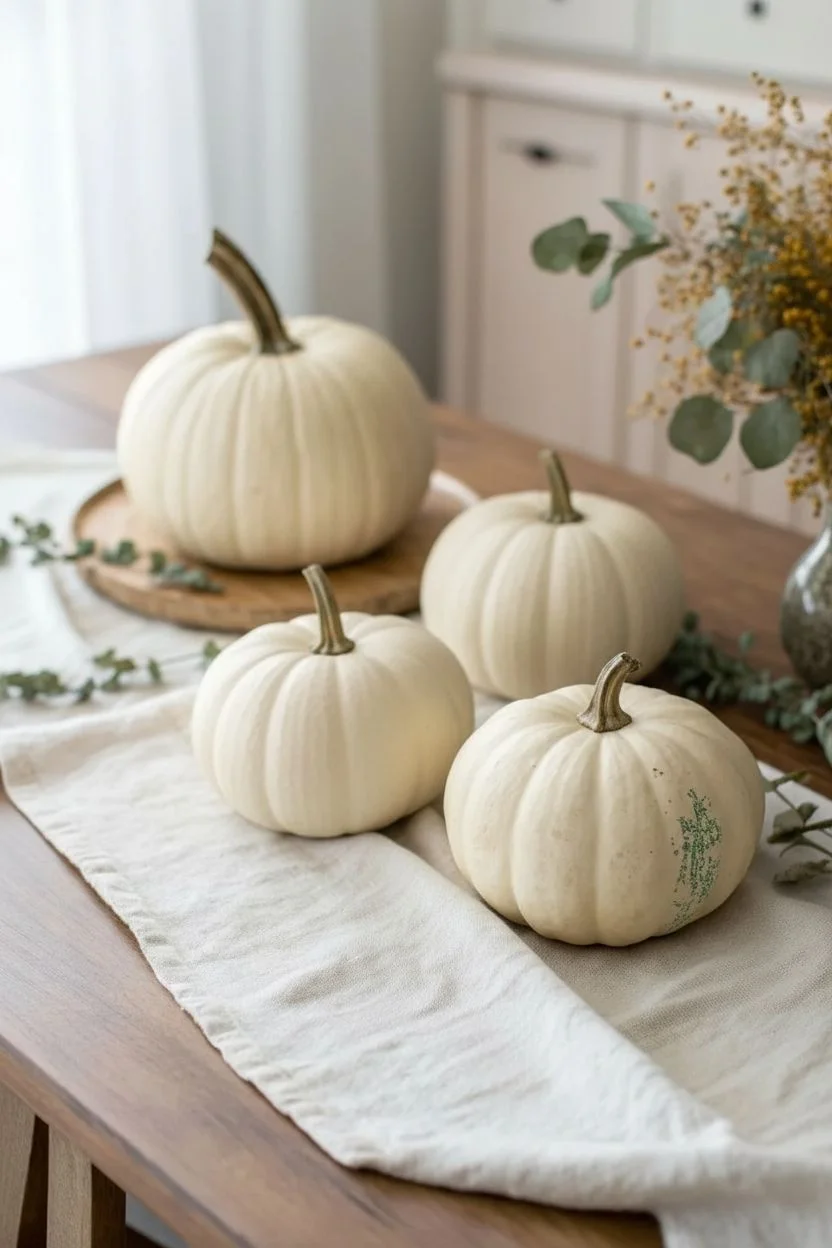
- 3 faux or real white pumpkins (varying sizes)
- Acrylic craft paints (creamy white, muted pink, teal blue, sage green)
- Small stiff-bristle brush or old toothbrush
- Soft round paintbrush
- Water cup and paper towels
- Linen table runner (optional, for display and splatter catching)
- Wooden tray (optional)
- Clear matte sealer spray
Step 1: Preparation
-
Clean surface:
Begin by thoroughly wiping down your pumpkins with a damp cloth to remove any dust or dirt. If using real pumpkins, ensure they are completely dry before proceeding. -
Base coat:
If your pumpkins aren’t naturally a clean, crisp white, apply one or two coats of creamy white acrylic paint to create a uniform canvas. Let this base dry completely, usually about 20-30 minutes. -
Protect workspace:
Lay down newspaper or a drop cloth. Since we will be splattering paint, you’ll want a wide area protected from stray droplets.
Step 2: The Marbled Pumpkin
-
Prepare the palette:
Squeeze out small amounts of muted pink, teal blue, sage green, and white paint onto a palette or paper plate. Don’t mix them yet. -
Apply base patches:
Using a soft round brush, dab random patches of the muted pink onto the medium-sized pumpkin. Keep the edges soft and uneven. -
Layer colors:
While the pink is still slightly wet, introduce the teal blue in adjacent areas. Allow the colors to overlap slightly to create new, interesting hues. -
Blend wet-on-wet:
Dip a clean, damp brush into the white paint and gently drag it through the colored patches. This softens the transition between the colors and the white pumpkin skin, creating that marbled look. -
Add texture:
For a bit of variation, I like to lightly stipple a tiny bit of darker teal or sage over the wet areas to create depth within the marble swirls. -
Initial dry:
Let this pumpkin sit for about 10 minutes so the paint becomes tacky but not fully set.
Splatter Control
If splatters are too big, your paint is too watery or your brush is overloaded. Blot excess paint on a paper towel before flicking for a fine mist.
Step 3: The Speckled Accents
-
Prepare splatter mixture:
Mix a small amount of sage green paint with a few drops of water. You want a consistency similar to heavy cream or ink—runny enough to fly off bristles but thick enough to be opaque. -
Load the brush:
Dip a stiff-bristle brush or old toothbrush into the thinned green paint. Test the splatter on a piece of scrap paper first. -
Splatter the marbled pumpkin:
Hold the brush near the marbled pumpkin and flick the bristles with your thumb. Focus the splatter over the painted areas to integrate the design. -
Accent the white pumpkin:
Take the second small white pumpkin. Choose one side or a specific quadrant to focus on. Gently flicker the sage green paint to create a concentrated patch of speckles on just one curve, leaving the rest crisp white. -
Optional texture on runner:
If you are creating the full scene, you can lightly flick residual paint onto your linen runner. This mimics the ‘messy studio’ look in the photo, tying the decor together.
Metallic Touch
After the paint dries, add a second layer of splatter using metallic gold paint. It adds a subtle shimmer that catches light beautifully.
Step 4: Finishing
-
Stem maintenance:
Inspect the pumpkin stems. If they got any unwanted paint on them, wipe them clean with a damp paper towel immediately. -
Full dry time:
Allow all pumpkins to dry undisturbed for at least an hour. The thicker marbled areas may take a bit longer. -
Sealing:
Once fully dry, take the pumpkins to a well-ventilated area and spray them with a clear matte sealer. This protects the paint from chipping and gives a finished, professional sheen. -
Staging:
Arrange your trio with the large clean white pumpkin in the back for height, and your two painted masterpieces in the front to show off the details.
Now you have a serene, artistically coordinated centerpiece ready to grace your dining table for the season
Constellation Map Couple: One Sky, Two Halves
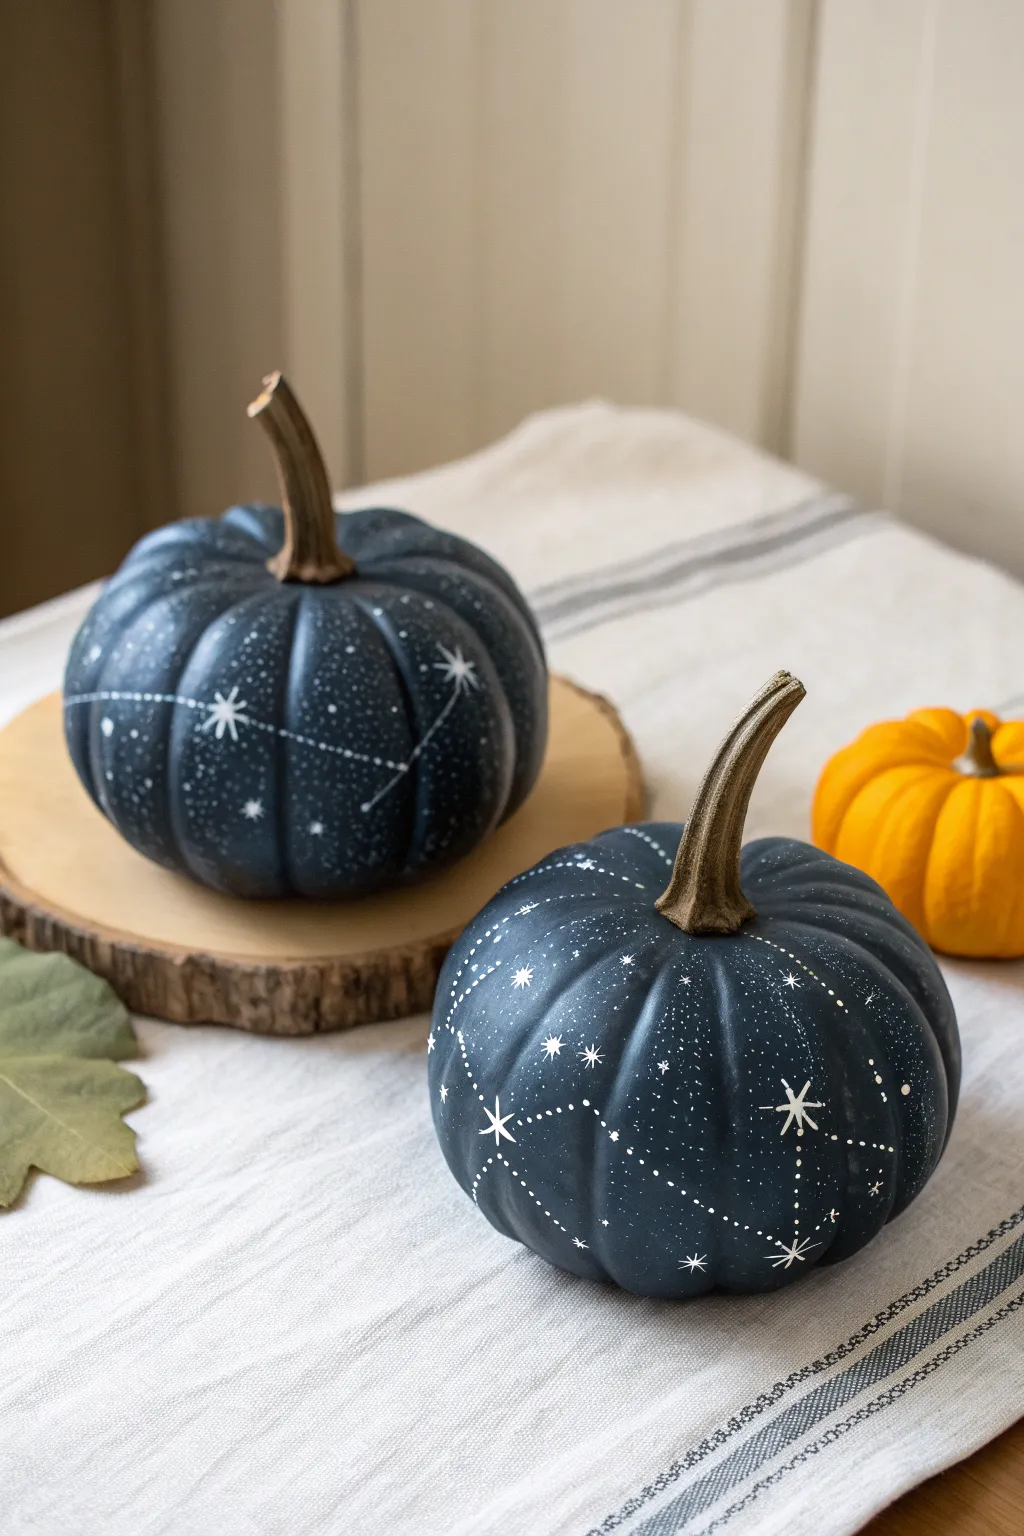
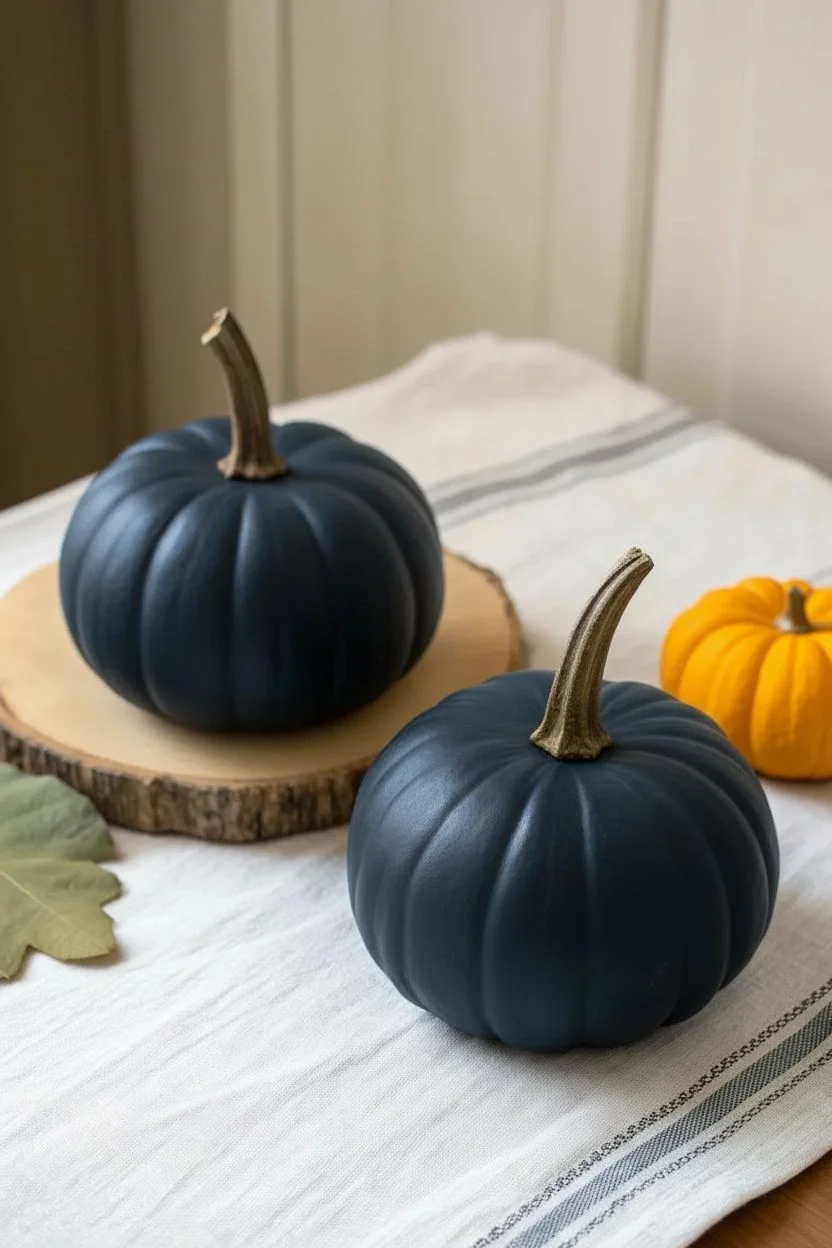
Transform ordinary pumpkins into a romantic celestial display with this elegant painting project. By wrapping corresponding star charts around two separate pumpkins, you create a connected night sky scene that is perfect for a sophisticated autumn centerpiece.
Step-by-Step Guide
Materials
- 2 Medium-sized pumpkins (real or faux)
- Acrylic paint (navy blue, black, midnight blue)
- White acrylic paint or specialized white paint pen (fine tip)
- Wide flat paintbrush
- Small round paintbrush
- Old toothbrush (optional for splattering)
- Pencil or white chalk pencil
- Matte spray sealer
- Water cup and paper towels
Step 1: Setting the Night Sky
-
Prep the surface:
Begin by wiping down your pumpkins with a damp cloth to remove any dirt or oils. If you are using real pumpkins, dry them completely with a paper towel. Remove any stems if possible, or tape them off with painter’s tape to keep them pristine. -
Mix the base color:
Create a rich, deep midnight shade by mixing navy blue acrylic paint with a small touch of black. You want a color that is dark enough to make the white pop, but not completely pitch black. -
Apply the first coat:
Using a wide flat brush, paint the entire surface of the pumpkin with your custom midnight mix. Paint in vertical strokes following the natural ribs of the pumpkin for a smooth finish. -
Let it dry:
Allow the first coat to dry for about 20-30 minutes. The darker the paint, the more obvious thin spots will be, so patience is key here. -
Apply the second coat:
Add a second layer of your dark blue paint to ensure full opacity. Check around the base and the top near the stem to make sure no orange skin is peeking through. -
Create depth:
While the second coat is still slightly tacky, I like to take a tiny bit of pure black on a dry brush and lightly sweep it into the deepest crevices (the vertical indentations) to add dimension to the shape.
Star Brightness Tip
For the brightest stars, apply a second tiny dot of thick white paint right in the center of your star shape after the first layer dries to create a glowing effect.
Step 2: Mapping the Stars
-
Plan your constellations:
Look up real constellations like the Big Dipper, Cassiopeia, or Orion. Using a white chalk pencil, lightly sketch the main anchor points (the big stars) of your chosen constellations onto the painted surface. -
Connect the couple:
If doing this as a couple project, sketch a design that ‘flows’ from one pumpkin to the other when they sit side-by-side, like a connecting star trail. -
Paint the major stars:
Dip a fine-tip paintbrush into white acrylic paint, or start your white paint pen. Draw 4-point or 8-point stars at your anchor points. Make the center lines longer and cross them with shorter diagonals. -
Add secondary stars:
Around the main constellations, dab small, simple dots to represent distant, fainter stars. Vary the pressure to create different sizes of dots. -
Connect the dots:
Using your finest brush or the pen, draw very small, dashed lines connecting the major stars to form the constellation shapes. Keep your hand steady and use very light pressure. -
Create the Milky Way effect:
Pour a small amount of white paint onto a palette and dilute it slightly with water. Dip an old toothbrush into this mix. -
Splatter the galaxy:
Hold the toothbrush about 6 inches from the pumpkin and run your thumb across the bristles to flick a fine mist of white specks over the dark background. This creates a realistic galaxy texture. -
Clean up the stem:
Remove any tape from the stem. If you got blue paint on a natural stem, wipe it off with a damp cloth or paint the stem a contrasting metallic gold or natural brown to neaten it up. -
Seal the work:
Once all paint is completely dry (wait at least an hour), take the pumpkins outside and spray them with a matte clear sealer. This protects the paint from chipping and keeps the finish velvety.
Wobbly Lines?
If your dashed lines look shaky, don’t wipe them! Wait for them to dry, then touch up the area with your leftover background blue paint to ‘erase’ the mistake.
Pair your pumpkins together on a mantle or tablescape to reveal your custom celestial map
Mixed-Media Accessory Couple: Bow Tie and Flower Crown
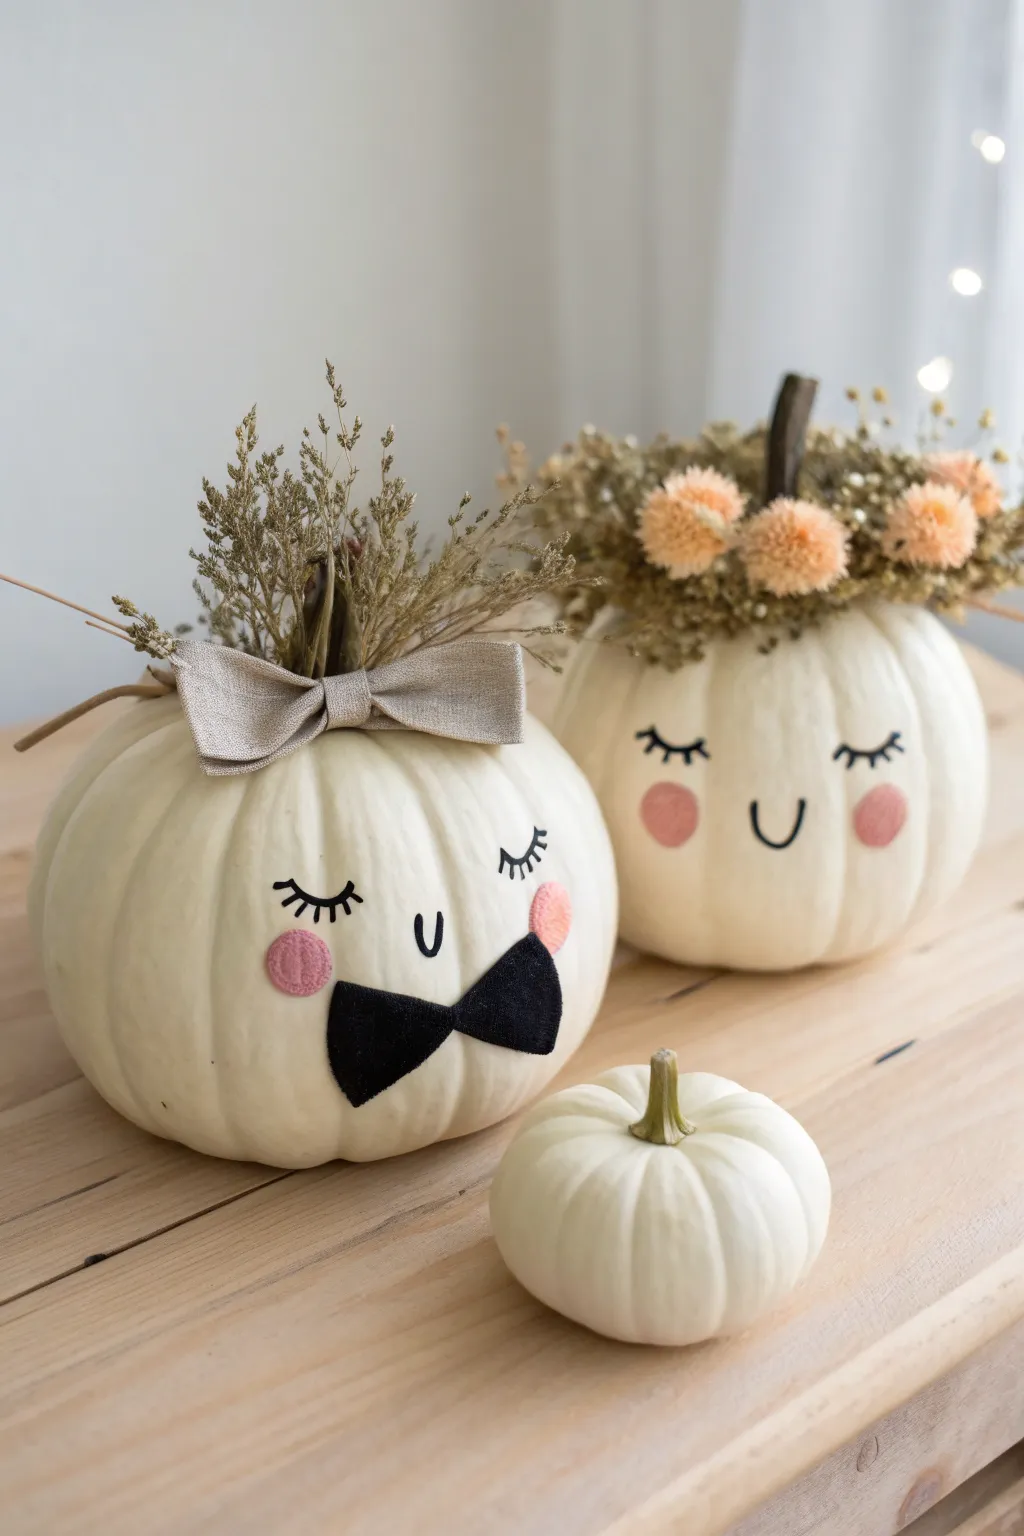
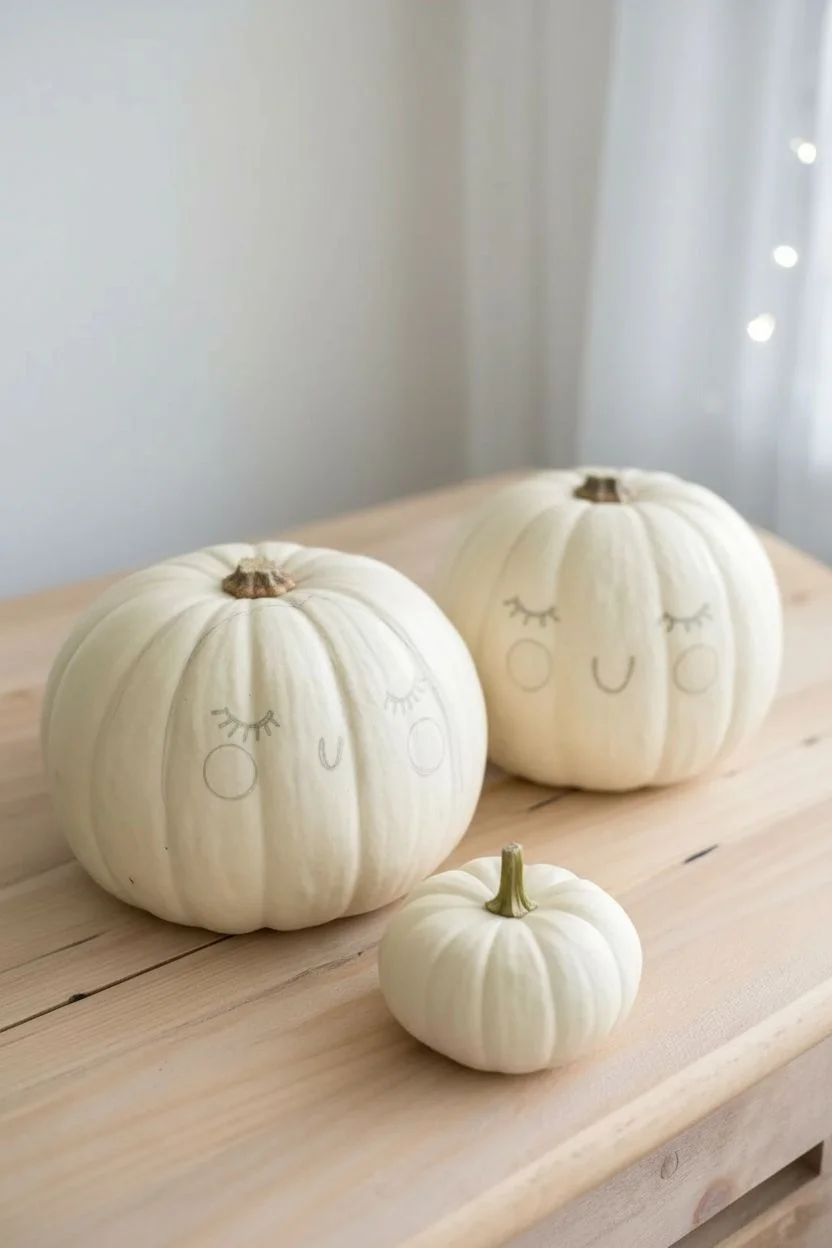
Bring character to your autumn display with this adorable pair of pumpkin personalities featuring delicate sleeping faces and charming mixed-media accessories. The soft white pumpkins serve as the perfect canvas for simple black line work and textured toppers, creating a whimsical “couple” look.
Step-by-Step
Materials
- Two medium white pumpkins (real or faux)
- One small white pumpkin (optional)
- Black acrylic paint pen or fine brush with black paint
- Pink felt or pink matte craft paint
- Stiff black felt
- Dried beige grass or wheat sprigs
- Dried orange globe amaranth or small dried flowers
- Burlap or linen ribbon (beige)
- Hot glue gun and glue sticks
- Scissors
- Pencil
- Small round sponge applicator (optional)
Step 1: Planning and Mapping
-
Clean the surfaces:
Wipe down your pumpkins with a damp cloth to remove any dirt or waxy residue. If you are using real pumpkins, dry them thoroughly before starting. -
Sketch the faces:
Using a pencil, very lightly sketch the placement of the eyes and mouth on the smoothest side of each pumpkin. Aim for the center-lower half of the pumpkin to leave room for the accessories on top. -
Draft the features:
Draw two U-shapes for closed eyes. Add small lashes—three or four per eye usually looks sweetest. Draw a small, simple U-shape between them for a smiling mouth.
Placement Pro Tip
Draw faces on the flatter ‘panels’ of the pumpkin rather than over the deep vertical grooves. This makes drawing smooth lines significantly easier.
Step 2: Painting the Faces
-
Trace the eyes:
Go over your pencil lines with a black paint pen or a fine brush dipped in black acrylic paint. Use steady pressure to get clean, crisp lines for the lashes. -
Create the mouth:
carefully trace the small smile. Keep the line weight consistent with the eyes for a cohesive look. -
Add rosy cheeks:
For the cheeks, you have two options. You can cut small circles from pink felt and glue them on, or paint soft pink circles using a round sponge applicator. I prefer painting them for a softer, blended edge. -
Let it dry:
Allow the painted features to dry completely before you start handling the pumpkin to add accessories, preventing accidental smudges.
Step 3: The Gentleman (Bow Tie Pumpkin)
-
Cut the bow tie:
Cut a bow tie shape out of stiff black felt. It should be proportional to the pumpkin’s “chin” area. -
Attach the tie:
Hot glue the black felt bow tie just below the mouth, slightly off-center for a jaunty look if desired, or perfectly centered for a formal appearance. -
Create the hair:
Gather a small bunch of dried beige grass or wheat. Trim the stems short. -
Glue the grass:
Hot glue the grass vertically behind the pumpkin stem so it stands up like spiky hair. -
Make the top bow:
Tie a neat bow using the beige linen or burlap ribbon. Trim the ends cleanly. -
Secure the bow:
Glue the beige bow right at the base of the stem, covering the glued ends of the dried grass ‘hair’.
Level Up: Fabric Texture
Instead of painting the eyelashes, cut tiny thin strips of black electrical tape or stiff felt for a 3D, tactile effect that pops in photos.
Step 4: The Lady (Flower Crown Pumpkin)
-
Prepare the base:
Take a handful of dried moss or dried grass pieces and glue them in a ring around the stem of the second pumpkin to create a textured base for the crown. -
Select the blooms:
Trim the stems off your dried orange globe amaranth or small flowers. -
Assemble the crown:
Hot glue the flowers onto the grassy ring you created. Space them out evenly or cluster them in the front for a fuller look. -
Fill the gaps:
Tuck extra bits of dried grass or small baby’s breath between the orange flowers to add volume and texture to her crown. -
Final check:
Clean up any visible hot glue strings and arrange the pair together, placing the small unpainted pumpkin nearby to complete the vignette.
Display your charming pumpkin couple on a mantel or entryway table to greet guests with a smile


Have a question or want to share your own experience? I'd love to hear from you in the comments below!