
If you’ve ever looked into a cow’s big, gentle eyes and thought, I need to paint that, you’re in the right place. These cow painting ideas are all about personality—sweet expressions, playful poses, and fun little details that make your cow feel like a character.
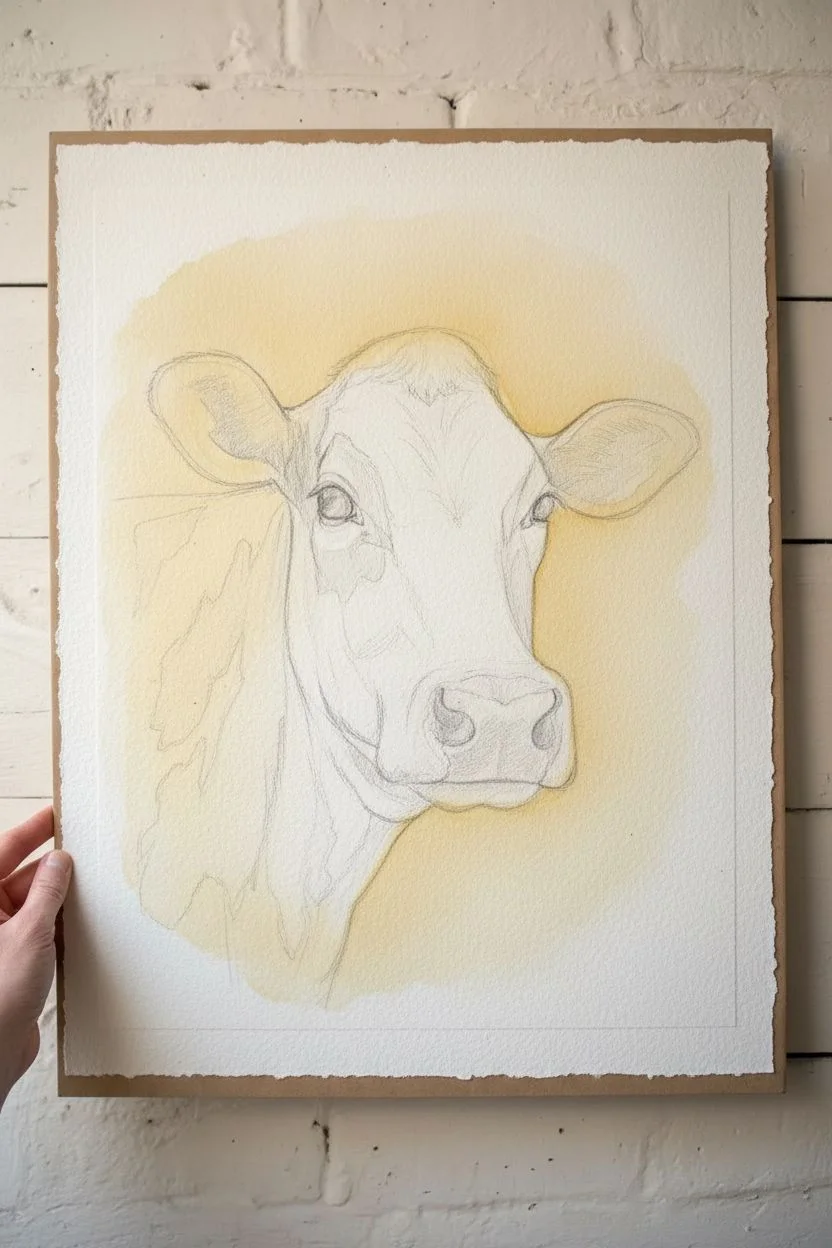
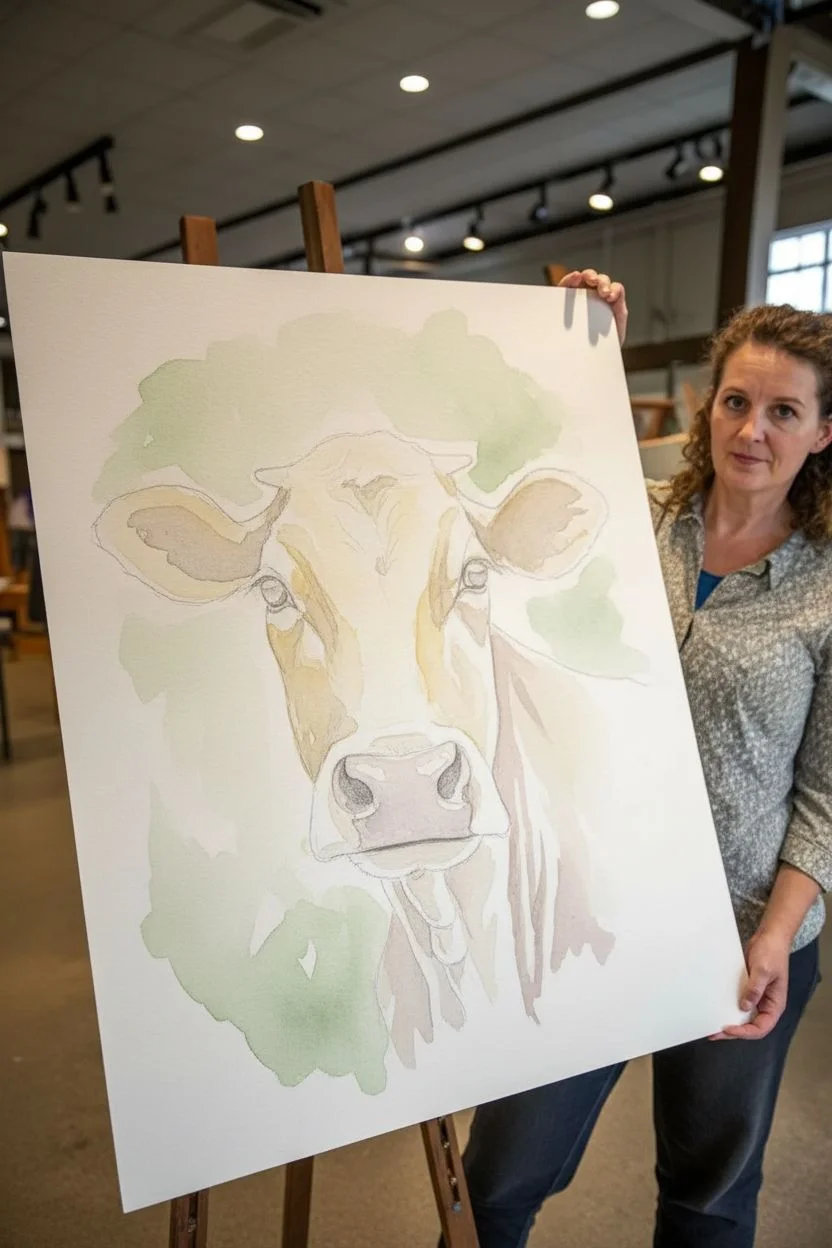
Classic Cow Portrait With Soft Eyes
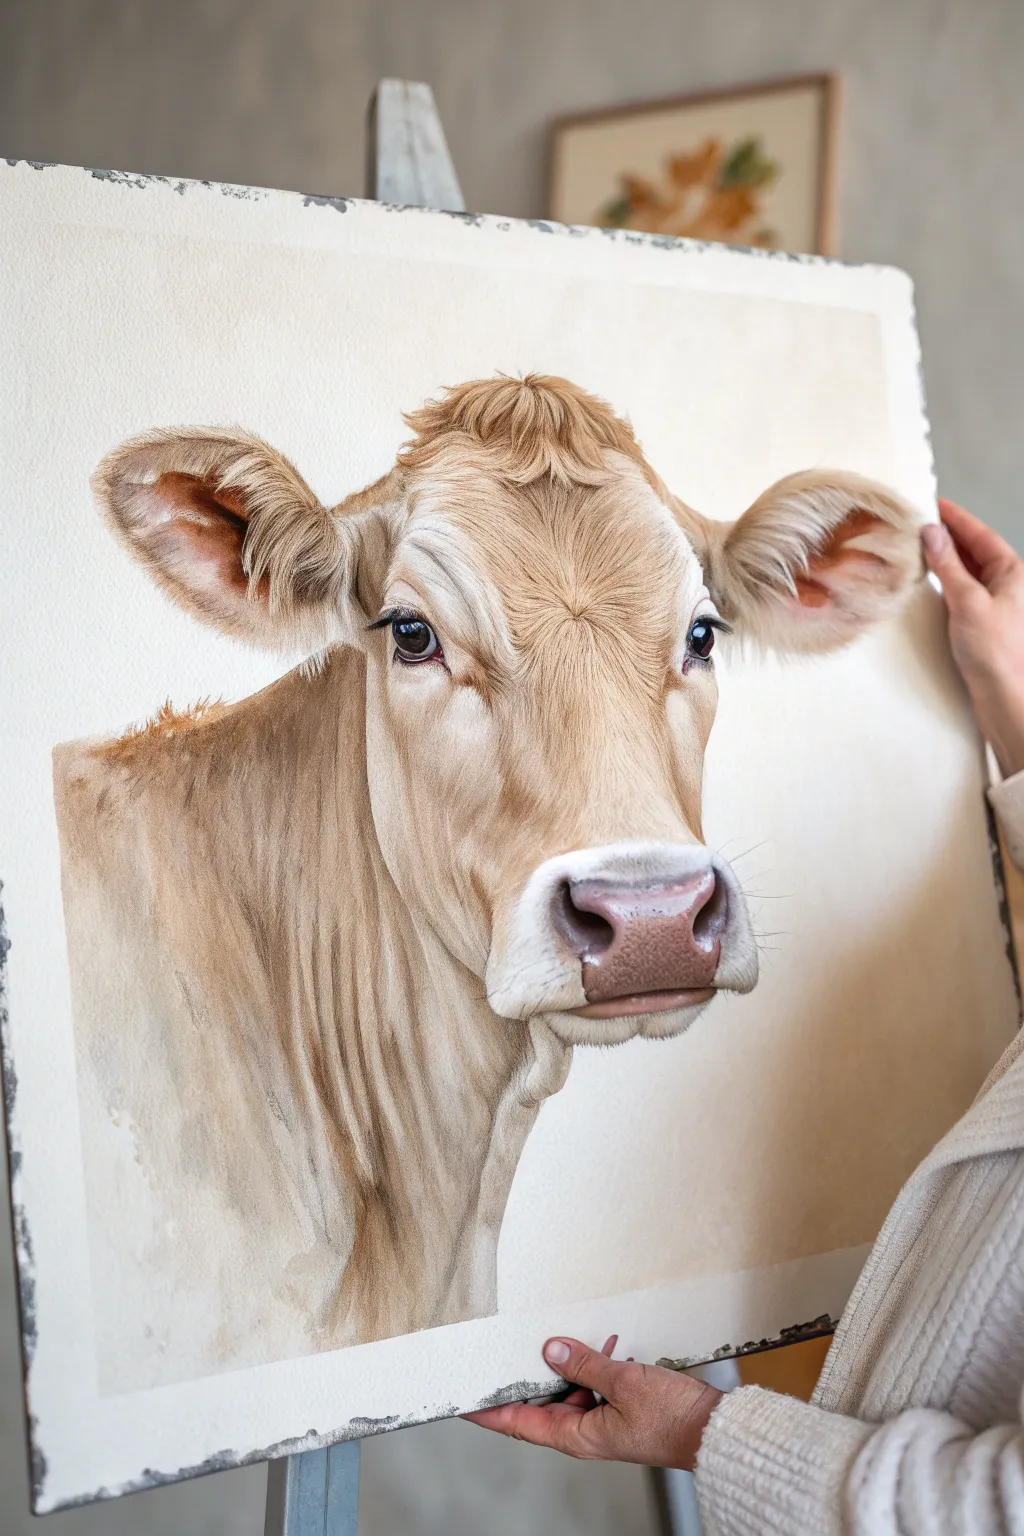
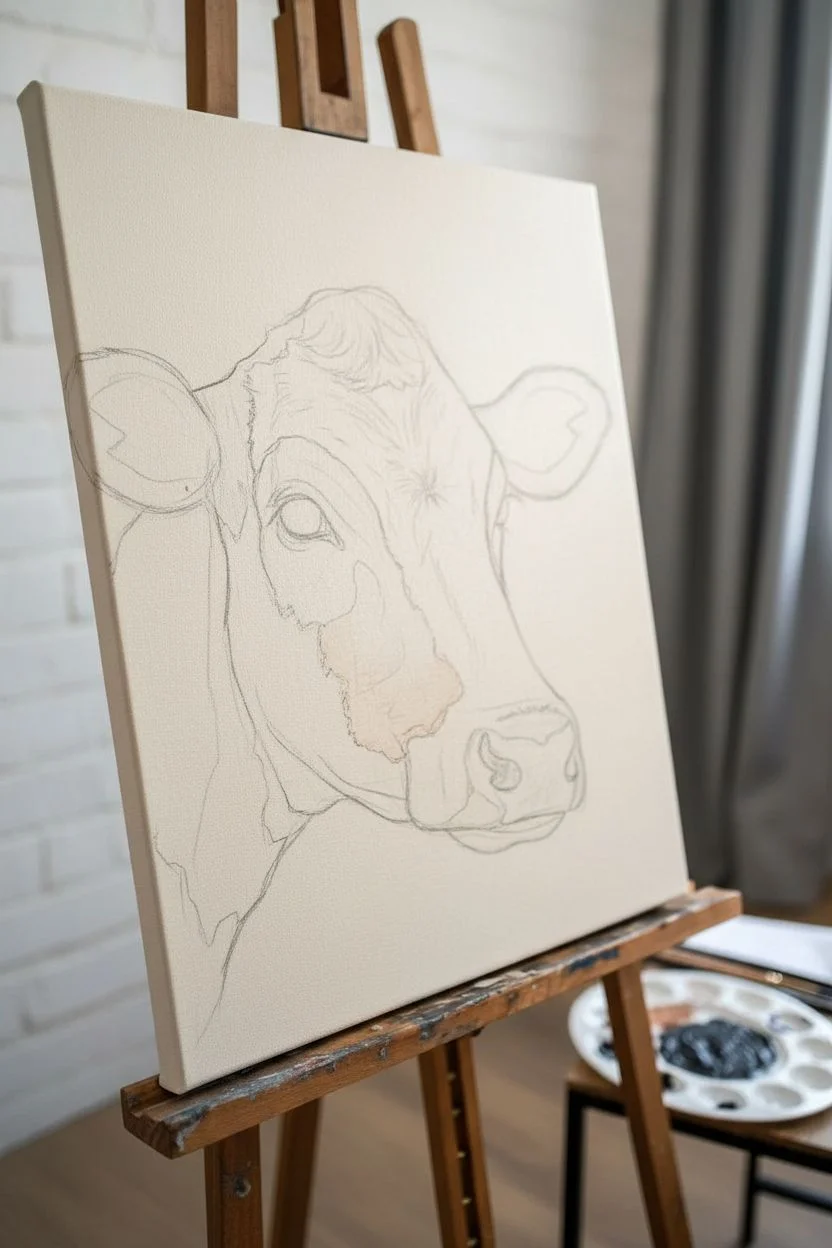
Capture the soulful expression of a dairy cow with this detailed watercolor study, focusing on building layers of soft tans and creams. The result is a lifelike portrait that balances precise fur texture with the soft, wet look of the nose and eyes.
Detailed Instructions
Materials
- Cold-press watercolor paper (300gsm/140lb)
- Watercolor paints (Burnt Sienna, Yellow Ochre, Burnt Umber, Sepia, Ultramarine Blue, Alizarin Crimson)
- White gouache (for highlights)
- Round brushes (sizes 2, 6, and 10)
- Fine liner brush (size 0 or 00)
- Faber-Castell Polychromos colored pencils (optional, for final details)
- Masking fluid
- HB Pencil
- Kneadable eraser
- Board and masking tape
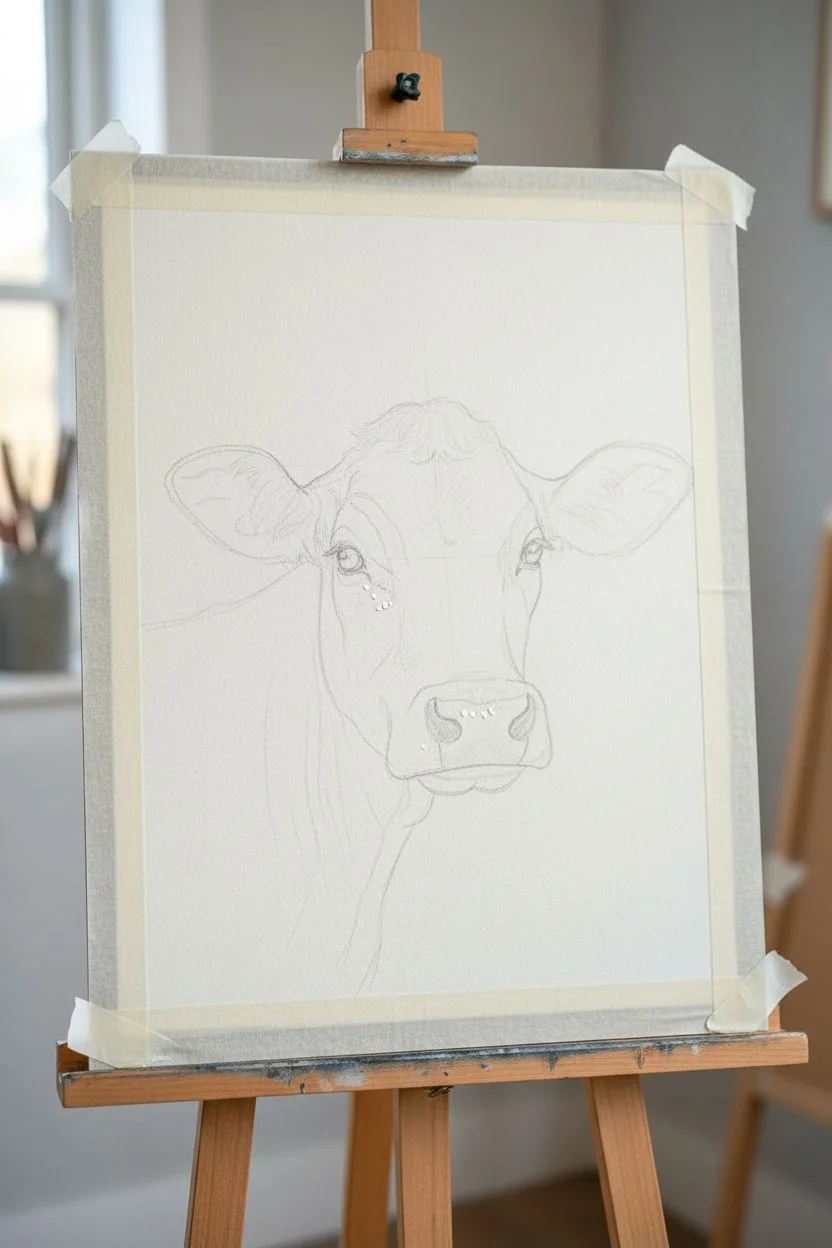
Step 1: Preparation and Sketching
-
Paper preparation:
Begin by taping your cold-press watercolor paper securely to a board. This prevents buckling when we start applying washes and ensures a clean border if you paint to the edge. -
Outline sketch:
Lightly sketch the cow’s contour using an HB pencil. Focus on the triangular shape of the head, the large ears, and the placement of the eyes and nose. Keep lines faint so they don’t show through the transparent watercolor layers later. -
Protecting highlights:
Apply a tiny dot of masking fluid to the brightest highlight in each eye and a few speckles on the damp nose area. Let this dry completely before touching the paper with water.
Pro Tip: Soft Transitions
To keep the cow looking soft rather than bristly, soften the edges of your darker fur strokes with a clean, damp brush before the paint dries completely.
Step 2: Base Layers and Washes
-
Initial wash:
Mix a very dilute wash of Yellow Ochre and a touch of Burnt Sienna. Using a large round brush (size 10), wet the entire cow shape (wet-on-wet technique) and drop in this pale tan color, avoiding the nose and eyes. This establishes the warm undertone. -
Mapping shadows:
While the paper is still slightly damp, drop in a slightly stronger mix of Burnt Sienna and Burnt Umber into the darker areas: the hollow of the ears, under the chin, and the neck folds. Let the colors bleed softly. -
The pink nose:
For the muzzle, mix Alizarin Crimson with a tiny bit of Burnt Sienna to get a fleshy pink. Paint the nose area, leaving the top edge slightly lighter where it meets the fur. I like to drop clear water into the center of the pink while it’s drying to create a ‘bloom’ texture that mimics damp skin. -
Background wash:
If you want the subtle off-white background shown in the reference, apply a very watery wash of raw sienna mixed with plenty of water around the cow, fading it out toward the paper edges.
Level Up: Mixed Media Touch
Use colored pencils just for the eyelashes and the finest ear hairs. The wax resists the watercolor slightly and creates a crisp, tangible texture that paint often misses.
Step 3: Building Form and Features
-
Defining the eyes:
Once dry, paint the irises with Burnt Umber. While wet, drop in Sepia or Lamp Black into the pupil area and the very top of the iris under the lid. This gradient gives the eye depth and roundness. -
Eye details:
Use a liner brush and dark Sepia to carefully outline the eye and paint the eyelashes. The heavy lashes are key to that gentle cow look. -
Fur texture on the face:
Switch to a size 6 brush. Using varied mixes of Burnt Sienna and Yellow Ochre, start painting directional strokes that follow the bone structure of the face. Short strokes for the forehead, longer strokes for the cheeks. -
Ear depth:
Darken the inner ear shadows with a mix of Sepia and Ultramarine Blue to create a cool shadow tone. Use rapid, flicking strokes at the edge of the ears to suggest tufts of hair catching the light. -
Nose details:
Define the nostrils with a dark mix of Alizarin Crimson and Sepia. Darken the shadow under the nose and the line of the mouth to give the muzzle volume.
Step 4: Refining Texture
-
Neck folds:
Using the side of a size 6 brush, deepen the shadows in the neck folds. The fur here is longer, so use longer, sweeping strokes that curve downward. -
Forehead curls:
The ‘top knot’ of hair is a distinct feature. Use a size 2 brush to paint individual curly strands on the forehead using a darker brown, leaving negative space for the lighter undercoat to show through. -
Fine fur details:
For ultra-realistic texture, use a sharpened colored pencil (sanguine or burnt ochre) or a very dry watercolor brush to draw fine hairs over the dried paint, especially around the ears and crown. -
Final highlights:
Rub off the masking fluid on the eyes. If the catch-light is too stark, soften the edge with a damp clean brush. Use white gouache to add tiny wet highlights to the nose bumps and the lower eyelid rim. -
Assessment:
Step back to check your values. If the cow looks too flat, glaze a transparent layer of weak Cobalt Blue over the shadowed side of the face to push it back in space.
Now you have a stunning, soulful portrait ready to be framed in rustic wood


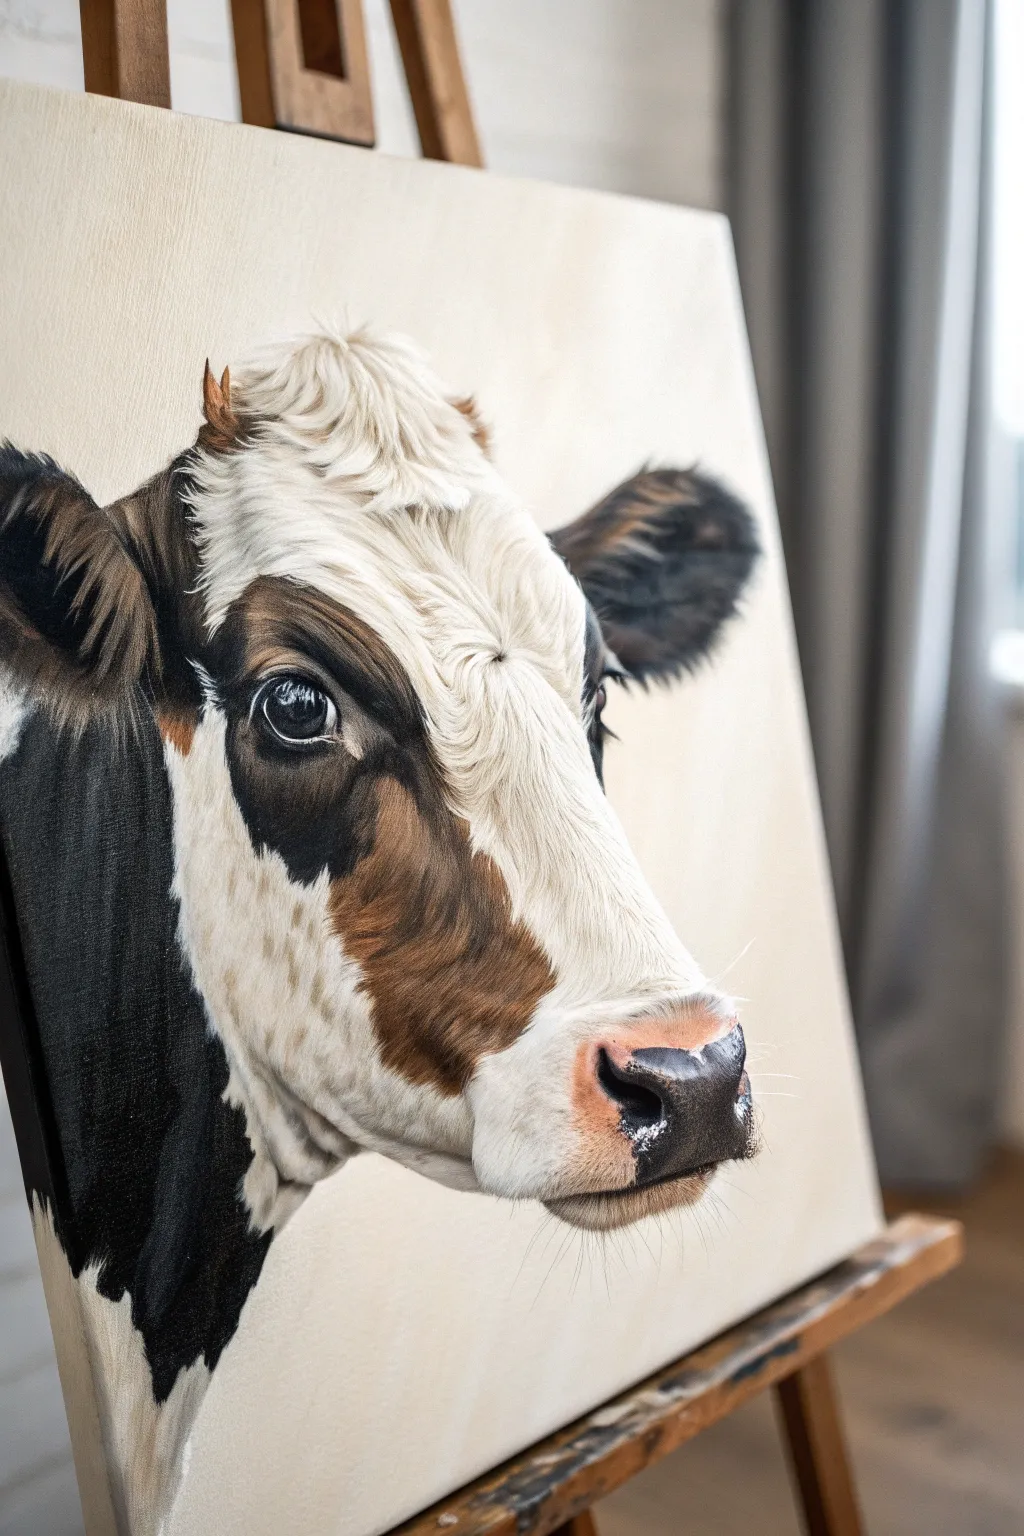
Holstein Close-Up With Bold Spots
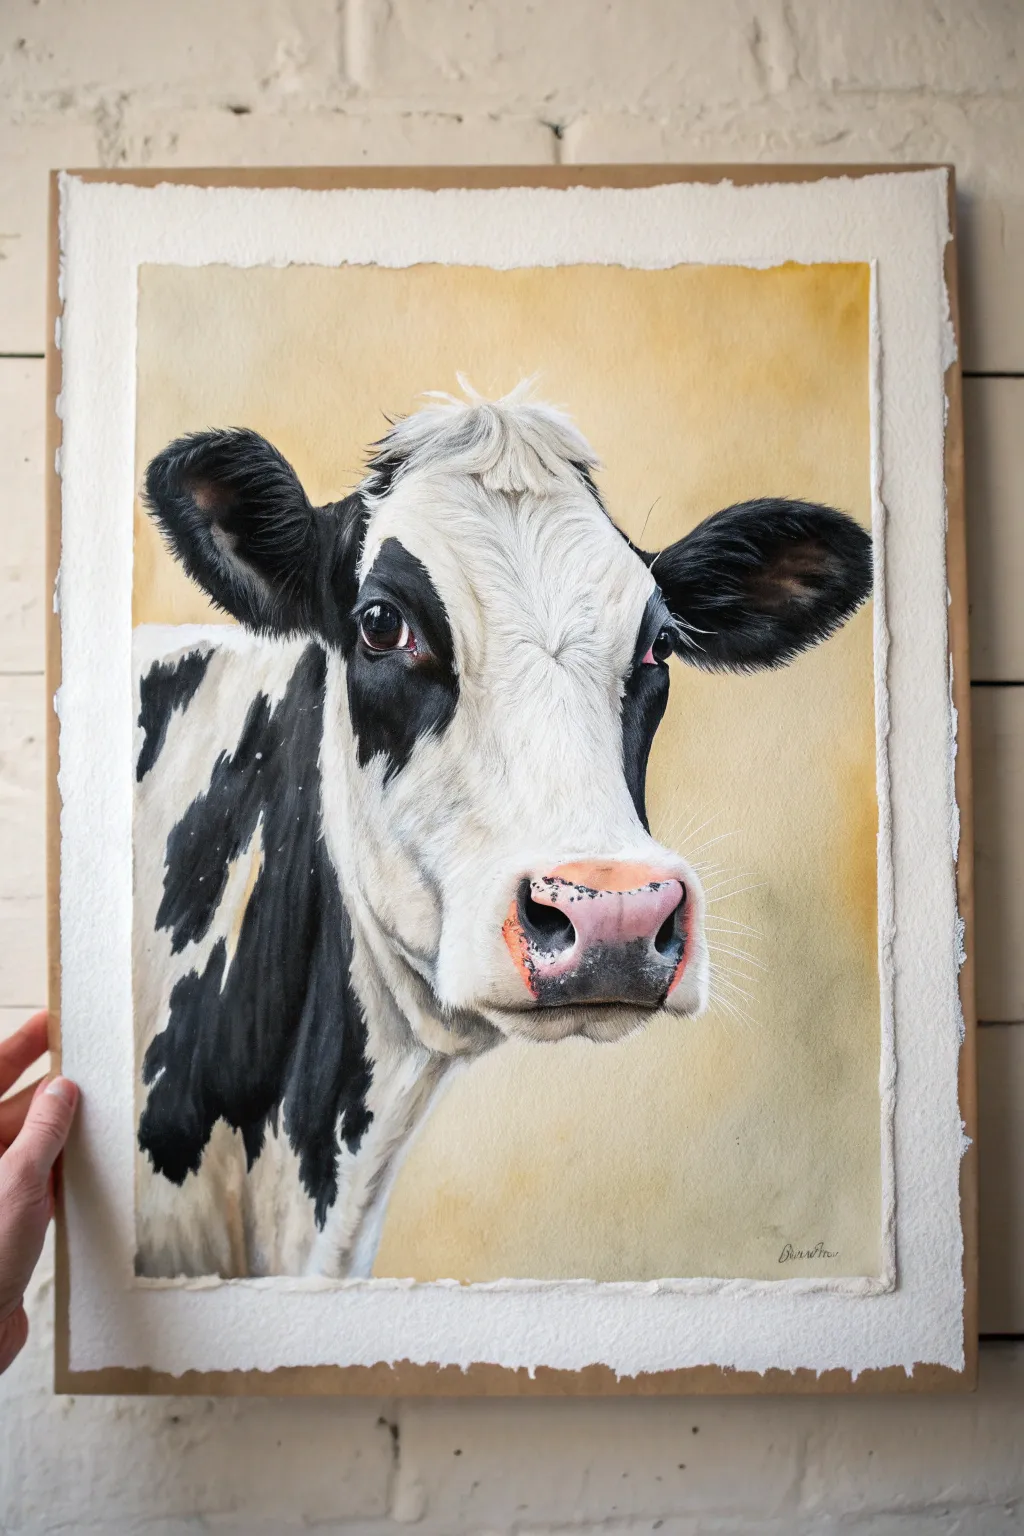
Capture the gentle gaze and distinct markings of a dairy cow with this realistic portrait project. This tutorial focuses on building soft textures for fur and achieving a lifelike wet nose using watercolor and colored pencil techniques.
Step-by-Step Tutorial
Materials
- Hot press watercolor paper (300 gsm or heavier) with deckled edges
- Watercolor paints (Payne’s Gray, Lamp Black, Yellow Ochre, Burnt Sienna, Alizarin Crimson, Ultramarine Blue)
- White gouache or white acrylic ink
- Watercolor brushes (round sizes 2, 6, and 10; finer liner for details)
- Colored pencils (black, dark grey, white, pink) for final details
- Masking fluid (optional)
- Painter’s tape and board
Step 1: Preparation and Background
-
Prepare your surface:
Begin by securing your watercolor paper to a board. Since this piece features deckled edges that are part of the final charm, float-mount the paper by taping it from the back or carefully taping just the very outer rim if you plan to frame over it. -
Draft the outline:
Lightly sketch the cow’s contours using a hard pencil (H or 2H). Pay close attention to the placement of the eyes and the specific shapes of the black spots on the neck and around the eye. Accurate mapping here is crucial for the likeness. -
Apply the background wash:
Mix a large wash of Yellow Ochre with a tiny touch of Burnt Sienna to warm it up. Wet the background area around the cow with clean water first, then drop in the pigment, keeping it darker near the top and fading slightly as you move down. Let the color diffuse softly without hard edges touching the cow.
Wet-on-Wet Nose Trick
To make the nose look realistically wet, dampen the pink area and drop in pigment. Before it dries, lift out tiny highlights with a thirsty brush or tissue.
Step 2: Base Layers and Shadows
-
Initial shading on white fur:
Using a very dilute mix of Ultramarine Blue and a touch of Burnt Sienna (making a soft grey), paint the shadow areas on the white parts of the face. Focus on the bridge of the nose and under the jawline to establish form early on. -
Blocking in the black spots:
Mix a strong black using Lamp Black and Payne’s Gray. Start painting the dark patches, but don’t go full strength yet. Use uneven brush strokes at the edges of the spots to mimic the direction of hair growth rather than painting a smooth line. -
The pink nose base:
Mix a fleshy pink tone using Alizarin Crimson and a little Yellow Ochre. Apply a flat wash over the nose area, leaving small slivers of white paper for the brightest highlights on the nostril rim.
Level Up: Deckled Edges
If your paper doesn’t have those lovely rough edges, tear the paper against a metal ruler instead of cutting it. This mimics the handmade paper look perfectly.
Step 3: Detailed Texture Work
-
Developing the eyes:
Paint the iris with a deep brown-black, leaving a crisp white highlight (or masking it beforehand). Once dry, glaze the entire eye with a very watery layer of Burnt Sienna to give it depth and gloss. -
Deepening the blacks:
Go back into your black spots with a thicker, creamier mix of pigment. This time, really focus on the texture. I find a rigger brush or a very fine round brush works best here to flick tiny hairs outward from the black patches into the white zones. -
Refining the white fur:
Use a damp, clean brush to soften any hard edges in your grey shadows on the face. You want the white fur to look soft and velvety, not angular. -
Nose details:
Dabble a darker, cooler pink (add a speck of blue to your pink mix) into the shadow areas of the nose and around the nostrils. While this layer is damp, drop in small dots of Payne’s Grey to create the speckled ‘freckles’ on the nose so they bleed slightly.
Step 4: Finishing Touches
-
Adding texture with colored pencils:
Once the paint is bone dry, use a sharp black colored pencil to deepen the darkest crevices of the ears and add individual stray hairs along the cow’s top knot. -
Creating whiskers:
Using white gouache or a white gel pen, draw fine, sweeping whiskers originating from the muzzle. Keep your wrist loose to ensure the lines taper naturally at the ends. -
Top knot highlights:
Mix a slightly thicker white gouache and gently paint the messy hair texture on top of the cow’s head (the poll). This brings the white hair forward against the background. -
Final assessment:
Step back and check your values. If the nose looks too flat, enhance the nostril depth with pure black. If the background looks too pale, add another glaze of Yellow Ochre to the corners.
Mounting this piece on a neutral backing board really lets the warm background and stark black-and-white contrast shine


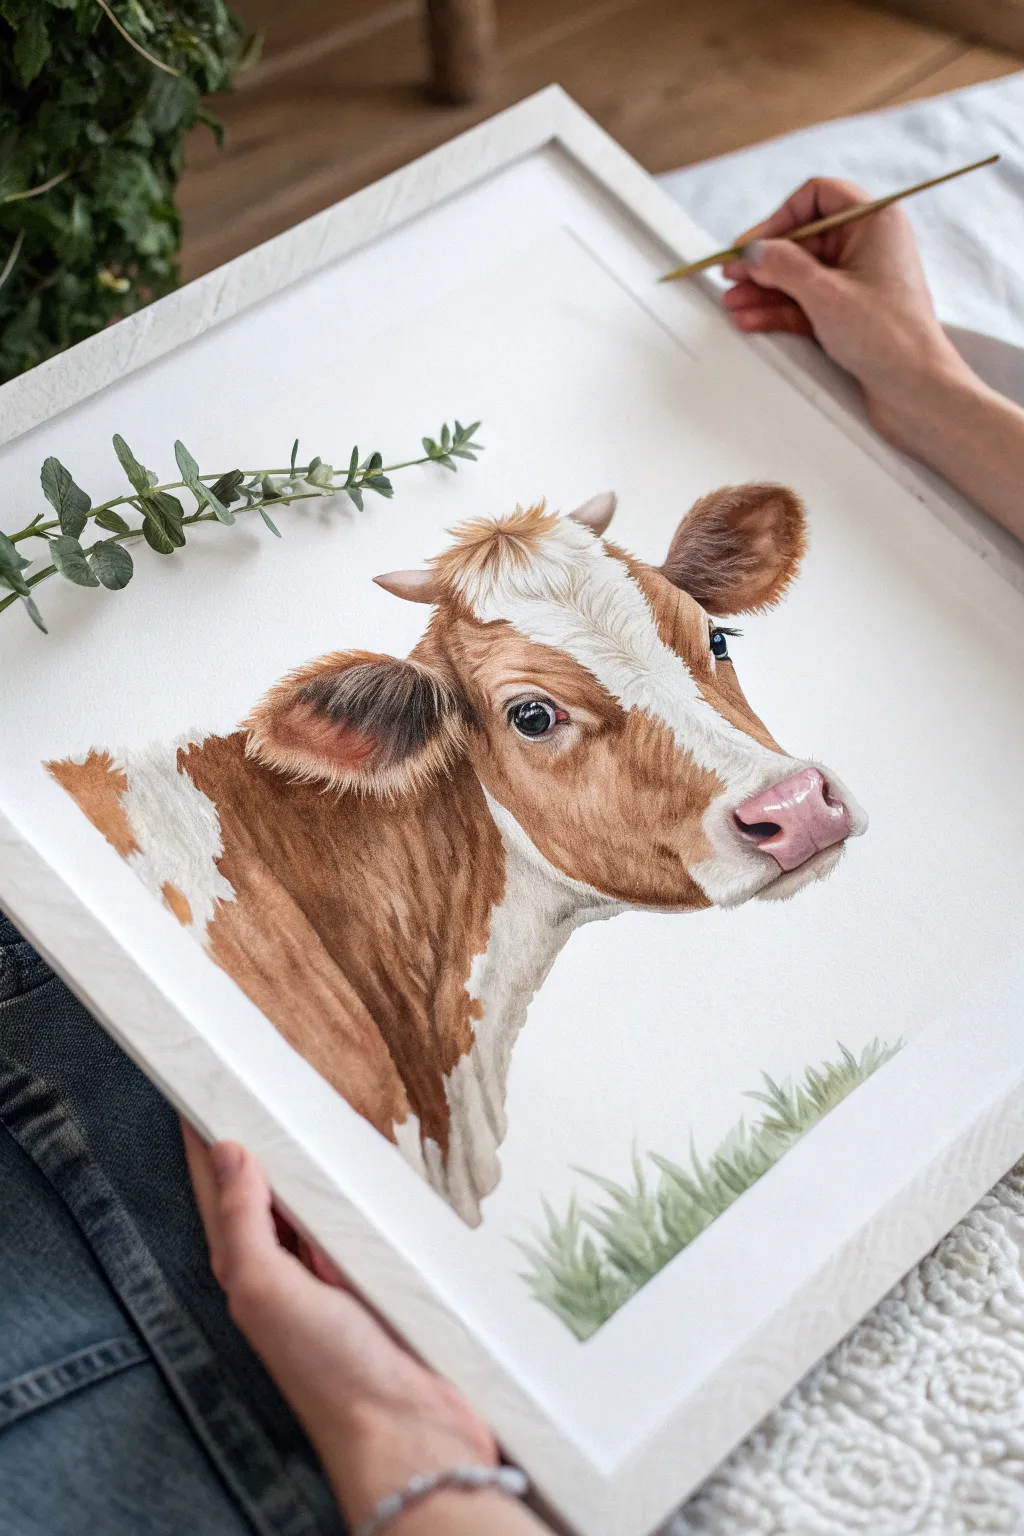
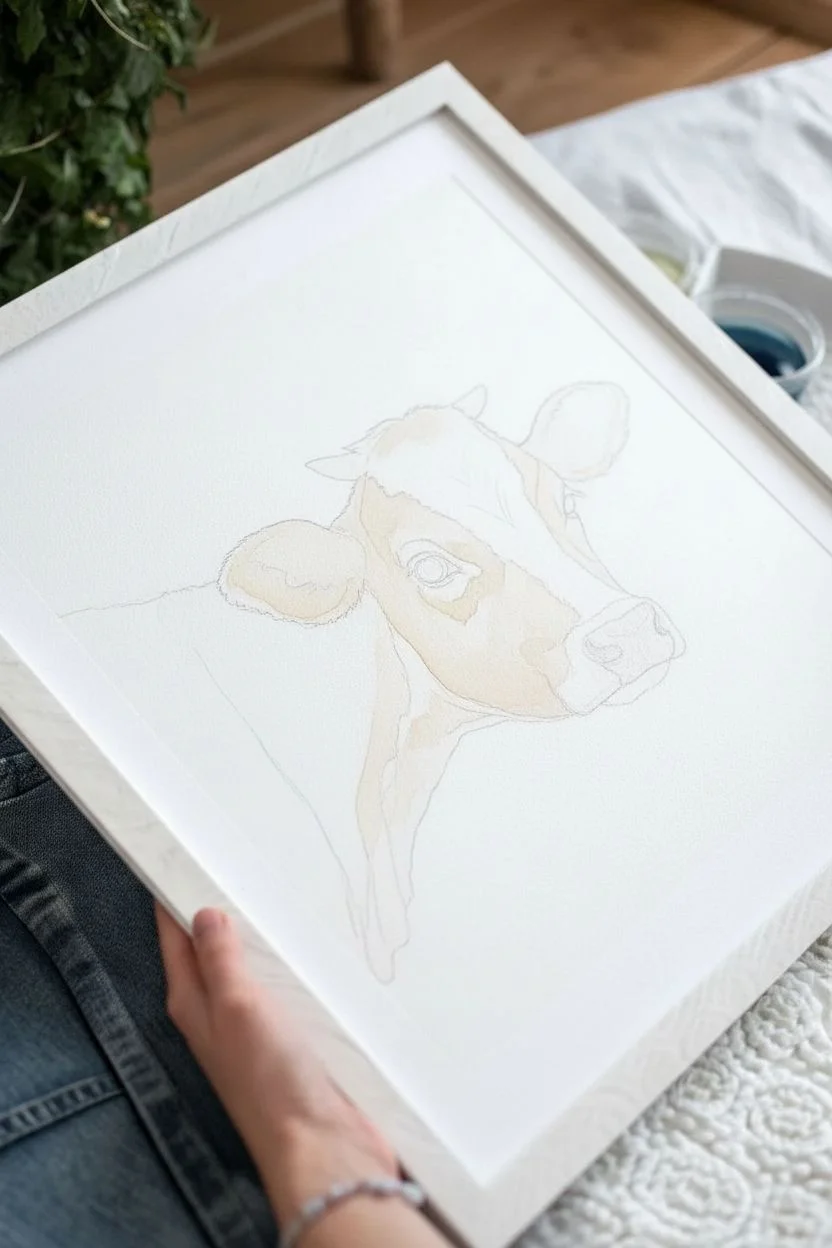
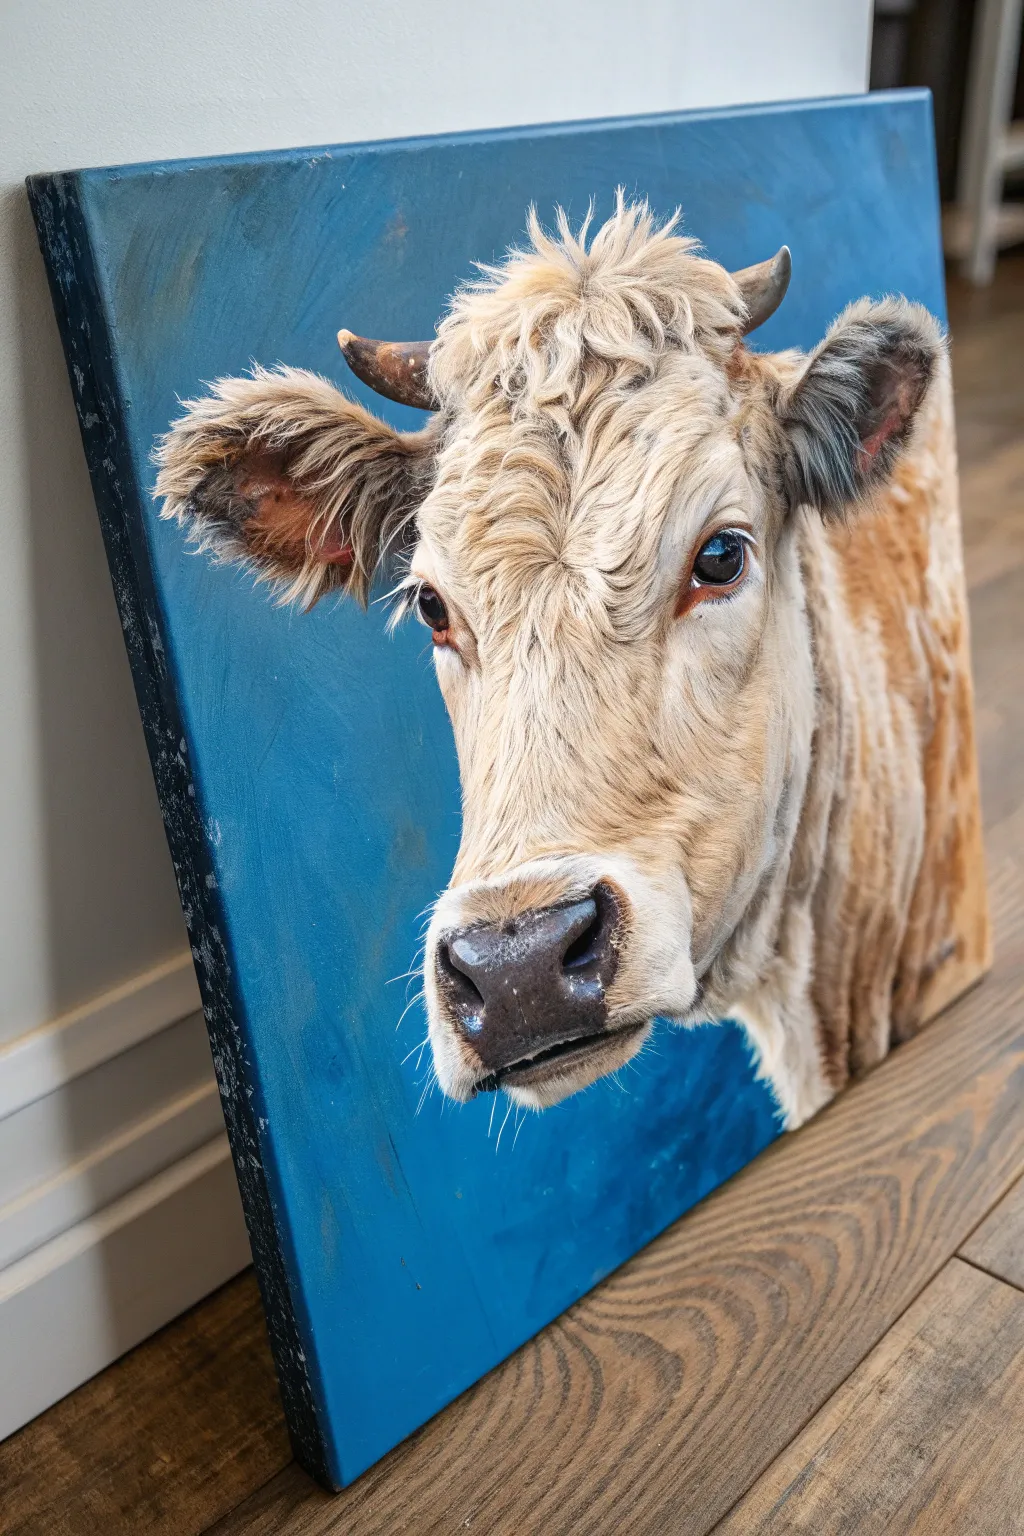
Jersey Cow in Warm Caramel Tones
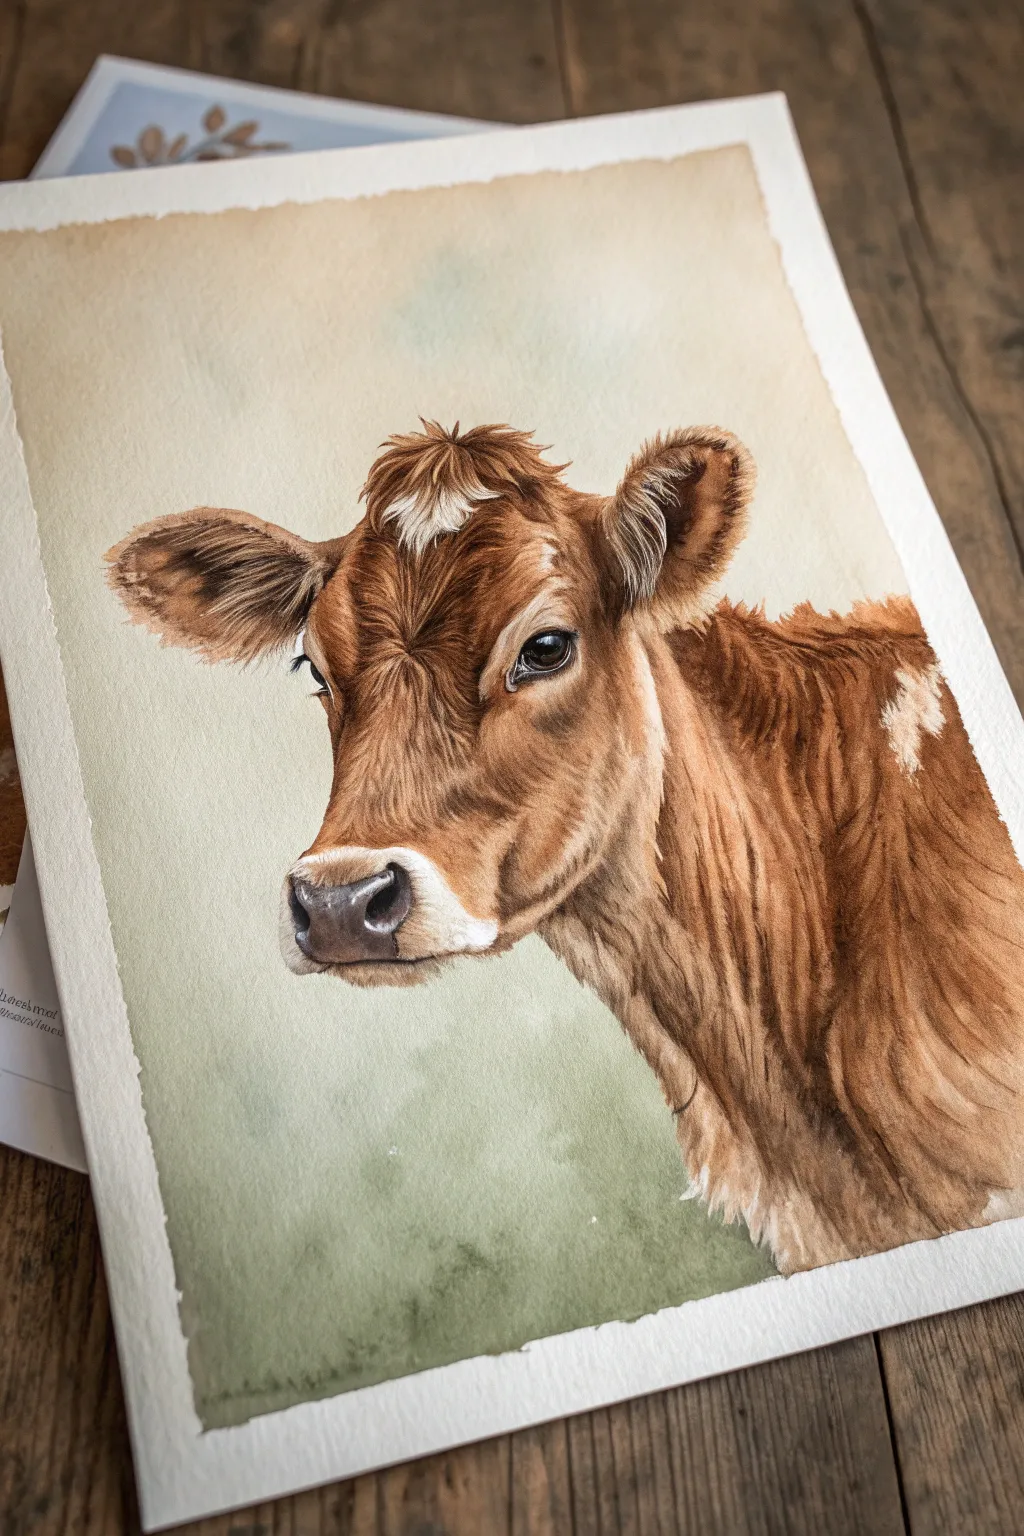
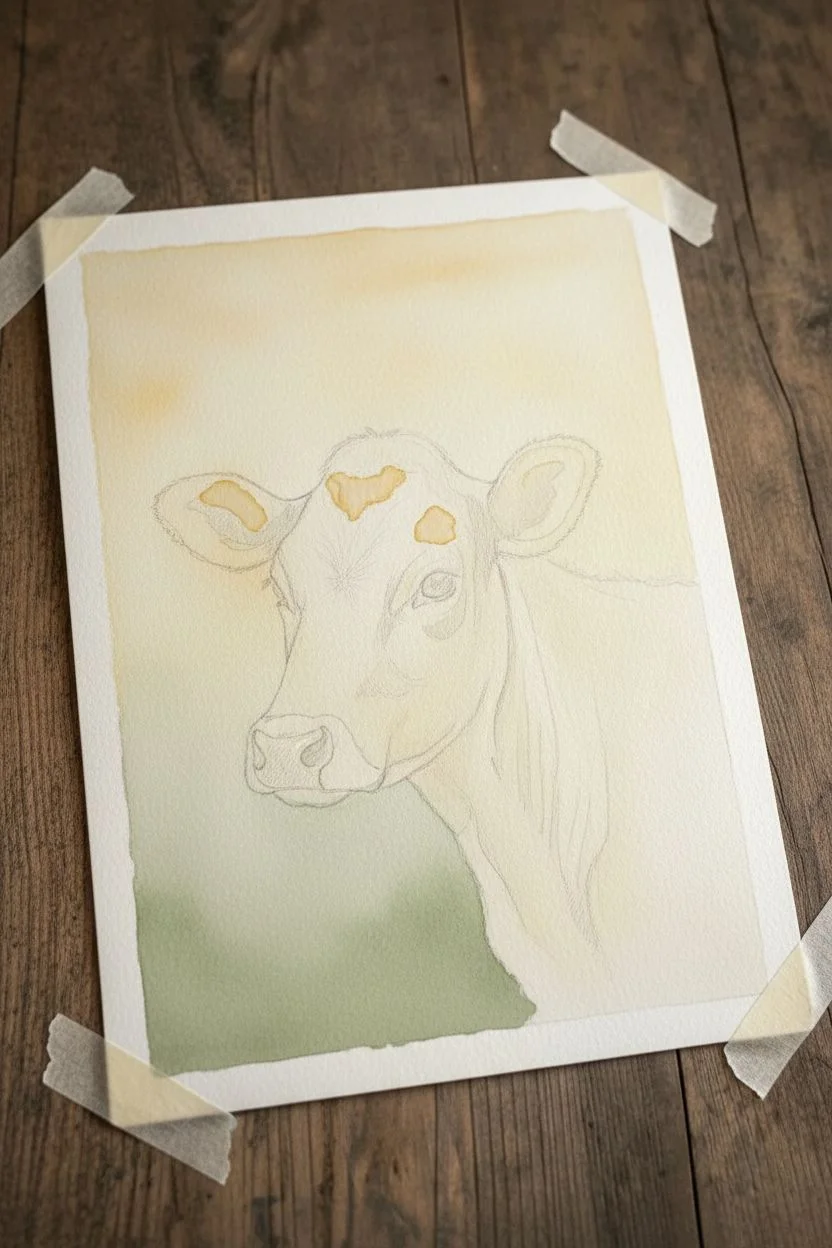
Capture the gentle spirit of a Jersey cow with this warm, realistic watercolor study. This project focuses on building up rich caramel fur textures and creating soulful, lifelike eyes set against a soft, pastoral background.
Step-by-Step Guide
Materials
- Cold press watercolor paper (300 gsm)
- Pencil (HB or 2H)
- Kneaded eraser
- Watercolor paints: Burnt Sienna, Yellow Ochre, Burnt Umber, Payne’s Grey, Sap Green, and Sepia
- White gouache or white gel pen
- Round brushes: Sizes 2, 4, and 8
- Rigger or liner brush (Size 0)
- Masking tape
- Palette
- Paper towels
- Two jars of water
Step 1: Planning and Background
-
Initial sketch:
Begin with a light pencil sketch of the cow’s head and neck. Focus on the wide set of the ears, the subtle curve of the jawline, and the distinct shape of the muzzle. Keep your lines faint so they won’t show through the transparent watercolor layers later. -
Protecting highlights:
Identify the bright white patches on the forehead, the rim of the muzzle, and the sparkle in the eyes. You can either carefully paint around these or apply a tiny bit of masking fluid to keep the paper pristine white. -
Background wash:
Wet the entire background area with clean water, avoiding the cow sketch. While wet, drop in a very dilute mix of Yellow Ochre near the top, fading into a soft, desaturated Sap Green near the bottom. Tilt the paper to let the colors blur naturally, creating an out-of-focus field effect. -
Base layer:
Once the background is bone dry, mix a watery wash of Yellow Ochre and Burnt Sienna. Apply this over the entire cow (except the white markings) to establish a warm, glowing underpainting.
Step 2: Building Form and Fur
-
Mapping shadows:
Using a size 4 brush and a mix of Burnt Sienna with a touch of Sepia, start defining the darker areas: inside the ears, under the jaw, and the deep creases of the neck skin. This establishes the three-dimensional form early on. -
Mid-tone texture:
Switch to a size 2 brush. Using short, directional strokes, apply a Burnt Sienna glaze to mimic the direction of the fur growth. Pay attention to how the hair swirls on the forehead and flows down the neck. -
Deepening the ears:
For the fluffy interior of the ears, use a dry-brush technique with a darker mix of Burnt Umber. Drag the brush lightly to create a rough, hair-like texture that looks soft rather than solid. -
The eyes:
Paint the iris with a dark Sepia, leaving the highlight pure white. While the paint is still damp, drop in pure black pupil for depth. The contrast here is crucial for that gentle cow expression. -
Refining the muzzle:
Paint the nose pad with a mix of Payne’s Grey and a tiny bit of Burnt Sienna. Keep the top edge wet and lift out a little pigment with a thirsty brush to create a shiny, wet look on the nose. -
Shadow accents:
Mix a dark, cool shadow color using Sepia and Blue. Apply this selectively under the tuft of hair on the head and deep inside the ear folds to make the lighter fur pop forward.
Wet-on-Dry Trick
For realistic fur, always ensure the previous layer is completely dry before adding detail strokes. If the paper is damp, your crisp hairs will blur into blobs.
Step 3: Review and Details
-
Fur detailing:
Using your smallest liner brush or a size 0 round, paint individual hairs using a thick mix of Burnt Umber. Focus on the longer hairs on the neck and the messy tuft on the forehead. -
Adding warmth:
I like to glaze a transparent layer of pure Burnt Sienna over the cheek and neck area once the detailed layers are dry. This unifies the individual strokes and brings back that rich golden glow. -
White accents:
If you lost any highlights, use white gouache or a gel pen to reclaim the sparkle in the eye and add tiny stray white hairs on the forehead patch. -
Final contrast check:
Step back from your painting. Is the neck shadow dark enough? Deepen the darkest values one last time to ensure the head really stands out against the pale background.
Vintage Edge
Dip an old toothbrush in watered-down sepia ink and flick tiny specks onto the background for an aged, farmhouse aesthetic.
Peel off your tape carefully to reveal a warm, rustic portrait ready for framing


Highland Cow With Shaggy Bangs
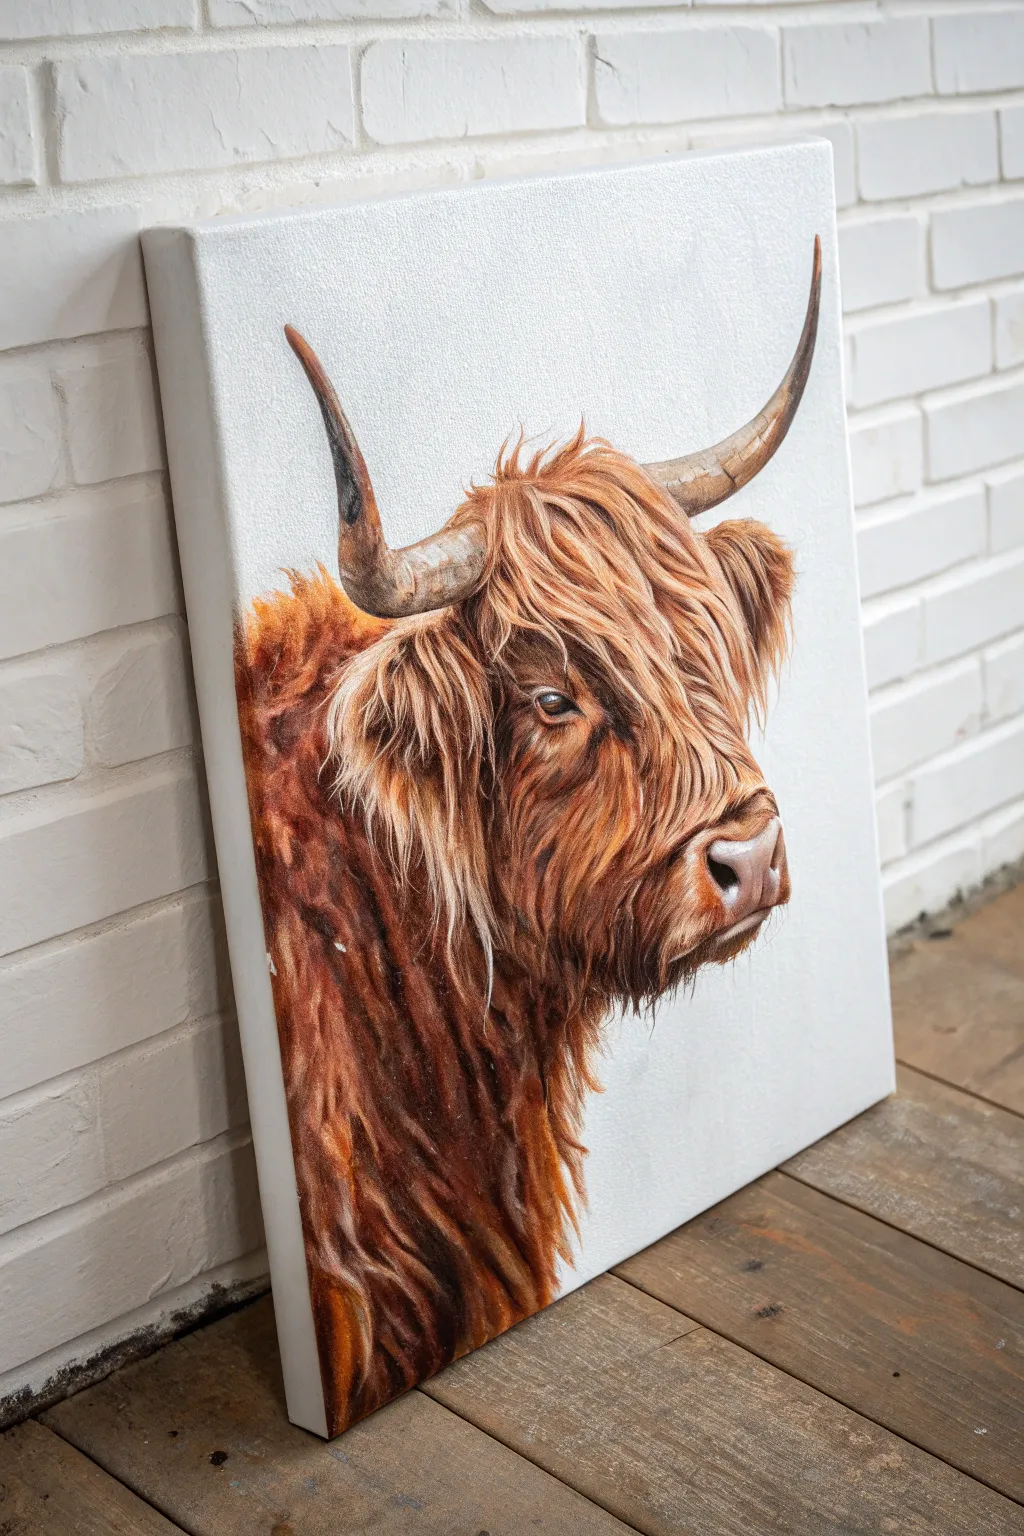
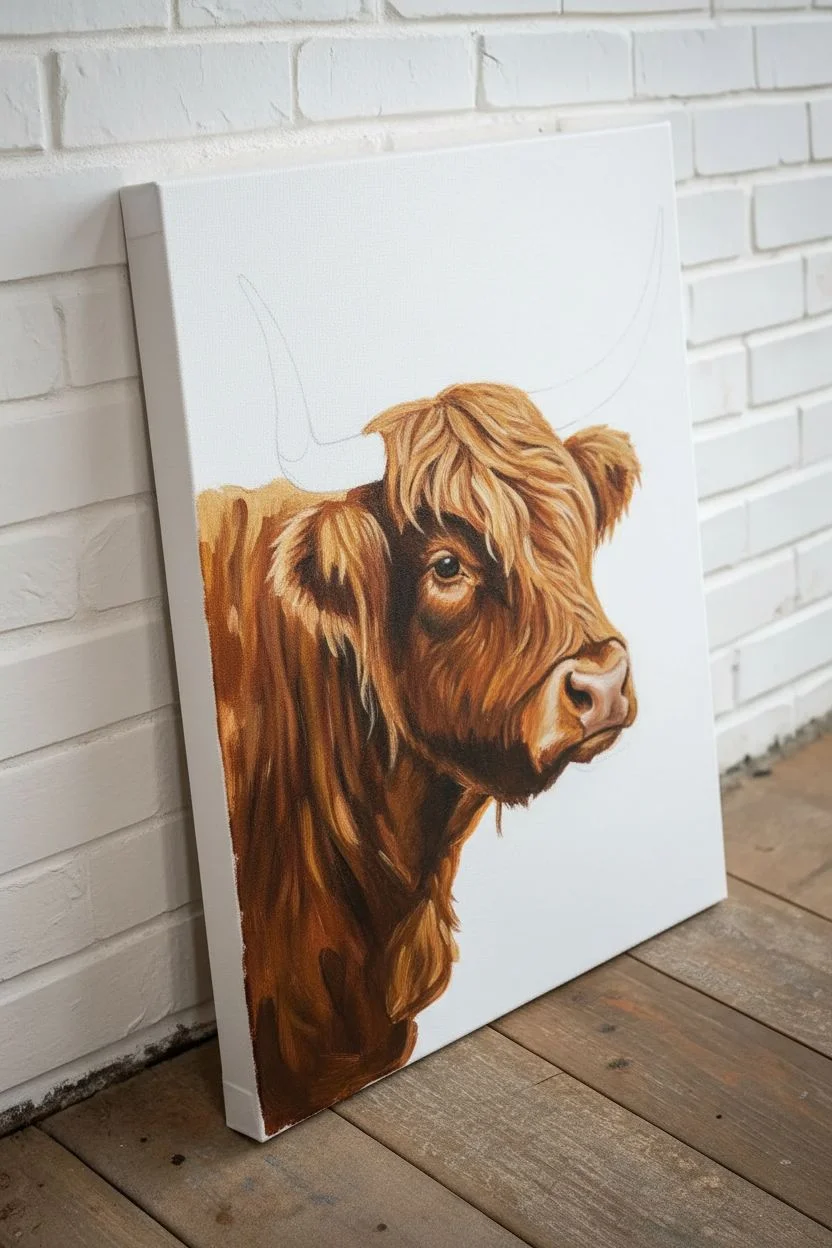
Capture the rustic charm of a Highland cow with this heartwarming acrylic painting project. You will focus on building layers of rich ochre and burnt sienna fur to create a lifelike texture that pops against a crisp white background.
Step-by-Step
Materials
- Stretched canvas (rectangular format, e.g., 16×20 inches)
- Acrylic paints: Titanium White, Burnt Sienna, Yellow Ochre, Burnt Umber, Mars Black
- Assorted brushes: 1-inch flat brush, #6 round brush, #2 liner brush, #4 filbert brush
- Palette for mixing
- Jar of water
- Paper towels
- Pencil for sketching
- Easel or flat surface
Step 1: The Foundation
-
Prepare the background:
Begin by coating your entire canvas with two layers of Titanium White using the large flat brush. This ensures a clean, opaque backdrop. Let the first coat dry completely before applying the second to avoid streaks. -
Lightly sketch the outline:
Using a pencil, draw the basic shape of the cow’s head profile. Focus on the large curve of the neck, the snout’s position, and the sweeping arcs of the horns. Don’t worry about individual hairs yet; just get the proportions right. -
Block in the darks:
Mix Burnt Umber with a touch of Mars Black. With the filbert brush, paint the darkest shadow areas: beneath the chin, deep inside the ear, and the shadowed side of the neck. This establishes your depth map early on. -
Base coat of color:
Create a mid-tone mix using Burnt Sienna and a little Yellow Ochre. Apply this color loosely over the entire cow shape, avoiding the horns and nose area. Brush in the general direction the hair grows—down the neck and sweeping across the forehead.
Brush Technique Tip
For the most realistic fur, always pull your brush stroke from the root of the hair to the tip, lifting pressure as you end the stroke to taper it.
Step 2: Building the Horns and Face
-
Base layer for horns:
Mix Titanium White with a tiny dot of Burnt Umber and Yellow Ochre to get a bone color. Paint the base of both horns. While still wet, blend a darker brown near the tips to show the natural gradient. -
Horn texture details:
Once the horn base is dry, use a small round brush with watered-down black to create the ridges and cracks. Paint thin, curved lines following the contour of the horn to give it volume and age. -
Paint the eye:
With your smallest brush, paint the visible eye using Mars Black and dark brown. Add a tiny dot of pure Titanium White near the top of the pupil for a reflection, which instantly brings life to the animal. -
Define the nose:
Mix a soft pinkish-brown using White and Burnt Sienna. Paint the snout area smooth, contrasting with the furry texture elsewhere. Add darker nostrils and highlight the wet top edge of the nose with white.
Level Up: Texture Medium
Mix impasto gel or modeling paste into your highlight colors. This adds physical 3D texture to the canvas, making the fur look thick enough to touch.
Step 3: Creating the Shaggy Fur
-
Layering mid-tones:
Switch to a round brush. Using pure Yellow Ochre and Burnt Sienna, start painting distinct clumps of hair. Focus on the ‘bangs’ overlapping the forehead and the longer strands on the neck. -
Adding deep shadows:
Take your dark brown mix again. Paint thin, dark lines between the lighter clumps of hair to create separation and shadow. This negative space makes the lighter fur stand out. -
Detailing the ears:
The ears require shorter, fluffier strokes. Use the tip of the brush to flick paint outward from the center of the ear, mimicking the soft, tufted texture found there. -
Introducing highlights:
Mix Titanium White with Yellow Ochre. Using the liner brush, paint thin, individual hairs on top of your previous layers. Focus these highlights where the light hits: the top of the head, the bridge of the nose, and the outer neck. -
Refining the bangs:
Pay special attention to the hair covering the face. Ensure some strands sweep over the base of the horns and others curve down towards the nose to create that signature messy look. -
Softening edges:
Look at the edges where the fur meets the white background. Use wispy, feathery strokes to extend the hairs slightly onto the white, avoiding a hard, cutout appearance.
Step 4: Final Touches
-
Brightest highlights:
I like to load my liner brush with pure Titanium White (slightly watered down) for the final few hairs. Add just a few stray strands catching the light on the very top of the head and the tip of the chin. -
Deepen contrast:
Step back and assess the painting. If the fur looks flat, add a glaze of watered-down Burnt Umber to the deepest shadows on the neck to push them further back. -
Clean up the background:
If any paint smudged onto the white background, take a clean brush with Titanium White and carefully touch up the negative space around the cow for a crisp finish.
Hang your finished masterpiece in a well-lit spot to show off those intricate fur details
BRUSH GUIDE
The Right Brush for Every Stroke
From clean lines to bold texture — master brush choice, stroke control, and essential techniques.
Explore the Full Guide
Peeking Cow From the Side
Capture the gentle curiosity of a farmyard friend with this realistic yet soft watercolor portrait. This project focuses on building layers of warm russet tones and white highlights to create lifelike fur texture and a soulful, glossy eye.
Step-by-Step Tutorial
Materials
- High-quality hot press watercolor paper (smooth texture)
- Watercolor paints (Burnt Sienna, Yellow Ochre, Burnt Umber, Ultramarine Blue, Alizarin Crimson, Sap Green)
- White wooden frame (approx. 12×16 inches)
- Round watercolor brushes (sizes 2, 6, and 00 for fine details)
- Pencil (HB) and kneaded eraser
- Masking fluid (optional)
- Clean water jars and paper towels
Step 1: Sketch and Base Layers
-
Initial outline:
Begin by lightly sketching the cow’s head entering from the left side of the paper. Focus on the triangular shape of the nose and the placement of the eye. Keep your pencil lines very faint so they don’t show through the final paint. -
Protect the whites:
Identify the bright white patch on the forehead, the area around the muzzle, and the tiny catchlight in the eye. You can carefully paint around these, or apply a thin layer of masking fluid to preserve the pure white of the paper. -
First wash:
Mix a very watery wash of Yellow Ochre and Burnt Sienna. Apply this loosely to the brown areas of the cow’s face and neck, avoiding the white markings. This establishes a warm undertone for the fur. -
Pink tones:
While the first wash is drying, mix a diluted Alizarin Crimson with a touch of Burnt Sienna to create a fleshy pink. Paint the nose area, keeping it wet-on-wet to ensure soft transitions, but leave the nostril area empty for now. -
Initial shadows:
Once the base layer is dry, mix a light gray using Ultramarine Blue and a tiny bit of Burnt Sienna. Glaze this gently under the jawline and inside the white ear fur to give the form some three-dimensional volume.
Step 2: Building Texture and Features
-
Fur texture:
Switch to your size 6 brush. Using a mix of Burnt Sienna and Burnt Umber, start painting directional strokes that follow the growth of the hair. Keep these strokes somewhat loose for the neck area but tighter around the face. -
The eye:
The eye is the focal point. Paint the iris with a dark mix of Burnt Umber and Ultramarine Blue—it should look almost black. Be extremely careful to leave the white highlight unpainted. This reflection gives the animal life. -
Deepening the nose:
Return to the nose. Add a slightly darker pink mix to the shadowed areas and the nostril rim. Paint the nostril opening itself with a dark, cool brown, softening the edges so it doesn’t look like a cutout hole. -
Refining the ears:
For the ears, use short, flicking strokes with a size 2 brush. The outer edges should look fuzzy. Mix Burnt Umber with a little red for the inner ear shadows to show the skin showing through the fur. -
Layering the coat:
I like to let the first texture layer dry completely before adding the next. Go over the brown patches again with a darker mixture (Burnt Umber) to create depth, focusing on the area behind the jaw and under the ear.
Muddy colors?
If your fur looks muddy, you might be overworking wet layers. Let each layer dry completely before adding the next glaze. Patience is key for crisp fur texture.
Step 3: Fine Details and Finishing Touches
-
Whiskers and eyelashes:
Using your smallest 00 brush and a dark, inky consistency of paint, add the long eyelashes above the eye. Use quick, confident flicks. Do the same for the few subtle whiskers on the chin and muzzle. -
White fur details:
If you feel the white areas look too flat, use a very diluted gray to paint tiny hair-like shadows. This suggests that the white patch has texture and isn’t just empty paper. -
Adding the grass:
Mix Sap Green with a touch of Yellow Ochre. At the bottom right corner, paint loose, upward strokes to suggest blades of grass. Keep this area slightly out of focus to ensure attention stays on the cow’s face. -
Final assessment:
Step back and look at your contrast. If the darks have faded as they dried (which watercolor often does), glaze over the deepest shadows one last time to make the image pop. -
Framing:
Once the painting is bone dry—wait at least a few hours—place it into your white wooden frame. A simple frame works best here to complement the rustic subject matter without distraction.
Add dimensionality
Carefully lift out a few tiny highlights on the nose bridge using a damp brush and clean paper towel. This ‘lifting’ technique adds a soft, velvety glow to the snout.
Hang your charming new artwork in a kitchen or entryway to greet guests with a friendly farmyard gaze
Half-Face Cow Crop for Beginners
This project focuses on a striking, realistic cow portrait that uses a tight crop to emphasize the animal’s gentle expression and textured coat. By painting on a light-colored surface, you’ll let the negative space breathe while building up layers of rich browns, blacks, and creamy whites.
Detailed Instructions
Materials
- Square canvas or prepared wood panel (approx. 16×16 or 20×20 inches)
- Acrylic paints: Titanium White, Mars Black, Burnt Umber, Raw Sienna, Yellow Ochre, Burnt Sienna
- Flat synthetic brushes (sizes 8 and 12)
- Round detail brushes (sizes 0 and 2)
- filbert brush (size 6)
- Palette knife (optional for mixing)
- Water container and paper towels
- Charcoal pencil or light grey pastel
- Easel
Step 1: Sketching and Blocking
-
Composition and Layout:
Begin by deciding your composition. The key to this ‘half-face’ look is letting the neck flow off the bottom left edge while keeping the eyes central. Use a charcoal pencil to lightly sketch the outer contour of the cow’s head, ears, and snout. -
Mapping the Features:
Draw the placement of the eyes, nostrils, and the distinct patches of color. Pay close attention to the shape of the white blaze down the forehead, as this negative space defines the face structure. -
First Dark Layer:
Load a size 8 flat brush with thinned Mars Black. paint the deepest shadow areas first: the neck on the left, the dark patch around the left eye, and the inner ear shadows. Keep the paint thin so the texture of your canvas still shows through slighty. -
Mid-Tone Browns:
Mix Burnt Umber with a touch of Burnt Sienna. Apply this to the brown patches on the cheek and around the snout. Don’t worry about fur texture yet; just get the solid color down to establish the map of the face.
Fur Flow Guide
Always paint fur strokes in the direction of hair growth. On the forehead, they often swirl outward; on the nose, they flow downward. This mimics anatomy.
Step 2: Developing the Eyes and Snout
-
The Eye Base:
Using a smaller filbert brush, paint the eyeball completely black. While it’s wet, mix a dark grey and add a subtle curve near the bottom to suggest roundness. -
The Spark of Life:
Once the eye is tacky or dry, use a size 0 round brush with pure Titanium White to add the reflection highlight. Place it near the top of the pupil; this tiny dot instantly brings the animal to life. -
Pink Snout Base:
Mix Titanium White with a tiny bit of Burnt Sienna and a speck of red (or just use the brown mix very sparingly) to create a fleshy pinkish-tan. Paint the nose area, keeping edges soft. -
Nostril Details:
Use dark grey or soft black to define the nostril shape. Soften the transition between the dark nostril hole and the pink skin using a damp brush to avoid a cartoonish outline.
Step 3: Fur Texture and Detailing
-
Directional Brushstrokes:
Switch to a clean filbert or bright brush. Observe the direction the fur grows—down the snout, radiating from the forehead swirl. Start painting the white fur areas using creamy white (mix white with a tiny dot of Raw Sienna) using short, confident strokes. -
Layering the White:
Go over the white areas again with pure Titanium White on the high points—the bridge of the nose and the top of the head—to create volume. -
Blending the Patches:
Where the brown and white patches meet, use a size 2 brush to pull small flicks of the lighter color into the darker color, and vice versa. This creates a realistic jagged fur edge rather than a straight line. -
Eyelashes and Whiskers:
With your smallest liner brush and thinned black paint, add the long eyelashes above the eye. Use quick, flicking motions so the lines taper naturally at the ends. -
Ear Texture:
The inside of the ear needs soft, fluffy texture. Use a mostly dry brush with a light grey-brown mix and scumble (scrub gently) inside the ear to create a fuzzy appearance. -
Wet Nose Shine:
Return to the nose area. Mix a watery white and glaze a highlight over the top curve of the nose leather to make it look moist. -
Final Adjustments:
Step back from your easel. Check your darks—if the black neck area looks flat, add a subtle deep blue-black glaze to create depth. Ensure the background remains clean; if you smudged it, paint over it with a shade matching your canvas or panel.
Make It 3D
Don’t just use pure white for the white fur. Mix a light blue-grey for the shadowed white areas under the jaw to make the head look truly three-dimensional.
Now you have a stunning, farmhouse-style portrait ready to hang or lean on a mantel

PENCIL GUIDE
Understanding Pencil Grades from H to B
From first sketch to finished drawing — learn pencil grades, line control, and shading techniques.
Explore the Full Guide
Tongue-Out Cow Licking Its Nose

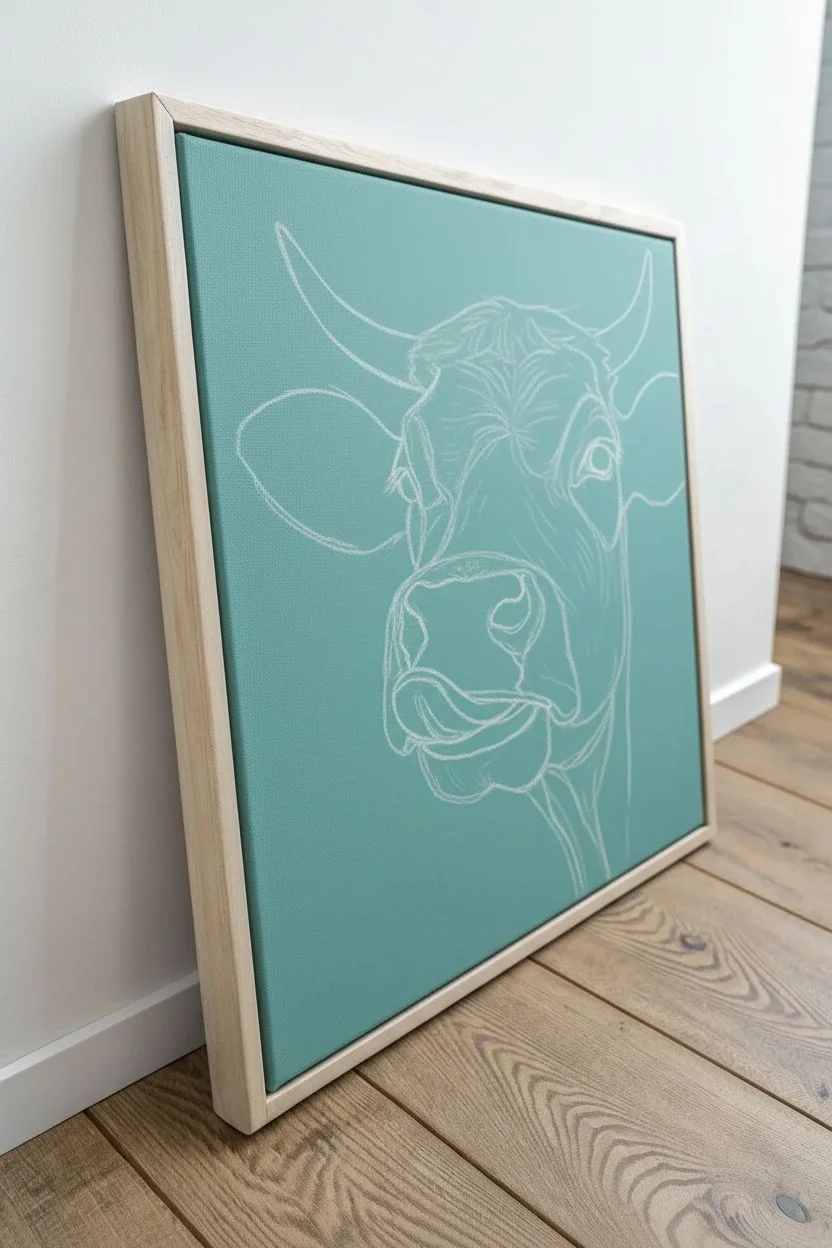
Capture the whimsical personality of farm life with this charming acrylic painting of a cow sticking its tongue out. Set against a striking teal background, the realistic fur textures and humorous expression make for a delightful piece of decor.
How-To Guide
Materials
- Stretched canvas (16×20 or similar)
- Acrylic paints (primary colors plus titanium white, burnt umber, raw sienna, mars black, and teal/aqua)
- Set of synthetic brushes (flat shaders, rounds, and a fine liner)
- Palette knife
- Water cup and paper towels
- Chalk or pastel pencil for sketching
- Floating wooden frame (optional)
Step 1: Background & Sketching
-
Prep the background:
Begin by covering your entire canvas with a solid coat of teal or aqua paint. Use a large flat brush to ensure smooth, even coverage. If the canvas texture shows through too much, apply a second coat once the first is dry. -
Dry completely:
Let the background layer dry fully before moving on. This prevents your sketch lines from digging into wet paint. -
Outline the subject:
Using a light chalk or pastel pencil, sketch the cow’s head. Start with a large oval for the head, position the ears on the sides, and mark the large snout area. Don’t forget the curve of the tongue reaching up toward the nose.
Step 2: Blocking in Base Colors
-
Map the white areas:
Mix a warm white using Titanium White with a tiny touch of Yellow Ochre or Raw Sienna. Block in the main face area, forehead, and bridge of the nose, avoiding the eyes and snout. -
Add brown markings:
Using Burnt Umber mixed with a little white, fill in the ears and the neck area on the right side. Keep the edges ragged where the brown meets the white to suggest fur texture later. -
Base the snout:
Mix a pinkish-grey tone for the snout using white, a touch of red, and a tiny bit of black or brown. Fill in the entire nose area, leaving holes for the nostrils. -
First layer of the tongue:
Paint the tongue with a mix of red and white to create a fleshy pink. It should be slightly brighter and warmer than the snout color.
Fixing “Flat” Fur
If fur looks flat, you likely over-blended. Let it dry, then layer crisp, individual strokes on top using different shades of the base color to create depth.
Step 3: Developing Details and Texture
-
Paint the eyes:
Use Mars Black for the pupils and a dark brown for the iris. Always leave a tiny speck of white paper or add a white dot later for the ‘catchlight’ reflection, which brings the cow to life. -
Create snout texture:
Once the snout base is dry, stipple darker pink/grey dots over the nose area using an old, scruffy brush or the tip of a stiff sponge. This mimics the bumpy texture of a cow’s nose. -
Define the nostrils:
Deepen the nostrils with a mix of dark purple and black. Soften the edges into the snout so they don’t look like pasted-on circles. -
Detail the tongue:
Add shadows under the curl of the tongue with a darker red-purple. Use a lighter pink to highlight the wet, raised curve where the light hits it. -
Enhance the horns:
Paint the horns starting with a dark brown base at the connection point, blending into a lighter beige toward the tips. Add horizontal striations with a liner brush to show growth ridging.
Level Up: Texture Medium
Mix molding paste into your white paint for the forehead curls. It physically raises the paint, giving the cow’s ‘hairdo’ actual 3D texture you can feel.
Step 4: Fur and Final Touches
-
Layering white fur:
Switch to a smaller round brush or filbert. Mix a bright white and start flicking short strokes over the previous off-white base layer. Pay attention to the direction of hair growth, especially swirling on the forehead. -
Detailing brown fur:
Do the same for the brown patches on the ears and neck. Use lighter browns and tans to add highlights to the tips of the fur clumps on the ears. -
Refine the edges:
Use your smallest liner brush to pull tiny individual hairs out from the cow’s silhouette onto the teal background. This breaks up the hard outline and adds realism. -
Add whiskers:
Mix a thin, watery light grey paint. With a quick, confident hand, pull long whiskery strokes from the muzzle area outward. -
Final highlights:
I like to add one last pop of pure white to the wettest part of the nose and the glint in the eye to finalize the expression. -
Frame it:
Once completely cured, install your canvas into a light wood floating frame to match the rustic-modern aesthetic of the reference image.
Hang your quirky masterpiece in a kitchen or entryway for an instant conversation starter that brings a smile to everyone’s face
Flower Crown Boho Cow

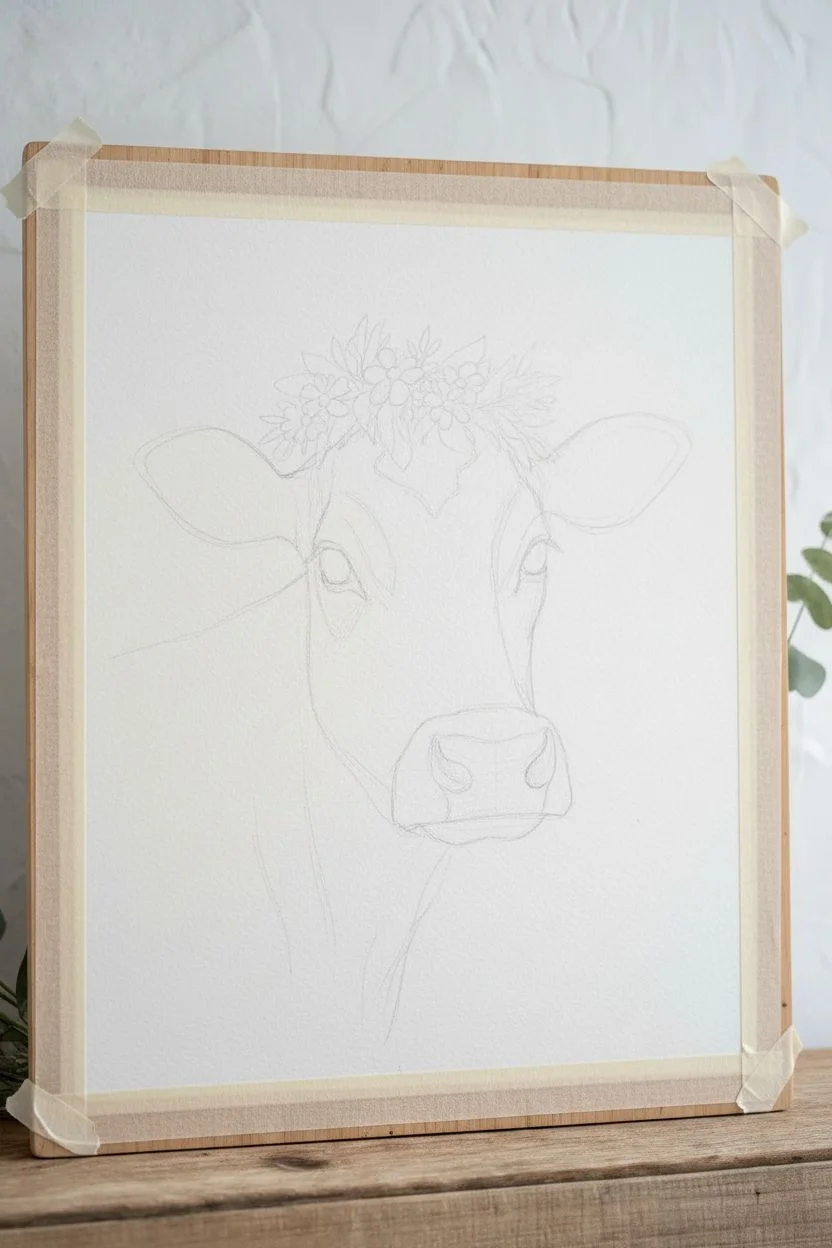
Capture the gentle spirit of this Jersey cow adorned with a delicate white floral wreath in this soft, rustic artwork. The painting combines realistic animal portraiture with loose, romantic botanicals for a perfect farmhouse-chic piece.
Detailed Instructions
Materials
- Heavyweight watercolor paper (300gsm/140lb, cold press)
- Watercolor paints (Burnt Sienna, Raw Umber, Yellow Ochre, Payne’s Grey, Titanium White gouache)
- Round brushes (sizes 2, 6, and 10)
- Flat wash brush (1/2 inch) for background tinting
- HB pencil and kneaded eraser
- Painter’s tape and drawing board
- Fine liner brush for fur details
Step 1: Sketching the Subject
-
Prepare the surface:
Tape your watercolor paper down securely to your board on all four sides. This prevents buckling when washes are applied later. -
Block in basic shapes:
Start with a light sketch using an HB pencil. Draw a large oval for the head and a smaller rounded rectangle for the snout area. Position the ears extending outward from the upper sides of the oval. -
Refine features:
Define the eye placement, ensuring they sit widely apart on the forehead. Sketch the nostrils and the distinct Y-shape of the muzzle. -
Add the crown:
Lightly sketch the floral crown sitting just above the cow’s brow bone. Draw simple daisy shapes and leafy stems, keeping the lines faint so they don’t show through the white petals later.
Muddy Colors?
If your brown fur looks dull, let the layer dry completely before adding shadows. Wet-on-wet is great for base coats, but layering wet paint endlessly creates mud.
Step 2: Layering the Fur Base
-
First wash:
Mix a watery wash of Yellow Ochre and a touch of Burnt Sienna. Apply this loosely over the cow’s face and body, avoiding the eyes, nose, and the white patch on the forehead. -
Deepen the coat color:
While the paper is still slightly damp, drop in stronger Burnt Sienna pigment on the left side of the neck and the cheek area to create soft, diffused shadows. -
Cool shadows:
Mix a diluted Payne’s Grey into your brown mixture for the shadowed side of the neck and under the chin. This cool tone adds dimension and realism to the warm coat.
Step 3: Detailed Features
-
Painting the eyes:
Switch to your size 2 brush. Use concentrated Payne’s Grey or Black to paint the eyes. Leave a small, unpainted white circle in each pupil for the ‘catchlight’ reflection, which brings the cow to life. -
Detailing the lashes:
I prefer to use a rigger or fine liner brush here to flick out long, dark eyelashes from the outer corners of the eyes. -
The wet nose:
Paint the muzzle using a mix of Payne’s Grey and a tiny bit of blue. Use wet-on-wet technique to blend the dark nostrils into the lighter grey nose bridge, keeping the top edge soft. -
Nose texture:
Once the nose base is dry, stipple tiny dots of lighter grey and white gouache on the upper muzzle to mimic the bumpy texture of a cow’s nose.
Pro Tip: Eye Sparkle
Make the eyes look glossy by adding a tiny second highlight of pure white gouache on the lower rim of the iris, opposite the main light reflection.
Step 4: Floral Crown & Fur Texture
-
Greenery base:
Mix sap green with a little brown for a natural olive tone. Paint the leaves around the crown, varying your pressure to create tapered ends. Leave the flower shapes unpainted for now. -
White flowers:
Use Titanium White gouache (since it’s opaque) to paint the daisy petals. Overlap them slightly onto the brown fur to ground the crown. -
Flower centers:
Dot the centers of the daisies with thick Yellow Ochre or Cadmium Yellow. Add a tiny speck of brown to the bottom of each yellow center for depth. -
Building fur texture:
Using a relatively dry size 6 brush, drag darker brown paint in the direction of hair growth on the neck and ears. This ‘dry brush’ technique simulates individual hairs perfectly. -
Ear details:
Darken the inner ears with Burnt Umber, leaving the fluffy rim lighter. Use short, quick strokes to make the ear hair look fuzzy. -
Final highlights:
Use white gouache to add final whiskery hairs on the chin and highlight the rim of the ears.
This serene cow portrait makes a charming addition to any room, bringing a sense of calm and nature to your space


Whimsical Cow With Oversized Sparkly Eyes

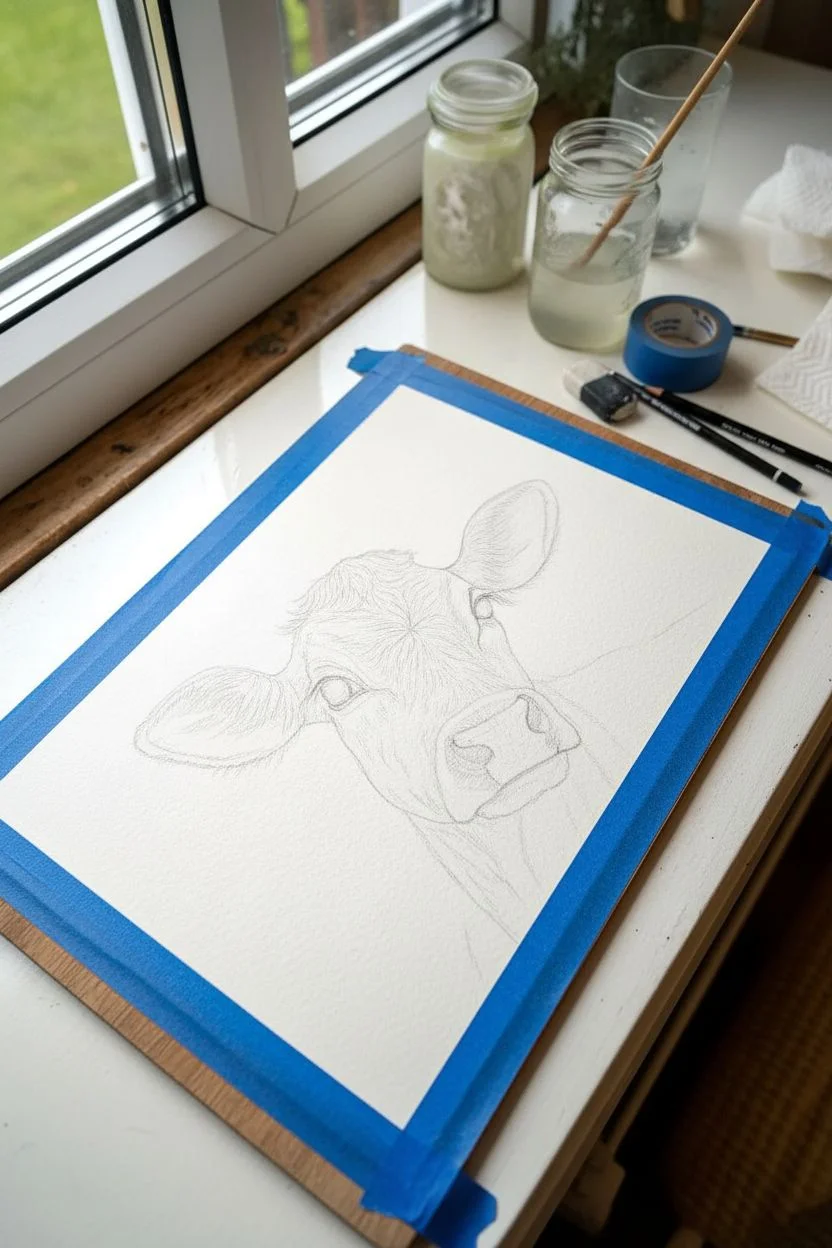
Capture the tender expression of a young calf with this realistic watercolor project that balances fine detail with playful, loose splatter effects. The soft brown tones and oversized, glossy eyes create an endearing portrait perfect for bringing a touch of countryside charm to your walls.
Detailed Instructions
Materials
- High-quality cold press watercolor paper (300 gsm)
- Watercolor paints (Burnt Sienna, Raw Umber, Yellow Ochre, Lamp Black, Ultramarine Blue, Alizarin Crimson)
- White gouache or white gel pen
- Round watercolor brushes (sizes 2, 6, and 10)
- Fine detail brush (size 00 or 0)
- Masking tape
- Graphite pencil (HB) and kneaded eraser
- Two jars of water
- Paper towels
Step 1: Preparation and Sketching
-
Secure the paper:
Begin by taping down all four edges of your watercolor paper to a board or hard surface using masking tape. This prevents the paper from buckling when wet and creates a clean, professional border once removed. -
Outline the subject:
Using your HB pencil, lightly sketch the outline of the cow. Focus on the triangular shape of the nose, the wide-set eyes, and the position of the ears. Keep your lines faint so they won’t show through the transparent watercolor layers later. -
Detail the features:
Refine the sketch by adding the nostril shapes, the folds around the eyes, and the direction of the prominent hair tufts on the forehead. Mapping out the hair direction now will help guide your brushstrokes during the painting process.
Pro Tip: Fur Direction
A cow’s hair often swirls on the forehead. Rotate your paper as you paint these strokes so your hand stays comfortable and the flicking motion remains natural and fluid.
Step 2: Base Layers and Fur Texture
-
Mix the base tone:
Create a watery wash of Yellow Ochre with a tiny touch of Burnt Sienna. Apply this very lightly over the entire head, avoiding the nose tip and the highlights in the eyes. I like to keep this layer uneven to start suggesting texture. -
Build the shadows:
While the first layer is still slightly damp, drop in a mix of Raw Umber and Burnt Sienna into the shadowed areas: under the ears, along the neck folds, and beneath the jawline. Let the colors bleed softly. -
Paint the nose:
For the nose, mix a dark grey using Lamp Black and a touch of Ultramarine Blue. Paint the nostrils darkest, fading out towards the top of the nose pad. Leave tiny slivers of white paper for the wet shine on the nose. -
Establish fur texture:
Once the base is dry, switch to a size 2 or 6 brush. Using short, flicking strokes with a thicker mix of Raw Umber, start painting the hair. Follow the growth direction you sketched earlier, particularly the swirls on the forehead. -
Define the ears:
Paint the inside of the ears using a diluted Alizarin Crimson mixed with Burnt Sienna for a fleshy pink tone. Use the tip of your brush to flick dark hairs over the edges of this pink area to create depth. -
Deepen the neck folds:
Use a darker brown mix to accentuate the loose skin on the neck. Paint vertical, slightly curved lines to show the folds, softening the edges with a clean, damp brush so they don’t look like stripes.
Troubleshooting: Muddy Fur
If fur texture looks like a blob, you didn’t let the layers dry. You must let the soft wash underneath dry completely before painting the crisp hair lines on top.
Step 3: The Eyes and Refining Details
-
Base layer for eyes:
Paint the iris with a dark brown mix. While wet, drop in pure black for the pupil, allowing it to blend slightly. Essential: leave a crisp white circle or shape reserved for the reflection highlight. -
Add depth to the gaze:
Once the first eye layer is dry, glaze over the top half of the eye with a transparent black wash to simulate the shadow cast by the eyelashes and upper lid. This makes the eyes look round and glossy. -
Fine hair details:
Switch to your 00 detail brush. With a dark, opaque brown paint, add individual hairs around the eyes, ears, and crown of the head. These crisp lines sitting on top of the softer washes create the realistic fur effect. -
Intensify contrast:
Look at the darkest points—the nostrils, corner of the mouth, and pupil. Re-apply a concentrated mix of Lamp Black and Burnt Umber to these spots to make the painting pop. -
Add highlights:
Using white gouache or a gel pen, add tiny whiskers on the chin and reinforce the catchlight in the eyes if needed. You can also add a few white hairs in the ears for contrast.
Step 4: Final Touches
-
Create the background splatter:
Mix a watery solution of Burnt Sienna or a soft pinkish-brown. Load a medium brush, hold it over the paper, and tap the handle against another brush to splatter small droplets around the cow. -
Control the splatter:
If any large drops land on the face where you don’t want them, quickly dab them up with a clean corner of a paper towel. A few stray spots on the fur are fine and add to the style. -
Remove the tape:
Allow the painting to dry strictly and completely. Slowly peel the masking tape away at a 45-degree angle, away from the painting, to reveal your crisp white border.
Now frame your gentle bovine friend and enjoy the peaceful vibe it brings to the room
Textured Fur With Chunky Brushstrokes
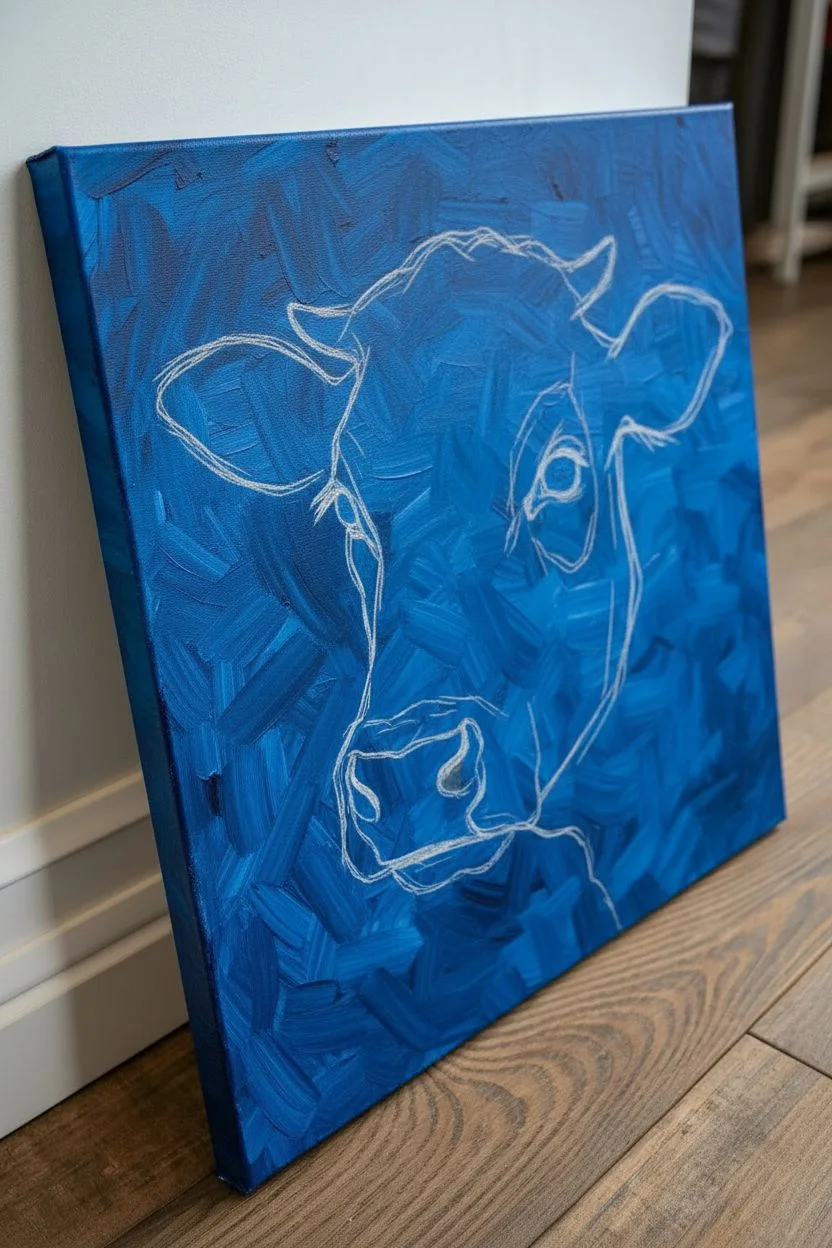
Capture the gentle spirit of a farm favorite with this striking portrait that pops against a deep cerulean background. By focusing on layered fur texture and expressive eyes, you’ll create a piece that feels both modern and classically pastoral.
Step-by-Step
Materials
- Stretched canvas (rectangular or square)
- Acrylic paints (Titanium White, Burnt Umber, Yellow Ochre, Raw Sienna, Mars Black, Phthalo Blue, Ultramarine Blue)
- Medium and large flat brushes
- Small round detail brush (size 0 or 1)
- Fan brush (optional for fur texture)
- Palette knife
- Water cup and paper towels
- Chalk or pastel pencil for sketching
Step 1: Setting the Stage
-
Prepare your canvas:
Start with a clean, stretched canvas. If the surface feels too rough, you can apply a layer of gesso, but the natural tooth of the canvas actually helps grab the paint for the background texture we want later. -
Mix the background blue:
Combine Phthalo Blue with a touch of Ultramarine Blue and a tiny bit of Mars Black to deepen it. Aim for a rich, ocean-like cerulean that isn’t too bright but definitely not navy. It should feel vibrant. -
Paint the background:
Using a large flat brush, cover the entire canvas with your blue mix. Use crisscross strokes rather than smooth horizontal lines to give the background a subtle, painted energy. Let this layer dry completely. -
Sketch the outline:
Once the blue is dry, use a white chalk or a light pastel pencil to sketch the cow’s head. Focus on the main shapes: the boxy snout, the triangular ear shapes, the curve of the horns, and the placement of the eyes.
Paint looking flat?
Don’t be afraid of darks! If the face looks flat, re-glaze your shadow areas (under the chin, inside ears) with a transparent wash of burnt umber to push them back.
Step 2: Base Layers & Shadows
-
Block in the darkest shadows:
Mix Mars Black with a little Burnt Umber. Paint the dark interior of the ears, rings around the eyes, the nostrils, and the deep shadow under the jawline where the neck begins. -
Apply the mid-tones:
Create a warm tan color using White, Yellow Ochre, and Burnt Umber. Block in the shadowed side of the cow’s face (usually the side further from your light source) and the deeper fur inside the ears. -
Paint the base coat of fur:
Mix a creamy off-white color. Using a medium flat brush, fill in the rest of the face and neck. Don’t worry about individual hairs yet; just get the solid color down to cover the blue background. -
Define the horns:
Use a mix of grey and brown to paint the horns. Keep the tips darker (nearly black) and the base lighter where it meets the head. Add a slight curve to your brushstrokes to mimic the horn’s roundness.
Go 3D
Mix modeling paste into your white acrylic for the final fur highlights on the forehead. This physical texture will catch real light and mimic the thick curls.
Step 3: Texture & Detail
-
Start the fur texture:
Switch to a smaller brush or a worn-out flat brush. Load it with a lighter cream color (White with a tiny dot of Raw Sienna). flick the brush in the direction of hair growth—upward on the forehead, downward on the cheeks. -
Build the curly crown:
The top of the head needs extra texture. Use shorter, curving strokes to create that chaotic, fluffy ‘cowlick’ look between the horns. Layer light cream over your darker tan base to create depth. -
Refine the snout:
The nose area should look smoother and slightly wet. Use a mix of pink and grey (White, tiny bit of Alizarin Crimson if you have it, or just burnt umber/black mix) to paint the nose pad. Add small highlights to the nostrils for moisture. -
Paint the eyes:
Fill the eye shape with dark brown/black. While wet, add a small stroke of blue reflection if you like providing atmosphere. The most crucial part is the tiny white catch-light dot near the top of the pupil—this brings the cow to life. -
Layering the neck fur:
The fur on the neck is longer. Use longer, sweeping strokes with a mix of white and tan. I like to let the brush run ‘dry’ slightly at the ends of strokes to create a wispy, natural hair effect. -
Refine the ears:
Add long, wispy white hairs coming out of the ears, overlapping the dark interior shadow you painted earlier. This contrast creates immense depth. -
Final highlights:
Take pure Titanium White on your smallest brush. Add the brightest highlights to the bridge of the nose, the tips of the curly hair on the head, and the wet rim of the lower eyelid. -
Touch up the background:
If your fur painting got messy, take your original blue background color and carefully cut back in around the outline to sharpen the silhouette, or leave it loose for a painterly look.
Hang your masterpiece where the bright blue background can add a cheerful splash of color to the room
Pastel Background With a Neutral Cow

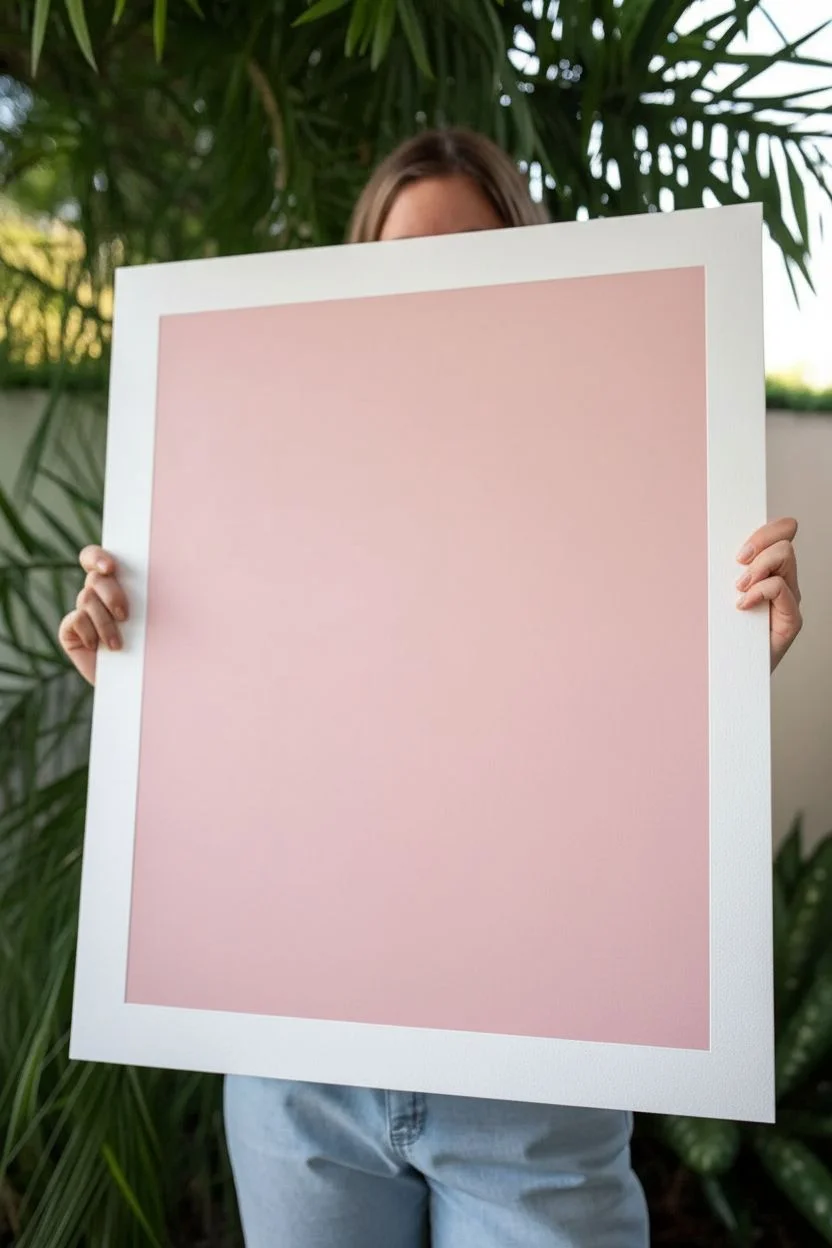
Capture the gentle spirit of a farm favorite with this stunning portrait that pairs hyper-realistic fur textures against a soft, unexpected pastel pink backdrop. This project balances precise detailing with a clean, minimalist background for a modern and eye-catching piece of wall art.
Step-by-Step Tutorial
Materials
- High-quality canvas board or heavy watercolor paper (18×24 inches recommended)
- Acrylic paints (Titanium White, Burnt Umber, Raw Sienna, Yellow Ochre, Mars Black, Rose Pink, Buff Titanium)
- Gesso for priming
- Soft synthetic flat brushes (1-inch and 2-inch for background)
- Fine liner brushes (size 0 and 00) for fur details
- Small round brushes (size 2 and 4)
- Graphite transfer paper
- Masking tape
- Palette knife for mixing
- Reference photo of a cow
Step 1: Setting the Scene
-
Prepare your surface:
Begin by applying a coat of white gesso to your canvas or heavy paper to ensure a smooth painting surface. If you want ultra-smooth blending for the background, lightly sand the gesso once it’s dry with fine-grit sandpaper. -
Create the border:
Since this artwork features a crisp white border, measure about 1.5 to 2 inches from the edge all around and apply artist’s masking tape firmly. This will give you that clean, professional gallery look when peeled away later. -
Mix the perfect pink:
On your palette, mix a large amount of Titanium White with a small dollop of Rose Pink and a tiny touch of Burnt Umber to desaturate it slightly. You want a muted ‘millennial pink’ tone rather than a bright bubblegum shade. -
Paint the background:
Using your large flat brush, paint the entire area inside the tape with your mixed pink. Use long, smooth horizontal strokes to minimize texture. Apply a second coat if necessary for opaque, solid coverage.
Step 2: Sketching and Blocking
-
Transfer the outline:
Once the pink background is fully dry (I usually wait at least an hour), use graphite transfer paper to lightly trace your cow outline directly onto the pink surface. Focus on the main shapes: the ears, the snout, and the eye placement. -
Mix base fur colors:
Create a mid-tone tan color using Buff Titanium, Raw Sienna, and plenty of White. You’ll need three main puddles: a dark shadow tone (add Burnt Umber), a mid-tone, and a highlight tone (mostly White with a hint of Sienna). -
Block in general shapes:
With a size 4 round brush, fill in the cow’s form with the mid-tone tan. Don’t worry about fur texture yet; just establish where the cow exists on the canvas. Leave the eyes and nose bare for now. -
Establish shadows:
While the base is still slightly tacky or just dry, paint the darker shadow areas underneath the chin, inside the ears, and along the neck creases. This maps out the three-dimensional form of the animal.
Pink Panic?
If your pink background looks streaky, don’t overwork it while wet. Let it dry completely, sand lightly, and apply a second thin coat mixed with a glazing medium for a flawless finish.
Step 3: The Devil in the Detail
-
Start the fur texture:
Switch to a size 2 brush. Using the darker tan mix, start adding directional strokes to mimic the flow of fur. Observe your reference: the hair on the forehead swirls, while the neck fur falls downwards. -
Layering lighter hairs:
Using your fine liner brush and the highlight mixture, paint thin, individual hairs over your mid-tone base. This layering creates depth. Concentrate these lighter strokes on the forehead, the bridge of the nose, and the tops of the ears. -
Painting the eyes:
The eyes bring the painting to life. Paint the iris dark brown/black, but leave a small white spot for the reflection catchlight. Add a rim of pale pinkish-grey around the eye for the waterline to add realism. -
Detailing the snout:
Mix a greyish-mauve tone for the nose pad. Paint it smoothly, then use a dry brush with a lighter grey to dab subtle texture on top, mimicking the damp, bumpy skin of a nose. Darken the nostrils with Mars Black. -
Refining the ears:
The ears should look fluffy. Use the liner brush to pull jagged strokes outward from the ear edge to show the tufts of hair breaking the silhouette against the pink background. -
Adding the ear tag:
For a pop of realism, sketch a small yellow tag in one ear. Paint it with Yellow Ochre and add a shadow underneath it so it looks attached to the ear, rather than floating.
Make It Pop
Swap the neutral cow for a Highland coo with rusty oranges to contrast beautifully against a teal or sage green background instead of pink.
Step 4: Final Touches
-
Deepen contrast:
Step back and look at your painting. If it looks flat, go back in with a glaze of watery Burnt Umber in the deepest shadows—under the jaw and inside the ears—to make the lighter fur pop. -
Brighten highlights:
Add pure Titanium White strokes very sparingly on the wettest part of the nose and the brightest tufts of fur on the poll (the top of the head). -
Clean up edges:
If any fur strokes went too wild, use your pink background color on a small brush to tidy up the silhouette. This makes the cow look crisp against the background. -
The reveal:
Gently peel away the masking tape at a 45-degree angle to reveal your crisp white border. Sign your masterpiece in the bottom corner with a fine brush or pen.
Hang your charming bovine artwork in a bright spot to let those soulful eyes greet everyone who enters the room.
Bold Color Shadows on a Cow Face
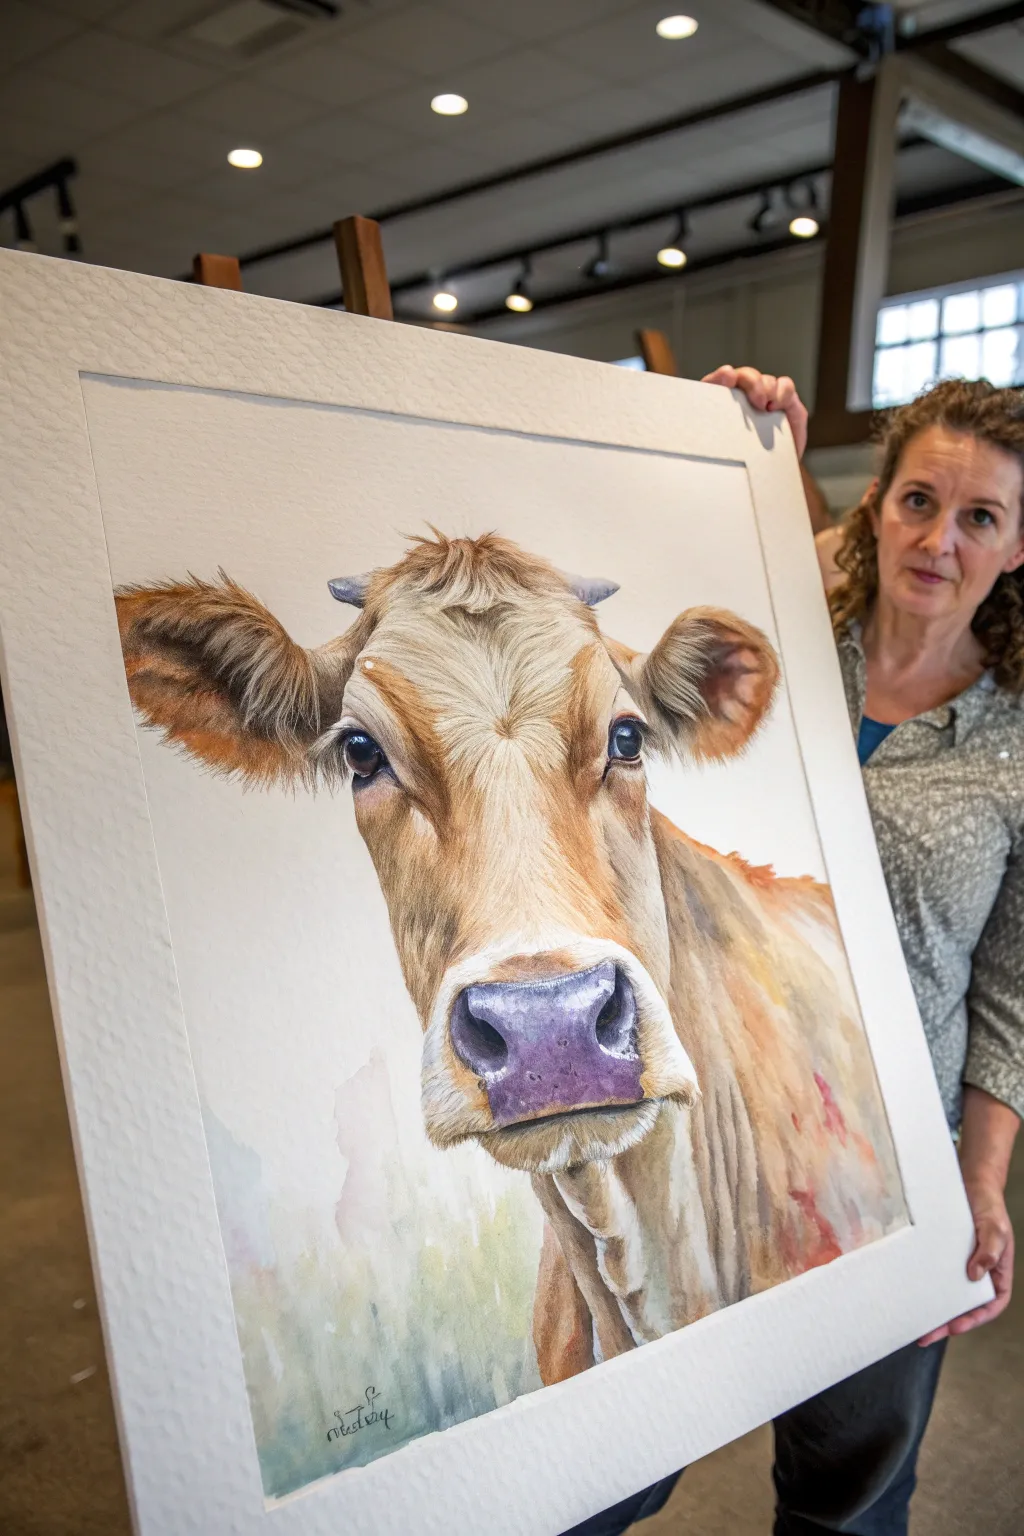
Capture the soft gaze and velvety texture of a Jersey cow with this detailed watercolor tutorial. The project focuses on building realistic fur through delicate layering and making the nose pop with bold, unexpected shadow colors.
Step-by-Step
Materials
- High-quality watercolor paper (300gsm cold press, roughly 16×20 inches for impact)
- Watercolor paints: Burnt Sienna, Yellow Ochre, Ultramarine Blue, Alizarin Crimson, Burnt Umber, Neutral Tint
- Round brushes (sizes 4, 8, and 12)
- Fine liner brush (size 0 or 1)
- Masking fluid (optional)
- Pencil (HB) and kneaded eraser
- Two jars of water
- Paper towels
Step 1: Initial Sketch and Base Washes
-
Sketch the outline:
Begin with a light contour drawing of the cow’s head. Focus on crucial proportions: the wide placement of the eyes, the distinctive diamond shape of the forehead curls, and the broad muzzle. Keep your pencil lines faint so they won’t show through the transparent watercolor layers later. -
Protect the highlights:
Use masking fluid or white wax resist to preserve tiny dots in the eyes and the glistening wet spots on the nose. Let this dry completely before touching it with a brush. -
First wet-on-wet wash:
Wet the entire face area with clean water, avoiding the eyes and nose. Drop in a very dilute mix of Yellow Ochre and a touch of Burnt Sienna. Let these colors bloom and spread naturally to create a soft, glowing underlayer for the fur. -
Define the nose base:
While the fur layer dries, mix Alizarin Crimson with a tiny bit of Cobalt Blue to create a mauve tone. Apply this to the nose area, keeping the wash relatively flat and light for now. -
Establish the background:
Wet the paper surrounding the cow. Drop in loose washes of watery green and hints of the mauve used on the nose to create a diffused, out-of-focus pasture feel. Let the paint fade irregularly toward the bottom edge.
Wet-in-Wet Softness
For the velvety nose look, drop darker purple paint into the wet mauve base layer. This creates soft, diffused edges perfect for a wet snout.
Step 2: Building Form and Shadows
-
Deepen the fur tones:
Once the first layer is bone dry, mix Burnt Sienna with a little Burnt Umber. Using a size 8 brush, start mapping out the darker areas: the hollows above the eyes, the sides of the snout, and the inner ears. Soften the edges with a clean, damp brush to avoid hard lines. -
Paint the eyes:
For the eyes, use a rich mix of Burnt Umber and Ultramarine Blue to get near-black. Carefully paint around the masked highlights. Leave the iris slightly lighter brown to show depth. -
Sculpt the nose:
Return to the nose with a stronger purple-grey mix (Ultramarine and Alizarin). define the nostrils first with the darkest value. Then, glaze over the shadow side of the muzzle to give it a 3D rounded form. -
Add ear details:
The inside of the ears requires soft, fuzzy texture. Use a dry-brush technique with Burnt Sienna to suggest hair, then deepen the inner shadow with a cool brown. -
Layer the neck shadows:
The neck skin on a cow often has loose folds. Paint vertical, wavy strokes of watered-down Burnt Umber and grey-blue to suggest the dewlap and neck wrinkles beneath the chin.
Step 3: Texture and Final Details
-
Develop fur texture:
Switch to a smaller round brush (size 4). Using short, directional strokes, follow the growth pattern of the hair. Focus specifically on the ‘crown’ of the head where the hair swirls. Use a mix of Yellow Ochre and Burnt Sienna here. -
Enhance the nose texture:
Add small, stippled dots of dark purple-grey on the nose to suggest the bumpy, wet texture of a bovine muzzle. Keep these marks subtle. -
Fine hair details:
I like to use a size 0 liner brush here for the eyelashes and the fine hairs sticking out of the ears. Quick, confident flicks of the wrist work best to keep lines tapering naturally. -
Add horns and warmth:
Paint the small horns with a pale grey wash, darkening slightly at the base. Glaze a tiny bit of warm orange or red-brown on the cheeks or neck where the skin is thinner to imply warmth. -
Remove mask and refine:
Rub off the masking fluid with your finger or an eraser. If the white highlights in the eyes are too stark, gently glaze over them with a very watery blue to push them back slightly. -
Final assessment:
Step back from your work. If the cow feels too flat, add a final glaze of Cobalt Blue mixed with brown to the deepest shadow areas under the jaw and inside the ears to boost contrast.
Adding Life with Color
Mix a tiny bit of the background green into your shadow mixtures on the jawline. This reflected light ties the subject to the environment beautifully.
Frame your gentle giant with a wide mat to give the delicate watercolor textures room to breathe and shine.
Cow Portrait in a Circular Frame Wreath
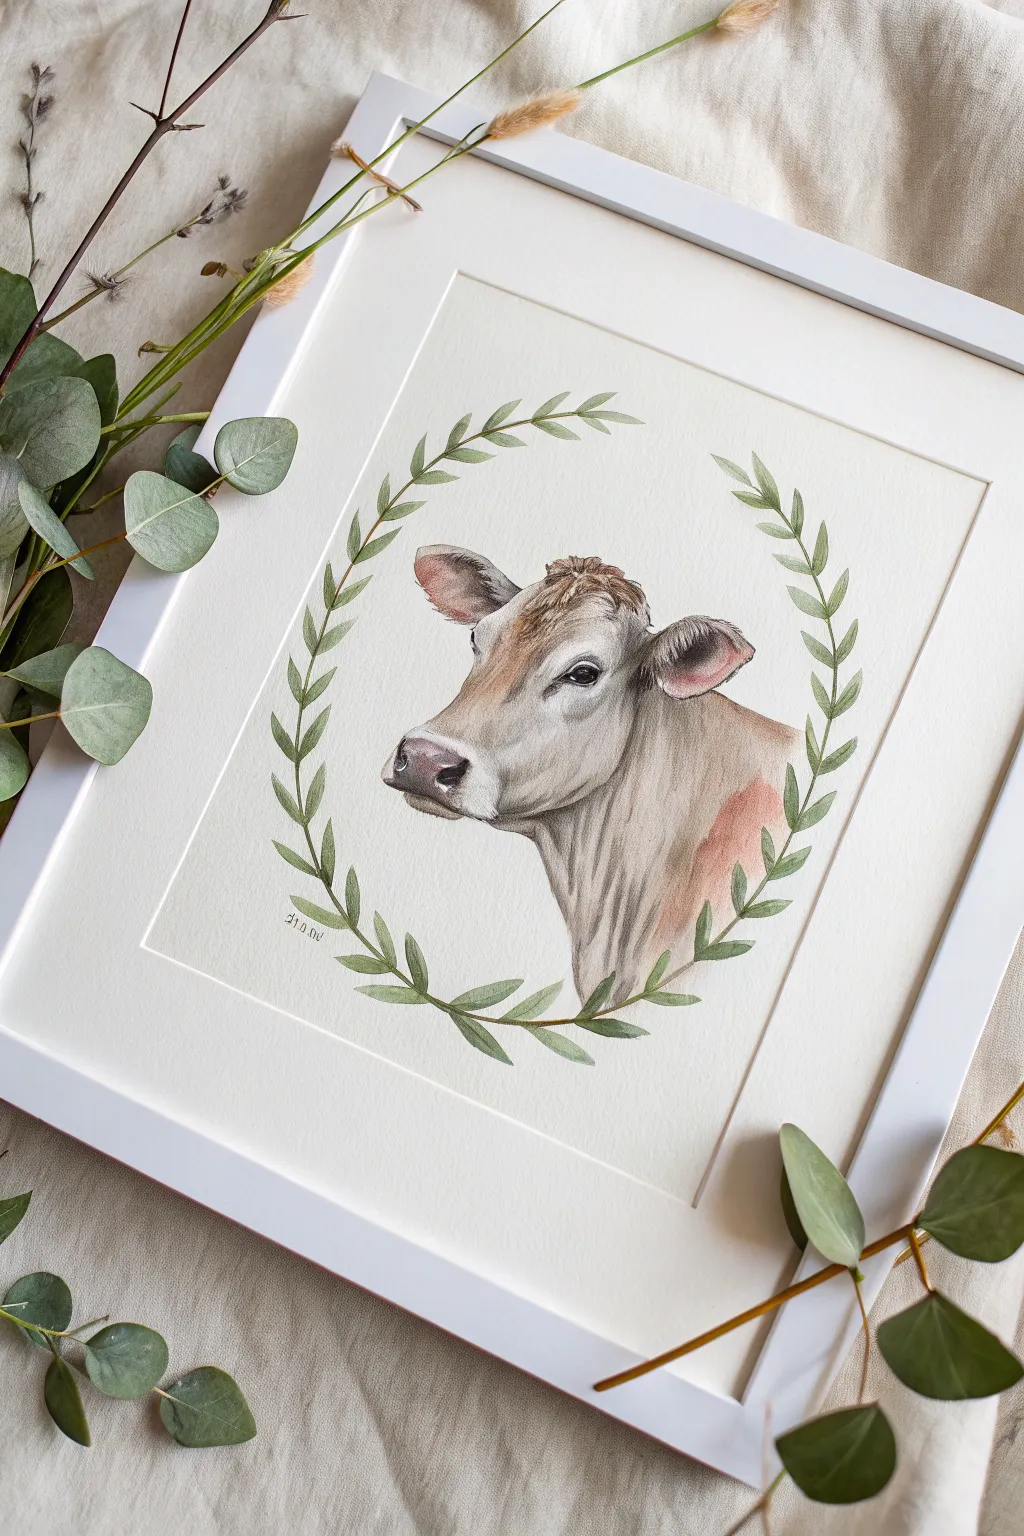
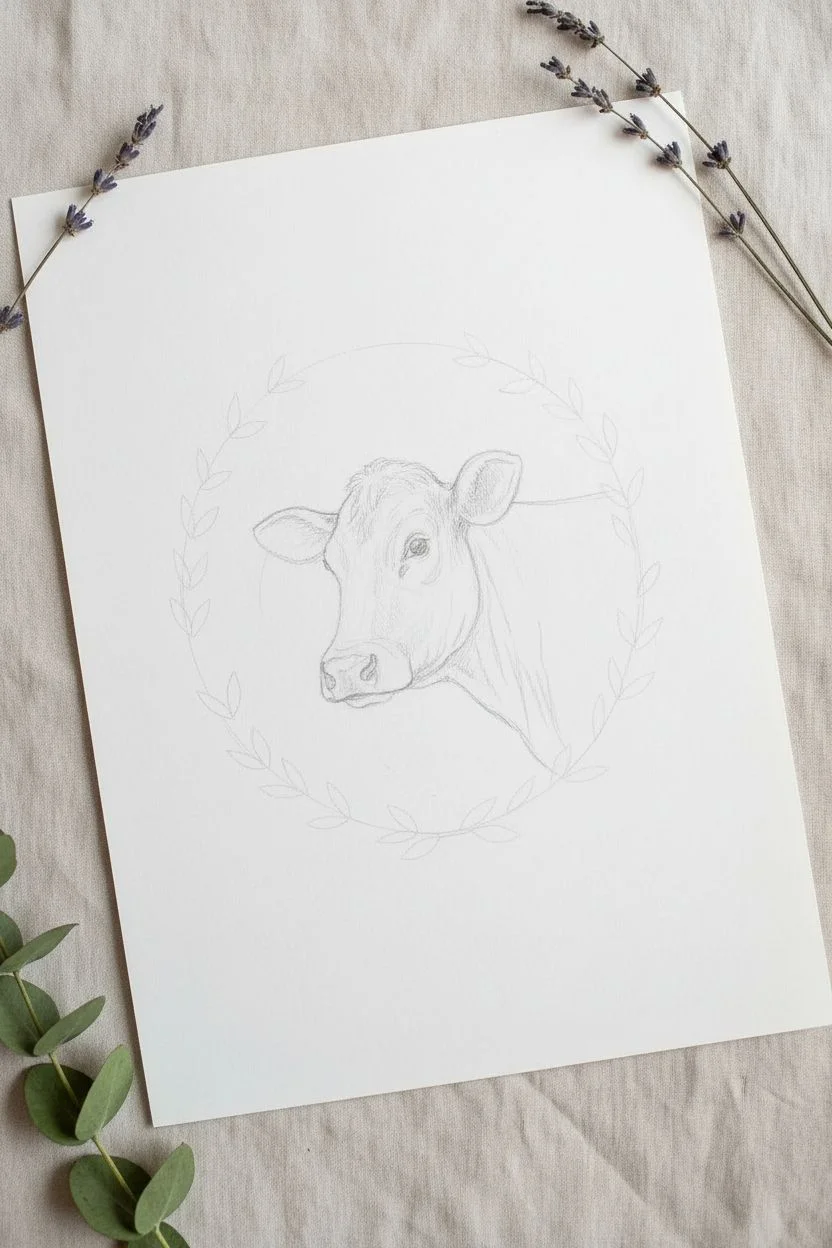
Capture the soft, soulful gaze of a brown cow with this delicate watercolor portrait framed by a simple botanical wreath. This project combines realistic animal portraiture with loose, decorative foliage for a charming farmhouse-style piece.
Step-by-Step Tutorial
Materials
- Hot press watercolor paper (smooth texture is key for detail)
- Watercolor paints: Burnt Sienna, Burnt Umber, Yellow Ochre, Paynes Grey, Sap Green, Olive Green, Alizarin Crimson
- Round brushes: sizes 0 or 1 (for details), 4, and 8
- Pencil (HB or H) for sketching
- Kneaded eraser
- Circular object or compass (approx. 6-8 inches diameter)
- White gouache or white gel pen (optional for highlights)
- Two jars of water
- Paper towels
Step 1: Drafting the Composition
-
Establish the circle:
Begin by lightly tracing a large circle in the center of your paper using a compass or a bowl. This will serve as the guide for your leafy wreath later. -
Position the subject:
Sketch the cow’s outline inside the circle. Position the head slightly off-center, facing left, so the neck extends down towards the bottom right of the wreath. Ensure the ears and horns stay comfortably within the circle’s boundary. -
Refine facial features:
Sketch the details of the face lightly. Pay close attention to the placement of the eye, the curve of the nostril, and the tuft of hair between the ears. Keep your pencil pressure light so lines don’t show through the paint. -
Sketch the wreath:
Draw a simple stem following the curvature of your initial circle. Add pairs of small, pointed oval leaves extending outwards from the stem. Keep the leaves looser and less detailed than the cow.
Muddled Fur?
If fur texture looks muddy, your paper was too wet. Let layers dry fully between strokes. Use a separate scrap paper to test if your paint consistency is ‘dry’ enough for hair details.
Step 2: Painting the Cow Portrait
-
Base wash:
Mix a very watery wash of Yellow Ochre and a touch of Burnt Sienna. Apply this to the entire cow shape, avoiding the white of the eye and the nose tip. Let this initial layer dry completely. -
Building form:
Mix Burnt Sienna with a little Burnt Umber. Using a size 4 brush, deepen the color on the neck, the side of the cheek, and under the jawline to create volume. -
Adding the reddish tones:
While the neck area is still slightly damp, drop in a stronger mix of Burnt Sienna or a hint of diluted Alizarin Crimson on the lower neck to replicate that warm, rusty patch seen in the reference. -
Facial details:
Switch to your smaller brush. Use a mix of Paynes Grey and Burnt Umber to carefully paint the dark interior of the eye, leaving a tiny speck of white paper for the catchlight. -
Painting the nose:
For the nose, use a watery mix of Alizarin Crimson and Paynes Grey to get a dusty pink-grey. Paint the nose area, darkening the nostrils with a more concentrated mix of the same colors. -
Creating texture:
Using a nearly dry size 1 brush with Burnt Umber, add fine directional strokes to suggest hair texture on the forehead tuft, the ears, and the bridge of the nose. -
Deepening shadows:
Strengthen the shadows under the chin, inside the ears, and around the eye socket using Burnt Umber mixed with a touch of blue or purple to cool it down. This high contrast makes the portrait pop.
Make It Seasonal
Customize the wreath for seasons! Add tiny red berries for winter, small wildflowers for spring, or change the leaves to dried autumn colors like ochre and rust for a fall vibe.
Step 3: Painting the Wreath & Finishing
-
Stem work:
With your size 1 brush, paint the main stem of the wreath using a mix of Sap Green and Burnt Umber for a brownish-green, woodier look. -
Leaf variation:
Paint the leaves using Sap Green and Olive Green. I prefer to vary the water-to-paint ratio here—make some leaves translucent and pale, and others saturated and dark to create depth. -
Connecting the elements:
Ensure the bottom of the cow’s neck fades gently into white paper before it hits the bottom leaves, creating a floating vignette effect rather than a hard cutoff. -
Final highlights:
Once everything is bone dry, use a white gel pen or small dot of gouache to sharpen the highlight in the eye or add a few stray white hairs on the darker parts of the coat. -
Signature and framing:
Lightly erase any visible pencil marks around the wreath. Sign your piece delicately near the foliage, following the curve of the leaves.
Place your finished piece in a clean white frame to let those gentle earth tones really shine.
Night-Sky Cow With Starry Background
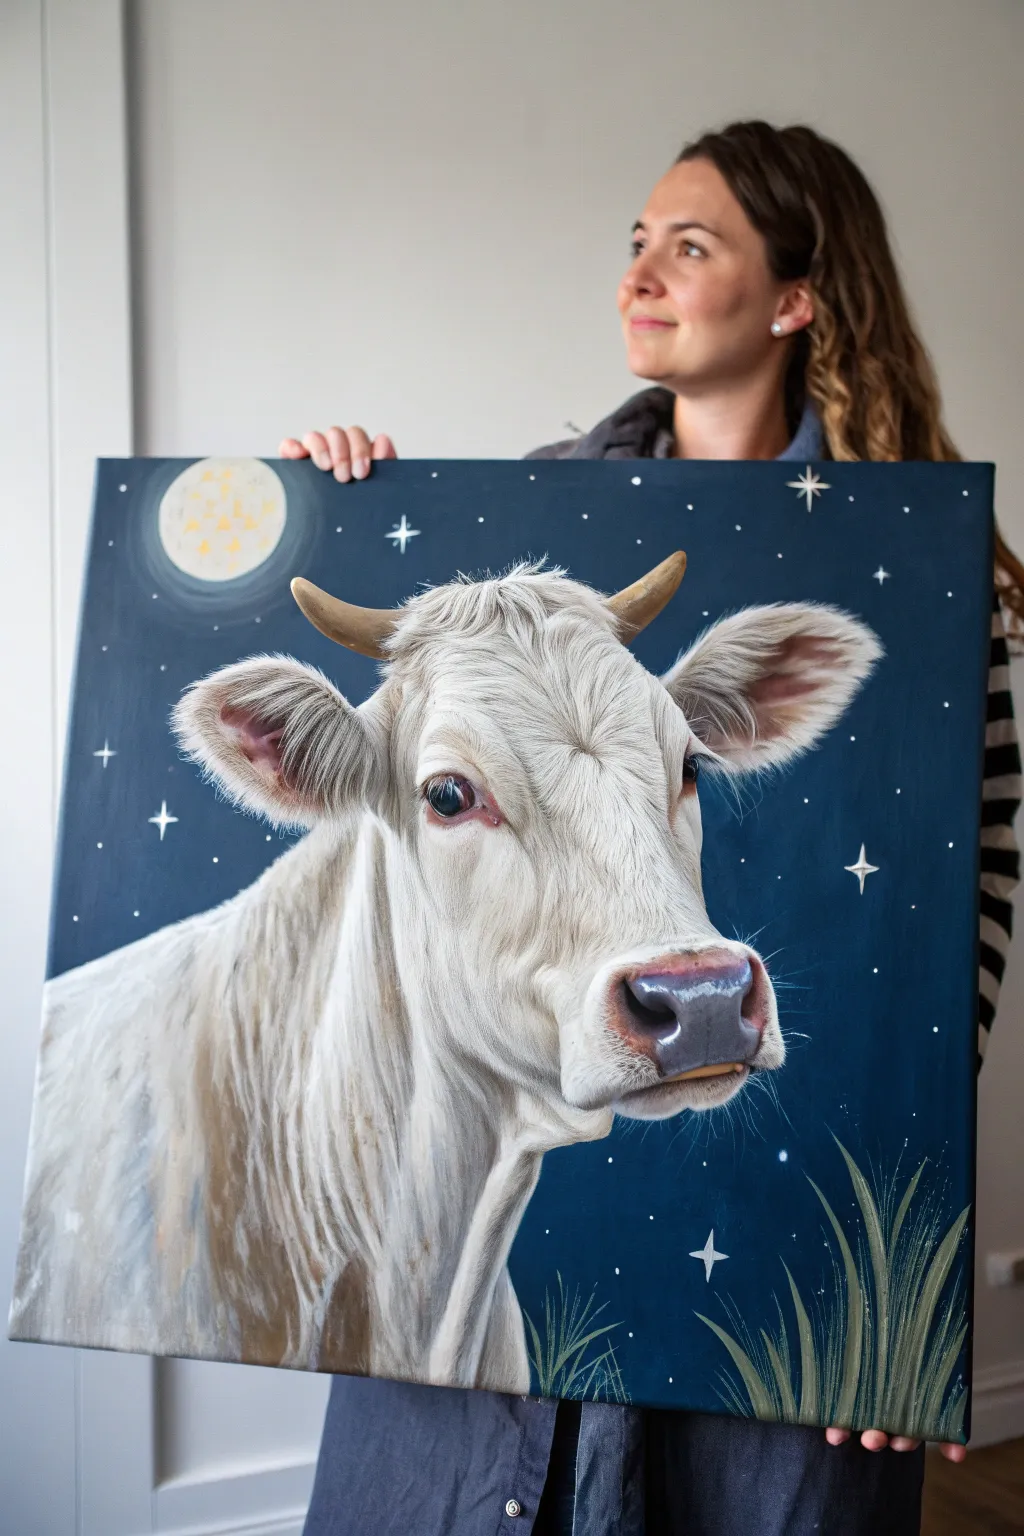
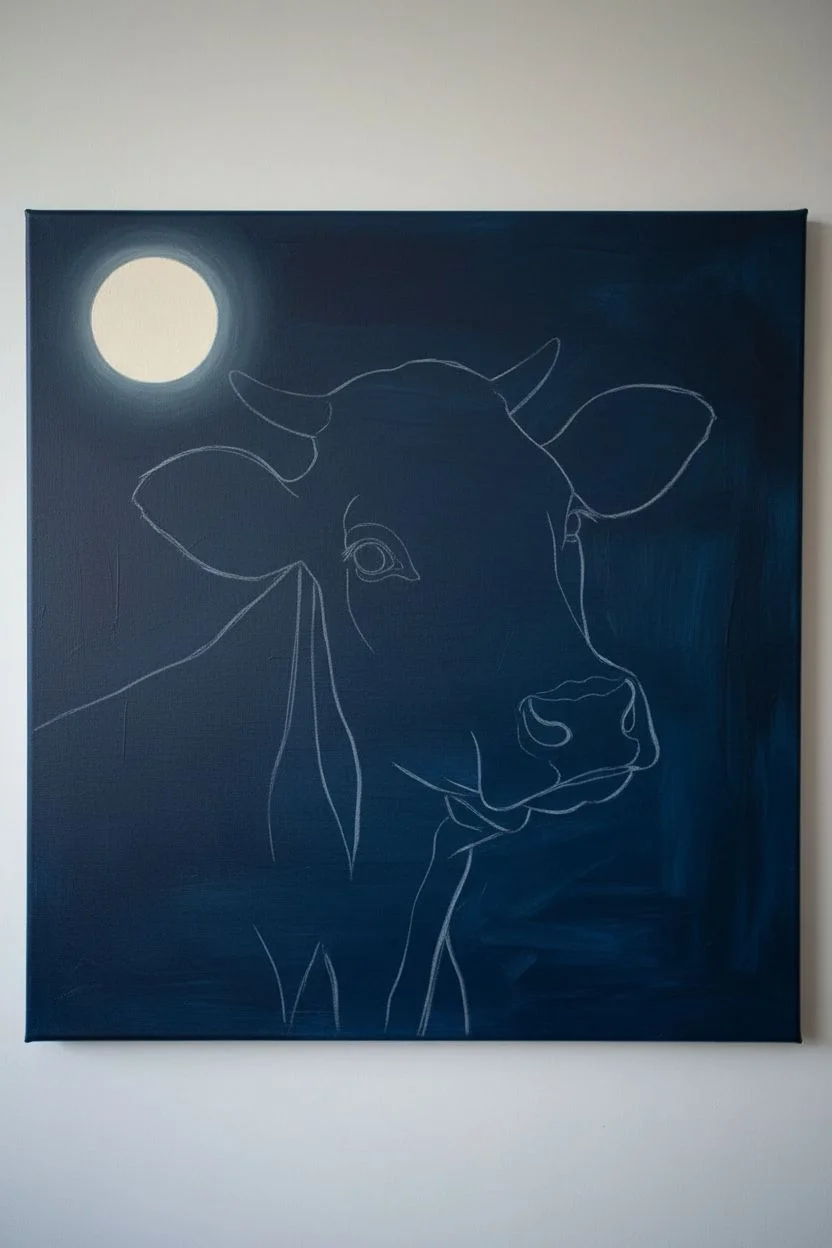
Capture the serene beauty of a white cow set against a whimsical, deep blue night sky. This acrylic painting project balances realistic fur textures with a dreamy, illustrative background perfect for bringing a touch of magic to your home decor.
How-To Guide
Materials
- Large stretched canvas (at least 20×24 inches)
- Acrylic paints (dark phthalo blue, prussian blue, titanium white, mars black, burnt umber, yellow ochre, cadmium red hue)
- Wide flat brush (for background)
- Filbert brushes (sizes 6 and 8)
- Round detail brushes (sizes 0 and 2)
- Fan brush (optional, for grass)
- Chalk or pastel pencil for sketching
- Palette and water cup
Step 1: Setting the Scene
-
Prepare the background:
Mix a deep, rich midnight blue using phthalo blue, a touch of black, and a tiny bit of white to make it opaque. Use a wide flat brush to coat the entire canvas evenly. Apply two coats for solid coverage, letting the first dry completely before adding the second. -
Sketch the subject:
Once the blue base is bone dry, use a white chalk or pastel pencil to lightly sketch the outline of the cow. Focus on the large shapes first: the broad forehead, the snout, and the position of the ears. Don’t worry about fur details yet, just get the proportions right on the canvas. -
Establish the moon:
In the upper left corner, paint a circle using a mix of titanium white and a tiny dot of yellow ochre. It doesn’t need to be staring-white; a creamy off-white looks more natural.
Step 2: Blocking In the Cow
-
Base coat the cow:
Mix a light grey using mostly white with a touch of burnt umber and blue (to cool it down). Fill in the entire shape of the cow with this base tone, effectively blocking out the dark background. This creates a primer layer for the fur texture. -
Darken the shadows:
Identify the shadowed areas: under the chin, inside the ears, and around the eyes. Mix a darker grey-brown and paint these shapes using a filbert brush to establish the three-dimensional form of the head. -
Paint the nose:
Create a dusty pink using white, a little burnt umber, and a dot of cadmium red. Paint the nose area, keeping the nostrils dark grey or black. Add touches of blue-grey on the top of the nose for highlights.
Fixing the Fur
If the fur looks too stiff or wire-like, your paint might be too thick. Add a drop of water to your white paint to make it flow like ink, allowing for softer, tapered hair lines.
Step 3: Creating Texture
-
Layering the fur:
Switch to a smaller round brush (size 2). Mix a creamy white paint and start painting individual fur strokes over your grey base. Pay close attention to the direction the fur grows—it flows downwards on the neck but fans out from the center of the forehead. -
Refining the ears:
The inside of the ears needs a soft, fuzzy look. Use a scumbling technique with pinkish-grey paint, rubbing the brush in small circles, then layer longer white hairs on the outer edges and tips. -
Detailing the eyes:
Paint the eye utilizing a dark brown-black mix. Leave a small section lighter for the iris if visible. Crucially, add a tiny, pure white dot as a reflection highlighting the curve of the eye; this brings the cow to life immediately. -
Horns and shadows:
Paint the horns with a gradient of yellow ochre at the base fading into grey-brown at the tips. Ensure the horns have a shadow at the base where they meet the head to make them look rooted. -
Adding high highlights:
I like to take pure titanium white on a detail brush and add the brightest hairs now. Focus on the top of the head, the bridge of the nose, and the backlit edges of the ears where the ‘moonlight’ would hit.
Cosmic Glow Up
Add a touch of iridescent or glitter medium to the white paint used for the stars. When the light hits your painting from the side, the night sky will actually shimmer.
Step 4: Atmospheric Finishes
-
Moon details:
Return to your moon circle. Mix a slightly darker cream color and dab it irregularly onto the surface to create craters and texture. Add a faint translucent white aura around the moon using a dry brush technique to make it glow. -
Sprinkle the stars:
Using a small detail brush, paint tiny white dots scattered across the blue background. Pick a few spots to create larger, four-pointed ‘twinkle’ stars by painting a cross shape with a long, thin liner brush. -
Paint the grass:
At the bottom right, use a liner brush or fan brush to flick upward strokes of muted green (mix yellow ochre and blue) and tan. Vary the height and angle of the blades to look natural. -
Shadow integration:
Glaze a very thin, watery layer of blue over the shadowed side of the cow (the bottom left) to reflect the ambient light of the night sky, tying the subject to the background.
Step back and admire how the stillness of the night amplifies the gentle nature of your subject
Abstract Cow Spots as a Modern Painting
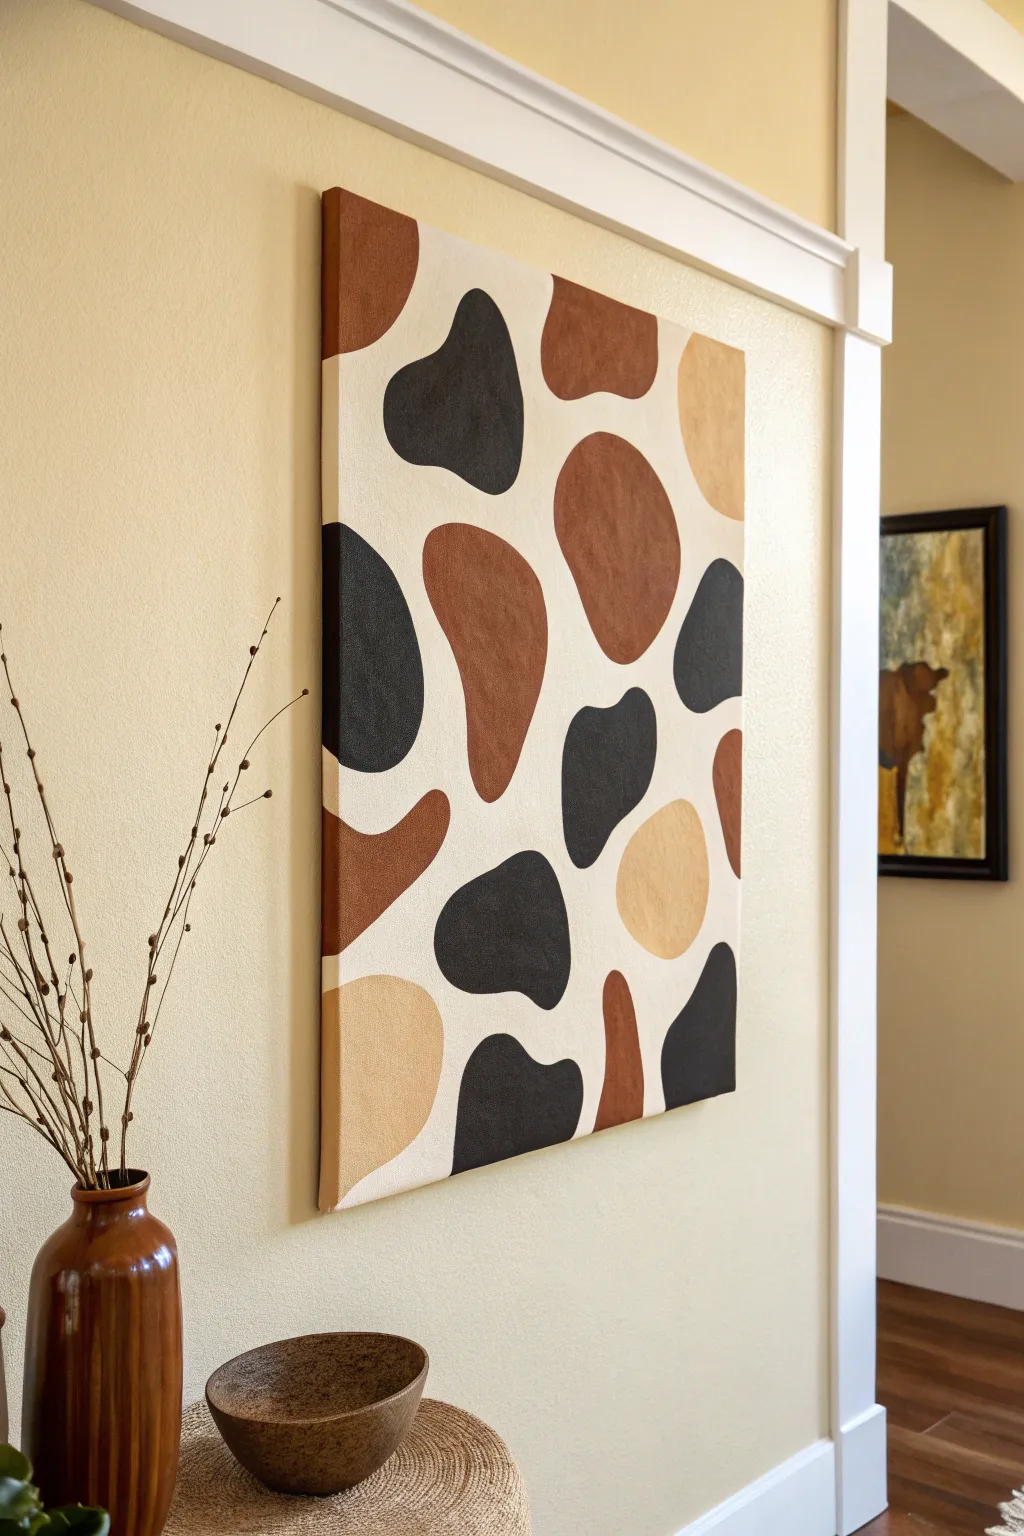

Embrace the modern farmhouse aesthetic with this minimalist take on the classic cow print pattern. Using a palette of warm earth tones and soft, organic shapes, you will create a large-scale statement piece that adds textural interest to any wall.
Step-by-Step
Materials
- Large stretched canvas (24×36 or similar)
- Acrylic paints: Titanium White, Unbleached Titanium (cream), Burnt Sienna, Raw Umber, Black
- Medium and large flat paintbrushes
- Small round brush for edges
- Pencil
- Palette or paper plate
- Cup of water
- Paper towels
Step 1: Preparing the Canvas
-
Mix the background color:
Start by creating a warm, creamy base tone. Mix Titanium White with a generous amount of Unbleached Titanium. You want a color that looks like warm milk or light parchment, not a stark hospital white. -
Apply the base coat:
Using your largest flat brush, paint the entire face of the canvas with your background mix. Utilize long, horizontal strokes to ensure even coverage. -
Paint the edges:
Don’t forget the sides of the canvas. Painting the wrapped edges gives the piece a professional, finished look even if you choose not to frame it later. -
Let it dry completely:
Allow the base coat to dry fully. This usually takes about 20-30 minutes depending on the thickness of your paint. If the canvas texture still shows through too much, apply a second coat.
Smooth Operator
To get super smooth edges on your spots without shaky hands, use an angle shader brush. The slanted bristles help navigate curves much easier than a standard flat brush.
Step 2: Designing the Pattern
-
Plan your palette:
Squeeze out your spot colors onto the palette. You need three distinct shades: a deep charcoal black (mix black with a touch of brown to soften it), a warm reddish-brown (Burnt Sienna mixed with a little white), and a light tan (Raw Umber mixed with lots of white). -
Sketch organic shapes:
Lightly sketch the outlines of your cow spots onto the dry canvas using a pencil. Keep the shapes rounded, fluid, and irregular—avoid perfect circles or rigid ovals. -
Vary the sizes:
Draw some spots quite large and dominant, while others should be smaller to fill gaps. I like to balance the negative space so the background feels just as important as the spots. -
Edge placement:
Draw several shapes that run off the edge of the canvas. This ‘cropping’ effect makes the pattern feel continuous and natural, rather than contained within a box.
Texture Play
Mix a little baking soda or modeling paste into your paint for the spots. This adds a raised, gritty texture that mimics the tactile feel of hide or fur.
Step 3: Painting the Spots
-
Start with the darkest spots:
Using a medium flat brush, fill in the shapes designated for your soft black color. Work carefully along the pencil lines to create a crisp, smooth edge. -
Paint the mid-tones:
Switch to a clean brush and fill in the reddish-brown shapes. Ensure the paint is opaque; you shouldn’t see the canvas weave clearly through the spot color. -
Fill the light spots:
Finally, paint the remaining tan or beige spots. If this light color appears streaky over the cream background, let it dry and add a second layer. -
Refine the edges:
Take a small round brush and your background cream color to clean up any wobbly lines. You want the curves to look intentional and smooth. -
Extend spots to sides:
For any spot that touches the edge of the canvas, continue painting the shape around the side and corner. This ‘gallery wrap’ style makes the artwork pop from all angles. -
Check for consistency:
Step back about five feet from the canvas. Look for any areas that feel too crowded or too empty. You can easily add a small spot or expand an existing one to balance the composition.
Step 4: Finishing Touches
-
Final drying time:
Allow the spots to dry completely, ideally overnight if you applied thick layers. -
Erase pencil marks:
If any pencil lines are still visible around the edges of your paint, gently erase them with a soft white eraser. -
Optional varnish:
To protect your work and unify the sheen, apply a coat of matte spray varnish over the entire piece once it is fully cured.
Hang your new masterpiece in a hallway or living space to bring a warm, inviting focal point to your home decor


Have a question or want to share your own experience? I'd love to hear from you in the comments below!