Crackle paint has this magical way of making a brand-new surface look like it has stories to tell. If you love that weathered, timeworn vibe, these crackle paint ideas will give you plenty of directions to play in.
Classic Two-Color Crackle Finish
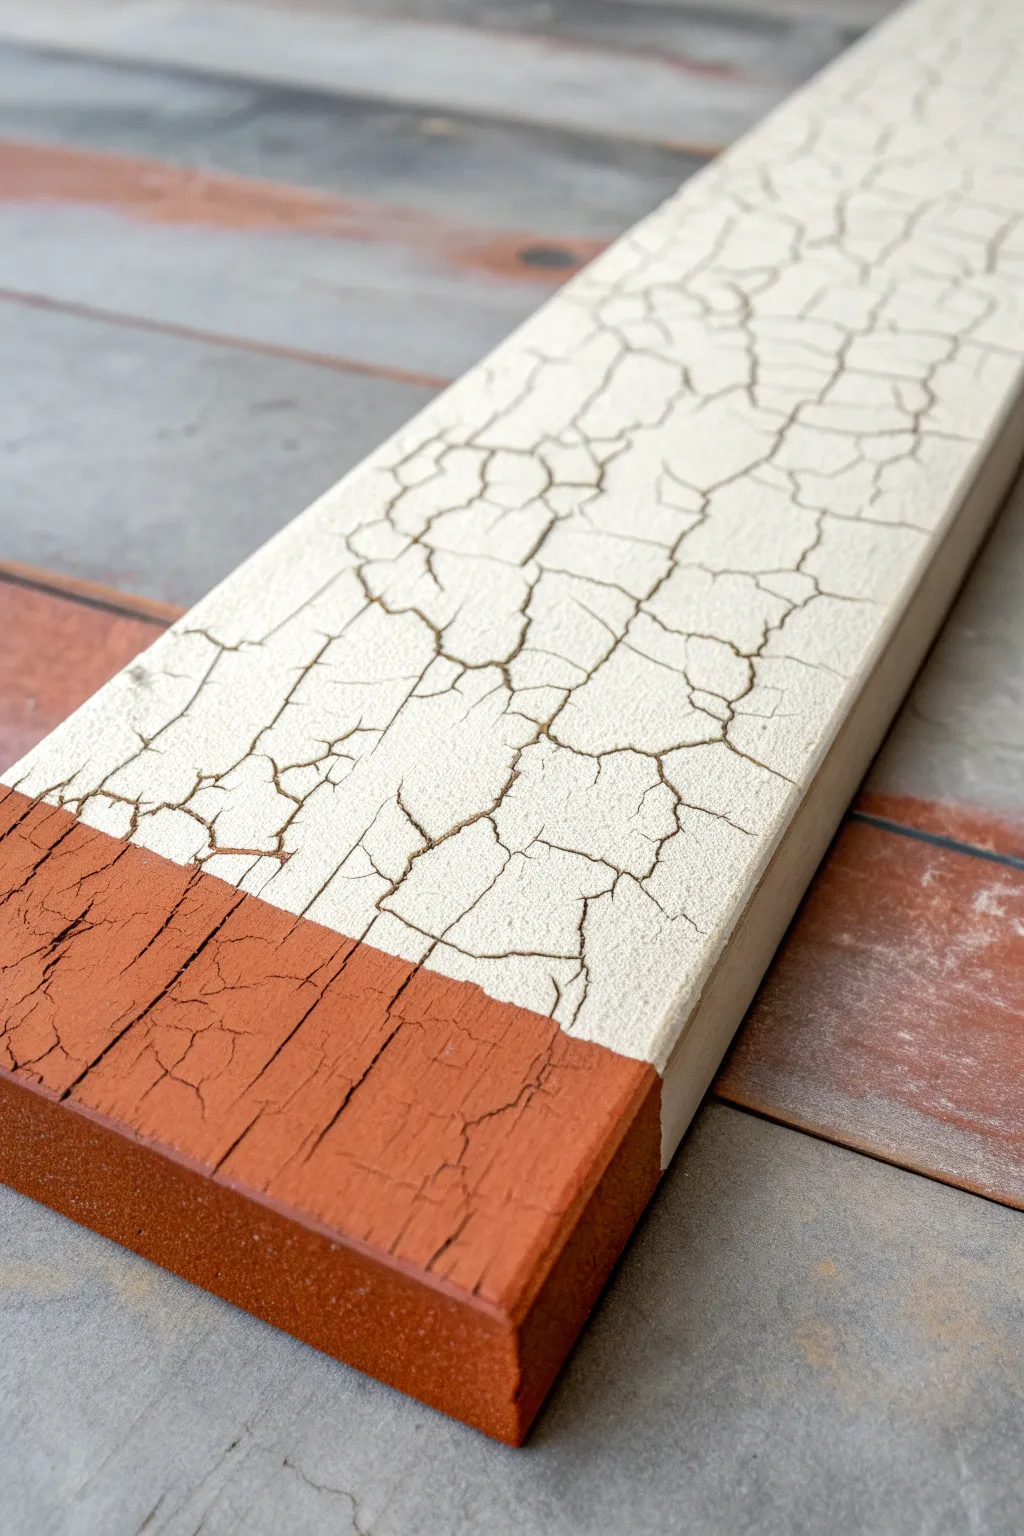
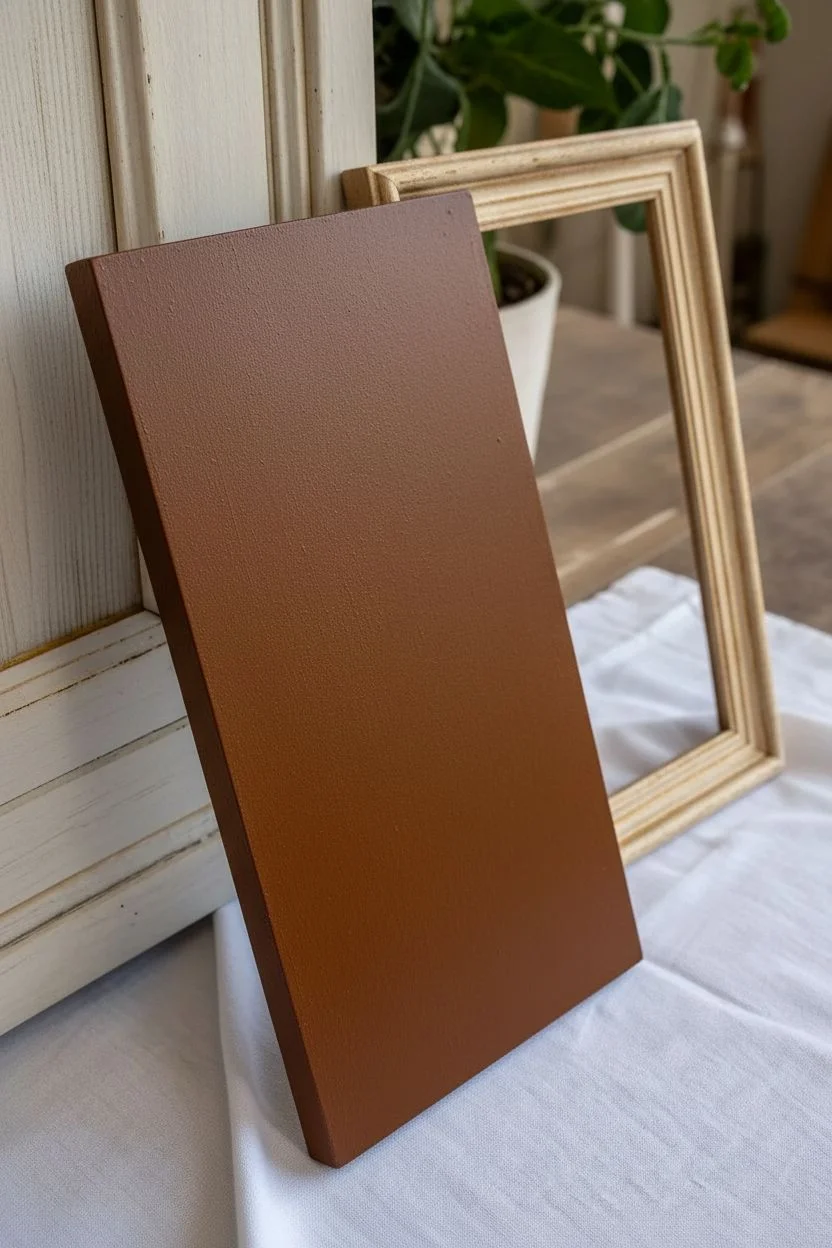
Achieve a beautifully weathered, antique aesthetic with this classic two-color crackle technique. By layering contrasting paint colors with a specialized medium in between, you can create dramatic fissures that reveal the bold base tone underneath.
Step-by-Step Guide
Materials
- Smooth wooden board (pine or MDF)
- Sandpaper (220 grit)
- Tack cloth
- Terracotta or rust-colored acrylic paint (Base Color)
- Cream or off-white acrylic paint (Top Color)
- Crackle medium (or liquid white glue)
- Flat synthetic paintbrushes (1-2 inch)
- Painter’s tape (optional)
- Matte clear sealer (optional)
Step 1: Base Preparation
-
Sand the surface:
Begin by sanding your wooden board with 220-grit sandpaper to ensure a smooth, even surface. This helps the paint adhere properly without grain patterns interfering with the crackle effect. -
Clean the dust:
Wipe away every speck of sanding dust using a tack cloth or a slightly damp rag. A clean surface is crucial for the layers to bond correctly. -
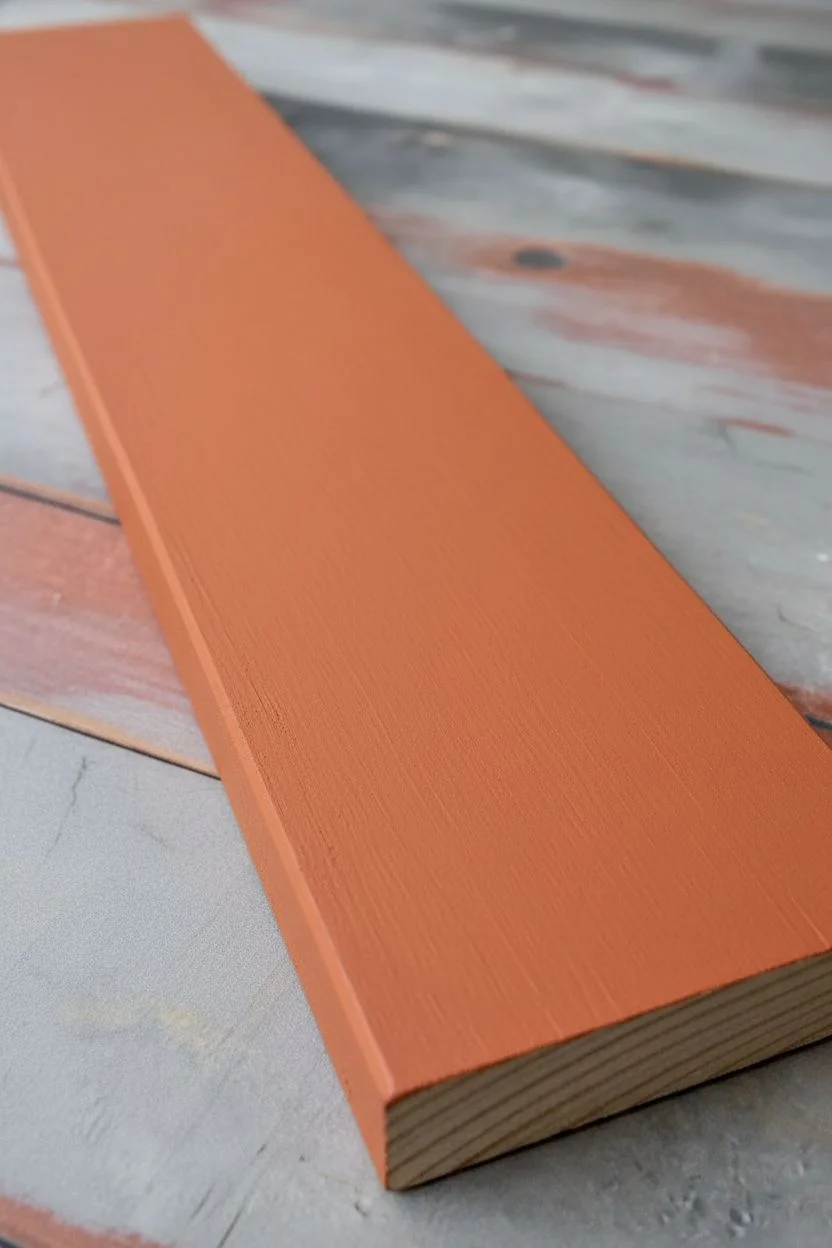
Apply the base coat:
Using a flat brush, apply a generous coat of the terracotta acrylic paint to the entire top surface and the sides of the board. I like to make sure this layer is completely opaque. -
Check for coverage:
Let the first coat dry to the touch, and if you see any wood grain peeking through, apply a second coat of the rust-colored paint. -
Dry completely:
Allow the base coat to dry thoroughly. This is non-negotiable; if the base is wet, the subsequent layers will mix rather than crackle. Wait at least 1-2 hours.
Muddy colors?
If your top coat turns pinkish, you overworked the paint. Only pass over the tacky medium once per stroke to keep layers distinct.
Step 2: The Crackle Effect
-
Apply the medium:
Brush on a thick, even layer of crackle medium over the dry base coat. If you are on a budget, regular white PVA school glue works as an excellent substitute. -
Gauge the thickness:
Pay attention to how much medium you apply; a thicker layer of medium will result in larger, wider cracks, while a thin layer creates fine, spiderweb cracks. -
Wait for the tack phase:
Allow the medium (or glue) to dry until it is tacky but not fully dry. The surface should feel sticky to your finger but shouldn’t come off wet. -
Prepare the top coat:
Load a clean flat brush with a generous amount of cream-colored acrylic paint while the medium is still tacky. -
Apply top paint:
Brush the cream paint over the tacky medium in single, confident strokes. Do not back-brush or go over the same spot twice, as this will disturb the cracking process. -
Masking the end (optional):
To recreate the specific look in the photo where the end remains solid red, simply stop painting the cream color a few inches before the edge, leaving a sharp transition line.
Go Metallic
Try a metallic gold or copper base coat instead of terracotta. The cracks will shimmer underneath the matte cream top layer.
Step 3: Drying and Sealing
-
Observe the reaction:
Watch as the paint dries; you will see the cracks begin to form almost immediately as the top layer shrinks over the flexible medium underneath. -
Air dry naturally:
Let the project sit undisturbed for several hours. This natural drying process often produces the most organic-looking finish. -
Speed dry (optional):
If you are impatient, you can use a hair dryer on a low heat setting to accelerate the cracking, though this can sometimes create smaller, tighter cracks. -
Verify dryness:
Touch the surface lightly to ensure the paint is fully cured and hard before moving it. -
Seal the piece:
Once fully cured (preferably overnight), apply a clear matte sealer to protect the finish from chipping without adding unwanted shine.
Enjoy displaying your rustic, time-worn creation on a shelf or as part of a larger farmhouse decor project


White Over Dark for Antique Charm
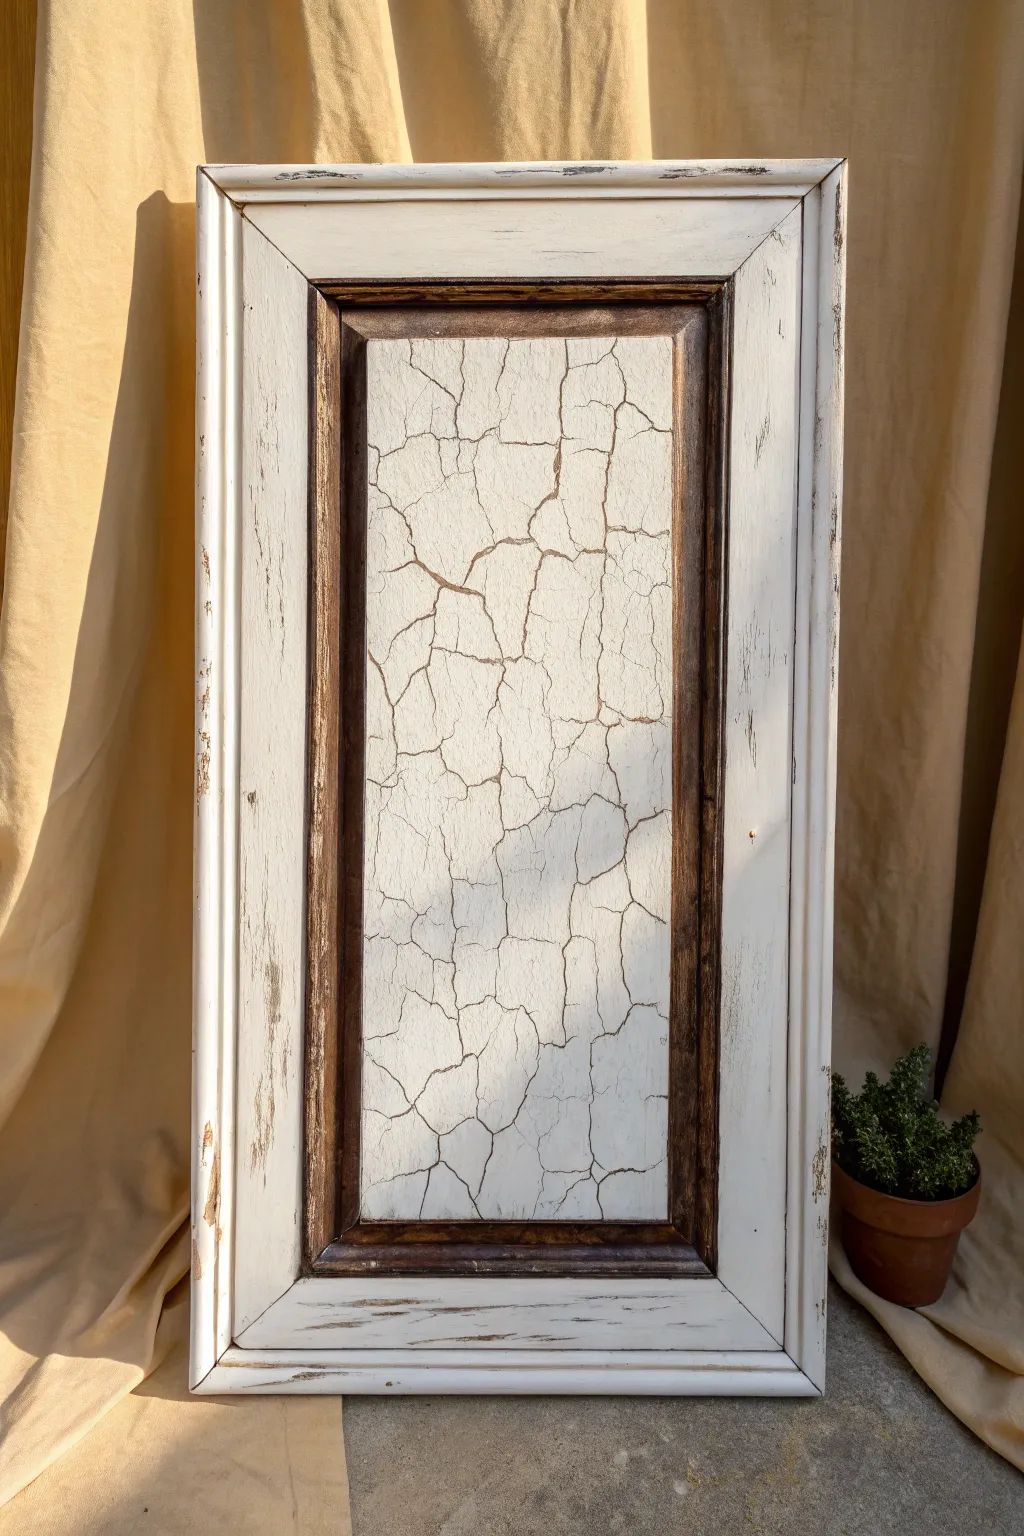
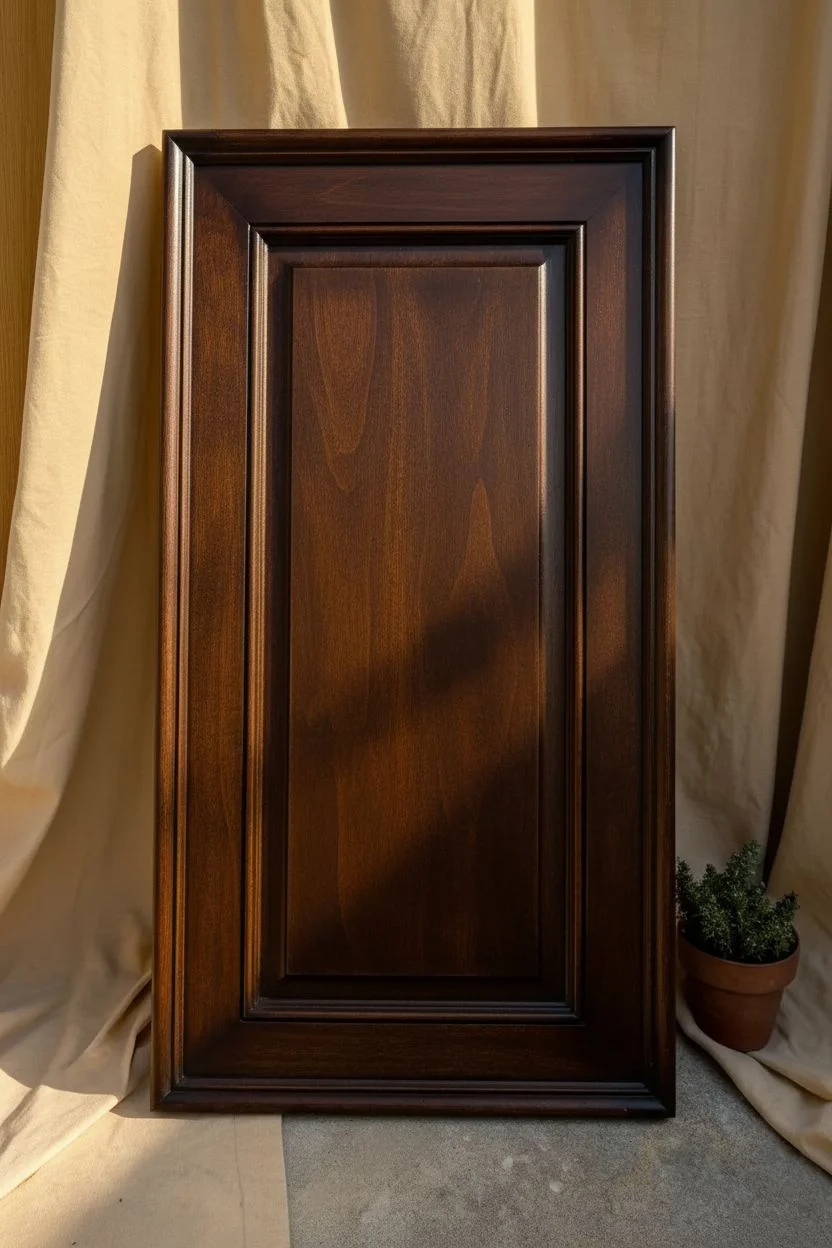
Transform a plain cabinet door into a distressed masterpiece using the classic white-over-dark technique. This project mimics the look of aged, peeling paint revealing gorgeous dark wood underneath, perfect for farmhouse decor or repurposed wall art.
Step-by-Step Tutorial
Materials
- Unfinished or old wood cabinet door (repurposed)
- Dark walnut or espresso wood stain
- Dark brown acrylic paint (optional, for deeper contrast)
- White or cream latex paint (flat or eggshell finish)
- Commercial crackle medium
- Sandpaper (120 and 220 grit)
- Foam brushes
- Synthetic bristle brushes (2-inch width)
- Clean rags
- Drop cloth
- Clear matte polyurethane (optional)
Step 1: Preparation and Base Layer
-
Clean the Surface:
Begin by thoroughly cleaning your cabinet door to remove any grease, dust, or old wax. If the door has a glossy finish, scuff it lightly with 120-grit sandpaper to help the new layers adhere. -
Apply the Base Stain:
Using a clean rag or foam brush, apply a generous coat of dark walnut wood stain to the entire door, paying special attention to the center panel and the inner grooves of the frame. -
Wipe and Let Dry:
Wipe away any excess stain with a lint-free cloth. Allow the stain to dry completely according to the manufacturer’s instructions. This dark layer is crucial because it’s what will peek through the cracks later. -
Deepen the Color (Optional):
If your stain looks too light for a high-contrast effect, brush a thin layer of dark brown acrylic paint over the center panel and let it dry completely. This ensures the cracks really pop.
Step 2: Applying the Crackle Medium
-
Target the Center Panel:
Using a foam brush, apply a thick, even layer of crackle medium to just the center recessed panel of the door. The thicker the medium, the larger the cracks will be. -
Wait for Tacky Stage:
Allow the medium to dry until it is tacky to the touch but not wet. Do not let it dry completely clear and hard, or it won’t react with the paint. -
Apply the Frame Medium:
While the center sets, brush a much thinner layer of crackle medium on the outer frame. We want subtle texture here, not the deep fissures of the center panel.
Cracks Not Appearing?
Users: If paint isn’t cracking, your medium was likely too dry or your top coat too thin. Apply medium generously and paint while it’s still tacky.
Step 3: The Top Coat Transformation
-
Paint the Center Panel:
Load a bristle brush with a generous amount of white latex paint. Apply it over the tacky center panel in single, confident strokes. Do not brush back and forth, as this will disturb the cracking process. -
Watch the Magic:
I like to step back for a moment here; the paint will begin to separate and crack almost immediately as it reacts with the medium below. Leave it untouched to do its work. -
Paint the Frame:
Paint the outer frame and the routed edges with the same white paint. Use thinner coats here than you did in the center for a more naturally worn look rather than a chemically cracked one. -
Dry Time:
Let the entire piece dry completely, preferably overnight. The paint needs to be fully hardened before the final distressing steps.
Add an Aged Patina
Once dry, rub a small amount of dark antique wax over the white paint and wipe it back. It settles into the cracks for a truly grimy, vintage look.
Step 4: Distressing and Finishing
-
Sand the Edges:
Take your 220-grit sandpaper and gently distress the outer frame. Focus on corners and high points where wear would naturally occur over time. -
Expose the Inner Frame:
Use a folded piece of sandpaper to aggressively sand the inner beveled edge (the frame surrounding the center panel). Remove most of the white paint here to create that dark, framing border seen in the image. -
Spot Distress the Surface:
If there are areas on the frame that look too perfect, hit them lightly with sandpaper to create scratches and reveal the dark stain underneath. -
Clean Up Dust:
Wipe the entire piece down with a tack cloth or slightly damp rag to remove all sanding dust from the cracks. -
Seal (Optional):
For durability, apply a clear matte polyurethane top coat. If you prefer the raw, chalky texture for a wall hanging, you can skip this step.
Now you have a beautifully weathered piece that adds instant history to your space


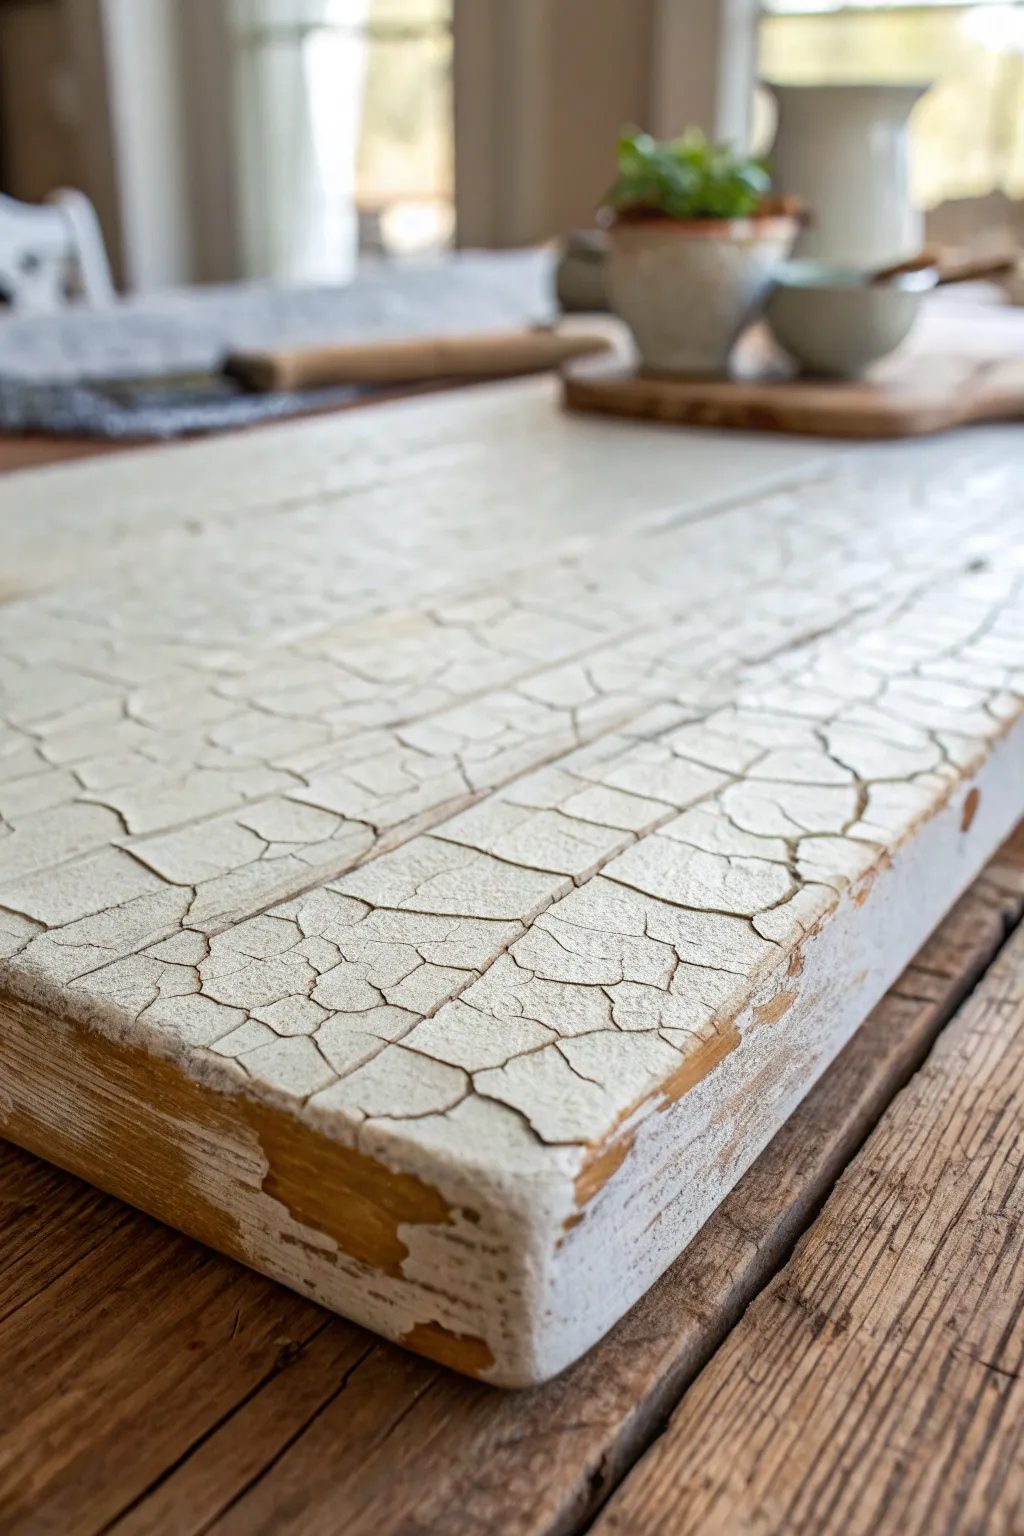
Dark Over Light for Moody Crackle
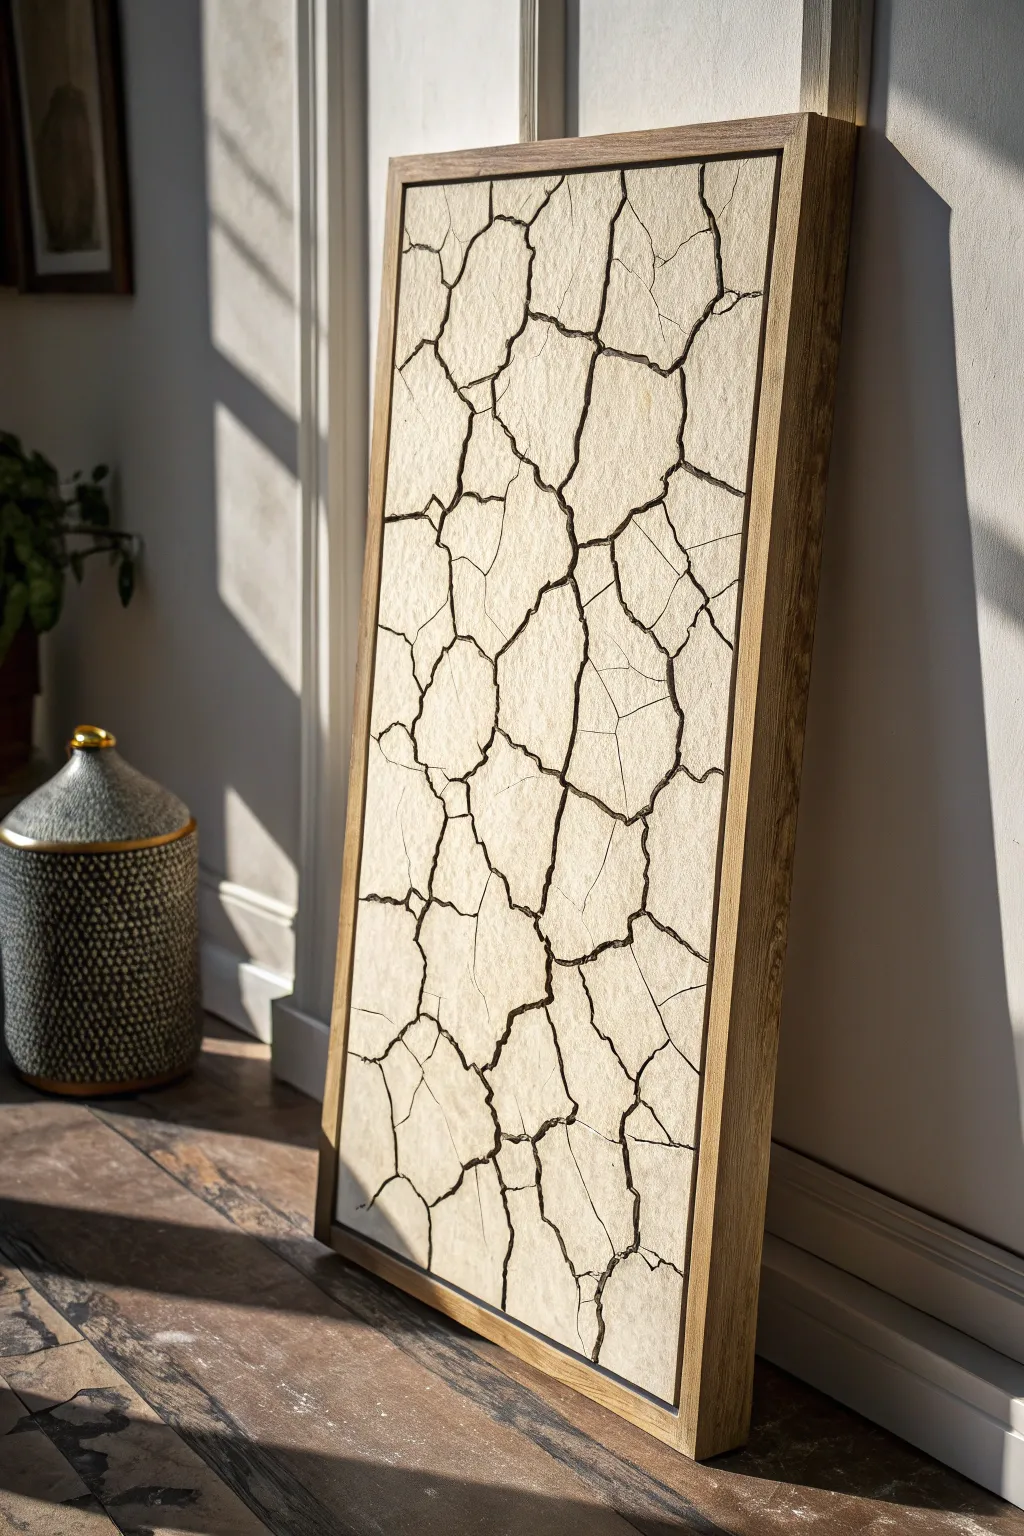
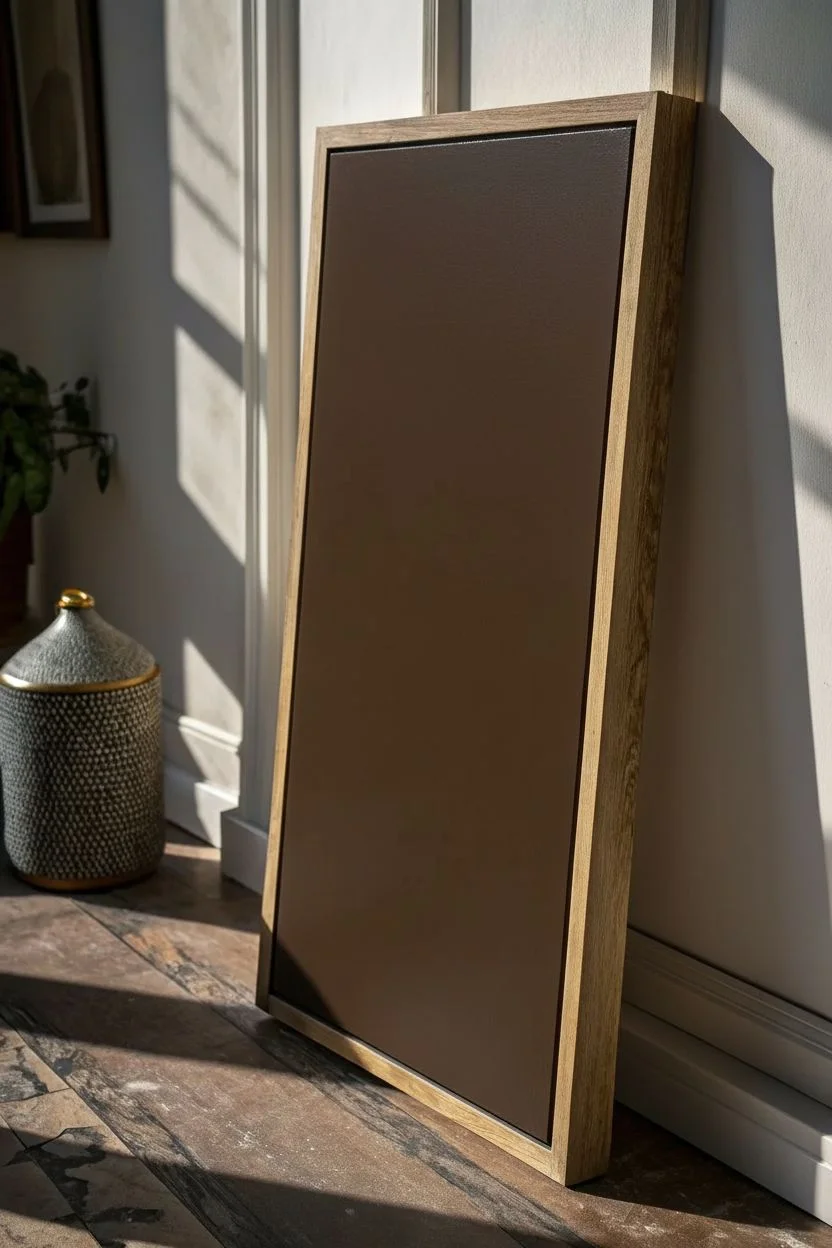
Capture the stark beauty of parched landscapes with this heavily textured piece that brings organic drama to any room. Using a specialized crackle paste technique, you’ll create deep, realistic fissures that look like sun-baked clay.
Detailed Instructions
Materials
- Large wooden canvas or deep cradled wood panel (approx. 24×36 inches)
- Floating frame (optional, for finishing)
- Heavy body acrylic paint (Dark Umber or Black)
- Modeling paste or heavy structure gel
- Crackling medium or crackle paste (specialized for wide cracks)
- Matte cream or beige acrylic paint
- Palette knives (assorted sizes)
- Wide flat synthetic brush
- Matte varnish spray
Step 1: Base Preparation
-
Prime the surface:
Ensure your wooden panel is clean and dust-free. Apply a coat of gesso if the wood is raw, allowing it to dry completely to create a stable foundation for the heavy texture layers. -
Apply the dark undercoat:
Paint the entire surface with your Dark Umber or Black heavy body acrylic. This layer represents the shadows deep within the cracks, so ensure coverage is solid and opaque. -
Dry thoroughly:
Let this dark base layer dry completely. If the paint is even slightly wet, the crackle medium applied later might mix with it and muddy the color instead of revealing it.
Step 2: Creating the Texture
-
Mix the crackle medium:
If your crackle paste requires mixing with paint, blend it now with your cream/beige acrylic. I prefer using a dedicated heavy crackle paste that can be painted over later for the deepest textures. -
Apply the first patch:
Using a large palette knife, scoop a generous amount of crackle paste onto the center of the panel. Do not spread it thin like frosting; you need significant thickness (about 1/8 to 1/4 inch) to generate those wide fissures seen in the photo. -
Work to the edges:
Continue applying the paste outward towards the frame. Vary the thickness slightly—thicker areas will create larger cracks, while thinner areas will result in finer spider-web lines. -
Smooth the surface:
Gently glide the largest palette knife over the top to flatten the peaks. You want a relatively flat plateau surface, distinct from stippled texture, to mimic dry ground. -
The drying phase:
This is the most crucial step. Allow the piece to dry naturally in a warm, dry room for at least 24-48 hours. Using a hair dryer can force cracks too quickly and make them fall off, so patience is key here.
Cracks not forming?
If cracks are too thin, your paste layer was likely too thin. For wide, dramatic fissures, the wet paste needs to be applied thickly—think peanut butter on toast, not butter.
Step 3: Refining and Color
-
Inspect the cracks:
Once fully dry, check for any loose flakes. Gently brush the surface with a soft, dry brush to dislodge any unstable pieces before painting. -
Top coat application:
If you used a white uncolored paste, load a wide flat brush with your matte cream or sandstone acrylic paint. Keep the paint relatively dry; do not water it down. -
Surface dragging:
Drag the brush lightly over the top surface of the dried ‘plates.’ The goal is to color the top surface without letting wet paint drip down into the dark cracks you established earlier. -
Enhance localized texture:
For a more organic look, dab a little darker beige or watered-down brown ink on a sponge and randomly press it onto a few distinct ‘islands’ of texture to create subtle color variation. -
Define the edges:
Use a small detail brush to touch up the edges of the panel where the paste meets the side, ensuring the dark undercoat or the light topcoat looks intentional and finished.
Add Organic Grit
Mix a small amount of fine sand or coffee grounds into your topcoat paint. When brushed over the crackle plates, it adds a gritty, realistic stone feel.
Step 4: Project Assembly
-
Seal the work:
Spray the entire piece with a matte varnish. This locks the potentially fragile crackle paste in place and prevents future flaking. -
Measure the frame:
If you are framing this yourself, measure your floating frame to ensure a 1/4 inch gap around the canvas for that high-end gallery look. -
Mount the artwork:
Place the artwork into the floating frame (or attach the custom wood trim as shown in the photo) using wood glue and brad nails from the back. -
Final inspection:
Stand the piece up and let the light hit it from the side. This raking light will highlight the depth of the cracks and confirm you achieved the desired dramatic effect.
Hang your new textured masterpiece where side-lighting can emphasize the deep, dramatic cracks you’ve created


Glue-Based Crackle for Budget Projects

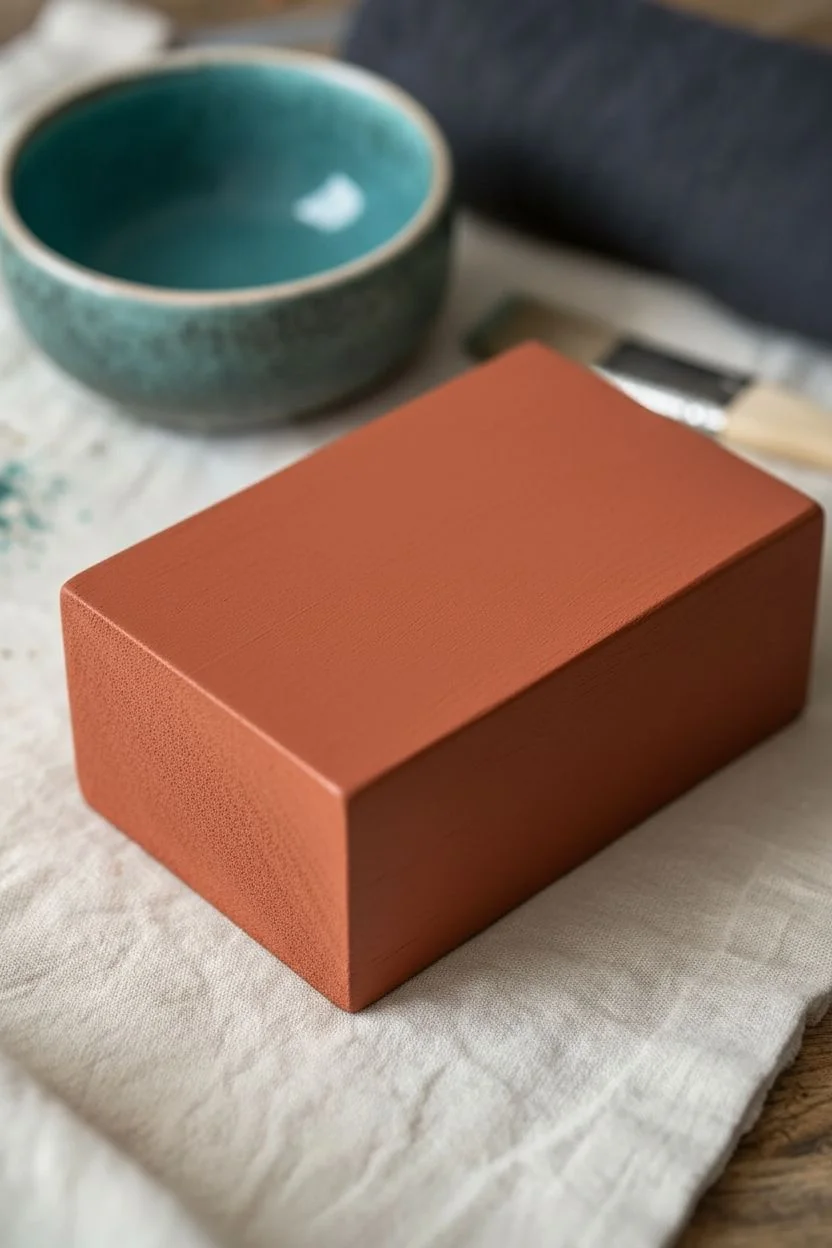
Transform a simple wooden block into a piece that mimics the intricate, aged beauty of raku pottery using everyday glue. The rich terracotta base peeking through fissures of turquoise creates a stunning, tactile finish that looks far more expensive than it is.
How-To Guide
Materials
- Rectangular wooden block (sanded smooth)
- Acrylic paint: Terracotta or Burnt Sienna (base color)
- Acrylic paint: Teal or Turquoise (top coat)
- PVA glue (white school glue) or clear school glue
- Flat synthetic paintbrushes (1-inch width)
- Small bowl for glue
- Sandpaper (220 grit)
- Paper towels
- Hairdryer (optional, for speeding up the process)
- Matte spray varnish (to seal)
Step 1: Base Preparation
-
Sand the surface:
Begin by sanding your wooden block with 220-grit sandpaper to remove any rough splinters or existing finish. Wipe away the dust with a slightly damp paper towel. -
Apply the base color:
Using a clean flat brush, apply a generous coat of Terracotta or Burnt Sienna acrylic paint. This color represents the distinctive ‘cracks’ you will see later. -
Check coverage:
Ensure the wood is completely covered. If the wood grain is still visible, let the first coat dry and apply a second layer for a solid, opaque finish. -
Allow to dry completely:
Let this base layer dry thoroughly. It must be bone dry before you apply the glue, or the colors will muddy together.
Step 2: The Crackle Medium
-
Pour the glue:
Pour a generous amount of PVA glue into a small bowl. You won’t be diluting this; you want it thick. -
Apply the glue layer:
Brush a layer of glue over the dry terracotta paint. I like to keep this layer moderately thick because the thicker the glue, the larger the cracks will be. -
Wait for the tacky stage:
This is crucial: Let the glue dry until it is tacky but not wet. It should feel sticky to the touch, like a post-it note, but shouldn’t come off on your finger.
Brush Direction Matters
For a grid-like crackle, brush the glue horizontally and the top coat vertically. Painting both layers in the same direction creates long, linear cracks.
Step 3: Creating the Effect
-
Prepare the top coat:
While the glue is setting up, get your Teal acrylic paint ready. Load up a clean, dry flat brush. -
Apply the top color:
Brush the teal paint directly over the tacky glue. Use long, single strokes. Do not go back and forth over the same spot, as this will disturb the glue and ruin the effect. -
Watch the magic:
As the paint interacts with the drying glue underneath, cracks will begin to form almost immediately. Let the painted block sit undisturbed. -
Force drying (optional):
If you are impatient, you can use a hairdryer on a low, warm setting to encourage cracking, but natural air drying usually yields the most organic patterns. -
Paint remaining sides:
Once the top face is dry enough to handle gently, repeat the glue and paint process on the sides of the block.
Paint Slipping Off?
If the top paint slides off, your glue layer was too wet. Wait until the glue is gummy and tacky, not liquid, before applying the final color.
Step 4: Finishing Touches
-
Inspect the cracks:
Look over your work. The teal paint should possess a distinct separation, revealing the warm terracotta spiderwebbing underneath. -
Touch up edges:
If any corners were missed during the painting process, dab a tiny bit of teal paint on them, blending it gently. -
Let it cure:
Allow the entire block to cure overnight. The glue layer underneath the paint takes longer to dry than the paint itself. -
Seal the project:
Take the block to a well-ventilated area and apply a light coat of matte spray varnish. This protects the finish without adding an unnatural shine, keeping that ceramic look. -
Final curing:
Let the varnish dry according to the can’s instructions before displaying your faux-ceramic art piece.
With your finished crackle block, you’ve mastered a timeless technique that adds vintage character to any surface
BRUSH GUIDE
The Right Brush for Every Stroke
From clean lines to bold texture — master brush choice, stroke control, and essential techniques.
Explore the Full Guide
Big Alligator Cracks With Thick Top Coat
Achieve that authentic, time-worn texture with this heavy-duty crackle technique that mimics decades of weathering. By using a generous application of glue and paint, you will create dramatic ‘alligator skin’ fissures that reveal the warm wood tones beneath.
Step-by-Step Guide
Materials
- Wooden board or riser (uncut pine works well)
- Medium-grit sandpaper (120-grit)
- Clear school glue or wood glue (PVA glue)
- Thick white chalk paint or flat latex paint
- Cheap chip brushes (2-3 inches wide)
- Hairdryer or heat gun
- Matte clear sealer (polyurethane or wax)
- Tack cloth
- Drop cloth
Step 1: Preparation and Base Layer
-
Surface Prep:
Begin by sanding your wooden board thoroughly with 120-grit sandpaper to remove any rough splinters, focusing especially on the edges where you want the natural wood to peek through later. -
Clean Up:
Wipe the entire board down with a tack cloth to ensure it is completely free of sawdust, as dust can interfere with the glue adhesion. -
Base Color Decision:
Since we want the raw wood to show through the cracks, leaving the wood unpainted is best. However, if you want a darker contrast, apply a coat of dark wood stain now and let it dry completely.
Step 2: The Crackle Medium
-
Pouring the Glue:
Pour a generous amount of clear school glue or wood glue directly onto the flat surface of the board. -
Spreading the Medium:
Use a chip brush to spread the glue across the surface. For these big cracks, you want a thick, visible layer of glue—about the thickness of a dime. -
Setting Time:
Let the glue sit for about 5 to 10 minutes until it becomes tacky and forms a slight skin, but is still wet underneath.
Glue Thickness Matters
For bigger cracks, use more glue. A thin layer creates fine, porcelain-like cracks, while a thick, gloopy layer creates the chunky alligator texture shown here.
Step 3: Applying the Top Coat
-
Loading the Brush:
Dip a clean chip brush generously into your white chalk paint. You want the brush fully loaded to avoid dragging. -
The One-Pass Rule:
Gently lay the paint over the tacky glue. Do not overwork it; applying the paint in single, smooth strokes in one direction is crucial for the cracks to form properly. -
Thick Application:
Ensure the paint layer is relatively thick. A heavier top coat is the secret ingredient for those deep, wide ‘alligator’ cracks seen in the photo. -
Immediate Reaction:
You might start seeing tiny splits almost immediately. Resist the urge to go back and touch up any spots, as this will smudge the crackle effect.
Paint Sliding Around?
If the paint turns into a muddy mess with the glue, you are brushing too hard. Lay the paint on top gently, almost floating it over the glue layer.
Step 4: Drying and Distressing
-
Accelerated Drying:
Grab your hairdryer or heat gun. Hold it about 6-8 inches away from the surface and move it constantly to heat the paint. -
Watching Cracks Form:
As the heat hits the wet paint and glue, the top layer will shrink and split dramatically. Continue heating until the paint is dry to the touch. -
Full Cure:
Once the surface feels dry, set the project aside for several hours or overnight to ensure the thick glue layer underneath hardens completely. -
Edge Distressing:
Take your sandpaper and gently scuff the corners and edges of the board. This mimics natural wear and tear where the paint would naturally chip off over time. -
Surface Scuffing:
I like to lightly run sandpaper over a few high spots on the flat surface as well, knocking down any overly sharp paint peaks for a smoother hand-feel.
Step 5: Sealing
-
Dust Removal:
Wipe away all sanding dust carefully with a clean tack cloth. -
Final Protection:
Apply a coat of matte clear sealer or furniture wax to protect the finish without adding unwanted shine, preserving that dry, rustic look.
Place your newly aged board on the kitchen counter for an instant touch of rustic charm
Fine Hairline Crackle for Subtle Texture
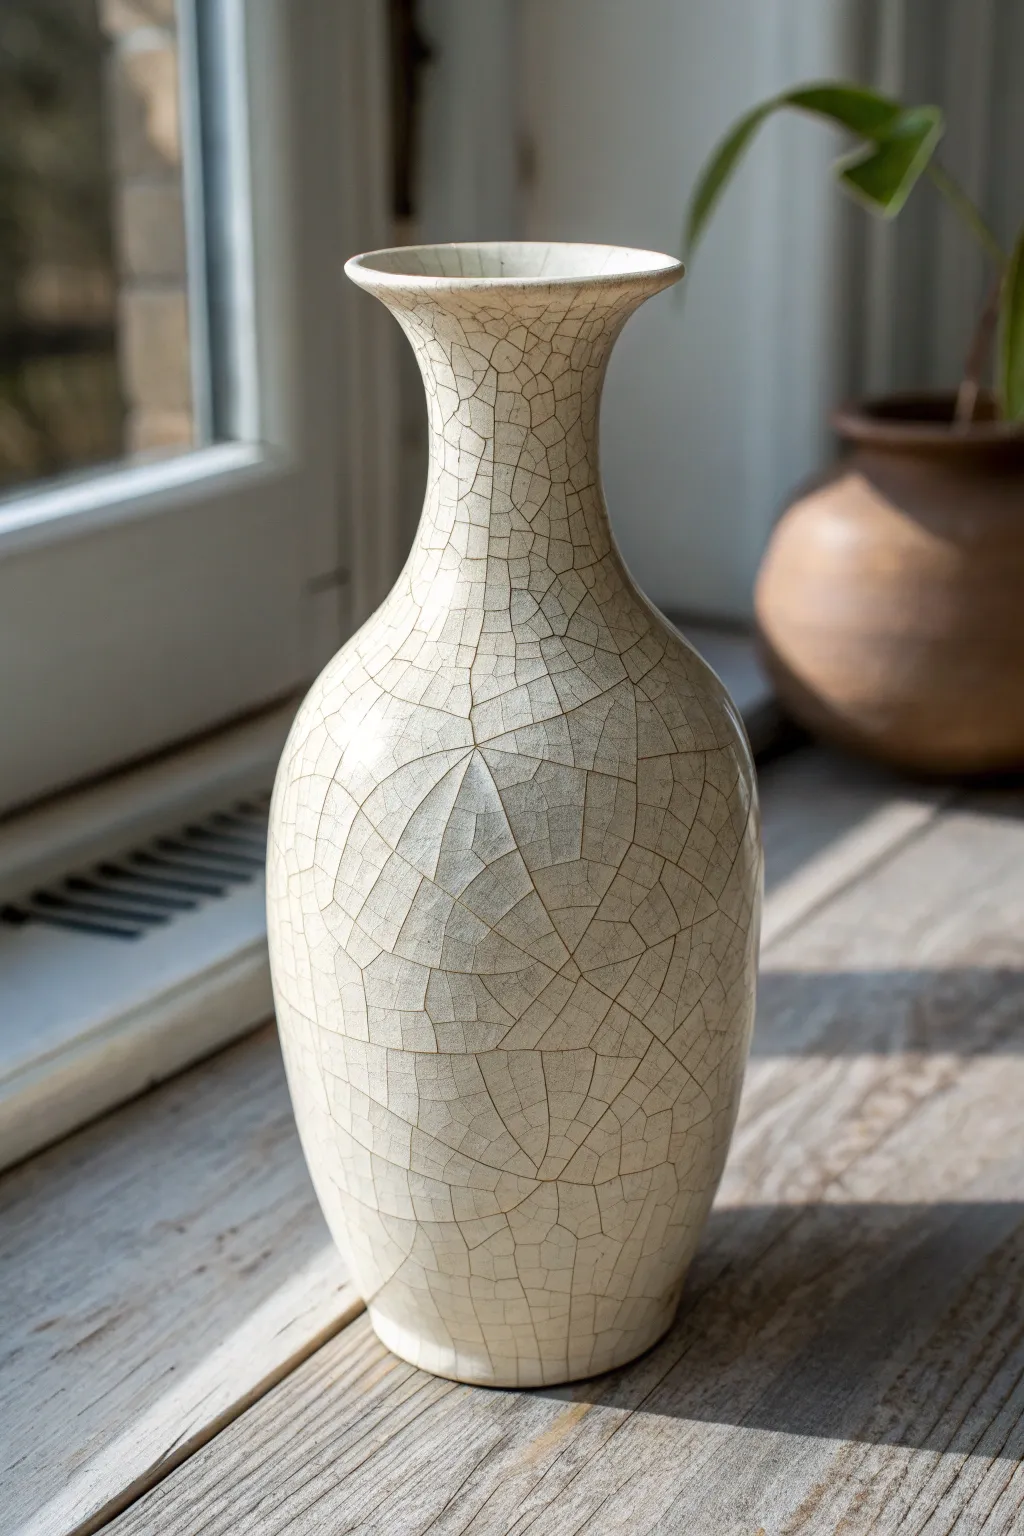
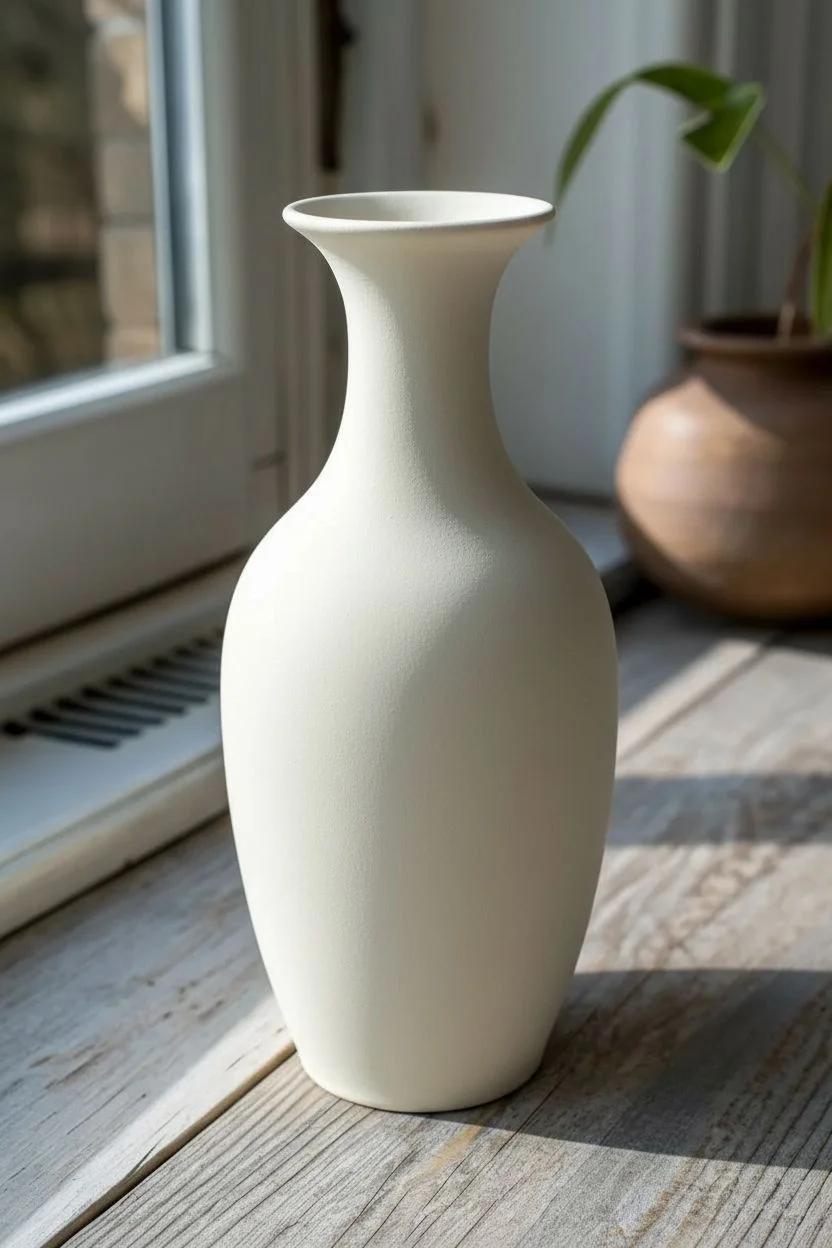
Transform a plain ceramic or glass vase into a piece that mimics the look of aged porcelain with delicate hairline fractures. This technique achieves a sophisticated, antique aesthetic by creating ultra-fine cracks rather than large chunks, perfect for adding subtle texture to your decor.
Detailed Instructions
Materials
- Clean glass or ceramic vase (smooth surface)
- Rubbing alcohol
- Lint-free cloth
- White or ivory chalk-style paint
- Two-part crackle medium (Step 1 Base & Step 2 Topcoat)
- Soft synthetic flat brushes
- Dark antiquing wax or oil paint (burnt umber)
- Clean cotton rags
- Clear water-based satin or matte varnish
Step 1: Preparation and Base Coat
-
Clean surface:
Begin by thoroughly cleaning your vase with rubbing alcohol and a lint-free cloth to remove any oils or dust that might repel the paint. -
Apply base color:
Brush on a smooth, even coat of white or ivory chalk-style paint. Use long vertical strokes to minimize brush marks. -
Dry and repeat:
Let the first coat dry completely, usually for about an hour. If the original vase color shows through, apply a second coat for full opacity. -
Check finish:
Ensure the base paint is bone dry before proceeding. Any moisture trapped underneath will interfere with the chemical reaction of the crackle medium.
Don’t Rush the Tacky Phase
The ‘tacky’ phase of Step 1 is crucial. If it’s too wet, the layers mix and fail to crack. If too dry, Step 2 won’t react. Test a small spot with your knuckle—it should feel like sticker residue.
Step 2: Applying the Crackle Medium
-
Apply Step 1:
Apply the first component of your two-step porcelain crackle medium. Use a dedicated soft brush and apply a generous, even layer over the entire painted surface. -
Let it tack up:
Allow ‘Step 1’ to dry until it is clear but still tacky to the touch. This usually takes 30 to 60 minutes depending on humidity. -
Apply Step 2:
Brush on the second component (‘Step 2’) of the medium. The thickness of this layer often dictates crack size; a thinner layer tends to yield the finer, hairline cracks seen in the project image. -
Force dry (optional):
For smaller cracks, I sometimes let it air dry naturally. However, gently using a hair dryer on a low, warm setting can sometimes accelerate the process and create interesting variations in the pattern. -
Wait for cracks:
Let the piece sit undisturbed for several hours or overnight. The cracks are transparent at this stage and will be very hard to see until we antique them.
Cracks Not appearing?
If hairline cracks don’t appear after drying, the room might be too cold or humid. Try moving the piece to a warmer, drier room, or gently warm the surface with a hairdryer to encourage the reaction.
Step 3: Revealing the Texture
-
Choose your antique medium:
To make the cracks visible, use a dark antiquing wax or a small amount of burnt umber oil paint. The dark pigment will settle into the crevices. -
Rub in color:
Using a soft cotton rag, rub the wax or oil paint over the entire surface in a circular motion, pressing firmly to force the pigment into the fine cracks. -
Wipe back:
immediately take a clean section of your rag and wipe away the excess wax from the surface. You want the surface to be white again, leaving color only trapped inside the cracks. -
Buff gently:
Continue buffing gently until you achieve the desired level of cleanliness. If the wax is stubborn, a tiny drop of clear wax usually helps lift the excess dark wax. -
Dry time:
Allow the antiquing medium to cure/dry according to the manufacturer’s instructions, typically overnight.
Step 4: Sealing
-
Select varnish:
Choose a clear, non-yellowing water-based varnish. A satin finish mimics the sheen of real porcelain best. -
Apply topcoat:
Carefully brush on the varnish to seal the wax and protect the delicate crackle finish. Avoid over-brushing, which might pull up the wax. -
Final cure:
Let the vase cure fully for a few days before handling it excessively or placing it near heat sources.
Place your newly finished vase in a spot with good natural light to highlight the intricate web of texture you have created

PENCIL GUIDE
Understanding Pencil Grades from H to B
From first sketch to finished drawing — learn pencil grades, line control, and shading techniques.
Explore the Full Guide
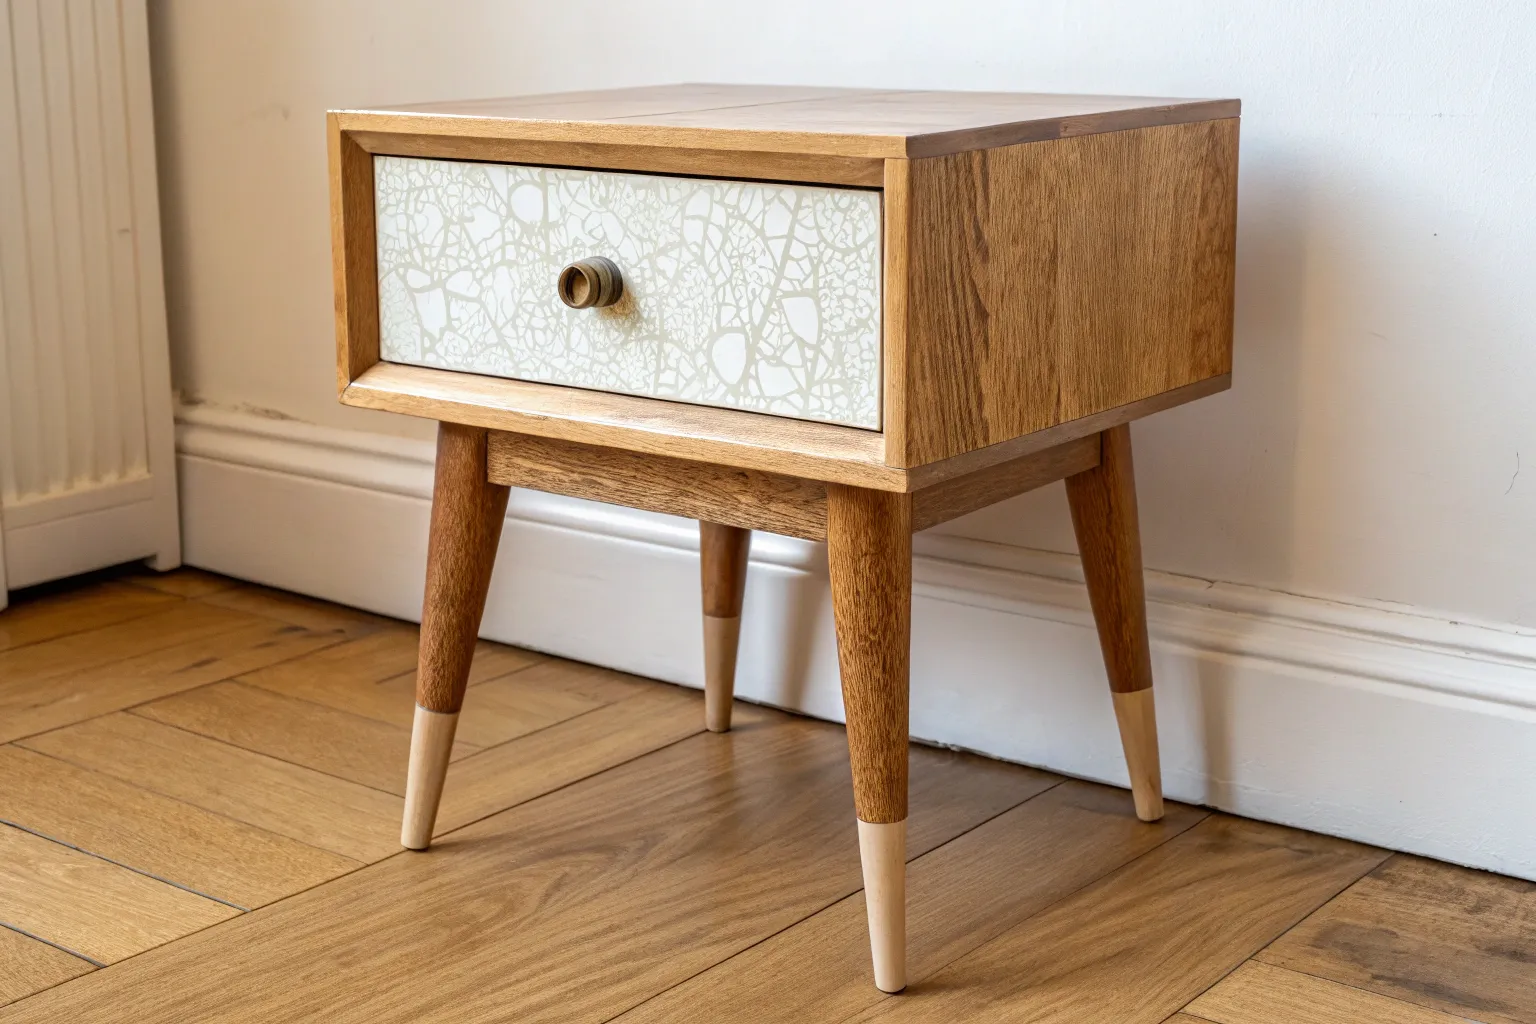
Crackle Only Where Wear Makes Sense

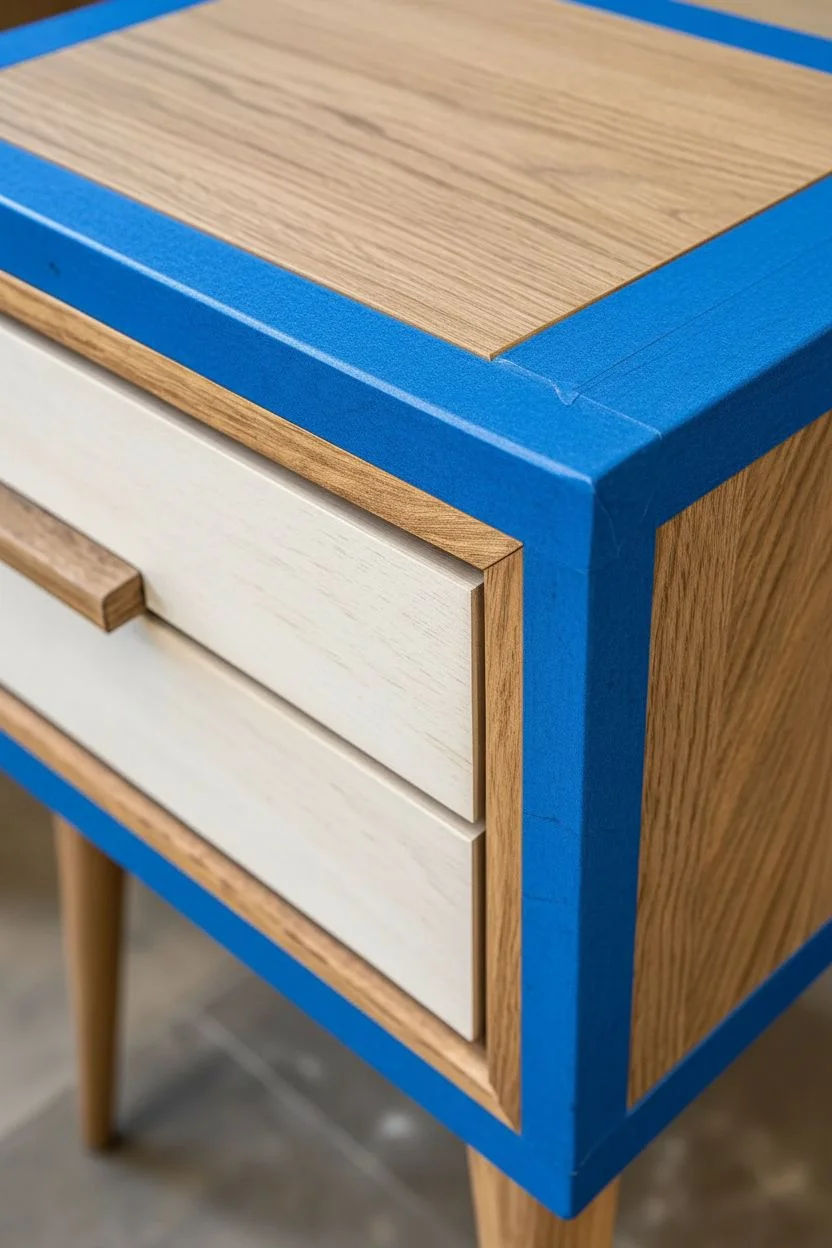
This project transforms a standard wooden nightstand by contrasting sleek, natural wood grain with a textured, aged crackle finish that mimics weathered stone or plaster. The result is a sophisticated piece where the distressed frame acts as a bright border for the warm, recessed timber panels.
Step-by-Step Guide
Materials
- Wooden nightstand (unfinished or stripped)
- Painter’s tape (high quality)
- Sanding sealer
- Clear matte polyurethane
- White chalk paint or heavy-body acrylic
- Crackle medium (two-part system recommended for fine cracks)
- Dark antiquing wax or dark gray acrylic wash
- Clean lint-free rags
- Synthetic bristle brushes
- Sandpaper (120, 220, and 400 grit)
- Tack cloth
Step 1: Preparation & Masking
-
Disassemble the Furniture:
Remove the drawers and unscrew any hardware. If the legs are removable, take them off to make painting the frame easier. -
Sand the Substrate:
Sand the entire piece with 120-grit sandpaper to remove any old finish or rough spots. Follow up with 220-grit for a smooth base. Wipe away all dust with a tack cloth. -
Planning the zones:
Identify which areas will remain natural wood (the drawer fronts’ trim, side panels, and top inset) and which will receive the crackle finish (the main outer frame and legs). -
Apply Sealer:
Apply a coat of sanding sealer to the entire piece. This protects the wood areas you want to keep natural and creates a uniform surface for paint adhesion on the frame. -
Masking Off:
This is crucial for the crisp lines seen in the image. Carefully tape off the wood sections you want to preserve—specifically the top panel inset, the side panels, and the delicate trim around the drawers. Press the tape edges down firmly.
Tape Tearing Paint?
Score the edge of the tape with a sharp craft knife before pulling. This separates the paint film from the tape, preventing chips on your fresh lines.
Step 2: The Crackle Finish
-
Base Coat Application:
Paint the exposed frame areas with a base layer of white chalk paint. Chalk paint is great here because it has a matte, plaster-like build. -
Apply Crackle Medium:
Once the base coat is dry, apply your clear crackle medium. Brush it on generously but evenly. The thickness of this layer often dictates the size of your cracks. -
Top Coat Technique:
When the medium is tacky (refer to your specific product’s instructions), apply a second, thicker coat of the white paint. Do not over-brush; lay the paint down and leave it, or you’ll disturb the cracking process. -
Dry and Crack:
Let the paint dry completely. You should see fine fissures appearing as the top layer shrinks away from the medium. I find natural air drying works best, but a hair dryer on low can speed it up if you’re impatient. -
Highlighting the Cracks:
The cracks might look white-on-white initially. To get that ‘stone’ look, mix a very dilute wash of dark gray acrylic paint or use a dark antiquing wax. -
Wiping Back:
Brush the dark wash over the crackled areas, working it into the crevices. Immediately wipe off the surface with a lint-free rag, leaving the dark pigment only trapped within the cracks.
Step 3: Wood Finishing & Assembly
-
Remove Tape:
Carefully peel away the painter’s tape while the paint is fully dry but before sealing. Pull the tape at a 45-degree angle away from the painted edge to ensure a sharp line. -
Clean Up Edges:
If any paint bled under the tape onto the natural wood, gently scrape it away with a razor blade or a tiny piece of folded 400-grit sandpaper. -
Seal the Wood:
Apply a clear matte polyurethane to the exposed natural wood sections (top, sides, drawer trim). This brings out the grain warmth and matches the sheen of the matte paint. -
Final Protective Coat:
Coat the entire piece, including the crackled frame, with a final layer of clear matte poly. This locks in your crackle effect and prevents the paint from chipping over time. -
Drawer Reassembly:
Slide the drawers back in. The contrast between the clean wood trim and the textured frame should now look seamless.
Stone Texture Trick
Add a teaspoon of plaster powder or unsanded grout to your white paint. This gritty texture makes the finish feel deeply aged, just like real limestone.
Step back and admire how this textural technique turns a simple piece of furniture into a seemingly time-worn architectural treasure.
Directional Crackle With One-Way Brush Strokes
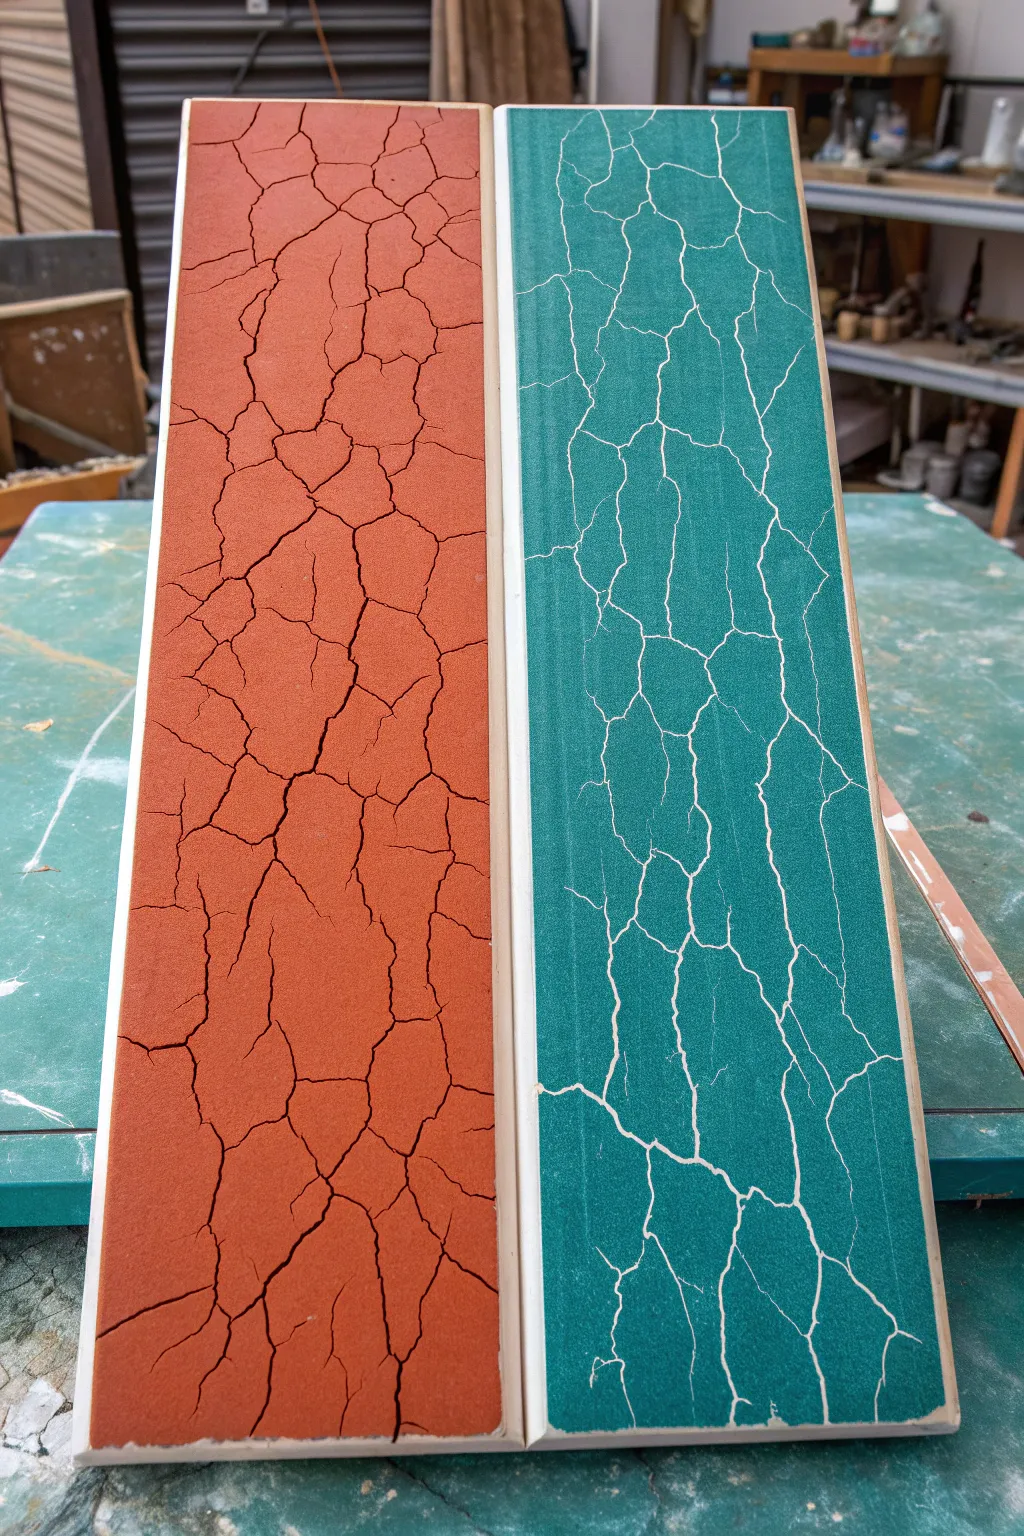

This project showcases how brush stroke direction influences the final look of crackle medium, creating long, linear fissures rather than a random spiderweb effect. You’ll produce twoboards featuring striking terracotta and teal finishes that demonstrate this unique, directional aged effect.
Detailed Instructions
Materials
- Two long rectangular wooden boards or canvas panels
- Sandpaper (220 grit)
- White acrylic paint or primer (for the teal board base)
- Dark brown or black acrylic paint (for the terracotta board base)
- Clear crackle medium (specifically one designed for acrylics)
- Terracotta orange acrylic paint (matte finish)
- Teal/Emerald green acrylic paint (matte finish)
- Wide, flat synthetic bristle brush (2-3 inches)
- Medium flat synthetic brush
- Clear matte varnish (optional)
Step 1: Base Coat Preparation
-
Surface Prep:
Begin by lightly sanding your wooden boards to remove any rough splinters or existing glossy finishes. Wipe them clean with a tack cloth or damp rag to ensure no dust remains. -
Analyzing the Contrast:
Decide which board will be which color. The terracotta board in the example shows dark cracks, meaning it needs a dark base coat. The teal board shows white cracks, requiring a white base coat. -
Painting the Dark Base:
Apply a solid coat of dark brown or black acrylic paint to the first board. Ensure full coverage so the wood grain doesn’t show through. Let this dry completely. -
Painting the Light Base:
Apply a solid coat of white acrylic paint or primer to the second board. Depending on the opacity of your paint, you might need a second coat to get a bright, clean white. Allow this to dry fully.
Step 2: Applying the Crackle Medium
-
Choosing the Brush:
Select a clean, wide flat brush. The key to the “directional” look mentioned in the title is using a brush that spans a significant width of the board if possible, or maintaining very straight lines. -
Application Direction:
Apply a generous layer of clear crackle medium to both boards. Brush in one consistent vertical direction from top to bottom. Do not cross-hatch or swirl the brush. -
Thickness Control:
Keep the medium layer relatively thick but not pooling. A thicker layer usually results in larger, more distinct cracks, which is what we want for this look. -
Drying Time:
Allow the crackle medium to dry according to the manufacturer’s instructions. Usually, it needs to be tacky but not wet. I generally wait about 45 to 60 minutes, but check your bottle specifics.
Cracks not appearing?
If cracks are tiny or invisible, your top coat was likely too thin or you brushed over it too many times. The paint must be applied liberally in a single pass to pull apart correctly.
Step 3: Top Coat & Cracking
-
Loading the Top Color:
Load your wide brush generously with the terracotta paint for the dark-based board. You need enough paint on the brush to lay it down in one pass without dragging. -
The Critical Stroke:
Apply the top coat of paint in the *exact same direction* as you applied the crackle medium (vertical strokes). Move quickly and confidently. -
One Pass Rule:
Do not brush back over an area you have already painted. Overworking the paint disturbs the chemical reaction and will turn the cracks into a mushy texture. -
Repeat for Teal:
Clean your brush thoroughly (or use a fresh one) and repeat the process on the second board using the teal paint over the white base. Remember: vertical strokes, one pass only. -
Watching the Magic:
As the paint begins to dry, the cracks will start to appear almost immediately. Because you brushed vertically, the cracks will form primarily in vertical, bark-like patterns. -
Full Cure:
Let the boards sit undisturbed for at least 24 hours. The cracking process can continue subtly as the moisture evaporates from the lower layers.
Pro Tip: Hairdryer Hack
Want wider fissures? Use a hairdryer on a low, warm setting immediately after applying the top coat. The heat accelerates drying, forcing the paint to shrink faster and crack wider.
Step 4: Finishing Touches
-
Smoothing Edges:
Once fully dry, check the edges of your boards. If paint dripped over the side, sand it down gently for a clean, professional profile. -
Sealing:
To protect fragile flakes of paint, apply a coat of clear matte varnish. Use a spray varnish rather than a brush-on type to avoid accidentally lifting any loose paint flakes.
You now have a stunning pair of textured panels that highlight the fascinating mechanics of crackle medium


Drawer Front Makeover With Contrast Crackle
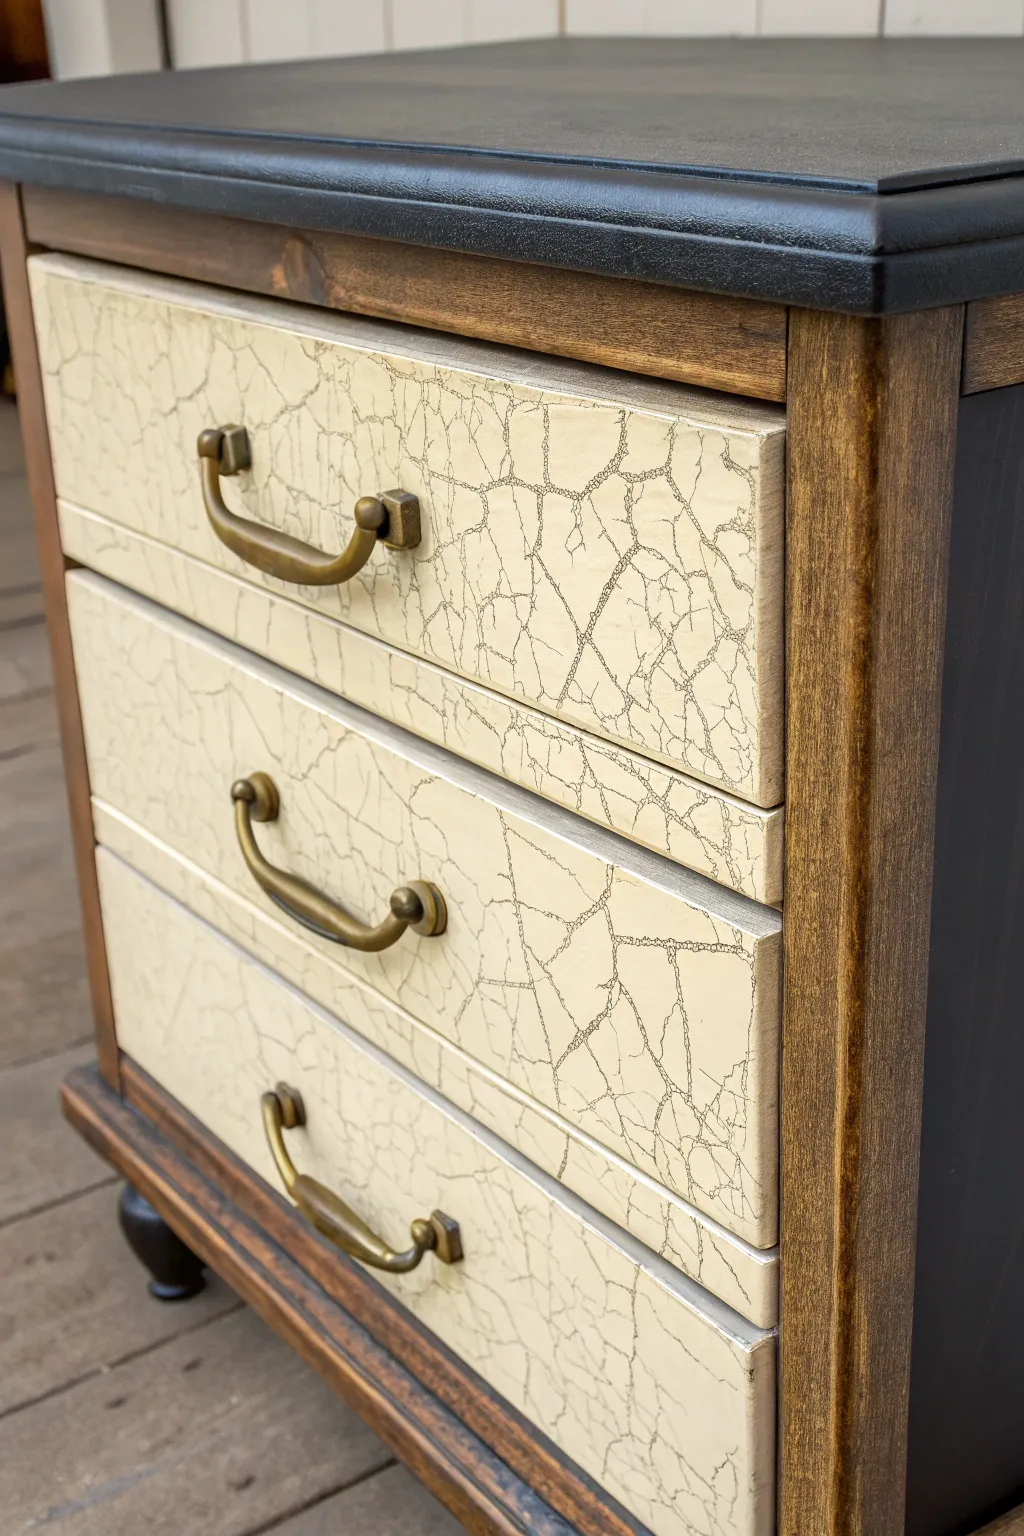
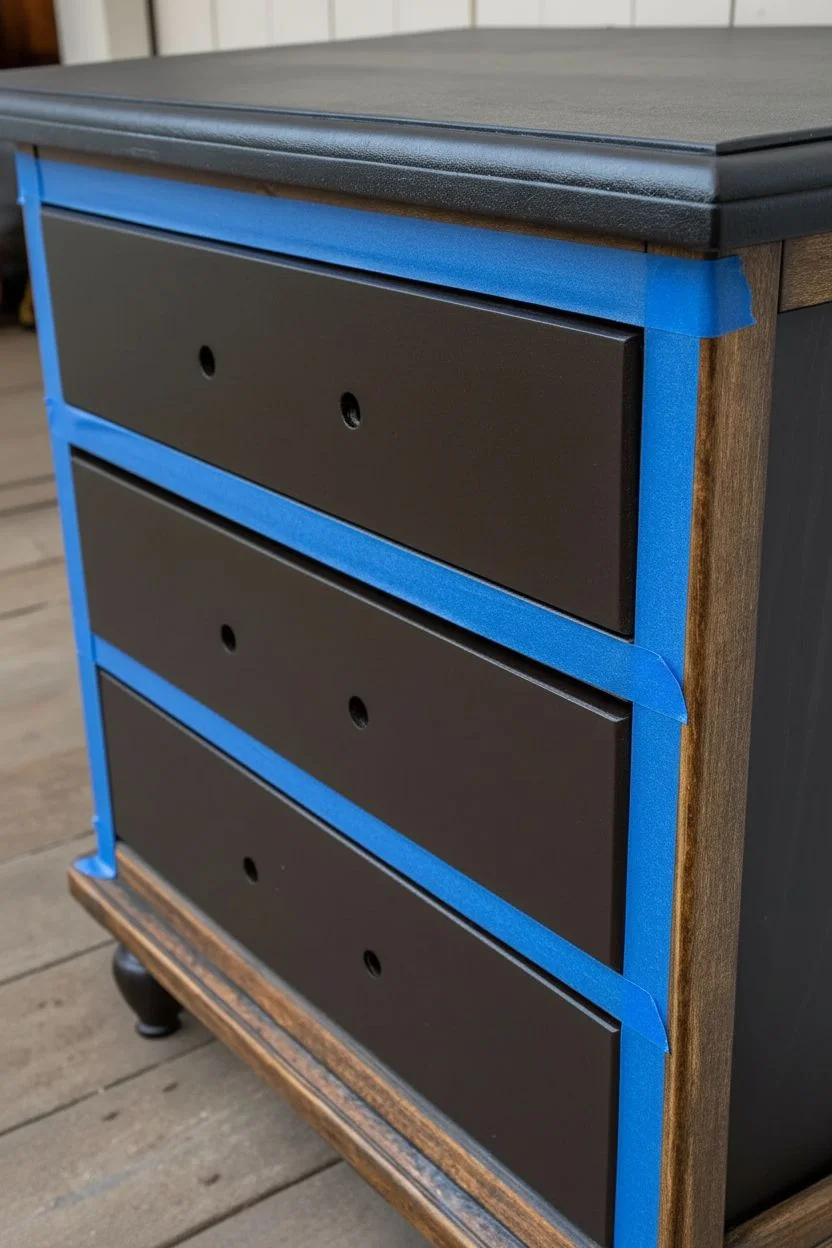
Transform a plain dresser by giving its drawers a striking, aged personality with this two-tone crackle technique. The dark undercoat peeking through cream-colored fissures creates a sophisticated, antique texture that looks beautifully weathered.
Step-by-Step Tutorial
Materials
- Wooden dresser or nightstand
- Screwdriver (for hardware removal)
- Sandpaper 120-grit and 220-grit
- Tack cloth or lint-free rags
- Painter’s tape
- Water-based primer
- Dark brown or black acrylic paint (base coat)
- Crackle medium (clear)
- Cream or off-white acrylic paint (top coat)
- Synthetic flourettes or flat brushes (high quality)
- Polycrylic topcoat or clear furniture wax
- Drop cloth
Step 1: Preparation and Base Coat
-
Remove Hardware:
Begin by unscrewing and removing all drawer pulls or knobs. Store them safely in a baggie with their screws so nothing gets lost during the painting process. -
Clean Surfaces:
Wipe down the drawer fronts thoroughly to remove any dust, oils, or furniture polish. A solution of TSP (trisodium phosphate) or a degreaser works best for older furniture. -
Sand for Adhesion:
Lightly scuff sand the drawer fronts using 120-grit sandpaper. You don’t need to strip the wood entirely, just create enough ‘tooth’ for the new paint to stick. Wipe away all dust with a tack cloth. -
Mask Off Edges:
If you want to keep the surrounding frame or drawer sides original, carefully apply painter’s tape to protect those areas from stray brushstrokes. -
Apply Primer:
Brush on a thin coat of water-based primer. This ensures your dark base coat coverage is even and durable. Let the primer dry completely according to the can’s instructions. -
Paint the Base Color:
Apply your dark brown or black paint. This is the color that will show through the cracks later, so ensure solid, opaque coverage. I prefer two thin coats rather than one thick one for the smoothest finish. -
Dry Threshold:
Allow the dark base coat to dry completely. If you rush this step, the crackle medium might lift the paint, ruining the effect.
Don’t Overwork It
The most crucial rule is: do not double-brush. Once you lay down the top coat paint, leave it alone instantly. Going back over wet paint stops the chemical reaction.
Step 2: The Crackle Technique
-
Apply Crackle Medium:
Brush on a generous layer of clear crackle medium over the dark paint. The thickness of this layer dictates the size of your cracks—thicker application generally yields larger cracks. -
Wait for Tacky State:
Check the manufacturer’s instructions for drying time. You usually want the medium to be tacky but not wet, dry to the touch but still sticky. -
Prepare the Top Coat:
While the medium sets, get your cream or off-white paint ready. Ensure you have enough poured out to cover a whole drawer front without stopping. -
Apply the Top Color:
Using a clean brush, apply the cream paint over the tacky medium. Use long, confident strokes in one direction. Do not brush back and forth over the same spot, or you will disturb the crackling process. -
Watch the Magic:
As the top coat dries, the cracks will begin to appear almost immediately. Leave the drawers undisturbed until the paint is fully dry. -
Repeat for All Drawers:
Process one drawer at a time to ensure you catch the crackle medium at the perfect stage of tackiness for each one.
Step 3: Sealing and Assembly
-
Light Sanding (Optional):
Once fully cured, if the texture feels too rough, you can very gently pass a 220-grit sandpaper over the surface to knock down high ridges, but be careful not to sand through the color. -
Seal the Surface:
Protect your new finish with a coat of water-based Polycrylic or clear furniture wax. This prevents the crackle paint from chipping during daily use. -
Reinstall Hardware:
Once the sealer is dry, reattach your brass handles. The metallic sheen against the cracked cream paint completes the vintage aesthetic.
Dual-Direction Cracking
For a spiderweb or crazed look rather than linear finish, brush the crackle medium on vertically, but apply the top coat of paint horizontally.
Enjoy the timeless, weathered charm your newly updated piece brings to the room
Crackle Layering With a Third Accent Color
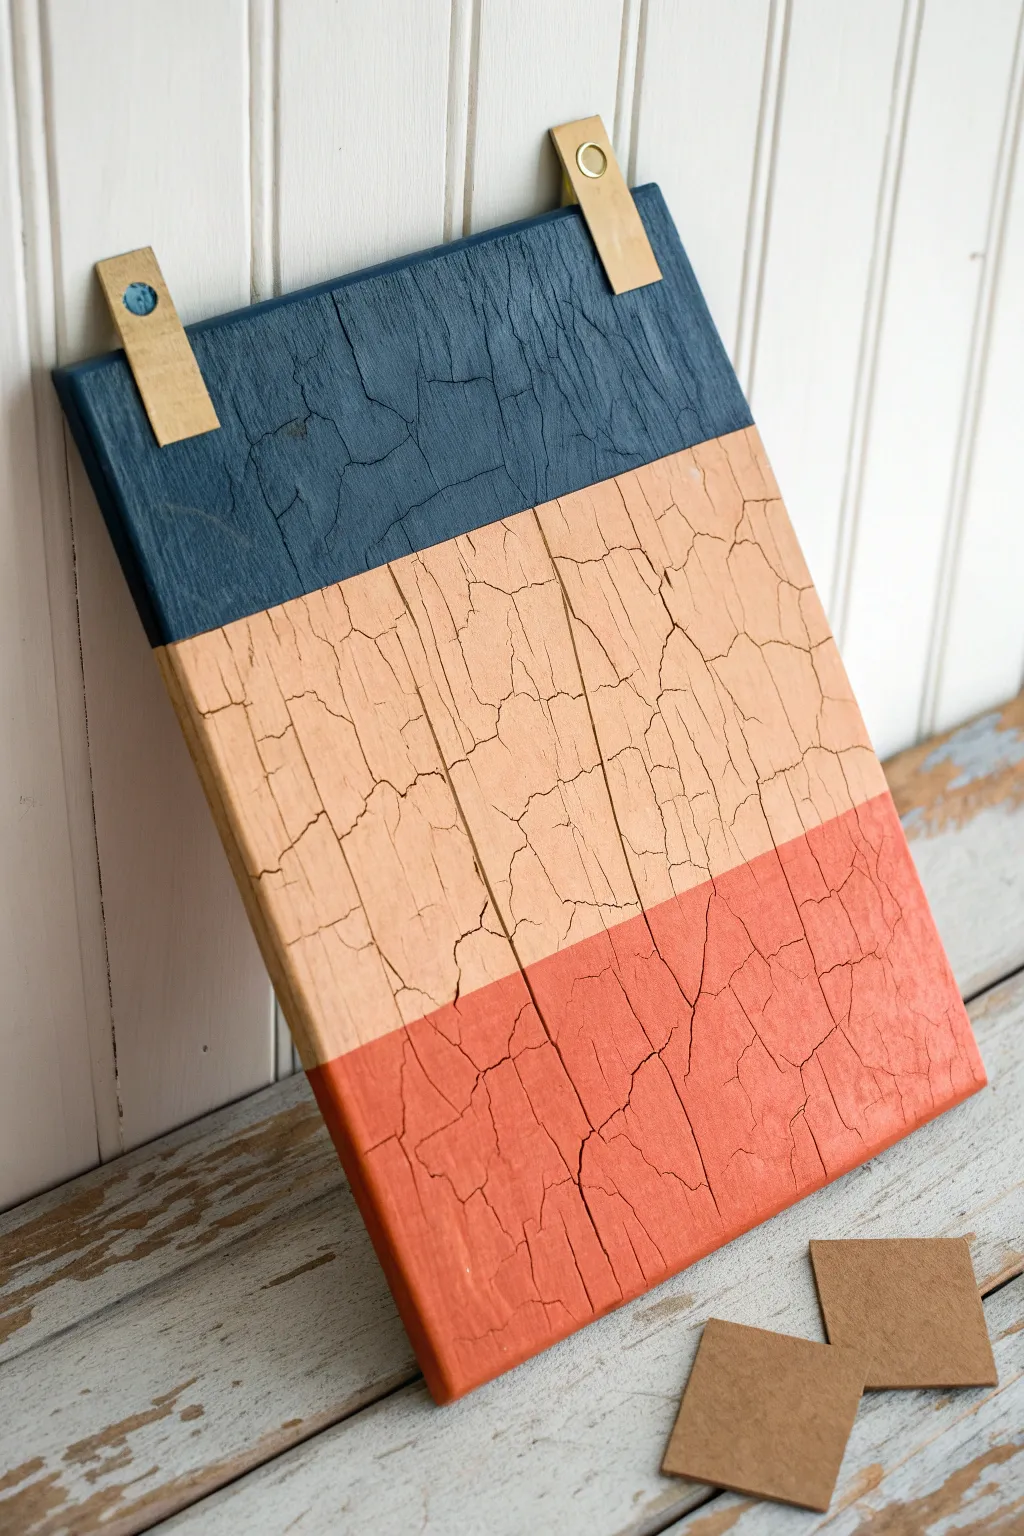
Embrace the beauty of imperfection with this striking tri-color wood plank project featuring a heavy, time-worn texture. The bold layering of deep navy, soft peach, and vibrant coral creates a modern geometry that contrasts wonderfully with the vintage-style crackle finish.
Step-by-Step
Materials
- Unfinished wood plank (pine or plywood)
- Dark navy blue acrylic paint
- Light peach or cream acrylic paint
- Coral or terracotta orange acrylic paint
- Crackle medium (or school glue)
- Wide flat synthetic paintbrushes
- Small brass or metallic bracket clips
- Sandpaper (220 grit)
- Clear matte sealer (optional)
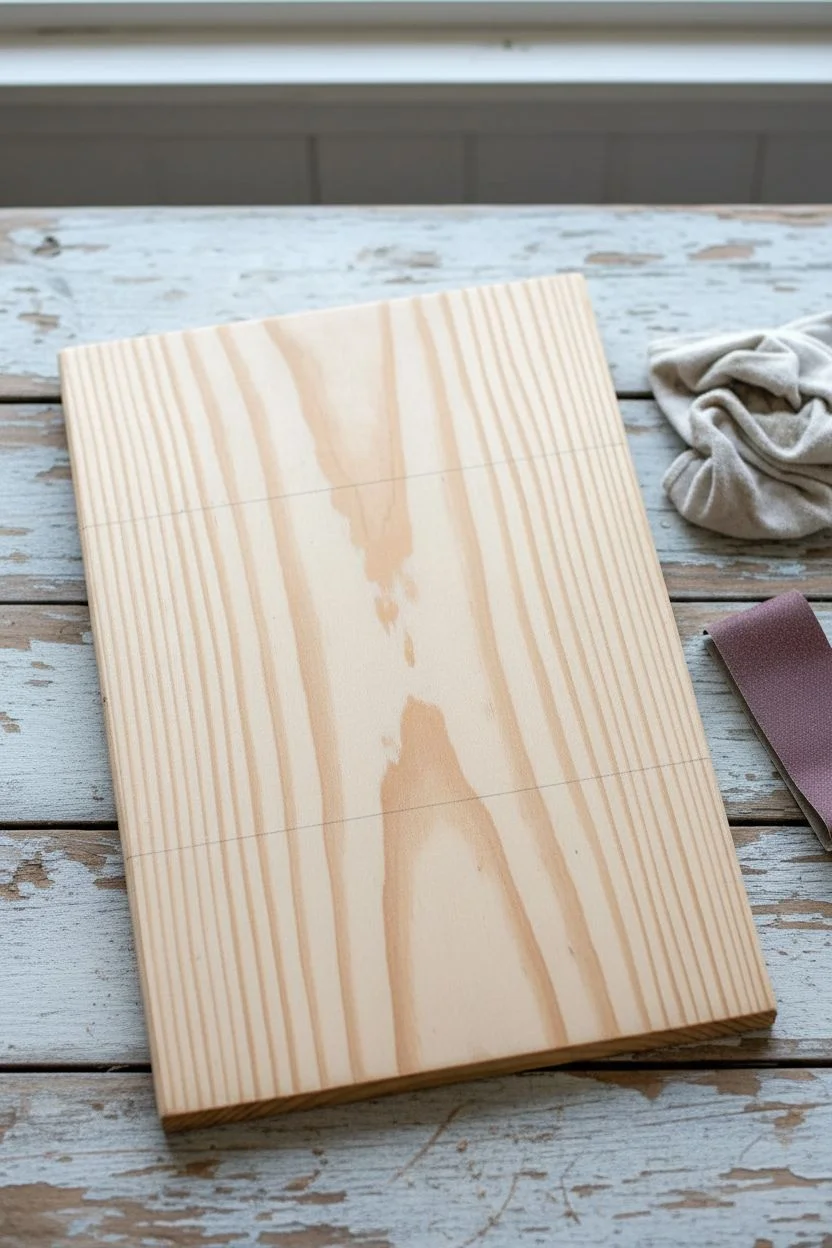
Step 1: Preparation and Base Coat
-
Sand the Wood:
Begin by giving your wooden plank a quick sanding with 220-grit sandpaper. You want to remove any rough splinters, but the surface doesn’t need to be perfectly glass-smooth since we are adding texture later. -
Clean the Surface:
Wipe away all sanding dust with a tack cloth or a slightly damp rag to ensure proper adhesion for your paint layers. -
Map Your Sections:
Lightly mark two horizontal lines across your board using a pencil and ruler. This divides the board into three equal (or unequal, if you prefer) sections for your color blocking. -
Base Color Application:
For the most dramatic crackle effect, you need a contrasting base. Paint the entire board a dark brown or black first if you want the cracks to reveal darkness. Alternatively, you can apply the blue, peach, and coral colors directly if using a clear crackle medium, but for this specific look, painting the sections directly is usually fine as long as the wood grain shows through the cracks.
Cracks Too Small?
If your cracks are barely visible, your layer of crackle medium (or glue) was likely too thin. Next time, apply a goopy, thick layer and let it get tacky before painting.
Step 2: Applying the Crackle Medium
-
Apply Medium to Top Section:
Brush a generous layer of crackle medium (or school glue) onto the top third of the board. The thickness of this layer dictates the size of your cracks; a thicker layer yields wider, more dramatic cracks. -
Apply Medium to Middle Section:
Continue applying the medium to the middle section. Try to keep the transition line relatively clean, but don’t worry about perfection as the crackle adds chaotic charm. -
Apply Medium to Bottom Section:
Finish by coating the bottom third with the medium. Ensure the entire surface is wet. -
Wait for Tackiness:
Allow the medium to dry until it is tacky but not fully dry. This usually takes about 10 to 20 minutes, depending on humidity. If you touch it, your finger should stick slightly but not come away wet.
Level Up: Hardware Hack
Don’t have vintage clips? Use standard metal hinge brackets from a hardware store and age them with a little black paint or rub ‘n buff wax for an antique look.
Step 3: Layering the Colors
-
Paint the Navy Top:
Load a clean brush with the dark navy paint. Apply it over the tacky medium on the top section. Use single, confident strokes in one direction. Do not brush back and forth, or you will disturb the crackle process. -
Paint the Peach Middle:
Immediately switch to a clean brush and the peach paint. Apply it to the middle section, carefully meeting the edge of the blue paint without blending them too much. -
Paint the Coral Bottom:
Finally, apply the coral paint to the bottom section using the same single-stroke technique. Work relatively quickly so the medium underneath doesn’t dry out completely before the top coat is applied. -
Watch the Magic:
Let the board sit undisturbed. As the top coat dries, it will begin to shrink and pull apart, revealing the cracks. Resist the urge to touch it or speed it up with a hair dryer too aggressively, as natural drying often produces the best organic patterns.
Step 4: Finishing Touches
-
Full Dry Time:
Allow the project to dry completely, preferably overnight. The paint needs to be fully cured before handling. -
Seal the Surface:
If you plan to handle the board often, lightly brush on a clear matte sealer to protect the flaky paint texture. -
Attach Hardware:
Position your decorative metallic clips or brackets at the top edge of the board, spaced evenly from the corners. -
Secure Clips:
If your clips have screw holes, pre-drill tiny pilot holes to avoid splitting the wood, then screw them in place. If they are purely decorative clips, you can glue them with a strong adhesive like E6000.
Display your textured masterpiece on a mantle or shelf to add a pop of rustic color to your room
Metallic Underlayers for Shimmering Cracks
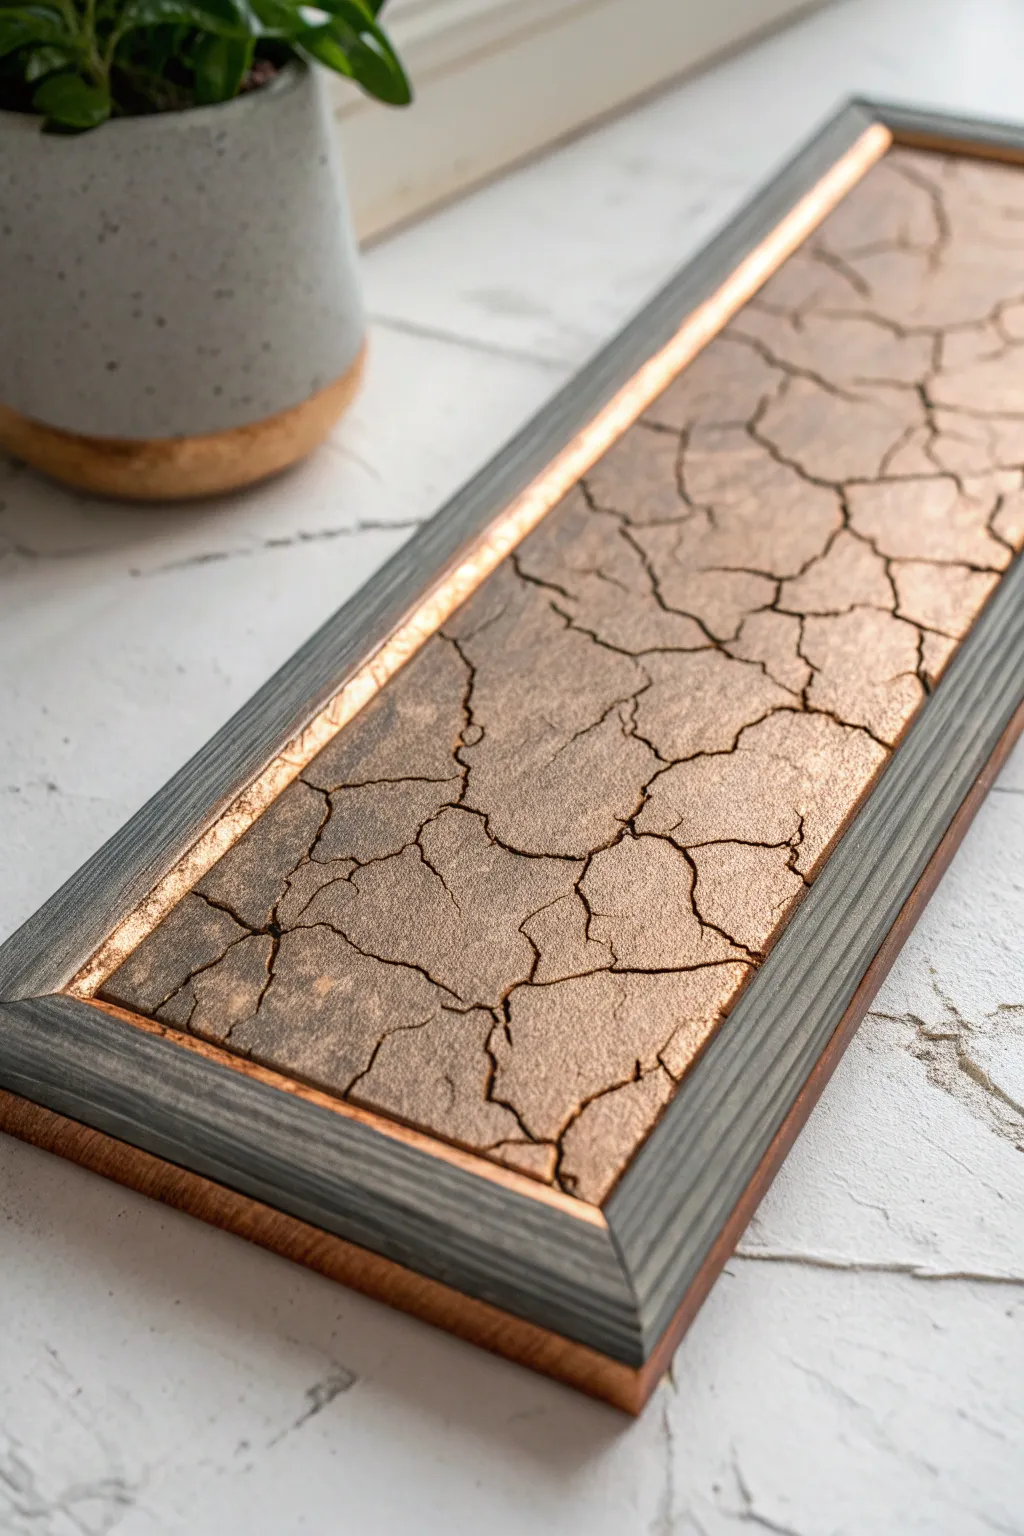
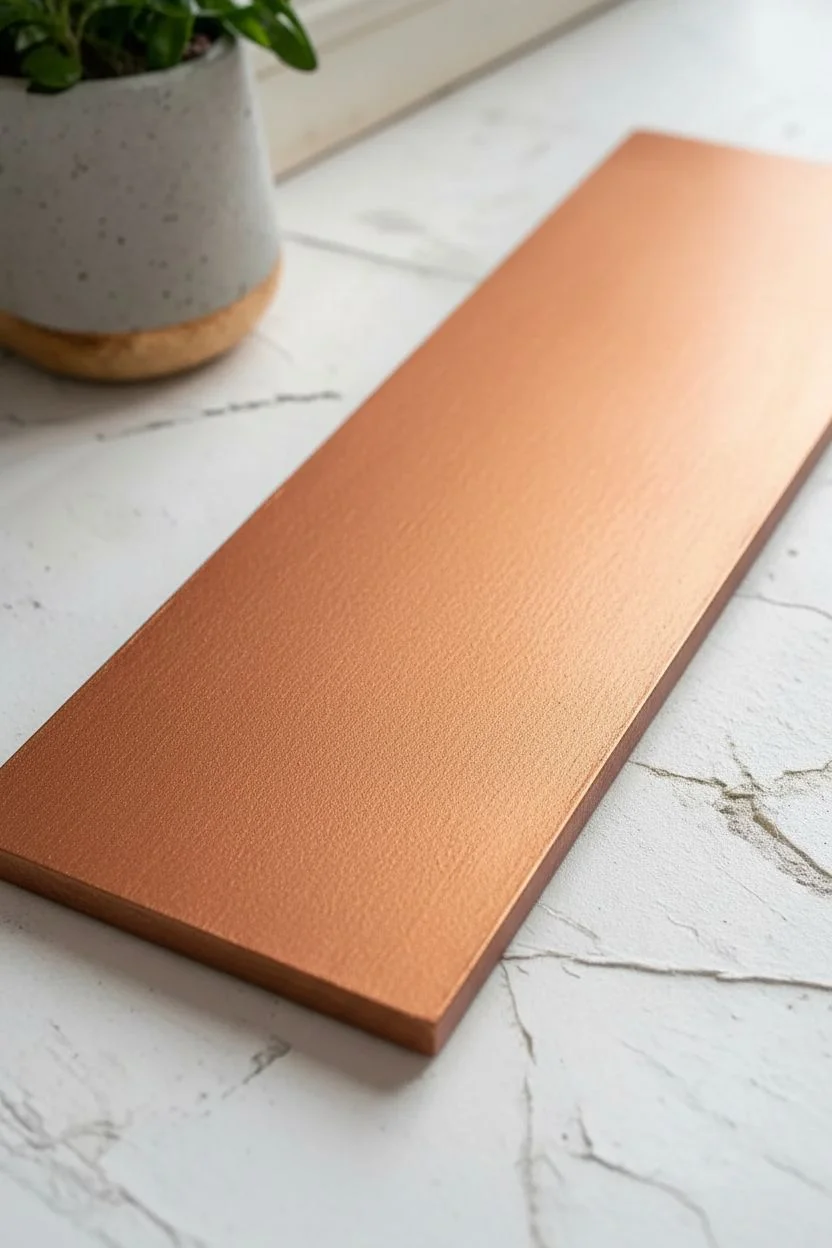
This striking project mimics the look of parched earth with precious metal veins running through the cracks, all framed in distressed wood. By layering a rich copper base beneath a crackle medium and a textured topcoat, you create an industrial-chic piece perfect for a coffee table or wall accent.
Step-by-Step Guide
Materials
- Rectangular wooden panel (approx. 6×18 inches)
- Wooden trim or molding (1-inch width)
- Metallic copper acrylic paint
- Dark grey or taupe chalk paint
- Crackle medium (high-viscosity formula)
- Wood glue
- Grey wood stain
- Brad nails or pin nailer
- Fine-grit sandpaper (220 grit)
- Wide synthetic flat brush
- Clean cotton rags
- Painter’s tape
- Clear matte varnish
Step 1: Preparing the Base
-
Sand the Panel:
Start by sanding the rectangular wooden panel until it is perfectly smooth, paying special attention to the edges. -
Apply the Base Coat:
Using a wide flat brush, paint the entire surface of the panel with the metallic copper acrylic paint. Ensure the coverage is opaque and even. -
Dry and Repeat:
Let the copper paint dry completely. Apply a second coat if the wood grain is still visible, as you want a solid metallic finish to shine through the cracks later. -
Seal the Edges:
Apply a strip of painter’s tape along the outer 1/4 inch of the panel if you plan to glue the frame on top of the paint, though painting edge-to-edge is usually safer for coverage.
Direction Matters
Brush the crackle medium vertically and the top coat horizontally. Opposing brush strokes create the most natural, organic-looking crack patterns.
Step 2: Creating the Crackle Effect
-
Apply Crackle Medium:
Pour a generous amount of crackle medium onto the copper surface. Brush it on in a single direction. A thicker layer of medium will result in larger, more distinct cracks. -
Wait for Tacky Stage:
Allow the medium to dry until it is tacky but not fully hardened, usually about 1 to 2 hours depending on humidity. -
Prepare the Top Coat:
Pour your dark grey chalk paint into a tray. Chalk paint works best here because its matte, heavy consistency fractures beautifully. -
Paint the Top Layer:
Load your brush generously and apply the top coat over the crackle medium. Brush perpendicular to the direction you applied the clear medium. -
Avoid Double Brushing:
I’ve learned the hard way that you must not drag your brush over the same spot twice; doing so will disrupt the chemical reaction and ruin the crackle effect. -
Let the Magic Happen:
Set the panel aside to dry naturally overnight. As the moisture evaporates, the top layer will shrink and separate, revealing the copper veins underneath.
Step 3: Framing and Finishing
-
Cut the Frame:
Measure your panel and cut the wooden trim with mitered 45-degree corners to fit perfectly around the perimeter. -
Stain the Frame:
Apply the grey wood stain to the trim pieces. Wipe off excess stain immediately with a rag to achieve a weathered gray-wash look that complements the dark crackle paint. -
Add Metallic Accents:
Once the stain is dry, gently dry-brush a tiny amount of copper paint onto the inner lip of the frame pieces to tie the design together. -
Attach the Frame:
Apply wood glue to the back of the trim pieces and position them on the panel edges. Secure them with clamps or small brad nails. -
Seal the Project:
Finish by applying a clear matte varnish over the entire cracked surface. This protects the flaky paint and locks the texture in place. -
Clean Up:
Check the underside of the panel for any glue drips or paint run-off and sand them away for a professional finish.
Cracks Too Small?
If your cracks are hairline thin, you likely applied the crackle medium too thinly. Next time, slather it on thicker for wide, dramatic fissures.
Display your textured masterpiece on a mantle where the light can catch those hidden metallic glimmers
Crackle + Light Sanding on Corners
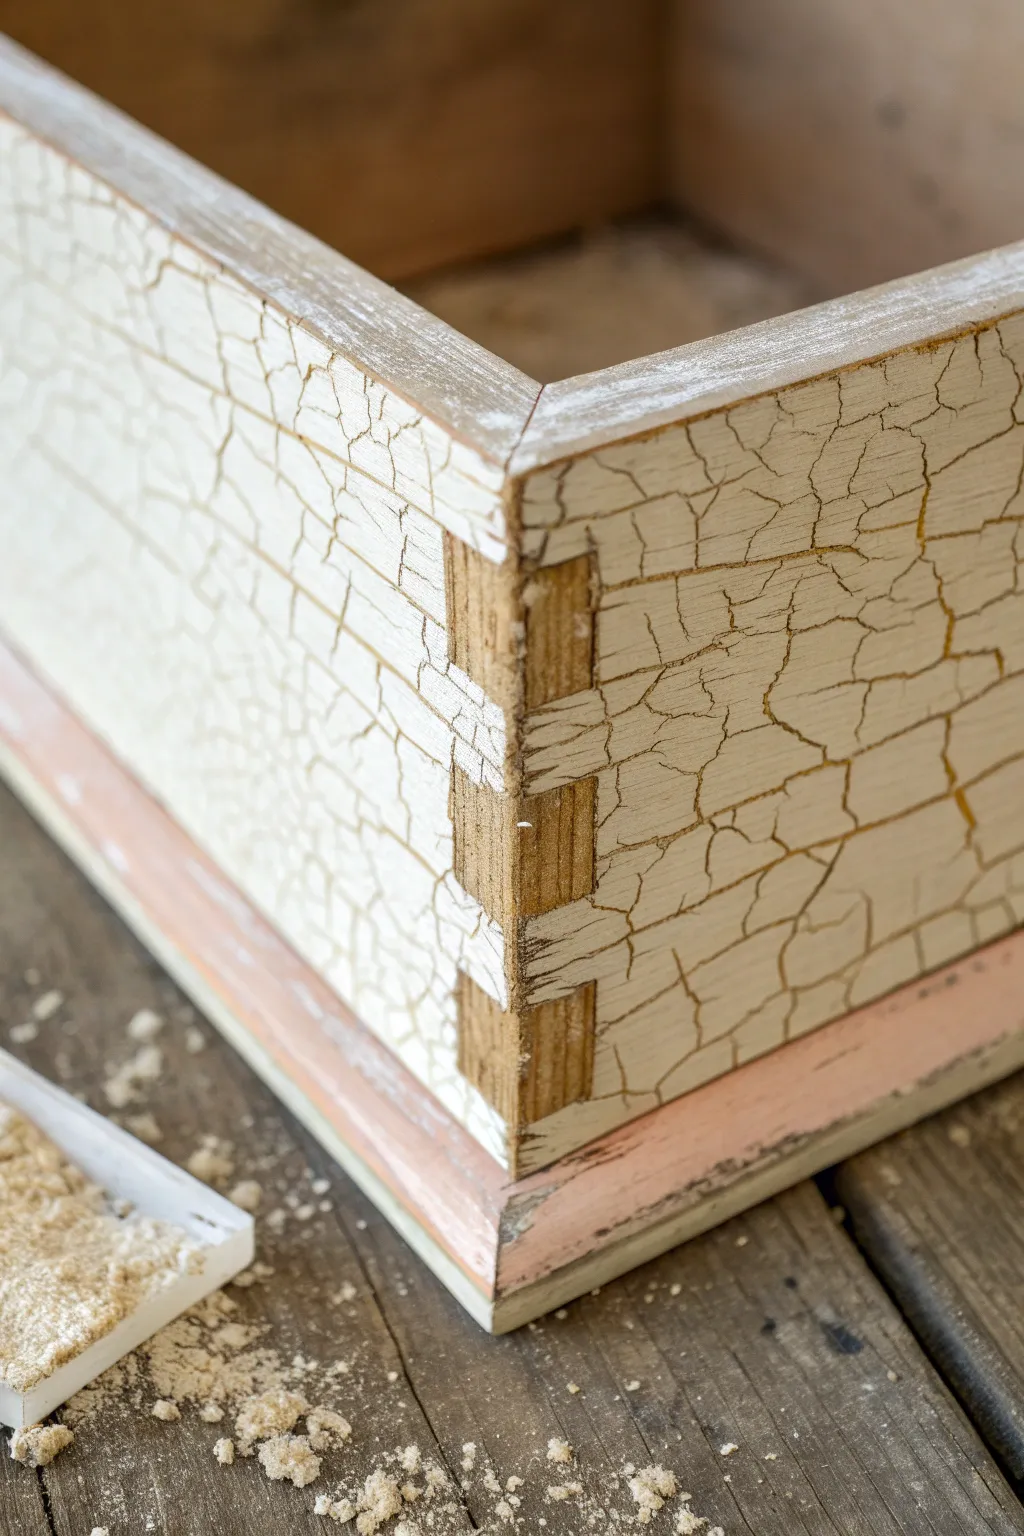
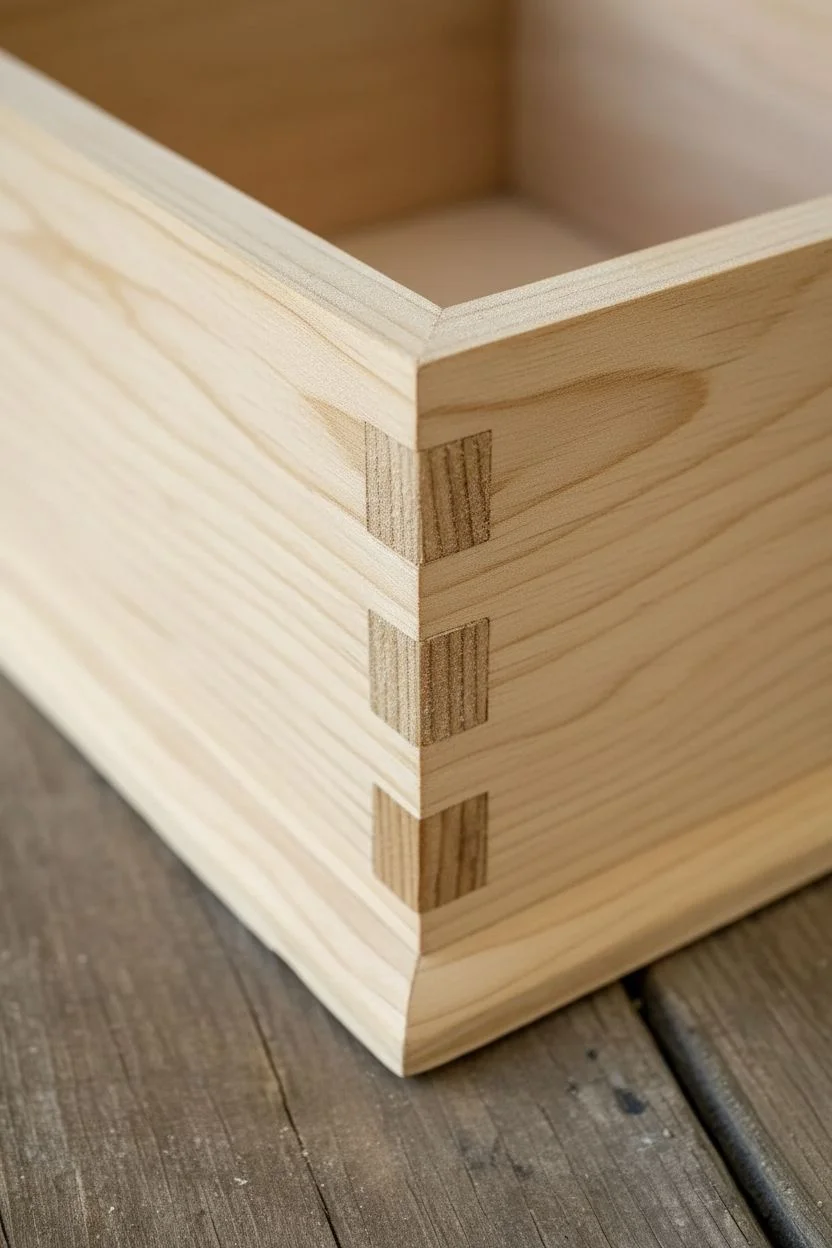
Learn how to transform a simple wooden crate into an aged masterpiece featuring a distinctive crackle finish and exposed joinery. This technique highlights the natural wood grain through the paint while giving the corners a worn, antique appearance.
Step-by-Step
Materials
- Unfinished wooden box with finger joints
- Sandpaper (medium grit 120-150)
- Clean cloth or tack cloth
- Dark base coat paint (optional, if you want cracks to show color)
- Crackle medium (clear)
- Cream or off-white chalk paint
- Synthetic bristle paintbrush
- Small sanding block
- Matte clear sealer
- Drop cloth or newspaper
Step 1: Preparation and Base Layer
-
Surface Prep:
Begin by inspecting your wooden box for any rough splinters or serious imperfections. Since we want a rustic look, you don’t need it perfect, but a quick once-over with medium grit sandpaper ensures a good bonding surface. -
Clean the Wood:
Wipe down the entire box with a clean, dry cloth or a tack cloth to remove every bit of sawdust. Dust is the enemy of a good crackle finish. -
Apply the Base Coat (Optional):
If you want the cracks to reveal a specific dark color, apply a base coat of brown or black paint now. However, for the natural look shown in the image, you can leave the wood raw so the natural grain shows through the cracks. -
Base Dry Time:
If you applied a paint base coat, allow it to dry completely. If you left the wood raw, proceed to the next step immediately.
Step 2: Applying the Crackle Medium
-
Load the Brush:
Dip a clean synthetic brush generously into your clear crackle medium. -
Apply Medium:
Brush the medium over the exterior vertical sides of the box. Use even, long strokes. -
Watch the Thickness:
The thickness of the medium determines the size of the cracks. For the prominent cracking seen here, apply a medium-to-heavy coat, but don’t let it drip. -
Let it Set:
Allow the crackle medium to dry until it is tacky but not soaking wet. I find this usually takes 15 to 45 minutes depending on humidity, but check your bottle’s instructions.
Troubleshooting: No Cracks?
If cracks didn’t appear, you likely over-brushed the top coat or let the medium dry too long. It must be tacky when painted.
Step 3: Painting the Top Coat
-
Prepare Top Color:
Stir your cream or off-white chalk paint thoroughly to ensure the pigment is evenly distributed. -
Apply Top Paint:
Using a clean brush, apply the top coat over the tacky crackle medium. Use long, single strokes in one direction. -
Do Not Overwork:
This is crucial: do not brush back and forth over the same spot. The cracking process begins almost immediately, and brushing over it will ruin the effect. -
Wait for Cracks:
Watch as the paint dries and separates to reveal the wood or base coat underneath. Let the box dry completely, preferably overnight, to ensure the paint hardens fully.
Pro Tip: Direction Matters
Brush the crackle medium vertically and the top coat horizontally (or vice versa) to create a more jagged, authentic cracked pattern.
Step 4: Distressing and Finishing
-
Detailed Sanding Setup:
Once the paint is bone dry, grab your small sanding block or a piece of 150-grit sandpaper. -
Sand the Corners:
Focus specifically on the corners where the finger joints meet. Sand aggressively enough to remove the paint and crackle medium entirely from the end grain of the protruding joints. -
Expose the Joinery:
Continue sanding the vertical corner edge until the raw wood of the interlocking joints is clearly visible, creating a sharp contrast against the painted sides. -
Top Edge Distressing:
Run your sandpaper lightly along the top rim of the box to expose a thin line of raw wood, matching the worn aesthetic of the corners. -
Clean Up Dust:
Use a dry cloth or a soft bristle brush to sweep away all the fine sanding dust generated from the distressing process. -
Seal the Project:
To stop the paint from flaking further, apply a coat of matte clear sealer over the entire exterior. This locks in the crackle and protects the exposed raw wood.
Now step back and admire how the exposed wood corners add immediate history and character to your piece
Antiquing Glaze Over Crackle for Depth
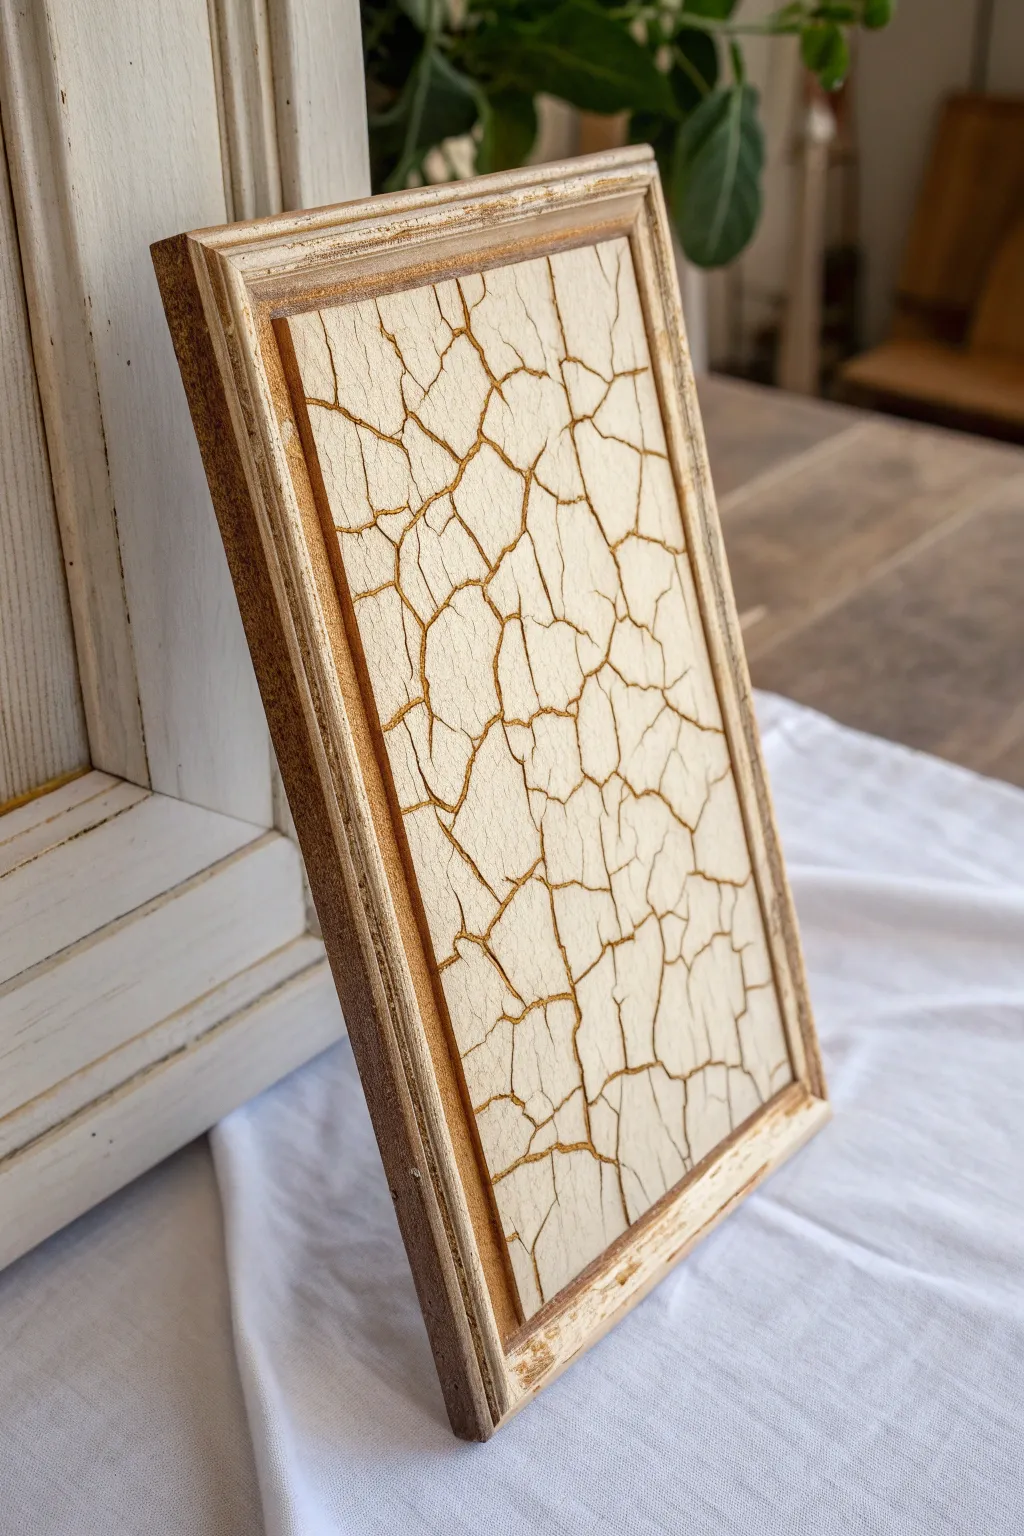
Achieve a sophisticated, centuries-old look with this technique that highlights deep fissures with a rich antiquing glaze. By layering a dark base, crackle medium, and light topcoat, you create a stunning textured surface perfect for small art panels or cabinet accents.
Step-by-Step Guide
Materials
- Small wooden art panel or canvas board (approx 5×7 inches)
- Wooden frame (unfinished or stripped)
- Dark acrylic paint (Burnt Umber or Dark Gold)
- Crackle medium (two-step or standard weathering crackle)
- Cream or off-white acrylic paint (chalk paint works well)
- Antiquing glaze (brown or coffee-colored)
- Flat synthetic brushes (1-inch width)
- Soft cotton rags or lint-free shop towels
- Fine grit sandpaper (220 grit)
- Clear matte varnish (water-based)
Step 1: Preparation and Base Coat
-
Prep the surface:
Begin by lightly sanding your wooden panel and frame to ensure they are smooth and free of splinters. Wipe away any dust with a damp cloth. -
Apply the dark undercoat:
Paint the entire front surface of the panel with your metallic gold or Burnt Umber acrylic paint. This color will eventually show through the cracks, acting as the ‘veins’ of your piece. -
Paint the frame:
While the panel dries, paint the wooden frame. You can stain it or use the same base color. For the look in the photo, a light wash of the Burnt Umber gives it a nice aged wood tone without covering the grain entirely. -
Let it cure completely:
Allow the base coat on the panel to dry fully. It needs to be completely set so the crackle medium doesn’t lift it up later.
Step 2: The Crackle Process
-
Apply crackle medium:
Brush a generous, even layer of crackle medium over the dry base coat. The thickness of this layer often dictates crack size—thicker medium usually means bigger cracks. -
Dry to tackiness:
Let the medium dry until it is tacky but not wet. Consult your specific brand’s instructions, as timing varies, but usually 30-60 minutes is the sweet spot. -
Prepare the topcoat:
Load a clean flat brush with your cream or off-white acrylic paint. You want plenty of paint on the brush to avoid dragging. -
Apply the top paint:
Paint over the tacky crackle medium using long, confident strokes in one direction. Try not to overwork it; going back over wet paint can ruin the crackle effect. -
Watch the magic:
As the top coat dries, the fissures will begin to appear, revealing the dark or metallic base underneath. Let this layer dry completely, ideally overnight.
Muddy Outcome?
If the glaze stains the topcoat too much, your top paint might have been too porous. Next time, apply a thin coat of clear sealer BEFORE glazing to make the wipe-back cleaner.
Step 3: Glazing and Finishing
-
Sand the edges:
Once fully dry, take your 220 grit sandpaper and gently distress the edges of the panel to soften the transition where the frame will sit. -
Prepare the glaze:
Mix a small amount of antiquing glaze. I like to dilute it slightly with water if it feels too thick, ensuring it flows easily into the cracks. -
Apply the glaze:
Brush the glaze over the entire cracked surface. Don’t worry if it looks messy; the goal is to get the liquid deep into the crevices. -
Wipe back:
Immediately take a soft, slightly damp cloth and gently wipe away the excess glaze from the high points (the cream paint). Leave the dark glaze settled in the cracks and textured areas. -
Frame alignment:
Place your finished panel into the frame. Check the fit; if the paint layers added too much thickness, you might need to sand the panel edges slightly more. -
Secure the frame:
Secure the panel into the frame using glazier points or a strong adhesive. Ensure it sits flush. -
Final distressing:
For added continuity, dry-brush a tiny bit of the cream paint onto the high points of the wooden frame to tie the two elements together. -
Seal the work:
Finish with a coat of clear matte varnish to protect the surface and seal in the antiquing glaze, preventing it from rubbing off over time.
Metallic Pop
Swap the dark brown undercoat for a bright metallic copper or gold. When you glaze over it later, the cracks will shimmer subtly beneath the antique finish.
Display your new textured masterpiece on a mantle where the light can catch the depth of the cracks
Crackle on Curved Surfaces Like Vases
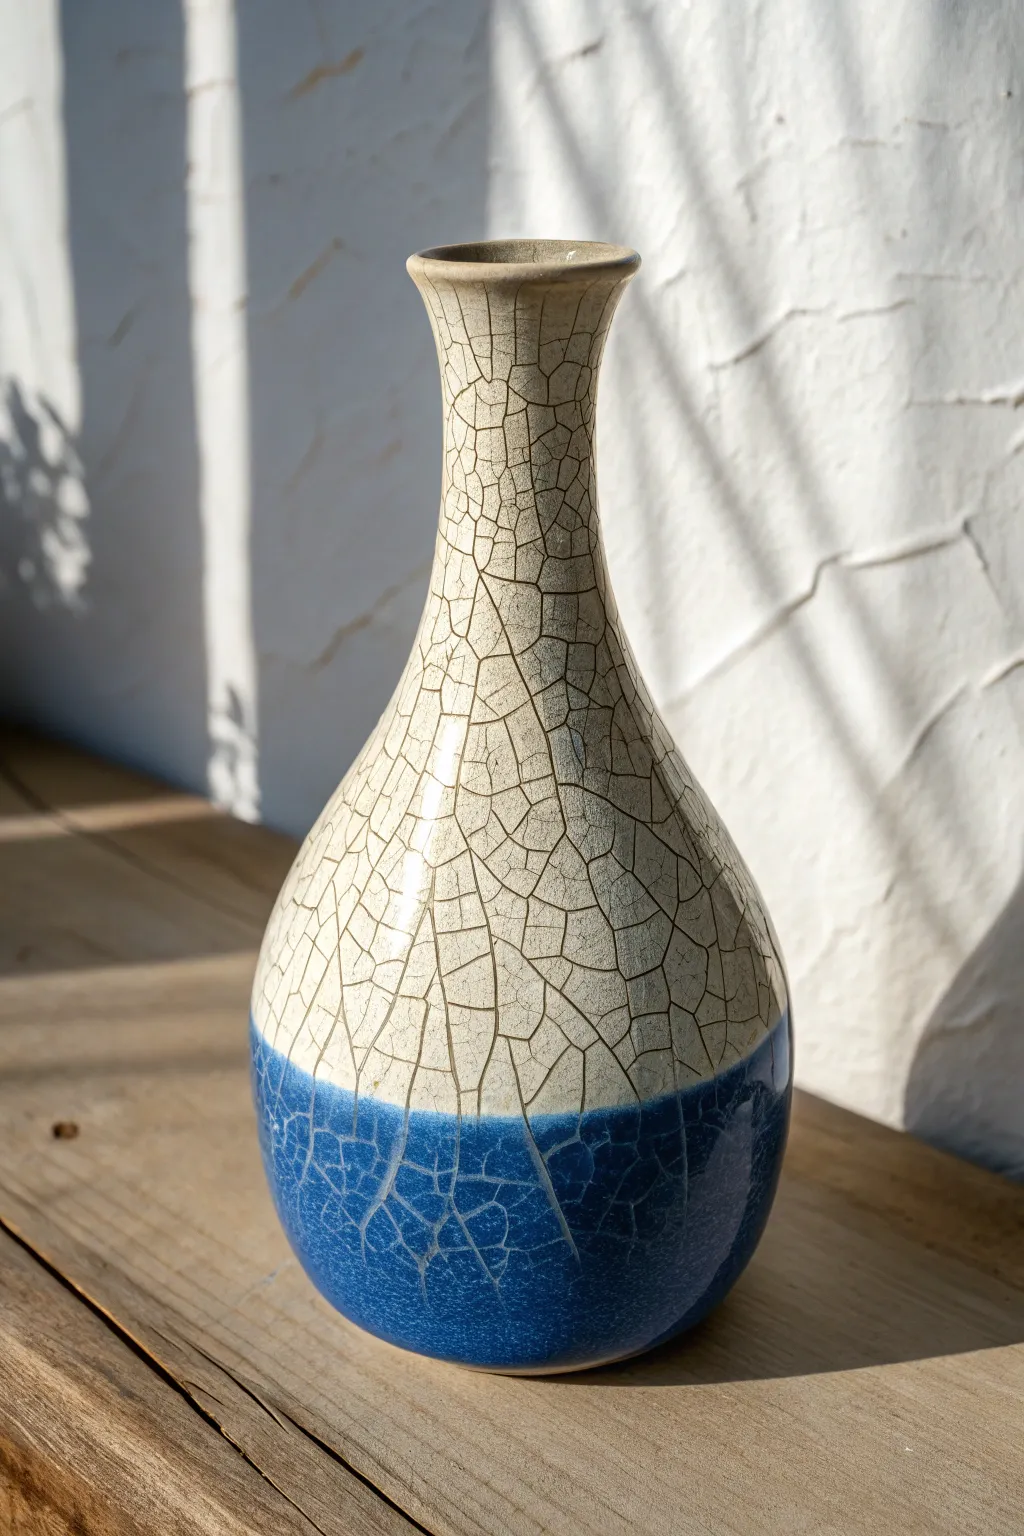
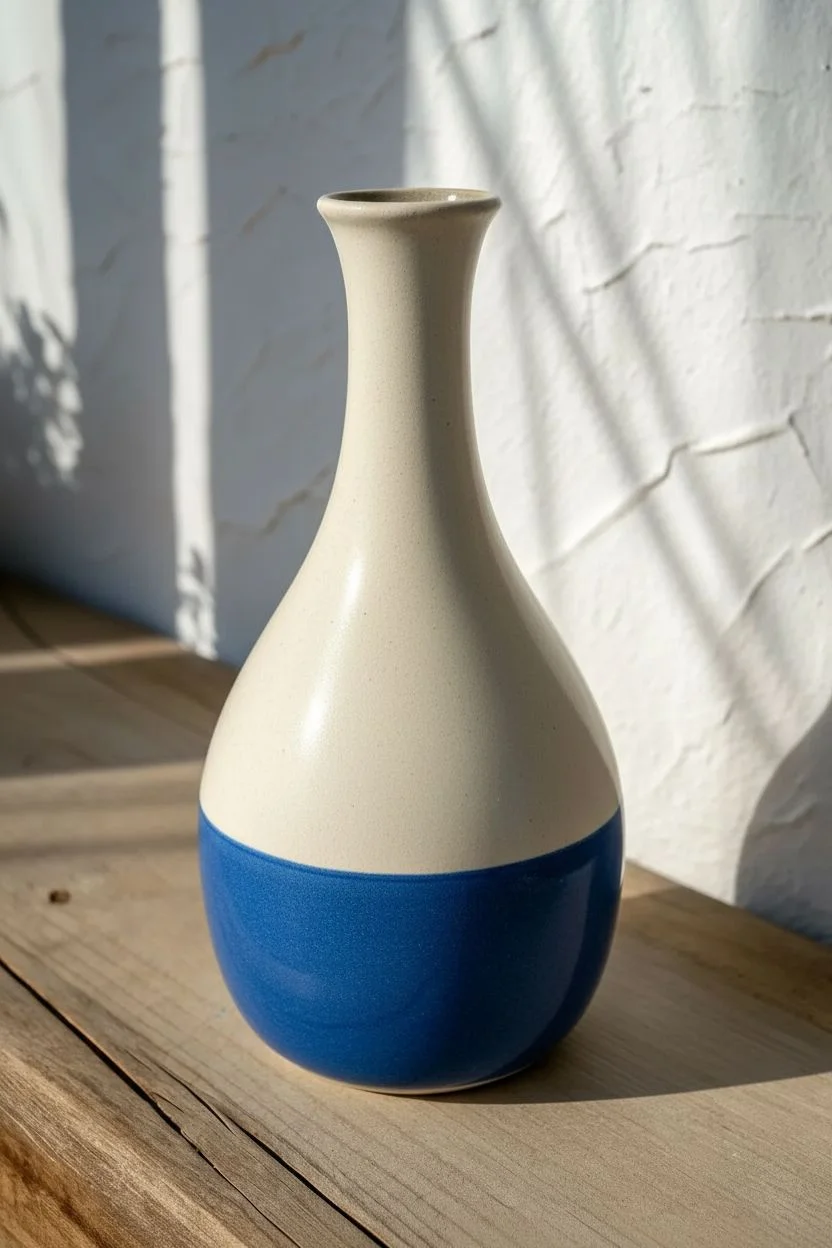
Transform a plain glass or ceramic vase into a stunning faux-antique masterpiece with this two-tone crackle technique. The dark, organic webbing creates a sophisticated aged look that mimics high-end kiln-fired pottery without the need for a kiln.
Step-by-Step Tutorial
Materials
- Smooth glass or ceramic vase (tear-drop shape preferred)
- White primer (spray or brush-on)
- Cream or off-white acrylic paint (satin finish)
- Deep glossy blue acrylic paint or spray paint
- Two-part crackle medium kit (Step 1 Base & Step 2 Topcoat)
- Dark antique wax or dark brown oil paint
- Soft synthetic brushes
- Lint-free cotton rags
- High-gloss varnish (spray or brush-on)
- Painter’s tape
Step 1: Base Preparation
-
Clean the surface:
Before you begin, ensure your vase is completely free of dust, oils, or price tag residue by wiping it down with rubbing alcohol. -
Prime the vase:
Apply a coat of white primer to the entire exterior of the vase to give your subsequent paint layers something to grip onto. -
Apply the top color:
Once the primer is dry, paint the entire upper neck and body of the vase with your cream or off-white acrylic paint. You may need two coats for full coverage. -
Tape the horizon line:
Decide where you want the transition between cream and blue to happen. Wrap a piece of painter’s tape around the vase at this level, pressing down firmly to seal the edge. -
Apply the bottom color:
Paint the bottom section with the deep glossy blue paint. Apply smooth, even strokes up to the tape line. -
Remove tape:
Carefully peel away the painter’s tape while the blue paint is still slightly tacky to ensure a clean line, then let the entire vase cure for at least 24 hours.
Uneven Cracking?
If cracks are too small or barely visible, your Step 1 layer was likely too thin. For bold, wide cracks like the photo, apply a heavier coat of the base medium next time.
Step 2: The Crackle Process
-
Apply Step 1 Medium:
Brush on the ‘Step 1’ or ‘Base Coat’ of your two-part crackle system over the entire vase. Apply a generous, even layer, as thickness often dictates crack size. -
Let it tack:
Allow this layer to dry until it is clear but still tacky to the touch. This usually takes about 30 to 60 minutes depending on humidity. -
Apply Step 2 Medium:
Apply the ‘Step 2’ or ‘Top Coat’ of the crackle system. Brush it on perpendicular to how you applied any previous brushstrokes to encourage random organic cracking patterns. -
Wait for cracks:
Let the vase sit undisturbed. As it dries, fine clear cracks will begin to appear. Do not use a heat gun, as forced drying can sometimes cause lifting.
Step 3: Highlighting and Sealing
-
Prepare the antiquing agent:
Load a soft cloth with a small amount of dark antique wax. Alternatively, I like to use a tiny dab of dark brown oil paint thinned slightly for this step. -
Fill the cracks:
Rub the dark wax or paint vigorously over the entire surface of the vase in circular motions, pushing the pigment deep into the cracks. -
Wipe back excess:
Immediately take a clean, lint-free rag and gently wipe away the excess wax from the surface. The dark color will remain trapped in the cracks while clarifying the cream and blue base colors. -
Check the transition:
Pay close attention to the area where the cream meets the blue. Ensure the cracks cross this boundary naturally without large globs of wax gathering at the seam. -
Buff to a sheen:
Once you are happy with the level of darkness, lightly buff the surface with a dry cloth to bring out a subtle shine. -
Seal the artwork:
To protect your faux ceramic finish and prevent the wax from smudging, finish with a coat of high-gloss varnish. Spray varnish is best here to avoid dragging the wax.
Add Metallic Flair
Instead of dark brown wax, try using metallic gold rubbing paste to fill the cracks. This creates a luxurious ‘Kintsugi’ effect on the deep blue section.
Place your new vase where sunlight can catch the gloss finish and highlight the intricate web of cracks you’ve created
Crackle Resist Patches for Peeling Paint Illusion
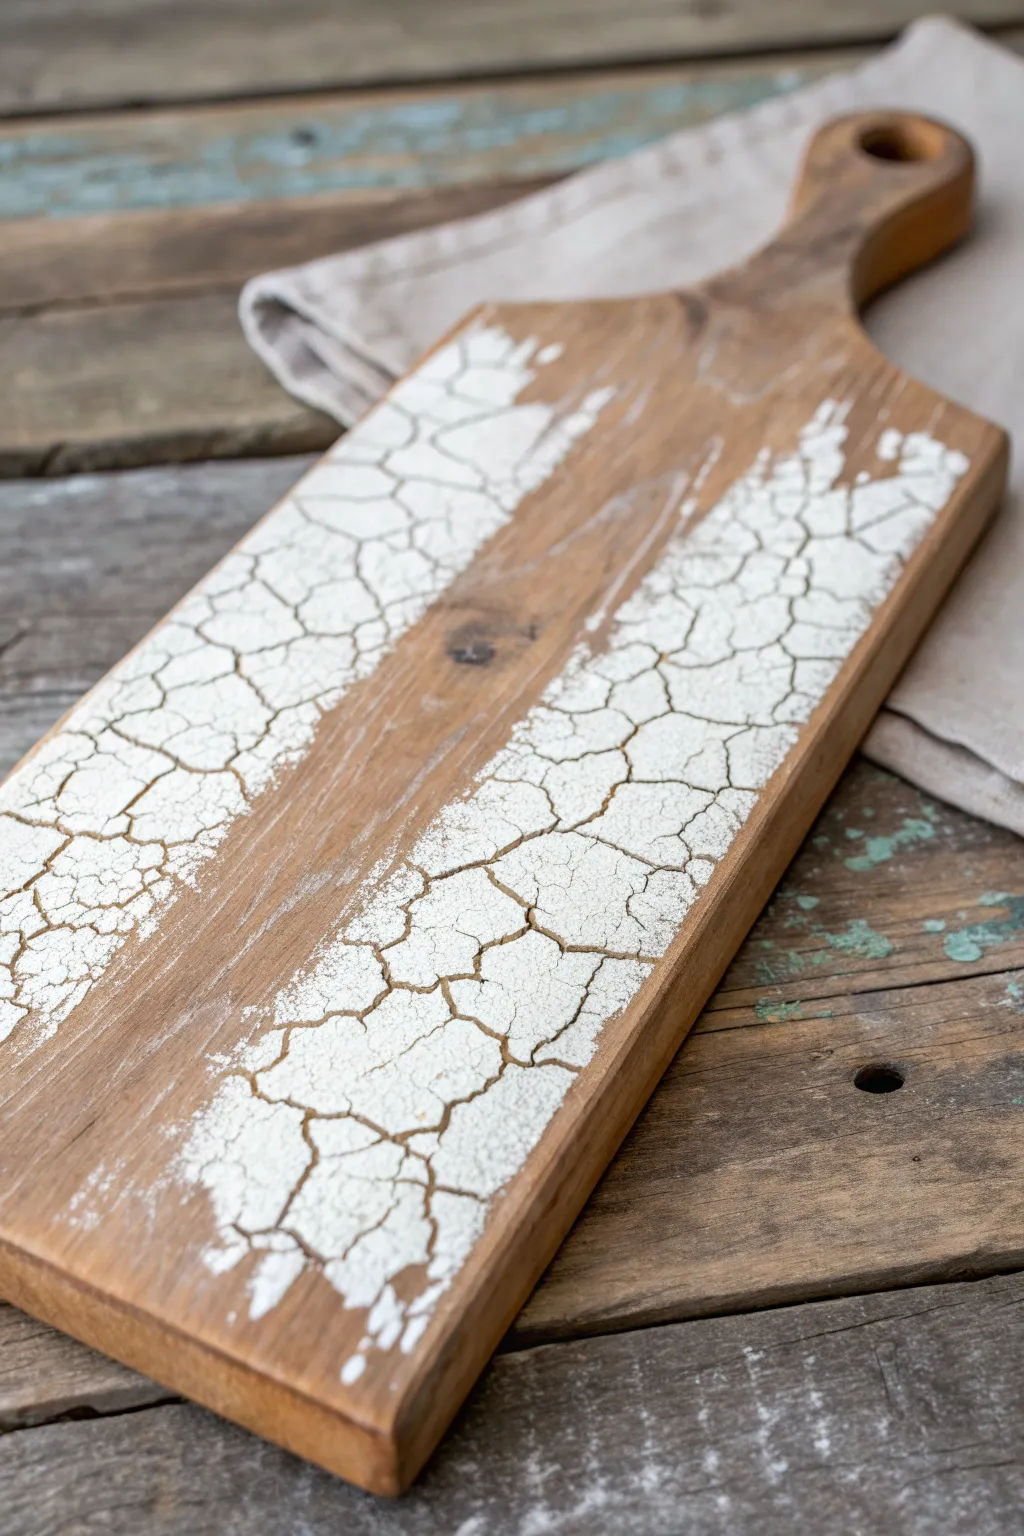
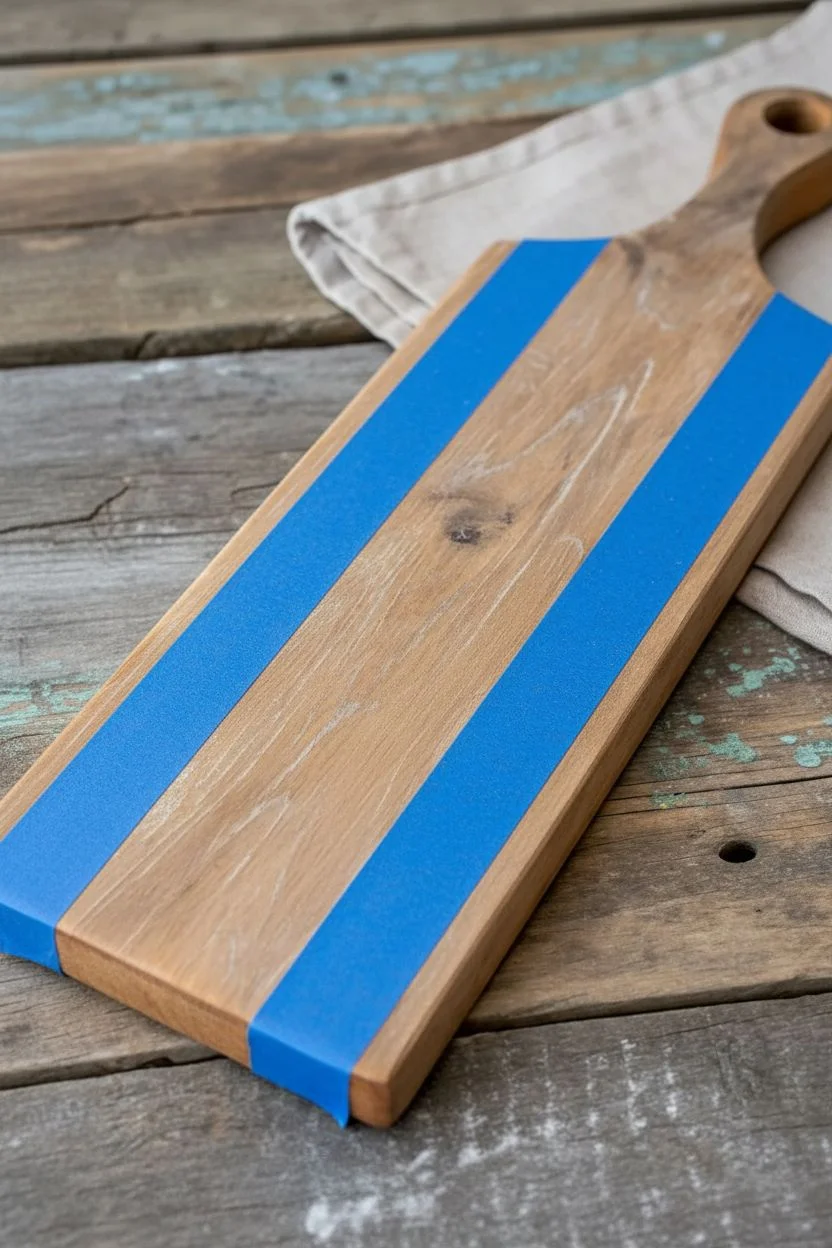
Transform a plain wooden serving board into a vintage farmhouse treasure with this satisfying resist technique. The chunky, peeling texture created by the crackle medium imparts an authentically aged look that feels decades old.
Detailed Instructions
Materials
- Wooden cutting board or serving paddle
- PVA glue (white school glue) or dedicated crackle medium
- Chalk-style paint (matte white or cream)
- Painter’s tape or masking tape
- Medium-sized flat synthetic brush
- Small chip brush or bristle brush
- Sandpaper (medium grit)
- Clear matte sealer/polyurethane (food safe if using for serving)
- Hairdryer (optional, for speed)
Step 1: Preparation
-
Prepare the surface:
Before starting any painting, ensure your wooden board is clean, dry, and free of any oils or previous finishes that might repel paint. A quick scuff with medium-grit sandpaper helps everything adhere better. -
Mask the center:
To achieve the look in the photo, you will want a clear strip of natural wood down the middle. Apply two long strips of painter’s tape lengthwise down the center of the board. I prefer to leave about a 2-inch gap between the edges of the board and the tape to mimic natural wear zones. -
Seal the edges:
Press the tape edges down firmly with your thumbnail or a credit card to prevent the glue or paint from bleeding underneath.
Step 2: The Crackle Layer
-
Apply the medium:
Pour a generous amount of PVA glue or crackle medium onto the exposed wood sections on either side of the tape. -
Spread unevenly:
Using a flat brush, spread the glue. For the chunky cracks seen in the example, apply a thick layer. Don’t worry about making it perfectly smooth; slight variations in thickness create more interesting crack patterns. -
Wait for tackiness:
Let the glue sit until it becomes tacky or forms a very thin skin, but is still wet underneath. This usually takes about 5-10 minutes depending on humidity.
Paint sliding off?
If paint slides off the glue and won’t stick, you waited too long and the glue skin is too dry. Wipe it off immediately with a damp cloth and reapply fresh glue.
Step 3: Painting
-
Load the brush:
Load your brush generously with the matte white chalk paint. You want enough paint to cover the glue in a single pass without dragging. -
Apply paint over glue:
Gently glide the paint over the tacky glue. Do not overwork it. Use long, horizontal strokes or slight dabbing motions. The key is to lay the paint on top, not mix it into the glue. -
Start drying:
As the paint begins to dry, the glue underneath will shrink, pulling the top layer of paint apart. You can speed this up carefully with a hairdryer on a low, warm setting if you are impatient like me. -
Watch the cracks form:
Continue drying until the entire painted surface has crackled and is dry to the touch. The thicker the glue layer was, the wider the cracks will be.
Glue thickness matters
Thick glue equals big fractures; thin glue equals tiny spiderweb cracks. Vary the thickness across the board for a more organic, random pattern.
Step 4: Finishing Touches
-
Remove the tape:
Carefully peel away the painter’s tape while the project is dry but not fully cured to avoid chipping the edges excessively. -
Soften the transition:
Currently, you have a hard, straight line where the tape was. Take your sandpaper or a damp cloth and gently distress the inner edges of the paint to blur that harsh line into the natural wood. -
Distress the perimeter:
Sand the outer edges of the board lightly to make the paint look naturally worn away by years of handling. -
Clean up dust:
Wipe the board down with a tack cloth or slightly damp rag to remove all sanding dust. -
Seal the surface:
Apply a coat of clear matte sealer or food-safe wax to protect the finish. This ensures the flaky paint effect stays put and doesn’t actually flake off onto your table.
Display your newly aged board as a stunning backdrop for dry goods or as a standalone rustic accent piece
Ombre Crackle From Light to Dark
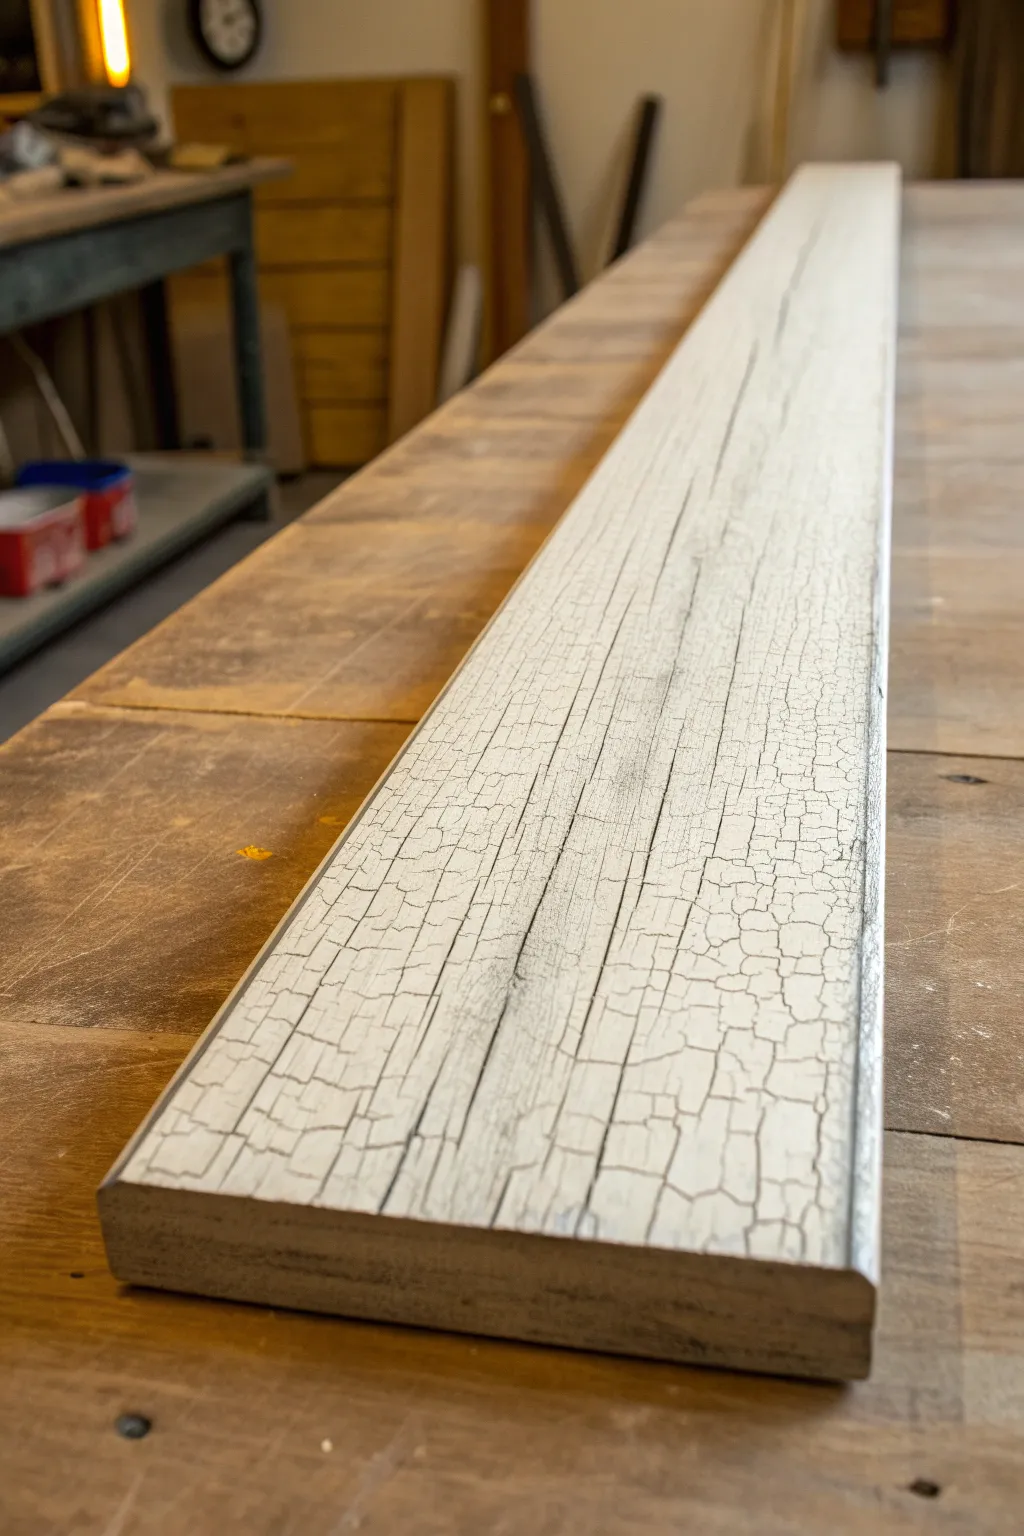
Achieve a sophisticated, weathered look by blending a crackle finish with a gentle gradient. This project transforms a standard board into a statement piece featuring texture that shifts from a solid, creamy white into deeply fissured, grey-toned rustic charm.
Step-by-Step Guide
Materials
- Raw wooden board (approx. 1×6 inch)
- Sandpaper (120 and 220 grit)
- Dark grey acrylic paint or chalk paint (Base coat)
- Off-white latex or chalk paint (Top coat)
- Professional crackle medium (or quality white school glue)
- 2-inch synthetic bristle brush
- Foam brush
- Water spray bottle
- Clear matte polyurethane sealer
- Clean lint-free rags
Step 1: Preparation and Base Coat
-
Sand the surface:
Begin by sanding your wooden board thoroughly with 120-grit sandpaper to remove any rough splinters, then finish with 220-grit for a smooth base. Wipe away all dust with a tack cloth or damp rag. -
Apply the dark base:
Using your synthetic brush, paint the entire top surface and sides with the dark grey paint. This color will be visible through the cracks later, so ensure solid, opaque coverage. -
Allow to dry:
Let the grey base coat dry completely. If you are using chalk paint, this might take about 30 minutes; acrylics may need an hour. It must be bone dry before the next step. -
Light sanding (optional):
For an extra smooth finish, I like to run a fine 220-grit sandpaper lightly over the dried grey paint, just to knock down any brush ridges, then wipe clean again.
Don’t Overwork It
The #1 mistake is brushing over the same spot twice. One confident stroke is key. If you miss a spot, leave it; fixing it usually ruins the crackle effect.
Step 2: Creating the Ombre Crackle
-
Apply crackle medium:
Brush a generous layer of crackle medium over the entire board using the foam brush. The thickness of this layer dictates crack size: thicker medium equals bigger cracks. -
Create the gradient thickness:
To achieve the subtle ‘ombre’ effect in the texture size, apply the medium slightly thicker at one end of the board and feather it out to be thinner at the far end. -
Observe tackiness:
Wait for the medium to become tacky but not fully dry. It should feel sticky like masking tape. This usually takes 15 to 45 minutes depending on humidity. -
Prepare the top coat:
Load your clean synthetic brush with a substantial amount of off-white paint. You need enough paint to glide over the sticky surface without dragging. -
Paint the top layer:
Apply the white paint in long, singular strokes from one end to the other. Do not brush back and forth, as this will disturb the crackle process. -
Feather the paint application:
As you move toward the end of the board where you applied less crackle medium, lighten your brush pressure slightly to allow the texture to become finer. -
Watch the magic happen:
As the paint begins to dry, the cracks will start to appear almost immediately. Avoid touching the surface while this chemical reaction occurs.
Step 3: Finishing Touches
-
Full cure time:
Allow the project to dry undisturbed for at least 4 to 6 hours. Overnight is best to ensure the crackle medium underneath has fully hardened. -
Distress edges (optional):
Take a small block with 120-grit sandpaper and gently sand the sharp edges of the board to reveal the raw wood, framing your crackle finish. -
Inspect the gradient:
Check your ombre effect. If the bright end looks too stark, you can dry-brush a tiny amount of grey paint over the very tips of the cracks to soften the transition. -
Seal the surface:
Apply a coat of clear matte polyurethane to protect the finish. Use a sprayer or a very soft brush to avoid re-wetting the water-based crackle medium too aggressively. -
Final wipe down:
Once the sealer is dry, give the board a quick wipe with a lint-free cloth to ensure it is ready for handling or hanging.
Tint The Topcoat
Mix a tiny drop of the grey base color into your white topcoat for the ‘darker’ end of the board to enhance the ombre gradient visually, not just texturally.
This textured masterpiece is now ready to serve as a rustic leaner shelf or a unique wall accent
Abstract Crackle Art Panels as Wall Decor
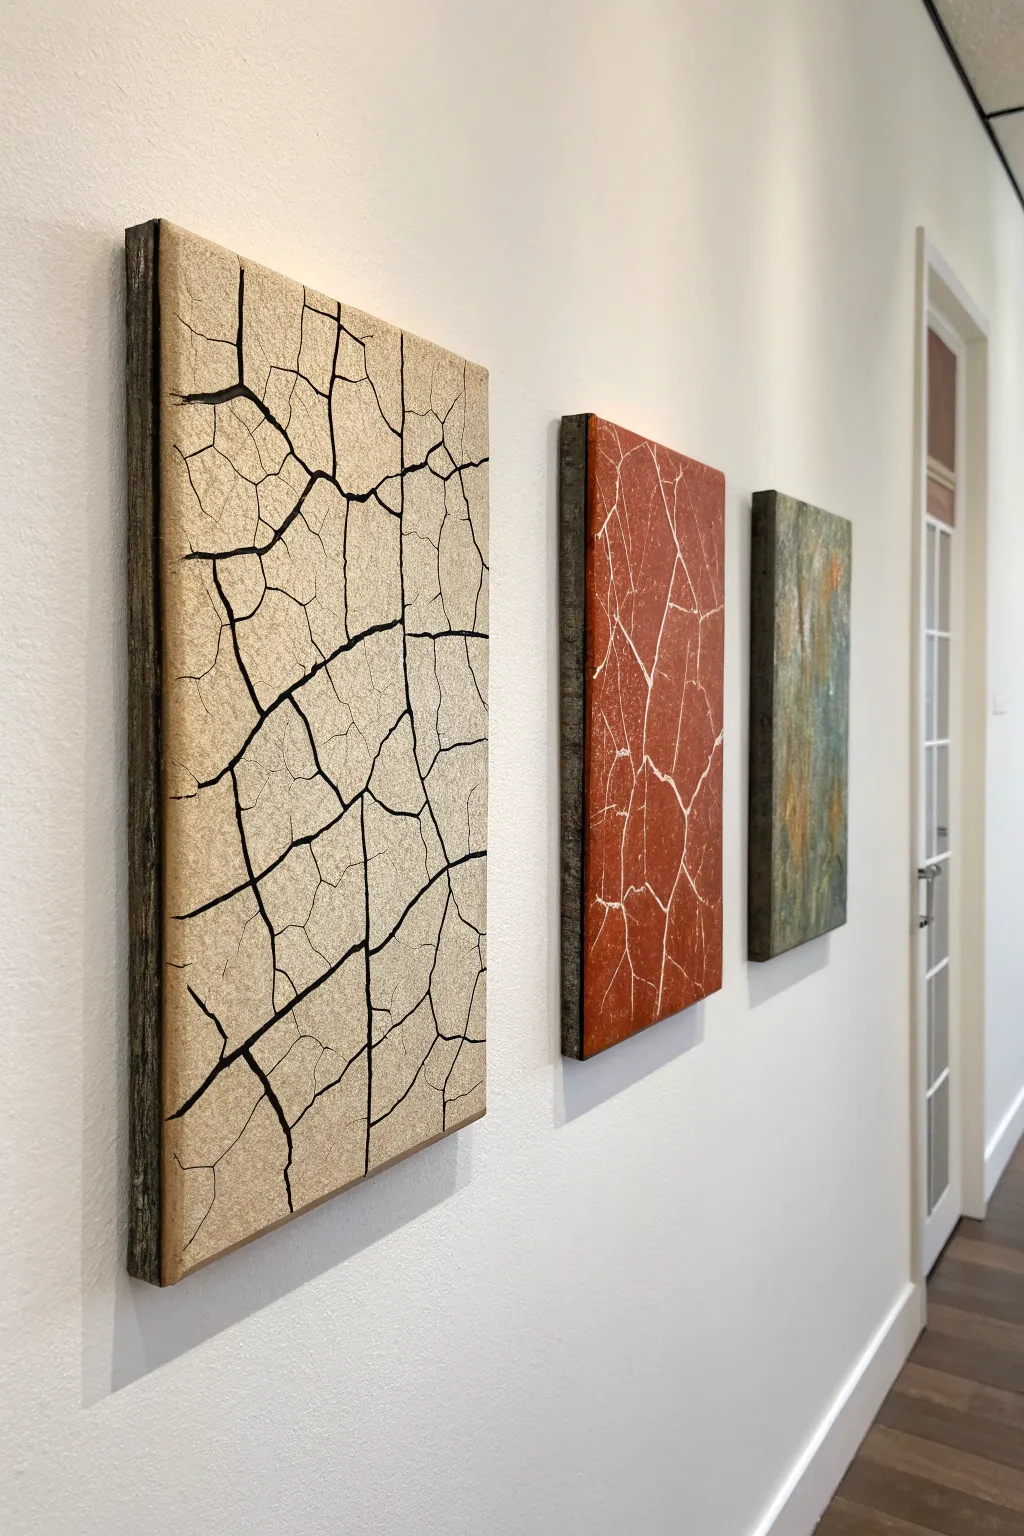
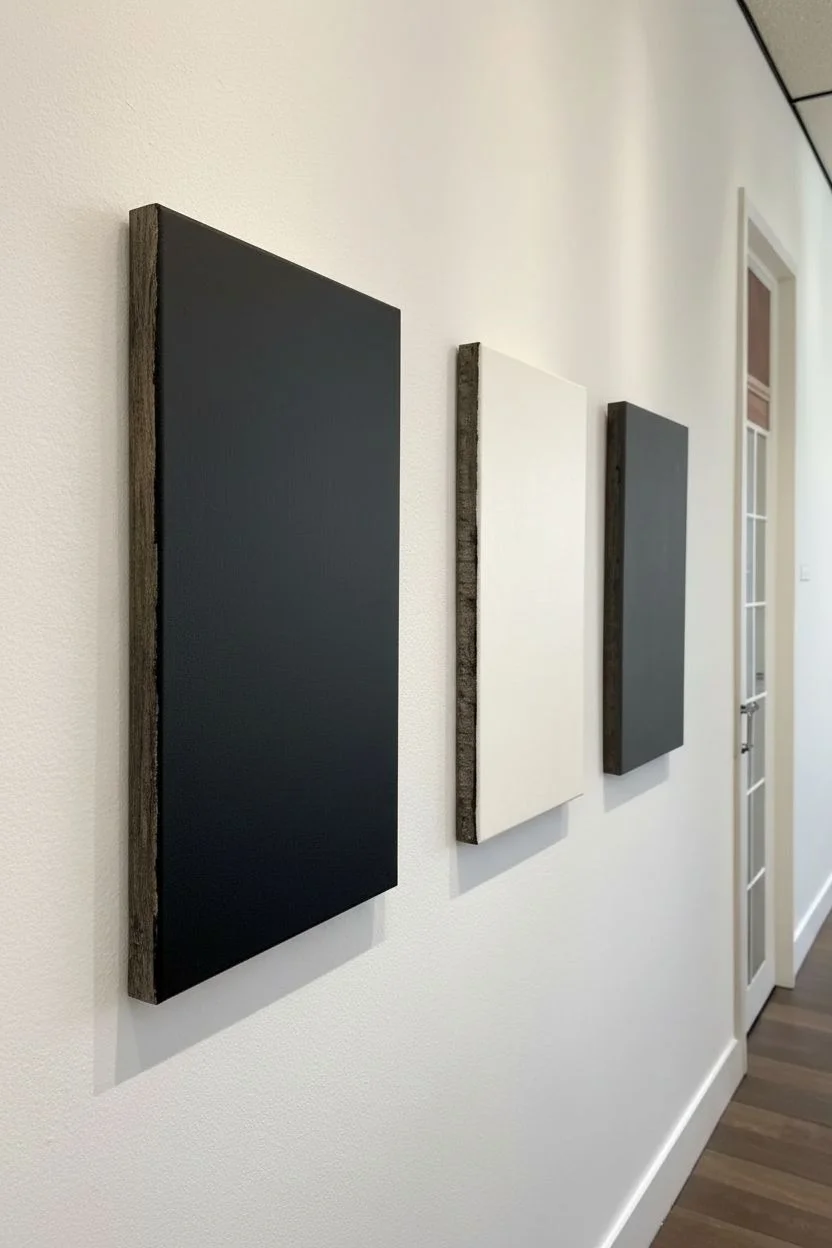
Transform simple wooden panels into a sophisticated gallery wall with this modern take on crackle finishes. By varying your base colors and top coats, you can create a cohesive triptych featuring striking organic fissures that mimic parched earth and aged ceramics.
Step-by-Step Tutorial
Materials
- 3 deep-profile wood canvas panels (cradled wood panels)
- Black acrylic paint (matte)
- White or cream acrylic paint (matte)
- Terracotta or burnt orange acrylic paint
- Olive green and grey acrylic paints
- Crackle medium (high-quality clear crackle glaze)
- Flat synthetic brushes (1-inch and 2-inch)
- Palette knife
- Fine-grit sandpaper (220-grit)
- Matte clear varnish spray
- Dark wood stain (optional for edges)
Step 1: Preparation & Base Layers
-
Prepare the panels:
Sand the face and edges of all three wood panels with 220-grit sandpaper to remove any roughness. Wipe them clean with a tack cloth or slightly damp rag to ensure no dust remains. -
Stain the edges:
For that professional framed look visible in the photo, apply a dark wood stain to the deep outer edges of the panels. Alternatively, paint the edges a solid dark grey. Let this dry completely. -
Apply the contrasting base coat (Panel 1):
For the first beige panel with black cracks, paint the entire face with a solid coat of matte black acrylic. This color will be what shows through the cracks later. -
Apply the contrasting base coat (Panel 2):
For the terracotta panel, apply a coat of white or very light cream paint. The cracks on this one appear lighter, so the base needs to be bright. -
Apply the contrasting base coat (Panel 3):
For the greenish third panel, apply a dark charcoal or deep brown base coat. Let all base coats dry for at least 2 hours or until fully cured.
Paint sliding off?
If your top coat slides around or mixes with the medium, you likely didn’t let the crackle medium dry to the correct ‘tacky’ stage. It must be sticky, not wet.
Step 2: The Crackle Application
-
Apply the crackle medium:
Pour your clear crackle medium onto the center of Panel 1. Using a clean brush, spread a generous, even layer across the surface. Do not overwork it; simply glide it on. -
Manage medium thickness:
Keep in mind that thicker applications of medium usually result in larger, wider cracks, while thin layers create fine spiderweb cracks. For the first panel, aim for a medium-heavy application. -
Repeat for remaining panels:
Apply the medium to panels 2 and 3. I often vary the stroke direction here—horizontal on one, vertical on another—to see how it influences the organic patterns. -
Wait for the tacky stage:
Allow the crackle medium to dry until it is tacky but not wet. Check your specific product’s instructions, but usually, this takes about 1-4 hours. It shouldn’t come off on your finger, but it should feel sticky.
Step 3: Top Coat & Revealing Texture
-
Apply the top color (Panel 1 – Beige):
Load a wide brush generously with beige or sand-colored paint. Apply it over the tacky medium in one distinct direction. Do NOT brush back over wet paint, or you will disturb the crackle process immediately. -
Apply the top color (Panel 2 – Terracotta):
Using the terracotta orange paint, apply your top coat to the second panel. Use a slightly thinner layer of paint here if you want finer, more delicate cracking. -
Apply the top color (Panel 3 – Green mixed):
For the third panel, loosely mix olive green and grey on your palette but don’t blend them fully. Apply this to the panel for a variegated, painterly look. -
Watch the magic happen:
As the top layer of paint dries, it will shrink and pull apart, revealing the base color underneath. The beige panel should show the black base, and the orange panel should reveal the white base. -
Dry completely:
Let the panels sit undisturbed for 24 hours. The cracking process can continue for quite a while, so patience is key for the best results.
Metallic modern twist
Swap the matte black base coat on the first panel for a metallic gold. The gold will shimmer through the beige cracks for a luxe, kintsugi-inspired effect.
Step 4: Finishing Touches
-
Enhance with a wash (Optional):
If the third (green) panel looks too flat, dilute a little dark brown paint with water and brush it over the surface, wiping it back immediately with a rag to stain the texture. -
Seal the artwork:
Once fully cured, take the panels to a well-ventilated area and spray them with a matte clear varnish. This protects the paint from peeling and deepens the colors slightly. -
Install hanging hardware:
Attach sawtooth hangers or wire to the back of the cradled wood frames, ensuring they are level.
Hang your new textural masterpieces in a row to enjoy the organic rhythm of your handmade triptych


Have a question or want to share your own experience? I'd love to hear from you in the comments below!