Kids don’t need fancy skills to make amazing art—they just need a spark and a page that feels safe to play on. These creative drawing ideas for kids are my go-to prompts when you want instant inspiration without the pressure of “doing it right.”
Draw Cute Animals Using Simple Shapes
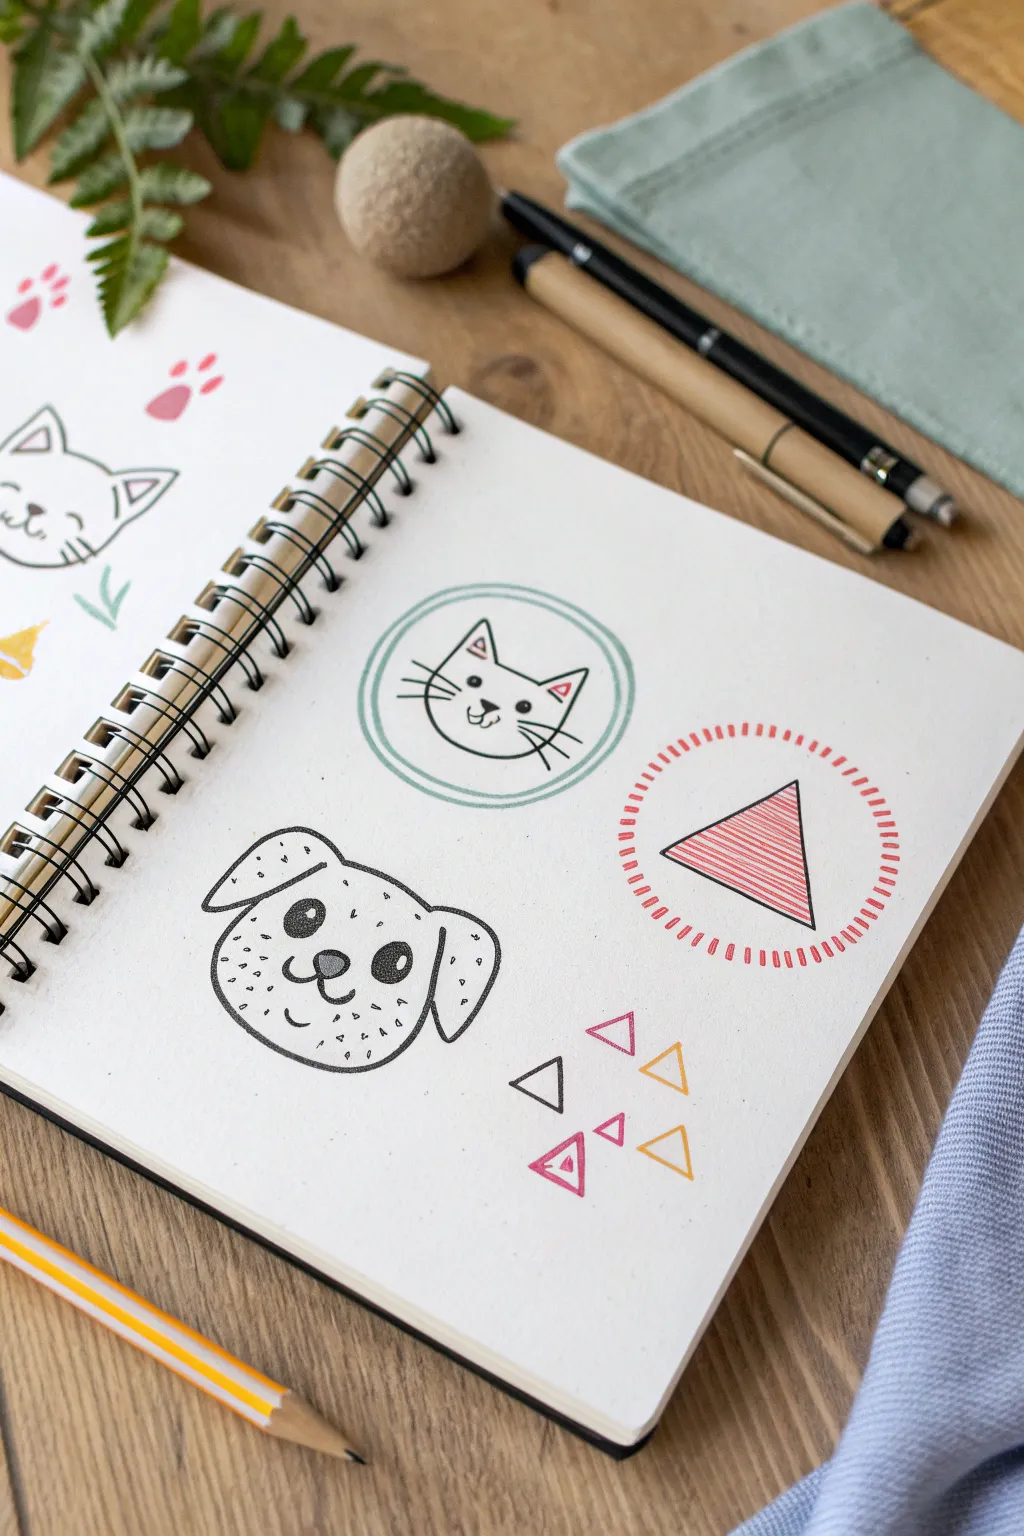
Transform basic geometric shapes into adorable animal portraits with this simple sketchbook exercise. By starting with circles and triangles, you’ll create a charming cat and a spotted dog that pop off the page with minimalist style.
Step-by-Step Guide
Materials
- Sketchbook with white paper
- Fine-liner pen (black, 0.5mm or similar)
- Pencil for sketching
- Eraser
- Colored pencils or markers (teal/sage green, red/coral, yellow/orange)
- Circle template or compass (optional, for perfect circles)
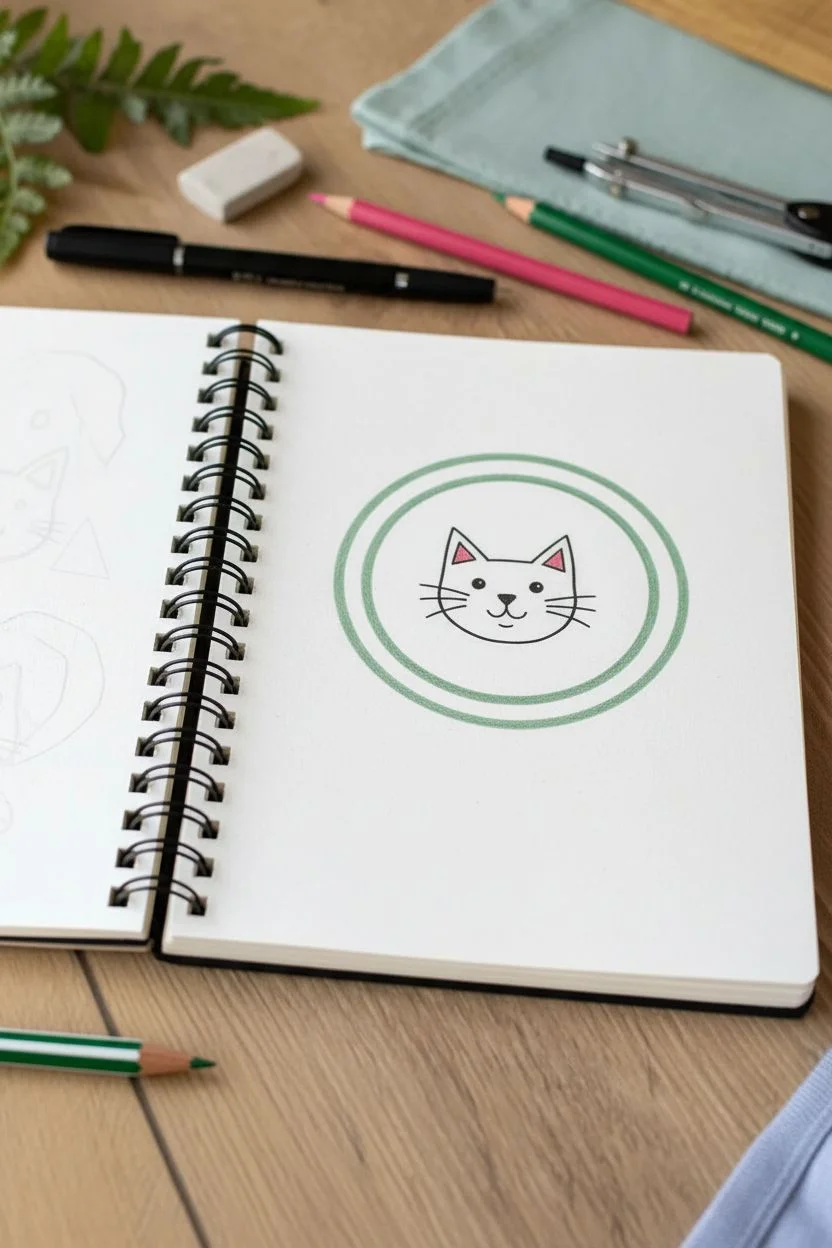
Step 1: The Geometric Cat
-
Draw the frame:
Start by drawing a perfect circle using your sage green marker or colored pencil. If you don’t have a steady hand, a compass or tracing a small lid works wonders. -
Double the border:
Create a second, slightly smaller circle inside the first one with the same green color, leaving a thin gap between them to create a frame effect. -
Outline the head:
Switch to your black fine-liner. Draw a simple oval shape centered inside your green frame for the cat’s head. -
Add ears:
Draw two triangular ears on top of the head. Inside each ear, draw a smaller triangle using a red or pink fine pen for a pop of color. -
Draw the face:
Place two small black dots for eyes. Below them, draw a small inverted triangle for the nose and a curved ‘3’ shape on its side for the mouth. -
Whiskers and details:
Finish the kitty by adding three quick horizontal whiskers on each cheek.
Step 2: The Spotted Dog
-
Sketch the head shape:
Using your black pen, draw a wide, rounded shape that is slightly flatter on top and curvier at the bottom—almost like a loaf of bread. -
Add floppy ears:
On the left and right sides of the head, draw U-shaped flaps pressing against the face for the ears. -
Draw the features:
Draw two large circles for eyes. Fill them in black, leaving a tiny white speck in each for a highlight. Add a large, rounded triangle nose between them. -
Create the muzzle:
Draw a vertical line down from the nose, curving out to the left and right to make the mouth smile. -
Add texture:
This dog is a dalmatian-style pup, so stipple lots of tiny dots all over the face and ears to create a spotted coat texture.
Wobbly circles?
If freehand circles are tricky, lightly trace a coin or bottle cap with pencil first. Ink over your guide, then erase the pencil marks once dry.
Step 3: Geometric Accents
-
The central triangle:
To the right of the dog, draw a bold equilateral triangle. Fill it with horizontal red lines, spacing them evenly. -
Radiating circle:
Surround the triangle with a dashed circle. Use red ink to make small, evenly spaced tick marks radiating outward to form the ring. -
Floating shapes:
In the bottom right corner, draw a cluster of small triangles using different colors like pink and yellow. Vary their rotation to make them look like confetti. -
Inner details:
I like to add smaller triangles inside some of the larger confetti shapes to mimic the style of the cat’s ears.
Level Up: Expressions
Change the eye shapes to vary emotions. U-shaped eyes look sleepy or happy, while simple dots look alert. Try adding eyebrows!
Fill the rest of the page with more animal variations to complete your doodle sheet


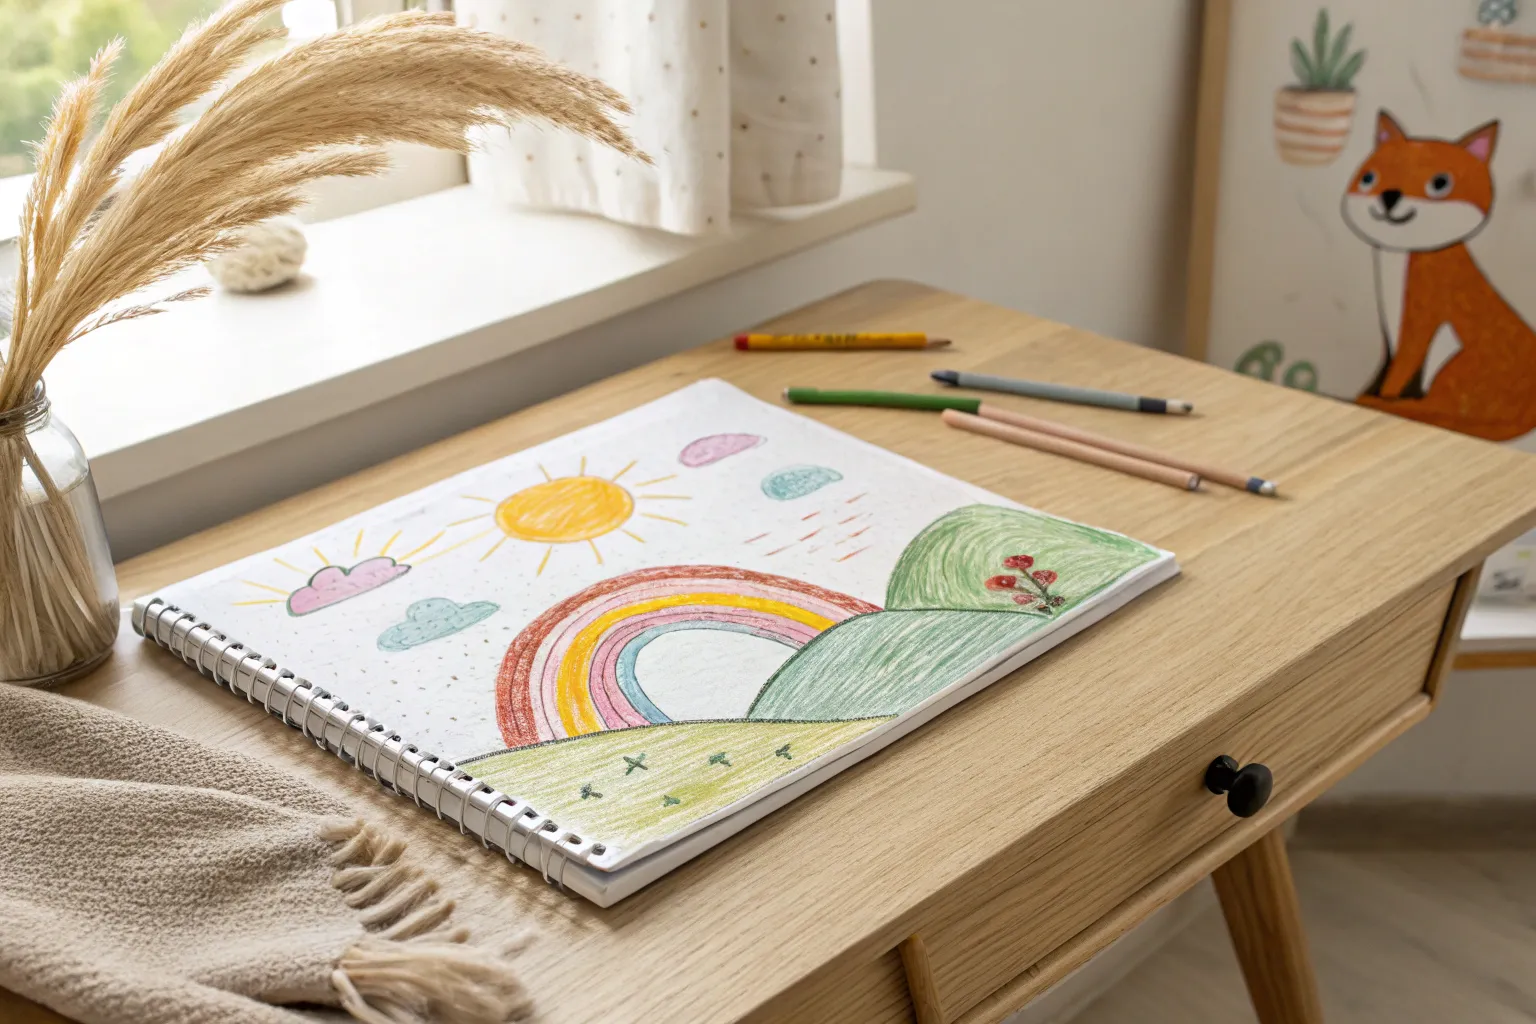
Create A Rainbow Sky With Puffy Clouds
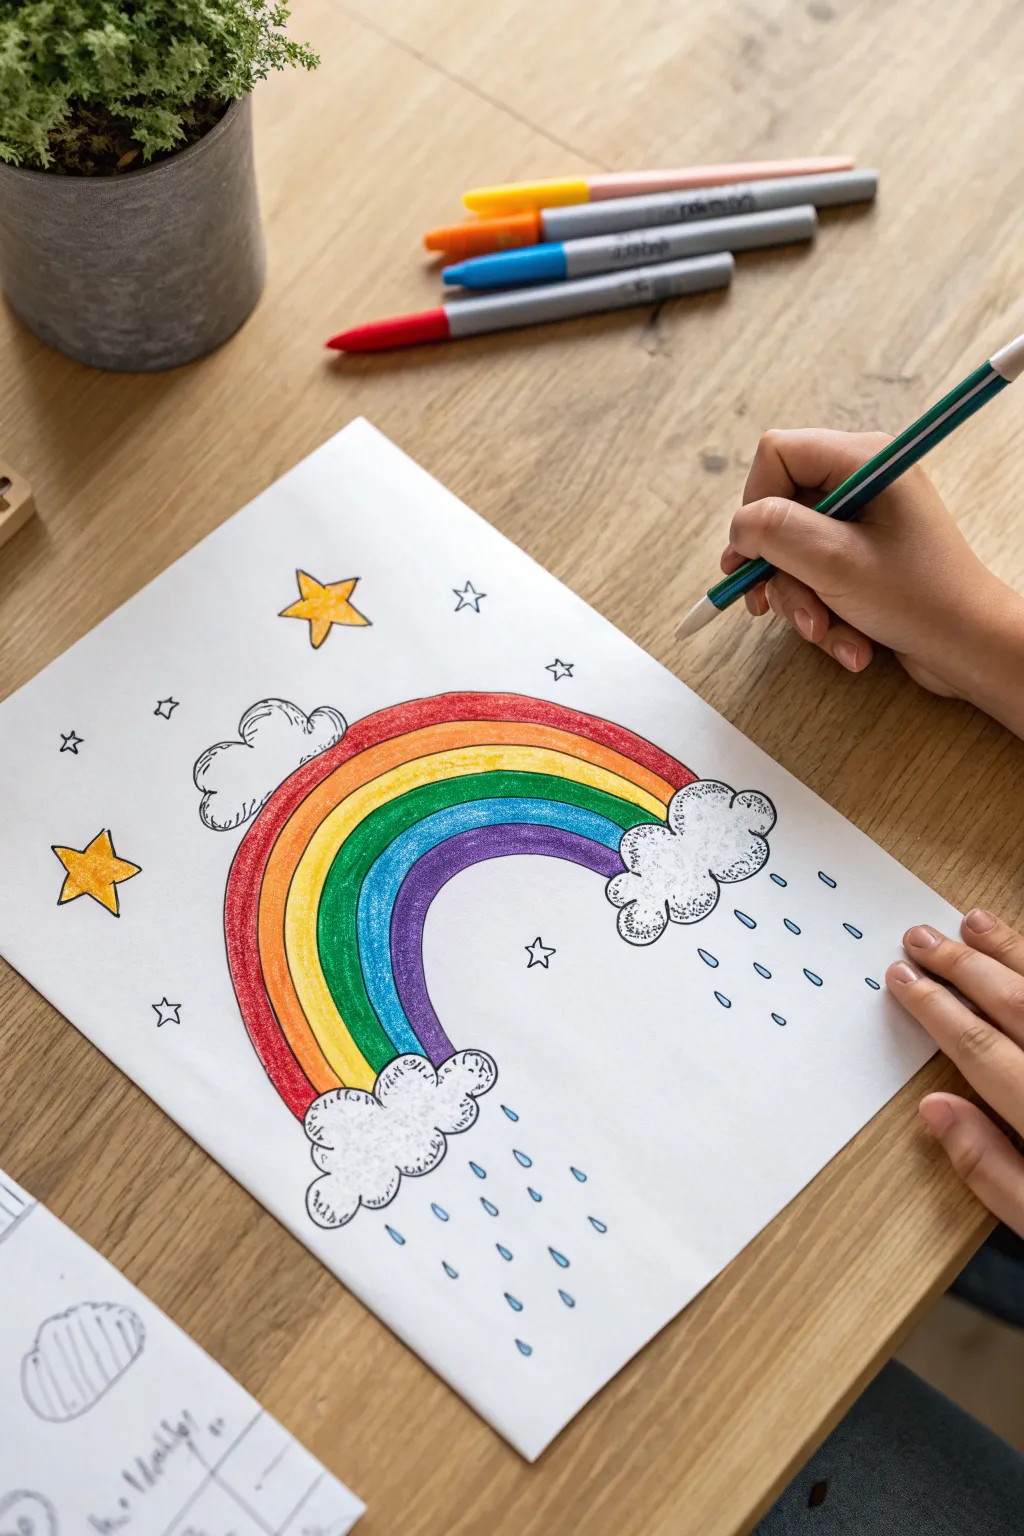

Brighten up your day with this cheerful drawing of a vibrant rainbow arcing between fluffy cloud clusters. It’s a classic, joyful motif featuring bold marker colors and simple, doodle-style stars that makes for a perfect afternoon art activity.
Step-by-Step
Materials
- White drawing paper (A4 or Letter size)
- Black fine-liner or drawing pen (0.5mm – 0.8mm)
- Felt-tip markers (Red, Orange, Yellow, Green, Blue, Purple)
- Pencil (HB or 2B) and eraser (optional for sketching)
Step 1: Drawing the Outline
-
Start the left cloud:
Begin on the lower left side of your paper. Using your black pen, draw a lumpy, bumpy cloud shape. It doesn’t need to be closed at the top right just yet, as the rainbow will emerge from there. -
Draw the right cloud:
Move to the middle-right area of the page, slightly higher up than the first cloud. Draw a second fluffy cloud. Keep the lines wiggly to give it that soft, cartoon texture. -
Add the third cloud:
Draw one final cloud cluster near the bottom center, slightly to the right of the first cloud. This creates a nice balanced composition where your rainbow can end. -
Create the top arc:
Connect the top of the left cloud to the top of the right cloud with a large, smooth arching line. This creates the upper boundary of your rainbow. -
Define the color bands:
Draw five more arched lines underneath your first one, following the same curve. Space them out as evenly as you can so you have six distinct stripes for your colors. -
Connect the bottom:
Ensure the lowest arc line connects firmly into the cloud shapes at both ends, making the rainbow look like it’s tucked behind them. -
Add cloud details:
Go back to your clouds and add little internal curved lines or ‘u’ shapes inside the borders. This adds volume and makes them look puffier. -
Draw large stars:
In the empty sky space on the left, draw two five-pointed stars. Vary their sizes—maybe make the top one slightly larger. -
Sprinkle small stars:
Add tiny, simple star shapes (just five quick lines) scattered around the upper sky area to fill in the blank space. -
Add raindrops:
Underneath the right-side cloud and the bottom cloud, draw small teardrop shapes falling downwards. I like to group them in little clusters of three or four.
Step 2: Adding Vibrant Color
-
Color the outer band:
Take your red marker and fill in the very top stripe of the rainbow. Use long, smooth strokes following the curve of the arch to keep the ink even. -
Add the orange layer:
Fill the second stripe down with bright orange. Try to color right up to the black line without going over it. -
Fill the yellow stripe:
Color the third band with yellow. Since yellow is a light color, be careful not to drag the black ink from the outline if it isn’t fully dry. -
Color the green band:
Use a grassy green marker for the fourth stripe. The rainbow is really starting to pop now. -
Add the blue stripe:
Fill the fifth section with a nice sky blue or cyan color. -
Finish the purple band:
Color the final, smallest inner arch with purple or violet to complete the spectrum. -
Color the big stars:
Use your yellow or orange marker to color in the two large five-pointed stars on the left side. -
Highlight the raindrops:
Take a light blue marker and carefully fill in the little teardrops falling from the clouds. -
Define cloud shadows:
Optional: lightly trace the bottom curves of the clouds with a grey marker or very light blue to give them a bit of 3D shadow.
Smooth Arcs
Turn your paper sideways when drawing the big rainbow curves. Your hand naturally pivots in an arc, making it easier to draw smooth, confident lines.
Shimmery Sky
Use a glitter gel pen to trace over the small stars or add outlines to the clouds. It adds a magical sparkle that catches the light.
Now you have a colorful masterpiece ready to brighten up any wall or fridge door


Turn Hand Tracings Into Silly Characters

Transform a simple outline of your hand into a charming, fire-breathing friend with this imaginative project. Using basic markers and a bit of creativity, you’ll turn fingers into spikes and thumbs into happy faces.
How-To Guide
Materials
- White drawing paper or watercolor paper
- Pency for initial tracing
- Thick black marker or brush pen for outlining
- Colored markers or watercolor pens (green, pink, grey)
- Eraser
Step 1: Tracing and Transforming
-
Position the hand:
Place your non-dominant hand flat on the center of the paper with your fingers spread slightly apart. The thumb should be sticking out to the side. -
Trace the outline:
Using a pencil, carefully trace around the entire hand, moving from the wrist, around each finger, and back down the other side of the wrist. -
Rotate the paper:
Turn the paper so the fingers are pointing like spikes along a back, and the thumb is pointing upward to become the dragon’s head. -
Define the head:
Sketch a large, rounded shape at the top of the thumb tracings to form the snout and head. Close off the bottom of the hand shape with a curved line for the dragon’s belly. -
Add the tail:
Extend a long, curved tail from where the pinky finger was traced, wrapping it slightly upwards for a playful look. -
Draw the legs:
Sketch two short, sturdy legs at the bottom of the body. Add three small curved lines on each foot for the claws. -
Add facial features:
Draw two large circles for eyes near the top of the head with black dots for pupils. Add a wide, curved smile and a small tongue sticking out.
Smooth Tracing Tip
Keep your pencil vertical while tracing around the fingers. Angling it too much can make the fingers look too thin or distorted.
Step 2: Details and Coloring
-
Outline in ink:
Go over your final pencil lines with a black marker or brush pen. Make the lines bold and confident, especially around the main body shape. -
Create the belly scales:
Draw a line running parallel to the dragon’s front curve, from the neck down to the tail. Fill this strip with horizontal lines to look like belly plates. -
Add textures:
Draw small, dashed lines or ‘U’ shapes all over the dragon’s skin to create a scaly texture without having to draw every single scale. -
Draw the spikes:
On top of the finger shapes you traced earlier, draw triangular spikes. These fingers are now the ridges on the dragon’s back. -
Color the spikes:
Use a pink or red marker to fill in the triangular spikes and the tongue. Add a small floating heart near the mouth for extra cuteness. -
Shade the body:
With a light green marker or colored pencil, gently shade the body. I like to leave the belly plates white for contrast. -
Add background elements:
Draw simple ‘m’ shapes in the background to represent distant birds flying in the sky. -
Sketch the ground:
At the dragon’s feet, draw a few rounded rock shapes so your character has solid ground to stand on. -
Final touches:
Erase any visible pencil lines that weren’t inked over to keep the artwork looking crisp and clean.
Background Idea
Turn the simple rock shapes into a pile of gold coins or treasure for your dragon to guard by adding yellow circles.
Now your prehistoric pal is ready to hang on the wall or fridge


Draw Your Family As Stick Figures With Big Personality
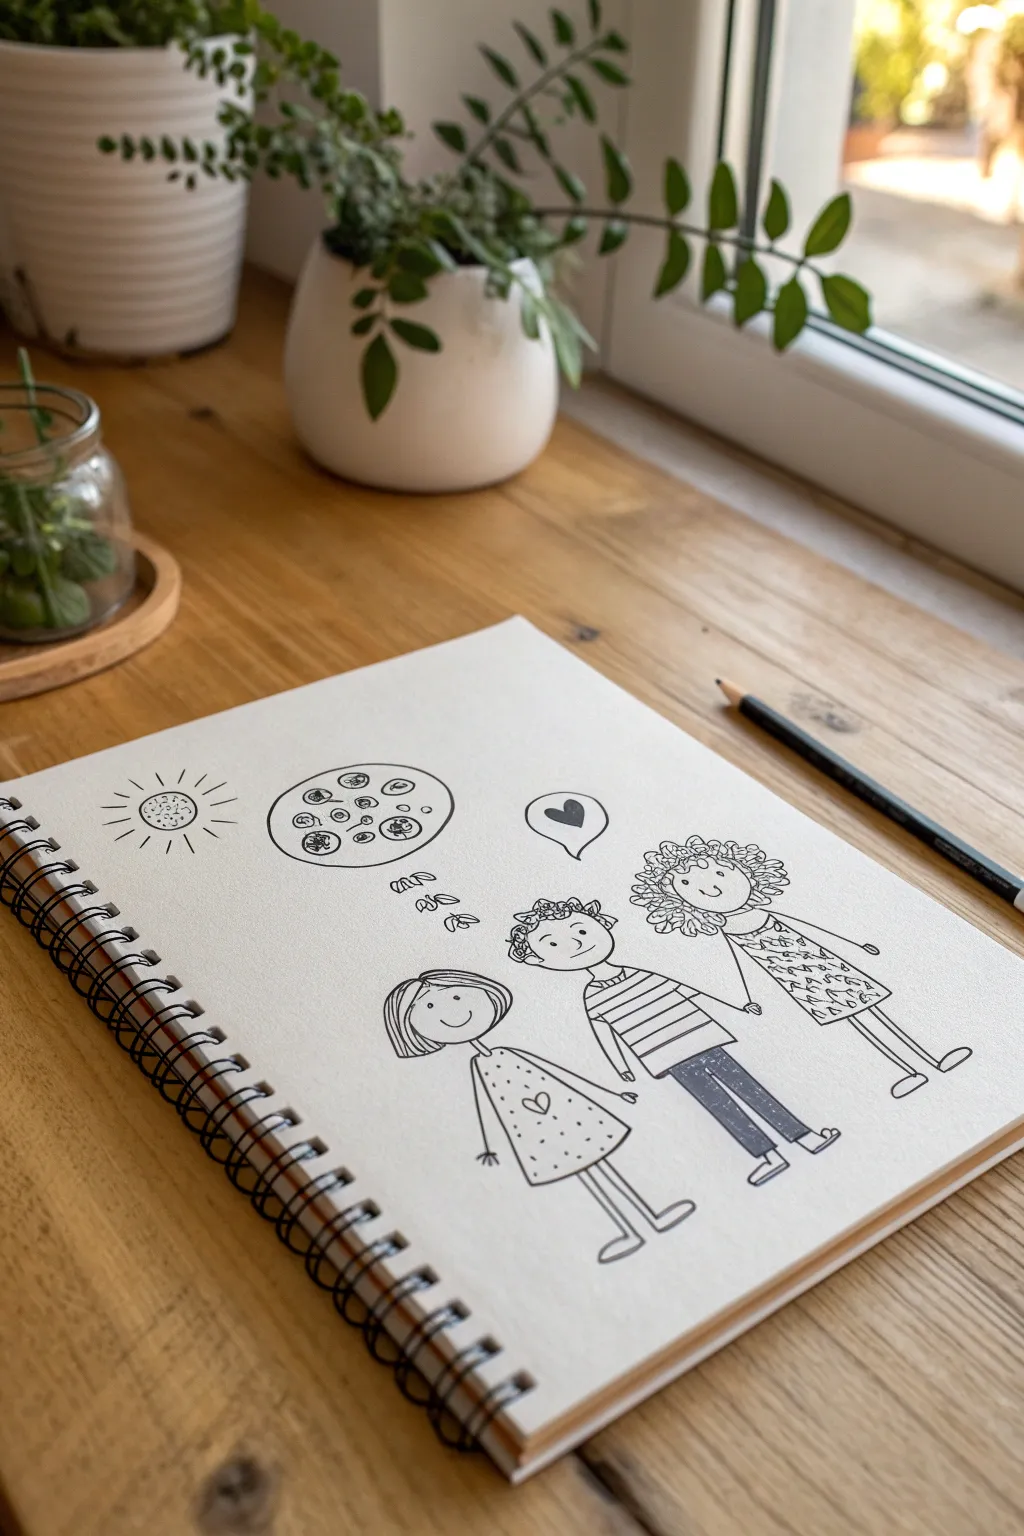
Capture the unique charm of your family members with this simple yet expressive line art style that focuses on personality over realism. Using thick, confident lines and playful details, you’ll create a heartwarming keepsake that looks like a professionally illustrated storybook page.
Step-by-Step Guide
Materials
- Acid-free spiral sketchbook (heavyweight paper preferred)
- Black fineliner pen (0.5mm or 0.8mm for main lines)
- Graphite pencil (HB for sketching)
- Soft white eraser
- Optional: Thin black marker for filling dark areas (like pants)
- Ruler (optional for shirt stripes)
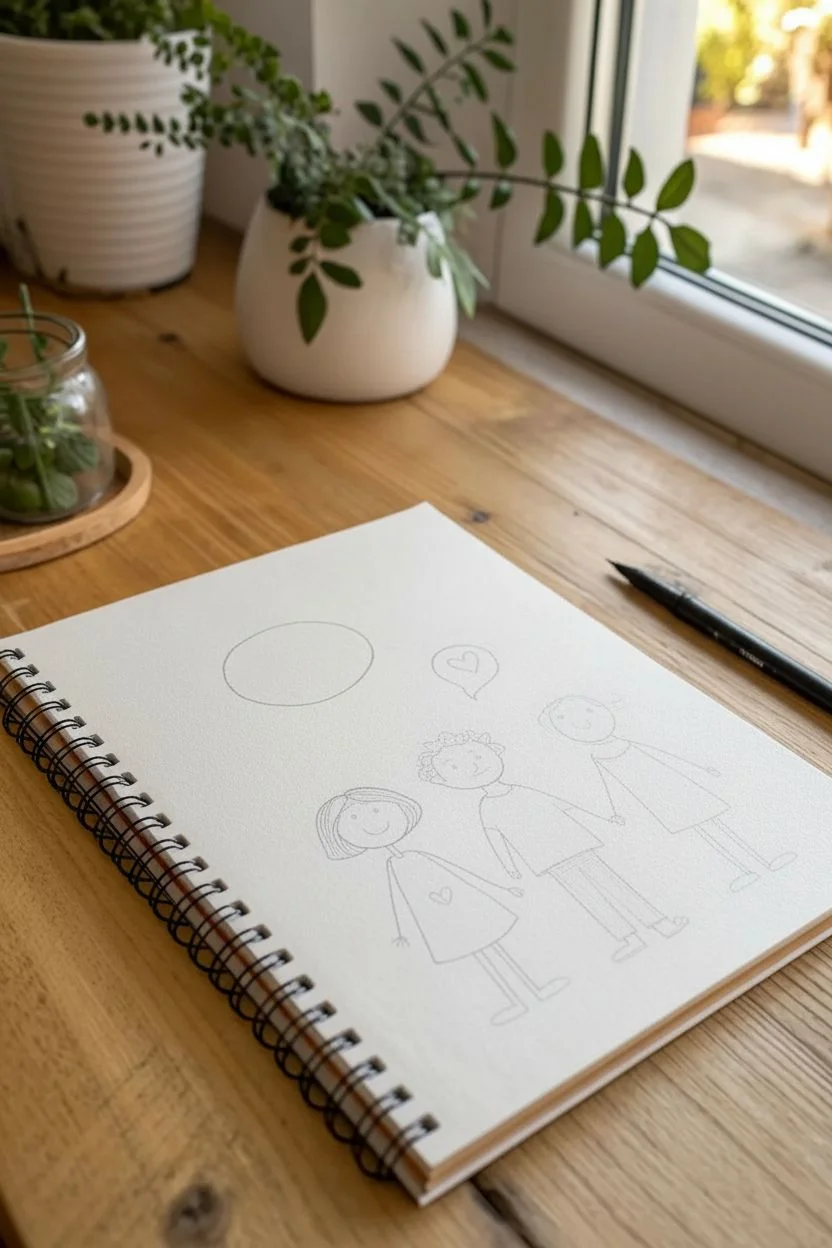
Step 1: Sketching the Layout
-
Visualizing the composition:
Start by lightly visualizing where your figures will stand on the page. Aim to center them, leaving some breathing room at the top for extra doodles like the sun or thought bubbles. -
Head placement:
With your pencil, lightly sketch three ovals for heads. Place the middle one slightly higher to represent a taller figure, establishing the height hierarchy of your family group. -
Stick bodies:
Draw simple vertical lines down from each head for the bodies. Don’t worry about width yet; just get the lengths right for the legs and torsos. -
Adding limb gestures:
Sketch the arms and legs as single lines first. To show connection, position the hands of adjacent figures close together or touching.
Ink Confidence
Don’t rush the inking process. If a line goes slightly wobbly, don’t try to correct it; embrace it as part of the hand-drawn charm.
Step 2: Drawing the Figures
-
Inking the faces:
Switch to your black fineliner. Draw the face outlines first. For the figure on the left, create a rounded bob shape for hair. The center figure gets short, ruffled hair, and the right figure needs big, curly loops. -
Simple facial features:
Keep faces minimal: dots for eyes, simple curved lines for noses, and wide, gentle U-shapes for smiles. Simplicity creates that charming ‘doodle’ aesthetic. -
Defining the left outfit:
Draw a triangular dress shape for the left figure. Add small dots inside the dress for a pattern and sketch a tiny heart on the chest area. -
Drawing the center outfit:
For the middle figure, draw a rectangular torso for a t-shirt. Add horizontal stripes across it. Draw straight legs and shade them in heavily with your pen to represent jeans or dark trousers. -
Defining the right outfit:
Create a patterned dress for the figure on the right. Scribble loose, leafy shapes or squiggles inside the dress outline to give it texture without being too precise. -
Stick limbs:
Draw the arms and legs as thin, double lines or just thick single lines. Keep hands simple—just small loops or circles are enough. -
Adding feet:
Draw the feet pointing outward. Simple elongated ovals or rectangular shoe shapes work best for this style.
Step 3: Atmospheric Details
-
Drawing the sun:
In the upper left corner, draw a small circle with a textured interior. Add radiating lines of varying lengths around it for rays. -
Creating the thought bubble:
Above the left figure, draw a small trail of leaves leading up to a large oval bubble. Inside, sketch little circular motifs—perhaps cookies or planets—whatever the character might be dreaming of. -
Adding the heart balloon:
Draw a speech bubble or balloon shape above the group. Fill it with a bold, black heart to symbolize family love. -
Final clean up:
Once the ink is completely dry—I usually wait at least five minutes to be safe—gently erase all your pencil guides underneath to reveal the crisp black lines.
Add Pop of Color
Use watercolor pencils to lightly color just one element per person (like the heart, the stripes, or the sun) for a chic, minimalist splash of vibrancy.
Now you have a framed-worthy piece of art that perfectly captures your family’s dynamic
BRUSH GUIDE
The Right Brush for Every Stroke
From clean lines to bold texture — master brush choice, stroke control, and essential techniques.
Explore the Full Guide
Invent A Fantasy Pet With Mix-and-Match Features
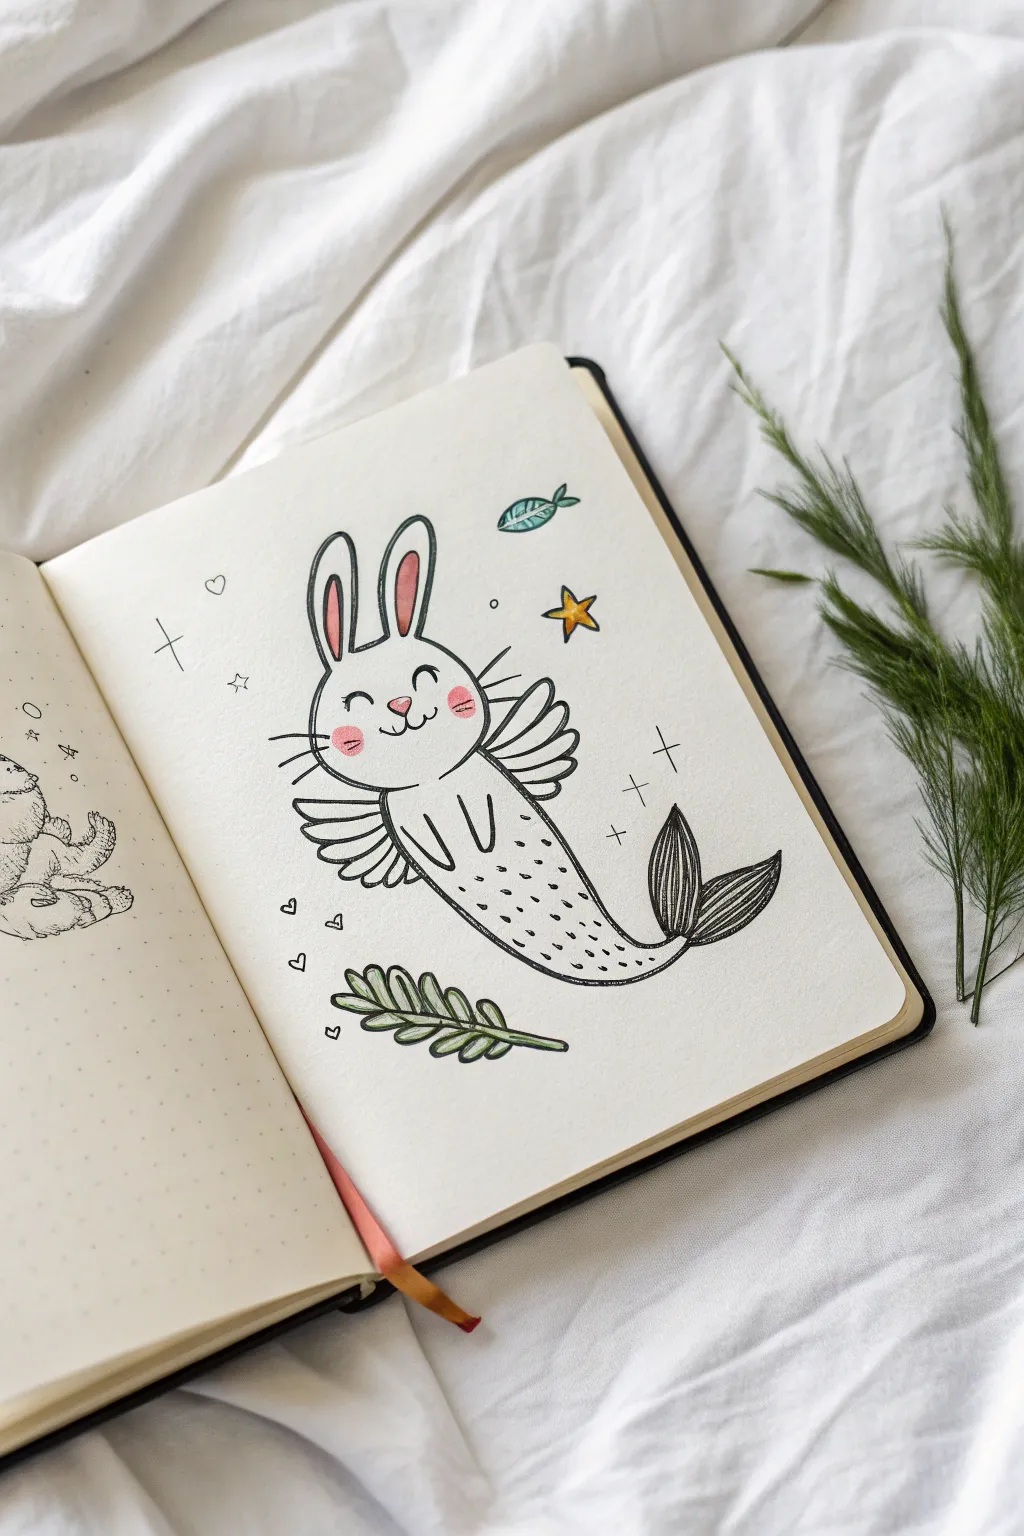
Dive into imagination by combining two adorable creatures into one fantastical pet: a bunny that is half mermaid. This clean, line-art style drawing features whimsical details like wings and stars, perfect for practicing fine liner work and simple color accents.
Step-by-Step
Materials
- Dotted or plain sketchbook paper
- Pencil (HB or similar for sketching)
- Eraser
- Fine liner pen (black, 0.3mm or 0.5mm)
- Colored pencils (pink, yellow, green)
- White gel pen (optional for highlights)
Step 1: Face & Ears
-
Sketching the head shape:
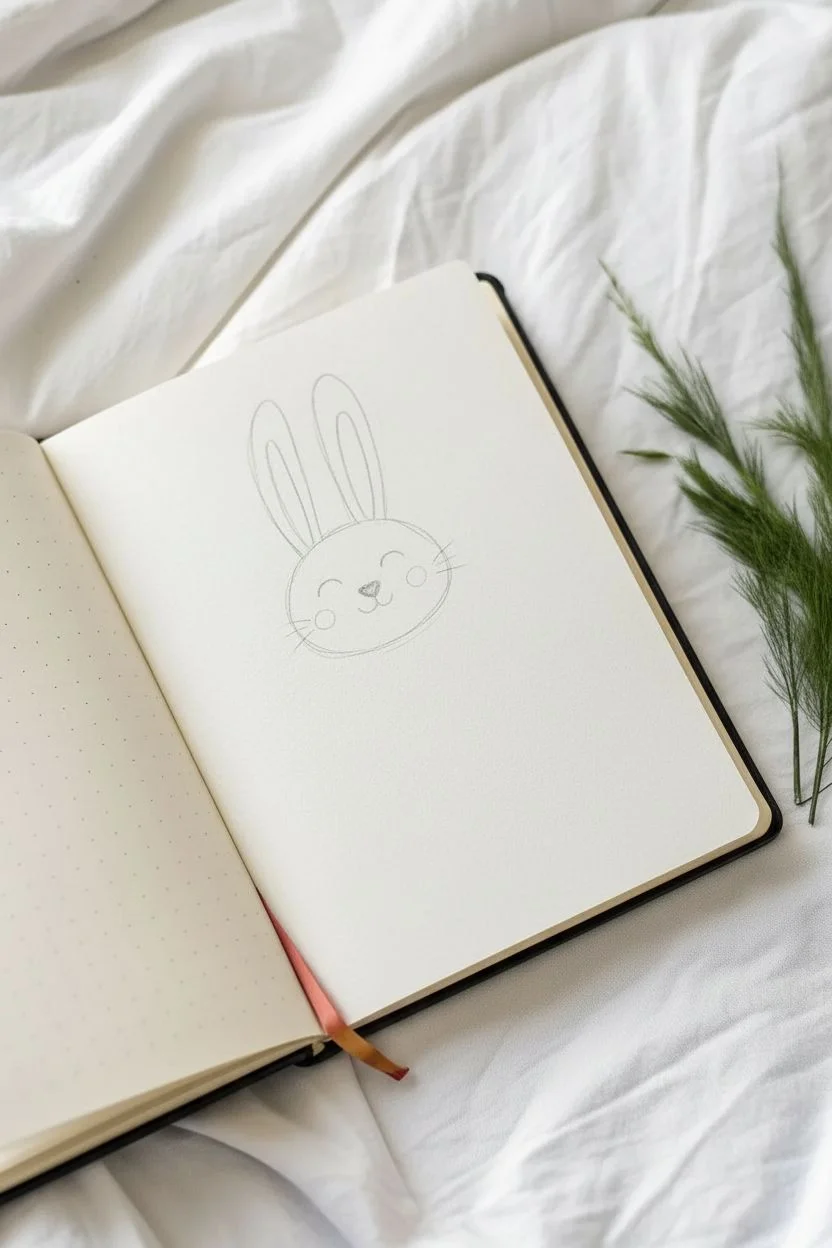
Begin with a pencil to lightly sketch a flattened oval shape for the bunny’s head. It should be wider than it is tall, almost like a jellybean on its side. -
Adding the ears:
Draw two long, looping bunny ears sticking straight up from the top of the head. Make the one on the left slightly taller to add some character. -
Drawing the face details:
Place two small, arched lines for closed, smiling eyes. Below them, draw a small heart-shaped nose and a ‘W’ mouth connecting to it. -
Adding definition:
Sketch the inner ear shapes, following the curve of the outer ears but leaving a gap. Add a few whiskers sticking out from each cheek.
Step 2: Body & Tail
-
Merging the body:
Instead of legs, draw two curved lines extending down from the head to form a torso that smoothly transitions into a tail shape. -
Curving the tail:
Curve the body to the right, tapering it until it gets quite narrow at the end, creating a sleek mermaid tail silhouette. -
Drawing the fins:
At the very tip of the tail, draw two fin shapes flaring out like a fishtail. Add internal lines to give the fins texture. -
Adding the arms:
Draw two simple U-shaped arms on the torso. The arms should look like they are tucked in excitedly against the chest. -
Creating the wings:
Sketch four wing shapes (like simplified feathers) extending from the back of the bunny—two on the left and two on the right behind the head.
Clean Lines Pro Tip
When inking, pull the pen toward you rather than pushing it away. This gives you more control over the line weight and reduces shakiness.
Step 3: Inking & Coloring
-
Tracing the lines:
Using your black fine liner, carefully trace over your pencil lines. Try to keep a consistent pressure for a clean, doodle-like quality. -
Adding tail texture:
With the pen, add small dashes or dots along the mermaid tail section to represent scales. It helps if these follow the curve of the body. -
Erasing the sketch:
Once the ink is completely dry—give it a full minute—gently erase the pencil lines underneath to leave a crisp black drawing. -
Coloring the accents:
Use a pink pencil to color the inner ears, nose, and two round circles on the cheeks. Use yellow for the star and green for the leaf and fish details around the character. -
The finishing touches:
Draw a few tiny hearts, stars, and sparkles around the bunny to fill the negative space. Add a green leaf sprig below and a small fish above to complete the scene.
Make It Sparkle
Use glitter gel pens for the tail scales or the magic dust to make your fantasy creature shimmer on the page.
Your adorable bunny-maid is now ready to swim through the stars of your sketchbook
Design A Dream House With Patterned Rooms
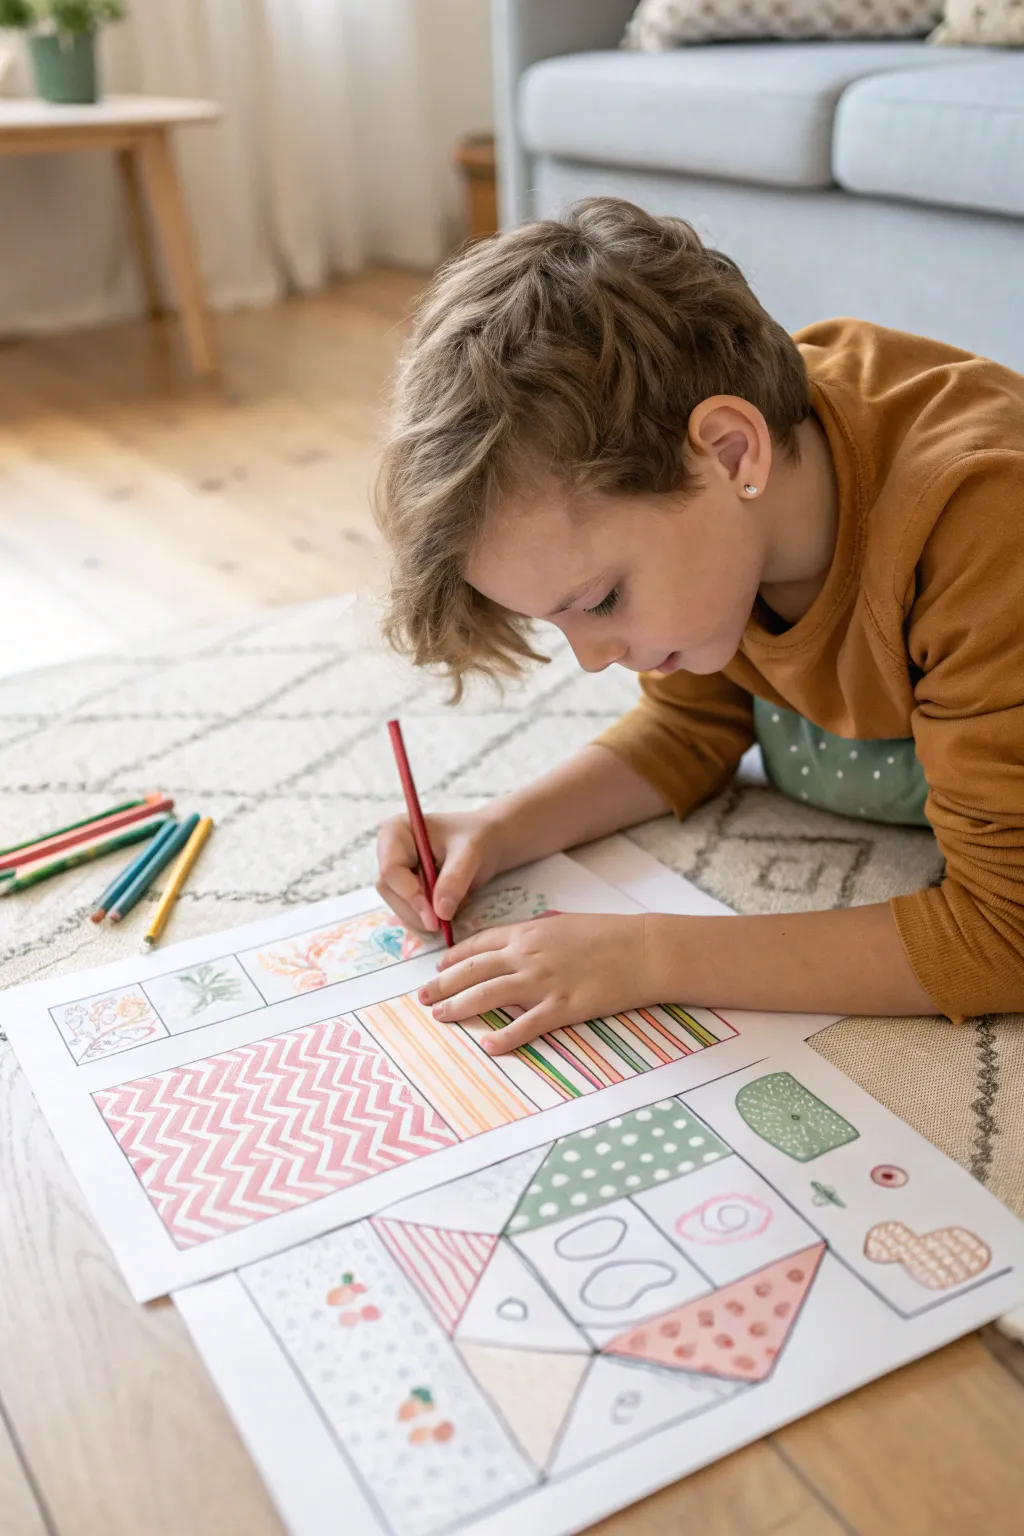
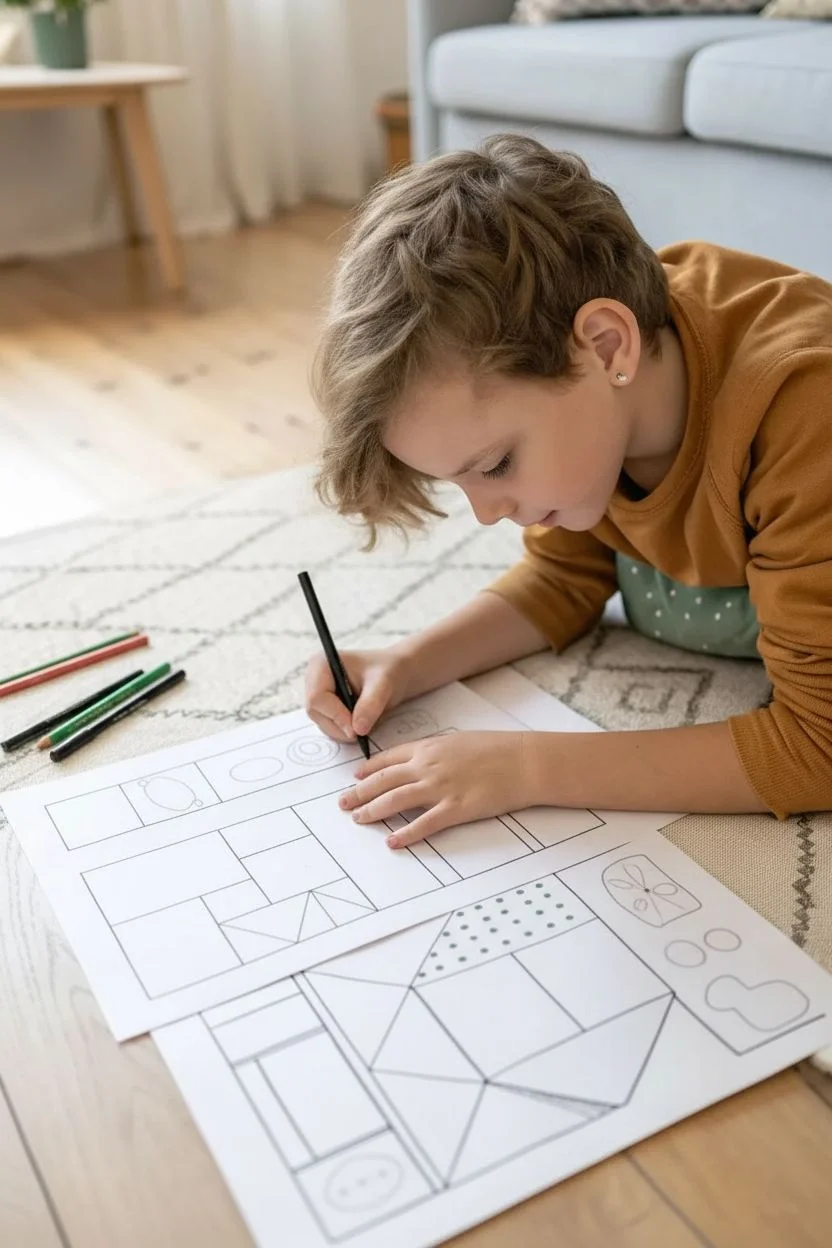
This architectural drawing project invites young artists to imagine their perfect home, room by room, focusing on interior design and texture rather than just furniture. By filling segmented spaces with unique patterns like chevron, polka dots, and stripes, kids create a vibrant, quilt-like floor plan that is both structured and whimsical.
Detailed Instructions
Materials
- Large sheet of white drawing paper (A3 or larger recommended)
- Black fine-liner pen or thin marker
- Ruler (optional, but helpful for straight lines)
- Colored pencils (red, orange, green, blue palette)
- Pencil and eraser for initial sketching
Step 1: Planning the Layout
-
Draw the main frame:
Start by drawing a large rectangle on your paper to serve as the outer walls of the house or the main section of the building. -
Section off the rooms:
Use your black pen or marker to divide the large rectangle into smaller geometric shapes. Create a mix of squares and rectangles to represent different rooms like bedrooms, a kitchen, and a living area. -
Add a roofline:
On top of or adjacent to your main rectangle, draw a large triangle or a series of pitched shapes to create an attic space or roofline. You can subdivide this triangle into smaller triangles for added visual interest. -
Create distinct zones:
Look at your layout and decide which shapes will be ‘pattern zones’ and which will have specific drawings. Leave some spaces larger for big bold patterns.
Keep it Clean
Place a scrap piece of paper under your drawing hand while coloring. This prevents the colored pencil wax from smudging across the clean white areas of your floor plan.
Step 2: Drawing the Details
-
Sketch interior elements:
In the lower rooms (like the triangular attic space), draw simple shapes to represent furniture or windows. For example, draw rounded ovals for windows or a simple table shape. -
Draw the chevron floor:
Select a large rectangular room to feature a bold pattern. Draw zigzag lines horizontally across the entire space to create a chevron effect. Keep the spacing relatively even for a tidy look. -
Create a striped room:
In a smaller adjacent rectangle, draw vertical lines close together to make a striped wallpaper or rug pattern. -
Add a polka dot section:
Choose another shape, perhaps part of the roof or a bathroom area, and fill it with small, evenly spaced circles. -
Incorporate nature motives:
In the smaller square sections (perhaps representing a garden or balcony), sketch delicate leaf patterns or small flowers.
Collage It
Instead of drawing all the patterns, cut out small squares of wrapping paper or fabric scraps and glue them into the ‘rooms’ for a mixed-media texture effect.
Step 3: Adding Color and Texture
-
Color the chevron pattern:
Using a red or pink colored pencil, gently shade in the zigzag lines. You can alternate between colored and white stripes, or use two different shades of pink for depth. -
Fill the stripes:
Take orange, green, and red pencils. Color the vertical striped room, alternating colors to create a bright, multi-colored effect similar to a beach towel or rug. -
Shade the polka dots:
For the polka dot section, use a soft green pencil to color the background space around the dots, leaving the circles white for contrast. -
Decoration details:
Use a light touch with an orange pencil to add small details like hearts or fruit shapes in the remaining white spaces or ‘blank’ walls. -
Define the furniture:
Go back to your furniture sketches (like the table or windows) and outline them firmly with the black pen to make sure they pop against the lighter pencil shading. -
Soft background shading:
I like to take a light beige or peach pencil and very lightly scumble over any large white areas to give the rooms a warm, lived-in glow.
Now you have a fully designed dream house ready for imaginary inhabitants to move in.

PENCIL GUIDE
Understanding Pencil Grades from H to B
From first sketch to finished drawing — learn pencil grades, line control, and shading techniques.
Explore the Full Guide
Draw A Garden Tree for Every Season
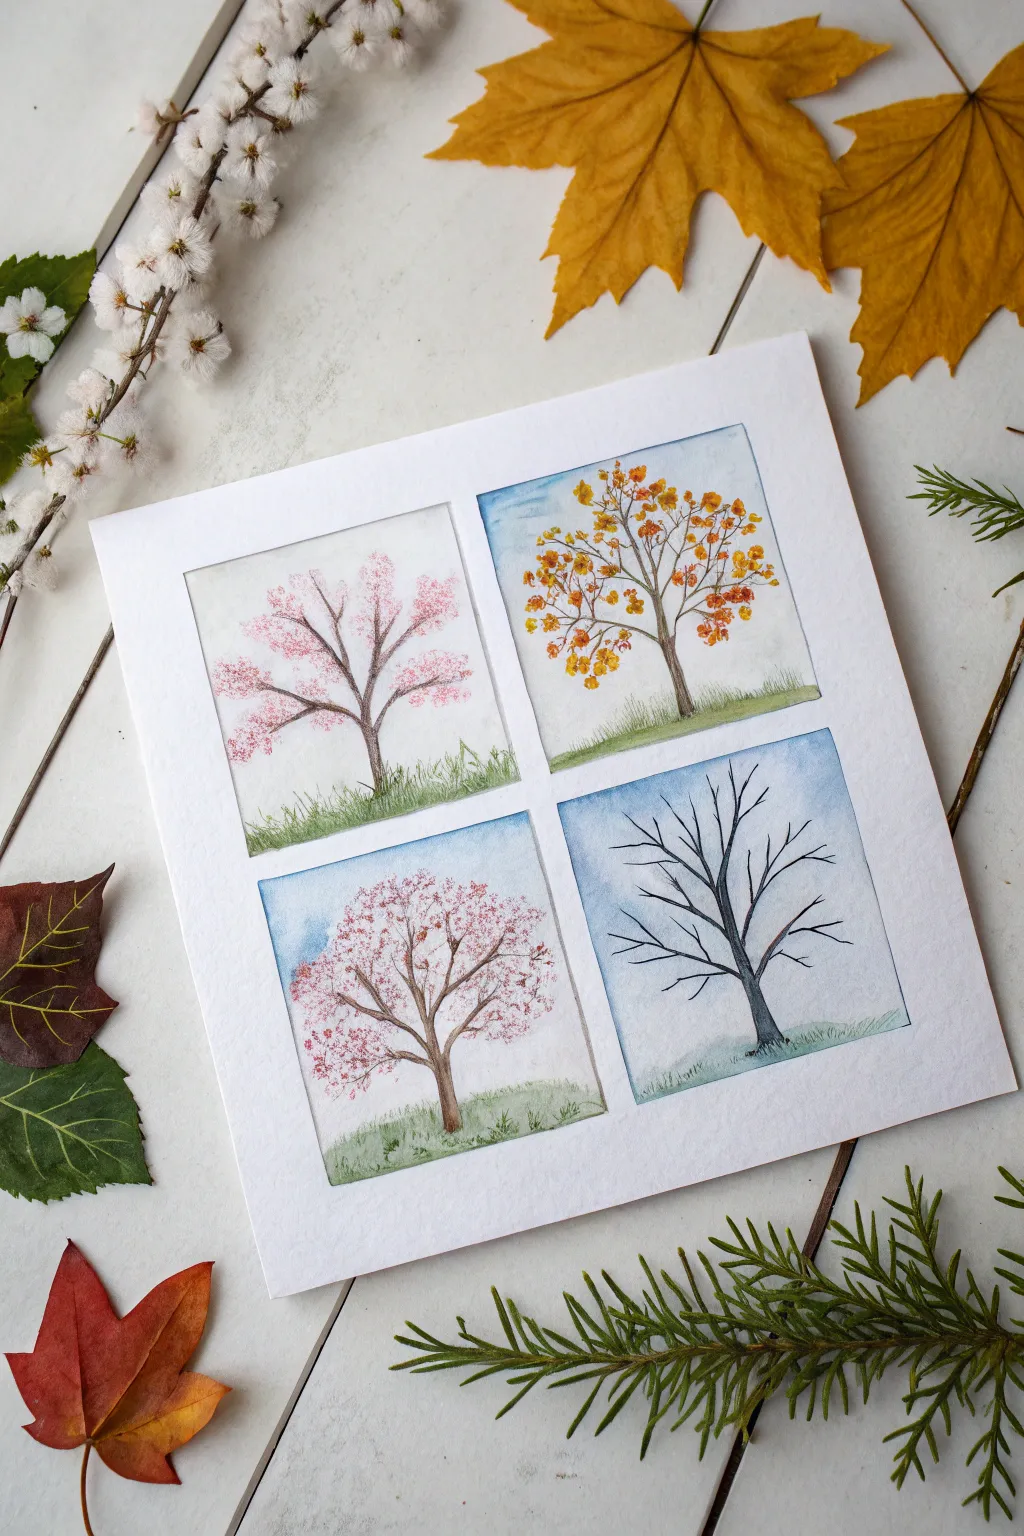
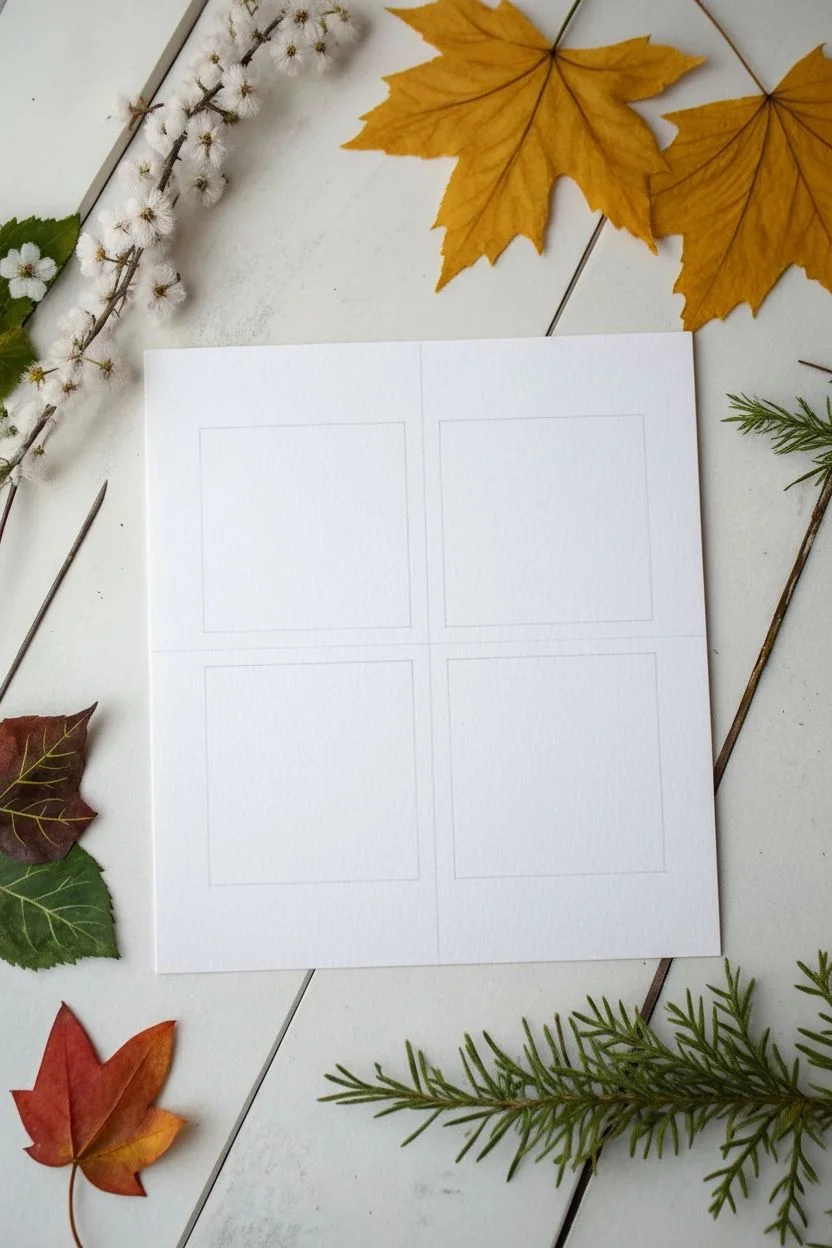
Capture the magic of nature’s cycle with this charming illustration that showcases a single tree transforming through spring, summer, autumn, and winter. This project uses simple watercolor and pencil techniques to create distinct seasonal moods on one clean sheet of paper.
How-To Guide
Materials
- High-quality watercolor paper (white)
- Pencil (HB or H for light sketching)
- Ruler
- Watercolors (pan or tube set)
- Small round paintbrush (size 2 or 4)
- Water cup and paper towels
- Fine-liner pen (optional, for outlines)
Step 1: Setting the Grid
-
Paper Preparation:
Begin with a square or rectangular piece of white watercolor paper. If you’re cutting a larger sheet down to size, ensure your edges are sharp and straight. -
Measuring the Grid:
Use your ruler to find the exact center of the paper. Lightly draw a vertical line and a horizontal line to divide the page into four equal quadrants. -
Creating Borders:
Inside each quadrant, measure about half an inch inward from the center lines and the outer edge. Draw a smaller square inside each section to create a clean white border around your four future paintings.
Bleeding Colors?
If your paint spreads where you don’t want it, your paper is too wet. Let it dry completely, then dab carefully with a barely-damp brush to lift the mistake.
Step 2: Sketching the Trees
-
Basic Shapes:
In the upper-left square (Spring), lightly sketch a tree trunk that branches upward. Try to make the branches look like a ‘Y’ shape that splits into smaller ‘Y’s. -
Replicating the Form:
Repeat this same basic tree structure in the other three squares. They don’t need to be perfect photocopies, but keeping the trunk size consistent helps show it is the same tree changing over time. -
Ground Lines:
Add a simple, slightly curved horizon line behind each tree trunk to represent the ground. Vary the height slightly if you want a more natural look.
Step 3: Painting Spring (Top Left)
-
Blossom Base:
Mix a very diluted pink watercolor. Gently dab small spots of color near the tips of the branches to create soft cherry blossoms. -
Trunk and Grass:
Paint the trunk with a light wash of brown. For the grass, use a fresh spring green, using short, upward brush strokes to suggest new growth poking up.
Add Real Texture
Glue actual tiny dried flower petals on the Spring tree or tiny bits of crushed dry leaf on the Autumn tree for a mixed-media 3D effect.
Step 4: Painting Autumn (Top Right)
-
Sky Wash:
I like to start this one with the sky. Wet the upper area of the box with clean water and drop in a very faint blue, keeping it lighter than the other panels. -
Fall Foliage:
Mix vibrant oranges, yellows, and touches of red. Dab these colors onto the branches, leaving some gaps to show the sky. Drip a few ‘leaves’ falling toward the ground. -
Golden Grass:
Paint the ground using a mix of yellow-ochre and dull green to show grass that is starting to fade for the year.
Step 5: Painting Summer (Bottom Left)
-
Full Canopy:
This tree needs the most leaves. Use a stippling motion (dotting) with various shades of medium and dark pink mixed with a little green to show a full, flowering canopy. -
Summer Grass:
Paint the ground with a deeper, more saturated green. Fill the area solidly but keep the texture soft.
Step 6: Painting Winter (Bottom Right)
-
Cold Sky:
Paint a cool blue wash over the entire sky area, slightly darker at the top and fading as it reaches the horizon. -
Bare Branches:
Using a finer brush or the very tip of your current brush, paint the tree trunk and branches in a dark grey or black-brown. Keep the branches sharp and bare—no leaves here. -
Snowy Ground:
Leave the ground mostly white paper. You can add a very faint wash of light blue just under the tree to represent a shadow on the snow.
Step 7: Final Details
-
Refining Texture:
Once dry, go back with a slightly darker brown paint or a pencil to add texture lines to the tree trunks. -
Erasing Guides:
Check that all paint is completely dry to the touch. Gently erase your initial pencil grid lines, leaving crisp white borders between your seasonal scenes.
Now you have a beautiful seasonal cycle captured in a single frame
Give Weather Faces and Feelings
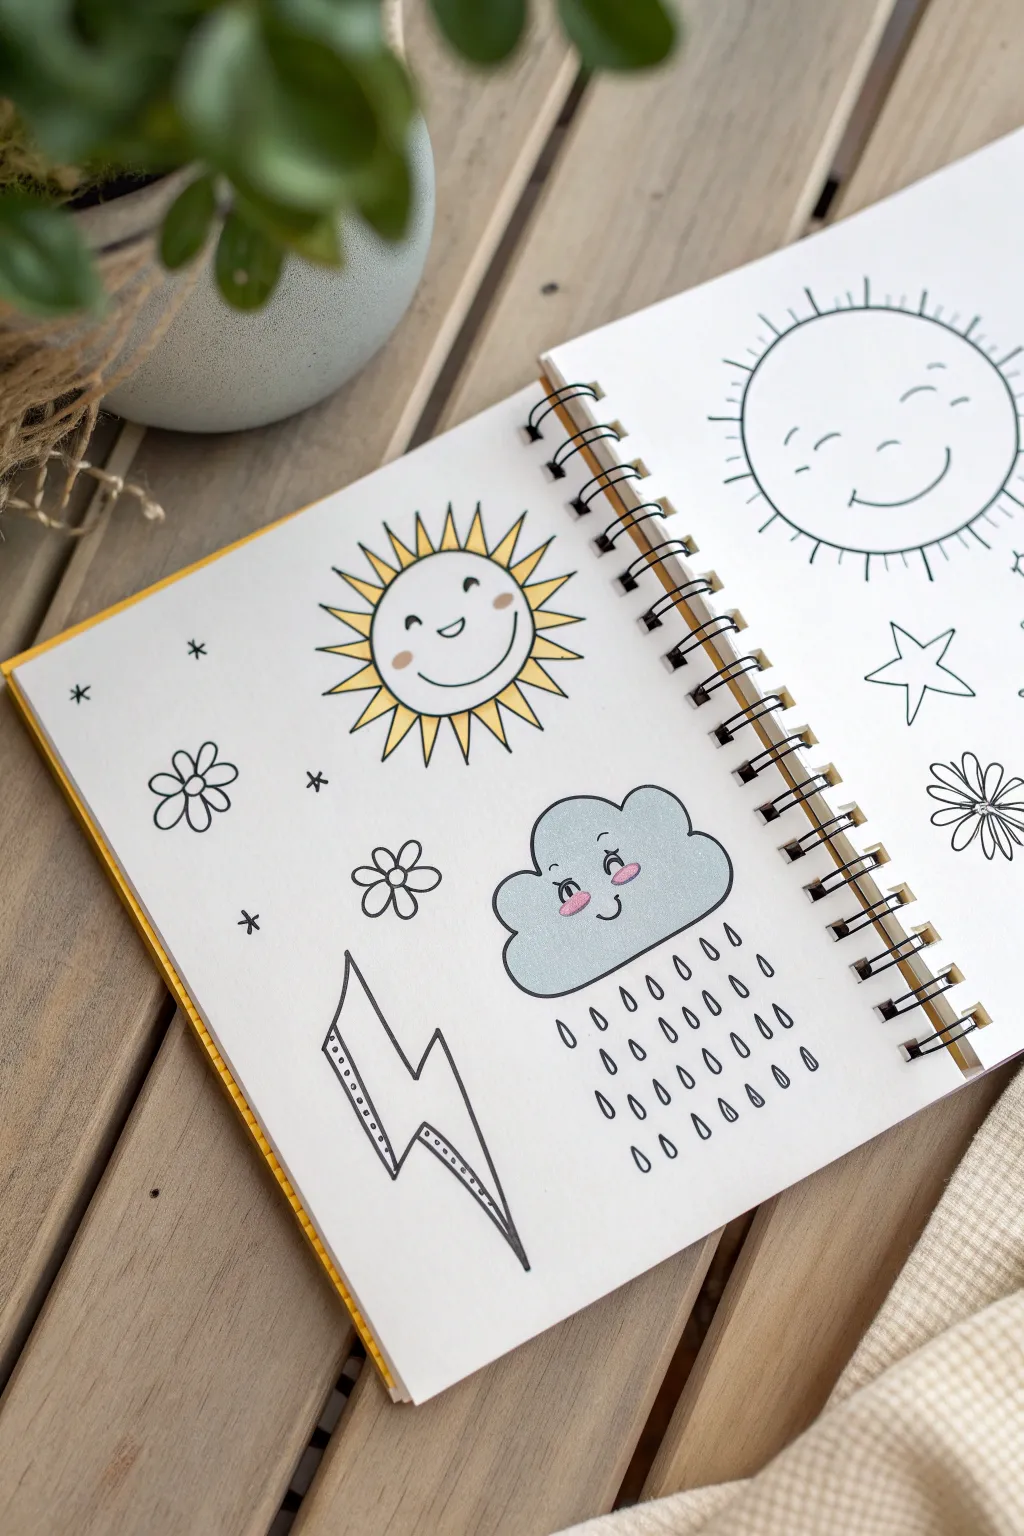
Transform ordinary weather symbols into adorable characters with expressive faces in this simple doodle project. Using clean black lines and soft pastel accents, you’ll create a cheerful sketchbook page featuring a radiant sun, a blushing rain cloud, and energetic lightning.
Step-by-Step Tutorial
Materials
- Spiral-bound sketchbook or heavy drawing paper
- Fine-tip black drawing pen (archival ink recommended)
- Yellow chiseled marker or highlighter
- Light blue wide marker or highlighter
- Pink colored pencil or fine marker
- Pencil (HB or 2B for sketching)
- Eraser
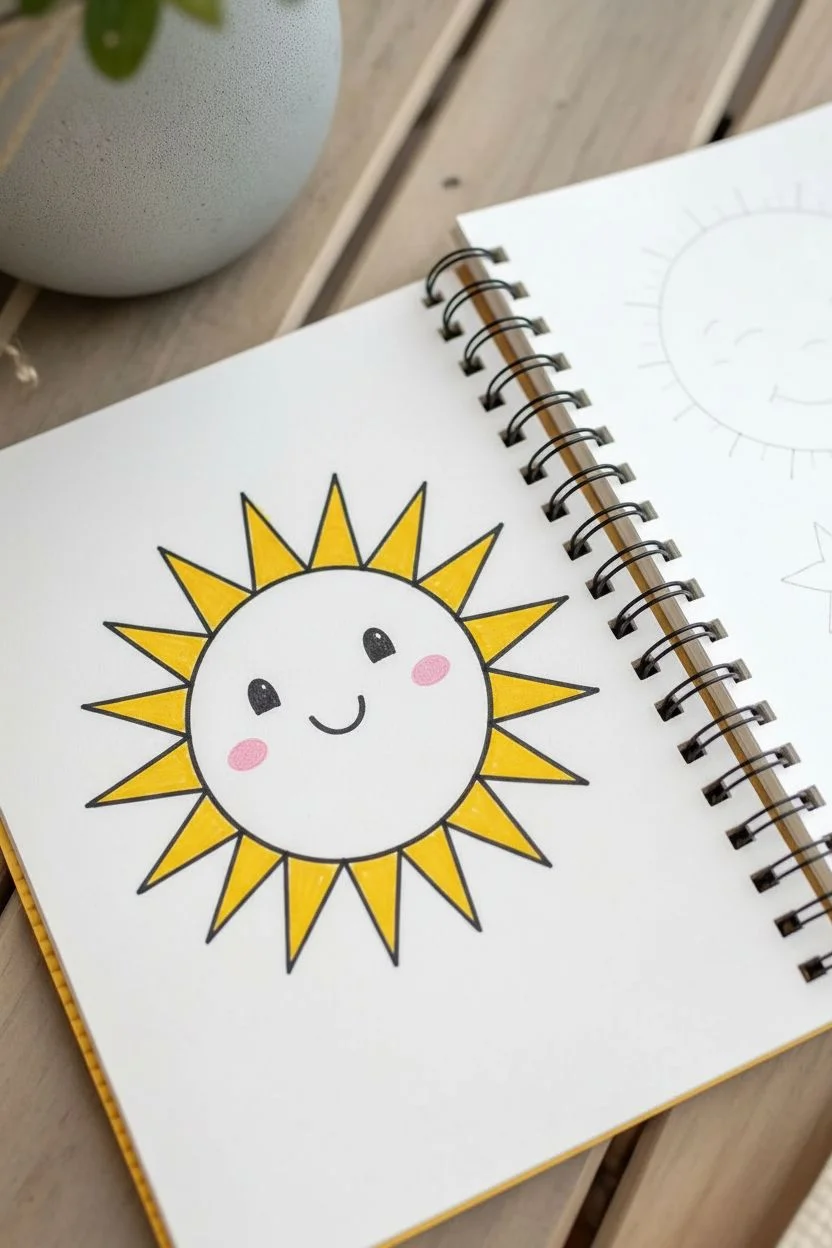
Step 1: Drawing the Sunny Character
-
Circle base:
Begin by drawing a perfect circle in the upper middle area of your page. You can trace a small cup if you want it exact, but a hand-drawn circle adds charm. -
Adding rays:
Around the circle, draw a series of triangles for the sun’s rays. Aim for roughly 16-20 triangles, keeping them relatively uniform in size. -
Creating the outline:
Instead of closing the bottom of each triangle, leave them open where they meet the circle rim. This creates a continuous, spiky sun shape. -
Facial features:
Draw two wide-set, small black ovals for eyes. Add a wide, U-shaped smile right between them to give the sun a joyful expression. -
Coloring the rays:
Using your yellow marker, carefully fill in the triangular rays. Leave the central face area white for a clean, graphic look. -
Rosy cheeks:
I like to add two small pink ovals just under the eyes using a colored pencil or marker to make the sun look friendly and warm.
Ink Smudge Prevention
Work from the top left of the page down to the bottom right (if right-handed) to avoid dragging your hand through fresh ink.
Step 2: Creating the Blushing Cloud
-
Cloud outline:
Below the sun, sketch a fluffy cloud shape using about five or six connected semicircles. Flatten the bottom line slightly for stability. -
Adding color base:
Before drawing the face, maximize contrast by coloring the entire cloud with a light blue marker. Let the marker ink dry for a few seconds. -
Cloud face:
Once dry, use your black fine liner to draw two small C-shapes for winking eyes and a tiny U-shaped smile in the center. -
Blush details:
Draw prominent pink ovals on the cheeks, layering the pink color right over the blue marker for a soft, blended effect. -
Raindrops:
Beneath the cloud, draw four rows of teardrop shapes. Stagger the rows slightly so the drops look like falling rain.
Emotion Variations
Change the feelings! Make the cloud grumpy with a zigzag mouth or make the sun tired with closed, flat eyelids.
Step 3: Lightning & Decorations
-
Lightning bolt shape:
To the left of the rain, draw a sharp, jagged lightning bolt using straight lines. Make the top section wider than the bottom point. -
Inner details:
Draw a secondary line inside the left edge of the bolt to give it dimension. Fill this narrow strip with tiny dots for texture. -
Small flowers:
Fill empty negative spaces with simple five-petal flowers. Draw a small circle center, then add five loops around it. -
Tiny stars:
Add tiny asterisks or starburst shapes scattered around the sun and flowers to fill the background. -
Final inking:
Go over all your main black lines one last time to ensure they are crisp and dark, especially around the colored areas.
Now you have a page full of personality-packed weather friends ready to brighten your sketchbook


Make Fingerprint Doodles Into Animals and Bugs
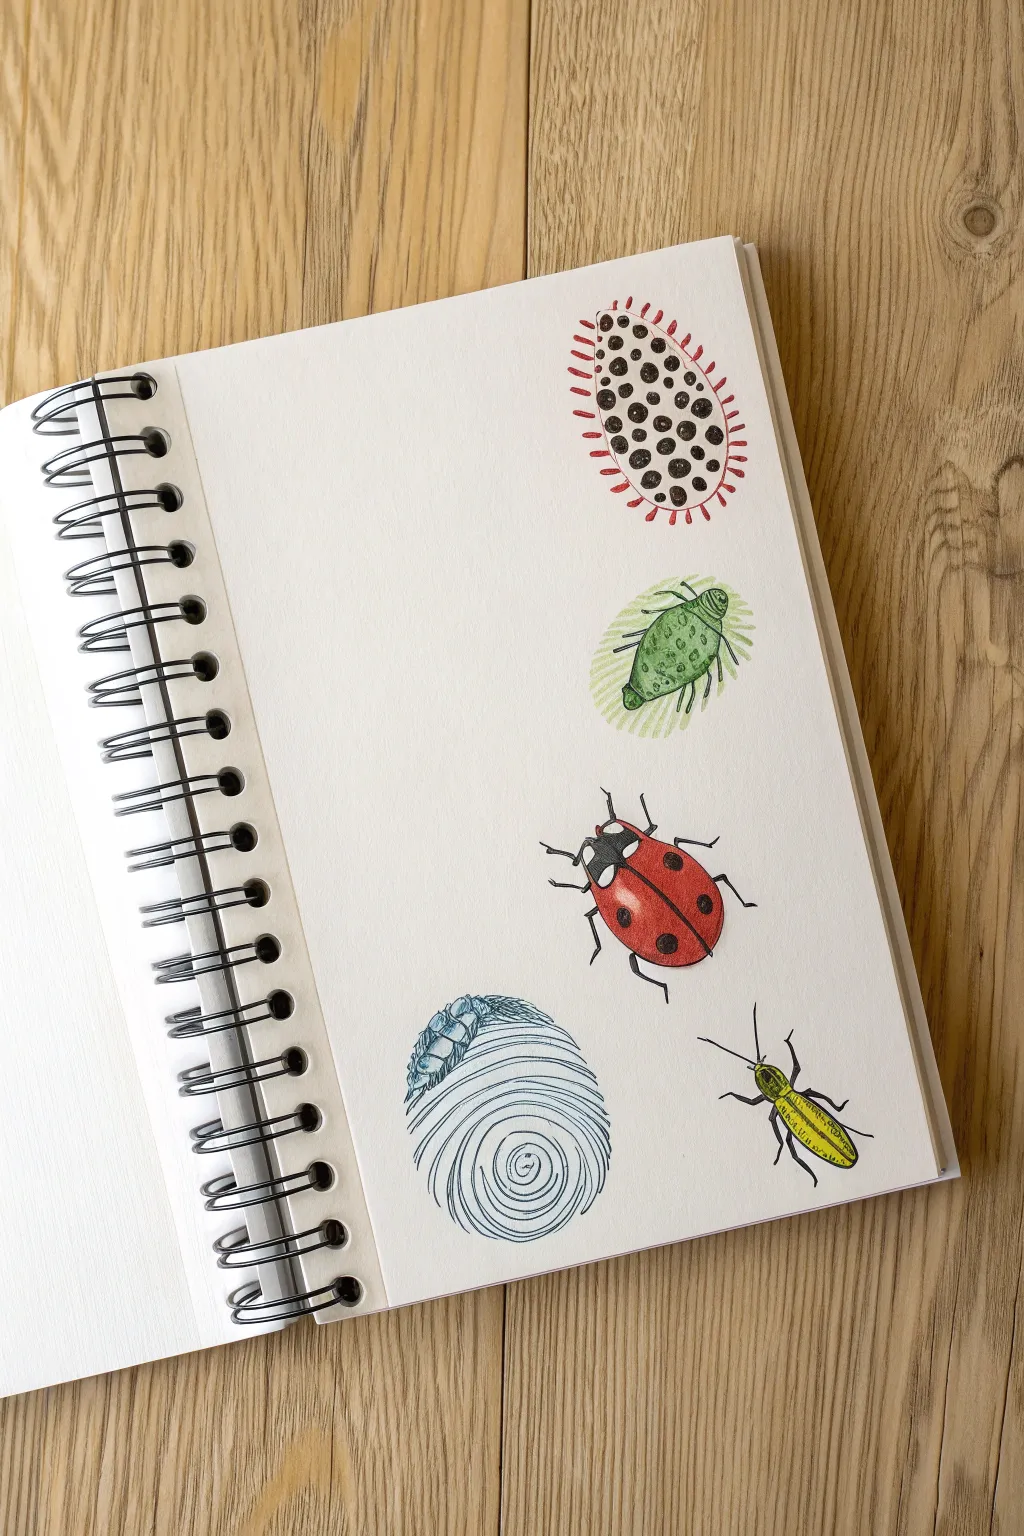
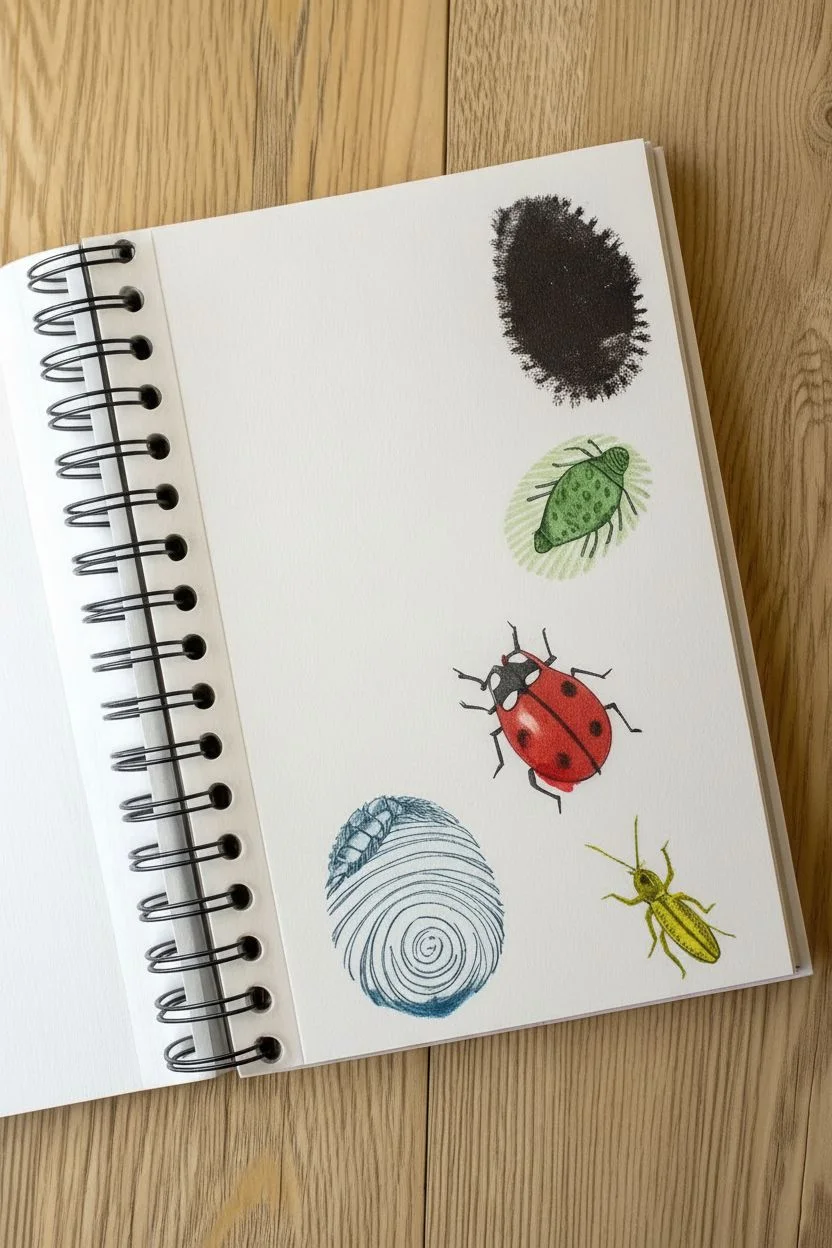
Turn simple ink smudges into a vibrant collection of creepy-crawlies with this classic and charming art project. By combining colorful stamp pads with fine-line details, you can transform ordinary fingerprints into lively beetles, ladybugs, and fantastical insects.
Step-by-Step Guide
Materials
- White or crème mixed media paper (sketchbook)
- Ink pads (various colors: red, black, green, blue, yellow)
- Fine liner pens (black, 0.3mm or 0.5mm)
- Damp cloth or baby wipes (for cleaning fingers)
- Scrap paper (for testing prints)
Step 1: Creating the Body Shapes
-
Prepare your workspace:
Lay out your sketchbook on a flat surface. Keep your baby wipes nearby because changing colors gets messy quickly. -
Stamp the spotted crawler:
Press your thumb firmly onto a black ink pad. Stamp it near the top right of the page to create the body for the spotted bug. -
Stamp the green beetle:
Clean your thumb, then press it onto a green ink pad. Stamp this print slightly below the black one, angling it diagonally for a walking effect. -
Create the ladybug base:
Switch to a vibrant red ink pad. Place a clear, bold thumbprint below the green beetle, keeping it relatively horizontal. -
Stamp the blue spiral shell:
Using a blue ink pad, press your thumb firmly near the bottom left of the page. Wiggle it slightly if you want a wider shape for the snail shell base. -
Add the yellow insect:
Finish the stamping phase by using yellow ink to place a smaller print (try using your index finger) near the bottom right. -
Let the ink set:
Wait about 5-10 minutes for the fingerprints to dry completely. If the ink is wet, your pen lines will bleed or smudge.
Step 2: Inking the Details
-
Detail the spotted crawler:
Start with the top black print. Since it’s dark, draw legs coming out from the sides using red ink or a red marker. Add small red dashes around the perimeter to suggest fuzz or bristles. -
Outline the green beetle:
On the green print, use your black fine liner to draw a horizontal line separating the head. Add vertical lines down the back for wings. -
Add beetle legs:
Draw three legs on each side of the green body and two tiny antennae at the front. -
Define the ladybug:
On the red print, draw a curved black shape at the front for the head. Add white spots if you have a gel pen, or draw black spots with your liner. -
Finish the ladybug body:
Draw a line down the center of the red back to split the wings, and add six dainty legs—three on each side. -
Draw the snail shell:
Go to the blue print. Start in the center and draw a loose, shaky spiral moving outward to mimic a textured shell. -
Add the snail body:
Sketch a small, segmented body crawling out from under the blue shell, adding tiny eye stalks. -
Outline the yellow bug:
On the yellow print, outline the shape in black ink to define the wings. Draw a separate section for the thorax and head. -
Final insect details:
Give the yellow bug long, sweeping antennae and thin legs. You can add texture lines on the wings for a realistic look.
Clean Prints
For the crispest fingerprints, press your finger onto slippery scrap paper once before stamping your final art paper. This removes excess ink blobs.
Add a Habitat
Use green watercolors or colored pencils to lightly sketch leaves, branches, or a jar around your bugs to place them in a scene.
Now you have a whole page of personality-filled insects ready to crawl off the paper
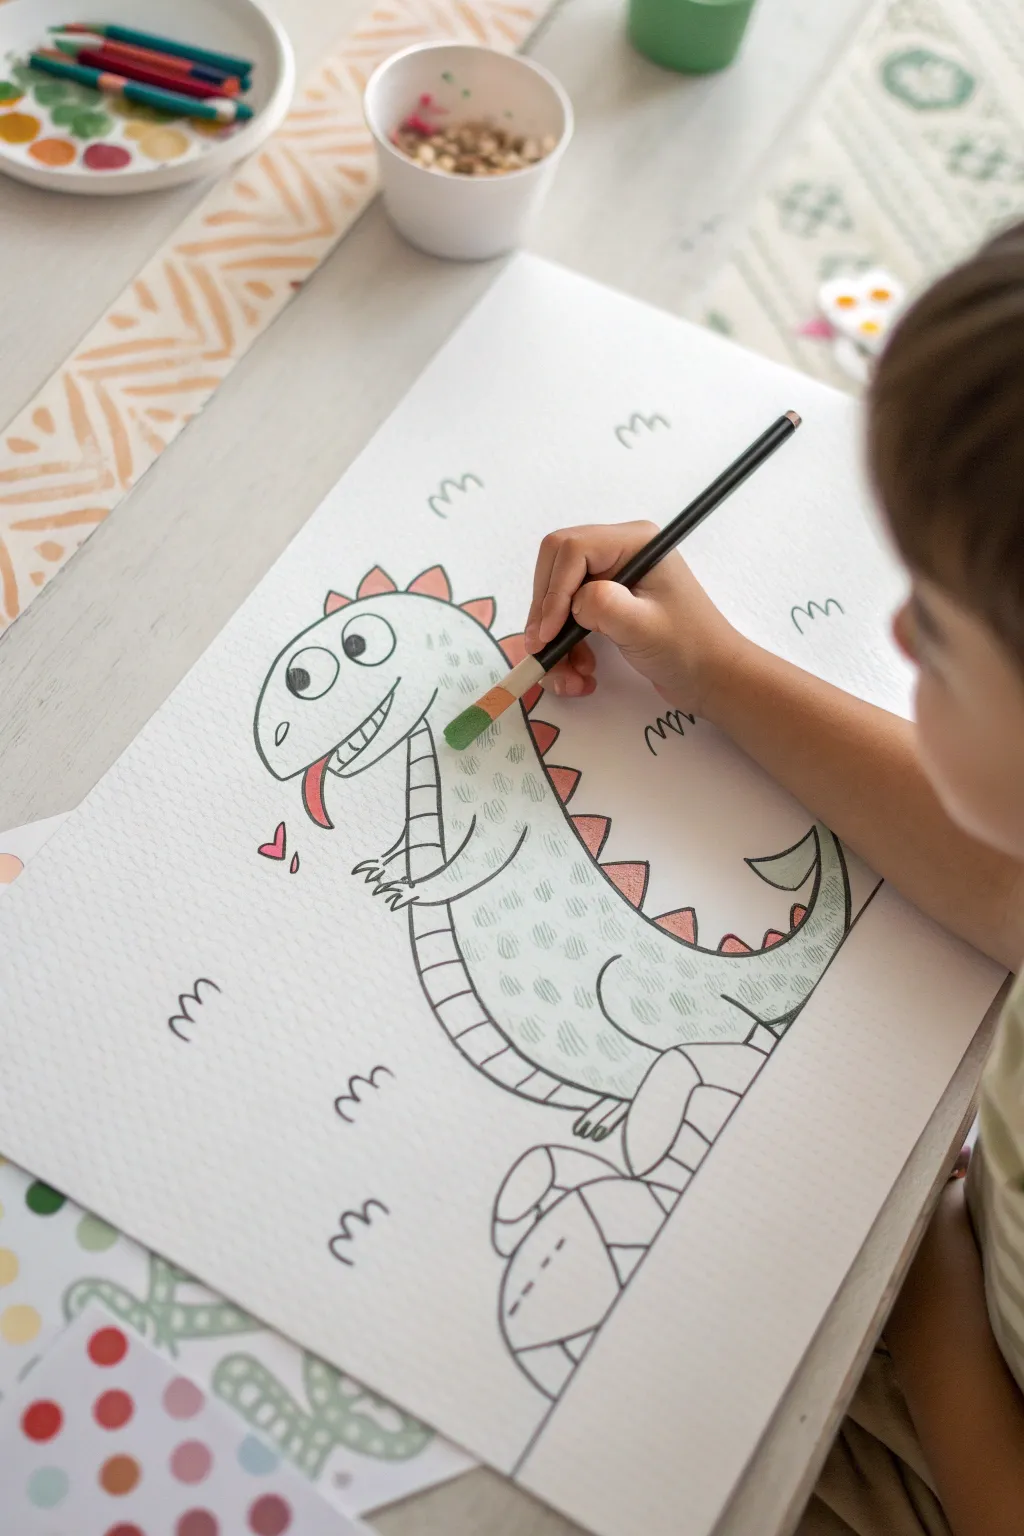
Draw A Big Friendly Dinosaur With Patterned Skin
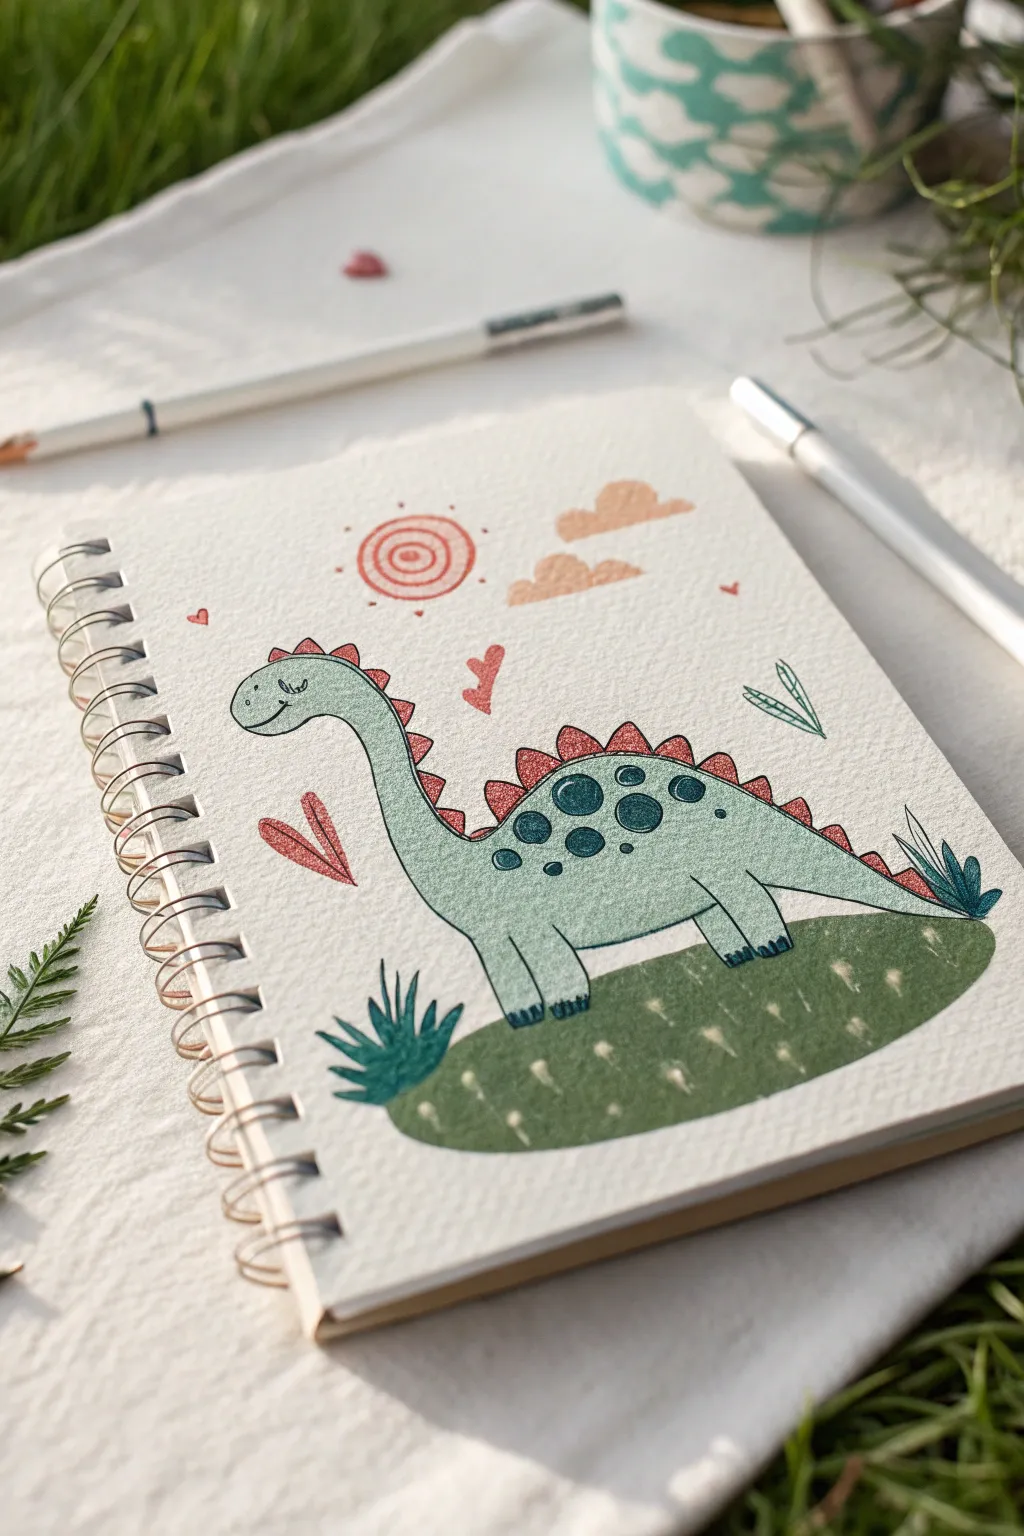
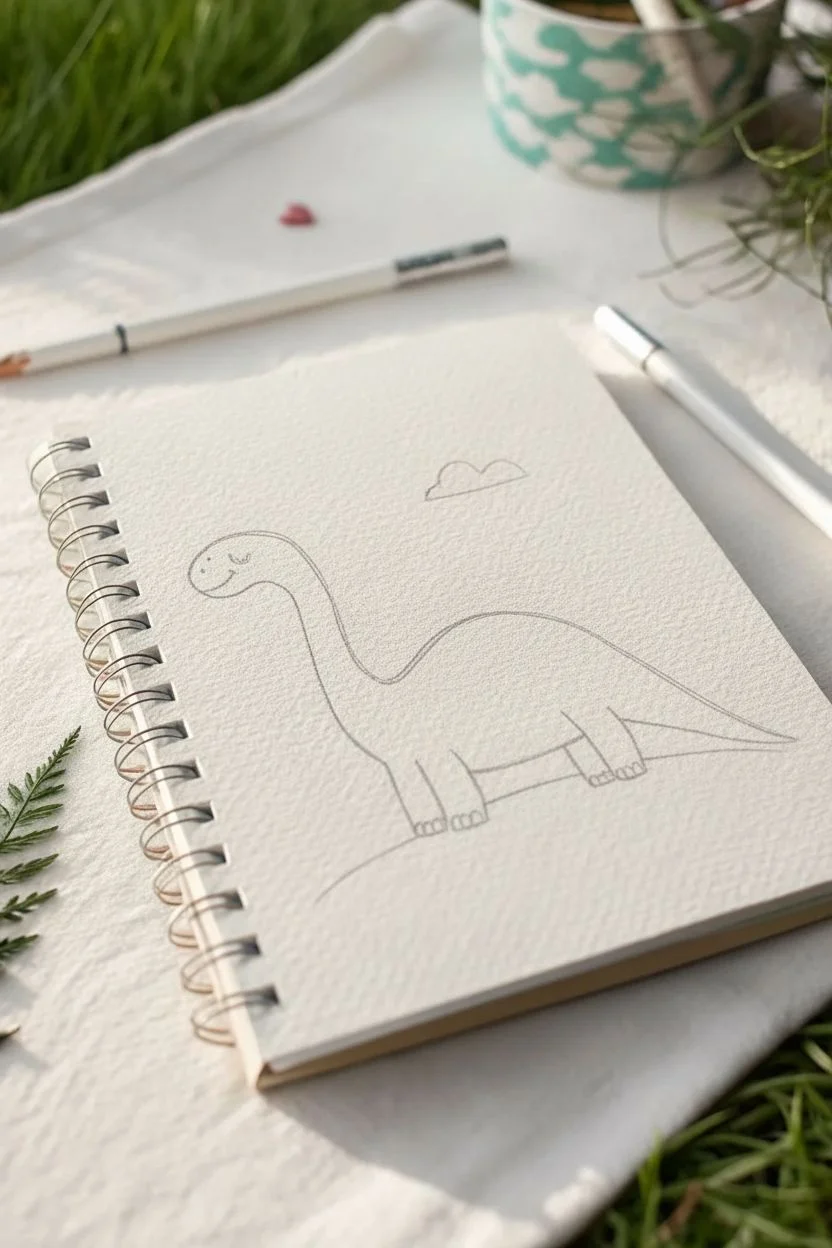
Create a charming, prehistoric friend with this simple illustration tutorial. Using a mix of soft watercolors and crisp lines, you’ll bring to life a gently smiling dinosaur complete with decorative spots and a sunny background.
Detailed Instructions
Materials
- Heavyweight textured paper (watercolor or mixed media)
- Pencil (HB or H for light sketching)
- Eraser
- Fine-liner pen (black or dark grey, waterproof)
- Watercolor paints (sage green, forest green, coral red, pastel pink)
- Small round brushes (size 2 and 4)
- White gel pen (optional for highlights)
Step 1: Sketching the Shape
-
Map out the body:
Start by lightly sketching a large oval shape for the dinosaur’s body near the bottom center of your page. Keep the lines faint so they are easy to erase later. -
Add the neck and head:
Draw a long, curved neck extending upwards from the front of the oval. Top it with a smaller, rounded oval for the head, giving it a soft snout shape. -
Sketch the tail:
From the back of the body, extend a tapering tail that points downwards towards the ground, balancing the composition. -
Draw the legs:
Add two sturdy, rectangular legs at the bottom of the body. Make them slightly rounded at the bottom for feet, and distinct from the belly line. -
Include the hill:
Draw a curved horizon line underneath the dinosaur to create a grassy mound for it to stand on.
Clean Lines Pro-Tip
When outlining on textured paper, hold your pen more vertically. This helps the ink flow into the paper’s grooves, preventing broken lines.
Step 2: Adding Details & Ink
-
Draw the face:
Add a small, curved line for a smiling mouth and a closed, U-shaped eye with a few tiny eyelashes to give it a sleepy, friendly expression. -
Form the spikes:
Sketch a row of triangular plates or spikes running all the way from the back of the head, down the spine, and onto the tail. Vary the sizes slightly, making them largest on the back. -
Outline in ink:
Go over your pencil lines with a waterproof fine-liner pen. Use a confident hand, but don’t worry if the lines interact with the textured paper for a sketchier look. Erase the pencil marks once the ink is totally dry. -
Draw the plants:
Add small tufts of pointy grass or succulent-like plants on the hill near the dinosaur’s feet and tail. -
Sketch background elements:
Draw a simple spiral sun in the sky, two fluffy clouds, and a few floating heart shapes to fill the empty space.
Level Up: Texture
Sprinkle a tiny pinch of salt onto the wet green paint of the hill. Let it dry completely, then brush it off for a cool, mottled grass effect.
Step 3: Painting & Coloring
-
Paint the body base:
Using a diluted sage green watercolor, fill in the dinosaur’s entire body. Keep the wash relatively even, but let the paper texture show through. -
Color the spikes:
Paint the triangular spikes with a coral red or terra cotta color. I like to be careful here to keep the red separate from the green so they don’t muddy together. -
Paint the hill:
Use a darker, forest green for the grassy mound underneath. If you want texture, dab the brush slightly rather than using smooth strokes. -
Add the spots:
Once the body paint is dry, paint dark teal or forest green circles on the dinosaur’s side. Make three large ones and a few smaller ones scattered around. -
Paint the sky elements:
Use a diluted coral or orange for the spiral sun and the hearts. Paint the clouds with a very pale, warm beige or peach tone. -
Detail the grass:
Paint the little plant tufts with a concentrated dark green or blue-green to make them stand out against the hill. -
Add final textures:
Use your fine pen or a white gel pen to add tiny dashes on the hill for grass texture, or small dots on the dinosaur’s knees and toes for extra detail.
Now you have a gentle giant ready to wander through your sketchbook pages
Build A Drawing from A Mystery Scribble
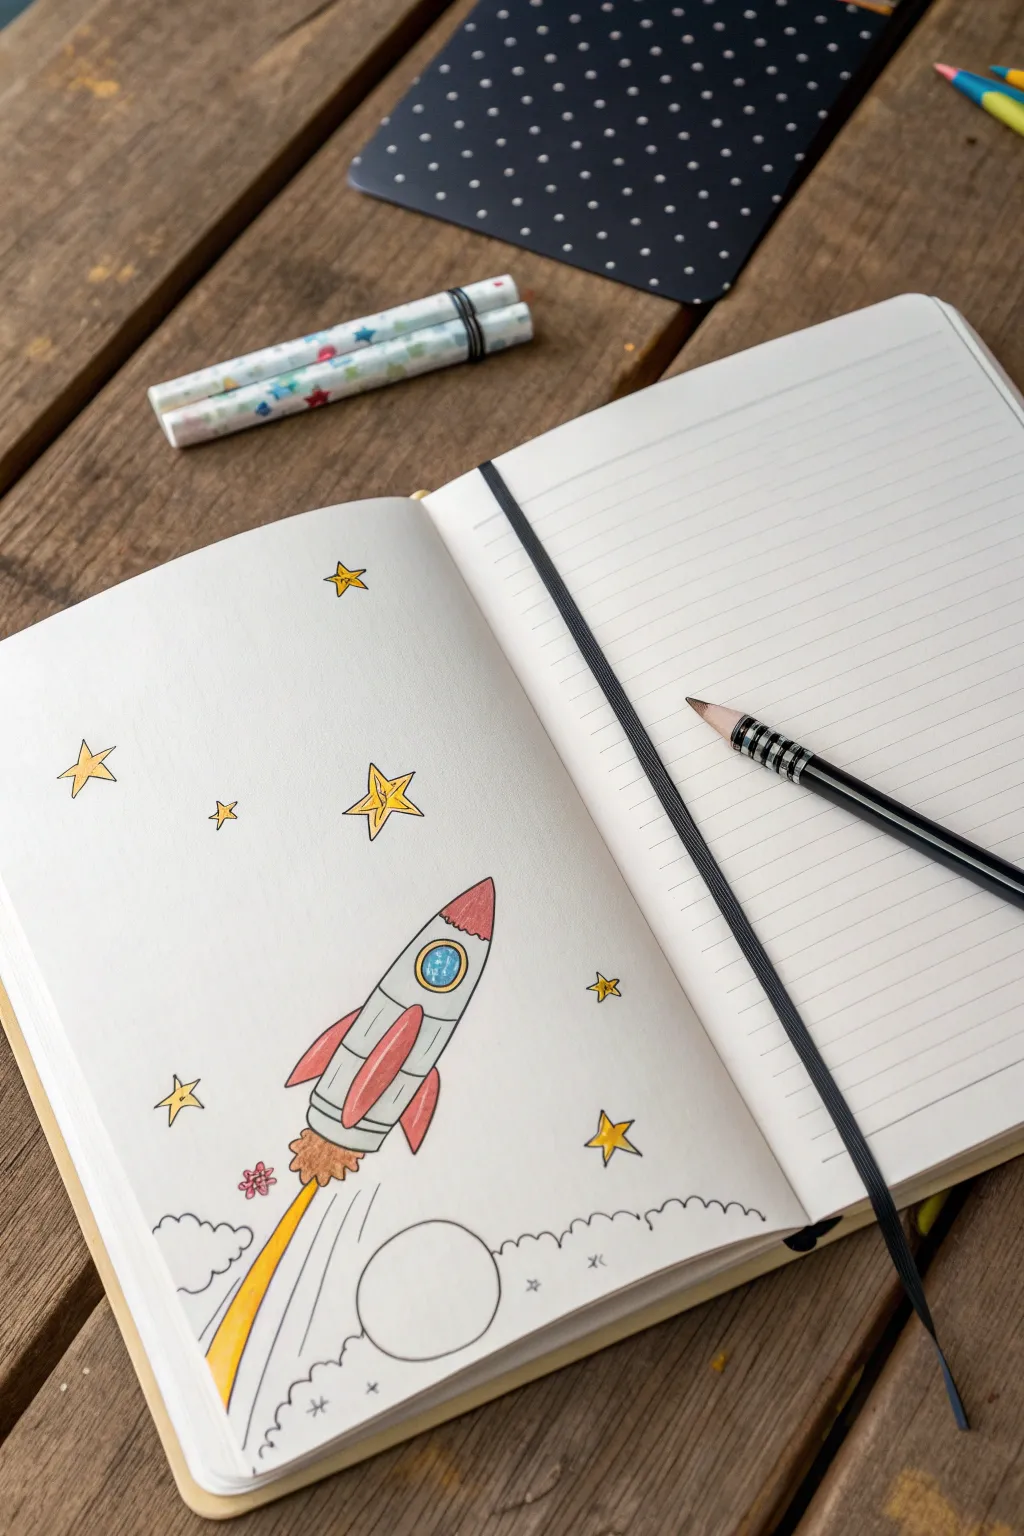
Transform a random squiggle into an exciting space adventure with this clever rocket ship drawing. Using simple shapes and vibrant colors, you’ll turn ordinary lines into a vehicle ready for interstellar travel.
How-To Guide
Materials
- Blank notebook or sketchbook (lined on one side is fine)
- Black fine-liner pen or marker
- Colored pencils (red, light blue, yellow/gold, silver/grey)
- Pencil for sketching
- Eraser
Step 1: The Mystery Scribble Base
-
Create the scribble:
Start by drawing a random, curvy line near the bottom of your page. In this project, our mystery scribble looks a bit like a bumpy cloud or a puff of smoke. Don’t overthink it; just let your hand wiggle across the paper to create a puffy shape. -
Identify the shape:
Look at your scribble. Can you see the smoke from a rocket launch? That’s what we’ll build! If your scribble is different, try to find a place where a rocket could be launching from. -
Outline the smoke:
Using your black fine-liner, go over your pencil scribble to define the cloud of smoke at the bottom of the page. Add a few small ‘x’ marks or loops inside the cloud to give it texture. -
Draw the moon:
Nestled within or near your smoke cloud, draw a simple circle. This will be a planet or moon that the rocket is leaving behind.
Step 2: Constructing the Rocket
-
Draw the fuselage:
Above the smoke cloud, draw a long, bullet-like shape pointing diagonally upward towards the top right corner. This is the main body of the rocket. -
Add the fins:
Sketch three fins. One fin should stick out from the left side, one from the right, and a central fin should run down the middle of the rocket body. Make them curved and aerodynamic. -
Create the window:
Near the top nose of the rocket, draw a circle for a porthole window. Add a smaller circle inside it to create a frame. -
Detail the nose cone:
Draw a curved line separating the very tip of the rocket from the rest of the body to create the nose cone. -
Add the exhaust:
At the very bottom of the rocket, draw a jagged, flame-like shape connecting the rocket to the smoke cloud below. This shows the blast-off fire. -
Ink the lines:
Trace over all your pencil lines for the rocket with the black fine-liner. I find it helpful to rotate the notebook slightly to get smoother curves. -
Draw speed lines:
Add long, straight lines trailing from the bottom of the smoke cloud and the rocket fins downwards. These ‘motion lines’ make the rocket look like it’s moving fast.
Use a Template
If five-pointed stars are tricky to draw freehand, make a small cardboard stencil to trace, or just use simple diamond shapes instead.
Step 3: Stardust and Color
-
Scatter the stars:
Fill the empty space around the rocket with stars. Draw classic five-point stars of different sizes—some large, some tiny. -
Color the fins and nose:
Grab your red colored pencil. Fill in the three fins and the nose cone at the top. Press lightly for a softer look or harder for bold color. -
Shade the body:
Use a silver or light grey pencil to color the main body of the rocket. Leave the window and the flame uncolored for now. -
Fill the window:
Color the inner circle of the window with light blue to look like glass reflecting the sky. -
Ignite the flame:
Color the jagged flame shape at the bottom orange or brownish-orange. Then, color the long blast trail yellow to show the bright energy. -
Brighten the stars:
Use a yellow or gold pencil to color in all your stars. If you have a metallic pen, that works great here too. -
Final touches:
Erase any remaining pencil sketch lines that are still visible under your ink. Your mystery scribble is now a full space scene.
Fixing Wobbly Lines
Rocket looks a bit crooked? don’t erase! Just thicken the outline on the uneven side to balance it out and add ‘weight’ to the drawing.
Now you have a dynamic drawing that started from just a simple line
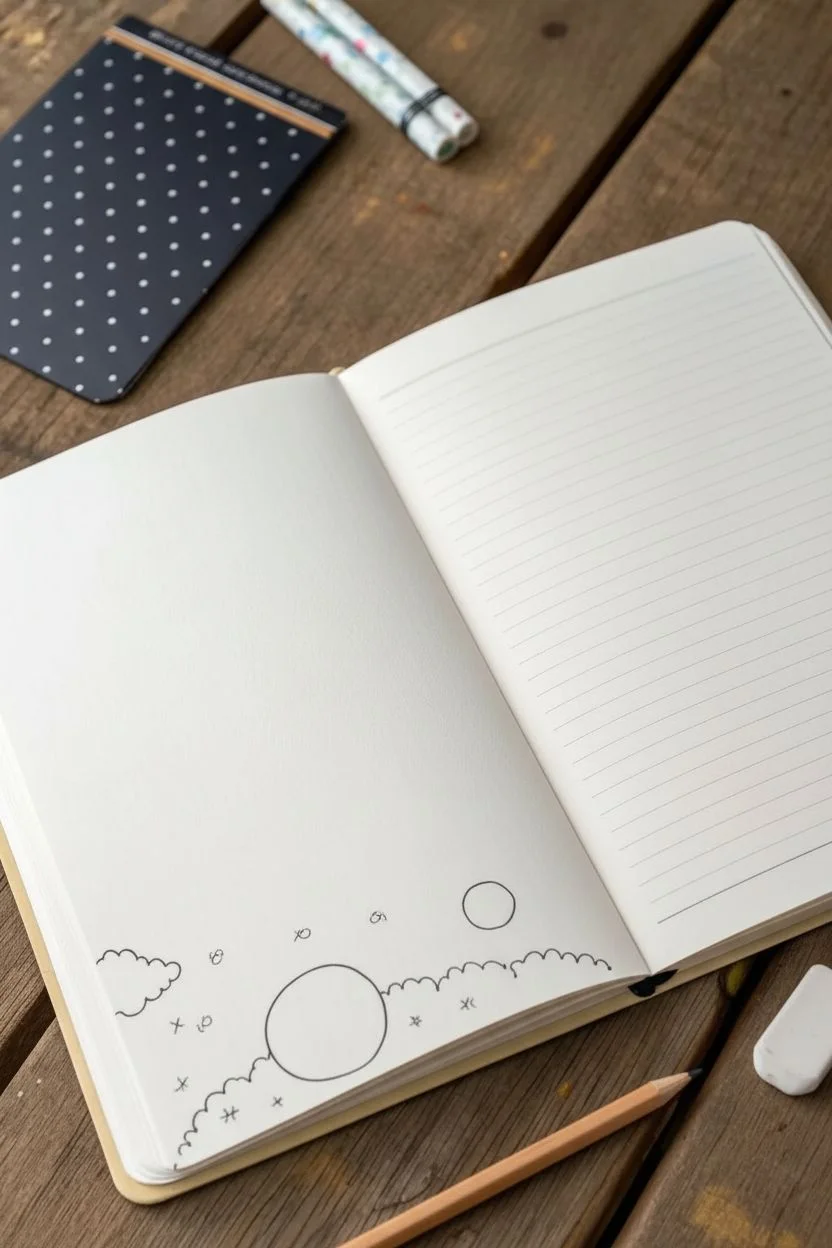
Try Reverse Coloring With Bold Outlines First
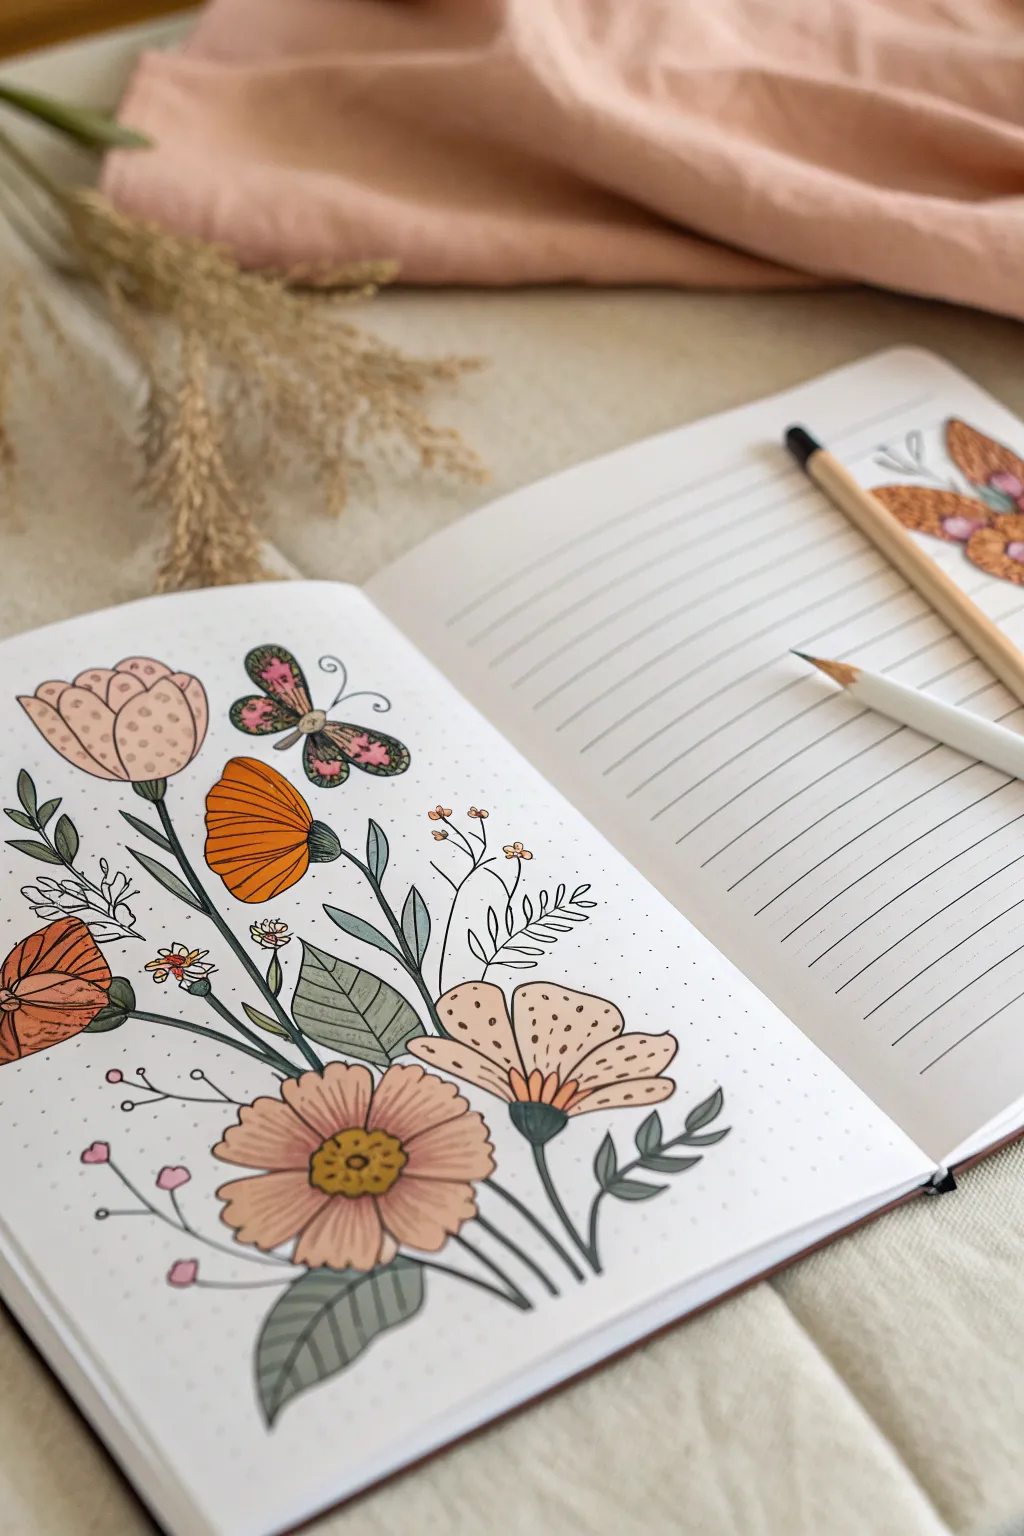
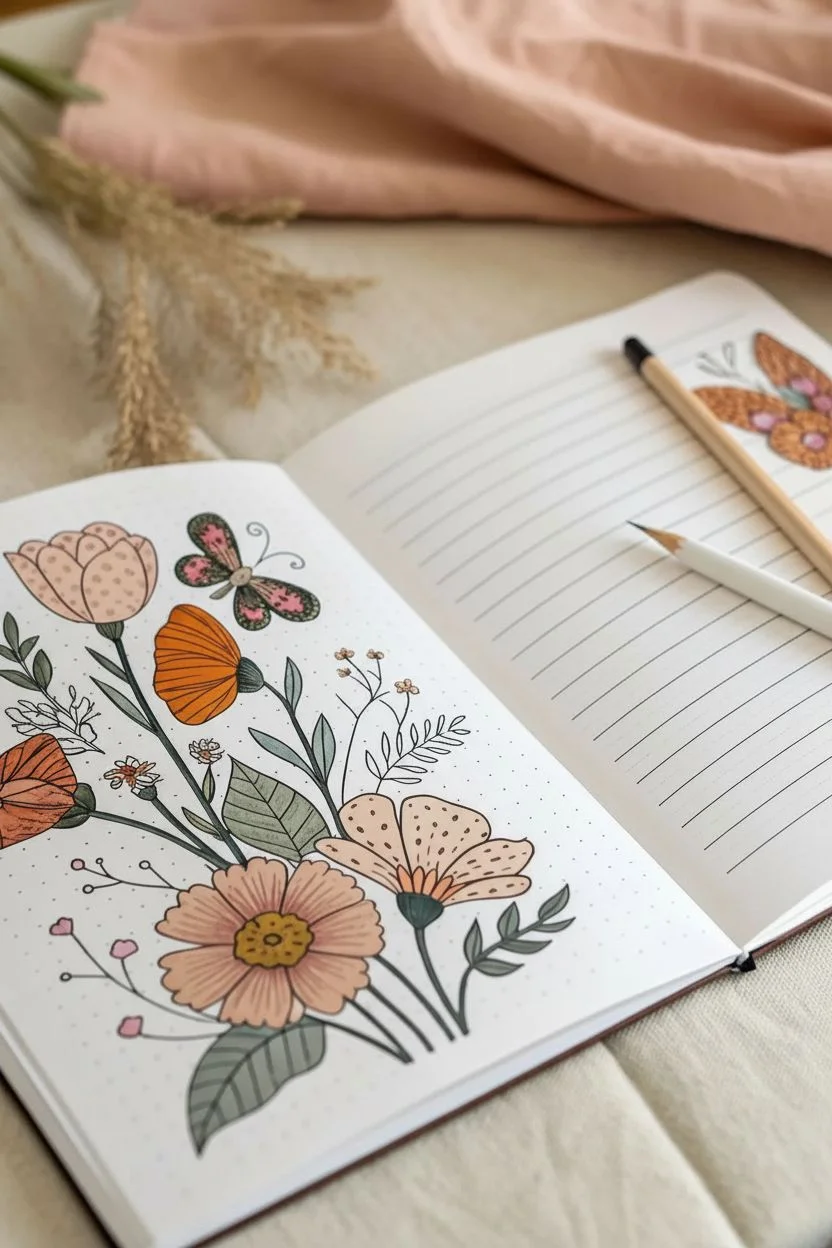
This project invites you to turn coloring on its head by starting with the colors and adding the lines last. The result is a charming, vintage-style floral spread in your dotted journal that feels structured yet whimsical.
Step-by-Step Guide
Materials
- Dotted journal or sketchbook
- Pencil (HB or 2B)
- Fine liner pen (black, 0.5mm or 0.8mm)
- Colored pencils or markers (muted pinks, oranges, and greens)
- Eraser
Step 1: Planning and Coloring
-
Visualize the layout:
Start by looking at your blank dotted page. Imagine a cluster of flowers rising from the bottom corner, angling upwards towards the center. You don’t need to draw lines yet, just get a sense of the composition. -
Block in the main blooms:
Take a muted orange or peach colored pencil. Gently draw a rough, solid oval shape for a tulip-like flower on the upper left side. Color it in completely but lightly. -
Add a statement flower:
Using a slightly brighter orange, create a fan shape in the middle area for a poppy. Don’t worry about petals yet; just focus on the main silhouette of color. -
Create the lower blooms:
Switch to a soft pink or tan shade. Near the bottom center, color a large, round shape for a daisy-like flower, ensuring it’s large enough to anchor your bouquet. -
Add secondary flowers:
Using a lighter peach tone, add a smaller, flatter oval shape to the right of your daisy. This will become another open bloom facing upward. -
Fill in the foliage base:
Grab a muted sage green pencil. Draw long, sweeping strokes extending from the bottom of your flower shapes downward to create stems. Add rough leaf shapes—ovals and pointed ellipses—along these paths. -
Include a butterfly:
Above the orange poppy shape, use pink and green to color two small, adjoining wing shapes. This spot of color will transform into a butterfly later.
Loose Aesthetics
Don’t try to stay perfectly inside the colored areas when inking. Let the black lines crisscross or miss the color slightly for a trendy, imperfect art style.
Step 2: Inking the Details
-
Outline the tulip:
Now, take your black fine liner. Going over your top orange oval, draw the petals of a tulip. Give the lines a slight curve to show volume, and add small dots inside for texture. -
Define the poppy:
Move to the bright orange fan shape. Draw a bold outline around the color, adding vertical lines inside the shape to suggest the folds of the petals. -
Detail the main daisy:
For the large pink circle at the bottom, draw a distinct center first. Then, outline individual petals radiating outward, letting your pen lines embrace the color you already laid down. -
Draw the stems:
Trace over your green stem lines with the black pen. Make these lines smooth and confident. I find it helps to pull the pen toward me for straighter lines. -
Add leaf veins:
Outline your green leaf shapes. Draw a central vein down each leaf, and add smaller diagonal veins branching off to give them a realistic botanical look. -
Create the butterfly:
Outline the butterfly wings you colored earlier. Draw a small, segmented body in the center and add delicate antennae curling outward. -
Add small filler elements:
Look for empty white spaces. Draw tiny sprigs of leaves or small buds using just your pen, without coloring them in. This mimics the delicate fern-like doodles seen in the example. -
Pattern the wings:
Go back to the butterfly and add tiny circles or tear-drop shapes inside the wings for extra detail. -
Enhance with dots:
Add stippling (small dots) to the centers of flowers and the base of petals to create shading and depth without needing darker colors. -
Final touches:
Review your drawing. If you see any spots where the color extends too far outside your lines, embrace it—that offset look is part of the artistic charm.
Mixed Media Magic
Try using watercolor paints for the initial color blocks instead of pencils. The translucent wash creates a beautiful, dreamy contrast against the sharp black ink.
Now you have a beautifully illustrated page that looks professionally designed
Create A Story Comic Strip in Three Panels
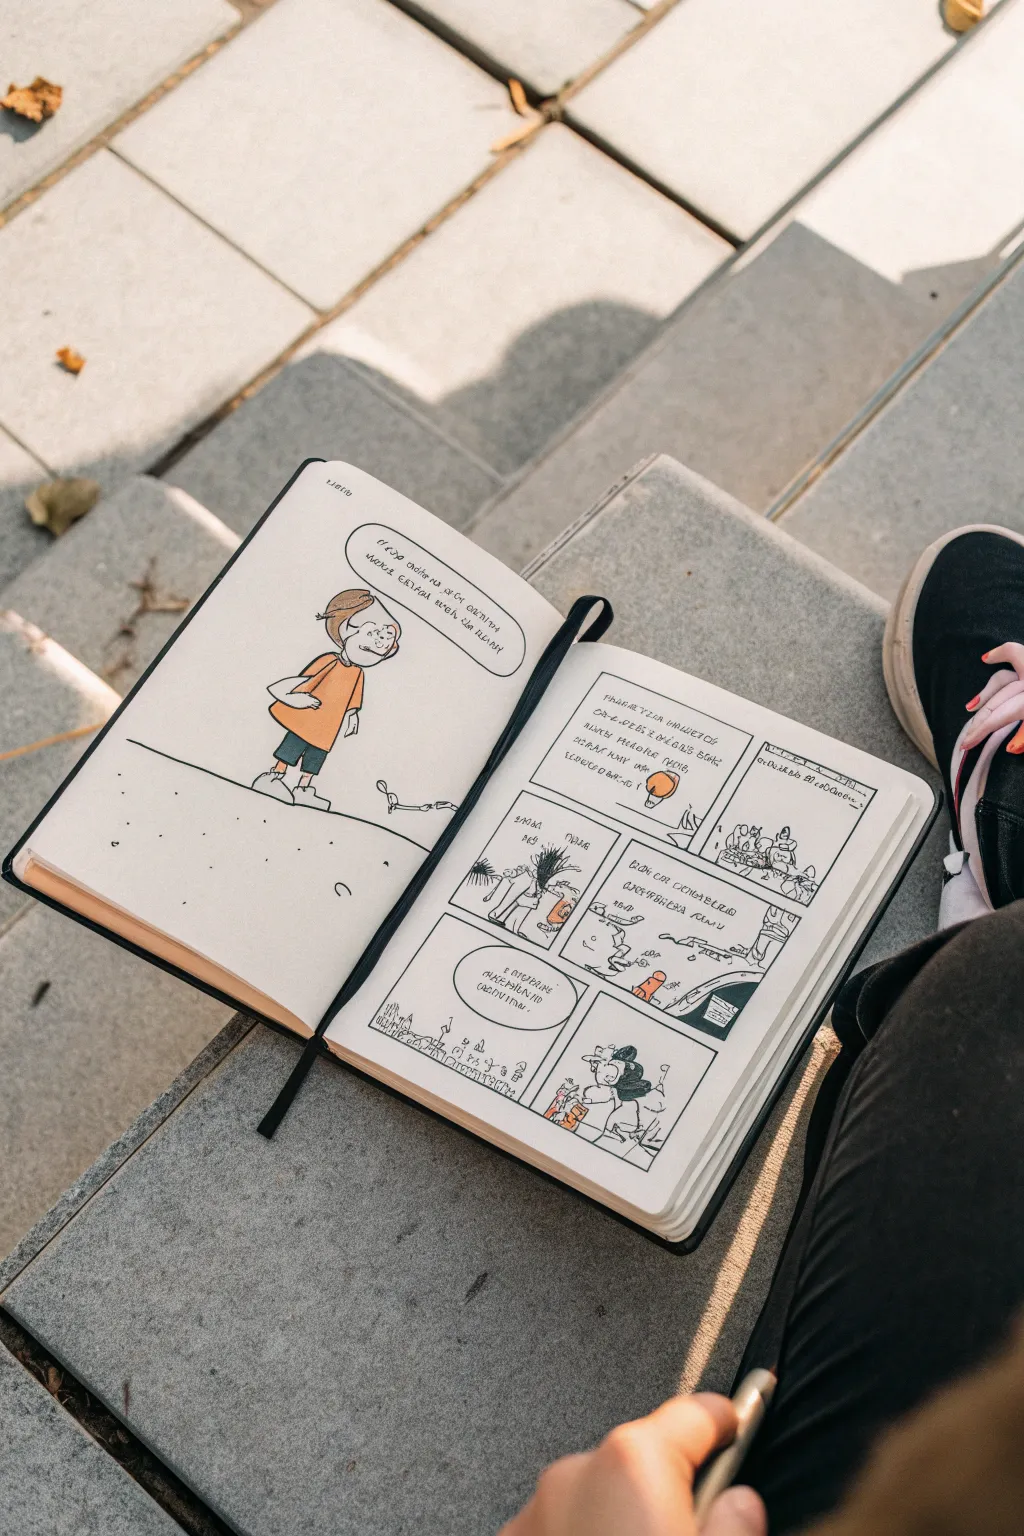

Turn a blank spread in your sketchbook into a complete narrative experience with this fun comic layout. You’ll create a full-page character portrait on one side that leads directly into a clear, panel-based story on the facing page, giving your characters room to breathe and act.
Step-by-Step
Materials
- Hardcover sketchbook (A5 or similar size)
- Black fineliner pens (various nib sizes like 0.3mm and 0.5mm)
- Pencil (HB or H for sketching)
- Eraser
- Ruler
- Colored pencils or alcohol markers (orange, light blue, skin tones)
Step 1: Setting the Stage
-
Plan the Layout:
Open your sketchbook to a fresh two-page spread. We will dedicate the left page entirely to a ‘splash page’ or character introduction, and the right page for the sequential panels. -
Draft the Grid:
On the right page, use your ruler and pencil to lightly draw a large rectangle that fills most of the page. Leave a consistent margin around the edges. -
Create the Three Rows:
Divide that large rectangle into three horizontal sections. The top row will be two panels, the middle will be three smaller panels, and the bottom row create two final panels. Keep your pencil lines very faint here so they are easy to adjust.
Smudge Prevention
Place a scrap piece of paper under your hand while drawing the right-side panels. This prevents your hand from smearing the fresh ink or pencil on the finished character portrait.
Step 2: Character Portrait
-
Sketch the Protagonist:
Move to the left page. Draw a large, simple cartoon figure standing on a horizon line. Start with a circle for the head and a simple rectangular body shape. -
Add Details:
Refine the character by adding short hair, a t-shirt, and shorts. Give them an expressive face—perhaps looking slightly confused or curious, as seen in the example. -
The Dialogue Bubble:
Draw a large, oval speech bubble floating above the character’s head. Make sure it’s big enough to hold a sentence or two of opening narration. -
Inking the Outline:
Take your thicker fineliner (0.5mm) and trace over your pencil lines. I like to use a confident, single stroke for the outline to give it a clean comic book feel. -
Adding Color Accents:
Use an orange marker or colored pencil to fill in the character’s shirt. Keep the coloring flat and simple. Use a light blue or teal for the shorts.
Interactive Story
Leave the last panel of the comic strip blank or just draw a ‘?’ inside it. Ask a friend to draw the ending or suggest what happens next to turn it into a collaborative game.
Step 3: Drawing the Story Panels
-
Developing the Narrative:
On the right page, sketch simple scenes inside your grid boxes. Start with an establishing shot in the top left panel showing where your character is located. -
Action Sequences:
Fill the middle row with small, quick actions. This is great for showing movement or a sudden realization. Keep the background details minimal to keep focus on the action. -
Drafting Text:
Lightly pencil in your speech bubbles and captions before you draw the final artwork to ensure the text fits comfortably. -
Inking the Panels:
Use your ruler and the thicker black pen to ink the panel borders first. This immediately makes the page look professional and tidy. -
Refining the Drawings:
Switch to a thinner 0.3mm pen for the details inside the panels. This line weight difference helps distinguish the frame of the comic from the art inside it. -
Lettering:
Carefully write your dialogue in all caps. Try to keep the letters uniform in size and centered within the bubbles. -
Final Erasure:
Once the ink is completely dry—wait at least five minutes to be safe—gently erase all the underlying pencil sketches.
Step 4: Finishing Touches
-
Spot Coloring:
Apply the same limited color palette to the panels. Use the orange only on key objects or the main character’s shirt to guide the viewer’s eye through the story. -
Horizon Line:
Go back to the left page and ensure the simple single line representing the ground extends fully across the page behind the character’s feet. -
Review and Sign:
Check for any stray pencil marks and sign your work in the bottom corner of the right page.
Now you have a professional-looking comic spread ready to be filled with endless adventures
Draw A Magical Portal That Opens Into Another World
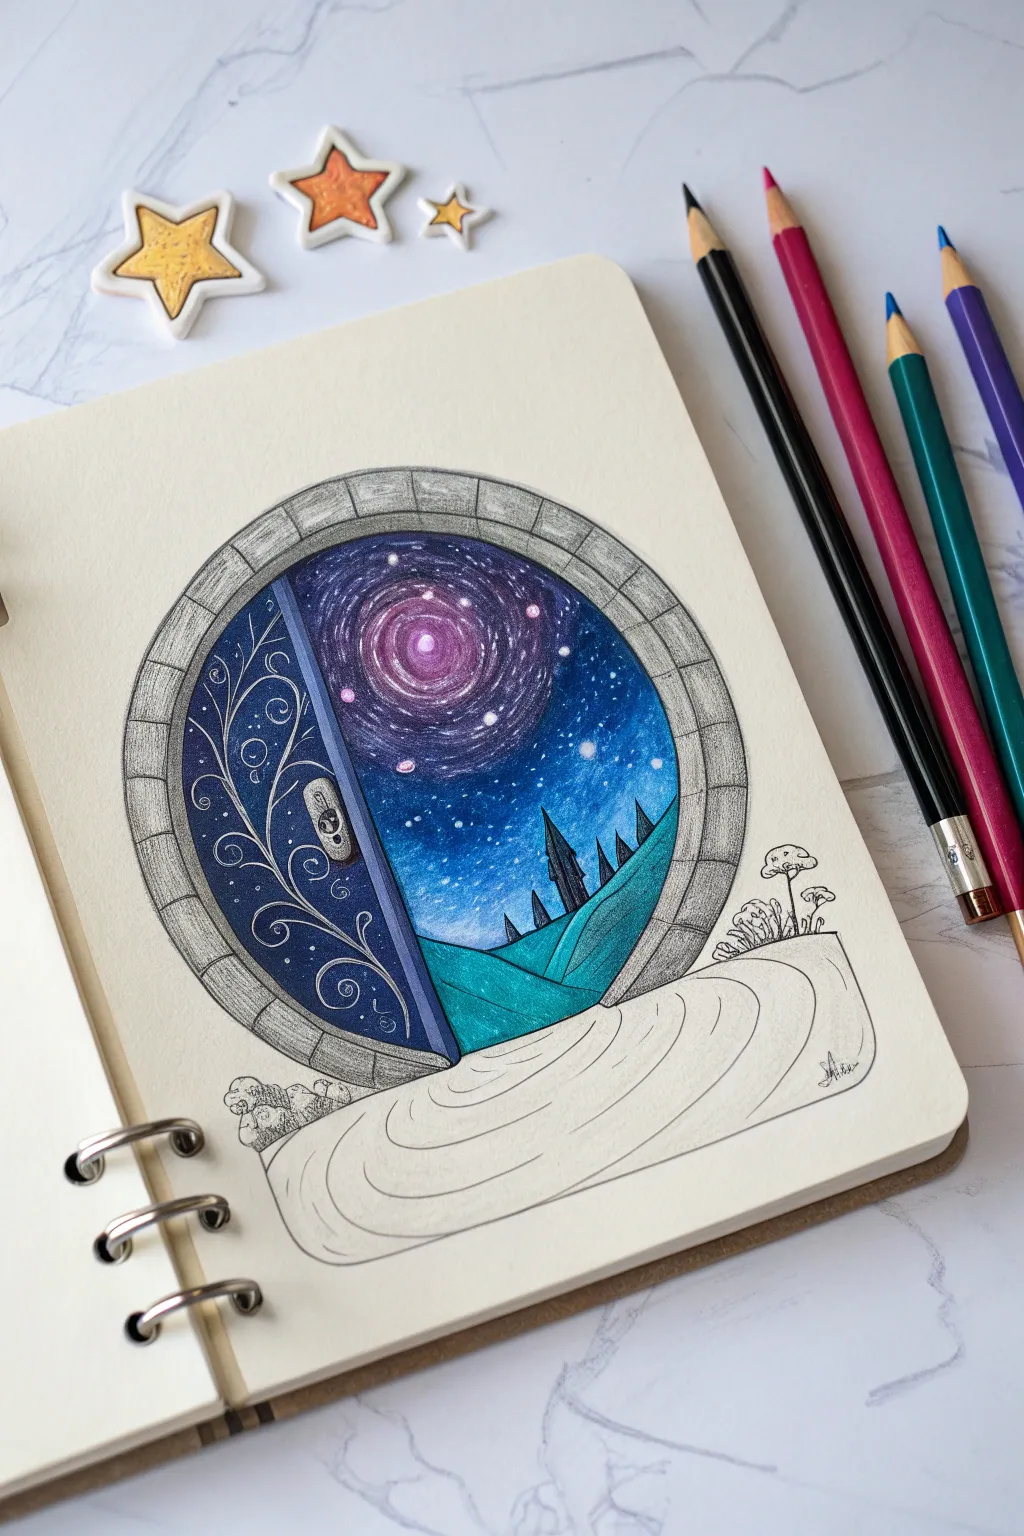
Step through an ordinary doorway into a cosmic wonderland with this imaginative drawing project. Using colored pencils, you’ll learn how to blend a vibrant galaxy sky and frame it within an ancient, mysterious stone archway.
How-To Guide
Materials
- Heavyweight sketchbook paper
- Pencil (HB or 2B)
- Fine liner pen (black, 0.1mm or 0.3mm)
- Colored pencils (black, dark blue, purple, magenta, pink, cyan, teal)
- White gel pen
- Compass or a round object to trace
- Eraser
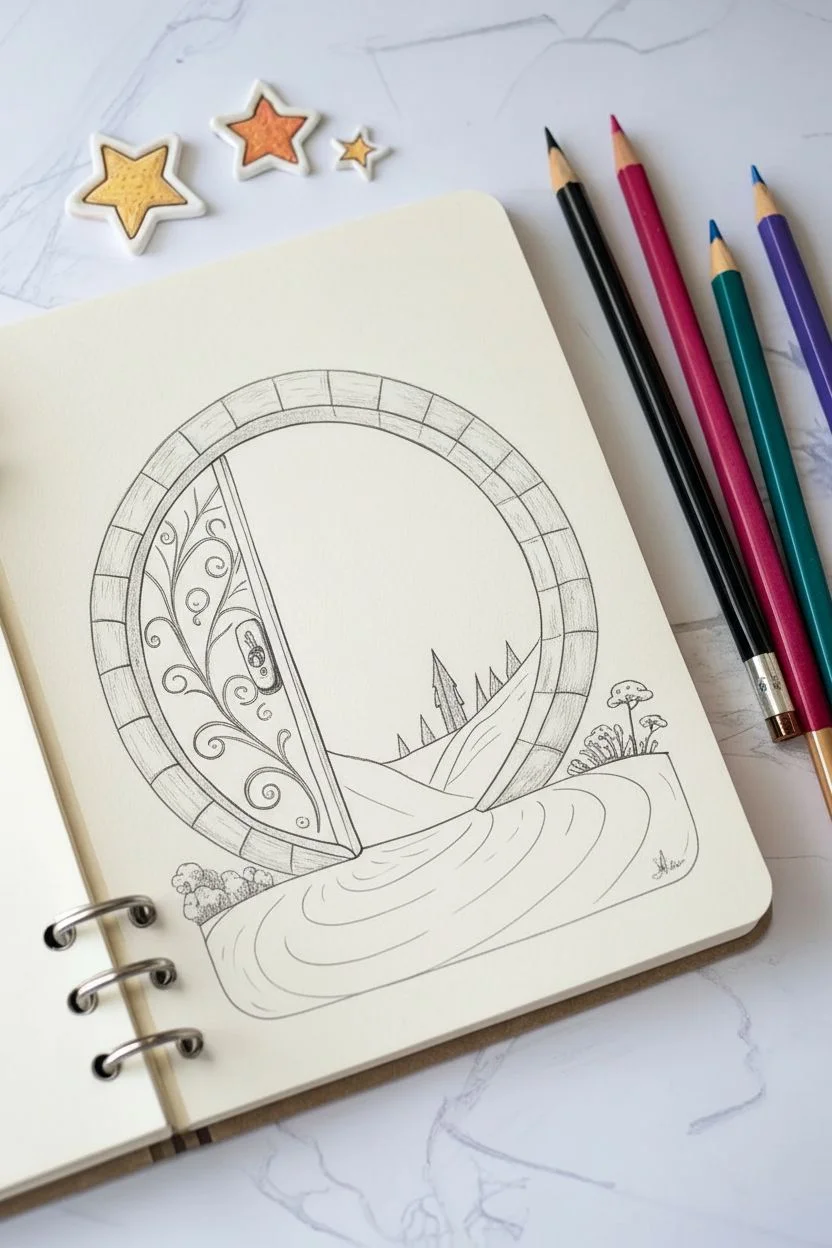
Step 1: Drafting the Outline
-
Draw the main circle:
Start by lightly sketching a large circle in the center of your page using a compass or by tracing a bowl. This will be the outer edge of your portal. -
Add the inner rim and door:
Draw a slightly smaller circle inside the first one to create the thickness of the stone frame. Then, draw a vertical line slightly off-center to mark the door opening. Angle the top and bottom of the door slightly inward to create a sense of perspective, showing the door is ajar. -
Detail the stonework:
Divide the circular frame into individual stone blocks by drawing small lines radiating from the center. Make them slightly uneven to give it an old, rustic look. -
Sketch the landscape:
Inside the open portal area, sketch rolling hills at the bottom and a few simple, pointy shapes for distant trees or castle spires. -
Ink the drawing:
Go over your pencil lines with a black fine liner pen. Ink the stones, the door frame, the landscape silhouette, and the decorative swirls on the door itself. Erase the pencil marks gently once the ink is dry.
Cosmic Blending Tip
To get that smooth galaxy look, layer your colored pencil strokes in small circles rather than back-and-forth lines. This fills the paper tooth evenly.
Step 2: Coloring the Cosmos
-
Start with the spiral center:
Focusing on the sky inside the portal, lightly shade a small spiral shape where the galaxy core will be using magenta and light pink pencils. -
Layer the deep space:
Surround your pink spiral with deep purple, blending outward into dark blue. Press lightly at first, layering the colors to build richness. -
Add the darkest blues:
Fill the rest of the sky area with your darkest blue and touches of black, especially near the top edges, to make the galaxy really pop. -
Blend the transitions:
Go back over the borders between colors with a lighter shade (like using purple over the blue-pink edge) to create a smooth, seamless gradient. -
Color the landscape:
For the alien terrain, use teal and cyan pencils. Shade the rolling hills, making the bottom of each hill slightly darker to show depth.
Step 3: Finishing Details
-
Color the door:
Color the wooden door inside the portal with a dark blue or indigo. Press harder around the edges and softer near the center to give it a slightly rounded appearance. -
Shade the stone frame:
Use a grey pencil to lightly shade the stone blocks. Add a little extra grey near the inner edges to create a 3D shadow effect. -
Create the stars:
Using your white gel pen, dot tiny distinct stars all over the galaxy sky. Tap gently for small stars and press harder for larger, closer stars. -
Add magical sparkles:
Draw a few larger ‘cross’ shaped glimmers with the white gel pen near the galaxy spiral and on the door handle to make it look enchanted. -
Ground the portal:
Sketch a few curved, flowing lines on the ground outside the portal with a pencil to suggest a path leading up to the magical entrance. -
Draw foreground elements:
Add small details like mushrooms or rocks near the base of the portal using your fine liner and a light touch of grey pencil to frame the bottom.
Level Up: Hidden Worlds
Change the scene inside! Instead of space, draw a sunny beach, a candy forest, or an underwater city to customize where your magic door leads.
Now you have a gateway to the stars right in your sketchbook


Have a question or want to share your own experience? I'd love to hear from you in the comments below!