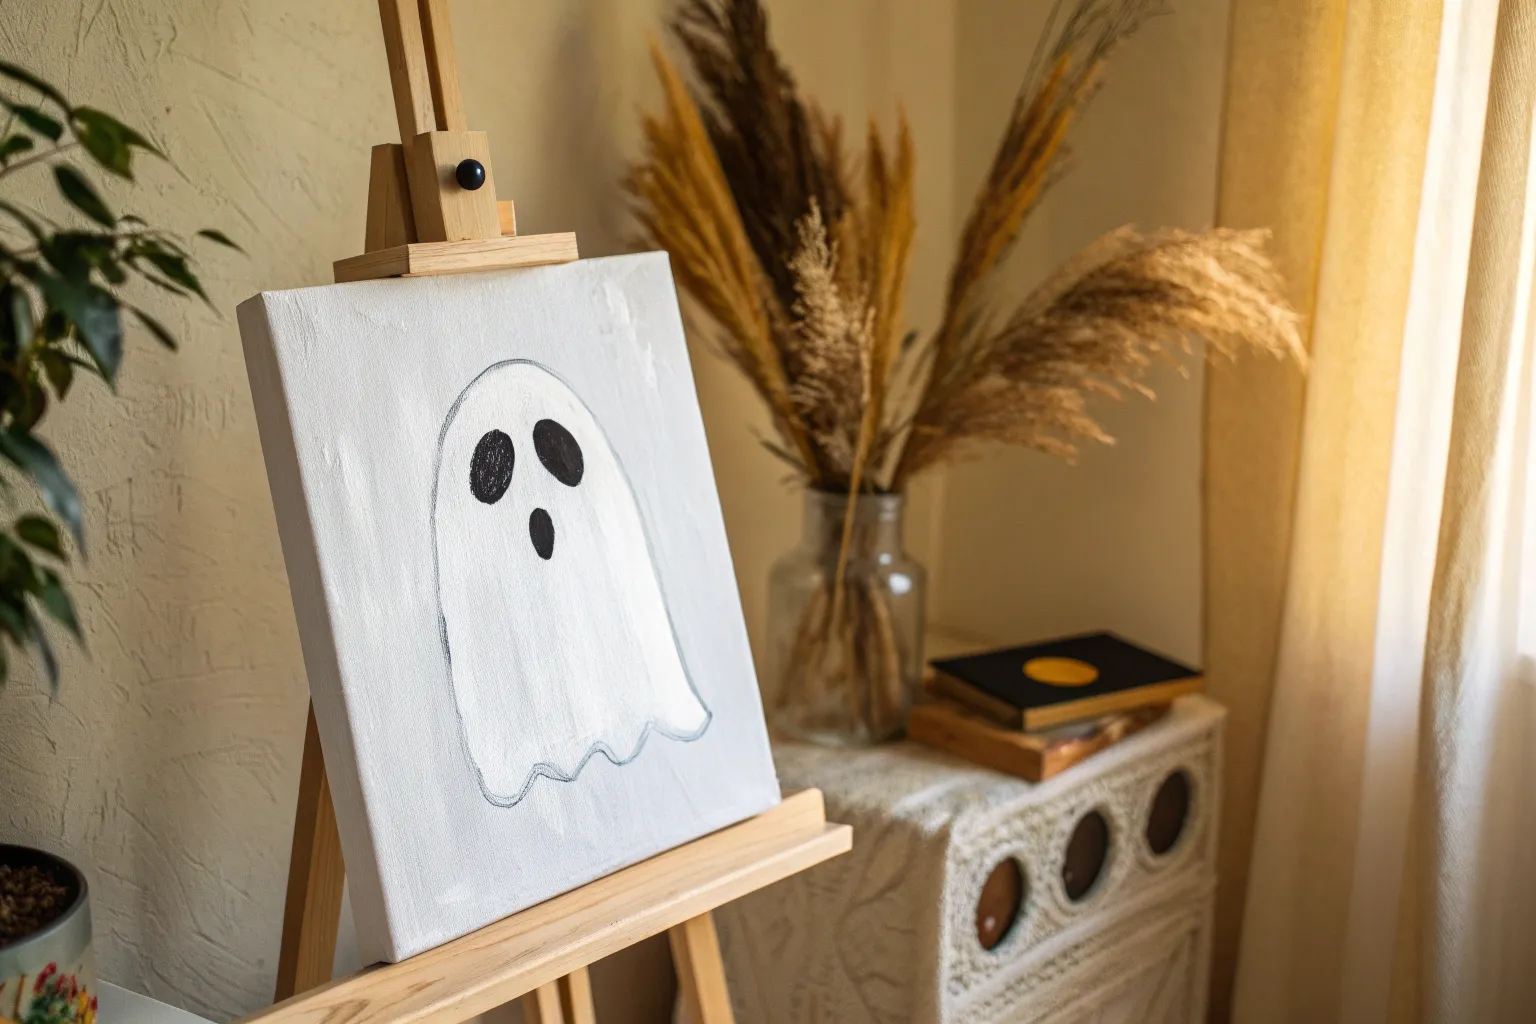
Whenever I’m craving a little thrill in the studio, I reach for high-contrast shadows and an eerie color palette—instant atmosphere, zero overthinking. Here are my favorite creepy painting ideas, starting with the classic spooks and slowly drifting into the weirder, more unsettling stuff.
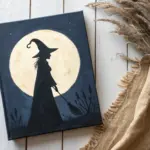
Classic Sheet Ghost in Moonlight
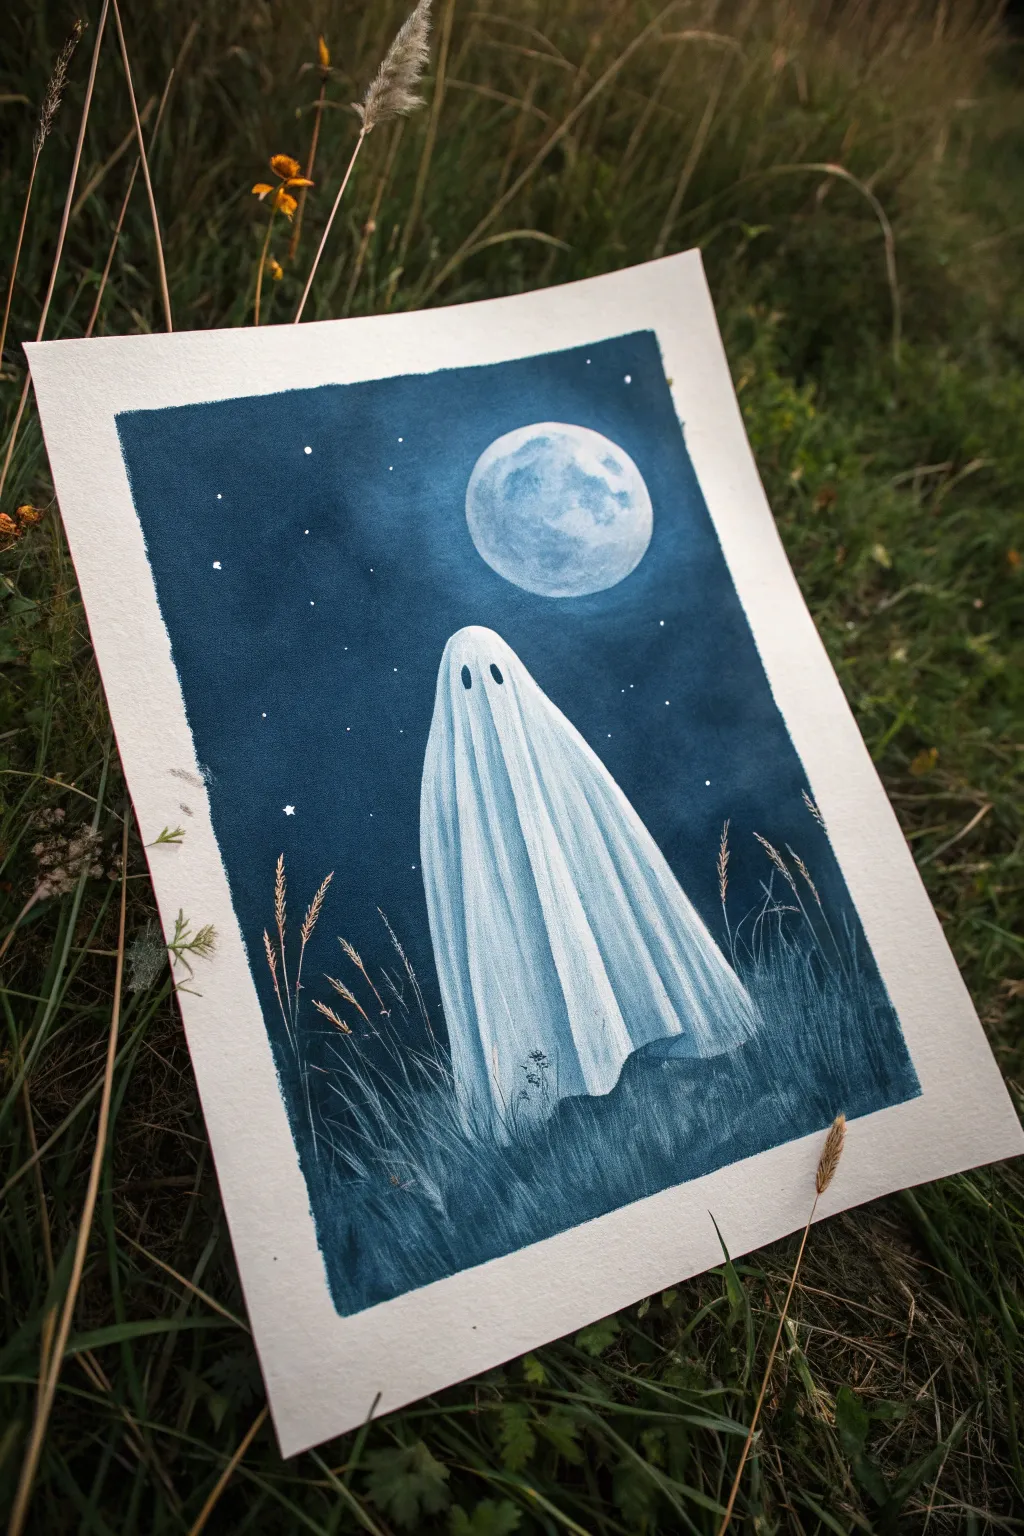
Capture the eerie charm of a classic sheet ghost wandering through a moonlit field with this monochromatic painting tutorial. Using shades of moody indigo and crisp white, you’ll learn to create glowing moonlight effects and translucent fabric textures.
Detailed Instructions
Materials
- Heavyweight watercolor paper or mixed media paper (cold press)
- Masking tape (for clean borders)
- Acrylic gouache or matte acrylic paints (Prussian Blue, Titanium White, Black)
- Flat shader brush (3/4 inch)
- Small round brush (size 2 or 4)
- Fine liner brush (size 0 or 00)
- Palette for mixing
- Cup of water and paper towels
Step 1: Setting the Scene
-
Tape your borders:
Start by taping down all four edges of your paper to a flat surface. This ensures a crisp, clean border when you finish and keeps the paper from buckling. -
Mix your night sky color:
Create a deep, rich midnight blue by mixing Prussian Blue with a tiny touch of Black. You want a color that is dark but clearly blue, not just black. -
Paint the background gradient:
Using the flat shader brush, paint the entire background. Start with the darkest mix at the top corners and edges. As you move toward the center where the moon will be, mix in a tiny bit of white to lighting the blue slightly, creating a subtle vignette effect. -
Let it dry completely:
Allow the background layer to dry fully. Acrylic gouache dries quickly, usually within 10-15 minutes, but ensure it’s cool to the touch before proceeding.
Step 2: The Moon and Grass
-
Outline the moon:
Mix a pale blue-white (Titanium White with a speck of your blue mix). Using a round brush, paint a circle in the upper right quadrant. It doesn’t need to be geometrically perfect; a slight irregularity adds character. -
Add moon texture:
While the moon is still slightly damp, dab in pure white highlights and slightly darker grey-blue shadows to create craters and surface texture. -
Start the grass layer:
Switch to a darker blue shade (your original background color). Using the tip of your round brush, flick upward strokes from the bottom of the page to create the grassy field. Vary the height and direction. -
Create depth in the field:
Mix a slightly lighter, hazier blue. Add a second layer of grass strokes behind and amongst the dark ones. This variety in value creates the illusion of a thick, moonlit meadow.
Uneven Moon?
If your moon circle looks lopsided, don’t overwork it trying to fix the edge. Instead, use the dark sky color to carefully ‘cut in’ and reshape the exterior of the circle
Step 3: Painting the Ghost
-
Draft the ghost shape:
Using a very dilute white paint or a white colored pencil, lightly sketch the outline of the ghost. It should be tall and draped, wider at the bottom like a bell. -
Base coat the ghost:
Fill in the ghost shape with a mix of white and a tiny drop of blue. You don’t want pure white yet; start with a very pale, cool grey-blue so you can add brighter highlights later. -
Define the folds:
Using a liner brush and a diluted mid-tone blue, paint vertical lines to represent the folds of the sheet. I find it helpful to start these lines from the ‘head’ area and let them flow loosely down to the hem. -
Add shadows:
Deepen the shadows between the folds. Use a darker blue glaze (paint thinned with water) to darken the recessed areas of the fabric, giving the ghost volume and dimension. -
Highlight the peaks:
With pure Titanium White and a dry-brush technique, highlight the raised parts of the folds (the ‘peaks’ of the fabric) that are catching the moonlight. -
Paint the eyes:
Using your smallest detail brush and pure black paint, add two tall oval shapes for the eyes. Place them fairly high up on the head for that classic spooky look. -
Add transparency:
To make the ghost look settled in the scene, lightly paint a few blades of grass overlapping the bottom hem of the ghost using the background blue color.
Level Up: Glow Effect
Make the moon glow by dry-brushing a very faint, translucent ring of pale blue-white around the moon’s edge, fading into the dark sky
Step 4: Final Details
-
Add tall weeds:
Mix a light beige or pale straw color. Use your finest liner brush to add thin, spindly stalks of dry grass or wheat poking up in the foreground, catching the light. -
Paint the stars:
Dip a toothbrush or stiff brush into diluted white paint and flick it carefully over the sky area to create a spray of stars. You can also manually dot a few larger stars with a liner brush. -
Peel the tape:
Once the painting is 100% dry, slowly peel away the masking tape at a 45-degree angle away from the painting to reveal your clean edges.
Now you have a hauntingly beautiful piece of spooky art to display on your shelf


Haunted House With Lit Windows
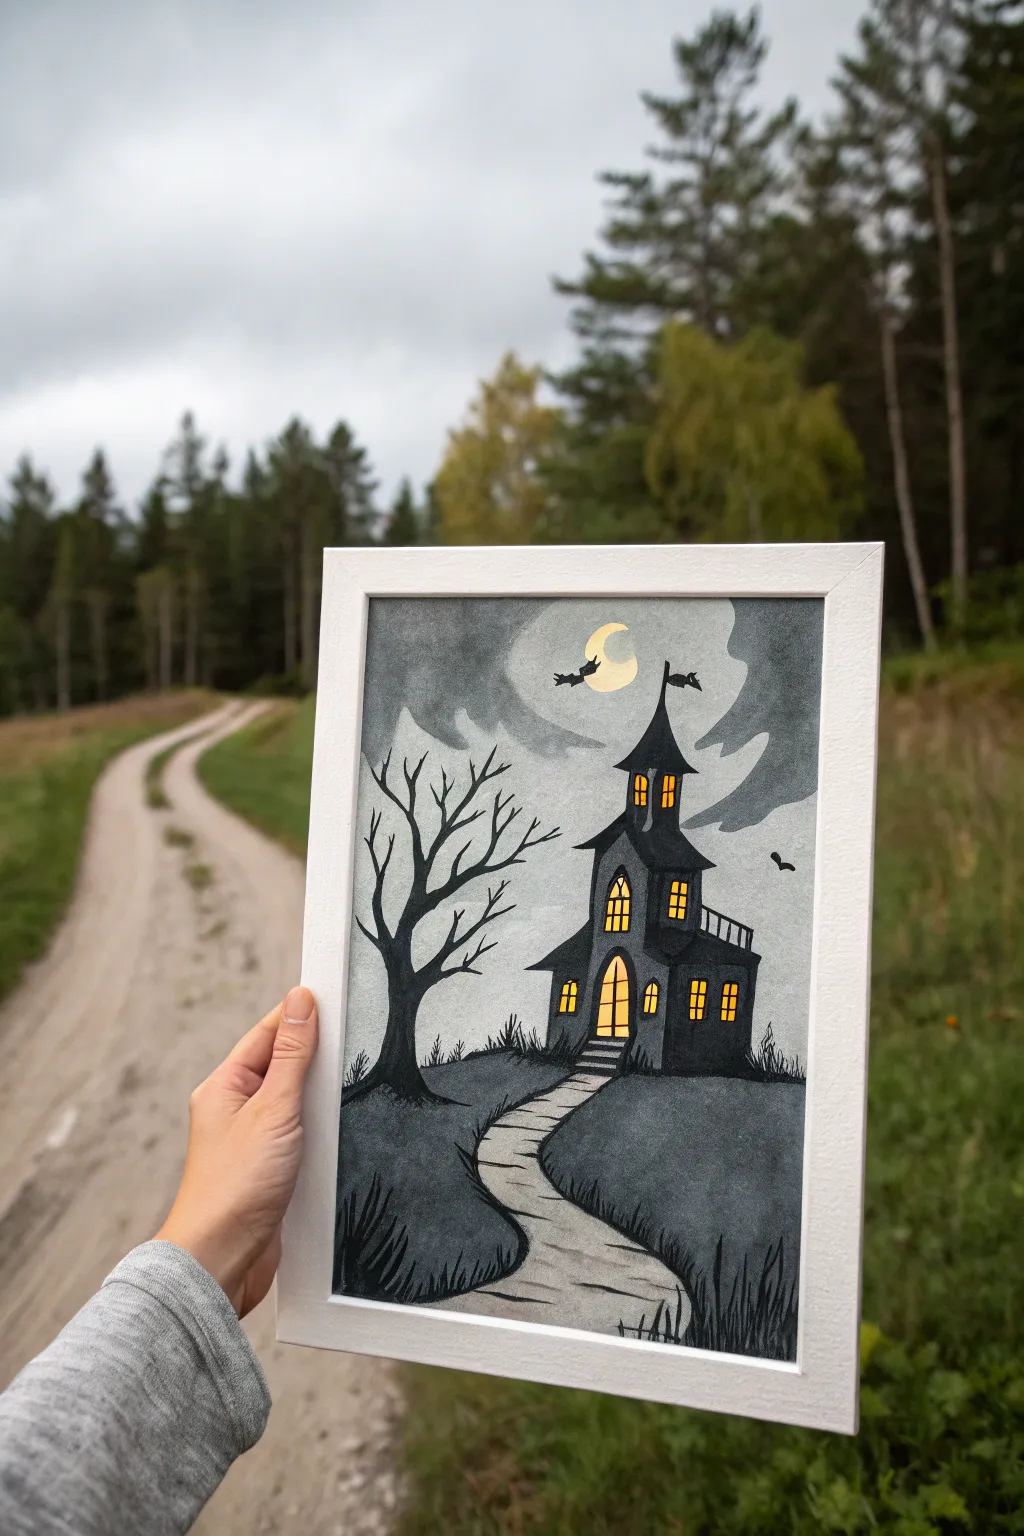
This atmospheric watercolor painting captures a classic haunted house silhouette set against a brooding gray sky. Its most striking feature is the warm, inviting glow emanating from the windows, creating a perfect eerie contrast for Halloween décor.
Step-by-Step Guide
Materials
- Cold press watercolor paper (A4 or 8×10)
- Black watercolor or gouache paint
- Yellow and orange watercolor or gouache paint
- White gouache or white gel pen
- Graphite pencil (HB) and eraser
- Round brushes (flats for large areas, fine tips for details)
- Masking tape
- Palettes for mixing grays
Step 1: Planning and Sketching
-
Secure the paper:
Tape down all four edges of your watercolor paper to a board. This keeps the paper flat when wet and creates that crisp white border seen in the final piece. -
Draft the horizon:
Lightly sketch a curved horizon line about one-third up from the bottom of the page. This will separate the dark ground from the stormy sky. -
Outline the winding path:
Draw a winding S-shaped path leading from the bottom foreground up to where the house will sit. Make it wider at the bottom and narrower as it recedes to create depth. -
Sketch the manor:
Draw the silhouette of the house. Include a main central tower with a pointed roof, a small side annex, and a porch. Don’t worry about perfect architectural lines; a little wonkiness adds character. -
Add nature elements:
Sketch a gnarled, bare tree on the left side with jagged branches reaching upward. Add small grass tufts and the moon shape in the sky.
Fixing Smudged Windows
If black paint accidentally bleeds into your yellow windows, let it dry completely. Then, paint over the mistake with opaque white gouache, let that dry, and re-apply the yellow on top.
Step 2: Painting the Atmosphere
-
Paint the glowing windows:
Before touching any dark colors, fill in the window shapes and the moon with bright yellow. Drop a tiny bit of orange into the bottom of the windows while wet to simulate warm candlelight. -
Create the grey wash:
Mix a watery, pale gray wash. Paint the sky area, carefully working around the moon and the house silhouette. Keep the edges soft and uneven to look like rolling clouds. -
Darken the sky:
While the first layer is still slightly damp, drop in concentrated dark gray or diluted black into the upper corners and around the moon to create cloudy depth. -
Paint the moody clouds:
Use a darker grey to paint distinct cloud shapes swirling around the house tower. I find that lifting a little paint with a dry brush helps create misty edges.
Textured Fog Effect
For a spookier vibe, lightly dab a crumpled paper towel onto the wet grey sky paint. This lifts pigment unevenly, creating a ghost-like, misty texture perfect for a haunted scene.
Step 3: Building the Silhouette
-
Fill the ground:
Mix a dark charcoal grey. Paint the ground area on either side of the path. Use vertical flicking strokes near the bottom to suggest tall, dry grass. -
Paint the path:
Use a very pale, watery gray for the path itself. Once dry, add thin horizontal lines with a finer brush to mimic flagstones or steps. -
Block in the house:
Using black gouache or very concentrated watercolor, fill in the house shape. Be extremely careful around your yellow windows—you want sharp frames. -
Detail the tree:
Use your finest brush and black paint to fill in the tree silhouette. Paint the trunk thick at the bottom and let the branches taper off into needle-thin points.
Step 4: Final Details
-
Refine the window frames:
Once the yellow and black areas are totally dry, use a fine liner brush or a black pen to draw the cross-bars (muntins) over the yellow window spaces. -
Add flying bats:
Paint small, V-shaped bat silhouettes near the moon and the tower’s peak using solid black. -
Highlight the roof:
With white gouache or a gel pen, add tiny, subtle highlights on one side of the roof peaks and the tree trunk to mimic moonlight hitting the surfaces. -
Remove the tape:
Wait until the painting represents bone-dry paper. Peel the tape away slowly at a 45-degree angle to reveal your clean white border.
Frame your spooky masterpiece in a simple white frame to really make those dark tones pop next Halloween


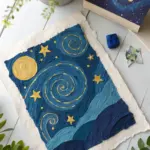
Bats Crossing a Full Moon
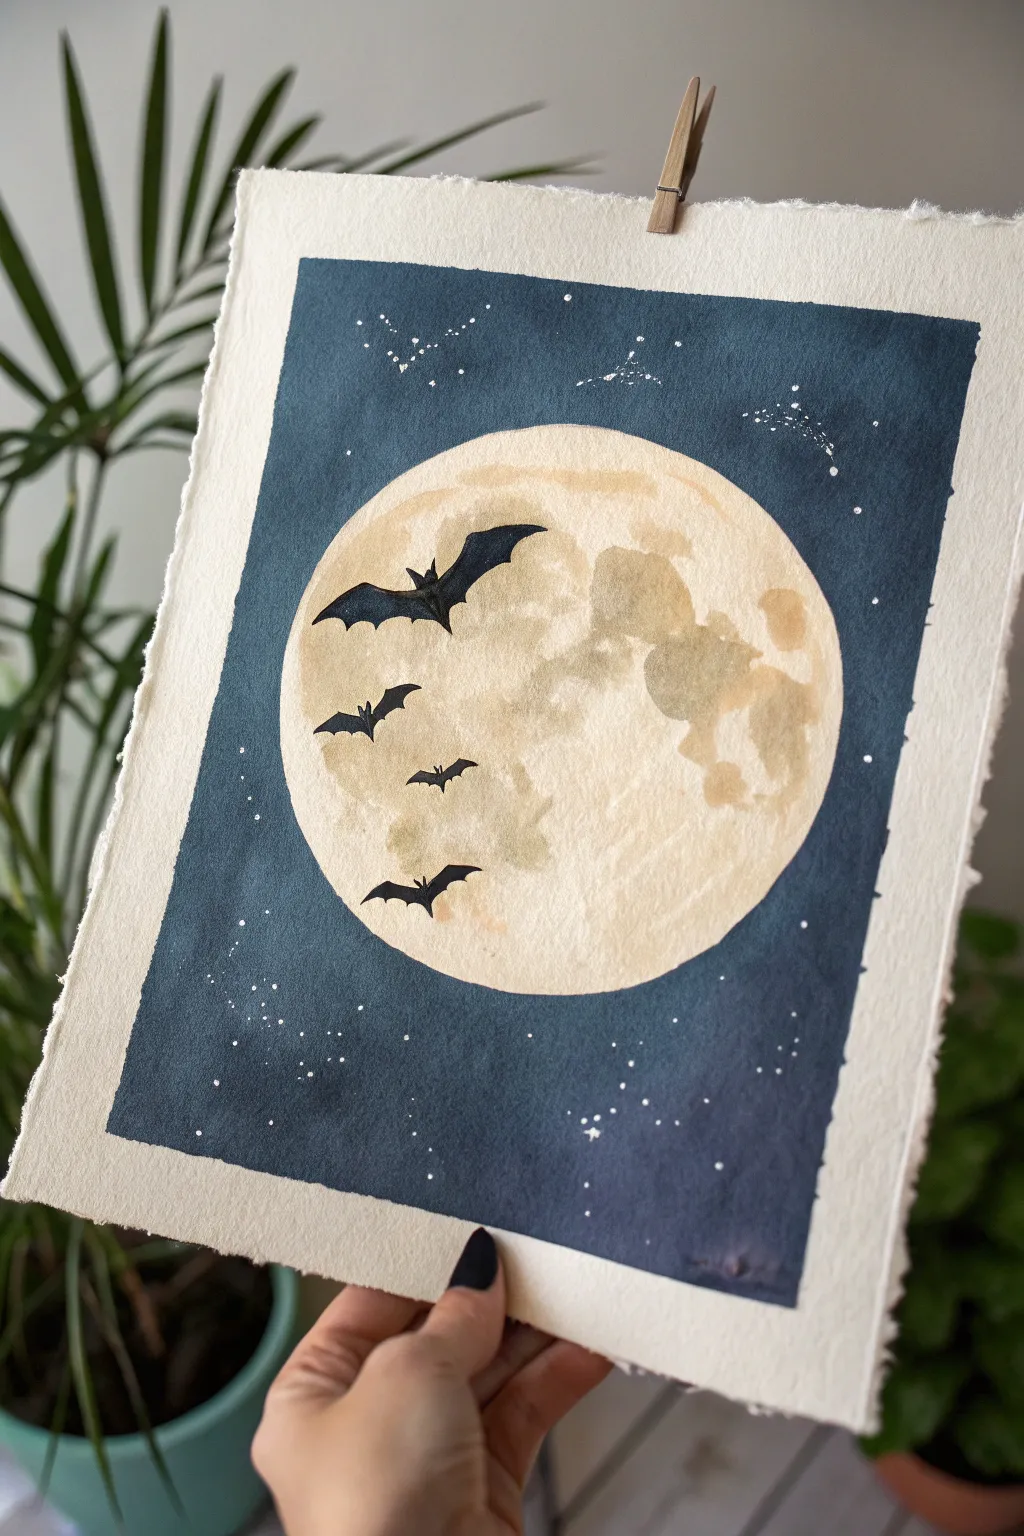
Capture the eerie beauty of a full moon framed by a dark night sky with this striking watercolor project. By utilizing negative space and sharp silhouettes, you’ll create a moody scene perfect for spooky décor.
Detailed Instructions
Materials
- Cold press watercolor paper (deckle edge optional)
- Watercolor paints (Indigo, Payne’s Grey, Burnt Sienna, Yellow Ochre)
- Black ink or black gouache
- Pencil and circular object (for tracing)
- Masking fluid
- Large round brush (approx. size 8-10)
- Small liner or detail brush (size 0-1)
- White gel pen or whitewash gouache
Step 1: Planning the Celestial Scene
-
Define the Moon:
Begin by placing a circular object, like a small saucer or roll of tape, slightly off-center in the middle of your paper and tracing it lightly with a pencil. Don’t press too hard, as you want the line to disappear later. -
Mask the Moon:
To keep your moon perfectly crisp while painting the sky, apply a generous layer of masking fluid over the entire circle. I like to use an old brush for this as the fluid can ruin bristles. -
Add Stars:
Using the tip of a toothpick or a fine stylus dipped in masking fluid, dot random specks across the background area to create preserved white stars later on. -
Let it Dry:
Allow the masking fluid to dry completely. It should change color slightly and feel tacky but firm to the touch.
Uneven Background?
If your dark sky looks streaky, re-wet the entire background area and charge in more pigment. Watercolors dry lighter, so a second layer often helps smooth it out.
Step 2: Painting the Night Sky
-
Prepare the Dark Wash:
Mix a large amount of deep blue paint. A combination of Indigo and Payne’s Grey works beautifully to achieve that midnight hue. -
Apply the Rectangular Frame:
Using your large round brush, paint a rectangular block of color around your masked moon, leaving a rough, clear border of raw paper around the edge. Don’t worry about perfect straight lines. -
Deepen the Color:
While the first layer is still wet, drop in more concentrated Indigo ink or paint near the corners and edges to create depth and a vignetted look. -
Wait for Drying:
Let this dark background layer dry completely. If you peel the masking fluid too early, you risk smudging blue paint into your moon.
Step 3: Creating the Textured Moon
-
Reveal the Circle:
Gently rub your finger over the dried masking fluid to peel it away, revealing the stark white paper underneath. -
Mix Moon Tones:
Prepare a very watery mix of Yellow Ochre and a touch of Burnt Sienna. You want pale, tea-stained colors, not bright yellows. -
Paint the Craters:
Wet the moon circle with clean water first. Then, drop your pale yellow-brown mix onto the wet paper in random blotches to suggest craters and lunar seas. -
Soften Edges:
While the moon is damp, use a clean, slightly thirsty brush to lift up some pigment, creating soft highlights and varied texture across the surface.
Add Sparkle
Mix a tiny bit of iridescent medium or metallic watercolor into your moon craters while they are still wet for a subtle, magical glow when caught in the light.
Step 4: Adding Bats and Details
-
Sketch the Bats:
Once the moon is fully dry, lightly sketch four bat outlines flying across interpretation. Vary their sizes to create a sense of distance. -
Fill the Silhouettes:
Switch to your smallest detail brush and load it with opaque black ink or gouache. Carefully fill in your bat sketches, ensuring the wing tips are sharp. -
Refine the sky:
If your original masked stars aren’t popping enough, use a white gel pen or a small dot of white gouache to add a few more prominent constellations to the blue background. -
Final Touches:
Check the edges of your rectangular background. If you want a more distinct starry effect, flick a tiny amount of white paint near the top right corner.
Now step back and admire how the stark silhouettes bring your moonlit night to life


Distorted Screaming Face Close-Up
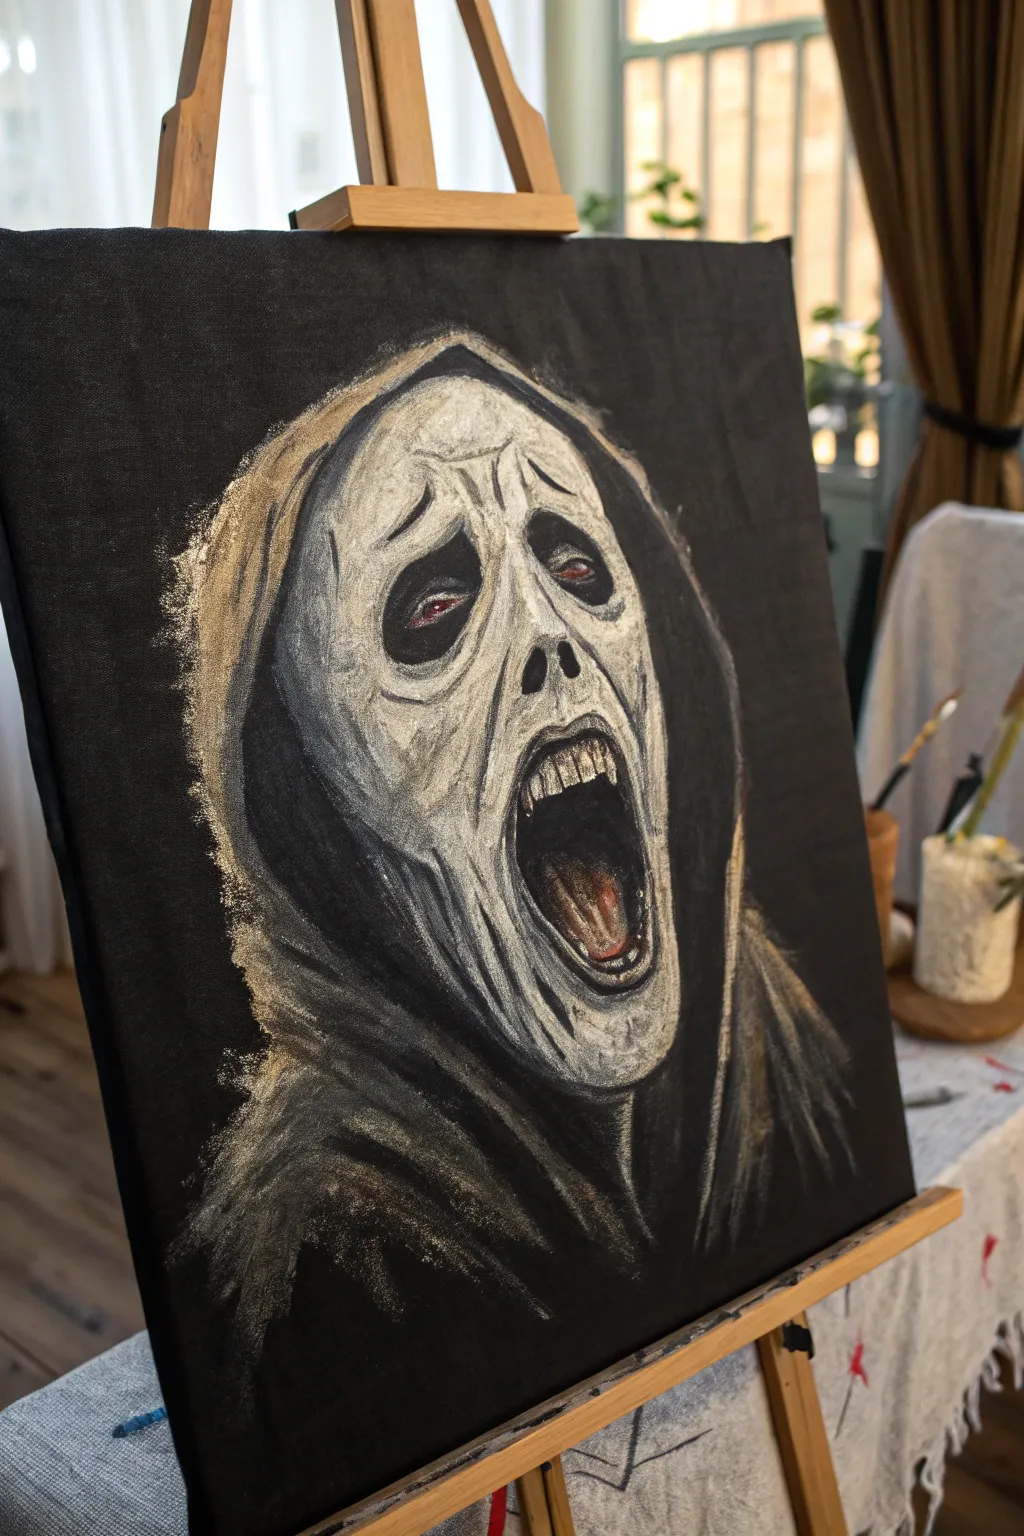
Capture the iconic terror of a classic horror figure with this striking acrylic painting on a black canvas. The intense contrast between the stark white mask and the shadowy void creates a dramatic, screamer-worthy masterpiece.
Step-by-Step
Materials
- Stretched canvas (black primed or painted black)
- White charcoal pencil or chalk
- Heavy body acrylic paints (Titanium White, Mars Black, Unbleached Titanium, Raw Umber, Cadmium Red)
- Flat brushes (various sizes)
- Filbert brush (medium)
- Fine detail liner brush
- Palette knife
- Water bonding agent or spray bottle (optional)
Step 1: Laying the Ghostly Foundation
-
Prepare the Void:
Begin with a fully black canvas. If you didn’t buy a black gessoed canvas, apply two coats of Mars Black acrylic to a standard white canvas, allowing complete drying between coats to ensure a solid, light-absorbing background. -
Map the Scream:
Using a white charcoal pencil or a piece of chalk, lightly sketch the elongated oval shape of the face in the center. Don’t worry about perfection; the distorted nature helps the creepy vibe. -
Define the Features:
Sketch two large, drooping teardrop shapes for the eye sockets. Add two small vertical slits for the nose and a distinctively large, elongated oval for the open screaming mouth. -
Outline the Hood:
Draw the contours of the hood draping around the face. Keep the lines loose and flowing to mimic heavy fabric, ensuring the hood shape tapers off into the darkness at the bottom.
Dry Brush Drama
Don’t wet your brush for the hood highlights. Use very little paint on a dry brush to create that scratchy, fabric texture.
Step 2: Building the Form
-
Block in Base Values:
Mix a medium grey using Titanium White and a touch of Mars Black. Use a medium filbert brush to fill in the mask area, avoiding the eyes, nose, and mouth cavities. This doesn’t need to be solid opaque; letting some black show through adds texture. -
Establish the Deepest Shadows:
Switch to pure Mars Black. Refine the shapes of the eye sockets, nose holes, and the gaping mouth. Make sure the edges are crisp where the mask meets these voids. -
First Highlight Layer:
Load a flat brush with Unbleached Titanium (a warm, creamy white). Apply broad, downward strokes on the forehead and cheekbones to start building the 3D form. -
Draping the Fabric:
For the hood, use a dry-brush technique with a dark grey mix. Drag the brush lightly over the black canvas around the face to suggest the texture of rough cloth catching the light.
Step 3: Creating Texture and Depth
-
Sculpting the Expression:
Using a smaller brush, add forehead wrinkles and worry lines around the eyes using a mix of Raw Umber and dark grey. These lines should curve downward to emphasize the mournful, terrified expression. -
Adding the Teeth:
Inside the mouth, paint the upper row of teeth using Titanium White dirty with a little Umber. Keep them slightly irregular and not perfectly pearly white for a more realistic, gritty look. -
Painting the Tongue:
Mix Cadmium Red with a bit of Raw Umber to create a dried-blood color. Paint the tongue sitting low in the mouth, adding a touch of white highlight to make it look wet. -
Intensifying the Eyes:
Deep within the black eye sockets, add barely-visible crescents of dark red. This subtle detail gives a menacing glow without being overly cartoonish. -
Brightest Highlights:
I prefer to use a palette knife or a stiff bristled brush here. Apply pure Titanium White to the highest points: the brow ridge, the bridge of the nose, and the edges of the mouth opening.
Make it Glow
Mix a tiny amount of fluorescent paint into your white highlights. Under a blacklight, the face will eerily hover in the dark.
Step 4: Final Haunting Touches
-
Distressing the Edges:
Take a dry, scruffy brush with a light grey-gold mix. Vigorously scumble the edges of the hood where it meets the black background to create a frayed, spectral energy. -
Refining the Cracks:
Use your fine liner brush with watered-down black paint to sharpen the cracks and wrinkles on the face, giving the mask a worn, aged appearance. -
Adding Spatter:
Flick a tiny amount of watered-down white or light grey paint onto the lower fabric area to suggest dust or old age. -
Final Contrast Check:
Step back and evaluate the values. If the mask looks too flat, add more pure white to the highlights and re-blacken the mouth void to ensure it looks like an endless pit.
Hang your new terrifying portrait in a dimly lit hallway to give your guests a proper fright


Have a question or want to share your own experience? I'd love to hear from you in the comments below!