Cute acrylic paintings are my favorite kind of project because they’re quick, forgiving, and instantly mood-boosting. If you’re craving soft colors, simple shapes, and that cozy “I made this!” feeling, these ideas will keep your brush happily busy.
Pastel Sky With a Smiling Moon
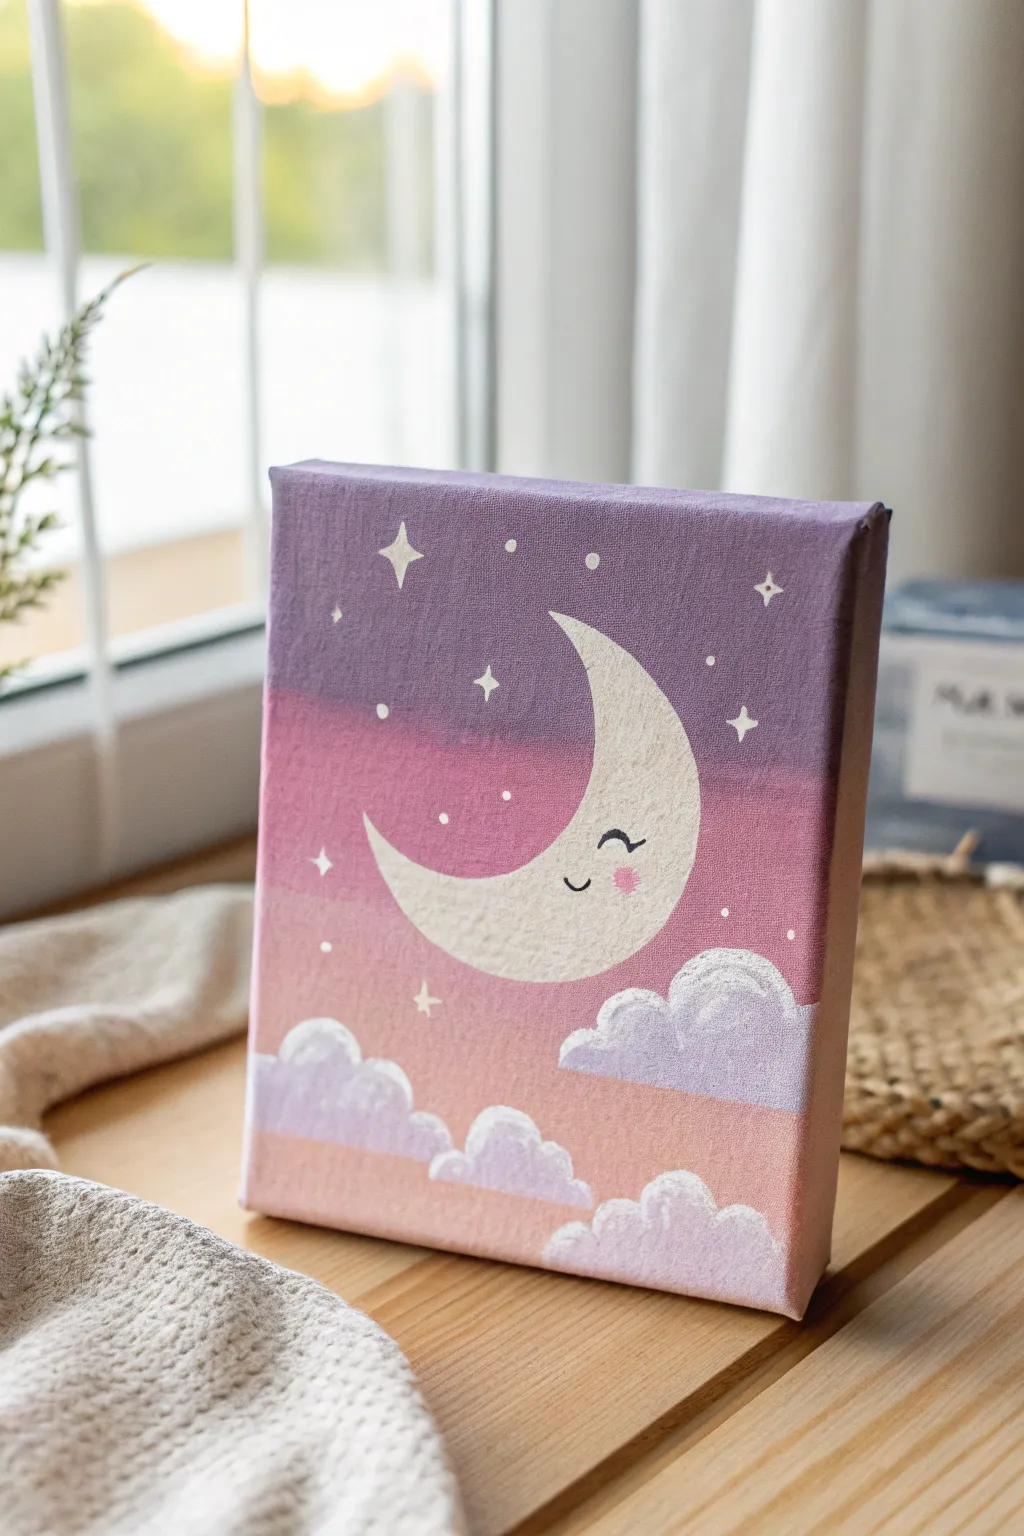
Bring the night sky into your room with this soft and soothing canvas art featuring a gentle crescent moon. The calming gradient background and fluffy clouds make it a perfect piece for a nursery or cozy reading corner.
Detailed Instructions
Materials
- Small stretched canvas (square or rectangular)
- Acrylic paints: Lavender/Purple, Deep Pink, Light Peach, Titanium White, Black
- Flat shader brush (medium size)
- Small round detail brush
- Pencil for sketching
- Cup of water and paper towels
- Palette or paper plate
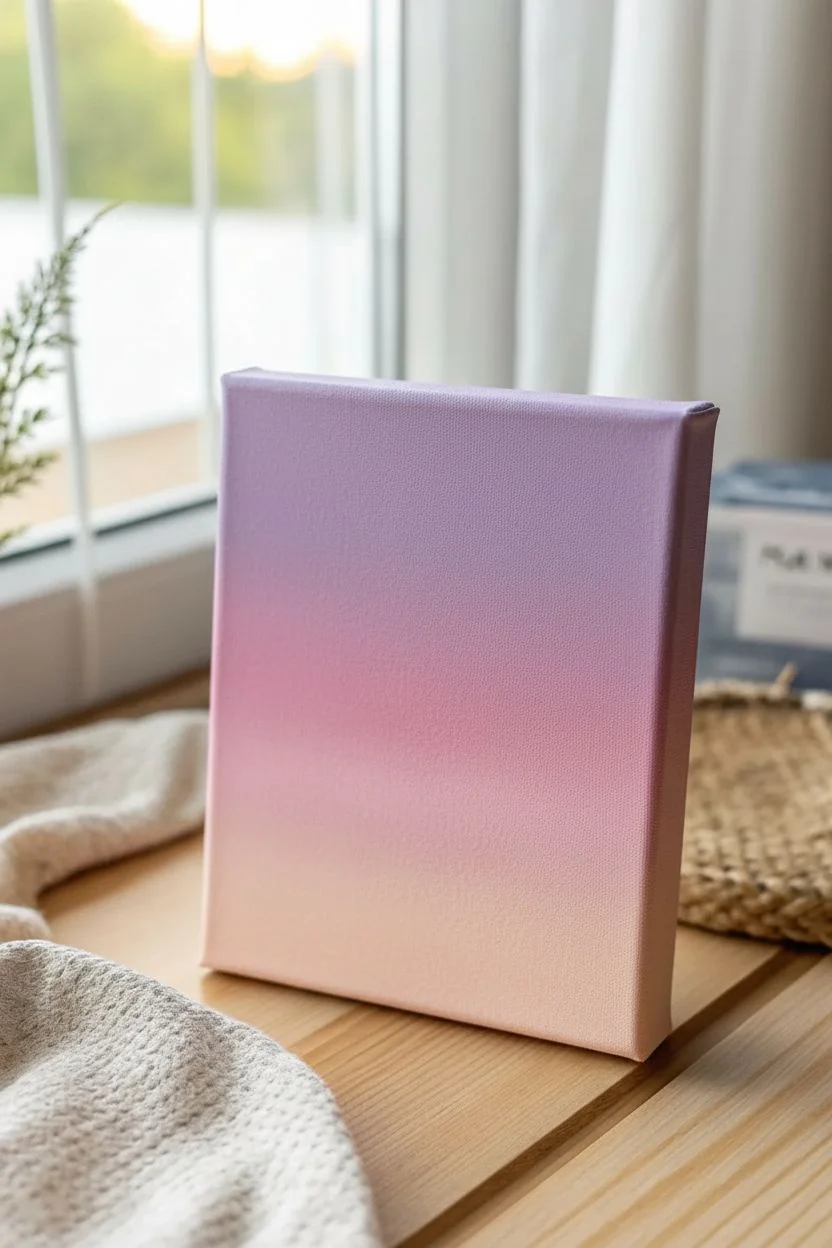
Step 1: Creating the Ombré Sky
-
Mix your colors:
Before you start, prepare three main gradient colors on your palette: a soft lavender purple, a medium dusty pink, and a light peach. You may need to mix white into your tube colors to achieve that pastel, chalky finish. -
Paint the top section:
Using your flat shader brush, apply the lavender paint to the top third of the canvas. Don’t forget to paint the sides of the canvas as well for a polished, finished look. -
Paint the middle section:
Clean your brush, then apply the dusty pink paint to the middle third of the canvas. While the paint is still wet where the pink meets the purple, gently sweep your brush back and forth horizontally to blend them into a seamless transition. -
Finish the bottom gradient:
Apply the light peach color to the bottom third. Use the same horizontal blending technique where the peach meets the pink to soften the line. Let the background dry completely before moving on.
Smooth Blends
Work quickly when painting the background gradient. Acrylic dries fast, and the colors blend best when both adjacent strips of paint are still wet.
Step 2: Painting the Moon
-
Sketch the outline:
Lightly draw a large crescent shape in the center of the canvas with a pencil. Aim for a chubby, rounded shape rather than a thin sliver to make it look cuter. -
Fill in the base:
Using a clean brush, fill in the moon shape with Titanium White. You might need two coats to ensure the background gradient doesn’t show through. -
Add warmth to the moon:
Mix a tiny dot of peach or yellow into your white paint to create an imperceptibly warm off-white. Paint a second layer over the moon with this shade to give it a soft glow. -
Paint the face details:
Once the moon is fully dry, use your smallest round brush or a very fine marker to paint a small, curved U-shape for the closed eye and a smaller curve for the smile. -
Add the eyelashes:
Carefully delicately flick two tiny lines outward from the closed eyelid to create the lashes. -
Give it a blush:
Mix a small amount of pink with white. Dab a small circle on the cheek area right under the eye to create a rosy blush.
Sparkle Effect
Once the painting is totally dry, add a layer of clear glitter glaze over the white moon or the clouds to make the artwork shimmer in the light.
Step 3: Adding Clouds and Stars
-
Start the clouds:
Pick up pure white paint on a round brush. Dab rounded, fluffy shapes along the bottom edge of the canvas, overlapping some over the peach background. -
Create depth in clouds:
While the white is still wet, pick up a tiny bit of your leftover lavender paint. Lightly blend it into the bottom curves of the clouds to create soft shadows and volume. -
Refine the cloud tops:
Go back over the top edges of the fluffy shapes with pure white to make them pop against the sky. -
Paint four-point stars:
Using your smallest brush and white paint, create several four-pointed stars in the purple section of the sky. Draw a small cross, then curve the lines inward slightly to connect them. -
Add twinkling dots:
Dip the handle end of a paintbrush into white paint and dot it randomly around the sky to create distant stars. -
Final touches:
Check your edges and ensure the face details are crisp. If the black lines look faded, go over them one last time.
Now you have a serene piece of art ready to hang on your wall or gift to a friend


Tiny Rainbow Over Puffy Cotton-Candy Clouds
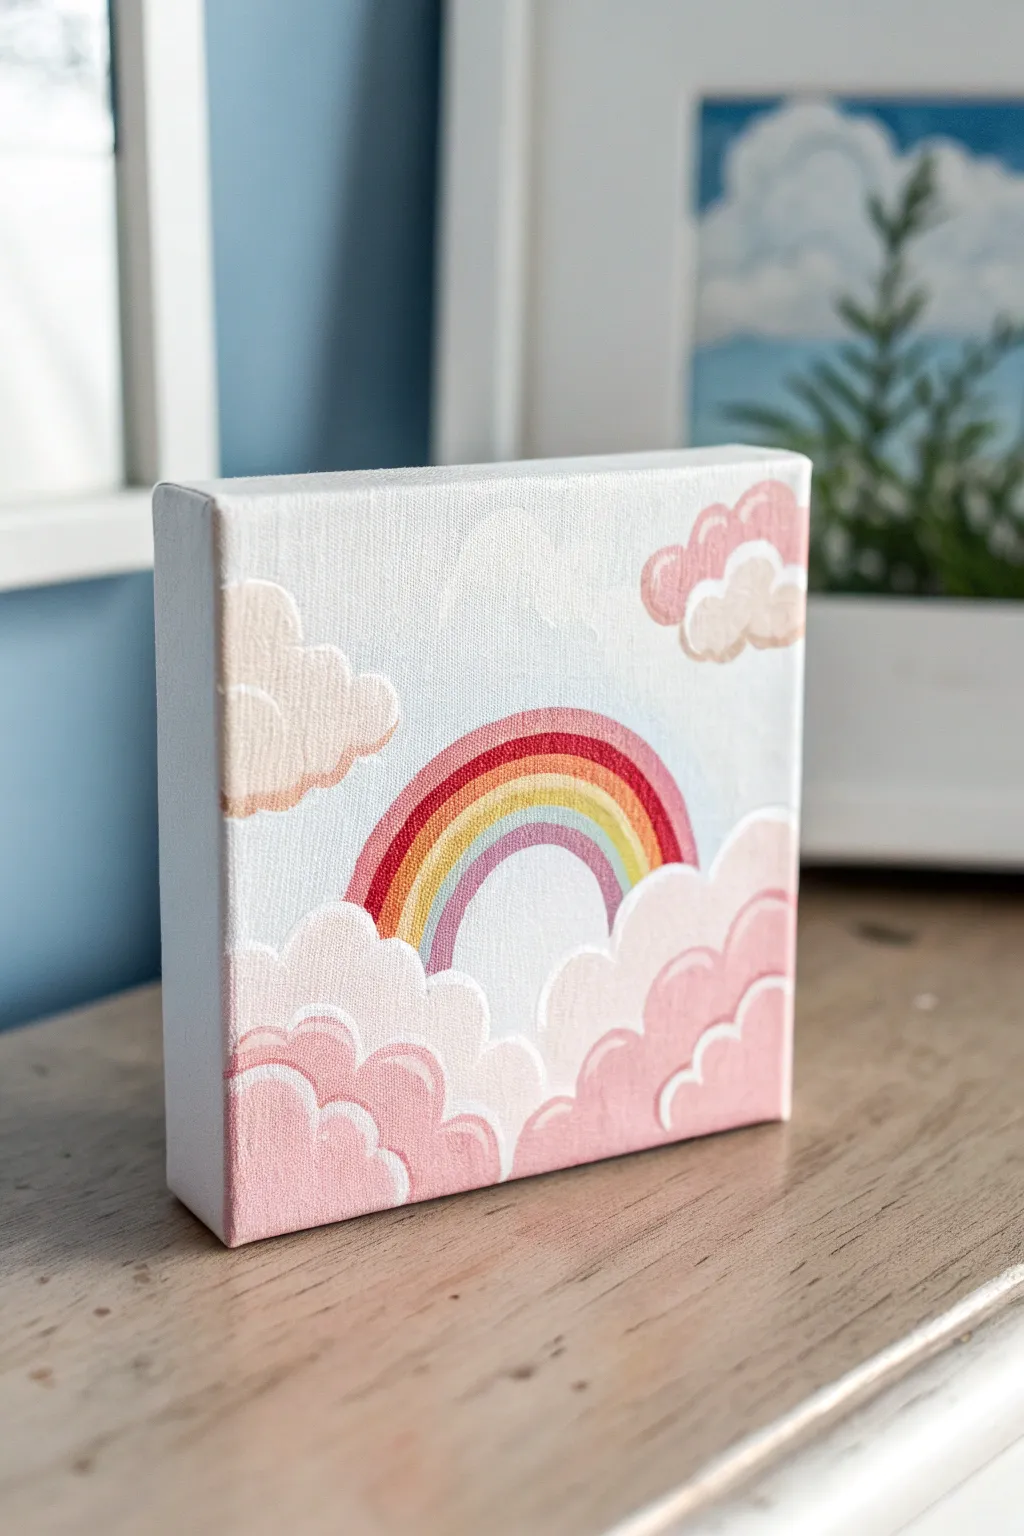
This charming mini canvas features a soft, muted rainbow arching over layers of fluffy, cotton-candy pink clouds. Perfect for a nursery or a bright little desk accent, the key to this look lies in the gentle color palette and crisp white highlights that give the clouds their puffy dimension.
Step-by-Step Tutorial
Materials
- Small square canvas (e.g., 4×4 or 6×6 inch)
- Acrylic paints: Titanium White, Primary Red, Yellow Ochre, Teal or Turquoise, Violet, and a touch of Burnt Sienna
- Flat shader brush (size 6 or 8)
- Small round detail brush (size 0 or 1)
- Palette or paper plate for mixing
- Water cup and paper towels
- Pencil for sketching
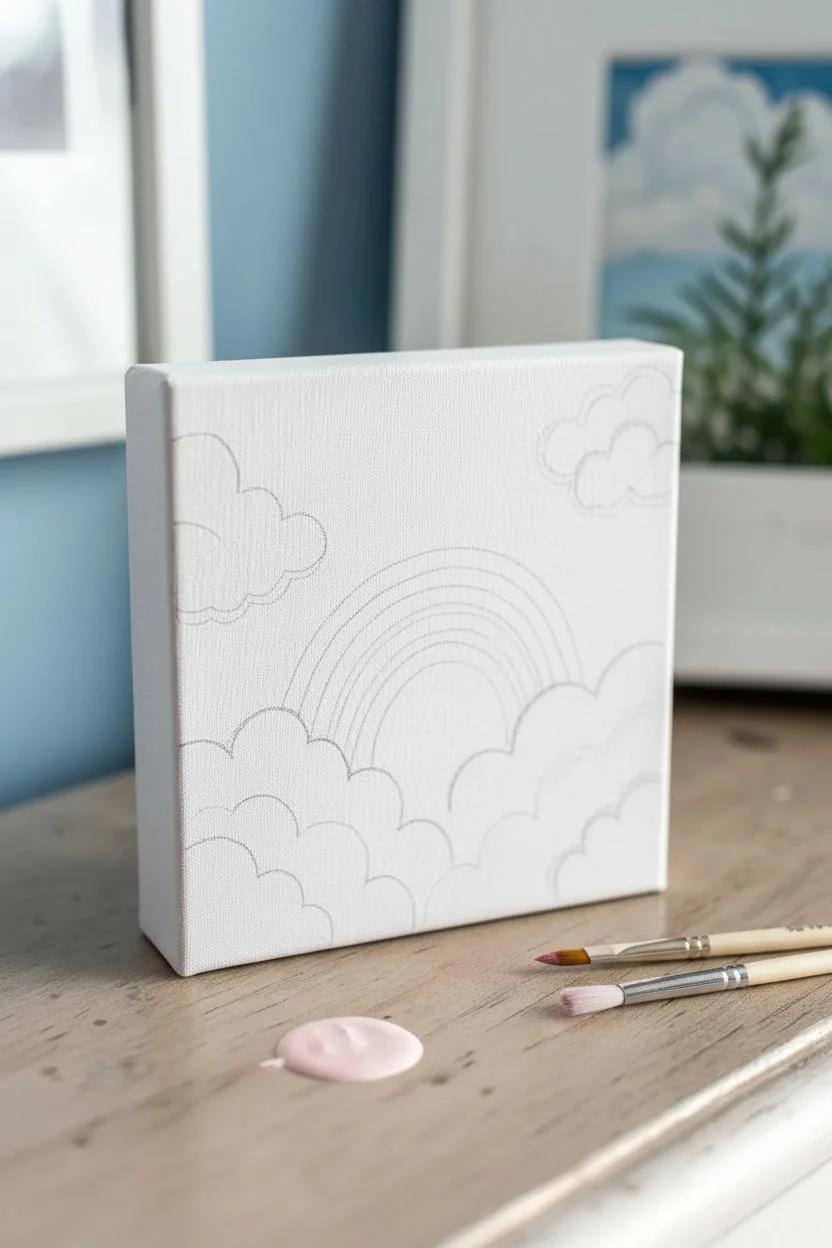
Step 1: Preparation & Sketching
-
Prepare the background:
Start by painting the entire canvas with a solid coat of Titanium White. Even though the canvas comes primed, this extra layer ensures a smooth surface for your delicate colors. Let this dry completely before moving on. -
Mix a base cloud color:
Create a very pale pink by mixing a tiny dot of Primary Red into a large dollop of White. You want this to be barely tinted, serving as the lightest value for your clouds. -
Plan the composition:
Lightly sketch the rainbow arch in the center of the canvas. It doesn’t need to be perfectly symmetrical; a hand-drawn look adds charm. Draw billowing cloud shapes at the bottom, overlapping the ends of the rainbow, and add two floating clouds in the upper corners.
Clean Lines
If your hand feels shaky on the rainbow arches, use the pinky finger of your painting hand to brace against the table or the dry part of the canvas for stability.
Step 2: Painting the Rainbow
-
Mix your palette:
Prepare your rainbow colors on the palette. Aim for a slightly desaturated, vintage look rather than neon brights. Mix a bit of White into your Red, Orange (Red + Yellow), Yellow Ochre, Green (Teal + Yellow), and Violet to make them opaque and creamy. -
Paint the outer red arch:
Using your small round brush, paint the outermost arch first with your soft Red mix. Keep your hand steady, but don’t worry if the edges are slightly wobbly—we can clean them up later. -
Add the warm layers:
Clean your brush and paint the Orange stripe right nest to the Red. Follow immediately with the Yellow Ochre stripe. Painting them side-by-side while slightly wet can help them merge softly, but distinct lines are also fine for this graphic style. -
Finish the cool layers:
Continue the arch with your Teal/Green mix, followed by Blue and finally the inner Violet arch. Ensure the paint is thick enough to cover the white background completely. -
Refine the edges:
Once dry, if you notice any gaps or overlapping mistakes, go back in with the specific color to sharpen the lines. I like to do a second coat on the yellow specifically, as it tends to be the most transparent.
Chalky Finish
To get that matte, velvety texture seen in the photo, mix a tiny pinch of cornstarch into your acrylic paints. It reduces sheen and adds body.
Step 3: Creating Fluffy Clouds
-
Block in the main cloud shapes:
Using your flat brush, paint the base cloud shapes with the pale pink mix you created earlier. Ensure you cover the bottom of the rainbow legs so the clouds appear to be in front. -
Mix a mid-tone pink:
Add a little more Red and a tiny touch of Burnt Sienna to your pink mix to create a warmer, slightly darker ‘strawberry’ pink. -
Paint the lower cloud layers:
Apply this darker pink to the bottom curves of the cloud piles. Think of clouds as scoops of ice cream; you are painting the shadow on the bottom and sides of each scoop. -
Paint the floating corner clouds:
Use a combination of the beige/cream (White + heavy Yellow Ochre + touch of Red) for the body of the floating clouds, giving them a distinct color from the bottom mass. -
Add deep shadows:
Mix your darkest pink yet. Apply this sparingly to the very bottom edges and crevices between the cloud bumps to create depth.
Step 4: Highlights & Details
-
Define the edges:
Load your fine detail brush with pure Titanium White. You need the paint to be fluid, so dip your brush in water first if the paint feels sticky. -
Outline the cloud tops:
Paint a crisp white line along the top curve of every cloud ‘bump’. This is the defining feature of the style. The line should be distinct, acting almost like a cartoon outline but only on the sun-facing sides. -
Add inner highlights:
Add smaller curved strokes of white inside the pink shapes to suggest extra billows of fluff. Don’t outline the entire cloud shape; leave the bottom edges softer or unbordered. -
Clean up background:
Take a look at the white sky background. If you smudged any pink or rainbow colors onto it, use pure white paint to tidy up those negative spaces around the rainbow. -
Paint the edges (Optional):
For a finished gallery look, extend the design around the sides of the canvas, or simply paint the sides a solid white or pink.
Let your sweet sky painting dry completely before finding the perfect shelf to display it


Strawberry With Glossy Highlights
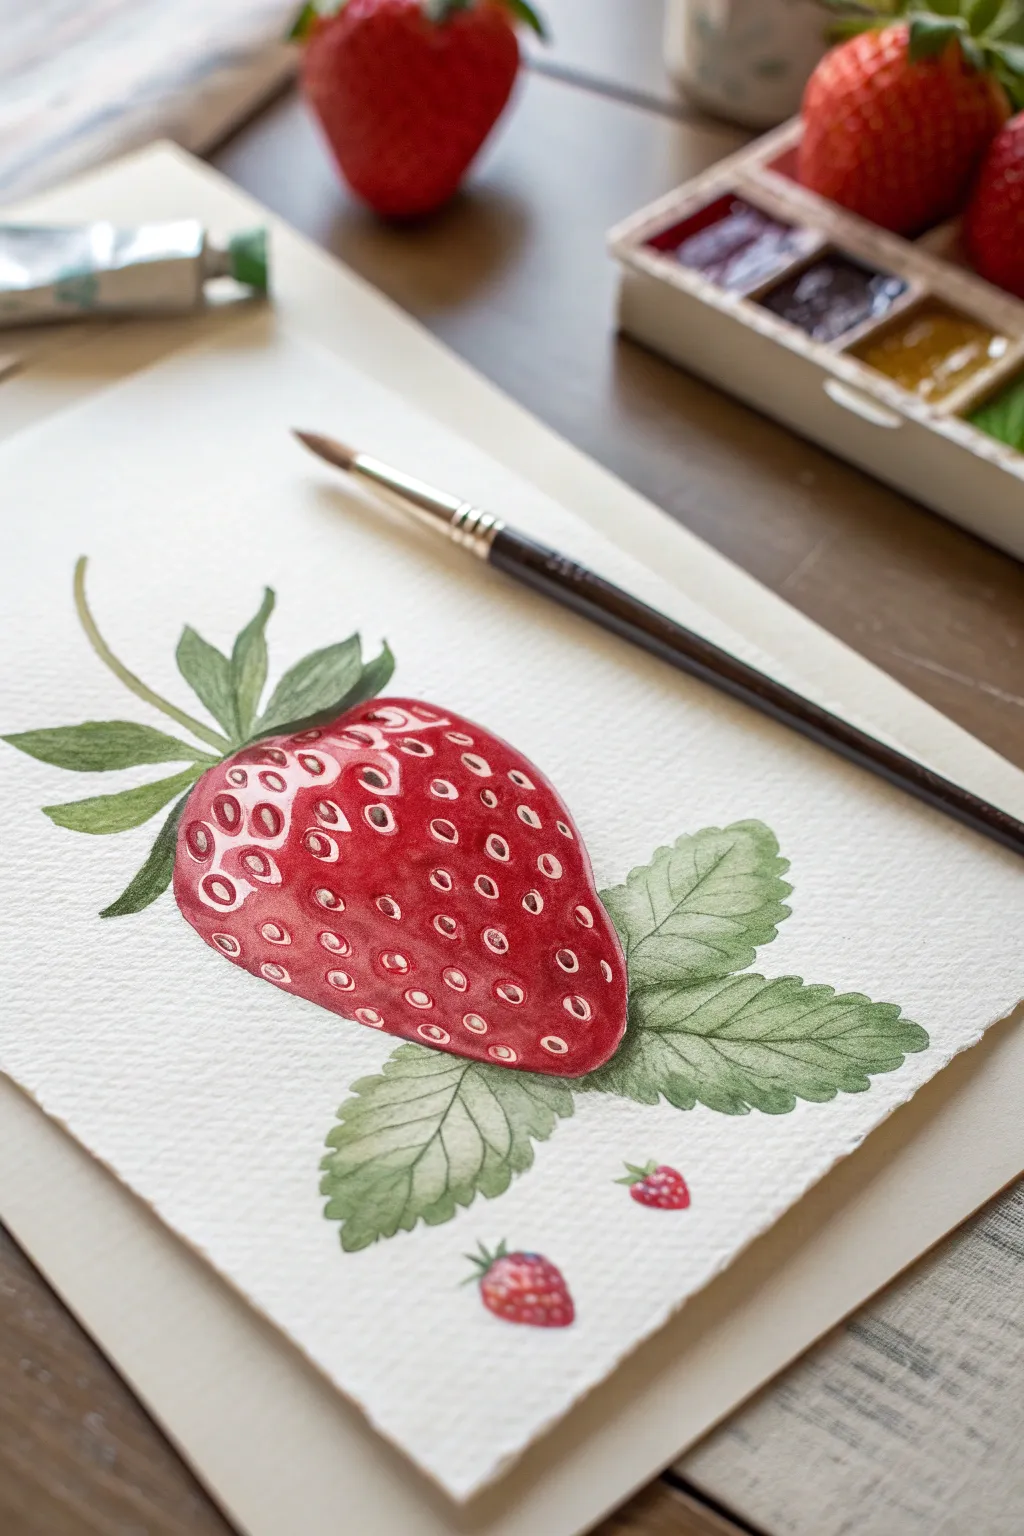
Capture the luscious shine of a ripe strawberry with this detailed tutorial that balances vibrant reds with crisp white highlights. Using acrylics purely for their opacity or thinning them to mimic the watercolor look shown here allows you to build rich layers and lifelike textures.
How-To Guide
Materials
- Heavyweight watercolor paper or mixed media paper (300gsm)
- Acrylic paints (Alizarin Crimson, Cadmium Red, Sap Green, Hookers Green, Titanium White, Yellow Ochre)
- Round synthetic brushes (sizes 2, 6, and a 00 for details)
- Acrylic fluid retarder or glazing medium (optional for transparency)
- Pencil (HB) and kneaded eraser
- Water cups and paper towels
- Palette
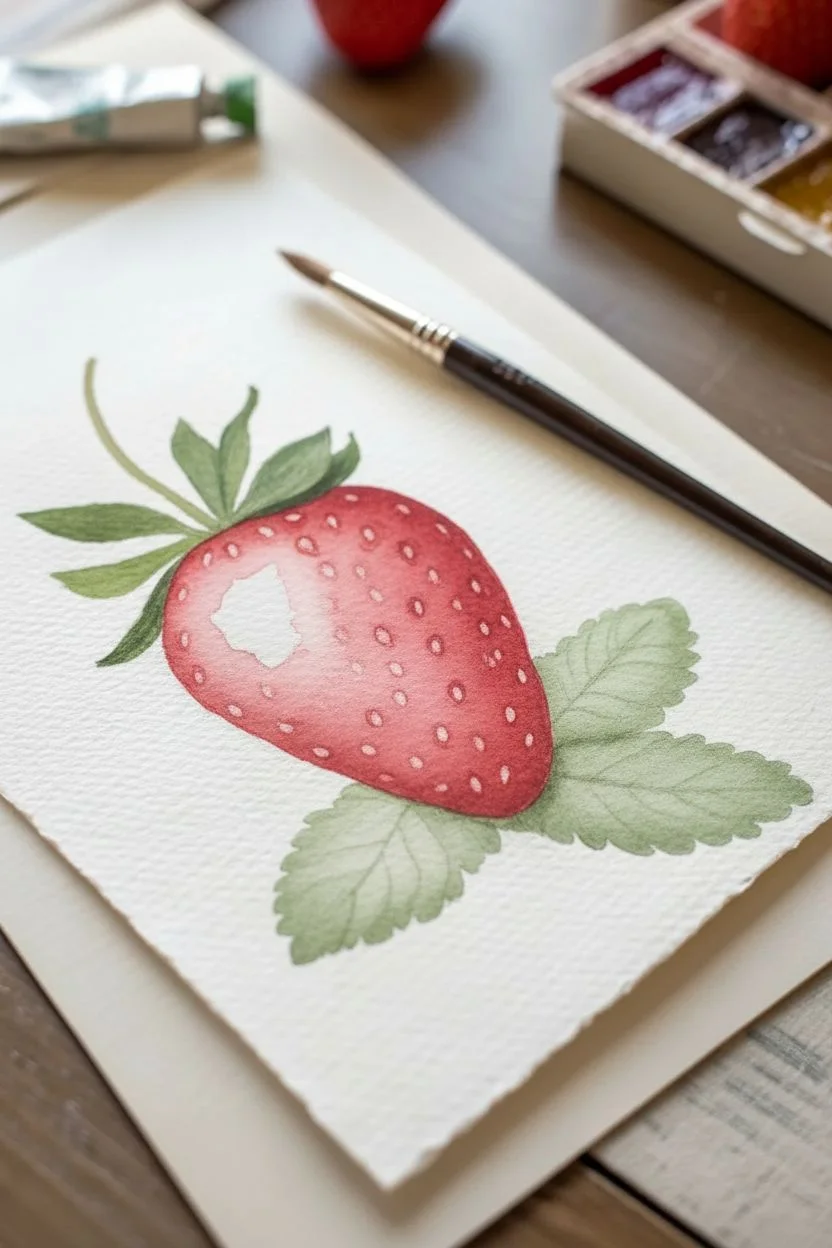
Step 1: Sketching and Base Layers
-
Outline the composition:
Begin by lightly sketching a large, rounded strawberry shape in the center of your paper. Add a cluster of leaves capping the top, and three larger, serrated leaves fanning out from the bottom right. -
Add mini berries:
Small details add charm, so sketch two tiny strawberries floating near the bottom edge—one slightly larger on the left and a micro-berry on the right. -
Mix leaf greens:
On your palette, mix Sap Green with a touch of White and a tiny bit of Yellow Ochre to create a desaturated, natural pale green. This will be the base for the bottom leaves. -
Paint bottom leaves:
Wash this pale green mix over the bottom right leaf cluster. Keep the paint thin, almost like a watercolor wash, to let the paper texture show through. -
Top leaves base:
For the leaves on top of the berry, use a slightly more saturated green mix (Hookers Green + White). Paint the jagged shapes carefully. -
Berry base wash:
Mix a watery wash of Cadmium Red. Apply this to the main strawberry body, lifting your brush occasionally to leave faint white areas where the brightest highlights will eventually go.
Pro Tip: Masking Fluid
To keep highlights pure white, apply masking fluid to the shiniest spots before you start painting red. Peel it off at the very end for crisp edges.
Step 2: Building Depth and Texture
-
Deepen the red:
Once the base is dry, mix Alizarin Crimson with a little Cadmium Red for a deeper shadow tone. Apply this to the bottom edge and right side of the berry to create volume. -
Second layer on leaves:
Use a size 2 brush and a darker green mix to add veins to the bottom leaves. Paint a central line and delicate branches extending to the edges. -
Darken top leaves:
Add shadows to the top leaves where they overlap the fruit, using Hookers Green mixed with a tiny dot of Red to deepen the tone without making it black. -
Paint the small berries:
Fill in the two tiny strawberries at the bottom with solid Cadmium Red. Add tiny green tops to them with your smallest brush. -
Plan the seeds:
Using a very faint pencil mark or a mental map, visualize where the seeds will sit on the main berry. They should follow the curve of the fruit, not straight lines.
Step 3: Refining Details and Gloss
-
Create seed indentations:
Mix a dark red-brown (Alizarin Crimson + Green). Using the size 2 brush, paint small tear-drop or oval shapes where each seed will go. This represents the shadow inside the seed pit. -
Paint the seeds:
Mix Yellow Ochre with White. With your 00 detail brush, place a tiny seed inside each dark pit you just painted, positioning it slightly off-center to show depth. -
Initial highlights:
I find that adding vitality requires contrast. Mix a pale pinkish-white and paint soft, curved highlights around the upper left shoulder of the berry. -
The glossy shine:
Now for the ‘wet’ look. Use pure Titanium White on your smallest brush. Paint crisp, sharp reflection lines and dots on the top left curve of the berry, near the seeds. -
Highlighting seeds:
Add a microscopic dot of white to the top of each individual yellow seed to make them look glossy and three-dimensional. -
Final leaf details:
Add extremely thin white or pale green lines along the veins of the leaves to make the texture pop. -
Mini berry details:
Don’t forget the little guys. Add tiny dark dots for seeds and micro-highlights of white to the two small berries at the bottom.
Level Up: Shadow Play
Mix a diluted purple-grey glaze and paint a soft cast shadow underneath the main berry and leaves. This grounds the object and makes it feel 3D.
Step back and admire how those crisp white highlights make your strawberry look fresh enough to eat


Kawaii Peach With Rosy Cheeks
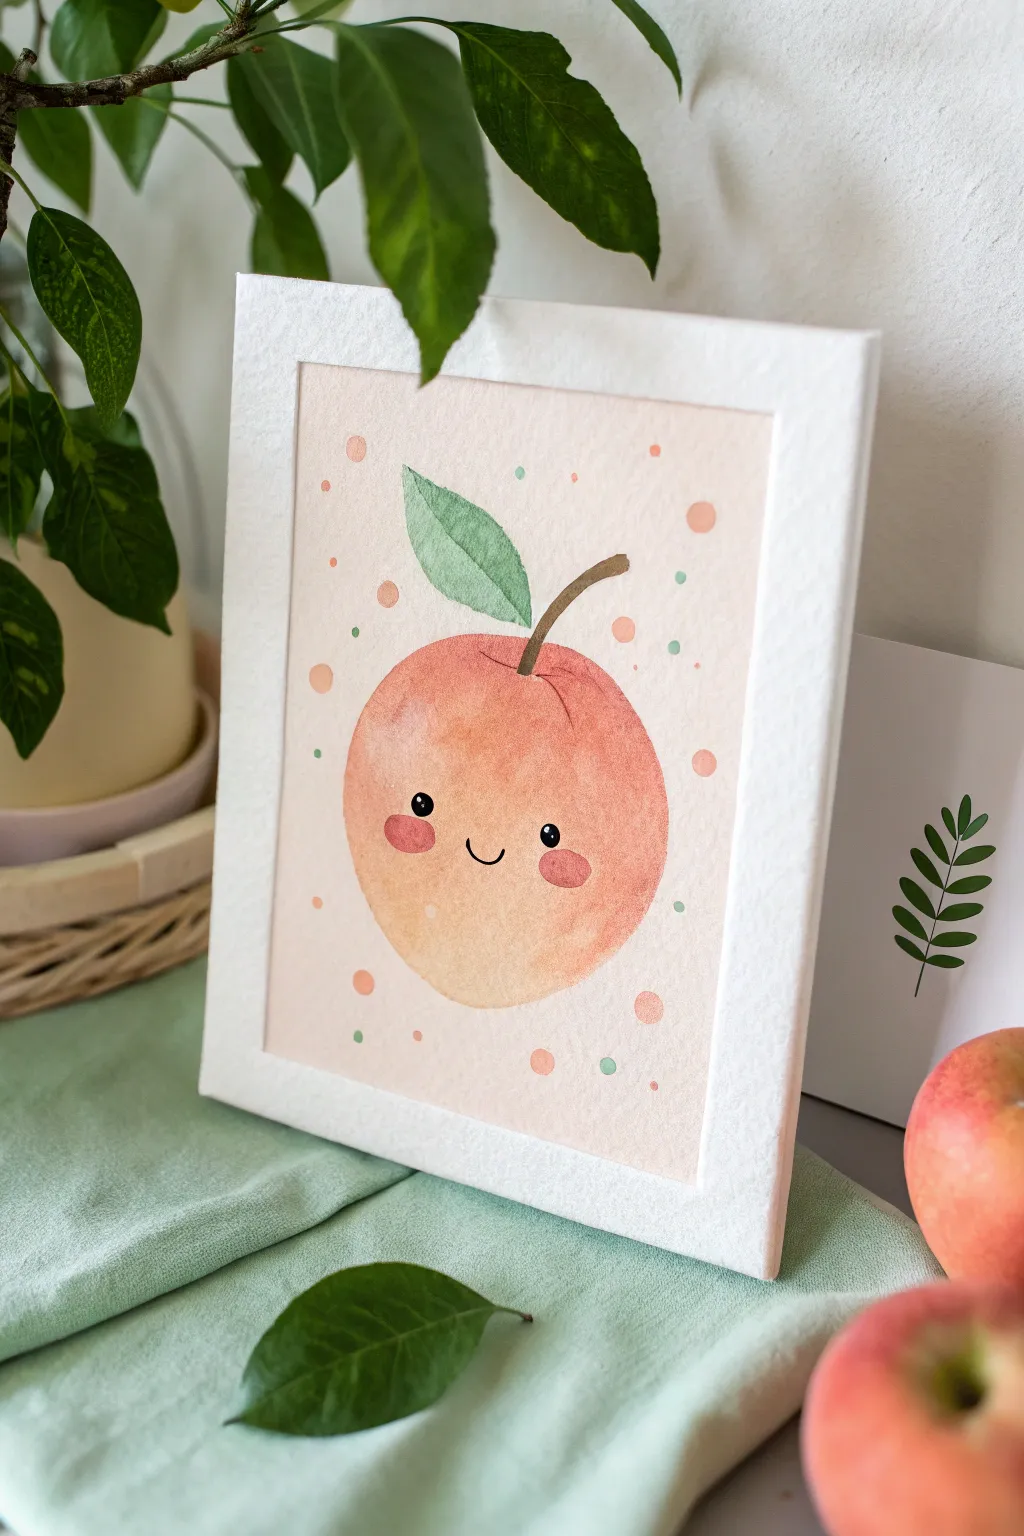
Capture the sweetness of summer with this adorable, blushing peach painting that radiates happiness. By layering diluted acrylics on textured paper, you’ll create a soft, watercolor-like effect that perfectly suits this kawaii character.
Step-by-Step Guide
Materials
- Heavyweight watercolor paper (cold press, roughly A5 size)
- Acrylic paints: Peach/Coral, Red, Green, Brown, Black, White
- Paintbrushes: Round brush (size 6 or 8), Fine liner brush (size 0 or 1)
- Palette for mixing
- Jar of water
- Pencil and eraser
- Paper towels
- Picture frame (white, with mount)
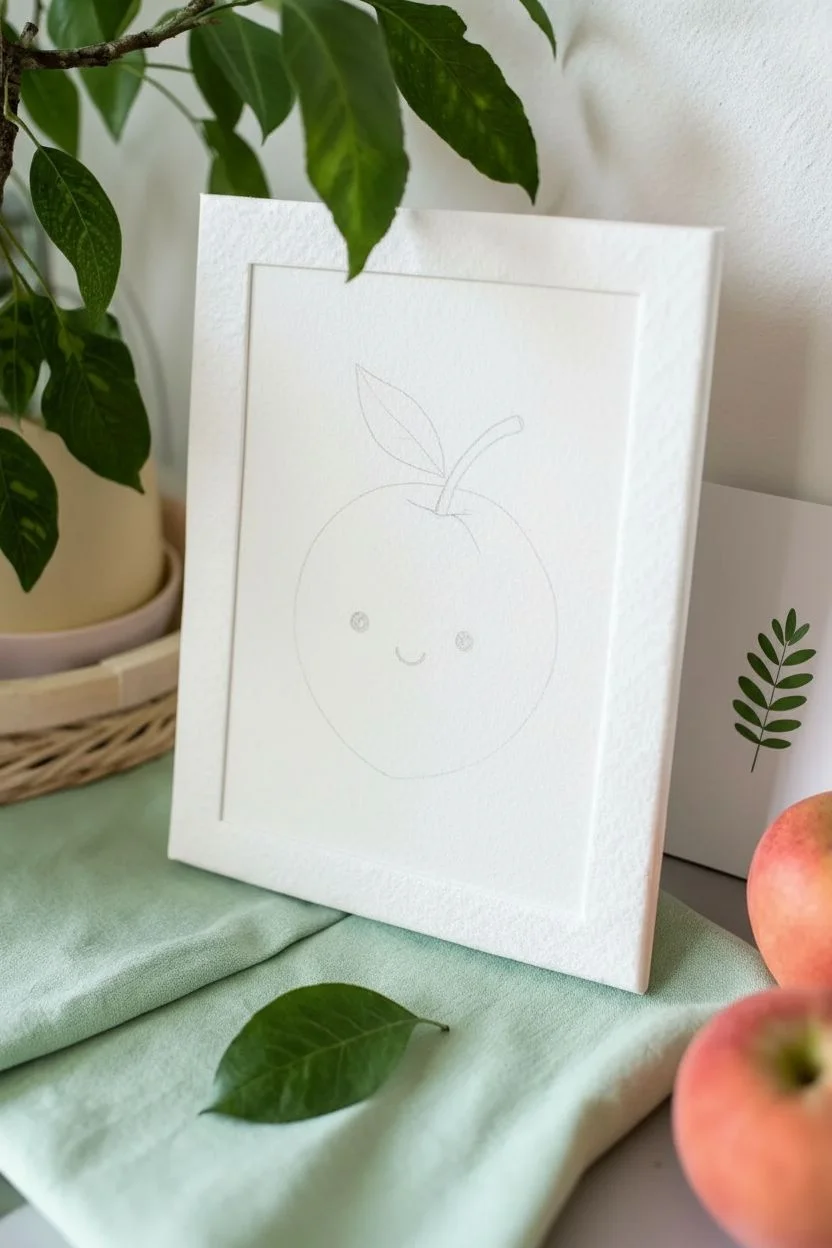
Step 1: Sketching the Shape
-
Outline the body:
Begin by lightly sketching a large circle in the center of your paper. Don’t make it perfectly round; flatten the bottom slightly and add a small dip at the very top center for the stem indentation. -
Add the stem and leaf:
Draw a short, curved line rising from the top indentation for the stem. Attach a single, pointed oval shape to the left side of the stem to serve as the leaf. -
Place the face:
In the lower half of the peach, lightly mark two small dots for eyes widely spaced apart, and a tiny ‘u’ shape in between them for the smiling mouth.
Water Control Problem?
If your paper warps or buckles from the watery paint, tape the edges of your paper down to a flat board before you start painting and leave it taped until it is completely dry.
Step 2: Painting the Fruit
-
Mix your base color:
Mix a generous amount of peach or coral paint with water on your palette. You want a milky consistency that is translucent, almost like watercolor. -
Apply the first wash:
Fill in the entire peach shape with your diluted mix. Work quickly so the edges don’t dry out, creating a smooth, even base layer. -
Create a gradient:
While the base is still slightly damp, mix a slightly stronger, less diluted reddish-orange. Dab this color along the right edge and bottom of the peach to create a soft shadow and rounded dimension. -
Blend the colors:
Clean your brush, leave it damp, and gently run it along the border where the darker color meets the lighter base to soften the transition. Let this layer dry completely.
Step 3: Adding Details
-
Paint the leaf:
Mix a soft sage green with a little water. Paint the leaf shape carefully. Once dry, use a slightly darker green mix and your fine liner brush to draw a central vein down the middle. -
Paint the stem:
Use a medium brown paint to fill in the stem. Make the base of the stem slightly thicker where it connects to the fruit. -
Create the blushing cheeks:
Mix a pinkish-red shade. Using a fairly dry brush, paint two small ovals directly under where the eyes will go. I like to tap the brush gently to give the cheeks a soft, fuzzy texture.
Make It Sparkle
Mix a tiny amount of iridescent medium or fine glitter into the paint for the cheeks or the background dots to give your artwork a subtle, magical shimmer when it catches the light.
Step 4: The Kawaii Face
-
Paint the eyes:
Using undiluted black paint and a fine liner brush (or a dotting tool), carefully paint two solid black circles for the eyes. -
Add the smile:
With the very tip of your finest brush and black paint, trace the small ‘u’ shape for the mouth. Keep the line thin and delicate. -
Add eye highlights:
Once the black eyes are 100% dry, dip the tip of a toothpick or a clean fine brush into pure white paint. Place a tiny white dot in the upper right corner of each eye to bring the character to life.
Step 5: Background & Finishing Touches
-
Mix confetti colors:
Prepare three diluted colors on your palette: the same peach you used for the fruit, a soft mint green, and a pale pink. -
Add the polka dots:
Randomly scatter small and medium-sized dots around the peach using these three colors. Keep them clustered closer to the fruit and more sparse towards the edges of the paper. -
Review and frame:
Check your painting for any stray pencil marks and erase them gently once the paint is fully dry. Place your finished artwork inside a white frame with a mount to showcase it professionally.
Hang your cheerful peach creation on a wall that needs a little extra joy and color
BRUSH GUIDE
The Right Brush for Every Stroke
From clean lines to bold texture — master brush choice, stroke control, and essential techniques.
Explore the Full Guide
Sleepy Bear Face on a Mini Canvas
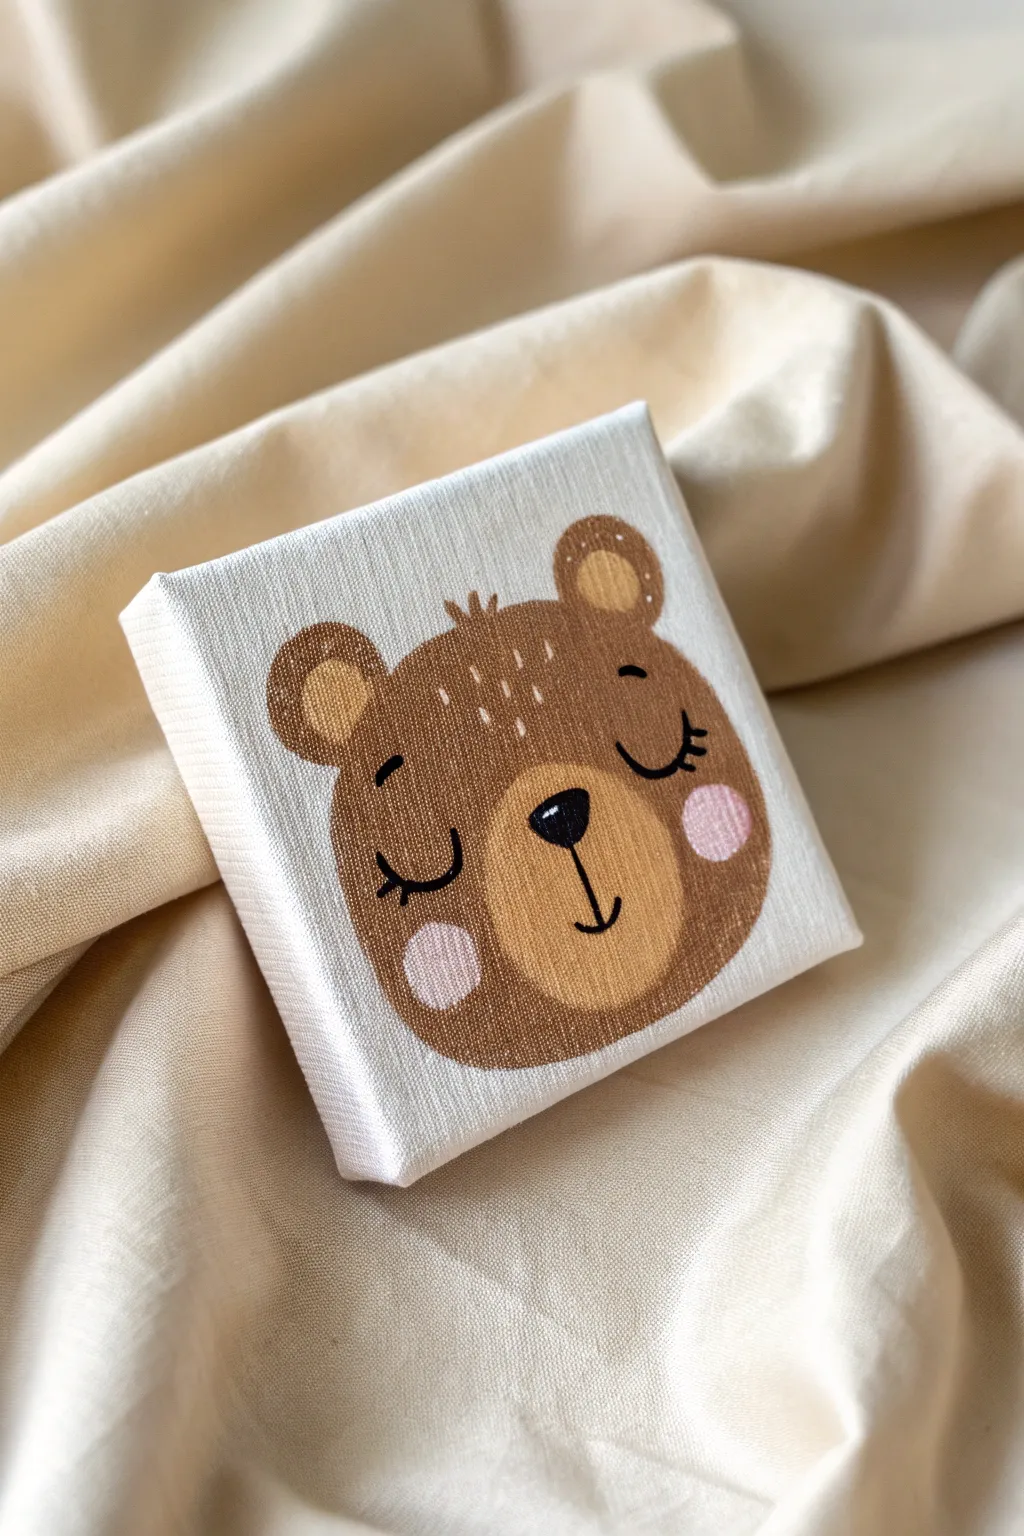
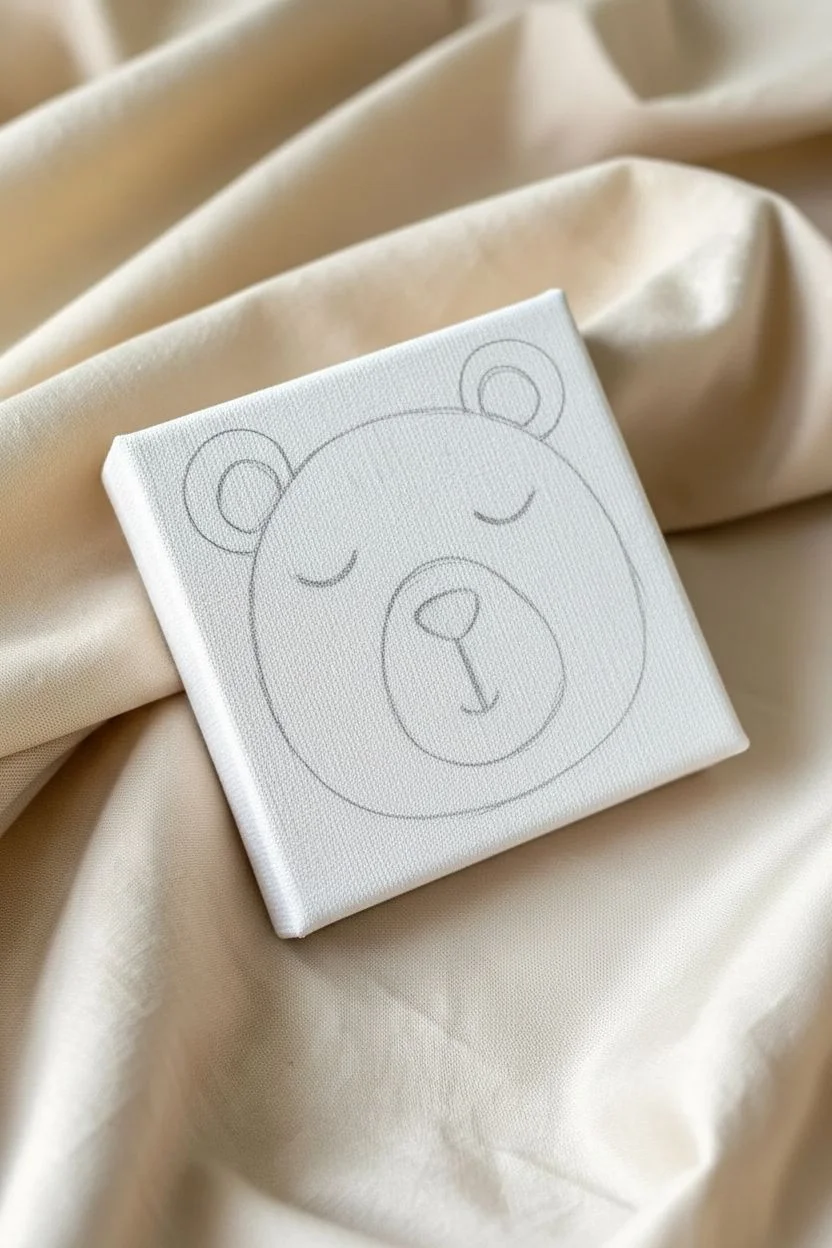
This adorable mini canvas features a cozy, sleeping bear face painted in warm brown tones. With its simple shapes and sweet expression, it makes a perfect decorative accent for a nursery or a cute desk buddy.
How-To Guide
Materials
- Mini square canvas (4×4 or 6×6 inches)
- Acrylic paints: Dark brown, light tan/ochre, soft pink, black, and white
- Pencil for sketching
- Eraser
- Flat paintbrushes (small and medium)
- Fine detail or liner brush
- Palette or paper plate
- Cup of water
- Paper towels
Step 1: Sketching the Bear
-
Outline the head:
Start by lightly sketching a large oval shape that fills most of the canvas. Make the bottom slightly wider than the top to give the bear chubby cheeks. -
Add the ears:
Draw two small semicircles on the top corners of the head. Inside each ear, sketch a slightly smaller semicircle for the inner ear detail. -
Sketch the muzzle:
In the lower center of the face, draw a wide, rounded oval shape for the bear’s snout area. This should take up a good portion of the bottom half of the face. -
Mark the features:
Lightly mark where the nose will go—a small rounded triangle at the top of the muzzle oval. Sketch two curved lines for the closed eyes just above the muzzle line.
Use a Steady Hand
For the thin black lines like the eyes and mouth, slightly water down your black paint to an ink-like consistency. It will flow much smoother from the brush.
Step 2: Blocking in Color
-
Paint the main fur:
Mix a medium warm brown shade. Use your medium flat brush to fill in the main head shape and the outer parts of the ears. Carefully paint around the muzzle oval you sketched. -
Fill the muzzle:
Mix a lighter tan or ochre color by adding white and a touch of yellow to your brown. Paint the muzzle area and the inner shapes of the ears with this lighter shade. -
Smooth the edges:
While the paint is still slightly wet, carefully smooth out any ridges where the dark brown meets the light tan to ensure a clean transition, though a sharp line is also fine for this cartoon style. -
Let it dry:
Allow the base layers to dry completely. Acrylics dry darker, so don’t worry if it looks a bit light at first. -
Second coat:
If the canvas texture is showing through too much, apply a second thin coat of both the dark brown and light tan paints for solid coverage.
Step 3: Adding Details
-
Paint the cheeks:
Mix a soft pastel pink. Using a small brush, paint two circles on the cheeks, overlapping slightly onto the border between the dark brown fur and the light snout. -
Add the nose:
Using black paint and a small round brush, fill in the nose shape. It should look like an inverted triangle with rounded corners. -
Paint the mouth:
With your finest liner brush and black paint, draw a straight vertical line coming down from the bottom tip of the nose, curving into a small anchor shape for the mouth. -
Draw the eyes:
Using the same liner brush and black paint, carefully paint two downward-curving arcs for the sleeping eyes. Make the lines slightly thicker in the middle. -
Add eyelashes:
Paint two or three tiny, curved lashes extending from the outer corners of each eye for a sweet touch. -
Highlight the nose:
Dip the very tip of a detail brush or a toothpick into white paint. Add a tiny dot or comma shape on the upper corner of the black nose to make it look wet and shiny. -
Add fur details:
Mix a lighter version of your brown or use slightly watered-down white paint. Paint tiny dashes or tick marks on the forehead and ears to simulate tufts of fur. -
Final touches:
Check your edges and clean up any stray paint marks with a clean, damp brush or a bit of white paint if you smudged the background.
Fixing Uneven Circles
If your pink cheek circles look lopsided, wait for them to dry fully. Then, use the surrounding brown paint to carefully ‘cut in’ and reshape the edges.
Now you have a charming little bear painting ready to bring a sense of calm to any small space
Simple Tulip Bouquet With Big Petals
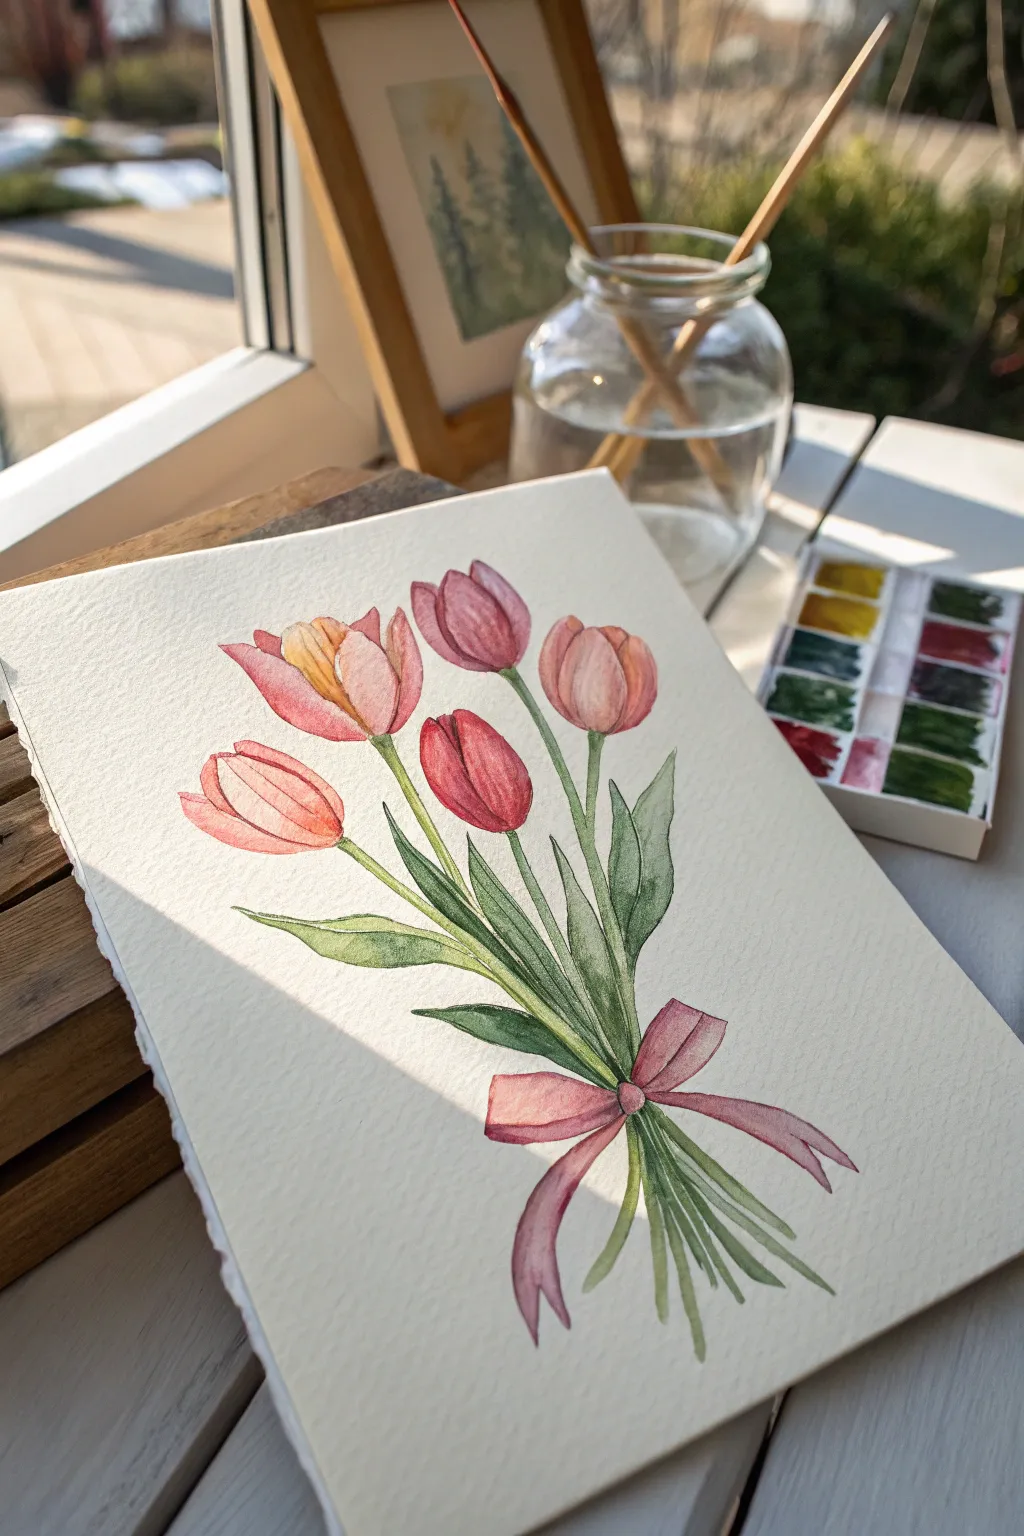
This gentle study captures the elegance of spring tulips bound by a simple bow. By layering translucent washes of color, you will build a soft, romantic bouquet that looks effortlessly graceful.
Step-by-Step Tutorial
Materials
- Cold-press watercolor paper (300 gsm)
- Watercolor paints (Alizarin Crimson, Cadmium Yellow, Sap Green)
- Round brushes (size 6 for washes, size 2 for details)
- HB Pencil
- Kneaded eraser
- Jar of water and paper towels
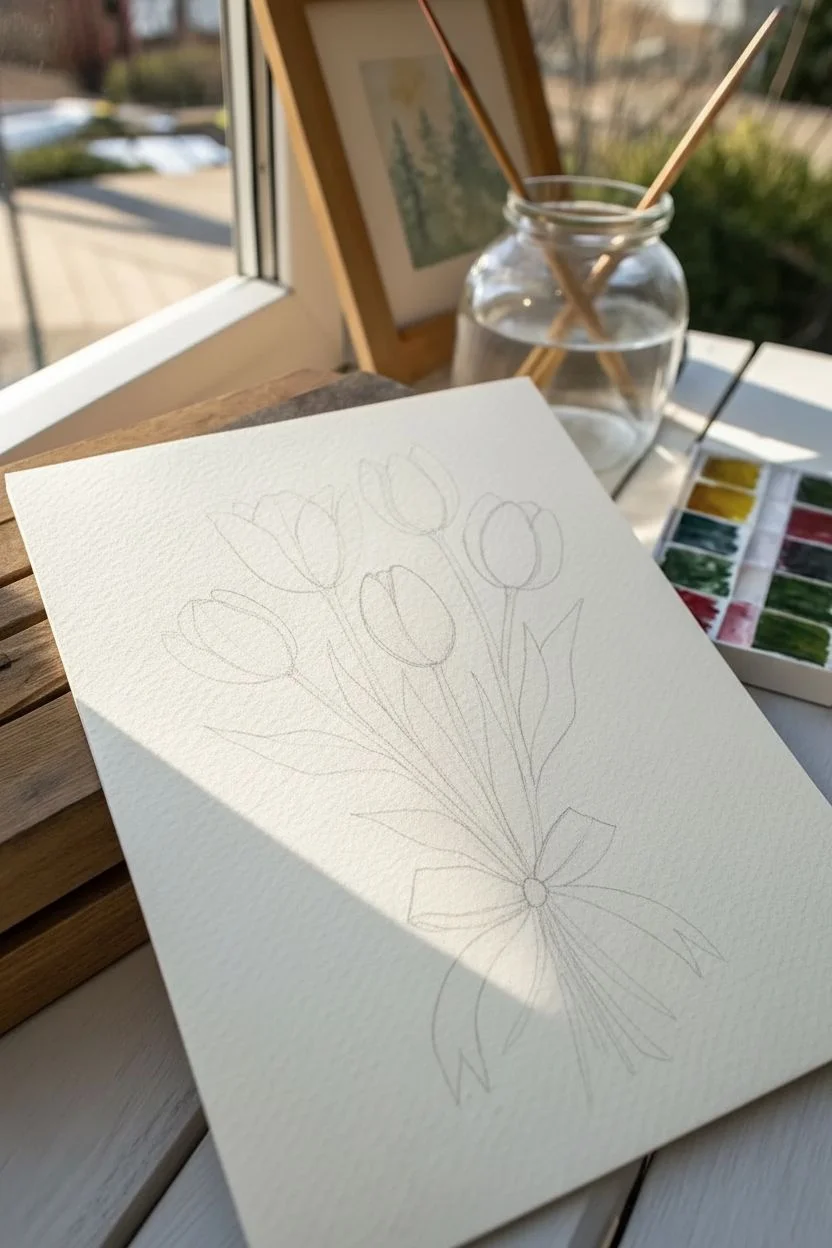
Step 1: Sketching the Composition
-
Outline the blooms:
Lightly sketch five oval ‘U’ shapes for the tulip heads, angling them slightly outward like a fan. -
Draft the stems:
Draw long, slender stems converging at a single pinch point about three-quarters of the way down the page. -
Add foliage:
Sketch broad, lance-shaped leaves tucking in behind the stems and blooms. -
Sketch the bow:
Draw a small knot at the pinch point, adding two loops and two trailing ribbon ends. -
Refine the petals:
Inside your U-shapes, draw simple overlapping curves to define individual petals, then lighten all lines with your eraser until they are barely visible.
Preventing Muddy Colors
Wait for the flower heads to be completely dry before painting the green stems where they touch. If they are wet, the red and green will bleed together and turn brown.
Step 2: Painting the Blooms
-
Mix your base pinks:
Create a watery puddle of crimson red. For the peachier tulip, mix in a touch of yellow. -
First wash:
Paint the overall shape of each flower head with a very pale, watery wash of your color. -
Wet-on-wet shading:
While the first layer is still wet, touch the tip of your brush loaded with slightly more concentrated pigment to the bottom of each flower head. -
Create gradients:
Tilt your paper slightly to let the darker pigment flow upward naturally, creating a soft gradient. -
Defined petals:
Once the first layer is bone dry, paint the specific petal shapes using a slightly darker mixture, leaving small overlaps visible to show depth. -
Deepen the contrast:
Add a third layer of concentrated red only in the deepest crevices where the petals meet the stem.
Step 3: Greenery and Details
-
Prepare the green:
Mix sap green with a tiny drop of red to create a natural, earthy olive tone rather than a synthetic bright green. -
Paint the stems:
Using the tip of your size 6 brush, pull long, confident strokes from the flower heads down to the ribbon knot. -
Fill the leaves:
Paint the leaves with a varied wash—I like to drop a little yellow into the tips and blue into the shadows while the paint is wet. -
Stem bottoms:
Paint the short, cut ends of the stems emerging from below the ribbon knot. -
Ribbon base:
Paint the bow and ribbons with your pink mixture, being careful to paint around the green stems. -
Ribbon folds:
Once the ribbon is dry, use your smallest brush to paint dark red lines indicating the folds and shadows.
Level Up: Texture
For a vintage look, try ‘dry brushing’ the final shadows on the petals. Wipe your brush on a towel until almost dry before swiping it for a textured effect.
Now you have a timeless floral illustration suitable for framing or gifting.

PENCIL GUIDE
Understanding Pencil Grades from H to B
From first sketch to finished drawing — learn pencil grades, line control, and shading techniques.
Explore the Full Guide
Happy Frog Popping Out of a Pond
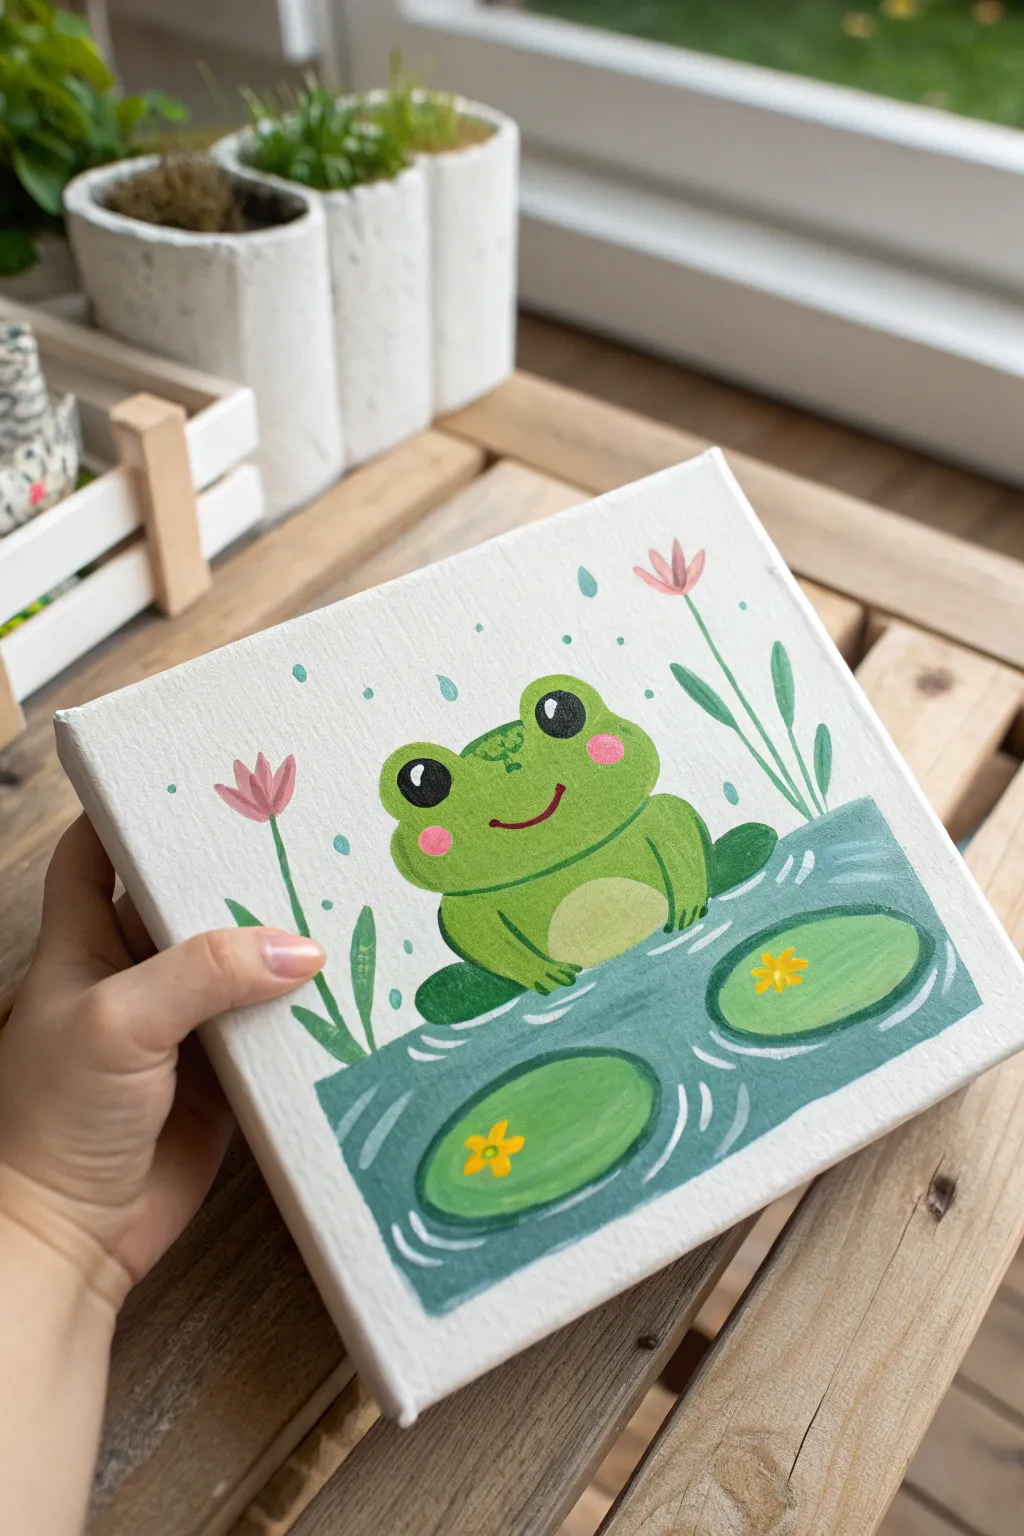
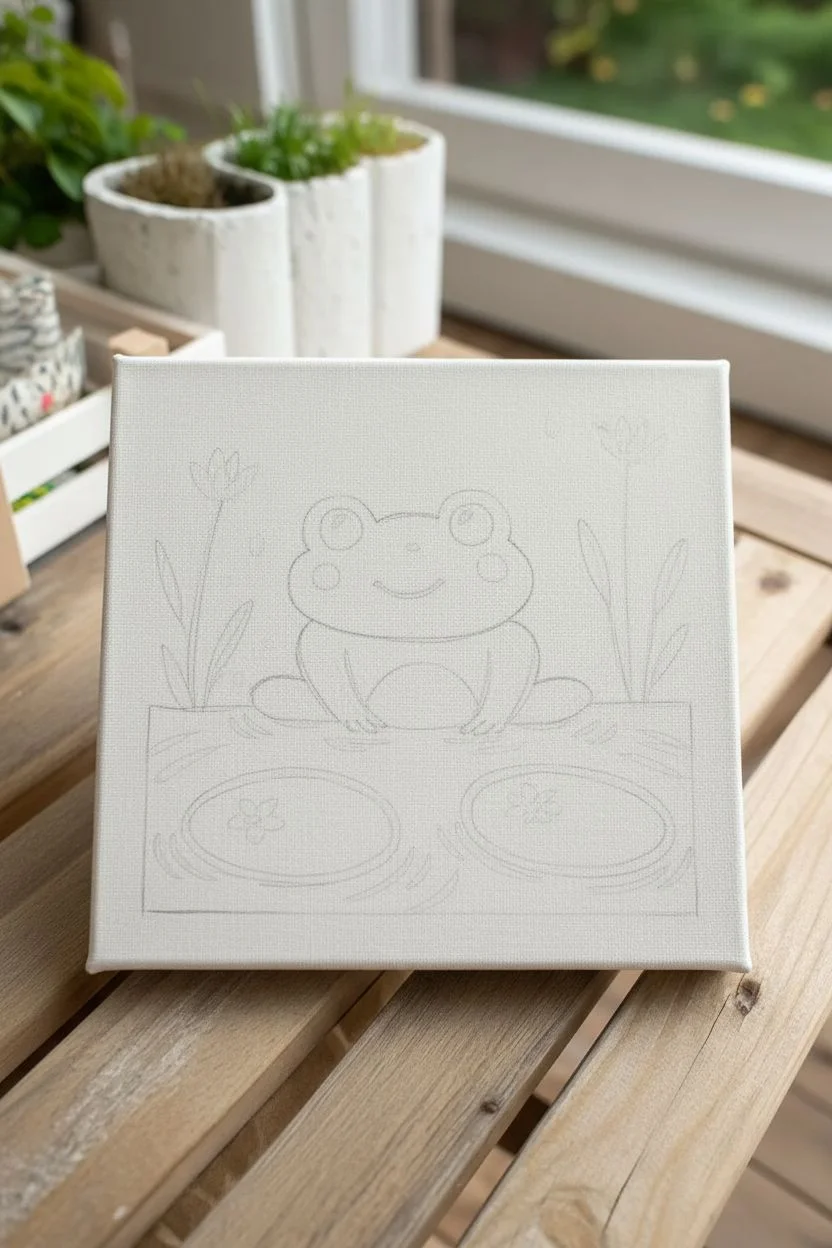
Bring a little joy to your desk with this adorable square canvas painting featuring a smiling frog enjoying a rainy day. Using bright acrylics and simple shapes, you’ll create a charming scene complete with lily pads and gentle raindrops.
Step-by-Step Tutorial
Materials
- Small square stretched canvas (approx. 6×6 or 8×8 inches)
- Acrylic paints: Light green, dark green, teal/blue-green, white, pink, black, yellow
- Paintbrushes: Flat brush (medium), round brush (small), fine liner brush
- Pencil and eraser
- Palette for mixing
- Cup of water and paper towels
Step 1: Sketching the Composition
-
Rough out the water line:
Start by lightly drawing a wavy horizontal line across the bottom third of the canvas to establish the water’s surface. -
Draw the frog body:
In the center, just above the water line, sketch a large, rounded bean shape for the frog’s head and body. Add two semi-circles on top for the eyes. -
Add details and surroundings:
Sketch simple oval shapes for the lily pads floating in the water. Draw vertical lines on the left and right sides for the tall grass and flower stems.
Clean Lines
If your hand shakes while outlining, try resting your pinky finger on a dry part of the canvas for balance. Thinning the paint slightly with water also helps the brush glide smoother.
Step 2: Blocking in Base Colors
-
Paint the background:
Mix a very large amount of white with a tiny dot of teal or green to create an off-white, cool-toned background. Paint the entire upper sky area around your pencil sketch. -
Fill in the water:
Use a teal or blue-green shade to fill the water section at the bottom. Ensure the edge meets your wavy pencil line cleanly. -
Paint the frog base:
Mix a bright, lime green shade and fill in the frog’s entire head and body shape. You may need two coats here for solid coverage. -
Color the lily pads:
Use a slightly darker or different shade of green for the oval lily pads to distinguish them from the water color.
Make it Sparkle
Once the painting is fully dry, apply a layer of glossy varnish or Mod Podge over just the water area and the frog’s eyes to make them look wet and shiny.
Step 3: Bringing the Frog to Life
-
Add the belly:
Mix a pale yellow-green (mostly white with a touch of your frog green) and paint a semi-circle on the lower part of the frog’s body for its tummy. -
Paint facial features:
Using black paint and a detail brush, fill in the large circles for the eyes. Add a simple curved line for the mouth. -
Add rosy cheeks:
Dip a small round brush or even a cotton swab into pink paint and dab two circles onto the frog’s cheeks. -
Highlight the eyes:
Once the black eyes are dry, add a small white dot to the upper corner of each eye to create a cute sparkle. -
Outline the body:
Mix a darker green and use a fine liner brush to outline the frog’s shape, adding definition to the arms and separating the head from the body slightly.
Step 4: Environment Details
-
Paint the plants:
Use a dark green and a thin brush to paint the stems rising from the water. Add leafy shapes to the stems on the left. -
Add flowers:
Using pink paint, create small tulip-like shapes at the top of the tall stems. Paint yellow star-shapes or simple crosses on the lily pads. -
Create water ripples:
Dilute some white paint slightly. Using a fine liner brush, paint curved, scratchy lines around the lily pads and the frog’s base to simulate water movement. -
Paint the rain:
Mix a light teal color and paint small teardrop shapes and dots scattered across the sky area to look like gentle rain. -
Final touches:
Check for any patchy areas and add a second coat if needed. I usually double-check the white eye highlights are bright enough before finishing.
Step back and enjoy the cheerful companion you’ve just created
Baby Turtle With Bubbles and Blush
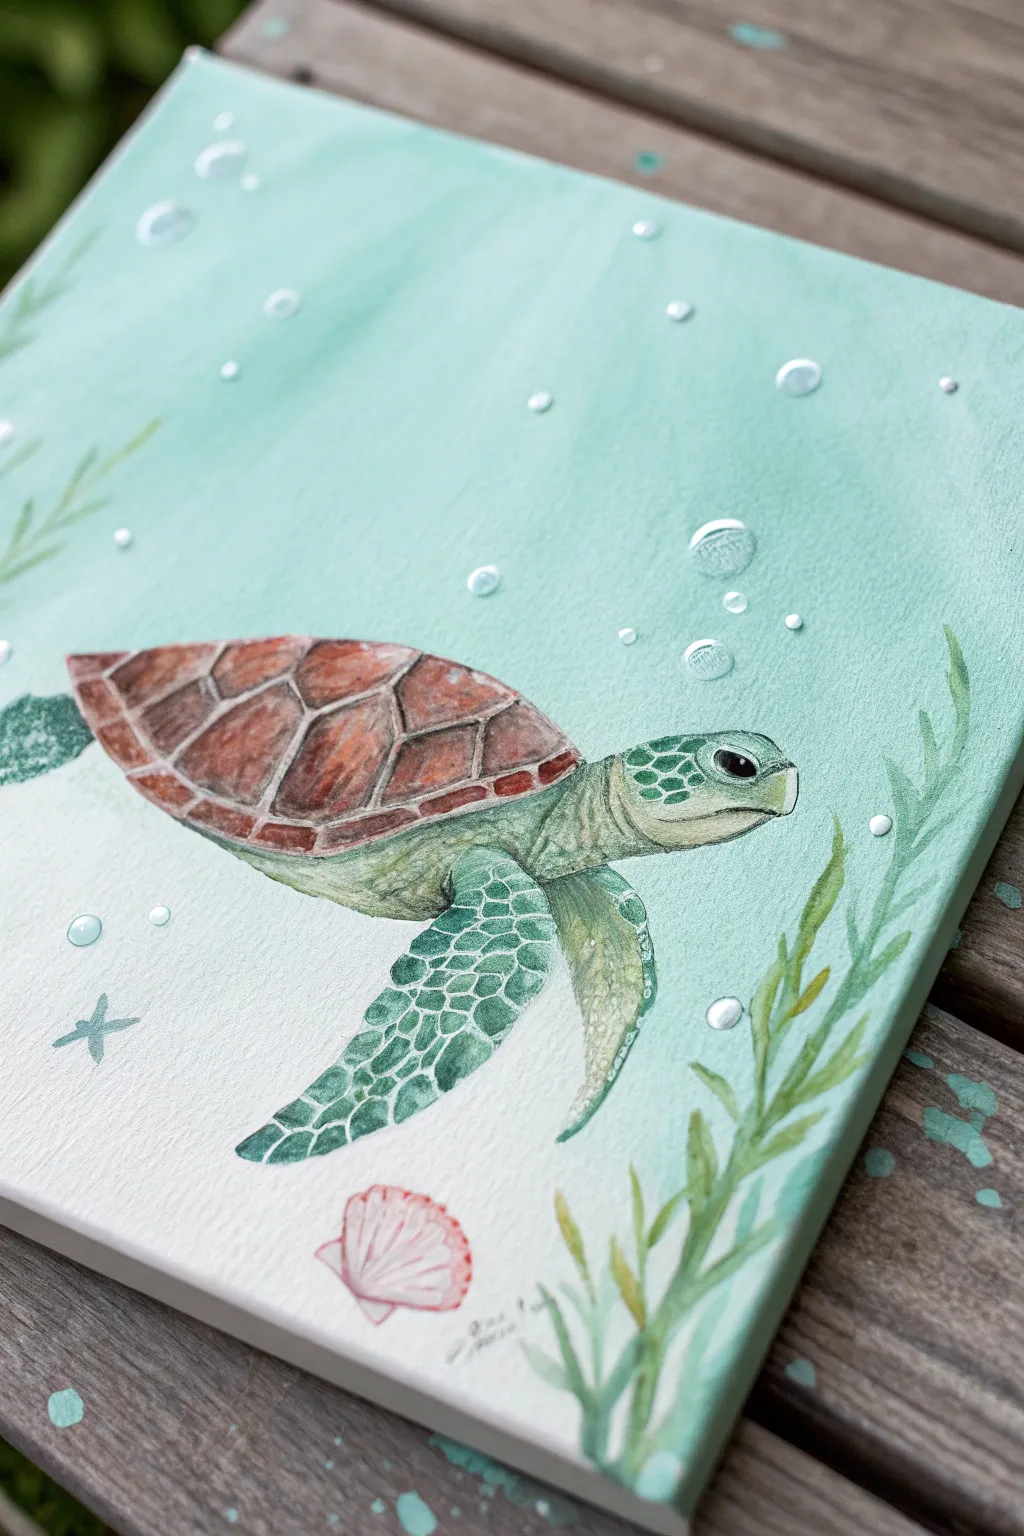
Capture the calm of the ocean with this adorable baby sea turtle painting, featuring lovely teal gradients and delicate bubble details. This project perfectly balances structured patterns on the shell with fluid, organic strokes for the seaweed.
Step-by-Step Guide
Materials
- Small rectangular stretched canvas
- Acrylic paints (Teal, White, Burnt Sienna, Brown, Sap Green, Emerald Green, Black, Pink)
- Wide flat brush
- Medium round brush
- Fine liner brush or detail brush
- Pencil and eraser
- Palette
- Water cup and paper towels
- Acrylic gloss medium (optional for bubbles)
Step 1: Setting the Scene
-
Prepare the background:
Start by mixing a light teal color using teal paint and plenty of white. Use your wide flat brush to cover the entire canvas. Create a subtle gradient by adding slightly more teal at the top and bottom corners, blending towards a nearly white center to mimic sunlight filtering through water. -
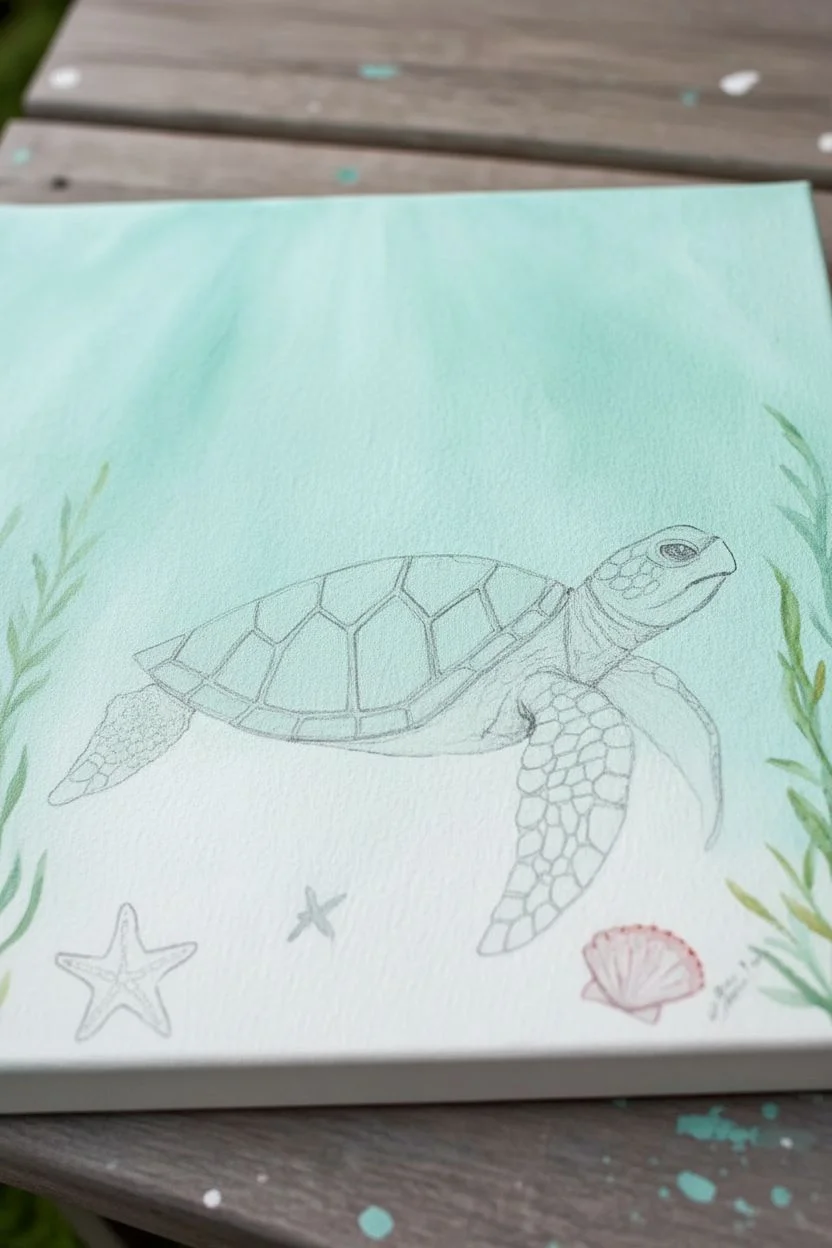
Sketch the turtle:
Once the background is fully dry, lightly sketch the turtle’s outline with a pencil. Draw an almond shape for the shell, a rounded head, and two large front flippers extending outward. Add the smaller back flippers tucked behind. -
Draw the details:
Refine your sketch by mapping out the scutes (plates) on the shell—these look like a mosaic of irregular polygons. Sketch the eye and mouth, and lightly mark the placement of the seaweed and seashell at the bottom.
Step 2: Painting the Turtle
-
Base coat the shell:
Mix Burnt Sienna with a touch of white to create a soft, reddish-brown. Fill in the shell segments, leaving thin gaps between them where you want the lighter boundary lines to be. -
Add shell dimension:
Using a slightly darker brown, shade the bottom right edges of each shell segment to create depth. Then, mix a lighter orange-brown and highlight the top left of each segment. -
Paint the skin base:
Mix a pale, milky green using Sap Green and white. Paint the head, neck, and flippers with this base color. Don’t worry about the scales yet; just get a solid underpainting down. -
Create the scale pattern:
Switch to your fine liner brush and Emerald Green paint. Carefully paint small, irregular polygon shapes closely together on top of the dry pale green base on the flippers. The pale green showing through the gaps will act as the grout lines between scales. -
Detail the head:
Continue painting smaller scale shapes on the top of the turtle’s head. Paint the eye area black, leaving a tiny white dot for the reflection to bring it to life. -
Shade the underbelly:
Mix a very watery, dark green wash. Glaze the underside of the turtle’s body and the back flipper to show shadow and push it visually into the background.
Uneven Scales?
If your hand shakes while painting scales, try bracing your pinky finger against the dry part of the canvas for stability. Variation in scale size actually looks more natural.
Step 3: Surrounding Elements
-
Paint the seaweed:
Using a medium round brush and Sap Green, paint wavy, organic lines rising from the bottom corners. Vary the pressure on your brush to make the leaves taper from thick to thin. -
Add the seashell:
Paint the seashell shape with a mix of white and a tiny dot of pink. Once dry, use a fine brush with deeper pink or red to paint the ridges fanning out from the base. -
Include the starfish:
With a diluted teal or grey-blue, paint a simple silhouette of a starfish in the empty space on the left side. -
Create the bubbles:
For the bubbles, mix a very transparent white wash or use gloss medium. Paint circles of varying sizes around the turtle. Add a solid white crescent highlight on the top left and a smaller dot on the bottom right of each bubble for a 3D glass effect. -
Final highlights:
Add tiny pure white highlights to the wettest-looking parts of the turtle’s shell and the top curve of the seaweed strands to make everything look submerged.
Add Sparkle
Mix a tiny amount of iridescent medium or glitter paint into your final white highlights on the bubbles. It gives a magical shimmer when the light hits the canvas.
Step back and admire your serene underwater scene, now ready to bring a splash of ocean calm to any room.


Whimsical Butterflies in Pastel Flight
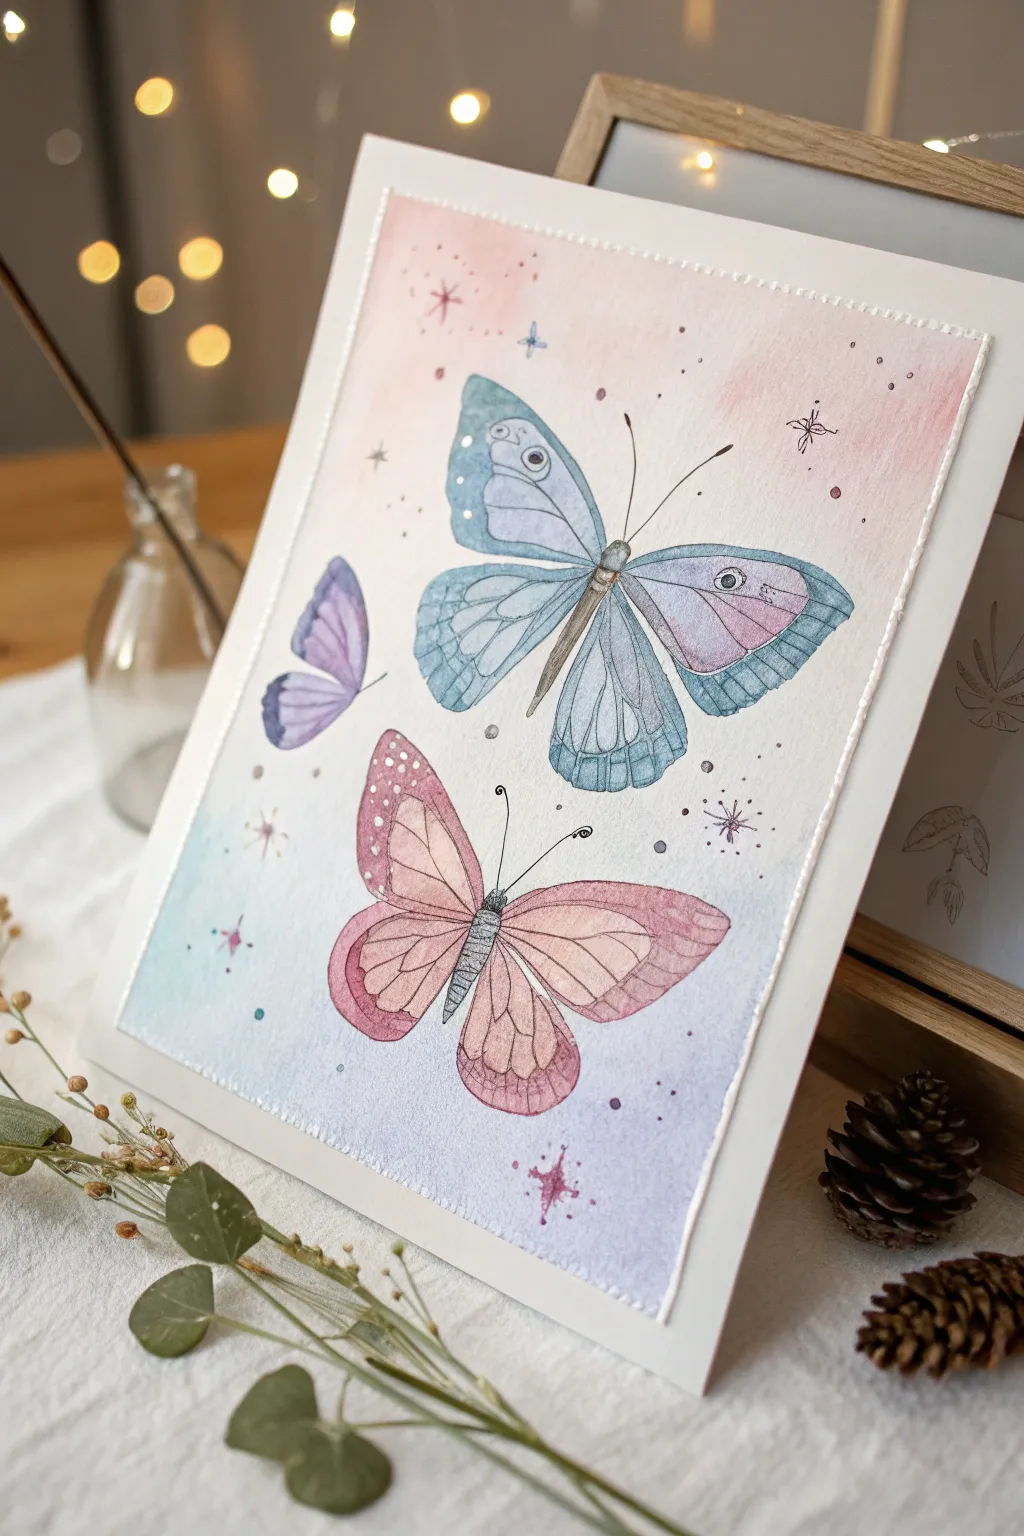
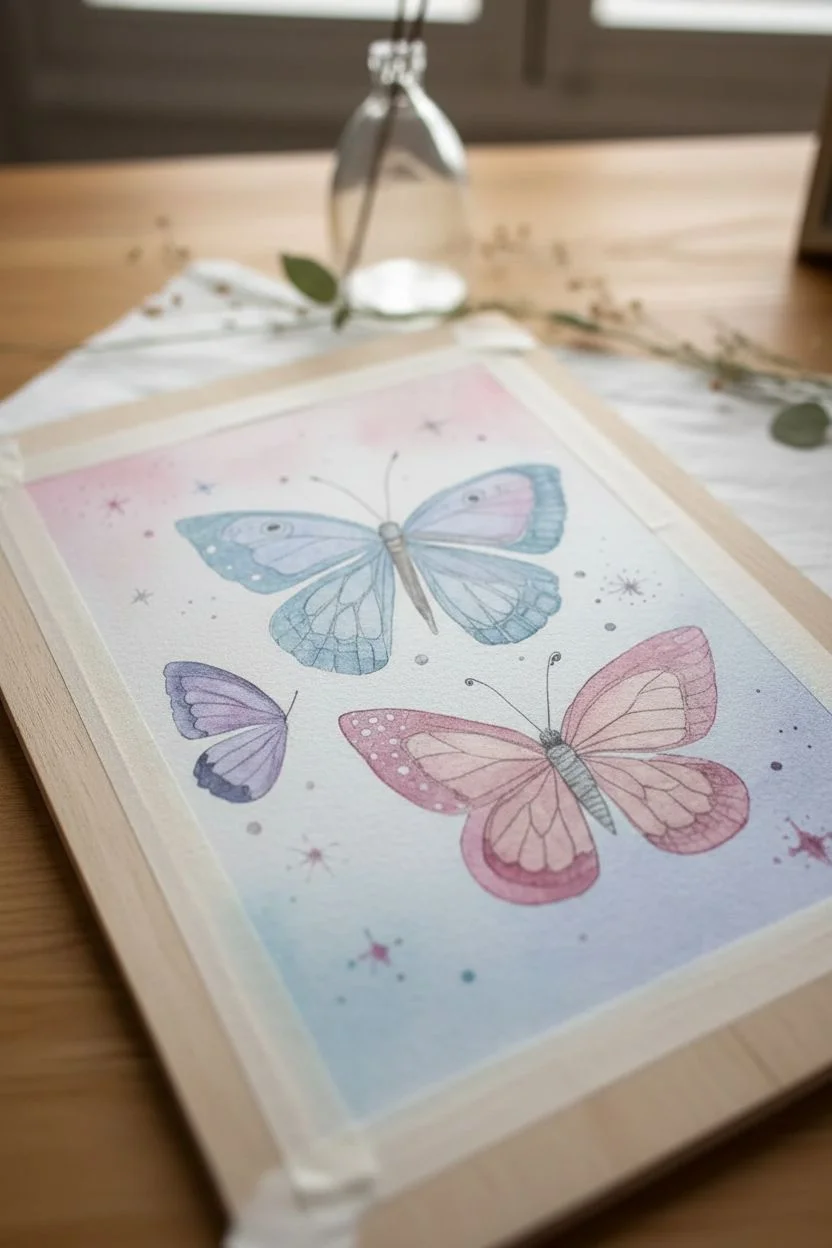
Capture the magic of an ethereal garden with this delicate butterfly study, featuring soft pastel washes and finely detailed insect wings. The dreamy blend of pink and periwinkle creates a soothing backdrop for these gentle, fluttering creatures.
Detailed Instructions
Materials
- Heavyweight watercolor paper or mixed media paper (at least 300 gsm)
- Acrylic paints: Titanium White, Ultramarine Blue, Magenta, Violet, Burnt Umber
- Water spray bottle
- Set of soft synthetic brushes: large flat brush (for background), size 2 and 0 round brushes (for details)
- Palette or mixing plate
- Graphite pencil (HB or H)
- White gel pen or fine white acrylic marker
- Fine black liner pen (waterproof) or very fine brush with black paint
- Paper towels
- Masking tape
Step 1: Preparation’s First Flutter
-
Secure the paper:
Tape down all four edges of your paper to a hard board using masking tape. This creates a clean white border and prevents the paper from buckling under the wet washes. -
Sketch the layout:
Lightly sketch the outlines of three butterflies: a large central blue one with open wings, a smaller purple one in profile on the left, and a medium pink one below. Keep lines faint to avoid showing through the final paint. -
Mix background colors:
Prepare a very diluted wash of Magenta with a touch of Titanium White for the top, and a diluted Ultramarine Blue mixed with Titanium White for the bottom area. -
Apply the background wash:
Using the large flat brush, wet the paper slightly with clean water (avoiding the butterfly shapes if possible, but it’s okay if they get wet). Paint the top half pink and the bottom half blue, blending them softly in the middle to create a seamless gradient. -
Add sparkle details:
While the background is fully dry, pencil in tiny starbursts and dots scattered around where the butterflies will be. You can paint these later, but it helps to know their placement now.
Step 2: Painting the Wings
-
Base coat the blue butterfly:
Mix a soft periwinkle using Blue, White, and a tiny dot of Violet. Fill in the wings of the large central butterfly. Add a slightly darker blue to the wing edges while wet for a soft blend. -
Base coat the pink butterfly:
Create a dusty rose color by mixing Magenta, White, and a speck of Burnt Umber. Fill in the lower butterfly’s wings, keeping the center slightly lighter than the tips. -
Base coat the purple butterfly:
For the small side butterfly, use a Violet and White mix. Paint the single wing shape, darkening the edge closest to the body to suggest depth. -
Painting the bodies:
Mix Burnt Umber with a touch of Blue to make a dark, soft charcoal color. Using the size 2 round brush, carefully paint the slender bodies and heads of all three butterflies. -
Adding wing veins:
Once the base coats are bone dry, switch to your size 0 brush or fine liner pen. Dilute your dark charcoal mix slightly and draw thin, delicate veins radiating from the butterfly bodies to the wing tips.
Clean Edges Trick
If you painted over your butterfly sketch during the background wash, simply lift the color with a clean, damp stiff brush before it dries completely.
Step 3: Magical Details
-
Define the patterns:
Paint small circular ‘eyes’ on the blue butterfly’s wings using a dark outline and a filled color that contrasts slightly with the wing base. -
Gradient enhancements:
Glaze a very thin layer of purple over the bottom edges of the blue butterfly’s wings to tie the color palette together. I find this creates a lovely iridescence. -
Highlighting with white:
Use your white gel pen or a fine brush with pure Titanium White to add tiny dots along the wing edges and crisp highlights on the bodies. -
Antennae and legs:
With the finest point possible (pen or brush), draw the curling antennae and any visible legs with smooth, confident strokes. -
Celestial accents:
Paint the small stars and dots in the background using dark purple or black. Add a tiny white center to the larger stars for extra sparkle. -
Faux stitching border:
As a final whimsical touch, use a white gel pen or thick white paint to create a dashed line running vertically down the sides of the painted area, mimicking a sewn thread.
Add Real Texture
Once the painting is dry, use a needle and actual embroidery floss to stitch over the white dashed border lines for a stunning mixed-media 3D effect.
Peel off the tape carefully to reveal your crisp edges and enjoy your dreamy butterfly flight
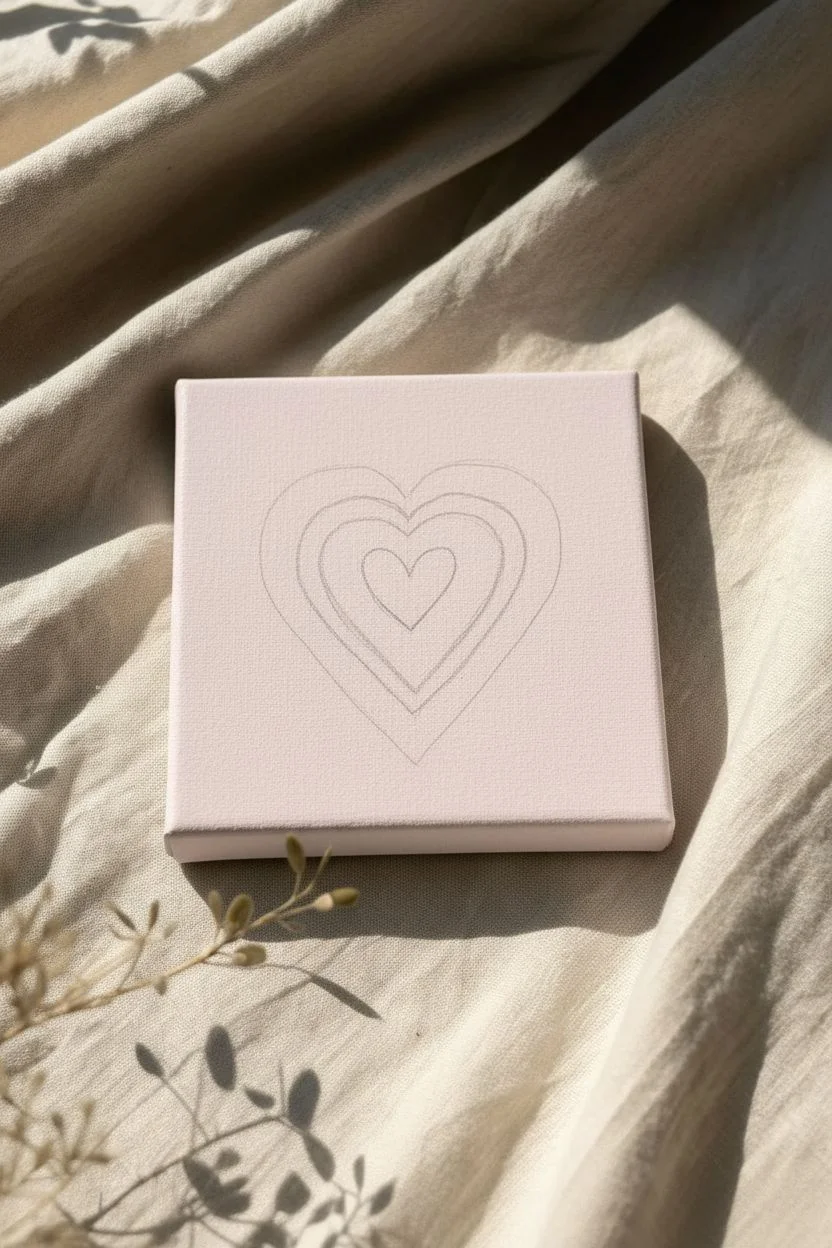
Radiating Heart in Candy Colors
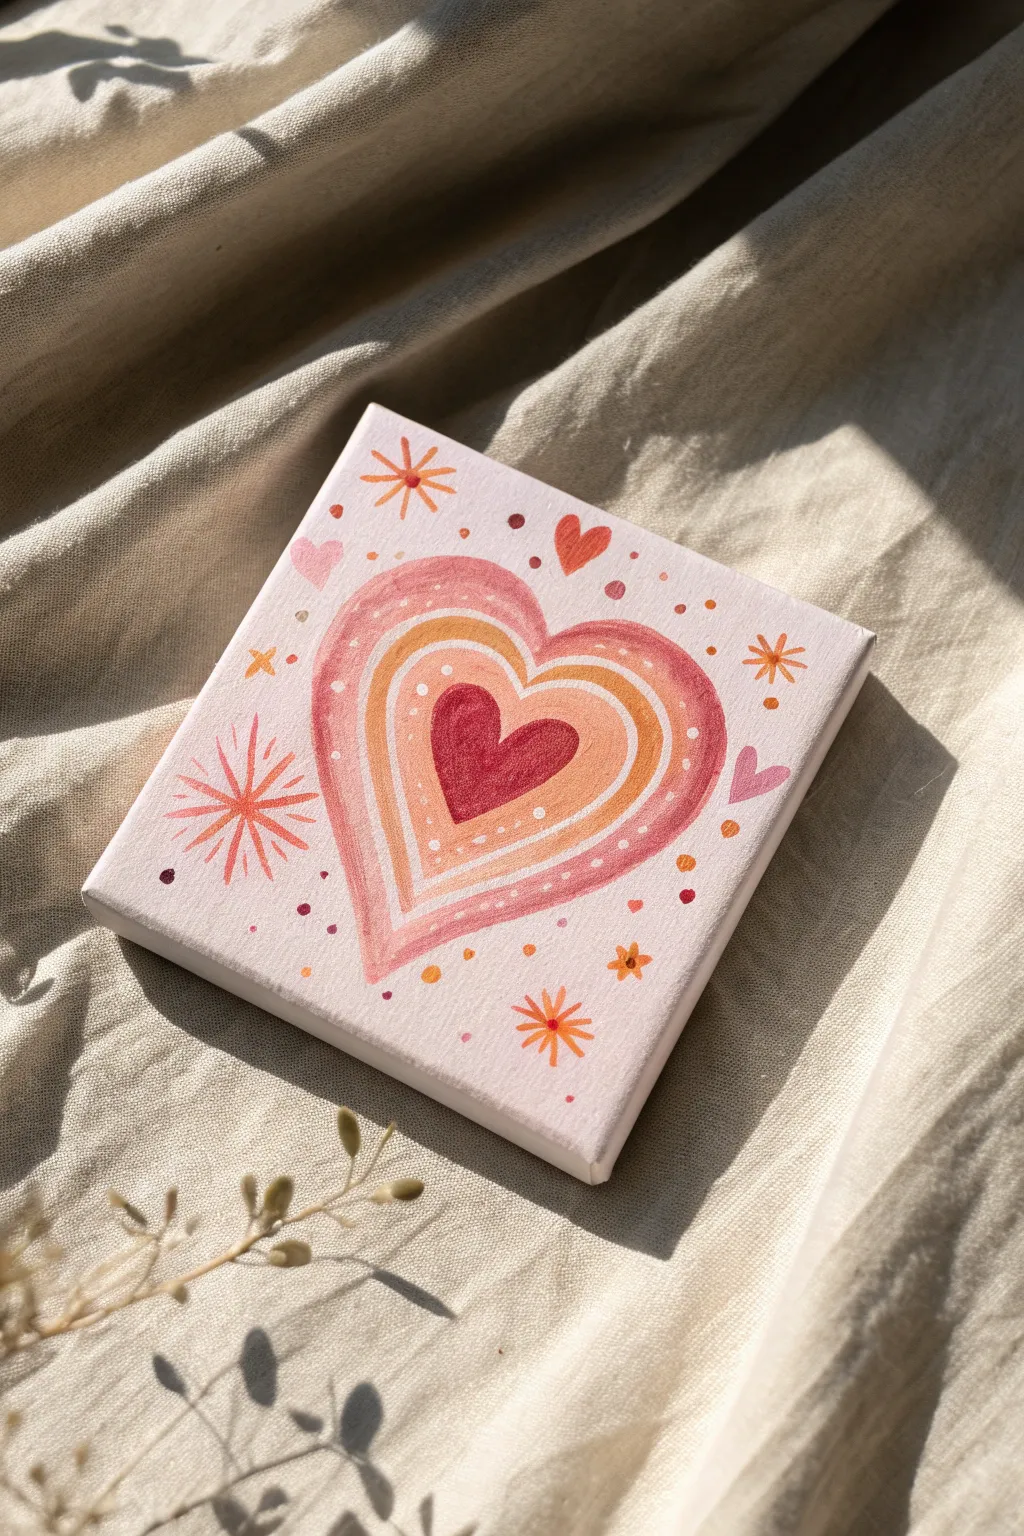
Capture a sweet, groovy vibe with this radiating heart canvas, featuring warm candy-colored hues and playful starburst accents. The concentric layers create a satisfying depth while keeping the overall look soft and romantic.
Step-by-Step Guide
Materials
- Small square canvas (approx. 4×4 or 6×6 inches)
- Acrylic paints: deep red, coral orange, peach, soft pink, white, warm yellow
- Flat brush (small to medium)
- Small round detail brush (size 0 or 1)
- Dotting tool or toothpick
- Pencil for sketching
- Palette for mixing
Step 1: Base and Sketch
-
Prime the background:
Mix a tiny drop of soft pink into your white paint to create a very pale, marshmallow-pink background shade. Apply an even coat over the entire canvas, including the sides, and let it dry completely. -
Sketch the center:
Lightly sketch a small heart right in the center of the canvas using a pencil. This will be the bullseye of your design. -
Map the radiating layers:
Sketch three or four larger heart outlines around the central one, leaving about a quarter-inch of space between each line. Don’t worry if they aren’t perfectly symmetrical; a little wobble adds charm.
Step 2: Painting the Layers
-
Paint the core heart:
Using your small round brush, fill in the smallest central heart with your deepest red shade. Apply two thin coats if necessary for opacity. -
Apply the first ring:
Mix a coral orange shade. Carefully paint the band surrounding the center heart. Use the flat edge of your brush to get crisp lines, but remember that the white space between rings is actually painted, not empty canvas. -
Add separation lines:
Mix a creamy peach color (white + small amount of orange/pink). Use the detail brush to paint thin lines separating the red center from the coral ring, and then outline the outside of the coral ring. -
Paint the outer bands:
Continue working outward. Paint the next wide band in a soft pink. I usually mix white into my red to get a distinct value change from the center. -
Final heart outline:
Paint the outermost shell of the heart in a slightly darker pink or reddish-orange to frame the entire shape. Smooth out any shaky edges with the detail brush.
Clean Lines Hack
Use a flat shader brush for the wide bands of the heart. Turn the brush on its chisel edge to carve out the curves, then flip it flat to fill the distinct color blocks.
Step 3: Details and Embellishments
-
Add interior dots:
Dip the tip of a toothpick or small dotting tool into white paint. Gently place tiny dots along the coral band to give it a retro patterned look. -
Paint starbursts:
Around the main heart subject, use your detail brush to paint simple starbursts. Draw a vertical line, a horizontal line, and two diagonal lines crossing at a center point. Use orange or red for these. -
Add floating hearts:
Fill the empty corner spaces with tiny floating hearts in contrasting colors like deep red or soft pink. -
Sprinkle confetti dots:
Using the handle end of a paintbrush, stamp random colorful dots (confetti) throughout the background space to fill any voids. -
Highlight the starbursts:
If you want extra dimension, add a tiny dot of a lighter color in the very center of your starbursts.
Paint Too Transparent?
Warm colors like reds and oranges are often naturally translucent. If your pencil lines show through, mix a tiny bit of white into your base color to increase opacity.
Allow the canvas to dry fully before displaying your lovely creation on a mini easel or shelf
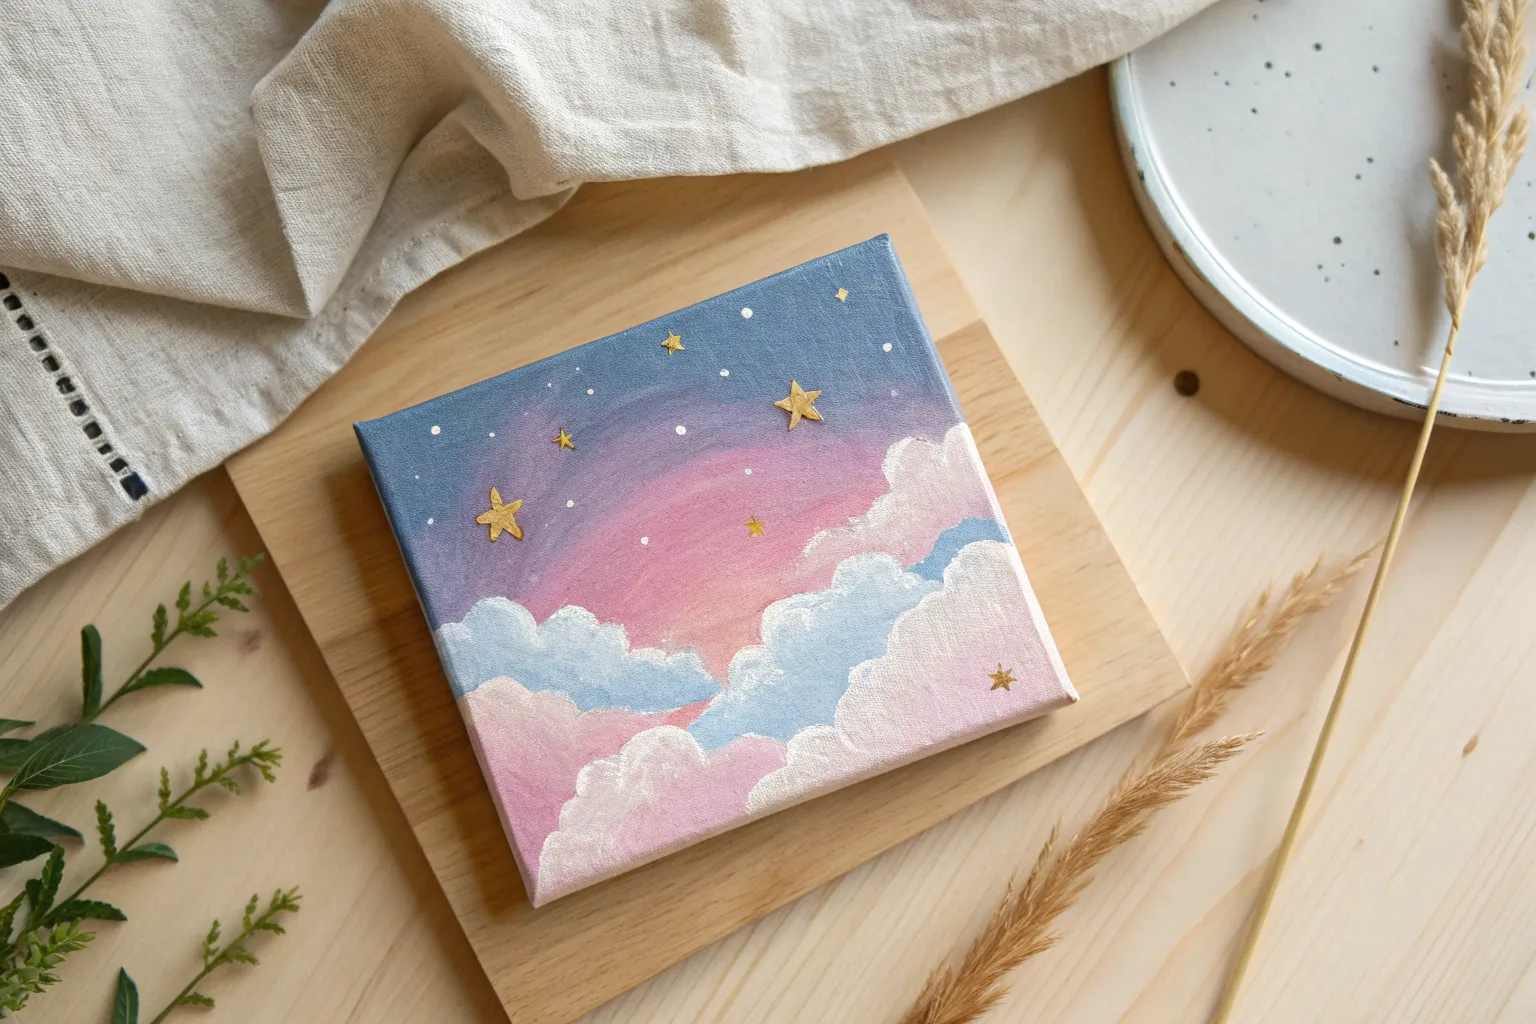
Dreamy Night Sky With Chunky Star Dots
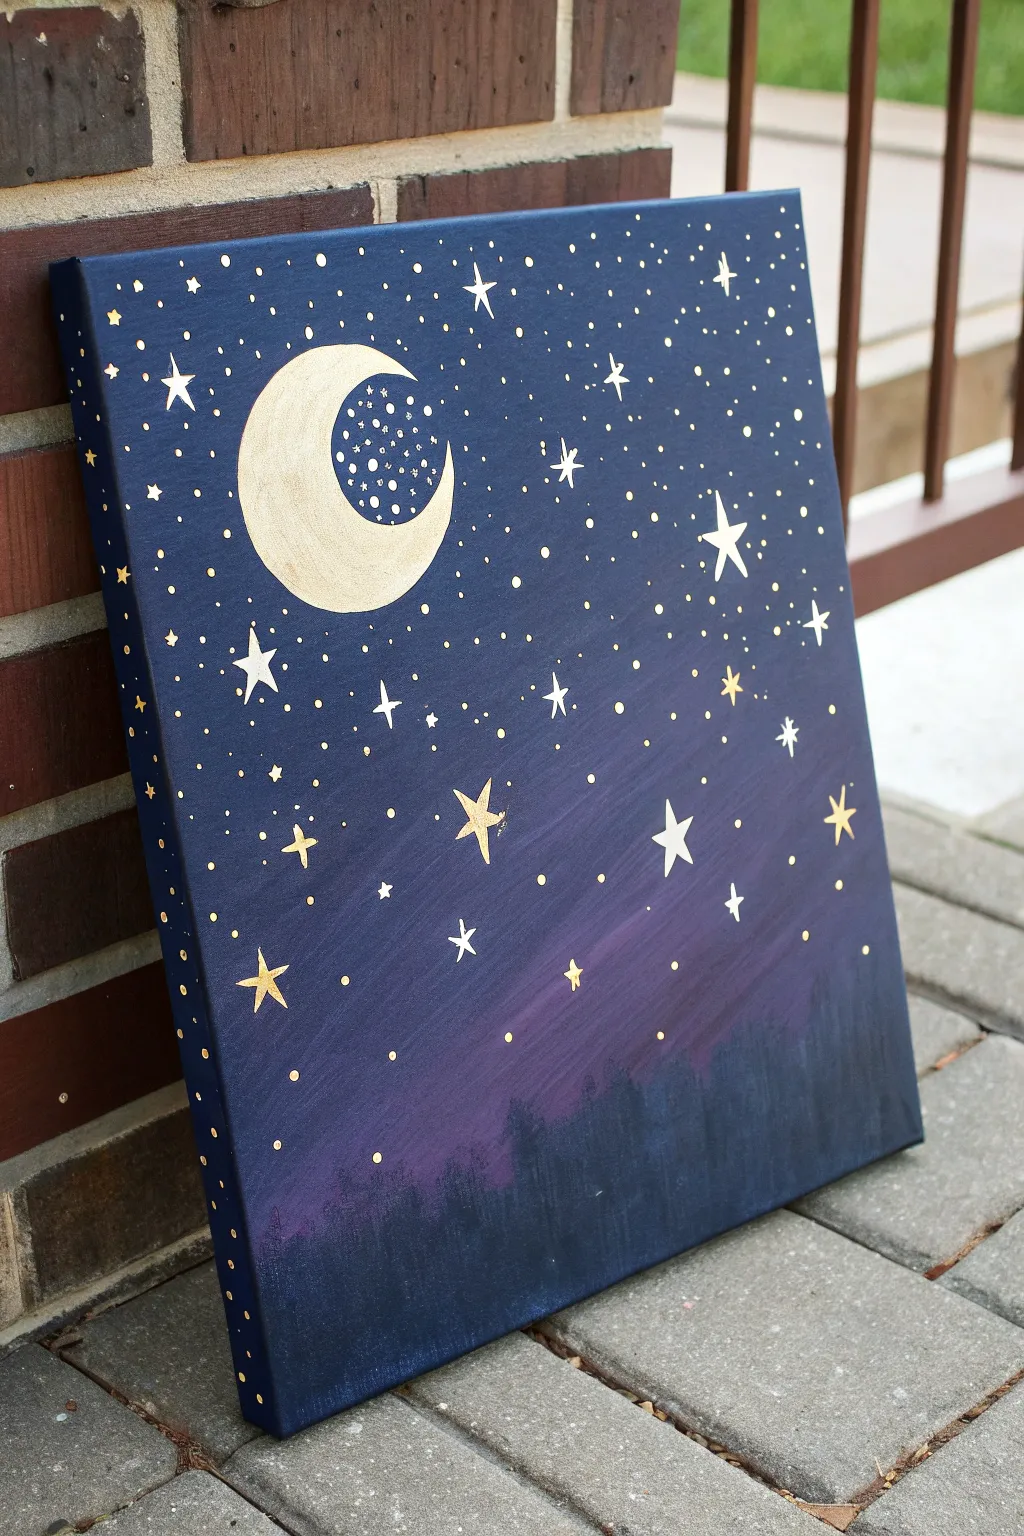
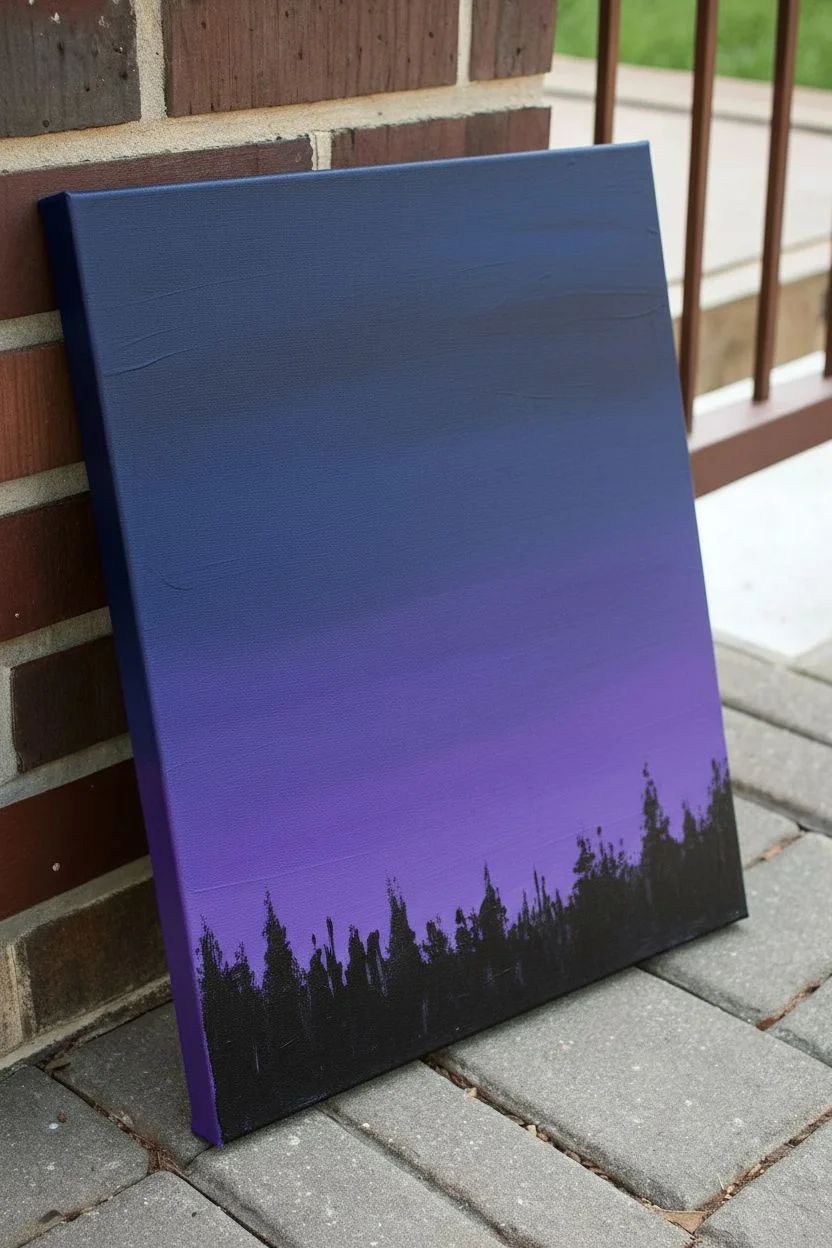
Capture the magic of a starlit evening with this dreamy acrylic painting featuring a shimmering gold moon. The blending of deep blues and violets creates a perfect backdrop for the constellation of chunky stars that brings the whole piece to life.
Step-by-Step Guide
Materials
- Stretched canvas (rectangular, e.g., 11×14 or similar)
- Acrylic paints: Navy Blue, Phthalo Blue, Dioxazine Purple, Mars Black, Titanium White, Metallic Gold
- Large flat brush (1 inch)
- Medium flat or filbert brush
- Small round detail brush (size 0 or 1)
- Small dotting tool or toothpick
- Pencil
- Circular object (like a roll of masking tape) for tracing
- Paper plate or palette
- Cup of water and paper towels
Step 1: Setting the Atmosphere
-
Prime with dark blue:
Start by squeezing a generous amount of Navy Blue paint onto your palette. Using your large flat brush, cover the top two-thirds of the canvas with this deep blue shade using horizontal strokes. -
Paint the edges:
Don’t forget to wrap the color around the sides of the canvas as you go. This gives the finished piece a polished, gallery-ready look without needing a frame. -
Blend the transition:
While the blue is still wet, introduce Dioxazine Purple just below the navy section. Blend the two colors where they meet using back-and-forth horizontal strokes to create a smooth, seamless gradient. -
Deepen the horizon:
At the very bottom third of the canvas, mix a little Mars Black with your purple. Paint this dark mixture downward to the bottom edge, blending it slightly upward into the purple section. -
Create the tree silhouette:
Once the background is dry to the touch, load a medium brush with pure Mars Black. Dab vertical, choppy strokes along the bottom edge to create the suggestion of a distant forest line. Vary the heights slightly for realism.
Fixing Wobbly Stars
If your hand shakes while painting star points, switch to a white gel pen or paint marker for the finest lines. It offers much more control than a brush.
Step 2: The Golden Moon
-
Outline the moon:
Wait for the background to be completely dry. Place your circular object in the upper left quadrant and lightly trace a circle with a pencil. Freehand a smaller inner curve to turn that circle into a crescent shape. -
Base coat the moon:
Fill in the crescent shape with Titanium White first. Metallic paints can be transparent, so this white underlayer makes the gold pop significantly brighter. -
Apply the gold:
Once the white is dry, paint over the crescent with your Metallic Gold paint. You might need two coats to get that solid, shimmering finish. -
Add inner details:
Using your smallest detail brush or a dotting tool, add tiny clusters of white and gold dots inside the curve of the crescent to give it texture and sparkle.
Add Glow
Mix a tiny drop of white paint with a lot of glazing medium or water. Lightly glaze a translucent circle around the moon for a hazy, glowing halo effect.
Step 3: A Galaxy of Stars
-
Paint the hero stars:
Select 5-7 spots around the sky for your largest stars. Using a small round brush and white paint, create five-pointed stars or four-point ‘twinkle’ stars. Keep the lines thin and crisp. -
Add golden accents:
Paint a few medium-sized five-pointed stars using the Metallic Gold paint. I like to scatter these sparsely to balance the white stars. -
Create mid-sized dots:
Dip the handle end of a paintbrush into white paint. Dot the canvas randomly to create varied, chunky stars that are larger than mere speckles. -
Fill the galaxy:
Switch to a toothpick or a small dotting tool. Dip it in white paint and fill the empty spaces with tiny pinprick stars. The density should change occasionally to look more natural. -
Add side details:
Extend the star field onto the painted sides of the canvas. This small detail adds wonderful continuity when the artwork is viewed from an angle. -
Highlight the hero stars:
Once your large white stars are dry, add a tiny dot of gold in their centers for an extra bit of dimension.
Step back and admire your own slice of the infinite cosmos, ready to light up any room
Silhouette Streetlamp With a Heart Cloud Glow
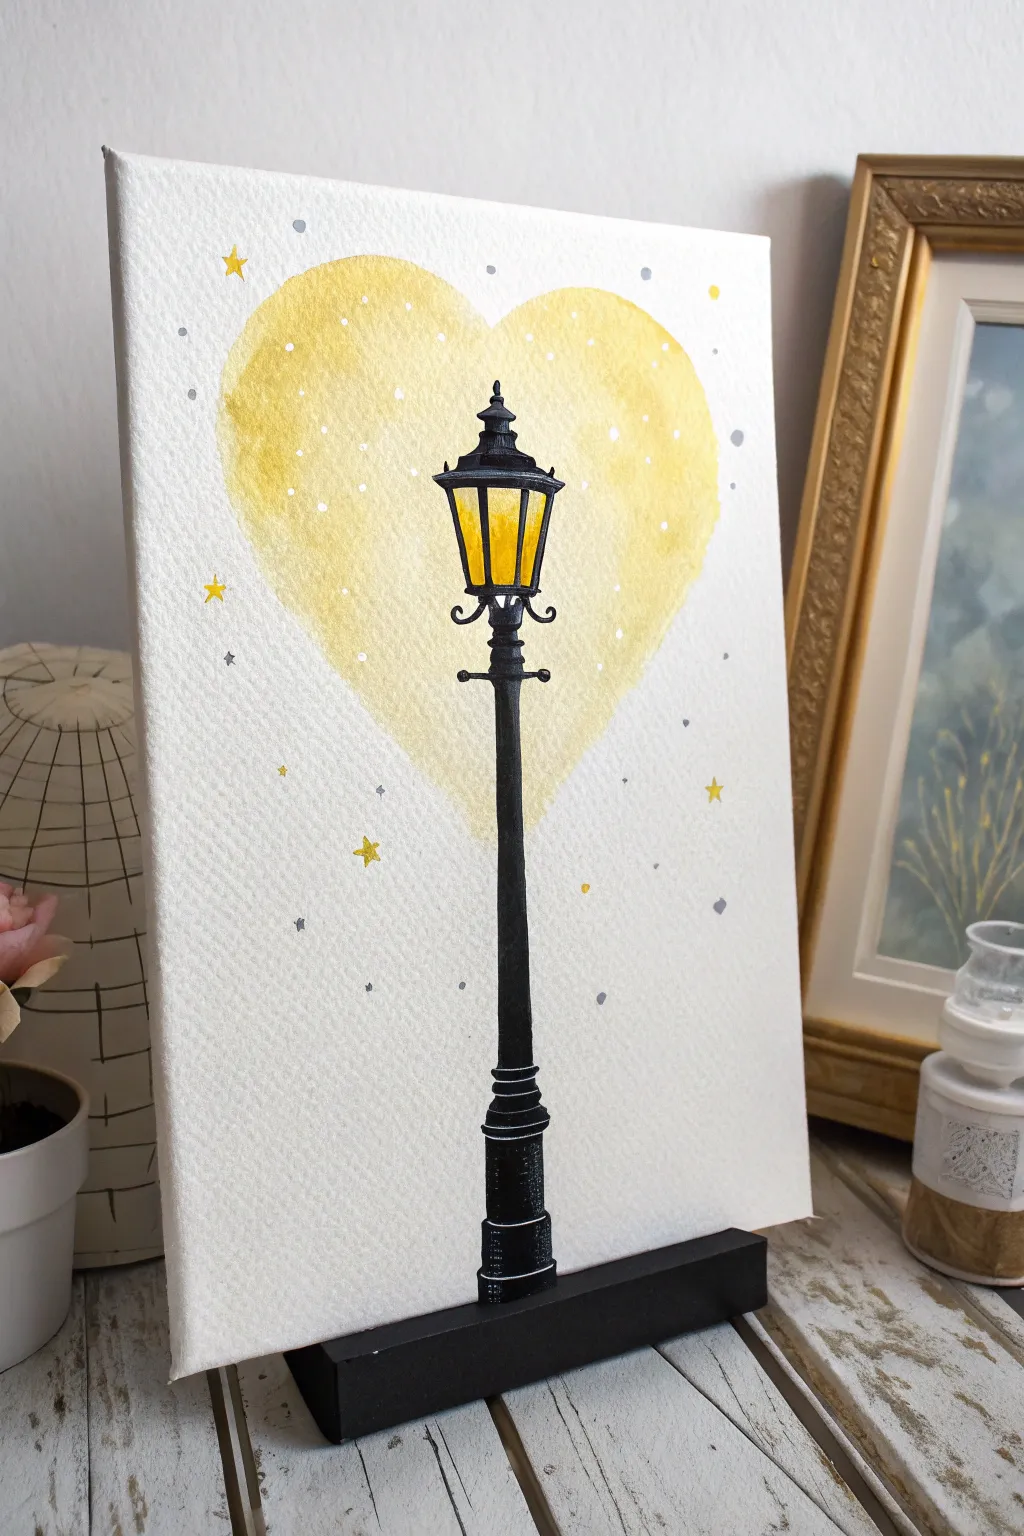
Illuminate your space with this charming painting featuring a classic streetlamp silhouetted against a warm, heart-shaped glow. The high contrast between strict black lines and soft, watercolor-like yellow washes creates a dreamy, romantic atmosphere perfect for a bedroom or cozy corner.
Step-by-Step
Materials
- Small stretched canvas or canvas panel (e.g., 5×7 or 8×10 inches)
- Acrylic paints: Carbon Black, Titanium White, Primary Yellow, Yellow Ochre
- Silver paint or metallic silver marker
- Flat brush (roughly 1/2 inch) for the background
- Small round detail brush (size 0 or 00) for the lamp
- Pencil and eraser
- Ruler
- Palette or small dish for mixing
- Water cup and paper towels
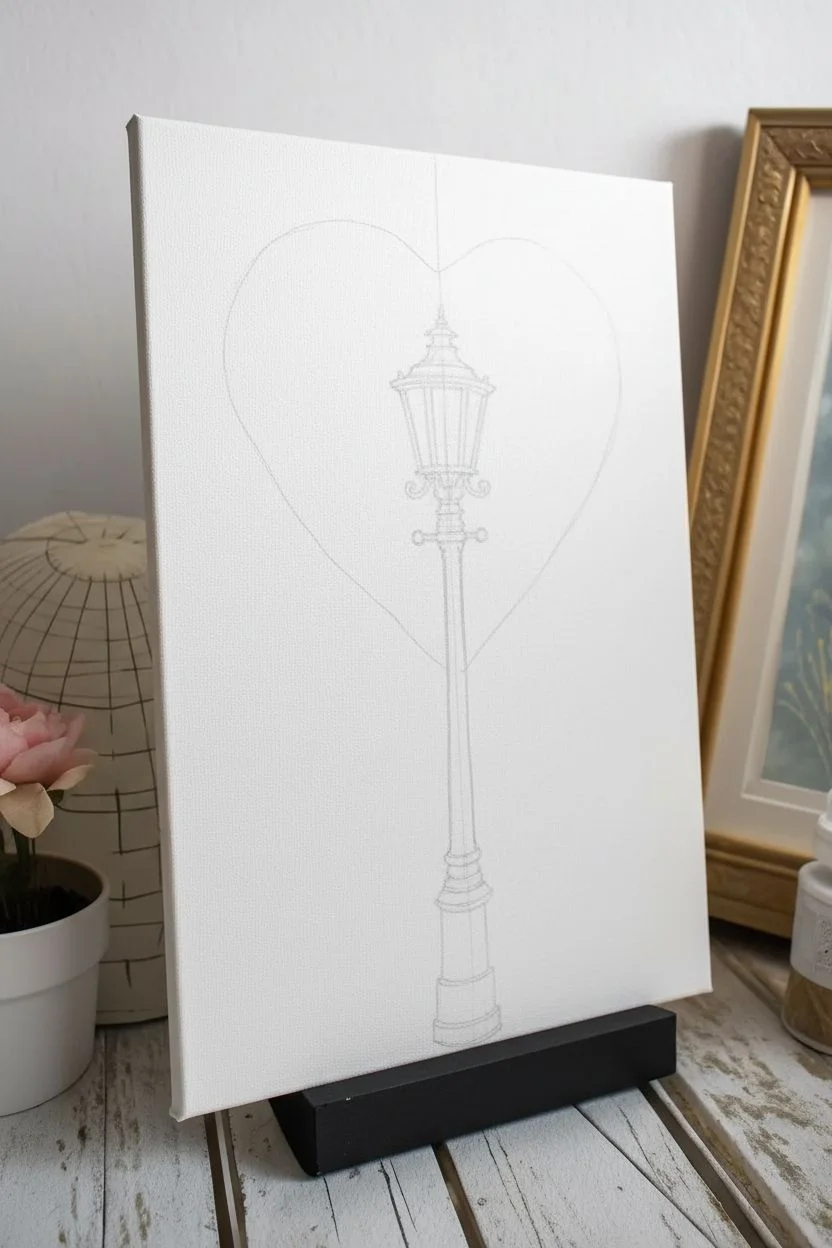
Step 1: Setting the Scene
-
Prime the Surface:
Begin with a clean white canvas. If your canvas isn’t pre-primed or looks a bit dull, apply an even coat of Titanium White acrylic over the entire surface to ensure a bright, crisp background. Let this dry completely. -
Draft the Lamp:
Using a ruler, lightly draw a vertical line down the center of the canvas to act as your guide. Sketch the streetlamp’s shape lightly with a pencil. Start with the base at the bottom, move up the slender pole, and sketch the lantern shape at the top. -
Light Markings:
Around the lantern head, lightly sketch a large heart shape. This doesn’t need to be perfectly symmetrical—a slightly organic, cloud-like shape adds character. This area will be your glow.
Pro Tip: Sharp Lines
If you struggle painting straight lines for the pole, use masking tape! Place two strips vertically leaving a thin gap, paint black in the middle, and peel away for a perfect post.
Step 2: Creating the Glow
-
Mix the Golden Wash:
On your palette, mix a generous amount of water with Primary Yellow and a tiny touch of Yellow Ochre to create a semi-transparent glaze. You want this to look almost like watercolor. -
Paint the Heart:
Fill in your sketched heart shape with the yellow wash. Keep the edges slightly uneven and soft. If the paint is too opaque, dip your brush in water and thin it out directly on the canvas. -
Add Depth:
While the yellow is still slightly damp, dab a little more saturated yellow near the center where the lamp light will be brightest, and let it fade out toward the edges of the heart. -
Wait for Dryness:
It is crucial to let the yellow layer dry completely before moving on to the black paint, otherwise, you might smudge the crisp silhouette.
Step 3: The Silhouette
-
Outline:
Load your small round detail brush with Carbon Black paint. Usually, I thin the black paint just slightly with a drop of water to help the ink flow smoothly for long lines. Carefully outline the lantern head first. -
Fill the Post:
Paint the vertical post of the lamp. Use your ruler again if you need a steady hand guide, or use your pinky finger as a pivot point on the dry canvas to keep your line straight. -
Detail the Base:
Paint the decorative base of the lamp at the bottom. This area is usually thicker and might have some ridges or stepped sections, as seen in the reference image. -
Refine the Lantern:
Fill in the structural parts of the lantern head black, leaving the ‘glass’ panes strictly transparent so the yellow heart background shows through. This creates the illusion that the light is on. -
Add Decorative Curls:
Using the very tip of your detail brush, add the small horizontal crossbar below the lantern and any little curly ironwork flourishes. These delicate details make the lamp look vintage.
Level Up: Texture
For a rustic look, use a coarse sponge to dab the yellow heart instead of a brush. This creates a fluffy, cloud-like texture that contrasts beautifully with the sleek lamp.
Step 4: Magical Details
-
Highlight the Lamp:
Once the black paint is bone dry, take a clean detail brush with a tiny bit of Titanium White. Add very thin, scratchy highlight lines on the base ridges and the top of the lantern cap. This makes the lamp look 3D and metallic. -
Paint the Stars:
Using your yellow mix (make it more opaque this time by using less water), paint small five-pointed stars scattered randomly around the background. -
Add Silver Accents:
Dip a brush handle or a dotting tool into silver paint (or use a silver marker) to add tiny dots and smaller stars between the yellow ones. This adds a subtle shimmer to the sky. -
Final White Dots:
To finish off the magical dust effect, add minute dots of pure white paint interspersed among the stars and silver specks, concentrating a few inside the yellow heart area as well.
Step back and admire the warm, inviting glow of your personal streetlight
Mini Planets With Cute Rings and Sparkles

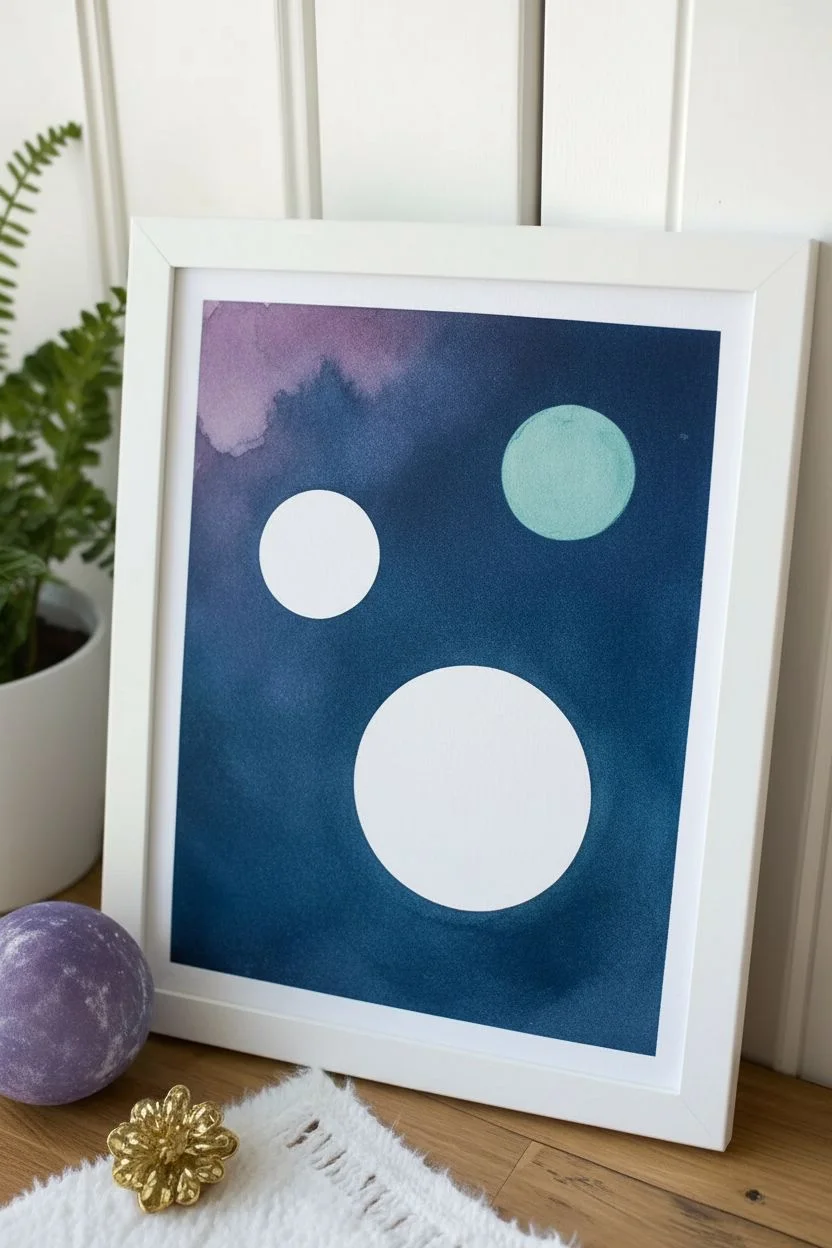
Create a dreamy celestial scene featuring three soft, textured planets floating in a deep indigo galaxy. This project combines loose, watercolor-style blending with crisp metallic accents for a magical finish that looks lovely in any white frame.
How-To Guide
Materials
- Heavyweight watercolor paper or mixed-media paper
- Acrylic paints (Indigo/Navy Blue, White, Violet, Teal, Pink, Gold Metallic)
- Water suitable for thinning acrylics
- Soft round brushes (sizes 6 and 2)
- Fine liner brush (size 0 or 00)
- Pencil and circular objects for tracing (cups, lids)
- Palette for mixing
- Paper towels
- Old toothbrush (optional for stars)
Step 1: Setting the Scene
-
Draft your composition:
Begin by lightly tracing three circles onto your paper using different sized lids or cups. Place the largest circle slightly off-center at the bottom, a medium one near the top right, and the smallest to the left. -
Prepare the background wash:
Mix a deep indigo or navy blue acrylic paint with a generous amount of water to create a watercolor consistency. The paint should be fluid but still opaque enough to hold color. -
Paint the galaxy:
Carefully paint around your traced planetary circles, filling the entire background with your dark blue wash. While the paint is still wet, you can dab in touches of violet or slightly lighter blue in corners to create a nebulous, cloudy effect. -
Wait for the void to dry:
Let the background dry completely before moving on to the planets to prevent colors from bleeding into one another.
Step 2: Painting the Planets
-
Base the red planet:
For the largest bottom planet, mix a watery purple-pink shade. Paint the entire circle with a very light wash of this color first. -
Add planet texture:
While the base is damp, stripe across the planet with slightly thicker bands of pigment—alternating between violet, pink, and white. Allow the edges of the stripes to bleed softly into each other. -
Paint the pink moon:
Move to the small circle on the left. Mix a soft pastel pink and paint curved bands similar to the first planet, keeping the lines lighter near the top to suggest volume. -
Create the ringed giant:
For the top right planet, use a watered-down teal or turquoise. Paint horizontal bands, leaving some areas very pale to show highlight and form. -
Let the planets set:
Allow all paint layers to dry thoroughly. The surface must be dry to the touch before adding the crisp metallic details in the next phase.
Starry Mess?
If your star splatter gets on the planets, wait for it to dry completely, then gently paint over the speckle with the planet’s base color to hide it.
Step 3: Celestial Details
-
Draft the rings:
For the teal planet, very lightly sketch an elliptical ring shape that cuts across the middle and loops behind the planet. -
Gild the rings:
Using your fine liner brush and undiluted metallic gold paint, carefully fill in the ring shape. Add a second thin line parallel to the main ring for extra detail. -
Paint larger stars:
Use the gold paint to draw several five-pointed stars scattered around the empty space. Vary their sizes to create depth. -
Create distant starfields:
Dip an old toothbrush or a stiff brush into watery white paint. Use your thumb to flick the bristles, spraying a fine mist of white speckles across the dark background. -
Add singular stars:
With the liner brush and white paint, add tiny focused dots in clusters to represent distant constellations that stand out more than the splatter. -
Final highlights:
Add a tiny touch of gold or white to the edge of a planet or two to make them pop against the dark space background.
Level Up
Add 3D dimension by using puffy paint for the gold stars, or stick actual gold leaf onto the planet rings for a texture that catches the light.
Now mount your cosmic masterpiece in a simple frame to bring a touch of the universe into your room


Have a question or want to share your own experience? I'd love to hear from you in the comments below!