Whenever I need a little creative boost, I go straight for cute drawing prompts that feel light, quick, and impossible to mess up. Here are my favorite cute drawing inspo ideas you can riff on in your sketchbook anytime you want something charming without the pressure.
Chubby Cat Faces
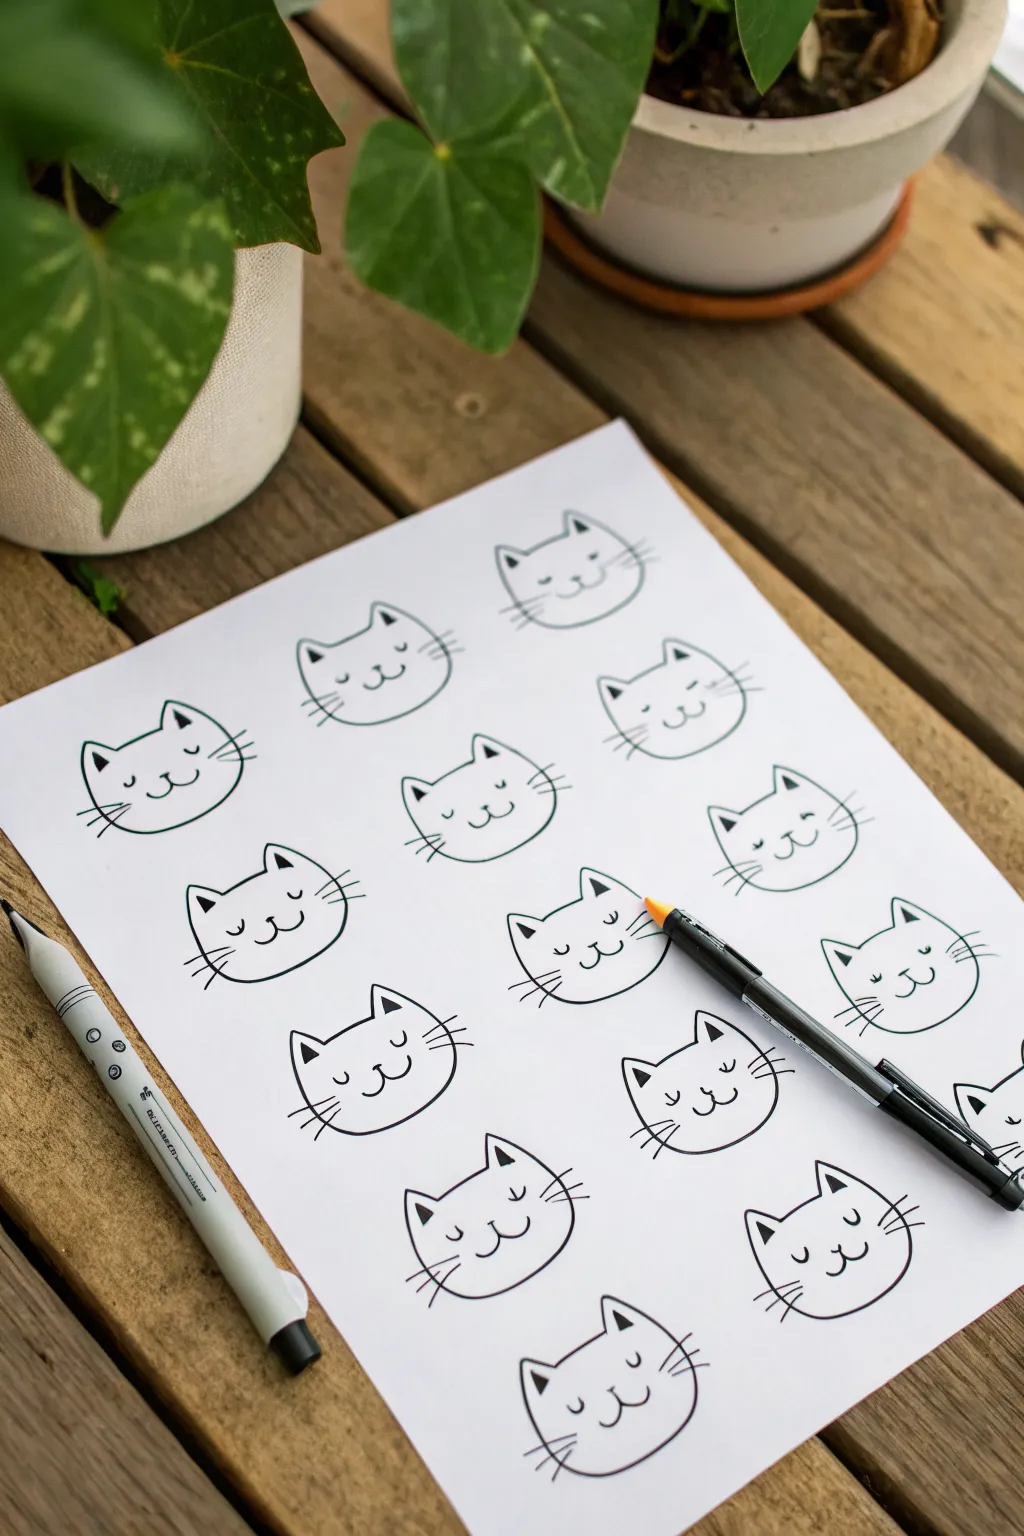
Fill a page with charm by drawing a grid of blissfully chubby cat faces. This meditative ink drawing project relies on simple, repeating shapes to build confidence and create a satisfying pattern of feline expressions.
Detailed Instructions
Materials
- White drawing paper (A4 or cardstock)
- Fine liner pen (black, 0.4mm or 0.5mm)
- Thicker marker or brush pen (black, for filling ears)
- Pencil (HB or 2H)
- Eraser
- Ruler (optional)
Step 1: Planning the Layout
-
Lightly Grid:
Begin by envisioning a grid on your paper. If you struggle with spacing, lightly sketch a 3×5 or 4×5 grid using a pencil and ruler to keep your cats evenly distributed. -
Sketch Head Shapes:
Using your pencil, draw a series of slightly flattened u-shapes or wide ovals. These don’t need to be perfect circles; a slightly wider bottom gives them that adorable chubby cheek look. -
Add Ears:
On top of each head shape, sketch two small triangles for ears. Keep them somewhat widely spaced to accentuate the flatness of the head.
Variation Tip
Change the expressions! Try making one cat wink, have open circular eyes, or stick a tongue out to break the pattern.
Step 2: Inking the Features
-
Outline the Head:
Switch to your fine liner pen. Trace over your pencil outlines for the head, keeping your wrist loose for smoother curves. Don’t worry if lines aren’t perfectly symmetrical; it adds character. -
Draw the Eyes:
For the sleepy look shown here, draw two small, downward-curving arcs in the middle of the face. They should look like little ‘u’ shapes. -
Add Lashes:
Flick a tiny line or two off the outer corner of each eye to suggest eyelashes. -
Create the Nose:
Center a tiny, inverted triangle or a small dot between and slightly below the eyes. -
Form the Mouth:
Draw two curved lines extending outward from the bottom of the nose, resembling a ‘3’ turned on its side or a classic ‘w’ mouth. -
Whisker details:
Add three straight lines on each cheek. Vary the lengths slightly, making the middle whisker the longest for a dynamic look.
Step 3: Finishing Touches
-
Fill the Ears:
Draw a smaller triangle inside the left ear of each cat. Using your thicker marker or brush pen, color this inner triangle solid black. -
Right Ear Detail:
For the right ear, simply draw a small diagonal line inside to suggest depth without filling it in completely. -
Erase Guide Lines:
Wait until the ink is completely dry—I usually give it at least five minutes to be safe. Then, gently erase all your initial pencil sketches and grid lines. -
Check for Gaps:
Review your lines. If any outlines are too faint or broken, go back over them with the fine liner to crispen up the drawing. -
Pop of Color (Optional):
While the main look is monochrome, you can take an orange or pink marker and add a tiny dot to the nose or cheeks of one specific cat to create a focal point.
Smudge Prevention
Place a scrap piece of paper under your drawing hand. This stops oils from your skin transferring and prevents ink smudges.
Now you have an adorable sheet of cat doodles ready to be framed or used as custom wrapping paper


Puppy Paws and Floppy Ears
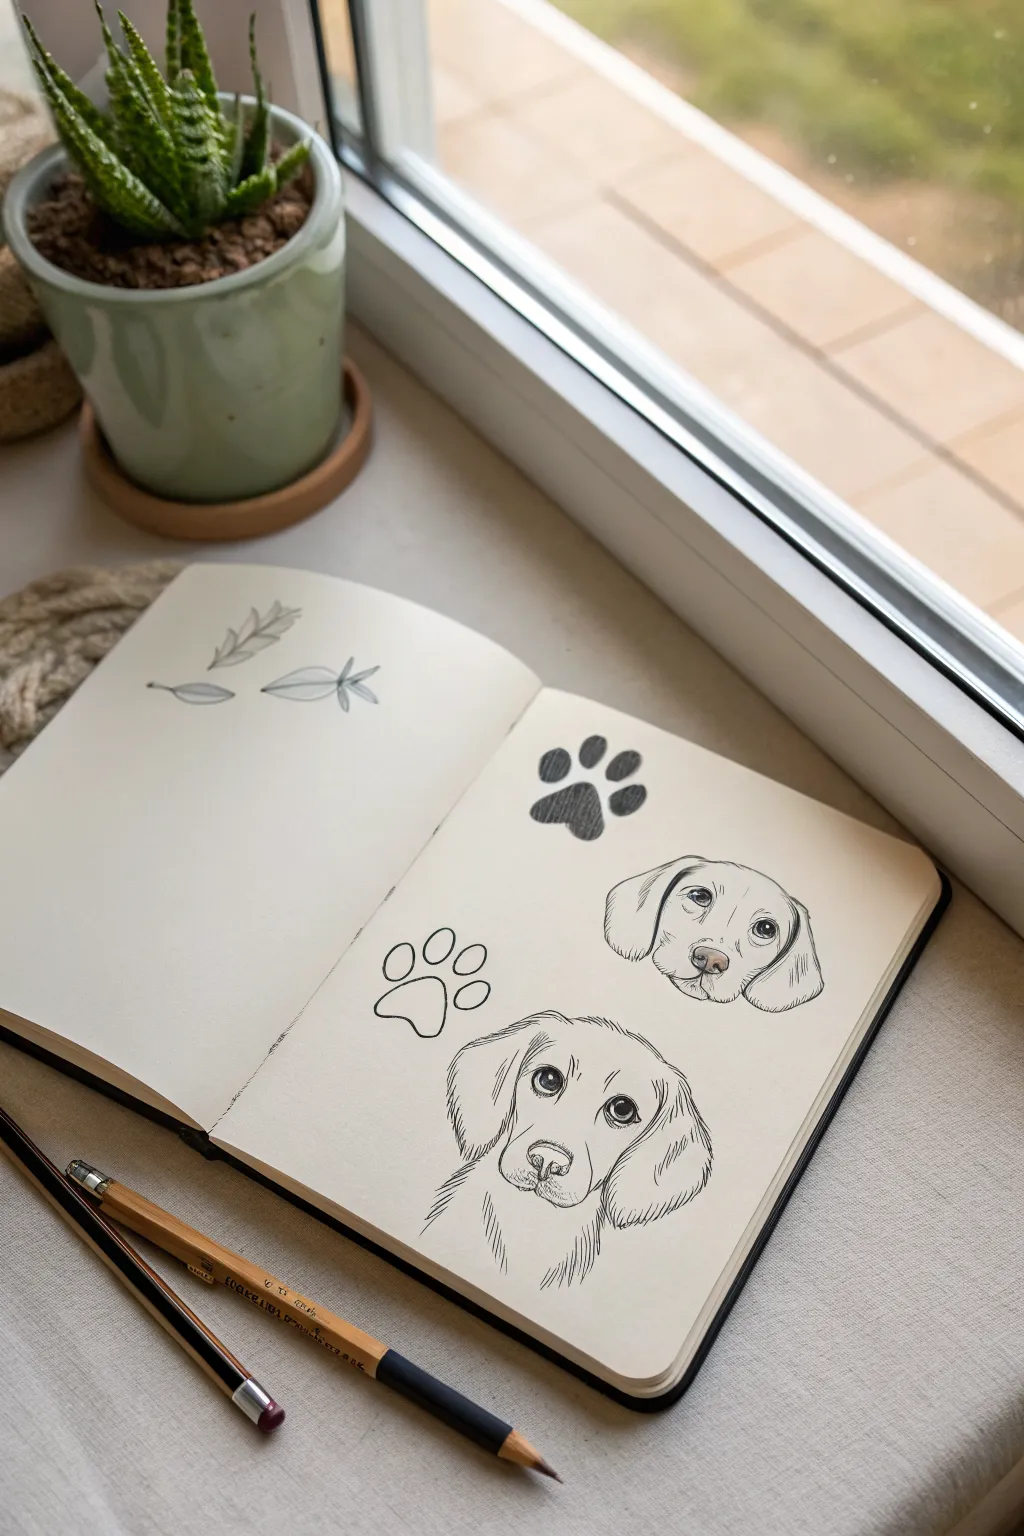
Capture the sweetness of man’s best friend with this charming sketchbook spread featuring two delightful puppy portraits and paw prints. This graphite and ink study combines soft shading with crisp line work to bring out those soulful eyes and velvety textures.
How-To Guide
Materials
- Smooth heavyweight sketchbook paper
- HB or 2B graphite pencil (for sketching)
- Fine liner pens (0.1mm, 0.3mm, and 0.5mm)
- Kneaded eraser
- Blending stump (tortillon)
Step 1: Planning the Layout
-
Map out the composition:
Visualize the right-hand page as your main canvas. Mark two circular areas for the puppy heads—one slightly higher and to the right, the other lower and centered. Leave space in the top left corner for the paw prints. -
Rough in the head shapes:
Using your HB pencil with a very light hand, draw a rounded square shape for the top puppy’s head and a slightly larger, boxier shape for the bottom dog. Add center lines to help align the facial features later. -
Draft the ears:
Sketch large, drooping triangle shapes on either side of the heads. Keep the lines curved and relaxed to suggest the soft weight of floppy ears.
Eye Highlights
Never fully color the eyes black. Leave a tiny white circle untouched in the pupil. It brings the dog to life instantly.
Step 2: Drawing the Top Puppy
-
Place the features:
On the top sketch, draw two almond shapes for eyes wide apart. Place a small, rounded triangle nose just below the eye line. -
Refine the outline:
Switch to a slightly firmer pencil pressure. Define the curve of the skull and the cheeks. Notice how the ears attach slightly below the top of the skull. -
Detail the eyes:
Draw the iris and pupil clearly, leaving a small white circle in each eye for the highlight. This reflection is crucial for that ‘puppy dog eyes’ look. -
Ink the top portrait:
Take a 0.3mm fine liner. Go over your pencil lines with confident strokes. Use broken lines on the ears to suggest fur texture rather than a solid hard outline.
Step 3: Drawing the Bottom Puppy
-
Sketch the face:
Move to the lower dog. This one is looking slightly up. Draw the muzzle as a U-shape extending from the face. Place the nose higher on this muzzle shape. -
Add expressive eyes:
Draw larger, rounder eyes for this pup. Add a subtle crease above the eyes to give it an attentive expression. -
Detail the fur:
When sketching the chest and neck area, use quick, jagged strokes to mimic fluffier fur. -
Ink the bottom portrait:
Use the 0.5mm pen for the main outlines to give this dog more visual weight. Switch to the 0.1mm pen for the delicate whiskers and fine fur details inside the ears.
Make it Personal
Customize the spread by writing your own dog’s name in a calligraphy font between the two sketches or adding a date.
Step 4: Adding the Prints
-
Sketch the solid paw:
In the top left gap, draw a main pad (somewhat heart-shaped) and four smaller toe pads above it. -
Fill the solid paw:
Using a soft graphite pencil (like a 4B) or a thick black marker, fill in this paw print completely. I prefer using cross-hatching with a pen for a textured, sketched look. -
Draw the outline paw:
Below the solid print and to the left of the bottom dog, sketch a second paw print. Ink only the outline of this one with a 0.3mm pen, keeping the inside empty for contrast.
Step 5: Finishing Touches
-
Erase guidelines:
Once the ink is completely dry—give it a few minutes to be safe—gently erase all underlying pencil sketches with a kneaded eraser. -
Add faint shading:
Use your pencil to add very light shading inside the ears and under the chins. Use a blending stump to smooth this out, creating a soft gray tone that suggests depth without overpowering the ink. -
Optional botanical doodles:
If you want to mirror the image exactly, sketch a few simple leaves or feathers on the opposing left page using very faint graphite lines, keeping them subordinate to the main drawings.
Close your sketchbook knowing you’ve captured a bit of canine joy on the page
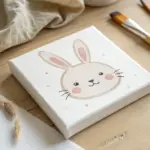

Bunny Mochi Shapes
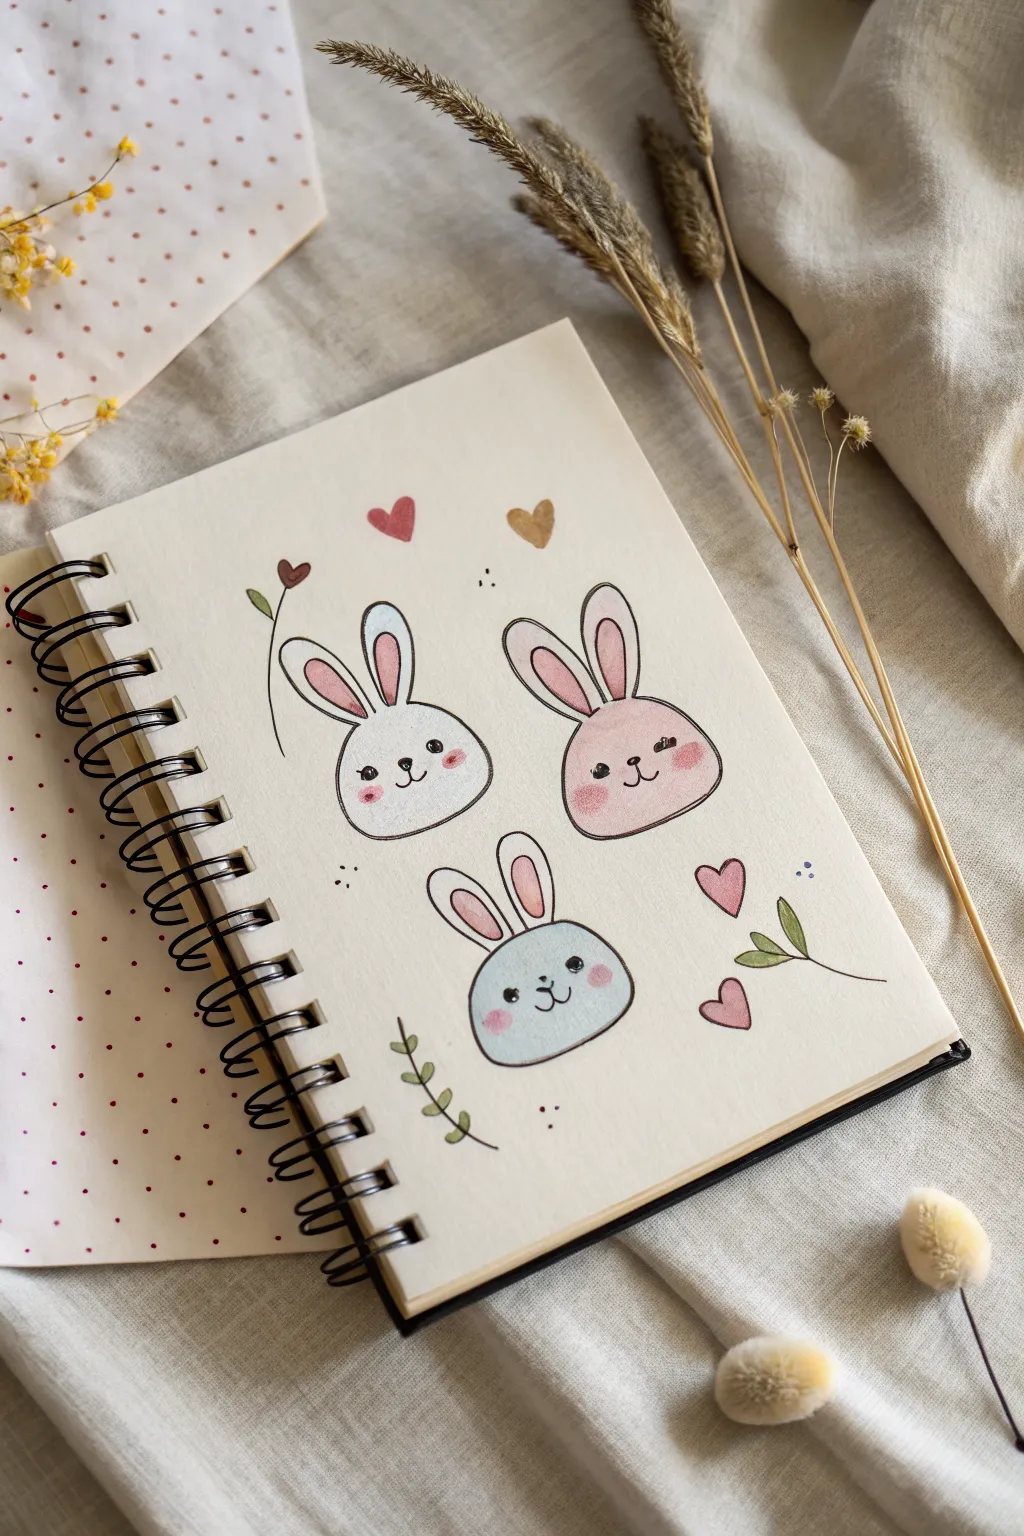
Create this sweet page of squishy, mochi-shaped bunnies using simple watercolor washes and fine liner details. The soft pastel palette and rounded forms give these little characters an irresistible, marshmallow-like charm.
Step-by-Step Guide
Materials
- Spiral-bound watercolor sketchbook (cold press paper recommended)
- Black fine liner pen (waterproof/archival ink, size 01 or 03)
- Watercolor paints (White, pastel pink, soft blue, brown/sepia, earthy yellow)
- Round watercolor brush (size 4 or 6)
- Pencil and eraser
- Jar of water
- Paper towel
Step 1: Sketching the Shapes
-
Outline the heads:
Start by lightly sketching three soft, flattened oval shapes in a loose triangular arrangement on your page. These are the ‘mochi’ heads, so keep the bottoms slightly flatter than the tops for that squishy look. -
Add the ears:
Draw medium-length ears on top of each oval. Place them fairly close together, standing upright but rounded at the tips. -
Mark inner ears:
Sketch a smaller, thinner oval shape inside each ear to mark where the pink inner ear color will go later. -
Add accessories:
Lightly pencil in the surrounding decorative elements: a heart and flower stem on the top left, a heart cluster on the bottom right, and a leafy sprig at the bottom center.
Wet-on-Dry Trick
Make sure your base color is completely bone-dry before adding the pink cheeks. If it’s still wet, the cheeks will bleed out too much and lose their cute circular shape.
Step 2: Watercolor Base Layers
-
Paint the blue bunny:
Mix a very watery, pale blue. Fill in the head shape of the bottom bunny, keeping the wash even. -
Paint the pink bunny:
Using a soft pastel pink, fill in the head of the right-hand bunny. Save a bit of this pink mix for the hearts. -
Paint the white bunny:
Use clean water or a very faint, milky wash of white gouache/watercolor to fill the top-left bunny if your paper isn’t bright enough, or simply leave the paper bare for a pure white look. -
Color the inner ears:
With a slightly more saturated pink, carefully paint the inner ear shapes on all three rabbits. -
Add blushing cheeks:
While the faces are dry (or slightly damp for a fuzzier look), dab two small circles of rosy pink onto the cheek areas of each bunny.
Step 3: Illustrating Details
-
Outline the forms:
Once the paint is completely dry, use your black waterproofing pen to trace the outer perimeter of the bunnies—ears and heads. -
Draw the faces:
In the center of each face, draw two small dots for eyes and a tiny ‘u’ shape for the mouth. Add a vertical line connecting the nose area to the mouth. -
Add subtle lashes:
For extra cuteness, give two of the bunnies tiny eyelashes extending from the outer corners of their eyes. -
Paint the decorative hearts:
Use varied shades of red, pink, and gold ochre to paint in the floating hearts you sketched earlier. -
Paint the foliage:
Mix an olive green shade and paint simple leaves on the stems near the bunnies. -
Ink the accessories:
Outline your hearts and plant stems with the black fine liner. Don’t worry if the lines aren’t perfect; a loose line adds character. -
Final touches:
Add tiny clusters of three dots around the bunnies using the fine liner to fill empty space and balance the composition.
Make it Sparkle
Use a white gel pen to add tiny highlights to the eyes and the tops of the cheeks after the black ink dries. It makes the bunnies look glossy and alive.
Now you have a charming trio of soft bunnies ready to brighten up your sketchbook


Tiny Bears in Sweaters
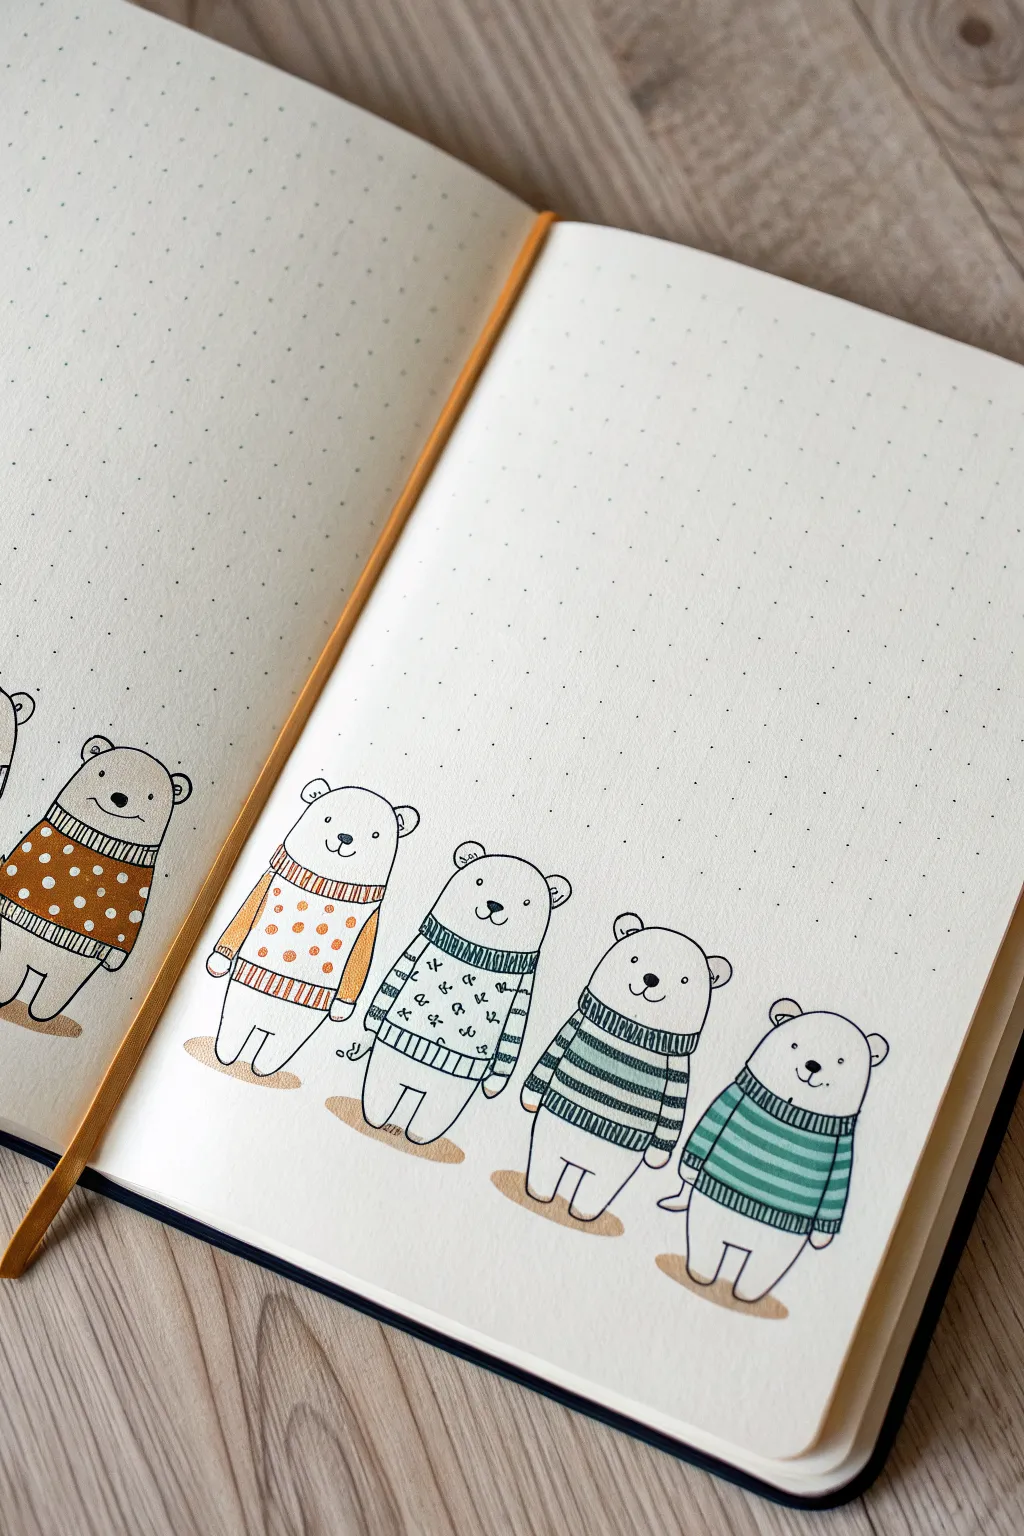
Add a touch of warmth to your bullet journal with this adorable lineup of hand-drawn bears sporting their favorite winter knits. This beginner-friendly spread uses simple shapes and muted colors to create a heartwarming border perfect for winter months.
How-To Guide
Materials
- Dot grid notebook or journal
- Fine liner pen (black, roughly 0.3mm)
- Pencil and eraser
- Alcohol-based markers (muted teal, mustard yellow, rust orange, light grey)
- White gel pen (optional for pattern details)
Step 1: Planning the Layout
-
Establish the baseline:
Count up about 4-5 dots from the bottom edge of your page. Lightly sketch a horizontal guideline in pencil across the spread to ensure all your bears stand on the same ground. -
Sketch the body shapes:
Using your pencil, draw simple, rounded oblong shapes for the bears’ bodies. Space them evenly apart, leaving about 2-3 dot grid squares between each figure. -
Add heads and ears:
On top of each body shape, sketch a slightly flattened circle for the head. Add two small semi-circles on top for the ears, keeping them rounded and soft. -
Define the limbs:
Draw simple, stubby arms hanging at the sides or slightly tucked in. Add small, rounded rectangular shapes at the bottom for legs.
Color Coordination
Limit your palette to 3-4 distinct colors. Repeating the same teal or mustard tones across different bears ties the whole illustration together.
Step 2: Inking the Outline
-
Trace with fine liner:
Go over your pencil sketches with a black fine liner. Keep your stroke confident but slightly loose to maintain that hand-drawn charm. -
Draw the faces:
Place the facial features low on the head circle for cuteness. Draw two tiny dots for eyes and a small, filled-in oval for the nose. Connect the nose to a small ‘w’ shape mouth. -
Create the sweater necklines:
Draw a curved line just below the bear’s chin to mark the sweater collar. Add a second parallel line beneath it to create a thick ribbing effect. -
Define hemlines and cuffs:
Similarly, draw bands at the bottom of the body shape and at the ends of the sleeves. Ribbed details (small vertical lines) will be added later. -
Erase guidelines:
Once the ink is completely dry—I usually give it a full minute just to be safe—gently erase all pencil marks to leave a clean drawing.
Smudge Prevention
Work from left to right if you are right-handed (or vice versa) when inking. This prevents your hand from dragging across wet ink and smearing the lines.
Step 3: Adding Patterns & Color
-
Bear 1: Polka dots:
For the bear on the far left, color the sweater body with a rust-orange marker, carefully coloring around small circles to leave them white. Alternatively, color it solid and add white dots later with a gel pen. -
Bear 2: Textured knit:
Use a mustard yellow marker for the next bear. Fill in the sweater area completely. Once dry, draw small orange dots in rows to mimic a textured knit stitch. -
Bear 3: Fair Isle pattern:
This bear wears a patterned sweater. Use a teal marker to only draw horizontal bands across the body. In the white spaces between, use your fine liner to draw tiny ‘x’ shapes or zig-zags. -
Bear 4: Simple stripes:
Alternate between thick stripes of teal and thin stripes of light grey. Keep the lines slightly curved to follow the roundness of the bear’s tummy. -
Bear 5: Bold stripes:
For the final bear, color bold, horizontal teal stripes across the sweater, leaving equal bands of white in between. -
Inking the ribbing:
Return to your black fine liner. Draw small, vertical hash marks inside all the collars, cuffs, and bottom hems you created earlier to simulate ribbing texture. -
Final details:
Use a light beige or grey marker to add a small oval shadow underneath each bear’s feet to ground them on the page.
Now you have a charming row of companions to accompany your daily notes

PENCIL GUIDE
Understanding Pencil Grades from H to B
From first sketch to finished drawing — learn pencil grades, line control, and shading techniques.
Explore the Full Guide
Simple Penguin Waddles
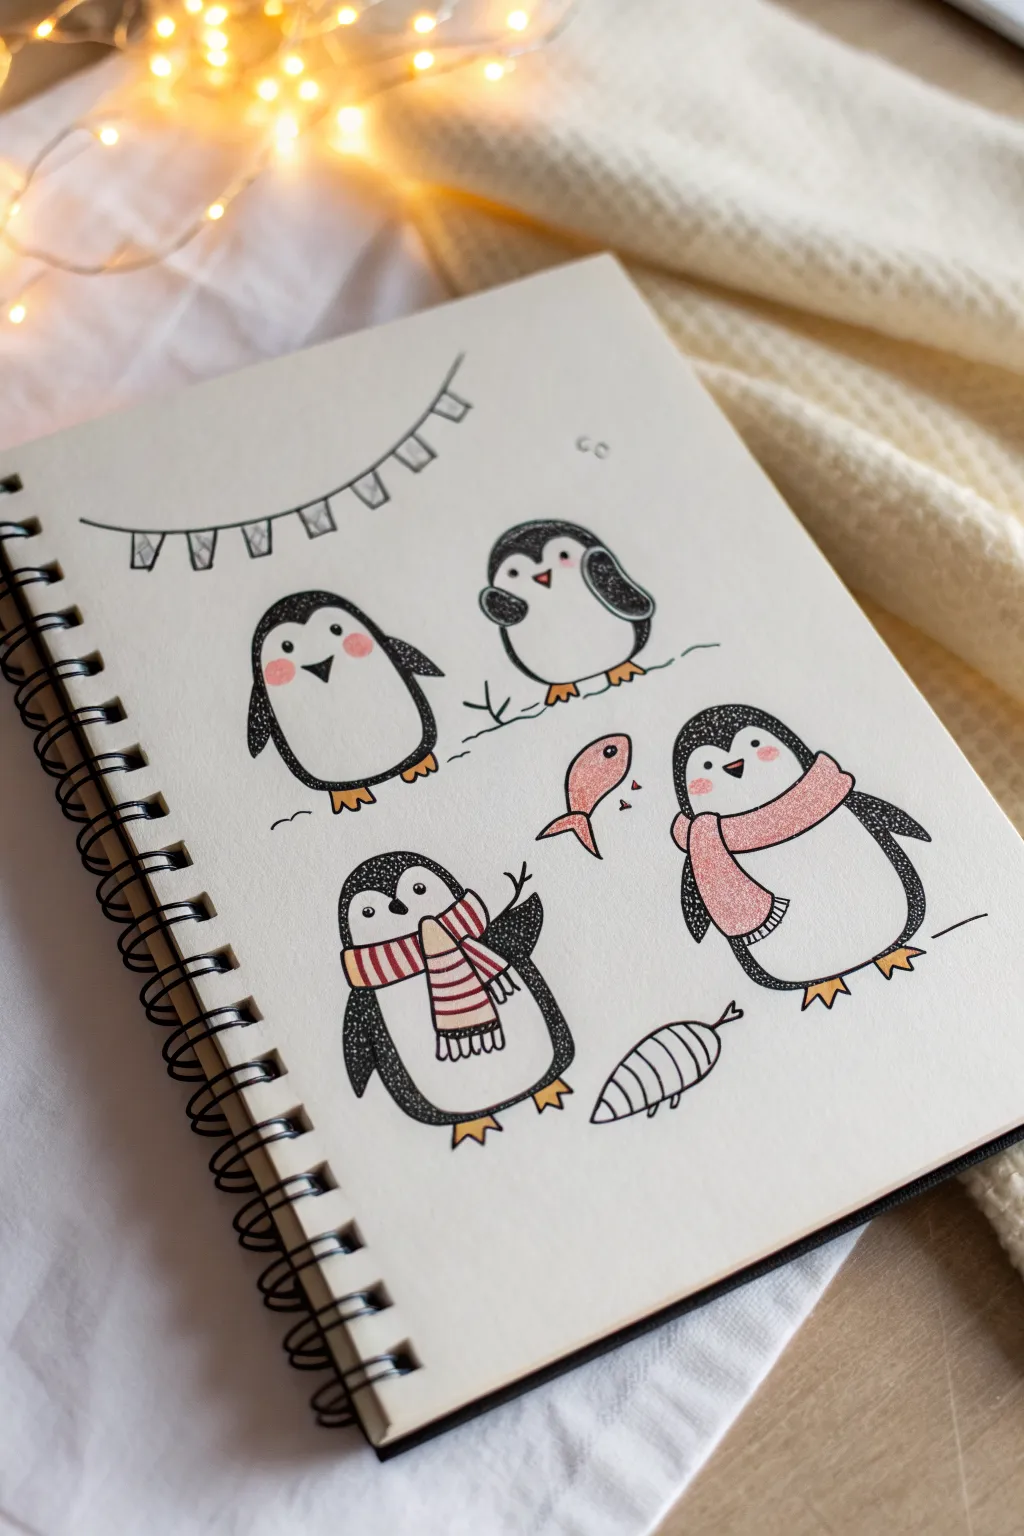
Capture the charm of winter with this adorable set of four hand-drawn penguins in a sketchbook. Using simple shapes and minimal color, these waddling characters are perfect for doodles or bullet journal spreads.
Step-by-Step Tutorial
Materials
- Spiral-bound sketchbook or drawing paper
- Fine-liner pen (black, 0.3mm or 0.5mm)
- Pencil and eraser for sketching
- Pink or coral colored pencil/marker (for cheeks and fish)
- Red or striped patterned wash tape/marker (optional for scarf)
- Small ruler (optional for bunting)
Step 1: Sketching the Shapes
-
Light outlines:
Start by lightly sketching four distinct oval or egg-like shapes arranged across your page to position your penguins. Keep the lines faint so they erase easily later. -
Define the bodies:
Refine the shapes. For the top left penguin, draw a standard oval. For the top right, make it slightly rounder. The bottom two should be similar stout ovals, but slightly larger to accommodate accessories. -
Face markings:
Inside each oval, draw the classic ‘widow’s peak’ hairline shape that separates the black feathers from the white belly. Vary the height of this line on each penguin to give them distinct expressions. -
Add wings and feet:
Sketch small, triangle-like wings on the sides of the bodies. For the feet, add little webbed triangles at the bottom, pointing outwards.
Tip: Texture Magic
Don’t color the black areas solid! Using tiny scribbles or circles creates a ‘furry’ texture that makes drawings feel much cozier.
Step 2: Inking the Details
-
Trace the outlines:
Using your black fine-liner, carefully trace over your pencil lines. I like to use a slightly broken or sketchy line for the fur to make it look softer, rather than a rigid single stroke. -
Fill the black areas:
Use a stippling or scribbling technique to fill in the dark parts of the penguins (the outer body and head). Instead of solid black, use tiny, tight loops or dots to create a textured, fuzzy look. -
Draw the faces:
Add two small dots for eyes and a small upside-down triangle for the beak on each penguin. Position them centrally within the white face area. -
Top-left penguin details:
Give the first penguin a simple beaming expression. Keep his arms down by his sides. -
Top-right penguin details:
Pose this penguin looking to the left. Draw one wing raised slightly near the face as if he’s waving or shy. -
Bottom-left accessories:
Draw a thick, striped scarf around the neck of the bottom-left penguin. Let the ends of the scarf hang down the front of the belly. -
Bottom-right accessories:
Give the final penguin a solid scarf wrapped snugly around its neck. Draw one end flipping casually over its shoulder.
Oops: Smudged Ink?
If you smear ink while erasing, turn it into a shadow or a patch of ice. Or, draw a small fish over it to hide the mistake!
Step 3: Adding Charm & Color
-
Erase pencil marks:
Once the ink is completely dry, gently erase all underlying pencil sketches to clean up the page. -
Rosy cheeks:
Take your pink pencil or marker and add soft, circular blush marks to the cheeks of the first and last penguin. -
Coloring the scarves:
Color the bottom-right scarf solid pink. For the bottom-left scarf, use red or pink to fill in alternating stripes, leaving some white for contrast. -
Decorative bunting:
In the top left corner, draw a curved line. Hang small triangle flags from it. Fill the flags with tiny scribbles or simple patterns. -
Fishy friends:
Draw whimsical fish shapes in the empty spaces—one pink fish swimming near the center and a skeletal fish bone doodle at the bottom. -
Grounding lines:
Add tiny, jagged lines near the feet of the top birds to suggest snowy ground or ice cracks. -
Final texture check:
Look over the black areas again. If any spots look too light, add a few more Scribbles to deepen the contrast against the white paper.
Enjoy filling your sketchbook with this chilly little family
Smiling Frogs and Lilypads
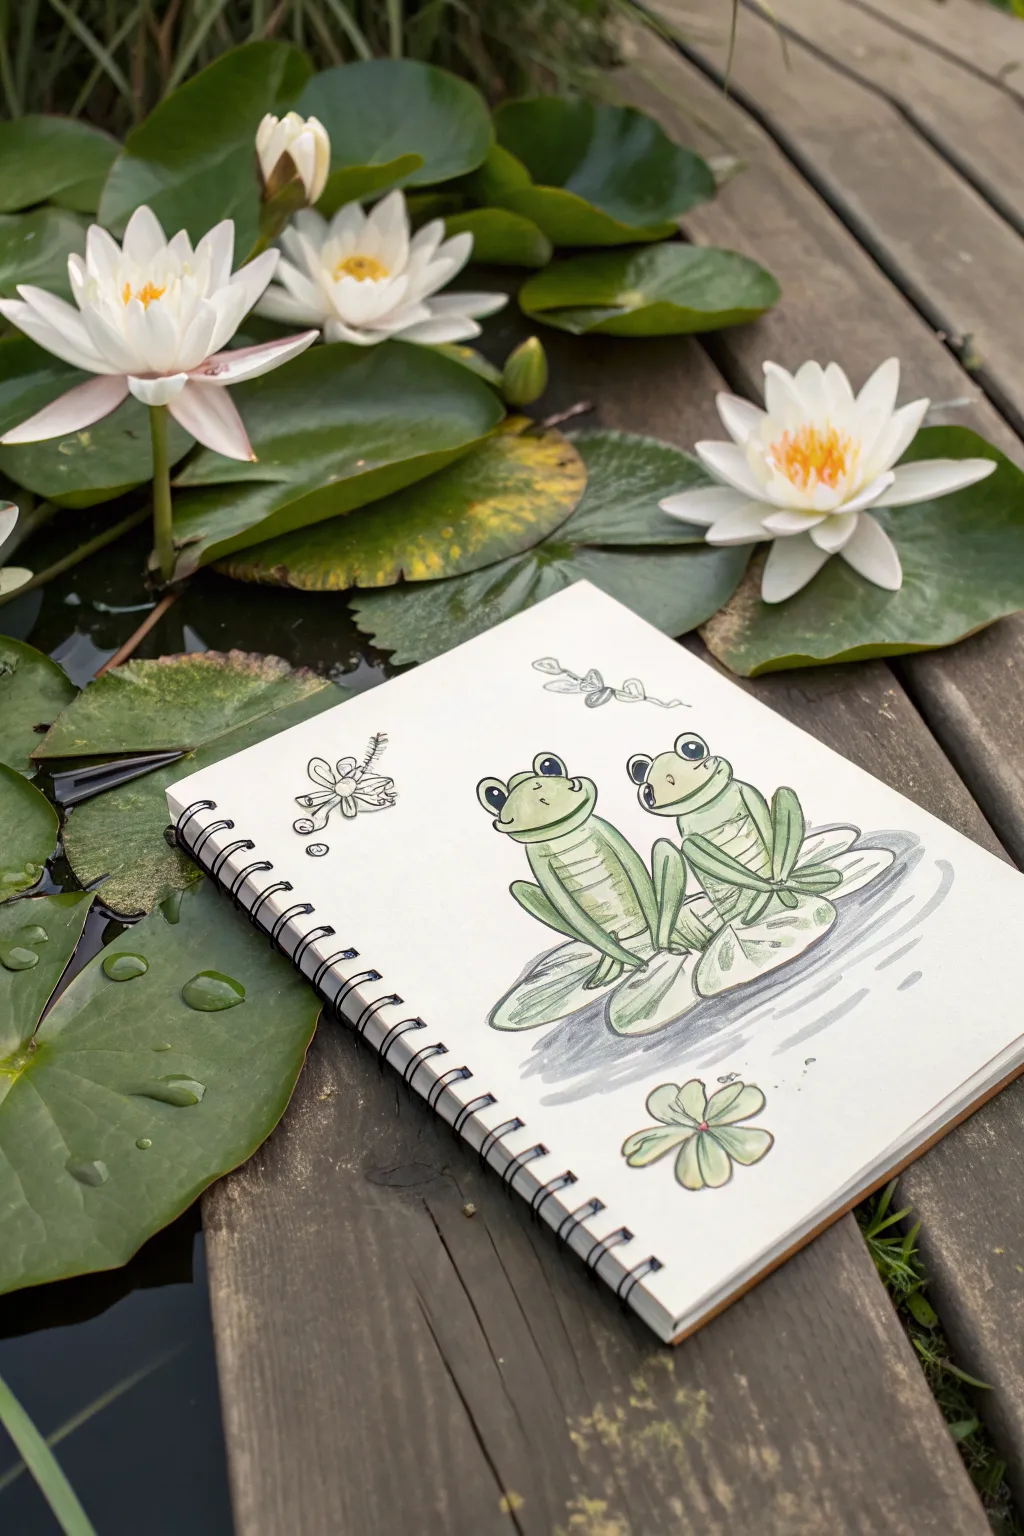
Capture the charm of a peaceful summer pond with this adorable illustration of two smiling frogs perched on lily pads. Using a mix of fineliners and alcohol markers, you’ll create a lively, translucent look that feels right at home next to nature.
Step-by-Step Guide
Materials
- Heavyweight sketchbook paper (mixed media or marker paper)
- Black fineliner pens (0.3mm and 0.5mm)
- Alcohol-based markers (Light Olive, Sage Green, Grey-Blue, Pale Yellow)
- Pencil (HB)
- Soft eraser
- White gel pen (optional for highlights)
Step 1: Penciling the Forms
-
Map out the frogs:
Start by lightly sketching two oval shapes side-by-side in the center of your page. The left frog should be slightly shorter and rounder, while the right frog can be a bit taller. Add smaller circles on top of their heads for eyes. -
Add froggy features:
Sketch curving lines for their arms and legs. Draw their long, folded legs tucked up against their bodies, with webbed feet resting on the ground. Give them wide, happy smiles right under their eyes. -
Sketch the lily pads:
Draw large, flat oval shapes beneath each frog to represent the lily pads. Make sure the pads look like they are floating by keeping the perspective flat. -
Add decorative elements:
In the open white space around the frogs, lightly sketch a four-leaf clover at the bottom and a dragon-fly or floral motif floating near the top left corner.
Loose Lines
Don’t try to make your ink lines perfectly straight. A slightly jittery or broken line adds character and makes the drawing feel more like a lively field sketch.
Step 2: Inking the Outlines
-
Outline the frogs:
Using your 0.5mm fineliner, go over your pencil lines for the frogs. Use a confident, slightly loose stroke to give the drawing an organic, sketchy feel. -
Draw the striped bellies:
Switch to a 0.3mm pen. Draw horizontal, slightly curved lines across the frogs’ chests and bellies to create a ribbed texture. I like to keep these lines a bit thinner than the main outline. -
Detail the pads and plants:
Ink the lily pads, adding a few veins radiating from the center. Outline the clover and flying insect detail with the finer pen as well. -
Clean up the sketch:
Once the ink is completely dry—give it a full minute—gently erase all the underlying pencil marks to leave a crisp black-and-white drawing.
Paper Choice Matter
If your markers bleed through ordinary paper, place a scrap sheet behind your drawing page to protect the rest of your sketchbook.
Step 3: Adding Color & Depth
-
Base layer for frogs:
Take a Light Olive marker and fill in the frogs’ bodies, leaving the ribbed belly area white for now. Apply the ink quickly to avoid streaks. -
Shading the bellies:
Use a very pale yellow or the lightest green you have to gently wash over the belly stripes, keeping it lighter than the rest of the body. -
Coloring the lily pads:
Use a Sage Green marker for the lily pads. Start from the center and brush outward. You can layer the same color a second time near the bottom of the pad to create a simple shadow. -
Adding water ripples:
Using a Grey-Blue marker, draw loose, horizontal strokes underneath the lily pads to suggest water. Let these strokes taper off at the ends. -
Accent details:
Color the four-leaf clover with your Sage Green, and add tiny touches of color to the insect motif. -
Final shading:
Go back in with your main Light Olive marker and add a second layer of ink under the frogs’ chins and where their legs overlap the body to add dimension. -
Eye details:
Fill in the pupils with solid black ink, leaving a tiny speck of white paper for a highlight, or add a dot of white gel pen afterward for that sparkle.
Now you have a charming amphibian scene that looks perfect nestled in a garden setting
BRUSH GUIDE
The Right Brush for Every Stroke
From clean lines to bold texture — master brush choice, stroke control, and essential techniques.
Explore the Full Guide
Sweet Snacks with Faces

Fill your journal pages with this delightful spread of six sweet treat doodles, ranging from playful donuts to a blushing mood bun. Using simple ink lines and soft pastel touches, you’ll create a cohesive collection perfect for bullet journals or sketchbooks.
Step-by-Step
Materials
- Dotted bullet journal or grid paper
- Fine liner pen (01 or 03 size, black ink)
- Pastel pink highlighter or marker
- Pencil and eraser (for sketching)
Step 1: Sketching the Layout
-
Structure the cracker:
Begin in the top left area. Use the dots as a guide to lightly pencil a square with rounded corners. Divide the inside into a 3×3 grid. -
Outline the top donut:
Moves slightly right. Sketch a large circle, then draw a smaller, slightly irregular circle in the center for the hole. -
Draft the bottom donut:
Below the cracker, draw a flattened oval shape. Add a smaller oval inside for the hole to suggest perspective. -
Shape the cake slice:
To the right of the middle donut, sketch a triangular wedge shape. Add a wavy line near the bottom for the icing drip. -
Form the mood bun:
At the bottom center, draw a rounded, slightly squashed circle shape (like a bao bun). Sketch a little bow on top. -
Create the cupcake:
On the bottom right, sketch a trapezoid for the wrapper and swirls piling up on top for the frosting.
Grid Guide
Use the dots on your paper to count spaces! For example, make the cracker exactly 6 dots wide so the 3×3 grid divides perfectly evenly.
Step 2: Inking the Details
-
Ink the waffle cracker:
Trace the outer square with a wavy, textured line. Ink the inner grid, then add small stippled dots along the bottom and right edges of each inner square for shading. -
Detail the classic donut:
Ink the outer and inner circles. Add small ovals and circles scattered on top for sprinkles. Draw a wavy line inside the donut shape to represent the glaze line. -
Finish the donut glaze:
Add small hatch marks along the bottom right curve of the donut for shadow. -
Ink the perspective donut:
Go over your sketch with the pen. Draw a wavy line horizontally across the middle for the filling or icing. Add many small dots on the top surface for texture. -
Complete the cake slice:
Ink the triangle and the wavy icing line. Draw three small circles on top for cherries or berries. Add vertical hatching on the bottom cake layer for texture. -
Ink the cute bun:
Trace the bun shape and bow. Draw the facial features: two small solid circles for eyes and a tiny ‘u’ shape for the mouth. -
Define the cupcake wrapper:
Draw the swirled frosting with smooth, curvy lines. For the wrapper, draw vertical lines that slightly fan out, giving it a pleated look.
Ink Smudges?
If you erase too soon, ink will smear. Test dryness by lightly touching the lines; they should feel room temp, not cool to the touch.
Step 3: Adding Accents & Color
-
Add decorative elements:
Around the treats, draw tiny embellishments like teardrops, hearts, leaves, and small coffee beans to fill the negative space. -
Erase pencil lines:
Wait for the ink to be completely dry, then gently erase all your initial pencil sketches. -
Color with pink:
Take your pink highlighter or marker. Fill in the bow on the bun and add two oval blushes under its eyes. -
Highlight the cupcake:
Color the swirls of frosting on the cupcake with the same pink shade. -
Final shading touches:
Look for areas that need more depth. I like to add a tiny bit of extra hatching on the ‘shadow side’ (usually bottom right) of the objects for pop.
Now you have a charming page of sweets ready to brighten up your week
Cozy Drinks in Mugs

Capture the warmth of a cozy afternoon with this adorable doodle featuring two smiling mugs side-by-side. The simple linework mixed with pops of red and brown creates a charming, heartwarming illustration perfect for your journal.
Detailed Instructions
Materials
- Blank sketchbook or drawing paper
- Fine liner pen (0.3mm or 0.5mm, black waterproof ink)
- Pencil (HB or 2B)
- Eraser
- Colored pencils or markers (Red, Brown, Tan)
Step 1: Sketching the Basics
-
Outline the mug shapes:
Start by lightly sketching two rounded rectangles near the bottom of your page. Keep the corners soft and slightly curved rather than sharp. The left mug should tilt very slightly to the left, and the right mug can sit straighter. -
Add the rims:
Draw an oval at the top of each rectangle to create the opening of the mugs. Make sure the ovals are thin to show perspective. -
Sketch the handles:
Add C-shaped handles to the outer sides of each mug. For the left mug, the handle goes on the left; for the right mug, place it on the right. -
Draw the faces:
Place two small dots for eyes wide apart on each mug. In the center below the eyes, sketch a small, simple ‘U’ shape for a smile.
Ink Smearing?
If your fine liner smears when you color over it, verify it says ‘waterproof’ or ‘archival.’ If not, do your coloring first and add the black outlines last.
Step 2: Inking the Lines
-
Trace the main outlines:
Using your fine liner, go over your pencil lines for the mug bodies. I like to keep the lines slightly loose and organic rather than perfectly straight ruler lines. -
Refine the rims:
Ink the top ovals. To give the mugs depth, draw a second, smaller curve inside the back half of the rim to show the thickness of the ceramic. -
Detail the faces:
Carefully ink the eye dots and the smiles. On the left mug, add two tiny scribbles or asterisks for cheeks. On the right mug, draw small hearts for cheeks. -
Ground the objects:
Draw quick, diagonal hatch marks underneath each mug to create a simple shadow, suggesting they are sitting on a surface.
Make it Yours
Customize the mugs! Add patterns like stripes or flowers to the ceramic body, or change the steam into tiny ghost shapes for a Halloween theme.
Step 3: Adding Whimsy & Color
-
Draw the steam:
Above each mug, draw two swirling lines rising upward. Add little curls at the ends of the lines to make them look like decorative steam. -
Add floating elements:
In the empty space above the mugs, draw a large heart on the left and a sketched heart on the right. Scatter three or four simple stars around the steam. -
Color the coffee:
Using a brown colored pencil or marker, fill in the oval liquid inside the mugs. Leave circular streaks of lighter brown or tan to mimic ripples or foam. -
Decorate the left heart:
Color the left floating heart solid red, but leave small white circles uncolored to create a polka-dot pattern. -
Add warmth to the cheeks:
Use a red or pink pencil to gently color in the cheek details you inked earlier. -
Detail the stars:
Add a tiny secondary star shape inside one of your larger stars for a ‘doodle’ effect, shading it lightly if desired. -
Erase pencil marks:
Wait until the ink is completely dry to avoid smudging, then gently erase all your initial pencil sketches.
Now you have a sweet pair of mugs that look ready to share a warm conversation


Fruit Friends in a Grid
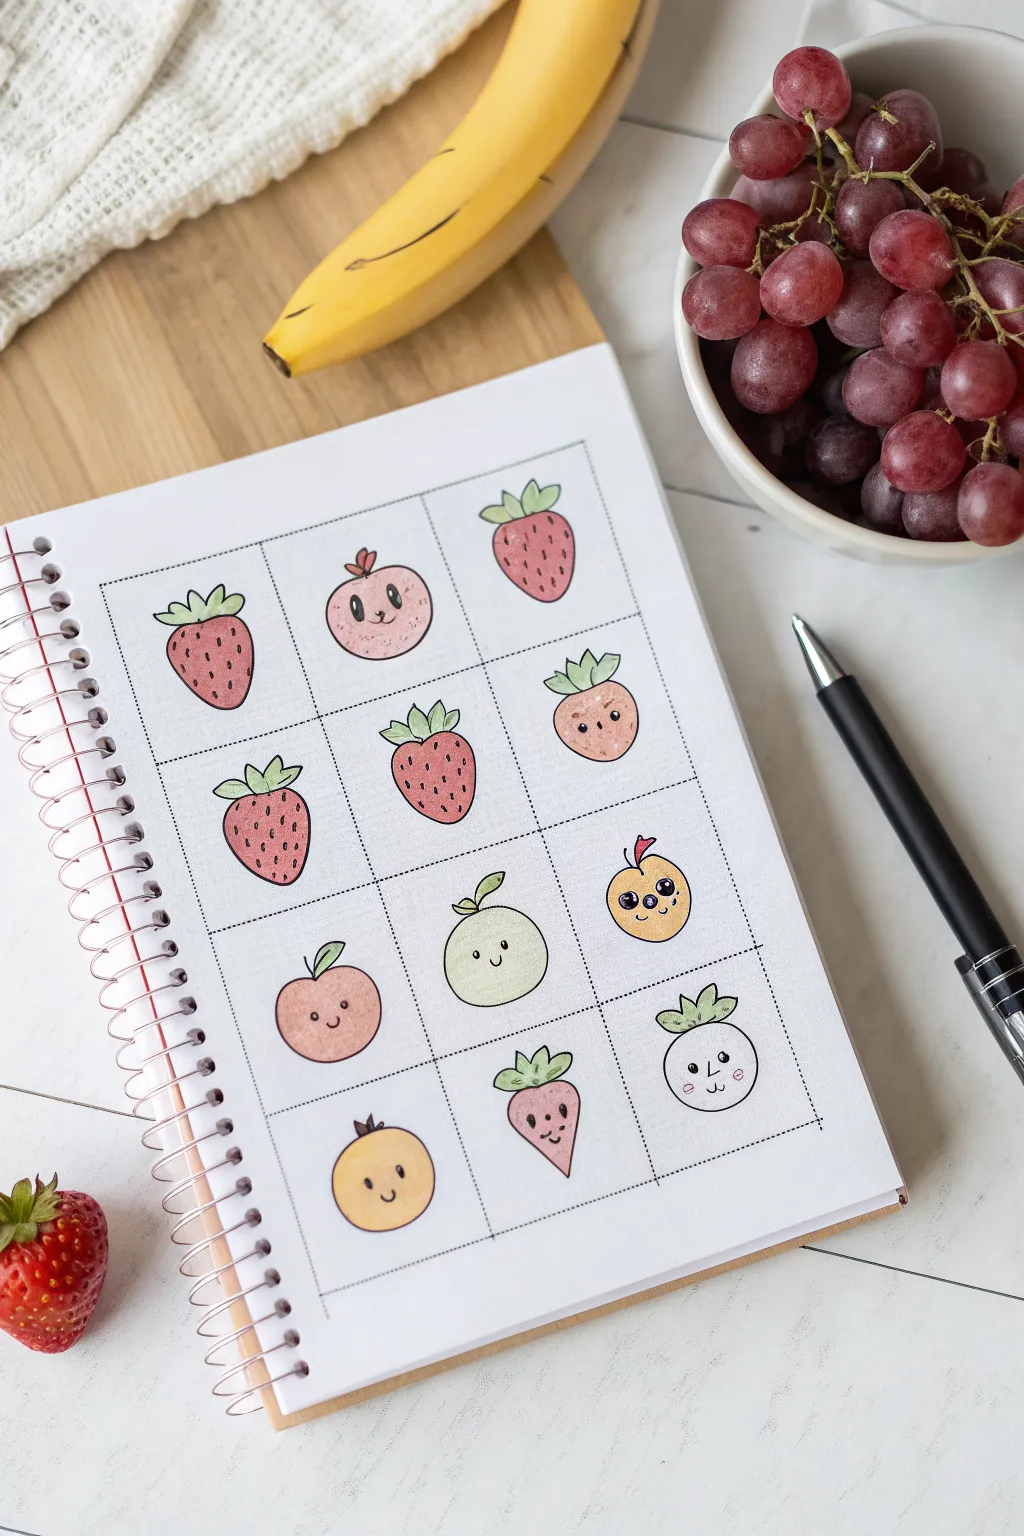
Transform a simple page into a gallery of personality-packed produce with this grid drawing exercise. This project combines structured layout with whimsical character design, perfect for practicing expressions and warming up your creativity.
Step-by-Step Guide
Materials
- Spiral-bound sketchbook or drawing paper
- Ruler
- Pencil (HB or H)
- Eraser
- Fine liner pens (black, 0.3mm and 0.5mm)
- Colored pencils or alcohol markers (various fruit shades)
- White gel pen (optional for highlights)
Step 1: Setting the Stage
-
Measure the margins:
Start by finding the center of your page. Leave a generous margin around the edges, roughly 1-2 inches, to frame your artwork nicely. -
Draft the grid:
Using your ruler and pencil, lightly draw a large rectangle. Divide this rectangle into three equal columns and four equal rows to create a grid of twelve squares. -
Ink the boundaries:
Go over your pencil grid lines with a dashed or dotted line style using a 0.3mm fine liner. This makes the boxes feel like custom stamps or stickers rather than a rigid table.
Uneven Grid?
Don’t stress if your squares aren’t perfect! A wonky grid adds handmade charm. If it bothers you, draw the grid on separate graph paper and trace it.
Step 2: Sketching the Characters
-
Outline the strawberries:
In the first column, lightly sketch strawberry shapes in the top, middle, and bottom boxes (skipping the third row). Vary their sizes slightly; make one plump and another a bit longer. -
Draw round fruits:
Fill the second column with rounder shapes. Try a pomegranate shape at the top, a classic apple in the third row, and an orange at the bottom. -
Add unique shapes:
Use the remaining squares for variety. Sketch a taller berry shape in row one, a squat strawberry in row two, and perhaps a turnip or round veggie shape in the final corner spot. -
Add the leaves:
Top each fruit with a unique leaf crown. Use zigzag lines for strawberry sepals and curved, single stems for the apples and oranges. -
Draft the faces:
This is the most important part! Lightly sketch simple kawaii faces on about half the fruits. Use wide-set eyes and tiny mouths. Leave some fruits plain to create visual balance.
Step 3: Inking and Details
-
The main outlines:
Trace over your fruit pencil sketches with the 0.5mm pen. Use a confident, continuous line for cleaner results, but keep the vibe relaxed and hand-drawn. -
Detail the textures:
For the strawberries, add small tear-drop seeds or tiny dashes. Don’t overfill them; spacing is key to keeping it cute. -
Ink the expressions:
Carefully ink the faces. Fill in the eyes with solid black, leaving a tiny white dot uncolored for that sparkle, or use a white gel pen later. -
Erase pencil guides:
Wait a moment for the ink to truly set, then gently erase all the underlying pencil sketch lines and grid measurements.
Level Up: Stickers
Draw these on adhesive sticker paper instead of a notebook. Cut along the dotted grid lines, and you’ll have a custom set of fruit sheet stickers.
Step 4: Adding Color
-
Base layer: Reds:
Take a soft red colored pencil or marker. Gently color the strawberries, starting light and building up saturation near the edges for a 3D effect. -
Base layer: Pinks and Oranges:
Color the pomegranate with a dusty pink and the orange with a warm apricot shade. I like to color in small circular motions to get smooth coverage. -
Base layer: Greens:
Use a light lime green for the apples and a slightly darker forest green for all the leaf tops. -
Blushing cheeks:
On the fruits with faces, add little pink ovals just below the eyes to give them rosy cheeks. -
Final highlights:
If you have a white gel pen, add tiny highlights to the upper curves of the fruits to make them look shiny and fresh.
Now you have a whole page of friendly fruits ready to brighten up your day
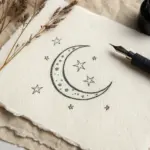
Happy Clouds, Stars, and Moons
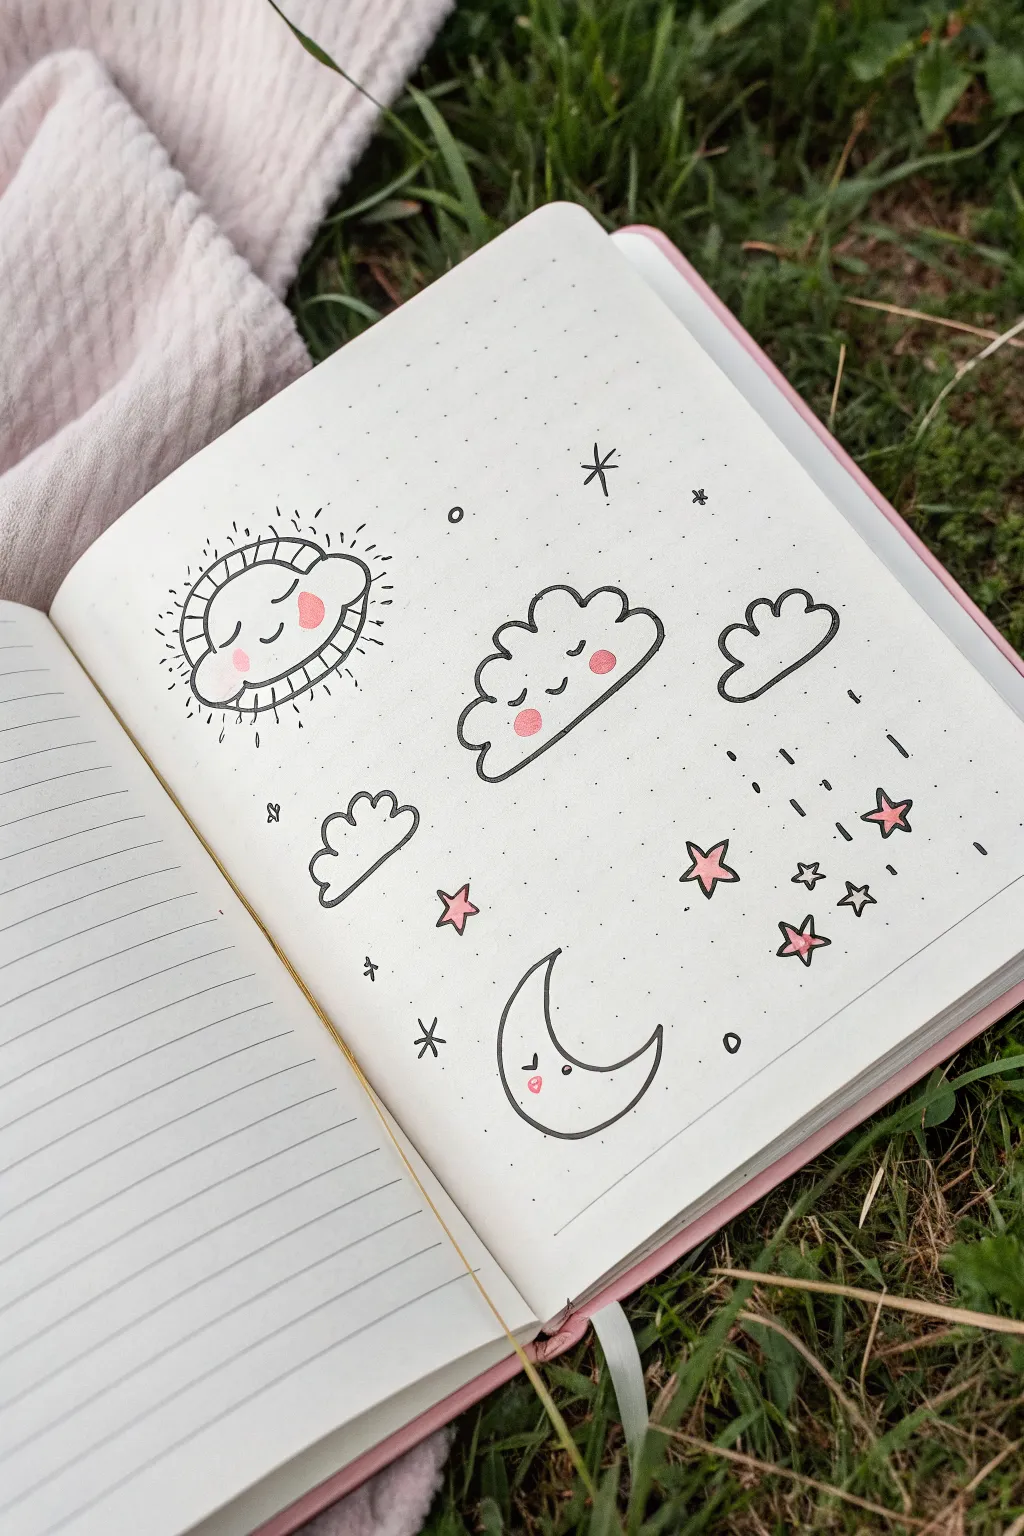
Brighten up your bullet journal page with this charming collection of smiling celestial bodies and fluffy clouds. These simple line drawings use minimal supplies to create a cozy, dreamy atmosphere perfect for filling empty page corners.
Step-by-Step
Materials
- A5 Dot Grid Journal or Notebook
- Fine Liner Pen (Black, 0.3mm or 0.5mm)
- Pink Highlighter or Felt Tip Marker (pastel shade)
- Pencil and Eraser (optional for sketching)
Step 1: Drawing the Happy Sun & Rain Cloud
-
Outline the sun:
Start near the top left of your page. Draw a medium-sized circle using your black fine liner. Don’t worry if it’s not perfectly round; a little wobble adds character. -
Add the sun’s rays:
Draw an outer ring around your circle, composed of connected, curved humps—almost like flower petals or a cloud border. -
Detail the shine lines:
Radiating outward from each hump of the outer ring, flick short, quick lines of varying lengths to simulate glowing light. -
Draw the sun’s face:
Inside the circle, draw two small arc shapes for closed, happy eyes and a tiny ‘U’ shape for a smile. -
Outline the rain cloud:
Move to the right side of the page. Draw a classic cloud shape with a flat bottom and three fluffy humps on top. -
Add the rain drops:
Beneath the right side of the cloud, draw three vertical dashed lines to represent gentle rain.
Step 2: Creating the Central Cloud & Moon
-
Draw the main cloud:
In the center of the page, draw a larger, fluffier cloud. Make the bottom slightly curved instead of flat this time. -
Give the cloud personality:
Add a face to this central cloud with two simple U-shaped eyes that look like they are blinking, and a tiny smile right in the middle. -
Sketch the crescent moon:
Towards the bottom center, draw a large ‘C’ shape. Connect the tips with a smaller inner curve to form a crescent moon. -
Add the moon’s face:
Give the moon a sleepy profile. Draw one closed eye near the left edge and a tiny mouth.
Wobbly Lines?
If your circles or lines aren’t smooth, don’t erase! Go over the line again loosely to create a sketchy, intentional ‘doodle’ style.
Step 3: Filling with Stars & Extras
-
Draw classic stars:
Scatter three or four five-pointed stars around the bottom right area. These don’t need to be perfect; a hand-drawn look is better. -
Add sparkle stars:
In the empty spaces, draw simple cross shapes or asterisks (*) to look like twinkling distant stars. -
Insert filler clouds:
If there are large gaps, add one or two tiny, simple cloud outlines without faces to balance the composition. -
Add tiny circles:
Dot a few tiny, open circles randomly around the page to act as bubbles or distant planets.
Mixed Media Magic
Try using a silver or gold gel pen to fill in the little sparkle asterisks for a spread that actually shimmers in the light.
Step 4: Adding Color & Final Touches
-
Prepare the pink marker:
Grab your pastel pink highlighter or marker. We’ll use this sparingly for cute accents. -
Blush the sun:
Draw oval pink cheeks on the sun’s face, right under the eyes. -
Blush the main cloud:
Add round pink cheeks to the large central cloud. -
Color the stars:
Fill in the five-pointed stars completely with the pink marker. -
Final cheeks:
Add a solitary tiny pink dot on the moon’s cheek for a subtle blush effect.
Now you have a cheerful sky scene that adds a touch of joy to your daily planning
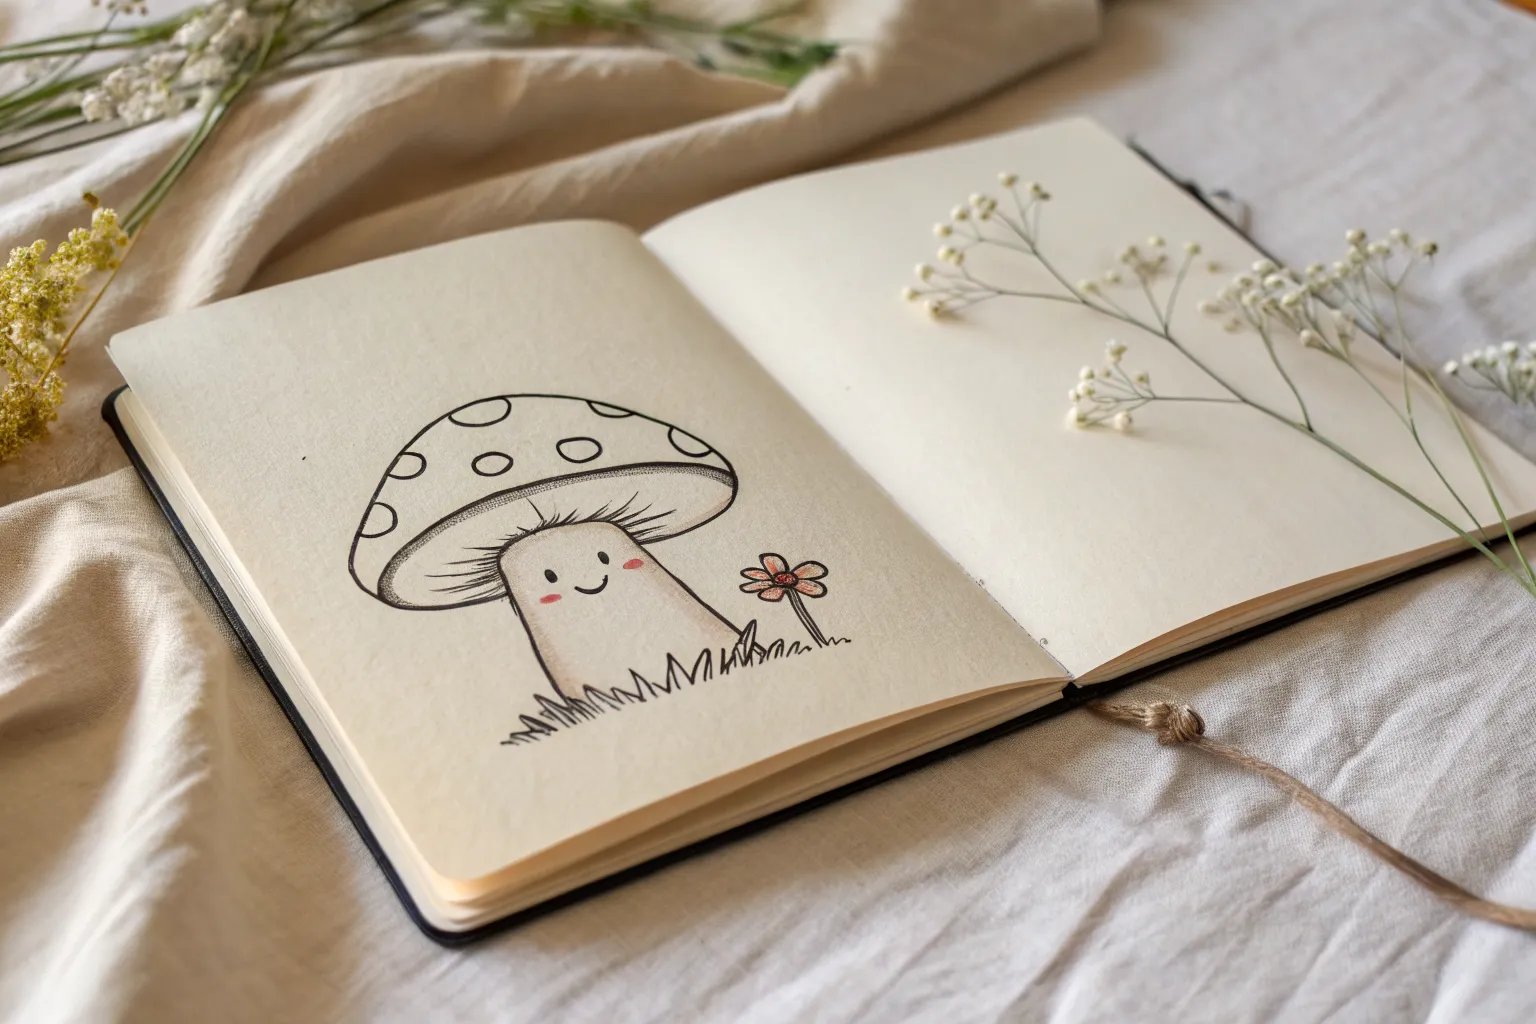
Mini Mushrooms and Forest Sprouts
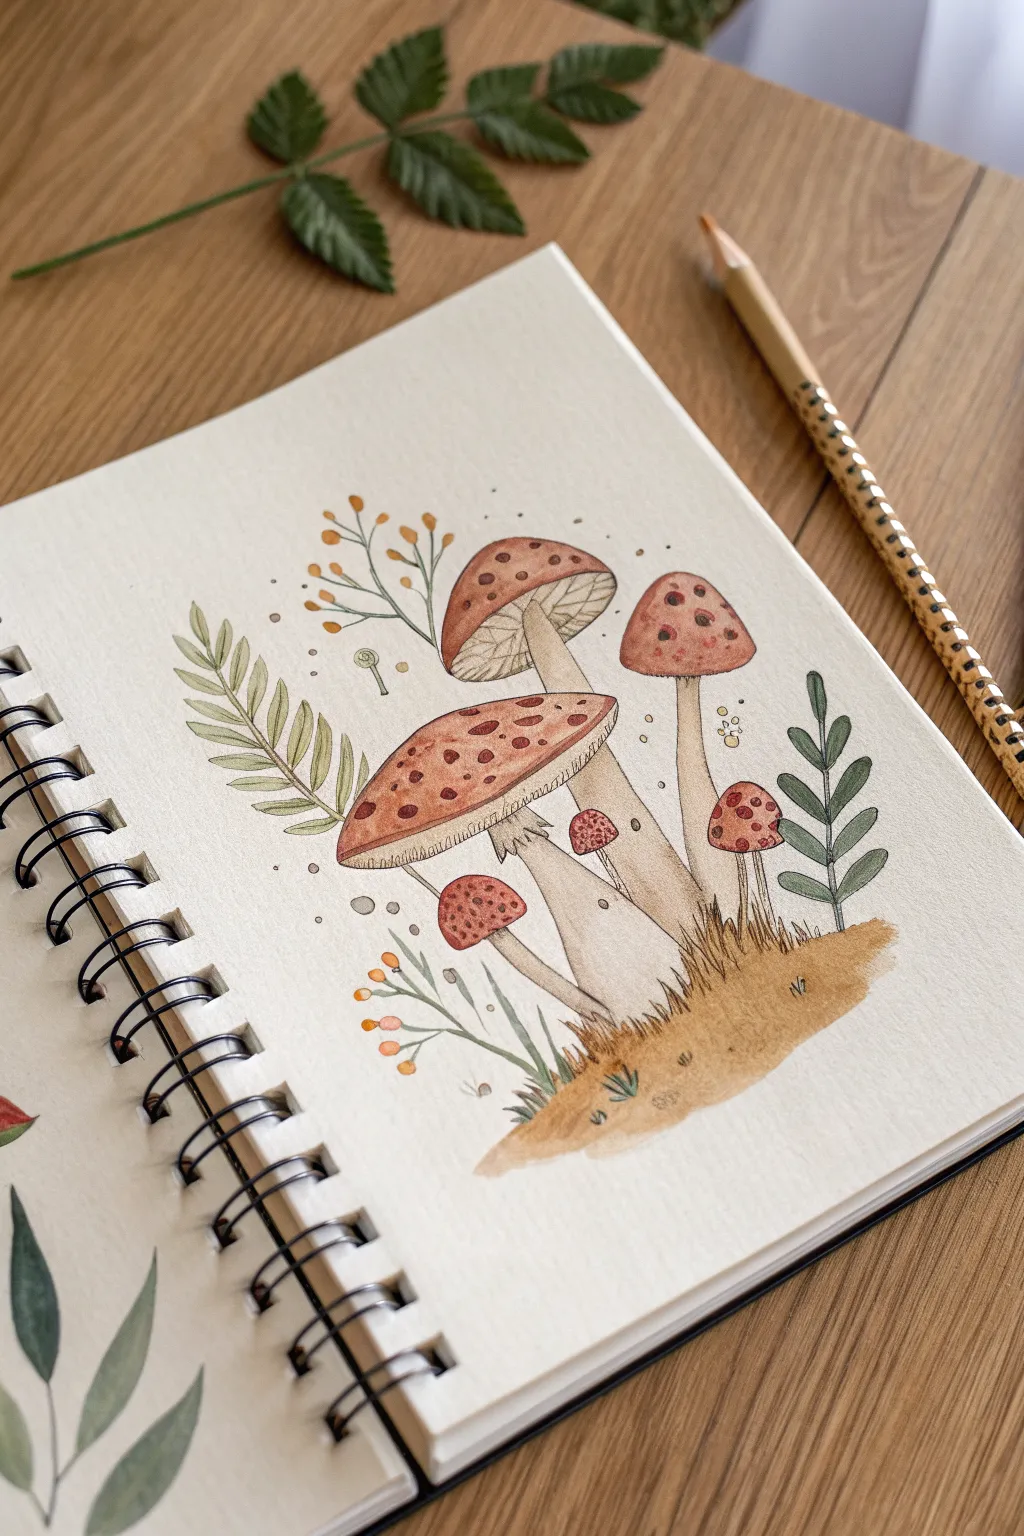
Capture the charm of the forest floor with this delicate illustration featuring earthy mushrooms, gentle ferns, and tiny berries. Using a combination of soft watercolor washes and fine ink details, you’ll create a cozy, nature-inspired scene right in your sketchbook.
How-To Guide
Materials
- Heavyweight watercolor paper or mixed media sketchbook (at least 200gsm)
- Pencil (HB or H) and kneadable eraser
- Waterproof fine liner pens (black or sepia, sizes 0.1 and 0.3)
- Watercolor paints (burnt sienna, yellow ochre, sap green, burnt umber, crimson)
- Soft round brushes (sizes 2 and 6)
- White gel pen or gouache (optional for highlights)
- Paper towel and water jar
Step 1: Sketching the Layout
-
Main shapes:
Begin by lightly sketching the caps of the three main mushrooms using oval shapes. Place the largest one in the center, tilting slightly left, and arrange the taller, thinner one behind it to the right. -
Adding stems:
Draw the stems extending down from the caps. Make the central mushroom’s stem thick and sturdy, while the one on the right should be taller and slender. Add a tiny mushroom tucked near the base on the right. -
Foliage placement:
Sketch a curving fern leaf on the left side, following the curve of the mushroom cap. Add a straighter, leafy stem on the right side and a few spindly berry sprigs poking out near the top left. -
Grounding the scene:
Draw a rough, uneven line at the bottom to represent the mound of earth and grass where everything is growing. Keep this loose and organic. -
Refining details:
Go back over your mushroom caps and add the little spots. Also, lightly sketch the gills—the fine lines underneath the caps—and the skirt on the central mushroom stem.
Bleeding Lines?
If ink bleeds when you paint over it, switch the order! Do all your watercolor work first, let it dry completely, and then add your ink linework on top for crisp details.
Step 2: Watercolor Washes
-
Mushroom caps:
Mix a diluted burnt sienna or terra cotta color. Paint the mushroom caps, leaving the spots unpainted (white paper) for now. If the color feels too uniform, drop a tiny bit of darker brown on the shadowed side for dimension. -
Painting stems:
Using a very watery mix of yellow ochre and a touch of brown, paint the stems. Keep this layer pale to suggest an off-white, creamy texture. -
Adding greenery:
Mix a muted sap green. Paint the fern leaves on the left, starting with a lighter wash and adding a second layer to the tips once dry to create a gradient effect. Use a darker, cooler green for the leafy stem on the right. -
Ground layer:
Apply a wash of yellow ochre and burnt umber to the ground area. Use jagged, upward brushstrokes at the top edge of the soil to mimic grass blades. -
Berry accents:
Dip a small brush into orange or yellow ochre for the tiny berries on the thin sprigs. These only need a single dot of color each. -
Spot color:
For the spots on the mushroom caps, you can either leave them white or gently dab a diluted crimson or darker brown inside the reserved white spaces for contrast.
Step 3: Inking and Definition
-
Outline the mushrooms:
Once the paint is completely bone-dry, take your 0.1 fine liner. Incorporate broken or wobbly lines for the mushroom contours to keep the organic feel rather than a rigid outline. -
Drawing gills:
Carefully draw fine lines radiating from the stem to the edge of the cap underside. Keep these lines very close together and delicate. -
Texturing the stems:
Add tiny stippling (dots) or very short dashes near the top of the stems and under the caps to suggest shadow and texture. -
Leaf details:
Outline the leaves. For the fern, draw a center vein but don’t outline every single leaflet perfectly; let the watercolor define the shape. -
Adding grass texture:
Use quick, upward flicks of the pen at the base to create tufts of grass growing out of the painted earth mound. Vary the length and direction slightly for realism. -
Atmospheric dots:
Sprinkle a few tiny dots of ink in the empty space around the mushrooms to add a bit of magic and fill the negative space without cluttering it. -
Final highlights:
If your watercolors covered the spots too much, use a white gel pen to reclaim the highlights on the mushroom caps or add a tiny glint to the berries.
Pro Tip: Color Harmony
Limit your palette to 3-4 distinct earthy colors. Mixing your greens with a tiny bit of your brown paint will make the foliage look more natural and cohesive.
Now you have a charming little forest patch to brighten up your sketchbook pages.
One-Line Flower Doodles
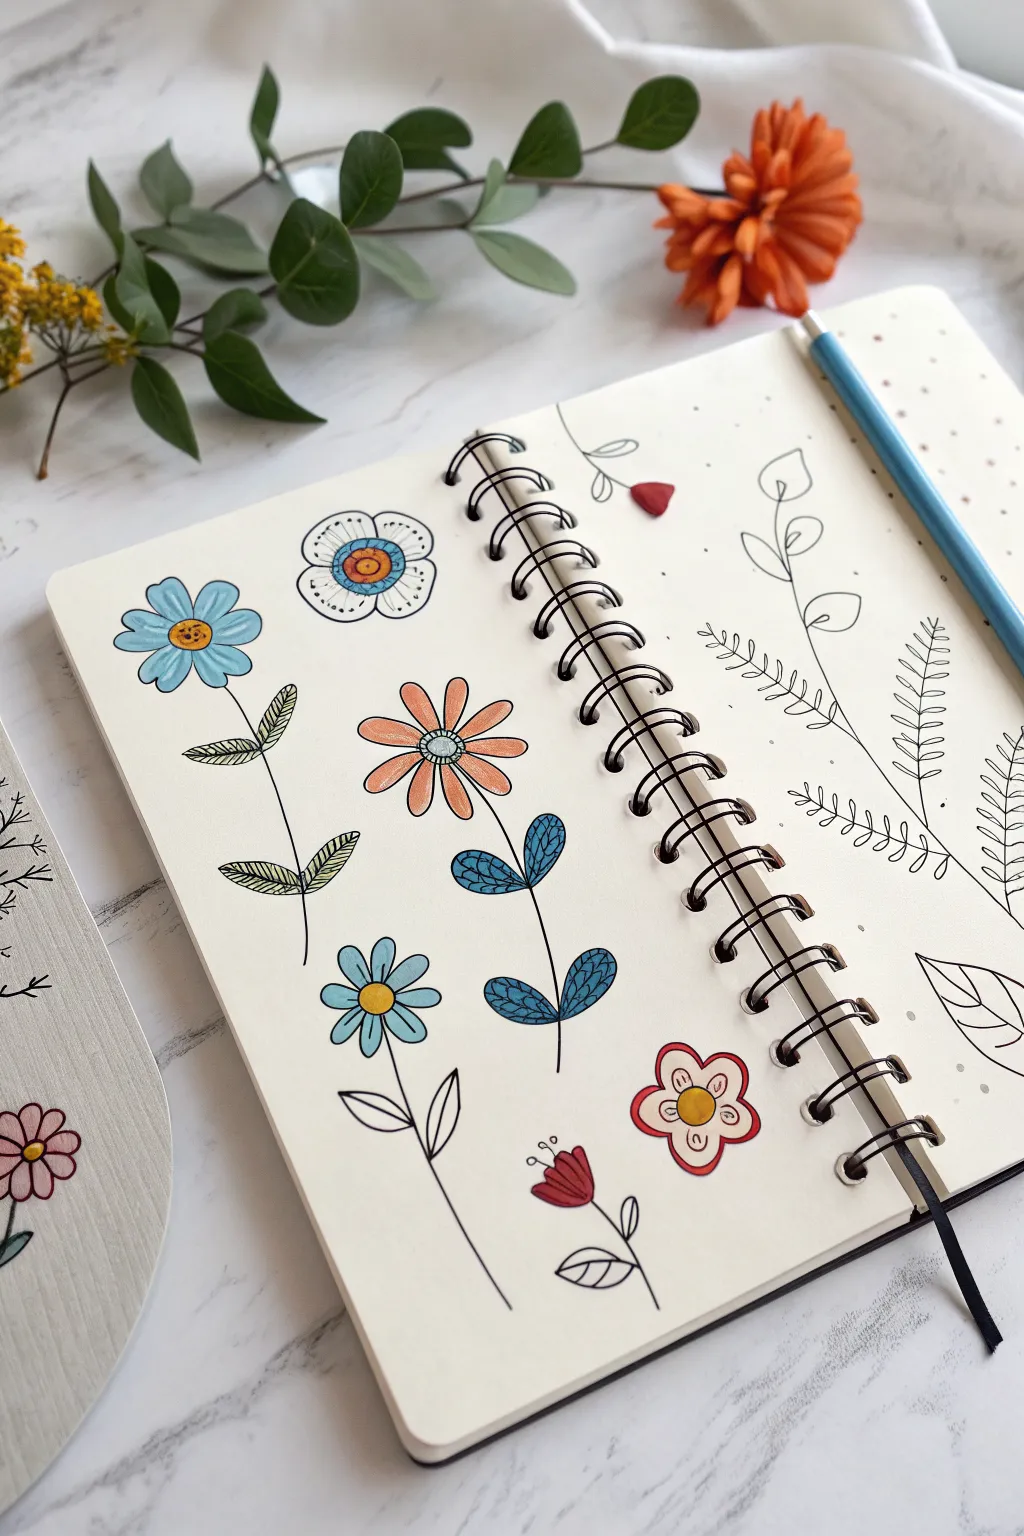
Transform a blank page into a vibrant garden with this collection of playful, stylized flower doodles. This spread combines simple linework with bold pops of color, perfect for relaxing and practicing your botanical drawing skills.
Detailed Instructions
Materials
- Spiral-bound notebook or sketchbook
- Fine liner pen (black, approx. 0.3mm or 0.5mm)
- Colored pencils or markers (light blue, orange, red, green, teal)
- Pencil for sketching (optional)
- Eraser (optional)
Step 1: Planning and Outlining the Left Page
-
Start with the blue daisy:
Begin near the top left. Draw a small circle for the center, then add about six to eight rounded petals surrounding it. Keep the shapes loose and organic rather than perfectly symmetrical. -
Add the stem and leaves:
Draw a thin, single line extending downwards from the blue flower. About halfway down, sketch two leaves branching out—one left, one right. Fill these leaves with simple hatching lines for texture. -
Draw the circular mandala flower:
To the right of the first flower, draw a larger circle. Inside, draw a smaller circle, and then a tiny dot in the center. Decorate the outer ring with small scalloped loops. -
Create the large orange daisy:
In the middle of the page, draw a central hub with a double circle. Extend long, slender petals outward. I like to make these petals slightly pointy at the tips for variety. -
Detail the orange flower’s stem:
Bring a stem down from the orange flower. Near the bottom, draw two prominent, rounded leaves branching upward. Instead of simple veins, draw a grid or scale pattern inside the leaves for a unique look. -
Sketch the bottom blue flower:
Below the first blue flower, draw a smaller, simpler version. Five petals are enough here. Give it a straight stem and two large, simple pointed leaves near the base. -
Add the tiny red bud:
In the bottom right corner of this page, draw a small tulip-shaped bud. Add a short stem and a single leaf with a vein down the center. -
Draw the bottom corner flower:
Below the spiral binding, draw a retro-style flower with five rounded petals surrounding a center circle. This one floats without a stem.
Step 2: Designing the Right Page
-
Start the vine border:
On the right page, draw a long, wavy line running vertically. This will be the main vine. -
Add varying leaf shapes:
Along the wavy vine, alternate your leaf styles. Draw some as simple loops, some as pointed fern-like leaves, and others as heart-shaped foliage. -
Draw the floating leaves:
To the right of the vine, sketch independent botanical elements. Draw a long stem with tiny, paired oval leaves growing all the way up, resembling a fern. -
Add a large detailed leaf:
In the bottom right corner, draw a large, singular leaf shape. Add detailed veining lines inside to give it dimension.
Ink Smearing?
Wait at least 5 minutes after drawing your black outlines before coloring. If using alcohol markers, ensure your liner pen is water-proof or alcohol-proof to prevent bleeding.
Step 3: Coloring and Refining
-
Color the blue flowers:
Use a light blue marker or pencil to fill in the petals of the top-left flower and the smaller bottom-left flower. Keep the centers uncolored for now. -
Add orange tones:
Color the petals of the central daisy with a soft orange. Use a darker orange or yellow-orange for the center of the top blue flower to make it pop. -
Detail the mandala:
For the circular mandala flower at the top, color the inner ring blue and the very center dot orange. Leave the outer scallops white or lightly shade them. -
Fill the unique leaves:
Take a teal or blue-green shade and color in the textured leaves of the central orange flower. This non-traditional leaf color adds a fun, graphic touch. -
Add red accents:
Color the small tulip bud at the bottom in deep red. You can also add a touch of red to the petals of the retro flower near the spiral binding. -
Highlight the centers:
Use yellow to fill the remaining centers of the flowers. Finally, re-trace any black lines that might have been faded by the coloring process to make them crisp again.
Level Up: Pattern Play
Instead of solid coloring, fill some petals with tiny dots, stripes, or cross-hatching to add texture and visual interest without needing more colors.
Enjoy flipping through your sketchbook and seeing your colorful garden bloom on the page
Cute Sea Critters in Bubbles
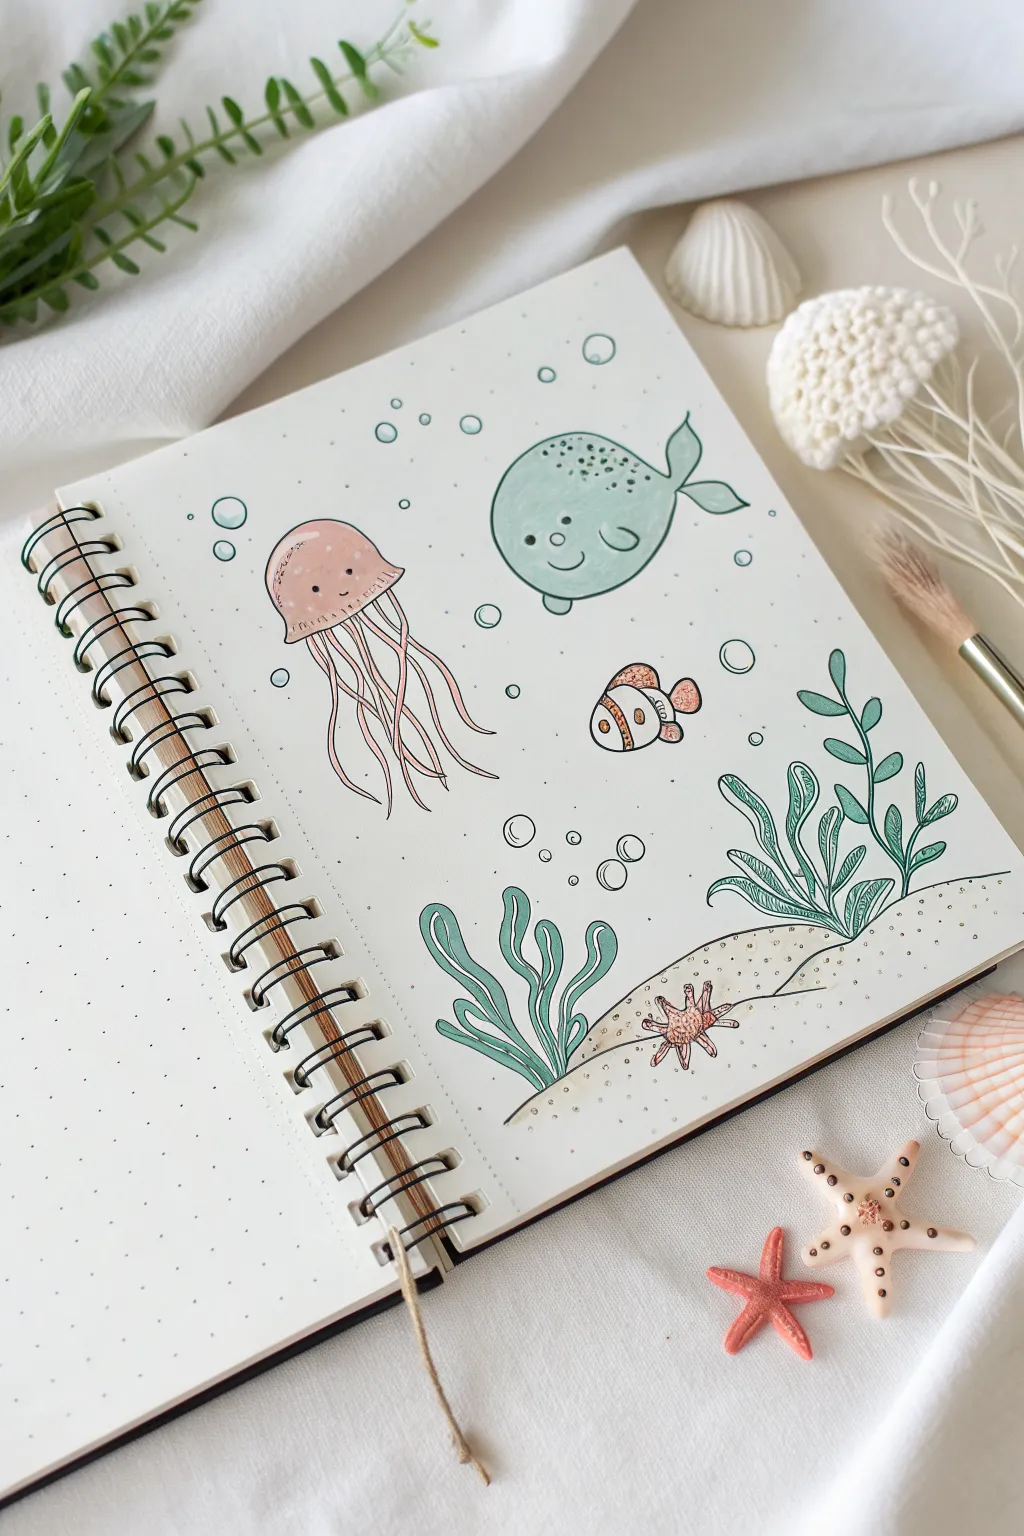
Dive into creativity with this charming underwater scene featuring friendly sea creatures and floating bubbles. This bullet journal spread uses soft pastels and clean linework to create a relaxing, aquatic atmosphere perfect for any sketchbook.
Step-by-Step Guide
Materials
- Dotted bullet journal or heavyweight sketchbook paper
- HB pencil and eraser
- Fine liner pens (0.1mm, 0.3mm, and 0.5mm size, black waterproof ink)
- Pastel colored markers or brush pens (soft pink, mint green, light orange)
- White gel pen for highlights
Step 1: Drafting the Layout
-
Establish the ground:
Start by lightly sketching a sloping, sandy seabed at the bottom right corner of your page using your pencil. Use two soft, overlapping curves to create depth. -
Position the main characters:
Sketch a large circle for the whale in the upper right, a gumdrop shape for the jellyfish on the left, and a small oval for the clownfish in the center. -
Add vegetation:
Draw wavy, vertical lines sprouting from the seabed to map out where the seaweed clumps will go. I usually place a shorter clump on the left and a taller, more complex one on the right for balance. -
Sketch the details:
Fill in the specific features: add the whale’s tail and flippers, the jellyfish’s flowing tentacles, and the clownfish’s stripes. Don’t forget their simple, smiling faces.
Smudge Prevention
When inking over pencil, ink flows differently on graphite. Dab the sketch with a kneaded eraser first to lighten it so the ink adheres better.
Step 2: Inking the Lines
-
Outline the creatures:
Using a 0.3mm fine liner, carefully trace over your pencil sketches for the main animals. Keep your hand steady to achieve smooth, continuous curves. -
Refine the seaweed:
Use the same pen to ink the seaweed. For the clump on the right, draw the leaves with a double line to give them shape, rather than just single strokes. -
Add the seabed:
Ink the curves of the sandy bottom. You can break the line slightly here and there to suggest a soft, sandy texture rather than a hard edge. -
Draw the bubbles:
Switch to a 0.5mm pen to draw various sizes of circles floating upwards throughout the page. Group them in loose clusters of big and small bubbles. -
Erase guidelines:
Wait a few minutes to ensure the ink is completely dry, then gently erase all visible pencil marks.
Step 3: Adding Color
-
Color the whale:
Take your mint green marker and fill in the whale’s body. Apply the color in smooth strokes to avoid streakiness. -
Paint the jellyfish:
Use a soft pink marker for the jellyfish’s bell. You can leave a tiny bit of white space near the top for a natural highlight, or color it solid. -
Fill the clownfish:
Color the clownfish with light orange, being careful to leave the white stripes uncolored. -
Shade the seaweed:
Use the mint green marker again for the seaweed. For the clump on the left, color the entire shape. For the detailed right clump, color inside the leaves. -
Tint the ground:
Lightly shade the seabed with a very pale beige or warm grey marker, or just add a few dots of color to suggest sand.
Consistent Bubbles
Draw your bubbles quickly! A fast, confident circular motion usually results in a rounder shape than trying to draw a circle slowly.
Step 4: Details & Texture
-
Add spots and patterns:
Once the base colors are dry, use your 0.1mm fine liner to add texture dots. Stipple the top of the jellyfish and the back of the whale. -
Detail the seaweed:
Add central veins to the leaves of the right-side seaweed clump using the 0.1mm pen to give them more dimension. -
Draw the starfish:
Draw and color a tiny pink starfish resting on the sand. Use the fine liner to add little dots along its arms. -
Texture the sand:
Randomly dot the sandy area with your thinnest pen to create a grainy texture. -
Final highlights:
Use a white gel pen to add small reflection dots to the eyes of the creatures and a little shine mark on the bubbles.
Enjoy filling your notebook with this adorable underwater world
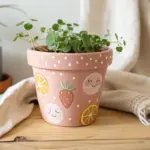
Tiny Houseplants in Pots
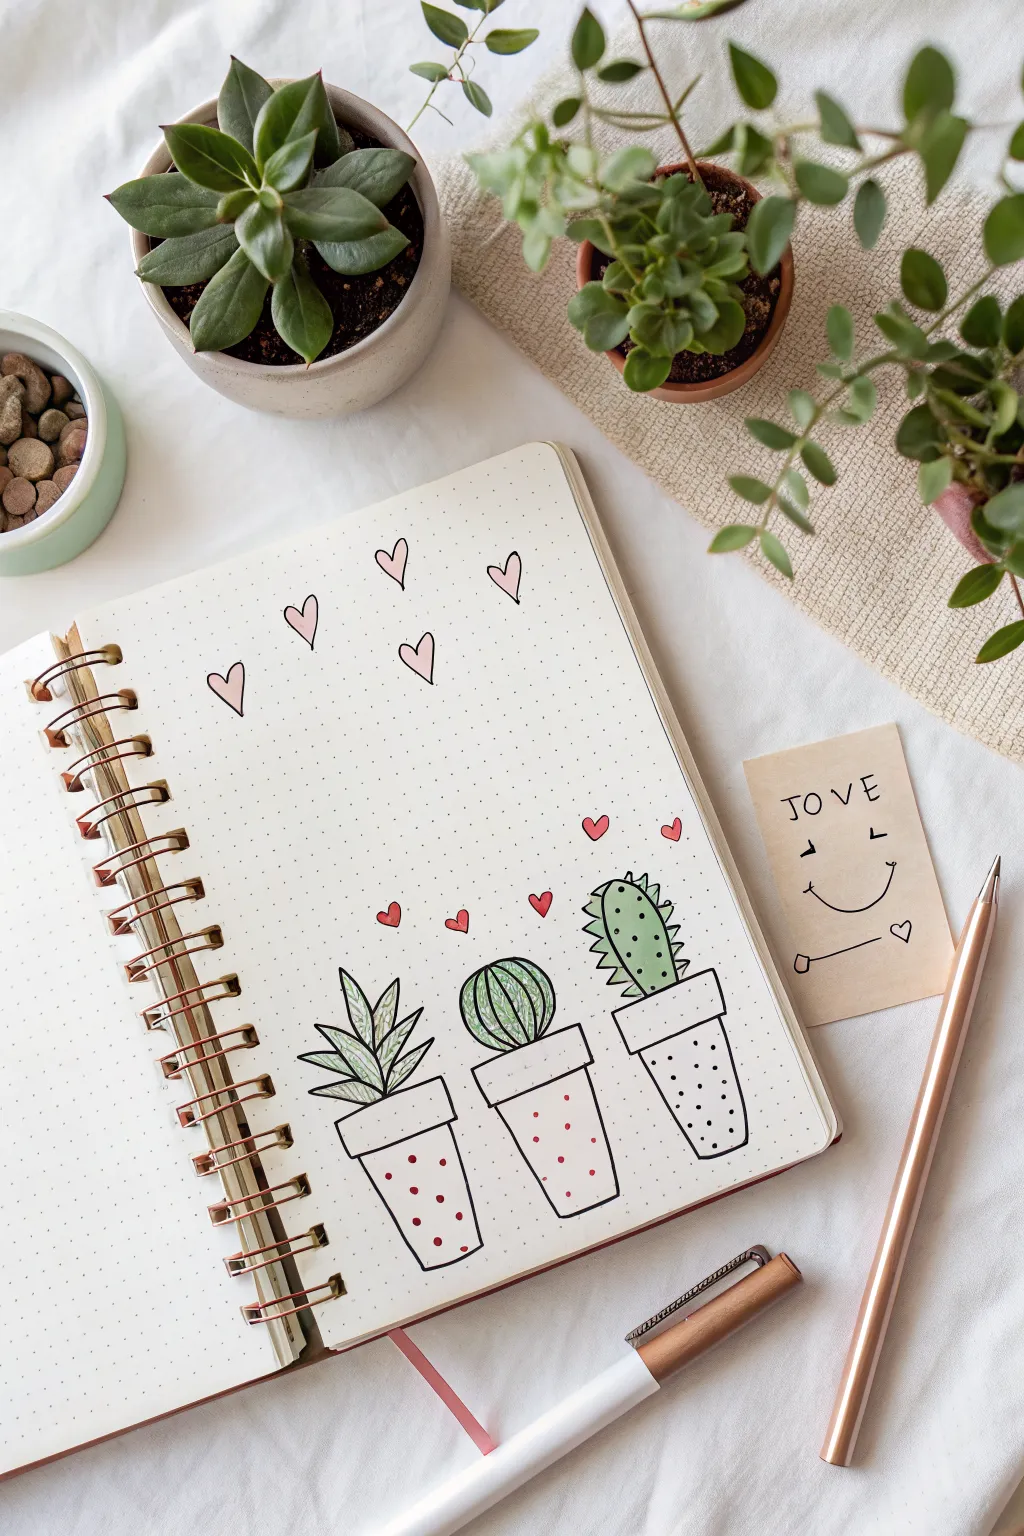
Bring a little desert charm to your bullet journal with this adorable trio of potted cacti and succulents. This simple line drawing combines playful polka dots and sweet hearts for a minimalist yet cheerful page decoration.
Step-by-Step Tutorial
Materials
- Dotted bullet journal or grid paper
- Fine-liner pen (black, 0.3mm or 0.5mm)
- Colored pencils or brush pens (sage green, light green, pink)
- Ruler (optional, freehand looks more organic)
Step 1: Drawing the Pots
-
Outline the rims:
Start near the bottom of your page. Draw three narrow, horizontal rectangles spaced evenly apart. These will be the rims of your pots. I like to tilt the outer edges slightly inward for a 3D effect. -
Add the pot bodies:
From the bottom corners of each rim, draw two lines tapering slightly inward as they go down. Close the bottom with a flat horizontal line to finish the shape of each flower pot. -
Decorator details:
Using your black pen, add patterns to the pots. For the left and center pots, leave them blank for now as we’ll add color dots later. For the far right pot, draw tiny black speckles or dots all over the surface.
Uneven Lines?
Wobbly lines add to the hand-drawn doodle aesthetic. If a line goes rogue, just thicken the border slightly to mask the mistake.
Step 2: Sketching the Plants
-
Left plant: The spiky succulent:
For the first pot, draw three tall, pointed leaves shooting straight up from the center. Add two smaller, shorter leaves on either side, angling them outward like an open fan. -
Detail the sharp leaves:
Draw a vertical line down the center of each leaf to give them dimension. -
Center plant: The round cactus:
On the middle pot, draw a simple circle resting on the rim. It doesn’t need to be perfect; a hand-drawn circle has character. -
Ribbing texture:
Add curved vertical lines following the contour of the circle, creating ‘ribs’ for the cactus. Three to four lines usually look best. -
Right plant: The prickly pear:
For the final pot, draw a tall, elongated oval shape. It should be taller than the middle cactus but a bit wider than the individual leaves of the first plant. -
Add the spikes:
Draw tiny ‘v’ shapes or zigzags along the outer edge of this cactus to represent sharp spines. Add a few small dots scattered on the inside body for texture.
Step 3: Color and Final Touches
-
Color the left succulent:
Use a light sage green pencil to fill in the leaves. Apply a little more pressure at the base of the leaves to create a subtle gradient shadow. -
Color the center cactus:
Color the round cactus with a slightly richer green. If you want, leave a tiny sliver of white near the top left for a highlight. -
Color the right cactus:
Fill the final cactus with a soft, minty green hue, coloring right over the internal dots you drew. -
Decorate the pots:
Switch to a pink felt tip or colored pencil. Carefully add small polka dots to the white spaces on the first two pots. -
Floating hearts:
Draw tiny solid pink hearts floating just above the plants—two near the left plants and one near the right. -
Upper page details:
Towards the top of the page, use your black fine-liner to draw five simple open heart outlines. vary their height slightly creating a gentle arc across the page. -
Pink accents:
Take your pink pencil or marker and lightly color inside the heart outlines for a soft flush of color, or leave them hollow for a cleaner look.
Make it yours
Customize the pots by drawing different patterns like stripes, chevrons, or tiny grid lines instead of just using polka dots.
Now you have a sweet botanical border ready for your weekly tasks or notes
Little Ghosts with Big Feelings
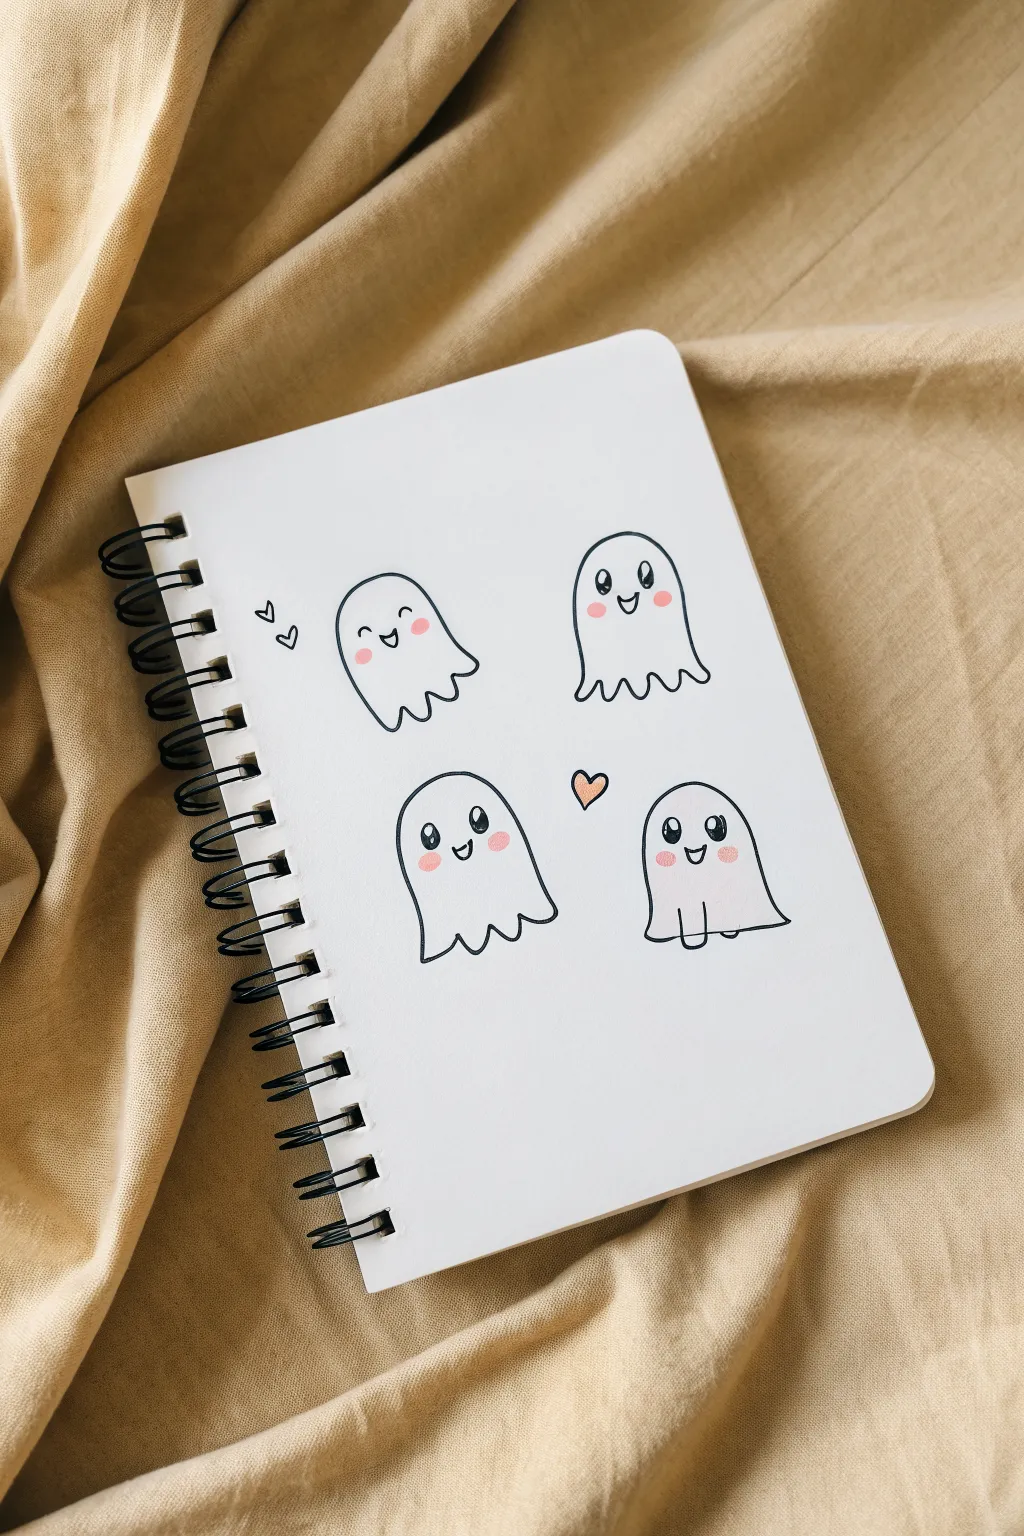
Capture the spirit of creativity with these four distinct and adorable ghost characters. This simple project uses clean line art and small pops of pink to bring big emotions to your sketchbook page.
Detailed Instructions
Materials
- White spiral-bound sketchbook or drawing paper
- Pencil (HB or H for light sketching)
- Eraser
- Black fine-liner pen (0.3mm to 0.5mm)
- Pink marker, highlighter, or colored pencil
Step 1: Drafting the Shapes
-
Page Layout:
Visualize your page divided into four equal quadrants. You’ll want to place one ghost in the center of each imaginary square to keep the composition balanced. -
Ghostly Outlines:
Using a pencil with very light pressure, sketch four dome shapes. They should look like upside-down ‘U’s. Make them roughly the same size, but vary the width slightly for character variation. -
Adding Skirts:
Connect the bottom of each dome with a wavy line. For the top-left and top-right ghosts, use a classic scalloped wave pattern. For the bottom ones, keep the waves slightly flatter or more irregular.
Wobbly Lines?
Don’t panic! Wobbly lines actually work great for ghosts. If a line goes astray, just thicken the outline slightly to smooth it out naturally.
Step 2: Character Details
-
Top Left Expression:
For the first ghost, draw two small arched lines for happy, closed eyes. Add a ‘D’ shape on its side for a wide, laughing mouth. -
Floating Hearts:
Sketch two tiny heart shapes floating to the left of the first ghost. Tilt them slightly for a whimsical effect. -
Top Right Expression:
Give the second ghost large, oval eyes. Draw a small, simple ‘U’ shape mouth right between them for a cheerful look. -
Bottom Left Expression:
Draw two large oval eyes on the third ghost. Inside each oval, draw a smaller circle near the top for a highlight. Add a simple smiling mouth. -
Bottom Right Expression:
Repeat the large oval eyes with highlights for the final ghost. For this one, draw the arms! Add two small ‘U’ shapes extending downward from the bottom hem of the ghost, making it look like little hands are resting on the ground. -
Center Love:
Place a single heart shape floating in the space between the four ghosts, slightly closer to the bottom row.
Glow Up
Use a white gel pen to add tiny sparkles or extra highlights to the pink cheeks once the marker ink is fully dry for extra cuteness.
Step 3: Inking & Color
-
Tracing Outlines:
Take your black fine-liner and carefully trace over your pencil lines. Keep your hand steady and try to make the perimeter lines smooth and continuous. -
Inking Faces:
Ink the facial features. For the ghosts with open oval eyes, fill in the main part of the eye with black ink, leaving the small highlight circles pure white. -
Erase Sketches:
Wait at least a full minute to ensure the ink is completely dry. Gently erase all visible pencil marks underneath your ink lines. -
Rosy Cheeks:
Using a pink marker or colored pencil, draw small horizontal ovals right under the eyes of every ghost. This instantly adds that classic kawaii charm. -
Heart Accents:
Color in the small floating hearts next to the first ghost with black ink (sketchbook style). However, for the central heart, color it in solid pink to tie the composition together.
Now you have a page full of spirited friends ready to haunt your sketchbook with happiness
Sticker-Style Icon Sheet
Fill a journal page with this charming collection of tiny, sticker-style doodles, perfect for adding a pop of whimsy to your spreads. This project mimics the look of a printed sticker sheet using simple shapes, bold outlines, and a cozy, limited color palette.
Step-by-Step
Materials
- Dotted or blank journal notebook
- Black fine-line drawing pen (0.3mm or 0.5mm)
- Dual-tip markers or colored pencils (dusty pink, mustard yellow, teal, muted red)
- Pencil and eraser (for sketching layouts)
Step 1: Planning the Layout
-
Establish a grid foundation:
If you are using a dotted notebook, visualize a loose grid where each icon will sit. This doesn’t need to be rigid, but having an idea of spacing prevents overcrowding. Aim for about 1-2 inches of space per icon. -
Sketch the anchor shapes:
Using a light pencil, sketch the largest elements first to balance the page. Place the Polaroid frame in the bottom right corner and the rainbow near the bottom center. -
Scatter the medium icons:
Lightly sketch in the medium-sized motifs like the lion face, the cat face, clouds, and envelopes. Distribute them evenly across the page so no single area feels too heavy. -
Fill the gaps:
In the remaining empty spaces, pencil in smaller filler shapes: hearts, stars, dots, and tiny flowers. Vary the rotation of these shapes to create a playful, tossed-confetti look.
Smudged Ink?
If your black outline smudges when you marker over it, try coloring the shapes first and adding the black outlines last. This works great for water-based markers.
Step 2: Drawing the Icons
-
Ink the frame:
Switch to your black fine-liner. Draw the rectangular Polaroid frame in the bottom corner. Inside, draw two simple triangles with horizontal stripes and a curved ‘smile’ line connecting them to create a festive bunting graphic. -
Draw the celestial elements:
Ink the scattered five-point stars and the crescent moon. Keep lines clean and continuous. For the stars, you don’t need geometric perfection; a slightly rounded or hand-drawn look adds to the charm. -
Create the hearts and envelopes:
Outline the various hearts—some standard, some elongated. Draw the simple rectangular envelopes, adding a triangle flap on the top or a crisscross ‘X’ to suggest a sealed letter. -
Add character faces:
Carefullyink the round lion face with its mane ruffle, the cat face with pointed ears, and the simple smiley face circle. Add tiny dots for eyes and small curves for mouths. -
Finish outlines and erase:
Complete all remaining pencil outlines with ink, including the rainbow arches and small flowers. Let the ink dry completely for at least five minutes before gently erasing all pencil marks.
Step 3: Adding Color
-
Color the warm tones:
Start with a dusty pink or muted red marker. Fill in selected hearts, the lion’s mane, and the stripes on the bunting. I like to leave small white gaps occasionally to mimic light reflection. -
Add yellow highlights:
Use a mustard yellow marker to color the stars, the crescent moon, the smiley face, lightning bolts, and the alternate stripes on the bunting within the frame. -
Incorporate patterned details:
For some hearts and stars, instead of solid coloring, use your fine liner to add tiny polka dots or stripes inside the shape before adding a wash of color, or just leave them patterned in black and white. -
Cool tones and accents:
Use a teal or soft green marker for leaves, the envelope details, the cat face, and one arch of the rainbow. This balances the warmth of the pinks and yellows. -
Final shading touches:
If you want extra depth, add a tiny bit of hatching with your black pen or a slightly darker shade of marker on one side of the larger icons to give them a 3D sticker effect.
Turn them into real stickers
Draw this directly onto full-sheet white label paper. Once finished, carefully cut around each doodle leaving a small white border to make a custom sticker sheet.
Now you have a lively page of custom icons ready to inspire your next journaling session
Mix-and-Match Character Builder
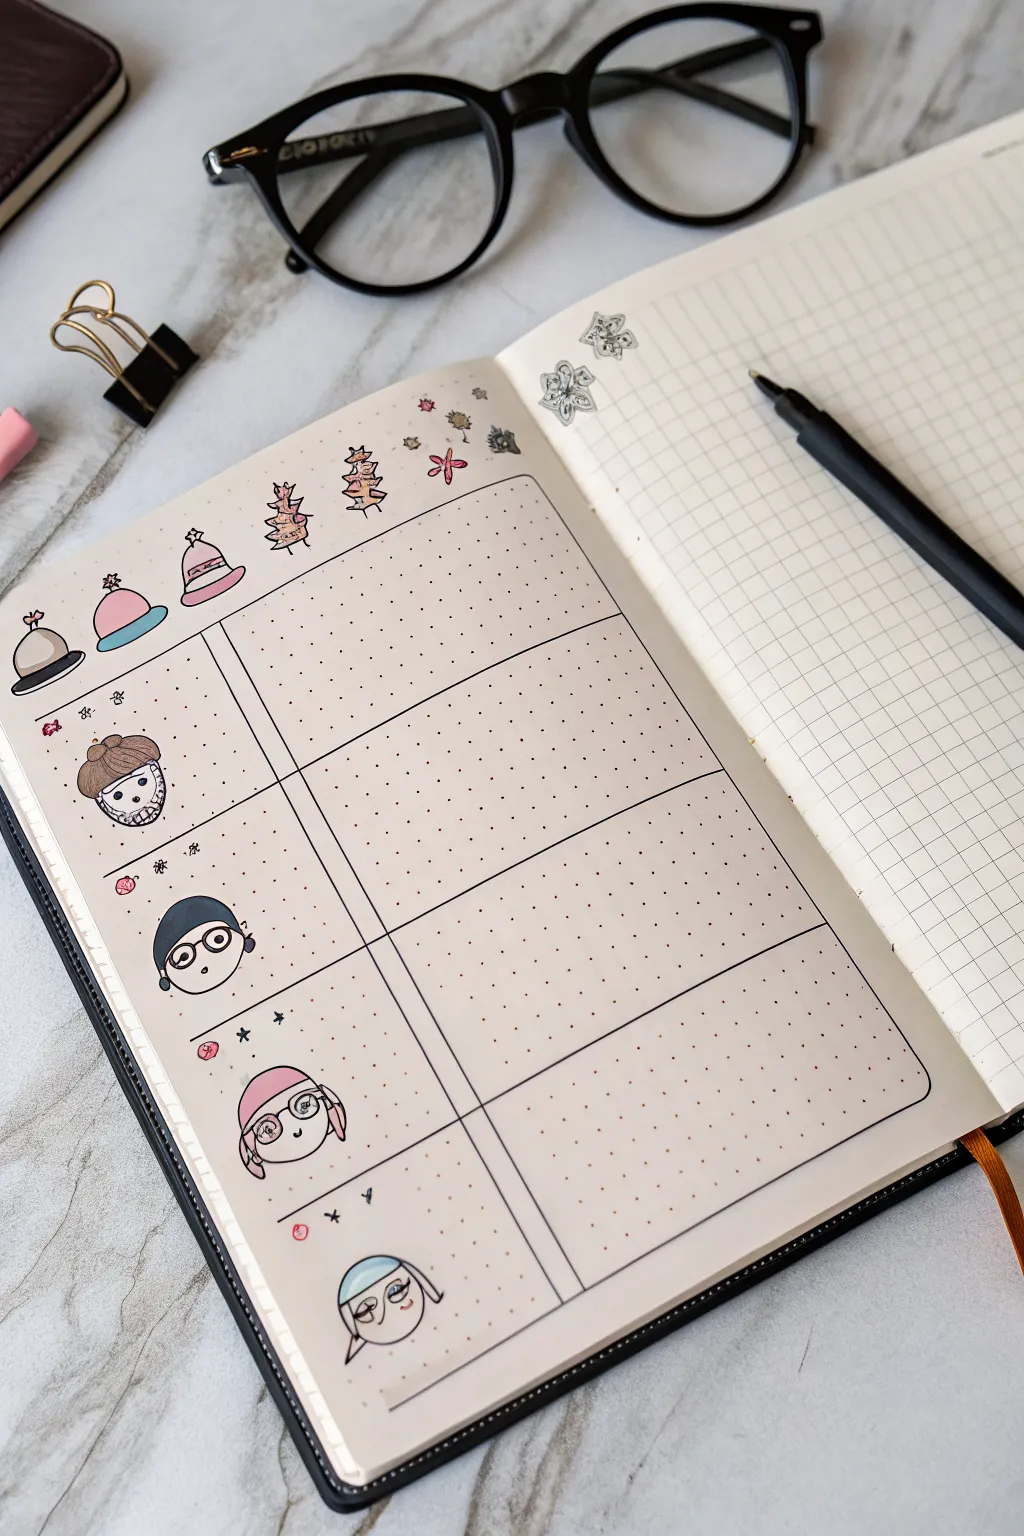
Transform your bullet journal into a creative playground with this interactive character design layout. Featuring a structured grid for neatness and adorable, customizable doodle heads, this spread invites you to mix and match accessories for endless drawing fun.
Step-by-Step Guide
Materials
- A5 Dot Grid Notebook or Bullet Journal
- Pigma Micron Pen (01 or 03 size)
- Ruler
- Pencil and Eraser
- Colored Markers or Mildliners (pastel pink, blue, beige, brown)
- Corrector Pen or White Gel Pen (optional for highlights)
Step 1: Setting the Structure
-
Define the margins:
Begin by leaving a small breathing room at the top and bottom of your page. Using your pencil and ruler, lightly mark out a large rectangular frame that fills most of the page but leaves about a 1-inch header space at the top. -
Create the rows:
Divide your large rectangle horizontally into five equal sections. These will be the ‘lanes’ for your different character variations. -
Draw the divider line:
Draw a vertical line about one-third of the way in from the left edge. This creates a smaller column on the left for the character faces and a larger column on the right for your notes or larger drawings. -
Ink the layout:
Once you are happy with the spacing, trace over your pencil grid lines with a black fine liner. Use a ruler for crisp, professional-looking edges, but don’t worry if lines overshoot slightly—it adds charm.
Grid Guard
Use a piece of scrap paper under your hand while drawing the lower rows. This prevents oils from your hand smudging the ink or marker on the upper characters you’ve just finished.
Step 2: Drawing the Accessories Header
-
Sketch the hats:
In the header space above your grid, pencil in a row of small, winter-themed accessories. Start with three different beanie styles on the left: one pom-pom hat, one standard beanie, and one with ear flaps. -
Add nature elements:
To the right of the hats, sketch two small, stylized pine trees or leaves and a few tiny star-like flowers to balance the composition. -
Color the accessories:
Using pastel markers, color the hats in alternating shades of pink and blue. Add touches of beige to the pine trees for a soft, earthy look. -
Ink the details:
Go over the header sketches with your fine liner. Add tiny stripes to the hats and define the jagged edges of the leaves.
Step 3: Creating the Character Heads
-
Outline the faces:
In the left-hand column of the grid, draw a circle or oval for a face in each of the bottom four rows. Leave the top row empty for now. -
Draft the first character:
In the second row, sketch a character wearing a fuzzy winter hat. Draw the hat sitting low on the forehead, covering the ears. -
Draft the second character:
In the third row, draw a character with a simple beanie. Give them glasses by drawing two circles connected by a small bridge. -
Draft the third character:
For the fourth row, create a character wearing a headband or earmuffs. I like to add little pigtails here to make the silhouette distinct. -
Draft the fourth character:
In the bottom row, draw a character with a simple side-swept hairstyle and a small beret or flat cap.
Style Swap
Try leaving the faces blank! Draw just the head shapes and hats in pen, then use pencil to draw different expressions depending on your daily mood.
Step 4: Adding Color and Fine Details
-
Skin tones and hair:
Use a beige or light brown maker to color the visible skin on the faces. Leave the eyes white if you plan to draw them large, or color over the whole face if using simple dot eyes. -
Coloring the hats:
Apply your pastel pinks and blues to the headwear. Alternate colors so no two adjacent characters have the exact same hat color. -
Inking the faces:
Trace your character sketches with the fine liner. Add simple facial features: dots for eyes, small curved lines for noses, and tiny smiles. -
Adding textures:
Use hatching (fine parallel lines) to add texture to the first character’s fuzzy hat and the hair of the bearded character. It gives a nice illustrative quality. -
Decorative dividers:
Draw a thin horizontal line within the character box, just above the head. Below this line, add tiny icons like stars, swirls, or dots to separate the character from the row above. -
Final clean up:
Wait for the ink to fully dry, then erase all underlying pencil marks to reveal your clean, crisp spread.
You now have a charming framework ready to fill with plans, habits, or more creative doodles
Tiny Worlds in Jars
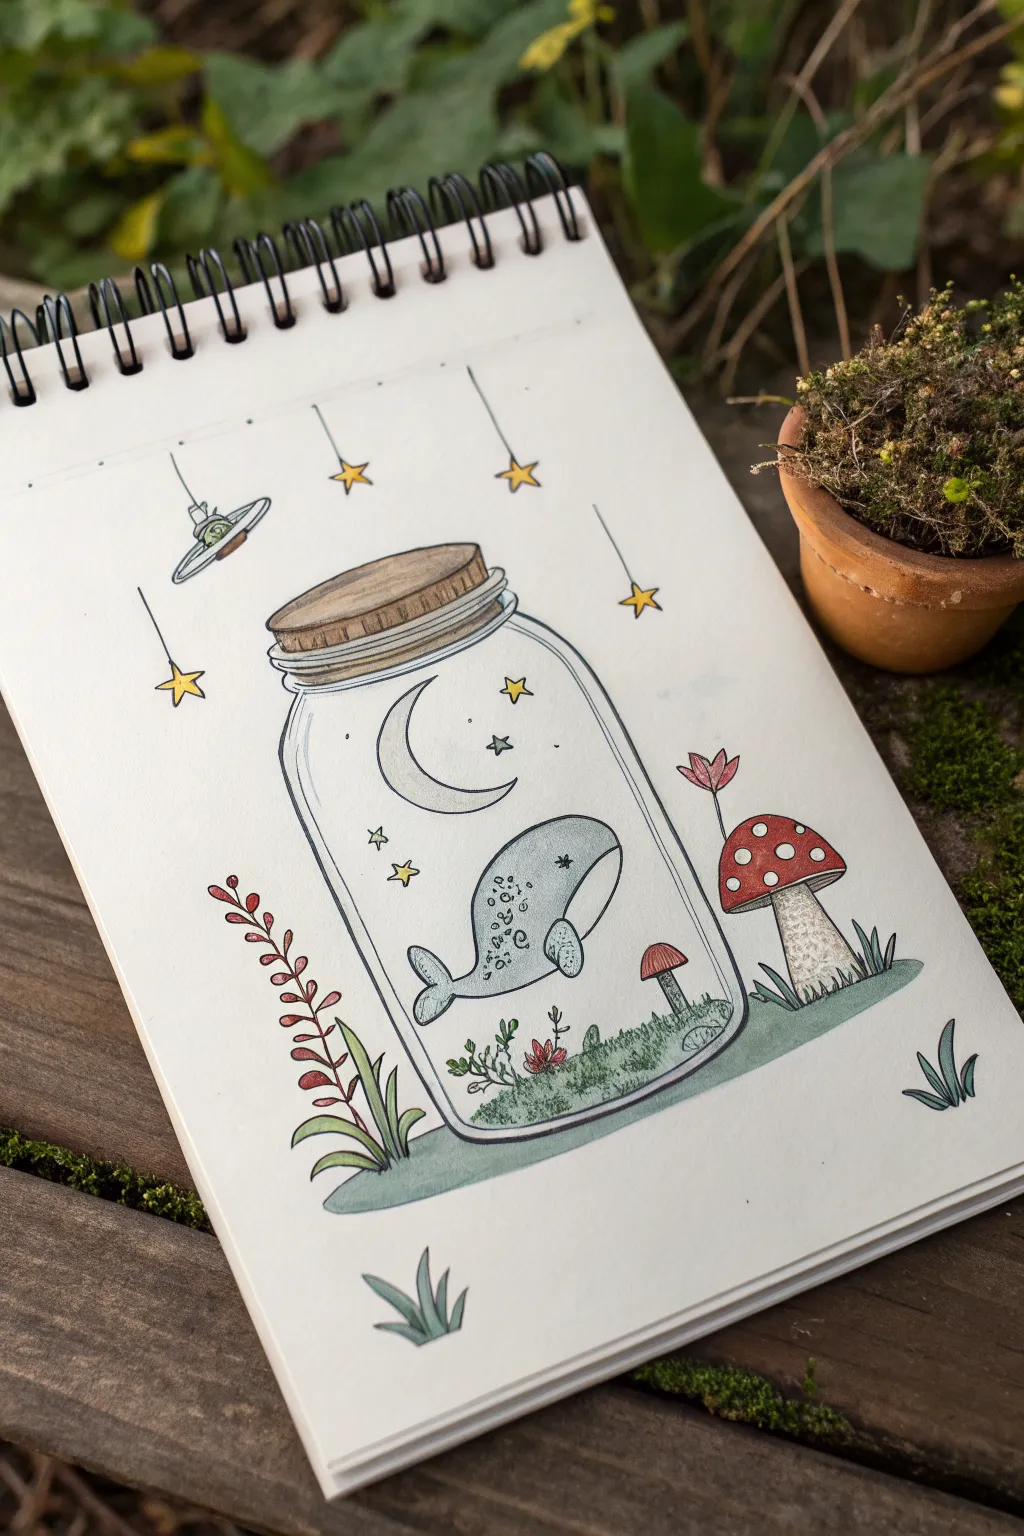
Capture a dreamy, miniature universe with this charming illustration featuring a tiny whale floating in a starry jar. The soft colors and clean ink lines create a gentle, magical aesthetic perfect for sketchbooks and journals.
Step-by-Step
Materials
- Sketchbook or mixed media paper
- Pencil (HB or H)
- Eraser (kneaded preferred)
- Fine liner pens (0.1mm, 0.3mm, 0.5mm)
- Colored pencils or alcohol markers (muted blues, reds, greens, yellows)
- White gel pen (optional)
Step 1: Drafting the Shapes
-
Outline the jar:
Begin by sketching the main jar shape lightly in pencil. Draw a large, rounded rectangle with slightly curved corners at the bottom. Add the neck of the jar by drawing two concentric ovals at the top, creating the rim and lid base. -
Add the lid details:
Draw the lid as a thick disk sitting on top of the rim. Sketch slightly curved horizontal lines across the side of the lid to suggest the screw-top threads. -
Place the whale:
Inside the jar, sketch a small, chubby whale shape floating in the center. Give it a rounded head and a slightly upturned tail for a playful look. -
Add celestial elements:
Draw a crescent moon floating above the whale. Scatter a few small stars around the inside of the jar and hanging from the ‘ceiling’ of the page on strings outside.
Glass Effect
To make the jar look like real glass, leave deliberate white vertical streaks on the curved sides while coloring. This mimics light reflection.
Step 2: Building the Scene
-
Create the ground:
Sketch a gentle, uneven horizon line that passes behind the bottom of the jar. This anchors your object so it isn’t floating in space. -
Sketch foliage and mushrooms:
On the right side of the jar, draw a large mushroom with a rounded cap. Add a smaller mushroom inside the jar at the bottom right. Sketch some simple grass blades and a tall, leafy red plant on the left side. -
Add floating details:
Include a tiny UFO or hanging lamp fixture in the top left corner to enhance the surreal feel. Draw vertical lines dropping down from the top edge to ‘hang’ your exterior stars.
Uneven Ink Lines?
If your hand shakes while drawing the jar’s curve, don’t worry. Making the line slightly thicker in that area can hide the wobble and add line weight variety.
Step 3: Inking the Lines
-
Outline the main strokes:
Using a 0.3mm or 0.5mm fine liner, carefully trace over your pencil lines for the jar, lid, and whale. Keep your hand steady for smooth curves. -
Detail the textures:
Switch to a thinner 0.1mm pen for delicate details like the grass blades, the spots on the whale’s back, and the stars. I usually add tiny dots or stippling on the mushroom stem for texture. -
Erase pencil marks:
Wait for the ink to dry completely to avoid smudging. Gently erase all underlying pencil sketches until the page is clean.
Step 4: Adding Color
-
Color the whale:
Use a soft, muted light blue to color the whale’s body. Leave the belly white or use a very pale gray to differentiate it. -
Fill the jar interior:
Lightly shade the inside of the jar with a very faint blue or grey, focusing on the edges to suggest glass thickness, but leave the center mostly white for transparency. -
Paint the flora:
Color the mushroom cap a classic red with white spots. Use varied shades of sage and olive green for the grass patches inside and outside the jar. -
Color the wood and stars:
Use a light brown or tan for the jar lid, adding darker streaks to emphasize the wood grain if desired. Fill in the stars and moon with a soft yellow. -
Ground the image:
Add a wash of muted green or blue-grey underneath the jar and plants to create a shadow and ground the entire composition.
Now you have a peaceful little world preserved forever on paper


Have a question or want to share your own experience? I'd love to hear from you in the comments below!