Whenever I need a quick dose of springtime joy, I start sketching Easter bunnies, Easter eggs, and all those tiny spring details that make everything feel lighter. Here are my go-to cute Easter drawing ideas, starting with the classics you expect and ending with a few fun, weirder twists that still feel totally Easter.
Simple Bunny Face Doodle
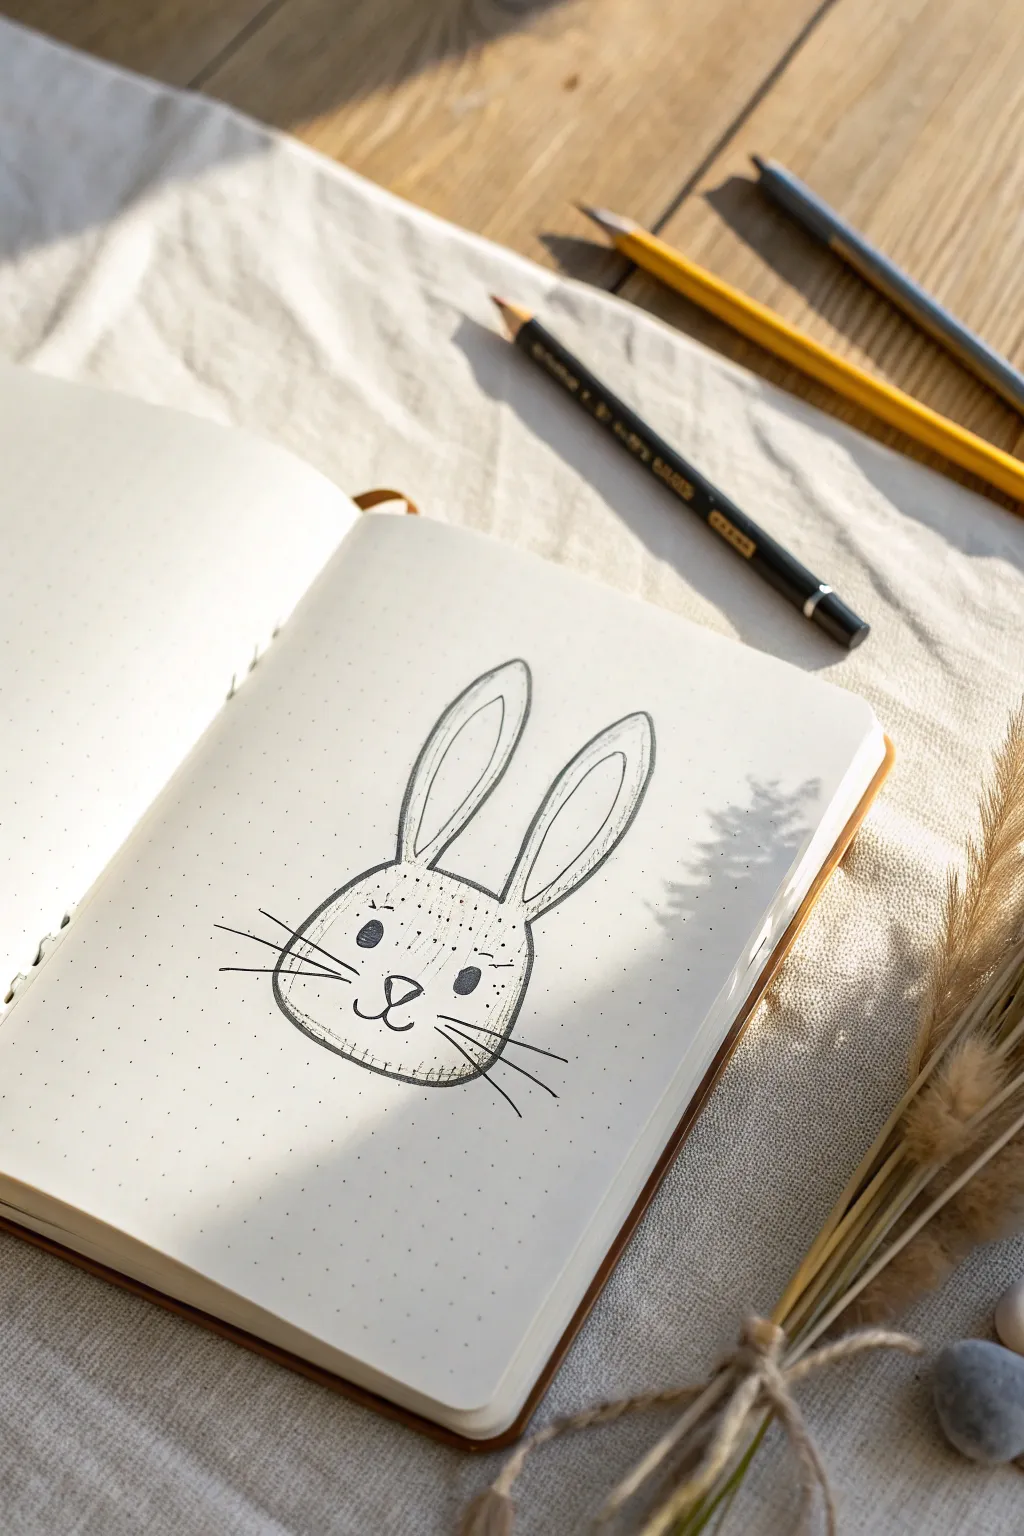
This minimal bunny face is a masterclass in using negative space and simple lines to create character. Drawn on dot-grid paper, it features elongated ears and a sweet, hatched texture that gives it a hand-sketched charm perfect for your bullet journal.
How-To Guide
Materials
- Dot grid notebook or loose dotted paper
- Fine liner pen (black, approx. 0.3mm or 0.5mm)
- Pencil (HB or H for light sketching)
- Soft eraser
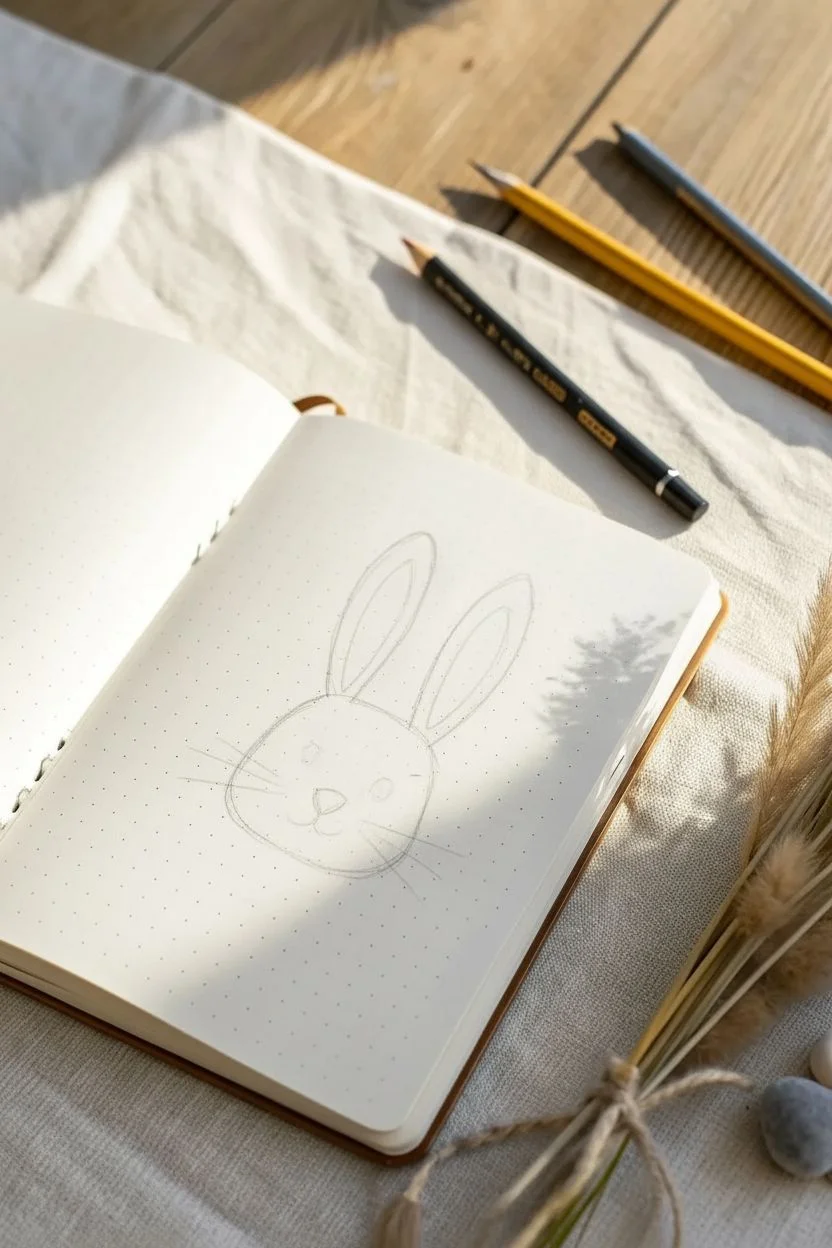
Step 1: Planning the Proportions
-
Establish the base:
Begin by counting out a width of roughly 6-7 dots for the base of the head. Lightly sketch a wide, flattened oval shape in pencil to define the bunny’s head, keeping the bottom curve slightly flatter than the top. -
Mark ear positions:
From the top center of your oval, pencil in two tall, narrow arches for the ears. Make them slightly farther apart at the tips and closer together where they meet the head. -
Locate the features:
Lightly mark a horizontal guideline about one-third of the way up from the bottom of the head. This will help you place the nose and eyes symmetrically.
Wobbly Lines?
Embrace the imperfection! If a line isn’t smooth, go over it once more with a deliberate, scratchy style to make the sketch look intentionally rapid and artistic.
Step 2: Inking the Outline
-
Draw the head shape:
Switch to your black fine liner. Trace the bottom half of the oval first, using a confident line. I find it helpful to break the line slightly at the sides rather than forcing a perfect continuous circle. -
Create the left ear:
Draw the outer left ear, curving it gently outwards. Then, draw the inner ear shape, leaving a consistent gap between the inner and outer lines. -
Create the right ear:
Repeat the process for the right ear, ensuring the height matches the left one. Don’t worry if they aren’t perfectly identical; asymmetry adds personality. -
Connect the top:
Draw the short curved line between the ears to close the top of the head.
Step 3: Face Details & Texture
-
Draw the nose:
In the lower center of the face, ink a small, inverted triangle with rounded corners. Leave a tiny sliver of white uncolored inside for a highlight. -
Add the mouth:
From the bottom point of the nose, draw a short vertical line down, then split it into two curved hooks going left and right to form the classic bunny smile. -
Ink the eyes:
Draw two solid black ovals for eyes on either side of the nose, spaced widely apart. Angle them slightly inward at the bottom for a cute expression. -
Add eyebrows:
Place small, floating curved lines above each eye to create floating eyebrows. Keep them faint and short. -
Whiskers:
Draw three long whiskers on each cheek area. Start the stroke near the face and flick outward quickly so the line tapes off at the end. -
Apply hatching texture:
This is the key stylistic element. Using very light pressure, draw short, vertical hatching lines at the bottom curve of the chin and slightly up the sides of the cheeks. -
Texture the forehead:
Add a few broken, vertical hatching lines on the forehead between the eyes to suggest fur texture. -
Dot the cheeks:
Sprinkle a few tiny stippled dots around the whisker area to add density without heavy lines. -
Shade the ears:
Add a few hatching lines inside the bottom of the inner ear shapes to give them depth. -
Cleanup:
Once the ink is completely dry—give it a full minute—gently erase all your underlying pencil sketches.
Grid Guide
Use the dot grid to your advantage. Count dots to ensure your ears are the same height and width before you commit to ink.
Now you have a charming little character ready to decorate your spring weekly spread


Chubby Kawaii Bunny Pose
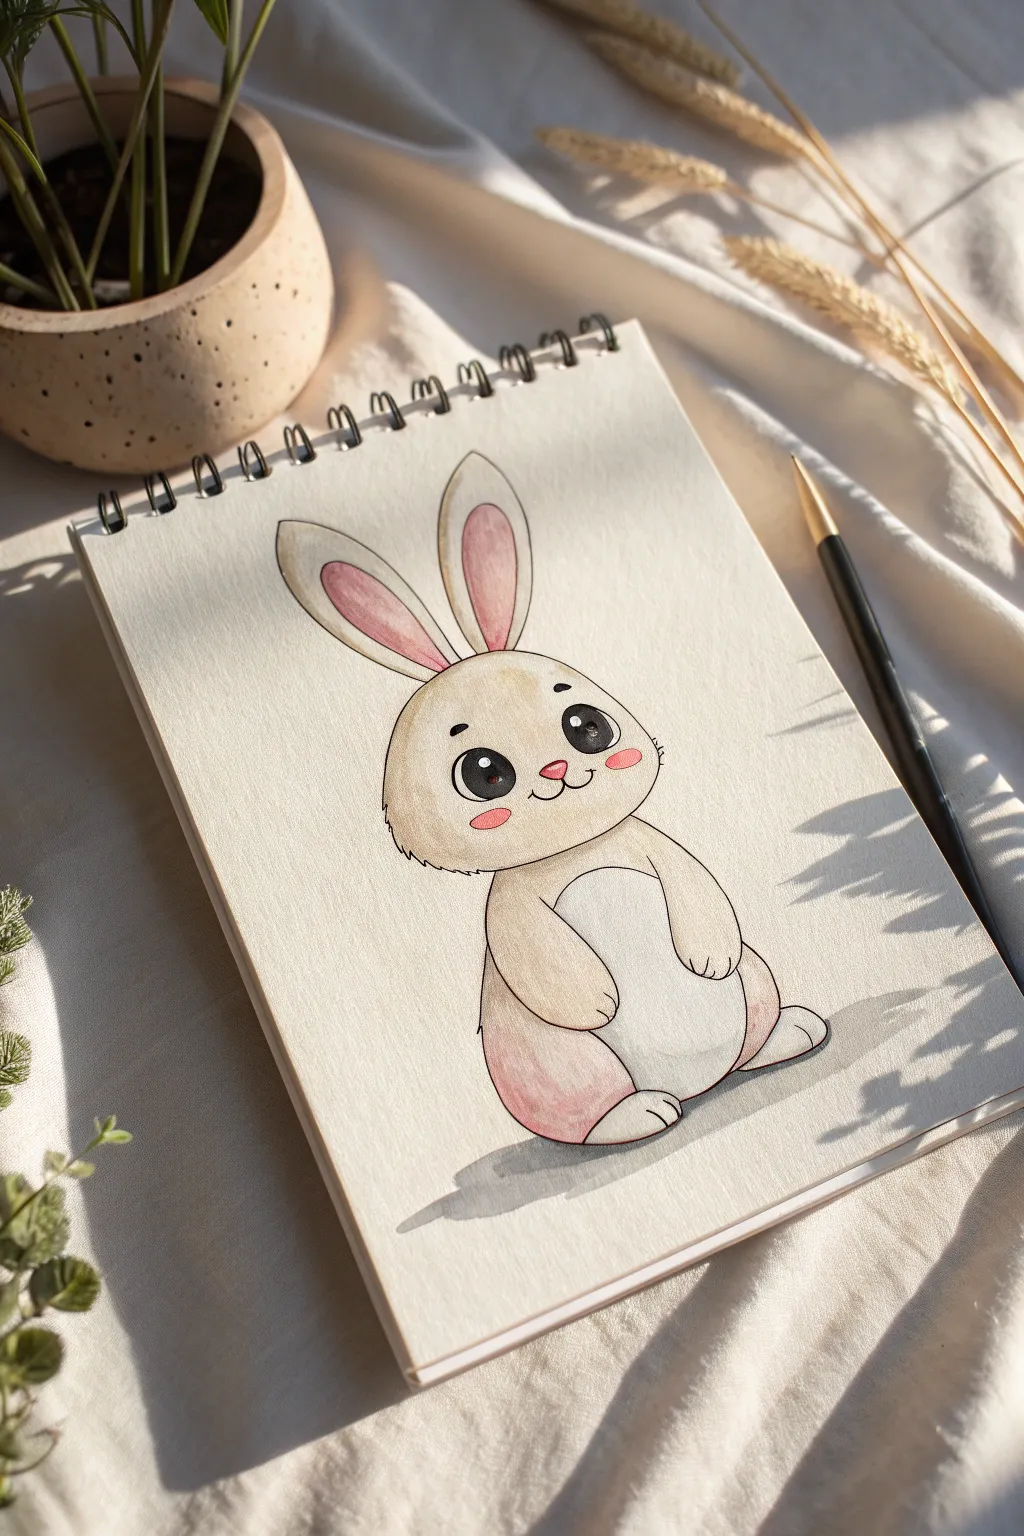
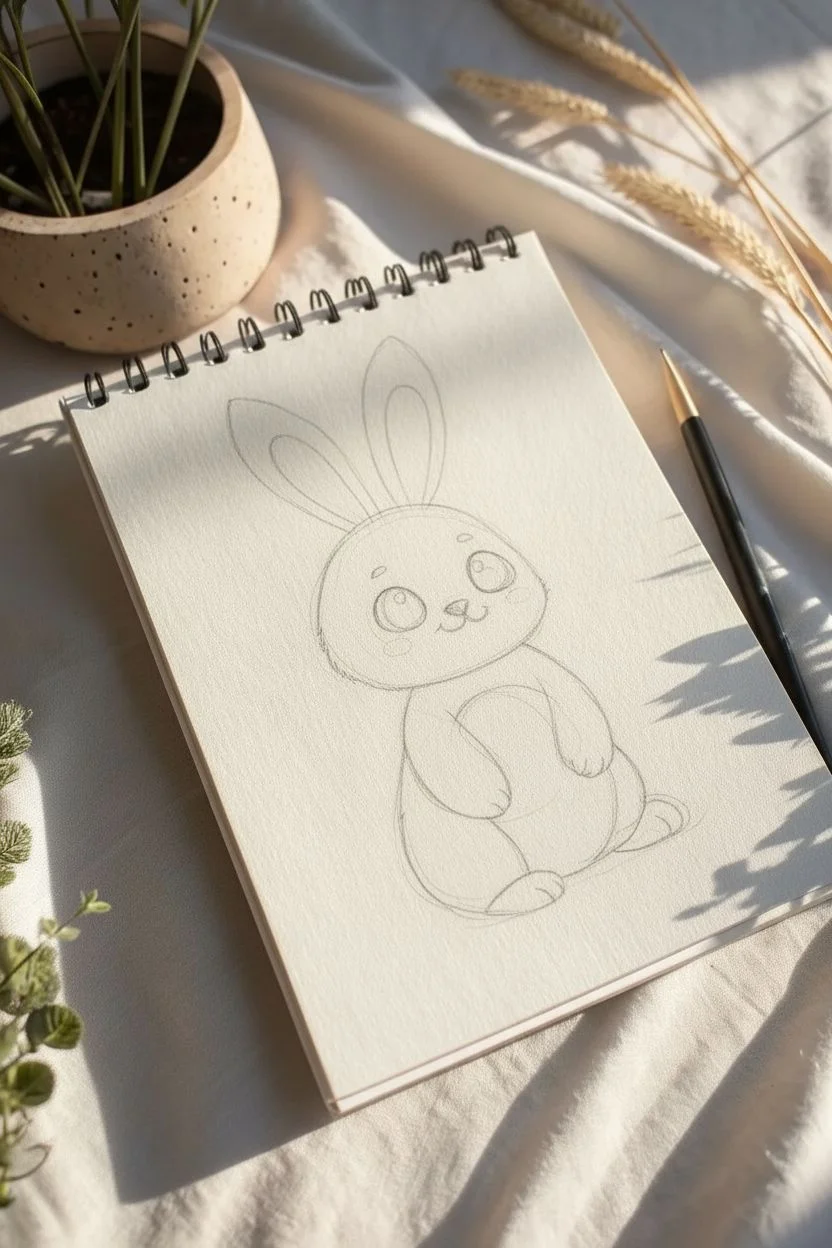
Capture the essence of spring with this adorable, chubby kawaii bunny illustration. Using soft watercolor washes and crisp ink lines, you’ll create a heartwarming character perfect for Easter cards or sketchbook spreads.
Step-by-Step
Materials
- Sketchbook with mixed media or watercolor paper (approx. 160-200 gsm)
- HB pencil and soft eraser
- Fine liner pen (black, 0.3mm or 0.5mm, waterproof)
- Watercolor paints or water-based markers (beige, pink, cool grey)
- Soft round watercolor brush (size 4 or 6)
- White gel pen (optional for highlights)
Step 1: Sketching the Shape
-
Head start:
Begin by lightly sketching a large, rounded shape for the head. Think of a slightly squashed circle or a soft bun shape, keeping the lines faint so they can be erased later. -
Body basics:
Attached directly to the bottom of the head, draw a pear-shaped body. The bottom should be significantly wider than the top to give that signature chubby look. -
Ears facing up:
Draw two long, petal-shaped ears extending from the top of the head. Position the left one slight angled outward and the right one standing straighter. -
Adding arms:
Sketch two short, sausage-shaped arms resting against the belly. The arms should look like they are hugging the body’s curve. -
Feet and belly:
Add small, oval feet at the very base of the body. Then, draw a large U-shape inside the body to define the white belly area.
Step 2: Kawaii Details
-
Face placement:
Draw a horizontal guideline low on the face. Place two large circles for eyes on this line, leaving plenty of space between them for maximum cuteness. -
Sweet features:
Inside the eye circles, add large highlights (white spots) in the upper corners. Between the eyes, draw a tiny triangle nose and a ‘w’ shape for the mouth. -
Cheeks and fluff:
Mark out small ovals for rosy cheeks right under the eyes. Add small jagged lines on the sides of the cheeks to suggest furry texture.
Uneven Wash?
If your watercolor dries with hard edges or ‘blooms,’ try wetting the paper slightly with clean water before applying the paint to help it flow smoothly.
Step 3: Inking the Outline
-
Tracing lines:
Using your waterproof black fine liner, carefully trace over your pencil lines. I find it helps to rotate the sketchbook to keep your hand comfortable on the curves. -
Fur texture:
When inking the cheeks and the bottom of the head, use broken, jagged strokes instead of a solid line to create a fluffy fur effect. -
Clean up:
Wait (patiently!) for the ink to dry completely to avoid smudging. Once dry, gently erase all the underlying pencil sketch marks.
Make it Shine
Once the black eyes are totally dry, use a white gel pen to add extra sparkly dots or tiny hearts inside the pupils for an extra kawaii expression.
Step 4: Adding Color
-
Base coat:
Dilute a beige or warm tan watercolor paint. Apply a very light wash over the head, ears, and outer body, leaving the belly and inner ears white. -
Pink accents:
Mix a soft rose pink. Paint the inner parts of the ears, the little nose, and two distinctive circles for the blushing cheeks. -
Building depth:
While the beige layer is still slightly damp, drop a stronger concentration of beige or light brown on the left side of the body and under the chin for shadow. -
Bottom blush:
Add a wash of pink to the bottom left curve of the bunny’s body, blending it upward into the beige for a gradient effect. -
Eye details:
Fill in the eyes with solid black ink or dark grey paint, being extremely careful to preserve the white highlights you sketched earlier. -
Grounding shadow:
Mix a watery cool grey. Paint a cast shadow underneath the bunny, stretching slightly to the right to ground your character.
Now you have a charming little companion ready to hop off the page


Bunny Hugging a Painted Egg
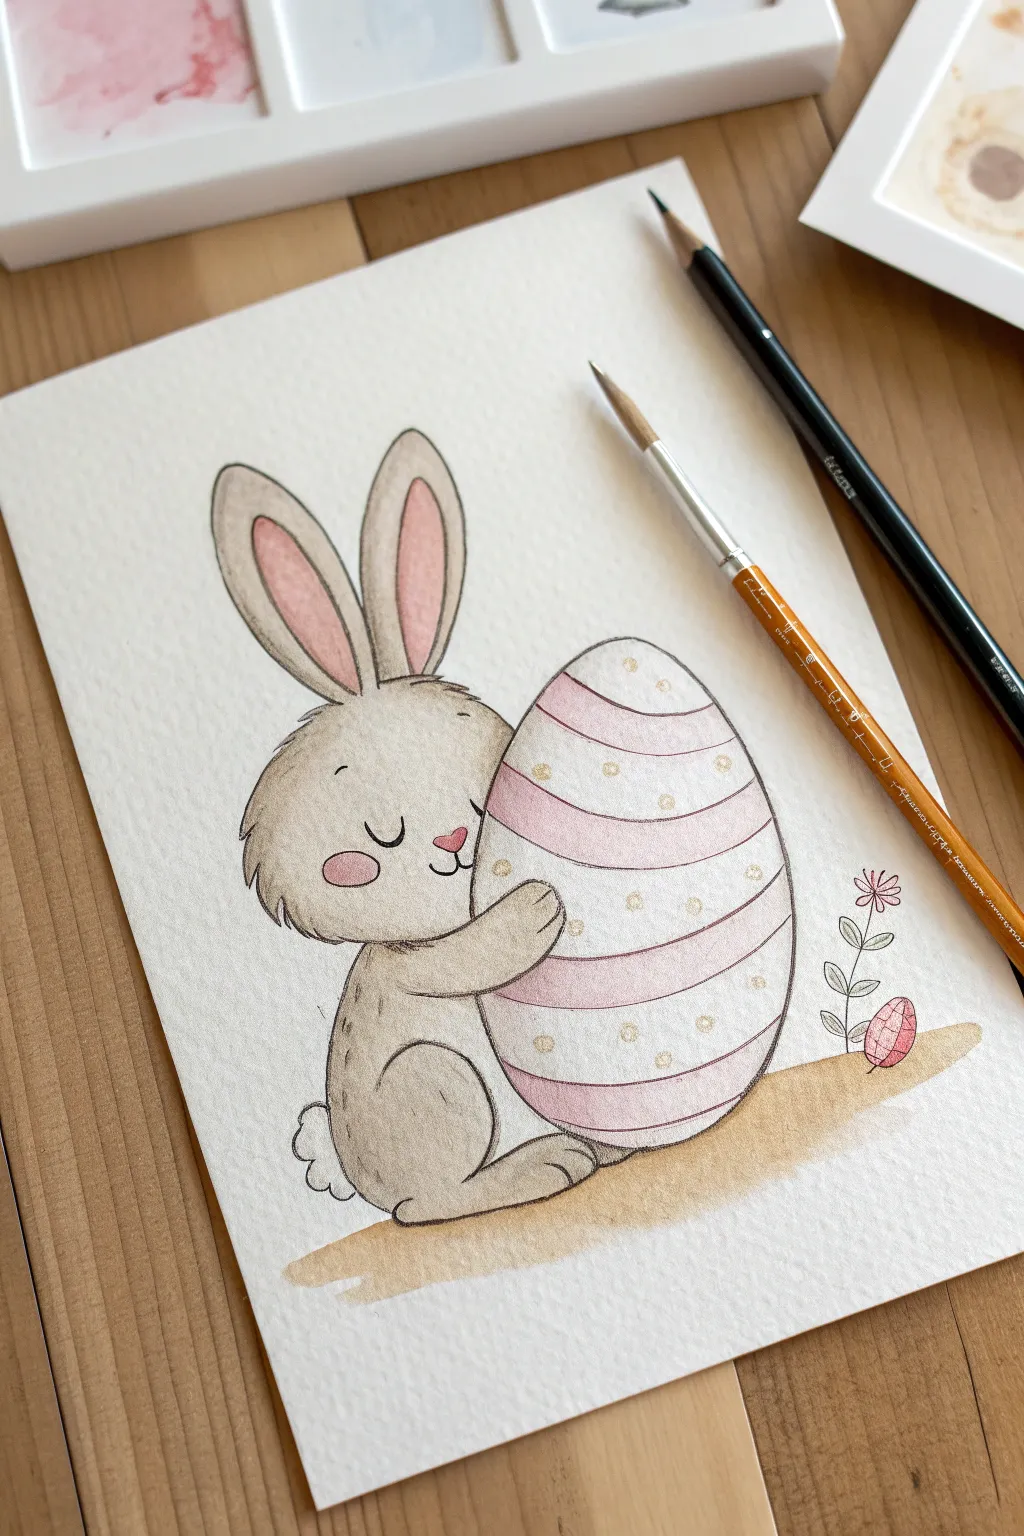
Capture the sweetness of Easter with this gentle illustration of a floppy-eared bunny embracing a giant, decorated egg. Using a combination of soft watercolors and crisp outlining, this project creates a heartwarming piece perfect for holiday cards or nursery decor.
How-To Guide
Materials
- Cold press watercolor paper (approx. 300gsm)
- HB pencil for sketching
- Fine liner pen (black or dark sepia, waterproof)
- Watercolor paints (Light Brown, Pink, White/Gouache, Green)
- Round watercolor brush (size 4 or 6)
- Small detail brush (size 0 or 1)
- Jar of water
- Paper towel
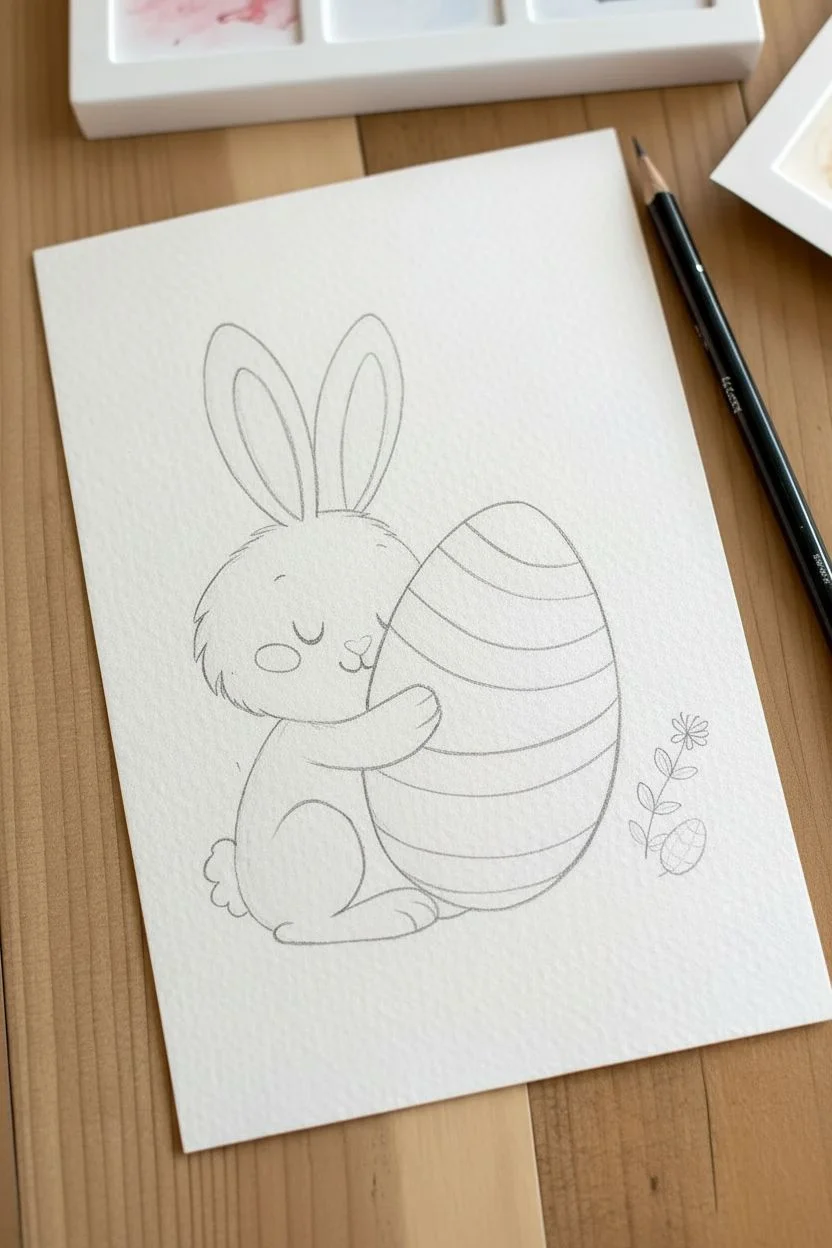
Step 1: Sketching the Foundations
-
Outline the egg shape:
Begin by lightly sketching a large, oval egg shape on the right side of your paper. Tilt it slightly to the left so it looks like it’s resting comfortably. -
Add the bunny’s head:
Draw a rounded circle overlapping the upper left side of the egg. This will be the bunny’s head. Ensure the chin area tucks slightly behind the curve of the egg. -
Sketch the body and limbs:
Draw a curved line extending down from the head for the back, ending in a rounded thigh and foot. Sketch an arm reaching around the front of the egg to show the hugging action. -
Draw the ears and face:
Add two long, upright ears on top of the head. Inside the face, lightly mark positions for closed, curved eyes, a small triangular nose, and a smile. -
Add background details:
Sketch a simple ground line beneath the bunny and egg. On the far right, add a tiny flower stem and a miniature egg to balance the composition.
Muddy Fur?
If your watercolors look muddy or bleed too much, let the first layer dry completely before adding shadows. Wet-on-dry gives you much more control than wet-on-wet.
Step 2: Inking the Design
-
Trace over the sketch:
Using your waterproof fine liner, carefully go over your pencil lines. Use short, flicking strokes for the bunny’s fur to create a fluffy texture, especially on the cheeks and back. -
Refine the egg pattern:
Draw the stripes across the egg with smooth, confident curves that follow the egg’s rounded form. Add small circles or dots between the stripes for decoration. -
Erase pencil marks:
Wait until the ink is completely dry to prevent smudging. Gently erase all visible graphite lines to leave a clean black outline.
Step 3: Watercolor Washes
-
Paint the bunny’s fur:
Mix a watery sheer brown. Apply a wash over the bunny’s body and head. While it’s wet, I like to drop in slightly darker brown pigment near the edges and bottom of the paws to create soft shadows. -
add pink accents:
Using a soft pink, paint the inner ears, the nose, and the round rosy cheeks. Let these areas bleed slightly into the wet fur if you want a softer look, or wait for the brown to dry for crisp edges. -
Color the egg stripes:
Paint alternating stripes on the large egg with a pale pink wash. Leave the white stripes blank for now. Paint the tiny background egg in a matching pink tone. -
Paint the ground:
Swipe a wash of ochre or light brown under the characters to ground them. Let the paint fade out at the edges for a vignetted effect. -
Detail the flower:
Use a touch of green for the flower stem and leaves, and a dab of pink for the petals.
Pro Tip: Fur Texture
When painting the fur, lift your brush at the end of each stroke. This ‘feathering’ technique mimics hair better than a solid block of color.
Step 4: Final Details
-
Deepen the shadows:
Once the initial brown layer is dry, mix a more concentrated brown. Paint thin strokes along the back, under the arm, and where the bunny meets the egg to add dimension. -
Decorate the egg:
Using a small detail brush, add golden or brownish dots to the white sections of the egg pattern. -
Add the tail:
Leave the tail mostly white, but add a tiny shadow underneath in light grey or diluted blue to give it volume. -
Highlighting:
If you have white gouache or a gel pen, add tiny highlights to the nose or the top of the egg for a polished finish.
Now you have a charming keepsake that perfectly captures the cozy spirit of the season


Easter Egg Pattern Sampler Page

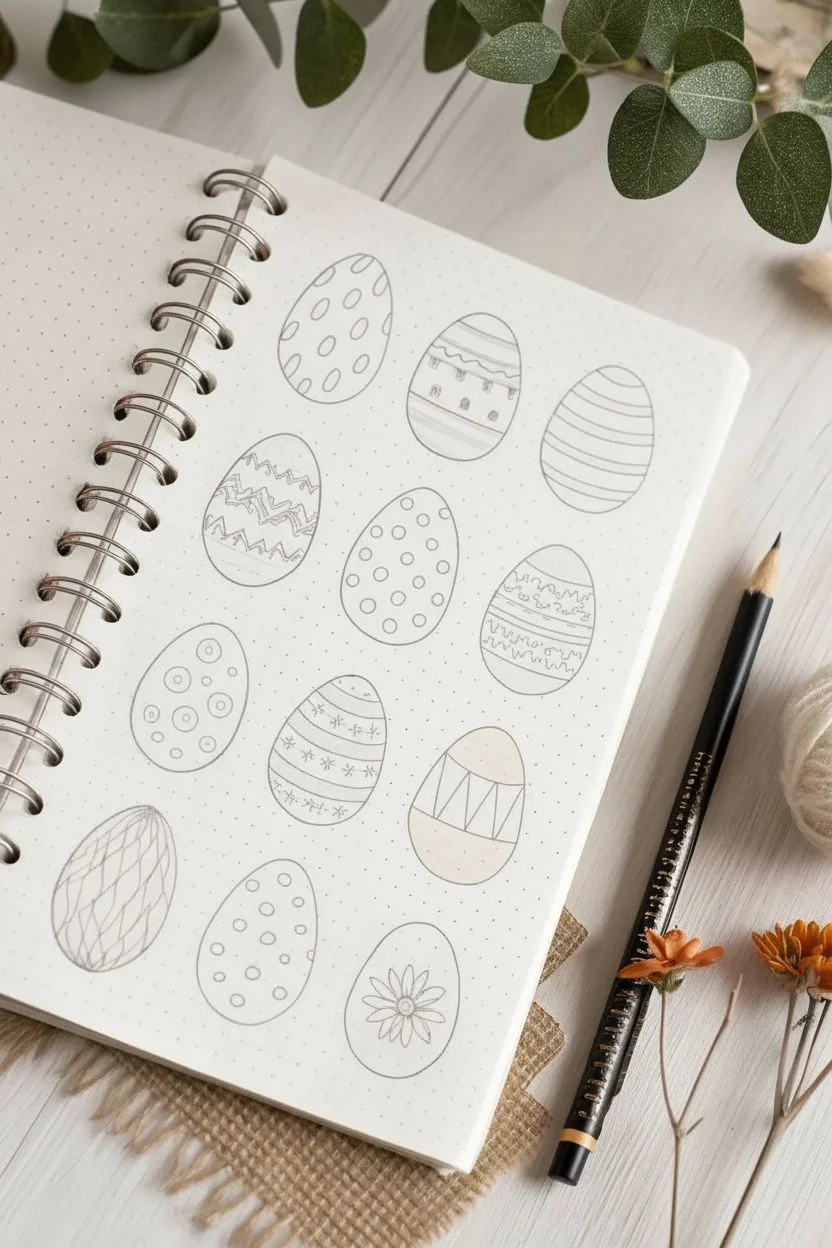
Create a soothing spread of simple, hand-drawn Easter eggs featuring a variety of charming patterns. This project combines crisp fine-line doodles with soft, muted pastel coloring for a minimalist bullet journal aesthetic.
How-To Guide
Materials
- Dotted bullet journal or heavyweight sketch paper
- Fine liner pen (black, size 0.3mm or 0.5mm)
- Pencil (HB or H)
- Eraser
- Colored pencils (muted pink, sage green, beige, light gray)
- Ruler (optional)
Step 1: Drafting the Layout
-
Visualize the Grid:
Visualize a loose grid on your page. The goal is to fit about 12 to 14 eggs comfortably. They don’t need to be perfectly aligned, but spacing should feel balanced. -
Pencil Sketching the Outlines:
Using a light hand and your pencil, sketch the basic oval shapes for all the eggs. Aim for a slightly tapered top and a wider bottom for a classic egg silhouette. -
Planning the Patterns:
Before inking, lightly sketch the internal patterns for each egg. Include variety like stripes, polka dots, zig-zags, scalloped lines, and a central flower motif for the bottom egg.
Step 2: Inking the Designs
-
Outline the Shapes:
Take your black fine liner and carefully trace over your pencil ovals. Try to keep your hand steady and close the shapes neatly at the top. -
Inking Polka Dots:
For the first polka dot egg, draw small circles randomly distributed inside the oval. Keep them open; do not fill them in black. -
Inking Stripes and Zig-Zags:
Move to the striped eggs. For the zig-zag pattern, draw continuous sharp peaks and valleys across the center. You can double up the lines to create a ribbon effect. -
Adding Scallops and Swirls:
For the more intricate middle egg, draw horizontal bands first, then fill the spaces with small scallops (u-shapes) and tiny loopy swirls. -
Drawing the Flower:
For the bottom center egg, start with a small circle near the bottom third. Draw long, teardrop-shaped petals radiating outward from this center point. -
Creating Texture:
For the bottom left egg, use cross-hatching or intersecting curved lines to create a textured, woven net appearance. -
Erase Sketches:
Once all the ink is completely dry—give it a few minutes to avoid smearing—gently erase all the underlying pencil marks to leave a clean black-and-white base.
Keep it Clean
Work from top-left to bottom-right (if right-handed) when inking. This prevents your hand from resting on wet ink and smudging your fresh lines.
Step 3: Coloring
-
Selecting the Palette:
Choose a limited color palette of 3-4 soft shades to keep the page cohesive. I prefer using a dusty pink, a soft beige, and a muted grey-green. -
Coloring the Stripes:
Fill in alternating stripes on the striped eggs. Use the pink for the simple horizontal stripes and the beige for the zig-zag ribbon fillers. -
Filling the Backgrounds:
For the egg with the house-like windows, color the background bands in a soft sage green, leaving the window shapes white. -
Accenting the Dots:
On the polka dot eggs, you can choose to color the dots themselves or color the background space around them. Try leaving the dots white and shading the egg a light gray. -
Detailing the Flower:
Color the center of the flower on the bottom egg pink or orange, leaving the petals sharp white against a plain or lightly shaded background. -
Adding Dimension:
Color the geometric shapes on the beige egg near the bottom. Fill the bottom section and the top section, leaving a zig-zag white band in the middle for contrast. -
Final Touches:
Review your eggs. If any look too plain, use your fine liner to add tiny dots or ‘confetti’ specks in the empty spaces to balance the texture.
Wobbly Ovals?
If your egg shapes aren’t perfect, don’t restart. Thicken the outline slightly on the corrective side to hide the wobble. It adds hand-drawn character.
You now have a delightful collection of patterned eggs to brighten up your journal page
BRUSH GUIDE
The Right Brush for Every Stroke
From clean lines to bold texture — master brush choice, stroke control, and essential techniques.
Explore the Full Guide
Chick in a Cracked Eggshell
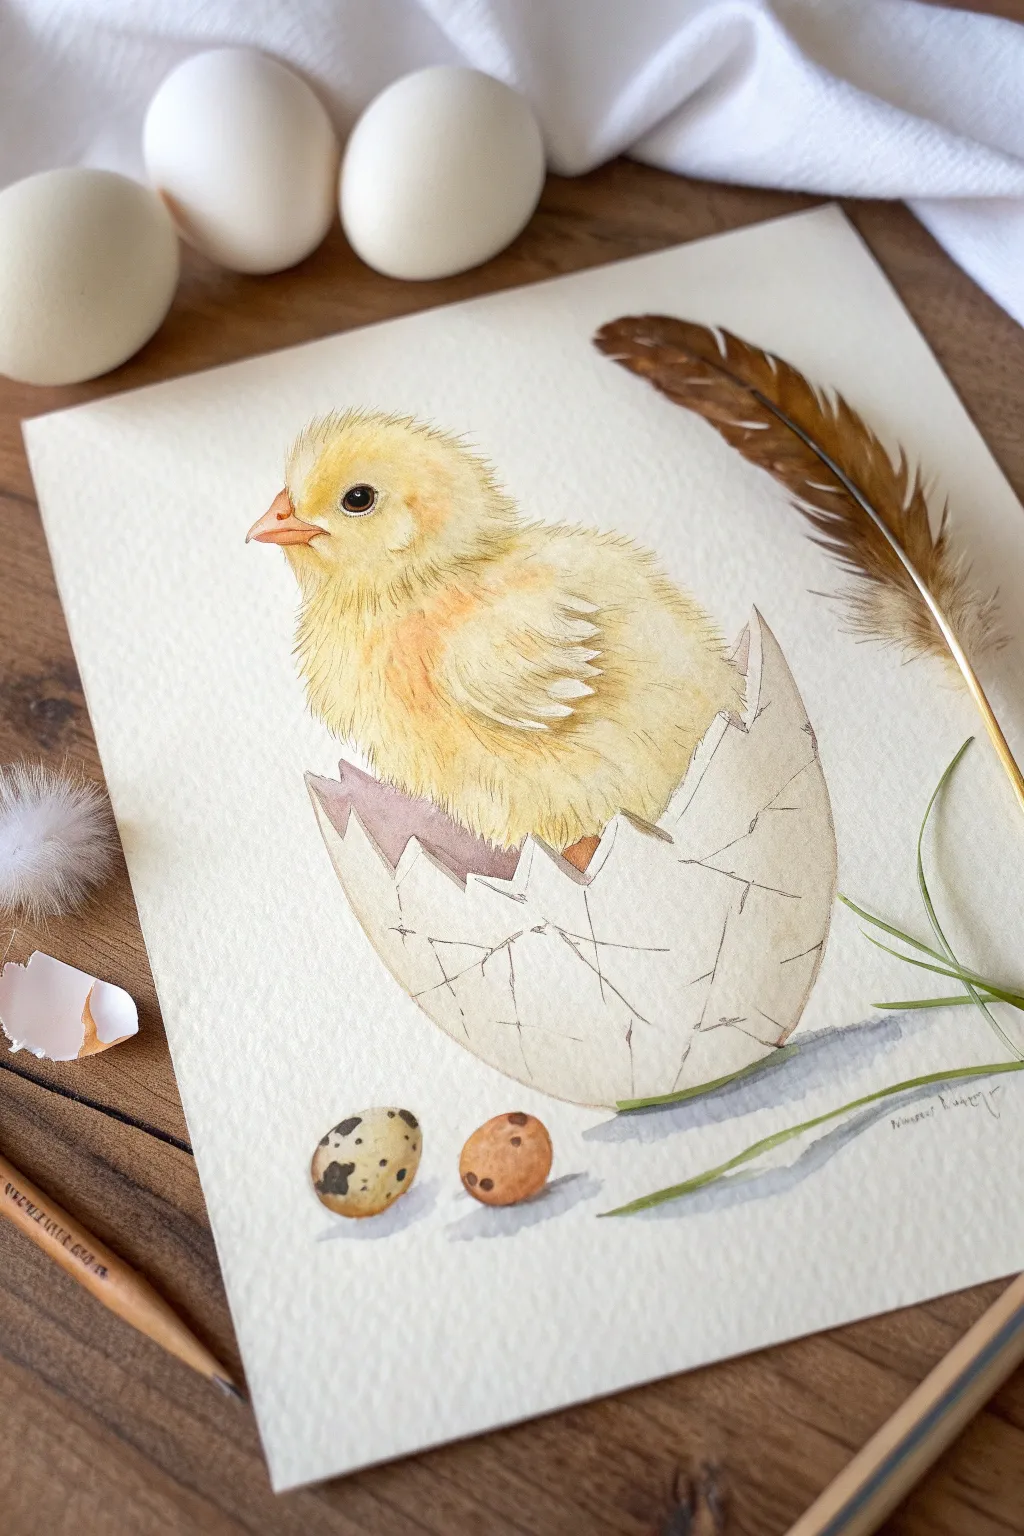
Capture the magic of new life with this delicate watercolor painting of a fluffy chick emerging from its shell. This project focuses on building soft textures for the downy feathers and creating realistic cracks for a charming Easter centerpiece.
Step-by-Step
Materials
- Cold press watercolor paper (300 gsm)
- HB pencil for sketching
- Kneaded eraser
- Watercolor paints (Lemon Yellow, Cadmium Yellow, Yellow Ochre, Burnt Sienna, Payne’s Grey, Sepia)
- Round watercolor brushes (sizes 2, 4, and 0 for details)
- White gouache or white gel pen
- Clean water
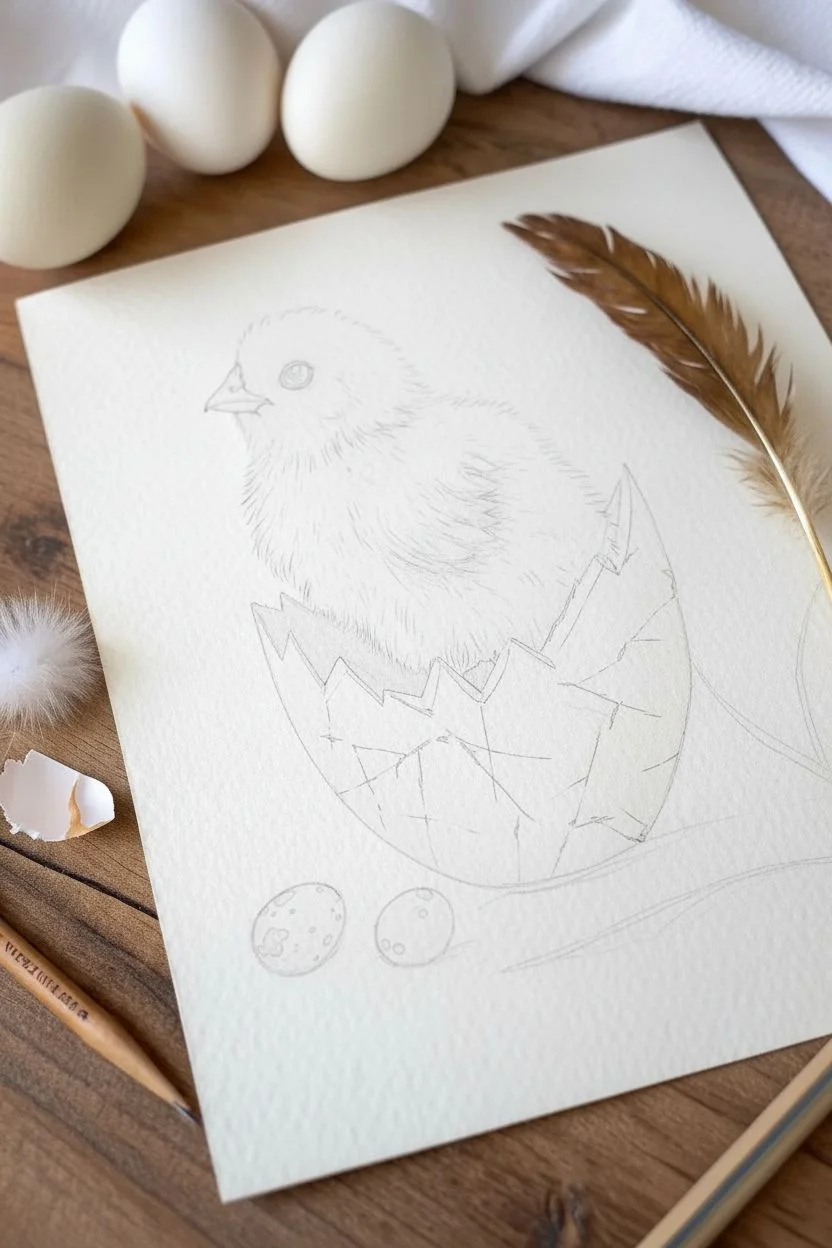
Step 1: Sketching the Composition
-
Outline the egg shape:
Start by lightly drawing a large, broken oval shape for the main eggshell. The bottom should be rounded, while the top edge needs jagged, zig-zag lines to represent the cracked opening. -
Sketch the chick:
Nestle the chick inside the shell. Draw a round head and a fluffy body that sits deep within the egg. Add a small triangular beak and a round eye placed centrally on the face. -
Add foreground details:
At the base of the big egg, lightly sketch two tiny quail eggs—one oval and one slightly more round. Add a few faint lines indicating straw or grass blades to ground the composition. -
Refine and erase:
Go over your sketch to add the jagged crack lines on the surface of the shell. Once satisfied, use your kneaded eraser to roll over the paper, lifting the graphite until the lines are barely visible guides.
Muddy colors?
Wait for the yellow fluff layer to be bone-dry before painting the grey shell interior. If the wet yellow touches wet grey, they will bleed into a murky green.
Step 2: Painting the Chick
-
Base wash for the chick:
Mix a watery Lemon Yellow. Apply this wash to the chick’s body, avoiding the eye and beak. Keep the edges soft and feathery rather than creating a hard outline. -
Adding warmth and depth:
While the first layer is still slightly damp, drop in touches of Cadmium Yellow and a tiny bit of Yellow Ochre under the heavy fluff of the chest and wing area to create volume. -
Painting the eye:
Using your smallest brush and Sepia (or dark brown), carefully paint the eye, leaving a tiny pinprick of white paper for the highlight. This brings the chick to life immediately. -
Beak details:
Paint the beak with a mix of Burnt Sienna and a touch of Cadmium Yellow. Add a darker line where the beak opens and a tiny nostril detail. -
Feather texture:
Once the yellow base is completely dry, use a size 0 brush with a thicker mix of Yellow Ochre to paint tiny, flicking strokes. I like to focus these on the wing and the back of the head to simulate downy feathers.
Add a realistic touch
Use an old toothbrush to flick tiny specks of brown paint lightly over the large eggshell. This creates a natural texture that looks less perfect and more organic.
Step 3: The Eggshell and Foreground
-
Shell shading:
Keep the eggshell mostly white. Mix a very dilute wash of Payne’s Grey and Sepia to create a warm off-white shadow. Apply this to the bottom curve of the shell where it rests on the ground. -
Inner shell shadow:
Paint the inside back of the shell (behind the chick) with a slightly darker, purplish-grey mix to push it into the background and make the chick pop forward. -
Defining the cracks:
Using a fine liner brush and a diluted grey-brown mix, trace the cracked lines you sketched earlier. Vary the pressure so the lines aren’t uniform; they should look brittle and random. -
Quail eggs base:
Paint the two small foreground eggs with a warm, sandy wash (Yellow Ochre plus a touch of brown). Let this dry completely. -
Quail eggs speckling:
Load your small brush with Sepia or dark brown. Dot the small eggs with varying sizes of spots to mimic the quail pattern. Group some spots closer together for a natural look. -
Grounding shadows:
Mix a cool grey (Payne’s Grey) and paint a soft horizontal shadow under the large egg and the small eggs so they don’t look like they are floating.
Step 4: Final Details
-
Greenery accents:
If you sketched grass blades, paint them now using a simple sap green or olive tone. Keep the strokes quick and loose. -
Enhancing highlights:
Use white gouache or a white gel pen to add a final brightness to the eye highlight if needed, or to add a crisp edge to the broken shell pieces.
Now you have an adorable symbol of spring ready to frame or turn into a greeting card
Bunny and Carrot Besties
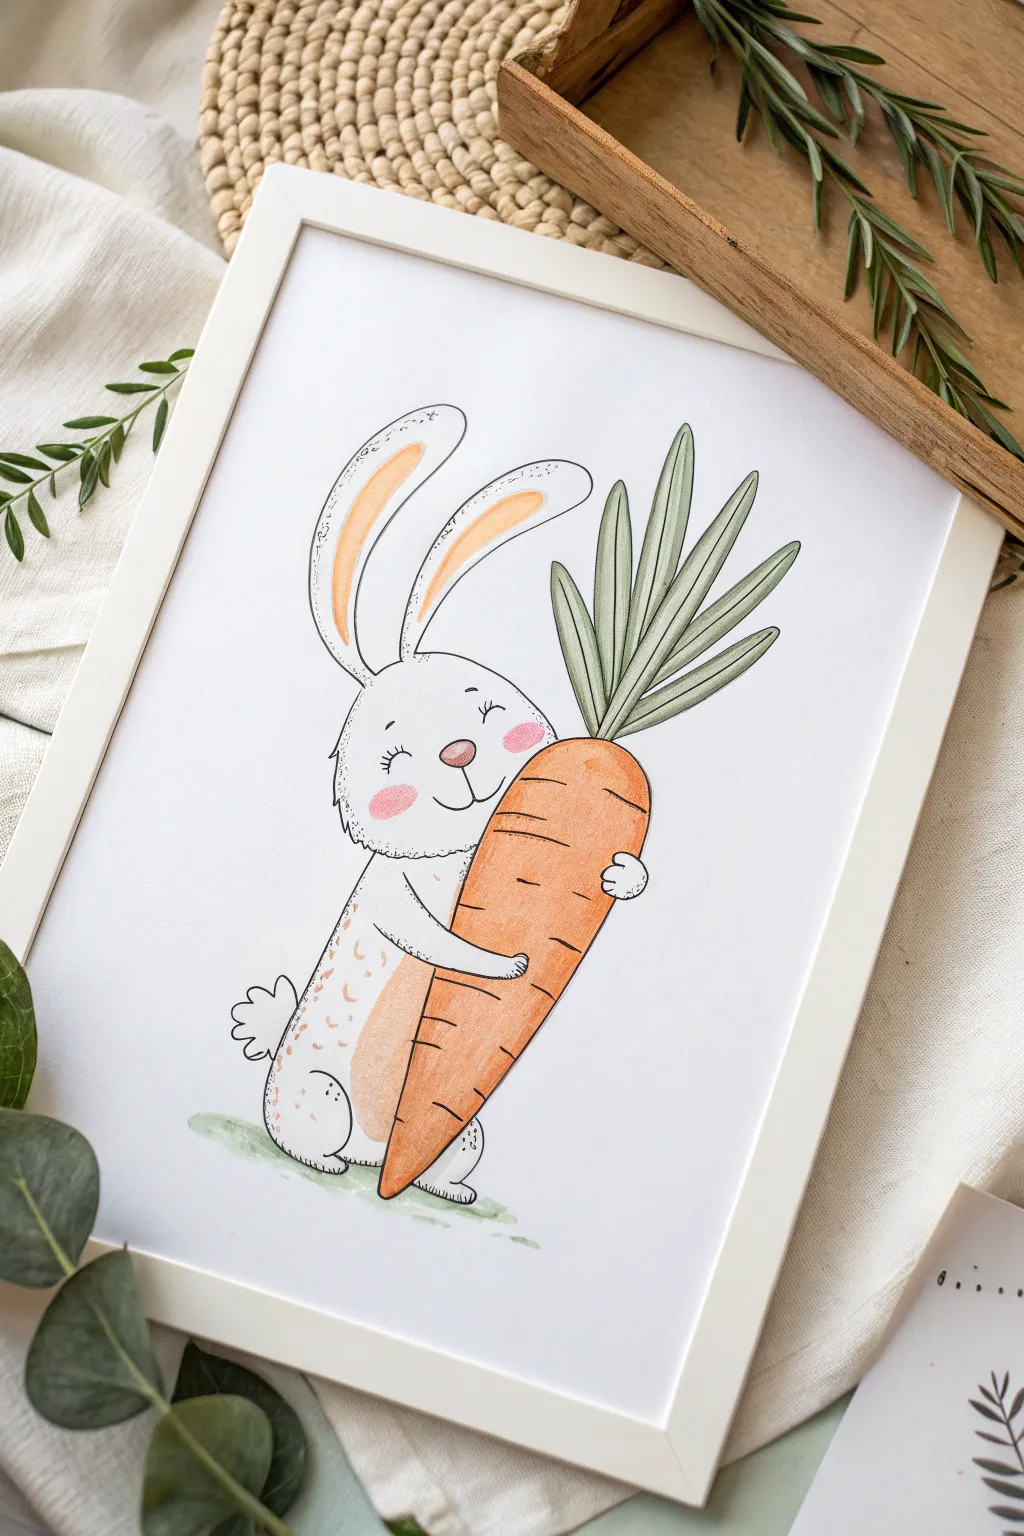
Celebrate Easter with this adorable illustration of a happy rabbit embracing its favorite snack. The design combines loose ink outlines with soft watercolor washes for a charming, rustic storybook feel.
How-To Guide
Materials
- Hot press watercolor paper (A4 or 8×10)
- Pencil (HB or H for light sketching)
- Kneaded eraser
- Fine liner pen (black, waterproof, size 0.1 or 0.3)
- Watercolor paints (orange, green, pink, light brown/ochre)
- Small round brushes (size 2 and 4)
- Water cup and paper towel
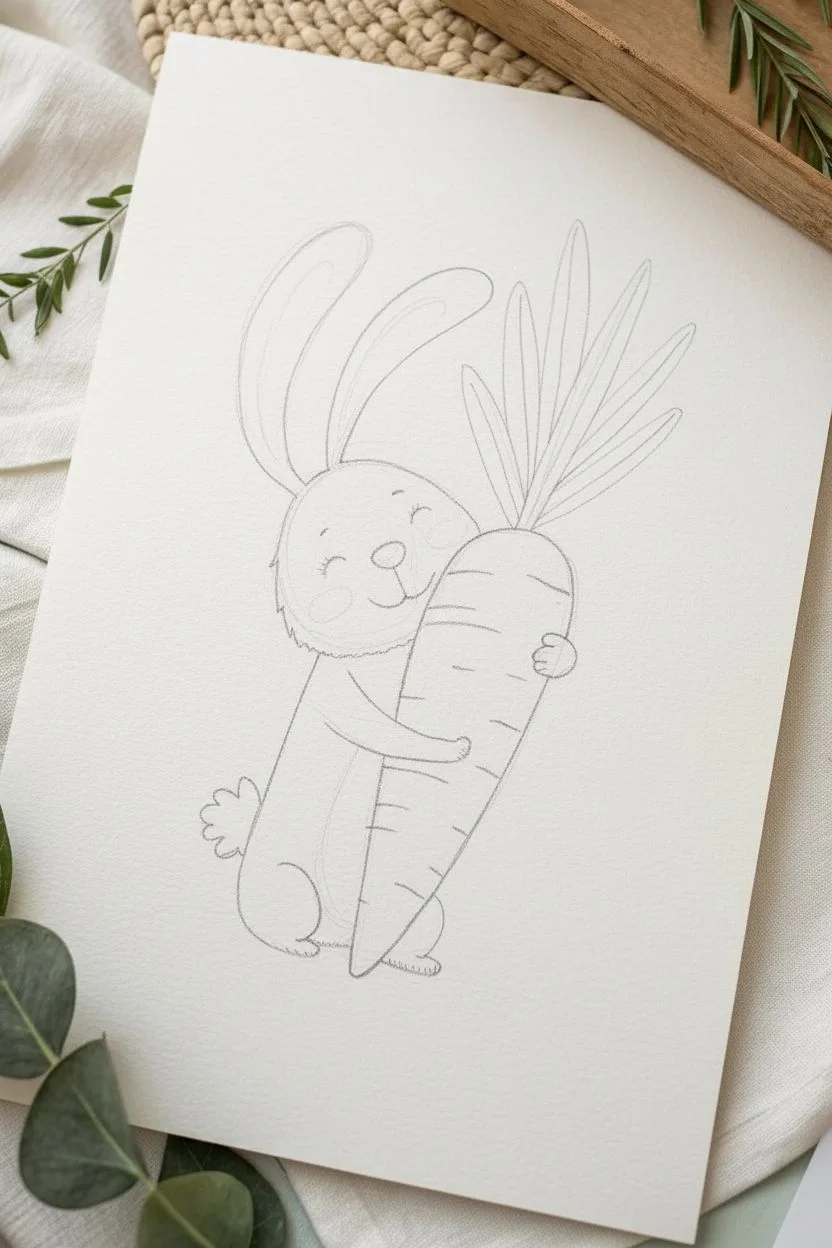
Step 1: Sketching the Composition
-
Outline the carrot:
Begin by drawing the giant carrot first, as it’s the central anchor. Sketch a long, inverted tear-drop shape that leans slightly to the right, taking up about two-thirds of the vertical space. -
Add the bunny head:
Position the bunny’s head peeking out from behind the left side of the carrot. Draw a rounded oval shape that connects directly to the carrot’s curve. -
Draw the ears:
Sketch two long, floppy ears extending upward. The left one should curve slightly outward, while the right one can tilt inward, perhaps partially obscured by the carrot tops later. -
Body and arms:
Draw the bunny’s body curving down along the left side of the carrot. Most importantly, sketch the arms wrapping tightly around the vegetable—one arm reaching across the front, and the paws gripping the sides. -
Carrot greens:
Top the carrot with a burst of leafy greens. Draw about five or six distinct, long leaf shapes fanning out to the top right corner. -
Facial features:
Lightly mark placement for the closed, smiling eyes, a small triangular nose, and two rosy cheek circles.
Smudged Ink?
If your pen smears when erasing pencils, switch to a purely alcohol-based marker or wait much longer before erasing. You can also dab instead of rub to be safe.
Step 2: Inking the Details
-
Trace with fine liner:
Go over your pencil lines with a waterproof black fine liner. Use a broken or ‘sketched’ line style for the bunny’s fur to make it look fluffy rather than smooth. -
Texture lines:
Add small, dashed strokes inside the outline of the bunny, particularly on the chest and paws, to suggest soft fur texture. -
Carrot details:
Ink the carrot with a smoother line, adding horizontal curved creases across its width to give it roundness and character. -
Leaf veins:
Draw a central vein line down the middle of each green leaf. -
Erase pencil marks:
Wait at least 5-10 minutes for the ink to fully set, then gently remove all underlying graphite with your kneaded eraser.
Step 3: Watercolor Washes
-
Paint the carrot:
Mix a vibrant orange watercolor. Paint the entire carrot body, letting the color pool slightly at the bottom edge for a natural shadow effect. -
Color the greens:
Use a muted sage green for the leaves. I prefer not to fill the shape completely—leaving tiny slivers of white paper at the edges keeps the look airy and illustrative. -
Bunny’s ears and nose:
Dilute a soft pink or peach tone with plenty of water. Gently tint the inner ears, the nose, and add circular blush spots to the cheeks. -
Fur accents:
The bunny is mostly white, so we only need to shade the edges. Using a very watered-down light brown or warm grey, add shadows under the chin, along the back, and under the arms. -
Grounding the image:
Add a quick, loose wash of light green horizontally beneath the bunny’s feet so the figures don’t look like they are floating in space. -
Final speckles:
Once the fur shading is dry, use a slightly darker brown on the tip of your smallest brush to add tiny speckles or dots on the bunny’s lower back and leg for texture.
Add Dimension
Mix a tiny drop of purple into your orange paint to create a darker, deeper rust color. Use this to paint a thin shadow on the carrot right underneath the bunny’s arms.
Now you have a sweet piece of seasonal art ready to be framed or turned into a greeting card

PENCIL GUIDE
Understanding Pencil Grades from H to B
From first sketch to finished drawing — learn pencil grades, line control, and shading techniques.
Explore the Full Guide
Mini Easter Icon Doodle Sheet
Fill a journal page with this charming collection of bite-sized Easter icons, featuring sweet bunnies, decorated eggs, and tiny baskets. The grid layout keeps everything neat while the soft color palette adds a cozy, nostalgic feel to your sketchbook.
Step-by-Step Tutorial
Materials
- Dotted bullet journal or heavyweight smooth sketchbook paper
- Fine liner pen (black, 0.3mm or 0.5mm)
- Colored pencils or fine-tip markers (pastel yellow, orange, pink, light brown, green)
- Pencil and eraser (for sketching)
Step 1: Planning and Sketching
-
Grid Setup:
Visualize a grid on your dotted paper to keep spacing consistent. Aim for about 4 columns and 7-8 rows of small icons, leaving roughly 2-3 dots of space between each doodle. -
Rough Placement:
Lightly sketch circles and ovals with a pencil to mark where each icon will go. This ensures you have a balanced mix of vertical shapes (bunnies) and round shapes (eggs/flowers) before committing to ink.
Step 2: Drawing the Bunny Heads
-
Basic Shapes:
Start by inking your bunny head outlines. Draw a mix of simple round faces with long ears pointing up, and some with one ear flopped over for variety. -
Adding Personality:
Place small dots for eyes wide apart on the face. Add tiny ‘x’ shapes or small curves for mouths. I like to keep the features very minimal to maintain that cute ‘kawaii’ aesthetic. -
Patterned Bunnies:
For a few bunnies, draw the outline but leave the face blank to be filled with patterns later, or add spots to their ears immediately.
Ink Confidence
Don’t stress if your lines aren’t perfectly straight. The wiggly, hand-drawn nature of the lines adds to the organic charm of this doodle style.
Step 3: Creating the Easter Eggs
-
Egg Outlines:
Draw oval shapes scattered throughout your grid. Keep the bottom slightly wider than the top for a natural egg look. -
Stripes and Zigzags:
Decorate some eggs with simple horizontal stripes or zigzag lines across the center. -
Spots and Speckles:
Fill other eggs with tiny polka dots or small clusters of specks to create texture without overwhelming the small space. -
Floral Eggs:
Draw a tiny flower or bow directly onto the center of one or two eggs for a special focal point.
Level Up: Sticker Sheet
Draw these on sticker paper and cut around them carefully. Now you have custom homemade Easter planner stickers for your weekly spread.
Step 4: Adding Seasonal Details
-
Woven Baskets:
Draw small trapezoid shapes with handles. Add a cross-hatch pattern (horizontal and vertical lines) to mimic the weave of a wicker basket. -
Spring Flora:
In the gaps between larger icons, doodle simple five-petal flowers, sprigs of leaves, or tulips. Draw a vertical line for the stem and add small ovals for leaves. -
Sweet Extras:
Include a few miscellaneous items like a gift box with a bow, a milk bottle, or a carrot to round out the theme.
Step 5: Coloring and Refining
-
Soft Yellows:
Use a pastel yellow pencil to fill in the woven baskets and the centers of the daisies. Keep the shading light and airy. -
Warm Oranges:
Color key details with orange, such as the carrots, some egg patterns, and berries on the leaf sprigs. -
Rosy Cheeks:
Take a pink pencil and add tiny circular blush marks to the cheeks of every bunny. This is a crucial step for maximum cuteness. -
Earthy Tones:
Use a light brown to color any speckles on the eggs or spots on the bunnies. -
Touch-ups:
Wait for any marker ink to fully dry, then gently erase your original pencil grid lines to reveal a clean, finalized page.
Flip through your journal and enjoy seeing your page filled with these cheerful signs of spring
Egg Hunt Scene in a Meadow
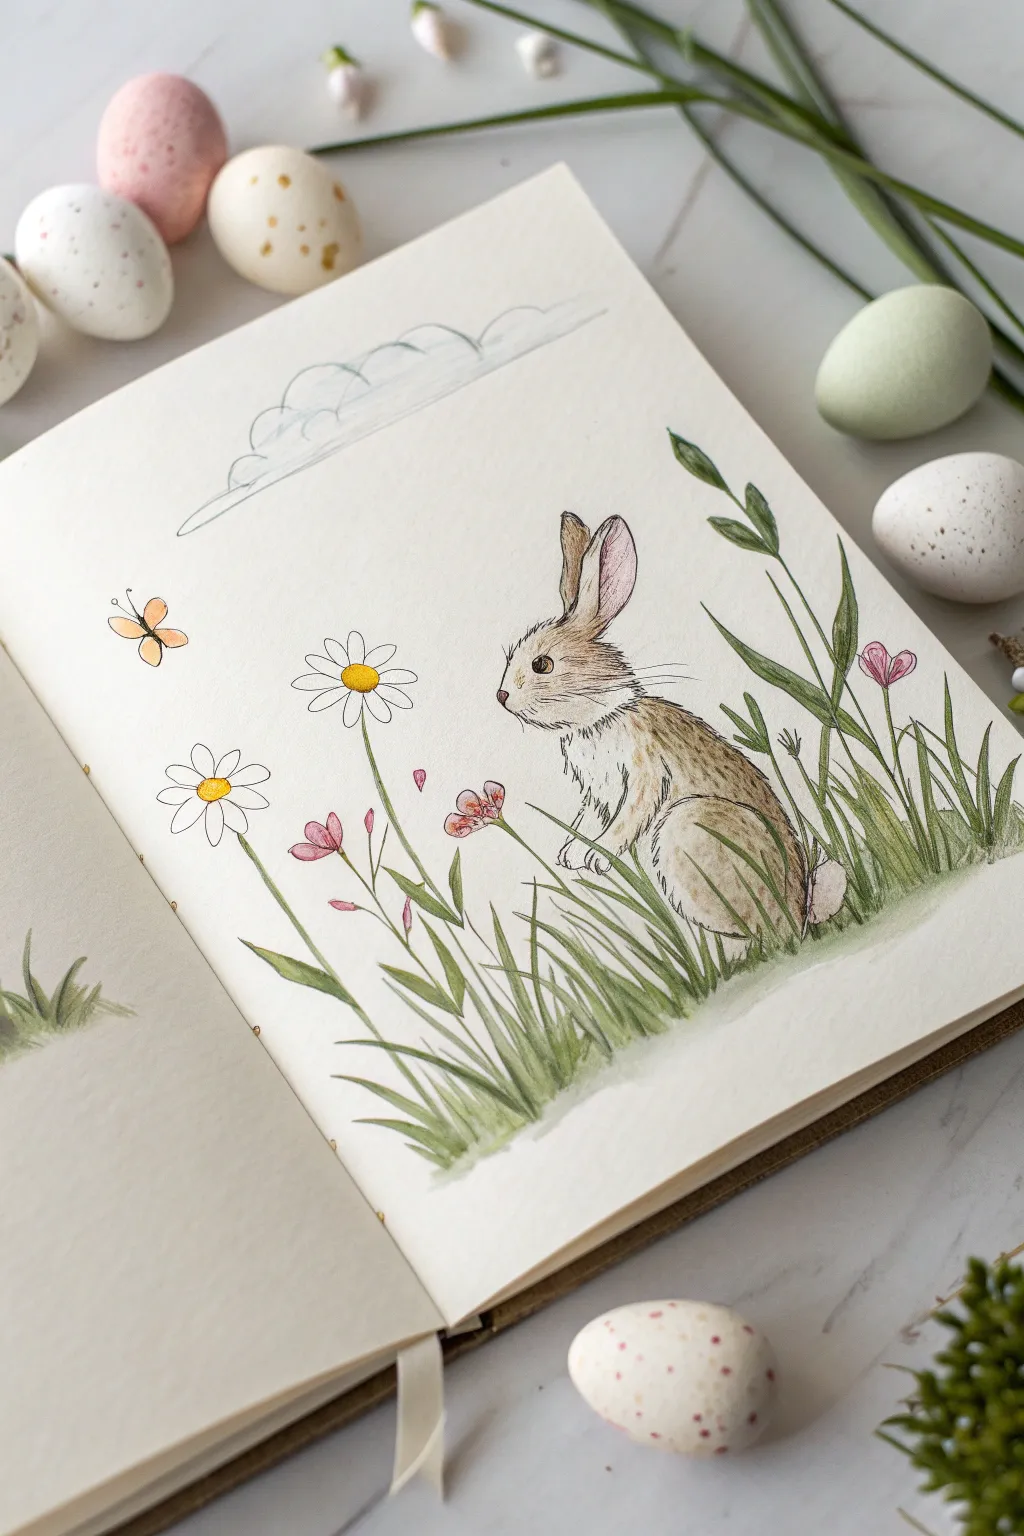

Capture the soft elegance of spring with this delicate mixed-media illustration featuring a watchful bunny amidst blooming wildflowers. The combination of fine ink lines and gentle watercolor washes creates a charming, storybook quality perfect for an Easter sketchbook spread.
Detailed Instructions
Materials
- Cold press watercolor paper or sketchbook
- Pencil (HB or lighter)
- Fine liner pen (black or sepia, 0.1mm – 0.3mm)
- Watercolor paints (Brown/Ochre, Green, Yellow, Pink/Rose)
- Small round brushes (Size 2 and 4)
- Eraser
- Cup of water and paper towels
Step 1: Sketching the Composition
-
Position the bunny:
Begin lightly with your pencil on the right side of the page. Draw an oval for the body and a smaller circle for the head, connecting them with a gentle curve for the neck. -
Refine the bunny’s shape:
Pencil in the tall, alert ears pointing upwards. Add the hind leg shape, tucked under the body, and sketch tiny front paws resting on the imagined ground. -
Draft the flora:
To the left of the bunny, sketch three tall stems for daisies at varying heights. Add two smaller stems near them for pink wildflowers. -
Add grass texture:
Sketch clumps of grass blades rising up around the bunny’s feet and behind him, ensuring the blades curve naturally rather than standing straight up. -
Include background elements:
Draw a few simple cloud shapes near the top of the page and a small butterfly hovering near the tall daisy on the far left.
Smudge Alert
Wait at least 10 minutes before erasing pencil lines over ink. If your eraser drags the ink, it wasn’t fully dry, and you risks ruining the crisp lines.
Step 2: Inking the Details
-
Outline the bunny:
Using your fine liner, trace the bunny’s outline. Use short, broken strokes for the fur, especially on the chest and back, to create texture rather than a solid line. -
Define the face:
carefully ink the eye, leaving a tiny white highlight. Dot the nose and draw long, sweeping whiskers extending from the muzzle. -
Ink the flowers:
Draw the daisy petals and centers with clean, continuous lines. For the grass, use quick, upward flicking motions to keep the tips sharp and energetic. -
Finalize ink work:
Trace the butterfly and the cloud outlines lightly. Once the ink is completely dry, gently erase all your underlying pencil marks.
Make it Sparkle
Once the watercolor is totally dry, use a white gel pen to add tiny dots to the flower centers or extra whiskers over the painted fur for pop.
Step 3: Painting with Watercolor
-
Wash the bunny’s fur:
Mix a diluted light brown or ochre. Paint the bunny’s body, leaving the chest and tail white. While damp, drop slightly darker brown near the hip and spine for shadow. -
Adds pink accents:
Use a very pale pink wash for the inside of the bunny’s ears and the nose. Use a slightly more saturated pink for the small wildflower buds. -
Paint the daisies:
Fill the daisy centers with a bright yellow. Leave the petals paper-white, or add the faintest touch of grey-blue near the center for depth. -
Color the greenery:
Using a sap green or similar natural shade, paint the grass blades. Vary the intensity—some pale, some darker—to distinguish the layers of foliage. -
Ground the scene:
I like to take a very watered-down green and sweep a faint wash underneath the bunny and grass to ground the image so it isn’t floating. -
Paint the butterfly:
Dab a soft orange or yellow onto the butterfly wings, keeping the color light and transparent. -
Enhance the sky:
lightly paint the bottom edges of the clouds with a very surprisingly pale blue-grey to give them volume without filling them in completely.
Enjoy the peaceful spring atmosphere your new drawing brings to the page


Bunny in a Flower Crown
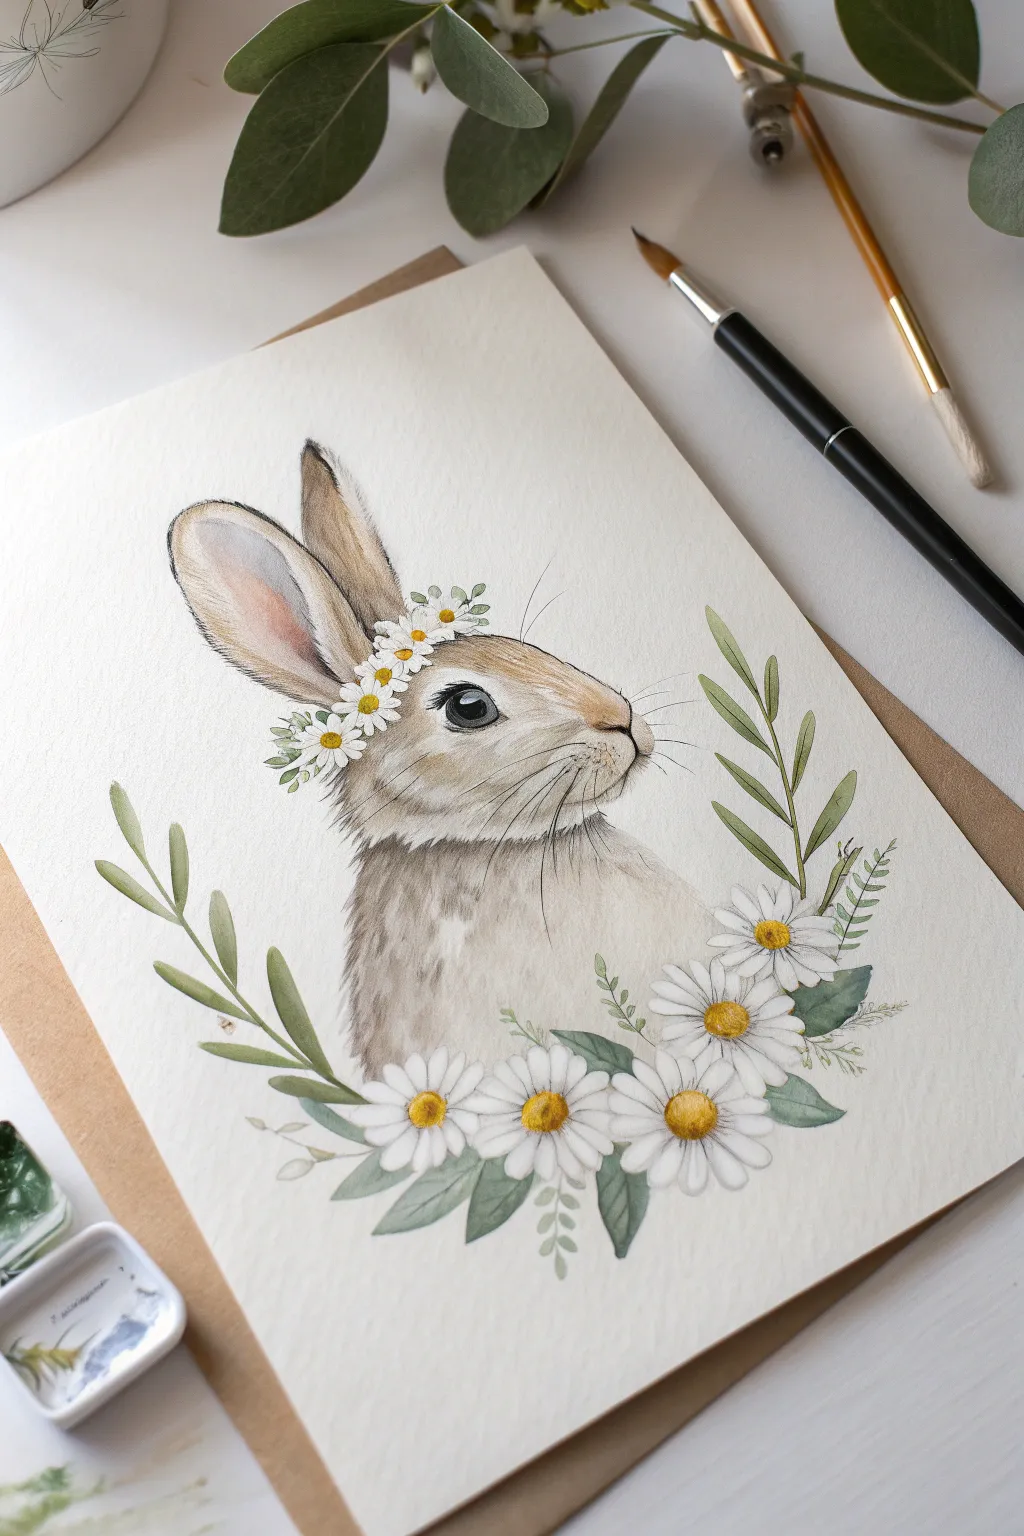
Capture the soft elegance of spring with this gentle portrait of a rabbit adorned in simple daisies. This mixed-media project combines soft watercolor washes for the fur with precise fine-liner or pencil details for a realistic yet illustrative finish.
Step-by-Step Guide
Materials
- Cold-press watercolor paper (300gsm)
- Watercolor paints (Burnt Umber, Yellow Ochre, Sap Green, Sepia, Payne’s Grey)
- White opacity gouache (optional)
- Fine round watercolor brushes (Size 0, 2, and 4)
- Black micron pen or fine waterproof fine-liner (0.1mm)
- HB sketch pencil and kneaded eraser
- Ceramic palette for mixing
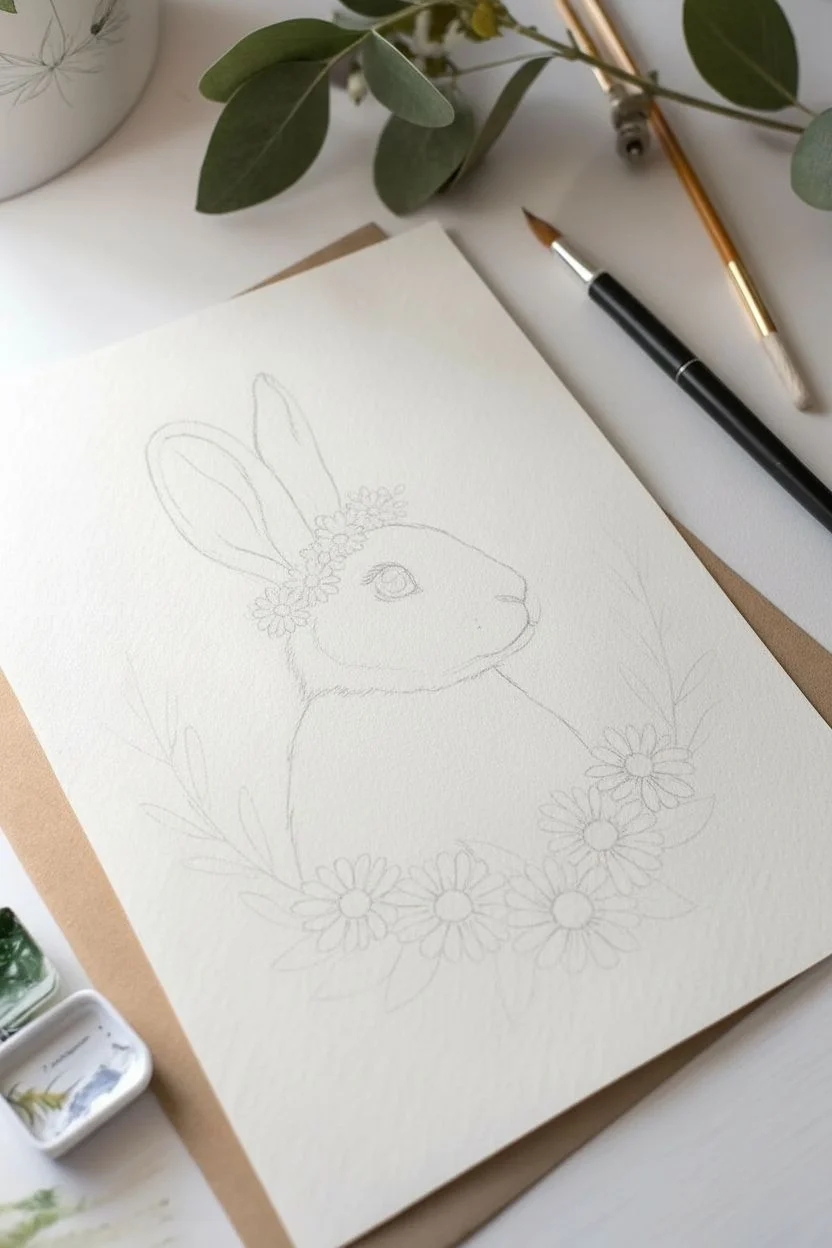
Step 1: Sketching the Composition
-
Head Placement:
Begin by lightly sketching an oval for the rabbit’s head, angled slightly upward to the right. Add a connected, softer shape below for the chest area to establish the bust portrait composition. -
Ear Structure:
Draw two long, tapered ear shapes. The ear on the left should be more open, showing the pink inner ear, while the right ear is tucked slightly behind, showing mostly the furred back. -
Facial Features:
Sketch the eye placement about halfway down the head oval. Mark the nose tip and the gentle curve of the muzzle. Keep these lines very faint so they don’t show through later. -
Floral Framework:
Draw small circles across the forehead for the flower crown daisies. Sketch larger circles at the base of the rabbit’s chest for the bottom wreath, adding simple curved lines to indicate where leaves will flow outwards.
Muddy Fur?
If fur colors are blending into a brown blob, wait for layers to dry completely between applications. Texture needs a dry surface to stay crisp.
Step 2: Painting the Bunny
-
Base Fur Wash:
Mix a watery wash of Yellow Ochre and a touch of Burnt Umber. With your size 4 brush, apply this to the head and ears, leaving the area around the eye and muzzle white. -
Shadows and Depth:
While the paper is still slightly damp, drop in a darker mix of Burnt Umber and Sepia at the base of the ears, under the chin, and along the back of the neck to create instant volume. -
Pink Inner Ear:
Mix a very diluted dusty rose or light red. Gently paint the inside of the left ear. I like to blend the edges into the brown fur while wet to avoid a hard outline. -
The Eye:
Using a small size 0 brush and nearly black paint (or Sepia mixed with Payne’s Grey), carefully fill in the eye. Leave a tiny, crisp white speck unpainted for the reflection, which brings the rabbit to life. -
Fur Texture:
Once the base layer is bone dry, use a size 0 brush with a concentrated Sepia mix. Paint tiny, flicking hair strokes following the curve of the face, particularly on the cheeks and forehead.
Step 3: Creating the Florals
-
Daisy Centers:
Paint the centers of the daisies with a bright yellow. For the bottom wreath flowers, add a tiny dot of orange-brown on one side of the yellow center to suggest a shadow. -
Leaves and Greenery:
Mix Sap Green with a little brown to desaturate it. Paint the slender leaves framing the bunny, varying your pressure to make the tips tapered and sharp. -
Petal Definition:
The petals are mostly the white of the paper. However, use a very watery grey-blue to paint faint shadows between the petals to separate them visually. -
Crown Details:
For the tiny daisies on the head, use the tip of your smallest brush to dab green in the gaps, suggesting leaves peeking through the tight floral band.
Soften the edges
For a dreamy look, use a clean, damp brush to soften the bottom edge of the bunny’s chest fur, fading the paint gently into white.
Step 4: Refining Details
-
Whiskers:
Using your fine-liner (or a steady hand with the size 0 brush), draw long, sweeping whiskers starting from the muzzle. Make the movement quick so the lines don’t look shaky. -
Deepening Contrast:
Add a somewhat darker wash of grey-brown to the chest area to ground the figure, letting it fade out softly at the bottom behind the large daisies. -
Leaf Veins:
When the green leaves are dry, use the fine-liner or a darker green mix to draw a central vein down the larger leaves for added realism. -
Final Highlights:
If you lost any highlights, use a tiny amount of white gouache to touch up the eye reflection or the tips of the fur on the nose.
Step back and admire the gentle expression of your woodland creature, ready for spring celebrations
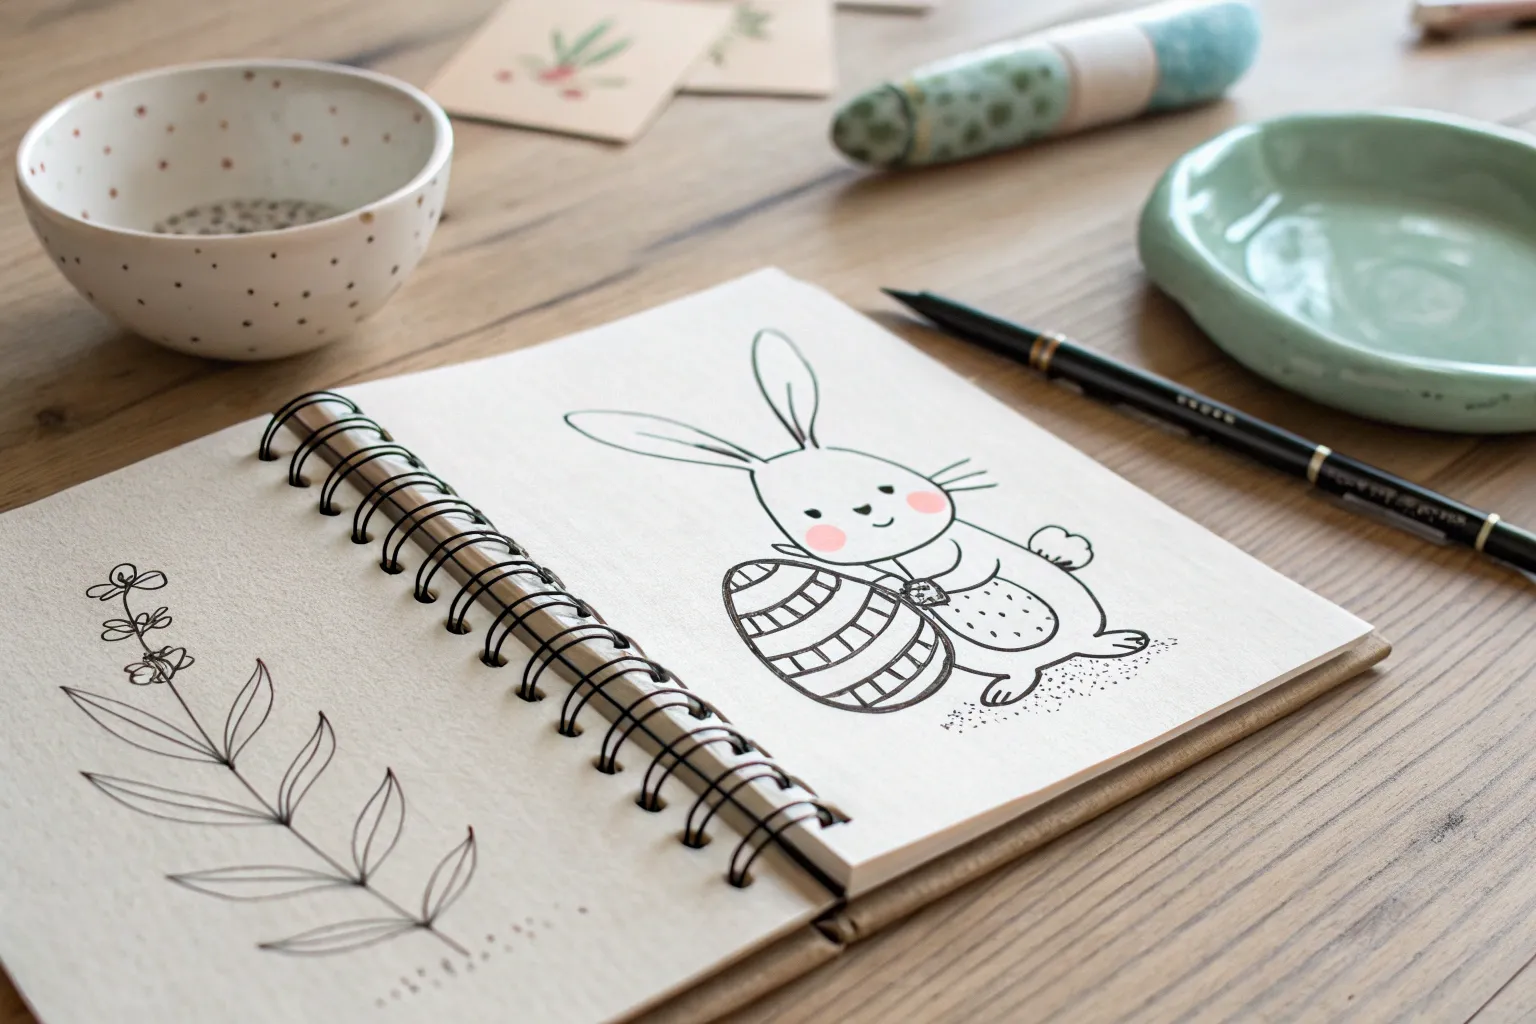
Minimal Line Art Bunny and Egg

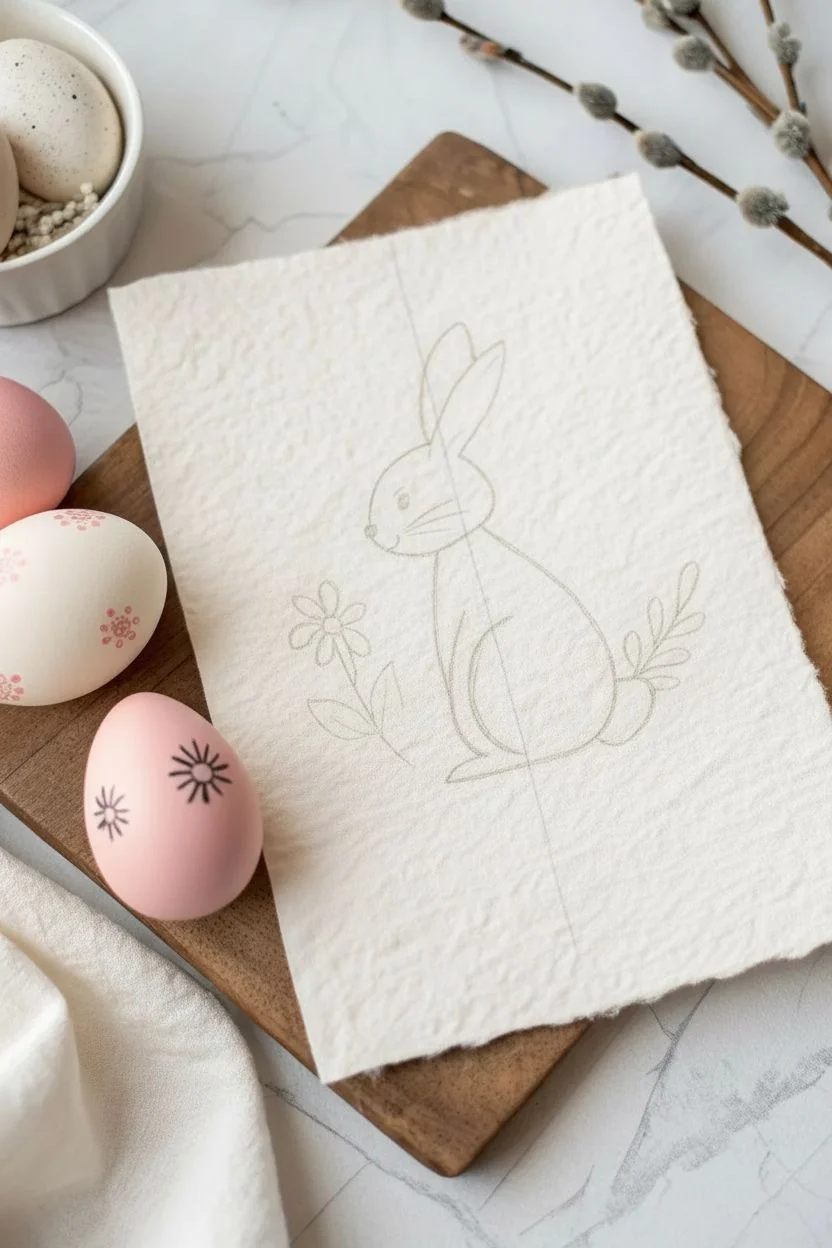
Capture the sweetness of spring with this minimal line art bunny, featuring charming dotted details and simple botanical accents. The texture of deckle-edge paper elevates this simple sketch into a beautiful piece of seasonal decor.
How-To Guide
Materials
- Textured handmade paper with deckled edges (A5 or 5×7 size)
- Fine liner pen (black, size 03 or 05)
- Thicker graphic marker or brush pen (black)
- Pencil (HB for sketching)
- Kneaded eraser
- Ruler (optional)
Step 1: Planning and Sketching
-
Position the subject:
Start by lightly marking the center of your textured paper. The bunny will sit slightly to the right of the center line to make room for the flower on the left. -
Draft the head:
Sketch a soft, rounded oval shape for the head. It shouldn’t be a perfect circle; give it a slight tilt to the left for a curious expression. -
Add the ears:
Draw two long, teardrop-shaped ears extending from the top of the head. Make the left ear slightly straighter and the right ear curved or ‘flopped’ just a bit for character. -
Outline the body:
From the bottom of the head, draw a pear-shaped body curve sweeping down and to the right. Keep the back rounded and the chest area slightly puffed out. -
Form the haunch:
Inside the lower body area, sketch a large semi-circle to represent the bunny’s powerful back leg (the thigh). This anchors the bunny to the ground. -
Sketch the tail and feet:
Add a small, fluffy cloud shape at the very back for the tail. Draw a simple elongated oval at the base for the foot. -
Draft the botanicals:
To the left of the bunny, sketch a simple daisy-like flower with a stem and two leaves. On the right, behind the bunny, add a leafy sprig peeking out.
Paper Texture Tip
When drawing on rough handmade paper, pull the pen toward you rather than pushing it away. This prevents the nib from snagging on the fibers and splattering ink.
Step 2: Inking the Outline
-
Trace main lines:
Using your thicker graphic marker or brush pen, carefully go over your pencil lines. The texture of handmade paper can be tricky, so move slowly to ensure the ink catches effectively. -
Refine the face:
Draw the nose as a small triangle. Add a dot for the eye with a tiny curved brow above it. Draw three straight whiskers extending from the cheek area. -
Add ear details:
Inside the left ear, draw a thinner, slightly jagged line to suggest fur texture and inner ear depth. -
Detail the flower:
Outline the flower petals. Don’t worry about perfect symmetry; a slightly wavering line adds to the organic, hand-drawn aesthetic. -
Ground the scene:
Draw zig-zag or small ‘v’ shapes near the bunny’s feet and the flower stem to represent grass blades, grounding the composition.
Add a Wash
Use diluted watercolor in soft grey or beige to add a very subtle shadow under the bunny or inside the ears for a dimensional look that keeps the minimal vibe.
Step 3: Adding Texture
-
Switch pens:
Change to your finer 03 or 05 fine liner pen for the delicate details. This contrast in line weight makes the drawing pop. -
Stipple the body:
Add small dots scattered across the bunny’s body, concentrating them slightly more near the back curve to suggest shadow and form. -
Add botanical accents:
Draw tiny circles floating near the flower stem and blades of grass to add a whimsical, pollen-like effect. -
Erase guidelines:
Wait until the ink is completely dry—handmade paper absorbs ink deeply and can smudge easily. Once dry, gently lift the pencil marks with a kneaded eraser. -
Final inspection:
Check your line work. If the paper texture caused any skips in the ink, carefully fill those gaps to create solid, confident black lines.
Now you have a charming piece of art perfect for an Easter card or a seasonal frame display


Have a question or want to share your own experience? I'd love to hear from you in the comments below!