
If you’re craving cute Mother’s Day drawing ideas that feel heartfelt without being complicated, you’re in the right place. I’m sharing sweet, beginner-friendly designs that look adorable on a card and still leave room for your own personal touch.
Classic Heart With “Happy Mother’s Day”
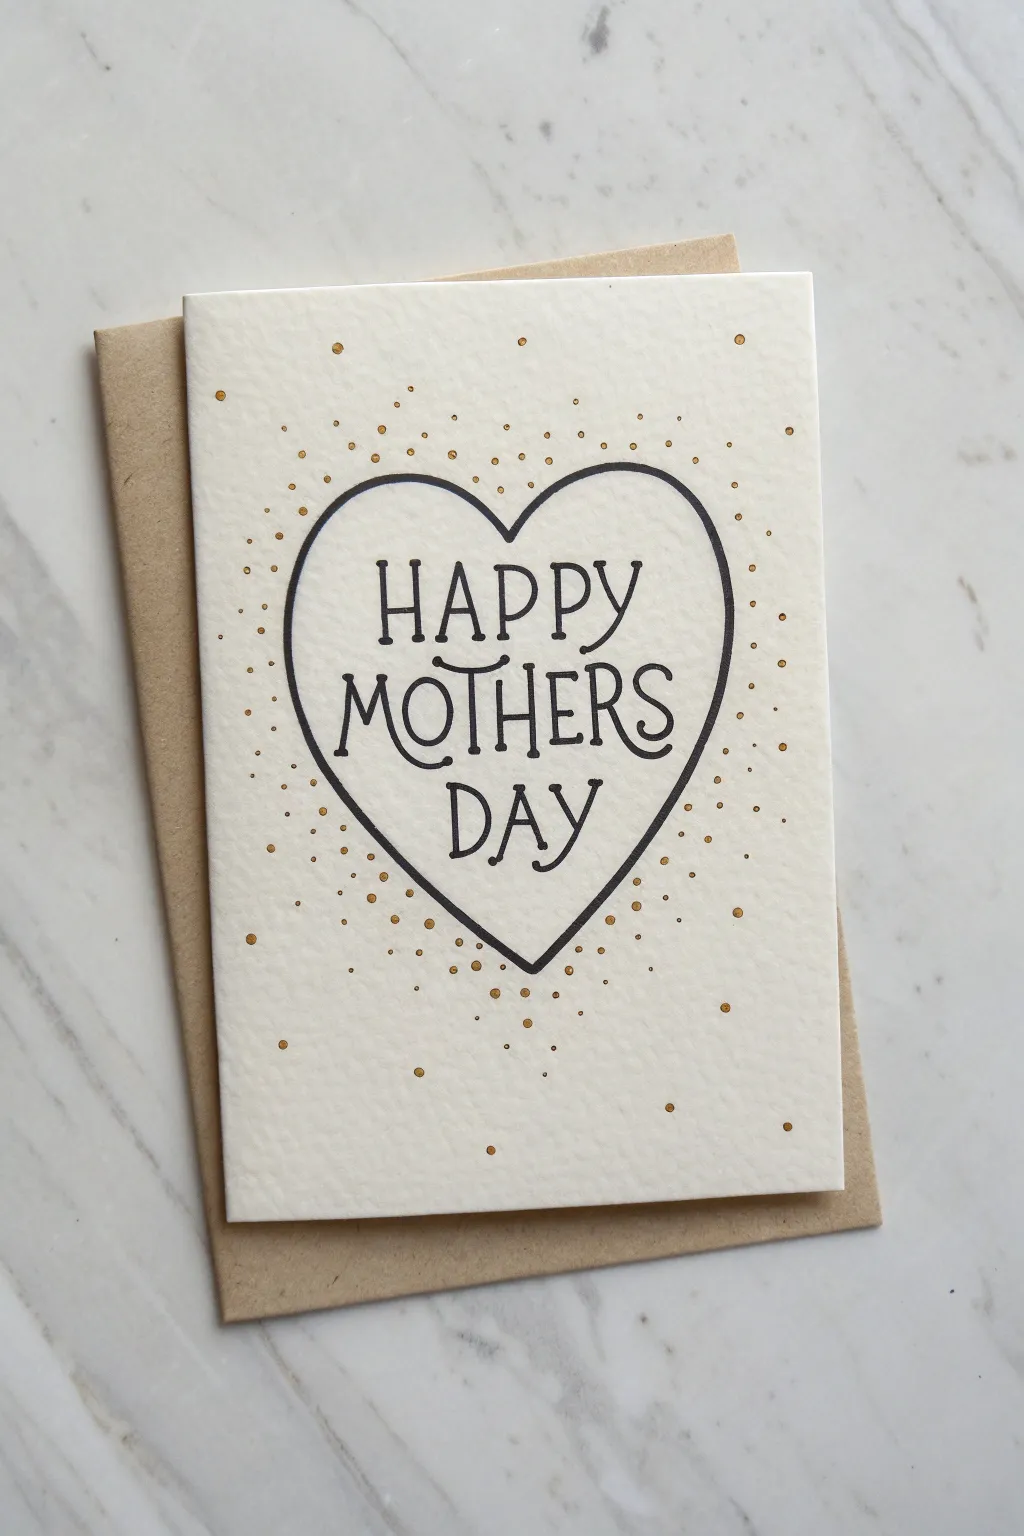
This classic design combines simple line art with a touch of sparkle for a truly elegant homemade card. By pairing crisp black lettering with scattered gold accents, you create a polished, boutique-style greeting that feels both personal and professional.
Step-by-Step Guide
Materials
- Heavyweight white cardstock or watercolor paper (A5 size folded to A6)
- Kraft paper envelope (A6)
- Black fineliner pen (0.5mm or 0.8mm)
- Metallic gold paint pen or gold gel pen
- Pencil (HB or 2H)
- Eraser
- Ruler
Step 1: Drafting the Design
-
Prepare your card base:
Start by folding your heavyweight cardstock in half to create a standard greeting card size. Run a bone folder or the back of a spoon along the crease to ensure it lays perfectly flat. -
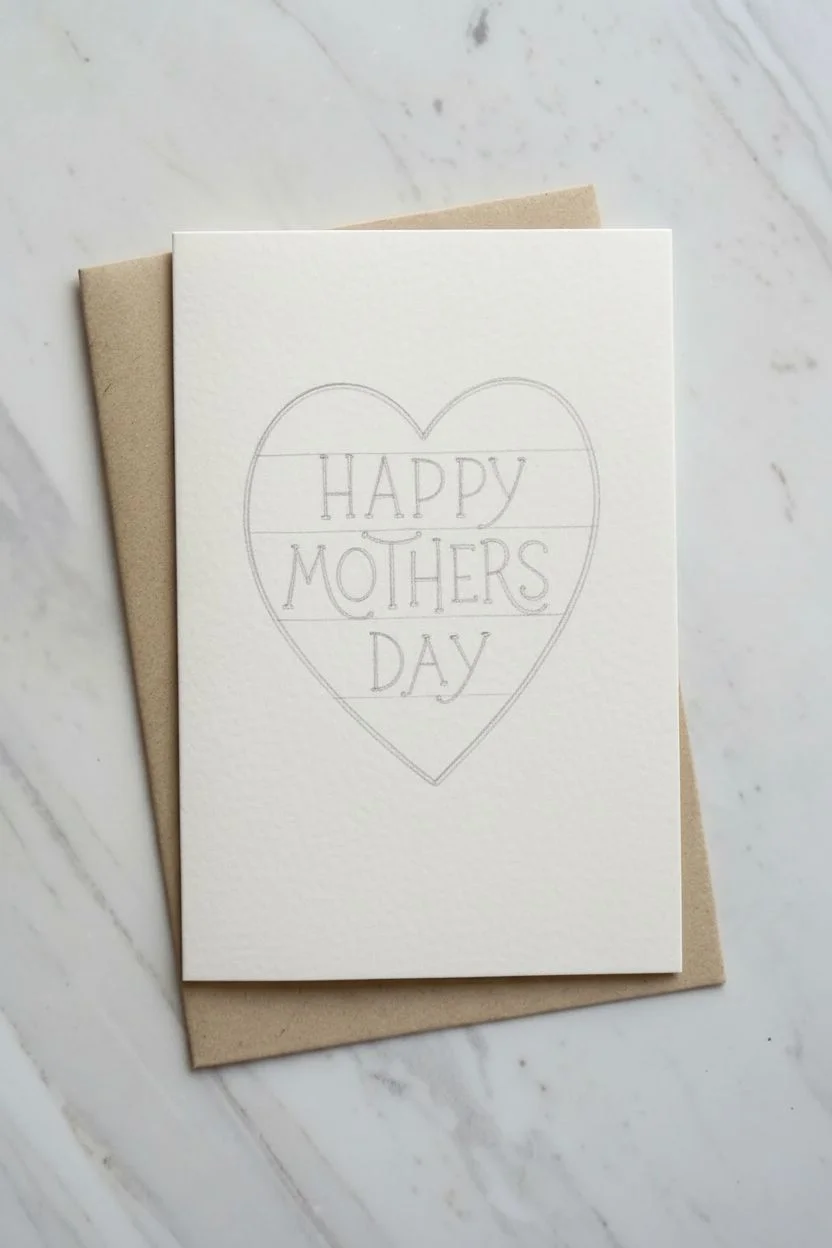
Lightly sketch the heart:
Using your pencil with very light pressure, draw a large heart in the center of the card front. Aim for a shape that is slightly wider than it is tall, leaving about an inch of margin on all sides. -
Draft the text guidelines:
Inside the heart, use your ruler to lightly draw three horizontal lines to guide your text. Space them evenly to accommodate the three words: HAPPY, MOTHERS, and DAY. -
Sketch the lettering:
Pencil in the letters. Use a whimsical serif style where the letters engage with each other lightly. Notice how the ‘T’ and ‘H’ in ‘MOTHERS’ nest together slightly. Center each word on its guide line.
Step 2: Inking the Outlines
-
Trace the heart:
Take your black fineliner and carefully trace over your pencil heart outline. Go slowly to keep the line steady. Don’t worry if it’s not mathematically perfect; the hand-drawn quality adds charm. -
Ink the first word:
Trace the word ‘HAPPY’. Pay attention to the serifs (the little feet on the letters) and add small curves or variations to keep the font playful rather than rigid. -
Ink the middle word:
Move on to ‘MOTHERS’. Since this is the longest word, ensure your spacing remains consistent as you ink so you don’t run out of room on the right side. -
Ink the final word:
Finish by inking ‘DAY’. Make these letters slightly larger if needed to fill the bottom point of the heart visually. -
Erase pencil marks:
Wait at least 5-10 minutes for the ink to dry completely. I prefer to wait a bit longer just to be safe, then gently erase all your pencil guides.
Gold shine secrets
For raised, textured gold dots that catch more light, use ‘Liquid Pearls’ or dimensional fabric paint instead of a standard gel pen.
Step 3: Adding the Sparkle
-
Start the confetti center:
Take your gold metallic pen. Begin placing dots closest to the black heart outline. These should be fairly dense but not touching the black line. -
Vary the dot sizes:
Create visual interest by making some dots tiny pinpricks and others slightly larger circles. You can achieve larger dots by gently pressing and swirling the pen tip. -
Radiate outward:
Work your way outward from the heart towards the edges of the card. As you move further away from the heart, space the dots further apart to create a fading or ‘bursting’ effect. -
Fill empty spaces:
Step back and look at the overall balance. If any areas look too empty near the heart, add a few medium-sized gold dots to fill the gaps. -
Protect the artwork:
Allow the metallic ink to dry fully before touching the surface, as gold pens can sometimes smudge easily. Once dry, pair it with the kraft envelope for a rustic finish.
Wobbly line fixes
If your heart outline looks shaky, thicken the line slightly in just that area to smooth it out. A variable-width line looks intentional and artistic.
Your finished card is now ready to bring a smile to someone special with its handmade charm
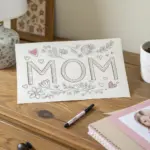


“Mom” Bubble Letters With a Heart “O”
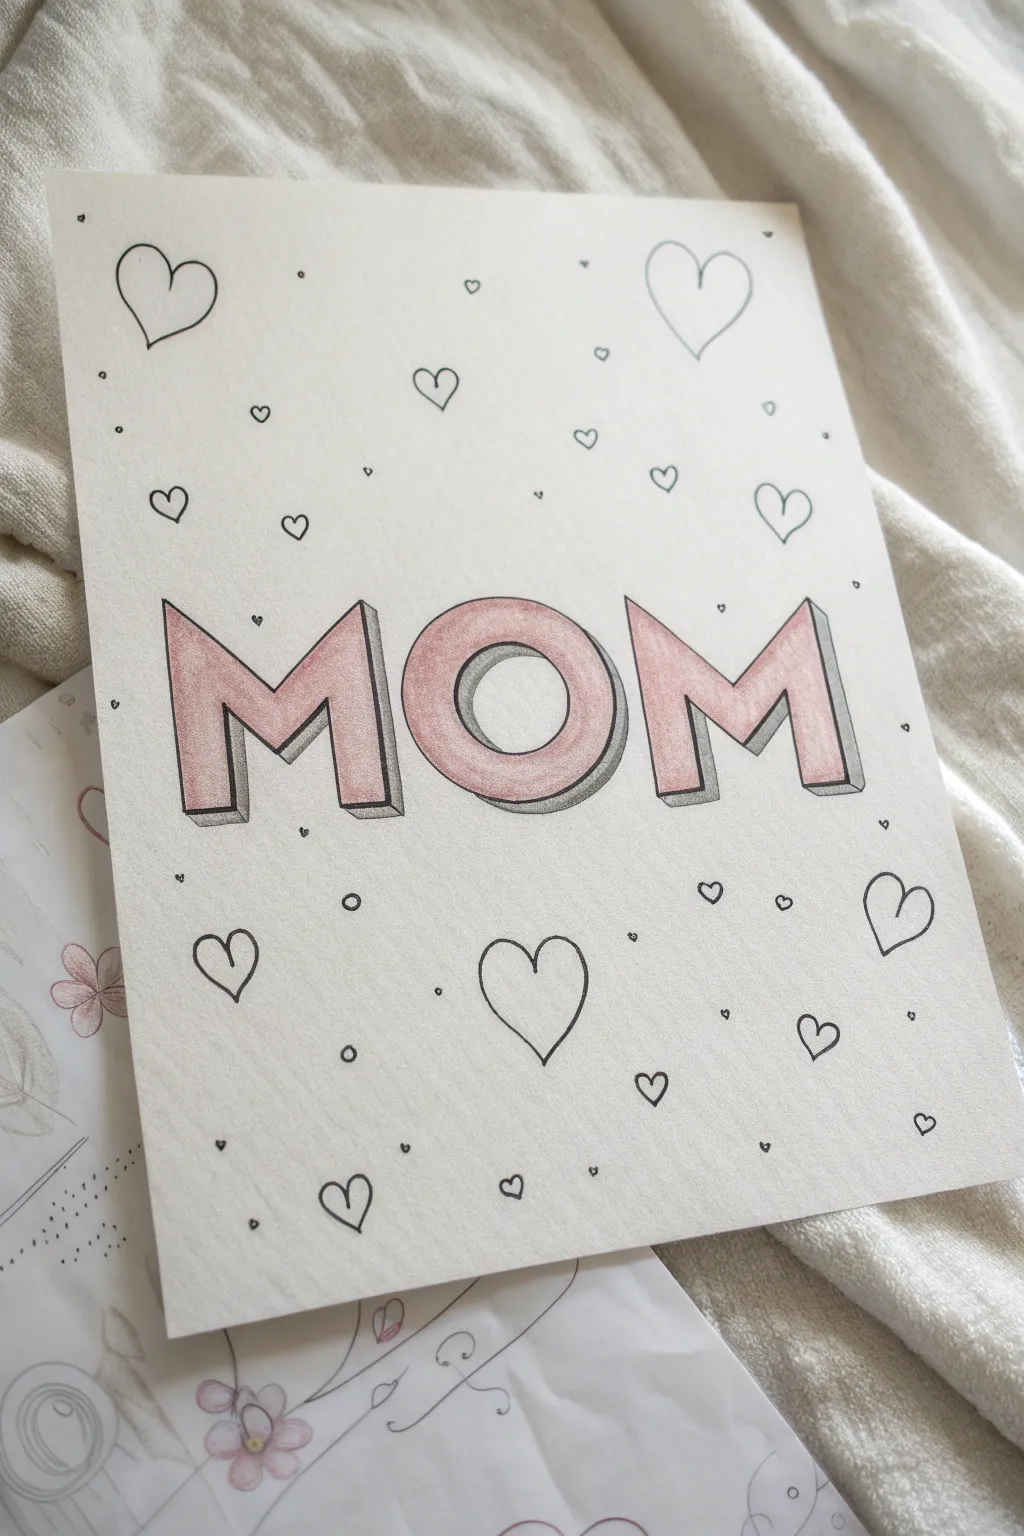

Create a heartfelt card that pops with this simple yet effective 3D lettering technique. The soft pink shading and scattered hearts give this design a sweet, playful vibe perfect for showing Mom some love.
Step-by-Step
Materials
- White cardstock or heavy watercolor paper
- Pencil (HB or lighter)
- Eraser
- Black felt-tip pen (fine liner)
- Pink colored pencil (textured or watercolor pencil works well)
- Grey colored pencil
- Ruler
Step 1: Drafting the Layout
-
Mark specific guidelines:
Start by finding the vertical center of your paper. Use a ruler to lightly draw a horizontal baseline about one-third of the way down from the top edge to ensure your letters sit straight. -
Sketch the center letter:
Draw a large circle for the ‘O’ directly in the center of your page. Make the line weight light so it can be adjusted. Sketch a smaller circle inside it to create the ring shape. -
Add the flanking letters:
Sketch a blocky ‘M’ on the left and right sides of the ‘O’. Try to keep the width of the letter strokes consistent with the thickness of your ‘O’ ring. -
Draw the 3D perspective lines:
To create the 3D block effect, draw short, diagonal lines extending from the bottom-right corners of every letter point. Keep these lines parallel and the same length. -
Connect the shadow shapes:
Connect the ends of your diagonal lines with vertical or horizontal lines that match the main letter shape. This closes off the ‘shadow’ block, making the letters look three-dimensional.
Clean Lines Tip
When erasing your pencil sketch, hold the paper taut with one hand to prevent crinkling the page, especially if using a softer, thicker paper stock.
Step 2: Inking and Coloring
-
Outline the main text:
Using your black fine liner, carefully trace over the main face of the letters ‘MOM’. Do not trace the 3D shadow lines just yet. -
Outline the 3D effect:
Now trace the drop-shadow block sections you created. Ensure the corners connect crisply to the main letter outlines. -
Erase pencil guides:
Once the ink is completely dry, gently erase all the graphite sketch marks to leave a clean black-and-white design. -
Color the letter faces:
Take your pink colored pencil and fill in the front faces of the letters. Use a light circular motion to build up a soft, textured texture rather than a solid, waxy block of color. -
Shade the 3D blocks:
Use the grey colored pencil to fill in the 3D shadow sections. Press slightly harder here to create contrast against the light pink faces.
Make It Sparkle
Trace over the pink letter faces with a clear glitter gel pen or add small rhinestones to the center of the hearts for a mixed-media 3D element.
Step 3: Adding Decorative details
-
Draw medium hearts:
Scattered around the word ‘MOM’, draw about 5-7 medium-sized hearts with your black pen. Keep the shapes loose and organic rather than perfectly symmetrical. -
Add tiny hearts:
Fill in some of the larger gaps with very small, solid or open hearts. Vary the orientation slightly so they look like they are floating. -
Sprinkle dots and details:
To make the background feel full without being cluttered, add tiny dots or small circles in the remaining empty spaces. -
Check for balance:
Step back and look at the composition. If any area looks too empty, add a small heart or dot to balance the visual weight.
Now you have a charming, hand-lettered card ready to brighten your mom’s day


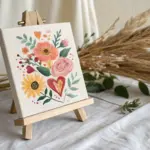
Flower Bouquet Tied With a Ribbon Banner
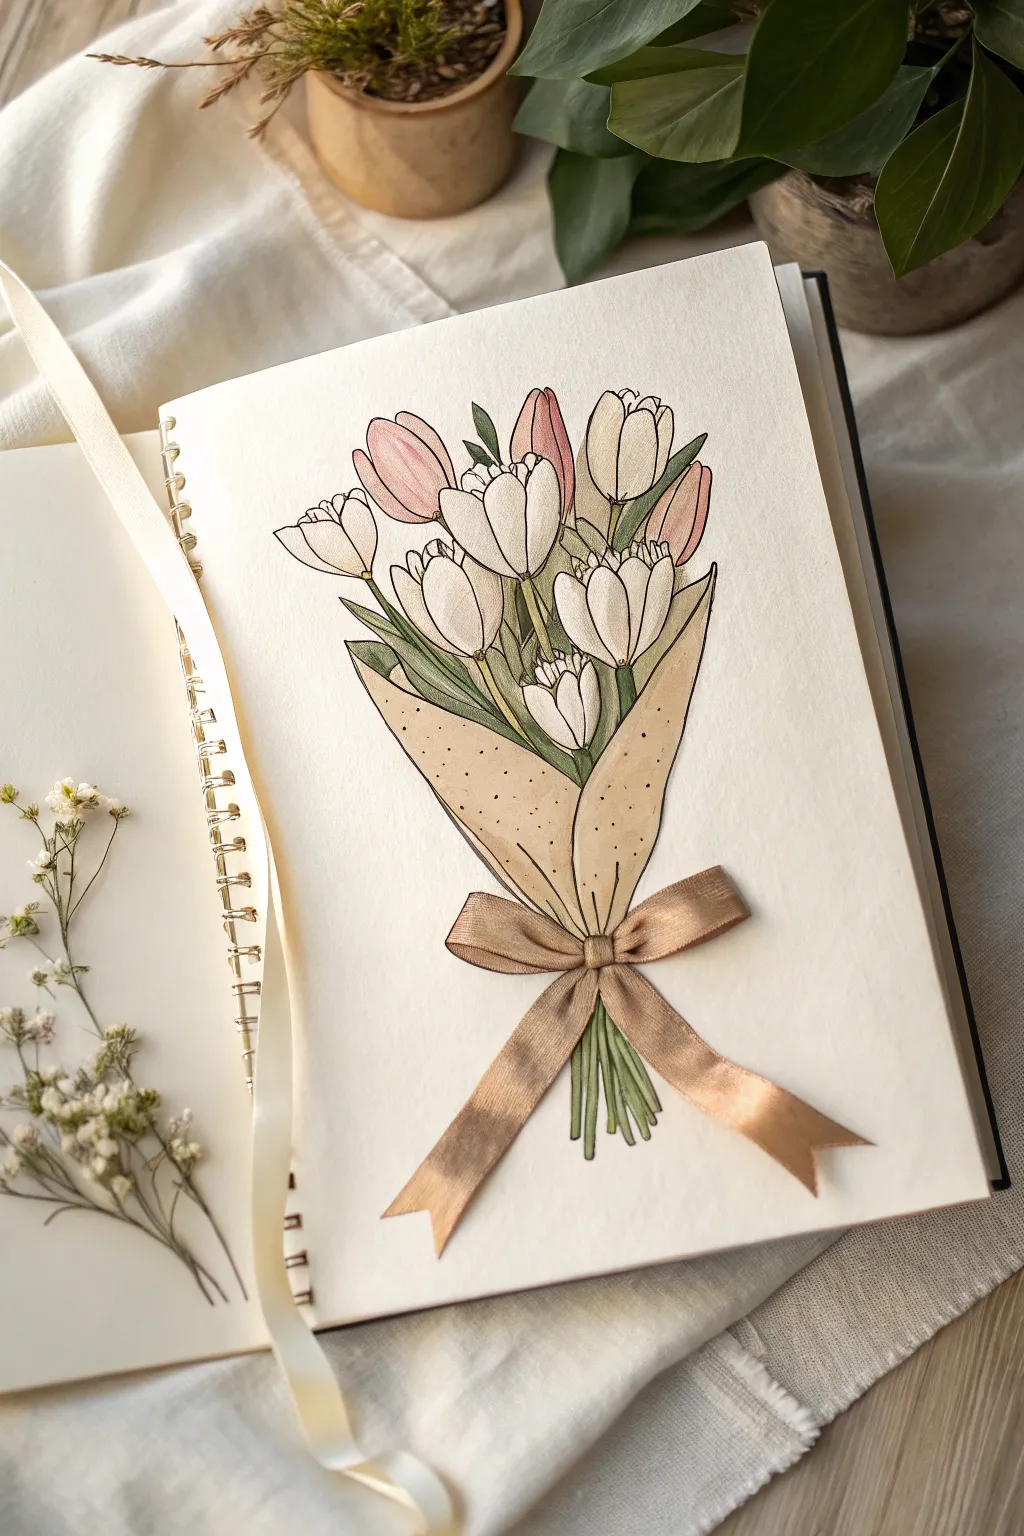
Capture the elegance of a classic flower delivery with this charming illustration of tulips wrapped in craft paper. The standout feature is a beautifully rendered ribbon that adds a touch of realism to the whimsical floral arrangement.
How-To Guide
Materials
- Spiral-bound sketchbook or heavy drawing paper
- Fine liner pens (0.1mm and 0.3mm, black)
- Alcohol-based markers or watercolors (pink, cream, light green, dark green, brown)
- White gel pen or acrylic paint
- Pencil (HB)
- Eraser
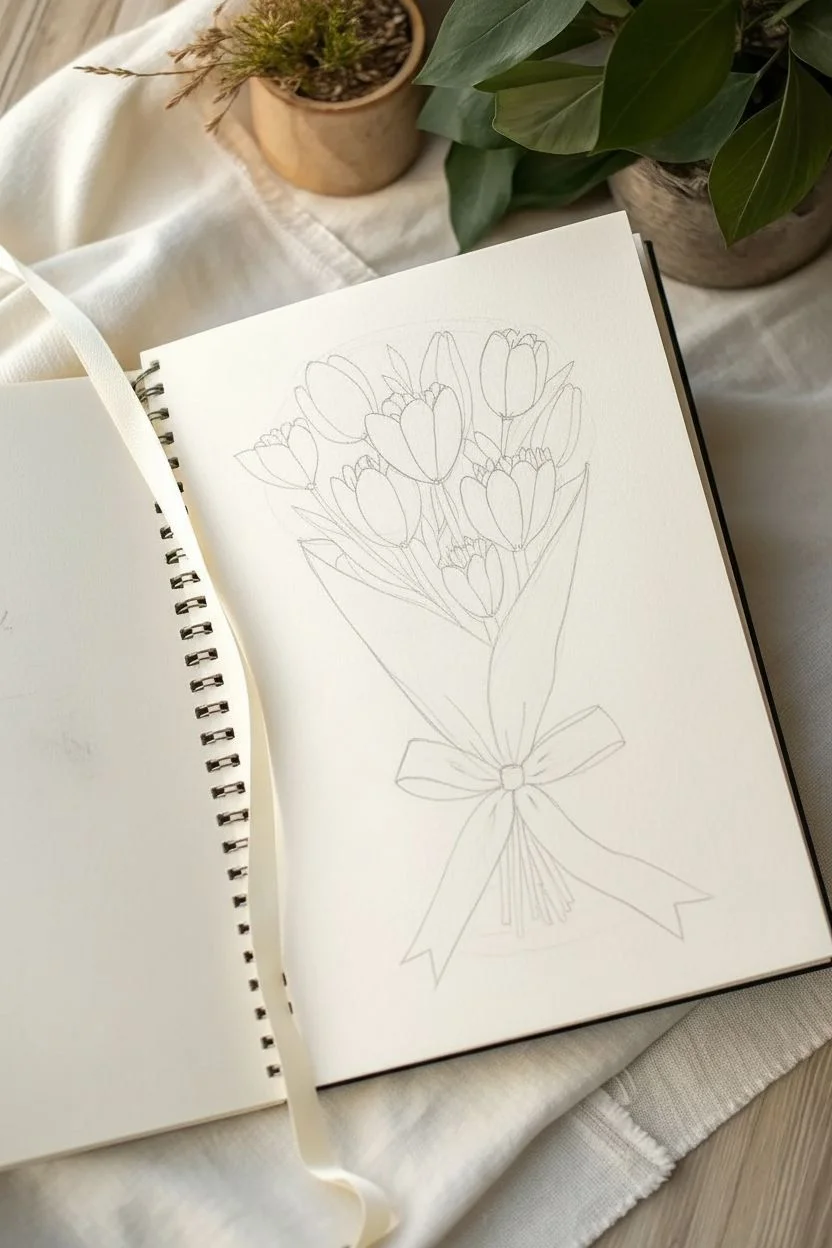
Step 1: Planning the Composition
-
Sketch the Basic Shape:
Begin lightly with your pencil. Draw a loose V-shape for the bouquet wrapper, but curve the lines slightly outward to mimic the fold of paper. Above the V, sketch a rough oval shape where the flower heads will eventually go. -
Outline the Wrapper Folds:
Refine the V-shape into a folded paper cone. Draw a diagonal line crossing over the front to show where one side of the paper wraps over the other. The top edges of the wrapper should be jagged and uneven, not a straight line. -
Position the Tulip Heads:
Inside the top oval area, sketch about seven to nine egg shapes for the tulip heads. Vary their angles—some facing straight up, others tilting left or right. Make sure they overlap slightly for a natural, bunched look. -
Add Stems and Leaves:
Connect the flower heads to the wrapper with long, slender stems. Fill the gaps between stems with spear-shaped leaves that poke out from inside the paper cone. -
Sketch the Ribbon Placement:
Draw a small circle or knot right at the narrowest point of the cone where the paper cinches. From this knot, draw two loops extending outward and two tails hanging down freely.
Keep it Clean
Put a scrap piece of paper under your hand while drawing. This prevents graphites smudges and oils from your skin transferring to the clean white page.
Step 2: Inking and Coloring
-
Inking the Outlines:
Using your 0.3mm fine liner, trace over your pencil lines. Use confident, smooth strokes. For the flower petals, try breaking the line slightly at the tips to keep them looking delicate. -
Detailing the Flowers:
Switch to the 0.1mm pen to add inner petal details. Draw simple curved lines inside each tulip head to define the separate petals. Erase all pencil marks once the ink is completely dry. -
Coloring the Tulips:
Use a soft pink marker for about half of the tulips, and a creamy white or very pale yellow for the others. If using markers, layer the color at the base of each flower head to create a shadow effect. -
Adding Greenery:
Color the stems and leaves with a sage green. I find that using two shades of green adds depth—use the darker green where the leaves tuck behind the flowers or into the wrapper. -
Coloring the Wrapper:
Fill in the paper cone with a light kraft-brown or beige color. Once the base layer dries, add tiny dots with a darker brown fineliner to give it a speckled, recycled paper texture.
Step 3: The Realistic Ribbon
-
Base Color for Ribbon:
Color the ribbon loops and tails with a bronze or metallic gold marker. Apply the color evenly to get a solid base. -
Creating the Satin Effect:
To make the ribbon look silky, you need high contrast. Add a darker brown or bronze shade to the parts of the ribbon that fold inward or sit behind the knot. -
Adding Highlights:
This is crucial for the 3D look shown in the example. Use a white gel pen or a very light peach pencil to draw a highlight strip down the center of the loops and tails. -
Finishing Touches:
Add small, dark vertical lines at the bottom of the bouquet wrapper to suggest the flower stems poking out the bottom. Add a small cast shadow under the ribbon tails to lift them off the page visually.
Make it 3D
Instead of drawing the ribbon, glue a real piece of satin ribbon onto the paper! Use a dab of hot glue for the knot and double-sided tape for the flat tails.
This lovely bouquet makes a perfect standalone card or a beautiful title page for a journal entry


Heart Envelope With Love Notes Popping Out
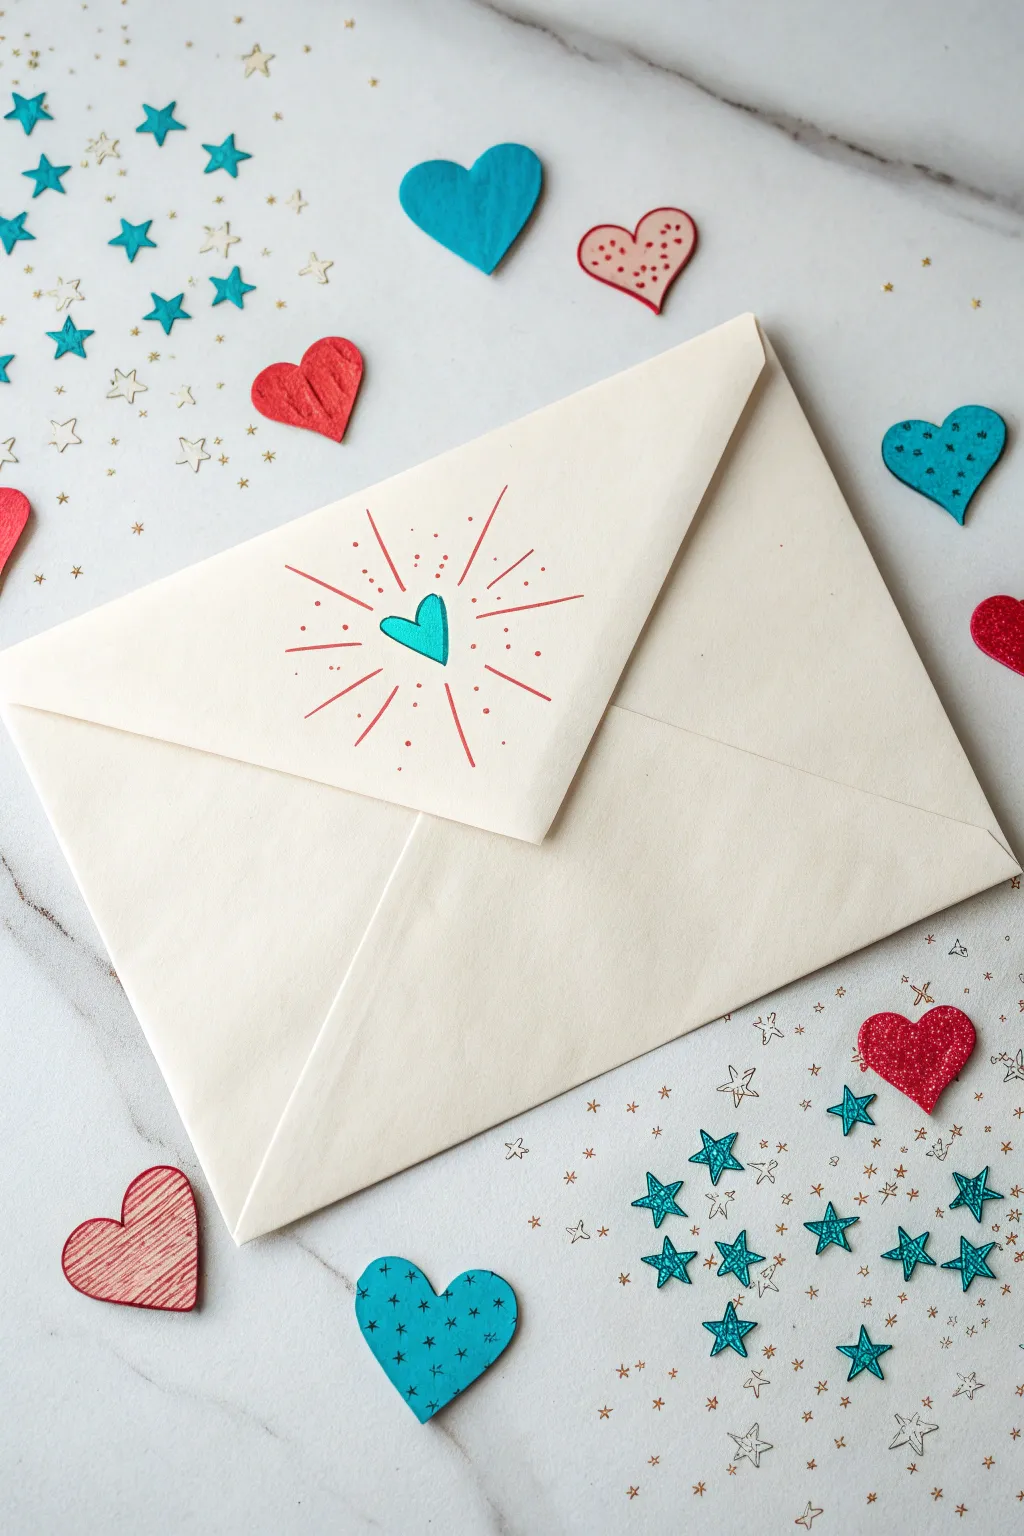
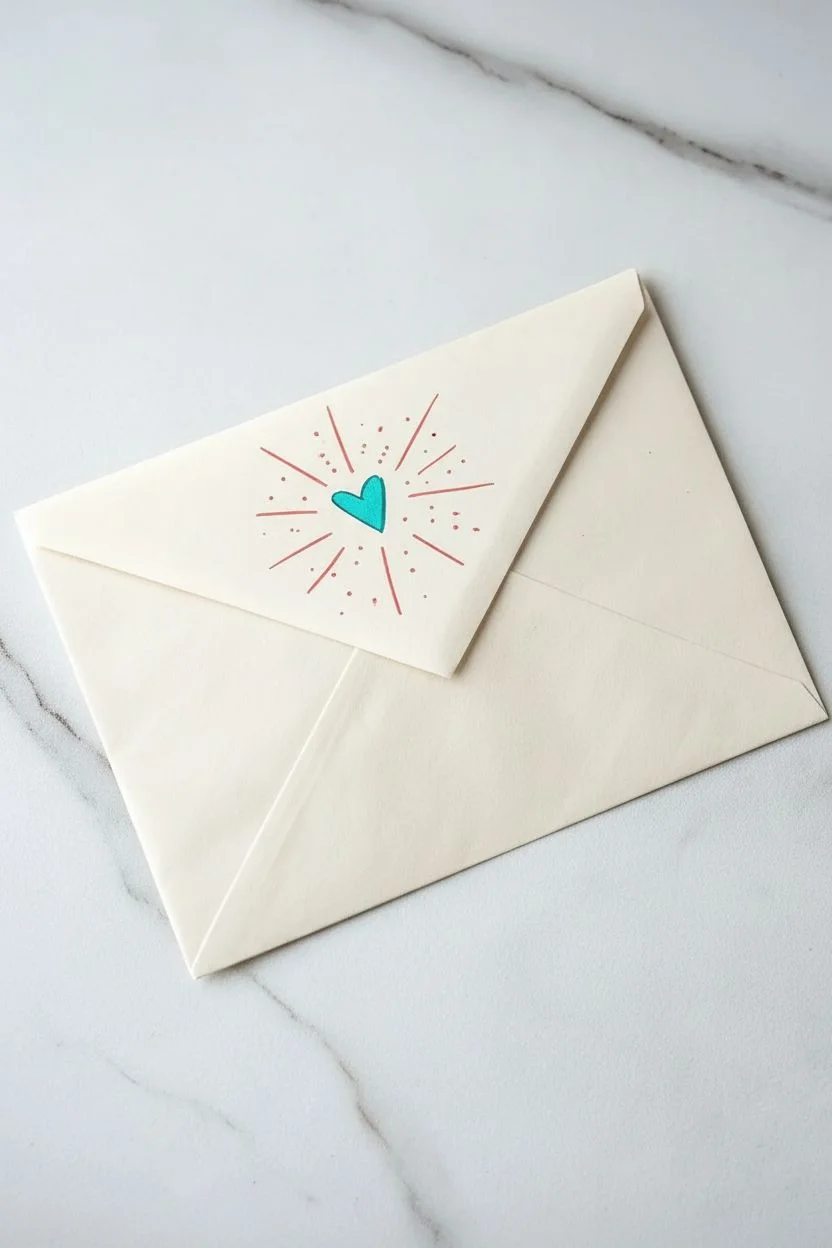
Transform a simple cream envelope into a vessel of love with this charming hand-drawn design. A vibrant teal heart surrounded by a playful sunburst makes for a delightful first impression before Mom even opens her card.
Step-by-Step Guide
Materials
- Cream or off-white A7 envelope
- Teal gel pen or fine-tip marker
- Coral pink or light red fine-tip pen
- Scrapbook paper (teal, red, patterned)
- Small star punch (optional)
- Small heart punch (optional)
- Scissors
- Gold glitter pen or metallic gel pen
Step 1: Drawing the Heart Burst
-
Position the envelope:
Place your cream envelope on a flat surface with the flap closed and facing you. Ensure the surface is hard and smooth so your pen lines remain crisp. -
Sketch the central heart:
Using a pencil very lightly, sketch a small, slightly tilted heart right in the center of the envelope’s flap triangle. -
Outline in teal:
Take your teal gel pen and carefully trace over your pencil heart outline. Make the outline bold and confident. -
Fill the heart:
Color in the heart completely with the teal ink. I like to use small circular motions here to ensure even coverage without streaking. -
Primary burst lines:
Switch to your coral pink or light red pen. Draw four long, straight lines radiating outward from the heart: one going up, one down, and one to each side. -
Secondary burst lines:
Draw shorter lines in between the four main lines you just created. Aim for varied lengths to give it a dynamic, exploding look. -
Add floating dots:
Scatter small dots of the same pink ink in the open spaces between the radiating lines. Cluster them slightly closer to the heart for density. -
Erase guidelines:
Once the ink is completely dry—give it a full minute just to be safe—gently erase any visible pencil marks from your initial sketch.
Ink Control Tip
Use a piece of scrap paper under your hand while drawing. This prevents skin oils from getting on the envelope and stops the ink from smudging.
Step 2: Creating the Confetti Styling
-
Cut paper hearts:
Using your scissors or a heart punch, create several small hearts from teal and red scrapbook paper. Try to use papers with subtle patterns or textures for visual interest. -
Punch out stars:
Use a star punch on metallic or teal paper to create a handful of tiny stars. If you don’t have a punch, simply drawing them directly on the surface works beautifully too. -
Draw surface stars:
On your flat lay surface (or directly on a larger piece of paper underneath the envelope), use the teal pen to draw five-pointed stars. -
Add gold accents:
With a gold glitter pen, draw tiny clusters of dots and small twinkle stars around the scattered paper shapes to add a magical shimmer. -
Arrange the scene:
Place the decorated envelope in the center. Scatter your paper hearts and stars around the perimeter, letting some overlap slightly for a casual, festive feel. -
Final touches:
Add a few drawn details to the paper hearts, like little dashes or outlines, to define them further against the background.
Add a Secret Message
Write a hidden ‘I Love You’ or date in tiny letters along one of the sunburst rays for Mom to discover upon closer inspection.
Now your envelope is a piece of art all on its own, ready to hold a special note for Mom
BRUSH GUIDE
The Right Brush for Every Stroke
From clean lines to bold texture — master brush choice, stroke control, and essential techniques.
Explore the Full Guide
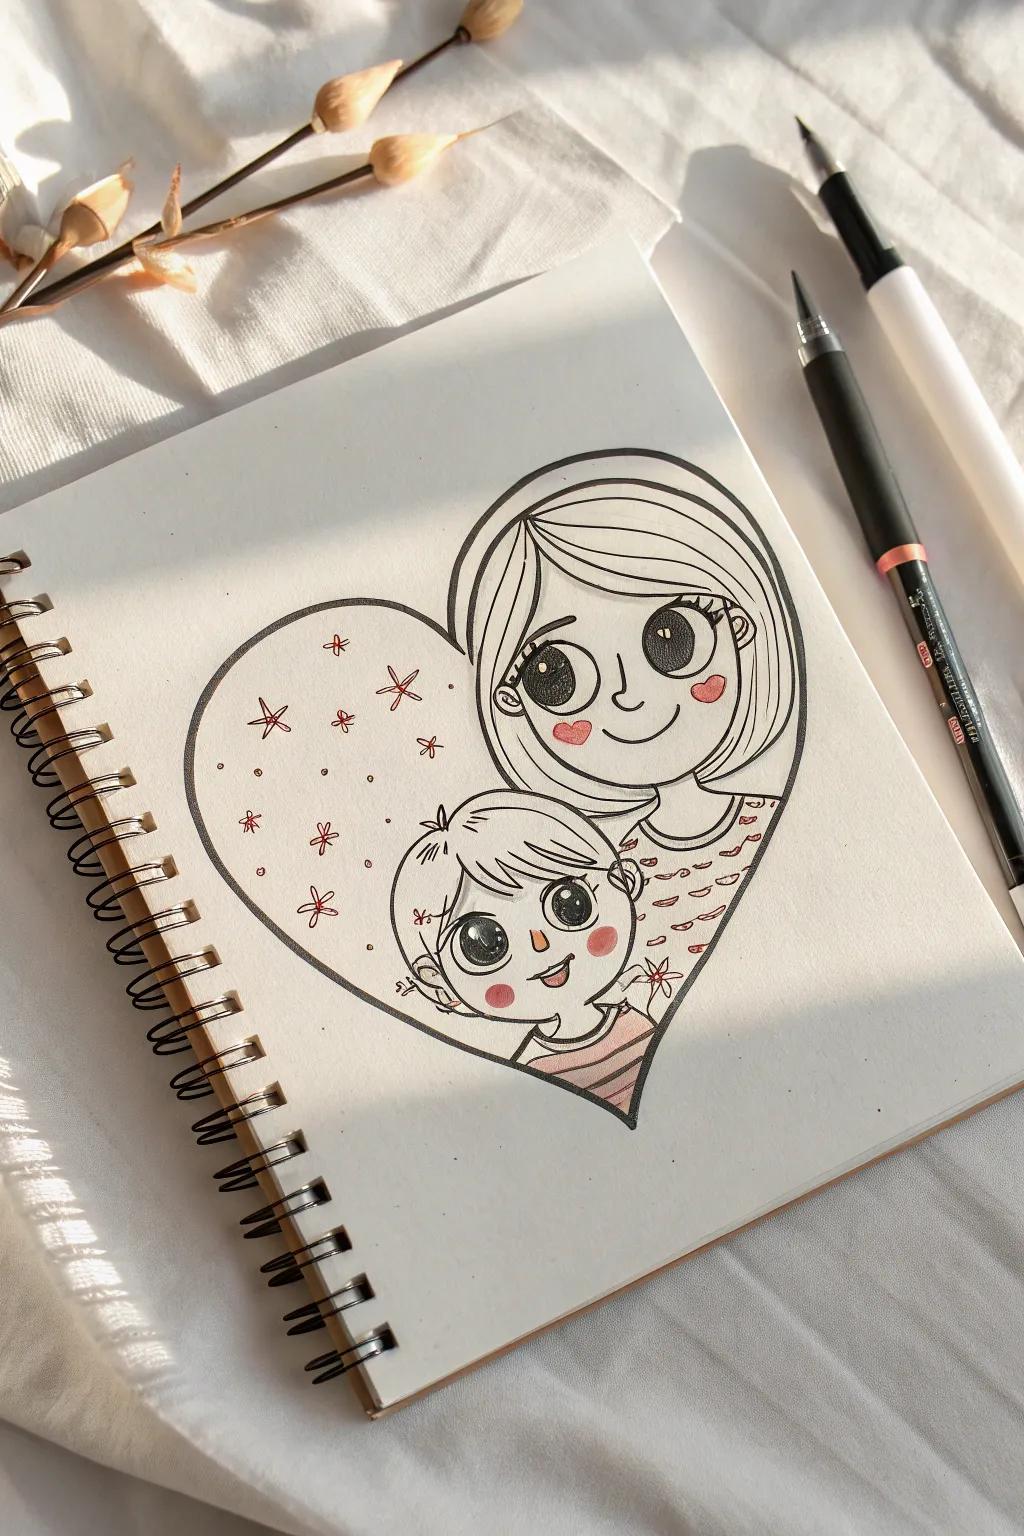
Simple Mom-and-Child Hug Silhouette
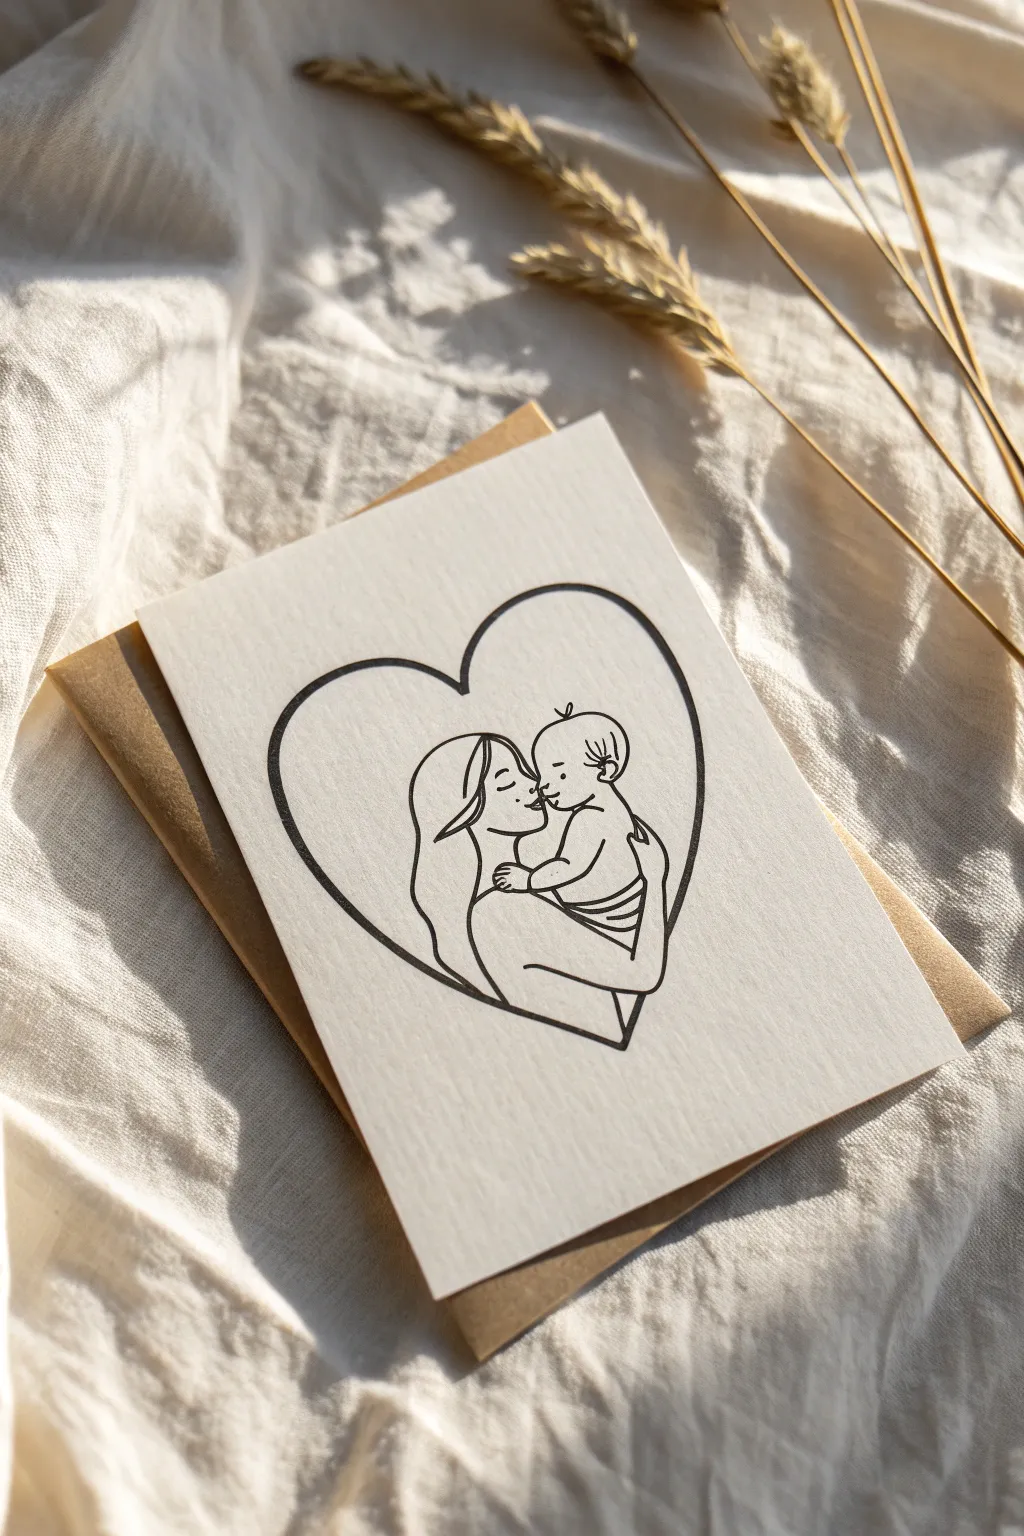
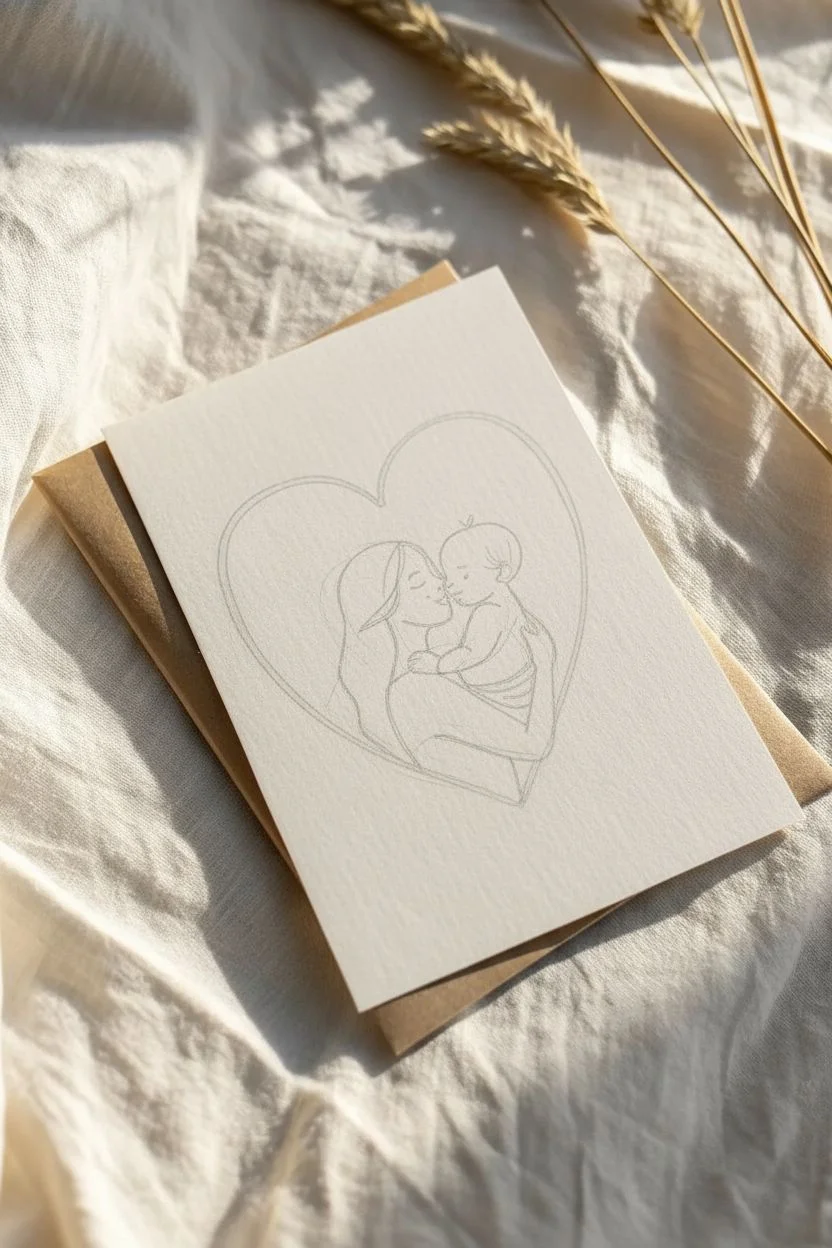
Capture the tender bond between mother and child with this elegant, minimalist line drawing. Using a single continuous-style line within a heart frame creates a modern and sentimental keepsake perfect for Mother’s Day.
Step-by-Step Tutorial
Materials
- High-quality textured cardstock (cream or off-white)
- Black fine liner pen (0.5mm and 0.8mm)
- Pencil (HB or lighter)
- Eraser
- Ruler
- Drafting compass or circular object to trace (optional)
- Kraft paper envelope (for presentation)
Step 1: Preparation & Sketching
-
Prepare your paper:
Cut your textured cardstock to your desired greeting card size. A standard A6 size (folded) works beautifully for this intimate design. -
Outline the heart:
Lightly sketch a large heart in the center of the card using your pencil. Aim for a wide, rounded shape rather than a narrow one to allow plenty of space for the figures inside. -
Position the figures:
Visualize where the mother and baby will sit. The mother’s head should be on the left, slightly lower than the top curve of the heart, facing right. -
Draft the mother’s profile:
Sketch a gentle curve for the mother’s forehead, nose, and chin. Keep the lines soft and rounded to convey gentleness. -
Add the baby’s profile:
Draw the baby’s face very close to the mother’s, nose-to-nose. Their foreheads should almost touch, creating a sense of intimacy. -
Sketch the embrace:
Draft the mother’s arm curving up to support the baby’s back. Then, sketch the baby’s small arm reaching toward the mother’s neck or shoulder.
Uneven Lines?
If your hand shakes while inking the long heart curve, intentionally make the line ‘sketchy’ by going over it multiple times loosely for an artistic look.
Step 2: Inking the Design
-
Start the heart outline:
Using the thicker 0.8mm pen, carefully trace the heart shape you sketched earlier. Go slowly to ensure a smooth, confident line. -
Refine the line weight:
I like to go over the heart outline a second time to thicken it slightly, making it the boldest element of the composition. -
Ink the faces:
Switch to your finer 0.5mm pen for the intricate details. Outline the mother’s profile first, including her closed eye and a simple curved line for her hair. -
Detail the baby:
Carefully ink the baby’s round head, small nose, and tuft of hair on top. Keep the features simple; a small dot is perfect for the eye. -
Connect the figures:
Draw the curved lines for the mother’s shoulder and the baby’s back. Notice how the mother’s hair creates a flowing line that leads the eye down the figure. -
Complete the embrace:
Ink the mother’s hand wrapping around the baby. The lines don’t need to be anatomically perfect; suggestive curves work best for this style. -
Check the connections:
Ensure the bottom of the drawing connects seamlessly with the bottom point of the heart outline, grounding the image.
Add Watercolor
Paint a very faint wash of blush pink inside the heart or just on the cheeks of the figures for a soft pop of color.
Step 3: Finishing Touches
-
Let the ink set:
Wait at least 10-15 minutes for the ink to dry completely. This prevents smudging during the next step. -
Erase pencil marks:
Gently erase all visible pencil sketches. Hold the paper taut with one hand while erasing to avoid creasing the cardstock. -
Inspect and refine:
Look for any gaps in your black lines. Fill them in carefully with the fine liner if needed to make the drawing look continuous. -
Presentation:
Place the finished card on top of a kraft envelope to replicate the warm, rustic aesthetic shown in the example image.
Once the ink is dry, your handmade card is ready to share a moment of pure love
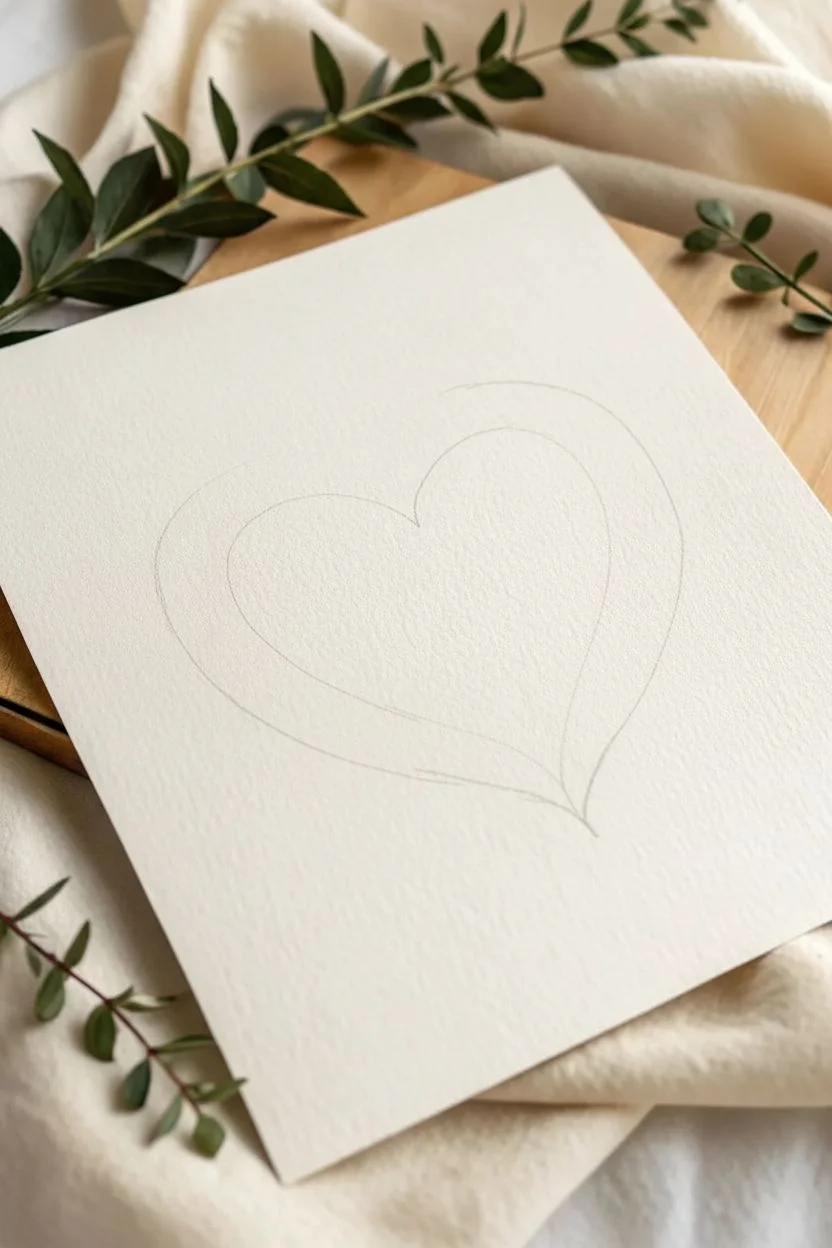
Handprint Heart With a Sweet Message
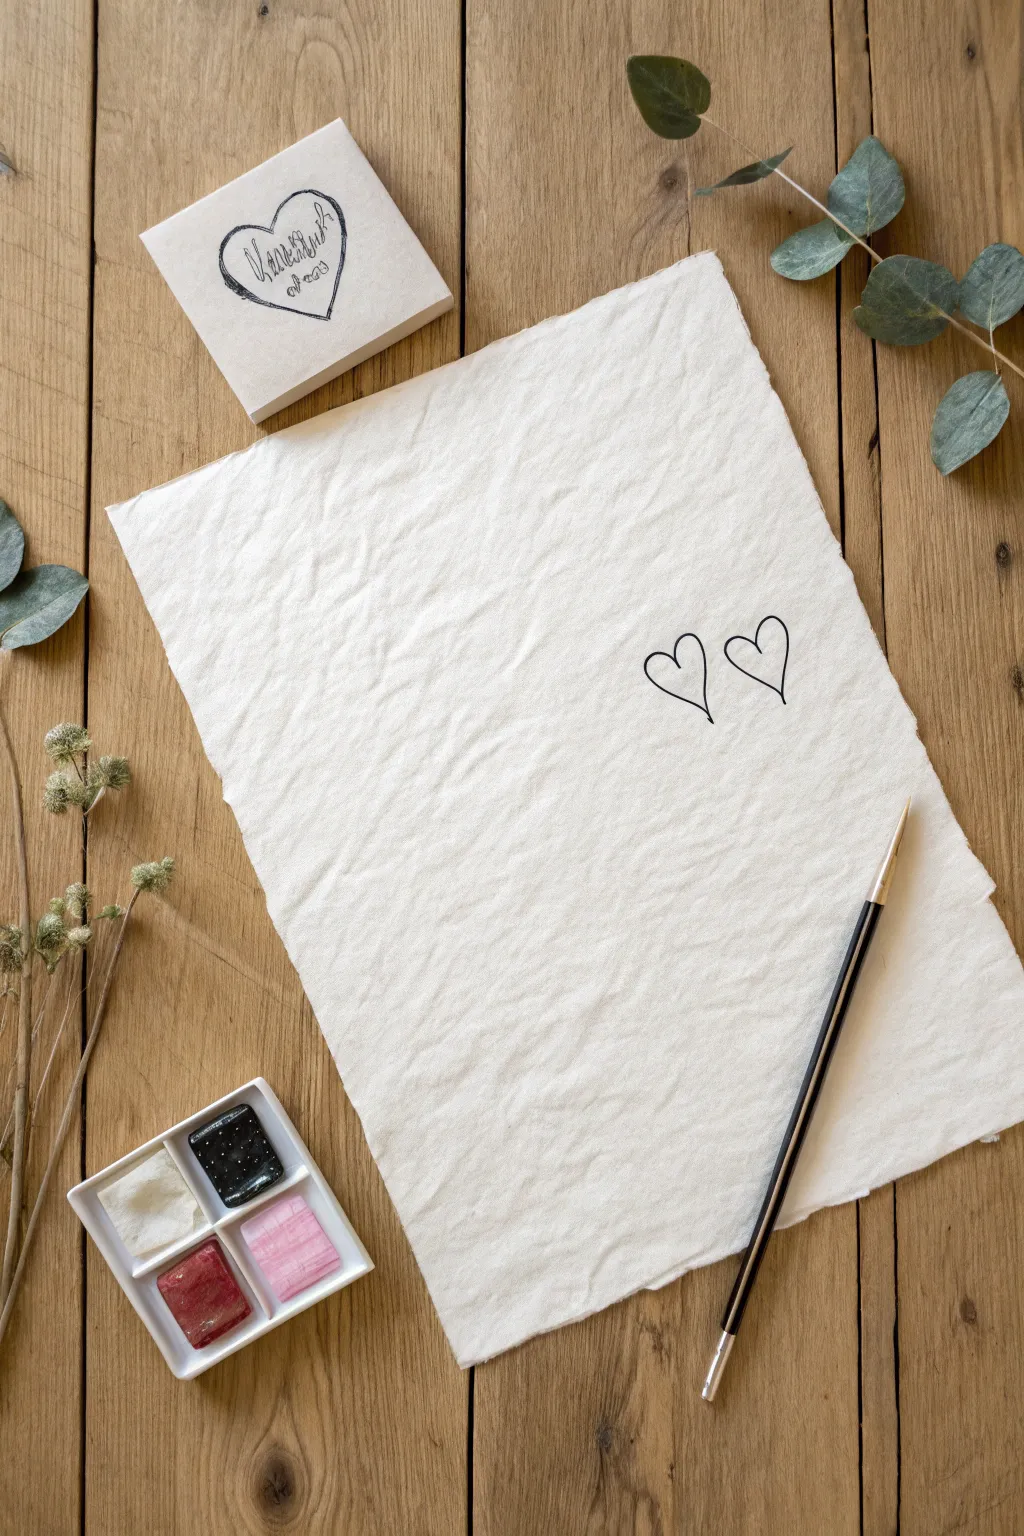
Embrace simplicity with this elegant project that speaks volumes through minimalist design. Using textured paper and delicate lines, you’ll create a sophisticated piece of art that looks effortless yet intentional.
How-To Guide
Materials
- Sheet of heavy, textured handmade paper (cotton rag paper works best)
- Fine liner brush (size 0 or 00)
- Black watercolor paint or black gouache
- Small ceramic palette
- Jar of water
- Test scrap paper
- Paper towel
Step 1: Preparation
-
Select your canvas:
Begin by observing the texture of your handmade paper. This project relies heavily on the ‘deckled’ or rough edges and the surface grain, so choose a sheet that has visible character. -
Prepare your paint:
Squeeze a very small amount of black watercolor or gouache into your ceramic palette. -
Adjust paint consistency:
Dip your brush in water and mix it into the black paint. You want an inky consistency—fluid enough to flow off the brush smoothly, but opaque enough to leave a strong black line. -
Test the flow:
On a scrap piece of paper, test your paint consistency. If the line breaks up too much, add a tiny drop more water. If it bleeds, the mix is too thin.
Step 2: Drawing the First Heart
-
Load the brush:
Fully load your fine liner brush with the black paint mixture, wiping any excess drip on the edge of the palette well. -
Position your hand:
Hover your hand over the right-center area of the paper. Keep your wrist loose; tension creates shaky lines. -
Start the left curve:
Touch the tip of the brush to the paper to start the top cleft of the first heart. Pull the brush up and around to the left in a smooth arc. -
Complete the left side:
Continue that curve downward, tapering off slightly as you reach the bottom point. Lift the brush. -
Draw the right curve:
Return to the top starting point. Create a mirrored arch to the right side, bringing it down to meet the first line at the bottom point. -
Check the join:
If the lines don’t meet perfectly at the bottom, extend one slightly to create a messy, artistic overlap. I think this actually adds to the charm.
Master the Texture
On rough handmade paper, don’t press hard. Let the brush ‘dance’ over the bumps. This creates intentional skips in the detailed line work that look organic.
Step 3: Completing the Pair
-
Position the second heart:
Identify a spot immediately to the right of your first heart. The goal is to have them look like a pair, perhaps slightly angled towards each other. -
Start the second heart:
Repeat the process for the second heart, starting with the left arch. Try to keep the size roughly similar to the first, but avoid making it a carbon copy. -
Finish the shape:
Draw the right arch to close the shape. Allow the natural texture of the paper to guide the brush—if the line skips slightly due to the grain, let it be. -
Clean up edges (optional):
Critically look at your shapes. If a curve feels too flat, very carefully thicken that specific section of the line with a second pass. -
Let it dry:
Allow the paint to sit undisturbed for at least 15 minutes. Handmade paper is absorbent and can stay damp longer than standard paper. -
Add a personal note (optional):
Once fully dry, the large white space on the left is perfect for a handwritten message, or you can leave it blank for a purely decorative look.
Fixing Broken Lines
If your line is too faint or runs out of paint mid-curve, reload your brush but start the new stroke slightly back over the existing line to blend the join.
Now you have a beautifully understated piece of art ready to frame or gift

PENCIL GUIDE
Understanding Pencil Grades from H to B
From first sketch to finished drawing — learn pencil grades, line control, and shading techniques.
Explore the Full Guide
Kawaii Heart Character Holding a Sign
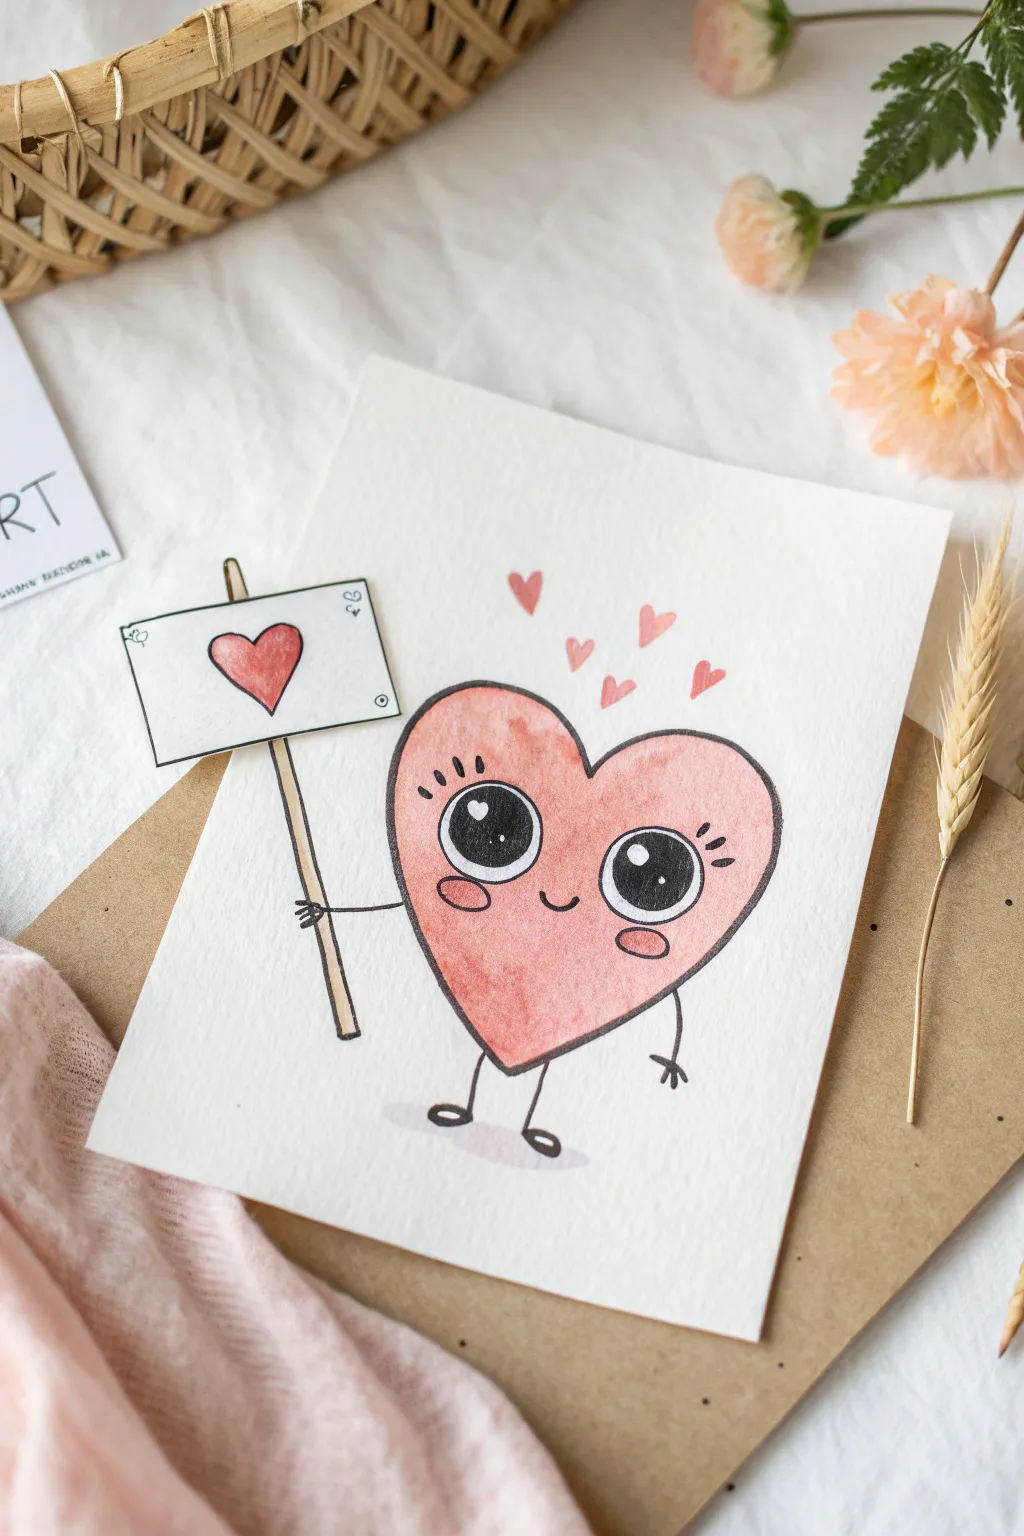
Spread a little love with this adorable, wide-eyed heart character holding a tiny sign just for Mom. Using simple watercolor washes and crisp ink lines, you’ll create a charming piece that looks straight out of a storybook.
Step-by-Step
Materials
- Cold press watercolor paper (A5 or 5×7 size)
- Pencil and eraser
- Waterproof fine liner pen (black, 0.3mm or 0.5mm)
- Watercolor paints (red, pink, brown)
- Small round paintbrush (size 2 or 4)
- Scrap paper for the sign
- Small craft stick or toothpick
- Craft glue
- Small staple or metallic wire (optional)
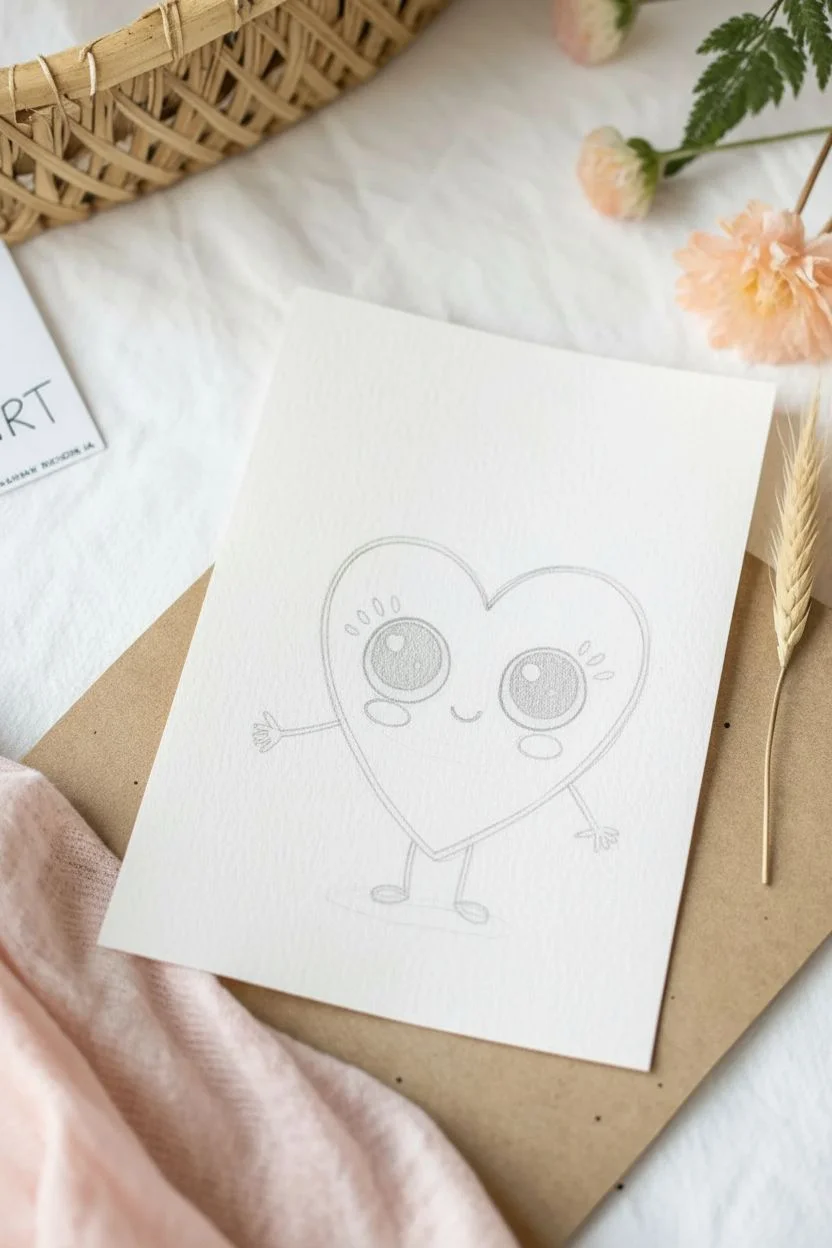
Step 1: Sketching the Character
-
Outline the Heart Body:
Begin by lightly sketching a large, rounded heart shape in the center of your watercolor paper. Keep the bottom point slightly softer and rounder for a cute, squishy look rather than a sharp geometric point. -
Position the Features:
Sketch two large circles for eyes in the middle of the heart, leaving plenty of space between them. Add a small, curved ‘u’ shape for the smile right between the eyes. -
Add Limbs:
Draw simple stick-figure lines for the legs at the bottom, ending in small oval feet. Add arms on the sides; the left arm should be extended outward as if holding something, and the right arm can just hang loosely.
Smudged Ink?
If your waterproof pen smudges when you paint, it needs more time! Let the ink cure for at least 15-20 minutes before adding water, or switch to pigment liners.
Step 2: Inking the Lines
-
Trace the Main Outline:
Using your waterproof fine liner, go over your pencil sketch. For the heart’s body, try to use a confident, continuous line. If the line wobbles a bit, that’s okay—it adds to the hand-drawn charm. -
Detail the Eyes:
Inside the large eye circles, draw smaller circles for highlights (catchlights) near the top left. Color in the rest of the eye completely black, leaving those little highlight circles pure white. -
Add Eye Details:
Draw three small eyelashes extending from the outer top corner of each eye. Then, draw small oval shapes just below each eye to serve as blushing cheeks. -
Ink the Limbs:
Go over the stick arms and legs. For the hands, draw three tiny fingers. Ensure the ink is fully dry before erasing your pencil marks to avoid smudging.
Make it Pop
Instead of a simple paper sign, use a real piece of fabric or washi tape for the banner to add a fun, tactile 3D element to your card.
Step 3: Watercolor Painting
-
Base Color Wash:
Mix a watery, pale red or pink watercolor. Gently fill in the heart shape. I prefer to keep the edges slightly imperfect or leave tiny white gaps near the outline for a loose, artistic feel. -
Painting the Cheeks:
Dip your brush into a slightly more saturated pink and carefully fill in the small oval cheek marks you drew earlier. -
Adding Depth:
While the main heart wash is still damp but not soaking wet, dab a tiny bit of darker red pigment near the bottom left curve to create a soft gradient shadow. -
Floating Hearts:
Above the character’s head, paint four or five tiny, freehand hearts using a reddish-pink shade. These don’t need outlines; just let the brush create the shape. -
Shadows:
Mix a very watery grey or purple-grey. Paint a quick, translucent oval shadow beneath the feet to ground your character so it doesn’t look like it’s floating.
Step 4: Creating the Sign
-
Cut the Sign Paper:
Cut a small rectangle (about 1.5 x 1 inch) from a scrap piece of watercolor paper or cardstock. -
Decorate the Sign:
Draw a border around the rectangle’s edge. In the center, draw and paint a small red heart. You can adhere a tiny staple or draw metallic details at the corners to make it look ‘nailed’ on. -
Prepare the Sign Post:
Take your small craft stick or a thick toothpick. If it’s too light, give it a quick wash of brown watercolor to look like wood. -
Assemble the Sign:
Glue the paper rectangle to the top of the stick. Let it dry completely. -
Attach to Artwork:
Carefully glue the stick onto the main paper so it aligns with the character’s outstretched hand. Since the hand is already drawn, position the stick ‘behind’ or ‘in’ the grip visually.
Once the glue is dry, your lovable character is ready to deliver a special message right to Mom’s heart
Tea Cup or Mug With a Heart Steam Swirl

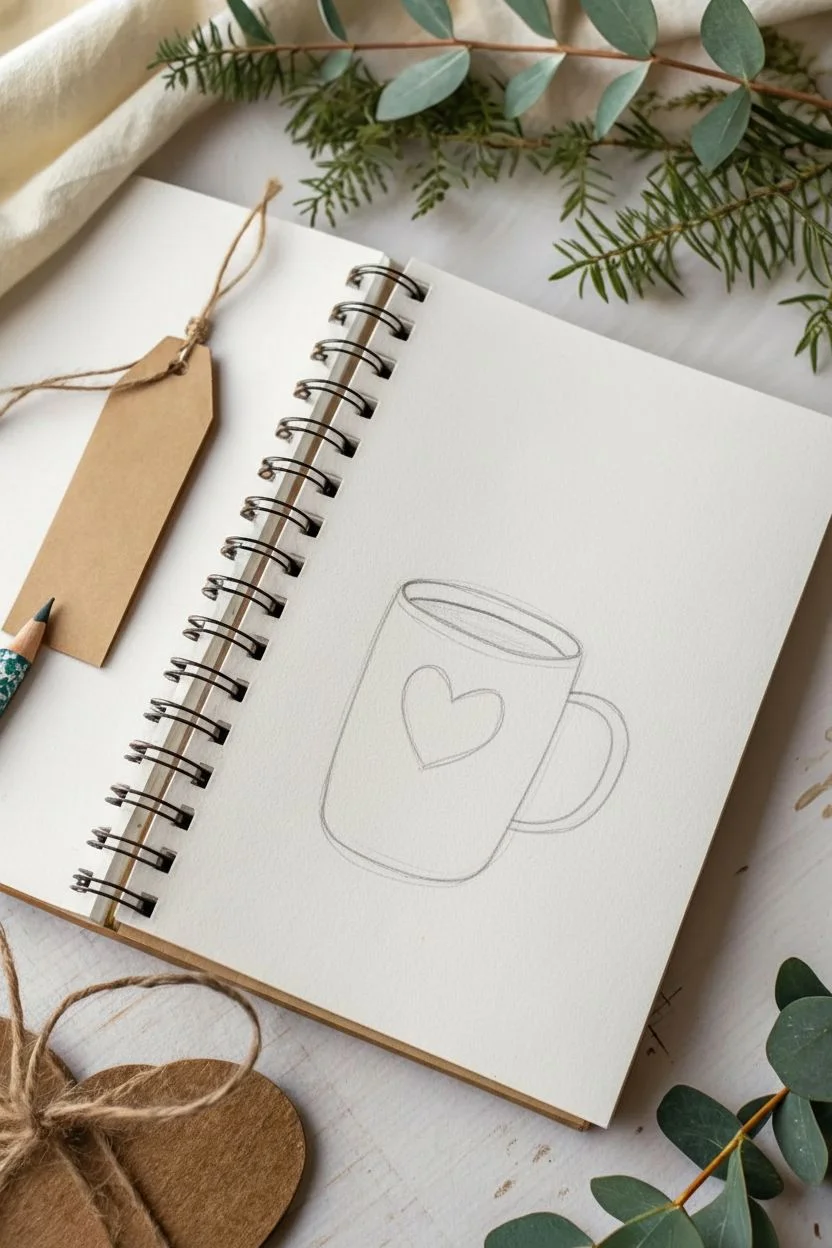
Warm your mom’s heart with this cozy, hand-drawn mug illustration featuring whimsical steam swirls and delicate patterns. Using simple fine-liners, you’ll create a charming piece of art perfect for a Mother’s Day card or a journal dedication.
Step-by-Step Guide
Materials
- Spiral-bound sketchbook or mixed media paper
- Pencil (HB or H for sketching)
- Eraser
- Red felt-tip pen or fine-liner (approx. 0.5mm)
- Teal or greenish-blue fine-liner (approx. 0.3mm)
- Brown colored pencil or marker (for liquid)
- Gold or yellow gel pen (optional for sparkle)
Step 1: Sketching the Base Shape
-
Draw the rim:
Start by lightly sketching a narrow oval near the center of your page with your pencil. This will form the opening of the mug. Don’t worry about perfection; a slightly hand-drawn wobble adds charm. -
Outline the body:
Drop two vertical lines down from the widest edges of your oval. Curve the bottom line gently to connect them, mirroring the curve of the front rim. -
Add the handle:
Sketch a C-shape on the right side of the mug. Make it thick enough to look sturdy, attaching it just below the rim and ending near the bottom quarter of the cup. -
Define the liquid layer:
Inside the top oval, draw a curved line mirroring the back rim to show the surface of the tea or coffee. Leave a small gap below the top edge so the mug looks like it has thickness.
Steady Hand Trick
Rest the side of your hand on a scrap piece of paper while drawing. This prevents smudging the ink and stabilizes your hand for smoother lines.
Step 2: Inking the Outline
-
Selecting your red pen:
Switch to your red fine-liner. Trace over the main body of the mug and the handle. Use a confident, fluid stroke. -
Detailing the rim:
Ink the top oval rim carefully. Notice how the back part of the rim (the part furthest from you) stops where the steam will eventually rise, leaving a clear view of the liquid inside. -
Drawing the central heart:
Right in the center of the mug’s body, draw a large, tilted heart with the red pen. Instead of coloring it in solid, fill it with close, horizontal sketchy lines for a textured look. -
Adding steam swirls:
Draw three wavy, vertical lines rising from the cup. Make them flicker like candle flames. Scatter about six to seven tiny open hearts around the steam lines to show love is in the air.
Step 3: Adding Patterns & Details
-
Top decorative band:
Switch to your teal or greenish-blue pen. Draw a horizontal line across the upper part of the mug, just below the rim. Add a row of tiny triangles hanging from this line. -
Adding polka dots:
Use the teal pen to stipple tiny dots all over the mug’s body, avoiding the central heart and the decorative bands. Keep them somewhat random but evenly spaced. -
Bottom geometric band:
Near the base of the mug, draw another horizontal teal line. Below this line, draw a large zig-zag pattern that touches the bottom of the mug. -
Coloring the liquid:
Use your brown colored pencil or marker to fill in the oval surface of the liquid. I like to press harder near the edges to create a sense of depth. -
Optional sparkle:
If you have a gold gel pen, add tiny flecks or lines inside the liquid area to make it look hot and shimmering. -
Cleanup time:
Once the ink is completely dry—give it a minute or two—gently erase all your original pencil guidelines to leave a crisp, clean illustration.
Wobbly Lines?
If your lines aren’t perfectly straight, just go over them again loosely to create a messy, artistic ‘sketch’ style intentionally.
Now you have a steaming cup of love ready to brighten someone’s day


“Best Mom” Crown on a Puffy Heart
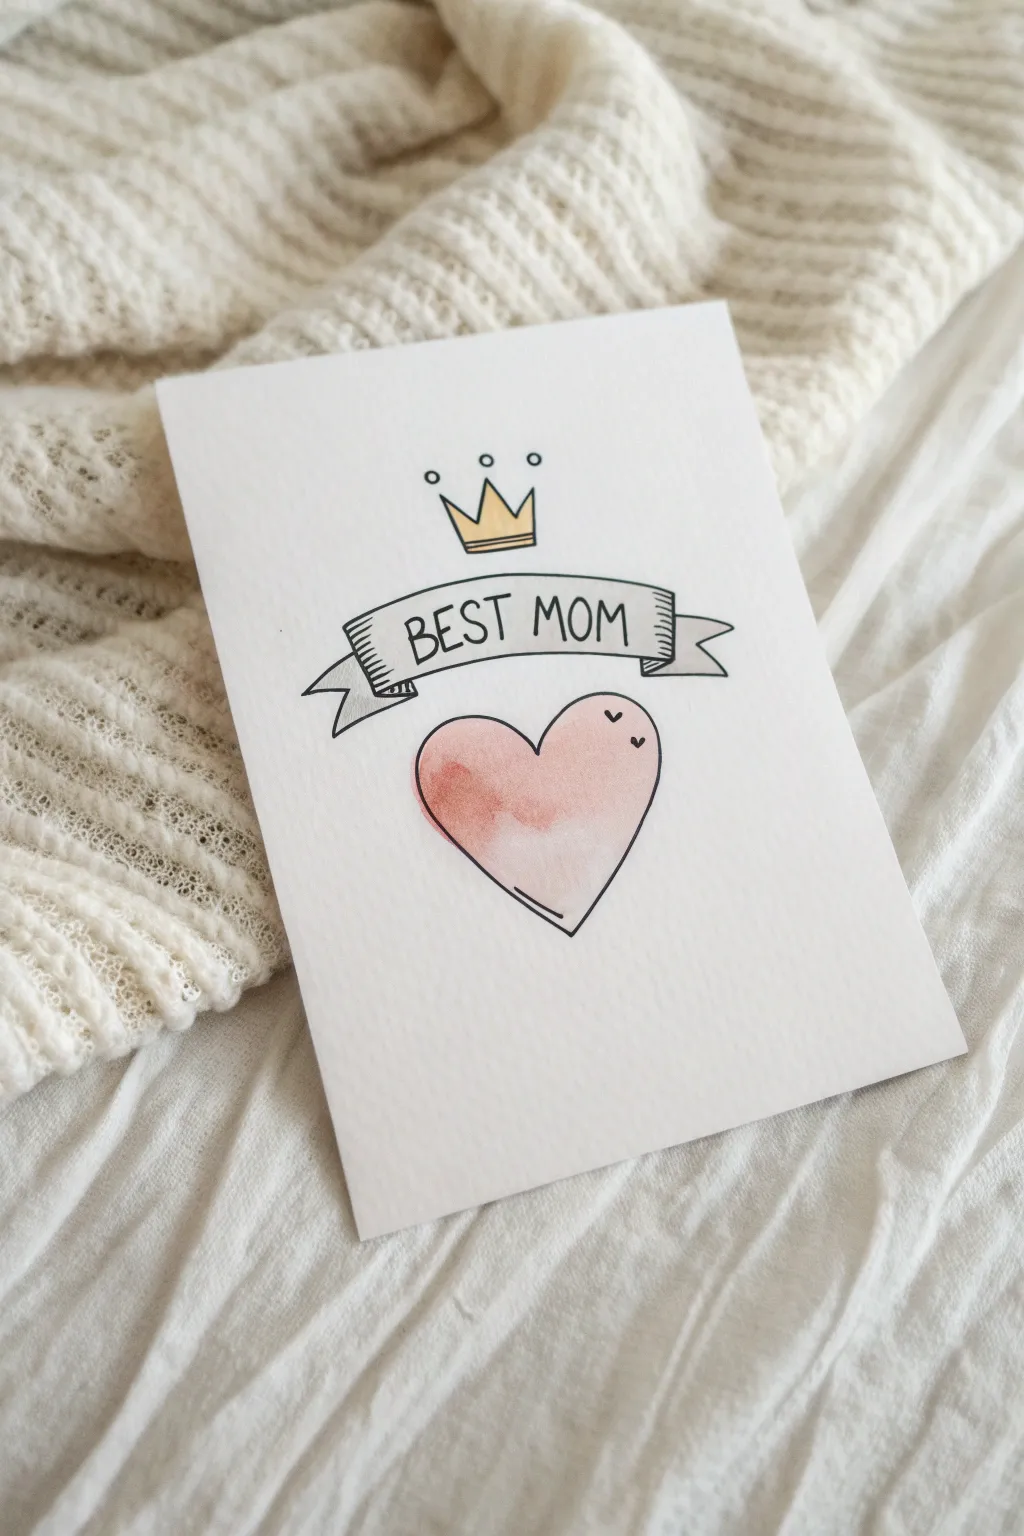

This sweet and simple card design combines crisp fineliner details with a loose, watercolor-style heart to create a charming minimalist greeting. It’s perfect for beginners because the imperfect, hand-drawn look is exactly what makes it special.
Detailed Instructions
Materials
- Heavyweight watercolor paper or cardstock (A5 folded to A6)
- Black archival fineliner pen (0.5mm or 0.8mm)
- Watercolor paints (red, pink, and yellow ochre)
- Small round paintbrush (size 4 or 6)
- Pencil and eraser
- Clean water
Step 1: Drawing the Base Design
-
Sketch the layout:
Begin by lightly sketching your design in pencil on the front of your folded card. Start with the banner in the center, placing the crown just above it and a large heart shape below it. -
Draw the banner outline:
Using your fineliner, ink the central rectangle of the banner first. Draw slightly curved top and bottom lines to give it a flowing movement, rather than a stiff box. -
Add the banner tails:
Draw the folded ribbon ends on either side. Start with the small triangle fold connecting the tail to the main banner, then draw the notched flag shape extending outward. -
Lettering:
Write ‘BEST MOM’ inside the banner using simple, all-caps serif or sans-serif lettering. I like to keep the letters tall and narrow to fit the ribbon style nicely. -
Add the crown:
Above the banner, draw a simple three-point crown. Keep the lines slightly loose for a playful feel. -
Crown details:
Add three small circles floating just above the crown points, and draw a horizontal line near the base of the crown to create the rim. -
Ink the heart:
Draw the outline of the heart below the banner. Notice how the heart in the example is slightly asymmetrical and ‘chunky’ rather than perfectly geometric; aim for that organic shape. -
Add tiny details:
Draw two tiny tick marks inside the top right corner of the heart and a small curved line near the bottom left point to suggest volume or a reflection. -
Erase pencil lines:
Wait a moment for the ink to fully dry, then gently erase all your pencil sketches to leave a clean black-and-white base.
Waterproof Ink is Key
Ensure your fineliner is labeled ‘waterproof’ or ‘archival.’ If not, the black lines will smear and ruin the design when you paint the heart.
Step 2: Adding the Watercolor
-
Mix your heart color:
On your palette, create a soft, watery mix of red and pink. You want a translucent wash, not thick opaque paint. -
Paint the first layer:
Paint inside the heart, but don’t try to fill it perfectly even. Start from the top left and pull the color down. -
Create the gradient:
While the first layer is still wet, drop a slightly more concentrated dot of red into the left side of the heart. Let it bleed naturally into the paler pink to create that beautiful variation seen in the photo. -
Paint outside the lines (optional):
If you look closely at the example, the paint doesn’t perfectly hug the ink line. It’s okay to leave some white space near the edges or go slightly over for an artistic touch. -
Paint the crown:
Rinse your brush and pick up a diluted yellow ochre or gold color. Carefully fill in the crown shape. -
Add banner shadows:
Using a very diluted grey or the tiniest amount of leftover dirty water on your brush, add small shadow strokes on the folded parts of the ribbon tails to give it depth. -
Final drying:
Let the card sit flat until the watercolor is completely bone dry. If the paper buckles slightly, you can place it under a heavy book overnight once it’s dry.
Add Metallic Touches
Trace over the ‘BEST MOM’ lettering or the crown outline with a gold gel pen after the paint dries for a subtle, shimmering upgrade.
Once dry, your handmade masterpiece is ready to bring a smile to your mom’s face
Heart-Shaped Balloon Bouquet Spelling “Mom”
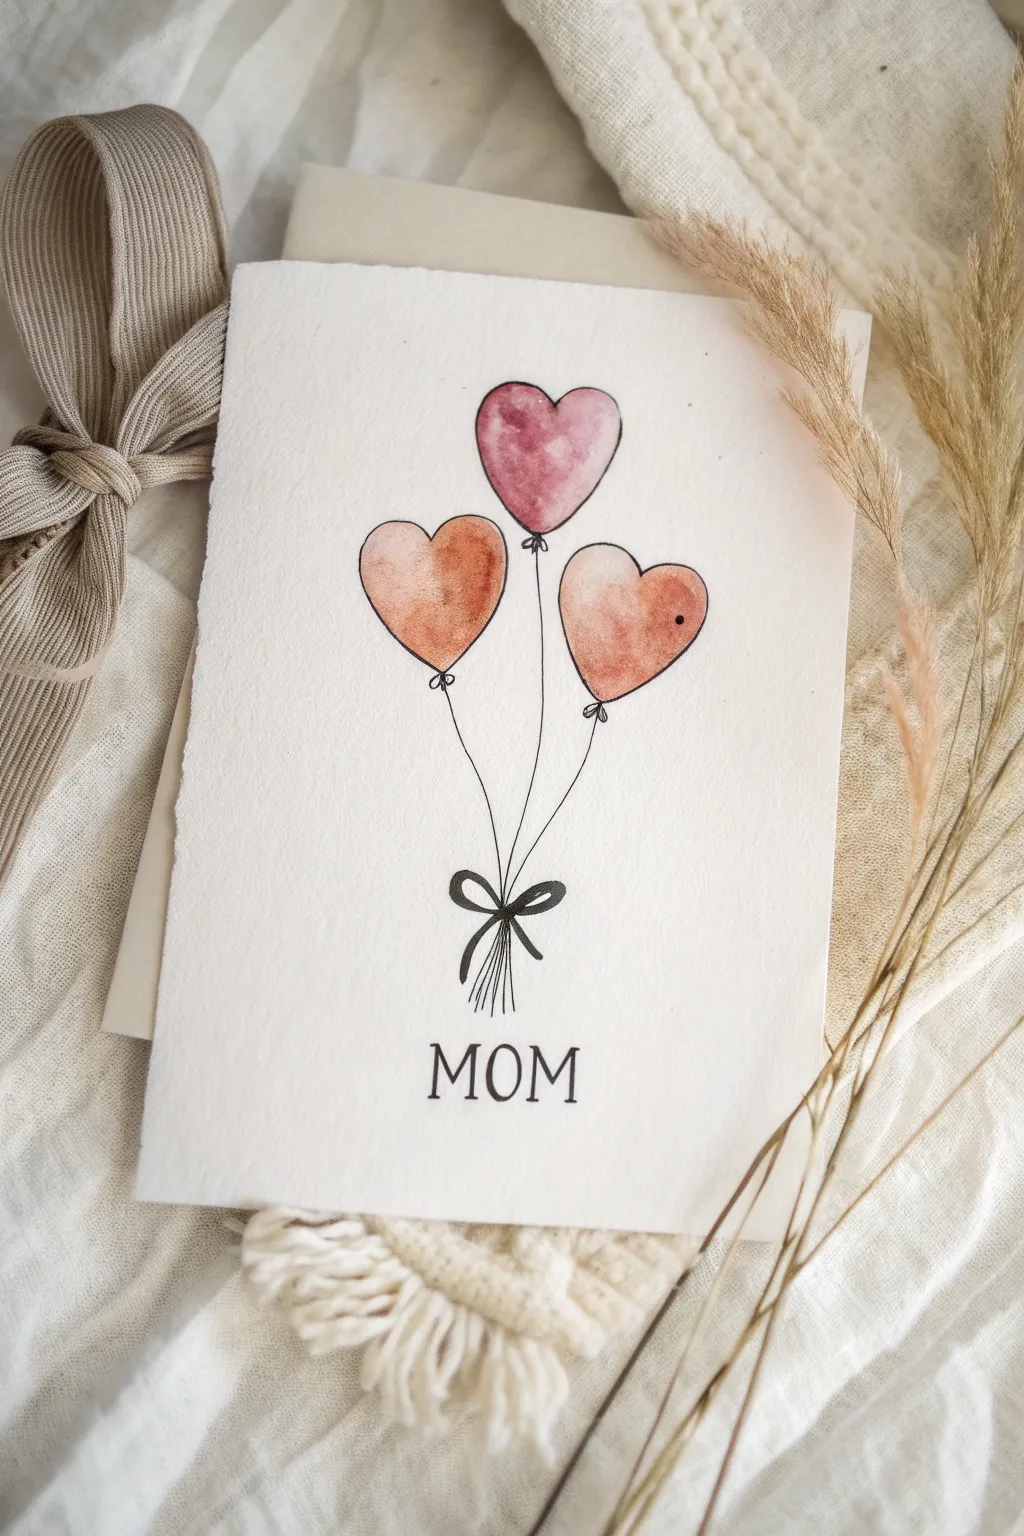
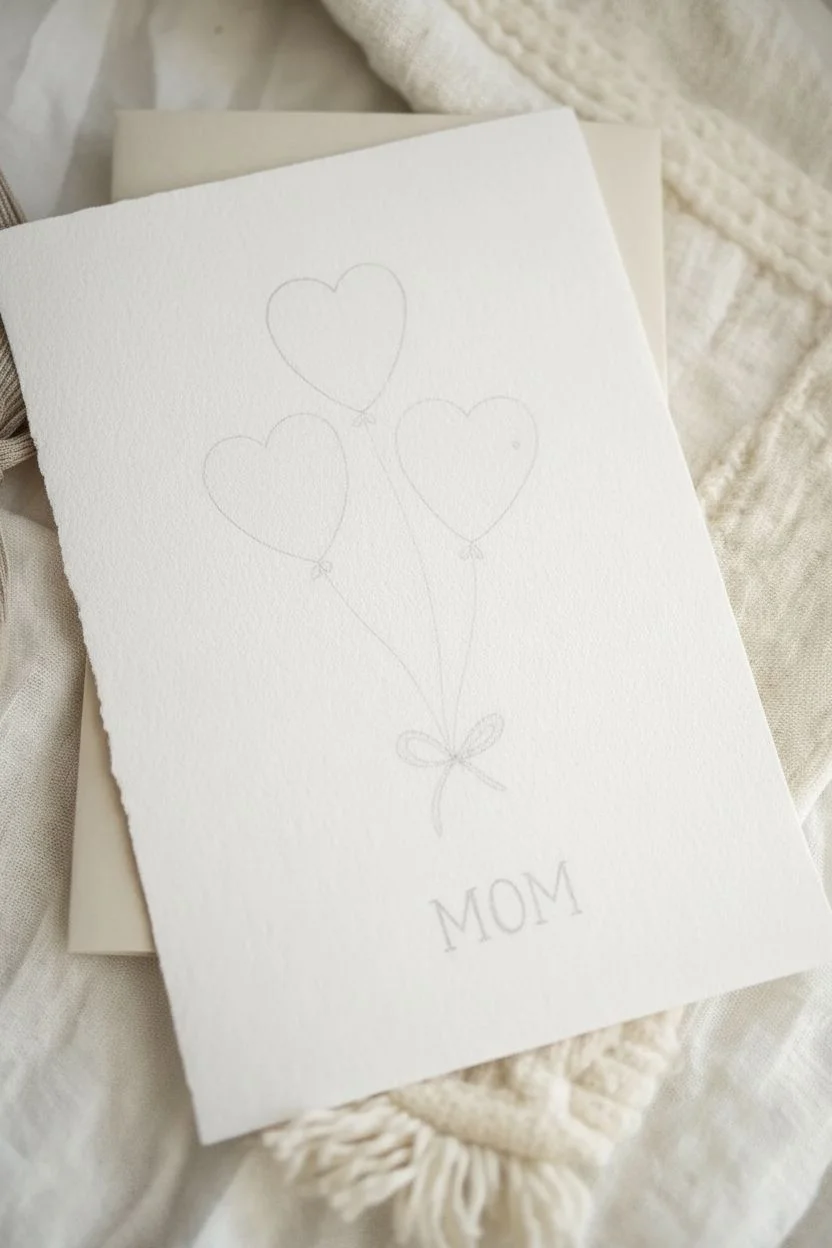
This minimalist Mother’s Day card features three floating heart balloons painted in warm, dusty tones, tied together with delicate pen illustrations. It combines simple watercolor washes with fine-line drawing to create a sentimental and artistic greeting that feels both modern and heartfelt.
Detailed Instructions
Materials
- Cold press watercolor paper (A5 size or folded cardstock)
- Watercolor paints (dusty rose, terracotta, burnt sienna)
- Round watercolor brush (size 4 or 6)
- Black various waterproof fine liner pen (0.1mm and 0.3mm)
- Pencil (HB or H)
- Kneaded eraser
- Paper towel
- Clean water jar
Step 1: Sketching the Layout
-
Prepare your card:
Cut your watercolor paper to your desired size. If you want a folded card, score and fold it now to ensure your design is centered on the front panel. -
Lightly sketch the balloons:
Using your pencil very lightly, sketch three heart shapes in the upper center of the card. Position the middle heart slightly higher than the two flanking it to create a pleasing triangle composition. -
Add strings and text:
Draw faint guidelines for the strings converging at a central point below. Beneath the string bundle, lightly pencil in the word ‘MOM’ in a clean serif font to ensure spacing is correct. -
Refine the sketch:
Step back and check your proportions. The hearts should look like inflated balloons, so keep the curves generous. Once happy, gently dab the sketch with a kneaded eraser until the lines are barely visible guidelines.
Bleeding Lines?
If ink ‘feathers’ into the paper, your paint wasn’t fully dry. Use a hairdryer on a low, cool setting to ensure absolute dryness before inking.
Step 2: Painting the Hearts
-
Mix your colors:
Prepare three distinct but harmonious warm shades. I like to mix a little brown into my reds and pinks to get those sophisticated dusty rose and terracotta tones shown in the example. -
Paint the top heart:
Load your brush with watery dusty rose paint. Start with the top center heart. Apply the color to the whole shape, letting darker pigment pool slightly at the bottom for a shadow effect. -
Highlight technique:
While the paint is still wet, you can lift a tiny bit of color from the upper left curve using a clean, slightly damp brush to create a subtle highlight, making the balloon look round. -
Paint the left heart:
Using a terracotta shade, paint the left-hand heart. Be careful not to let this wet shape touch the top heart if it is still drying, otherwise, the colors will bleed into each other. -
Paint the right heart:
Fill the final right-hand heart with a slightly lighter, peachy-brown mix. Varying the color intensity between the three balloons adds depth to the illustration. -
Let it dry completely:
This is crucial. Walk away for 10-15 minutes. The paper must be bone dry before you use a pen, or the ink will bleed and ruin the crisp lines.
Step 3: Inking and Details
-
Outline the balloons:
Take your 0.1mm fine liner. Carefully trace around your watercolor hearts. Using a very sketchy, broken line rather than a solid heavy one gives it that charming, hand-drawn aesthetic. -
Add the balloon knots:
Draw tiny triangles or small loops at the bottom point of each heart to represent the tied knots of the balloons. -
Draw the strings:
With a confident, quick motion, draw a slightly wavy line from each knot down to a single convergence point. A shaky hand actually helps here—pin-straight lines look unnatural. -
Add the bow:
Where the three strings meet, draw a cute bow using the 0.3mm pen. Make the loops mostly open and add two tails hanging down. -
Extend the stems:
Draw several short, vertical lines extending down from the bow, simulating the ends of the strings bunched together. -
Letter the sentiment:
Go over your pencil guide for the word ‘MOM’. Use the slightly thicker 0.3mm pen for the lettering to make it stand out against the delicate balloon strings. Add small serifs to the letters for a classic look. -
Final clean up:
Wait another minute for the ink to set, then gently erase any remaining visible pencil marks to leave a clean, professional finish.
Pro Tip: Texture
Drop tiny grains of table salt onto the wet watercolor paint. Once dry, brush them off to create a unique, speckled texture on the balloons.
Pair this card with a handmade envelope for a truly personal touch on her special day
Portrait Frame Doodle With “I Love You, Mom”
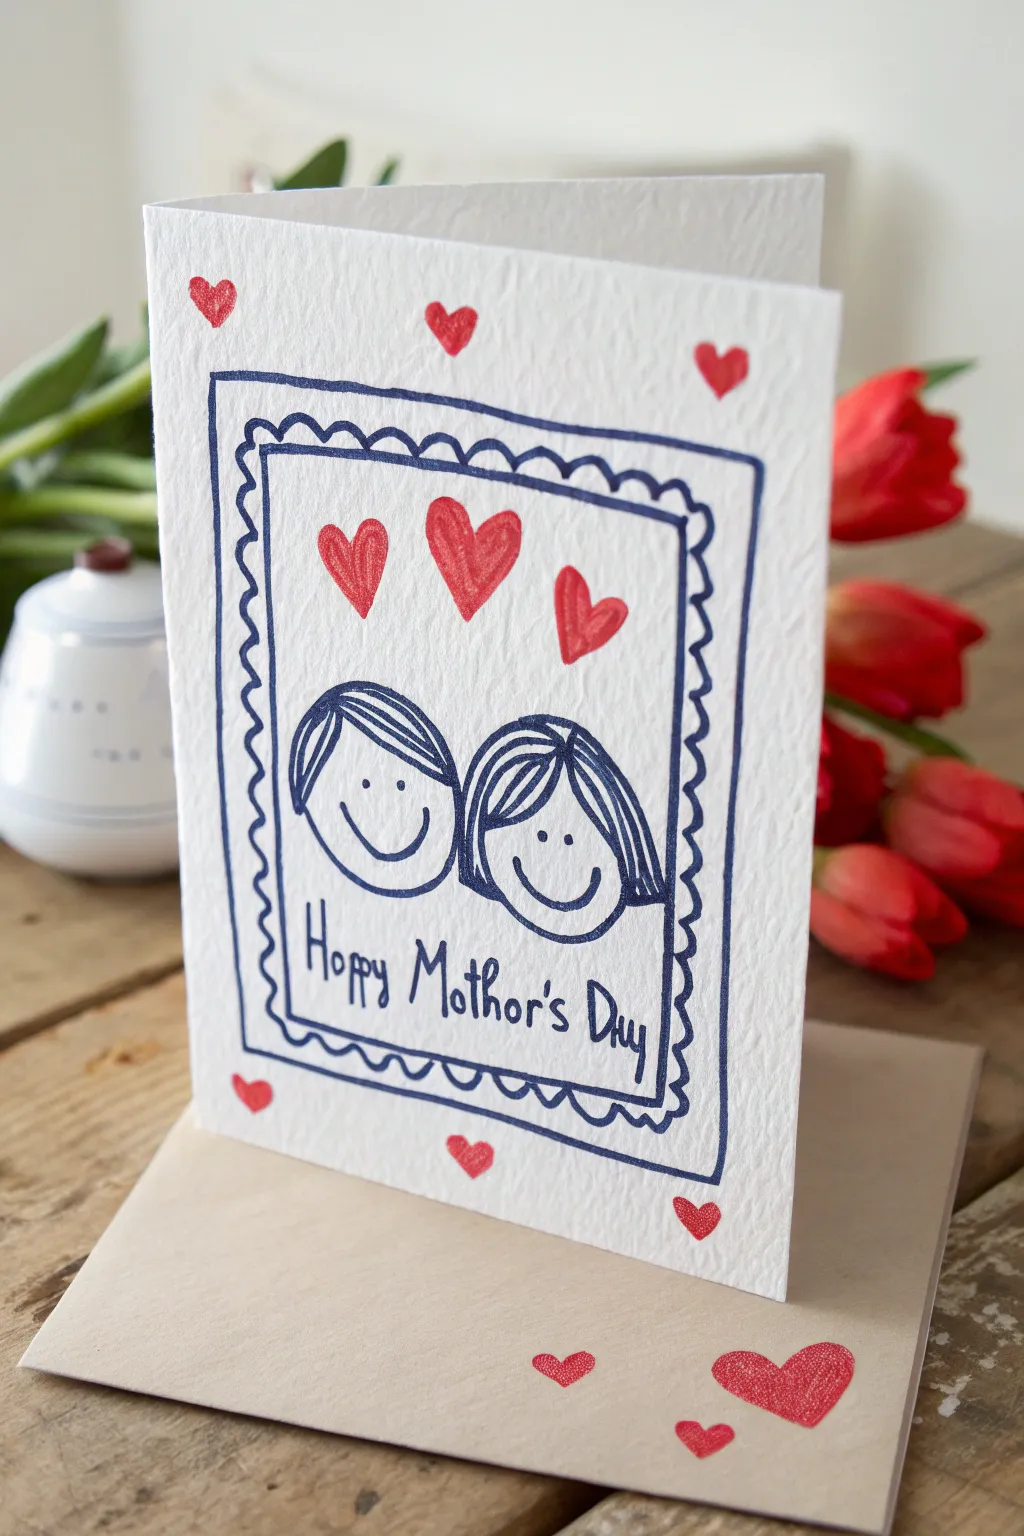
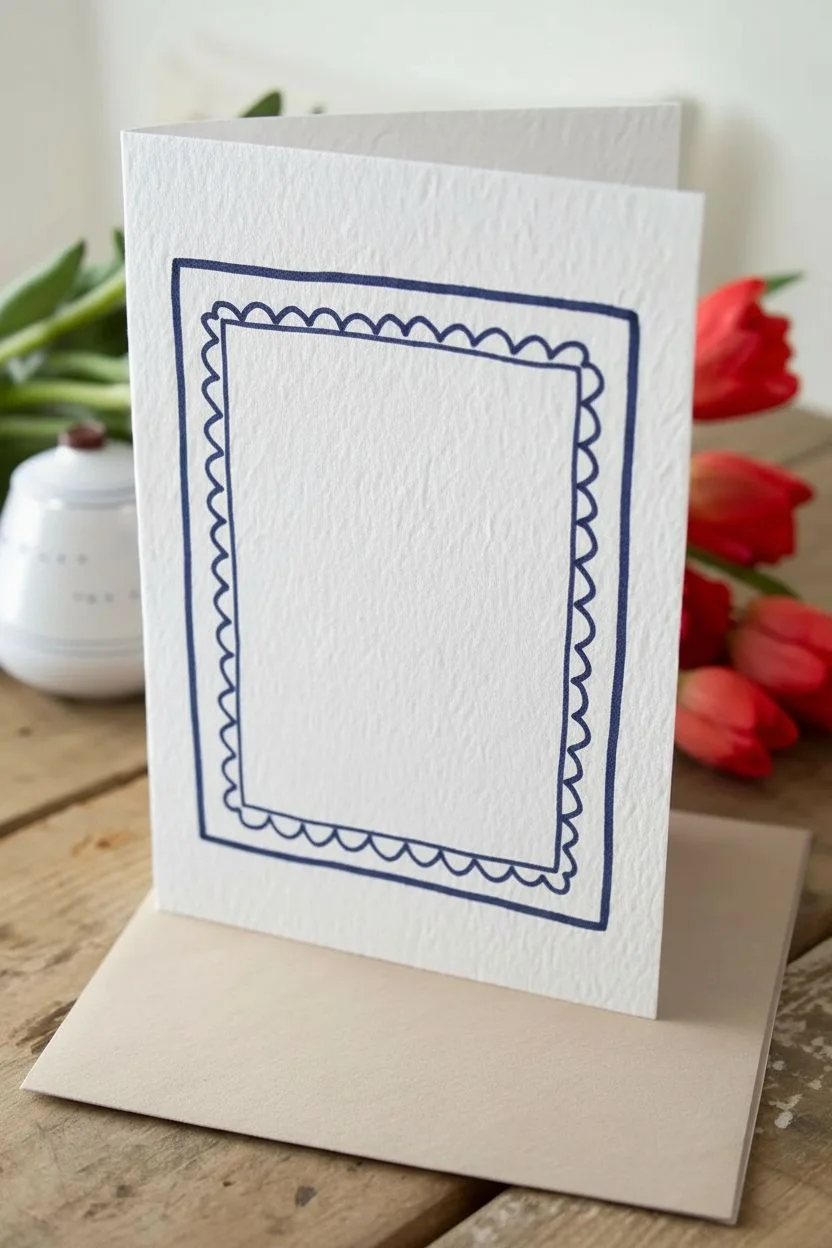
This sweet and simple card design captures the charm of a child’s drawing with a polished, minimalist touch using textured paper and classic doodle styles. It features happy faces framed like a postage stamp, accented with cheerful hearts for a loving handmade greeting.
Step-by-Step Tutorial
Materials
- Heavyweight textured cardstock (creamy white or watercolor paper)
- Kraft paper envelope
- Dark blue fine-point felt tip pen or pigment liner
- Red colored pencil or felt tip marker
- Ruler (optional, for guidelines)
Step 1: Setting the Scene
-
Prepare your canvas:
Begin by folding your sheet of textured cardstock in half to create a standard greeting card base. Ensure the crease is sharp and clean. -
Draw the outer border:
Using your dark blue pen, draw a large rectangle in the center of the card front. Leave about an inch of white space around all edges. Don’t worry about using a ruler; a slightly wobbly hand-drawn line adds character. -
Create the inner frame:
Draw a second, slightly smaller rectangle inside the first one. Leave a gap of about half an inch between the two lines to create a border area. -
Add the scalloped ‘stamp’ edge:
Inside the gap between your two rectangles, draw a continuous wavy or scalloped line. The high points of the waves should touch the outer line, and the low points should touch the inner line, creating a postage stamp perforation effect.
Steady Your Hand
Rest your wrist on a clean sheet of scrap paper while drawing. This prevents skin oils from smudging the ink or textured paper.
Step 2: Drawing the Portraits
-
Outline the faces:
In the lower half of the framed area, draw two circles side-by-side using the blue pen. These don’t need to be perfect circles; slightly oval or squarish shapes work great for a distinctive style. -
Add the hair details:
Draw simple hairstyles on each face. For the left figure, use sweeping curved lines across the forehead. For the right figure, create a center part with lines sweeping down the sides. I like to let the hair lines overlap the face outline slightly for a sketchy look. -
Draw the expressions:
Add two small dots for eyes on each face. Keep them wide-set for a cute appearance. -
Draw the smiles:
Draw a wide ‘U’ shape for the smiles. Make them big and cheerful, taking up most of the lower face area.
Stamp It
For the hearts on the envelope, carve a simple heart shape into a pink eraser and use a red ink pad to stamp them for a uniform look.
Step 3: Color & Sentiment
-
Add the floating hearts:
In the empty space above the heads, draw three hearts using your red pencil or marker. Generally, make the center heart slightly larger than the two flanking it. -
Fill the hearts:
Color in the hearts completely. If using colored pencil, a scribbly, textured fill looks charming; if using marker, fill them solidly. -
Write the message:
Beneath the faces, write ‘Happy Mother’s Day’ in your best casual handwriting. Use tall, narrow letters with the blue pen, mixing upper and lower case styles for a playful vibe. -
Add extra decorative hearts:
Draw small hearts scattered outside the main frame—one in the top left corner, one top center, one top right, and three along the bottom edge. -
Decorate the envelope:
Take your kraft envelope and draw a few small red hearts on the flap or front corner to tie the whole gift presentation together.
Now you have a charming, personalized card ready to brighten Mom’s special day
Mama Bear and Cub With Heart Noses
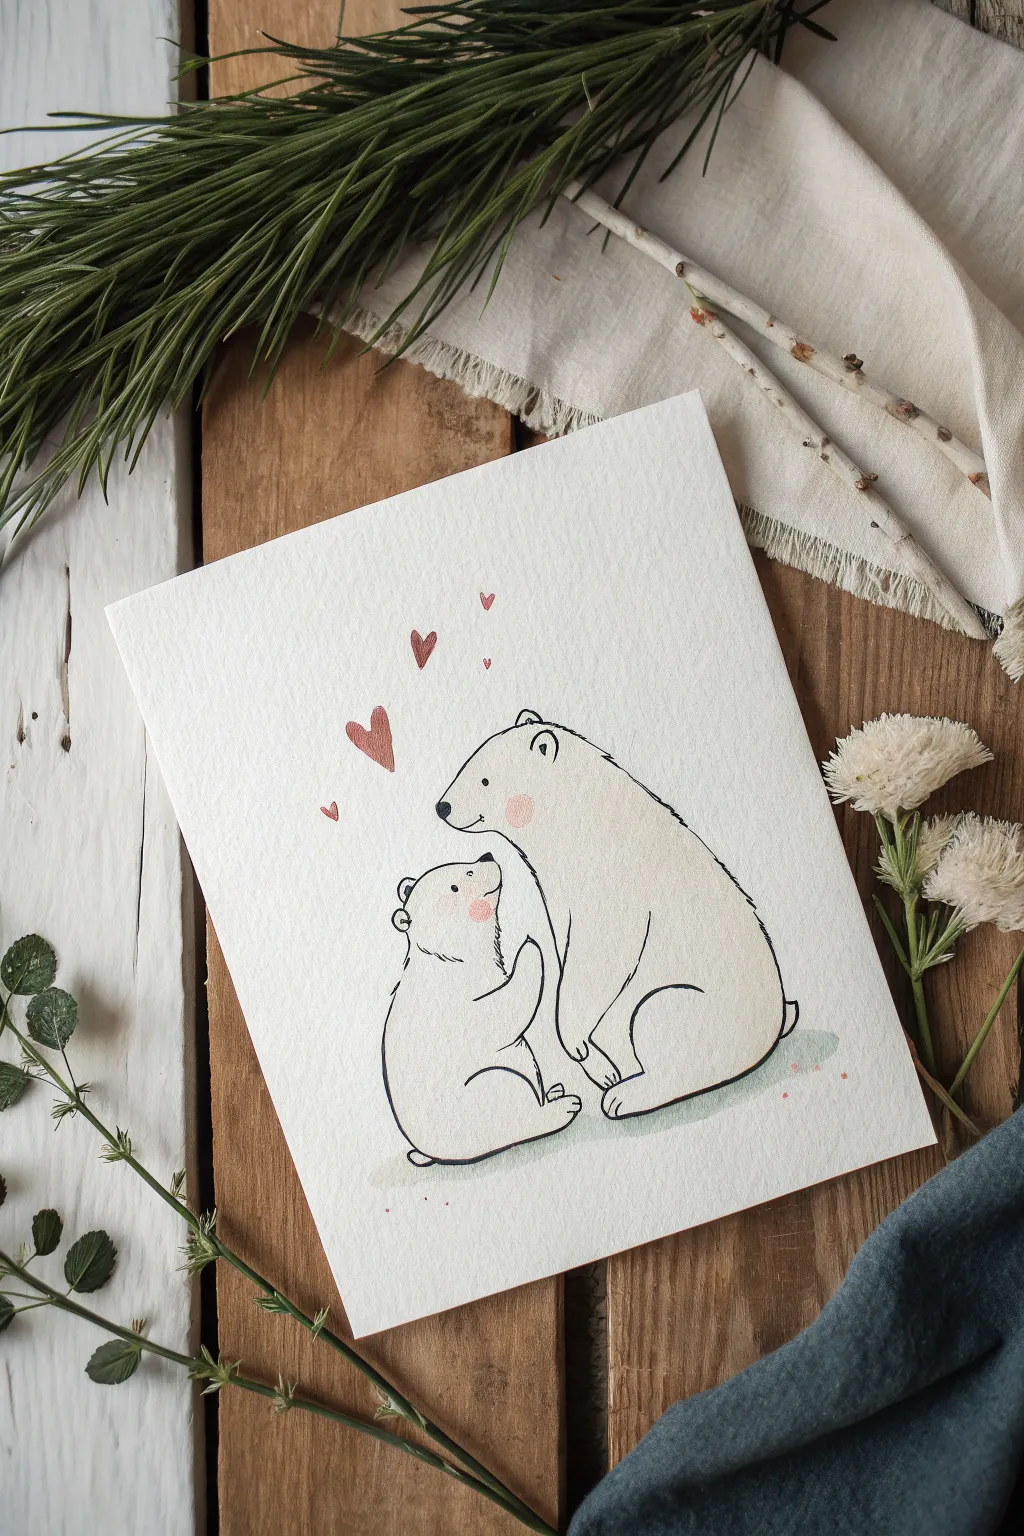
Celebrate the special bond between mother and child with this gentle watercolor illustration featuring a mama polar bear and her cub. The minimalist style uses soft washes and ink outlines to create a heartwarming keepsake perfect for Mother’s Day.
Step-by-Step Guide
Materials
- Cold press watercolor paper (300 gsm)
- Pencil (HB or 2H)
- Kneaded eraser
- Waterproof fine liner pen (black, 0.3mm or 0.5mm)
- Watercolor paints (Payne’s Grey, Alizarin Crimson, Burnt Sienna)
- Round watercolor brushes (size 4 and 6)
- Clean water and paper towels
- Painter’s tape or masking tape
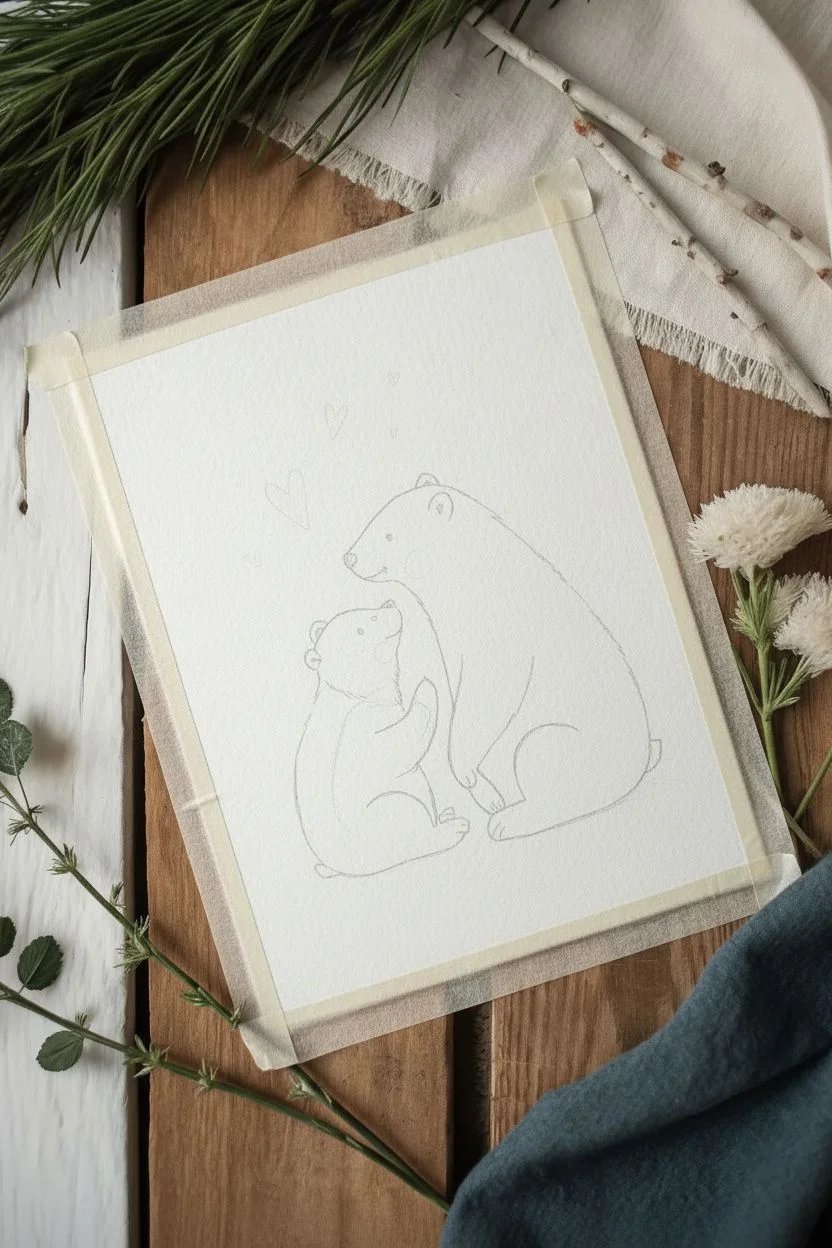
Step 1: Planning and Sketching
-
Secure your paper:
Tape down your cold-press watercolor paper onto a flat board or table using masking tape. This prevents the paper from buckling when we add water later. -
Outline the mama bear:
Using your pencil very lightly, start by drawing a large, rounded bean shape on the right side of the paper for the mama bear’s body. Her back should curve gently, and her head should be slightly lowered. -
Add the cub’s shape:
To the left of the mama bear, sketch a smaller, rounded form for the cub. Position the cub so it looks like it is looking up at its mom, with their snouts nearly touching. -
Refine the details:
Draw the ears as small semicircles. Define the legs and paws—mama bear sits on her haunches, while the cub sits back with its front paws reaching slightly upward. Keep lines loose and organic. -
Add the hearts:
Sketch three simple hearts floating in the space above and between the bears’ heads. Vary their sizes, with the largest one closest to the bears.
Keep it Watery
The charm of this piece is the faintness of the paint. Dilute your grey much more than you think you need; you can always add a second layer, but you can’t remove it.
Step 2: Washes and Color
-
Mix a soft grey:
Create a very watery mix of Payne’s Grey. If you want a warmer tone, add a tiny touch of Burnt Sienna. Test it on scrap paper; it should be extremely pale. -
Painting the bodies:
Apply clean water to the bear shapes first (wet-on-wet technique), avoiding the edges slightly. Then, drop in your pale grey mix along the shadowed areas: under the chins, along the backs, and where the legs meet the body. -
Softening the edges:
Use a clean, damp brush to feather out the grey paint towards the center of the bodies. We want the majority of the bears to remain the white of the paper. -
Adding the blush:
While the paper is still slightly damp (but not soaking), mix a very watery pink using Alizarin Crimson. Dab a small circle on the cheek of both bears for a rosy effect. Let it bleed softly. -
Painting the hearts:
Using a slightly more concentrated red mix, paint the three floating hearts. You can add a tiny unpainted highlight on the largest heart for extra charm. -
Grounding the scene:
Mix a very watery, cool grey-green shadow color. Paint a loose, horizontal oval shape underneath the bears so they aren’t floating in space. Let all paint dry completely.
Smudged Ink?
If your pen smudges, the paper wasn’t dry enough. Wait until the paper feels room temperature to the touch (damp paper feels cool) before starting ink work.
Step 3: Inking and Finishing
-
Inking the outlines:
Once the paper is bone dry, take your waterproof fine liner. Trace over your pencil lines loosely. Don’t worry about perfectly continuous lines; broken lines add character to the fur. -
Facial features:
Carefully draw the eyes as small black dots. Fill in the triangular noses with solid black ink, leaving a tiny bit of white paper for a highlight if possible. -
Defining the paws:
Add small curved lines to suggest claws on the paws. Keep these minimal so they don’t look scary—just cute curved dashes. -
Adding texture:
Add a few very short, quick hatch marks along the backs and rounded areas of the bears to suggest fur texture without outlining every hair. -
Final touches:
If you like, add a few tiny red splatter dots around the bottom for an artistic flair. Erase any visible pencil lines gently once the ink is totally set.
Now you have a sweet, handcrafted illustration ready to warm someone’s heart
Elephant Mom and Baby With Linked Tails
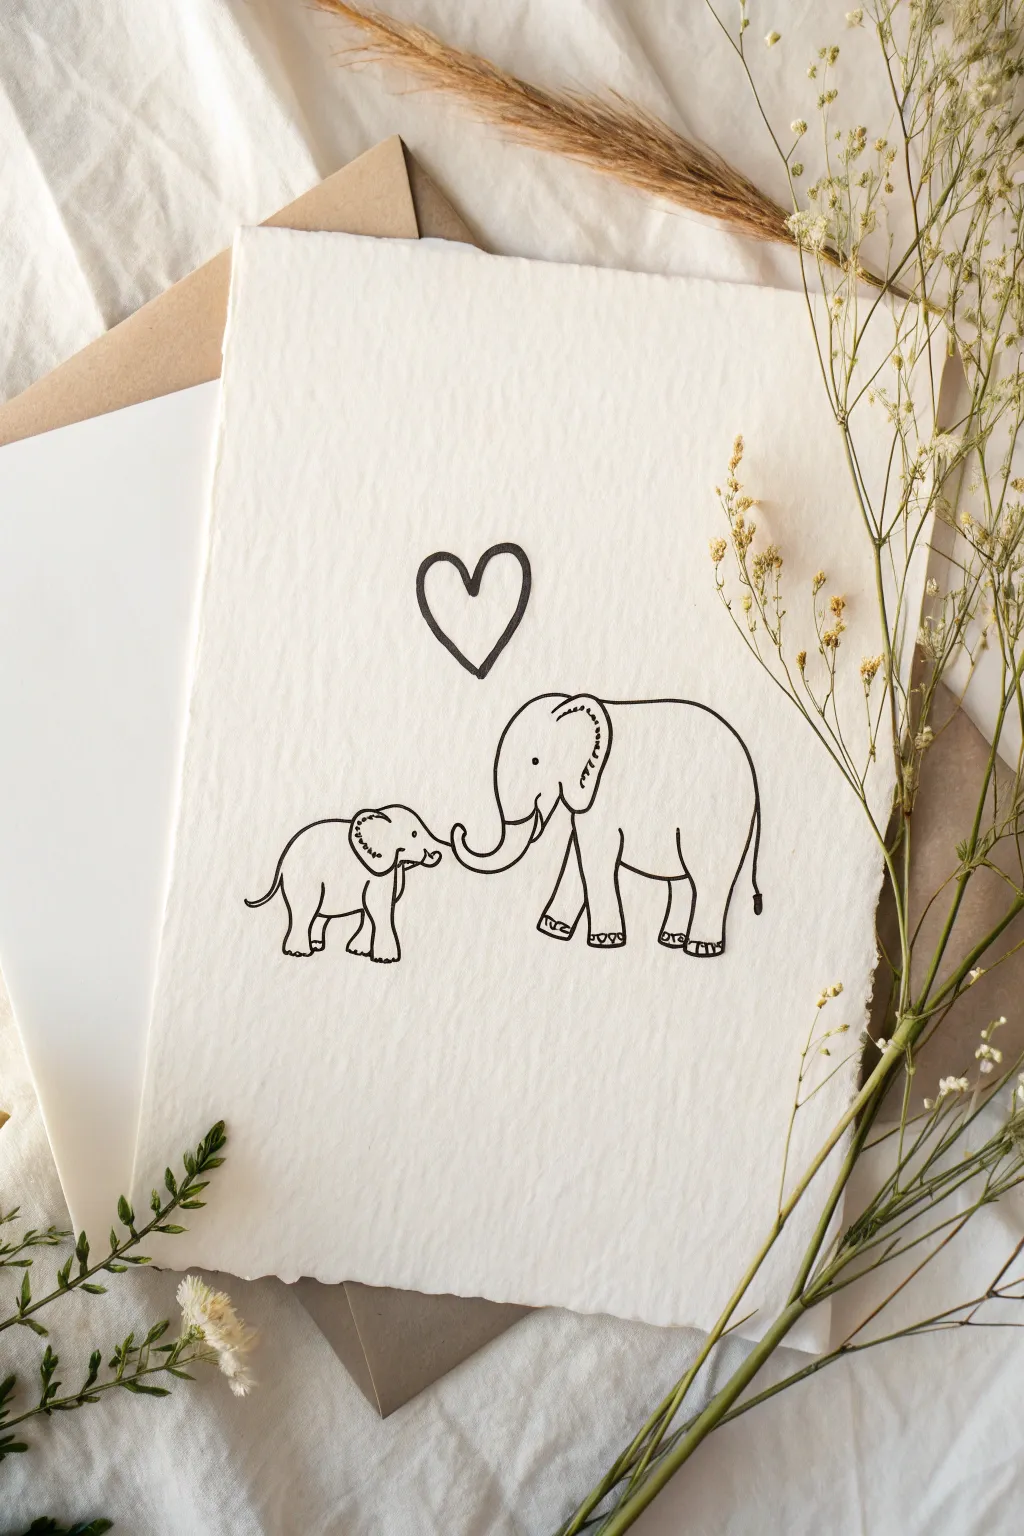
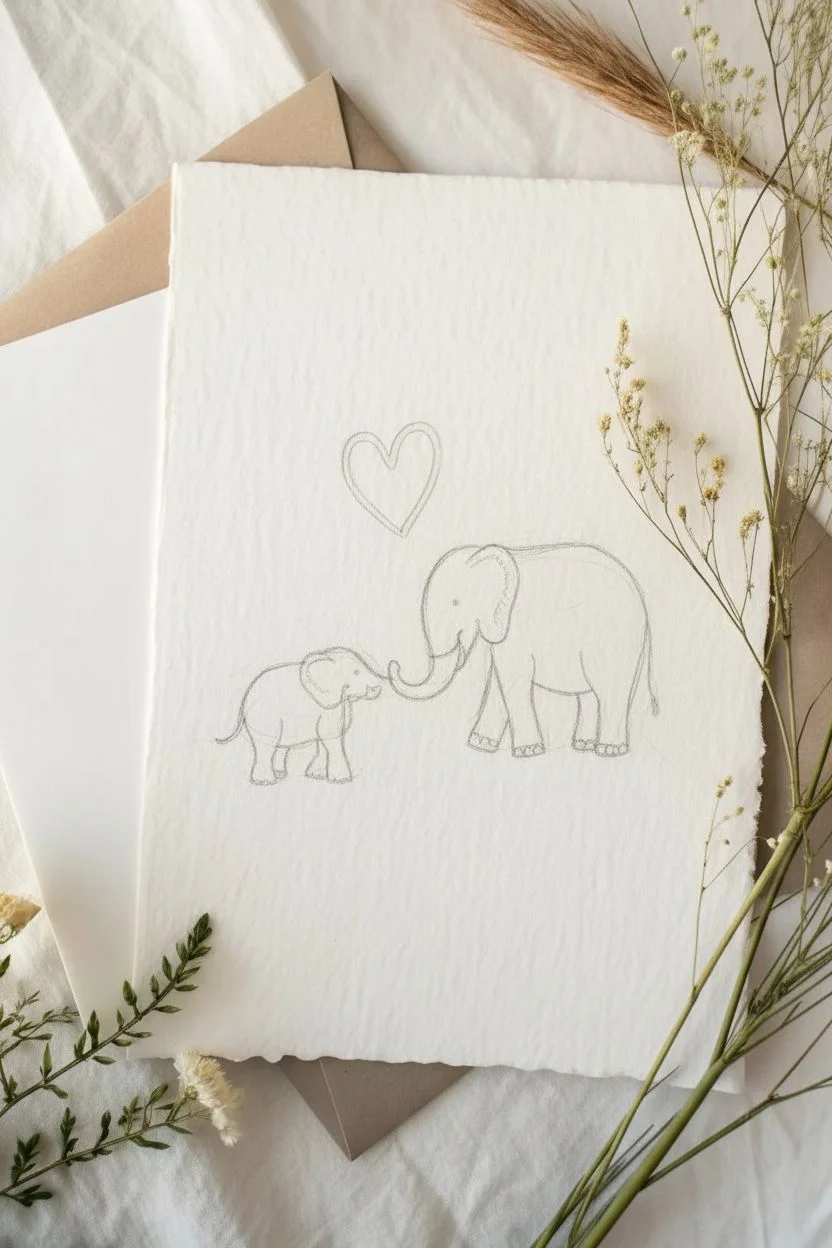
Celebrate the unbreakable bond of motherhood with this minimalist ink illustration. The charm lies in the simplicity of the clean black lines against the luxurious texture of handmade paper, creating a timeless keepsake.
Step-by-Step Tutorial
Materials
- Textured handmade paper (deckle edge, A5 or 5×7 inch)
- Fine liner pen (black, size 03 or 05)
- Pencil (HB or H)
- Kneadable eraser
- Ruler (optional for centering)
- Scrap paper for practice
Step 1: Planning and Sketching
-
Paper placement:
Place your sheet of handmade paper on a clean, flat surface. Because the paper has a textured surface, you’ll want to avoid pressing too hard, so tape isn’t recommended. Just ensure your workspace is stable. -
Visualize the layout:
Imagine the composition before you start. The two elephants should sit in the lower half of the page to leave breathable white space above for the heart. The larger elephant will be on the right, and the smaller on the left. -
Sketch the mama elephant’s head:
Using your pencil very lightly, draw a rounded curve for the top of the mother elephant’s head. Continue this line down to form the beginning of the trunk. -
Draw the mother’s trunk:
Extend the line into a ‘J’ curve that curls upward at the end. Draw the underside of the trunk parallel to the top line, tapering slightly as it reaches the tip. -
Outline the mother’s body:
From the back of the head, draw a large, smooth arching line to create her back and rear. This should be the largest shape on the page. Bring the line down to where the back leg will be. -
Add the ear and eye:
Sketch a large, ear shape just behind the head curve. It should look like a soft, inverted triangle or a butterfly wing. Add a small dot for the eye near the trunk base. -
Sketch the baby elephant:
To the left, sketch a smaller version of the elephant shape. Position the baby so its trunk is reaching up to touch the mother’s trunk tip. It’s crucial they connect or almost touch to convey the emotion. -
Refine the legs:
For both elephants, draw simple, sturdy legs. The mother needs four visible legs (two foreground, two background), while the baby can be simpler. Add tiny semi-circles at the bottom of the feet for toenails. -
Draw the heart:
Float a simple, open heart directly above the space between the two elephants. It should look hand-drawn and slightly imperfect to match the style.
Paper Texture Tip
When drawing on rough handmade paper, pull the pen toward you rather than pushing it away. This prevents the nib from snagging on the fibers and creates smoother lines.
Step 2: Inking and Finishing
-
Test your pen:
Before inking the final piece, scribble on a scrap piece of similar paper. Textured paper can bleed, so you want to ensure your ink flows smoothly without spreading too much. -
Ink the mother elephant:
Start tracing your pencil lines with the fine liner. Use a steady, continuous speed. If the pen skips over the paper texture, don’t worry—that broken line effect adds to the rustic charm. -
Detail the ear:
When inking the mother’s ear, add small, wiggly hatch marks along the top curve to suggest a fold or texture. -
Ink the baby elephant:
Carefully trace the baby elephant. Pay special attention to the trunk connection point; this is the focal point of the interaction. -
Trace the heart:
Go over the heart shape above them. A slightly thicker line weight here can look nice, so you might go over it twice if using a thin pen. -
Let the ink dry:
Allow the ink to sit for at least 15 minutes. Handmade paper is absorbent and holds moisture longer than standard printer paper. -
Erase pencil marks:
Gently dab—don’t rub—the paper with your kneadable eraser to lift off the graphite. Rubbing hard on this paper type can cause pilling or fuzziness. -
Final inspection:
Look at the line work. I sometimes like to thicken the bottom of the feet slightly to ground the figures, but keep the overall look light and airy.
Touch of Color
Use a very watered-down gray watercolor wash inside the elephants, or dab a tiny amount of pale pink inside the heart for a subtle pop.
Now you have a delicate piece of art ready to frame or slip into an envelope for Mom.
Garden Pot That Says “Mom” With Smiley Flowers


This charming handmade card features a classic terracotta pot bursting with cheerful daisies and a sweet personalized label. The combination of delicate ink lines and soft watercolor shading gives it a lovely, illustrated feel perfect for Mother’s Day.
Step-by-Step Guide
Materials
- White cardstock or heavy watercolor paper (folded to card size)
- Black fine-liner pen (waterproof/archival ink, size 0.3 or 0.5)
- Pencil and eraser
- Watercolor paints (terracotta/brown, green, yellow, grey)
- Small round paintbrush (size 2 or 4)
- Ruler
- Clean water and paper towel
Step 1: Planning the Sketch
-
Lightly sketch the pot:
Begin by using your pencil to outline the flower pot near the bottom center of your card. Draw a slightly tapered cylinder for the base and a wider rim at the top. The rim is essentially a long, thin rectangle with rounded ends. -
Add the sign:
Floating just above the pot’s rim, draw a simple rectangular box for the sign. Use your ruler if you want perfectly straight lines, but a hand-drawn line adds character. -
Sketch the flower stems:
Draw three lines extending upward from behind the sign. These will be your daisy stems. Make the center one strictly vertical and angle the side ones slightly outward. -
Outline the flower heads:
At the top of each stem, draw a small circle for the flower center. Surround each center with long, oval-shaped petals. Don’t worry about making them identical; natural variation looks better. -
Draw greenery:
Sketch in several leaves poking out from the pot and tucking behind the sign. Keep the leaf shapes simple and oval-like.
Bleeding Lines?
If your black ink blurs when you add watercolor, your pen isn’t waterproof. Let the ink dry for at least 20 minutes before painting, or paint first and ink last.
Step 2: Inking the Design
-
Trace over pencil lines:
Using your waterproof fine-liner pen, carefully trace over all your pencil lines. I prefer to start with the flowers at the top so I don’t smudge the ink with my hand as I work down. -
Lettering:
Inside the rectangular box, write the word “MOM” in simple, clean capital letters. Try to center the text as best as you can. -
Add details to leaves:
Inside each leaf, draw a central vein line and small diagonal lines branching off it to give the foliage texture. -
Erase pencil marks:
Wait for the ink to be completely dry—give it a few minutes to be safe—then gently erase all visible pencil sketches.
Step 3: Adding Color
-
Paint the pot’s base layer:
Mix a watery terracotta or light brown color. Fill in the main body and rim of the pot with a light wash. Keep it pale for now; we will build up darker values later. -
Paint the flower centers:
Drop a touch of bright yellow into the center of each daisy. While the paint is wet, you can dab a tiny bit of orange on one side to create a shadow effect. -
Color the leaves:
Use a muted green to paint the leaves and stems. Variate the green slightly by adding more water for some leaves and less for others to create depth. -
Shade the petals:
The petals stay mostly white, but to give them dimension, add a very faint wash of watered-down grey or violet just at the base of the petals where they meet the yellow center.
Pro Tip: Shadow Styling
Keep your light source consistent. If you shade the left side of the pot, make sure the leaves and flower centers also have shadows on their left side.
Step 4: Finishing Touches
-
Add pot texture:
Once the first layer on the pot is dry, mix a slightly more saturated brown. Paint small, random polka dots or splotches on the pot for a decorative texture. -
Deepen the shadows:
Add a thin line of darker brown right under the rim of the pot to show that the rim overhangs the base. -
Ground the object:
Mix a very watery grey wash. Paint a soft, diffuse oval shadow underneath the pot so it doesn’t look like it’s floating in mid-air.
Once the paint is fully dry, your lovely floral tribute is ready to be written in and gifted
Heart Wreath With Leaves and Tiny Dots

This elegant watercolor project features a delicate heart-shaped wreath adorned with lush foliage, warm ochre accents, and tiny red berries. The textured paper adds a beautiful, high-quality finish that makes this simple design feel incredibly special for Mother’s Day.
Detailed Instructions
Materials
- Cold press watercolor paper (300 gsm or heavier)
- Pencil (HB or H)
- Kneaded eraser
- Watercolor or gouache paints (Dark Green, Sap Green, Yellow Ochre, Burnt Sienna, Deep Red)
- Round brushes (sizes 2 and 4)
- Fine liner brush (size 0 or 00)
- Two jars of water
- Paper towel
Step 1: Planning the Shape
-
Lightly sketch the outline:
Begin by drawing a very faint heart shape in the center of your paper using an H or HB pencil. Keep your pressure extremely light, as you want these lines to disappear or be easily erased later. -
Define the stem flow:
Sketch two main curved lines that start from the bottom point of the heart and curve upwards to meet at the center dip. These will be the primary stems for your main leaves.
Oops! Blobs?
If a red berry bleeds into a green leaf, don’t panic. Gently dab the mistake with a twisted corner of a clean paper towel to lift the color, let it dry completely, and then re-paint the edge.
Step 2: Painting the Foliage
-
Mix your greens:
Prepare a dark, rich green by mixing deep green with a tiny touch of red or brown to desaturate it. Create a second, lighter sap green on your palette for variety. -
Paint the bottom leaves:
Using a size 4 brush, start at the bottom point of the heart. Paint elongated, pointed leaves branching off your main stem line. Press the brush down to widen the leaf belly and lift up to create a sharp point. -
Add color variation:
As you move up the sides of the wreath, alternate between your dark green and sap green mixes. I find that dropping a little water into a wet leaf creates a lovely natural texture as it dries. -
Incorporate ochre leaves:
Clean your brush thoroughly. Mix a Yellow Ochre or Gold paint. Intersperse these warm-colored leaves among the green ones, particularly focusing on the outer edges and the top curves of the heart. -
Create the top curves:
Near the top dip of the heart, make the leaves slightly smaller and more delicate to maintain the curve’s definition without looking clustered. -
Add translucent details:
For a softer look, water down a bit of grey or muted green and add a few “ghost” leaves behind the main ones to create depth.
Step 3: Adding the Inner Vine
-
Mix a golden brown:
Combine Burnt Sienna with a little Yellow Ochre to create a warm, golden-brown hue. Dilute it slightly so it flows easily. -
Draft the inner line:
Using your finest liner brush (size 0 or 00), paint a very thin, delicate vine that sits just inside the main green wreath. Following the heart shape, let this line weave slightly. -
Add tiny sprigs:
Paint extremely small, grain-like leaves or sprigs along this inner vine. Keep these strokes short and precise to contrast with the lush outer leaves.
Gilded Edge
Use metallic gold watercolor paint for the inner vine layer and the tiny floating dots. It will catch the light beautifully and give the card a premium, store-bought feel.
Step 4: Berries and Finishing Touches
-
Paint the berries:
Load a size 2 brush with Deep Red paint. Tuck clusters of 2-3 round berries into the empty spaces between the green leaves. -
Add single berries:
Place single red dots near the tips of some vines to balance the composition. -
Scatter the confetti dots:
Using the very tip of your fine brush, add tiny red dots floating loosely around the outside and inside of the wreath. This adds a whimsical, magical feeling to the piece. -
Connect the berries:
Once the red berries are dry, use your fine liner brush with brown paint to draw hairline stems connecting the berries back to the main branches. -
Erase pencil lines:
Wait until the painting is completely bone-dry. Gently dab—don’t rub—with your kneaded eraser to lift any visible pencil guidelines.
This heartfelt design is ready to be framed or folded into a card for a truly personal gift
Coupon Card Doodles: Hugs, Help, and Tea
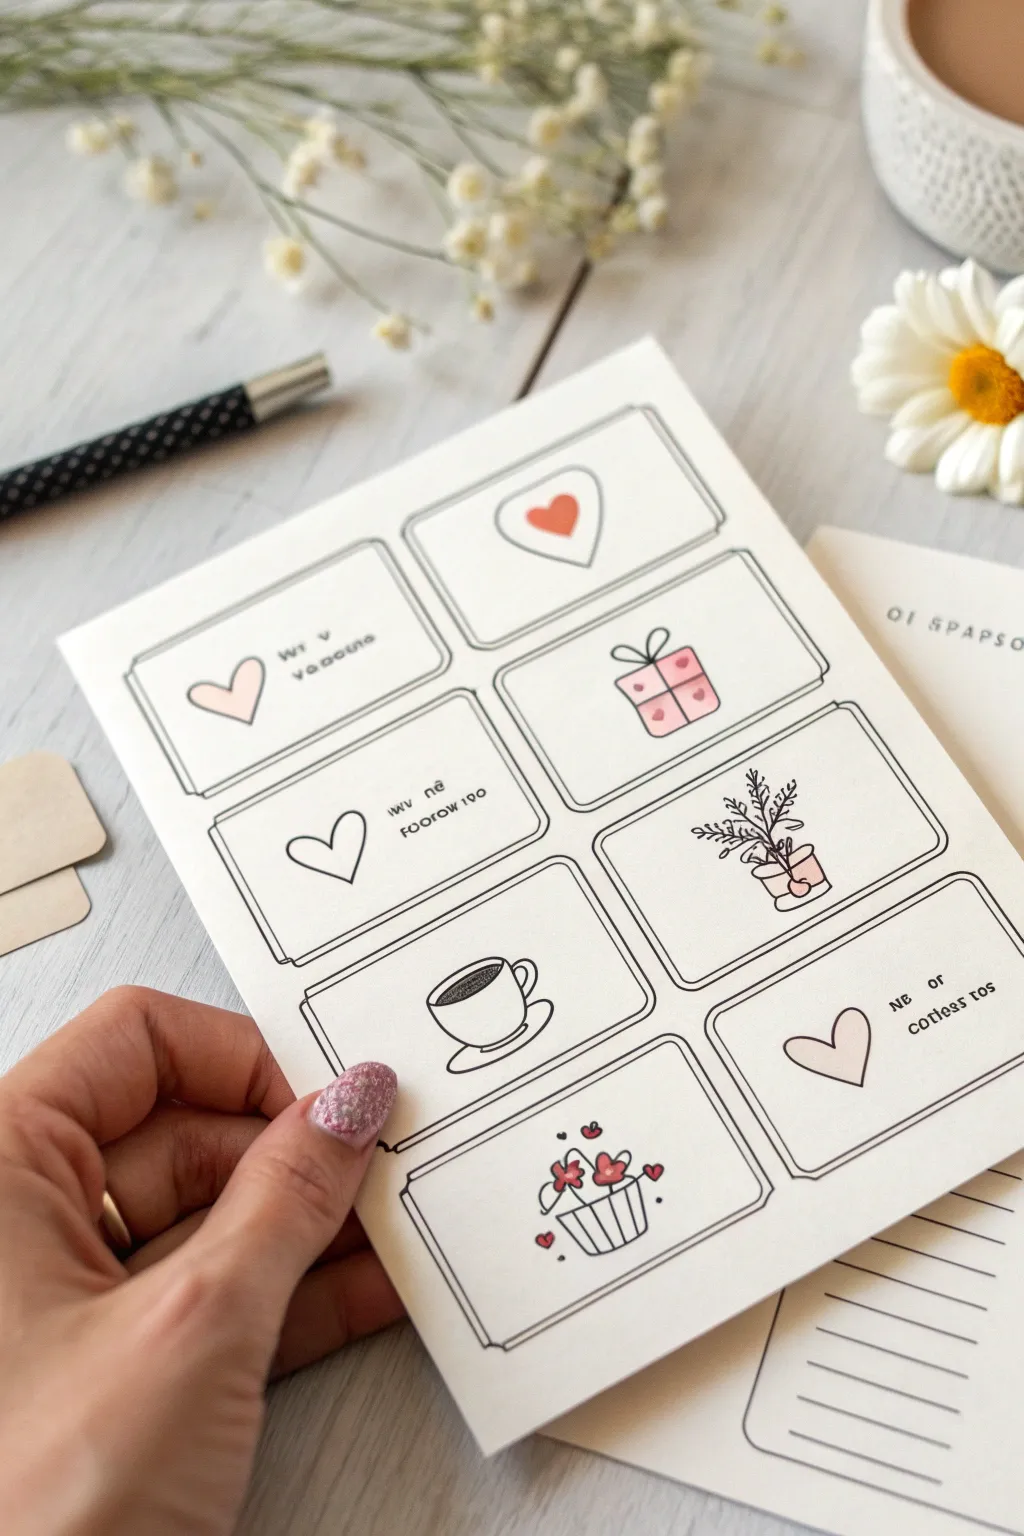
Create a heartfelt and interactive gift with these charming hand-illustrated coupon cards. Featuring simple line art and soft color accents, this printable-style sheet offers sweet promises like tea, hugs, and quality time that Mom can redeem whenever she needs a pick-me-up.
Step-by-Step
Materials
- Heavyweight drawing paper or white cardstock
- Fine liner pen (black, 0.3mm or 0.5mm)
- Ruler
- Pencil and eraser
- Colored pencils or markers (pastels, pinks, light brown)
- Scissors (optional, for cutting out later)
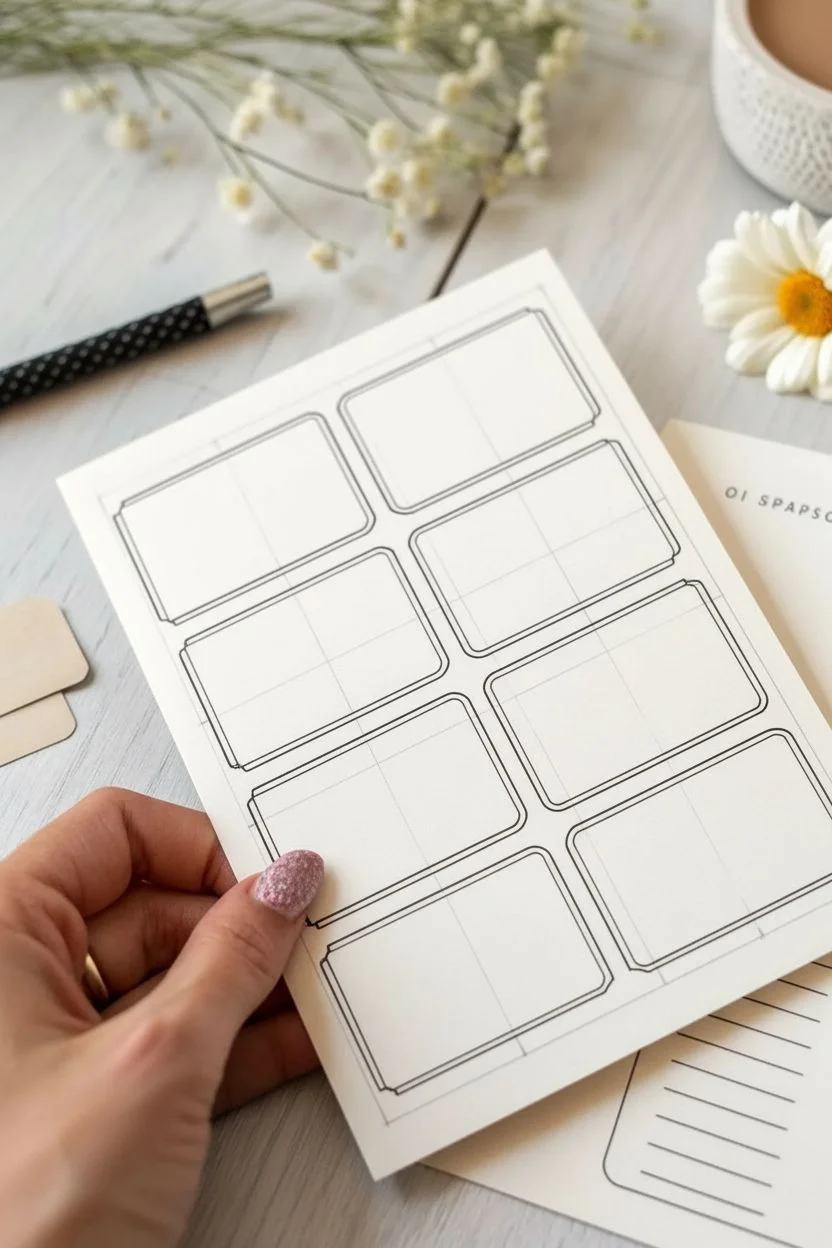
Step 1: Setting Up the Grid
-
Measure margins:
Start by identifying the printable area of your paper. Leave a generous 1-inch border around the edges so the coupons feel centered and intentional. -
Draw layout guidelines:
Using your ruler and a light pencil touch, divide your page into a grid. Aim for two equal columns and about four or five rows, depending on your paper size. Each coupon should be roughly business-card sized or slightly larger. -
Round the corners:
Sketch a rectangular border inside each grid section. Instead of sharp 90-degree angles, gently round the corners of each rectangle to give the coupons a softer, friendlier look. -
Ink the frames:
Trace over your rounded rectangular sketches with your black fine liner pen. Use a double-line technique—drawing a second line very close to the first—to create a frame effect that looks casually hand-sketched rather than perfectly rigid.
Step 2: Doodling the Designs
-
Sketch the heart motifs:
In several of the boxes, lightly pencil in heart shapes. Vary them slightly—one might be a single floating heart, another could be a heart inside a circle or square icon. -
Add iconic objects:
Choose simple symbols for other coupons. Sketch a classic coffee or tea cup on a saucer for a beverage coupon, and a simple gift box with a bow for a surprise treat. -
Draw the plant doodle:
For a ‘fresh flowers’ or ‘garden help’ coupon, sketch a small potted plant. Draw a U-shaped pot and add a few vertical stems with tiny leaf clusters radiating outward. -
Create the cupcake:
In another box, draw a cupcake shape. I like to start with the ribbed wrapper at the bottom, then add a fluffy cloud shape on top. Decorate it with tiny hearts instead of sprinkles. -
Ink the illustrations:
Go over your pencil sketches with the fine liner. Keep your lines clean and continuous. For the plant, use short, flicking strokes for the leaves to keep them feeling organic. -
Erase guidelines:
Once the ink is completely dry (give it a full minute so it doesn’t smudge), gently erase all your pencil grid lines and sketch marks.
Double-Line Trick
When inking the borders, deliberately make the second line slightly wobbly or imperfect. It prevents the grid from looking too stiff.
Step 3: Adding Text & Color
-
Pencil in the text:
Decide what each coupon offers. Classic options include ‘One Free Hug’, ‘Breakfast in Bed’, or ‘Afternoon Tea’. Lightly pencil the text next to the corresponding icon to ensure centered spacing. -
Lettering style:
Ink the text using a simple, small caps handwriting style. It doesn’t need to be perfect calligraphy; a neat, everyday print matches the doodle aesthetic best. -
Color the hearts:
Using a soft pink or muted red colored pencil, fill in the heart shapes. Keep the coloring light and airy rather than pressing hard for full saturation. -
Tint the gift box:
Color the gift box icon with pink accents. You might color just the box and leave the ribbon white, or vice versa, to create nice visual contrast. -
Warm up the beverages:
Use a light brown or mocha color to fill in the liquid inside the tea/coffee cup doodle. It adds just enough context to make the drawing clear. -
Final foliage touches:
Add very subtle green or brown touches to the plant stems, and perhaps a pop of color on the pot. Keep the color palette restrained so the black line work remains the star.
Make Perforations
Use a sewing tracing wheel (without ink) or a dotted line cutter tool between coupons to make them actually tearable for Mom to redeem.
Now you have a charming sheet of promises ready to gift, proving that thoughtful gestures are truly the best present of all
Chibi Mom-and-Kid Faces in a Heart Frame

Capture the bond between mother and child with this adorable chibi-style doodle. Framed neatly within a simple heart outline, this sketch uses bold linework and sweet, blushy details to create a perfect greeting card design.
Detailed Instructions
Materials
- Sketchbook or heavy drawing paper
- Pencil (HB or 2B)
- Eraser
- Fine-liner pen (black, 0.3mm or 0.5mm)
- Brush pen or thicker marker (black)
- Pink colored pencil or pastel highlighter
- Compass (optional, for circles)
- Ruler
Step 1: Planning the Layout
-
Draw the heart frame:
Start by lightly sketching a large heart shape in the center of your page. Make it wide enough to comfortably fit two circular head shapes inside. Focus on keeping the curves smooth and symmetrical. -
Position the figures:
Inside the right half of the heart, lightly sketch a large circle for the mother’s head. Down in the bottom center/left area, sketch a slightly smaller circle for the child, overlapping just a bit with the mom’s lower side. -
Add guide lines:
Draw faint vertical and horizontal lines across the faces to help you place the eyes and mouth later. The mom’s face should be slightly higher up in the composition.
Smudge Prevention
If you are right-handed, ink from left to right so your hand doesn’t rest on wet lines. Place a scrap piece of paper under your hand as a guard.
Step 2: Drawing the Mom
-
Outline the face shape:
Refine the circle into a face shape. For chibi style, keep the cheeks round and the chin very soft. Draw the neck extending down towards the heart’s edge. -
Sketch the hair:
Draw sweeping curves for the mom’s hair. I like to start with a side part, bringing long strands down to frame the face. Add a curved line over the top of the head to suggest a headband or the hair’s volume. -
Create the features:
Draw two large oval eyes. Leave small white circles inside them for highlights (glimmers). Add a small ‘u’ for the nose and a simple curved smile. Don’t forget the eyelashes. -
Detail the clothes:
Sketch a simple curved neckline for her shirt. Add small half-circles or hearts as a pattern on her top to give it some texture.
Pro Tip: Eye Sparkle
To make the characters look even cuter, add two highlights in the eyes instead of one: a larger circle at the top and a tiny dot at the bottom.
Step 3: Drawing the Child
-
Define the child’s face:
Refine the smaller circle into a face shape. Since this is a child, keep the face shape even rounder and squatter than the mom’s. -
Add the hair:
Draw short, choppy bangs across the forehead. Keep the hair short and layered, perhaps with a few cute tufts sticking up at the crown for a playful look. -
Draw the expression:
Place large, round eyes similar to the mom’s but slightly wider apart. Add a tiny button nose and an open, cheerful mouth. Draw the shirt collar and simple stripes on the outfit.
Step 4: Inking and Details
-
Ink the main lines:
Take your fine-liner pen and carefully trace over your pencil lines. Start with the faces and hair. Use confident, smooth strokes to avoid wobble. -
Thicken the heart:
Use a slightly thicker pen or brush pen to trace the main heart outline. This heavy line acts as a frame and separates the drawing from the background. -
Fill in the eyes:
Color in the pupils with solid black ink, being very careful to leave the white highlight circles completely clean. This contrast is what makes the eyes look alive. -
Pattern the background:
In the empty space on the left side of the heart, draw small embellishments. Simple 5-point stars, tiny flowers, and little dots work perfectly to fill the void. -
Erase pencil marks:
Wait until the ink is completely dry to touch—smearing is the worst enemy here. Gently erase all the underlying pencil sketches.
Step 5: Adding Color
-
Apply blush:
Take a pink colored pencil or a soft pastel. Gently rub circular spots of pink onto the cheeks of both characters. You can also add little heart shapes on the cheeks for extra cuteness. -
Color the details:
Use the pink pencil to shade the stripes on the child’s shirt and the pattern on the mom’s shirt. Color the tiny stars in the background red or pink to tie it all together.
Now you have a heartwarming keepsake perfect for gifting to a special mom
Hand-Lettered “Mom” With Floral Doodles as Shadows
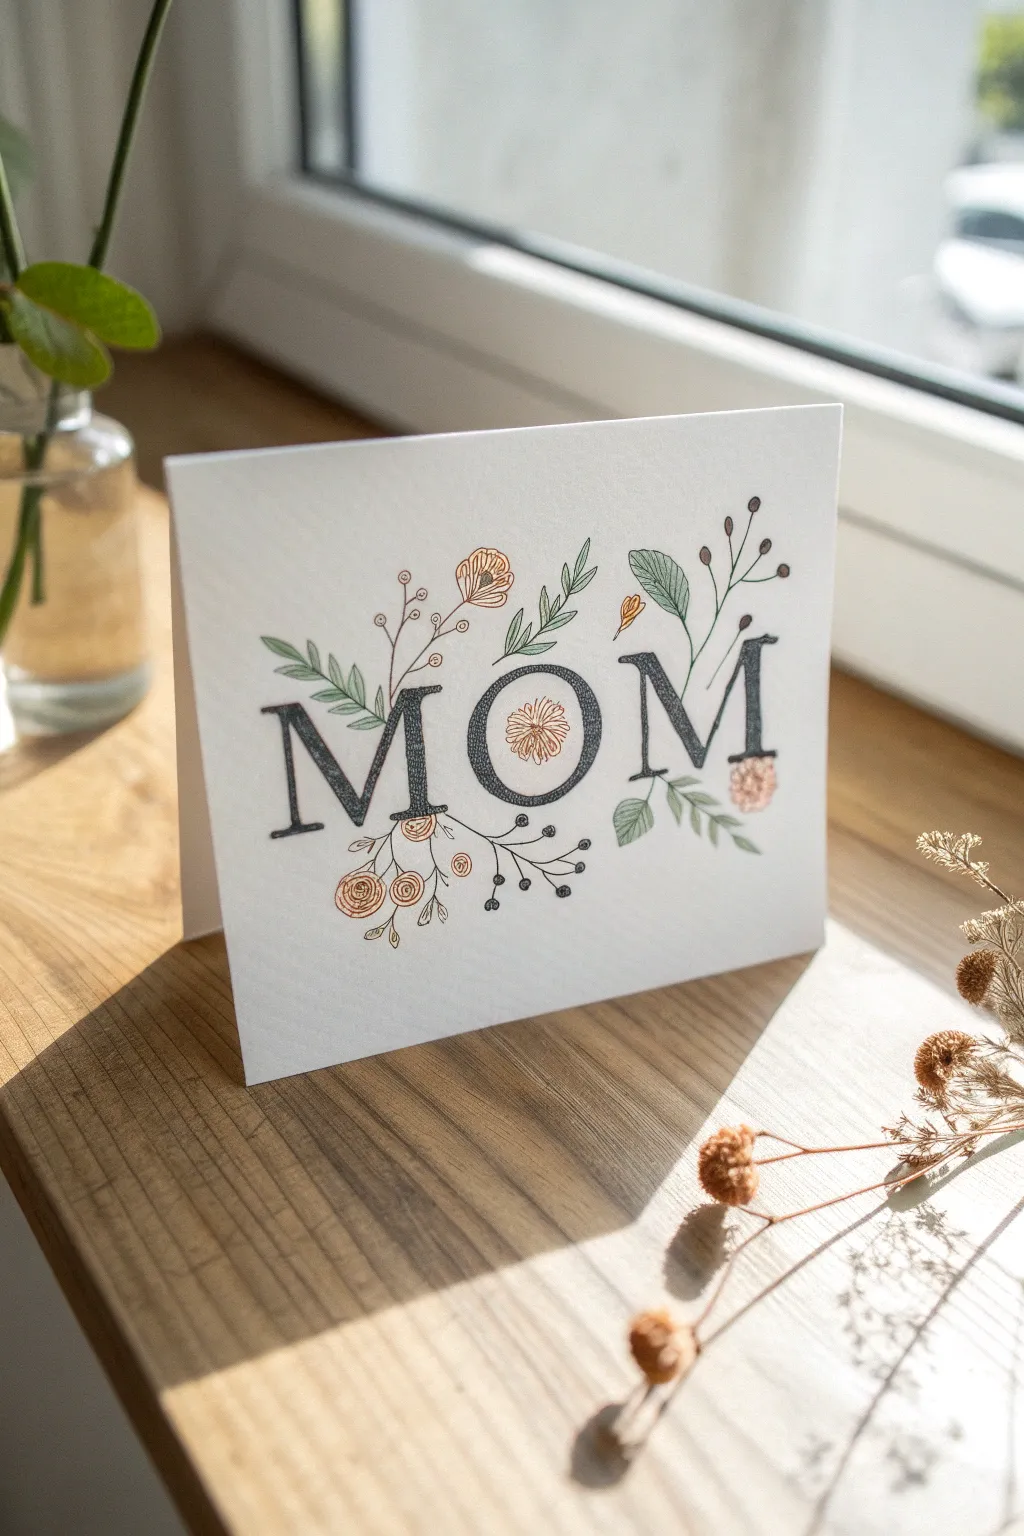
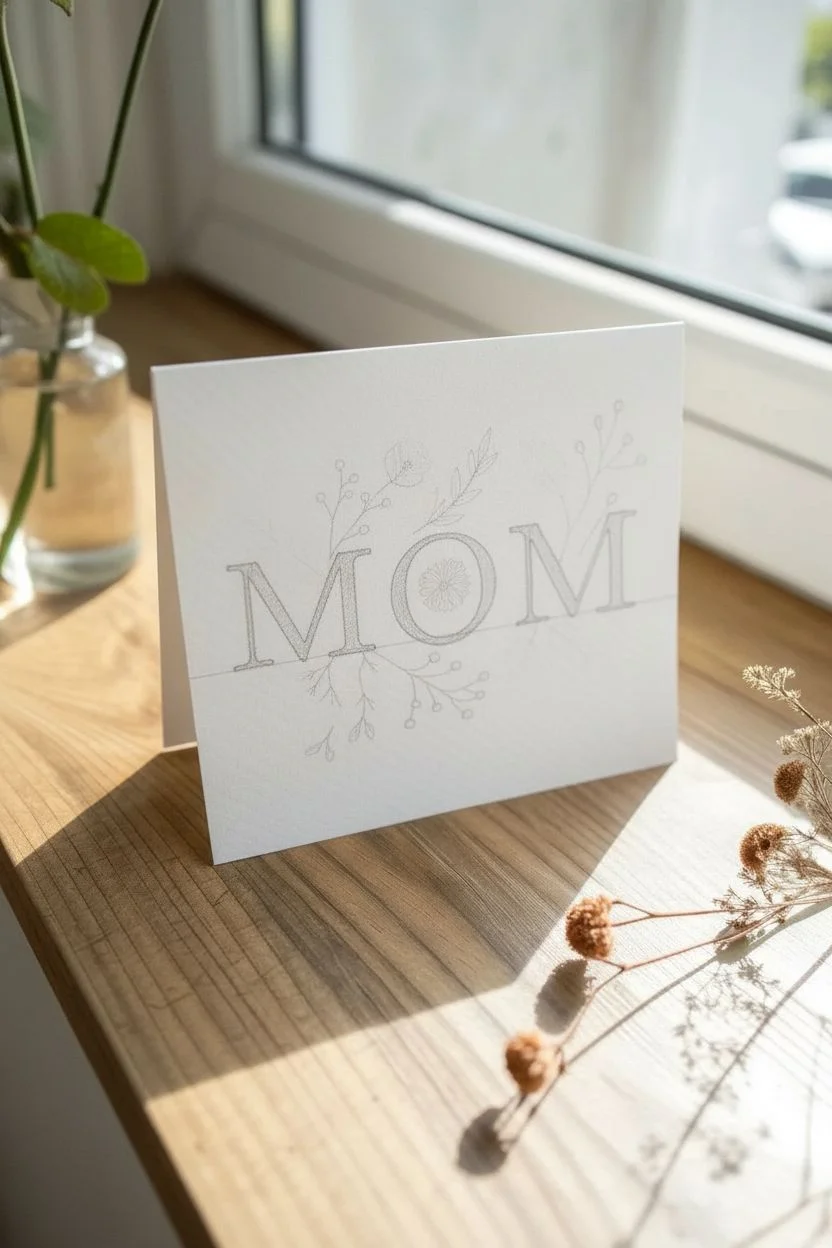
This elegant card combines bold serif lettering with delicate botanical illustrations acting as drop shadows. The soft mix of black ink, sage greens, and muted peach tones creates a sophisticated yet handmade look perfect for Mother’s Day.
Step-by-Step
Materials
- High-quality white cardstock (folded)
- Pencil (HB or H)
- Good eraser (kneaded preferred)
- Black fineliner (0.3mm or 0.5mm)
- Dark grey felt-tip marker or brush pen
- Colored pencils or fine markers (sage green, muted orange/peach)
- Ruler
Step 1: Drafting the Layout
-
Establish the baseline:
Begin by lightly drawing a horizontal guideline across the center of your card using a ruler. This ensures your letters stay perfectly straight. -
Sketch the letters:
Sketch the word ‘MOM’ in large serif block letters. Focus on keeping the serifs (the little feet at the ends of the strokes) distinct and rectangular. -
Refine spacing:
Check the spacing between the letters. The ‘O’ should be round and centered, with the two ‘M’s mirroring each other on either side. -
Add texture lines:
Before inking, lightly mark where you want the internal texture to go. Notice how the original artwork has a textured, almost hatched interior rather than solid black.
Ink Smearing?
If your fineliner smears when you erase pencil lines, switch to a pigment-based liner like a Micron or wait at least 15 minutes before erasing.
Step 2: Inking the Lettering
-
Outline in black:
Using your black fineliner, carefully trace the outline of your ‘MOM’ letters. Keep your hand steady for crisp, sharp edges on those serifs. -
Fill with texture:
Instead of coloring solidly, use your dark grey marker or fineliner to fill the letters with a tight scribbling or hatching motion. This creates that lovely charcoal-like texture seen in the photo. -
Erase pencil guides:
Once the ink is completely dry—I like to give it an extra minute just to be safe—gently erase your initial pencil guidelines.
Step 3: Drawing the Floral Accents
-
Plan the floral placement:
Lightly sketch vines and flowers weaving through and behind the letters. Think of these as a ‘floral shadow’—they should mostly appear to the right or bottom of the letters. -
Left side leaves:
Draw a stem of simple pointed leaves curving upwards from the bottom left of the first ‘M’. Alternate the leaves on either side of the stem. -
Center flower detail:
Inside the ‘O’, sketch a small, circular bloom with delicate petals. This breaks up the negative space and ties the letters to the botanical theme. -
Right side flourishes:
Sketch a taller, leafy branch reaching up the right side of the final ‘M’, and add some small berry sprigs near the bottom right. -
Add variety flowers:
Intersperse small rose-like swirls and tiny buds throughout the greenery. Place a prominent rose doodle near the bottom gap between the first ‘M’ and ‘O’. -
Outline the botanicals:
Go over your floral sketches with the fine black pen. Keep these lines thinner and more delicate than the heavy lettering outlines.
Pro Tip: Depth trick
Make the flowers look like they are truly behind the letters by stopping your pen line right at the edge of the letter’s border, never crossing over.
Step 4: Adding Color
-
Color the leaves:
Use a sage green colored pencil or marker to fill in the larger leaves. Keep the coloring soft; you don’t need to press hard. -
Shade the stems:
For the thin stems and smaller leaf veins, re-trace over them lightly with the green pencil to add a hint of color without making them too thick. -
Add peach accents:
Take your muted orange or peach color and fill in the circular flowers and buds. This warm tone contrasts beautifully with the cool grey letters. -
Berry details:
Using a dark grey or black pen, color in the tiny berries solid black for high contrast against the petals. -
Final touches:
Look for any empty spots that feel unbalanced. Add tiny floating seeds or dots in black ink to fill awkward gaps and add movement. -
Clean up:
Do a final pass with your eraser to remove any stray sketch lines, leaving only your clean ink and color work.
Now you have a beautifully custom card ready to be written in
Secret Message Card: Lift-the-Flap Heart
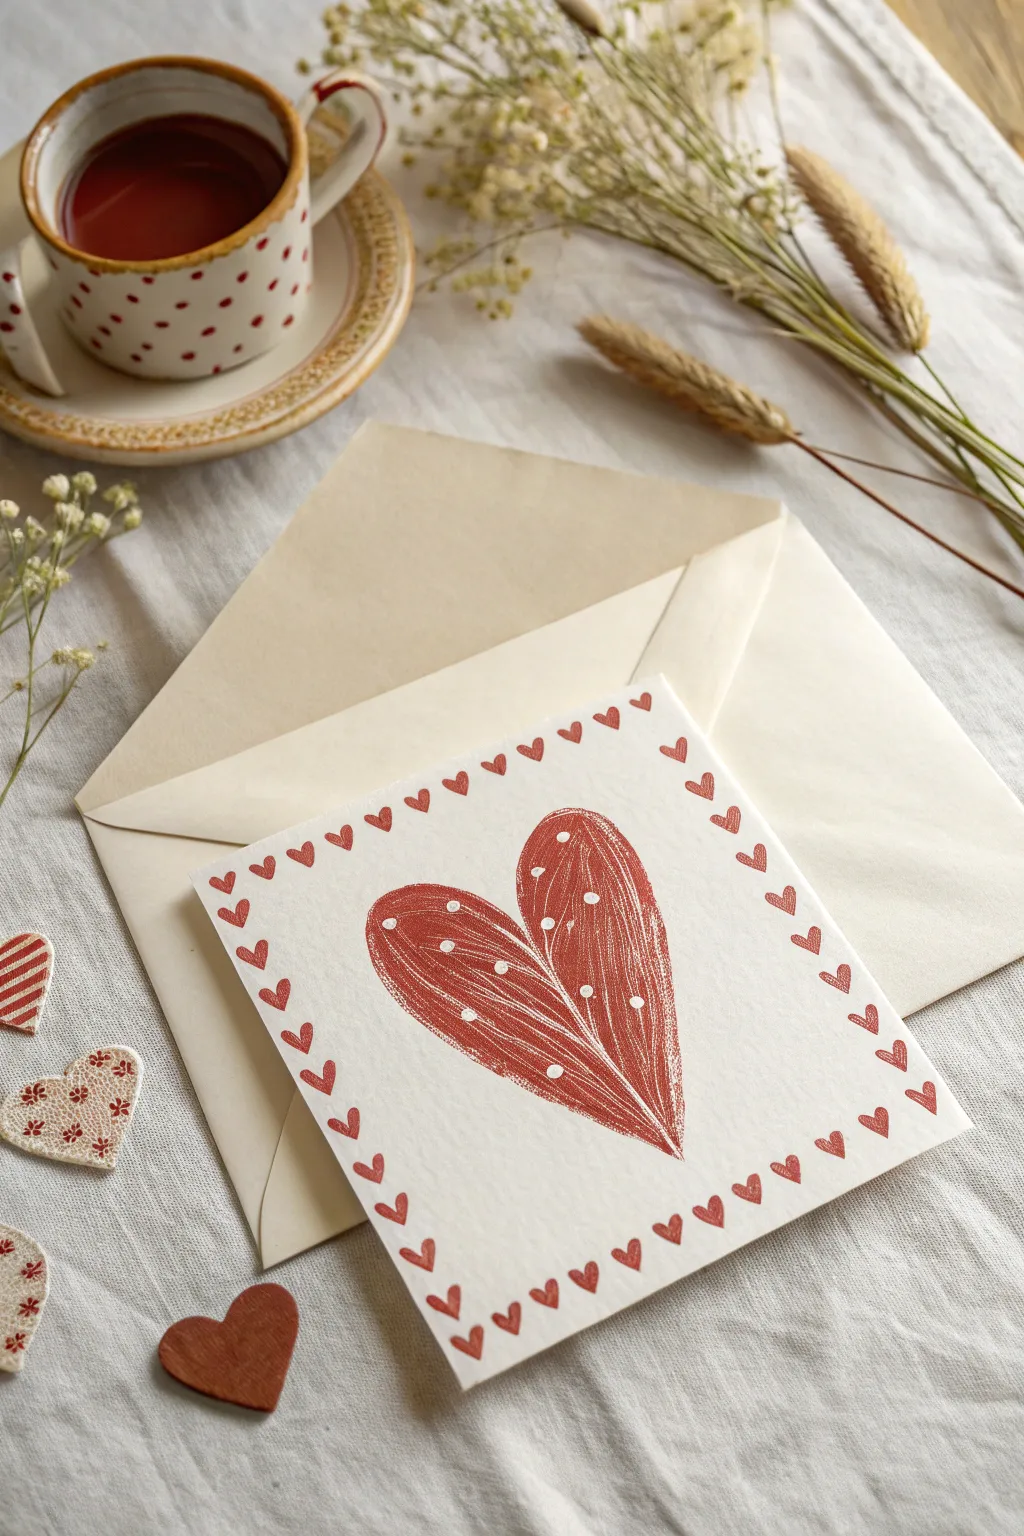
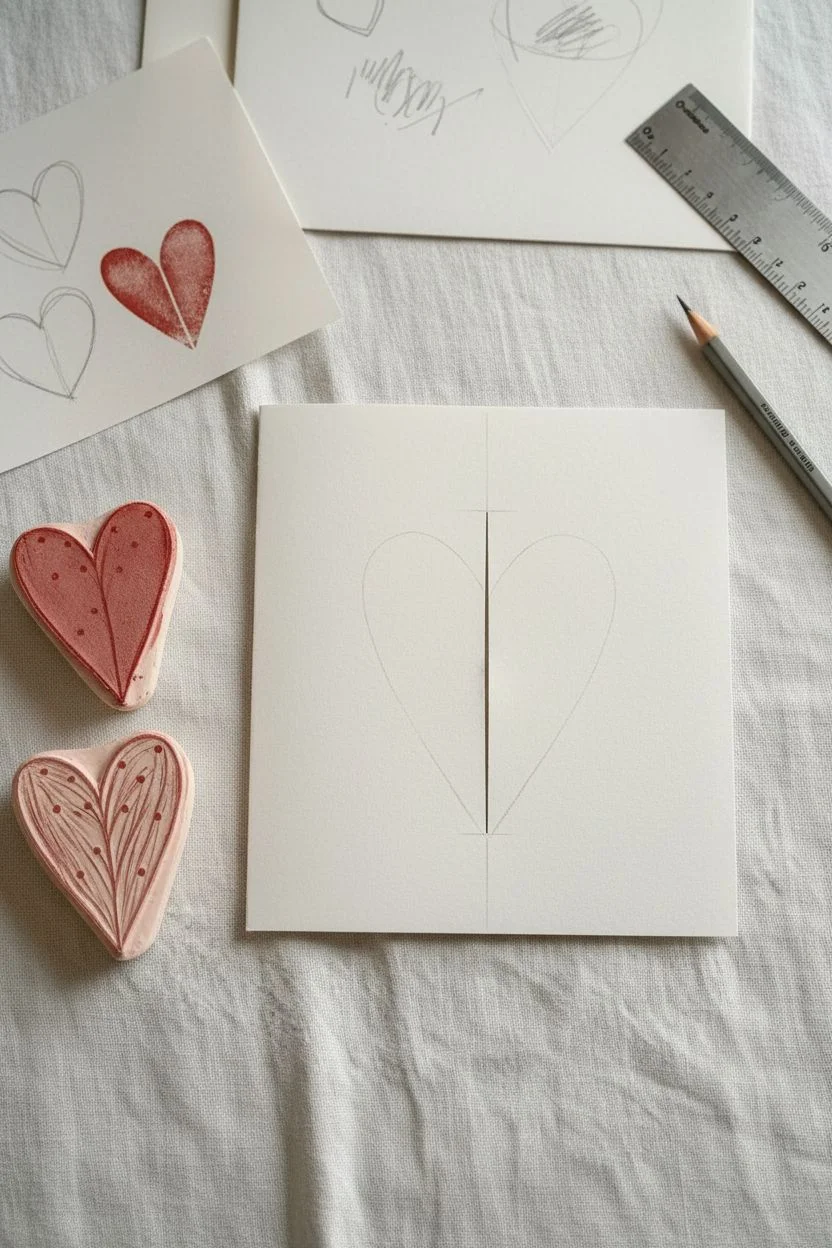
Create a heartfelt surprise with this rustic greeting card featuring a split heart design that acts as two little doors. Using a simple block printing technique, the central heart has a charming, textured look while the tiny stamped hearts create a delicate border.
Step-by-Step Tutorial
Materials
- Heavyweight white cardstock (square usually works best)
- Small block of soft-cut lino or a rubber carving block
- Lino carving tool with a V-gouge
- Red block printing ink or heavy body acrylic paint
- Foam roller or brayer
- Small heart-shaped rubber stamp (mini size)
- Red ink pad
- Bone folder
- Craft knife and metal ruler
- Pencil for sketching
- Scrap paper for testing
- White gel pen (optional for touch-ups)
Step 1: Designing the Heart Doors
-
Prepare the card base:
Cut your cardstock to your desired size (e.g., 6×12 inches to fold into a 6×6 square). Score the center lightly but don’t fold it yet. -
Create the flaps:
Instead of a standard fold, this card needs two flaps meeting in the middle. If using a 6×6 base, find the vertical center of the front panel. Using your craft knife, slit straight down the middle of just the front cover so it opens like French doors. -
Sketch the master heart:
On a piece of scrap paper roughly the size of your closed card front, sketch a tall, elongated heart shape. Draw a vertical line strictly down the center of the heart to divide it in half. -
Transfer to carving block:
Place your carving block over the sketch. You need to carve two separate stamps: the left half of the heart and the right half. Transfer the outline of each half onto your rubber block.
Stamp Slipping?
If your rubber stamp slides while printing on the cardstock, you likely have too much ink on the block. Blot some off on scrap paper and try again with a lighter hand.
Step 2: Carving the Texture
-
Outline the shapes:
Use your V-gouge carving tool to carefully carve away the rubber around the outside of your heart halves. Go slowly around curves to keep the edges smooth. -
Add surface detail:
To mimic the texture in the photo, carve thin, slightly curved vertical lines running through the heart halves. Leave some areas solid red. -
Create the dots:
Using the tip of your tool or a small drill bit, gouge out small random circles on surface of the heart halves. These will remain white when printed. -
Test paint:
Ink up your two stamps and press them onto scrap paper. Ensure the two halves align nicely when placed side-by-side but don’t touch.
Make it Sparkle
Once the red ink is fully dry, use a fine-tip gold gel pen to trace the carved white lines inside the heart for a touch of elegant shimmer that catches the light.
Step 3: Printing the Card
-
Ink the roller:
Squeeze a small amount of red block printing ink onto a palette. Roll your brayer back and forth until it has a velvety texture and an even coating of ink. -
Apply ink to stamps:
Roll the ink onto your carved heart halves. I like to do a thin coat first, then a second pass to ensure rich coverage without flooding the fine carved lines. -
Print the left flap:
Place a piece of clean scrap paper inside the card to protect the interior. Position the left heart stamp on the left flap, aligning the straight edge very close to the center cut. -
Print the right flap:
Repeat the process with the right heart stamp on the right flap. Try to match the height perfectly with the left side so they form a complete heart when the card is closed. -
Press firmly:
Apply firm, even pressure with your hand or a clean brayer over the back of the stamp to transfer the ink fully. Peel it back carefully. -
Initial drying:
Let the wet block printing ink dry completely before handling the card again; this can take closer to an hour depending on ink thickness.
Step 4: Adding the Border Details
-
Prepare the mini stamp:
Ink up your small heart rubber stamp using a standard red ink pad. Test it first to ensure the orientation is correct. -
Stamp the corners:
Start by stamping one small heart in each of the four corners of the card front. Use the angle of the heart to point inward toward the center. -
Fill the gaps:
Working from the corners inward, stamp additional small hearts along the perimeter. Space them evenly, rotating the stamp slightly so the hearts follow the flow of the edge. -
Final dry:
Allow the stamped ink to dry for a few minutes. -
Add the secret message:
Open the flaps. On the inside right panel, hidden beneath the heart flaps, write your personal message so it’s revealed only when the heart is ‘broken’ open.
Now you have a charming, interactive card ready for writing a hidden message inside


Have a question or want to share your own experience? I'd love to hear from you in the comments below!