
If you’ve got a plain terra cotta pot and a little paint, you’re already halfway to something ridiculously adorable. I love these cute pot painting ideas because they’re beginner-friendly, quick to personalize, and they make plants feel like tiny companions.
Simple Smiley Face Pot
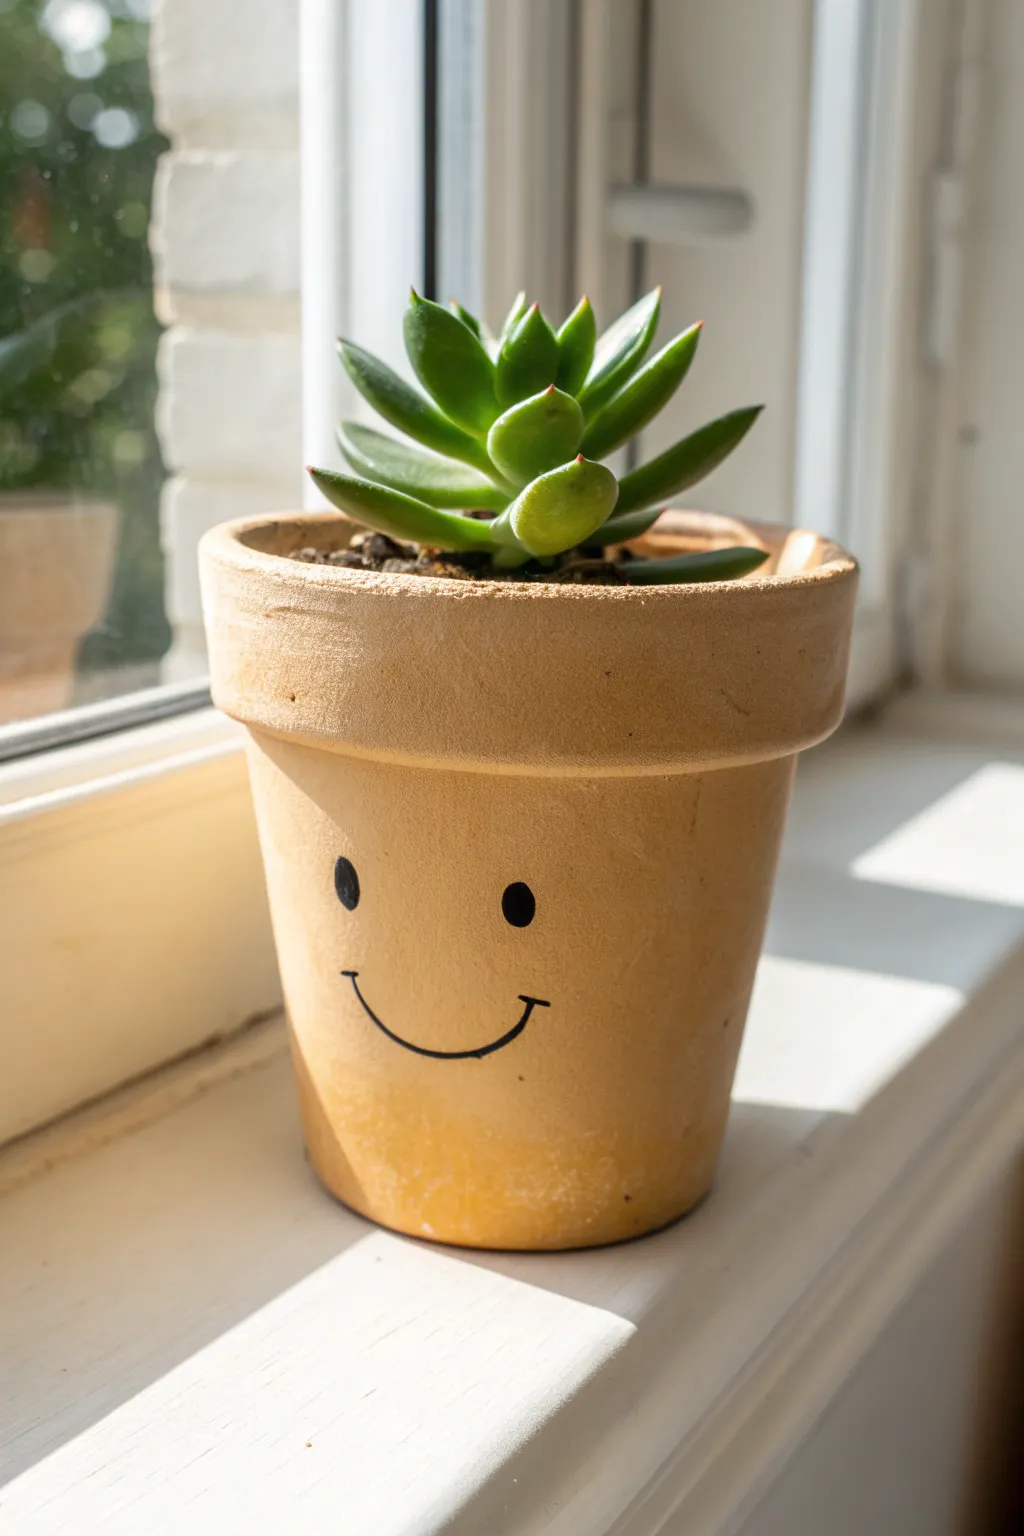
Sometimes the simplest designs are the ones that bring the most joy to a bright windowsill. This ultra-minimalist project focuses on creating a charming, clean line drawing of a smiley face directly onto basic terra cotta for a warm, natural look.
Detailed Instructions
Materials
- Small terracotta pot (clean and dry)
- Black fine-tip paint marker or oil-based Sharpie
- Pencil (HB or lighter)
- White eraser
- Clear matte sealant spray (optional)
- Tracing paper (optional)
Step 1: Planning and Surface Prep
-
Clean the surface:
Before you begin, ensure your terra cotta pot is entirely free of dirt and dust. If you’ve washed it, let it dry for at least 24 hours to ensure no moisture is trapped in the clay. -
Identify the ‘face’ side:
Rotate your pot to find the smoothest side. Terra cotta often has small nicks or imperfections; you want your drawing surface to be as consistent as possible so the marker doesn’t skip. -
Determine placement:
Look at the pot straight on. The ideal spot for the face is roughly centered vertically on the main body of the pot, perhaps slightly lower than the exact center to make it look ‘cute’. -
Sketch the eyes lightly:
Using your pencil very lightly, draw two small circles for the eyes. Space them wider apart than you think—this wide-set placement creates a sweeter, more innocent expression. -
Sketch the smile:
Draw the curve of the smile below the eyes. Aim for a wide, shallow ‘U’ shape rather than a deep semi-circle. The smile should extend just past the outer edges of the eyes on both sides. -
Refine the smile tips:
Add tiny little upward ticks or subtle deepening at the very ends of the smile line to give it character. -
Check symmetry:
Step back and look at your pencil sketch from a distance. Verify that the eyes are level with each other and the smile isn’t tilting to one side.
Step 2: Inking the Design
-
Prime the marker:
Shake your black paint marker well and press the tip onto a piece of scrap paper until the ink flows smoothly and black, not grey. -
Outline the first eye:
Carefully trace the pencil circle of the left eye. Keep your hand steady by resting your pinky finger against the pot rim for stability. -
Fill the eye:
Color in the circle completely. I find it helps to work in a small spiral from the center outward to get even coverage without over-saturating the clay. -
Complete the second eye:
Repeat the process for the right eye, ensuring it matches the size of the first one. -
Trace the smile center:
Starting from the bottom center of the smile curve, trace outwards to the left. Pull the marker towards you rather than pushing it away for a cleaner line. -
Finish the smile curve:
Return to the center and trace outwards to the right, connecting the line smoothly so there isn’t a bump in the middle. -
Add line weight:
The smile line should be slightly thinner than the diameter of the eyes. If your line looks too wispy, go over it one more time very slowly to thicken it slightly. -
Let the ink set:
Allow the paint marker to dry completely for about 15 to 20 minutes. Terra cotta is porous and absorbs ink quickly, but surface pigment needs time to cure. -
Erase guidelines:
Once you are certain the black ink is bone dry, gently use your white eraser to remove any visible pencil marks around the edges of your drawing. -
Optional sealing:
If you plan to keep this pot outdoors, give the painted area a light misting of matte clear sealant. For indoor pots, the raw clay look is often nicer without sealant.
Use an Oil-Based Pen
Water-based markers will fade or bleed when you water the plant. An oil-based paint pen (like a classic Sharpie paint marker) bonds much better with porous clay.
Uneven Ink Flow?
If the clay is drinking up the ink and looking gray, wait for the first layer to dry completely, then dot a second layer on top. Don’t scrub while wet.
Pop your favorite succulent inside and enjoy the friendly new face on your windowsill


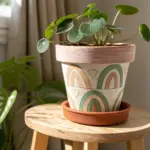
Rosy Cheeks and Freckles
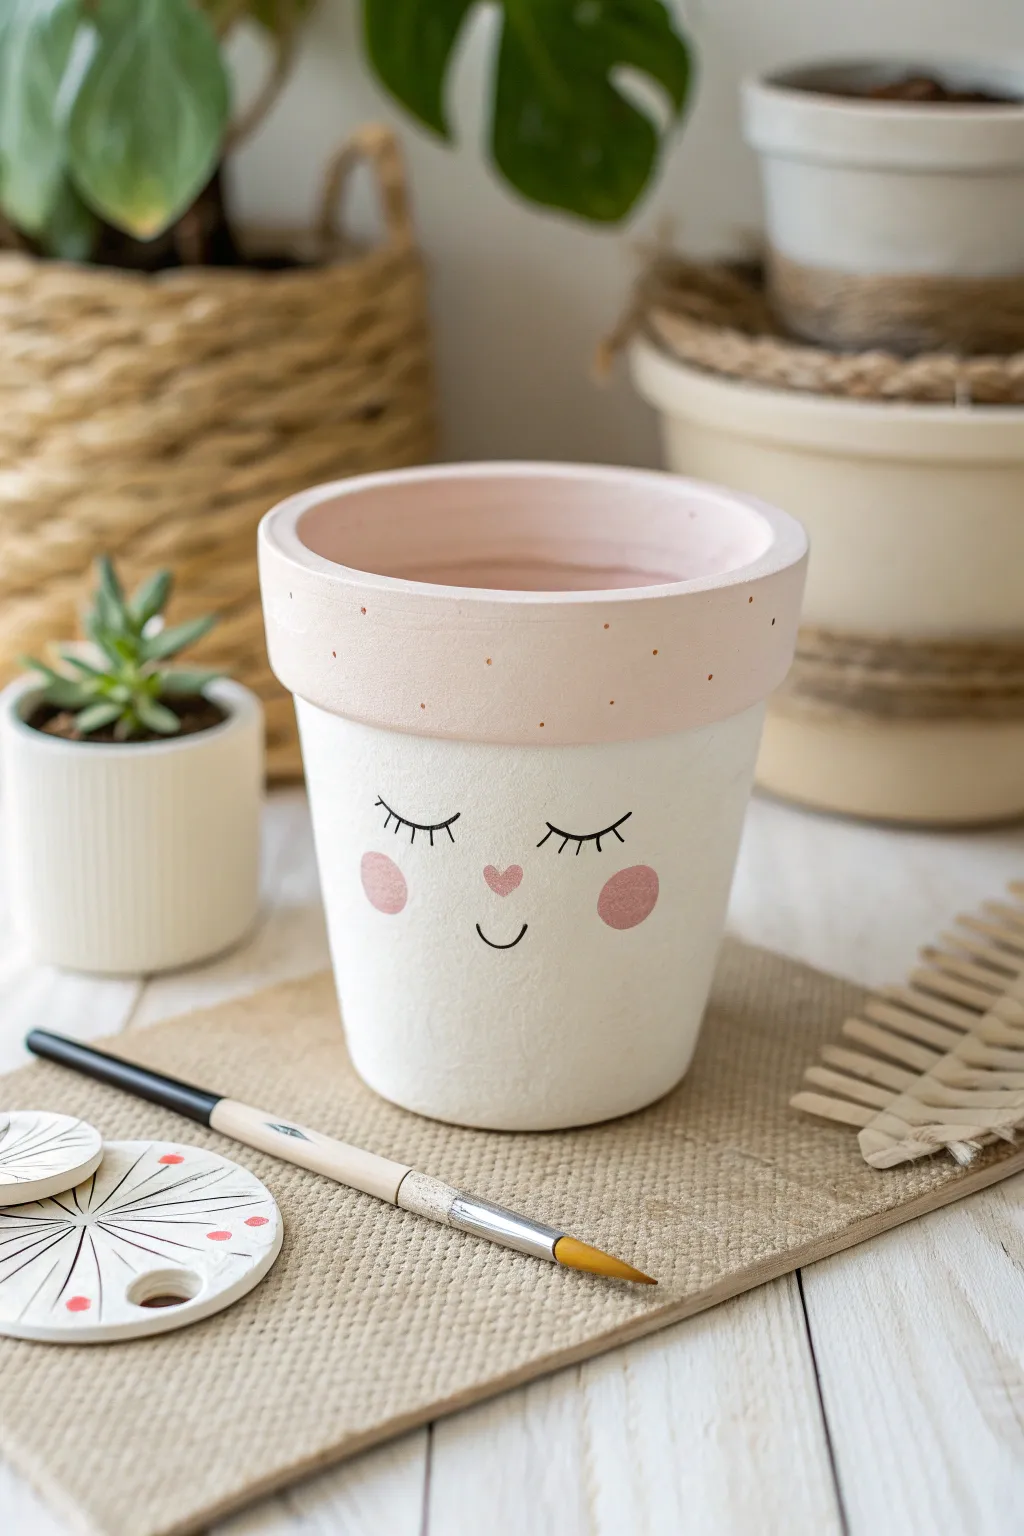
Transform a plain terracotta pot into this serene, sleeping character with soft rosy cheeks and delicate freckles. The pastel pink rim adds a gentle touch, making it the perfect cozy home for your favorite succulent or small houseplant.
Step-by-Step
Materials
- Terracotta pot (4-6 inch standard size)
- White acrylic paint (matte finish)
- Pastel pink acrylic paint
- Black acrylic paint pen (fine tip) or liner brush
- Small round sponge brushes (or a dabber)
- Flat paintbrush (medium size)
- Thin detail paintbrush
- Paper plate or palette
- Small bowl of water
- Paper towels
- Matte sealant spray (optional)
Step 1: Base Coat Preparation
-
Clean the surface:
Before starting, ensure your terracotta pot is completely clean and dry. Wipe away any dust or debris with a damp cloth and let it air dry so the paint adheres properly. -
Paint the body:
Using your flat medium brush, apply a layer of white acrylic paint to the main body of the pot, stopping just under the rim. Don’t worry if the first coat looks streaky. -
Dry and repeat:
Allow the first layer of white to dry for about 15-20 minutes. Apply a second or third coat until you have a solid, opaque white finish without any clay showing through. -
Paint the rim:
While the body dries, use a clean brush to paint the upper rim with your pastel pink paint. Carefully follow the line where the rim meets the body to keep the edge crisp. -
Paint the interior:
Paint the inside of the rim with the same pastel pink, going down about an inch into the pot so the clay color doesn’t show when soil is added.
Paint Pen Won’t Flow?
If your black paint pen is skipping over the bumps in the terracotta, press the tip on a scrap paper to get the ink flowing again before returning to the pot.
Step 2: Adding the Details
-
Create the cheeks:
Dip a round sponge dabber lightly into a slightly darker shade of pink (or mix a little red into your pastel pink). Blot excess paint on a paper towel first. -
Stamp the blush:
Gently press the sponge onto the lower half of the white area to create two soft, round rosy cheeks. Space them widely enough to leave room for the mouth. -
Paint the heart nose:
Using a small detail brush or the tip of a toothpick, paint a tiny pink heart right in the center between the cheeks, positioned slightly higher than the center line. -
Draw the eyes:
Once the base is bone dry, use a fine-tip black paint pen to draw two curved arches for closed eyes. Position them centered above the cheeks. -
Add lashes:
Carefully draw three small, straight lashes coming off the outer edge of each eye arch. Keep your hand steady and light for thin lines. -
Draw the smile:
Draw a small, simple ‘U’ shape directly below the heart nose to create a gentle smile. -
Add rim details:
Take a toothpick or the very tip of a small brush dipped in a darker brownish-pink or terracotta color. Dot tiny, random speckles all around the pink rim to mimic freckles or texture.
Get Perfect Cheeks
Don’t have a sponge dabber? The eraser end of a standard pencil makes a perfect stamp for small, circular blush spots. Just dip and stamp.
Step 3: Finishing Touches
-
Final drying:
Let all the facial details dry completely for at least an hour to prevent any smearing during the sealing process. -
Seal the work:
To protect your artwork from water damage when you water your plant, lightly mist the entire pot with a matte sealant spray. -
Planting:
Once the sealer is dry and no longer tacky, fill your cute new pot with soil and your chosen plant.
Place your adorable new pot on a sunny windowsill where its sweet face can brighten your morning

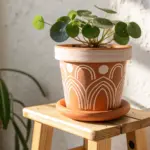
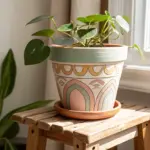
Cat Face With Whiskers
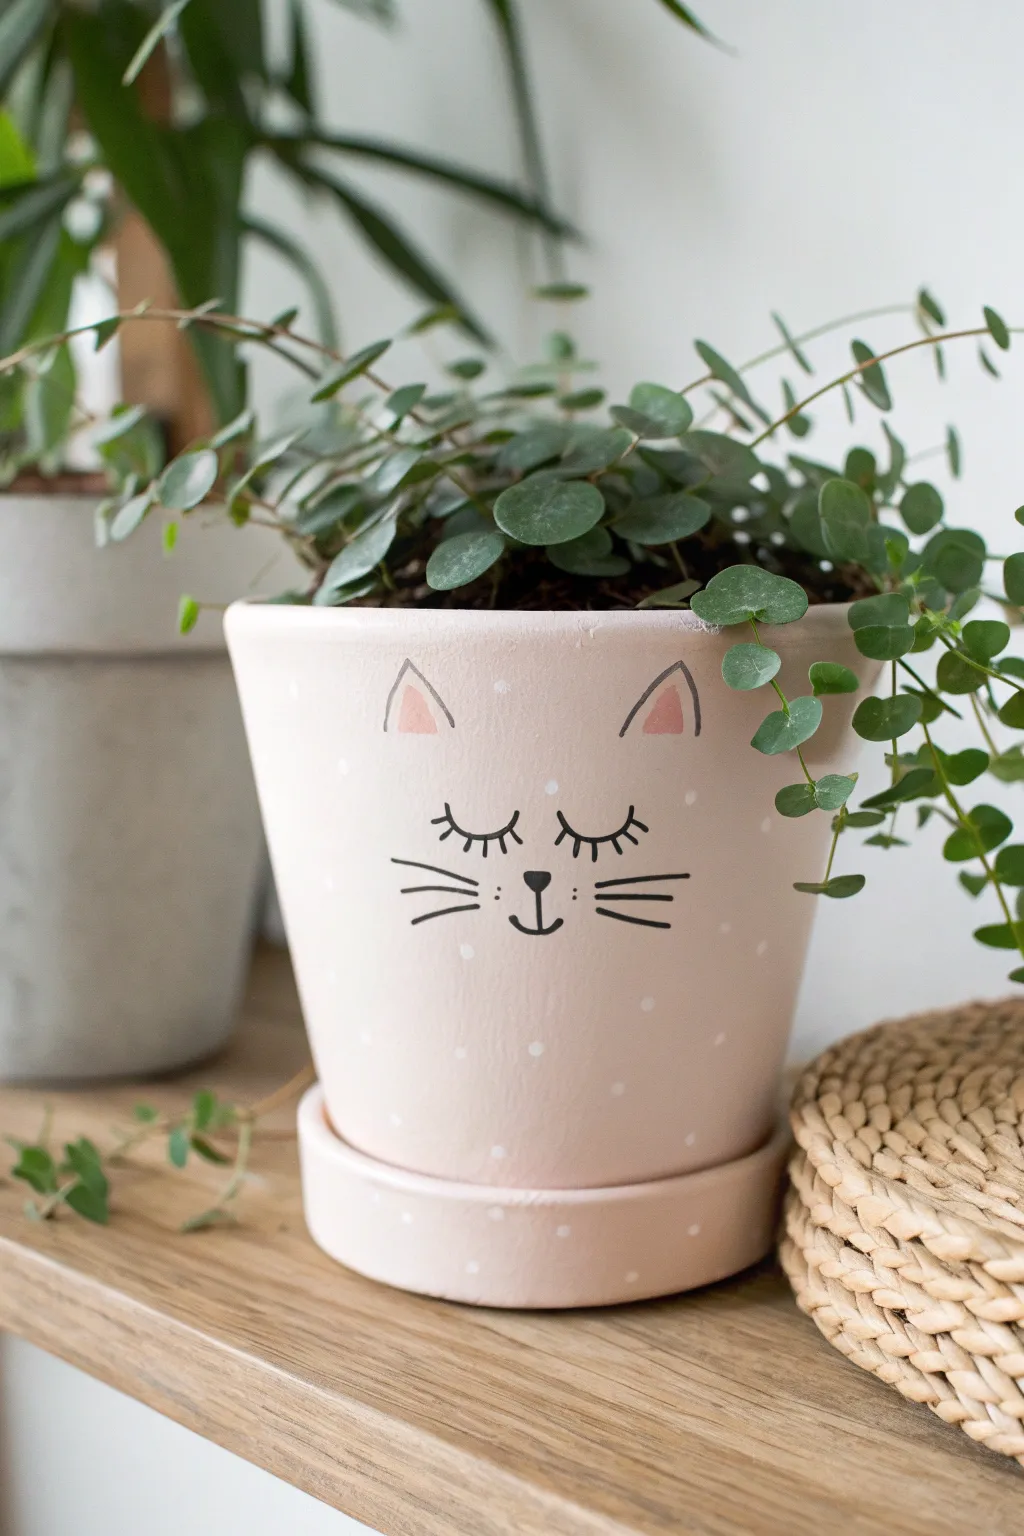
Transform a plain terracotta pot into a charming feline companion featuring a soft pastel pink base and a sweet, slumbering expression. This delightful project combines simple linework with delicate polka dots for a whimsical touch that brightens any shelf.
Detailed Instructions
Materials
- Terracotta pot and matching saucer (clean and dry)
- Pastel pink acrylic paint (matte finish recommended)
- White acrylic paint
- Black acrylic paint or black fine-tip paint pen
- Light coral or darker pink acrylic paint (for ears)
- Wide flat paintbrush (approx. 1 inch)
- Small round detail brush (size 0 or 1)
- Toothpick or dotting tool
- Water cup and paper towels
- Palette or small plate
- Pencil
- Clear acrylic sealer spray (matte or satin)
Step 1: Base Coat Preparation
-
Clean and Dry:
Ensure your terracotta pot is completely free of dust and dirt. Wipe it down with a damp cloth and let it dry thoroughly before starting, as moisture can trap bubbles under the paint. -
Mix Your Pink:
Pour your pastel pink acrylic paint onto the palette. If it feels too thick, add a tiny drop of water to help it spread evenly without streaking. -
First Coat:
Using the wide flat brush, apply a smooth, even layer of pink paint over the entire exterior of the pot and the saucer. Don’t forget to paint the top rim of the pot for a cohesive look. -
Dry and Repeat:
Let the first coat dry completely (about 15-20 minutes). Terracotta is porous and will soak up the first layer. Apply a second or third coat until you have a solid, opaque pastel pink finish. -
Inner Rim:
Paint just inside the top rim of the pot, descending about one inch down. This ensures the clay color won’t show once soil is added.
Clean Lines Secret
Use a paint pen instead of a brush for the black line work (whiskers and eyes). It offers much better control and prevents shaky lines.
Step 2: Painting the Face
-
Sketch the Features:
Once the base coat is bone dry, lightly sketch the cat face design with a pencil. Draw two triangles for ears near the top rim, two curved sleepy eyes in the middle, a small nose, and whiskers. -
Outline the Ears:
Using your fine detail brush or a black paint pen, carefully trace the outer triangle shape for the ears. Keep your lines thin and confident. -
Fill the Ears:
Dip your clean detail brush into the light coral or darker pink paint. Carefully fill in a smaller triangle shape inside your black outlines to create the inner ear. It doesn’t need a black outline itself; the color contrast is enough. -
Draw the Eyes:
With the black paint or pen, draw two downward-curving arcs for the closed eyelids. Space them evenly apart, centered below the ears. -
Add Lashes:
Add three small, straight lashes extending upwards from the top center of each eyelid curve. This gives the sleepy expression its sweet character. -
Nose and Mouth:
Paint a small, inverted soft triangle or heart shape for the nose centered below the eyes. Draw a short vertical line down from the nose, curving outward slightly at the bottom to hint at a mouth. -
Whiskers:
Draw three straight horizontal lines on each cheek area for the whiskers. I like to make the middle whisker slightly longer than the top and bottom ones for a more natural look. -
Add Freckles:
Place three tiny black dots on each side of the nose, just between the nose and the whiskers, to act as whisker pads.
Level Up: Tail Trick
Paint a curvy cat tail on the back of the pot! It adds a surprising 360-degree detail that makes the painted planter fun from every angle.
Step 3: Polka Dots and Finish
-
Prepare White Paint:
Squeeze a small amount of white acrylic paint onto your palette. It should be creamy but not too runny. -
Create the Dots:
Dip the tip of a toothpick, the back end of a paintbrush handle, or a dotting tool into the white paint. Gently press it onto the pot to create small, uniform polka dots. -
Randomize Pattern:
Scatter the white dots randomly around the cat face and on the sides and back of the pot. Also, add scattered dots to the rim of the saucer to tie the set together. -
Final Dry:
Allow all the detail work to dry completely for at least an hour. Be careful not to smudge the fresh paint while handling the pot. -
Seal the Deal:
Take the pot and saucer to a well-ventilated area. Spray them with a clear acrylic sealer (matte or satin) to protect your artwork from water damage and soil stains.
Pop in your favorite leafy green plant and enjoy your adorable new windowsill friend


Panda Face in Black and White

Transform a plain terracotta planter into an adorable panda pal for your favorite houseplants. This black-and-white design features a sweet smiling face on the base and playful polka dots along the rim, making it a perfect beginner-friendly painting project.
Step-by-Step Guide
Materials
- Terracotta pot (standard size with rim)
- White acrylic paint
- Black acrylic paint
- Light pink acrylic paint
- Wide flat paintbrush
- Small round paintbrush
- Fine liner brush
- Clear acrylic sealer (matte or gloss)
- Pencil
- Water cup and paper towels
Step 1: Base Coat Prep
-
Clean the surface:
Before you begin, wipe down your terracotta pot with a damp cloth to remove any dust or debris, then let it dry completely to ensure the paint adheres well. -
Apply the first white layer:
Using your wide flat brush, paint the entire exterior of the pot white. Don’t worry if the terracotta color shows through slightly on this first pass. -
Paint the rim:
Continue painting the white base coat over the rim and just inside the top edge of the pot for a clean, finished look. -
Let it dry:
Allow the first coat to dry completely. Acrylics on terracotta usually dry quickly. -
Apply the second coat:
Add a second layer of white paint to get a solid, opaque coverage. I usually find that two or three coats are needed to completely hide the orange clay tone.
Step 2: Sketching the Design
-
Outline the panda eyes:
Once the white paint is bone dry, use a pencil to lightly sketch two large, slanted ovals for the panda’s eye patches on the main body of the pot. -
Add facial features:
Sketch a small oval nose between and slightly below the eyes, and draw a simple ‘w’ shape for the mouth using light pencil strokes. -
Plan the rim pattern:
Lightly mark even spacing around the rim where you want your black polka dots to go. -
Sketch the mini-face:
In the center of the rim, right above the main panda face, draw a tiny nose and mouth. This adds a whimsical touch where the rim becomes a ‘hat’ or secondary character.
Circle Secrets
Struggling to paint perfect circles for the polka dots? Use a round sponge dauber or even a wine cork dipped in black paint to stamp perfect circles instantly.
Step 3: Painting details
-
Fill the eye patches:
Using a small round brush and black paint, carefully fill in the large oval eye patches you sketched. Work slowly around the edges to keep the curves smooth. -
Add the nose:
Paint the main central nose oval with solid black paint. -
Paint the mouth:
Switch to your fine liner brush. Carefully trace over your pencil lines for the mouth, connecting it to the bottom of the nose with a small vertical line. -
Create the smiling eyes:
Once the black eye patches are fully dry, use the fine liner brush and white paint to add small, curved arches inside the black patches to represent closed, smiling eyes. -
Add rosy cheeks:
Dip a round brush into the light pink paint. Dab two soft, round circles just below the outer edges of the eye patches to give the panda a blushing look. -
Paint the rim dots:
Using the round brush and black paint, fill in the circles on the rim to create bold polka dots. -
Detail the rim face:
Use your fine liner brush to paint the tiny nose and mouth on the rim in black, nestled between two of the polka dots.
Bamboo Snack
Enhance the theme by painting a small green bamboo shoot coming out of the panda’s mouth, or hot glue some artificial leaves to the side for a 3D effect.
Step 4: Finishing Touches
-
Check for touch-ups:
Look over the pot for any smudges or thin spots. You can use a bit of white paint to clean up the edges of the black polka dots or eye patches if needed. -
Apply sealer:
Once all paint is completely cured (wait a few hours or overnight), apply a coat of clear acrylic sealer to protect your artwork from water damage and scratches.
Now your charming panda pot is ready to be the new home for a succulent or small leafy plant
BRUSH GUIDE
The Right Brush for Every Stroke
From clean lines to bold texture — master brush choice, stroke control, and essential techniques.
Explore the Full Guide
Bunny Pot With Long Ears
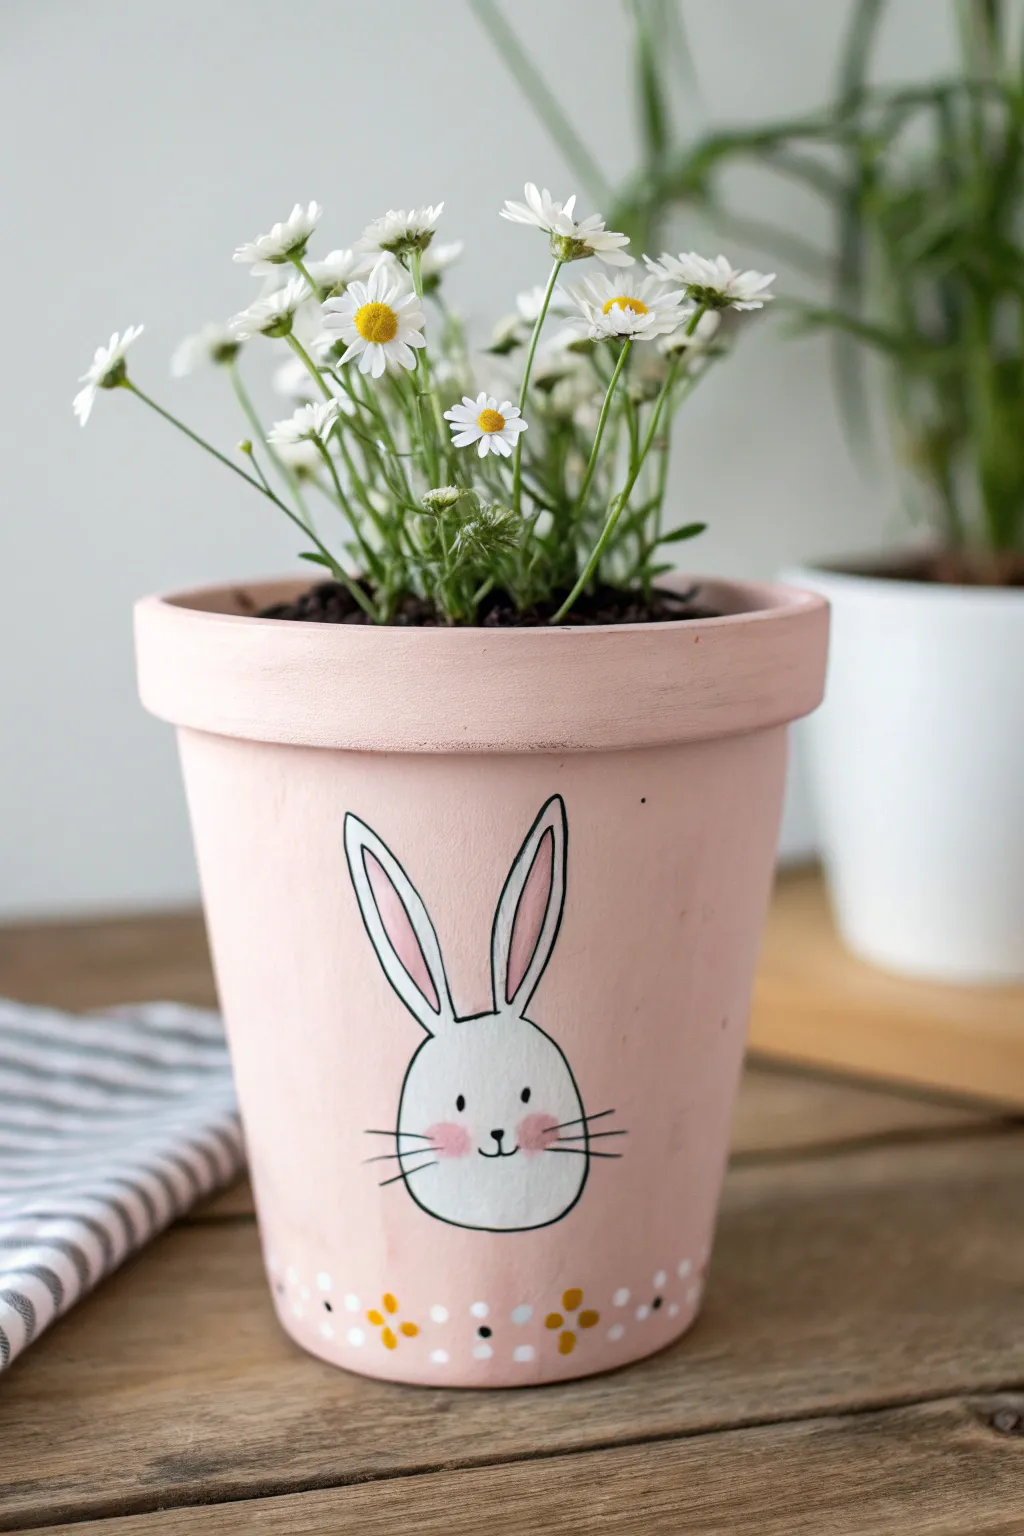
Bring a touch of springtime charm to your indoor garden with this adorable hand-painted flower pot. Featuring a sweet bunny face with rosy cheeks and long ears against a soft pastel pink background, this project is perfect for beginners looking to brighten up their plant display.
Step-by-Step Tutorial
Materials
- Terracotta pot (4-6 inch diameter)
- White acrylic paint
- Soft pink acrylic paint (pastel shade)
- Black acrylic paint or black paint marker
- Mustard yellow acrylic paint
- Wide flat paintbrush
- Small round detail brush
- Fine liner brush
- Pencil with eraser
- Water cup and paper towels
- Sealer or outdoor varnish (optional)
Step 1: Base Coat Preparation
-
Clean the surface:
Before you begin painting, ensure your terracotta pot is completely clean and dry. Wipe away any dust or residue with a damp cloth and let it air dry for a few minutes to ensure the paint adheres smoothly. -
Apply the background color:
Using a wide flat paintbrush, apply an even coat of soft pink acrylic paint over the entire exterior of the pot, including the rim. Don’t forget to paint just inside the top rim about an inch down so the terracotta doesn’t show when filled with soil. -
Add a second coat:
Terracotta is porous and tends to soak up the first layer of paint. Once the first coat is dry to the touch, apply a second layer of pink to achieve a solid, opaque finish without streaks.
Step 2: Painting the Bunny
-
Sketch the outline:
Lightly sketch the bunny’s face using a pencil on the front of the pot. Draw a rounded oval for the head lower down on the pot body, and extend two long, pointed ears upward that reach almost to the top edge of the rim. -
Fill the silhouette:
Take a small round brush and fill in the entire bunny shape—ears and head—with white acrylic paint. You will likely need two coats here as well to cover the pink background completely. -
Paint the inner ears:
Mix a tiny amount of your pink base paint with a drop of white to create a lighter pink shade. Use a small detail brush to paint the inner shapes of the bunny ears, leaving a crisp white border around the edges. -
Outline the shape:
Once the white paint is fully dry, use a fine liner brush tailored for detail work (or a black paint marker for easier control) to trace the outline of the head and ears with a thin black line. -
Add facial features:
Using the same black paint or marker, draw two small dots for eyes and a tiny, rounded triangle for the nose in the center of the face. Add a small ‘w’ shape beneath the nose to form the mouth. -
Give it whiskers:
Flick your wrist gently to paint three thin whiskers extending outward from each cheek. Try to keep these lines light and energetic rather than stiff. -
Blush the cheeks:
Dip a dry brush or even your fingertip into a small amount of pink paint. Dab off the excess on a paper towel, then gently stamp two round rosy cheeks onto the bunny face just below the eyes.
Use a Paint Marker
Struggling with the thin black outline? Swap the liner brush for a waterproof black acrylic paint pen. It gives you the control of drawing with a marker.
Step 3: Decorative Details
-
Create the bottom border:
Along the very bottom edge of the pot, paint a series of small white dots spaced evenly apart. You can use the handle end of a paintbrush dipped in paint to make perfectly round dots. -
Add floral accents:
In the spaces between some of your white dots, create simple flower shapes using mustard yellow paint. Paint a central dot and four small petals around it to mimic tiny blossoms. -
Seal the artwork:
If you plan to keep a live plant in this pot, apply a coat of clear acrylic sealer or varnish over the entire painted surface. This protects your artwork from water damage when you water your plant.
Streaky White Paint?
White paint over a colored base often looks translucent. Don’t overload the brush; instead, paint 3 thin layers, letting each dry fully, for solid coverage.
Pop in some daisies or fresh herbs and enjoy your adorable new planter
Ladybug Spots and Tiny Wings
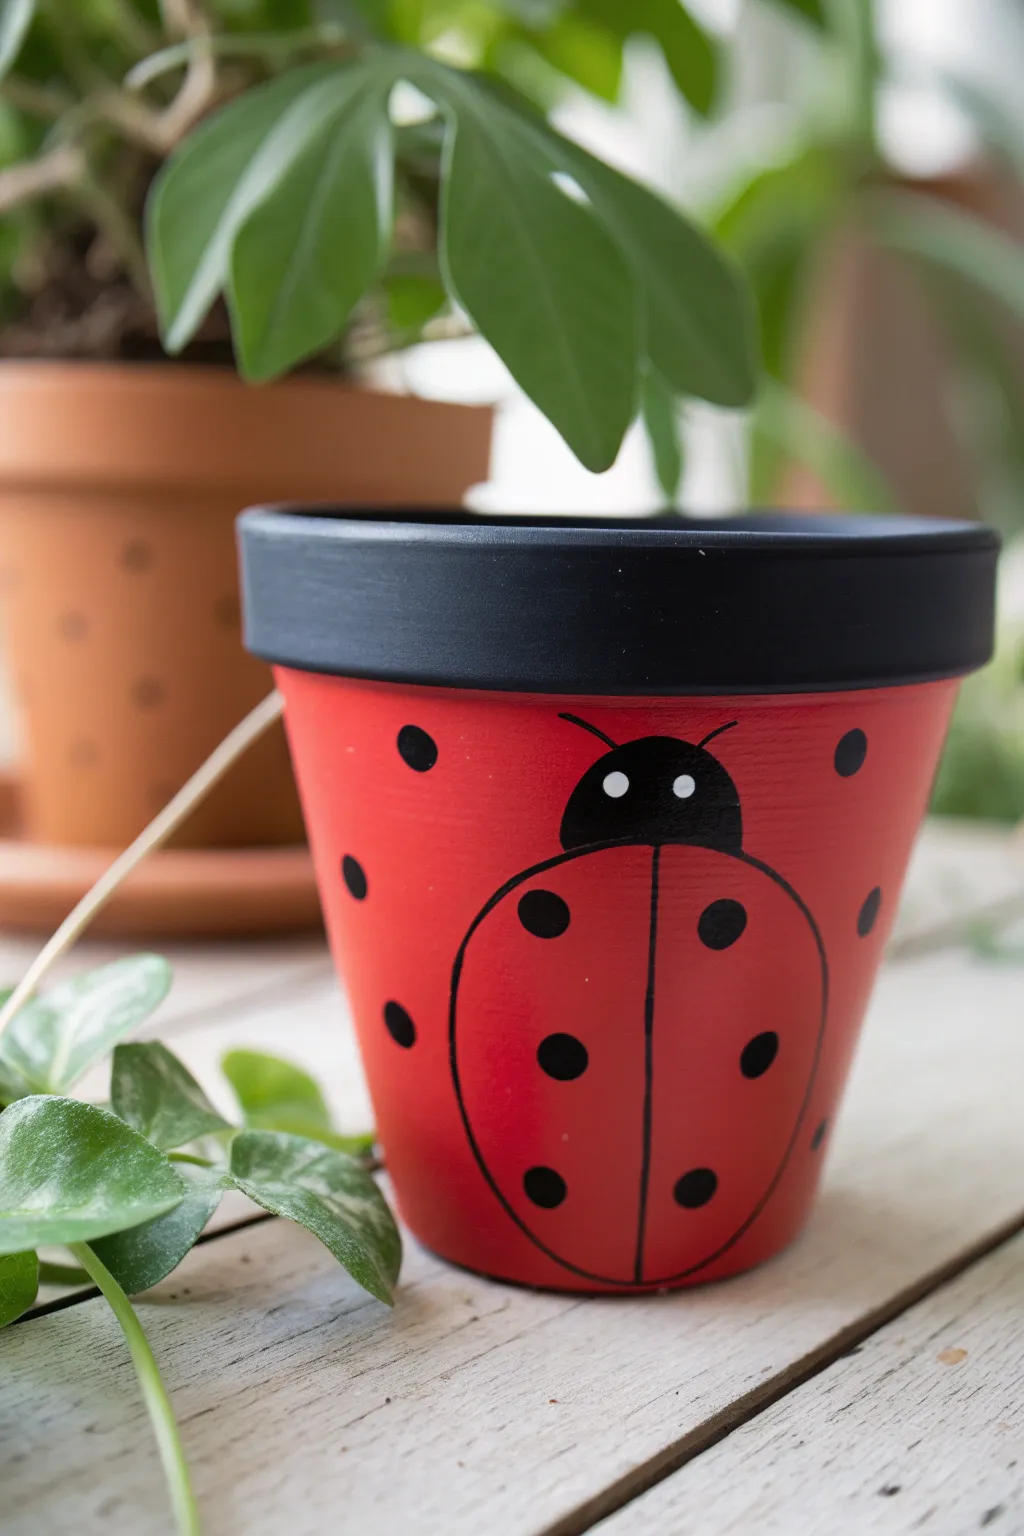
Transform a plain terracotta pot into this cheerful ladybug character that’s guaranteed to brighten up any windowsill. With its bold red base and crisp black rim, this project combines a classic garden motif with a clean, graphic style.
Step-by-Step
Materials
- Clean terracotta pot (standard size)
- Red acrylic paint (bright cherry or cardinal red)
- Black acrylic paint
- White acrylic paint
- Medium flat paintbrush (for base coats)
- Small round paintbrush (for details)
- Pencil
- Water cup and paper towels
- Matte or satin clear sealant spray (optional)
Step 1: Setting the Scene
-
Prep the pot:
Before you unscrew any paint caps, ensure your terracotta pot is clean, dry, and free of sticker residue or dust which can mess with paint adhesion. -
Paint the rim:
Start with your medium flat brush and the black acrylic paint. Carefully paint the entire upper rim of the pot, inside and out. -
Define the edge:
Pay special attention to the underside of the lip where the rim meets the pot body to get a crisp line. -
Paint the body red:
Rinse your brush thoroughly (or grab a fresh one) and switch to the bright red paint. Cover the entire body of the pot below the rim. -
Apply a second coat:
Terracotta is thirsty and absorbs the first layer quickly. Once the first coat is dry to the touch, apply a second coat of red to get that solid, opaque look shown in the photo.
Uneven Circles?
If brush-painted dots look messy, use a foam pouncer or a Q-tip dipped in paint. Press straight down and lift straight up for a crisp edge.
Step 2: The Main Ladybug
-
Sketch the outline:
Using a pencil very lightly, draw a large oval shape on the front of the pot for the ladybug’s body. Add a smaller semi-circle on top for the head. -
Block in the head:
Use your small round brush and black paint to fill in the head shape completely. -
Add the antennae:
While you are working on the head, carefully flick two thin, curved lines coming off the top for the antennae. -
Outline the wings:
Paint a thin black outline around the large oval body shape you sketched earlier. -
Create the center line:
Draw a vertical line straight down the middle of the oval to separate the wings, thickening it slightly as you go. -
Add wing spots:
Dip the back end of your paintbrush handle into black paint to stamp perfect circles onto the red wings—three or four per side usually looks balanced. -
Paint the eyes:
Wait for the black head section to be completely dry. Then, using a tiny detail brush or a toothpick, add two small white dots for the eyes.
Paint Tip
Terracotta absorbs moisture from soil, which bubbles paint from the inside out. Seal the INSIDE of the pot before painting the outside to prevent peeling.
Step 3: Pattern and Finish
-
Dot the background:
To tie the whole design together, add scattered black polka dots around the rest of the red pot surface, outside the main ladybug drawing. -
Keep it random:
I prefer to vary the spacing of these background dots slightly so it doesn’t look too grid-like. -
Let it cure:
Allow the entire pot to dry for at least 24 hours to ensure all layers are set hard. -
Seal (optional):
If you plan to use this outdoors or with real plants that need watering, spray the entire pot with a clear acrylic sealer to protect your artwork from moisture.
Now you have a charming little beetle ready to hold your favorite succulents or herbs

PENCIL GUIDE
Understanding Pencil Grades from H to B
From first sketch to finished drawing — learn pencil grades, line control, and shading techniques.
Explore the Full Guide
Bumblebee Stripes Pot
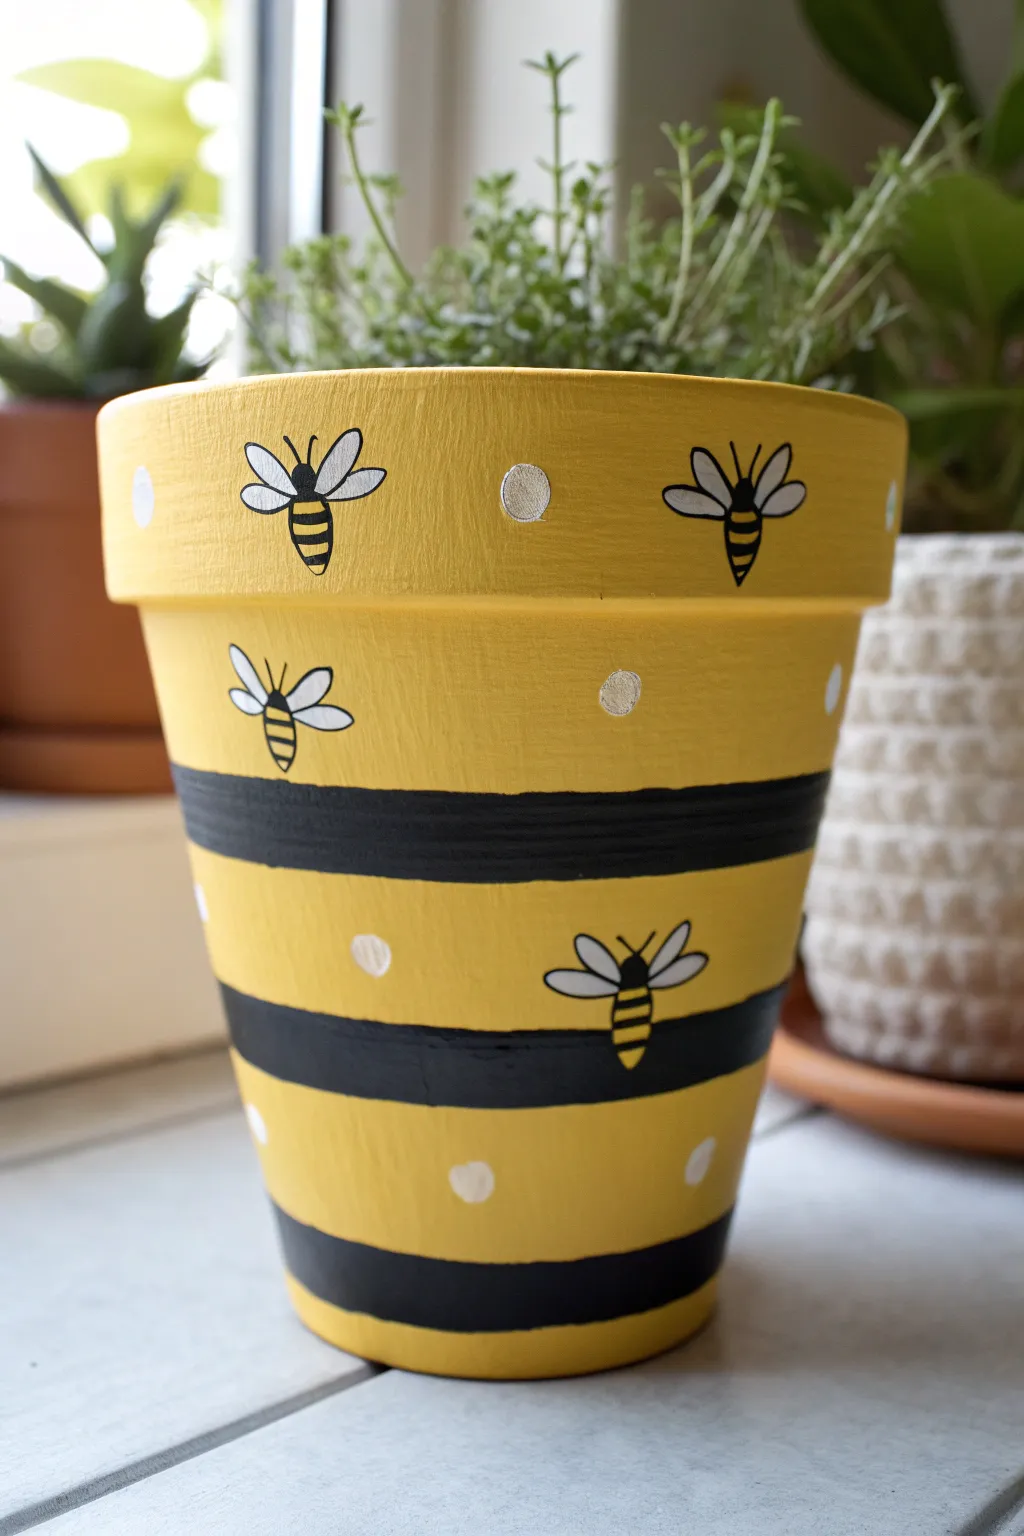
Transform a plain terra cotta pot into a cheerful home for your plants with this buzzing bumblebee design. Featuring bold black stripes, whimsical flying bees, and delicate white polka dots, this project brings sunny garden vibes indoors.
How-To Guide
Materials
- Terra cotta pot (any size)
- Acrylic paint (bright yellow, black, white)
- Wide flat paintbrush
- Medium round paintbrush
- Fine detail brush (liner brush)
- Pencil and eraser
- Painter’s tape or masking tape (optional)
- Water cup and paper towels
- Clear acrylic sealer spray (matte or gloss)
Step 1: Base Preparation
-
Clean the surface:
Before you begin, wipe down your terra cotta pot with a damp cloth to remove any dust or debris. Let it dry completely so the paint adheres properly. -
Apply the yellow base:
Load your wide flat brush with bright yellow acrylic paint. Cover the entire exterior of the pot, including the top rim. You will likely need 2-3 coats to get a solid, opaque yellow without streaks. -
Paint the inner rim:
Don’t forget to paint the top 1-2 an inches of the inside of the pot. This ensures the raw clay won’t show once soil and plants are added. -
Dry thoroughly:
Allow the yellow base coat to dry completely before moving on to avoid muddying your colors later.
Bee Wing Transparency
Mix a tiny drop of water into your white paint for the wings. This makes the paint slightly translucent, giving the wings a delicate, airy appearance.
Step 2: Stripes and Details
-
Mark your stripes:
Lightly sketch horizontal lines around the pot with a pencil to guide your black stripes. Looking at the design, plan for a thick stripe just below the rim area, a medium stripe below that, and a thinner stripe near the base. -
Paint the black bands:
Using a steady hand and a medium round or flat brush, fill in your pencil guides with black paint. If you prefer crisp lines, you can use painter’s tape, but freehand painting gives it a charming, organic look. -
Outline the bee bodies:
In the yellow spaces between stripes and on the rim, use a pencil to lightly sketch small oval shapes for the bee bodies. Orient them in different directions like they are buzzing around. -
Paint bee stripes:
With your fine detail brush and black paint, create the bee bodies by painting alternating black and yellow bands. Since the background is already yellow, you just need to paint the black stripes of the bee. -
Add the wings:
Using white paint and a small round brush, paint two teardrop shapes on either side of the bee’s body for the wings. I usually do this in a single stroke, pressing down and lifting up to create the shape. -
Outline wings and stinger:
Once the white wings are dry, use your finest liner brush and black paint to carefully outline the wings. Add a tiny black triangle at the bottom of the body for a stinger and two small antennae at the top.
Step 3: Finishing Touches
-
Add polka dots:
Dip the handle end of a paintbrush into white paint to create perfect polka dots. Stamp these randomly in the empty yellow spaces around the bees. -
Paint larger dots:
For the larger, rougher white circles seen on the rim, use a small brush to dab on white paint. These don’t need to be perfect circles; a slightly textured look adds character. -
Final dry:
Let all your detailed work dry for several hours. Acrylics dry fast, but thicker dots can take a bit longer. -
Seal the pot:
Take the pot to a well-ventilated area and spray it with a clear acrylic sealer. This protects your artwork from water damage when you water your plants.
Fixing Wobbly Stripes
If your black stripes get uneven, let them dry fully. Then, use a small brush with your base yellow paint to touch up the edges and straighten the lines.
Now your bumblebee pot is ready to hold your favorite succulents or herbs and brighten up any windowsill
Watermelon Slice Pot
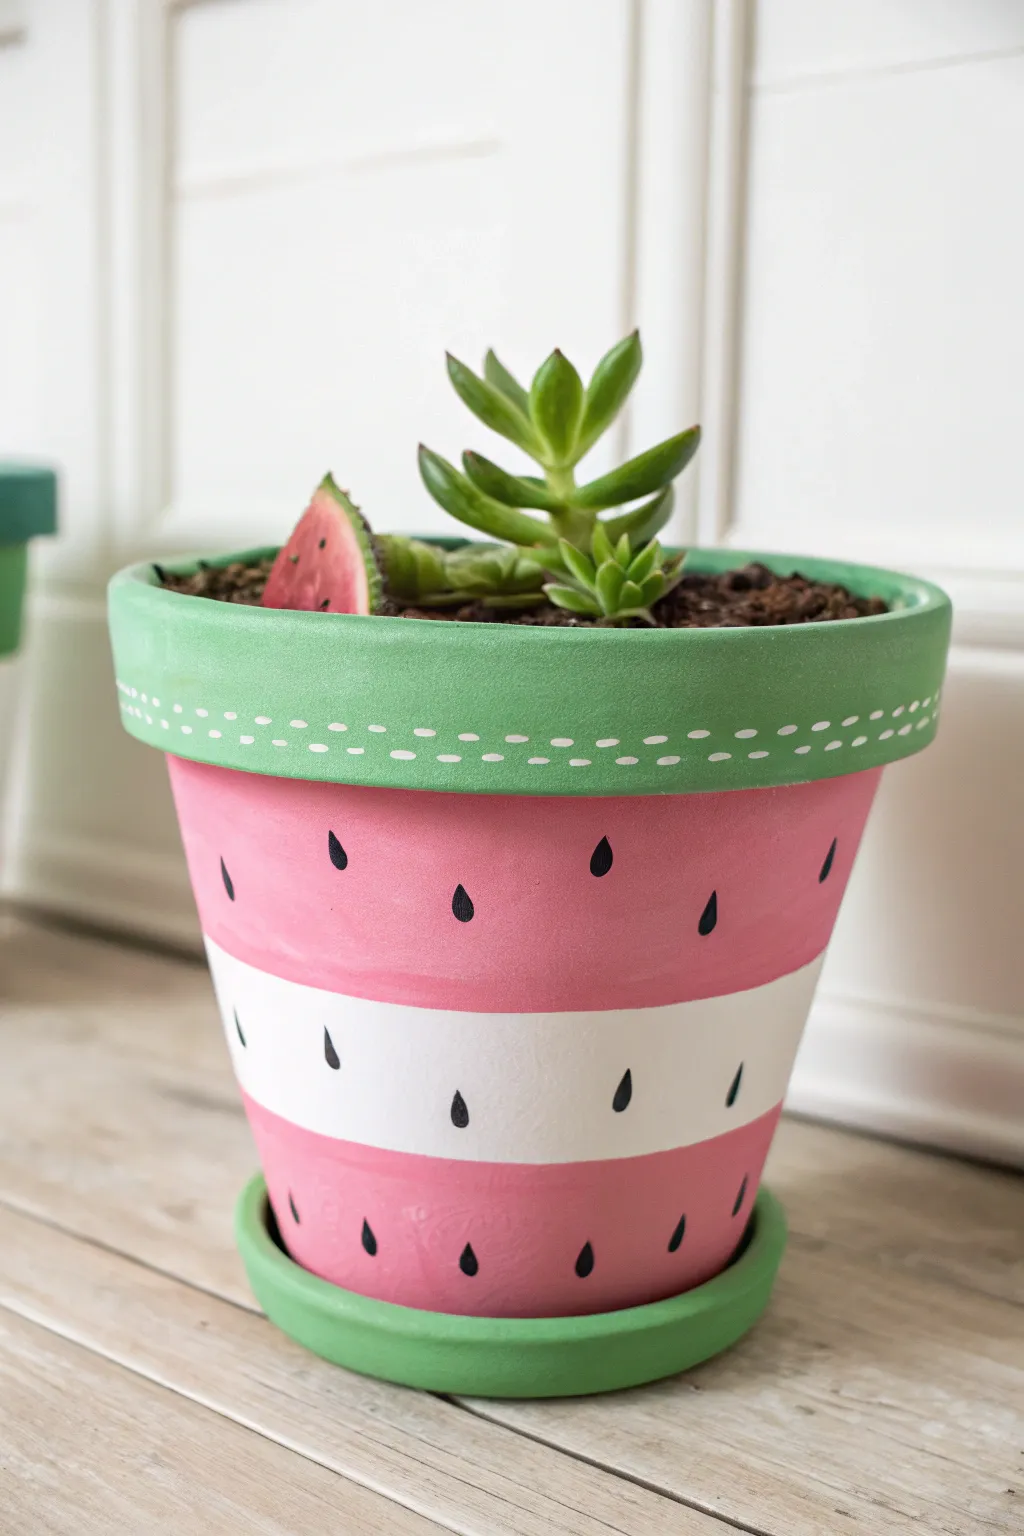
Bring the refreshing vibes of summer indoors with this vibrant watermelon-themed planter. It features bold pink and white stripes mimicking the fruit’s flesh, complete with a rind-green rim and charming scattered seeds.
Step-by-Step Tutorial
Materials
- Terra cotta pot (standard size)
- Terra cotta saucer
- Acrylic craft paint: Bright pink (watermelon flesh)
- Acrylic craft paint: White
- Acrylic craft paint: Leaf green
- Acrylic craft paint: Black
- Flat paintbrush (medium width)
- Small round detail brush
- Very fine liner brush or white paint pen
- Painter’s tape or masking tape
- Spray sealer or varnish (matte or satin finish)
- Pencil
Step 1: Preparation & Base Coat
-
Clean the pot:
Before starting, ensure your terra cotta pot is free of dust and stickers. Wipe it down with a damp cloth and let it dry completely. -
Prime with white:
Paint the entire exterior of the pot and the saucer with a coat of white acrylic paint. This primer layer helps the top colors pop, especially the pink and green. -
Dry the base:
Allow the white base coat to dry fully. If the terra cotta color is still showing through, apply a second coat for opacity.
Bleeding Lines?
If paint bleeds under your tape, let it dry completely. Then, use a flat brush with stiff bristles to scrape away the excess gently before touching up with white.
Step 2: Painting the Fruit Flesh
-
Tape the stripe:
To create the crisp white band seen in the photo, wrap a piece of painter’s tape horizontally around the middle of the pot. Press the edges down firmly to prevent leaks. -
Paint the bottom pink:
Using your medium flat brush, paint the area below the tape with your bright pink watermelon shade. Bring the paint all the way down to the bottom edge. -
Paint the top pink:
Paint the section directly above the tape pink as well, stopping just before you reach the thick rim of the pot. -
Let it dry:
Allow the pink paint to dry to the touch to avoid smudging during the next steps. -
Remove the tape:
Carefully peel off the painter’s tape. You should now have a clean white stripe sandwiched between two pink sections. -
Touch up edges:
If any pink bled under the tape, use a small brush and white paint to clean up the lines for a sharp finish.
Step 3: Adding the Rind & Seeds
-
Paint the rim:
Paint the thick top rim of the pot with your leaf green acrylic paint. Be careful where the green meets the pink body to keep a neat line. -
Paint the saucer:
Coat the entire outer edge and rim of the saucer in the same leaf green to complete the rind look. -
Add ‘stitches’:
Once the green rim is dry, use a very fine liner brush or a white paint pen to draw small dashed lines (stitches) all the way around the center of the green rim. -
Draft the seeds:
Lightly sketch small teardrop shapes with a pencil onto the pink and white sections. Staggering them randomly typically looks best. -
Paint the seeds:
Fill in your pencil sketches using black paint and a small round detail brush. Remember, teardrops are round at the bottom and pointy at the top.
Add a Bite Mark
Before painting, use a file or sandpaper to create a small notch in the rim. Paint the exposed area pink to make it look like someone took a bite out of the melon.
Step 4: Finishing Touches
-
Paint the inner rim:
For a polished look, paint the top inch of the inside of the pot green so the terra cotta doesn’t show when soil is added. -
Seal the pot:
Once every layer is completely dry, take the pot outside and apply a spray sealer. I find a matte finish keeps it looking natural, while gloss makes it look like ceramic. -
Dry and plant:
Let the sealer cure for at least 24 hours before adding your soil and succulents.
Now you have a juicy splash of color ready for your favorite small plant


Strawberry Pot With Seed Dots
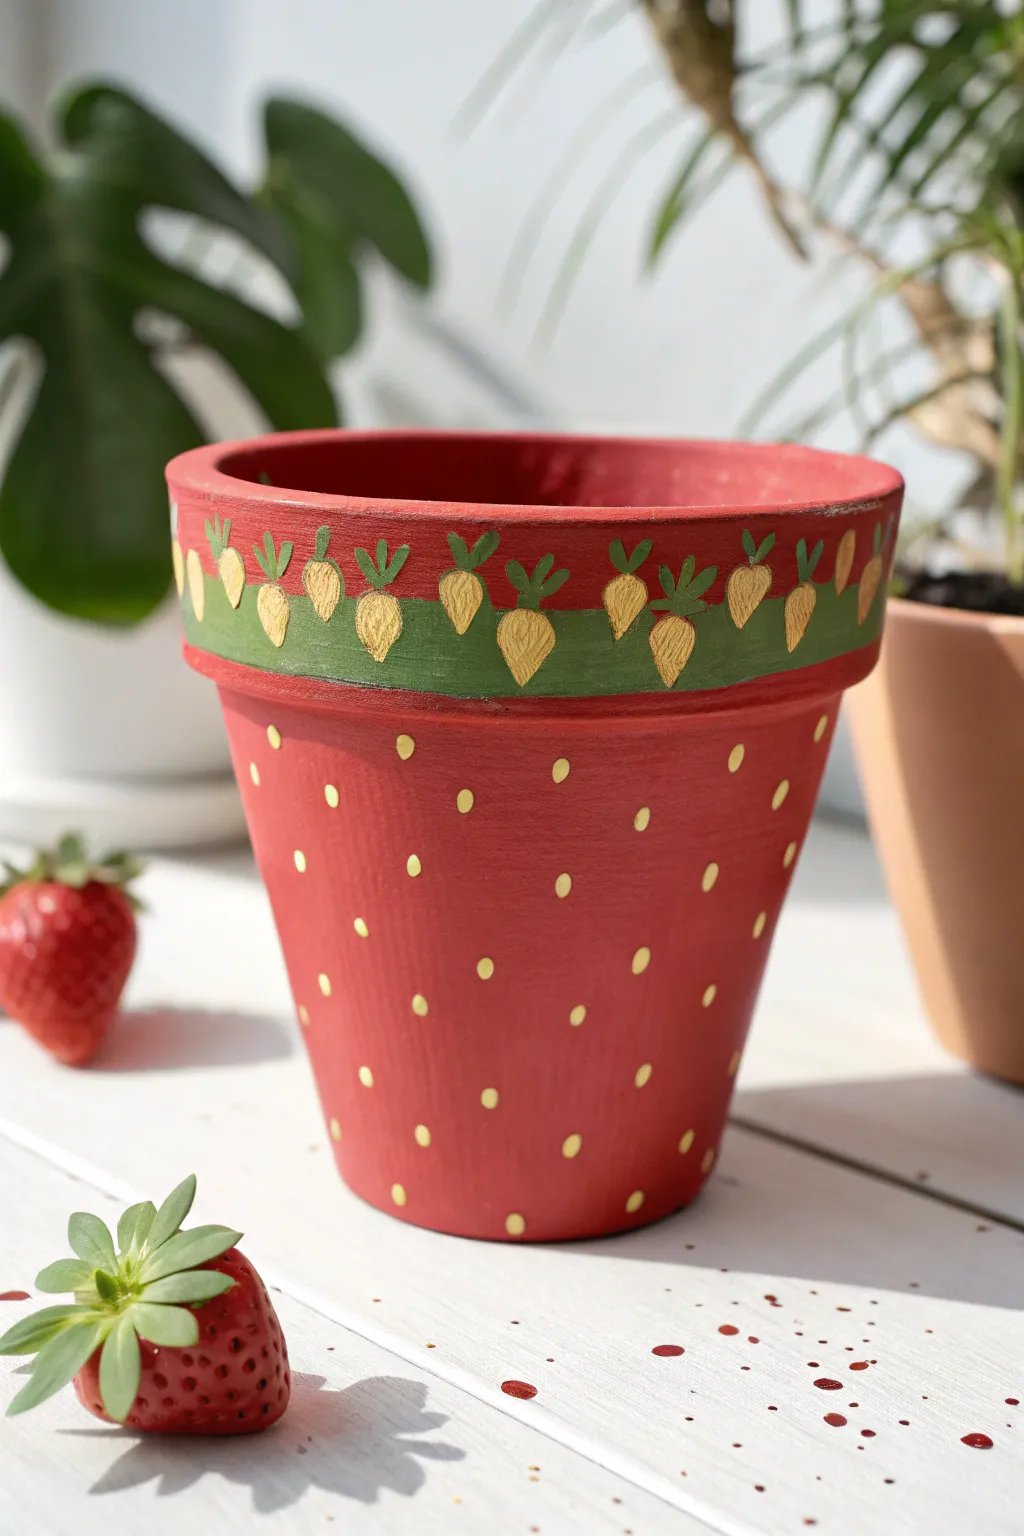
Transform a plain terracotta pot into a juicy summer delight with this adorable strawberry design. The combination of a vibrant red base, golden seed accents, and a cute leafy rim creates a cheerful home for your favorite small plants.
Step-by-Step
Materials
- Terracotta pot (4-6 inch size)
- Red acrylic paint (bright scarlet or berry red)
- Green acrylic paint (olive or forest green)
- Gold or yellow ochre acrylic paint
- Paint brushes (medium flat brush, small detail brush, fine liner brush)
- Water cup and palette
- Paper towels
- Clear acrylic sealer spray (optional but recommended)
Step 1: Base Painting
-
Clean surface:
Begin by wiping down your terracotta pot with a damp cloth to remove any dust or debris. Let it dry completely so the paint adheres properly. -
Apply base red:
Using a medium flat brush, paint the entire exterior of the pot below the rim with your bright red acrylic paint. Don’t paint the rim itself just yet. Let the first coat dry. -
Paint the inside lip:
Paint the inside of the pot just about an inch down from the top rim in red. This ensures that once filled with soil, the visible parts still look finished. -
Second coat:
Apply a second or even third coat of red to get a solid, opaque coverage without streaks. Allow the paint to dry fully between layers.
Seed Spacing Trick
Use a small piece of masking tape as a spacer between your seeds to keep the rows perfectly even without needing to measure every single time.
Step 2: Painting the Rim
-
Green background:
For the rim of the pot, use your chosen green acrylic paint. Carefully paint the vertical face of the rim all the way around, creating a solid green band. -
Refine the edges:
Use a smaller brush to tidy up the line where the green rim meets the red body. A steady hand helps here, but don’t worry if it’s not machine-perfect; handmade charm is part of the appeal. -
Add rim foliage:
Now for the decorative pattern on the rim. Using your gold or yellow ochre paint and a small detail brush, paint small teardrop shapes pointing downward, spaced evenly around the green band. These represent little golden berries or decorative accents. -
Paint leaves on rim:
Using a slightly darker green or simply layering over the lighter green, paint tiny leaves sprouting from the top of each golden teardrop shape. Use a fine liner brush to create three small flicks of paint for each stem.
Step 3: Adding the Seeds
-
Prepare gold paint:
Load a small detail brush or the handle end of a paintbrush with your gold or yellow ochre paint. You want the consistency to be creamy but not drippy. -
Start the pattern:
Begin placing small, oval-shaped dots on the red section of the pot. I like to start near the top, just under the rim, spacing them about an inch apart. -
Alternate rows:
Work your way down the pot in rows. For a natural strawberry look, offset each row so the seeds fall in the spaces between the seeds in the row above, creating a diamond-like pattern. -
Shape the seeds:
Rather than perfect circles, try to drag your brush tip slightly upwards as you lift it to give the seeds a tiny teardrop shape, mimicking real strawberry seeds. -
Fill gaps:
Check around the bottom edge and fill in any empty spaces with partial seeds to make the pattern look continuous.
Uneven Coverage?
If the red paint looks streaky or transparent, let it dry for a full hour before adding another thin layer. Thick globs of paint peel easier than thin layers.
Step 4: Finishing Touches
-
Final drying:
Set the pot aside in a safe, dust-free area and let it cure for at least 24 hours. The thick layers need to be completely hard before sealing. -
Sealing:
To protect your artwork against water and sunlight, spray the entire painted surface with a clear acrylic sealer. Two light coats are better than one heavy coat.
Now you have a charming vessel ready for a real strawberry plant or a spiky succulent
Lemon Pot With Leafy Stem
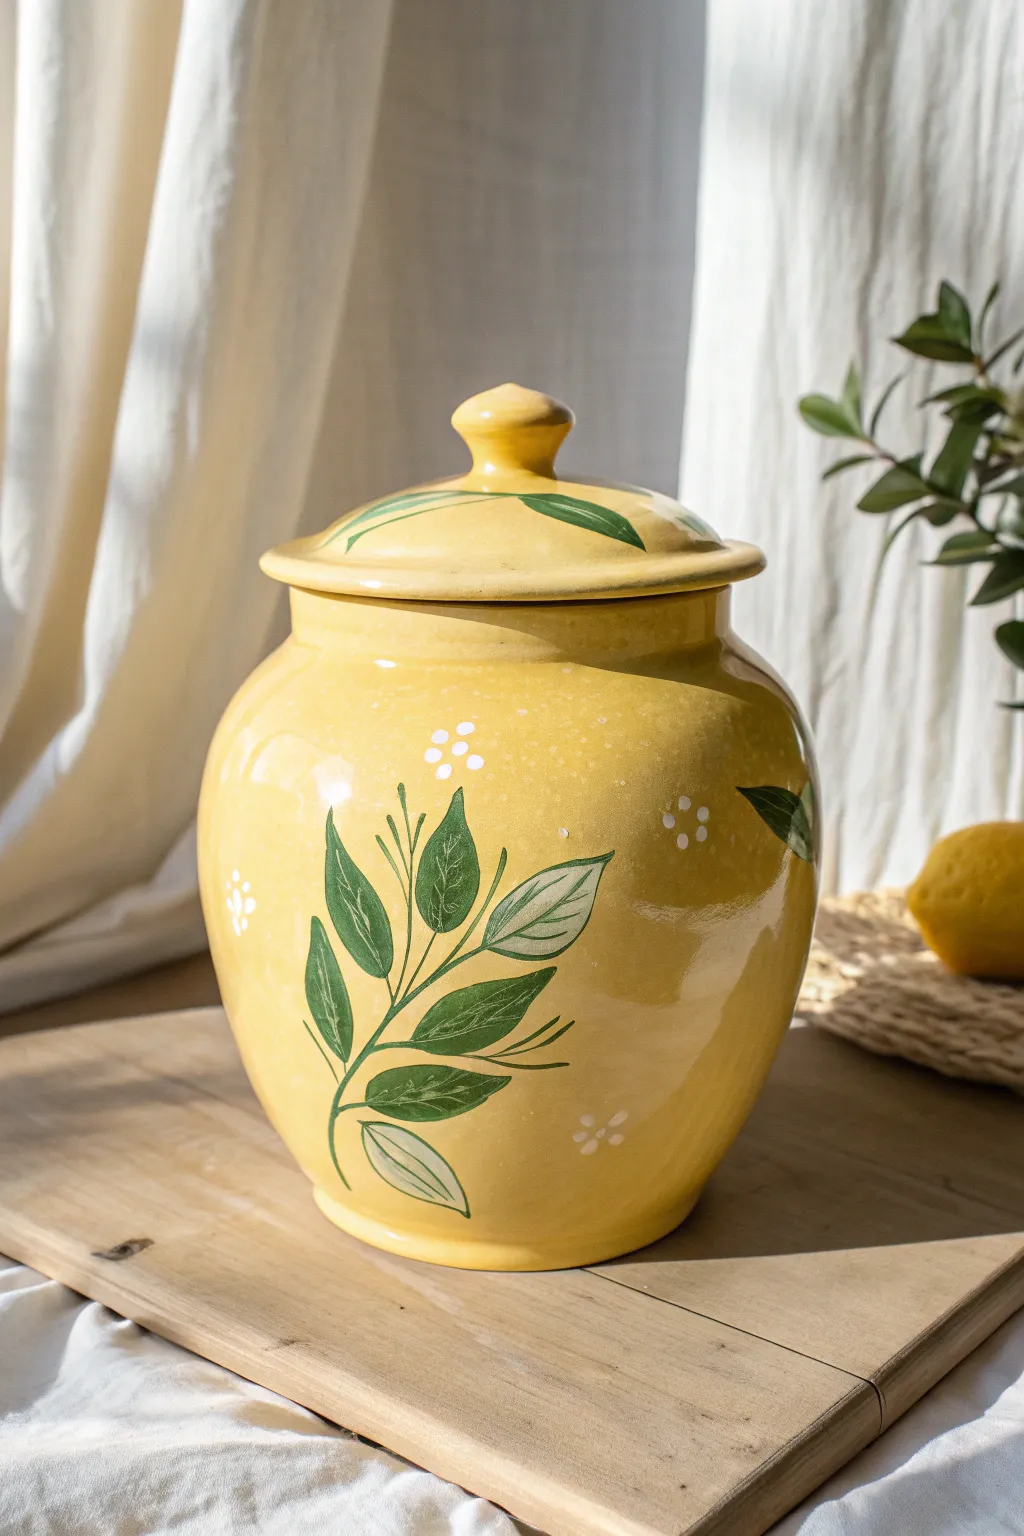
Bring a burst of Mediterranean sunshine into your kitchen with this cheerful yellow storage jar featuring delicate green foliage. The bright base color pairs beautifully with hand-painted leaves and tiny white blossoms for a look that feels both vintage and fresh.
Step-by-Step Tutorial
Materials
- Ceramic jar with lid (pre-glazed or bisque)
- Glossy yellow ceramic paint (or spray paint for base)
- Dark green acrylic or ceramic paint
- Sage or light green acrylic or ceramic paint
- White acrylic or enamel paint
- Clear sealant or food-safe glaze (gloss)
- Small round detail brush (size 1 or 2)
- Medium flat brush
- Pencil for sketching
- Palette or small plate
- Water cup and paper towels
Step 1: Base Preparation
-
Clean surface:
Begin by thoroughly wiping down your ceramic jar and lid with rubbing alcohol or soapy water to remove any oils or dust. Let it dry completely. -
Apply base color:
Using your medium flat brush, apply the glossy yellow paint to the entire exterior of the jar and the lid. You may need 2-3 coats to get a rich, opaque coverage like the example. -
Dry thoroughly:
Allow the yellow base coat to dry fully between layers and then cure completely according to your paint manufacturer’s instructions before starting the detailed work.
Step 2: Painting the Foliage
-
Sketch the stems:
Lightly trace the main curved stem lines onto the jar using a pencil. Aim for a flowing, organic S-shape or C-shape that wraps slightly around the curve. -
Paint main stems:
Mix a small amount of dark green paint with a tiny drop of water to improve flow. Use your fine detail brush to paint thin, wispy lines following your pencil sketches. -
Outline leaves:
Using the same dark green, paint the outlines of almond-shaped leaves attached to your stems. Vary the sizes, keeping some small near the tips and larger near the base. -
Start leaf filling:
Fill in about half of the leaves with solid dark green paint. Don’t worry about perfect smoothness; a little texture adds to the hand-painted charm. -
Add lighter leaves:
Wash your brush well, then switch to the sage or light green shade. Fill in the remaining leaf outlines. This color variation adds depth and mimics light hitting the foliage. -
Add vein details:
Once the lighter green leaves are dry to the touch, use the dark green again to paint a single central vein line down the middle of each sage-colored leaf. -
Create leaf texture:
For the dark green leaves, mix a tiny bit of white into your sage green to create a very pale mint. Use this to add subtle vein highlights on the dark leaves for contrast. -
Lid details:
Repeat a simplified version of this leaf pattern on the lid. Paint one or two elongated leaves curving outward from the central knob.
Paint Slipping?
If acrylic paint slides off the glazed surface, lightly sand the area with fine-grit sandpaper first to create ‘tooth’ for the paint to grip.
Step 3: Blossoms & Finishing
-
Paint blossom clusters:
Dip the very tip of your smallest brush or the handle end of a paintbrush into white paint. Dot clusters of 3-4 small circles around the leaves to represent tiny citrus blossoms. -
Add scattered accents:
Place a few solitary white dots randomly in the empty yellow spaces to fill out the design without making it look cluttered. -
Final cure:
Allow the detailed painting to dry for at least 24 hours. If using air-dry paints, let them cure fully before handling. -
Seal the piece:
Apply a coat of clear gloss sealant over the entire jar. This unifies the sheen of the base and the detail work, giving it that high-gloss ceramic look.
Add Dimension
Mix a tiny drop of yellow into your green for the tips of the leaves. This gradient creates a sun-kissed look that mimics real citrus trees.
Place your new sunny jar on a counter or shelf to add a warm pop of color to your home
Drippy Icing Donut Pot
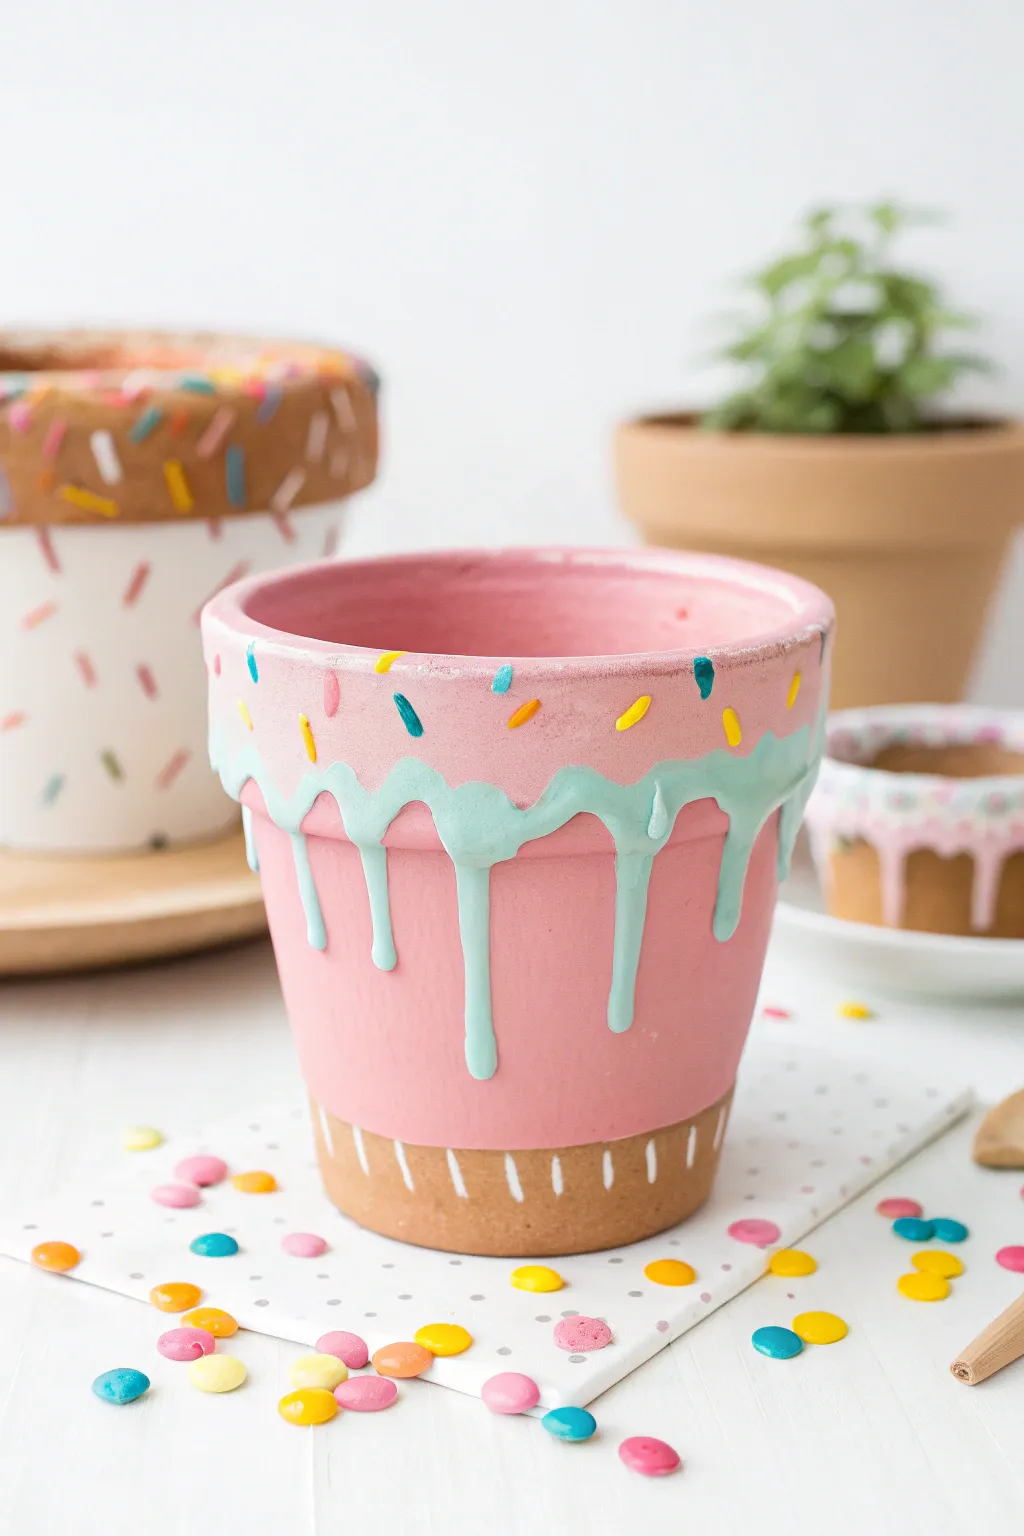
Transform a plain terracotta pot into a sweet treat that looks good enough to eat with this clever painting technique. By layering thick paint drips over a bright pink base, you’ll create a charming donut-inspired planter complete with colorful sprinkles.
Step-by-Step Guide
Materials
- Small terracotta pot (clean and dry)
- Acrylic craft paints: Bright Pink, Pale Turquoise/Mint, White, Yellow, Orange, Blue
- Medium flat paintbrush
- Small liner brush or detail brush
- Pencil
- Palette or paper plate
- Water cup and paper towels
- Clear acrylic sealant spray (matte or satin finish)
Step 1: Base Coat and Stripes
-
Prepare the pot:
Ensure your terracotta pot is thoroughly clean and dry. If there is any sticker residue, remove it completely or the paint won’t adhere properly. -
Mark the rim:
Using a pencil, lightly mark a line just above the bottom rim of the pot. You want to leave the very bottom section unpainted to serve as the ‘cake’ part of your donut visual. -
Paint the bottom stripes:
Dip your smallest detail brush into white acrylic paint. Paint short, vertical hatch marks all around the unpainted bottom rim of the pot to mimic the texture of a cupcake wrapper or just add a decorative touch. -
Apply the pink glaze:
Load your medium flat brush with bright pink paint. Paint the entire body of the pot, starting from the top rim down to the pencil line you marked earlier. -
Paint the inside:
Don’t forget to paint the inside of the pot too. Cover the interior walls with the same bright pink so it looks consistent even when filled with soil. Let this pink layer dry completely.
Step 2: Creating the Drip
-
Mix the icing color:
Prepare your pale turquoise or mint green paint. If it feels too thin, mix in a tiny bit of white paint to increase the opacity; you want this layer to look thick and creamy. -
Outline the drip shape:
With a smaller brush, hand-paint a wavy line around the upper third of the pot using the turquoise paint. Purposefully make some waves dip much lower than others to simulate gravity pulling heavy icing down. -
Fill the drippy section:
Fill in the area above your wavy line with the turquoise paint, covering the top rim of the pot as well. Use a generous amount of paint to hide brush strokes. -
Enhance the drips:
To make the drips look 3D, go back over the lowest points of your waves. Add a second coat or a little extra bead of paint at the very bottom of each drip to make them look rounded and heavy. -
Let it set:
This step requires patience. Let the turquoise layer dry completely before moving on to sprinkles, otherwise the colors will muddy together.
Batter Up Tip
Mix a tiny amount of baking powder into your turquoise paint. It creates a puffy texture as it dries, making the icing look realistically thick and raised.
Step 3: Sprinkles and Finish
-
Prepare sprinkle colors:
Squeeze dime-sized amounts of yellow, orange, blue, and darker pink paint onto your palette. I generally use the same pink from the base coat for consistency. -
Add first sprinkles:
Using your finest detail brush, paint small, short dashes randomly over the turquoise icing section. Start with just yellow dashes, spacing them out unevenly. -
Layer more colors:
Clean your brush and repeat the process with orange dashes. Angle them differently—some vertical, some horizontal, some diagonal—to create a random, tossed look. -
Finish the sprinkle mix:
Add the final dashes of blue and pink. Make sure a few sprinkles overlap or touch the edges of the turquoise drips for a natural effect. -
Check for gaps:
Step back and look at the pot. If any areas on the icing look too empty, add one or two more sprinkles to balance the composition. -
Seal the artwork:
Once all paint is bone dry (wait at least an hour), take the pot to a well-ventilated area. Spray it with a clear acrylic sealant to protect your design from water damage when you water your plants.
Flavor Variations
Make a whole bakery set! Try a chocolate glazed version with brown paint and white icing, or a strawberry version with light pink paint and dark pink drips.
Pop a succulent inside your new creation for a zero-calorie treat that brightens up any windowsill
Scatter of Simple Daisies
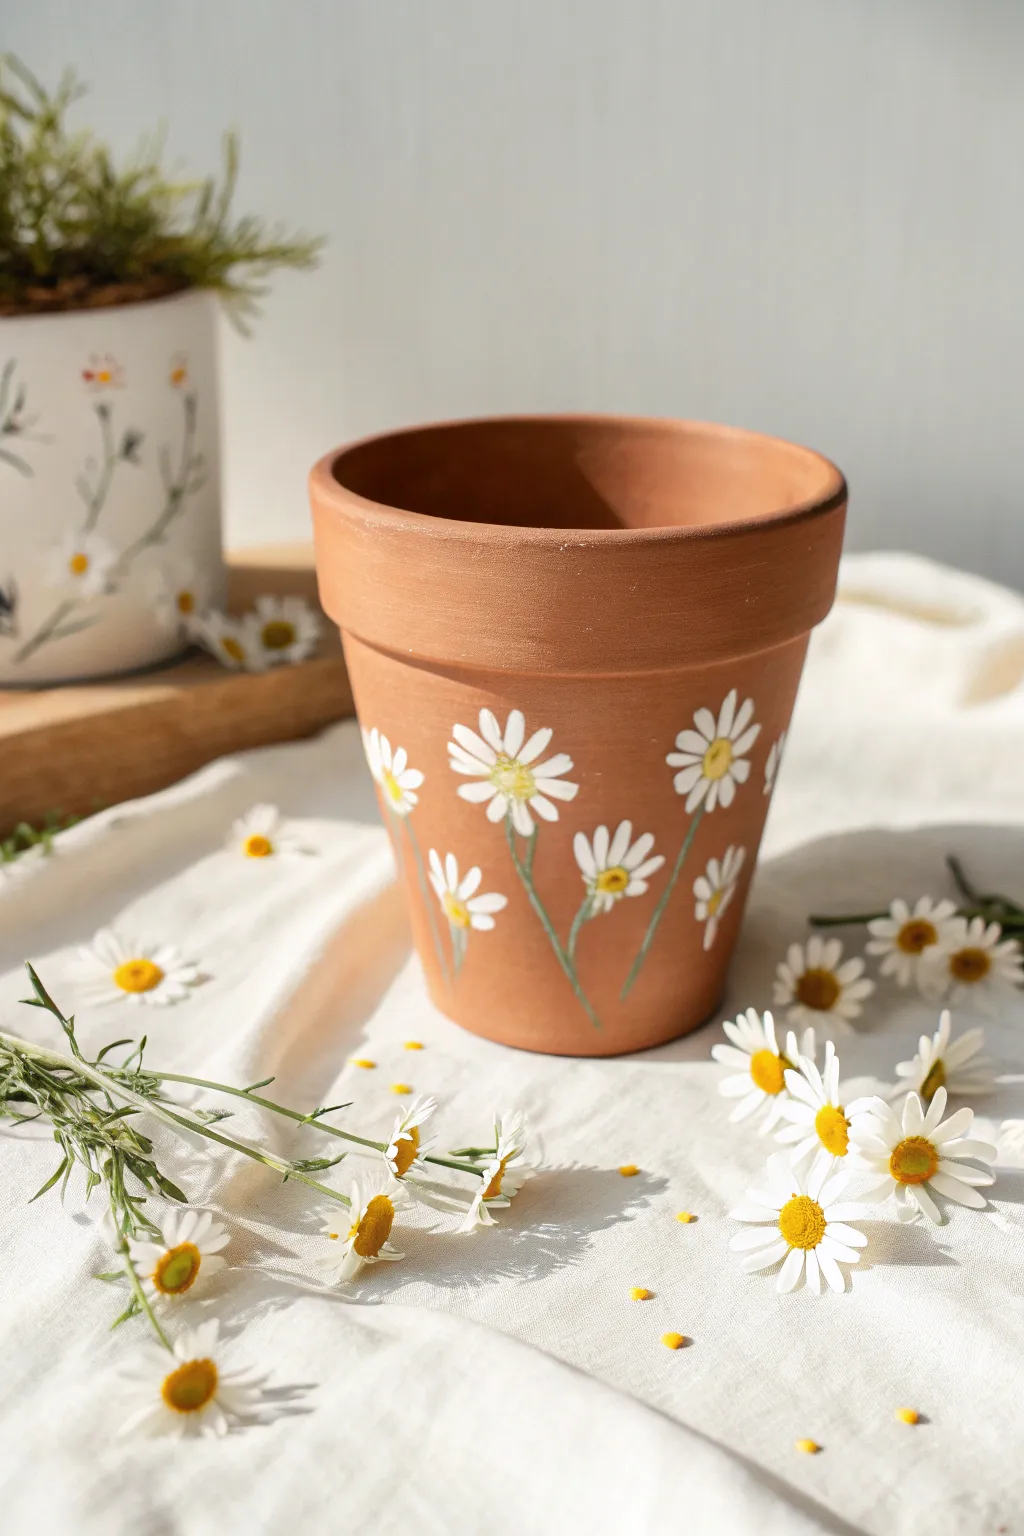
Transform a plain terracotta pot into a charming garden accent with this delightfully simple daisy design. The organic scattering of white blooms against the earthy clay creates a fresh, rustic look perfect for indoor herbs or outdoor flowers.
Detailed Instructions
Materials
- Clean terracotta pot (standard size)
- White acrylic paint
- Yellow ochre or golden yellow acrylic paint
- Sage green acrylic paint (or mix green with a little white)
- Small round paintbrush (size 2 or 4)
- Fine liner brush (size 0 or 00)
- Paper plate or palette
- Water cup and paper towels
- Clear matte sealer spray (optional)
Step 1: Preparation
-
Clean the surface:
Before you begin, wipe down your terracotta pot with a damp cloth to remove any dust or loose clay particles. Let it dry completely so the paint adheres properly. -
Plan your layout:
Visualize where you want your flowers to sit. In the reference image, the daisies are clustered mostly around the lower half of the pot, with petals reaching upward. You won’t need pencil lines, but having a general idea helps keep the composition balanced.
Step 2: Painting the Petals
-
Load your brush:
Squeeze a generous amount of white acrylic paint onto your palette. Dip your small round brush into the paint, ensuring the bristles are fully coated but not dripping. -
Paint the first flower center:
Start by imagining a small circle where the center of a flower will be. You don’t need to paint the center yet, but use it as an anchor point for your petals. -
Create the top petals:
Press the tip of your brush down near your imaginary center and pull outward slightly to create a petal shape. The petals should be slightly wider at the outer edge and taper in toward the middle. -
Complete the flower circle:
Continue painting petals around your imaginary center. Aim for about 10-14 petals per flower. Don’t worry if they overlap slightly or aren’t perfectly uniform; imperfections add to the hand-painted charm. -
Vary the sizes:
Move to a new spot on the pot and paint another daisy. I like to make some flowers slightly smaller, like buds just opening, and others fully spread out to create visual interest. -
Check the spacing:
Scatter about 5-7 main flowers around the visible side of the pot. Leave enough negative space of the terracotta showing through so the design breathes. -
Let the white dry:
Acrylic on terracotta dries quickly, but give the white petals about 10 minutes to set completely before adding the next layers. If the white looks too sheer, you can carefully dab a second coat on just the centers of the petals.
Paint looking transparent?
Terracotta is very porous and soaks up paint fast. If your white looks streaky, let the first layer dry completely and simply apply a second coat for opaque, bright petals.
Step 3: Adding Details
-
Paint the centers:
Using your yellow ochre paint and a clean small round brush, dab a circle right in the middle of your white petals. A textured dab looks better than a perfect swirl. -
Add dimension to the centers:
While the yellow is still slightly wet, you can dip the very tip of your brush into a tiny bit of white or a brighter yellow and dot it onto the top curve of the center. This creates a subtle highlight. -
Prepare the green paint:
On your palette, water down your sage green paint just a tiny bit. This helps the paint flow smoother for fine lines. -
Draw the stems:
Switch to your fine liner brush. Starting from the bottom of a flower head, pull a thin, wispy line downward. Let the lines curve naturally rather than drawing them stick-straight. -
Cross the stems:
Allow some stems to cross over each other as they reach the bottom of the pot. This makes the bouquet look more gathered and natural. -
Add small leaves:
along the stems, use the liner brush to press and lift small, almond-shaped leaves. Keep them sparse so they don’t clutter the design.
Natural Petal Tip
Instead of painting stiff lines, press the belly of the brush down and lift up quickly as you pull toward the center. This creates a natural teardrop petal shape automatically.
Step 4: Finishing Touches
-
Add falling petals:
To mimic the loose feel of the photo, paint a few stray white petals ‘falling’ or detached near the bottom of the pot or slightly away from the main flower heads. -
Review and refine:
Step back and look at your pot. If any center looks too flat, add another yellow dot. If a stem looks too faint, go over it gently once more. -
Seal the artwork:
Once all paint is bone dry (wait at least an hour), take the pot to a well-ventilated area. Spray a light, even coat of matte clear sealer over the painted area to protect your work from water and soil.
Now your pot is ready to be filled with soil and greenery for a delightful display
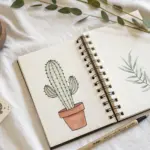
Doodled Vine Wrap Pot
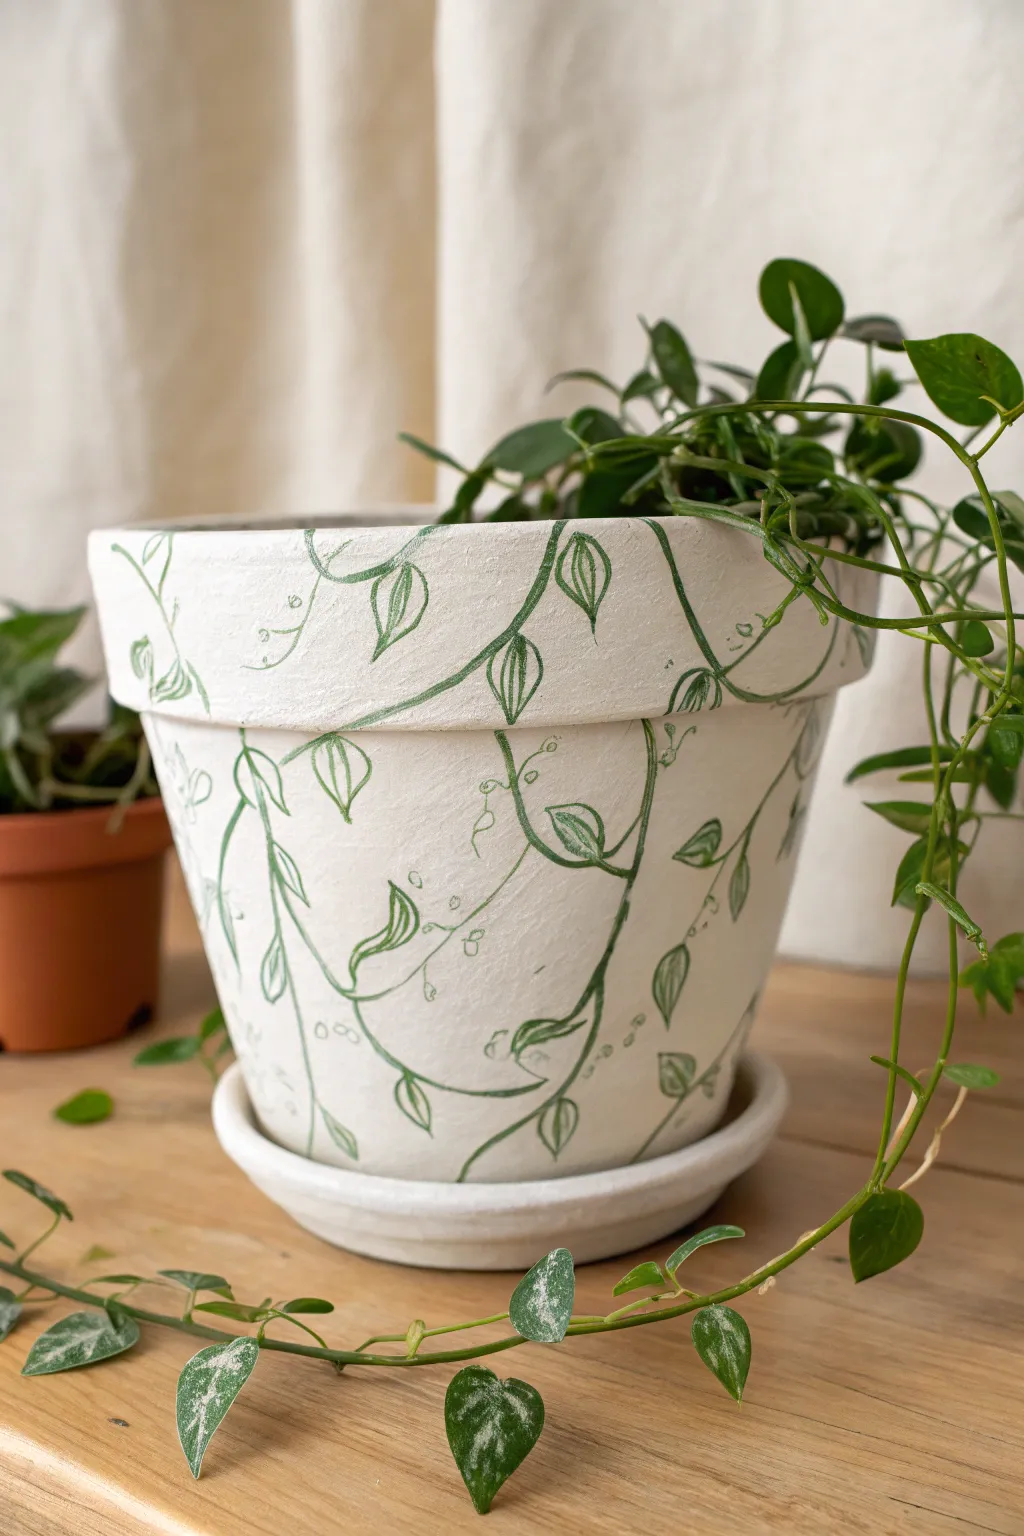
Transform a plain terracotta pot into a botanical beauty with this charming hand-drawn design. Using a simple white base and delicate green ink, you can create a free-flowing vine pattern that perfectly compliments trailing houseplants.
Step-by-Step Guide
Materials
- Terracotta pot and matching saucer
- White matte acrylic paint or chalk paint
- Flat paintbrush (1-inch width)
- Fine tip paint pen (dark green) or waterproof micron pen
- Pencil and eraser
- Clear matte sealer spray
- Water cup and paper towels
Step 1: Base Preparation
-
Clean the surface:
Ensure your terracotta pot is completely clean and dry. Wipe away any dust with a damp cloth and let it air dry for a few minutes to ensure the paint adheres properly. -
Apply the first coat:
Using your flat paintbrush, apply an even layer of white matte paint to the exterior of the pot. Don’t forget to paint the top rim and the exterior of the matching saucer. -
Paint the inner rim:
Paint the inside of the pot just down to where the soil line will be, roughly two inches deep. This gives it a finished look even if the soil settles later. -
Let it dry:
Allow the first coat to dry completely. Terracotta absorbs moisture quickly, so this shouldn’t take long, but cool to the touch means it’s still wet. -
Apply the second coat:
Apply a second coat of white paint to ensure solid, opaque coverage where no orange clay shows through. I find cross-hatching your brush strokes helps create a nice, subtle texture. -
Final dry:
Let this base layer cure fully for at least an hour before moving on to the drawing phase.
Step 2: Sketching the Vines
-
Plan the flow:
Lightly sketch a few main vine lines with a pencil. Make them wavy and organic, wrapping them diagonally around the pot and over the rim to create movement. -
Add leaf placement:
Sketch small leaf shapes along your vine lines. Alternate the direction of the leaves—some pointing up, some down—to mimic natural growth. -
Don’t overthink it:
Keep the pencil sketch extremely faint. You only need a general guide, and heavy graphite lines can smudge into the white paint later.
Clean Lines Tip
Rest your pinky finger on the pot surface as you draw to stabilize your hand. This acts as an anchor and prevents shaky lines on the curved surface.
Step 3: Inking the Design
-
Trace the main stems:
Using your green fine-tip paint pen or waterproof marker, carefully trace over your main vine lines. -
Vary the line weight:
As you draw the stems, try pressing slightly harder in the curves and lighter on the straight sections to give the vines a dynamic, hand-drawn feel. -
Outline the leaves:
Draw the leaf outlines attached to the stems. Focus on a simple pointed oval shape for a classic pothos or philodendron look. -
Add leaf details:
Draw a center vein line down the middle of each leaf. You can add tiny diagonal veins branching off the center line for extra detail. -
Connect the rim:
Ensure your design travels seamlessly over the thick rim of the pot. Draw the lines up and over the lip so the pattern doesn’t look cut off. -
Fill in gaps:
Look for empty white spaces and add small curlicues, tiny circles, or delicate tendrils to fill the void without cluttering the design. -
Draw on the saucer:
Carry a few trailing vines down onto the edge of the saucer so the two pieces feel like a unified set.
Mix It Up
Instead of just green, use a mix of dark and light green pens. Layering two shades adds depth and makes the illustrated foliage look lush and dimensions.
Step 4: Finishing Touches
-
Remove pencil marks:
Once the ink is 100% dry (give it roughly 30 minutes to be safe), gently erase any visible pencil guidelines. -
Seal the artwork:
Take the pot to a well-ventilated area and spray it with a clear matte sealer. This protects the white paint from yellowing and keeps the ink from running when you water your plant.
Now you have a custom planter that looks just as lovely as the greenery you’ll place inside it
Confetti Polka Dot Pot
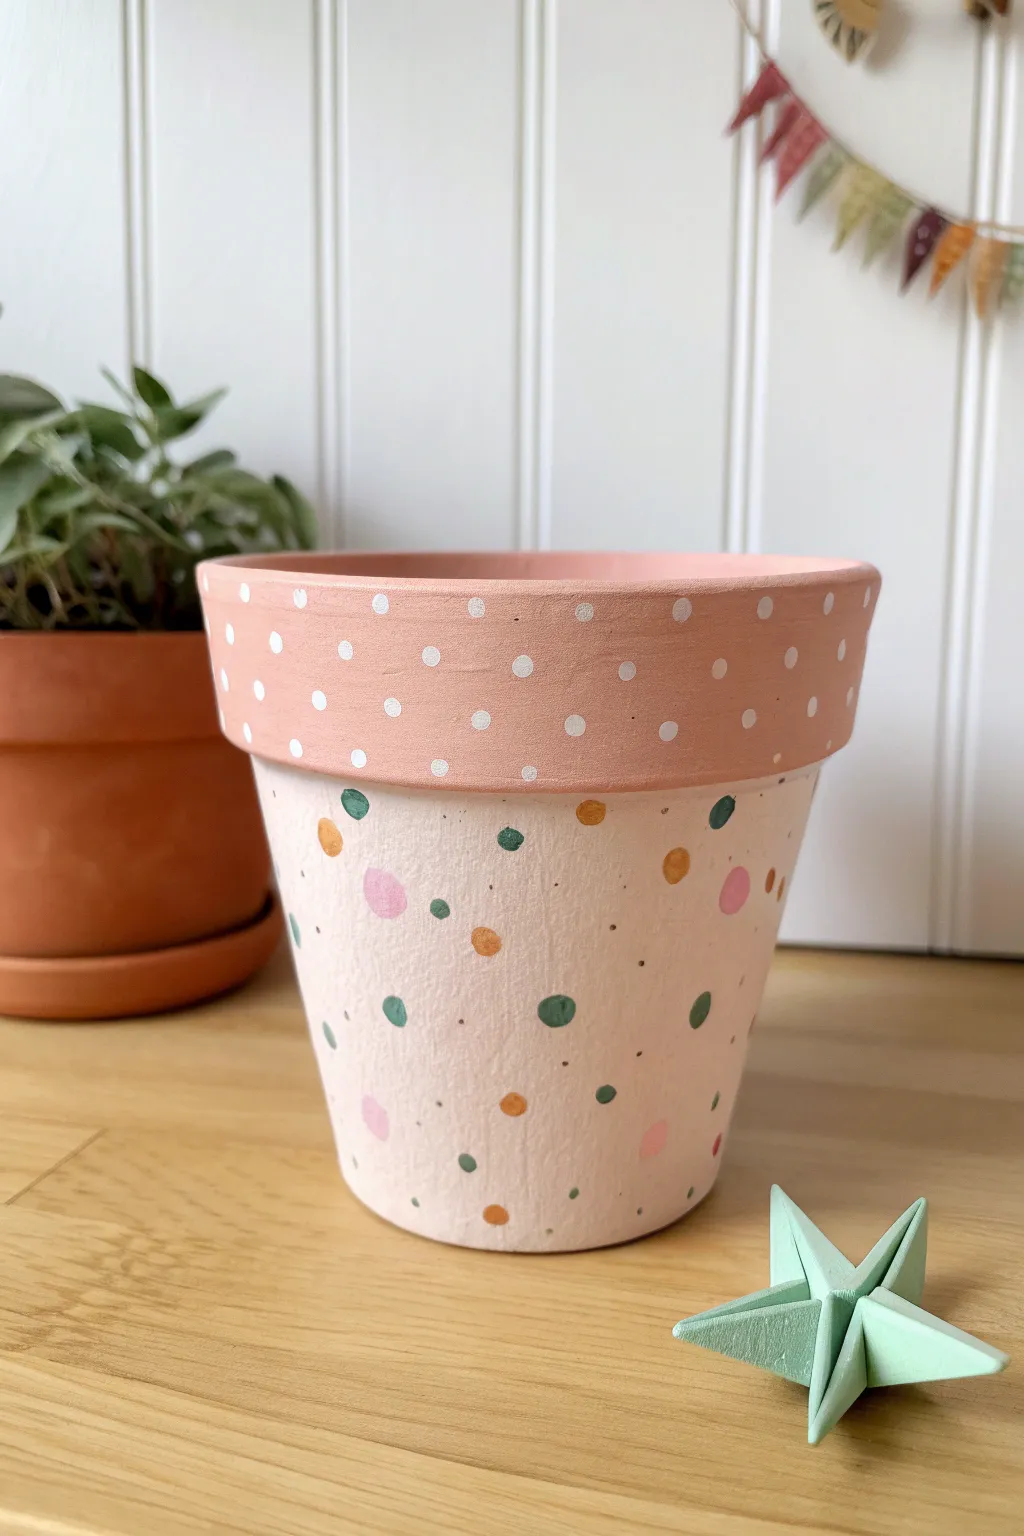
Bring a little playful energy to your plant collection with this festive design that feels like a party in a pot. The soft blush and cream background sets the stage for a random scattering of confetti dots, creating a look that is both modern and undeniably cheerful.
Detailed Instructions
Materials
- Terra cotta pot (standard 4 or 6 inch size)
- Acrylic craft paints (Light peach/coral, very pale cream or blush pink, white, deep teal, gold, muted pink)
- Medium flat paintbrush (approx 1 inch)
- Small round paintbrush
- Pencil with a new eraser
- Cotton swabs (Q-tips)
- Paper plate or palette
- Clear matte acrylic sealer spray
Step 1: Base Coat Prep
-
Clean the surface:
Start by wiping down your terra cotta pot with a damp cloth to remove any manufacturing dust or store grime. Let it dry completely before you start painting. -
Mix the body color:
Create a very pale, creamy blush color for the main body of the pot. Mix a generous amount of white acrylic paint with just a tiny drop of pink or peach to get that soft, almost-neutral tone. -
Paint the body:
Use your flat brush to apply the creamy blush shade to the bottom portion of the pot, painting just up into the crease under the rim. Don’t worry about the rim itself yet. -
Apply a second coat:
Once the first layer is dry to the touch (usually 15-20 minutes), add a second coat to ensure the terra cotta color doesn’t peek through, giving you a solid, opaque canvas. -
Paint the rim:
Switch to your light peach or coral paint. Carefully paint the entire rim of the pot, including the top lip and just slightly inside the top edge for a finished look. -
Refine the edge:
Use a smaller flat brush if needed to get a crisp line right where the rim meets the body of the pot. I find it helpful to turn the pot upside down on a jar to reach this area easily without smudging.
Eraser Stamp Secret
If your pencil eraser isn’t making a clean circle, gently rub the eraser on fine sandpaper first to flatten the surface and remove any old graphite residue.
Step 2: Adding the Pattern
-
Prepare the rim dots:
Dip the unused eraser end of a pencil into white acrylic paint. This is the secret to getting perfectly round, uniform circles. -
Stamp the rim:
Press the eraser onto the peach rim to create a row of polka dots. Try to space them evenly in a staggering brick-lay pattern—one row near the top, and a second row offset below it. -
Mix confetti colors:
Pour small dollops of your confetti colors onto your palette: deep teal, muted pink, gold, and perhaps a darker orange/copper shade. -
Start the large confetti:
Using a small round paintbrush, paint random, medium-sized circles on the body of the pot. These don’t need to be perfect circles; the hand-painted, slightly irregular look adds to the charm. -
Vary the colors:
Rotate between your confetti colors as you make these larger spots, ensuring no two similar colors are bunched too closely together. -
Add medium dots:
Dip the end of a regular pencil eraser into your teal and gold paints to stamp medium-sized dots in the empty spaces between your hand-painted circles. -
Create tiny specks:
For the smallest details, dip a cotton swab (Q-tip) or the handle end of a paintbrush into your paint. Dot these tiny specks randomly to fill in gaps. -
Check the balance:
Step back and look at the pot as a whole. If there are large empty spaces, add a few tiny ‘dust’ specks with a toothpick or a very fine brush tip to balance the composition. -
Let it cure:
Allow the entire pot to dry for at least 24 hours. Acrylic paint dries fast but needs time to fully harden.
Uneven Coverage?
If the confetti dots look streaky, don’t overload the brush. Instead, let the first layer dry for 10 minutes and dab a second thin layer right on top for opacity.
Step 3: Finishing Touches
-
Seal the work:
Take the pot to a well-ventilated area and spray it with a clear matte acrylic sealer. This protects your paint from water damage when you water your plant. -
Final dry:
Let the sealer dry completely according to the can’s instructions before potting your favorite green friend.
Pop in a leafy green plant and enjoy the instant cheer of your new confetti creation
Scalloped Rim in Pastels
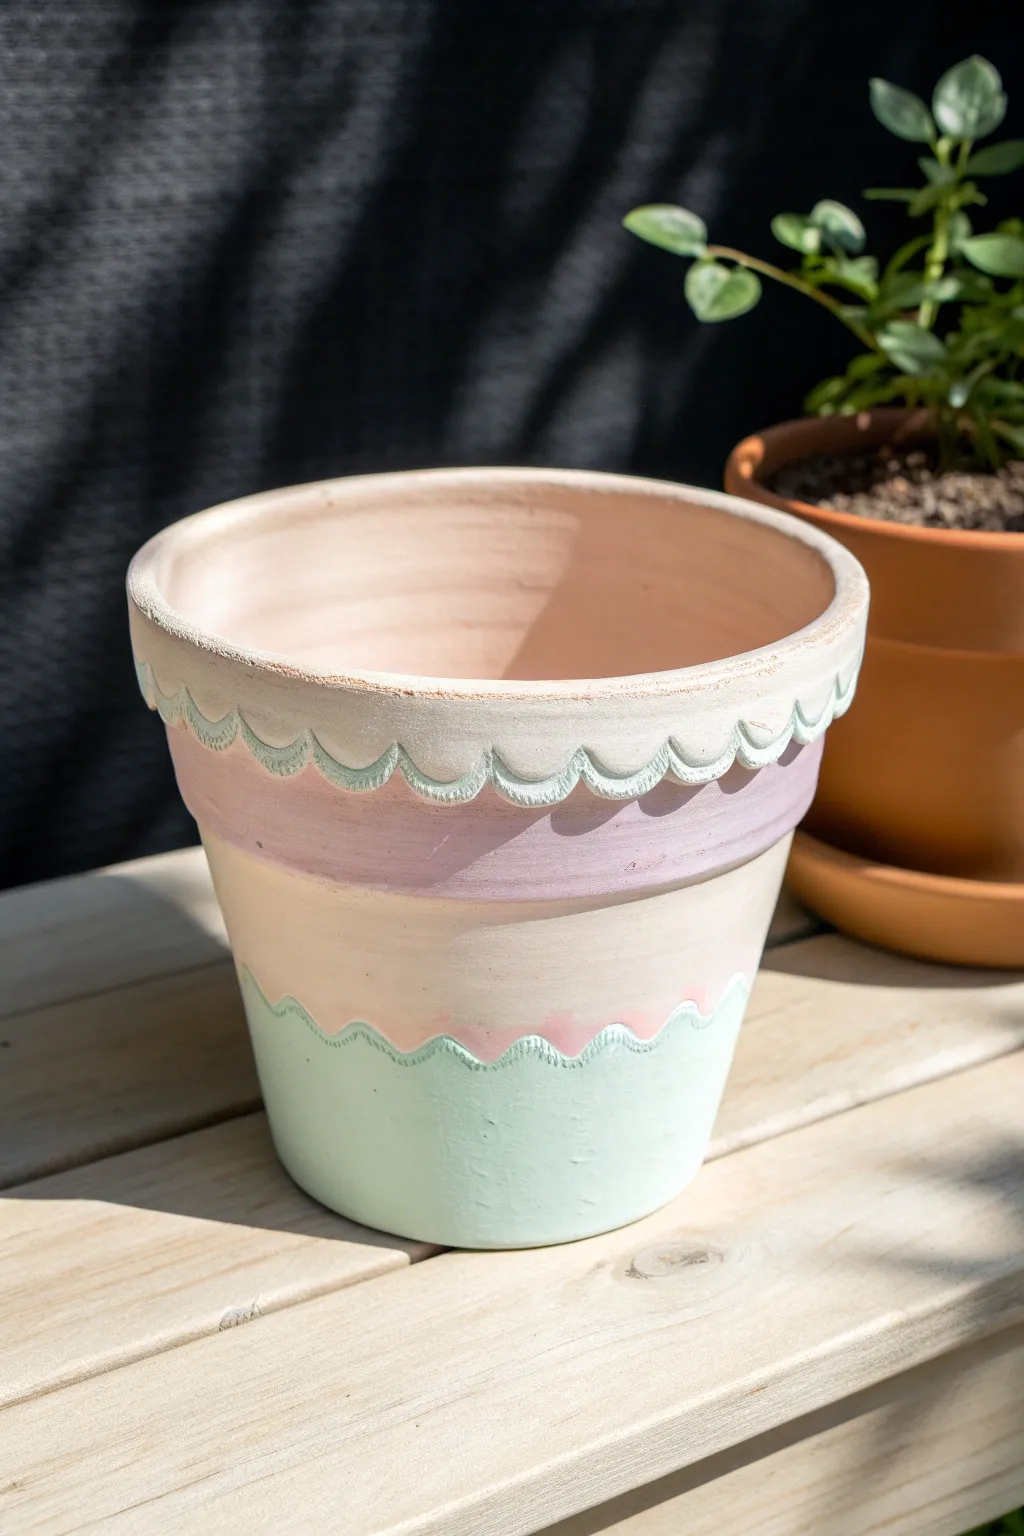
Transform a plain terracotta pot into a sweet, confectionery-inspired planter with soft pastel tiers and delicate scalloped details. This beginner-friendly project uses masking tape hacks and gentle colors to create a whimsical home for your favorite indoor plants.
Step-by-Step Tutorial
Materials
- Terracotta pot (clean and dry)
- White acrylic paint (priming base)
- Pastel pink acrylic paint
- Pastel lavender/lilac acrylic paint
- Mint green acrylic paint
- Flat paintbrush (medium width)
- Fine detail paintbrush
- Pencil
- Paper plate or round object (for tracing)
- Sealant spray (matte or satin finish)
Step 1: Preparation & Base Coat
-
Clean surface:
Ensure your terracotta pot is completely free of dust and dirt. Wipe it down with a damp cloth and let it dry fully before starting. -
Prime the pot:
Apply a base coat of white acrylic paint to the exterior. This doesn’t need to be perfect, but it helps the pastel colors pop and prevents the terracotta orange from bleeding through. -
Dry completely:
Allow the white base coat to dry completely. Terracotta absorbs moisture, so give it an extra 15 minutes to ensure it’s not cool to the touch.
Step 2: Creating the Scalloped Rim
-
Drafting the scallops:
Around the thick upper rim of the pot, use a pencil to lightly draw a scalloped pattern. You can freehand this for an organic look, or use a small coin or bottle cap to trace consistent half-circles. -
Painting the rim background:
Paint the background of the rim area (behind where your scallops will be outlined) with a very pale, creamy white or barely-there pink to create a neutral top tier. -
Detailing the scallops:
Using your fine detail brush and the mint green paint, carefully trace over your pencil lines to create the defining scalloped edge along the bottom of the rim. -
Filling the rim accent:
I like to add a second thin line of mint green just above the scalloped edge to give it depth, almost like icing on a cake.
Wobbly Lines?
If freehanding scallops is tricky, make a stencil. Cut a half-circle shape out of cardstock or thin cardboard and trace it repeatedly around the pot for uniformity.
Step 3: Painting the Body Tiers
-
Marking the sections:
Lightly mark two horizontal lines around the body of the pot to divide it into three main sections: the top stripe under the rim, the middle band, and the bottom base. -
Painting the top stripe:
Fill the top section (just under the heavy rim) with your pastel lavender paint. Use a flat brush to get a smooth, even application. -
Painting the middle stripe:
Paint the middle band using a soft pastel pink. Don’t worry about the bottom edge being perfectly straight yet, as we will add scallops there too. -
Painting the base:
Paint the bottom section of the pot with the mint green paint. Bring this color up to meet the pink section. -
Adding the second coat:
Pastels can be sheer. Apply a second coat to the lavender, pink, and mint sections to ensure solid, opaque coverage.
Add Texture
Mix a tiny pinch of baking soda into your acrylic paint before applying the final coat. It creates a matte, ceramic-like texture that looks very high-end.
Step 4: Final Details & Sealing
-
Drafting the lower scallops:
Once the pink and mint paints are dry, lightly sketch a scalloped line with your pencil exactly where the two colors meet. -
Painting the transition:
Use your fine detail brush and mint green paint to paint over the sketch, creating the appearance that the mint green layer is scalloped over the pink layer. -
Touching up:
Check for any uneven pencil marks or smudges. Use a tiny bit of the appropriate background color to correct any mistakes. -
Weatherproofing:
If you plan to put a real plant inside, apply a clear acrylic sealant spray over the entire exterior. This protects your hard work from water damage during watering. -
Final cure time:
Let the sealant cure for at least 24 hours before filling the pot with soil and your favorite greenery.
Now you have a charming, customized planter ready to brighten up any windowsill
Pastel Ombre With Tiny Stars
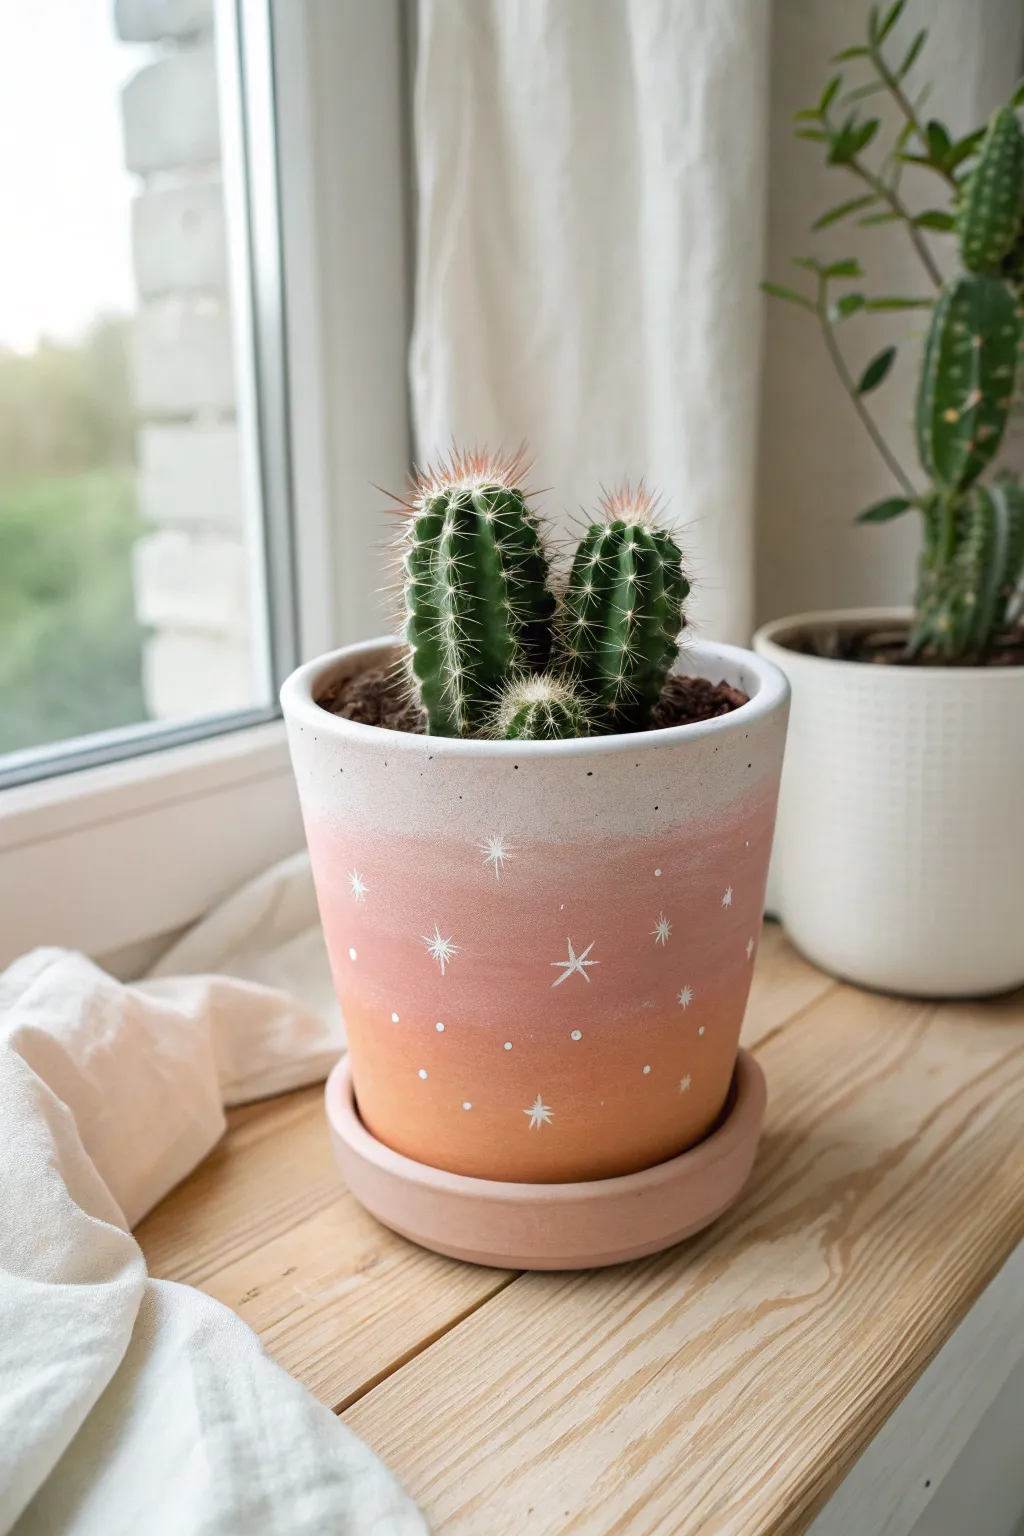
Transform a plain terracotta pot into a dreamy desert sunset with this soft, blended gradient design. The gentle transition from creamy white to terra cotta orange, sprinkled with delicate stars, creates the perfect cozy home for your favorite cactus.
How-To Guide
Materials
- Clean terracotta pot with matching saucer
- White acrylic paint (specifically a warm, creamy white)
- Pastel pink acrylic paint
- Soft orange or peach acrylic paint
- Base coat / Primer (optional)
- Two wide flat paintbrushes or sponge brushes
- Fine detail liner brush (0 or 00 size)
- Palette or paper plate for mixing
- Water cup and paper towels
- Matte spray sealer
Step 1: Preparation and Base
-
Clean the Surface:
Begin by wiping down your terracotta pot with a damp cloth to remove any dust or debris. Let it dry completely. -
Prime the Pot (Optional):
Since terracotta is very porous, applying a coat of white primer or a base layer of white acrylic paint helps the final colors pop. Paint the entire exterior white and let it dry. -
Prepare the Saucer:
Paint the saucer a solid pastel pink or peach to match the bottom tone of your ombre. I find two thin coats usually give the best coverage here.
Seamless Blending Tip
Keep a spray bottle of water nearby. A light mist over the wet paint keeps acrylics workable longer, making that smooth gradient much easier to achieve.
Step 2: Creating the Ombre Gradient
-
Paint the Top Band:
Using a wide flat brush, paint the top third of the pot (the rim area) with your creamy white paint. Don’t worry about a neat bottom edge. -
Apply the Middle Tone:
While the white is still slightly wet, take your pastel pink paint on a fresh brush. Paint the middle section of the pot, bringing the pink up to meet the white. -
Blend the Upper Transition:
Use clean, light horizontal strokes to blend where the pink meets the white. You want a soft, hazy line rather than a sharp stripe. -
Paint the Bottom Band:
Apply the orange or peach paint to the bottom third of the pot while the pink middle section is still tacky. -
Blend the Lower Transition:
Work the orange paint upward into the pink, using horizontal strokes again to blur the colors together. If the paint dries too fast, dip your brush in a tiny bit of water to reactivate the blending. -
Review and Refine:
Step back and look at your gradient. If the colors look too separated, you can go back with a slightly damp brush or a bit more paint to smooth out the transitions. Let the ombre layer dry completely before moving on.
Make It Glossy
Swap the matte sealer for a high-gloss varnish to give the pot a ceramic-glazed look. Add iridescent glitter to the wet white stars for extra sparkle.
Step 3: Adding Celestial Details
-
Test Consistency:
Put a small dollop of white paint on your palette. Add a minuscule drop of water to make it flow like ink—this helps create crisp fine lines without dragging. -
Draw the Large Stars:
Using your fine detail liner brush, paint a ‘plus’ sign (+) anywhere on the decorative band. Then, paint an ‘X’ right through the center of it to create an 8-point star. -
Taper the Points:
Go back over your star legs and gently flick the brush outward at the ends to make the points sharp and tapered. -
Add Smaller Stars:
Create variation by painting smaller 4-point stars (just a simple cross shape) scattered between the large ones. -
Fill with Stardust:
Dip the very tip of your brush handle or a toothpick into the white paint. Dot the empty spaces between stars to create distant stardust. -
Paint the Rim:
For a clean finish, paint the very top lip of the pot white if it got messy during the gradient phase.
Step 4: Finishing Up
-
Seal the Artwork:
Once all paint is bonedry (wait at least an hour), take the pot outside and spray it with a clear matte sealer. This protects the ombre from water damage when you water your plants. -
Final Assembly:
Place the finished pot onto the pink saucer you painted earlier. It’s now ready for potting.
Now you have a serene, sunset-inspired piece that brings a touch of magic to your windowsill
Marbled Pour Paint Cutie Pot
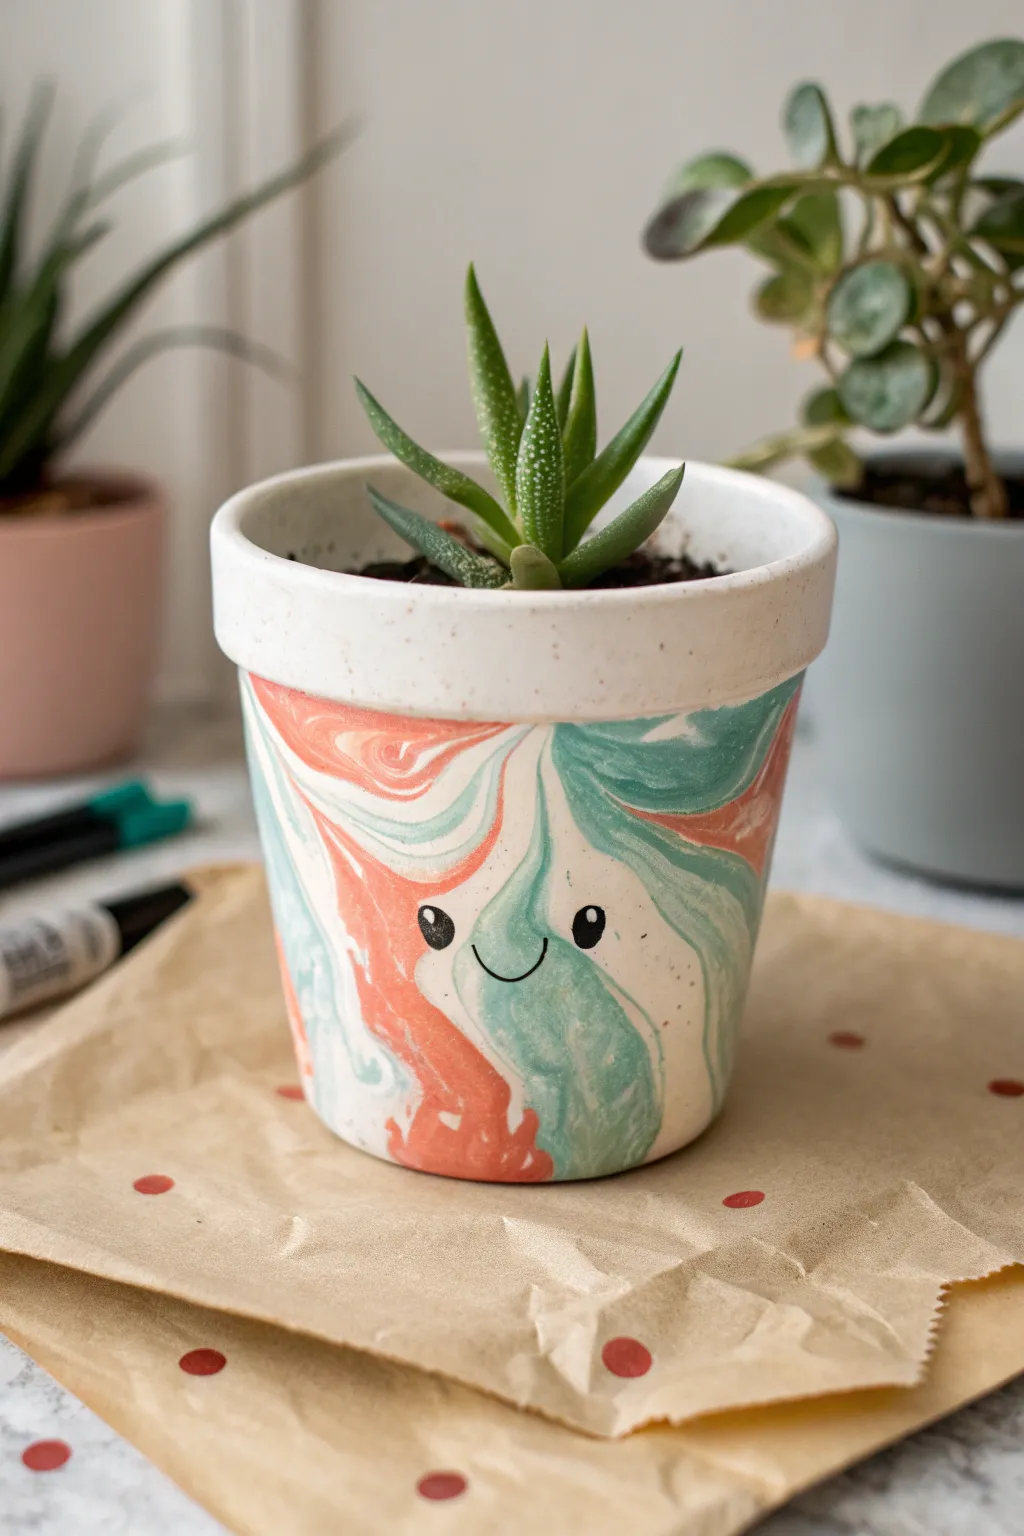
Transform a plain ceramic pot into an adorable character with this swirling marble technique. The soft blend of coral and teal creates a dreamy background for a simple, charming face that is sure to brighten any windowsill.
Detailed Instructions
Materials
- Small white ceramic or terracotta pot (3-4 inch)
- Acrylic fluid pouring paints (Coral, Teal, White)
- Pouring medium (if using standard acrylics)
- Small plastic cup for mixing
- Large plastic bin or deep tray
- Painter’s tape
- Black permanent marker or paint pen
- Clear spray sealant (matte or gloss)
- Disposable gloves
- Protective crafting paper or cardboard
- Succulent or small plant for potting
Step 1: Preparation
-
Clean surface:
Begin by wiping down your ceramic pot with a damp cloth to remove any dust or oils. Let it dry completely. -
Tape the rim:
Since the rim of the pot in our example remains pure white, carefully apply painter’s tape around the entire top lip of the pot. Press the edges down firmly to prevent paint from seeping underneath. -
Tape the inside:
For a cleaner finish, stuff the inside of the pot with paper or tape off the inner rim so the paint doesn’t splash inside where the soil will go. -
Prepare workspace:
Set up a large plastic bin or tray lined with protective paper. Place a small raised object, like an upside-down yogurt cup or slightly smaller jar, in the center to balance your pot on while pouring.
Pro Tip: Consistency Check
Test your paint flow on a piece of cardboard first. If it globs, add more medium. If it runs like water, add a touch more paint.
Step 2: Creating the Marble Effect
-
Mix paints:
If you aren’t using pre-mixed pouring paints, mix your standard acrylics with a pouring medium according to the bottle instructions. The consistency should be like warm honey. -
Layer the cup:
Take your small plastic mixing cup. Pour a bit of white, followed by coral, then teal. Repeat these layers two or three times. Do not stir; you want the colors to sit on top of each other. -
Position the pot:
Place your taped pot upside down on your raised stand in the tray. -
The dirty pour:
Start pouring the paint from your cup directly onto the center of the pot’s bottom (which is facing up). Pour slowly and move in a small circular motion to help the paint flow evenly down the sides. -
Tilt and flow:
If the paint isn’t covering a specific spot, you can gently tilt the stand or blow lightly on the paint to encourage it to move. I like to let gravity do most of the work here for the most natural swirls. -
Drip dry:
Allow the excess paint to drip off the rim (which is currently at the bottom). Let the pot sit undisturbed for at least 24 hours until fully dry.
Troubleshooting: Bubbles
If you see tiny bubbles appearing in the wet paint, gently blow on them or use a kitchen torch quickly to pop them before the paint sets.
Step 3: Finishing Touches
-
Remove tape:
Once the paint is completely dry to the touch, carefully peel away the painter’s tape from the rim. If the paint bridged over the tape, score it lightly with a craft knife first to avoid peeling the design. -
Draw the face:
Locate an area on the pot where the marble pattern is lighter or less busy—this will be the face. Using a black paint pen or permanent marker, draw two small oval eyes. -
Add eye highlights:
Use a tiny dot of white paint or a white gel pen to add a small ‘glint’ inside the black ovals. This brings the character to life instantly. -
Draw the smile:
Draw a small, simple ‘U’ shape between the eyes for a smile. Keep the line thin and delicate. -
Seal result:
Take the pot to a well-ventilated area and spray it with a clear sealant. This protects your paint job from water damage when you water your plant. -
Planting:
Once the sealant is dry, fill your new cutie pot with soil and add a small succulent, like the zebra haworthia shown in the photo.
Now you have a happy little plant friend ready to add personality to your shelf


Have a question or want to share your own experience? I'd love to hear from you in the comments below!