Whenever I need a quick mood-boosting sketch, I draw a cute pumpkin—it’s basically instant charm on paper. Here are my favorite cute pumpkin drawing ideas to help you build adorable characters, from classic faces to more playful, unexpected designs.
Kawaii Face Pumpkin
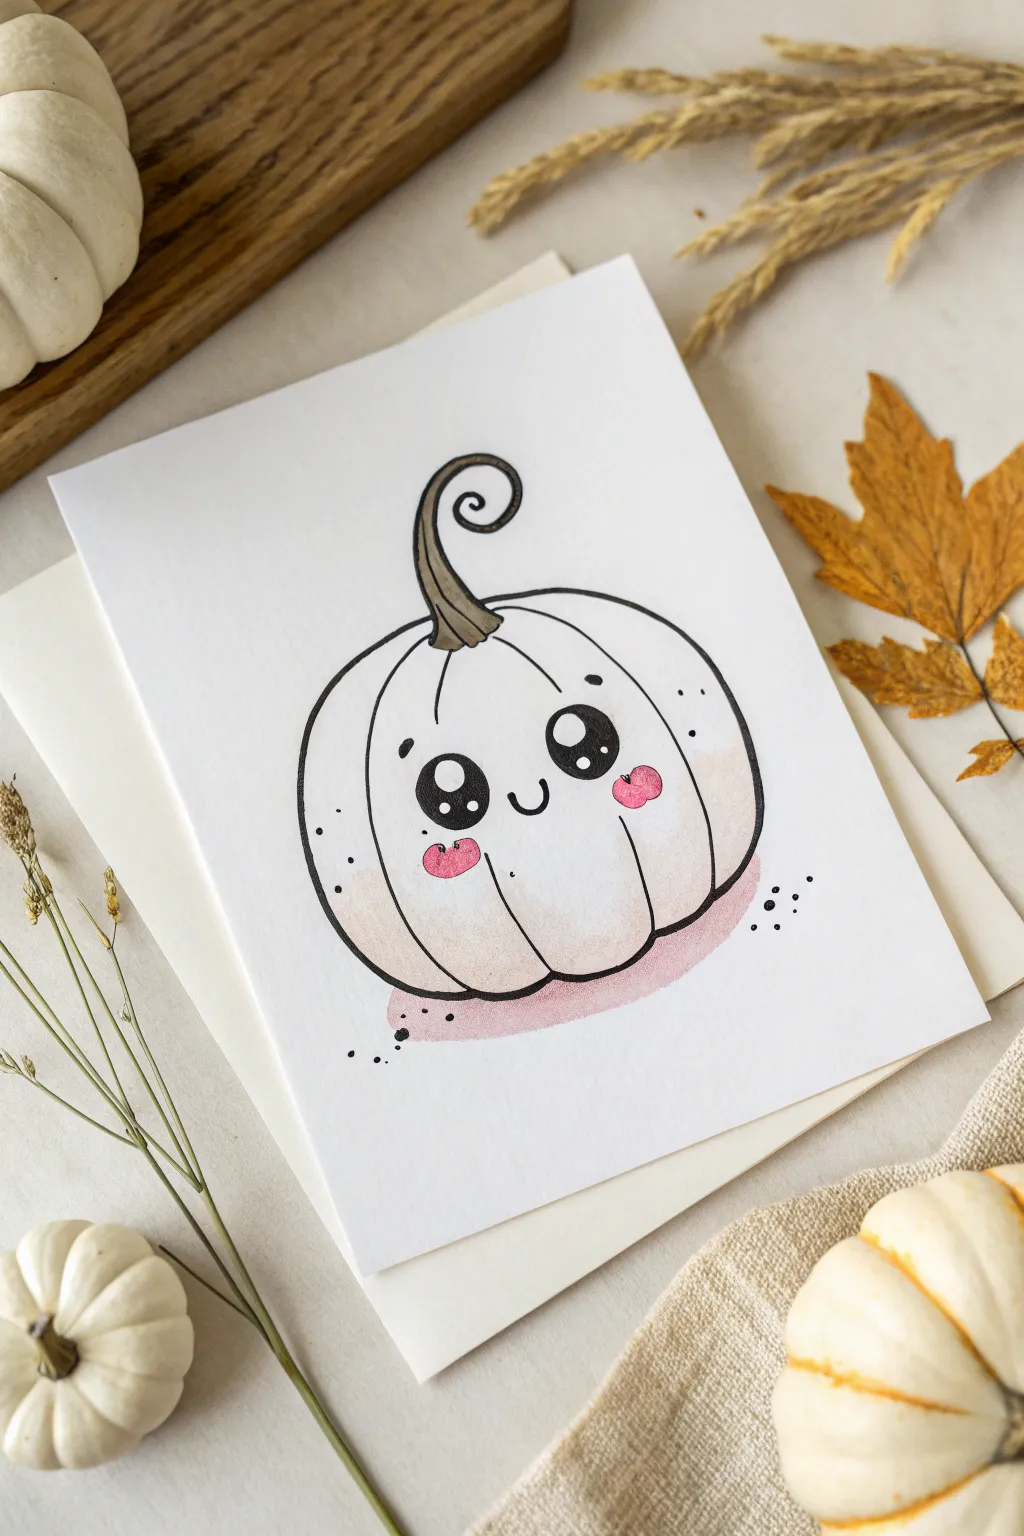
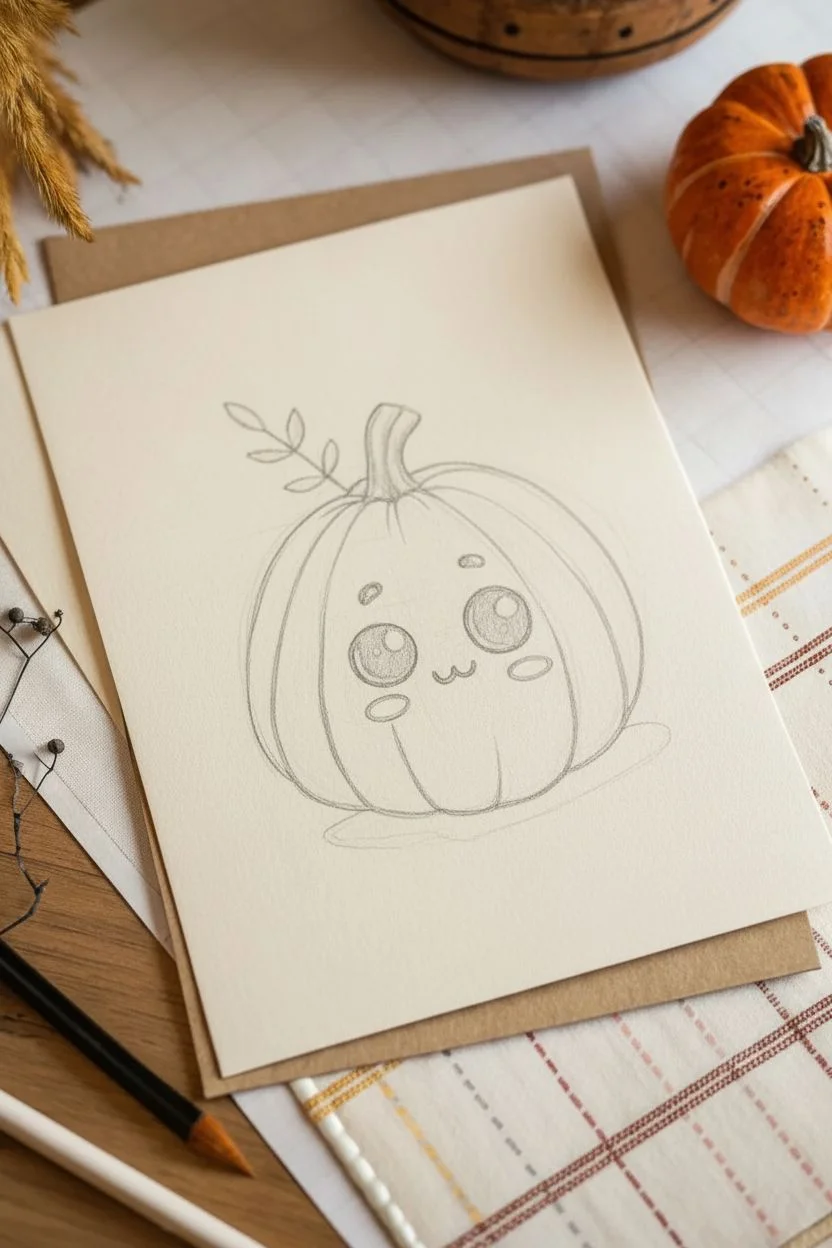
This adorable project captures the essence of a cozy autumn with a minimalist, kawaii-style pumpkin illustration that’s perfect for greeting cards or seasonal decor. With its big, sparkling eyes and rosy cheeks, this character brings a gentle warmth to the page using simple ink lines and soft shading.
Step-by-Step Guide
Materials
- High-quality white cardstock or watercolor paper
- Pencil and eraser
- Fine-point black waterproof pen (multiliner, 0.3 or 0.5)
- Black brush pen or thicker marker
- Watercolor paints or alcohol markers (soft peach, pink, brown)
- White gel pen (optional)
- Small round paintbrush
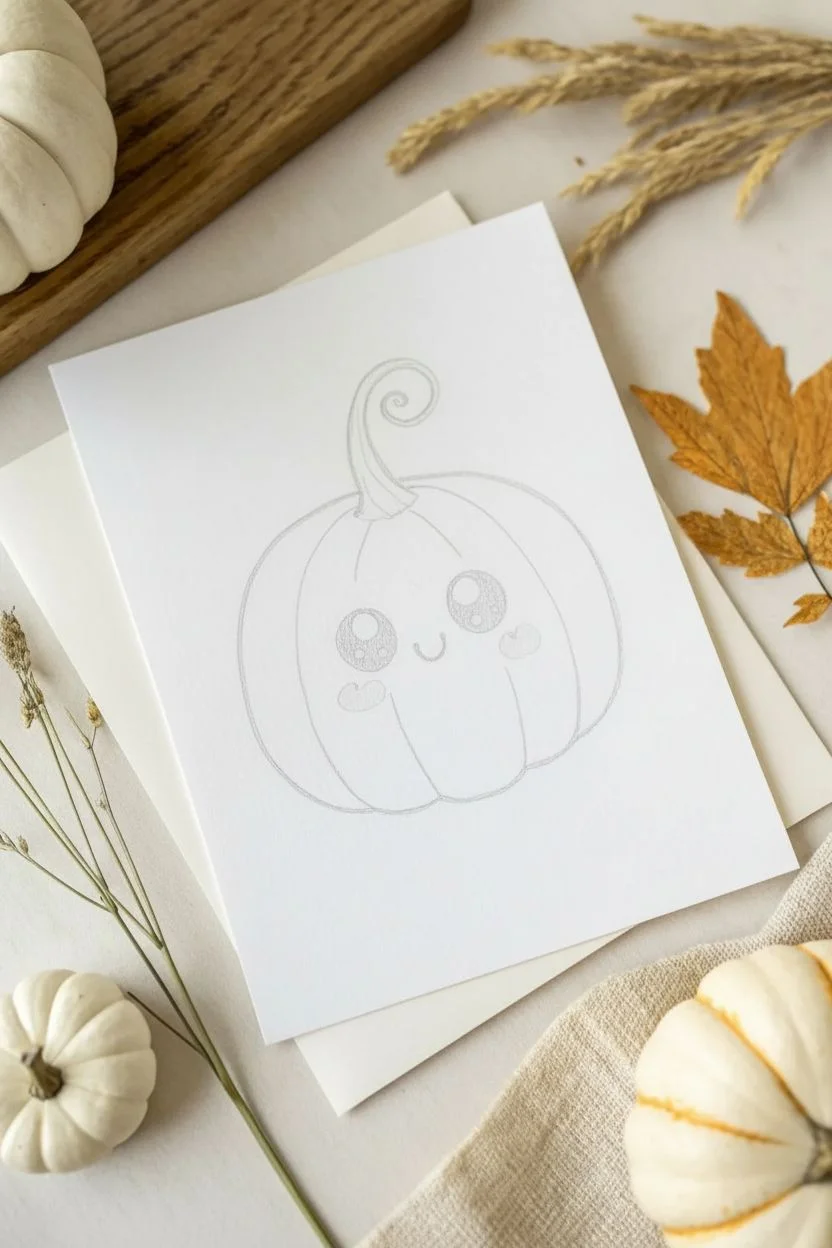
Step 1: Sketching the Shape
-
Draw the central oval:
Start lightly with a pencil. Draw a slightly flattened oval shape in the center of your paper to serve as the main body of the pumpkin. Keep the lines faint so they are easy to erase later. -
Add the ribs:
Divide the oval into sections to create the pumpkin’s ribs. Draw curved lines radiating from the top center point down to the bottom. The sections on the far left and right should be wider and more curved to show dimension. -
Sketch the stem:
At the top center point where your rib lines meet, draw a stem that curls elegantly to one side. Make the base of the stem slightly wider where it connects to the fruit and taper it as it spirals upward. -
Draft the face:
Place two large circles in the middle section for eyes, spacing them evenly apart. Between them, just slightly lower, draw a tiny ‘u’ shape for a smiling mouth. Sketch small ovals under each eye for the blushing cheeks.
Pro Tip: Eye Sparkling
Make the two white highlights in the eyes different sizes (one large, one small). This asymmetry makes the character look more alive and expressive.
Step 2: Inking the Lines
-
Outline the body:
Using your fine-point waterproof black pen, carefully trace over your pencil lines for the pumpkin’s outer shape and the internal ribs. Keep your hand steady for smooth, crisp curves. -
Detail the stem:
Trace the stem outline. Add a few thin, internal lines following the curve of the stem to give it a woody texture. -
Ink the face features:
Trace the small mouth and the cheek outlines. For the eyes, draw two smaller circles inside each large eye circle to represent highlights—one medium and one tiny. -
erase sketches:
Once the ink is completely dry—give it a full minute just to be safe—gently erase all underlying pencil marks to reveal a clean illustration.
Step 3: Adding Color & Detail
-
Fill the eyes:
Switch to a black brush pen or thicker marker to fill in the eyes. Be very careful to color around the small highlight circles, leaving them pure white for that sparkling kawaii look. -
Base shading:
Prepare a very diluted wash of soft peach or warm beige watercolor. I personally like to wet the paper slightly first near the bottom of the pumpkin, then drop in the color so it diffuses upward, creating a gradient from the bottom up. -
Paint the stem:
Use a light brown or olive tone for the stem. Paint it solidly or leave tiny gaps for highlights. -
Blush those cheeks:
Load your brush with a bright, soft pink. Dab color into the cheek ovals, allowing it to remain fairly concentrated so they pop against the pale pumpkin body. -
Deepen shadows:
Add a second, slightly darker layer of your peach/beige mix to the very bottom edges of the pumpkin segments and along the rib lines to enhance the 3D effect. -
Ground the subject:
Paint a subtle, freeform wash of pinkish-brown underneath the pumpkin to act as a shadow, grounding the object so it doesn’t look like it’s floating.
Level Up: Seasonal Friends
Draw a trio of these pumpkins in different shapes—tall, round, and squat—to create a complete pumpkin patch family for a larger art print.
Step 4: Final Touches
-
Add speckles:
Using your fine black pen, add tiny dots and specks loosely around the pumpkin’s perimeter and a few on the pumpkin skin itself for texture. -
Highlight check:
If you accidentally colored over eye highlights, use a white gel pen to add the shiny spots back in. You can also add a tiny white dot to each pink cheek for extra cuteness.
Now your sweet little pumpkin is ready to bring a smile to anyone’s face this autumn season


Pumpkin With Blush Cheeks and Highlights
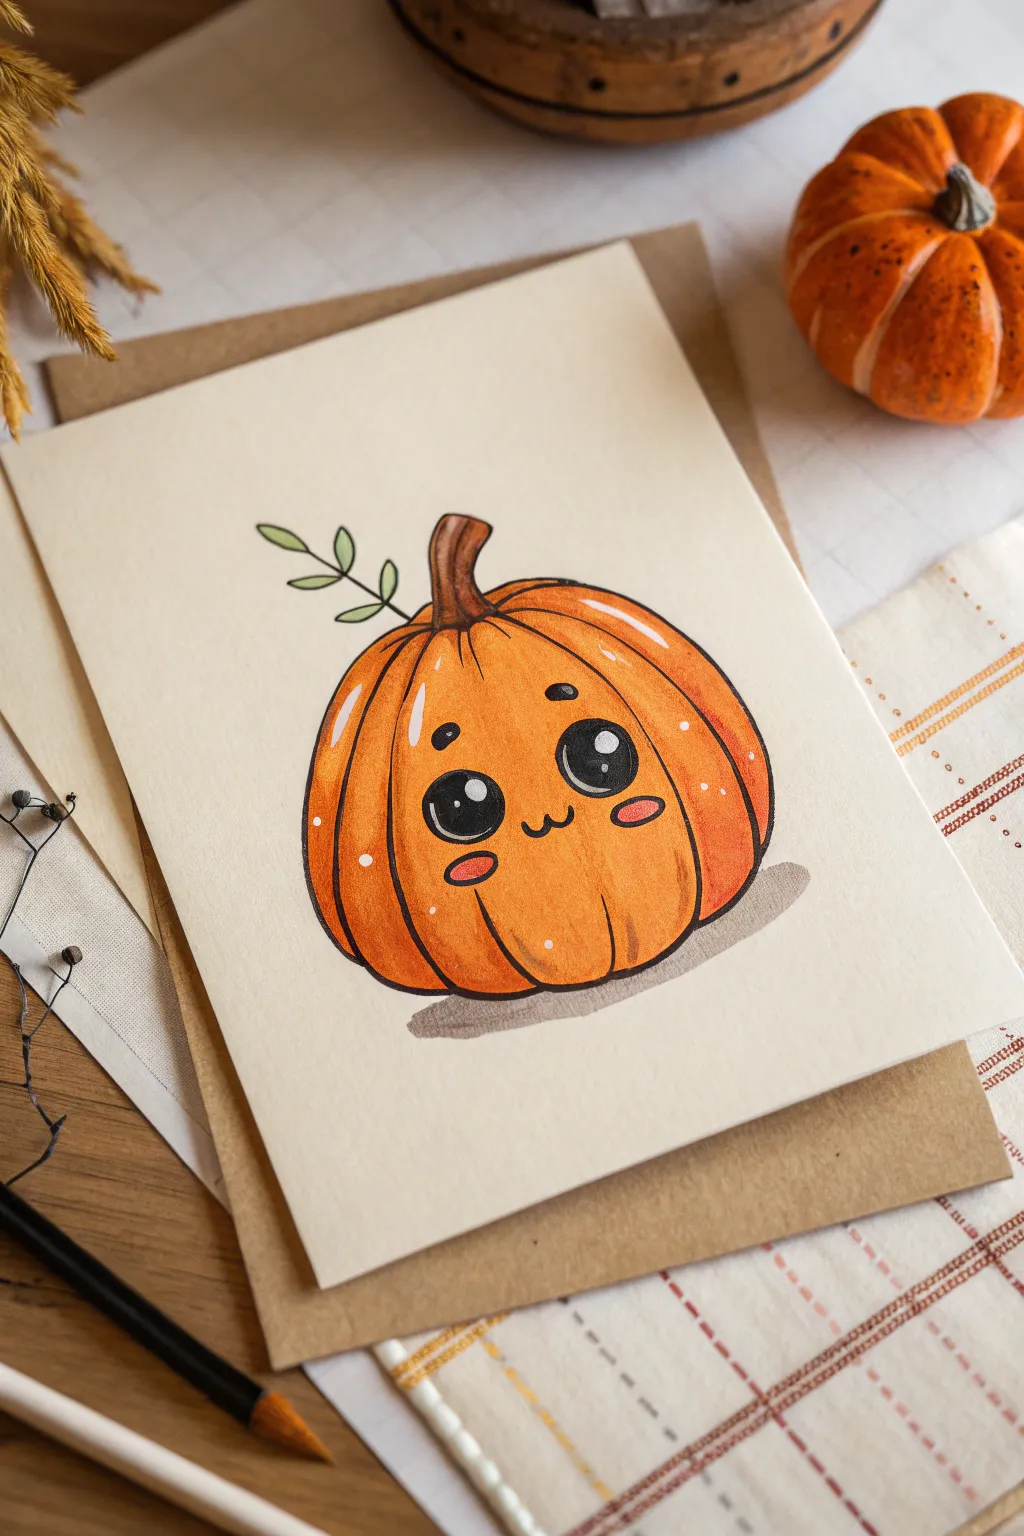
Capture the essence of autumn sweetness with this adorable, bright orange pumpkin drawing. Featuring kawaii-style eyes, a tiny smile, and soft blush marks, this piece uses simple shapes and careful shading to pop right off the page.
Step-by-Step Tutorial
Materials
- Warm-toned drawing paper or cream cardstock
- Pencil (HB) and eraser
- Fine liner pen (black, waterproof, 0.3mm or 0.5mm)
- Alcohol-based markers (Orange set: light, medium, dark)
- White gel pen (for highlights)
- Green fine liner or marker (for the leaf)
- Brown marker or colored pencil (for the stem and shadow)
Step 1: Sketching the Shape
-
Draw the central oval:
Begin by sketching a large, slightly flattened oval in the center of your page. This will serve as the main body of the pumpkin. -
Add segments:
Starting from the top center point, draw curved lines cascading down the sides of the oval. Make the middle segment wide for the face, and add narrower curved segments on either side to create the ribbed pumpkin texture. -
Define the stem:
Draw a slightly twisted, rectangular shape protruding from the top center dip. Add a curved line at the top to give it a cut and dried appearance. -
Sketch the face:
Lightly sketch two large circles for eyes in the lower half of the central segment. Below them, draw a tiny ‘w’ shape for the mouth. Add small ovals under the eyes for the blush marks. -
Add the greenery:
Draw a simple twig extending from behind the stem to the left, adding small leaf ovals along the stem.
Ink Confidence
Don’t press too hard with the fine liner. A relaxed hand creates smoother curves which are essential for the pumpkin’s round, friendly look.
Step 2: Inking & Coloring
-
Outline the pumpkin:
Go over your pencil lines with a black fine liner. Use a steady hand for the pumpkin ridges, allowing the lines to taper slightly at the ends. -
Fill the eyes:
Use the black liner or a black marker to fill in the large eye circles, but leave two small white circles inside each one (a larger one top-right, smaller one bottom-left) to act as reflections. -
Base layer of orange:
Erase your pencil marks. Take your lightest orange marker and color the entire pumpkin body, working in vertical strokes that follow the curve of the segments. -
Add depth with shading:
Using a medium or dark orange marker, add shading between the segments where the ridges dip inward. I find it helpful to flick the marker stroke upward from the bottom to create a smooth gradient. -
Color the blush:
Use a pink or coral marker to fill in the oval blush marks under the eyes. -
Stem and leaves:
Color the stem with a medium brown marker. Use a light green fine liner or marker to trace and fill the floating leaf sprig.
Make It Festive
Turn this into a Halloween greeting card by writing ‘Hey Pumpkin’ or ‘Happy Fall’ in modern calligraphy script above the leaf sprig.
Step 3: Finishing Touches
-
Deepen the contrast:
Add a second layer of your darkest orange to the very bottom curves of the pumpkin to give it weight and roundness. -
Highlighting:
Using a white gel pen, add small dots and lines to the upper left side of the pumpkin segments. This mimics light hitting a shiny surface. -
Add texture dots:
Sprinkle a few tiny white dots on the darker orange areas for extra texture. -
Ground the pumpkin:
With a grey or desaturated brown marker, draw a simple oval shadow directly underneath the pumpkin so it doesn’t look like it’s floating.
Now you have a charming little pumpkin character ready to brighten up any autumn day


Pumpkin With Curly Vines and Leaves
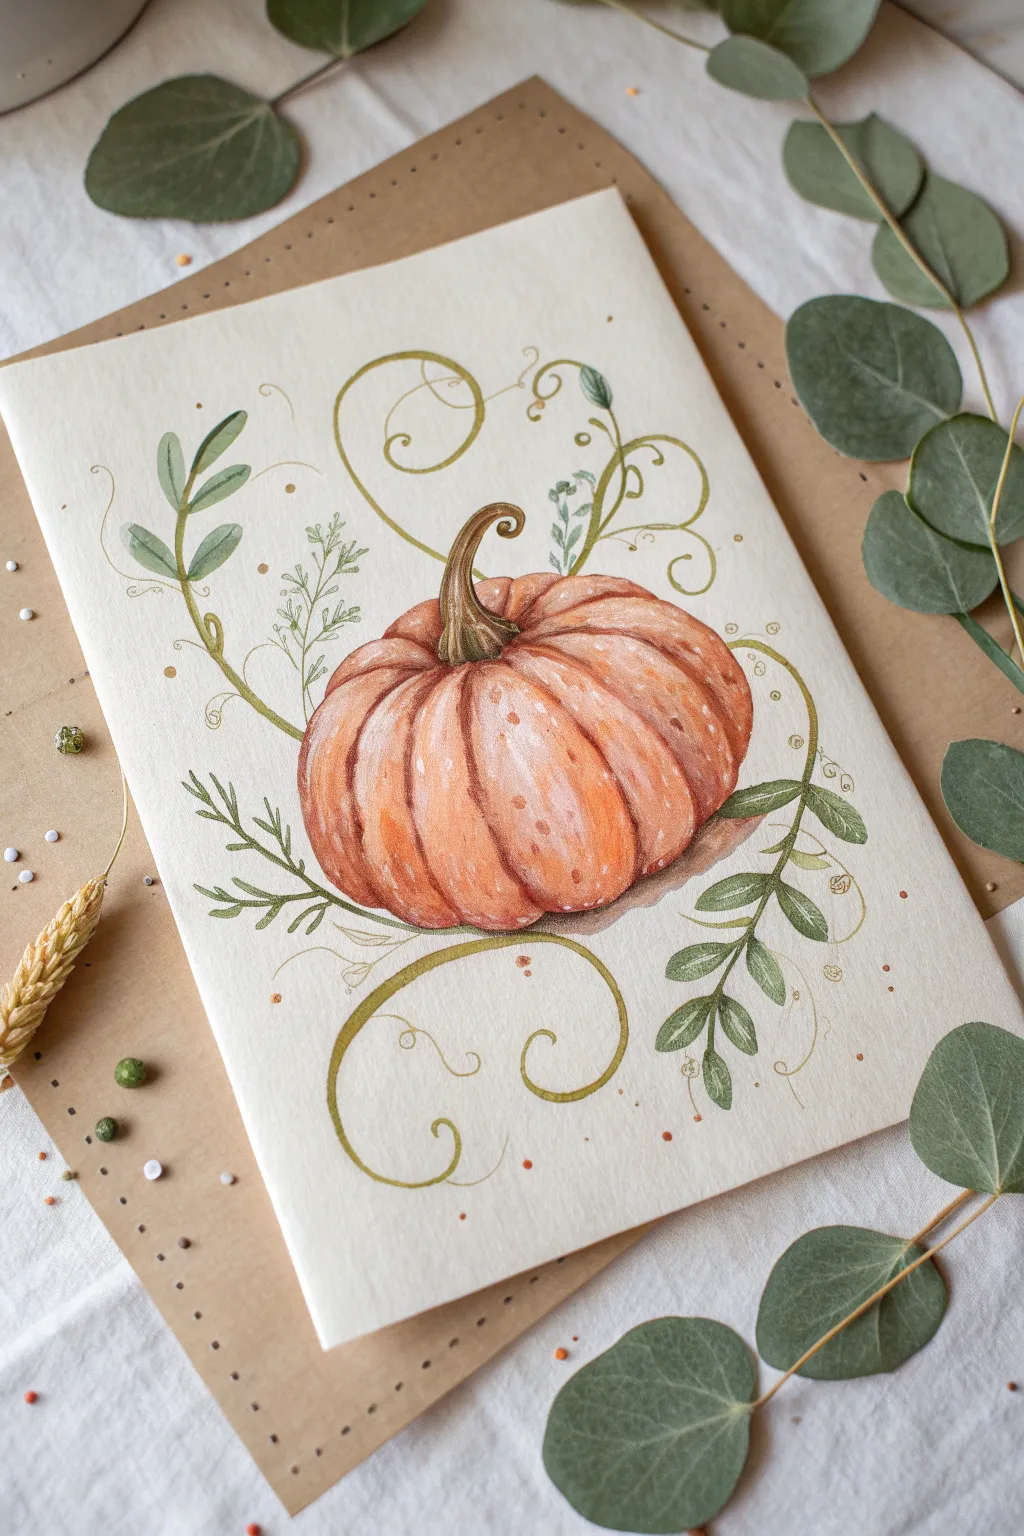
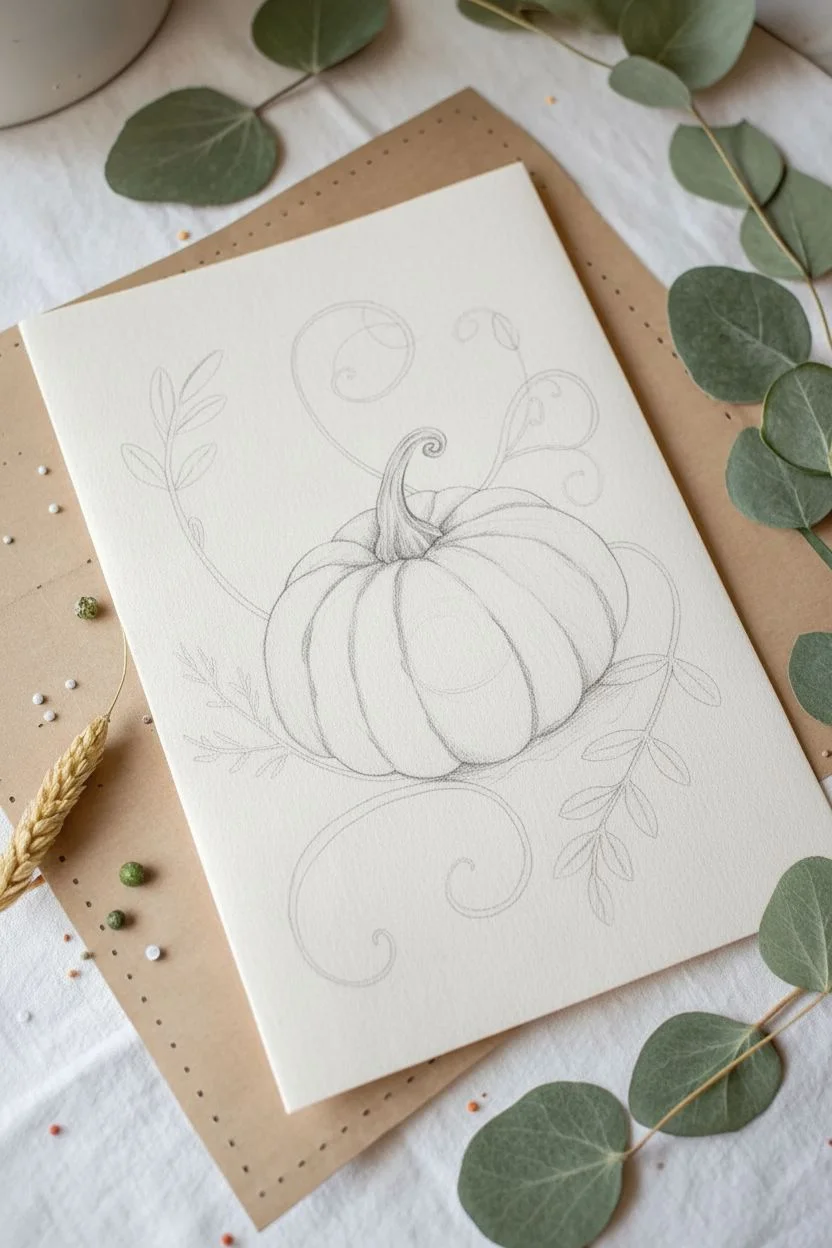
Capture the magic of autumn with this delicate illustration featuring a textured orange pumpkin surrounded by dancing, curly vines and soft green sprigs. This project combines colored pencil details with watercolor-like softness to create a charming seasonal greeting or art print.
Step-by-Step
Materials
- Heavyweight watercolor paper or hot-press illustration board (A5 or 5×7 inches)
- HB or H graphite pencil for sketching
- Kneaded eraser
- Water-soluble colored pencils or watercolor paints (Orange, Burnt Sienna, Olive Green, Sap Green, Light Brown)
- Fine tip brush (size 2 or 4)
- Fine-liner pens (sepia or light brown, 0.1mm)
- White gel pen or gouache for highlights
- Kraft paper (for mounting/presentation)
Step 1: Sketching the Base
-
Establish the Pumpkin Shape:
Start by lightly drawing an oval shape slightly below the center of your page to anchoring the composition. This doesn’t need to be perfectly round; a slightly flattened bottom adds realism. -
Define the Ribs:
From the center top point, draw curved lines cascading down the sides of the oval to create the pumpkin’s segments (ribs). Make the segments facing you wider, and the ones on the sides significantly narrower. -
Add the Stem:
Draw a thick, twisting stem emerging from the top center indentation. Give it a playful curl at the tip, leaning slightly to the left, and widen the base where it connects to the fruit. -
Draft the Florals:
Sketch long, flowing S-curves extending outward from behind the pumpkin. Add small oval leaves along these stems and map out the large, decorative swirls at the top and bottom.
Step 2: Applying Color
-
First Wash:
Using diluted watercolor or water-soluble pencil, layout a pale orange wash over the entire pumpkin body, avoiding the stem. Keep this layer light to preserve the paper’s luminosity. -
Deepening the Shadows:
Once the base is dry, use a deeper orange or burnt sienna to shade the grooves between the ribs. Feather this color outward slightly to give the segments volume. -
Coloring the Stem:
Fill in the stem with a mix of olive green and light brown. Add vertical texture lines with a darker brown pencil to mimic the woody grain. -
Painting Leaves:
Paint the leaves in varying shades of muted green—olive for the larger leaves and a sage or mint tone for the delicate sprigs. Keep the paint somewhat transparent.
Uneven Wash?
If your watercolor dries with hard edges (blooms), soften them with a slightly damp brush while the paper is still cool to the touch, or hide them later with colored pencil texture.
Step 3: Refining Details
-
Building Pumpkin Texture:
Switch to dry colored pencils. Use a sharp orange pencil to draw tiny vertical strokes and stippling dots across the pumpkin skin, concentrating on the shadow areas for texture. -
Enhancing the Ribs:
I like to use a reddish-brown pencil here to deepen the very bottom of the pumpkin and the deepest crevices between the ribs, creating a strong sense of three-dimensionality. -
Defining the Vines:
Trace over your initial pencil lines for the decorative swirls using a light olive green pencil. Vary the pressure to make the line thinnest at the curled ends. -
Adding Veins:
Draw simple central veins on the larger green leaves using a sharpened dark green pencil.
Add Some sparkle
Use metallic gold watercolor or a gold gel pen for the decorative swirls and dots instead of green. It adds a magical, festive quality perfect for Thanksgiving cards.
Step 4: Final Touches
-
Adding Highlights:
Use a white gel pen or a tiny dot of white gouache to add speckles to the top of the pumpkin ribs where the light would hit. This makes the surface look slightly waxy and realistic. -
Background Elements:
With a fine-point sepia pen or pencil, add tiny decorative dots and very faint, thread-like tendrils around the main vines to fill empty space. -
Clean Up:
Gently erase any visible graphite sketch lines that weren’t covered by paint or pencil. -
Mounting:
For the finishing presentation shown in the photo, mount your artwork onto a sheet of kraft paper or cardboard, leaving a border to frame the piece warmly.
Now you have a beautifully textured botanical illustration ready to display or gift.


Pumpkin Patch Family Lineup
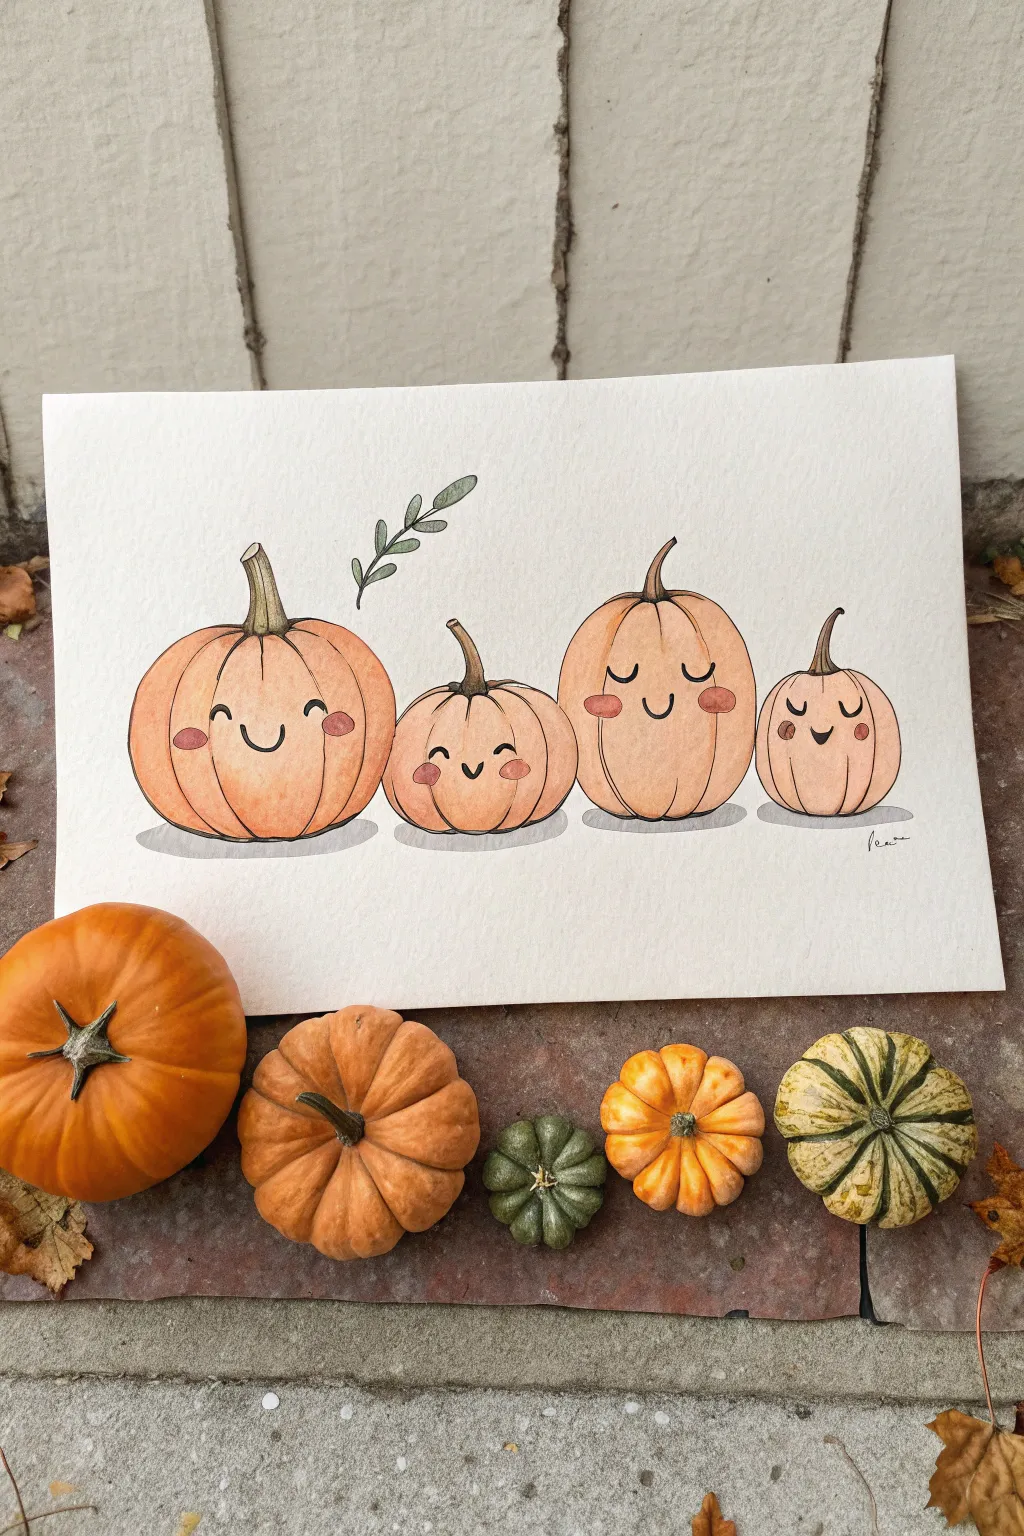
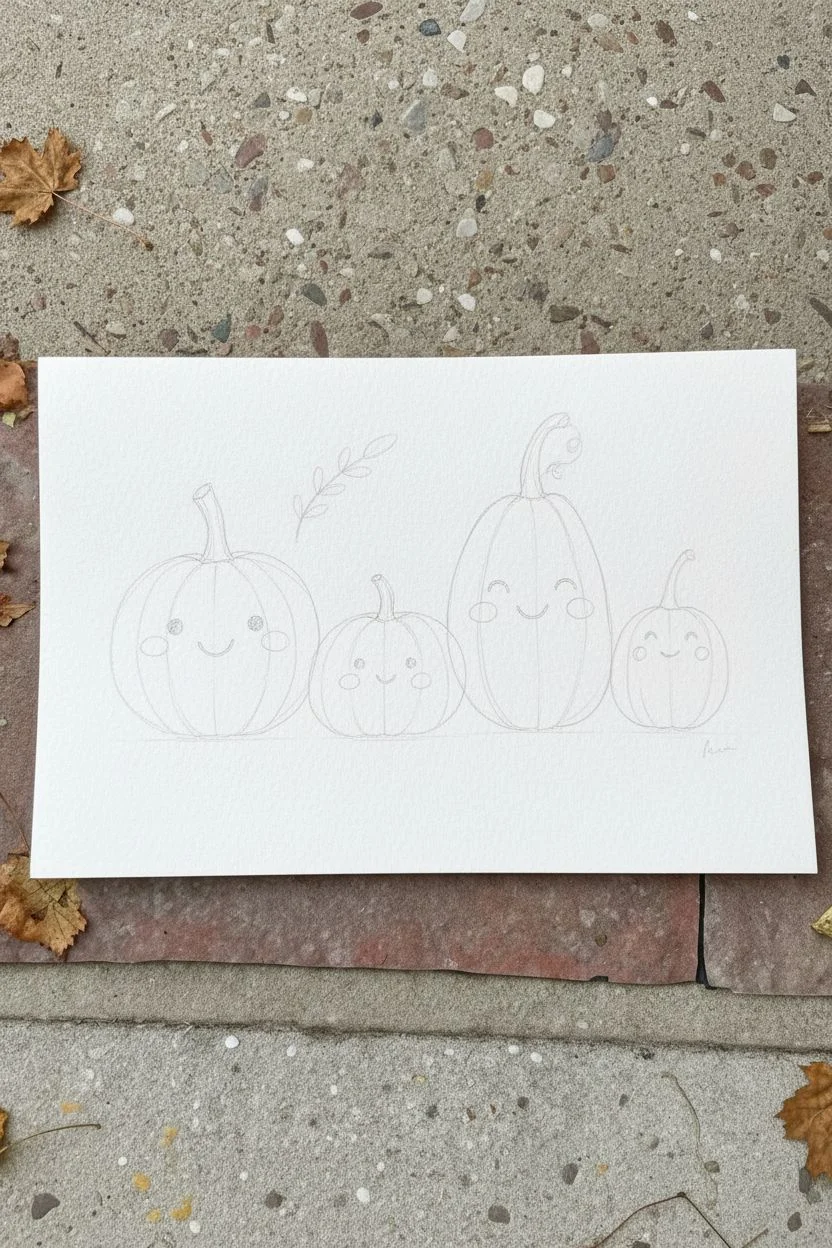
Capture the charm of autumn with this adorable illustration featuring a family of four smiling pumpkins. Using watercolors and ink, you’ll create a heartwarming lineup complete with varied shapes, sweet expressions, and a delicate leafy sprig.
Step-by-Step Guide
Materials
- Cold press watercolor paper (A4 or 9×12 inch)
- HB pencil and eraser
- Waterproof fine liner pen (black, 0.3mm or 0.5mm)
- Watercolor paints (shades of orange, brown, green, soft pink)
- Round watercolor brush (size 6 or 8)
- Small detail brush (size 2)
- Mixing palette and water cup
Step 1: Sketching the Shapes
-
Map out the positions:
Begin by lightly marking the baseline where your pumpkins will sit. Draw four distinct pumpkin shapes in a horizontal row. From left to right, create a large round one, a shorter squat one, a taller oval one, and finally a small round one. -
Add the segments:
Lightly sketch the vertical curved lines (ribs) on each pumpkin to give them form. Start from the center top and curve downwards to the base, making sure the lines follow the round contour of each shape. -
Draw the stems:
Top each pumpkin with a unique stem. Give the first one a thick, curved stem, the second a short stubby one, the third a slender tall stem, and the fourth a cute curled stem. -
Give them personality:
Pencil in simple, happy faces on each gourd. Use variations like crescent eyes for a sleeping look or open dots for a cheerful gaze. Keep the mouths small and centered. -
Add a botanical touch:
Sketch a simple, floating sprig of leaves hovering between the first and second pumpkin to add a bit of height and visual interest to the composition.
Fixing Smudges
If you accidentally smudge ink before it dries, turn it into a shadow! Gently blend the smudge out with a little water before painting, or cover with slightly darker orange paint later.
Step 2: Inking the Details
-
Outline the pumpkins:
Using your waterproof fine liner, carefully trace over your graphite lines. I like to keep my hand loose here to allow for natural variations in the line weight. -
Refine the faces:
Ink the eyes and mouths clearly. For the closed ‘sleeping’ eyes, use a smooth U-shape. Do not ink the cheek circles yet; those will be painted later. -
Erase guidelines:
Once the ink is completely dry (wait a few minutes to avoid smudging), gently erase all visible pencil marks to leave a clean black-and-white drawing.
Add Seasonal Flair
Make it festive by painting different patterned hats on the pumpkins or adding a dusting of glitter to the stems once the paint is dry.
Step 3: Watercolor Wash
-
Base coat for pumpkins:
Mix a warm, light orange watercolor. Apply a wash over the entire body of each pumpkin. You can leave the very center of some segments slightly lighter to suggest a highlight. -
Painting the stems:
While the bodies dry, paint the stems using a light brown or earthy green mix. Keep the color slightly sheer to maintain the illustrative feel. -
Adding depth:
Once the base orange is dry, mix a slightly darker, more saturated orange. Paint along the vertical rib lines and the bottom edges. This creates a shadow effect that makes the pumpkins look rounder. -
Softening the shadows:
Immediately after applying the darker orange, use a damp, clean brush to blend the inner edge of the color outward, preventing harsh lines. -
Greenery details:
Paint the floating sprig with a muted sage green. Carefully fill in each small leaf, staying within your inked lines.
Step 4: Finishing Touches
-
Rosy cheeks:
Dip your detail brush into a watered-down soft pink or coral. Dab two small oval circles on each pumpkin face for the blush. Keep this paint quite watery so it stays transparent. -
Grounding shadows:
Mix a very watery grey or diluted brown. Paint a simple, flat oval shadow directly underneath each pumpkin to ground them, so they don’t look like they are floating in space. -
Final stem details:
If the stems look too flat, add a tiny stripe of darker brown on one side for dimension. -
Signature:
Sign your name in jagged handwriting near the bottom right to complete your artwork.
Step back and enjoy your delightful row of happy autumn friends
BRUSH GUIDE
The Right Brush for Every Stroke
From clean lines to bold texture — master brush choice, stroke control, and essential techniques.
Explore the Full Guide
Waving Pumpkin With Tiny Arms
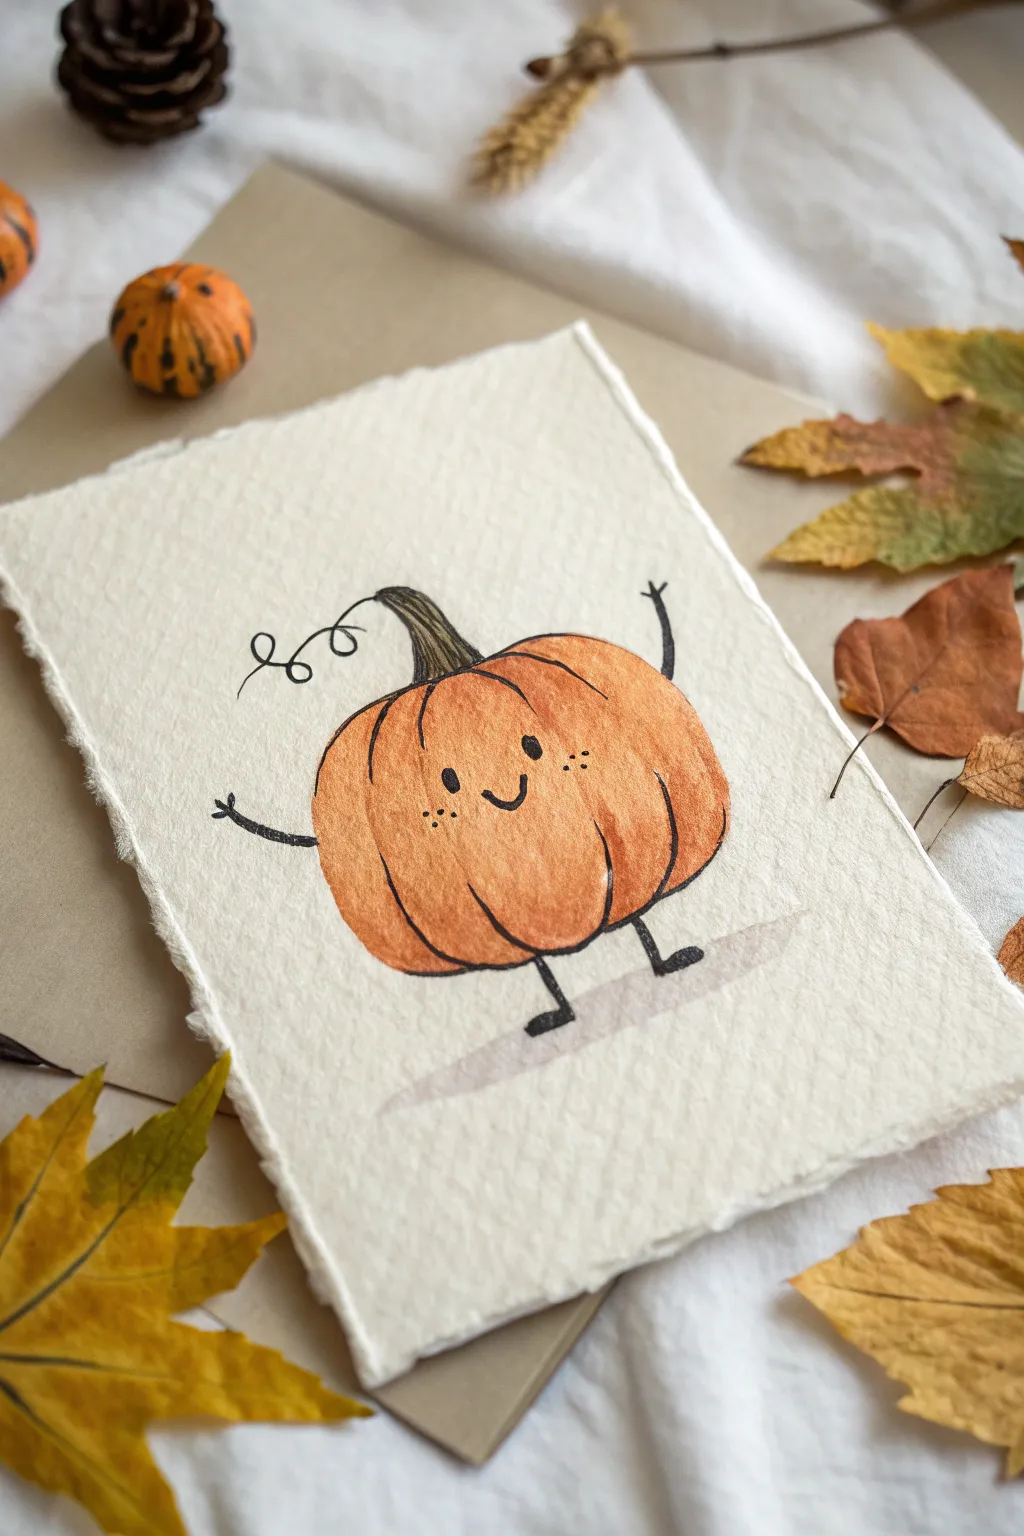
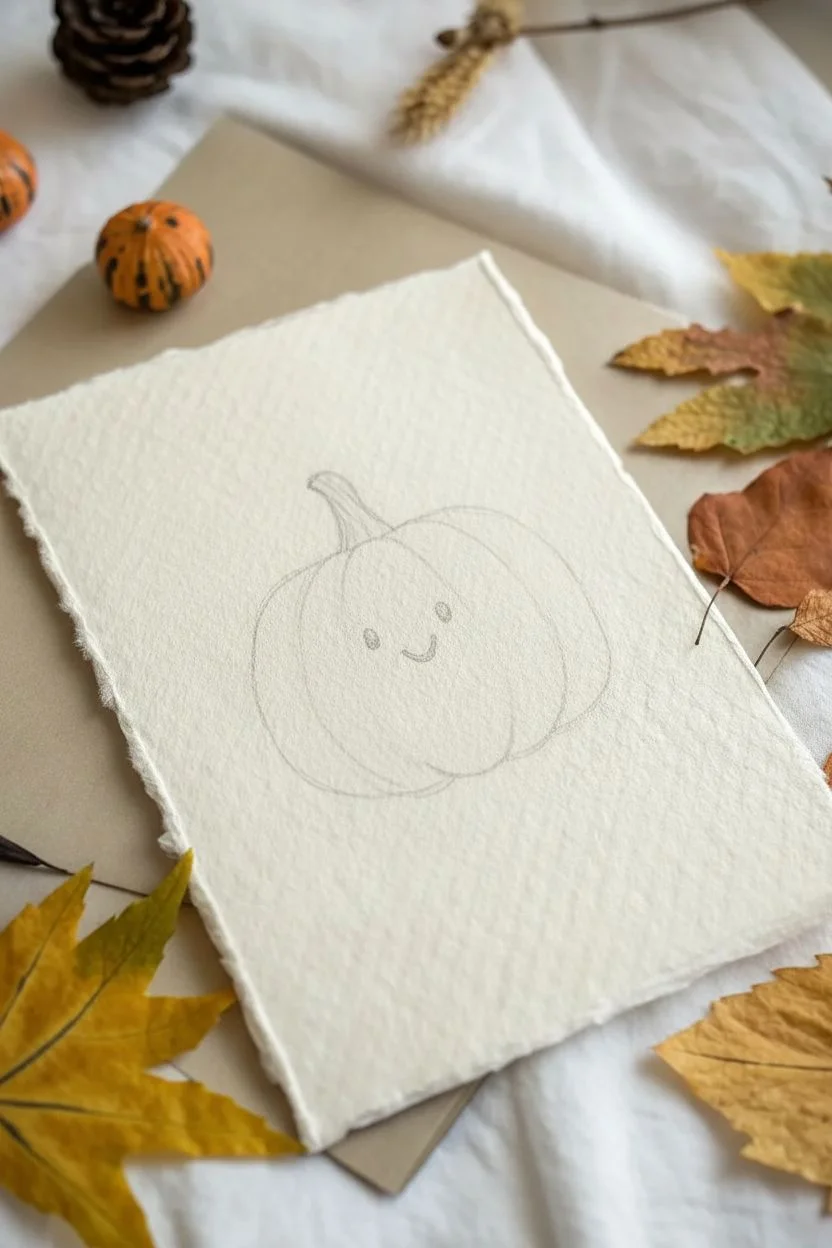
Celebrate the cozy season by painting this cheerful pumpkin character who is ready to offer a friendly wave. Using a simple line-and-wash technique on textured paper, you’ll create an adorable piece of autumn art perfect for greeting cards or seasonal decor.
Step-by-Step Guide
Materials
- Heavyweight watercolor paper (deckled edge preferred)
- Watercolor paints (orange, burnt sienna, yellow ochre, sap green, brown)
- Fine liner pen (black, waterproof, size 03 or 05)
- Round watercolor brush (size 4 or 6)
- Pencil (HB)
- Eraser
- Paper towel
- Water cup
Step 1: Sketching the Character
-
Create the base shape:
Start by lightly sketching a wide, slightly flattened oval shape in the center of your paper. This doesn’t need to be perfect; organic shapes make the pumpkin look more natural. -
Mark the ridges:
Draw curved vertical lines running from the top center divot down to the bottom center. These lines define the pumpkin’s segments, making the outer segments curve more drastically than the middle ones. -
Add the stem:
Sketch a thick, curved stem emerging from the top center divot, leaning slightly to the left for personality. -
Position the face:
In the central segment, lightly mark two small dots for eyes and a tiny ‘u’ shape for a smile. Keep the face features grouped closely together to maximize cuteness.
Uneven Color?
If your watercolor dries with hard edges inside the pumpkin, try wetting the paper slightly before applying paint next time, or work faster to keep a ‘wet edge’ as you fill the shape.
Step 2: Inking the Outline
-
Trace the body:
With your waterproof fine liner, carefully go over your pencil lines for the pumpkin’s body. I like to use slightly broken or wavering lines here to match the rustic texture of the paper. -
Draw the arms and legs:
Add two simple stick legs at the bottom with L-shaped feet. Then, draw thin black arms; one should be raised in a wave, and the other extended to the side. -
Ink the face:
Fill in the small solid black circles for eyes and trace the smile. Add three tiny freckle dots below each eye. -
Add the curly tendril:
From the base of the stem, draw a loose, spring-like coil floating off to the left using your pen. -
Detail the stem:
Outline the stem and add a few vertical texture lines inside it to look like fibrous plant material. -
Erase pencil marks:
Wait a moment for the ink to dry completely, then gently erase all visible pencil sketches.
Paper Personality
To get the fuzzy edges shown in the photo, tear your watercolor paper against a ruler instead of cutting it with scissors. This creates a charming deckled look.
Step 3: Watercolor Wash
-
Mix your orange:
On your palette, mix a bright orange with a tiny touch of burnt sienna or brown to tone it down slightly, making it look like a real pumpkin skin. -
Paint the segments:
Fill in the pumpkin segments with your orange mix. Work one segment at a time or wet the whole shape first for a softer blend. -
Add shadows:
While the paint is still damp, drop a slightly more concentrated orange or reddish-brown along the bottom edge and the vertical ridge lines to create volume. -
Lift highlights:
Rinse your brush and blot it on a towel so it’s thirsty. Gently lift a little pigment from the top-center of the side segments to create a highlight effect. -
Paint the stem:
Mix a muddy green using sap green and a touch of brown. Carefully fill in the stem area, keeping the color somewhat translucent. -
Ground shadow:
Mix a very watery, pale grey or diluted brown. Paint a quick, loose horizontal wash underneath the feet to ground the character, so he isn’t floating in space.
Let your little waving friend dry completely before displaying it alongside some real autumn leaves
Pumpkin With Witch Hat Charm
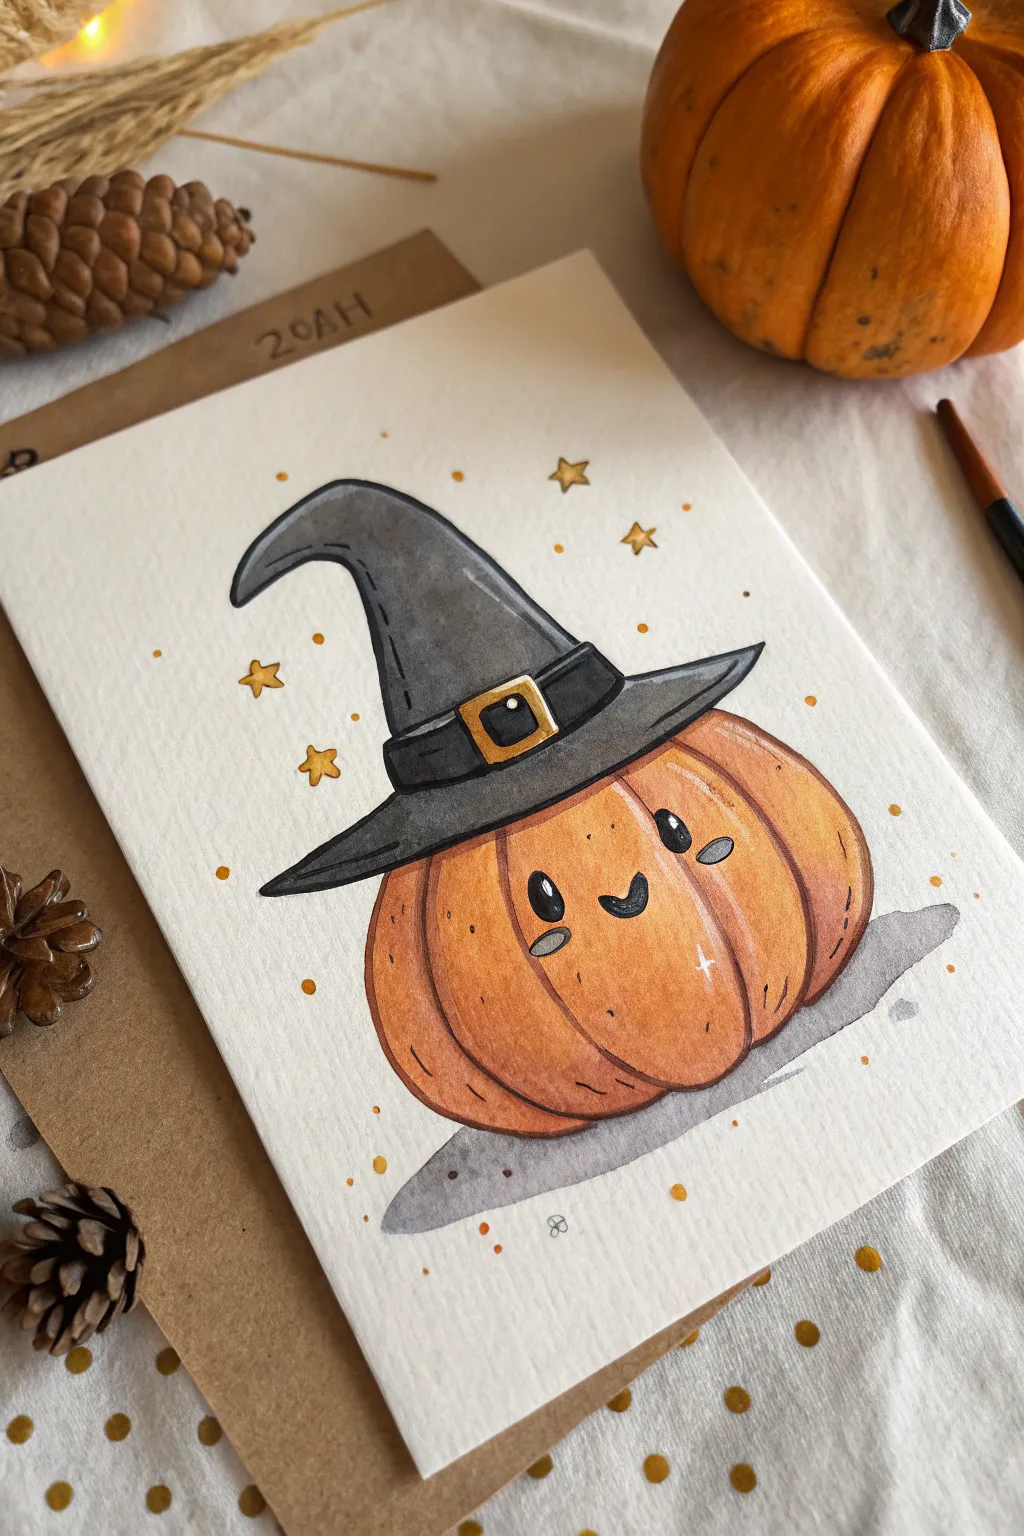

This adorable illustration features a cheerful orange pumpkin donning a slightly oversized, crooked witch’s hat. The watercolor style gives it a soft, cozy feel that is perfect for handmade Halloween greeting cards or seasonal wall art.
How-To Guide
Materials
- Cold-press watercolor paper (approx. 300gsm)
- Pencil (HB or H) and eraser
- Waterproof fine liner pen (black, 0.3mm or 0.5mm)
- Watercolor paints (Orange, Yellow Ochre, Burnt Sienna, Payne’s Grey, Black)
- Round watercolor brushes (size 4 and size 0 for details)
- White gel pen or gouache for highlights
- Two jars of water and paper towels
Step 1: Sketching the Outline
-
Map out the pumpkin shape:
Start by lightly sketching a wide, slightly flattened oval for the pumpkin’s body. Divide it into curved sections (ribs) that radiate from the top center to the bottom, giving it that classic plump look. -
Draft the hat brim:
Draw an ellipse that sits right on top of the pumpkin, tilting slightly to the left. Extend the edges past the pumpkin’s width to create a wide brim. -
Add the hat cone:
Form the cone of the hat starting from the brim. Curve it towards the left, ending in a slightly hooked or droopy point. Don’t make the lines too straight; a little wobble adds character. -
Detail the hat band:
Sketch a band around the base of the cone, just above the brim. Draw a small square buckle in the center. -
Sketch the face:
Place two small oval eyes wide apart on the pumpkin’s face. Add a tiny, curved mouth right between them for a sweet expression. -
Ink the lines:
Once you are happy with the sketch, trace over your pencil lines with a waterproof black fine liner. Don’t worry about perfect lines; a sketchy quality works well here. -
Erase pencil marks:
Wait a moment for the ink to dry completely, then gently erase all visible pencil lines to prepare for painting.
Step 2: Painting the Pumpkin
-
Base wash:
Mix a watery vibrant orange. Paint the entire pumpkin body, carefully avoiding the eyes and mouth. Keep the wash light initially. -
Add depth to the ribs:
While the base layer is still slightly damp, drop some darker orange or touches of Burnt Sienna into the grooves between the pumpkin ribs. This wet-on-wet technique creates soft shadows. -
Fill the eyes and mouth:
Use solid black ink or concentrated black watercolor to fill in the eyes and mouth. Leave a tiny white spot in each eye if you can, or we can add it later with a gel pen. -
Darken the bottom:
Once dry, glaze a thin layer of Burnt Sienna along the very bottom of the pumpkin to ground it and give it weight.
Muddy colors?
Ensure your orange layer is fully dry before painting the grey hat brim. If they touch while wet, the colors will bleed and create a muddy brown seam.
Step 3: Painting the Hat
-
Base gray layer:
Dilute Payne’s Grey or a mix of black and blue with plenty of water. Paint the hat brim and cone with this soft grey, keeping it uneven for texture. -
Shadowing the hat:
While damp, add more concentrated grey to the right side of the hat cone and under the brim where it casts a shadow on the pumpkin. -
Painting the band and buckle:
Paint the hat band in a very dark grey or black. For the buckle, use a bright Yellow Ochre or gold paint to make it pop.
Level Up: Texture
Splatter tiny droplets of orange or gold watercolor over the finished piece using an old toothbrush for a magical, speckled effect.
Step 4: Final Details
-
Ground shadow:
Mix a very watery grey puddle. Paint a loose, irregular oval shape underneath the pumpkin to serve as a cast shadow on the ground. -
Sparkle highlights:
Using a white gel pen or white gouache, add a tiny ‘twinkle’ star on the pumpkin’s cheek and crisp white dots in the eyes. -
Background stars:
Dip your brush in yellow paint and draw tiny five-point stars scattered around the background. You can also add some small yellow or orange dots for magic dust. -
Enhance outlines:
I like to go back with the fine liner to re-thicken the outer contours of the hat and pumpkin, making the character stand out boldly against the paper.
Now you have a charming little pumpkin friend ready to celebrate the season

PENCIL GUIDE
Understanding Pencil Grades from H to B
From first sketch to finished drawing — learn pencil grades, line control, and shading techniques.
Explore the Full Guide
Pumpkin With Unicorn Horn and Pastels
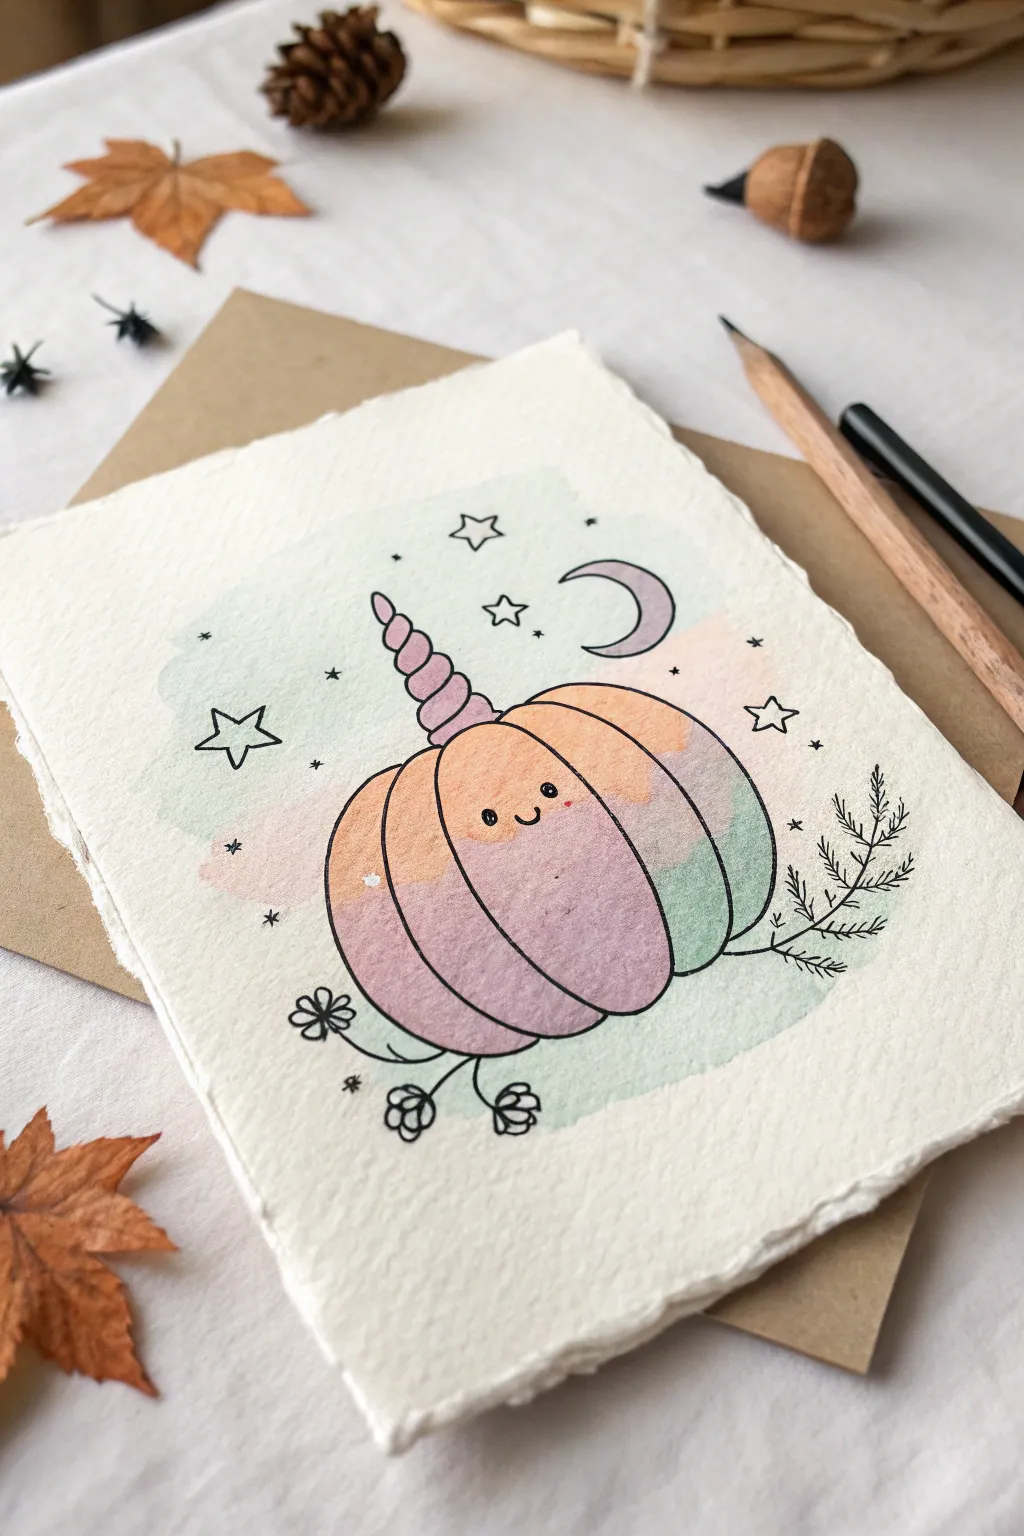
Combine the coziness of autumn with a touch of fantasy in this adorable mixed-media illustration. You will create a soft, dreamy pumpkin character featuring a unicorn horn, surrounded by celestial doodles and gentle watercolor washes.
Step-by-Step
Materials
- Cold press watercolor paper (with deckle edge if possible)
- Pencil (HB or lighter)
- Black fineliner pens (0.1 and 0.3 sizes)
- Watercolor paints (pastel pink, purple, orange, mint green)
- Round watercolor brush (size 4 or 6)
- Cup of water
- Paper towel
- Eraser
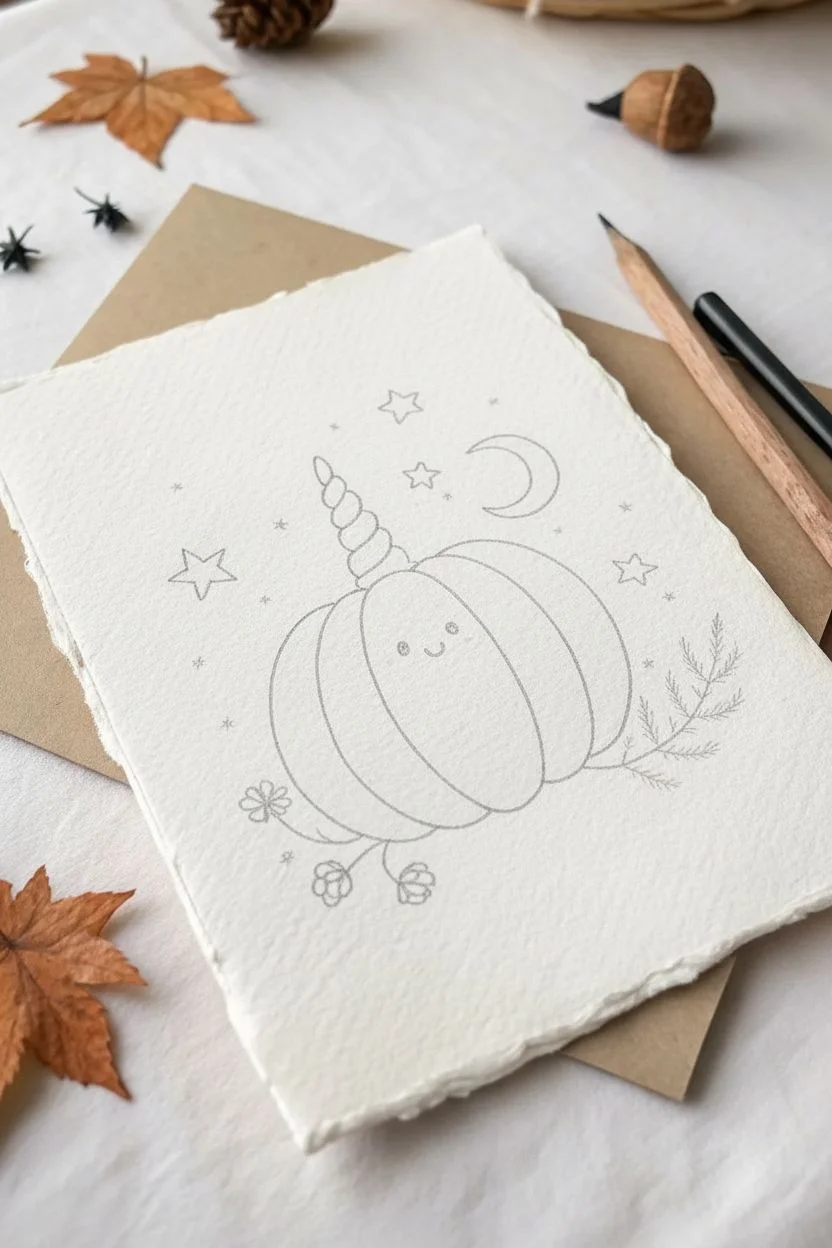
Step 1: Sketching the Character
-
Center the pumpkin:
Begin by lightly sketching the main pumpkin shape in the center of your paper. Draw a wide oval that is slightly flattened at the top and bottom to create that classic pumpkin silhouette. -
Add the segments:
Draw curved vertical lines inside the oval to define the pumpkin’s segments. Start with a central curve and add two more on each side, letting them round out towards the edges to give the pumpkin volume. -
Draw the horn:
Instead of a regular stem, sketch a spiral unicorn horn emerging from the center top. Make it slightly tapered, with diagonal curved lines wrapping around it to show the twist. -
Create a cute face:
Low on the center segment, mark two small dots for eyes and a tiny ‘u’ shape between them for a smile. Keep the features small and close together for maximum cuteness.
Step 2: Adding Whimsical Details
-
Sketch celestial elements:
Around the top of the pumpkin, draw a crescent moon and scattered stars. Vary the stars by drawing some as classic five-point shapes and others as simple tiny diamonds or dots. -
Add botanical touches:
Sketch a fern-like branch curving up the right side of the pumpkin. On the bottom left, draw a few simple flowers with round petals on thin stems. -
Refine the lines:
Take a moment to clean up your sketch, erasing any stray marks and lightening the pencil lines so they won’t show through the watercolour later.
Ink Bleeding?
If your black lines are feathering or spreading like spiderwebs, your paper is definitely still damp. Stop immediately and use a hair dryer before continuing.
Step 3: Watercolor Washes
-
Prepare the pastel palette:
Dilute your watercolors significantly with water. You want very sheer, light washes of pink, purple, soft orange, and mint green. Test them on a scrap piece of paper first to ensure they aren’t too vibrant. -
Paint the background wash:
Using a wet-on-dry technique, paint a very loose, abstract patch of color behind the pumpkin sketch. I like to dab mint green and pale blue irregularly, letting the water soften the edges so it looks like a cloud. -
Color the pumpkin:
Paint the pumpkin segments using alternating pastel colors like soft orange, pink, and lavender. Let the colors bleed slightly into each other while wet for a dreamy gradient effect. -
Fill the horn:
Carefully paint the unicorn horn with a light pink or purple wash. -
Total drying time:
This is crucial: verify the paper is 100% bone dry before letting any ink touch it. If the paper is cool to the touch, it’s still damp. Wait 10-15 minutes or use a hair dryer.
Make It Sparkle
Once the painting is dry, use a metallic gold gel pen or gold watercolor paint to accent the stars and the spiral of the unicorn horn for extra magic.
Step 4: Inking and Definition
-
Outline the pumpkin:
Using your 0.3 pen, trace over the main pumpkin lines. Keep your hand relaxed; a slightly shaky or organic line adds to the charm of the illustration. -
Ink the details:
Switch to a finer 0.1 pen for the delicate elements like the stars, the moon, and the fern leaves. This line weight hierarchy helps the main character stand out. -
Darken the face:
Fill in the eyes completely black with the pen, leaving a tiny white speck in each if you can for a highlight. Retrace the smile to make it crisp. -
Add texture:
Add tiny stipple dots or small dashes near the bottom of the pumpkin segments to suggest shadow and texture without using heavy shading.
Now you have a enchanting little pumpkin friend ready to brighten up any autumn day
Pumpkin Hugging a Friendly Ghost
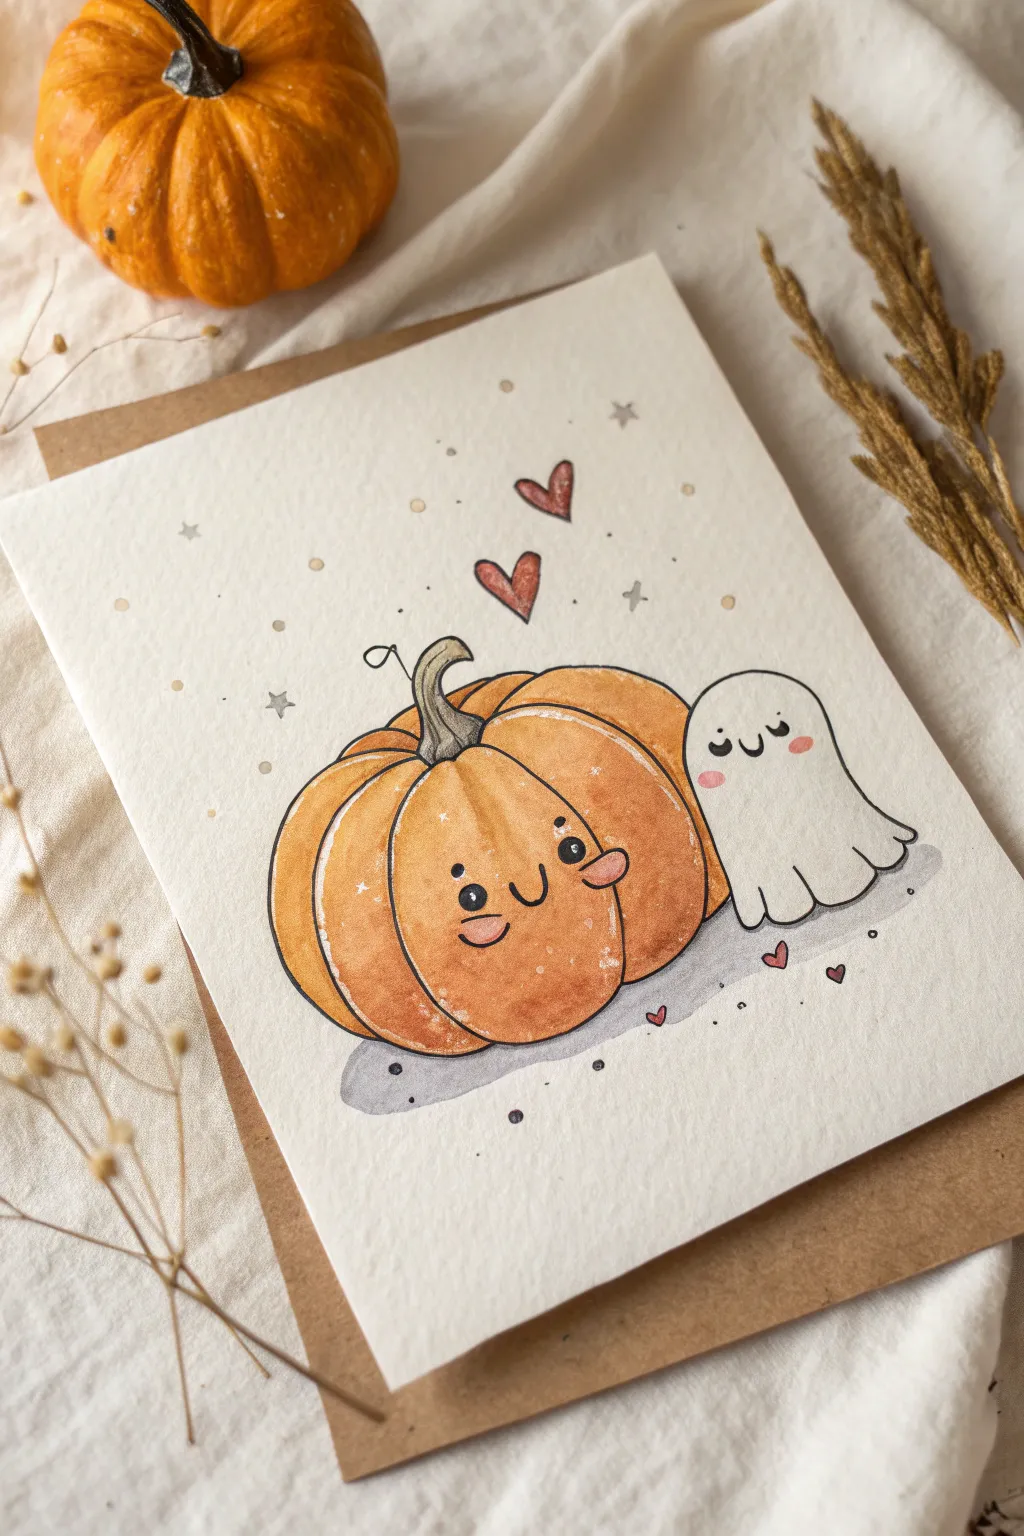
Celebrate spooky season with sweetness by drawing this adorable duo of a cheerful pumpkin and a shy little ghost. Using watercolors and fine liners creates a soft, charming illustration perfect for a handmade Halloween greeting card.
How-To Guide
Materials
- Cold press watercolor paper (A5 size or folded card)
- Pencil (HB) and eraser
- Waterproof fine liner pen (01 or 03 black)
- Watercolor paints (Orange, Yellow Ochre, Burnt Sienna, Payne’s Gray, Crimson Red)
- Round watercolor brushes (sizes 2 and 4)
- White gel pen or gouache for highlights
- Clean water and paper towel
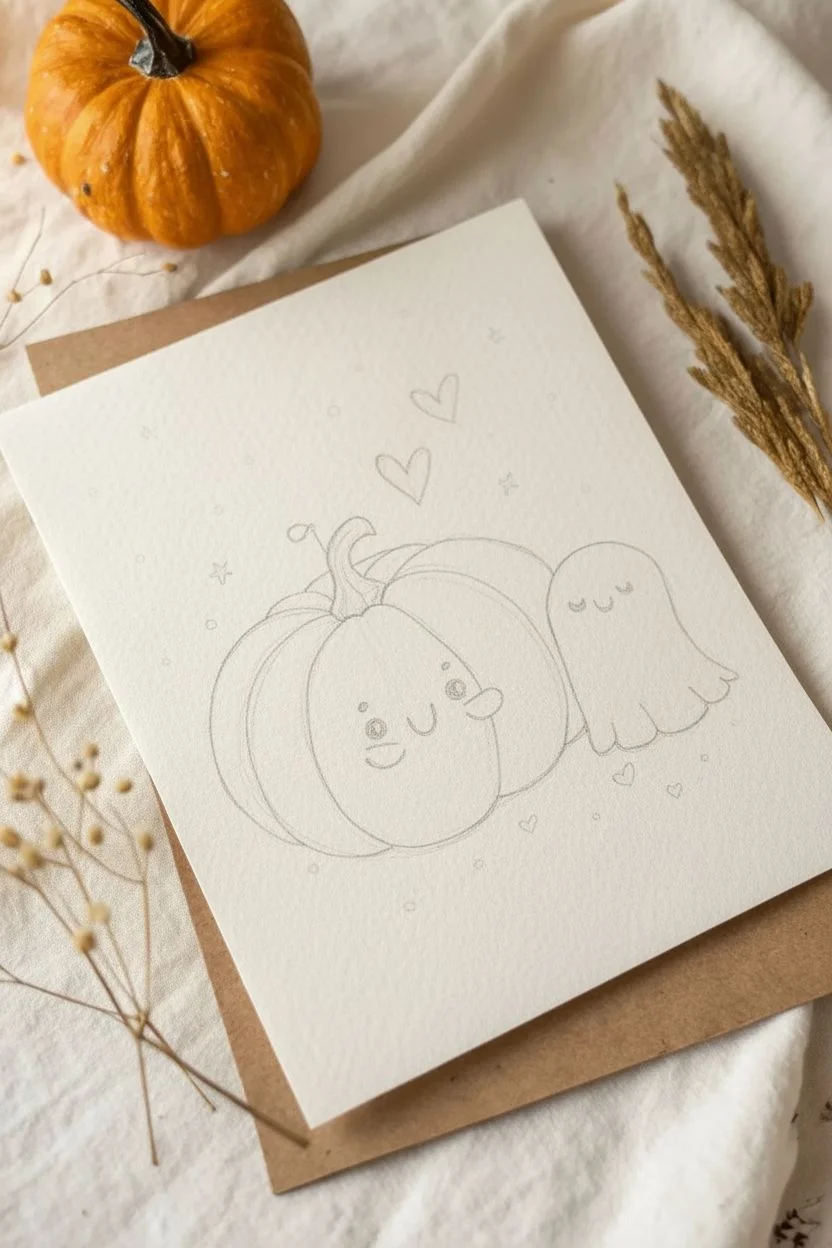
Step 1: Sketching the Outline
-
Map out shapes:
Start by lightly sketching a wide oval shape for the pumpkin slightly to the left of the center. To its right, sketch a simpler, gumdrop shape for the ghost. -
Detail the pumpkin:
Divide the pumpkin oval into vertical sections using curved lines that radiate from the top center. Make the ridges bumpy at the bottom. Add a twisted stem curling out from the dip in the top. -
Refine the ghost:
Define the ghost’s shape, giving it a rounded head and a wavy bottom hemline with soft scallops. -
Add faces:
Draw simple kawaii faces on both characters. Place wide-set eyes and a small U-shaped mouth on the pumpkin. Give the ghost a smaller, simpler face with closed, happy eyes.
Ink Smudging?
If your black lines bleed when you paint, your pen might not be fully waterproof. Test it on a scrap paper first, or do the painting first and add ink lines last.
Step 2: Inking the Drawing
-
Trace the lines:
Go over your pencil sketch with a waterproof black fine liner. Use a confident hand, but don’t worry if the lines are slightly wobbly—it adds to the hand-drawn charm. -
Add floating elements:
Draw two small hearts floating above the pumpkin, along with scattered tiny stars and circles in the background for a magical effect. -
Erase pencil marks:
Wait for the ink to dry completely to avoid smearing, then gently erase all the underlying pencil sketch lines.
Make it Sparkle
Use metallic gold watercolor paint for the background stars and dots. It catches the light beautifully and makes the card feel extra festive.
Step 3: Painting with Watercolor
-
Base pumpkin layer:
Mix a bright orange with a lot of water. Paint the entire pumpkin body, working section by section. Keep the edges wet so the color blends smoothly. -
Add pumpkin shadows:
While the orange is still slightly damp, drop a more concentrated orange or burnt sienna into the creases between the pumpkin ribs and along the bottom curve to create dimension. -
Paint the stem:
Use a mix of greenish-brown or muted gray for the stem. Keep the application sheer. -
Ghost shadows:
The ghost stays mostly white, so we just want to paint shadows. Mix a very watery, pale gray (using Payne’s Gray) and paint just the bottom right side and under the wavy hem. -
Grounding shadow:
Paint a loose, oval-shaped shadow underneath both figures using a diluted gray wash. This stops them from looking like they are floating in mid-air. -
Add blush:
Use a tiny amount of diluted crimson or pink to paint oval blush patches on the pumpkin’s cheeks and the ghost’s face.
Step 4: Final Details
-
Color the hearts:
Fill in the floating hearts and tiny hearts on the ground with a soft red or pink watercolor. -
Enhance background:
Use a very pale wash of yellow or brown to dab color onto the background stars and circles you drew earlier. -
White highlights:
Once the paint is bone dry, use a white gel pen to add tiny reflection dots in the pumpkin’s black eyes and on its cheeks. You can also add little sparkles on the pumpkin skin for texture.
Now you have a heartwarming handcrafted card ready to share with someone special this autumn


Pumpkin With Mini Bat Wings

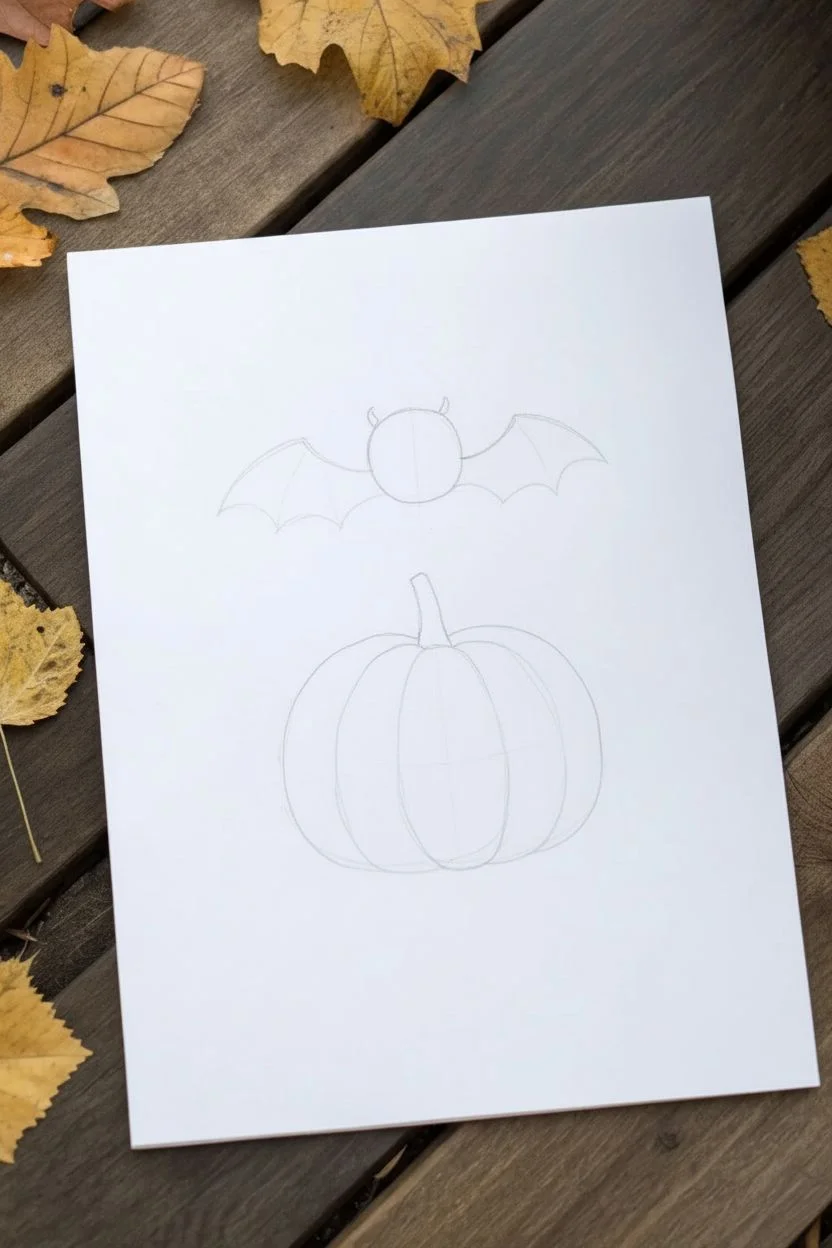
Capture the sweeter side of Halloween with this charming illustration featuring a blushing bat and a cheerful, fanged pumpkin. Using soft shading and clean ink lines, you’ll create a duo that is more adorable than spooky.
Step-by-Step Guide
Materials
- Thick drawing paper or mixed media paper
- Pencil (HB or H for light sketching)
- Eraser
- Fine-liner pen (black, waterproof, size 0.3 or 0.5)
- Colored pencils or alcohol markers (orange, peach/pink, brown, grey)
- White gel pen (optional for highlights)
Step 1: Planning the Shapes
-
Position the main subjects:
Start by lightly sketching a large circle in the lower-middle of your paper for the pumpkin. Leave enough space above it for the bat. -
Sketch the bat’s body:
Above the pumpkin, draw a smaller circle for the bat’s head/body. It should be centered relative to the pumpkin below. -
Define the pumpkin ridges:
Turn the pumpkin circle into a proper gourd by drawing curved vertical lines. Start with a central oval shape, then add curved ‘C’ shapes attaching to the sides to create the segments. -
Add the stem:
Draw a slightly curved, rectangular stem protruding from the top of the central pumpkin segment. -
Draft the bat wings:
Extend two curved lines outward from the top of the bat’s body. Create the scalloped bottom edge of the wings by connecting three distinct points back toward the body, mimicking an umbrella shape.
Highlight Hacking
If you accidentally color over the eye reflections, don’t restart. Use a white gel pen or a dot of white acrylic paint to add the sparkle back in at the very end.
Step 2: Adding Personality
-
Draw the pumpkin face:
Place two wide-set, oval eyes on the upper half of the pumpkin. Add a simple straight line for a mouth, punctuated by two small triangles pointing downward for little fangs. -
Detail the bat face:
Give the bat two large, round eyes with shiny highlights. Draw a tiny mouth with two even tinier fangs, and sketch small, pointed ears on top of the head. -
Refine the lines:
Go over your pencil sketch once you are happy with the placement. I usually soften the pencil lines with a kneaded eraser before inking so the graphite doesn’t smear.
Smudge Prevention
Place a scrap piece of paper under your drawing hand while coloring. This protects the pristine parts of the paper from oils on your skin or graphite transfer.
Step 3: Inking and Coloring
-
Ink the outlines:
Using your waterproof fine-liner, trace over your pencil lines. Use confident, smooth strokes. Fill in the eyes solid black, leaving small white circles for the reflections. -
Erase guidelines:
Wait a minute or two for the ink to dry completely, then gently erase all remaining pencil marks to keep the paper clean. -
Color the pumpkin base:
Take a light orange pencil or marker and fill in the pumpkin. Leave the center of each segment slightly lighter to create a rounded, 3D effect. -
Shade the pumpkin:
Use a darker orange or light brown to shade the grooves between the segments and the bottom curve of the pumpkin. -
Color the bat:
Use a pale pink or peach tone for the bat’s body and face. For the wings, lightly shade them with a dusty rose or light grey, adding a bit of texture. -
Add blush:
Using a pink pencil, add small circular blush marks to the cheeks of both the pumpkin and the bat for extra cuteness. -
Ground the drawing:
Use a light grey marker or pencil to draw a simple oval shadow underneath the pumpkin so it doesn’t look like it’s floating in space. -
Final touches:
Sign your artwork at the bottom with a small, stylish signature to claim your masterpiece.
Now you have a sweet piece of seasonal art ready to display or gift to a friend
Pumpkin With Cute Cat Ears
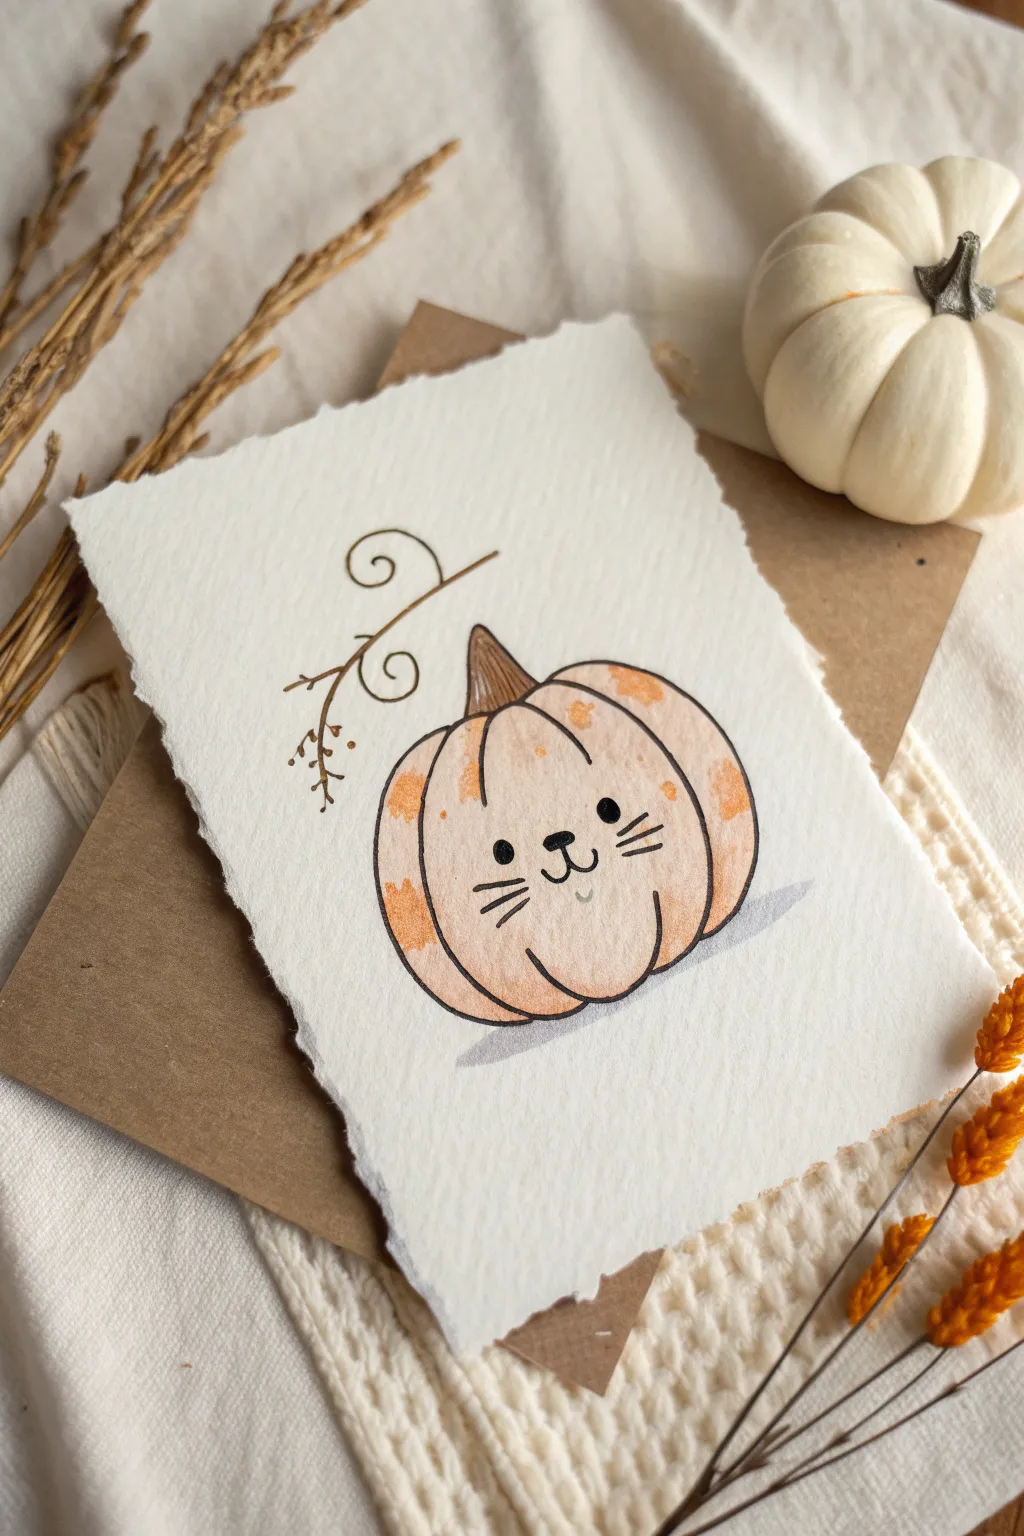

This adorable project combines the coziness of autumn with feline charm in a simple watercolor illustration. Using deckled-edge paper adds a wonderful handcrafted touch that makes this little pumpkin cat feel like a special keepsake.
Detailed Instructions
Materials
- Cold-pressed watercolor paper (deckled-edge preferred)
- Pencil (HB or H)
- Kneadable eraser
- Fine liner pen (black, waterproof, size 01 or 03)
- Watercolor paints (orange, brown, yellow orchre)
- Small round watercolor brush (size 2 or 4)
- Clean water and paper towel
Step 1: Sketching the Shape
-
Outline the pumpkin:
Begin by lightly sketching a wide oval shape in the center of your paper. Make sure the bottom is slightly flatter than the top to give it weight. -
Add the segments:
Draw curved vertical lines starting from the top center point and curving down to the bottom. These define the pumpkin’s ridges. The center segment should be the widest, perfect for placing the face later. -
Draw the stem:
At the very top, sketch a short, tapered stem tilting slightly to the left. I like to make the base of the stem curve around the top of the pumpkin slightly to show perspective. -
Sketch the vine:
From the stem area, draw a delicate, curly vine extending upward and to the left. Add a few tiny circles at the end of a branch to represent berries or buds.
Natural Edges Pro Tip
If you don’t have deckled paper, fold heavy watercolor paper and tear it along a ruler’s edge. Dampen the fold line first for a softer, fuzzier tear.
Step 2: Inking the Design
-
Trace the main lines:
Using your waterproof black fine liner, carefully trace over your pencil lines for the pumpkin body and stem. Keep your hand relaxed; a slightly wobbly line actually adds organic character to pumpkins. -
Add the face:
In the center segment, draw two small solid black circles for eyes. Just below them, draw a small inverted triangle with rounded corners for the nose. -
Draw the mouth and whiskers:
From the bottom of the nose, draw a small ‘w’ shape for the mouth. Add three straight whiskers on each cheek area, extending outward. -
Ink the vine:
Go over your vine sketch with the pen. For the tiny berries, you can simply make small dots or open circles. -
Erase pencil marks:
Wait until the ink is completely dry—this is crucial to avoid smudges. Then, gently erase all visible pencil lines.
Level Up: Metallic Touch
Once the watercolor is dry, trace over the curly vine or the whisker tips with a gold gel pen for a subtle, festive shimmer.
Step 3: Adding Color
-
Prepare your wash:
Mix a very watery, pale orange on your palette. You want this to be pastel and transparent, not bold and opaque. -
Paint the base layer:
Apply this pale wash over the entire pumpkin body. It’s okay if it’s not perfectly even; watercolor texture looks lovely here. -
Add texture spots:
While the base layer is still slightly damp, mix a slightly more saturated orange or yellow ochre. Dab irregular spots near the outer edges and tops of the segments to suggest a spotted gourd texture. -
Paint the stem:
Using a light brown hue, fill in the stem. Keep the strokes vertical to mimic the fibrous texture of a pumpkin stem. -
Define the shadows:
Mix a tiny bit of brown into your orange. Paint very thin lines along the bottom curves of the pumpkin segments to give them volume and roundness. -
Let it dry completely:
Allow the paint to fully set before moving to the final step to prevent bleeding. -
Add the ground shadow:
Mix a very watery grey or cool purple. Paint a simple, horizontal wash underneath the pumpkin to ground it so it isn’t floating in space.
Now you have a charming piece of fall art ready to display or gift to a friend
Stacked Pumpkins Totem

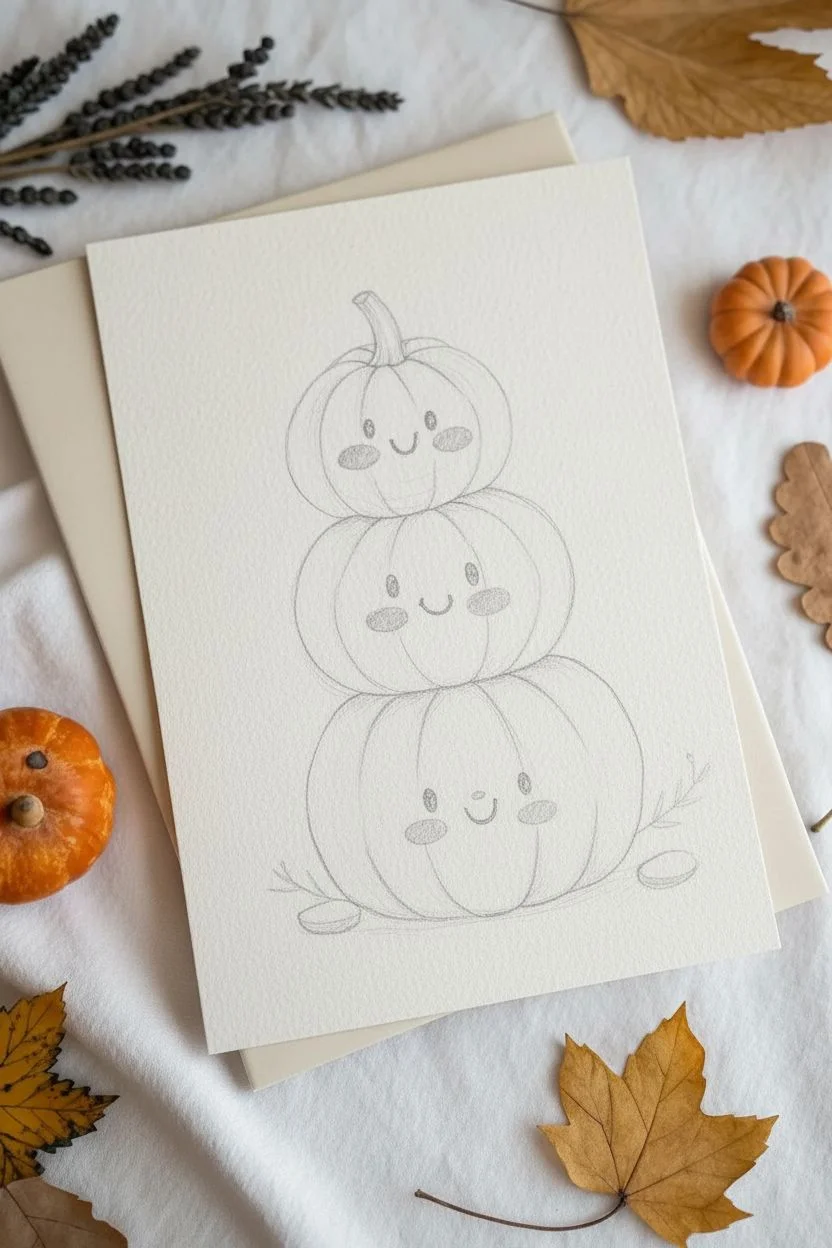
This charming illustration features a totem of three expressive pumpkins, graduating in size from a stout base to a petite top. The gentle watercolor wash and fine ink outlines create a cozy, handcrafted look perfect for fall greeting cards.
Detailed Instructions
Materials
- Cold press watercolor paper (300 gsm)
- Watercolor paints (shades of orange, ochre, brown, and pink)
- Fine liner pen (black or sepia, 0.3mm or 0.5mm, waterproof)
- Round watercolor brushes (size 4 and size 6)
- Pencil (HB) and kneaded eraser
- Clean water and paper towel
Step 1: Sketching the Structure
-
Lightly pencil the stack:
Begin by drawing three lightly sketched ovals stacked on top of each other. Make the bottom oval the largest and widest, the middle slightly smaller, and the top one the smallest and roundest. -
Define the pumpkin shapes:
Refine the ovals into pumpkin shapes by slightly flattening the tops and bottoms. Add vertical curved lines to indicate the ribs or segments of each pumpkin. -
Add the stem:
Draw a small, curved stem emerging from the very top pumpkin. Keep it slightly twisted for a natural look. -
Pencil in the faces:
Place the faces on the ‘belly’ of each pumpkin. Sketch wide-set eyes and simple U-shaped smiles. Add oval cheek patches just below the eyes. -
Include subtle details:
Add two small pebble shapes at the base of the bottom pumpkin for grounding. Sketch a tiny sprig of leaves on the left and right sides of the base.
Bleeding Lines?
If your ink lines bleed when painting, check your pen type. It must say ‘waterproof’ or ‘archival.’ If not, do the ink drawing last, only after the paint is 100% dry.
Step 2: Applying Watercolor
-
Base wash for the top pumpkin:
Mix a light orange-ochre color. Using plenty of water, paint the top pumpkin. Leave tiny white gaps near the top edge for highlights to give it volume. -
Base wash for the middle pumpkin:
While the top is drying, paint the middle pumpkin. Use a slightly warmer, brighter orange here. Again, keep the wash loose and uneven for texture. -
Base wash for the bottom pumpkin:
For the largest pumpkin, mix a deeper, slightly reddish-orange (terracotta). Paint the entire shape, letting the color pool slightly at the bottom for shadow. -
Paint the stem and stones:
Use a diluted brown to paint the stem on top and the two small stones at the bottom. -
Adding the cheeks:
Once the orange paint is mostly dry (damp but not wet), dab a soft pink color onto the cheek ovals. This helps the blush bleed slightly into the pumpkin skin for a soft look. -
Deepening the shadows:
Mix a slightly darker version of your orange. Carefully paint thin lines along the bottom of each segment line you sketched earlier to suggest grooves. -
Painting the sprigs:
Use a dusty green for the stems of the side sprigs and add tiny dots of yellow or orange for berries.
Make it Sparkle
Once the painting is dry, use a metallic gold gel pen to trace just the stems or add tiny dots to the background for a magical autumn vibe.
Step 3: Refining with Ink
-
Check dryness:
Ensure the paper is completely bone-dry before touching it with a pen. If it’s cool to the touch, it’s still wet. -
Outline the pumpkins:
Using your waterproof fine liner, trace the outer edges of the pumpkins. Use a broken line technique—lifting your pen occasionally—to keep the illustrative style light. -
Detail the segments:
Draw the vertical rib lines. Don’t connect them all the way from top to bottom; let the lines fade out in the center of the pumpkin to suggest highlight and roundness. -
Ink the faces:
Carefully draw the eyes and mouths. Fill in the eyes solid black, leaving a tiny white dot in each for a sparkle highlight. -
Define the cheeks:
Add tiny hatching lines or a simple outline around the pink cheek patches to define them. -
Final touches:
Outline the stem, the small stones, and the sprigs. Add a faint ground shadow under the bottom pumpkin using a very diluted grey wash if desired.
Now you have an adorable pumpkin family ready to brighten someone’s harvest season
Pumpkin House With Windows
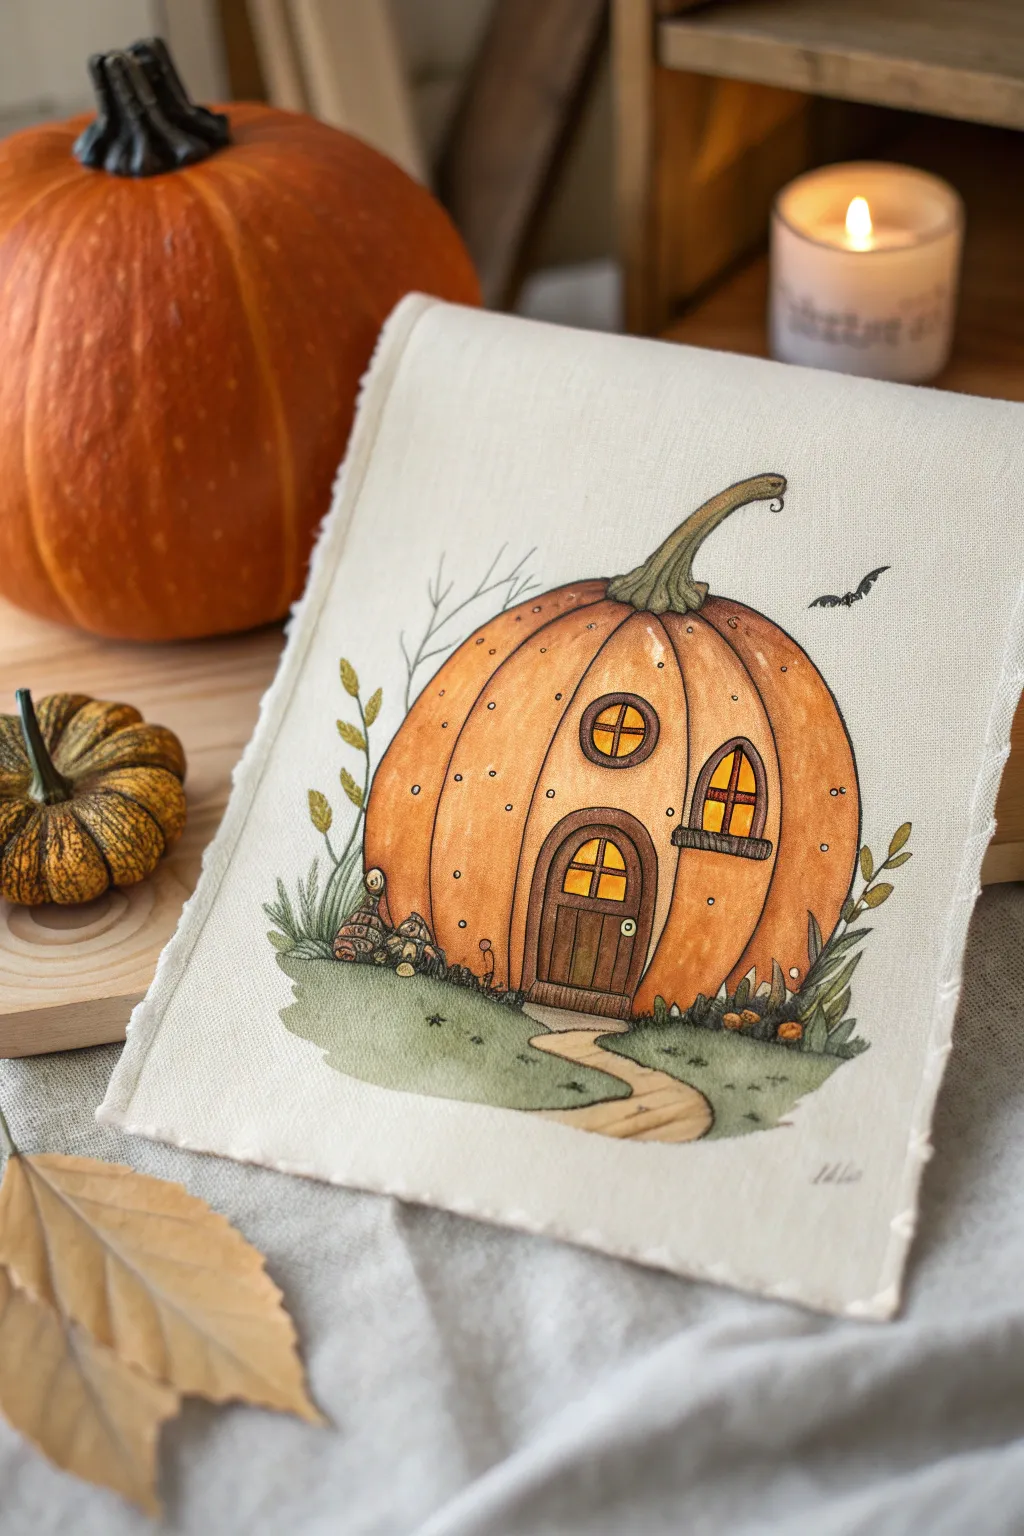
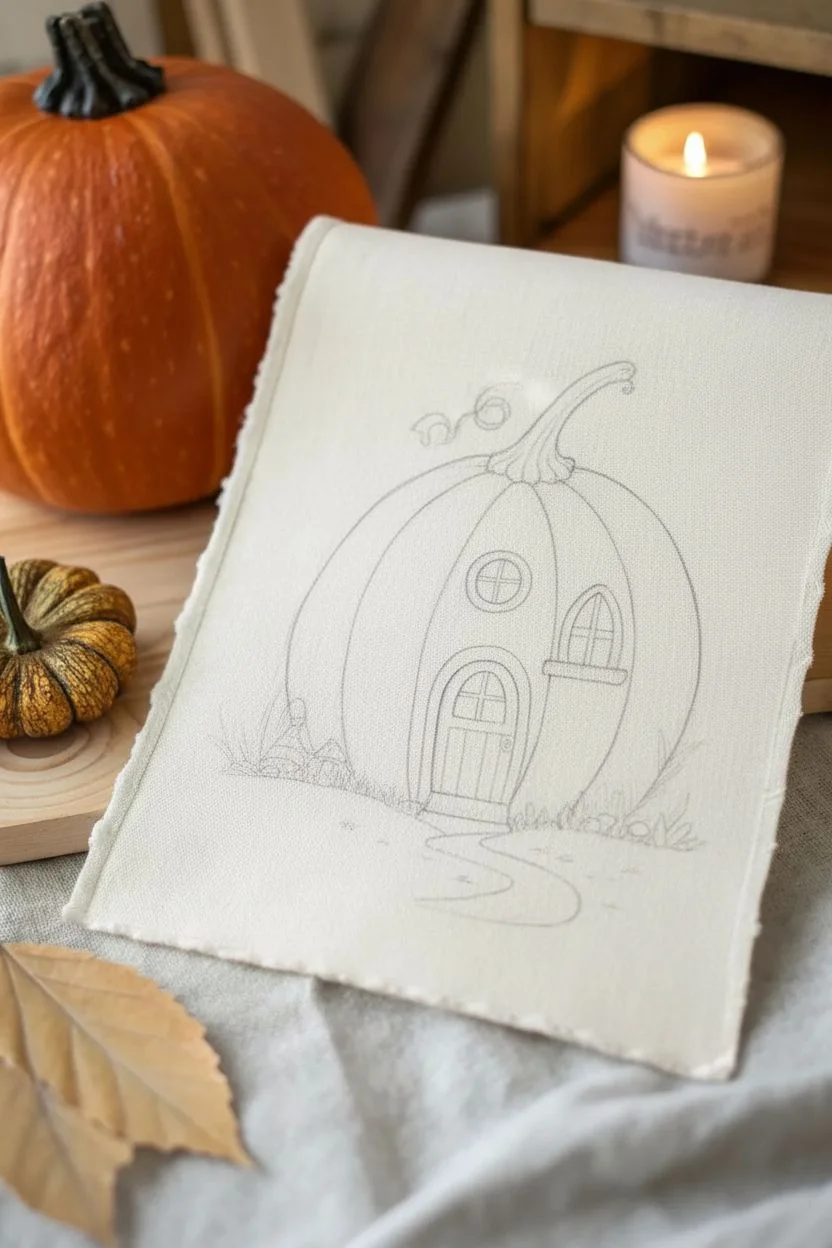
Transform a simple piece of fabric into a fairytale scene with this charming ink and watercolor illustration. The warm orange tones and glowing windows create a cozy, inviting atmosphere perfect for autumn decor.
Step-by-Step Guide
Materials
- Heavyweight cotton or linen fabric swatch
- Fine liner pens (sepia or dark brown, waterproof)
- Watercolor paints (Vermilion, Yellow Ochre, Burnt Sienna, Olive Green)
- Small round watercolor brushes (sizes 0 and 2)
- Pencil and eraser
- Pinking shears (optional, for edges)
- Fabric stiffener or palette for mixing
Step 1: Sketching the Structure
-
Outline the pumpkin shape:
Start by lightly sketching a large, squat oval shape in the center of your fabric. Make the bottom slightly flatter than the top to give the pumpkin weight as it sits on the ground. -
Define the ridges:
Draw curved vertical lines running from the top center down to the bottom edge. These segment the pumpkin into its characteristic ribs, creating a sense of volume. -
Add the stem:
Sketch a curled, twisted stem emerging from the top center. Let it curve off to the right side, adding a small curly vine for a playful touch. -
Place the door and windows:
In the center rib, sketch an arched doorway. Add two circular or arched windows on the upper sections of the pumpkin. Keep the sizes slightly imperfect for a rustic, handmade look. -
Create the landscape:
Draw a gentle horizon line behind the pumpkin. Sketch a winding path leading from the door to the bottom edge of the fabric, flanked by small tufts of grass.
Fabric Painting Pro-Tip
Painting on untreated fabric can cause colors to bleed. Mix a tiny drop of fabric medium or gum arabic into your watercolor water to help control the flow and keep edges crisp.
Step 2: Inking the Details
-
Refine the lines:
Using a waterproof sepia or dark brown fineliner, carefully trace over your pencil sketch. Use a slightly shaky line for the pumpkin texture to make it feel organic rather than rigid. -
Detail the door:
Draw vertical planks inside the door frame and add a tiny circle for the doorknob. Create a frame around the door to give it depth. -
Add window panes:
Draw crossbars in the windows to create panes. Don’t forget to add small ledges or frames beneath the windows. -
Embellish the surroundings:
Ink in some tall grasses, small leafy plants on the sides, and a few bare twiggy branches behind the pumpkin. Add a tiny silhouette of a bat flying in the distance. -
Erase guidelines:
Once the ink is completely dry—I usually wait about ten minutes to be safe—gently erase all visible pencil marks.
Step 3: Adding Watercolor Warmth
-
Paint the pumpkin base:
Mix a watery wash of Vermilion and Yellow Ochre. Paint the pumpkin segments, keeping the center of each rib lighter to create a highlight effect. -
Deepen the shadows:
While the paint is still damp, drop concentrated Burnt Sienna into the grooves where the ribs meet and along the bottom edge to enhance the 3D form. -
Color the stem and greens:
Use a muted Olive Green for the stem and the grass patches. Vary the intensity, making the grass directly under the pumpkin darker for shadow. -
Paint the door and wood:
Fill in the door planks with a rich Burnt Umber. Use a lighter brown wash for the winding path leading to the entrance. -
Make the windows glow:
Use a bright, saturated Yellow or Gold paint for the window panes and the door window. This simulates warm candlelight coming from inside.
Level Up: 3D Elements
Make your art pop by using actual embroidery thread to stitch the pumpkin’s vertical lines or the grass blades after the paint dries, adding real texture to the piece.
Step 4: Finishing Touches
-
Add texture dots:
Once the watercolor is dry, use your fineliner or a white gel pen to add tiny speckles or dots on the pumpkin skin for texture. -
Define the grass:
Add small flicks of green paint or ink to the grassy areas to suggest individual blades. -
Fray the edges:
If you want the rustic look shown in the example, gently pull a few threads loose from the sides of your fabric canvas.
Display your miniature pumpkin cottage by leaning it on a shelf or pinning it to a mood board for a spot of seasonal cheer
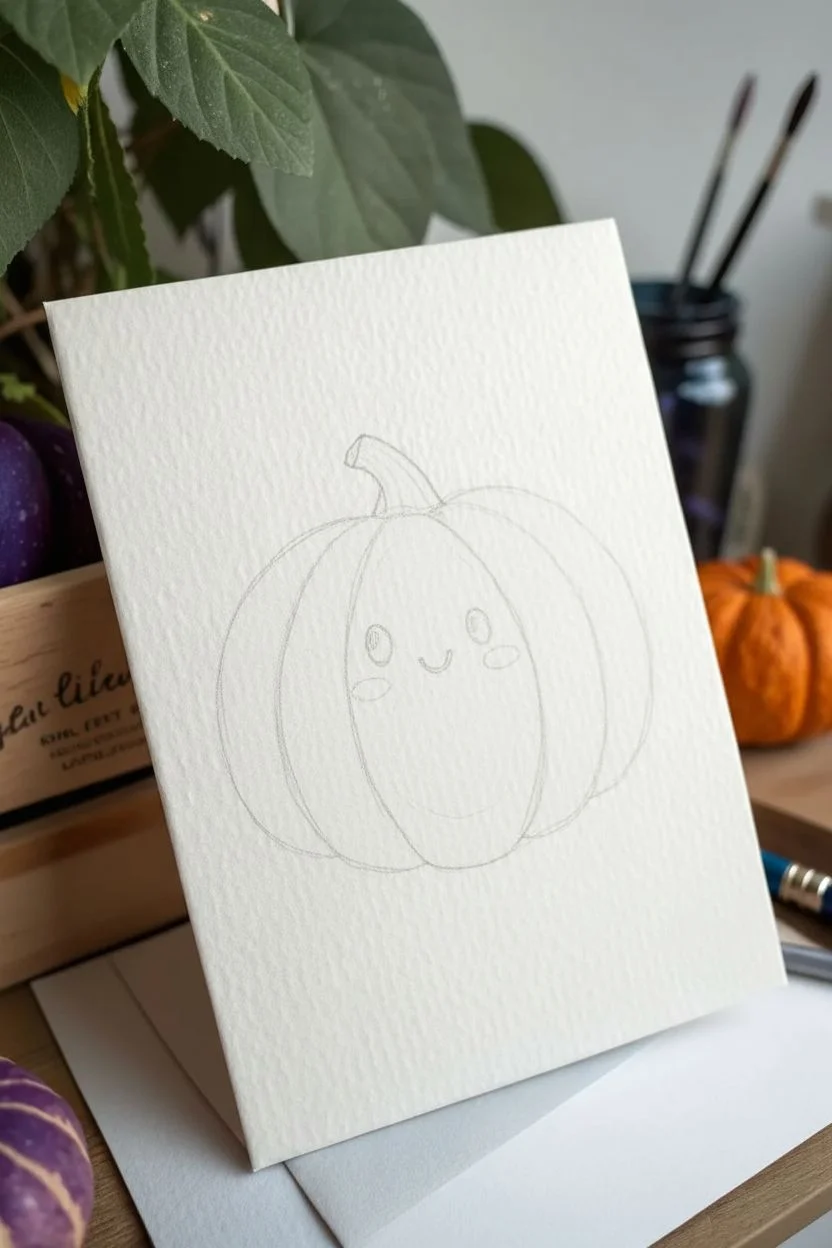
Pumpkin With Floral Crown
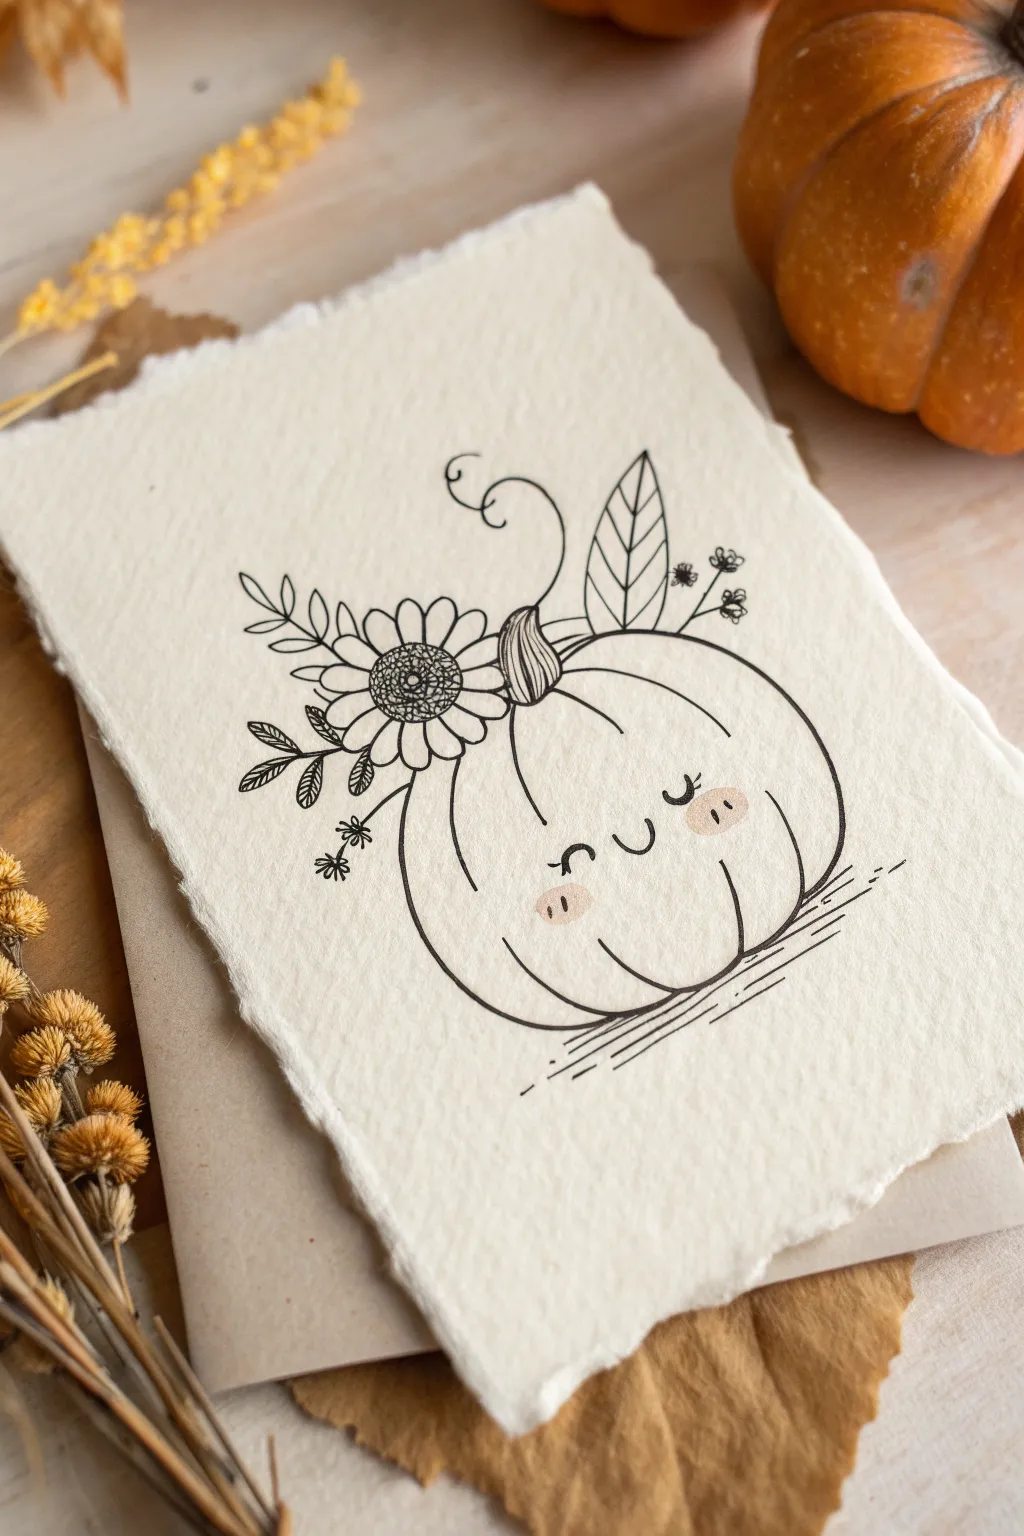
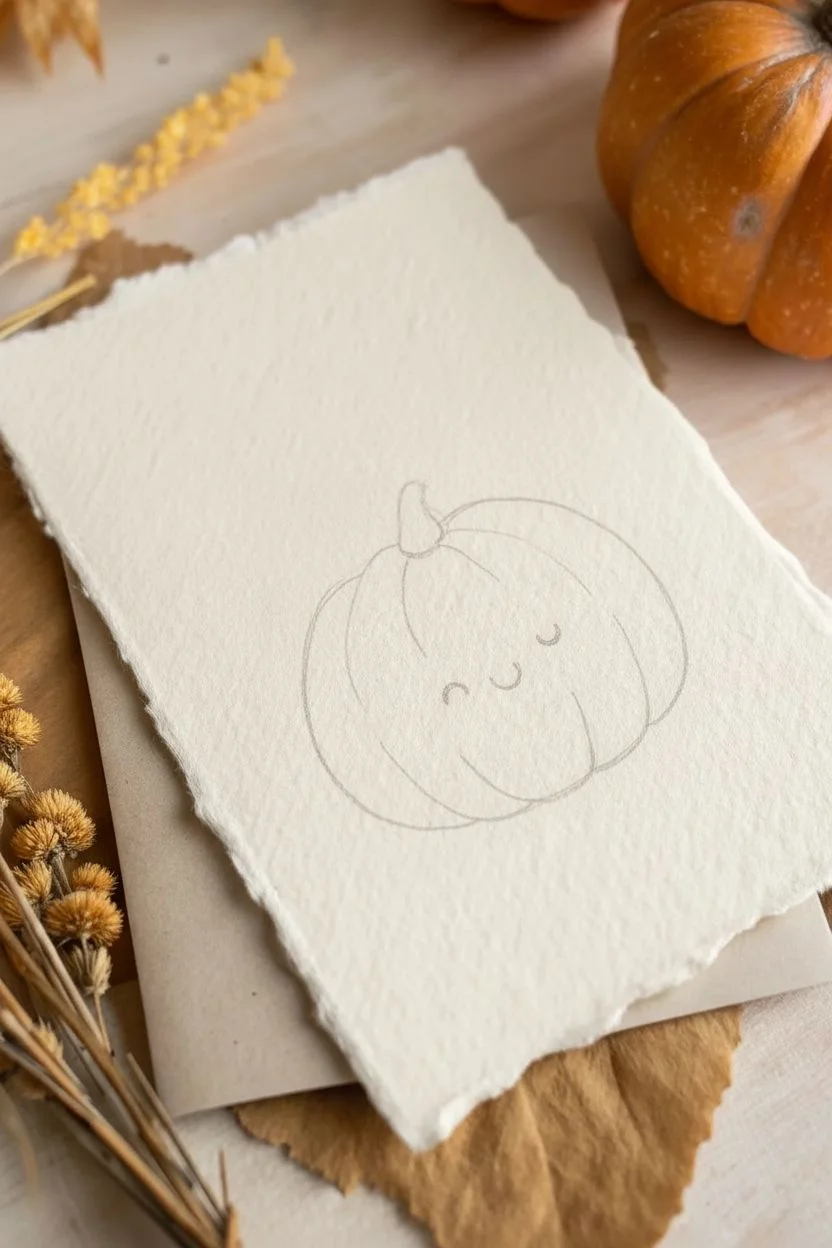
This charming project features a cheerful line-art pumpkin adorned with a delicate floral crown, drawn on lovely textured paper. The sweet expression and blushing cheeks make it an irresistibly cute addition to your autumn sketchbook or greeting card collection.
Detailed Instructions
Materials
- Textured heavy-weight watercolor paper or handmade cotton paper
- Fine liner pen (black, size 03 or 05)
- Pencil (HB or H)
- Kneadable eraser
- Soft pink pastel pencil or colored pencil
Step 1: Drafting the Pumpkin Shape
-
Outline the base:
Begin by lightly sketching an oval shape with your pencil on the center of the paper, making it slightly wider than it is tall to give the pumpkin that squat, cozy look. -
Add the stem base:
Draw the base of the stem at the top center of your oval, creating a small dip where the stem connects to the pumpkin body. -
Define the ribs:
Sketch curved lines radiating from the stem dip down towards the bottom center of the pumpkin. Don’t worry about perfect symmetry; these lines define the plump segments. -
Place the face:
Mark light positions for the eyes and mouth low on the central segment. Keeping the features low and centered makes the character look cuter.
Step 2: Creating the Floral Crown
-
Position the main flower:
To the left of the stem, sketch a medium-sized circle for the flower center, surrounded by simple, rounded petals. -
Add large leaves:
On the right side of the stem, draw a large, pointed leaf shape standing upright, balancing the flower on the left. -
Fill in botanical details:
Add smaller sprigs of leaves and tiny berries or buds peeking out from behind the main flower and large leaf to create a lush, full arrangement. -
Draw the curling vine:
Sketch a playful, spiraling vine line originating from the stem and curling upwards into the empty space above.
Wobbly Lines?
Don’t stress about perfect curves! slightly shaky or organic lines actually enhance the hand-drawn, cozy aesthetic of this illustration style.
Step 3: Inking and Details
-
Ink the pumpkin body:
take your fine liner pen and carefully trace over your pumpkin pencil lines. Focus on smooth, confident strokes for the outer edges. -
Detail the segments:
Trace the internal curved lines, but stop them slightly short before they hit the bottom outline to keep the drawing feeling light and airy. -
Ink the stem:
Line the stem, adding vertical striations or lines inside it to suggest a woody texture. -
Outline the flora:
Go over your floral sketches with the pen. Add a cross-hatch or stippled texture to the center of the sunflower for contrast. -
Add leaf veins:
Draw a central line down your leaves and add small, angled v-shapes for the veins. -
Draw the face:
Ink two small ‘u’ shapes for the eyes, adding tiny lashes on the outer corners. Draw a small, happy curve for the mouth right between them. -
Ground the drawing:
Add a few horizontal, sketchy lines underneath the pumpkin to shadow the base so it doesn’t look like it’s floating.
Add Dimension
Use a light gray marker or diluted watercolor to add a thin shadow line along the right side of the pumpkin and underneath the floral leaves.
Step 4: Finishing Touches
-
Erase guidelines:
Once the ink is completely dry—I usually wait at least five minutes to be safe—gently dab and rub with your kneading eraser to remove all pencil marks. -
Apply blush:
Using your pink pastel or colored pencil, gently shade two circular patches on the cheeks. Soft circles work best for a sweet look. -
Detail the blush:
Take your black pen again and add two tiny vertical hatch marks inside each pink cheek patch for that classic ‘doodle blush’ style.
Enjoy your delightful pumpkin illustration, perfect for gifting or framing
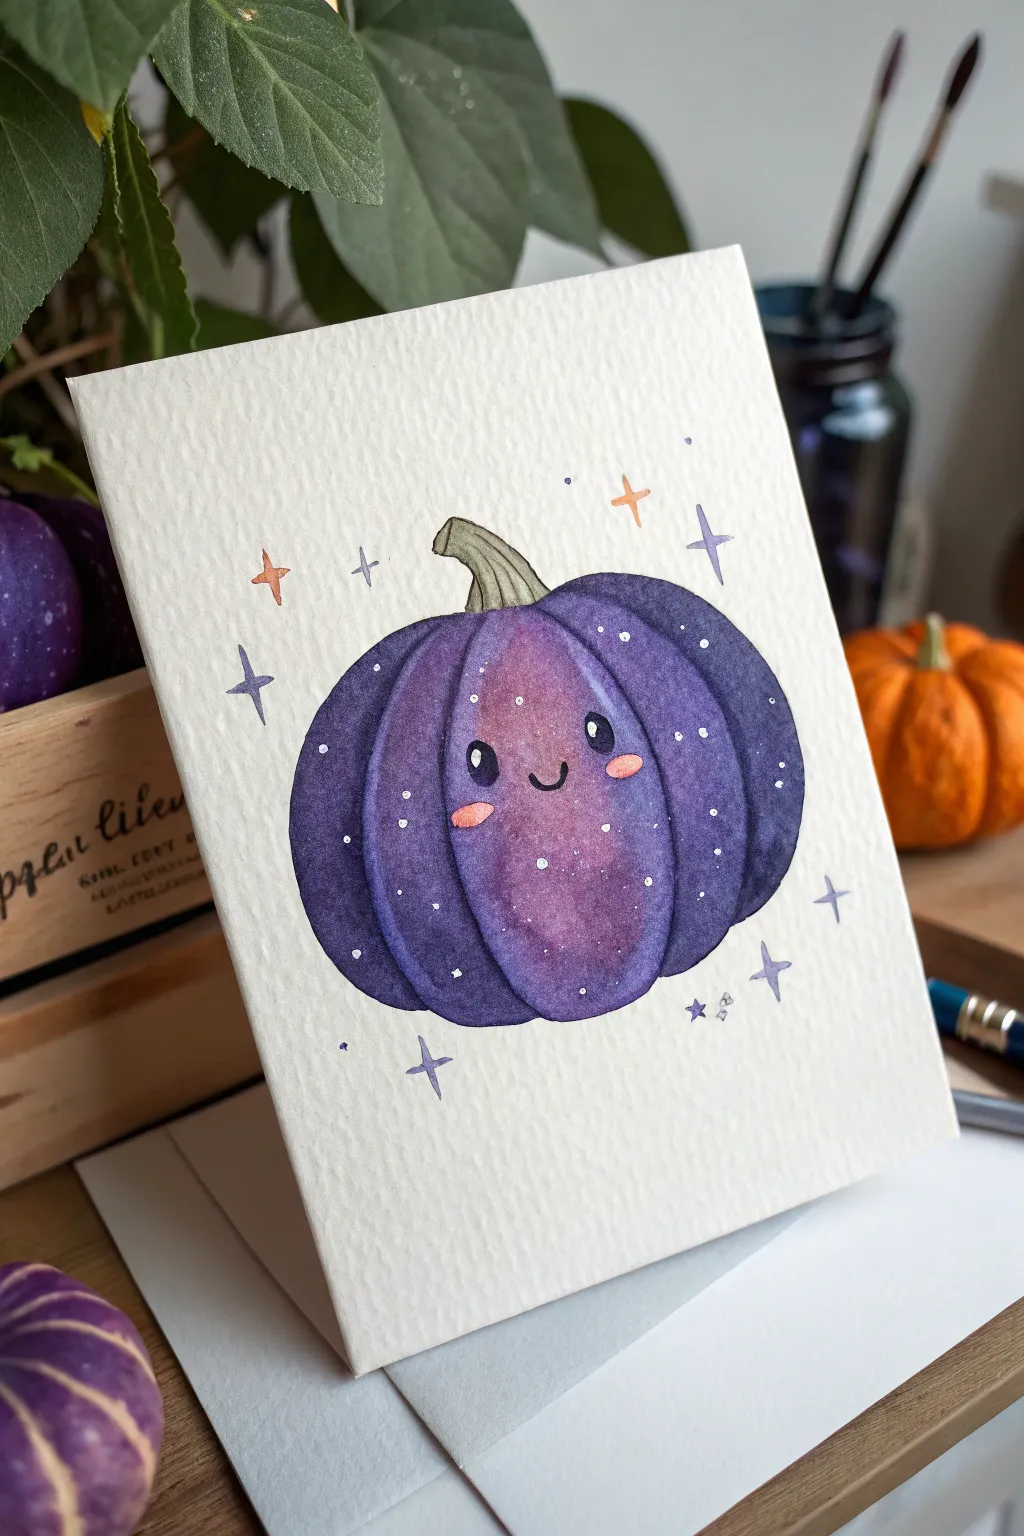
Galaxy Glow Cute Pumpkin

Transform a traditional autumn symbol into a celestial wonder with this dreamy watercolor project. This cute purple pumpkin features a galaxy-inspired wash, twinkling stars, and an adorable smiling face that adds whimsy to the cosmic theme.
Step-by-Step Tutorial
Materials
- Cold press watercolor paper (300 gsm recommended)
- Watercolor paints (Purple, Indigo, Magenta, Paynes Gray, Sap Green, Burnt Umber)
- White gouache or white gel pen
- Synthetic round brushes (Size 2, 4, and 6)
- Pencil (HB or H)
- Kneadable eraser
- Two jars of water
- Paper towel
Step 1: Sketching the Shape
-
Basic outline:
Start with a light pencil sketch of an oval shape that is slightly wider than it is tall. Don’t worry about making it a perfect circle; the organic, slightly squashed shape makes it look more like a real pumpkin. -
Adding ribs:
Divide the oval into sections using curved lines that radiate from the top center to the bottom center. Create a wide, central panel for the face, flanked by narrower curved segments on the left and right sides to give the pumpkin volume. -
Stem and expression:
Draw a thick, slightly twisted stem at the top center. Then, sketch the facial features: two wide-set oval eyes, tiny rosy cheeks, and a small u-shaped smile in the very center of the main panel. -
Lighten lines:
Before painting, gently roll your kneadable eraser over the entire sketch. You want the graphite lines to be barely visible so they don’t smear or show through the translucent watercolor layers.
Step 2: Painting the Galaxy Wash
-
Base wash preparation:
Mix a generous amount of a deep purple watercolor. I like to have a slightly reddish-purple and a blue-purple ready on my palette to create subtle shifts in hue. -
Painting the first segment:
Start with the leftmost segment. Wet the paper inside the lines with clean water first (wet-on-wet technique), then drop in your purple paint, letting it bloom naturally. -
Creating depth:
While the segment is still wet, drop a tiny bit of darker indigo or Payne’s gray at the very bottom and top edges to create a 3D shadow effect. -
Alternating segments:
Skip the segment immediately next to the one you just painted and move to the next one. This prevents the wet paint from two sections bleeding together. Continue painting alternating sections until all are filled. -
Central panel variation:
For the large center panel where the face is, keep the center slightly lighter by using more water or lifting a little pigment with a thirsty brush. This creates a rounded highlight effect. -
Filling the gaps:
Once your first set of segments is bone dry, go back and paint the remaining sections using the same purple mixes, ensuring clear definition between the ribs.
Galaxy Gradient Trick
Drop hints of magenta or teal into the wet purple paint while the pumpkin body is drying. These colors will bleed softly, creating a rich ‘nebula’ look without hard edges.
Step 3: Stem and Facial Features
-
Painting the stem:
Mix a muted olive green using Sap Green and a touch of Burnt Umber. Paint the stem, adding thin lines of darker brown texture along the twist to show the ridges. -
Rosy cheeks:
Use a diluted magenta or coral color to paint two soft ovals for the cheeks. Blend the edges slightly with a damp brush so they aren’t too harsh against the purple background. -
Eyes and mouth:
Using a very fine brush (size 0 or 2), mix a concentrated black or dark indigo. Carefully fill in the eye ovals and paint the simple line for the smile. -
Eye highlights:
Essential for cuteness: leave a tiny circle of white paper unpainted inside the eyes, or add it later with white gouache if you accidentally filled it in.
Fixing Bleeding Edges
If two segments blend together, wait for them to dry completely. Then, use a fine brush with a slightly darker purple mix to paint a thin line over the seam to redefine the separation.
Step 4: The Cosmic Details
-
Galaxy speckling:
Load a toothbrush or a stiff brush with white gouache diluted slightly with water. Cover the face area with a piece of scrap paper, then tap the brush over the pumpkin to flick tiny white ‘stars’ onto the purple skin. -
Adding larger stars:
Use a white gel pen or a fine brush with opaque white to draw slightly larger dots scattered around the pumpkin skin to represent brighter stars in the galaxy. -
External sparkles:
Surround the pumpkin with drawn sparkles. Use watered-down purples and oranges to paint four-pointed stars floating in the background. -
Final touches:
Add tiny outlines or extra defined specks with your white gel pen to the sparkles for a magical finish.
Once the white stars are dry, your charming celestial pumpkin is ready to bring a touch of magic to your desk or mantel


Have a question or want to share your own experience? I'd love to hear from you in the comments below!