
When I’m craving a quick, feel-good sketch, I almost always end up drawing a cute snowman—those round shapes and sweet expressions are just too fun. Here are my favorite cute snowman drawing ideas you can mix, match, and make totally your own.
Classic Stacked Circles Snowman
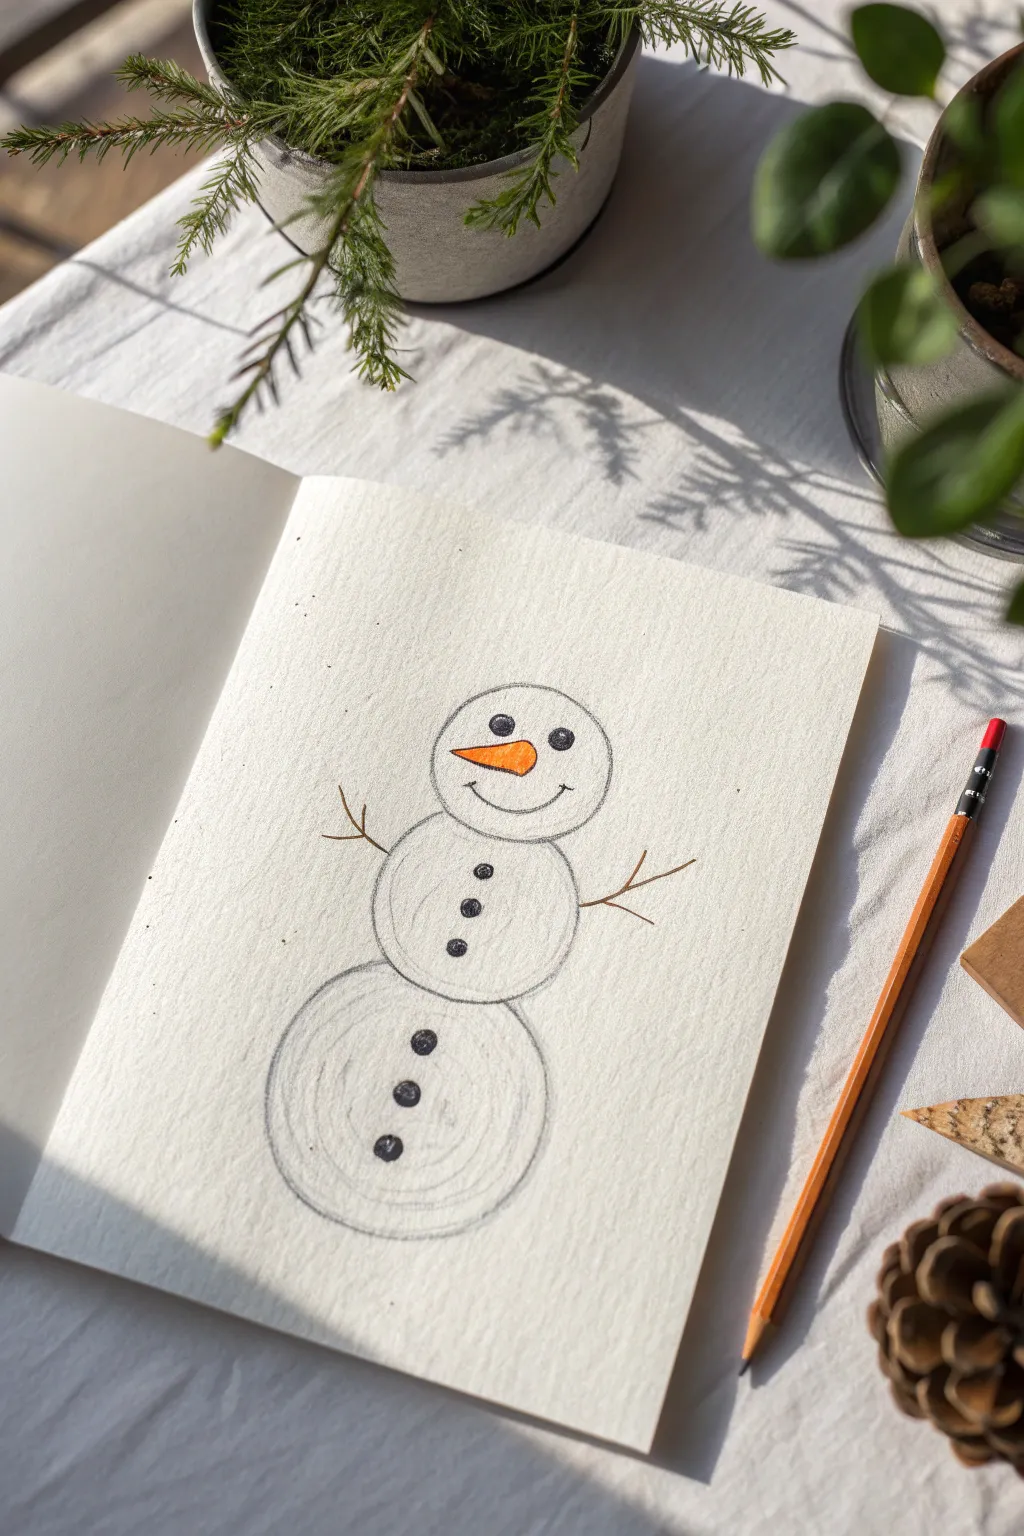
This charming sketch captures the essence of winter with a timeless three-circle snowman design. Using simple geometric shapes and soft shading techniques, you can bring this frosty friend to life on textured paper.
Detailed Instructions
Materials
- Textured sketchbook paper (creamy or off-white)
- Graphite pencil (HB or 2B)
- Orange colored pencil
- Finer black pencil or pen for details
- Eraser
Step 1: Building the Body
-
Establish the base:
Start by drawing a large circle near the bottom of your page. This will be the sturdy base of your snowman. Sketch lightly at first so you can adjust the shape if needed. -
Add the middle section:
Draw a slightly smaller circle resting directly on top of the base. Overlap them just a tiny bit to make the connection look natural, rather than like two distinct balls floating apart. -
Create the head:
Top off the stack with the smallest circle for the head. It should be proportional to the body below, centered nicely to keep your snowman balanced. -
Refine the outlines:
Go over your circle outlines again with a bit more pressure to define them. A slightly wobbly or scuffed line actually adds character here, suggesting packed snow rather than perfect geometry.
Circle Perfection
If you struggle with freehand circles, trace the bottom of a cup or a coin lightly first, then go over the line with a looser hand to make it look sketched.
Step 2: Facial Features
-
Place the eyes:
Draw two small, solid black circles in the upper half of the head circle. Space them out generously to give the face an open, friendly expression. -
Draw the carrot nose:
Sketch a triangular carrot shape pointing to the left. Start between the eyes and angle it slightly downward for a whimsical look. -
Color the nose:
Fill in your carrot shape with the orange colored pencil. Press firmly to get a vibrant pop of color against the white paper. -
Add the smile:
Create a simple curved line beneath the nose for a smile. I like to add tiny perpendicular tick marks at the ends of the smile to create cute dimples.
Winter Wear
Give your snowman more personality by sketching a striped scarf around the neck or adding a classic top hat on the head.
Step 3: Details and Texture
-
Add the buttons:
Draw three small circles down the center of the middle body section. Fill them in solidly with your pencil. -
Continue the buttons:
Add three more similar buttons on the large bottom circle, keeping them aligned with the ones above. -
Sketch the stick arms:
From the sides of the middle circle, draw thin, branching lines for arms. Make them angular and twig-like, angling slightly upward. -
Add circular texture:
Inside the body circles, lightly sketch concentric curved lines or swirls. These faint lines simulate the rolled texture of a snowball. -
Clean up stray marks:
Use your eraser to gently lift any initial sketch lines that are distracting, but leave some of the internal sketchiness to maintain the hand-drawn charm.
Step back and admire your cozy winter creation

Wide-Eyed Kawaii Snowman Face
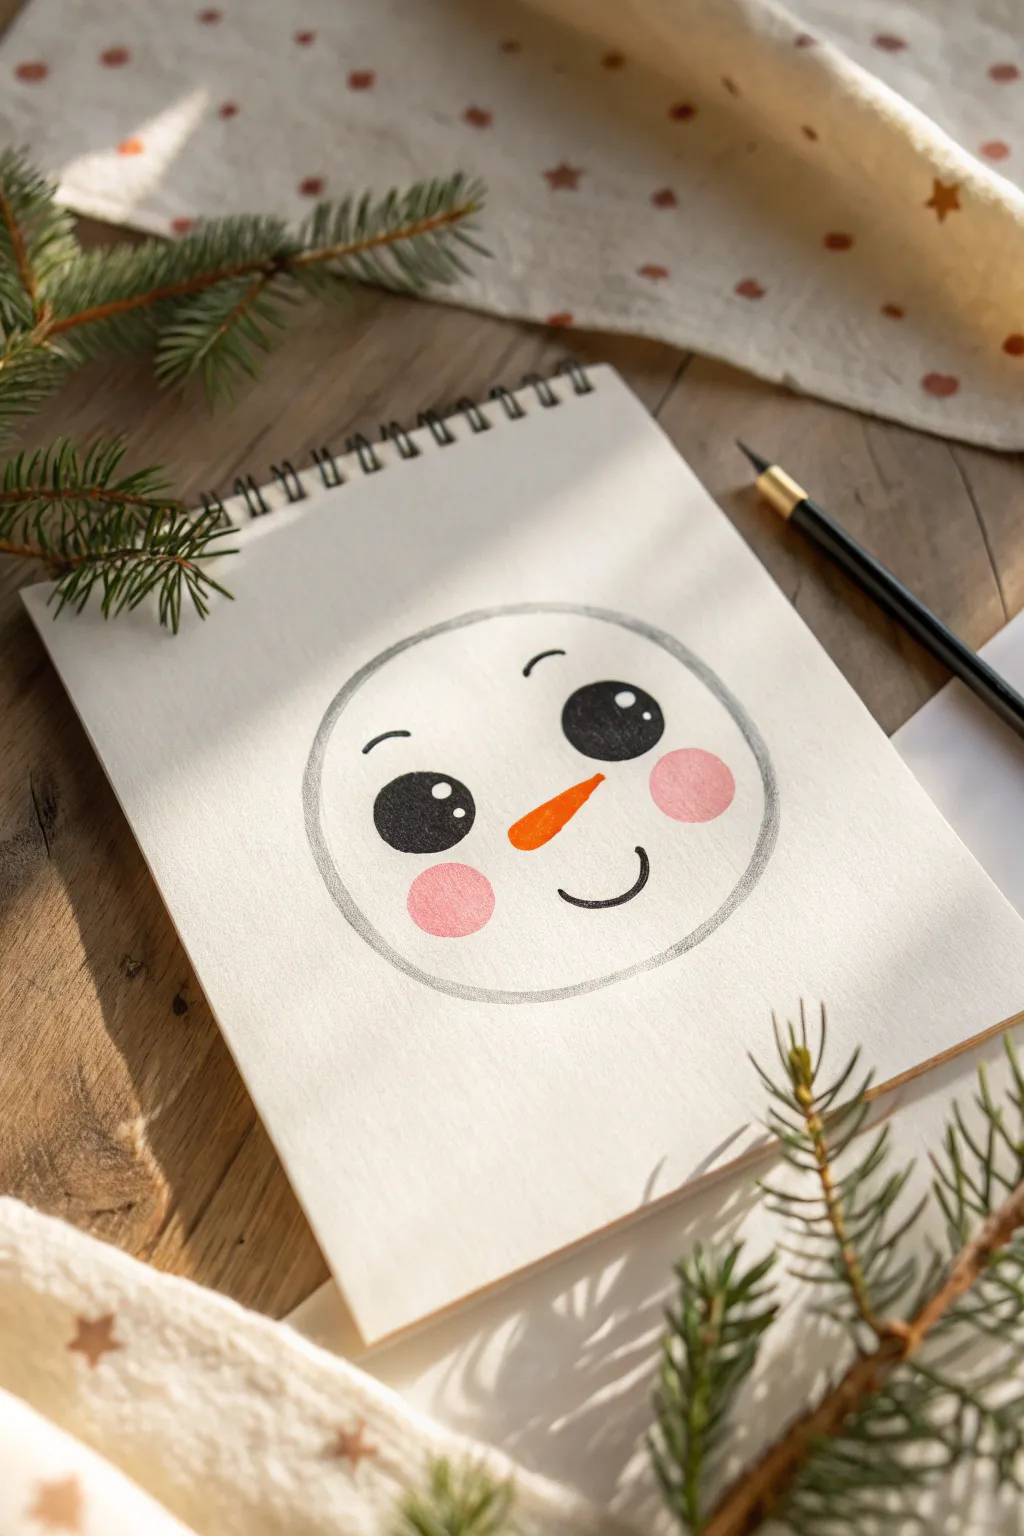
Capture the magic of winter with this adorable, wide-eyed snowman face that radiates sweetness. The simple circular design focuses on expressive eyes and rosy cheeks to create a heartwarming character perfect for holiday cards or sketchbook doodles.
Step-by-Step
Materials
- Spiral-bound sketchbook or drawing paper
- Light grey colored pencil (or HB pencil for sketching)
- Black brush pen or black marker
- Orange marker or colored pencil
- Pink colored pencil or pastel chalk
- Compass or a round object to trace (approx. 3-4 inches)
- White gel pen (optional, for eye highlights if marker is opaque)
Step 1: Setting the Foundation
-
Outline the head shape:
Begin by drawing a perfect circle in the center of your page. You can use a compass, but tracing a round object like a jar lid or a large mug works wonderfully for getting that smooth, unbroken line. -
Define the circle’s edge:
Go over your initial circle with a slate blue or light grey colored pencil. Keep the pressure relatively light so the texture of the paper shows through slightly, giving it a soft, snowy feel rather than a harsh outline. -
Map out the features:
Before committing to ink, lightly sketch the placement of the eyes, nose, and mouth with a pencil. Place the eyes wide apart on the upper half of the face to maximize the kawaii effect.
Step 2: Bringing the Face to Life
-
Draw the eye outlines:
Using your black marker or brush pen, carefully draw two large, solid ovals for the eyes. They should be slightly tilted inward at the top for a friendly expression. -
Add the pupils:
Fill in the eye ovals with solid black ink. This is a crucial step—ensure you leave two small white circles inside each oval for the ‘catchlights’ or reflections. If you accidentally fill them in, don’t worry; you can add them back later with a white gel pen. -
Create the eyebrows:
Draw two small, curved eyebrows floating just above the eyes. These should be short, simple arches that mimic the curve of the eye below them. -
Draw the nose shape:
In the space between the eyes but slightly lower, draw a carrot shape pointing toward the right. It should be a rounded triangle, slightly thicker on the left and tapering to a soft point. -
Color the nose:
Fill the nose shape with a vibrant orange marker. I like to start filling from the edges and work inward to keep the outline crisp. -
Add the smile:
With a fine-tip black pen, draw a simple, U-shaped mouth. Place it centered below the nose, keeping the line smooth and upward-curving for a classic happy expression. -
Cap the smile:
Add a tiny vertical tick mark or a small thickening at the right end of the smile line to give the mouth a little extra character and depth.
Uneven Eyes?
If your ovals don’t match, simply thicken the smaller one slowly. You can also turn them into larger circles—bigger eyes just make the character look even cuter and more expressive.
Step 3: Soft Details & Finishing Touches
-
Position the blush:
Identify the spots directly under the outer corners of the eyes for the cheeks. This placement is key to the cute aesthetic. -
Apply the first blush layer:
Using a pink colored pencil, gently shade two circular patches. Use a circular motion with your pencil to build up the color gradually without creating harsh strokes. -
Soften the cheeks:
If the pencil texture looks too rough, use your finger or a paper blending stump to smudge the pink circles slightly, creating a soft, airbrushed look. -
Review the outline:
Check your main grey circle outline again. If it faded while your hand rested on the paper, re-trace it gently to ensure the snowman’s head is clearly defined against the white background. -
Clean up sketch lines:
Once the ink is completely dry, take a clean eraser and gently remove any visible graphite sketch lines from step one.
Pro Tip: Instant Texture
Instead of colored pencil for the cheeks, rub a pink pastel chalk on a separate paper, pick up the dust with your finger, and dab it onto the drawing for a seamless, soft blush effect.
Now you have a charming winter friend greeting you from the page, ready to brighten up any cold day


Cozy Scarf With Simple Stripes
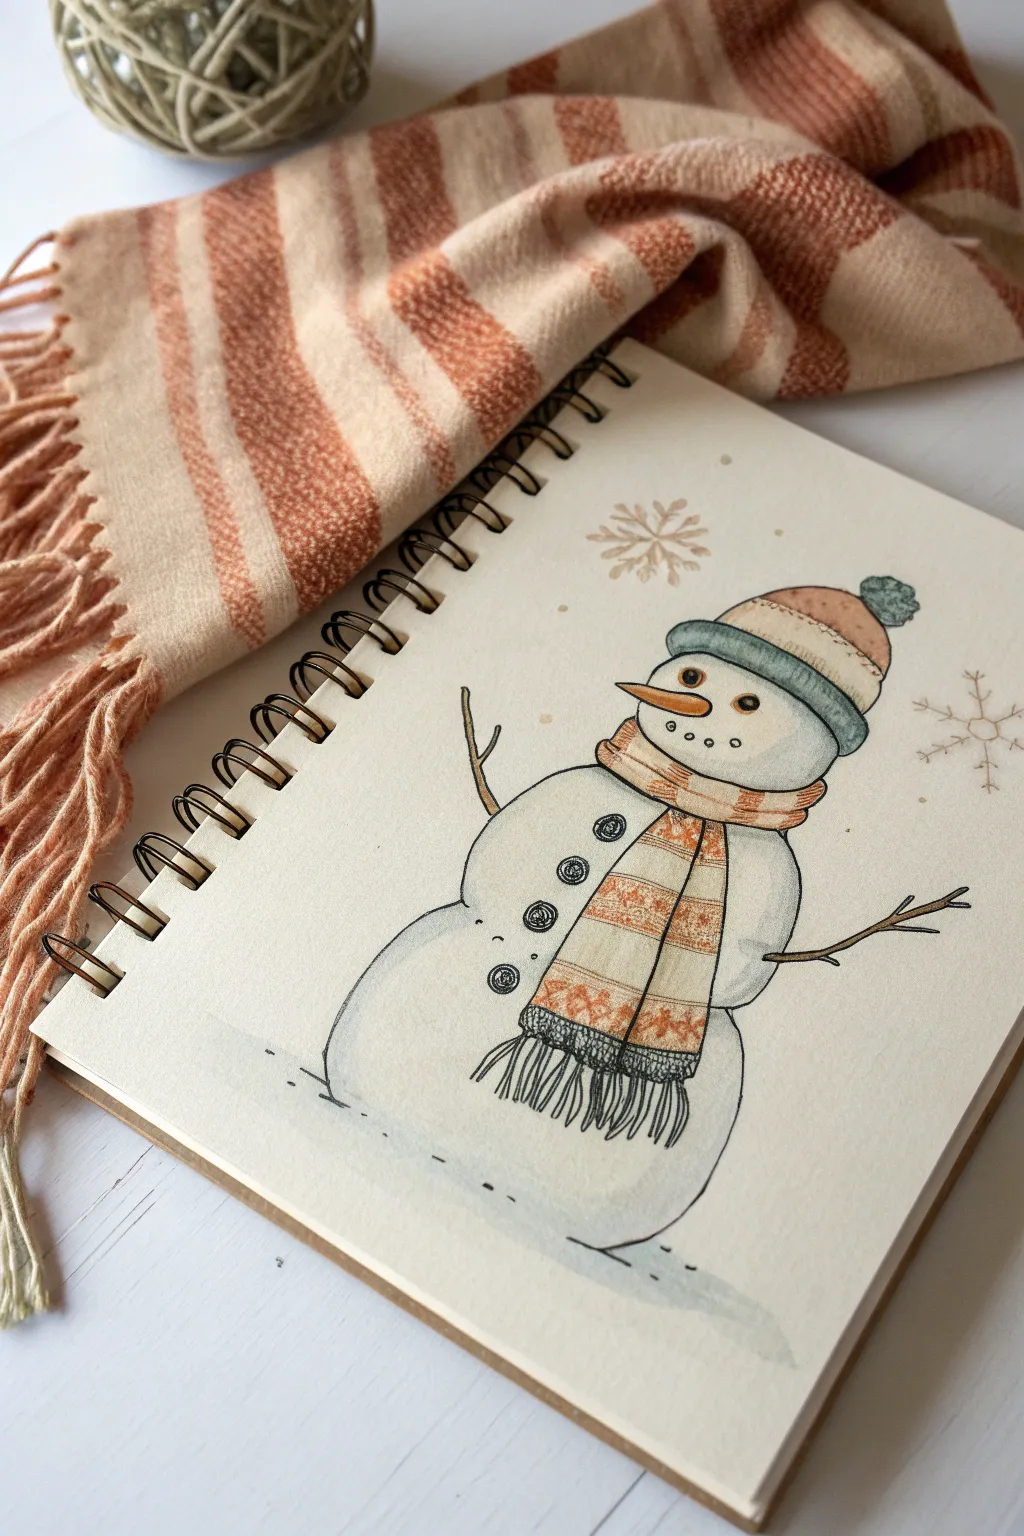
Capture the essence of winter with this charming snowman illustration, featuring a warm, striped scarf and a matching beanie. Using simple ink outlines and soft watercolor washes, you’ll create a cozy character that feels right at home on the page.
Detailed Instructions
Materials
- Sketchbook with mixed media or watercolor paper
- Pencil (HB) and eraser
- Fine liner pen (0.3mm or 0.5mm, waterproof black ink)
- Watercolors (Terracotta/Burnt Orange, Teal/Blue-Grey, Shadow Grey)
- Small round paintbrush (size 4 or 6)
- White gel pen (optional for highlights)
Step 1: Pencil Structure
-
Foundation shapes:
Begin by lightly sketching three stacked circles for the snowman’s body. Make the bottom circle the widest and slightly flattened at the base to give him weight. -
Headgear placement:
Draw an oval shape tilted slightly back on the top circle for the beanie’s brim. Add a rounded dome on top and a small pom-pom circle. -
Scarf wrapping:
Sketch the scarf wrapped snugly around the neck area. Draw the loop first, then add the long tail draping down the front of the body, just off-center. -
Facial features:
Add a carrot nose pointing left, two small dots for eyes, and a curved line of smaller dots for the smile. -
Stick arms:
Sketch two thin branches sticking out from the middle section. The left arm can angle upward, while the right arm extends outward.
Ink Smudging?
If your black outline bleeds when you paint, stop immediately. Your pen might not be waterproof. Let it dry 24 hours or switch to a pigment micron pen.
Step 2: Inking the Outline
-
Trace clean lines:
Using your waterproof fine liner, carefully trace over your pencil lines. Don’t worry if the lines are slightly wobbly; it adds to the organic, hand-drawn feel. -
Add texture details:
Draw vertical ribbing lines on the beanie brim and horizontal stripes on the scarf. Make sure the stripes follow the curve of the fabric. -
Refine the fringe:
At the bottom of the scarf tail, draw individual strands for the fringe, grouping them slightly to look like gathered yarn. -
Button details:
Ink three distinct buttons down the center of the middle snowball. I like to add tiny ‘X’ marks or four holes inside each button for realism. -
Snowflake accents:
Draw a few simple snowflakes in the background using crossed lines and small ‘V’ shapes at the tips. -
Erase guidelines:
Wait a few moments for the ink to dry completely, then gently erase all visible pencil marks so your watercolor stays clean.
Cozy Texture
While the paint is wet on the scarf, sprinkle a few grains of table salt. Brush it off when dry to create a mottled, wool-like texture effect.
Step 3: Watercolor Washes
-
Painting the nose:
Mix a bright orange and fill in the carrot nose. Leave a tiny sliver of white paper at the top edge for a highlight. -
Warm striped accents:
Dip your brush into a terracotta or burnt orange paint. Fill in alternating stripes on the scarf and the main dome of the hat. -
Hat brim and pom-pom:
Using a diluted teal or blue-grey color, paint the ribbed brim of the beanie and the pom-pom on top. -
Scarf patterning:
For the scarf, alternate your colors. Leave some stripes white or paint them a very pale beige to create a patterned wool look. -
Snowman shading:
Mix a very watery grey wash. Paint a thin shadow along the left side of the snowballs and under the scarf to give the figure dimension. -
Grounding shadow:
Add a wash of that same grey at the base of the snowman to ground him, softening the edges with clean water so it fades out naturally.
Step 4: Final Touches
-
Fringe wash:
Lightly dab a little dark grey or black paint onto the tips of the scarf fringe to separate them from the snowman’s white body. -
Snowflake tint:
Wait for the ink to be fully waterproof, then you can add a barely-there wash of warm beige or gold over the snowflakes. -
Highlight adjustments:
If you lost any highlights during painting, use a white gel pen to add small dots to the eyes or the carrot nose.
Now your sketchbook has a friendly winter companion ready to weather the cold


Top Hat With a Ribbon Band
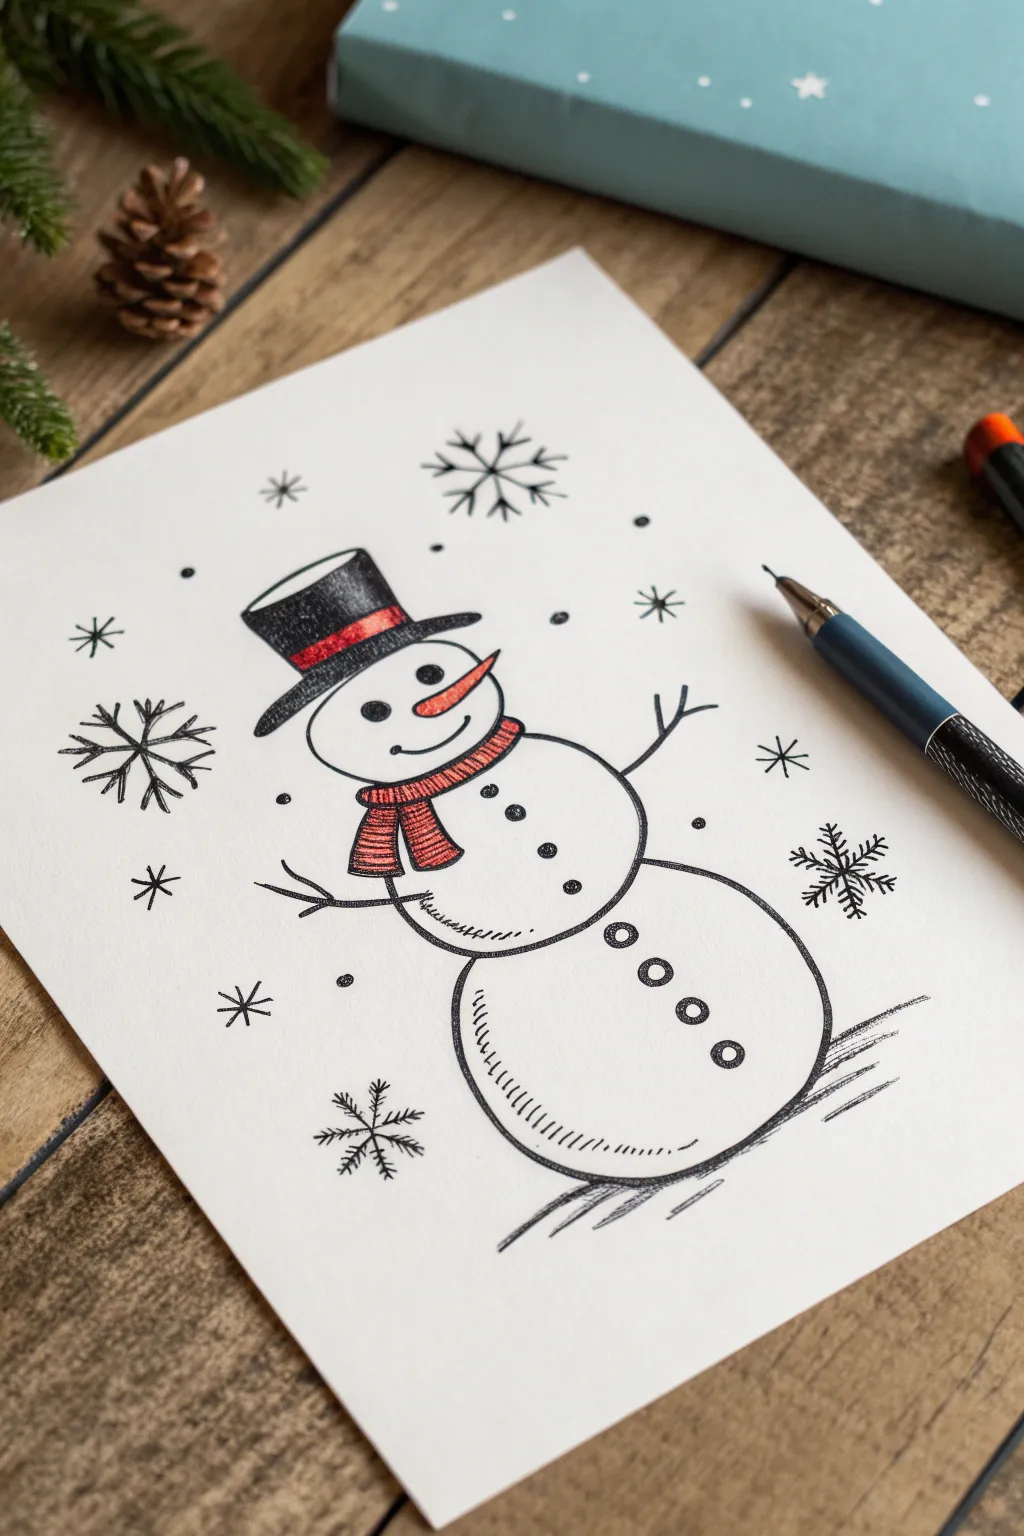
Capture the spirit of winter with this charming illustration of a snowman sporting a jaunty top hat and cozy scarf. Using simple circular forms and crisp ink lines, you’ll create a friendly holiday character surrounded by delicate snowflakes.
How-To Guide
Materials
- White drawing paper or cardstock
- Pencil (HB or 2B)
- Eraser
- Fine-point black drawing pen or marker (0.3mm or 0.5mm)
- Red colored pencil or fine-tip marker
- Orange colored pencil or fine-tip marker
Step 1: Drafting the Snowman Structure
-
Outline the head:
Start near the upper middle of your page by sketching a medium-sized circle in pencil for the snowman’s head. Keep your pressure light so you can erase these lines later. -
Add the middle section:
Drawing directly below the head, create a slightly larger, slightly flattened circle for the middle body segment. It should overlap just a tiny bit with the bottom of the head. -
Draw the base:
Sketch the largest circle at the bottom for the base of the snowman. This one should be the widest of the three to give him a stable foundation. -
Sketch the hat placement:
Draw an oval shape tilted slightly to the left on top of the head for the hat’s brim. Above that, sketch a cylinder shape for the stovepipe part of the hat. -
Indicate the scarf:
Lightly sketch a curved band right where the head meets the body. Add two rectangular shapes hanging down on the left side to represent the ends of the scarf. -
Draft the arms:
Draw simple stick lines extending from the middle body section for arms. Add small ‘V’ shapes at the ends for twig fingers.
Fixing Smudges
If you smudge ink while erasing, turn it into a falling snowflake or a shadow. Wait longer next time before erasing!
Step 2: Inking the Details
-
Ink the hat:
Using your black pen, trace over your hat sketch. Make the brim distinct and add a band across the cylinder part. Fill in the main part of the hat with black ink, leaving the band empty for now. -
Define the face:
Draw two solid black dots for eyes. In the center, draw a pointy carrot nose. Below the nose, create a simple curved line with a small tick at the end for a smile. -
Ink the scarf:
Go over your scarf lines with the black pen. Draw horizontal stripes inside the scarf shape to give it a knit texture. -
Outline the body:
Trace the circular body segments. Instead of a perfect continuous line, breaks the line occasionally or add slight overlapping strokes to suggest a rougher snowball texture. -
Add buttons:
Draw three small circles down the center of the middle and bottom snowballs. Leave the centers white and just ink the outlines for a button look. -
Detail the twig arms:
Go over your arm sketches with slightly jagged, organic lines to make them look like real wood branches. -
Add texture lines:
On the lower left curves of each snowball, add small hatching marks (short, parallel strokes). This adds volume and shadow to the round forms. -
Ground the snowman:
Sketch a few horizontal, jagged lines underneath the base to separate the snowman from the ground and show he is sitting in snow.
Step 3: Color and Final Touches
-
Erase pencil guides:
Once the ink is completely dry, gently erase all the underlying pencil sketches to clean up the drawing. -
Color the carrot nose:
Use your orange pencil to fill in the carrot nose. I usually press a little harder near the base of the nose to add a bit of dimension. -
Color the accessories:
Use the red pencil to color the hat band and the scarf. For the scarf, try to color between the black stripe lines you drew earlier. -
Draw simple snowflakes:
Scatter small asterisk (*) shapes around the snowman using the black pen. Vary their sizes for interest. -
Create complex snowflakes:
Draw a few larger snowflakes by crossing three lines and adding smaller ‘v’ shapes to the tips. This variety fills the negative space beautifully. -
Add falling snow dots:
Finally, add tiny solid black dots randomly among the snowflakes to represent falling snow.
Make It Sparkle
Use a clear glitter gel pen over the ‘snow’ areas and the white parts of the body for a frosty, magical finish.
Now you have a festive winter friend ready to decorate a greeting card or gift tag
BRUSH GUIDE
The Right Brush for Every Stroke
From clean lines to bold texture — master brush choice, stroke control, and essential techniques.
Explore the Full Guide
Beanie Hat With a Pom-Pom
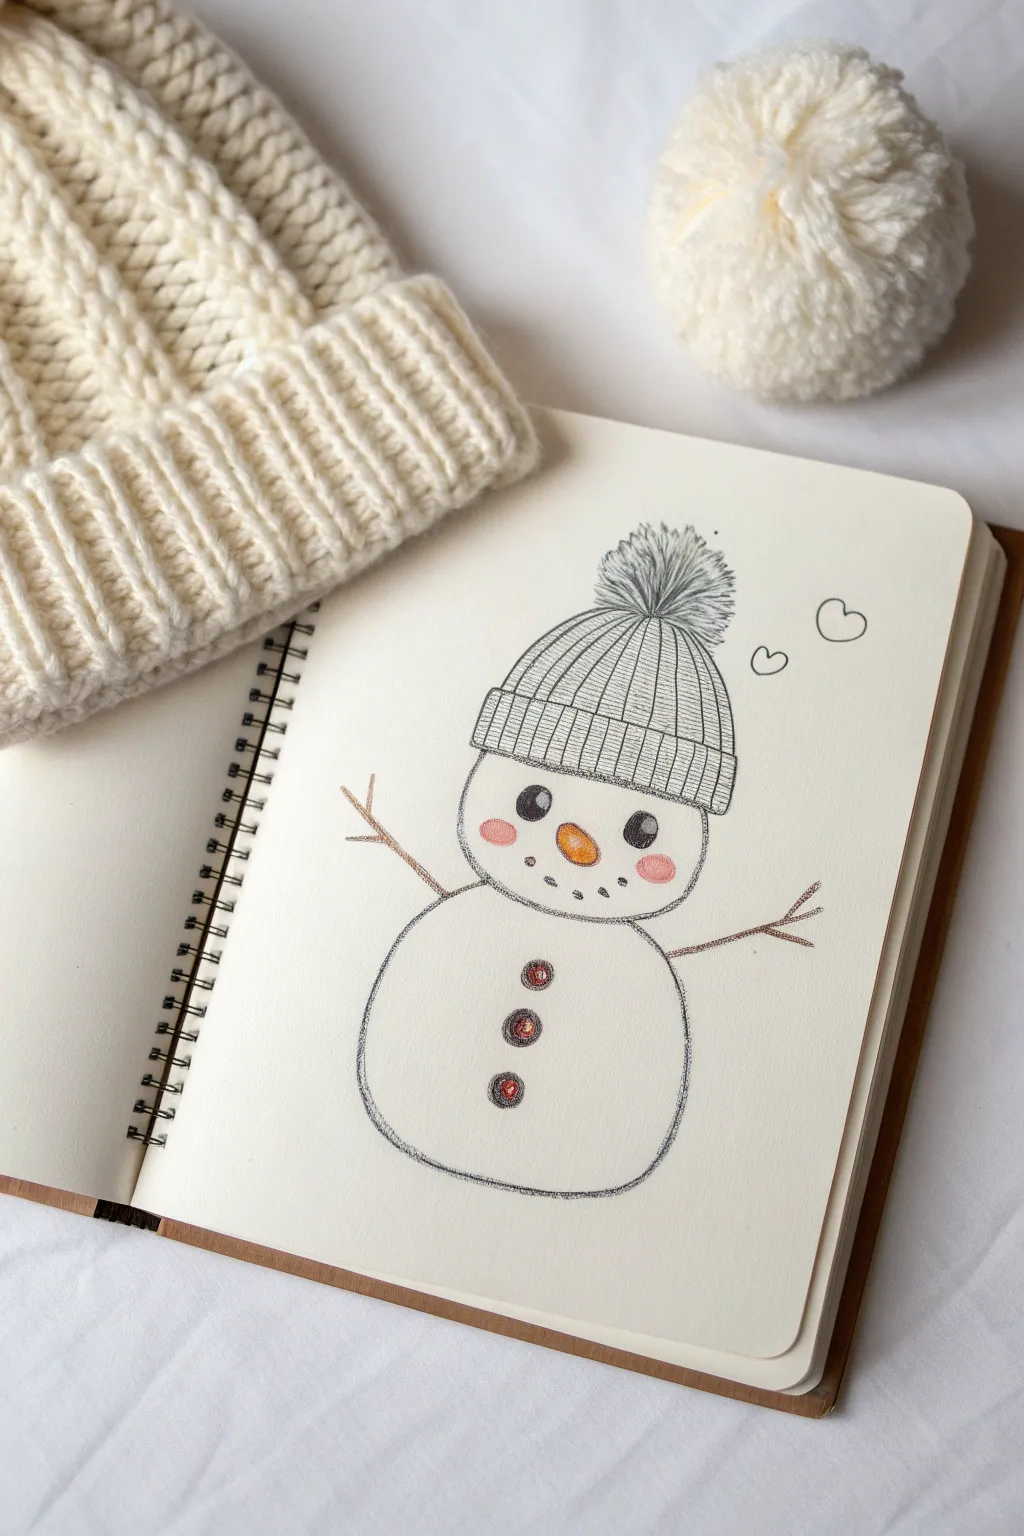
Capture the warmth of winter with this charming snowman sketch featuring a highly detailed beanie. This drawing focuses on simple shapes brought to life with delicate texture lines and soft pops of color for a minimalist yet festive look.
Step-by-Step Tutorial
Materials
- Sketchbook or drawing paper (smooth or light texture)
- Fine liner pen (black, roughly 0.3mm or 0.5mm)
- Pencil (HB for sketching)
- Eraser
- Colored pencils (orange, pink, brown)
Step 1: Basic Structure
-
Head shape:
Start by lightly sketching a slightly flattened oval for the head using your pencil. Keep the top line faint as it will be covered by the hat later. -
Body base:
Draw a larger, wider oval directly underneath the head for the body. The bottom should be fuller and rounder to give the snowman a sturdy, classic shape. -
Hat brim guidelines:
Visualize where the hat sits on the head. Sketch a curved rectangle or band shape overlapping the upper third of the head oval. This will become the folded brim of the beanie. -
Hat dome:
Extend a curved semi-circle upwards from the brim to form the main part of the hat.
Curve Control
When drawing the vertical lines on the hat, make sure they curve with the shape of the head rather than straight up and down. This makes the hat look 3D.
Step 2: Inking the Outline
-
Solidifying the hat:
Switch to your fine liner pen. Trace the outline of the hat brim, keeping the corners slightly rounded for a soft textile look. Then trace the dome of the hat. -
Snowman body:
Ink the visible parts of the face oval below the hat. Continue down to outline the large body oval. Use a slightly sketchy, broken line if you want an organic texture, or a single clean line for a cartoon style. -
Drawing the arms:
Draw stick arms extending from the sides of the body. Angle them slightly upward and add a small ‘Y’ branch at the end of each to mimic twigs. -
Erasing basics:
Wait a moment for the ink to dry completely, then gently erase all your initial pencil guidelines.
Pattern Play
Instead of simple vertical lines, try filling the hat brim with a zigzag or alternating dot pattern to make it look like a fair isle knit sweater.
Step 3: Adding Details & Texture
-
Ribbed brim texture:
On the hat brim, draw vertical lines spaced closely together. These shouldn’t be perfectly straight; give them a slight curve to follow the form of the head. -
Hat body texture:
Fill the dome of the hat with similar vertical lines that curve inward toward the top point, mimicking the knit pattern of a beanie. -
Pom-pom creation:
At the very top of the hat, draw a burst of short, quick lines radiating outward from a center point. This creates the fluffy pom-pom texture. -
Facial features:
Draw two solid black circles for eyes, leaving a tiny white dot in each for a highlight. Add a small sideways oval for the carrot nose and a curved line of tiny dots for the smile. -
Buttons:
Draw three small circles vertically down the center of the body for buttons. Ink heavily inside them but leave the centers slightly open or textured.
Step 4: Color & Final Touches
-
Blushing cheeks:
Using a pink colored pencil, gently color two small ovals directly under the eyes. Press lightly to keep it soft. -
Carrot nose:
Color the nose with an orange pencil. I like to press harder on the bottom edge to create a sense of dimension and shadow. -
Button details:
Add a touch of brown or dark red to the center of the buttons to make them pop against the white paper. -
Arm color:
Trace over your ink lines on the stick arms with a brown pencil to give them a woody tone. -
Floating hearts:
Finish the piece by drawing two small, simple hearts floating to the right of the hat with your fine liner.
Now you have a sweet winter character ready to decorate your journal pages
Stick Arms With a Little Wave
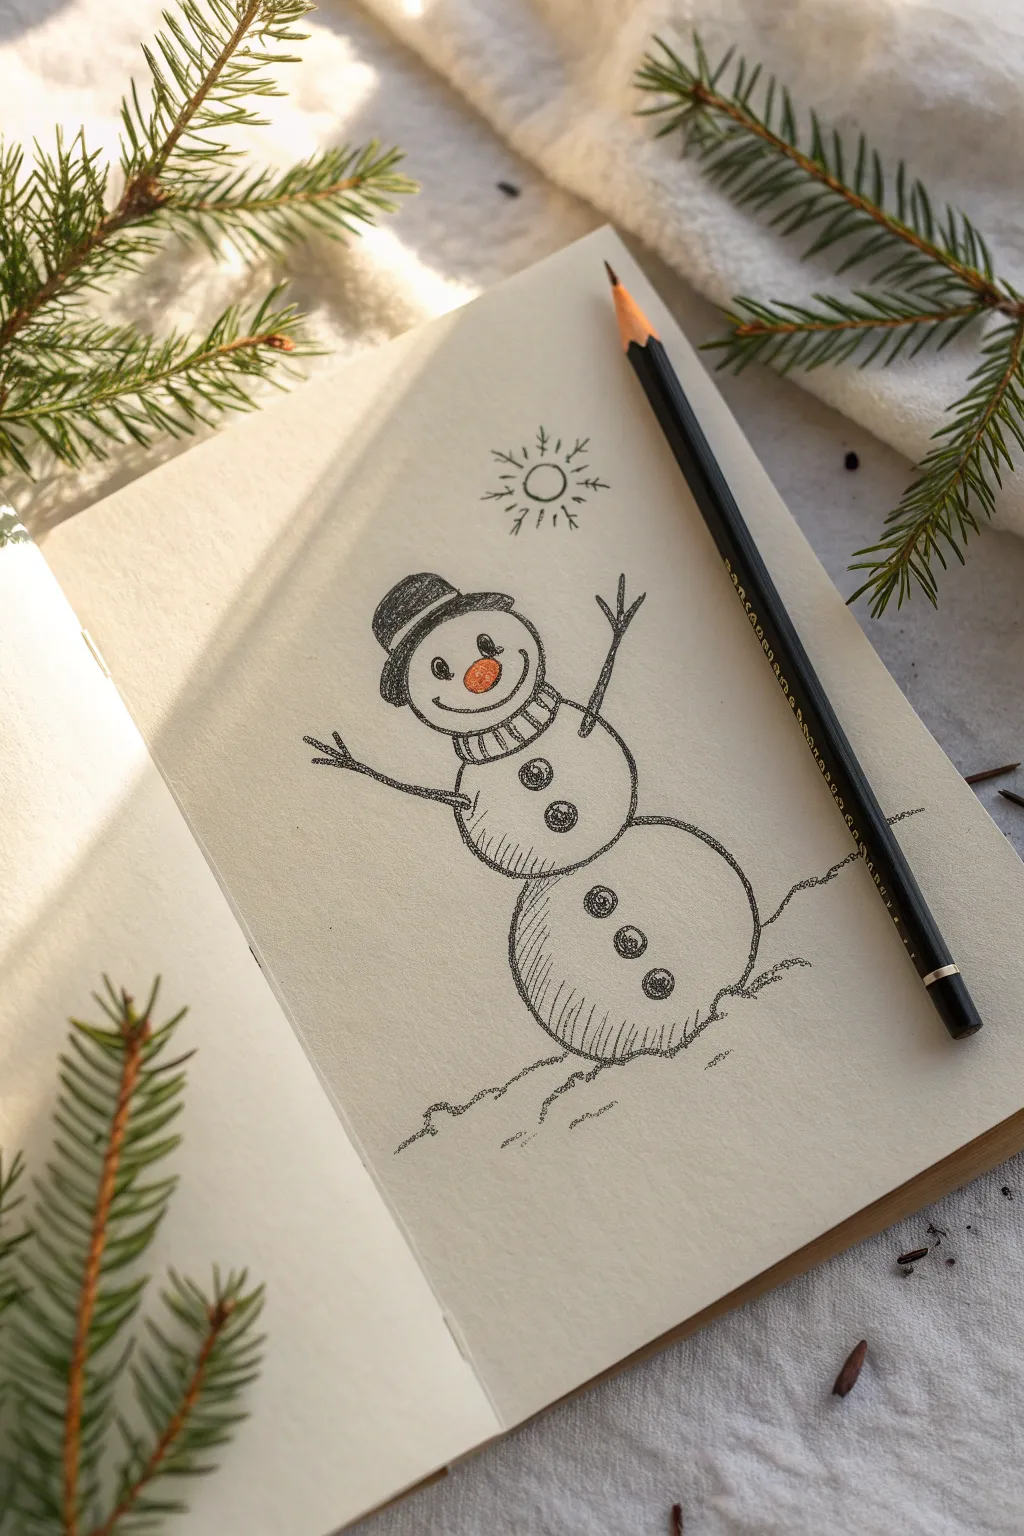
This charming, hand-drawn sketch captures a classic three-tiered snowman offering a cheerful wave. With subtle shading for dimension and a pop of orange for the nose, it is a perfect little winter illustration for your sketchbook.
How-To Guide
Materials
- Sketchbook with cream or off-white paper
- Pointed black drawing pencil (charcoal or soft graphite, e.g., 4B or 6B)
- Orange colored pencil
- Eraser
- Small blending stump (optional)
Step 1: Building the Snowman’s Body
-
Draw the base snowball:
Start by drawing a large circle near the bottom center of your page. It doesn’t need to be perfectly round; a slightly irregular shape looks more like packed snow. -
Add the middle section:
Draw a slightly smaller circle sitting directly on top of the base. Overlap them just a tiny bit so they look connected rather than just floating. -
Create the head:
Place a third, smallest circle on top for the head. Keep the proportions balanced so he doesn’t look top-heavy. -
Outline the ground:
Sketch a jagged, uneven line underneath the bottom snowball to represent the snowy ground. Let the line break in places for a loose, sketchy feel.
Step 2: Adding Character Details
-
Position the hat brim:
Draw a curved oval shape slightly overlapping the top of the head circle. This forms the brim of his hat. -
Finish the hat shape:
Sketch a rounded, rectangular shape on top of the brim. Add a small curved line near the base of the hat crown to suggest a ribbon or band. -
Draw the scarf:
Below the head, draw two curved lines wrapping around the neck area. Connect them with small vertical lines inside to create a ribbed, knit texture. -
Sketch the stick arms:
From the middle snowball, draw two thin lines extending outward. Add small ‘V’ shapes at the ends to look like twig fingers. One arm should be lifted higher in a wave.
Smudgy Paper?
If your hand smudges the pencil shading while you draw, slip a scrap piece of paper under your drawing hand to act as a shield.
Step 3: Face and Buttons
-
Place the eyes:
Draw two small, solid black circles on the face. Leave a tiny speck of white paper showing in each eye to create a lively sparkle. -
Draw the carrot nose:
Sketch a small, sideways triangle between the eyes. Keep the lines light for now. -
Add the smile:
Draw a simple curved line beneath the nose. Add a small ‘cheek’ dash at the end of the smile for a friendly expression. -
Draw the buttons:
Add two circles on the middle section and three on the bottom section. Fill them in loosely, leaving the centers slightly lighter to suggest volume.
Make it Sparkle
Use a white gel pen to add tiny dots of snow falling around the figure or to add brighter highlights on the coal buttons.
Step 4: Shading and Finishing Touches
-
Color the nose:
Take your orange pencil and fill in the carrot nose. Apply more pressure at the base near the face and fade slightly toward the tip. -
Shade the hat:
Using your black pencil, fill in the hat with dense, dark strokes. I like to shade in a circular motion here to mimic the felt texture. -
Apply body shading:
Use hatched lines (short, parallel strokes) on the lower left side of each snowball. This creates a shadow that gives the snowman 3D form. -
Shade the ground:
Add a few scribble-like hatch marks under the bottom snowball to ground the figure and cast a shadow on the snow. -
Add the sun:
Above the snowman, draw a small circle with loose rays radiating outward. This balances the composition. -
Darken outlines:
Go over your main outlines one last time with a bit more pressure to define the shape, keeping the lines sketchy and loose.
Now you have a delightfully sketched companion ready for the winter season

PENCIL GUIDE
Understanding Pencil Grades from H to B
From first sketch to finished drawing — learn pencil grades, line control, and shading techniques.
Explore the Full Guide
Snow Arms With Puffy Mittens
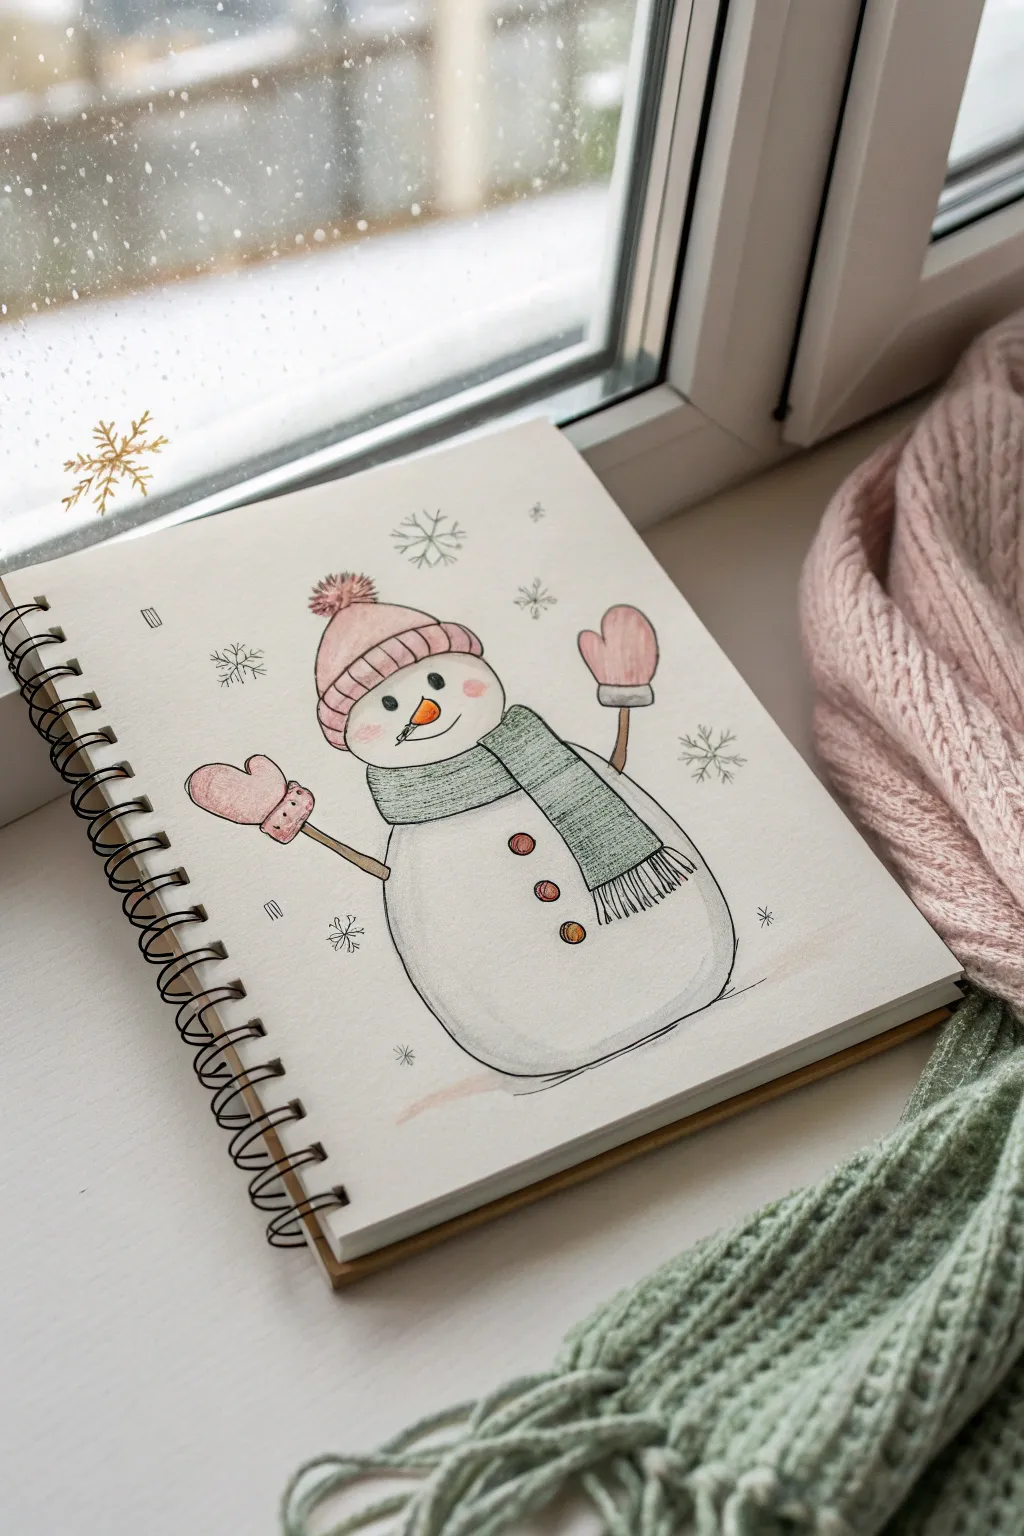
Capture the warmth of winter crafting with this charming colored pencil sketch of a friendly snowman. Featuring soft textures, puffy pink mittens, and a classic carrot nose, this illustration is perfect for greeting cards or decorating your sketchbook.
Step-by-Step Tutorial
Materials
- Sketchbook with slightly textured paper
- HB pencil
- Eraser
- Fine liner pen (black or dark grey, 0.3mm)
- Colored pencils (light pink, dark pink, sage green, orange, light grey)
Step 1: Basic Shapes
-
Outline the body:
Start lightly with your HB pencil. Draw a large, slightly squashed oval at the bottom for the snowman’s base to give him a settled, heavy look. -
Add the head:
Draw a smaller circle overlapping the top of the base oval. Erase the line where they intersect so it looks like one continuous form. -
Sketch the hat:
Top the head with a beanie shape. Draw a curved band across the forehead for the cuff, a rounded dome for the hat, and a messy circle on top for the pom-pom.
Loose Lines
Don’t connect every single ink line perfecty. Leaving small gaps in the outline adds whimsical character and makes the drawing feel more alive.
Step 2: Arms and Accessories
-
Draw the scarf:
Draft a thick scarf wrapped around the neck area. Let one end drape down across the body’s right side, adding indications for fringe at the bottom. -
Position the arms:
Sketch thin, stick-like arms extending outward. Angle the left arm down slightly and raise the right arm up in a waving gesture. -
Add puffy mittens:
At the end of each stick arm, draw a large mitten shape. Make them oversized and rounded, with a separate thumb section and a cuff where they meet the stick. -
Facial features & buttons:
Place two dots for eyes, a carrot shape for the nose, and a simple curved smile. Add three round buttons down the center of the body.
Pattern Up
Customize the scarf by drawing alternating colored stripes or adding small polka dots before you shade it in to match your own winter accessories.
Step 3: Inking and Coloring
-
Ink the outlines:
Go over your pencil lines with a fine liner pen. Use a loose, sketchy hand rather than a rigid continuous line to keep the cozy, illustrated feel. -
Detail the textures:
Add small lines to the scarf to suggest knitting texture. Draw little dashed lines on the hat cuff for ribbing and scribble texture into the pom-pom. -
Color the warm tones:
Use a light pink pencil to fill the hat and mittens. I usually hold the pencil further back for a softer shading effect. Use a darker pink to add blush to the cheeks and shading on the ribbing. -
Color the cool tones:
Fill the scarf with a sage green pencil. Use slightly more pressure on the fringe and edges to create depth. -
Bright accents:
Color the nose bright orange and the buttons with a reddish-brown or dark pink. -
Shading the snow:
Take a light grey pencil and gently shade the left side and bottom of the snowman’s body to give it volume and roundness. Keep the center white. -
Final atmosphere:
Draw simple snowflake shapes and tiny circles floating around the snowman with your pen to complete the wintry scene.
Now you have a sweet winter friend ready to brighten up any page
Button Details in a Heart Pattern
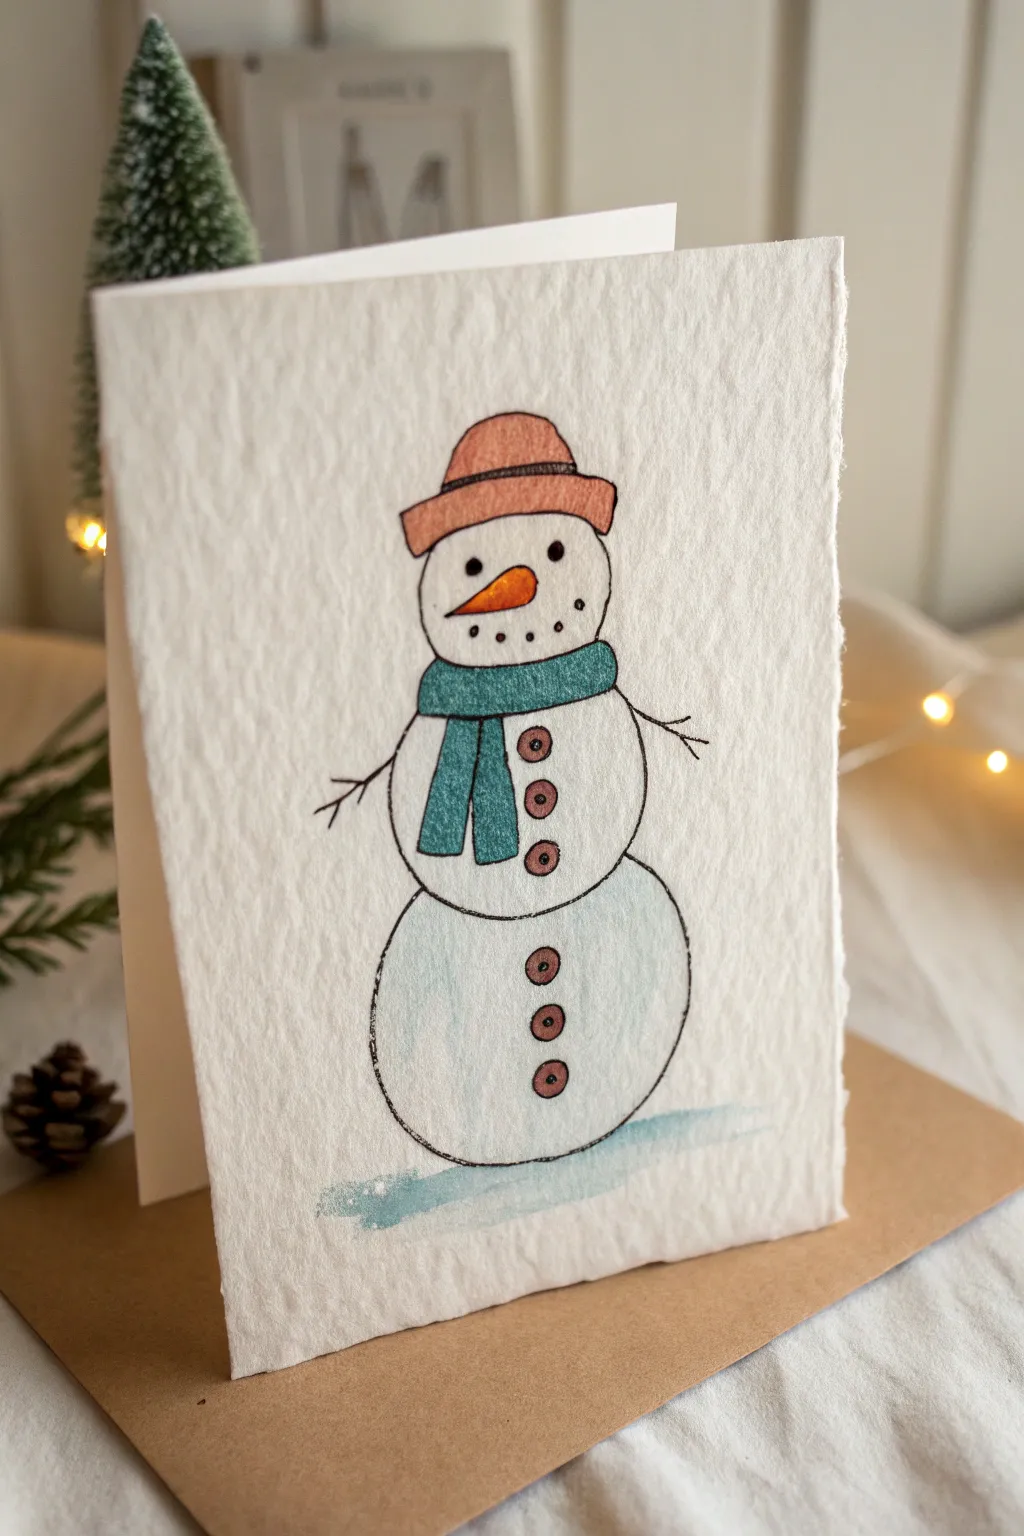
This charming holiday card features a simply illustrated snowman with a rustic, handmade feel. The textured paper and delicate watercolor washes create a cozy, vintage aesthetic perfect for seasonal greetings.
Step-by-Step
Materials
- High-quality textured watercolor paper (cold press or handmade cardstock)
- Fine liner pen (black, waterproof, 0.3mm or 0.5mm)
- Watercolor paints (burnt sienna, turquoise/teal, orange, light blue)
- Small round watercolor brush (size 2 or 4)
- Pencil and eraser
- Kraft paper envelope (optional, for styling)
Step 1: Planning and Sketching
-
Prepare the card base:
Cut your textured watercolor paper to size and fold it in half to create a standard greeting card shape. A 5×7 inch folded size works beautifully for this design. -
Outline the head:
Using a light pencil touch, draw a small circle near the top center of the card for the snowman’s head. Keep it loose; perfect circles aren’t necessary here. -
Add the body segments:
Draw a slightly larger circle directly beneath the head for the middle section, and then the largest circle at the bottom for the base, stacking them to form the classic snowman shape. -
Sketch the accessories:
Lightly sketch a simple bucket-style hat on the head. Then, draw a scarf wrapped around the neck area, letting two tails hang down over the middle section.
Step 2: Inking the Design
-
Trace the main shapes:
Go over your pencil lines with a waterproof black fine liner. Use a slightly shaky or broken line technique to enhance the rustic, hand-drawn look rather than aiming for mechanical precision. -
Draw stick arms:
Extend two simple, branch-like lines from the middle snowball to create the arms. Add tiny ‘fingers’ at the ends for that twiggy appearance. -
Add the face:
Ink two small solid dots for eyes and a row of smaller dots for the smile. Draw a triangular carrot nose pointing off to the left. -
Detail the buttons:
Draw three small circles on the middle section and three on the bottom section. Add tiny dots inside each to look like buttonholes. -
Erase guidelines:
Once the ink is completely dry, gently erase all underlying pencil marks to keep the paper surface clean.
Clean Lines Tip
Make absolutely sure your black pen is waterproof before painting. Test it on a scrap piece of paper first to avoid ruining your sketch.
Step 3: Adding Color
-
Paint the hat:
Load your brush with a diluted burnt sienna or terra cotta watercolor. Fill in the hat shape, keeping the color somewhat transparent to let the paper texture show through. -
Color the scarf:
Mix a teal or turquoise shade. Carefully paint the scarf loop and the hanging tails, trying to stay within the inked lines. -
Add the nose:
Use a bright orange to fill in the carrot nose. A single dab of color is usually enough for this small detail. -
fill the buttons:
Using a darker brown or a concentrated version of your hat color, dab small amounts of paint into the six button circles. -
Shade the snow:
create a very watery, pale blue wash. Gently paint a crescent shape along the left side of the bottom snowball to give it slight dimension. -
Ground the figure:
While you have the pale blue on your brush, add a quick, horizontal wash right underneath the snowman to create a shadow on the ‘ground’ so he isn’t floating in space. -
Let it dry:
Allow the card to verify completely flat until the watercolor is dry to the touch, preventing any smudging.
Paper Buckling?
If your card warps from the water, place it under a heavy book overnight once it’s dry. This will flatten the paper fibers back out.
Now you have a handmade holiday greeting ready to warm someone’s heart


Tilted Pose for Extra Charm
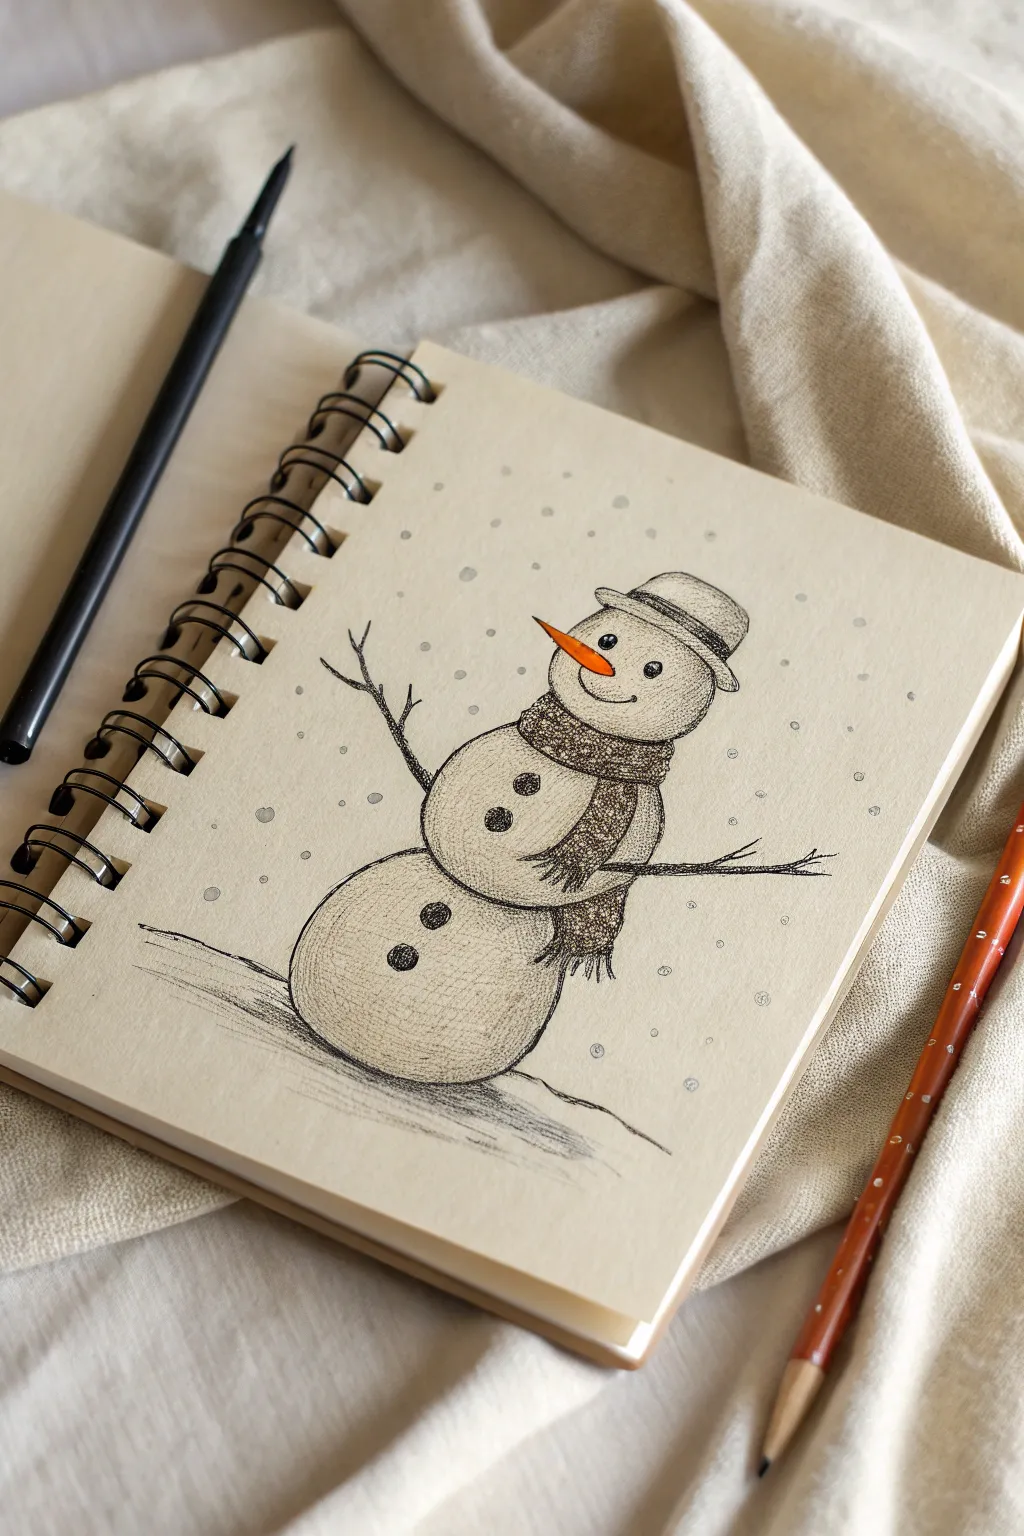
Capture the playful spirit of winter with this charming snowman sketch, featuring a gentle tilt that adds personality and movement. Using simple stippling and line work on toned paper creates a cozy, nostalgic illustration perfect for seasonal journals.
How-To Guide
Materials
- Spiral-bound sketchbook with toned (tan/kraft) paper
- Fine-point black drawing pen (0.1mm or 0.3mm)
- Black brush pen or slightly thicker marker (0.5mm)
- Orange colored pencil or marker
- Pencil and eraser for sketching
Step 1: Planning the Structure
-
Establish the curve:
Begin by lightly sketching a curved vertical line with your pencil. This axis line shouldn’t be straight up and down; give it a slight lean to the right to create that ’tilted’ charm mentioned in the title. -
Map out the body shapes:
Sketch three circles along your axis line. Make the bottom circle the largest and slightly flattened at the base. The middle circle should be medium-sized, and the head circle the smallest. -
Refine the connections:
Instead of letting the circles just sit on top of each other, slightly overlap them. Erase the intersecting internal lines so the shapes merge into a single snow-figure. -
Add the hat and scarf:
Draw a brimmed hat sitting jauntily on the head. Then, sketch the rough outline of a scarf wrapping comfortably around the neck area, allowing the ends to drape down the left side of the middle snowball.
Step 2: Inking the Outline
-
Trace the main lines:
Switch to your fine-point black pen. Carefully trace over your pencil outlines. Use a broken, slightly sketchy line quality rather than a solid, perfect stroke to mimic the texture of packed snow. -
Detail the face:
Draw two small, solid black circles for eyes on the head. Add a curved carrot shape for the nose pointing left, and a simple curved line or series of dots for a smiling mouth. -
Draw the stick arms:
Create the arms using thin, jagged lines. The left arm should reach upward, and the right arm should extend outward. Add tiny twigs branching off the main sticks for realism. -
Define the buttons:
In the center of the middle and bottom snowballs, draw irregular, dark circles for lumps of coal. I like to leave tiny specks of white inside them to look like highlighted texture.
Ink Confidence
Don’t worry about shaky lines! For a snowman, wobbly lines actually look better—they mimic the uneven texture of packed snow.
Step 3: Shading and Texture
-
Base shading with stippling:
This is where the drawing comes to life. Using your finest pen, start placing tiny dots (stippling) along the bottom right curves of each snowball. This establishes the shadow side. -
Build the gradient:
Increase the density of dots near the outline and gradually space them out as you move toward the center of the snowballs. This creates a rounded, 3D effect. -
Texture the scarf:
Fill the scarf with a tight pattern. You can use tiny cross-hatching or very dense stippling to make it look like wool. Add varied lines at the ends of the scarf to represent fringe. -
Darken the hat:
Use close, parallel sketching lines or cross-hatching to shade the hat. Make the band of the hat slightly darker or lighter than the rest to distinguish it. -
Ground the figure:
Sketch some quick, horizontal scribal lines under the bottom snowball. This creates a cast shadow and suggests the snowy ground so he isn’t floating in space.
Smudge Alert
If your hand drags ink across the paper, place a scrap piece of paper under your drawing hand to protect your work while you stipple shading.
Step 4: Finishing Touches
-
Apply color:
Take your orange pencil or marker and carefully fill in the carrot nose. This sole pop of color against the monochromatic sketch creates a strong focal point. -
Add falling snow:
Randomly scatter small, open circles and tiny dots around the snowman to simulate gently falling snow. Vary their sizes slightly for depth. -
Deepen contrast:
Review your drawing. If the shadows on the right side of the snowballs look too light, go back in with more dots to deepen the contrast. -
Erase guidelines:
Once the ink is completely dry, gently erase any remaining visible pencil marks from your initial sketch.
Now you have a lively winter character ready to decorate your seasonal spread
Snowman Holding a Tiny Heart
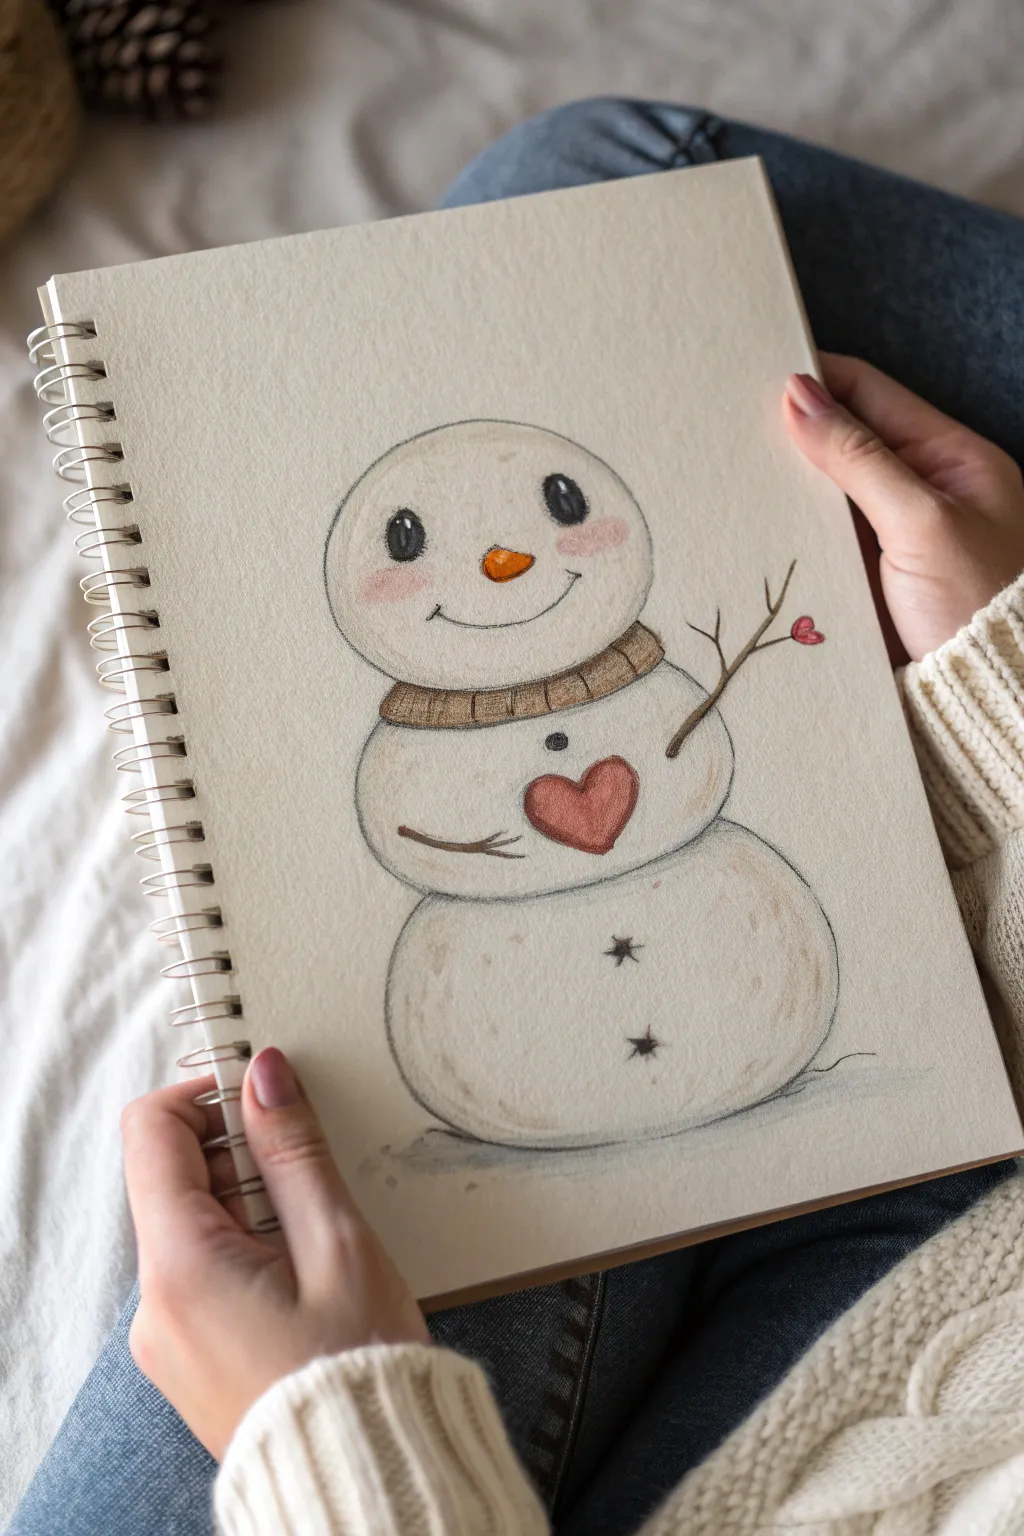
This endearing illustration features a softly shaded snowman clutching a vibrant red heart, rendered in colored pencils on textured sketchbook paper. The gentle blending and warm tones create a cozy, handmade feel perfect for winter greeting cards or festive sketchbook pages.
Detailed Instructions
Materials
- Spiral-bound sketchbook (textured heavyweight paper)
- Set of colored pencils (cream, warm grey, brown, orange, red, black)
- Graphite pencil (HB or 2B) for sketching
- Kneaded eraser
- Fine-liner pen (optional, dark brown or black)
- Blending stump or tissue
Step 1: Sketching the Base Structure
-
Map out the circles:
Begin by lightly sketching three stacked circles using your graphite pencil. Make the bottom circle the largest and widest, the middle one slightly smaller and flatter, and the top one (the head) perfectly round. These don’t need to be geometrically perfect; a slightly organic shape adds charm. -
Add facial guidelines:
Lightly mark a vertical center line and horizontal eye line on the top circle to help with placement later. Sketch a small triangle shape for the carrot nose slightly below the eye line. -
Outline the accessories:
Draw two curved lines around the neck area (between the top and middle circle) to indicate the scarf. Sketch a heart shape in the center of the middle circle, slightly overlapping the left side as if being held. -
Sketch arms and buttons:
Add thin lines for twig arms coming from the middle section. The left arm should curve inward to ‘hold’ the heart. On the bottom circle, mark two small star shapes for buttons.
Fixing Smudges
If you smudge the graphite sketch into the light snow color, use a kneaded eraser to lift the dirty pigment, then re-apply the cream layer over clean paper.
Step 2: Adding Color and Texture
-
Base layer for the snow:
Using a cream or very light beige colored pencil, gently shade the entire body of the snowman. I like to keep this layer light to let the paper texture show through, giving it a fluffy snow appearance. -
Define the shadows:
Take a warm grey or light brown pencil and shade the edges of each circle, particularly underneath the scarf and where the snowball segments meet. This creates dimension and roundness. -
Color the scarf:
Fill in the scarf area with a medium brown pencil. Use vertical strokes to mimic a ribbed knit texture. Add a darker brown to the bottom edge of the scarf for a shadow. -
Brighten the nose:
Color the carrot nose with a bright orange pencil. Add a tiny touch of brown on the underside to give it 3D form. -
Make the cheeks glow:
With a soft pink or coral pencil, lightly color circular patches on the cheeks. Scumble the pencil (draw small scribbles) to soften the edges.
Make It Sparkle
Add a touch of white gel pen to the highlights in the eyes, the tip of the nose, and the top of the red heart to make the drawing look glossy and wet.
Step 3: Refining Details
-
Draw the eyes:
Use a black pencil to draw two oval eyes. Leave a tiny white spec in each pupil for the highlight, which brings the character to life. -
Detail the mouth:
Draw the smile using a thin, dark grey or black line. Add small upright ticks at the ends of the mouth to enhance the cheerful expression. -
Color the heart:
Fill in the heart held by the snowman with a rich red pencil. Press firmly to make it the focal point, contrasting against the pale snow. -
Define the arms:
Go over your twig arm sketches with a dark brown pencil. Add little branches forking off, and perhaps draw a tiny red berry or heart bud on the end of the extended arm. -
Finalize the buttons:
Darken the star-shaped buttons on the bottom tier using dark brown or black. Make the lines crisp so they stand out against the cream body. -
Ground the figure:
Lightly shade a small puddle or shadow area directly underneath the bottom snowball using grey-blue to ground the figure so it doesn’t look like it’s floating. -
Final outline check:
Review your drawing and strengthen any outer lines with a sharpened dark grey pencil to cleanly separate the snowman from the background.
Now you have a charming winter friend captured in your sketchbook to enjoy all season long
Snowman Holding a Wrapped Present
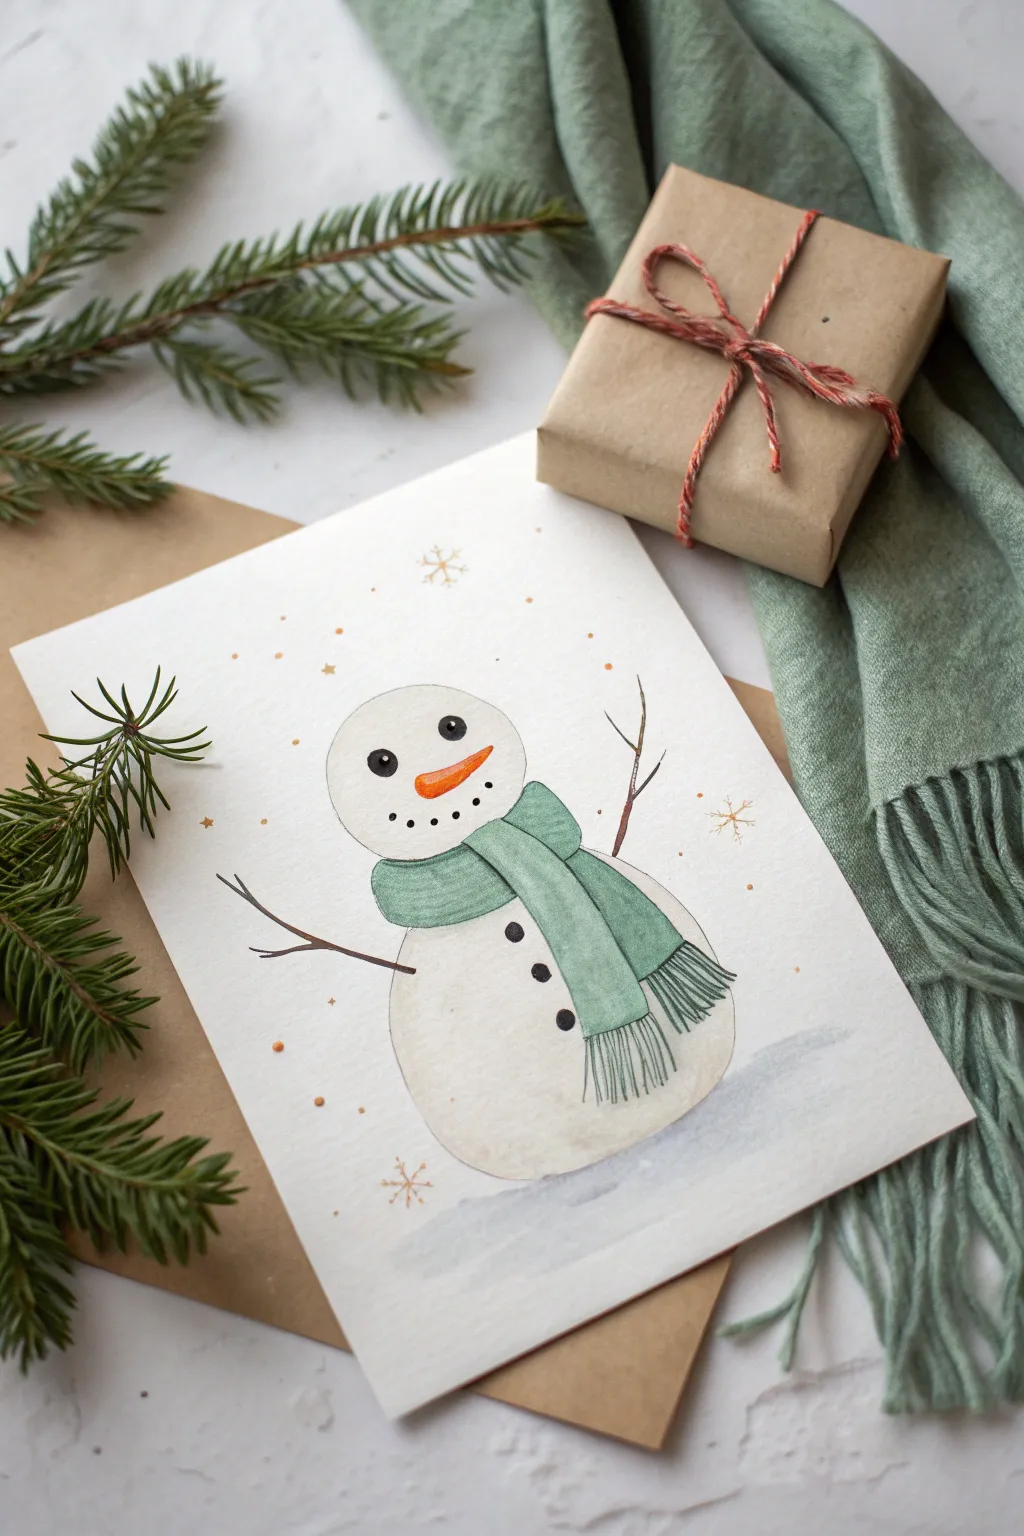
Create a heartwarming holiday greeting with this charming watercolor illustration of a snowman wrapped in a sage green scarf. The soft washes and delicate ink details give this piece a playful yet classic winter feel that’s perfect for handmade cards.
Step-by-Step Tutorial
Materials
- Cold press watercolor paper (cut to card size)
- Watercolor paints (Payne’s Gray, Burnt Orange, Sage Green/Teal)
- Round watercolor brushes (size 2 and 6)
- Fine liner pen (black, 0.3mm or 0.5mm)
- Pencil (HB or H)
- Kneadable eraser
- Clean water and paper towels
- Gold or bronze gel pen (optional for stars)
Step 1: Sketching the Outline
-
Map out the shapes:
Begin by lightly sketching two circles with your pencil. Draw a slightly smaller circle for the head and a larger, slightly flattened oval shape beneath it for the body, making sure they overlap just a little. -
Add the scarf:
Sketch the scarf draped around the neck area. Draw two tails hanging down the right side of the body—one shorter and one longer—erasing the underlying body lines where the scarf covers them. -
Refine the details:
Lightly mark the position of the stick arms, the carrot nose, and the eyes. Keep your pencil pressure very light so the graphite won’t show through the transparent watercolor later.
Step 2: Painting the Base Layers
-
Shadow the body:
Mix a very watery wash of Payne’s Gray or a diluted black to create a soft gray. Using your size 6 brush, paint the body shapes, keeping the center of the snowman almost white and concentrating the pigment on the edges to create a 3D sphere effect. -
Paint the scarf:
Load your brush with a sage green or muted teal. Fill in the scarf shape, letting the color pool slightly at the bottom of the tails for natural shading. -
Add the nose:
Using a size 2 brush and bright orange paint, fill in the carrot nose. I like to add a tiny dot of darker orange on the bottom edge for extra dimension. -
Let it dry completely:
Wait for all paint layers to be bone dry. If the paper is cool to the touch, it still needs more time.
Clean Lines Tip
When inking over watercolor, use quick, confident strokes. Hesitating creates shaky lines. Practice your ‘broken line’ technique on scrap paper first.
Step 3: Adding Ink Details
-
Outline the body:
Using your fine liner pen, trace over the pencil lines of the head and body. Use a broken, sketchy line rather than a solid heavy one to keep the look organic. -
Define the face:
Draw solid black circles for the eyes, leaving a tiny white dot in each for a highlight. Add a curved row of small dots for the charcoal mouth smile. -
Ink the scarf:
Outline the scarf shape. Add vertical lines at the ends of the scarf tails to create the look of fringe tassels. -
Add texture to the scarf:
Draw faint, curved lines horizontally across the scarf fabric to suggest folds and movement. -
Draw the stick arms:
Using the pen, draw thin, branching lines for the arms. Make them slightly jagged and uneven to resemble real twigs.
Add Winter Magic
Splatter white gouache or acrylic paint lightly over the finished drawing using an old toothbrush to create a falling snow effect.
Step 4: Final Touches
-
Add the buttons:
Draw three solid black circles down the center of the body for the coal buttons. -
Ground the figure:
Mix a very pale blue-gray wash. Paint a horizontal, uneven strip beneath the snowman to represent the snowy ground, blending it out to nothing at the edges. -
Add magical sparkles:
Using a gold gel pen or orange watercolor on a fine brush, draw tiny dots and asterisk-shaped snowflakes scattered around the snowman’s head. -
Erase pencil marks:
Once you are absolutely certain the ink and paint are dry, gently dab away any visible pencil sketches with your kneadable eraser.
Now you have a festive, hand-painted snowman ready to bring joy to someone’s holiday season
Hot Cocoa Mug Snowman Moment
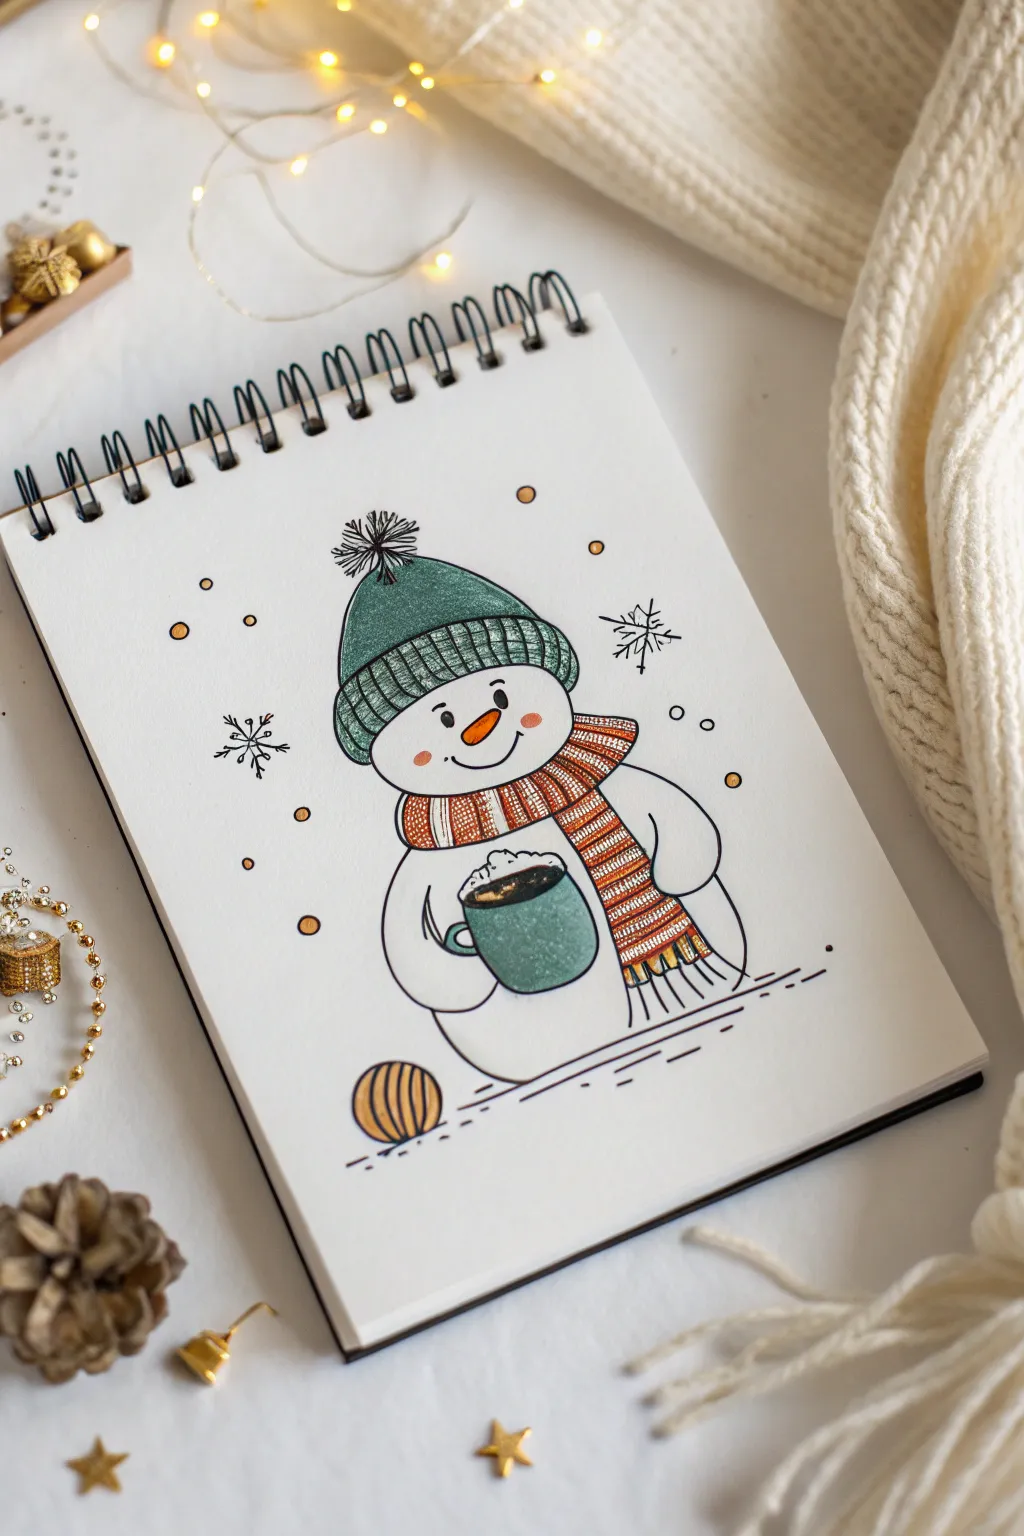
Capture the warmth of the season with this adorable illustration of a snowman enjoying a hot drink. Using fine liners and simple markers, you’ll build a charming character dressed in textured winter accessories.
How-To Guide
Materials
- Spiral-bound sketchbook or heavy drawing paper
- Pencil (HB or 2B) and eraser
- Fine-liner pen (black, approx. 0.3mm or 0.5mm)
- Green marker or colored pencil (teal/forest green shade)
- Orange and brown markers (for scarf and carrot)
- White gel pen (optional, for highlights)
Step 1: Pencil Sketching
-
Outline the head:
Start by lightly sketching a rounded oval shape for the snowman’s head. Imagine a flattened snowball resting on a larger body. -
Add the hat shape:
Draw the beanie cap sitting snugly on the head. Sketch a curved band across the forehead for the brim, and add a rounded triangle on top, finishing with a small circle for the pom-pom. -
Create the body:
Below the head, draw a larger, rounded shape for the upper torso. Don’t worry about drawing the bottom snowball yet; just focus on where the arms will connect. -
Draft the scarf:
Draw the scarf wrapping around the neck area. Add one long tail draping down the front right side of the body, making sure it looks wrapped and cozy. -
Position the mug:
Sketch a U-shaped mug in the center of the body. Draw simple, mitten-less rounded hands holding the sides of the cup to suggest a firm grip. -
Sketch the face:
Lightly mark placement for two eyes, a carrot nose pointing slightly right, and a bright, upward-curved smile.
Smudge Prevention
Place a scrap piece of paper under your drawing hand while coloring. This protects the pure white paper from oils on your skin and prevents accidental ink dragging.
Step 2: Inking the Lines
-
Ink the main outlines:
Using your black fine-liner, go over your pencil lines. Keep your hand steady but relaxed to create smooth, confident strokes for the body and hat. -
Add texture to the hat:
Draw vertical lines on the hat’s brim to simulate ribbing. For the pom-pom, use short, flicking strokes radiating outward to make it look fluffy. -
Detail the mug:
Ink the handle and the rim of the mug. Inside the rim, draw a bubbly, uneven line to represent the whipped cream or marshmallows floating on top. -
Draw scarf patterns:
Ink the horizontal stripes on the scarf. At the very end of the scarf tail, draw vertical lines to create the fringe. -
Finalize facial features:
Fill in the small black dot eyes. Carefully ink the carrot nose and the smile. Add small, floating circles and simple six-pointed snowflakes around the snowman for atmosphere. -
Clean up:
Once the ink is completely dry, gently erase all underlying pencil marks to leave a clean black-and-white drawing.
Step 3: Coloring and Details
-
Color the hat and mug:
Take your green marker and fill in the hat and the mug. Apply the color evenly, perhaps leaving tiny slivers of white for a highlight effect, or just fill it solid. -
Stripe the scarf:
Using orange and brown markers, alternate colors on the scarf stripes. Leave some thin white gaps between the colors to mimic the texture of the knit. -
Tint the nose and cheeks:
Color the carrot nose orange. Add two soft, small pink or light orange circles on the cheeks for a rosy, cold-weather flush. -
Fill the cocoa:
Use a dark brown marker to color the liquid inside the mug, careful to paint around the white whipped cream area. -
Ground the figure:
Draw a few horizontal lines below the snowman to suggest the ground. Add a small decorative ball or ornament on the ground near the bottom left using the orange and brown markers. -
Add floating accents:
Color the small floating circles with a touch of orange or yellow gold to make the scene festive. If you have a white gel pen, add a tiny dot to the eyes or mug for extra shine.
Level Up: Texture
Use a colored pencil over the dried marker on the hat to add shading. This mixed-media approach creates a fuzzy, fabric-like depth that markers alone can’t achieve.
Now you have a charming winter companion to brighten up your sketchbook pages
Swinging Snowman in a Simple Scene
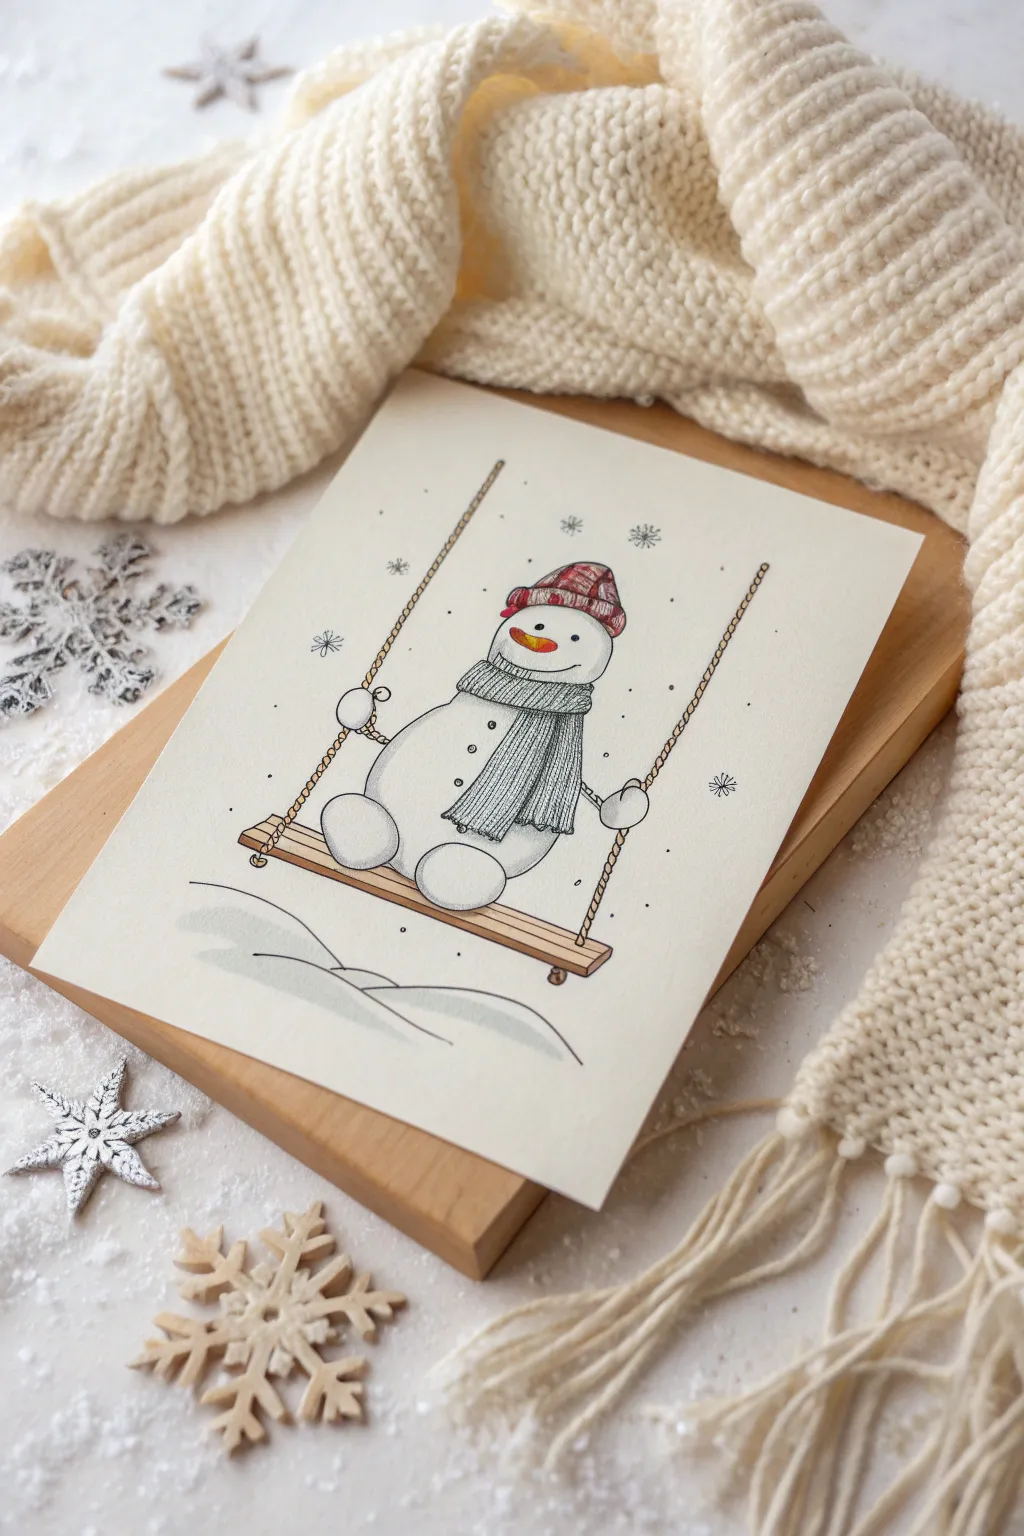
Capture the whimsy of winter with this delightful illustration of a snowman enjoying a gentle swing ride. This project uses fine liners and subtle pencil shading to create a cozy, hand-drawn feel perfect for greeting cards or seasonal decor.
Step-by-Step Tutorial
Materials
- Heavyweight drawing paper or mixed media cardstock (cream or off-white)
- H or HB pencil for initial sketching
- Fine liner pen (black, 0.3mm and 0.5mm)
- Colored pencils or fine markers (red, orange, grey)
- Soft hi-polymer eraser
- Ruler
Step 1: Sketching the Framework
-
Establish the Swing:
Begin by lightly sketching the swing seat. Draw a long, thin rectangle horizontally across the lower third of your paper. Make it slightly thicker to show the wooden plank’s depth. -
Draw the Ropes:
Using your ruler, lightly draft two long diagonal lines extending from the top corners of your paper down to the ends of the swing seat. They should angle slightly inward as they go down. -
Outline the Snowman:
Sketch the snowman’s body directly on the swing. Start with a large, rounded shape for the lower body that looks like it’s ‘sitting’ flat on the wood. Add a slightly smaller circle on top for the head. -
Add Limbs and Details:
Draw two smaller circles near the bottom of the body for feet hanging off the edge. Sketch simple oval shapes for hands gripping the swing ropes on either side.
Step 2: Refining Features
-
Sketch the Face:
Draw a carrot nose pointing to the left. Add two small dots for eyes and a gentle, curved smile to give him a happy expression. -
Design the Scarf:
Wrap a scarf around the neck area. Draw the loop first, then add two ends hanging down the front of the body with small fringe lines at the tips. -
Top it Off:
Place a beanie hat on the snowman’s head. Sketch a folded brim and a rounded top, adding a little texture or pom-pom suggestion if you like. -
Environment Hints:
Lightly sketch a curved horizon line behind the swing to represent snow drifts on the ground. You can also mark spots for falling snowflakes in the air.
Uneven Ropes?
If your swing ropes look crooked, don’t restart. Use a ruler to mark faint pencil guide dots every inch, then draw your rope texture connecting those dots for alignment.
Step 3: Inking the Illustration
-
Outline the Ropes:
Switch to your 0.3mm fine liner. Trace over the rope lines, but instead of a straight line, draw small, twisted ‘S’ shapes or tiny loops to mimic the texture of twisted rope. -
Ink the Snowman:
Carefully outline the snowman’s body, head, and limbs with the 0.5mm pen. Keep the lines clean but not ruler-straight to maintain a hand-drawn charm. -
Define the Accessories:
Ink the scarf and hat. Add vertical lines to the scarf to suggest a knitted rib pattern, and cross-hatching to the hat for a plaid or woven look. -
Wood Grain Details:
Outline the swing seat. Add a few horizontal lines inside the rectangle to simulate wood grain, and draw small loops where the rope connects to the wood. -
Finalize the Scene:
Ink the snowy ground line with a fluid, wavy stroke. Draw simple snowflake shapes (asterisks or tiny stars) scattered in the empty space around the snowman.
Level Up: Sparkles
After coloring, use a white gel pen to add tiny highlights on the nose and hat, or add dots of clear glitter glue to the snowflakes for real winter shimmer.
Step 4: Color and Shading
-
Erase Guidelines:
Once the ink is completely dry, gently erase all underlying pencil sketch lines. I usually check twice to make sure the ink won’t smudge before doing this. -
Add Color Accents:
Use a red colored pencil to fill in the hat stripes. Color the carrot nose with a vibrant orange, pressing harder at the base for depth. -
Shade the Scarf:
Use a grey pencil or fine marker to color the scarf. You can leave faint white streaks to enhance the fabric texture. -
Create Dimension:
Take a grey sizing pencil or a very light wash of grey marker and add shadows. Focus on the right side of the snowman’s body, under the scarf, and under the hat brim to make the figure look round. -
Ground Shadows:
Add a soft grey shadow on the snow hill beneath the swing to suggest distance and form.
Now you have a charming winter scene ready to display or gift to a friend
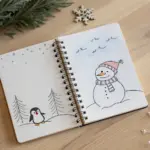
Best Friends Snowmen in Two Sizes
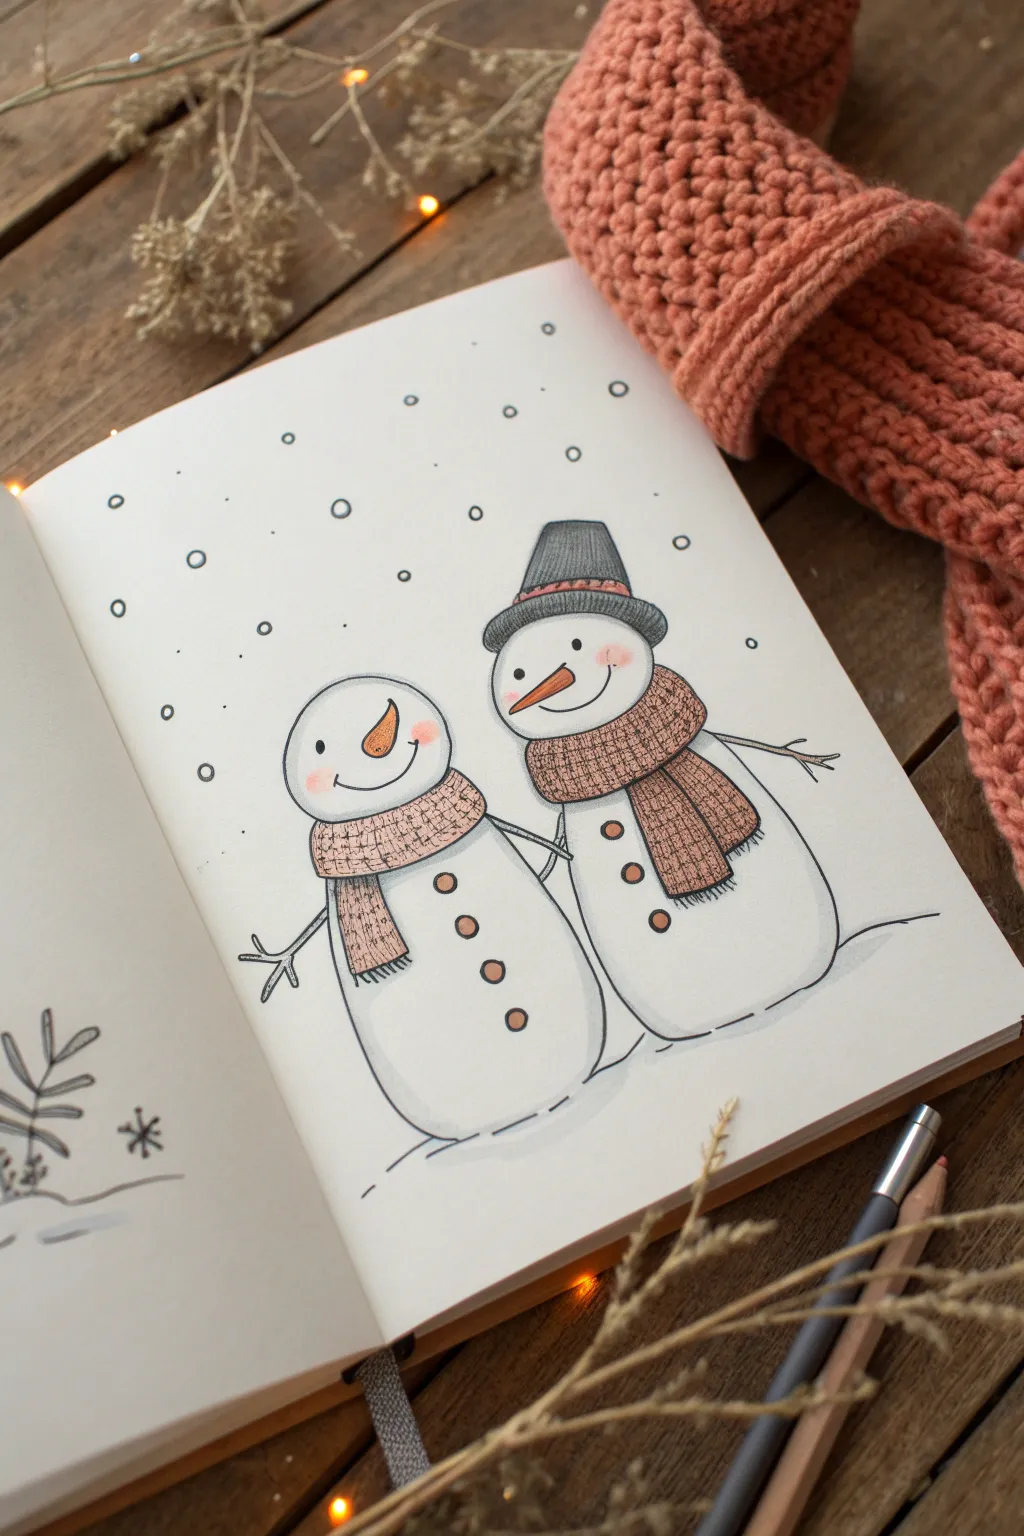
Capture the warmth of winter friendship with this adorable illustration of two snowmen bundled up in matching scarves. This simple yet heartwarming drawing uses soft shading and expressive lines to bring a pair of frosty friends to life on your page.
Step-by-Step Guide
Materials
- High-quality sketchbook or drawing paper
- Pencil (HB or H for sketching)
- Fine liner pen (0.3mm or 0.5mm, black or dark grey)
- Colored pencils (light brown, dark brown, orange, pink, grey)
- Eraser
- White gel pen (optional for highlights)
Step 1: Basic Structure
-
Position the bodies:
Start by lightly sketching the outline of the two snowmen using your pencil. Draw the taller snowman on the right and a slightly shorter, wider one on the left. Instead of perfect circles, use slightly flattened organic shapes for a natural, hand-drawn look. -
Initial proportions:
Ensure the bottom sections are large and rounded, tapering slightly as they go up. The heads should be generous ovals sitting directly on top of the body shapes. -
Draw the hat:
Sketch a simple hat on the taller snowman. Draw a curved brim low on the forehead and a rounded, slightly tapered top. Leave the smaller snowman bare-headed for contrast.
Make It Look Knit
Draw tiny ‘x’ patterns or vertical lines on the scarf with a fine pen before coloring. This mimics wool texture far better than solid coloring alone.
Step 2: Adding Details
-
Sketch the scarves:
Drape a scarf around the neck of each snowman. For the taller one, draw the scarf wrapping around snugly with two long ends hanging down the front. For the shorter one, make the scarf look a bit chunkier, wrapping once with a shorter tail hanging down. -
Add facial features:
Place two small dots for eyes on each face. For the noses, draw long, carrot-like triangles pointing towards each other to suggest connection. Add simple curved lines for smiles. -
Include buttons and arms:
Draw three small circles down the chest of the taller snowman and three on the smaller one. Sketch thin, stick-like branches for arms on the outer sides of each snowman, adding tiny forks at the ends for fingers.
Mix Up The Background
Instead of just circles, draw tiny, detailed snowflakes or star bursts with a silver gel pen to add a magical winter sparkle to the empty space.
Step 3: Inking
-
Refine the outlines:
Take your fine liner pen and carefully trace over your pencil lines. I prefer using a broken or slightly wavy line for the snow bodies to give them a fluffy, textured appearance rather than a rigid geometric outline. -
Ink the details:
Ink the scarves, hat, and facial features with confident strokes. Be sure to outline the carrot noses clearly. -
Erase pencil marks:
Once the ink is completely dry, gently erase all underlying pencil sketches to clean up your drawing.
Step 4: Coloring & Shading
-
Color the scarves:
Use a light brown or tan colored pencil to fill in the scarves. Apply a cross-hatch pattern with a darker brown pencil or pen over the base color to create a woven, knitted texture. -
Fill the hat:
Color the hat on the right snowman with a dark grey pencil. Add a small band of red or brown for a pop of color. -
Brighten the noses:
Use a bright orange pencil for the carrot noses. Press harder at the base and lighter at the tip to give them dimension. -
Add rosy cheeks:
Lightly dust pink circles just below the eyes on both snowmen to give them a cold, rosy cheek effect. This adds instant charm. -
Shade the snow:
With a very light grey or pale blue pencil, add subtle shading along the bottom and sides of the snowmen to create volume. Keep the center parts white to represent light hitting the snow.
Step 5: Final Touches
-
Enhance the buttons:
Color the buttons in a warm brown tone to match the cozy aesthetic. -
Create atmosphere:
Draw small, scattered circles and tiny dots around the figures to represent falling snow. Vary the sizes to create depth in the scene. -
Ground the figures:
Sketch a faint, uneven horizon line behind and around the base of the snowmen so they aren’t floating in space. A little grey shading underneath helps anchor them.
Now you have a charming winter scene ready to decorate your journal or holiday cards
Snowman With Reindeer-Style Twig Antlers
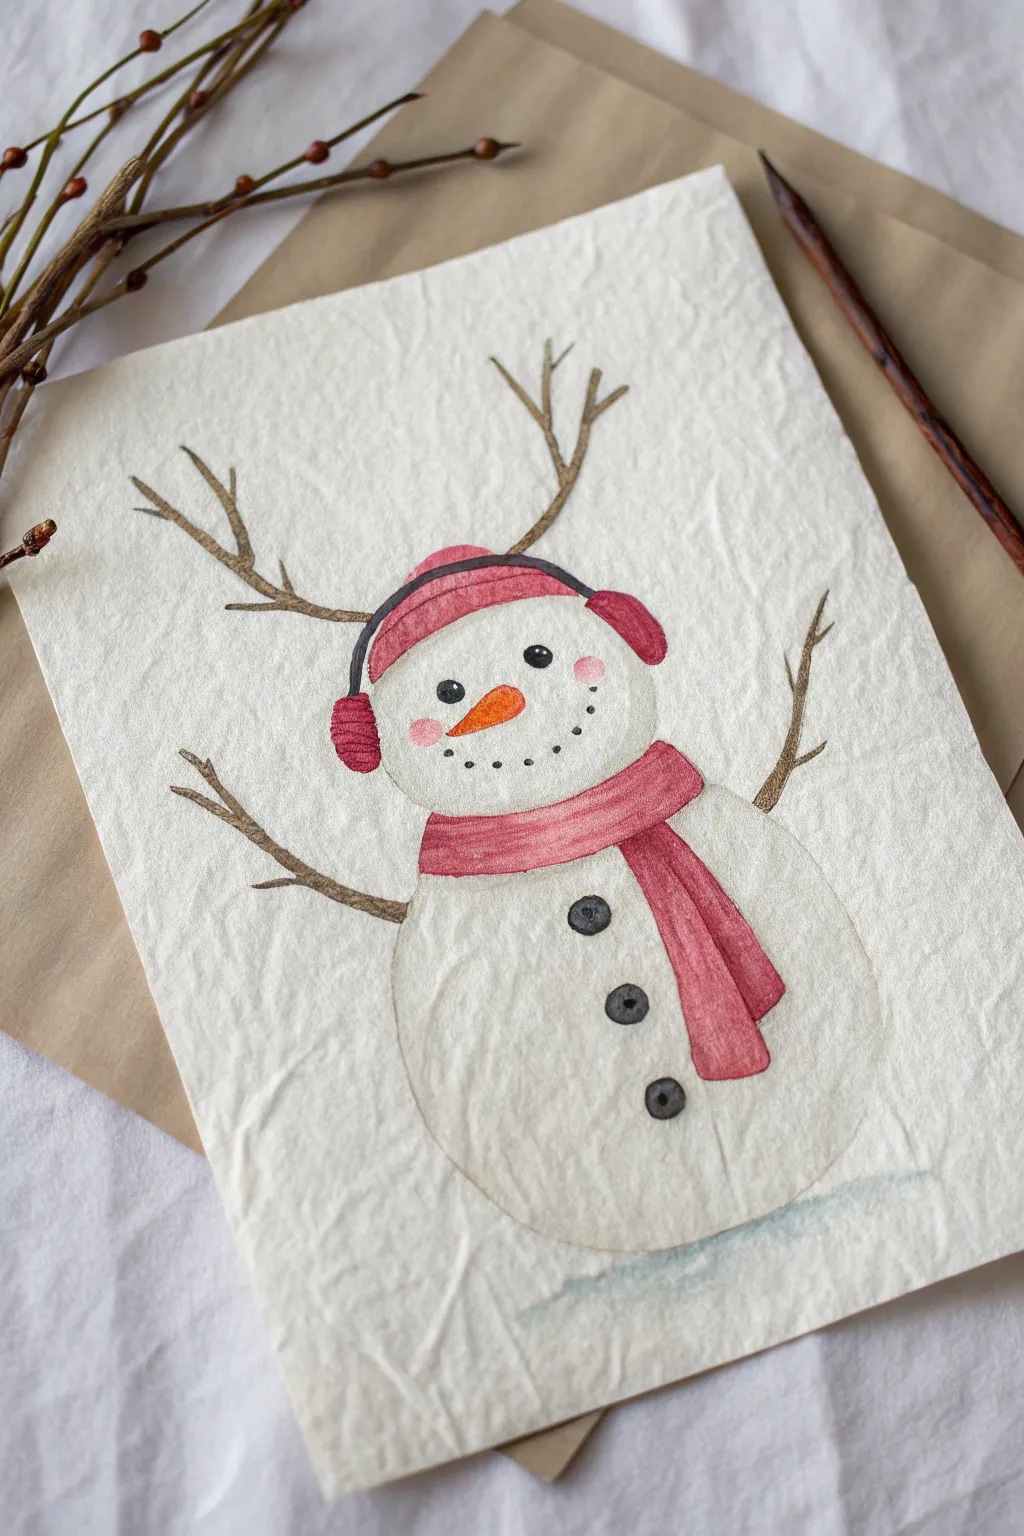
Capture the whimsy of winter with this delightful watercolor illustration featuring a snowman sporting playful twig antlers. The texture of handmade paper adds a rustic, cozy feel that perfectly complements the soft washes of color.
How-To Guide
Materials
- Textured handmade watercolor paper (cold press or rough grain)
- Watercolor paints (Payne’s Grey, Alizarin Crimson, Burnt Umber, Orange)
- Round watercolor brushes (sizes 2, 4, and 6)
- Pencil (HB or lighter) and kneaded eraser
- Fine liner pen (black or dark brown) or very fine brush
- Jar of clean water
- Paper towels
Step 1: Sketching the Base
-
Outline the body forms:
Begin by lightly sketching two overlapping circles with your pencil. Draw a smaller circle for the head and a larger, slightly flattened oval underneath for the body. Keep your lines faint so they won’t show through the paint later. -
Add the accessories:
Sketch a simple beanie hat sitting snugly on the head, adding earmuffs on the sides. Draw a scarf wrapped around the neck, letting the ends drape down the snowman’s chest. -
Sketch the branches:
Draw twig arms extending outward from the body. Then, add the defining feature: two large, branching ‘antlers’ emerging from behind the head to give him that reindeer look. -
Map the face:
Mark the position of the eyes, carrot nose, and a dotted smile. Add three round buttons down the center of the bottom snowball.
Step 2: Painting the Snowman
-
First wash for the snow:
Mix a very watery, pale grey using a touch of painting water and a tiny drop of Payne’s Grey. Should be barely visible. Gently fill in the body and head shapes, leaving the edges soft. -
Adding volume:
While the first wash is still damp, drop a slightly darker grey along the bottom and right edges of the snowballs to create shadow and dimension. This makes the snowman look round rather than flat. -
Painting the accessories:
Use a mix of Alizarin Crimson or a muted red for the hat and scarf. Paint the main sections with a size 4 brush. I find that leaving tiny slivers of white paper between the scarf folds helps define them without needing outlining. -
Deepening the red tones:
Once the first layer of red is dry, add a second coat to the shadowed areas of the scarf and the rim of the hat to create fabric texture. -
The carrot nose:
Paint the nose with a bright orange. Use the very tip of your brush to keep the point sharp.
Bleeding Colors?
If your red hat bleeds into the white snow, your paper was too wet. Let the white layer dry completely before painting adjacent colors. You can lift wet mistakes with a clean, thirsty brush.
Step 3: Details and Antlers
-
Painting the twigs:
Switch to your smallest brush (size 2) and Burnt Umber paint. Carefully trace over your pencil lines for the arms and antlers. Vary the pressure on your brush to make the twigs look natural—thicker at the base, thinner at the tips. -
Adding texture to wood:
If the paint is too uniform, dab a little darker brown onto the wet twigs to simulate bark texture. -
Facial features:
Using a fine brush with concentrated black or dark grey paint, dot in the eyes and the coal mouth. These should be opaque and crisp. -
Rosy cheeks:
Dilute a tiny bit of your red paint with lots of water. Gently dab two soft circles on the cheeks. Soften the edges with a clean, damp brush if the color looks too harsh. -
Headphones detail:
Draw the thin black band connecting the earmuffs over the hat using a fine liner pen or your smallest brush with black paint.
Try Metallic Paint
Mix a little gold watercolor into your brown paint for the antlers, or add a sheer wash of iridescent medium over the snowballs to give the artwork a magical, frosty morning shimmer.
Step 4: Final Touches
-
Buttons:
Paint the three buttons on the chest with dark grey or black. Add a tiny white highlight (either lifting paint or using white gouache) to make them look shiny. -
Grounding shadow:
Mix a cool, watery blue-grey. Paint a simple horizontal wash underneath the snowman to ground him, so he isn’t floating in space. -
Clean up:
Allow the painting to dry strictly and completely. Once the paper is bone dry, gently erase any visible pencil marks, being careful not to rub the painted areas.
Now you have a charming winter character ready to frame or turn into a holiday card.
Angelic Snowman With Soft Wings
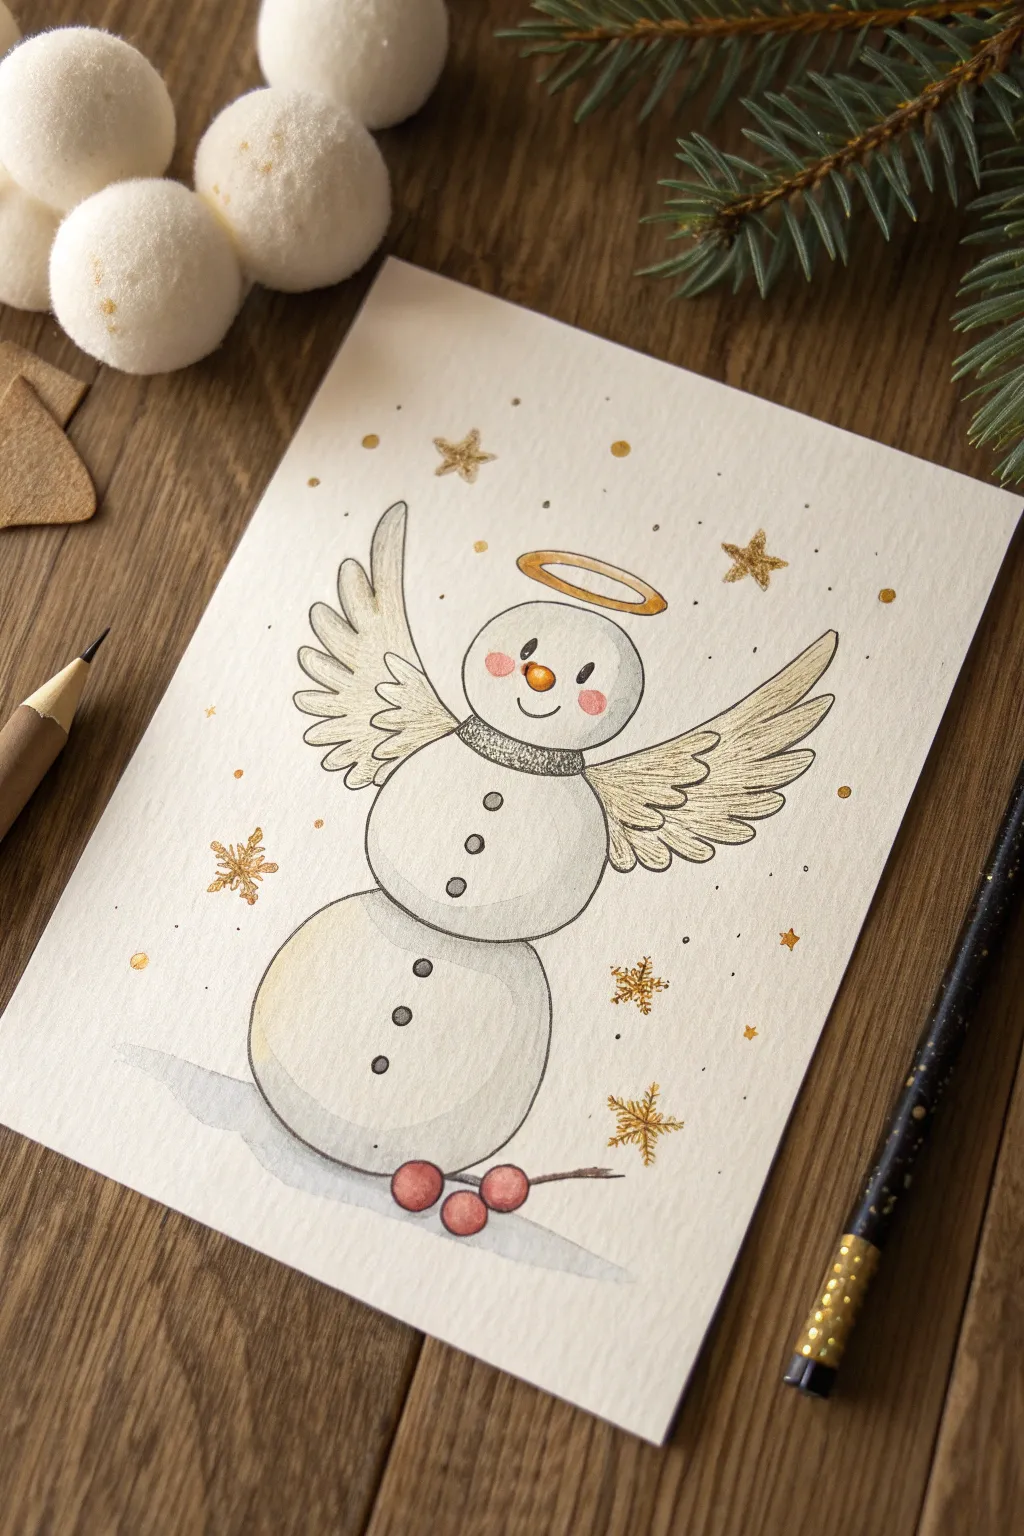
Transform a classic winter figure into a celestial being with this gentle snowman angel illustration. The combination of soft colored pencil shading and crisp ink lines creates a heartwarming holiday card or festive art piece.
Step-by-Step Tutorial
Materials
- Heavyweight textured drawing paper or mixed media cardstock
- HB graphite pencil and eraser
- Fine-point black ink pen (0.3mm or 0.5mm)
- Colored pencils (cool grey, soft blue, warm brown, orange, pink, red)
- Gold metallic marker or gel pen
- White gel pen (optional for highlights)
Step 1: Drafting the Structure
-
Base shapes:
Begin by lightly sketching three stacked circles in the center of your page. Make the bottom circle the largest and slightly flattened, the middle circle medium-sized, and the head circle the smallest. -
Wing outline:
From the ‘shoulders’ of the middle snowball, sketch large, sweeping wing shapes that extend upwards and outwards. Imagine them like slightly curved leaves pointing toward the top corners. -
The halo:
Draw a flattened oval floating just above the snowman’s head to serve as the halo. Give it a double line to add thickness. -
Facial features:
Lightly mark placement for the eyes, a carrot nose pointing slightly left, and a simple curved smile. Don’t press too hard with your pencil here. -
Ground details:
Sketch a faint, wavy line beneath the bottom snowball for the ground and add a simple twig lying horizontally with three small berries at the base.
Smudge Prevention
Keep a spare piece of scrap paper under your drawing hand. Resting your hand on this barrier prevents oils and friction from smearing your fresh pencil shading.
Step 2: Inking the Details
-
Main outlines:
Using your black fine-liner, carefully trace over your pencil lines for the snowman’s body. Use a steady hand, keeping the lines relatively thin and consistent. -
Feather texture:
When inking the wings, don’t just trace the outline. Draw individual ‘U’ shapes and elongated loops inside the wing shape to mimic layers of feathers. I find starting from the wing tips and working inward creates a natural overlap. -
Collar and buttons:
Draw the scarf or collar around the neck with a textured, stippled look. Add three buttons vertically down the chest and three more on the bottom section. -
Face finalization:
Ink the eyes as solid black ovals with tiny white highlights left empty. Ink the carrot nose and the smile, adding small cheek curves. -
Clean up:
Once the ink is completely dry, thoroughly erase all underlying graphite pencil lines to leave a clean drawing surface.
Step 3: Coloring and Shading
-
Snowman shading:
Take a cool grey colored pencil and lightly shade the left and bottom curves of each snowball. This creates dimension and makes the figure look round rather than flat. -
Wing warmth:
Lightly color the wings with a very pale cream or warm grey pencil, blending it softly so the paper texture still shows through. -
Rosy cheeks:
Use a pink pencil to add soft, circular blushes to the snowman’s cheeks, right next to the smile lines. -
Carrot nose:
Color the nose with a bright orange pencil, pressing harder on the bottom edge to suggest a shadow. -
Berry details:
Color the three berries at the bottom with a deep red pencil, leaving a tiny spot uncolored on each for a shine highlight. -
Ground shadows:
Use a light blue or cool grey to add a cast shadow on the ground beneath the snowman and the twig, grounding the figure.
Sparkle Upgrade
Apply a tiny dab of glitter glue specifically on the center of the gold stars or the rim of the halo. It adds a physical texture that catches the light beautifully.
Step 4: Metallic Touches
-
Golden halo:
Use your gold metallic marker or pen to color in the halo ring. Let the ink flow smoothly to cover the space fully. -
Starry background:
Draw several five-pointed stars scattered around the background using the gold pen. Vary their sizes for visual interest. -
Snowflakes:
Draw geometric snowflake shapes in gold, interspersed among the stars. -
Magical dust:
Finish by dotting tiny gold texturing around the background to look like distant stars or magical dust.
Now you have a serene winter guardian ready to watch over your holiday season
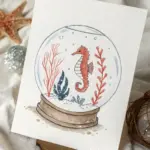
Snowman Inside a Snow Globe Outline
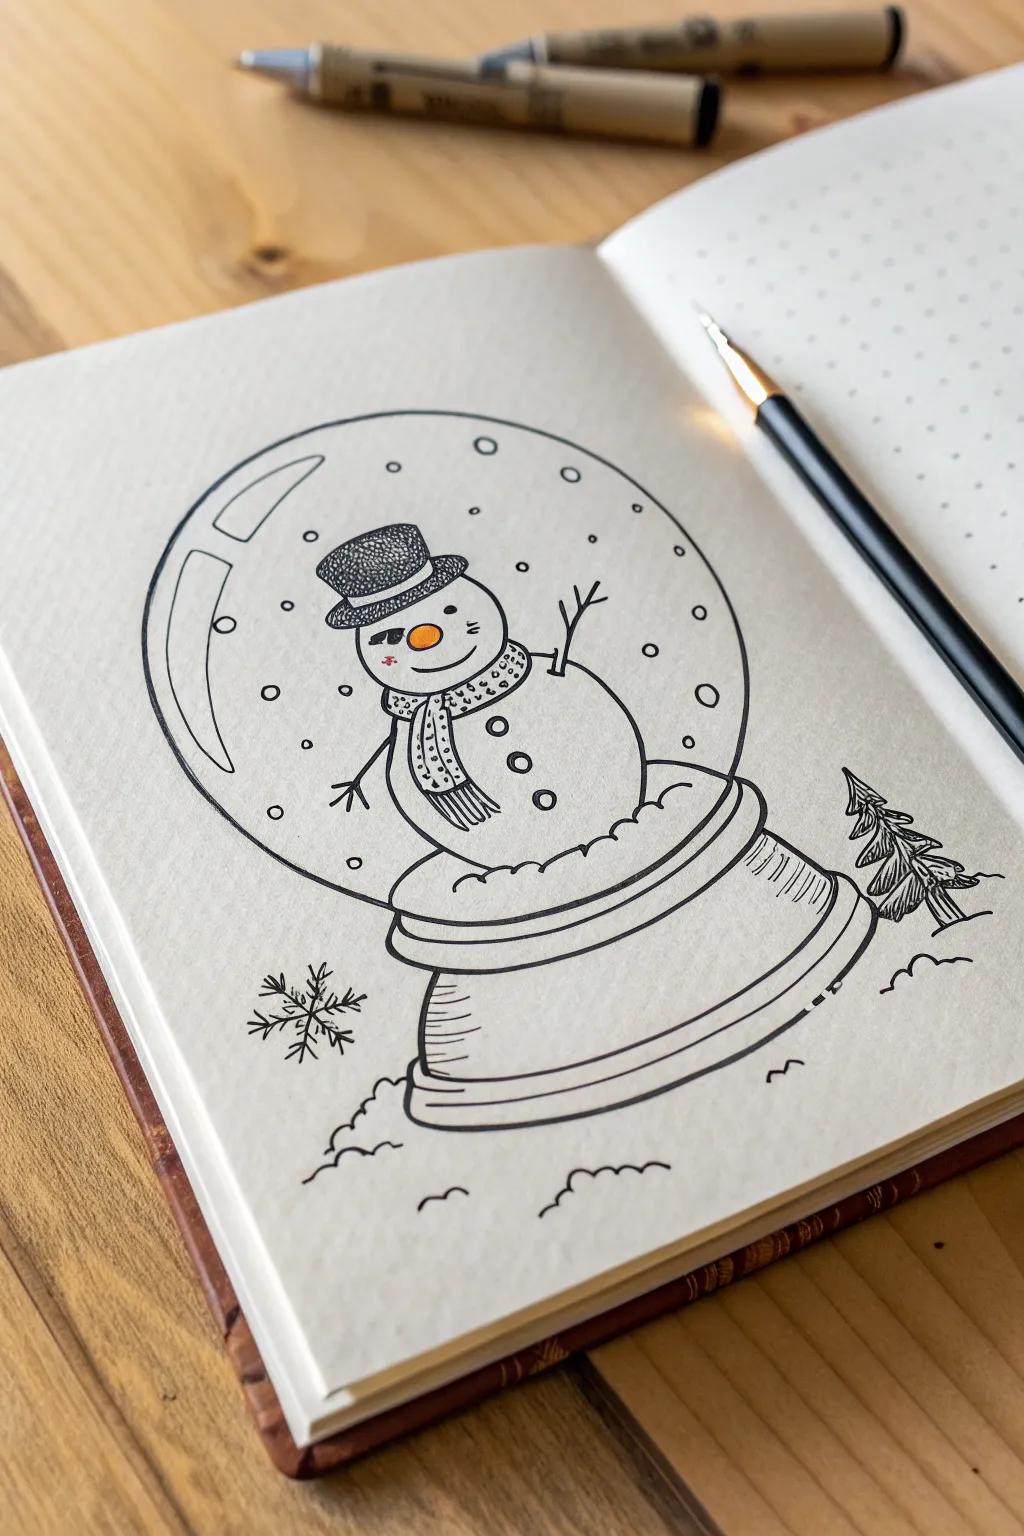
Capture the magic of winter in a jar with this charming snow globe illustration. Using simple linework and minimal color, this project creates a cozy, contained scene perfect for greeting cards or journal spreads.
Step-by-Step Guide
Materials
- Dot grid notebook or sketchbook
- Pencil (HB or lighter)
- Eraser
- Fine liner pens (sizes 01, 03, and 05 recommended)
- Compass or circular object to trace (approx. 3-4 inches diameter)
- Small orange marker or colored pencil
Step 1: Drafting the Structure
-
Draw the globe:
Begin by using a compass or tracing a circular object to draw a perfect circle lightly in pencil near the center of your page. Leave plenty of room at the bottom for the base. -
Sketch the base shape:
Directly under the circle, lightly sketch a wide, flattened oval that slightly overlaps the bottom edge of the globe. This will be the top rim of the snow globe’s base. -
Form the base body:
Draw two diagonal lines angling slightly outward from the oval you just drew. Connect them at the bottom with a curved line that mimics the curve of the top oval. Add a smaller, thinner rectangle shape at the very bottom for the foot of the base. -
Position the snowman:
Inside the globe, sketch two circles for your snowman’s body. The bottom circle should be larger and sit comfortably on the ‘floor’ of the globe. The head circle should be slightly smaller and rest on top. -
Add scene elements:
Lightly sketch a small pine tree to the right of the globe and a snowflake to the left to balance the composition. Inside the globe, sketch a stick arm on each side of the snowman.
Uneven Circles?
If your hand-drawn circles look wobbly, embrace it! This is a sketchy style. However, rotating the paper while keeping your hand still can help create smoother curves.
Step 2: Inking the Outline
-
Ink the main globe:
Switch to a thicker pen, like an 05 fine liner. Carefully trace the large circle of the globe. Stop your line where the base overlaps the bottom of the circle so you don’t draw through the solid parts. -
Define the base:
Ink the outlines of the tiered base. Use smooth, confident curved strokes to emphasize its rounded, 3D form. Add a few extra curved lines inside the base area to suggest ridges or decorative molding. -
Create the snow mound:
Where the snowman sits, draw a bumpy, cloud-like line across the bottom section of the globe circle. This creates the snowy ground inside the sphere. -
Outline the snowman:
Trace the snowman’s body using an 03 pen. Instead of a perfectly smooth line, I sometimes give the line a slight wobble to make it look like packed snow.
Step 3: Adding Details
-
Draw the accessories:
Sketch a top hat on the snowman’s head. Add a scarf around the neck by drawing a curved rectangle and two hanging strips. Fill the hat with stippling (lots of tiny dots) for a textured, fabric look. -
Pattern the scarf:
Using your thinnest pen (01), draw small circles and dots on the scarf to give it a polka-dot pattern. Add fringe lines at the end of the scarf. -
Face and buttons:
Draw two small dashes for eyes, a curved smile, and three round buttons down the chest. Don’t draw the nose in ink yet. -
Draw the arms:
Ink the stick arms with thin, branching lines. Keep them simple and twig-like. -
Add the reflection:
To make the globe look like glass, add two curved shapes on the upper left interior of the circle. One should be a long, thin rectangle, and the other a smaller curved trapezoid.
Make It Sparkle
For a magical finish, use a white gel pen to add tiny highlights on the snowman’s buttons, the black hat, or add extra bright snowflakes over the glass lines.
Step 4: Finishing Touches
-
Snow and scenery:
Draw small circles throughout the empty space inside the globe to represent falling snow. Vary the sizes slightly for interest. -
Ink the exterior elements:
Go over the pine tree on the right and the snowflake on the left. Add little bumpy lines on the ground outside the globe to ground the object on the page. -
Pop of color:
Once the ink is totally dry, erase all your pencil marks. Take your orange marker and carefully draw a small carrot nose on the snowman’s face. -
Final shading:
Use your thinnest pen to add tiny hatching lines on the side of the base and under the tree branches to suggest shadow and depth.
You now have a delightful winter scene that captures the stillness of the season
Negative Space Snowman With a Starry Sky
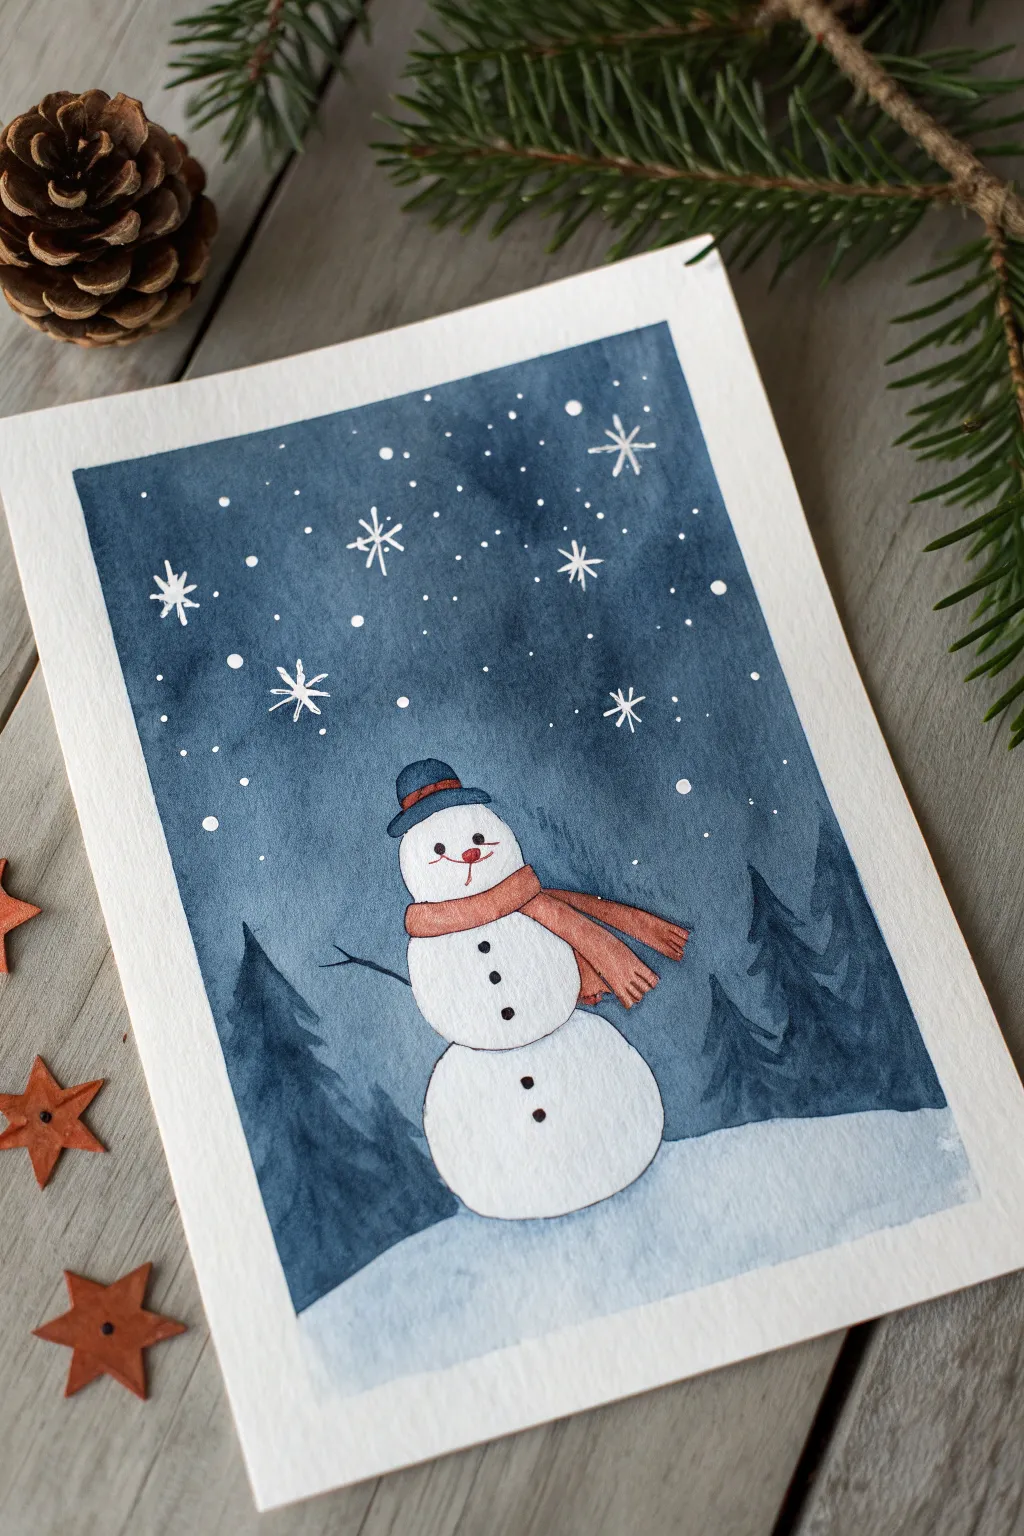
Capture the stillness of a winter night with this charming watercolor piece. By painting around your subject rather than filling it in, you let the brightness of the paper become the snowman itself against a deep, snowy evening sky.
Step-by-Step Guide
Materials
- Cold press watercolor paper (A5 size recommended)
- Pencil (HB) and soft eraser
- Watercolor paints (Indigo, Payne’s Grey, Burnt Sienna, Burnt Umber)
- Round brushes (size 6 for washes, size 2 for details)
- White gel pen or white gouache
- Masking fluid (optional)
- Painters tape or washi tape
Step 1: Sketching and Preparation
-
Define the borders:
Begin by taping down all four edges of your watercolor paper to a board. This creates the crisp, clean white border seen in the final piece and prevents the paper from buckling when wet. -
Sketch the snowman:
Lightly sketch three stacked circles for the snowman’s body in the lower center of the page. Add a simple carrot nose, a hat, and a scarf draped around the neck. -
Add landscape details:
Draw a gently curved horizon line behind the snowman to mark the snowbank. Sketch loose, triangular tree shapes on either side of the snowman to guide your background painting later. -
Protect the white:
This is a negative space painting, meaning the snowman stays white because we don’t paint him. You can apply masking fluid over the snowman shape now, or simply paint carefully around the lines later.
Uneven Background?
If your sky wash dries with ‘blooms’ or watermarks, embrace it! In winter scenes, these textures look just like swirling wind or frosty clouds.
Step 2: Painting the Night Sky
-
Mix your night color:
Prepare a rich, dark blue wash. I like to use Indigo mixed with a touch of Payne’s Grey to get that deep, wintry twilight hue. -
Apply the first wash:
Using a larger round brush, start painting from the top of the paper downwards. Keep the color saturated and dark at the top, gradually adding a tiny bit of water as you move down to create a subtle gradient. -
Navigate the negative space:
As you reach the snowman and the tree outlines, carefully paint around them. The sky color should touch the pencil lines but never cross into the snowman’s white body. -
Paint around the snowflakes (optional):
If you are feeling confident, you can leave tiny pinpricks of white paper unpainted in the sky to act as distant stars, though we will add brighter ones later with a pen. -
Let it dry completely:
Before moving on to the trees, the sky layer must be bone dry to prevent colors from bleeding into one another.
Make it Sparkle
Mix a tiny pinch of cosmetic-grade glitter or iridescent medium into your white gouache for the stars. The snow will shimmer when the light hits it.
Step 3: Painting the Trees
-
Mix the tree color:
Create a cooler, slightly lighter mix than the sky using Indigo and plenty of water. You want the trees to look like shadowy silhouettes. -
Paint the tree shapes:
Fill in the triangular tree sketches on either side of the snowman. Use the tip of your brush to create jagged edges that mimic pine branches. -
Layering depth:
While the tree paint is still slightly damp, drop a more concentrated dark blue into the centers of the trees. This creates a soft, misty look suitable for a distant forest.
Step 4: Snowman Details
-
Paint the hat:
Use a dark blue-grey for the snowman’s hat, leaving a tiny sliver of unpainted paper or painting a thin red stripe for the hat band. -
Warm up the scarf:
Mix a warm Burnt Sienna or terracotta color. Paint the scarf carefully, following the drape of the fabric. Add darker lines at the ends to suggest fringe. -
The face and buttons:
Using a fine detail brush (size 0 or 2), paint a small orange triangle for the carrot nose. Use black or dark grey for the eye dots, the mouth, and the buttons down the chest. -
Add arm twigs:
With the detail brush and dark brown paint, draw thin, spindly lines sticking out from the side for the stick arms. -
Shadowing the snow:
Mix a very watery, pale blue wash. Add a faint curve of shadow on the bottom right of each snowball segment to give the snowman dimension and roundness.
Step 5: Foreground and Finishing Touches
-
Paint the ground:
For the snowy ground, use a very diluted wash of the sky color (mostly water). Sweep it horizontally across the bottom, leaving patches of white paper to represent highlights on the snow. -
Add the stars:
Once everything is completely dry, use a white gel pen or white gouache to add the starry details. Draw several six-pointed stars and scatter tiny dots randomly for falling snow. -
Highlight the trees:
I recommend adding a few tiny white dots or lines on the dark trees to suggest snow caught in the branches. -
The Reveal:
Wait until the paper is cool to the touch (completely dry), then slowly peel away the tape at a 45-degree angle to reveal your crisp, clean frame.
Now you have a serene winter scene that perfectly captures the quiet magic of the season

Have a question or want to share your own experience? I'd love to hear from you in the comments below!