Dance paintings are all about catching that split-second where movement turns into pure emotion. Here are some of my favorite dance painting ideas that make your brushstrokes feel like they’re dancing right along with the figure.
Classic Ballerina in Arabesque
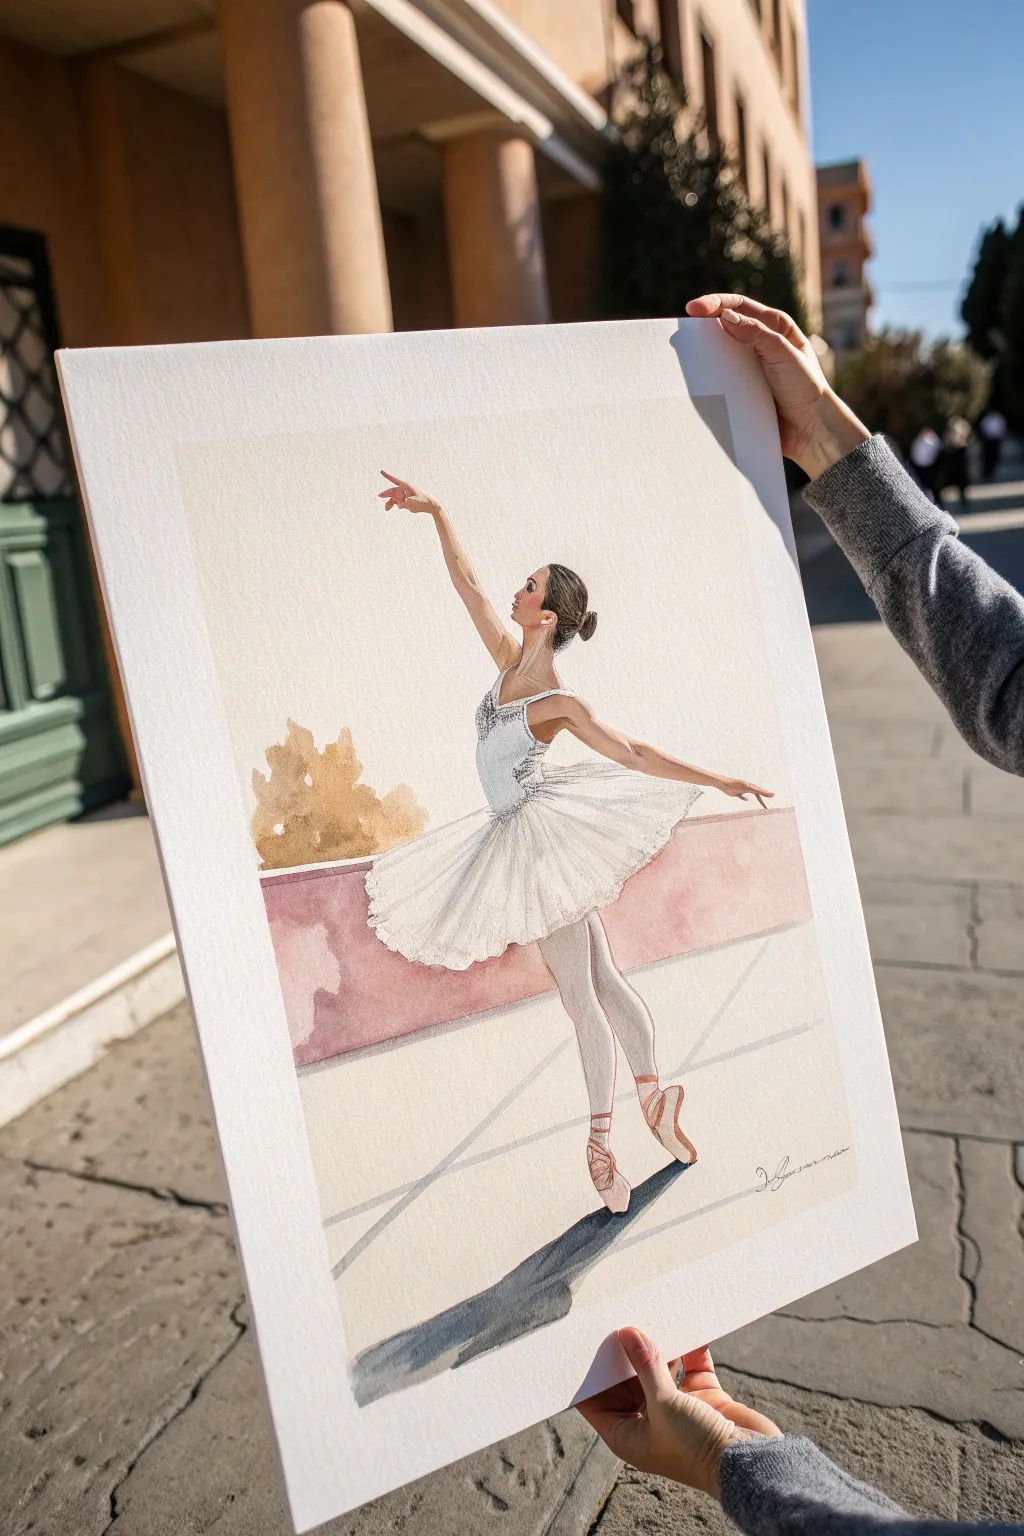
Capture the ethereal beauty of ballet with this delicate watercolor study. This project focuses on soft washes and subtle shading to render the sheer fabric of a tutu and the elegance of an arabesque pose against a warm, sunlit backdrop.
Step-by-Step Tutorial
Materials
- Cold press watercolor paper (300 gsm)
- Watercolor paints (Ultramarine Blue, Alizarin Crimson, Burnt Sienna, Yellow Ochre, Payne’s Gray, Titanium White gouache)
- Round watercolor brushes (sizes 2, 6, and 10)
- Masking fluid and applicator (optional)
- HB pencil and kneadable eraser
- Mixing palette
- Two jars of water
- Paper towels
Step 1: Drawing and Preparation
-
Analyze the pose:
Begin by observing the ‘line of action’ in the reference. The ballerina is in an arabesque, creating a long, elegant curve from her fingertips down to her extended back toe. -
Sketch the figure:
Using your HB pencil, lightly sketch the ballerina’s form. Focus on the geometry of the tutu—it’s essentially a flat, tilted oval shape radiating from the waist. -
Refine the details:
Add the smaller details like the bun, the straps of the bodice, and the ribbons on the pointe shoes. Keep your lines very faint so they won’t show through the transparent paint later. -
Sketch the background:
Draw the horizon line for the low wall behind her and the perspective lines for the ground shadows. The shadow should stretch long and diagonal to the left, anchoring the figure.
Muddy Tutu Shadows?
If your grey shadows look dirty, you likely used too much warm pigment. Stick to cool blues and violets for white fabric shadows to keep them looking crisp and clean.
Step 2: Painting the Figure
-
Skin tones base:
Mix a diluted wash of Yellow Ochre and a touch of Alizarin Crimson. Apply this wet-on-dry to the face, arms, and visible back area, leaving tiny slivers of white paper for highlights on the shoulder and cheekbone. -
Deepening skin shadows:
While the base is still slightly damp, drop in a slightly more concentrated mix of Burnt Sienna under the chin, the armpit, and the muscle definitions of the back to create volume. -
Rendering the tights:
The tights are white but need form. Use a very watery mix of Payne’s Gray and Alizarin Crimson (a cool lavender grey). Paint the shadowed side of the legs, leaving the front of the shin and thigh pure white paper. -
Painting the shoes:
Use a dusty pink mix (Alizarin Crimson + Burnt Sienna) for the pointe shoes. Paint the satin sheen by leaving a hard white highlight on the box of the shoe, blending the pink around it.
Pro Tip: Soft Edges
soften the edge of the cast shadow as it moves away from the foot. Use a clean, slightly damp brush to blur the far edge, mimicking how light actually diffuses.
Step 3: The Tutu and Bodice
-
Bodice shadows:
The bodice is white with silver/grey detailing. Use a size 2 brush and a pale grey mix to define the side panels and shadow under the bust. Add tiny dots of darker grey for texture. -
Tutu structure:
For the tutu, do not paint it solid white. Instead, paint the *shadows* between the ruffles using a diluted grey-blue mix. Use a fanning motion with your brush, radiating outward from the waist. -
Layering tulle:
Once the first layer is dry, add shorter, darker strokes of grey near the hips to suggest multiple layers of gathered fabric. Keep the outer edges of the tutu soft and broken to mimic sheer tulle. -
Adding gouache highlights:
I find a touch of white gouache is perfect here. Use it to add crisp, opaque white lines on the top edges of the tulle folds to make them pop against the shadows.
Step 4: Background and Atmosphere
-
The wall wash:
Mix a muted dusty rose color for the lower wall. Apply a flat wash, carefully cutting around the tutu’s edge. Create a soft, uneven edge on the left to suggest an old, plastered texture. -
Background foliage:
Wet the area above the wall slightly. Drop in soft touches of Yellow Ochre and Burnt Sienna to suggest distant autumn trees or bushes. Let the colors bleed softly; they shouldn’t be detailed. -
Ground plane:
Wash the ground area with a very pale, warm beige (lots of water + trace of Yellow Ochre). Keep this extremely subtle so the white legs don’t get lost. -
The cast shadow:
Mix a strong cool grey (Ultramarine Blue + Burnt Sienna). Paint the cast shadow on the ground decisively. The shadow should be darkest near the toes and fade slightly as it stretches away. -
Final touches:
Once everything is bone dry, sharpen the hair details with dark brown and add the signature artist scribble in the bottom corner. Erase any remaining stray pencil lines.
Step back and admire the poetic movement you have captured in this quiet moment

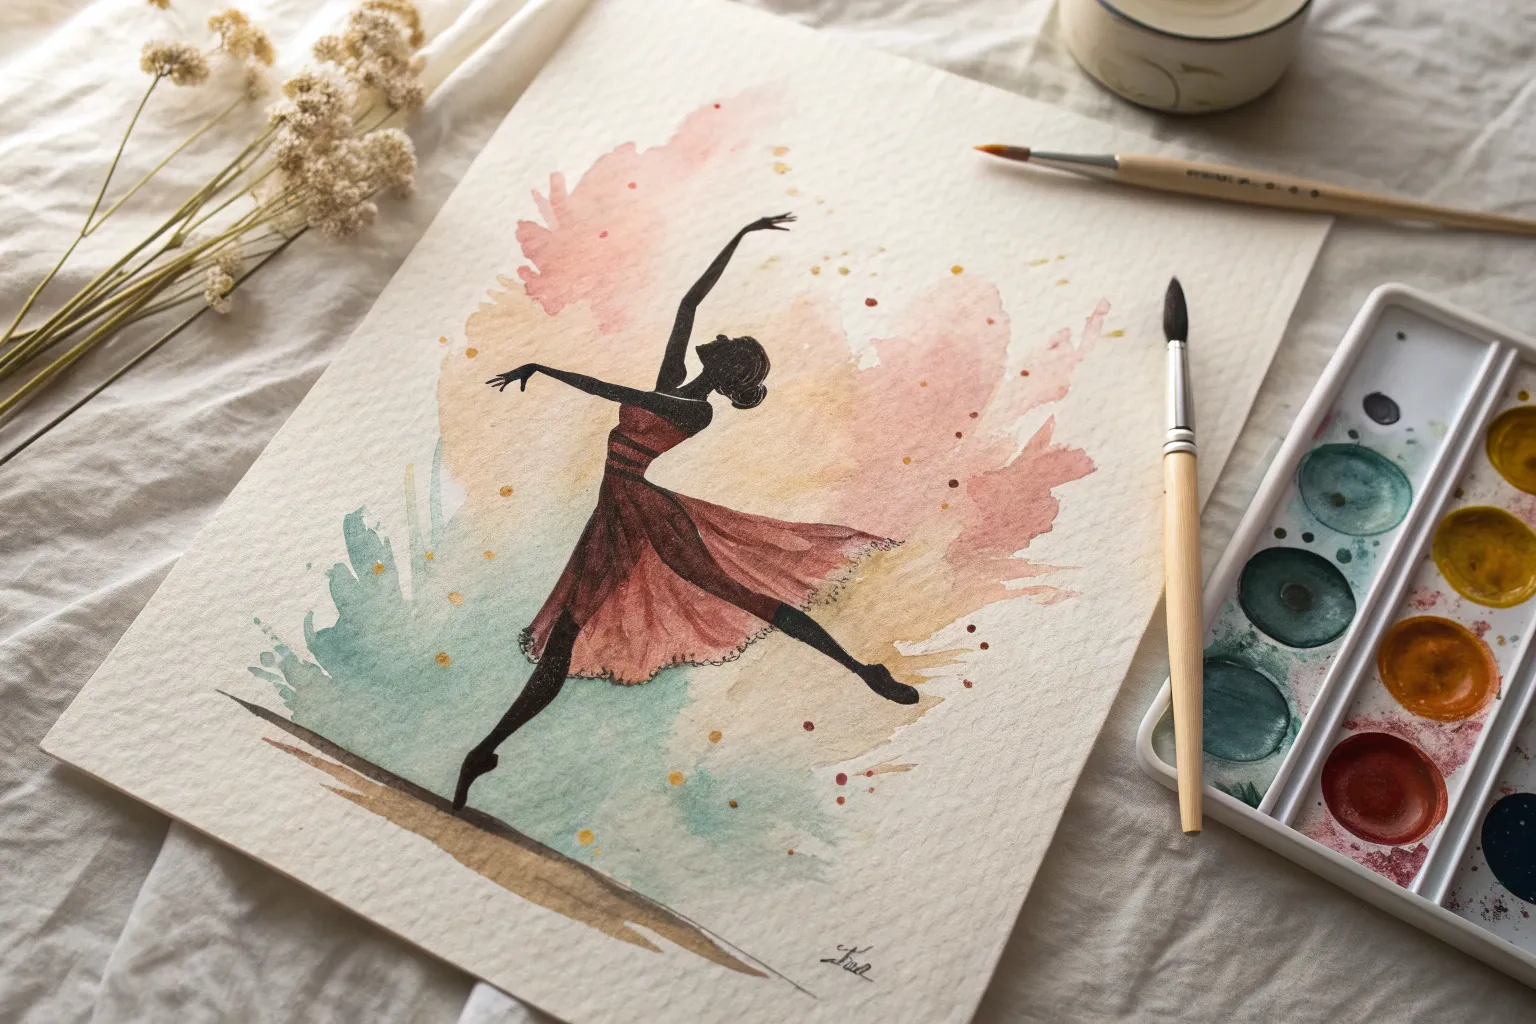
Black Dancer Silhouette With Spotlight
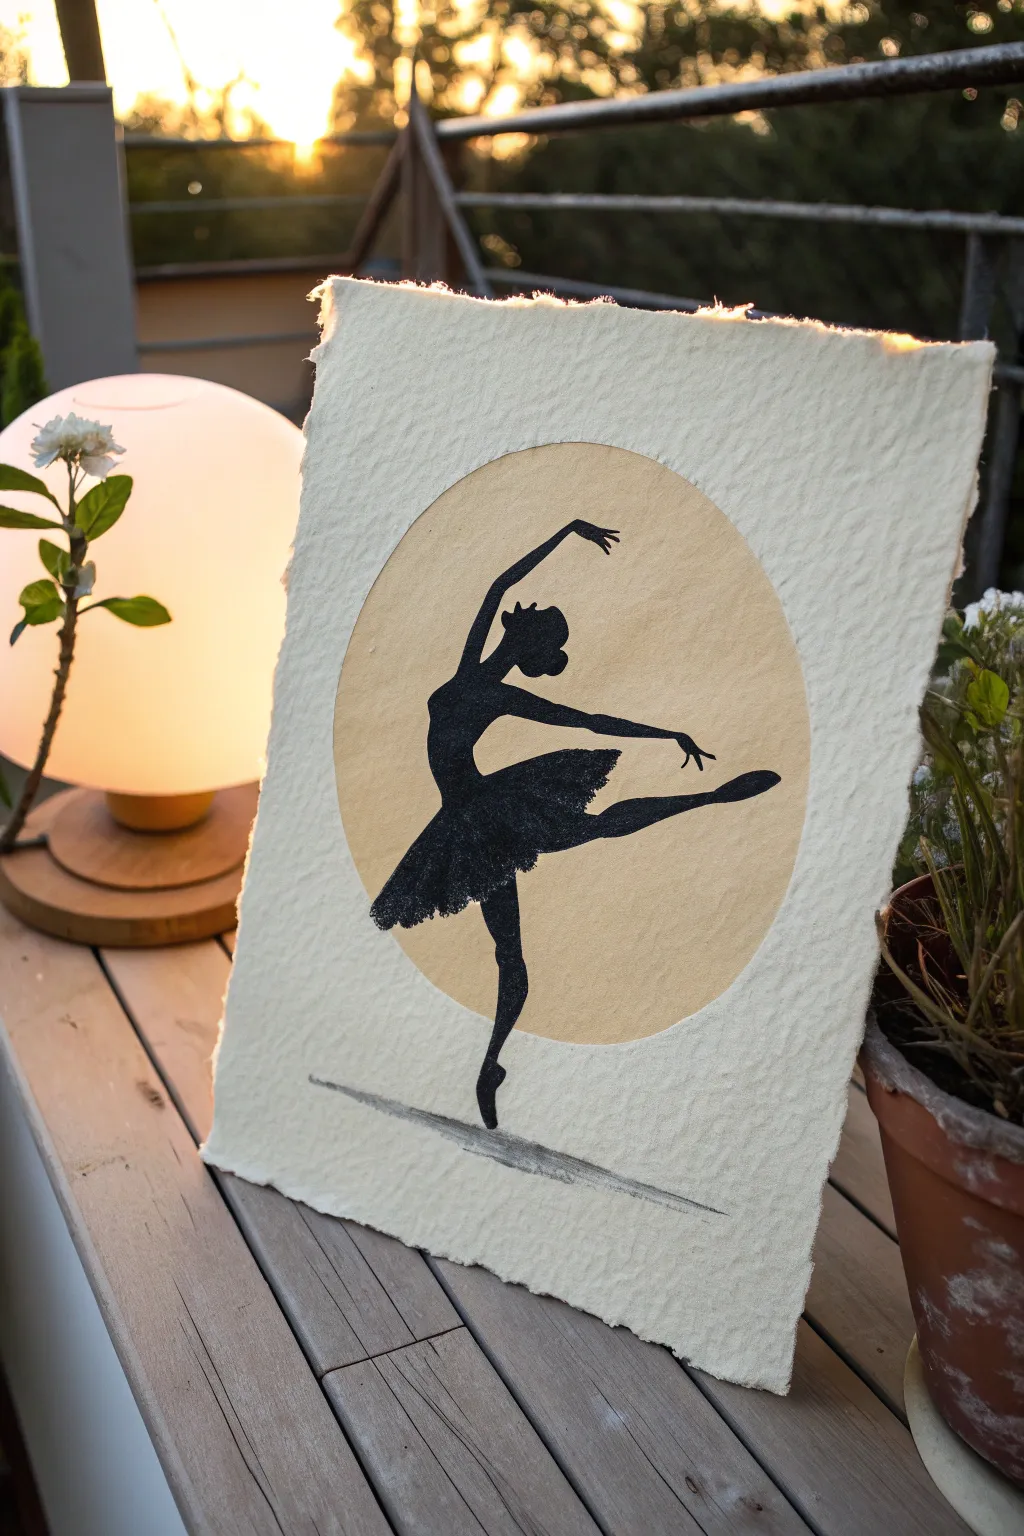
Capture the grace of ballet with this striking silhouette piece, where a deep black figure stands out against a soft, golden spotlight. The raw, deckled edge of handmade paper adds a beautiful organic texture that contrasts perfectly with the sharp elegance of the dancer’s form.
Detailed Instructions
Materials
- Heavyweight handmade watercolor paper (deckled edge)
- Black acrylic paint or India ink
- Gold or ochre watercolor paint
- Compass or circular object (for tracing)
- Pencil
- Fine liner brush (size 0 or 00)
- Flat shader brush (size 6 or 8)
- Old toothbrush (optional for texture)
- Jar of clean water
- Palette
Step 1: Setting the Stage
-
Prepare your paper:
Select a gorgeous sheet of handmade paper. The heavy texture and irregular ‘deckled’ edges are key to this look, so avoid trimming it unless absolutely necessary. -
Define the spotlight:
Using a compass or a round household object like a bowl, lightly trace a large circle in the center of your paper. This will become the luminous backdrop for your dancer. -
Mix the spotlight color:
Prepare a wash of gold or yellow ochre watercolor. You want a warm, slightly muted tone rather than a bright neon yellow, so mix in a tiny touch of brown if needed. -
Paint the circle:
Carefully fill in the penciled circle with your gold wash using the flat shader brush. Keep the edges relatively crisp. -
Let it dry completely:
Patience is crucial here. The background circle must be bone dry before you add the black silhouette, or the ink will bleed into the gold and ruin the sharp edges.
Step 2: Drafting the Dancer
-
Sketch the silhouette:
Lightly sketch the ballerina’s outline with a pencil directly over the dry gold circle. Focus on the pose: an arched back, arms extended gracefully, and one leg extended behind in an arabesque. -
Refine the tutu:
Sketch the tutu shape with jagged, uneven edges to suggest ruffled fabric. Don’t worry about details inside the shape; just focus on the outer contour. -
Position the feet:
Ensure the supporting foot is centered at the bottom of the circle to maintain visual balance, while the back leg extends well beyond the circle’s edge.
Pro Tip: Masking Fluid
For a perfect circle, paint masking fluid over the circle area first, paint the rest of the paper (if desired), and then peel it off to reveal pure white paper to paint gold.
Step 3: Painting the Silhouette
-
Load your brush:
Switch to your fine liner brush and load it with opaque black acrylic paint or India ink. The black needs to be very dark and solid. -
Outline the head and arms:
Start at the top. Carefully paint the head, the bun, and the delicate arms. Use the very tip of the brush to get the fingers sharp. -
Fill the torso:
move down to the bodice, filling it in completely solid. I find it easier to outline a section first and then flood the middle with paint. -
Create the tutu texture:
When painting the tutu, use a ‘stippling’ or dabbing motion with a slightly drier brush near the edges. This creates a fluffy, tulle-like texture instead of a hard line. -
Paint the legs:
Switch back to smooth strokes for the legs. Taper the paint down to the very point of the toe shoe for unintended delicacy. -
Double-check opacity:
Once the first layer of black is dry, hold it up to the light. If you see streaks, apply a second coat of black to ensure a true silhouette effect.
Level Up: Metallic Pop
Use actual gold leaf for the circle instead of paint. Apply sizing (glue) in the circle shape, lay down the leaf, and brush away the excess for a true metallic shine.
Step 4: Final Touches
-
Ground the dancer:
Mix a very watery grey wash using your black paint and lots of water. -
Add a shadow:
Paint a faint, horizontal streak beneath the supporting foot. This ‘grounding shadow’ prevents the dancer from looking like she is floating in space. -
Erase guidelines:
Once absolutely everything is dry, gently erase any visible pencil marks from your initial sketch.
Now you have a stunning, high-contrast piece of art ready to be displayed near a light source to catch the texture of the paper

Watercolor Wash for Motion Blur
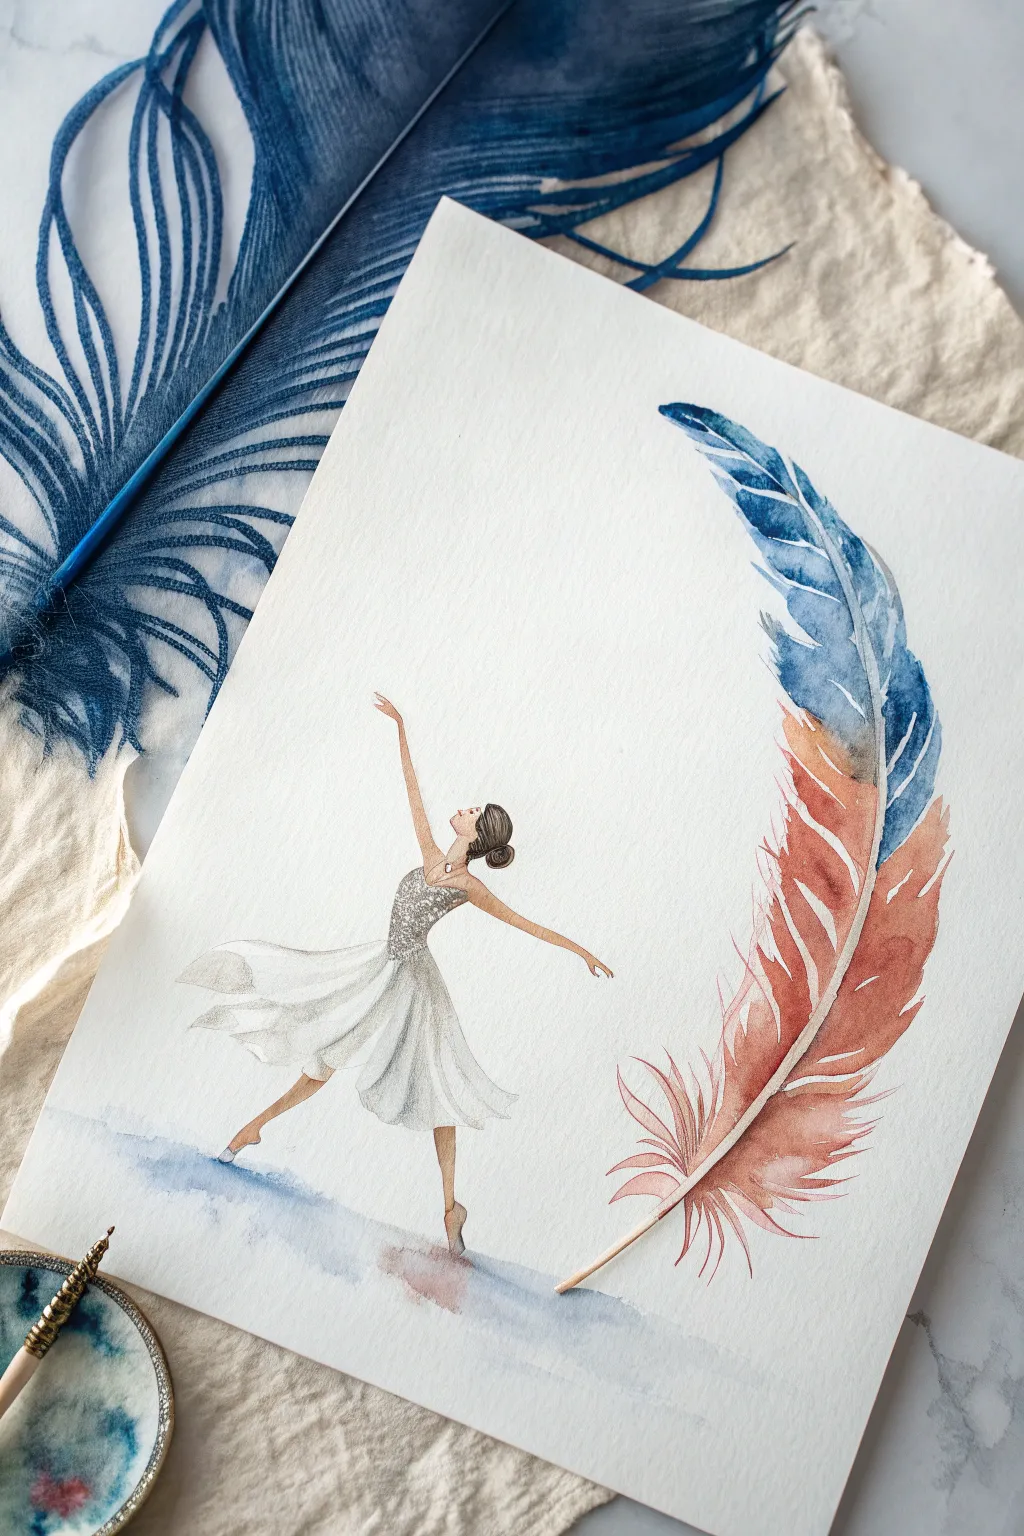
Capture the elegance of movement with this delicate watercolor composition featuring a poised ballerina and a sweeping, stylized feather. The blend of soft washes and fine details creates a dreamlike quality perfect for dance-themed art.
Step-by-Step
Materials
- Cold press watercolor paper (300 gsm)
- Watercolor paints (Indigo, Payne’s Grey, Burnt Sienna, Opera Rose, Sepia)
- Round brushes (sizes 2, 6, and 8)
- Fine liner brush or rigger brush
- Pencil (HB or H for light sketching)
- Kneadable eraser
- White gouache or white gel pen
- Clean water
Step 1: Sketching the Elements
-
Initial outline:
Begin by lightly sketching the ballerina’s figure. Locate her in the lower-left center of the page. Draw a gentle curve for her torso and head, extending her left arm upward and her right arm outward to create a graceful line. -
Feather placement:
Sketch a large, C-shaped curve on the right side of the paper. This will be the spine of the feather. It should arc around the dancer, framing her without touching. -
Refining the drawing:
Add the details of her dress—a fitted bodice dropping into a flowing, handkerchief-hem skirt. For the feather, sketch the basic shape of the barbs, keeping the edges rough and organic. -
Lighten lines:
Roll your kneadable eraser over the entire sketch. You want the graphite lines to be barely visible so they don’t show through the transparent watercolor layers.
Muddy Gradient?
If the blue and brown mix into a dull grey, wait for the first color to dry completely before adding the second. You can glaze the transition later.
Step 2: Painting the Ballerina
-
Skin tones:
Mix a very dilute wash of Burnt Sienna with a touch of Opera Rose. Using a size 2 brush, carefully paint the dancer’s face, neck, arms, and legs. Keep the color light and build up shadow under the chin and arms while the first layer is barely damp. -
The bodice:
For the sparkly bodice, use a mix of Payne’s Grey and silver (if you have it) or just diluted grey. Dot the color on stippling style to suggest texture and sequins. -
Painting the skirt:
The skirt is white, so you are painting the *shadows*, not the object itself. Mix a very watery grey wash. Use swift, loose strokes to define the folds of the fabric, leaving plenty of white paper untouched for the highlights. -
Hair and shoes:
Once the face is dry, paint the hair using Sepia or dark brown. Leave a tiny speck of white for a highlight on the bun. Paint the pointe shoes in a soft beige or pale pink.
Feathery Texture
To get realistic feather edges, flick your wrist swiftly outward at the end of each stroke. This lifts the brush and creates a fine, tapered point.
Step 3: Creating the Feather
-
Top section wash:
Start at the top of the feather curve. Load a size 6 or 8 brush with Indigo blue. Paint the upper barbs using outward flickering strokes, letting the color fade slightly as you move down the spine. -
Transition zone:
While the blue is still wet, introduce a warm reddish-brown (mix Burnt Sienna with a drop of Opera Rose) to the middle section. Allow the blue and brown to bleed into each other naturally on the paper for a soft gradient. -
Bottom section wash:
Continue painting the lower barbs with the reddish-brown mix, softening the color as you reach the quill tip. Use increasingly loose, feathery strokes to mimic the texture of down. -
Defining the spine:
With a fine liner brush and concentrated Indigo, paint a thin, broken line down the center of the feather to indicate the main shaft. -
Feather details:
Once the main wash is dry, use a damp brush to lift out slight highlights or add darker, thin strokes of Indigo and Brown to emphasize the separation between the feather barbs.
Step 4: Finishing Touches
-
Grounding shadow:
Mix a watery blue-grey. Wet the area beneath the dancer’s feet and drop in the color, letting it diffuse horizontally to create a soft, abstract floor reflection. -
Sparkle accents:
I like to use a tiny bit of white gouache or a gel pen to add sharp highlights to the bodice of the dress and the very top edge of the feather spine. -
Final assessment:
Step back and look at the balance. If the feather feels too light, add a second glaze of color to the darkest parts to increase contrast.
Let your painting dry completely before framing this elegant tribute to dance.

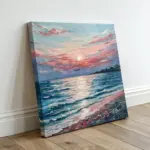
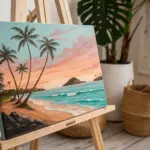
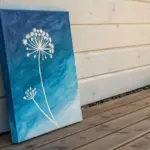
Simple Figure on a Gradient Stage
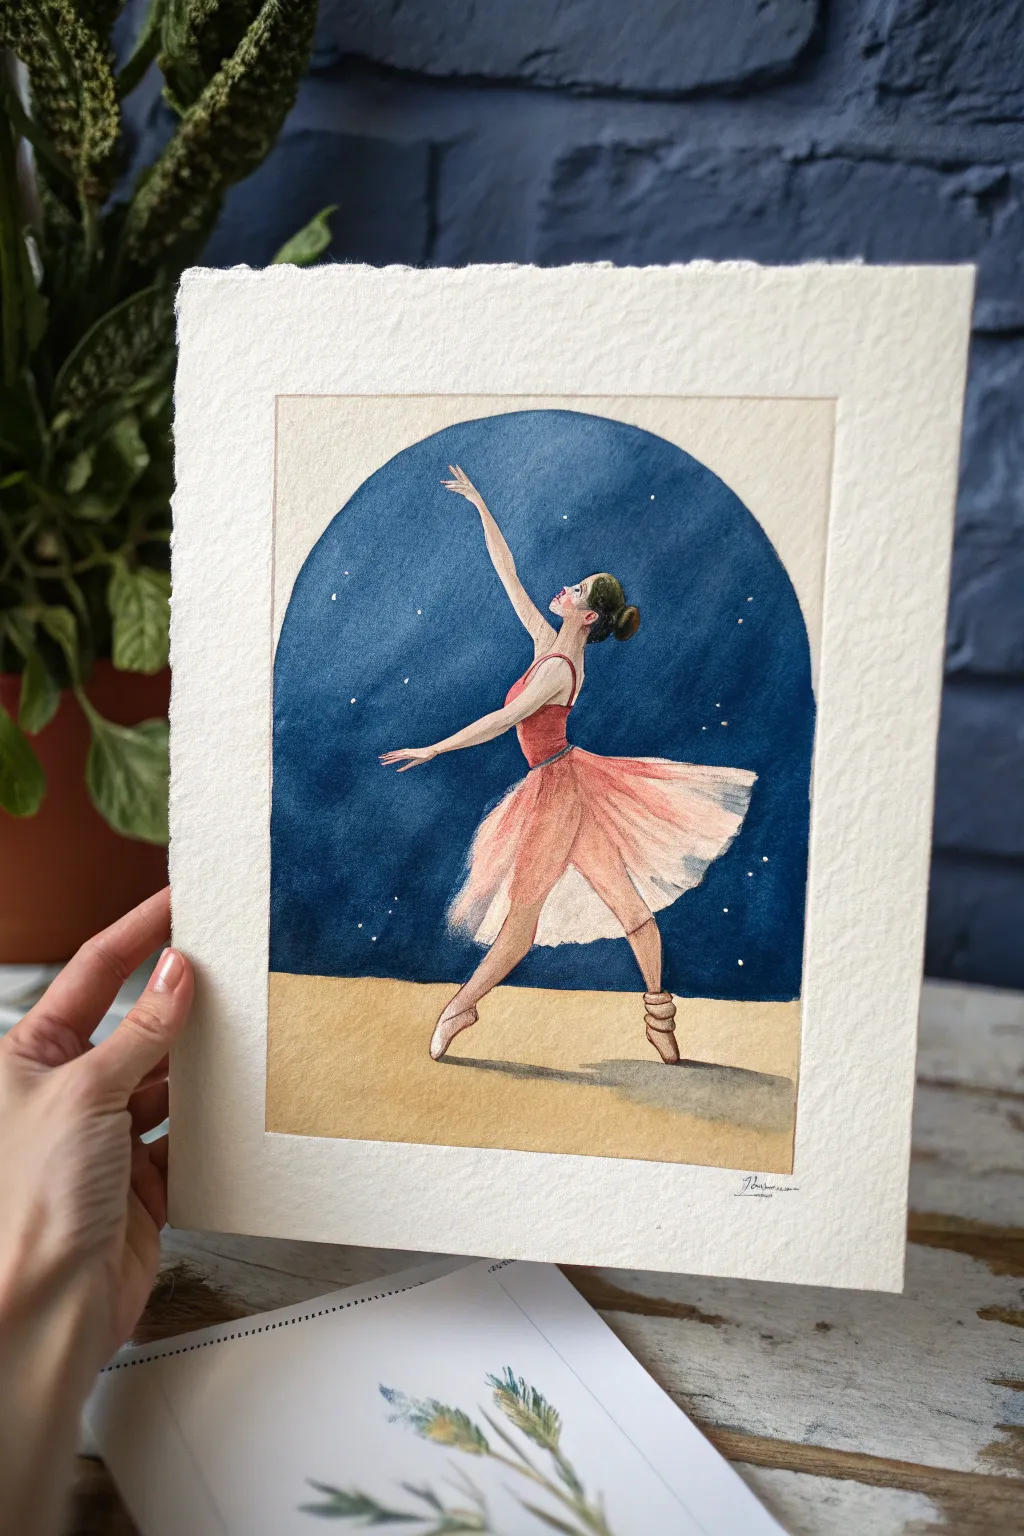
Capture the grace of dance with this enchanting painting featuring a ballerina posed against a deep blue, starry night sky. The arched composition and soft gradient floor create a theatrical stage effect that highlights the delicate movement of the figure.
How-To Guide
Materials
- Cold press watercolor paper (300 gsm)
- Gouache paints (Ultramarine Blue, Prussian Blue, Titanium White, Burnt Sienna, Yellow Ochre, Alizarin Crimson)
- Pencil (HB or H) and eraser
- Ruler and compass (or a round object for the arch)
- Round brushes (sizes 2, 4, and 0 for details)
- Mixing palette
- Washi tape or masking tape
- Jar of water
Step 1: Setting the Stage
-
Prepare the borders:
Begin by taping down the edges of your paper to a board. Use a ruler to lightly mark a rectangular boundary, leaving a wide, clean margin of white paper around your painting area to mimic the framed look in the reference. -
Draw the arch:
Inside your rectangular boundary, lightly draw the arched shape. Focus on creating a flat bottom line for the floor and vertical sides that transition into a smooth semi-circle at the top. This creates the ‘window’ into the scene. -
Sketch the figure:
Lightly sketch the ballerina’s pose. Start with a gesture line for the spine and leg extension. Position her head looking upward toward her raised hand. Outline the tutu’s triangular shape and define the legs, ensuring the feet are pointed in ballet shoes. -
Refine the details:
Clean up your sketch by erasing stray lines. Add details like the bun hairstyle, the shoulder straps of the leotard, and the gentle curve of the arms. Keep the lines faint so they won’t show through lighter paint layers later.
Keep it Clean
If your blue background color accidentally overlaps onto the ballerina’s skin area, don’t panic. Let it dry completely, then paint over the mistake with opaque white gouache before applying the skin tone.
Step 2: Painting the Background
-
Mix the night sky color:
Create a deep, rich blue by mixing Prussian Blue with a touch of Ultramarine. You want a color that feels like midnight. -
Fill the arch:
Carefully paint around your pencil sketch of the ballerina. Fill the arched background area with your dark blue mix. I find it helpful to outline the figure first with a small brush before filling the large areas. -
Create the stage floor:
Mix Yellow Ochre with plenty of White and a tiny dot of Burnt Sienna to create a sandy beige tone. Paint the bottom section of the arch, meeting the blue background cleanly at the horizon line. -
Add the stars:
Once the blue paint is bone dry, load a small brush with pure Titanium White. Gently dot tiny stars into the sky. Vary the sizes slightly for a natural effect, placing a few near her raised hand as if she is reaching for them.
Make it Sparkle
For a magical touch, sprinkle a tiny pinch of ultra-fine cosmetic glitter onto the wet paint of the tutu skirt, or use a metallic gold pen to add a few larger ‘constellation’ stars in the sky.
Step 3: Bringing the Ballerina to Life
-
Base skin tone:
Mix White, Yellow Ochre, and a speck of Alizarin Crimson to make a pale skin tone. Paint the face, neck, arms, and legs. Let this layer dry completely. -
Paint the leotard:
Mix Alizarin Crimson with White to get a soft rose-red. Paint the bodice of the dress, carefully following the curves of her torso. -
Layer the tutu:
For the skirt, use a very watered-down mix of pink and white. Paint broad, sweeping strokes outward from the waist. Gouache’s opacity works well here—layer slightly lighter pinks over darker ones to simulate the folds of tulle. -
Add skin shadows:
Darken your original skin tone mix slightly with a touch of Burnt Sienna. Add subtle shadows under the chin, along the underside of the arms, and on the calf muscles to give the figure volume. -
The hair and face:
Use a dark brown (mix Burnt Sienna and Ultramarine) to paint the hair and bun. With your smallest brush (size 0), carefully dot the eye and define the profile of the nose and chin. -
Ballet shoes:
Paint the shoes using a satin pink or beige tone. Add the ribbons wrapping around the ankles using fine lines.
Step 4: Final Touches
-
Highlighting:
Use pure white paint to add highlights to the top of the bun, the shoulder, and the brightest folds of the tutu. This makes the figure pop against the dark background. -
Grounding shadow:
Mix a diluted grey-brown wash. Paint a soft, elongated shadow on the floor extending from her feet to the right side, anchoring her to the ground. -
Clean up edges:
Check the edges of your arch. If the paint bled, you can tidy it up with opaque white gouache around the outside, or simply erase any pencil marks left in the border.
Step back and admire the contrast between that deep blue sky and the delicate pink dancer.
BRUSH GUIDE
The Right Brush for Every Stroke
From clean lines to bold texture — master brush choice, stroke control, and essential techniques.
Explore the Full Guide
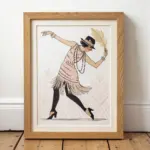
Tango Couple in Dramatic Contrast
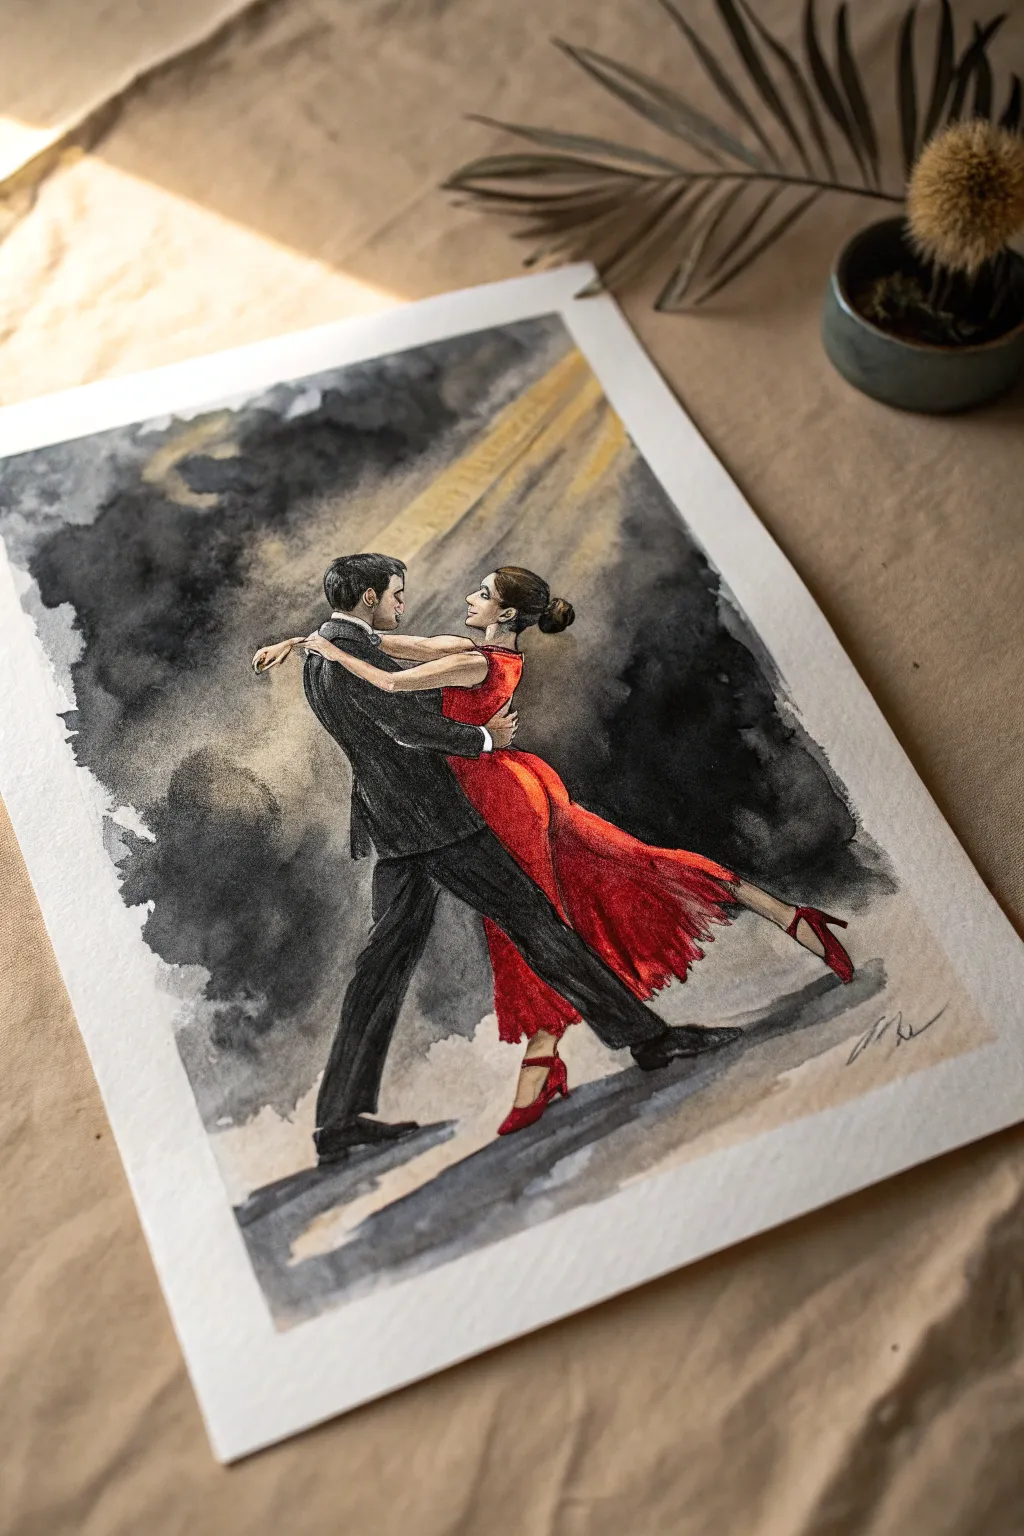
Capture the passion and intensity of the Tango with this dramatic watercolor painting, featuring a striking contrast between the moody, storm-cloud background and the vibrant red of the dancer’s dress. This project balances loose, wet-on-wet background techniques with precise, dry-brush detailing for the figures.
Detailed Instructions
Materials
- Heavyweight watercolor paper (300gsm, cold press)
- Watercolor paints: Carbon Black, Paynes Grey, Cadmium Red, Alizarin Crimson, Yellow Ochre, Burnt Umber, Flesh Tint
- Pencil (HB) for sketching
- Kneadable eraser
- Masking fluid (optional)
- Round brushes: sizes 8 (wash), 4 (detail), and 0 (fine lines)
- Clean water jars
- Painters tape
- Paper towels
Step 1: Preparation and Sketching
-
Secure the paper:
Tape your watercolor paper down to a board on all four sides. This prevents buckling when we apply the heavy background washes later. -
Outline the figures:
Using an HB pencil, lightly sketch the two dancers. Start with a gesture line to capture the dynamic lean of the pose. Pay attention to the man’s extended leg and the woman’s arched back. -
Refine the details:
Flesh out the shapes of the clothing—the sharp lines of the tuxedo and the flowing, ruffled hem of the red dress. Keep the facial features suggestive rather than hyper-realistic. -
Protect the highlights:
If you are worried about accidentally painting over the figures or the beam of light, you can apply a thin layer of masking fluid over the dancers’ silhouettes. Let it dry completely.
Step 2: The Dramatic Background
-
Wet the background area:
Brush clean water over the entire background area, avoiding the figures. You want the paper glistening but not pooling with water. -
Apply the light beam:
While the paper is wet, drop a dilute wash of Yellow Ochre mixed with a touch of fleshy pink diagonally from the top right corner. This creates the spotlight effect. -
Start the dark clouds:
On the left side, charge your brush with a strong mix of Paynes Grey and Carbon Black. Touch the wet paper and let the paint bloom outwards towards the center. -
Build the localized contrast:
While moist, dab more concentrated black into the dark cloud areas to create depth. I like to tilt the board slightly to let the dark paint drift naturally, creating that smoky, atmospheric look. -
Create the floor shadow:
Paint horizontal strokes of watered-down grey below the dancers’ feet to ground them. Let this wash bleed slightly into the background but keep the edges near the feet distinctive. -
Dry completely:
Allow the background to bone dry. This is crucial—if you paint the figures now, the red will bleed into the black clouds.
Bleeding edges?
If red paint bleeds into the white shirt or background, quickly dab it with a clean, slightly damp paper towel to lift the color, then dry immediately with a hair dryer before retouching.
Step 3: Painting the Figures
-
Skin tones:
Mix a light flesh tint (Burnt Umber + White/Pink) and paint the face, arms, and hands. Add tiny touches of darker brown for shadows under the jaw and arms. -
The red dress base:
Apply a bright wash of Cadmium Red to the dress. Keep the paint fluid so it covers the shape evenly. -
Dress shadows and depth:
Before the red dries completely, drop in Alizarin Crimson or a touch of purple into the folds and the shadow side (left) of the dress to give it volume. -
The tuxedo:
Paint the man’s suit using Paynes Grey. Don’t use straight black; grey allows you to layer darker tones for lapels and creases later. -
Darkest accents:
Once the suit base layer is dry, come back with Carbon Black to define the legs, the shoes, and the hair of both dancers. Leave tiny white gaps for the collar and shirt cuffs.
Pro Tip: Sharp Suit
For the man’s suit, leave extremely thin lines of unpainted white paper between the arm and the torso. This negative space defines the limb without needing a heavy outline.
Step 4: Fine Details and Finish
-
Refining edges:
Use your size 0 brush to tidy up the silhouettes. Sharpen the profile of the faces and the woman’s bun. -
Dry brush texture:
For the bottom ruffles of the dress, use a ‘dry brush’ technique with concentrated red paint. Drag the brush lightly to create a scratchy, fabric-like texture. -
Enhancing the light:
Reinforce the beam of light if it faded too much by glazing a very thin layer of yellow over the background wash on the right side. -
Grounding shadows:
Add sharp, dark shadows directly underneath the man’s shoes and the woman’s heel to firmly plant them on the floor. -
Final check:
Step back and assess contrast. If the background clouds dried too light, you can carefully glaze another layer of black over the dry paint to deepen the drama.
Remove the tape carefully to reveal a crisp border around your passionate scene.
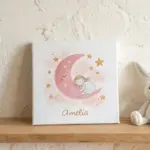
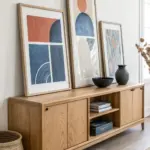
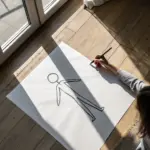
Negative Space Dancer Cutout
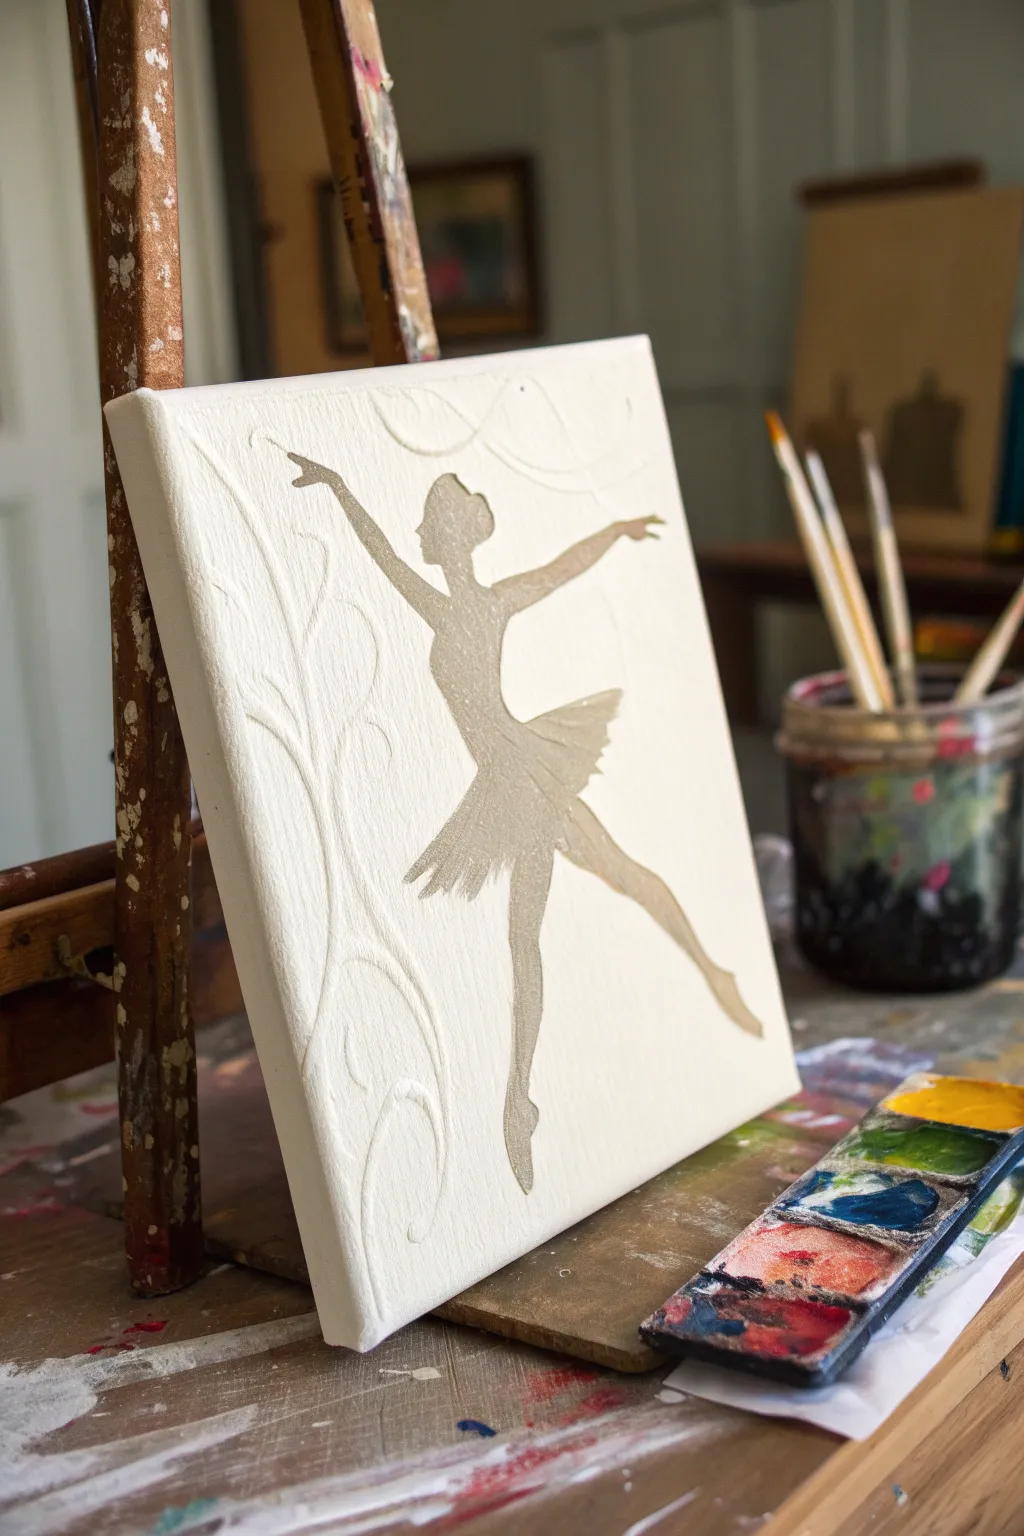
Capture the elegance of movement with this unique negative space technique that plays with dimension and light. By building up a creamy, swirled background around a dancer’s silhouette, you create a beautiful relief effect that feels both classical and modern.
How-To Guide
Materials
- Small square stretched canvas (e.g., 8×8 or 10×10 inches)
- Heavy body white acrylic paint or gesso
- Modeling paste (optional, for extra thickness)
- Contact paper or masking tape
- Pencil
- Hobby knife (e.g., X-Acto) and cutting mat
- Palette knife or flat sculpting tool
- Metallic champagne or pale gold acrylic paint
- Small flat synthetic brush
- Fine-grit sandpaper (optional)
- Matte or satin varnish
Step 1: Preparation & Stenciling
-
Surface Prep:
Begin by wiping down your canvas to ensure it’s free of dust. If the canvas grain is very rough, you might applying a thin base coat of gesso to smooth it slightly, though a little texture is fine for this project. -
Base Color Application:
Paint the entire canvas with your metallic champagne or pale gold acrylic paint. This will be the color of the dancer later. Apply two thin coats for opaque coverage, letting the first dry completely before adding the second. -
Design the Silhouette:
While the base coat dries, sketch your ballerina silhouette onto the backing of a sheet of contact paper. You can also print a design and trace it if you aren’t comfortable freehanding. -
Cut the Mask:
Using a sharp hobby knife on a cutting mat, carefully cut out the dancer shape. You want the positive shape (the dancer herself) to use as a sticker mask. -
Apply the Mask:
Once the gold base paint is 100% dry—don’t rush this or the paint will peel—peel the backing off your contact paper dancer and stick it firmly to the center of the canvas. Burnish the edges well with your fingernail so no paint can seep underneath.
Clean Peel Fix
If the texture paste tears when lifting the sticker, run a sharp craft knife gently around the edge of the sticker *before* peeling to cut the seal.
Step 2: Texture Building
-
Mix the Medium:
On a palette, mix heavy body white acrylic paint with modeling paste in a 50/50 ratio. This creates a thick, frosting-like consistency that holds peaks and swirls perfectly. -
Apply Around the Edges:
Start applying the white mixture around the outer edges of the canvas first, working your way inward toward the sticker mask. Use a palette knife to spread it thickly. -
Cover the Edges:
Gently overlap the edges of the contact paper sticker with your texture paste. This ensures that when we peel it later, there will be a crisp, recessed line defining the dancer. -
Create the Swirls:
Using the tip of your palette knife or even the handle of a paintbrush, carve swirling, organic lines into the wet paste. I like to mimic the flow of a dancer’s ribbon or fabric in the background. -
Define the Frame:
Ensure the texture extends all the way to the sides of the canvas, giving the piece a finished, sculptural look from every angle.
Step 3: The Reveal
-
Initial Drying:
Let the texture paste set for about 30 to 45 minutes. It should be firm to the touch but still slightly flexible, not rock hard yet. -
Remove the Mask:
Find the edge of your contact paper sticker—you may need a pin or needle to lift a corner. Slowly and carefully peel the sticker away. Doing this before the paste is fully cured prevents the texture from cracking heavily. -
Clean Up Edges:
If any white paste seeped under the mask or created a jagged edge during peeling, use a damp brush or a toothpick to gently clean up the outline of the dancer while the paste is still pliable. -
Full Cure:
Allow the canvas to dry completely overnight. Thick applications of modeling paste can take up to 24 hours to fully harden. -
Final Touch-ups:
Inspect the gold silhouette. If the peeling process lifted any base paint, use a small detail brush to touch up the champagne gold color. -
Seal the Work:
Apply a coat of satin varnish over the entire piece. This unifies the sheen between the metallic dancer and the matte texture paste, protecting your artwork for years.
Level Up: Gilded Edges
Add a touch of luxury by carefully painting the very rim of the raised texture ridges with a dry brush and a tiny amount of gold paint.
Hang your textured masterpiece where the light can catch those beautiful swirls and shadows

PENCIL GUIDE
Understanding Pencil Grades from H to B
From first sketch to finished drawing — learn pencil grades, line control, and shading techniques.
Explore the Full Guide
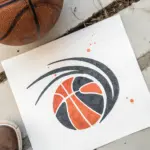
Geometric Dancer Made of Shapes
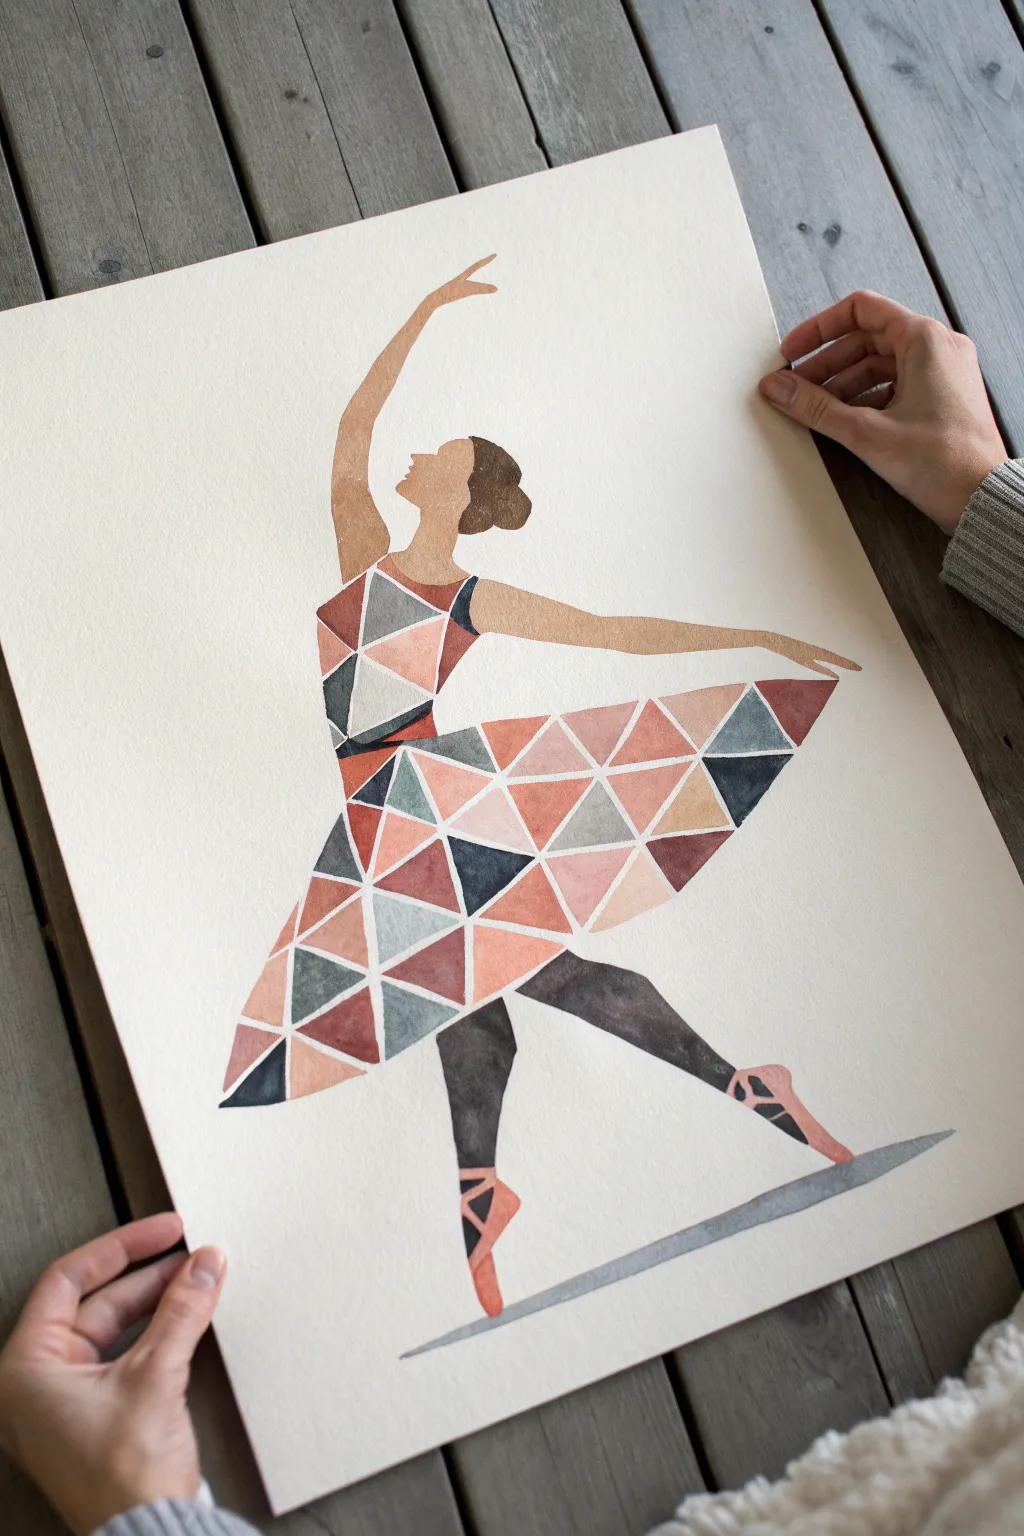
Capture the grace of dance with this modern watercolor project that blends fluid movement with structured geometry. By constructing the dancer’s tutu from a mosaic of triangles, you create a stunning stained-glass effect against a minimalist silhouette.
How-To Guide
Materials
- Heavyweight watercolor paper (9×12 inches or larger, cold press)
- Watercolor paints (shades of muted pink, coral, slate blue, warm grey, and brown)
- Graphite pencil (HB or lighter)
- Fine liner brush (size 0 or 1)
- Round watercolor brush (size 4 or 6)
- Ruler
- Eraser
- Masking fluid (optional)
- Palette for mixing
- Paper towels and water cup
Step 1: Sketching the Form
-
Outline the silhouette:
Start by lightly sketching the outline of the ballerina on your watercolor paper. Focus on the graceful curve of the back and the extended arms. Keep the head a simple oval profile with a bun. -
Define the dress shape:
Draw the outline of the bodice and the large, sweeping triangular shape of the tutu. The skirt should flare out widely to the right, balancing the figure. -
Create the geometric grid:
Using a ruler, draw a network of intersecting straight lines inside the bodice and skirt area. You want to create a variety of triangles—some large, some small—to mimic a faceted gem or mosaic. -
Sketch the legs:
Draw the legs extending downward. The front leg should be straight on pointe, while the back leg extends behind. Mark out the shape of the ballet slippers and ribbons on the ankles.
Clean Lines Hack
If you struggle with steady hands, apply liquid masking fluid over the white gaps between triangles before painting. Rub it away once the paint is dry for perfect white lines.
Step 2: Painting the Skin and Body
-
Mix a skin tone:
On your palette, mix a warm tan or soft brown color. Add plenty of water to keep it semi-transparent. -
Paint the upper body:
Using the round brush, fill in the face, neck, and arms with your skin tone mix. Keep the edges crisp but the wash flat. -
Paint the hair:
Switch to a darker brown. While the skin tone is dry, carefully paint the hair bun and head shape, ensuring a clean line where the hair meets the forehead. -
Fill the leggings:
Mix a dark charcoal or soft black wash for the legs. Paint them in carefully, stopping right at the ankle where the shoe ribbons begin.
Add Some sparkle
Mix a tiny amount of metallic gold watercolor or gouache into a few random triangles on the skirt to make the costume catch the light.
Step 3: Faceted Watercolor Technique
-
Prepare your palette:
Mix three or four distinct colors for the dress: a muted rose, a peach/coral, a slate blue-grey, and a deeper charcoal. Keep puddles of each ready. -
Paint the first triangles:
Select a random triangle in the skirt grid. Fill it with the rose color. I find it helpful to use the fine liner brush near the pencil lines to stay neat. -
Alternate colors:
Move to a non-adjacent triangle and paint it slate blue. Continue hopping around the grid, filling shapes with different colors so that no two touching triangles are the same shade. -
Leave gaps:
Crucially, leave a tiny hairline of white paper visible between each painted triangle. This acts like the ‘grout’ in a mosaic and keeps the colors from bleeding into one another. -
Incorporate the bodice:
Continue this pattern up into the bodice of the dress, using smaller triangles here to fit the tighter space. -
Vary the saturation:
To add depth, make some triangles more watered down and others more pigment-heavy. This variety makes the skirt look like it’s shimmering.
Step 4: Details and Finishing
-
Paint the shoes:
Use the coral or rose mix to paint the ballet slippers on the feet. carefully draw the crisscross ribbons extending up the ankle with your finest brush. -
Add the shadow:
Mix a very watery grey wash. Paint a long, thin, horizontal strip beneath the shoes to ground the dancer, suggesting a floor. -
Erasure:
Once the painting is completely bone-dry—give it extra time just to be safe—gently erase any visible pencil lines that weren’t covered by paint, especially around the outer silhouette. -
Final touches:
Check for any uneven edges in your triangles. If needed, use the fine liner to sharpen up points or edges with a tiny bit more paint.
Step back and admire the rhythmic balance of color and form in your finished piece
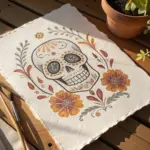
Nature-Filled Dancer Silhouette
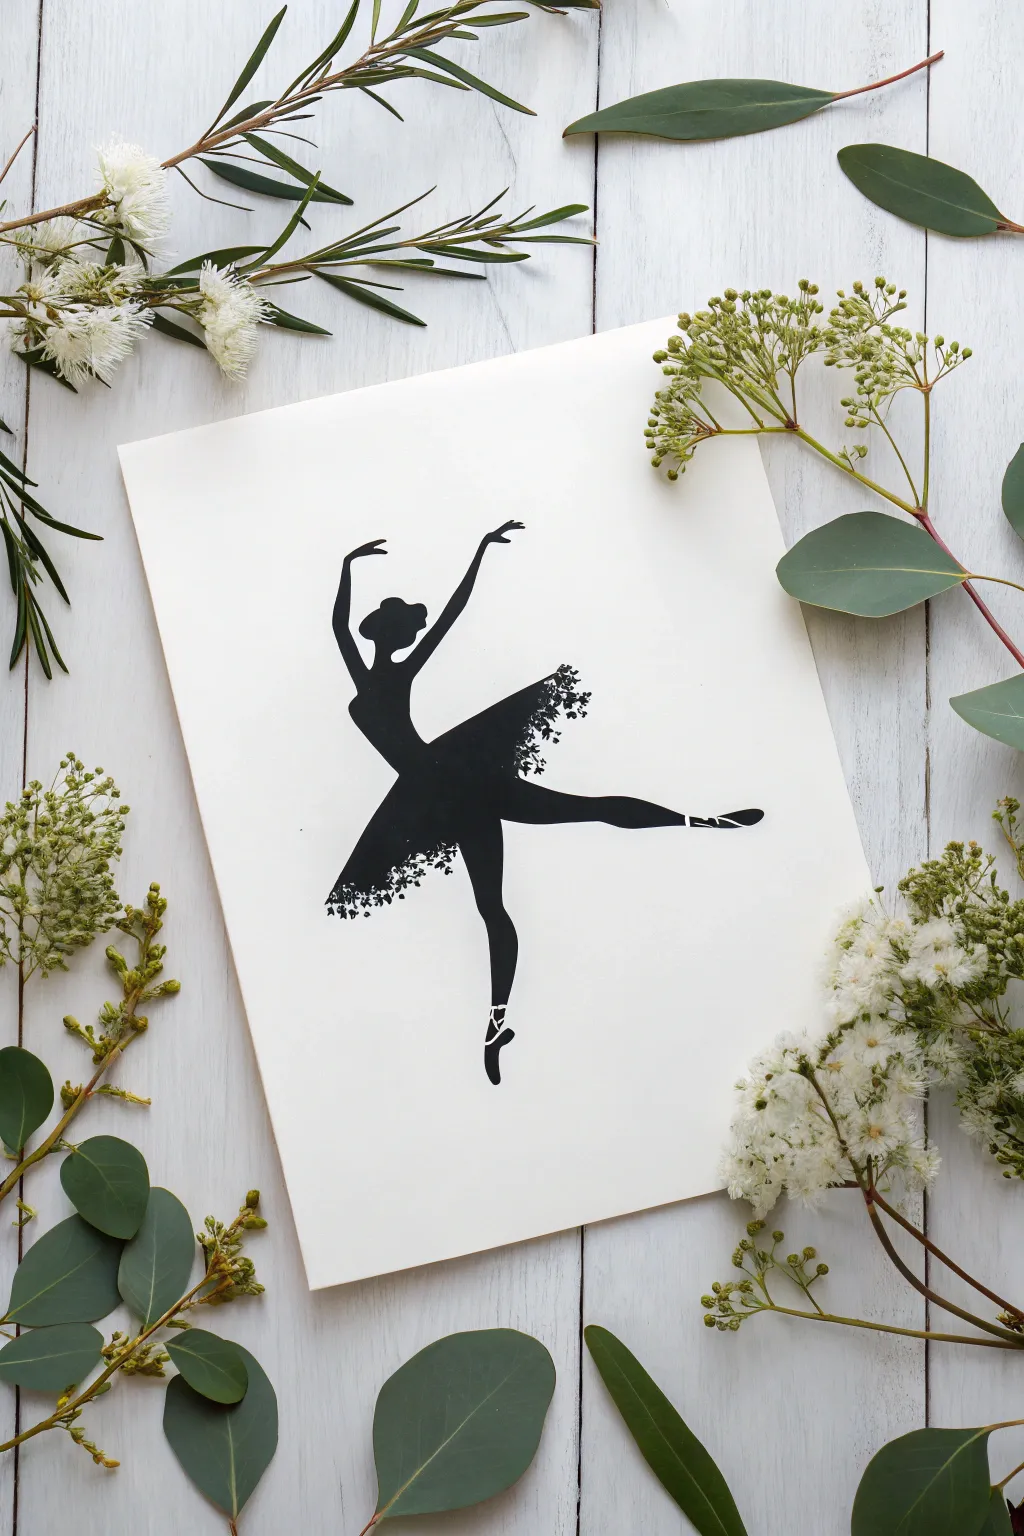
This elegant project combines the grace of dance with organic details, featuring a stark black silhouette of a ballerina in an arabesque pose. The unique twist is the tutu, which dissolves into delicate floral textures, making it perfect for a nature-inspired art piece.
Step-by-Step Tutorial
Materials
- Heavyweight mixed media paper or Bristol board (white)
- Black waterproof ink (India ink or high-quality acrylic ink)
- Fine liner pens (sizes 005, 01, and 05)
- Pencil (HB or H)
- Kneaded eraser
- Small round paintbrush (size 2 or 4)
- Reference photo of a dancer
- Optional: Lightbox or transfer paper
Step 1: Planning and Sketching
-
Choose your pose:
Select a reference image of a ballerina in a dynamic pose. The arabesque shown here works beautifully because the extended leg creates a strong line contrasting with the softer skirt. -
Establish the curve:
Using your pencil lightly, draw a sweeping ‘action line’ that follows the curve of the dancer’s spine through the extended leg. This ensures your figure looks fluid rather than stiff. -
Block in the anatomy:
Sketch the basic shapes of the body along your action line. Focus on the silhouette outline rather than internal details. Pay special attention to the arch of the foot and the tilt of the head. -
Refine the outline:
Go over your blocked shapes to create a clean, single contour line. Define the fingers gracefully and ensure the bun on the head is clearly shaped. -
Map the skirt area:
Instead of drawing a solid skirt, lightly sketch the general triangular shape where the tutu would be. Don’t draw a hard outline here; just mark the boundaries.
Ink Bleeding?
If ink feathers into the paper grain, stop. Let it dry, then thicken your ink slightly or switch to a smoother Bristol paper which handles liquid better.
Step 2: Filling the Solid Silhouette
-
Outline with ink:
Using a size 05 fine liner or your small brush with ink, carefully trace the final pencil lines of the body, arms, and legs. Do not outline the skirt area yet. -
Fill the core shapes:
Load your brush with black ink. Fill in the head, torso, and legs. Work slowly near the edges to keep them crisp. I find it helpful to rotate the paper so my hand is always in a comfortable position. -
Add definition to the shoes:
Leave tiny slivers of white paper (negative space) to represent the ribbons of the pointe shoes and the separation between the shoe and the foot. This small detail adds immense realism. -
Refine the hands:
Switch to a delicate 01 or 005 pen to fill in the fingers. A brush can be too clumsy for these tiny details, and you want them to look elegant.
Step 3: Creating the Botanical Texture
-
Start the skirt base:
Where the skirt meets the waist, paint a solid black connection, but as you move outward, begin breaking up the solid mass. -
Stipple the transition:
Using the tip of your brush or a 05 pen, start creating a stippling effect (dots) mixed with tiny leaf shapes. This gradient should move from solid black at the waist to looser shapes further out. -
Add floral details:
Look at the edges of your skirt boundary. Instead of a straight line, draw tiny silhouettes of leaves, vines, and flower petals using your finest pen. This mimics the ‘nature-filled’ look. -
Build density:
Return to the middle of the skirt and add more density with leafy shapes. You want the skirt to look like a growing bush or a collection of pressed flowers. -
Fade the edges:
Ensure the very outer edges of the tutu are the most sparse, with individual tiny leaves floating slightly detached from the main mass to create an airy, dissolving effect.
Negative Space Tip
Use white gel pen to add the shoe ribbons back in if you accidentally painted over them. It’s much easier than trying to paint around them!
Step 4: Finishing Touches
-
Erase pencil marks:
Wait until the ink is completely bone dry. Then, gently roll a kneaded eraser over the entire drawing to lift any visible graphite. -
Check the contrast:
Stand back and look at the silhouette. If the black looks patchy or grey in areas, apply a second coat of ink to ensure a deep, opaque matte finish. -
Final smooth:
Use your 005 pen to sharpen any fuzzy edges on the silhouette, particularly around the nose, chin, and fingertips.
Now you have a stunning, high-contrast silhouette that captures the movement of dance with a botanical twist.


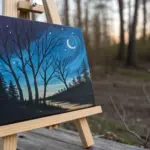
Cosmic Dance With Stardust Drips
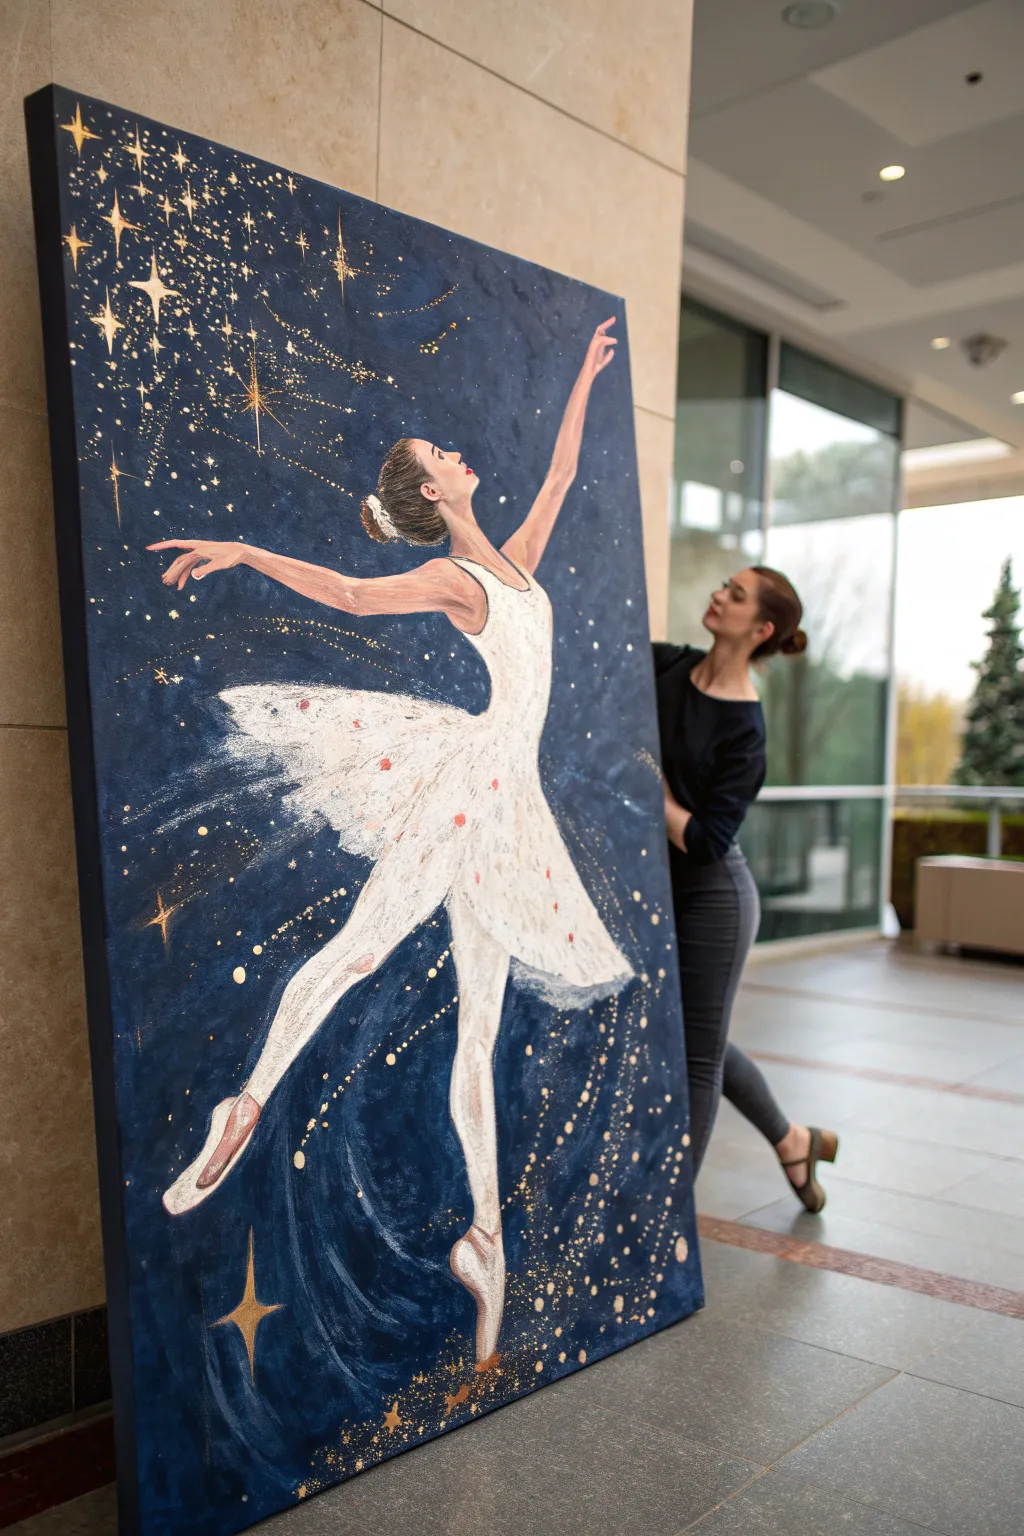
Capture the ethereal grace of ballet set against the vast beauty of the cosmos with this stunning large-scale painting project. The deep blue background contrasts beautifully with the brilliant white tutu and metallic gold accents, creating a piece that feels both grounded and magical.
Step-by-Step
Materials
- Large canvas (at least 36×48 inches)
- Acrylic paints: Ultramarine Blue, Phthalo Blue, Black, Titanium White, Raw Umber, Alizarin Crimson
- Metallic gold acrylic paint
- Large flats or wash brushes (2-3 inch)
- Medium filbert brushes
- Small round detail brushes (sizes 0 and 2)
- Chalk or pastel pencil for sketching
- Old toothbrush or stiff bristle brush for spattering
- Palette knife
- Mixing palette and water container
Step 1: Setting the Cosmic Stage
-
Prepare the Background:
Begin by covering the entire canvas with a mix of Ultramarine Blue and a touch of Black. Use a large wash brush and apply the paint in sweeping, uneven strokes to create a sense of texture and depth rather than a flat wall of color. Let this base coat dry completely. -
Deepen the Void:
Mix Phthalo Blue with Black to create a very deep, almost midnight navy. Apply this generously around the bottom corners and the outer edges, blending inward toward the lighter blue center where the figure will stand. This creates a natural vignette effect. -
Add Cosmic Texture:
While the second layer is still slightly tacky, use a dry brush with a small amount of pure Ultramarine Blue to scumble lighter patches into the background. This subtle cloudiness mimics the nebulous look of space.
Star Splatter Trouble
If your paint splatter blobs instead of spraying, your paint is too thick. Add water until it’s ink-like. Test on scrap paper first to control the density.
Step 2: The Dancer’s Form
-
Sketch the Silhouette:
Using a piece of white chalk or a light pastel pencil, lightly sketch the outline of the ballerina. Focus on the elongated curve of her raised arm and the extended leg ‘en pointe’ to capture that feeling of upward motion. -
Block in Skin Tones:
Mix Titanium White, a tiny drop of Alizarin Crimson, and a touch of Raw Umber to create a pale skin tone. Block in the face, arms, and legs. Don’t worry about shading yet; just establish the shapes. -
Paint the Tutu Base:
Fill in the dress area with Titanium White. Use a medium filbert brush and apply the strokes in the direction the fabric would flow—downward for the bodice and fanning out for the skirt. -
Define the Hair:
Using Raw Umber mixed with a little Black, paint the hair in a tight bun. Add a few small strokes of a lighter brown to suggest highlights where the stage light hits her head.
Level Up: Texture
Mix modeling paste into your white paint for the tutu. This will add physical thickness to the skirt, making the fabric look 3D and tangible on the canvas.
Step 3: Details and Light
-
Refine the Anatomy:
Go back into the skin tones with a slightly darker mix (add more Raw Umber) to create shadows under the chin, along the arm muscles, and on the calves. Blend these gently into the base tone for a soft, realistic look. -
Texture the Tutu:
To give the tutu volume, mix a very light grey (White + tiny dot of Black). Paint shadows in the folds of the skirt and the side of the bodice away from the light source. Keep the strokes loose to mimic tulle fabric. -
Add Pointe Shoes:
Paint the pointe shoes using a mix of White and a hint of pink. Use a small round brush to define the ribbons wrapping around the ankles, highlighting the arch of the foot. -
Enhance the Highlights:
Using pure Titanium White, add sharp, bright highlights to the top of the shoulder, the bridge of the nose, and the highest points of the tutu skirt. This high contrast makes the figure pop against the dark background. -
Add Floral Accents:
Dip a small brush into Alizarin Crimson and dab tiny, imperfect spots onto the tutu to represent small embroidered flowers or sequins. Keep them sparse so they don’t overwhelm the white dress.
Step 4: Stardust and Magic
-
Create the Starfield:
Load an old toothbrush or stiff bristle brush with watered-down Metallic Gold paint. FLick the bristles with your thumb to spray a fine mist of gold stars across the entire canvas, focusing heavily on the area above her hand. -
Paint Larger Stars:
Switch to a size 0 detail brush and Metallic Gold paint. Hand-paint traditional four-point stars of varying sizes, concentrating them in the upper left corner to simulate a constellation pouring down. -
Connect the Constellations:
Paint very thin, delicate lines connecting some of the gold stars. In the reference, these lines create a sense of movement, like shooting stars tracing paths across the sky. -
Add Magic Trails:
Using the gold paint, add swirling lines that wrap around the dancer’s legs and follow the sweep of her skirt. These loose, gestural lines suggest she is dancing amidst the stardust itself. -
Gilding the Figure:
I like to add a subtle rim of gold light to the dancer’s silhouette. Carefully outline the light-facing side of her arm and head with a very thin line of gold to tie her into the background environment. -
Final White Splatter:
For depth, do one final, very light splatter using watered-down Titanium White. This creates the look of distant stars behind the prominent gold ones.
Step back and admire how the gold catches the light, bringing your celestial dancer to life

Have a question or want to share your own experience? I'd love to hear from you in the comments below!