Sometimes you don’t want a “pretty” painting—you want one that feels like a quiet conversation with your own inner world. These deep painting ideas are the kind of concepts I reach for when I want meaning, metaphor, and a little shiver of truth on the canvas.
Starry Void With a Tiny Silhouette
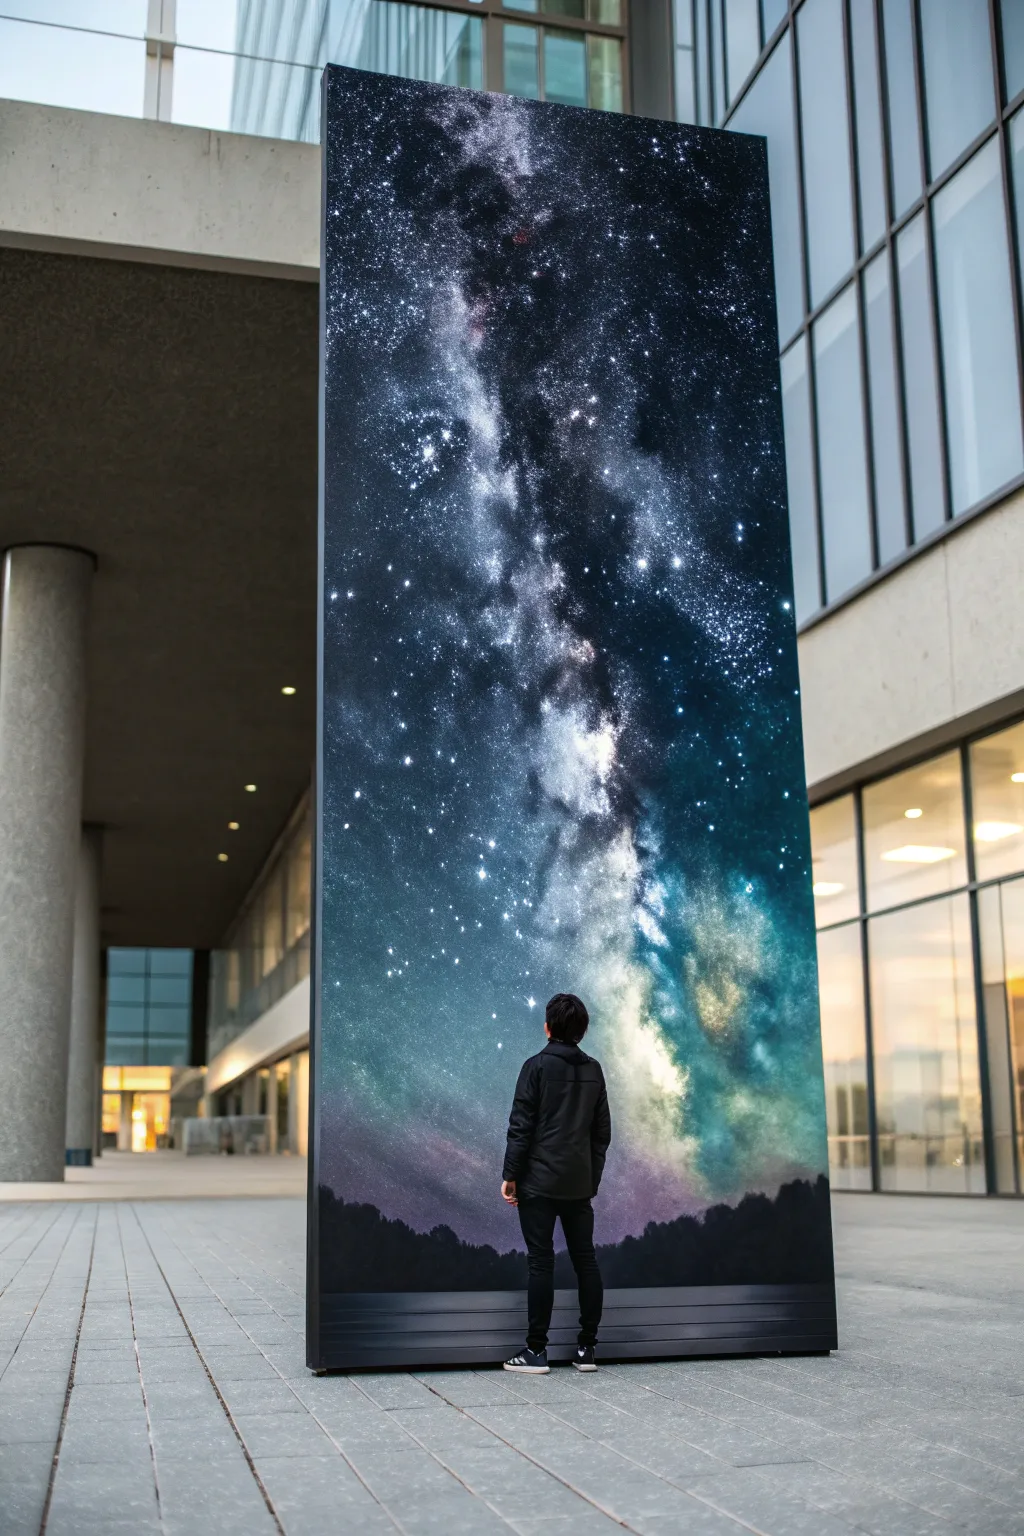
This stunning project transforms a simple vertical panel into a portal to the cosmos, featuring a breathtaking Milky Way view anchored by a subtle treeline silhouette. Whether you create this as a large-scale painting or a mounted high-resolution print, the result is an awe-inspiring focal point that draws the viewer into the depths of space.
Step-by-Step
Materials
- Large vertical MDF or plywood panel (approx. 4ft x 8ft)
- Black gesso or matte black acrylic paint
- High-flow acrylics (Phthalo Blue, Dioxazine Purple, Titanium White)
- Sponge applicators or sea sponges
- Soft blending brushes (large and medium)
- Old toothbrush or stiff bristle brush (for splattering)
- Masking tape
- Matte varnish spray
- Heavy-duty base stand or wall mounting brackets
Step 1: Preparing the Void
-
Prepare the substrate:
Begin by sanding your large vertical panel to ensure a perfectly smooth surface, as any texture will distract from the celestial effect. Wipe away all dust with a damp cloth. -
Apply the base coat:
Coat the entire panel with black gesso or matte black acrylic paint. I find that doing two thin coats provides a deeper, truer black than one thick coat. -
Establish the horizon:
Decide where your treeline will sit at the very bottom. Place a strip of masking tape horizontally across the bottom few inches to keep this area pure black for later.
Star Splatter Fix
Did a splatter blob get too big? Don’t wipe it! Let it dry completely, then paint over it with black paint. You can ‘erase’ stars this way without smearing the background.
Step 2: Nebula Formation
-
Sponge the first nebula layer:
Dip a dampened sea sponge into a mix of black and Phthalo Blue. Dab this loosely in a diagonal band stretching from the bottom right towards the top left to define the Milky Way’s path. -
Deepen the cosmos:
Layer in Dioxazine Purple and darker blues around the edges of your initial path, blending them outward into the solid black background so there are no hard lines. -
Create the core glow:
Mix a small amount of Titanium White with your blue paint to create a pale haze. Apply this to the center of your diagonal band, focusing on the bottom third where the galactic core is brightest. -
Intensify the highlights:
Using a clean, almost dry brush or sponge, add touches of pure white mixed with a tiny drop of yellow to the absolute brightest clusters within the nebula clouds. -
Blend the transitions:
Take a large, dry soft brush and very gently feather the edges of your painted clouds. This softening step is crucial to make the gas clouds look ethereal rather than stuck on.
Step 3: Starlight and Silhouette
-
Prepare the star splatter:
Dilute Titanium White paint with water until it reaches an inky, milk-like consistency perfect for splattering. -
Create distant stars:
Load an old toothbrush with the thinned white paint. from a distance of about two feet, run your thumb over the bristles to create a fine mist of tiny stars across the entire painting. -
Add major stars:
Move closer to the panel for a second pass of splatters to create slightly larger, brighter stars. Focus these denser star clusters within the light nebula band. -
Hand-paint hero stars:
Use a fine liner brush to manually dot in a few specific bright stars. You can add a tiny cross shape to a few of these to simulate lens diffraction or ‘twinkle’. -
Reveal the ground:
Once the sky is completely dry, peel away the masking tape from the bottom edge. -
Paint the treeline:
Using pure black paint and a small flat brush, paint the silhouette of pine treetops sticking up into the nebula. Keep shapes irregular and organic. -
Final assembly:
If your panel requires a frame or standing base (like the monolith style in the image), attach the heavy-duty base brackets to the back or bottom edge now. -
Seal the artwork:
Finish with a coat of matte varnish spray to protect the paint and eliminate glare, keeping the focus on the depth of the image.
Fiber Optic Upgrade
Drill tiny holes through the brightest stars and poke fiber optic strands through from the back. Connect them to an LED light source for a twinkling deep-space effect.
Step back and lose yourself in the vast, starry expanse you have created on this monumental canvas


Single Light in a Storm
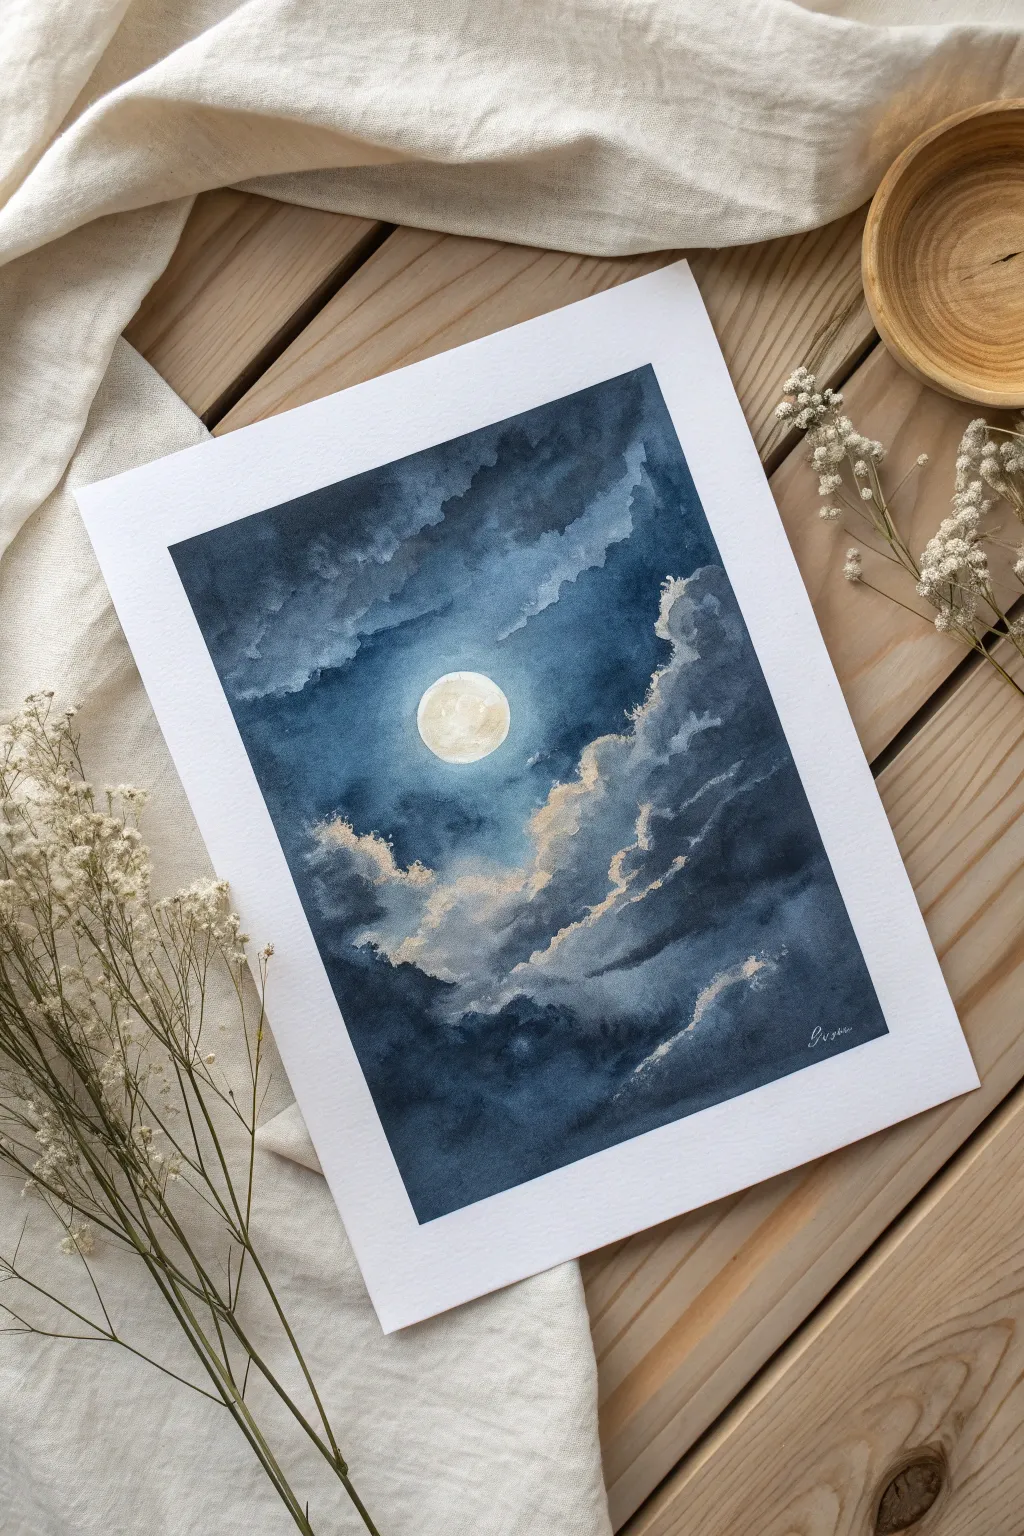
Capture the solemn beauty of a bright moon breaking through stormy, dark clouds with this moody watercolor project. The deep indigo tones contrast beautifully with the stark white moonlight, creating an atmosphere of quiet mystery.
Step-by-Step Guide
Materials
- Cold press watercolor paper (300 gsm)
- Watercolor paints (Indigo, Payne’s Grey, Prussian Blue, Burnt Umber, White Gouache)
- Round brushes (sizes 2, 6, and 12)
- Masking fluid or white wax crayon
- Clean water jars
- Paper towels
- Masking tape
Step 1: Setting the Scene
-
Secure Your Paper:
Begin by taping down all four edges of your watercolor paper to a board or table. This prevents buckling and creates that crisp, professional white border seen in the final piece. -
Mask the Moon:
Locate the center of your paper, slightly offset towards the top third. Using a very clean brush or an applicator tool, apply masking fluid in a perfect circle to preserve the bright white paper for your moon. Allow this to dry completely before touching it. -
Prepare Your Palette:
Mix a large puddle of your darkest blue. Combine Indigo with a touch of Burnt Umber or Payne’s Grey to achieve a deep, stormy midnight hue. You will need a lot of this pigment, so mix more than you think is necessary.
Step 2: Creating the Atmosphere
-
Wet-on-Wet Base:
Using your largest brush, wet the entire paper around the masked moon with clean water. The paper should be glistering but not swimming in a puddle. -
First Cloud Layer:
Load your brush with a diluted version of your dark blue mix. Drop this color into the wet paper, leaving irregular ‘holes’ of lighter paper around the moon area to suggest glowing clouds. Let the water move the paint naturally. -
Building Depth:
While the paper is still damp, pick up a more concentrated, creamy mixture of Indigo. Dab this into the corners and the bottom of the painting, darkening the sky furthest from the light source. -
Softening Edges:
If strong hard lines form where you don’t want them, rinse your brush, dry it slightly on a towel, and gently tickle the edge of the paint to soften it back into the damp paper.
Edge Control
Don’t outline the whole cloud. Only paint the shadow side or the top edge depending on the light. Let the other side fade into the background.
Step 3: Forming the Storm
-
Defining Cloud Shapes:
Wait for the shine to leave the paper (damp, but not wet). Switch to a size 6 brush. Using thick, dark paint, start painting the distinct cloud forms. Use a rolling motion with your brush to create the fluffy, billowing tops of the clouds. -
The Halo Effect:
Be careful as you paint near the moon. Leave a rim of lighter wash or white paper around the masked moon area. This creates a blooming ‘halo’ effect as if the light is penetrating the mist. -
Lifting Highlights:
I sometimes like to take a clean, damp brush (the ‘thirsty brush’ technique) and lift pigment away from the top edges of the lower clouds. This mimics the moonlight catching the ridges of the storm. -
Adding Silver Linings:
Mix a small amount of white gouache with your pale blue watercolor. Paint thin, broken lines along the upper jagged edges of the darkest clouds to emphasize the silver lining where the moonlight hits hard.
Add Stardust
Flick a tiny amount of white gouache or metallic silver paint onto the darker corners of the sky to suggest distant stars breaking through.
Step 4: Final Details
-
Deepening Shadows:
Once the main layers are dry, look for areas that need more drama. Apply your darkest, almost black mixture to the deep crevices between cloud banks to maximize contrast. -
Reveal the Moon:
Gently rub away the masking fluid to reveal the crisp white circle. If the edge is too sharp, soften it slightly with a barely damp brush to integrate it into the sky. -
Texturing the Moon:
The moon shouldn’t be stark white. Mix a very watery, pale grey-yellow. Dab it gently into the moon circle to create subtle craters and shadows, leaving some pure white highlights. -
Final Highlights:
Use pure white gouache with your smallest brush to add tiny, sharp highlights on the cloud edges closest to the moon for that intense, glowing effect. -
The Reveal:
Ensure the painting is 100% dry to the touch. Carefully peel away the masking tape at a 45-degree angle to reveal your clean edges.
Step back and admire the dramatic glow you have created from simple pigments and water


Diver Into the Ocean Depths
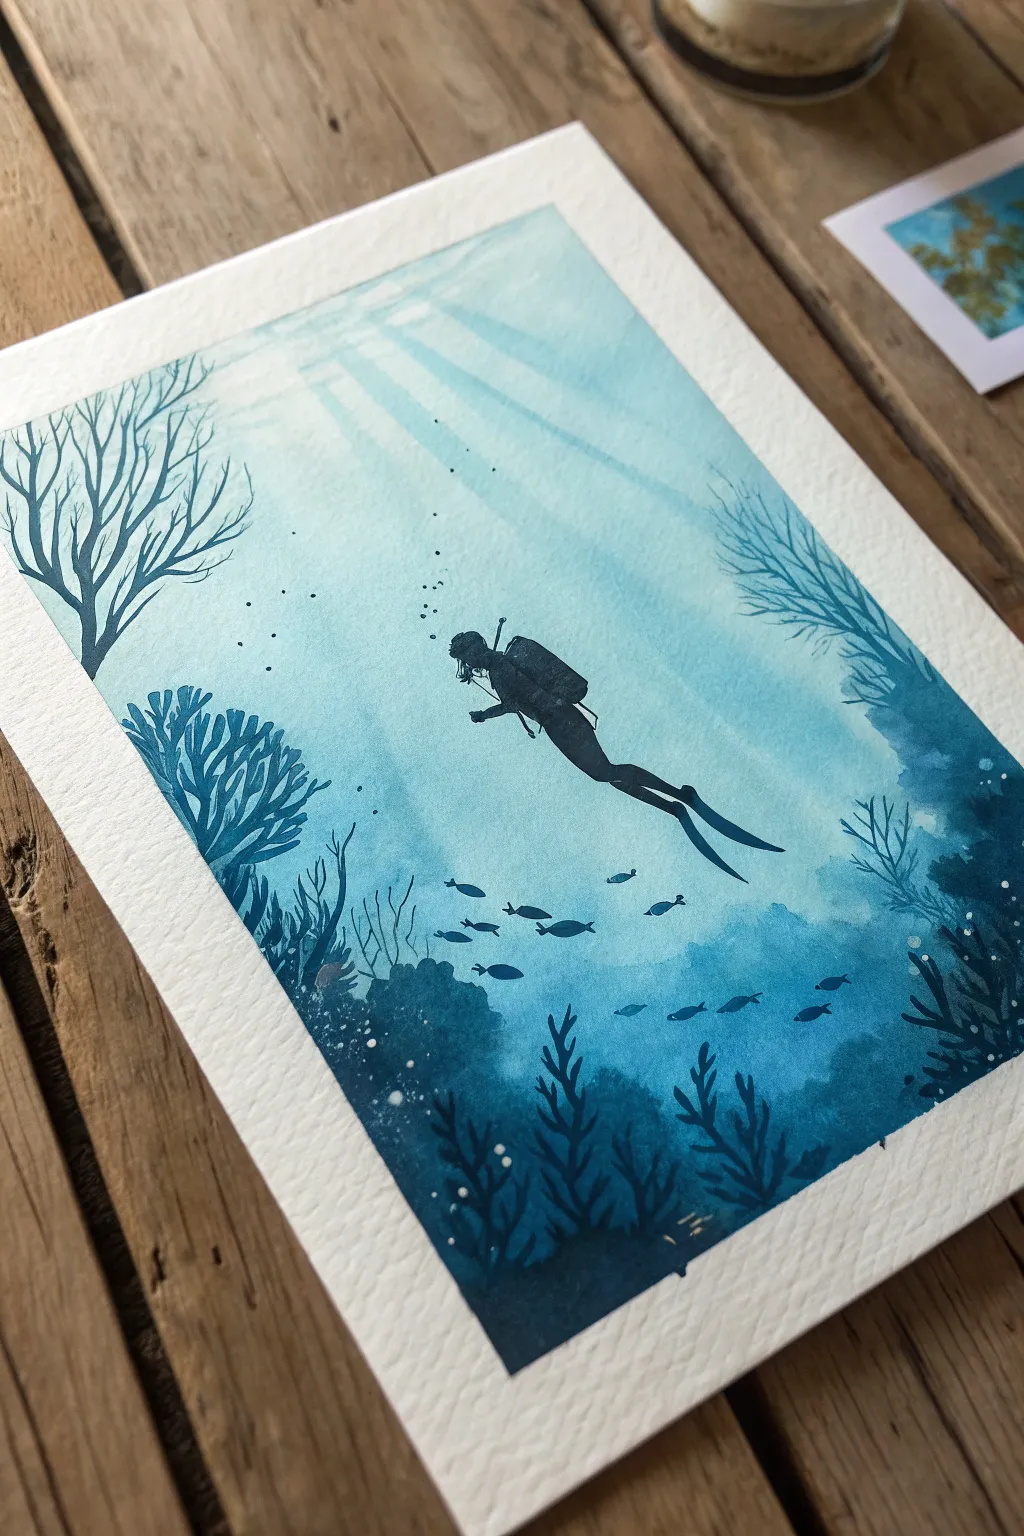
Capture the serene weightlessness of the ocean with this monochromatic watercolor underwater scene. Using layers of turquoise and deep indigo, you’ll create a dramatic sense of depth surrounding a lone diver silhouette.
How-To Guide
Materials
- Cold press watercolor paper (300 gsm)
- Masking tape
- Watercolor paints (Turquoise, Phthalo Blue, Indigo/Payne’s Grey)
- Flat wash brush (large)
- Round brushes (size 4 and size 0 for details)
- White gel pen or white gouache
- pencil (HB)
- Jar of clean water
- Paper towels
Step 1: Preparation and The Great Wash
-
Secure your canvas:
Tape down all four edges of your watercolor paper to a board or table with masking tape. This creates that crisp white border seen in the image and prevents the paper from buckling under heavy water usage. -
Sketch the diver:
Lightly sketch the silhouette of the diver in the center. Don’t worry about details yet, just get the posture and the angle of the fins correct. Keep your pencil lines faint so they don’t show through later. -
Pre-wet the paper:
Using your large flat brush, wet the entire paper surface with clean water. The paper should be glisten but not have puddles sitting on top. -
Base gradient:
Load your brush with a watery turquoise mix. Start at the bottom and paint upwards, diluting the paint with more water as you reach the top to create a fade. The top third should remain very pale, almost white. -
Lift out sunbeams:
While the paint is still damp, take a clean, slightly damp brush and gently lift off pigment in diagonal strokes radiating from the top surface. This creates the soft light rays filtering down.
Water Control Tip
For the light rays, if your paint dries too fast to lift out color, wet the line again with clean water, wait ten seconds, then blot with a paper towel.
Step 2: Building the Depths
-
First layer of depth:
Once the background is completely dry, mix a slightly stronger blue-green shade. Paint the silhouette of the distant coral structures on the left and right sides. Keep edges soft and irregular to suggest organic forms. -
Darker mid-ground:
Let the previous layer dry. Now, switch to a darker Phthalo Blue. Paint the coral shapes lower down on the paper, overlapping the lighter ones behind them. This layering creates the illusion of distance. -
Foreground foundation:
Mix your darkest color using Indigo or Payne’s Grey. Paint the bottom section of the seabed, creating a solid, dark foundation for the foreground plants. -
The diver silhouette:
Using a small round brush (size 4) and your darkest Indigo mix, carefully fill in the diver sketch. Ensure the paint is opaque. -
Refining the silhouette:
Switch to your smallest brush (size 0) to add the fine details of the diver: the regulator, the straps of the tank, and the sharp points of the fins. Get these edges crisp.
Fuzzy Silhouettes?
If your diver or plants look fuzzy, the underlying paper was likely still damp. Wait for total dryness before adding sharp foreground details.
Step 3: Detailing Life
-
Adding the school of fish:
With a medium-dark blue mix, paint small, streamlined dart shapes in the lower third of the painting. Vary their sizes slightly to suggest movement. -
Foreground flora:
Load your brush with the darkest pigment. Paint vertical, swaying plant shapes rising from the dark bottom corners. Use quick, upward strokes that taper off to simulate seagrass or soft coral. -
Coral texture:
Use the tip of your brush to add spiky branches to the coral silhouettes on the left, making sure they look distinct against the paler water. -
Left-side branching:
On the left side, paint a specific, taller branchy coral structure in a dark silhouette tone, reaching up towards the light. -
Right-side texture:
Balance the composition by adding softer, bushier coral textures on the right side using a stippling motion with your brush.
Step 4: Atmosphere and Bubbles
-
Bubbles rising:
Using a white gel pen or a tiny dot of white gouache, add a trail of bubbles rising from the diver’s regulator. Make the dots smaller as they go up. -
Ocean particles:
Add a few tiny specks of dark blue or white throughout the water to represent floating plankton or debris, which adds realism to the underwater atmosphere. -
The reveal:
Wait until the painting is bone dry—if it feels cold to the touch, wait longer. Then, slowly peel off the masking tape at a 45-degree angle to reveal your crisp border.
Now you have a piece of current-swept ocean calm right on your desk


Face Hidden by Flowing Color
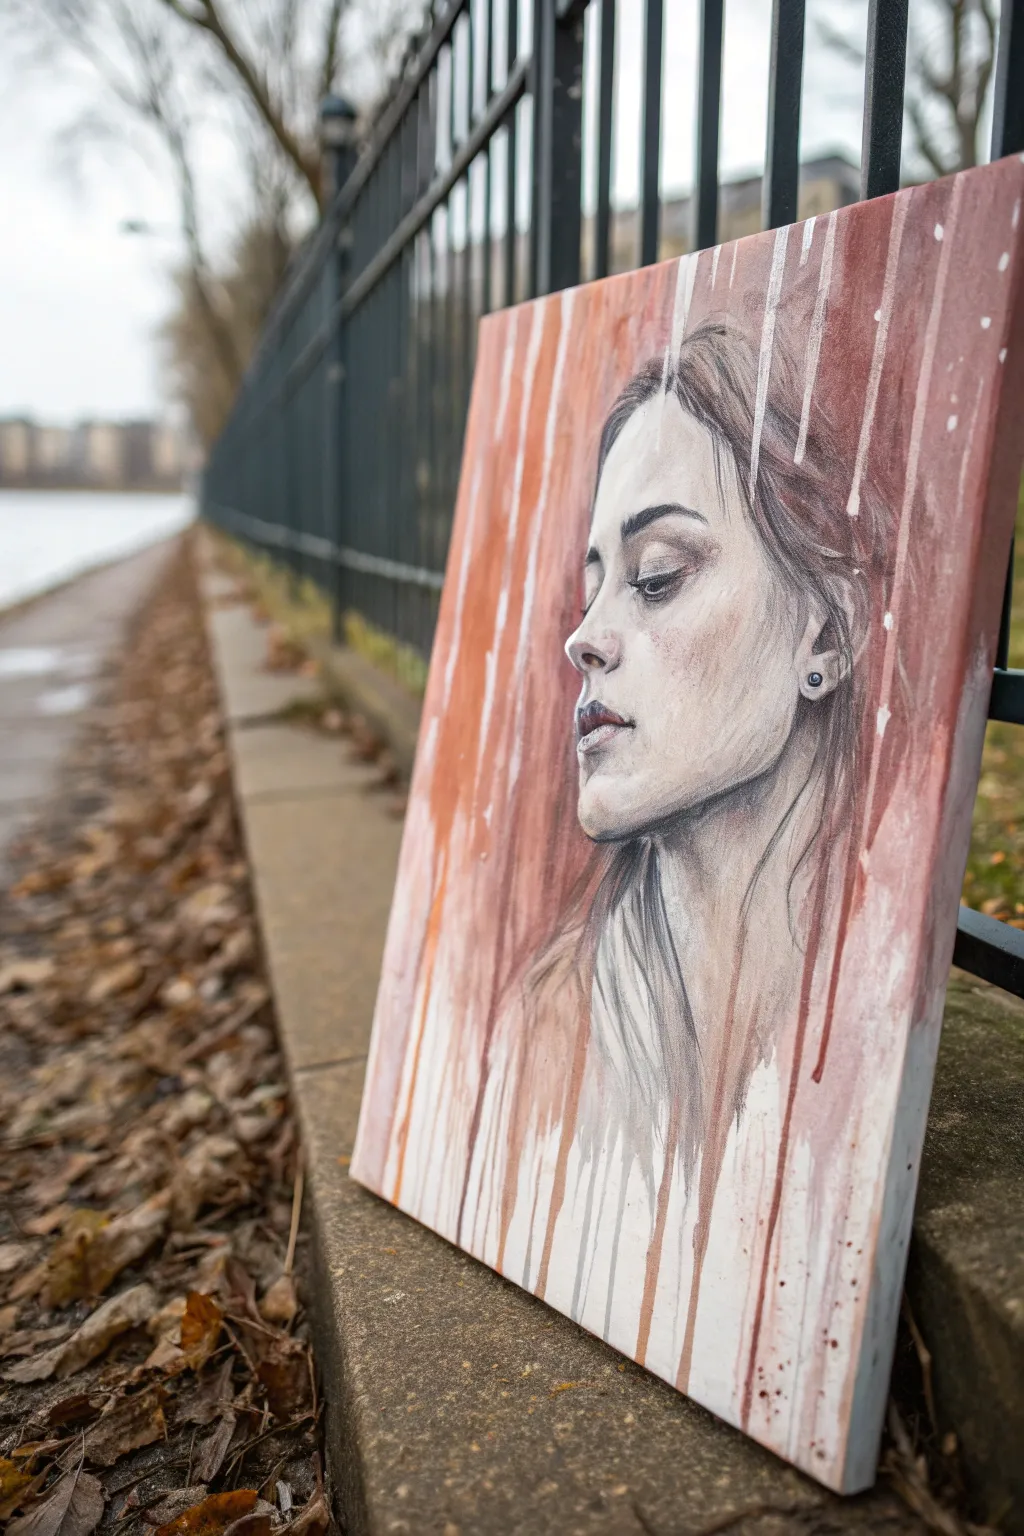
Capture the melancholy beauty of a rainy day with this evocative mixed media portrait. By combining precise pencil work with loose, flowing acrylic washes, you’ll create a piece that feels both realistic and expressively abstract.
Detailed Instructions
Materials
- Stretched canvas or canvas board (approx 16×20 inches)
- Graphite pencils (HB, 2B, 4B, 6B)
- Kneaded eraser and vinyl eraser
- Matte gel medium or workable fixative
- Acrylic paint (Burnt Sienna, Red Oxide, White)
- Water spray bottle
- Large flat brush or foam brush
- Detail brushes (synthetic round size 2 and 4)
- Paper towels
- Easel or prop to hold canvas upright
Step 1: Drafting the Portrait
-
Prepare the surface:
Begin with a clean white canvas. If the texture is too rough for drawing, apply a coat of gesso and sand it smooth once dry. -
Sketch the outline:
Using an HB pencil, lightly sketch the profile of the face. Focus on the main shapes: the slope of the nose, the curve of the lips, and the jawline. -
Refine features:
Pay close attention to the eye. It should be half-closed, looking downward. Sketch the ear placement carefully, ensuring it aligns correctly with the jaw. -
Start shading:
Switch to a 2B pencil to begin shading the skin. Use gentle hatching or circular motions to build up the darker areas around the eye socket, under the nose, and beneath the jaw. -
Deepen contrasts:
Use 4B and 6B pencils for the darkest elements: the pupil, the lash line, and the strand of hair tucked behind the ear. Keep the skin shading relatively smooth. -
Add highlights:
Use your erasers to pull out highlights on the cheekbone, the tip of the nose, and the forehead. This contrast is what gives the face its dimension. -
Seal the drawing:
Since graphite can smudge when painted over, seal your drawing with a spray fixative or a very thin layer of matte medium. Let it dry completely.
Too much flow?
If drips are running too fast or uncontrollably, lay the canvas flat immediately to stop the flow. You can also thicken the paint slightly with gel medium.
Step 2: Applying the Wash
-
Mix the base color:
Dilute your acrylic paints (Red Oxide and Burnt Sienna) with a significant amount of water. You want a consistency similar to watercolor or ink. -
Position the canvas:
Prop your canvas upright at a slight angle. Gravity is essential for the dripping effect in this step. -
Apply the first drip:
Load a large flat brush with the watery paint mixture. Press it against the very top edge of the canvas and let the paint run down naturally. -
Control the flow:
As the paint runs down, you can guide it slightly with a wet brush, but try not to over-manipulate it. The organic, uneven streaks are part of the charm. -
Create white space:
Leave deliberate gaps between the drips where the white canvas or the graphite drawing shows through clearly. Don’t cover the entire face. -
Layering tones:
While the first drips are still damp, add slightly darker concentrations of paint to the top edges to create a gradient effect as they flow down.
Add dimensionality
Mix a tiny amount of iridescent mediu or pearl white into your white paint for the final rain splatters to make them catch the light like real water raindrops.
Step 3: Integration and Details
-
Define the hair:
Mix a semi-opaque version of your reddish-brown paint. Use a round brush to paint the hair strands, letting them blend into the vertical drips. -
Enhance shading with paint:
I like to use a very diluted wash of the brown paint to add subtle warmth to the shadowed side of the neck and beneath the chin, harmonizing the drawing with the background. -
Add white accents:
Using pure white acrylic and a fine brush (or even a white gel pen), add tiny opaque highlights to the eye, the earring, and the moisture on the lips. -
Splatter texture:
Load a toothbrush or stiff brush with white paint. Flick the bristles to create a fine mist of white speckles across the canvas, simulating rain or snow. -
Final adjustments:
Step back and assess the balance. If a drip covers a crucial feature like the eye too heavily, gently lift it with a clean, damp paper towel before it dries.
Enjoy the interplay of structure and fluidity in your new atmospheric portrait
BRUSH GUIDE
The Right Brush for Every Stroke
From clean lines to bold texture — master brush choice, stroke control, and essential techniques.
Explore the Full Guide
Roots Beneath the Surface
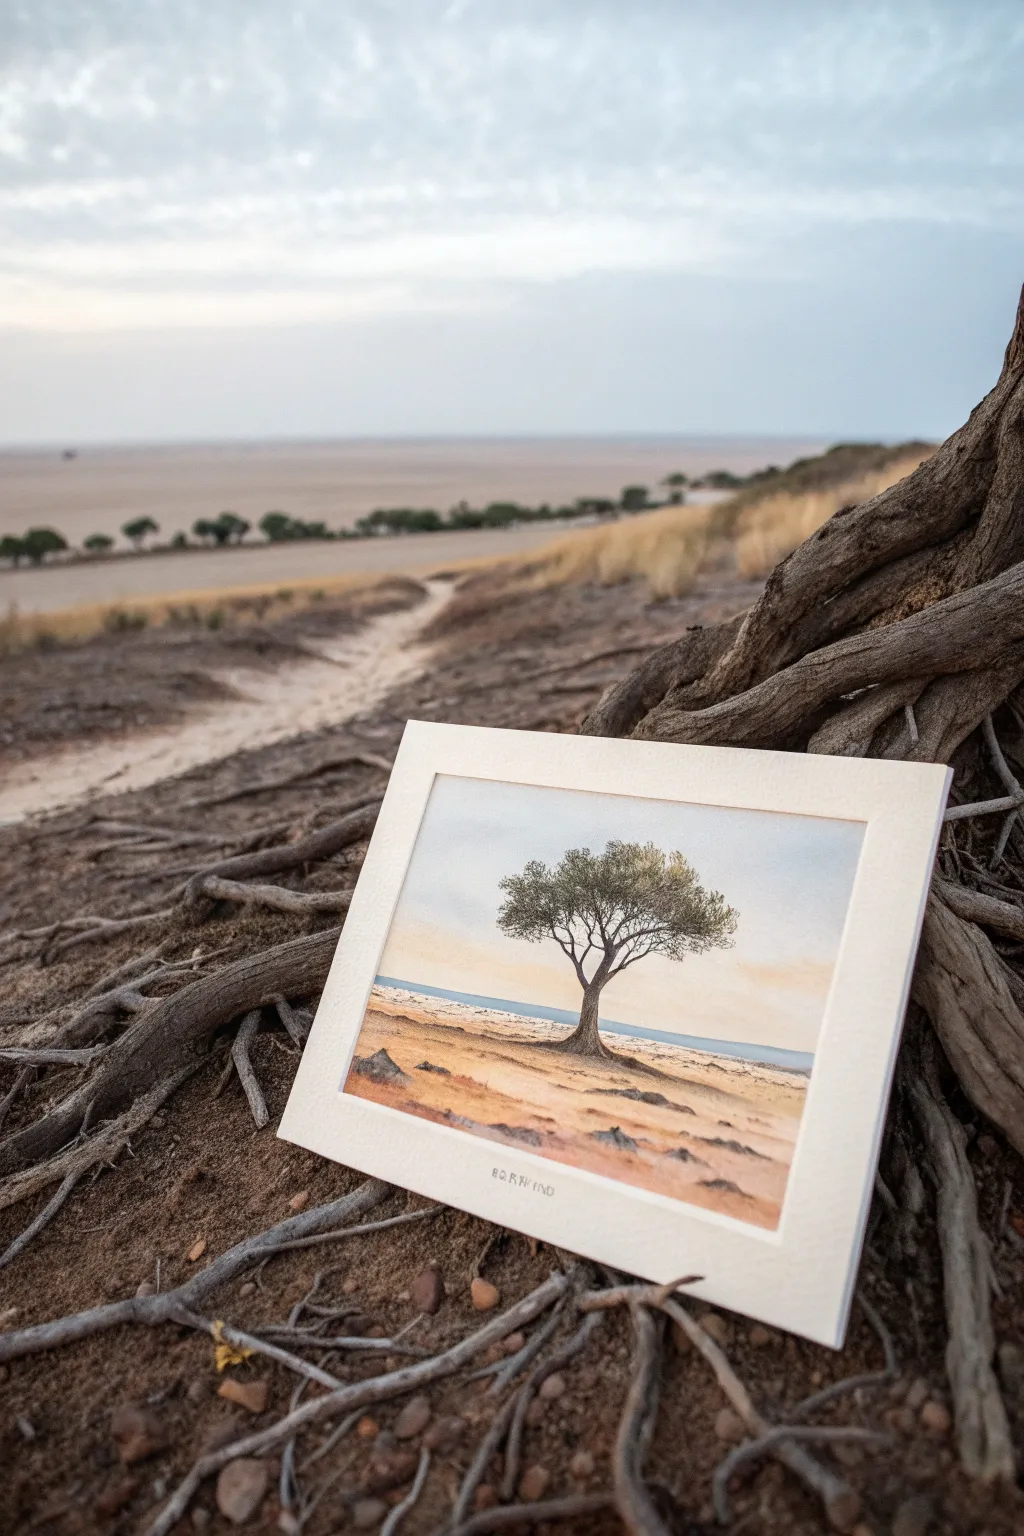
Capture the stark beauty of an isolated tree standing guard over a vast, arid landscape with this delicate watercolor study. This project focuses on mastering soft gradients for the sky and textured dry-brush techniques to render the gnarled character of the roots and foliage.
Step-by-Step
Materials
- Cold press watercolor paper (140lb/300gsm)
- Watercolor paints (Yellow Ochre, Burnt Sienna, Burnt Umber, Ultramarine Blue, Sap Green, Payne’s Grey)
- Round brushes (sizes 8, 4, and 0 for details)
- Masking fluid (optional)
- Two jars of water
- Paper towels
- Pencil (HB or H) for sketching
- Drawing board and tape
- Cream or off-white matte board for framing
Step 1: Preparation and Sketching
-
Set the Horizon:
Begin by lightly taping your paper to a board. Use a ruler to draw a very faint horizon line about one-third of the way up the page. This low horizon emphasizes the vastness of the sky. -
Outline the Subject:
Sketch the main tree in the center. Focus on the twisting trunk and the way the branches spread outward like a canopy. Keep your pencil pressure light so lines don’t show through the paint later. -
Map the Shadows:
Lightly indicate where the shadow of the tree falls on the ground. Also, sketch in a few small, distant rocks or shrubs in the foreground and along the horizon to give the scene scale.
Muddy Colors?
If your ground colors are turning grey/muddy, let layers completely dry between washes. Don’t overwork the paper while it’s damp, or the pigments will dull each other.
Step 2: Painting the Atmosphere
-
Sky Gradient:
Wet the entire sky area with clean water. Load your large brush with a very dilute mix of Ultramarine Blue and a touch of Payne’s Grey. Start at the top and wash downwards. -
Warm Horizon:
As you reach the horizon line, blend in a very pale wash of Yellow Ochre or a warm peach tone while the paper is still damp. This creates that soft, hazy atmospheric glow often seen at dawn or dusk. -
Distant Plains:
Once the sky is dry, paint a strip of cool, muted blue-grey right along the horizon line to represent distant land or water. Soften the edges so it doesn’t look like a hard wall. -
Ground Wash:
For the foreground, use a wet-on-dry technique with a mix of Yellow Ochre and Burnt Sienna. Keep the wash streaky—horizontal strokes work best here to mimic the flat, windswept earth.
Pro Tip: Scratching Out
While the trunk paint is damp, use the tip of a craft knife or a credit card edge to scratch out tiny lines. This reveals the white paper, creating perfect highlights.
Step 3: The Tree and Details
-
Trunk Structure:
Mix a strong Burnt Umber with a little Payne’s Grey. Using your size 4 brush, paint the trunk, starting from the roots and moving up. Let the brush skip slightly to create texture on the bark. -
Branch Network:
Switch to your size 0 detailing brush. Extend the trunk into thinner and thinner branches. Remember that branches usually grow upward and outward, tapering as they go. -
Foliage Texture:
Mix Sap Green with Burnt Sienna for a muted, olive tone. Remove excess water from your size 4 or old scruffy brush to use a dry-brush technique. Dabbing gently creates the look of sparse, airy leaves. -
Adding Depth to Leaves:
While the foliage is still slightly damp, drop in darker spots of green (mixed with Payne’s Grey) on the underside of the leaf clumps to suggest volume and shadow. -
Tree Shadow:
Paint the cast shadow on the ground using a transparent wash of cool grey (Ultramarine + Burnt Sienna). Ensure the shadow connects firmly to the base of the trunk to ‘plant’ the tree. -
Foreground Elements:
Paint the small rocks and scrubby bushes in the foreground using the darkest brown mix. Add tiny shadows underneath them to ground them. -
Ground Texture:
Splatter tiny droplets of brown paint or use a dry brush to scumble some texture onto the foreground sand. This mimics pebbles and uneven terrain.
Step 4: Finishing Touches
-
Final Contrast Check:
Step back and assess your values. Darken the right side of the tree trunk if your light source is coming from the left, adding dimension to the cylinder shape. -
Text:
If you wish to replicate the reference exactly, carefully pencil in the title or signature at the bottom center in a minimal serif font, then ink it delicately. -
Matting:
Once fully dry, cut a cream-colored matte board with a beveled window opening slightly smaller than your painting size. I find that a wide border helps isolate the subject and enhances the feeling of vastness. -
Assembly:
Tape the painting to the back of the matte board using acid-free artist tape to ensure it stays flat and preserved.
Place your finished piece in its matte and enjoy the serene, rooted strength it brings to your space
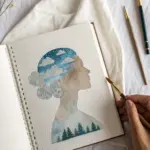
Underwater Memories Floating Up
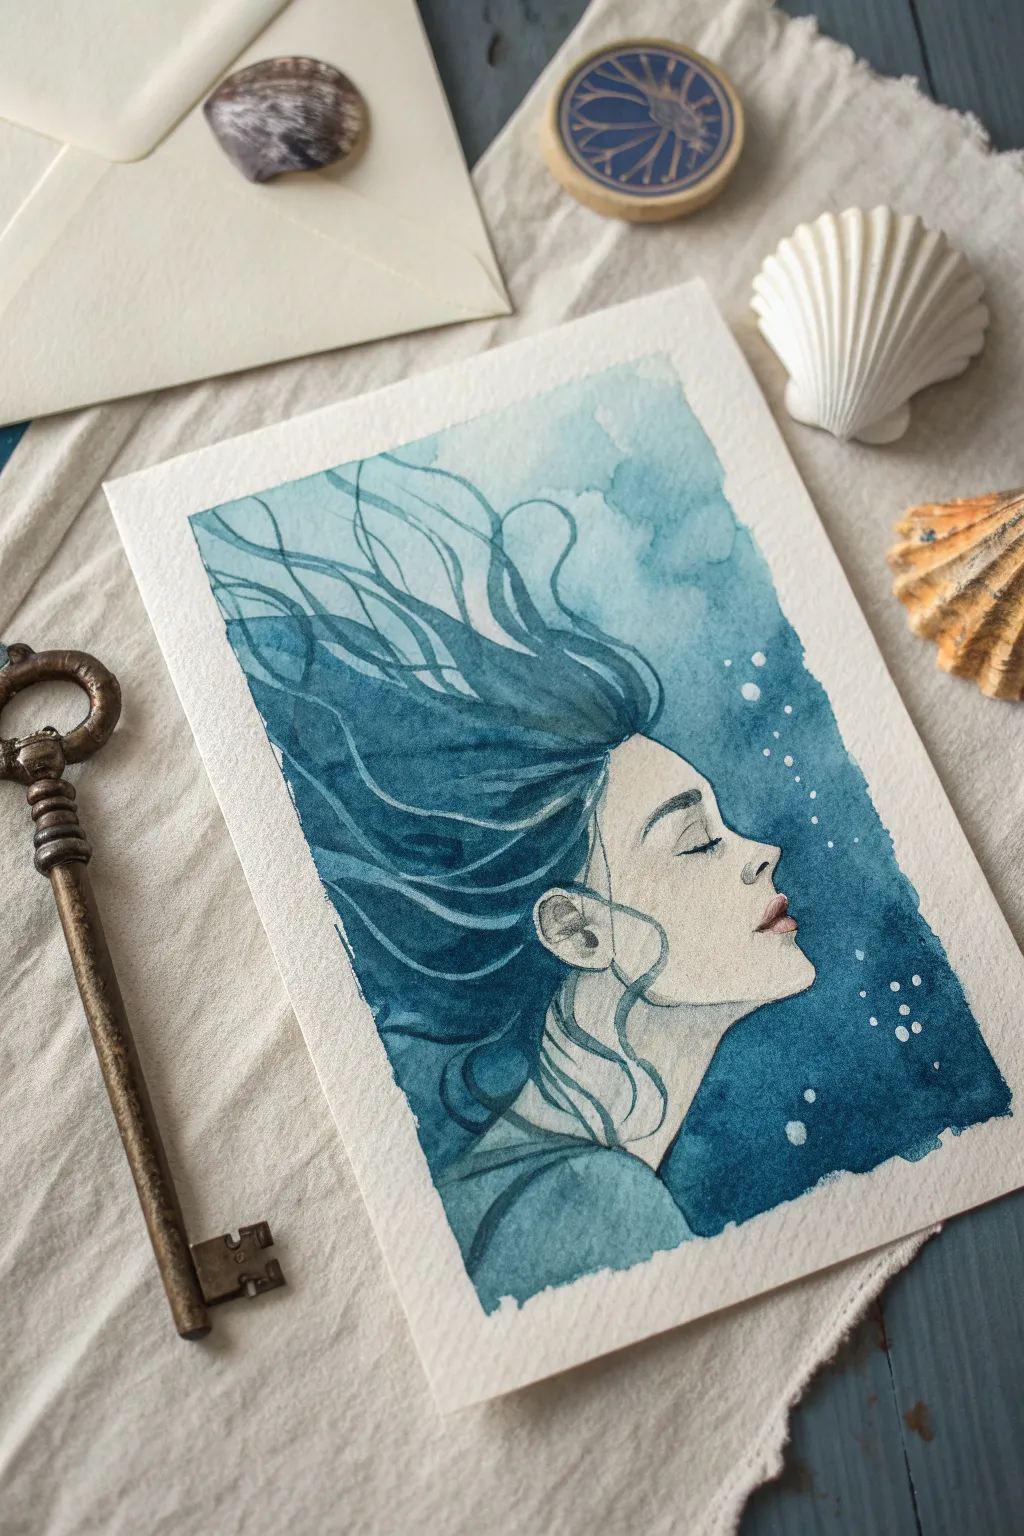
Capture the tranquil beauty of a figure suspended in water with this monochromatic watercolor study. Using gentle washes of Prussian blue and teal, this project emphasizes negative space and fluid transitions to create a dreamlike underwater atmosphere.
Step-by-Step Tutorial
Materials
- Cold press watercolor paper (300 gsm)
- Watercolor paints: Prussian Blue, Phthalo Blue (or Turquoise), Indigo, and a touch of Burnt Sienna (for skin tone)
- White gouache or white gel pen
- Round brushes: Size 6 (for washes) and Size 2 (for detailing)
- H pencil (hard lead for light sketching)
- Masking tape
- Mixing palette
- Two jars of water
- Paper towels
Step 1: Preparation and Sketching
-
Secure the paper:
Tape down your watercolor paper to a board on all four sides. This prevents buckling and creates that clean, professional white border seen in the reference image. -
Outline the profile:
Using your H pencil, lightly sketch the profile of the woman’s face. Keep the lines faint so they disappear under the paint later. Focus on the upward tilt of the chin and closed eyes. -
Map the hair flow:
Draw flowing, wavy lines extending upward from the head to represent hair floating in water. Don’t worry about individual strands yet; just map out the general shape of the hair mass.
Control the Bloom
For the watery background texture, drop clean water into the drying paint. This creates ‘cauliflowers’ or blooms that mimic light refracting underwater perfectly.
Step 2: Painting the Face and Initial Washes
-
Mix the skin tone:
Dilute a tiny amount of Burnt Sienna with plenty of water to create a very pale, almost translucent wash. If it looks too orange, tone it down with a microscopic dot of blue. -
Paint the face:
Gently fill in the face profile with your wash. Leave the paper white for the highest highlights on the nose and cheekbone if you can, or lift color out quickly with a thirsty brush. -
Add gentle shading:
While the face is still slightly damp, add a slightly more concentrated mix of the skin tone around the eye socket, under the chin, and near the hairline to create subtle dimension. -
Prepare the water hues:
In your palette, create three puddles of blue: a light teal (watered down Phthalo), a mid-tone cyan, and a deep Prussian blue. -
Wet-on-wet background base:
Wet the entire area around the figure with clean water. Drop in the light teal and cyan randomly, letting them bloom and spread to create a soft, uneven watery texture. Leave the hair area mostly unpainted for now.
Muddy Colors?
If your blues look dull, you likely overmixed them on the palette. Let colors mix on the paper instead for vibrant, transparent transitions.
Step 3: Defining the Hair and Depths
-
Base layer for hair:
Once the background is dry, wet the hair area. Drop in your mid-tone blue, letting it flow upwards. Keep this layer loose and not too dark yet. -
Darkening the surroundings:
Mix a strong saturation of Prussian Blue and Indigo. Carefully paint around the profile of the face—this is negative painting. By darkening the water right next to the pale face, the profile will pop forward. -
Building hair strands:
Switch to your smaller brush. Using the dark Indigo mix, paint fluid, ribbon-like lines through the hair mass. Vary the pressure—press down for thick sections and lift up for tapering ends. -
Creating movement:
Ensure the hair lines curve and meander. I like to let some lines cross over each other to create depth within the floating strands. -
Connecting hair to water:
Soften the outer edges of the hair mass with a damp brush so the hair seems to dissolve slightly into the surrounding water rather than having a hard outline.
Step 4: Final Details
-
Defining features:
Use a very fine brush and a dense mix of brown/grey to carefully paint the eyelash line, the nostril, and the line between the lips. Keep these delicate. -
Lip color:
Add a touch of rose or red to the lips, keeping the edges soft. -
Adding bubbles:
Using white gouache or a white gel pen, dot small rising bubbles in the dark blue water area near the face. Vary the sizes for a natural look. -
Hair highlights:
If some hair sections look too flat, add a few thin lines of white gouache to suggest light catching on wet strands near the surface. -
The reveal:
Ensure the paper is completely bone-dry before slowly peeling off the masking tape at a 45-degree angle to reveal the crisp border.
You now have a peaceful underwater portrait that captures a moment of suspended silence

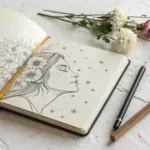
PENCIL GUIDE
Understanding Pencil Grades from H to B
From first sketch to finished drawing — learn pencil grades, line control, and shading techniques.
Explore the Full Guide
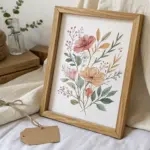
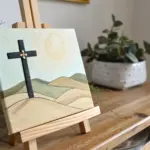
Layered Masks on One Portrait
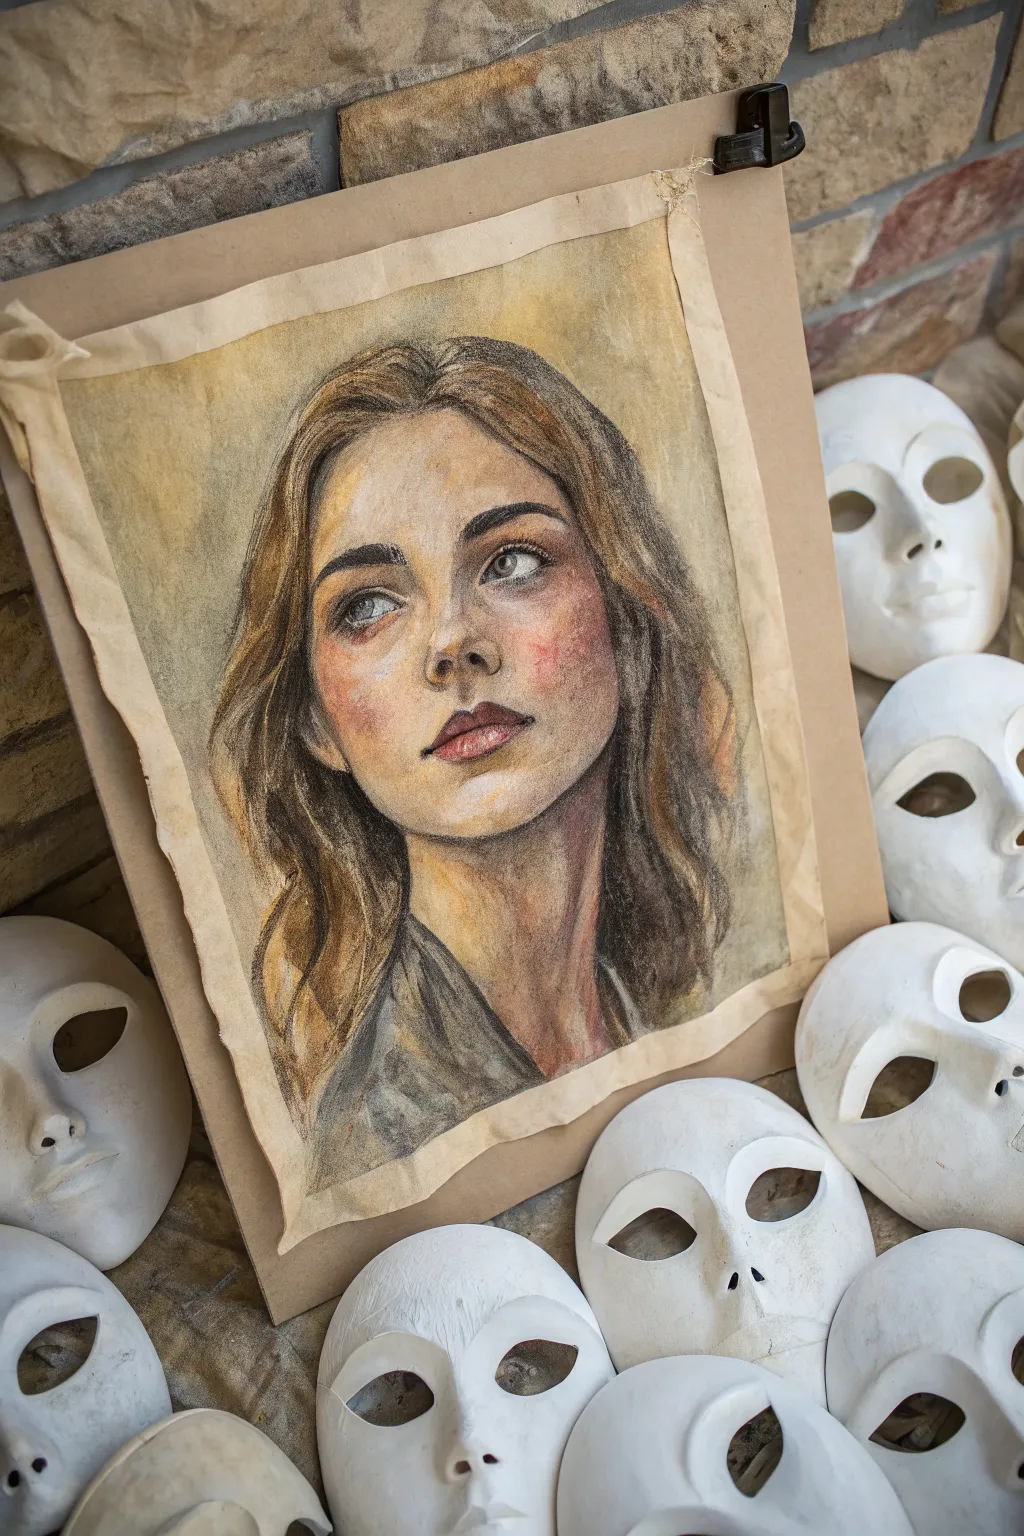
This evocative project combines a soulful, semi-realistic portrait with the stark symbolism of blank masks. You’ll create a textured, vintage-style drawing on toned paper and arrange a conceptual display around it.
How-To Guide
Materials
- Toned drawing paper (tan or light brown, medium tooth)
- Standard drawing board or foam core backing
- Soft pastels or charcoal pencils (burnt umber, sanguine, black, white)
- Kneaded eraser
- Blending stumps (tortillons)
- Workable fixative spray
- Plain white craft masks (paper maché or plastic)
- White acrylic paint (matte finish)
- Masking tape or clips
- Sandpaper (fine grit)
Step 1: Preparing the Canvas
-
Age the paper:
Begin by gently tearing the edges of your toned drawing paper to create a deckled, vintage look. Don’t worry about perfect straight lines; the roughness adds character. -
Add texture wash:
Lightly sponge a very diluted wash of yellow ochre or tea over the paper to create uneven staining. Let this dry completely before drawing. -
Mount the paper:
Clip or tape your dried paper onto a sturdy backing board. The clips can remain part of the final aesthetic, adding to the studio feel.
Muddy colors?
If skin tones look dirty, you may be over-blending. Stop, spray with fixative to set the layer, and then apply fresh, clean strokes of color on top without smudging.
Step 2: Drawing the Base Portrait
-
Initial sketch:
Using a light brown pastel or charcoal pencil, sketch the basic oval of the face and place features. Focus on a slight upward gaze and three-quarter rotation. -
Establish shadows:
Block in the main shadow shapes under the chin, the side of the nose, and the eye sockets using a burnt umber or dark sanguine tone. -
Define the eyes:
Draw the irises clearly, leaving the whites of the eyes slightly muted (using the paper tone). Add a crisp dark line for the upper lashes. -
Build skin tones:
Layer peach and light ochre pastels for the skin. Smudge gently with your finger or a chamois cloth to smooth the complexion while keeping some paper grain and tooth visible.
Step 3: Refining Features & Mood
-
Add the flush:
Apply a soft dusty rose or sanguine pastel to the cheeks and lips. Blend this outwards so there are no harsh edges on the blush. -
Highlighting:
Using a sharp white charcoal pencil or soft pastel stick, add bright highlights to the bridge of the nose, the forehead, and the ‘catch lights’ in the pupils. -
Hair structure:
Draw the hair in loose, flowing masses rather than individual strands. Use broad strokes of dark brown and touches of black for the deepest recesses. -
Hair details:
Add golden or light brown streaks to suggest light hitting the waves of hair. Keep the edges of the hair soft where they meet the background. -
Clothing rough-in:
Sketch the clothing loosely with charcoal. Keep this area sketchy and abstract to ensure the focus remains on the detailed face. -
Background blending:
Smudge a little of your hair color and background tone (maybe a dull yellow or grey) around the head to ground the figure in space. -
Seal the drawing:
Once satisfied, spray the drawing with a workable fixative to prevent the pastels from smearing during the assembly phase.
Add Conceptual Depth
Paint one mask to match the portrait’s face EXACTLY, then place it among the white ones to suggest the subject has removed their ‘real’ face.
Step 4: The Mask Assembly
-
Prime the masks:
Take your store-bought masks and lightly sand them if they are glossy plastic. Paint them with a coat of matte white acrylic to unify their texture. -
Create shadows (optional):
If you want the masks to look older, dry-brush a tiny amount of grey paint into the eye sockets or mouths of the masks. -
Arrangement:
Place the drawing board upright against a wall. Scatter the white masks around the base of the drawing, some looking up, some looking away. -
Final composition:
Adjust the masks so they frame the artwork without blocking it. They should look like a discarded audience or shed identities.
Step back and appreciate the contrast between the vibrant, living portrait and the stillness of the surrounding masks
Staircase Leading Into a Dark Void
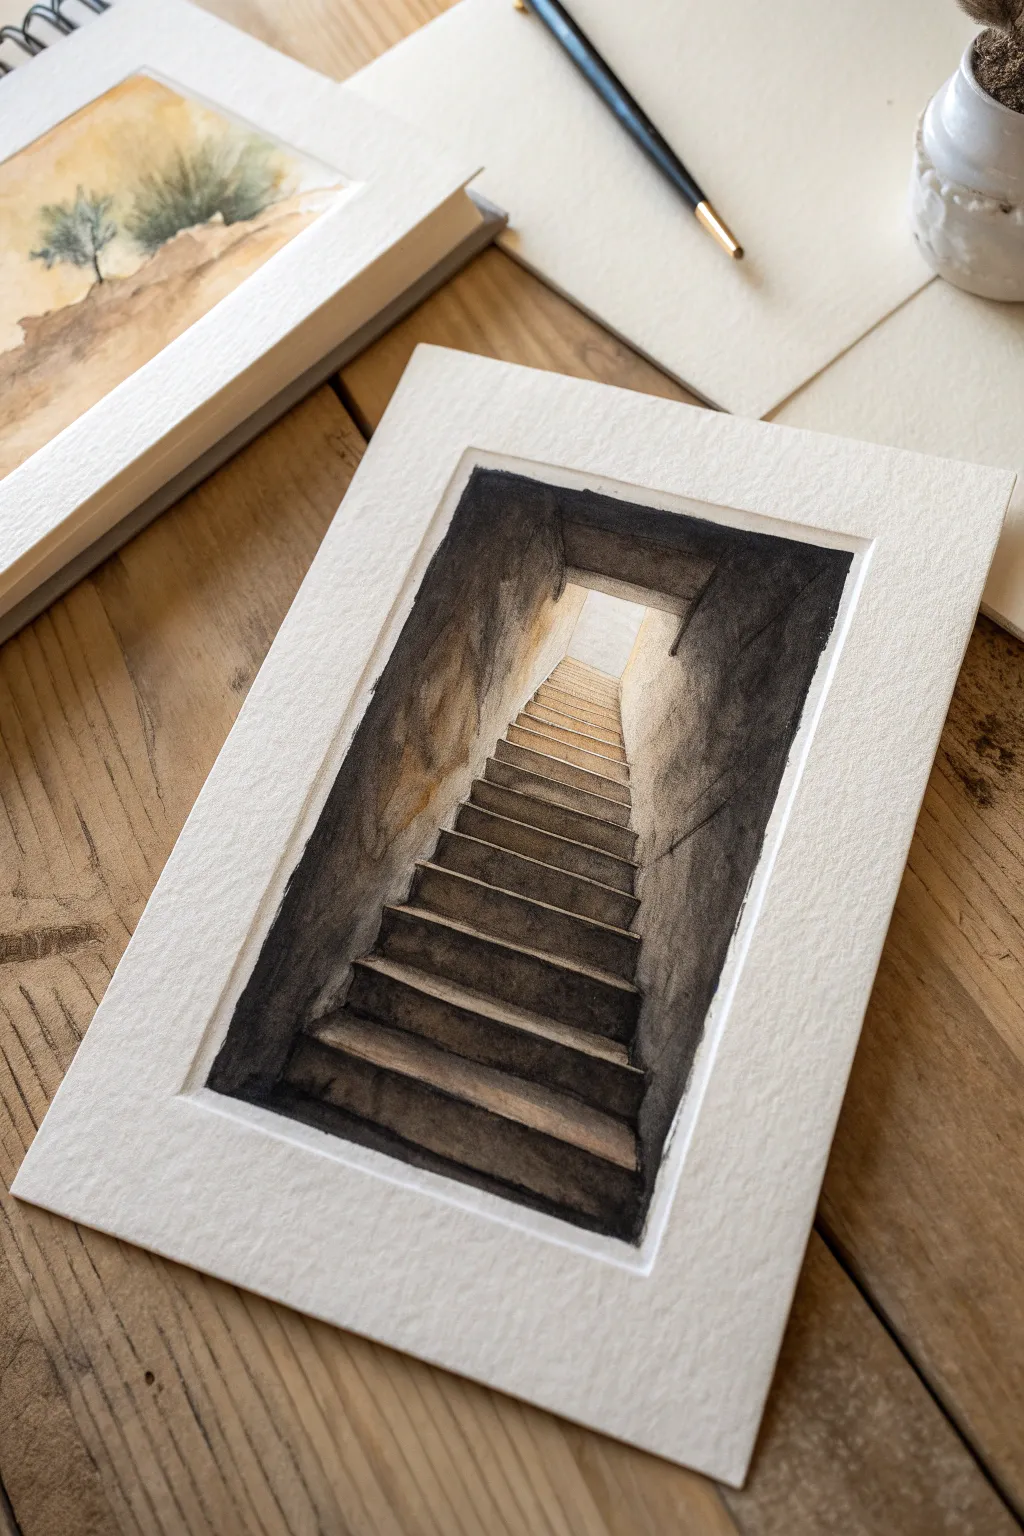
Capture the mysterious allure of a stone staircase leading from a dark, enclosed tunnel toward a glowing exit in this watercolor study. This project focuses on high-contrast values and perspective to create a dramatic sense of depth and atmosphere.
Step-by-Step
Materials
- Cold Press Watercolor Paper (approx. 300lb or block)
- Watercolor Paints (Payne’s Grey, Burnt Umber, Yellow Ochre, Sepia)
- Flat Wash Brush (1/2 inch)
- Round Detail Brush (Size 2 or 4)
- Pencil (HB) and Kneaded Eraser
- Ruler
- Masking Tape
Step 1: Preparation and Sketching
-
Secure the paper:
Begin by taping down your watercolor paper to a board on all four sides. This creates that crisp white border seen in the final piece and prevents the paper from buckling under heavy washes. -
Establish the vanishing point:
Decide on your light source at the top. Use a ruler to lightly mark a small rectangle near the top center of the page—this will be the exit doorway. -
Draft the perspective lines:
Draw diagonal lines extending from the corners of your top doorway down toward the bottom corners of the paper. These lines define the walls of the tunnel. -
Draw the stairs:
Sketch the horizontal lines for the steps. Start with very narrow spacing near the top doorway and gradually increase the distance between lines as you move down the page to create realistic perspective.
Muddy Shadows?
If your dark walls look flat or muddy, you likely overmixed. Drop in pure pigment (blue or brown) while the wash is wet and let them blend naturally on the paper.
Step 2: The First Washes
-
Underpaint the light:
Mix a very watery wash of Yellow Ochre. Paint the ‘exit’ rectangle and the top few stairs, letting the color fade out as it moves down the staircase. -
Add warmth to the walls:
While the paper is still slightly damp, add faint touches of Burnt Umber to the wall sections nearest the light source. This creates the glow reflecting off the stone. -
Define the stair tops:
Using a dilute mix of Burnt Umber and Sepia, paint the flat, horizontal tops of the stairs. Keep the mix transparent so the underlying warmth shines through.
Step 3: Building the Shadows
-
Establish the tunnel walls:
Mix a dark, heavy wash of Payne’s Grey and Sepia. Using your flat brush, paint the large wall sections on the left and right, carefully cutting around the stairs. I find it helpful to use jagged, vertical strokes here to mimic rough rock texture. -
Gradate the darkness:
Make the walls darkest at the bottom corners and slightly lighter near the top. You can lift a little pigment with a thirsty brush near the top to suggest light hitting the uneven stone surface. -
Paint the stair risers:
Switch to your round brush. Paint the vertical ‘risers’ of the stairs (the front facing part) with a dark mix of Sepia. These should be significantly darker than the tops of the steps to show dimension. -
Deepen the foreground:
For the steps closest to the bottom edge, use your darkest Payne’s Grey mix on the risers. This heavy contrast anchors the painting and pushes the viewer’s eye upward.
Texture Pro Tip
Sprinkle a tiny pinch of salt onto the wet wall paint near the bottom. When it dries and you brush it off, it leaves behind a perfect, pitted stone texture.
Step 4: Refining Details
-
Enhance the texture:
Once the walls are dry, dry-brush some pure Payne’s Grey or Black onto the darkest areas of the walls to create a craggy, cavernous feel. -
Cast shadows:
Add thin, dark lines right under the lip of each step. This small shadow separates the riser from the tread and makes the stairs look solid. -
Adjust the light source:
If the top doorway looks too stark, soften the edges slightly with a damp clean brush to create a glowing, blooming light effect. -
Clean up edges:
Use a small brush with dark paint to sharpen the uneven, rocky silhouette where the walls meet the stairs. The edges shouldn’t be perfectly straight; rocky imperfections add realism. -
The Reveal:
Wait until the painting is completely bone-dry. Carefully peel away the masking tape at a 45-degree angle to reveal the clean white frame.
Step back and admire how this simple study of light and dark draws the viewer right into the scene


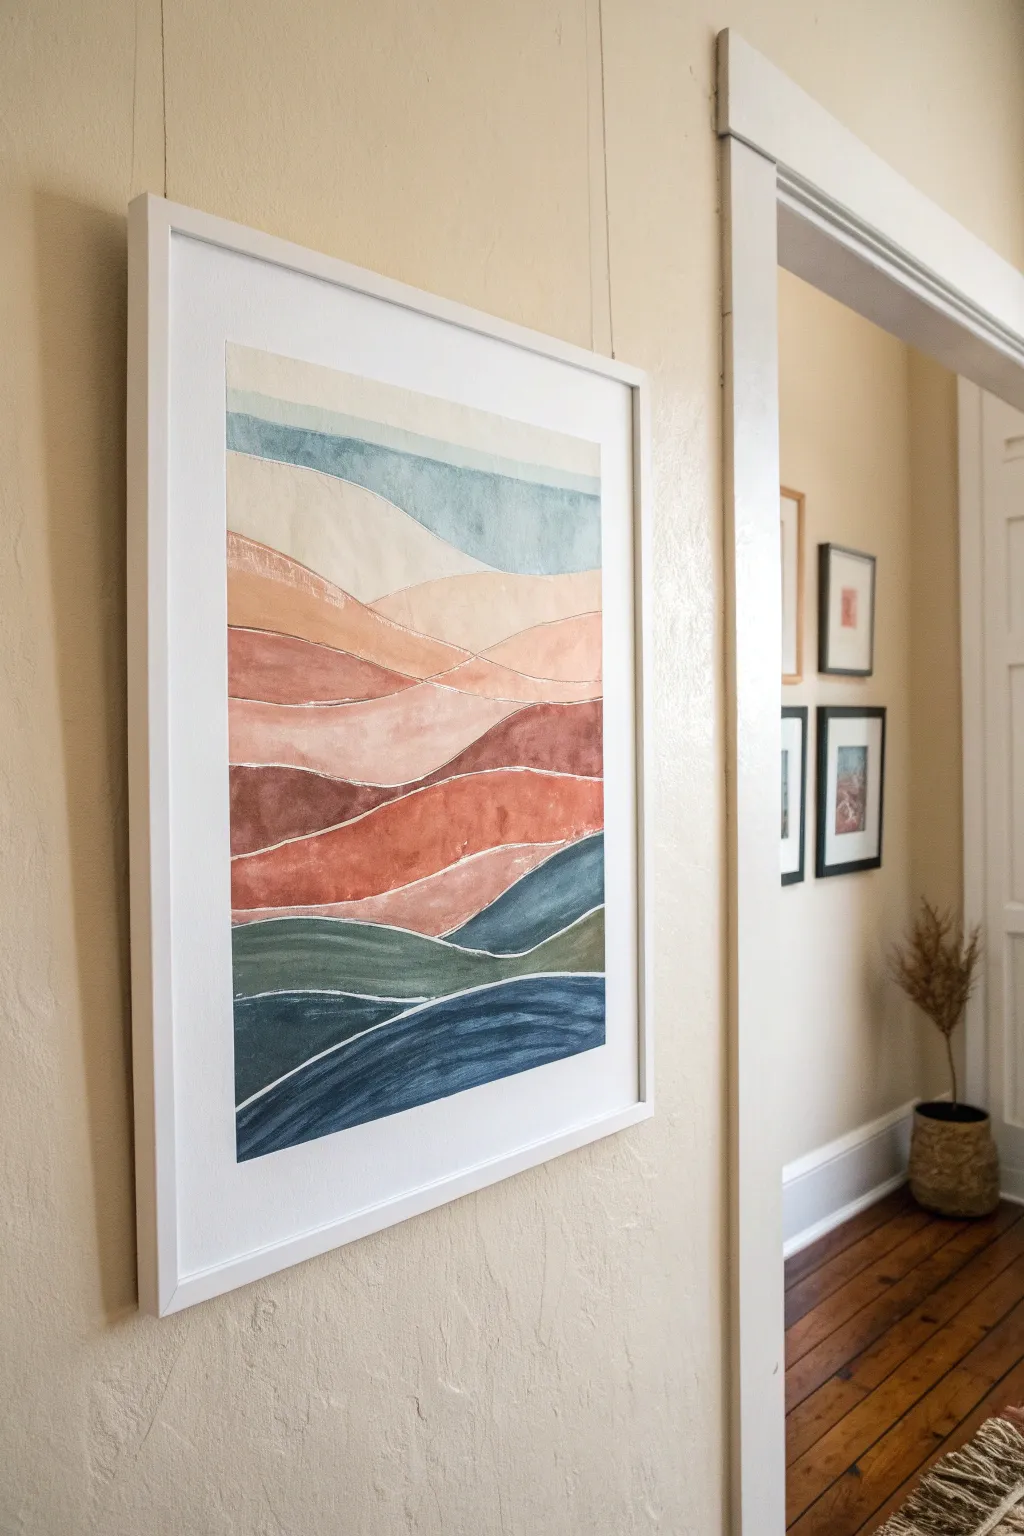
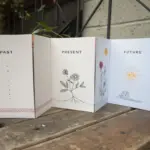
Abstract Map of Emotions

This serene abstract landscape captures the essence of rolling hills and sediment layers through soothing bands of color. Using a resist technique, you’ll create crisp, organic white lines that separate gradients of teal, terracotta, and deep blue.
Step-by-Step Guide
Materials
- Heavyweight watercolor paper or mixed media paper (at least 140lb)
- Masking fluid (drawing gum) with a fine applicator tip
- Gouache paints (Teal, Burnt Sienna, Ochre, Navy Blue, White, Rust)
- Watercolor brushes (medium flat brush and small round brush)
- Palette for mixing
- Pencil and eraser
- Paper towels
- Artist tape
Step 1: Preparation & Sketching
-
Secure the paper:
Begin by taping down all four edges of your watercolor paper to a hard board or table. This creates a clean border and prevents the paper from buckling when wet. -
Draft the layers:
Lightly sketch wavy, horizontal lines across the paper. Start from the top third and work your way down, creating about 8-10 distinct sections that mimic rolling hills or geological strata. -
Vary the flow:
Ensure the lines aren’t uniform; let some dip low while others crest high to create a natural, organic rhythm.
Step 2: Applying the Resist
-
Trace with masking fluid:
Using a fine applicator tip or an old brush you don’t mind ruining, carefully trace over your pencil lines with masking fluid. -
Refine the lines:
Keep the fluid lines relatively thin but consistent. These masked areas will become the crisp white separators between color fields later. -
Let it cure:
Allow the masking fluid to dry completely. It should feel rubbery and tacky to the touch, but not wet. Patience here prevents smearing.
Brush Wisdom
Don’t use your best brushes for masking fluid! The latex dries quickly and ruins bristles. Use a cheap synthetic brush or a dedicated silicone tool.
Step 3: Painting the Layers
-
Mix the sky tones:
On your palette, mix a pale, watery blue-grey for the topmost section. Gouache can be diluted to look like watercolor, which works beautifully here. -
Paint the upper sections:
Fill in the top two bands. I like to use a slightly more saturated teal for the second band to start building depth immediately. -
Transition to warmth:
For the middle sections, mix warm earth tones. Create a gradient starting with a pale sandy beige, moving into soft peach, and deepening into a rich terracotta. -
Apply the warm colors:
Paint these bands in the middle of the composition. Don’t worry if you paint over the masking fluid; it protects the paper underneath. -
Deepen the palette:
As you move to the lower third, mix darker colors: burnt sienna, deep olive green, and dark denim blue. -
Anchor the bottom:
Fill the final bottom layers with your darkest navy and deep teal shades to give the artwork visual weight. -
Add texture (optional):
While the paint is still damp in certain sections, you can blot it slightly with a paper towel to create a weathered, stone-like texture. -
Dry completely:
Let the entire painting dry thoroughly. If the paper feels cool to the touch, it is likely still damp inside.
Texture Twist
Sprinkle a pinch of salt onto the wet teal and blue sections. As it dries, the salt absorbs pigment, creating a beautiful crystalline texture.
Step 4: Revealing the Design
-
Remove the mask:
Once you are certain the paint is bone dry, gently rub the dried masking fluid with your clean finger or a rubber cement pickup tool to peel it away. -
Clean up edges:
Use a white eraser to remove any remaining pencil marks that might be visible within the revealed white lines. -
Peel the tape:
Slowly peel away the artist tape at a 45-degree angle away from the painting to reveal your crisp outer border. -
Frame it:
Place the finished piece in a simple white frame with a mat to echo the white lines within the artwork.
Hang your new abstract landscape in a hallway or bedroom where its calming layers can set a peaceful tone


Have a question or want to share your own experience? I'd love to hear from you in the comments below!