
Dinosaurs are honestly the perfect painting subject: instantly recognizable shapes, tons of room for imagination, and you can go as simple or detailed as you want. Here are my favorite dinosaur painting ideas to help you make something fun, bold, and totally yours.
Classic Dino Silhouette at Sunset
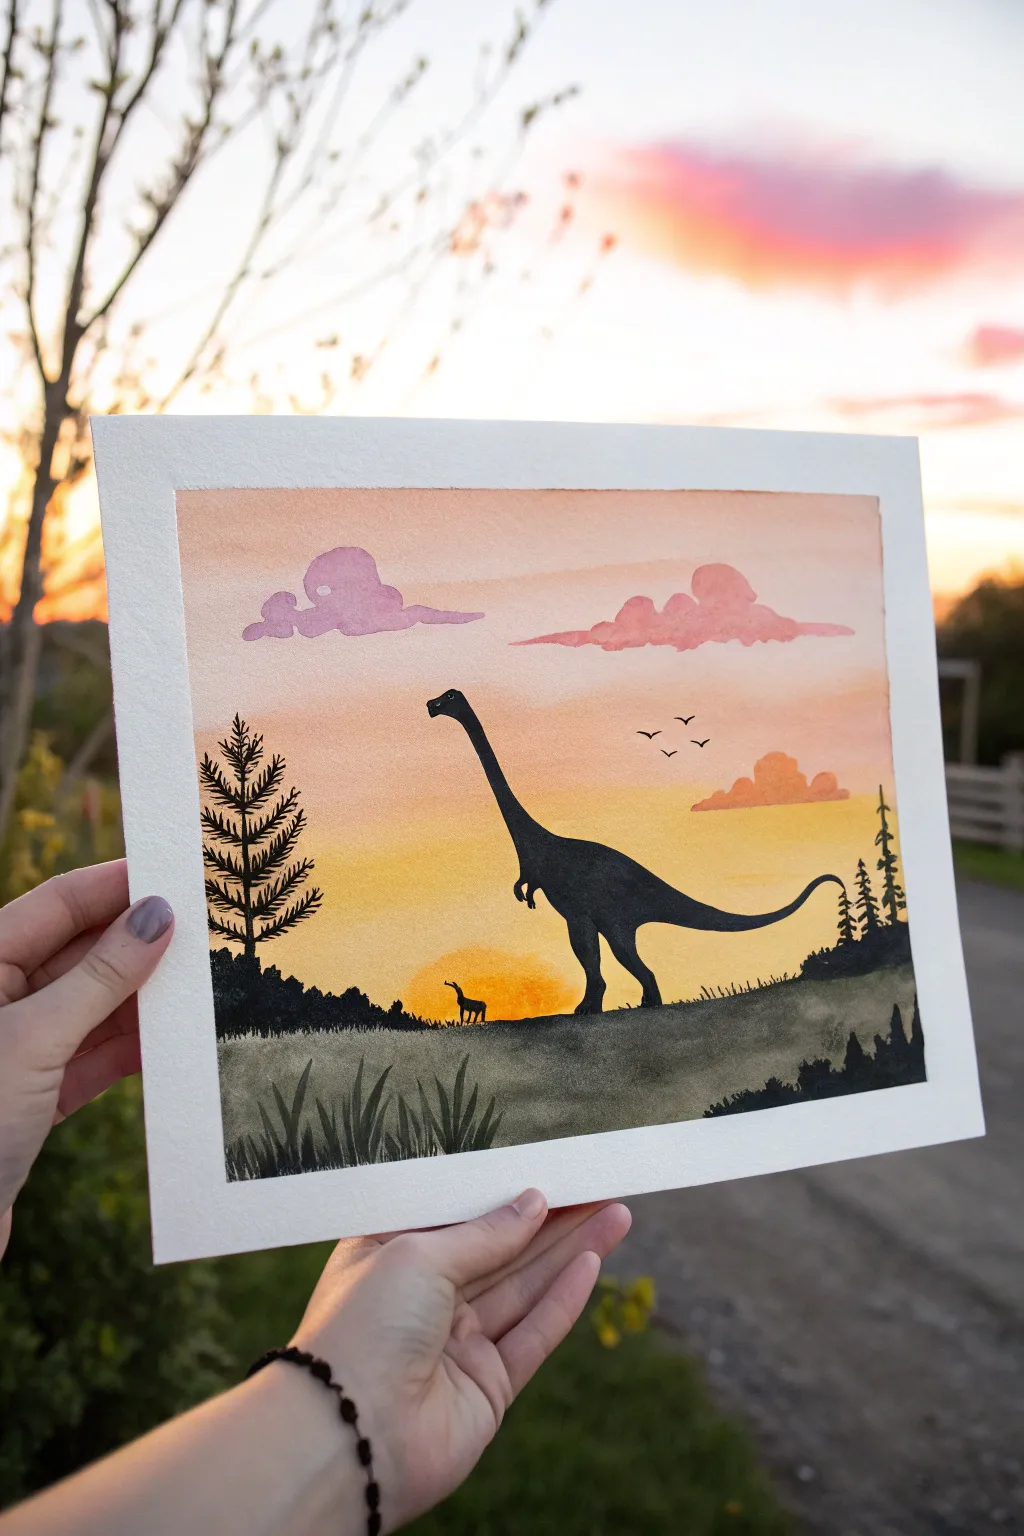
Capture the calm majesty of a distant era with this serene watercolor sunset. By layering warm gradient washes behind a crisp, black dinosaur silhouette, you’ll create a striking contrast that brings this gentle giant to life.
Step-by-Step Tutorial
Materials
- Watercolor paper (cold press, 140lb/300gsm recommended)
- Watercolor paints (Yellow, Orange, Pink, Light Purple/Lavender)
- Black gouache or high-pigment black watercolor
- Painter’s tape or masking tape
- Flat wash brush (large)
- Round detail brushes (size 0 or 1, and size 4)
- Pencil and eraser
- Palettes for mixing
- Water cups and paper towels
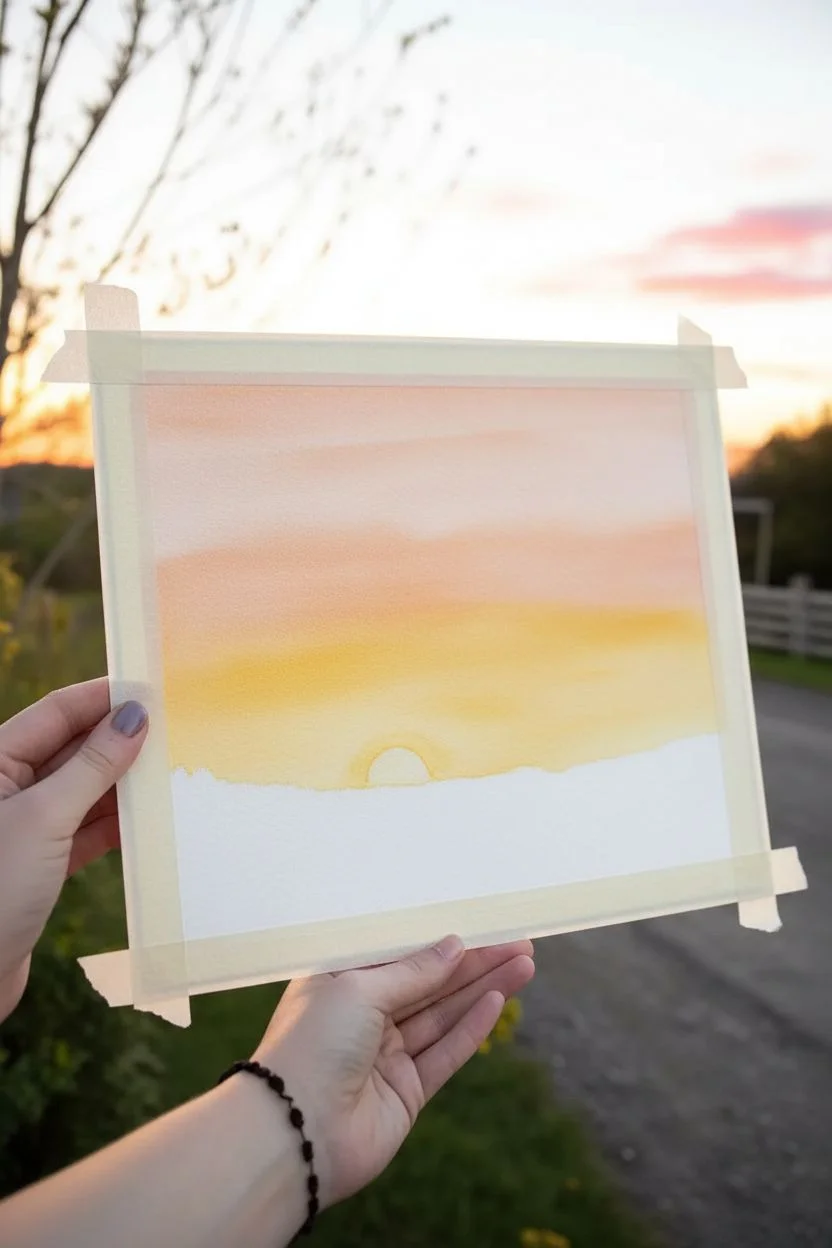
Step 1: Creating the Sky Gradient
-
Prepare your canvas:
Begin by taping down all four edges of your watercolor paper to a hard board or table. This creates that clean, crisp border you see in the photo and prevents the paper from buckling when wet. -
Sketch the horizon:
Lightly draw a low, rolling horizon line near the bottom third of the paper using a hard pencil. Keep the pressure very light so the graphite doesn’t show through the sky later. -
Wet the sky area:
Using your large flat brush and clean water, apply a thin, even layer of water to the entire sky area above your horizon line. The paper should glisten but not have puddles. -
Apply the vibrant yellow:
Load your brush with a bright, warm yellow. Paint a horizontal band just above the horizon line, letting the wet paper help the color spread smoothly. -
Blend in the orange:
While the yellow is still wet, mix a soft orange and apply it immediately above the yellow band. Gently overlap the edges so the colors merge seamlessly into a gradient. -
Add the upper sky:
For the top portion of the sky, switch to a very pale, diluted pinkish-orange tone. Blend this down into the orange strip, keeping the topmost part of the paper the lightest to mimic atmospheric fading. -
Paint the sun:
While the yellow horizon area is still damp, lift out a small semi-circle of pigment right at the horizon line using a clean, thirsty brush, or add a concentrated dab of darker orange to suggest a setting sun. -
Let the gradient dry:
Allow this base layer to dry completely. If the paper feels cold to the touch, it’s still damp. Wait until it is room temperature or use a heat tool.
Step 2: Painting Clouds and Silhouettes
-
Add fluffy pink clouds:
Mix a soft rose-pink color. With a round brush, paint fluffy, organic cloud shapes in the upper sky. Keep the edges slightly soft by working quickly, but define the distinct cloud bottoms as shown in the reference. -
Paint lower orange clouds:
Using a slightly deeper orange tone, paint smaller, lower-hanging cloud formations closer to the horizon on the right side. This adds depth to your sky. -
Sketch the dinosaur:
Once the sky is fully dry, lightly sketch the outline of the large dinosaur. Focus on the long, curved neck and the thick tail. Don’t forget the tiny baby dinosaur silhouette near the sun. -
Fill the horizon line:
Switch to your black gouache or concentrated watercolor. Using the medium round brush, paint the undulating ground silhouette, covering your pencil line. Keep the top edge slightly jagged to suggest grass and terrain. -
Paint the large dinosaur:
Carefully fill in the large dinosaur shape with solid black. Use your smallest detail brush for the delicate curves of the neck and head to ensure smooth, sharp edges. -
Add the baby dino:
Paint the tiny silhouette of the smaller dinosaur near the sun. You only need a few small strokes here—capture the shape rather than the details. -
Create tree silhouettes:
On the left side, paint a tall, jagged pine tree using short, upward dabs of your brush. Add smaller tree shapes on the far right edge to frame the composition. -
Add flying birds:
Using the very tip of your smallest brush or a fine liner pen, add three tiny ‘V’ shapes in the sky to represent birds flying in the distance. -
Paint foreground grass:
Dilute your black paint slightly to make a dark grey. Paint loose, vertical grass blades in the immediate foreground at the very bottom of the paper to give a sense of closeness.
Smoother Gradients
Tilt your paper slightly while painting the sky wash. Gravity helps pull the wet paint downward, naturally blending the yellow into the orange without harsh lines.
Bleeding Lines?
If your black silhouette bleeds into the sky, the background wasn’t dry enough. Let it dry fully, then sharpen the edge with opaque black gouache or a black ink pen.
Peel off your tape slowly at an angle to reveal those satisfying crisp white borders on your prehistoric masterpiece


Cute Cartoon Dino Portrait
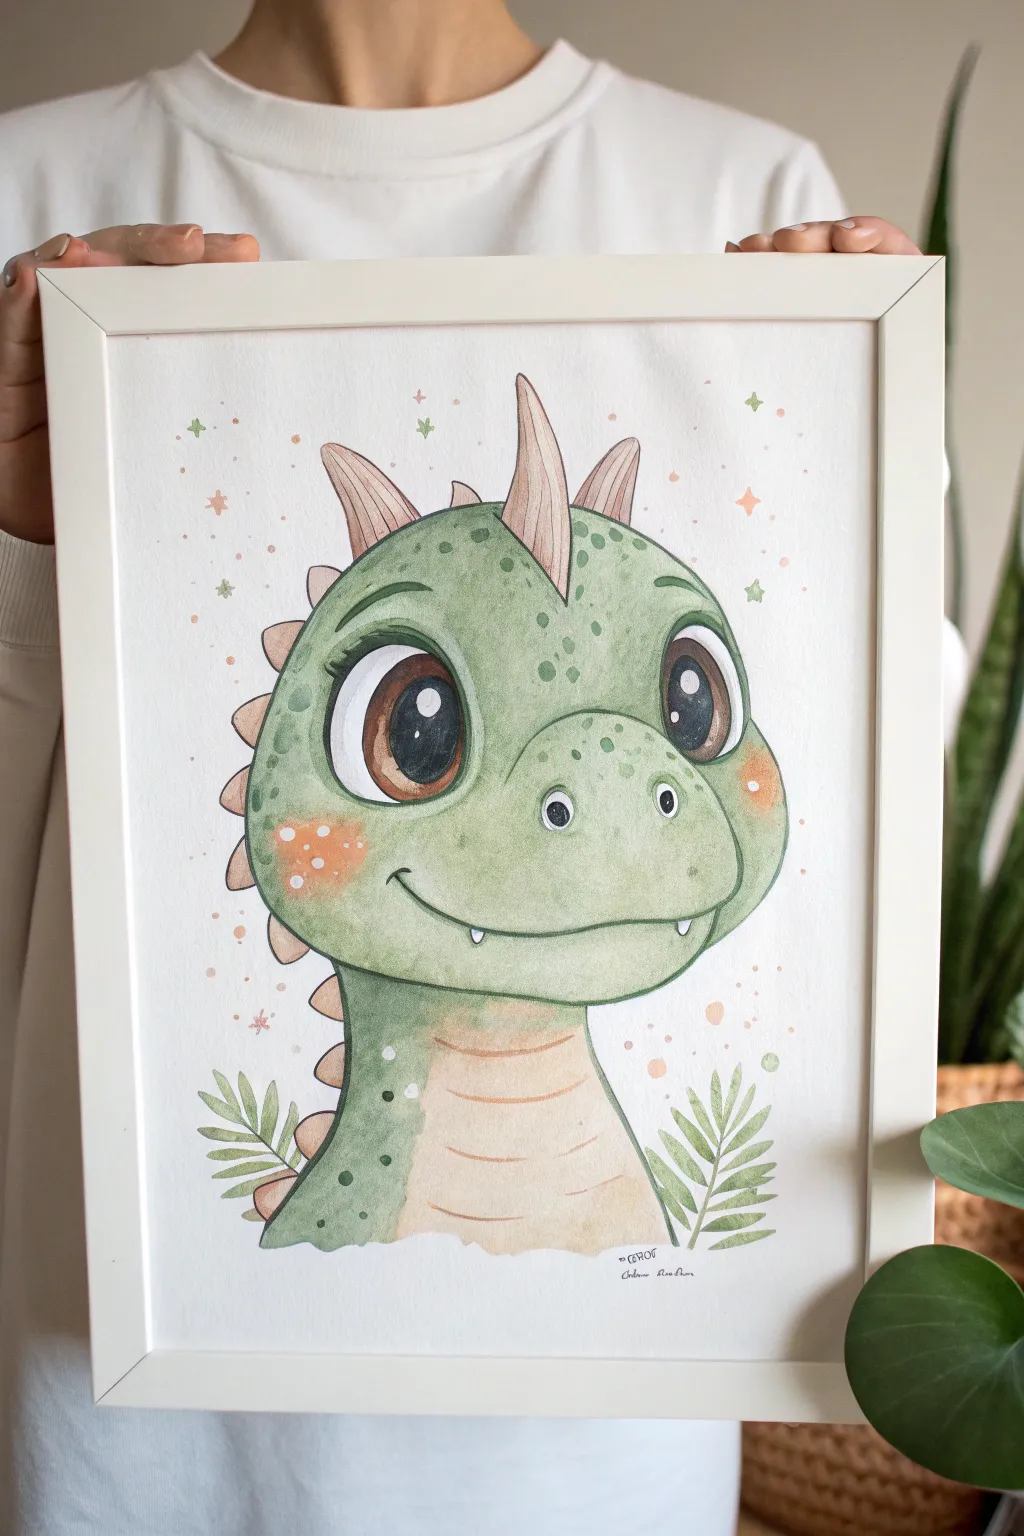
Capture the charm of childhood with this adorable watercolor portrait of a friendly baby dinosaur. Featuring soft washes of green, expressive oversized eyes, and a sprinkle of magical stardust, this piece makes a heartwarming addition to any nursery or playroom decor.
Step-by-Step
Materials
- Cold press watercolor paper (300 gsm)
- Watercolor paints (Sap Green, Hooker’s Green, Burnt Sienna, Yellow Ochre, Rose Madder, Lamp Black)
- Round watercolor brushes (sizes 2, 6, and 10)
- HB pencil for sketching
- Kneaded eraser
- White gel pen or gouache for highlights
- Two jars of water
- Paper towels
- Masking tape (optional)
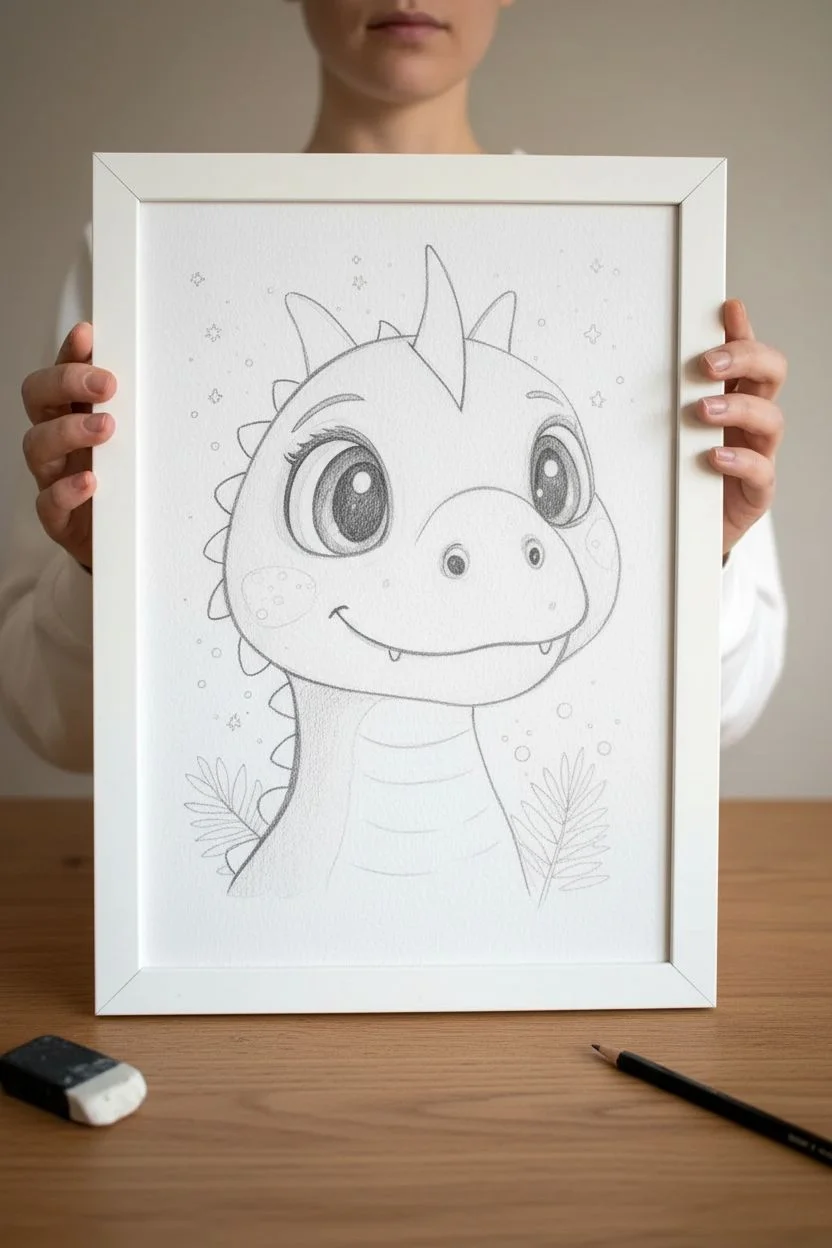
Step 1: Sketching the Character
-
Basic Shapes:
Start by lightly sketching a large, rounded oval for the head. Add a gently curving neck extending downward. -
Facial Features:
Draw a smaller oval snout area on the lower half of the face. Place two large, widely spaced almond shapes for the eyes, ensuring the left eye is slightly larger to account for the perspective. -
Adding Details:
Sketch the three conical horns on top of the head—one centered and two angled back. Add the spines running down the back of the neck and the curved line separating the belly from the green skin. -
Leaves and Sparkles:
Lightly pencil in simple fern-like fronds at the base of the neck on both sides. Add tiny stars and circles in the background space. -
Refining Lines:
Go over your sketch to darken the definitive lines, adding the pupils, nostrils, and a wide, gentle smile. Use your kneaded eraser to lift up excess graphite so the paint won’t get muddy.
Muddy Colors?
If your green and pink cheek colors turn brown where they touch, let the green layer dry completely first. Then glaze the pink on top instead of mix it wet-on-wet.
Step 2: Applying the Base Wash
-
Green Skin Base:
Mix a watery wash of Sap Green. Using your size 10 brush, fill in the entire head and neck area, avoiding the eyes, horns, belly, and cheeks. -
Wet-on-Wet Texture:
While the green base is still wet, drop in slightly concentrated Hooker’s Green or a darker mix around the edges of the face and under the chin to create instant volume. -
Belly and Horns:
Mix a very pale wash of Yellow Ochre with a touch of rose. Paint the belly area, the spines, and the three head horns with this soft cream color. -
Rosy Cheeks:
Dilute Rose Madder to a soft pink. Gently dab circles onto the cheeks while the green is barely damp for a soft, blended edge. -
Let it Dry:
Allow the paper to dry completely before moving to the next step. If it feels cool to the touch, it’s still wet.
Make it Sparkle
For a magical nursery effect, use metallic gold watercolor paint for the background stars and the highlights on the dinosaur’s horns.
Step 3: Building Depth and Detail
-
Texture Spots:
Using a size 6 brush and a medium-strength green mix, dab small spots onto the forehead and snout to mimic reptile skin texture. -
Defining the Eyes:
Paint the irises with a rich Burnt Sienna. Once dry, fill the pupils with Lamp Black, leaving large white circles for the catchlights (or paint around them). -
Shadows and Contrast:
Mix a darker green-grey. Add shadows under the chin, beneath the horns, and along the spine to make the figure pop. -
Belly Stripes:
Use a diluted brown-orange mix to paint thin, curved horizontal lines across the belly for a ribbed texture. -
Painting the Foliage:
Fill in the bottom leaves with a variety of green shades—some light, some dark—to create visual interest at the base.
Step 4: Magical Final Touches
-
Background Sparkles:
Using a small size 2 brush, paint the background stars and dots with pastel pinks, oranges, and greens. -
Inking the Outline:
Once the painting is bone dry, use a very fine brush with black paint or a waterproof fine liner pen to loosely outline the main features. -
White Highlights:
Take your white gel pen or opaque white gouache. Add crisp highlights to the eyes, shiny spots on the nose, and little dots on the cheeks. -
Clean Up:
Erase any remaining visible pencil marks gently. Sign your name near the bottom right under the leaves. -
Framing:
Place your finished artwork in a simple white frame to complement the clean aesthetic of the illustration.
Now you have a charming prehistoric friend ready to brighten up any wall space


Long-Neck Dino in a Simple Landscape
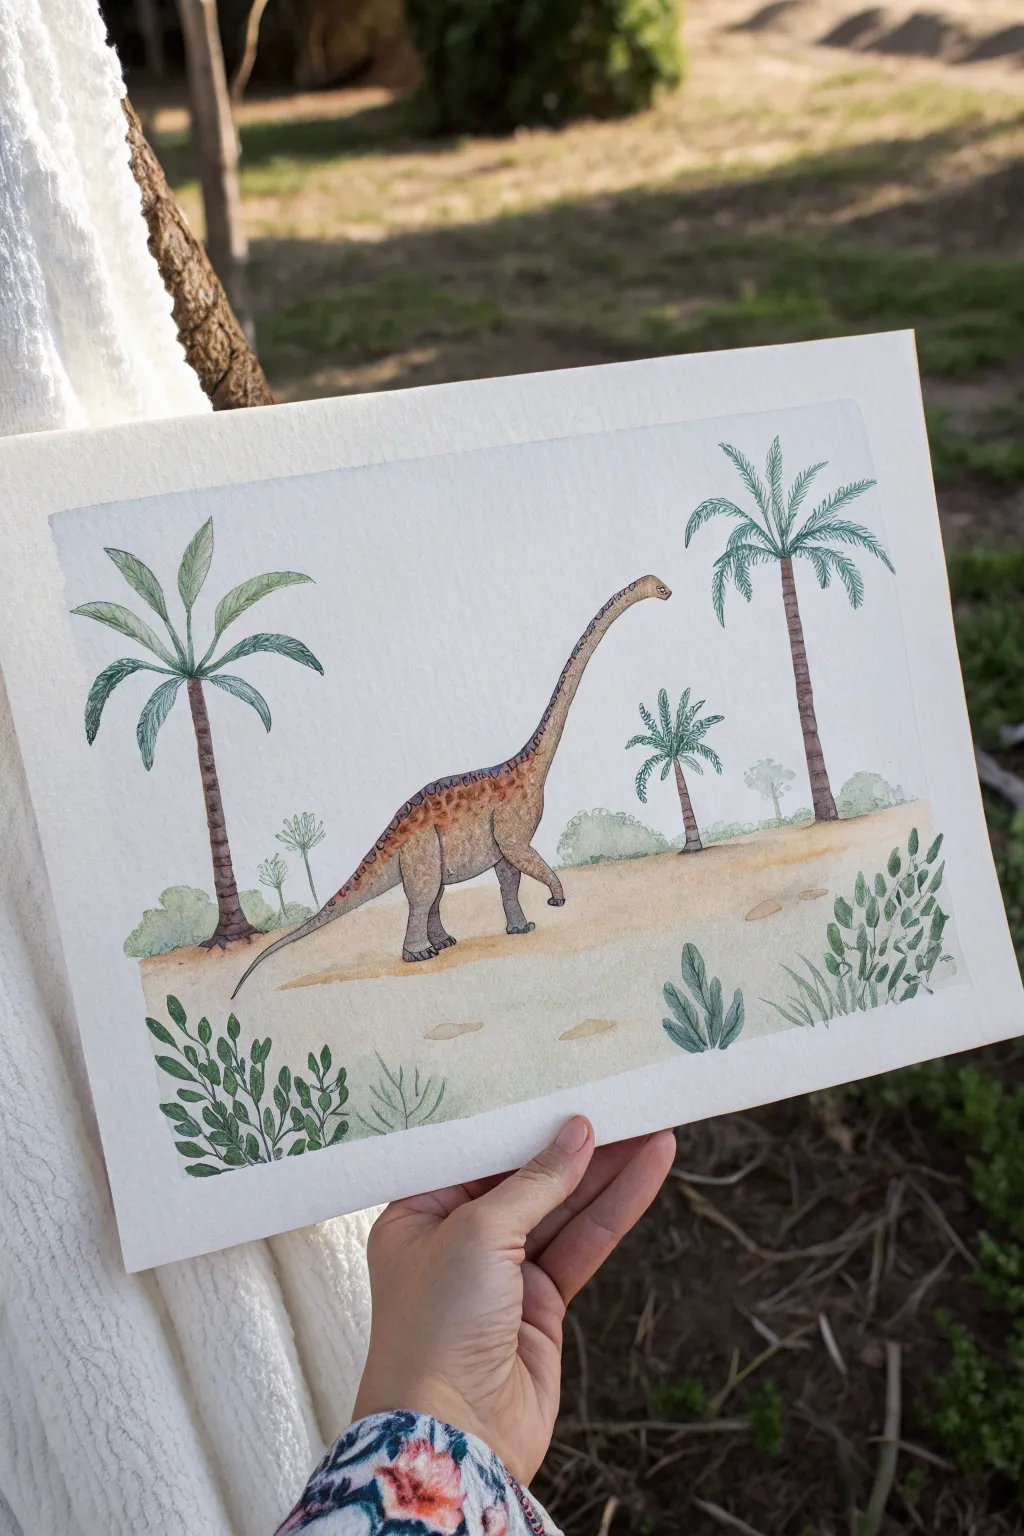
Capture the peaceful essence of the Jurassic period with this soft watercolor illustration of a long-necked dinosaur meandering through prehistoric palm trees. The muted earth tones and delicate foliage details make this a charming addition to any nursery or playroom decor.
Detailed Instructions
Materials
- Cold press watercolor paper (140lb/300gsm)
- Watercolor paint set
- Pointed round brushes (sizes 2, 4, and 6)
- HB Pencil
- Kneaded eraser
- Colored pencils (brown, dark green)
- Masking tape
- Two jars of water
- Paper towels
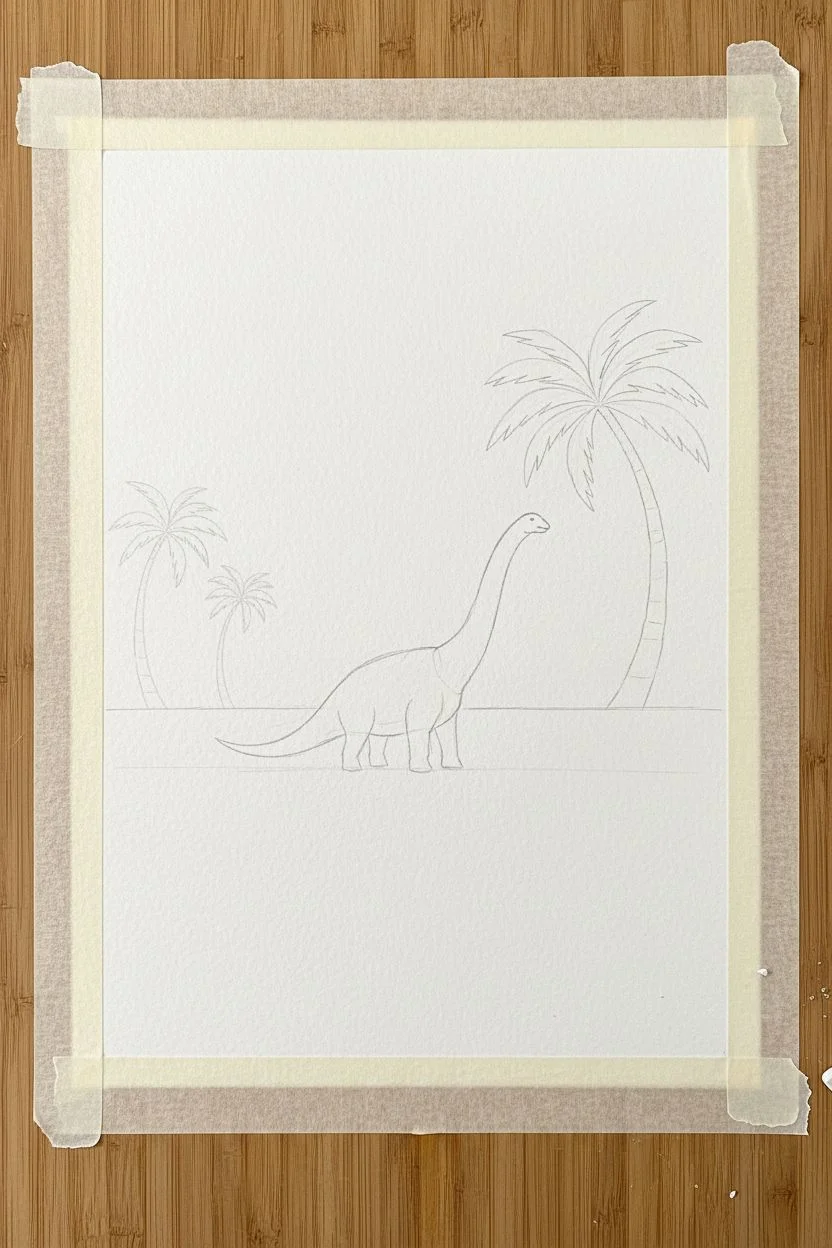
Step 1: Sketching the Scene
-
Prepare your surface:
Begin by taping the edges of your watercolor paper to a board or table. This creates a crisp white border and prevents the paper from buckling when wet. -
Draft the horizon:
Lightly sketch a horizontal line across the lower third of the paper to distinguish the ground from the sky. This doesn’t need to be perfectly straight; a slight gentle slope adds realism. -
Outline the dinosaur:
Sketch the dinosaur’s body in the center. Start with an oval for the body, then extend a long, curved neck upward and a tapered tail sweeping downward to the left. Remember to keep your pencil lines extremely light so they don’t show through the paint. -
Add palm trees:
Position three main palm trees: a large one on the right, a medium one on the left, and a smaller one in the background. Draw curved lines for trunks and simple starburst shapes to mark where the fronds will go. -
Clean up the sketch:
Use your kneaded eraser to lift any excess graphite, leaving only faint guidelines visible.
Step 2: Washing in Color
-
Paint the ground:
Mix a watery wash of yellow ochre and a touch of burnt sienna. Apply this to the ground area using a larger brush, leaving some softer, lighter patches to suggest uneven terrain. -
Base layer for the dinosaur:
While the ground dries, paint the dinosaur’s body with a diluted wash of grey-brown. I like to drop in a slightly darker brown on the underside of the belly and neck while it’s still damp to create natural shading. -
Trunk textures:
Using a size 4 brush, paint the palm trunks with a medium brown. Add horizontal stripes or ridges using a slightly darker, less watered-down brown to mimic bark texture. -
Painting the fronds:
Mix a cool jungle green. For the palm leaves, use the tip of your brush to flick outward from the center of the tree, creating long, arching shapes. Vary the green by adding a little blue or yellow for depth. -
Background bushes:
Suggest distant shrubbery along the horizon line using very pale, watery greens. Soft, rounded shapes work best here to keep the focus on the dinosaur.
Clean Edges
To prevent paper tearing when removing tape, warm the masking tape slightly with a hair dryer for a few seconds before peeling. It softens the adhesive perfectly.
Step 3: Adding Details
-
Patterning the dinosaur:
Once the base layer is completely dry, mix a reddish-brown shade. Paint small, irregular spots along the dinosaur’s back and top of the neck. -
Defining the features:
Use a fine liner brush or a sharpened colored pencil to outline the dinosaur’s eye, mouth, and toes. Add fine lines to the leg joints to suggest wrinkled skin. -
Foreground foliage:
Paint the leafy bushes in the bottom corners. Use a darker, saturated green for these to create a sense of depth, painting individual leaves that overlap each other. -
Enhancing textures:
Take a brown colored pencil and lightly shade the darker areas of the dinosaur’s underbelly and the palm trunks. This mixed-media approach adds a lovely illustrative quality. -
Final shadows:
Mix a diluted purple-grey. Paint small, horizontal cast shadows on the ground directly beneath the dinosaur’s feet and the base of the trees to ground them. -
Review and refine:
Step back and look at your composition. If the sky feels too empty, you can add a very faint, watery blue wash, but keeping it white maintains a clean, modern look. -
The reveal:
Wait until the painting is 100% dry to the touch, then slowly peel away the masking tape at a 45-degree angle to reveal your crisp white border.
Make it Pop
Make the dinosaur stand out by adding a very thin outline with a sepia micron pen after the paint dries. It gives a classic storybook illustration vibe.
Frame your prehistoric masterpiece to add a touch of timeless adventure to your room


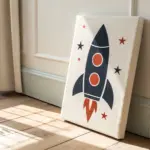
T-Rex Profile With Bold Color Blocks
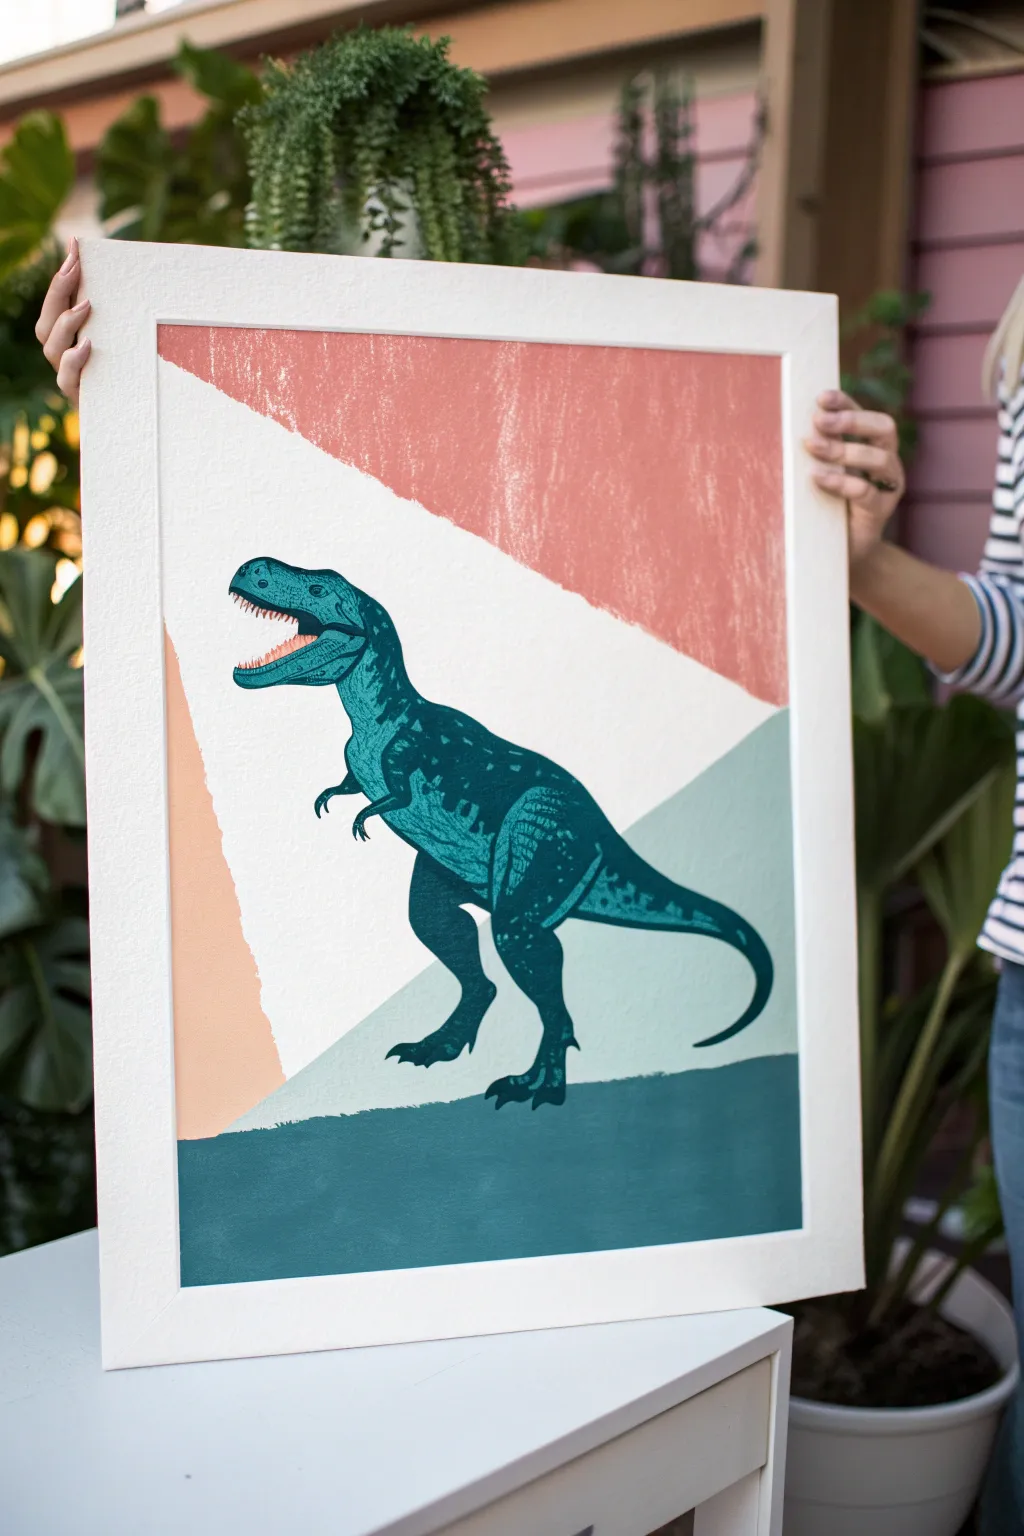
Combine bold, geometric abstraction with prehistoric power in this striking wall art project. Using linocut printing techniques over color-blocked acrylics creates a textured, retro-modern look perfect for a kid’s room or eclectic living space.
Step-by-Step Tutorial
Materials
- Heavyweight printmaking paper or mixed media paper (11×14 or larger)
- Soft-cut linoleum block
- Linoleum carving tool set (u-gouge and v-gouge)
- Block printing ink (dark teal or deeply saturated blue)
- Brayer (rubber roller)
- Acrylic paints (salmon pink, peach, sage green, dark teal)
- Painter’s tape or masking tape
- Flat paintbrush (1-inch width)
- Pencil and tracing paper
- Baren or wooden spoon (for burnishing)
- Glass or acrylic sheet (inking plate)
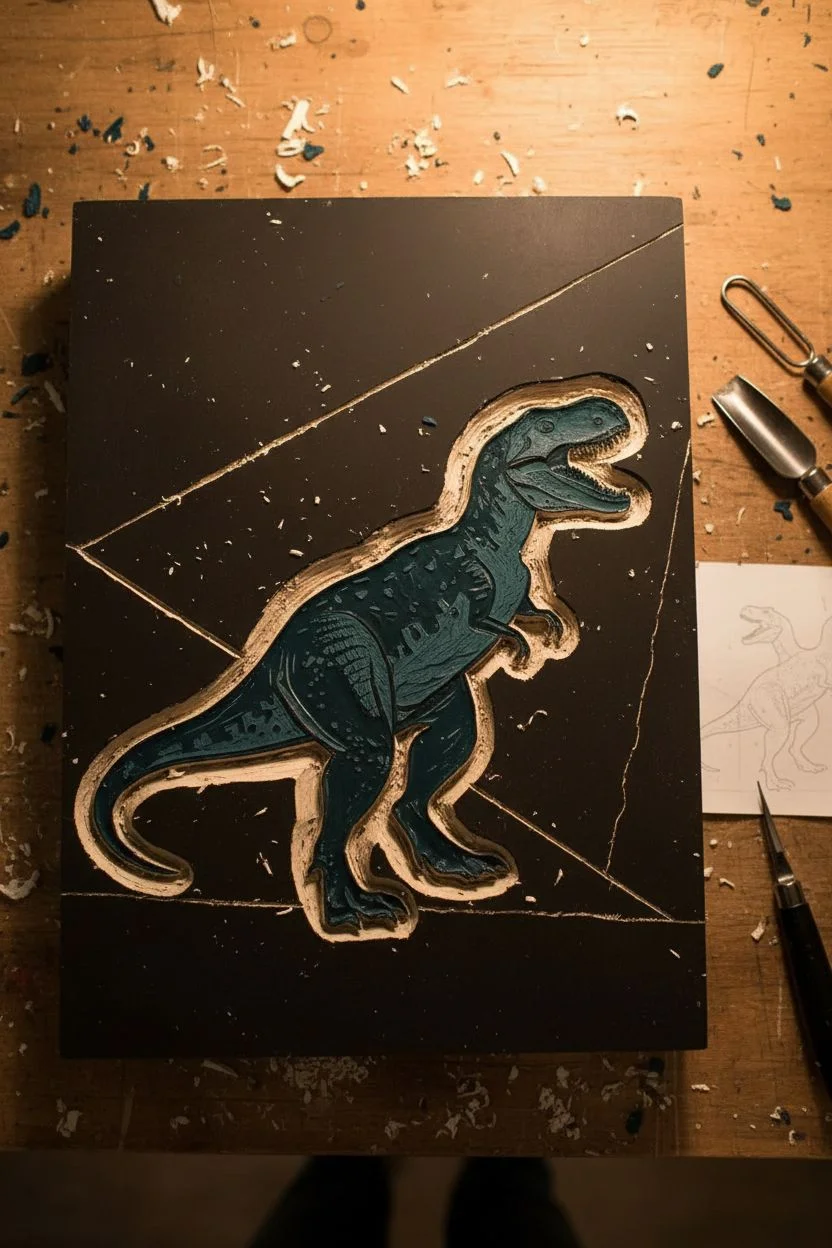
Step 1: Carving the Dinosaur
-
Draft the design:
Begin by sketching a T-Rex profile on tracing paper. Focus on the silhouette and major muscle definitions rather than tiny details. You want bold shapes that translate well to a carving block. -
Transfer to block:
Flip your tracing paper over onto the linoleum block and rub the back with a pencil to transfer the graphite. Remember, your printed image will be a mirror image of your carving, so the T-Rex needs to face the opposite direction on the block. -
Outline the shape:
Using a fine V-gouge tool, carefully carve along the outline of your dinosaur design. Create a clean separation between the dinosaur and the background material. -
Clear the background:
Switch to a wider U-gouge to remove all the linoleum outside of your dinosaur shape. I usually carve away from the outline to avoid slipping into the design. -
Add texture details:
Use the V-gouge again to carve interior details like the eye, teeth, and skin texture. Don’t remove too much material inside the body; leave raised areas to pick up ink for that distinct textural look.
Step 2: Painting the Background
-
Tape the first angle:
On your heavyweight paper, use painter’s tape to mark off a large diagonal section in the upper right corner. Seal the edge of the tape firmly with your fingernail. -
Apply the pink block:
Paint the taped-off upper section with salmon pink acrylic. Use a fairly dry brush to create a slightly distressed texture if desired, or go opaque for a solid look. Let it dry completely before peeling the tape. -
Tape the bottom section:
Once the pink is dry, mask off the bottom area. You want to create a horizon line that intersects with where you plan to place the dinosaur’s feet. -
Paint the ground:
Fill this bottom section with your dark teal acrylic paint. This anchors the composition and gives the dinosaur a solid base. -
Add the triangular accents:
Tape off two smaller triangular sections: one on the left in peach/beige, and one on the right in sage green. These should look like shards or geometric mountains behind the dinosaur. -
Final dry time:
Ensure all acrylic layers are bone dry before attempting to print over them. Wet acrylic will cause the printing ink to smear.
Patchy looking print?
If your print is too faint, you likely didn’t use enough ink or pressure. If lines are blurry, you used too much ink. Test on scrap paper first!
Step 3: Printing the Layer
-
Prepare the ink:
Squeeze a small line of dark teal block printing ink onto your glass sheet. Use the brayer to roll it out until you hear a sticky, velcro-like sound. The ink should be tacky, not gloopy. -
Ink the block:
Roll the brayer firmly over your carved T-Rex block. Apply a thin, even layer of ink, ensuring the raised surface is fully coated but the carved grooves remain clear. -
Position the print:
Carefully align your block over the painted background. The feet should rest on the dark teal ground line, with the body overlapping the geometric shapes. -
Press and burnish:
Place the block face down onto the paper. Using a baren or the back of a wooden spoon, apply firm, clear pressure in circular motions over the entire back of the block. -
The reveal:
Hold one corner of the paper down and slowly peel the block away to reveal your print. If the ink looks spotty, that adds to the handmade charm. -
Finishing touches:
Allow the relief ink to dry for at least 24 hours—oil-based inks take longer than water-based ones. Once cured, place your artwork in a simple white frame.
Make it Metallic
For a luxe twist, swap the dark teal printing ink for gold or copper. The metallic sheen looks incredible against the matte acrylic background.
Hang your prehistoric masterpiece proudly to add a roar of creativity to your wall.
BRUSH GUIDE
The Right Brush for Every Stroke
From clean lines to bold texture — master brush choice, stroke control, and essential techniques.
Explore the Full Guide
Triceratops With Patterned Plates
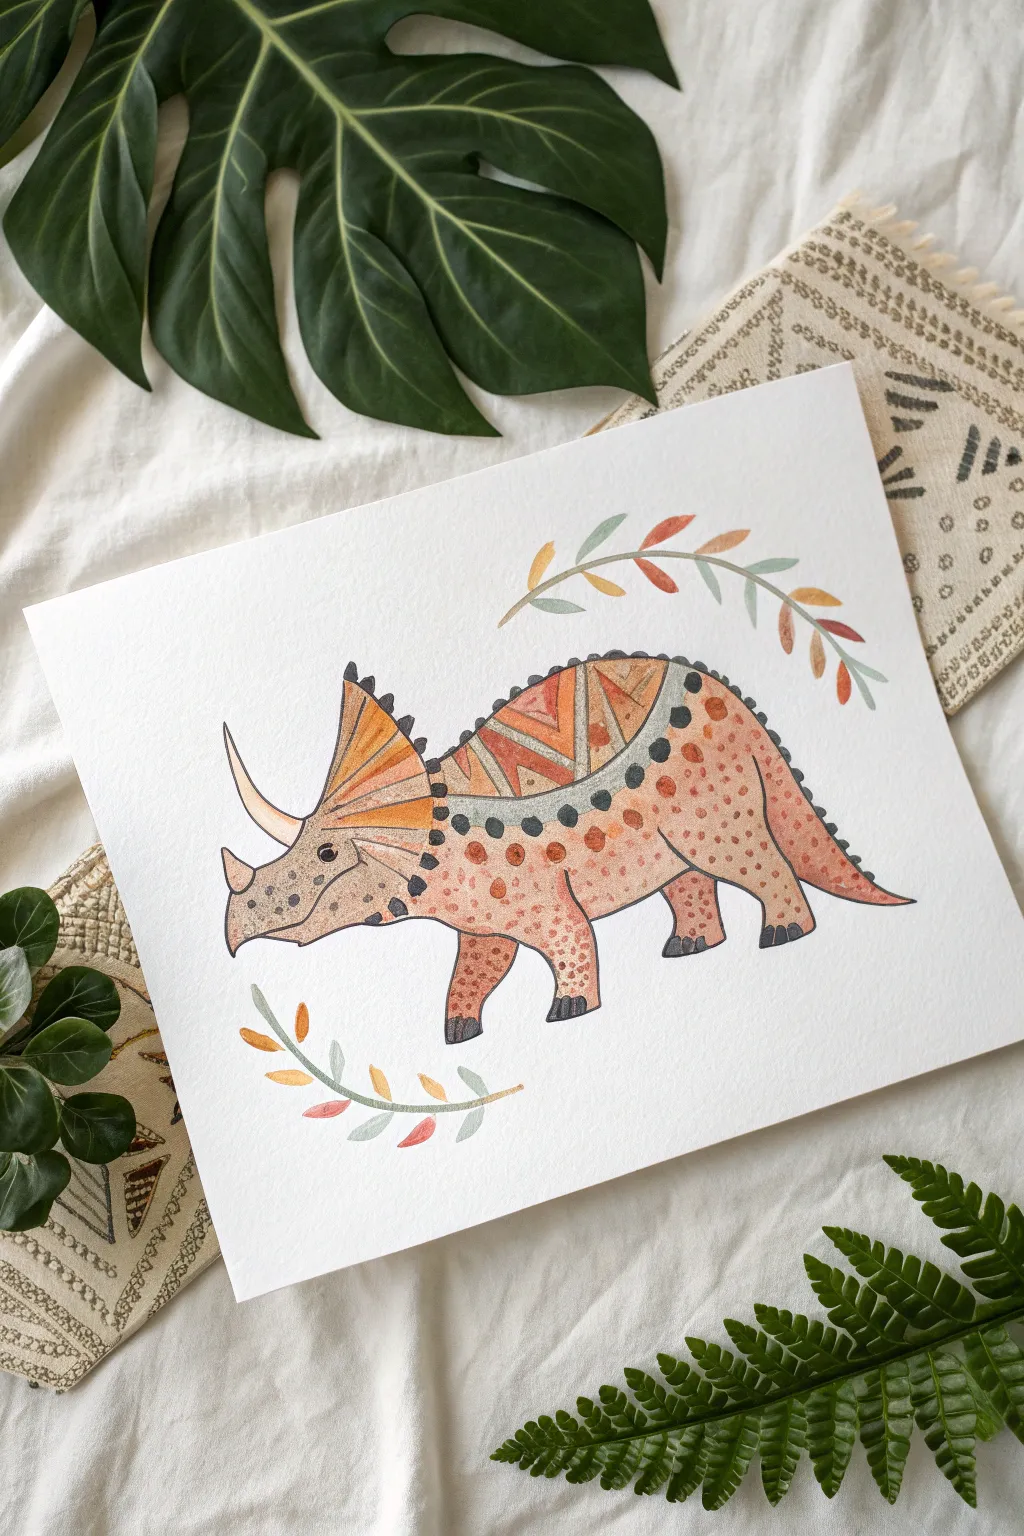
This charming project combines the prehistoric world with modern boho aesthetics, featuring a triceratops adorned in geometric patterns and warm terracotta tones. It is a perfect piece for a nursery or playroom, blending playful illustration with sophisticated watercolor techniques.
How-To Guide
Materials
- Cold press watercolor paper (minimum 140lb/300gsm)
- Watercolor paints (terracotta, burnt sienna, ochre, sage green, gray)
- Small round brushes (sizes 2 and 4)
- Fine liner pen (black or dark brown, waterproof)
- Pencil (HB or H)
- Kneaded eraser
- Paper towel
- Water jar
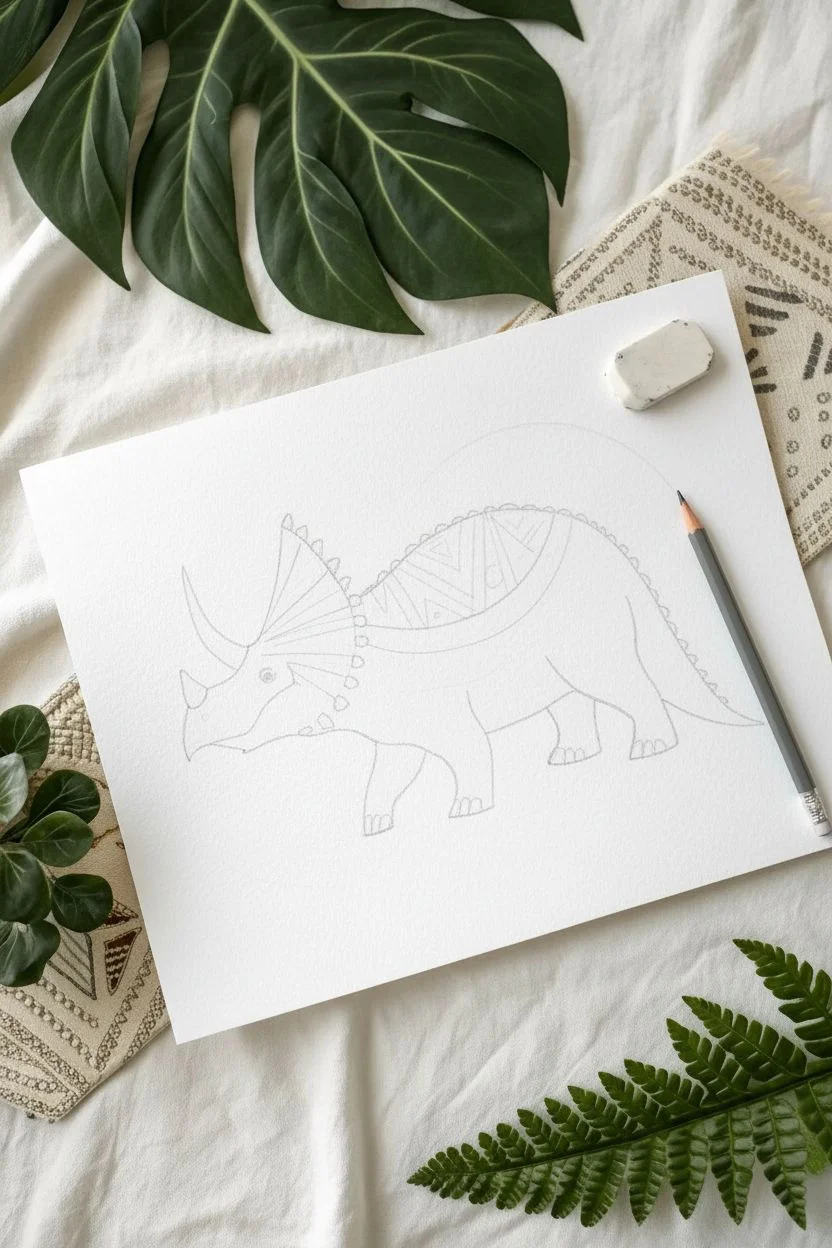
Step 1: Sketching the Outline
-
Basic Shapes:
Begin by lightly sketching the main body of the triceratops using an HB pencil. Start with a large oval for the body and a smaller, rounded shape for the head attached to the left side. -
Adding the Frill and Horns:
Draw the distinct triceratops frill extending up and back from the head. Add the three horns: two long ones above the eyes and a shorter one on the nose. -
Tail and Legs:
Sketch a thick tail tapering to a point at the rear. Add four sturdy legs, keeping the feet relatively flat and simple. -
Internal Patterns:
Lightly draw the decorative guidelines inside the body. Create a curved line across the back to separate the ‘saddle’ area, and divide the frill into triangular sections.
Step 2: Painting the Base Layers
-
The Face and Legs:
Mix a watery wash of gray-brown. Paint the face, lower belly, and legs, keeping the color light and transparent. Avoid the horns for now. -
Primary Body Color:
Load your brush with a warm terracotta or salmon pink color. Paint the main body area below the decorative back saddle, blending it gently where it meets the gray legs. -
The Geometric Saddle:
Using a slightly darker orange and gray, paint the alternating stripes and triangles within the saddle area on the dinosaur’s back. Let some sections remain the paper’s white for contrast. -
Frill Details:
Paint the sections of the head frill using alternating tones of ochre, orange, and gray to create a sunburst effect. -
Horns and Claws:
Wash a very pale ochre over the horns. Use a dark gray for the toes on each foot.
Water Control Pro-Tip
For the geometric patterns, work on non-adjacent sections first. Letting one triangle dry before painting its neighbor prevents colors from bleeding into a muddy mess.
Step 3: Adding Texture and Detail
-
Dotted Texture:
Once the body paint is completely dry, use a concentrated terracotta mix to dab small dots across the main body area, creating a speckled skin texture. -
Decorative Dots:
Dip a fine brush into dark gray paint. Carefully place a row of larger dots along the curved line separating the saddle from the body. -
Frill Decoration:
Add similar dark gray dots along the base of the frill where it meets the head. -
Facial Features:
Paint a small, solid black eye with a tiny white highlight left unpainted (or added later with white gel pen). Add small dots to the snout area for texture.
Fixing Smudged Ink
If your pen smudges, stop immediately. Let it dry completely, then carefully dab opaque white gouache or acrylic over the mistake before redrawing the line.
Step 4: Finishing Touches
-
Inking the Outline:
After ensuring the paint is bone dry, take your waterproof fine liner. Trace the entire outline of the dinosaur with a slightly jittery, organic line rather than a perfect geometric one. -
Defining Sections:
Use the pen to outline the internal pattern sections on the saddle and frill to make the geometry pop. -
Top Foliage:
Above the dinosaur, paint a gently arching branch. Use sage green for the stem and alternate between muted green and terracotta for the simple, almond-shaped leaves. -
Bottom Foliage:
Paint a second, smaller branch curving upwards from the bottom left, mirroring the colors used in the top branch. -
Final Cleanup:
Once the ink is set, gently erase any visible pencil marks with a kneaded eraser to leave a clean, professional finish.
Frame your prehistoric masterpiece to add a touch of warmth and whimsey to any room
Stegosaurus With Fun Back Spikes
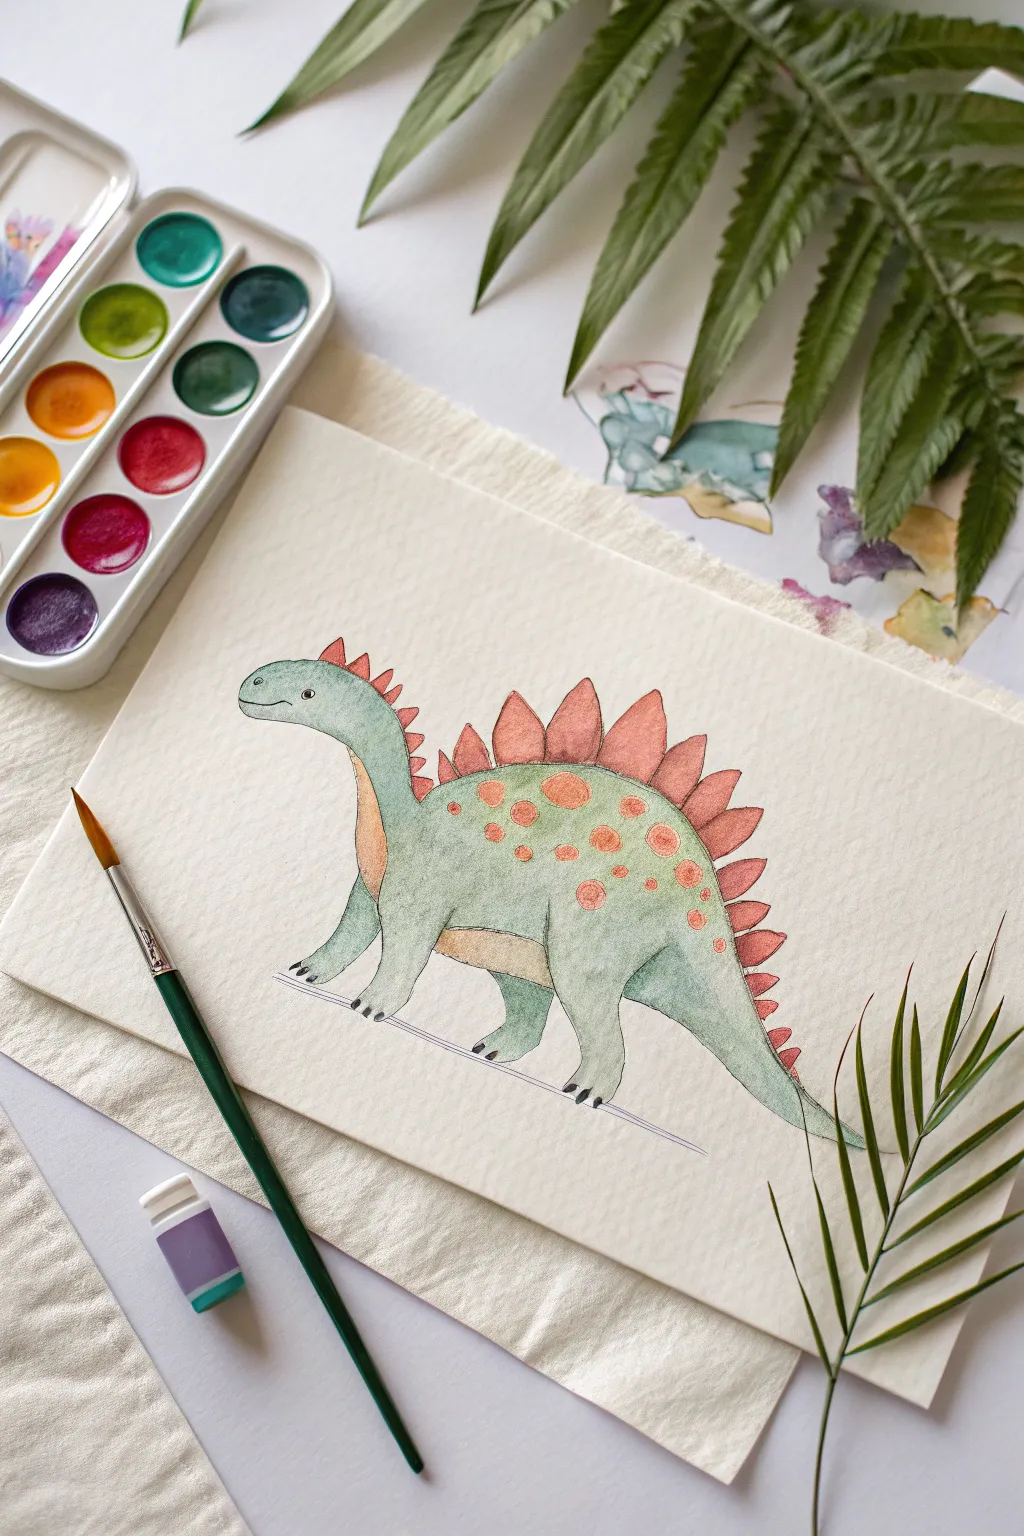
This charming project features a friendly, cartoon-style Stegosaurus painted in soft watercolors. With its gentle green tones and contrasting coral-red plates, this artwork captures a playful prehistoric vibe that’s perfect for a nursery or kid’s room.
Step-by-Step Tutorial
Materials
- Cold press watercolor paper (textured)
- Watercolor paints (pan set or tubes)
- Round watercolor brush (size 4 or 6)
- Small detail brush (size 0 or 1)
- Graphite pencil (HB) and eraser
- Fine liner pen (black or dark grey, waterproof)
- Water cup and paper towels
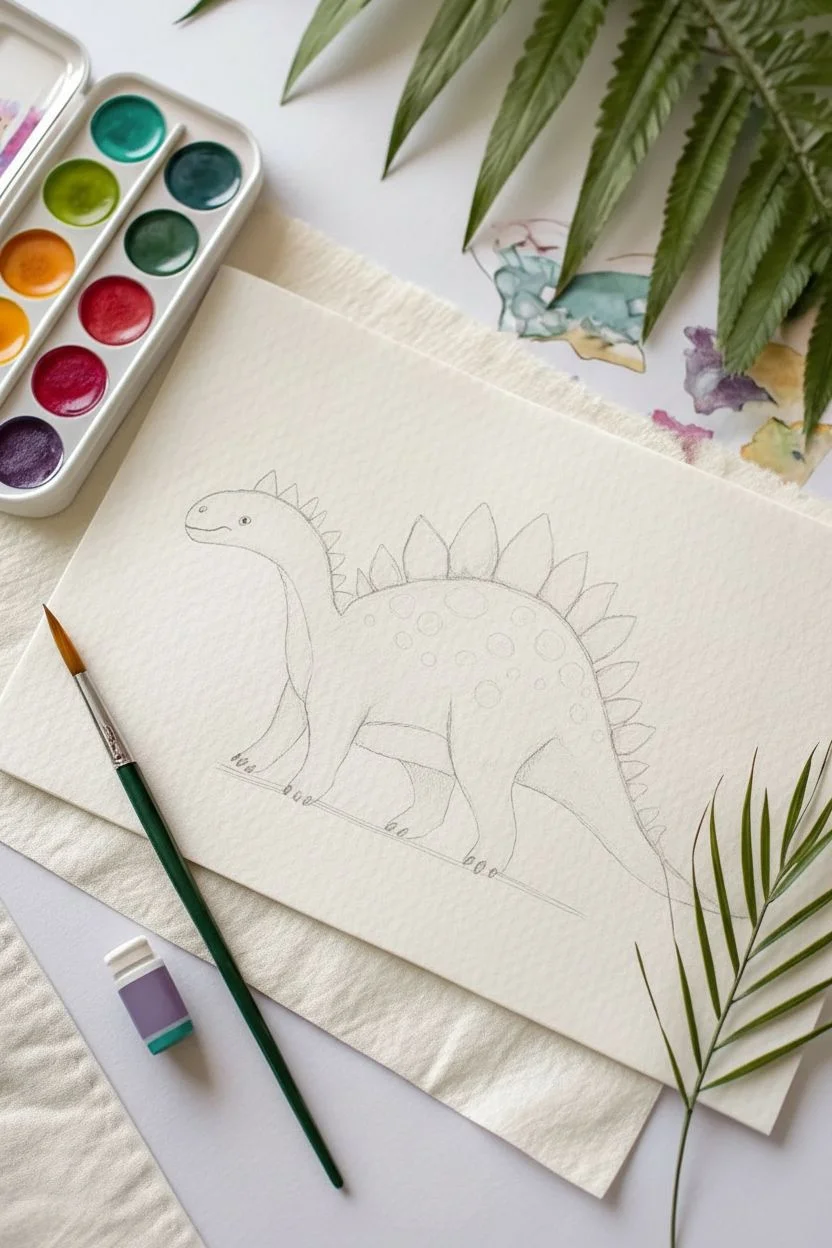
Step 1: Sketching the Dino
-
Outline the body shape:
Start with a light pencil sketch. Draw a large oval for the main body, slightly tilted. Extend a curved neck upwards to the left for the head, creating a rounded snout. -
Add the tail and legs:
Extend a thick, tapering tail down towards the right side. Draw four sturdy legs—ensure the back legs look a bit thicker than the front ones to show weight. -
Draw the plates:
Sketch a row of triangular plates along the dinosaur’s back. Start small at the neck, make them largest in the middle of the back, and taper them down to small points near the tail tip. -
Refine the details:
Add a small dot for the eye, a curve for the mouth, and a line separating the underbelly. Lightly sketch circular spots on the dino’s side.
Color Harmony Tip
To make the green and coral colors feel cohesive, I like to mix a tiny dot of the green paint into the coral mixture, and vice versa. It links them visually.
Step 2: Painting the Body
-
Prepare your green mix:
Mix a muted sage green color. You can achieving this by mixing a standard sap green with a tiny touch of brown or grey to desaturate it slightly. -
Apply the first wash:
Using your medium round brush, paint the entire body of the dinosaur in a light wash of this green, avoiding the underbelly, the back plates, and the circular spots. -
Darken the edges:
While the paint is still slightly damp, drop a cleaner, slightly darker green pigment along the bottom edge of the belly and legs to create a shadow effect. -
Paint the underbelly:
Mix a very pale, warm beige or cream color. Paint the underbelly section, blending the edge slightly where it meets the green body for a soft transition.
Fixing bumpy paper
If your paper warps while painting wet-on-wet, tape the edges down to your table with masking tape before you start, and leave it taped until 100% dry.
Step 3: Adding the Plates and Details
-
Mix the coral color:
Create a warm, reddish-orange hue for the plates. A mix of red and yellow ochre works well to keep it earthy rather than neon. -
Fill in the plates:
Carefully paint each triangular plate along the back. You can vary the intensity slightly, making the base of the plates a bit darker than the tips. -
Paint the spots:
Using the same coral-orange mixture, fill in the circular spots you left unpainted on the dinosaur’s side. -
Dry thoroughy:
Let the entire painting dry completely. This is crucial before adding ink to prevent bleeding.
Step 4: Inking and Finishing Touches
-
Outline the body:
Take your fine liner pen (make sure it’s waterproof if you plan to touch up paint later) and carefully trace your pencil lines. Use disjointed, sketchy strokes rather than one continuous line to mimic the texture in the photo. -
Add facial features:
Ink the eye, leaving a tiny white highlight if possible, and draw the simple smile line. -
Texture the skin:
Add tiny stippling dots or very short dashes on the green skin to suggest a rough, dinosaur-like texture. -
Ground the figure:
Draw a simple horizontal line under the feet to ground the character so it doesn’t look like it’s floating. -
Final shading:
If the dried painting looks too flat, use a very diluted grey-green wash to add deeper shadows under the neck and where the legs meet the body.
Once dry, you can sign your name near the tail and frame this adorable prehistoric friend

PENCIL GUIDE
Understanding Pencil Grades from H to B
From first sketch to finished drawing — learn pencil grades, line control, and shading techniques.
Explore the Full Guide
Dinosaur and Volcano Scene
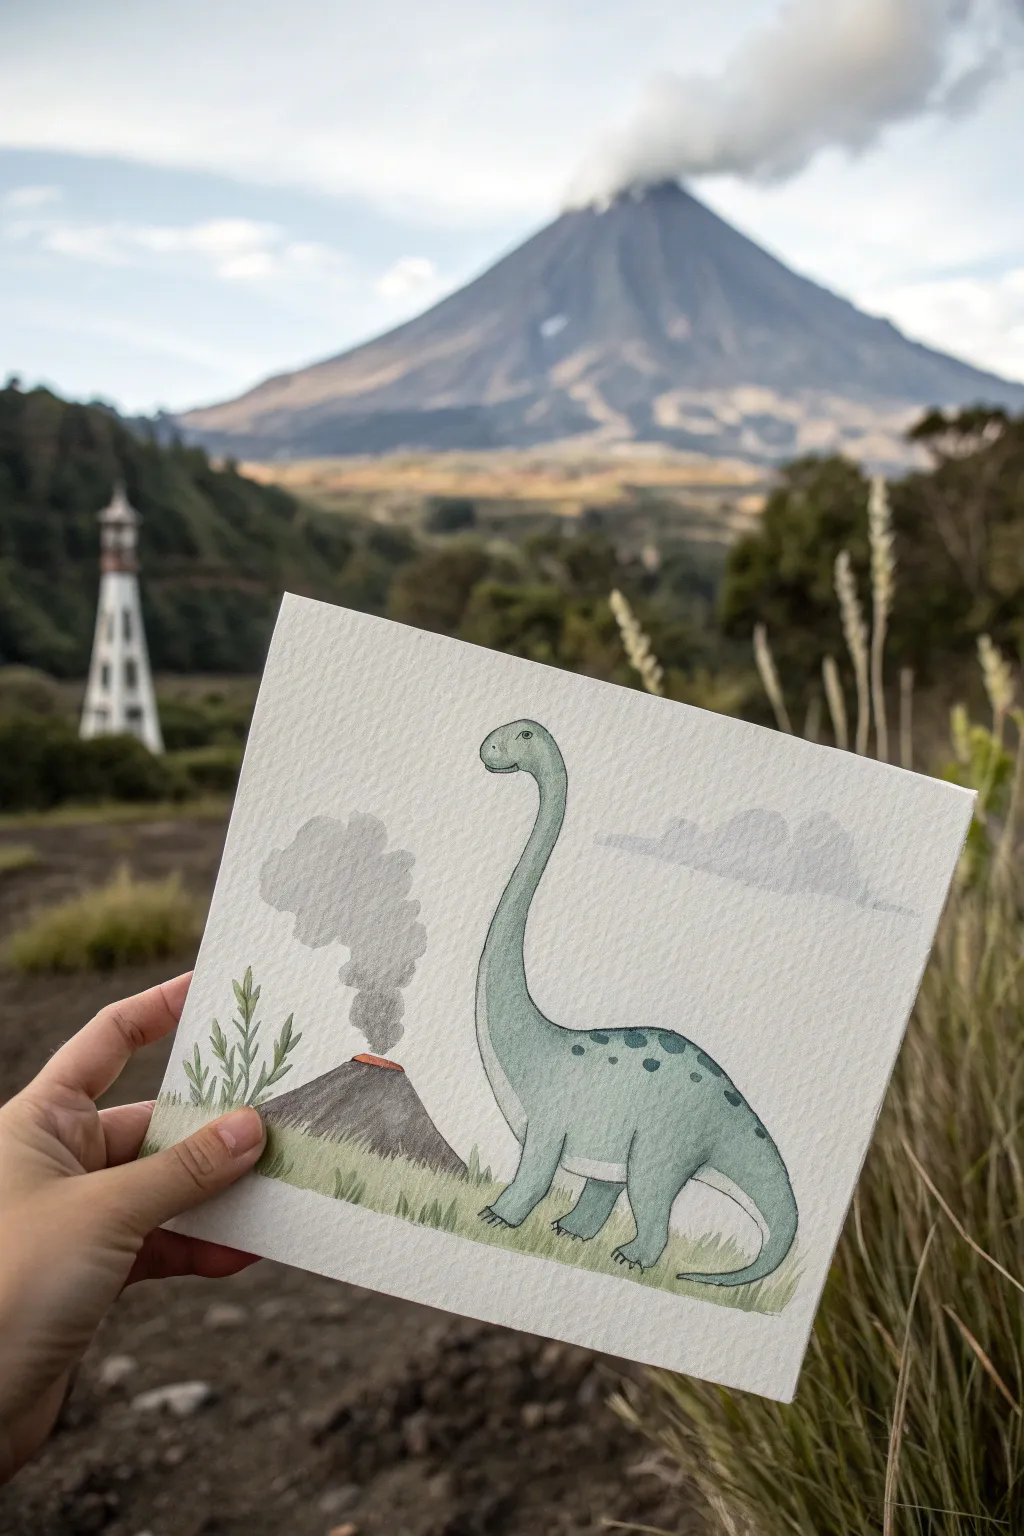
Capture the charm of prehistoric times with this serene watercolor scene featuring a friendly long-necked dinosaur and a smoking volcano. The soft pastel tones and simple lines make this an approachable project for artists of all levels looking to create something sweet and storybook-like.
Step-by-Step Guide
Materials
- Cold press watercolor paper (square format, approx. 6×6 inches)
- HB pencil and kneaded eraser
- Watercolor paints (Sage Green, Paynes Grey, Burnt Sienna, darker Green)
- Round brushes (sizes 2 and 6)
- Fine liner pen (grey or sepia, 0.1mm)
- Jar of water
- Paper towel
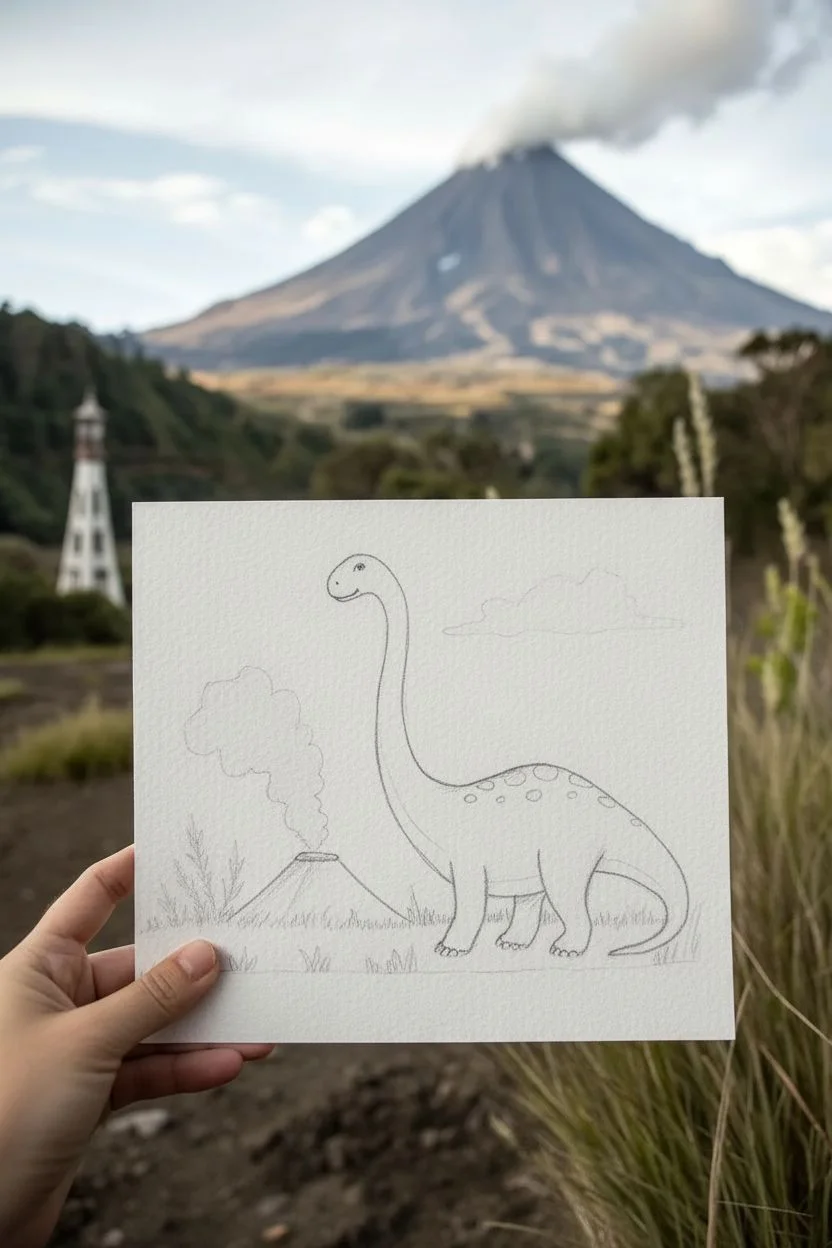
Step 1: Sketching the Scene
-
Outline the dinosaur:
Begin by lightly sketching the dinosaur’s body on the right side of your paper. Start with a small oval for the head, followed by a long, sweeping curve for the neck that flows into a rounded body. Add a long, tapering tail that curves down near the bottom edge. -
Add the legs and details:
Sketch four sturdy, rounded legs. The front legs should be straight, while the back legs show a slight bend at the knee. Mark a curved line across the belly to separate the underbelly from the main body, and sketch a small, friendly eye and a smiley mouth. -
Position the volcano:
To the left of the dinosaur, draw a simple triangle with a flat top for the volcano. It should be smaller than the dinosaur to create a sense of scale. Add a wavy, cloud-like shape billowing out from the top to represent smoke. -
Draw the foreground:
Connect the dinosaur and the volcano with a simple horizon line. Add small, tufted grass shapes along the bottom and a few leafy fern-like plants near the volcano’s base to frame the scene.
Soft Edges
For fluffier volcano smoke, dab the painted area with a clean tissue while it’s still wet to lift color and create soft, cloudy textures.
Step 2: Watercolor Washes
-
Paint the dinosaur’s body:
Mix a watery wash of Sage Green. Using your size 6 brush, fill in the dinosaur’s body, avoiding the belly area and the eye. Keep the paint wet enough so it pools slightly, creating a smooth, even texture. -
Underbelly details:
Dilute your green mix even further until it is barely tinted water, or use a very pale cream. Paint the belly area with this lighter shade to give the dinosaur some dimension. -
Paint the volcano:
While the dinosaur dries, mix Paynes Grey with a touch of Burnt Sienna to get a warm, dark grey. Paint the volcano cone, letting the color fade slightly as you reach the bottom. -
Add the lava:
With a fine brush, add a tiny strip of bright Burnt Sienna or orange right at the rim of the volcano to suggest glowing lava. -
Create the smoke:
Wet the smoke area with clean water first. Then, drop in a very diluted grey wash, letting it bloom softly into the wet paper for a fluffy, airy look.
Bleeding Lines?
If your ink bleeds when you add paint or erase, your paper wasn’t dry enough. Always ensure the paper feels room temperature, not cool touch, before inking.
Step 3: Adding Texture and Definition
-
Paint the spots:
Once the green body paint is completely dry, mix a slightly more concentrated, darker green. Use your size 2 brush to dab small spots along the dinosaur’s back and tail. -
Define the grass:
Use a mix of sap green and yellow ochre to paint the grass tufts and the fern leaves. Use short, upward strokes to mimic blades of grass. -
Add background clouds:
If you wish to add the subtle clouds seen in the reference, mix an extremely pale grey wash. Paint simple, rounded cloud shapes in the sky, keeping edges soft. -
Outline in ink:
Once the painting is bone dry—I usually give it an extra five minutes just to be safe—trace your original pencil lines with a fine liner pen. Keep the line work delicate and broken in places for an organic feel. -
Add final details:
Use the pen to draw tiny vertical lines on the volcano for texture, add claws to the dinosaur’s feet, and darken the eye, leaving a tiny white highlight. -
Erase pencil marks:
Gently gently rub your kneaded eraser over the entire image to lift any visible graphite, leaving just the ink and paint.
Now you have a charming prehistoric snapshot ready to frame or gift
Jurassic Jungle Frame Around a Dino
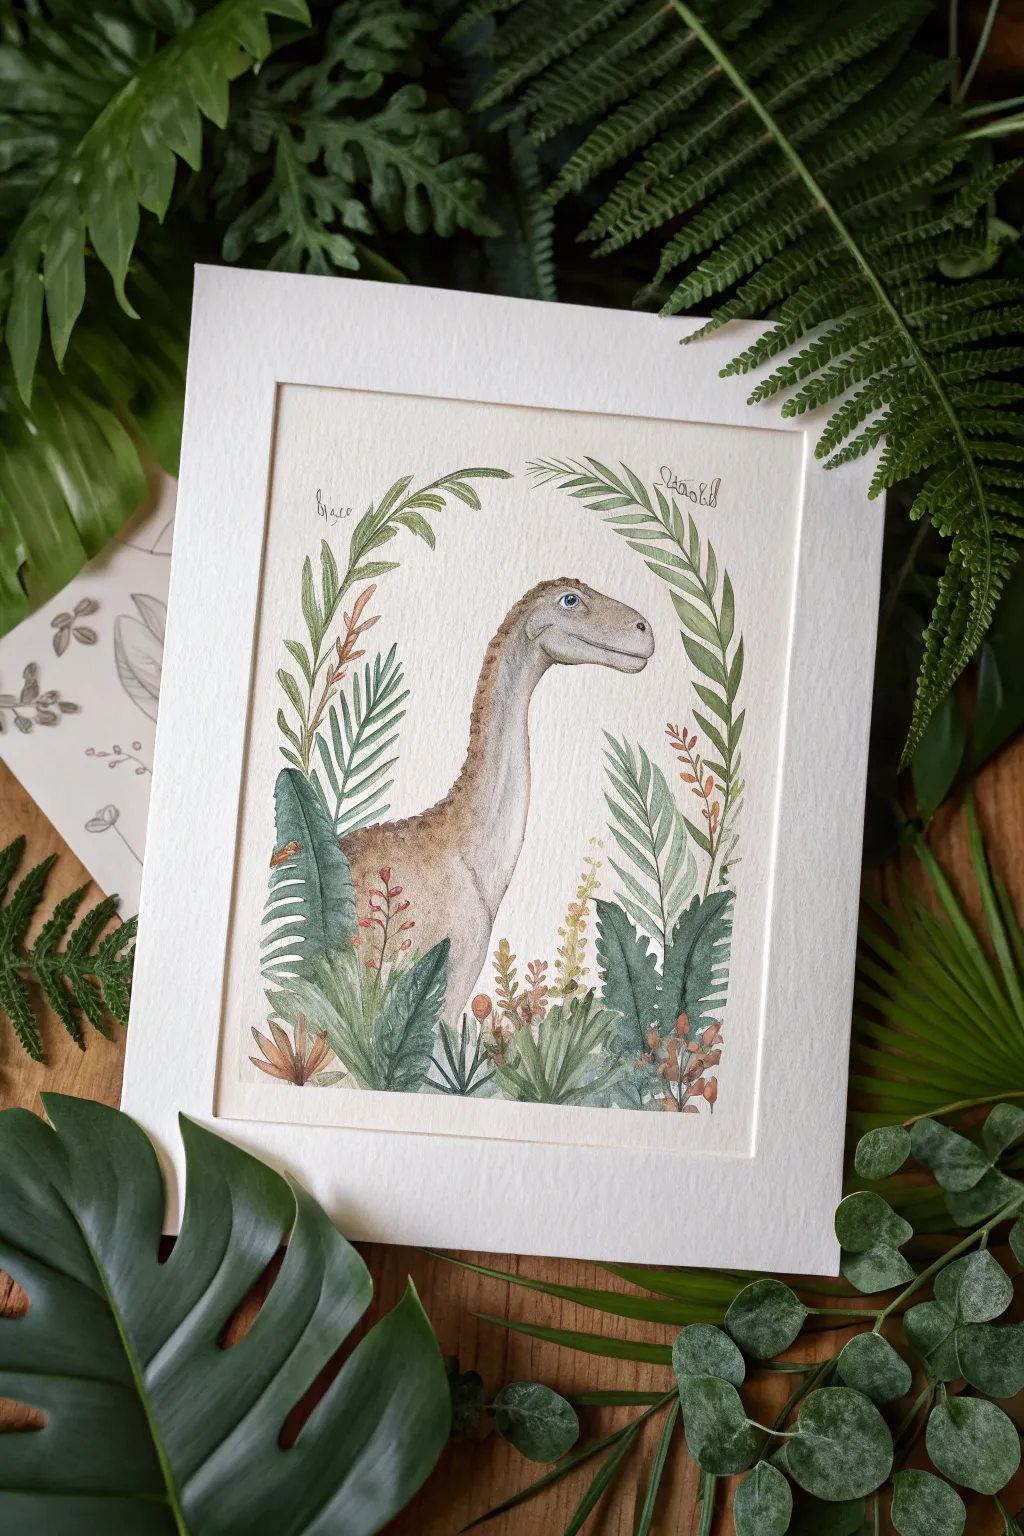
Transport yourself back to the Jurassic period with this gentle watercolor illustration featuring a smiling sauropod framed by lush, ancient foliage. The soft, earthy tones and delicate linework create a vintage botanical print aesthetic perfect for a nursery or study.
Detailed Instructions
Materials
- Hot press watercolor paper (smooth texture)
- Watercolor paints (Earth tones: Burnt Sienna, Yellow Ochre, Sap Green, Paine’s Gray)
- Fine liner pens (sepia or dark brown, 0.1mm and 0.3mm)
- Round watercolor brushes (sizes 2, 4, and 6)
- HB Pencil
- Kneaded eraser
- Masking tape
- White mat board frame (for display)
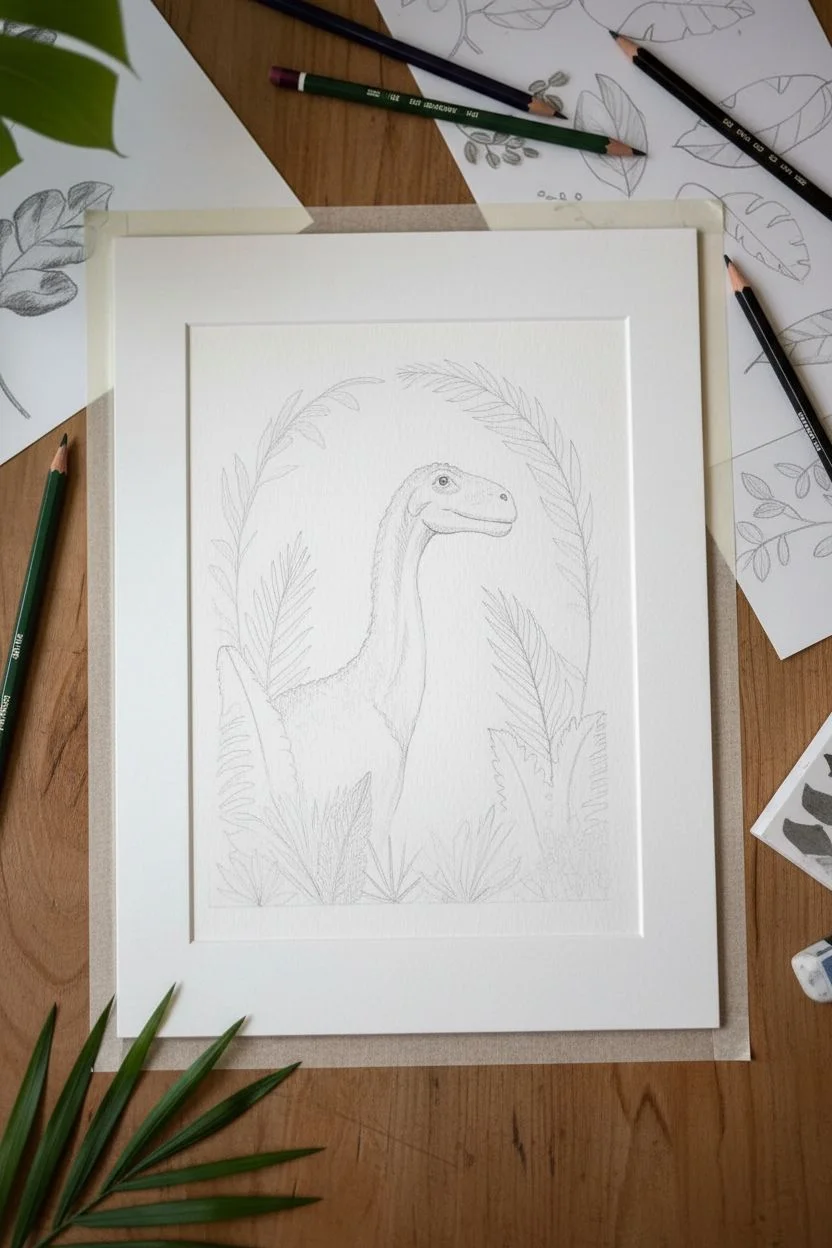
Step 1: Sketching the Composition
-
Draft the frame:
Start by lightly sketching an oval shape in the center of your paper to serve as a guide. This doesn’t need to be drawn heavily; it marks the negative space where the dinosaur’s neck will rise from. -
Outline the dinosaur:
Sketch the dinosaur’s long neck rising from the bottom center, curving slightly to the right. Add the head with a characteristic rounded snout and a gentle smile, ensuring the eye is placed high on the skull. -
Map out the foliage:
Around the dinosaur’s base and curving over its head, lightly draw the main stems of your plants. Include large palm-like leaves at the bottom and fern fronds arching over the top to create a natural ‘frame’. -
Refine the sketch:
Go over your pencil lines to define the individual leaflets on the ferns and the texture of the broad leaves. Use your kneaded eraser to lighten the graphite until it’s barely visible before you start painting.
Muddy colors?
If your greens look dull, avoid mixing more than 3 colors. Let layers dry fully before glazing. A clean brush and fresh water are vital for keeping watercolor bright.
Step 2: Painting the Gentle Giant
-
Base wash for skin:
Mix a very watery wash of Burnt Sienna and a touch of Paine’s Gray. Apply this to the dinosaur’s skin, keeping the color lightest on the throat and top of the head to mimic sunlight. -
Adding skin texture:
While the first layer is still slightly damp, drop in stronger pigment of Burnt Sienna along the back of the neck and under the jawline to create shadow and volume. -
Detailing the face:
Use your smallest brush (size 2) to carefully paint the eye with a drop of blue or grey, leaving a tiny white speck for the highlight. Add a soft pinkish-brown wash to the snout for warmth. -
Neck patterns:
Once the base is dry, mix a darker brown. Using the tip of your brush, dab small, irregular spots along the back of the neck, fading them out as you move toward the underbelly.
Step 3: Creating the Jungle Frame
-
Base greenery:
For the leaves, mix Sap Green with a little Yellow Ochre. Paint the lighter, broader leaves at the bottom first, using long, smooth strokes to fill their shapes. -
Darker foliage accents:
Mix Sap Green with Paine’s Gray to get a deep, forest green. Use this for the fern fronds arching over the top and the shadowed leaves tucked behind the lighter ones at the base. -
Adding floral pops:
Using a reddish-brown or terracotta mix, paint the small sprigs of prehistoric ‘flowers’ or spore pods interspersed among the green leaves. Keep these marks small and delicate. -
Layering for depth:
I find it helpful to wait for the first green layers to dry completely, then glaze a second, transparent layer of blue-green over the bottom-most leaves to push them into the background.
Pro Tip: Edges
For a softer look on the dinosaur’s skin, soften the hard paint edges with a clean, damp brush before the paint dries completely. This is the ‘softening off’ technique.
Step 4: Finishing Touches
-
Inking the outlines:
Take your sepia fine liner pen. Very loosely outline the leaves and the dinosaur. Do not trace every single line rigidily; broken, sketchy lines add to the organic feel. -
Adding veins and texture:
Use the pen to draw the central veins in the leaves and add tiny hatching lines on the dinosaur’s neck to suggest wrinkly skin. -
Optional text:
If you wish, use a delicate cursive script to write the dinosaur’s name or a faux-scientific label near the top arch of the ferns. -
Final assessment:
Erase any remaining pencil marks carefully. Check if the dinosaur’s eye needs a bit more definition with the pen. -
Matting:
Place your finished painting behind a clean white mat board to give it that professional gallery look and create breathing room around the composition.
Now you have a charming piece of paleo-art ready to be framed and admired on your wall


Night Sky Dino With Stars
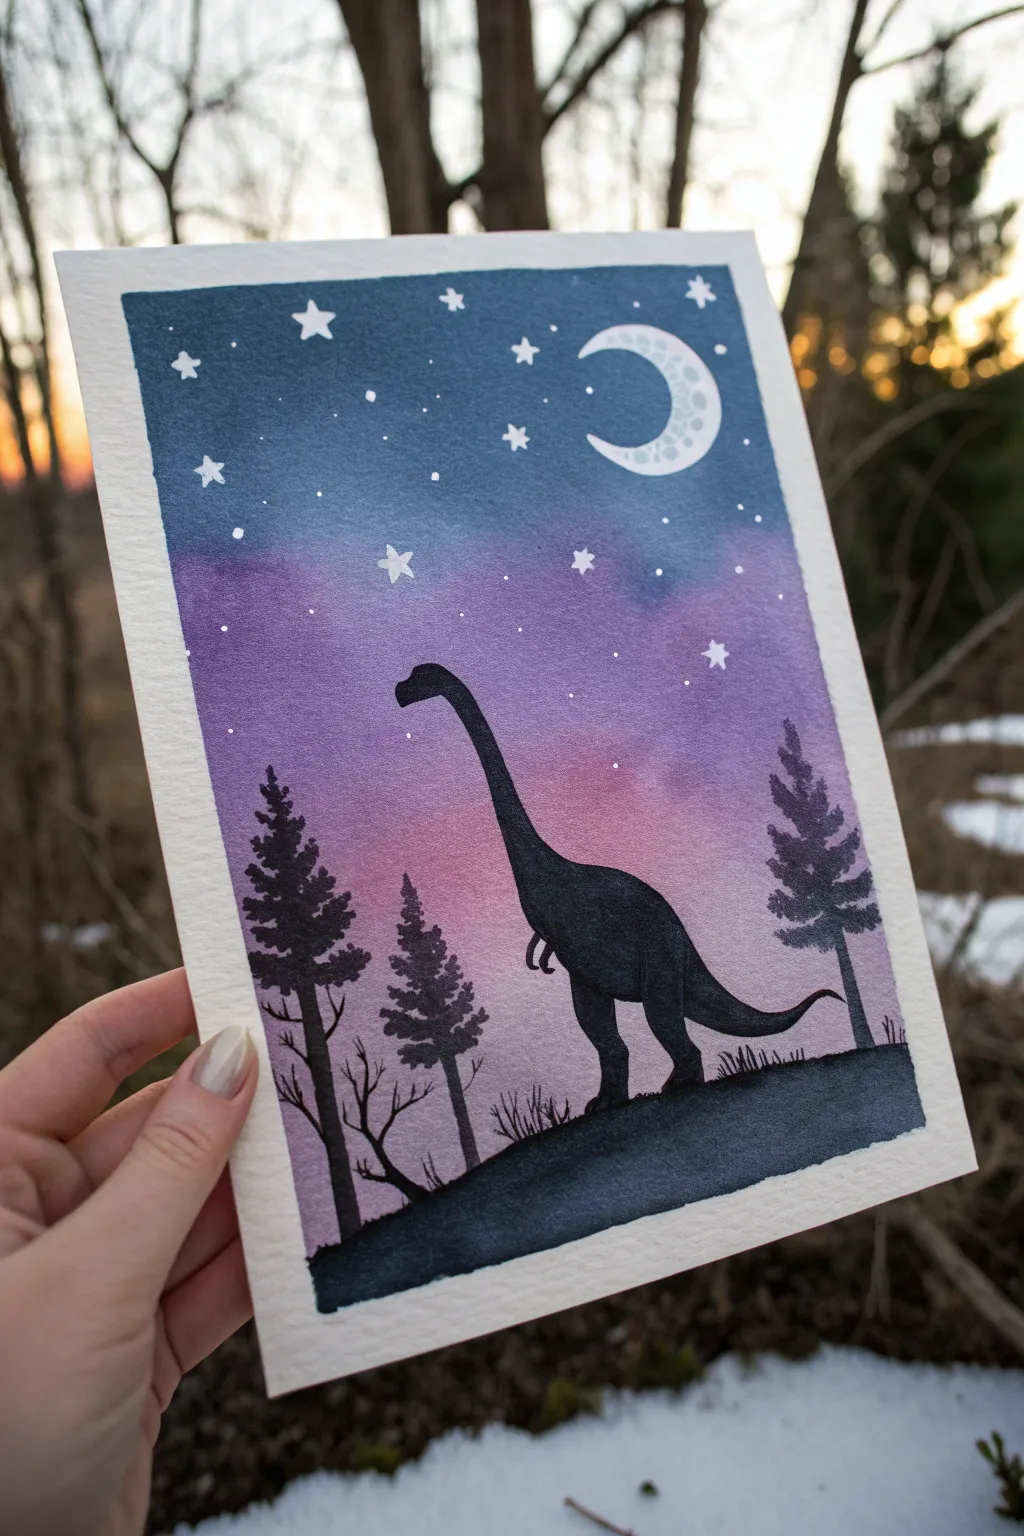
This whimsical watercolor project features a gentle sauropod silhouette gazing up at a dreamy galaxy sky. With simple blending techniques and bold silhouettes, it creates a magical prehistoric scene perfect for a nursery or bedroom.
Step-by-Step
Materials
- Cold press watercolor paper (approx. 5×7 inches)
- Watercolor paints (Indigo, Purple, Magenta/Pink)
- Black gouache or black acrylic paint
- White gel pen or white gouache
- Painter’s tape or masking tape
- Flat wash brush
- Detail round brush (size 0 or 1)
- Pencil and eraser
- Jar of clean water
- Paper towels
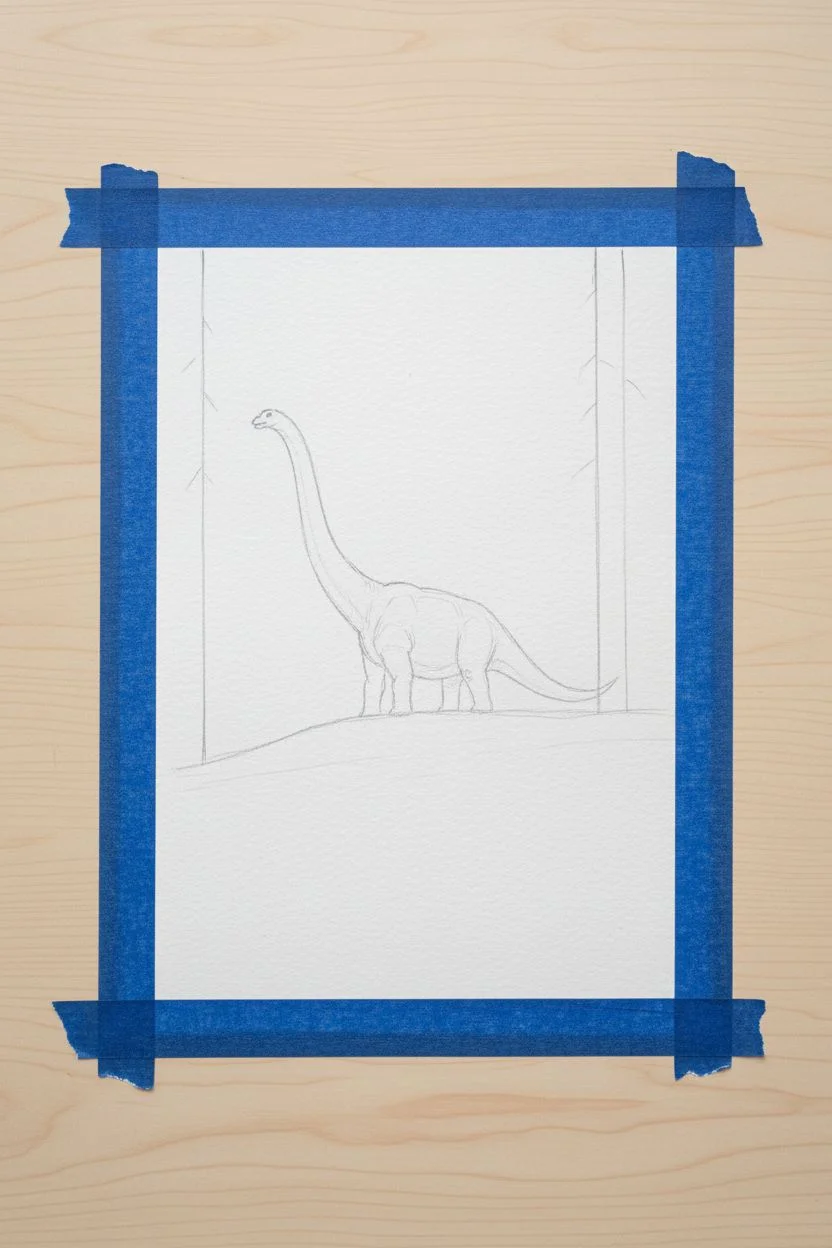
Step 1: Setting the Scene
-
Prepare your paper:
Begin by taping down the edges of your watercolor paper to a board or table. This creates that crisp white border seen in the final piece and prevents the paper from buckling when wet. -
Sketch the silhouette:
Lightly sketch the outline of the dinosaur and the ground. Don’t worry about details inside the shape, as this will be filled in solid black later. Keep your pencil lines faint so they don’t show through the sky. -
Plan the trees:
Mark the positions for your pine trees on the left and right sides. You don’t need to draw every branch now, just vertical lines to guide where the trunks will stand.
Step 2: Painting the Galaxy Sky
-
Wet the sky area:
Using your flat brush and clean water, gently wet the entire sky area above the ground line. Avoid the moon shape if you can, but since we are using white gouache later, you can paint over it if needed. -
Apply the horizon glow:
Start at the bottom of the sky (near the dinosaur’s back) with a diluted magenta or pink. Let the wet paper help the pigment bloom upward softly. -
Transition to purple:
While the pink is still damp, load your brush with purple watercolor. Apply this across the middle section of the sky, letting it touch and blend slightly into the pink layer below. -
Add the deep night sky:
For the top third of the painting, use a concentrated indigo or dark blue. Allow this dark color to bleed down into the purple, creating a seamless gradient from night to twilight. -
Let it dry completely:
This is crucial. The background must be bone-dry before adding the black silhouette. I usually wait at least 15-20 minutes or use a hair dryer on a low setting.
Don’t Rush the Gradient
Work wet-on-wet for the sky. If the paper dries while blending, re-wet it slightly with clean water so the pink, purple, and blue merge without hard lines.
Step 3: The Silhouette & Details
-
Paint the ground:
Switch to your black gouache or acrylic paint. Fill in the ground area first, creating a solid, opaque base for your dinosaur to stand on. -
Fill the dinosaur shape:
Using your detail brush and black paint, carefully outline and fill in the dinosaur. Pay attention to the curve of the neck and the tip of the tail to keep the silhouette recognizable. -
Add pine trees:
Paint the vertical trunks for the trees. To make the branches, use a flicking motion with the tip of your brush, starting wider at the bottom and getting narrower at the top. -
Add skeletal trees:
For variety, add a few small, bare leafless trees near the dinosaur’s feet. These thin, jagged lines add great texture to the foreground. -
Create grass texture:
Use the very tip of your smallest brush to flick tiny black lines upward from the ground contour, mimicking grass blades.
Fixing Wobbly Silhouettes
If your dinosaur outline gets messy, wait for the black paint to dry completely. Then, use black paint to gently thicken the line and smooth out the bump.
Step 4: Celestial Highlights
-
Draw the moon:
Once the sky is dry, use a white gel pen or opaque white gouache to paint the crescent moon shape in the dark blue section. -
Texture the moon:
Add tiny grey or light blue dots inside the white crescent to give the moon a cratered texture. -
Add the stars:
Draw various sizes of stars using your white pen. Mix simple dots with five-pointed stars to create depth. Cluster a few together for a natural look. -
The reveal:
Carefully peel away the masking tape at a 45-degree angle to reveal your clean edges and frame your prehistoric masterpiece.
Now you have a serene prehistoric night scene ready to display or frame
Stencil-Style Dinosaur in Negative Space
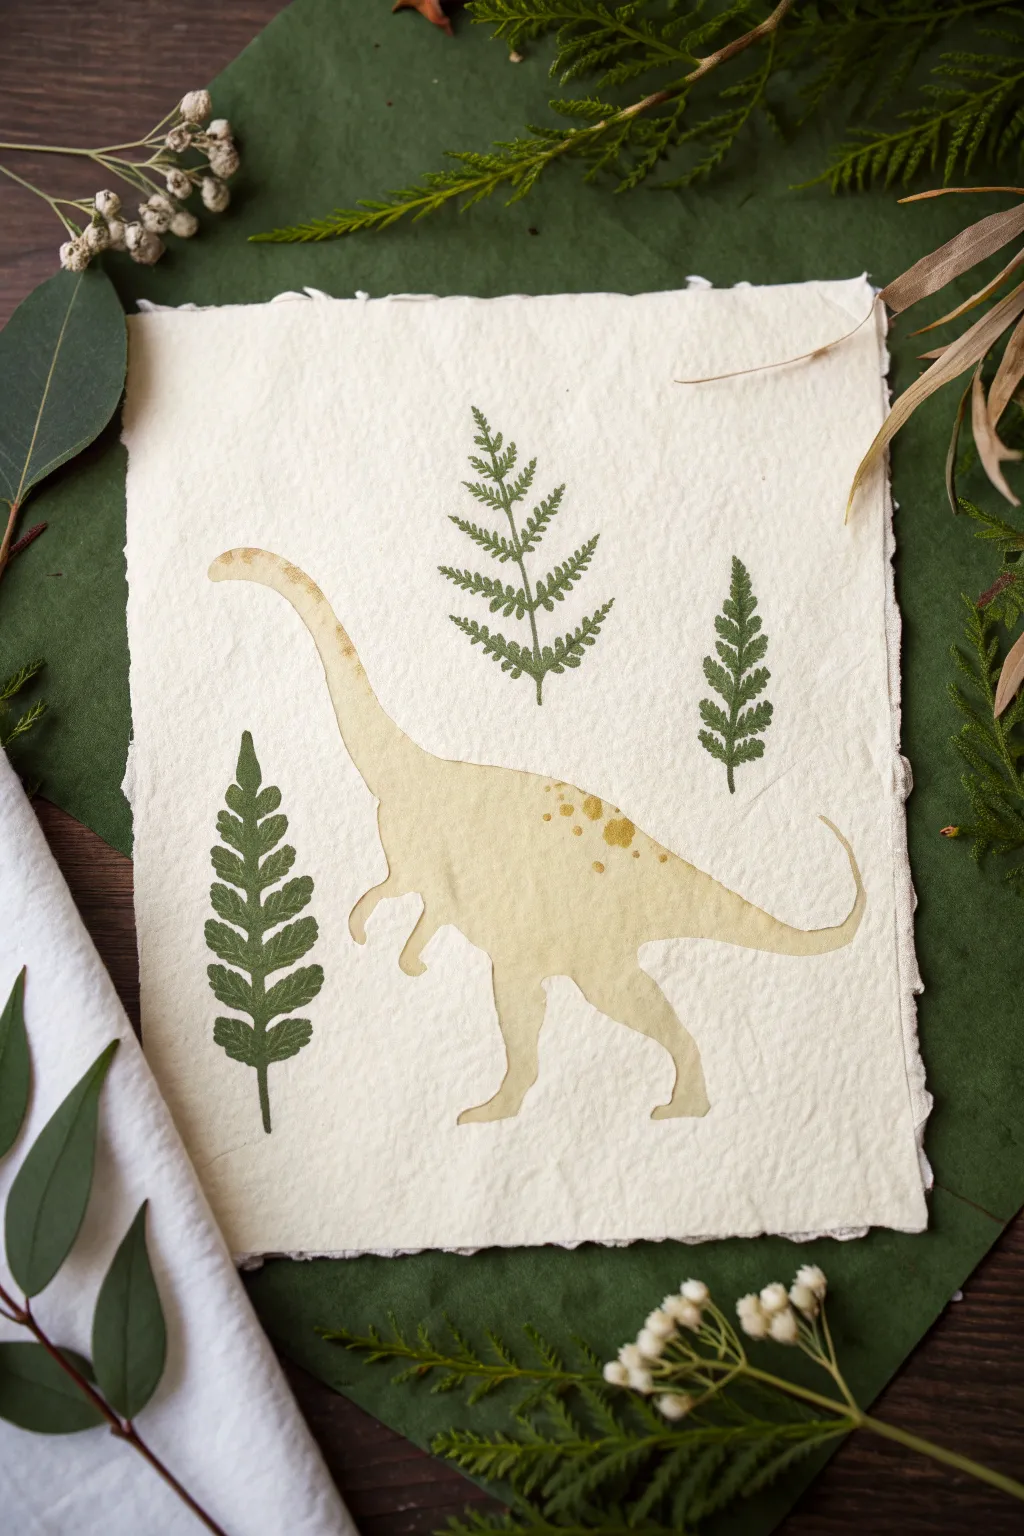
Create a sophisticated piece of dinosaur art that feels more like a fossil discovery than a cartoon. By combining natural coffee staining techniques with botanical elements on textured paper, you’ll achieve an organic, earthy look perfect for a gallery wall or a nature-themed nursery.
Detailed Instructions
Materials
- High-quality watercolor paper or handmade cotton rag paper (with deckle edges)
- Strong brewed coffee or tea (cooled)
- Sauropod dinosaur silhouette stencil (mylar or cardstock)
- Real fern leaves (pressed or fresh) OR fern stamps
- Green ink pad (if using stamps) or green watercolor paint
- Small spray bottle or sponge applicator
- Removable painter’s tape or stencil adhesive
- Paper towels
- A clean workspace
Step 1: Preparation & Paper
-
Brew your stain:
Brew a very strong cup of coffee or dark tea. The stronger the brew, the richer the color of your dinosaur will be. Let it cool completely before using it to prevent warping the paper. -
Prepare the paper:
Select a sheet of thick, textured paper. I prefer handmade cotton rag paper because the rough surface grabs the pigment beautifully. If your paper doesn’t have deckle edges, you can gently tear the edges against a ruler to create that vintage look. -
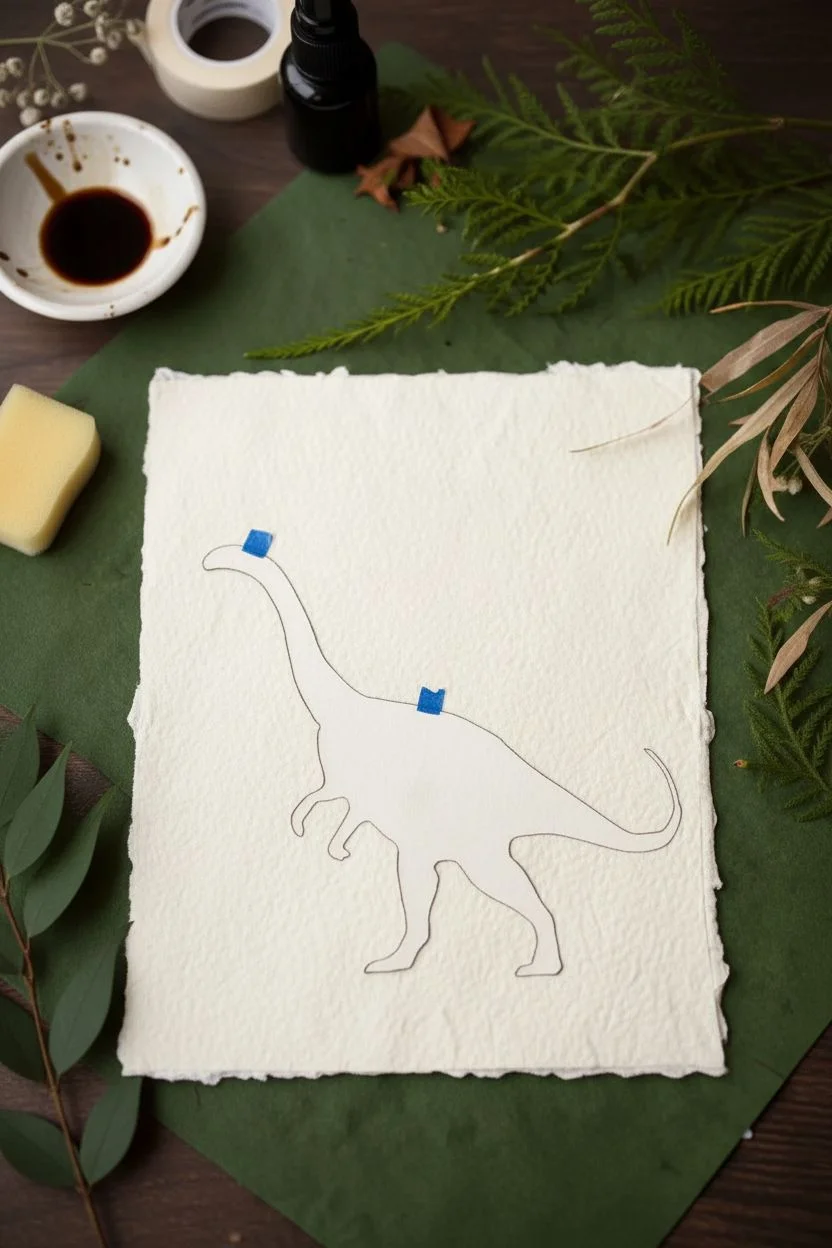
Position the stencil:
Place your dinosaur stencil in the center of the paper. Since we are creating a negative space effect where the dinosaur is colored and the background is plain (or vice versa), decide now. For the look in the photo, you actually want a reverse stencil or ‘mask’—a solid paper dinosaur shape that covers the paper. -
Secure the mask:
Use a tiny loop of painter’s tape or a light mist of repositionable spray adhesive on the back of your dinosaur cutout. Press it firmly onto the center of your paper.
Bleeding Edges?
If coffee bleeds under the stencil, use less liquid next time. You can also thicken the coffee with a tiny bit of gum arabic to control the flow better.
Step 2: Creating the Fossil Shape
-
Apply the stain:
Wait, let’s look closer at the image. The dinosaur is actually the *stained* part, and the background is creamy. Let’s pivot: You need a traditional stencil (a sheet with a dinosaur-shaped hole). -
Secure the negative stencil:
Place the stencil sheet over your paper so the dinosaur void is centered. Tape down the edges so the paper doesn’t shift. -
Dab the pigment:
Dip a sponge or foam brush into your cooled coffee. Dab off the excess on a paper towel—you want it damp, not soaking wet. -
Build the color:
Gently dab the coffee sponge inside the stencil opening. Start light; you can always add more. I like to let the first layer dry briefly and add a second coat to create those uneven, organic splotches that look like fossilized stone. -
Add texture spots:
While the main shape is still slightly damp, take a smaller brush and drop tiny blooming dots of concentrated coffee or darker watercolor onto the dinosaurs back to create the spotted texture seen in the reference. -
Reveal the shape:
Allow the paper to dry until it is cool to the touch, not cold/wet. Carefully lift the stencil straight up to avoid smearing the edges.
Step 3: Botanical Details
-
Select your greenery:
The image features distinct fern fronds. You can use real pressed leaves coated in paint for a ‘nature print’ or high-quality stamps. -
Plan the arrangement:
Before committing ink to paper, hover your stamps or leaves over the artwork. Place one large frond centrally above the dinosaur’s back, and two smaller ones flanking the sides to balance the composition. -
Ink the ferns:
If using specific leaf stamps, tap them onto a moss-green ink pad. Ensure the stem and individual leaves are fully coated but not gloopy. -
Press the prints:
Press the stamp firmly onto the paper. Rock it ever so slightly to ensure the textured paper catches the ink, but be careful not to slide it. -
Repeat the process:
Stamp the remaining ferns. Notice how the fern on the left sits lower than the dinosaur’s neck, while the right one is higher near the tail. This asymmetry keeps the eye moving. -
Dry and flatten:
Once all ink and coffee is dry, place the artwork under a heavy book overnight if the liquid has caused any heavy buckling.
Level Up: Real Nature
Instead of stamps, coat real fern leaves with acrylic paint and press them onto the paper. It creates an authentic, one-of-a-kind fossil texture.
Display your finished prehistoric piece in a simple floating frame to show off those beautiful rough edges
Textured Dino Skin With Sponge Dabbing
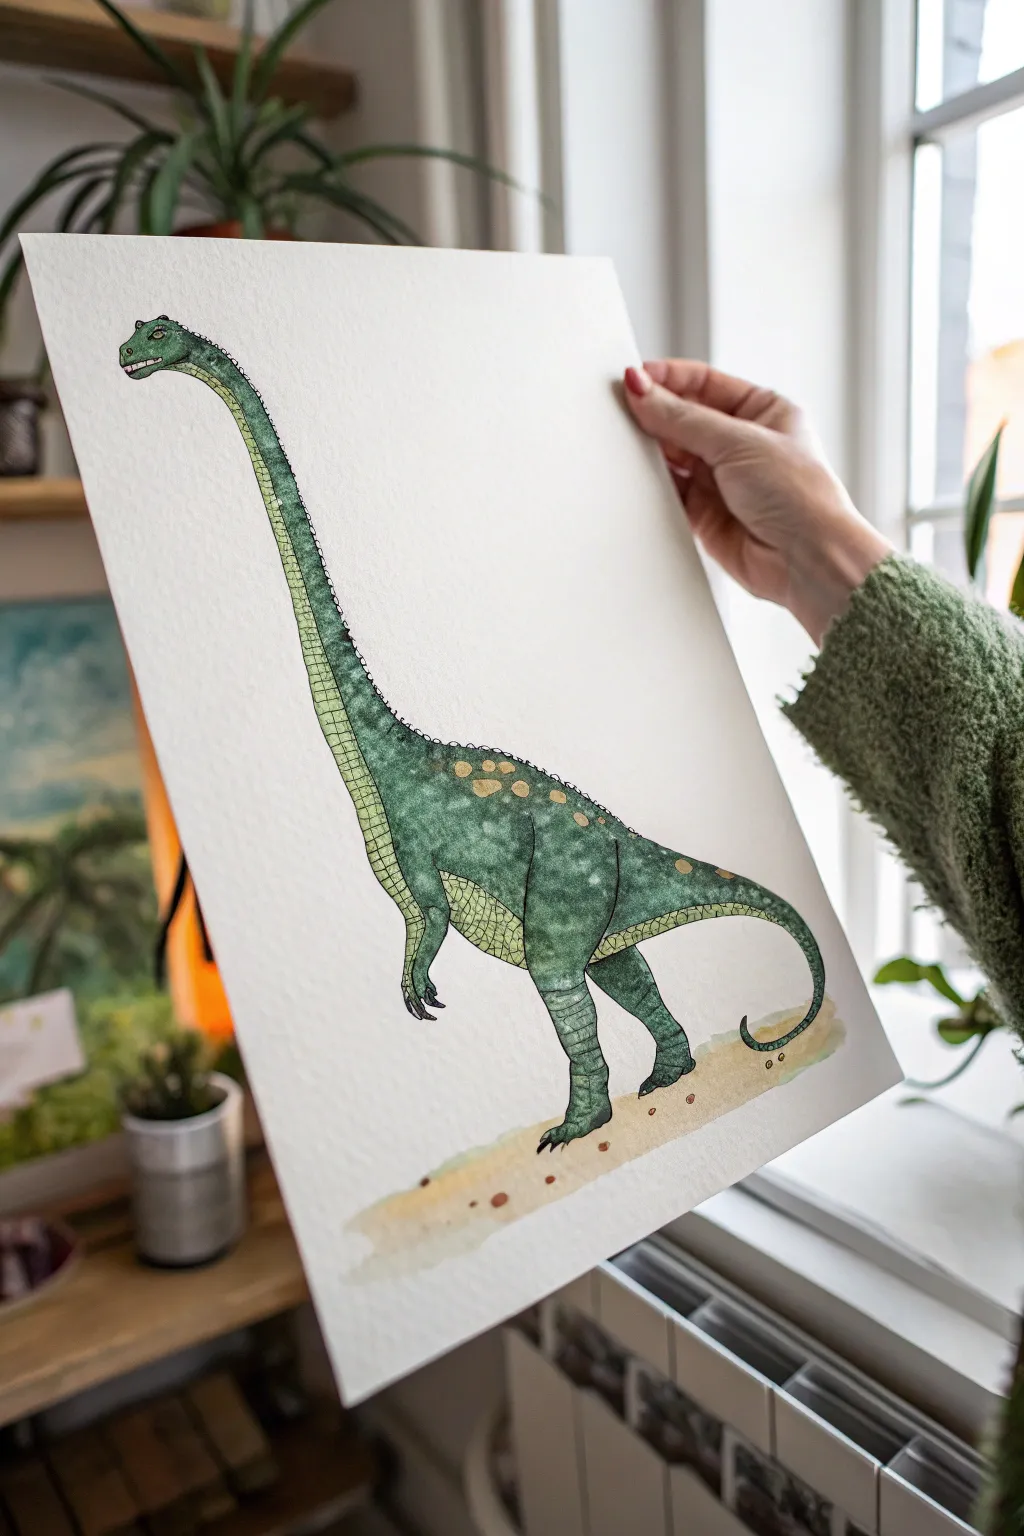
Bring a prehistoric giant to life with this charming watercolor tutorial, featuring a friendly, long-necked dinosaur. By combining simple ink outlines with textured sponge painting, you’ll achieve a perfect scaly skin effect that looks great on textured paper.
How-To Guide
Materials
- Cold press watercolor paper (A3 or A4 size)
- Pencil (HB) and eraser
- Fine liner waterproof pen (0.3mm or 0.5mm)
- Watercolor paints (Sap Green, Olive Green, Yellow Ochre, Burnt Sienna)
- Small natural sponge or sea sponge
- Small round paintbrush (size 4 or 6)
- Medium round paintbrush (size 8)
- Paper plate or palette
- Water cups and paper towels
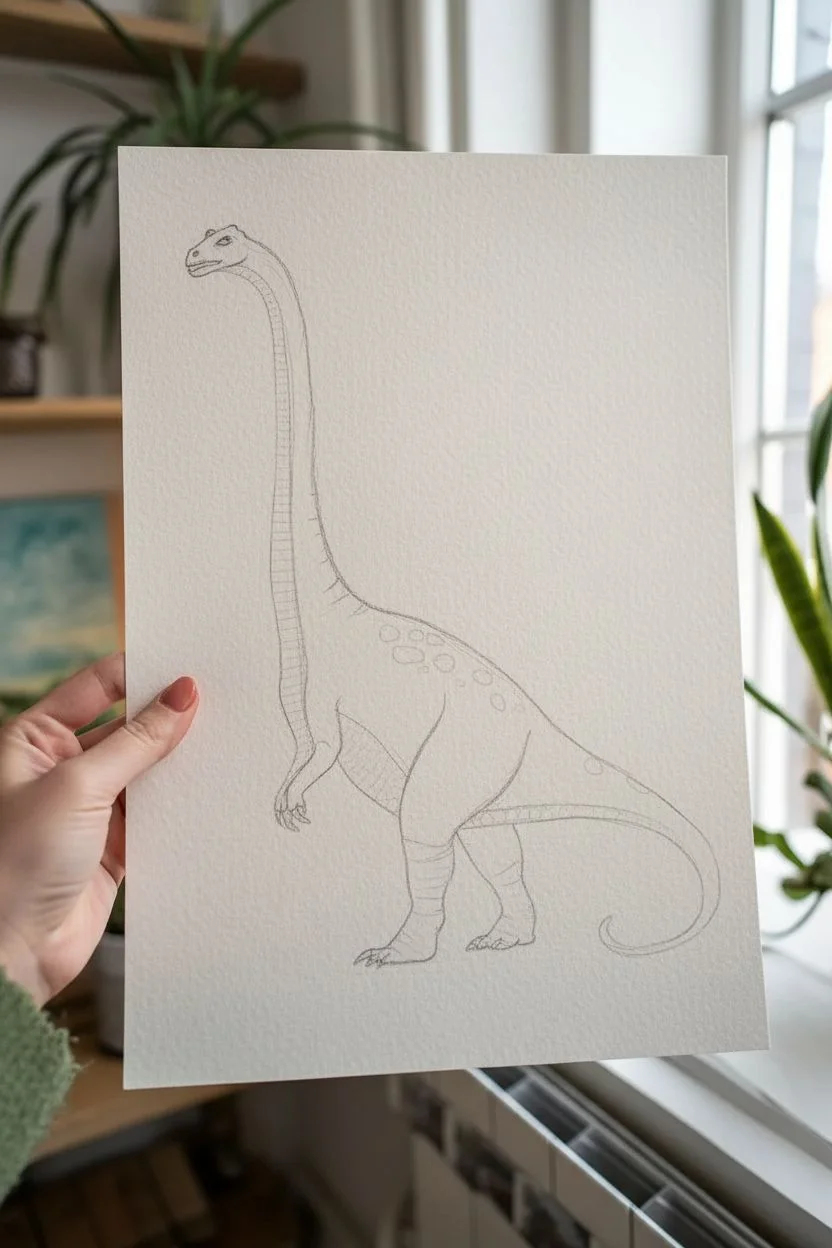
Step 1: Sketching the Shape
-
Draft the body curve:
Start by lightly sketching a long, sweeping curve that will act as the spine. This line should start high on the left for the neck, dip down for the back, and curve back up slightly for the tail. -
Flesh out the torso:
Draw an oval shape around the lowest part of your spine curve to create the dinosaur’s heavy body. It should look a bit like a large bean. -
Add the neck and head:
Extend parallel lines up from the body along your spine guide to form the long neck. Top it with a small, rounded oblong shape for the head, giving it a slight snout. -
Draw the legs and tail:
Sketch two thick, sturdy legs supporting the body—make sure the feet look planted flat. Then, taper the body lines into a long, whip-like tail that curves downward. -
Refine the details:
Add a definition line running from the bottom of the jaw all the way down the neck and underbelly to separate the lighter stomach scales from the darker back scales.
Sponge Pro Tip
Tear a small piece off a kitchen sponge to get a rough, organic edge. A perfectly square sponge will leave unnatural blocky shapes that don’t look like reptile skin.
Step 2: Inking the Outline
-
Trace with waterproof pen:
Take your waterproof fine liner and carefully go over your pencil lines. I like to use jagged, slightly broken lines for the back to suggest a rough texture. -
Detail the underbelly:
Draw horizontal lines all the way down the neck and underbelly section (the strip you marked out earlier) to create a segmented, plated look. -
Create the face:
Ink a small circle for the eye with a tiny pupil, and draw a simple line for the mouth. You can add a few teeth peeking out for character. -
Erase pencil marks:
Wait about five minutes to ensure the ink is totally dry, then gently erase all the underlying pencil sketches to clean up the paper.
Step 3: Adding Color and Texture
-
Prepare the sponge:
Dampen your small sponge and squeeze it out thoroughly so it is barely moist. Load it with a mix of Sap Green and a touch of gray or brown on your palette. -
Dab the main body:
Gently dab the sponge over the upper body, neck, and tail sections. Don’t press too hard; you want the texture of the paper to show through to mimic skin pattern. -
Paint the underbelly:
Switch to your medium paintbrush. Mix a watery wash of Yellow Ochre and pale green, then fill in the segmented underbelly area you drew earlier. -
Add shadows:
While the sponge paint is dry, use your small brush with a darker Olive Green to paint shadow lines along the bottom of the legs and where the neck meets the body. -
Paint the spots:
Mix a creamy, opaque consistency of Yellow Ochre or light orange. Paint oval spots along the dinosaur’s back, right over the dry green sponge texture.
Level Up: Metallic Scales
Once the green paint is dry, use a metallic gold watercolor or marker to add tiny dots inside the yellow spots for a magical, shimmering finish.
Step 4: Grounding and Finishing
-
Create the ground:
Mix a watery wash of Burnt Sienna and Yellow Ochre. Paint a loose, uneven strip of ground beneath the dinosaur’s feet, letting the edges fade out. -
Add ground details:
While the ground wash is still wet, drop in a few tiny dots of darker brown to suggest pebbles or dirt clods. -
Highlight the eye:
If you accidentally painted over the eye, use a tiny dot of white gouache or a gel pen to bring the highlight back. -
Final ink touches:
Once absolutely dry, you can re-trace any outer lines that might have gotten faded by the layers of paint to make the dinosaur pop.
Display your finished sauropod in a simple wooden frame to complement the natural tones of the painting
Neon Dino Pop Art Color Scheme
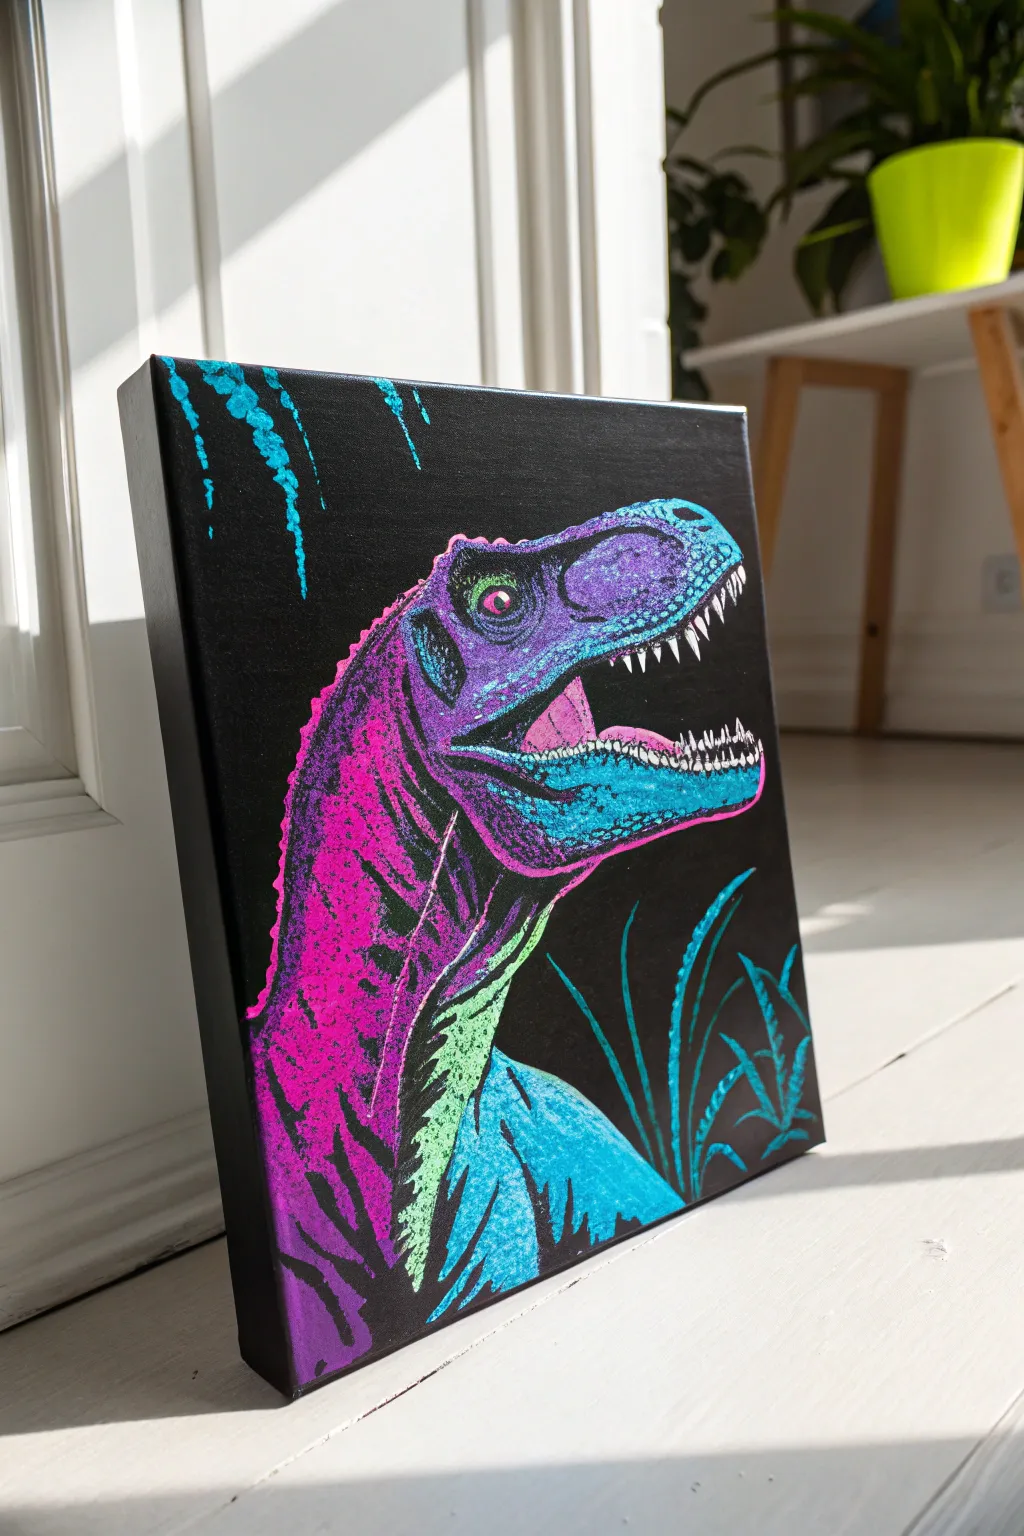
This vibrant project combines the raw power of a T-Rex with an electrifying 80s-inspired color palette for a truly unique piece of wall art. By using high-contrast neon paints against a stark black background, you’ll create a pop-art masterpiece that looks like it’s glowing from within.
Step-by-Step Tutorial
Materials
- Square stretched canvas (approx. 12×12 or similar)
- Black acrylic gesso or heavy body black acrylic paint
- White colored pencil or chalk (for sketching)
- Neon acrylic paints: Hot Pink, Electric Purple, Cyan/Turquoise, Lime Green
- White acrylic paint (for highlights)
- Assorted synthetic brushes (medium flat brush, small round brush, fine liner brush)
- Reference photo of a dinosaur profile
- Water cup and paper towels
Step 1: Setting the Stage
-
Prime the Surface:
Begin by coating your entire canvas with black acrylic gesso or heavy body black paint. Don’t forget to paint the edges for a gallery-wrapped look. Let this base coat dry completely until it is matte and solid. -
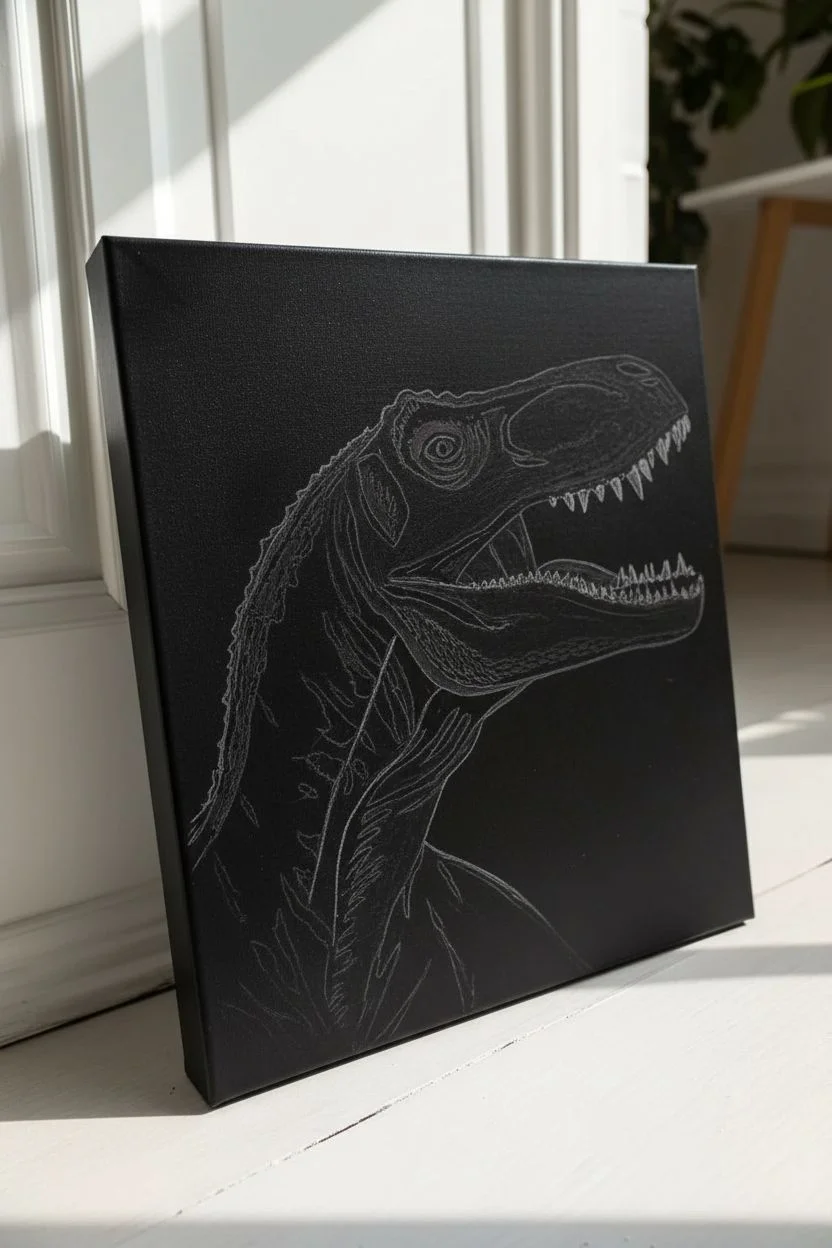
Sketch the Outline:
Using a white colored pencil or a piece of chalk, lightly sketch the profile of the dinosaur. Focus on the main shapes: the boxy snout, the curve of the neck, and the open jaw. Keep the lines faint so they are easy to cover later. -
Map the Shadow Zones:
Because we want a high-contrast look, lightly mark where the deepest shadows will be. In this style, the ‘shadows’ are simply the black canvas showing through, so identifying these negative spaces early is crucial.
Step 2: Layering the Neons
-
Create the Purple Base:
Start with your Electric Purple. Using a medium brush, block in the upper portion of the head and the back of the neck. Don’t paint a solid block; use short, choppy strokes to suggest rough skin texture. -
Add the Pink Glow:
While the purple is still slightly tacky, blend Hot Pink into the top ridge of the neck and the back of the head. This creates a gradient effect. Use the pink to also define the tongue. -
Define the Jawline:
Switch to your Cyan or Turquoise paint. Paint the lower jaw and the chest area. This cool tone contrasts beautifully with the warm pinks above. Again, leave gaps of black showing to represent wrinkles and shadows. -
Highlight with Green:
I like to use Lime Green sparingly for the brightest under-lighting. Apply this to the underside of the neck and throat area where the skin stretches. This ‘under-glow’ gives the dinosaur volume. -
Refining the Eye:
Use a small round brush to paint the eye socket. Fill the iris with Lime Green or Pink, adding a tiny vertical slit pupil in black. A tiny dot of white paint for a reflection brings the dinosaur to life.
Colors Looking Dull?
Neon acrylics can sometimes be transparent. For maximum pop, painting a layer of white underneath the neon areas first acts like a primer, making the top color incredibly bright.
Step 3: Texture and Details
-
Stippling the Skin:
Take a dry, small round brush with very little paint on it. Stipple (dab repeatedly) mixed purple and pink over the main face area. This creates a scaly, pebbled texture rather than a smooth finish. -
Adding White Teeth:
Using your finest liner brush and pure white paint, carefully stroke in the sharp, conical teeth. Make the ones near the front larger and the ones in the back smaller to suggest perspective. -
Intensifying Highlights:
Mix a tiny amount of white into your Cyan and Pink paints to create pastel highlight colors. Use these to line the very edges of the snout, the brow ridge, and the top of the neck spines. -
Painting the Foliage:
In the bottom right corner, use your liner brush to pull up swift, curving strokes of Cyan or Turquoise. These represent abstract, fern-like plants. Keep them simple and stylized. -
Creating the Sky Effect:
In the top left corner, mix a watery wash of Cyan. Use a brush to flick or drip a few controlled lines coming down, simulating rain or abstract energy. -
Final Cleanup:
Step back and look at your contrast. If you accidentally painted over important shadow areas, take your black paint and reclaim those negative spaces to sharpen the image.
Pro Tip: Dry Brushing
Don’t wet your brush before picking up paint for the texture phase. A ‘dry brush’ drags pigment only across the raised weave of the canvas, creating perfect automatic reptile skin texture.
Hang your prehistoric pop art in a well-lit spot to watch the colors truly radiate energy


Have a question or want to share your own experience? I'd love to hear from you in the comments below!