If you’ve ever stared at a blank canvas and thought, “I don’t know what I’m doing,” you’re exactly who DIY abstract art is for. These beginner-friendly ideas are all about big impact, low pressure, and making something you’ll actually want to hang up at home.
Tape-Resist Color Blocks
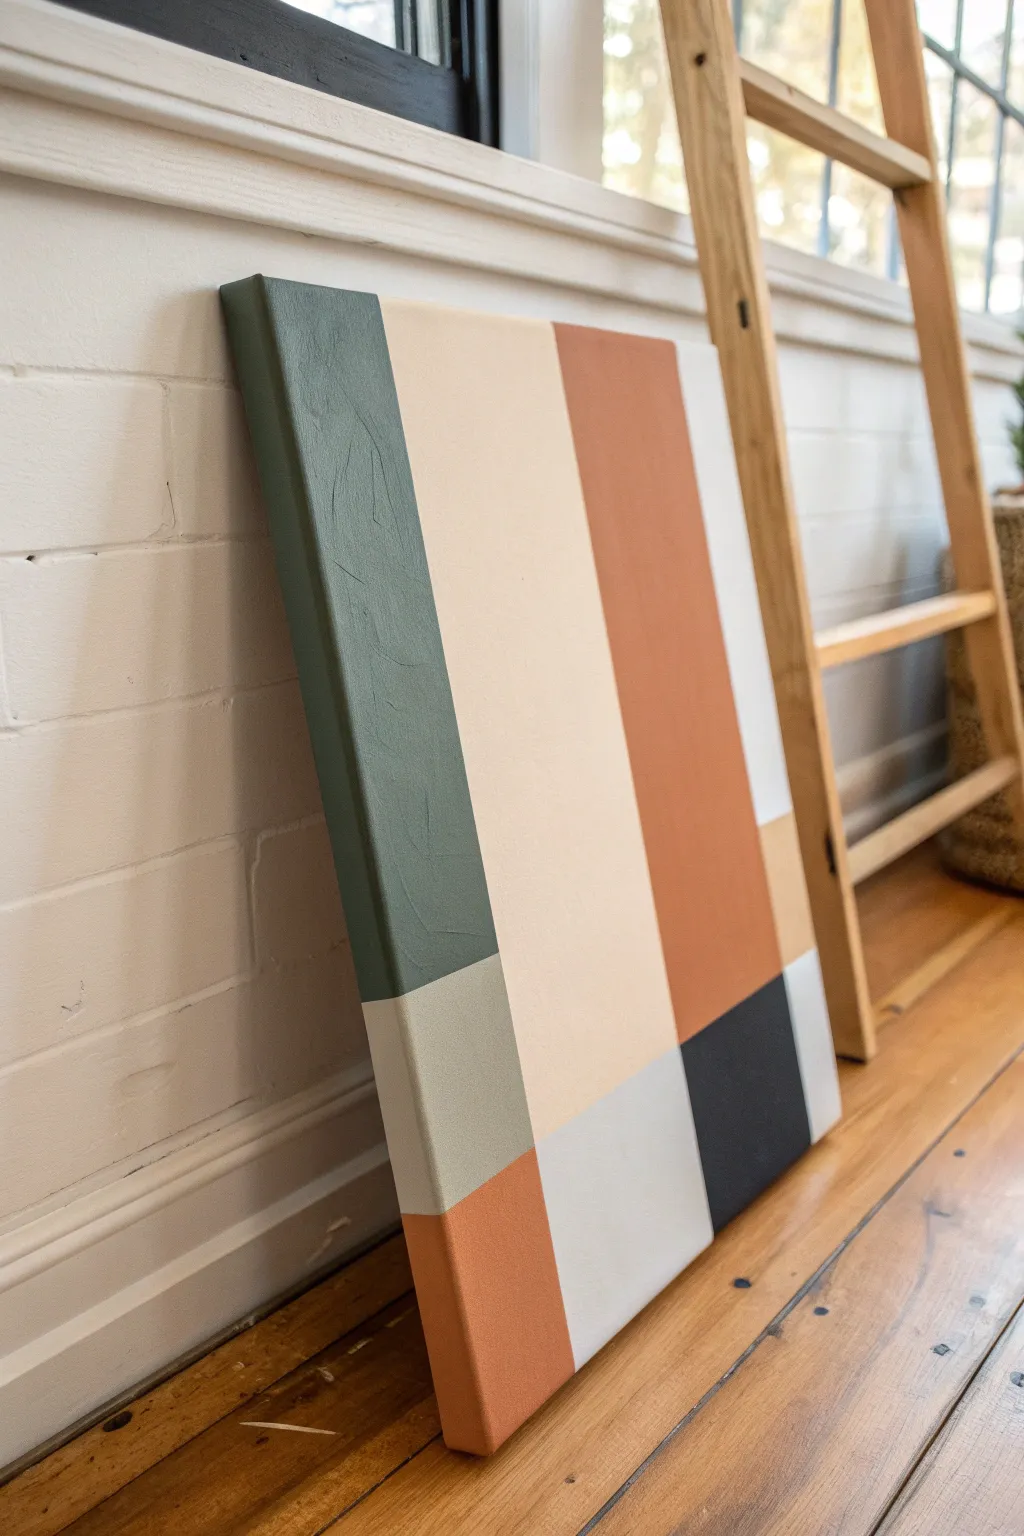
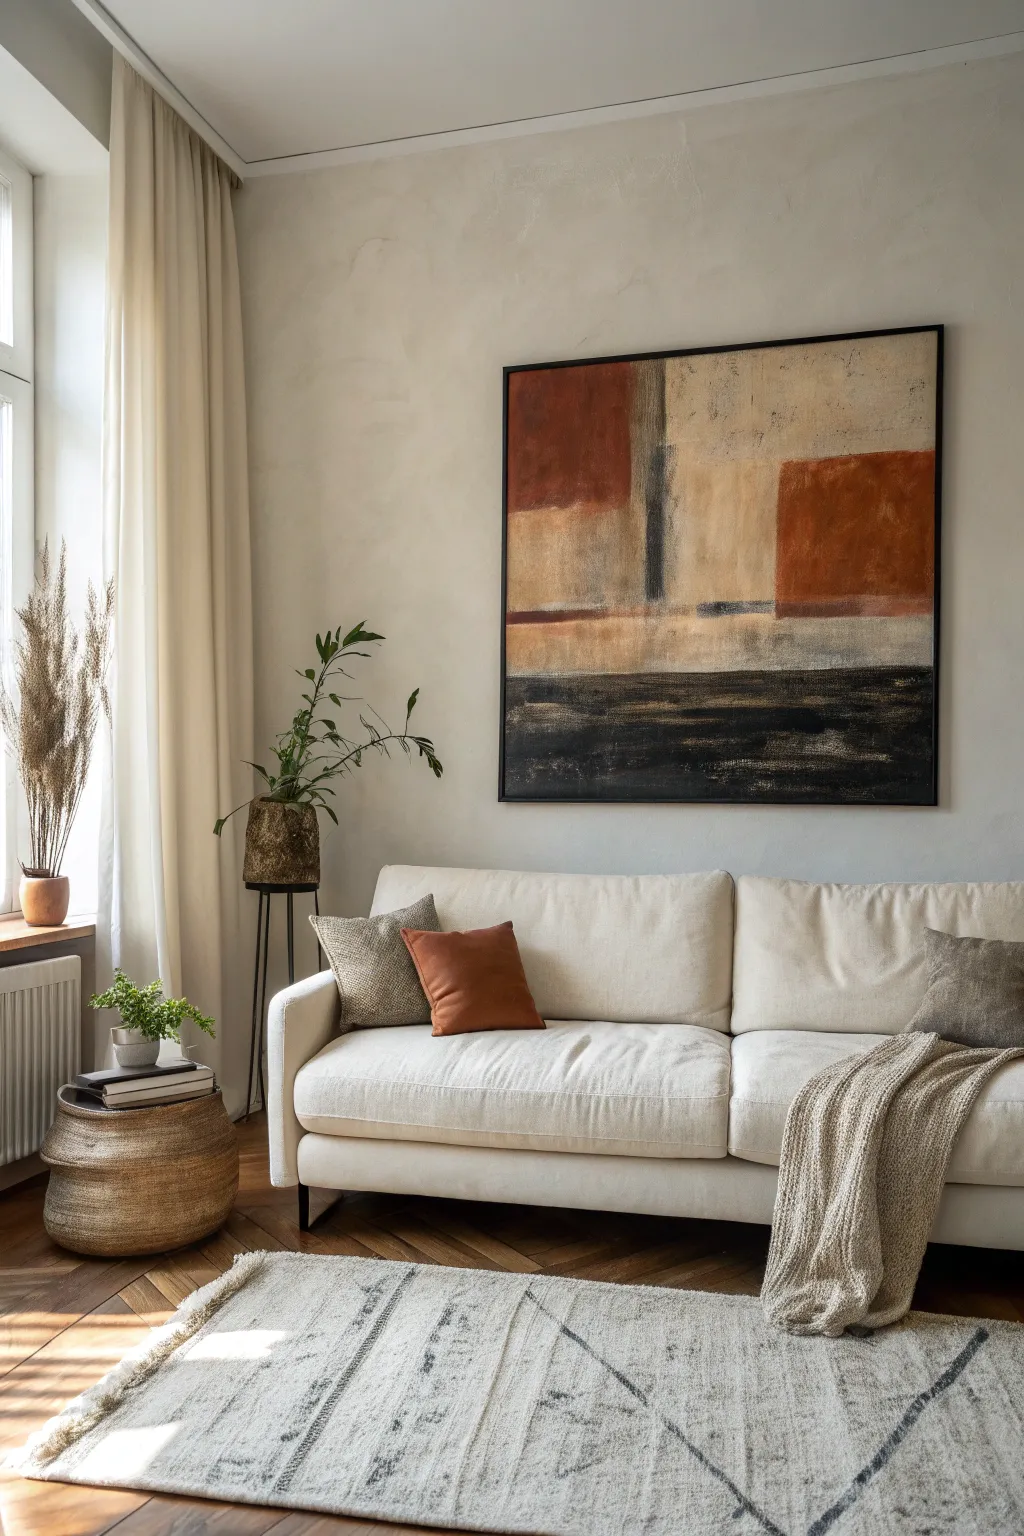
Achieve a high-end gallery look with this simple yet striking abstract painting featuring muted earth tones and clean, architectural lines. The minimalist color blocking creates a serene focal point that blends beautifully with modern or bohemian decor.
Step-by-Step Tutorial
Materials
- Large stretched canvas (square or rectangular)
- Painter’s tape or masking tape (1/4 inch or 1/2 inch width)
- Acrylic paints (Sage Green, Light Beige/Cream, Terracotta/Rust, Light Grey, Taupe, Charcoal/Black)
- Flat paint brushes (1-2 inch width)
- Palette or paper plates for mixing
- Drop cloth or newspaper
- Ruler or straight edge
- Pencil
- Gesso (optional)
Step 1: Preparation and Layout
-
Prime the surface:
If your canvas isn’t pre-primed, apply a coat of white gesso to ensure a smooth surface and let it dry completely. This helps the paint adhere better and keeps colors true. -
Plan the composition:
Lightly sketch your design onto the canvas with a pencil. Based on the reference, you want primarily vertical sections with a horizontal break near the bottom third. -
Create the vertical divisions:
Use your ruler to mark straight vertical lines. Looking at the image, divide the canvas into three main vertical columns of varying widths—the left is narrowest, the middle is widest, and the right is medium width. -
Add horizontal breaks:
Draw horizontal lines to create the smaller blocks at the bottom. These lines don’t need to go all the way across; they can be staggered to create visual interest. -
Apply the tape:
Place your painter’s tape specifically over the lines you just drew. Press the edges of the tape down firmly with your fingernail or a credit card to prevent paint from bleeding underneath.
Seal the Tape Edges
Before applying color, paint a thin layer of white paint over the tape edges. This seals any gaps, ensuring the only thing that bleeds under is white, keeping your colored lines crisp.
Step 2: Painting the Color Blocks
-
Mix the cream tone:
Prepare a large amount of the light beige or cream color. This is the dominant color in the center panel, so ensure you have enough to cover that large area. -
Paint the central panel:
Apply the cream paint to the large central vertical section. Use long, smooth strokes. I prefer to paint away from the tape edge inward to minimize bleed-through risk. -
Apply the sage green:
Paint the top section of the left column with the sage green acrylic. Ensure the paint extends fully over the side edge of the canvas for a finished, professional look. -
Add the terracotta:
Fill in the top section of the right column with your rust or terracotta color. Apply two coats if the first one looks streaky, letting it dry briefly between layers. -
Paint the bottom left:
For the lower section of the left column, use a taupe or light grey-green distinct from the sage above it. -
Fill the bottom center:
Paint the bottom middle block (beneath the cream section) with a very light grey or off-white to create a subtle contrast. -
Add the dark anchor:
Paint the bottom right block with charcoal or deep black. This heavy color anchors the composition visually. -
Fill the corner accents:
If your design includes the very bottom corner accent seen in the image, paint that final small block with the rust/terracotta color again to balance the top right. -
Paint the edges:
Don’t forget the sides of the canvas! Carry each color block over the edge relative to where it sits on the front, creating a ‘gallery wrap’ effect.
Uneven Texture?
If brush strokes look too prominent, switch to a foam roller for the larger color blocks. It provides a smoother, flatter finish that looks more like a print.
Step 3: Finishing Touches
-
Let it set deeply:
Allow the paint to dry until it feels tacky but not fully cured—usually about 20-30 minutes depending on paint thickness. -
Peel the tape:
Carefully peel back the painter’s tape at a 45-degree angle while the paint is still slightly damp. This ensures the sharpest possible lines without chipping dry paint. -
Touch up:
Inspect your white lines. If any color bled through, use a small detail brush and white paint (or gesso) to clean up the edges once the colors are fully dry. -
Final cure:
Let the entire painting cure for at least 24 hours before hanging or sealing with a varnish.
Once dry, lean your new masterpiece against a wall or hang it up to bring warmth and structure to your space


Bold Brushstroke Minimalism
Embrace the warmth of terracotta and the grounding depth of black with this large-scale abstract piece. By layering blocks of color over a textured beige background, you’ll create a sophisticated, gallery-worthy artwork that feels both modern and timeless.
How-To Guide
Materials
- Large canvas (e.g., 36×36 or 48×48 inches)
- Acrylic paints: Burnt Sienna, Mars Black, Titanium White, Unbleached Titanium (beige), Raw Umber
- Wide flat paintbrush (2-3 inches)
- Medium flat paintbrush (1 inch)
- Palette knife
- Painter’s tape or masking tape
- Water container and paper towels
- Matte varnish (optional)
Step 1: Setting the Background
-
Prepare the canvas:
Lay your canvas on a flat surface or mount it on an easel. Wipe it down with a dry cloth to ensure it’s free of dust. -
Mix the base tone:
On your palette, mix a generous amount of Titanium White with a touch of Unbleached Titanium and a tiny dab of Raw Umber. You want a warm, dusty beige or ‘stone’ color. -
Apply the base coat:
Using your wide brush, cover the entire upper two-thirds of the canvas with this beige mixture. Don’t aim for perfect opacity; visible brushstrokes add to the rustic texture. -
Add vertical texture:
While the paint is still wet, drag a dry brush vertically through sections of the beige paint to create faint vertical striations. This gives the background depth. -
Let it dry completely:
Allow this base layer to dry fully before moving on. This usually takes about 20-30 minutes depending on paint thickness.
Step 2: Blocking the Terracotta
-
Map out the shapes:
Visually divide the upper beige section. You are aiming for two large rectangular blocks: one in the upper left and one on the right side, slightly lower. -
Mix the rust color:
Combine Burnt Sienna with a little Raw Umber to deepen it. If it’s too vibrant, a tiny touch of black will dull it slightly to a more earthy rust tone. -
Paint the left block:
Paint a large rectangle in the upper left quadrant. Keep the edges relatively soft, not razor-sharp. I like to use a slightly dry brush here to let some background show through. -
Paint the right block:
create a similar block on the right side, positioning it slightly lower than the left one to create asymmetry. Make this one slightly wider if possible. -
Add the vertical accent:
Mix a dark grey using Black and White. Paint a thin, vertical stripe between the two rust blocks, slightly off-center to the left. This acts as a ‘spine’ for the composition. -
Soften the edges:
Use a clean, slightly damp brush to gently feather the edges of your rust and grey shapes, blending them slightly into the beige background for a worn look. -
Dry break:
Step back and let these shapes dry to the touch.
Dry Brushing Magic
For that weathered, vintage feel, wipe most of the paint off your brush onto a paper towel before hitting the canvas. This ‘dry brush’ technique leaves scratchy, textured marks.
Step 3: Anchoring with Darkness
-
Define the horizon:
Use painter’s tape to create a straight horizontal line across the canvas, separating the bottom third from the top section. This will be your dark base. -
Mix the dark base:
Squeeze out plenty of Mars Black. Mix in a little Raw Umber to give it warmth so it isn’t a flat, lifeless black. -
Paint the bottom section:
Fill the entire area below the tape with your dark mixture. Use long, horizontal strokes. -
Texturize the dark field:
Before the black dries, take your palette knife with a tiny bit of Unbleached Titanium or beige on it. Gently scrape it horizontally across the black paint. -
Create horizontal movement:
Continue scraping and dragging the lighter color through the black to create the appearance of a rough landscape or water surface at night. Don’t overmix; you want distinct streaks. -
Remove the tape:
Carefully peel off the painter’s tape while the paint is still slightly tacky to reveal a crisp horizon line.
Add Mixed Media
Mix a handful of baking soda or fine sand into your beige base paint before applying it. This creates a gritty, stone-like texture that catches the light beautifully.
Step 4: Refining and Framing
-
Blend the transition:
If the horizon line feels too sharp, take a dry brush with a tiny amount of the beige base color and lightly drag it horizontally right over the seam to soften it. -
Final touches:
Step back and look for balance. If the top feels too empty, add very watered-down beige washes over the rust blocks to push them back visually. -
Seal the work:
Once fully dry (give it 24 hours), apply a coat of matte varnish to protect the surface and unify the sheen. -
Frame it up:
To match the inspiration image, install the canvas into a black floating frame. This adds a crucial finished border that makes the colors pop.
Hang your new masterpiece in a well-lit living area to let those earthy textures really shine


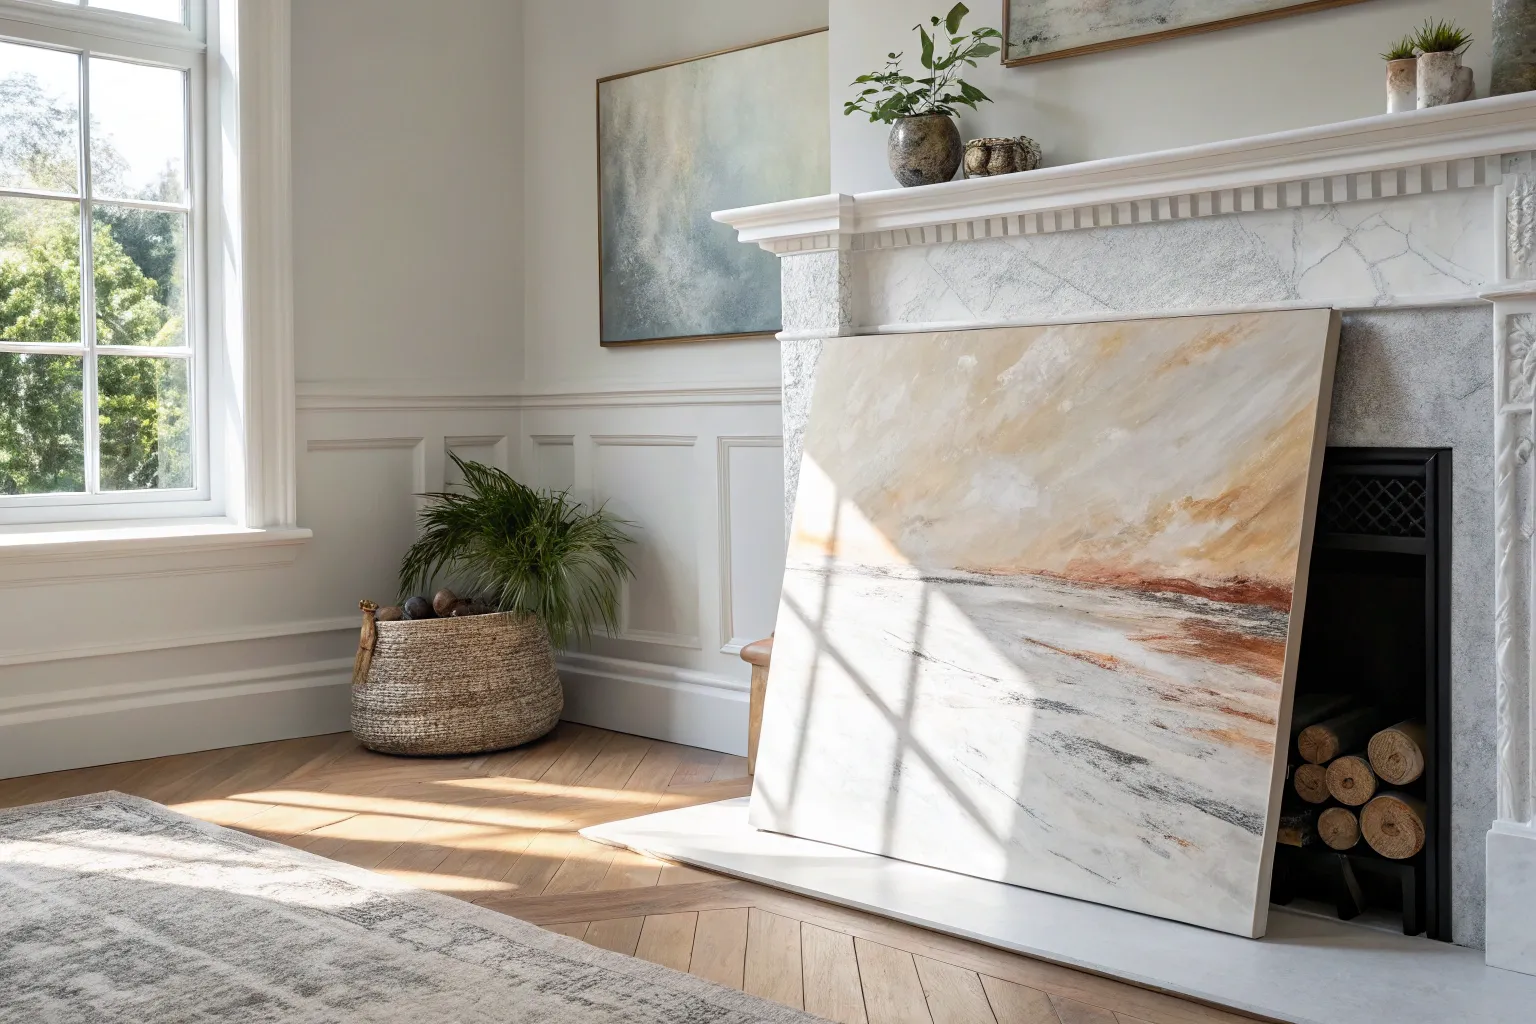
Palette Knife Texture Fields

Transport the rugged beauty of a seaside cliff into your home with this highly textured abstract painting. Using simple palette knife techniques and a soothing palette of terracotta, ochre, and white, you’ll build layers that mimic natural rock formations.
Detailed Instructions
Materials
- Large rectangular stretched canvas (e.g., 24×36 inches)
- Heavy body acrylic paints (Terracotta, Yellow Ochre, Titanium White, Burnt Sienna)
- Modeling paste or heavy structure gel
- Large palette knives (flat and angled)
- Optional: Texture sand or pumice gel
- Disposable palette or paper plate
- Drop cloth
- Easel (optional but helpful)
Step 1: Preparation and Base Layout
-
Set up your workspace:
Place your canvas on an easel or flat on a covered table. Since we are using heavy paste, ensure your support is sturdy. -
Plan the diagonal flow:
Visualize a diagonal composition flowing from the top left to the bottom right. This mimics the natural striations of sedimentary rock. -
Mix your base texture:
Scoop a generous amount of modeling paste onto your palette. If you want a grit comparable to real stone, mix in a small amount of texture sand.
Step 2: Creating the Ridge Structure
-
Apply the first white ridge:
Using a palette knife, apply a thick band of plain white modeling paste diagonally across the canvas. Don’t smooth it out; let the ridges peak and valley naturally. -
Create the secondary ridge:
Add a second, parallel band of white paste lower down the canvas. I like to make this one slightly thinner to create visual variety. -
Roughen the edges:
Use the edge of your knife to scrape and pull the paste outwards slightly, so the ridges don’t look like perfect lines but rather organic formations. -
Let the structure set:
Allow these heavy white ridges to dry until the surface forms a skin (usually 1-2 hours) before painting over them, though fully drying overnight is safest.
Knife Angle Secrets
Hold the palette knife at a low angle (almost flat) to glide over texture, or at a high 45-degree angle to scrape back layers and reveal the colors underneath.
Step 3: Applying Color Fields
-
Mix the terracotta tone:
Combine terracotta paint with a touch of Burnt Sienna to deepen it. Mix this directly into some fresh modeling paste for body. -
Apply the dark corners:
Apply the terracotta mixture to the top left and bottom right corners of the canvas, framing the central lighter area. -
Blend the transition:
While the paint is wet, drag the palette knife lightly from the terracotta section towards the center, letting the color fade out. -
Create the ochre center:
Mix Yellow Ochre with Titanium White and a little paste. Fills the spaces between your white ridges and the terracotta corners. -
Scrape and drag technique:
Use a clean knife to drag the ochre paint over the canvas surface, allowing the texture of the canvas to show through in some spots for a weathered look.
Add Metallic Sheen
Mix a small amount of metallic bronze or gold paint into the ochre section. It catches the light like mineral deposits in real cliff rock.
Step 4: Highlighting and Refining
-
Enhance the white peaks:
Once the colored sections are tacky or dry, load a knife with pure Titanium White. Gently graze it over the tops of your dried texture ridges. -
Add high-contrast breaks:
Dab thick globs of white alongside the ochre sections to create ‘breaking wave’ or ‘quartz vein’ effects within the rock pattern. -
Dry brush blending:
If any transitions between colors look too harsh, take a dry brush with a tiny amount of white paint and softly buff the boundary lines. -
Check for balance:
Step back five feet. Ensure the ‘flow’ of the diagonal lines feels continuous and that no single color dominates too overwhelmingly. -
Final cure:
Allow the entire piece to dry for at least 24-48 hours. Thick modeling paste takes much longer to cure than standard acrylic paint.
Hang your new masterpiece in a well-lit area where the changing daylight can play across the deep textures you created


Black-and-White Graphic Marks
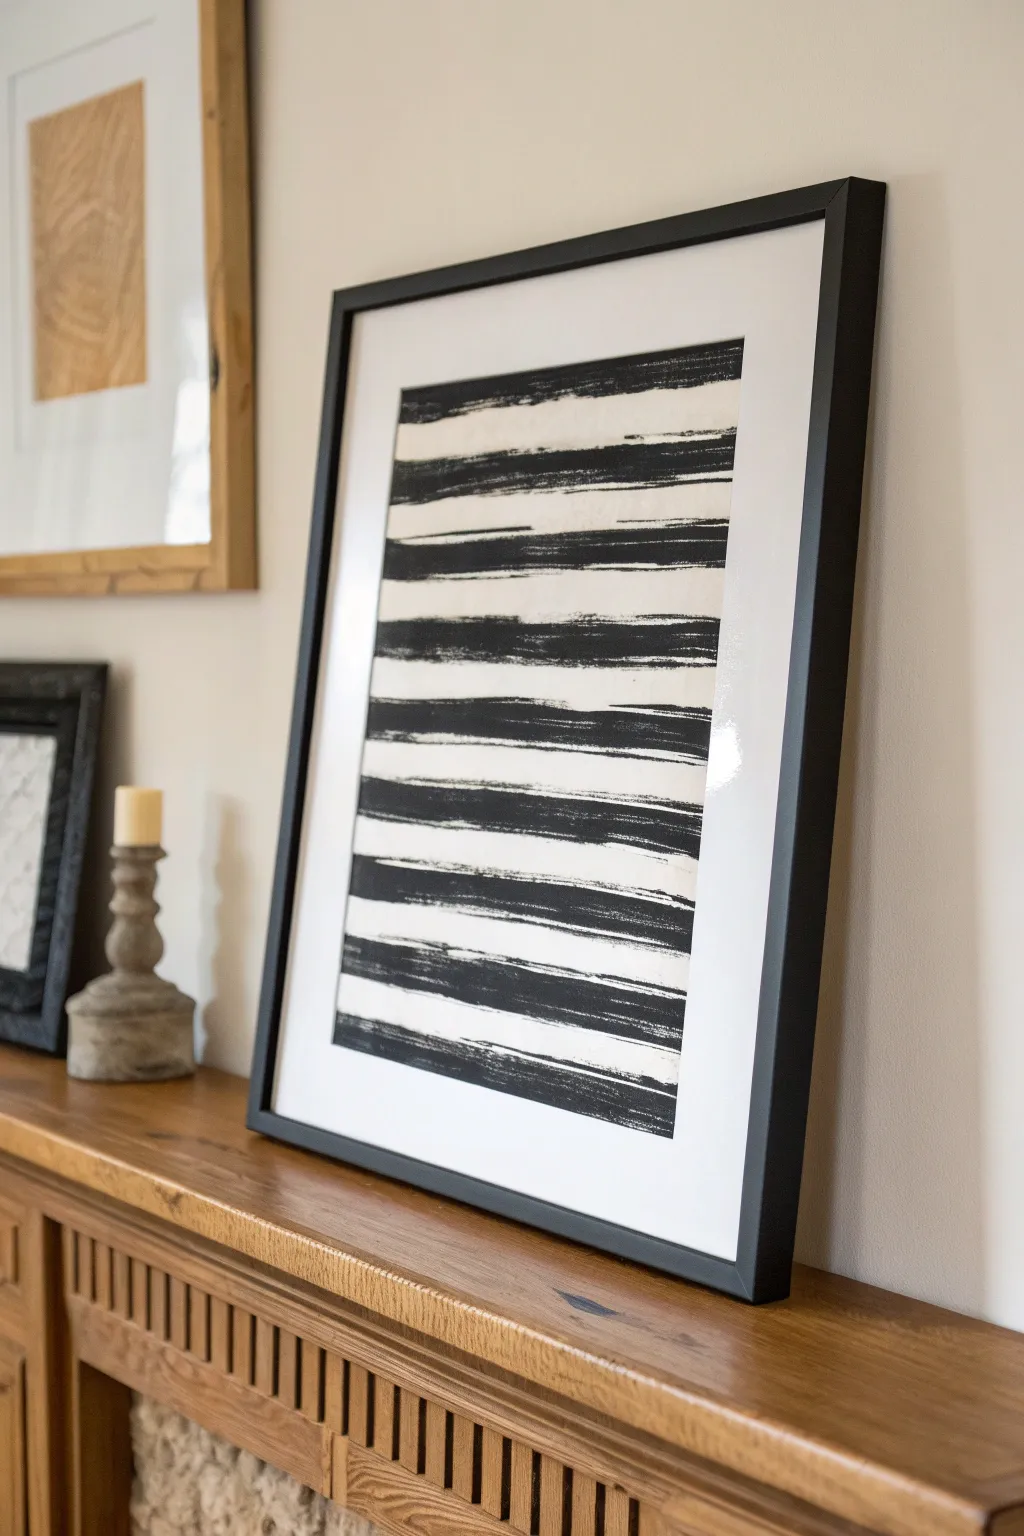
You don’t need to be a professional painter to create striking, modern art for your walls. This high-contrast piece uses bold, sweeping horizontal marks to create a rhythmic pattern that looks expensive but is incredibly simple to make.
How-To Guide
Materials
- Heavyweight cold press watercolor paper (140lb or higher)
- Black acrylic paint or India ink
- 2-inch wide flat bristle brush (hog hair or similar coarse bristles)
- Painter’s tape or masking tape
- Large flat work surface
- Scrap paper for testing
- Picture frame with mat (to fit your paper size)
Step 1: Preparation
-
Clean your surface:
Ensure your table is clean and dry. Lay down some newspaper or a drop cloth if you are worried about splatters, although this technique is fairly controlled. -
Secure the paper:
Place your watercolor paper onto the flat surface. Use small pieces of painter’s tape on the very corners to hold it steady so it doesn’t shift while you are painting. -
Prepare the paint:
Squeeze a generous amount of black acrylic paint onto a palette or disposable plate. If using India ink, pour a small amount into a wide mouth jar or shallow dish. -
Load the brush:
Dip your wide flat brush into the black medium. You want the bristles fully coated but not dripping wet. Wipe any excess off on the edge of the container or a paper towel.
Brush Maintenance
Rinse your brush immediately after finishing. Acrylic paint dries fast and can ruin bristles permanently if left to harden inside the ferrule.
Step 2: Creating the Strokes
-
Test your texture:
Before hitting the final paper, do a practice run on scrap paper. Drag the brush horizontally to see how the bristles interact with the surface. You’re aiming for a slightly ‘dry brush’ look where the texture of the bristles shows through at the start and end of the stroke. -
Plan your spacing:
Visualize the spacing of your stripes. You don’t need pencil lines—part of the charm is the organic, hand-done feel—but try to keep a mental rhythm of ‘stripe, white space, stripe, white space’. -
Paint the first stripe:
Start near the top of the paper, leaving a margin of white space for the mat. Place your brush down firmly on the left side and pull it straight across to the right in one confident motion. -
Lift and feather:
As you reach the end of the stroke on the right side, lift the brush slightly to let the stroke taper off naturally rather than stopping abruptly. -
Add the second stripe:
Reload your brush slightly if needed. Move down about an inch or two (depending on your desired density) and repeat the horizontal motion. -
Vary the pressure:
I like to vary the pressure just a little bit between strokes. Pressing harder creates a solid black line, while lighter pressure allows the paper’s tooth to show through for that lovely distressed texture. -
Continue down the paper:
Work your way down the sheet, maintaining roughly equal spacing but not stressing over perfection. If a line wavers, let it be; mistakes add character. -
Check density:
Step back occasionally to look at the overall balance. Ensure the weight of the black stripes feels evenly distributed from top to bottom.
Try Different Tools
Swap the brush for a squeegee or a piece of cardboard dipped in paint. Dragging these across the paper creates sharper edges but equally cool texture.
Step 3: Finishing and Framing
-
Let it dry completely:
Allow the paint or ink to dry fully. Acrylics usually dry within 20-30 minutes, but India ink might take a bit longer if applied thickly. -
Flatten the paper:
If the paper has buckled slightly from the moisture, place it under a heavy book (protected by a clean sheet of paper) overnight once it is 100% dry. -
Prepare the frame:
Clean the glass of your frame on both sides to remove dust and fingerprints. -
Mount the artwork:
Place your artwork face down into the mat. Use a small piece of artist tape to secure the top edge of the paper to the back of the mat board. -
Assemble the frame:
Layer the glass, the matted artwork, and the backing board into the frame. Secure the clips or tabs on the back to hold everything tight. -
Hang and admire:
Choose a spot on your wall that needs a bold focal point and hang your new masterpiece.
Enjoy the sophisticated, gallery-like feel this simple project adds to your room
BRUSH GUIDE
The Right Brush for Every Stroke
From clean lines to bold texture — master brush choice, stroke control, and essential techniques.
Explore the Full Guide
Soft Neutral Wash Layers
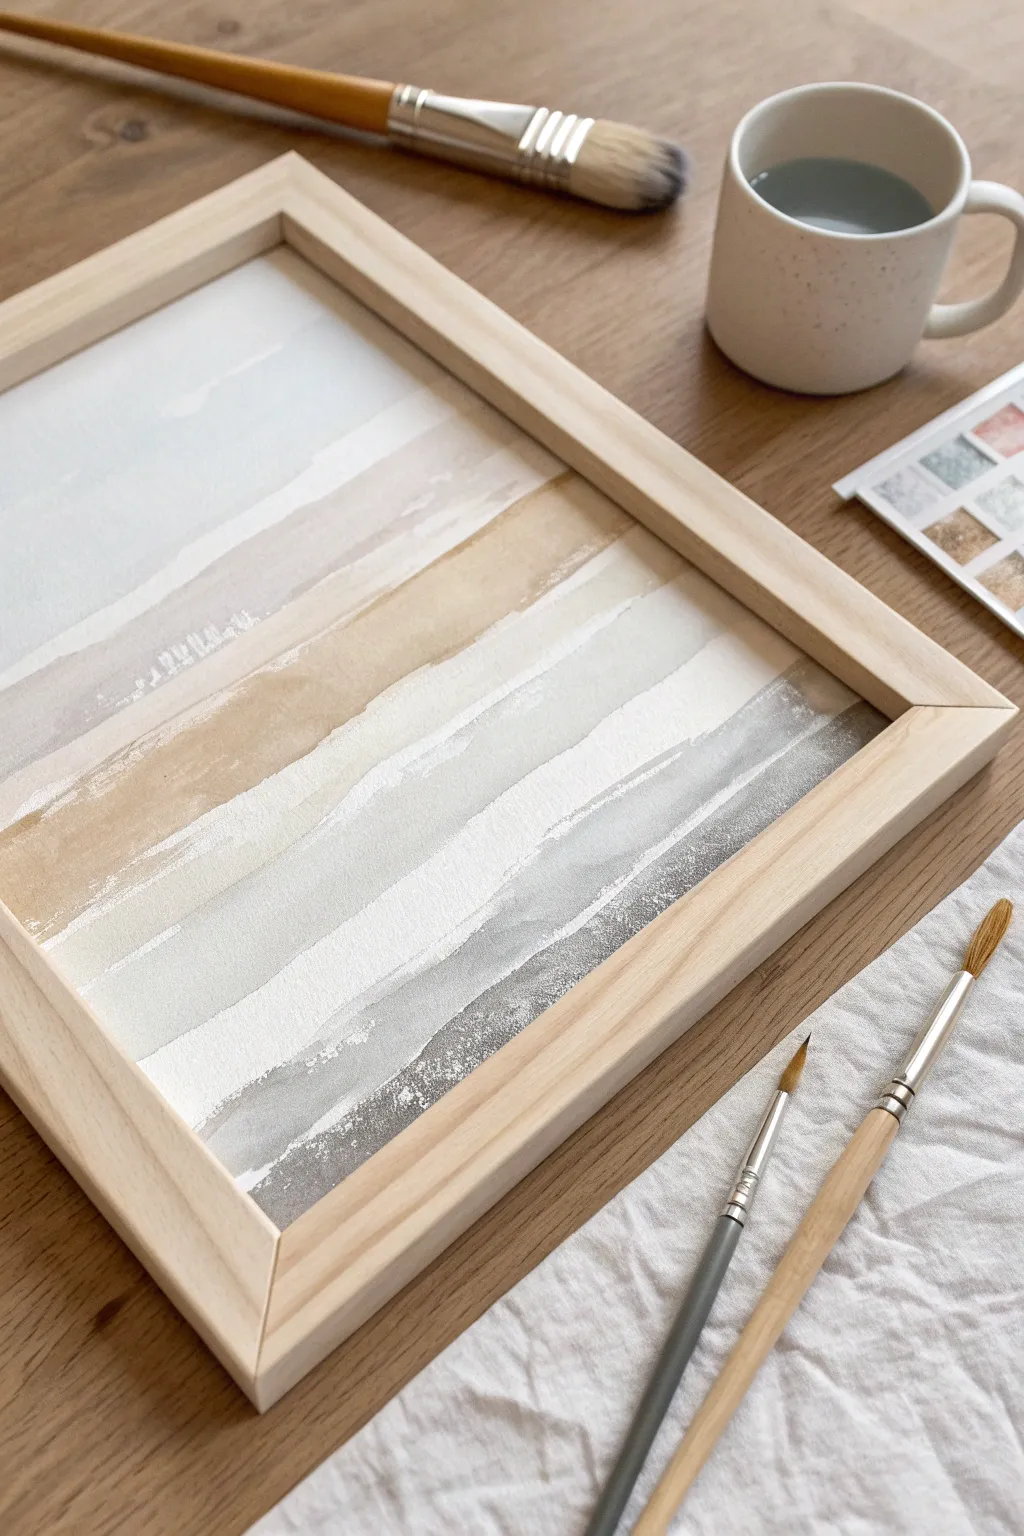
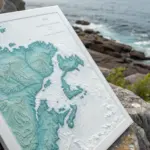
Capture the calming essence of a hazy coastline with this soft, layered abstract piece. Using simple masking techniques and a wash methodology, you’ll create gentle transitions between sand, fog, and sea tones that fit perfectly into any neutral decor scheme.
Step-by-Step
Materials
- High-quality watercolor paper (cold press creates nice texture)
- Watercolor paints or fluid acrylics (Payne’s Grey, Raw Sienna, Titanium White, Burnt Umber)
- Large flat wash brush (1-inch width)
- Medium round brush
- Painter’s tape or masking fluid
- Two jars of water (one for rising, one for mixing)
- Paper towels
- Wooden frame (light pine or birch finish)
Step 1: Preparation & First Wash
-
Prepare your paper:
Cut your watercolor paper to fit your designated frame. Tape the paper down to your work surface on all four sides using painter’s tape to prevent buckling when wet and to create a clean border. -
Mix the sky tone:
Dilute a very small amount of Payne’s Grey with plenty of water to create a misty, pale blue-gray. It should be transparent and light. -
Apply the top layer:
Using your large flat brush, paint the top third of the paper with horizontal strokes. Keep the bottom edge of this section uneven and organic rather than a straight line. -
Softening edges:
While the paint is still wet, dip a clean brush in plain water and run it along the bottom edge of the blue-gray section to feather it out slightly.
Bleeding Lines?
If paint seeps under your tape, your paper might have too much texture. Burnish the tape edge firmly with a fingernail or spoon before painting to seal it tight.
Step 2: Creating Texture with Masking
-
Dry completely:
Let the first layer dry fully. Simply waiting is best, but a hairdryer on low heat works if you are impatient. -
Apply torn tape:
Tear a strip of painter’s tape lengthwise to create a jagged, uneven edge. Place this tape horizontally across the paper, covering the bottom of your painted sky area. This will preserve the white space beneath it. -
Mix the sandy tone:
Combine Raw Sienna with a tiny touch of Burnt Umber and plenty of water. You want a warm, beige-sand color that isn’t too orange. -
Paint the middle band:
Brush this sandy wash below your tape line. Allow the paint to pool slightly in some areas for natural variation in opacity. -
Lift for texture:
While the beige section is damp, lightly blot a few spots with a crumpled paper towel. This lifts pigment to create a weathered, stone-like texture.
Step 3: Building the Lower Layers
-
Remove tape and dry:
Once the beige layer is bone dry, carefully peel away the masking tape to reveal the crisp white separation line. -
Establish the horizon line:
Mix a slightly stronger wash of Payne’s Grey. Paint a band near the bottom third, leaving a gap of white paper between this section and the beige section above. -
Add white highlights:
If using fluid acrylics or gouache, take Titanium White and dry-brush it lightly over the transition areas to simulate foam or separating fog. If using pure watercolor, skip to the next step. -
Deepen the base:
For weight at the bottom, mix a saturated dark grey or charcoal. Apply this to the very bottom edge of the paper, using a ‘dry brush’ technique where the bristles are slightly separate, creating a scratchy, organic texture.
Pro Tip: Torn Edge
Don’t cut your tape with scissors! Tearing the masking tape by hand creates that organic, ‘ragged’ white line that mimics breaking waves or rugged landscape layers.
Step 4: Refining & Framing
-
Assess the balance:
Step back and look at your bands of color. If the transitions feel too stark, use a damp brush to gently soften specific areas, but maintain the overall striped structure. -
Splatter details:
Dip your round brush in clean water and tap it against your finger over the painting. The droplets will bloom on the dried paint, creating subtle watermarks that add visual interest. -
Final drying time:
Allow the entire piece to rest flat until completely dry. This ensures no moisture is trapped when framing. -
Remove border tape:
Peel off the tape holding the paper to the table. Pull the tape away from the center of the artwork at a 45-degree angle to avoid tearing the paper surface. -
Mount and frame:
Place your artwork into the light wood frame. Omit the glass if you prefer the texture to be visible, or use a mat board to give the piece breathing room.
Hang your new atmospheric artwork in a space where you want to invite a moment of quiet reflection
One-Line Abstract Curves
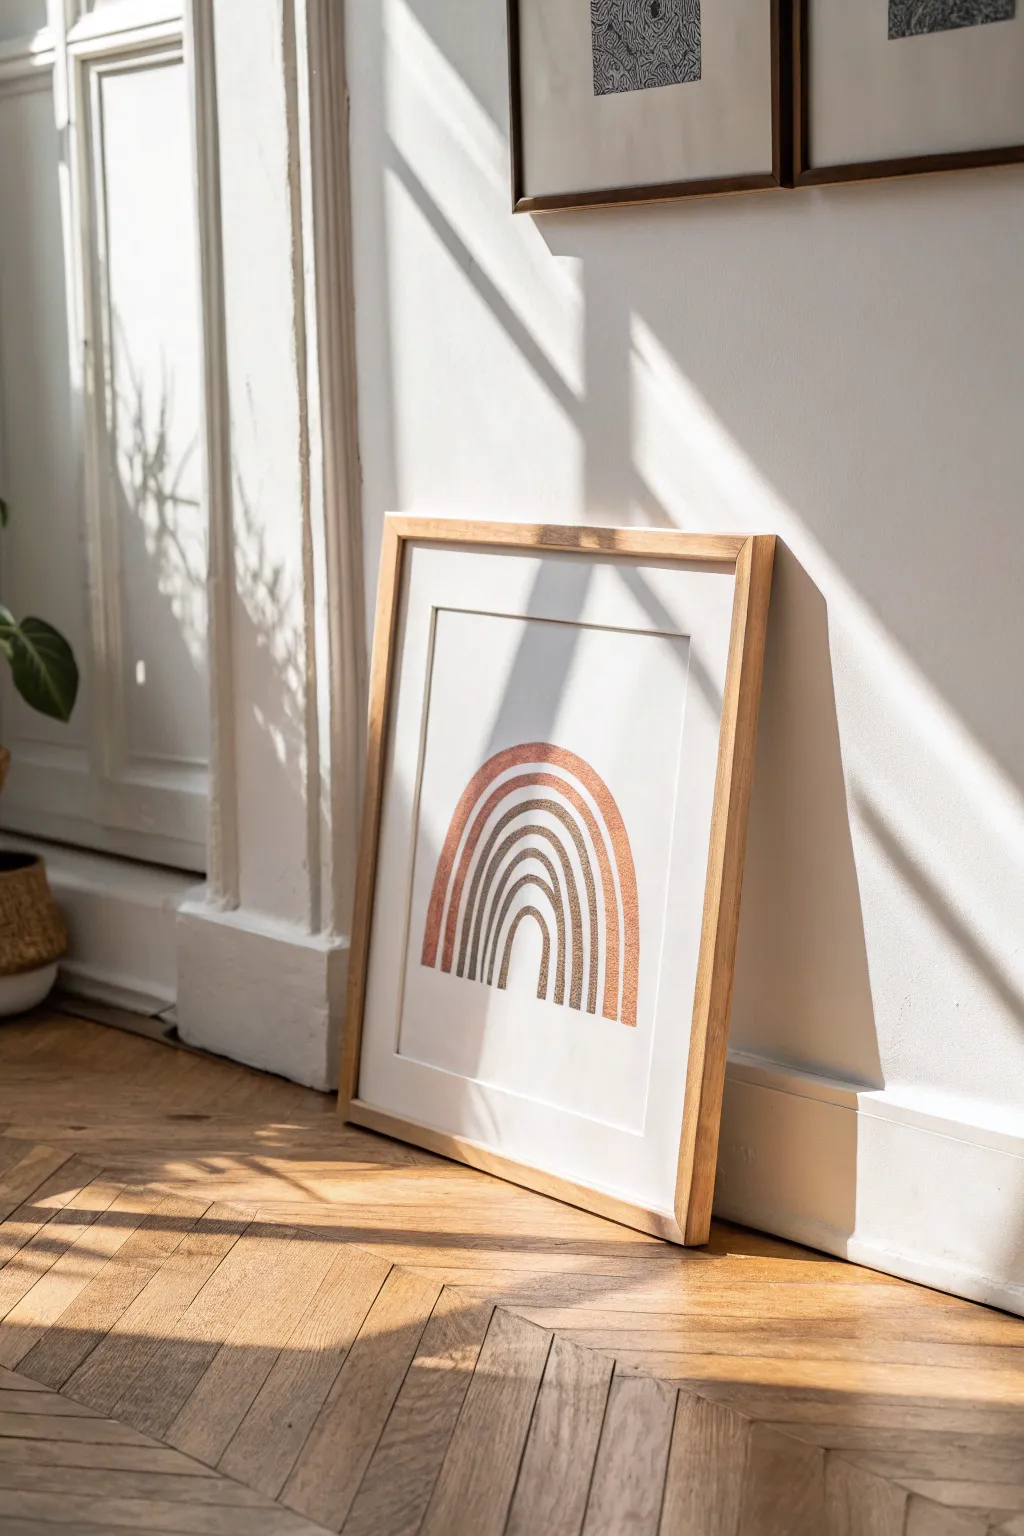
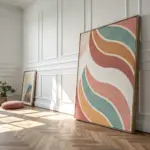
This minimalist project brings a warm, bohemian touch to your space with its soothing palette of terracotta, sage, and bronze. By using textured metallic paints or pens, you can create a simple yet striking series of nested arches that catch the sunlight beautifully.
How-To Guide
Materials
- Heavyweight textured art paper (watercolor or mixed media paper)
- Ruler
- Pencil
- Compass using an extender arm (or a string and pin method)
- Metallic paint pens (copper, bronze, sage green, dark brown)
- Or: Fine glitter and craft glue
- Eraser
- Light wood frame with mat board
Step 1: Preparation and Grid
-
Measure the center:
Begin by finding the exact horizontal center of your paper. Make a tiny, light mark near the bottom third of the page; this will serve as your anchor point for all the arches. -
Establish the baseline:
From your center mark, lightly draw a straight horizontal line across the paper using your ruler. This baseline ensures all your rainbow legs end at the exact same level. -
Mark the intervals:
Decide on the thickness of your bands. For the look in the image, you’ll want about 1cm to 1.5cm spacing. Place the compass point on your center mark and make small tick marks along the baseline to guide where each arch will start and stop.
Pro Tip: Texture Trick
To mimic the gritty look in the photo without glitter, use watercolor paper with a rough ‘cold press’ grain. The pen will skip slightly over the bumps, creating instant texture.
Step 2: Drafting the Design
-
Draw the smallest arch:
Set your compass to the smallest radius. Place the point firmly on your center mark and swing the pencil to create the innermost arch, stopping exactly at the baseline. -
Draw the spacing gap:
Widen your compass by a very small amount (about 2-3mm) and draw a second line outside the first one. This creates the negative space or ‘breathing room’ between the colored bands. -
Create the first band boundary:
Widen the compass again by your chosen band width (e.g., 1.5cm) and draw the next curve. You now have the outline for your first solid colored arch. -
Repeat the process:
Continue this pattern—draw a gap line, then a band width line—until you have four distinct arch bands outlined in pencil. -
Clean up sketch:
Step back and check your symmetry. Lightly erase any lines that extend past the baseline so you have a clean guide to fill in.
Step 3: Adding Color and Texture
-
Select your palette:
Choose an earthy gradient. I prefer starting with the darkest tone in the center and working outward to lighter, warmer tones like copper or terracotta. -
Fill the inner arch:
Using your darkest metallic pen or textured paint, carefully trace the outline of the smallest arch first to create a barrier. -
Color the fill:
Fill in the rest of the semi-circle with small, vertical strokes or stippling motions to build up that speckled texture visible in the photo. -
Move to the second band:
Skip the narrow gap you drew. With a sage or medium-brown shade, outline and fill the second band. Be very careful near the edges to keep the white gap crisp. -
Apply the third color:
Switch to a lighter bronze or beige tone for the third band. If using paint pens, shake them well to ensure the metallic pigment is evenly distributed. -
Finish with the outer arch:
Use your warmest terracotta or copper color for the large, final arch. This frames the piece and creates a nice contrast with the paper. -
Check density:
Look closely at your fill sections. If the paper tooth is showing through too much, go back over with a second layer of stippling to make the color richer. -
Dry thoroughly:
Let the artwork sit undisturbed for at least an hour. Metallic inks often stay tacky longer than standard markers.
Troubleshooting: Shaky Arches
If your hand isn’t steady enough to fill the curves perfectly, use a flexible curve ruler or masking tape designed for curves to block off the edges before coloring.
Step 4: Finishing Touches
-
Erase pencil marks:
Once you are 100% certain the ink is dry, gently run a soft eraser over the visible pencil lines in the white gaps. Be careful not to smudge the color. -
Sign and frame:
Add a small signature if desired. Place the artwork behind a mat board and secure it in a light wood frame to complete the organic aesthetic.
Place your framed masterpiece in a sunny spot where the light can catch the subtle metallic sheen for a lovely afternoon glow

PENCIL GUIDE
Understanding Pencil Grades from H to B
From first sketch to finished drawing — learn pencil grades, line control, and shading techniques.
Explore the Full Guide
Scrape-and-Reveal Layers
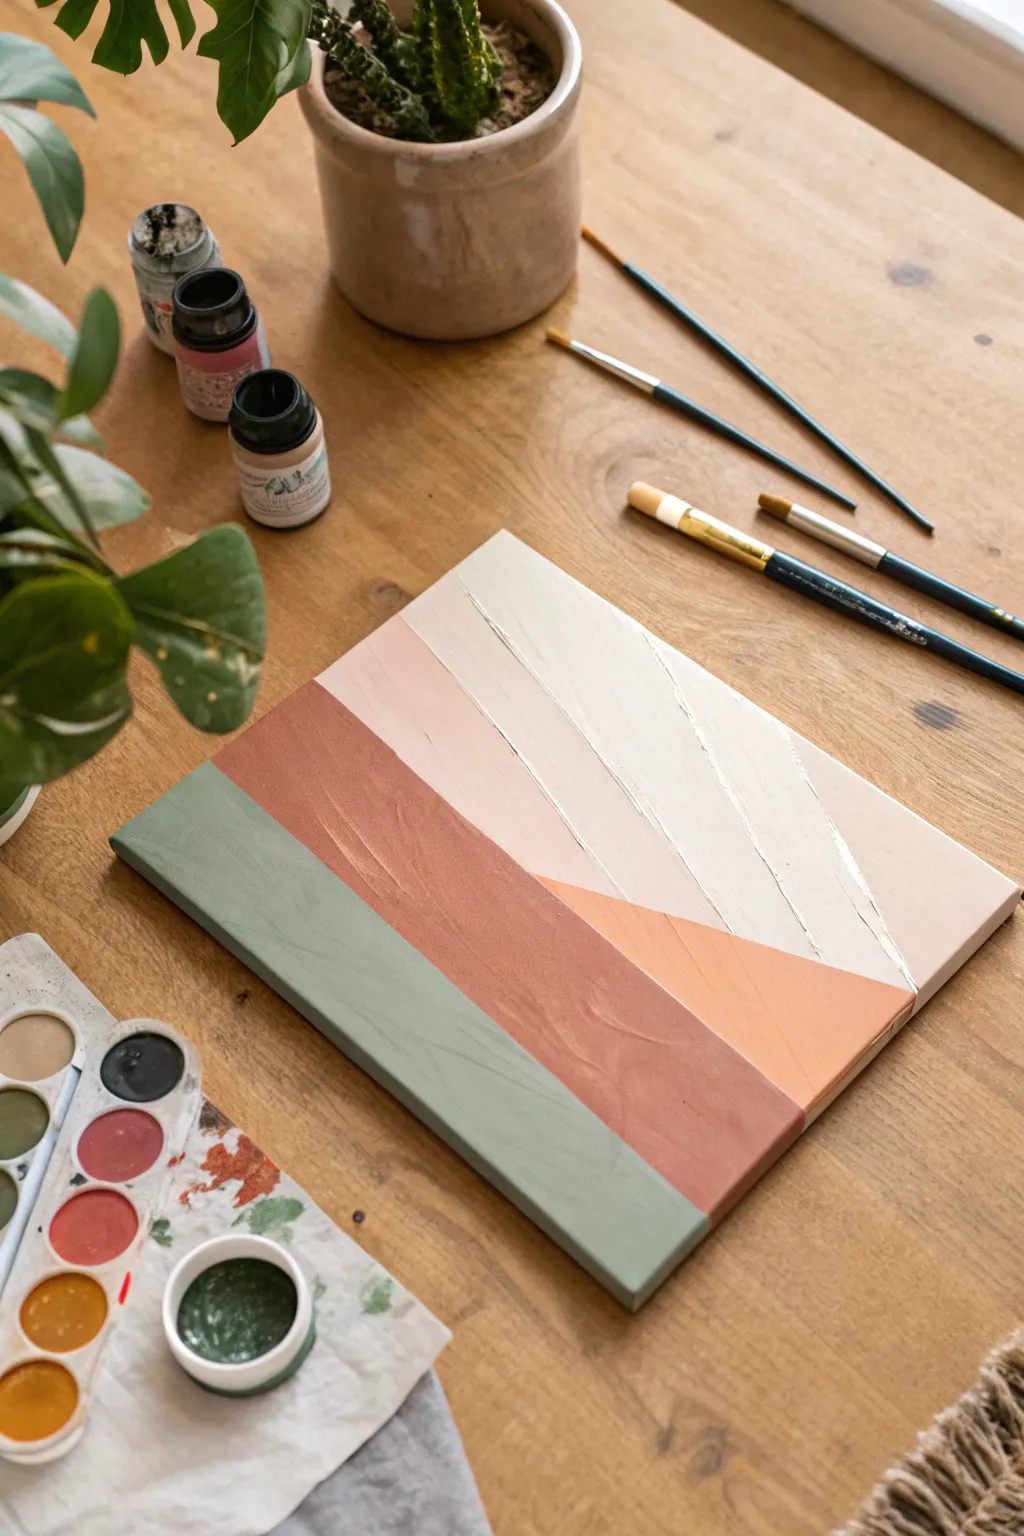
Create a soothing, minimalist statement piece with this textured geometric canvas art. Combining soft earth tones like sage, terracotta, and cream with subtle impasto techniques, this project brings a modern, tactile feel to any space.
Detailed Instructions
Materials
- Small square canvas (e.g., 8×8 or 10×10 inches)
- Acrylic paints: Sage Green, Terracotta/Rust, Peach/Coral, Cream/Off-White
- Texture paste or modeling paste (optional, for added dimension)
- Flat paintbrushes (various sizes)
- Painter’s tape or masking tape
- Palette knife or old plastic card
- Palette or paper plate for mixing
Step 1: Preparation & First Section
-
Surface Prep:
Ensure your canvas is clean and free of dust. If you want a smoother finish, you can apply a quick coat of gesso, but the raw canvas texture works fine for this rustic look. -
Tape the First Line:
Visualize a diagonal line running from the bottom left third upward towards the right side. Apply a strip of painter’s tape along this line to define the separation between the bottom green section and the rest of the canvas. -
Mix Sage Green:
On your palette, mix a sage green shade. If your green is too bright, tone it down with a tiny drop of red or brown, and lighten with white until you have a soft, earthy hue. -
Paint the Bottom Corner:
Fill the bottom-left triangular section with your sage green paint. Use a flat brush and apply the paint relatively thickly to create some texture. -
Smooth the Edges:
Paint firmly over the edge of the tape to ensure a crisp line. Don’t forget to paint the sides of the canvas in this section so the artwork wraps around the frame. -
First Drying Phase:
Let this green section dry completely. It must be dry to the touch before you can apply tape over it for the next steps.
Crisp Lines Secret
To prevent bleeding, seal the tape edge with a thin layer of the *base* color (or white) first. Let it dry, then paint your new color on top.
Step 2: Middle Layers
-
Tape the Second Section:
Once the green is dry, gently remove the first piece of tape. Now, apply a new strip of tape over the dry green edge to protect it. Add another strip of tape further up the canvas to define the top edge of the terracotta band. -
Apply Terracotta:
Mix a rich terracotta or rust color. Apply this to the band adjacent to the green section. I like to use slightly multidirectional brushstrokes here to build subtle visual interest. -
Create the Peach Triangle:
While the terracotta is drying, you can stake out the small triangular section on the right. Use tape to block off the surrounding areas. -
Paint Peach Accents:
Fill this smaller geometric shape with a soft peach or coral tone. This color acts as a bridge between the dark rust and the light cream top. -
Second Drying Phase:
Allow all these middle colored sections to dry thoroughly. Impatience here leads to smudged lines, so give it time.
Paint Ridge Collapse
If your textured ridges flatten out as they dry, your paint was too fluid. Mix in more modeling paste or cornstarch next time to hold the shape.
Step 3: Texture & Top Layer
-
Prepare the Top Section:
Remove all previous tape. Apply fresh tape along the upper edges of your terracotta and peach sections to protect them while you work on the final area. -
Mix Texture Medium:
For the top cream section, mix your off-white acrylic paint with a bit of modeling paste or texture gel. If you don’t have paste, simply use heavy body acrylics or let the paint sit for a moment to thicken. -
Apply Cream Base:
Spread a thick layer of the cream mixture onto the remaining top portion of the canvas. -
Scrape and texture:
Using a palette knife or the edge of a stiff card, scrape into the wet cream paint. Create diagonal or fan-like ridges radiating from the center or corner. -
Define the Ridges:
Ensure the ridges are physically raised. This ‘scrape-and-reveal’ effect catches the light and adds the signature dimension seen in the project photo. -
Remove Tape:
Carefully peel off the final strips of tape while the cream paint is still slightly wet to prevent the thick paint from peeling up with the tape. -
Touch Up:
Inspect your lines. If any paint bled under the tape, use a small detail brush with the appropriate color to tidy up the edges. -
Final Dry:
Let the entire canvas dry overnight, especially the thick textured top section, before displaying.
Hang your new textured masterpiece in a well-lit spot to let shadows play across the ridges
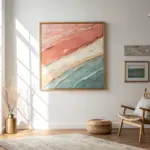
Ombre Fade Abstract
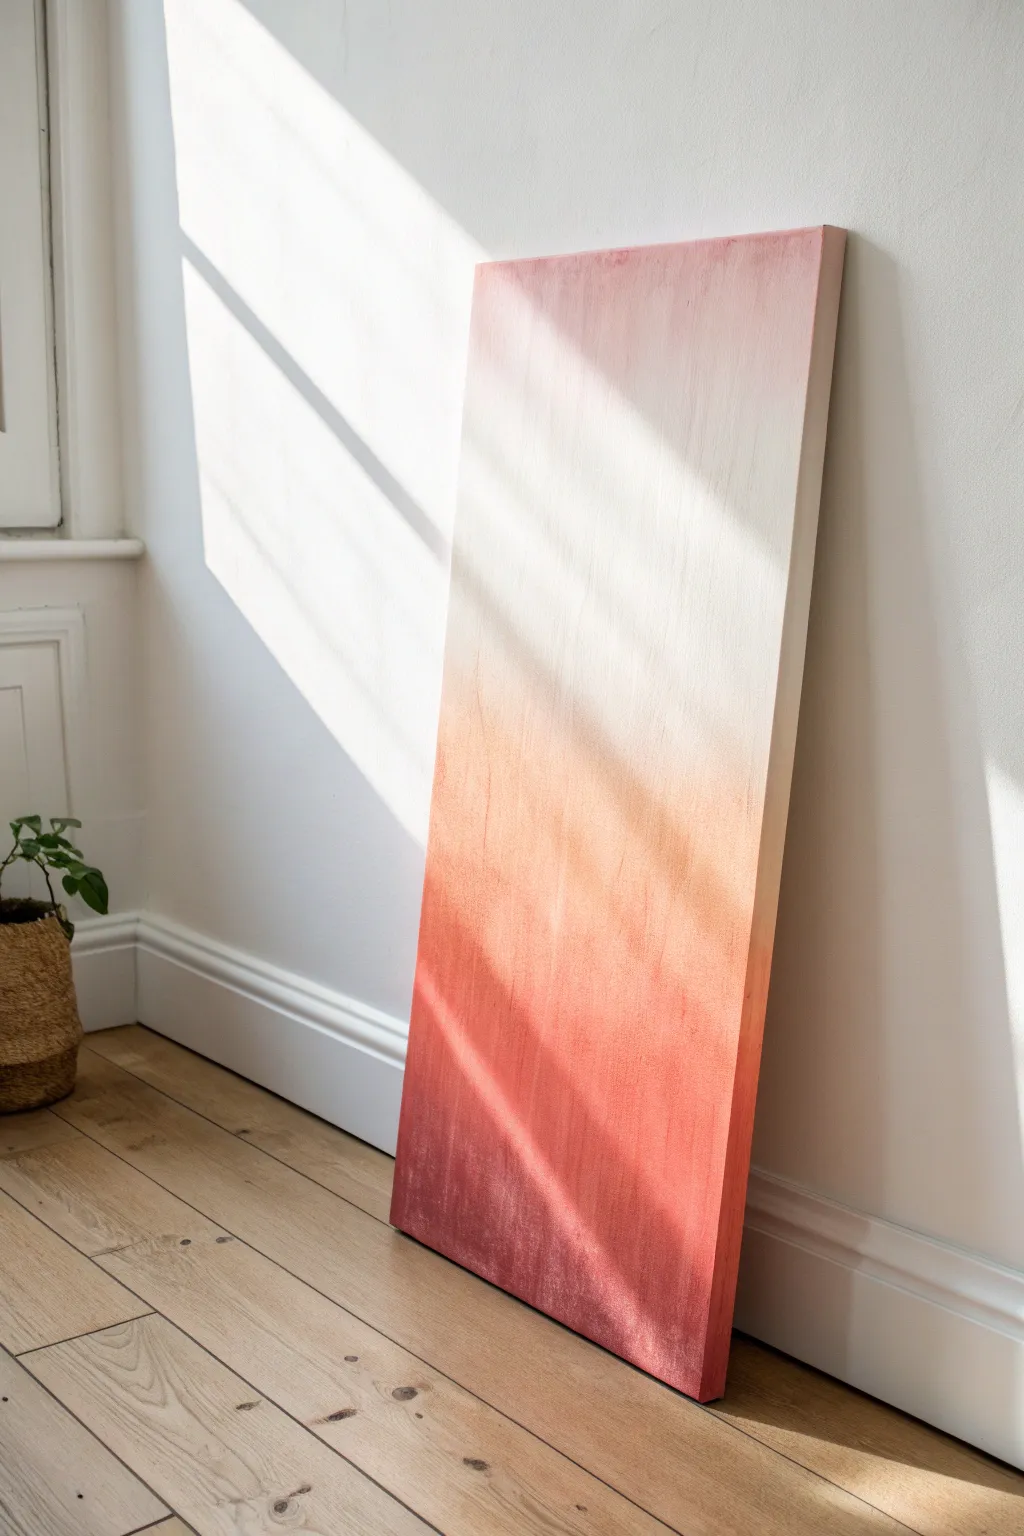
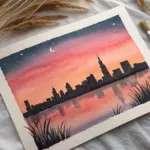
Capture the warmth of a setting sun with this minimalist ombre art piece, featuring a seamless fade from deep terracotta to soft porcelain. The textured finish gives it an organic, lived-in feel perfect for modern interiors.
Step-by-Step Tutorial
Materials
- Large rectangular canvas or wood panel
- Gesso (if unprimed)
- Wide flat synthetic paintbrush (2-3 inch)
- Soft blending brush
- Acrylic paint: Burnt Sienna
- Acrylic paint: Red Oxide or Terracotta
- Acrylic paint: Titanium White
- Palette or disposable plates
- Water jar
- Spray bottle with water (mister)
Step 1: Preparation
-
Prime the Surface:
Ensure your canvas or wood panel is clean and free of dust. Apply a coat of white gesso if the surface is raw wood or unprimed canvas to ensure the colors pop. -
Mix Your Base Shade:
On your palette, create the darkest tone for the bottom of the piece. Mix Red Oxide with a touch of Burnt Sienna to get that deep, earthy rust color. -
Prepare the Mid-Tones:
Create two intermediate shades: one that is a pure version of your rust color, and a second version mixed with about 30% Titanium White to start lightening it. -
Prepare the Highlights:
Mix a large amount of Titanium White with just the tiniest speck of your rust mixture to create a warm off-white or cream color for the top section.
Pro Tip: Keep it Wet
Acrylics dry fast! Keep a spray bottle of water handy to mist the canvas lightly. This keeps the paint workable for smoother blending between color zones.
Step 2: Painting the Gradient
-
Apply the Base:
Using your wide flat brush, paint the bottom quarter of the canvas with your darkest rust mixture. Apply it with vertical strokes for a slight texture. -
Add the Second Layer:
Without cleaning the brush perfectly, pick up your mid-tone rust color. Paint the next quarter of the canvas, slightly overlapping the dark bottom section. -
Blend the Transition:
While the paint is still wet, use the dry blending brush to gently sweep back and forth horizontally where the colors meet to soften the line. -
Apply the Lighter Mid-Tone:
Move up to the third quarter of the canvas. Dip into your lighter pinkish-rust mix (the one with 30% white) and apply it here. -
Softening the Middle:
Use your mister to spritz a tiny bit of water on the transition line between the mid-tones if the paint is drying too fast, then blend horizontally again. -
Painting the Top:
Clean your wide brush thoroughly. Apply the cream/off-white mixture to the very top section of the canvas, bringing it down to meet the pinkish mid-tone. -
Downward Blending:
Drag clean white paint slightly downwards into the pink section to create a hazy, sun-bleached look rather than a hard line.
Level Up: Texture Medium
Mix a fine sand or pumice gel medium into your base colors before painting. This adds a gritty, stucco-like texture that catches the light beautifully.
Step 3: Refining Texture
-
Assess the Fade:
Step back and look at the gradient from a distance. Identify any areas where the transition looks like a distinct stripe rather than a fade. -
Dry Brushing Correction:
Dip a dry brush into the color needing adjustment, wipe most of it off on a rag, and lightly scumble (scrub) over harsh lines to blur them. -
Vertical Integration:
I find that doing a few very long, light vertical strokes from the bottom up while the paint is tacky helps unify the texture and mimics wood grain. -
Adding Depth:
If the bottom looks too flat, dab a tiny bit of pure Burnt Sienna into the very lowest corners and blend upwards to ground the piece. -
Final White Wash:
For an ultra-soft look, apply a very watery whitewash over just the top half once the underlayer is dry to haze it out further. -
Paint the Edges:
Don’t forget the sides of your canvas or panel. Wrap the gradient colors around the edges for a professional gallery-wrapped finish. -
Drying:
Lay the artwork flat to dry completely, ensuring no dust settles on the wet paint.
Place your new artwork near a window to let natural light play across the subtle color transitions you’ve created


Easy Abstract Triptych Set
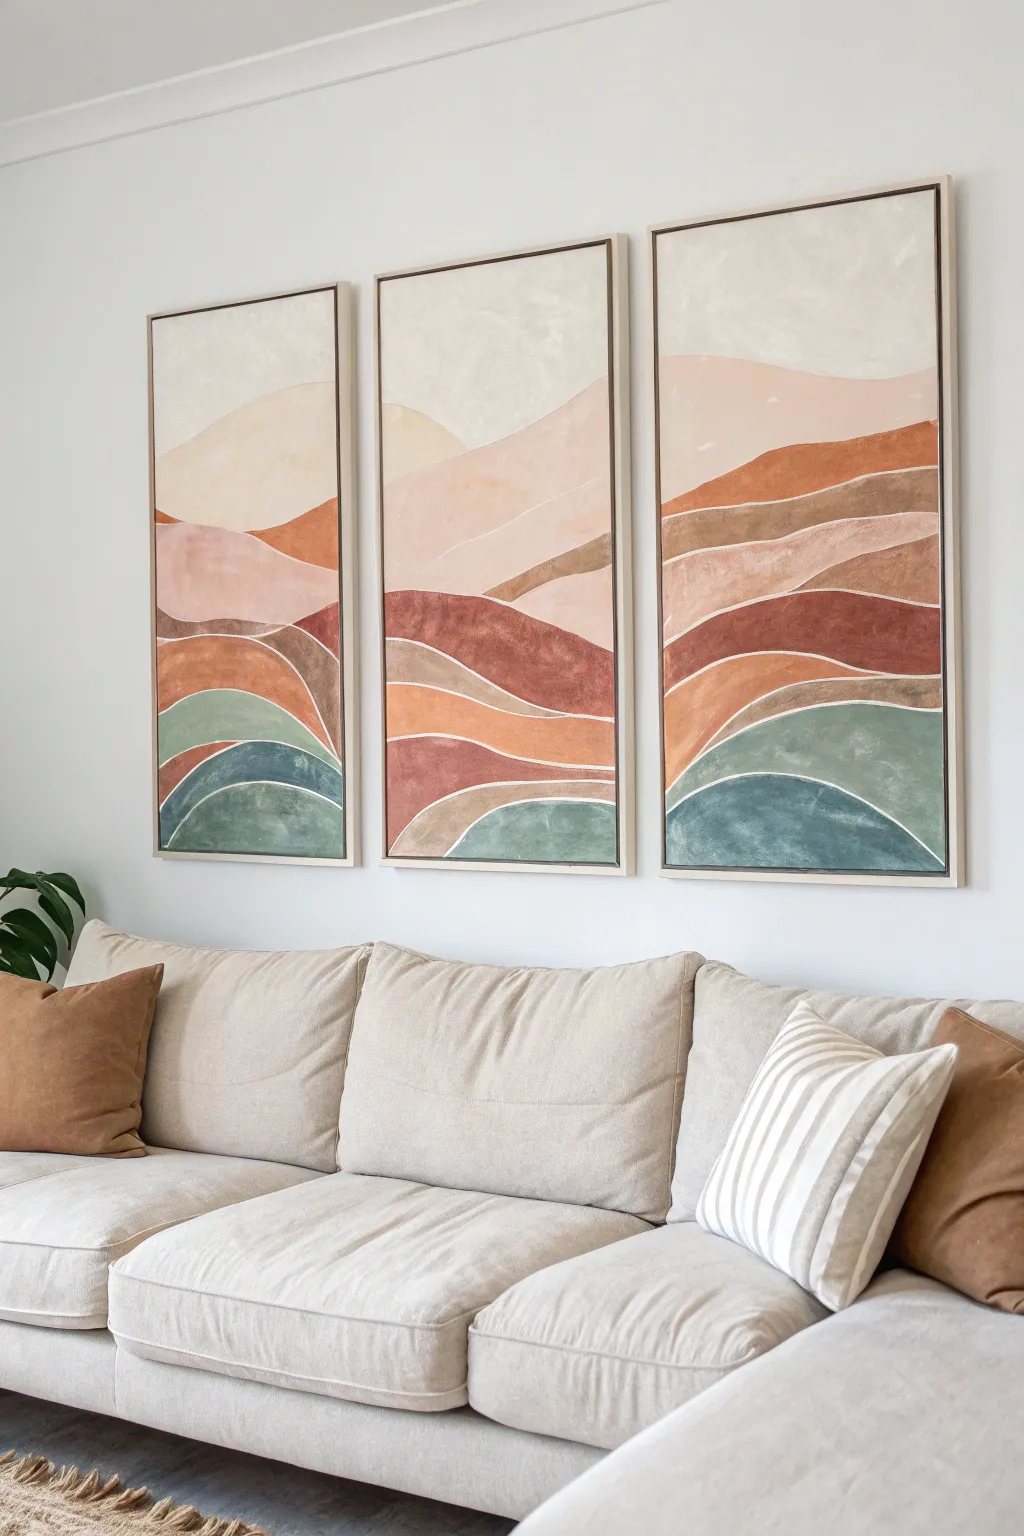
Bring earthy warmth to your living space with this three-panel canvas set featuring abstract rolling hills in terracottas, sages, and ochres. The flowing, continuous lines connect across all three canvases, creating a cohesive landscape that adds serene movement to any wall.
How-To Guide
Materials
- 3 large stretched canvases (e.g., 24×36 inches)
- Acrylic paints (Titanium White, Burnt Sienna, Yellow Ochre, Sage Green, Raw Umber, Terracotta)
- White paint marker (chisel tip)
- Large flat paintbrush (2 inch)
- Medium round paintbrush
- Pencil and eraser
- Masking tape or painter’s tape
- Spray bottle with water
- Mixing palette or paper plates
- Drop cloth
- Floating frames (optional, for finishing)
Step 1: Preparation & Sketching
-
Set up the workspace:
Lay down your drop cloth and arrange the three canvases side-by-side on the floor or a large table. Leave about 1-2 inches of space between them, exactly as they will hang on the wall, to ensure the flowing lines connect accurately. -
Plan the horizon lines:
Using a pencil, lightly sketch the wavy hill lines. Start from the left canvas and draw a swooping line that continues onto the middle and right canvases. Draw 6-8 distinct layers of hills, varying the height and curvature to create a sense of depth. -
Map color zones:
Lightly label each section with the intended color family (e.g., ‘dark terracotta’, ‘light sage’, ‘cream’) so you don’t get confused once you start painting. Aim for a gradient effect, with lighter, paler colors at the top (sky/distant hills) and darker, saturated tones at the bottom. -
Refine the curves:
Step back and look at the composition from a distance. Adjust any awkward angles in your pencil lines now; smooth, organic curves work best for this style.
Step 2: Painting the Artwork
-
Mix the sky tone:
Start at the very top. Mix a large amount of Titanium White with a tiny dot of Yellow Ochre and Burnt Sienna to create a warm, creamy off-white. -
Paint the background:
Apply this cream mixture to the top section of all three canvases. Use your large flat brush with long, horizontal strokes. I like to keep the paint slightly thin here for a washed, airy look. -
Create the first hill layer:
Mix a pale peach color by adding a bit more Terracotta to your cream base. Paint the first set of distant hills just below the sky. -
Build intensity downward:
Move to the next layer down. Mix a muted terracotta shade. Don’t worry about perfect opacity; a slightly streaky or textured application adds to the organic feel. -
Introduce earth tones:
For the middle layers, mix Raw Umber with Burnt Sienna for a deep reddish-brown. Paint the corresponding sections across all three canvases to maintain continuity. -
Add accent colors:
In the lower third, introduce your Sage Green and deep blues. Mix the green with a little gray or white to mute it so it isn’t too bright. Apply these to the specific hill curves you mapped out earlier. -
Add texture:
While the paint is still wet on the lower hills, lightly spritz a section with water and dab it with a paper towel or a dry brush to lift a little color, creating a weathered, stone-like texture. -
Paint the edges:
Don’t forget the sides of your canvases. Extend the colors around the edges for a professional, gallery-wrapped finish if you aren’t framing them. -
Let it dry:
Allow the canvases to dry completely, ideally overnight. The thick acrylics need to be fully set before the detailing phase.
Uneven Lines?
If free-handing the white lines feels too risky, you can leave a small gap of bare canvas between colors while painting, then refine it with white paint later.
Step 3: Detailing & Finishing
-
Prepare the paint pen:
Shake your white chisel-tip paint marker well. Test the flow on a scrap piece of paper to ensure smooth, opaque lines. -
Outline the hills:
Carefully trace over your original pencil lines between the color blocks. Keep a steady hand and apply consistent pressure to create a uniform white border between each hill. This ‘white space’ mimics the look of a collage or batik print. -
Clean up edges:
If the white line looks shaky, you can tidy it up by carefully painting back over the edges with the adjacent hill color using a small detail brush. -
Erase visible guides:
Once the paint marker is 100% dry, gently erase any remaining pencil marks that might be peeking through the lighter paint sections. -
Seal (optional):
Apply a coat of matte varnish spray to protect the painting from dust and UV light. A matte finish preserves the earthy, chalky aesthetic better than gloss. -
Frame and hang:
If using floating frames, install the canvases into them now. Hang the triptych on your wall, using a level and spacer to maintain that critical gap between panels.
Pro Tip
Mix a tiny amount of texture paste or baking soda into your acrylics for the lower hills to give the artwork true relief and tactile depth.
Step back and admire your cohesive landscape that brings a custom, designer touch to your home
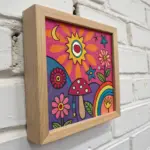
Mini Grid of Abstract Panels
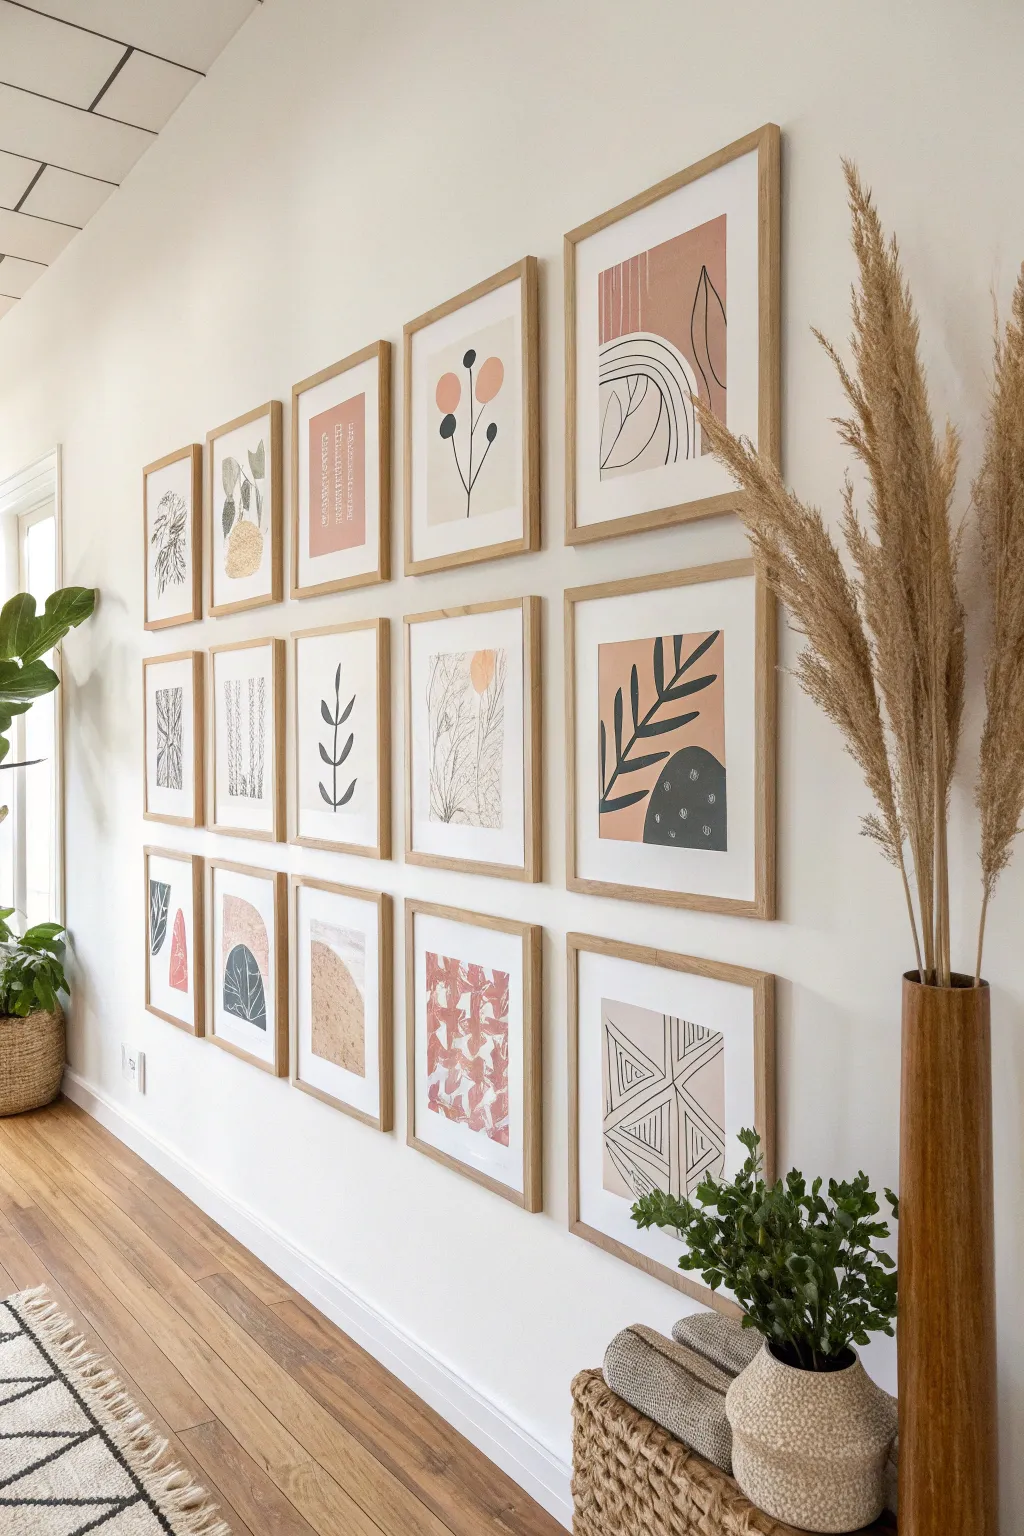
Bring the calming vibes of a modern art gallery into your home with this stunning grid of mini abstract panels. Featuring organic shapes, botanical sketches, and warm earthy tones, this large-scale installation is surprisingly easy to create using simple painting and drawing techniques.
Detailed Instructions
Materials
- 15 frames (light wood finish, identical size, e.g., 11×14 or 16×20)
- Heavyweight watercolor paper or mixed media paper (cut to frame size)
- Acrylic paints (Terracotta, Sage Green, Beige/Sand, Black, White)
- Assorted flat paintbrushes (medium and small)
- Fine-tip black drawing pens or markers (various sizes)
- Pencil and eraser
- Ruler
- Painter’s tape (optional)
- Level and hammer/nails for hanging
Step 1: Conceptualizing the Grid
-
Plan your palette:
Before putting brush to paper, select a cohesive color palette. The image uses a mix of warm terracotta, muted sage green, deep black, and creamy beige. Pre-mix your acrylics to ensure consistency across all 15 pieces. -
Map out designs:
Sketch small thumbnail ideas for your 15 panels. You want a balance of three main types: purely organic painted shapes, line-art botanicals, and mixed-media geometric patterns. Aim for variety so two similar designs won’t sit right next to each other.
Paint Warping Paper?
If your paper buckles from the acrylic paint, place the dry artwork under a heavy stack of books overnight to flatten it before framing.
Step 2: Creating Painted Abstracts
-
Paint organic shapes:
For panels featuring solid blocks of color (like the arches or blobs), sketch the outline lightly with a pencil first. These shapes shouldn’t be perfect circles or squares; allow them to be slightly wobbly and organic. -
Fill with color:
Using a flat brush, fill in your sketched shapes with your pre-mixed acrylics. Apply thin, even layers. You may need two coats for the lighter colors like beige or white to get solid coverage. -
Add detail layers:
Once the base shapes are dry, you can layer contrasting colors on top. For example, paint a black semi-circle over a terracotta background, or add white stippling dots onto a dark grey shape for texture.
Add Textured Elements
Mix a little baking soda into your acrylic paint for the solid shapes. It creates a rough, plaster-like texture that adds amazing depth.
Step 3: Drawing Botanicals & Lines
-
Sketch botanical stems:
For the line-art panels, use your pencil to lightly draft simple leaf branches, flower stems, or abstract plant shapes. Keep the lines clean and minimal. -
Ink the lines:
Go over your pencil sketches with a fine-tip black marker. Vary your pressure to create lines that feel hand-drawn and natural rather than mechanical. I like to lift the pen slightly at the end of a leaf for a tapered look. -
Create geometric patterns:
For panels with geometric lines (like the triangles or grids), use a ruler if you want precision, or freehand it for a looser boho feel. Draw repeating patterns like stripes, chevrons, or grids using the black marker. -
Combine techniques:
Create several ‘hybrid’ panels. Paint a large organic circle in beige, let it dry completely, and then draw a delicate black botanical stem directly over the paint. This ties the different styles together.
Step 4: Assembly and Hanging
-
Final touches:
Erase any visible pencil marks carefully once the ink is totally dry. Sign your pieces small in the corner if you like. -
Frame the artwork:
Clean the glass of your frames to remove fingerprints. Place each artwork into a light wood frame. If your frames have mats, ensure the art is centered perfectly. -
Plan the layout on the floor:
Lay all 15 framed pieces on the floor. Rearrange them until the colors and patterns are balanced—try not to cluster all the dark pieces or all the botanical drawings in one spot. -
Measure the wall:
Determine the center point of your wall space. You will want uniform spacing between frames—about 2 to 3 inches is standard for a grid like this. -
Hang the grid:
Start by hanging the center-most frame first. Use a level to ensure it is perfectly straight. Then, work your way outwards, measuring the gap carefully for each adjacent frame to maintain a crisp grid.
Step back and admire how a collection of simple sketches transforms your wall into a high-end design feature
Torn Paper Abstract Collage
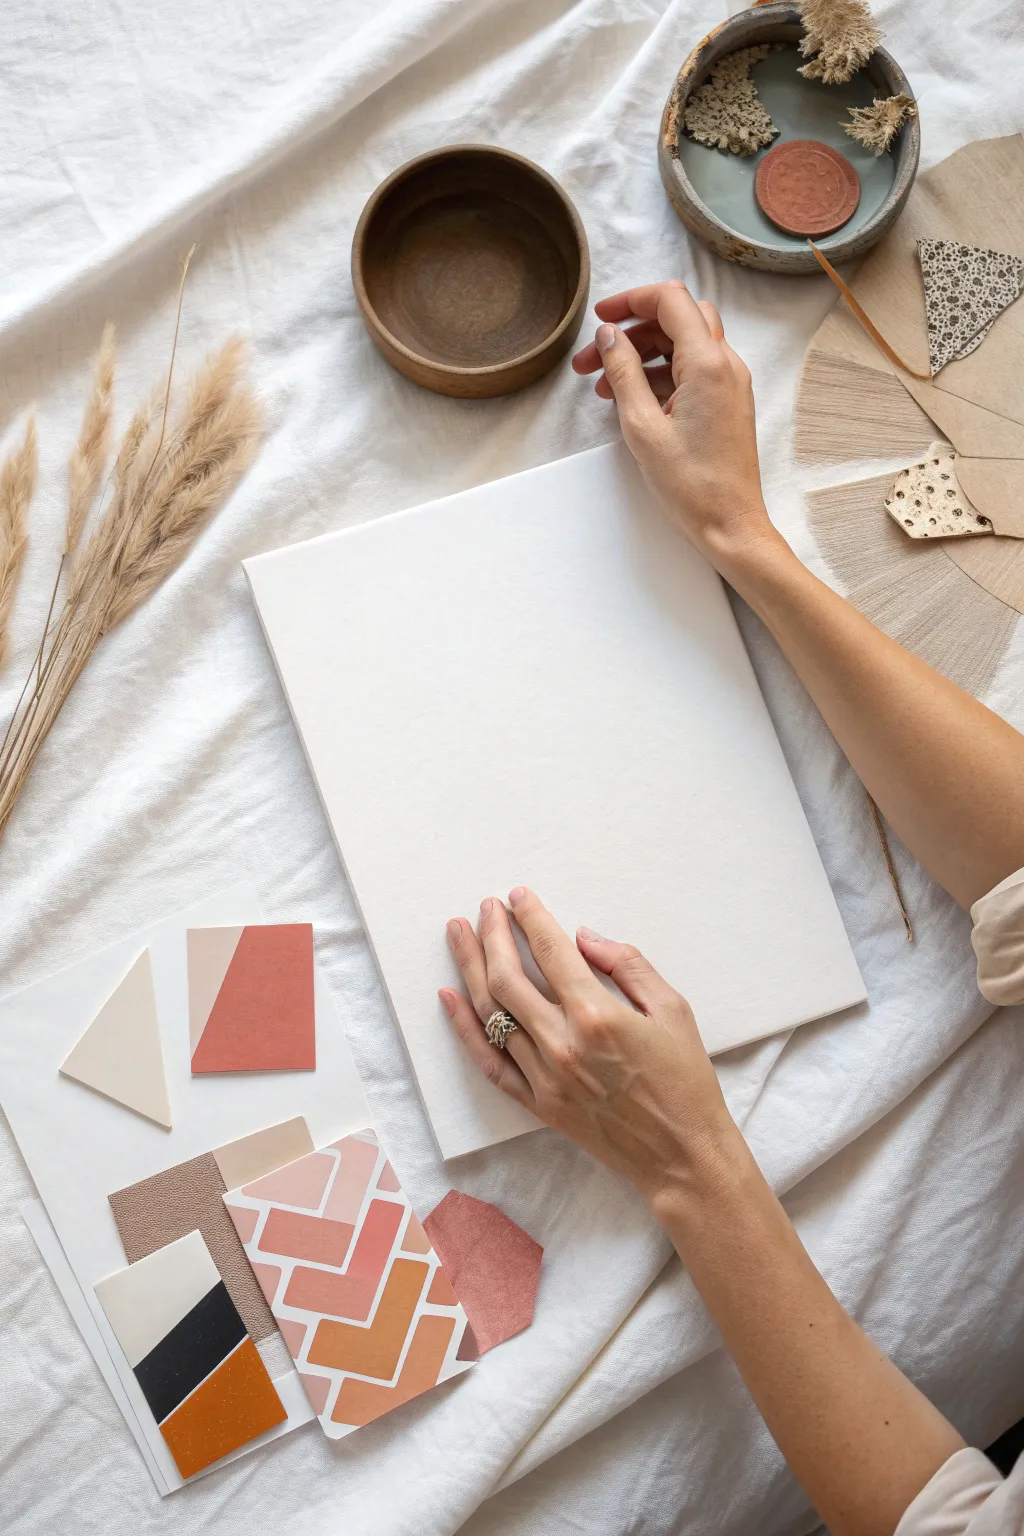
Embrace the beauty of minimalism and texture with this soothing abstract collage project. By combining torn paper elements, geometric shapes, and a soft, earthy color palette, you’ll create a piece remarkably similar to the mood board inspiration shown.
Step-by-Step Guide
Materials
- Blank stretched canvas (approx. 11×14 or similar)
- Heavyweight cardstock or mixed media paper (white, cream, beige)
- Colored craft paper (terracotta, rusty orange, black, tan)
- Textured specialty paper (cork, linen, or handmade paper)
- Matte finish decoupage glue (like Mod Podge)
- Flat paintbrush for glue application
- Scissors
- Ruler
- Pencil
- Tweezers (optional, for placement)
Step 1: Preparation & Concept
-
Assess your palette:
Before gluing anything, gather your materials to establish a color story. Look for a balance of warm earth tones—terracotta, dusty pinks, creamy whites, and deep blacks or charcoal for contrast. -
Plan your composition:
Lay your blank canvas on a clean, flat surface. This project relies on ‘negative space,’ meaning the white of the canvas is just as important as the paper you add. Visualize where you want your focal points to be. -
Create geometric variety:
Cut several precise shapes from your colored cardstock. Triangles, rectangles, and trapezoids are excellent choices. Keep edges sharp and clean for a modern look.
Smooth Operator
Use a brayer or an old credit card to gently smooth down papers after gluing. This ensures a professional, bubble-free bond with the canvas.
Step 2: Creating Texture
-
The tearing technique:
To contrast the sharp geometric shapes, create organic elements by tearing some of the thicker paper. Hold the paper firmly and tear slowly towards you to reveal the inner fibers; this white ‘deckled’ edge adds wonderful dimension. -
Mock-up the layout:
Arrange your cut shapes and torn pieces onto the dry canvas without glue. Experiment with layering—try placing a sharp triangle over a torn, textured piece of tan paper. -
Refining the balance:
Step back and look at your arrangement. Does it feel balanced? You might want to cluster elements in the bottom left or create a flowing line across the center. I prefer to snap a quick photo with my phone once I’m happy with the layout so I don’t forget it.
Nature’s Touch
Incorporate real dried botanicals! Press a small dried leaf or sprig of pampas grass into the collage using heavy gel medium for an organic 3D element.
Step 3: Assembly
-
Prepare the adhesive:
Pour a small amount of matte decoupage glue into a dish or onto a palette. A matte finish is crucial here to maintain the natural, non-shiny aesthetic of the paper. -
Gluing the base layer:
Starting with the bottom-most unique pieces, apply a thin, even layer of glue to the back of the paper. Press it firmly onto the canvas, smoothing from the center outward to remove air bubbles. -
Layering elements:
Continue adding your shapes one by one. If you are overlapping pieces, ensure the bottom layer is relatively dry first so it doesn’t shift. -
Adding micro-details:
Consider adding very small strips or tiny geometric chips (like the black stripe seen in the reference) for visual interest. These small details draw the eye in.
Step 4: Finishing Touches
-
Clean the edges:
Check the edges of your glued papers. If any corners are lifting, use a toothpick or small brush to dab a tiny bit of glue underneath and press down. -
Seal the work (optional):
If you want extra protection, you can brush a very thin layer of matte medium over the entire canvas. However, leaving the paper raw often looks better for this specific matte, textured style. -
Final drying:
Let the canvas sit flat for at least 2-3 hours to ensure everything is completely bonded and dry.
Hang your new textural masterpiece in a well-lit spot to let the shadows play across the torn edges
Sand-Textured Abstract Plaster Look
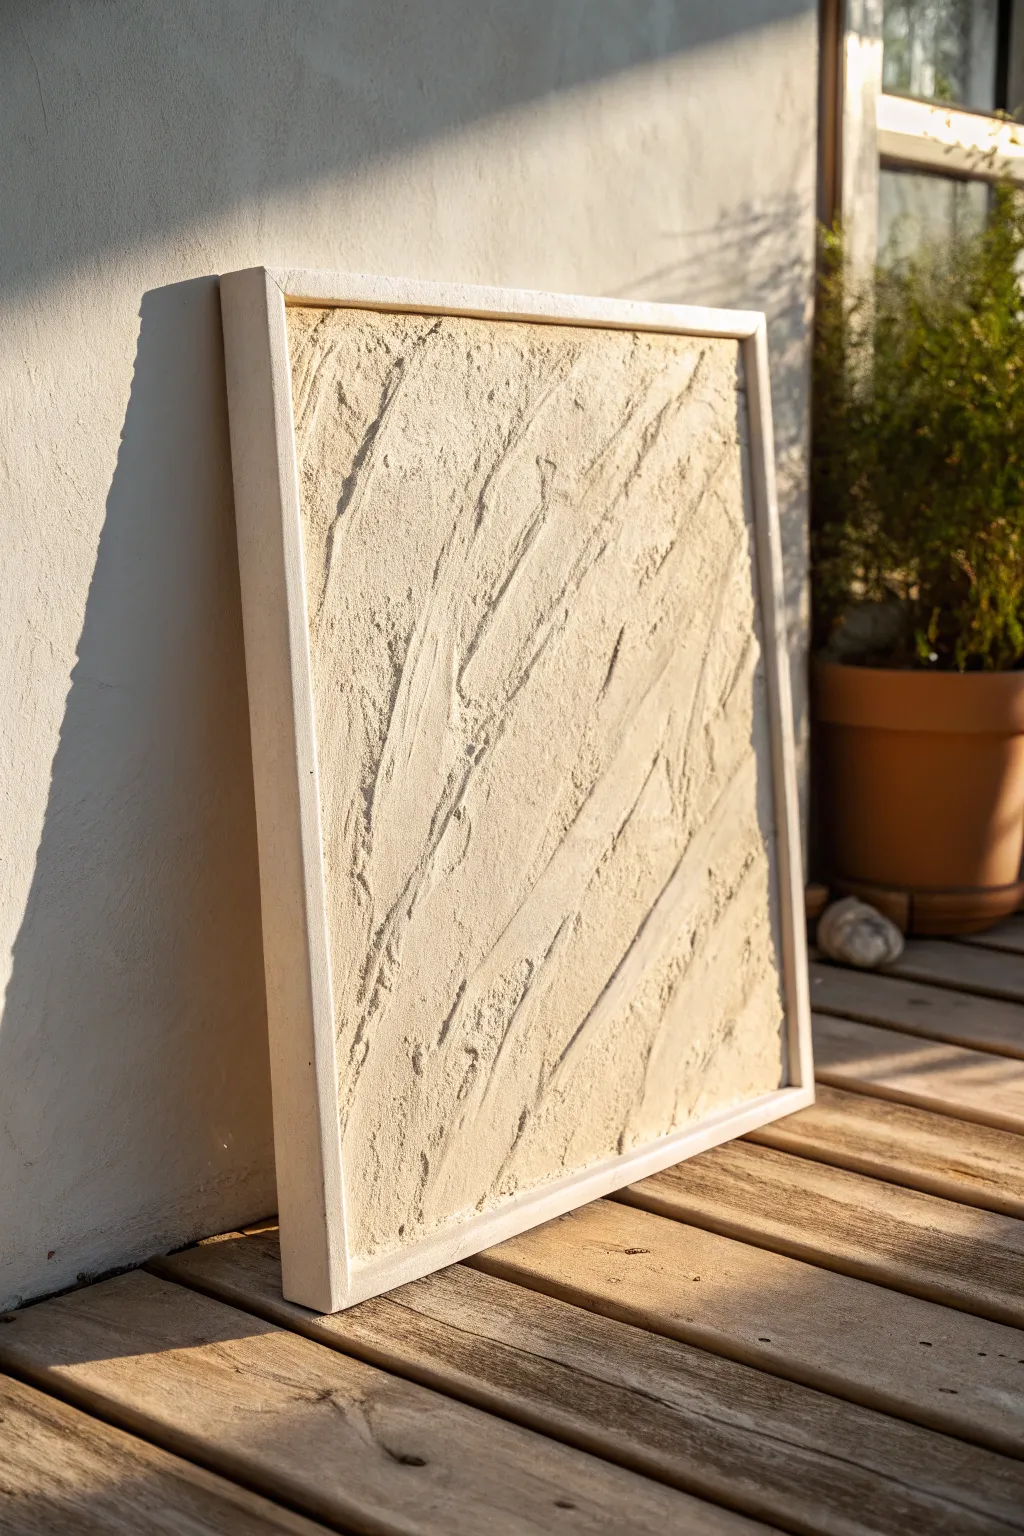
Achieve a high-end, gallery-worthy look with surprisingly simple materials using this textured sand art technique. The result is a minimalist piece that captures the organic, sweeping movements of wind-blown dunes in a warm, neutral palette.
How-To Guide
Materials
- Large square canvas (stretched) or wood panel
- Joint compound or drywall mud (pre-mixed bucket)
- Fine sand (white play sand or decorative craft sand)
- White acrylic paint (warm white or cream)
- Beige or tan acrylic paint (for mixing)
- Large trowel or wide putty knife
- Notched trowel (optional, for variation)
- Floating frame (light wood or white)
- Strong craft glue or wood glue
- Mixing bucket or tray
- Drop cloth
Step 1: Preparation & Base Texture
-
Prepare the workspace:
Lay down your drop cloth to protect your floor. This project can get messy with sand and plaster, so a garage or outdoor space is ideal. -
Mix the medium:
Scoop a generous amount of joint compound into your mixing bucket. You want enough to cover the entire canvas thickly. -
Add sand for grit:
Pour fine sand into the joint compound. Start with a ratio of about 2 parts compound to 1 part sand. Mix thoroughly until the texture feels gritty but spreadable. -
Tint the mixture:
Add a squeeze of warm white and a tiny drop of beige acrylic paint directly into the compound mix. This ensures the base color is embedded in the texture, not just painted on top. -
Apply the first layer:
Using your large trowel, spread a base layer of the mixture over the entire canvas. It doesn’t need to be perfect; aim for about 1/4 inch thickness.
Control the Cracks
Thicker plaster cracks more as it dries. If you want a smooth look, apply thin layers. If you want an ancient, weathered look, apply it thickly and let it crack naturally.
Step 2: Creating the Swooping Design
-
Plan your motion:
Before touching the wet plaster, visualize diagonal, sweeping motions running from the bottom left to top right, mimicking natural dunes. -
Sculpt the main ridges:
Hold the trowel at a 45-degree angle. Press firmly and drag it diagonally across the canvas to create deep ridges and valleys. -
Overlap textures:
Make a second pass parallel to the first, slightly overlapping the previous stroke. Let the excess mixture build up on the edges of the trowel lines to create dimension. -
Refine the details:
Use the edge of the trowel to scratch into the flat areas slightly, adding more organic imperfection. I find that inconsistent pressure actually makes the piece look more authentic. -
Add surface sand:
While the compound is still very wet, sprinkle a pinch of dry sand over specific areas—like the tops of the ridges—to enhance the matte, earthy feel. -
Let it cure:
Allow the artwork to dry completely. Because the layer is thick, this can take 24 to 48 hours. Do not rush this step, or cracks may form.
Metallic Touch
Mix a small amount of gold mica powder into your sealing layer. It adds a subtle, shimmering quality that looks like sun glinting off real sand grains.
Step 3: Finishing & Framing
-
Check for loose sand:
Once fully dry, stand the canvas up and gently tap the back to dislodge any loose sand that didn’t adhere. -
Seal the surface:
Mix equal parts water and white glue (or a matte medium) and gently brush it over the surface to seal the sand and prevent shedding. -
Highlighting (optional):
If you want more depth, dry brush a very light coat of pure white paint just on the highest ridges of the texture to catch the light. -
Prepare the frame:
Take your floating frame pieces. If they are raw wood, you may want to give them a light whitewash to match the sandy aesthetic. -
Mount the artwork:
Place the canvas inside the frame. Use wood glue or appropriate framing hardware to secure the canvas, ensuring an even gap around all four sides. -
Final clean up:
Wipe down the frame edges to remove any dust or fingerprints before hanging or displaying.
Now you have a serene, tactile piece of art that brings a calming, natural element to your space
Simple Acrylic Pour Flow
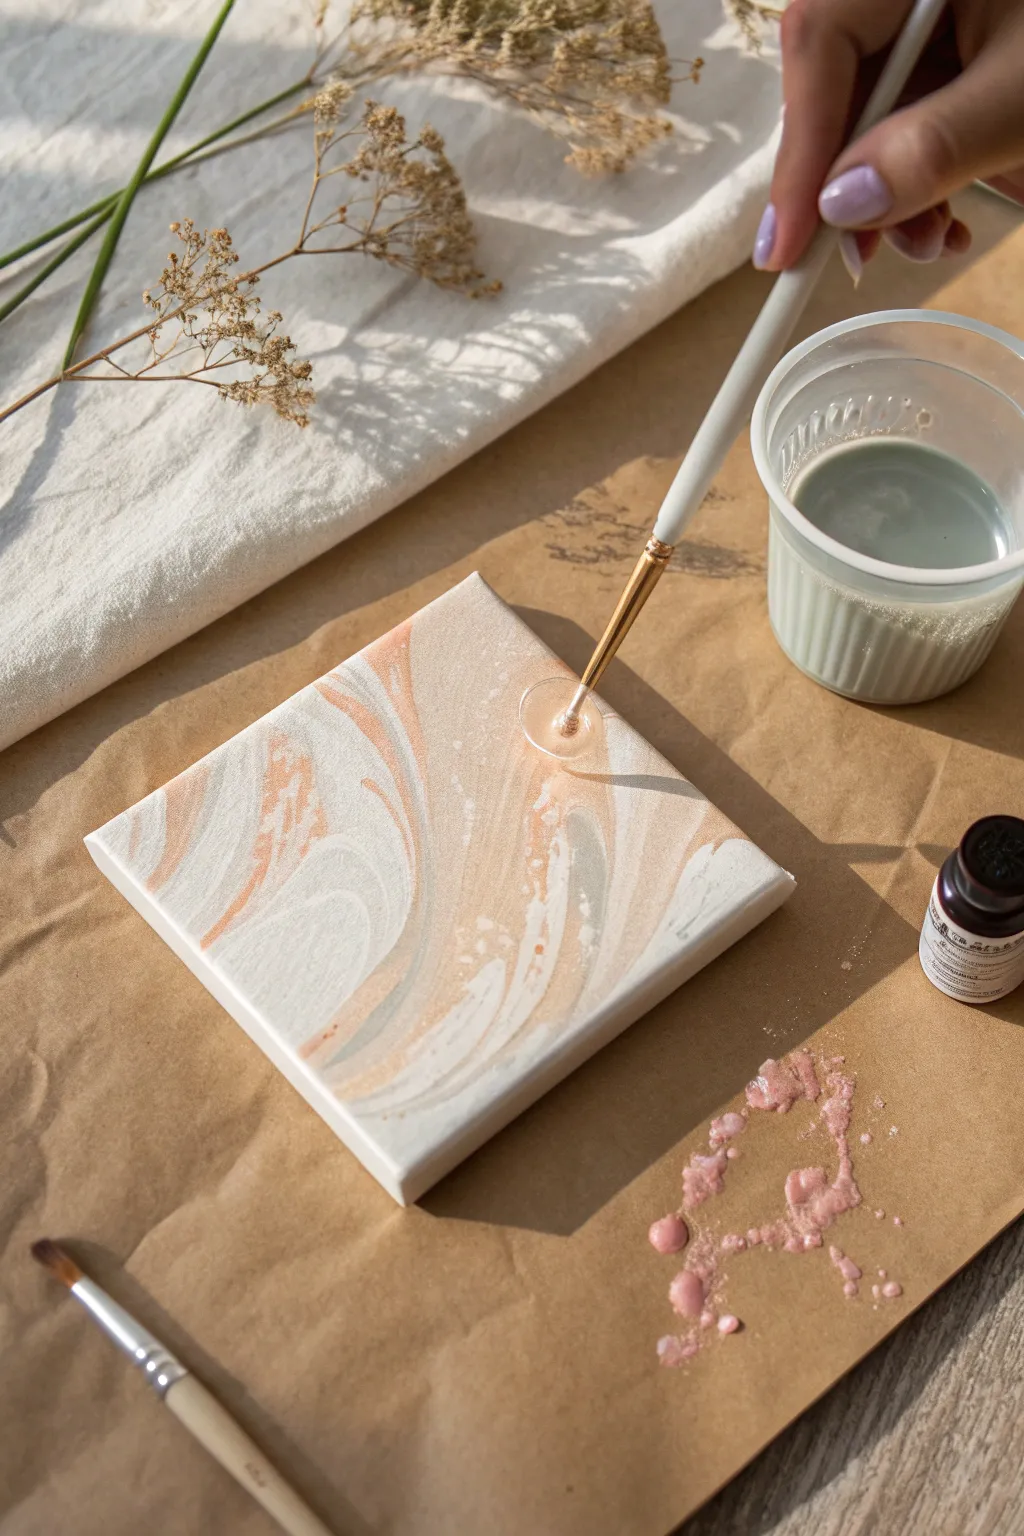
Capture the soft elegance of natural stone with this gentle acrylic pour project. Using a mix of muted pastels like cream, peach, and soft grey, you’ll create swirling organic patterns that feel calm and sophisticated on a small canvas masterboard.
Step-by-Step Tutorial
Materials
- Small square stretched canvas (e.g., 6×6 or 8×8 inch)
- Acrylic paints (Titanium White, Unbleached Titanium/Beige, Light Peach/Salmon, Light Grey or Blue-Grey)
- Pouring medium (Liquitex or Floetrol)
- Small plastic cups for mixing
- Craft sticks for stirring
- Water (distilled is best)
- Protective surface cover (kraft paper or plastic sheeting)
- Small paintbrush (for touch-ups)
- Gloves (optional)
- Small jar of metallic or specialty ink (optional for accents)
Step 1: Mixture Preparation
-
Prepare your workspace:
Begin by covering your table with kraft paper or a plastic drop cloth to catch drips. Elevate your canvas slightly off the table using four small cups or push pins in the corners so the paint flows freely over the edges. -
Mix paint and medium:
In separate small cups, mix each acrylic paint color with your pouring medium. A standard ratio is 1 part paint to 2 parts medium, but check your medium’s instructions. You want a consistency similar to warm honey or heavy cream. -
Add water sparingly:
If the mixture feels too thick, add a few drops of water at a time and stir gently. Aim for a fluid consistency that runs off the craft stick in a continuous stream without breaking immediately. -
Check opacity:
Ensure your white and beige mixtures are opaque enough to cover the canvas. The peach and grey can be slightly more translucent for depth.
Step 2: The Pouring Process
-
Create a base layer:
Pour a generous amount of your white or beige mixture directly onto the center of the canvas. Use a palette knife or tilt the canvas to spread a thin, wet layer across the entire surface. This ‘wet cushion’ helps other colors glide. -
Layer the colors:
In a clean cup, layer your colors one by one. Don’t stir! Start with white, then pour a little peach, followed by grey, then beige. Repeat this layering until the cup is about half full. -
The dirty pour:
With a steady hand, gently pour your layered cup contents onto the canvas in a slow, wandering stream. You can move in circular motions or simple lines to distribute the paint. -
Tilt and flow:
Grip the canvas by the wooden frame underneath. Slowly tilt it in different directions to stretch the paint. Watch how the colors marble together as they move toward the edges. -
Cover the corners:
Guide the paint all the way over the corners. If the paint seems reluctant to flow over a corner, you can use a finger to dab a little extra paint there to ‘encourage’ the flow.
Pro Tip: Consistency Check
Test your paint thickness on a piece of paper first. If it creates a mound, it’s too thick; if it spreads like water, it’s too thin. Aim for a flat puddle.
Step 3: Refining and Drying
-
Check the composition:
Set the canvas back down on your supports. Look at the composition. If you want more peach in one area, you can drizzle a tiny amount directly from your mixing cup. -
Add metallic accents:
For that extra shimmer seen in the inspiration, take a small brush dipped in metallic ink or gold paint. Gently touch the tip to wet areas where colors meet to introduce subtle metallic veins. -
Refine swirls:
Using the handle end of a paintbrush or a skewer, gently drag through the paint to manipulate the shapes. I like to do this sparingly to maintain the natural fluid look. -
Pop air bubbles:
Inspect the surface for tiny bubbles. You can pop them with a toothpick or by passing a culinary torch quickly over the surface (keep it moving so you don’t burn the paint). -
Clean the drips:
Run a craft stick or your finger along the underside edge of the canvas to scrape off dripping paint. This prevents dried bumps from forming on the bottom. -
Let it cure:
Leave the artwork to dry in a dust-free area for at least 24 to 48 hours. The paint will self-level as it dries.
Level Up: Resin Finish
Once fully cured (after 2-3 weeks), apply a coat of clear art resin. This adds a glass-like finish that makes the pastel colors pop and look like real polished stone.
Enjoy the soothing process of watching your marble masterpiece settle into its final form
Squeegee Drag Abstract Stripes
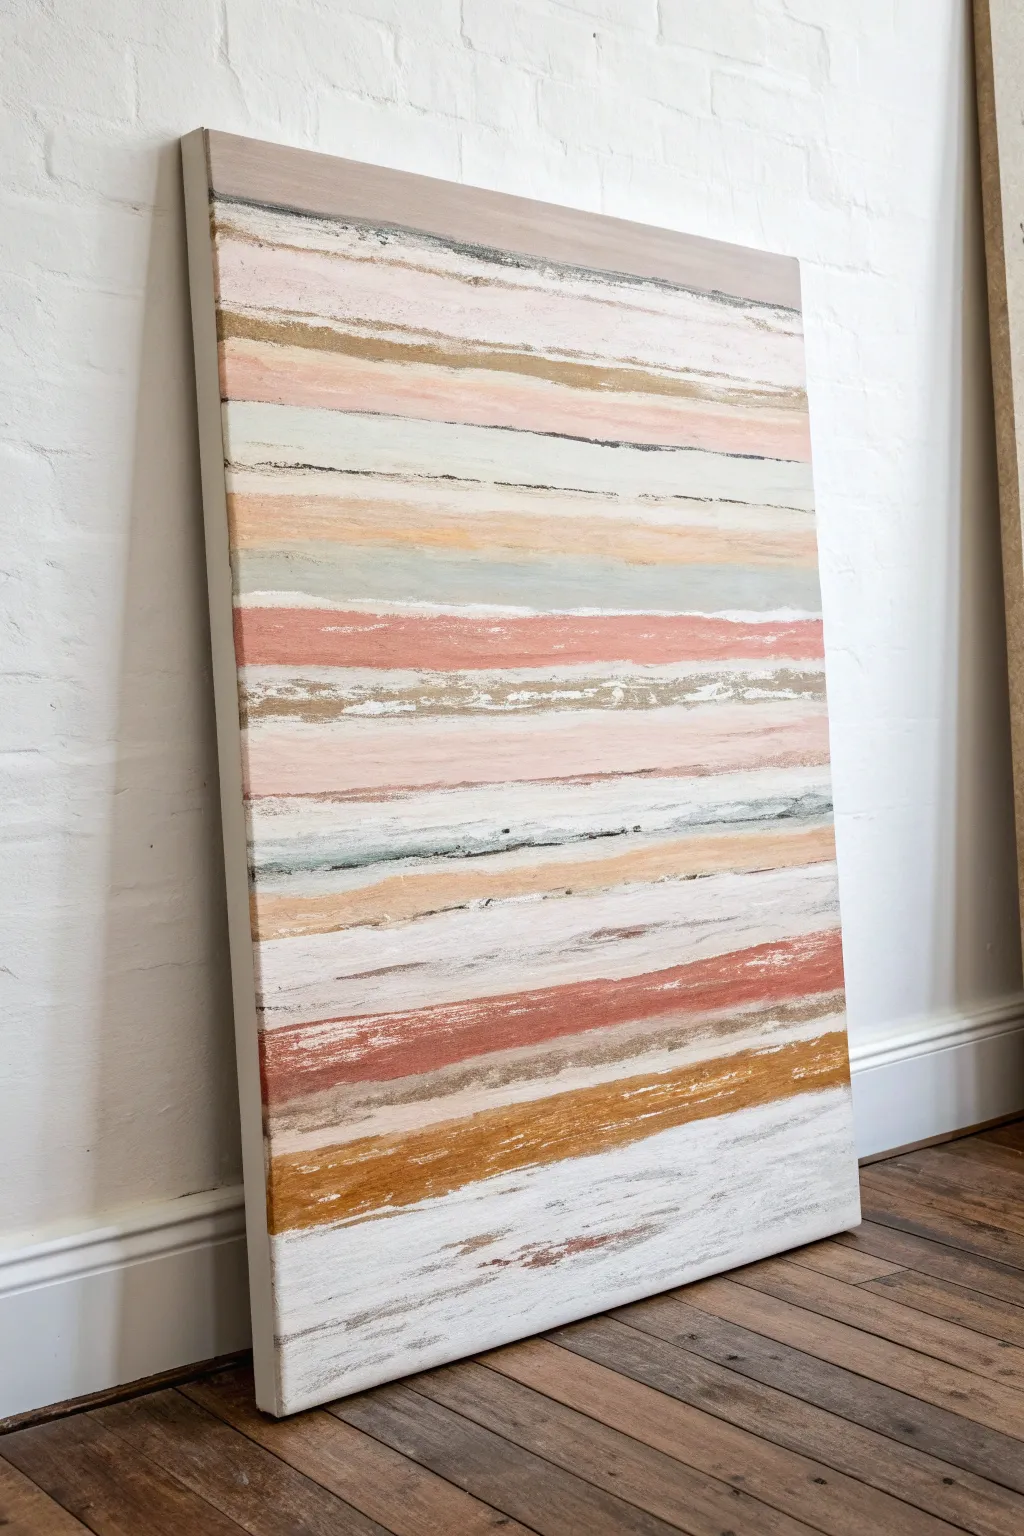
Master the art of the squeegee drag with this serene, earth-toned abstract piece. Creating these textured, organic stripes is surprisingly therapeutic and results in a sophisticated, layered look perfect for modern interiors.
Step-by-Step Guide
Materials
- Large stretched canvas (e.g., 24×36 inches or larger)
- Acrylic paints (White, Beige, Terracotta, Peach, Sage Green, Ochre, Brown)
- Window squeegee (10-12 inches wide)
- Paper towels or rags
- Palette knifes or plastic spoons for dispensing paint
- Drop cloth
- Spray bottle with water (optional)
Step 1: Base Preparation
-
Prepare your workspace:
Lay down a drop cloth on a flat surface like a large table or the floor. This technique can get messy, so ensure your area is well-protected. -
Prime the canvas:
Apply a generous layer of white acrylic paint over the entire canvas to create a wet base. This helps the subsequent colors glide smoothly rather than instantly soaking into the fabric. -
Mix your palette:
Prepare your acrylic colors on a palette or paper plate. You want a consistent, creamy texture—not too watery, but fluid enough to drag.
Muddy Colors?
If your stripes are turning brown or grey, you are likely overworking the paint. Stop dragging over the same spot repeatedly. Apply paint, drag once, wipe the tool, and move on.
Step 2: Creating the Stripes
-
Apply the first paint beads:
Starting near the top, squeeze or spoon small dollops of paint directly onto the canvas in a horizontal line. Alternate colors slightly, perhaps mixing a bit of beige and white. -
The first drag:
Place your squeegeeblade directly above the line of paint dots. Apply firm, even pressure and pull the squeegee horizontally across the canvas from left to right in one smooth motion. -
Clean the tool:
After every single drag, wipe the squeegee blade completely clean with a paper towel. This prevents the colors from turning into a muddy brown mess. -
Layering the next stripe:
Below your first stripe, apply a new line of paint dots. Try a contrasting tone like the terracotta or peach. Position this line so that when you drag, it barely overlaps the edge of the previous stripe. -
Varying pressure:
As you drag this second row, experiment with your pressure. Pressing harder removes more paint to show the white base, creating that distressed, weather-worn look seen in the photo. -
Introduce earth tones:
Move down the canvas, introducing the darker colors like ochre and brown. Apply these sparingly mixed with white to keep the overall feel light and airy. -
Adding the sage accents:
Create a stripe using the sage green mixed with plenty of white. I find this cool tone balances the warmth of the terracotta beautifully. -
Creating texture breaks:
Don’t aim for perfect, solid lines. Occasionally stop the squeegee mid-drag, lift it, and place it down again a few inches over to create breaks and white space. -
Handling the edges:
Let the squeegee run off the edge of the canvas for a clean finish, or stop just short for a framed effect. Be sure to wipe up drips on the sides immediately.
Step 3: Refining and Layering
-
Let it tack up:
Allow the first layer of stripes to dry for about 15-20 minutes. It doesn’t need to be bone dry, just tacky enough that a second layer won’t blend into mud. -
add thin accent lines:
Go back in with very small amounts of darker grey or brown paint on just one edge of the squeegee. Drag these gently over existing stripes to create thin, defining horizon lines. -
The white wash technique:
To mimic the faded areas in the reference image, apply a line of pure white paint over a colored section that feels too heavy. Drag the squeegee lightly to veil the color underneath. -
Scraping back:
If a section feels too thick, use a clean, dry squeegee to scrape over it firmly. This pulls paint off and reveals the texture of the canvas weave. -
Bottom anchor:
Finish the bottom edge with a heavier, more solid band of white or very pale grey to ‘ground’ the composition. -
Final drying:
Let the painting dry flat for at least 24 hours. The thick ridges of paint created by the squeegee will take longer to cure than standard brushstrokes.
Pro Tip: The Blade Angle
Hold the squeegee at a 45-degree angle for a smooth, thick application. For a scratchy, distressed look that reveals underlayers, hold the handle almost perpendicular to the canvas.
Hang this large-scale piece in a hallway or living room to add a calm, horizontal flow to your space
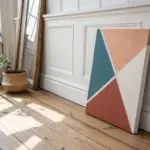
Cut-Paper Stencil Negative Spaces
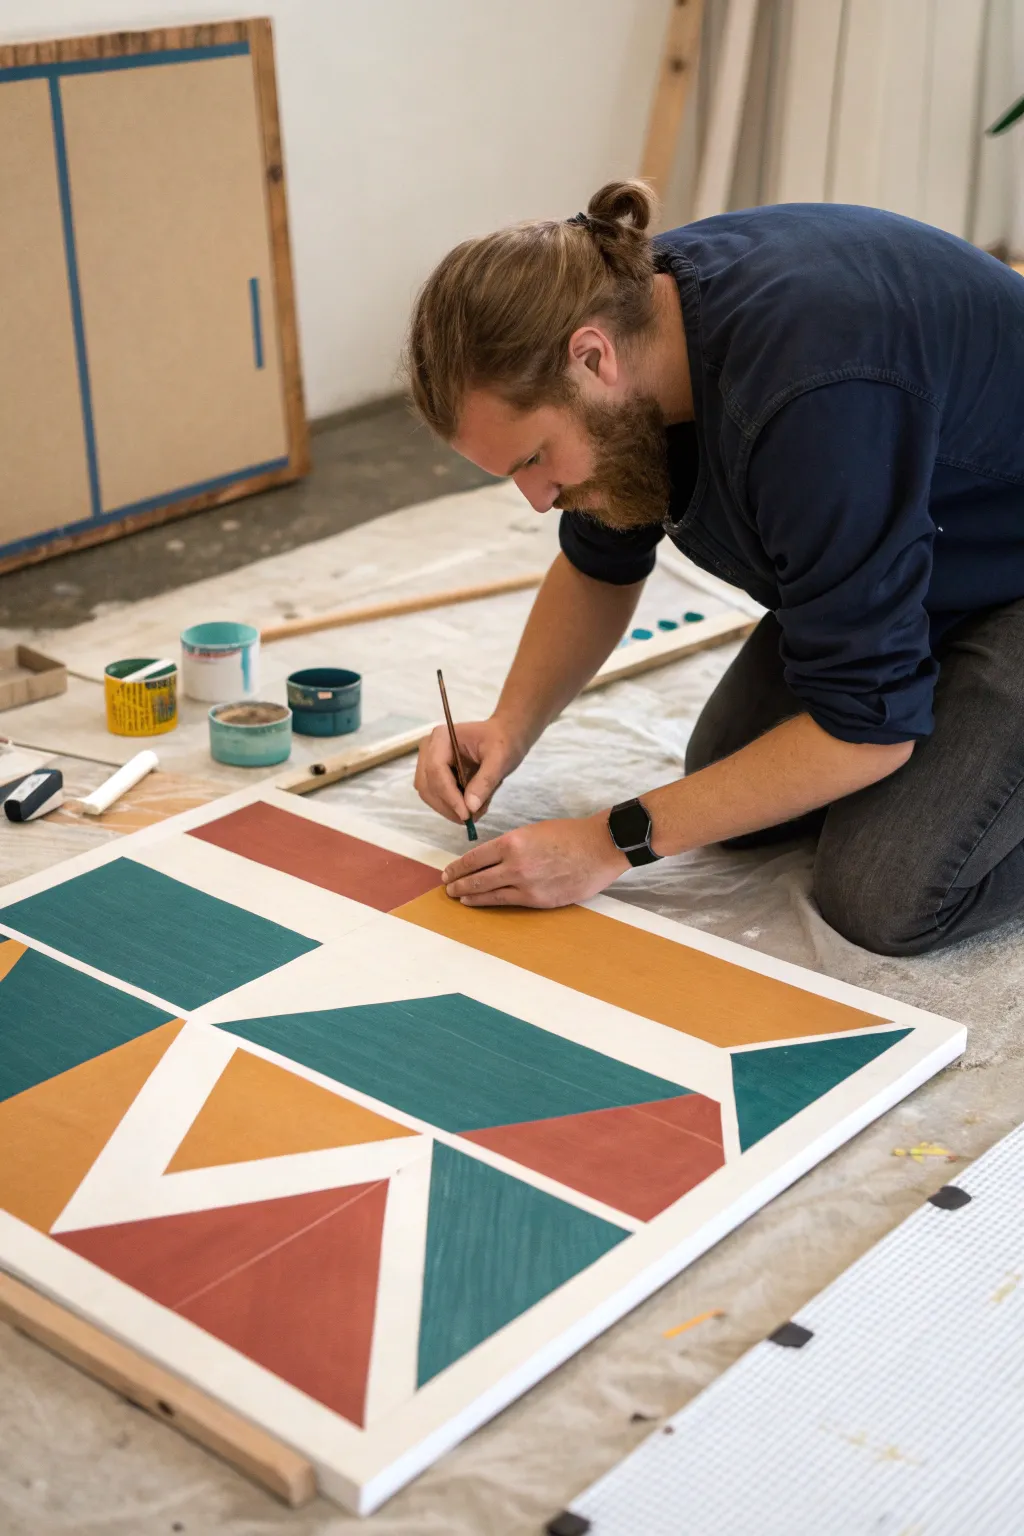
Achieve crisp lines and bold blocks of color with this large-scale geometric painting that uses negative space as a primary design element. The interplay of mustard, teal, and terracotta against a stark white background creates a modern, architectural feel perfect for any living space.
Detailed Instructions
Materials
- Large stretched canvas (at least 24×36 inches)
- Painter’s tape (various widths, 0.5-1 inch)
- Acrylic paints (Teal, Mustard Yellow, Terracotta)
- White acrylic gesso or primer
- Flat synthetic paintbrushes (1-inch and small angle brush)
- Drop cloth or plastic sheeting
- Measuring tape or ruler
- Pencil
- Matte varnish (optional)
Step 1: Preparation & Masking
-
Prime the surface:
Begin by applying a fresh coat of white gesso to your canvas, even if it came pre-primed. This ensures a bright, consistent base for your negative space lines. -
Let it cure:
Allow the gesso to dry completely. If the surface feels rough, lightly sand it with fine-grit sandpaper and wipe away the dust. -
Plan the layout:
Lightly sketch your geometric design with a pencil. Aim for a mix of triangles and trapezoids that interlock but don’t touch, leaving gaps for the white lines. -
Apply the tape:
Run lengths of painter’s tape over your pencil lines to mask off the areas that should remain white. Press the edges down firmly with your fingernail or a credit card. -
Seal the tape edges:
Paint a very thin layer of your white base color over the edges of the tape. This trick prevents colored paint from bleeding underneath, ensuring razor-sharp lines later.
Bleeding Lines?
If paint bleeds under the tape, wait for it to dry completely. Then, lay a piece of tape over the colored part and re-paint the white line to ‘cut’ back into the shape for a crisp edge.
Step 2: Painting the Geometry
-
Mix your palette:
Prepare your three main colors: a deep teal, a warm mustard yellow, and a muted terracotta red. Pour enough of each to cover large sections. -
Start with Teal:
Identify the sections designated for teal. Using a flat 1-inch brush, fill in these shapes with smooth, confident strokes. -
Maintain brush direction:
Try to brush in the direction of the longest side of the shape to minimize visible texture, or cross-hatch for a more woven look. -
Apply Mustard sections:
Rinse your brush thoroughly or switch to a fresh one. Fill in the yellow trapezoids and triangles, being careful near the tape edges. -
Add the Terracotta:
Paint the final red sections. If the paint looks streaky, let the first coat dry to the touch and apply a second coat for opacity. -
Refine edges:
Use a smaller angle brush to get paint right up to the tape line without blobbing it on too thick, which can cause peeling issues.
Add Texture
Mix a modeling paste or sand into your acrylics before painting the colored shapes. This adds physical depth and contrast against the smooth, flat white negative space lines.
Step 3: Finishing Touches
-
First peeling step:
Wait until the paint is dry to the touch but not fully cured (usually about 30-45 minutes). Start peeling the tape slowly at a 45-degree angle. -
Remove remaining tape:
Continue removing all tape strips. Pulling while the paint is slightly tacky often results in cleaner edges than waiting for it to be bone dry. -
Touch up:
Inspect your white lines. If any color bled through, use a tiny detailed brush and white paint to clean up the mistake. -
Erase guidelines:
Gently erase any visible pencil marks that weren’t covered by paint or tape. -
Seal the work:
Once the entire piece is fully cured (overnight is best), apply a coat of matte varnish to protect the surface and unify the sheen.
Hang your new masterpiece in a well-lit area to let the bold colors truly pop
Found-Object Pattern Printing
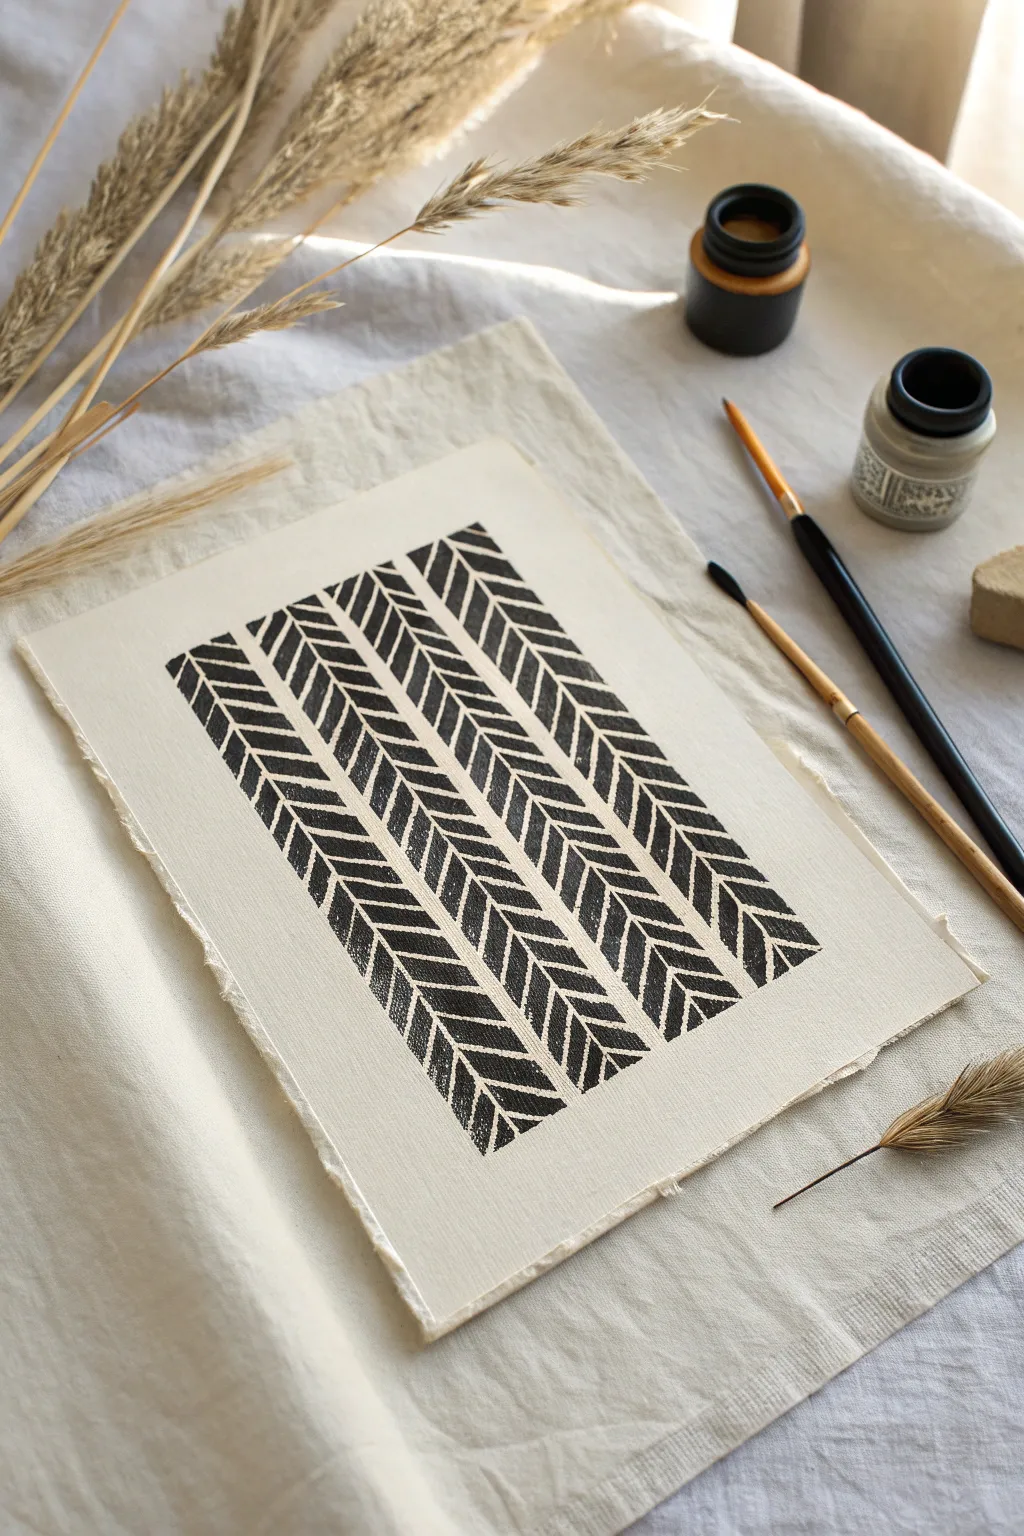
Embrace the imperfect beauty of block printing with this geometric herringbone design. Using simple carving tools and black ink, you’ll create a striking, high-contrast pattern that looks sophisticated yet handmade on textured paper.
Step-by-Step Guide
Materials
- Soft-cut linoleum block or rubber stamp carving block
- Linoleum cutter tool with a V-gouge blade
- Black block printing ink or heavy body acrylic paint
- Brayer (roller) or foam brush
- Heavyweight cream or off-white textured paper (e.g., watercolor or mixed media paper)
- Pencil and ruler
- Scrap paper for testing
- Glass or acrylic sheet (for rolling out ink)
Step 1: Designing & Carving the Block
-
Prepare your block size:
Cut a small strip of your rubber carving block. For this specific pattern, you need a rectangle approximately 1 inch wide by 3-4 inches long. -
Sketch the pattern:
Use a pencil to draw a series of parallel diagonal lines across the surface of the block. These will act as your carving guides. -
Duplicate the angle:
Ensure all your lines slant at the same angle to create a uniform diagonal texture. -
Carve the negative space:
Using your V-gouge tool, carefully carve away the rubber between the pencil lines. Remember to carve away from your body for safety. -
Clean the lines:
Go back over your cuts to ensure the grooves are deep enough that they won’t pick up ink. The raised lines are what will print. -
Trim the edges:
Use a craft knife or your carving tool to clean up the outer edges of the rectangular block, ensuring a sharp, straight border.
Uneven is Better
Don’t stress about perfect coverage. The ‘chatter’ (small stray marks) and uneven ink density are hallmarks of handmade prints and add character.
Step 2: Preparing the Paper
-
Tear the paper edges:
To achieve the rustic, deckled look seen in the photo, place a ruler on your paper and tear the edges against it rather than cutting them with scissors. -
Measure margins:
Lightly mark pencil dots at the top and bottom of your paper to define the center line, which helps keep your columns straight.
Try Gradient Inking
Mix a tiny bit of dark blue or brown into your black ink on the palette for a richer, more complex color that looks like vintage printing.
Step 3: Inking & Printing
-
Prepare the ink:
Squeeze a small amount of black block printing ink onto your glass or acrylic sheet. -
Roll out the ink:
Use a brayer to roll the ink until it has a velvety texture and makes a slight sticky sound. If using a foam brush, dab a thin, even layer onto the stamp. -
First test print:
Press your inked stamp onto scrap paper to check your design. I usually find I need to carve a little deeper after seeing the first test. -
Start the first column:
Ink your stamp and press it onto the paper, slanting the diagonal lines downward to the right. -
Continue the column:
Re-ink and press the stamp directly below the first impression, maintaining the same orientation. Leave a tiny gap between prints for a segmented look. -
Create the herringbone effect:
For the second column, rotate your stamp 180 degrees. The lines should now slant downward to the left, creating a ‘V’ shape where they meet the first column. -
Align the rows:
Stamp down the second column, trying to align the top and bottom of each block with the neighbor in the first column. -
Repeat across the page:
Continue adding columns, alternating the rotation of the stamp for each new vertical row to build the full herringbone chevron pattern. -
Let it dry:
Allow the ink to dry completely, which may take anywhere from an hour to overnight depending on the type of ink used.
Once dry, display your textured print in a simple floating frame to show off those beautiful torn edges


Have a question or want to share your own experience? I'd love to hear from you in the comments below!