If you’ve been craving a meaningful art project, a family canvas is such a sweet way to turn everyday love into wall-worthy paint. I’m sharing my go-to DIY ideas that let every family member leave a mark—literally—with handprints, footprints, and a few playful twists.
Family Handprint Tree
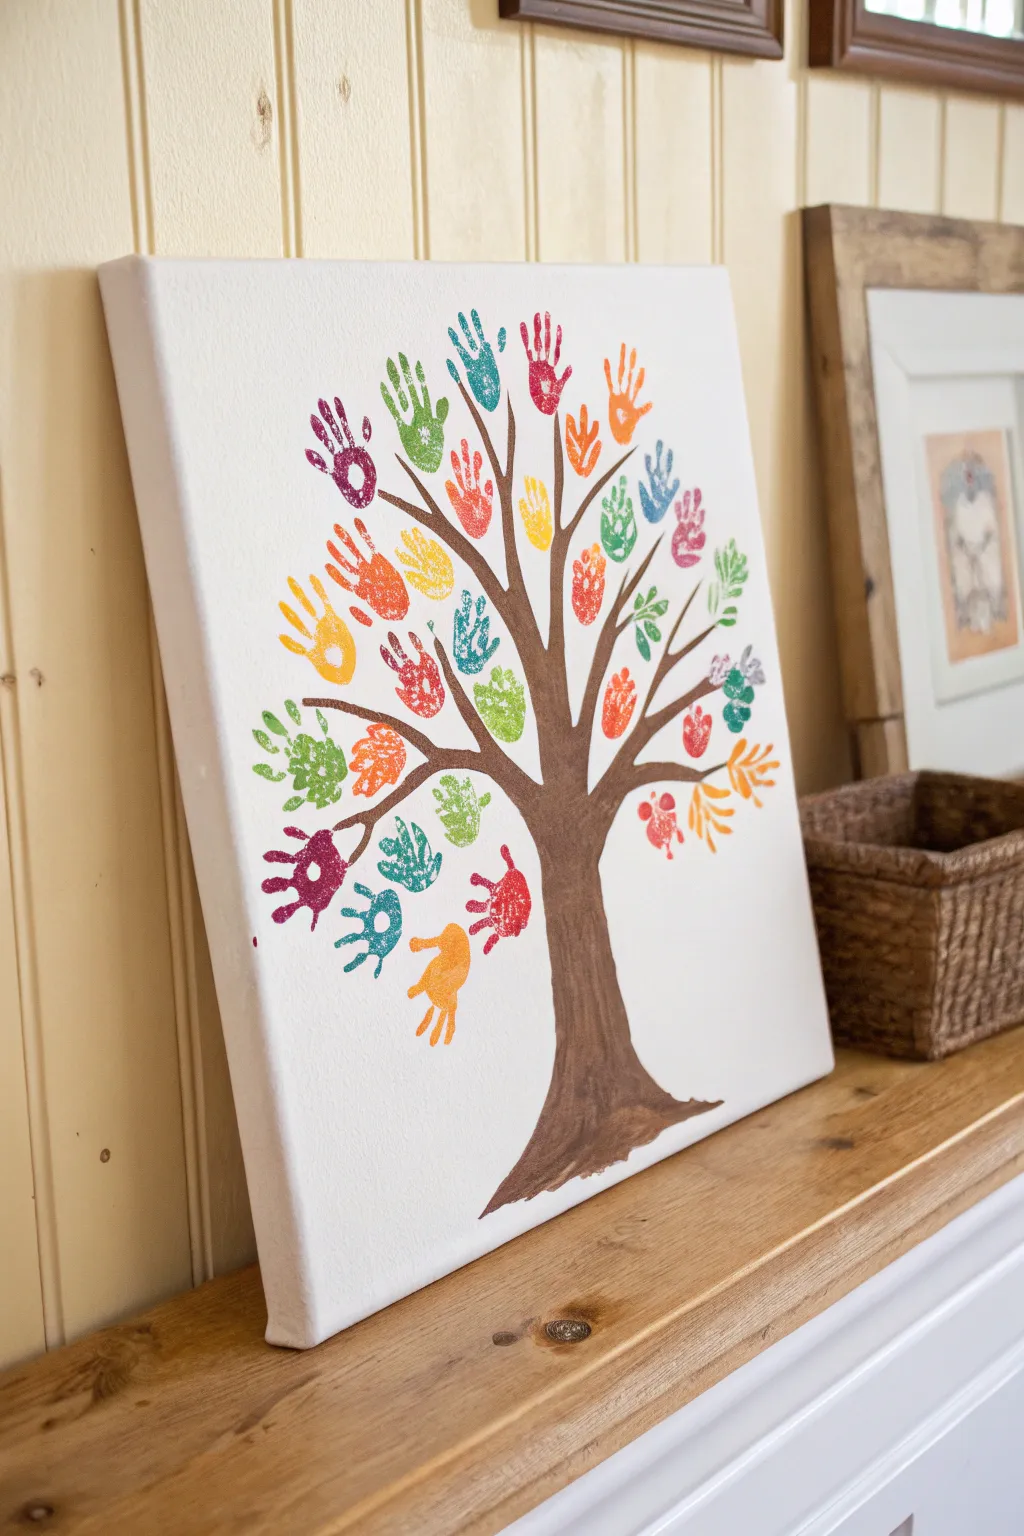

This heartwarming canvas captures the growth of your family in a vibrant, artistic way using handprints as the leaves of a sturdy tree. It’s a colorful keepsake that blends personal touches with bright decor, perfect for freezing a moment in time on your wall.
Step-by-Step Tutorial
Materials
- Large stretched canvas (at least 16×20 inches recommended)
- Acrylic craft paints (various bright colors: red, orange, yellow, green, blue, purple, teal)
- Brown acrylic paint (for the trunk)
- Paintbrushes (flat brush for trunk, smaller detail brush for branches)
- Paper plates or palette
- Pencil
- Baby wipes or damp paper towels (essential for cleanup)
- Table covering/newspaper
Step 1: Painting the Tree Structure
-
Prepare your canvas:
Set up your workspace by covering your table and placing your blank canvas on a flat surface. ensure it is free of dust or lint before starting. -
Sketch the outline:
Lightly sketch the tree trunk and main branches with a pencil. Start wide at the bottom center for the base and extend upward, branching out towards the top corners to fill the space. -
Mix the brown paint:
Squeeze out brown acrylic paint onto your palette. If you want a more dimensional look, mix in a tiny drop of white or black to create slight variations in the wood tone. -
Paint the trunk base:
Using a flat brush, fill in the base of the trunk with smooth, vertical strokes. I like to keep the edges slightly organic rather than perfectly straight to mimic real bark. -
Extend the main branches:
Continue painting upward, tapering the thickness of the lines as the trunk splits into the main V-shaped branches. -
Add secondary branches:
Switch to a smaller brush to paint thinner branches extending from the main ones. These don’t need to be perfect; they just need to provide ‘perches’ for the handprints later. -
Fill empty spaces:
Look for large gaps in the canopy area and add a few more twig-like lines to ensure the tree looks full once the ‘leaves’ are added. -
Let the trunk dry completely:
Allow the brown paint to dry fully before moving on. This prevents the bright handprint colors from muddying if they accidentally overlap the wet branches.
Clean Prints Secret
Apply paint to hands using a foam brush rather than dipping into a puddle. This prevents globs and ensures you can see the unique fingerprints.
Step 2: Adding the Handprint Leaves
-
Plan the color distribution:
Decide generally where you want specific colors to go. A scattered rainbow effect works best, so try to avoid clumping the same colors together. -
Prepare the first color:
Pour a small puddle of your first paint color (e.g., teal) onto a paper plate. It needs to be wide enough to fit a hand. -
Coat the hand:
Dip the hand into the paint or use a foam brush to paint a generous, even layer directly onto the palm and fingers. Make sure the paint isn’t dripping. -
Place the first print:
Position the hand near the end of a branch tip. Press down firmly on the palm and each individual finger to ensure a clear impression. -
Lift carefully:
Lift the hand straight up off the canvas to avoid smudging the print. Keep baby wipes nearby to clean the hand immediately after pressing. -
Repeat with the same color:
Re-apply paint and add 3-4 more handprints of this same color in different spots around the tree to balance the composition. -
Switch colors:
Clean the hand thoroughly or switch to a different family member. Prepare the next color (e.g., orange) and repeat the stamping process. -
Vary the angles:
Rotate the canvas or the angle of the hand slightly for each print so the leaves look natural and dynamic, pointing in different directions. -
Fill the canopy:
Continue adding prints in reds, yellows, greens, and purples until the tree looks lush and full. It’s okay if some prints slightly overlap the brown branches. -
Touch up gaps:
Step back and look for any large white spaces. Add a few smaller handprints or even just fingertips to fill these voids if the full hand is too big. -
Final drying:
Let the canvas sit undisturbed for at least 2-3 hours, or overnight, to ensure the thick paint of the handprints cures completely.
Smudged a Print?
Don’t panic! Let the smudge dry completely, then paint a new handprint over it in a darker color, or simply turn the smudge into a ‘falling leaf’.
Once dry, display your collaborative masterpiece in a family room where everyone can admire their contribution to the family tree


Stacked Handprints in a Heart
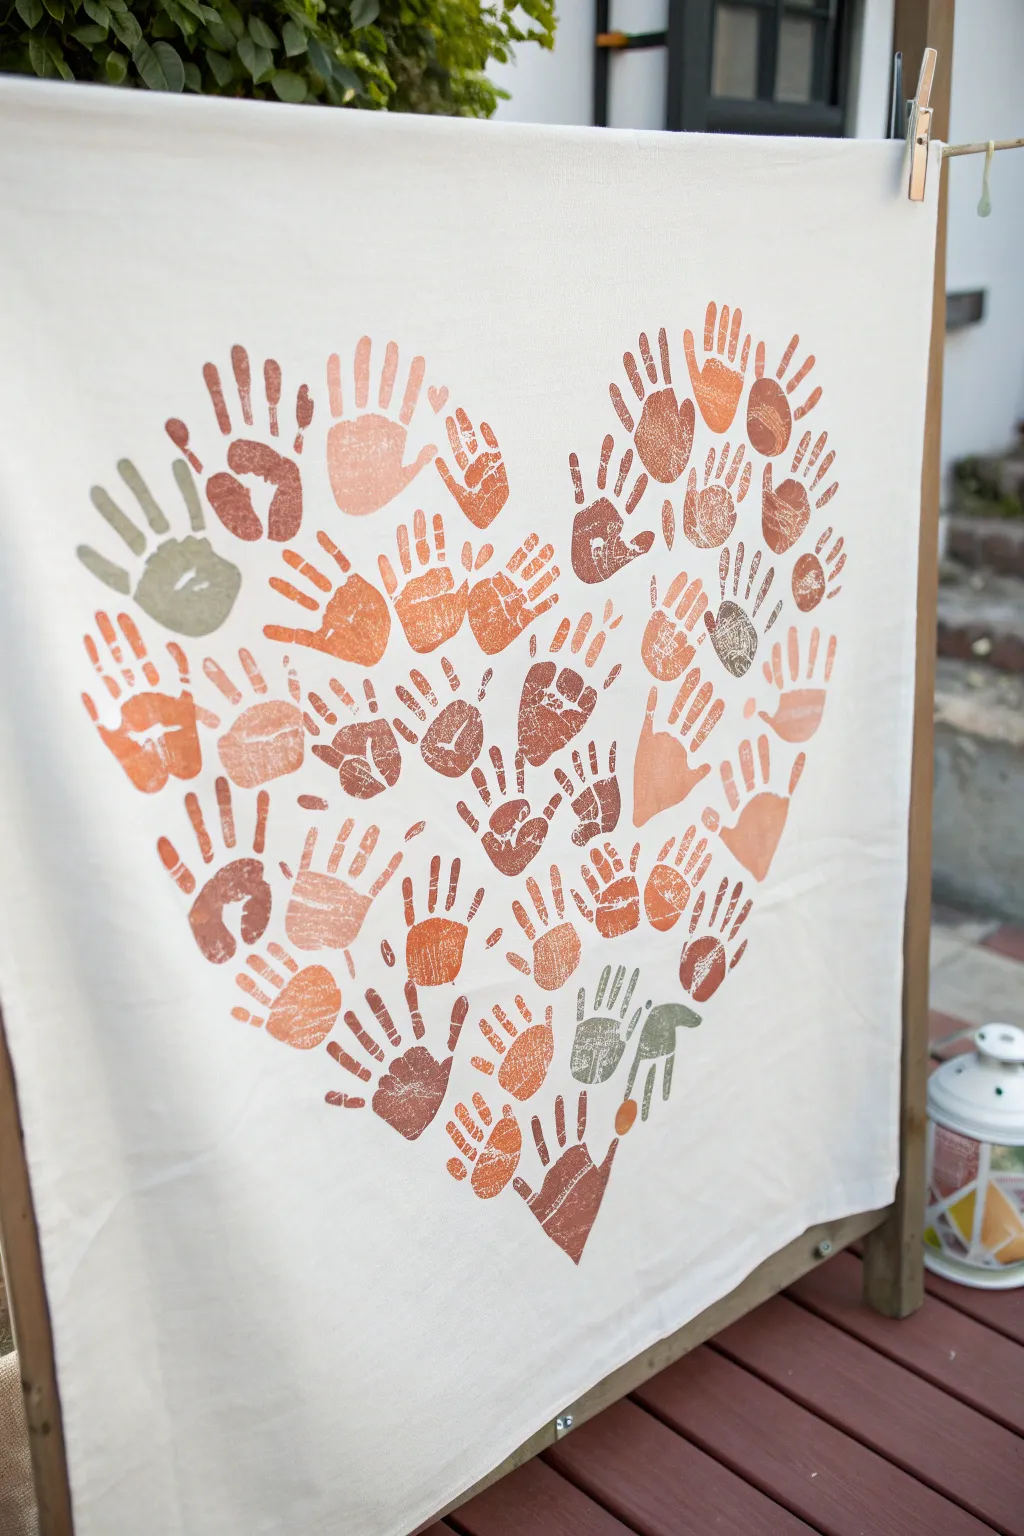
Celebrate family unity with this stunning large-scale canvas project that turns simple handprints into a warm, cohesive heart design. The beautiful palette of terracotta, sage, and deep browns gives this keepsake a modern, rustic aesthetic perfect for home decor.
Step-by-Step
Materials
- Large white canvas fabric (hemmed) or drop cloth
- Fabric paints (terracotta, burnt orange, sage green, dark brown, beige)
- Paper plates or plastic palettes
- Foam brushes or sponge applicators
- Pencil (light)
- Large piece of cardboard or craft paper (for template)
- Scissors
- Protective table covering
- Wet wipes or damp towels (essential for cleanup)
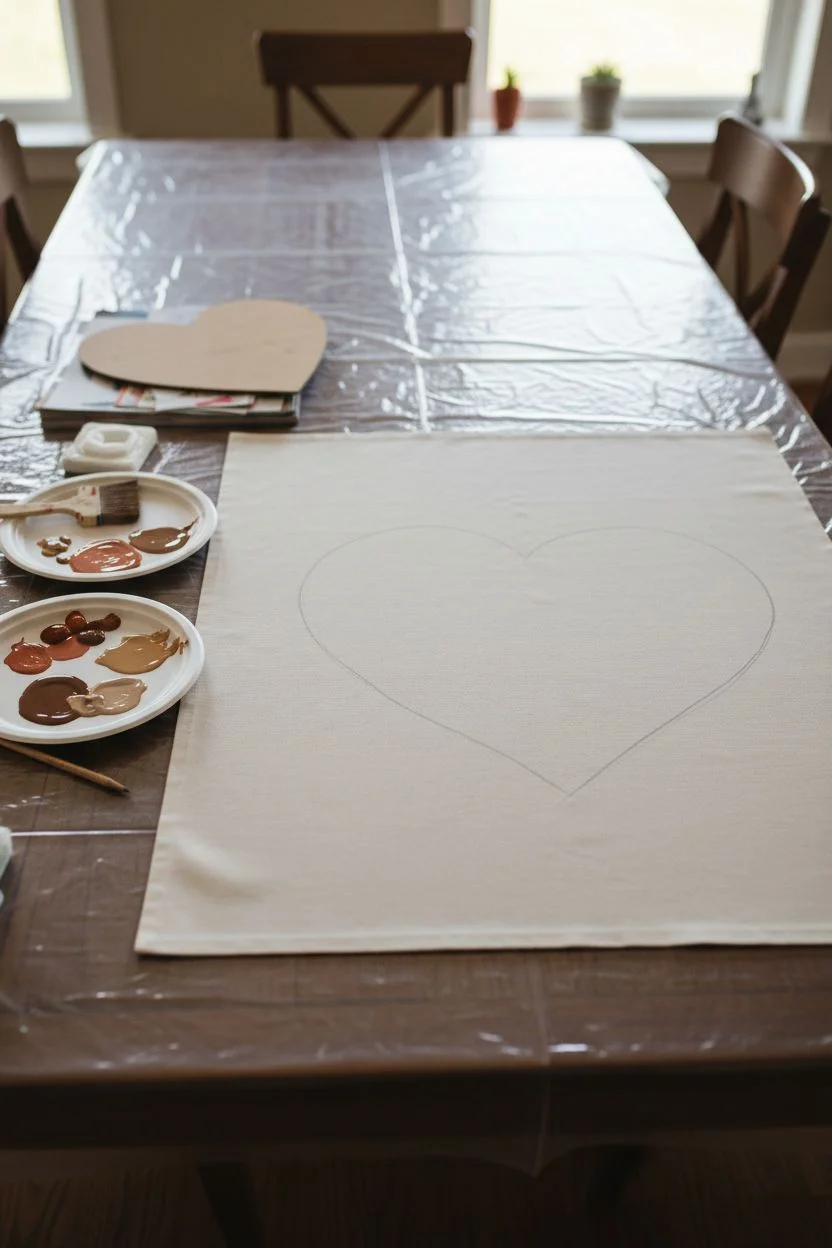
Step 1: Preparation & Layout
-
Prepare your workspace:
Lay down a protective covering on a large, flat surface like a dining table or clean floor. Smooth out your white canvas fabric on top, ensuring there are no deep wrinkles or creases. -
Create a heart template:
Cut a large heart shape out of cardboard or craft paper that matches the size you want your final design to be. This guides the handprint placement without requiring you to draw directly on the fabric yet. -
Mark the boundaries:
Place the heart template onto the center of your canvas. Using a pencil, very lightly trace around the perimeter of the heart. These faint lines will serve as the outer boundary for your handprints. -
Prepare the palette:
Squeeze your fabric paint colors onto paper plates. I like to mix a little white into some of the darker browns to create varied shades of beige and tan for more visual depth.
Clean Edges Trick
Apply paint to the hand with a foam brush rather than dipping the hand in paint. This prevents globs and gives you a crisp, detailed print where you can see the unique lines.
Step 2: Printing Process
-
Start at the bottom tip:
Begin the printing process at the very bottom point of the heart. Apply a dark brown or reddish-brown paint to a hand using a foam brush. -
Apply the first print:
Press the hand firmly inside the bottom point of your pencil outline. Ensure the fingers are spread slightly but remain within the shape’s boundary. -
Work upwards along the edge:
Change colors to a lighter terracotta. Place the next handprint slightly above and to the left of the bottom print, following the pencil curve upwards. -
Mirror the other side:
Switch to a sage green or beige tone. Place a handprint on the right side of the bottom tip, mirroring the left side to establish symmetry early on. -
Fill the outline:
Continue adding handprints along the pencil line, alternating colors randomly. Rotate the hands slightly so the fingers point outward, following the natural curve of the heart shape. -
Create the heart arches:
When you reach the top curves of the heart, angle the handprints inward to define the rounded arches clearly. Use contrasting colors here to make the shape pop. -
Start filling the center:
Once the perimeter is established, begin filling the empty space in the middle. Choose colors that contrast with the neighbors to avoid a muddy look. -
Layering for density:
Don’t be afraid to let fingertips or palms overlap slightly with existing dry prints. This creates a dense, cohesive look rather than scattered floating hands. -
Vary hand sizes:
If involving multiple family members, distribute smaller child prints among larger adult prints to balance the visual weight of the heart. -
Check for gaps:
Step back and look for any large white spaces. If you spot a gap too small for a full hand, you can use just a few fingers or a palm edge to fill it in seamlessly.
Step 3: Finishing Touches
-
Clean as you go:
Use wet wipes immediately after each print to prevent accidental smudges on clean areas of the white canvas. -
Dry completely:
Allow the canvas to lie flat and dry for at least 24 hours. Fabric paint can be thick in the ridges of handprints and takes time to cure. -
Set the ink:
Once fully dry, you may need to heat-set the fabric paint according to the bottle instructions, usually by ironing the reverse side of the canvas. -
Erase guidelines:
If any pencil marks are still visible around the edges, gently erase them now that the paint is set. -
Prepare for hanging:
Attach simple wooden dowels or clips to the top corners, or slide a rod through the top hem to display your artwork.
Add a hidden detail
Use a tiny finger print to maximize the heart shape! Add a tiny red heart inside the palm of one specific handprint to represent a special date or a new addition to the family.
Hang your collective masterpiece in a hallway or living room to remind everyone of the love you share


Side-by-Side Footprint Lineup
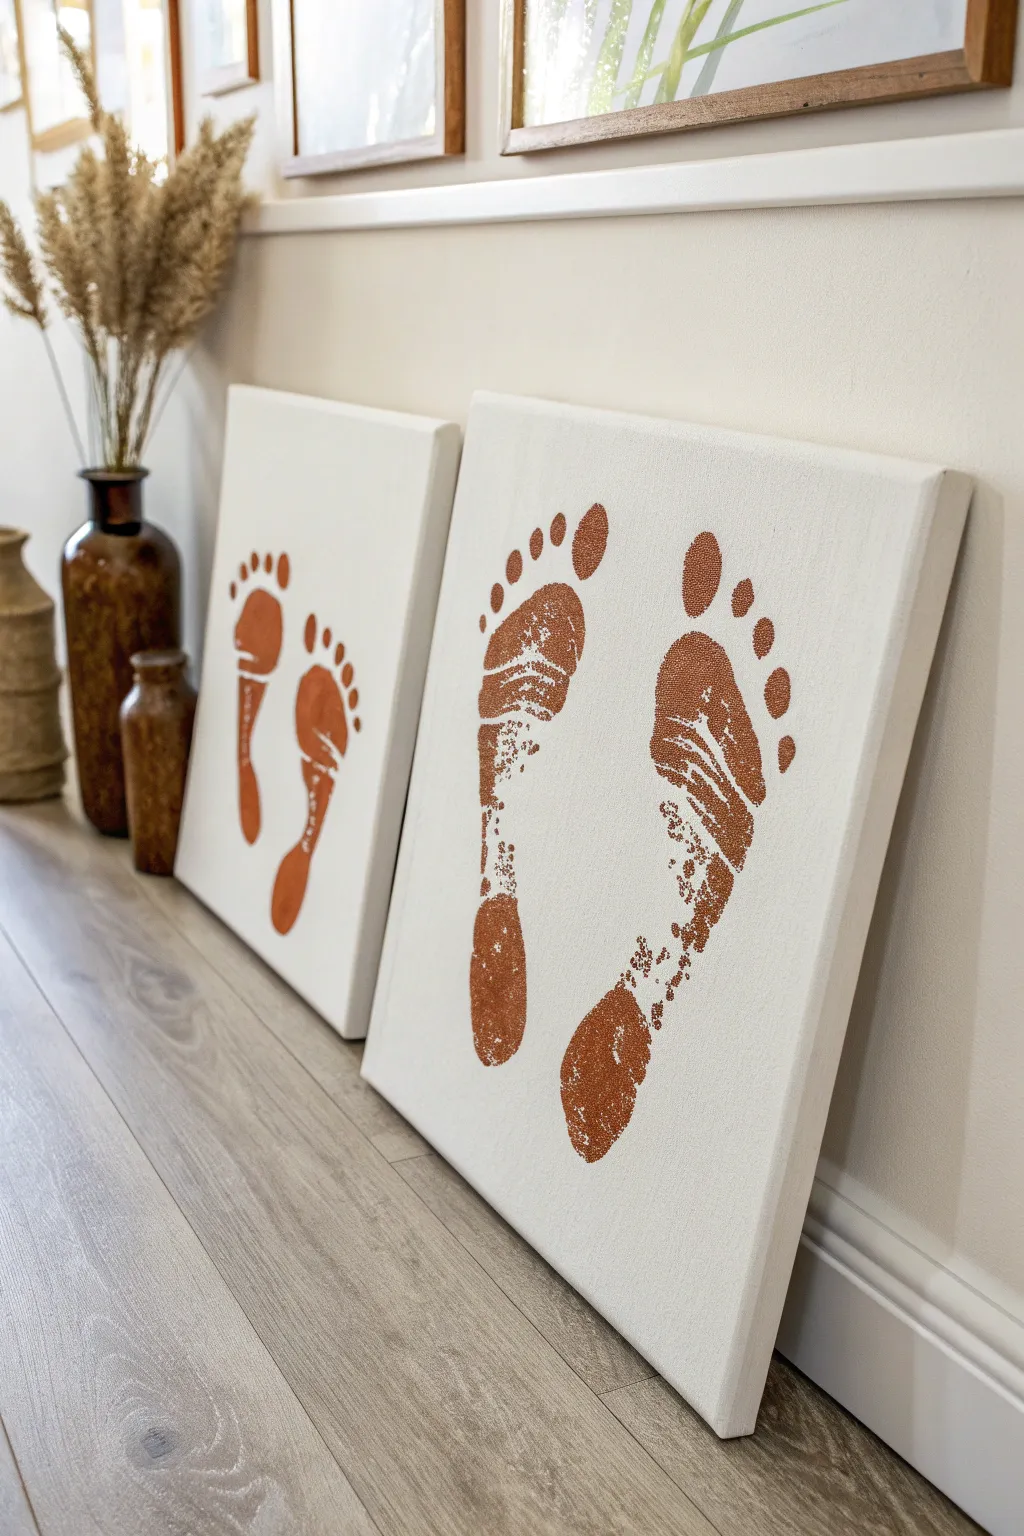
Capture the fleeing moments of childhood with this elegant side-by-side canvas display comparing adult and child footprints. The warm, metallic-flecked terracotta paint adds a sophisticated, earthy touch that blends beautifully with modern home decor.
Step-by-Step Guide
Materials
- Two square stretched canvases (e.g., 12×12 or 16×16 inches)
- Acrylic paint in Terracotta or Burnt Sienna
- Metallic glitter medium or fine loose copper glitter
- Foam paintbrushes (2-inch width)
- Plastic drop cloth or newspaper
- Baby wipes or damp towels (essential for cleanup)
- Disposable plate or palette
- Matte spray sealant (optional)
- Two smooth stones or weights (to keep canvas steady)
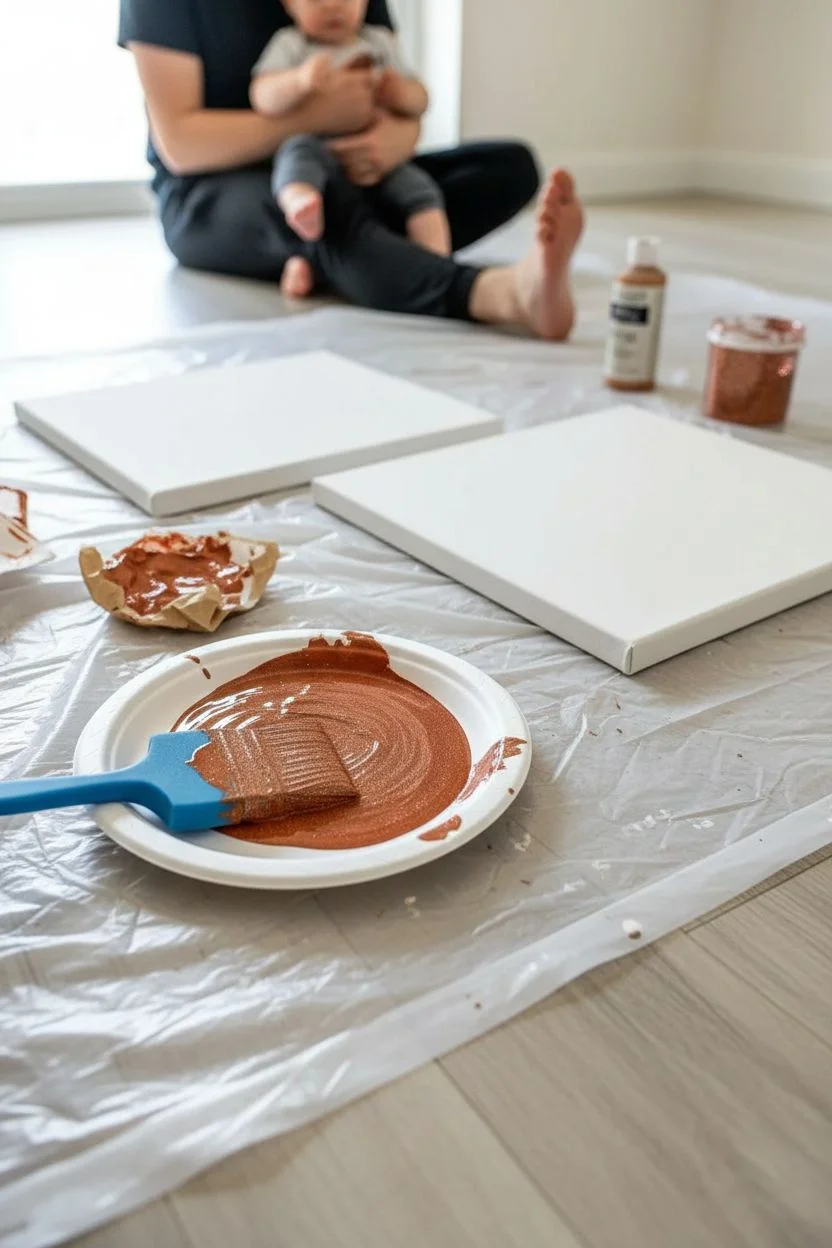
Step 1: Preparation & Mixing
-
Set the Stage:
Lay down a plastic drop cloth or newspaper on a hard, flat floor surface. It is much easier to stamp footprints on the floor than on a table, as you can use your body weight for an even impression. -
Prepare the Canvases:
Unwrap your canvases and wipe them down with a dry cloth to remove any dust. Place them side-by-side on your prepared floor area. -
Create the Custom Color:
Squeeze a generous amount of Terracotta or Burnt Sienna acrylic paint onto your disposable plate. -
Add the Sparkle:
This project features a lovely texture. Mix a metallic glitter medium directly into your acrylic paint. If using loose copper glitter, sprinkle it in gradually until the paint has a visible shimmer but isn’t too thick or clumpy. -
Test the Consistency:
Dab a little of your mixture onto a scrap piece of paper. You want an opaque color that holds the glitter well without being drippy.
Step 2: Stamping the Adult Prints
-
Apply Paint to Foot:
Starting with the adult, have them sit on a chair near the canvas. Using a foam brush, apply an even, generous coat of the paint mixture to the bottom of the right foot. Ensure the toes and heel are fully covered. -
Position the Foot:
Guide the painted foot over the right side of the first canvas. Aim for a centered vertical alignment, leaving space on the left for the second foot. -
Press Down Firmly:
Press the foot onto the canvas. Instruct the person to stand up carefully if possible, shifting their weight onto that foot to ensure a deep, textured impression. I find leaning into the print captures the arch detail best. -
The Reveal:
Hold the canvas down firmly with one hand while the person lifts their foot straight up—avoid sliding or twisting. Immediately clean the foot with baby wipes. -
Repeat for Left Foot:
Paint the left foot and repeat the process on the left side of the same canvas to complete the pair.
Smudged Print Rescue
If a foot slides and smudges, wipe the wet paint off the canvas immediately with definitive, firm swipes using a damp cloth. Let the canvas dry completely before trying again.
Step 3: Stamping the Child Prints
-
Engage the Child:
Bring over the second canvas. For younger children or babies, it helps to have a helper hold the child while you manipulate the foot and the canvas. -
Paint the Little Foot:
Apply the glittery terracotta mixture to the child’s right foot. Ticklish feet can be tricky, so work quickly but thoroughly with the foam brush. -
The Mini Stamp:
Press the child’s foot onto the canvas. Since children weigh less, you will need to gently press on the top of their foot and individually press down each toe to ensure contact with the rough canvas texture. -
Lift and Clean:
Lift the foot straight up and wipe it clean immediately. -
Finish the Pair:
Repeat with the left foot to complete the child’s set. Allow the differing sizes to highlight the contrast between parent and child.
Glitter Distribution
Mix the glitter into the paint immediately before applying to the foot. Heavy glitter tends to sink to the bottom of the paint pile quickly, leaving you with less sparkle.
Step 4: Final Touches
-
Check for Gaps:
Examine the prints while wet. If a toe didn’t print clearly, you can use a small brush to dab a tiny bit of paint in the missing area, but be careful not to make it look ‘painted on’—imperfections add character. -
Let it Dry:
Move the canvases to a safe, level spot to dry. Because the paint is textured with glitter, allow at least 24 hours for it to fully cure. -
Seal the Memory:
Once fully dry, take the canvases outside and lightly mist them with a matte spray sealant. This prevents the glitter from shedding over time and protects the prints from fading.
Display these leaning against a wall or mounted in a hallway for a daily reminder of how much your family grows


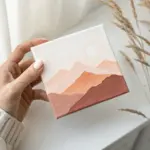
Family Name and Established Date
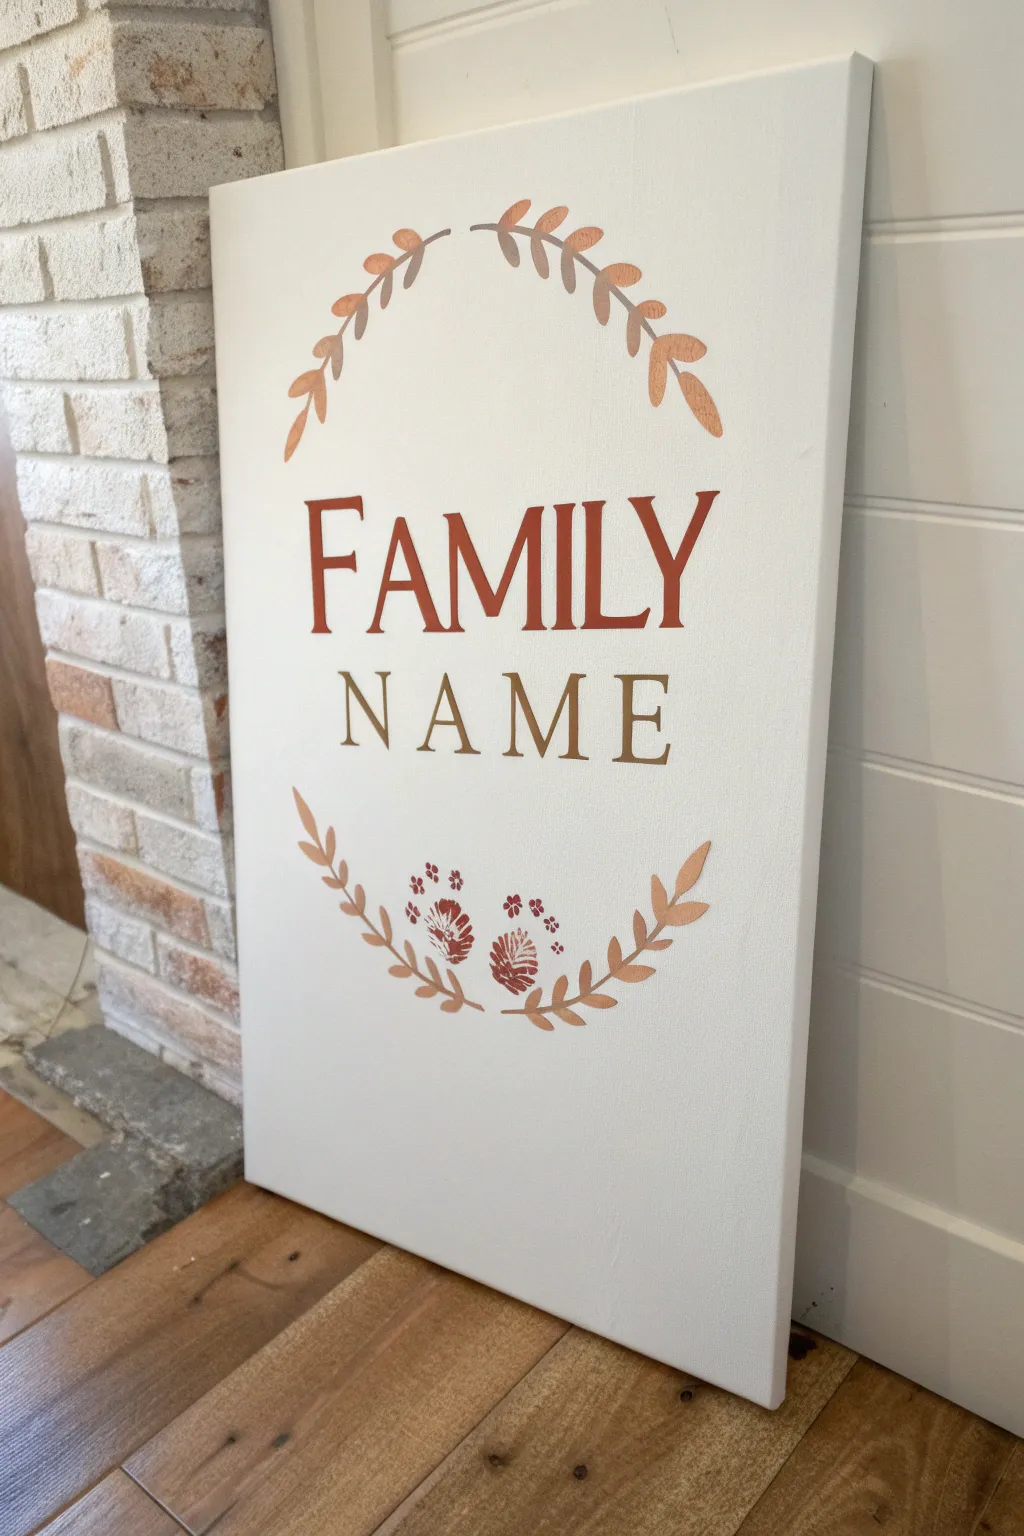
This minimalist canvas project combines warm autumn tones with classic typography to create a sophisticated piece of personalized wall art. The subtle metallic sheen of the gold paint catches the light beautifully against the crisp white background, making it perfect for an entryway or mantel display.
Detailed Instructions
Materials
- Large rectangular stretched canvas (approx. 24×36 inches)
- White acrylic gesso (optional for priming)
- Acrylic paint in ‘Rust/Terracotta’ and ‘Metallic Gold’
- Personalized stencil (vinyl or mylar) cut with a die-cutting machine
- Transfer tape
- Stencil brushes or high-density foam pouncers
- Mod Podge or clear matte acrylic medium
- Sponge brush
- Weeding tool
- Painter’s tape
- Ruler or measuring tape
Step 1: Preparation & Stencil Design
-
Prep the canvas:
If your canvas isn’t already primed or feels rough, apply a thin coat of white gesso with a sponge brush. Let it dry completely to create a smooth surface that helps the stencil adhere better. -
Create your design:
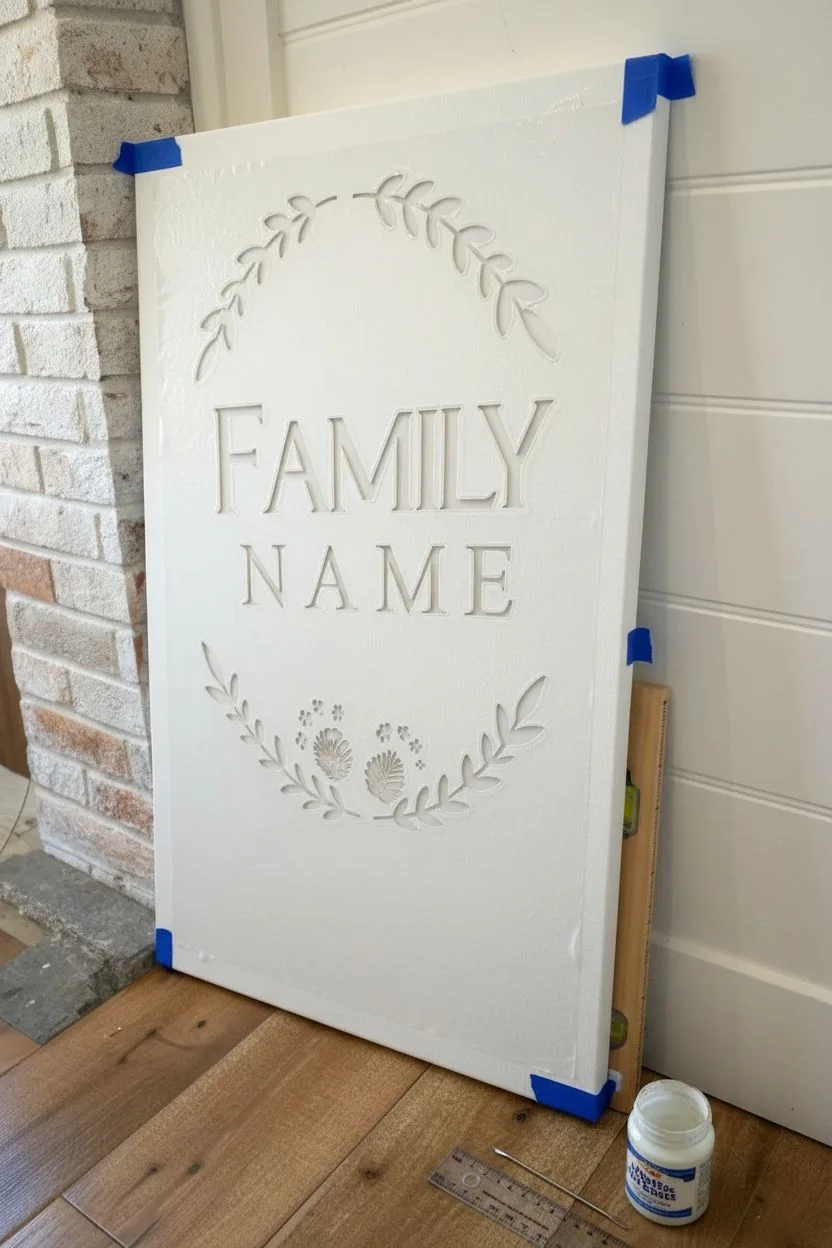
Using design software like CanvasWorkspace or Cricut Design Space, layout your text. Choose a bold serif font like ‘Cinzel’ or ‘Trajan’ for the word ‘FAMILY’ and a similar but lighter weight serif for ‘NAME’. Arrange two curved laurel branches to frame the text—one arching over the top and one cupping the bottom. -
Cut the stencil:
Load your adhesive vinyl onto your cutting mat. Check your blade depth and cut the design. Since this is a large project, you may need to cut the design in two or three separate sections to fit the mat. -
Weed the design:
carefully remove the vinyl parts where you want the paint to go (the letters and leaves). Keep the negative space intact. Using a sharp weeding tool helps with the tiny corners of serif fonts.
Bleed-Proof Lines
Using Mod Podge to seal stencil edges is non-negotiable on canvas! The rough texture guarantees paint bleed without this clear barrier first.
Step 2: Applying the Stencil
-
Apply transfer tape:
Lay a sheet of transfer tape over your weeded vinyl design. Use a scraper tool or credit card to burnish it firmly, ensuring the vinyl lifts off the backing paper. -
Measure and mark:
Find the absolute center of your canvas using a ruler. I like to mark the center point lightly with a pencil or place a small piece of painter’s tape to guide alignment. -
Place the stencil:
Position the vinyl on the canvas. Start with the central ‘FAMILY’ text to anchor the design, then align the top and bottom laurel branches relative to the text. Use a level to ensure the words are perfectly straight. -
Burnish onto canvas:
Rub the vinyl firmly onto the canvas surface. Canvas has texture, so you really need to work the vinyl into the weave to prevent leaks. -
Seal the edges:
Lightly brush a thin layer of Mod Podge or clear matte medium over the stencil openings. This crucial step seals the edges of the vinyl so any paint that bleeds underneath will be clear, keeping your colored lines crisp.
Step 3: Painting & Revealing
-
Paint ‘Family’ and details:
Dip a foam pouncer or stencil brush into the Rust/Terracotta acrylic paint. Dab off excess paint onto a paper towel until the brush is almost dry—’dry brushing’ is key to clean lines. -
Apply rust color:
Tap the paint vertically over the ‘FAMILY’ lettering and the small decorative floral elements at the very bottom center. Apply 2-3 thin coats rather than one thick one. -
Paint ‘Name’ and leaves:
Switch to a fresh brush and the Metallic Gold paint. Stencil the word ‘NAME’ (or your actual surname) and the laurel leaves on the top and bottom branches. -
Let paint set:
Allow the paint to dry until it is tacky but not fully hardened, usually about 10-15 minutes. -
Remove the stencil:
Carefully peel back the vinyl at a sharp 45-degree angle. Go slowly to avoid ripping up any paint that might have bridged the gap between stencil and canvas. -
Pick out centers:
Use your weeding tool or a pin to gently lift out the small vinyl islands inside letters like ‘A’, ‘R’, or ‘O’. -
Touch ups:
If you notice any tiny bleeds, use a small detail brush with white paint to clean up the edges. Once fully dry, erase any visible pencil marks.
Add Dimension
Mix a tiny drop of the rust paint into the gold for the base of the leaves to create a subtle ombré effect where the stems meet the branch.
Hang your new custom artwork proudly or lean it on a mantle for a cozy, personalized touch to your living space
BRUSH GUIDE
The Right Brush for Every Stroke
From clean lines to bold texture — master brush choice, stroke control, and essential techniques.
Explore the Full Guide
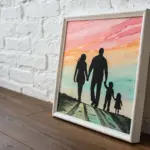
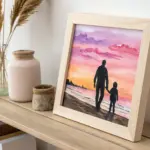
Simple Family Silhouettes
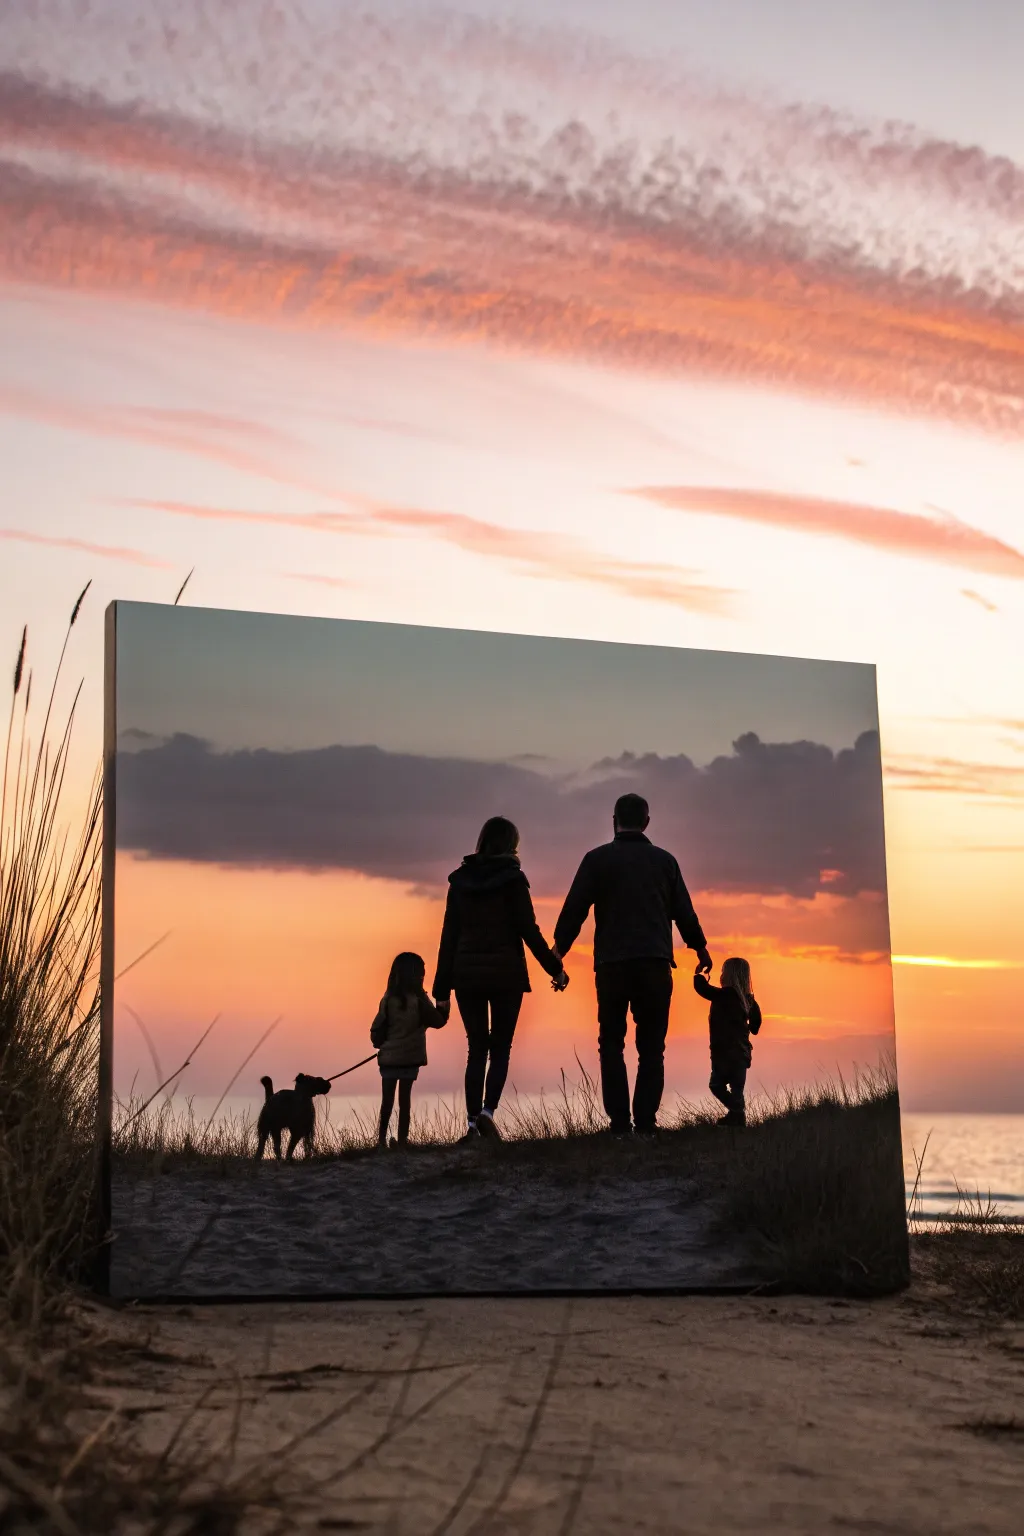
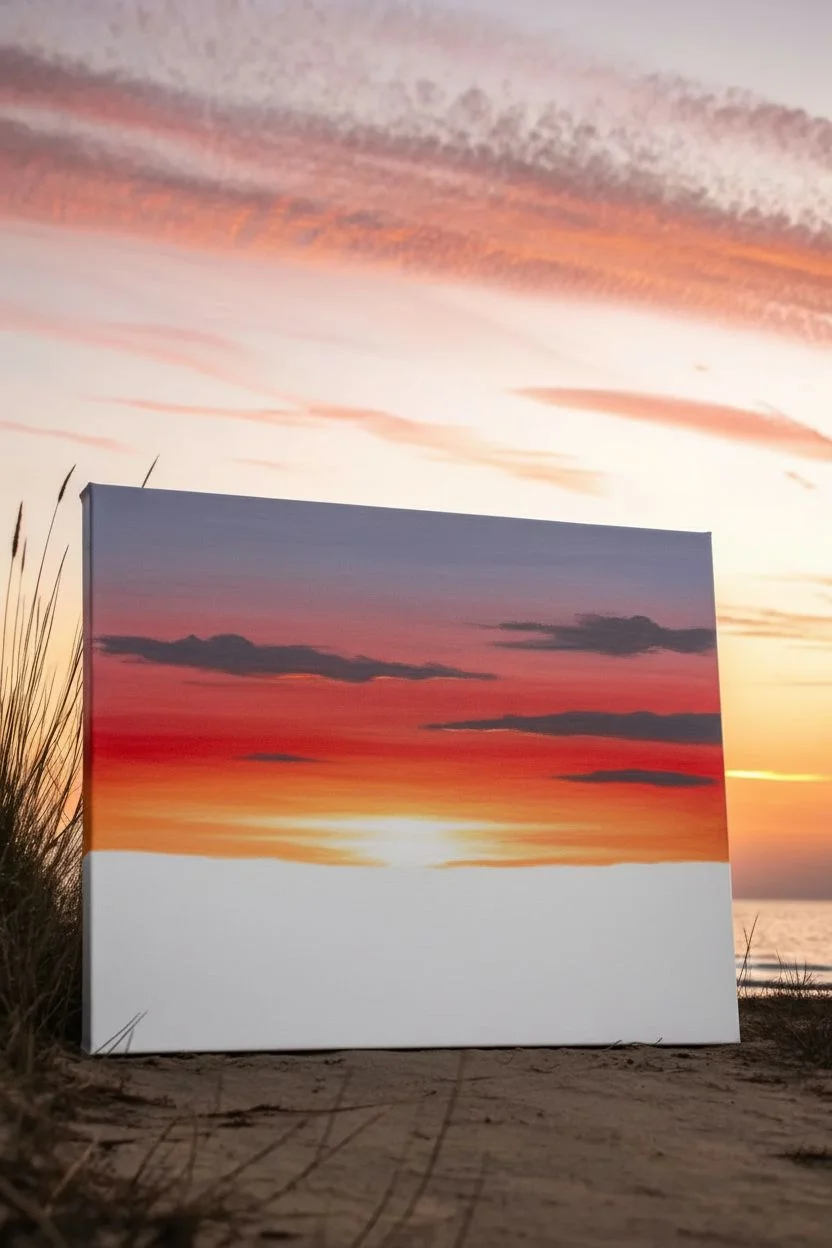
Capture a fleeting family moment forever with this striking silhouette canvas project. By combining a vibrant sunset gradient with distinct black shapes, you’ll create a professional-looking art piece that perfectly preserves the memory of those long summer evenings.
Step-by-Step
Materials
- Large stretched canvas (e.g., 24×36 inches)
- Acrylic paints (Titanium White, Cadmium Yellow, Orange, Alizarin Crimson, Lavender/Light Purple, Black)
- Large flat brush (2-3 inch) for blending
- Medium round brush
- Small liner brush or detail brush
- Pencil
- Reference photo of your family (printed to size or projected)
- Black posca pen or acrylic marker (optional)
- Palette or paper plate
- Water cup and paper towels
- Painter’s tape or masking tape (optional for horizon)
Step 1: Painting the Sunset Background
-
Establish the horizon:
Decide where your ground line will be. This image uses a low horizon line to emphasize the sky, so lightly mark a line about one-fifth of the way up from the bottom of the canvas. -
Prepare the palette:
Squeeze out generous amounts of your sunset colors: yellow, orange, crimson, and lavender. Keep the black separate for later. -
Start with lightness:
Using your large flat brush, apply a mix of white and yellow just above your horizon line. This simulates the glowing sun just dipping below sight. -
Blend upwards into orange:
While the yellow is still wet, introduce orange paint, brushing horizontally back and forth to create a seamless gradient as you move up the canvas. -
Deepen the sky:
Transition from orange into crimson red as you reach the middle section. I like to keep my brush slightly damp to help the acrylics merge softly without harsh lines. -
Add the upper atmosphere:
Finish the top third of the canvas with lavender or a soft purple mixed with a touch of white, blending it down into the red to create realistic evening clouds. -
Create background clouds:
Mix a dark grey-purple color. Using a dry-brush technique, essentially scrubbing a small amount of paint onto the canvas, lightly dab in some long, horizontal cloud formations across the middle of the sky. -
Let it cure:
Allow the entire background to dry completely. This is crucial because you want a crisp silhouette on top, not a muddy smear.
Clean Lines Hack
Use a black fine-tip acrylic paint marker for outlines and thin elements like the leash or hair strands. It offers way more control than a brush.
Step 2: Creating the Silhouettes
-
Prepare your template:
You don’t need to freehand this! Print your family photo and cut out the shapes, or use a projector to cast the image onto the dry canvas. -
Trace the outlines:
Lightly trace the figures onto the canvas with a pencil. Focus on the distinct shapes—the messy bun, the holding hands, the dog’s leash. -
Block in the ground:
Fill the bottom section below the horizon line with solid black paint. Add slight bumps and uneven texture to the top edge to mimic sand dunes and grass. -
Fill the figures:
Switch to a medium round brush and carefully fill in the bodies of the figures with solid black acrylic paint. -
Refine the edges:
Use your small liner brush to sharpen the details. The edges need to be crisp against the colorful background for the silhouette effect to work. -
Add the grass details:
Using the liner brush or a fine black acrylic marker, flick quick, upward strokes from the black ground into the sunset area to create wispy dune grass. -
Paint the dog:
Carefully paint the dog’s silhouette. Pay attention to the negative space between the legs so the shape remains readable. -
Connect with the leash:
Paint the leash last. A steady hand and a very thin brush (or paint pen) work best here; pull the line in one smooth motion if possible. -
Check for opacity:
Once the black paint dries, hold the canvas up to a light. If you see light shining through the figures, apply a second coat of black for true opacity.
Add 3D Texture
Before painting the black ground, mix sand or modeling paste into your black paint. This gives the dune area a gritty, realistic beach texture.
Hang your masterpiece in a well-lit room where the sunset colors can truly warm up the space
Loose Family Portrait Sketch Wash
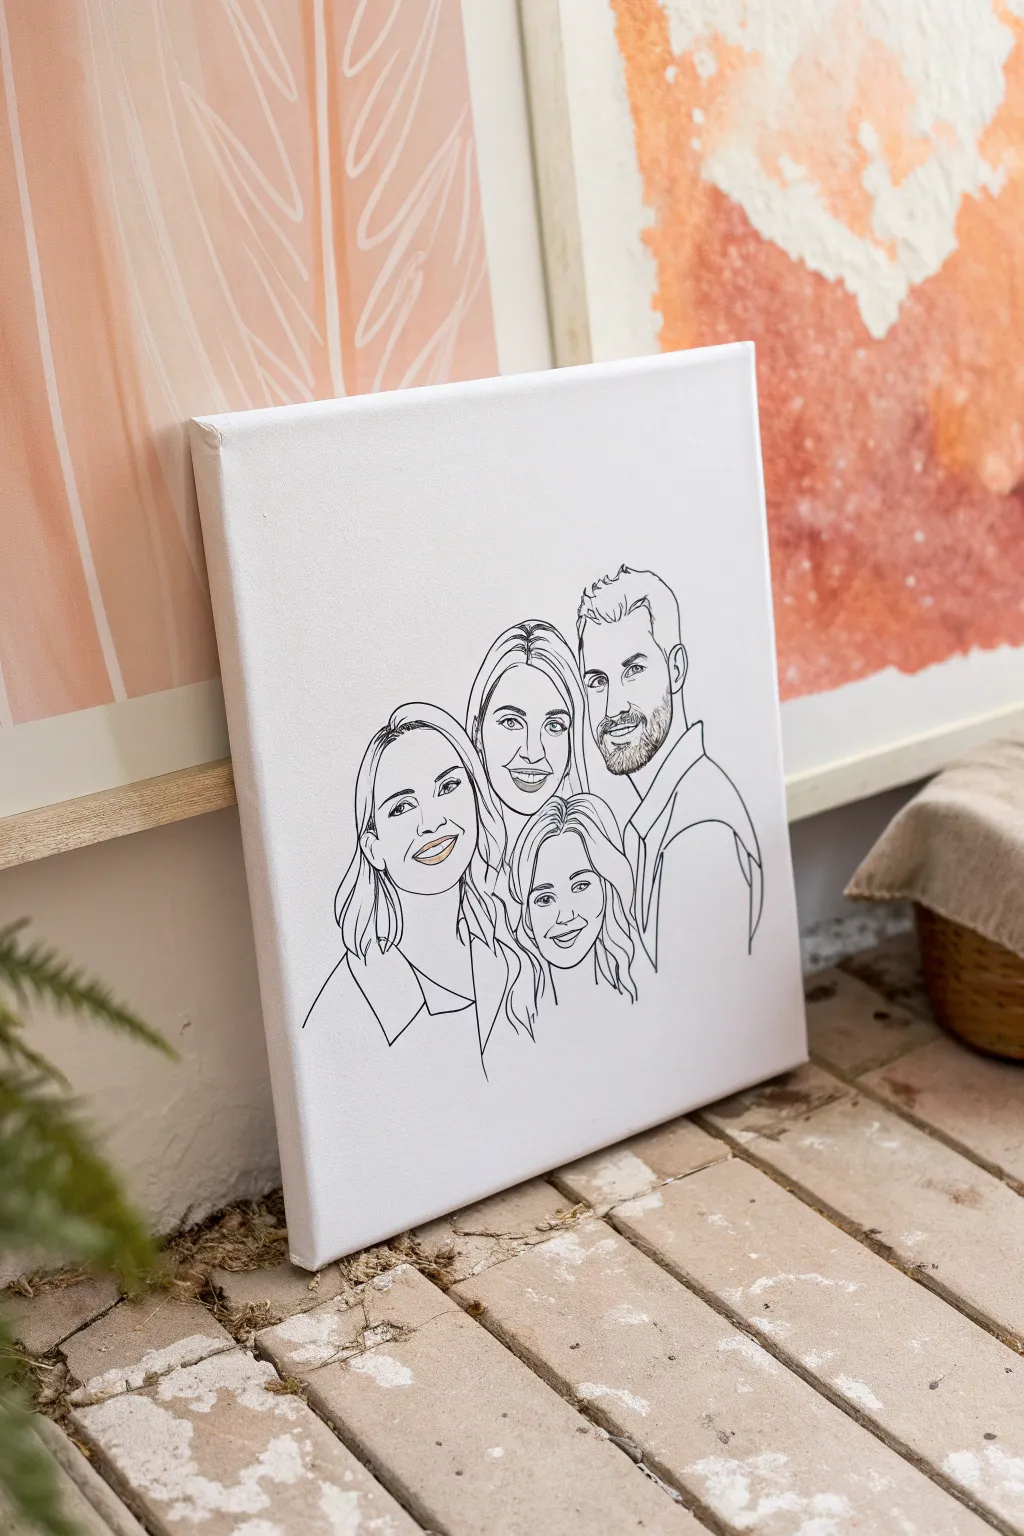

Transform a favorite family photo into a sophisticated, modern art piece using digital tracing techniques transferred onto canvas. This project captures the essence of your loved ones with clean, minimalist black lines and subtle pops of color for a gallery-worthy finish.
Step-by-Step Guide
Materials
- High-resolution family photo
- Digital tablet (iPad) or computer with drawing software (Procreate, Illustrator, or Photoshop)
- Square blank artist’s canvas (size of your choice)
- Black ultra-fine point permanent marker or paint pen (0.5mm or 0.7mm)
- Graphite transfer paper
- Pencil and masking tape
- Optional: Print-on-demand canvas service (if printing digitally)
Step 1: Digital Preparation & Tracing
-
Select your reference:
Choose a clear, well-lit photo where faces are clearly visible. A photo where everyone is close together works best for this composition. -
Set up your digital canvas:
Open your drawing software and create a new project with the same dimensions as your physical canvas. Import your reference photo as the bottom layer and lower its opacity to about 50% so you can see your drawing lines clearly. -
Choose your digital brush:
Select a monoline brush with pressure sensitivity turned off. You want a consistent, smooth line width throughout the entire sketch to mimic a pen stroke. -
Trace the primary contours:
Create a new layer above the photo. Begin tracing the main outlines of the faces—jawlines, hair shapes, and necklines. Focus on the major shapes rather than individual strands of hair. -
Define the facial features:
Zoom in to trace the eyes, nose, and mouth. Simplify these features; use just a few lines to suggest the nose bridge and nostrils rather than outlining the entire nose. This minimalism is key to the style. -
Add character details:
Draw in eyebrows and distinct facial hair, like the beard shown in the example, using short, directional strokes to suggest texture without overworking it. -
Refine the hair:
Add a few internal lines within the hair shapes to show flow and direction, but keep it sparse. Too many lines will clutter the minimalist look. -
Finalize the line work:
Hide the photo layer to check your sketch. Erase any intersecting lines that look messy and ensure the shoulders and clothing lines trail off elegantly at the bottom. -
Add a touch of color:
On a layer beneath your line art, add a very subtle wash of color to just one focal point if desired, like a soft pink on the lips, to bring a tiny bit of life to the monochrome sketch.
Wobbly Lines?
If your hand shakes while inking the canvas, use your pinky finger as a stabilizer on the dry parts of the canvas, or brace your wrist against a book stacked to the same height as the canvas frame.
Step 2: Transfer to Canvas
-
Print your design:
Print your finished digital sketch on standard paper, scaling it to fit your actual canvas size. You may need to tile print across multiple pages and tape them together if the canvas is large. -
Prepare the transfer:
Place a sheet of graphite transfer paper (dark side down) onto your canvas. Position your printed sketch on top and secure everything firmly with masking tape so it doesn’t shift. -
Trace the transfer:
Using a sharp pencil or ballpoint pen, trace over every line of your printed design with firm pressure. I find a colored pen helps here so you can see exactly where you’ve already traced. -
Reveal the guide:
Lift one corner of the paper to ensure the graphite is transferring clearly. If it’s too faint, press harder. Once verified, remove the paper and tape to reveal your faint graphite guide on the canvas.
Step 3: Inking & Finishing
-
Ink the lines:
Take your black fine-point paint pen or permanent marker. Carefully go over your graphite lines. Keep your hand steady and try to make long, confident strokes rather than short, sketchy ones. -
Clean up:
Allow the ink to dry completely for at least an hour. Once dry, gently erase any visible graphite lines that peek out from under the ink with a kneaded eraser. -
Add the color detail:
If you included the lip color in your design, use a very diluted acrylic paint or a pale marker to carefully fill in that small area. -
Seal the artwork:
Apply a spray matte varnish to protect the artwork from UV light and dust, holding the can 12 inches away for an even coat.
Go Digital Instead
Skip the manual tracing! Upload your high-res digital file directly to a canvas printing service. This guarantees perfect lines and is ideal if you want multiple copies for grandparents.
Hang your custom portrait in a spot with good lighting to let the crisp lines and modern aesthetic shine

PENCIL GUIDE
Understanding Pencil Grades from H to B
From first sketch to finished drawing — learn pencil grades, line control, and shading techniques.
Explore the Full Guide
Family Birth Flower Bouquet
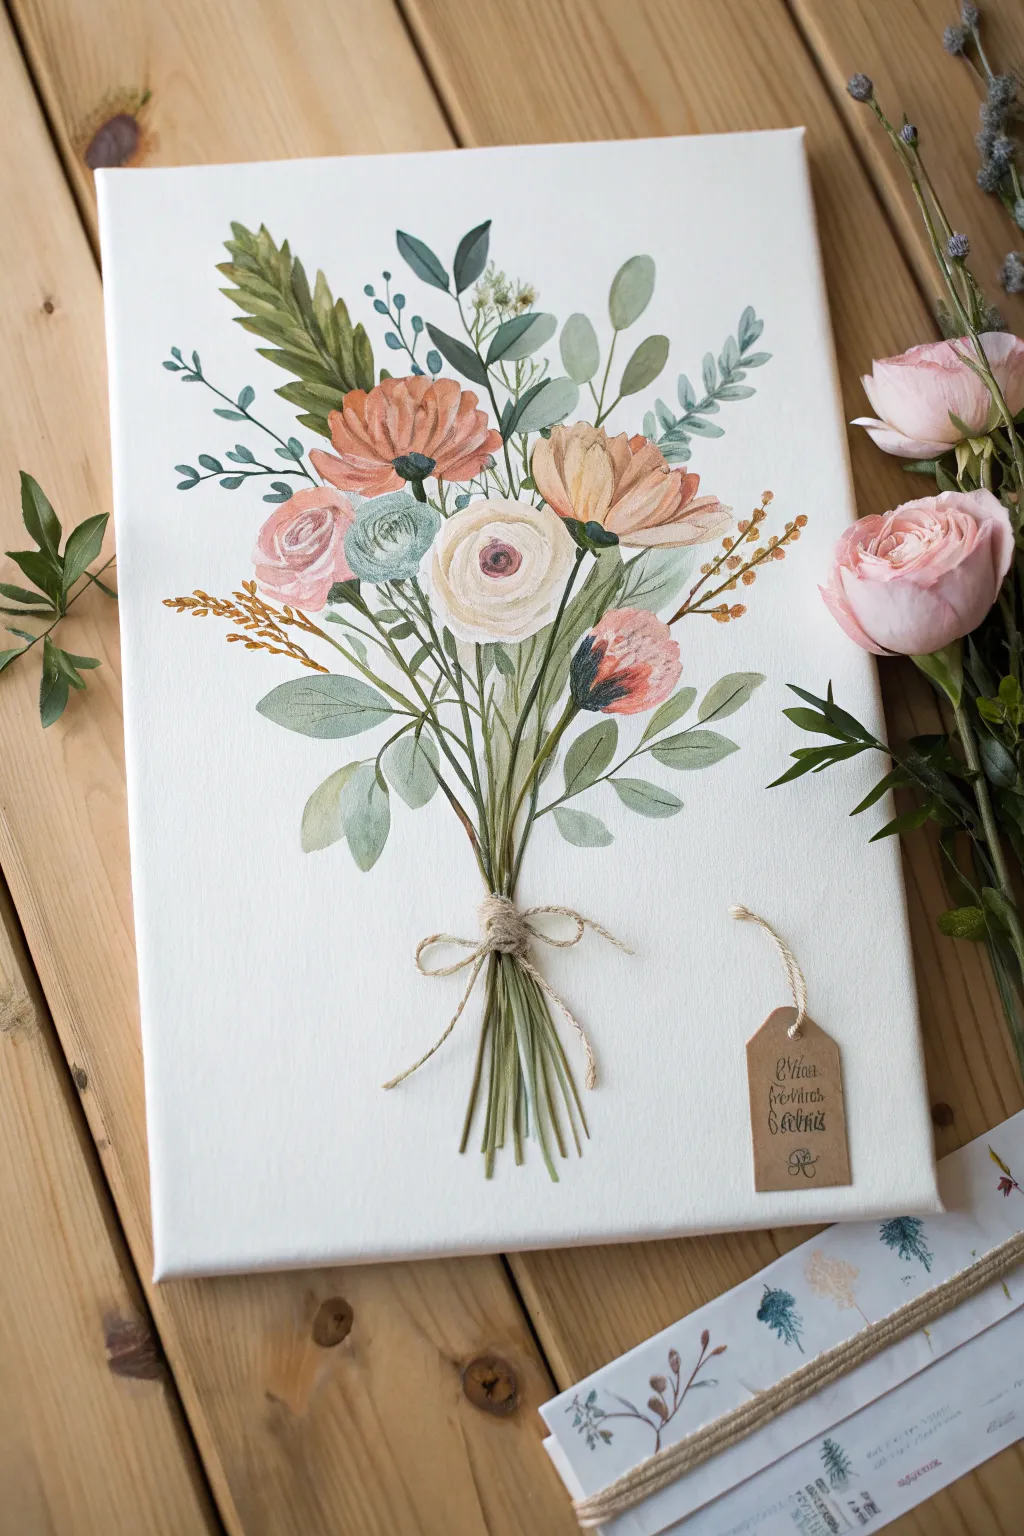
Celebrate your family’s unique composition with a custom botanical illustration where each flower represents a family member’s birth month. This project uses soft acrylics to create a delicate, watercolor-style bouquet that serves as a timeless and personal piece of wall art.
How-To Guide
Materials
- Primed stretched canvas (medium grain, rectangular)
- Acrylic paints (botanical palette: sage green, olive, blush pink, coral, cream, raw umber)
- Acrylic glazing medium or flow improver
- Pencil (HB or lighter) and kneaded eraser
- Round synthetic brushes (sizes 2, 4, and 6)
- Fine liner brush (size 0 or 00)
- Kraft paper tag
- Natural jute twine
- Fine-point black permanent marker or calligraphy pen
- Hot glue gun or strong clear adhesive
- Palette and water cup
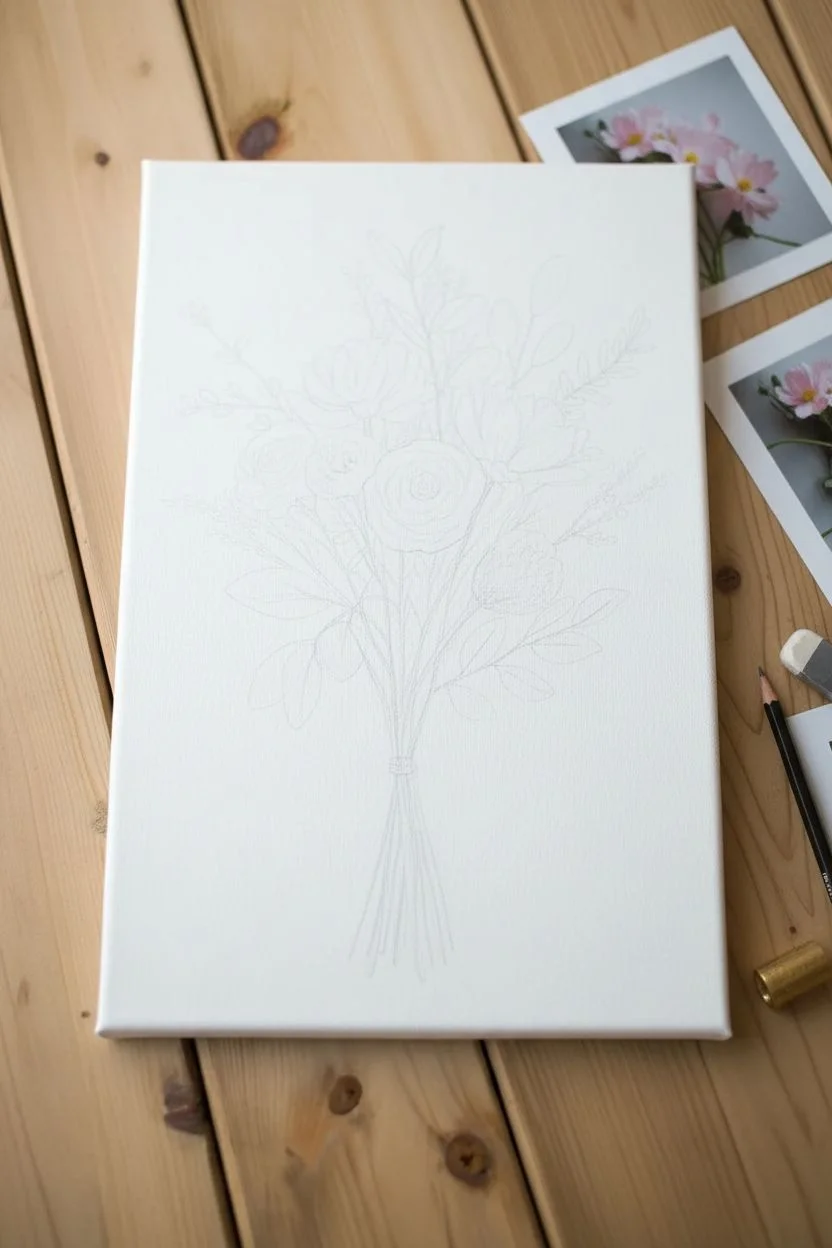
Step 1: Planning the Composition
-
Research your blooms:
Begin by identifying the birth flower for each family member you wish to include. Look up reference photos for each bloom (e.g., roses for June, marigolds for October) to understand their basic shapes. -
Draft the layout:
Lightly sketch your bouquet arrangement directly onto the canvas with an HB pencil. Aim for a balanced ‘V’ shape, with taller stems in the back and the main blooms clustered in the center. Don’t press too hard; you want the lines to be barely visible. -
Refine the stems:
Ensure all your stems converge at a single pinch point near the bottom third of the canvas. This is where the bouquet will be ‘tied’ later.
Step 2: Painting the Foliage
-
Mix your greens:
Prepare a few shades of green on your palette. Mix sage green with a touch of white for eucalyptus leaves, and olive green with a bit of raw umber for woody stems. -
Apply the base stems:
Using a size 2 round brush, paint the stems first. Use long, confident strokes starting from the flower head down to the pinch point. Thin your paint slightly with water for smoother lines. -
Add leafy elements:
Fill in the background foliage. For eucalyptus-style leaves, use a size 4 brush to dab broad, rounded shapes in lighter sage green. Vary the pressure to create natural tapering. -
Layer darker details:
Once the initial greens are dry, come back with a darker olive mix and a fine liner brush to add veins to the leaves and definition to the stem shadows.
Natural Texture
Mix a tiny pinch of cornstarch into your acrylic paint for the petals. This thickens the paint slightly and gives it a matte, velvety texture closer to gouache.
Step 3: Creating the Blooms
-
Paint the main flowers:
Start with the largest blooms. Mix your chosen colors with a tiny drop of glazing medium to increase transparency. For roses or ranunculus, paint rough concentric circles, letting the white canvas show through slightly between petals for highlights. -
Build petal depth:
While the base color is still slightly tacky, mix a darker version of the flower color. Add this to the center of the bloom and the base of the petals to create a 3D cupped effect. -
Add accent flowers:
Paint the smaller filler flowers and buds. Use quick, stippling motions for textured elements like goldenrod or lavender, using warm ochre or soft purple tones. -
Refine with white:
I find that adding tiny dashes of pure white or cream to the edges of the petals really makes them pop. Use your smallest detail brush for these final highlights.
Sentimental Roots
Instead of a generic tag, glue a small wooden heart or a metal charm with an engraved date to the ‘knot’ of the bouquet for an heirloom-quality detail.
Step 4: The Finishing Touches
-
Paint the twine illusion:
At the convergence point of the stems, paint a horizontal band of raw umber to represent the binding. Add a simple bow shape with looping tails. -
Texture the twine:
Use a liner brush with cream paint to add tiny diagonal hash marks across your painted bow, mimicking the twisted texture of real rope. -
Prepare the tag:
Take your physical kraft paper tag and write your family name or a date using the fine-point black marker. A calligraphy style looks beautiful here. -
Attach the tag:
Thread a small piece of real jute twine through the tag’s hole. Using a dot of hot glue, attach the tag to the canvas near the painted bow so it hangs naturally. -
Secure the string:
loop the real twine ends slightly to blend with the painted twine, gluing them down flat to create a seamless trompe-l’œil effect where the real meets the painted.
Hang your completed canvas in a well-lit spot to let those personalized botanical colors shine
Home Sweet Home Family House Portrait
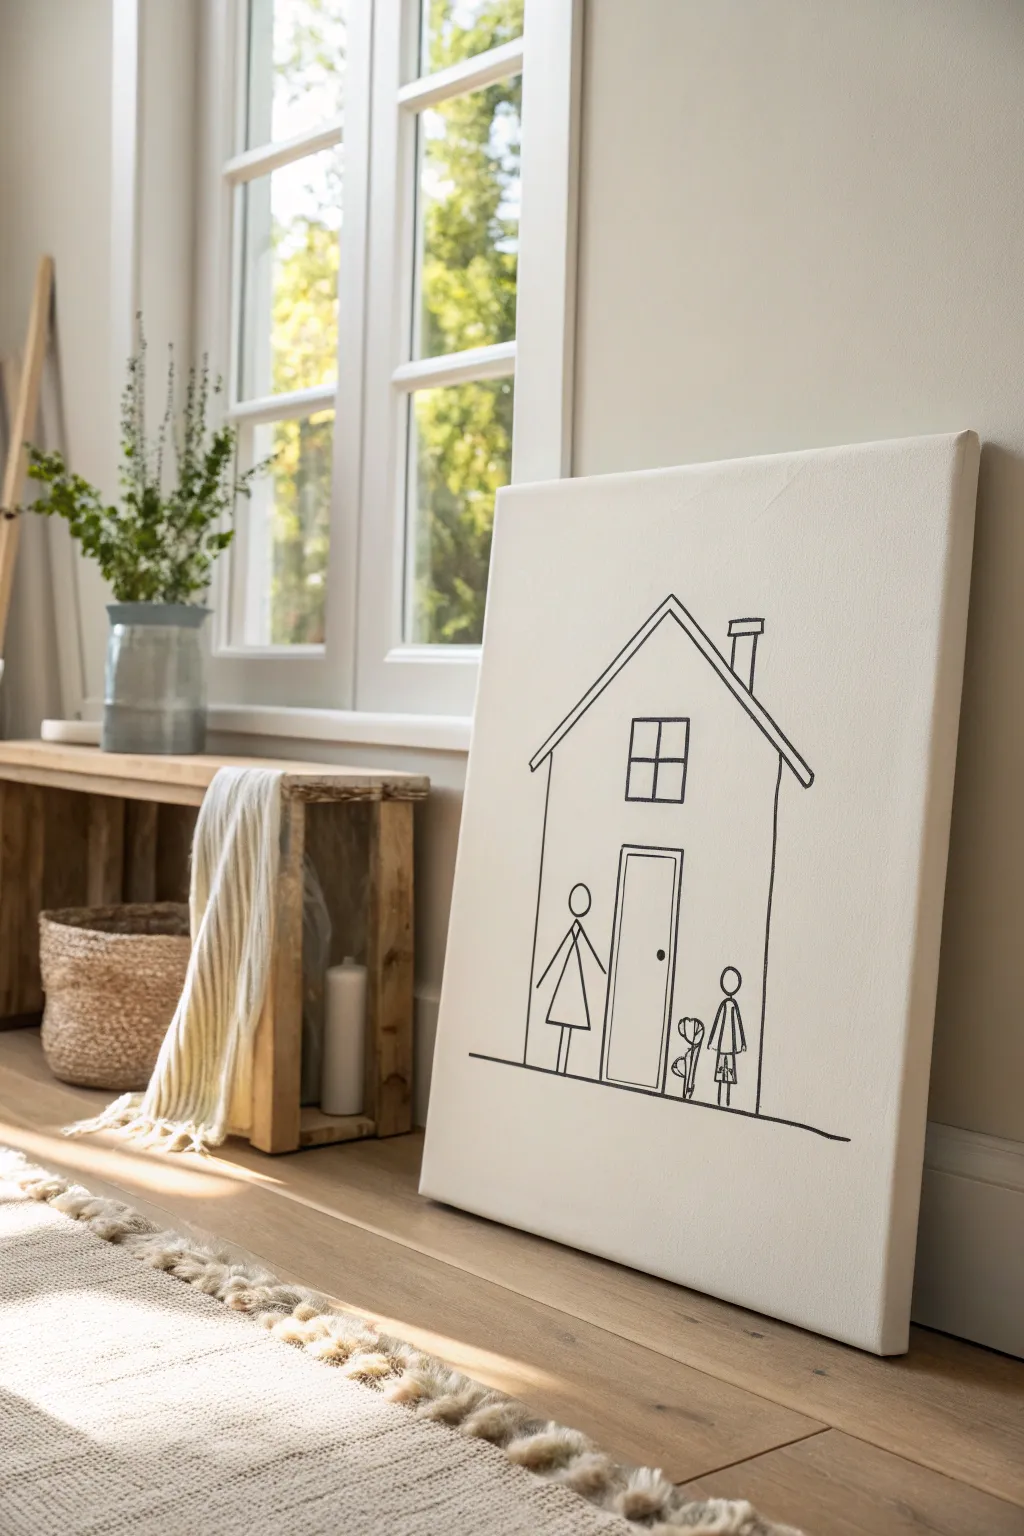
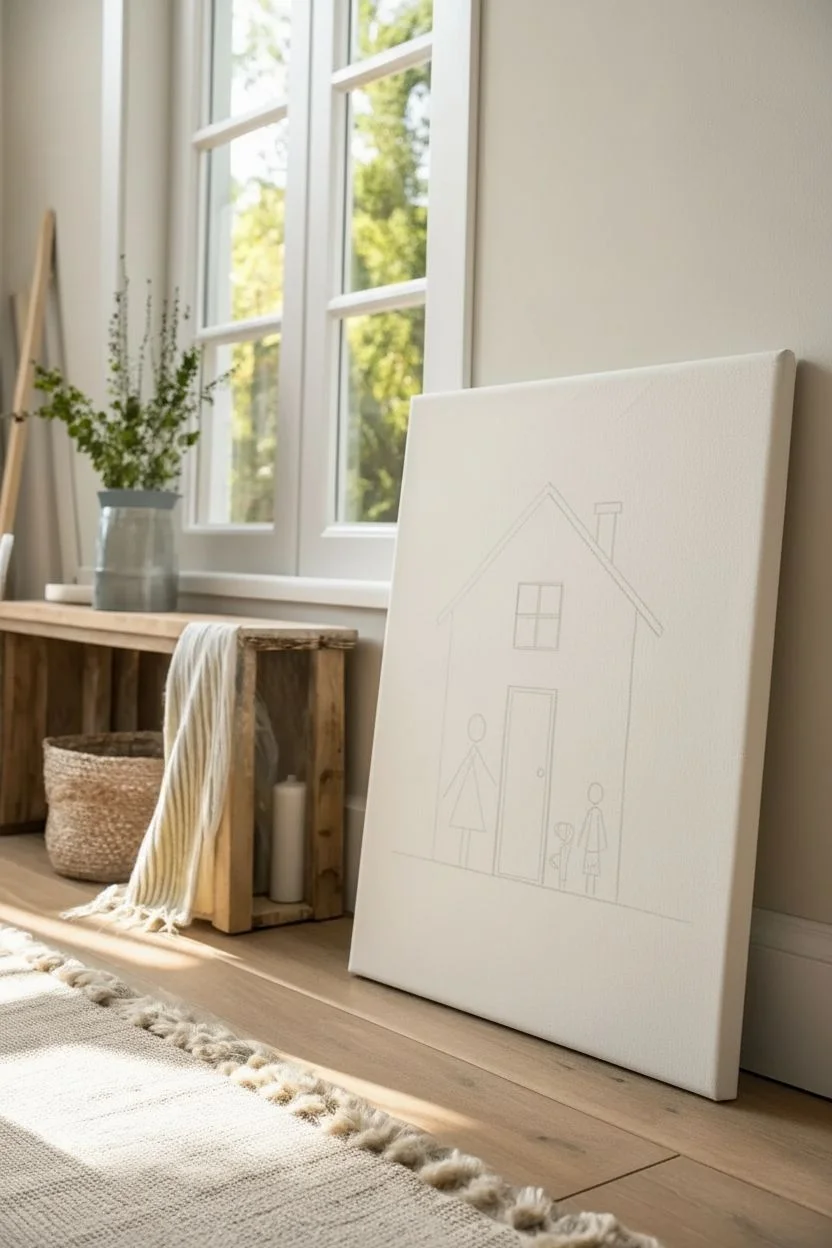
Capture the simple joy of family with this charmingly minimalist line art portrait. Using stark black ink against soft white canvas, this project brings a playful, childlike innocence to your home decor that feels both modern and heartwarming.
Step-by-Step
Materials
- Pre-stretched canvas (white, roughly 16×20 inches or size of choice)
- Pencil (HB or H)
- Eraser (kneaded)
- Black paint marker (medium tip)
- Black paint marker (fine tip)
- Ruler or straight edge
- Scrap paper for sketching
- Acrylic matte varnish (optional)
Step 1: Planning and Sketching
-
Mock up your family:
Before touching the canvas, grab some scrap paper and sketch out your stick figure family. Decide between triangle dresses or rectangular shirts, and play with different hairstyles to characterize each member. -
Determine scale:
Hold your sketch against the canvas to gauge the size. You want the house to fill about two-thirds of the vertical space, leaving room at the bottom for the ground line. -
Draw the ground line:
On the canvas, use your ruler and a pencil to draw a light horizontal line near the bottom. This anchors the drawing and ensures your house doesn’t look like it’s floating. -
Outline the house frame:
Lightly sketch the main rectangle of the house body using the ruler. Keep the lines vertical and parallel to the canvas edges. -
Add the roof:
Sketch a triangle on top of your rectangle. Aim for a slightly steeper pitch to give it that classic storybook feel, extending the eaves slightly past the walls. -
Sketch the chimney:
Add a small rectangular chimney on one slope of the roof. Don’t forget the little cap on top for extra detail. -
Place the door and window:
Find the center of the house body and sketch a tall rectangle for the door. Above it, draw a square window with a cross in the middle for panes. -
Pencil in the figures:
Lightly draw your stick figures standing on the ground line. I usually place the parents on either side of the doorway and the children or pets closer to the center.
Step 2: Inking the Design
-
Prepare the markers:
Shake your black paint markers well and press the tips on scrap paper until the ink flows smoothly and black. -
Trace the main structure:
Using the medium tip marker and your ruler, trace the straight lines of the house walls and roof. Move steadily to keep the line weight consistent. -
Ink the architectural details:
Switch to freehand or keep using the ruler to ink the door frame, window panes, and chimney. A slight wobble here actually adds to the hand-drawn charm. -
Draw the figures:
Carefully trace over your stick figure pencil lines. Use the fine tip marker here if your canvas is smaller or if you want delicate details for hands and hair. -
Ground the scene:
Trace the bottom horizon line, extending it slightly past the house on both sides. It need not go all the way to the canvas edge; a floating line often looks more artistic. -
Let the ink cure:
Allow the paint marker ink to dry completely. This usually takes about 15 to 20 minutes, but check the manufacturer’s instructions. -
Erase guidelines:
Once the ink is bone dry, gently erase any visible pencil marks with a kneaded eraser. Rub lightly to avoid scrubbing the canvas texture. -
Seal the work (optional):
If you want to protect the canvas from dust, apply a thin coat of matte acrylic varnish spray over the entire surface.
Clean Lines Hack
Wipe the edge of your ruler with a paper towel after every few lines. Wet paint marker can accumulate on the straight edge and smudge across your white canvas unexpectedly.
Wobbly Marker Fix
If a line looks shaky or too thin, don’t panic. Simply go over it again to thicken the line weight intentionally. A bolder line style often looks more confident and hides small slips.
Step back and admire your beautifully simple artwork that celebrates the essence of home.


Fingerprint Family Balloon Bunch
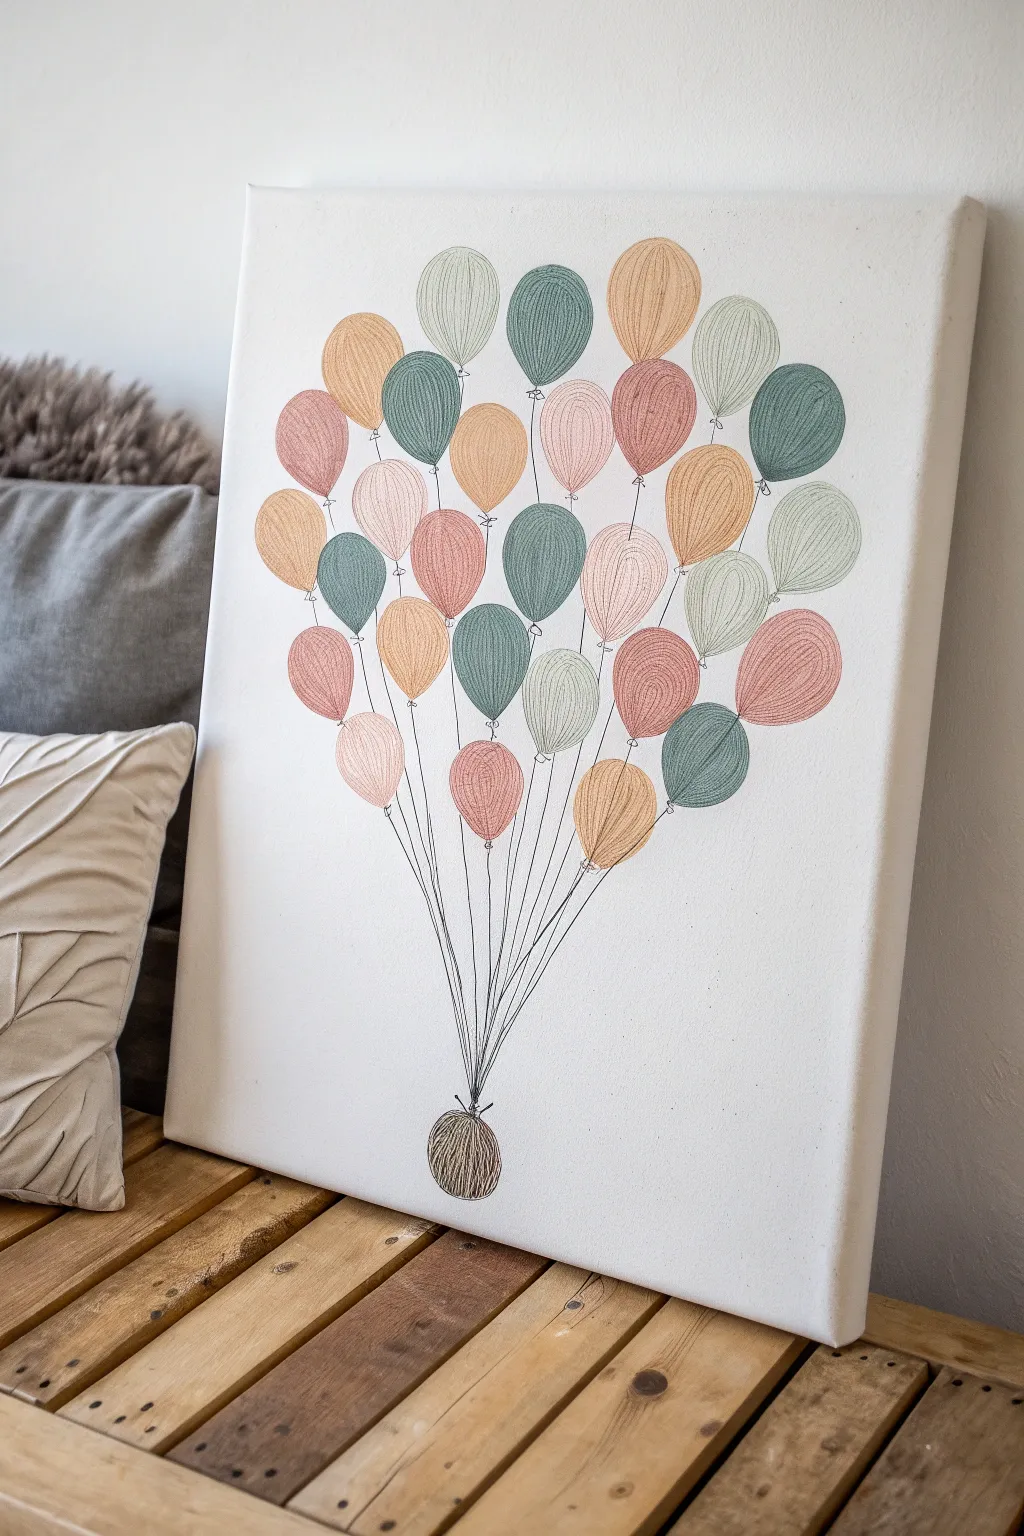
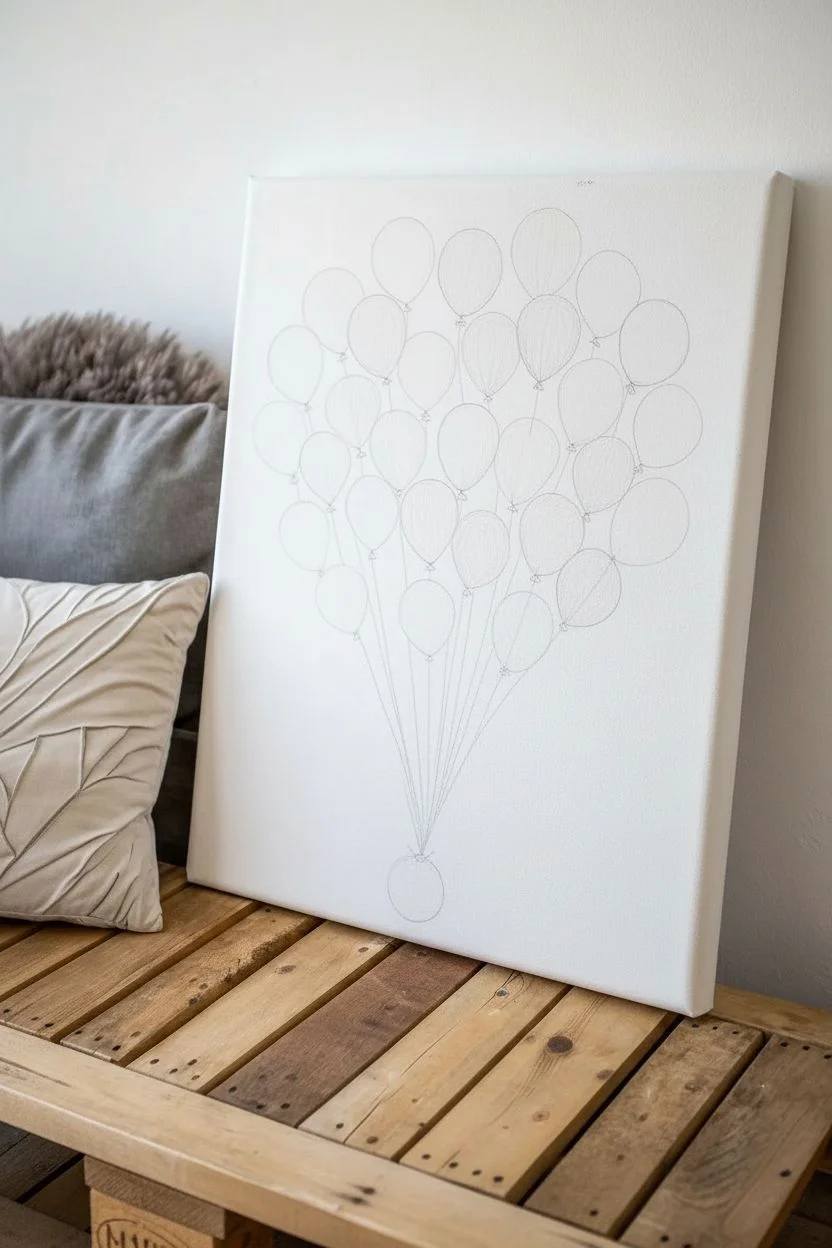
Capture the lightness of a celebration with this charming canvas art featuring a cluster of textured, pastel balloons lifting a heavy weight. The sketched lines give it a lovely hand-drawn feel while the color palette keeps it modern and soft.
Step-by-Step Guide
Materials
- Rectangular stretched canvas (e.g., 16×20 inch)
- Pencil and eraser
- Fine liner pens (black, 0.3mm and 0.5mm)
- Acrylic paints (muted tones: sage, blush, mustard, teal)
- Small round paintbrushes (sizes 2 and 4)
- Ruler
- Palette for mixing
- Cup of water and paper towels
Step 1: Sketching the Layout
-
Plan the composition:
Visualize the canvas divided vertically. Imagine the balloon cluster taking up the top two-thirds of the space, leaving the bottom third for the long strings and the anchor weight. -
Draw the anchor:
Near the bottom center of the canvas, lightly sketch a round, slightly irregular circle to represent the rock or weight that holds the balloons down. -
Sketch the balloons:
Using your pencil, draw about 20-25 oval balloon shapes in the upper area. Vary their angles slightly so they don’t look too uniform. Ensure some overlap to create depth, as if they are bunched together. -
Add balloon details:
Draw small triangles at the bottom of each oval to represent the tied knot of the balloon. -
Connect the strings:
Use a ruler or freehand sketch to draw a straight line from the knot of every single balloon down to the single anchor point at the bottom. The lines should all converge at the top of the rock.
Ink Smearing?
If your pen clogs or smears over the paint, the acrylic might be too thick or textured. Lightly sand the painted areas with fine-grit sandpaper for a smoother drawing surface.
Step 2: Adding Color
-
Prepare your palette:
Mix your acrylic paints to create a soft, muted palette. You’ll want a dusty pink, a calm sage green, a warm mustard yellow, and a muted teal. Add a drop of white to soften any colors that feel too vibrant. -
Paint the first layer:
Fill in the balloon shapes with your mixed colors. Try to distribute the colors evenly so no two balloons of the exact same shade are touching. -
Paint the anchor:
Paint the bottom circular weight in a neutral beige or soft brown tone. -
Let it dry:
Allow the paint to dry completely. This is crucial because the next step involves drawing ink over the paint, which will snag or bleed if the surface is wet.
Make It Personal
Write family names or important dates inside the balloons using the same black fine liner. Place one name per balloon for a creative family tree alternative.
Step 3: Inking details
-
Outline the shapes:
Take your 0.5mm black fine liner and carefully trace the pencil outline of each balloon and the bottom knot. -
Add texture to balloons:
Switch to a thinner 0.3mm pen. Draw curved, vertical contour lines inside each balloon. These lines should follow the curve of the balloon shape to make them look round and three-dimensional. -
Vary the line density:
Don’t make lines perfectly parallel. Let them be slightly organic and sketchy, closer together near the edges to suggest shading. -
Texture the anchor:
Use the pen to draw messy, scribbled concentric circles inside the brown anchor weight to give it a rough, heavy texture. -
Trace the strings:
Go over your pencil strings with the black pen. You can make these lines slightly shaky or double them up in places to give the artwork more character. -
Erase guidelines:
Once the ink is fully dry, gently erase any visible pencil marks from your initial sketch.
Hang your new canvas in a sunny spot to enjoy those uplifting colors every day
Puzzle Piece Family Canvas
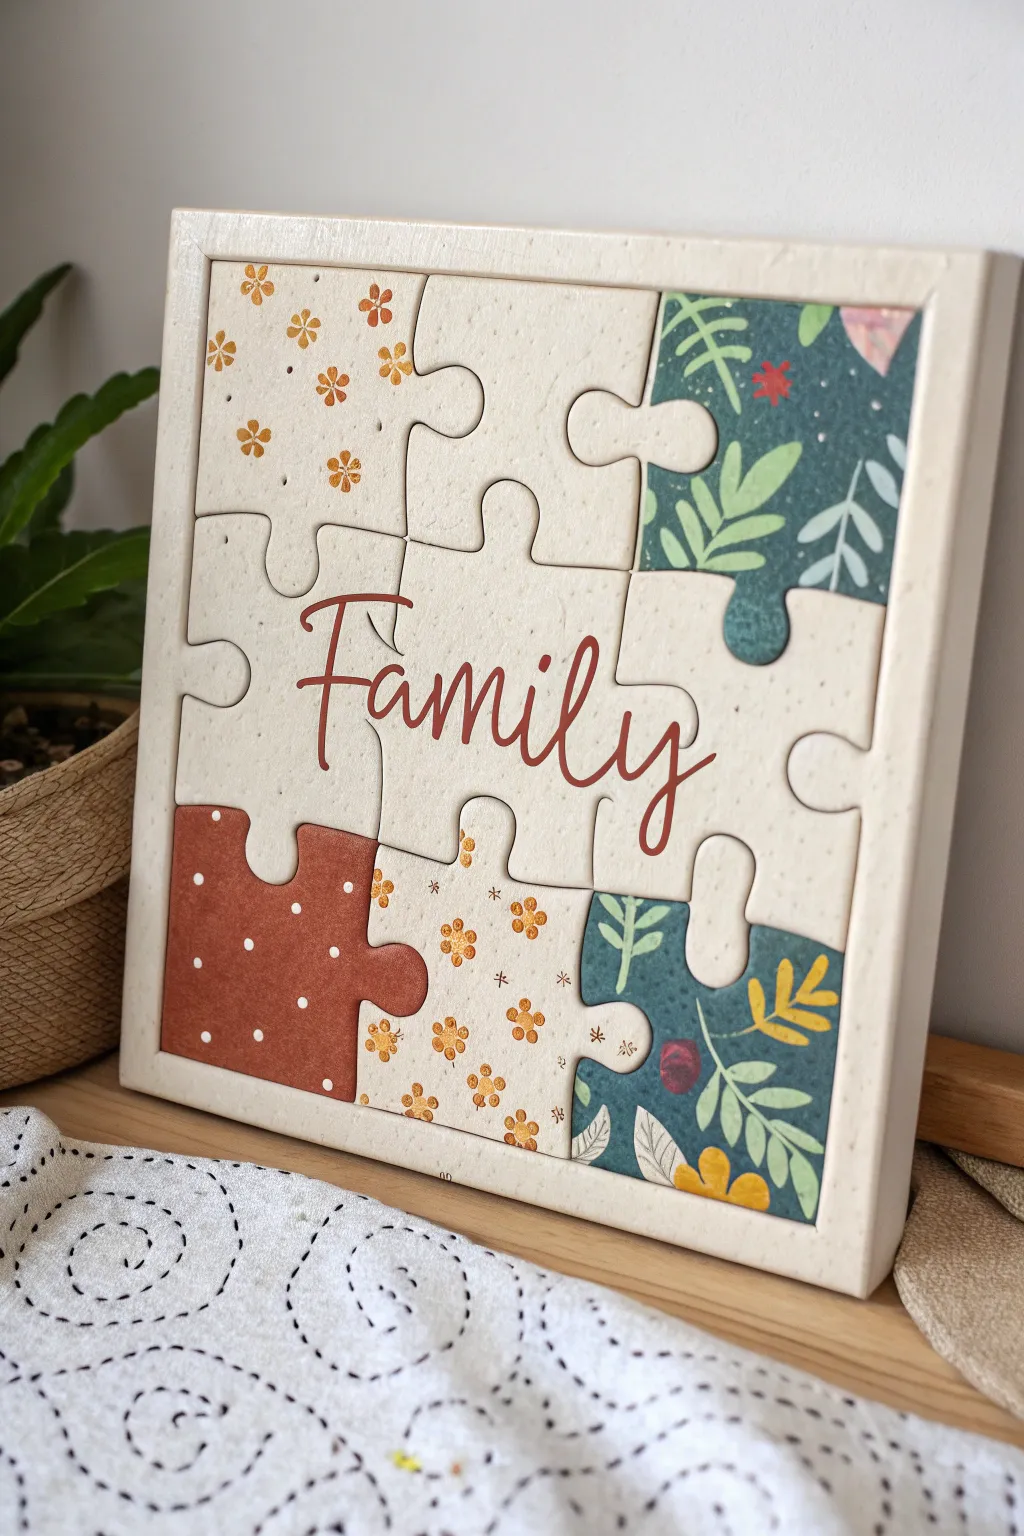
This charming project creates the illusion of a completed jigsaw puzzle on a standard artist’s canvas. By combining warm, earthy tones with simple hand-painted patterns, you’ll create a sentimental piece of wall art that symbolizes how your family fits perfectly together.
Step-by-Step
Materials
- Square stretched canvas (12×12 inches recommended)
- Wooden floater frame to fit canvas size
- Acrylic paints: Cream, terracotta/rust, deep teal, mustard yellow, sage green
- Pencil and white eraser
- Ruler
- Flat shader brush (size 6 or 8)
- Round detail brushes (size 0 and 1)
- Fine tip brown or dark grey paint pen (optional for outlining)
- Carbon transfer paper (optional)
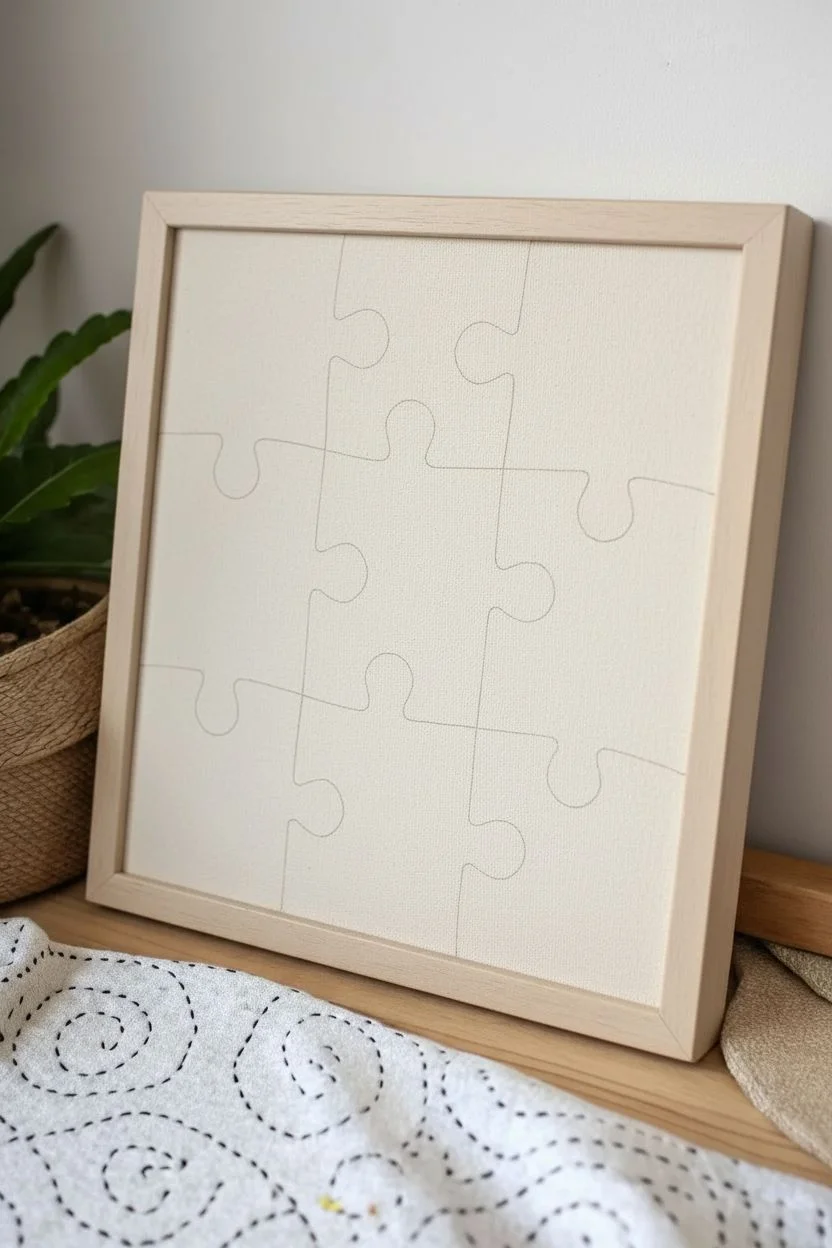
Step 1: Designing the Grid
-
Measure the grid:
Begin by lightly measuring your square canvas into a neat 3×3 grid. Use your ruler to make small tick marks, then draw very faint vertical and horizontal lines to create nine equal squares. -
Sketch the puzzle connections:
Transform the grid into puzzle pieces by drawing circular knobs and sockets over the straight lines. Vrtry the direction—some should point up, some right, creating unique interlocking shapes. -
Clean up the sketch:
Once you are happy with the puzzle shapes, erase the original straight grid lines that are now inside the specific puzzle pieces, leaving only the organic, curving outline of the 9-piece puzzle.
Clean Lines Pro-Tip
If you struggle painting perfectly smooth stems or letters, dilute your acrylic paint with a few drops of water until it has an ink-like consistency. It will flow off the brush much easier.
Step 2: Blocking in Color
-
Paint the central cross:
Identify the central piece and the four pieces directly adjacent (top, bottom, left, right). Paint these five pieces with your cream acrylic paint to form a large ‘plus’ sign shape in the middle. -
Fill the terracotta corner:
Locate the bottom-left corner piece and fill it entirely with the terracotta or rust-colored paint. -
Fill the teal corners:
Paint the top-right and bottom-right corner pieces with the deep teal green. This helps balance the visual weight of the design. -
Fill the floral corner:
Paint the remaining top-left corner with the cream paint as well, but keep in mind this one will get a different pattern than the central text area. -
Apply a second coat:
Acrylics often dry slightly translucent. Apply a second coat to all sections to ensure the colors are solid and opaque, covering the canvas texture evenly.
Troubleshooting: Shaky Text
If painting the script ‘Family’ text feels too daunting, skip the brush! Use a high-quality acrylic paint pen (like a Posca marker) in a rust color for precise control without the mess.
Step 3: Adding Patterns & Text
-
Create the polka dots:
Dip the non-brush end (the handle) of a paintbrush into cream paint and dot it onto the terracotta puzzle piece to create uniform, simple polka dots. -
Paint the foliage:
On the teal sections, use your size 0 round brush and sage green paint to add loose botanical shapes. Paint simple stems with oval leaves coming off them, and add a few mustard yellow accents for variety. -
Add petite flowers:
On the top-left cream corner and the bottom-center piece, paint tiny five-petal flowers using the mustard yellow and rust paints. -
Draft the lettering:
Lightly pencil the word ‘Family’ across the central row of puzzle pieces. A cursive or script style works best to contrast with the blocky puzzle shapes. -
Paint the script:
Using a liner brush and terra-cotta paint (or a paint marker), carefully trace over your penciled letters. Vary the pressure to make the downstrokes slightly thicker than the upstrokes.
Step 4: The 3D Puzzle Effect
-
Outline the pieces:
To make the puzzle look real, trace the wavy lines between the pieces with a very fine brush and a mixture of brown and grey paint. Keep this line thin but distinct. -
Add shadows:
I like to mix a transparent glaze for this step, though watered-down grey paint works too. Paint a thin, translucent shadow line just along the bottom and right edges of every puzzle ‘knob’. -
Add highlights:
Using pure white paint, add a tiny, crisp highlight line on the top and left edges of the puzzle knobs. This contrast between shadow and light creates the faux-embossed 3D look. -
Frame the artwork:
Once completely dry, place your canvas into the wooden floater frame. This gives the finished piece a polished, high-end gallery feel.
Hang your new puzzle art in a gathering space to celebrate the unique way your family fits together.
Family Milestone Timeline Stripes
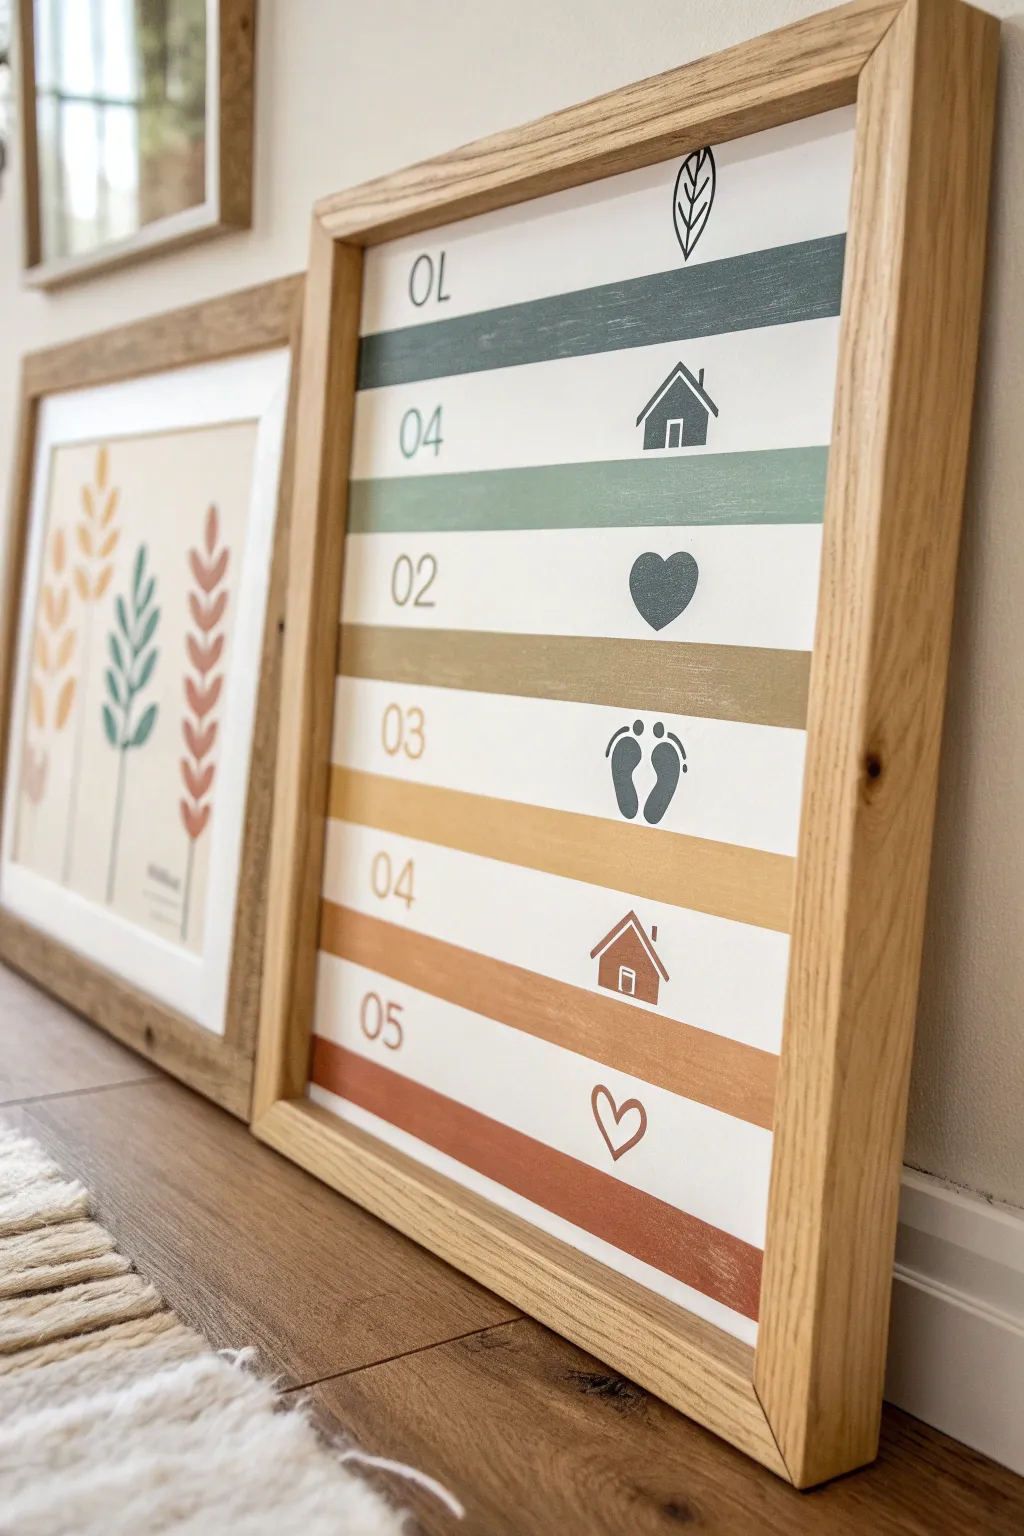
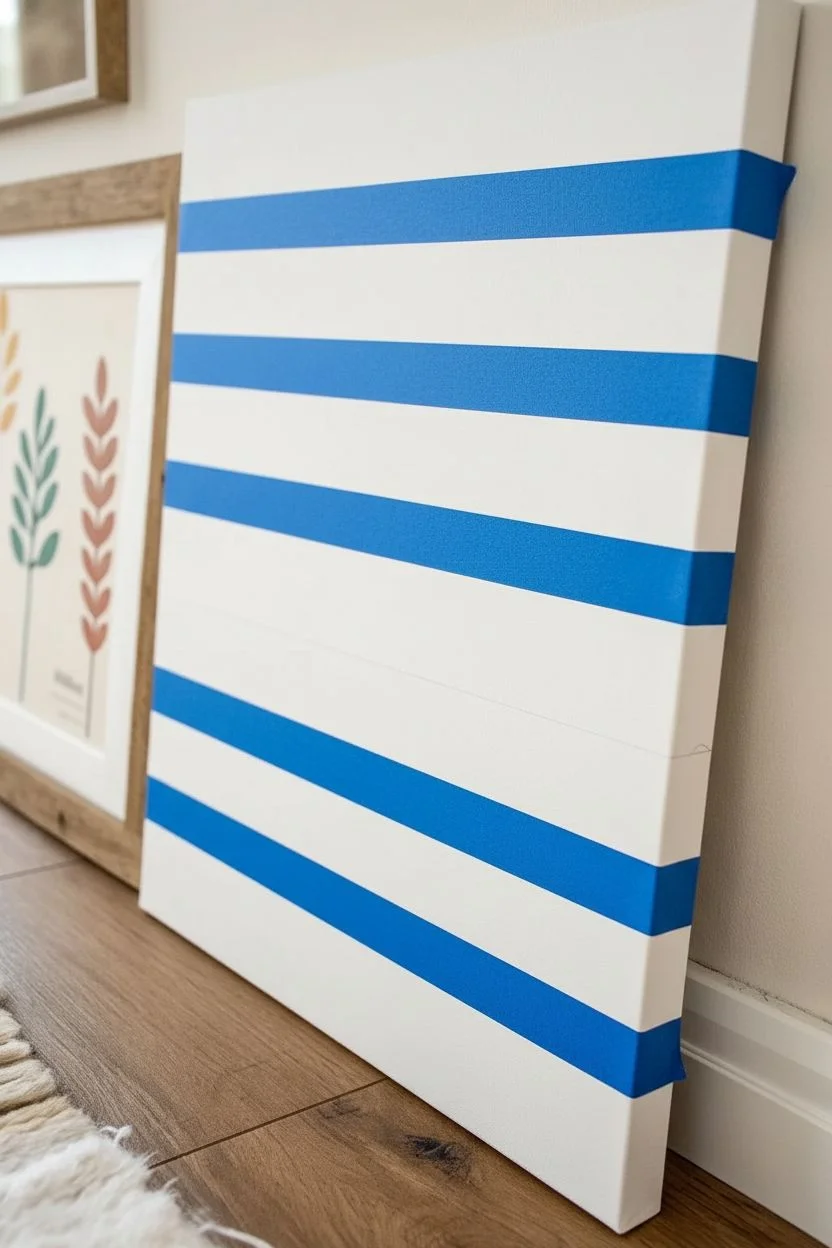
Celebrate your family’s journey with this modern, minimalist timeline that turns key dates into graphic art. Using soothing earth tones and simple iconography, this piece creates a structured yet warm visual diary of your most cherished memories.
How-To Guide
Materials
- Large rectangular canvas or sturdy art board (16×20 inches or similar)
- Painter’s tape (1-inch width for crisp lines)
- Acrylic craft paints (Deep green, sage green, tan/ocre, mustard yellow, terracotta, burnt orange)
- White acrylic paint (for the background)
- Flat foam brushes or wide flat synthetic brushes
- Fine detail brush or paint pens (black and dark grey)
- Pencil and ruler
- Stencils (optional) or printer for tracing icons
- Rubber eraser
- wooden frame (floating or standard) to fit your canvas size
Step 1: Preparing the Base
-
Prime the surface:
Start by giving your entire canvas or art board a coat of fresh white acrylic paint. Even if the canvas is already white, this layer ensures a smooth, non-porous surface that makes masking tape peel away cleaner later on. -
Measure the stripes:
Once the white base is completely dry (give it at least an hour), use your ruler to measure out horizontal sections. You want alternating bands of white space and colored stripes. Mark these lightly with a pencil along the left and right edges. -
Mask the white zones:
Apply strips of painter’s tape across the canvas where you want the white background to remain. Press the edges of the tape down firmly with your fingernail or a credit card to prevent paint bleed.
Tape Bleeding?
If paint bleeds under the tape, wait for it to dry completely. Then, use a small flat brush with white paint to carefully touch up the line and cover the mistake.
Step 2: Painting the Stripes
-
Select your palette:
Choose an ombre or earth-tone palette. The example uses a progression from cool greens at the top to warm terracottas at the bottom. Squeeze small amounts of each color onto a palette. -
Apply the first color:
Using a flat brush or foam applicator, paint the top exposed strip with your deepest green shade. Brush horizontally to minimize texture marks. -
Continue the gradient:
Move down to the next exposed strip with a lighter sage green. I like to wash my brush thoroughly between colors or use separate foam brushes to keep the tones distinct. -
Paint the warm tones:
Proceed with the tan/ochre strip, followed by the mustard yellow, terracotta, and finally the deep burnt orange at the bottom. Make sure the paint coverage is opaque; apply a second coat if the white shows through. -
The reveal:
While the paint is still slightly tacky (not fully cured), carefully peel back the painter’s tape at a 45-degree angle. This helps ensure a crisp line without chipping the paint.
Level Up: Texture
Mix a teaspoon of baking soda into your acrylic paints before applying the stripes. This creates a trendy, terracotta-like texture that adds depth to the simple bands.
Step 3: Adding Details
-
Plan your milestones:
Decide which year and icon goes on which white stripe. Lightly sketch the numbers (e.g., “01”, “04”) on the left side and the corresponding icon (leaf, house, heart, feet) on the right side using a pencil. -
Paint or draw the numbers:
Using a fine detail brush with paint that matches the stripe *above* or *below* it offers a cohesive look. Alternatively, outline the numbers in a neutral grey or gold using a paint pen for precision. -
Create the icons:
Draw the icons using a dark grey or black paint pen. Keep the shapes simple—outlines for houses and leaves work well, while solid shapes work great for hearts and footprints. -
Clean up:
Once the ink or paint is totally dry, gently erase any visible pencil sketch lines with a clean white eraser.
Step 4: Finishing Touches
-
Seal the artwork:
Apply a clear matte spray sealer over the entire piece to protect the paint and prevent the white areas from yellowing over time. -
Frame it:
Place your finished board into a light wood frame. A natural oak or pine frame complements the earth tones perfectly and gives it that finished, high-end look.
Hang your new personalized timeline in a hallway or nursery to keep your family’s story front and center
Negative Space Handprint Modern Look

Create a striking piece of modern decor with this high-contrast black and white canvas art. Instead of typical colorful kids’ crafts, this project uses bold white prints on a stark black background for a sophisticated look that fits any living room aesthetic.
Step-by-Step
Materials
- Large stretched canvas (size appropriate for your family)
- Black acrylic paint (matte or satin finish)
- White acrylic paint (heavy body opacity recommended)
- Wide foam brush or painter’s roller
- Small foam brushes (one per family member)
- Paper plates or palette
- Drop cloth or newspapers
- Baby wipes or damp towels (essential for quick cleanup)
Step 1: Preparing the Canvas
-
Surface protection:
Begin by laying down a generous amount of newspaper or a drop cloth on a flat, stable surface. This project can get messy, especially with little ones involved. -
Base coat application:
Pour a substantial amount of black acrylic paint onto a paper plate. Using the wide foam brush or roller, cover the entire front surface of the canvas. -
Covering the edges:
Don’t forget to paint the sides of the canvas as well. This gallery-wrapped look ensures the artwork feels finished even without a frame. -
Drying and recoating:
Allow the first coat to dry completely, which typically takes about 20-30 minutes. Apply a second coat to ensure a deep, opaque black background without streaky brushstrokes. -
Full cure:
Let the black background dry fully, preferably overnight or for at least 2-3 hours. The paint must be completely dry so the white handprints adhere properly and don’t mix into gray smears.
Smudged Print Rescue
If a hand slips, wipe the wet white paint immediately with a damp cloth. Paint over the mistake with black, let it dry completely, and try again.
Step 2: Creating the Handprints
-
Planning the layout:
Before painting any hands, gather your family and hover your hands over the dry canvas to decide on placement. I like to put the larger adult hands toward the top or center, with the smaller kids’ hands arranged organically below. -
Preparing the white paint:
Squeeze a generous amount of white craft paint onto clean paper plates. You want a fresh puddle for each person to avoid tinting the white. -
Painting the first hand:
Start with an adult’s hand first as a practice run. Instead of dipping the hand, use a small foam brush to paint a generous, even layer of white paint directly onto the palm and fingers. -
Checking coverage:
Ensure the paint covers all creases and the full length of the fingers, but isn’t dripping wet. If it’s too thick, the print will look like a blob; too thin, and it won’t show up against the black. -
Stamping the canvas:
Guide the painted hand firmly onto the planned spot on the canvas. Press down explicitly on the palm, thumb, and each individual finger to ensure good contact. -
Lifting cleanly:
Have the person lift their hand straight up—not dragging it sideways—to prevent smudging. Clean the hand immediately with baby wipes. -
Repeating the process:
Repeat the painting and stamping process for each family member. Move quickly enough that the layout flows well, but take your time with each individual print. -
Touching up opacity:
If a print came out too faint, don’t try to re-stamp it, as you’ll likely create a double image. Instead, use a fine detail brush with a tiny bit of white paint to lightly fill in the main palm area, leaving the textured edges natural. -
Drying the prints:
Allow the white paint to dry completely. Because you applied a thick layer for stamping, this might take longer than the base coat.
Make It Personal
Use a white paint pen to sign names and ages in tiny script under each handprint, or write the year in the bottom corner for a time-capsule effect.
Step 3: Finishing Touches
-
Sealing the art:
Once fully dry, you can gently brush on a clear matte spray varnish. This protects the prints from dust and scratches over time. -
Installation prep:
Decide where to display your masterpiece. The high contrast looks excellent leaning on a shelf or mounted on a brick wall as shown in the inspiration photo.
Hang your timeless family portrait in a prominent place to enjoy this snapshot of time forever
Constellation Map of Your Family
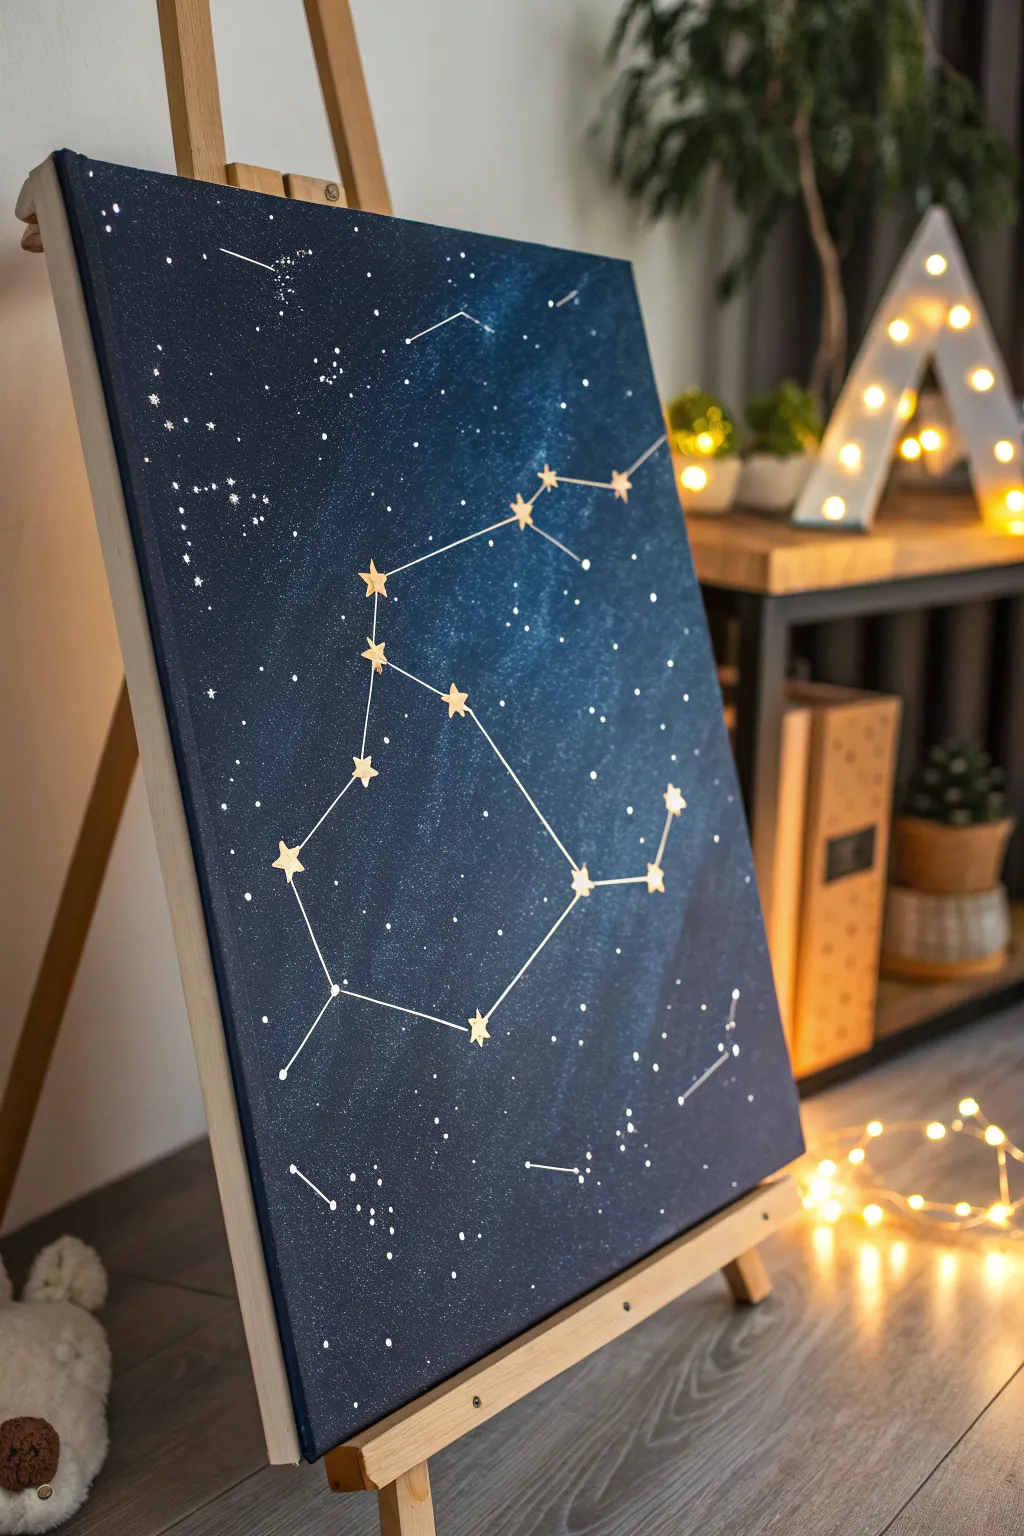
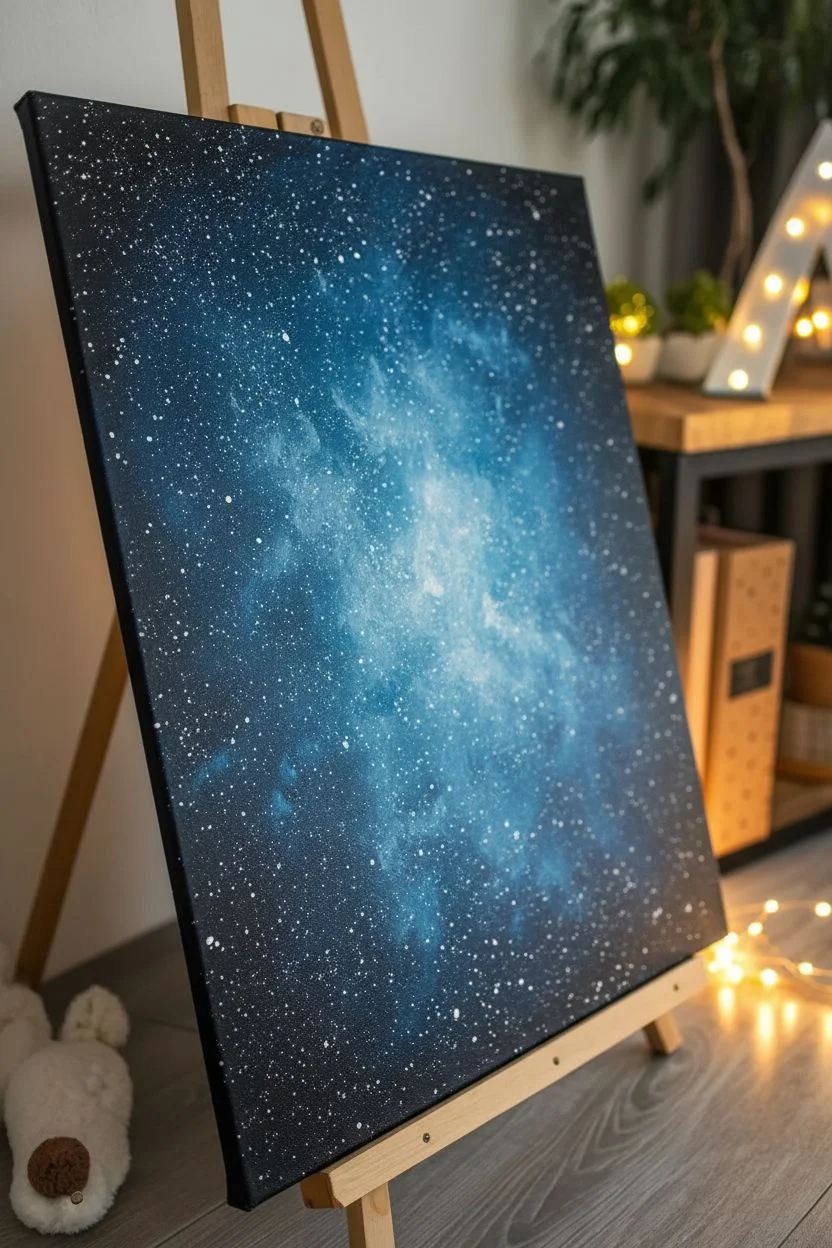
Transform a plain canvas into a stunning deep-space masterpiece featuring your family’s zodiac constellations. This project combines rich acrylic blending with delicate gold leaf details for a sophisticated piece of wall art that feels both personal and magical.
Step-by-Step
Materials
- Stretched canvas (12×16 inch or similar)
- Acrylic paints: Ultramarine Blue, Phthalo Blue, Black, White
- Gold leaf sheets or gold metallic paint
- Gilding adhesive (if using gold leaf)
- Small flat brush and detail liner brush
- Old toothbrush
- White gel pen or white paint marker (fine tip)
- Ruler
- Stencil or printed constellation map
- Pencil
Step 1: Creating the Night Sky
-
Apply the base coat:
Start by squeezing distinct blobs of Ultramarine Blue, Phthalo Blue, and Black directly onto the canvas. Don’t mix them on the palette—let them blend on the surface. -
Blend the background:
Using a slightly damp flat brush, spread the paint in random, sweeping motions. Aim for a gradient effect where some areas, especially the corners, are nearly black while the center retains lighter blue tones to suggest depth. -
Add nebula clouds:
While the base remains slightly tacky, mix a tiny amount of white with blue on your brush. Gently dab or dry-brush cloudy patches into the lighter blue areas to create a milky way effect. -
Splatter the stars:
Dilute a small amount of white acrylic paint with water until it has an inky consistency suitable for splattering. -
Create the starfield:
Dip an old toothbrush into the thinned white paint. Point the bristles toward the canvas and run your thumb across them to spray fine mist-like stars over the entire surface. Vary your distance for different star sizes. -
Dry completely:
Let the canvas dry fully. This is crucial because any moisture will interfere with the crisp lines you’ll draw next—I usually give it at least an hour.
Starry Depth Trick
Mix a tiny drop of diluted black paint into your white splatter mix. Splattering faint grey stars before the bright white ones adds incredible 3D depth to the sky.
Step 2: Mapping the Stars
-
Plan placement:
Print out a map of your chosen constellation (like Gemini shown here) sized to fit your canvas. Tape it lightly to the dry canvas. -
Mark anchor points:
Using a pencil, poke firmly through the paper at each major star point to leave a small indent or graphite mark on the canvas surface, then remove the paper. -
Connect the dots:
Take your white gel pen or paint marker and a ruler. Draw straight, crisp lines connecting your marked star points to form the constellation’s geometric shape. -
Add secondary constellations:
If you want background details, sketch in smaller, fainter constellations in the corners using dashed lines or lighter strokes to keep the main subject prominent.
Step 3: Gilding the Stars
-
Apply size adhesive:
Using a small detail brush, paint star shapes with gilding adhesive directly over your major anchor points. Let the adhesive sit until it becomes clear and tacky. -
Apply gold leaf:
Gently press a sheet of gold leaf over the tacky star shapes. Rub the back of the sheet softly with a dry brush to ensure it adheres well. -
Remove excess gold:
Once the gold is secure, use a dry, soft brush to dust away the unglued gold leaf, revealing sharp, shiny gold stars. -
Paint alternative stars:
If you aren’t using gold leaf, simply paint 5-pointed stars over the anchor points using high-pigment metallic gold acrylic paint. -
Highlight the connections:
Go over your white connecting lines one last time if the paint splatters or gold leaf obscured them, ensuring everything looks connected and deliberate. -
Seal the work:
Apply a clear gloss varnish over the entire painting. This unifies the sheen of the different paints and protects the delicate gold leaf from tarnishing over time.
Oops, Giant Splatter?
If you accidentally flick a huge blob of white paint onto the dark sky, don’t wipe it! Let it dry, then paint over it with black/blue to turn it into a distant planet or void.
Hang your celestial artwork proudly and enjoy the glimmer of gold catching the light
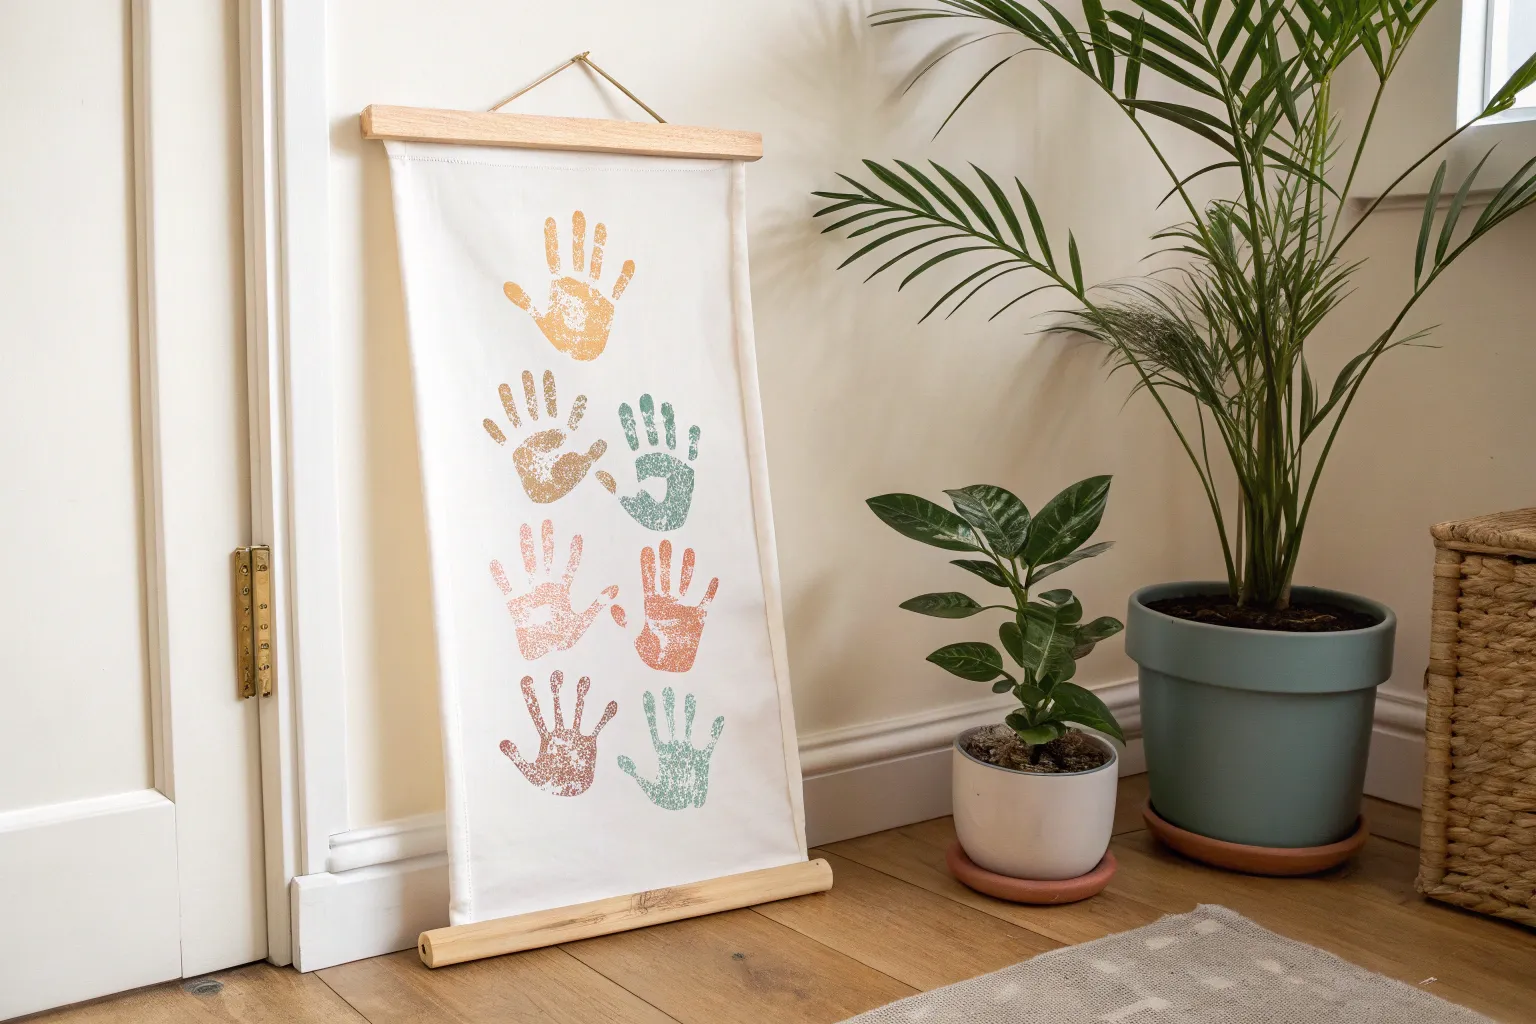
Add-a-Print Each Year Growth Canvas
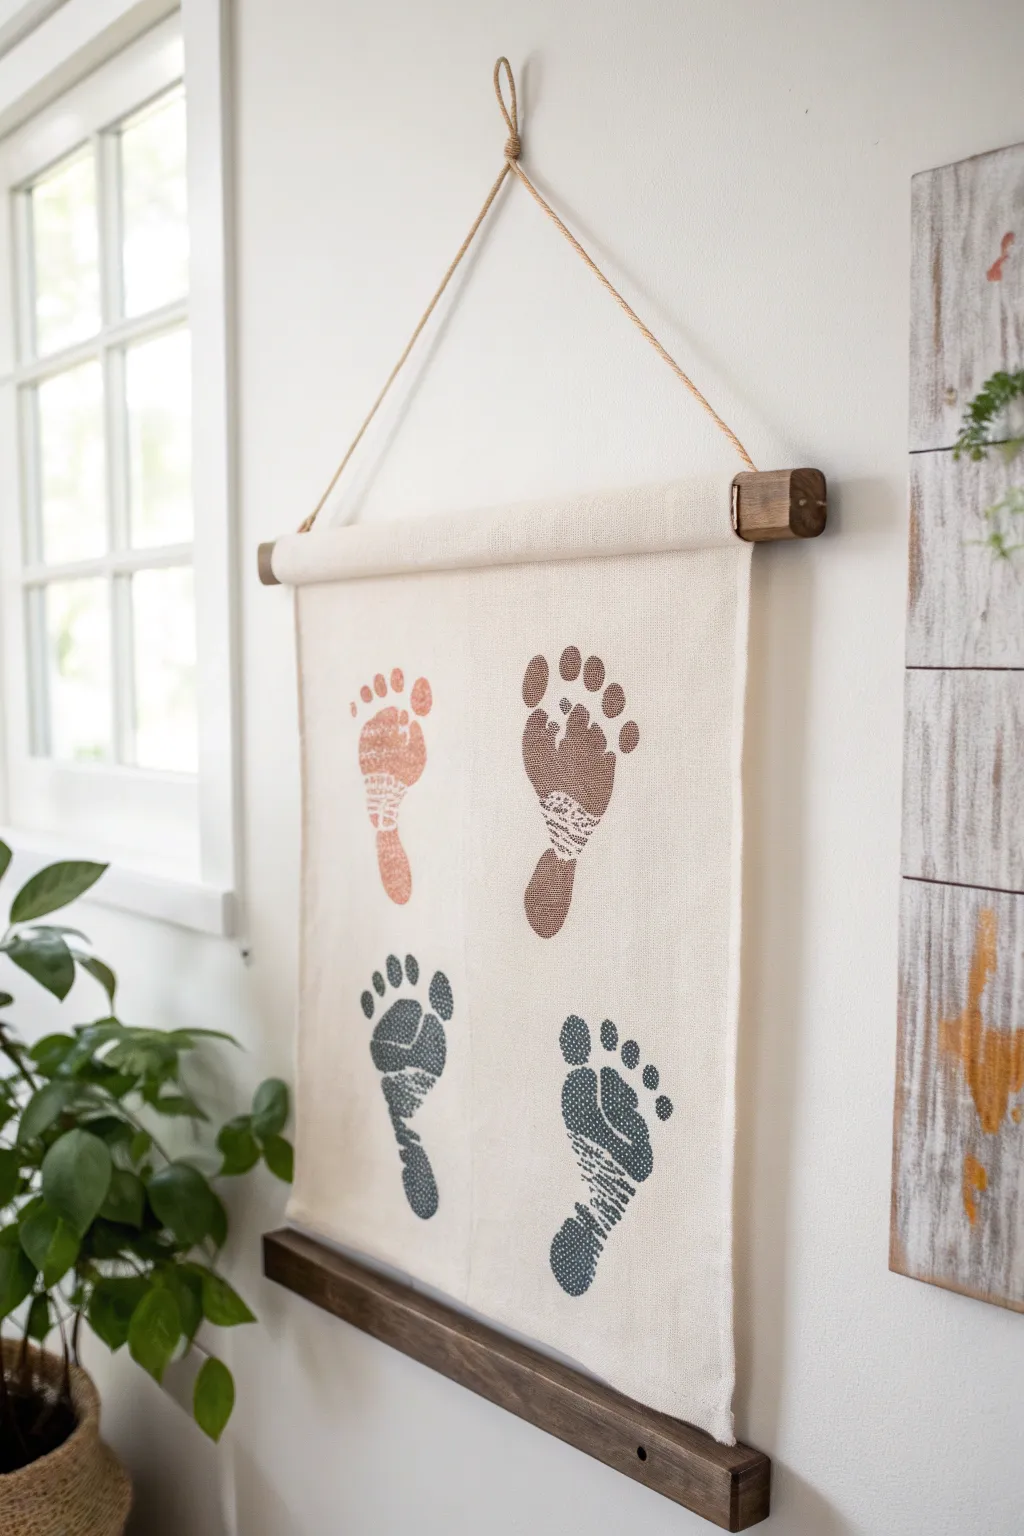
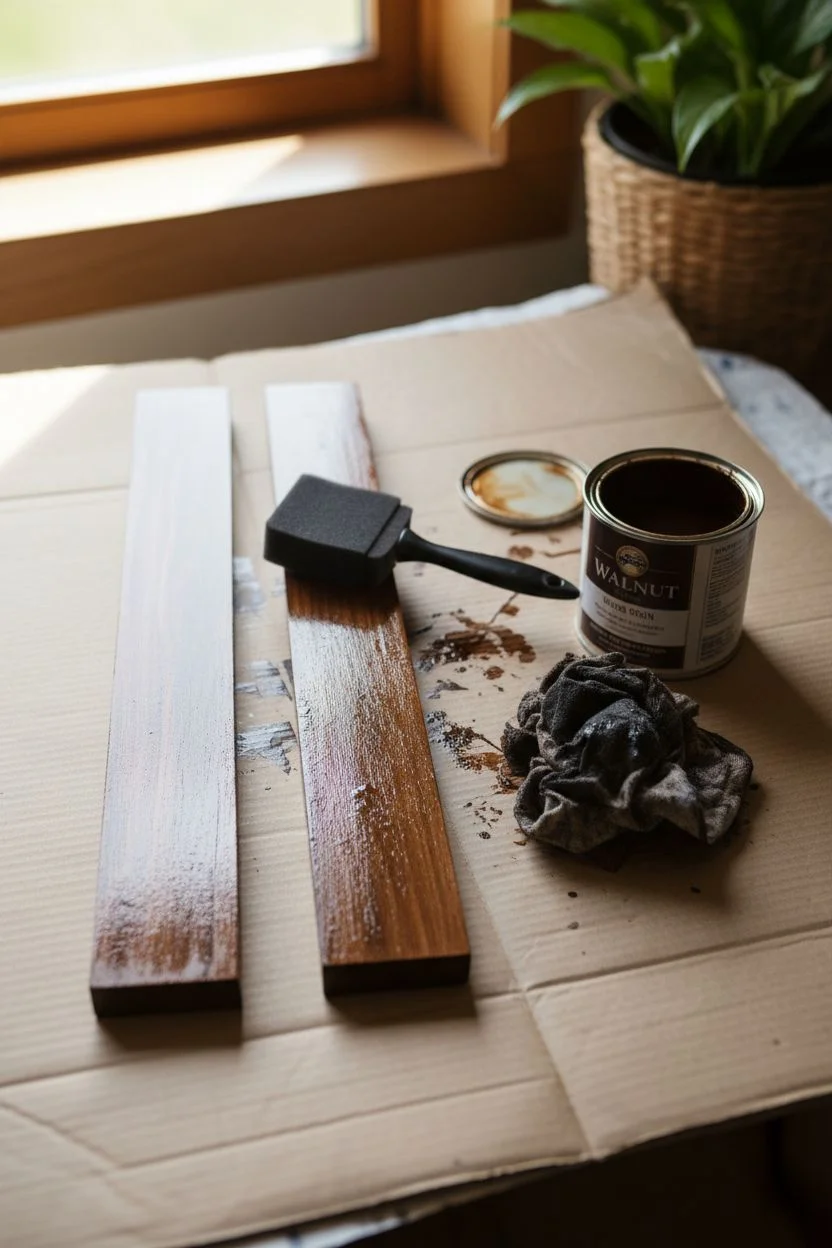
Capture the fleeting moments of growth with this lovely, rustic hanging scroll featuring your family’s footprints. The natural linen texture combined with earth-toned prints creates a warm, minimalist keepsake perfect for any nursery or living room wall.
Step-by-Step Guide
Materials
- Heavyweight linen or cotton duck canvas fabric (approx. 18″ x 24″)
- Two wooden dowels or square trim pieces (1″ x 1″, cut to 20″ length)
- Dark wood stain (walnut or espresso)
- Foam brushes or old rags for staining
- Fabric paint (terracotta, mocha, charcoal, and navy)
- Paint rollers or large sponge brushes
- Jute twine or cotton cord
- Hot glue gun and glue sticks (or heavy-duty fabric glue)
- Scissors
- Iron and ironing board
- Pencil and ruler
- Cardboard or plastic sheet (to protect surfaces)
Step 1: Preparing the Wood Frame
-
Cut and Sand:
Begin by cutting your wooden trim or dowels to match the width of your desired canvas, leaving about an inch of overhang on each side. Sand any rough edges until smooth to the touch. -
Apply Wood Stain:
Using a foam brush or rag, wipe your chosen wood stain onto the trim pieces. I like to do one heavy coat and wipe off the excess after a few minutes for a rich, deep color. -
Let Dry:
Set the stained wood pieces aside on a protected surface to dry completely according to the manufacturer’s instructions, usually a few hours.
Smudge Savior
If a print smudges slightly, don’t panic! Use a fine-tip paintbrush and matching paint to carefully touch up the edges or fill in missing toe gaps.
Step 2: Preparing the Canvas
-
Cut the Fabric:
Measure and cut your linen or canvas fabric to your desired dimensions. Remember to account for the space needed to wrap around the wood pieces at the top and bottom. -
Press Flat:
Iron the fabric thoroughly to remove any creases or wrinkles. A smooth surface is crucial for getting clear, crisp footprint impressions later. -
Create Frayed Edges (Optional):
For a rustic look, you can gently pull a few threads from the vertical sides of the canvas to create a soft, frayed edge.
Level Up: Embroidered Details
Once the paint is dry, use embroidery floss to stitch the name and date under each footprint for a personalized, heirloom-quality finish.
Step 3: Creating the Footprints
-
Plan the Layout:
Lay your canvas flat on a hard surface. Use a ruler to lightly mark the center point or use small pieces of tape to guide where each footprint should go to ensure they are centered and evenly spaced. -
Prepare the Paint:
Squeeze a generous amount of your first fabric paint color onto a paper plate. Roll a foam roller or sponge brush through it until it is evenly coated but not dripping. -
Apply Paint to Foot:
Gently apply the paint to the bottom of the foot. Ensure coverage on all toes and the arch, but avoid gobbling it on too thick, which can cause slipping. -
Stamp the Print:
Press the foot firmly onto the canvas in the designated spot. Press down gently on each toe and the heel to ensure contact. -
Lift and Clean:
Lift the foot straight up to avoid smearing. Immediately clean the paint off the foot with wet wipes or warm soapy water. -
Repeat for All Prints:
Repeat the process for the remaining footprints, using different colors for visual interest. Allow the paint to dry fully for at least 24 hours.
Step 4: Assembling the Scroll
-
Attach Top Wood:
Lay one stained wood piece flat. Apply a line of hot glue along one side. -
Secure Canvas Top:
Press the top edge of your canvas onto the glue. Roll the wood once so the canvas wraps around it, hiding the raw edge, and secure with another line of glue if necessary. -
Attach Bottom Wood:
Repeat the gluing and rolling process with the bottom wood piece. This acts as a weight to keep the scroll hanging straight. -
Add Hanging Cord:
Measuring a length of jute twine, tie a knot securely around each end of the top wooden piece. Alternatively, you can staple the twine to the back of the wood for a cleaner front view. -
Tie the Top Loop:
Find the center of your twine and tie a small loop knot if you wish to hang it from a specific hook, or simply drape the twine over a nail.
Now you have a timeless piece of art that beautifully freezes a moment in time for your family to cherish


Have a question or want to share your own experience? I'd love to hear from you in the comments below!