If you want a Father’s Day gift that hits him right in the heart, a simple canvas made with little hands is hard to beat. I pulled together my favorite DIY Father’s Day canvas ideas that feel personal, look cute on a wall, and are totally doable even with wiggly kids.
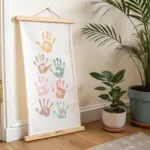
Happy Father’s Day Tie Made From Handprints

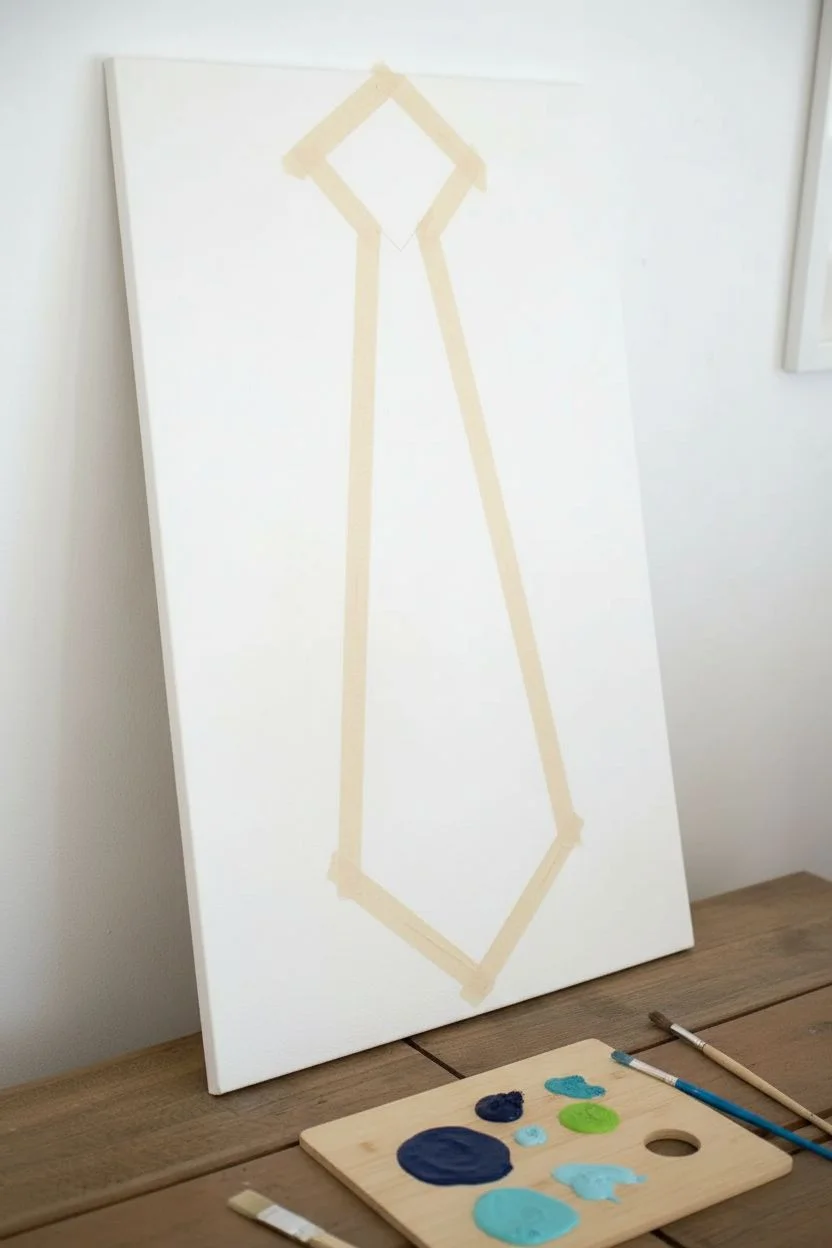
Transform little handprints into a stylish tie design that Dad will cherish forever. This large-scale canvas art combines playful finger painting with clean, modern typography for a truly personalized Father’s Day gift.
Step-by-Step
Materials
- Large white stretched canvas (rectangular, portrait orientation)
- Painter’s tape or masking tape
- Acrylic paints (dark blue, teal, light blue, lime green)
- Foam brushes or large paintbrushes
- Small detail paintbrush
- Dark blue vinyl letters or stencils
- Scissors
Step 1: Preparing the Canvas
-
Outline the tie shape:
Begin by creating the outline of a necktie directly on the canvas using masking tape or painter’s tape. You will need to tape off the negative space so the inside remains white for painting. -
Form the knot:
For the top ‘knot’ of the tie, create a small diamond distraction at the top center of the canvas. Tape off the area surrounding this diamond shape carefully. -
Form the body:
Leave a small gap below the knot, then tape off a long, tapering shape for the main body of the tie. Make sure the bottom comes to a classic V-point. -
Seal the edges:
Press down firmly on all the tape edges. Run your fingernail or a credit card along the tape lines to ensure a tight seal, which prevents paint from bleeding underneath.
Step 2: Creating the Handprints
-
Prepare the palette:
Squeeze out your acrylic paint colors onto a paper plate or palette. Use a mix of dark blues, teals, and light greens to create a coordinated look. -
Paint the hand:
Using a foam brush, coat your child’s hand with one of the paint colors. Apply a thin, even layer rather than a glouph so the print details show up clearly. -
Stamp the first print:
Guide the child’s hand into the taped-off tie area and press down firmly. Lift the hand straight up to avoid smudging the print. -
Clean and switch colors:
Wipe the hand clean with a baby wipe or wash it, then apply a different color paint (like lime green) and create another print nearby. -
Fill the shape:
Continue stamping handprints inside the taped area, rotating the hand in different directions to create a random, dynamic pattern. -
Overlap for texture:
Don’t be afraid to let the prints overlap slightly once the bottom layers are semi-dry. This adds depth to the design. -
Fill the gaps:
If there are small white spaces left that a full hand won’t fit into, use just the fingertips or a thumbprint to fill those voids with color. -
Let it dry completely:
Allow the paint to dry fully. This is crucial before removing the tape to ensure crisp lines.
Clean Print Secret
Apply paint to the hand with a brush rather than dipping the hand in paint. It prevents blobs and ensures the palm lines appear clearly.
Step 3: Finishing Touches
-
Peel the tape:
Once the paint is dry to the touch, slowly and carefully peel away the painter’s tape. Pull at a 45-degree angle away from the painted area to reveal the clean tie shape. -
Add the text:
In the upper left corner of the canvas, position your text. You can use large vinyl letter stickers that spell out ‘HAPPY FATHERS DAY’. -
Alternative lettering method:
If you don’t have stickers, use stencils and a small sponge brush with dark blue paint to stipple the letters onto the canvas. -
Detail work:
I like to take a very small detail brush and touch up any spots where the handprint paint might have bled slightly under the tape, using white paint to mask it. -
Final inspection:
Check the canvas for any stray smudges or loose edges on the stickers and smooth them down.
Custom Collar
Glue a real collared shirt collar (cut from an old shirt) to the top of the canvas for a cool 3D mixed-media effect.
Hang this masterpiece on the wall and watch Dad beam with pride every time he sees those tiny prints

Sticker Resist “#1 Dad” Modern Color Blocks
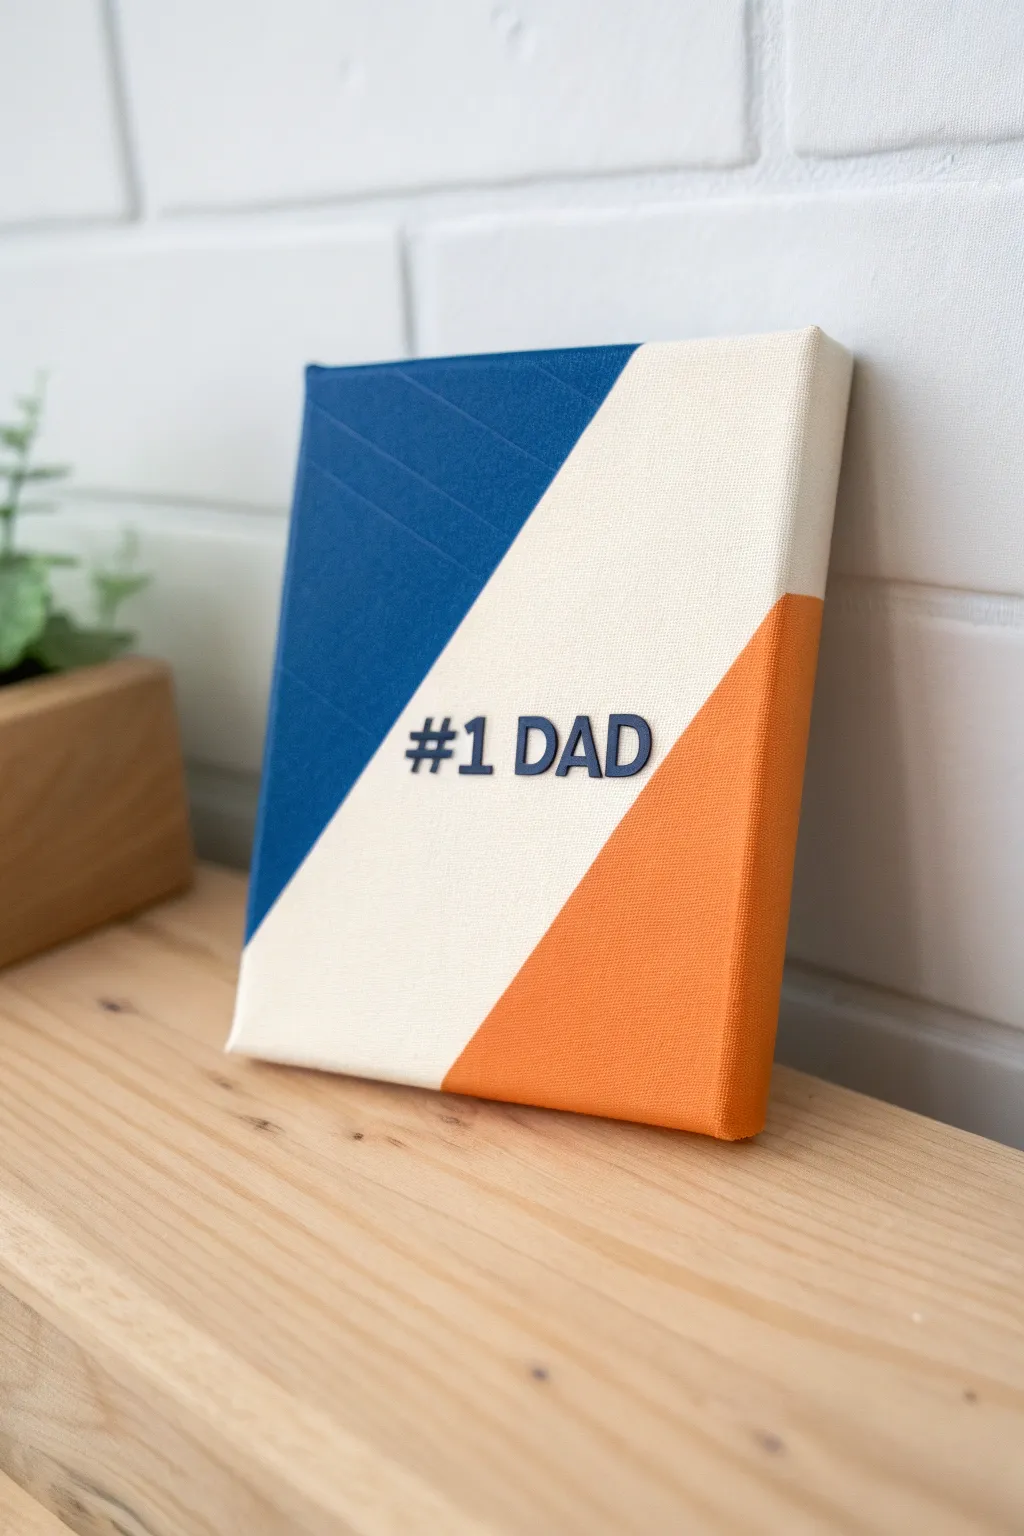
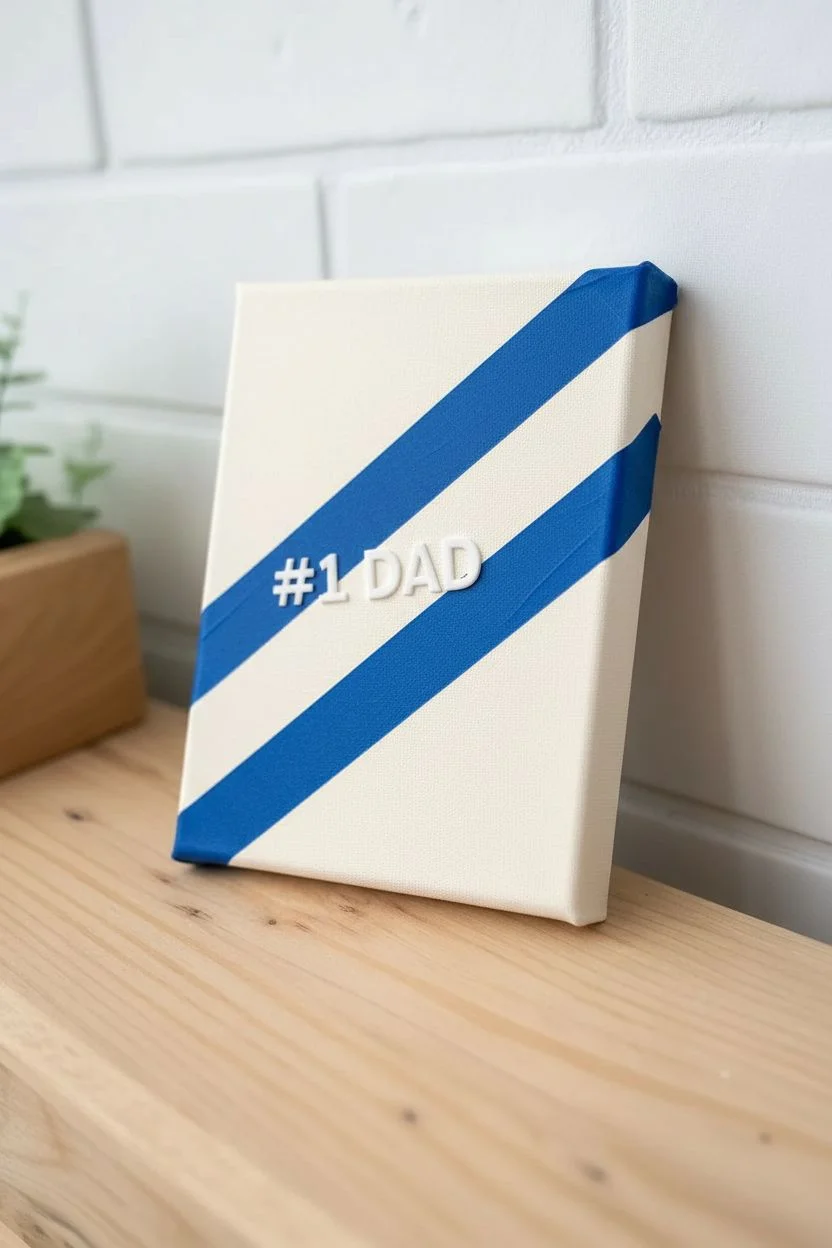
Create a sleek and masculine gift for dad using a simple sticker resist technique and bold color blocking. This tutorial results in a crisp, professionally finished canvas that looks great on a desk or shelf.
Step-by-Step Guide
Materials
- Small stretched canvas (square or rectangular)
- Blue acrylic paint (heavy body preferred)
- Orange acrylic paint
- Off-white or cream acrylic paint
- Painter’s tape or masking tape (1 inch width)
- Thick foam letter stickers (or chipboard letters)
- Flat paintbrush (medium size)
- Small detail paintbrush (optional)
- Sealant or matte varnish (optional)
Step 1: Planning the Design
-
Base coat application:
Start by painting the entire canvas with your off-white or cream acrylic paint. This ensures the middle stripe has a solid, even color when you peel the tape later. -
Dry time is key:
Allow this base coat to dry completely. If the paint is even slightly tacky, the tape we apply next might pull it up. -
Position the text:
Before sticking them down, arrange your ‘#1 DAD’ letters diagonally across the center of the canvas to find the perfect spacing. -
Adhere the letters:
Press the foam letters firmly onto the dried cream surface. Ensure the edges of the stickers are sealed tight against the canvas texture. -
Tape the boundaries:
Apply a strip of painter’s tape across the canvas diagonally, running parallel to your text. You want to create a wide central channel where the text sits. -
Seal the tape edges:
Run your fingernail or a credit card firmly along the edge of the tape to prevent paint bleed-under.
Bleeding Lines?
If paint bleeds under the tape, wait for it to dry fully. Then, scrape away the excess gently with an X-Acto knife or paint over the mistake with the base cream color.
Step 2: Adding Color
-
Paint the blue section:
Select the upper-left triangular section designated for the blue paint. Using a flat brush, apply the blue acrylic paint, brushing away from the tape edge initially to minimize bleeding. -
Paint the canvas edges:
Don’t forget to wrap the color around the sides of the canvas for a finished, gallery-style look. -
Paint the orange section:
Clean your brush thoroughly or switch to a new one. Paint the lower-right triangular section with the orange acrylic paint. -
Paint the letters:
Carefully paint the top surface of the foam letters. You can use the blue or a contrasting dark grey/black depending on the look you want. In the example, a dark navy or black is used. -
Second coats:
I usually find that orange pigment is less opaque, so apply a second coat to the orange section if the canvas texture is showing through too much. -
Let it set:
Allow the paint to dry until it is dry to the touch, but not fully cured hard.
Step 3: The Reveal
-
Remove the tape:
Slowly peel back the painter’s tape at a 45-degree angle. This reveals the crisp cream line between your color blocks. -
Remove the stickers:
Gently lift the foam letter stickers. Be very careful here; you actually want to leave the stickers ON if you painted them as 3D elements (as shown in the photo), or peel them off if you wanted a negative space ‘stencil’ effect. -
Wait, clarify the style:
Looking closely at the project image, the letters are raised and painted dark blue. So, keep the stickers attached! Ensure their top color is solid and edges are tidy. -
Touch ups:
Use a small detail brush with the cream paint to fix any tiny spots where the blue or orange might have bled under the tape. -
Final cure:
Let the entire piece dry overnight before handling to ensure the thick paint on the letters doesn’t smudge.
Make it Pop
For a higher-end look, use metallic gold or silver paint for the central geometric stripe instead of plain cream, or swap the foam letters for wooden laser-cut ones.
Place this modern piece on a floating shelf or wrap it up for a customized gift dad will appreciate


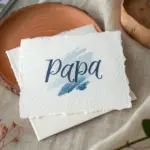
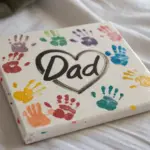
Footprints Turned Into “Dad, You Rock” Stones
This rustic and heartfelt project transforms simple footprints into a charming stone-textured keepsake for Dad. The speckled finish on the foot shapes creates a faux-granite look that pairs perfectly with the warm earth tones and crisp lettering.
Detailed Instructions
Materials
- Rectangular stretched canvas (e.g., 11×14 inches)
- Faux stone spray paint (one can in sandstone/tan, one in teal/green)
- Brown acrylic paint
- Cardstock or contact paper (for stencils)
- Painter’s tape or stencil adhesive
- Scissors and X-Acto knife
- Small round paintbrush
- Make-up sponge (optional)
- Pencil
- Clear matte sealer spray
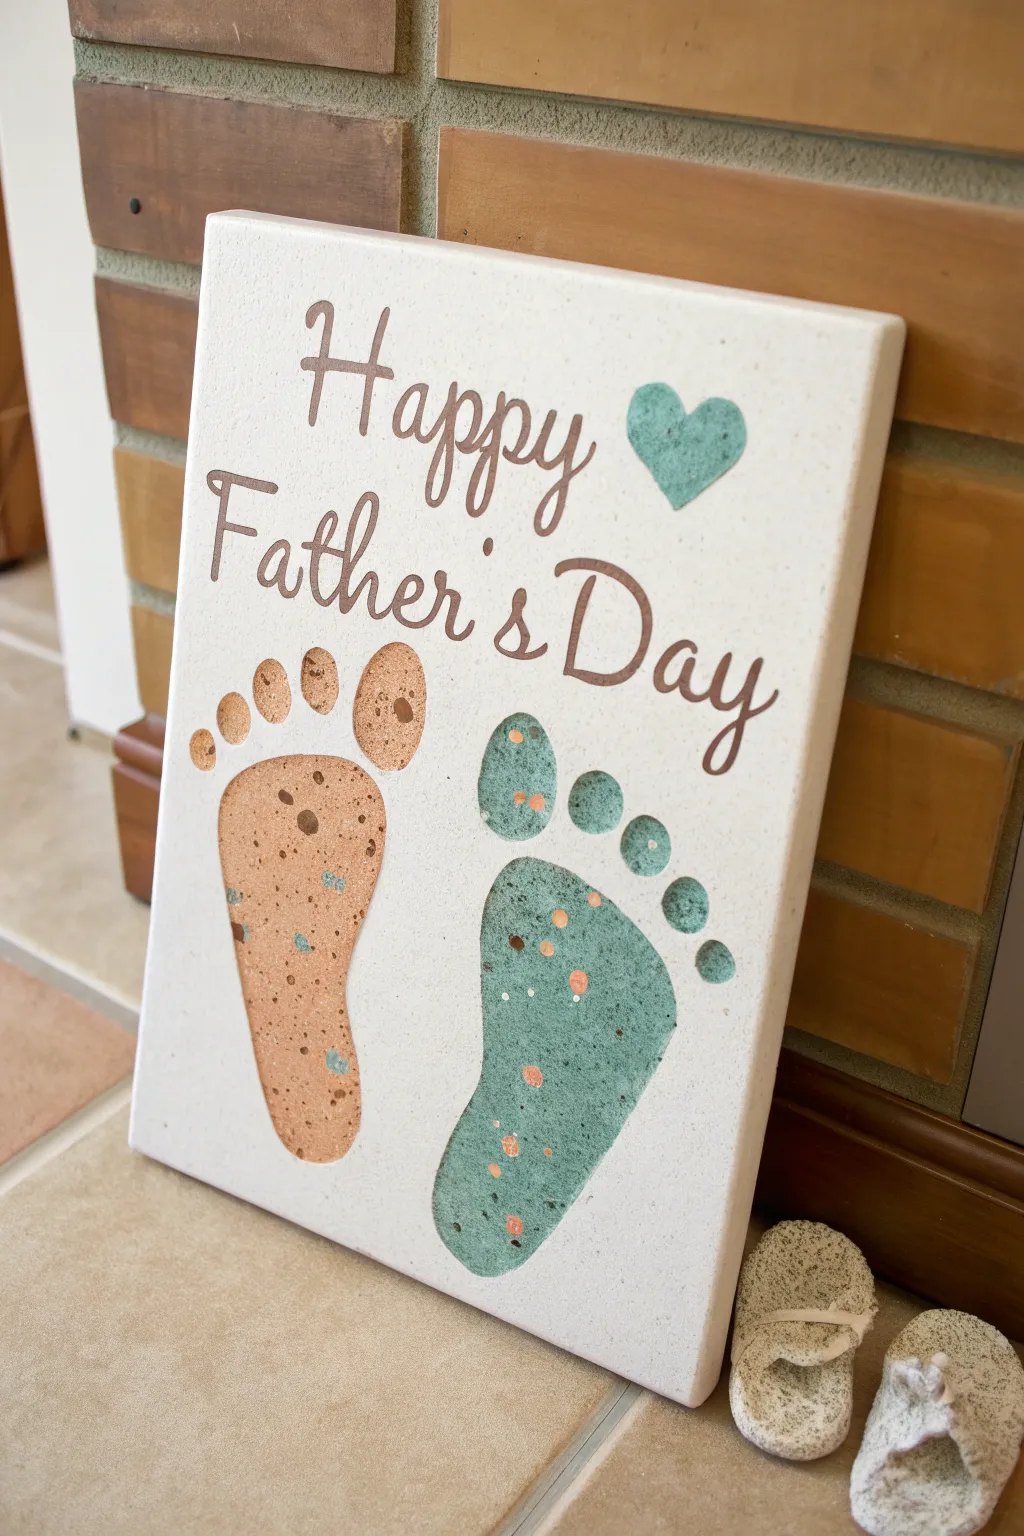
Step 1: Designing the Layout
-
Trace footprints:
Begin by tracing your child’s left and right feet onto a piece of cardstock or heavy paper. -
Refine the shapes:
Since wiggly toes can be tricky, smooth out the traced lines slightly to create clean, recognizable footprint shapes. -
Cut the stencils:
Carefully cut out the footprint shapes using scissors. You want to keep the *negative* space (the hole in the paper), so try to cut from the interior or use an X-Acto knife to remove the foot shape without slicing the border. -
Create the heart stencil:
Cut a small, simple heart shape out of cardstock to place near the top right of the composition. -
Position the stencils:
Lay your cardstock stencils onto the white canvas. Place the left foot slightly lower than the right for a walking effect, leaving plenty of room at the top for lettering.
Sticky Situation
Use contact paper instead of cardstock for your stencils. It sticks directly to the canvas, creating a perfect seal that prevents the spray paint from bleeding underneath.
Step 2: Creating the Stone Texture
-
Secure the first stencil:
Tape down the stencil for the left footprint securely. Ensure the edges around the toes are flat against the canvas to prevent paint bleed. -
Spray the first texture:
Take your sandstone/tan faux stone spray paint and apply a light, even coat inside the stencil opening. Hold the can about 8-10 inches away. I prefer doing two light coats rather than one heavy one to avoid pooling. -
Secure the second stencil:
Once the first footprint is dry to the touch, mask off that area completely with paper to protect it. Tape down the stencil for the right footprint and the heart shape. -
Spray the second texture:
Using the teal/green faux stone spray paint, fill in the right footprint and the heart stencil. -
Let it dry completely:
Remove all stencils carefully while the paint is still slightly tacky, then allow the canvas to dry for several hours. The stone texture needs time to set properly. -
Inspect the edges:
If any spray paint bled under the stencil, use a small brush with white acrylic paint to touch up the edges and sharpen up the toes.
Step 3: Adding the Sentiment
-
Pencil the lettering:
Lightly sketch ‘Happy Father’s Day’ in cursive script the space above the footprints. Center the word ‘Happy’ and let ‘Father’s Day’ span the width below it. -
Prepare the brown paint:
Squeeze a small amount of chocolate brown acrylic paint onto a palette or paper plate. -
Outline the text:
Using a thin detail brush, carefully trace over your pencil lines. Keep your hand steady and reload your brush often for smooth strokes. -
Thicken the downstrokes:
To achieve a faux-calligraphy look, go back and thicken every downward stroke of the letters, leaving the upward strokes thin. -
Enhance the details:
Check for any uneven spots in the lettering and smooth them out. The dark brown color should contrast boldly against the white background. -
Seal the artwork:
Once all paint is completely dry (give it overnight if possible), take the canvas outside and spray a coat of clear matte sealer over the entire piece to protect the textured footprints.
Make It 3D
Glue actual small, flat pebbles or river rocks onto the canvas around the border or in the corners to enhance the rugged, nature-inspired stone theme.
This textured masterpiece is sure to be displayed proudly for years to come


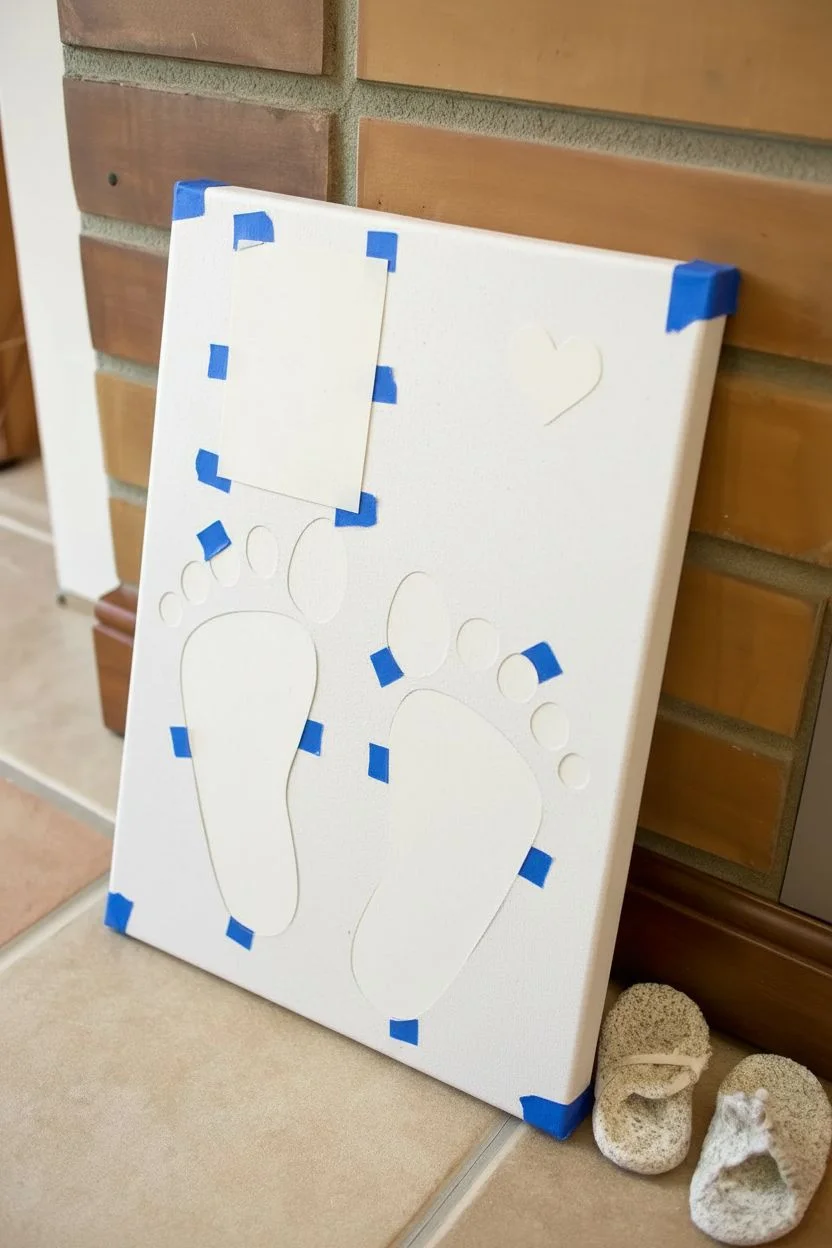
Superhero Dad Handprint Cape Silhouette
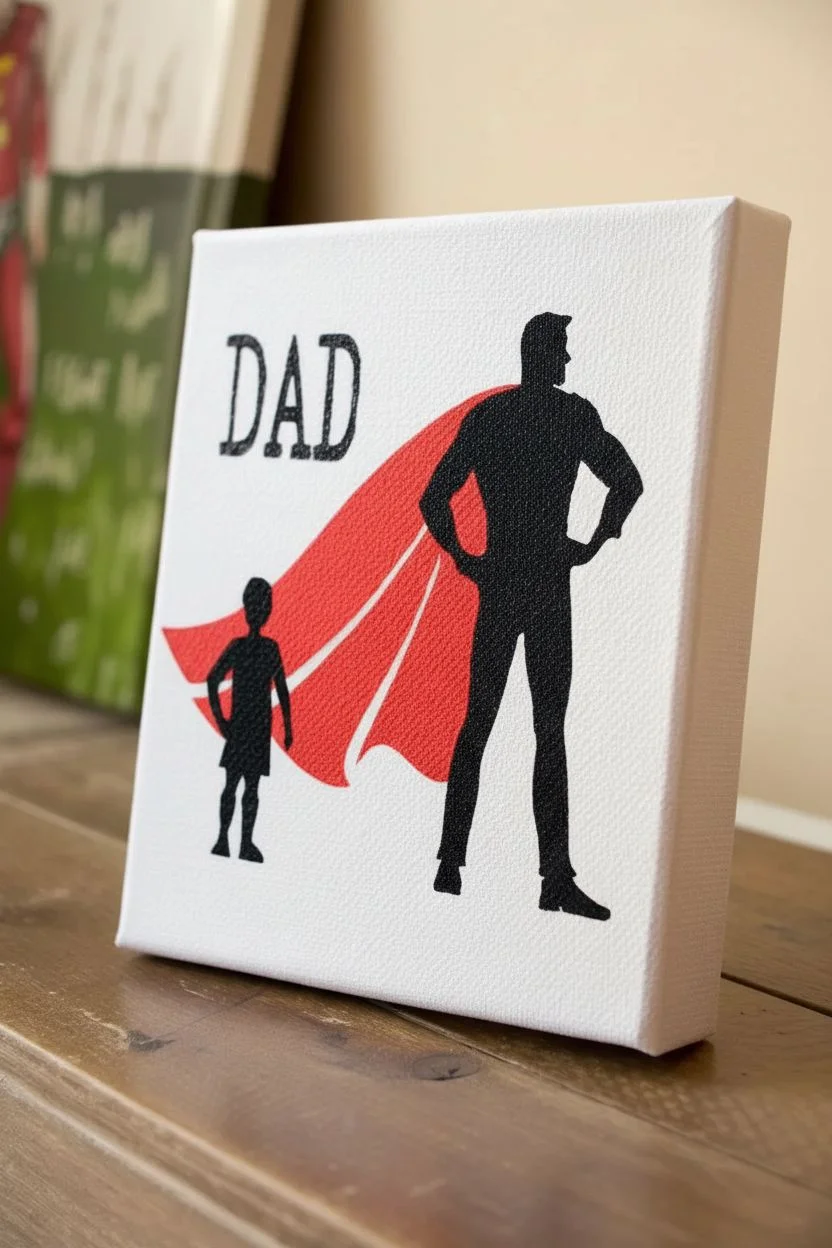
Transform a simple canvas into a powerful artistic tribute with this striking black and red silhouette design. While the original concept often uses footprints for the cape, this version simplifies the look with bold, graphic shapes perfect for a modern office or den.
Step-by-Step Guide
Materials
- Small square wrapped canvas (approx. 8×8 or 10×10 inches)
- Black acrylic paint
- Red acrylic paint
- Silhouette stencil (can be cut from vinyl using a Cricut/Silhouette machine or printed on cardstock)
- Small sponge pouncers or cosmetic wedges
- Fine-tip paintbrush
- Mod Podge or stencil adhesive spray
- Matte black vinyl (optional alternative to painting silhouettes)
Step 1: Preparing the Design
-
Source the silhouettes:
Find or draw a silhouette of a superhero man standing with hands on hips and a small child standing nearby looking up. You will need separate stencil elements for the figures and the red cape. -
Create the text stencil:
Choose a bold, slightly distressed font for the word ‘DAD’ and size it to fit the upper left quadrant of your canvas. -
Cut the stencils:
If using a cutting machine, cut your design on adhesive vinyl. If working manually, print the design on heavy cardstock and carefully cut out the interior shapes with a sharp craft knife. -
Weed and transfer:
Remove the negative space (the parts you want to paint) from your vinyl design. Apply transfer tape over the vinyl stencils.
Bleed Prevention
Canvas texture is bumpy, making stencils tricky. Always paint a base ‘sealing’ layer of Mod Podge over your stencil edges before adding color for razor-sharp lines.
Step 2: Painting the Artwork
-
Apply the main stencil:
Carefully position the stencil onto the white canvas. Press down firmly on all edges, especially near the detailed areas like the ‘DAD’ text and the superhero’s legs, to prevent paint bleed. -
Seal the edges:
A little trick I use is to brush a very light layer of Mod Podge or white paint over the stencil edges first; this creates a barrier so your colored paint stays crisp. -
Paint the text:
Load a sponge pouncer with black acrylic paint. Dab off the excess on a paper towel until the sponge is almost dry, then gently tap over the ‘DAD’ letter openings. -
Paint the figures:
Using the same dry-brush dabbing technique, fill in the dad and child silhouettes with black paint. Apply thin layers to build opacity rather than one thick glob. -
Mask off the black:
Once the black paint is touch-dry, carefully cover the nearby black areas with painter’s tape if your stencil doesn’t provide enough separation for the red cape. -
Paint the cape:
Using a clean sponge, fill in the cape area with bright red acrylic paint. You may need two coats here to get that vibrant superhero red against the canvas texture. -
Add texture detail (optional):
To mimic the cape folds shown in the example, use a very fine brush with a slightly lighter red or white mix to paint thin, curved lines inside the red cape area while it’s still tacky.
Step 3: Finishing Touches
-
Remove the stencil:
Wait until the paint is tacky but not fully cured—usually about 10 minutes. Slowly peel back the stencil at a sharp 45-degree angle. -
Fix imperfections:
If any paint bled under the stencil, use a tiny brush dipped in white paint to touch up the edges. Conversely, fill in any ‘holidays’ (missed spots) in the black figures with a fine liner brush. -
Let it cure:
Allow the entire canvas to dry completely for at least 24 hours. -
Seal the canvas:
Protect your work by applying a clear matte spray varnish over the entire surface. This evens out the sheen between the painted areas and the raw canvas.
Make It Personal
Instead of a painted red cape, use the child’s actual painted footprint! Position the heel near the dad’s shoulder to create a sentimental ‘cape’ shape.
Now you have a dynamic piece of custom art that celebrates the superhero in your life, ready to hang or display on a desk
BRUSH GUIDE
The Right Brush for Every Stroke
From clean lines to bold texture — master brush choice, stroke control, and essential techniques.
Explore the Full Guide
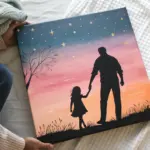
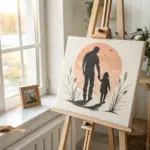
“Dad and Me” Sunset Silhouette Canvas
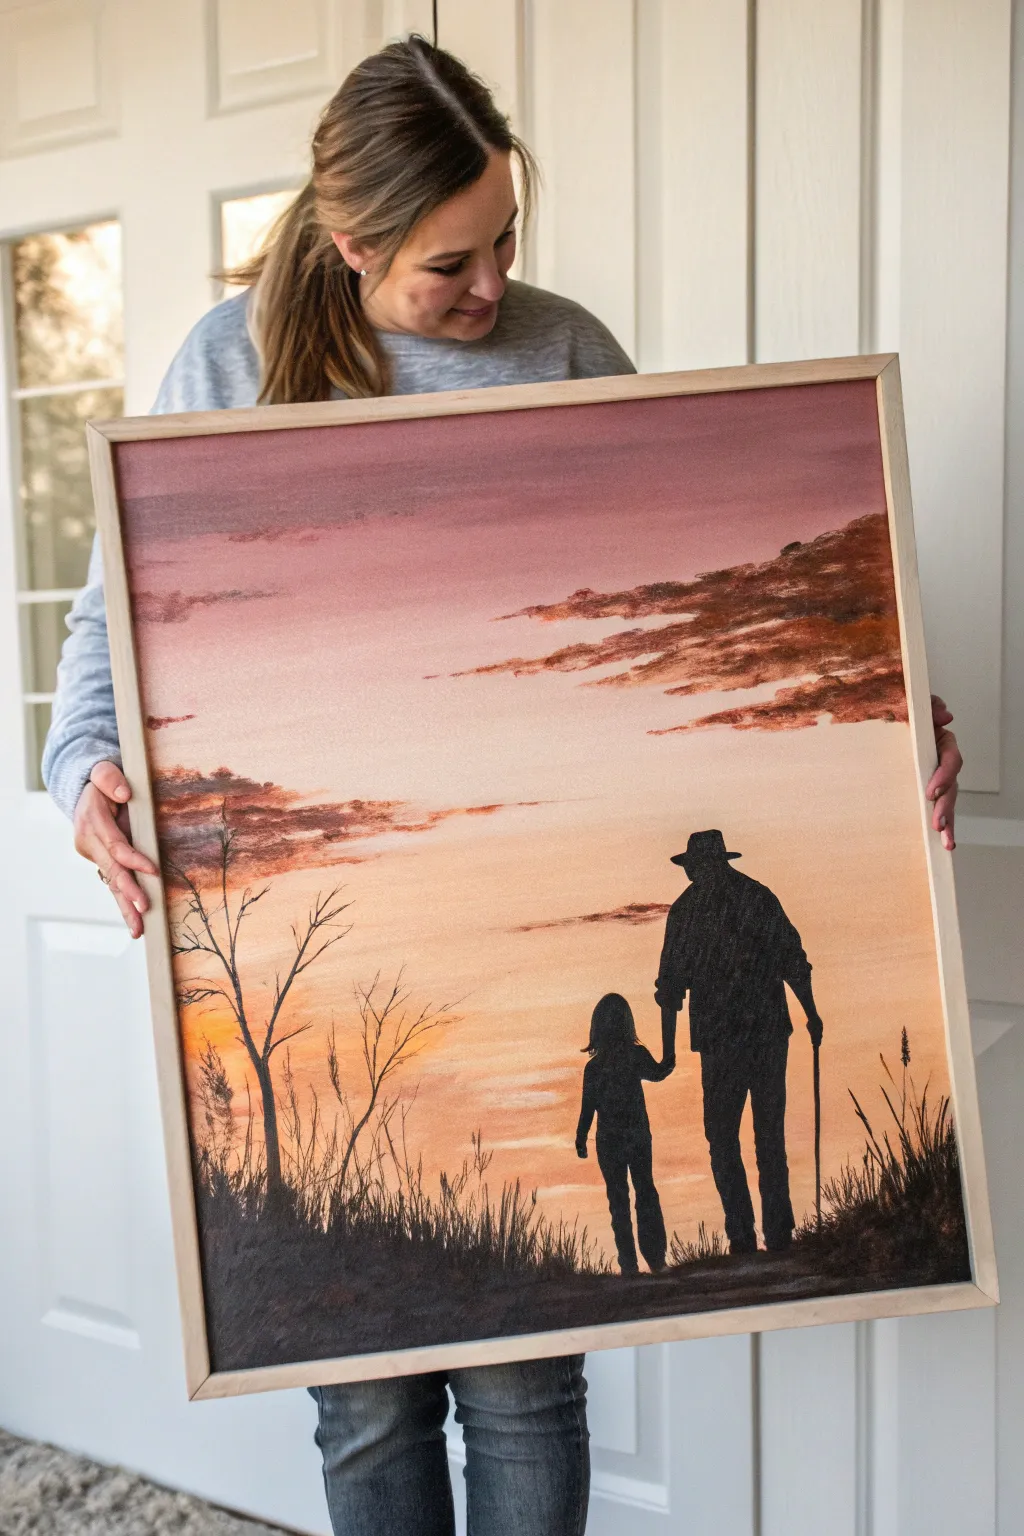
Capture the timeless bond between father and child with this heartwarming sunset silhouette painting. Using warm gradients and striking black contrasts, you will create a personalized masterpiece that feels like a cherished memory frozen in time.
Step-by-Step Tutorial
Materials
- Large stretched canvas (e.g., 20×24 inches)
- Acrylic paints: Titanium White, Yellow Ochre, Cadmium Orange, Burnt Sienna, Burnt Umber, Mars Black
- Large flat brush or sponge brush (for background)
- Medium round brush (for clouds)
- Small liner brush (for details)
- Graphite transfer paper or soft pencil
- Printed silhouette reference photo
- Palette or paper plate
- Cup of water and paper towels
- Light wood floating frame (optional)
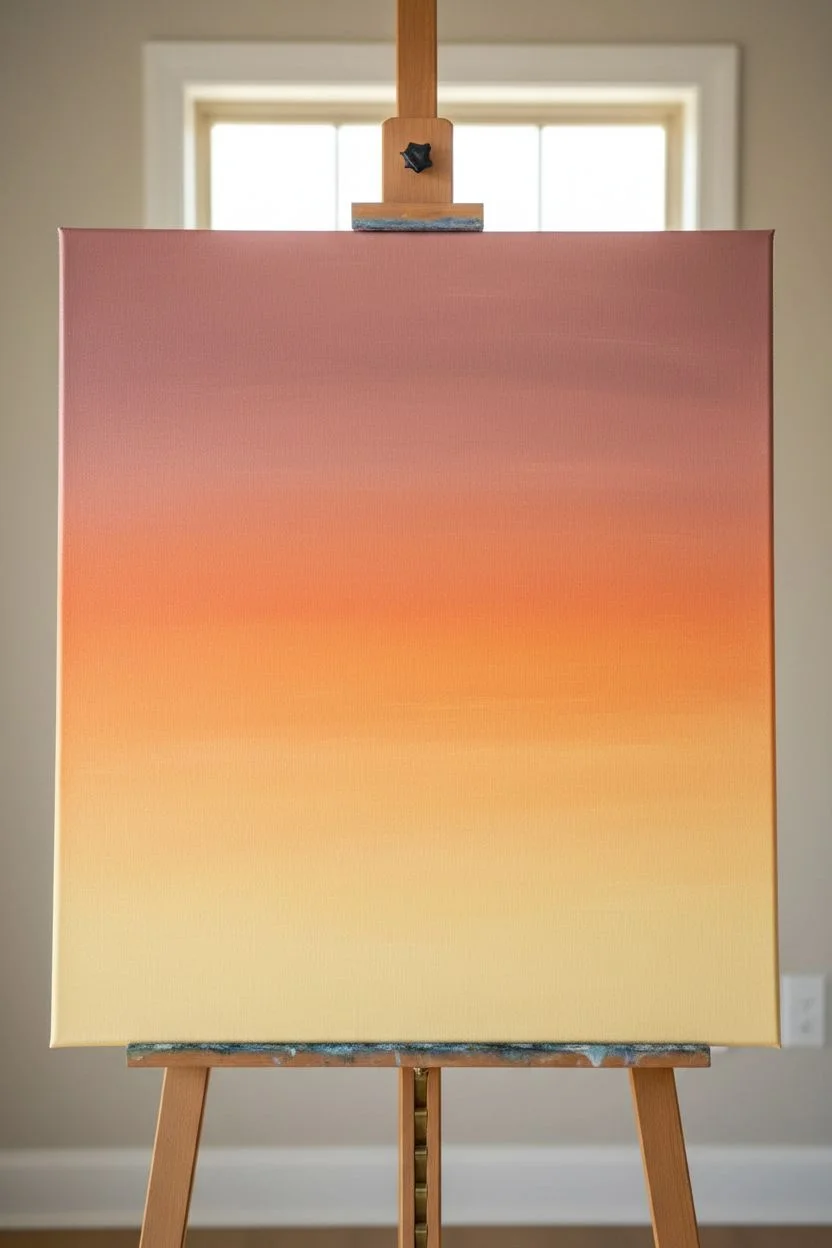
Step 1: Creating the Sunset Gradient
-
Prime the sky:
Begin by squeezing a generous amount of Titanium White and a touch of Yellow Ochre onto your palette. Mix a pale, creamy yellow and cover the bottom third of the canvas using long, horizontal strokes to establish the horizon glow. -
Blend the middle warmth:
While the yellow layer is still wet, introduce Cadmium Orange above it. Blend the orange downwards into the pale yellow using sweeping left-to-right motions to create a seamless transition without harsh lines. -
Add the upper dusk tones:
Mix a small amount of Burnt Sienna with White to create a muted dusty pink or mauve tone. Apply this to the top third of the canvas, blending it down into the orange section to complete the sunset gradient. -
Smooth the transition:
Take a clean, slightly damp large brush and run it horizontally across the entire canvas from top to bottom one last time to soften any brushstrokes and unify the sky. -
Dry completely:
Let this background layer dry fully before moving on. I usually give it about 30 minutes, or you can use a hair dryer on a cool setting to speed up the process.
Step 2: painting the Clouds
-
Mix cloud colors:
Create a mixture of Burnt Sienna and a tiny dot of Black to get a deep brownish-red. You want a color that is darker than the sky but not fully black yet. -
Form the cloud shapes:
Using a medium round brush, dab irregular, horizontal shapes across the upper half of the sky. Keep the edges soft and less defined to mimic distant clouds. -
Add cloud highlights:
Pick up a little bit of the original orange mix on the dirty brush and blend it into the bottom edges of the clouds. This suggests the setting sun is illuminating them from below.
Blending Woes?
If acrylics dry too fast while blending the sky, mix in a drop of slow-drying medium or retarder. This keeps paint workable longer for smoother gradients.
Step 3: Adding the Silhouettes
-
Prepare the design:
Print out a silhouette photo of a man and child holding hands. If you don’t have a photo, find a stock silhouette image online, scale it to your canvas size, and print it. -
Transfer the image:
Place transfer paper on the dried canvas where you want the figures to walk. Tape your printed image on top and trace the outline firmly with a pencil. -
Paint the figures:
Load a small round brush with Mars Black paint. Carefully fill in the traced outlines of the father and child. Use steady strokes for the edges to ensure the silhouette looks crisp against the sunset. -
Refine distinct features:
Switch to your smallest liner brush to sharpen tiny details like the brim of the hat, fingertips, or the walking stick handle. These small details are what make the figures readable.
Make It Personal
Instead of a generic silhouette, define the profiles to match the actual dad and child by tracing a real photo taken against a bright window.
Step 4: Grounding the Scene
-
Establish the ground line:
Using the Mars Black, paint a solid, slightly uneven strip across the very bottom of the canvas to represent the earth they are walking on. -
Sketch the tree:
On the left side, paint a thin, gnarled tree trunk rising from the ground. Extend several thin, bare branches upwards and outwards into the orange sky. -
Add grass texture:
Using a dry brush technique or an old frayed brush, flick upward strokes of black along the ground line to create the look of tall wild grasses and weeds. -
Connect the elements:
Ensure the feet of the figures naturally blend into the black ground line so they look like they are walking through the grass, rather than floating above it. -
Frame the piece:
Once the painting is completely cured (wait at least 24 hours), place it into a light wood floating frame to give it a polished, gallery-ready appearance.
Hang this sentimental artwork in a well-lit spot where the warm colors can truly shine throughout the day
“I’m Hooked on You, Dad” Handprint Fish Canvas
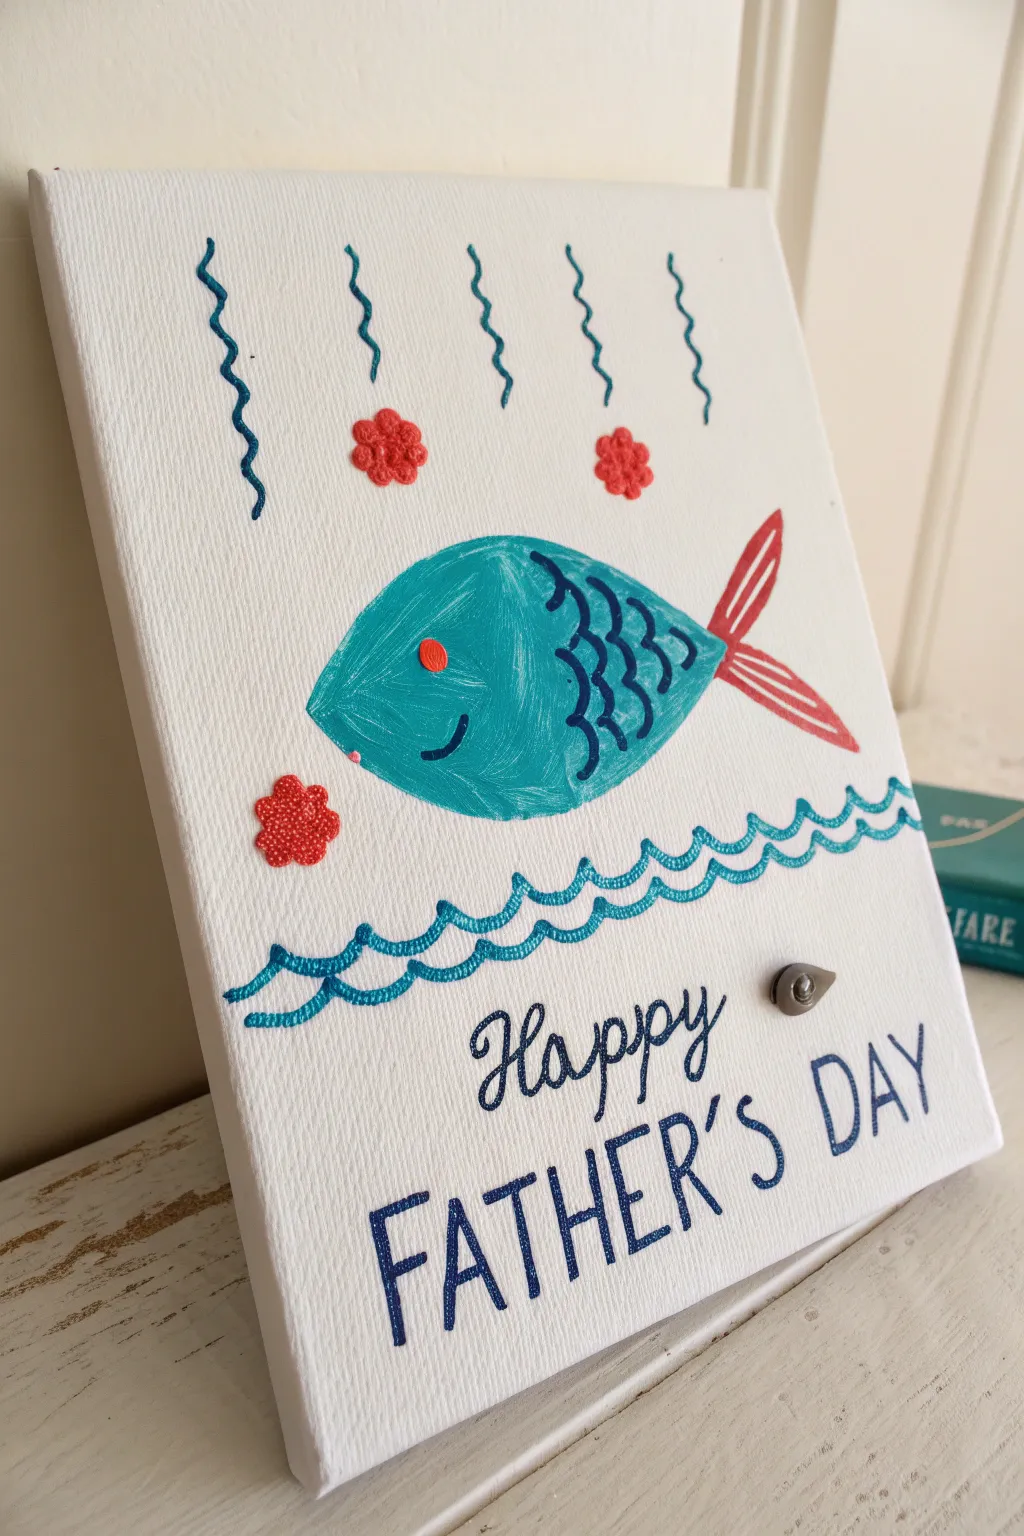
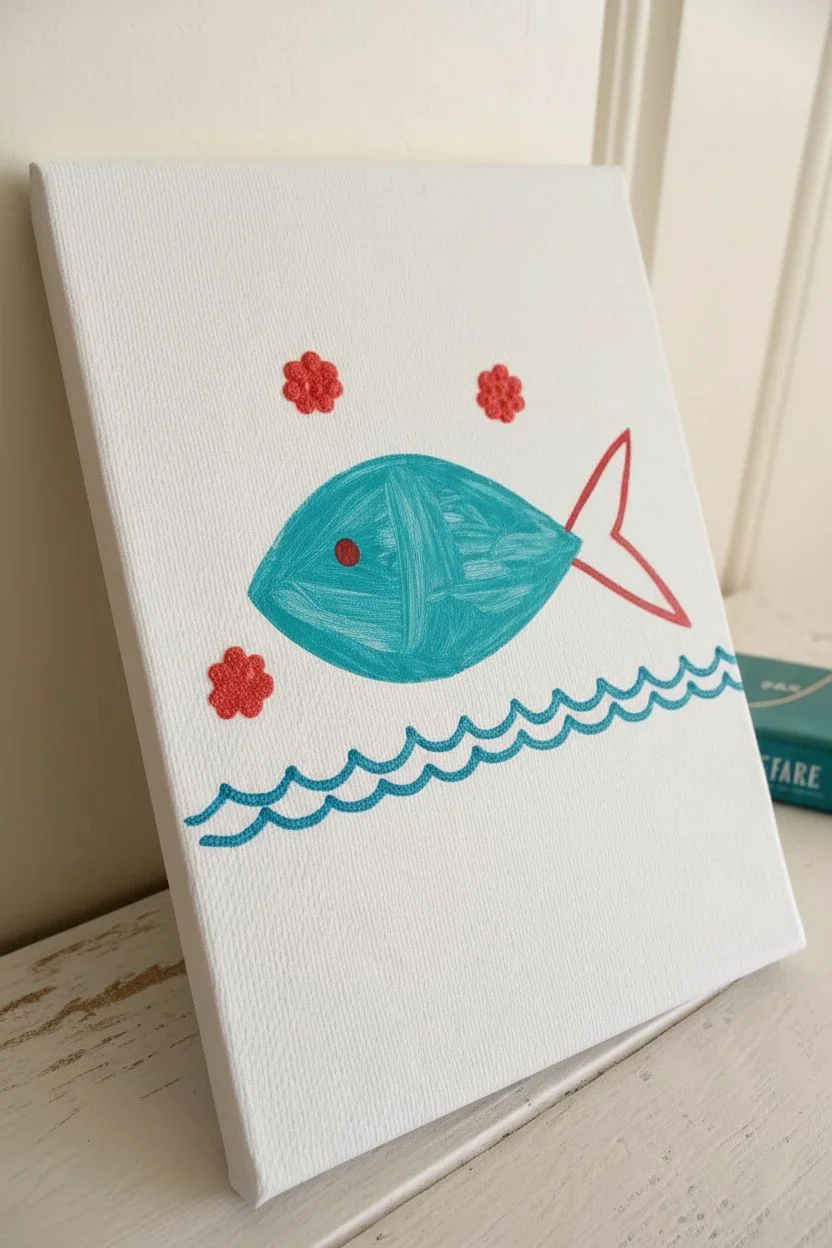
This cheerful canvas combines simple painting techniques with fine-line details to create a heartfelt Father’s Day gift. It features a stylized turquoise fish swimming above a wavy blue sea, topped with whimsical red flowers and a heartfelt message.
Step-by-Step Guide
Materials
- Small stretched canvas (approx. 5×7 or 8×10 inches)
- Acrylic paints: turquoise, dark blue, white, red/coral
- Paintbrushes: medium flat brush and fine detail round brush (size 0 or 1)
- Blue permanent marker or paint pen (fine point)
- Small grey button
- Hot glue gun or strong craft glue
- Pencil and eraser
- Paper plate or palette
Step 1: Painting the Elements
-
Sketch the outline:
Begin by lightly sketching the outline of a simple, almond-shaped fish body in the center of your canvas using a pencil. Add a triangular tail shape at the back end. -
Paint the body:
Load your medium flat brush with turquoise acrylic paint. Fill in the almond body shape with smooth, horizontal strokes to ensure even coverage. -
Add the tail:
While the body dries, or using a smaller brush if needed, paint the tail shape outline in red or coral. You can leave the inside white for now to add stripes later, or paint it solid red if you prefer a bolder look. -
Dry completely:
Allow the paint to dry fully. Acrylics dry quickly, but give it about 15-20 minutes so you don’t smudge the base layer when adding details. -
Paint the eye:
Dip the handle end of a paintbrush into red or orange paint and dot it onto the fish’s face to create a perfectly round eye. -
Create the waves:
Mix a small amount of dark blue paint with a tiny bit of turquoise. Using your fine brush, paint two wavy lines near the bottom of the canvas to represent the ocean surface. -
Add floating flowers:
Using red paint and your fine brush (or a toothpick), dab small clusters of dots above the fish to create simple flower shapes floating in the water.
Clean Lines
If you aren’t confident with a paint brush for the fine lines, use an extra-fine point POSCA paint marker. It gives you the control of a pen with the look of paint.
Step 2: Defining Details
-
Outline the scales:
Make sure the turquoise paint is bone dry. Using a dark blue paint pen or fine brush with dark blue paint, draw three vertical rows of scallops on the fish’s body to create scales. -
Draw the mouth:
With the same blue pen or fine brush, draw a simple curved smile line near the front of the fish. -
Detail the tail:
Use your red paint or a red marker to draw lines inside the tail fin, giving it texture and definition. -
Add squiggles:
Draw four vertical, wavy lines starting from the top edge of the canvas coming down toward the fish using dark blue paint or marker to mimic gentle currents. -
Enhance the waves:
Go back to your ocean waves at the bottom. Add a second, darker blue wavy line just below the first lighter one to add depth to the water.
Make It 3D
Instead of painting the flowers, use small red buttons or glue on tiny felt flower cutouts for more texture and a mixed-media feel.
Step 3: Text and Embellishment
-
Draft the text:
Lightly use your pencil to write ‘Happy FATHER’S DAY’ at the bottom of the canvas to ensure your spacing is centered. -
Ink the script:
Trace over the word ‘Happy’ using a navy blue paint pen or marker in a cursive, flowing script style. -
Ink the block letters:
Trace ‘FATHER’S DAY’ in tall, thin, all-caps block letters using the same blue marker. I find going over the downstrokes twice makes the letters pop. -
Glue the button:
Place a small dab of hot glue or strong craft glue just to the right of the word ‘Happy’. -
Secure the button:
Press the small grey button into the glue. This adds a cute 3D element that looks like a little pebble or bubble.
Now you have a charming, hand-painted keepsake ready to display on a desk or shelf

PENCIL GUIDE
Understanding Pencil Grades from H to B
From first sketch to finished drawing — learn pencil grades, line control, and shading techniques.
Explore the Full Guide
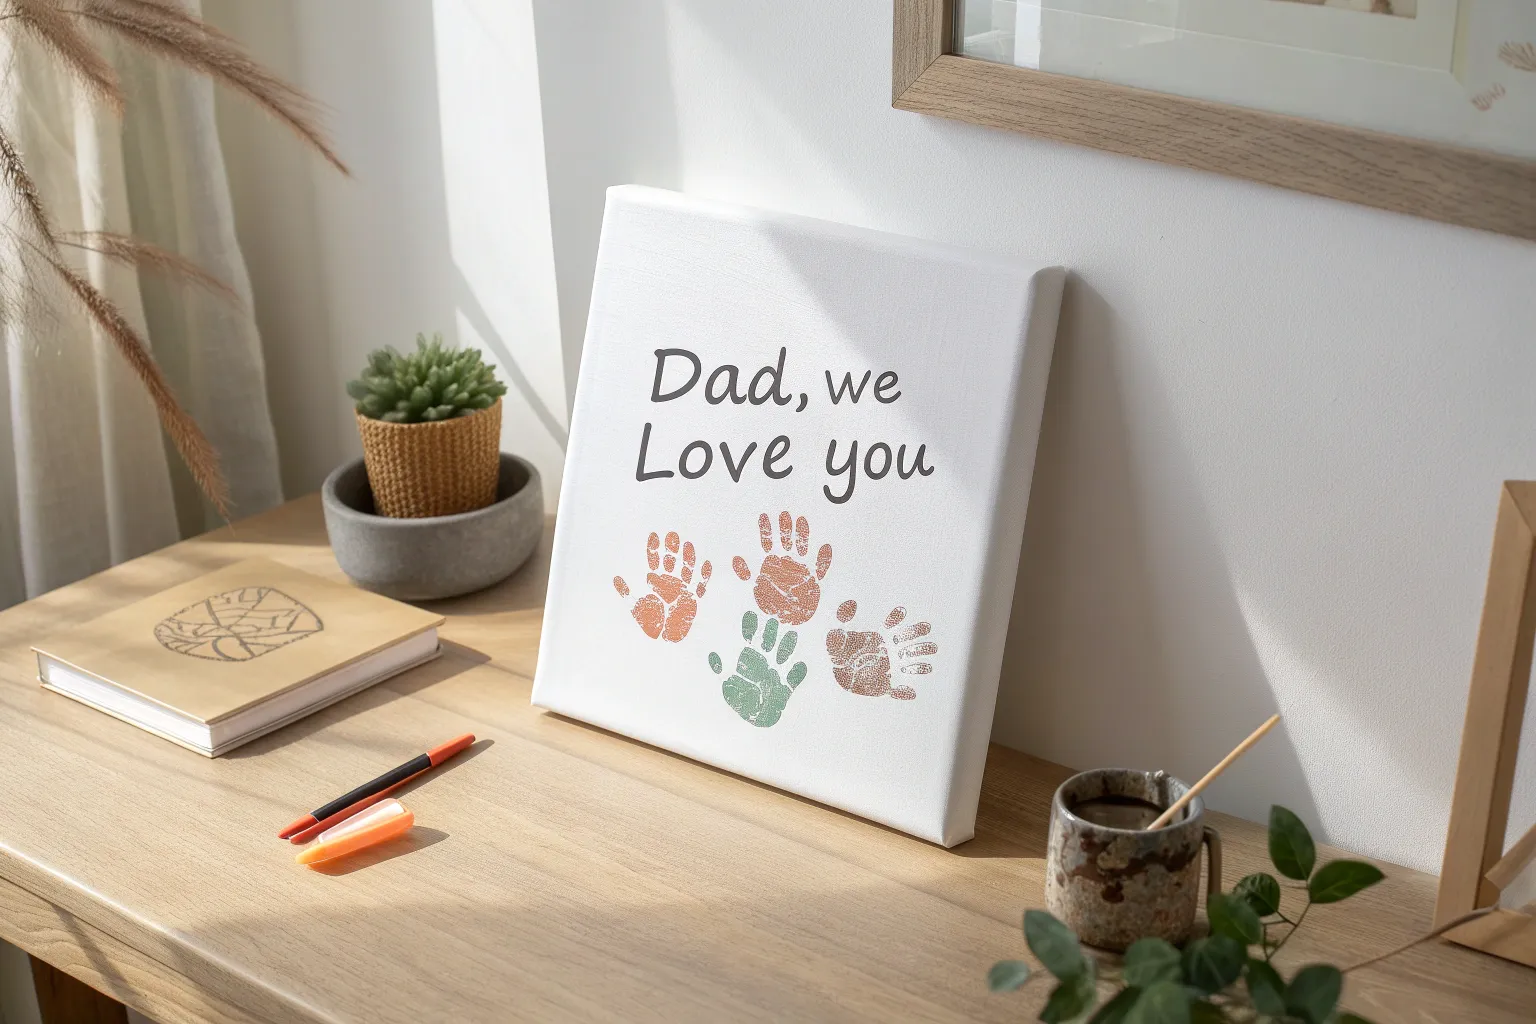
Kids’ Scribble Background With Clean “We Love You, Dad” Overlay
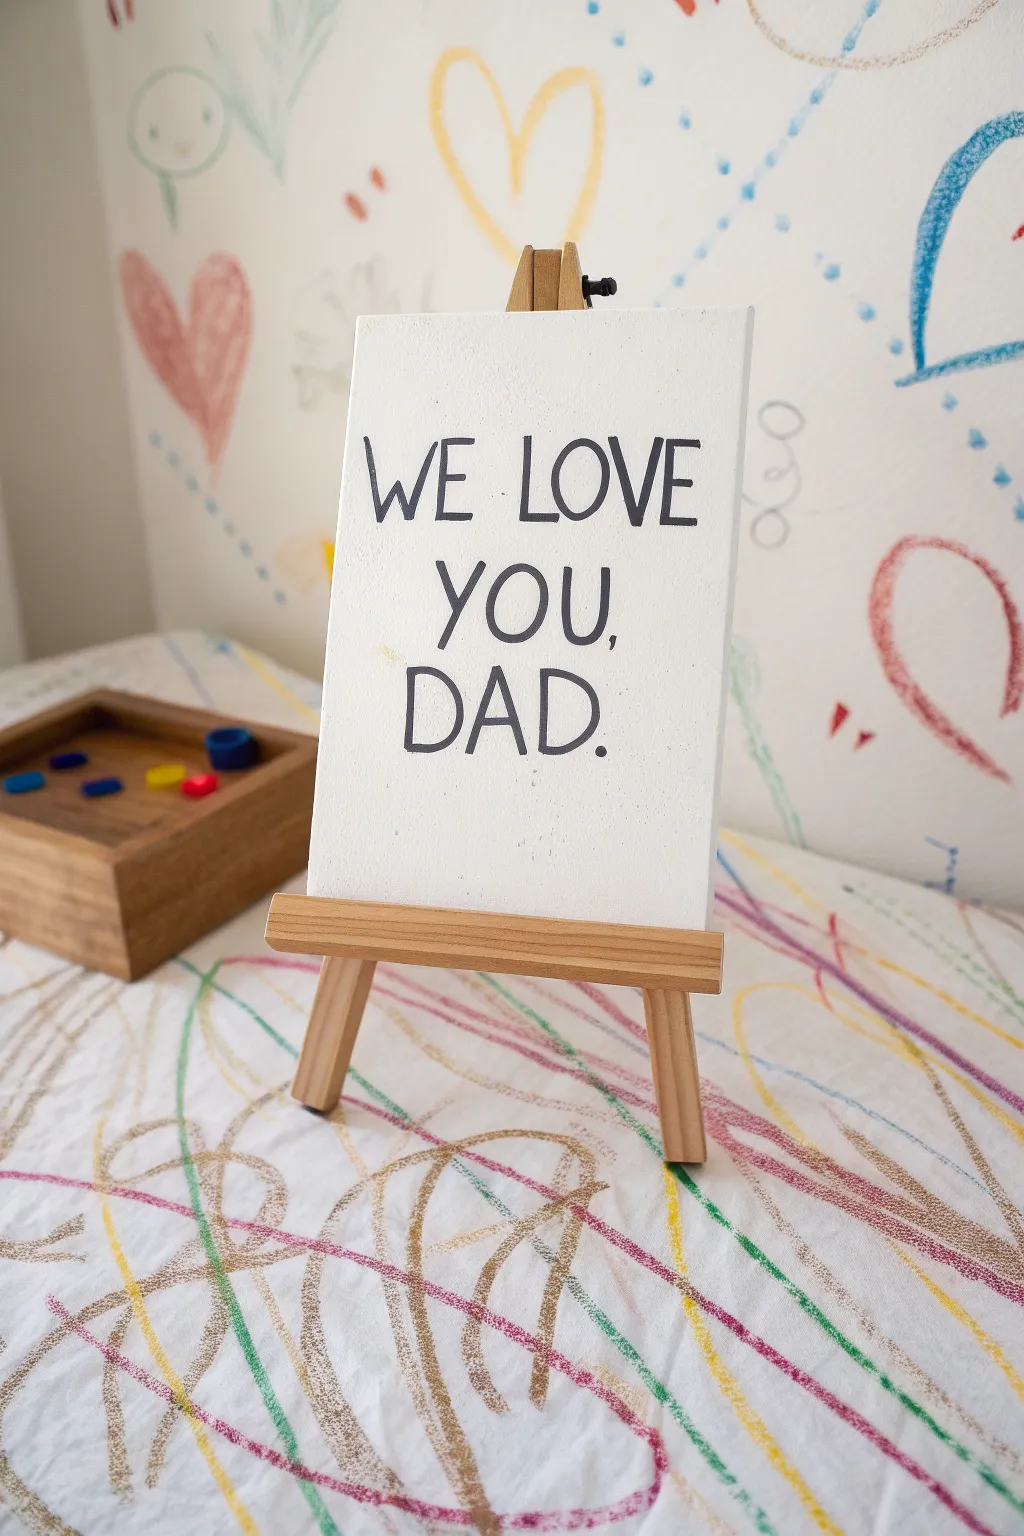
Transform chaotic toddler energy into a sophisticated keepsake with this clever canvas project. By utilizing a vinyl stencil or sticker overlay on top of enthusiastic scribbles, you create a sharp, professional-looking message that pops against a colorful, abstract background.
Step-by-Step Guide
Materials
- Small rectangular canvas (approx. 5×7 or 6×8 inches)
- Mini wooden display easel
- Crayons or oil pastels (various colors: red, yellow, blue, green, brown)
- White acrylic paint
- Foam paint brush or wide flat brush
- Black vinyl and cutting machine (Cricut/Silhouette) OR black alphabet stickers
- Transfer tape (if using vinyl)
- Weeding tool
- Clean cloth or rag
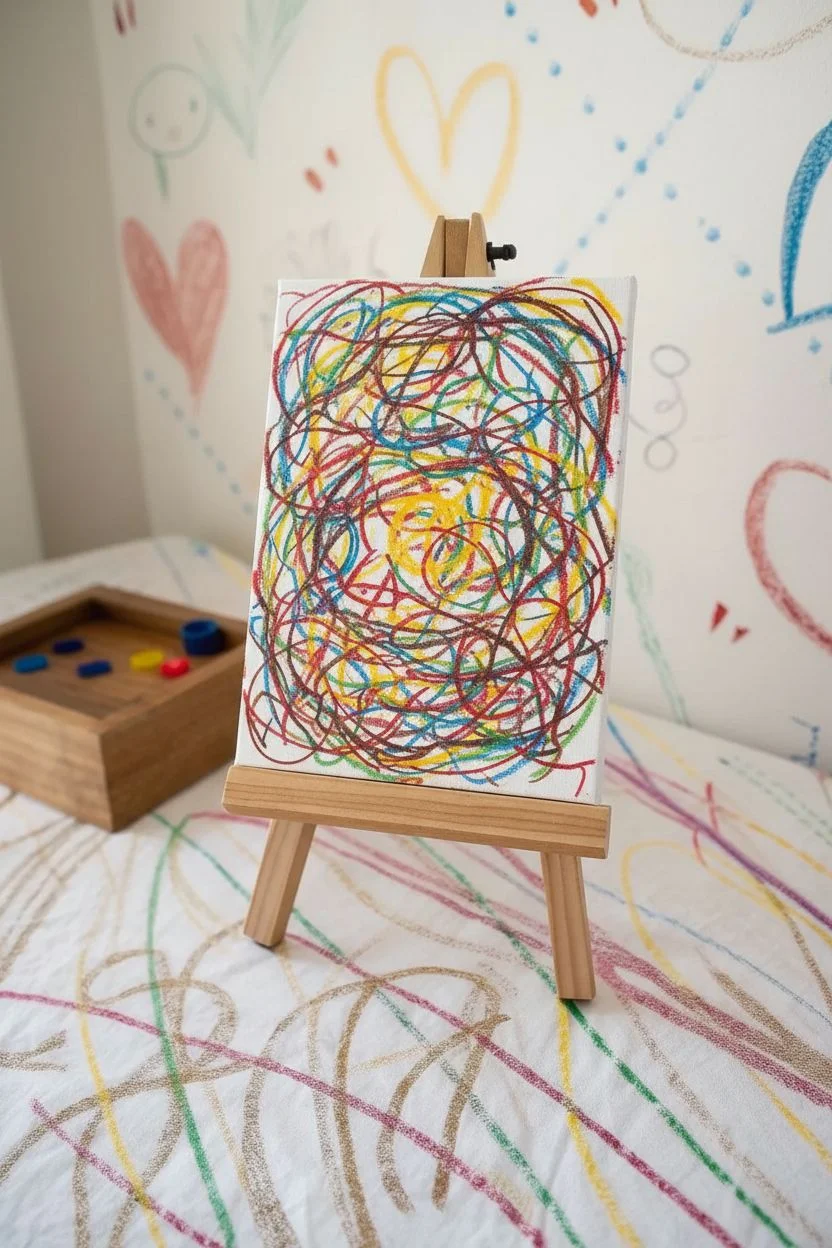
Step 1: Creating the Chaotic Base
-
Prepare the workspace:
Set up a safe area for coloring. Since this part is free-form, putting down a drop cloth or butcher paper is a smart move if little ones are involved. -
Initial scribble layer:
Hand the canvas to your child along with the crayons or oil pastels. Encourage them to draw all over the surface. -
Go to the edges:
Ensure the coloring extends all the way to the edges of the canvas face. The scribbles need to cover the area where the text will eventually go. -
Color density check:
Look at the canvas. You want a good density of lines, whirls, and loops. If there are too many large white gaps, add a few more scribbles yourself to fill them in.
Step 2: Applying the Text Method
-
Design your message:
While the coloring happens, design your text (‘WE LOVE YOU, DAD.’) in your cutting machine software. Choose a tall, clean sans-serif font for readability. -
Cut and weed:
Cut the text out of black vinyl. Weed away the excess vinyl so only the letters remain. -
Alternative method note:
If you don’t feature a cutting machine in your crafting arsenal, simple black alphabet stickers from a craft store work perfectly fine here. -
Transfer tape application:
Apply transfer tape over your weeded vinyl design. Burnish it firmly to ensure the letters stick to the tape.
Vinyl on Canvas Tip
Canvas texture can make vinyl tricky. Paint a layer of Mod Podge on the canvas first and let dry; this creates a smooth surface for the letters to stick to.
Step 3: The Negative Space Technique
-
Apply the vinyl:
Wait! Actually, looking closely at the specific style shown, this project uses a ‘painted over’ effect. Instead of the previous step, cut your letters out of *removable* vinyl to use as a stencil, or apply the black letters directly if you want them on top of white. -
Correction: Top Layer Method:
Let’s stick to the most accurate recreation of the image. The image shows black text on a clean white board. Paint the entire canvas white first if it isn’t already, or start with a fresh board. -
Apply text:
Apply the black vinyl letters ‘WE LOVE YOU, DAD.’ to the center of the clean white canvas. -
Burnish well:
Rub the letters firmly to ensure they adhere well to the canvas texture.
Letters Won’t Stick?
If vinyl lifts with the transfer tape, use a hair dryer on low heat. Warm the vinyl slightly while pressing it into the canvas weave, then peel slowly.
Step 4: The Scribble Background (Reverse Engineering)
-
Set the scene:
The image actually shows the scribbles *on the wall* or fabric behind the easel, not on the canvas itself. However, to mimic the *look* of the photo as an art piece, we will add scribbles to the canvas edges. -
Edge detailing:
Take your crayons and gently scribble only on the very edges or sides of the canvas, leaving the center white area pristine around the text. -
Mount on easel:
Place the finished canvas onto the mini wooden easel. -
Final adjustment:
Adjust the rear leg of the easel so the canvas sits at a pleasant viewing angle.
Now you have a modern, minimalist tribute to Dad that fits perfectly on his desk


Have a question or want to share your own experience? I'd love to hear from you in the comments below!