
When I’m stuck on what to draw, dog drawing ideas always save the day—there’s just so much personality to play with. Grab your sketchbook and let’s fill a page with pups, from super-simple doodles to more creative little scenes.
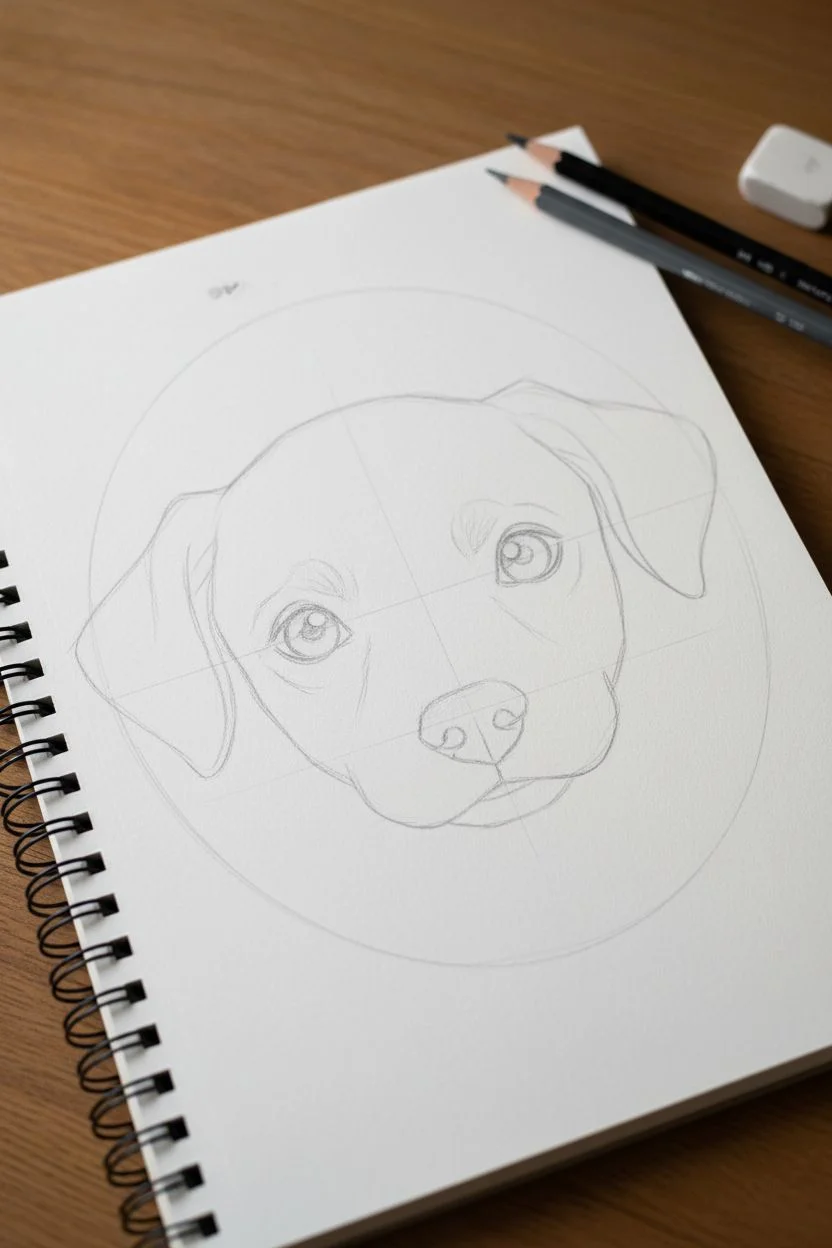
Easy Dog Face From Circles and Ovals
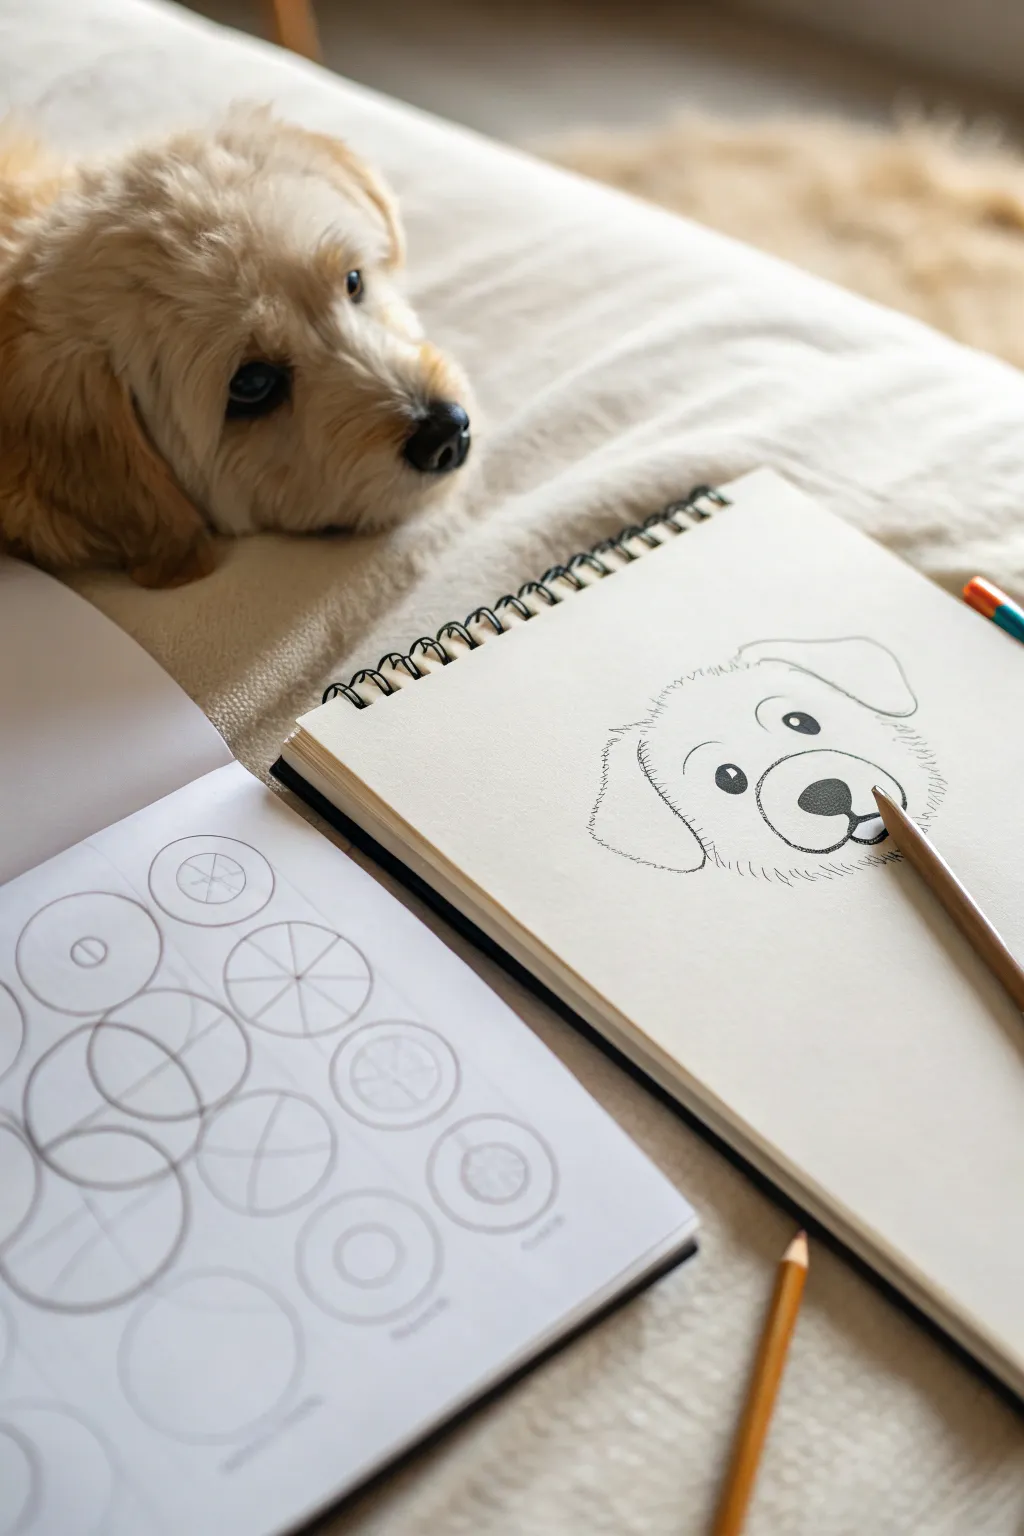
Capture the sweetness of a puppy using gentle, flowing lines and minimal shading. This drawing style focuses on creating an adorable, approachable face without getting bogged down in hyper-realistic fur details.
Step-by-Step Tutorial
Materials
- Spiral-bound sketchbook with medium-tooth paper
- HB or 2B graphite pencil (for initial sketching)
- 4B or 6B graphite pencil (for darker features)
- Kneaded eraser
- Reference photo or a live model (like the cute pup in the image!)
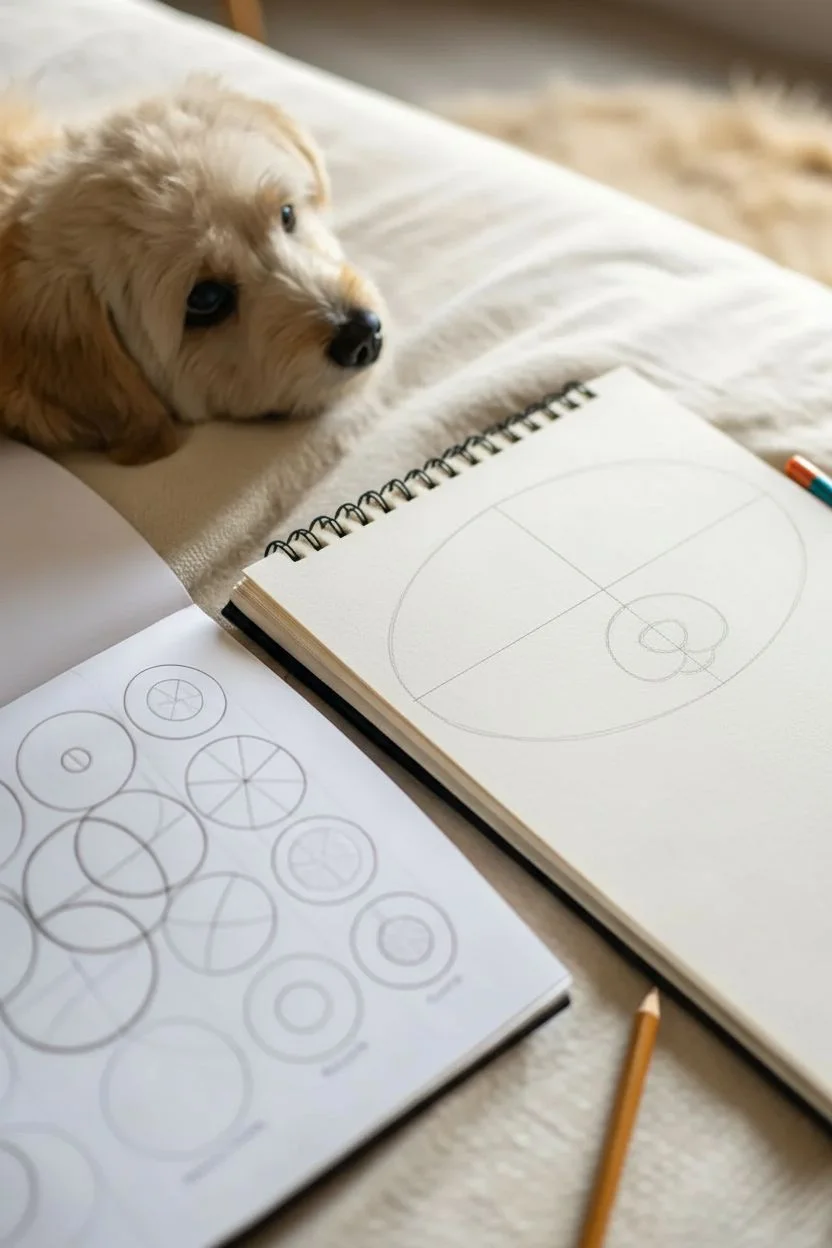
Step 1: Laying the Foundation
-
Visualize the main shape:
Start by lightly sketching a broad, horizontal oval for the head. This doesn’t need to be perfectly round; think of it as a slightly flattened circle that will serve as the container for the face. -
Mark the center lines:
Draw a faint vertical line down the center of your oval to help with symmetry. Then, add a horizontal line slightly below the middle mark—this is where the eyes and the top of the snout will align. -
Place the snout:
Sketch a smaller, rounded oval in the lower center section of the face. This shape should overlap your horizontal guideline slightly. Keep your pencil pressure very light so these guidelines are easy to erase later.
Step 2: Defining the Features
-
Draw the nose:
Inside the top of the snout oval, draw a rounded triangle shape with soft corners. This will be the nose. It should look like a soft mushroom cap or a rounded guitar pick pointing down. -
Add the mouth:
From the bottom center of the nose, draw a small vertical line down, then curve it outward to the left and right to create the ‘W’ shape of the mouth. Add a small U-curve under the center for the lower jaw. -
Position the eyes:
Place two circles for eyes on the horizontal guideline, spaced evenly from the center line. They should be relatively large to give that cute puppy look. -
Refine the eye shape:
Slightly flatten the bottom of the eye circles. Add a small, curved line above each eye to suggest eyebrows or the ridge of the eye socket, giving the puppy an alert expression. -
Outline the ears:
Draw floppy triangle shapes hanging down from the top corners of the head oval. Keep the lines curved and organic—no sharp points—to mimic soft, folded ears.
Eyes Looking Wonky?
If the eyes feel misaligned, turn your sketchbook upside down. This trick helps your brain see the shapes abstractly, making it easier to spot and fix asymmetry errors.
Step 3: Texturing and Finalizing
-
Create the fur texture:
Instead of a solid outline, go over the perimeter of the face using short, broken strokes. These little dashes simulate fluffiness. Vary the direction of the strokes slightly so they look natural rather than mechanical. -
Add forehead fur:
Add a few small, feathery strokes at the very top of the head between the ears to show the tuft of fur often found on puppies. I find this simple touch adds a lot of character. -
Define the ear fur:
Use longer, slightly wavier strokes for the bottom edges of the ears, contrasting with the shorter strokes on the muzzle. -
Fill in the eyes:
Switch to your softer, darker pencil (4B or 6B). Draw a small white circle inside each eye for the highlight (catchlight), then fill in the rest of the eye solid black. -
Darken the nose:
Shade the nose darker, leaving a faint highlight on the top edge to suggest wetness. The nose should be the second darkest element after the eyes. -
Clean up guidelines:
Take your kneaded eraser and gently dab away the initial structural ovals and center lines. Be careful not to smudge your dark shading. -
Final touches:
Strengthen the mouth line and add a few final ‘whiskery’ dots or dashes on the muzzle for texture. Step back and ensure the expression feels balanced.
Softer Fur Technique
Hold your pencil further back on the barrel when drawing the fur outline. This loosens your wrist movement, creating more organic, flowing lines rather than stiff scribbles.
You now have a charming puppy sketch ready to be shared or colored in with your favorite medium


Cute Puppy Sitting With Oversized Paws
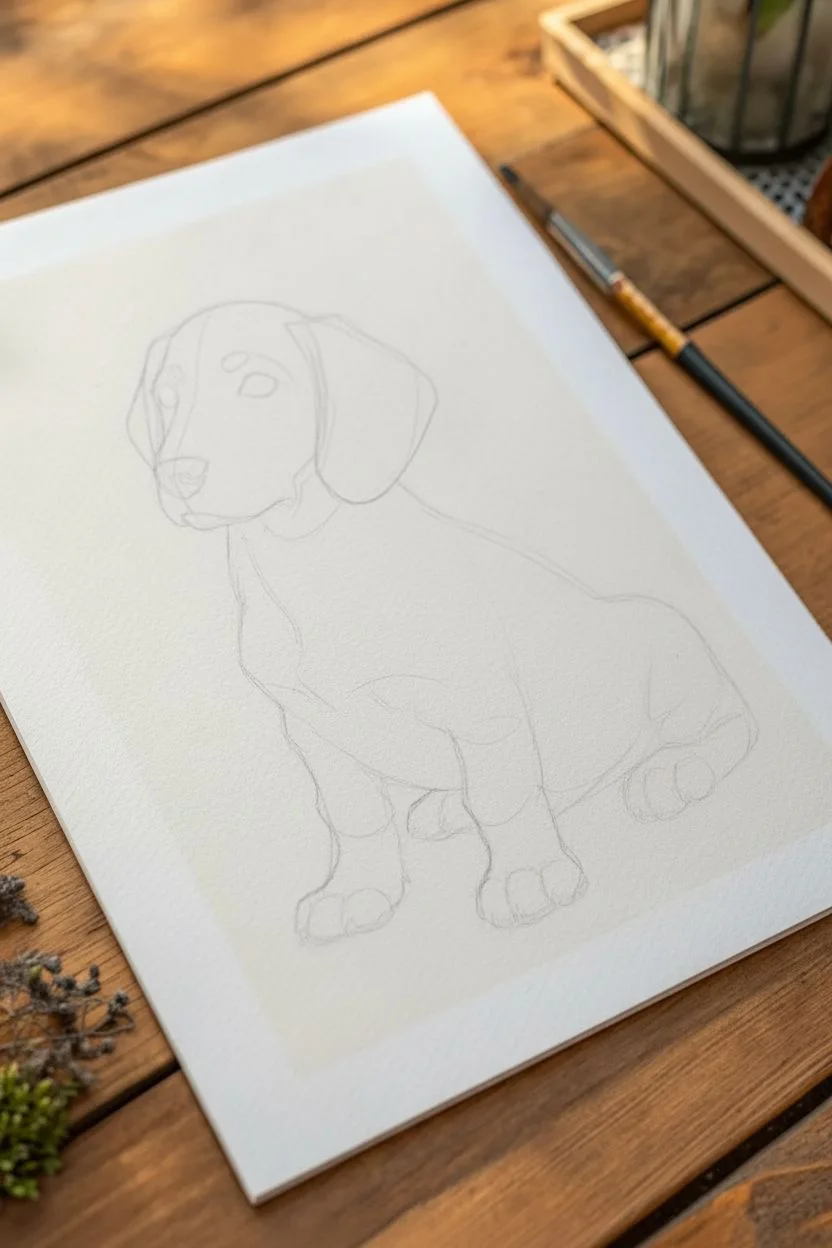
Capture the undeniable charm of a young puppy with this detailed graphite pencil drawing. This project focuses on building realistic fur textures and creating depth through careful shading to bring those adorable oversized paws to life.
Step-by-Step Guide
Materials
- High-quality drawing paper (smooth or vellum finish, approx. 150gsm)
- Graphite pencil set (grades 2H, HB, 2B, 4B, 6B)
- Fine-point mechanical pencil (0.5mm, HB)
- Kneaded eraser
- Precision eraser (pencil style or mono zero)
- Blending stump or tortillon
- Soft tissue for smoothing
- Workable fixative spray (optional)
Step 1: Base Structure & Outline
-
Establish the main shapes:
Begin with a very light hand using a 2H pencil. Draw a large oval for the body and a slightly smaller circle for the head above it. Add two cylindrical shapes for the front legs, deliberately making the paws at the bottom look slightly larger than usual to capture that clumsy puppy proportion. -
Refine the silhouette:
Connect your geometric shapes to form the puppy’s contour. Sketch the floppy ears hanging down from the sides of the head and curved lines for the back and haunches. Pay close attention to the posture; the puppy should look like it’s sitting heavily on its rear. -
Map facial features:
Lightly mark a horizontal line across the face for eye placement. Sketch the almond-shaped eyes, the triangular nose, and the soft curve of the muzzle. Ensure the ear flaps frame the face symmetrically.
Muddy Fur?
If your shading looks grey and smeared, you may be over-blending. Re-sharpen your pencil and add crisp, individual hair strokes on top of the blurred areas to restore texture definition.
Step 2: Developing the Face
-
Darken the eyes and nose:
Switch to a 4B pencil to fill in the pupils, leaving a tiny white circle in each for the catchlight. Use the same dark tone for the nostrils. Shade the iris with a 2B, keeping it slightly lighter than the pupil. -
Initial fur mapping:
Using your mechanical pencil, start drawing short, directional strokes on the face. Follow the natural growth pattern: outward from the nose bridge and down the cheeks. Keep these strokes very light initially. -
Add depth to the ears:
The ears need to feel velvety. Use a blunt 2B pencil to lay down a soft base tone on the ears, then layer darker strokes over the shadowed areas where the ear folds against the head.
Level Up: Color Tint
Once the graphite drawing is done, use a watercolor wash or diluted ink in sepia or blue-grey. Lightly glaze over the eyes or collar for a subtle, artistic pop of color.
Step 3: Body Texture & Shading
-
Chest and neck fur:
Work your way down the neck. The fur here acts like a collar; use longer, curved strokes to show how the skin folds slightly as the puppy sits. I find that deepening the shadows under the chin helps separate the head from the body immediately. -
Define the front legs:
Outline the muscles in the front legs using medium pressure. Create a ‘parting’ in the fur down the center of the chest. Shade the sides of the legs with HB to make them look cylindrical and round. -
Sculpt the body mass:
shade the main body using the side of your pencil for broader coverage. Use a blending stump to smooth this base layer, creating a soft, short-haired coat appearance. Then, go back over it with a sharp pencil to add texture details. -
Detailing the back and haunches:
Use a 4B pencil to add deep shadows where the back legs tuck under the body. The fur direction should curve around the hip, emphasizing the sitting position.
Step 4: Paws & Finishing Touches
-
Outline the toes:
Focus on those big paws. Clearly define the separation between each toe with dark, curved lines. Add small, dark triangles for the claws peeking out. -
Texture the paws:
The fur on the paws is very short. Use tiny, stippling marks or very short dashes. Shade the bottom of the paws heavily to show weight and contact with the ground. -
Grounding shadow:
Create a cast shadow underneath the puppy using a 6B pencil. Use horizontal strokes that fade out as they move away from the body to anchor the figure to the surface. -
Highlight retrieval:
Take your precision eraser and lift out thin highlights on the tops of the paws, the bridge of the nose, and the chest. This ‘negative drawing’ technique mimics light hitting glossy fur. -
Final contrast check:
Step back and assess your values. Darken the deepest crevices (under the ears, between toes) with your 6B and crisp up the whiskers with the sharpest point of your mechanical pencil.
Now you have a soulful puppy portrait ready to be framed or gifted to a dog lover


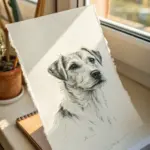
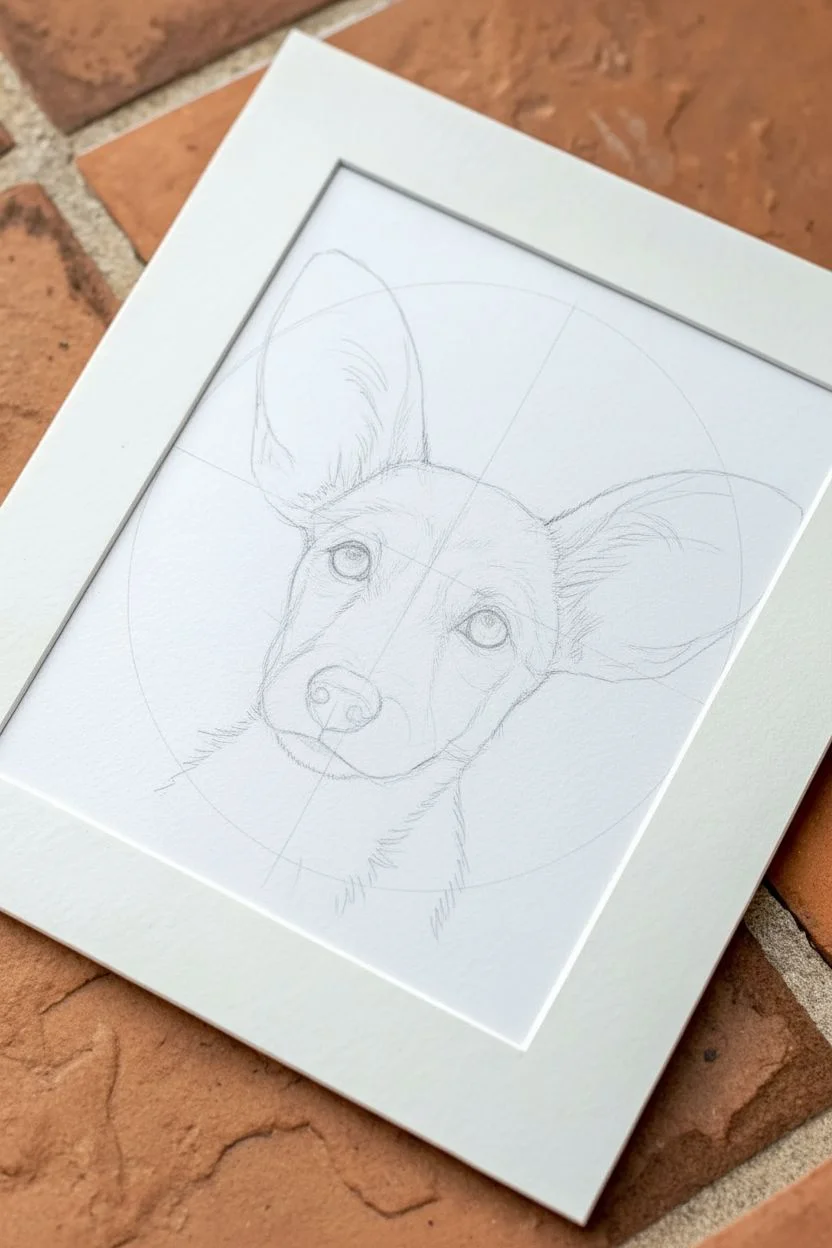
The Classic Head-Tilt Expression Study
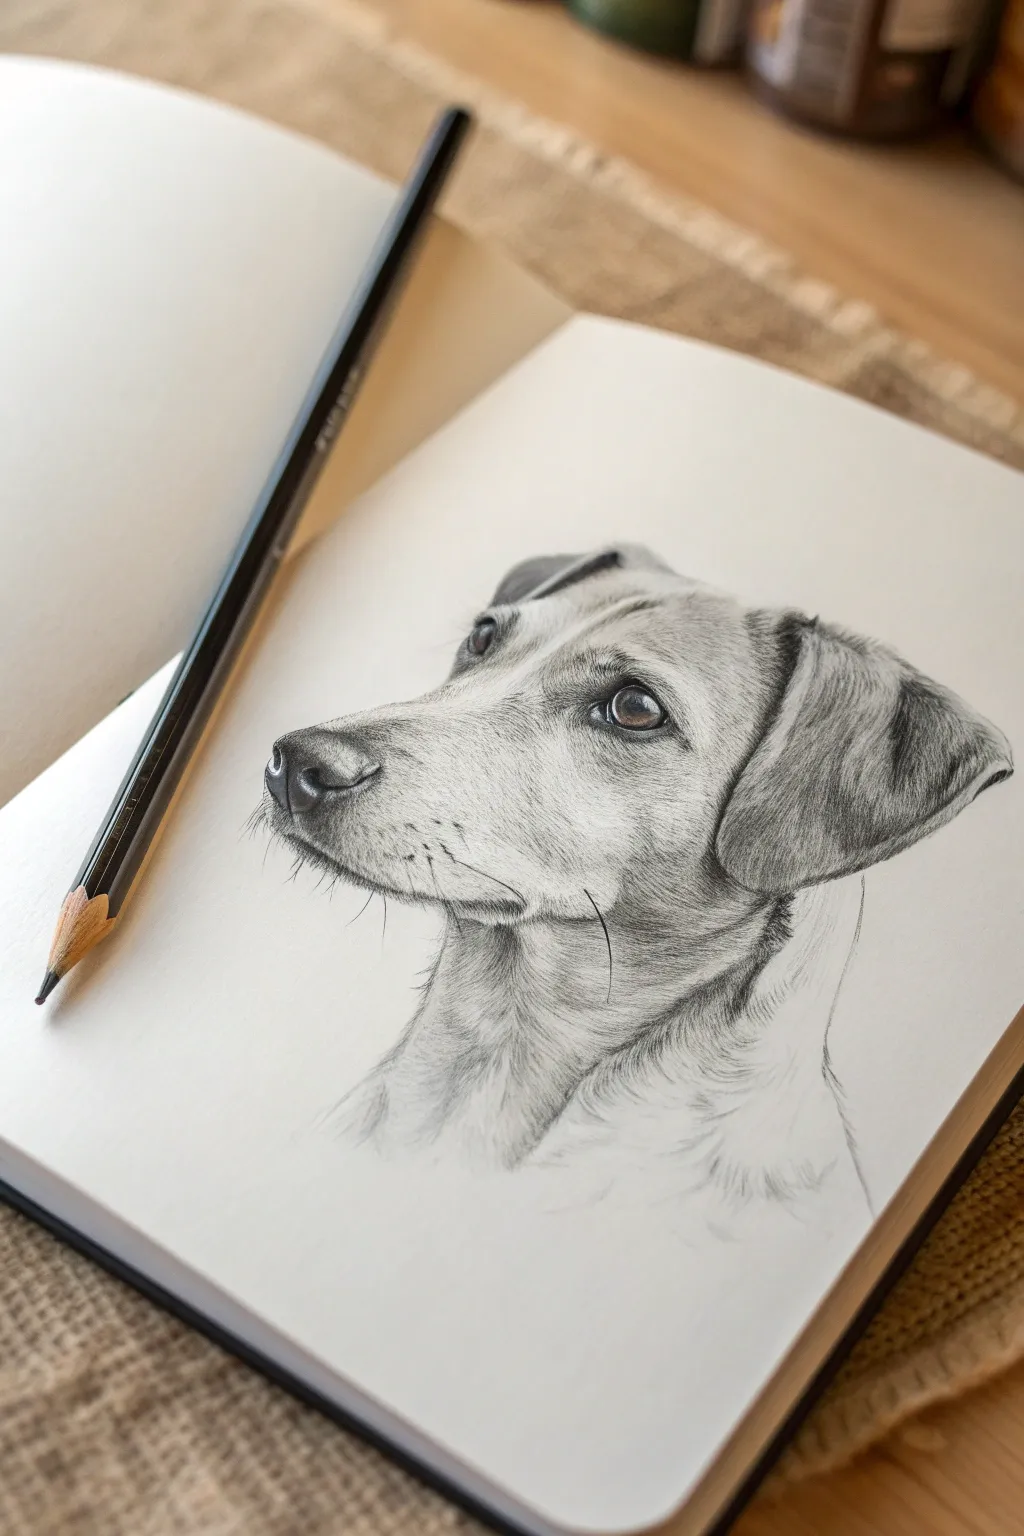
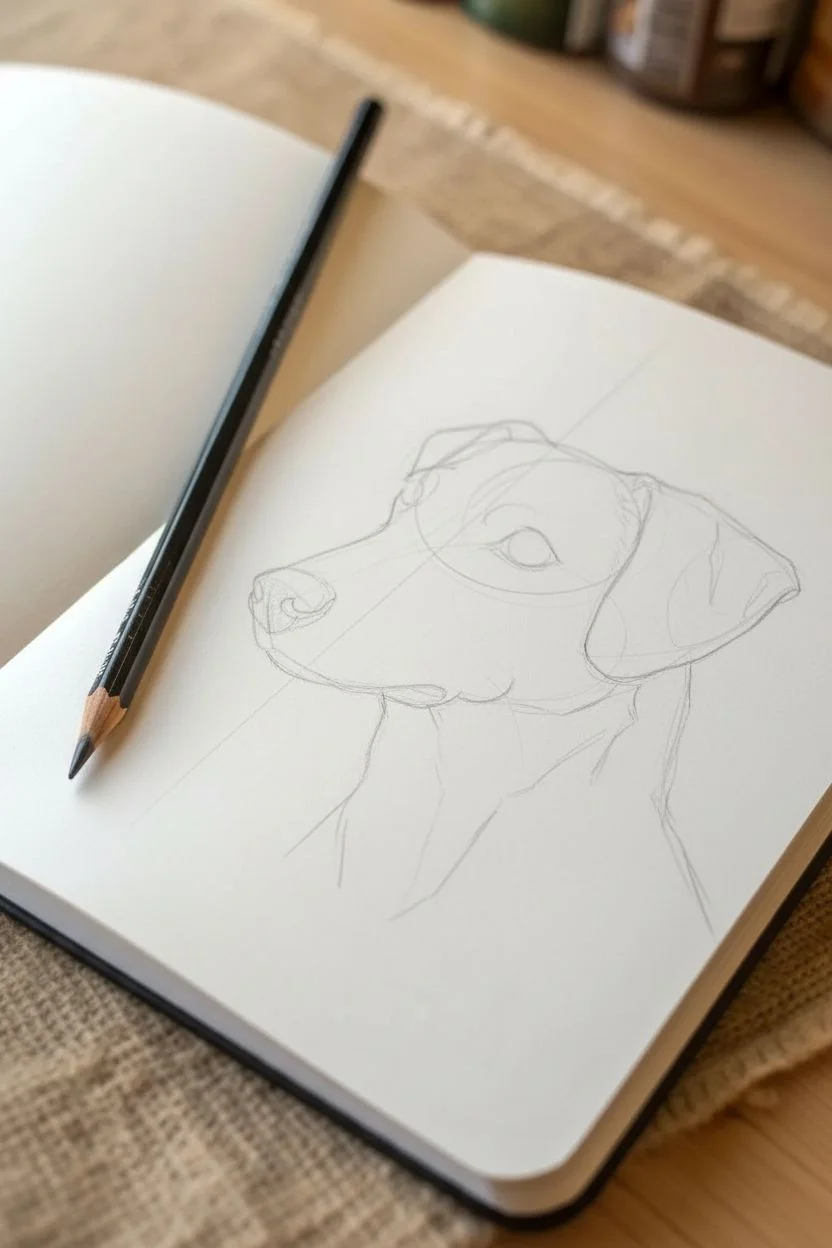
This project captures the soulful gaze of a dog using delicate graphite techniques to create realistic fur texture and depth. By focusing on the classic three-quarter profile, you’ll learn to render subtle muscle structure and the soft sheen of a short coat.
Detailed Instructions
Materials
- Sketchbook with medium-tooth paper
- Graphite pencils (HB, 2B, 4B, and 6B)
- Kneaded eraser
- Precision mechanical pencil (optional, for fine hairs)
- Blending stump or tortillon
- Pencil sharpener
Step 1: Planning the Proportions
-
Establish the axis:
Begin with an HB pencil using very light pressure. Draw a faint diagonal line to represent the angle of the dog’s snout and head tilt. This axis is crucial for getting that inquisitive expression right. -
Block in basic shapes:
Sketch a circle for the cranial area and a cylindrical shape extending downwards for the muzzle. Connect these with sweeping lines to form the neck and jawline. -
Place the features:
Mark the position of the visible eye, the nose tip, and the ear set. The eye should sit slightly above the halfway point of the skull’s curve. Ensure the ear placement accounts for the fold and flap.
Step 2: Defining the Features
-
Refine the eye:
outline the almond shape of the eye. Before shading, carefully map out the highlight—the tiny white reflection that brings the drawing to life. Darken the pupil with a 4B pencil, leaving the highlight pure white. -
Detail the nose:
Sketch the nostrils and the texture of the nose leather. Use small, stippling motions or tiny circles to suggest the rough, wet texture here, rather than straight lines. -
Carve the mouth and jaw:
Draw the line separating the upper and lower lips. This line isn’t perfectly straight; give it a slight curve to suggest the underlying teeth and gum structure. Add the faint whisker spots on the muzzle.
Fur Direction Trick
Always constantly rotate your paper while drawing fur. Pulling pencil strokes toward you creates a more natural taper than pushing them away.
Step 3: Layering Fur and Value
-
Initial shading layer:
Switch to a 2B pencil. Apply a base layer of shading to the darker areas: the ear flap, the shadow under the jaw, and the side of the neck. Follow the direction of the fur growth with your strokes. -
Building short fur texture:
On the muzzle and face, use short, sharp strokes to mimic short hair. The strokes should radiate outward from the nose bridge. Keep your pencil distinctively sharp for this phase. -
Deepening the ear:
The ear requires darker values to show it framing the face. Use a 4B or 6B pencil to fill in density here, layering strokes over each other to create a rich, velvety look, but keep the edges near the top slightly lighter where the light hits. -
Contouring the neck:
Define the neck muscles by shading the hollows and leaving the protruding muscles lighter. The fur here acts as a directional map—curve your strokes around the cylindrical form of the neck. -
Whisker details:
Plot the whiskers. Use quick, confident flicks. For white whiskers against dark fur, I sometimes use an indenting tool beforehand, or simply lift out pigment later with a kneaded eraser formed into a fine point. -
Blending for softness:
Use a blending stump gently on the mid-tones of the face to smooth out the transition between the light snout and the shadowed cheek. Don’t over-blend; you want to retain some grain for texture.
Make it Yours
Instead of a plain background, lightly shade a simple geometric shape (like a square or circle) behind the dog’s head to frame the portrait.
Step 4: Final Polish
-
Enhance contrast:
Go back in with your darkest 6B pencil. Re-darken the pupil, the nostrils, and the deep shadow cast by the ear. This high contrast is what makes the drawing pop off the page. -
Clean up highlights:
Use your kneaded eraser to tap and lift graphite from the brow bone, the bridge of the nose, and the collar bone area to create soft highlights. -
Edge refinement:
Soften the edges of the drawing where the neck fades into the white paper. Instead of a hard outline, let the pencil strokes vignette and feather out naturally.
Now step back and admire the personality you’ve captured through those subtle pencil strokes


Floppy-Eared Puppy Close-Up
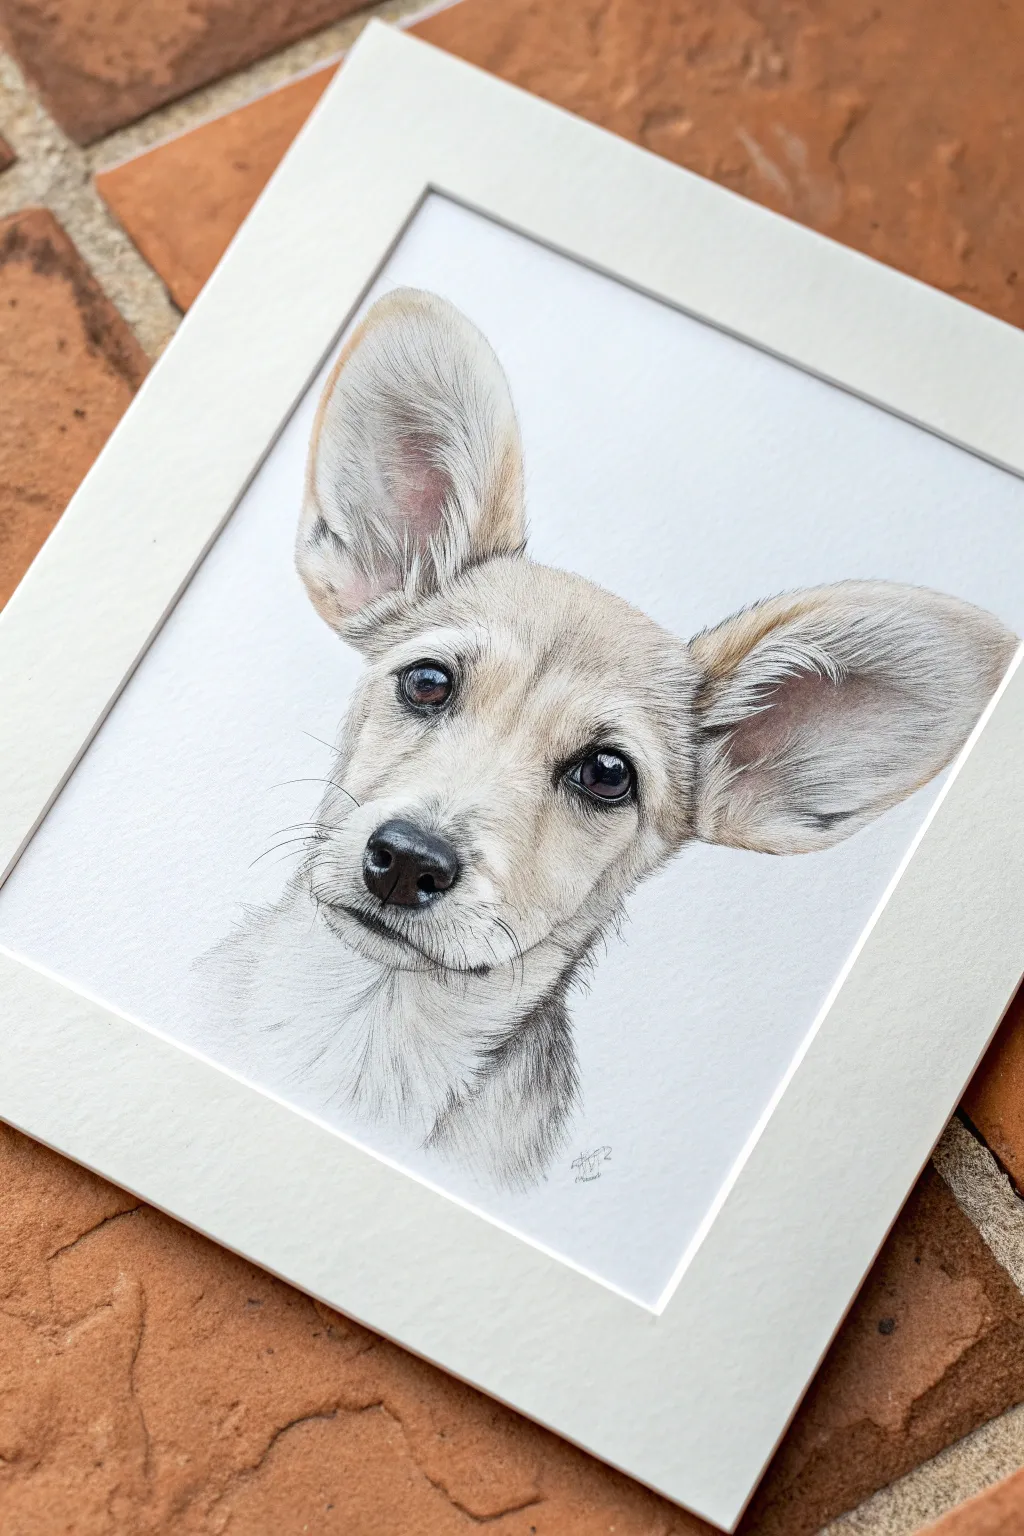
Capture the soulful expression of a young pup with this detailed colored pencil tutorial. By focusing on layering fur textures and building depth in the eyes, you will create a heartwarming portrait that looks almost soft enough to touch.
How-To Guide
Materials
- High-quality colored pencils (wax or oil-based)
- Smooth bristol or hot-pressed watercolor paper
- HB or 2H graphite pencil for sketching
- Kneadable eraser
- Fine-point black liner or dark charcoal pencil
- White gel pen or gouache (for highlights)
- Pencil sharpener
Step 1: Sketching the Foundations
-
Outline the basic shapes:
Start with a light circle for the head and a smaller oval for the muzzle. Add two large, rounded triangles for the ears, paying attention to their asymmetry—one ear is slightly more perked than the other. -
Map facial features:
Draw faint guidelines to align the eyes, nose, and mouth. The eyes should be spaced evenly, and the nose should sit centrally on the muzzle oval. -
Refine the contour:
Using your HB pencil, lightly sketch the final outline of the puppy, adding jagged lines to suggest fur around the cheeks and neck. Erase your initial geometric guides gently with the kneadable eraser until only a faint ghost image remains.
Fur Looks Flat?
Work in varied layers. Don’t press hard immediately; build up 3-4 layers of color with flicking strokes. Ensure your pencil strokes always follow the fur’s growth direction.
Step 2: The Soulful Eyes & Nose
-
Base layer for the eyes:
Fill the iris area with a warm brown pencil, leaving a tiny circle of pure white paper for the primary highlight. This creates instant life. -
Darken the pupils:
Use a black pencil to fill in the pupil, blending it slightly outward into the brown iris to soften the edge. Darken the rim of the eye for definition. -
Detail the nose:
Color the nose with dark grey or black. Instead of a solid block of color, use stippling (tiny dots) to mimic the wet, textured surface of a dog’s nose, leaving small areas lighter for shine. -
Add deep shadows:
Reinforce the nostrils with your darkest black, ensuring they look like deep cavities rather than flat shapes.
Add Personality
Change the eye reflection! Instead of a simple white dot, draw a tiny window shape in the pupil to suggest the puppy is looking out a window.
Step 3: Layering the Fur
-
Base fur tone:
Lightly shade the entire face (except the white muzzle area) with a cream or very pale yellow-ochre pencil. Keep your strokes following the direction of hair growth—outward from the nose. -
Define the muzzle:
Switch to a light grey pencil to detail the white fur on the muzzle. Use short, flicking strokes to create the illusion of whiskers and short hairs. -
Mid-tone shading:
Take a light brown or tan pencil and begin darkening the areas around the eyes, the bridge of the nose, and the forehead. I find it helps to keep the pencil extremely sharp for these fine hairs. -
Deepen the ear shadows:
The inside of the ears requires depth. Use a mix of warm pink and cool grey to shade the inner ear skin, then layer darker brown fur over the edges. -
Texture the neck:
On the neck and chest, use longer, sweeping strokes with a dark grey or cool brown pencil to suggest thicker, fluffier fur. vary the pressure to create shadow pockets between clumps of hair.
Step 4: Refining Details
-
Enhance contrast:
Go back in with a dark charcoal or black pencil to deepen the darkest shadows underneath the chin and inside the ear folds. High contrast makes the portrait pop. -
Add whiskers:
With a steady hand and a fine-point black liner or very sharp black pencil, draw the long whiskers extending from the muzzle. These should be quick, confident curves. -
Clean up highlights:
Use a white gel pen or a tiny dot of white gouache to re-establish the bright catchlights in the eyes if they got smudged. You can also add a few stray white hairs on the ears for realism. -
Final inspection:
Look at the drawing from a distance. If the fur looks too smooth, add more directional strokes with a sharp pencil to break up any flat areas. -
Matting:
Once finished, clean up any smudges on the paper background and place a bright white mat over the drawing to frame it professionally.
Step back and admire the sweet, attentive gaze of your completed puppy portrait
BRUSH GUIDE
The Right Brush for Every Stroke
From clean lines to bold texture — master brush choice, stroke control, and essential techniques.
Explore the Full Guide
Expressive Puppy Dog Eyes With Catchlights
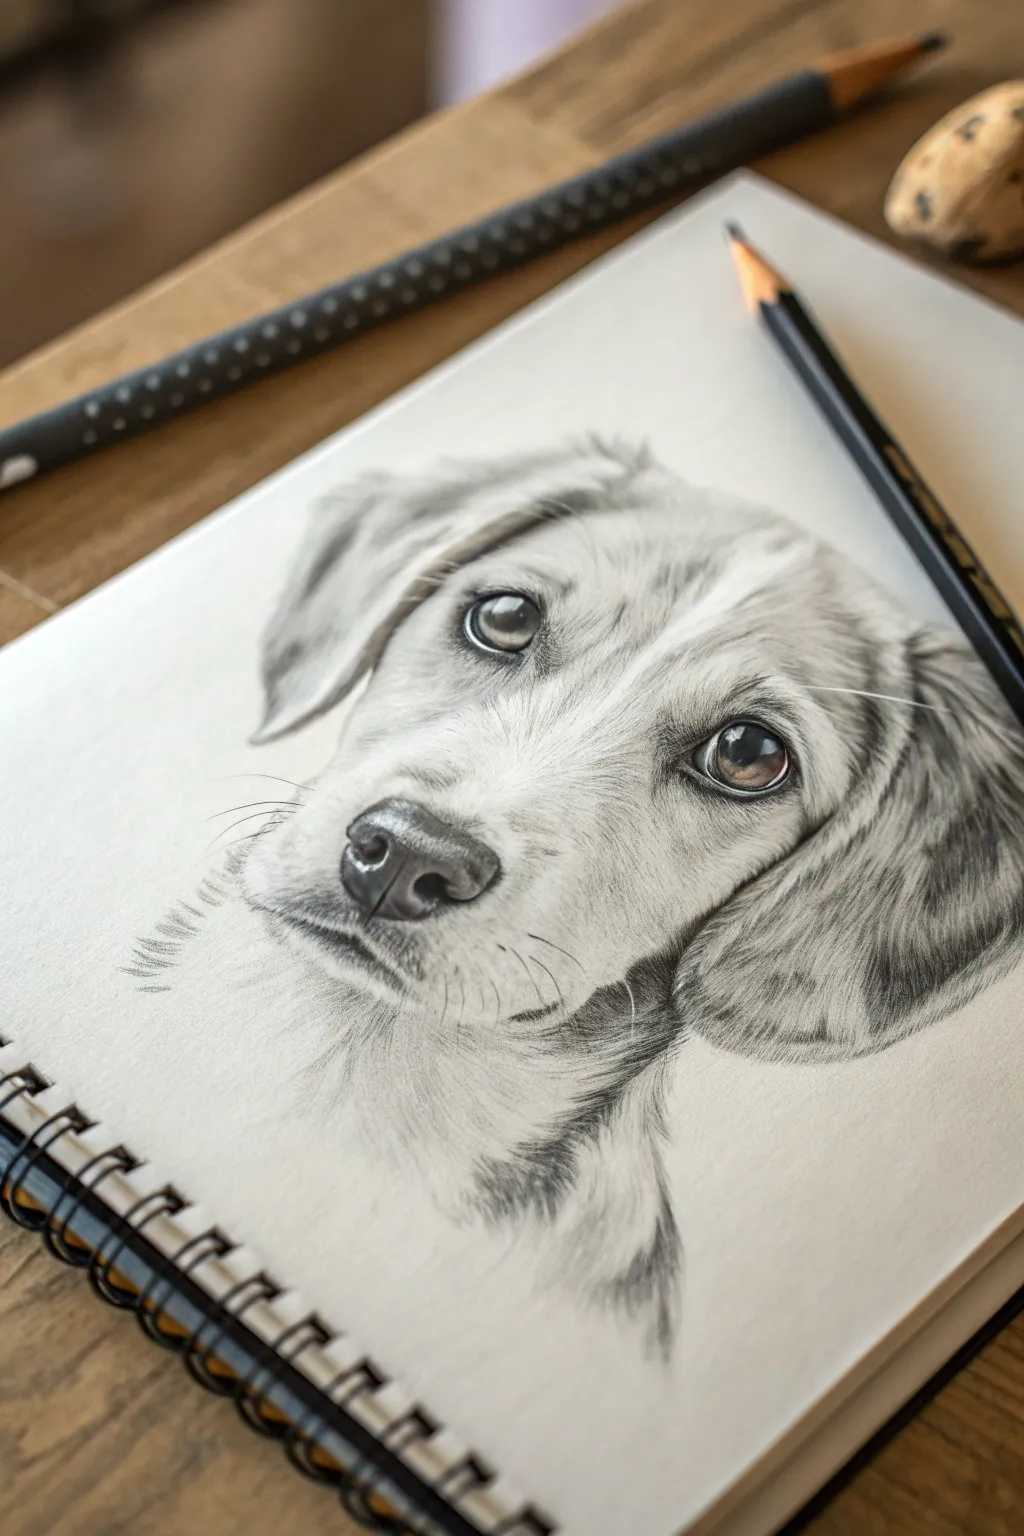
Capture the irresistible charm of a puppy’s gaze with this detailed pencil drawing tutorial. You will learn to use layering and precise shading to create deep, expressive eyes and soft, touchable fur texture.
Step-by-Step Guide
Materials
- Heavyweight sketch paper or Bristol board (smooth surface preferred)
- Graphite pencils (HB, 2B, 4B, 6B)
- Mechanical pencil (0.5mm HB for fine details)
- Kneaded eraser (putty rubber)
- standard vinyl eraser
- Paper blending stump (tortillon)
- Pencil sharpener
Step 1: Basic Structure & Mapping
-
Establish the head shape:
Start very lightly with an HB pencil to block out the rounded, slightly tilted oval shape of the puppy’s head. Don’t press hard; these are ghost lines. -
Position the features:
Draw faint guidelines intersecting the face to place the eyes and nose. The eyes should be large and spaced widely apart, sitting roughly halfway down the head shape. -
Outline the nose:
Sketch the triangular shape of the nose button, ensuring the nostrils have a distinct, comma-like curve. -
Map the ears:
Lightly draw the floppy ears framing the face. Notice how the left ear (viewer’s left) pulls back slightly, while the right ear hangs fuller. -
Refine the eye shapes:
Carefully outline the almond shape of the eyes. This is the most crucial part—mark out the small white circles for the catchlights (reflections) now so you don’t accidentally shade over them later.
Step 2: The Expressive Eyes
-
Darken the pupils:
Switch to a 4B or 6B pencil to fill in the pupils. Make them distinct and deep black, avoiding the tiny catchlight circles you marked earlier. -
Shade the irises:
Using a 2B pencil, stroke outward from the pupil to the edge of the iris in a starburst pattern. Leave the bottom curve of the iris slightly lighter to simulate reflected light. -
Add the eye rims:
Darken the upper and lower eyelids (waterlines) with a 4B pencil. The upper lid casts a shadow, so make that line thicker and darker than the lower rim. -
Soften the gaze:
Use the blending stump to gently smudge the iris shading, making the transition seamless. Keep the catchlight crisp white for that wet, glossy look.
Preserve the Whites
The eye’s catchlight is vital. If you accidentally smudge graphite into it, dab firmly with a kneaded eraser to lift the pigment back to pure white.
Step 3: Nose & Muzzle
-
Fill the nostrils:
Use your 6B pencil to fill the deepest shadows inside the nostrils. Fade this darkness out toward the top of the nose pad. -
Texture the nose:
Stipple (dot) lightly with a mechanical pencil or sharp HB over the top of the nose to create a leathery texture. Leave a small highlighted strip on the upper curve unlabeled or very light. -
Detail the mouth:
Draw the dark separation line of the mouth. Use short, upward strokes coming from this line to suggest the short hairs of the muzzle.
Softer Fur Texture
After drawing hair strokes, gently sweep a clean blending stump over them in the direction of growth. Then, add a few sharp pencil strokes on top for definition.
Step 4: Fur Texture & Final Shading
-
Directional fur mapping:
Observe the direction the fur grows—outward from the nose bridge and down the cheeks. Sketch light arrows if it helps you remember the flow. -
Short hair strokes:
Using a sharp HB pencil, create short, flicking strokes for the fine hair on the forehead and nose bridge. Lift your pencil at the end of each stroke to taper the hair. -
Darken the ears:
Switch to a 2B or 4B pencil for the darker ear fur. Use longer, softer strokes here, layering them to build up the density and shadow under the ear flap. -
Create depth around the eyes:
Deepen the shading in the hollows just above the eyes and the bridge of the nose. I like to smudge this slightly with a tissue or stump to make the fur look soft rather than wiry. -
Neck and chest fur:
For the chest area, use longer, looser strokes that fade out into the white of the paper. This vignette effect keeps the focus on the face. -
Whisker details:
Use a sharp edge of your eraser or a white gel pen (if you have one) to pull out a few thin whiskers on the muzzle. Alternatively, press hard with a generic tool to indent the paper before shading, revealing white lines. -
Final contrast check:
Step back and squint. Darken the pupils and nostrils one last time with your 6B to ensure the contrast pops.
Now you have a charming portrait that captures the gentle spirit of man’s best friend
Simple Dog Paw Print Doodles
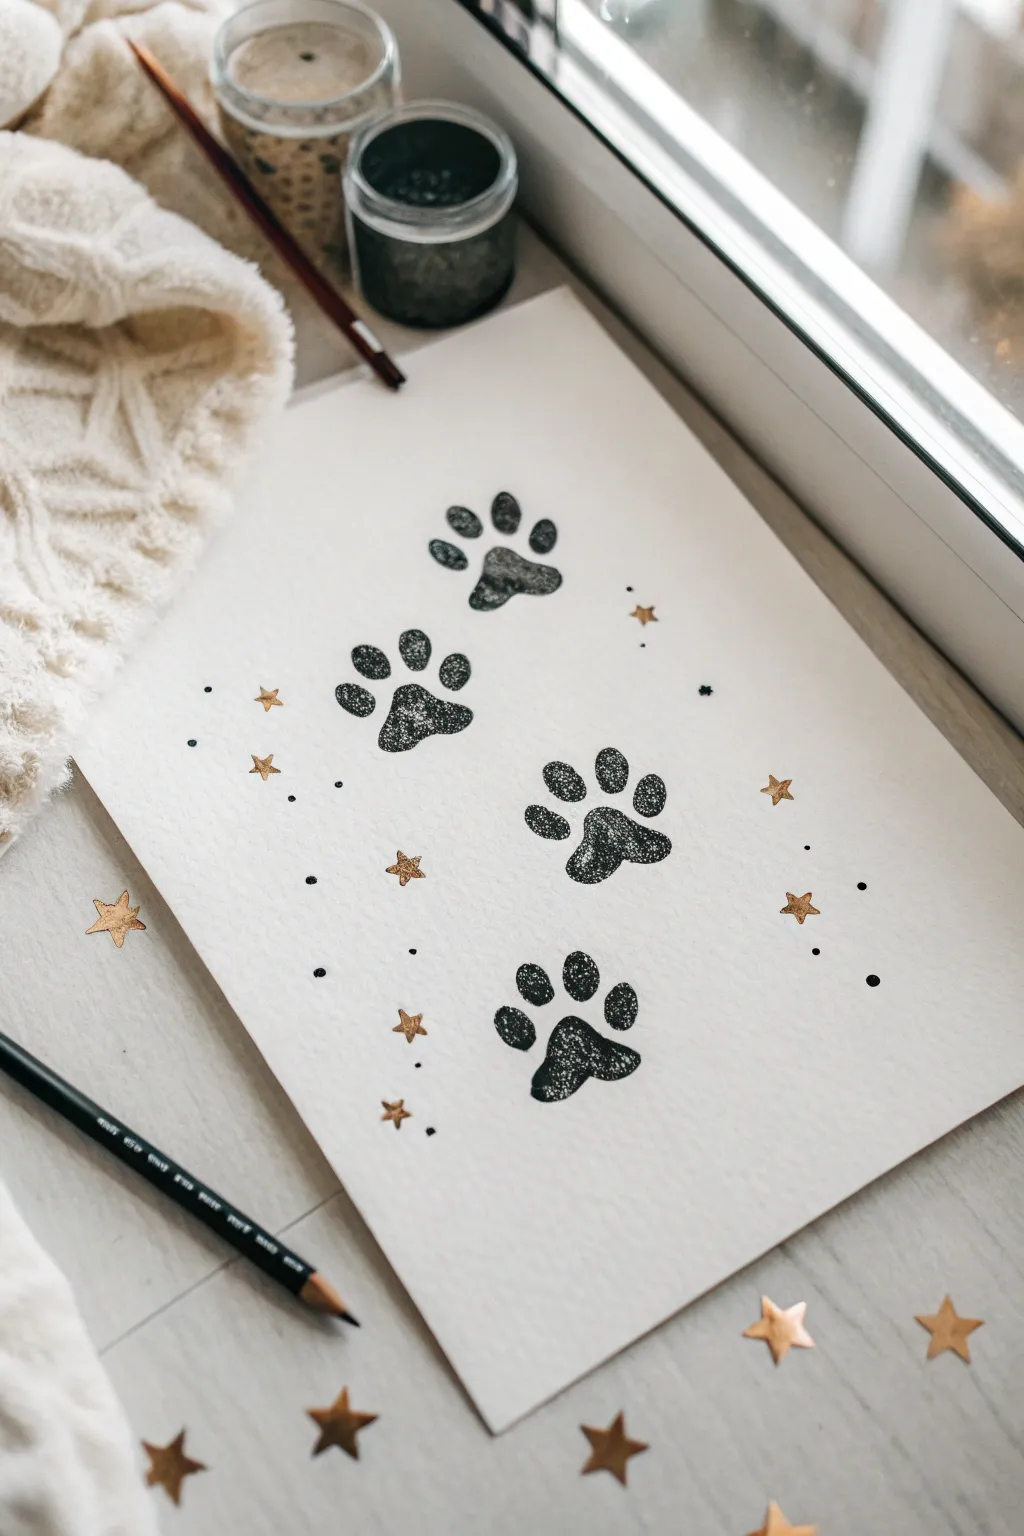
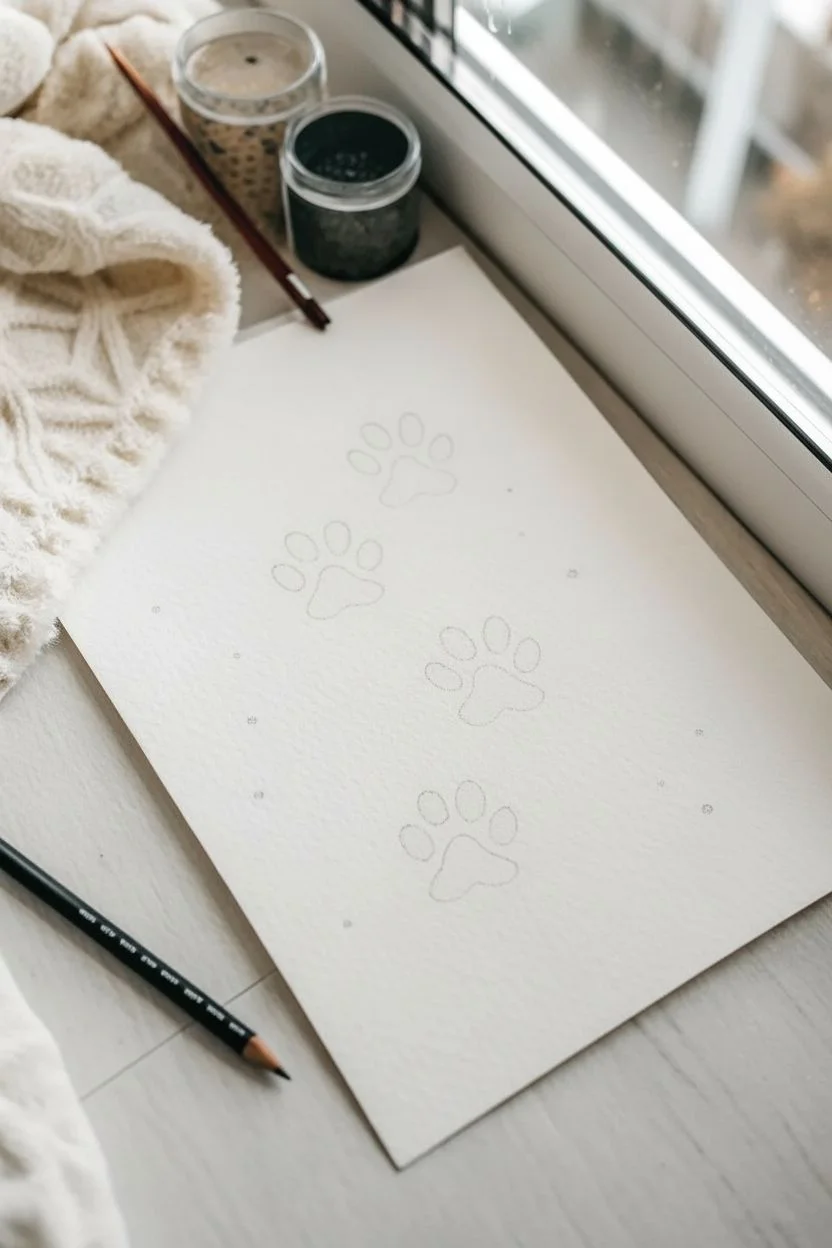
Create a whimsical piece of pet-themed art featuring textured paw prints floating among a galaxy of golden stars. This simple yet elegant project combines black stamping ink with metallic accents for a cozy, magical look.
Step-by-Step
Materials
- Heavyweight white drawing paper or cardstock
- Black stamping ink pad or black acrylic paint
- Small round sponge applicator or potato/eraser for stamping
- Gold foil star stickers or gold metallic gel pen
- Fine-tip black fineliner pen (0.3mm or 0.5mm)
- Pencil (graphite)
- Scrap paper for testing
Step 1: Planning the Layout
-
Prepare your workspace:
Clear a flat surface near a window for good lighting. Place your heavyweight paper in the center and have your scrap paper nearby for testing your stamps. -
Visualize the placement:
Look at your blank page and imagine a gentle ‘S’ curve or zigzag pattern for the paw prints. You’ll want to place four distinct paw prints, spaced evenly apart so they traverse the page diagonally. -
Mark light guide points:
Using your pencil very lightly, make tiny dots where the center of each main paw pad will go. This ensures your composition is balanced before you commit with permanent ink.
Step 2: Creating the Paw Prints
-
Load your sponge tool:
Press your round sponge applicator or stamp tool firmly into the black ink pad. If using acrylic paint, dab a small amount onto a palette and tap the sponge until it’s evenly coated but not dripping. -
Test the texture:
Press your tool onto the scrap paper. You want a slightly speckled, organic texture rather than a solid black block, which mimics the look of a real paw print. Adjust the amount of ink as needed. -
Stamp the main pads:
Starting at the top of your layout, stamp the large, triangular-shaped main pad for the first paw. Rock the tool slightly to ensure contact, then lift straight up. -
Add the toes:
Stamp four smaller ovals above the main pad to create the toes. Arrange them in a gentle arc. Repeat this process for the remaining three paw prints, following your pencil guides down the page. -
Add texture definition:
If any prints look too solid, take a clean, dry corner of a sponge and dab gently while the ink is wet to lift a tiny bit of pigment, creating that rough, textural look visible in the example. -
Let the ink dry:
Allow the black ink to dry completely. This usually takes about 10-15 minutes, depending on the thickness of your application.
Stamp Hack
Don’t have a stamp? Use the eraser end of a pencil for the toe pads and a thumbprint (wash hands after!) for the main pad to get organic shapes.
Step 3: Adding the Celestial Details
-
Scatter the gold stars:
Take your gold foil star stickers. Place medium-sized stars randomly around the paw prints. I like to imagine a breeze blowing through the page and place them where they feel most natural. -
Vary the star sizes:
If you have different sizes of stickers, mix them up. Or, use a gold metallic gel pen to draw tiny five-pointed stars in the empty spaces between the stickers for variety. -
Add tiny ink dots:
Take your fine-tip black fineliner. creating a ‘stardust’ effect by gently tapping the pen tip onto the paper to make varying sizes of small black dots. -
Cluster the dots:
Concentrate some of the dots near the gold stars or paw prints to creating visual clusters, while leaving other areas more sparse. -
Balance the composition:
Step back and look at the whole piece. If a corner feels too empty, add a small gold star or a few extra black dots to maintain balance. -
Final inspection:
Check for any pencil marks underneath your stamped areas. Once you are certain the ink is 100% dry, gently erase any visible guide marks.
Smudge Alert
If you accidentally smudge black ink, turn the smudge into a shadow for a new gold star sticker. Place the sticker right over the mistake.
Display your sparkly paw print art on a desk or frame it for a sweet reminder of your furry friend

PENCIL GUIDE
Understanding Pencil Grades from H to B
From first sketch to finished drawing — learn pencil grades, line control, and shading techniques.
Explore the Full Guide
Sleeping Dog Curled Into a Cozy Ball
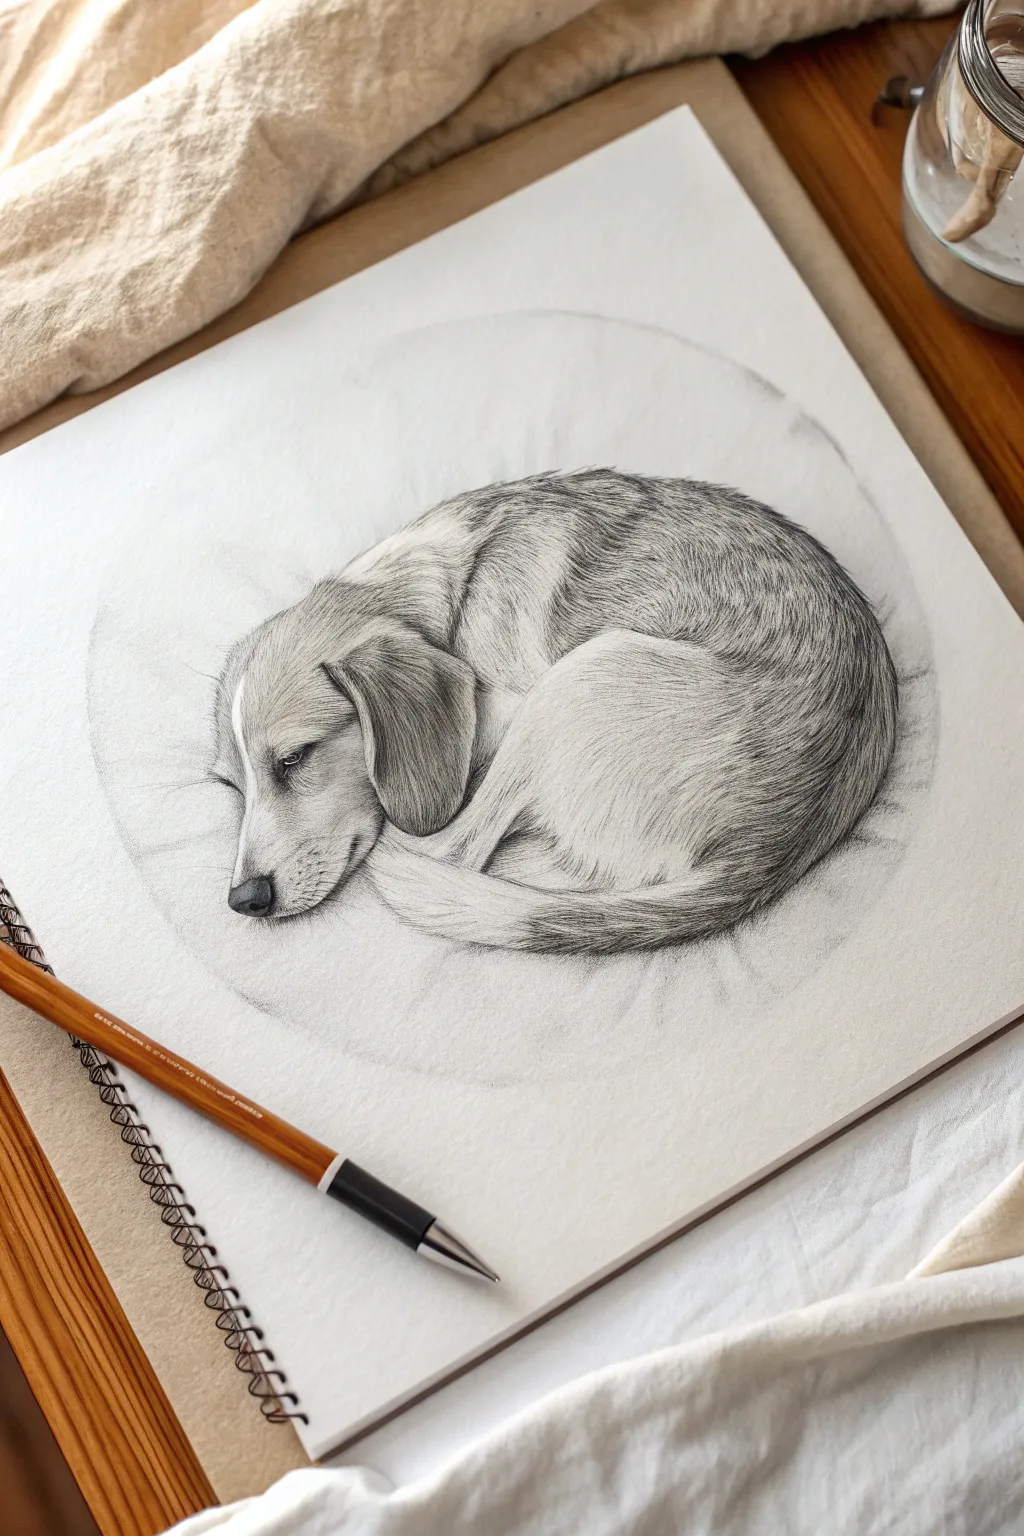

Capture the peaceful essence of a sleeping dog with this detailed graphite pencil study. By confining the subject within a subtle circular composition, you create an intimate, focused portrait that emphasizes the cozy, curved posture of your furry friend.
Detailed Instructions
Materials
- Smooth bristol board or heavyweight drawing paper (white)
- Graphite pencils (H, HB, 2B, 4B)
- Mechanical pencil (0.5mm, HB lead)
- Kneaded eraser
- Precision stick eraser (optional but helpful)
- Blending stump or tortillon
- Compass or circular template (optional)
Step 1: Laying the Foundation
-
Establish the boundary:
Begin by lightly sketching a large circle in the center of your page. This won’t be a hard outline in the final piece, but acts as a container for the composition. Use your H pencil with very light pressure so it can be easily erased or integrated later. -
Map the basic shapes:
Inside your circle, break the dog’s body down into three main oval shapes: one for the head, a larger one for the ribcage, and a curved shape for the hindquarters wrapping around. Ensure these shapes flow together to mimic the curled spine. -
Refine the outline:
Using your HB pencil, connect these shapes. Define the triangular drop of the ear, the snout resting near the paws, and the tail tucked neatly against the nose. Keep your lines loose and sketchy at this stage. -
Mark key features:
Place the eye (which is closed or partially closed), the nose, and the separation between the legs and the body. Pay attention to where the fur creates natural folds, particularly around the neck and hip.
Step 2: Developing Form and Texture
-
Start the shading base:
Switch to your 2B pencil. Lightly shade the darker areas of the dog, such as under the ear, the belly area where the legs tuck in, and the deepest part of the tail curve. Do not press hard; layering is key here. -
Directional fur strokes:
Begin adding fur texture. The direction of your pencil strokes is critical—they must follow the curve of the body. Create short, flicking strokes that radiate from the spine down towards the belly. -
Detailing the ear:
The ear is a focal point. Use slightly darker strokes (4B) to define the shadow underneath it, lifting it away from the head. Keep the texture on the ear smooth and velvety with tighter, shorter marks. -
Defining the face:
I like to use a mechanical pencil here for precision. intricately draw the small hairs on the muzzle and around the closed eye. Leave a tiny sliver of white paper for the highlight on the eyelid to show volume. -
Deepening the shadows:
Return to the darkest crevices—the nostrils, the corner of the mouth, and the junction where the tail meets the face. Use your 4B pencil to push these values to a rich dark grey, anchoring the drawing.
Keep it Clean
Place a piece of scrap paper under your drawing hand. This prevents the oils in your skin from smudging your graphite work or transferring hand oils to the pristine white paper.
Step 3: Refining and Polishing
-
The mid-tone fur:
Build up the layers on the main body. Where the light hits the curve of the back and the shoulder, keep your strokes sparse and light (H pencil). Where the body curves away, increase density. -
Softening the bed:
To give the impression that the dog is sinking into something soft, lightly shade the area just outside the dog’s body within your original circle. Use a blending stump to smooth this graphite out, creating a shadowy ‘nest’ effect without drawing individual fabric threads. -
Lifting highlights:
Take your kneaded eraser and mold it into a sharp point. ‘Draw’ with the eraser by lifting graphite off the top of the shoulder, the bridge of the nose, and the curve of the hip to create bright fur highlights. -
Blending for softness:
Use a clean blending stump to gently smudge the mid-tones of the fur. Follow the direction of the hair growth. This unites the individual pencil strokes so the fur looks cohesive rather than scratchy. -
Re-establishing texture:
Smudging can sometimes blur your crisp lines. Go back over the shadowed areas with your mechanical pencil or sharp 2B to add fresh, crisp hairs on top of the blended areas for realistic depth. -
Finalizing the circular edge:
Ensure the background shading within the circle fades out gently as it reaches the edge. You want a soft vignette effect, not a harsh ring. Use the kneaded eraser to dab away any hard perimeter lines.
Fur Looks Flat?
You might be drawing individual hairs too uniformly. Vary your stroke length and pressure. Let some strokes cross over others slightly to create a messy, natural look rather than perfect rows.
Take a moment to clean up any stray smudges around the border to let your peaceful subject truly shine
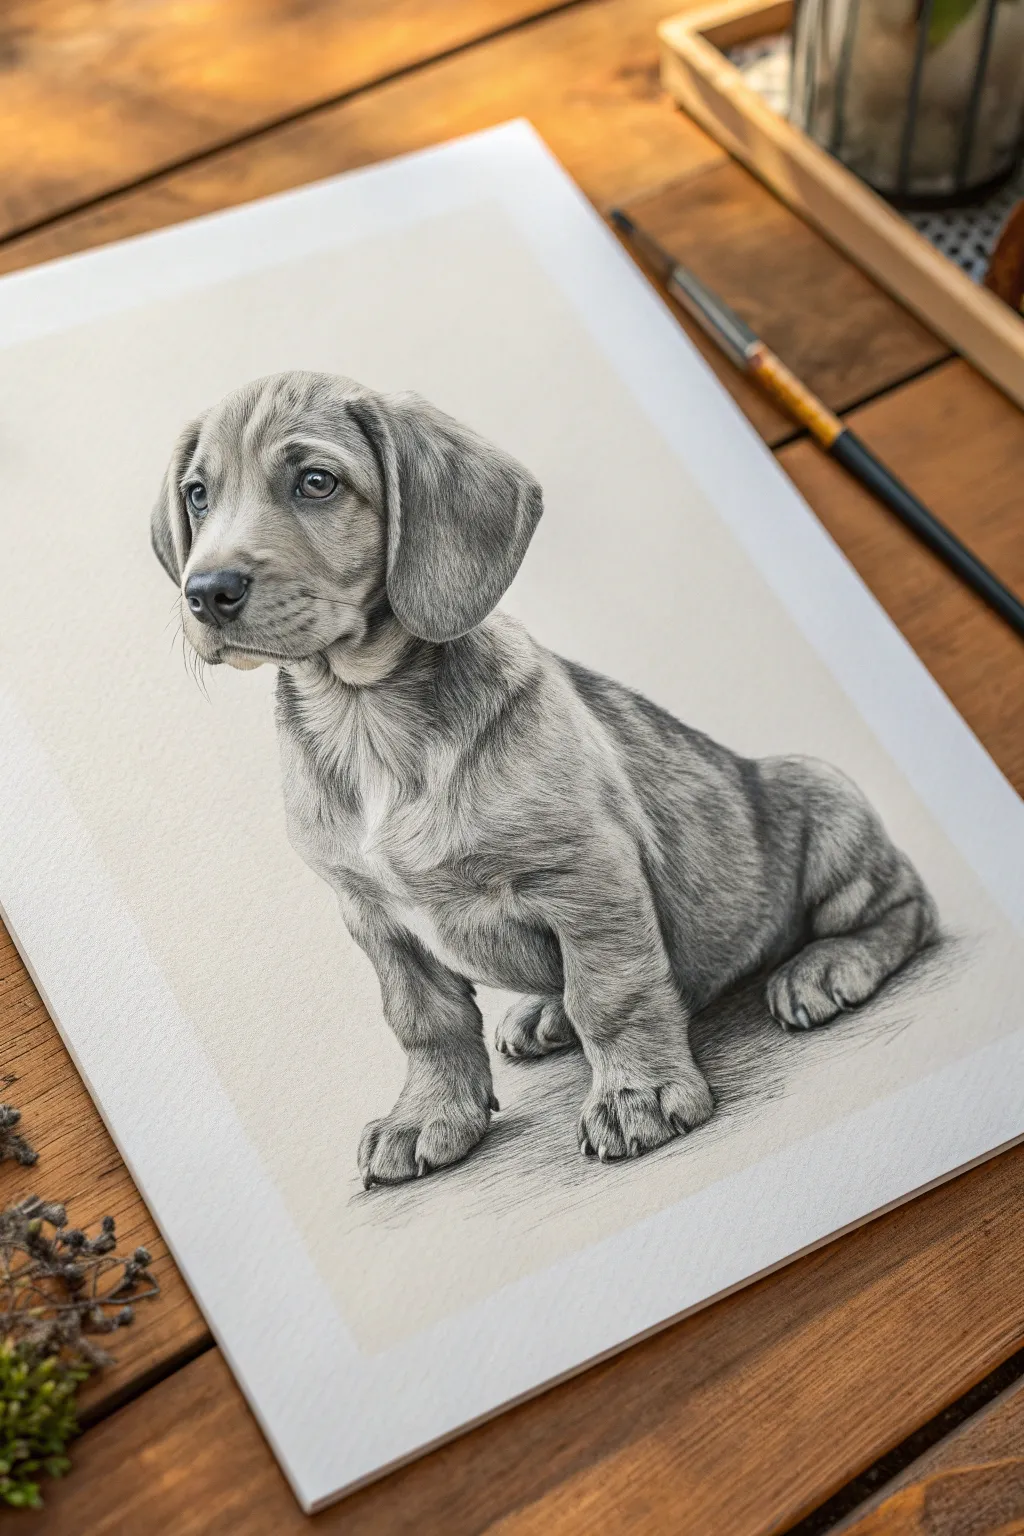
Long-Body Dachshund Side View

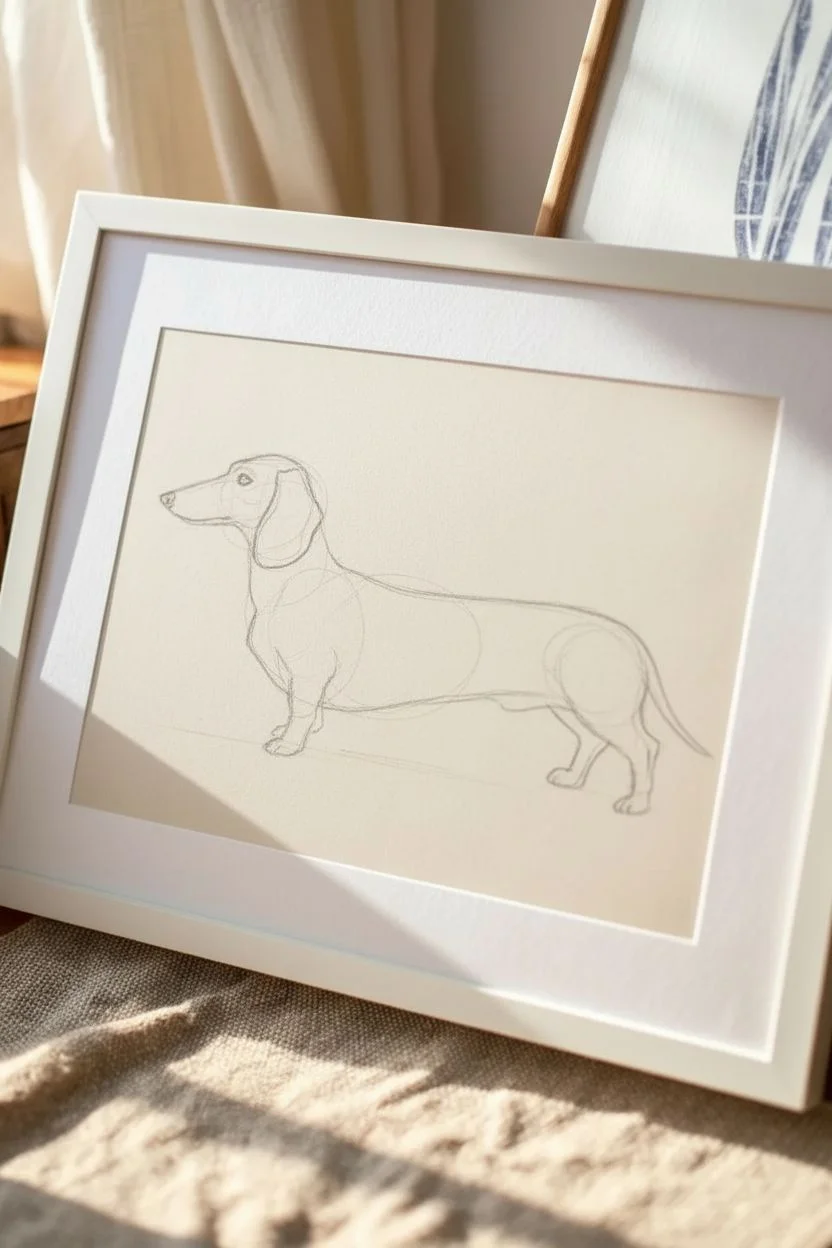
Capture the classic silhouette of a dachshund using a rich monochromatic palette and stippling techniques. This project combines precise outlining with patient dot-work to create a textured, vintage-style print that looks elegant in a simple frame.
Step-by-Step
Materials
- Heavyweight smooth drawing paper or Bristol board (cream/off-white)
- Fine liner pens (Dark Navy Blue or Indigo, sizes 0.1, 0.3, and 0.5)
- Graphite pencil (HB or 2H)
- Kneaded eraser
- Ruler
- Reference photo of a standard dachshund side profile
- White picture frame with mat (clean white)
Step 1: Drafting the Silhouette
-
Establish the ground line:
Begin by lightly drawing a horizontal line across the lower third of your paper using a ruler. This ensures your dog stands flat and prevents the ‘floating’ effect. -
Sketch the main body shapes:
Visualize the dachshund as geometric forms. Draw a long oval for the body, a smaller circle for the chest area, and a slanted oval for the head. Connect these shapes loosely with light pencil strokes. -
Refine the outline:
Using your reference photo, carve out the specific contours. Pay attention to the deep chest (brisket), the slight tuck-up at the belly, and the iconic long snout. -
Add key details:
Sketch the large, floppy ear dropping straight down from the skull. Mark the placement of the eye (a small almond shape) and the nose. Add the legs, noting how the front legs are slightly bowed and the back legs extend backward. -
Clean up the sketch:
Once you are happy with the proportions, gently erase your construction lines, leaving only a faint outline of the final dog shape to guide your ink work.
Step 2: Inking and Texturing
-
Outline the form:
Take your 0.3 blue fine liner and trace the perimeter of the dog. Keep the line consistent but natural—slightly broken lines on the furrier areas like the chest can add softness. -
Establish shadow areas:
Identify where the darkest shadows fall: under the ear, the belly, the armpits, and the underside of the tail. Lightly mark these zones with your pencil so you know where to concentrate your ink. -
Begin the stippling process:
Using the 0.5 pen, start filling the darkest shadow areas with dense dots. The dots should be very close together, almost merging into solid black-blue color. -
Create the mid-tones:
Switch to your 0.3 pen. Move outward from the shadow areas, spacing your dots slightly further apart. This gradient from dense to sparse creates the 3D rounded effect of the body. -
Detail the head and ear:
The ear needs to look distinct from the neck. darker shading on the ear itself helps push it forward visually. Use the 0.1 pen for the delicate area around the eye and snout to preserve detail. -
Fill the body highlight:
For the main body, stipple evenly but leave the top edge of the back lighter (fewer dots) to suggest light hitting the spine. I find this creates that sleek, shiny coat look dachshunds are known for. -
Texture the legs and paws:
Use the 0.1 pen to add tiny dots on the paws and claws. Ensure the back leg in the background is slightly darker than the foreground leg to create depth. -
Add the cast shadow:
Underneath the paws, use horizontal hatching and loose stippling to create a rough ground shadow. This anchors the dog to the page.
Ink Consistency
Keep your pen vertical when stippling. Slanting the pen creates dashes instead of round dots, which changes the texture from fur-like to messy. A steady, upright hand is key.
Step 3: Finishing Touches
-
Erase pencil marks:
Wait at least 15 minutes for the ink to fully dry. Then, gently roll your kneaded eraser over the drawing to lift any remaining graphite guidelines. -
Adjust contrast:
Step back and look at the drawing from a distance. If the dog looks too flat, go back in with the 0.5 pen and darken the deepest shadows again. -
Matting and framing:
Center your artwork behind a clean white mat board. Place it into the frame, ensuring no dust is trapped between the glass and the art.
Try Colored Paper
Swap the cream paper for a soft tone like sage green or blush pink. Using a black ink on colored paper creates a totally different, modern pop-art vibe for your pet portrait.
Hang your new dachshund print in a well-lit spot to show off the delicate ink texture


Corgi Loaf Pose With Tiny Legs
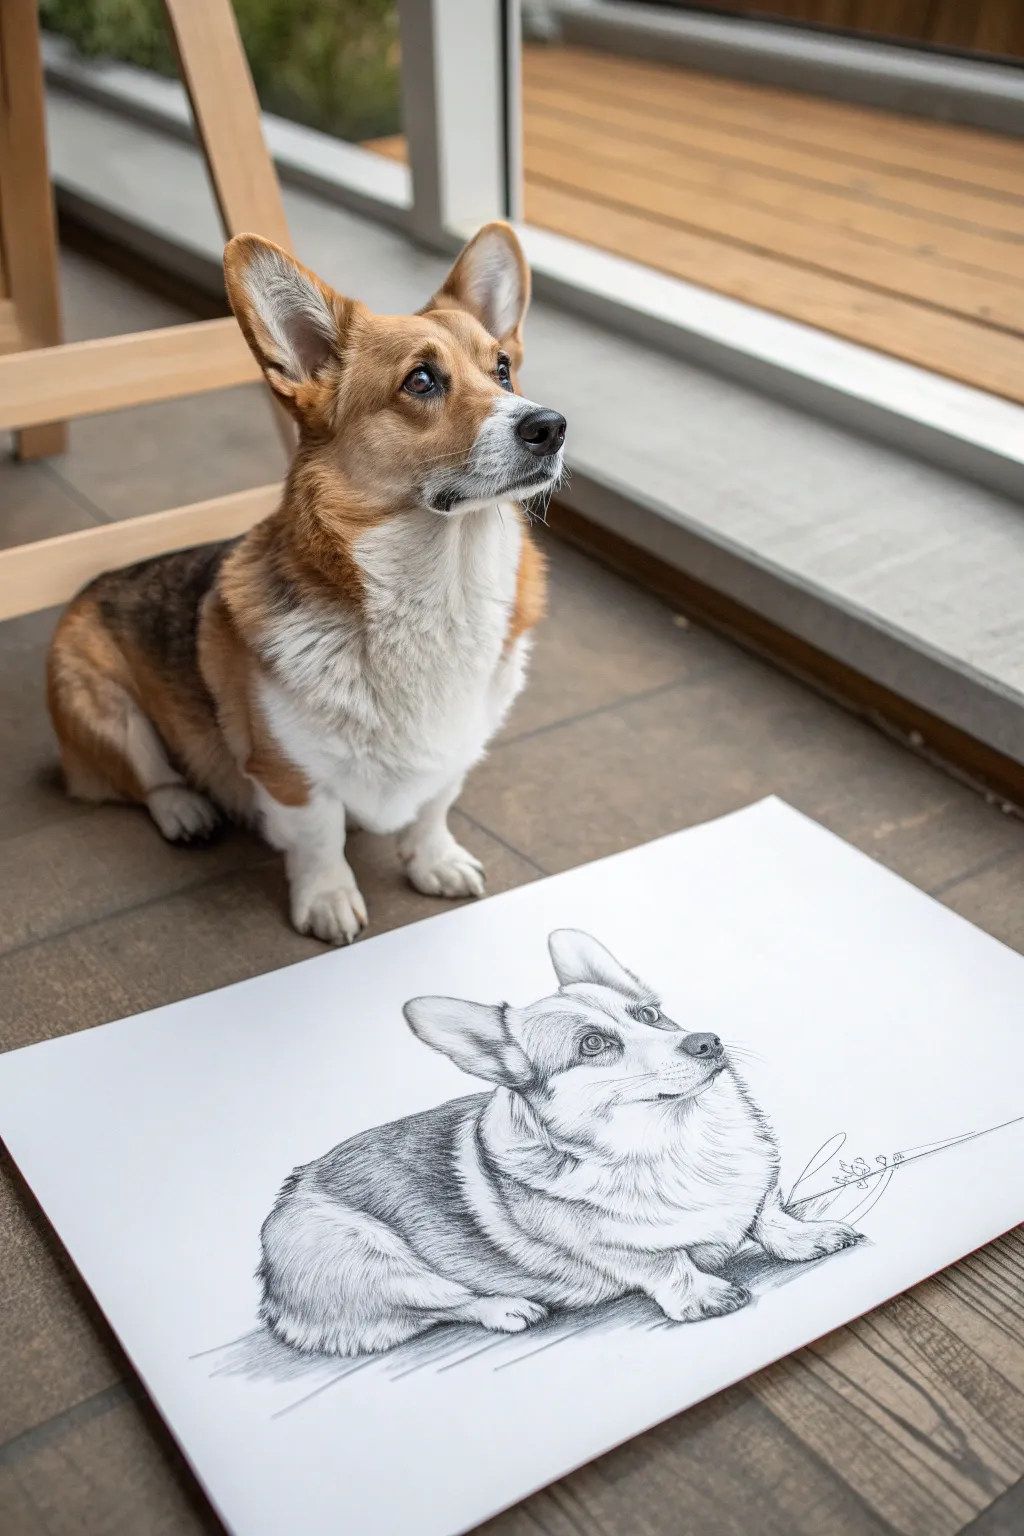

Capture the irresistible charm of a Corgi with this detailed pencil study, focusing on their distinct loaf-like posture and expressive face. With careful hatching and layered shading, you’ll render luscious fur textures and deep, soulful eyes that seem to look right off the page.
Detailed Instructions
Materials
- High-quality drawing paper (smooth or vellum finish, approx. 9×12 inches)
- Graphite pencils (range: HB, 2B, 4B, 6B)
- Fine-point mechanical pencil (0.5mm, HB lead)
- Kneaded eraser
- Precision vinyl eraser
- Blending stump (tortillon)
- Soft tissue or cotton swab
Step 1: Structural blocking
-
Proportion guidelines:
Begin with an HB pencil using very light pressure. Draw a slanted oval for the main body mass and a slightly smaller, overlapping circle for the chest area to establish the sitting posture. -
Head placement:
Position a rounded square shape above the chest circle for the head. Add a vertical centerline that curves slightly upwards to indicate the dog is looking up. -
Defining the muzzle:
Sketch a short, boxy cylinder protruding from the lower half of the head shape. Corgi snouts are distinctive, so ensure it doesn’t get too long or pointy. -
Ear triangulation:
Add two large, rounded triangles on top of the head. The ears should be alert and angled slightly outward. Keep the lines loose; we will refine the fluff later. -
Tiny legs:
Sketch the suggestion of the front legs tucked neatly beneath the chest. The ‘loaf’ pose hides most of the legs, so focus on the little paws meant for grounding.
Fur looks flat?
Don’t shade with solid blocks of grey. Always lift your pencil at the end of every stroke to create tapering lines that mimic individual hairs overlapping each other.
Step 2: Facial details and features
-
Mapping the eyes:
Draw two almond shapes along the horizontal axis of the face. The pupils should be positioned towards the top of the eye to emphasize the upward gaze. -
Refining the nose:
Detail the nose leather with a soft triangular shape. Add small curves for the nostrils. Use a 2B pencil to darken the nostrils immediately to anchor the face’s contrast. -
Adding life to the eyes:
Switch to your 4B pencil. Darken the pupils, leaving a specific, sharp white circle for the catchlight (reflection). This is crucial for realism. -
Mouth and smile:
Draw the mouth line extending back from the muzzle, curving slightly up at the corner to give that classic Corgi smile. Keep this line soft rather than harsh.
Keep it clean
Place a scrap piece of paper under your drawing hand while you work. This prevents oils from your skin smudging the graphite you’ve already laid down on the paper.
Step 3: Fur texture and shading
-
Directional mapping:
Before shading, use your HB pencil to draw faint arrows indicating fur direction. The neck fur flows downward and outward, while the muzzle fur is short and radiates from the nose. -
Initial hatching:
Using the mechanical pencil for precision, begin hatching short strokes around the eyes and ears. Follow your directional map closely. -
Deepening shadows:
Take the 4B pencil and shade the dark patches of fur, specifically the ‘mask’ around the eyes and the ears. Use smooth, clustered strokes rather than a solid block of grey. -
The white ruff:
The chest fur is voluminous. I prefer to use curved, C-shaped strokes with the H or HB pencil here to suggest fluffiness without making it too dark. -
Body contours:
Shade the back and side of the dog using 2B and 4B pencils. Create the illusion of the round body by darkening the underside where it meets the floor. -
Blending for softness:
Use a blending stump to gently smudge the graphite on the hindquarters and shadow areas. This mimics the soft undercoat.
Step 4: Final refinements
-
Whiskers and fine hairs:
With a freshly sharpened 4B pencil or the mechanical pencil, add the long whiskers on the muzzle. Make these quick, confident flicks. -
Highlights and cleanup:
Use a precision eraser or the sharp edge of a cut eraser to lift out ‘negative’ hairs in the dark patches and clean up the eye reflections. -
Grounding shadow:
Add a dark, horizontal cast shadow directly under the paws and belly using a 6B pencil. This weights the figure so it doesn’t look like it’s floating. -
Loose signature:
Add a few loose, scribble-like lines extending to the right, perhaps suggesting a signature or artistic flourish, to match the dynamic energy of the reference.
Now you have a charming Corgi portrait ready to frame or gift to a dog lover
Squishy-Face Bulldog or Pug Portrait
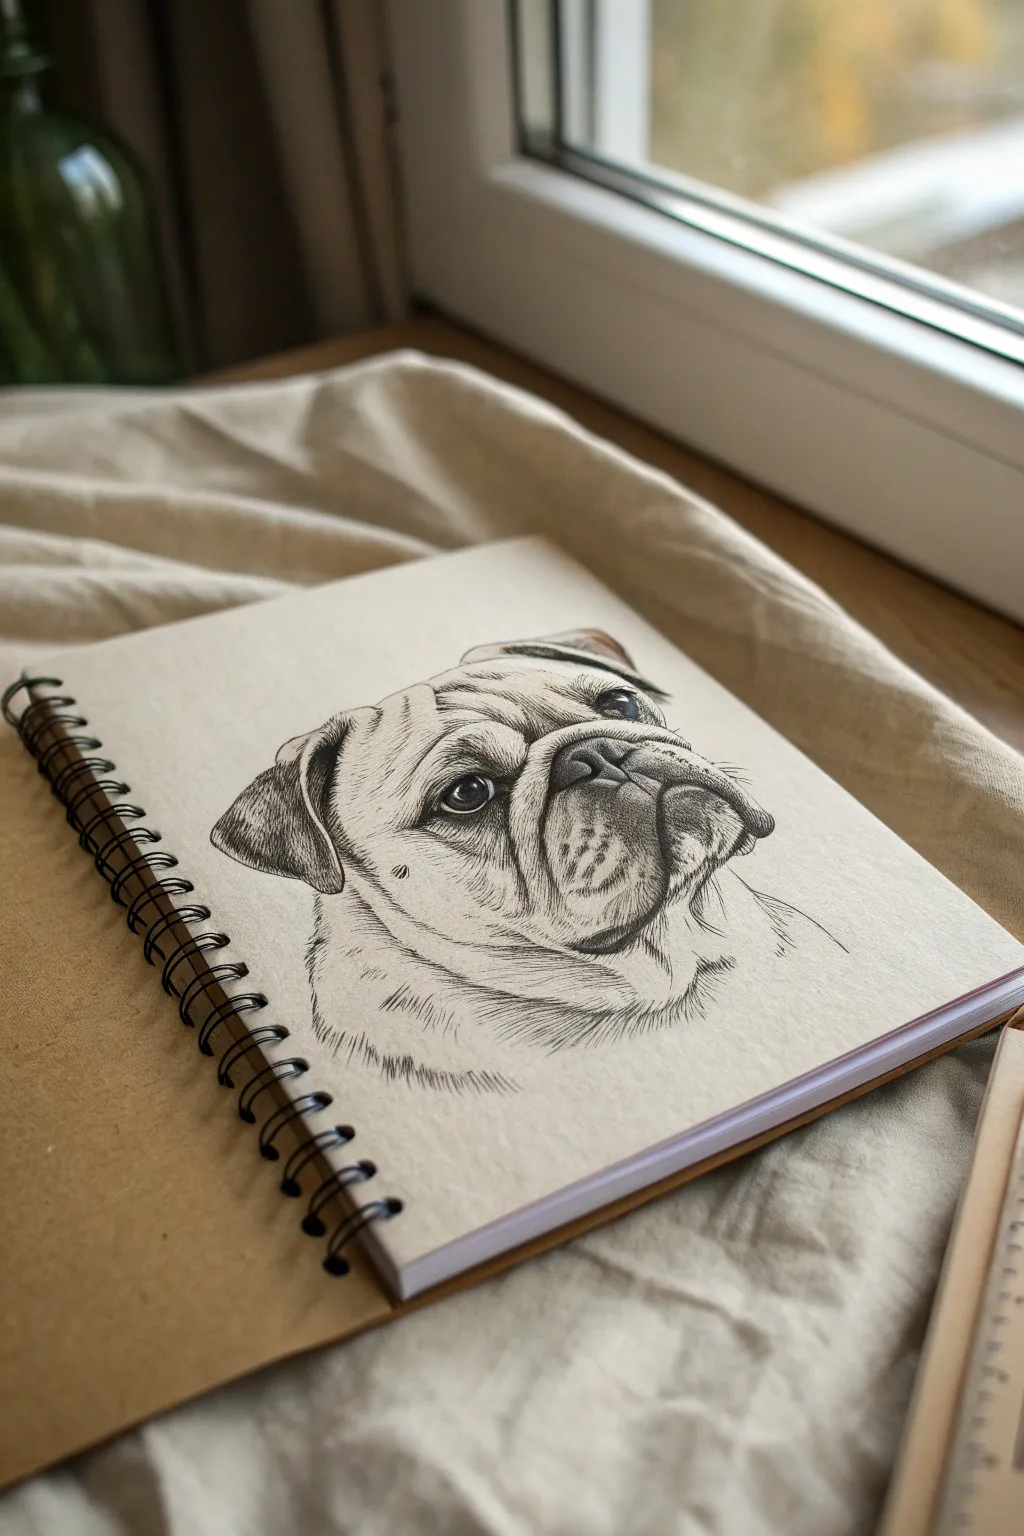
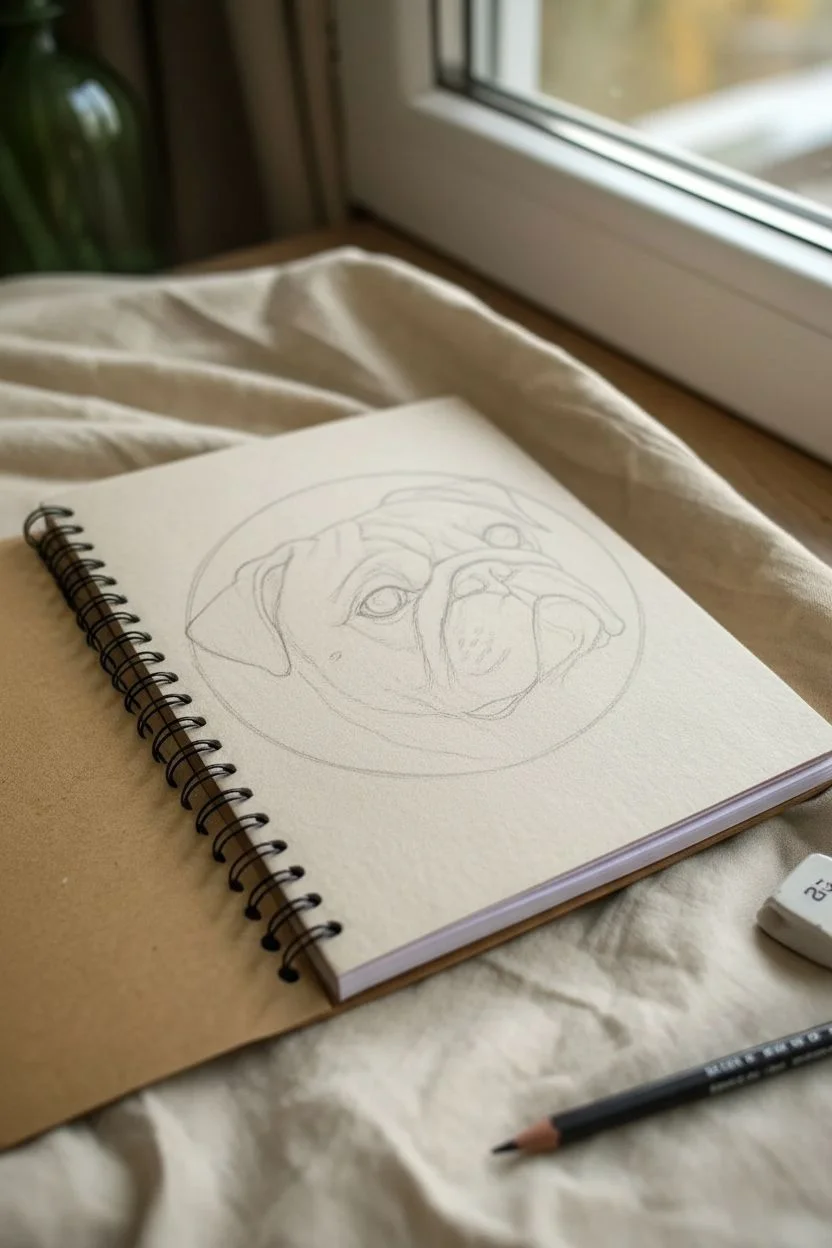
Capture the irresistible charm of a squishy-faced pug with this precise pen and ink tutorial. You’ll learn how to build up layers of fine hatching to create realistic fur texture and deep, soulful wrinkles on warm-toned paper.
Step-by-Step Tutorial
Materials
- Beige or cream-colored sketchbook paper (smooth texture preferred)
- HB or 2B graphite pencil
- Kneaded eraser
- Black fineliner pens (sizes 0.05, 0.1, and 0.3mm)
- White gel pen (optional for highlights)
Step 1: Sketching the Framework
-
Basic Shapes:
Begin with a pencil, drawing a large, slightly flattened circle for the head. Add a smaller, squarish oval in the lower center for the muzzle area. -
Placing Features:
Mark a horizontal line across the middle of the head circle. Place the eyes wide apart on this line. They should be relatively large ovals slightly angled downward at the outer corners. -
Defining the Wrinkles:
Sketch the characteristic forehead wrinkles as soft arches above the eyes. Draw the heavy folds of skin draping over the nose bridge, connecting the forehead lines to the muzzle. -
Refining the Ears:
Add the triangular ears, folding them forward so the tips point toward the eyes. Keep the lines soft to suggest the velvety texture of the ear flaps. -
The Mouth and Jowls:
Sketch the distinctive inverted ‘U’ shape of the mouth. Add the heavy jowls hanging down on either side, ensuring they overlap the lower jaw slightly to create depth. Once satisfied with the proportions, lightly dab the sketch with your kneaded eraser to make the faint graphite lines barely visible guideposts.
Uneven Ink Flow?
If your fineliners are skipping over the paper texture, slow your strokes down. Fast strokes on textured paper can break; slower movement allows the ink to soak in fully for solid, dark lines.
Step 2: Inking the Eyes and Nose
-
The Eyes:
Switch to your 0.1mm fineliner. Outline the eyes carefully, thickening the upper lid line significantly to mimic eyelashes and shadow. Leave a tiny white circle in each pupil for the reflection. -
Darkening the Pupils:
Fill in the pupils with solid black using the 0.3mm pen. Work slowly around the reflection highlight to keep it crisp. -
Nose Texture:
Outline the nose shape with the 0.1mm pen. Instead of coloring it solid black, use tiny stippling dots or very tight scribbles to create a leathery, wet texture, leaving the top edge lighter for a highlight.
Mastering Fur Direction
Always pull your pen stroke in the direction the hair grows, lifting the pen at the end of the stroke. This creates a tapered line that mimics the natural look of animal fur.
Step 3: Building Fur & Shadows
-
Outlining Folds:
Use the 0.1mm pen to trace your main wrinkle lines. Don’t use a single continuous line; break the line up slightly or vary the pressure to make it look organic rather than cartoony. -
Directional Fur Mapping:
Observe the direction the fur grows—usually radiating outward from the center of the face. With the 0.05mm pen, start adding very short, quick flicking strokes along the forehead and cheeks. -
Deepening Shadows:
Focus on the deep creases around the muzzle and under the neck folds. Use closer, denser hatching lines here with the 0.1mm pen to create dark values without losing the texture of the hair. -
Ear Texture:
The ears often appear darker. Use cross-hatching (layering lines in opposing directions) on the shadowed underside of the ear flap to create a deep, rich tone. -
Muzzle Details:
Add the whisker spots on the muzzle with small dots. Draw the whiskers themselves using confident, quick strokes so the lines taper naturally at the ends.
Step 4: Final Refinements
-
Neck Ruff:
Extend the drawing down into the neck area. Use longer, looser strokes here to suggest the thicker ruff of fur, tapering off into the white space of the paper for a vignette effect. -
Contrast Check:
Step back and squint at your drawing. I find this helps identify areas that need more contrast. Darken the deepest crevices between skin folds with the 0.3mm pen to make the 3D form pop. -
Last Polish:
Erase any remaining pencil marks completely. If you have a white gel pen, add a tiny extra dot to the eye reflection or the wettest part of the nose for extra sparkle.
Your sketchbook now hosts a wonderfully characterful portrait ready to charm anyone who turns the page
Spotted Dalmatian Pattern Practice
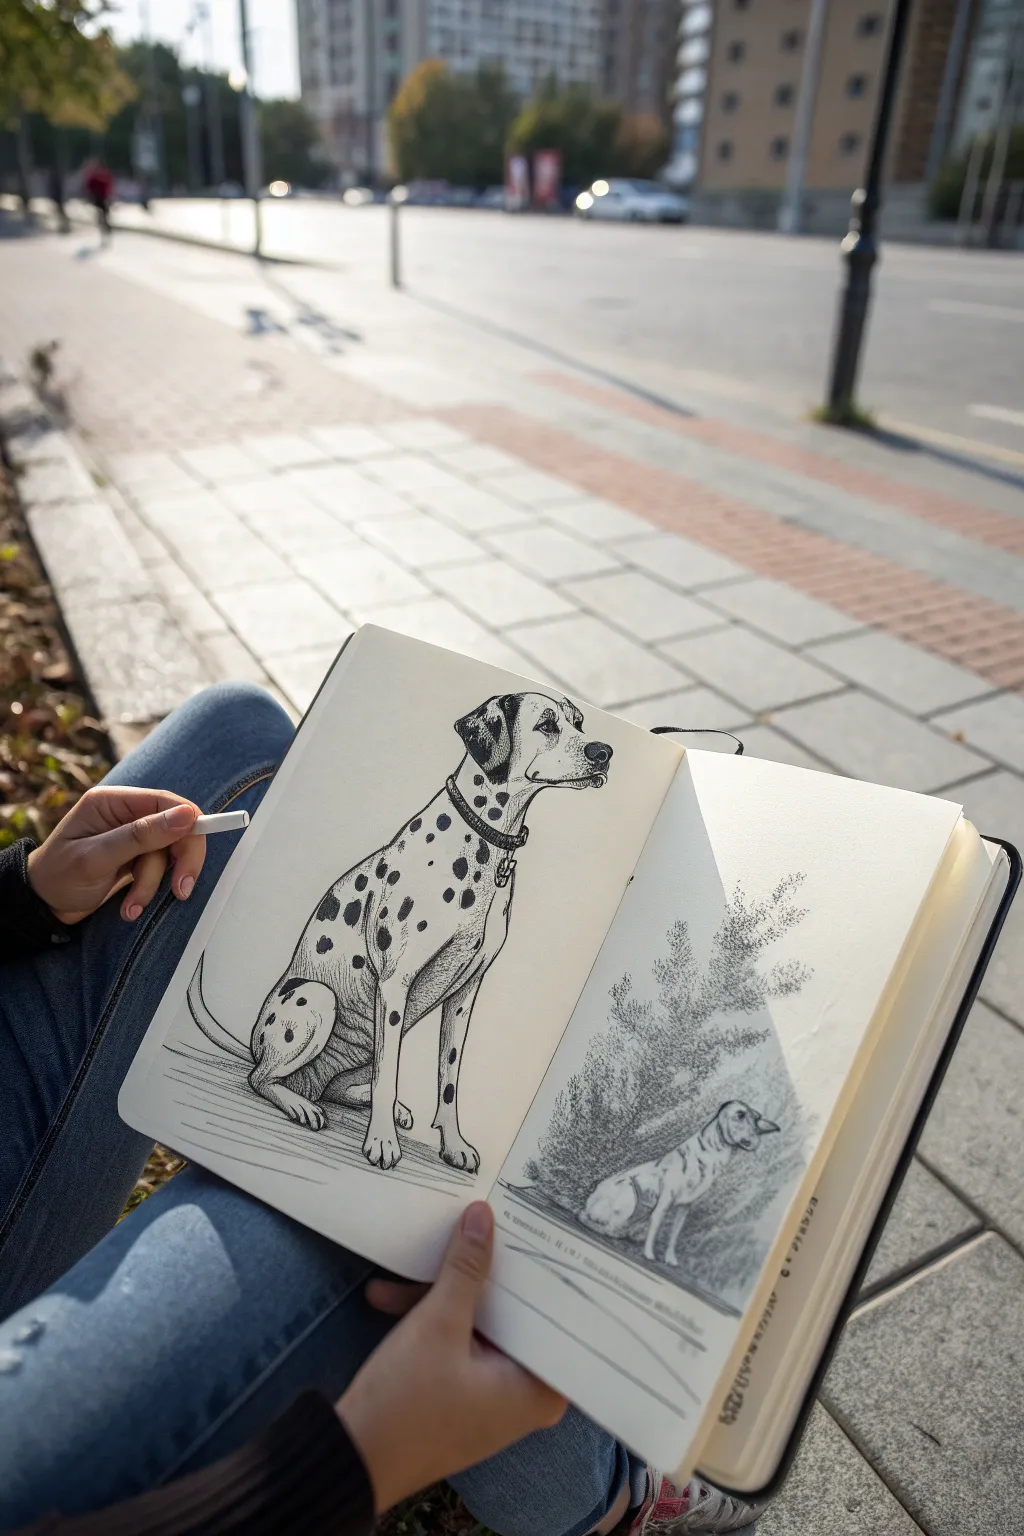
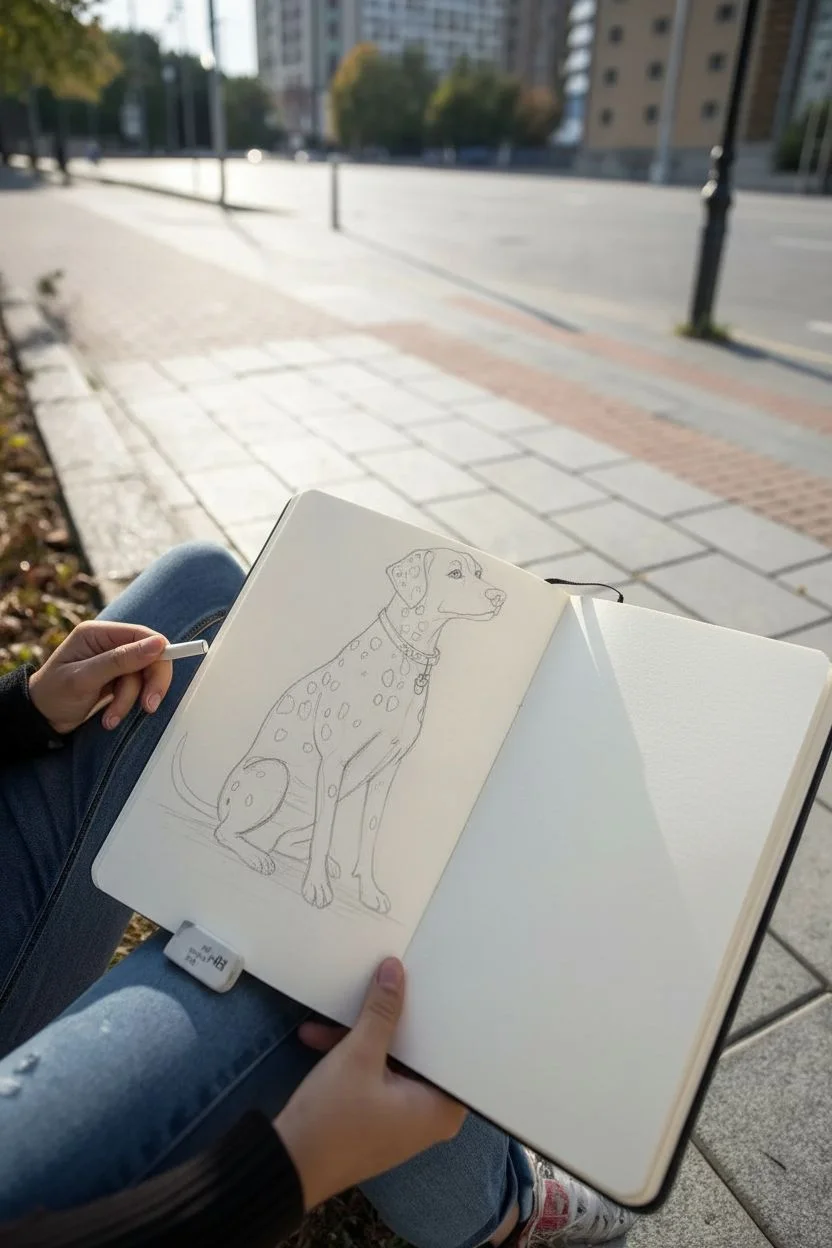
This project focuses on capturing the distinct elegance of a Dalmatian using fine liner pens to create contrast and texture. You will practice careful spot placement and contour hatching to bring the dog’s muscular form to life on the page.
Step-by-Step
Materials
- Sketchbook (heavyweight paper preferred)
- HB Graphite pencil
- Kneadable eraser
- Fine liner pens (sizes 0.1, 0.3, and 0.5)
- Reference photo of a sitting Dalmatian
Step 1: Structural Sketch
-
Establish the pose:
Start with your HB pencil, using light pressure to draw a large oval for the chest and a smaller circle above it for the head. Connect them with a curved line to indicate the neck’s posture. -
Map the limbs:
Sketch the front legs as straight, vertical columns, and use a large, rounded shape for the haunches to show the sitting position. Ensure the paws are planted firmly on the ground plane. -
Refine the silhouette:
Connect your basic shapes with smooth contour lines. Dalmatians have a lean, athletic build, so keep the waist tucked and the chest deep. Add the tail curving gently behind the rear leg. -
Add facial features:
Draw the muzzle, keeping it somewhat square but tapered. Sketch the triangular ear flapping downwards. Position the eye just below the forehead ridge, giving it an alert expression. -
Indicate the spots:
Lightly draw small circles and organic shapes across the body. Don’t shade them yet; just plan their random distribution, focusing on the ears and back where they are often denser. -
Accessorize:
Sketch a simple collar around the neck with a tag hanging down. This adds a nice touch of domestic realism to the portrait.
Spots Look Too Uniform?
Real Dalmatians have spots of varying sizes. If yours look like polka dots, go back and alter the shapes of a few—merge two together or make edges jagged.
Step 2: Inking and Detailing
-
Outline the main contours:
Switch to a 0.3 fine liner. Carefully go over your pencil lines, breaking the line slightly in areas where the fur might be softer or where light hits the form. -
Define the facial details:
Use a 0.1 pen for the eye, nose, and mouth. Leave a tiny white highlight in the eye to make it look alive. Darken the nose, perhaps leaving a small highlight on the top edge. -
Fill the spots:
Using a 0.5 pen, fill in the spots you mapped out earlier. Make the edges slightly irregular rather than perfect circles to mimic real fur patterns. -
Detail the collar:
Ink the collar with firm lines. I like to add tiny vertical hatch marks on the collar strap to suggest a woven or leather texture. -
Add muscle definition:
With the 0.1 pen, add very light, curved hatching lines around the shoulder, chest, and thigh muscles. These lines should follow the curve of the dog’s body to suggest volume. -
Shade the underbelly:
Add closer hatching lines underneath the belly and on the legs where shadows would naturally fall. This grounds the figure and gives it weight. -
Create a ground plane:
Draw horizontal lines beneath the paws to suggest floorboards or pavement. Keep these loose and fast to contrast with the careful drawing of the dog. -
Erase pencil guides:
Wait until the ink is completely dry to avoid smudging. Then, gently use your kneadable eraser to lift all the graphite lines. -
Final touches:
Assess the drawing for contrast. If the dog looks too flat, add a few more hatching lines in the deepest shadow areas, like the crease of the back leg or under the chin.
Contour Hatching Direction
Always curve your hatching marks around the form of the limb (like wrapping a rubber band around a tube). Straight/flat lines flatten the drawing instantly.
With practice, you will master the balance between the stark black spots and the subtle shading of the white coat
Golden Retriever Holding a Flower Sprig
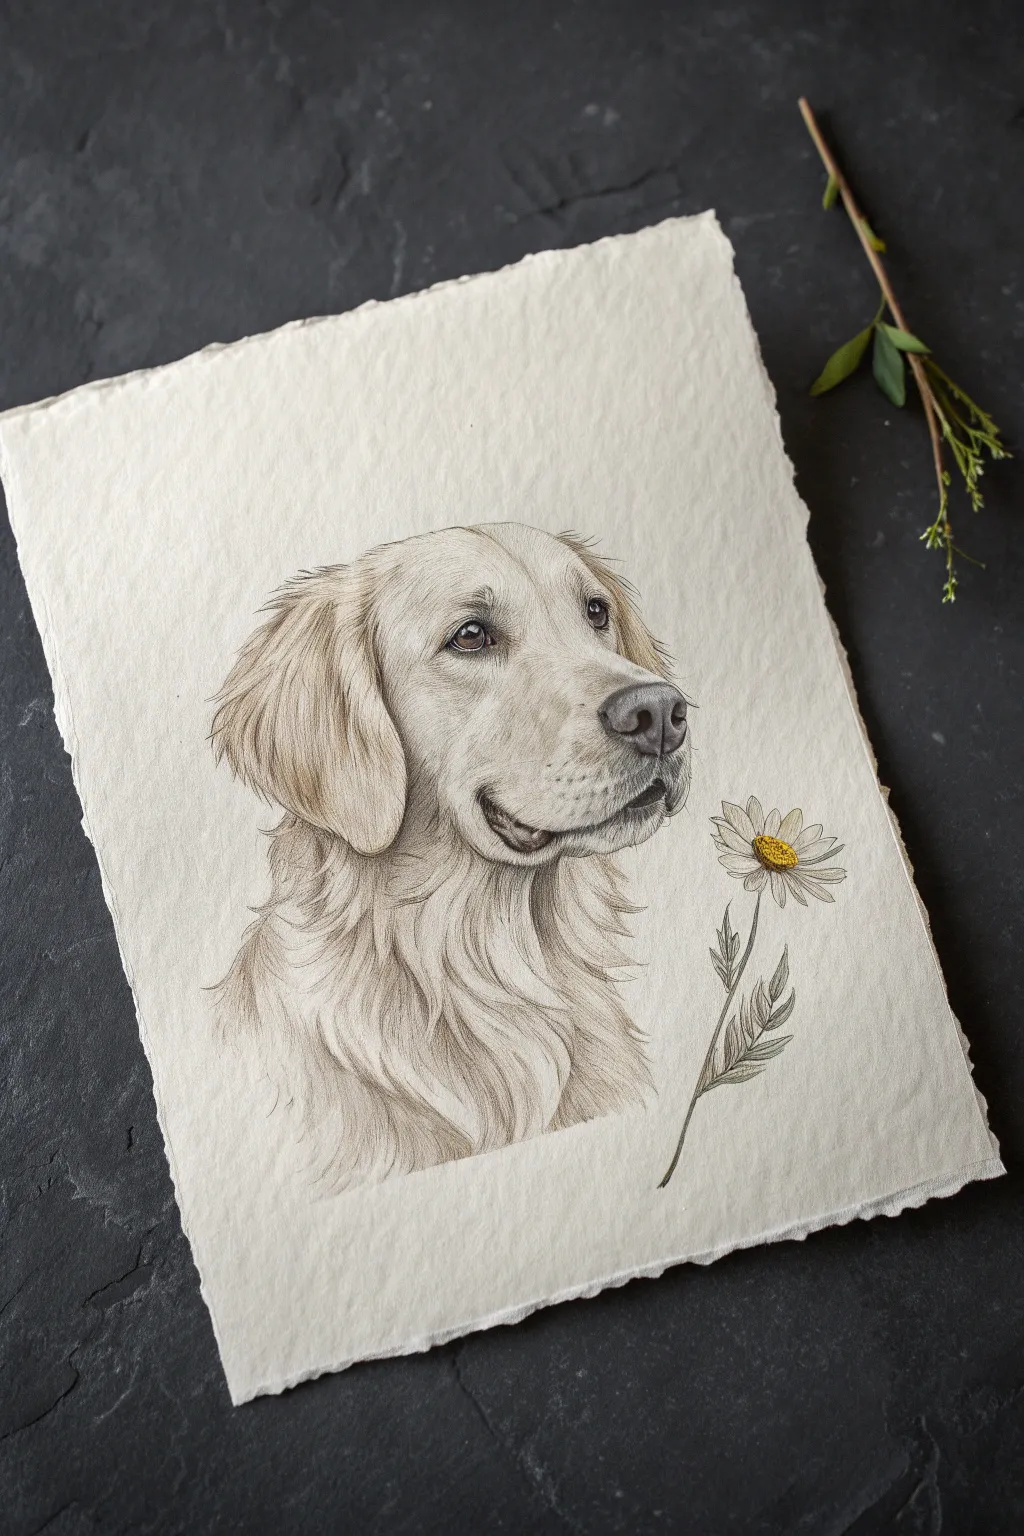
This elegant tutorial captures the gentle spirit of a Golden Retriever with delicate colored pencil shading and a touch of whimsy. By working on high-quality, deckled-edge paper, you will elevate this sweet portrait into a piece of fine art suitable for framing.
Detailed Instructions
Materials
- Heavyweight textured drawing paper (deckled edge preferred)
- High-quality colored pencils (earth tones, greys, and pale yellow)
- H or HB graphite pencil for outlining
- Kneaded eraser
- Fine liner or sharp dark grey pencil for details
- Blending stump or cotton swab
- Pencil sharpener
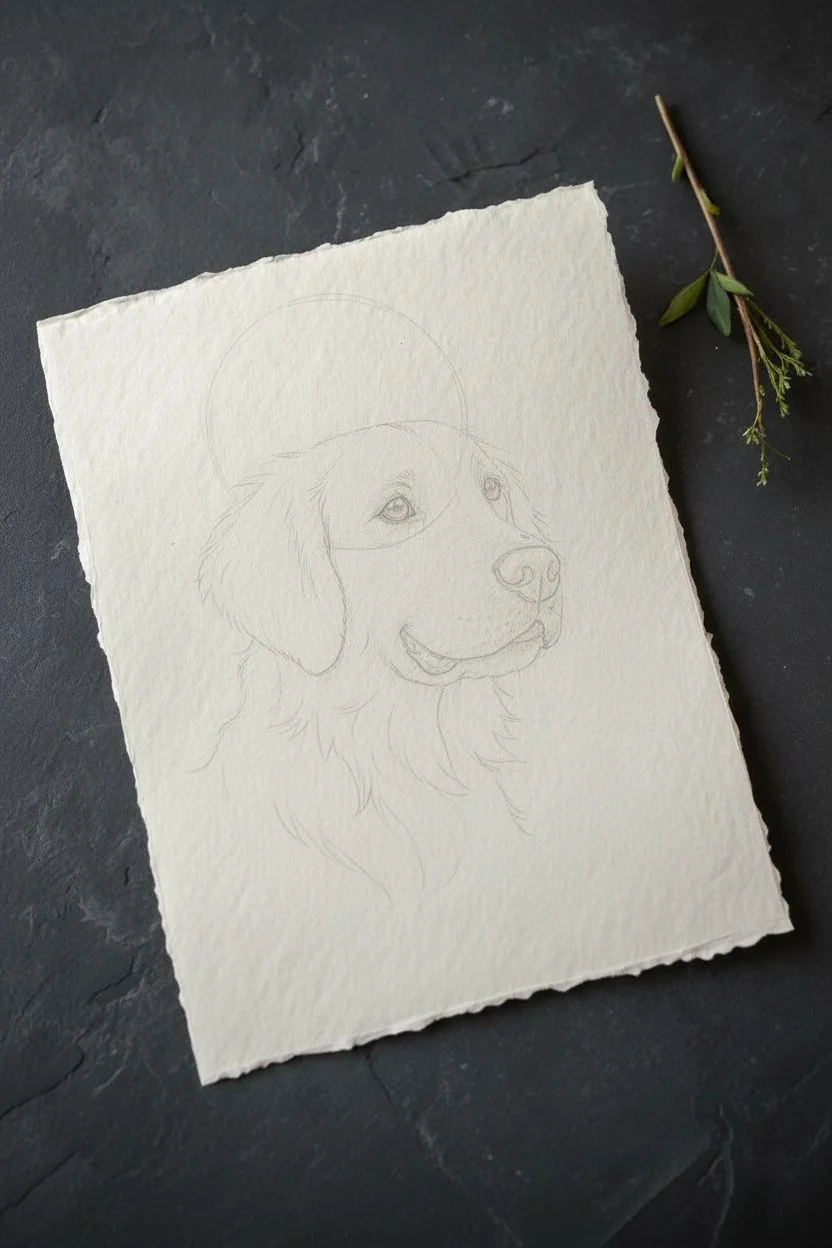
Step 1: Forming the Foundations
-
Lightly sketching the shapes:
Begin with a very faint graphite sketch to establish the dog’s proportions. Draw a large circle for the cranial area and a slightly smaller oval extending outwards for the muzzle. Mark the position of the ear, heavily drooping down the side. -
Refining the features:
Sketch the almond shape of the eye, pointing towards the ear base. Outline the triangular soft nose and the gentle curve of the mouth. Ensure the mouth suggests a faint smile, typical of the breed. -
Positioning the flower:
To the right of the dog’s nose, sketch a simple stem rising up to a daisy-like flower head. Position it so the dog appears to be gently presenting or sniffing it. -
Indicating fur flow:
Instead of drawing individual hairs yet, map out the direction the fur grows using light arrows or lines. Pay attention to the neck ruff and the sweeping curves on the ear. -
Lifting the graphite:
Before adding color, gently roll your kneaded eraser over the entire sketch. You want the graphite guidelines to be barely visible so they don’t muddy the colored pencil later.
Step 2: Layering the Fur
-
Applying the base tone:
Using a cream or very pale ochre pencil, apply a light wash of color over the entire head, avoiding the highlight in the eye and the teeth. Keep your pressure extremely light to preserve the paper’s texture. -
Building structure with mid-tones:
Switch to a sand or light tan color. Start defining shadow areas: under the ear flap, beneath the jawline, and around the eye socket. Use short strokes that mimic the direction of the fur growth you mapped earlier. -
Deepening the ear texture:
The ear fur is often crimped or wavy. Use a slightly darker golden-brown pencil to create wavy, overlapping strokes on the ear flap to suggest volume and softness. -
Defining the muzzle:
Use a warm grey to add shading around the nose and mouth. The muzzle hair is shorter, so use tiny, stippled marks or very short dashes here, transitioning into longer strokes as you move back toward the cheeks. -
Layering the neck ruff:
For the lush neck fur, use long, sweeping strokes with a light brown pencil. Leave significant gaps of the lighter base layer showing through to create the look of highlighted strands.
Muddy Fur Fix
If fur layers look muddy, you’ve likely applied too much pressure too soon. Let the wax settle, then use an electric eraser to lift fine highlights back out.
Step 3: Detailing Features & Flora
-
Rendering the eye:
Using a dark walnut brown or warm black, fill in the iris, leaving a crisp white highlight. Darken the rim of the eyelid to give the gaze depth and realism. -
sculpting the nose:
Color the nose with a slate grey or desaturated brown. Apply the color in layers, keeping the top surface slightly lighter to show moisture and dimension. Add the nostril depths with your darkest pencil. -
Refining the mouth:
Define the lip line with a dark brown. Add subtle shading at the corner of the mouth to enhance that characteristic retriever smile. -
Drawing the flower:
Use a moss green for the stem and leaves, applying it lightly. For the flower center, create texture with tiny dots of yellow and ochre. Lightly shade the petals with cool grey to give them form without making them look grey. -
Final fur details:
With a very sharp dark brown or dark grey pencil, add singular stray hairs around the edges of the ears and neck. These fine distinct lines sit on top of your blended layers and create crisp realism. -
Adding whiskers:
Use your sharpest pencil or a fine micro-pen to add the whisker spots on the muzzle, and draw a few very faint, sweeping whiskers extending outward.
Paper Choice Matters
For this soft, vintage look, don’t use smooth Bristol paper. Choose cold-press watercolor paper or textured cartridge paper to help break up the pencil strokes naturally.
Step back and admire the gentle expression you have created on your textured paper.
Dog Peeking Over a Table Edge
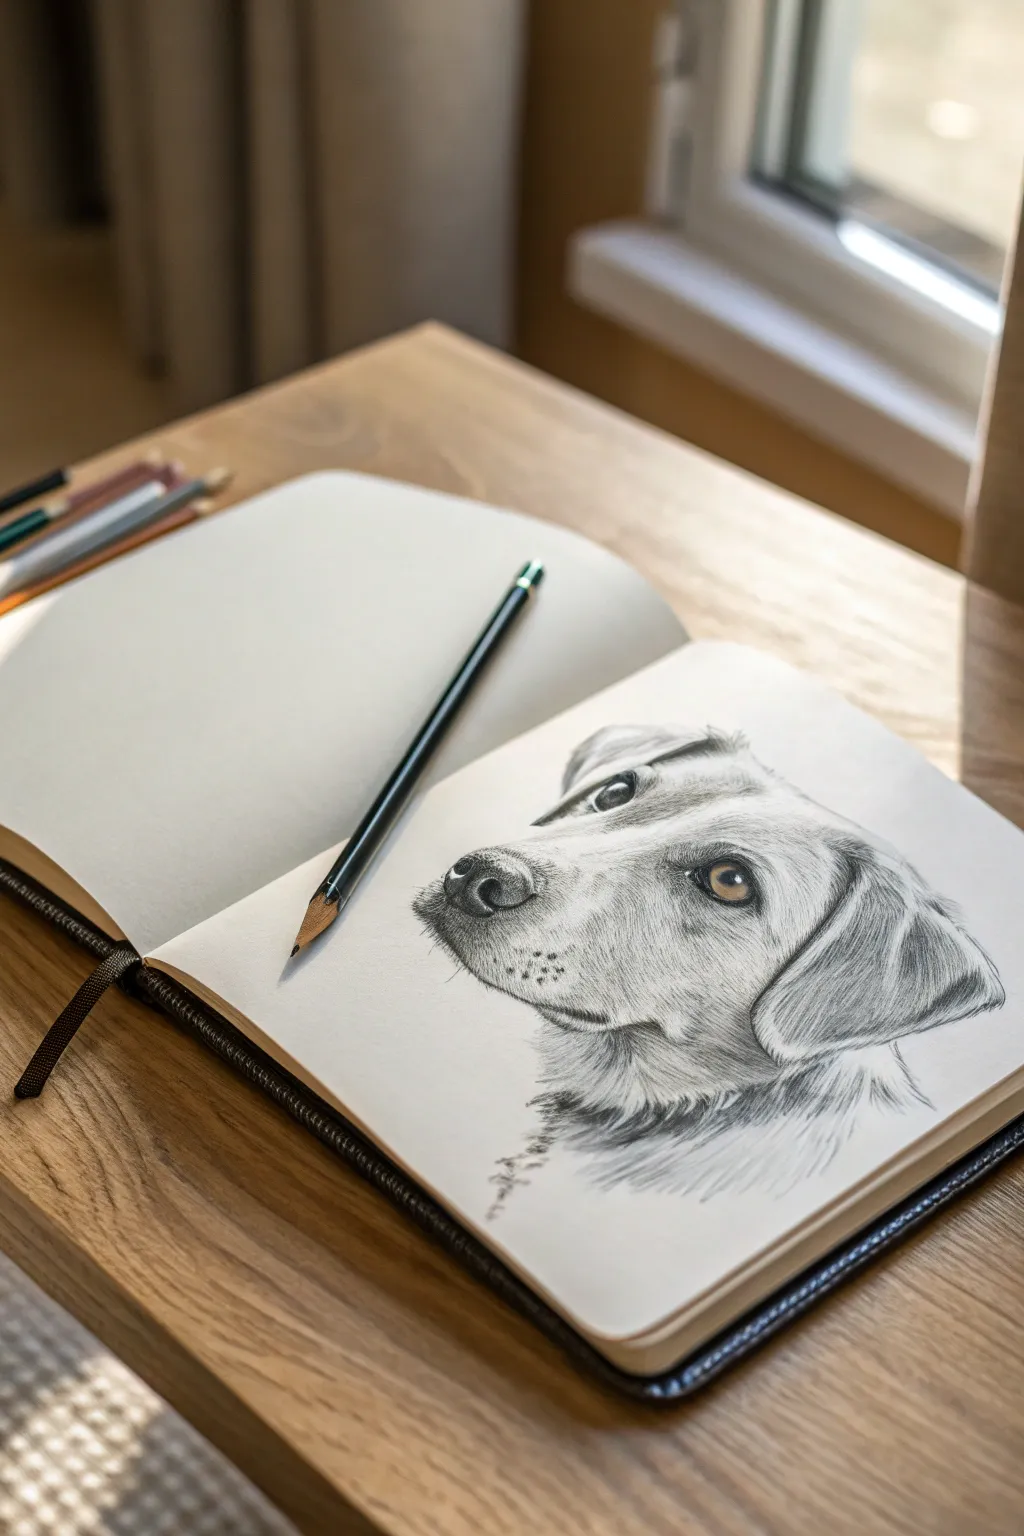
Capture the soulful expression of man’s best friend with this detailed graphite pencil study. By focusing on realistic fur texture and expressive eyes, you’ll create a lifelike portrait that seems to pop right off the sketchbook page.
How-To Guide
Materials
- Quality sketchbook paper (smooth or vellum surface)
- Graphite pencils (HB, 2B, 4B, 6B)
- Mechanical pencil (0.5mm HB for fine details)
- Kneaded eraser
- Blending stump or tortillon
- Reference photo of a dog
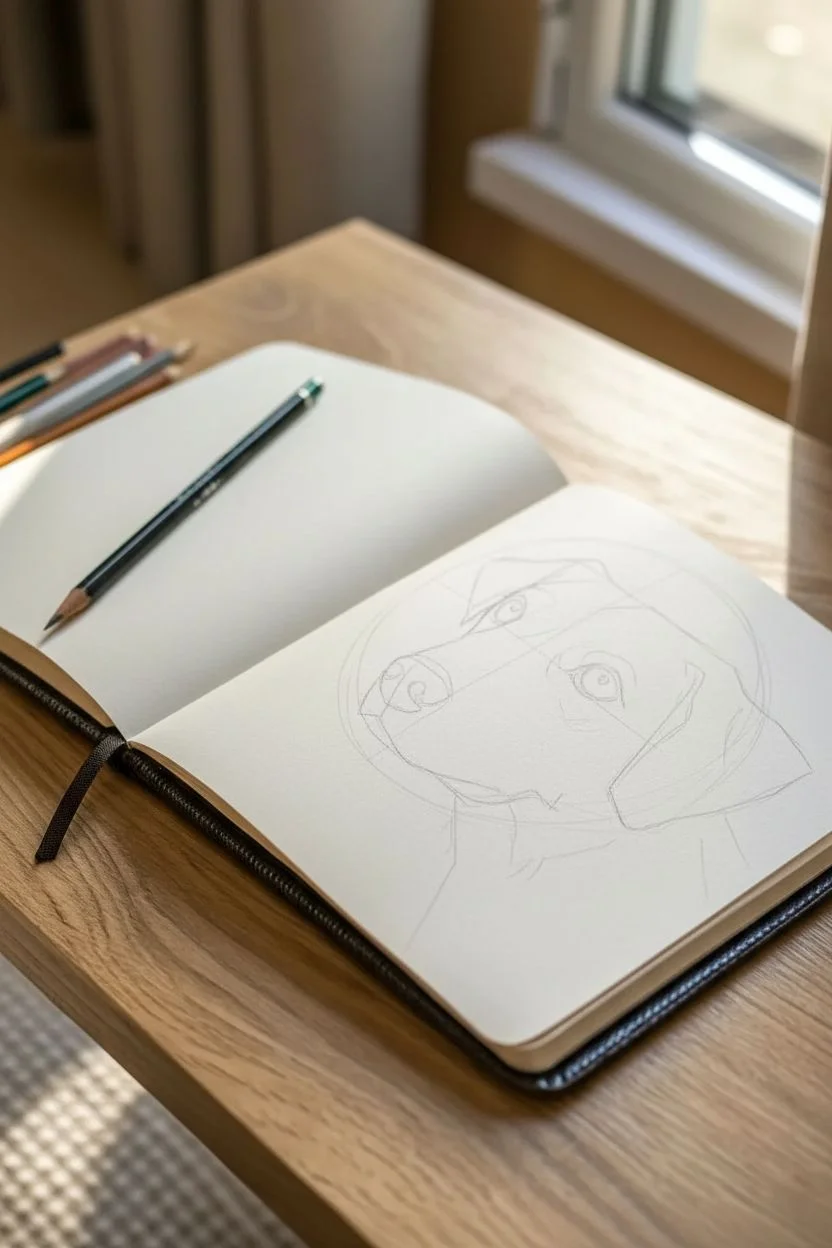
Step 1: Laying the Foundation
-
Basic Shapes:
Start by lightly sketching a circle for the cranial area and a rounded rectangle extending downwards for the snout using an HB pencil. Keep your pressure extremely light so these guide lines can be erased later. -
Refining the Contour:
Connect the shapes to form the overall silhouette of the dog’s head, neck, and ears. Pay attention to the angle of the head; the dog in the example is looking slightly upward and to the left. -
Placement of Features:
Draw faint cross-hairs on the face to align features. Mark the positions for the eyes, nose, and mouth line. Ensure the eyes are spaced correctly; the space between them is usually the width of one eye.
Step 2: Defining Key Features
-
Drafting the Eyes:
Outline the almond shape of the eyes. Draw the circular iris and pupil inside, but most importantly, leave a small, crisp white circle in each eye for the highlight—this brings the drawing to life. -
Shaping the Nose:
Sketch the nose shape, adding the nostrils. Note the ‘leather’ texture pattern on a dog’s nose, suggesting it with tiny, irregular shapes rather than a solid outline. -
Mapping Fur Direction:
Before shading, use light directional strokes to map out which way the fur grows. The fur on the snout flows back, while the fur on the ears hangs down.
Keep it Sharp
Keep your pencil incredibly sharp for fur. A dull point creates fuzzy, indistinct lines. Rotate the pencil in your hand every few strokes to maintain a point.
Step 3: Shading and Texture
-
Darkening the Eyes:
Switch to a 4B or 6B pencil to fill in the pupils, making them pitch black. Shade the iris with a 2B, radiating lines outward from the pupil, keeping that highlight paper-white. -
Nose Texture:
Shade the nose using a 4B pencil. Instead of smooth shading, use a stippling or small circular motion to replicate the bumpy texture. make the nostrils the darkest point. -
Initial Fur Layer:
Using an HB or mechanical pencil, start drawing individual hairs on the snout. Use short, quick flicks of the wrist. I find starting from the nose and working backward helps prevent smudging. -
Building Density:
Layer more hatch marks over your initial fur strokes. Vary your pencil pressure to create depth. Areas around the eyes and under the chin should be denser and darker. -
Ear Texture:
The fur on the ears is often softer and longer. Use longer, sweeping strokes with a 2B pencil here. Allow the hair to clump slightly at the tips for realism. -
Neck Ruff:
Sketch the thicker fur around the neck and chest. These strokes should be looser and less uniform than the face fur, suggesting movement and fluffiness.
Smudge Prevention
Graphite smudges easily. Place a clean sheet of scrap paper under your drawing hand to protect your work while you shade different areas.
Step 4: Final Details
-
Deepening Shadows:
Take a 6B pencil and reinforce the darkest shadow areas: specifically under the ear flaps, beneath the chin, and the corners of the mouth. -
Blending:
Use a blending stump to gently soften the transitions between shadow and light areas, particularly on the smooth parts of the snout. Be careful not to over-blend the distinct fur texture. -
Whisker Spots:
Add the tiny whisker dots on the muzzle. Make sure these follow the curve of the upper lip. -
Adding Whiskers:
With a sharp mechanical pencil, add confident, swift strokes for the whiskers. Press hard at the root and lift completely off the paper at the tip for a tapered look. -
Highlighting:
Use a kneaded eraser to lift out pigment in high-light areas, such as the brow bone and the top of the nose bridge, to create volume.
Step back and admire the loyal companion you have revealed on the page
Action Pose: Running or Jumping Pup
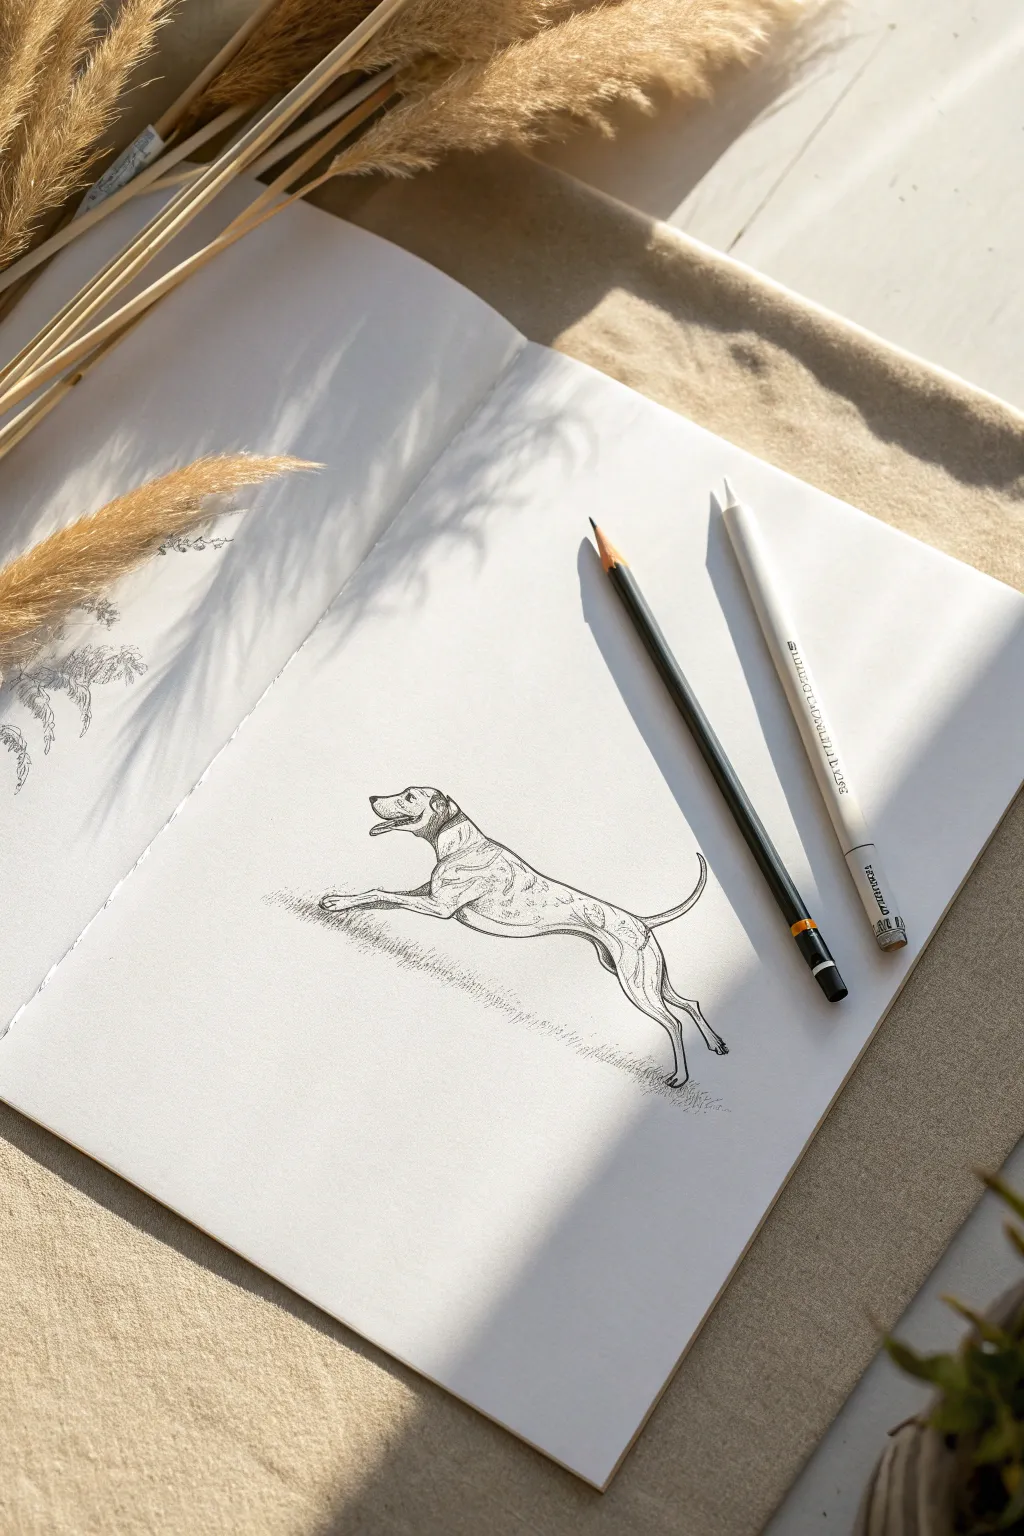
Capture the energy and movement of a hunting dog in mid-stride with this delicate graphite pencil sketch. The focus here is on clean anatomical lines and subtle shading to imply muscle definition without overwhelming the paper.
Detailed Instructions
Materials
- Sketchbook with smooth, off-white paper
- HB graphite pencil (for initial lines)
- 2B or 4B graphite pencil (for darker details)
- White charcoal pencil or white pastel pencil (for highlights)
- Kneaded eraser
- Blending stump (optional)
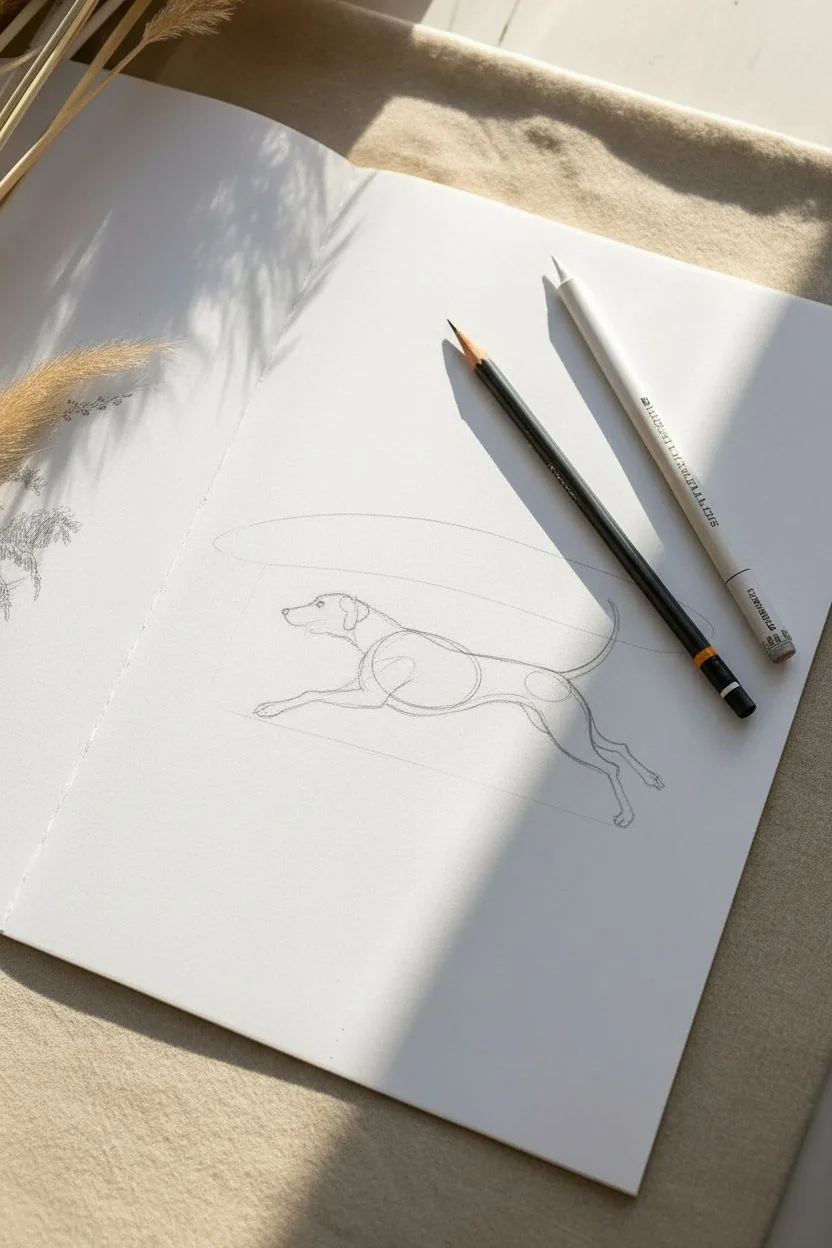
Step 1: Laying the Anatomical Foundation
-
Establish the spine:
Begin with your HB pencil using very light pressure. Draw a sweeping, slightly curved horizontal line that will act as the spine, extending from the neck area to the tip of the tail to capture the flow of movement. -
Block in the ribcage and hips:
Sketch an oval shape towards the front of your spine line for the ribcage. Add a smaller, slightly tilted circle further back for the hip area. Connect these shapes with fluid lines to form the torso. -
Position the head:
Draw the head shape attached to a sturdy neck. The muzzle should be pointing forward and slightly upward, indicating the dog’s focus while running. -
Map the legs:
Use simple stick lines to map out the leg positions. The front legs should be reaching forward, while the back legs are extended backward in a classic ‘pushing off’ pose. Pay attention to the joints—knees and hocks create sharp angles.
Keep it Sharp
Keep your pencil extremely sharp for the fur texture. A dull point creates fuzzy blobs, while a sharp point mimics individual hairs and creates that crisp, classic illustration style.
Step 2: Refining the Outline
-
Flesh out the limbs:
Go over your stick lines, adding volume to the legs. The thighs should be thick and muscular, tapering down towards the delicate ankles and paws. Keep the lines sleek to emphasize speed. -
Define the head features:
Refine the muzzle, adding the nose and an open mouth to show the dog catching its breath. Sketch the floppy ear lying back against the neck, affected by the wind of movement. -
Connect the contours:
Smooth out the connections between the neck, shoulders, and chest. I like to keep my pencil strokes loose here to maintain a sense of action rather than stiffness. -
Detail the tail:
Thicken the tail, ensuring it tapers to a point. It should curve slightly upward, acting as a rudder for the running dog.
Step 3: Detailed Shading and Texture
-
Erase guidelines:
Take your kneaded eraser and gently dab away the initial construction lines (spine, ovals) so they don’t interfere with your shading. -
Start shading muscles:
Switch to a slightly softer pencil if you have one, or just press a bit harder with the HB. Add shading to the underside of the belly, the shadowy area between the back legs, and under the neck. -
Define the shoulder blade:
Use short, directional strokes to suggest the shoulder blade popping out as the front leg extends. This anatomical detail is crucial for realistic movement. -
Add coat texture:
Instead of coloring entire areas, use short, quick hatching lines to suggest fur direction. Focus these marks on the neck curve, the flank, and the thigh muscles. -
Darken the accents:
Use your darkest pencil to deepen the eye, the nose, the inside of the ear, and the shadowed area under the paws. This contrast brings the drawing to life.
Add Motion Blur
Lightly smudge the tip of the tail and the back paws horizontally. This subtle ‘motion blur’ effect tricks the eye into seeing speed and makes the sketch feel much more dynamic.
Step 4: Grounding and Final Touches
-
Ground the subject:
Sketch quick, jagged grassy strokes directly underneath the paws and along the imaginary ground line. This ‘shadow’ prevents the dog from looking like it’s floating in mid-air. -
Soften the edges:
If some pencil lines look too harsh, use a blending stump or your finger to gently smudge the mid-tones on the hound’s body, blending the graphite into the paper grain. -
Add white highlights:
If you are working on off-white or cream paper like in the example, take your white charcoal or pastel pencil and add tiny highlights on the top of the nose, the shoulder, and the hip bone to make the form pop.
Now you have a dynamic sketch that perfectly freezes a moment of high-energy action.
Dog in a Bubble Bath Scene
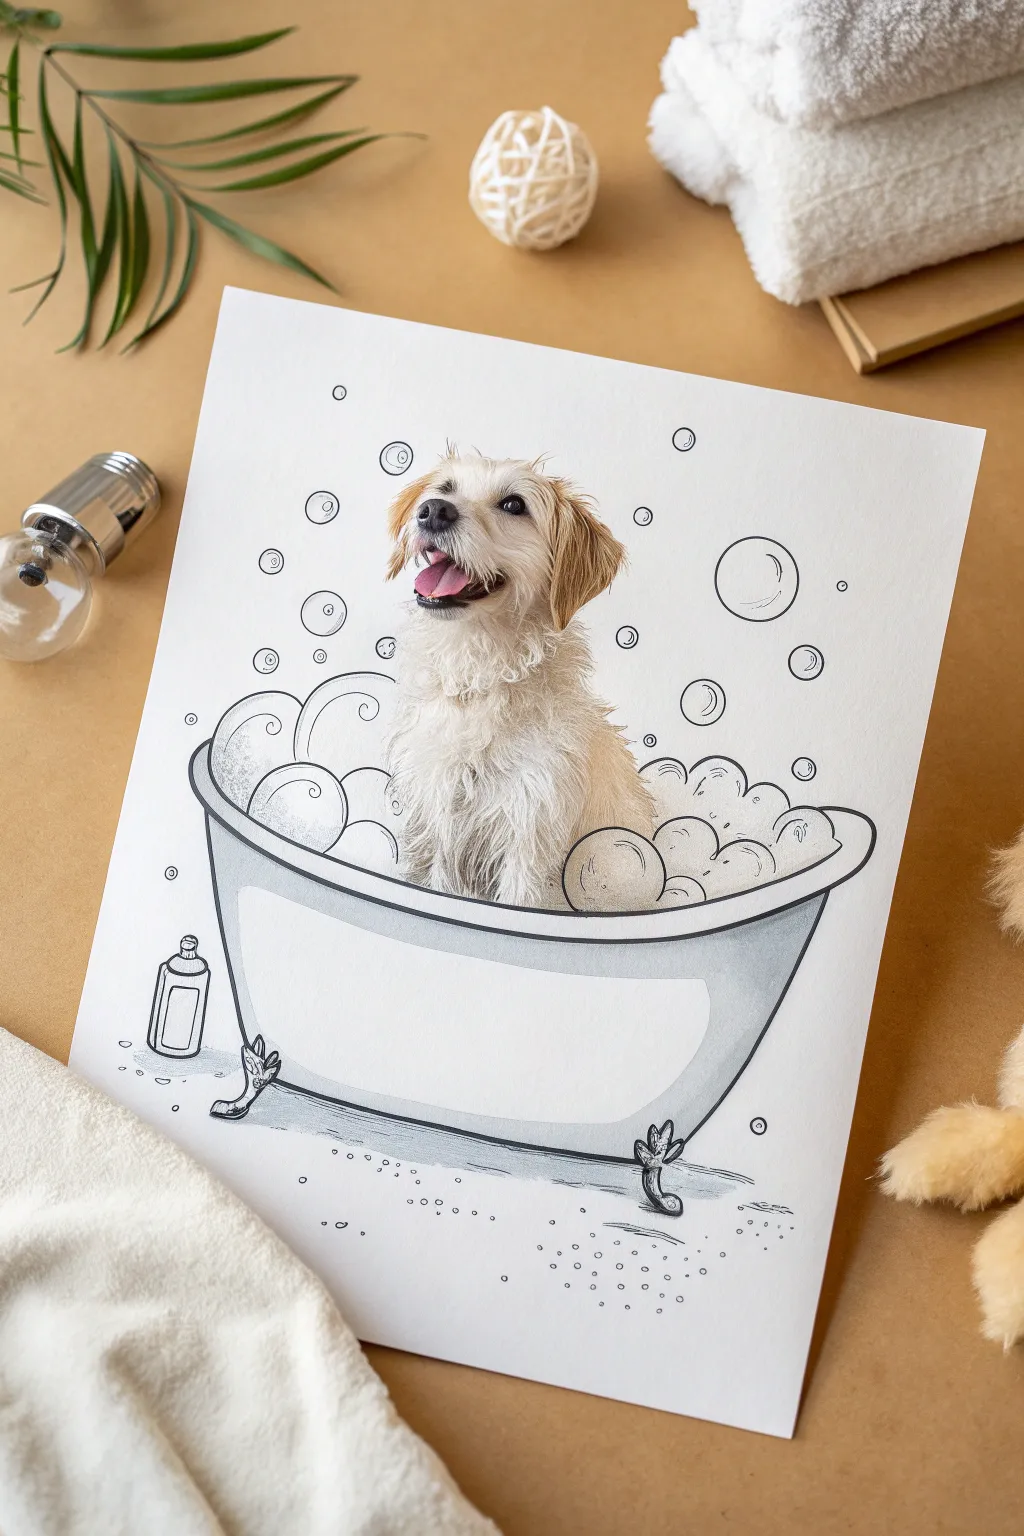
Create a whimsical portrait that blends photography with illustration in this charming mixed-media project. By combining a cutout photo of your furry friend with a simple hand-drawn bubble bath scene, you’ll produce a unique piece of art perfect for the bathroom wall.
Step-by-Step Guide
Materials
- High-quality photo of your dog (printed on matte photo paper)
- Heavyweight drawing paper or Bristol board (A4 size)
- Precision scissors or craft knife
- Glue stick or spray adhesive
- HB and 2B graphite pencils
- Fine-liner pen (black, 0.5mm)
- Blending stump (tortillon)
- Eraser
- Ruler (optional)
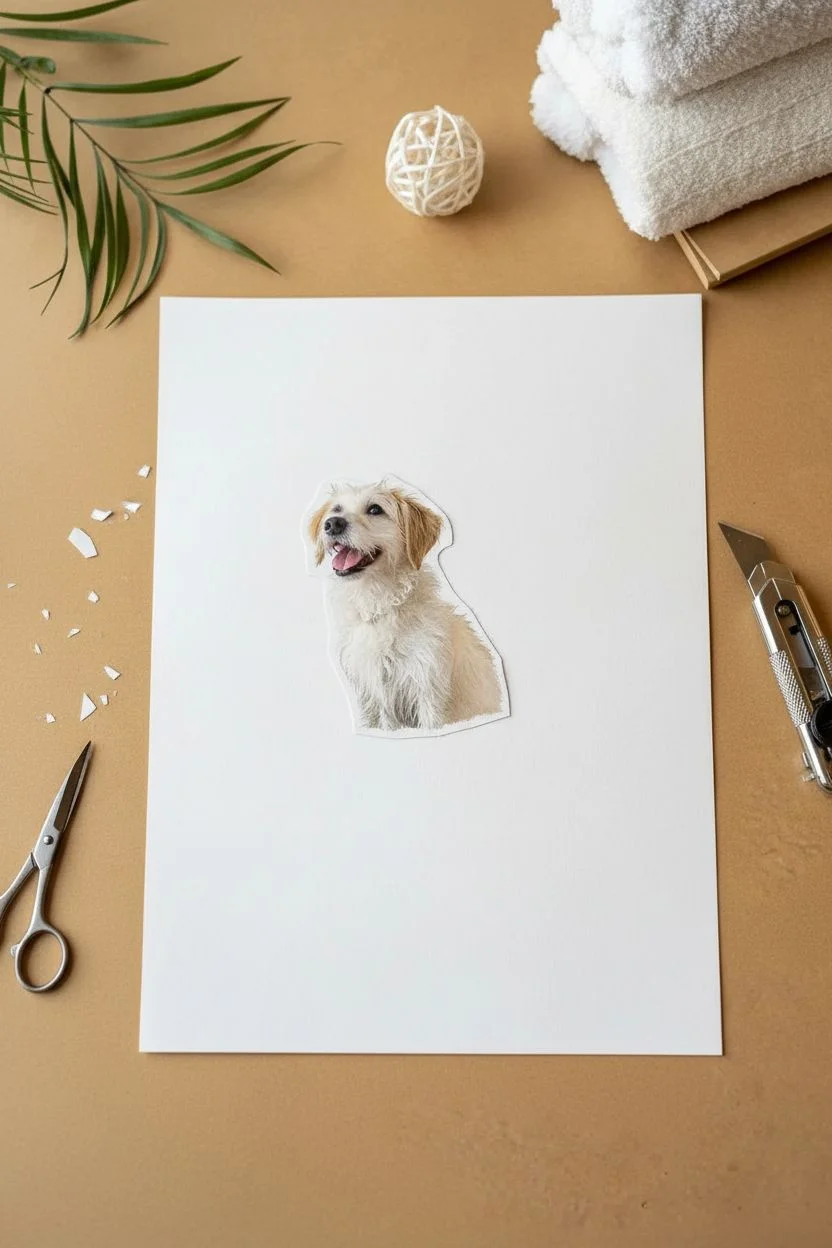
Step 1: Photo Preparation
-
Select the right photo:
Choose a clear, high-resolution photo of your dog sitting or looking up. A photo where the dog looks happy or has its mouth open works best for this playful theme. -
Print the image:
Print the photo on matte paper. Glossy paper can be hard to blend with drawing materials, so matte is the better choice here. Size it so the dog is about 4-5 inches tall. -
Cut out the subject:
Using precision scissors, carefully cut around the outline of your dog. Do not worry about cutting every single stray hair; a smooth outline often looks cleaner. -
Detail the fur edges:
For a more realistic look, I like to use a craft knife to gently feather the edges where the fur is fluffiest, avoiding that ‘paper doll’ straight line.
Seamless Blending
Use a white colored pencil to draw over the edge where the photo meets the paper. This softens the transition and hides the paper cut line.
Step 2: Sketching the Scene
-
Position the cutout:
Place your dog cutout on the drawing paper to visualize the composition, but don’t glue it down yet. Mark the bottom corners of the dog lightly with a pencil so you know where it sits. -
Draft the tub rim:
Using an HB pencil, sketch a wide, shallow oval curve just below your pencil marks. This will be the rim of the bathtub. -
Draw the tub body:
Sketch the body of the tub below the rim. Think of a rounded boat shape. Keep the lines loose and light at this stage. -
Add claw feet:
At the bottom corners of the tub, draw ornate claw feet. Start with a vertical oval and add three small toes gripping a ball or the floor. -
Sketch the bubbles:
Draw circles of various sizes floating above the tub and clustering around the rim. Overlap some circles to create depth, particularly where the dog will sit.
Add Color Accents
Use watercolor or markers to tint just the accessories, like the shampoo bottle or a rubber duck, keeping the rest monochrome.
Step 3: Assembly and Inking
-
Adhere the photo:
Apply glue to the back of your dog cutout. Position it carefully within your pencil marks, tucking it behind the imaginary line of the front bubbles. -
Create bubble piles:
Now, sketch more bubbles directly overlapping the bottom edge of the photo. This makes the dog look like it is truly submerged in the suds rather than just floating on top. -
Ink the outlines:
Take your fine-liner pen and trace over your pencil lines. Use a steady hand for the tub, but keep the bubble lines slightly broken or uneven to make them feel airy. -
Add floating bubbles:
In the open space above the dog, draw free-floating bubbles. Add a small ‘comma’ shape or a tiny oval inside each bubble to represent a light reflection. -
Draw the shampoo bottle:
To the left of the tub, sketch a simple rectangular bottle shape with a pump top. Ink the outline.
Step 4: Shading and Finishing
-
Erase pencil marks:
Once the ink is completely dry, gently erase all the underlying graphite sketch lines. -
Shade the tub:
Using a 2B pencil, lightly shade the sides of the bathtub. Focus the darkness on the outer edges and leave the center white to signal a curved, shiny surface. -
Create shadows:
Add a cast shadow underneath the claw feet and the shampoo bottle to ground them. Shade under the rim of the tub for dimension. -
Shade the bubbles:
Add very faint shading to the bottom curve of each bubble using the HB pencil. Keep this subtle so the bubbles remain looking transparent. -
Blend the graphite:
Use a blending stump to smooth out your pencil shading on the tub and floor. This creates a soft, clean aesthetic that contrasts nicely with the sharp photo. -
Final touches:
Add tiny dots or ‘sprinkles’ on the floor area to represent water splashes or dust, giving the illustration a finished texture.
Frame your mixed-media masterpiece to celebrate your pup’s bath time adventure
Whimsical Costume Dog With a Wizard Hat
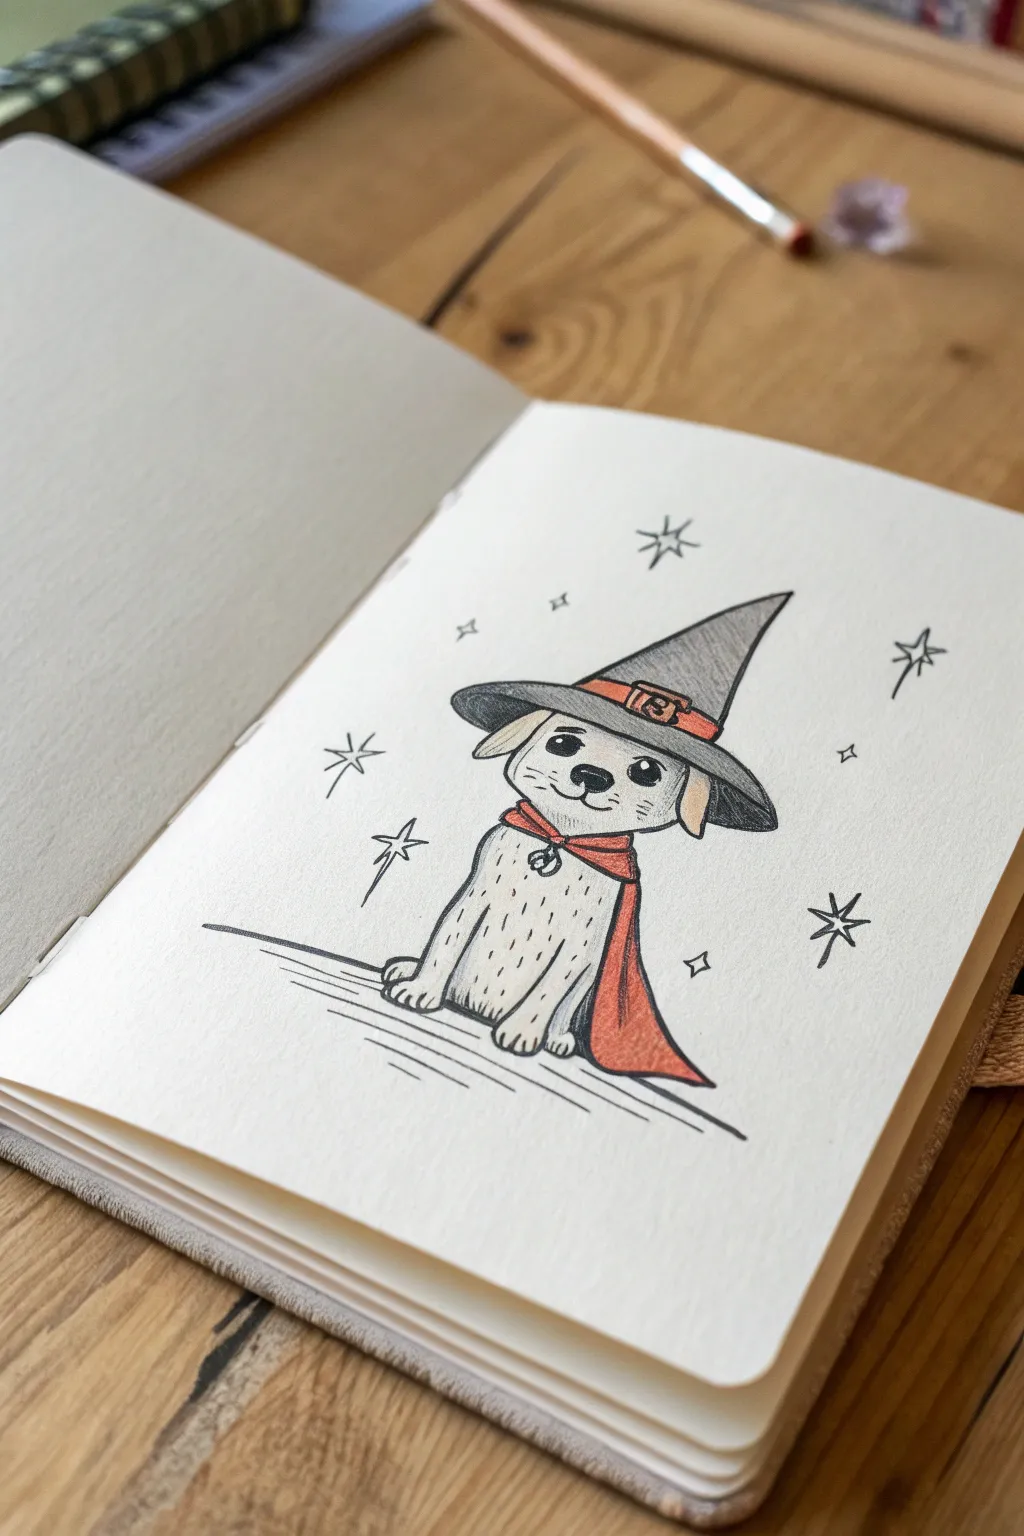
Summon a spell of cuteness with this adorable drawing of a golden puppy dressed in a classic wizard’s hat and cape. With its simple line work and selective coloring, this piece pops right off the page, making it a perfect project for a charming sketchbook entry.
Step-by-Step
Materials
- Sketchbook or drawing paper (medium tooth)
- Graphite pencil (HB or 2B)
- Fine liner pen (black, 0.3mm or 0.5mm)
- Colored pencils (grey, orange/terracotta, light yellow)
- Eraser
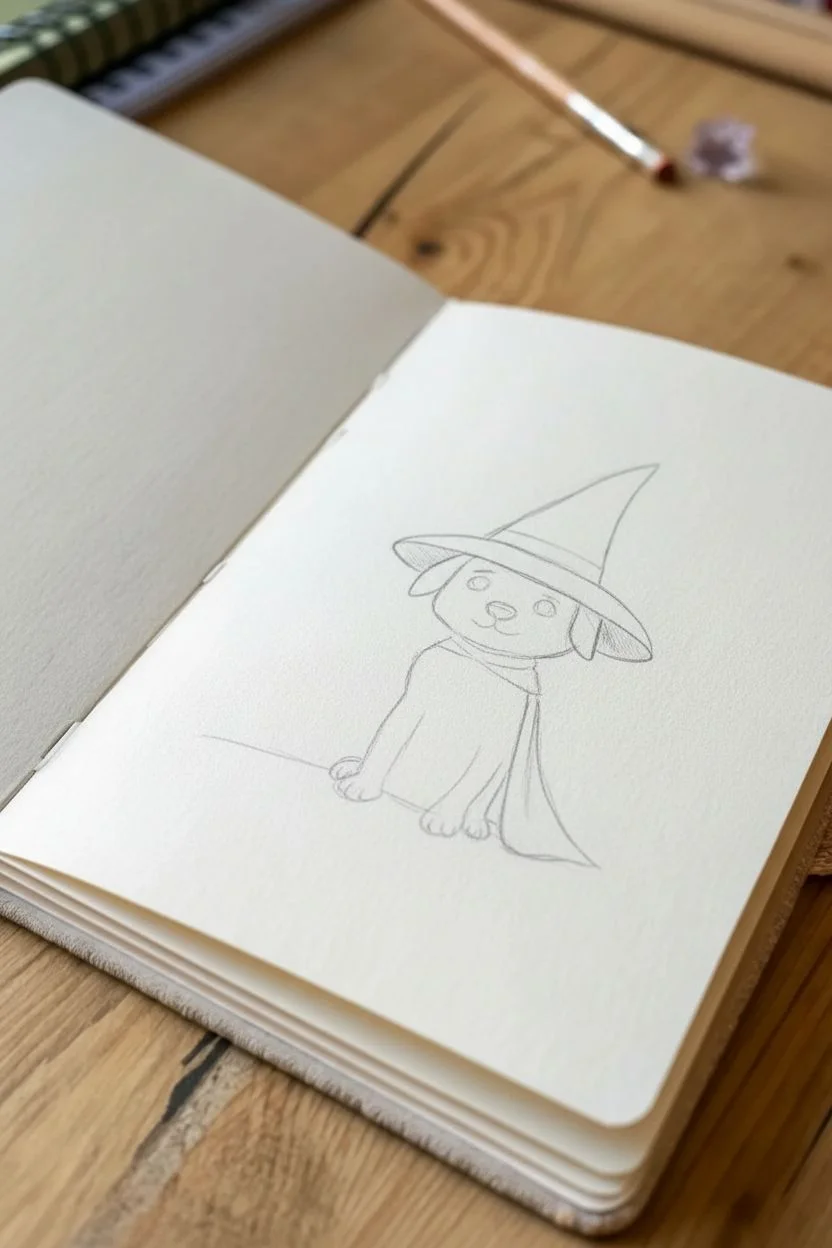
Step 1: Sketching the Basics
-
Head and Hat Shape:
Begin by lightly sketching a rounded square shape for the puppy’s head. Directly on top of this, draw a wide, tilted ellipse for the brim of the hat, letting it overhang the head on both sides. -
The Pointy Top:
From the center of the hat brim, draw a slightly curved triangle pointing upwards to form the cone of the wizard hat. Give the tip a subtle bend to the right for character. -
Adding Ears:
Sketch two floppy triangular shapes drooping down from just under the hat’s brim on either side of the head. -
Body Outline:
Draw a simple, slightly rectangular shape extending down from the head for the body. The bottom should be wider than the top to suggest a sitting pose. -
Paws and Cape:
Indicate two front paws at the base of the body with small oval shapes. Then, sketch a flowing line starting from the neck area, draping down behind the back leg to create the cape.
Step 2: Defining Features
-
Puppy Face:
Place two large circles for eyes in the middle of the face, leaving small white highlights near the top. Add a small oval nose between them and a simple ‘w’ shape for the mouth below. -
Hat Details:
Draw a band across the base of the hat cone. Add a small square buckle in the center of the band. -
Cape Collar:
Sketch a small knot or tie right under the puppy’s chin, connecting to the cape. This helps separate the head from the body visually. -
Fur Texture:
Lightly mark vertical dashed lines on the puppy’s chest and belly to suggest fluffy fur texture without needing to draw every hair. -
Grounding Shadow:
Add a few horizontal lines underneath the puppy to ground the figure so it doesn’t look like it’s floating in space.
Star Placement
Don’t arrange the stars symmetrically. Scattering them randomly in different sizes makes the magic sparkle look more organic and whimsical.
Step 3: Inking and Coloring
-
Inking the Outline:
Once you are happy with the sketch, carefully trace over your pencil lines with a black fine liner. Use smooth, confident strokes. -
Defining the Eyes:
Fill in the pupils with solid black ink, being very careful to preserve those tiny white highlights—they give the drawing life. -
Inking the Stars:
Around the puppy, draw several four-pointed stars and small diamond shapes to add a magical atmosphere. -
Cleaning Up:
Wait a moment for the ink to dry completely, then gently erase all your underlying pencil sketches. -
Base Color – Hat:
Use a grey colored pencil to shade the hat. Apply lighter pressure on the right side of the cone and brim to imply a light source. -
Coloring the Cape:
Take your orange or terracotta pencil and color the cape and the hat band. I like to press a bit harder near the folds of the cape for deeper saturation. -
Puppy Fur:
Using a very light touch with a yellow or cream pencil, shade the puppy’s ears and face lightly to distinguish the fur from the white paper. -
Shadow Accents:
Go back in with your grey pencil and add tiny shadows under the hat brim and right beneath the cape to add a touch of dimension.
Level Up: Magic Wand
Draw a tiny wooden stick in one of the lower paws or floating nearby with motion lines to show your wizard pup casting a real spell.
Now you have a magical companion ready to guard your notebook pages


Have a question or want to share your own experience? I'd love to hear from you in the comments below!