
Dogs are the best painting muses—full of personality, expressive eyes, and fun textures from silky ears to scruffy fur. I pulled together these dog painting ideas so you can find a vibe that fits your skill level, whether you want sweet realism or something totally playful.
Sleeping Puppy in Soft Light
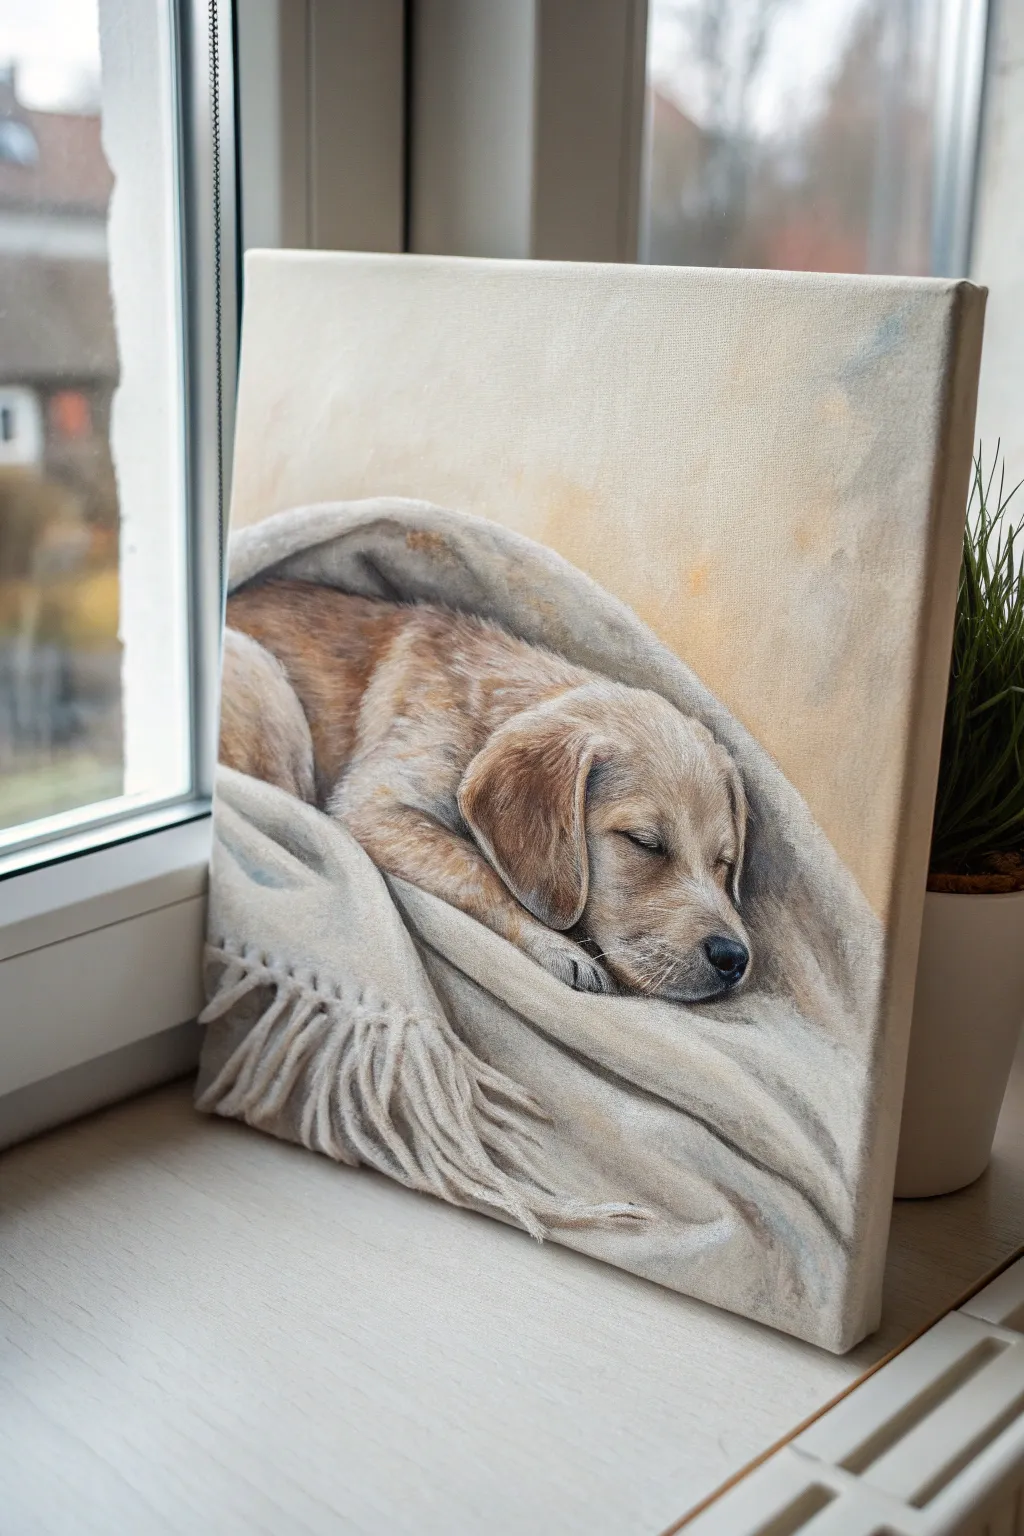
Capture the tender moment of a puppy deep in slumber with this soft realism project. Using warm, muted tones and gentle brushwork, you’ll create a painting that radiates comfort and peace, perfect for a sunny windowsill or a cozy corner.
Detailed Instructions
Materials
- Stretched canvas (approx. 12×16 inches)
- Acrylic or oil paints (Titanium White, Burnt Umber, Yellow Ochre, Burnt Sienna, Raw Sienna, Payne’s Grey)
- Soft synthetic brushes (flat shaders sizes 6-10, small round sizes 0-2)
- Fan brush (optional for fur texture)
- Palette and palette knife
- Water or medium/thinner
- Pencil for sketching
- Paper towels
Step 1: Preparation and Sketching
-
Prep the background:
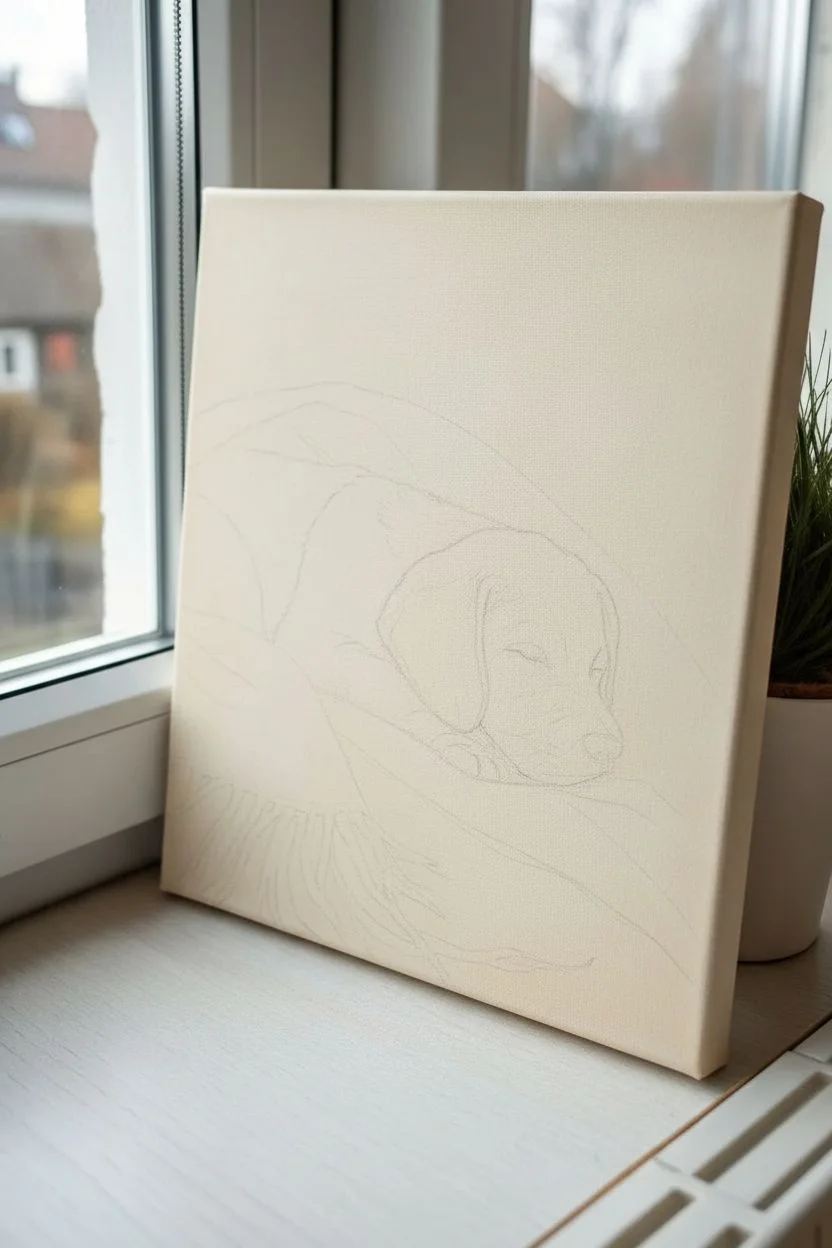
Begin by washing the entire canvas with a very diluted mix of Titanium White and a tiny touch of Yellow Ochre. This kills the stark white of the canvas and creates that warm, ambient glow visible in the background. -
Map out shapes:
Once the wash is dry, use a pencil to lightly sketch the main composition. Focus on the large C-curve of the body and the sweeping diagonal of the blanket that drapes over the puppy. -
Refine the features:
Detail the head placement, marking the closed eye, the snout, and the ear flap. Pay attention to how the ear folds over the cheek; getting this overlap right is key to the sleeping posture.
Fur Direction Trick
Always paint fur strokes growing away from the nose and spine. Varying the length of your strokes prevents the coat from looking stiff or plastic.
Step 2: Base Layers
-
Block in shadow areas:
Mix Burnt Umber with a little Payne’s Grey. Paint the darkest areas first: under the chin, the deep folds of the blanket, and the shadow beneath the ear. This establishes your contrast map. -
Establish the puppy’s coat color:
Create a base tone for the fur using Yellow Ochre, Burnt Sienna, and White. Apply this mid-tone over the body and head, keeping the strokes loose. -
Paint the blanket base:
For the blanket, mix a large amount of White with a tiny speck of Raw Sienna and Payne’s Grey to get a creamy, off-white grey. Block in the fabric, avoiding the fringe area for now.
Step 3: Fur and Texture
-
Layering fur tones:
Using a smaller flat brush, mix a slightly lighter version of your golden coat color. Apply strokes in the direction of hair growth—down the back, curving around the shoulder, and short strokes on the muzzle. -
Adding warmth:
Glaze a thin wash of Burnt Sienna over the curvature of the back and the ear. I find this creates that rich, reddish-gold depth typical of retriever puppies. -
Detailing the ear:
Switch to a small round brush (size 1 or 2). Paint individual hairs on the ear using a mix of Burnt Umber and White to show separation and softness. -
Refining the face:
Darken the nose with Payne’s Grey (never pure black), adding a tiny white highlight on the top edge to show wetness. Use fine strokes for the eyelashes and whiskers.
Texture Play
Uses a palette knife to apply thicker paint on the brightest parts of the blanket fringe. This impasto technique makes the fabric feel real and tactile.
Step 4: Painting the Blanket
-
Modeling the folds:
Strengthen the shadows in the blanket folds using a grey-brown mix. Soften the edges of these shadows into the light areas to simulate soft fabric like fleece or wool. -
Creating the fringe:
For the tassels at the bottom, use a small round brush loaded with thick off-white paint. Pull the strokes downward and slightly curved, letting them intertwine naturally. -
Shadowing the fringe:
Go back between the fringe strands with a darker grey mix to create depth, making the tassels look three-dimensional rather than flat lines.
Step 5: Final Touches
-
Brightest highlights:
Mix pure Titanium White with a touch of medium. Add final highlights to the top of the head, the shoulder curve, and the highest points of the blanket folds. -
Softening edges:
Check the edge where the fur meets the blanket. Use a clean, dry brush to lightly feather this boundary, so the puppy looks snuggled *into* the fabric, not pasted on top. -
Background adjustment:
If needed, re-apply the warm background wash around the subject to clean up any messy edges and ensure the light source feels consistent coming from the upper right.
Step back and admire the peaceful atmosphere you have captured on canvas


Dog in an Outdoor Nature Scene
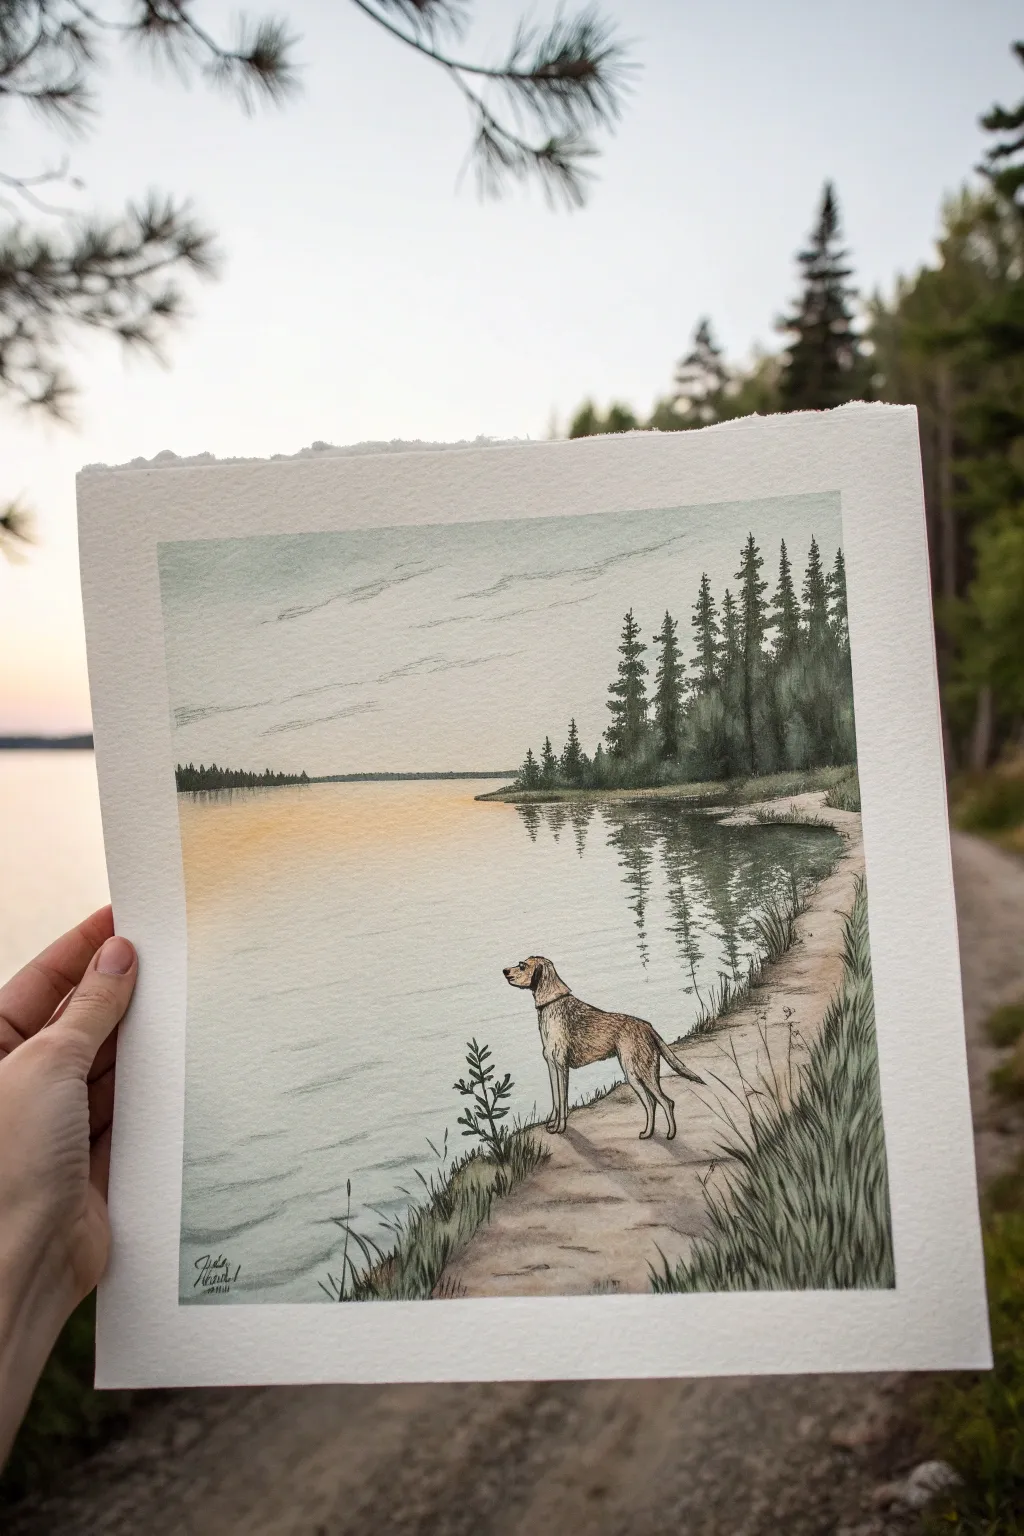
Capture the serene beauty of a forest lake at dusk with this mixed media artwork featuring a faithful canine companion. This project combines delicate ink linework with soft watercolor washes to create a peaceful, reflective scene.
How-To Guide
Materials
- Cold press watercolor paper (approx. 8×8 inches)
- Waterproof fineliner pens (0.1mm and 0.3mm, black)
- Watercolor paints (Indigo, Sap Green, Burnt Sienna, Yellow Ochre, Paynes Grey)
- Round watercolor brushes (Size 2 and 6)
- Pencil (HB or H)
- Kneadable eraser
- Masking tape
- Paper towels and water jars
Step 1: Sketching the Scene
-
Establish the horizon:
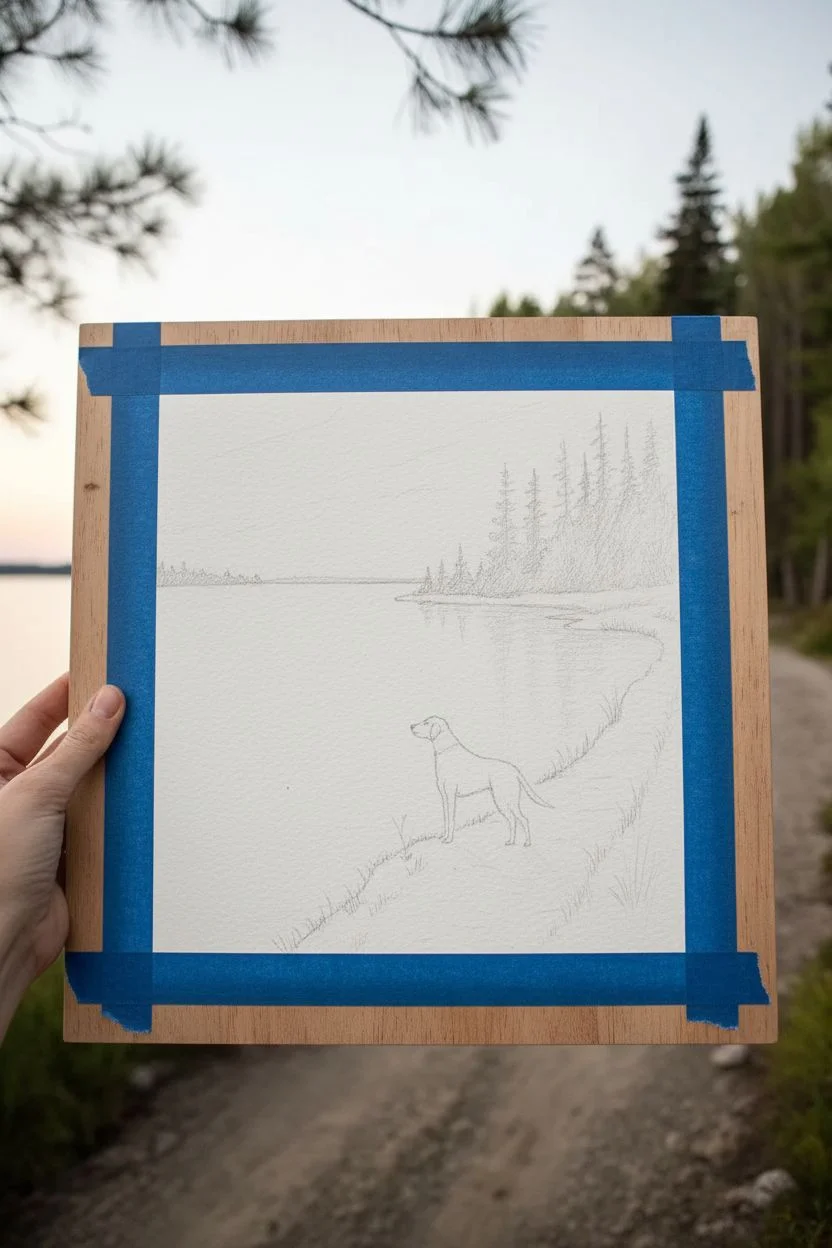
Tape your paper edges to a board to create a crisp border. Lightly pencil in a horizon line about one-third of the way down from the top of the page. This separates the sky from the distant treeline and lake. -
Outline the landmass:
Draw the curving shoreline on the right side. Start from the bottom middle and curve upward and right, narrowing as it recedes into the distance near the horizon. -
Position the dog:
Sketch the dog standing on the foreground path. Place it slightly off-center to the right, looking out over the water. Focus on basic shapes first—an oval for the chest, a rectangle for the body—before refining the legs and head. -
Add vegetation:
Lightly indicate where the tall pine trees will stand on the right bank. Add clumps of grass along the path’s edge in the foreground.
Uneven Water Wash?
If your lake wash dries with hard edges, re-wet the entire water area very gently with a large clean brush to soften and blend the pigments again.
Step 2: Inking the Details
-
Ink the dog:
Using a 0.1mm waterproof pen, carefully trace your dog sketch. Use short, flicking strokes for fur texture on the neck and tail, and smoother lines for the legs and back. -
Draw the trees:
Switch to a 0.3mm pen for the trees on the right. Draw vertical trunks first, then add scribbly, uneven horizontal strokes to create pine branches. Make the trees denser as they get closer to the foreground. -
Detail the shoreline:
Ink the grassy edge of the path. Use upward flicks for grass blades. Add small texture marks on the dirt path to suggest uneven ground. -
Add distant elements:
Use the 0.1mm pen to draw a very tiny, faint treeline on the far horizon. Keep these lines simple and minimal to suggest distance. Once all ink is completely dry, gently erase the pencil marks.
Seasonal Shift
Change the mood by swapping greens for rusty oranges and reds on the trees to depict an autumn scene, or leave trees bare for winter.
Step 3: Painting the Atmosphere
-
Wash the sky:
Wet the sky area with clean water. Drop in a very dilute mix of Paynes Grey near the top, fading into clear water as you move down. While it’s damp, add a touch of Yellow Ochre near the horizon for a sunset glow. -
Paint the water base:
Mirror the sky colors in the water. Paint the lake area with a pale wash, keeping the yellow tone near the horizon line and cooling to grey-blue towards the bottom. -
Add water reflections:
While the water wash is still slightly damp, use a darker grey-green mix to paint vertical, wiggly lines directly underneath the treeline on the right. Let these bleed slightly to look like soft ripples. -
Paint the trees:
Mix Sap Green with a touch of Indigo for a deep forest green. Paint the pine trees, carefully staying within your inked lines but allowing some variation in tone to suggest light and shadow.
Step 4: Refining the Foreground
-
Color the dog:
Paint the dog with a light wash of Burnt Sienna or Yellow Ochre. I like to let this dry briefly and then add a second, darker layer on the back and ears to create dimension. -
Paint the path:
Use a very watered-down mix of Burnt Sienna and a tiny bit of Grey for the dirt path. Keep the color uneven to mimic a natural trail. -
Grass and foliage:
Using your Size 2 brush, paint the grass clumps with Sap Green. Vary the intensity—some pale, some dark—to create depth in the foliage. -
Final shadows:
Mix a transparent grey and add a cast shadow under the dog’s paws, stretching towards the right side of the path. -
Finishing touches:
Once everything is bone dry, carefully peel off the masking tape to reveal the clean edges.
Frame your peaceful landscape or gift it to a dog lover who enjoys the outdoors


Dog With a Favorite Ball or Toy
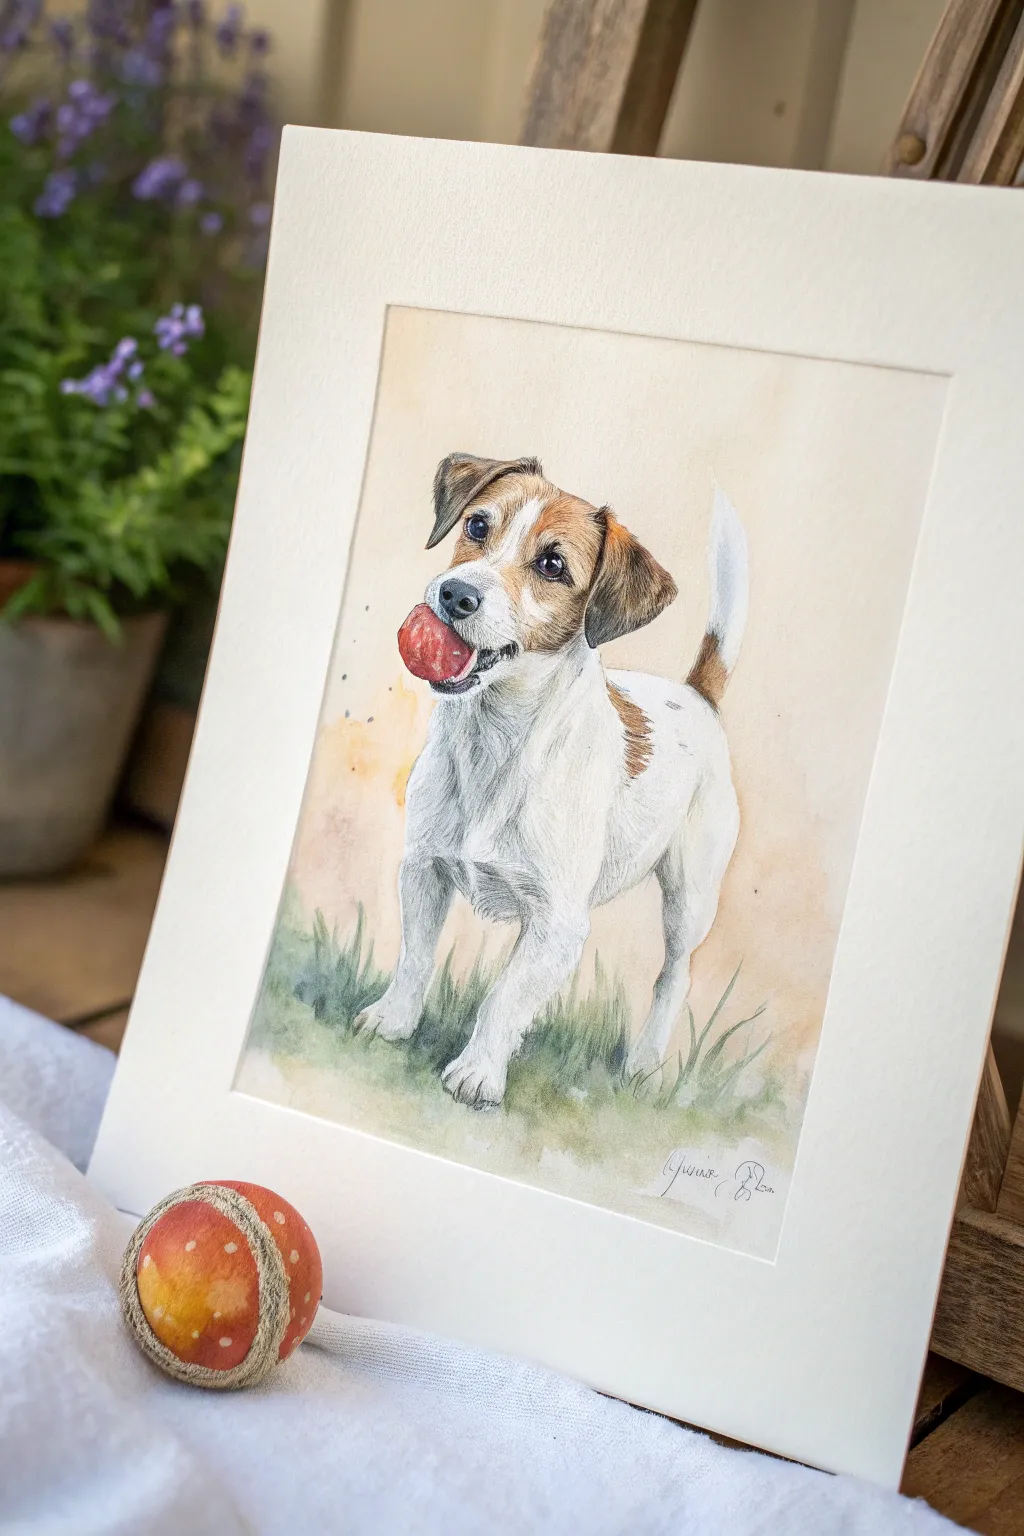
Capture the irresistible energy of a Jack Russell Terrier mid-play in this detailed watercolor portrait. The soft, luminous background contrasts beautifully with the crisp fur texture and the bright red ball, making the subject truly pop off the page.
Step-by-Step
Materials
- Cold press watercolor paper (300 gsm)
- Watercolor paints (Burnt Sienna, Yellow Ochre, Ultramarine Blue, Alizarin Crimson, Sap Green)
- White gouache for highlights
- HB graphite pencil
- Kneaded eraser
- Round watercolor brushes (Size 2, 6, and 10)
- Fine liner brush (Score 0 or 00)
- Two jars of water
- Paper towels
- Masking tape and drawing board
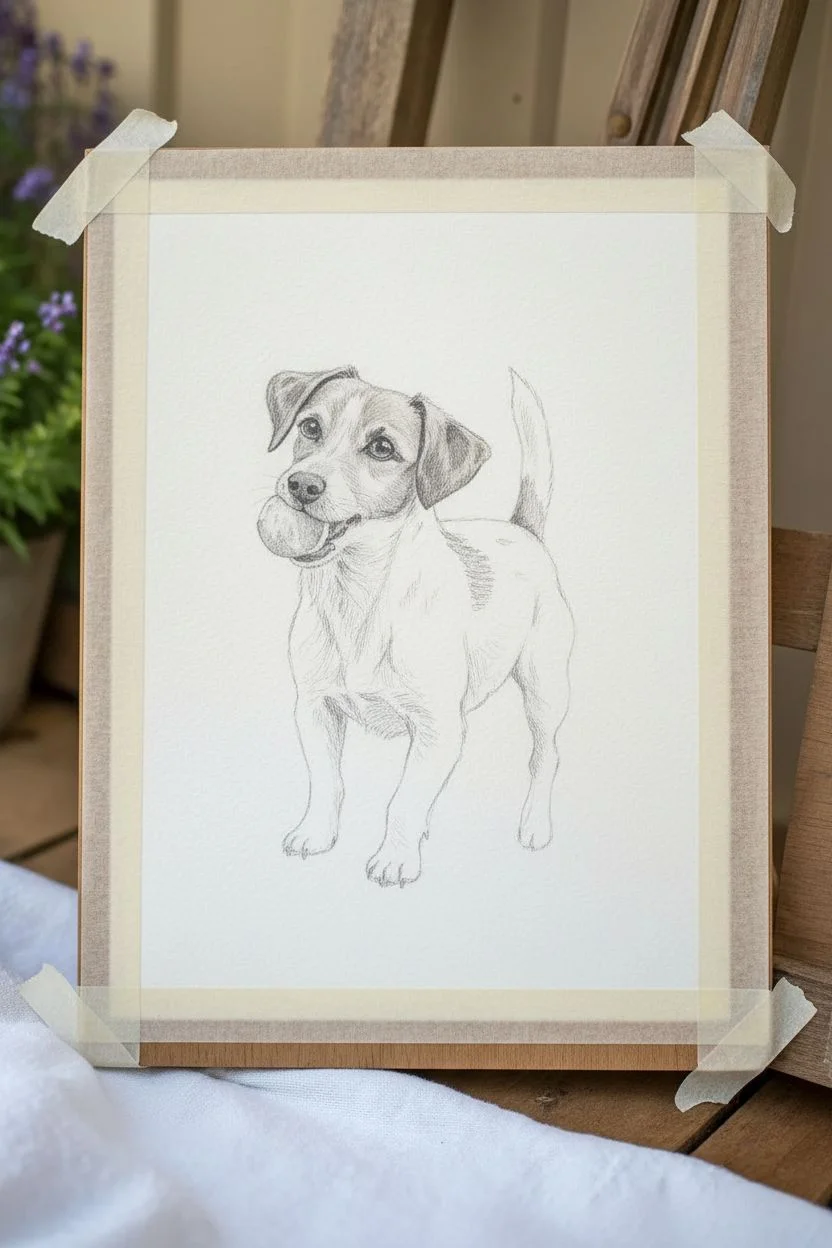
Step 1: Sketching and Preparation
-
Prepare the surface:
Begin by taping your watercolor paper to a drawing board to prevent buckling. Ensure the tape is pressed firmly along all edges to create a clean border later. -
Establish the composition:
Lightly sketch the dog’s outline using an HB pencil. Focus on the playful posture: the head tilted slightly up, legs planted wide, and the tail perked up. -
Detail the features:
Refine the facial features, paying close attention to the eyes and the ball in the mouth. Sketch the direction of the fur clumps lightly, especially around the ears and chest, acting as a map for your painting. -
Lighten the lines:
Roll a kneaded eraser gently over your sketch. You want the graphite lines to be barely visible so they don’t dirty the translucent watercolor layers.
Step 2: Washing the Background
-
Wet-on-wet start:
Moisten the background area around the dog with clean water using a size 10 brush. Be careful not to let water seep into the dog’s outline. -
Apply the soft wash:
Mix a very dilute wash of Yellow Ochre with a touch of Burnt Sienna. Drop this color loosely into the wet background, keeping it warmer near the dog’s head and fading out towards the edges. -
Grounding the figure:
While the paper is still damp near the bottom, introduce a soft mix of Sap Green and Ultramarine Blue to suggest grass. Let the green bleed slightly upwards into the cream background for a dreamy, out-of-focus look.
Fur Direction Pro-Tip
Always stroke the brush in the direction the hair grows. For short-haired breeds like this, use short, quick flicks rather than long, flowing lines.
Step 3: Painting the Dog
-
Base shadow layer:
Mix a pale, cool grey using Ultramarine Blue and a tiny amount of Burnt Sienna. With a size 6 brush, apply this shadow to the white fur areas—under the chin, the chest, and the belly—defining the dog’s volume. -
Blocking in the patches:
Paint the brown patches on the ears and back using Burnt Sienna. While wet, drop in slightly darker brown (mixed with blue) at the edges of the ears to create curvature. -
Defining the eyes:
Switch to a size 2 brush. Paint the iris with a dark brown, leaving a tiny spot of white paper for the catchlight. Once dry, deepen the pupil with a near-black mix. -
Painting the ball:
Use Alizarin Crimson for the ball. Paint the main shape but leave slight highlights unpainted or lift pigment out with a damp brush to show the ball’s roundness and wet texture. -
Nose and mouth details:
Paint the nose with a dark grey-black mix. Use a damp brush to soften the top edge of the nose for a highlighted effect, making it look wet.
Muddy Colors?
If your shadows look muddy, you likely overworked the wet paper. Let the layer dry completely, then apply a fresh, transparent glaze of color on top.
Step 4: Texturing and Refining
-
Creating fur texture:
Using the fine liner brush, start adding individual hair strokes. I prefer to work with a semi-dry brush here. Use grey for white fur shadows and dark brown for the patches, following the growth direction. -
Cheek and muzzle fur:
Add tiny, flicking strokes around the muzzle and cheeks to create that scruffy terrier look. Keep the paint varied in dilution so some hairs look sharper than others. -
Deepening the grass:
Return to the grass area. Use a size 6 brush to paint distinct blades of grass in the foreground using a darker, more saturated green mix to create depth against the pale paws. -
Adding whiskers:
With a very steady hand and your finest brush (or a white gel pen if you prefer), add the long whiskers on the muzzle and eyebrows. -
Final highlights:
Use a touch of white gouache to add the brightest sparkles to the eyes, the wet nose, and the saliva on the ball. -
Sign and peel:
Once completely dry, sign your work. Carefully peel away the masking tape at a 45-degree angle to reveal the crisp white border.
Now you have a charming, lively portrait ready to be framed or gifted to a dog lover


Modern Triptych of Dog Faces
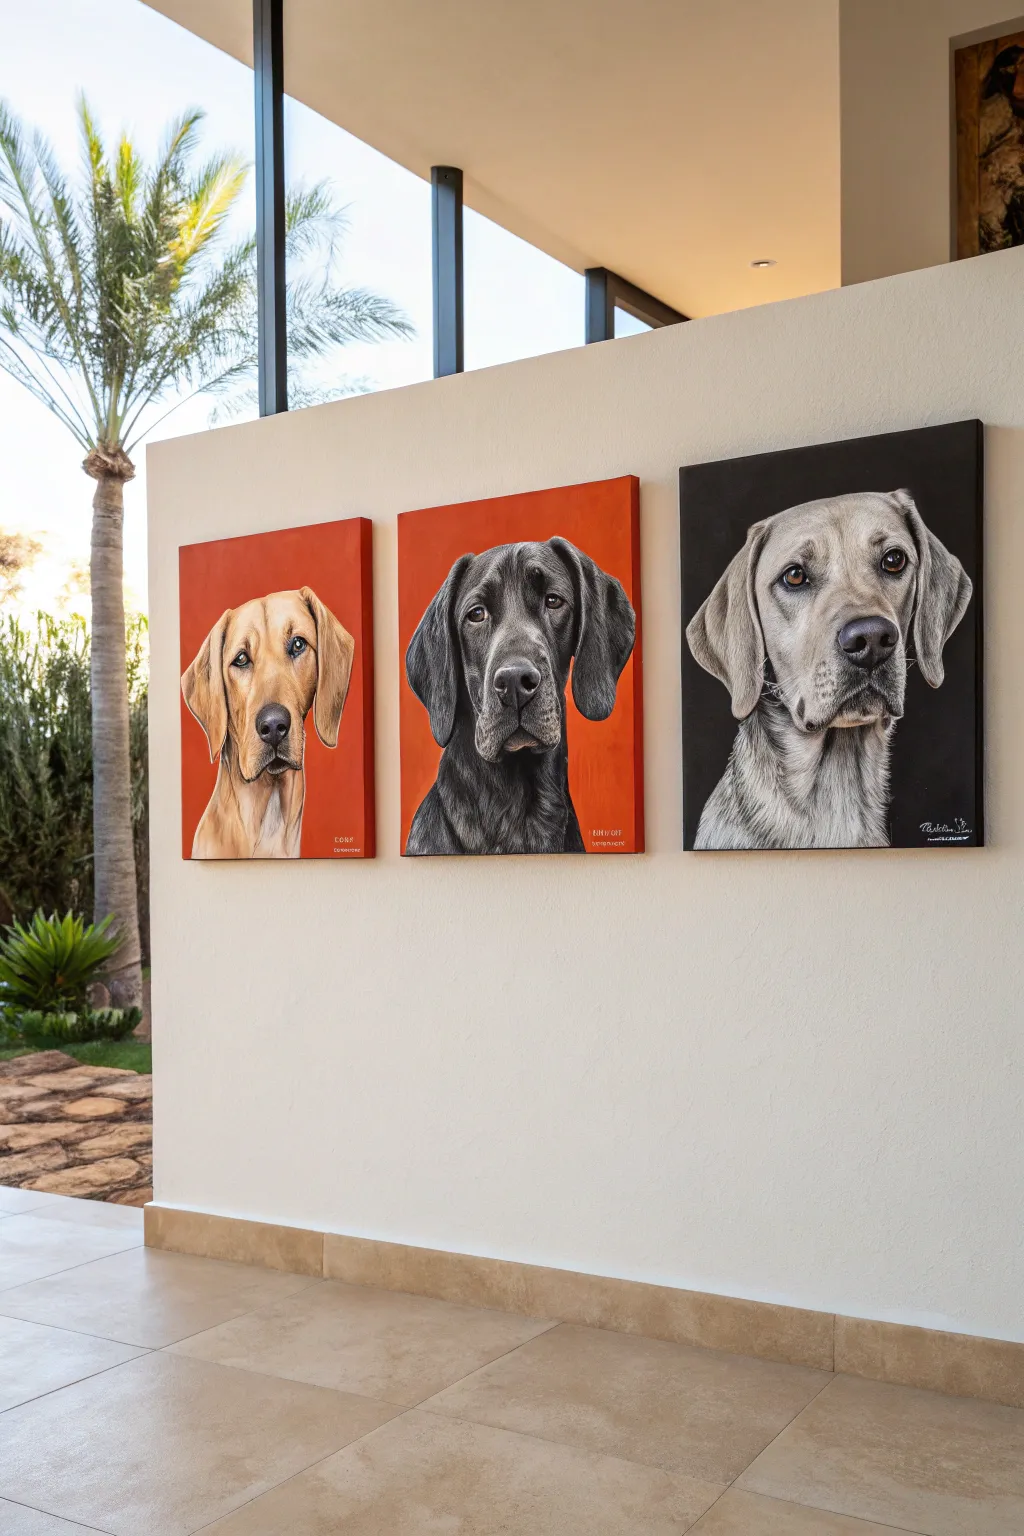
Celebrate your furry friends with this vibrant triptych that captures the unique spirit of three different dogs in a clean, modern style. By utilizing bold background colors—two warm terracotta-orange and one deep charcoal—you’ll create a striking visual rhythm that transforms pet portraiture into contemporary wall art.
Detailed Instructions
Materials
- 3 stretched canvases (16×20 or 18×24 inches recommended)
- Acrylic paints: Burnt Sienna, Cadmium Orange, Titanium White, Mars Black, Burnt Umber, Yellow Ochre, Raw Sienna
- Gesso (white)
- Synthetic paintbrushes (filbert sizes 6 & 10, round sizes 2 & 4, liner brush)
- Pencil (HB or 2B) and eraser
- Reference photos of dogs (head and neck only)
- Painter’s tape or masking tape
- Palette and water container
- Easel or flat working surface
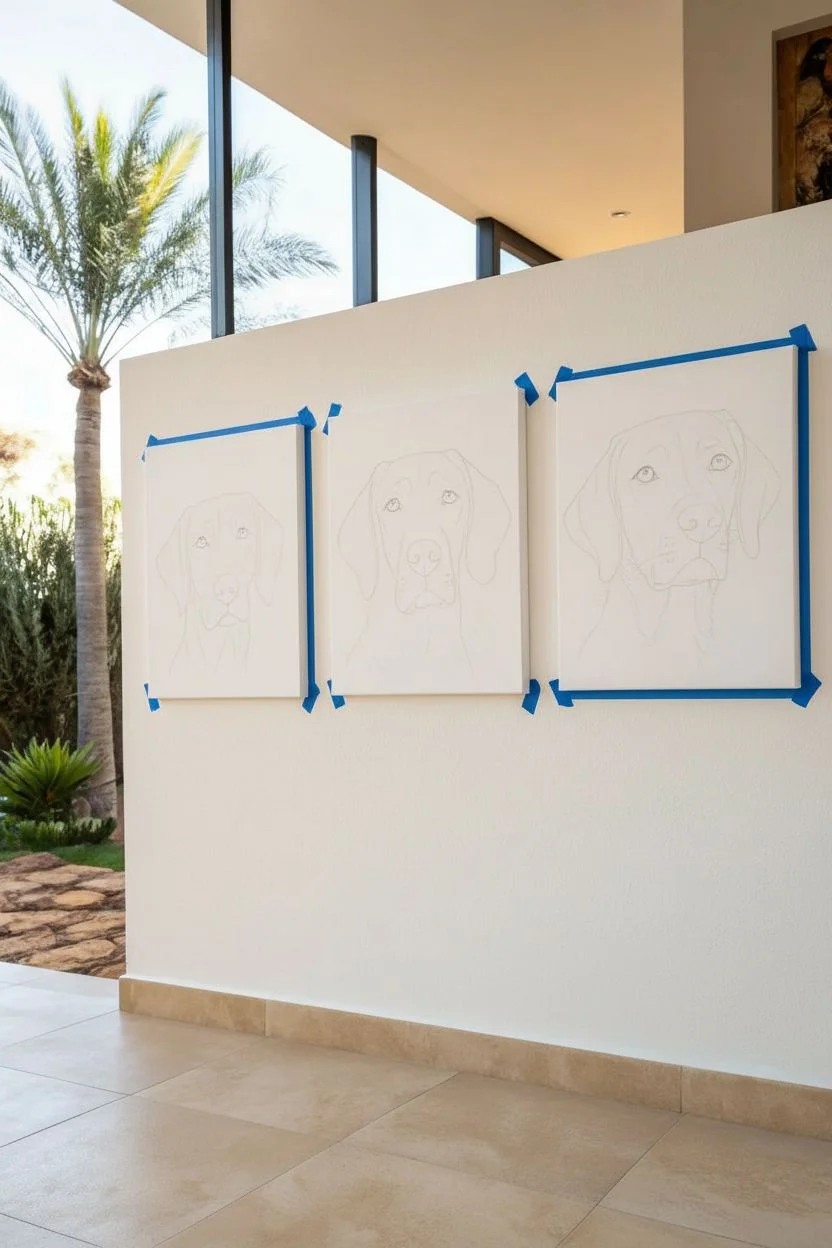
Step 1: Preparation & Drawing
-
Surface Priming:
Begin by applying a smooth coat of gesso to all three canvases if they aren’t pre-primed. Lightly sand between two coats for an ultra-smooth texture, which is crucial for detailed fur work. -
Select Your References:
Choose high-contrast photos of three dogs. For a cohesive triptych look like the example, ensure the dogs are facing slightly different angles—one looking left, one center, one right—to create a conversation between the pieces. -
Sketch the Outlines:
Using your HB pencil, lightly sketch the main contours of the dog heads onto the canvas. Focus on the position of the eyes and the snout; don’t worry about fur texture yet, just get the proportions accurate. -
Masking the Edges:
If you want clean, unpainted sides like a gallery wrap, apply painter’s tape along the outer edges of the canvas before you start the underpainting.
Eye Placement Trick
When sketching, ensure the eyes align horizontally. Even a slight tilt can make the dog look distorted. Use a ruler to check alignment across the face.
Step 2: Background Blocking
-
Mix the Terracotta Tone:
For the first two canvases (the tan and black dogs), mix Cadmium Orange with Burnt Sienna and a touch of White. You want a distinct, flat, matte color that feels warm and earthy. -
Apply the Warm Background:
Paint the background space around your pencil sketches on the first two canvases. Use a larger filbert brush (size 10) to lay the paint down smoothly, minimizing brushstrokes for a graphic poster-like effect. -
The Dark Contrast:
For the third canvas (the silver/grey dog), paint the background an almost-black charcoal. Mix Mars Black with a tiny bit of Burnt Umber to give it warmth so it isn’t too stark against the grey fur. -
Second Coats:
Once the first layer is fully dry, apply a second coat to all backgrounds. Solid, opaque color is key to the modern aesthetic of this triptych.
Fur Paint Too Thick?
If fine fur lines look clumpy, your paint is too dry. Add a drop of water or glazing medium to improve flow. The paint should resemble ink.
Step 3: Painting the Subjects
-
Underpainting the Faces:
Block in the basic local colors of each dog using thinned paint. For the tan dog, use a wash of Yellow Ochre; for the black dog, a dark grey; and for the silver dog, a mid-tone grey. -
Establishing Shadows:
Using a size 6 filbert, paint the deepest shadows—nostrils, inner ears, and under the chin. This creates a roadmap for the 3D form of the head. -
The Eyes Have It:
Paint the eyes early to bring the dog to life. Use Burnt Umber and Black for the pupil and iris, and save a crisp dot of Titanium White for the catchment light (reflection) at the very end. -
Layering Fur texture:
Switch to your size 4 round brush. Start building fur density by layering strokes in the direction of hair growth. I find it helpful to work from dark to light, pulling lighter colors over the dark base. -
Highs and Lows:
For the black dog, mix blues into your greys to depict the shine on the coat. For the tan dog, use Raw Sienna and White for the highlights on the snout and brow. -
Detailed Whiskers:
Use a liner brush with slightly watered-down paint (inky consistency) to flick in whiskers on the muzzle. Be quick and confident with these strokes to avoid shaky lines. -
Refining the Edges:
Go back with your background color and carefully ‘cut in’ around the dog’s fur to clean up the silhouette. This makes the subject pop sharply against the flat color. -
Final Glazing:
If the black dog looks too flat, apply a very thin glaze of Burnt Umber over the dark areas to unify the coat and add depth. -
Sign and Seal:
Sign your work discreetly in the corner using a liner brush. Once cured (usually 24-48 hours for acrylics), apply a satin varnish to protect the paintings and unify the sheen.
Hang your stunning trio together in a well-lit spot to command attention and celebrate your favorite breeds with artistic flair
BRUSH GUIDE
The Right Brush for Every Stroke
From clean lines to bold texture — master brush choice, stroke control, and essential techniques.
Explore the Full Guide
Ink Line Dog Portrait With Wash Shadows

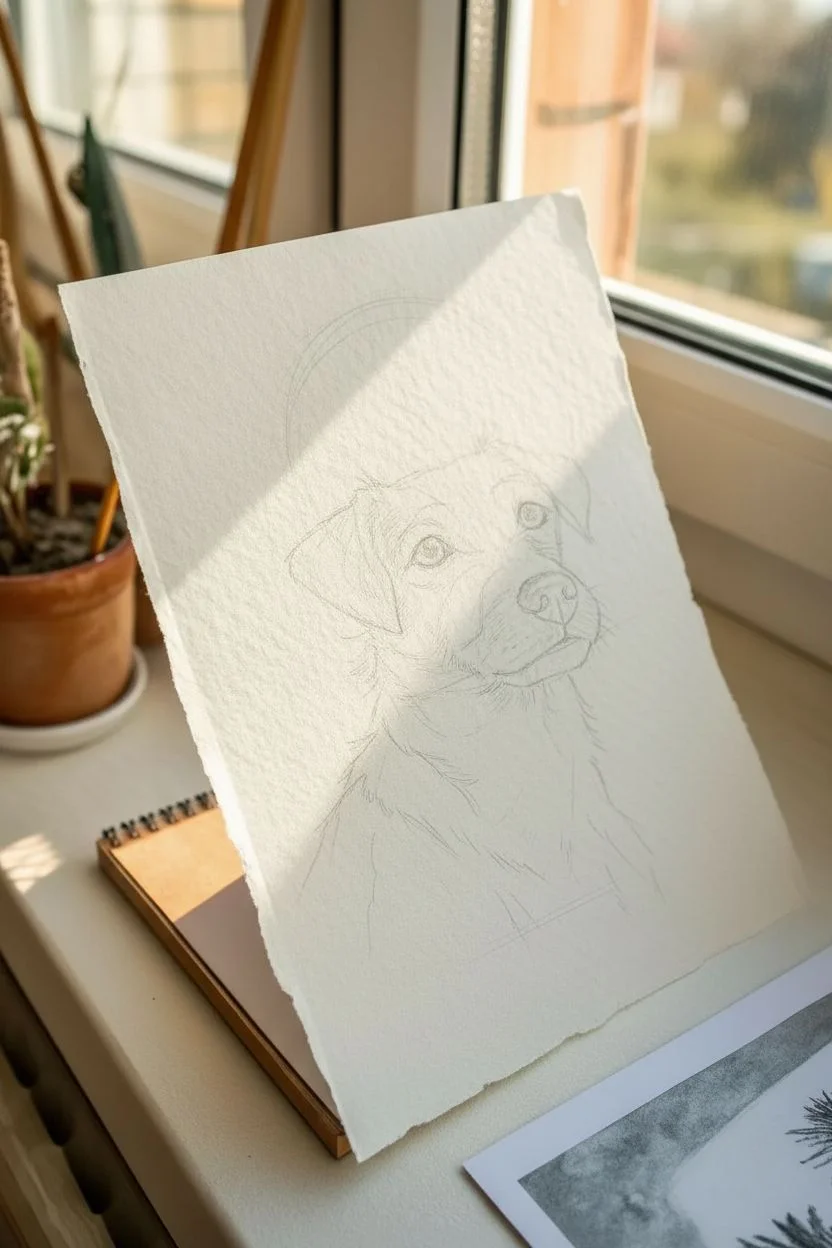
Capture the soulful expression of your favorite pup with this elegant ink drawing technique that balances precision with artistic freedom. Using fine liners on textured deckle-edge paper creates a timeless, classic look perfect for framing or gifting.
Step-by-Step Guide
Materials
- High-quality deckle-edge watercolor paper (cold press or rough texture)
- Set of waterproof creativity pens or fine liners (sizes 005, 01, 03, and 05)
- Graphite pencil (HB or 2H) and kneaded eraser
- Small round watercolor brush (size 2 or 4)
- Black india ink or diluted black watercolor paint
- Paper towels
- Reference photo of a dog
- Drafting tape (optional)
Step 1: Drafting the Structure
-
Analyze your reference:
Before putting pencil to paper, study your reference photo. Take note of the direction the fur grows in different areas—around the eyes, the snout, and the ears. These directional changes are crucial for a realistic ink drawing. -
Lightly sketch the basic shapes:
Using your HB or 2H pencil, lightly map out the dog’s head. Start with a circle for the cranium and a blocky shape for the snout. Keep your pressure extremely light so these lines can be easily erased later without damaging the textured paper surface. -
Refine the features:
Mark the placement of the eyes, nose, and ears. Pay special attention to the alignment of the eyes; getting their spacing right is key to capturing the dog’s likeness. Sketch the general outline of the fur tufts rather than individual hairs. -
Clean up the sketch:
Use your kneaded eraser to lift up any heavy graphite lines. You want only a faint ‘ghost’ of the image to guide your ink work. This keeps the final drawing looking clean and professional.
Step 2: Inking the Details
-
Start with the eyes:
Using a 01 fine liner, carefully outline the eyes. Switch to a 05 pen to fill in the pupil, leaving a small white circle for the catchlight (reflection). This immediately brings life to the portrait. -
Define the nose:
Use the 03 pen for the nose texture. Instead of coloring it solid black, use stippling (small dots) or tiny, tight scribbles to suggest the rough, wet texture of a dog’s nose. Darken the nostrils completely. -
Map the fur direction:
With your 005 or 01 pen, start laying down the first layer of fur. Use short, quick strokes that follow the exact direction of hair growth you observed earlier. Don’t try to draw every hair; focus on the flow. -
Build darker values:
Switch to the 03 pen to add depth. Focus on areas deeply in shadow, like under the ears, beneath the chin, or where fur overlaps. Creating contrast here makes the drawing feel three-dimensional. -
Detail the ears:
Ears often have different fur textures. Use longer, wavier strokes for the silky hair on the outside of the ear, and darker, denser marks for the inner ear shadows. -
Create the muzzle texture:
For wire-haired breeds like the one in the example, use jagged, broken lines around the muzzle to show the coarseness. Keep the strokes lighter on the bridge of the nose where light hits. -
Refine the whiskers:
Use your finest pen (005) for whisker spots. If you’re feeling confident, use quick, confident flicks for the whiskers themselves, but ensure they don’t overpower the rest of the face.
Ink Bleeding Errors?
If ink bleeds when adding wash, stop immediately. Your pen might not be waterproof, or the paper is too wet. Switch to dry hatching for shadows instead.
Step 3: Adding Wash and Final Touches
-
Prepare your wash:
Mix a very small amount of India ink or black watercolor with water to create a pale grey wash. Test the strength on a scrap piece of paper first—it should be subtle, not opaque. -
Apply subtle shadows:
Using your small round brush, gently paint this wash into the deepest shadow areas—inside the ears, under the chin, and beside the nose. I find this technique softens the harshness of the ink lines. -
Soften the neck:
Fade the drawing out toward the bottom. Use fewer ink lines and a very watery wash to suggest the neck and shoulder, letting the portrait dissolve artistically into the white of the paper. -
Let it dry completely:
Wait for both the ink and the wash to be bone dry. If the paper feels cool to the touch, it is still damp. -
Final erase:
Take your kneaded eraser and gently dab over the entire drawing to pick up any remaining pencil graphite. Do not rub vigorously, or you might abrade the paper surface. -
Sign your work:
Use your finest pen to sign your name small and neatly near the bottom of the neck area, keeping it unobtrusive to the main subject.
Fur Texture Hack
Vary your pen gripping pressure. Hold the pen loosely near the end for long, flowing fur, and choke up near the nib for precise, tight details like eyes.
Place your finished piece on a small easel or frame it to show off that beautiful deckle edge


Have a question or want to share your own experience? I'd love to hear from you in the comments below!