A blank door is basically a tall, ready-made canvas, and it can change the whole vibe of a space with a few thoughtful brushstrokes. These door art ideas run from easy, high-impact paint jobs to playful illusions that make your doorway feel like a mini mural you get to walk through.
Bold Color Block Front Door
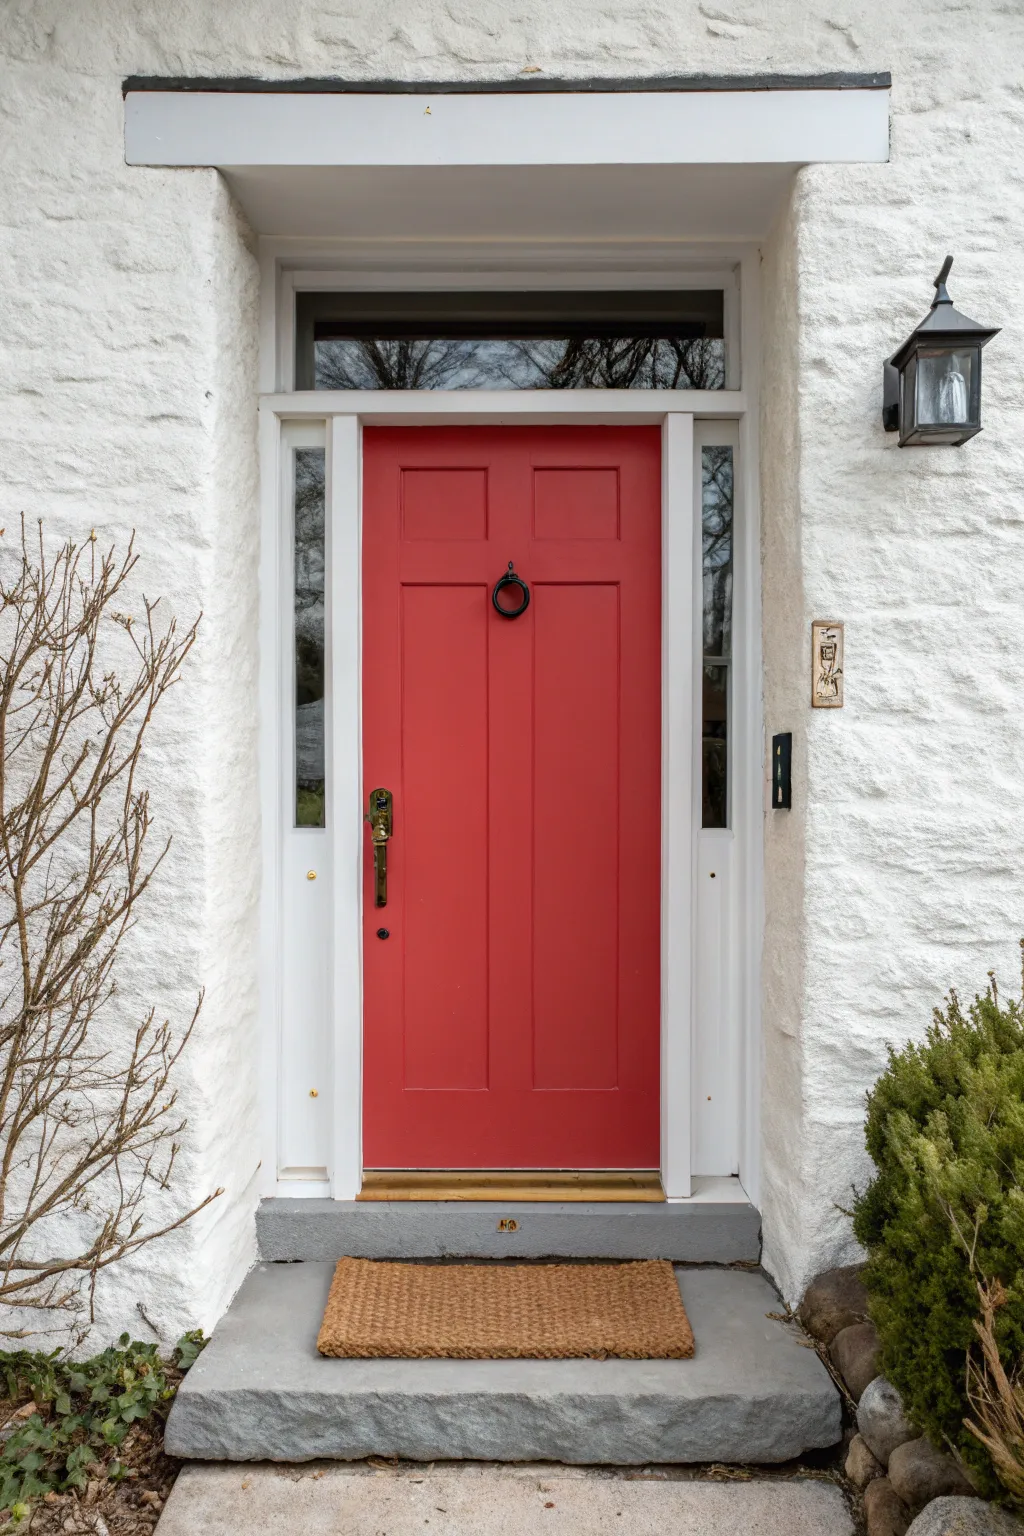
Transform your entryway into a welcoming focal point with this vibrant red front door tutorial. The crisp contrast between the bold scarlet panels and clean white trim creates an inviting, timeless aesthetic that instantly boosts curb appeal.
Step-by-Step Tutorial
Materials
- Exterior-grade satin or semi-gloss paint (bright red)
- Exterior-grade semi-gloss paint (white)
- Painter’s tape (blue or green)
- Sanding block (medium grit)
- Damp lint-free cloths
- High-quality 2-inch angled sash brush
- 4-inch foam roller and tray
- Screwdriver or chill
- Drop cloth
- Primer (grey tinted is best for red topcoats)
Step 1: Preparation is Key
-
Check the weather:
Before starting, ensure you have a stretch of 2-3 days with no rain and moderate humidity. Painting in direct, scorching sunlight can cause the paint to dry too fast, so aim for a clear, mild day. -
Remove hardware:
Using a screwdriver, carefully remove the door handle, lockset, kickplate, and that distinctive ring knocker. Keep all screws and parts organized in a labeled bag so nothing gets lost. -
Clean surface thoroughly:
Wash the entire door and the surrounding frame with a mild detergent or TSP substitute. Scrub away any grime, dirt, or grease that has built up over time, then rinse with clean water. -
Sand for adhesion:
Once dry, scuff sand the entire door surface using a medium-grit sanding sponge. You aren’t trying to strip it bare, just creating a ‘tooth’ for the new paint to grab onto. -
Wipe down:
Rigorously wipe away all sanding dust with a damp, lint-free cloth. Any leftover dust will create a gritty texture in your final finish, which we definitely want to avoid. -
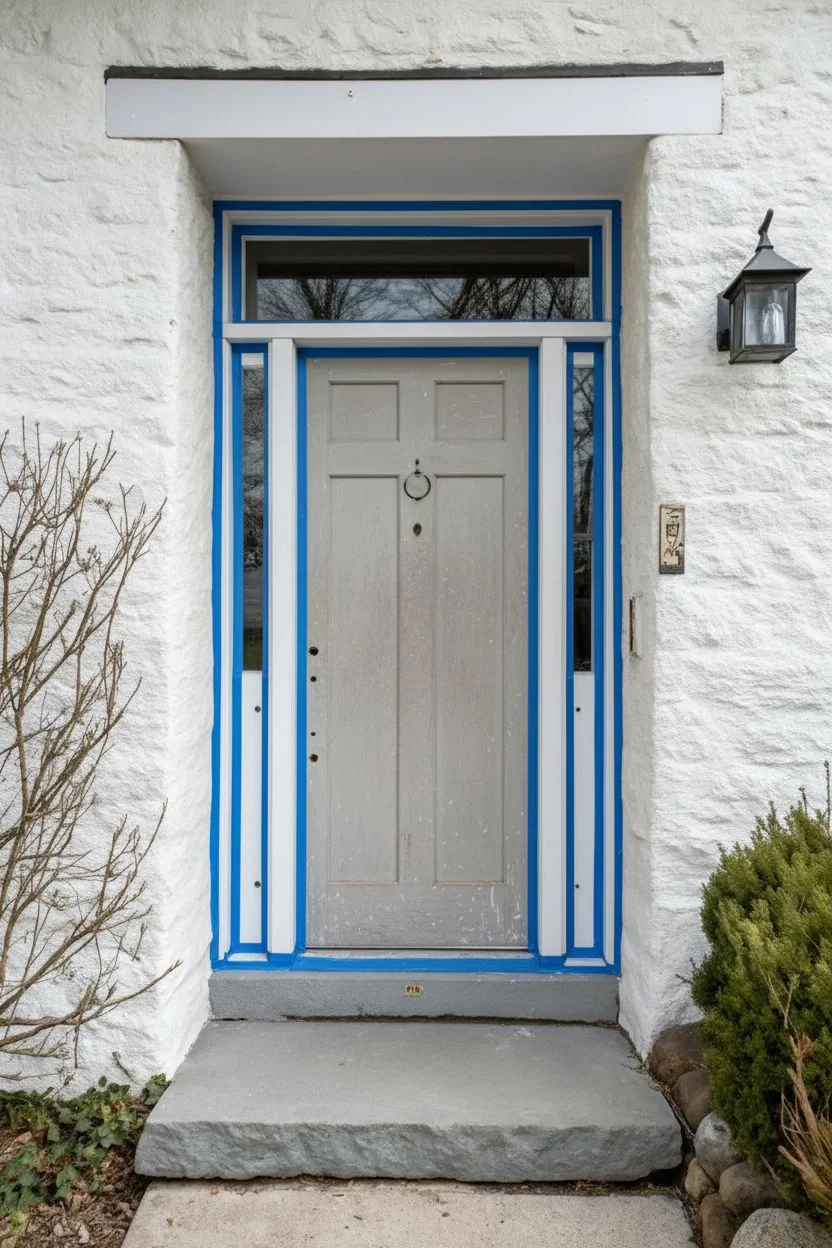
Tape off edges:
Apply painter’s tape to the hinges (if you didn’t remove the door), the glass panes of sidelights, and the threshold. Press the tape edges down firmly to prevent bleed-through.
Step 2: Painting the Door
-
Prime the surface:
Apply a coat of high-quality exterior primer. Since we are going for a deep red, I find using a grey-tinted primer helps achieve the true color faster than a white primer. -
Start with panels (First Coat):
Dip your angled sash brush into the red paint and coat the recessed rectangular panels first. Work paint into the corners but keep dragging it out to avoid pooling. -
Paint center stile:
Move to the vertical center strip (stile) between the panels. Brush vertically with confident strokes, feathering the edges where they meet the horizontal rails. -
Paint horizontal rails:
Paint the horizontal rails (top, middle, and bottom). Be watchful for drips at the intersection where the rails meet the vertical stiles. -
Finish vertical stiles:
Paint the two long vertical stiles on the far left and right edges of the door. Use long, continuous strokes from top to bottom for the smoothest finish. -
Painting the edges:
Open the door slightly to paint the hinge-side edge and the latch-side edge. Check your specific door type to see which edge ‘belongs’ to the exterior color versus interior. -
Dry and assess:
Let the first coat dry completely according to the manufacturer’s instructions. Red pigment is notoriously translucent, so don’t panic if it looks streaky right now. -
Apply subsequent coats:
Lightly sand with fine grit if necessary, wipe clean, and apply a second (and likely third) coat following the same order: panels, center stile, rails, outer stiles.
Red Pigment Reality
Red paint has poor coverage properties. Use a grey tinted primer base coat; it significantly reduces the number of red topcoats needed for full opacity.
Step 3: Painting the Trim and Finishing
-
Paint the frame:
While the door dries, clean and paint the surrounding door frame and sidelight mullions with crisp white semi-gloss exterior paint. Use the angled brush for precision near the glass. -
Remove tape:
Carefully peel away the painter’s tape while the final coat is still slightly tacky—this helps prevent the dried paint from peeling up with the tape. -
Reinstall hardware:
Once the door has cured for at least 24 hours (so the paint is hard enough to withstand pressure), screw the knocker, handle, and locks back into place. -
Add a crisp mat:
Place a fresh coir doormat at the base to complement the warm tones of the red door and complete the welcoming vibe.
Seasonal Switch
Swap the black ring knocker for a brass wreath hook to easily change door decor seasonally without damaging your fresh paint job.
Step back and admire how a single weekend project can completely redefine the character of your home’s exterior


Oversized Floral Door Mural
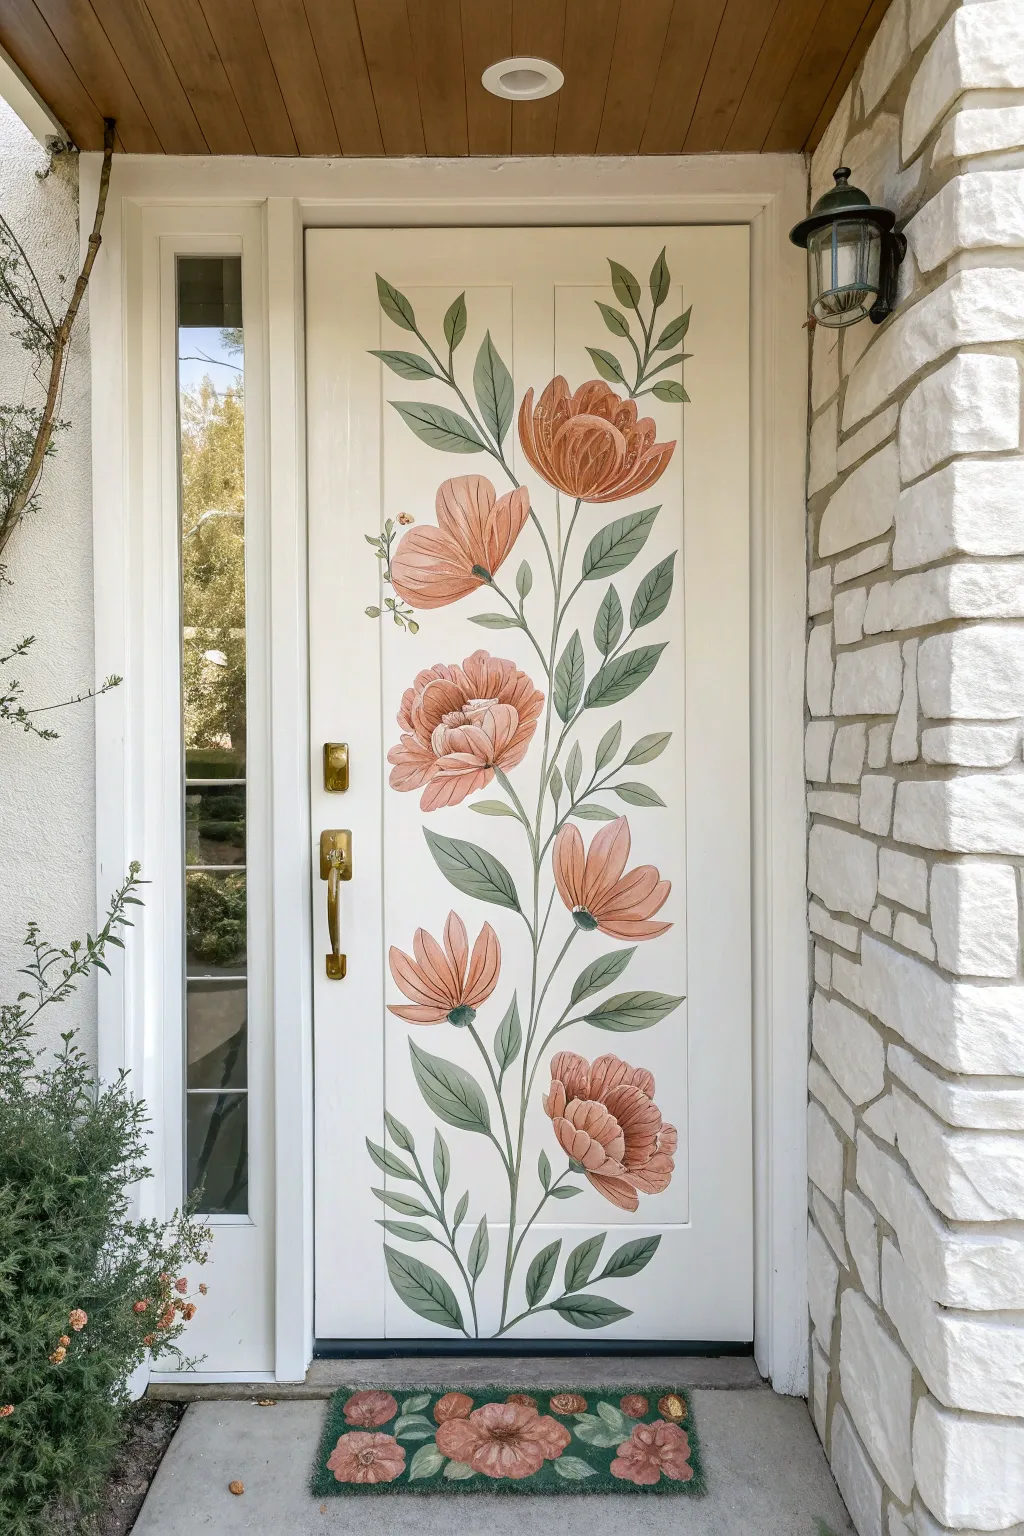
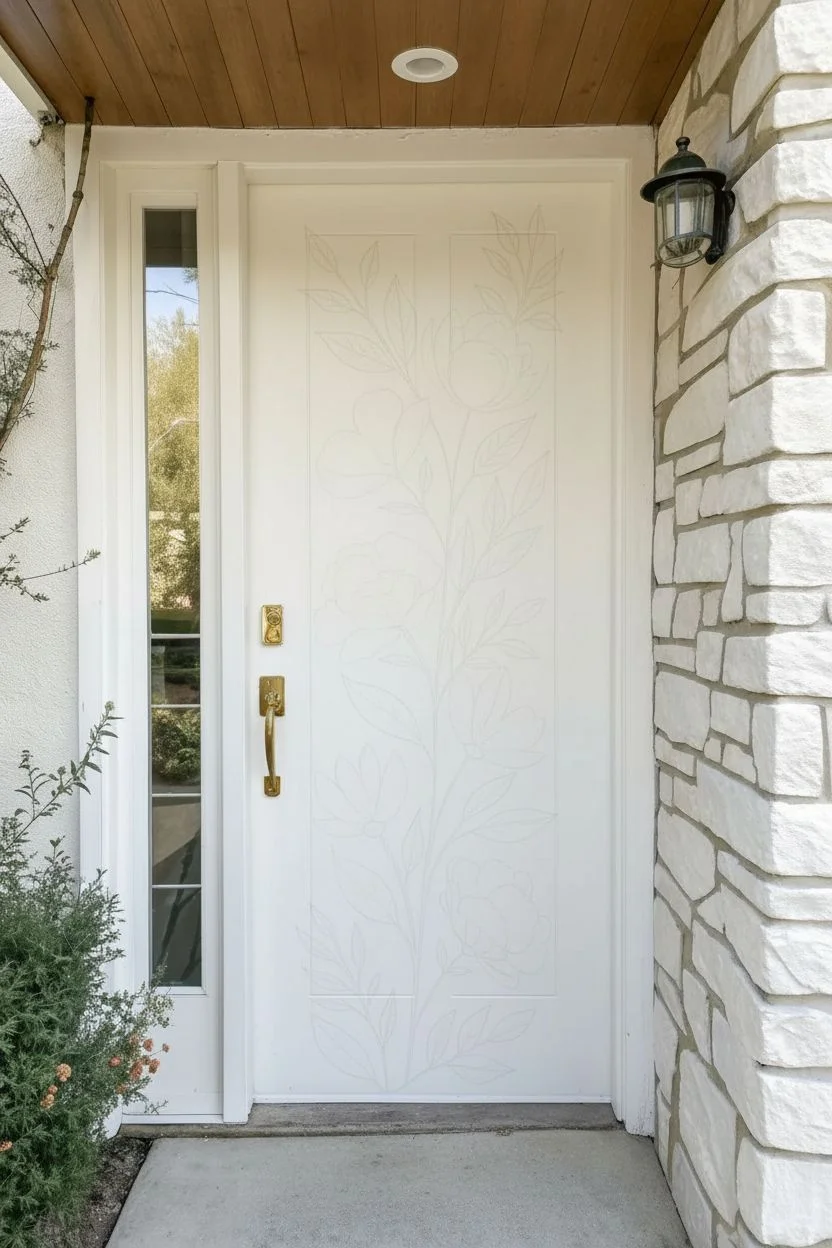
Transform a plain front door into a welcoming masterpiece with this oversized floral mural. The design features a climbing vine with stylized blooms in soft terracotta and sage hues, creating a charming, hand-painted look that feels both vintage and fresh.
Step-by-Step
Materials
- Exterior door paint (white or cream for base)
- Acrylic exterior paints (terracotta/peach, sage green, dark green, cream)
- Sandpaper 320-grit
- Painter’s tape
- Chalk or watercolor pencil (light color)
- Assorted synthetic brushes (1-inch flat, medium filbert, fine liner)
- Exterior clear sealant (polyurethane or varnish)
- Paper towels
- Palette or paper plate
Step 1: Preparation
-
Clean surface:
Begin by thoroughly cleaning the door surface to remove dust, dirt, and oils. A mixture of water and mild dish soap works well, but rinsing with plain water afterward is crucial. -
Light sanding:
Once dry, lightly scuff the area where the mural will go with 320-grit sandpaper. This helps the paint adhere better without stripping the existing finish completely. -
Base coat touch-up:
If your door isn’t already the desired background color, apply a fresh coat of exterior white or cream paint and let it cure for at least 24 hours before starting the art.
Step 2: Sketching the Design
-
Map the vine:
Using a light-colored chalk or watercolor pencil, lightly draw a wavy S-curve running vertically from the bottom center to the top right of the door panel. This serves as your main stem. -
Place the flowers:
Sketch circles or ovals to mark the placement of the six main blooms. Alternate their direction—some facing left, some right—to balance the composition visually along the vine. -
Fill with leaves:
Draw leaf shapes attached to the main stem. Group them in pairs or threes, ensuring they fill the negative space between the flowers without looking cluttered.
Chalk It Up
Sketch with chalk instead of pencil! It wipes off easily with a damp rag if you make a mistake, leaving no graphite smudges.
Step 3: Painting the Foliage
-
Base stem:
Mix a dark sage green. Using a medium filbert brush or a round brush, paint the main stem following your chalk line. Keep the pressure steady for a consistent width, tapering slightly at the very top. -
Leaf base color:
Fill in the leaf shapes with a mid-tone sage green. It’s okay if this layer looks flat; we will add dimension later. Let it dry to the touch. -
Leaf shading:
Mix a darker green shade. On one half of each leaf (usually the lower half), paint a shadow to suggest a central vein. Blend the edge slightly while the paint is wet for a softer look. -
Leaf highlights:
Add a touch of white or cream to your sage green. I like to add thin, curved strokes to the upper tips of the leaves to make them look sun-kissed and dimensional.
Add a Buzzer
Paint tiny bees or butterflies hovering near the top blooms to add a whimsical narrative element to your door garden.
Step 4: Painting the Blooms
-
Flower base coat:
Using the terracotta or peach paint, fill in the outlines of the flowers. Apply two thin coats rather than one thick one to avoid drips and brush marks. -
Defining petals:
Once dry, mix a slightly darker version of your peach color (add a tiny drop of brown or red). Use a filbert brush to paint C-shaped curves inside the circle to define individual overlapping petals. -
Deepening shadows:
Take a dark rust or reddish-brown color and paint into the deepest crevices between petals and the flower centers. This high contrast is what makes the flowers pop from a distance. -
Highlighting petals:
Mix a pale peach or cream color. With a small brush, gently sweep highlights onto the top edges of the petals where the light would naturally hit. -
Flower centers:
For the open-faced flowers, dot the centers with dark green or brown, then add tiny specks of white or yellow on top to represent pollen or stamens.
Step 5: Finishing Details
-
Clean up outliers:
Use a damp Q-tip or a brush with your background door color to clean up any stray chalk lines or paint edges that aren’t crisp. -
Connect stems:
Use a fine liner brush and your dark green paint to connect the flower heads securely to the main vine with thin, delicate little stems. -
Protective Sealing:
Allow the paint to cure for at least 48 hours. Then, apply two coats of clear exterior sealant (polyurethane or varnish) over the design to protect it from weather and UV fading.
Step back and admire how this vibrant botanical addition instantly boosts your home’s curb appeal


Geometric Stencil Pattern for Clean Lines
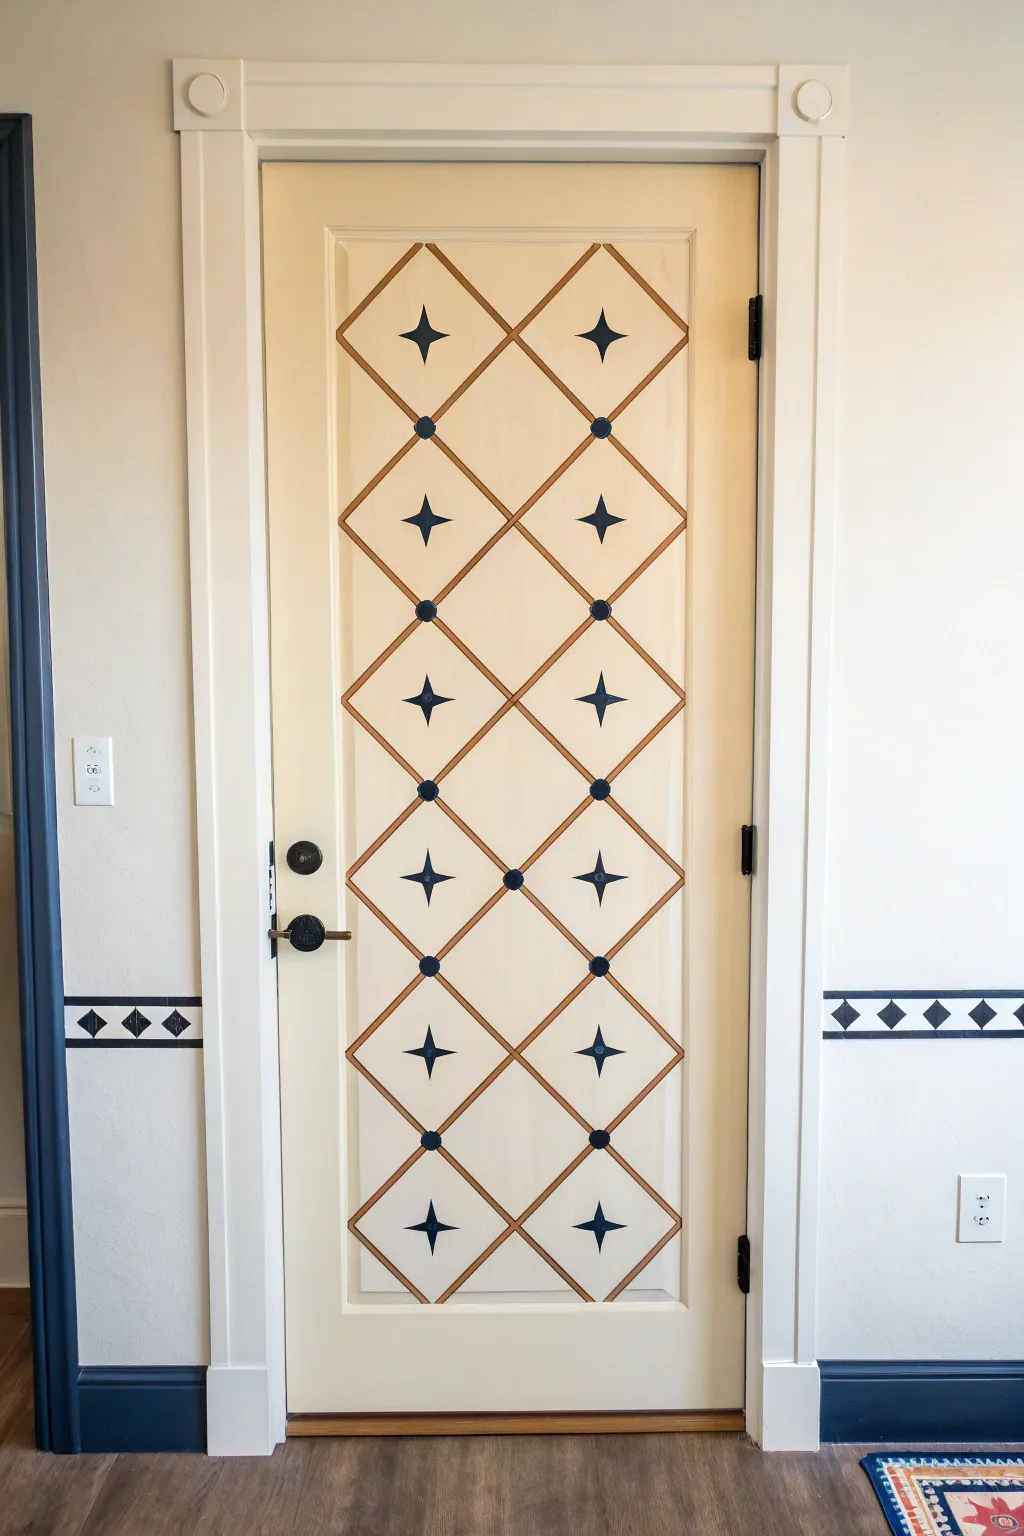
Transform a plain door into a striking architectural feature with this elegant geometric lattice design. The combination of crisp diamond outlines and classical four-pointed stars creates a sophisticated look that mimics expensive inlaid wood.
Step-by-Step Guide
Materials
- Door (flat panel or raised panel)
- Painter’s tape (multi-width pack)
- Pencil and long straight edge / level
- Measuring tape
- Base color paint (cream/off-white)
- Accent paint A (metallic antique gold or tan)
- Accent paint B (dark navy blue)
- Small angled sash brush
- Detail artist brushes (fine tip and small flat)
- Circular stencil or small foam pouncer (approx. 1 inch)
- Star stencil (four-pointed) or cardstock to make one
- Clear matte sealer (optional)
Step 1: Preparation & Base Coat
-
Clean surface:
Begin by thoroughly cleaning the door surface with a degreaser or mild soap and water to remove oils and fingerprints. Let it dry completely. -
Sand lightly:
Give the door a quick scuff sanding with fine-grit sandpaper (220-grit) to help the primer and paint adhere better. -
Apply base color:
Paint the entire inner panel of the door with your cream or off-white base color. You may need two coats for full opacity. -
Dry time:
Allow the base coat to cure for at least 24 hours before applying tape. This is crucial so the tape doesn’t peel up your fresh paint.
Step 2: Drafting the Lattice
-
Find the center:
Measure the width of the recessed door panel to find the exact vertical center line. Mark this lightly with a pencil at the top and bottom. -
Mark vertical spacing:
Design your grid. Measure the height and divide it by the number of diamond rows you want (in this example, there are four full diamonds vertically). Mark these intervals along your center line. -
Create the grid:
Using a long straight edge, lightly draw the diagonal lines connecting your center marks to the edges to form the diamond lattice structure. Aim for symmetry. -
Tape the lines:
Apply painter’s tape along the *outside* of your pencil lines to create the grid. Since the lines cross over each other, you will paint the grid in two phases or carefully cut the tape at intersections. -
Seal the tape:
Run a thin layer of your base color over the tape edges. This bleeds under the tape first and ensures your accent lines will be razor sharp.
Crisp Lines Secret
Use a credit card to press down the tape edges firmly. Sealing the tape with the *base color* before applying the accent color guarantees zero bleed.
Step 3: Painting the Design
-
Paint the lattice:
Using your small flat brush, paint between the tape lines with the metallic gold or tan paint. Apply two thin coats rather than one thick one. -
Remove tape:
Peel off the tape while the second coat is still slightly tacky to avoid pulling up dried paint chunks. -
Connect intersections:
If you had gaps at the intersections where the tape crossed, use a small detail brush and the gold paint to carefully connect the lines. -
Stencil the stars:
Place your four-pointed star stencil in the exact center of each diamond. Stencil with the dark navy blue using a fairly dry brush to prevent bleeding. -
Add corner accents:
At the left and right points of the diamonds (where they touch the door frame), hand-paint half-stars if your stencil doesn’t fit. -
Add circle intersections:
Dip a small foam pouncer or circular stencil into the navy blue paint. Press it gently at every point where the gold lines cross to create the decorative medallions. -
Touch ups:
I like to go back with a tiny artist brush and the base wall color to clean up any smudges or uneven edges around the stars. -
Seal (Optional):
Once fully cured (wait 48 hours), apply a clear matte sealer over the panel design to protect your handiwork from scratches.
Uneven Grid?
If your measurements seem off, cut a diamond template from cardboard first. Trace around it repeatedly to ensure every shape is identical before painting.
Step back and admire how a simple pattern adds depth and character to your room


Harlequin Diamonds That Follow the Door Panels
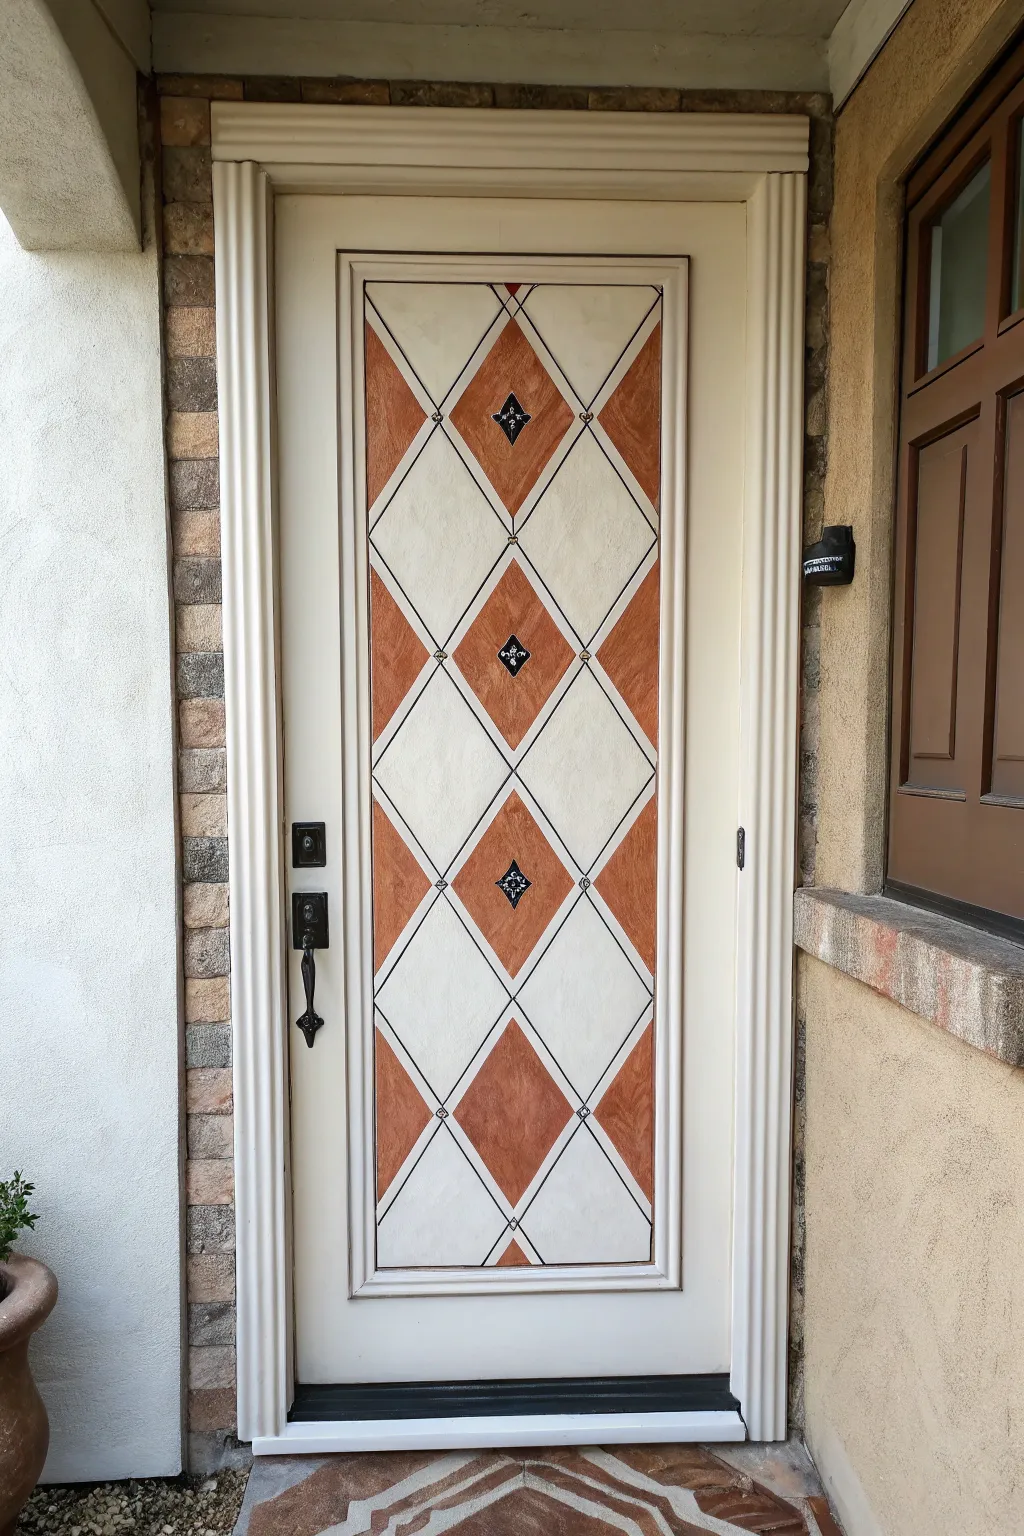

Transform a standard panel door into a welcoming entryway feature with this elegant harlequin diamond design. By combining warm faux-wood tones with cream accents and sharp detailing, you’ll create a sophisticated trompe-l’œil effect that looks like expensive inlay work.
Step-by-Step Guide
Materials
- Exterior-grade painters tape (1-inch width)
- Pencil and long straight edge ruler
- Measuring tape
- Exterior latex paint (base color: Cream/Off-white)
- Exterior latex paint or gel stain (accent color: Warm Terracotta or Mahogany)
- Black acrylic paint or paint pen (for linework)
- Small decorative diamond stencils (optional)
- Small detail brush (round size 2 or 4)
- Flat shader brush (1-inch)
- Clear exterior polyurethane sealer (satin finish)
- Damp rag for clean up
Step 1: Preparation and Base Coat
-
Clean the surface:
Begin by thoroughly cleaning the door with a mild detergent solution to remove any dirt, grease, or existing wax. Let it dry completely. -
Sand lightly:
Scuff sand the central panel area with fine-grit sandpaper (220-grit) to help the paint adhere, then wipe away all dust with a tack cloth. -
Apply the base color:
Paint the entire central recessed panel with your cream or off-white exterior base paint. Apply two coats for even coverage, allowing proper drying time between each layer as recommended by the manufacturer.
Clean Lines
For ultra-crisp lines, burnish the edge of your painter’s tape with a credit card or spoon before painting to ensure a tight seal.
Step 2: Mapping the Diamonds
-
Find the center:
Measure the width of the inner panel and mark the exact vertical center point at the top and bottom. Lightly draw a vertical plumb line connecting these points. -
Establish the grid:
Decide on the height of your diamonds – around 10-12 inches is usually pleasing. Mark these intervals along your center line. -
Draw the zig-zag pattern:
Using your straight edge, connect your center marks to the side edges of the panel to create the diamond grid. Keep your pencil pressure light so mistakes are easily erased. -
Tape the first set:
Apply painter’s tape along the outside edges of the diamonds you intend to paint with the accent color. I find it best to just tape the ‘whole’ diamonds first to avoid confusion. -
Seal the tape edges:
Run a very thin layer of your base cream color over the edge of the tape. This prevents the darker accent color from bleeding under.
Smudged Lines?
If paint bleeds under the tape, wait for it to dry completely. Then, use a small, stiff brush with a tiny bit of base paint to ‘erase’ the error.
Step 3: Painting the Texture
-
Apply the warm tone:
Using the terracotta paint or gel stain, fill in the masked-off diamond shapes. If using stain, wipe it on with a cloth for a textured wood-grain look. -
Create faux texture:
If using solid paint, experiment with ‘dry brushing’ a slightly darker brown over the wet terracotta to mimic wood grain and add depth. -
Remove tape and repeat:
Carefully peel the tape while the paint is still slightly tacky. Once fully dry, tape off the remaining partial half-diamonds at the edges and paint them to match.
Step 4: Detailing and Sealing
-
Outline the shapes:
Using a thin brush and black paint (or a steady hand with a thick paint pen), carefully trace the lines between the diamonds to create separations. -
Add corner accents:
At the intersection points where the diamonds meet, paint small loops or dots in black to mimic wrought iron joinery. -
Create the center motifs:
In the center of the terracotta diamonds, stencil or freehand a small black quatrefoil or ornate diamond shape. This anchors the design visually. -
Let it cure:
Allow all paint layers to dry for at least 24 hours to ensure the pigment is set. -
Protect the work:
Apply two thin coats of clear exterior polyurethane sealer over the panel to protect your artwork from UV rays and weather.
Step back and admire how this simple geometric pattern has added architectural depth and charm to your entryway.
BRUSH GUIDE
The Right Brush for Every Stroke
From clean lines to bold texture — master brush choice, stroke control, and essential techniques.
Explore the Full Guide
Chevron or Art Deco Lines That Echo the Architecture
Transform a plain slab door into a stunning architectural feature using this chevron and diamond wood overlay technique. The warm, natural tones of oak combined with precise geometric lines create a sophisticated entryway that perfectly bridges modern and rustic styles.
Step-by-Step
Materials
- Solid core exterior flush door (slab)
- Thin oak veneer strips or 1/4 inch oak lattice moulding (1.5 – 2 inches wide)
- Construction adhesive (heavy duty)
- Pin nailer with 1-inch headless pins
- Miter saw (crucial for precise angles)
- Speed square
- Wood glue
- Orbital sander with 120 and 220 grit pads
- Exterior spar varnish or marine sealer
- Wide painters tape
- Wood filler (oak tint)
- Black exterior matte paint (optional, for gaps)
- Measuring tape and pencil
Step 1: Preparation and Center Line
-
Surface prep:
Begin by laying your flush door flat on sawhorses. Sand the existing surface lightly with 120-grit paper to ensure the adhesive bonds well. Wipe away all dust with a tack cloth or damp rag. -
Mark the center:
Measure the width of the door at the top, middle, and bottom to find the exact center point. Use a long straightedge or chalk line to draw a clearly visible vertical line straight down the middle of the door; this is the spine of your chevron pattern. -
Darkening the gaps:
If you want the lines between your wood strips to have deep contrast like the inspiration image, paint the face of the door flat black before applying the wood. This ensures any tiny gaps between strips look like intentional shadow lines rather than showing the door underneath.
Step 2: Creating the Upper Chevron Pattern
-
Set the angle:
Set your miter saw to a 45-degree angle. Test cut two scrap pieces of your oak strip to ensure they meet perfectly at a 90-degree corner when placed against your center line. -
The first peak:
Cut your first two strips with 45-degree miters on one end. Place them at the very top of the door so the points meet exactly on your center line, forming an upside-down ‘V’. I find it helpful to let the excess length hang off the sides of the door for now; we will trim it later. -
Secure the start:
Apply construction adhesive to the back of these first two strips. Press them firmly into place, checking alignment with your center line again. Tack them down with a few pin nails to hold them while the glue cures. -
Using spacers:
To get those distinct dark grooves between planks, use tile spacers or pennies between each row of wood. If you prefer a tight fit, simply butt the next board against the previous one. -
Continue the pattern:
Continue cutting and installing strips in pairs, working your way down the door. Keep the center seam tight. Stop when you reach about 18-20 inches from the bottom of the door, where the diamond pattern will begin.
Alignment Drift
Check your center alignment every 3-4 rows. If the boards start drifting off the line, shim the next row slightly with a folded piece of sandpaper to correct the angle before gluing.
Step 3: The Diamond Detail
-
Marking the diamond:
At the bottom center, measure and draw a large diamond shape that spans the remaining width. The center of the diamond should align with your main vertical center line. -
Miter the frame:
Cut four pieces of oak strip to frame this diamond shape. You will need to adjust your miter saw angles—likely to 45 degrees, but double-check your drawing. These pieces form the border of the geometric inset. -
Install the center point:
Inside the large diamond, create a smaller, central diamond using four small mitered pieces. This creates the ‘bullseye’ effect seen in the photo. Glue and pin these carefully. -
Filling the fields:
Fill the space between the inner and outer diamond with strips cut to fit parallel to the border. Then, fill the remaining outer corners of the door bottom with strips that continue the original chevron angle, creating a seamless flow around the geometric feature.
Level Up: Hidden Door
Use this same technique on the surrounding wall cladding to create a ‘hidden’ door effect, where the chevron pattern continues seamlessly across the wall and door frame.
Step 4: Trimming and Finishing
-
Trim the overhang:
Once the adhesive has fully cured (usually 24 hours), use a track saw or a circular saw with a straight-edge guide to cut off all the overhanging wood strips flush with the sides of the door. -
Frame the edge:
Install long, vertical strips of oak (about 1/2 inch to 1 inch thick) along the left and right edges of the door to hide the cut ends of the chevron planks. Miter the corners for a professional framed look. -
Sanding flush:
Sand the entire face of the door with an orbital sander. Start with 120 grit to level out any uneven joints between strips, then move to 220 grit for a smooth finish suitable for staining. -
Sealing:
Apply at least three coats of exterior spar varnish. This builds a flexible, UV-resistant barrier. Ensure you get the sealer into the grooves to prevent water ingress. -
Hardware installation:
Finally, drill openings for your lockset and handle. Install a distinct black handle set to complement the dark shadow lines in the wood pattern.
Step back and admire how a few simple measurements and cuts have created a grand, custom entryway full of character
Nautical Crest and Symbols for a Coastal Door
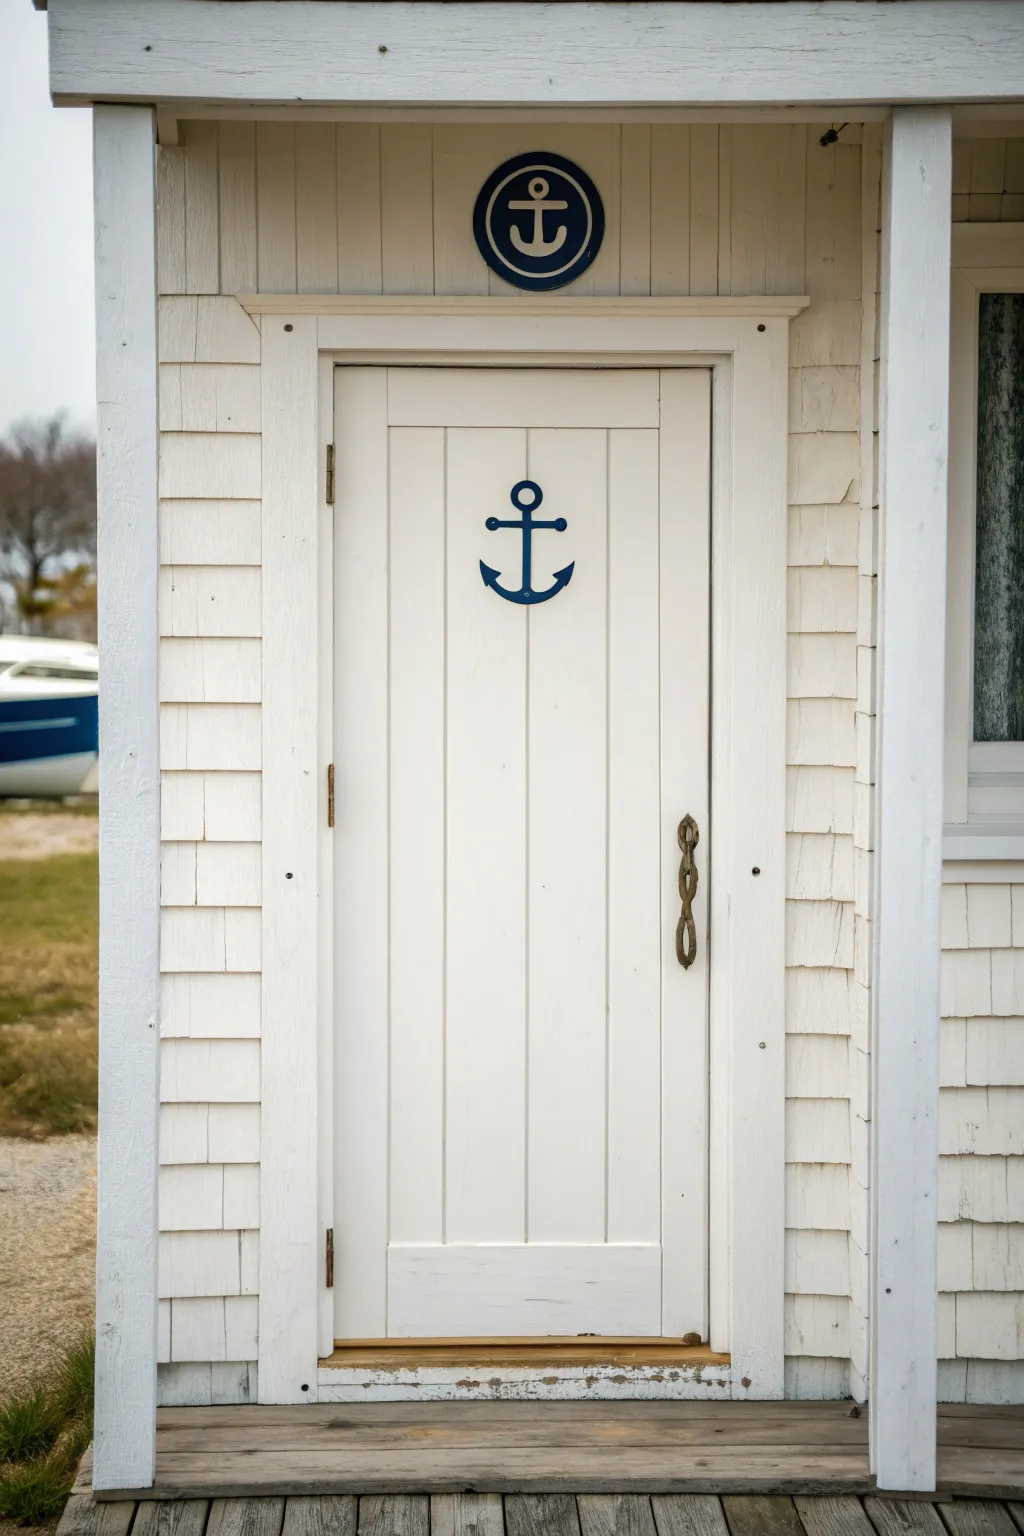
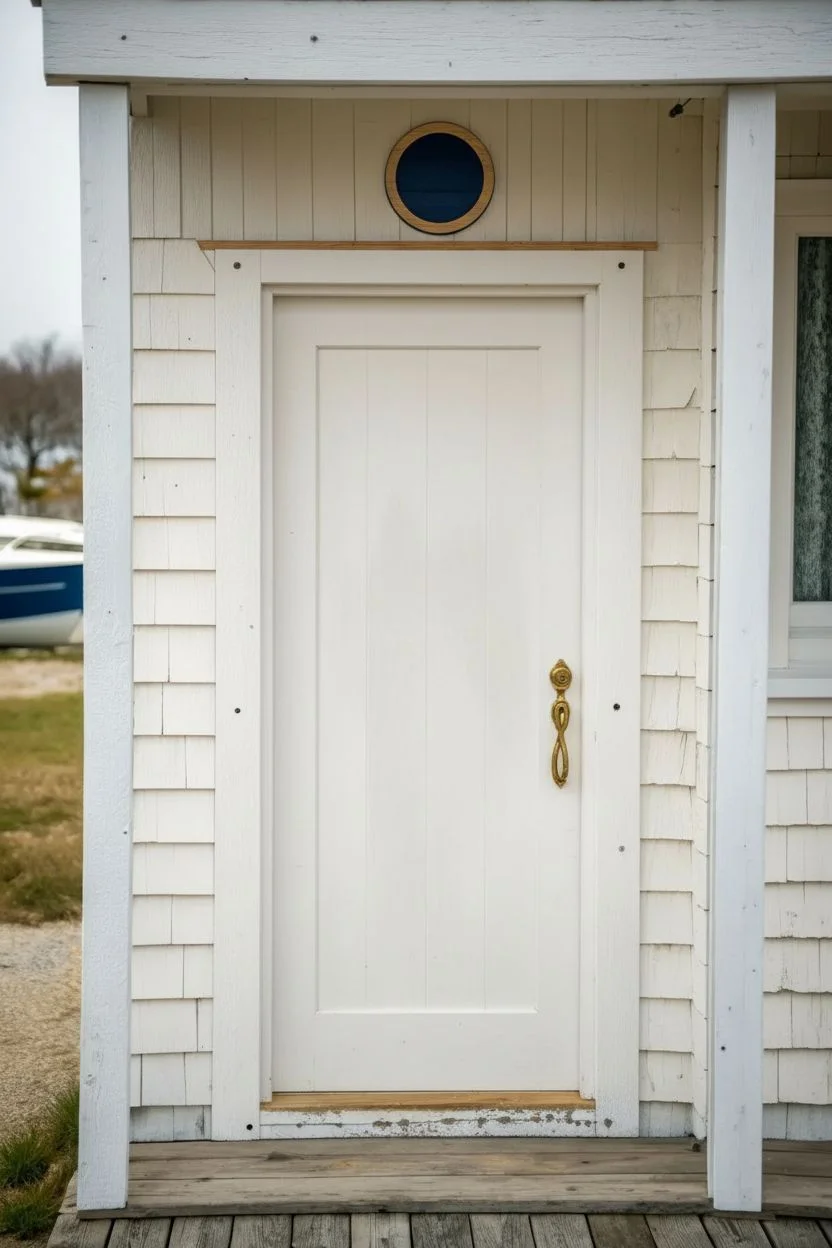
Bring classic maritime charm to any entryway with this crisp, nautical-themed project featuring a bold central anchor and a matching emblem above. This two-part design combines clean stenciling with simple woodwork adjustments to create a cohesive, seaside cottage look.
Detailed Instructions
Materials
- White exterior semi-gloss paint
- Navy blue exterior satin paint
- Round wooden plaque (approx. 8-10 inches)
- Anchor stencil (large for door)
- Small anchor stencil (for plaque)
- Painter’s tape
- Fine-grit sandpaper (220 grit)
- Medium-sized stencil brush
- Small detail brush
- Pencil and ruler
- Exterior mounting adhesive or small nails
- Matte clear sealer (exterior grade)
Step 1: Base Preparation
-
Clean the surfaces:
Start by thoroughly cleaning your door and the space above the frame with a mild detergent solution to remove any salt, dirt, or grease that might interfere with paint adhesion. -
Light sanding:
Once dry, scuff the area where the anchor will go and the wooden plaque with 220-grit sandpaper to give the paint something to grip. -
Base coat the plaque:
Paint the round wooden plaque with your navy blue satin paint. Apply two even coats, allowing sufficient drying time between each to ensure a rich, solid background color. -
Prepare the emblem border:
If your plaque doesn’t have a raised edge, use painter’s tape to mark off a thin rim around the circumference. Or, paint the rim a contrasting lighter wood tone or white.
Bleed-Proof Lines
Before painting the blue anchor, seal the stencil edges by painting a thin layer of the door’s base white color first. It fills gaps so the blue won’t bleed.
Step 2: Painting the Door Anchor
-
Find the center:
Measure the width of your door’s central panel carefully. Mark the exact vertical center point lightly with a pencil at your desired height—eye level is usually best. -
Secure the stencil:
Align your large anchor stencil over the center mark. Tape it down firmly on all four sides with painter’s tape to prevent slipping. -
Load the brush:
Dip your stencil brush into the navy blue paint, then offload most of it onto a paper towel until the brush feels almost dry. -
Apply the paint:
Using a straight up-and-down dabbing motion, stipple the paint through the stencil openings. Avoid brushing side-to-side, which can force paint under the edges. -
Build coverage:
Apply a second or third light coat if necessary for full opacity. I prefer doing several thin layers rather than one thick one to keep the edges crisp. -
Remove stencil:
Peel the stencil away carefully while the paint is still slightly tacky, pulling straight up to avoid smudging the design.
Smudged Edges?
If paint seeps under the stencil, don’t panic. Wait for it to dry completely, then use a small flat brush and the background door color to ‘erase’ the error.
Step 3: Creating and Mounting the Emblem
-
Position the top stencil:
Take your fully dry navy blue plaque and center the smaller anchor stencil on it. -
Paint the white anchor:
Using the white exterior paint and a clean stencil brush, repeat the dabbing technique to paint the white anchor symbol onto the blue background. -
Define the circle:
If you want the inner ring detail seen in the photo, place a circular object (like a bowl) or use a compass to lightly pencil a circle around the anchor, then carefully hand-paint this thin white line with a detail brush. -
Correct mistakes:
Use a detail brush dipped in the base color (navy) to tidy up any white lines that may have bled or look uneven. -
Seal the work:
Once both the door anchor and the plaque are completely cured (usually 24 hours), apply a coat of matte exterior sealer to protect the artwork from sun and salt air. -
Mount the emblem:
Measure the center point above the door frame. Secure the finished plaque using exterior mounting adhesive or finish nails, ensuring it sits flush and level.
Step back and admire how these simple nautical symbols have completely transformed your entryway into a coastal retreat

PENCIL GUIDE
Understanding Pencil Grades from H to B
From first sketch to finished drawing — learn pencil grades, line control, and shading techniques.
Explore the Full Guide
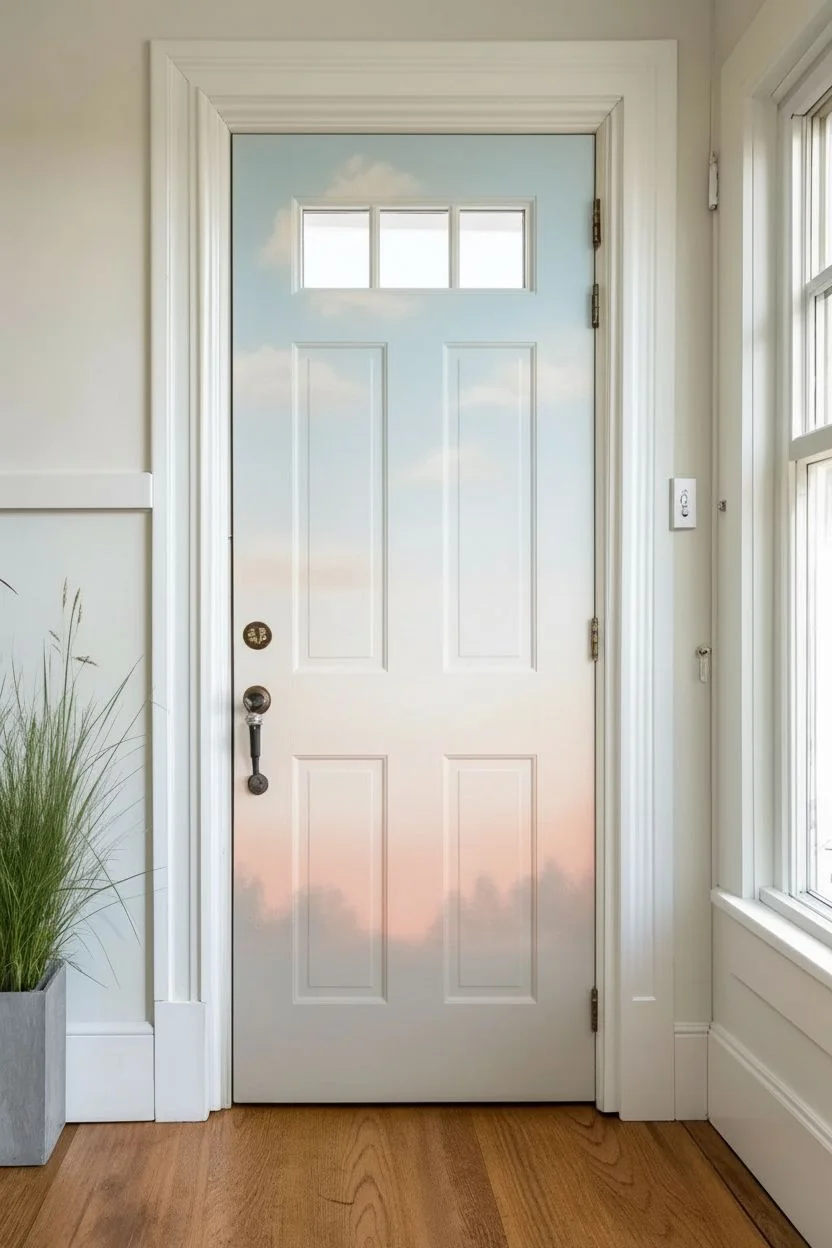
Garden-to-Home Sunflower Scene on the Door
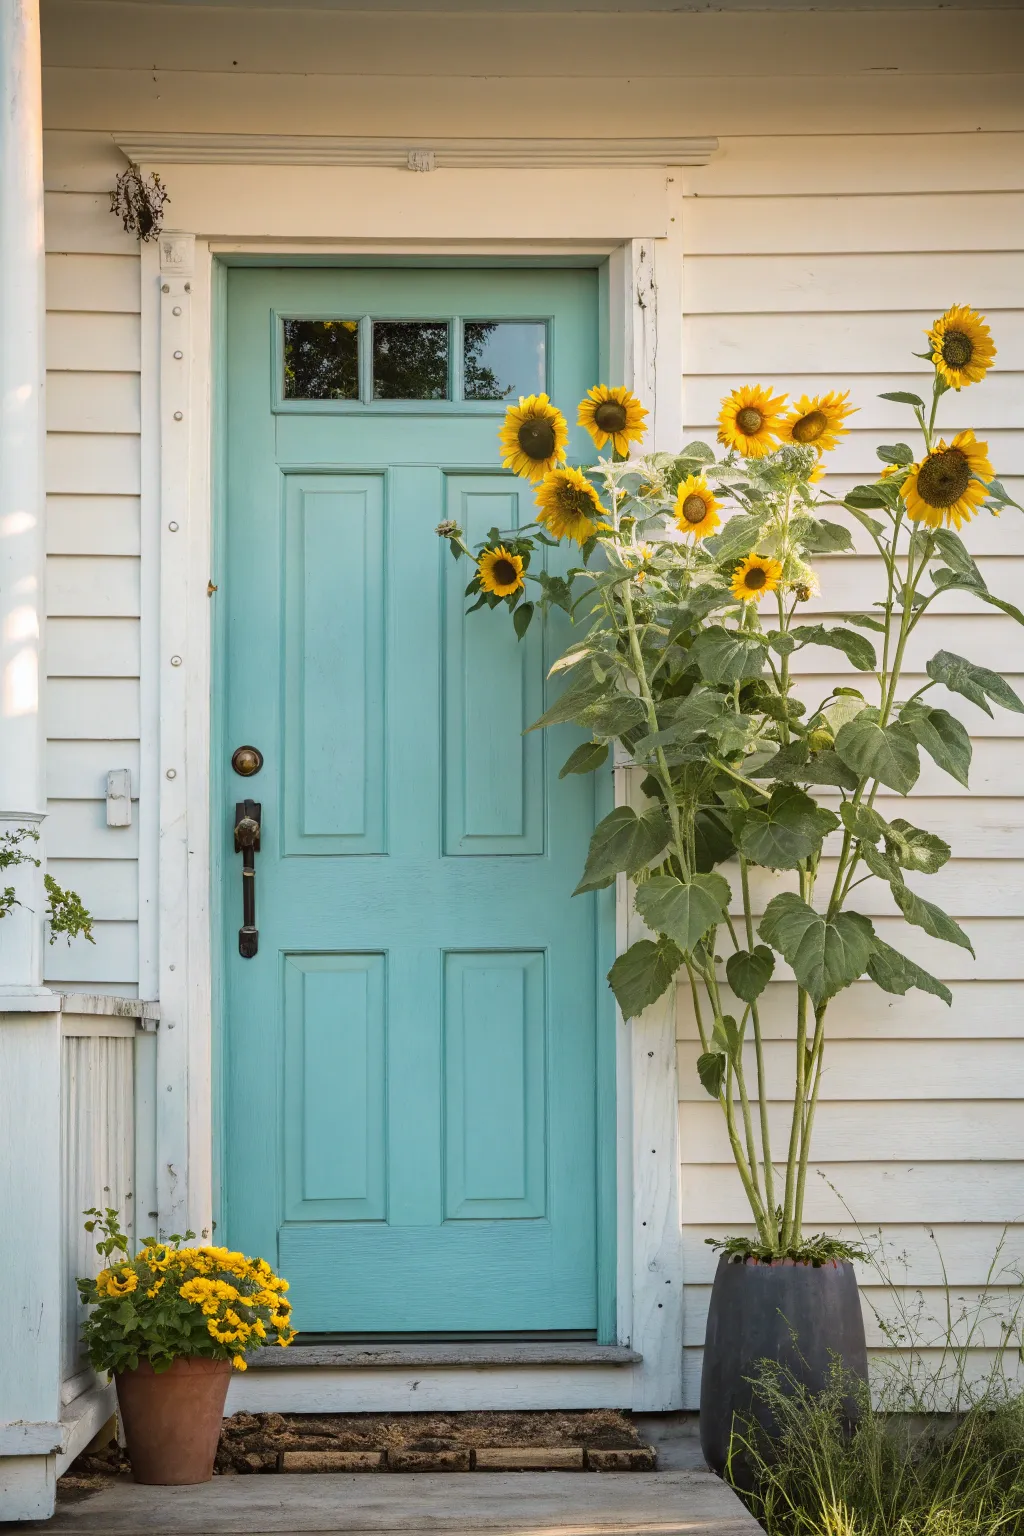
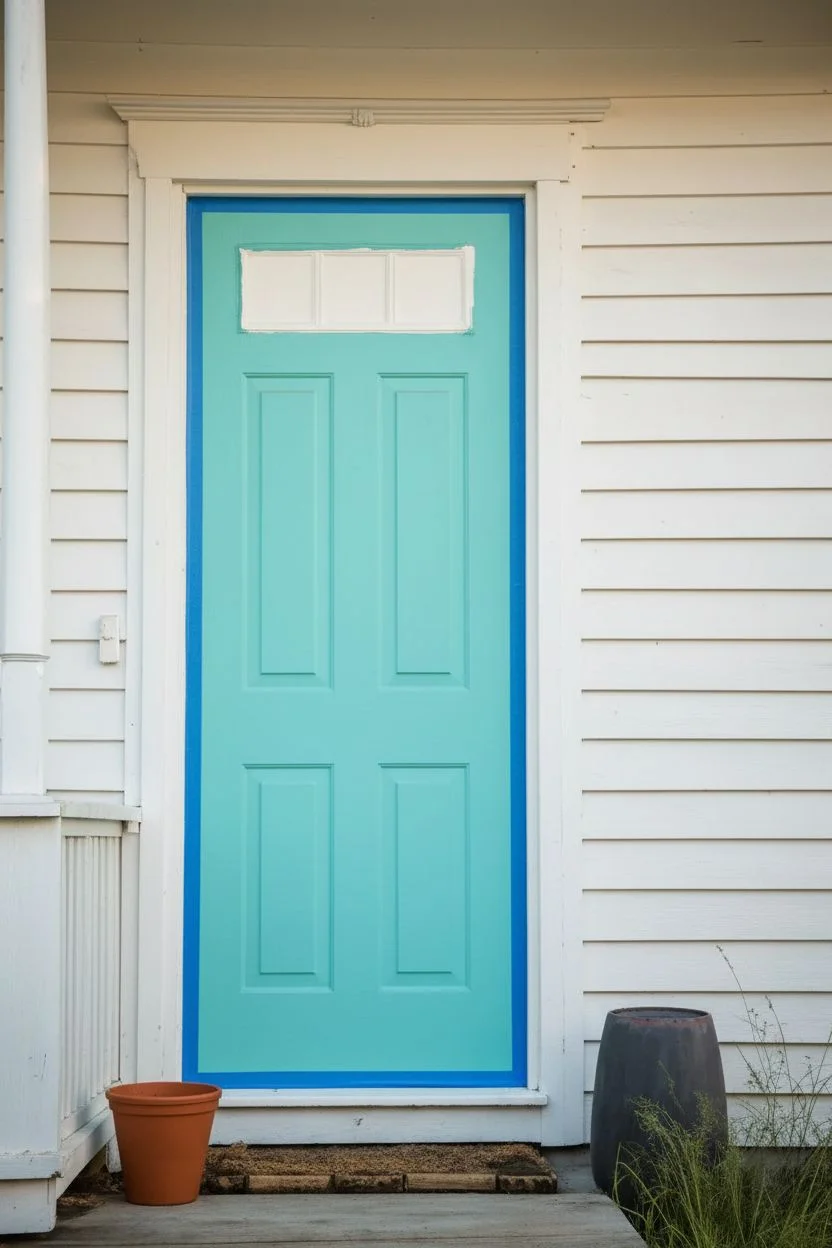
Transform a plain door into a charming cottage entrance with this realistic trompe l’oeil mural. Using clever shading and vibrant acrylics, you will paint a cheerful turquoise door scenes complete with faux windows and lively potted sunflowers.
Step-by-Step
Materials
- High-quality interior/exterior door blank or large wooden panel
- Sandpaper (120 and 220 grit)
- Primer suitable for wood
- Acrylic latex paints: Turquoise/Teal, White, Black, Dark Brown, Forest Green, Lime Green, Cadmium Yellow, Orange
- Painter’s tape variety pack (1-inch and 2-inch)
- Ruler and T-square
- Pencil
- Large flat brush (2-3 inch)
- Medium angled sash brush
- Small round detail brushes (sizes 2, 4, and 6)
- Matte or satin clear sealant (exterior grade)
Step 1: Preparing the Canvas
-
Surface Prep:
Begin by sanding your door or wooden panel thoroughly with 120-grit sandpaper to remove any rough spots, then smooth it out with 220-grit. Wipe away all dust with a tack cloth. -
Prime the Surface:
Apply a solid coat of primer across the entire surface. This ensures your vibrant turquoise color will pop and adhere correctly. Let this dry completely according to the manufacturer’s instructions. -
Base Color Application:
Using a large flat brush or roller, paint the entire door in a crisp white. This will serve as the ‘siding’ color seen on the left and right edges, and acting as a bright undercoat for the door itself.
Step 2: Drafting the Door
-
Marking the Frame:
Once the white base is dry, use your T-square and pencil to measure and draw the outline of the door frame centrally on your panel, leaving white space on the sides for the ‘siding’ effect. -
Taping the Edges:
Apply painter’s tape along the outside lines of your pencil marks. This protects the white ‘siding’ area while you work on the main door color. -
Painting the Teal:
Mix a custom turquoise shade—I personally like adding a tiny drop of grey to the teal to ground the color—and fill in the entire taped-off door area. Apply two coats for full opacity. -
Drawing the Panels:
When the teal paint is fully dry, use a ruler to lightly sketch the recessed panels: two long vertical rectangles at the bottom and top, and the window panes near the top.
Uneven Lines?
If your panel shadows look shaky, use painter’s tape for the straight edges. Let the base coat dry 100% before taping to avoid peeling.
Step 3: Creating Dimension
-
Shadowing the Panels:
Mix a darker version of your teal (add a touch of black/brown). Use an angled sash brush to paint the inner left and top edges of your sketched rectangles to create a recessed shadow effect. -
Highlighting Edges:
Mix a lighter tint of teal (add white). Paint the inner right and bottom edges of the rectangles. This contrast creates the optical illusion of raised molding. -
Painting the Windows:
Fill the top rectangular spaces with a very dark grey or black to simulate glass. Once dry, paint crisp teal grid lines over the black to form the muntins (window grids). -
Adding Reflections:
Using a dry brush with a tiny amount of white paint, streak subtle diagonal reflections across the ‘glass’ to make it look realistic.
Level Up: 3D Elements
Glue actual dehydrated sunflower heads or silk leaves onto the painted stems for a mixed-media piece that literally pops off the door.
Step 4: Painting the Flora
-
Sketching the Plants:
Lightly sketch the outline of the tall sunflower plant on the right side and the smaller pot of yellow flowers on the bottom left corner. -
Blocking in Greenery:
Use forest green to block in the stems and large leaves. Don’t worry about details yet; just establish the shapes. -
Layering Leaf Details:
Mix lime green with the forest green. Use a size 4 round brush to add veins and light-hitting areas on the leaves. Keep the lower leaves darker to suggest they are in shadow. -
Painting Sunflower Centers:
Dab dark brown circles where the flower heads will be. Stipple lighter brown and gold dots in the center for texture. -
Adding Petals:
Load a size 6 brush with cadmium yellow and orange. Paint the sunflower petals starting from the center outward, lifting the brush at the tip to create a sharp point. -
Grounding with Pots:
Paint the large pot on the right in a dark charcoal grey and the smaller pot on the left in terracotta orange. Add a curved shadow on the side of the pots opposite your light source to make them look round.
Step 5: Finishing Touches
-
Adding Hardware:
Paint a small circle and a vertical handle shape in black/bronze on the door. Add a tiny white highlight to the top curve of the doorknob to simulate metal shine. -
Creating Weathering:
Use a very watery grey wash to add subtle dirt or weathering marks near the bottom of the door and corners for an authentic, lived-in look. -
Sealing the Work:
Once all paint is cured (wait at least 24 hours), apply two coats of exterior-grade clear sealant to protect your mural from the elements.
Step back and admire how this vibrant mural brings permanent sunshine to your entryway
Four-Panel Botanical “Window” Paintings
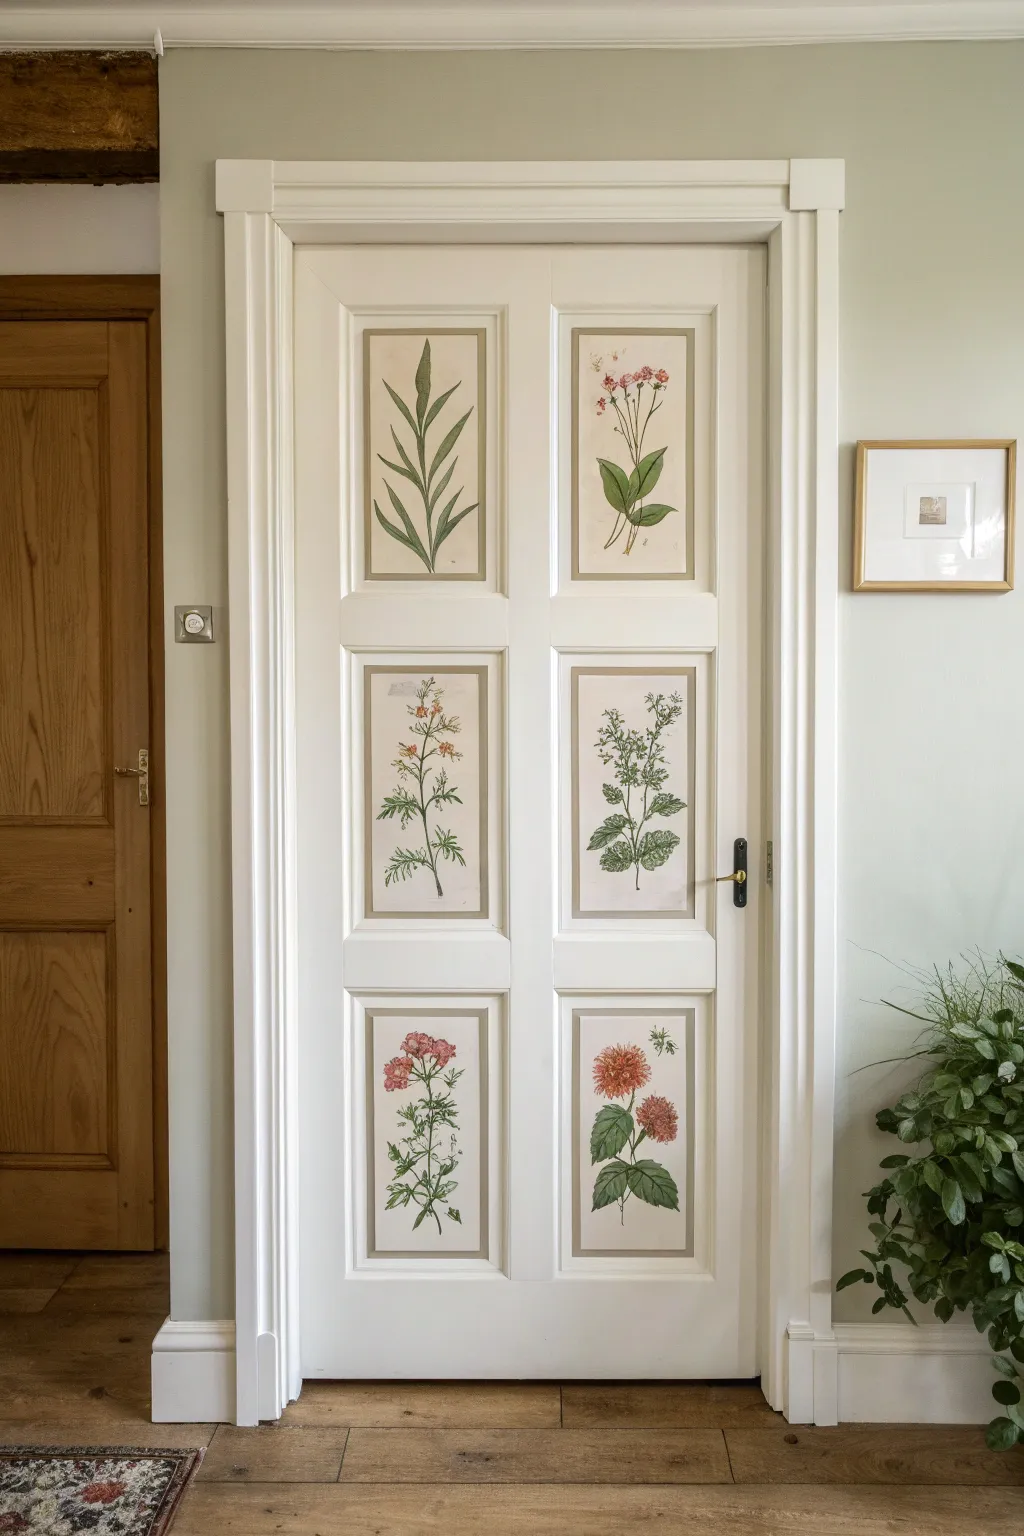

Transform a standard panel door into a gallery of vintage flora with this decoupage project. By adhering botanical prints directly into the door’s recessed panels, you create a sophisticated, custom look that feels like a hand-painted antique.
Step-by-Step Guide
Materials
- Six high-quality botanical art prints (sized to fit your door panels)
- Matte finish decoupage medium (e.g., Mod Podge)
- Foam brushes
- Brayer or clean rolling pin
- Measuring tape
- Pencil
- Craft knife and metal ruler (or scissors)
- Fine-grit sandpaper (220 grit)
- Clean, damp cloth
- Acrylic sealer spray (matte)
- Painter’s tape (optional)
Step 1: Preparation
-
Clean surface:
Begin by thoroughly cleaning the door panels with a mild detergent and water to remove any grease or dust. Let it dry completely. -
Light sanding:
Scuff the recessed panels lightly with 220-grit sandpaper; this helps the decoupage medium adhere better to the paint. -
Wipe down:
Use a damp cloth to wipe away all sanding dust, ensuring the surface is perfectly clean and dry. -
Measure panels:
Measure the flat, recessed area of each door panel precisely. Measure twice to ensure accuracy. -
Trim prints:
Cut your botanical prints to these exact dimensions using a craft knife and metal ruler for the cleanest straight edges. -
Dry fit:
Place each trimmed print into its corresponding panel to check the fit. If any edges curl up the sides of the recess, trim a hairline sliver off until they lay completely flat.
Step 2: Application
-
Apply medium to door:
Working one panel at a time, apply a thin, even layer of decoupage medium directly onto the door panel surface with a foam brush. -
Apply medium to paper:
Quickly apply a thin layer of medium to the back of the corresponding botanical print. -
Position the print:
Carefully place the print into the recess, aligning the top corners first and slowly lowering the rest. -
Smooth it out:
Starting from the center and working outward, use a brayer or your fingers to smooth the paper down firmly to eliminate air bubbles. -
Address edges:
Run your finger firmly along the perimeter of the print to ensure the edges are sealed tight against the door. -
Repeat process:
Repeat the application steps for all remaining door panels, handling the paper gently to avoid tearing. -
Initial drying:
Allow all panels to dry for at least 20-30 minutes. The paper may look slightly wrinkled while wet but should tighten as it dries.
Wrinkle Rescue
If stubborn bubbles appear after drying, prick them with a fine needle and press down. Heat from a hairdryer can also help smooth out minor wrinkles.
Step 3: Sealing and Finishing
-
First top coat:
Once dry, brush a thin layer of matte decoupage medium over the top of the prints to seal them. I prefer to brush in the direction of the stems for a subtle texture. -
Clean messy edges:
While the top coat is wet, wipe away any excess glue that strayed onto the door frame with a damp cloth. -
Dry and repeat:
Let the first coat dry for an hour. Apply a second thin coat for durability, alternating brush stroke direction if desired. -
Final cure:
Allow the project to cure for at least 24 hours before touching or cleaning. -
Protective spray:
For extra protection against moisture and fingerprints, finish with a light misting of clear matte acrylic sealer spray.
Antiqued Effect
Before sealing, lightly distress the edges of your prints with brown ink or tea stain to give them an aged, authentic vintage appearance.
Now you have a stunning architectural feature that brings the garden inside throughout the seasons


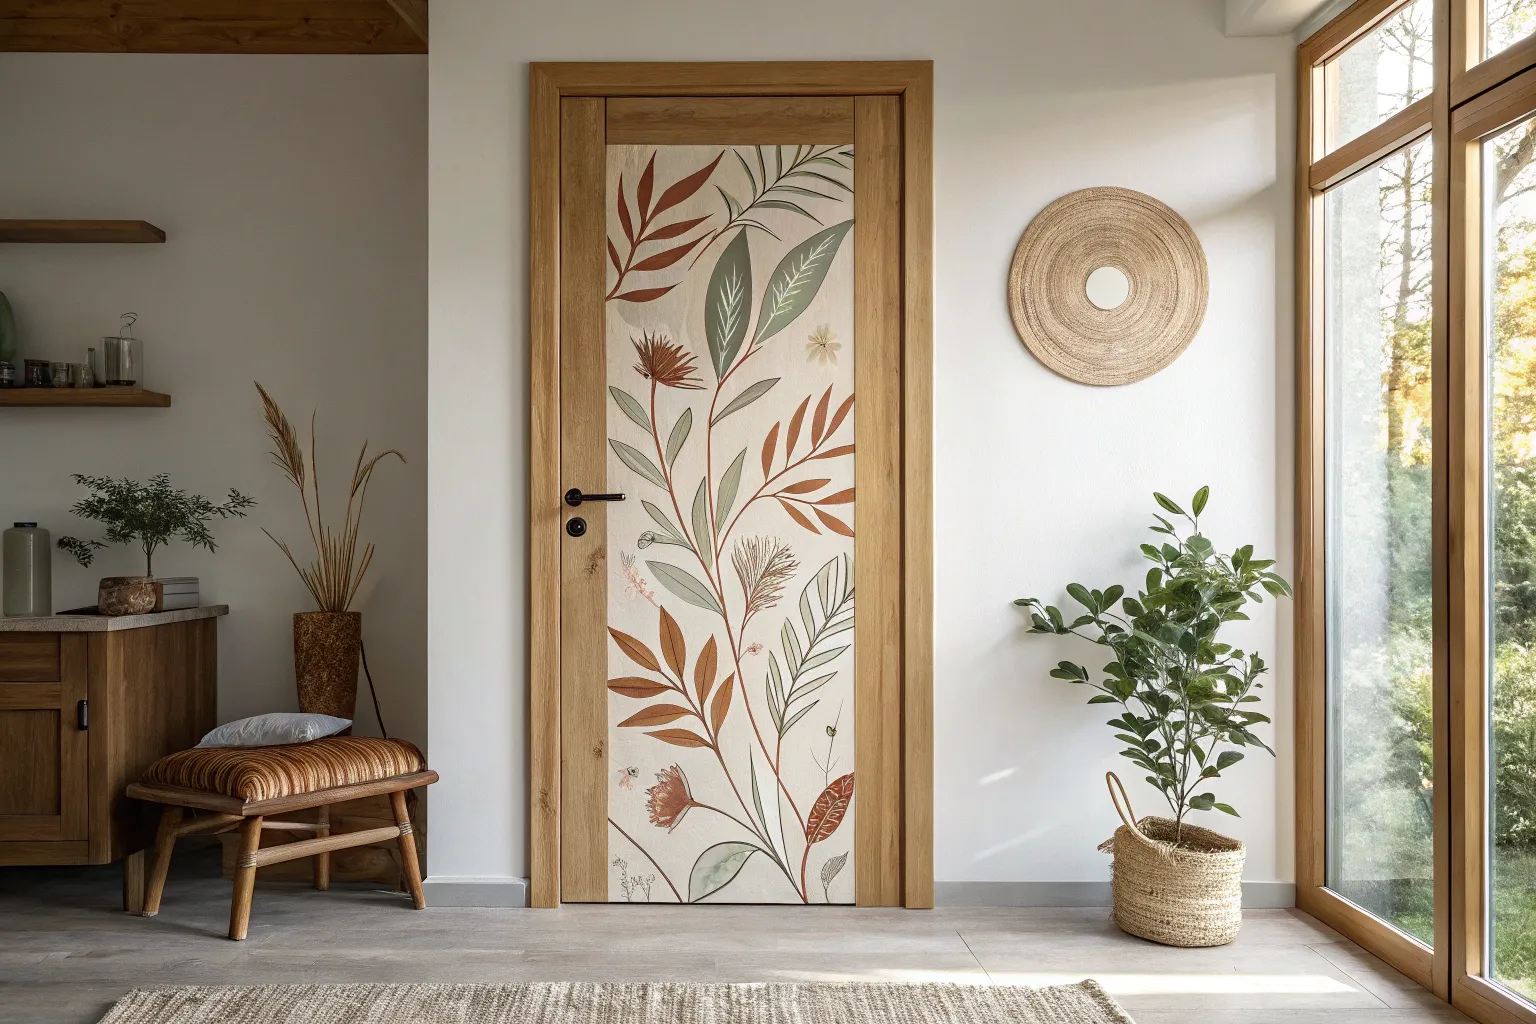
Leaf Silhouette Stenciling in High Contrast
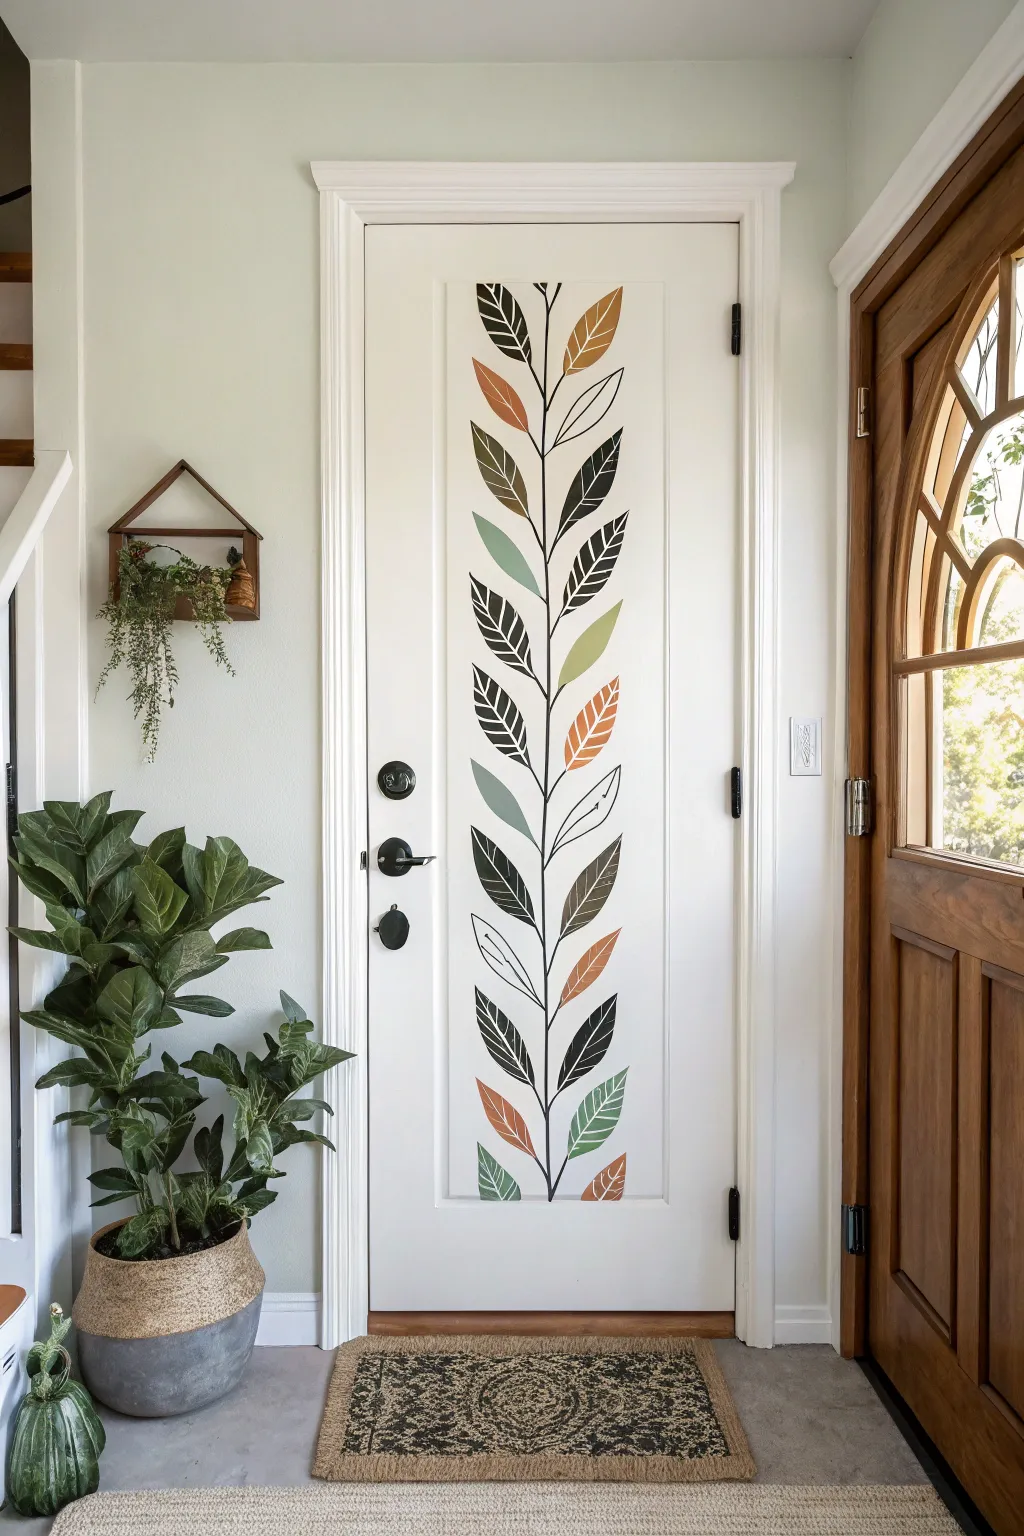

Transform a plain interior door into a statement piece with this elegant, high-contrast vine design. By combining solid, outlined, and detailed leaf shapes in an earthy palette, you’ll create a modern bohemian focal point that feels both organic and structured.
Step-by-Step Tutorial
Materials
- Interior door (painted white or creamy off-white)
- Painter’s tape (1-inch width)
- Graphite transfer paper (large sheets)
- Pencil and eraser
- Ruler or long level
- Acrylic paints (Black, Sage Green, Terracotta/Rust, Mustard Yellow)
- Small angled shader brush (for crisp edges)
- Fine liner brush (size 0 or 1 for stems and veins)
- Medium round brush
- Clear matte or satin polycrylic sealer
- Paper plate or palette
- Damp rag for quick cleanups
Step 1: Preparation & Design Transfer
-
Clean the surface:
Begin by thoroughly wiping down the central panel of your door with a damp cloth and mild detergent. Remove any dust, grease, or grime that might prevent the paint from adhering properly. -
Mark the center line:
Using your ruler and a pencil, lightly mark the vertical center of the door panel. This will be the guide for your main stem, ensuring the vine grows straight up rather than listing to one side. -
Draft the stem structure:
Sketch a very light, slightly wavy line following your center marks. Don’t make it perfectly straight; a subtle organic curve looks more natural. Add small connection points where you want your leaves to branch out. -
Sketch the leaf shapes:
Starting from the bottom, sketch alternating leaf shapes moving upward. Since I prefer a balanced look, I match the size of the leaves on the left and right but vary the height slightly. Aim for large, elongated teardrop shapes. -
Plan the leaf styles:
Designate which leaves will be solid blocks of color, which will be simple outlines, and which will have central vein details. Mark these lightly with a code (like ‘S’ for solid, ‘O’ for outline) directly on the door to avoid confusion later.
Clean Lines Pro Tip
For the steadiest lines with a liner brush, mix a tiny drop of water into your black paint on the palette. Inky consistency flows better than thick paint.
Step 2: Painting the Vine
-
Paint the main stem:
Load your fine liner brush with black acrylic paint. Carefully trace your central stem line, starting from the bottom and working your way up. Keep the line thin but consistent. -
Paint the solid black leaves:
Move on to the leaves designated as solid black. Use your angled shader brush to outline the leaf shape first, then fill in the center. The angled brush helps get sharp points at the leaf tips. -
Create the outline-only leaves:
Switch back to the fine liner brush. Dip it in black paint and carefully trace the outer perimeter of your ‘outline’ leaves. Keep your hand steady and ensure the line connects cleanly back to the main stem. -
Add vein details:
For the black leaves with vein details, first paint the outline. Then, draw a central line through the leaf and add angled ribs coming off it. Leave negative white space between the veins; do not fill these in.
Fixing Wobbly Lines
Line not straight? Don’t panic. Wait for it to dry, then use a small flat brush with white paint (matching the door) to ‘erase’ and reshape the edge.
Step 3: Adding Color & Sealing
-
Apply the Sage Green:
Using a clean medium round brush, fill in the leaves marked for green. You might need two thin coats to get full opacity without brush strokes showing. -
Add Terracotta accents:
Paint the selected rust-colored leaves. I like to scatter these colors randomly rather than in a pattern to keep the design feeling organic and less rigid. -
Fill in Mustard Yellow leaves:
Apply the mustard yellow paint to the remaining designated leaves. This color often requires a second coat as yellow pigments tend to be more translucent. -
Touch up edges:
Once the colors are dry, look closely at where the stems meet the leaves. Use your fine liner brush with black paint to refine these connections, ensuring every leaf looks securely attached to the vine. -
Erase pencil marks:
Wait until the paint is completely bone-dry—give it at least an hour. Gently erase any visible pencil sketch lines, being careful not to rub strictly over the paint. -
Seal the artwork:
To protect your door art from scuffs and cleaning, apply a thin coat of clear matte or satin polycrylic over the entire painted panel. Use a wide brush and long, smooth strokes.
Step back and admire how this simple botanical addition brings a completely new energy to your entryway
Color-Blocked Slat Door in a Coordinated Rainbow
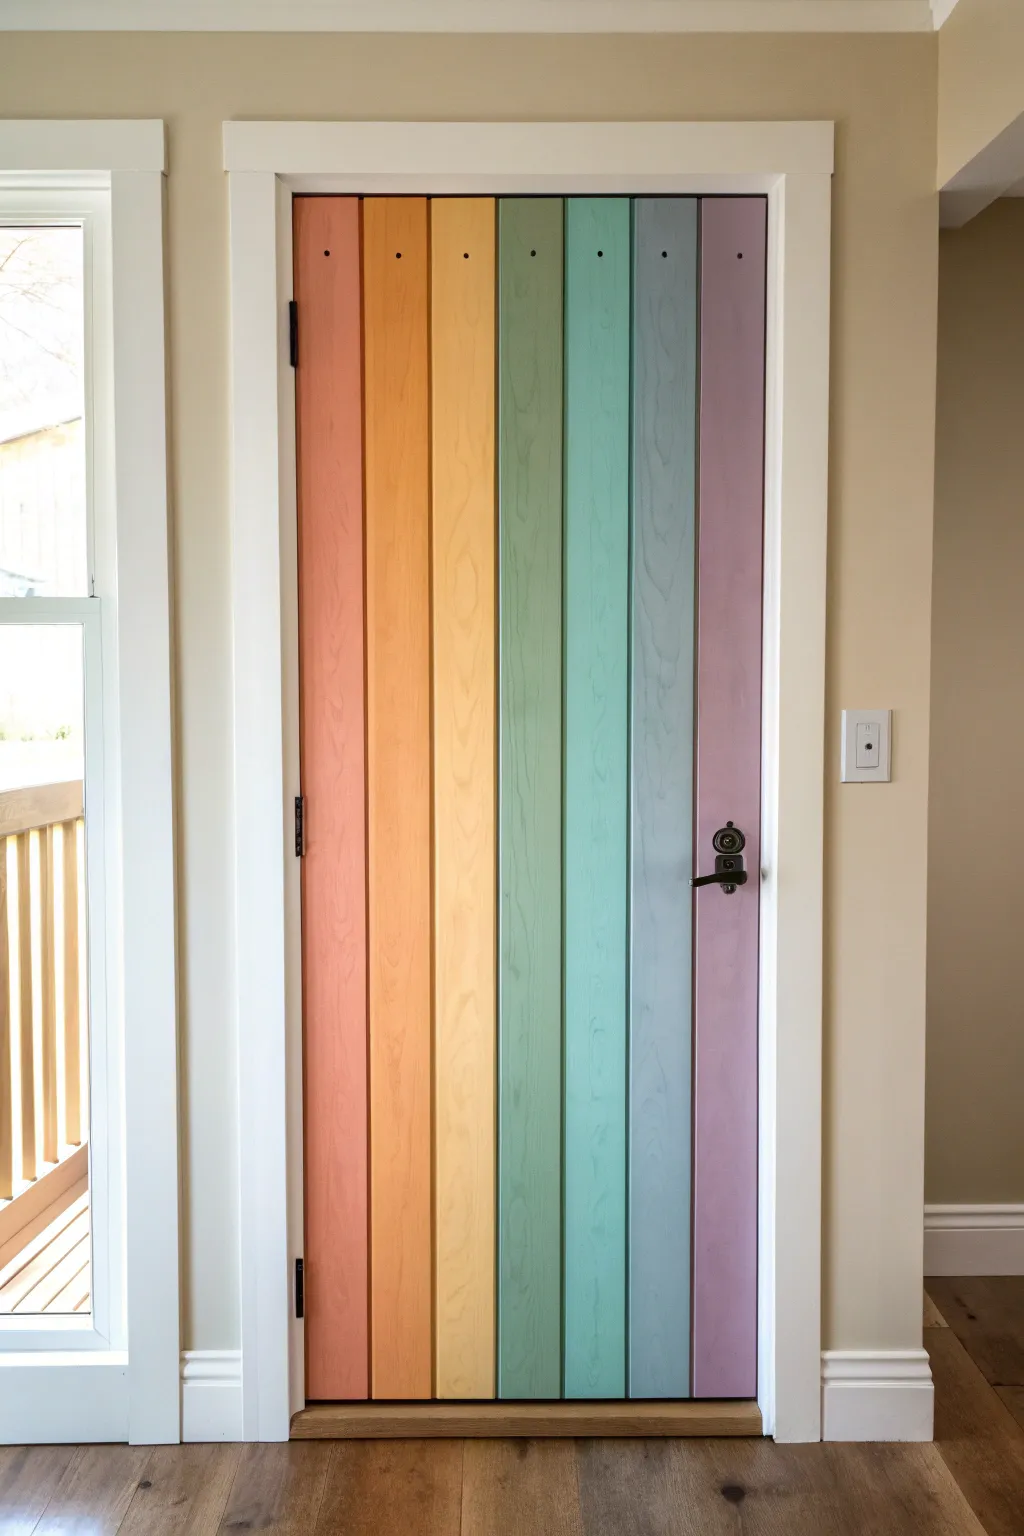
Transform a standard slab door into a stunning architectural feature with vertical wood slats stained in a soft, muted rainbow spectrum. This project adds texture and a sophisticated pop of color that feels curated rather than chaotic, bringing a sense of calm whimsy to any entryway.
Step-by-Step Guide
Materials
- Flat interior door (hollow or solid core)
- Plywood sheets (1/4-inch birch) or pre-cut lattice strips
- Table saw or circular saw (if ripping plywood)
- Construction adhesive (e.g., Liquid Nails)
- Pin nailer or brad nailer with 3/4-inch nails
- Wood filler
- Sandpaper (120 and 220 grit)
- Primer (if using opaque paint) or pre-stain wood conditioner (if staining)
- Water-based wood stains or diluted acrylic paints (7 colors: salmon, orange, yellow, sage green, teal, blue, lavender)
- Foam brushes or staining rags
- Polycrylic top coat (satin or matte finish)
- Spacers (nickel or tile spacers)
- Door hardware (knob and hinges)
Step 1: Slat Preparation
-
Measure and Calculate:
Measure the total width of your door carefully. Divide this width by 7 to determine the rough width of each slat, but remember to account for tiny gaps if you want them. For a seamless look like the example, aim for each slat to be exactly one-seventh of the door’s width. -
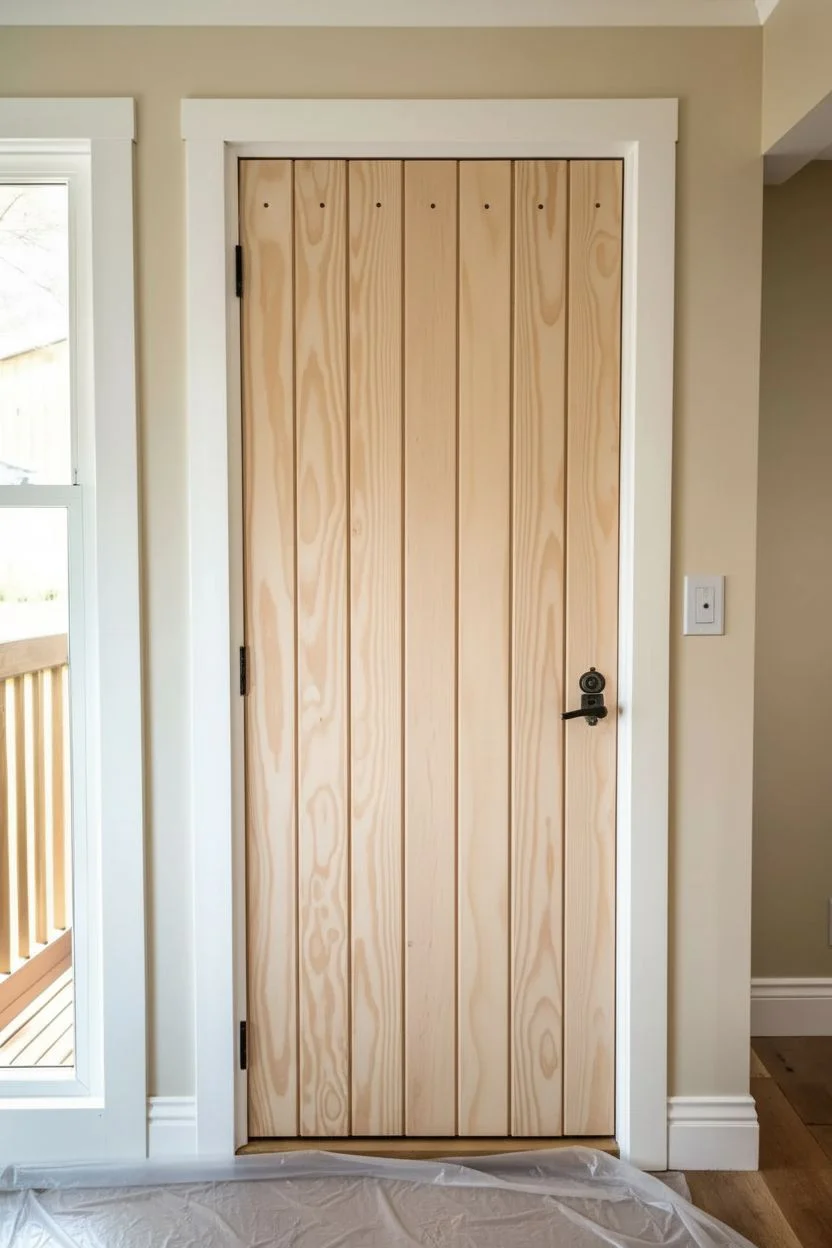
Rip the Slats:
Using a table saw, rip your 1/4-inch birch plywood into seven equal strips based on your calculations. Ensure the edges are clean and straight. -
Trim to Length:
Cut the strips to the exact height of your door. I find it safest to cut them just a hair long and sand them flush later, rather than risking a short slat. -
Sand the Edges:
Lightly sand the cut edges of each slat with 120-grit sandpaper to remove any splinters or fuzz from the saw blade. -
Pre-Fit:
Lay the slats onto the flat door (you can do this with the door still hanging or removed) to verify the fit. The outer edges should be perfectly flush with the door sides.
Uneven Slat Widths?
If your door width isn’t perfectly divisible by 7, make the two outer slats slightly wider or narrower. Your eye won’t notice a 1/8-inch difference on the ends as much as in the middle.
Step 2: Color Application
-
Choose Your Medium:
Decide between stain or a wash. The example shows wood grain, so use a semi-transparent stain or water down your acrylic paints (1 part paint to 2 parts water) to create a color wash. -
Test Colors:
On scrap pieces of your plywood, test your seven colors to ensure they create a harmonious gradient. Adjust the intensity by adding more water or more pigment. -
Apply Base Layer:
Apply a pre-stain wood conditioner to the slats if using stain, or wipe them with a damp cloth if using water-based paint, to raise the grain slightly and ensure even absorption. -
Stain Individually:
Stain each slat separately before attaching it to the door. This prevents color bleeding between the lines. Apply the color with a foam brush, wipe off excess, and let dry completely. -
Sand Between Coats:
Once the first coat is dry, lightly sand with 220-grit paper if the grain raised significantly. Apply a second coat if you want richer color.
Level Up: Black Accents
Paint the thin edges of each slat black before assembly. This creates a subtle shadow line or ‘pinstripe’ effect between colors, making the individual planks pop distinctly.
Step 3: Assembly & Finishing
-
Prep the Door Surface:
Scuff sand the face of the original door so the adhesive bonds well. Wipe away any dust. -
Attach the First Slat:
Apply construction adhesive in a zigzag pattern on the back of the first slat (the salmon/red end). Align it perfectly with the hinge-side edge of the door. -
Secure with Nails:
Use a pin nailer to tack the slat in place while the glue sets. Pin nails are nearly invisible, saving you major filling work later. -
Continuing the Pattern:
Butt the next slat (orange) tightly against the first. Apply adhesive, align, and pin nail. Repeat across the spectrum: yellow, green, teal, blue, lavender. -
Accommodate Hardware:
When you reach the slat that will cover the door handle hole, hold it in place and trace the hole from the back (if the door is off) or measure carefully. Use a hole saw to cut the opening in the slat before gluing it down. -
Fill Nail Holes:
If your pin nails left visible divots, fill them with a tiny bit of wood filler that matches the stain color, or use a wax pencil after sealing. -
Seal the Surface:
Apply a clear polycrylic top coat over the entire face of the door. I prefer a matte finish to keeps the look modern and soft. Use a high-quality brush to avoid bubbles. -
Add Decorative Details:
For an industrial touch like the reference photo, you can add small decorative tack nails or black screws near the top of each board. -
Rehang and Admire:
Reinstall your door hardware and hang the door back on its hinges.
Enjoy the gentle wash of color every time you walk into the room
Trompe-l’Oeil Picket Fence at the Bottom Edge
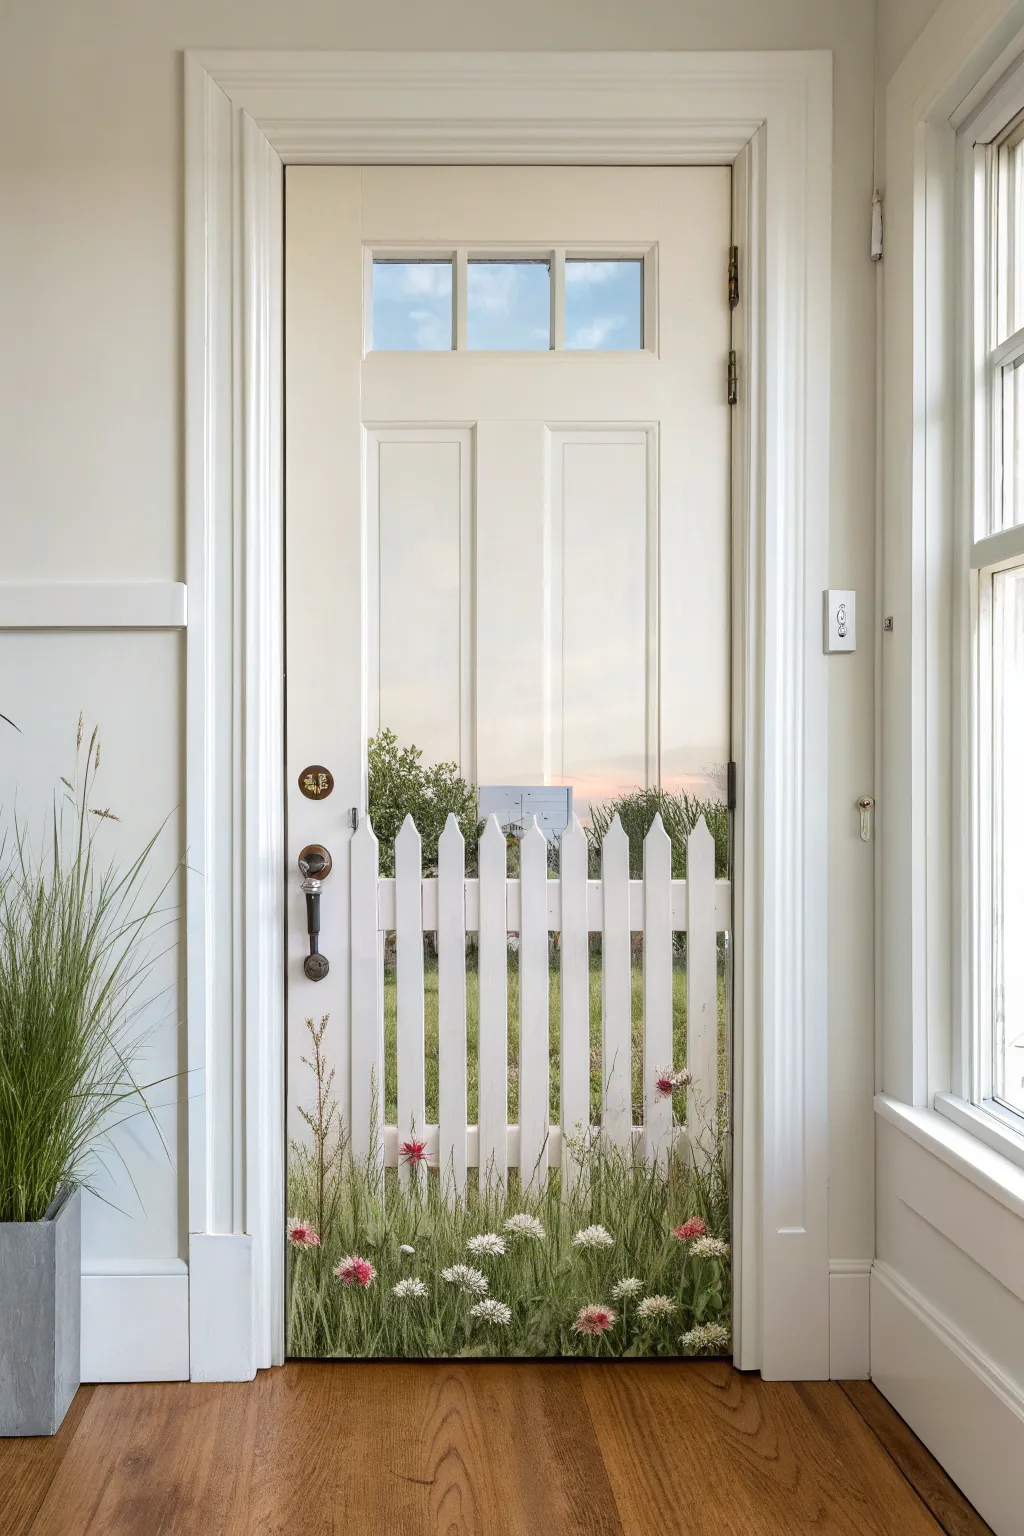
Transform a plain interior door into a charming garden vista with this trompe-l’oeil mural technique. Using a combination of geometric masking and freehand botanical painting, you’ll create the illusion of a white picket fence standing tall amongst wildflowers and grass.
Step-by-Step
Materials
- Interior door (white base preferable)
- Painter’s tape (various widths, 1-inch and 2-inch)
- Acrylic paints (various greens, white, pinks, yellows, sky blue)
- Acrylic glazing medium
- Pencil and long ruler
- Level
- Flat synthetic brushes (1-inch and 2-inch)
- Fan brush
- Detail liner brush
- Sandpaper (fine grit)
- Clear matte or satin varnish
Step 1: Preparation & Sky Background
-
Clean and Prep:
Begin by thoroughly cleaning the door surface to remove any grease or oils. If the door has a glossy finish, lightly sand it with fine-grit sandpaper to help the paint adhere, then wipe away the dust with a tack cloth. -
Define the Horizon:
Decide how high your picket fence will go, typically about one-third up the door. Use your level and pencil to lightly mark a horizon line slightly above where the fence tips will end. -
Paint the Sky Gradient:
Mix a pale sky blue with plenty of white. Starting from the top of the door (or just the window panes if your door has inset panels), paint a gradient that fades into a soft, warm peach or pink near your horizon line to mimic a sunset. -
Add Distant Foliage:
Using a dry brush technique and muted greens mixed with a touch of grey, dab in soft shapes representing distant trees along the horizon line. Keep edges blurry to maintain depth.
Uneven Lines?
If paint bleeds under your tape, don’t panic. Wait for it to dry completely, then use a small angled brush and the background color to carefully touch up and straighten the edge.
Step 2: Constructing the Fence
-
Grid the Pickets:
Once the background is completely dry, use your long ruler to measure vertical strips for your fence pickets. A standard picket is roughly 3-4 inches wide with equal gaps between them. -
Mask the Fence:
Apply strips of painter’s tape vertically to mask off the ‘negative space’ (the gaps) between the pickets. Ensure the tape edges are pressed down firmly to prevent bleed-through. -
Shape the Tops:
At the top of each unmasked picket area, use small pieces of tape to create the pointed triangle tip, or simply mark it lightly with pencil to freehand later if you have a steady hand. -
Paint the Pickets:
Paint the exposed picket areas with a bright, crisp white acrylic. You may need two coats for solid coverage over the background gradient. -
Add Dimension:
Before removing the tape, mix a tiny amount of grey into your white. Paint a very thin vertical line along the right side of each picket to create a shadow effect, adding 3D realism. -
Reveal the Fence:
Carefully peel away the masking tape while the paint is still slightly tacky to ensure clean, sharp lines.
Add a Visitor
Personalize your garden scene by painting a small detail like a butterfly resting on a picket, a ladybug on a leaf, or even a tiny snail hiding in the bottom grass.
Step 3: Growing the Garden
-
Base Layer of Grass:
Using a darker green, paint the bottom 6-8 inches of the door solid to ground the composition. Feather the top edge of this section upward using quick, flicking strokes. -
Texture with Fan Brush:
Load a fan brush with a medium green. Starting from the bottom, flick the brush upward to create varied grass blades overlapping the bottom of the white pickets. I find varying the pressure here creates the most natural look. -
Add Highlights:
Mix a lighter, yellow-green shade. Using the same flicking motion with a clean brush or liner brush, add individual blades of grass that catch the ‘light’ in the foreground. -
Paint Flower Stems:
Using your detail liner brush and dark green paint, draw thin, wandering vertical lines rising slightly taller than the grass for your wildflower stems. -
Create Clover and Blooms:
With a small round brush, stipple clusters of white and small pink dots to create clover flowers. Keep the clusters tight and oval-shaped. -
Add Wildflower Details:
For the taller pink flowers, use quick, short strokes radiating from a center point. Adding a tiny touch of dark pink or red at the base of the petals adds depth. -
Final Grass Layer:
Paint a few very thin, light green grass blades passing *in front* of the flower stems and pickets to integrate the flowers fully into the scene.
Step 4: Finishing Touches
-
Seal the Artwork:
Allow the entire mural to cure for at least 24 hours. Because doors are high-traffic areas, apply two thin coats of clear matte or satin water-based varnish to protect your work from scratches and fingerprints.
Step back and enjoy the view of your eternal summer garden right inside your home.
Doorframe-to-Wall “Spillover” Flowers for an Immersive Entry

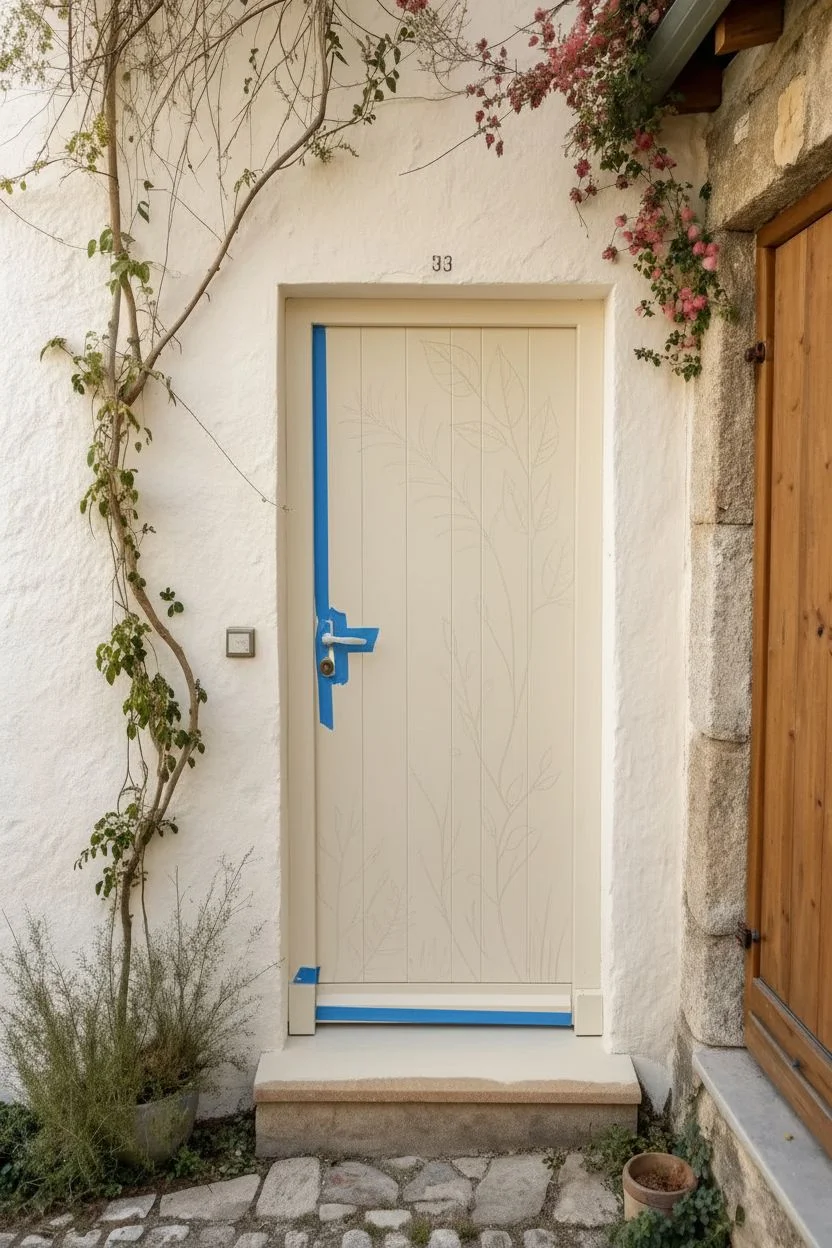
Transform a plain exterior door into a welcoming canvas of nature with this hand-painted botanical mural. Using a palette of warm rust, sage green, and soft ochre, you’ll create an organic climbing plant design that feels like a natural extension of your garden.
Detailed Instructions
Materials
- Exterior-grade acrylic latex paint (white/cream base)
- Acrylic paints (Rust, Terracotta, Sage Green, Deep Olive, Ochre, Brown)
- Painter’s tape
- Sandpaper (fine grit)
- Sugar soap or TSP cleaner
- Assorted brushes (flat 1-inch, round #4 and #8, fine liner)
- Chalk or watercolor pencil (light color)
- Clear exterior varnish or sealer (matte or satin)
- Drop cloth
- Mixing palette or paper plates
Step 1: Preparation & Base Coat
-
Clean the surface:
Begin by thoroughly cleaning the door with sugar soap or a TSP solution to remove dirt, grease, and grime, which ensures your paint adheres properly. -
Sand for texture:
Lightly sand the entire doorframe and door surface to create a ‘tooth’ for the new paint. Wipe away all dust with a damp cloth. -
Mask the hardware:
Apply painter’s tape carefully around the door handle, lock, hinges, and the door frame edges to protect them from stray brushstrokes. -
Apply the background:
Paint the entire door with your chosen white or cream exterior base paint. Apply two thin coats rather than one thick one for the smoothest finish, letting it dry completely between layers.
Fixing Shaky Lines
If your stem lines look jittery, wait for them to dry. Then, use the background wall color to ‘cut in’ and smooth the edges, effectively erasing the wobbly parts.
Step 2: Drafting the Design
-
Review reference images:
Look at the original image or real pressed flowers to understand how stems curve and leaves stagger naturally. -
Sketch the main stems:
Using a piece of chalk or a light watercolor pencil, lightly sketch the primary curved lines starting from the bottom right corner and reaching upward toward the top center. I prefer chalk because it wipes away easily if I change my mind. -
Add leaf placement:
Mark rough shapes where the large leaves and seed heads will go, ensuring the design feels balanced but not perfectly symmetrical.
Nature’s Imprint
For a truly organic texture, dip real fern fronds or sturdy leaves into your paint and press them directly onto the door as a stamp before refining with a brush.
Step 3: Painting the Foliage
-
Paint the main stems:
Mix a dark brown with a touch of purple/red. Using a #4 round brush, trace your sketched stem lines with confident, smooth strokes. -
Create the large fern leaf:
Use sage green mixed with a little white. With a flat brush turned on its edge or a larger round brush, paint the long, sweeping frond that curves over the top, making the leaflets smaller near the tip. -
Paint the rust leaves:
Mix terracotta and rust paint. Fill in the large, broad leaf shapes on the upper right side. Don’t worry about detailing the veins yet; just get the solid color down. -
Add lower greenery:
Using a deep olive green, paint the smaller, sharper leaves near the bottom left and center. Keep your brush loaded to ensure crisp edges. -
Paint delicate grasses:
Switch to a fine liner brush. With thinned-out green and brown paint, flick the brush upward at the very bottom of the door to create wispy grass blades.
Step 4: Detailing & Sealing
-
Add seed heads:
Dip a small round brush or the back of a brush handle into ochre paint. Dot careful clusters to form the dandelion-style seed heads floating among the stems. -
Detail the rust leaves:
Once the rust leaves are dry, use a fine liner brush with cream or diluted white paint to draw the skeletal veins inside the leaves for a graphic look. -
Refine the outlines:
Step back and assess. Use your liner brush to sharpen any blurry edges or add tiny connecting stems where elements look floating. -
Erase guidelines:
Gently wipe away any visible chalk marks with a damp cloth or sponge once the paint is fully dry to the touch. -
Seal the artwork:
Apply two coats of clear exterior varnish over the entire painted area to protect your artwork from UV rays and weather.
Step back and admire how your new botanical art brings a gentle, artistic season to your entryway all year round
Metallic Mandala Centerpiece on a Dark Door
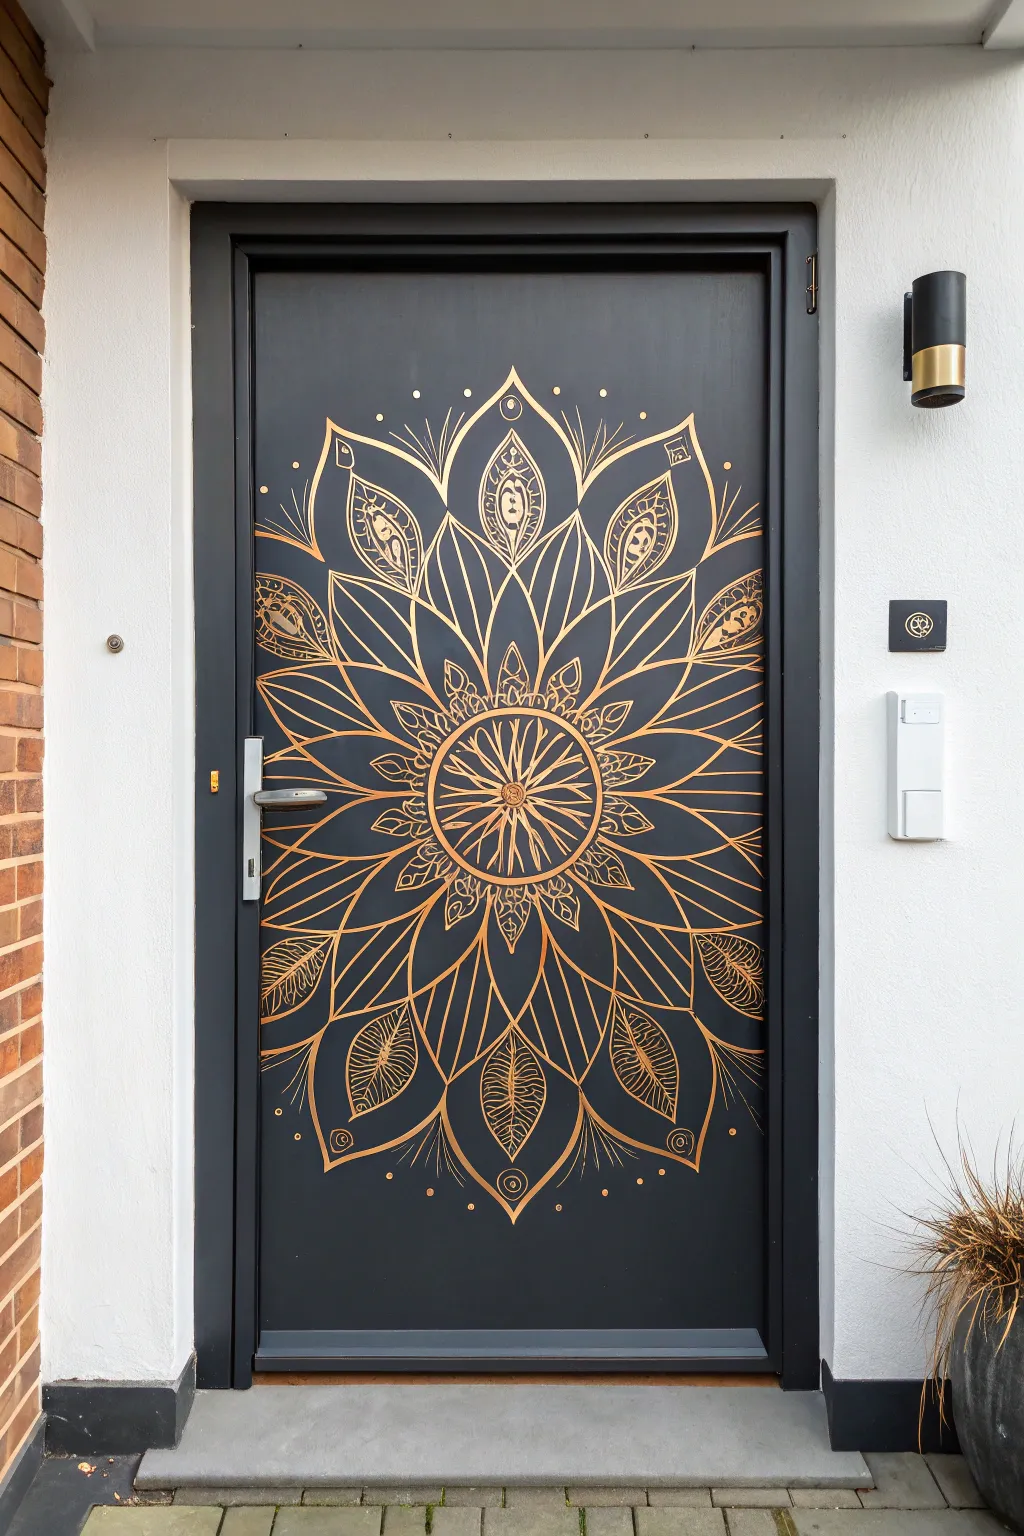
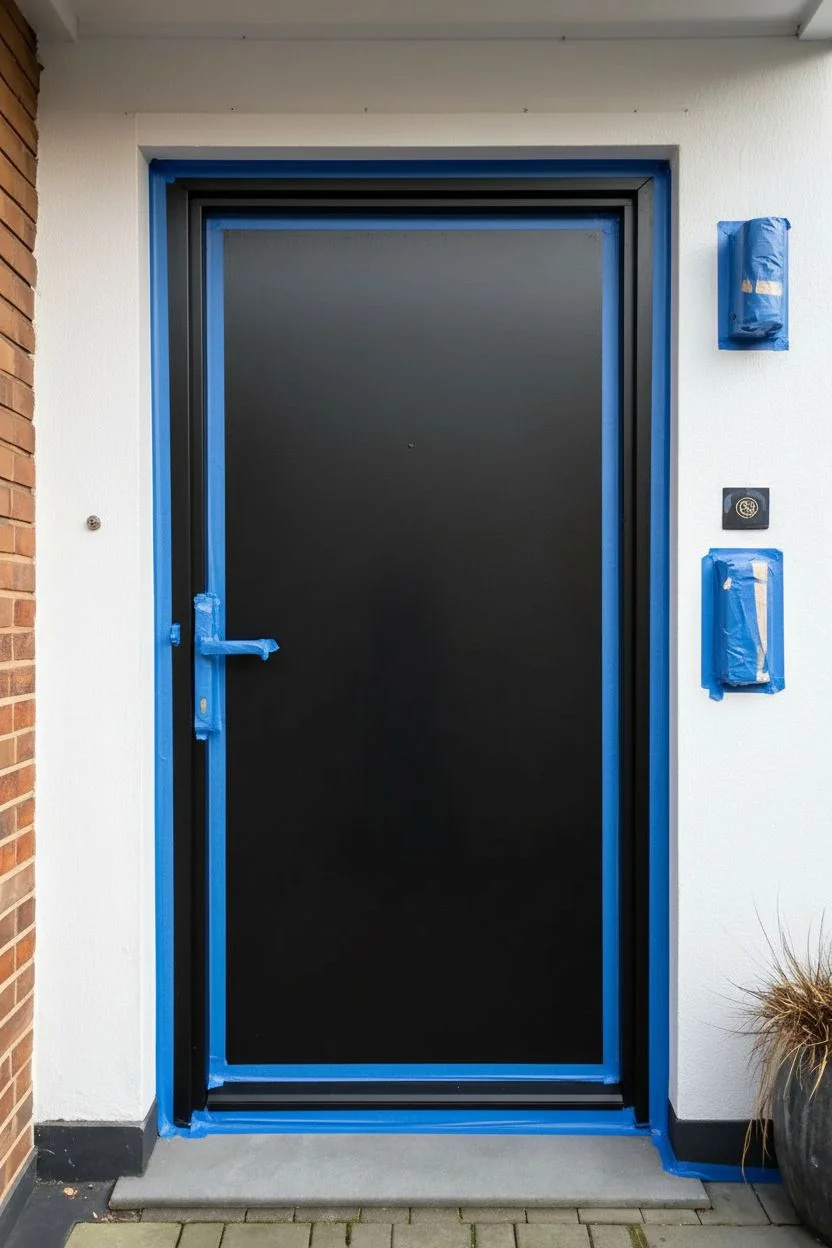
Transform a plain front door into a stunning statement piece with this sophisticated metallic mandala design. The contrast between the matte charcoal background and the shimmering gold paint creates an inviting, luxurious focal point for your home exterior.
Step-by-Step Guide
Materials
- Exterior-grade satin paint (Charcoal or Black)
- Metallic Gold exterior acrylic paint (or liquid gold leaf suitable for outdoors)
- White chalk pencil
- Large compass (or string and pushpin)
- Yardstick or long ruler
- Fine liner brushes (size 0 and 1)
- Medium round brush (size 4)
- Painter’s tape
- Sandpaper (220 grit)
- Exterior clear sealant (satin or matte)
Step 1: Door Preparation
-
Clean surface:
Thoroughly wash your door with a degreasing cleaner to remove dirt, oils, and road grime. Let it dry completely. -
Light scuffing:
Lightly sand the surface with 220-grit sandpaper to help the new paint adhere. Wipe away all dust with a tack cloth or damp rag. -
Tape hardware:
Use painter’s tape to protect the handle, lock, hinges, and weather stripping. I like to be extra meticulous here to save cleanup time later. -
Base coat:
Apply two coats of your dark exterior satin paint, allowing full drying time between coats according to the manufacturer’s instructions.
Wobbly Lines?
Prepare a small cup of the dark background paint. If you smear the gold or make a line too thick, simply paint over the mistake with the dark color to ‘erase’ it
Step 2: Mapping the Mandala
-
Find the center:
Measure the width and height of the main door panel to locate the exact center point. Mark this lightly with your white chalk pencil. -
Draw concentric circles:
Using a compass (or a string tied to a pencil anchored at the center), draw a series of light guide circles. Start with a small center circle (approx. 4 inches), then expand outward in 3-4 inch increments until you nearly reach the door edges. -
Create radial guides:
Draw vertical and horizontal lines intersecting at the center. Then, subdivide these quadrants with diagonal lines to create 8 or 16 equal pie slices, which will ensure your petals stay symmetrical.
Level Up
Add tiny self-adhesive rhinestones or flat-back crystals to the center of the medallion using outdoor-strength adhesive for extra sparkle in the sunlight
Step 3: Painting the Design
-
Center medallion:
Load a fine liner brush with metallic gold paint. Start at the very center, painting the inner circle and the initial small radiating lines or ‘seeds’. -
First petal layer:
Using your first guide circle, sketch the smallest ring of petals. Use the radial lines to keep the peaks of each petal aligned. -
Elaborate the middle ring:
Move to the next section. Paint longer, sweeping petal shapes. To achieve the look in the image, keep the outlines thin but fill in select details, like the internal teardrop or leaf veining patterns. -
Large outer petals:
Paint the largest, outermost petals. These should extend almost to the door frame. Use the medium round brush for thicker outer strokes, tapering the ends to sharp points. -
Add intricate details:
Switch back to your smallest liner brush. Add the fine details seen in the photo, such as the cross-hatching inside the leaves, small dots floating between petals, and the decorative ‘feathery’ lines near the tips. -
Clean up:
Once the gold paint is dry to the touch, gently wipe away any visible white chalk guidelines with a damp cloth.
Step 4: Finishing Touches
-
Second coat (Gold):
Metallic paints can be sheer. Go over your gold lines a second time to ensure opacity and maximum shine. -
Seal the work:
To protect your artwork from the elements, apply two thin layers of exterior clear sealant over the entire door face.
Step back and admire how this elegant design instantly upgrades your home’s curb appeal
Whimsical Faux Brick and Pastel Archway Illusion
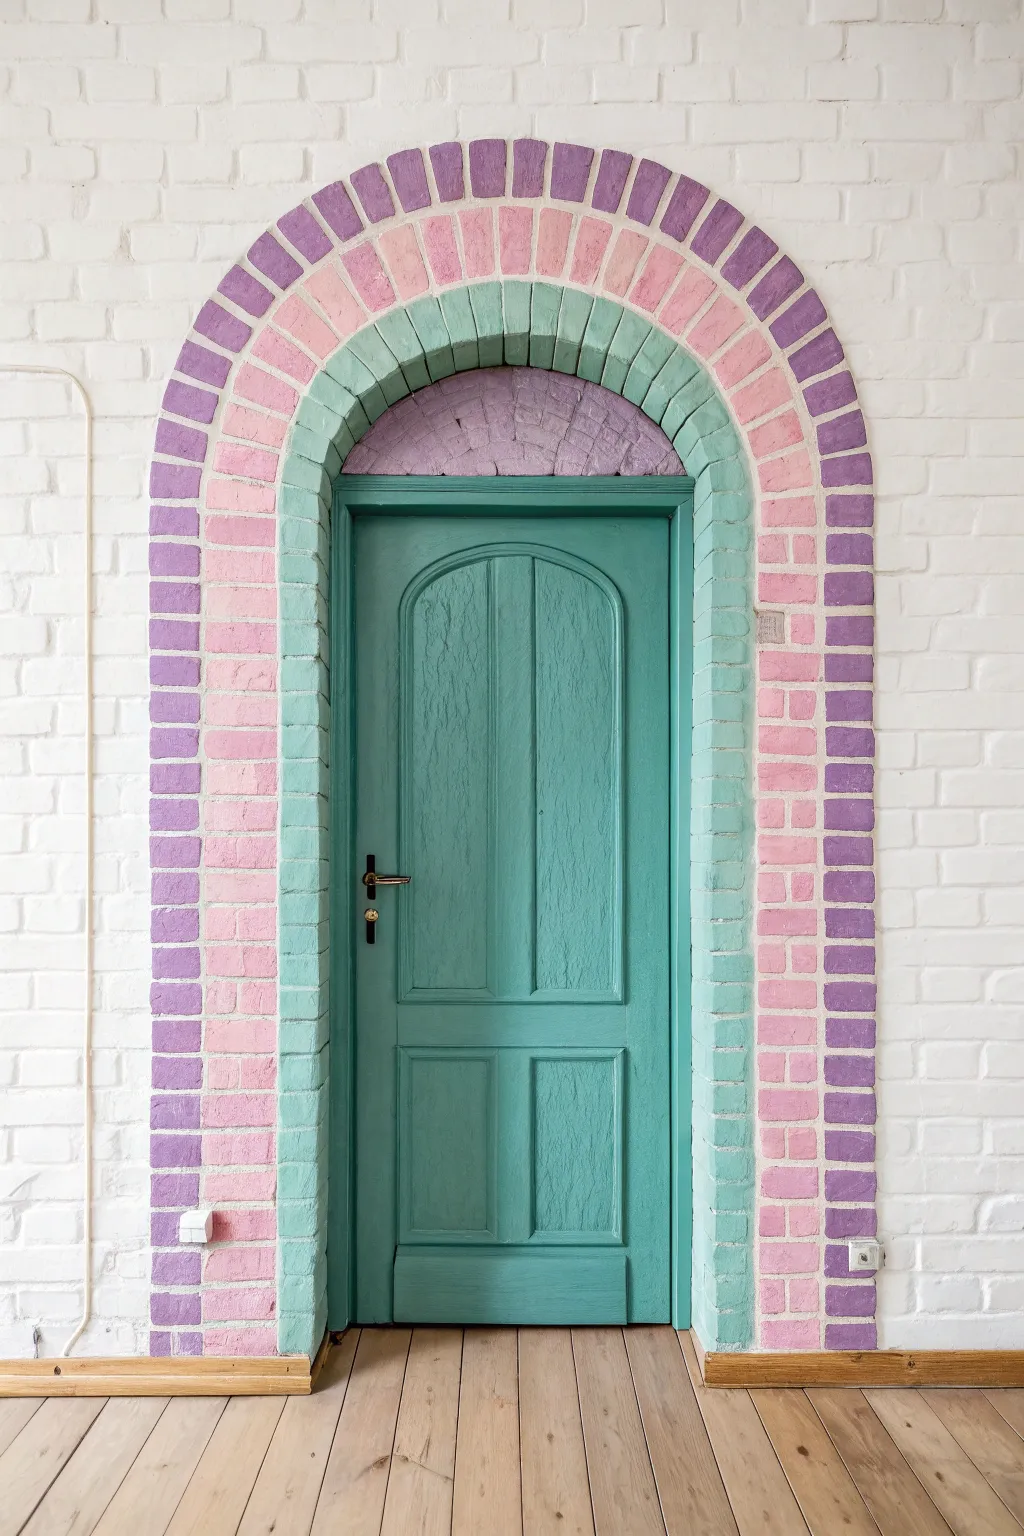
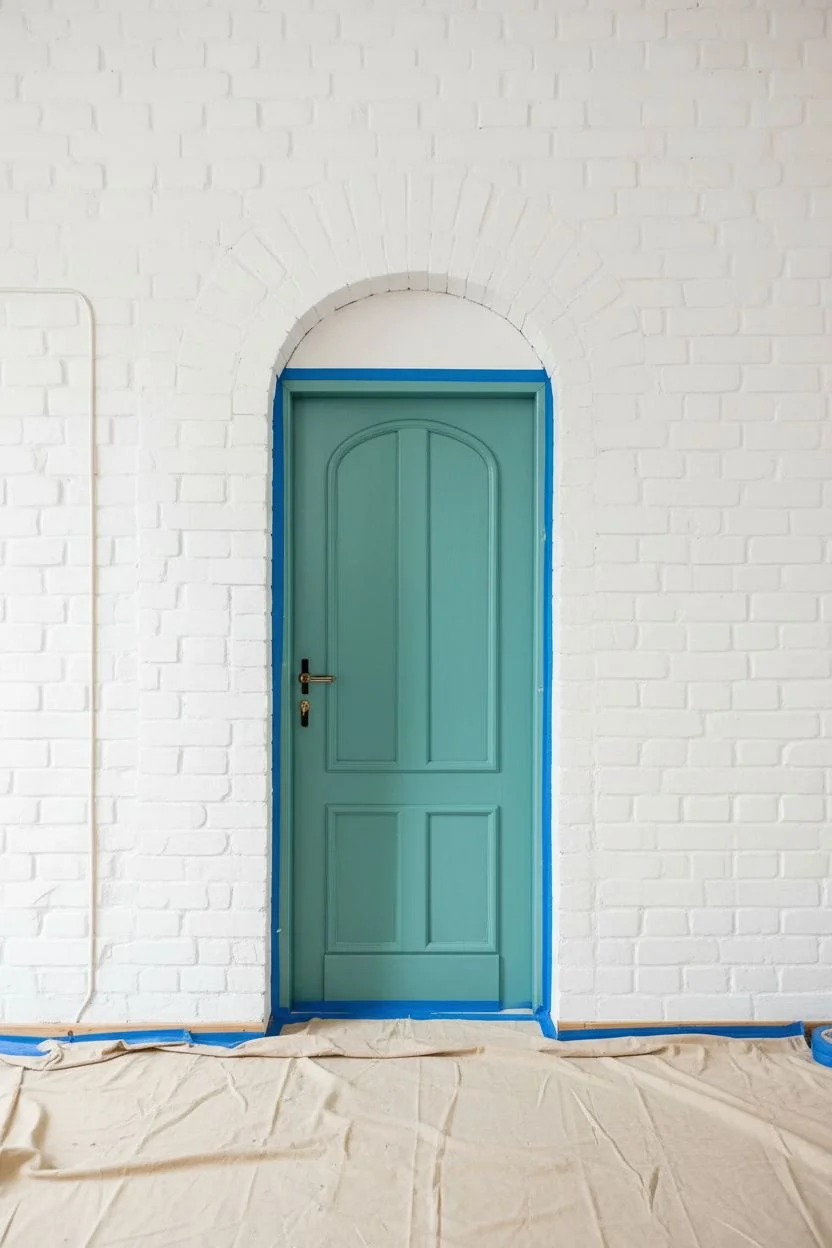
Transform a standard doorway into a storybook entrance with this charming faux-brick painted illusion. By layering soft pastels in teal, pink, and mauve over existing brickwork (or creating the brick effect yourself), you add architectural depth and a playful splash of color to any room.
Step-by-Step Tutorial
Materials
- Teal satin or semi-gloss interior paint (door and inner arch)
- Light pink chalk or matte finish paint
- Muted purple/mauve chalk or matte finish paint
- White wall paint (for touch-ups and grout lines)
- Painter’s tape (various widths)
- Fine-grit sandpaper
- 2-inch angled sash brush
- Small flat artist brush (for brick definition)
- Pencil and eraser
- String and thumb tack (for drawing the perfect arch)
- Drop cloth
Step 1: Preparation & Base Work
-
Clean and sand:
Begin by thoroughly cleaning the door and the surrounding brick wall area to ensure strong paint adhesion. Lightly sand the wooden door to rough up the previous finish, then wipe away any dust with a tack cloth. -
Protect the area:
Lay down your drop cloth to protect the wooden floor. Use painter’s tape to mask off the door hinges, handle (unless you plan to remove it, which is easier), and the floor trim where the arch will meet the ground. -
Paint the door base:
Apply the teal paint to the door panels first, working your way out to the stiles and rails. I find using an angled brush helps get into the molded corners without pooling paint. Let this dry completely before adding a second coat for full opacity.
Uneven Grout Lines?
Don’t panic if your white lines are wobbly. Real mortar is messy! Use a small flat brush with white paint to ‘cut in’ and reshape any wonky bricks for a cleaner look.
Step 2: Drafting the Arches
-
Mark the center point:
Locate the exact center of the doorway just above the door frame. If your wall is flat (not textured brick), stick a thumbtack here with a string tie to a pencil to act as a compass. -
Draw the arch guidelines:
Sketch three concentric arches radiating from the door frame. The first arch should hug the frame closely, the second should be about 4-5 inches wide, and the third equally wide. These lines will guide your brick painting.
Add Depth
Mix a tiny drop of dark grey into your brick colors and lightly stipple the bottom edge of each painted brick. This creates a subtle shadow for a 3D effect.
Step 3: Painting the Brickwork
-
Define the inner teal arch:
Using your teal paint, color in the bricks immediately surrounding the door frame. If you have real brick texture, follow the natural grout lines. If the wall is flat, paint rectangular brick shapes, leaving thin white gaps for ‘grout’ lines. -
Create the pink middle arch:
Move to the second ring using the light pink paint. Carefully paint individual brick shapes that stagger relative to the teal row. The goal is a hand-painted, slightly imperfect look, so don’t stress about laser-straight edges. -
Add the purple outer arch:
Paint the outermost ring with the mauve/purple shade. Maintain the radial pattern where the bricks angle slightly as they go over the curve of the arch. -
Fill the ‘transom’ area:
Between the top of the rectangular door frame and the curve of the teal arch, fill the semi-circle gap with smaller purple brick shapes. This creates a faux transom window effect. -
Refine the grout lines:
Once the colored bricks are dry, dip a small artist brush into your white wall paint. Go back and crisp up the grout lines between the colored bricks. This separation is what makes the illusion pop.
Step 4: Finishing Details
-
Touch up the perimeter:
Inspect the outer edge of the purple arch. Use white paint to clean up any stray brushstrokes, ensuring the transition from the colorful arch to the plain white wall is neat. -
Reassess opacity:
Stand back and check for patchy areas. The pastel colors might need a quick second layer on certain bricks to ensure the color looks solid and vibrant. -
Remove tape and hardware:
Peel off the painter’s tape slowly at a 45-degree angle to avoid ripping any fresh paint. Reattach your door handle and lock plate if you removed them earlier. -
Clean and seal (optional):
If this door is in a high-traffic area, apply a clear water-based polycrylic sealer over the painted brickwork to protect it from scuffs and fingerprints.
Step back and admire your whimsical entrance, knowing you’ve created a magical feature without laying a single stone


Have a question or want to share your own experience? I'd love to hear from you in the comments below!