Whenever I’m not sure what to draw, I come back to faces—they’re endlessly fun to practice and they instantly communicate mood. These face drawing ideas are meant to feel doable in a sketchbook, with just enough structure to help you grow without getting stuck chasing perfection.
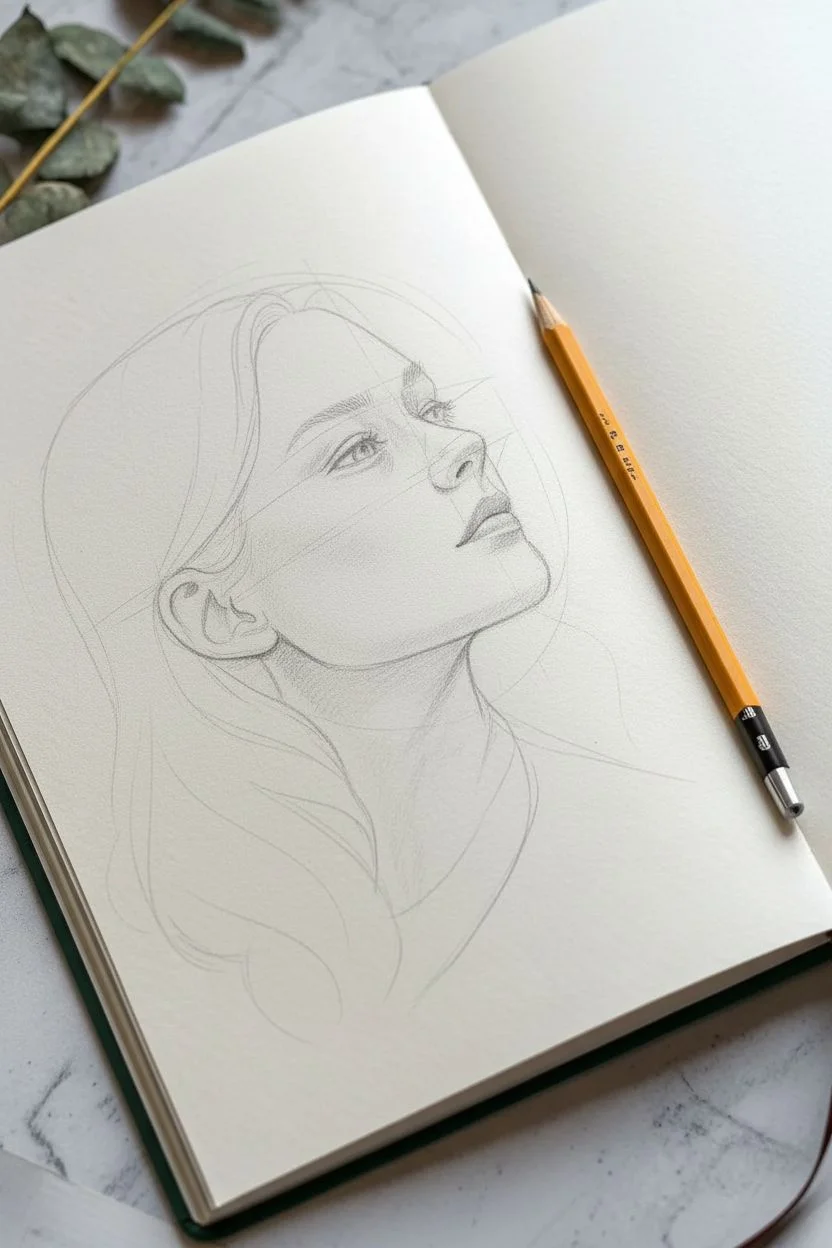
Classic Front View Face With Simple Proportion Lines
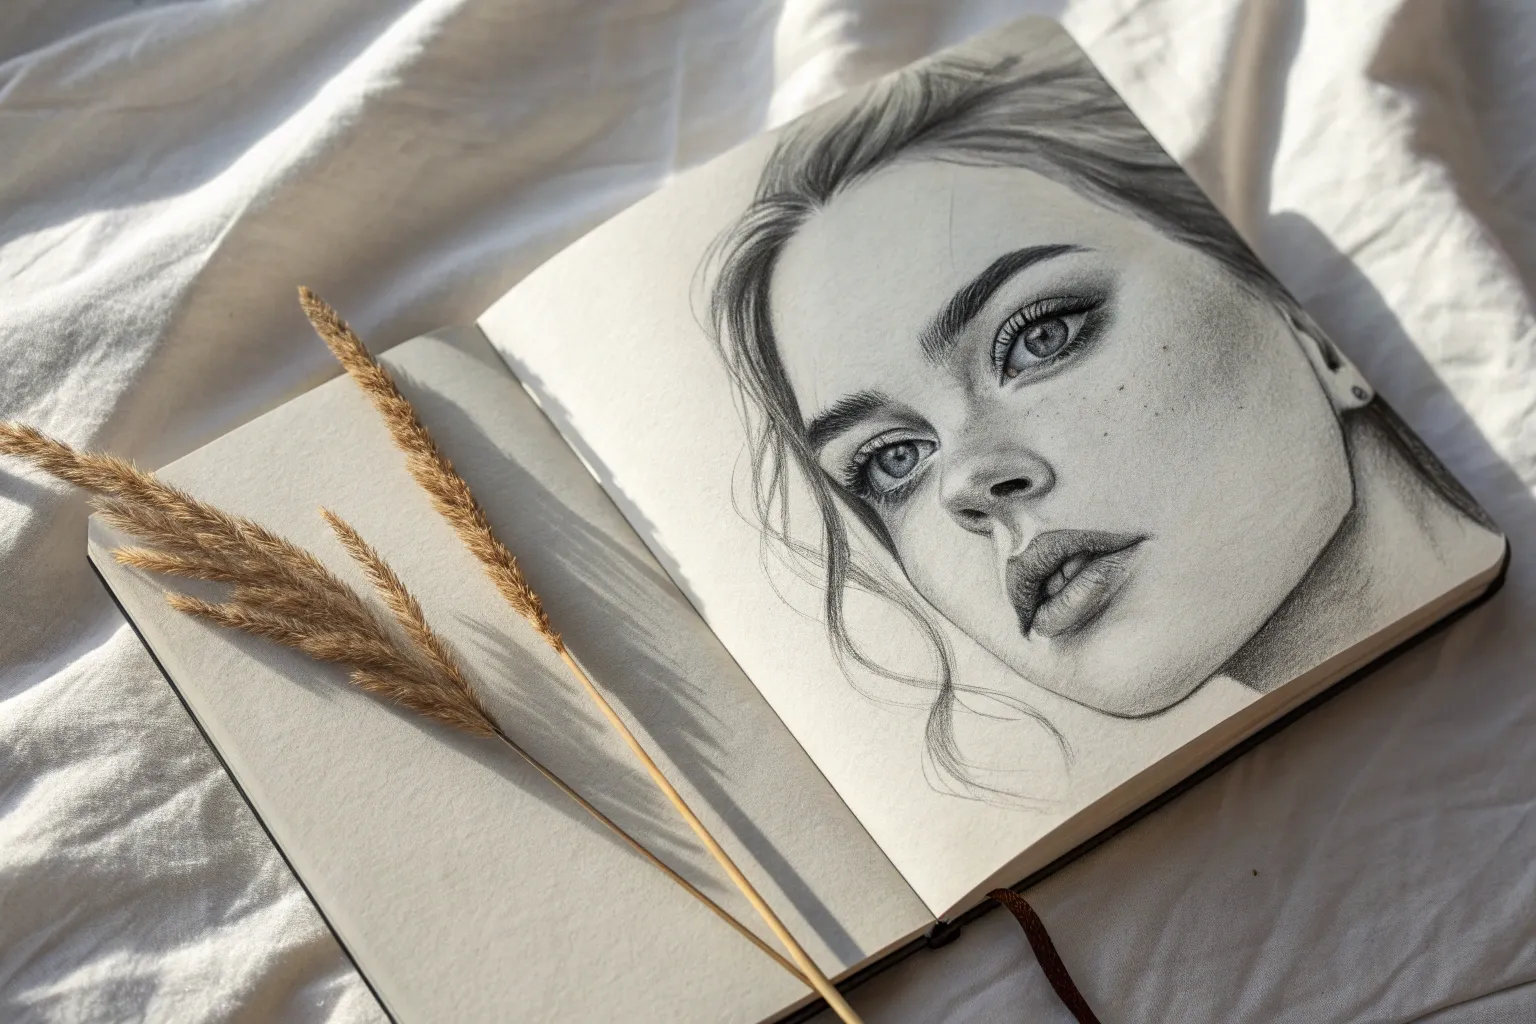
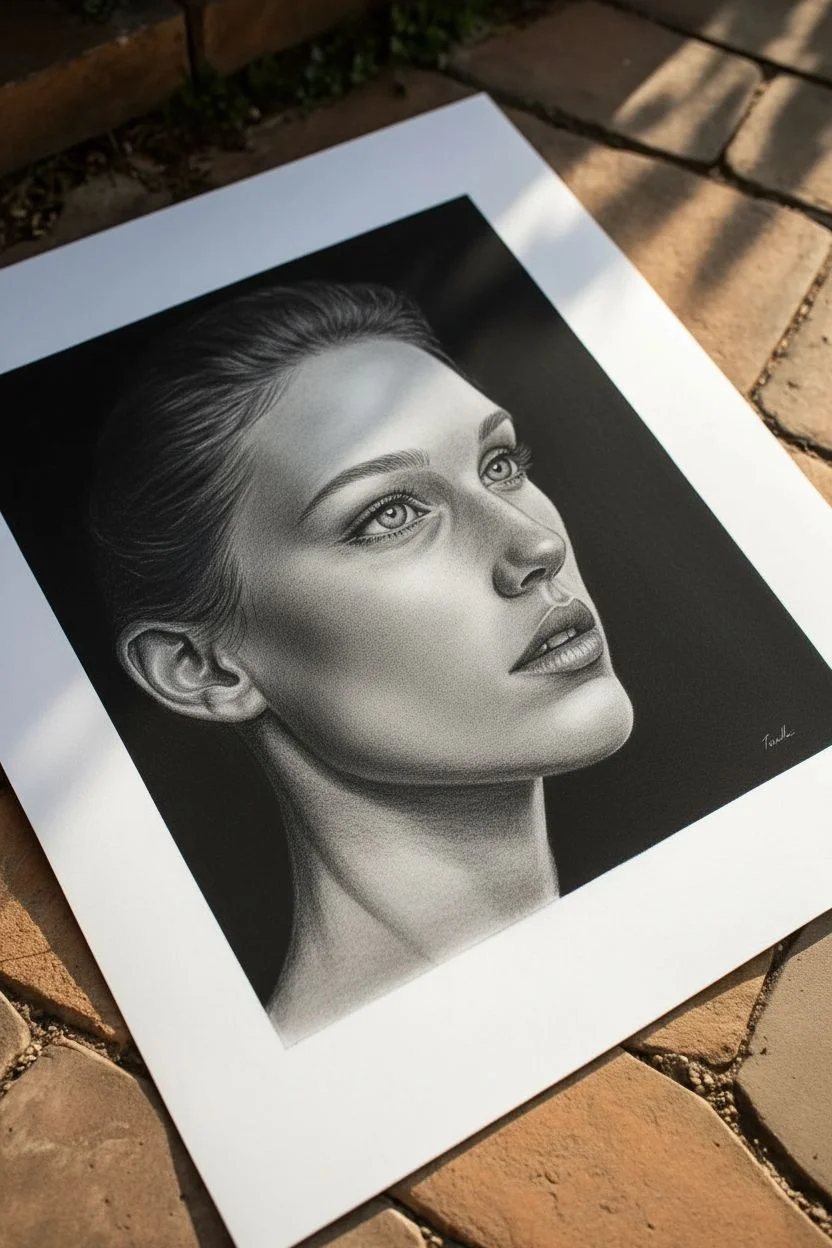
Capture the delicate beauty of a female portrait with this classic pencil sketch approach. This project focuses on flowing lines, soft shading, and capturing a dreamy expression through confident, minimal strokes.
Step-by-Step
Materials
- Sketchbook with smooth or lightly textured paper
- HB graphite pencil (for initial outlines)
- 2B or 4B graphite pencil (for shading and emphasis)
- Kneaded eraser
- Paper blending stump (optional)
- Pencil sharpener
Step 1: Laying the Proportions
-
Map the head shape:
Start with your HB pencil using very light pressure. Draw an oval shape slightly tilted to the left to establish the general angle of the head. -
Add guidelines:
Lightly sketch a vertical center line curving down the face. Add a horizontal eye line about halfway down the oval, followed by a nose line and a mouth line below that. -
Rough in the features:
Using loose circles and lines, mark the position of the eyes, the tip of the nose, and the width of the mouth. Keep everything geometric and faint at this stage.
Step 2: Defining the Eyes and Brows
-
Outline the eyes:
Switch to a slightly firmer stroke. Draw the almond shape of the eyes, noting that the subject’s left eye (viewer’s right) is slightly turned away. -
Add the pupils and irises:
Place the circular iris and pupil in each eye. Leave a tiny white spot in the upper corner of the pupil for a catchlight, which brings life to the gaze. -
Shape the eyebrows:
Sketch the eyebrows with short, feathery strokes that mimic hair growth. The brows should be relatively thick and have a gentle arch. -
Deepen the lash line:
Darken the upper lash line significantly with your softer pencil (2B/4B) to create depth. Add just a hint of lashes on the lower lid.
Eyes feel misaligned?
Flip your sketchbook upside down or look at it in a mirror. This fresh perspective instantly reveals symmetry errors you’ve gone ‘blind’ to while working close up.
Step 3: Refining Facial Features
-
Sculpt the nose:
Avoid drawing hard lines down the bridge of the nose. Instead, focus on the nostrils and the shadow under the tip of the nose to suggest its shape. -
Draw the lips:
Outline the cupid’s bow of the upper lip and the fuller curve of the bottom lip. The mouth is slightly open, so leave a small gap between the lips. -
Shade the lips:
Lightly cross-hatch the upper lip, as it usually sits in shadow. Keep the bottom lip lighter, perhaps adding a small highlight in the center. -
Carve the jawline:
Solidify the jawline, making sure it curves gently from the ear down to the chin. The chin should be somewhat soft, not too pointed.
Add a wash of color
For a mixed-media twist, lightly brush watercolor over the hair or lips. Keep the pencil graphite visible underneath for a stylish, illustrative effect.
Step 4: Flowing Hair and Neck
-
Establish the hairline:
Sketch the hairline around the forehead. The hair is parted in the middle and sweeps back. -
Create main hair volume:
Use long, sweeping strokes to draw the bulk of the hair. Let the lines flow naturally around the face, creating wavy sections that frame the cheekbones. -
Detail the strands:
Add individual strands within the larger shapes to show texture. I like to vary my line weight here—thick in the shadows and thin where light hits the hair. -
Draw the neck and shoulders:
Extend two curved lines down for the neck, leading into the suggestion of a collarbone and shoulder. Keep these lines sparse and elegant.
Step 5: Shading and Finishing Touches
-
Apply facial shading:
Using the side of your pencil lead, gently shade under the eyebrows, along the side of the nose, and beneath the cheekbone to create structure. -
Shadow the neck:
Add a distinct shadow under the jaw that falls onto the neck. This separates the head from the body and adds three-dimensionality. -
Enhance contrast:
Go back in with your darkest pencil and re-emphasize the pupils, corners of the mouth, and deepest hair shadows. -
Soften with eraser:
Take your kneaded eraser and dab away any guidelines that are still visible. You can also lift out highlights on the nose bridge and cheekbones.
Step back and admire the gentle expression you have captured in this classic portrait study


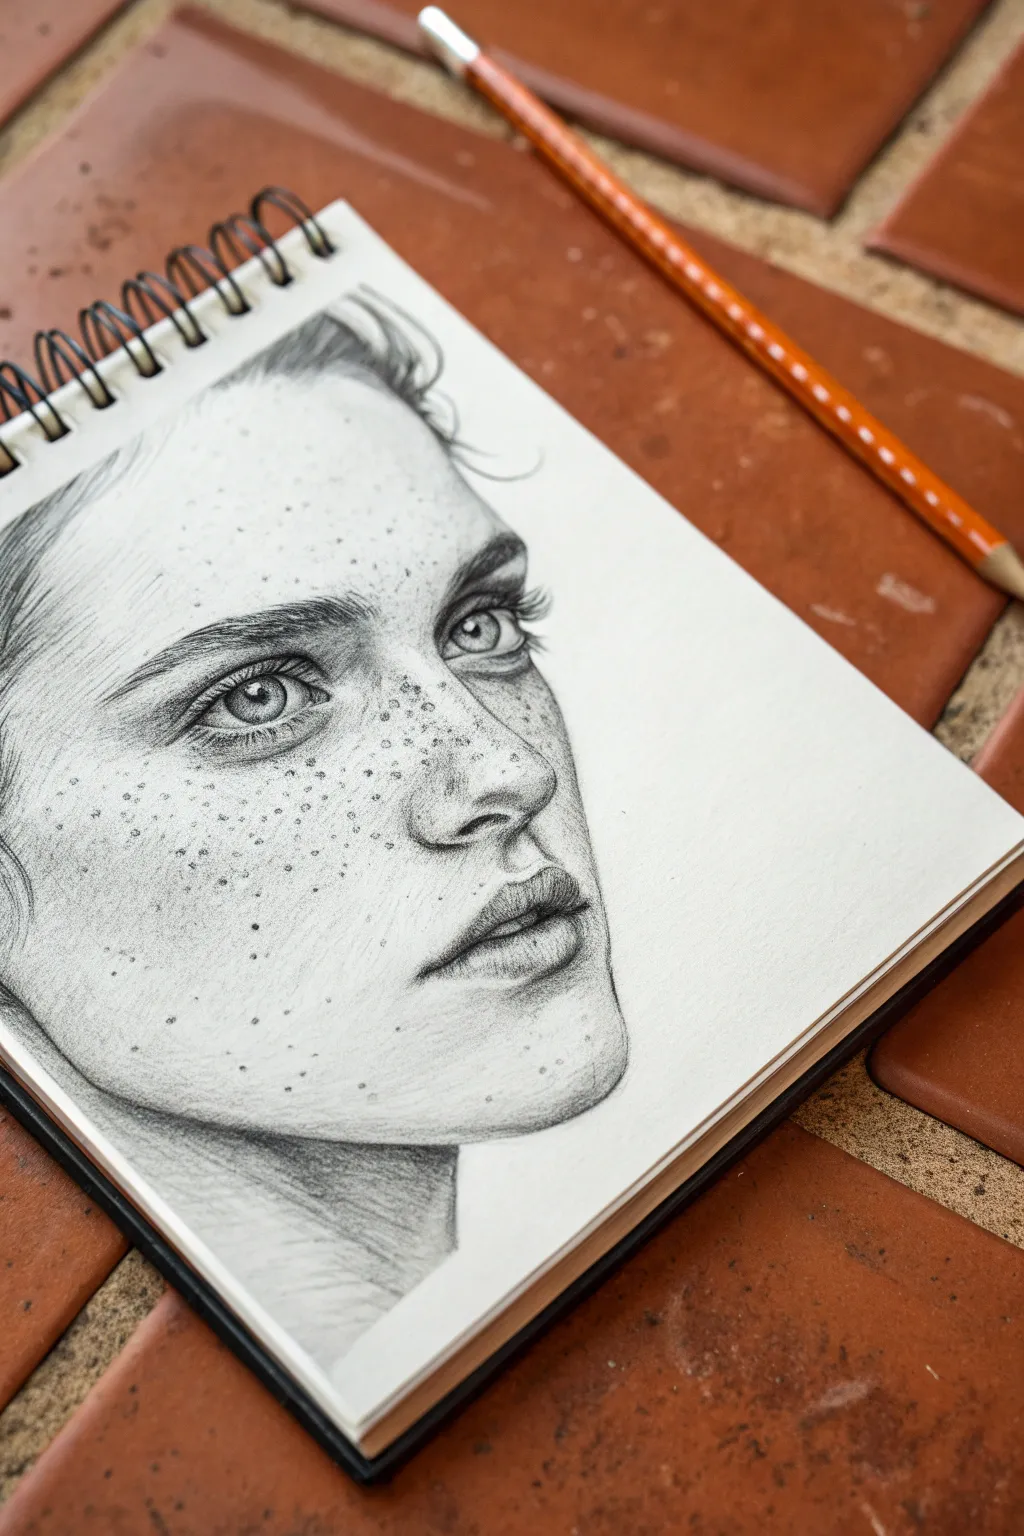
Three-Quarter View Face for Instant Depth
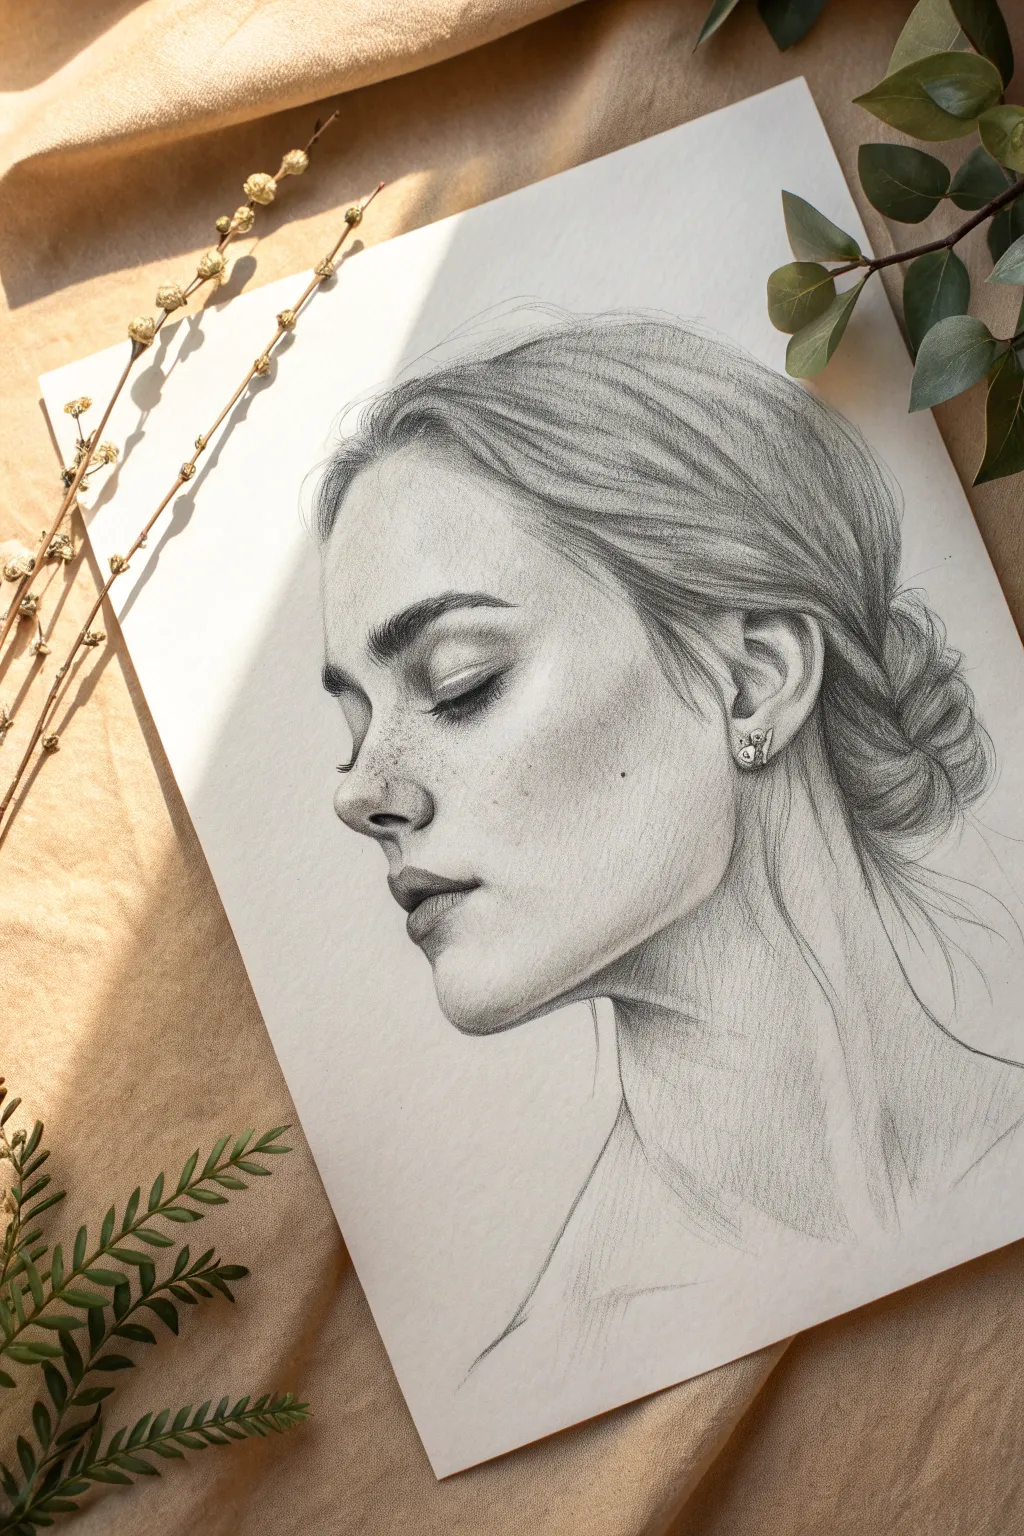
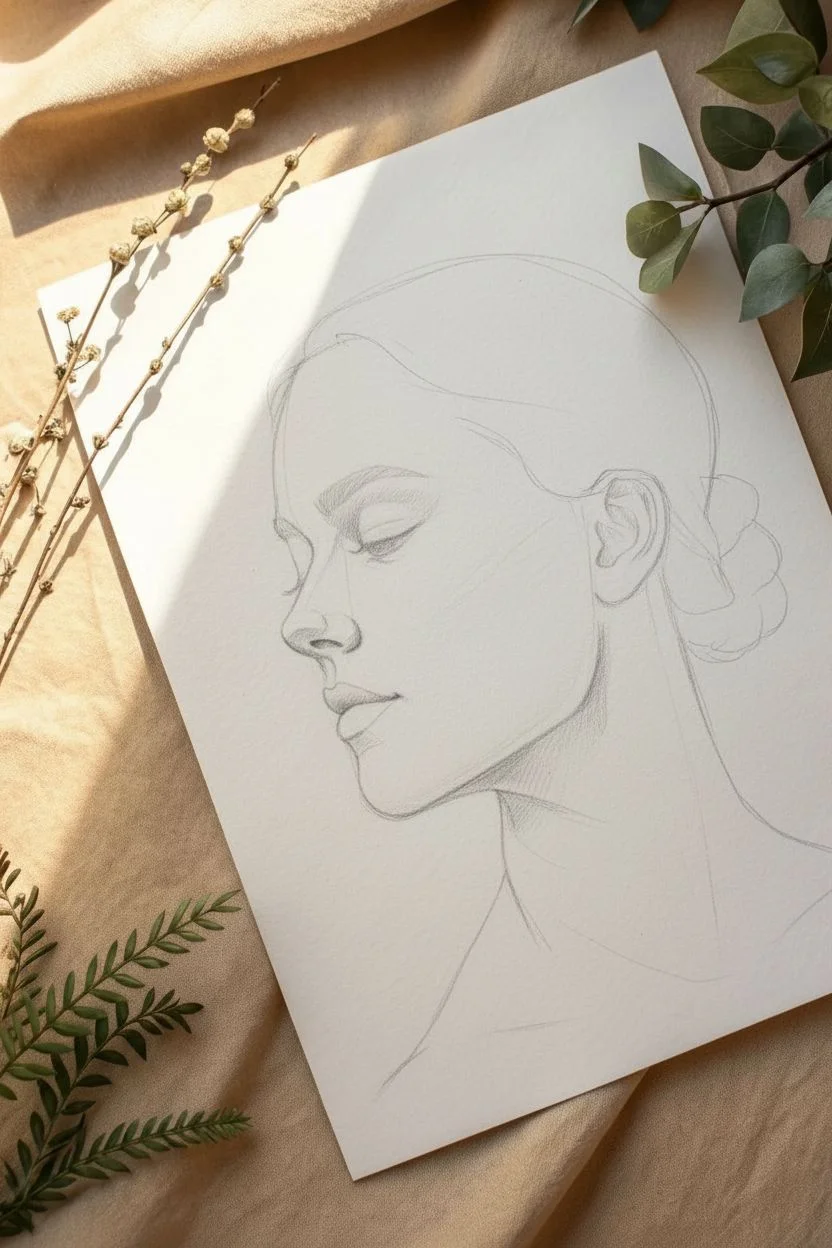
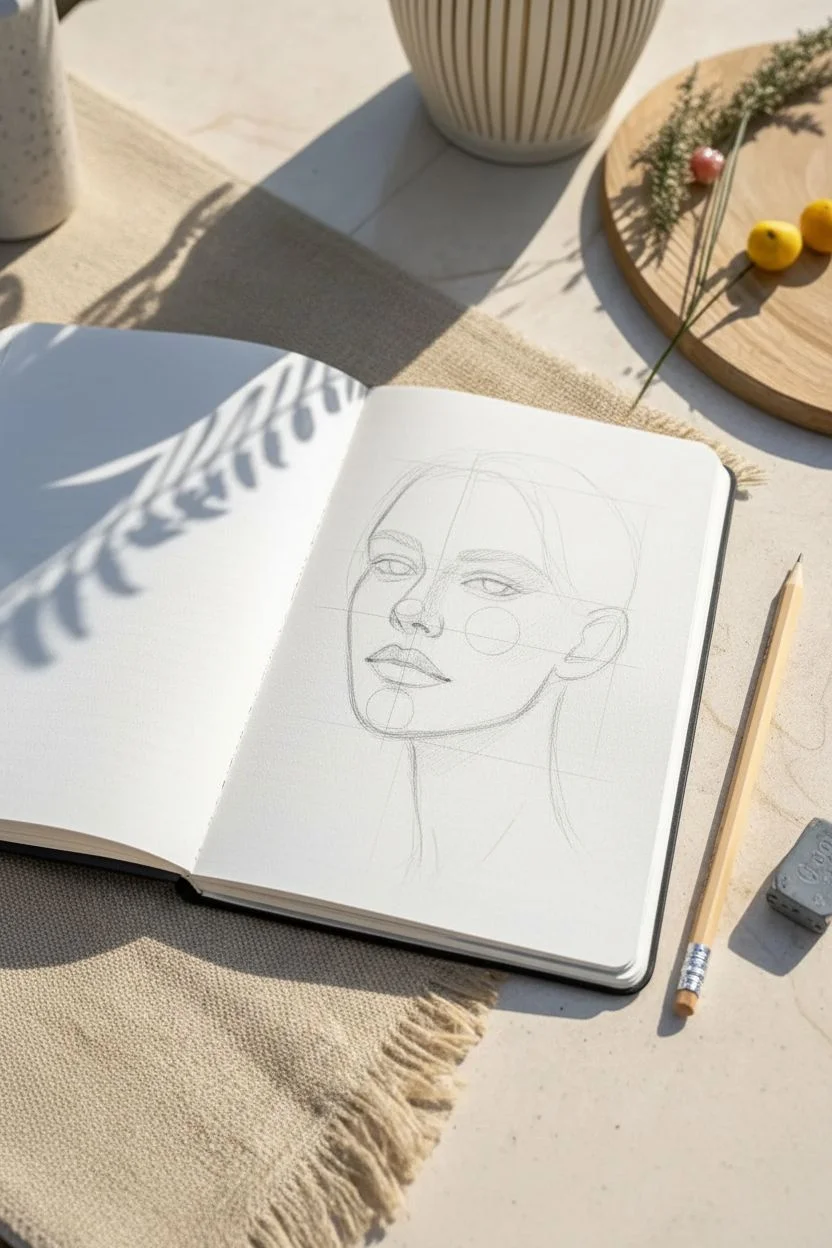
Capture quiet elegance with this detailed pencil study of a woman in profile. You will learn to render soft skin textures like freckles and build realistic hair volume using simple layering techniques.
Detailed Instructions
Materials
- Graphite pencils (HB, 2B, 4B, 6B)
- Smooth heavyweight drawing paper or bristol board
- Kneaded eraser
- Mechanical pencil (0.5mm HB for details)
- Blending stump or tortillon
- Tissue or soft cloth
Step 1: Structuring the Profile
-
Establish the Head Shape:
Begin with a light HB pencil to draw an oval for the cranial mass and a sweeping curve downwards to indicate the jawline. Visualize the tilt of the head before committing to the lines. -
Map the Facial Features:
Sketch a guideline for the profile line. Mark the placement of the brow ridge, the tip of the nose, the lips, and the chin. Ensure the ear is placed far enough back—roughly aligned with the back of the jaw. -
Refine the Outline:
Using your HB pencil, carefully refine the silhouette. Pay attention to the subtle dip of the nose bridge and the curve of the upper lip. Keep these lines faint so they don’t look like a harsh outline later.
Step 2: Developing the Features
-
Draw the Eye and Brow:
Since the eyes are downcast, draw a curved line for the lashes rather than an open eye shape. Thicken the lash line with a 2B pencil. For the eyebrow, use short, flicking strokes that follow the hair growth direction. -
Define the Nose and Nostril:
Shade the underside of the nose tip to create volume. Draw the nostril shape clearly, but avoid outlining the side of the nose; let shading define that edge instead. -
Sculpt the Lips:
Darken the corner of the mouth and the line between the lips using a 4B pencil. Shade the upper lip slightly darker than the lower lip to indicate the light source coming from above. -
Detail the Ear:
Sketch the intricate folds of the ear, keeping the darkest shadows in the deepest crevices. Add a small, simple shape for the earring stud.
Fixing “Muddy” Shading
If skin looks dirty, you likely over-blended. Lift graphite with a kneaded eraser to reveal paper texture, then re-apply shadows with crisp, unblended hatching.
Step 3: Shading and Texture
-
Apply Base Shading:
With an HB pencil held at a low angle, lay down a soft layer of graphite over the shadowed side of the face (cheek, jawline, and neck). Keep the forehead and nose bridge lighter. -
Blend the Values:
Use a blending stump to smooth out your pencil strokes. Work from light to dark areas to avoid dragging too much graphite into your highlights. -
Deepen the Shadows:
Switch to a 4B or 6B pencil to reinforce the darkest areas: under the jaw, the corner of the eye, and the back of the neck. This contrast is what creates the 3D effect. -
Add Specific Skin Texture:
I like to take a sharp mechanical pencil here to tap in tiny, random dots across the nose and cheekbones. Vary the pressure to create natural-looking freckles—some distinct, some faint.
Pro Tip: Hair Highlights
Mold your kneaded eraser into a knife-edge shape. Press and lift along the hair’s curve to “draw” bright, clean highlights into the graphite.
Step 4: Rendering the Hair
-
Block in Hair Flow:
Draw long, sweeping lines with a 2B pencil to establish the direction of the hair as it pulls back from the face. Don’t draw individual strands yet; focus on the major clumps. -
Create the Bun:
Sketch circular, overlapping shapes at the nape of the neck to form the messy bun. Use curved strokes to show how the hair wraps around itself. -
Add Depth to the Hair:
Use your 6B pencil to darken the areas where hair clumps overlap or tuck behind the ear. This negative space makes the lighter strands pop forward. -
Refine Strands and Flyaways:
Switch back to the mechanical pencil or a sharp HB. Draw fine, singular hairs escaping the bun and framing the neck. These delicate chaos lines add immense realism.
Step 5: Final Touches
-
Final Contrast Check:
Step back and assess your values. If the face looks flat, darken the shadow under the chin. Lift out bright highlights on the nose tip and lip with your kneaded eraser. -
Clean Up:
Erase any stray smudges on the white background space to keep the portrait crisp and professional.
Now you have a serene, emotive portrait ready to frame or gift


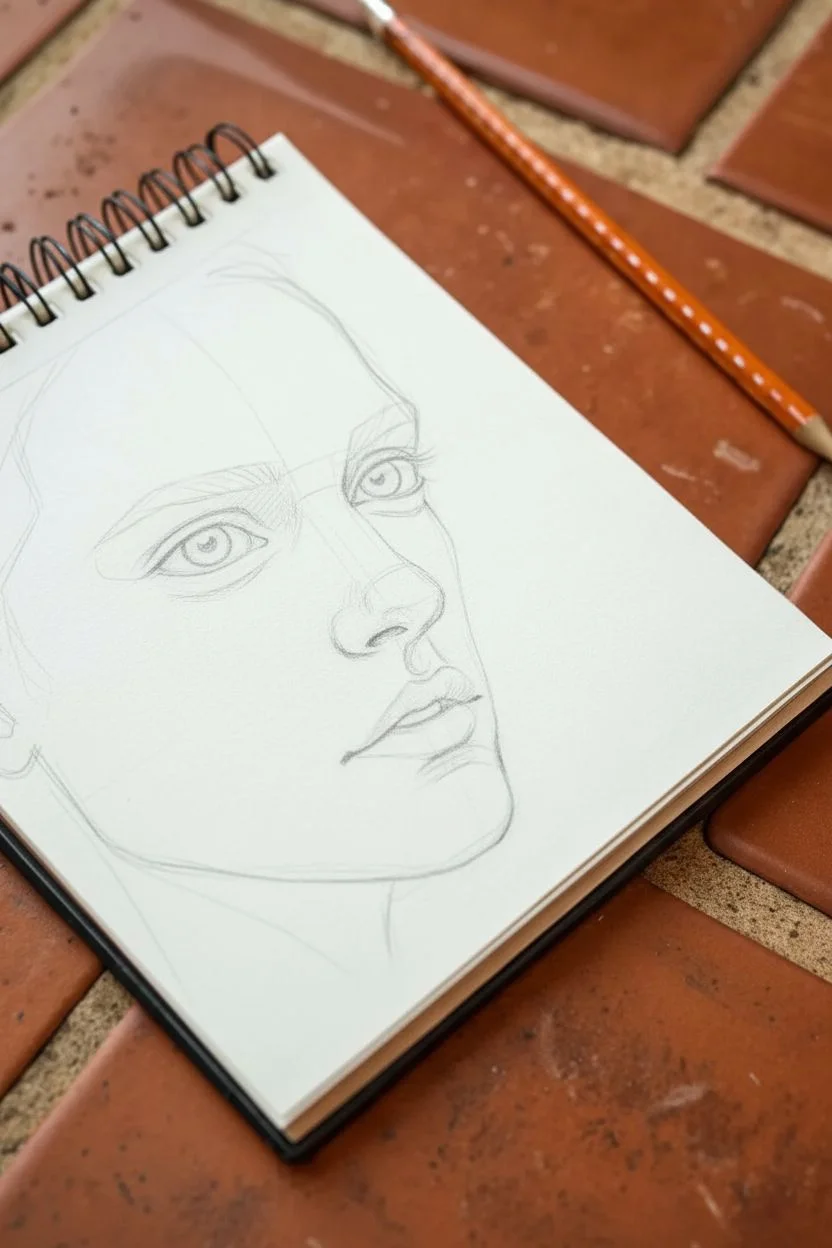
Hair as a Framing Device Around the Face
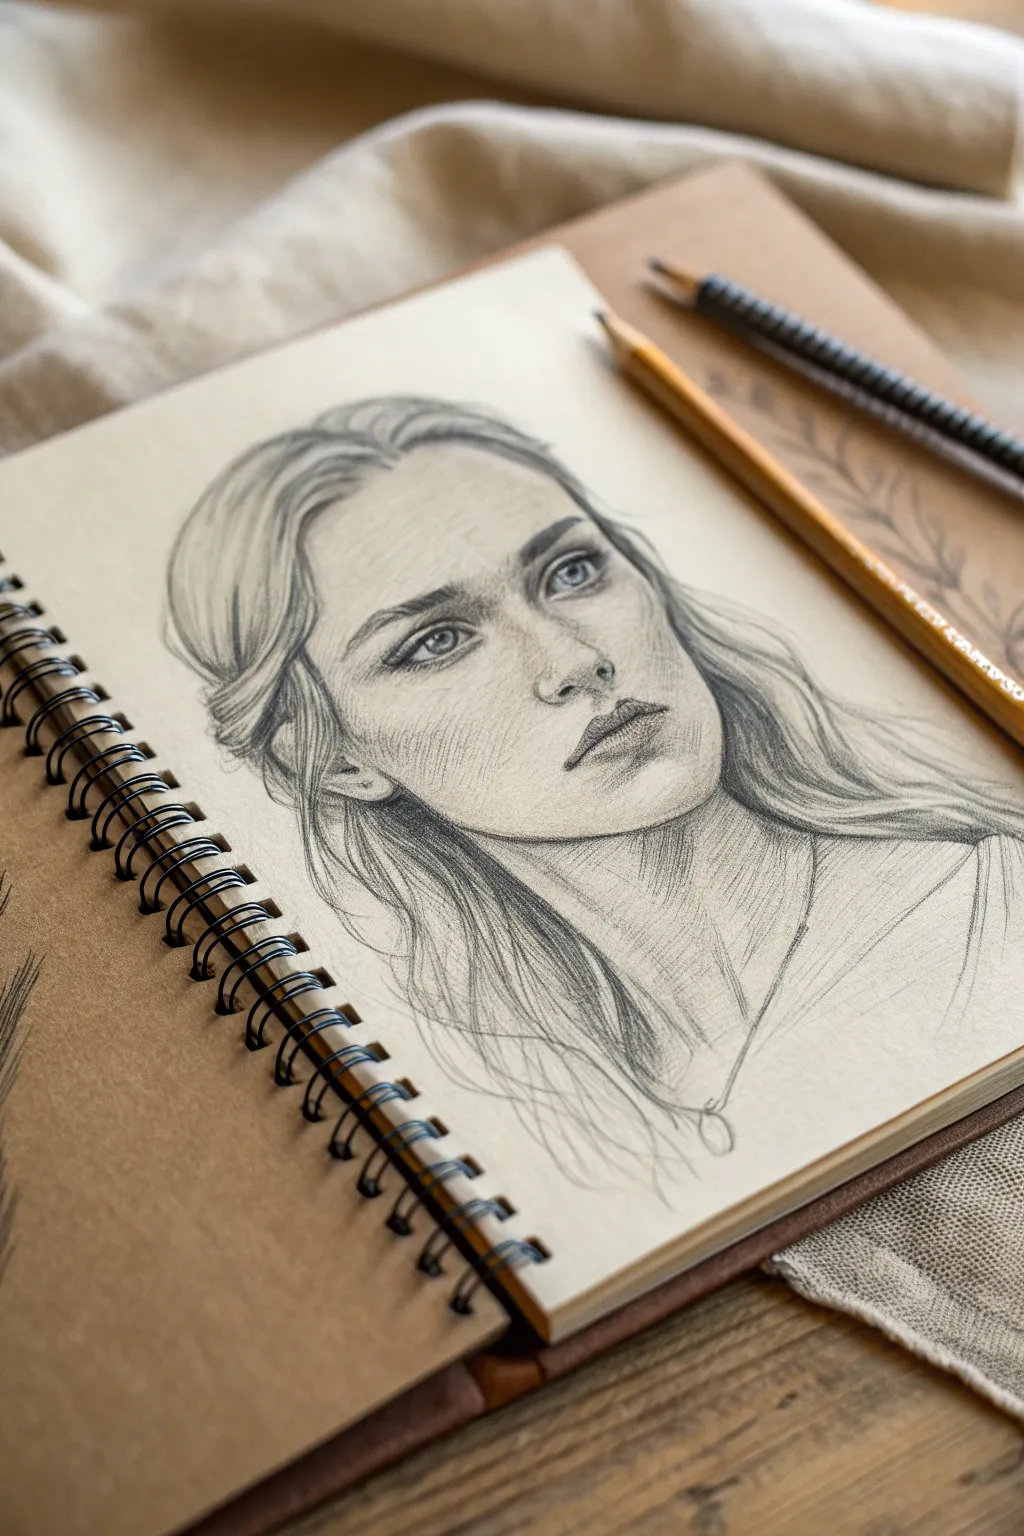
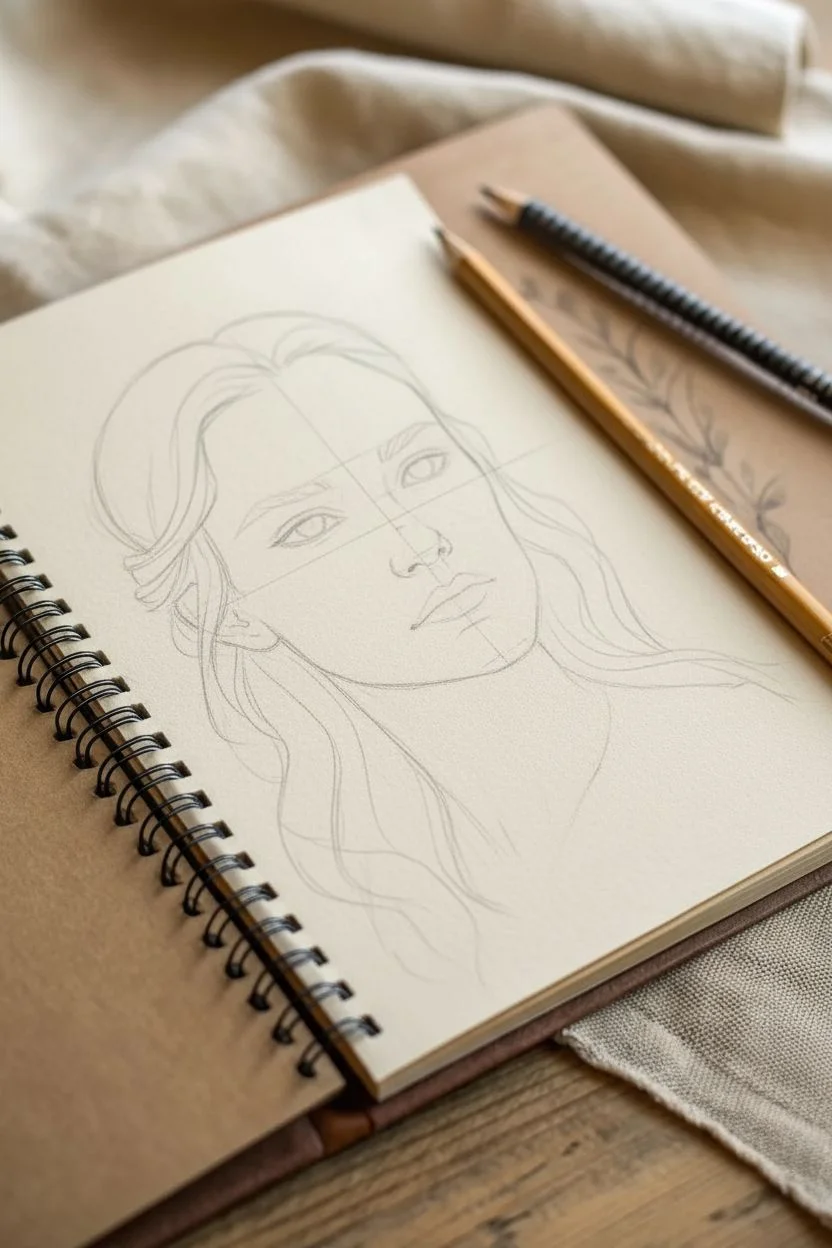
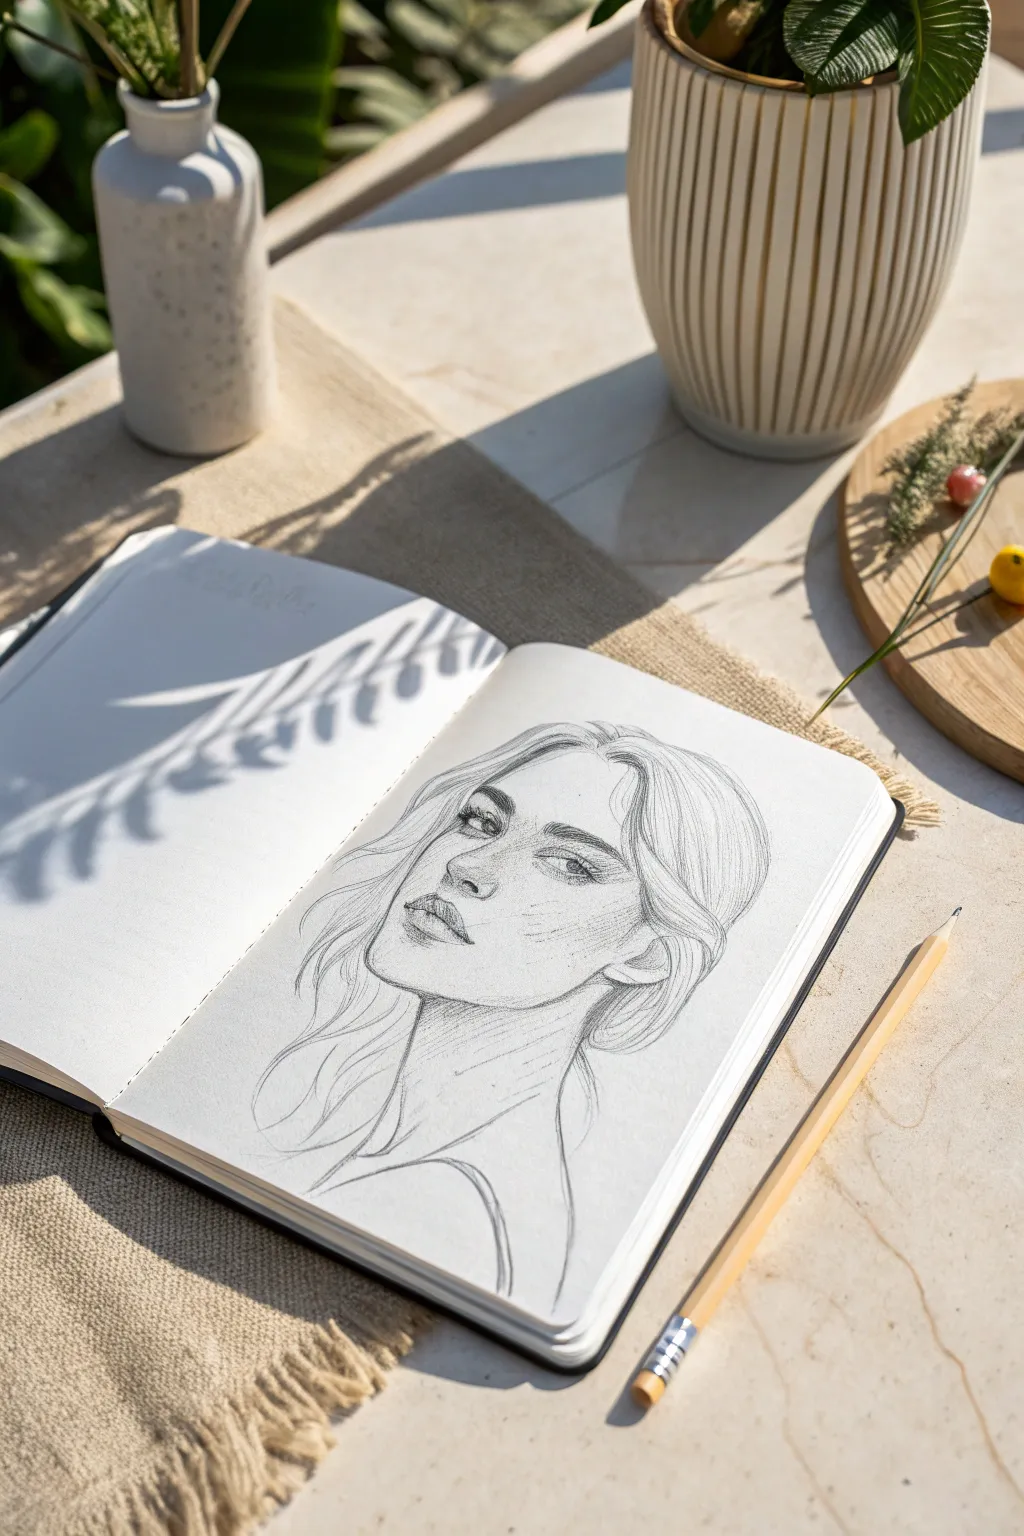
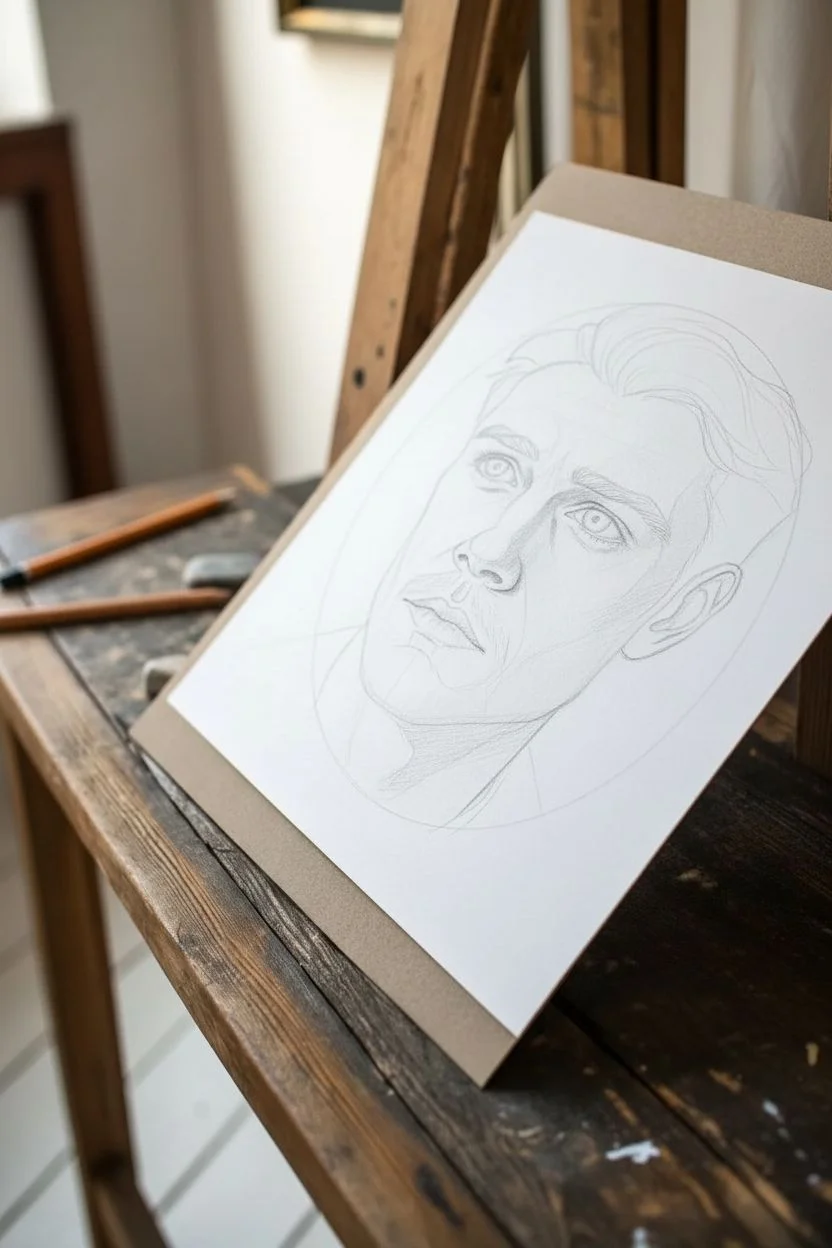
This tutorial guides you through creating a striking pencil portrait where the hair acts as a natural frame, drawing attention to a resolute facial expression. You’ll master delicate hatching techniques and learn how to build volume through shadow, resulting in a soft yet defined sketch on toned paper.
Step-by-Step
Materials
- Spiral-bound sketchbook with tan or cream-toned paper
- HB graphite pencil (initial lines)
- 2B graphite pencil (shading)
- 4B graphite pencil (deep shadows)
- Kneaded eraser
- Pencil sharpener
Step 1: Laying the Foundations
-
Establish the Head Shape:
Begin lightly with your HB pencil, sketching a basic oval for the head. Add a faint vertical centerline and a horizontal line about halfway down for the eyes to ensure symmetry. -
Map Facial Features:
Mark the position of the nose halfway between the brow line and the chin. Indicate the mouth line about halfway between the nose and chin. Keep these marks very light as they are just guides. -
Draft the Eyes and Brows:
Sketch the almond shapes of the eyes on the horizontal guideline. Their spacing should be roughly one ‘eye-width’ apart. Lightly block in the eyebrows just above, giving them a slight arch. -
Outline the Hair Frame:
Draw the general flow of the hair. Instead of individual strands, think of large ribbons or shapes. Start from the part line and sweep the hair down around the cheeks, creating that essential ‘framing’ effect.
Step 2: Developing the Portrait
-
Refine the Eyes:
Switch to your 2B pencil. define the upper lash line, making it darker and thicker than the bottom. Draw the iris circles, leaving a small white highlight near the top to bring life to the gaze. -
Shape the Nose:
Avoid outlining the bridge of the nose harshly. Instead, shade the side of the nose and define the nostrils and the bottom plane of the nose tip. -
Sculpt the Lips:
Draw the center line of the lips first. Shade the upper lip slightly darker than the lower lip. Add a small shadow beneath the bottom lip to make it pout forward. -
Add Facial Shading:
Using gentle hatching strokes with the 2B pencil, add shadows under the brow bone, along the side of the face masked by hair, and under the chin. I find that keeping hatching lines directional follows the contour of the skin beautifully. -
Strengthen the Jawline:
Clarify the jawline, but keep the line softer where the light hits it. Ensure the chin has a rounded, firm appearance.
Master the Hatch
Don’t smudge with your finger! Use clean, parallel pencil strokes (hatching) to create shading. It keeps the drawing crisp and preserves that classic sketchbook aesthetic.
Step 3: Structuring the Hair
-
Define Hair Roots:
At the part line, use short strokes to show hair emerging. Don’t press too hard yet; build the density gradually. -
Block in Hair Shadows:
Identify where the hair waves or tucks behind the ear. Use the 4B pencil here to create deep valleys of shadow. This contrast is what gives the hair volume. -
Create Flowing Strands:
Use long, sweeping strokes with your 2B pencil to mimic the length of the hair. Let your wrist be loose. The strokes should follow the curve of the ‘ribbons’ you sketched earlier. -
Add Flyaways:
To make the hair look realistic and not like a helmet, draw very fine, loose hairs escaping the main mass. This adds softness and movement. -
Neck and Shoulders:
Lightly sketch the neck muscles and collarbone area. Use vertical hatching to shadow the neck under the chin, grounding the head.
Hair Looking Flat?
If hair looks flat, you likely lack contrast. Don’t be afraid to go very dark in the crevices next to the face; this pushes the face forward and the background hair back.
Step 4: Final Touches
-
Deepen Contrast:
Take your 4B pencil and revisit the darkest areas: pupils, nostrils, the corners of the mouth, and the deepest crevices of the hair. -
Refine Hatching:
Go over the cheek and forehead shading. Ensure your hatching lines are consistent and cross-hatch lightly where you need darker values without losing paper texture. -
Lift Highlights:
Use your kneaded eraser to dab away graphite on the tip of the nose, the forehead, and the highest point of the cheekbones. You can also drag the eraser edge through the hair to create shiny highlights.
Now step back and admire how the dark values of the hair push the lighter tones of the face into the spotlight


Face With Glasses for Accessories and Reflections
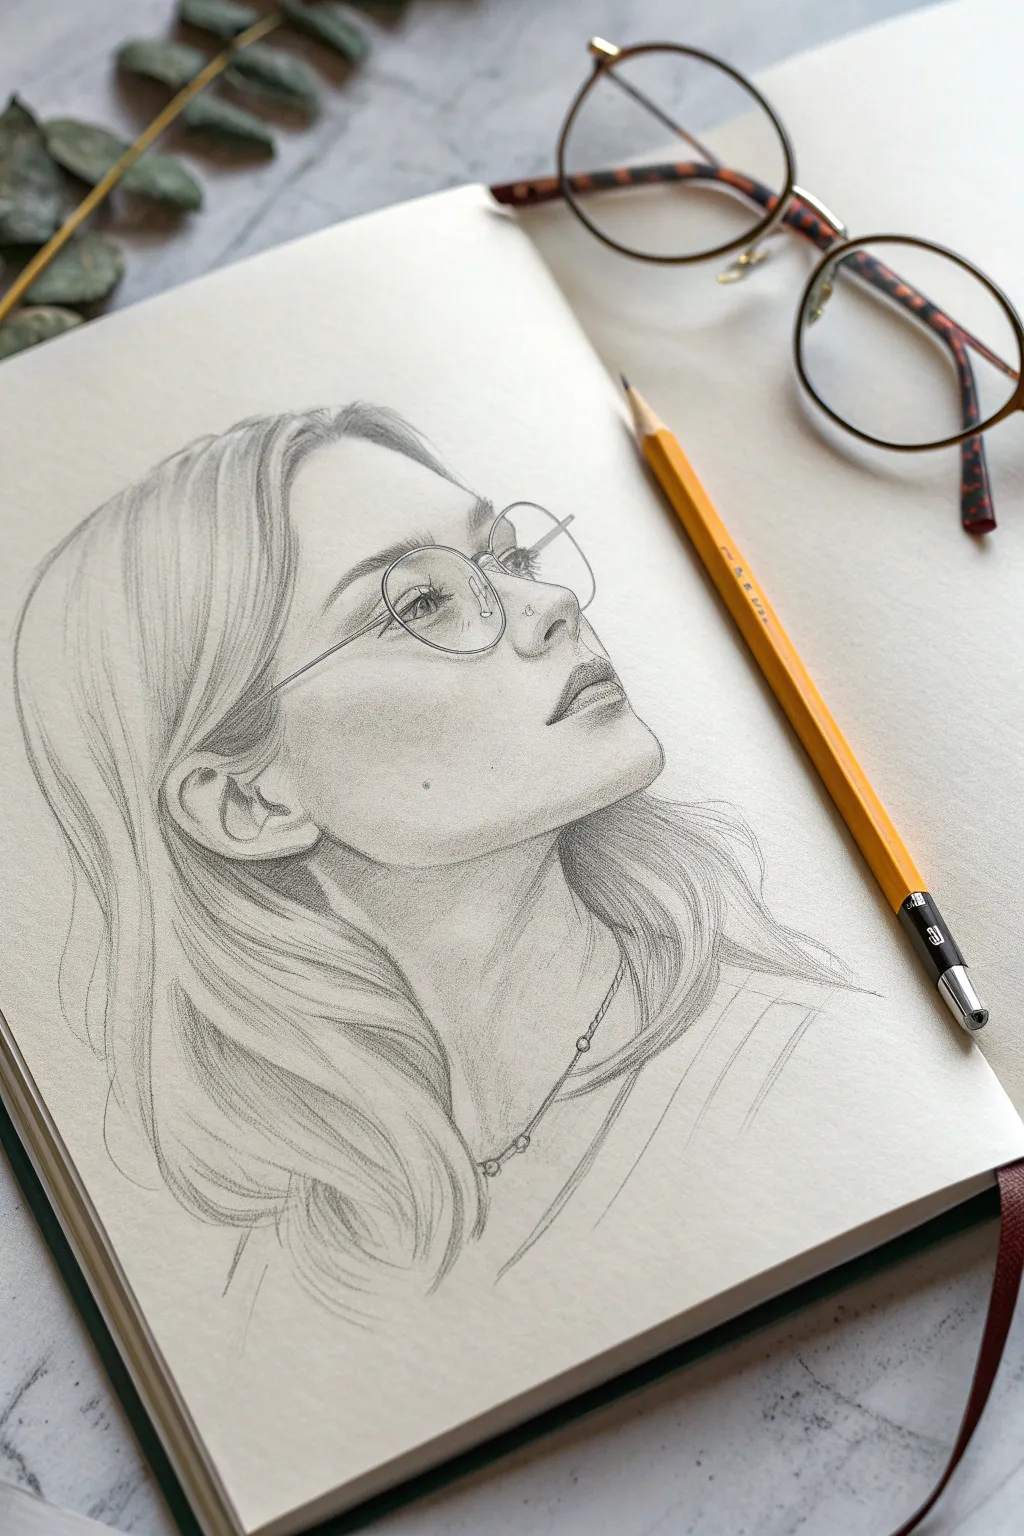
This project captures a serene, upward-gazing profile brought to life with delicate graphite shading and fine linework. The addition of wire-rimmed glasses adds an interesting layer of complexity, challenging you to render transparency and precise geometric shapes over organic forms.
Step-by-Step Guide
Materials
- Sketchbook with smooth or medium-tooth paper
- HB graphite pencil (for initial sketching)
- 2B graphite pencil (for shading)
- 4B graphite pencil (for darkest values)
- Mechanical pencil (optional, for fine details)
- Kneaded eraser
- Blending stump or tortillon
- Ruler (optional, to check glasses alignment)
Step 1: Structural Foundation
-
Establish the head angle:
Begin by lightly sketching a tilted oval to represent the cranium. Drawing a curved center line down the front helpful to establish the upward tilt of the head; the jawline should angle sharply back toward the ear placement. -
Map facial features:
Mark horizontal guidelines for the eyes, nose base, and mouth. Since the face is looking up, these lines should curve upwards around the form. Place the ear lower on the head than usual due to the tilt. -
Draft the profile:
Refine the outline of the face. Pay attention to the negative space in front of the face. Sketch a soft nose bridge, the protrusion of the lips, and a defined but gentle chin.
Uneven Glasses?
If the glasses look warped, draw a box in perspective around the eyes first. Fit the lenses inside this box to ensure they match the angle of the head tilt perfectly.
Step 2: The Glasses
-
Draw the frames:
Use your HB pencil to draw the large, rounded shape of the wire-rimmed glasses. The lens on the far side will be partially obscured by the nose bridge. Ensure the perspective matches the face’s tilt. -
Add the bridge and temples:
Connect the lenses with a curved bridge piece. Draw the thin arm (temple) of the glasses extending back over the ear. Keep these lines clean and precise to mimic metal. -
Check alignment:
Verify that the glasses sit correctly on the nose and align with the ear. If they look crooked, adjust them now before shading begins.
Hair Texture Tip
Don’t draw every strand. Focus on ‘ribbons’ of hair. Darken the negative spaces between these ribbons to create volume, leaving the high points of the waves mostly white paper.
Step 3: Shading and Form
-
Define the eyes:
Sketch the eye shapes. The near eye is seen in profile/three-quarter view, while the far eye is barely visible. Add the iris and pupil, leaving a small white highlight for life. -
Layer base shading:
Using a 2B pencil, apply light shading to the side of the face, the neck, and under the jawline. I find holding the pencil further back helps keep these initial strokes loose. -
Deepen the shadows:
Darken the nostrils, the corners of the mouth, and the crease of the eyelid. Add shading underneath the glasses frames to show they are casting a slight shadow on the skin. -
Render the lips:
Shade the upper lip slightly darker than the lower lip. Use vertical, curved strokes to mimic the texture of the lips.
Step 4: Hair and Details
-
Block in hair flow:
Draw long, sweeping lines to establish the direction of the hair. The hair should flow back from the forehead and tuck behind the ear, with loose waves falling over the shoulder. -
Add hair volume:
Group hair strands into locks rather than drawing every single hair. Shade the areas near the roots and where the hair tucks behind the ear to create depth. -
Refine the necklace:
Sketch the thin chain of the necklace following the curve of the neck. Add tiny circles for beads or clasps, giving them small shadows to make them sit on the skin.
Step 5: Final Touches
-
Highlight the glasses:
Ensure the frames have sharp, dark edges to look metallic. Use your eraser to lift out small highlights on the rim and potentially a faint reflection on the lens glass itself. -
Enhance contrast:
Switch to a 4B pencil to punch up the darkest areas: the pupil, the lash line, and the deepest shadows in the hair. -
Clean up:
Use the kneaded eraser to pick up any stray smudge marks on the skin area, keeping the complexion smooth.
Take a moment to admire how the simple addition of eyewear transforms the character of your portrait

PENCIL GUIDE
Understanding Pencil Grades from H to B
From first sketch to finished drawing — learn pencil grades, line control, and shading techniques.
Explore the Full Guide
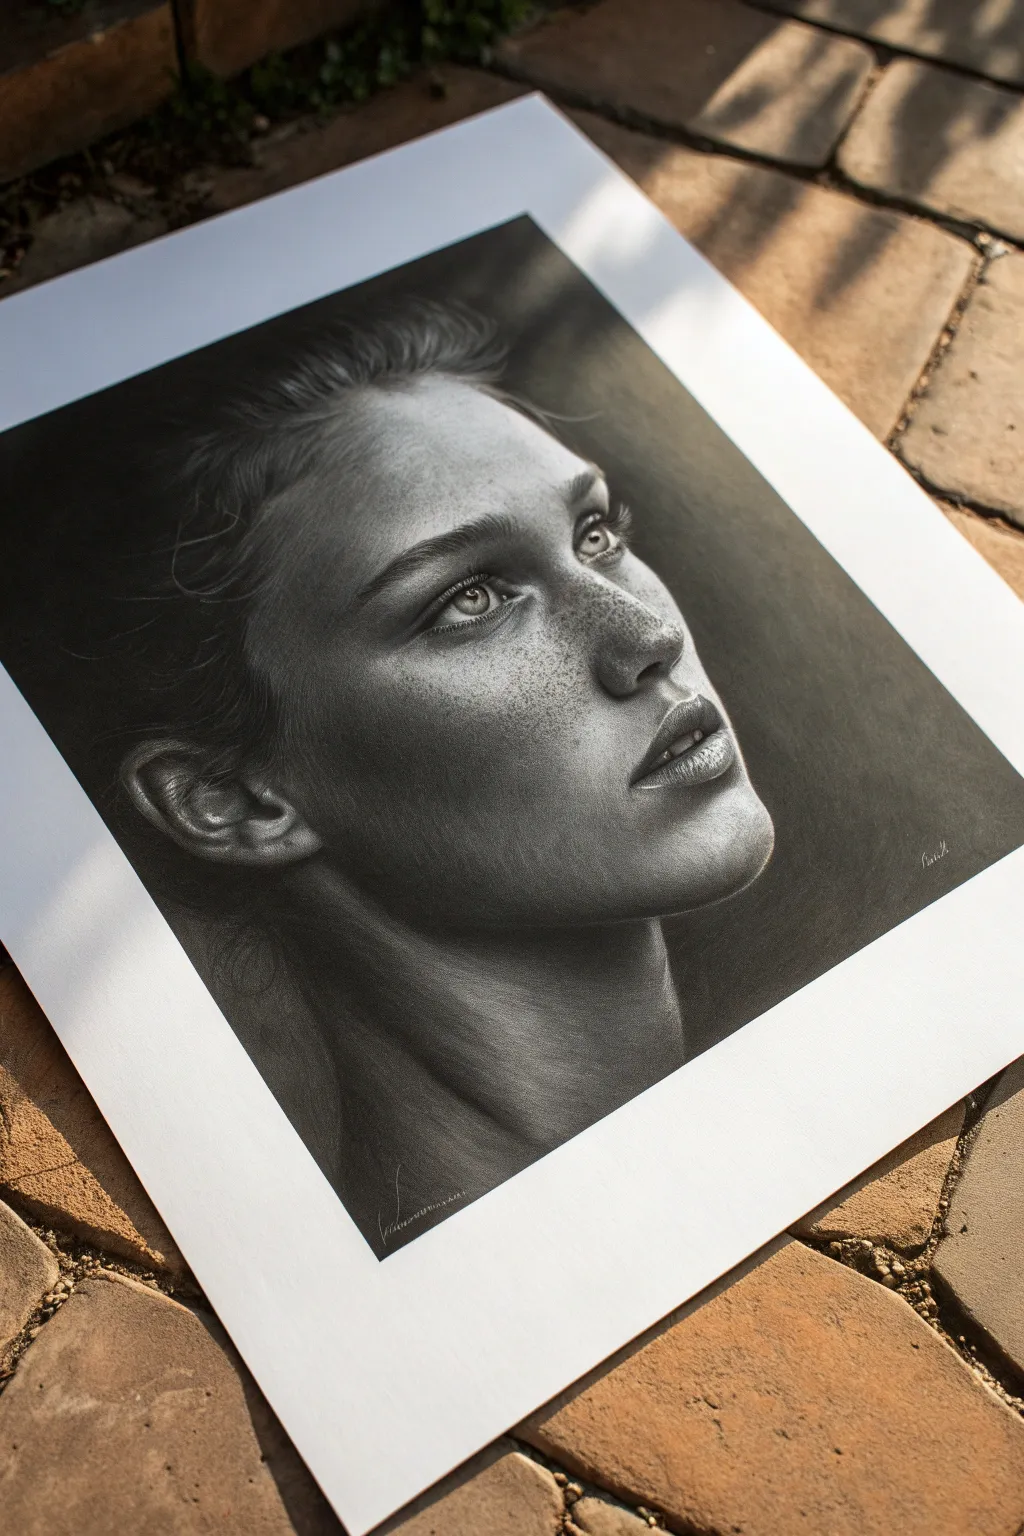
Freckles and Skin Texture Face Study in Graphite
This striking graphite study focuses on capturing realistic skin texture and facial features. By layering simple markings, you can build up a beautifully detailed portrait that emphasizes natural beauty without needing perfect photorealism.
Detailed Instructions
Materials
- Sketchbook with smooth heavyweight paper
- HB graphite pencil (for initial sketching)
- 2B graphite pencil (for shading)
- 4B graphite pencil (for darkest values)
- Kneaded eraser
- Paper blending stump (tortillon)
- Mechanical pencil (0.5mm, HB) for fine details
Step 1: Structural Sketching
-
Outline the head shape:
Begin with your HB pencil using very light pressure. Draw a loose oval for the head, tilting it slightly to the left to match the reference angle. Don’t worry about the hair yet; focus on the cranium and jawline curve. -
Map facial features:
Lightly sketch a vertical centerline and horizontal guides for the eyes, nose, and mouth. Position the eyes about halfway down the face. The nose tip should be about halfway between the eyes and chin. -
Draft the eyes and brows:
Sketch the almond shapes of the eyes. Note that the subject is looking slightly upward and to the right. Draw the outline of the iris and pupil. Above, block in the general shape of the eyebrows, keeping the strokes light and feathery. -
Define the nose and lips:
Sketch the bottom curves of the nose and the nostril wings. For the lips, focus on the center line first—it has a subtle curve—then outline the upper and lower lip shapes, keeping the bottom lip fuller.
Muddy Shadows?
If your shading looks dirty or gray, you might be over-blending. Try lifting graphite with a kneaded eraser and reapplying fresh pencil strokes without shrinking them.
Step 2: Rendering Features
-
Detail the eyes:
Switch to your mechanical pencil or a sharp 2B. Darken the pupil and the upper lash line. Draw the iris with radial lines moving from the pupil outward, leaving a small white highlight to show life. -
Build the eyebrows:
Use short, flicking strokes to create individual brow hairs. Follow the natural growth direction—upward near the nose, then angling outward towards the temples. Layer these strokes to build density. -
Shade the nose structure:
Using the 2B pencil, lightly shade the side of the nose bridge and under the tip. Use a blending stump to soften these shadows immediately, creating a smooth transition into the cheek. -
Contour the lips:
Shade the upper lip darker than the lower one. Add tiny vertical contour lines on the lips to show texture. Darken the corners of the mouth to give the expression depth. -
Add deep contrast:
Take your 4B pencil and deepen the darkest areas: the pupils, the nostrils, and the shadow cast by the jaw onto the neck. This contrast makes the drawing pop.
Level Up: Paper Texture
Place a piece of sandpaper or textured fabric under your drawing paper while shading skin. Rubbing the pencil over it will create automatic, organic skin pores.
Step 3: Texturing the Skin
-
General face shading:
Lightly cross-hatch or shade the cheekbones, forehead, and jawline with the HB pencil. Blend this softly with your stump to establish the base skin tone, leaving the bridge of the nose and upper cheeks lighter. -
Start the freckles:
This is the fun part. Using a sharp HB or mechanical pencil, start tapping small irregular dots across the nose bridge and cheeks. Vary the pressure; some should be faint, others darker. -
Layering freckle sizes:
I find it helps to add diversity here. Make some freckles slightly larger and irregular in shape, rather than perfect circles. Cluster them more densely on the nose and spread them out as you move toward the ears. -
Soften the texture:
Gently press your kneaded eraser onto the freckled areas to lift a tiny bit of graphite if they look too harsh. You want them to look like they are part of the skin, not floating on top. -
Final freckle pass:
Go back in with a 2B pencil and add a few very dark, sharp freckles on top of the softer ones to create depth and realism.
Step 4: Hair and Refinement
-
Establish hairline:
Sketch the hairline, paying attention to the wisps near the temple. Use long, flowing strokes that follow the hair’s wave pattern. -
Fill in hair volume:
Use the side of your 4B pencil to block in the darker masses of hair. Don’t draw every single strand; focus on the flow and the shadowed areas behind the ear. -
Add flyaways:
With a very sharp HB pencil, add loose, stray hairs escaping the main shape. These messy details add a lot of realism to the portrait. -
Neck shading:
Shade the neck with horizontal strokes, blending them to look smooth. Ensure the shadow under the chin is strong enough to separate the head from the neck. -
Clean up highlights:
Use the clean edge of your eraser to verify your highlights—on the nose tip, the bottom lip, and the tear duct. Crisp whites make the pencil work look cleaner.
Step back and admire the personality you’ve captured through those unique details and textures
Dramatic Lighting Face: Half in Shadow
Master the art of chiaroscuro with this dramatic charcoal study of a face emerging from darkness. This project focuses on high-contrast lighting, rendering delicate skin textures like freckles, and building deep, velvety blacks.
Step-by-Step
Materials
- High-quality smooth bristol board or heavyweight drawing paper (11×14 or larger)
- Graphite pencils (HB, 2B, 4B)
- Charcoal pencils (soft, medium, hard)
- Compressed charcoal stick
- White gel pen or white charcoal pencil
- Kneaded eraser
- Mono Zero ultra-fine eraser
- Blending stumps (tortillons) and soft tissue
- Soft makeup brush or drafting brush
Step 1: The Foundation: Layout and Basic Values
-
Light scaffolding:
Begin with an HB pencil, using very light pressure to sketch the basic proportions. Focus on the tilt of the head and the upward gaze. Map out the ‘shadow line’—the boundary where the light hits the face versus where it falls into darkness. -
Establishing the darks:
Before refining features, block in the background. Use a compressed charcoal stick to lay down the deep black background surrounding the face. This immediate contrast will help you judge the values of the skin correctly from the start. -
The first shadow layer:
Using a soft charcoal pencil, lightly shade the shadow side of the face (the cheek, neck, and ear area). Don’t go full black yet; aim for a mid-tone gray to establish the facial structure. -
Developing the eyes:
Switch to a sharpened graphite pencil for the eyes. Draw the iris with sharp detail, leaving the pupil pure black. Ensure the whites of the eyes aren’t stark white; shade them slightly to show the spherical form.
Step 2: Building Form and Tone
-
Blending the skin base:
Use a soft tissue to blend your initial charcoal layers on the face. Wrap the tissue around your finger to gently push the charcoal into the paper’s tooth, creating a smooth, skin-like base. -
Define the nose and cheek:
Strengthen the shadows under the nose and along the jawline using a 4B graphite pencil. The transition from the lit cheek to the shadowed jaw needs to be gradual but distinct. -
Sculpting the lips:
The lips need texture. Use vertical strokes with a 2B pencil to mimic the natural cracks and curves. Keep the upper lip darker than the lower lip to suggest volume. -
Deepening the hair roots:
Where the hair meets the forehead, use short, tapered strokes. Blend these out so there isn’t a hard line—hair should look like it’s growing effectively from the scalp, not sitting on top of it.
Smudge Control
Charcoal moves easily. Place a piece of glassine or clean scrap paper under your drawing hand at all times to prevent smearing your work or transferring oils.
Step 3: Texture and Details
-
Adding the freckles:
This is a key texture element. Take a sharp 2B pencil and stipple tiny, irregular dots across the nose and cheeks. Vary the pressure; some freckles should be dark and sharp, others faint and soft. -
Refining the ear:
The ear is mostly in shadow but catches crucial highlights. Darken the inner crevices with charcoal, but use your kneaded eraser to lift out the ridges of cartilage. -
Skin porosity:
To create hyper-realism, lightly tap a dull pencil lead over the highlighted areas of the cheek and nose. Gently pat with a tissue to soften them into pores. -
The neck muscles:
Shade the sternocleidomastoid muscle (the large neck muscle) to show the tension of the turned head. Keep the shading smooth to contrast with the textured face.
Make It Atmospheric
Lightly dust powdered graphite over the background edges with a large brush to create a ‘vignette’ effect, softening the stark black borders.
Step 4: Final Highlights and Contrast
-
Lifting lights:
Using the Mono Zero eraser, cut into your drawing to retrieve bright highlights. Focus on the bridge of the nose, the wetline of the lower eyelid, and the moisture on the lower lip. -
Stray hairs:
Take a very sharp hard charcoal pencil or graphite. Draw quick, confident, whisper-thin lines for stray hairs escaping the main mass. They should cross over both the dark background and the lit forehead. -
Catchlights:
Use a white gel pen or white charcoal for the tiny reflection in the pupil. This single dot brings the subject to life. -
Final value check:
Step back. Identify areas that look ‘flat.’ Deepen your darkest shadows one last time with compressed charcoal to make the highlights pop even more.
This intense study of light and shadow will add a striking, emotional piece to your portfolio
BRUSH GUIDE
The Right Brush for Every Stroke
From clean lines to bold texture — master brush choice, stroke control, and essential techniques.
Explore the Full Guide
Upward Tilted Face for a Bold, Emotional Mood
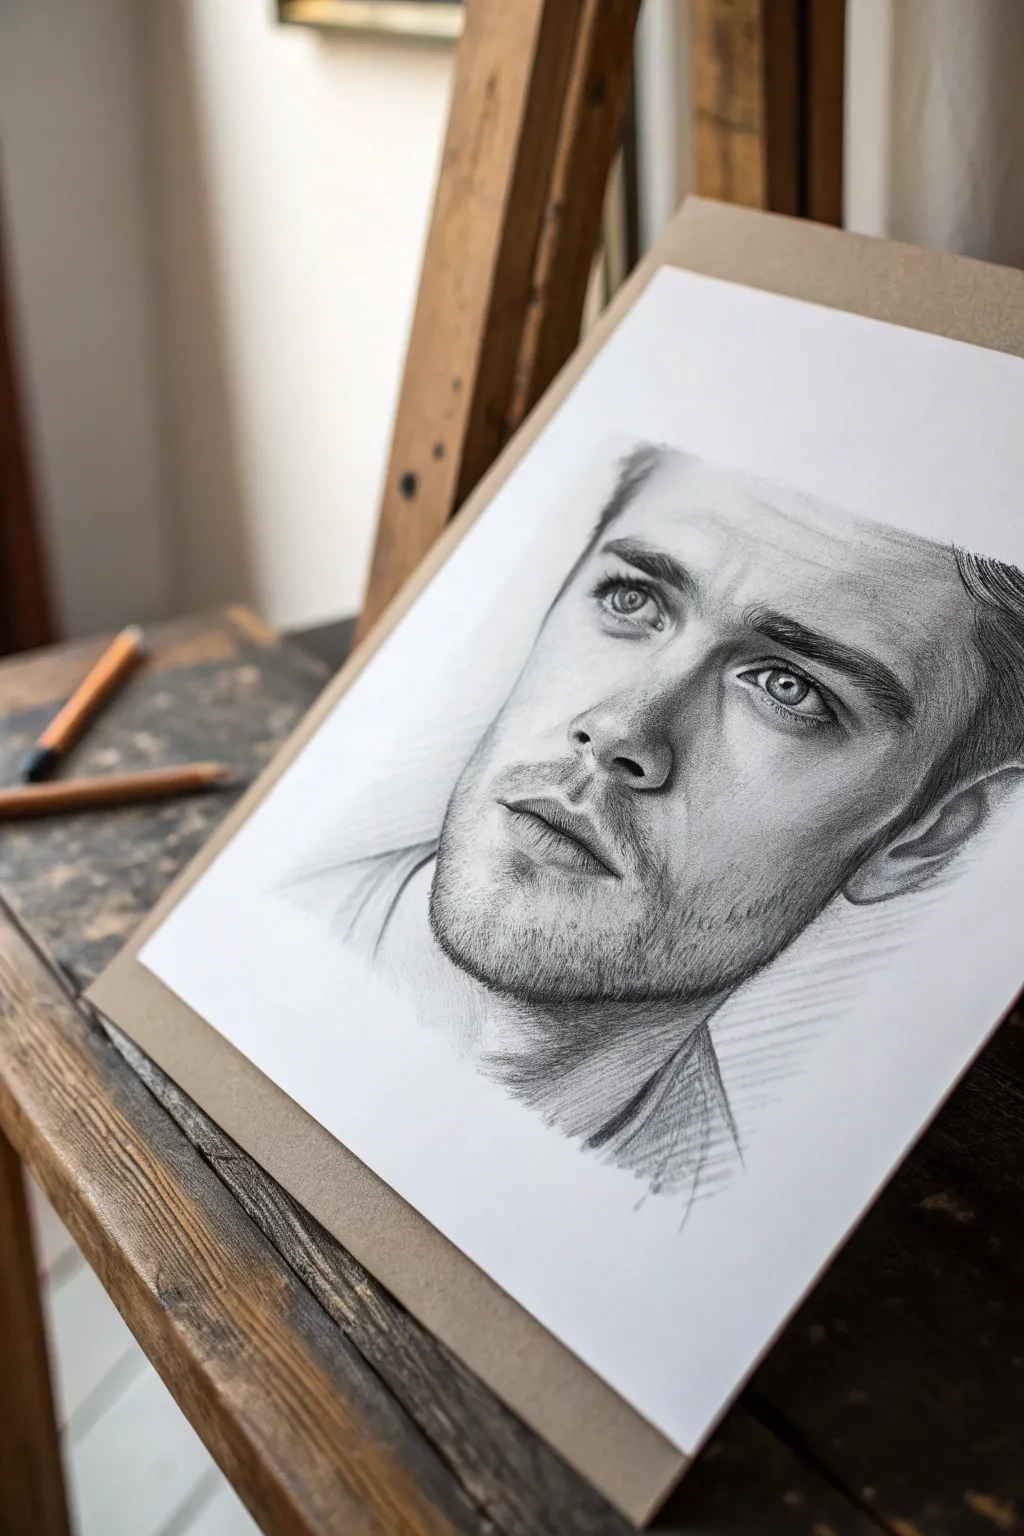
Capture a moment of quiet intensity with this graphite study of a male subject looking upward. This project focuses on realistic shading techniques, texturing facial hair, and managing the unique foreshortening challenges that come with an angled perspective.
How-To Guide
Materials
- High-quality drawing paper (smooth or medium tooth, roughly A3 size)
- Graphite pencils (ranges 2H, HB, 2B, 4B, 6B)
- Kneaded eraser
- Mechanical eraser (for fine highlights)
- Blending stumps (tortillons)
- Tissue or chamois cloth for soft blending
- Pencil sharpener or sandpaper block
Step 1: Structural Layout
-
Establish the Head Angle:
Begin with a light oval for the head shape. Unlike a straight-on portrait, tilt the axis line significantly to the left. Draw a curved horizontal line for the eyeline, arching it slightly upward to denote the head is tilting back. -
Map Facial Features:
Using a harder pencil like a 2H, sketch the placement of the eyes, nose, and mouth. Because of the upward tilt, the space between the nose and mouth will appear slightly elongated, while the forehead may appear slightly foreshortened. -
Refine the Jawline:
Draw the strong jawline, ensuring the chin is prominent. The angle requires showing the underside of the jaw slightly, blending into the neck area. -
Blocking in Hair and Ears:
Roughly sketch the hairline, receding slightly at the temples. Place the visible ear lower than you would for a straight-on view, as the head tilt shifts its relative position downward.
Fixing “Flat” Features
If the face looks flat, your mid-tones are likely too light. Don’t be afraid to shade the ‘light’ side of the face too; paper white should only be for the brightest highlights.
Step 2: The Eyes and Brow
-
Drafting the Irises:
Draw the irises looking upward and to the left. This gaze direction creates the ’emotional’ mood. Ensure the highlights (catchlights) are consistent in both eyes; usually, a small white circle near the top of the pupil works best. -
Shading the Sclera:
Lightly shade the corners of the ‘whites’ of the eyes with an HB pencil. Eyes are spheres, so they need shadow at the edges to look round, not flat. -
Defining the Eyelids:
Darken the upper lash line significantly with a 4B pencil. Add a distinct crease above the eye, following the curve of the eyeball underneath. -
Brow Texture:
Build the eyebrows using short, flicking strokes that follow the hair growth direction. Make them denser toward the center of the face and sparser at the tail.
Step 3: Creating Dimension
-
Nose Construction:
Avoid drawing hard outlines for the sides of the nose. Instead, use shading to suggest the bridge. Darken the nostrils, keeping the edges soft so they don’t look like stickers. -
Lip Volume:
Shade the upper lip darker than the bottom lip, as it angles inward and catches less light. Use vertical, curved hatching lines to mimic the natural texture of lip skin. -
Cheekbones and Planes:
Apply a soft wash of graphite (2B) under the cheekbones and along the temple. Use a tissue to blend this into a smooth gradient, establishing the planar changes of the face.
Level Up: Skin Pores
For hyper-realism, lightly tap a textured tissue or paper towel onto graphite dust and press it onto the shaded cheek areas to create subtle skin texture.
Step 4: Texture and Details
-
Stubble Foundation:
Lay down a base tone of grey across the jaw, chin, and upper lip area where the facial hair grows. Smooth this out with a blending stump. -
Drawing Individual Hairs:
With a sharp 4B or 6B pencil, add individual stubble hairs. Keep these strokes extremely short and multidirectional, especially around the chin and jawline, to look natural rather than uniform. -
Highlights in Hair:
Use a mechanical eraser or the sharp edge of a kneaded eraser to pick out tiny highlights within the stubble and the main hair on the head, creating depth and shine. -
Neck Shadows:
Cast a deep shadow under the jaw onto the neck. This separation is crucial for pushing the chin forward in space contrast.
Step 5: Final Polish
-
Deepen the Darks:
Revisit your darkest areas—pupils, nostrils, corners of the mouth—with a 6B pencil. I like to press firmly here to get that high-contrast photorealistic look. -
Clean Up Edges:
Review the outer contour of the face. If any blending smudged outside the lines, use a clean eraser to sharpen the separation between the subject and the white paper. -
Sketch the Shirt Collar:
Add loose, gestural lines for the collar and shoulder. Keep this area less detailed than the face to ensure the viewer’s focus remains on the eyes.
Step back and admire how the angled perspective and detailed shading bring this emotive portrait to life on your page
Hand-on-Cheek Pose to Add Story to a Face
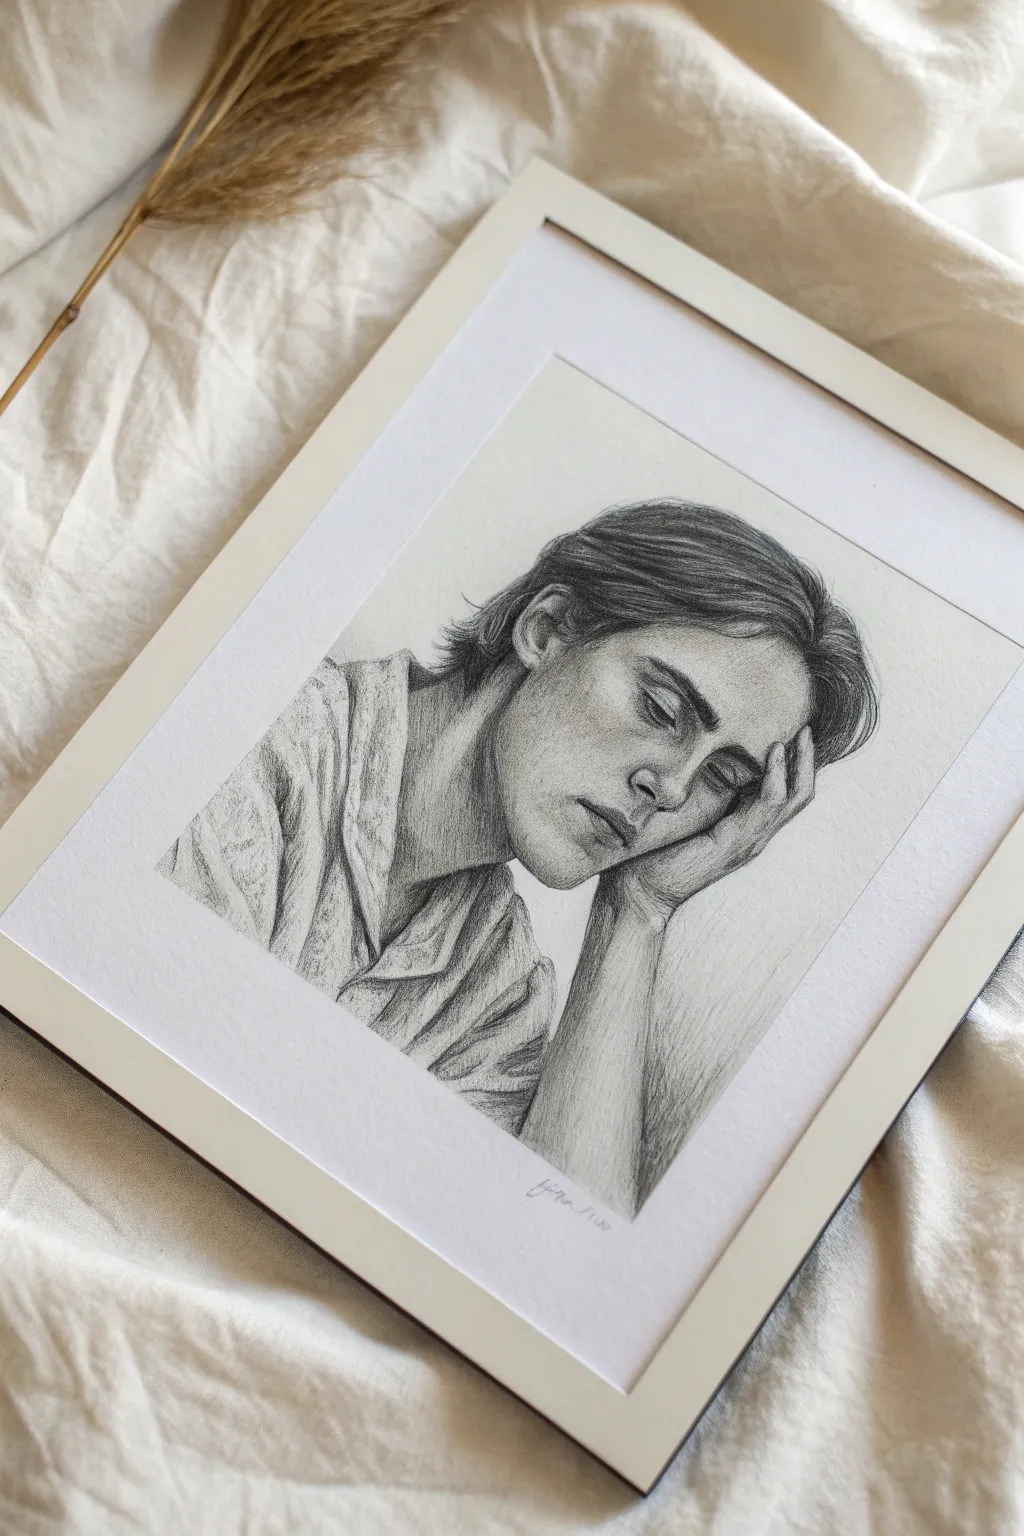
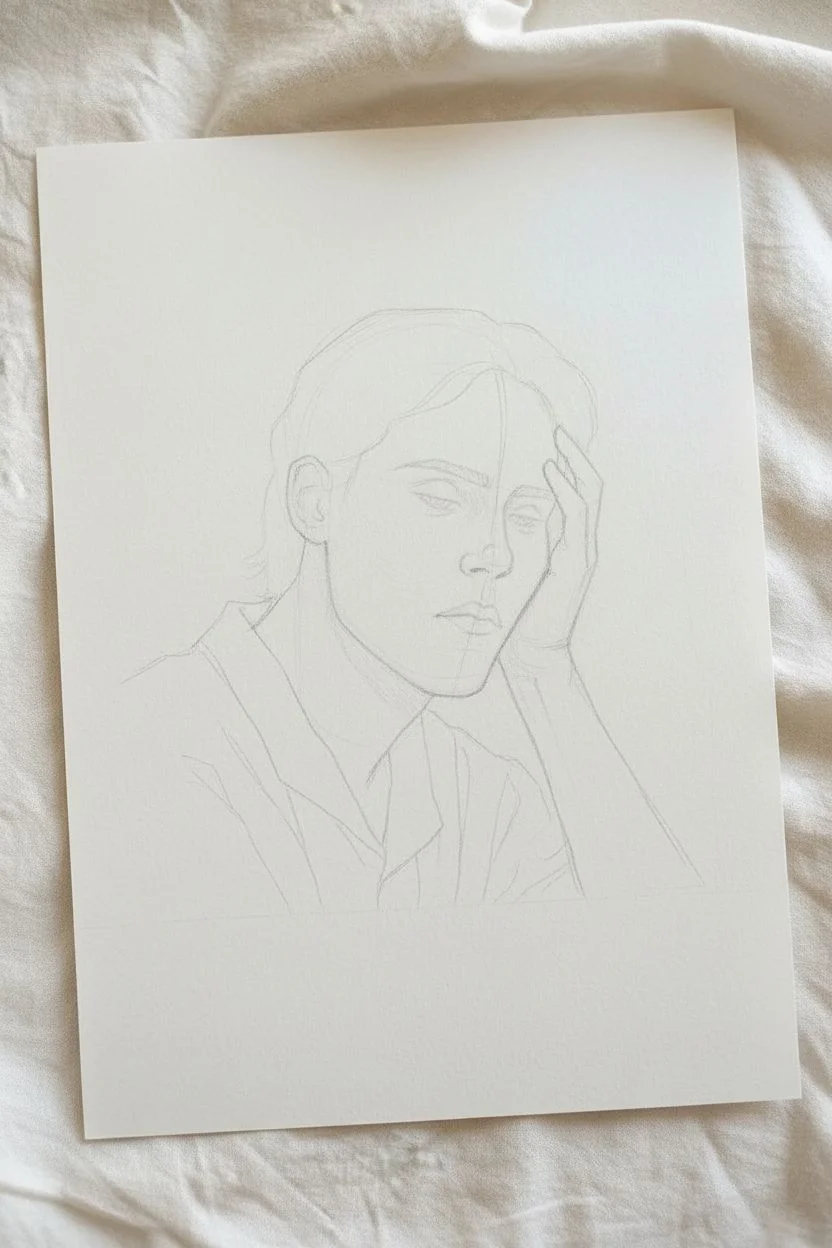
This realistic graphite drawing captures a quiet, introspective moment through the classic hand-on-cheek pose. You’ll work with layering and shading to build soft skin tones and expressive hair texture.
Step-by-Step
Materials
- High-quality drawing paper (smooth or vellum finish)
- Set of graphite pencils (HB, 2B, 4B, 6B)
- Mechanical pencil (for fine details)
- Kneaded eraser
- Blending stump or tortillon
- Tissue or cotton pad for smoothing
- White or cream picture frame with mat (optional)
Step 1: Structural Sketch
-
Establish the head tilt:
Begin with a light HB pencil to draw an oval for the head, tilting it slightly to the left. Draw a vertical centerline that curves with the angle of the face to guide feature placement. -
Map the hand placement:
Lightly sketch the basic shape of the hand and wrist. The palm should be pressing against the cheek, pushing the skin slightly upward. Don’t worry about finger details yet; just focus on the mass and position. -
Shoulder and collar lines:
Sketch the slope of the shoulders and the rough outline of the collar. The shirt is open, creating a V-shape below the neck that helps frame the face. -
Refine facial features:
Mark horizontal guidelines for the eyes, nose, and mouth. The eyes are looking down, so the eyelids will be prominent. Sketch the nose bridge and the lips, keeping lines very faint so they can be erased later.
Step 2: Drafting Features & Hand
-
Detail the eyes:
Switch to a mechanical pencil or a sharpened HB. Draw the eyelids with a heavy curve to show the downward gaze. Shade the iris darkly but leave small highlights if visible. -
Draw the nose and mouth:
Define the nostrils and the shadow under the nose. For the lips, focus on the shadow shapes rather than outlining them. The mouth should look relaxed, perhaps slightly compressed on the side resting against the hand. -
Shape the fingers:
Refine the fingers curling against the temple and cheek. Pay attention to the knuckles and how the skin of the face yields slightly to the pressure of the fingertips. -
Outline the hair flow:
Sketch the main clumps of hair. Notice how the hair sweeps back from the forehead and tucks behind the ear. Don’t draw individual strands yet, just the major sections.
Contact Shadows
Focus heavily on the ‘contact shadow’ where the fingers touch the skin. This specific dark line anchors the hand to the face, preventing it from looking like it’s floating.
Step 3: Shading and Texture
-
Initial skin tone:
Using a 2B pencil held at a low angle, lay down a light, even layer of graphite over the shadowed areas of the face—specifically the eye sockets, under the nose, and the side of the face away from the light. -
Blend the base layer:
Gently rub the graphite with a blending stump or tissue to create a smooth, skin-like texture. I usually move in small circular motions to avoid streaks. -
Deepen the shadows:
Take a 4B pencil to darken the deepest shadows: under the jawline, inside the ear, and the cast shadow of the hand on the face. This contrast creates the 3D form. -
Render the hair:
Use a 4B or 6B pencil for the hair. Draw confident strokes following the direction of growth. Leave some areas lighter for shine, and press hard in the crevices where hair overlaps. -
Detailing the hand:
Add shading to the fingers, focusing on the spaces between them and the shadow cast by the wrist. Keep the hand slightly lighter than the hair to ensure focus remains on the face.
Add Subtle Texture
Instead of blending the shirt perfectly, try cross-hatching or stippling. This difference in texture separates realism in the skin from the looser, artistic feel of the clothing.
Step 4: Refinement & Clothing
-
Clothing texture:
Sketch the shirt collar and folds with looser, sketchier lines. You don’t need smooth blending here; the visible pencil strokes imply fabric texture effectively. -
Highlights and clean up:
Use your kneaded eraser to tap and lift graphite from the high points: the tip of the nose, the forehead, and the knuckles. This ‘negative drawing’ adds realistic volume. -
Final contrast check:
Step back and squint at your drawing. Darken the pupils, nostrils, and deepest hair shadows with your softest pencil (6B) one last time to make the image pop. -
Presentation:
Once finished, spray with a fixative if desired. Place the drawing into a white mat and frame to give it a professional gallery look.
Framing this emotive piece adds a finishing touch that truly honors the time you spent perfecting the shading


Face Partly Hidden by Fabric for Soft Edges
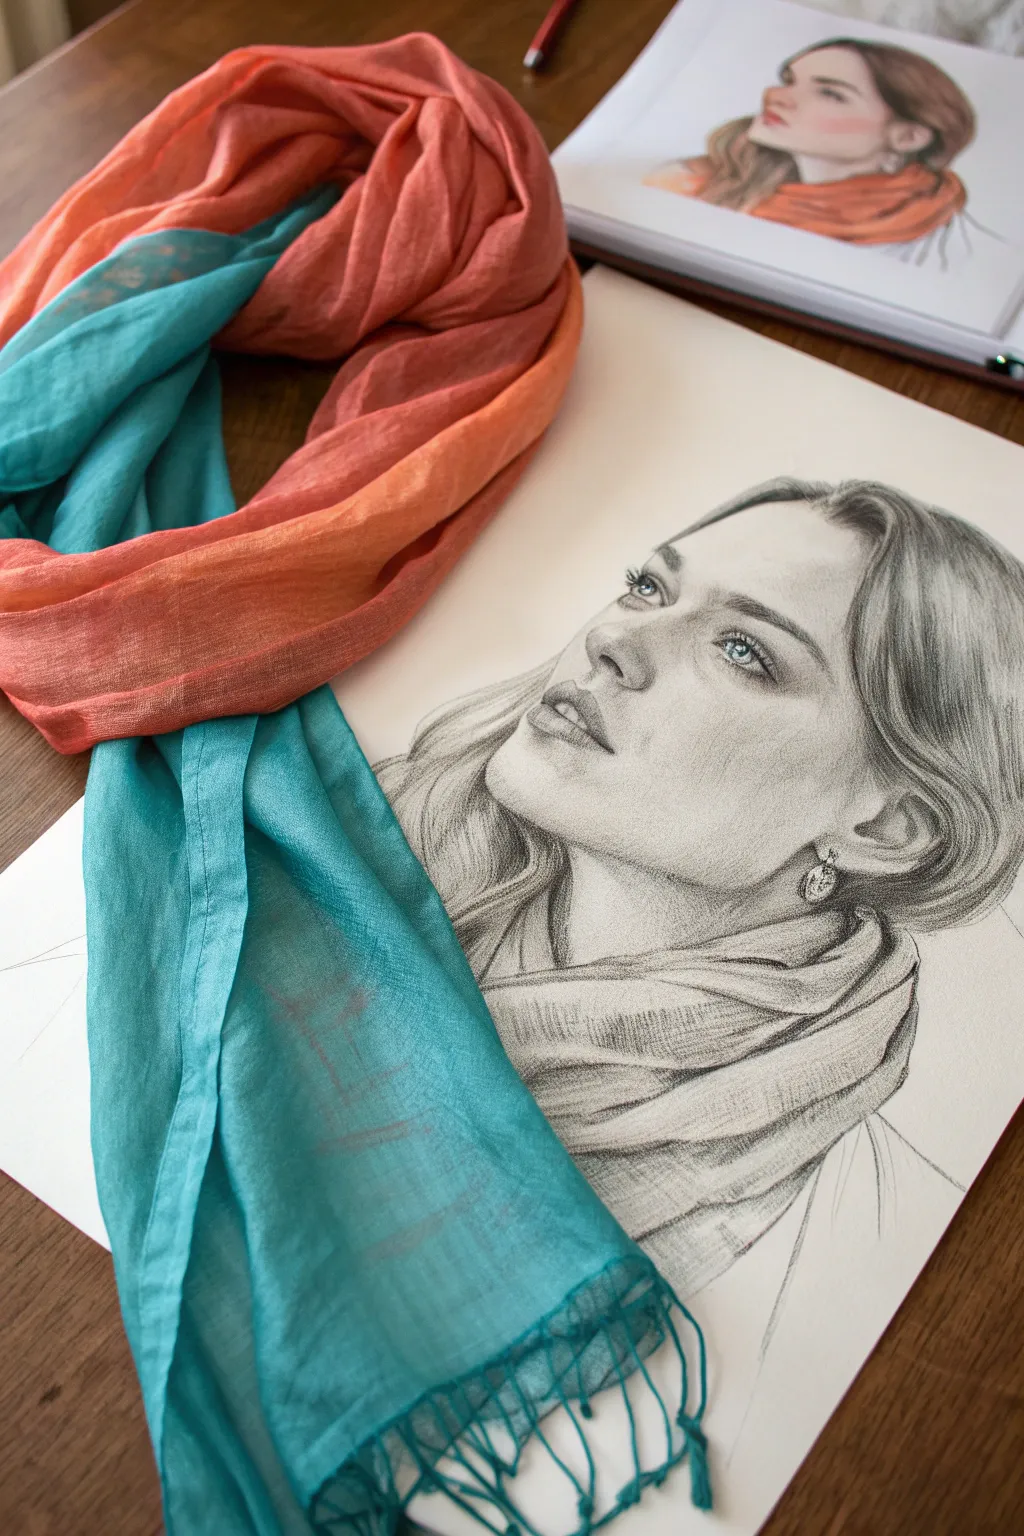
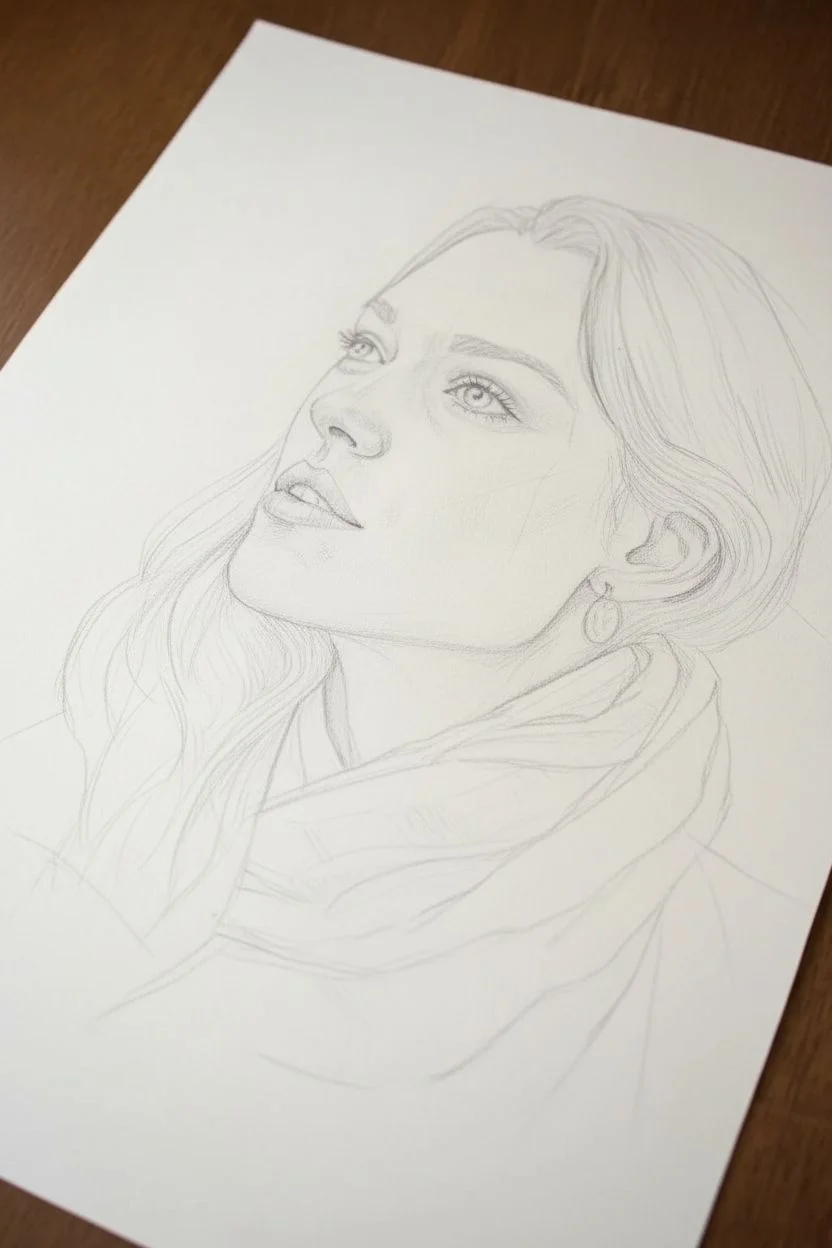
This evocative pencil drawing features a woman gazing upwards, partially framed by a textured scarf that adds softness to the composition. The interplay between the structured facial features and the flowing fabric creates a dynamic yet gentle portrait study.
Detailed Instructions
Materials
- Smooth bristol or drawing paper (A4 or A3)
- Graphite pencils (HB, 2B, 4B, 6B)
- Mechanical pencil (0.5mm HB) or very sharp H pencil
- Kneaded eraser
- Blending stumps (tortillons)
- Tissues or chamois cloth for soft blending
- Reference photo of a face with fabric (or the provided image)
Step 1: Initial Sketching
-
Establish the Head Angle:
Start with an HB pencil to lightly block in the oval of the head. Since the subject is looking up and away, tilt the axis line diagonally to guide the placement of features. -
Map Facial Features:
Using light guidelines, mark the position of the eyes, nose, and mouth. Notice the perspective; the eye further away will appear slightly smaller and foreshortened. -
Outline the Scarf Volume:
Loosely sketch the masses of the scarf around the neck. Focus on the large shapes and folds rather than individual threads, ensuring it wraps naturally around the form. -
Refine the Outline:
Go over your sketch with a mechanical pencil or sharp HB to define the contours of the jawline, nose bridge, and the wavy hairline. Keep lines delicate to prepare for shading.
Step 2: Shading the Face
-
Initial Eye Detailing:
Switch to a 2B pencil to darken the pupils and the upper lash line. Leave tiny white shapes for the catchlights in the eyes to give them life immediately. -
Soft Skin Tones:
Using an HB pencil held at a low angle, lightly shade the shadow areas: under the brow bone, the side of the nose, and beneath the chin. Use a tissue to smudge these into a smooth, even tone. -
Deepening Shadows:
Layer 4B graphite into the darker recesses, such as the nostrils and the corners of the mouth. Blend gently with a stump to refrain from harsh lines. -
Sculpting the Lips:
Shade the upper lip darker than the lower lip. Add subtle vertical strokes on the lower lip to suggest texture, then lift a small highlight in the center with a kneaded eraser. -
Refining the Eyes:
Add the iris texture with sharp, radiating lines. Use a 4B for the eyelashes, flicking the pencil outward for a natural taper. I prefer to do this slowly to avoid looking clustered.
Smudge Prevention
Place a scrap piece of paper under your drawing hand. This acts as a barrier, preventing your natural skin oils from smearing the graphite you’ve already laid down.
Step 3: Hair and Fabric Texture
-
Blocking in Hair:
Draw the hair in large locks first. Use long, flowing strokes with a 2B pencil that follow the direction of hair growth, leaving gaps for highlights. -
Darkening Hair Depth:
Use a 6B pencil to darken the areas where hair tucks behind the ear or under other layers. This creates volume and separation between the strands. -
Scarf Folds Formation:
Return to the scarf. Use the side of a 2B pencil to create broad shading strokes that define the valleys of the folds. -
Cross-Hatching Texture:
On the fabric, overlay your shading with loose, diagonal cross-hatching to simulate the weave of the material. This contrasts nicely with the smooth skin. -
Deepest Fabric Shadows:
Use your darkest pencil (6B) in the deepest crevices of the scarf folds to make it feel heavy and three-dimensional. -
Edge Control:
Soften the edges where the scarf meets the skin with a blending stump so the transition isn’t too abrupt, creating that ‘soft edge’ look.
Fabric Realism
Don’t outline every fold with a hard line. Instead, define folds purely through the contrast of light and shadow shapes for a softer, more realistic fabric look.
Step 4: Final Touches
-
Highlight Retrieval:
Take the kneaded eraser and lift out bright spots on the tip of the nose, the forehead, the cheekbone, and the highest points of the scarf folds. -
Jewelry Detail:
If including the earring, outline it crisply and add high-contrast shading to mimic the metallic shine. -
Final Contrast Check:
Step back and assess your values. Darken the pupils and deepest shadows one last time to ensure the drawing has a full range of tones.
Enjoy the process of watching a personality emerge from the paper as you refine the details


Have a question or want to share your own experience? I'd love to hear from you in the comments below!