
Whether you are designing a cover page for your planner or teaching a lesson on perspective, capturing the academic aesthetic offers endless creative possibilities. Let’s explore a collection of themes ranging from nostalgic classroom supplies to technical sketches of school buildings that will spark your inner student’s imagination.
The Classic Yellow School Bus
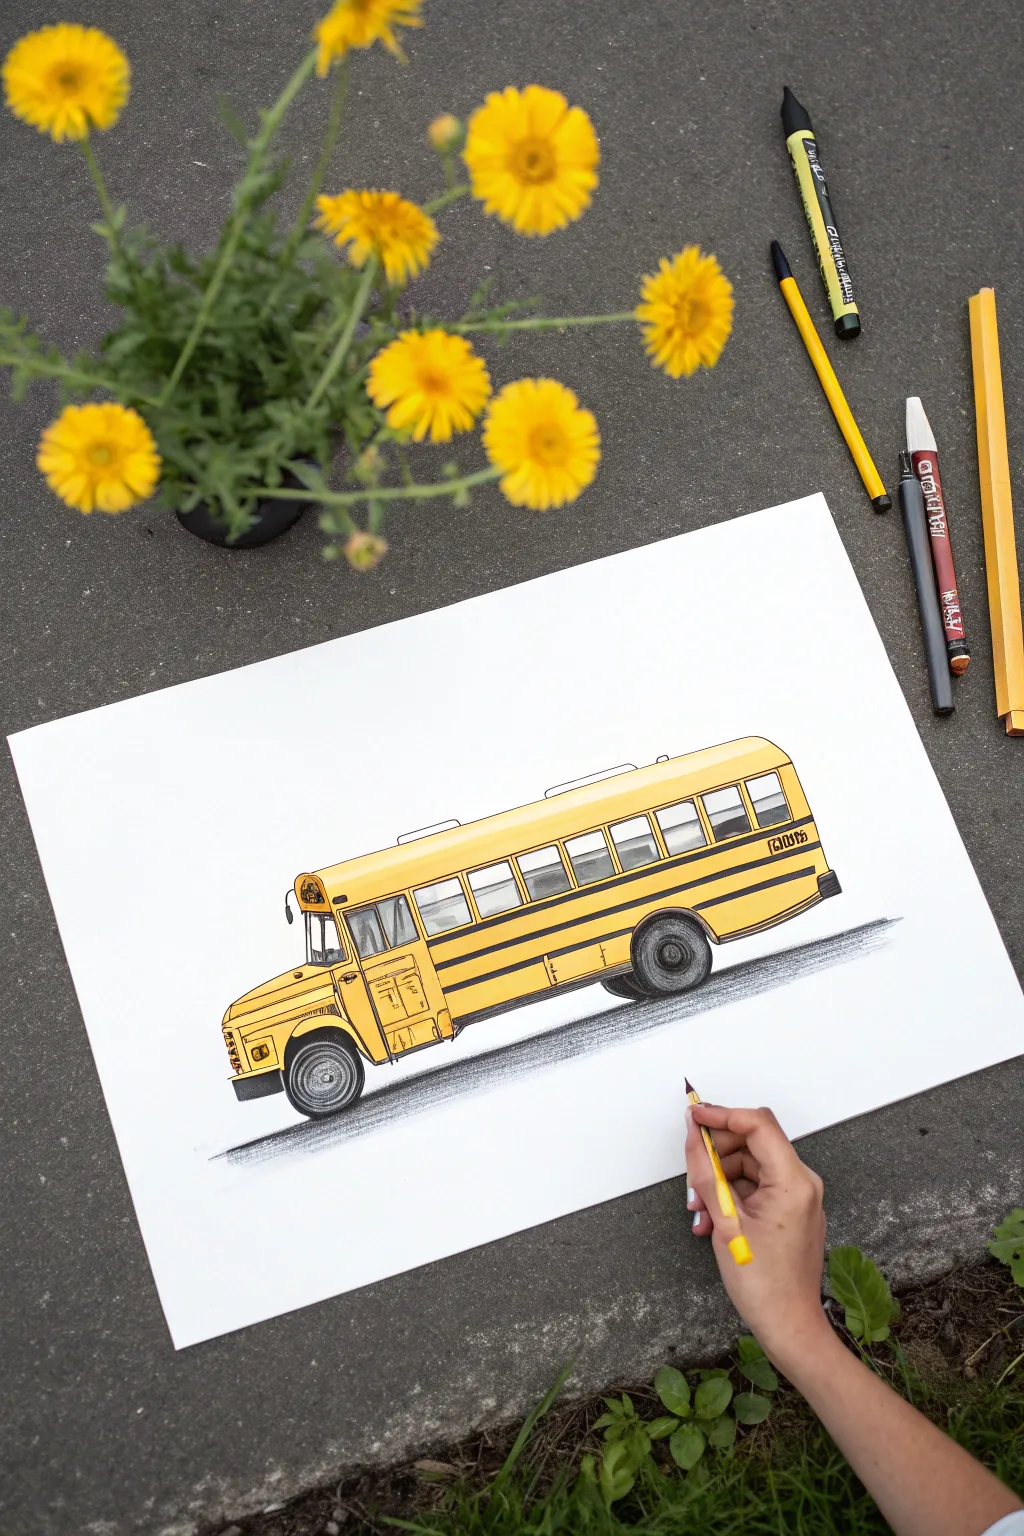
Capture the nostalgia of the daily commute with this crisp illustration of a classic yellow school bus. Using a mix of markers and pencils creates a vibrant look with varying textures that brings the vehicle to life.
How-To Guide
Materials
- Heavyweight drawing paper
- HB graphite pencil
- Eraser
- Ruler
- Fine liner pens (Black, 0.3mm and 0.5mm)
- Alcohol markers (Golden Yellow, Cool Grey)
- Colored pencils (Orange, Black, Dark Grey)
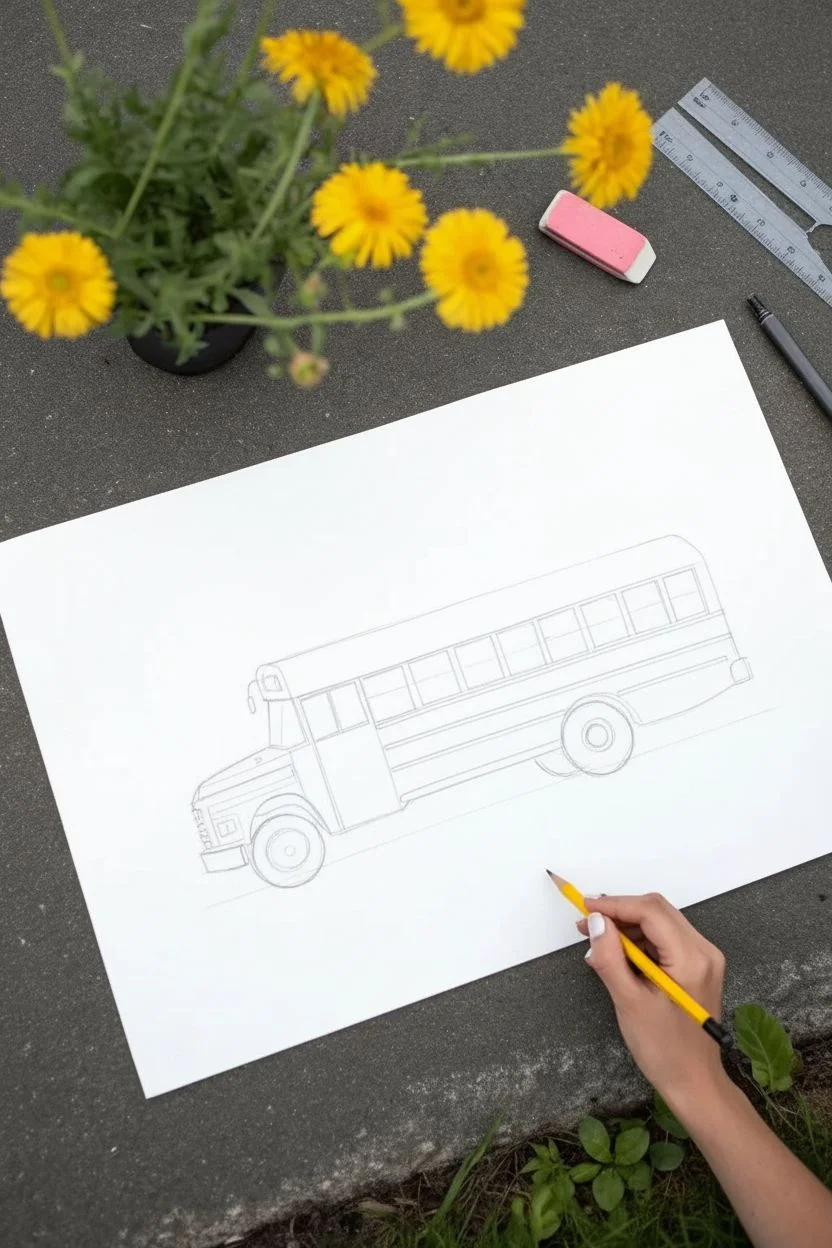
Step 1: The Framework
-
Draft the body shape:
Using your ruler and pencil, draw a long horizontal rectangle for the main passenger section of the bus. -
Add the engine nose:
Attached to the front left of your rectangle, sketch a smaller, slightly lower block shape for the hood and front grille area. -
Define the wheel wells:
Erase two semicircles at the bottom of the structure—one near the back and one under the front cab area—to create space for the tires. -
Sketch the wheels:
Draw circles inside the wheel wells for the tires, adding smaller concentric circles inside for the metal rims. -
Mark the perspective:
Slightly angle the front bumper and the grill lines to give the bus a 3/4 view, making it look 3-dimensional rather than flat.
Clean Lines Pro Tip
When inking long straight lines like the roof or stripes, move your entire arm from the shoulder, not just your wrist, to keep the line steady and avoiding wobbles.
Step 2: Details & Inking
-
Line the windows:
Sketch a long row of evenly spaced squares across the upper side of the bus body, plus the angled windshield at the front. -
Add the rub rails:
Use your ruler to draw three parallel horizontal stripes running the length of the bus body underneath the windows. -
Refine the doors:
Detail the folding entry door on the side right behind the front wheel, including the glass panels within it. -
Ink the outline:
Trace over your exterior pencil lines with a 0.5mm black fine liner to create a bold outer shape. -
Ink internal details:
Switch to a thinner 0.3mm pen to ink the windows, door hinges, and engine vents. I prefer gently erasing the pencil sketch once the ink is totally dry to avoid smudges.
Level Up: Customization
Use a white gel pen to write ‘SCHOOL BUS’ on the top header or add your own town’s name on the side panel for a personalized touch.
Step 3: Color & Shadow
-
Apply base color:
Fill in the entire body and hood with a golden yellow alcohol marker, carefully avoiding the stripes, windows, and tires. -
Color the stripes:
Fill in the horizontal rub rails and the bumper details with a dense black marker or colored pencil. -
Define the tires:
Color the rubber tires dark grey or black, leaving the inner rims ligher to suggest metal. -
Add warmth:
Lightly feature an orange colored pencil over the bottom half of the yellow sections to create a gradient and add dimension. -
Shade the rims:
Use a grey marker to color the wheel hubs, leaving tiny spots of white paper showing to act as metallic highlights. -
Create window depth:
Lightly shade the windows with cool grey, keeping the tops lighter to simulate sky reflections. -
Ground the bus:
Draw a cast shadow on the road beneath the bus using the side of a graphite pencil. -
Texture the shadow:
Extend the shadow horizontally with long, swift pencil strokes to mimic the texture of asphalt as shown in the reference.
Now you have a classic piece of school transportation ready to roll onto your portfolio page.


The Little Red Schoolhouse Icon
Capture the charm of a bygone era with this precise yet whimsical architectural drawing. Using clean ink lines and selective color accentuates the iconic bell tower and weatherboard siding, making a perfect portfolio piece or history project cover.
How-To Guide
Materials
- Smooth heavyweight drawing paper or Bristol board
- HB graphite pencil
- High-quality eraser
- Ruler (clear plastic preferred)
- Fine liner pens (sizes 0.1mm, 0.3mm, and 0.5mm)
- Colored pencils (Rust Red, Warm Grey, Tan, Dark Green)
Step 1: Constructing the Framework
-
Establish the corner:
Using your specific pencil and a ruler, draw a vertical line slightly to the left of the page center to act as the main front corner of the schoolhouse. -
Perspective lines:
Draw angled lines extending from the top and bottom of your vertical line towards invisible vanishing points; the angle on the right side should be flatter to show the long side of the building. -
Roof pitch:
Create a triangle on top of the front-facing wall for the roof gable, ensuring the peak is centered relative to the width of that wall. -
Bell tower base:
Sketch a square base sitting squarely on the roof ridge, just behind the front gable triangle. -
Tower details:
Add the belfry columns and a small, steeped pyramid roof on top, topping it off with a delicate cross or weather vane line.
Siding Secrets
To prevent the siding from looking like a prison uniform, vary your line weight. Press lightly in the middle of the wall and firm up the pressure near the corners.
Step 2: Features and Inking
-
Placement of openings:
Sketch the double doors centered on the front wall, and place regular rectangular windows along the side wall, keeping their tops aligned. -
Adding texture guides:
Lightly rule horizontal lines across the walls to represent the siding boards, spacing them evenly from the ground up to the eaves. -
Main outlines:
Switch to a 0.5mm fine liner to ink the main silhouette of the building and the roof edges, confident in your strokes. -
Detail work:
Use a finer 0.1mm or 0.3mm pen for the windows, door panels, and the decorative vents in the bell tower. -
Inking the siding:
Go over your horizontal pencil lines with the 0.1mm pen; I like to break the lines occasionally rather than drawing them solid edge-to-edge for a weathered look. -
Roof texture:
Draw very fine vertical lines or hatching on the roof surfaces to suggest shingles or metal seam roofing. -
Clean up:
Once the ink is completely dry to the touch, gently erase all underlying pencil guidelines.
Step 3: Color and Finish
-
Roof coloring:
Use a rust-red or terracotta colored pencil to fill in the roof areas, using vertical strokes that follow the slope of the roof. -
Door details:
Lightly shade the front doors with a tan or light brown pencil, pressing slightly harder at the edges for depth. -
Window depth:
Use a dark warm grey or black pencil to fill the window panes, leaving tiny slivers of white paper to mimic glass reflection. -
Grounding vegetation:
Sketch small tufts of grass or shrubs at the base of the foundation using reddish-brown and green pencils to ground the building. -
Final signature:
Add a small, loose shadow underneath the building with cool grey to anchor it to the page.
Smudge Alert
Fine liners can smear easily against a ruler. To fix this, stick a penny or thick tape to the underside of your ruler to raise the edge slightly off the paper surface.
Now you have a timeless architectural illustration ready to display


Gym Class Sneakers and Whistle


Capture the nostalgic vibe of gym class with this realistic graphite study of canvas high-tops and a vintage whistle charm. This project focuses on texture, fabric folds, and metallic reflections to bring simple school gear to life on the page.
Step-by-Step Tutorial
Materials
- Sketchbook or drawing paper (medium tooth)
- Graphite pencils (HB, 2B, and 4B)
- Kneaded eraser
- Pencil sharpener
- Blending stump (optional)
Step 1: Laying the Foundation
-
Block in the shapes:
Start with your HB pencil and lightly sketch two large, rounded rectangular forms to establish the footprint of the sneakers. Position one slightly overlapping the other. -
Define the soles:
Draw a curved line roughly an inch up from the bottom of each shape to separate the rubber sole from the canvas upper. -
Shape the uppers:
Sketch the ankle openings and the tongue of the shoes. Since these are high-tops, extend the fabric shape upwards, keeping the lines slightly relaxed to mimic soft canvas. -
Place the whistle:
Above the shoes, lightly sketch a small circle and a connecting chain loop to mark where the whistle or stopwatch charm will sit.
Flat looking laces?
Ensure you shade directly *underneath* the laces where they rest on the tongue. This cast shadow creates the illusion of 3D lift.
Step 2: Drafting Details
-
Map the eyelets:
Draw small circles running in parallel lines up the center of the canvas area. These will be the metal grommets for the laces. -
Flow the laces:
Draw the laces winding through the eyelets. Instead of stiff lines, use flowing, ribbon-like strokes that loop and twist to show gravity. -
Add thickness:
Go back over the single lace lines and add a second parallel line to give the laces width and volume. -
Rubber toe cap:
Define the signature rounded rubber toe cap at the front of each shoe, ensuring the curve is smooth. -
Stitching lines:
Lightly trace dashed lines along the seams of the canvas to indicate stitching. I like to keep these faint at first so they don’t overpower the drawing. -
Whistle details:
Add the inner concentric circles and gear-like teeth to the whistle charm to give it a mechanical look.
Step 3: Shading and Texture
-
Base tone:
Switch to a 2B pencil and apply a light, even layer of shading to the canvas parts of the shoe, leaving the rubber sole and toe cap white. -
Canvas texture:
Use cross-hatching (intersecting diagonal lines) on the shaded canvas areas to simulate the woven fabric texture. -
Deepen the shadows:
Use a 4B pencil to darken the inside opening of the shoe and the areas where the tongue sits deep beneath the laces. -
Lace definition:
Add small cast shadows underneath where the laces cross over each other. This pushes the bottom lace down and pops the top lace forward. -
Rubber shading:
Lightly shade the rounded sides of the rubber soles, keeping the top of the toe cap bright to show it is a rounded, reflective surface. -
Whistle metal:
Use high-contrast shading on the whistle charm. Leave sharp white areas for highlights and use your darker pencil for the recessed grooves to create a metallic shine. -
Grounding shadow:
Add a horizontal shadow underneath the shoes and the charm to anchor them to the surface so they don’t look like they are floating. -
Highlights and cleanup:
Take your kneaded eraser and tap it on the toe caps and eyelets to lift off graphite and create bright highlights, then erase any stray sketch lines.
Make it yours
Customize the canvas area by drawing a pattern, a logo, or even small doodles on the shoe fabric to mimic personalized sneakers.
Now you have a stylish, hyper-realistic sketch that perfectly captures the laid-back energy of gym class


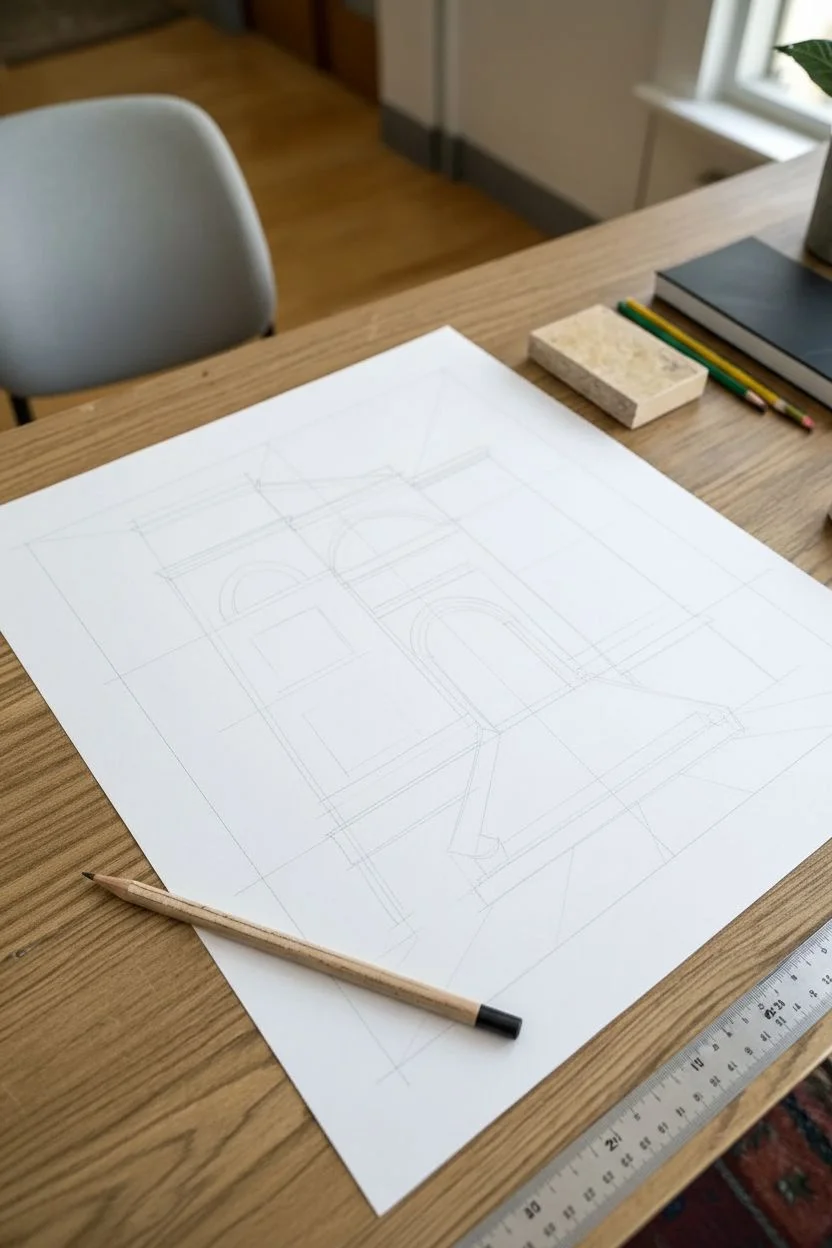
School Building Facade in Perspective
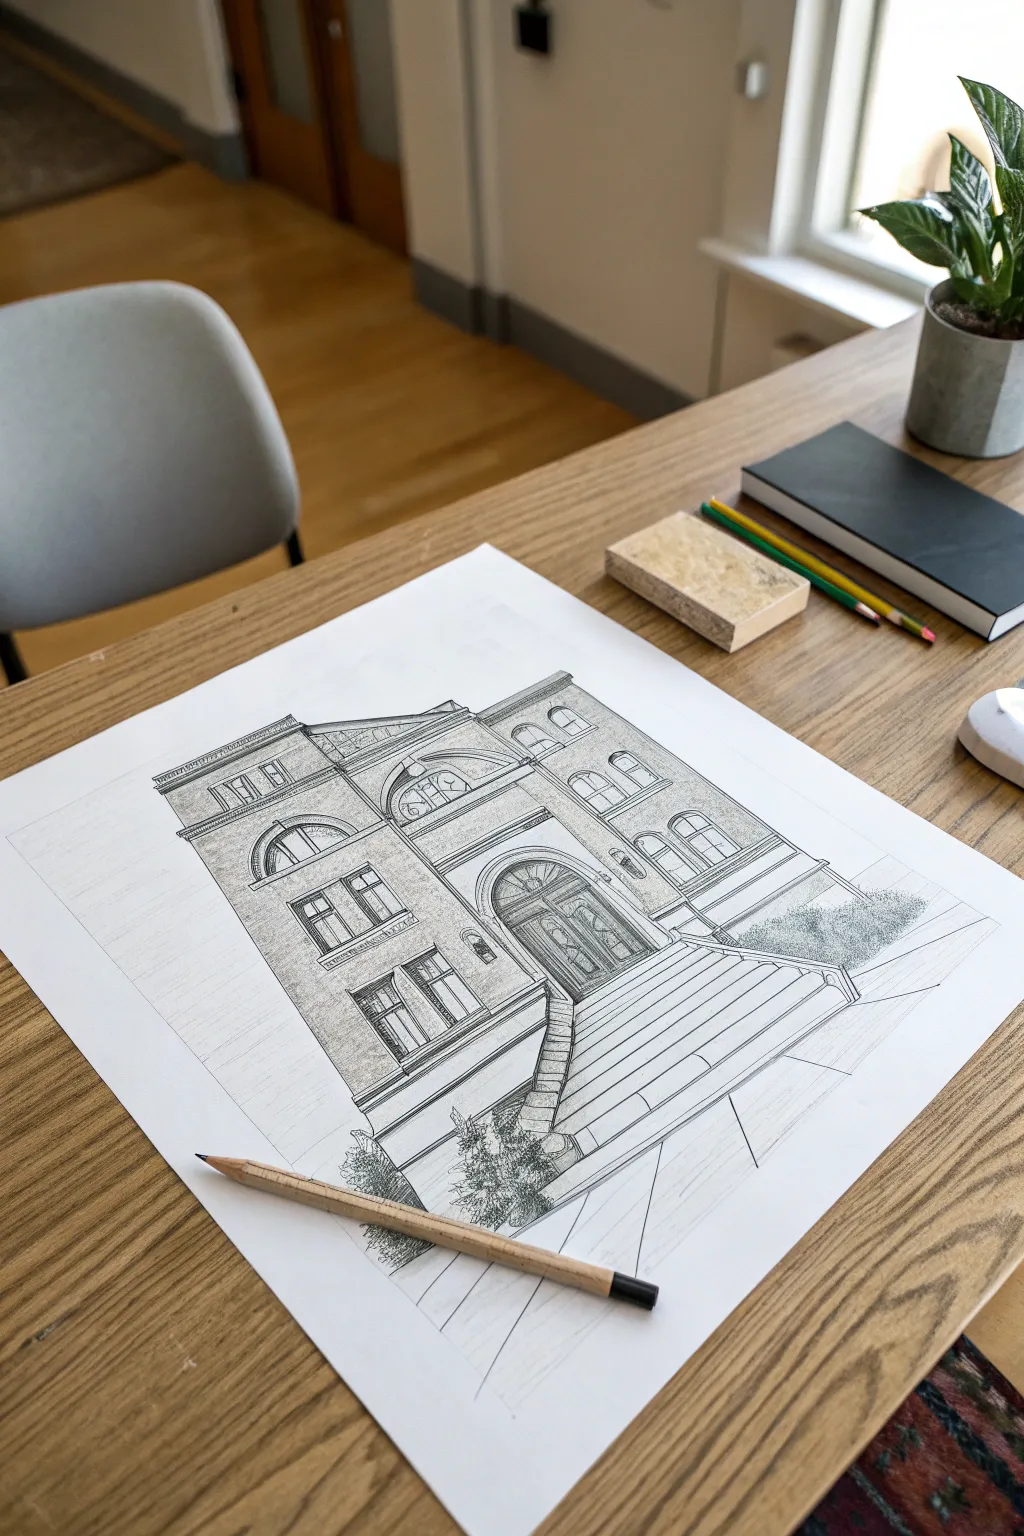
Master the art of three-point perspective with this detailed architectural drawing showing a grandiose school entrance. This project creates a stunning, professional-looking illustration that captures the height and stature of a classic building.
How-To Guide
Materials
- Heavyweight drawing paper (A3 or A4)
- Hard pencil (2H) for guidelines
- Soft pencil (2B or 4B) for shading
- 45cm ruler or straight edge
- Fine liner pens (0.1mm and 0.5mm)
- Kneaded eraser
Step 1: Setting the Perspective
-
Establish the horizon:
Draw a faint horizontal line very low on your page, almost at the bottom edge. This low angle will make the building look towering and impressive. -
Mark vertical convergence:
Locate a vanishing point high off the top of your paper (mentally or with a light mark). Draw three vertical lines that tilt slightly inward towards the top to create the building’s main segments. -
Define the sides:
Draw the roofline and base lines angling sharply downward toward vanishing points on the far left and right. This creates a dynamic 3-point perspective box. -
Block in floors:
Lightly sketch horizontal guidelines to divide the facade into the ground floor, main floor, and top cornice, following the angles of your roofline.
Angle Check
If the building looks warped, place small pieces of masking tape on your desk far outside the paper to mark stationary vanishing points. Align your ruler to these fixed spots for every angled line.
Step 2: Architectural Features
-
Sketch the entrance:
In the center vertical section, sketch a large arched doorway. Add a triangular pediment above the secondary floor windows to emphasize the center column. -
Build the stairs:
Draw the grand staircase as a widening trapezoid at the base. Add horizontal lines for individual steps, wider at the bottom and narrower near the door. -
Draft window placements:
Map out rectangular windows on the side wings. Keep the lines vertical but slanted slightly inward to match your main vertical guides. -
Add arches and rounded details:
Sketch semi-circles inside the top details of the windows and the main entrance transom. Use a light hand here so adjustments are easy. -
Detail the cornices:
Thicken the roofline and the bands between floors to represent protruding stone ledges or cornices. I find it helpful to double these lines to show thickness.
Level Up
Personalize the architecture by designing a unique crest or school name inside the semi-circle arch above the main door instead of using generic window pane shapes.
Step 3: Inking and Outline
-
Ink structural lines:
Using a 0.5mm pen and your ruler, carefully trace the main straight lines of the walls, steps, and roof. Lift the pen at intersections for a clean look. -
Ink detailed curves:
Switch to a 0.1mm pen to trace the window arches and the intricate framing of the front door freehand for a slightly more organic feel. -
Erase guidelines:
Once the ink is completely dry, gently erase all pencil guidelines with a kneaded eraser to reveal the clean structure.
Step 4: Texture and Shading
-
Shade window recesses:
Use the 0.1mm pen to hatch diagonal lines inside the window panes. Make the top corners of the windows darker to suggest glass reflecting a shadow. -
Add brick texture:
Using the soft pencil (2B), lightly shade the walls. Add tiny, sporadic tick marks with your fine pen to simulate brickwork without drawing every single brick. -
Deepen shadows:
Go over the areas under the cornices and inside the door arch with the 4B pencil to add deep contrast and weight to the stone. -
Add landscaping:
Use a scribbling motion (scumbling) with the 0.1mm pen at the base sides of the stairs to create the texture of bushes and foliage. -
Ground the building:
Draw a few angled lines widening toward the bottom of the page to represent the sidewalk pavement.
Step back and admire the impressive depth and academic atmosphere of your finished architectural drawing
BRUSH GUIDE
The Right Brush for Every Stroke
From clean lines to bold texture — master brush choice, stroke control, and essential techniques.
Explore the Full Guide
Op-Art 3D Segmented Hand
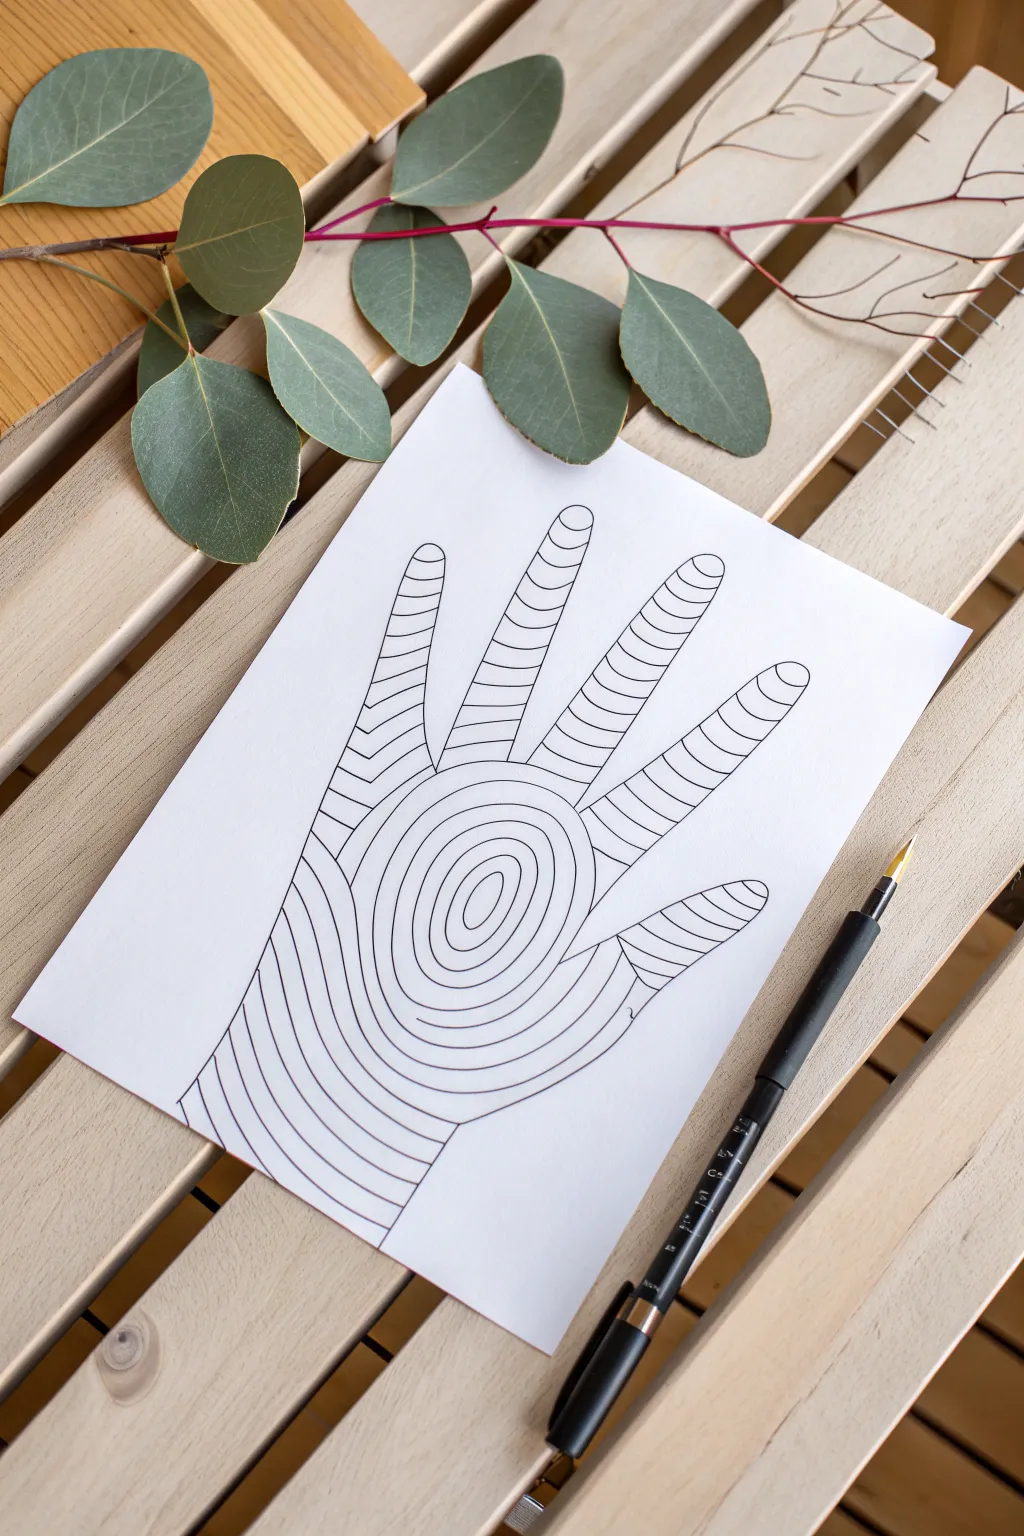
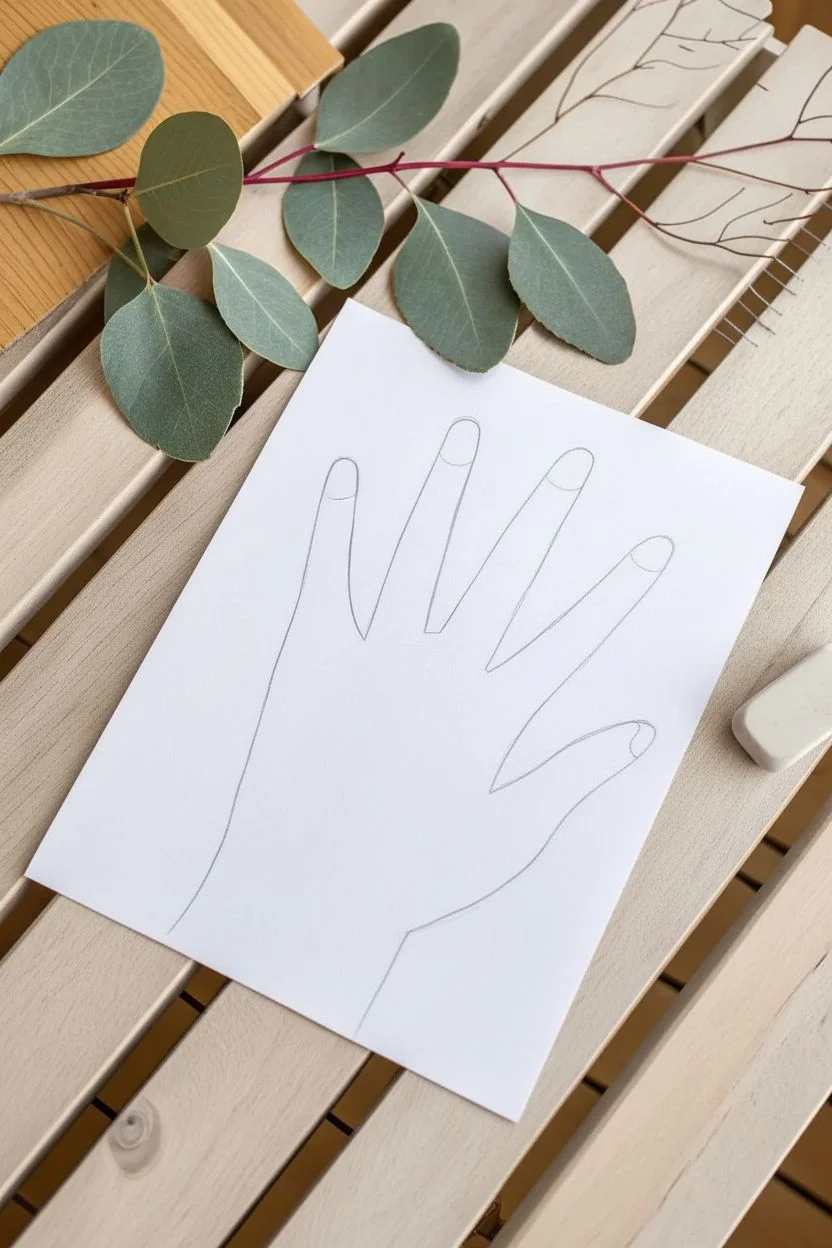
Transform a simple hand outline into a mesmerizing 3D landscape using nothing but curved lines. This Op-Art project makes your hand look like a topographical map or a volumetric sculpture popping right off the page.
Step-by-Step
Materials
- White drawing paper (A4 or Letter size)
- HB Pencil
- Soft eraser
- Black fine liner pen (approximately 0.5mm)
- Flat work surface
Step 1: Tracing the Silhouette
-
Position your hand:
Place your non-dominant hand flat in the center of the paper, spreading your fingers slightly so there is clear space between each one. -
Trace the outline:
Using your HB pencil, lightly trace roughly around your hand and fingers. Keep the pressure very light so these lines are easy to erase later. -
Close the shape:
Remove your hand from the paper and draw a curved line at the bottom to close off the wrist section. -
Refine the sketch:
Smooth out any bumpy areas from the tracing process to ensure you have a clean, flowing silhouette to work with.
Curve Control
The deeper the curve of your lines, the more ’round’ and 3D the fingers will appear. Flatter lines dampen the effect, while high arches maximize the volume.
Step 2: Mapping the Palm
-
Start the epicenter:
Locate the visual center of the palm area. Draw a small, vertical oval shape—this acts as the ‘bullseye’ for your pattern. -
Expand the rings:
Draw a slightly larger oval ring around the first one, maintaining an even gap between the lines. -
Continue the ripple:
Keep drawing concentric rings radiating outward from the center. Imagine ripples in a pond. -
Handle the edges:
As the rings get large enough to hit the side of the hand outline, stop drawing the line exactly at the perimeter edge. -
Fill the lower palm:
Continue creating these curved sections down toward the wrist. They should look like segments of large circles or contour lines on a map.
Step 3: Contouring the Fingers
-
Start the thumb:
Move to the thumb. Draw curved lines (arches) across the width of the thumb, stacking them from the base to the tip. -
Create volume:
Ensure each line curves upward like a rainbow. This curvature is crucial because it tricks the eye into seeing a 3D cylindrical shape. -
Outline the fingers:
Apply this same technique to the remaining four fingers, drawing stacked arches from the knuckles up to the fingertips. -
Check spacing:
I like to pause here and check that the distance between lines on the fingers roughly matches the spacing used in the palm for a cohesive look.
Color Pop
Make it psychedelic! Instead of black ink, alternate between two or three bright highlighters for the lines to create a vibrating color effect.
Step 4: Inking the Illusion
-
Outline in ink:
Switch to your black fine liner. Carefully trace the external outline of the entire hand first to define the boundary. -
Trace the palm:
Go over your pencil lines in the palm area. Try to keep your hand steady for smooth, confident curves. -
Trace the fingers:
Ink the curved lines going up each finger. I find rotating the paper actually helps my wrist create smoother arches during this step. -
Dry and erase:
Allow the ink to sit for a few minutes to ensure it is completely set. Then, gently erase all visible pencil marks to leave a crisp black and white design.
Now you have a striking piece of optical art that looks like it’s rising right off your desk.
Creative Color Wheel Umbrella

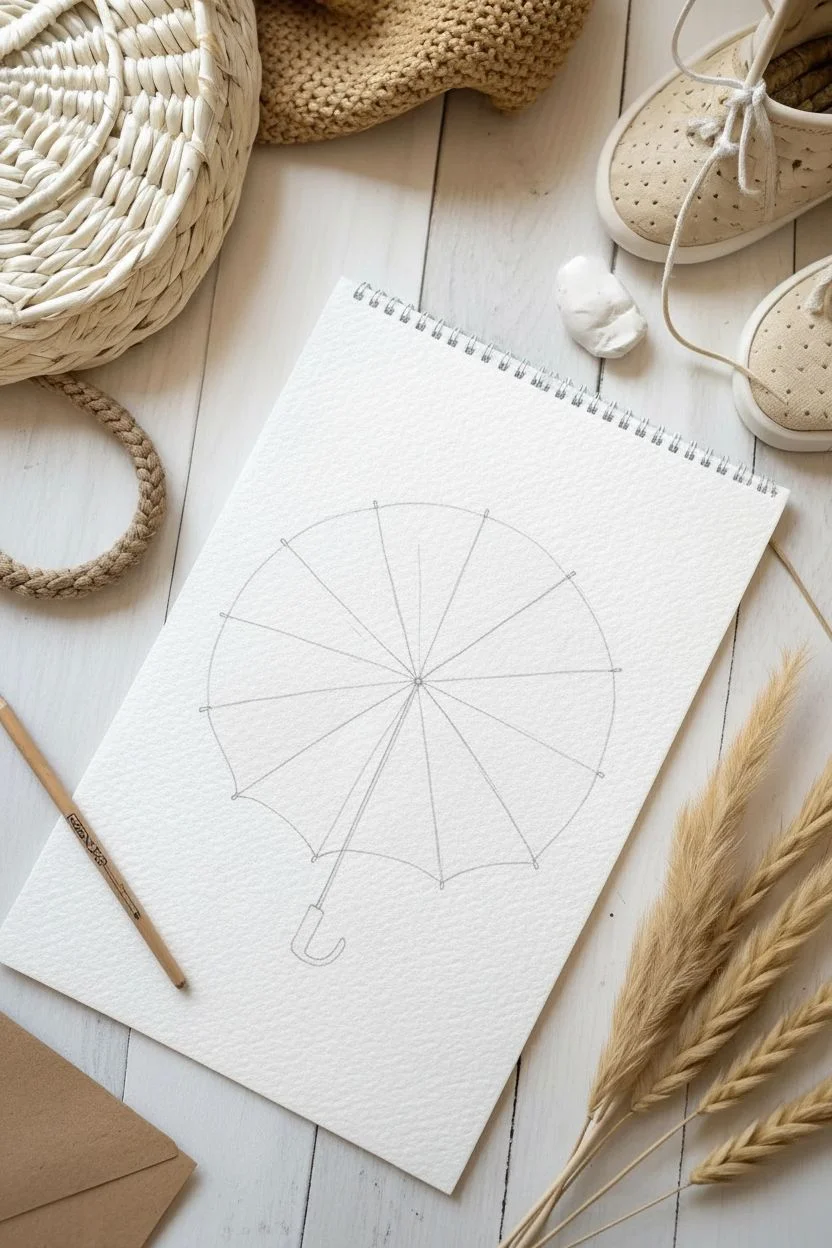
Capture the joy of a rainy day with this vibrant watercolor project that doubles as a study in color theory. You will arrange a spectrum of hues into a playful umbrella shape, practicing precise blending while creating a piece that feels both structured and artistic.
How-To Guide
Materials
- Cold-press watercolor paper (300gsm)
- Watercolor paint set
- Round brushes (size 2 and 6)
- HB Pencil and kneadable eraser
- Compass and ruler
- Waterproof fine-liner pen (black, 0.3mm)
- White opacity marker or white gouache
Step 1: Sketching the Framework
-
Draw the perimeter:
Using a compass, draw a light circle in the center of your page to define the overall size of the open umbrella. -
Divide the circle:
Use your ruler to lightly mark the center point, then divide the circle into twelve equal ‘pie slices’ to serve as the umbrella panels. -
Create the canopy edge:
Connect the outer points of your lines with shallow, inward-curving arches to create the scalloped fabric edge of the umbrella. -
Add the hardware:
Sketch a thin shaft extending from the center down through the bottom sections, finishing with a curved ‘J’ handle.
Muddy Colors?
To prevent colors from bleeding into each other, paint every other section first (e.g., Red, Yellow, Blue) and let them dry completely before returning to paint the sections in between.
Step 2: Painting the Spectrum
-
Start with red:
Begin at the 9 o’clock position with a deep crimson red, filling the segment carefully to stay within the lines. -
Transition to orange:
Moving counter-clockwise, mix a red-orange hue for the next panel, keeping the paint slightly translucent to show the paper texture. -
Yellow tones:
Continue around the bottom with pure orange, followed by a warm golden yellow and a bright lemon yellow as you move upward on the right side. -
Green segments:
Blend a soft lime green for the next section, transitioning into a deeper sea-green as you reach the top right quadrants. -
The galaxy slice:
For the deep blue section (around 10 o’clock), use a concentrated indigo or ultramarine to create a ‘night sky’ look, unlike the lighter washes used elsewhere. -
Close the loop:
Finish the circle with a violet-purple wedge connecting back to your starting red segment. -
Handle wash:
Paint a very light, watery grey wash over the handle to give it a metallic feel without making it solid black yet.
Gradient Level-Up
For a 3D effect, deposit more pigment near the center of the umbrella and use clean water to fade the color out toward the scalloped edges.
Step 3: Inking and Effects
-
Dry completely:
Wait until the paper is bone dry; if you touch it and it feels cool, it needs more time. -
Outline the ribs:
Use your waterproof fine-liner to trace the straight lines separating the colors, stopping just short of the center point. -
Define the edges:
Trace the scalloped outer edges with the pen, adding tiny nibs at the points where the ribs meet the fabric. -
Detail the handle:
Outline the handle and shaft with ink, drawing small horizontal lines near the curve for a textured grip look. -
Add splashes:
Load a wet brush with orange or red paint and gently tap it against a finger to flick tiny splatters around the bottom left of the umbrella. -
Galaxy stars:
I like to use a white opacity marker or a dot of white gouache to add tiny stars and constellations specifically on the dark blue ‘galaxy’ segment. -
Final cleanup:
Once the ink is fully set, gently erase any visible pencil marks from your initial sketch.
Now you have a whimsical, rain-ready piece of art that perfectly showcases your color mixing skills.

PENCIL GUIDE
Understanding Pencil Grades from H to B
From first sketch to finished drawing — learn pencil grades, line control, and shading techniques.
Explore the Full Guide
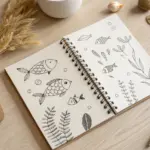
Kawaii Stationery Character Doodles


Brighten up your school notes with this charming set of kawaii-style line drawings featuring a happy moon, a little sun, and a scholarly globe. These simple, expressive characters are perfect for practicing facial proportions and adding flair to plain paper.
Step-by-Step
Materials
- White drawing paper or notebook
- Black fineliner or gel pen (approx. 0.5mm)
- Pencil and eraser for sketching
- Pink or red colored pencil
Step 1: The Happy Moon
-
Outline the shape:
Start by drawing a large, clean circle in the upper center of your page using a pencil. -
Ink the circle:
Trace over your pencil line with the black fineliner. Don’t worry if it’s not perfect; a slightly organic line adds character. -
Draw the eyes:
Place two small, upside-down arches (like rainbows) in the center for the happy, closed eyes. -
Add the smile:
Draw a small, upward-curved U-shape directly between and slightly below the eyes. -
Apply blush:
Using your pink or red pencil, gently color two small solid circles on the cheeks for a rosy look.
Smudge Alert
Wait at least 60 seconds before erasing pencil lines. Fineliner ink stays wet longer than you think, especially on smooth paper!
Step 2: Atmospheric Details
-
Sketch clouds:
To the left and right of the moon, lightly sketch two fluffy cloud shapes. -
Ink the clouds:
Go over the clouds with your pen using connected scalloped lines to create a soft, bumpy texture. -
Add sparkles:
Draw a few four-pointed stars above the moon by crossing two lines, similar to a narrow plus sign.
Step 3: The Little Sun
-
Position the sun:
Below the moon and slightly to the left, draw a much smaller circle. -
Add sunbeams:
Draw short, straight lines radiating outward all around the circumference of the small circle. -
Create the face:
Draw two tiny dots for eyes and a small curved mouth to give the sun a sweet personality. -
Rosy cheeks:
I like to add very faint scribbles of pink on the sun’s cheeks to match the moon.
Stationery Match
Customize your erasers to match! Use a permanent marker to draw simple faces on your own erasers like the ones in the photo.
Step 4: The Scholar’s Globe
-
Draw the globe body:
To the right of the sun, sketch a circle roughly double the size of the sun. -
Add the meridian arm:
Draw a curved line framing the left side of the globe, connecting to the top and bottom poles. -
Construct the stand:
Draw a short stem moving down from the meridian arm, connecting to a flat oval base. -
Map the world:
Draw irregular wavy shapes inside the circle to represent continents. Keep them simple and blob-like. -
Hidden face:
Find an empty space in the ‘ocean’ area of your globe and add two tiny eyes and a mouth. -
Ink and erase:
Trace all your globe lines with the fineliner, then erase the pencil sketches once the ink is dry.
Now you have a whimsical sheet of doodles ready to brighten your school day.


Have a question or want to share your own experience? I'd love to hear from you in the comments below!