If you’re craving duck painting ideas, you’re in the right headspace—ducks are basically built for cute shapes, playful color, and satisfying little details. I pulled together a mix of classic favorites and fresh twists so you can paint ducklings, mallards, and quirky duck characters without overthinking it.
Watercolor Duckling in Soft Washes
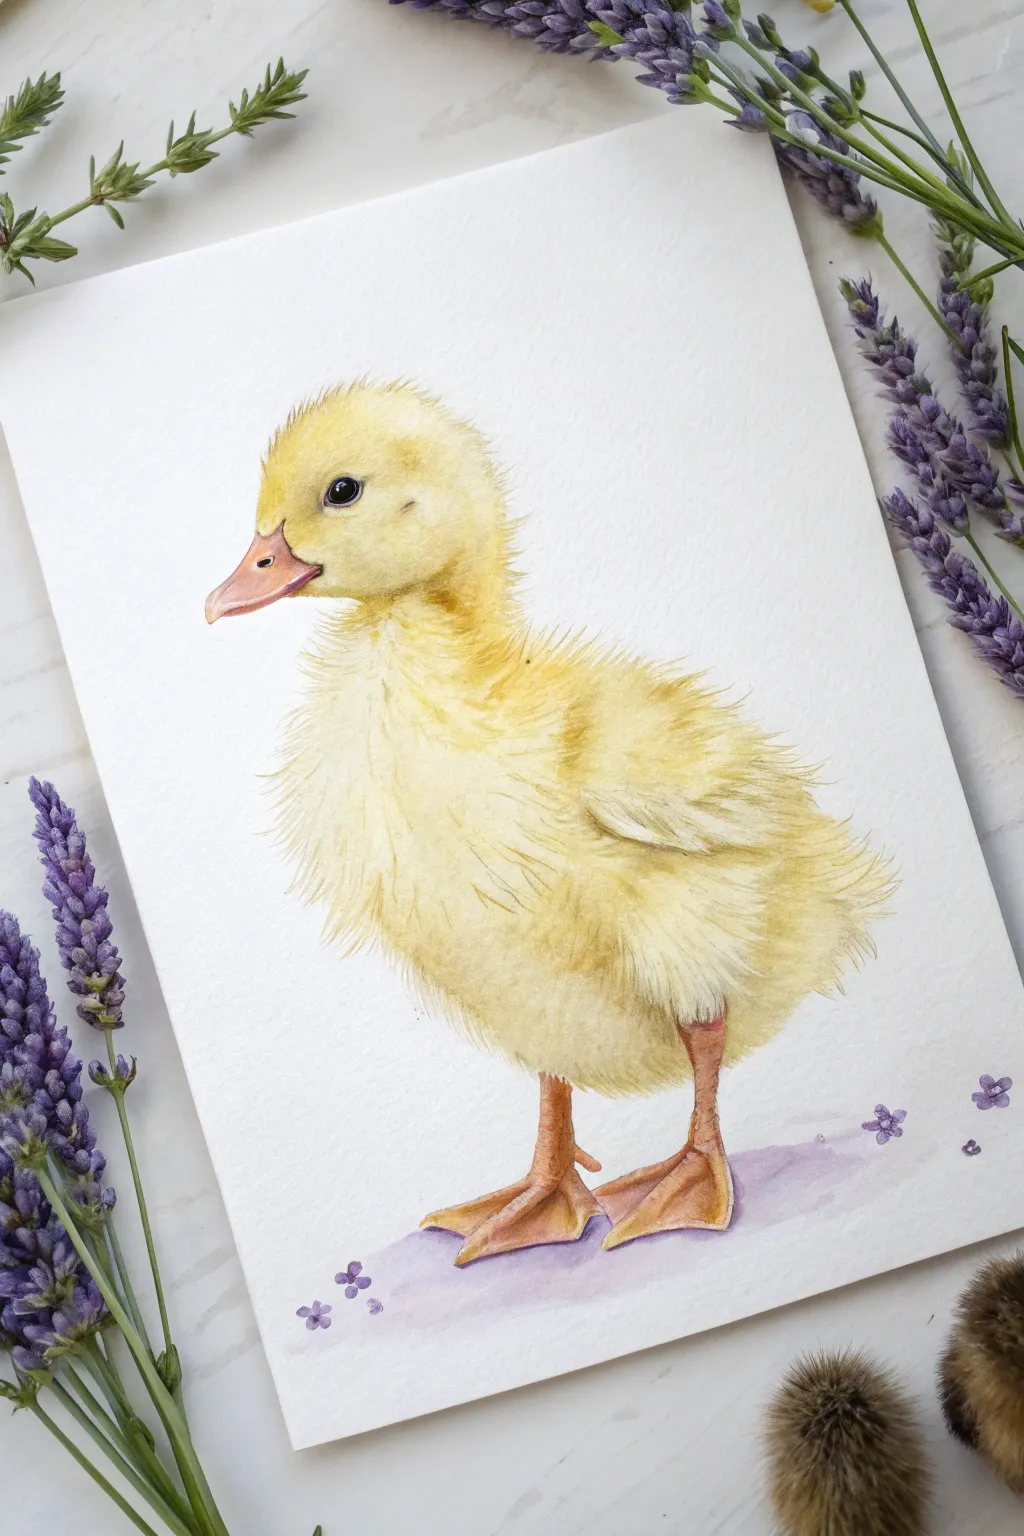
Capture the delicate charm of spring with this watercolor tutorial featuring a fluffy yellow duckling standing amidst scattered petals. Using soft washes and careful layering, you will build up the texture of the downy feathers to create a lifelike and heartwarming classic illustration.
Detailed Instructions
Materials
- Hot press watercolor paper (300 gsm)
- Watercolor paints (Lemon Yellow, Cadmium Yellow, Yellow Ochre, Burnt Sienna, Payne’s Grey, Alizarin Crimson, Violet)
- Round brushes (sizes 2, 4, and 00 for details)
- HB Pencil
- Kneaded eraser
- Palette for mixing
- Two jars of water
- Paper towels
Step 1: Planning and Initial Wash
-
Draft the outline:
Begin with a very light sketch of the duckling’s form using your HB pencil. Focus on the oval shape of the body and the smaller, rounded head. Don’t worry about individual feathers yet; just capture the posture and the placement of the beak and feet. -
Soften the sketch:
Before you pick up a brush, gently roll a kneaded eraser over your drawing. You want the graphite lines to be barely visible so they don’t show through the transparent yellow paint later. -
Apply the first wash:
Mix a very watery puddle of Lemon Yellow. With a size 4 brush, cover the entire body of the duckling, avoiding the beak and the eye area. Keep this layer very pale and even to establish the base light. -
Add warmth while wet:
While the first wash is still damp, drop in touches of Cadmium Yellow on the chest and the top of the head. This wet-on-wet technique creates soft, fuzzy transitions that mimic down.
Fixing “Muddy” Yellows
Yellow gets dirty easily! If your shadows look green or muddy, ensure your water is perfectly clean. Avoid mixing yellow with black; use purple or brown to darken it naturally.
Step 2: Building Texture and Form
-
Define the shadows:
Once the paper is completely dry, mix a little Yellow Ochre with your Lemon Yellow. Use a size 2 brush to paint the shadow areas: under the chin, beneath the small wing, and under the belly. Use short, flickering strokes to suggest fluff rather than hard lines. -
Paint the eye:
Switch to your size 00 brush. Paint the eye using Payne’s Grey (or a thick mix of black). crucially, leave a tiny speck of white paper unpainted for the highlight—this brings the duckling to life. -
Detail the beak:
Mix a soft pinkish-orange using Alizarin Crimson and a touch of Cadmium Yellow. Paint the beak, adding a tiny bit of Violet to the mixture for the nostril and the shadow line where the beak meets the feathers. -
Create feather texture:
Using a slightly drier mix of Yellow Ochre and a hint of Burnt Sienna so it’s not too bright, paint fine, directional brushstrokes all over the body. Follow the curve of the bird’s form, flickering the brush outward at the edges of the breast and tail to create that spiky, downy look. -
Deepen the wing definition:
Darken the area under the small wing flap with a glaze of Burnt Sienna. This separates the wing from the body and adds three-dimensional volume to the fluff.
Step 3: Feet and Finishing Touches
-
Base coat for the feet:
Paint the legs and webbed feet with a mix of Cadmium Yellow and Alizarin Crimson (aiming for a warm orange). Let this dry completely before moving to the next step. -
Shade the webbing:
Mix a darker, brownish-orange using Burnt Sienna. Apply this to the shadowed sides of the legs and between the toes on the webbed feet to show the structure of the bones beneath the skin. -
Refine the edges:
With the size 00 brush and a mix of Yellow Ochre, add extremely fine hairs sticking out around the outline of the head and back. This ‘breaking the edge’ technique is essential for making the subject look soft rather than like a cutout. -
Create the ground shadow:
Mix a very watery wash of Violet. Paint a horizontal puddle underneath the feet to ground the duckling. Keep the edges soft and diffusing outward. -
Add fallen petals:
Using the same violet mix (perhaps slightly more saturated), dab small, five-petaled flower shapes scattered near the feet and on the shadow. These imitate fallen lavender or lilac blossoms. -
Final assessment:
Step back and check your contrast. If the eye needs more definition, darken the pupil. If the yellow looks too flat, add one final glaze of dilute Yellow Ochre to the shadowed side of the body.
Level Up: Botanical Frame
Instead of just scattered petals, paint delicate lavender sprigs rising from the bottom corners to frame the duckling, creating a complete garden scene.
Enjoy the process of watching your little duckling become fluffier with every brushstroke


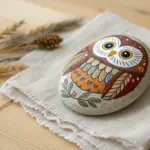
White Domestic Duck With Simple Shading
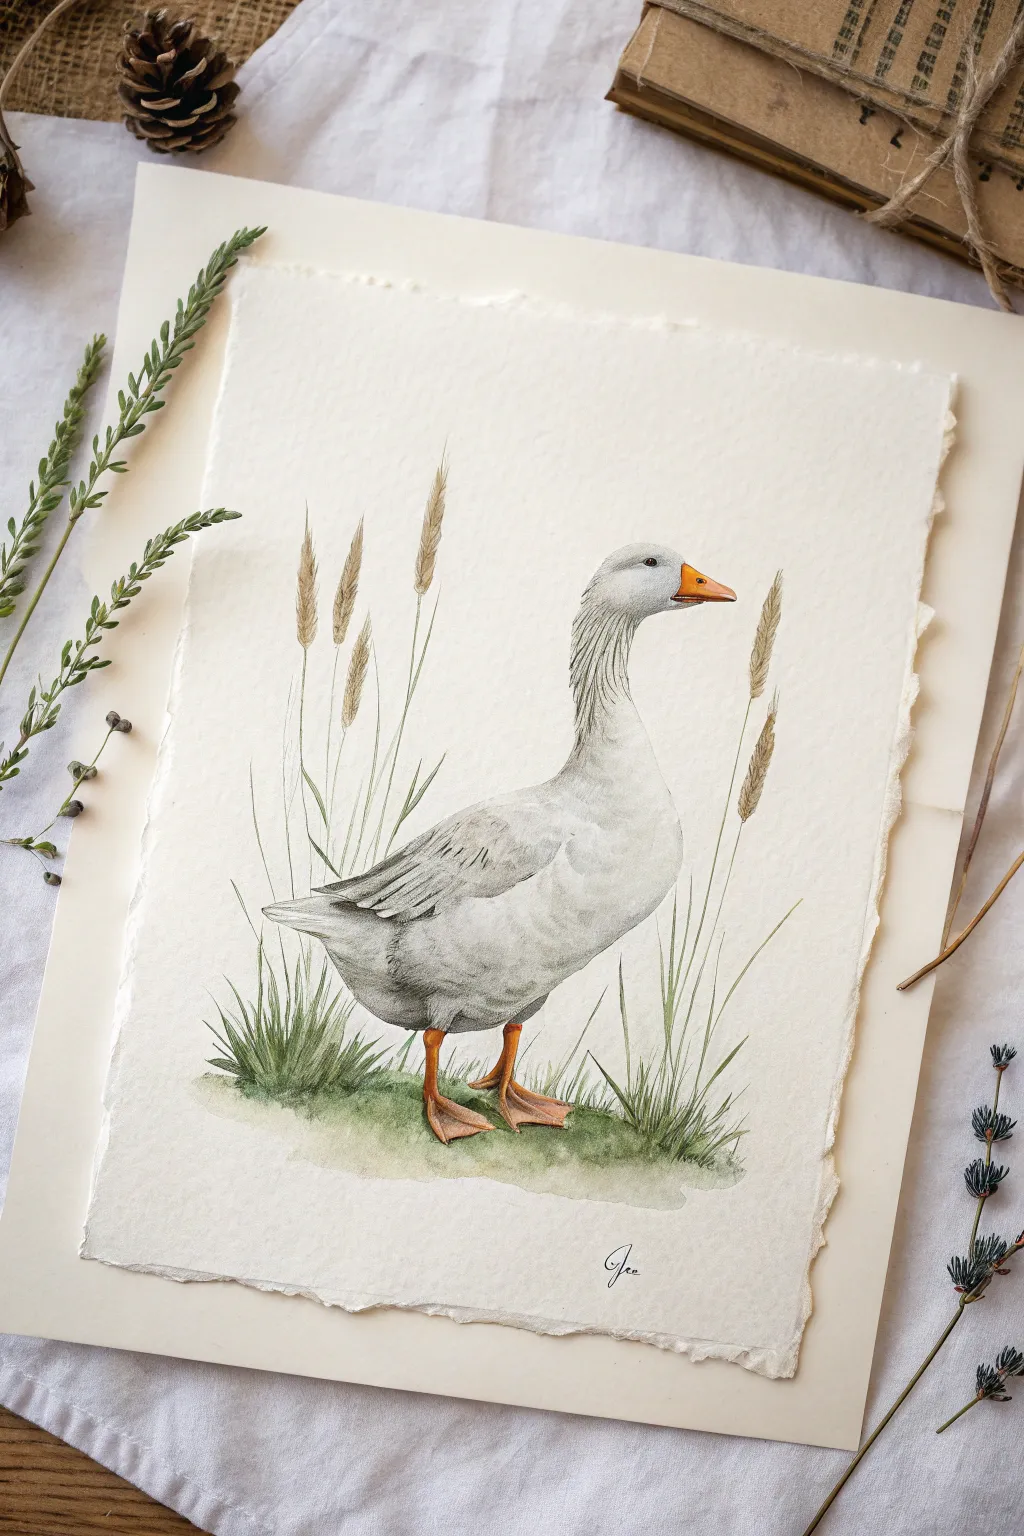
This elegant watercolor study captures the gentle dignity of a white domestic duck standing among tall grasses. With soft gray shading and delicate linework, you’ll create a piece that feels both rustic and refined, perfect for farmhouse-style decor.
Detailed Instructions
Materials
- Cold press watercolor paper (deckled edge optional)
- Watercolor paints (Payne’s Gray, Yellow Ochre, Burnt Sienna, Sap Green, Cadmium Orange)
- Round watercolor brushes (Size 2, 6, and 8)
- Fine liner brush (Size 0 or 00)
- Pencil (HB) and kneadable eraser
- Clean water and mixing palette
- Masking tape
Step 1: Sketching and Initial Wash
-
Light outline:
Begin with a very faint pencil sketch. Draw an oval for the body and a curved neck leading to the head. Map out the triangle of the beak and the positioning of the webbed feet. Keep your graphite light so it doesn’t show through the pale wash later. -
Drawing the environment:
Sketch a few vertical lines to indicate where the tall reeds will go behind the duck, and lightly mark the patches of grass around the feet. No need for detail here; just placeholders. -
First pale wash:
Mix a very watery puddle of diluted Payne’s Gray. It should be almost clear—just a whisper of color. Apply this to the shadowed areas of the duck: under the belly, the back of the neck, and the underside of the tail feathers. Leave the chest and top of the head pure white. -
Softening edges:
Before the gray wash dries completely, take a clean, damp brush and soften the edges where the gray meets the white paper. This creates the illusion of round, soft feathers rather than hard lines.
Step 2: Building Form and Features
-
Beak base:
Mix Cadmium Orange with a tiny touch of Burnt Sienna to tone it down. Paint the beak, leaving a tiny sliver of white paper near the nostril for a highlight. -
Defining the feathers:
Once the first gray wash is bone dry, mix a slightly stronger Payne’s Gray. Using a size 6 brush, paint curved, C-shaped strokes along the wing to suggest layered feathers. -
Neck texture:
With the tip of your brush and the same gray mix, add tiny, erratic vertical dashes along the neck curve. This mimic the texture of the neck feathers ruffling. -
Deepening shadows:
Add a third layer of darker gray to the deepest crevices: right under the wing, the space between the legs, and the very bottom of the belly. This contrast makes the white feathers pop. -
The eye:
Using your smallest brush and a concentrated dark gray or black, carefully paint the eye, leaving a tiny white dot for the reflection. Outline the eye ring with a faint gray circle.
Muddy Grays?
If your gray shadows look dirty, you likely overworked the paint while it was damp. Let layers dry completely between coats, and try mixing Ultramarine Blue and Burnt Sienna for a cleaner, livelier gray.
Step 3: Feet and Foliage
-
Painting the feet:
Use the orange mix from the beak for the feet. While wet, drop in a little concentrated Burnt Sienna at the base of the toes where they meet the grass to show shadow. -
Webbing details:
Let the feet dry, then use a thin mixture of brownish-orange to draw lines separating the toes and outlining the webbing. -
Ground wash:
Mix Sap Green with a little Yellow Ochre. Paint a loose, watery patch of green under the duck’s feet. Don’t worry about individual blades yet; just establish the ground. -
Adding grass texture:
While the ground wash is still damp, use a smaller brush with darker green (Sap Green + tiny bit of Payne’s Gray) to flick upward strokes. This creates soft, out-of-focus grass blades. -
Tall reeds:
Draw thin stems rising behind the duck using a liner brush and pale green-brown. For the seed heads at the top, use a stippling motion with Yellow Ochre and Burnt Sienna to create a fuzzy texture.
Feather Lightness
To keep the duck looking white, your shadows must be subtle. Dilute your gray paint much more than you think is necessary; you can always add another layer, but you can’t easily lift dark paint.
Step 4: Final Details
-
Refining the outline:
Take your finest liner brush and a very pale gray. Brokenly outline parts of the duck’s back and chest. I prefer a broken line because a solid outline can make the bird look like a cartoon. -
Sharpening the grass:
Add a few very sharp, distinct blades of grass in the foreground using concentrated green paint on dry paper. This adds depth by contrasting with the softer background wash. -
Beak details:
Add the nostril and the line separating the upper and lower beak using a dark orange-brown. -
Final check:
Step back. If the white body looks too flat, add a very watery glaze of blue-gray to the shadowed side to round out the form.
Sign your name near the grass line and enjoy the serene simplicity of your finished piece


Duck Family in a Follow-the-Leader Line
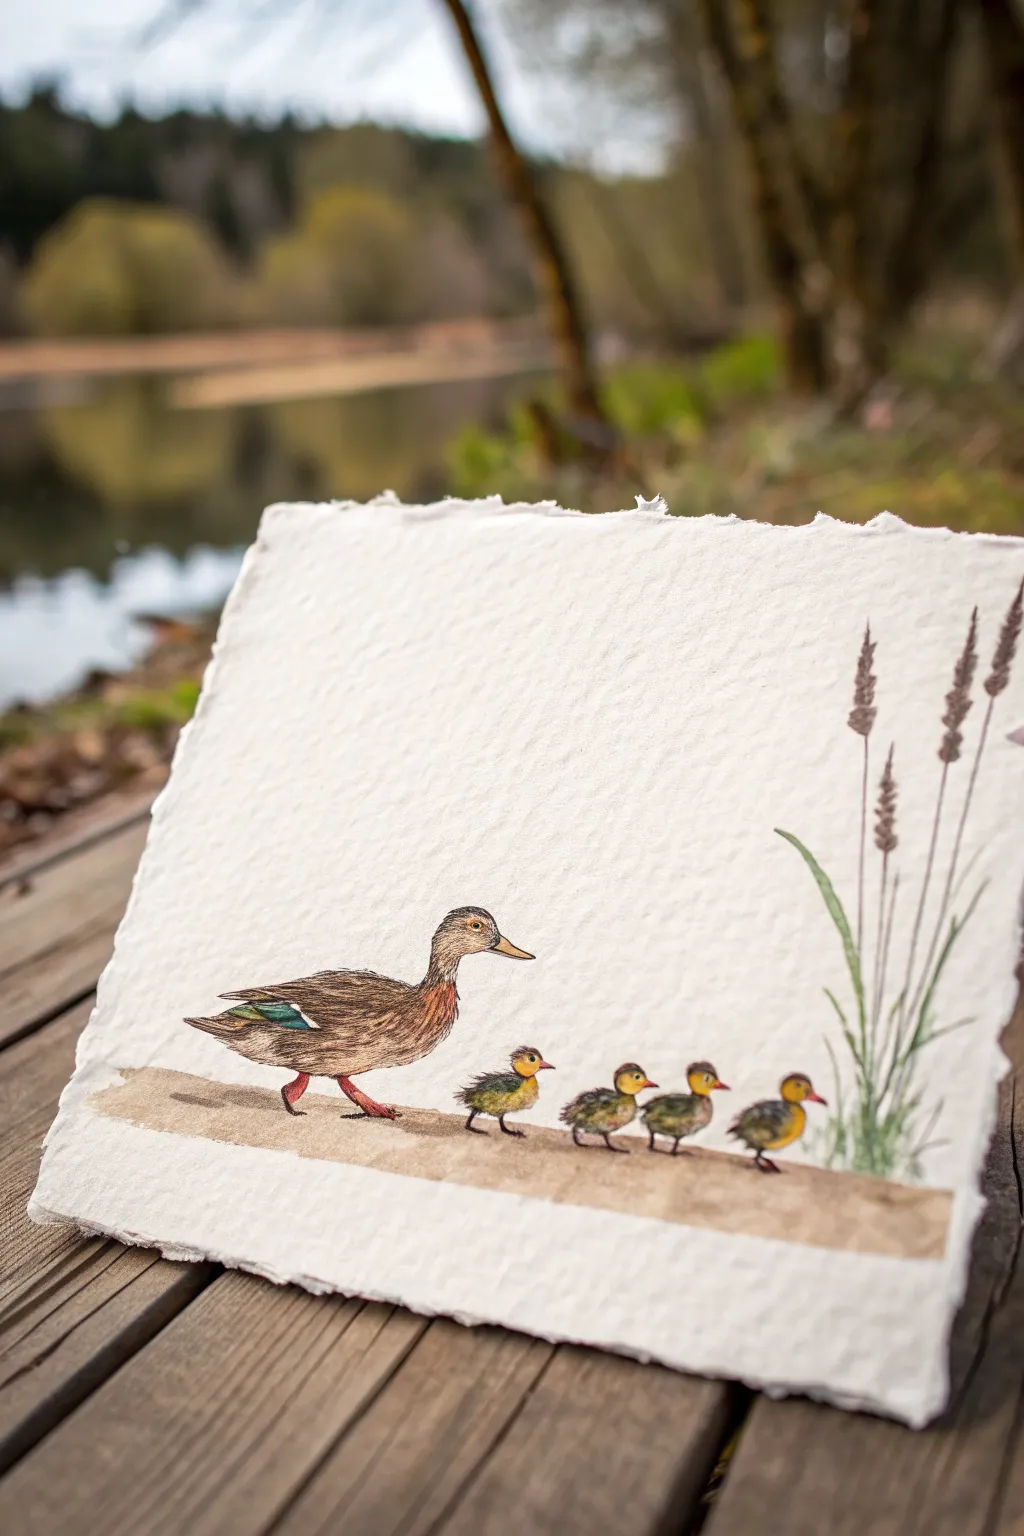
Capture a sweet moment of motherhood with this delicate pen and watercolor illustration on beautiful textured paper. The scene features a proud mallard leading her four ducklings along a sandy path, framed by simple reeds for a timeless, storybook aesthetic.
Step-by-Step Tutorial
Materials
- Thick, handmade cotton rag paper (deckle edge recommended)
- Fine liner pens (sepia or dark brown, sizes 0.1 and 0.3)
- Watercolor paints (Burnt Sienna, Yellow Ochre, Lamp Black, Viridian Green, Cobalt Teal)
- Small round watercolor brushes (sizes 0, 2, and 4)
- Pencil (HB) and kneaded eraser
- Paper towel
- Cup of water
- Mixing palette
Step 1: Sketching the Composition
-
Paper preparation:
Begin by selecting a high-quality, handmade paper with a rough texture. The texture is crucial here, as it adds character to the simple background. Tape down the corners lightly if needed to prevent slipping. -
Blocking out the path:
Using your HB pencil very lightly, draw a horizontal, slightly uneven strip about an inch from the bottom edge. This will be the sandy bank the ducks walk on. -
Positioning the mother duck:
Sketch the mother duck on the left side of the paper, facing right. Start with an oval for the body and a smaller circle for the head, connecting them with a gentle S-curve for the neck. -
Adding the ducklings:
Sketch four small ovals trailing behind the mother. Vary their spacing slightly so they don’t look like soldiers. Give them tiny round heads and beaks pointing forward. -
Drawing the reeds:
On the far right, sketch three vertical lines for the reed stems, varying their heights. Add small oval clusters near the tops for the seed heads and a few blade-like leaves at the base.
Bleeding Lines?
If your ink bleeds when painting, your pen isn’t waterproof. Test your pen on a scrap piece first, or do the ink drawing AFTER the paint has fully dried.
Step 2: Inking the Details
-
Outlining in brown:
Switch to your 0.1 sepia or dark brown fine liner. Carefully trace your pencil lines. For the feathers, use short, broken strokes rather than a solid continuous line to imply texture. -
Feather details:
On the mother’s wing, draw tiered rows of feathers. Create the signature distinct patch (speculum) on the wing by outlining a small rectangular area. -
Duckling fuzz:
When outlining the ducklings, use tiny stippling dots or very jagged, short lines to mimic their soft, downy fluff. Avoid smooth lines here. -
Reed texture:
Ink the reed heads using a tight scribbling motion to create density. Draw the stems with single, confident strokes. -
Erasing:
Once the ink is completely dry—give it a few minutes—gently erase all visible pencil marks with the kneaded eraser.
Pro Tip: Texture Magic
Don’t fight the paper’s roughness. Use a ‘dry brush’ technique (very little water) on the feathers to let the paper’s tooth show through, creating instant texture.
Step 3: Watercolor Application
-
Painting the path:
Mix a very dilute wash of Burnt Sienna. Paint the ground strip using a size 4 brush. Let the rough paper create natural white spots (granulation) for a sandy look. -
Mother duck’s body:
Paint the mother’s body with a mix of Burnt Sienna and a touch of Lamp Black for a brownish-grey tone. Keep the chest lighter, blending into a warmer brown. -
The speculum splash:
Using your size 0 brush, drop a vivid Cobalt Teal into the rectangular wing patch you drew earlier. This pop of color brings the bird to life. -
Duckling yellows:
Wash the ducklings’ heads and chests with Yellow Ochre. Keep this wash light and transparent to maintain that soft appearance. -
Duckling darks:
While the yellow is dry, paint the tops of their heads and backs with a dark grey-brown mix. I let this slightly touch the yellow in places for a soft blend. -
Finishing the legs and beaks:
Use a stronger, less diluted Burnt Sienna or orange mix for the beaks and feet of all the ducks. These are tiny details, so a steady hand and a size 0 brush are key. -
Greening the reeds:
Mix Viridian Green with a little brown to dull it down. Paint the stems and leaves of the reeds. For the seed heads, lightly dab a brown wash over the ink.
Allow your beautiful artwork to dry completely before framing or gifting this serene family scene


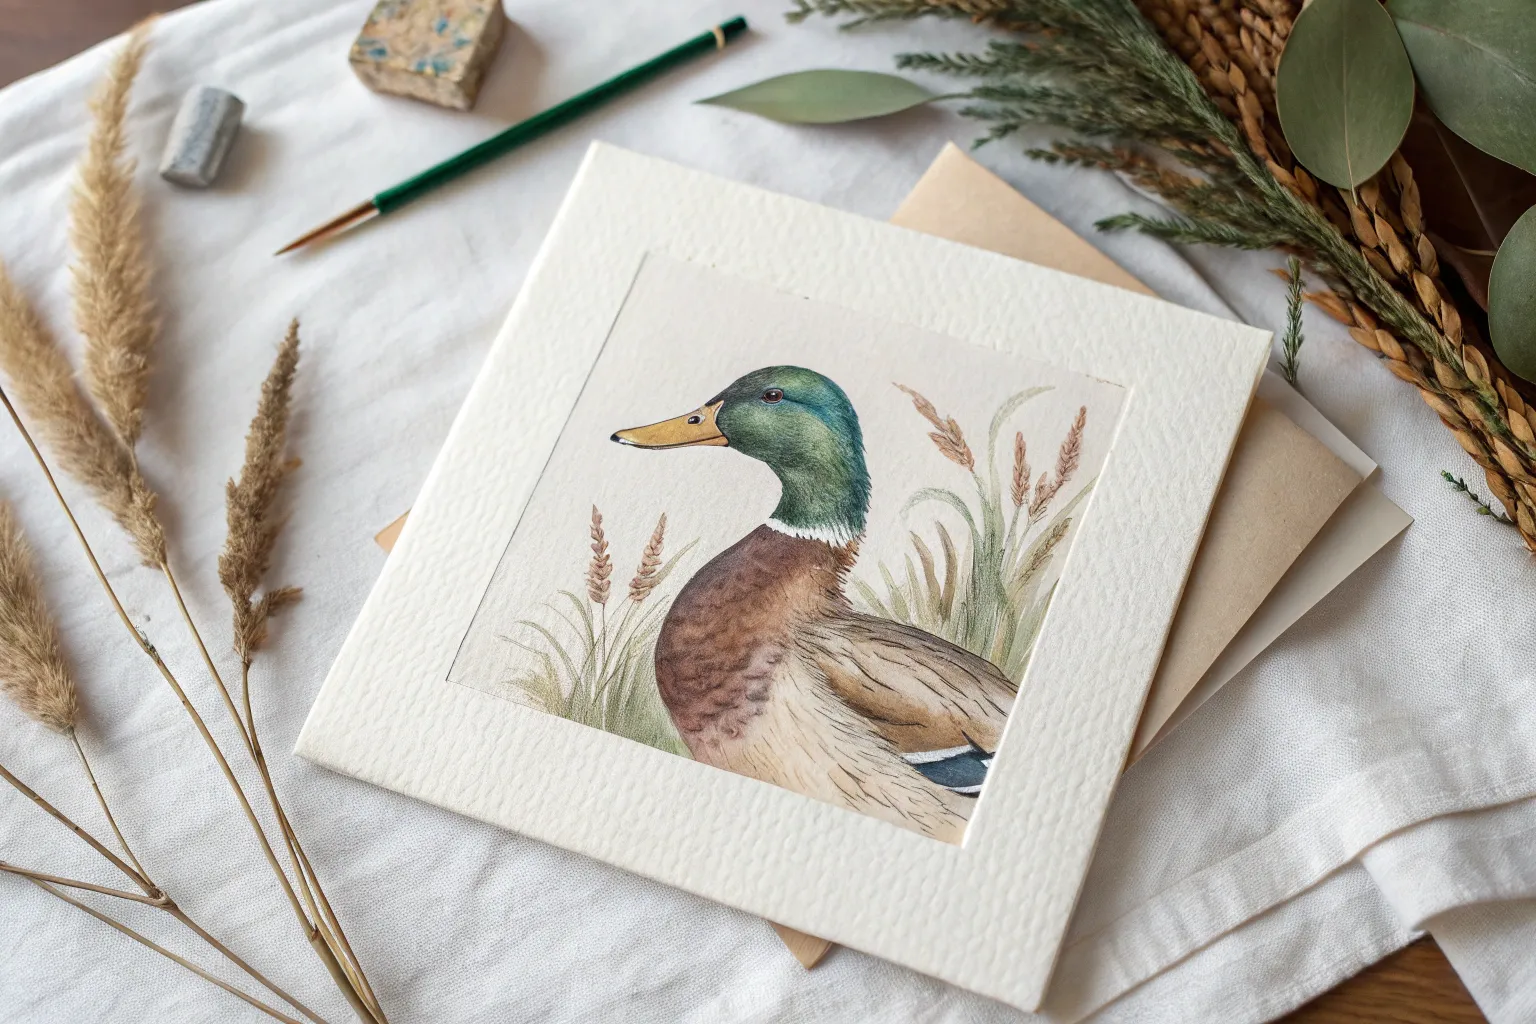
Duck Portrait Close-Up of the Face
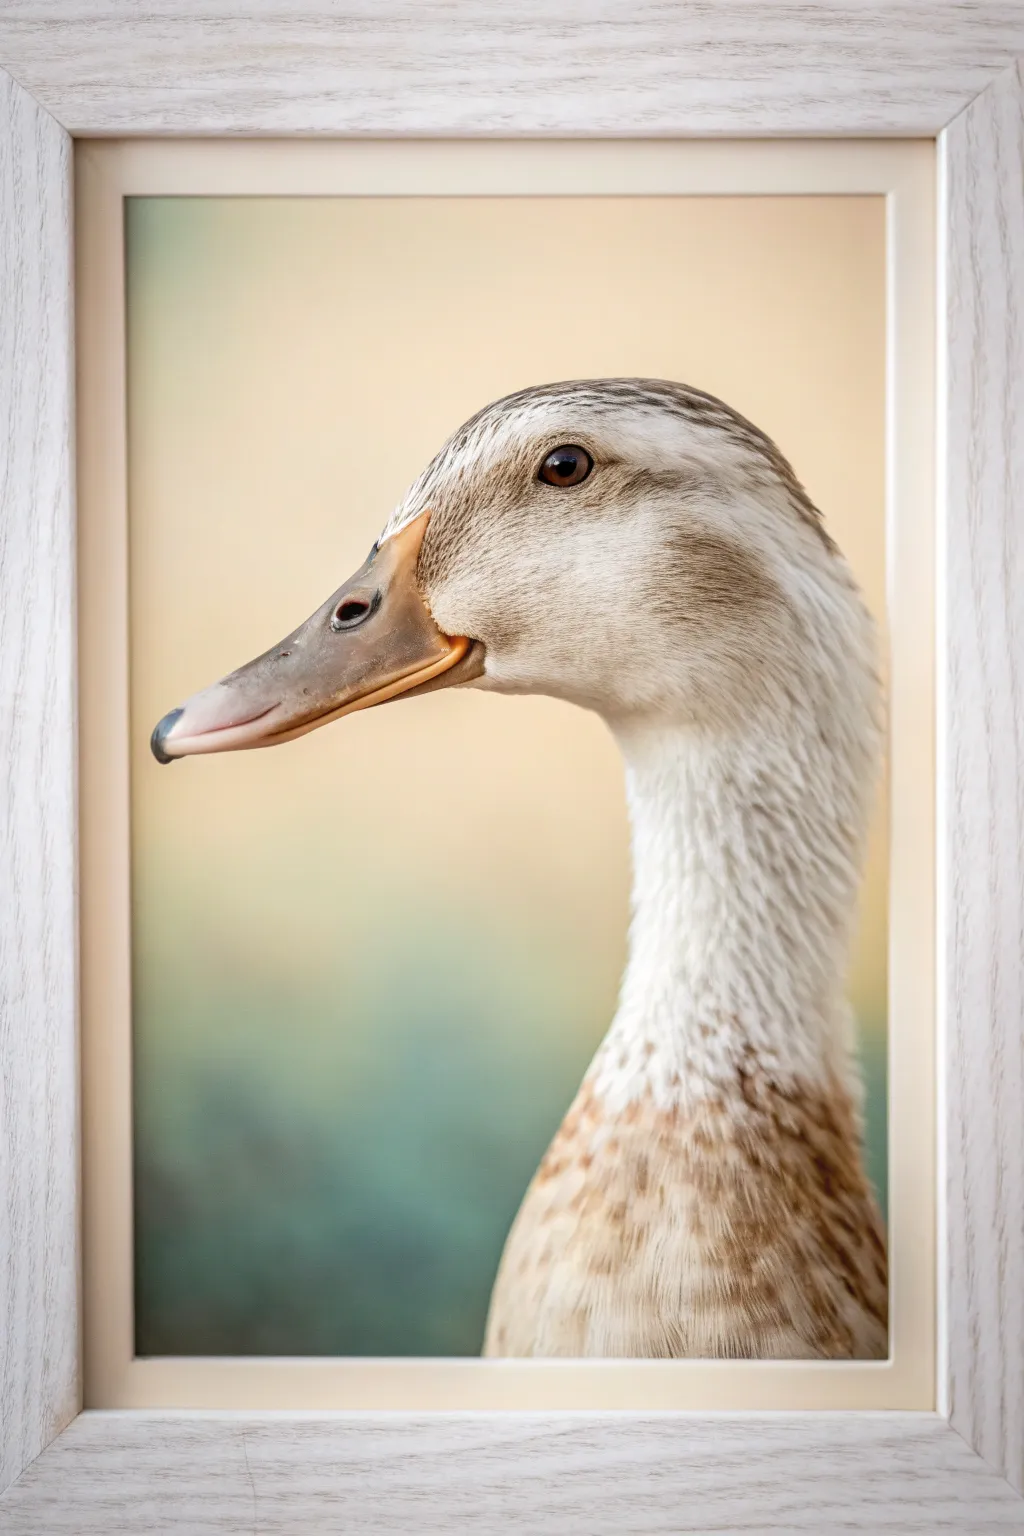
Capture the gentle elegance of a duck with this detailed close-up portrait, focusing on the intricate textures of feathers against a dreamy, soft-focus background. This project bridges the gap between realism and painterly charm, resulting in a gallery-worthy piece that highlights the bird’s expressive eye and bill.
Detailed Instructions
Materials
- Heavyweight watercolor paper or canvas board (9×12 inch)
- Acrylic paints (Titanium White, Burnt Umber, Yellow Ochre, Raw Sienna, Payne’s Grey, Teal, Cream)
- Synthetic brushes: medium flat brush, small round brush, fine liner brush
- Slow-drying medium (optional but recommended for blending)
- Palette and water cup
- Pencil for sketching
- Kneaded eraser
- Light wood frame (for finishing)
Step 1: Sketch and Background
-
Establish the composition:
Begin with a light pencil sketch. Draw a large, curved shape for the neck and head, positioning the eye about one-third of the way down from the top edge. Ensure the beak extends naturally to the left, creating a classic profile silhouette. -
Refine the features:
Tighten your sketch by defining the curve of the bill, the nostril placement, and the almond shape of the eye. Lightly mark the direction of feather growth on the neck to guide your brushstrokes later. -
Mix the background gradient:
On your palette, prepare a large amount of Cream and a separate pool of muted Teal mixed with White. You want a very soft, pastel transition. -
Apply the background wash:
Using a wet flat brush, paint the upper background area with the Cream mixture. While it’s still wet, blend in the muted Teal at the bottom, creating a seamless, out-of-focus horizon line behind the duck’s neck. -
Soften the edges:
Clean your brush and use it slightly damp to blur the transition between the two background colors. Let this layer dry completely before starting the bird.
Step 2: Blocking in the Duck
-
Base coat the feathers:
Mix a light grey-beige tone using White and a touch of Raw Sienna. Apply this solid base color over the entire head and neck area, avoiding the beak and eye. -
Paint the beak base:
Fill in the beak with a mix of Yellow Ochre and a tiny bit of Burnt Umber. It should look somewhat flat for now; we will add the rosy pink transition and shadows later. -
Establish the eye:
Use Burnt Umber to fill in the iris. While wet, drop a speck of black (or unmixed Payne’s Grey) in the center for the pupil, but leave a tiny spot of white paper or paint blank for the reflection. -
Add first shadows:
Using a watered-down Raw Sienna, glaze underneath the jawline and down the front of the neck where the feathers turn golden-brown. This establishes the form without adding texture yet.
Fixing Flat Feathers
If the feathers look too flat, don’t just add darks. Add ‘high’ highlights. Mix pure white with a medium-dry brush and add scumbled texture on the brightest curves of the neck.
Step 3: Detailing and Texture
-
Create directional texture:
Switch to a small round brush. using a mix of White and light Grey, start painting short, thin strokes following the curve of the head to simulate feathers. -
Deepen the neck pattern:
Mix Raw Sienna with Burnt Umber. Apply dappled, irregular spots on the lower neck, letting them fade as you move upward toward the chin. This mimics the speckled plumage. -
Define the beak gradient:
Blend a soft pinkish-grey and apply it to the tip of the beak. Blend this backwards into the yellow-brown base. Add a dark shadow line along the opening of the mouth to separate the upper and lower mandibles. -
Paint fine facial feathers:
I prefer using a fine liner brush here. Use nearly pure White to paint tiny, hair-like strokes around the eye and at the base of the bill. These should be extremely delicate. -
Enhance the eye depth:
Glaze a thin layer of transparent Burnt Umber over the iris to rich up the color. Add a crisp highlight of pure Titanium White to make the eye look wet and alive. -
Refine the nostril:
Paint the interior of the nostril dark grey, but add a tiny rim of light grey on the lower edge to give it 3D volume. -
Add the final fluff:
Using a dry-brush technique with bright White, lightly skim over the chest area where the neck meets the bottom frame. This suggests soft down feathers catching the light. -
Frame the piece:
Once fully dry, place your painting into a light wood frame to complement the natural, earthy tones of the duck.
Level Up: Dew Drop
Make the portrait ultra-realistic by adding a small water droplet on the beak. Use a dark shadow, a mid-tone reflection of the sky color, and a sharp white highlight point.
Hang your serene duck portrait in a quiet corner of your home to bring a touch of nature indoors.
BRUSH GUIDE
The Right Brush for Every Stroke
From clean lines to bold texture — master brush choice, stroke control, and essential techniques.
Explore the Full Guide
Swimming Duck With Ripple Rings
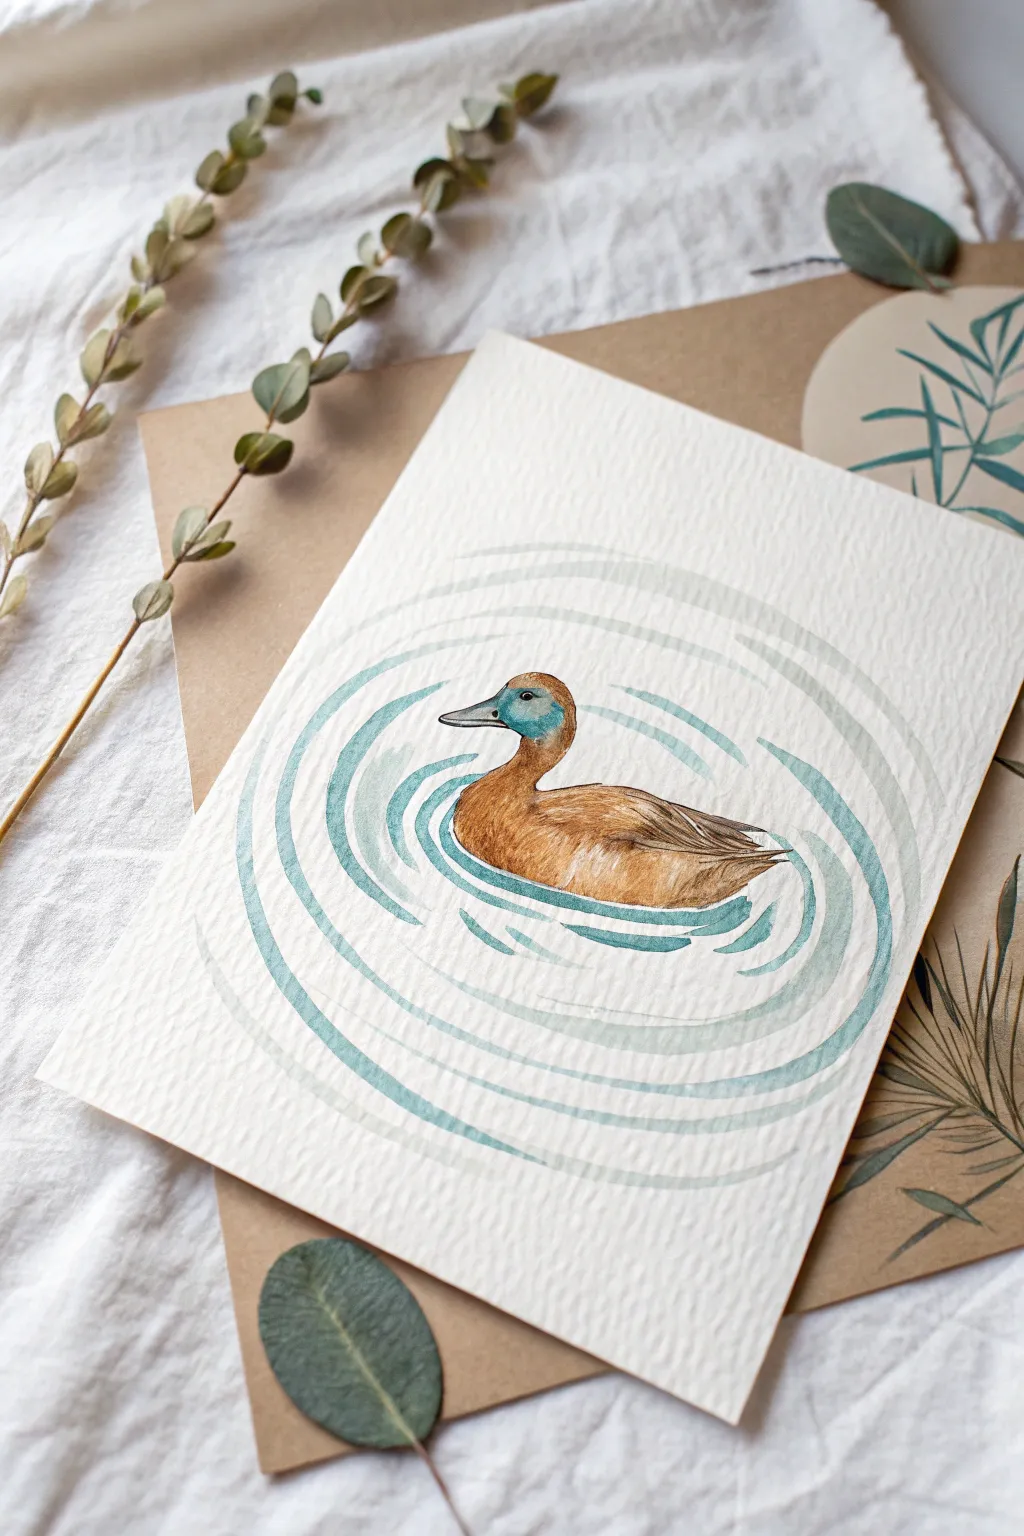
Capture the tranquil beauty of a Ruddy Duck gliding through water with this stylized watercolor project. By combining precise detailing on the bird with loose, rhythmic strokes for the water, you’ll create a serene composition full of movement.
Detailed Instructions
Materials
- Cold-press watercolor paper (300 gsm)
- Watercolor paints (burnt sienna, yellow ochre, cerulean blue, payne’s gray, warm brown)
- Round brushes (size 2 for details, size 6 for washes)
- Pencil (HB or 2H)
- Kneaded eraser
- Clean water jar
- Paper towels
- Mixing palette
Step 1: Sketching the Composition
-
Outline the bird:
Start by lightly sketching the duck’s silhouette in the center of your paper. Draw a simple oval for the body and a curved neck leading to a rounded head. Keep your pencil pressure very light so the graphite doesn’t show through the paint later. -
Add facial features:
Refine the head shape, adding the distinctive sloping beak and a small eye. Mark the boundary where the bill meets the face. -
Sketch the ripples:
Draw loose, concentric oval rings around the duck to represent the water ripples. These don’t need to be perfect circles; irregular spacing makes them look more natural and dynamic. -
Clean up:
Use your kneaded eraser to lift any heavy graphite lines, leaving just a faint guide for your brush.
Step 2: Painting the Duck
-
Base layer for the body:
Mix a watery wash of yellow ochre and burnt sienna. Apply this to the duck’s body, avoiding the beak and the eye area. Let the color flow naturally. -
Building texture:
While the base layer is still slightly damp, drop in concentrated warm brown along the back and wings to create a sense of volume and feather texture. -
Painting the beak:
Switch to your size 2 brush and mix a vibrant cerulean blue. Carefully paint the beak, leaving a tiny highlight unpainted if you wish for a wet look. -
Adding details:
Once the body is dry, use a mix of warm brown and payne’s gray to paint the wing feathers with thin, directional strokes that follow the curve of the bird’s body. -
The eye:
Using a very dark mix of brown and black, carefully dot in the eye, leaving a tiny speck of white paper for the glint.
Fixing Hard Edges
If your water ripples have harsh, dry edges where you paused, soften them with a clean, damp brush before the paint fully sets to maintain fluidity.
Step 3: Creating the Ripples
-
Mixing water colors:
Prepare two puddles of blue-green paint: one very diluted and watery for the outer rings, and one slightly more saturated for the rings closest to the duck. -
Inner ripples:
Using the size 6 brush, paint the ripple segments closest to the duck’s chest and tail. Use a confident, sweeping motion to keep the edges smooth. -
Expanding outward:
Continue painting the concentric rings, switching to the more diluted mix as you move further away from the bird. I find that breaking the lines occasionally creates a nice shimmer effect. -
Varying line width:
As you paint the rings, try varying the pressure on your brush—starting thin, pressing down for a thicker stroke, and lifting up again to taper the end. -
Adding reflection tones:
While the water rings are wet, drop a tiny amount of the duck’s brown body color into the water ripples directly beneath the bird to suggest a reflection.
Make it Shine
Add a touch of iridescent floral white or pearl medium to your water ripple mix. It gives the water a subtle, magical glisten when the light hits it.
Step 4: Final Touches
-
Deepening shadows:
Mix a dark brown glaze and apply it under the wing and along the waterline of the duck to ground the bird in the water. -
Assessment:
Step back and look at your composition. If the outer ripples look too faint, carefully layer a second pale wash over them once the first is bone dry.
Allow the entire piece to dry completely before framing your serene aquatic scene
Rainy Day Duck With Umbrella and Puddles
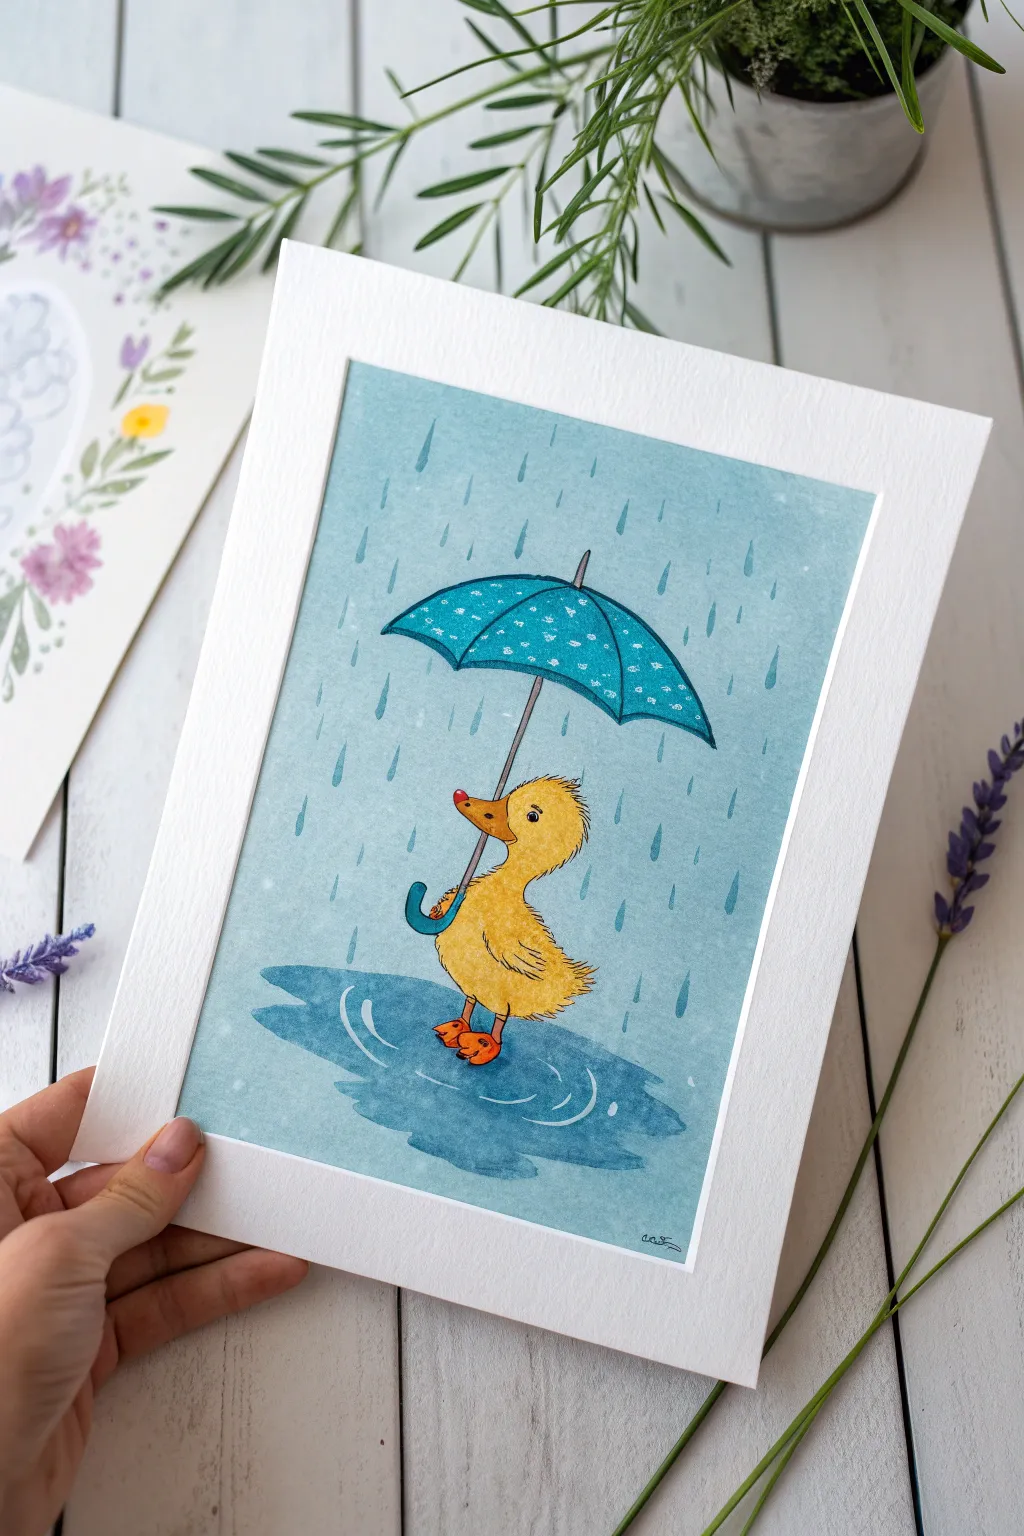
Capture the whimsical spirit of a rainy day with this adorable watercolor illustration featuring a fuzzy yellow duckling sheltered by a spotted umbrella. This tutorial walks you through building soft washes and crisp details to create a charming, storybook-style scene.
Step-by-Step
Materials
- Cold press watercolor paper (approx 5×7 inches)
- Pencil (HB or H) and kneaded eraser
- Watercolor paints (Cadmium Yellow, Yellow Ochre, Cerulean Blue, Indigo, Burnt Sienna, Orange)
- Fine liner pen (waterproof, black or dark grey, size 01 or 03)
- White gel pen or white gouache
- Round watercolor brushes (size 4 for washes, size 0 or 1 for details)
- Masking fluid (optional)
- Clean water and paper towels
Step 1: Sketching the Scene
-
Outline the duckling:
Start by lightly sketching a rounded bean shape for the duckling’s body. Add a circle on top for the head, connecting them with a short neck. Keep your pencil lines faint so they don’t show through the yellow paint later. -
Add features:
Draw a small beak pointing slightly upwards and a round eye. Sketch the wings tucked against the side and two little orange feet stepping forward. -
Draw the umbrella:
Position the umbrella shaft held by the duck’s wing. Draw a wide, curved dome shape above the head, ensuring it’s large enough to cover the duck. Add the ribs of the umbrella as curved lines radiating from the top center. -
Map the puddle:
Sketch an irregular, organic puddle shape around the duckling’s feet. Drawing a few ripple rings around where the feet touch the water adds a nice sense of movement.
Pro Tip: Furry Texture
When outlining with the ink pen, don’t draw a solid line around the duck. Use tiny ‘tick’ marks or broken lines to simulate the soft, fuzzy texture of down feathers.
Step 2: Painting the Background
-
Prepare the background wash:
Mix a watery pale blue using Cerulean Blue. We want a consistent, flat look for the rainy sky. -
Apply the wash:
Carefully paint around the duck, umbrella, and puddle shapes. Cover the rest of the paper with your pale blue mix. Work quickly to avoid hard drying lines, keeping a wet edge as you go. -
Add rain streaks:
While the background is still slightly damp but not soaking, use a slightly darker blue mix to paint vertical, dashed lines for rain. If the paper is too wet, they will blur too much; if dry, they will be sharp. Aim for a soft, semi-defined look.
Step 3: Painting the Main Subjects
-
Paint the duckling base:
Once the background is completely dry, load your brush with a bright Cadmium Yellow. Paint the entire duckling body, leaving the eye white. -
Add feathery texture:
While the yellow is still wet, drop in tiny touches of Yellow Ochre or a light orange near the bottom of the belly and under the wing to create shadow and fluffiness. -
Color the umbrella:
Mix a vibrant teal or turquoise color. Paint the umbrella canopy segments carefully. Creating a slight variation in tone between the panels can help show the umbrella’s curve. -
Paint the puddle:
Use a mix of Cerulean and a touching of Indigo for the puddle. Paint the main shape, but leave thin white gaps where your ripple sketch lines were to represent light catching the water’s surface. -
Beak and feet:
Use a bright Orange mixed with a tiny bit of Burnt Sienna for the beak and feet. These areas are small, so switch to your size 0 or 1 brush for precision.
Level Up: Glossy Rain
Add clear drying craft glue or glossy accents over the raindrops and the puddle ripples after painting. It creates a real 3D shine that looks just like water!
Step 4: Inking and Details
-
Deepen shadows:
Once the first layers are dry, add a second, darker layer of blue to the puddle directly under the duck to ground him. Add a second coat of orange to the bottoms of the feet for dimension. -
Outline the artwork:
Use your waterproof fine liner to outline the entire drawing. Use short, jagged strokes for the duckling to mimic downy feathers, and smooth, continuous lines for the umbrella and rain. -
Detail the umbrella:
Draw the umbrella handle in grey or brown. Use your white gel pen or gouache to add the polka dot pattern onto the dry blue umbrella canopy. -
Final highlights:
Add a tiny white catchlight to the duck’s eye with the gel pen. If you lost any rain streaks during the wash, you can carefully re-emphasize them with the blue paint now. -
Add splashing effects:
Using a clean wet brush, soften the edges of the puddle slightly in one or two spots to make it look wet and fluid.
Now you have a delightfully dreary-day friend ready to brighten up any wall

PENCIL GUIDE
Understanding Pencil Grades from H to B
From first sketch to finished drawing — learn pencil grades, line control, and shading techniques.
Explore the Full Guide
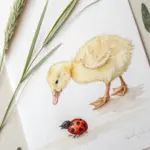
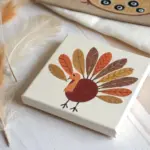
Flower Crown Duck Storybook Character
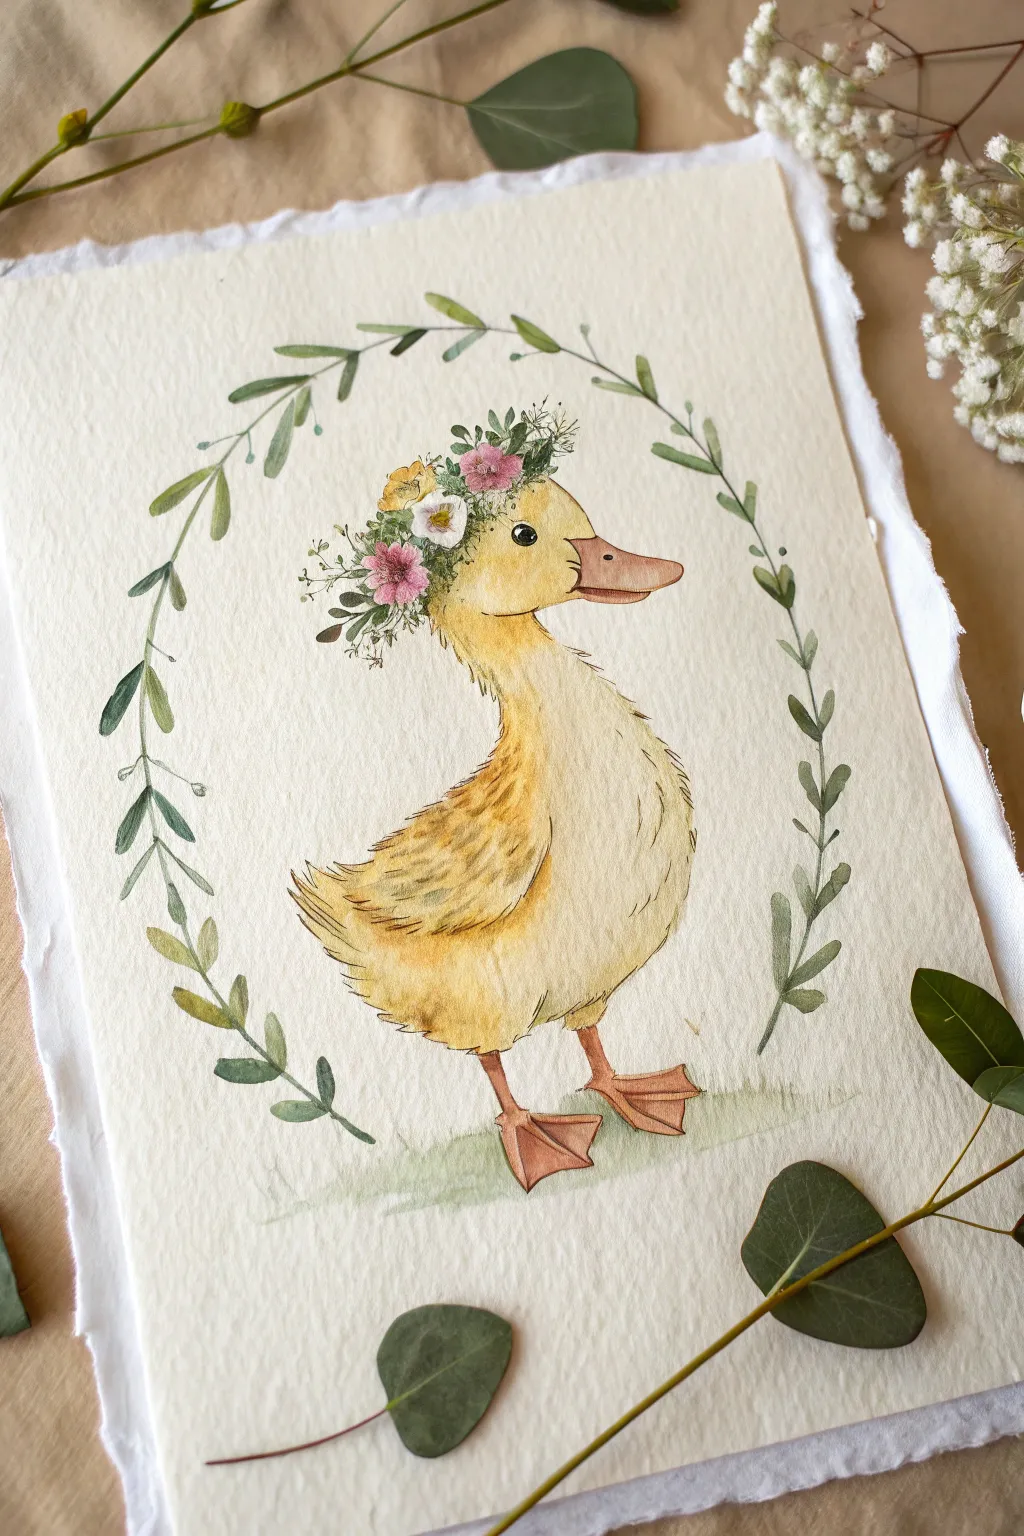
Capture the whimsical charm of classic children’s illustrations with this watercolor painting of a smiling duckling adorned in flowers. The soft yellow washes and delicate ink details create a heartwarming character perfect for a nursery or spring decor.
Step-by-Step Tutorial
Materials
- Cold press watercolor paper (deckled edge optional)
- Watercolor paints (Yellow Ochre, Lemon Yellow, Burnt Sienna, Sap Green, Alizarin Crimson, white gouache)
- Round watercolor brushes (sizes 2, 4, and 6)
- Fine liner pen (brown or sepia, water-resistant)
- Graphite pencil (HB or 2H)
- Kneaded eraser
- Two jars of water
- Paper towels
Step 1: Sketching the Character
-
Outline the body shape:
Begin with a light pencil sketch. Draw a gentle ‘S’ curve for the duck’s neck and chest, connecting it to a rounded oval for the body. Keep your lines very faint so they don’t show through the yellow paint later. -
Define the head and beak:
Sketch a rounded head shape at the top of the neck. Add the bill, making it slightly upturned for a smiling expression, and place a small oval high on the head for the eye. -
Sketch the accessories:
Lightly block in a floral crown sitting right on top of the head. Don’t draw every petal yet; just mark the placement. Finish the sketch by drawing the feet and faintly indicating the surrounding leafy oval wreath.
Pro Tip: Furry Texture
For the softest duckling down, lift a little pigment with a clean, damp brush or paper towel while the paint is drying on the chest area. This creates a natural highland.
Step 2: Layering the Initial Washes
-
Paint the first yellow layer:
Mix a watery wash of Lemon Yellow and a touch of Yellow Ochre. Using a size 6 brush, fill in the duck’s body and head. Use wet-on-dry technique here to keep the edges somewhat defined but soft. -
Create texture while wet:
While the yellow paint is still damp, drop in slightly more concentrated Yellow Ochre along the bottom of the belly and the back of the neck to suggest shadow and fluff. -
Paint the bill and feet:
Mix a soft orange using Yellow Ochre and a tiny bit of Burnt Sienna or Cadmium Red. Paint the bill and the feet with this warm tone, keeping the color translucent. -
Ground the duck:
Using a very dilute mix of Sap Green, paint a quick, horizontal wash under the feet to represent the grass. Let the edges fade out naturally.
Level Up: Vintage Paper
Soak your finished painting in strong black tea for 30 seconds and let it dry flat. This ages the paper instantly, giving it an authentic antique storybook appearance.
Step 3: Adding Details and Texture
-
Feather texture:
Once the base layer is completely dry, take a size 2 brush with a slightly darker yellow-brown mix. Make small, quick flicks along the chest, wing, and neck to simulate feathery down. I find keeping the brush fairly dry helps these lines look fluffy rather than harsh. -
Deepen shadows:
Add a second layer of the orange mix to the underside of the bill and the webbing of the feet to give them dimension. -
Paint the flower crown:
Using the tip of your size 2 brush, dab in small spots of Alizarin Crimson (pink) and Lemon Yellow for the flowers. Use various greens for tiny leaves tucked between the blooms. -
Define the eye:
Paint the eye dark brown or black, leaving a tiny speck of white paper unpainted for the highlight. This instantly brings the character to life.
Step 4: Inking and Framing
-
Ink the outlines:
Using a fine sepia liner pen, gently outline the duck. Don’t use a continuous solid line; use broken, feathery strokes to mimic the texture of soft down. -
Ink the floral details:
Add delicate ink details to the flower crown, defining individual petals and adding tiny stamens to the centers. -
Paint the wreath:
Mix a muted Sap Green (add a touch of red to dull it down). Using the size 4 brush, paint the surrounding wreath with loose, single-stroke leaves attached to a thin stem line. -
Enhance with white:
Use a tiny amount of white gouache or a white gel pen to add extra highlights to the flowers or to correct any areas where the paint might have bled into the highlight of the eye.
Allow your painting to dry fully before erasing any remaining pencil marks to avoid smudging your lovely new artwork
Garden Duck Among Tulips and Leaves
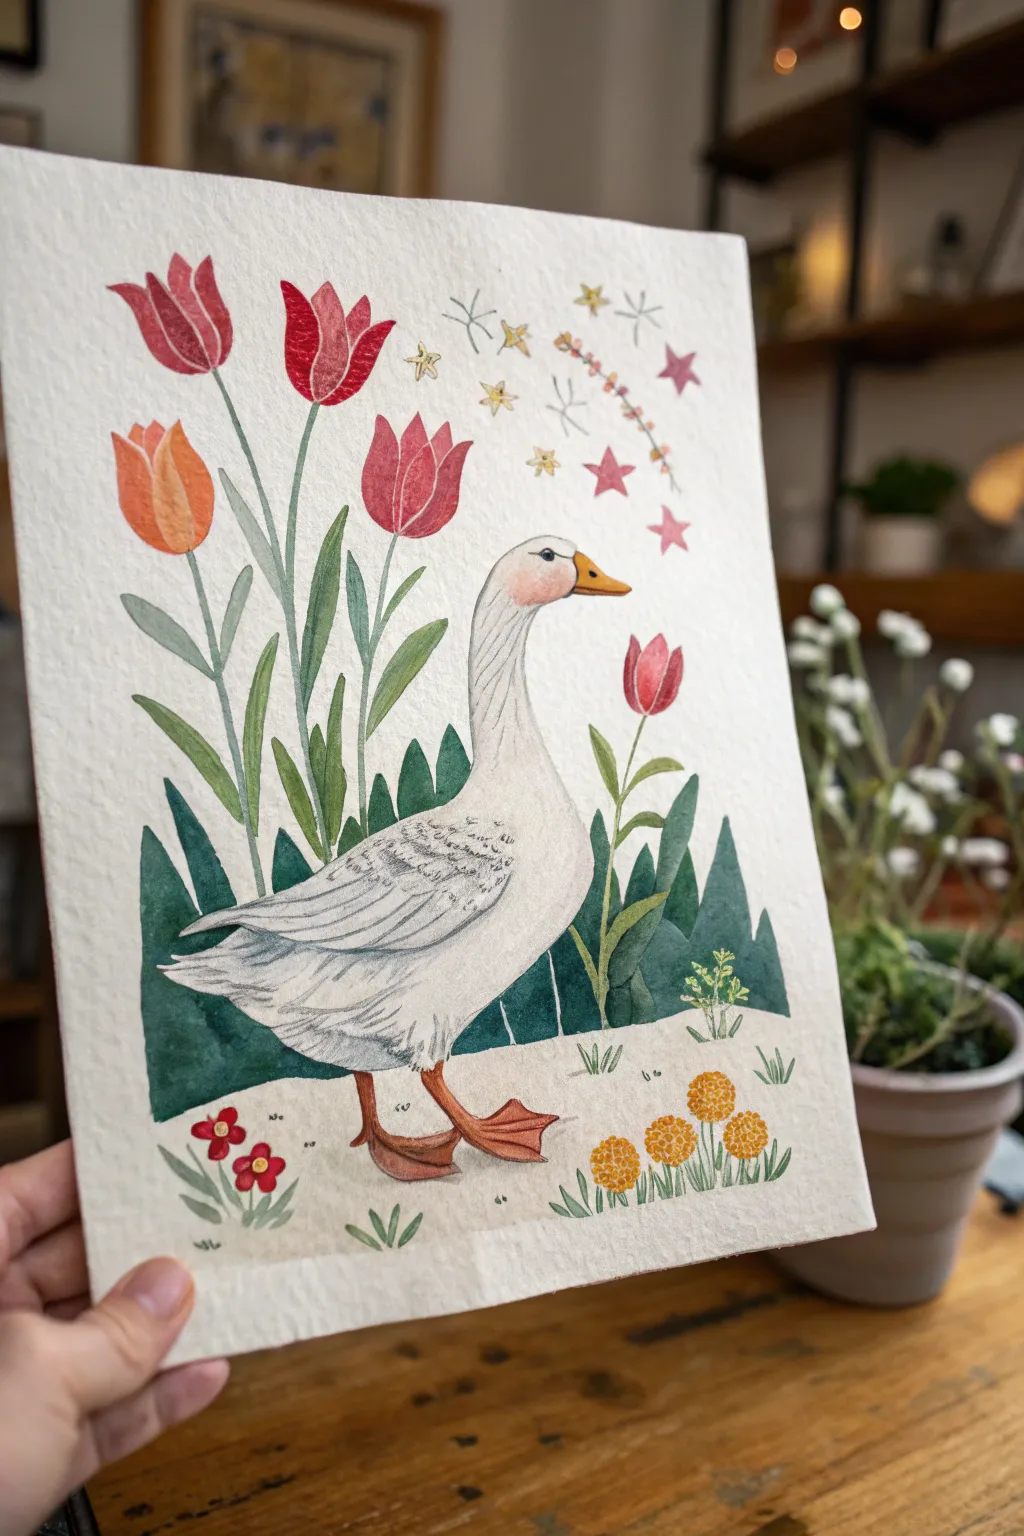
Capture the charm of a country garden with this delightful watercolor illustration featuring a proud white goose strolling among vibrant tulips. The style blends botanical accuracy with a touch of folk art whimsy, making it a perfect project for a relaxing afternoon.
How-To Guide
Materials
- Cold press watercolor paper (300 gsm)
- Watercolor paints (Vermilion, Alizarin Crimson, Sap Green, Viridian, Yellow Ochre, Burnt Sienna, Payne’s Grey)
- White gouache or white gel pen
- Round watercolor brushes (sizes 2, 4, and 6)
- Fine liner brush (size 0 or 00)
- HB Pencil and kneaded eraser
- Two jars of water
- Paper towels
- Masking tape
Step 1: Sketching the Layout
-
Prepare your paper:
Tape down your watercolor paper to a board on all four sides to prevent buckling. Lightly sketch the horizon line about a quarter of the way up from the bottom. -
Outline the goose:
Draw the goose’s shape in the center of the page. Start with an oval for the body and a gentle S-curve for the long neck, checking that the feet are grounded on your horizon line. -
Add floral elements:
Sketch tall tulips on the left side, varying their heights. Add a single tulip on the right side of the goose. Draw stylized, triangular foliage shapes near the horizon line to create depth. -
Refine the details:
Add small details like the stars and sparkles in the sky, the small yellow flowers near the feet, and the texture lines on the goose’s wing. Lighten your sketch with a kneaded eraser until it’s barely visible.
Keep it Clean
To keep the goose crisp white, be very careful not to let the green background foliage paint touch the wet grey shadows of the bird. Let sections dry fully.
Step 2: Painting the Goose
-
Base wash for the feathers:
Using a very dilute mix of Payne’s Grey and plenty of water, paint the shadow areas on the underside of the goose’s body and neck. The paper white will serve as your main highlight. -
Adding texture:
While the grey is still slightly damp, use a smaller brush to dab in slightly darker grey marks on the wing to suggest ruffled feathers. -
Paint the beak:
Mix Yellow Ochre with a tiny touch of Vermilion. Carefully paint the beak, leaving a tiny white highlight near the top if possible. -
Detail the eye and cheek:
Paint a very faint, watery pink circle on the cheek. Use a fine liner with black or dark grey for the eye, adding a tiny white dot for life. -
Paint the legs and feet:
Use a mix of Burnt Sienna and Vermilion for the legs and webbed feet. I like to layer the color, making the bottom of the feet slightly darker to show weight.
Step 3: Floral Surroundings
-
First layer of the tulips:
Paint the tulip heads using Alizarin Crimson and Vermilion. For the orange tulip, mix in more yellow. Keep the color slightly uneven to mimic petal texture. -
Stems and leaves:
Use a diluted Sap Green for the tall tulip stems and leaves. Paint these with long, fluid strokes to emphasize their height. -
Dark foliage background:
Deepen your Sap Green with a touch of Viridian or Blue. Paint the shorter, geometric leaf shapes behind the goose’s legs. This dark value will make the white goose pop. -
Ground flowers:
Paint the small round flower heads at the bottom right with Yellow Ochre. Use pure red for the tiny flowers on the bottom left.
Make it Sparkle
Use metallic gold watercolor paint for the stars and the centers of the ground flowers to give the illustration a magical, storybook quality.
Step 4: Refining and Decorating
-
Sky embellishments:
Using a clean, small brush, paint the stars and sparkles above the goose with diluted pinks and yellows. Keep these very soft and whimsical. -
Ground texture:
Apply a very faint wash of brown or beige for the path under the goose. Add tiny flicks of green for grass blades poking through the dirt. -
Wing definition:
Once the bird is totally dry, use a fine brush or a grey colored pencil to add precise scalloped lines on the wing feathers for extra definition. -
Highlight checks:
Examine the tulips. If they look flat, add a slightly darker shade of red to the base of the petals to create a cup shape. -
Final touches:
Use opaque white gouache or a gel pen to add sharp highlights to the tulip edges, the goose’s eye, and the center of the stars.
Peel off your tape to reveal crisp white edges and enjoy your charming garden scene.


Sunset Silhouette Duck on Golden Water
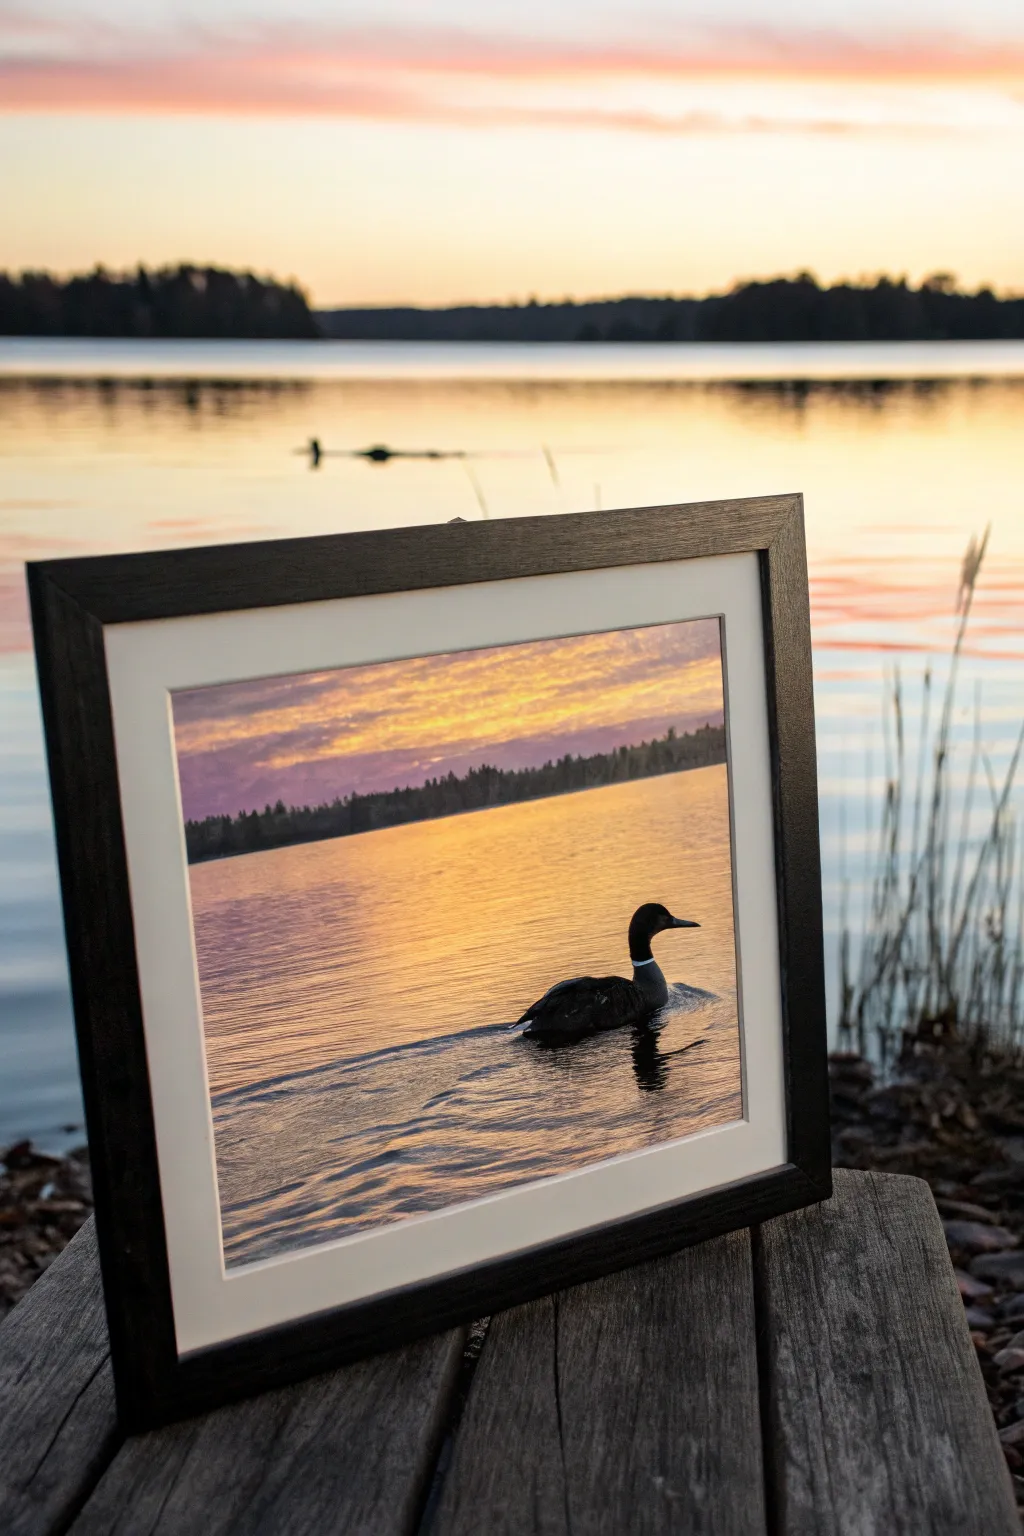
Capture the serene beauty of a loon gliding across golden waters with this atmospheric acrylic painting project. You will focus on blending warm sunset gradients and creating realistic water ripples to frame the stark, elegant silhouette of the bird.
Step-by-Step Tutorial
Materials
- Focal point: High-quality canvas board or stretched canvas (11×14 inches recommended)
- Acrylic paints: Titanium White, Cadmium Yellow, Cadmium Orange, Alizarin Crimson, Burnt Umber, Mars Black, Phthalo Blue
- Brushes: Large flat wash brush (1-inch), medium filbert brush, small round detail brush (size 0 or 1)
- Palette knife for mixing
- Water container and paper towels
- Painter’s tape (optional for horizon line)
- Reference photo of a loon or duck silhouette
- Black wooden frame with cream matting (for finishing)
Step 1: Setting the Scene
-
Establish the Horizon:
Begin by deciding where your horizon line will sit. For this composition, place it slightly above the vertical center. You can use a strip of painter’s tape to ensure a perfectly straight edge between the sky and the water. -
Paint the Sky Gradient:
Mix a soft lavender using Titanium White, a touch of Alizarin Crimson, and the tiniest speck of Phthalo Blue. Apply this to the top section of the sky area. While still wet, blend downwards into a mix of Cadmium Orange and Yellow, creating a smooth transition from cool dusk to warm sunset. -
Add Cloud Textures:
Using a smaller brush or a scrunched-up paper towel, dab faint streaks of purple-grey clouds across the upper sky. Keep these soft and horizontal to mimic distant stratus clouds catching the last light. -
Create the Distant Treeline:
Mix Mars Black with a little Burnt Umber and Phthalo Blue to create a deep, cool dark color. Just above the horizon line, paint a jagged strip of distant trees. vary the heights slightly to suggest pine tops, but keep the overall shape fairly flat and distant.
Muddy Water?
If your water reflections look muddy, let the yellow base layer dry completely before adding the darker ripples. Wet-on-wet mixing can sometimes turn orange and purple into brown.
Step 2: Painting the Golden Water
-
Base Water Layer:
Remove the horizon tape if you used it. Paint the water area with a base, horizontal wash of Cadmium Yellow mixed with a little White. The water should be brightest directly under where the sun would be setting. -
Reflect the Sky:
Introduce streaks of Cadmium Orange and the soft lavender color from the sky into the wet yellow paint. Use long, horizontal strokes with your flat brush to suggest the calm movement of the lake. -
Deepen the Shadow Areas:
As you move closer to the bottom of the canvas, darken the water mix with small amounts of Burnt Umber and Alizarin Crimson. The water closest to the viewer should be darker than the water near the horizon. -
Create Ripple Texture:
Switch to a smaller flat brush. Using a mix of Burnt Umber and Purple, paint thin, broken horizontal lines across the golden water. These represent the small waves and ripples on the surface. -
Refine the Reflection:
I find it helpful to squint at the canvas here. Ensure the ripples get smaller and closer together as they recede toward the horizon line to create depth.
Step 3: The Loon Silhouette
-
Outline the Shape:
Once the water background is completely dry, use a small round brush with thinned Mars Black to lightly outline the shape of the loon. Place it in the lower right quadrant for a balanced composition. -
Fill the Silhouette:
Fill in the bird’s body with solid Mars Black. Ensure the curves of the neck and head are smooth and elegant. The beak should be sharp and pointed slightly upward. -
Add the Neck Detail:
Loons have a distinctive white neck band. Using a detail brush and pure Titanium White, paint a small, curved stripe on the neck. If the black is still wet, wait for it to dry or the white will turn grey. -
Paint the Wake:
Mix a dark, watery grey using Black and water. Paint a V-shaped wake trailing behind the bird. These lines should disturb the horizontal ripples you painted earlier. -
Add Specific Reflections:
Directly beneath the bird, paint a blurry, dark reflection into the water. Use horizontal zigzag strokes to show how the reflection is broken up by the water’s movement. -
Highlight the Wake:
Add thin slivers of the bright yellow-white mix along the edges of the wake and the bird’s body where the water catches the light as it breaks.
The Perfect Gradient
Use a retarder medium to keep acrylics wet longer. This gives you extra time to blend that smooth sunset sky from purple to orange without the paint drying too fast.
Step 4: Finishing Touches
-
Enhance Water Glint:
Take pure Titanium White and add tiny, sparing dots or short dashes on the crests of the nearest ripples to create sparkling highlights. -
Frame Your Work:
Allow the painting to cure for at least 24 hours. Once dry, place it inside a heavy black frame with a cream or white mat to simulate the gallery-style presentation shown in the example.
Hang your finished piece in a well-lit spot to let the golden hues warm up the room
Palette Knife Duck With Thick Texture
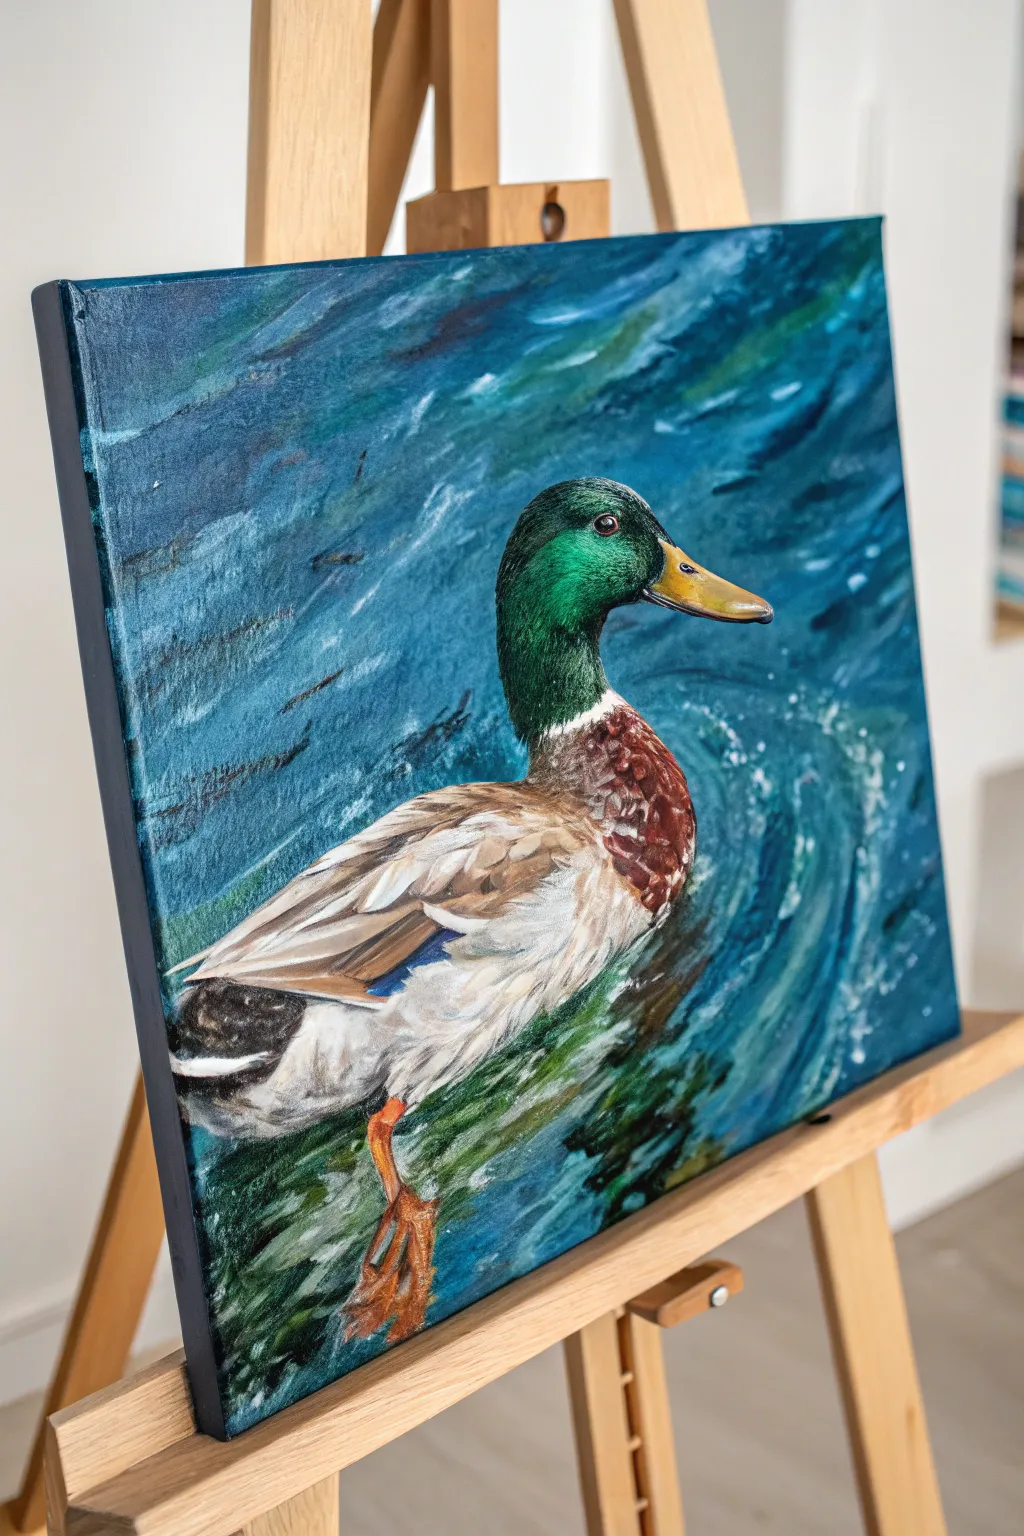
Capture the shimmer of a swimming mallard with this vibrant acrylic painting that plays with light and movement. Using a mix of brushwork and palette knife techniques, you’ll build up layers of cool blues and rich greens to create a water effect that feels alive.
Step-by-Step
Materials
- Square canvas (stretched, e.g., 12×12 inches)
- Acrylic paints: Phthalo Blue, Prussian Blue, Titanium White, Viridian Green, Sap Green, Burnt Sienna, Burnt Umber, Yellow Ochre, Cadmium Yellow Medium
- Modeling paste or thick body acrylics (optional for extra texture)
- Palette knives (one diamond-shaped, one elongated)
- Synthetic brushes (various sizes: flat, filbert, and a fine liner)
- Palette for mixing
- Cup of water and paper towels
Step 1: Planning and Underpainting
-
Sketch the composition:
Begin by lightly sketching the outline of the mallard in pencil. Place the duck slightly off-center to the right, ensuring the head rises confidently and the body angles downward into the imagined water line. Don’t worry about the feet yet. -
Block in the water base:
Mix a dark, watery base color using Prussian Blue and a touch of Viridian Green. Apply this loosely over the entire water area with a large flat brush, keeping your strokes sweeping and diagonal to mimic currents. -
Establish the duck’s darks:
Using Burnt Umber mixed with a tiny drop of blue, paint the darkest shadow areas of the duck: underneath the tail feathers and the shadowed side of the breast.
Don’t Over-Blend
When using the palette knife for water, resist the urge to smooth it out. The beauty of this style lies in the visible ridges and broken color that catch the light.
Step 2: Painting the Mallard
-
Create the emerald head:
Mix Viridian Green with a little Phthalo Blue. Paint the head silhouette, leaving space for the eye and beak. While wet, blend in a lighter mix (Viridian + Yellow + White) on the top/front of the head to show the iridescent highlight. -
Paint the beak:
Use Yellow Ochre as a base for the beak. Add a shadow along the bottom edge with Burnt Sienna and a bright highlight on the top curve using pale yellow to make it look smooth and hard. -
Detail the eye:
With your fine liner brush, paint the eye black. Once dry, add a tiny, crisp dot of Titanium White to bring the duck to life. paint the white neck ring next, keeping the edges slightly soft so it looks like feathers rather than a plastic collar. -
Render the chest feathers:
Mix Burnt Sienna with Titanium White to get a rusty reddish-brown. Apply this to the chest area using short, dabbing brushstrokes. Layer lighter variations on top to suggest individual fluffiness. -
Paint the wing and body:
For the main body, use a mix of light greys and creams (White + tiny dot of Umber). Use a flat brush to lay down directional strokes that follow the curve of the wing. Add the distinct blue-purple patch (speculum) on the wing edge. -
Add the feet:
Mix Orange (Yellow + Red) with a little Sienna. Paint the feet underwater. They should look somewhat distorted; smear the edges into the surrounding blue paint slightly to create the illusion that they are submerged.
Make It 3D
For the eye and the water droplets on the feathers, used a ‘Gloss Gel Medium’ or clear 3D paint as a final step. It creates a physical bump that shines realistically.
Step 3: Texturing the Water
-
Mix thicker water colors:
Prepare three piles of blue on your palette: a deep navy, a teal (Phthalo + White + Green), and a very pale icy blue. Consider mixing in a little modeling paste if you want the ridges to really stand out. -
Apply the dark ripples:
Load your palette knife with the navy mix. Apply it to the upper right and lower left corners using the edge of the knife to create sharp, jagged lines representing deep ripples. -
Create movement with mid-tones:
Using the teal mix and a clean knife, scrape color diagonally across the canvas. Let the knife skip over the textured canvas weave to create broken lines that look like glistening water. -
Add swirling currents:
Around the duck’s body, curve your knife strokes to show how the bird displaces the water. Use lighter blues here to show the churning wake. -
Paint the submerged reflections:
Beneath the bird, glaze a little transparent green and brown. This suggests the reflection of the duck’s body and the underwater vegetation. -
Highlight the splashes:
Load a small brush or the tip of a knife with pure Titanium White. Dapple small dots and streaks around the waterline where the duck meets the surface to create foam and splashes.
Step 4: Final Touches
-
Refine the edges:
Check the silhouette of the duck. Since the water was painted thickly, you may need to re-define the edge of the breast feathers so they appear to sit *in front* of the water texture. -
Deepen the contrast:
I usually step back at this point to check values. If the water looks flat, add a few more strokes of your darkest Prussian blue near the duck’s waterline for depth. -
Varnish and protect:
Once the thick paint is fully cured (which can take a few days for palette knife work), apply a gloss varnish to enhance the wet look of the water and protect those iridescent greens.
Hang your finished painting in a well-lit spot to let the textured water ripples catch the daylight
Ink Outline Duck With Loose Color Wash
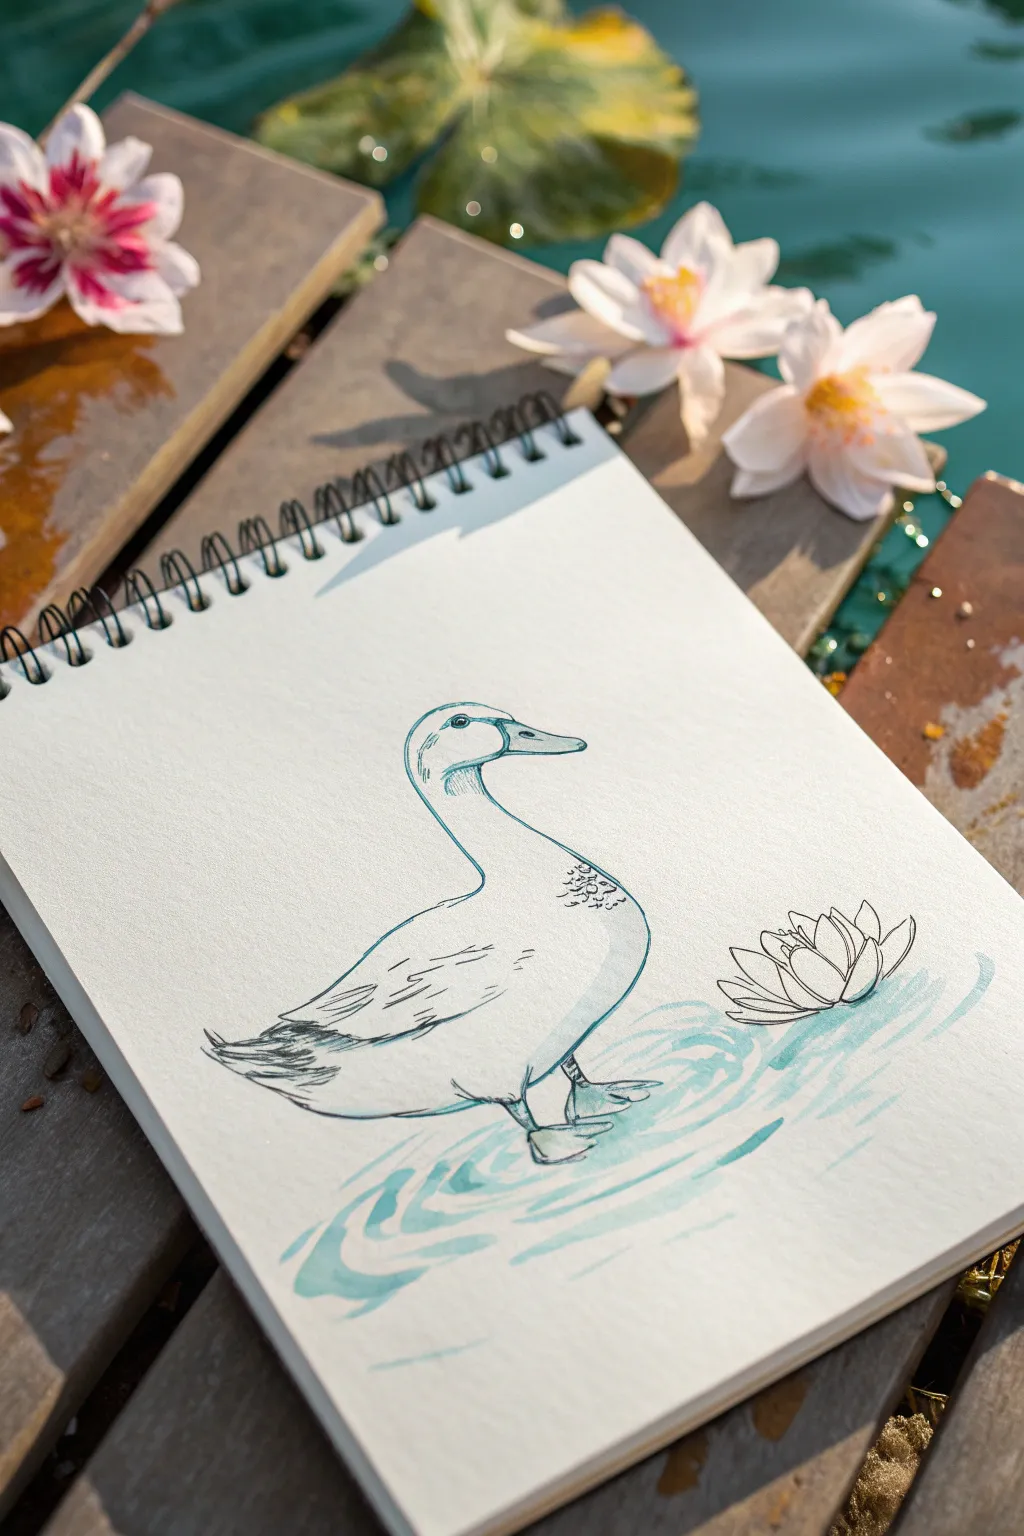
Capture the serene beauty of a duck gliding on water with this simple yet expressive technique. By combining crisp fineliner details with loose, watery washes of blue, you can create a sketch that feels fresh and spontaneous.
Step-by-Step Guide
Materials
- Spiral-bound sketchbook (heavyweight paper suitable for light washes)
- HB graphite pencil
- Kneaded eraser
- Waterproof fineliner pen (0.3mm or 0.5mm, black or dark grey)
- Watercolor paints (Turquoise, Cerulean Blue)
- Round watercolor brush (size 6 or 8)
- Water cup and paper towel
Step 1: Initial Sketching
-
Head and Neck:
Start near the center-left of your page. Lightly sketch a small oval for the head and extend a curved ‘S’ shape downward to form the graceful neck. -
Body Form:
Connect the neck to a larger, horizontal oval shape for the body. The duck should look like it is floating, so keep the bottom line relatively flat but rounded. -
Adding the Beak:
Draw the beak extending from the front of the head. It should be slightly rounded at the tip, with a subtle curve distinguishing the upper and lower mandible. -
Wing and Tail:
Sketch the wing shape resting against the side of the body, curving upward slightly towards the back. Extend the rear into a short, pointed tail. -
Under the Surface:
Lightly indicate the feet. Since the duck is in water, you only need to draw the upper parts of the feet and the splashing shapes around them, rather than detailed webbed toes. -
Flower Buddy:
To the right of the duck, sketch a simple water lily or lotus flower floating on the surface to balance the composition.
Ink Confidence
Don’t worry if your ink lines wobble. Variable line weights—some thick, some thin—actually make the drawing look more organic and lively.
Step 2: Inking the Outline
-
Trace Main Lines:
Using your waterproof fineliner, go over your pencil lines. Keep your hand relaxed; the lines don’t need to be perfectly continuous. A few broken lines add character. -
Detailing the Beak and Eye:
Carefully ink the eye, leaving a tiny white highlight circle inside. Define the nostril and the separation line on the beak. -
Texture on the Neck:
Add small, curved hatching lines on the curve of the neck to suggest shadow and form without coloring it in solid. -
Suggesting Feathers:
On the wing and chest, use quick, scribbly loops and short strokes to imply the texture of ruffled feathers. Concentrating these scribbles near the shoulder creates a nice focal point. -
Tail Feathers:
Use longer, sweeping strokes for the tail feathers, layering them slightly to show density. -
Erase Pencil Marks:
Once the ink is completely dry—I usually wait at least five minutes to be safe—gently erase all the underlying graphite sketch lines.
Add Warmth
Mix a tiny drop of yellow ochre into your water wash to paint the centre of the lotus flower for a gentle pop of contrasting color.
Step 3: Applying the Wash
-
Prepare the Paint:
Mix a very watery puddle of Turquoise or teal paint. You want this to be transparent, not thick. -
Water Ripples:
Load your brush and paint stylized ripples around the duck’s feet and under the belly. Use wavy, horizontal C-strokes that taper at the ends. -
Under the Flower:
Add a few swishes of the same blue wash beneath the lotus flower to ground it in the water. -
Soft Shadows:
With an extremely diluted version of the blue (add more water to your brush), add a faint shadow to the underside of the duck’s beak and neck. -
Wing Accents:
Dab just a hint of the pale blue onto the decorative scribbles on the wing to tie the color scheme together. -
Loose Splashes:
While the ripples are wet, you can drop in a tiny bit more concentrated pigment into the center of the waves to create depth. -
Final Drying:
Let the sketchbook lie flat until the watercolor is fully dry to prevent the colors from running across the page.
You now have a charming pond scene that looks effortless and artistic
Collage Duck With Patterned Feather Pieces
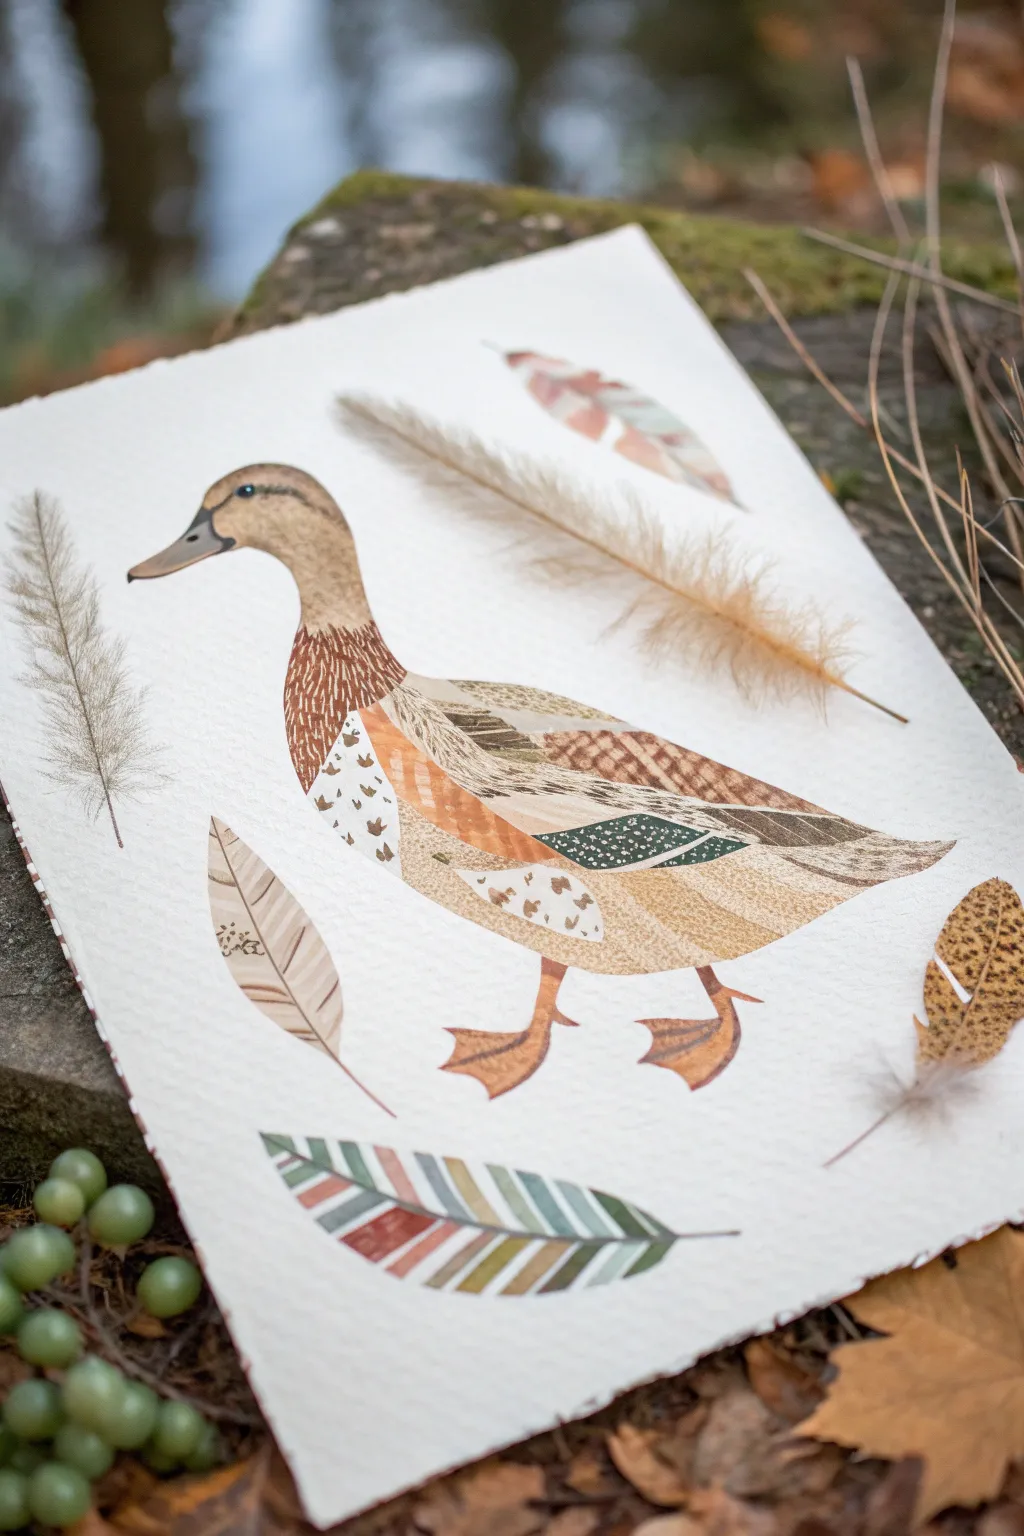
This charming mixed-media project combines watercolor painting with paper collage techniques to create a textured, whimsical duck portrait. By assembling the body from individually painted patterned segments, you’ll achieve a unique layered effect that mimics feathers in an artistic way.
Step-by-Step
Materials
- Heavyweight watercolor paper (300 gsm or heavier)
- Scrap watercolor paper or mixed media paper for cutting
- Watercolor paints (earth tones: sienna, umber, ochre, muted greens)
- Fine liner brush and medium round brush
- Pencil and eraser
- Scissors or precision craft knife
- Archival craft glue or glue stick
- White gel pen or gouache for highlights
Step 1: Preparation & Sketching
-
Sketch the outline:
Begin by lightly sketching the outline of a duck on your main sheet of heavyweight paper. Keep the lines faint so they won’t show through later. Mark out roughly where the wing and different body sections will sit. -
Map the collage sections:
Inside your wing and body outline, draw faint dividing lines to create ‘puzzle pieces.’ These shapes will represent different groups of feathers and will guide where you glue your paper pieces later. -
Create patterned paper sheets:
On a separate sheet of scrap watercolor paper, paint several swatches of different patterns using earth tones. Create one patch with small speckles, another with cross-hatching, one with stripes, and a few with flat washes of ochre and brown. -
Add detail to swatches:
Once your base washes are dry, use a fine liner brush to add distinct textures. Paint tiny ‘v’ shapes for breast feathers on a white background, and fine linear strokes on a brown background to mimic wing, flight feathers.
Loose Edges?
If paper corners curl up after gluing, simply place a sheet of wax paper over the artwork and weigh it down with a heavy book overnight to flatten it.
Step 2: Cutting & Assembling
-
Cut the shapes:
Cut your painted patterned paper into specific shapes that fit the ‘puzzle’ you drew on your main sketch. You’ll need curved pieces for the breast, long tapered shards for the wing feathers, and smaller scales for the back. -
Arrange the pieces:
Before gluing, lay out all your cut pieces onto the duck outline to ensure they fit together snugly. I like to overlap them slightly to create a sense of depth and volume. -
Glue the body:
Start gluing from the tail end working forward. Apply a thin layer of archival glue to the back of each paper shard and press it firmly into place. This layering mimics how real feathers sit. -
Form the wing:
Assemble the wing using your darker, striped, or heavily textured paper pieces. Place the long flight feathers last so they sit on top of the shorter covert feathers.
Add Soft Texture
Use actual dried grass or pressed leaves as stencils. Sponge paint over them on your paper scraps before cutting to create organic, natural textures.
Step 3: Painting & Refining
-
Paint the head:
Using watercolor directly on the main paper (not a cutout), paint the duck’s head. Use a wet-on-dry technique with brown and ochre to get a smooth finish, leaving a tiny circle unpainted for the eye highlight. -
Detail the neck:
Where the painted head meets the collage body, use small, stippled brushstrokes in dark brown to create a seamless transition that looks like neck feathers blending into the breast. -
Add the eye and beak:
Paint the beak in a soft yellow-brown, adding a darker shadow underneath. Fill in the eye with black, ensuring you preserve that white highlight for life-like sparkle. -
Paint the legs:
Sketch and paint the orange webbed feet directly onto the background paper. Add simple shadow lines on the toes to give them dimension. -
Integrate the edges:
If any white gaps are showing between your collage pieces, use a very fine brush with a matching paint color to gently fill them in, unifying the surface.
Step 4: The Floating Feathers
-
Sketch floating feathers:
Around the duck, lightly sketch the outlines of loose, falling feathers of different sizes to frame the composition. -
Paint the fluffy painted feather:
For the soft, fluffy feather near the top, use very watered-down beige paint. Use a flicking motion with a dry brush to drag pigment outward from the stem, creating wispy barbs. -
Paint the patterned feathers:
For the other feathers, paint them flat first, let them dry, and then add patterns like stripes or spots that echo the textures used on the duck’s body. -
Final touches:
Use a white gel pen to add tiny final highlights on the darkest patterned wing sections to make the textures pop.
Step back and admire how the different patterns come together to build a characterful and cozy duck portrait

Have a question or want to share your own experience? I'd love to hear from you in the comments below!