There’s something extra sweet about turning tiny baby handprints and baby footprints into Easter art you’ll actually want to frame. These ideas are designed to feel simple in the moment, but end up as real keepsake pieces you’ll love pulling out every spring.
Classic Bunny Footprint Keepsake
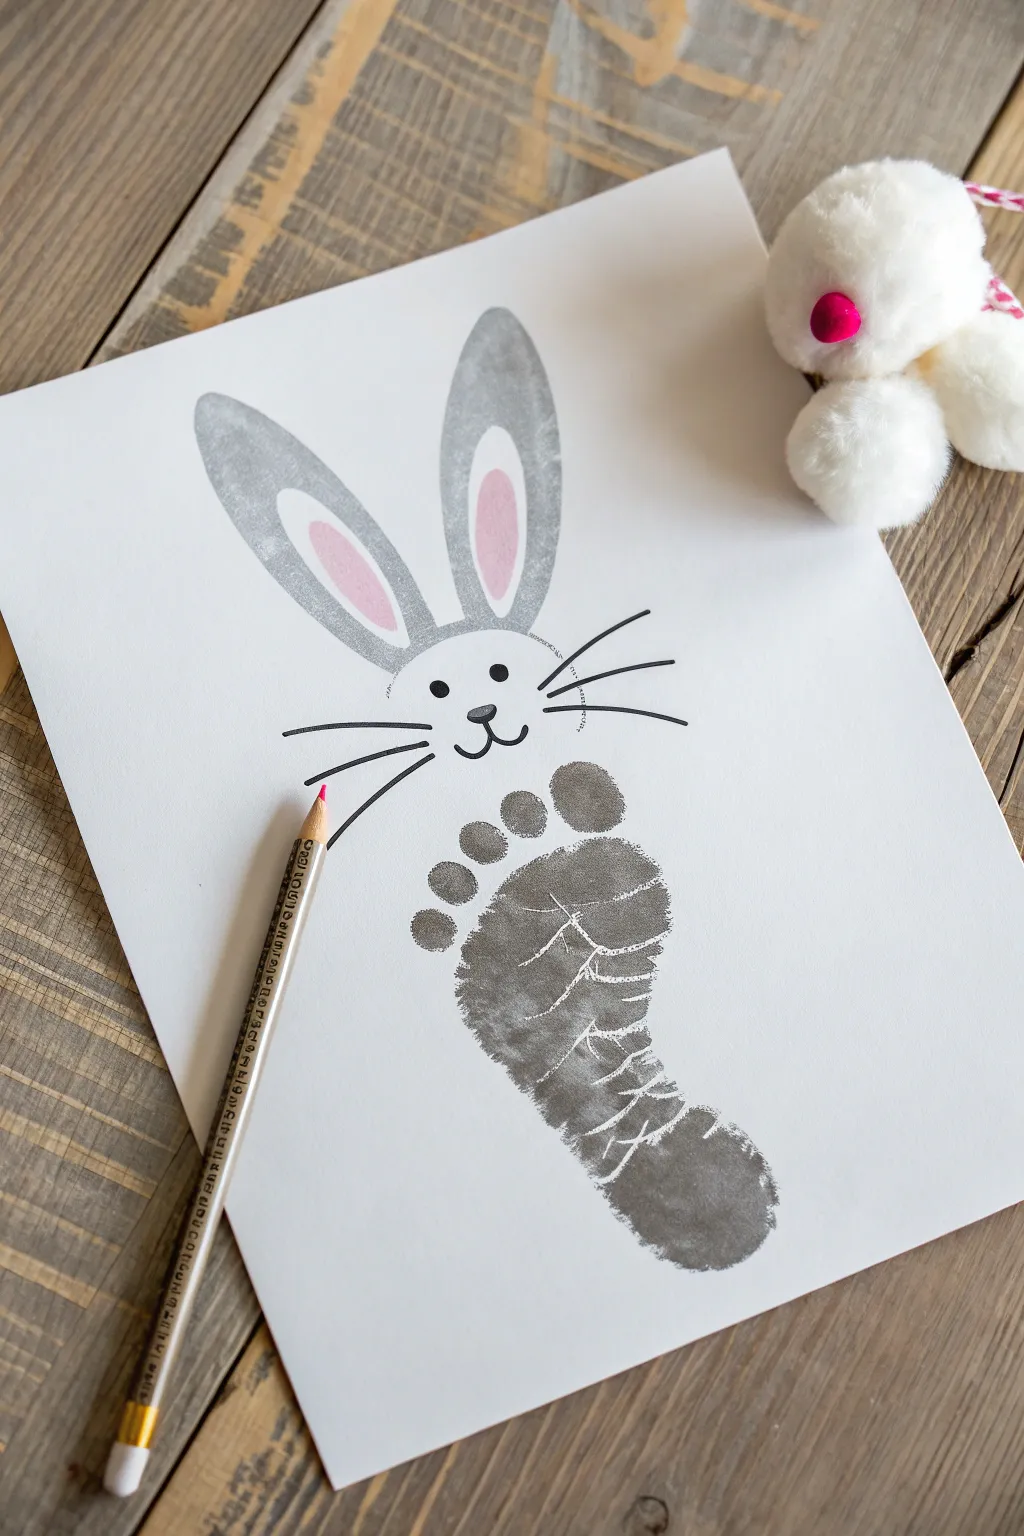
Transform a tiny footprint into an adorable Easter keepsake with this simple yet striking project. The gentle gray tones and minimalist line art give this artwork a modern, clean look that’s perfect for framing or gifting.
Step-by-Step Guide
Materials
- White cardstock or heavy art paper
- Non-toxic gray paint (washable tempera or finger paint)
- Small foam brush or sponge applicator
- Fine-tip black marker or pen
- Pink colored pencil or crayon
- Baby wipes (essential for quick cleanup)
- A willing little foot
Step 1: Capturing the Footprint
-
Prepare your canvas:
Lay your white cardstock on a flat, hard surface. You might want to tape the corners down gently with painter’s tape so the paper doesn’t shift during the printing process. -
Get the paint ready:
Squeeze a small amount of gray paint onto a paper plate or palette. Using a foam brush ensures an even, thin coat which captures the little lines and wrinkles of the foot better than a thick glob of paint. -
Apply paint to the foot:
Hold your baby’s foot securely and gently paint the entire bottom surface gray. Ticklish toes might wiggle, so try to work relatively quickly but thoroughly. -
Position the print:
Aim for the lower-center section of your paper to leave ample room at the top for the bunny’s ears. The heel will become the bunny’s head, and the toes will be the fluffy feet. -
Press and lift:
Press the foot firmly onto the paper, rolling slightly from heel to toe to ensure good contact. Lift the foot straight up to avoid smearing the print. -
Clean up time:
Immediately use those baby wipes to clean the painted foot before the little artist creates unintentional wall art. Let the footprint on the paper dry completely before moving to the next phase.
Smudged Print Rescue
If the print smears, turn it into a ‘fluffy’ bunny by dabbing extra paint around the edges to mimic fur texture, hiding the smudge intentionally.
Step 2: Drawing the Bunny
-
Outline the ears:
Once the paint is dry, use your black marker or gray paint with a fine brush to draw two tall, oval ear shapes extending upward from the heel of the footprint. -
Fill the ears:
If you used paint for the outline, fill the ears with a light gray wash or color them in lightly with a gray crayon to match the footprint’s texture. Leave a smaller oval shape white in the middle of each ear. -
Add pink details:
Using a pink colored pencil, gently shade inside the inner section of the ears. This adds a soft pop of color that brings the character to life. -
Draw the forehead line:
Lightly sketch a curved line connecting the base of the two ears to the top edge of the heel print. This defines top of the bunny’s head. -
Create the face:
With the black marker, draw two small solid dots for the eyes just below the forehead line. Leave a bit of space between them for a sweet expression. -
Add the nose:
Draw a small, soft triangular shape or a tiny heart for the nose directly below the eyes, centered on the ‘heel’ area. -
Draw the mouth:
From the bottom point of the nose, draw a small vertical line down, then curve it outward to the left and right like a ‘J’ and a backwards ‘J’ to form the bunny’s mouth. -
Sketch the whiskers:
Add three long, sweeping whiskers extending out from each cheek area. Make these lines quick and confident so they look sharp.
Cotton Tail Upgrade
Glue a real white pom-pom or a cotton ball onto the side of the heel print to give your bunny a 3D fluffy tail that pops off the page.
Now you have a timeless snapshot of how small those feet once were, ready to bring Easter cheer for years to come


Speckled Egg With Baby Fingerprint Dots
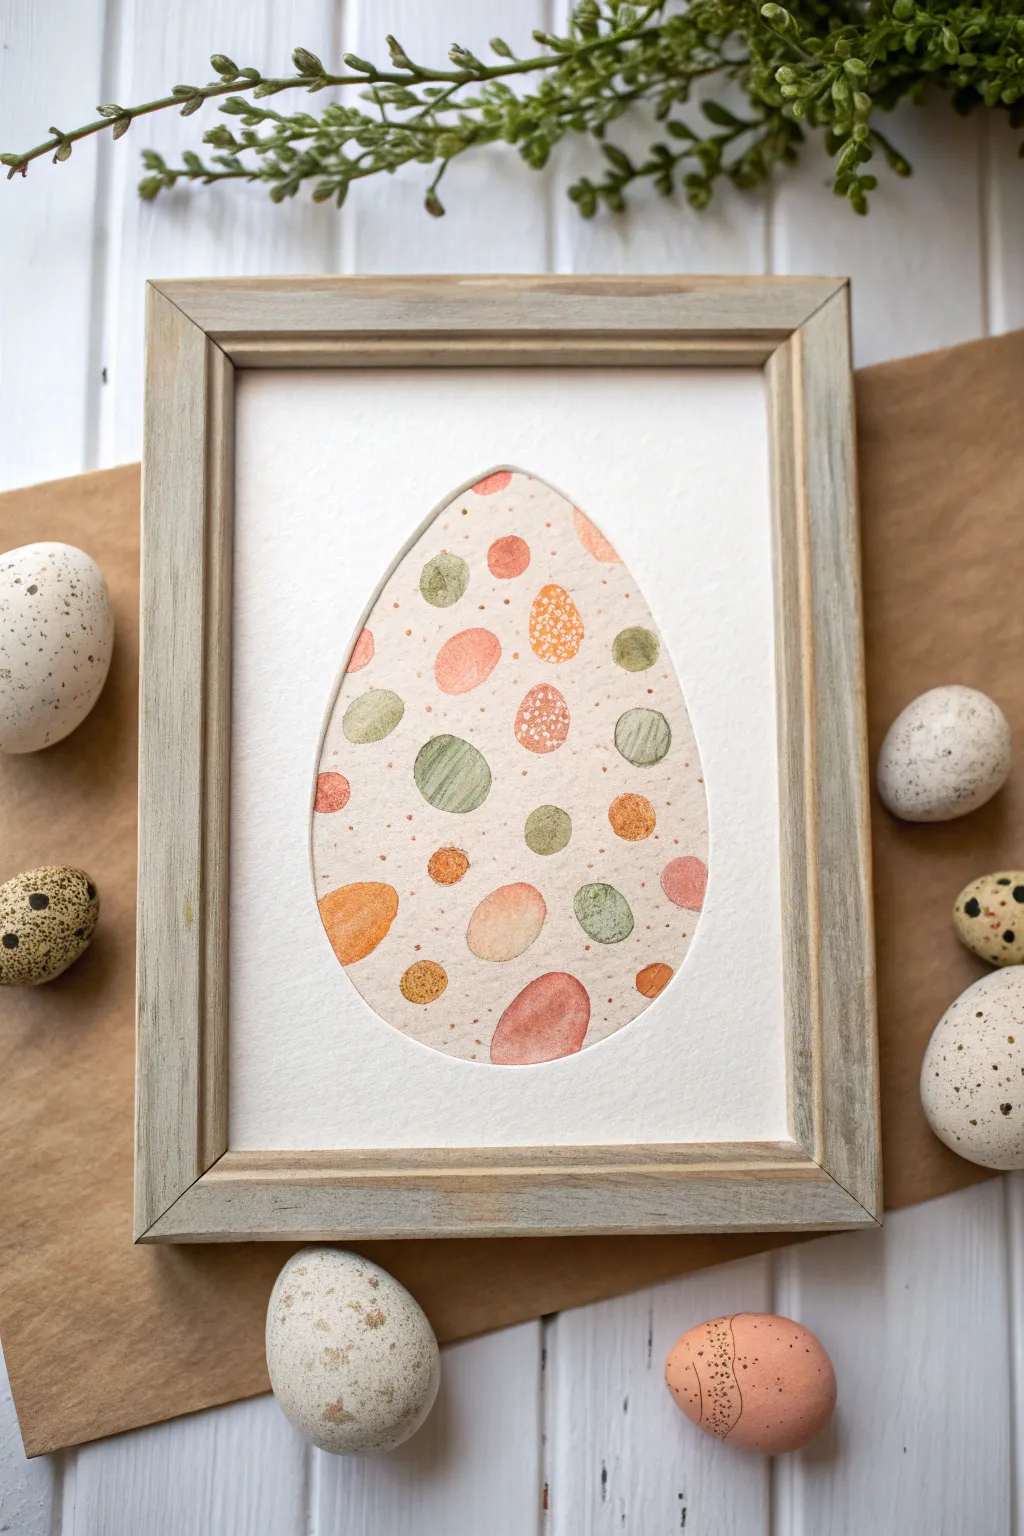
Capture the sweetness of little fingers with this sophisticated yet simple Easter craft. Using a clever reverse-matte technique, your child’s colorful fingerprints are transformed into a chic, speckled egg design perfect for seasonal decor.
Detailed Instructions
Materials
- Heavyweight cold-press watercolor paper (two sheets)
- Pencil
- Precision craft knife (like an X-Acto) or small pointed scissors
- Cutting mat
- Non-toxic, water-based finger paints or washable tempera
- Paint palette or paper plate
- Damp cloth or baby wipes (crucial for clean fingers!)
- Fine-point brown ink pen or watercolor marker
- Picture frame (around 5×7 or 8×10 inches)
- Double-sided tape or artist tape
Step 1: Creating the Fingerprint Canvas
-
Prepare the palette:
Squeeze small, dime-sized amounts of paint onto your palette. For the look in the photo, choose an earthy palette: terracotta orange, muted sage green, dusty pink, and mustard yellow. -
Finger printing:
Dip your child’s index finger or thumb into the first color. You want a distinct print, so stamp once or twice on scrap paper first to remove excess globby paint. -
Stamp the main shapes:
Press fingers onto the center of your first sheet of watercolor paper. Spread them out randomly, leaving plenty of white space between them. Alternate clean fingers for different colors to avoid muddy mixing. -
Add variance:
Mix up the sizes. Use thumbs for larger ovals and pinky fingers for smaller dots. I find this variety makes the final texture look much more organic and interesting. -
Let it dry completely:
This is non-negotiable! The paint must be bone dry before you add ink details. A hairdryer on a cool setting can speed this up if you’re impatient.
Little Artist Pro Tip
If working with a baby, put the paper in a high chair tray and guide their hand gently. It helps to accept smudges as part of the charm rather than aiming for perfection.
Step 2: Adding texture and Detail
-
Assess the composition:
Once the prints are dry, look at the spread. It should look like random confetti. If there are huge empty gaps, you can add a few tiny painted dots with a brush or fingertip now. -
Create the texture:
Using your fine-point brown pen, stipple tiny dots over a few of the painted fingerprints. You don’t need to do all of them; select about one-third of the prints to detail. -
Create background speckles:
Take the same brown pen and gently tap it against the white paper in the empty spaces between fingerprints. These tiny specks mimic the look of a real bird’s egg. -
Vary the speckle density:
Keep the ink dots random—clusters of three or four look more natural than evenly spaced rows.
Step 3: The Egg Reveal
-
Draft the egg shape:
On your second sheet of watercolor paper (this will be the top layer), lightly sketch a large egg shape in the center using a pencil. -
Cut the aperture:
Place this paper on your cutting mat. carefully trace your pencil line with the craft knife to remove the egg shape completely, leaving a “window.” -
Erase guidelines:
Gently erase any remaining visible pencil marks around the cut edge so the border is crisp and white. -
Align the layers:
Place your fingerprint artwork flat on the table, face up. Layer the window cut-out sheet on top. Move the top sheet around until you find the most pleasing section of the pattern. -
Secure the artwork:
Once aligned perfectly, hold the sheets firmly and use tape on the back or sides to secure the two papers together so they don’t shift. -
Frame it:
Clean the glass of your frame to remove dust. Place your layered artwork inside and close the back. The shadow created by the top layer adds a lovely depth to the piece.
Fixing Smudges
Did a fingerprint smudge or smear? Don’t toss the page! Simply position your egg ‘window’ cutout over a different section of the paper to hide the mistake.
Hang your beautiful speckled egg art to bring a touch of minimalist charm to your spring celebration


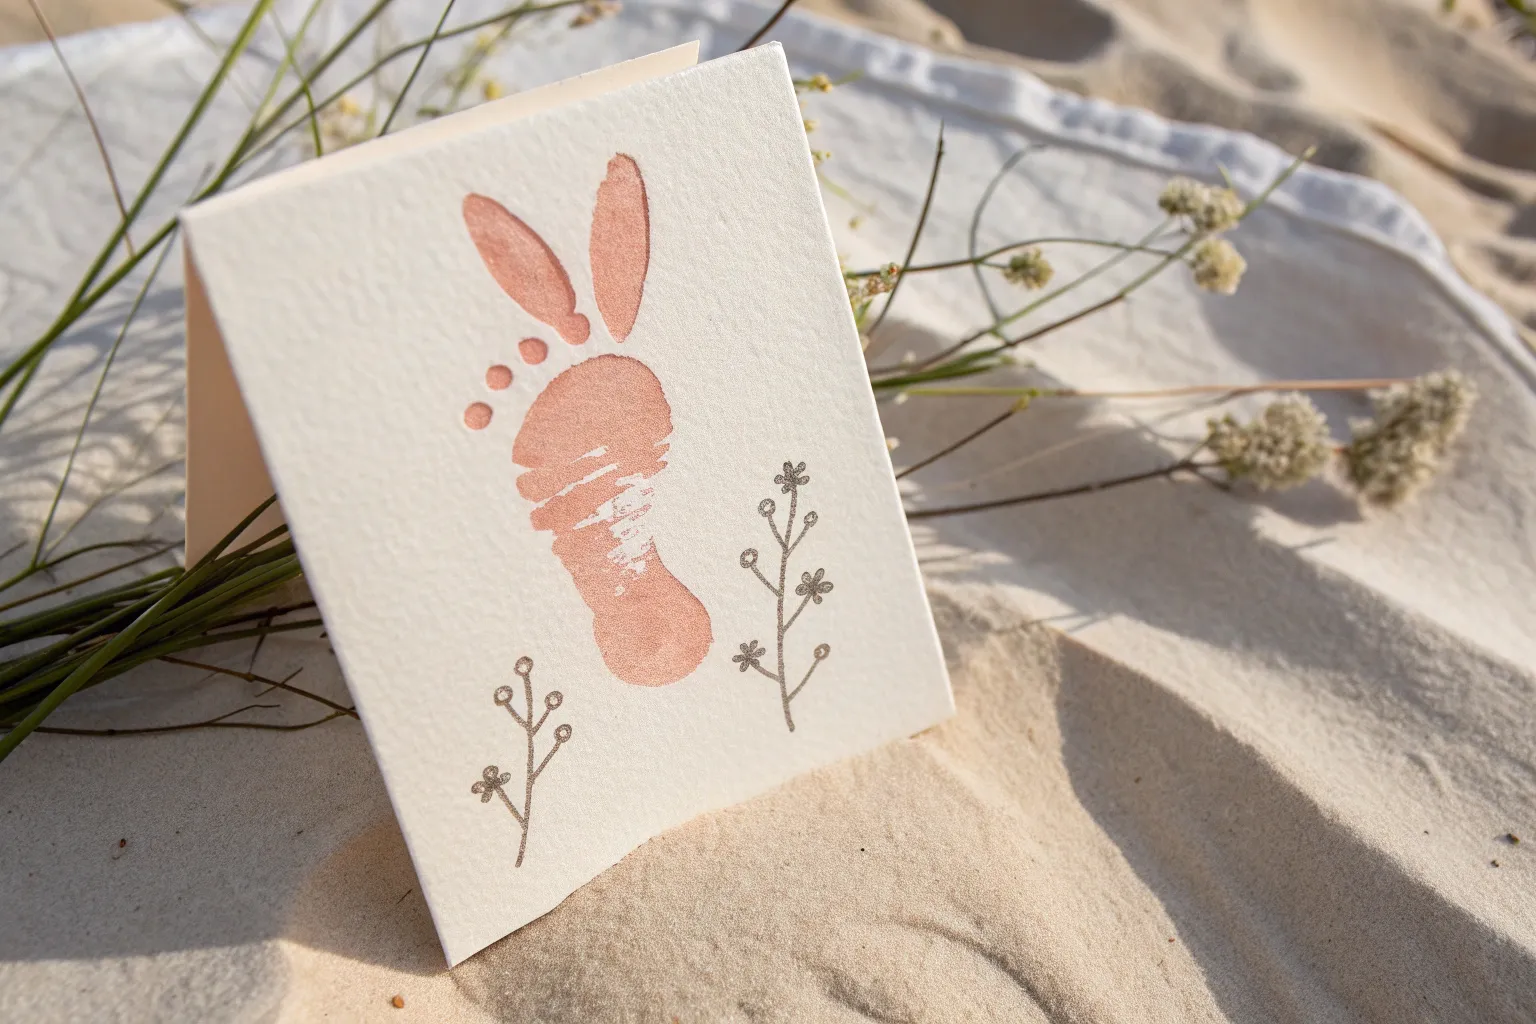
“My First Easter” Print With Footprint Centerpiece
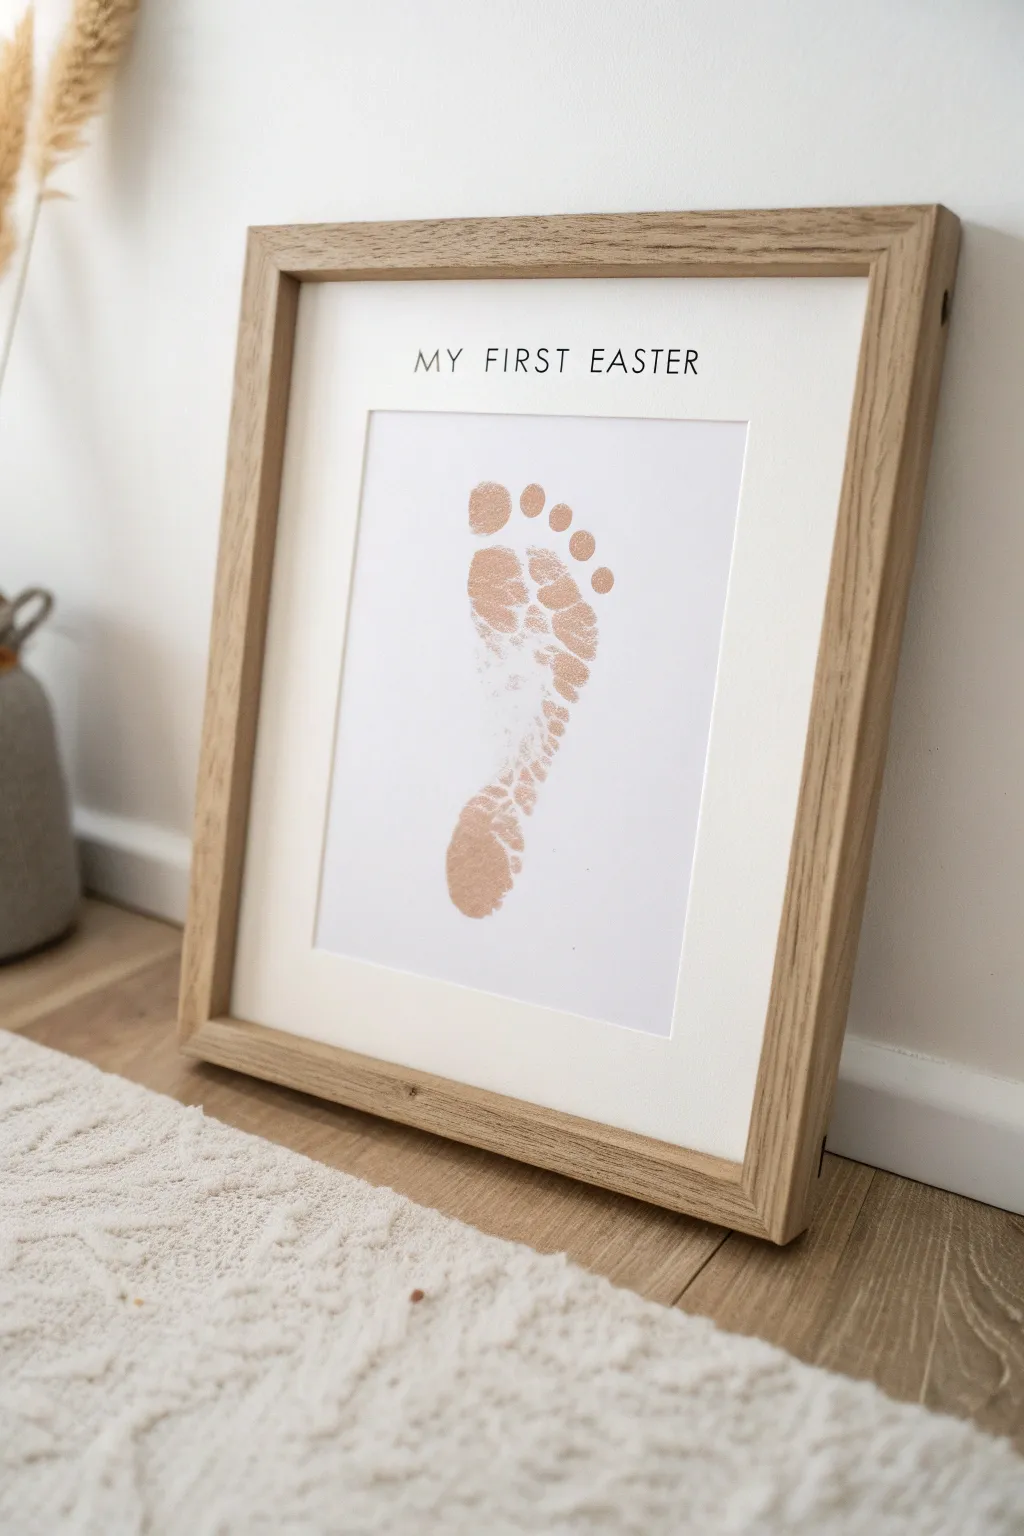
Capture a fleeting moment in time with this elegant and modern keepsake featuring your baby’s footprint in a stunning rose gold hue. This minimalist design places the focus entirely on the tiny details of those little toes, framed beautifully in natural wood for a timeless look.
Step-by-Step
Materials
- Heavyweight white cardstock or art paper (A4 size)
- Rose gold or copper metallic craft paint (non-toxic, washable)
- Small foam sponge brush or dense paintbrush
- Computer and printer (optional, for printed text)
- Black fine-liner pen (optional, for handwritten text)
- Baby wipes (essential for quick cleanup)
- Light wood box frame (A4 size) with a white mount
- Scrap paper for testing
- Washi tape or masking tape
Step 1: Preparing the Base
-
Design the text layout:
Before involving the baby, set up your paper. You can use word processing software to type ‘MY FIRST EASTER’ in a clean, sans-serif font like Futura or Helvetica. Center the text near the top of the page, leaving plenty of white space below for the footprint. -
Print or hand-letter:
Load your heavyweight cardstock into the printer and print the text. If you prefer a handmade touch, lightly pencil a guideline and use a black fine-liner to write the phrase in neat capital letters. -
Check the positioning:
Hold the frame’s mount over your printed paper to ensure the text sits comfortably within the window without being cut off. There should represent about an inch or two of white space between the text and the top edge of the mount. -
Secure the paper:
Tape your prepared paper to a flat, hard surface (like the floor or a low table) using small loops of tape on the back. This prevents the paper from sliding around while you are wrangling a wiggly baby.
Step 2: Capturing the Footprint
-
Prepare the workspace:
Have your paint, brush, and an open pack of baby wipes within arm’s reach. I find it helpful to have a helper for this stage—one person to hold the baby, one to guide the foot. -
Apply the paint:
Squeeze a small amount of rose gold metallic paint onto a palette or scrap paper. Dip the sponge brush in and dab it onto the baby’s foot. You want a thin, even coat—too much paint will cause slipping and smear the little ridges. -
Test run:
Do a quick practice stamp on a piece of scrap paper. This helps you gauge if you have the right amount of paint and gets the baby used to the sensation. -
Position the foot:
Bring the baby to the paper. Hover their foot over the center area, aiming for the ball of the foot to land a few inches below the text. -
Press and roll:
Gently press the heel down first, then roll the foot forward to the toes. Press lightly on each toe individually to ensure they make contact with the paper. -
Lift carefully:
Lift the foot straight up in one smooth motion to avoid smudging. Don’t worry if it’s not absolutely perfect; the texture makes it authentic. -
Clean up instantly:
Immediately wipe the baby’s foot thoroughly with the baby wipes before the paint begins to dry.
Smudge Rescue
If the paint smudged slightly, don’t foster despair! Use a fine white gel pen to tidy up the edges of the toes once the paint is fully dry.
Step 3: Finishing and Framing
-
Allow to dry:
Let the print dry completely flat for at least an hour. Metallic paints can sometimes take a little longer to set than standard acrylics. -
Inspect the print:
Once dry, check for any accidental smudges. If there are tiny stray marks, you can sometimes gently scratch them off the thick cardstock with a craft knife or cover them with a tiny dot of white-out. -
Prepare the frame:
Remove the back and the glass/acrylic from your wooden frame. Wipe the glass down on both sides to ensure no dust or fingerprints get trapped inside. -
Mount the artwork:
Place the white mount over your artwork. Align it so the footprint is centered nicely. Use masking tape to secure the artwork to the back of the mount board so it doesn’t slip over time. -
Assemble the frame:
Place the glass back into the frame, followed by the mounted artwork. Add the backing board and secure the clips.
Baby Wriggle Tip
Do this while baby is asleep or in a high chair! A sleeping baby offers the least resistance, resulting in a much clearer print with zero mess.
Now you have a sophisticated piece of seasonal art that freezes time in a beautiful, metallic shimmer


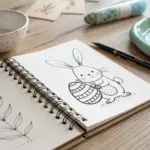
3D Tail Bunny Footprint With Mixed Media Details
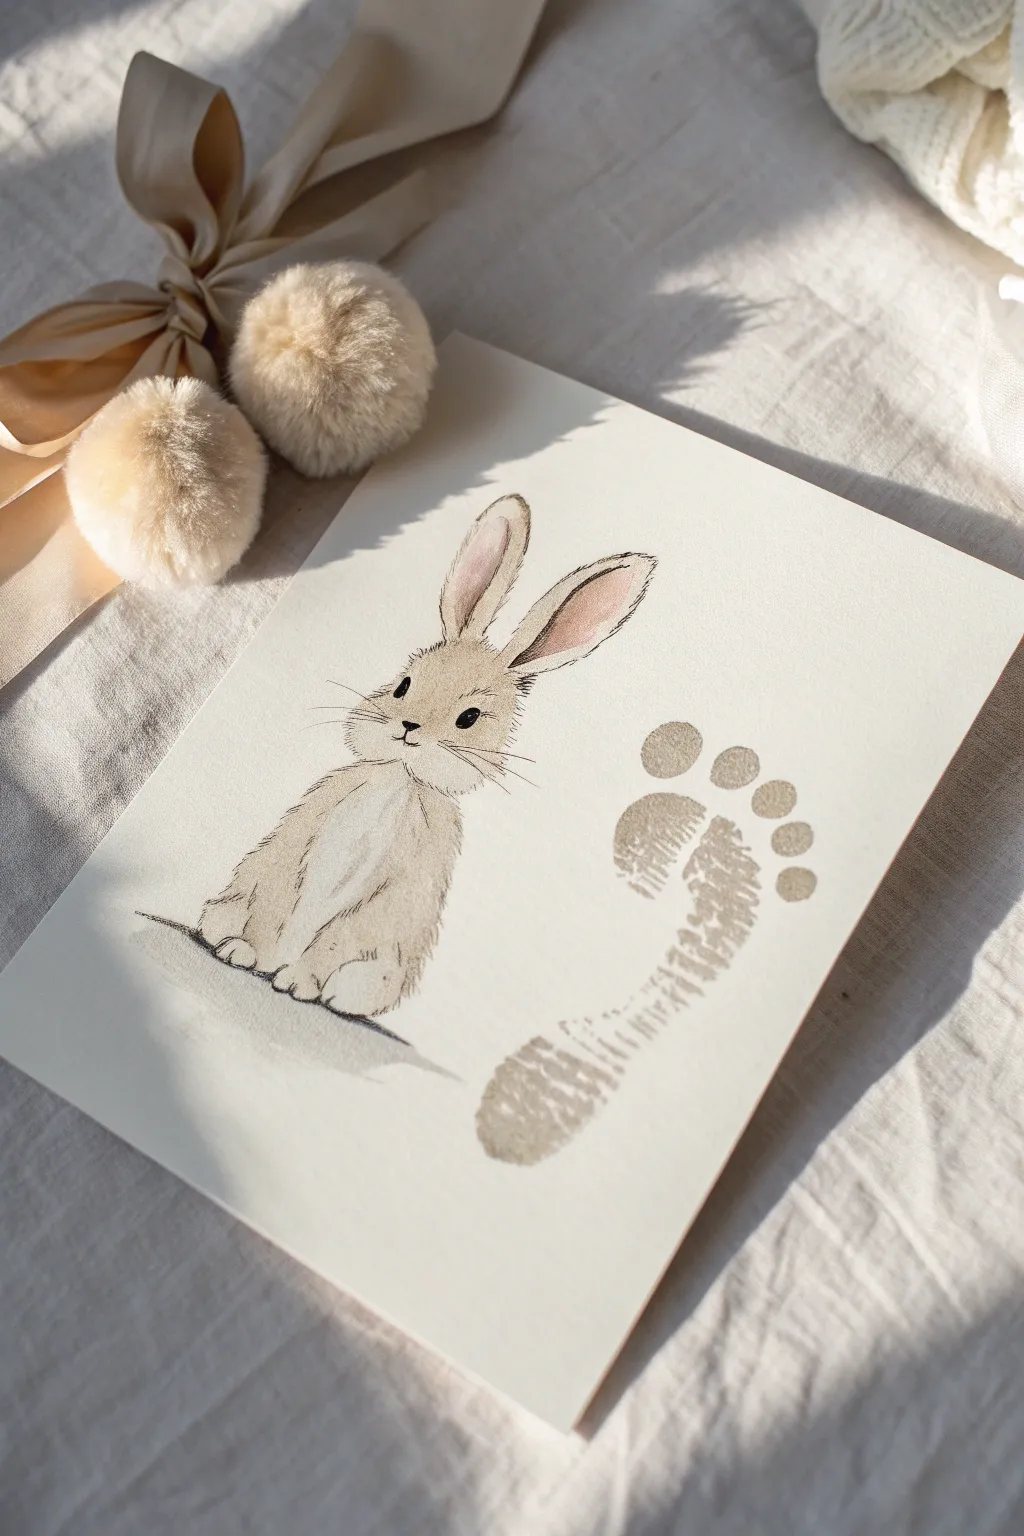
This sweet nursery art combines a delicate watercolor-style bunny sketch with a tangible memory of your little one’s footprint. The soft neutrals make it a perfect baby shower gift or a timeless addition to an Easter gallery wall.
How-To Guide
Materials
- Heavyweight watercolor paper or textured cardstock (creamy white)
- Pencil (HB or 2B)
- Fine liner pen (black or dark brown, archival ink)
- Watercolor paints (beige, warm grey, soft pink)
- Round watercolor brush (size 4 or 6)
- Baby-safe ink pad or tempera paint (beige/taupe)
- Cotton balls or faux fur pom-pom
- Strong craft glue (e.g., tacky glue)
Step 1: Planning the Layout
-
Positioning:
Lay your paper flat on a clean surface. Imagine a vertical line dividing the paper in half. The bunny will sit on the left, slightly lower than center, while the footprint will curve gently on the right side. -
Light Sketching:
Using your pencil very lightly, draw an oval for the bunny’s body and a smaller circle on top for the head. Add two long, almond-shaped ears pointing upwards from the head.
Smudged Ink?
If the footprint smudges, turn the mistake into texture! Use a damp brush to gently fade the smudge into a shadow, or add grass tufts around the print to hide imperfections.
Step 2: Drawing the Bunny
-
Refining the Shape:
Sketch the bunny’s fluffy cheeks by making the lines slightly jagged to mimic fur. Connect the head to the body with soft, sloping lines. -
Adding Details:
Draw two small, dark almond shapes for eyes. Add a tiny ‘Y’ shape for the nose and mouth. Sketch the front paws tucked in front of the chest and the rounded haunches at the base. -
Inking the Outline:
Once you are happy with the sketch, trace over your pencil lines with the fine liner pen. Use short, broken strokes rather than one continuous line to create a furry texture. -
Whiskers:
Flick the pen quickly outward from the cheeks to create thin, lively whiskers. Erase any visible pencil marks once the ink is completely dry.
Level Up: Texture
For a mixed-media twist, glue tiny strands of real wool or unspun roving onto the bunny’s chest area to make the white fur actually soft to the touch.
Step 3: Watercolor Washes
-
Mixing Color:
Dilute a beige or warm grey watercolor paint with plenty of water. You want a very transparent, tea-stained look for the fur. -
First Wash:
Paint the body and head, leaving the chest area white for contrast. Keep the edges soft; it’s okay if the paint goes slightly outside the lines. -
Ear Details:
Mix a very watery soft pink. Paint the inside of the bunny’s ears, blending it gently into the beige base near the bottom of the ears. -
Adding Depth:
While the paint is still slightly damp, drop a tiny bit of darker grey or brown near the paws and under the chin to create shadows. -
Grounding Shadow:
Paint a faint, horizontal wash of grey under the bunny so it doesn’t look like it’s floating in space. Let the paper dry completely.
Step 4: The Footprint
-
Prep the Foot:
Apply the beige baby-safe ink or paint to your child’s clean foot. Ensure full coverage but avoid thick globs, which can smear. -
Stamping:
Press the foot firmly onto the right side of the paper. I suggest doing a practice stamp on scrap paper first to gauge the pressure needed. -
Adding Toes:
After the main footprint dries, dip your thumb or a round sponge dabber into the same ink. Press five dots in an arc above the footprint to create ‘toes’ if the original print’s toes aren’t distinct enough or to stylize the look. -
Drying Time:
Allow the footprint ink to dry fully before handling the paper again to prevent smudging.
Step 5: Finishing Touches
-
The Tail:
Take a small beige faux fur pom-pom or a fluffy cotton ball. Apply a dot of strong craft glue to the back of the bunny where the tail should be. -
Attach and Fluff:
Press the pom-pom firmly onto the glue dot. Hold it for a few seconds to set. Gently fluff the fibers so it looks unified with the drawing.
Now you have a precious keepsake capturing a moment in time alongside your artistic touch


Have a question or want to share your own experience? I'd love to hear from you in the comments below!