If you’re looking for Easter painting ideas for kids that feel festive without being fussy, you’re in the right spot. I pulled together a mix of classic Easter eggs, sweet bunnies, and peepy little chicks—all doable for real kids with real attention spans.
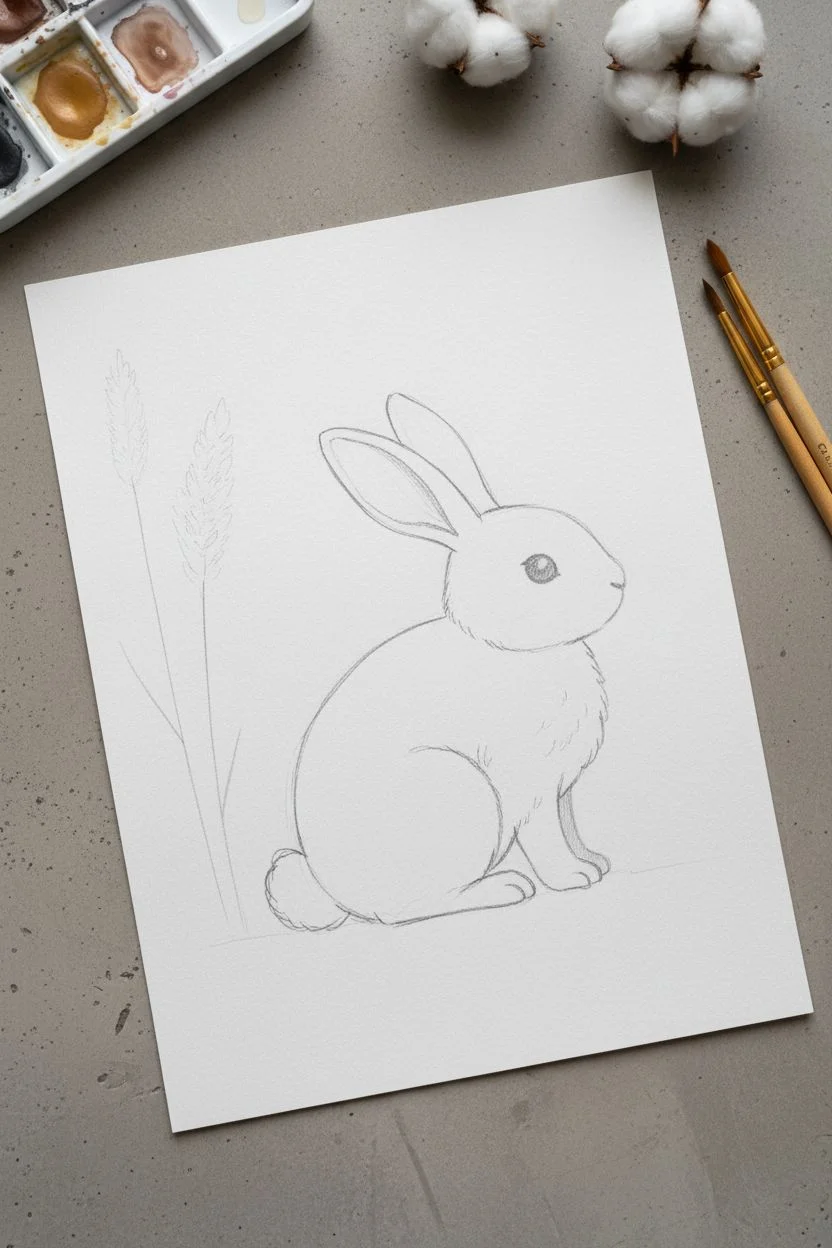
Simple Bunny Portrait Painting
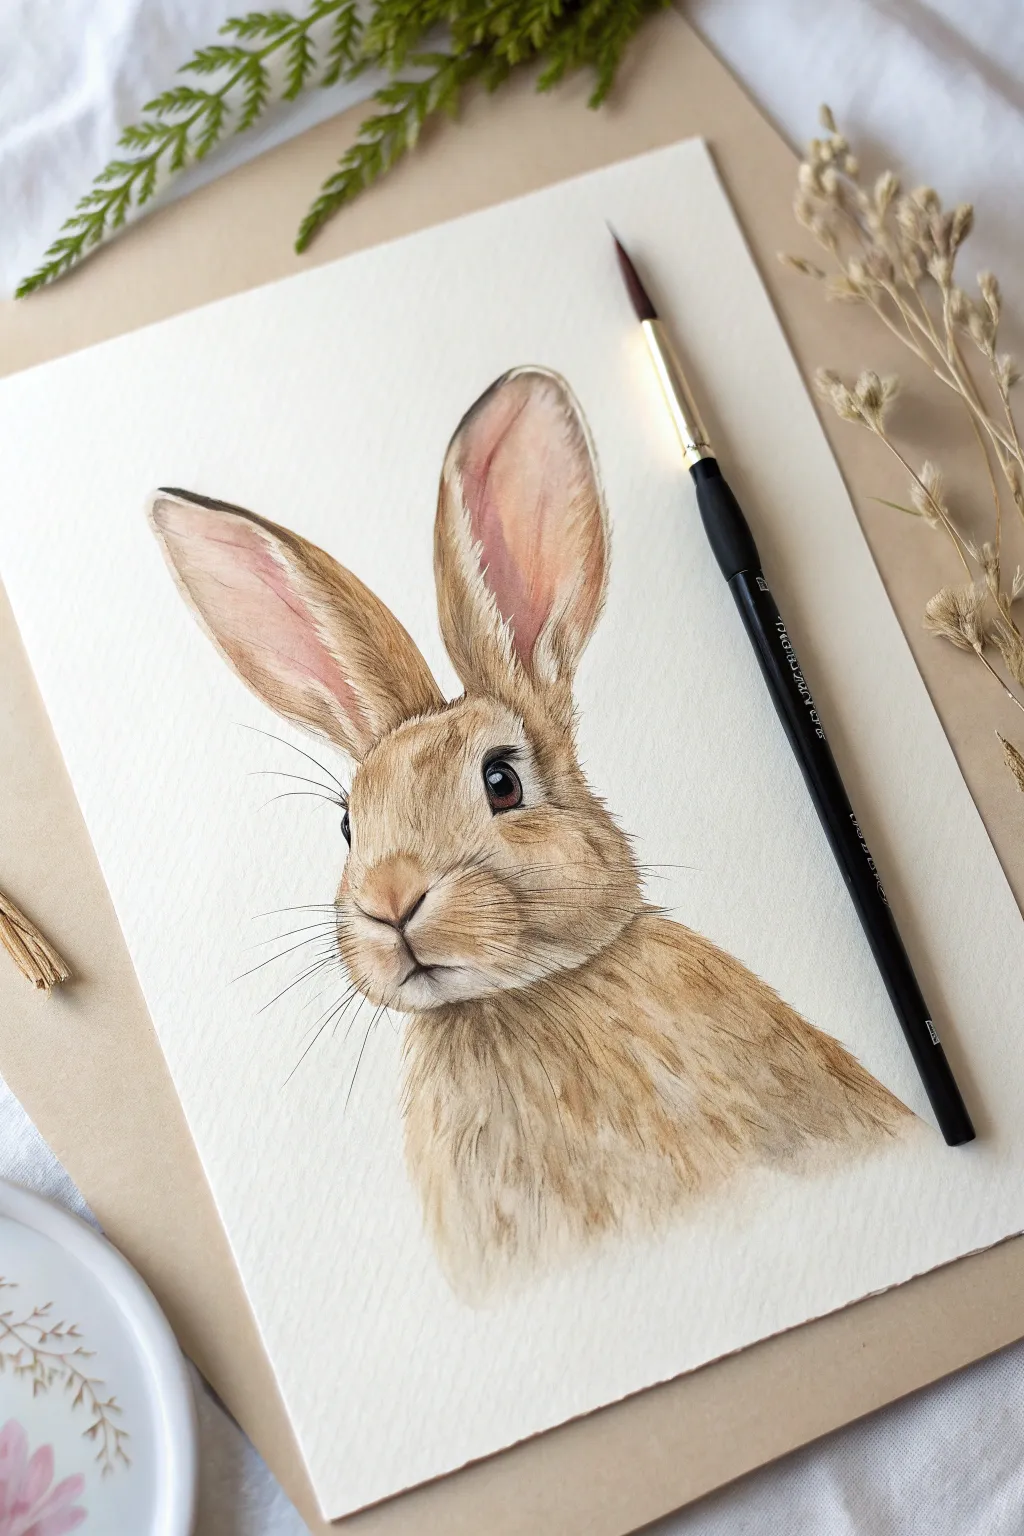

Capture the soft, furry texture of a rabbit with this approachable watercolor project that focuses on layering and fine details. The result is a charming, lifelike portrait perfect for Easter decor or a special springtime gift.
Step-by-Step Guide
Materials
- Cold-press watercolor paper (300 gsm)
- Watercolor paints (burnt sienna, yellow ochre, raw umber, ivory black, faint pink)
- Round watercolor brushes (sizes 2, 4, and 00 for details)
- HB pencil
- Kneaded eraser
- Clean water jar
- Paper towels
- Masking tape (optional)
Step 1: Sketching the Framework
-
Outline the head shape:
Begin by lightly sketching an oval for the bunny’s head using your HB pencil. Keep the lines very faint so they won’t show through the translucent watercolor later. -
Add the ears:
Draw two long, upright ears extending from the top of the head. Notice how the ear on the right is slightly broader and open, while the left one turns slightly away. -
Position facial features:
Sketch a large circle for the eye on the right side of the face. Place the nose as a small ‘Y’ shape lower down on the snout, and define the cheek area. -
Refine the chest:
Lightly draw the chest area extending downward, suggesting the fluffiness of the fur without drawing every single hair. Use your kneaded eraser to lift up any dark graphite lines until they are barely visible.
Muddy Fur?
If fur colours look muddy, you’re layering while paint is still wet. Let each layer dry completely (using a hair dryer helps) before adding defined hair strokes on top.
Step 2: Applying Base Layers
-
First wash of color:
Mix a watery wash of yellow ochre and a touch of burnt sienna. Using a size 4 brush, apply this light tan color over the entire bunny, avoiding the eye and the inner pink parts of the ears. -
Adding ear details:
While the body dries, mix a very pale, watery pink. Paint the insides of the ears, blending it gently into the tan fur at the edges for a natural transition. -
Deepening the fur tones:
Once the first layer is completely dry to the touch, mix a slightly stronger brown using burnt sienna. Apply this to the shadowed areas: under the chin, the side of the cheek, and the darker patches on the back of the ears. -
Creating texture:
I like to use a ‘dry brush’ technique here. Remove most of the moisture from your brush and lightly sweep it over the chest area to mimic the rougher texture of chest fur.
Backlit Glow
Make the bunny look sun-kissed by leaving the very edges of the ears unpainted white, or lift color slightly with a damp brush to create a rim-light effect.
Step 3: Defining the Features
-
Painting the eye:
Use raw umber mixed with a tiny bit of black for the eye. Leave a tiny white spot unpainted for the reflection highlight—this brings the bunny to life instantly. -
Darkening the pupil:
Add a second layer of nearly pure black to the center pupil of the eye, keeping the brown iris visible around the edges. -
Suggesting the nose:
Using a small size 2 brush and a pink-brown mix, carefully paint the nose and the split of the upper lip. -
Adding deeper shadows:
Mix raw umber and burnt sienna to create a dark brown. Paint the crease above the eye and the shadow where the ears meet the head to add dimension.
Step 4: Fur Details and Whiskers
-
Layering fine hairs:
Switch to your smallest brush (size 00 or 0). Using distinct, quick strokes with the dark brown mix, paint individual hairs on the face, following the direction the fur naturally grows. -
Softening the chest:
Add longer, looser strokes of light brown to the chest area. Keep these strokes feathered at the bottom so the painting fades out softly rather than having a hard edge. -
Enhancing ear tips:
Add darker brown or nearly black paint to the very tips of the ears and the outer rims to frame them. -
Painting the whiskers:
Load your fine liner brush with thin, inky black paint. With a confident, quick flick of the wrist, paint the long whiskers extending from the muzzle. Do not hesitate mid-stroke. -
Final highlights:
If you lost any whites, use a tiny dab of white gouache or a white gel pen to accentuate the eye sparkle or add a few white whisker roots.
Now you have a gentle woodland friend ready to be framed or gifted for the holiday season


Hatching Chick in a Cracked Egg
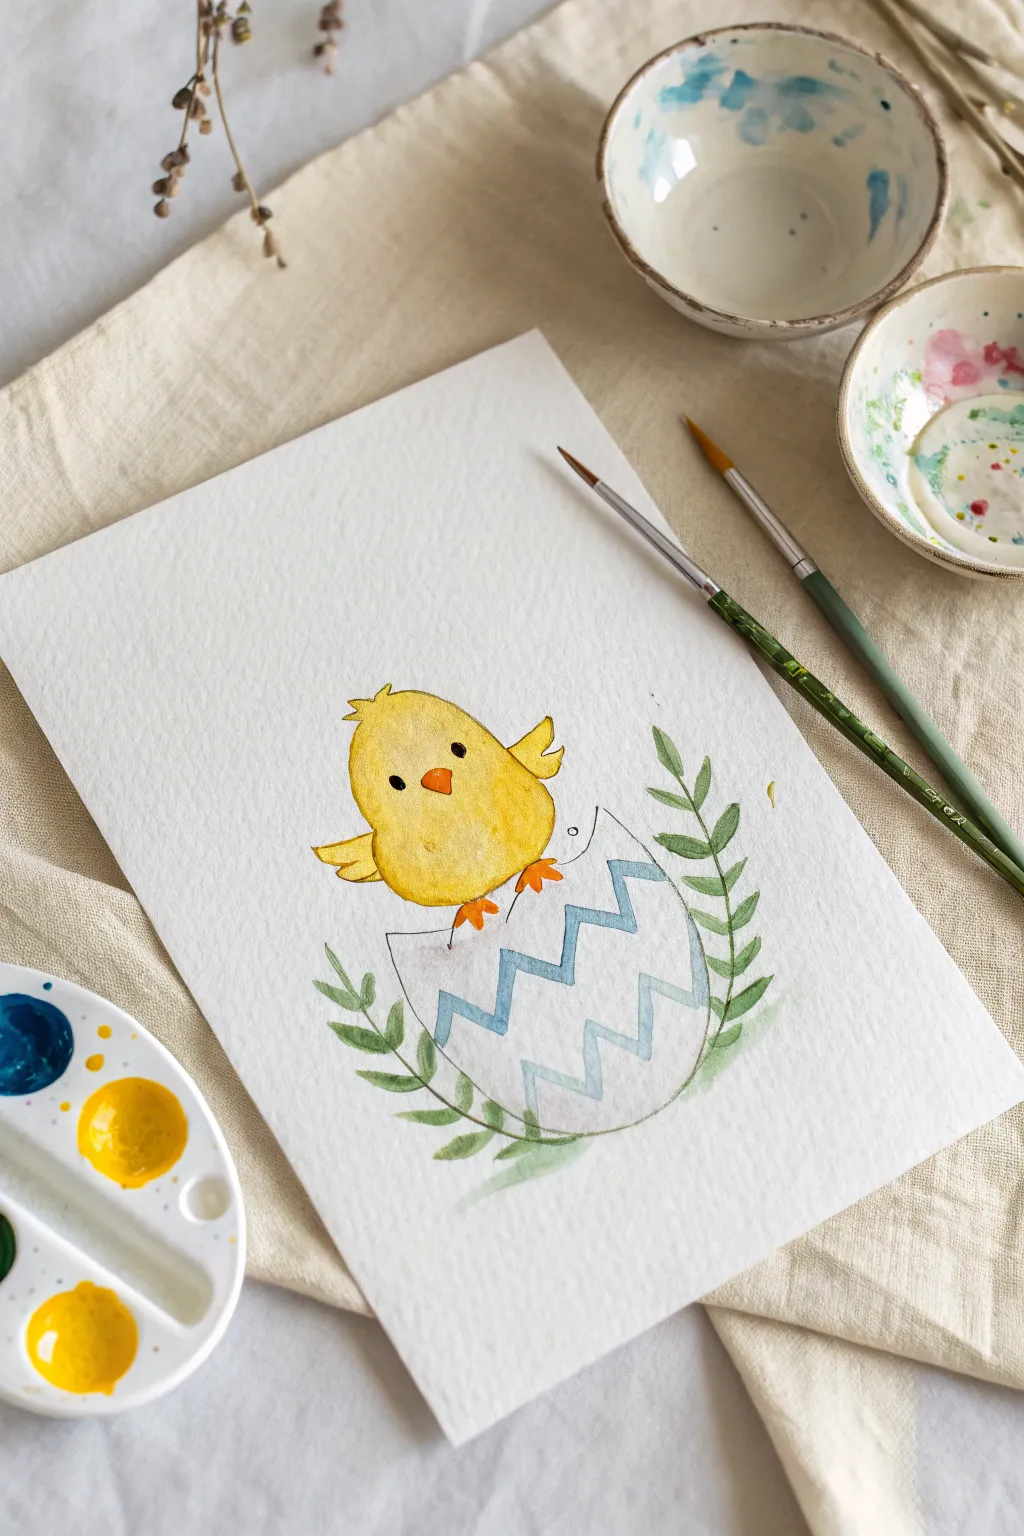
Capture the magic of spring with this adorable watercolor illustration of a fluffy chick making its debut. This gentle project uses simple shapes and soft washes to create a heartwarming scene perfect for Easter cards or seasonal decor.
How-To Guide
Materials
- Cold press watercolor paper (A4 or similar size)
- Watercolor paints (yellow, orange, light blue, greens, black)
- Round watercolor brushes (size 4 and size 0 or 2 for details)
- Palette for mixing
- Pencil (HB or H)
- Eraser
- Two jars of water (one for clean, one for dirty)
- Paper towels
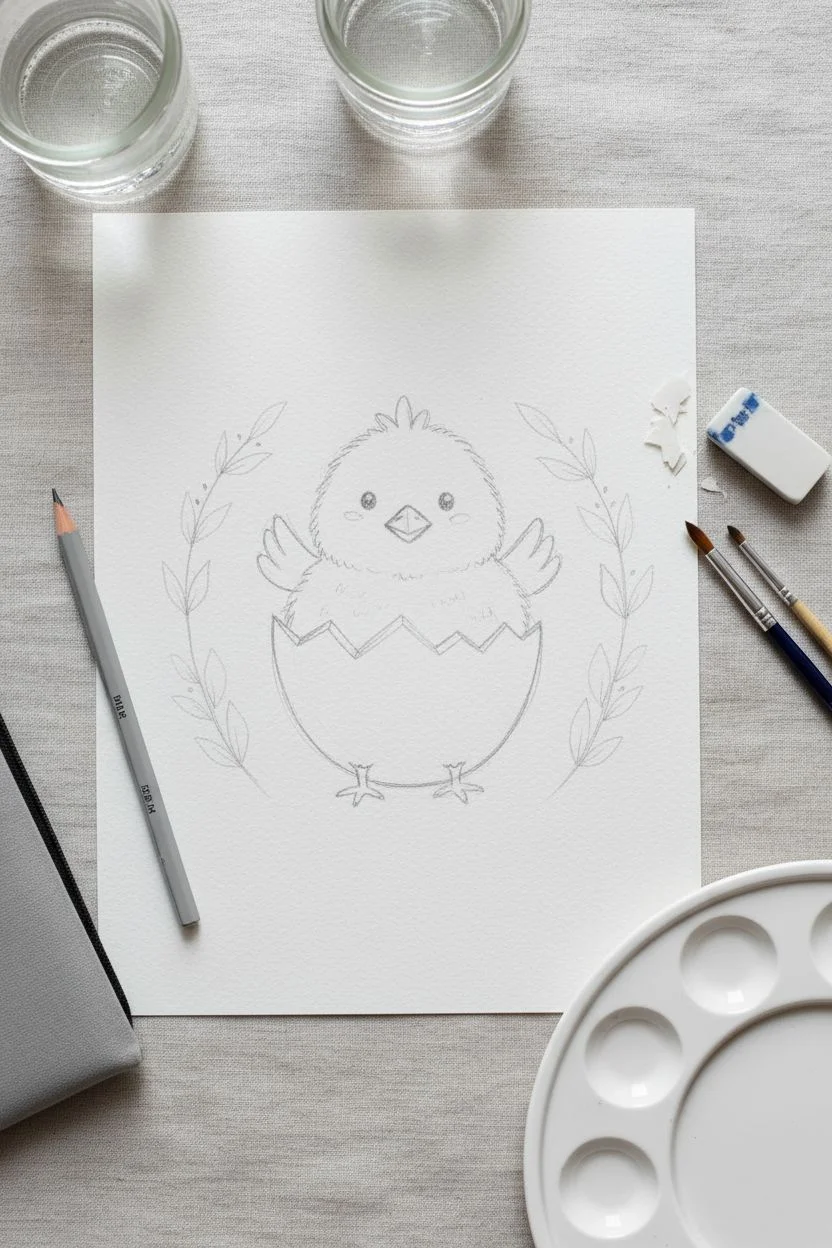
Step 1: Sketching the Outline
-
Draw the egg base:
Start by lightly drawing the bottom half of an egg shape near the lower center of your paper. It should look like a wide U-shape or a deep bowl. -
Add the crack:
Instead of closing the top of the egg with a smooth line, draw a sharp zig-zag line across the top opening. This creates the ‘cracked’ effect where the chick will pop out. -
Sketch the chick’s body:
Rising out of the cracked egg, draw a soft, rounded mound for the chick’s head and body. It should look a bit like a gumdrop shape sitting inside the shell. -
Add the wings and fluff:
On the sides of the body, sketch two small, curved wings pointing upwards. Add a little tuft of feathers on the very top of the head for cuteness. -
Draw the face and feet:
Place two small dots for eyes and a small diamond shape for the beak in the center of the face. Then, draw two tiny orange feet resting on the zig-zag edge of the eggshell. -
Frame with foliage:
Finish your sketch by drawing two curved lines framing the egg on the left and right side. Add small, simple leaf shapes along these stems to create a laurel effect.
Clean Edges Pro Tip
Don’t let the wet yellow paint touch the wet blue egg paint! Wait for the chick to dry completely before painting the top edge of the eggshell to avoid colors bleeding into green.
Step 2: Painting the Chick
-
First wash of yellow:
Load your medium-sized round brush with a bright, sunny yellow. Gently paint the entire body of the chick, being careful to work around the beak if you can, though watercolor is transparent enough to fix later. -
Adding shadow:
While the yellow is still slightly damp, drop a tiny bit of darker yellow or light orange along the bottom edge of the chick where it meets the shell. This adds roundness and volume. -
Painting the details:
Switch to your smaller detail brush. Mix a vibrant orange and fill in the triangular beak and the little feet resting on the shell edge. -
The eyes:
Once the face is completely dry, carefully use black paint (or a fine liner pen if you prefer) to dot in the wide-set eyes.
Level Up: Splatter
For a fun, artistic finish, load a brush with watered-down paint and tap it over the paper to create gentle splatters around the scene, mimicking pollen or magic dust.
Step 3: The Eggshell and Texture
-
Shadowing the shell:
The egg is white, so we are painting the *shadows*, not the object itself. Mix a very watery, pale blue-grey. Paint along the bottom curve of the egg and slightly up the sides to make it look 3D. -
Decorative pattern:
Using a light blue paint, carefully trace a zig-zag line across the front of the shell, mirroring the cracked edge above. You can add a second line below it for a striped pattern. -
Outline the crack:
Take a very fine brush with diluted black or dark grey paint and loosely outline the jagged top edge of the eggshell to define the break.
Step 4: The Greenery
-
Painting stems:
Using a natural green shade, paint the curved stems on either side of the egg with a confident, sweeping stroke. -
Adding leaves:
Press your brush down and lift up to create the leaf shapes along the stem. Vary the green shade slightly—adding a touch of yellow or blue—to make the foliage look natural. -
Final outlines:
I like to wait until everything is bone dry, then use a very fine brush with dark paint to loosely outline the chick and the egg. Keep the lines broken and sketchy for a charming, illustrative look.
Once dry, you can sign your name near the bottom and gift this sweet springtime scene to a friend

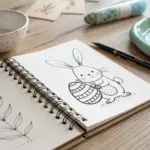


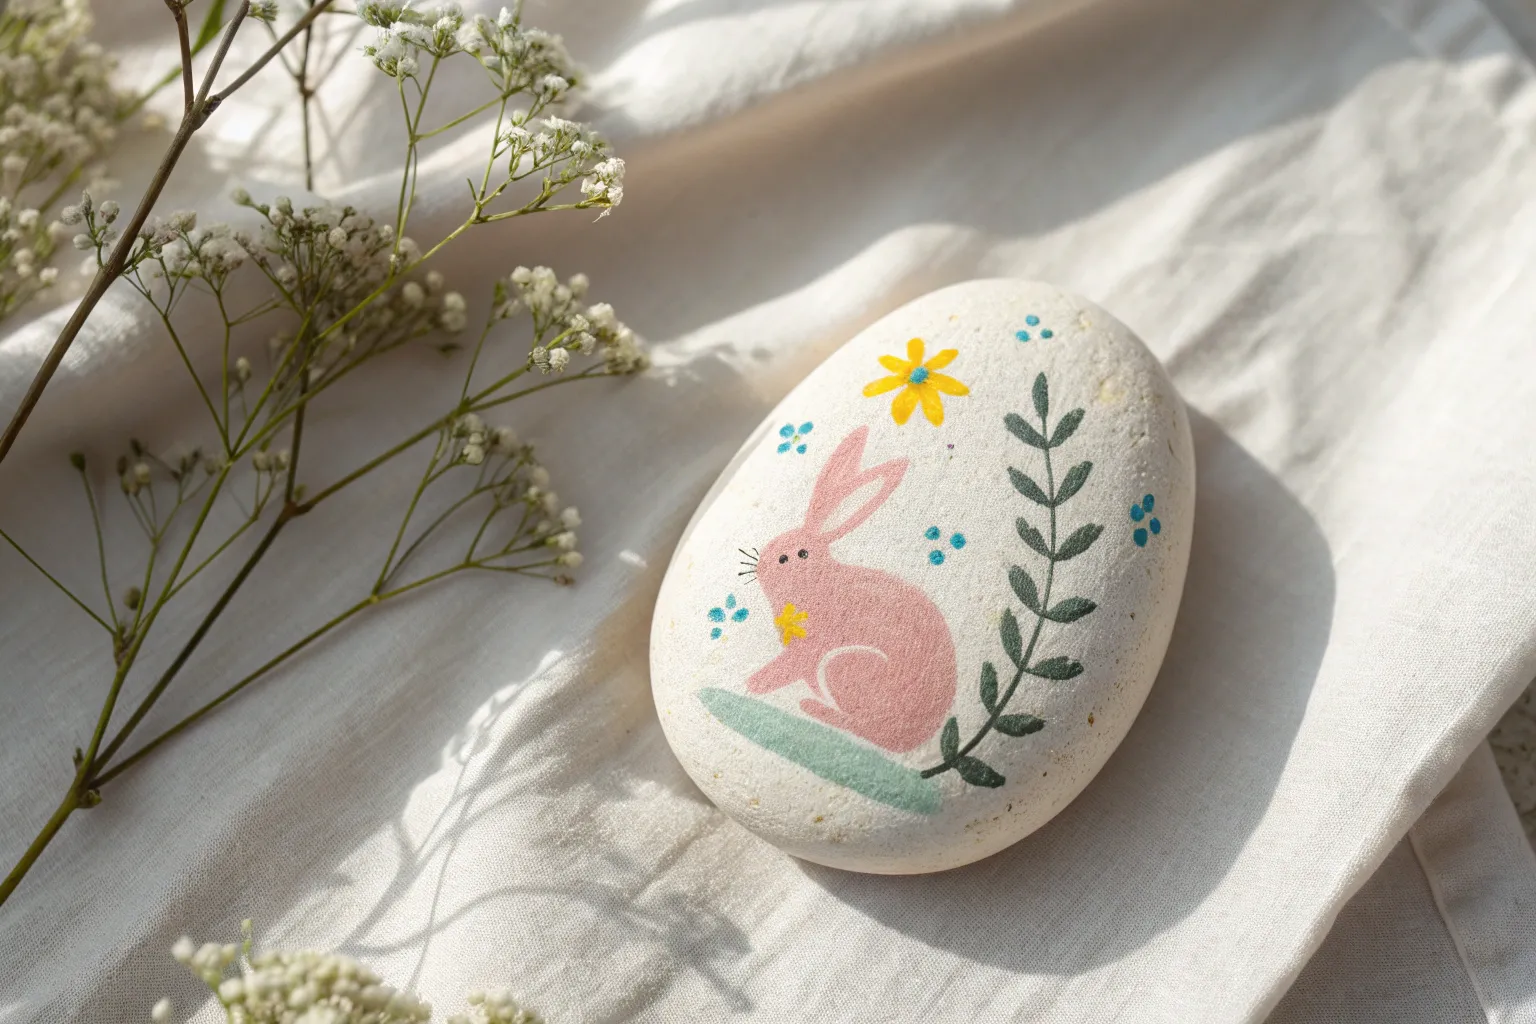
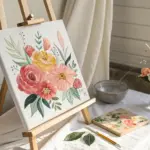
Watercolor Wash Easter Egg Patterns
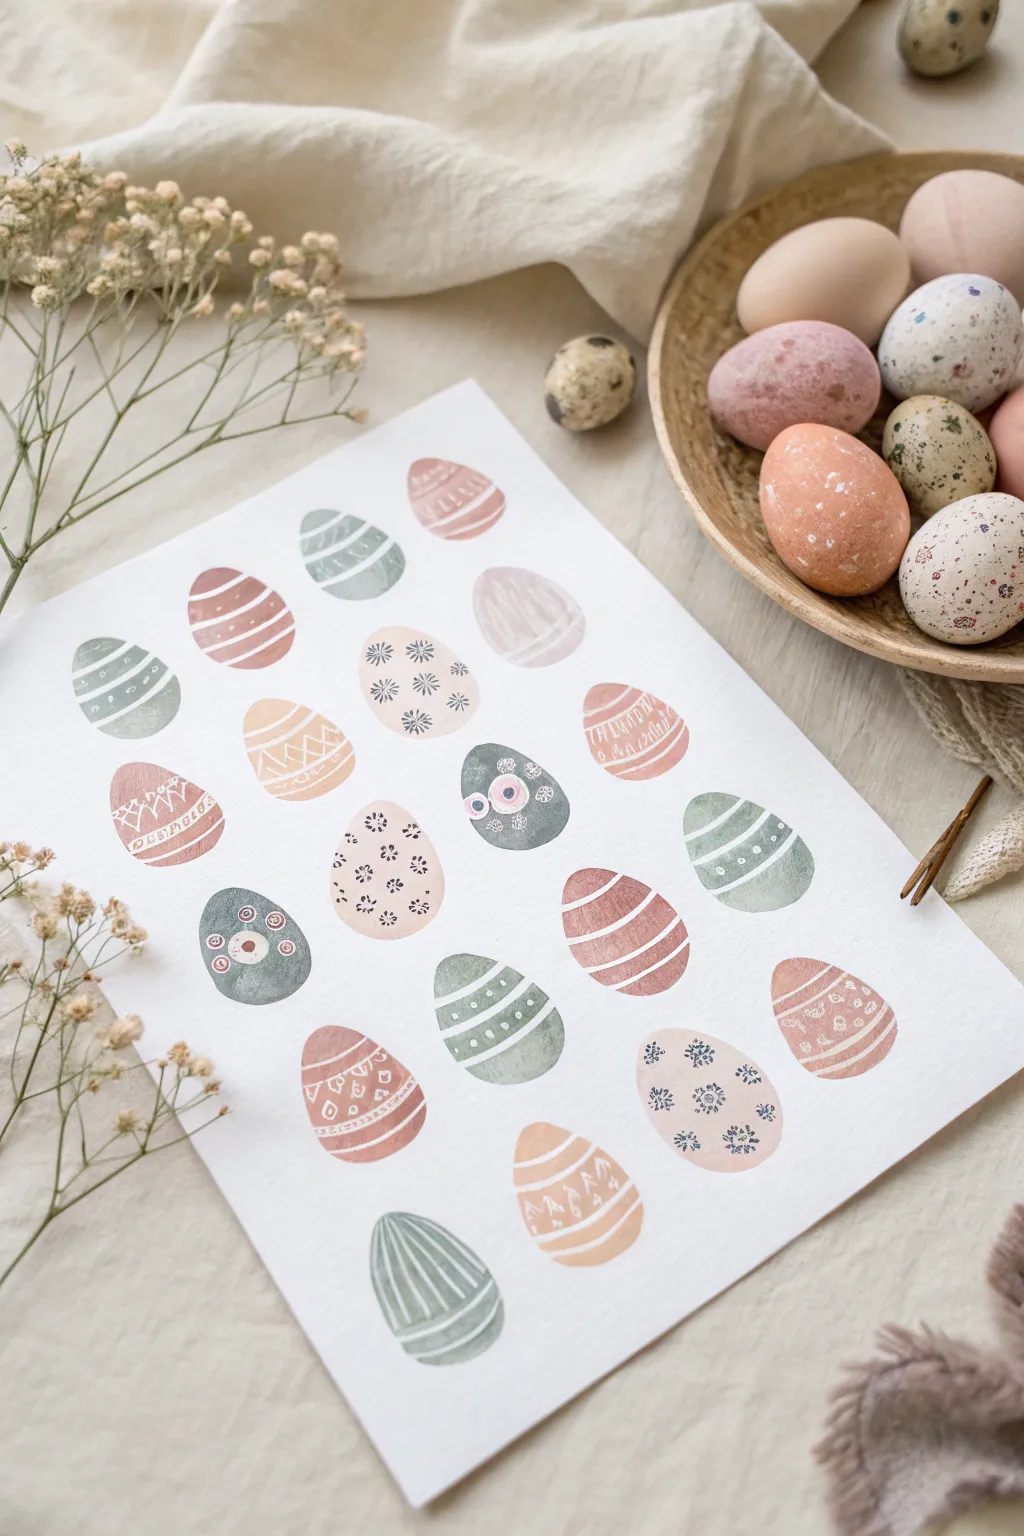
Create a stunning array of Easter eggs with a soft, muted color palette and delicate white detailing. This project explores simple watercolor washes combined with precise patterning to achieve a cohesive, modern folk-art look perfect for spring decor.
How-To Guide
Materials
- Cold press watercolor paper (A4 or similar size)
- Watercolor paints (sage green, dusty rose, terracotta, slate grey, muted blue)
- White gel pen or opaque white gouache with a fine-liner brush
- Pencil for sketching
- Soft round watercolor brushes (sizes 4 and 6)
- Jar of water
- Paper towels
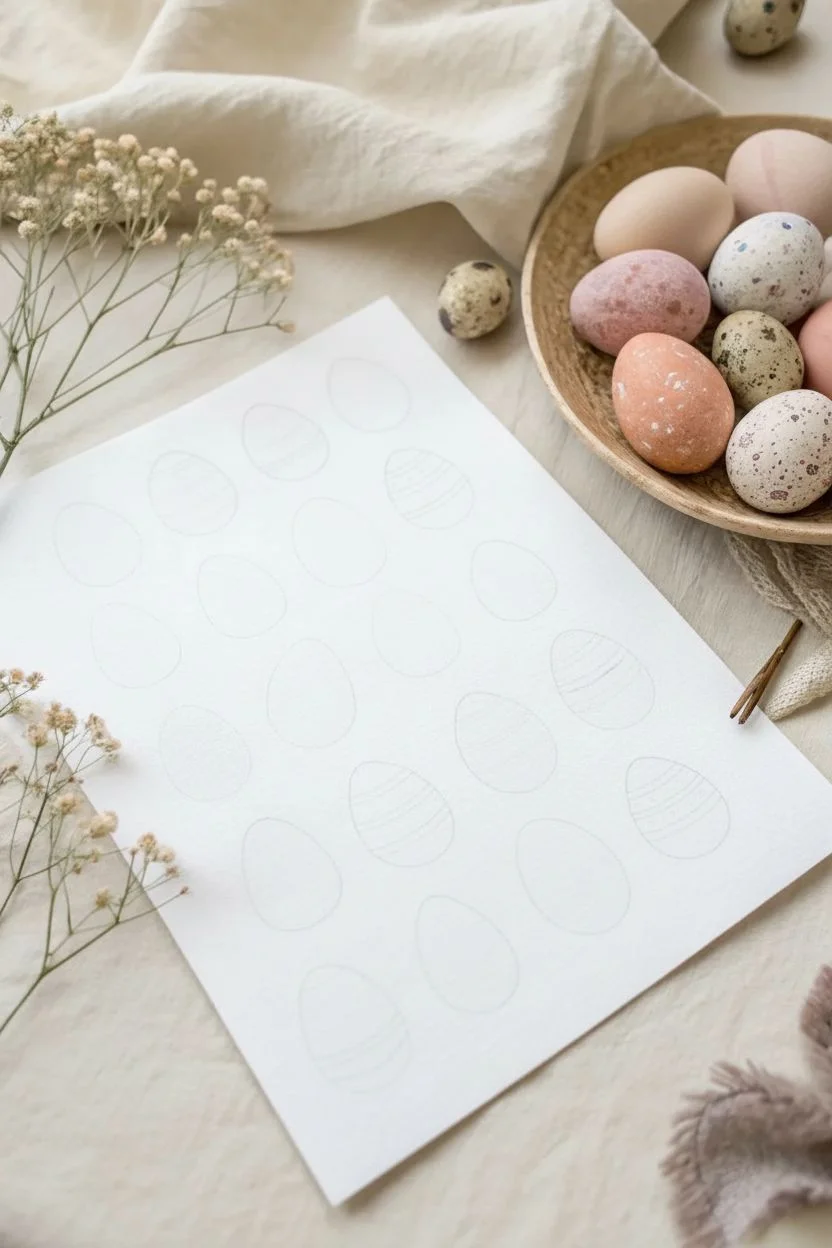
Step 1: Preparation & Sketching
-
Plan your layout:
Begin by lightly planning the arrangement of your eggs on the watercolor paper. Imagine an invisible grid to keep the spacing even, but it doesn’t need to be mathematically perfect. -
Lightly sketch the shapes:
Using a pencil, draw ovals for the eggs. Aim for a classic egg shape—slightly wider at the bottom and tapered at the top. Keep your pencil pressure extremely light so the graphite won’t show through the translucent paint later. -
Erase harsh lines:
Take a kneaded eraser and gently roll it over your sketched eggs. You want the lines to be barely visible, just enough to guide your painting without trapping dark graphite under the watercolor.
White Pen Woes?
If your white gel pen skips over the watercolor, the paint might still be slightly damp or the paper texture is too rough. wait longer or switch to white gouache.
Step 2: Painting the Base Washes
-
Mix your palette:
Prepare your colors. Focus on earthy, muted tones rather than bright primaries. Mix a little brown or grey into your greens and pinks to desaturate them for that trendy boho look. -
Paint the first egg:
Load your size 6 brush with a dusty rose or terracotta color. Fill in one of the egg shapes completely. Use enough water so the pigment flows, but not so much that it puddles uncontrollably. -
Alternate colors:
Moving across your paper, paint the next egg in a contrasting color, perhaps a sage green or slate blue. I like to scatter the colors randomly so no two same-colored eggs sit directly next to each other. -
Vary the saturation:
For visual interest, try making some eggs slightly more opaque with more pigment, and others sheer and watery. This variation adds depth to the overall composition. -
Let it dry completely:
This is crucial: allow the entire sheet to dry fully. If the paper is cool to the touch, it’s still wet. The white details will bleed and blur if you start the next phase too early.
Metallic Magic
Swap the white gel pen for a gold or copper metallic marker for some of the details to add a sophisticated shimmer to your boho color palette.
Step 3: Adding Patterns & Details
-
Select your detailing tool:
Choose either a white gel pen (for easier control) or a very fine brush dipped in opaque white gouache (for a more painterly texture). Test the flow on a scrap piece of paper first. -
Create striped patterns:
On a few eggs, draw horizontal stripes. Vary the thickness—some wide bands, some thin pin-stripes. You can add little dots or dashes inside the wider bands for extra texture. -
Draw floral motifs:
Find a solid-colored egg and fill it with tiny, simple flowers. A center dot surrounded by five small petal loops creates a lovely daisy pattern. Repeat this across the egg surface. -
Add vertical lines:
For a different look, draw vertical or curved longitude lines from the top of an egg to the bottom, mimicking the segments of a peeled orange or a beach ball. -
Incorporate geometric shapes:
Try zig-zags, triangles, or diamond shapes on other eggs. Mimicking sweater knitting patterns or folk art embroidery works beautifully for this style. -
Mix elements:
Don’t be afraid to combine elements on a single egg, like a row of zig-zags sitting between two rows of dots. Keep your hand steady and relaxed. -
Final assessment:
Step back and look at your composition. If any egg looks too plain, add a few more tiny white specks or lines to balance the visual weight of the page.
Frame this charming collection of eggs to bring a touch of handmade spring warmth to your home


Tape-Resist Bunny Silhouette Art
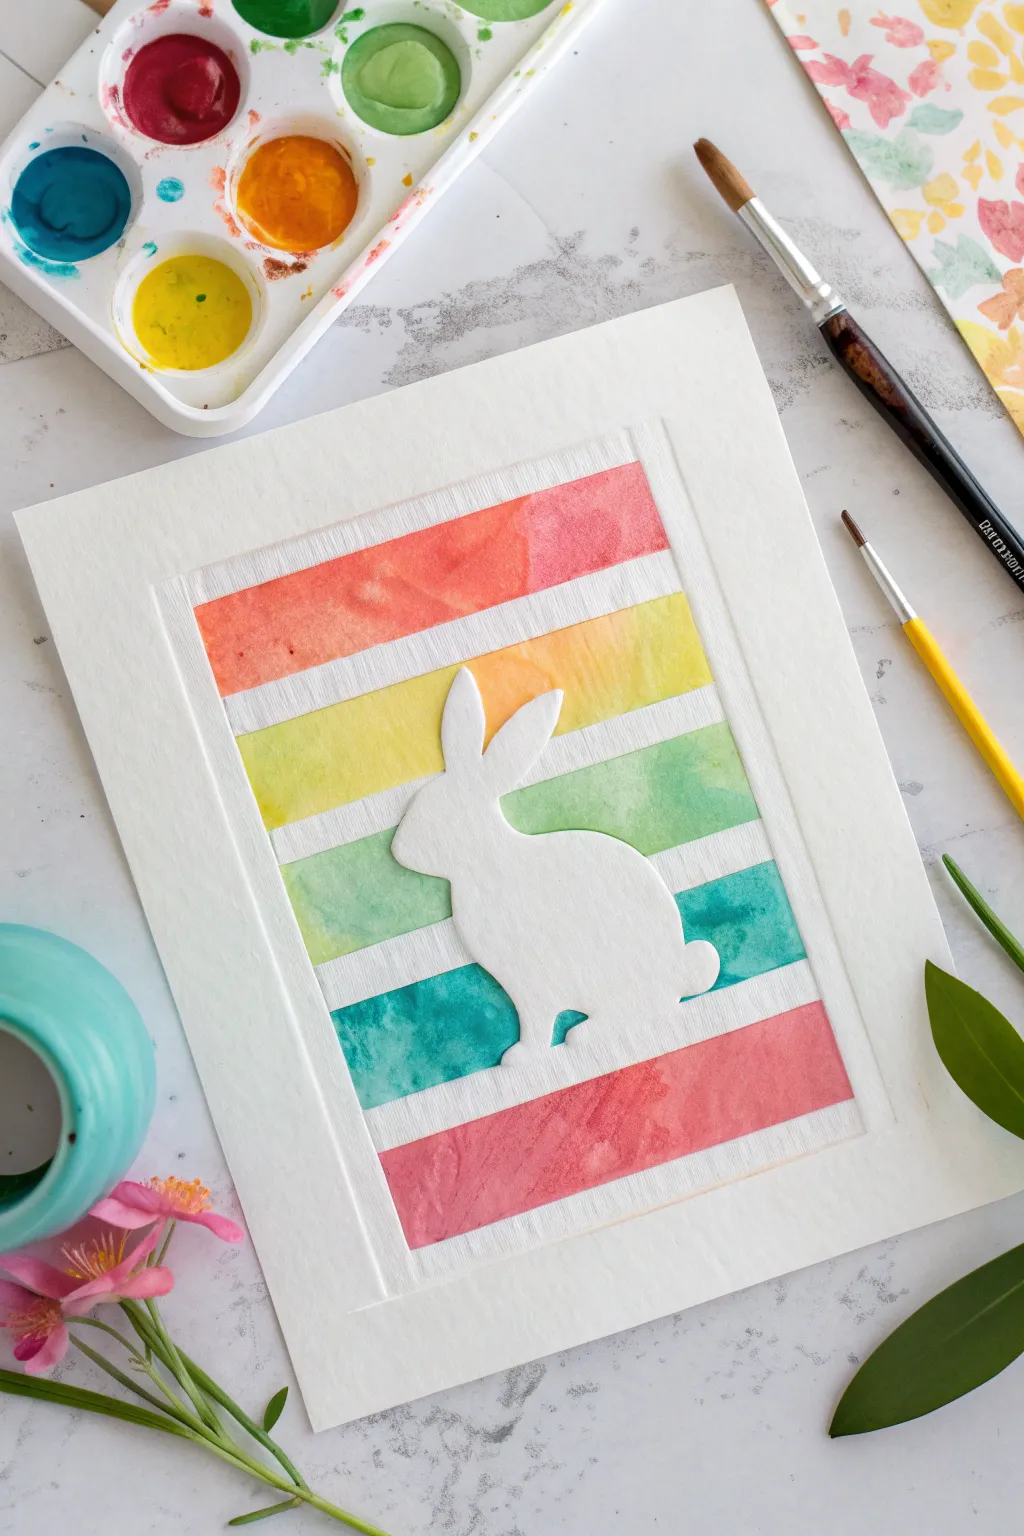
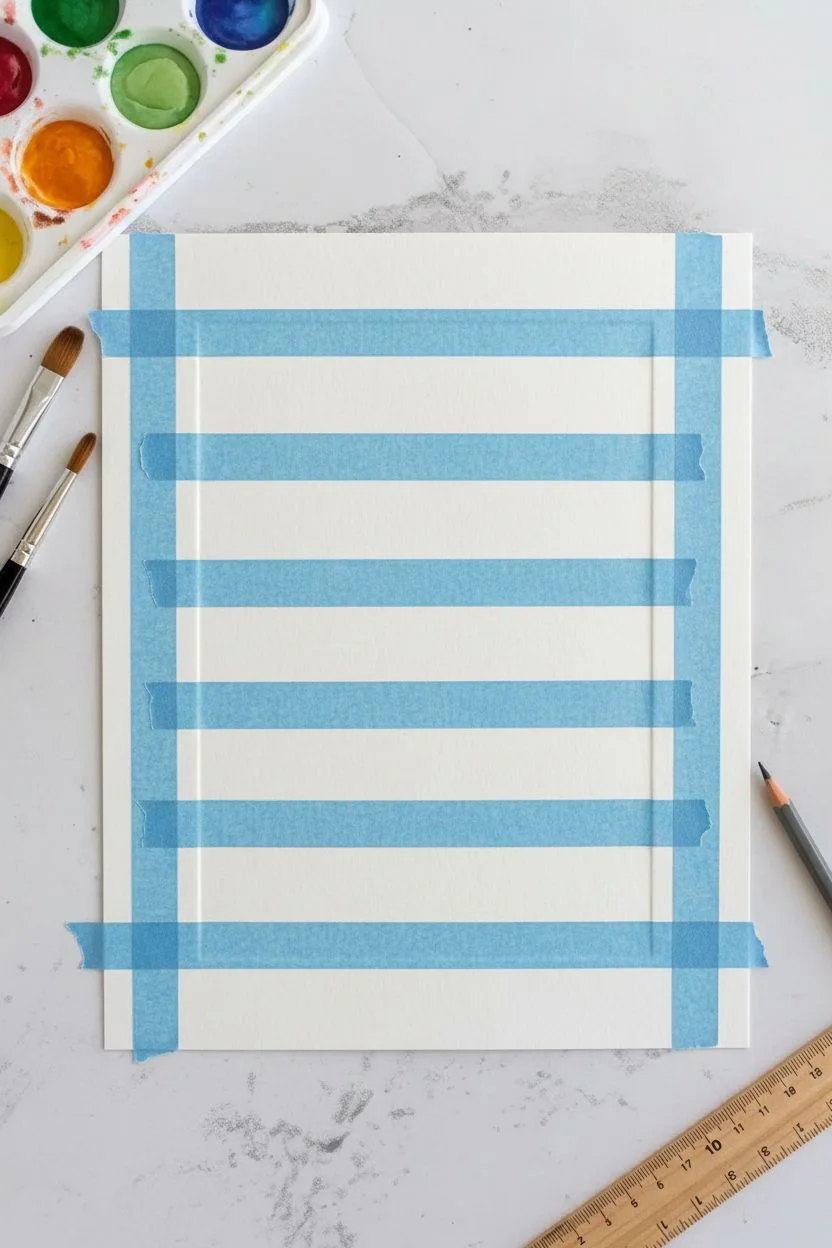
Brighten up your Easter decor with this vibrant watercolor resist art project. Crisp white lines pop against colorful horizontal stripes, highlighting a charming 3D bunny silhouette in the center.
Step-by-Step Guide
Materials
- Heavyweight watercolor paper
- Watercolor paint set
- Paintbrushes (round or flat)
- Painter’s tape or masking tape (approx. 1/2 inch width)
- Pencil
- Scissors
- Bunny template or stencil
- Double-sided foam tape or glue dots
- Ruler
Step 1: Prepare the Canvas
-
Set up your paper:
Cut a sheet of watercolor paper to your desired size (e.g., 5×7 or 8×10 inches). This will be your base canvas. -
Mask the border:
Apply strips of painter’s tape along all four edges of the paper to create a clean white border. Press the tape down firmly to prevent paint bleed. -
Create the stripes:
Use a ruler to lightly mark horizontal intervals for your stripes. Place strips of tape horizontally across the paper, spacing them evenly to create the white gaps between your colored bands. -
Seal the edges:
Run your fingernail or a credit card edge along the tape lines, especially near the painting area, to ensure a tight seal.
Bleeding Lines?
If paint leaks under the tape, use a white gel pen or a bit of white gouache paint to carefully touch up the edges once the watercolor is totally dry.
Step 2: Paint the Rainbow Background
-
Activate your paints:
Add a few drops of water to your watercolor pans to soften the pigment. For this project, you’ll want vibrant, saturated colors. -
Paint the top stripe:
Start with a warm red or coral color for the top section. Apply the paint generously, letting it pool slightly for texture. -
Create a gradient:
Move to the next open stripe and paint it orange. I like to let the colors vary slightly in intensity within each stripe for that authentic watercolor look. -
Continue the pattern:
Follow the rainbow order: proceed with yellow, then a lime green, followed by a teal or blue-green shade. -
Finish the bottom stripes:
Paint the final stripe with a reddish-pink or berry tone to balance the top color. -
Let it dry completely:
Allow the paint to fully dry. If the paper feels cool to the touch, it’s still damp. Waiting ensures crisp lines when you remove the tape.
Step 3: Reveal and Assemble
-
Remove the tape:
Gently peel back the tape at a 45-degree angle. Move slowly to avoid tearing the paper surface. -
Cut the bunny shape:
Trace a bunny silhouette onto a separate piece of smooth white cardstock or watercolor paper and carefully cut it out with sharp scissors. -
Prepare the adhesive:
Cut small pieces of double-sided foam tape. Place them on the back of the bunny cutout—one on the head, one on the body, and one near the tail. -
Mount the silhouette:
This creates dimension. Center your bunny over the painted background and press down gently to secure it in place. -
Final touches:
Erase any visible pencil marks from your border or bunny cutout for a pristine finish.
Salt Texture
While the paint is still wet, sprinkle a pinch of table salt onto the colored stripes. It creates a speckled, starry texture as it dries.
Display your colorful creation on a mantel or frame it for a cheerful handmade gift
BRUSH GUIDE
The Right Brush for Every Stroke
From clean lines to bold texture — master brush choice, stroke control, and essential techniques.
Explore the Full Guide
Fork-Textured Easter Egg Stripes
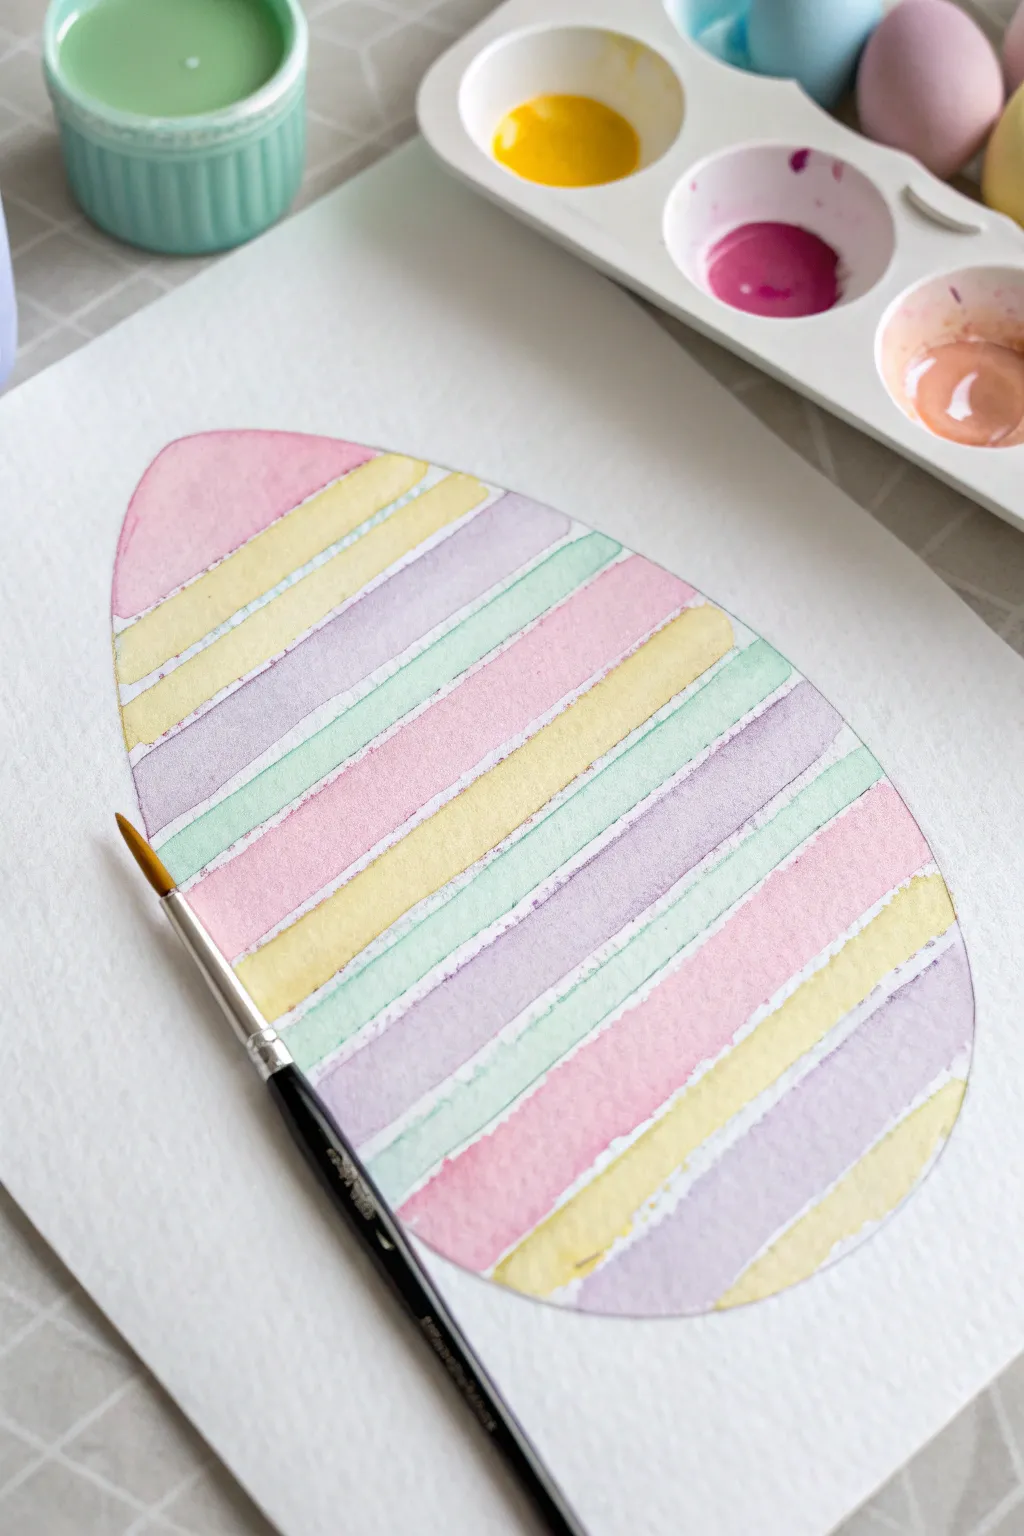
Bring soft pastel cheer to your Easter crafting with this delicate watercolor stripe project. The beauty of this artwork lies in its translucency, where bands of yellow, mint, pink, and lavender gently touch and blend on textured paper.
Step-by-Step Tutorial
Materials
- Cold press watercolor paper (A4 or roughly 9×12 inches)
- Pencil
- Eraser
- Watercolor paints (pans or tubes)
- Round watercolor brush (size 6 or 8)
- Water container
- Paper towel
- Palette or mixing tray
- Ruler (optional)
Step 1: Preparation and Sketching
-
Prepare your palette:
Begin by activating your watercolor paints. You will need four distinct pastel shades: a soft yellow, a pale mint green, a dusty rose pink, and a light lavender. Add plenty of water to your mixing wells to ensure the colors remain transparent and light. -
Test your colors:
On a scrap piece of paper, swatch your four mixed colors side-by-side. You want them to have similar values (lightness) so no single stripe overpowers the others. -
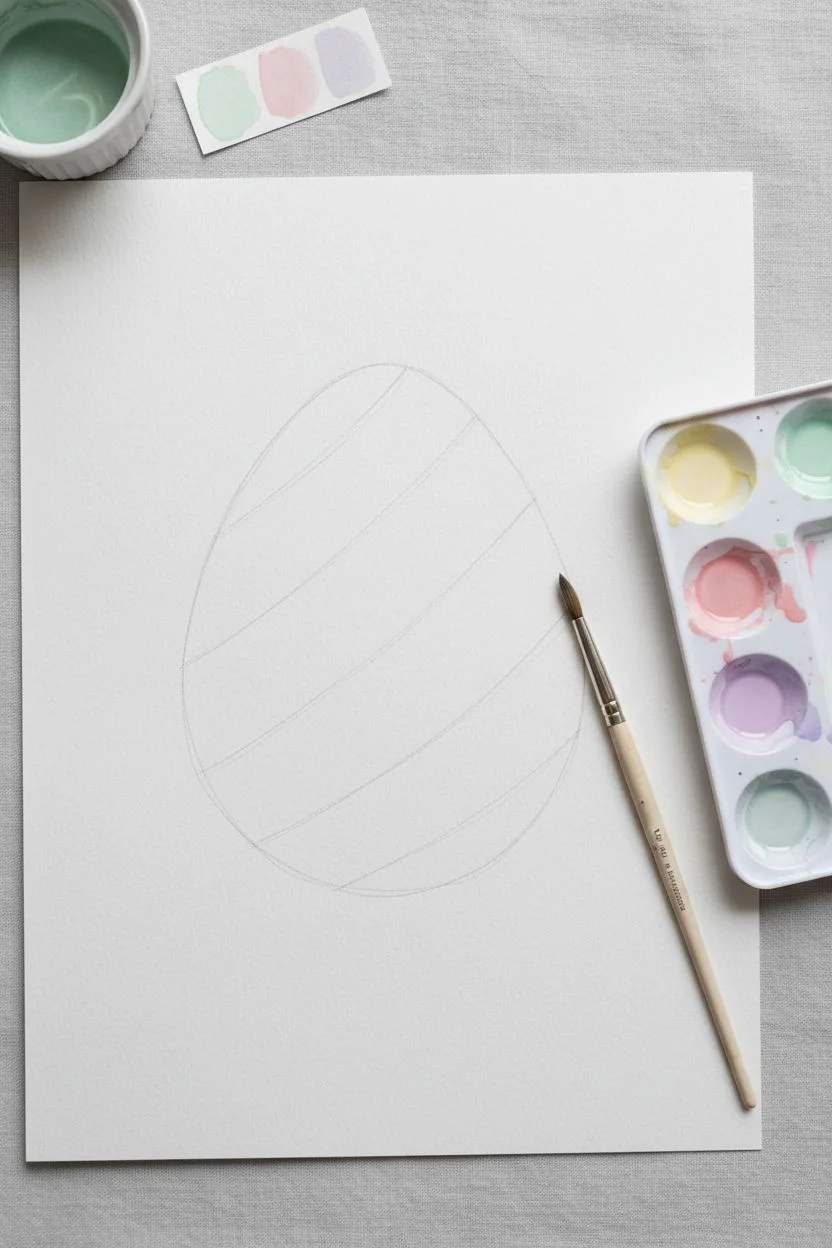
Draw the egg outline:
Using a pencil, draw a large egg shape in the center of your watercolor paper. Keep your lines incredibly light so they won’t show through the translucent paint later. -
Sketch the stripes:
Lightly sketch diagonal lines across the egg to mark out your stripes. Aim for bands that are roughly uniform in width, about 1/2 to 3/4 inch wide. You can use a ruler for precision or freehand it for a more organic look.
Step 2: Painting the Stripes
-
Start at the top:
Dip your round brush into the pink wash first. Carefully fill in the very top section of the egg, following the curve of your outline. -
Add the second color:
Rinse your brush thoroughly. Pick up the yellow wash and paint the next diagonal stripe immediately below the pink one. Allow the wet edges to just barely touch; if they bleed slightly, that adds to the charm. -
Continue the pattern:
Rinse and switch to lavender for the third stripe. Paint carefully along the diagonal line, keeping the paint within the egg’s outer curve. -
Complete the sequence:
For the fourth stripe, use the mint green. Paint this band with steady strokes, ensuring the color is even but transparent. -
Leaving white space:
You might notice very thin white gaps naturally appearing between some stripes where the brush didn’t perfectly meet the previous line. Don’t worry about filling these perfectly; they add a lovely shimmer to the piece. -
Repeat the colors:
Start the color sequence over again with pink. Paint the next stripe, maintaining the same diagonal angle as the previous bands. -
Work downwards:
Continue working your way down the egg, repeating the pattern: pink, yellow, lavender, green. I find it helpful to keep a paper towel handy to blot my brush if it’s holding too much water. -
Manage the edges:
As you paint stripes lower down, pay close attention to the outer edges of the egg shape. Use the tip of your round brush to achieve a clean curve. -
Watch for pooling:
If a puddle of paint forms at the end of a stripe, dry your brush on a paper towel and touch only the tip to the puddle to soak up the excess liquid.
Bleeding Colors?
If stripes are bleeding too much into each other, let each stripe dry for 30-60 seconds before painting the neighbor. This ‘wet-on-dry’ method keeps lines crisp.
Step 3: Finishing Touches
-
Paint the final stripe:
Fill in the very bottom curve of the egg with whichever color falls next in your sequence. Allow the entire painting to dry completely flat to prevent colors from running. -
Erase guidelines:
Once the paper is bone dry—and not a moment sooner—take a clean eraser and gently remove any visible pencil marks from the outer perimeter of the egg. -
Flatten the paper:
If your paper has buckled slightly from the water, you can place the dry painting under a heavy book overnight to flatten it out.
Salt Texture Trick
While the paint is still wet, sprinkle a tiny pinch of table salt onto a few stripes. When it dries and you brush it off, you’ll have a cool speckled texture.
Display your beautiful watercolor egg in a frame or cut it out to use as a festive Easter decoration
Plastic Egg Stamp Process Painting
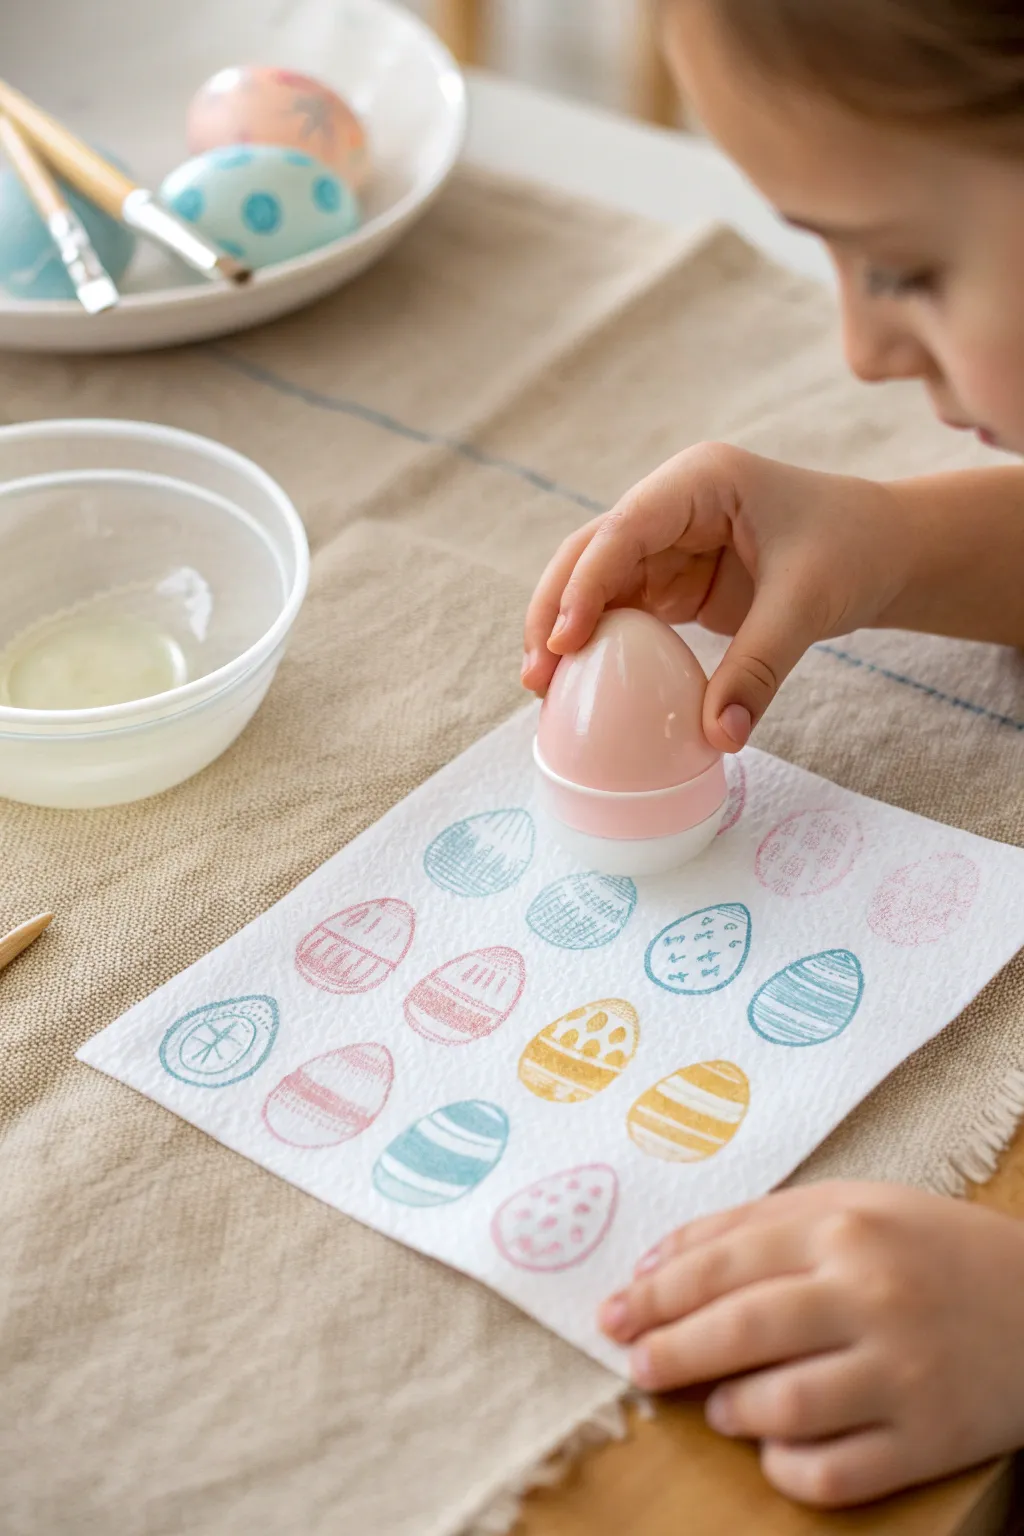
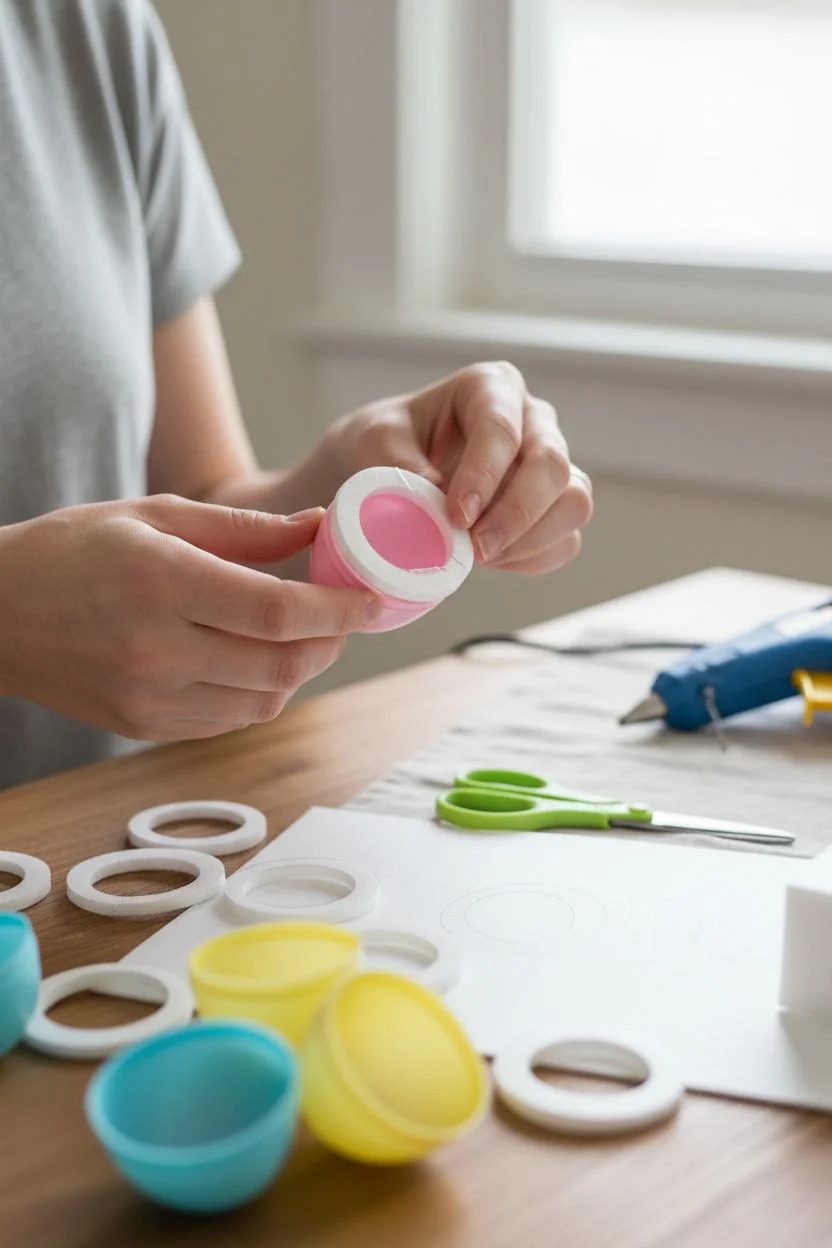
Transform ordinary plastic Easter eggs into custom stampers to create a beautiful, patterned masterpiece. This simple process art project results in a lovely, textured print featuring soft pastel eggs on a delicate paper surface.
Step-by-Step Tutorial
Materials
- Plastic Easter eggs (halves)
- White or cream paper napkins (or thin tissue paper)
- Craft foam sheet or thick felt (for the stamp rim)
- Scissors
- Hot glue gun or strong craft glue
- Paintbrushes (fine tip)
- Acrylic craft paints (pastel pink, blue, yellow)
- Small bowl or palette for paint
- Paper towels
- Optional: Markers or colored pencils (for adding details)
Step 1: Preparing Your Custom Stamps
-
Select your egg halves:
Separate your plastic Easter eggs. You will only need the halves for this project, preferably the ones with a smoother edge, though either side works excellently as a handle. -
Trace the rim:
Place the open end of an egg half onto a sheet of craft foam or thick felt. Trace around the circular rim with a pencil to create a guide for your stamp pad. -
Cut the foam ring:
Carefully cut out the circle you just traced. Then, cut out the interior of that circle, leaving a ring of foam that is about 1/4 inch wide—essentially matching the thickness of the egg’s plastic rim. -
Attach the foam:
Apply a thin, even layer of hot glue or strong craft glue to the rim of the plastic egg half. Press the foam ring firmly onto the glue and let it set completely. This creates a soft surface that holds paint much better than bare plastic.
Step 2: Setting Up the Surface
-
Prepare the napkin:
Unfold a white paper napkin and lay it flat on a protected work surface. The texture of the napkin adds a lovely, fabric-like quality to the final print. -
Smooth it out:
Gently smooth out the napkin with your hands to remove any major creases, ensuring a nice flat area for stamping. If using tissue paper, you might want to tape the corners down lightly.
Smudged Stamps?
If the egg shape is blurry, you are likely using too much paint on the foam rim. Blot the stamp on a scrap paper towel once before pressing it onto your artwork for a cleaner line.
Step 3: Stamping and Decorating
-
Prepare your palette:
Squeeze small amounts of pastel pink, blue, and yellow acrylic paint onto a palette or paper plate. You don’t need much paint for this technique. -
Paint the stamp rim:
Using a brush, apply a light coat of paint to the foam ring on your egg stamp. Avoid dipping the egg directly into a puddle of paint, as this tends to overload it and cause smearing. -
Make the first impression:
Press the painted egg rim firmly onto the napkin. Lift it straight up to reveal a clean oval outline. Repeat this process to create rows of egg shapes. -
Vary the colors:
Clean your stamp with a damp paper towel between color changes, or use different egg halves for different colors to keep the pastels bright and clean. -
Let the outlines dry:
Allow the stamped egg outlines to dry completely. Since acrylics dry fast on porous napkins, this should only take a few minutes. -
Paint interior patterns:
Once the outlines are dry, dip a fine-tip paintbrush into your paints. I like to dilute the paint slightly with a drop of water here to make it flow better on the napkin. -
Add stripes and zig-zags:
Fill the inside of some egg outlines with simple horizontal stripes or zig-zag patterns using a contrasting color. -
Create polka dots:
For other eggs, gently dab the tip of your brush to create polka dots. Try filling the top half with dots and the bottom half with solid colors. -
Designing complex fills:
Experiment with cross-hatching or tiny star shapes inside the outlines. The texture of the napkin will make these painted details look almost like a woven print. -
Review and refine:
Look over your composition. If any egg shapes look too empty, add a few more details or a wash of very watered-down paint to tint the inside. -
Final drying time:
Let the entire napkin sit undisturbed until fully dry. The paper will be fragile while wet, so avoid moving it until it stiffens back up.
Creative Twist
Instead of painting the patterns inside, use colored markers or watercolor pencils once the stamped outlines are dry for easier control and finer details.
Now you have a charming, handmade piece of Easter art perfect for display on the fridge or as a placemat for brunch

PENCIL GUIDE
Understanding Pencil Grades from H to B
From first sketch to finished drawing — learn pencil grades, line control, and shading techniques.
Explore the Full Guide
Cardboard Egg Shapes for Big Brush Strokes
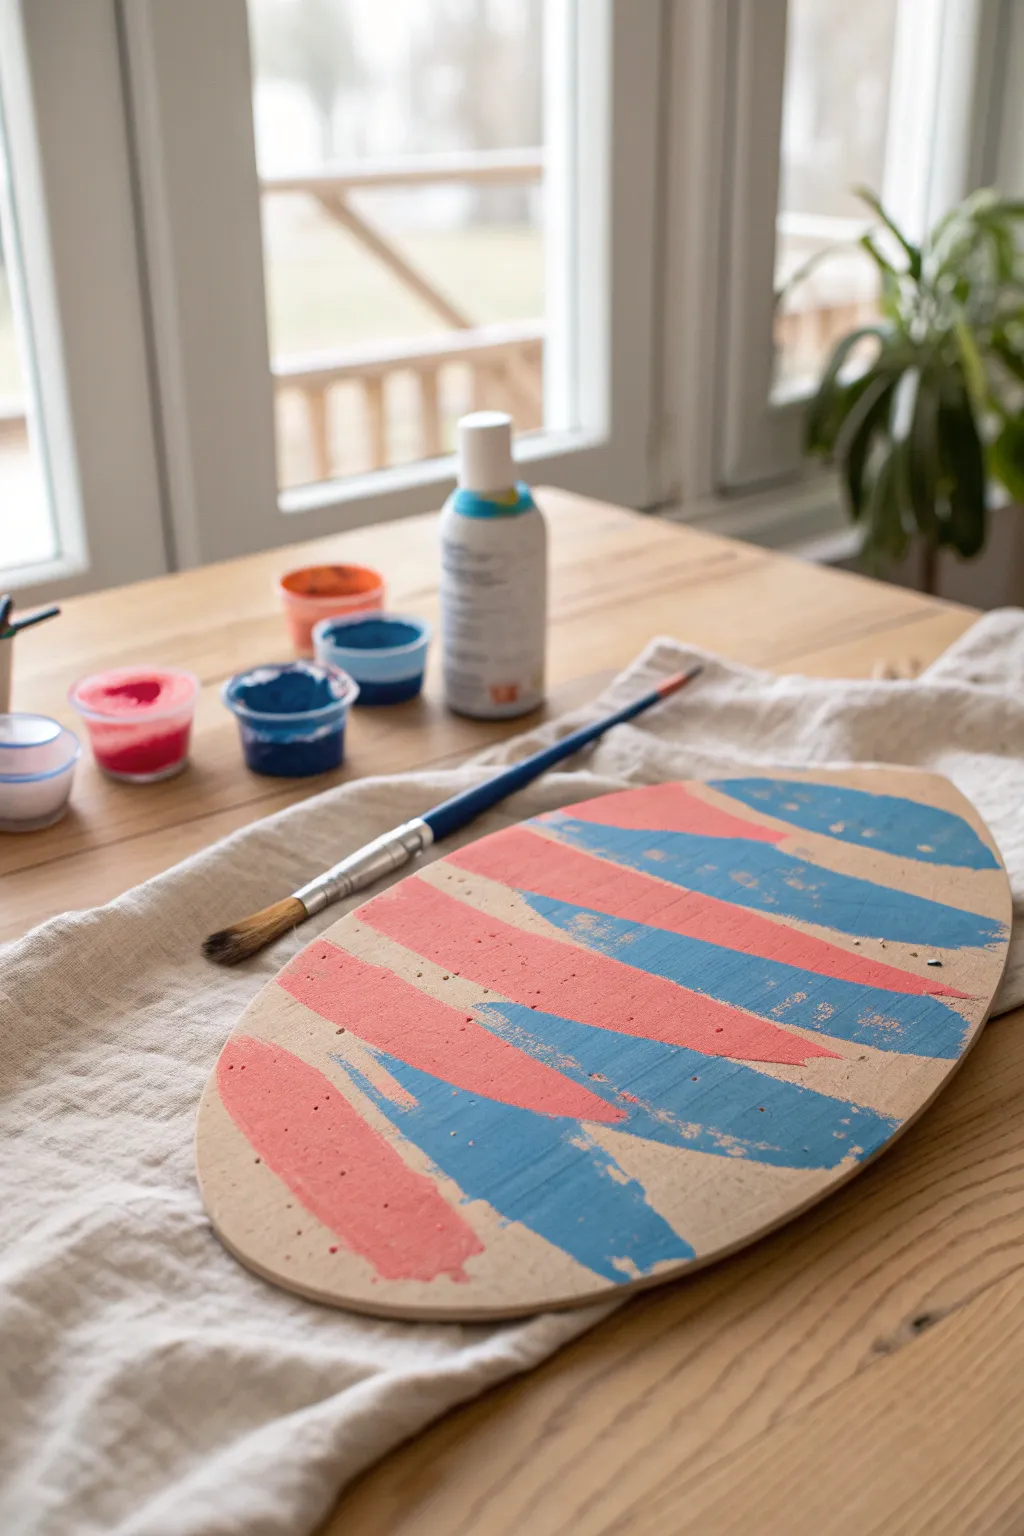

Embrace the joy of movement with this oversized cardboard egg project that is perfect for little hands still mastering their grip. The alternating diagonal stripes create a modern, minimalist look while allowing kids to explore sweeping gestures with chunky brushes.
How-To Guide
Materials
- Large sheet of sturdy cardboard (recycled shipping boxes work great)
- Pencil
- Sharp scissors or craft knife (for adult use)
- Medium-sized flat paintbrush (size 10-12)
- Acrylic or tempera paint in coral pink
- Acrylic or tempera paint in medium blue
- Paint palette or small cups
- Drop cloth or tablecloth
Step 1: Preparation
-
Prepare the workspace:
Since this project encourages large movements, lay down a protective cloth on your table or floor. Have a cup of water and paper towels nearby for cleaning brushes between color changes. -
Draw the egg outline:
On your piece of cardboard, draw a large oval shape. It doesn’t need to be geometrically perfect; an organic, slightly wider bottom gives it that classic egg character. Aim for a size that’s at least 12 inches tall to give plenty of room for painting. -
Cut out the shape:
Using sharp scissors or a craft knife, carefully cut along your pencil line. This step is best handled by an adult or an older child, as cardboard can be tough to slice through smoothly without bending. -
Clean up the edges:
If there are any rough, jaggy bits of cardboard on the rim from cutting, gently trim them off so the final piece looks neat and tidy. -
Set up the paint:
Pour a generous amount of the coral pink and medium blue paint into separate cups or wells on your palette. For these big strokes, you want enough paint to load the brush fully without constant dipping.
Smooth Moves
If the paint isn’t gliding well on the dry cardboard, mix a tiny drop of water into your paint cup. This improves ‘flow’ without making the cardboard soggy.
Step 2: Painting the Texture
-
Load the brush:
Start with your first color, perhaps the coral pink. Dip the flat brush deep into the paint, ensuring the bristles are well-coated but not dripping. -
Make the first stroke:
Start near the top of the egg. Place the brush down and drag it diagonally across the detailed surface from left to right. Apply firm pressure to flatten the bristles slightly, creating a wide, textured band. -
Leave negative space:
Before painting the next stripe, leave a gap of bare cardboard. This negative space is crucial as it acts as a visual separator between the colors and adds a rustic, natural element to the design. -
Add a blue stripe:
Rinse your brush thoroughly or switch to a clean one. Load it with the blue paint and paint a diagonal stripe in that gap you left, following the same angle as the first pink stroke. -
Alternative color method:
I usually prefer to paint all stripes of one color first to keep the paint water clean. If you choose this route, paint pink stripes all the way down the egg, leaving wide gaps between them, and let them dry for just a moment. -
Fill in the gaps:
Go back in with your blue paint and fill the empty spaces with diagonal blue strokes. By not having the wet paints touch directly, you keep the colors crisp and avoid muddy purple edges. -
Embrace the texture:
Don’t worry if the paint streaks or if the cardboard texture shows through in spots. Those slight imperfections and ‘dry brush’ moments add loveliness and depth to the artwork. -
Paint off the edge:
Encourage the painter to start the stroke on the cardboard and pull the brush all the way off the edge of the egg. This ensures the color wraps completely to the side and doesn’t stop awkwardly in the middle.
Make it Sparkle
Once the stripes are dry, use a thin brush to add lines of metallic gold paint or white glue and glitter between the color blocks for a festive pop.
Step 3: Finishing Touches
-
Check for balance:
Step back and look at the egg. If some areas look too sparse or the gaps are uneven, you can add smaller partial strokes near the edges to fill the visual space. -
Let it dry completely:
Lay the cardboard egg flat in a safe area to dry. Because cardboard is absorbent, acrylic paint usually dries to the touch within 20 to 30 minutes.
Prop this bold creation on a mantel or shelf to add an instant splash of color to your spring decor
Cotton Ball Bunny Tail Mixed Media
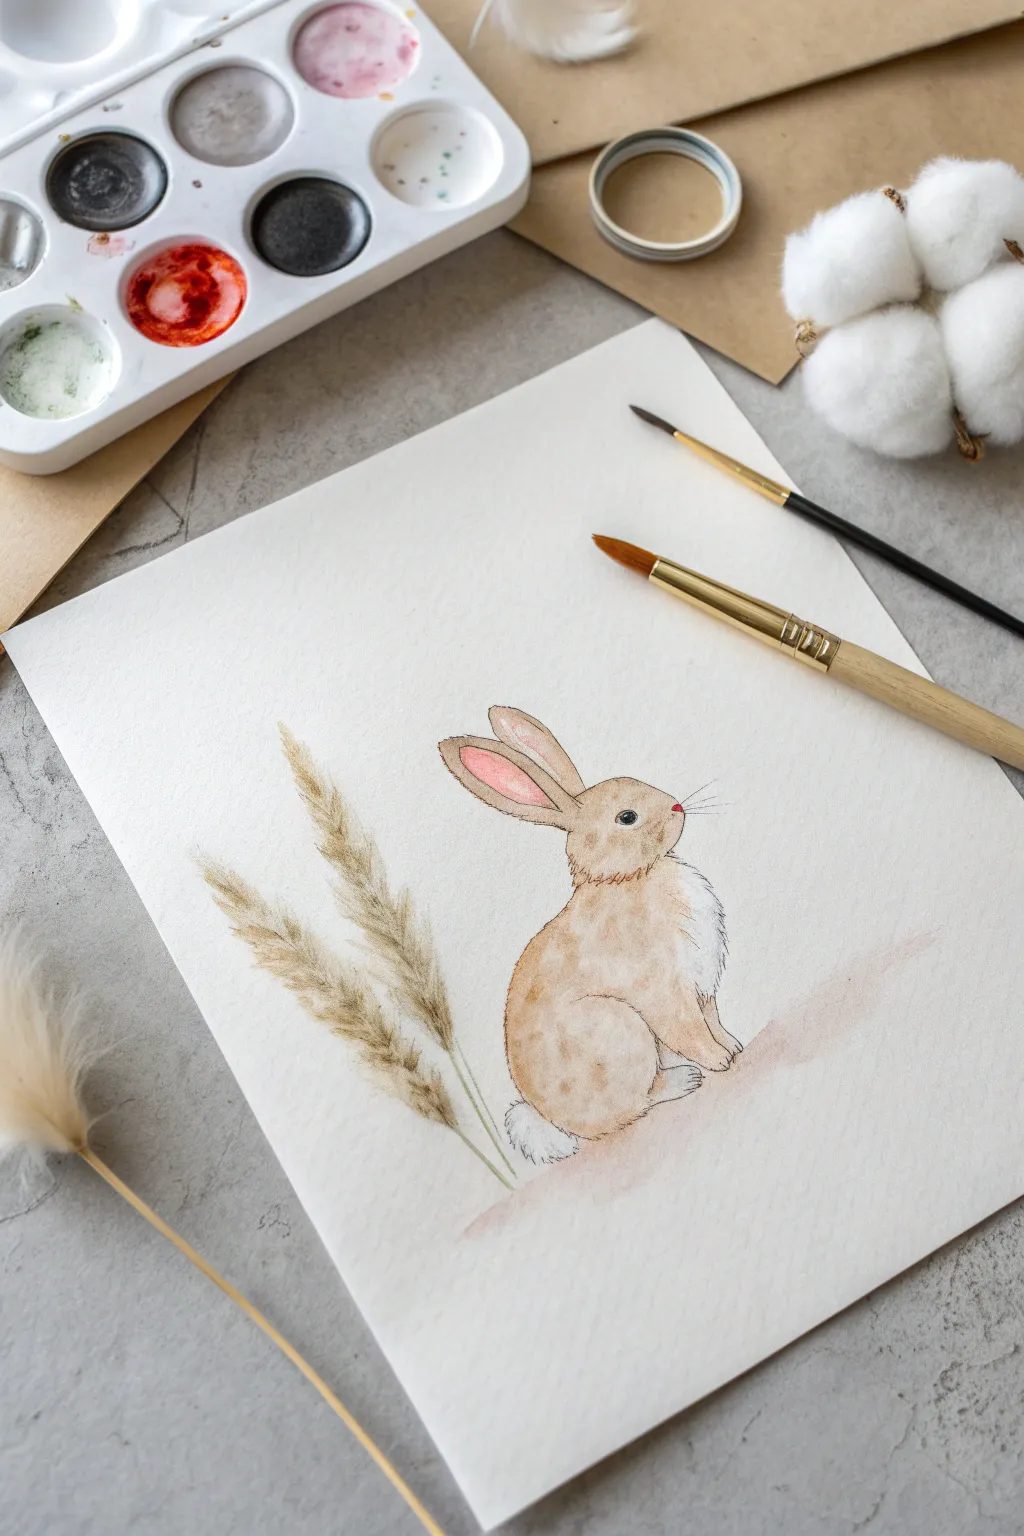
This sweet mixed media project combines delicate watercolors with fine ink details to capture a charming rabbit among soft grasses. The crowning touch is a textured, painted tail that mimics the fluffiness of real fur without needing actual cotton balls for every version.
Step-by-Step
Materials
- Cold press watercolor paper (A4 or similar size)
- Watercolor paints (pan set with ochre, brown, pink, black)
- Round watercolor brush (size 6 or 8)
- Fine liner brush or rigger brush (size 0 or 1)
- Black fine liner pen (waterproof) or very fine brush with black ink
- Pencil and eraser
- Jar of water
- Paper towels
- Optional: White gouache or white gel pen
Step 1: Sketching the Outline
-
Plan the composition:
Visualize where your bunny will sit on the paper. Leave plenty of white space around the edges, positioning the rabbit slightly to the right to leave room for the tall grasses on the left. -
Basic shapes:
Start sketching lightly with a pencil. Draw a larger oval for the body and a smaller, slightly overlapping circle above it for the head. Connect them with a gentle curve for the neck. -
Adding features:
Sketch two long ears extending backward from the head. Add a small curve for the nose, a circle for the eye, and outline the small feet tucked under the body. Don’t forget a small puffy shape for the tail. -
Refining lines:
Go over your sketch to refine the silhouette. Use short, broken pencil strokes in areas where the fur would be fluffiest, like the chest and tail, rather than a solid hard line.
Fixing heavy lines
If your pencil sketch is too dark, gently roll a kneaded eraser over it before painting. You want the pencil to be barely visible so the watercolor stays transparent and light.
Step 2: Painting the Bunny
-
Base wash:
Mix a watery light brown or ochre color. Paint a loose wash over the bunny’s body, avoiding the chest area and the tail to keep them white. Keep the paint very wet so it spreads softly. -
Adding warmth:
While the body is still damp, drop in a slightly darker brown near the haunches and the back of the neck. Let the colors bleed together naturally for that soft, furry look. -
Painting the ears:
Mix a very pale, watery pink. Carefully paint the inside of the long ears. Blend a little of your brown mix onto the outer edges of the ears while the pink is still wet. -
Creating texture:
Once the initial layer is semi-dry, take a smaller brush with slightly more concentrated brown paint. Add tiny, hair-like strokes along the back and legs to suggest fur texture. -
The fluffy tail:
For the cotton-tail effect, mix a very pale grey-blue. Dab it gently around the bottom curve of the white tail area to give it shadow and volume, leaving the center bright white.
Level Up: Real Texture
For a true mixed-media twist, skip painting the tail shadow. Instead, glue a small tuft of real cotton or a tiny white pom-pom onto the paper once the paint is fully dry.
Step 3: Adding Details & Scenery
-
Defining the eye:
Using a fine brush with black paint (or a waterproof pen), carefully fill in the eye, leaving a tiny speck of white paper unpainted for the glossy reflection. -
Fine ink work:
I like to use a very fine liner now to add broken outlines. Add sketchy, zig-zag lines around the neck ruff and the tail to emphasize the fluffiness. -
Whisker details:
With a quick, confident hand, flick your fine brush or pen outward from the nose to create long, delicate whiskers. -
Painting the grass:
Mix a muted brownish-green or tan color. Use the tip of your round brush to paint two tall, swaying stalks of pampas grass to the left of the rabbit. -
Feathery grass texture:
Use short, flicking brushstrokes branching off the main grass stems to create the feathery seed heads. Keep these strokes loose and airy. -
Grounding shadow:
Mix a watery reddish-brown or mauve. Paint a simple, horizontal wash under the bunny’s feet and fading out to the right to ground the figure so it isn’t floating.
Step back and admire your gentle woodland friend, ready for spring display


Have a question or want to share your own experience? I'd love to hear from you in the comments below!