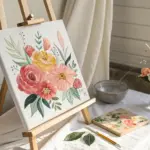
If you’re craving something sweet, colorful, and totally doable, Easter painting on canvas is such a fun little mood boost. I pulled together a mix of classic favorites and fresh twists so you can pick a vibe and start painting right away.
Easter Bunny Silhouette With a Pastel Sunset Wash
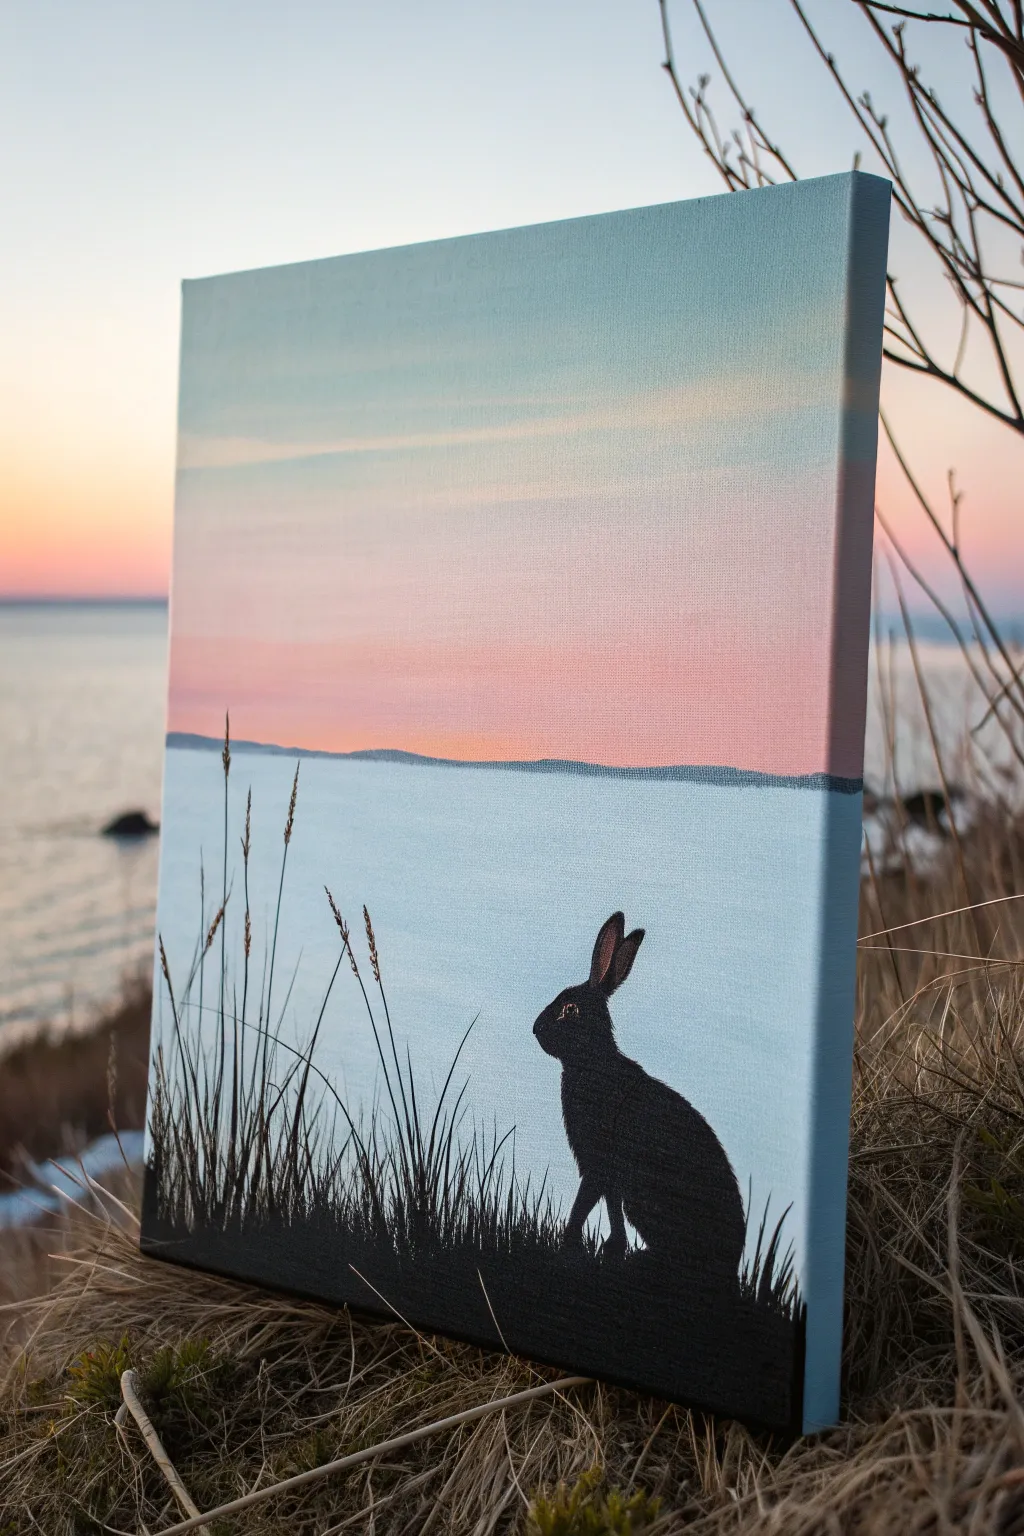
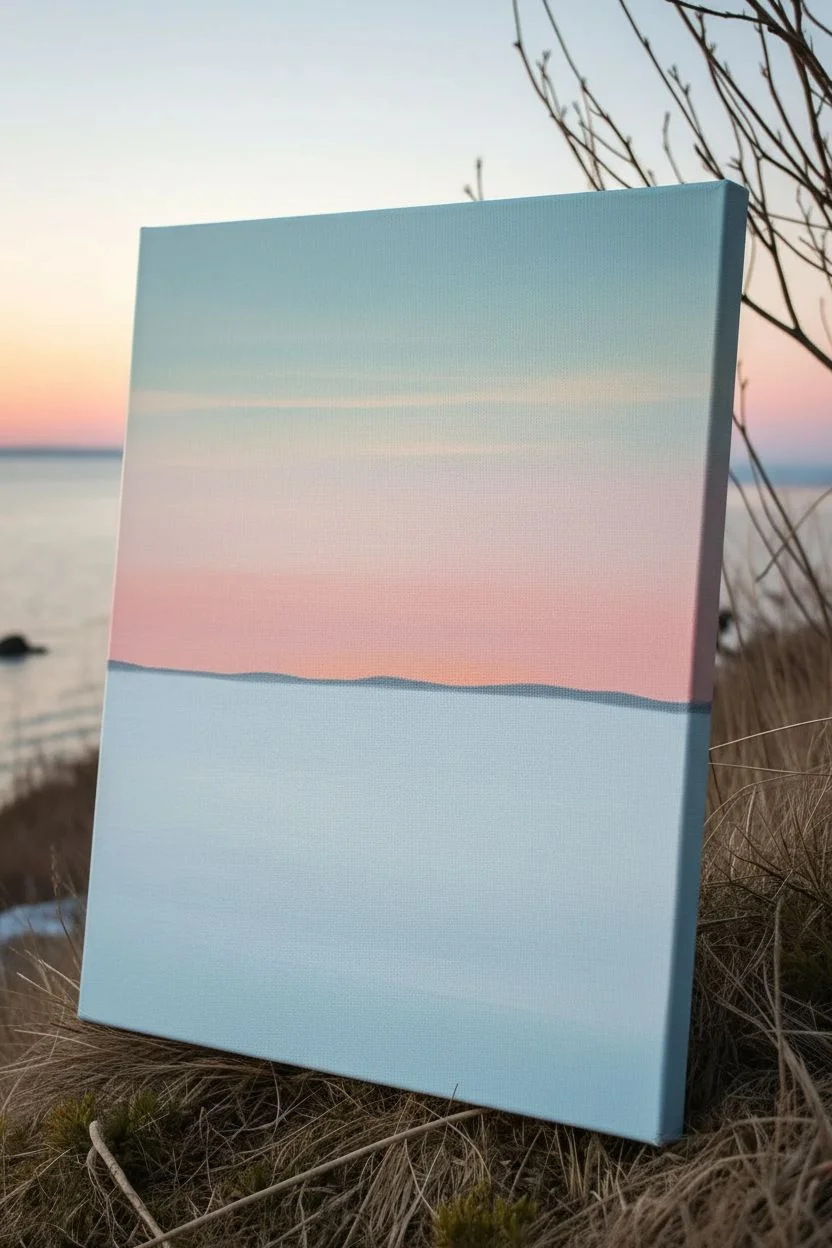
Capture the serene beauty of a spring evening with this elegant project featuring a dark rabbit silhouette against a soft, pastel sunset. The peaceful gradient background mimics the calm of twilight, making the sharp foreground details pop.
Step-by-Step Guide
Materials
- Stretched canvas (rectangular, portrait orientation)
- Acrylic paints: Titanium White, Light Blue, Pink, Peach/Light Orange, Black
- Large flat brush (1-2 inch) for background
- Medium flat brush
- Small round detail brush (size 0 or 1)
- Palette or mixing plate
- Cup of water
- Pencil for sketching
- Paper towels
Step 1: Painting the Sky Gradient
-
Prepare the blue mix:
Start by mixing a very pale blue using a large amount of Titanium White and just a tiny dot of Light Blue. You want a sky tone that feels airy and high up. -
Paint the top section:
Using your large flat brush, apply this pale blue mixture to the top third of the canvas. Use long, horizontal strokes that go all the way from edge to edge to ensure smoothness. -
Blend in the sunset:
While the blue is still slightly wet, clean your brush and pick up some white mixed with a hint of peach or soft pink. Paint the middle section of the sky, blending gently upward into the blue to create a soft, seamless transition. -
Intensify the horizon:
Mix a stronger peach or pink tone and apply it just above the horizon line (about halfway down the canvas). This represents the sun’s fading light. Blend this upward into the paler section.
Step 2: Creating the Seascape
-
Establish the water line:
For the water, mix white with a very small amount of blue again—slightly darker than the sky but still quite bright. Paint horizontally from the horizon line down to the bottom quarter of the canvas. -
Add the distant land:
Mix a small amount of black into your blue to create a grey-blue horizon color. Using a medium flat brush, paint a thin, straight strip across the horizon line to separate the sky from the water. It should look like faint land across a bay. -
Let it dry completely:
This is crucial. The background wash needs to be totally dry before you try to paint crisp silhouettes over it, or the black paint will turn muddy.
Paint Looking Streaky?
If your gradient looks rough, your paint might be drying too fast. Mist the canvas lightly with water or add a slow-drying medium to keep the acrylics workable for longer blending.
Step 3: The Silhouette Foreground
-
Sketch the outline:
Lightly sketch the shape of the bunny sitting in the lower right area. Draw the tall ears and the curve of the back. Also mark a rough, uneven line along the bottom for the grassy hill. -
Fill the bunny:
Dampen your medium brush slightly to make the black paint flow smoothly. Fill in the body of the bunny with solid black, ensuring the edges are opaque. -
Refine the edges:
Switch to your small round detail brush to tidy up the ears and the nose profile. The silhouette works best when these contours are very sharp. -
Paint the ground:
Fill the bottom strip of the canvas with solid black paint to create the hill the bunny is sitting on. -
Add grass blades:
Using the detail brush, paint individual blades of grass flicking upward from the black ground. Vary the lengths and angles, making some overlap the bottom of the bunny. -
Create tall weeds:
On the left side, paint taller stalks of grass that reach up into the water area. Paint fine lines for the stems and small dots or dashes at the tips to look like seed heads. -
Detail the eye:
I prefer to wait until the black bunny is dry, then add a tiny speck of white or very light brown for the eye catchlight. This brings life to the silhouette. -
Finish the edges:
Extend the background colors and black foreground around the sides of the canvas for a polished, gallery-ready look.
Make It Glossy
Once fully cured (wait 24h), seal the painting with a high-gloss varnish. This deepens the black silhouette contrast and makes the pastel water look wet and shimmering.
Now you have a tranquil piece of spring art ready to hang


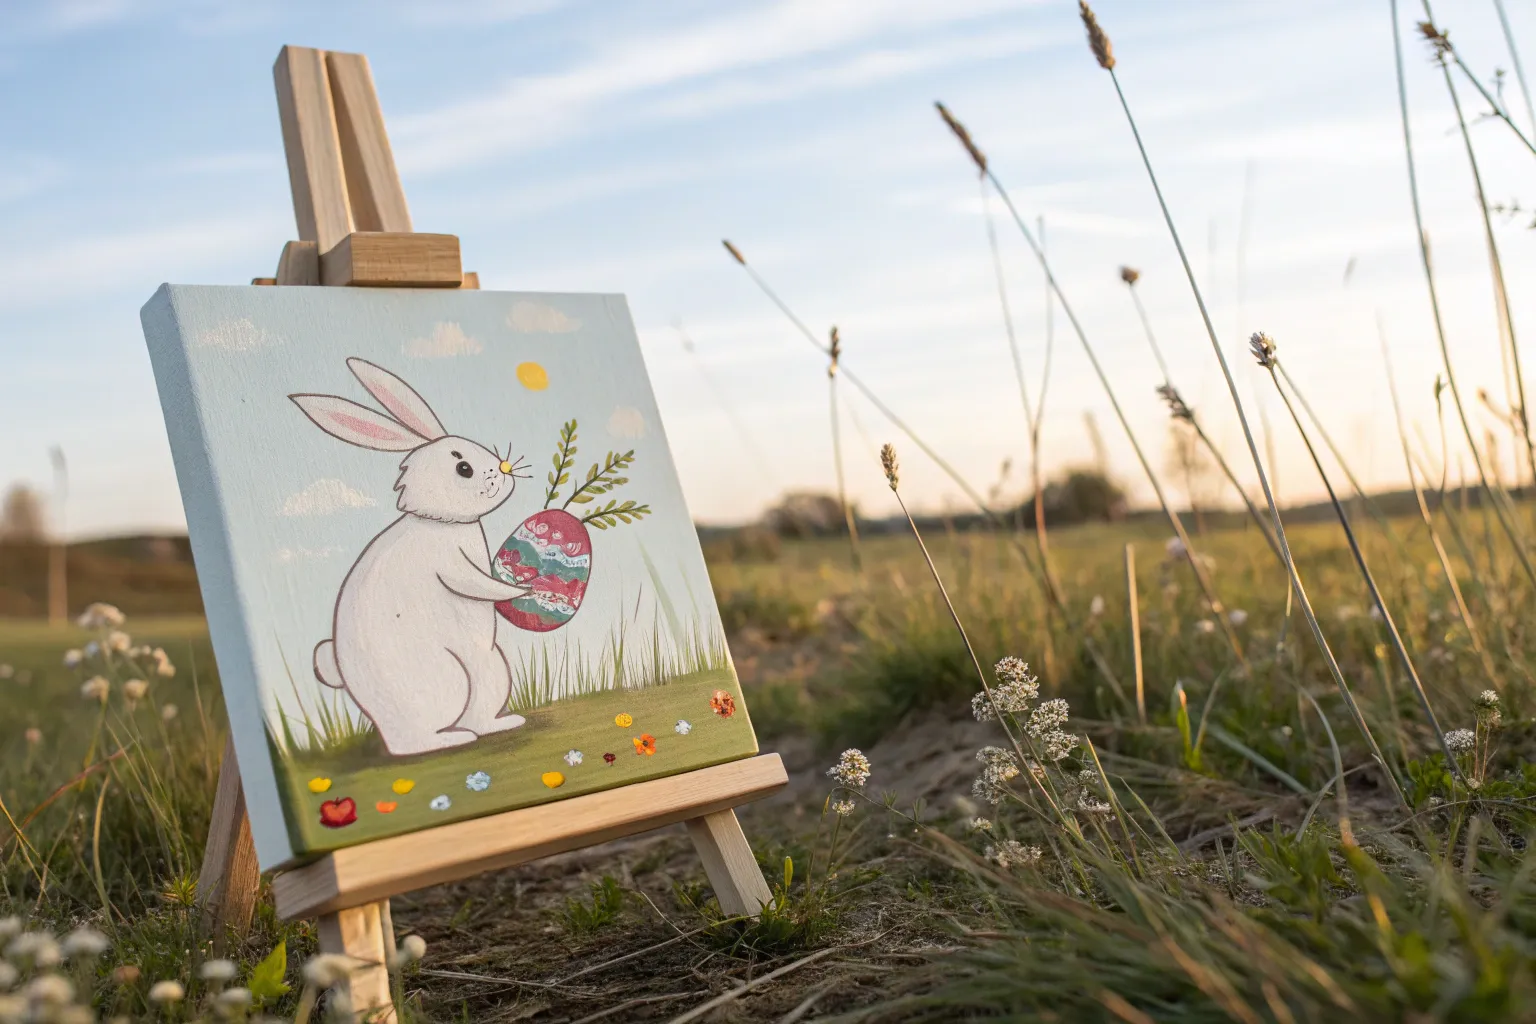
Easter Egg Hunt Meadow Scene
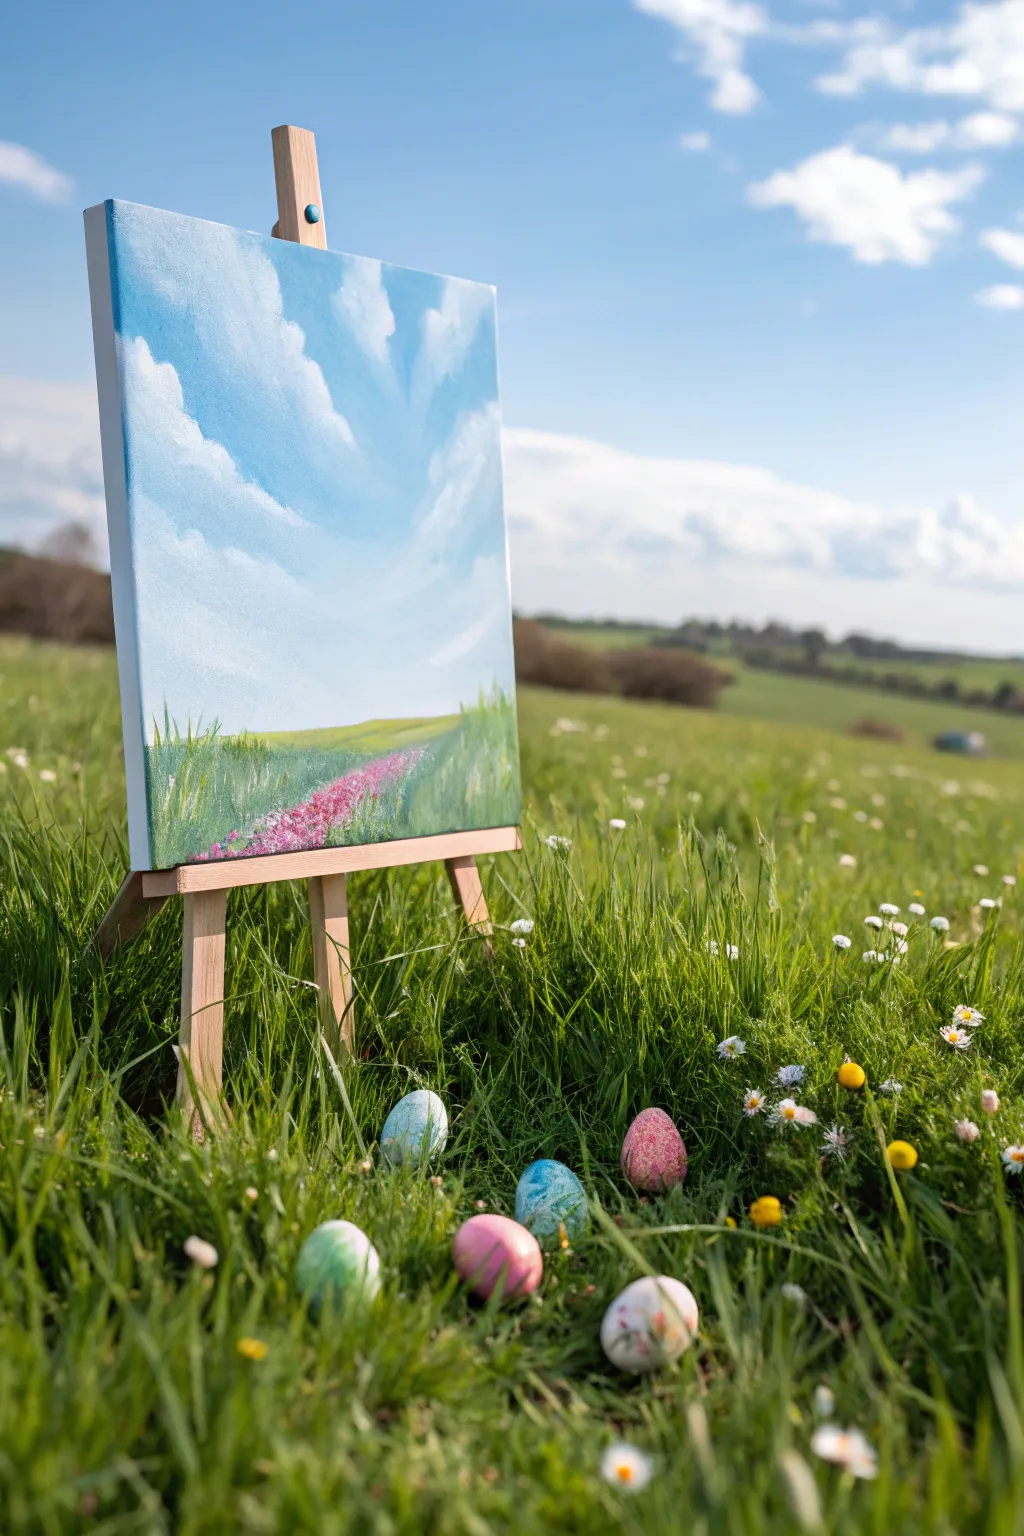
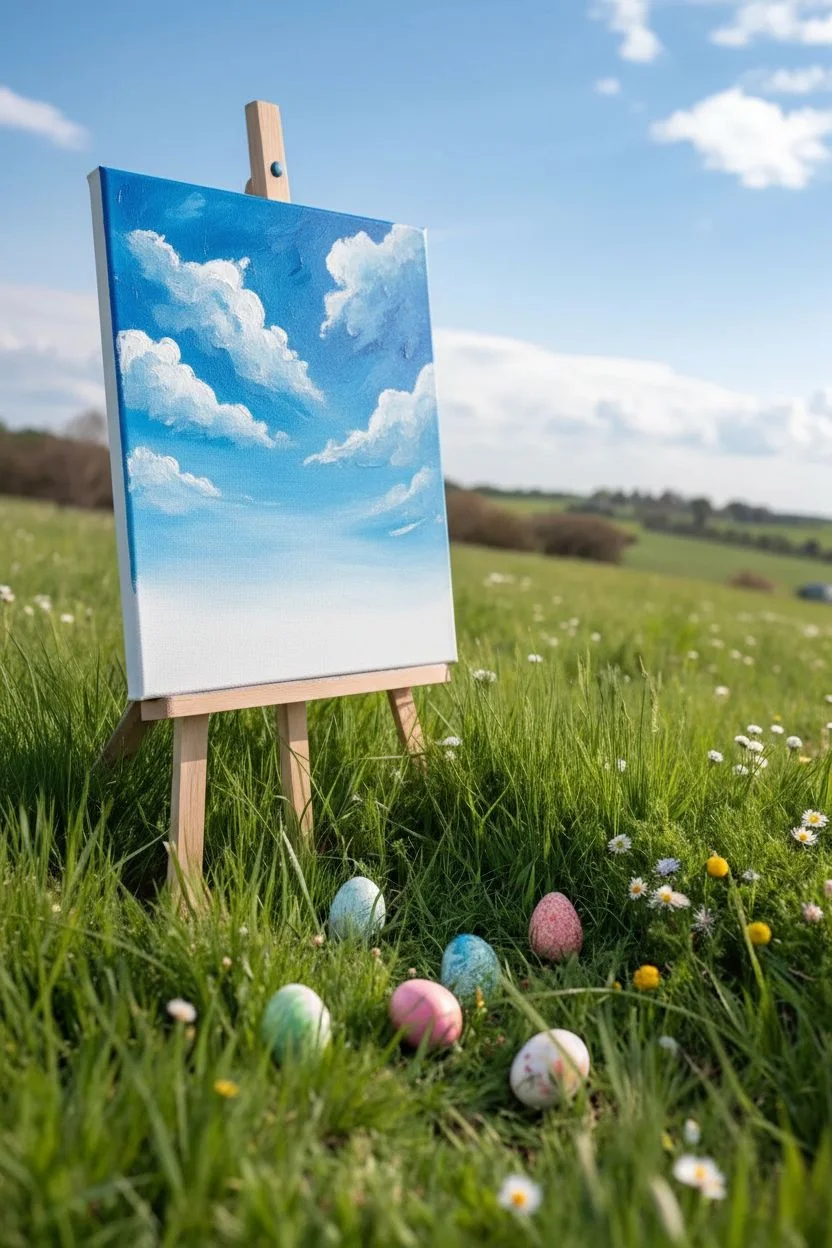
Capture the fresh, hopeful spirit of spring with this serene landscape painting that mirrors the beauty of a real Easter morning. You will learn to blend a perfect cloud-filled sky and create a textured wildflower meadow using simple brush techniques.
Detailed Instructions
Materials
- Canvas panel or stretched canvas (11×14 or similar)
- Acrylic paints: Titanium White, Cerulean Blue, Sap Green, Yellow Ochre, Magenta, Burnt Sienna
- Large flat brush (1 inch)
- Medium filbert brush
- Small round brush or liner brush
- Old toothbrush (optional for splatter)
- Palette for mixing
- Cup of water and paper towels
Step 1: Painting the Sky
-
Establish the gradient:
Begin by covering the top two-thirds of your canvas with Cerulean Blue. While the paint is still wet, mix a little Titanium White into your blue on the palette to create a lighter shade. -
Blend downward:
Apply this lighter blue mix to the lower part of the sky area, blending it upwards into the darker blue to create a natural atmospheric fade. The sky should be palest near the horizon line. -
Form cloud shapes:
Load your filbert brush with pure Titanium White. Using the rounded edge of the brush, scrub in soft, circular motions to form the tops of fluffy cumulus clouds. -
Add cloud dimension:
While the white is wet, pick up a tiny amount of the light blue mixture and blend it gently into the bottom edges of the clouds. This creates shadows and volume, preventing them from looking like flat cotton balls. -
Create wispy trails:
Use a dry brush or your finger to lightly drag the edges of the clouds outward, making them look windswept and soft against the blue backdrop. I find this helps them integrate better with the background.
Step 2: Layering the Landscape
-
Block in the grass:
Mix Sap Green with a touch of Yellow Ochre for a warm, sunny meadow color. Paint the bottom third of the canvas, covering the remaining white space completely. -
Darken the distance:
Add a tiny dot of Burnt Sienna or dark blue to your green mix to create a deeper shade. Apply this darker tone near the horizon line to suggest distant hills or dense vegetation. -
Define the pathway:
Visualize a diagonal path leading from the bottom left corner toward the center horizon. Lightly sketch this flow with a brush dipped in diluted green paint or a pencil. -
Texture the foreground:
Using a small round brush, flick upward strokes of varying greens (some mixed with yellow, some with blue) in the foreground to simulate individual blades of tall grass. -
Add distant foliage:
Dab the tip of your medium brush along the horizon line using a mix of deep green and blue to create the suggestion of a distant treeline or bushes.
Cloud Control
If your clouds look too heavy or distinct, use a clean, dry brush to lightly sweep over them horizontally. This blurs the edges and makes them look softer.
Step 3: Blooming Details
-
Start the wildflowers:
Mix Magenta with a little White to create a soft pink. Use the tip of your small brush to stipple clusters of dots along the pathway shape you defined earlier. -
Layer flower colors:
Add more White to your pink mix for highlights, and use pure Magenta for shadows. Dot these different shades over the initial flower patch to create depth and density. -
Create perspective:
Make the flower dots larger and more distinct near the bottom of the canvas, and gradually smaller and fuzzier as the path recedes toward the horizon. -
Highlight the grass:
Mix a pale, yellowish green. Add a few highlights to the tops of the grass blades closest to where the sun would hit, especially around the edges of your flower path. -
Final atmosphere check:
Stand back and look at the painting from a distance. If the horizon line looks too sharp, gently glaze over it with a very watered-down white wash to push it further into the distance.
Add Hidden Eggs
For a playful detailed twist, paint tiny, colorful oval shapes hidden among the tall grass blades in the foreground as if an egg hunt is underway.
Place your finished canvas on a mini easel to bring a breath of fresh spring air into your home


Baby Chick Peeking Out of a Cracked Egg
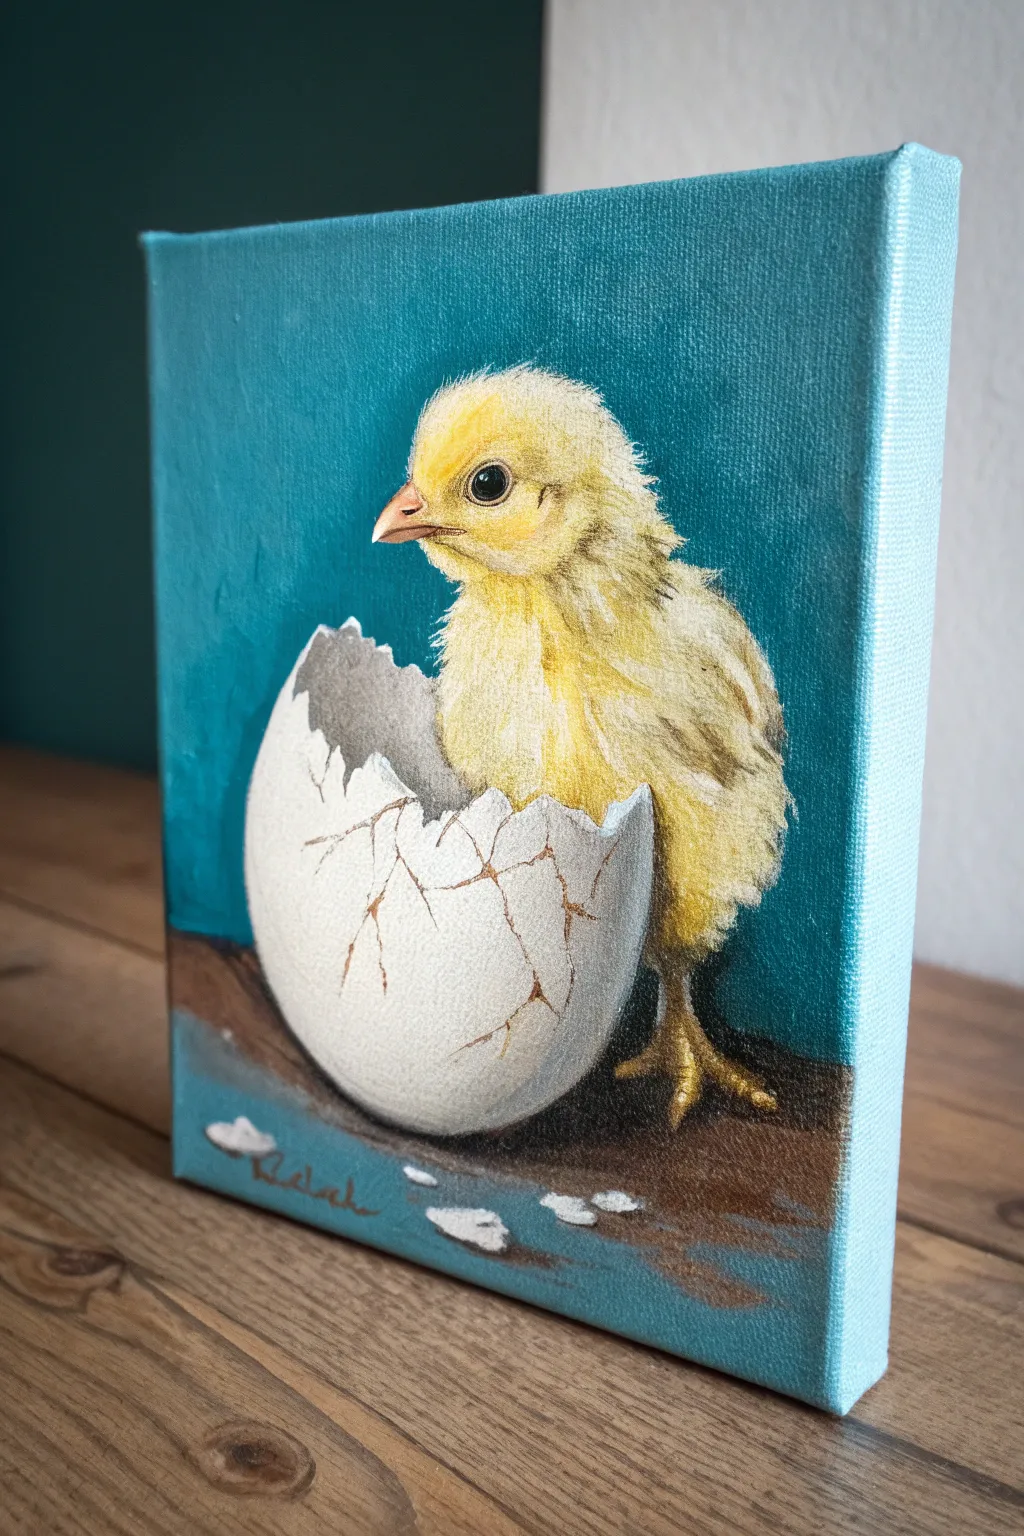
Capture the magic of new beginnings with this charming acrylic painting of a fluffy yellow chick emerging from a cracked eggshell. The vibrant teal background makes the yellow feathers pop, creating a joyful Easter centerpiece that feels alive with texture.
How-To Guide
Materials
- Small square stretched canvas (e.g., 6×6 or 8×8 inch)
- Acrylic paints: Titanium White, Mars Black, Cadmium Yellow Medium, Yellow Ochre, Burnt Umber, Teal (or Phthalo Blue + Green)
- Assorted brushes: 1-inch flat wash, #4 round, #0 liner, small filbert
- Palette paper or mixing plate
- Cup of water and paper towels
- Chalk or pencil for sketching
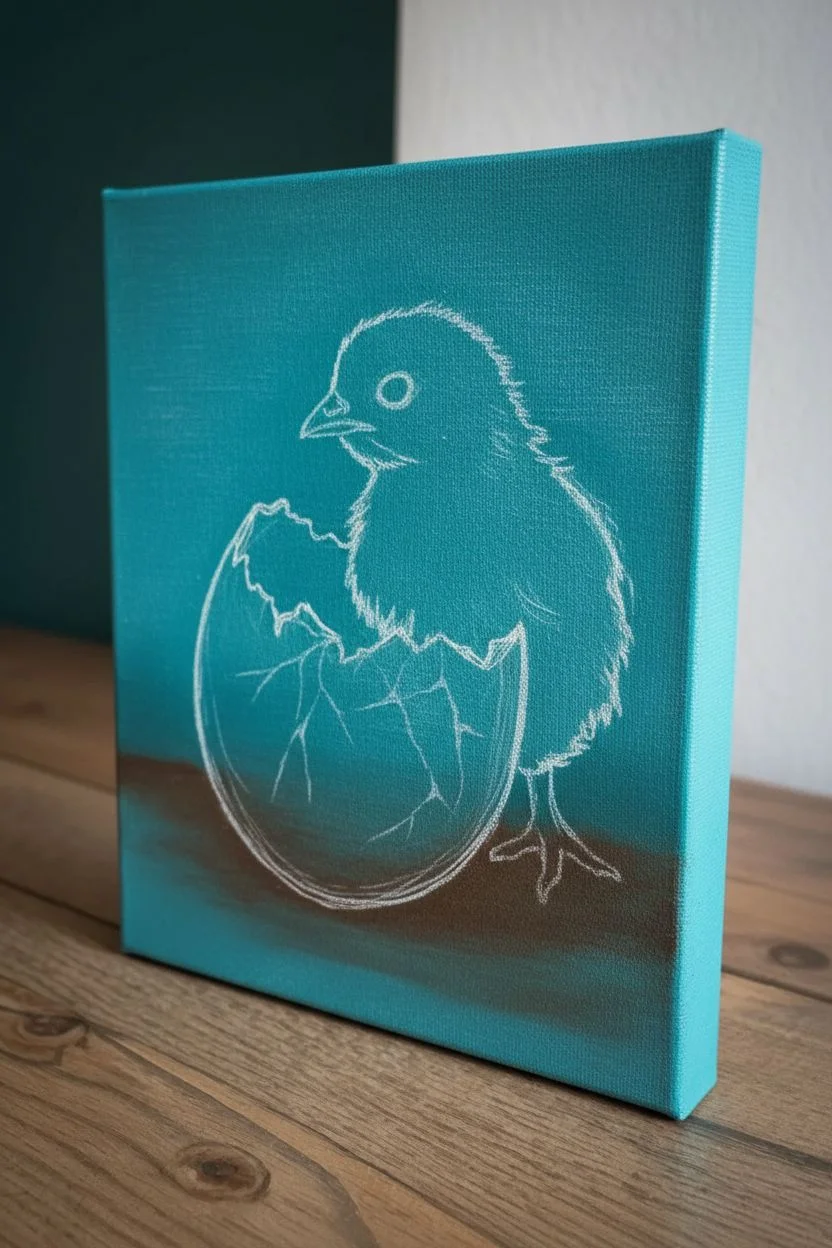
Step 1: Background & Sketch
-
Base Coat:
Begin by painting the entire background area with your Teal paint using a 1-inch flat wash brush. Work in smooth, horizontal strokes to ensure even coverage. -
Add Depth:
While the teal is still slightly wet, mix a tiny touch of Burnt Umber into a corner of your teal pile. Paint the bottom third of the canvas with this darker mix, blending it upwards slightly to suggest a shadowy ground plane. -
Paint the Edges:
Don’t forget to wrap your background color around the thick edges of the canvas for a gallery-finished look. -
Sketch the Outline:
Once the teal layer is completely dry to the touch, use a piece of white chalk or a light pencil to outline your composition. Draw a large oval shape for the egg, then sketch the jagged crack line across the middle. Finally, outline the chick’s head and body shape emerging from the top.
Step 2: Painting the Eggshell
-
Egg Base Color:
Mix a light grey using Titanium White and a dot of Mars Black. Fill in the bottom half of the egg shape. You want this to be off-white so you can add bright highlights later. -
Shadowing the Shell:
With a slightly darker grey, paint the curved bottom edge of the egg and the area directly beneath the jagged cracks to create roundness. -
Inside the Shell:
Paint the visible interior of the back shell (behind the chick) with a medium grey tone. This pushes that area into the background. -
Crackle Details:
Using your #0 liner brush and watered-down Burnt Umber, paint thin, meandering cracks branching off the main opening. Keep your hand loose and shaky for natural-looking fractures.
Feathery Texture Tip
Use an old, frayed brush for the feathers. Dab it gently rather than stroking to create instant, realistic fluff without painting every single hair.
Step 3: Fluffing the Feathers
-
Underpainting the Chick:
Block in the chick’s shape with a solid coat of Yellow Ochre. This dark yellow base is crucial for giving the feathers depth. -
Adding Texture:
Once the ochre dries, switch to a small filbert or round brush. Load it with Cadmium Yellow Medium and use short, flicking strokes to layer feathers over the base. Start from the bottom of the neck and work upward. -
Brightest Fluff:
Mix Cadmium Yellow with Titanium White. Apply this lightest yellow only to the top of the head, chest, and wing tips using tiny dabs to simulate soft down. -
The Eye:
Paint a solid black circle for the eye. When dry, add a tiny dot of pure Titanium White in the upper right quadrant of the pupil for that vital spark of life. -
Beak Details:
Paint the beak with a mix of Titanium White and a dash of Burnt Umber for a beige tone. Add a thin line of Burnt Umber to separate the upper and lower beak, and a tiny highlight on top.
Metallic Magic
Once the painting is dry, lightly glaze the brightest parts of the eggshell with a sheer pearl medium for a subtle, calcium-like shimmer.
Step 4: Grounding & Finishing
-
Ground Shadows:
Mix Burnt Umber with a little Black. Paint a cast shadow underneath the egg, blending it softly outward into the teal ground. -
Chick’s Legs:
Sketch the legs peeking out using the Yellow Ochre mix, adding darker brown shading on one side of the toes to make them look cylindrical. -
Shell Fragments:
Paint two or three small, irregular white shapes on the ground near the egg to represent fallen shell pieces. Add tiny grey shadows under them. -
Final Highlights:
Using pure Titanium White, add final bright highlights to the top ridges of the eggshell cracks to make them look sharp and brittle.
Step back and admire your adorable new artwork which is now ready to brighten up any room


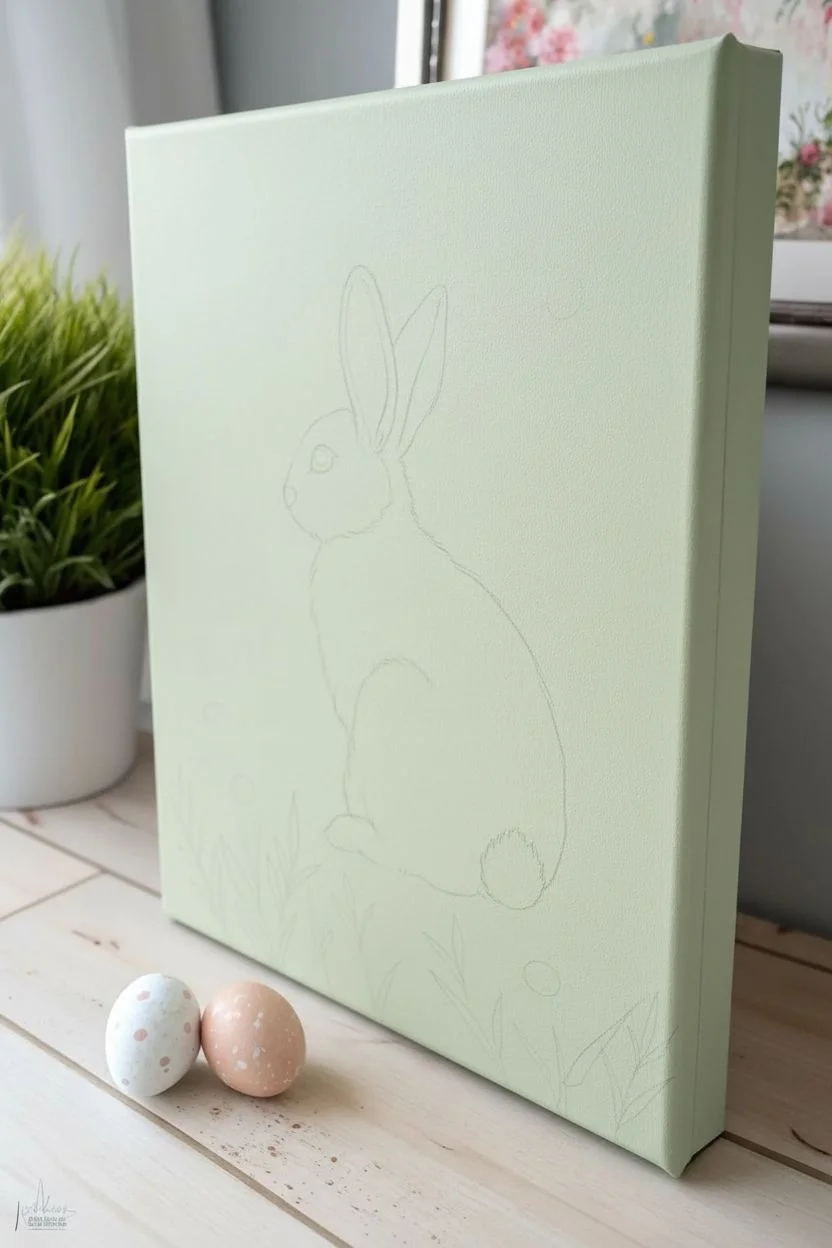
Bunny Butt in the Daisies
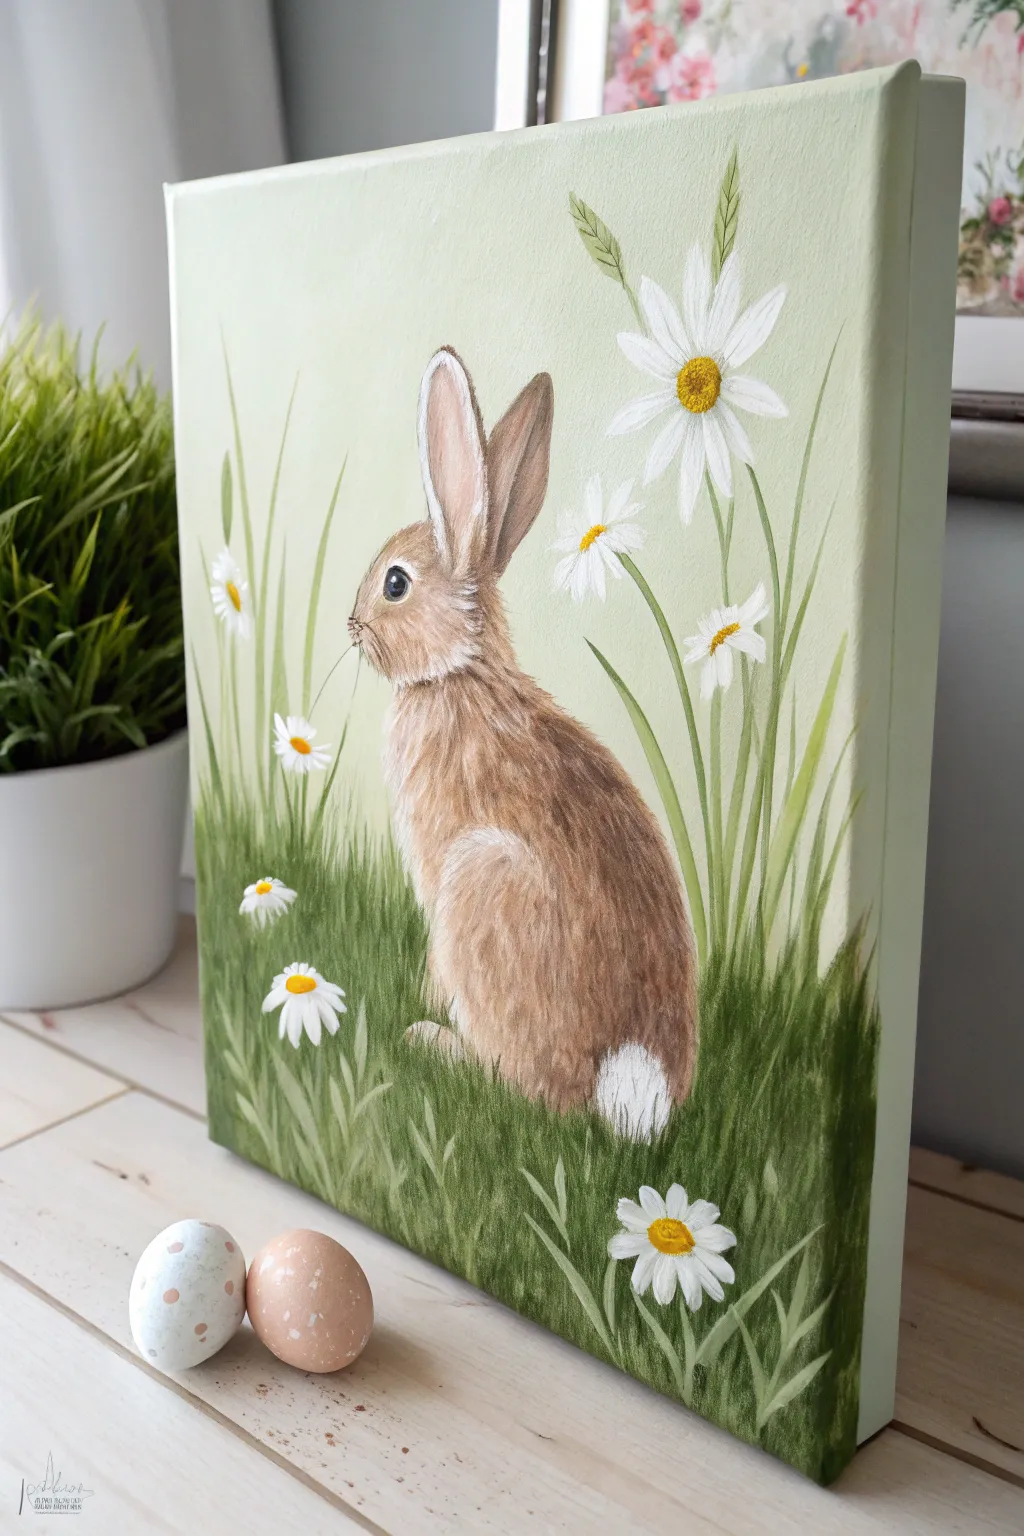
Capture the essence of spring with this serene portrait of a bunny surrounded by cheerful daisies. The soft green background and detailed fur texture create a lovely balance between realism and illustrative charm, perfect for seasonal decor.
Detailed Instructions
Materials
- Stretched canvas (square format, e.g., 10×10 or 12×12 inches)
- Acrylic paints: Titanium White, Burnt Umber, Yellow Ochre, Sap Green, Hooker’s Green, Lemon Yellow
- Flat shader brush (scumblling/background)
- Small round brush (details)
- Fan brush (optional, for grass)
- Liner brush (fine fur and whiskers)
- Palette and water cup
- Pencil for sketching
Step 1: Setting the Scene
-
Background wash:
Mix a large amount of Titanium White with a tiny touch of Sap Green and Yellow Ochre to create a very pale, muted sage color. Paint the entire canvas, including the sides, with this soft shade to establish your background atmosphere. -
Sketching the outline:
Once the background is fully dry, lightly sketch the outline of the rabbit using a pencil. Start with an oval for the body and a smaller circle for the head, connecting them with a curved neck line. Add the two tall ears. -
Placement of flora:
Lightly mark the positions of your main daisies. Place a large one near the upper right corner and scatter smaller ones near the bottom left to balance the composition. Sketch vertical guide lines for the tall grass blades.
Fur Realism Tip
Don’t overmix your fur colors on the palette. Let the bristles hold a bit of white and brown simultaneously for multi-tonal strokes.
Step 2: Building the Bunny
-
Base coat:
Fill in the bunny’s shape with a flat layer of light brown. Mix Burnt Umber with Titanium White to get this mid-tone tan color. Don’t worry about texture yet; just get the color down solid. -
Adding shadows:
While the base is drying slightly, mix pure Burnt Umber with a touch of Hooker’s Green to create a dark shadow tone. Paint this along the back curve, under the chin, and at the base where the bunny sits in the grass. -
Fur texture layers:
Switch to a small filbert or round brush. Mix a lighter tan (more white, less brown) and start applying short, directional strokes over the body. Follow the curve of the animal’s form—strokes should go down the back and curve around the thigh. -
Softening the blend:
Continue layering these strokes while the paint is slightly wet to blend the harsh edges. I find that working in small sections prevents the acrylics from drying too fast on the palette. -
Highlights and fluff:
Using a liner brush and off-white paint (White + tiny dot of Ochre), add fine hair details. Focus on the chest, the edge of the thigh, and the inside of the ears. Paint the tail as a fluffy white cotton ball with short, circular dabbing motions. -
Facial features:
Paint the eye a solid black circle, adding a tiny white reflection dot near the top for life. Use a thin wash of pinkish-brown (White + Burnt Umber + tiny red if you have it) for the inner ear shading.
Step 3: The Garden Details
-
Deep grass foundation:
Mix Hooker’s Green with a little Burnt Umber for a deep forest green. Using upward flickering strokes, paint the darkest grass at the very bottom of the canvas, overlapping the bottom of the bunny slightly to -
Mid-tone grass:
Lighten your green with Sap Green and White. Add a second layer of grass blades that reach higher up the canvas. vary the height and angle so they don’t look like a picket fence. -
Daisy petals:
For the flowers, use a small round brush loaded with Titanium White. Start at the center of your sketched flower location and pull the brush outward to create teardrop-shaped petals. Let some petals overlap the grass blades. -
Flower centers:
Mix Lemon Yellow with a speck of Yellow Ochre. Dab this into the center of each daisy. Stipple a tiny bit of brown on the bottom edge of the yellow center to give it a 3D rounded look. -
Stems and leaves:
Connect the floating daisy heads to the ground with thin, light green stems. Add a few broad leaves attached to the stems using a mix of Sap Green and White. -
Final whiskers:
Using your thinnest liner brush and watered-down white or light gray paint, add long, sweeping whiskers extending from the bunny’s nose. -
Bright touches:
Add a few final highlights of pure white on the tips of the grass blades where the sun would hit.
Level Up: Bee buzz
Paint a tiny bumblebee near one of the daisies. Use a dot of yellow, a stripe of black, and translucent white wings for extra whimsy.
Let your painting dry completely before displaying it as a cheerful welcome to the spring season
BRUSH GUIDE
The Right Brush for Every Stroke
From clean lines to bold texture — master brush choice, stroke control, and essential techniques.
Explore the Full Guide
Tulips in Bloom With Hidden Easter Eggs
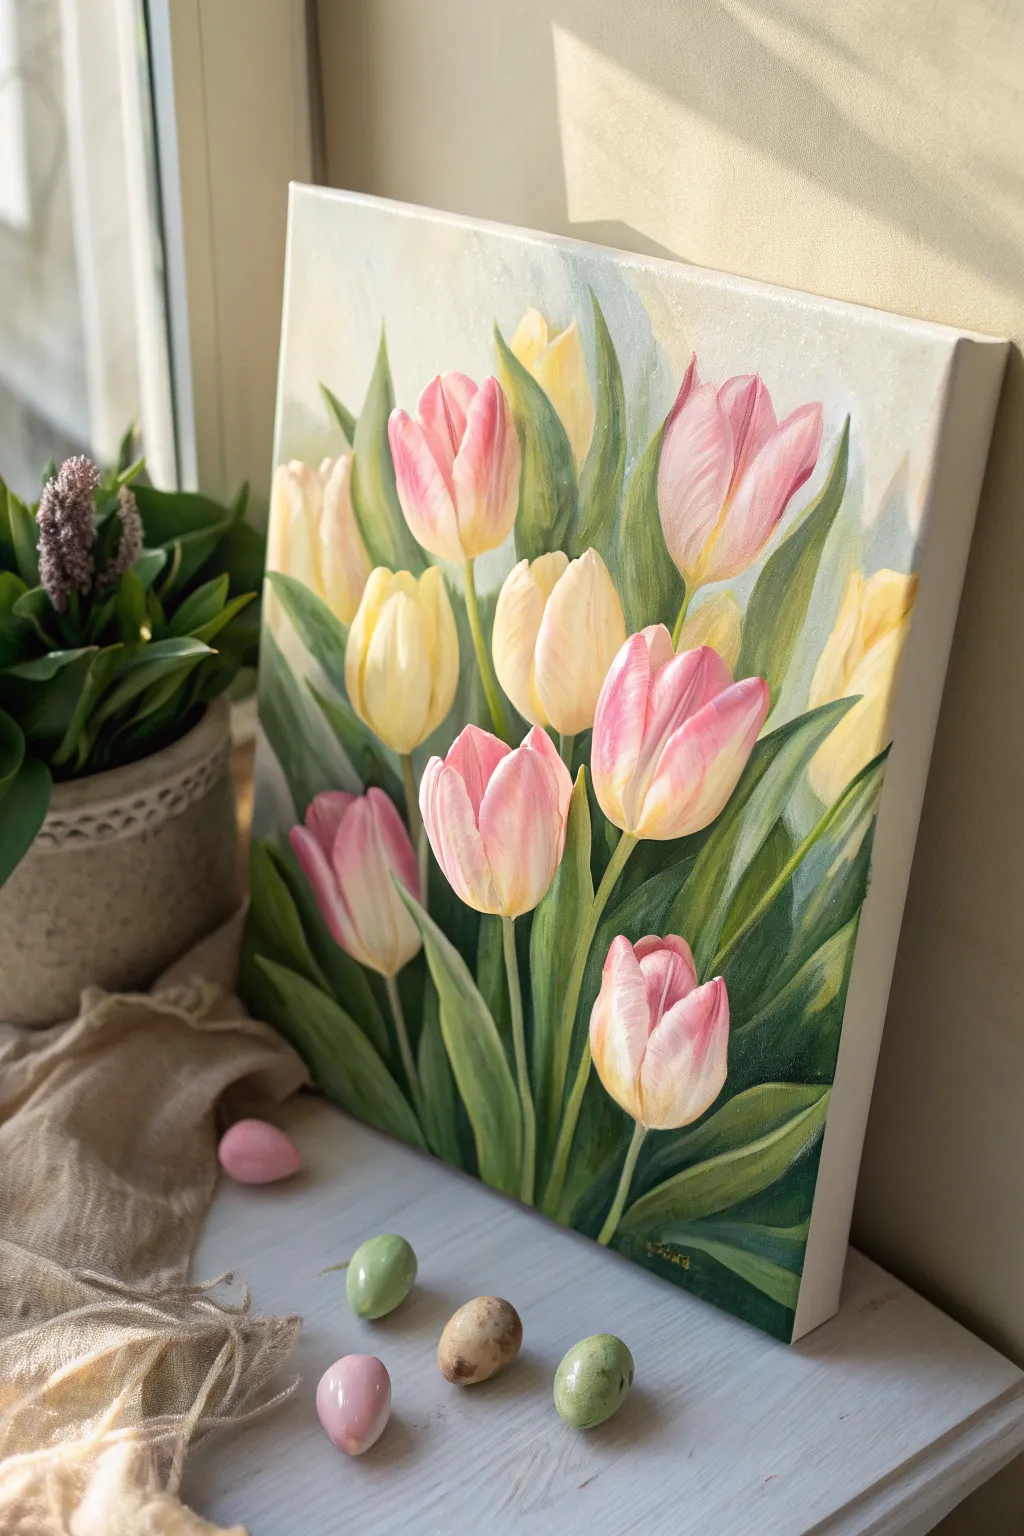
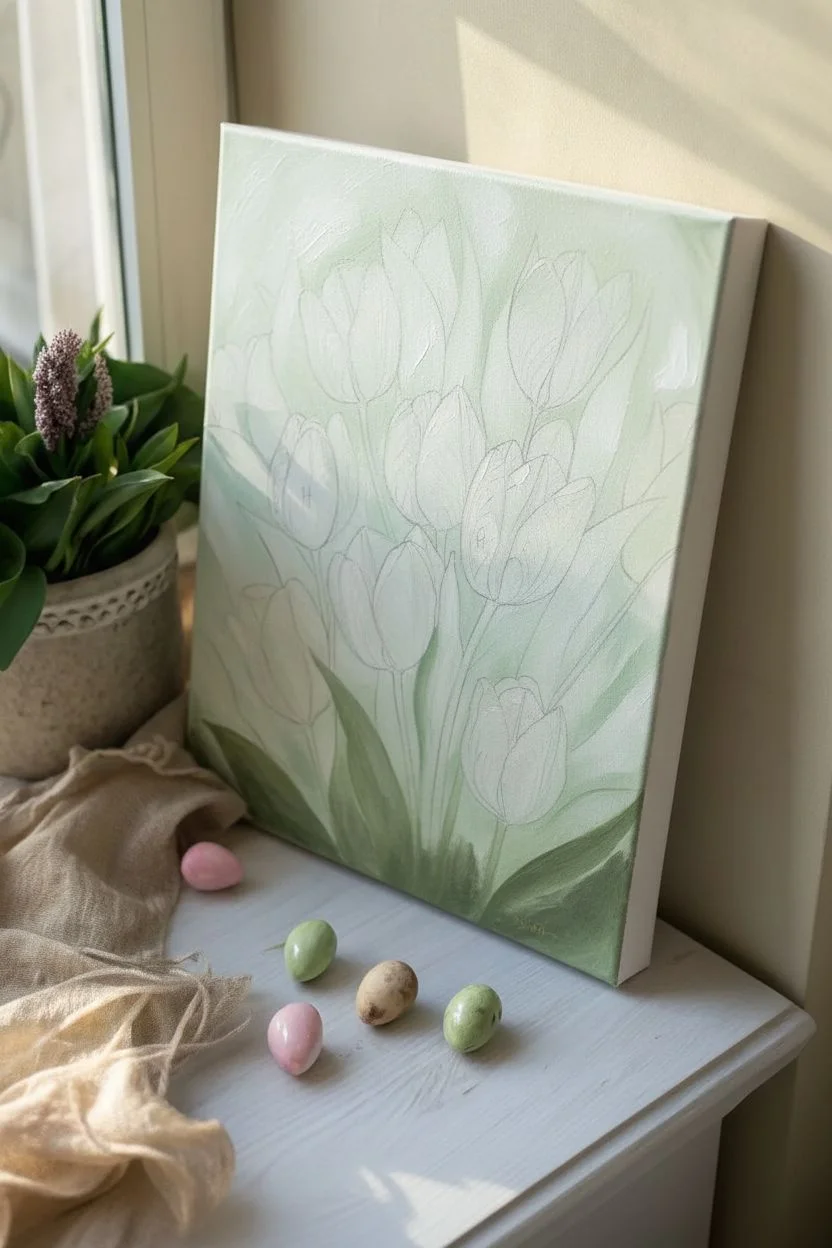
Capture the fresh, hopeful energy of spring with this painting of tall pink and yellow tulips reaching toward the light. This project focuses on realistic shading, soft color blending, and adding a playful hidden element perfect for the season.
Step-by-Step Guide
Materials
- Stretched canvas (rectangular, e.g., 11×14 or 16×20 inches)
- Acrylic paints: Titanium White, Cadmium Yellow Medium, Naples Yellow light, Alizarin Crimson or Magenta, Sap Green, Phthalo Green, Burnt Umber
- Set of synthetic brushes: Flat (3/4 inch), Filbert (size 6 and 8), Round (size 2 or 4)
- Palette for mixing
- Cup of water and paper towels
- Pencil for sketching
- Slow-drying medium (optional, for blending)
Step 1: Sketching & Background
-
Map out the composition:
Begin by lightly sketching the placement of your tulips using a pencil. Draw oval shapes for the flower heads at varying heights to create a natural, unforced rhythm. Add long, sweeping lines for the stems and broad, pointed shapes for the leaves. -
Define the light source:
Decide where your light is coming from—in this painting, it’s the upper right. Lightly mark the areas on the flower heads that will be highlights so you don’t paint over them too darkly later. -
Create a soft atmosphere:
Mix Titanium White with a tiny touch of Sap Green and Naples Yellow to create a very pale, misty greenish-white. Using a large flat brush, paint the background. Don’t make it a solid flat color; swirl in slight variations of white and pale blue-grey to suggest air and distance. -
Add background depth:
While the background is still slightly damp, mix a darker, muted green using Sap Green and a touch of Burnt Umber. Gently scumble this into the lower corners and between the sketch lines of the leaves to create deep shadows behind the main bouquet.
Paint Texture Tip
For the tulip petals, try not to over-blend the paint. Leaving slightly visible brushstrokes mimics the fibrous, silky texture of real flower petals.
Step 2: Painting the Foliage
-
Block in the leaves:
Using a filbert brush, fill in the leaf shapes with a base coat of Sap Green mixed with a little White. Use long, confident strokes that follow the curve of the leaf from bottom to top. -
Develop shadows in greenery:
Mix Phthalo Green with Alizarin Crimson (which neutralizes the green into a deep shadow color). Apply this to the base of the leaves and areas where leaves overlap, creating pockets of darkness that make the foreground pop. -
Add leaf highlights:
Mix Sap Green with Cadmium Yellow and White. Paint the edges of the leaves that are facing the upper right light source. This creates the waxy texture typical of tulip foliage. -
Paint the stems:
Use a round brush with a light yellow-green mix to draw the stems. Keep them fairly straight but not rigid. Ensure the stems connect logically to the flower heads above.
Step 3: The Tulip Blooms
-
Base coat for yellow tulips:
For the yellow flowers, apply a mix of Naples Yellow and White. Cover the entire oval shape, keeping the edges soft. -
Base coat for pink tulips:
For the pink flowers, mix White with a small amount of Alizarin Crimson to make a soft baby pink. Apply this as the base layer for the pink blooms. -
Connect petals to stems:
At the very bottom of each flower head, blend a tiny amount of the pale green stem color up into the base of the petals. This transitions the flower naturally rather than having it look like a lollipop stuck on a stick. -
Deepen the yellows:
On the shadow side (left side) of the yellow tulips, glaze a mix of Cadmium Yellow and a tiny dot of orange or pink. This adds warmth and roundness to the form. -
Define pink petals:
Using a size 4 round brush, mix a more vibrant pink. Paint the distinct petal shapes, leaving the lighter base coat visible on the highlighted edges. Tulips usually have overlapping petals, so define the separation lines clearly. -
Add ‘glow’ to the pinks:
Here I like to add a touch of yellow to the bottom center of the pink tulips. Blend it upwards gently; this makes the petals look translucent, as if the sun is shining through them.
Make it Sparkle
Once the painting is fully dry, you can mix a tiny amount of iridescent medium or fine glitter glaze over the egg to make it a true hidden treasure.
Step 4: Details & The Hidden Egg
-
Refine the highlights:
Take pure Titanium White (or white with just a whisper of yellow) and paint thin, crisp highlights on the upper right edges of the petals and the tips of the leaves. This simulates strong sunlight. -
Paint the hidden egg:
Choose a spot low in the foliage, perhaps peeking out from behind a leaf. Paint a small oval shape. You can color it similar to the tulips (pale pink or yellow) so it is camouflaged, or make it a distinct pastel blue. -
Detail the egg:
Add a shadow on the bottom left of your egg and a bright highlight on the top right to give it a 3D form. It should nestle into the shadows of the leaves. -
Final assessment:
Step back and look at the whole canvas. If any flower edges look too sharp against the background, slightly blur them with a clean, damp brush to mimic depth of field.
Hang your masterpiece near a window to let natural light enhance those sun-kissed petals
Daffodil Border Framing a Single Easter Egg
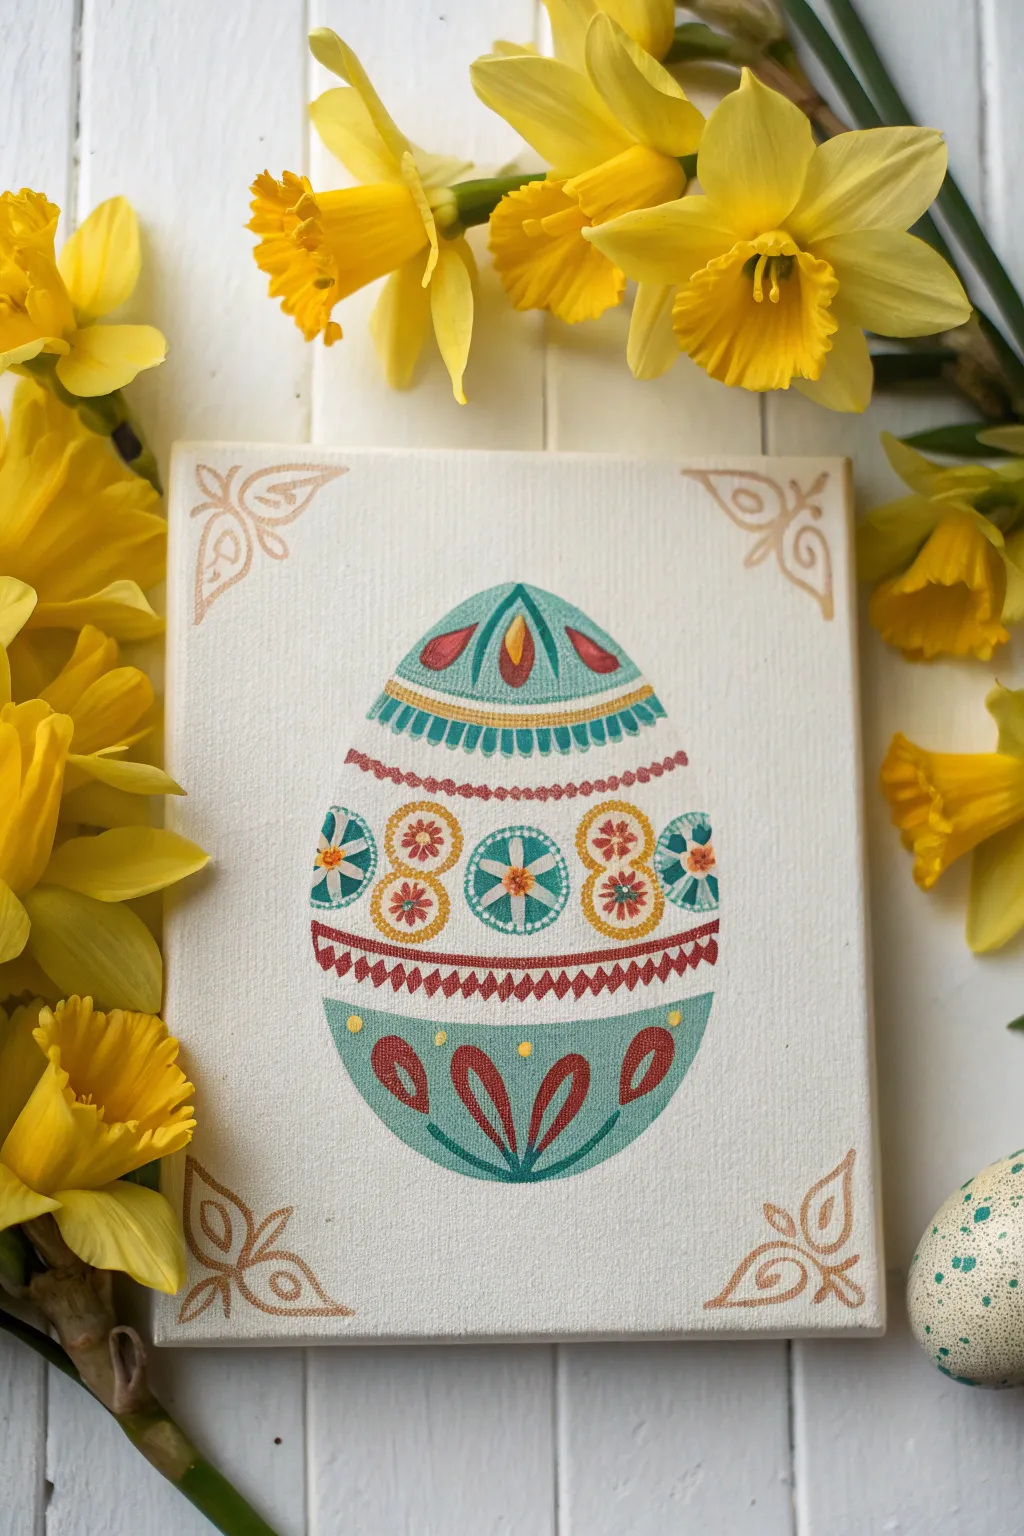
Embrace the freshness of spring with this delicate, folk art-inspired Easter egg painting. Using soft teal and warm red tones on a clean white background, this project creates a serene focal point perfect for distinct seasonal decor.
Detailed Instructions
Materials
- Small rectangular stretched canvas (e.g., 5×7 or 6×8 inches)
- Acrylic paints: Teal/Turquoise, Deep Red/Maroon, Mustard Yellow, White, Gold Metallic
- Pencil and eraser
- Ruler
- Fine detail brushes (sizes 0, 00, and 1)
- Flat brush (small, size 2 or 4)
- Palette or paper plate
- Cup of water and paper towels
Step 1: Preparation & Base Outline
-
Prime the surface:
If your canvas isn’t pre-primed, apply a coat of white gesso or white acrylic paint to ensure a smooth, bright surface. Let this dry completely. -
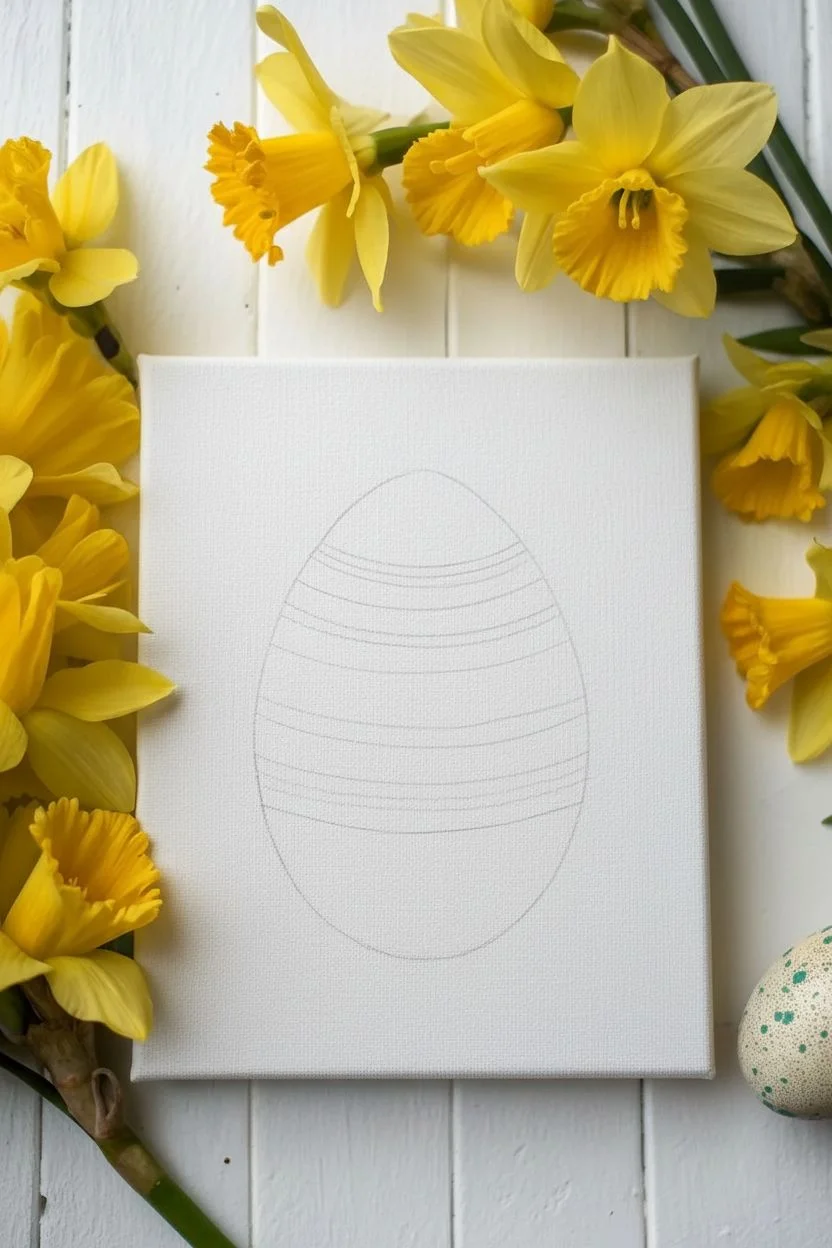
Sketch the egg shape:
Lightly draw a large oval shape in the center of the canvas. Aim for a classic egg silhouette that is slightly wider at the bottom and tapers gently toward the top. -
Divide into sections:
Using your ruler as a guide, lightly sketch horizontal bands across the egg to separate the different pattern zones. You’ll need a top cap, a decorative band, a central floral belt, a geometric stripe, and a bottom section.
Step 2: Painting the Main Blocks
-
Fill the top and bottom:
Mix a soft, muted teal color. Paint the very top cap of the egg and the large bottom section with this teal shade. Use a flat brush for smooth coverage, careful to stay within your pencil lines. -
Add the decorative stripes:
Paint the thin horizontal band just below the top cap with a mustard yellow. Leave a small gap of white space between the teal and yellow sections. -
Create the central band:
The wide middle section remains white as a background for the flowers. Ensure any pencil marks are erased or covered with a thin layer of white paint if they are too dark.
Uneven Egg Shape?
Cut a paper template of an egg shape first. Fold it in half to ensure symmetry, then trace around it lightly on your canvas for a perfect oval base.
Step 3: Adding Decorative Details
-
Paint top teardrops:
Inside the top teal section, use a detail brush to paint three vertical teardrop shapes. The center one should be larger and yellow; the two side ones should be red. -
Add scalloped borders:
Using a very fine brush and the teal paint, create a scalloped or ‘tooth’ pattern along the bottom edge of the upper decorative band. -
Detail the central flowers:
In the white middle band, paint three circular medallions. Paint the center one teal and the outer two yellow. Let them dry. -
Embellish the medallions:
Once the circles are dry, add contrasting floral details. Paint a white six-petal flower inside the center teal circle. For the yellow circles, add small red dots or petals in a radial pattern. -
Add connecting elements:
Between the main circles, paint half-circles in teal on the outer edges to frame the central pattern.
Level Up: 3D Texture
Use ‘puff paint’ or dimensional fabric paint for the small dots and the gold corner flourishes. This adds a tactile, raised texture that mimics embroidery.
Step 4: Geometric & Bottom Patterns
-
Paint the sawtooth row:
Below the central floral band, paint a row of small, connected red triangles or diamonds to create a sawtooth pattern. Keep your brush steady for uniform points. -
Decorate the bottom base:
In the large bottom teal section, paint large red teardrop shapes radiating upward from the bottom center. Mirror the shapes on the left and right sides. -
Add yellow accents:
Using a dotting tool or the back of a brush handle, place small yellow dots in the open spaces of the bottom teal section to add brightness.
Step 5: Corner Flourishes & Final Touches
-
Sketch corner designs:
Lightly pencil simple, curved leaf motives in the four corners of the canvas, pointing inward toward the egg. -
Paint gold outlines:
Using metallic gold or a light bronze paint mixed with a tiny bit of water for flow, carefully trace these corner leaf designs. Keep the lines thin and elegant. -
Review and refine:
Step back and look for any shaky lines. I find using a white gel pen or very thick white paint helps clean up edges where colors might have bled slightly.
Place your finished canvas on a small easel surrounded by fresh spring blooms to complete the festive look

PENCIL GUIDE
Understanding Pencil Grades from H to B
From first sketch to finished drawing — learn pencil grades, line control, and shading techniques.
Explore the Full Guide
Two Bunnies Sitting Together Under a Spring Sky
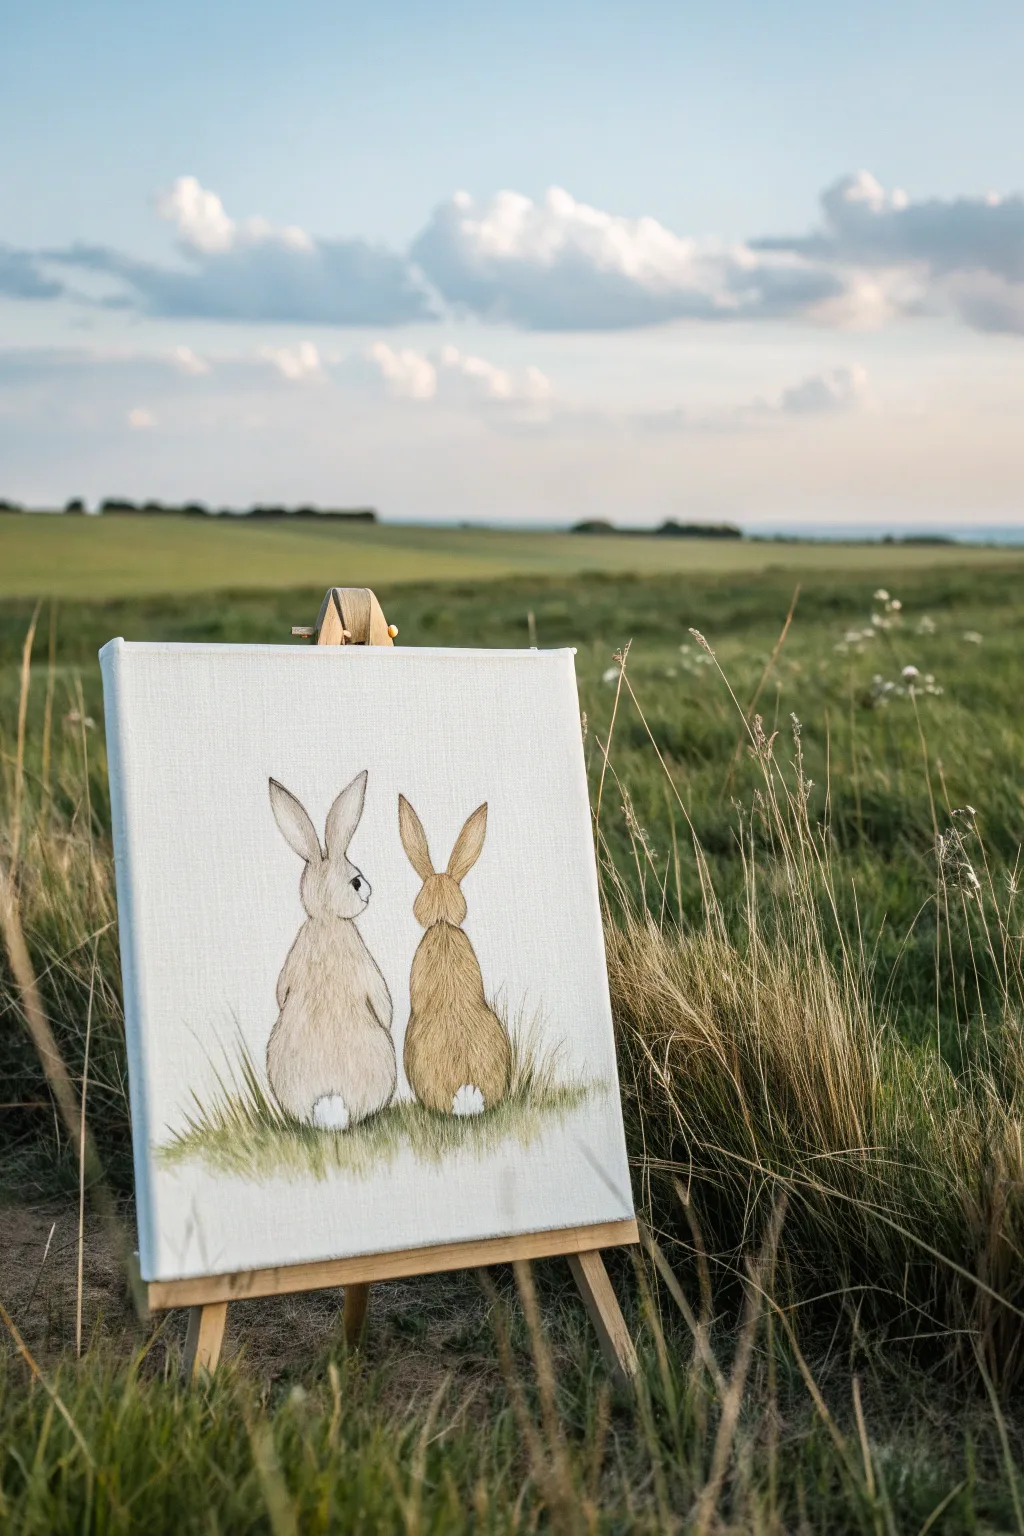
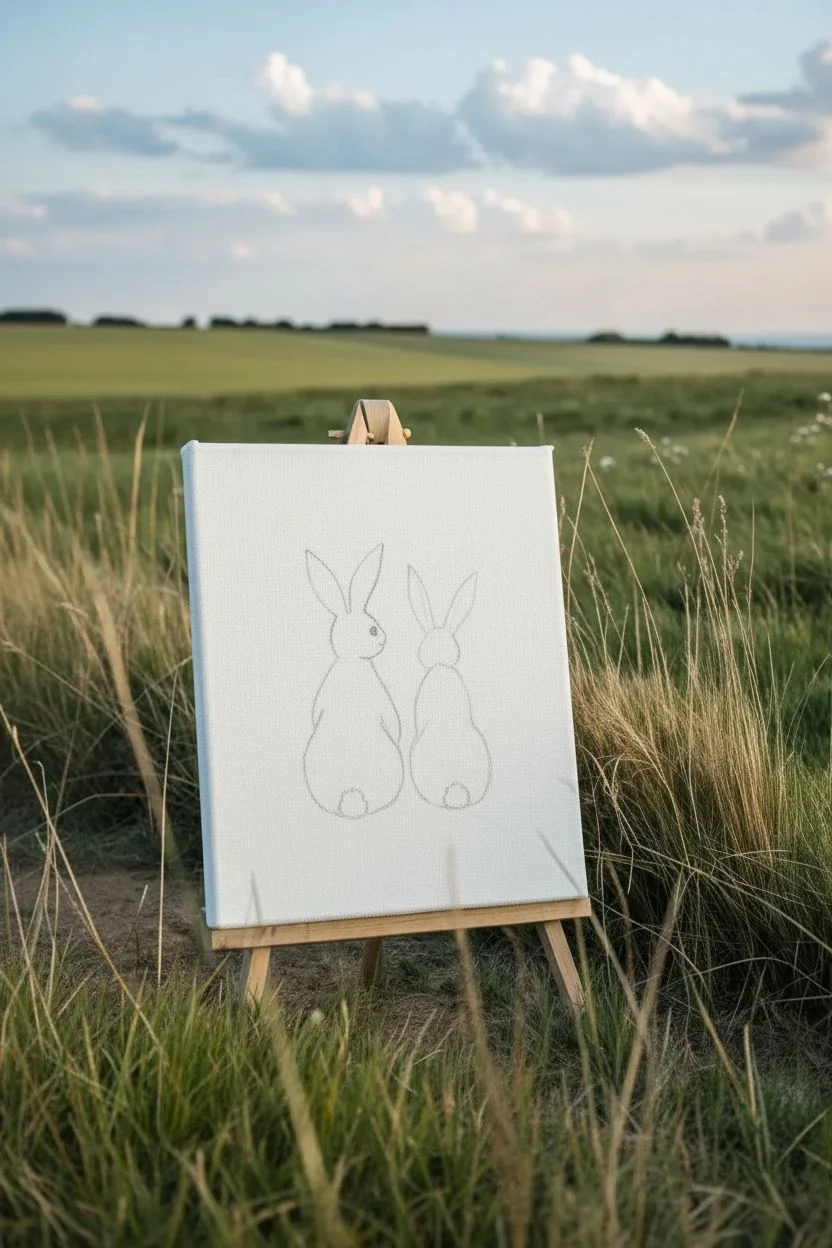
Capture the serenity of spring with this charming painting of two rabbits enjoying a quiet moment side-by-side. The soft, neutral tones and gentle grassy textures make this a peaceful addition to any Easter décor.
How-To Guide
Materials
- Stretched canvas (square or rectangular)
- Acrylic paints (Titanium White, Burnt Umber, Raw Sienna, Yellow Ochre, Sap Green, hint of Black)
- Pencil (HB or lighter) for sketching
- Assorted brushes (flat wash brush, small round detail brush #2 or #4, filbert brush)
- Palette or paper plate
- Cup of water and paper towels
Step 1: Planning the Composition
-
Prepare the Background:
Start with a clean white canvas. If your canvas isn’t pre-primed or feels rough, apply a thin coat of Titanium White gesso to create a smooth surface. Let this dry completely before sketching. -
Sketch the Outlines:
Using a light pencil, sketch the basic shapes of two rabbits sitting with their backs to the viewer. Draw two pear-shaped bodies side-by-side in the center of the canvas. -
Add Ears and Details:
Add tall ears to the larger rabbit on the left and slightly shorter ears to the one on the right. lightly mark the position of the tail puffs at the bottom. -
Refine the Profiles:
Turn the head of the left rabbit slightly to the right so its profile is visible. Keep the right rabbit facing directly forward or slightly angled toward its friend.
Fixing “Flat” Fur
If the bunnies look too flat, add deeper shadows where their bodies meet and under the ears. Contrast creates volume
Step 2: Painting the Fur
-
Base Coat – Left Bunny:
Mix Titanium White with a tiny drop of Black or Raw Umber to create a very pale grey-beige. Paint the entire body of the left rabbit with this base color, avoiding the tail area. -
Base Coat – Right Bunny:
For the right rabbit, mix Yellow Ochre with a touch of Burnt Umber for a warmer, golden-brown base. Fill in the body shape smoothly. -
Create Texture:
Once the base layers are tacky but not fully dry, use a small, mostly dry filbert brush to add texture. Use short, flicking strokes in a darker shade (Burnt Umber) to simulate fur growth patterns. -
Define the Ears:
Paint the insides of the ears with a slightly darker shadow tone. For the left rabbit, ensure you outline the eye on the side of the head with a fine point brush in dark brown or black. -
Highlight the Fur:
Clean your brush and pick up pure Titanium White. Gently dry-brush highlights onto the tops of the heads and the shoulders where the light would naturally hit.
Step 3: Adding Details and Environment
-
Fluffy Tails:
Load a round brush with thick Titanium White paint. Using a dabbing or stippling motion, create the round, fluffy cotton-tails at the base of both rabbits. -
Grounding Shadow:
Mix a watery grey-green wash. Apply this very lightly underneath the rabbits to ground them, so they aren’t floating in space. -
Painting Grass Blades:
Mix Sap Green with a little Yellow Ochre. Using your smallest detail brush or a liner brush, paint thin, upward strokes starting from the bottom of the canvas. -
Layering the Grass:
Vary your green tones by adding more white or brown to the mix. Add more grass blades that overlap the bottom of the rabbits’ fur to make them look nestled in the field. -
Variable Heights:
Make some grass blades taller and others shorter. I like to let a few tall, thin blades reach up past the bunny’s lower back for a natural, unkempt look. -
Final Touches:
Check the eye on the left rabbit; add a tiny white dot as a reflection highlight to bring it to life. Strengthen any outlines that may have been lost during the fur painting.
Add a Soft Sky
Before painting the bunnies, apply a very watery wash of pale blue to the top half of the canvas for a subtle spring sky effect
Step back and admire your peaceful scene, ready to bring a touch of nature into your home this Easter.
Simple Cross With Wildflower Wreath for Easter
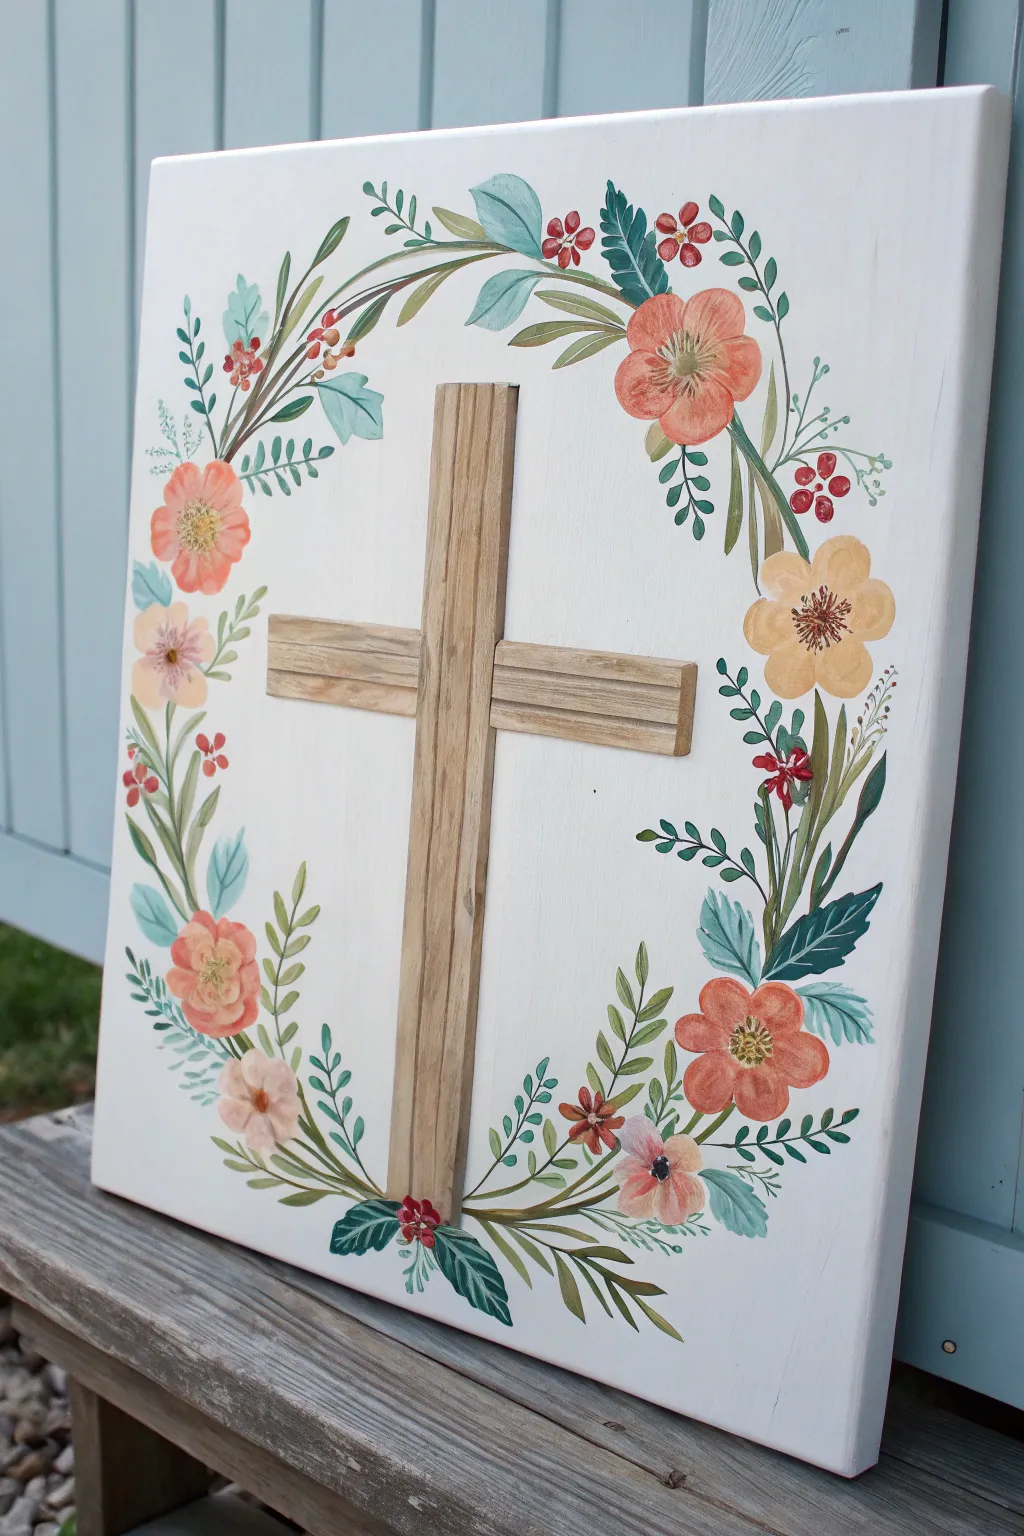
This rustic yet elegant Easter project combines mixed media for a dimensional effect. A simple wooden cross serves as the centerpiece, surrounded by a delicate wreath of hand-painted wildflowers in soft peach, yellow, and sage tones.
Detailed Instructions
Materials
- Square stretched canvas (12×12 or similar)
- Wide, flat balsa wood or thin craft plywood strips
- Wood stain (light oak or walnut) or brown watercolor paint
- Acrylic paints: White, Peach, Coral/Orange, Butter Yellow, Sage Green, Forest Green, Deep Teal, Red/Brown for centers
- Round brushes (sizes 2, 4, and 6)
- Liner brush for details
- Pencil
- Strong craft glue (E6000 or heavy-duty wood glue)
- Saw or craft knife (to cut wood)
- Sandpaper
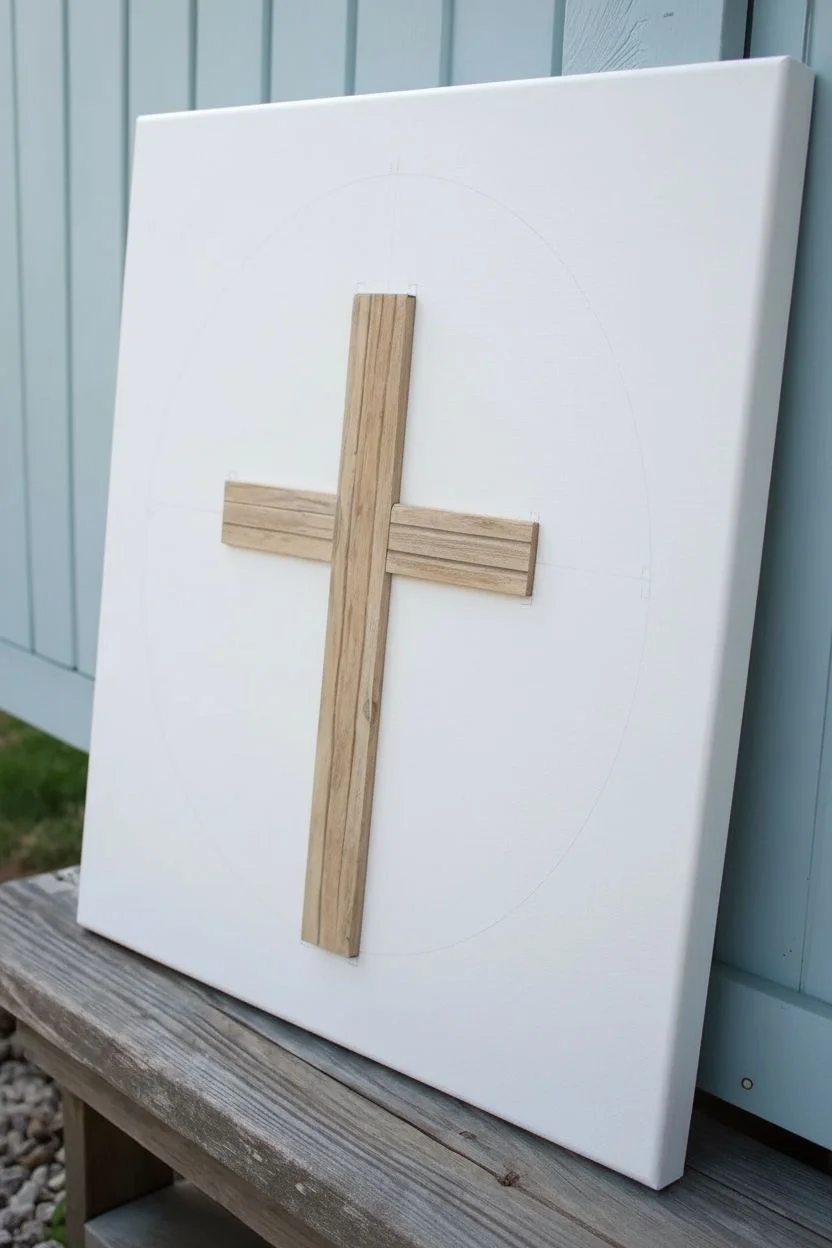
Step 1: Crafting the Cross
-
Prepare the canvas:
Start by giving your canvas a fresh coat of white acrylic paint if it isn’t perfectly bright. Ensure the surface is smooth and let it dry completely. -
Cut the wood strips:
Cut your wood strips to size. You’ll need one longer vertical piece (about 2/3 the height of your canvas) and one shorter horizontal piece for the crossbar. Sand any rough edges lightly. -
Stain the wood:
Apply a light stain to your wood pieces. If you don’t have wood stain, I like to water down brown acrylic paint to create a wash that mimics a stain; brush it on and wipe off the excess for a natural grain look. -
Position the cross:
Place the two wood pieces on the canvas without gluing them yet. Center the vertical piece and place the crossbar about one-third of the way down. Use a pencil to lightly mark the corners so you know exactly where the wreath should avoid overlapping later.
Step 2: Painting the Wreath
-
Sketch the wreath shape:
Using your pencil marks as a guide, lightly sketch a loose oval or circle shape around where the cross will sit. Draw faint stems flowing in a circular direction, leaving space for blooms. -
Paint main blooms:
Mix peach and a tiny bit of white. Using a size 6 round brush, paint loose, five-petal flowers at roughly the 10 o’clock, 2 o’clock, 5 o’clock, and 7 o’clock positions. Keep the strokes fluid and imperfect. -
Add yellow accents:
With a clean brush and butter yellow paint, add a few smaller, open-faced flowers or buds between the peach ones. These act as bright highlights in the composition. -
Paint larger leaves:
Load your brush with sage green. Paint elongated, almond-shaped leaves that flow along the curve of your imaginary circle. Press down at the base of the leaf and lift as you pull outward to create a tapered point. -
Add darker foliage:
Switch to forest green or a deep teal shade. Tuk small clusters of darker leaves behind the lighter ones to create depth and shadow. -
Create fern stems:
Using a liner brush and olive green, paint thin, curving stems radiating outward. Add tiny, symmetric leaflets along these stems for a fern-like appearance. -
Paint berry sprigs:
Mix a reddish-brown or deep coral. Paint thin stems with tiny clusters of three or four dots at the ends to resemble winter berries or buds.
Natural Wood Look
Don’t have real wood? Cut the cross shape from thick cardboard, paint it tan, and use a dry brush with darker brown to streak on a faux wood grain texture.
Step 3: Adding Details & Assembly
-
Detail the flower centers:
Once the flower petals are dry, use a small brush to dab a greenish-yellow center into the peach flowers. Add tiny brown or black dots around the center for stamens using the tip of your liner brush. -
Highlight the leaves:
Mix a very pale mint green or add white to your sage. Use the liner brush to add faint veins or highlights to the largest leaves for extra dimension. -
Clean up the background:
If any stray pencil marks are visible, carefully erase them or touch them up with a small dab of white paint. -
Glue the vertical post:
Apply a strong adhesive like E6000 to the back of the long wooden strip. Press it firmly onto the center of the canvas within your wreath gap. Hold it for a minute to ensure a good initial bond. -
Attach the crossbar:
Apply glue to the back of the shorter wood strip. Press it across the vertical strip. If your wood is thick, you might want to place a heavy book on top while it dries to keep it flat. -
Final touch-ups:
Check the composition. If the area near the wood looks too empty, paint a few extra leaves or berries that appear to be tucking slightly behind the cross.
Add Real Texture
For a 3D mixed media effect, glue small artificial moss tufts or dried baby’s breath flowers into the painted wreath at key focal points.
Allow the adhesive to cure overnight before displaying this serene piece on your mantel or wall


Negative-Space Bunny Filled With Egg Patterns
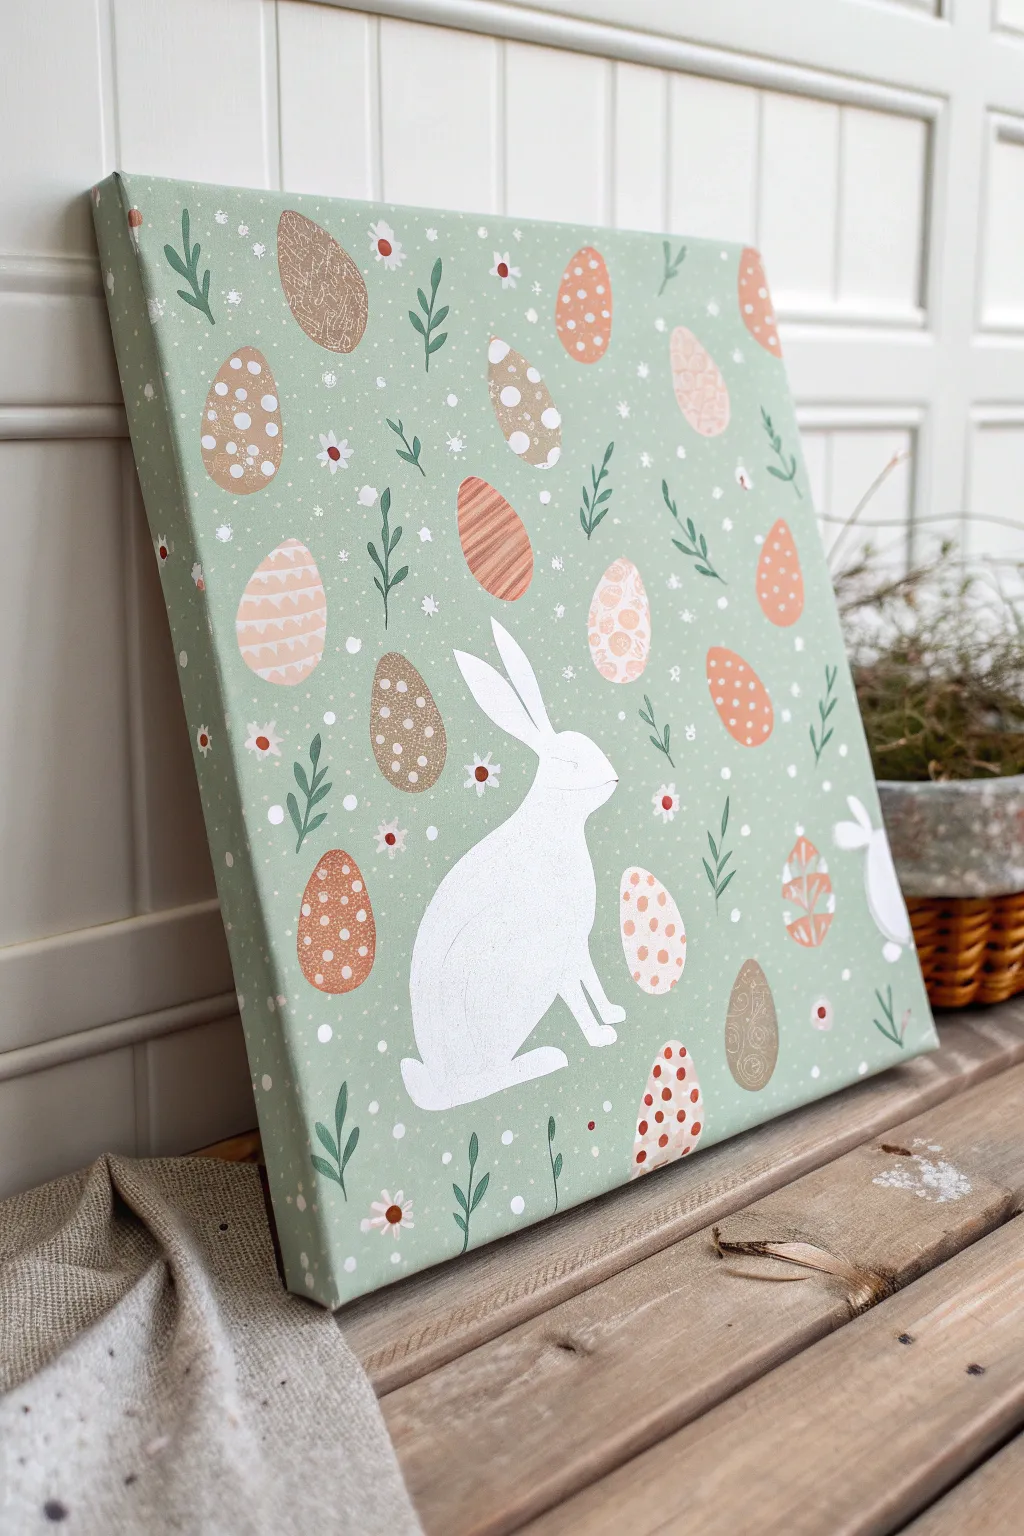
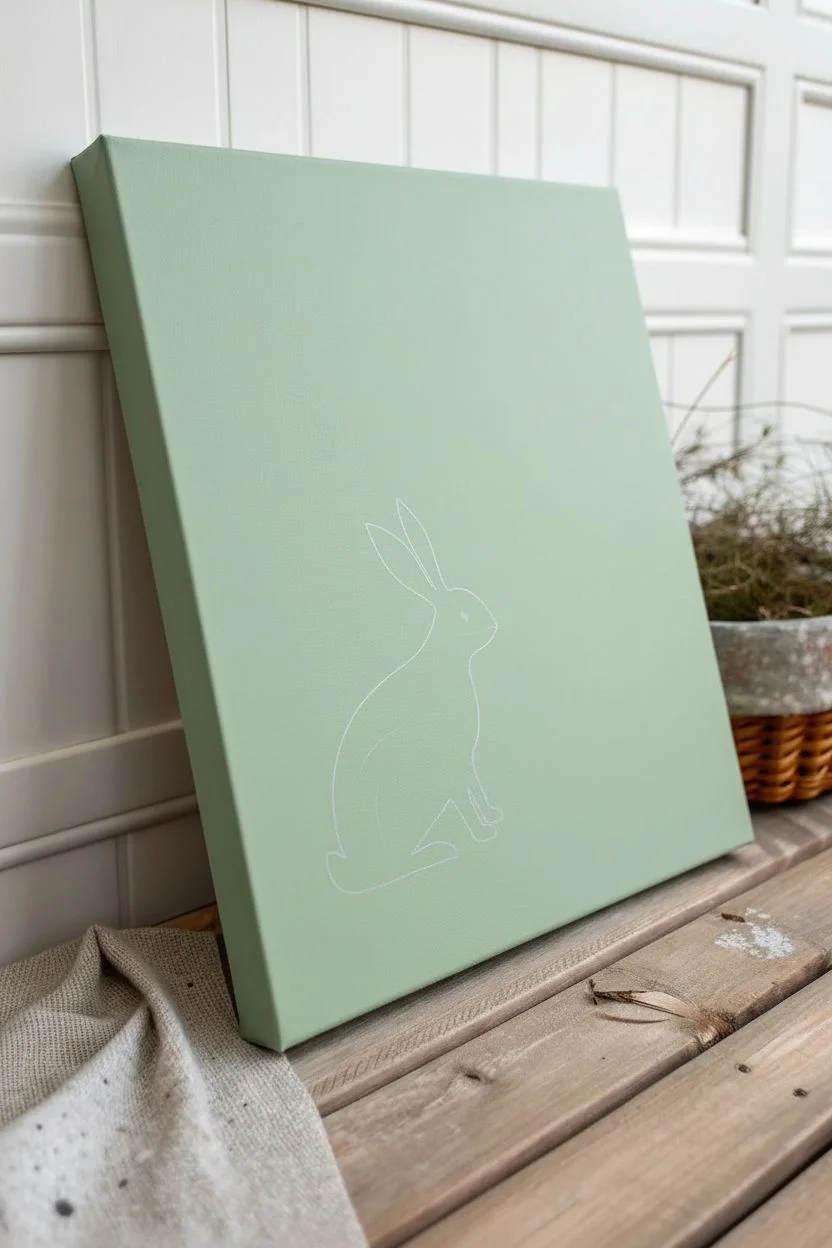
This charming project features a soothing sage green background adorned with a medley of decorative Easter eggs and delicate greenery. The focal point is a crisp white bunny silhouette that brings a modern yet rustic feel to your holiday decor.
Step-by-Step Tutorial
Materials
- Square stretched canvas (approx. 12×12 or 16×16 inches)
- Acrylic paints: Sage green (matte), titanium white, beige/tan, muted terracotta/coral, metallic gold (optional)
- Flat brush (1-inch) for background
- Small round detail brushes (sizes 0 and 2)
- Small flat brush (size 4)
- Bunny stencil (or cardstock to make your own)
- Pencil
- Palette for mixing custom shades
- Paper towels and water cup
Step 1: Setting the Scene
-
Base Coat:
Start by mixing your sage green acrylic paint. If the color is too vibrant, tone it down with a tiny drop of brown or gray. Use the large flat brush to cover the entire canvas, ensuring you paint the sides for a finished look. -
Second Layer:
Allow the first coat to dry completely. Apply a second coat of sage green to ensure an opaque, matte finish without streaks. Let this dry thoroughly before moving on. -
Sketching the Layout:
Lightly visualize where your bunny will sit. I prefer to place the bunny slightly off-center in the lower third. You can lightly trace your stencil now or wait until the background pattern is done; tracing now helps you avoid painting detailed eggs underneath where the bunny will eventually be.
Stencil Secret
Don’t have a stencil? Print a silhouette image, cut it out, and trace around it. Or, use the negative space of the paper as a stencil to sponge paint the shape.
Step 2: Creating the Egg Pattern
-
Blocking in Egg Shapes:
Using a small flat brush and your palette of beige, tan, and muted terracotta, paint small oval egg shapes scattered across the canvas. Vary the angles—some upright, some tilting left or right—to create a loose, tossed pattern. -
Varying Colors:
Try to distribute the colors evenly so you don’t have clumps of all-orange or all-beige eggs. Aim for a balanced, random distribution. -
Adding Details (Terracotta Eggs):
Once the base shapes are dry, switch to your size 0 round brush. On the terracotta eggs, paint tiny white polkadots, simple stripes, or small floral motifs. -
Adding Details (Beige Eggs):
On the beige/tan eggs, use white or a darker brown paint to add contrast. Try zigzag lines, larger spots, or intricate lace-like bands. -
Texture Variation:
For visual interest, you can leave some eggs solid or give them a ‘speckled’ egg look by flicking a toothbrush with diluted brown paint over just those specific egg areas (masking off the rest).
Textured Fur Effect
Instead of flat white, use a dry sponge to dab the white paint onto the bunny area. This creates a fluffy, fur-like texture that adds dimension.
Step 3: The Flora & Fauna
-
Painting Foliage:
Mix a darker distinct green (or use a deep forest green). Using the fine tip of your round brush, paint delicate sprigs of leaves in the empty spaces between the eggs. -
Adding Flowers:
Dip the back end of your brush handle into white paint and dot it onto the canvas to create small flower centers or petals scattered among the greenery. -
Background White Specks:
To mimic the falling petals or snow look in the reference, create tiny white dots primarily in the empty sage spaces. Keep these random and sparse.
Step 4: The Bunny Subject
-
Outline the Bunny:
If you didn’t trace it earlier, place your stencil or template over the now-dry patterned background. Lightly trace the outline of a sitting rabbit with a pencil. -
Filling the Silhouette:
Load a clean brush with titanium white paint. Carefully fill in the rabbit outline. You will likely need two or three thin coats to completely cover the green background and any pattern edges underneath. -
Refining Edges:
Use your smallest detailed brush to neaten the edges of the ears and paws, ensuring sharp, crisp lines against the background. -
Minimalist Details:
You can leave the bunny as a pure silhouette, or mix a very pale grey to add a tiny line for the eye and a suggestion of a thigh line for depth, just like in the photo. -
Final Touches:
Check the painting for any ‘floating’ elements. If the bunny looks like it’s hovering, add a few blades of grass or a flower slightly overlapping the bottom paws to ground it.
Once dry, display your canvas on a mantle or shelf to bring a soft spring atmosphere to your room


Have a question or want to share your own experience? I'd love to hear from you in the comments below!