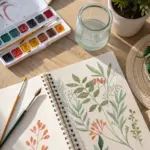
If you’re craving animal paintings that look adorable (or majestic) without feeling complicated, you’re in the right place. These ideas are all about simple shapes, bold color, and little tricks that make your animals instantly recognizable.
Panda Face With Big Sparkly Eyes
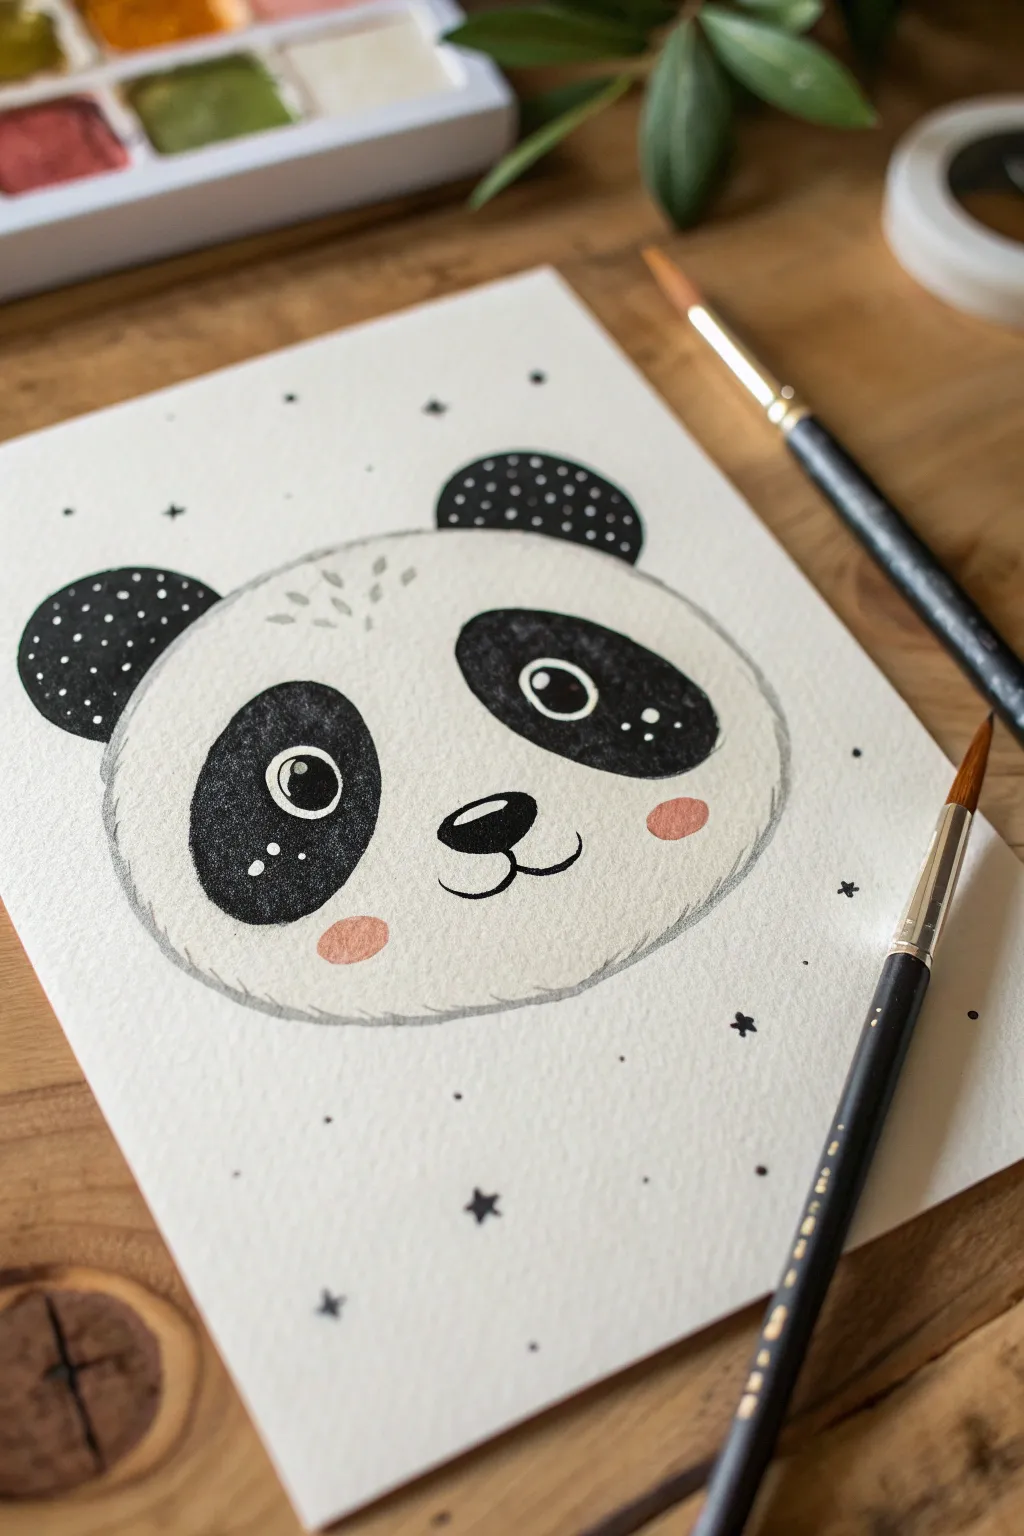
This charming tutorial captures the sweet innocence of a panda using simple shapes and monochromatic contrast. With big, twinkling eyes and stippled ear details, you’ll create an adorable illustration perfect for greeting cards or nursery decor.
Step-by-Step Guide
Materials
- Cold press watercolor paper (A5 size recommended)
- Black watercolor or gouache paint
- White gouache or white gel pen
- Soft pink watercolor or gouache
- Round brush (size 4 or 6)
- Small detail brush (size 0 or 1)
- Pencil and eraser
- Palette for mixing
- Water cups and paper towels
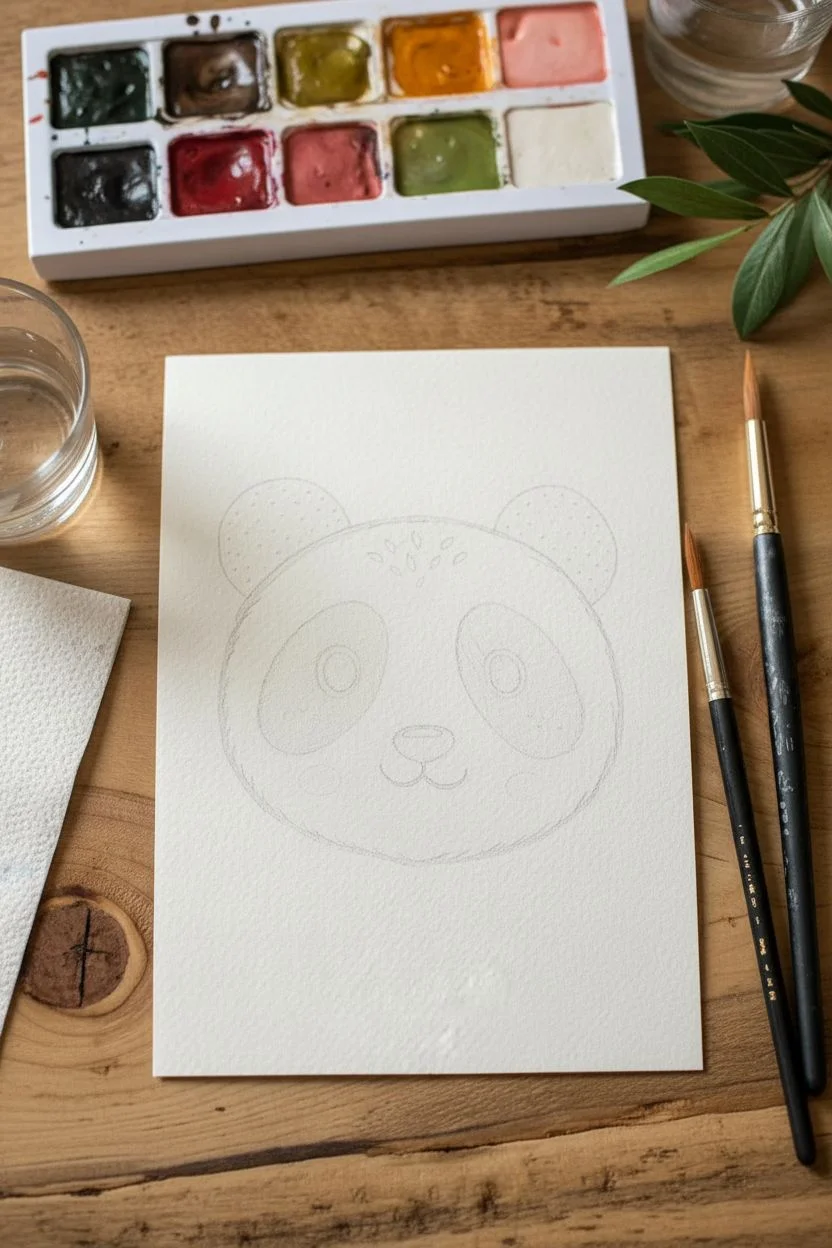
Step 1: Sketching the Base
-
Outline the head shape:
Begin by lightly sketching a wide, soft oval shape in the center of your paper. Keep the bottom slightly flatter than the top to give the panda chubby cheeks. -
Draw the ears:
Add two semi-circles on the top left and right of the head. Position them wide apart to enhance the cute, cartoonish proportion. -
Map out the features:
Lightly draw two large, kidney-bean shapes for the eye patches. They should tilt slightly inward toward the nose. Below them, sketch a small triangular nose and a simple ‘w’ shape for the mouth.
Pro Tip: Opacity is Key
For the crispest white dots over black paint, use gouache straight from the tube with very little water. Watercolor is too transparent for these details.
Step 2: Painting the Main Features
-
Fill the ears:
Using your medium round brush and solid black paint, carefully fill in the ear shapes. Aim for an opaque, solid black coverage. -
Paint the eye patches:
Switch to a slightly smaller brush if needed for control. Fill in the large kidney-bean eye patches with the same solid black paint. Leave these to dry completely before adding any details. -
Create the nose:
Paint the small triangular nose in black, rounding off the corners slightly so it looks soft rather than sharp. -
Outline the mouth:
Using the very tip of your detail brush or a fine liner, paint the smiling mouth lines connecting to the bottom of the nose.
Step 3: Adding Life and Details
-
Add the cheeks:
Dilute a small amount of pink paint with water to make a soft wash. Paint two small circles or ovals just below the outer edges of the eye patches for a rosy blush. -
Outline the head:
Mix a very watery, pale gray wash. Use a shaky, broken line technique to outline the main head shape. This simulates fur texture without needing to draw every hair. -
Add forehead fur:
With the same pale gray, dab a few small, leaf-shaped strokes near the top center of the forehead to suggest a little tuft of fur. -
Construct the eyes:
Inside the dried black eye patches, paint two smaller white circles for the actual eyes. Let the white layer dry, then add a smaller black pupil inside each, leaving a tiny white highlight visible.
Troubleshooting: Bleeding Black
If your black paint bleeds into the white paper, your brush was too wet. Let the area dry completely, then touch it up with white gouache or acrylic.
Step 4: Sparkles and Decoration
-
Detail the ears:
Once the black ears are bone dry, use white gouache or a gel pen to dot a stippled pattern over them. Keep the dots random but evenly spaced. -
Add eye sparkles:
Place tiny white dots around the black eye patches to simulate a starry, sparkly look. I like to group two or three dots of different sizes together. -
Highlight the eyes:
Add a crisp white reflection dot inside the black pupil you painted earlier to make the eyes look wet and alive. -
Decorate the background:
Scatter small black stars, dots, and tiny ‘x’ shapes around the panda’s head to fill the negative space. -
Final touches:
Check for any uneven edges and smooth them out with your detail brush. Ensure the pink cheeks have softened edges.
Once the paint is fully set, you have a playful panda friend ready to frame


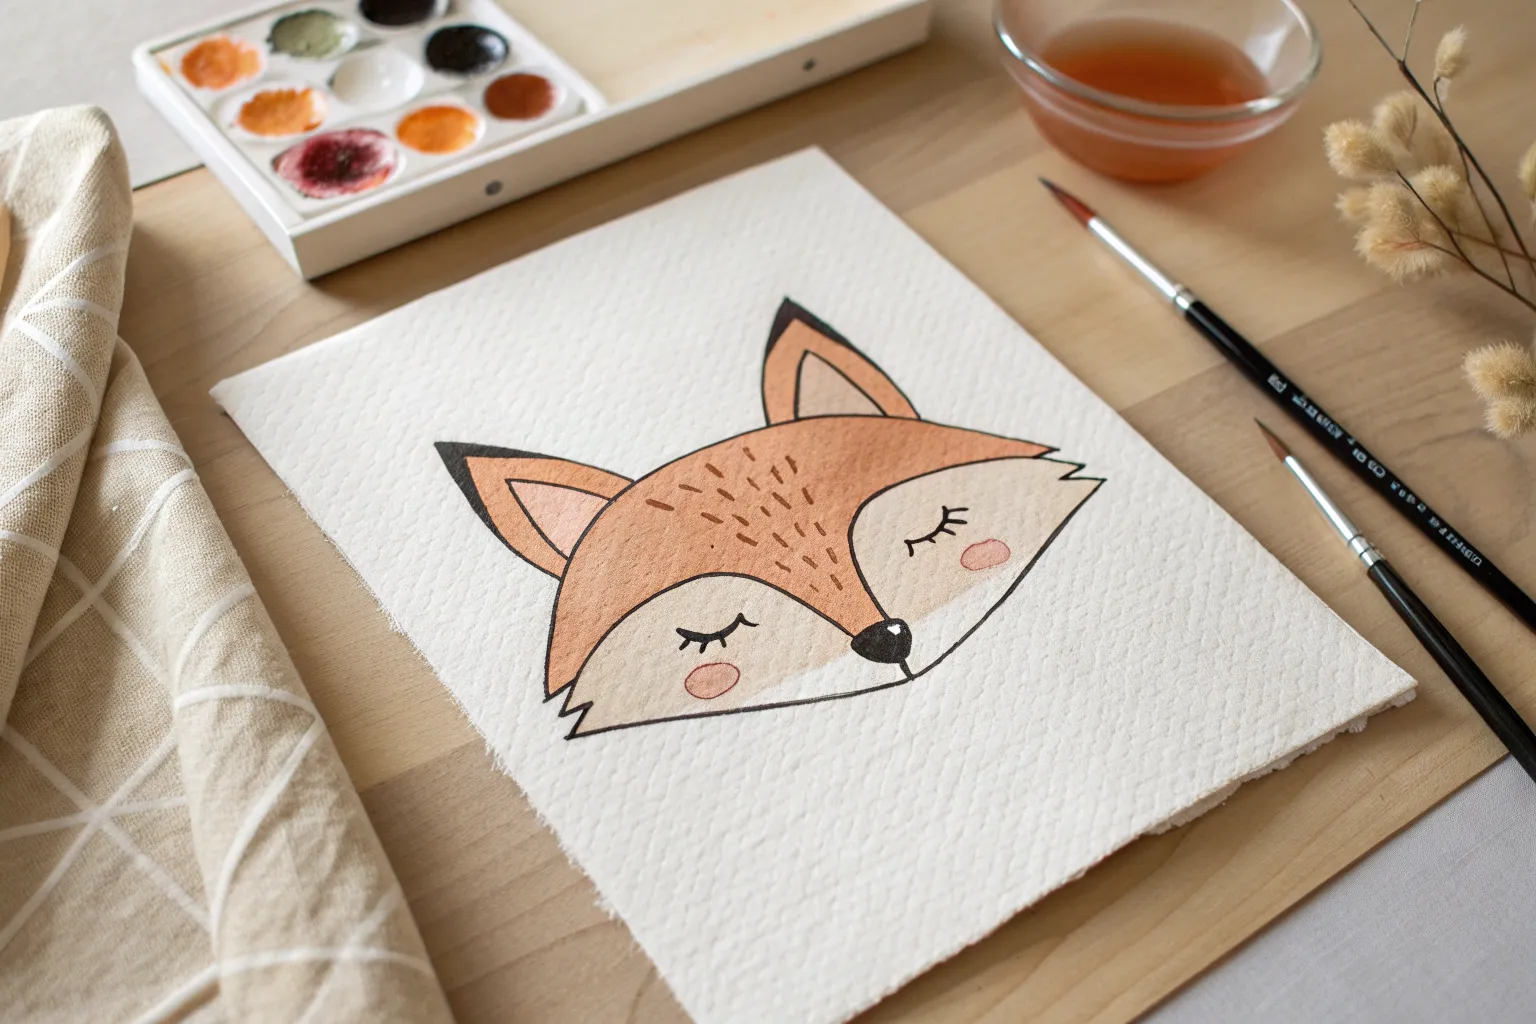
Fox in a Simple Forest Clearing
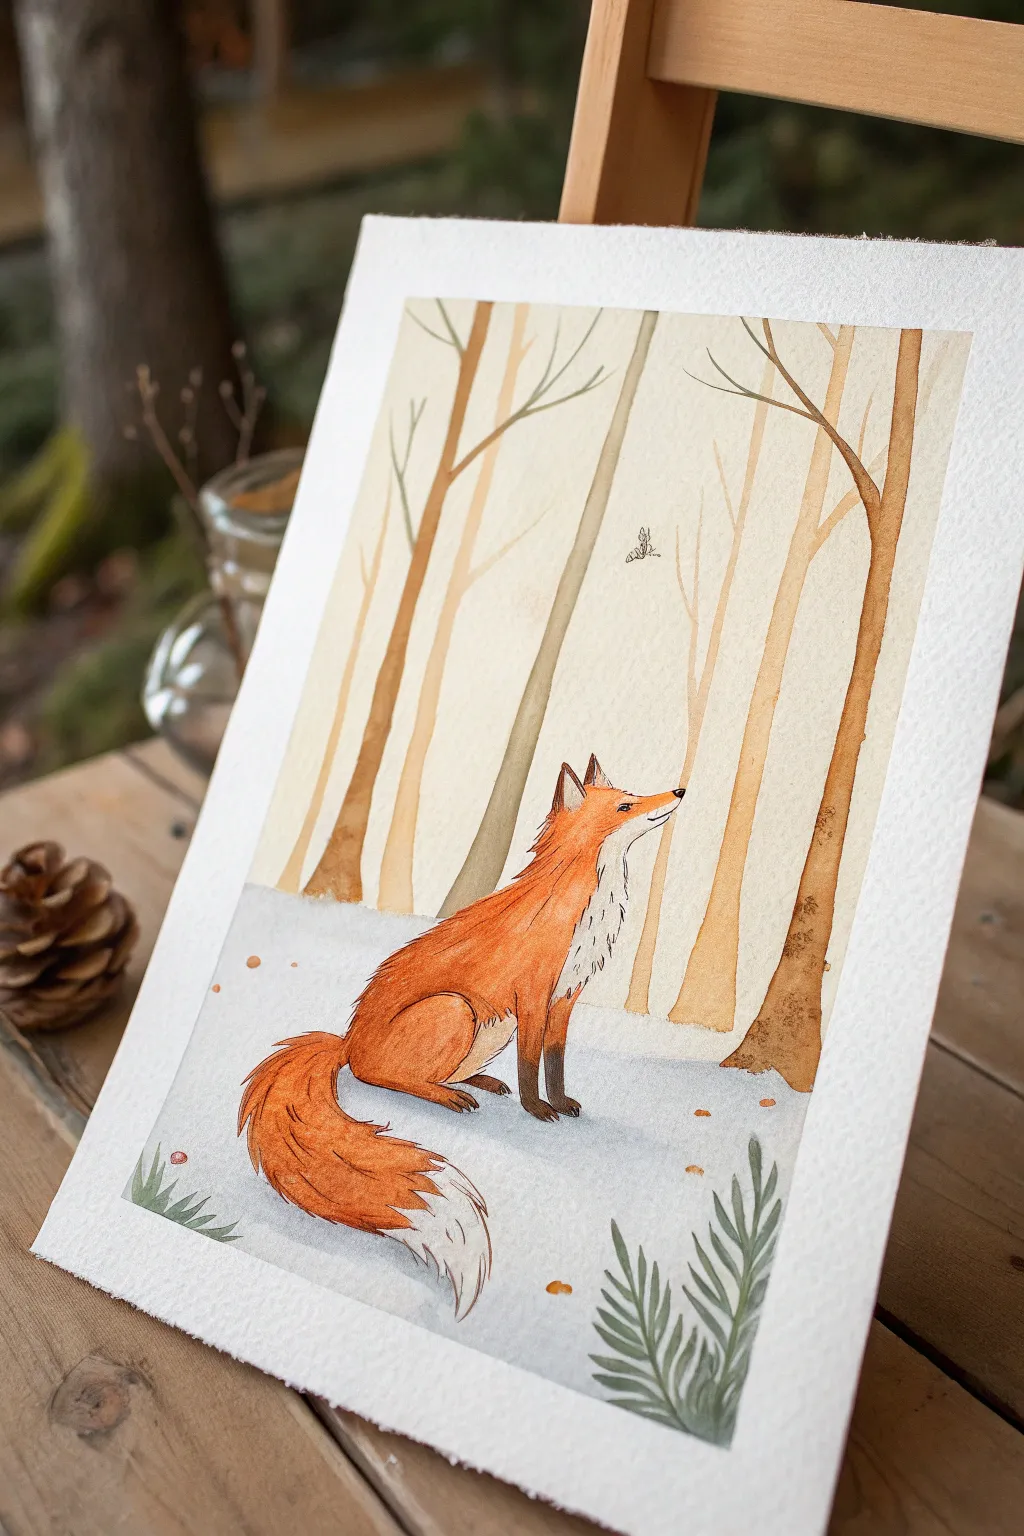
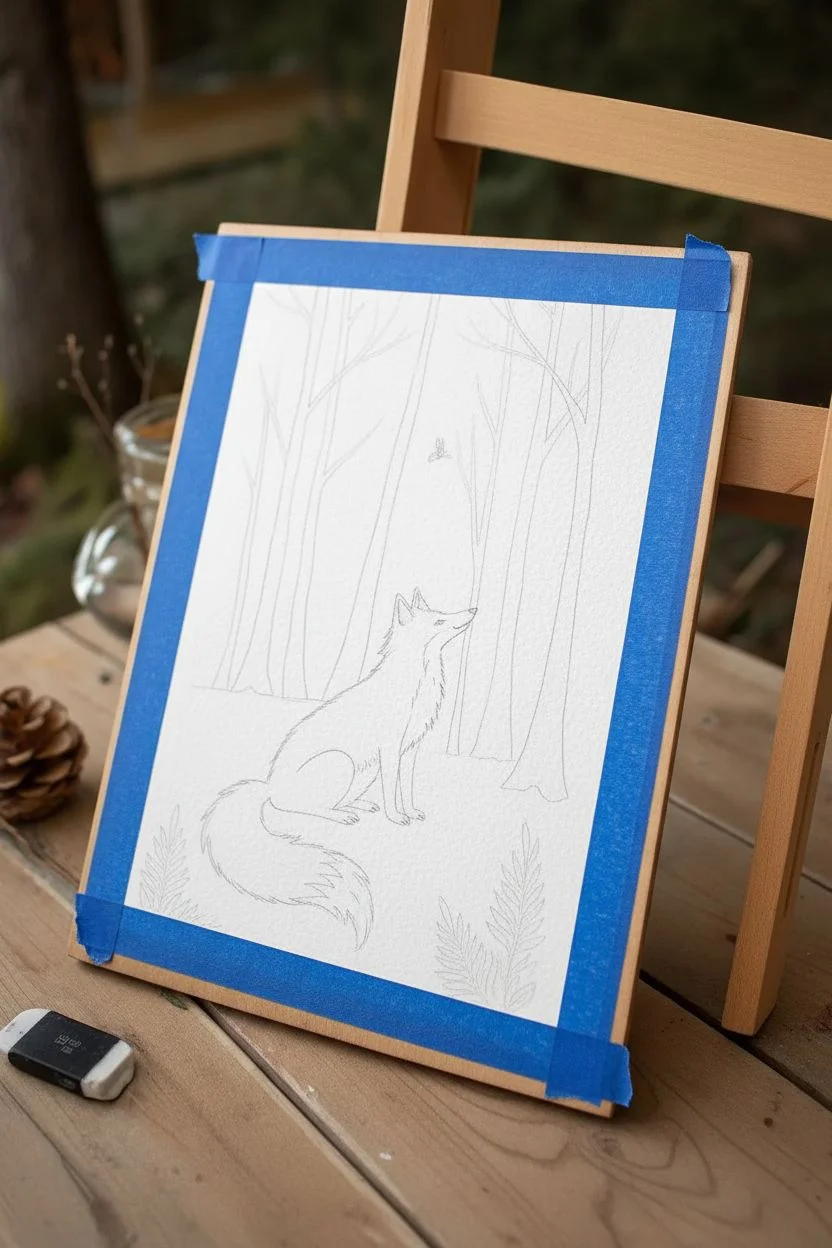
Capture the stillness of a winter forest with this charming watercolor illustration features a bright orange fox gazing up at the trees. The soft, muted background relies on negative space and simple washes, making it a perfect project to practice layering and animal anatomy without getting overwhelmed by details.
Detailed Instructions
Materials
- Cold press watercolor paper (300 gsm)
- Watercolor paints (Burnt Sienna, Cadmium Orange, Yellow Ochre, Burnt Umber, Indigo, Sap Green)
- Round brushes (sizes 2, 6, and 8)
- Pencil (HB or H for light sketching)
- Kneaded eraser
- Masking fluid (optional)
- Two jars of water
- Paper towels
- Painter’s tape
Step 1: Sketching the Scene
-
Tape boundaries:
Begin by taping down all four edges of your watercolor paper to a board. This creates that clean, crisp white border you see in the finished piece and keeps the paper flat while wet. -
Block in the fox:
Lightly sketch the fox in the lower center. Start with a simple oval for the chest and a sweeping curve for the back. Add the triangle shape for the head, ensuring the snout points upward. -
Refine the anatomy:
Add details to your fox sketch. Draw the large, bushy tail wrapping around the left side. Sketch the legs, noting that the front legs are straight while the back leg is crouched. -
Add the environment:
Draw vertical lines for the tree trunks. Vary their thickness and spacing to create depth. Sketch a few fern-like leaves in the bottom corners and a tiny insect flying in the space between the trees.
Step 2: Painting the Background
-
First tree wash:
Mix a very watery, pale brown using Yellow Ochre and a touch of Burnt Umber. With your size 8 brush, paint the furthest, lightest trees. Keep the edges soft and the color transparent. -
Foreground trees:
Once the first layer is dry, mix a slightly stronger brown. Paint the closer trees, particularly the curved one on the right. These should be more defined than the background trees but still relatively light. -
Snowy ground:
Use a very diluted wash of Indigo or a cool grey to suggest snow. Paint loosely around the fox’s feet and the base of the trees. Leave plenty of white paper showing to represent the brightest snow.
Pro Tip: Fur Texture
To make the chest look extra fluffy without painting every hair, try lifting a little wet paint with a dry brush or paper towel corner to create soft, highlighted edges.
Step 3: Bringing the Fox to Life
-
Base orange layer:
Mix Cadmium Orange with a little Burnt Sienna. Paint the main body of the fox, carefully avoiding the white chest area, the tip of the tail, and the chin. I find it helpful to work wet-on-dry here for control. -
Defining the fur:
While the orange is still slightly damp, drop in concentrated Burnt Sienna along the spine and the top of the tail to create a shadow and sense of volume. -
The dark points:
Switch to your size 2 brush. Mix a dark, almost black brown using Burnt Umber and Indigo. Carefully paint the ears (leaving the insides light), the paws, and the legs. -
Facial details:
Using the very tip of your small brush and the dark mixture, paint the eye, the nose, and the thin line of the mouth. This is the focal point, so take your time to get the expression right. -
Tail texture:
Once the orange tail section is dry, use dry-brushing strokes with darker orange to suggest fur texture. Outline the white tip of the tail with delicate, jagged strokes to show fluffiness.
Level Up: Atmospheric Depth
Add a very light blue glaze over the most distant trees once they are fully dry. This ‘atmospheric perspective’ trick instantly pushes them further into the background.
Step 4: Final Details
-
Chest fur:
Mix a very faint grey wash. Add subtle jagged strokes to the white chest ruff to imply fur texture without darkening the area too much. -
Foreground greenery:
Mix Sap Green with a touch of grey to desaturate it. Paint the fern leaves in the bottom corners using quick, confident strokes with your size 6 brush. -
Branch details:
Use your smallest brush to add thin, spindly branches extending from the tree trunks. Keep lines fluid and organic. -
Finishing touches:
Paint the tiny insect hovering above the fox. Add a few small orange or brown dots on the snow to represent fallen leaves or seeds. -
Reveal:
Wait until the painting is bone dry—touch the paper with the back of your hand to check for coldness. Gently peel away the tape at a 45-degree angle.
Now you have a serene winter scene ready to frame or gift to a woodland-loving friend


Koala Hugging a Tree Trunk
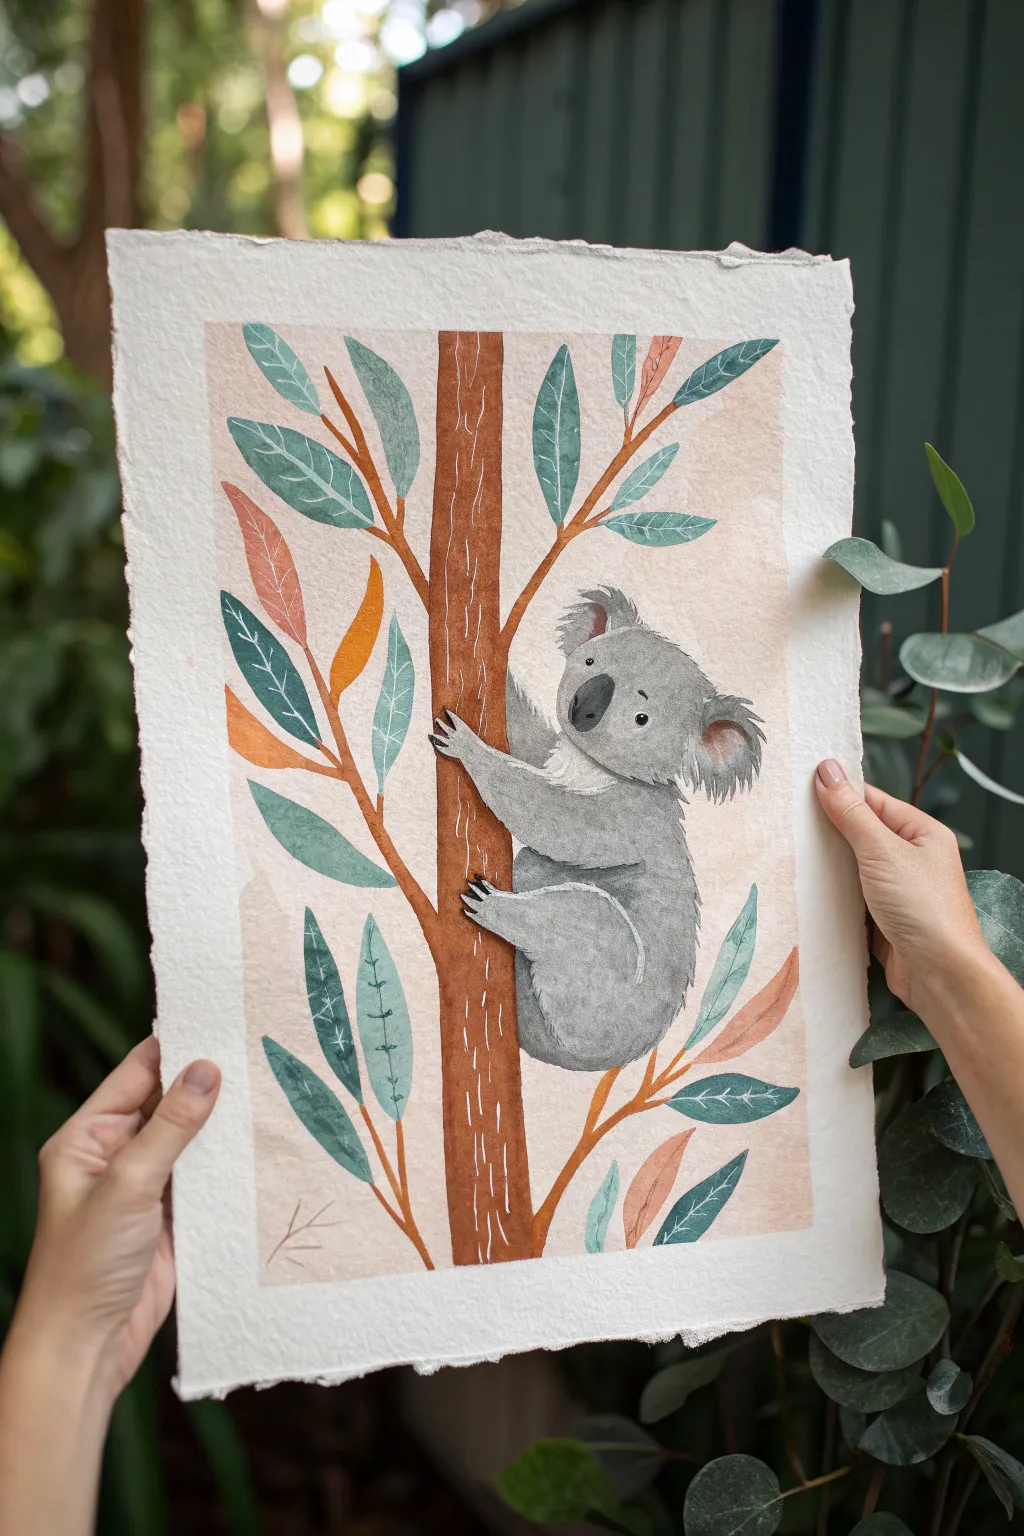
Capture the charm of Australia’s favorite marsupial with this delightful mixed-media style painting. Using calming earth tones and simple shapes, you’ll create a textured, huggable koala clinging to a stylized gum tree on beautiful deckle-edged paper.
How-To Guide
Materials
- Heavyweight cold-press watercolor paper with deckled edges (300 gsm or higher)
- Watercolor or gouache paints (Burnt Sienna, Sap Green, Payne’s Grey, White, Leaf Green, Ochre)
- Round brushes (size 2, 4, and 6)
- Fine liner brush (size 0 or 00)
- White gel pen or white gouache for details
- Pencil and kneadable eraser
- Paper towels and two jars of water
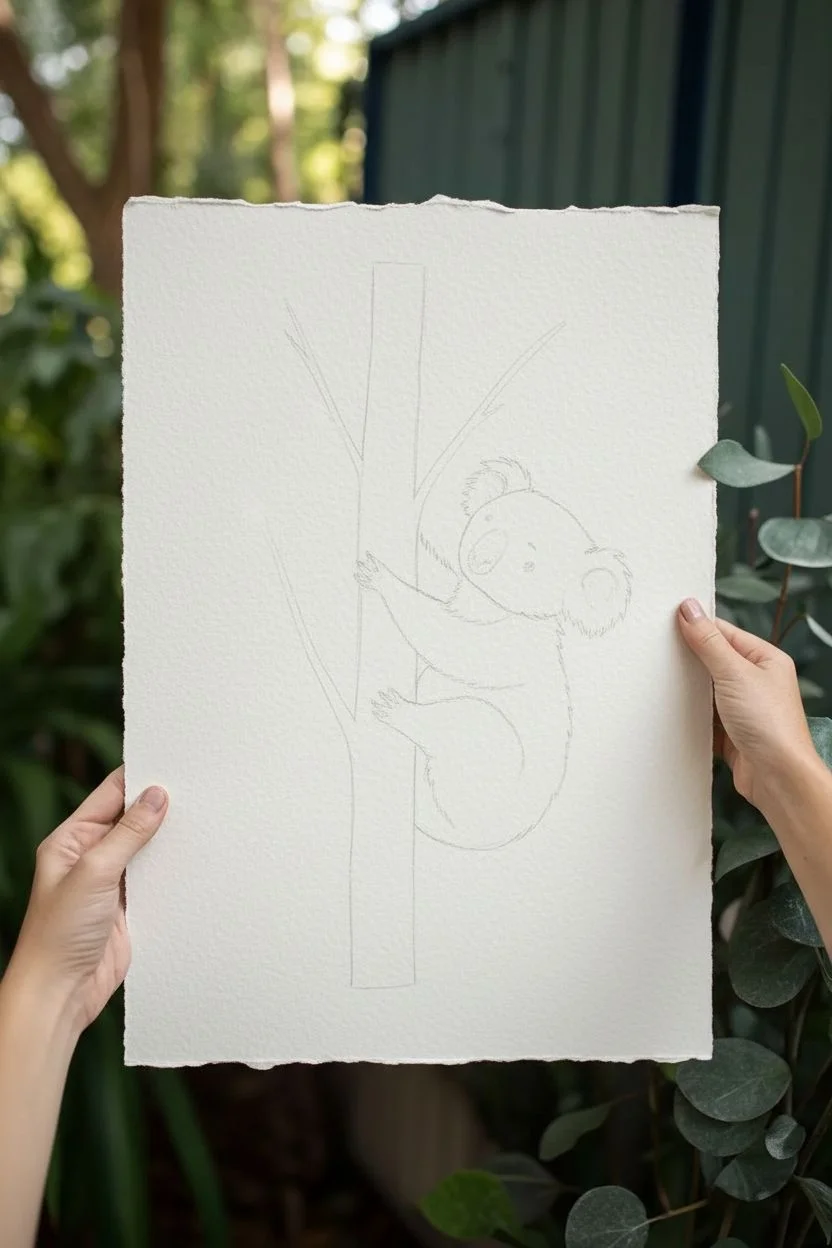
Step 1: Planning the Composition
-
Sketch the Trunk:
Begin by lightly sketching a vertical tree trunk slightly off-center. Let it be somewhat straight but with natural, organic wobbles, roughly 1-1.5 inches wide. -
Add the Branches:
Draw Y-shaped branches extending outward from the main trunk. Keep them simple and angular, reaching towards the top corners to frame the space. -
Position the Koala:
Sketch two overlapping ovals for the koala’s body and head on the right side of the trunk. The head should be a slightly flattened circle, and the body a rounded bean shape hugging the wood. -
Refine the Features:
Add the fluffy ears, arm placement, and facial features. Draw the front paws gripping the trunk and the back leg tucked up underneath for support.
Fix Fuzzy Edges
If your paint bleeds out of the lines, wait for it to dry completely. Then, use opaque white gouache to ‘paint over’ the mistake and reshape the edge cleanly.
Step 2: Laying the Base Colors
-
Paint the Trunk:
Mix a warm, reddish-brown using Burnt Sienna with a touch of Ochre. Paint the main trunk and branches with a size 6 brush, keeping the edges fairly crisp. -
Create the Background:
While the tree dries, wash a very pale, watery mix of beige or diluted blush pink over the background, carefully painting around your pencil sketch lines. -
Layer the Leaves:
Using two different shades of green—a cool blue-green and a warmer olive—paint the leaves. Alternate colors on the branches for visual interest, making them long and lance-shaped like eucalyptus leaves. -
Add Accent Leaves:
For a pop of color, paint a few scattered leaves in muted orange or coral, representing younger or drying growth.
Level Up: Deckle Edge
If you don’t have handmade paper, you can fake the look! Fold your paper along the cut line, wet the crease with a brush, and gently tear it apart for a soft, fibrous edge.
Step 3: Painting the Koala
-
Base Grey Coat:
Mix Payne’s Grey with plenty of water (or white gouache for changing opacity) to create a soft, medium grey. Fill in the koala’s body and head, leaving the inner ears and chin area unpainted for now. -
Fluffy Details:
Use a dabbing motion with a size 4 brush around the ears to imply fluffiness. I find this irregular edge looks much softer than a straight line. -
Darkening the Nose:
With a concentrated, darker grey-black mix, paint the large, oval nose. Leave a tiny sliver of white paper or add white later for a highlight. -
Inner Ears and Chest:
Mix a tiny amount of pink into white paint for the inner ears, and use pure white for the chest fluff and chin.
Step 4: Adding Texture and Detail
-
Fur Texture:
Once the grey base is dry, take a size 2 brush with slightly darker grey and add small, curved hatch marks over the body to simulate thick fur. -
Tree Bark Pattern:
Load a fine liner brush with white gouache or use a gel pen. Draw thin, broken vertical lines down the brown tree trunk to mimic the stringy bark texture. -
Leaf Veins:
Using a lighter shade of green (or white), paint delicate central veins and tiny patterns on the leaves. Keep these lines very thin. -
Facial Expression:
Use your finest brush or a black pen to add the small, round eyes and a tiny mouth line. Place a small white dot in the eyes to bring them to life. -
Claws:
Paint sharp, dark black claws on the paws where they grip the tree, ensuring they look like they are firmly holding the weight. -
Final Touches:
Review the painting for any gaps. Add a few extra white scribbles on the grey fur for highlights and ensure the contrast between the koala and the tree is distinct.
Now you have a sweet little friend hanging out on your wall to bring a calm vibe to your room


Sea Turtle Gliding Through Blue Water
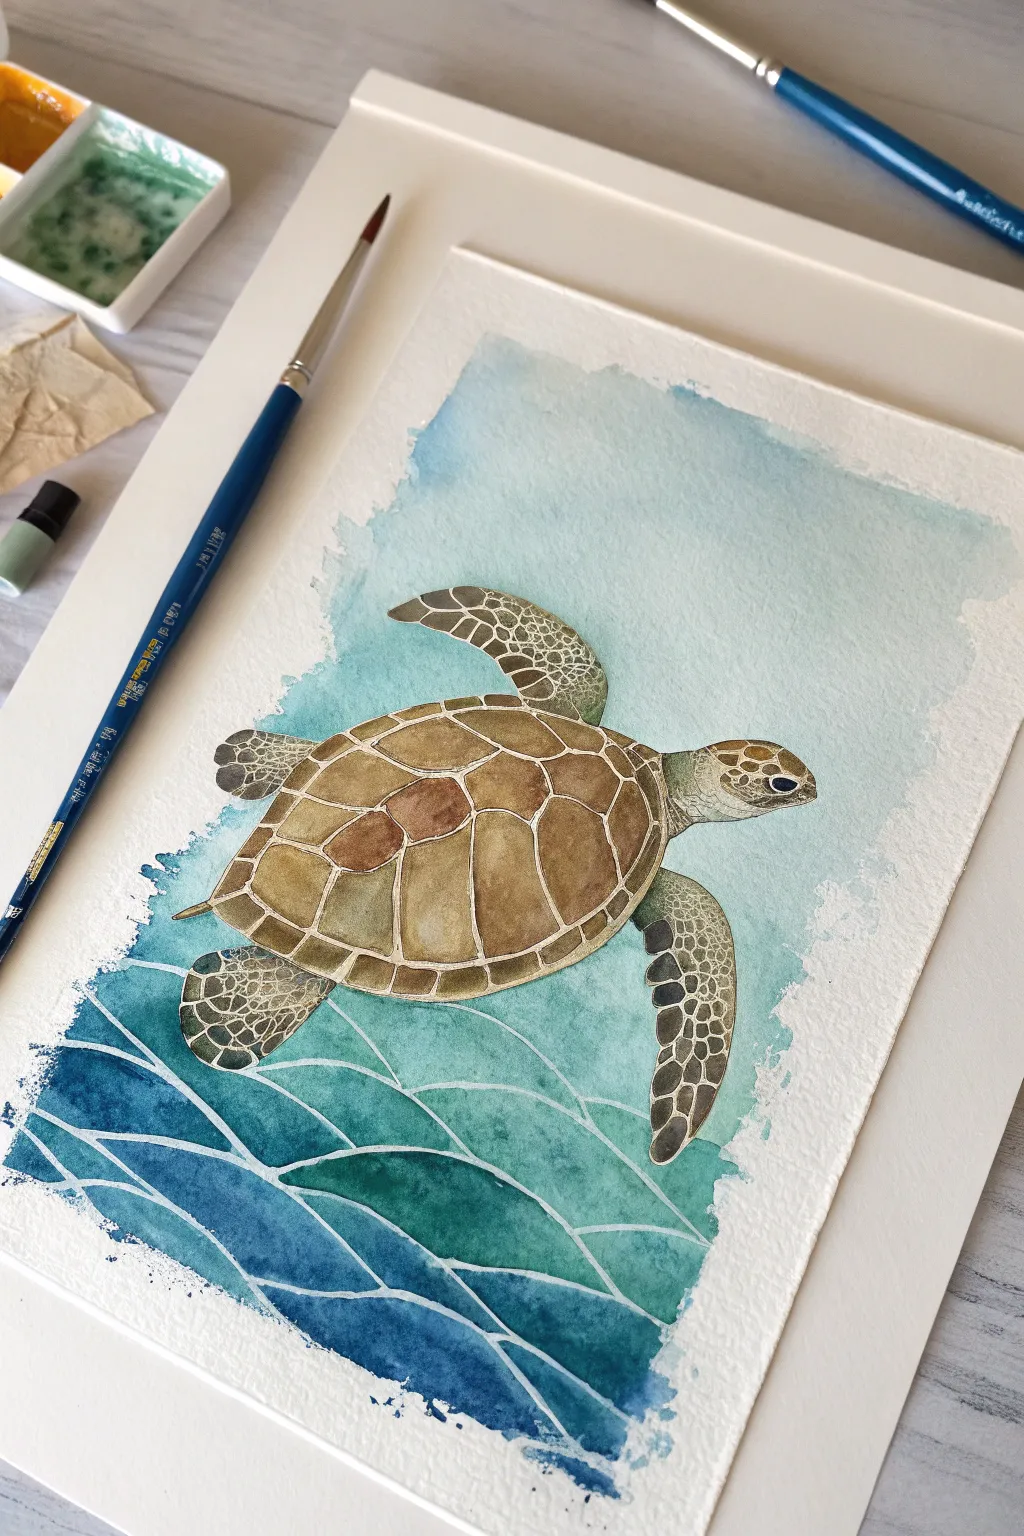

Capturing the serene movement of a sea turtle is easier than it looks with this layered watercolor technique. By combining precise shell details with a loose, watery background, you’ll create a striking contrast that brings the ocean to life on paper.
Step-by-Step
Materials
- Cold press watercolor paper (300 gsm)
- Watercolor paints (phthalo blue, turquoise, sap green, burnt umber, burnt sienna, yellow ochre)
- Round brushes (size 4 for details, size 10 for washes)
- Masking fluid (drawing gum) and old brush
- Painter’s tape
- Pencil and eraser
- Paper towels
- Two jars of water
Step 1: Preparation and Sketching
-
Secure the paper:
Tape your watercolor paper down to a board on all four sides. This helps prevent buckling when we add the water washes later. -
Sketch the outline:
Lightly draw the oval shape of the shell first, then add the flippers and head. Keep your pencil lines very faint so they don’t show through the final paint. -
Detail the pattern:
Draw the scutes (the plates) on the shell. Start with the central row of hexagons and work outward. Sketch the smaller scales on the flippers and head. -
Protect the white lines:
Using an old brush or a masking fluid pen, apply masking fluid over all the lines separating the shell plates, the flipper scales, and the wave ripples at the bottom. I let this dry completely before touching any paint.
Torn Tape?
If your masking fluid tears the paper upon removal, you likely applied it to damp paper or pulled too aggressively. Always wait for bone-dry paper and pull gently at a low angle.
Step 2: Painting the Turtle
-
Base layer for the shell:
Mix a watery yellow ochre and apply a varied wash inside the shell scutes. Drop in touches of burnt sienna while it’s still wet to create a warm underglow. -
Deepening shell tones:
Once the base is damp but not soaking, paint the centers of the scutes with burnt umber. Leave the edges lighter to create a domed, 3D effect. -
Flippers and head:
Paint the skin areas with a mix of sap green and a tiny bit of burnt umber. The scales should be darker than the spaces between them, but the masking fluid will handle the separation for you. -
Face details:
Use a small brush to carefully paint the eye dark blue or black, leaving a tiny speck of white paper for the highlight. This brings the turtle to life instantly. -
Final shell glazing:
Apply a final glaze of brown over parts of the shell to unify the colors, ensuring the centers remain the darkest points.
Pro Tip: Soft Edges
For the background, don’t paint a hard rectangular border. Let your brush skip over the paper’s texture at the edges to create that dreamy, rough aesthetic.
Step 3: The Ocean Background
-
Prepare the background area:
Wet the paper around the turtle with clean water, avoiding the painted animal itself. The water should glisten but not pool. -
Upper water wash:
Load your large brush with a very diluted turquoise or sky blue. Apply it to the top half of the background, letting the edges stay rough and natural. -
Deepening the depths:
Switch to a stronger mix of phthalo blue and turquoise. Paint the bottom section where the waves are, going right over the masked ripple lines. -
Creating the gradient:
Blend the darker blue bottom into the lighter top while both are wet, creating a soft transition that simulates depth. -
Drying time:
Let the entire painting dry completely. If the paper feels cool to the touch, it’s still wet inside.
Step 4: Finishing Touches
-
Reveal the whites:
Gently rub off the masking fluid with your finger or a rubber cement pickup tool. This is the most satisfying part, revealing crisp white lines. -
Refining the wave lines:
If the white wave lines at the bottom look too stark, you can gently glaze over them with a very watered-down blue to push them back into the water. -
Final assessment:
Check for any areas that need more contrast. You might want to darken the shadow side of the shell slightly to make it pop against the blue water.
Remove the tape to reveal a clean border and enjoy your tranquil underwater scene
BRUSH GUIDE
The Right Brush for Every Stroke
From clean lines to bold texture — master brush choice, stroke control, and essential techniques.
Explore the Full Guide
Zebra Stripes Made Easy With Bold Shapes
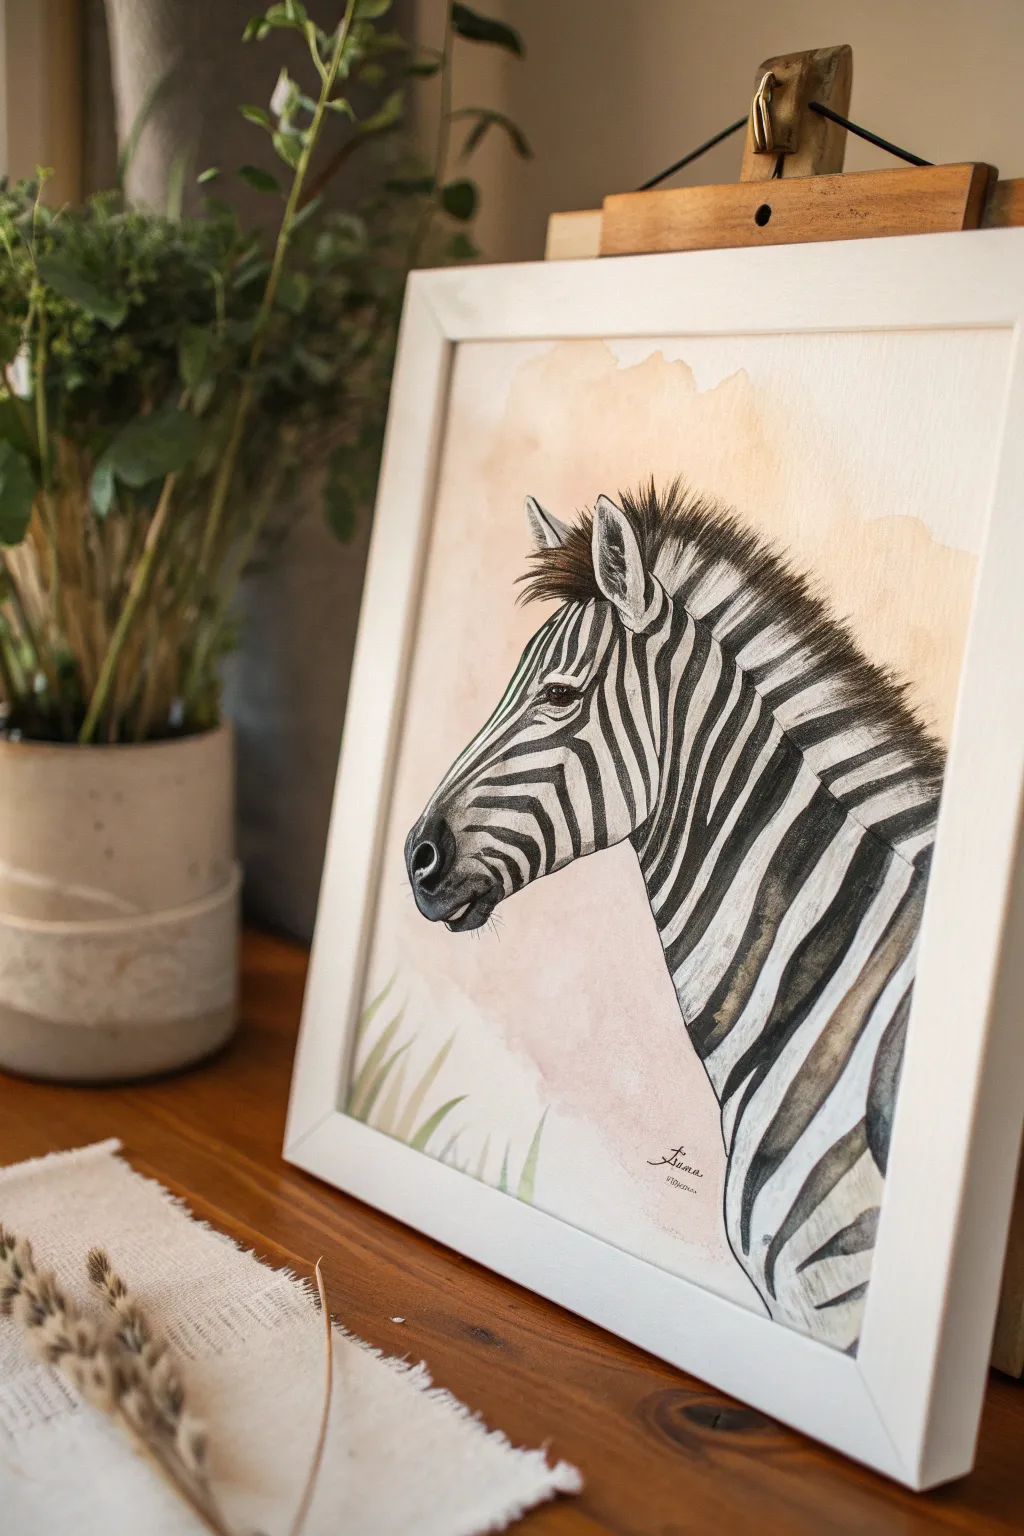
This project captures the striking contrast of a zebra’s profile against a soft, sun-warmed background. Using simple shapes as a guide, you’ll learn to balance fluid washes with crisp, detailed brushwork to create a lively animal portrait.
Step-by-Step Guide
Materials
- Cold press watercolor paper (A4 or 9×12 inches)
- Watercolor paints (Black, Burnt Sienna, Yellow Ochre, Sap Green)
- Round brushes (Size 8 for washes, Size 2 or 4 for details)
- Pencil (HB or 2H)
- Kneadable eraser
- Two jars of water
- Paper towels
- White or light wood frame (optional)
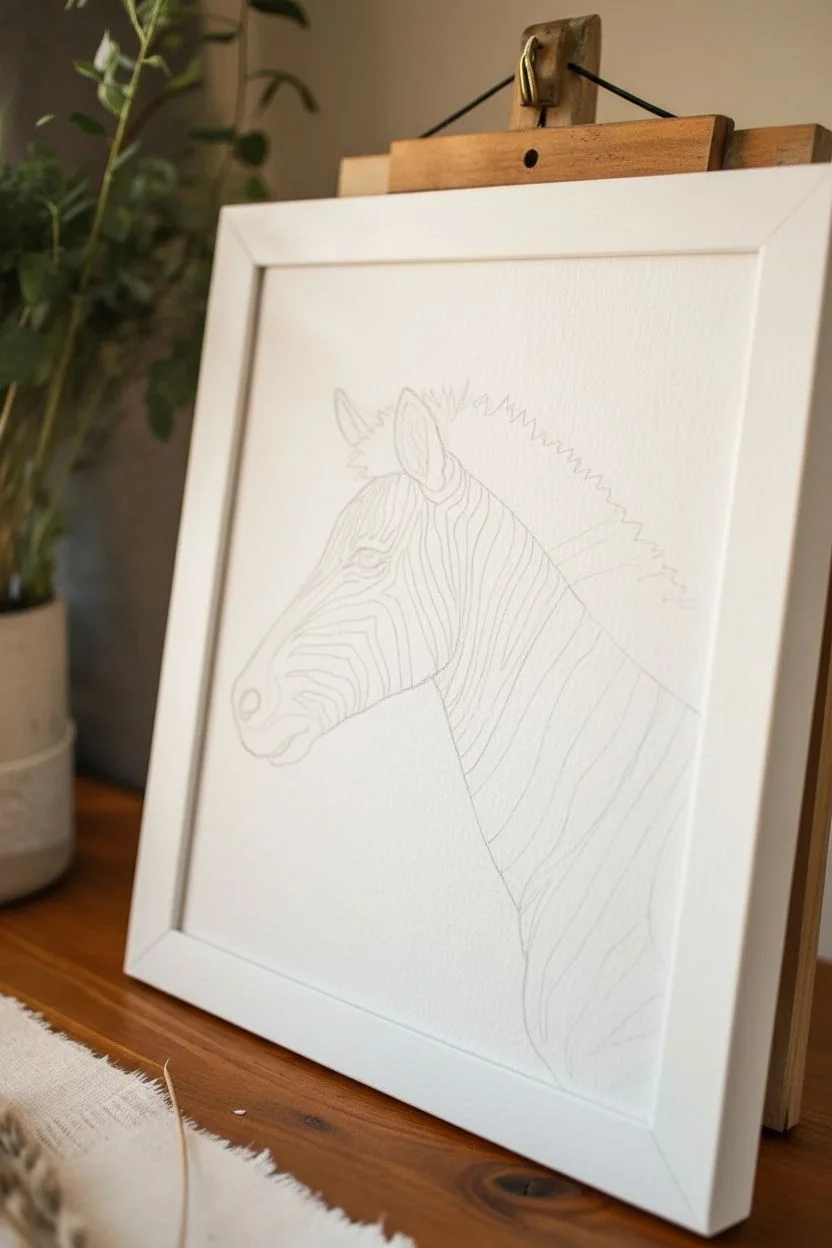
Step 1: Sketching the Foundations
-
Outline the head shape:
Begin lightly with your pencil, drawing an elongated oval for the zebra’s cheek and jaw area. Add a smaller, tapered nose shape extending downwards to the left to form the muzzle. -
Define the neck and mane:
Draw a strong, sloping line for the neck on the right side. Sketch a jagged, mohawk-like shape along the top edge for the mane, keeping the lines loose to suggest hair texture. -
Place the features:
Position the eye halfway down the head, drawing a small almond shape with a slight downward slant. Add the nostril near the tip of the muzzle and outline the triangular ears at the top of the head. -
Map the stripes:
This is the crucial step. Lightly sketch the stripe patterns. I find it helpful to start with the bold ‘Y’ shapes often found on the cheek and then fill in the parallel lines moving down the neck. Don’t worry about perfection; natural stripes are irregular.
Fixing Smudges
If black paint accidentally bleeds into a white area, quickly dab it with a clean, dry paper towel. Then, use a damp clean brush to scrub the spot gently and dab again.
Step 2: Creating the Soft Background
-
Mix your background wash:
Combine a touch of Burnt Sienna with Yellow Ochre and plenty of water to create a very pale, warm peach tone. We want this to look like a soft, dusty savannah backdrop. -
Apply the wash:
Using your size 8 brush, paint the area behind the zebra’s head. Keep edges organic and undefined. Let the paint pool slightly and dry naturally to create those lovely hard edges characteristic of watercolor. -
Add subtle greenery:
While the peach wash is damp near the bottom, or in a separate layer, mix a watery Sap Green. Paint a few simple, sweeping grass blades rising from the bottom edge.
Pro Tip: Lively Blacks
Don’t use just one flat black tone. While the paint is wet, drop in a tiny touch of blue or brown into different stripes. This variation adds subtle life and richness.
Step 3: Painting the Zebra
-
Prepare your black paint:
Mix a rich, dark black. I prefer mixing Paynes Gray with a bit of Burnt Umber to avoid the flatness of straight tube black, but a Lamp Black works well too. Make sure it’s creamy, not too watery. -
Paint the first stripes:
Using the size 4 brush, start filling in the stripes you sketched on the face. Keep your hand steady but allow the pressure to vary—press down for the thick part of the stripe and lift for the tapered ends. -
Work down the neck:
Continue painting the stripes down the neck. Notice how the stripes on the neck are generally broader than those on the face. Leave the white paper completely clean between stripes for maximum contrast. -
Detail the eye and muzzle:
Switch to your smallest brush (size 2). Paint the eye dark, leaving a tiny speck of white paper for the highlight. Paint the nose area black, softening the edge towards the grey muzzle skin. -
Add muzzle shading:
Dilute a tiny dot of black paint with lots of water to make a pale grey. Gently wash over the muzzle area around the nose and mouth to give it volume without darkening it too much. -
Paint the mane:
Use short, stiff strokes to paint the mane hairs. Alternate between your dark black mix and a slightly more watery version to create depth and texture in the hair bristles.
Step 4: Refining and Framing
-
Add subtle shadows:
Once the black stripes are bone dry, mix a very watery grey-brown. Glaze a tiny shadow under the jawline to separate the head from the neck. -
Erase guidelines:
Check that your paint is completely dry—if it feels cool to the touch, wait longer. Take your kneadable eraser and gently lift any visible pencil lines from the white areas. -
Sign and frame:
Add your signature near the bottom in a fine pen or small brush. Place your finished piece in a simple white frame to echo the clean white stripes of your zebra.
Hang your new artwork in a well-lit spot to enjoy the dynamic contrast and soft colors you’ve created together
Giraffe Silhouette Against a Sunset Gradient
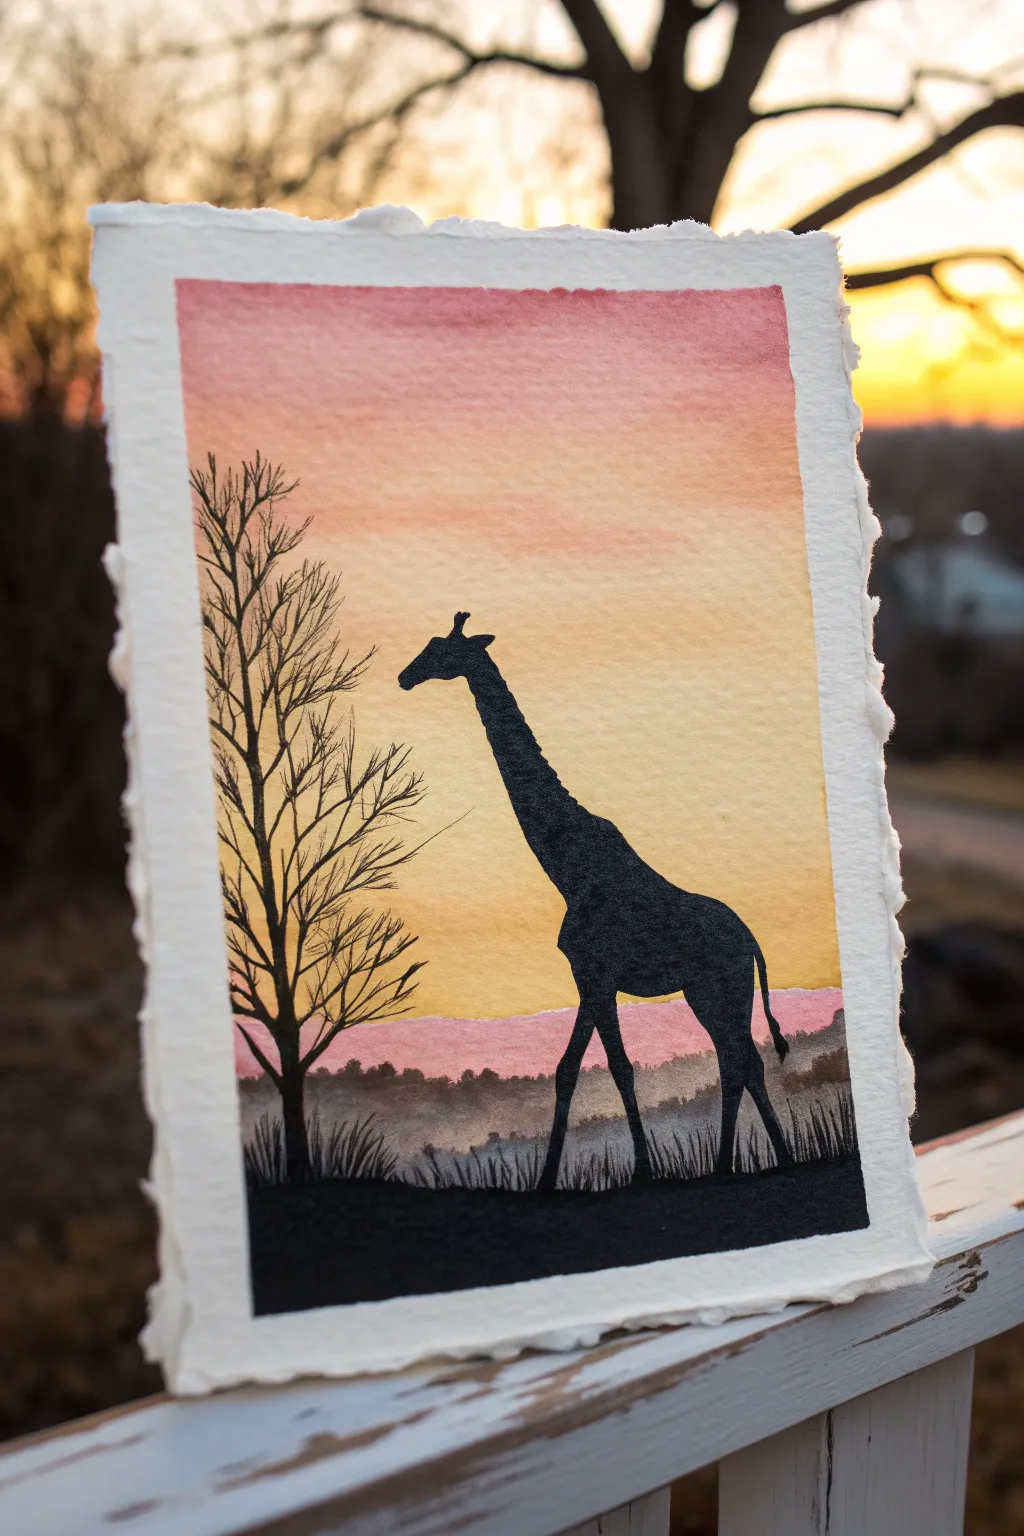
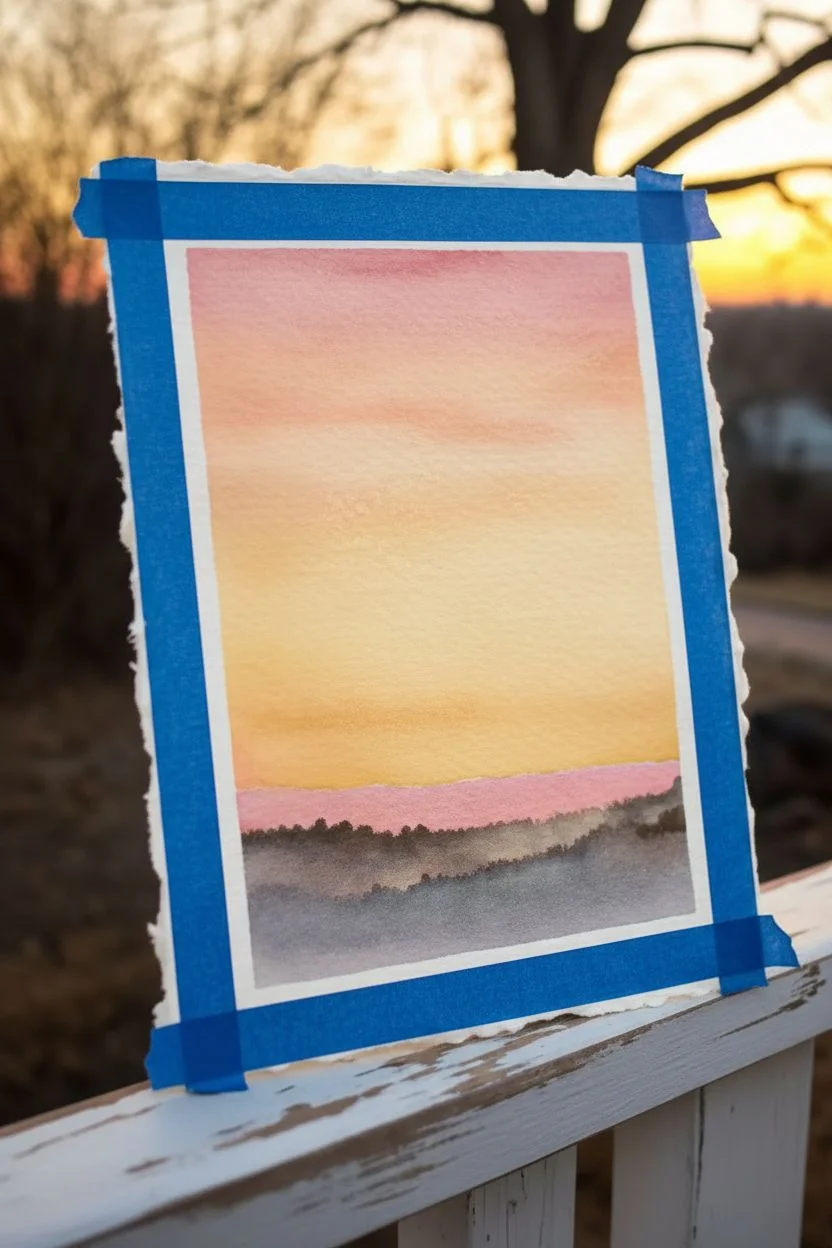
Capture the serene beauty of the savanna with this vibrant watercolor project that contrasts a glowing sunset gradient against the stark black silhouette of a giraffe. The handmade paper edge adds a lovely rustic touch to the finished piece.
How-To Guide
Materials
- Cold-pressed watercolor paper (heavyweight, preferably with deckled edges)
- Watercolor paints (Pink, Orange, Yellow, Light Purple)
- Black ink or acrylic paint (for the silhouette)
- Black fine-liner pen (0.3mm or 0.5mm)
- Flat wash brush (large)
- Round brush (size 2 or 4)
- Fine detail brush (size 00 or 0)
- Painter’s tape or masking tape
- Clean water jar and paper towels
- Pencil and eraser
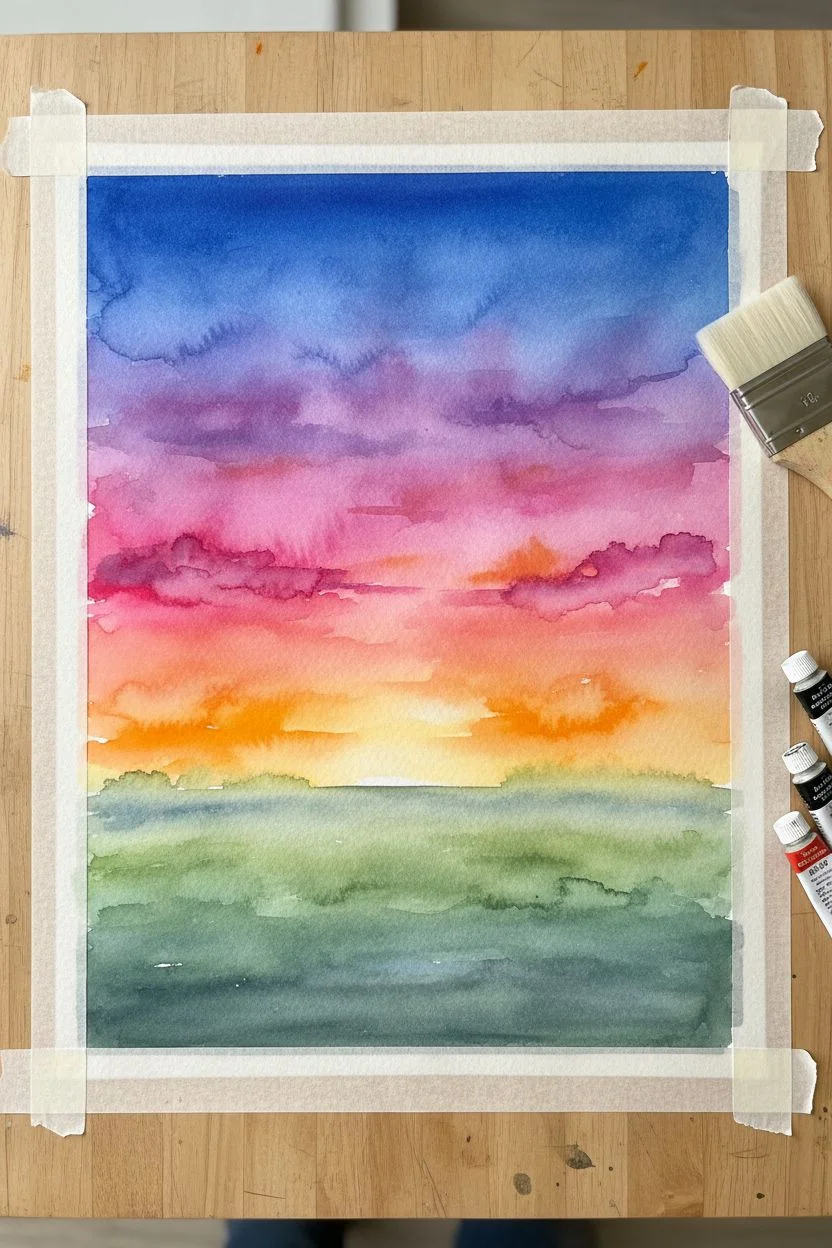
Step 1: Creating the Sunset Sky
-
Prepare your paper:
If your paper doesn’t have deckled edges, you can gently tear the edges against a ruler to create that rough, handmade look. -
Tape the borders:
Secure your paper to a hard board using painter’s tape. Create a rectangular border inside the paper edges, leaving about an inch of white margin visible around your painting area. -
Pre-wet the sky area:
Using your large flat brush and clean water, gently wet the rectangular area inside the tape. The paper should be glistening but not forming puddles. -
Paint the top gradient:
Load your brush with a soft rose or salmon pink watercolor. Apply this across the very top of the wet sky area, letting the color bleed naturally downward. -
Blend in the orange:
Clean your brush slightly and pick up a warm orange tone. Paint this directly below the pink, blending the meeting point gently while the paper is still wet. -
Finish with yellow:
Transition into a bright, warm yellow for the lower section of the sky, bringing it down almost to the bottom third of the rectangle. -
Add the horizon haze:
Near the bottom edge of the taped area, mix a very faint, watery purple-grey. Paint hazy, uneven shapes to suggest distant mountains or bushes in the background. -
Let it dry completely:
This is crucial—wait until the paper is bone dry. If you rush this step, the crisp silhouette lines you add later might bleed into the background.
Smooth Gradients
To get a seamless sunset blend, tilt your board slightly. Gravity pulls the wet paint down, helping the pink flow naturally into the orange and yellow without harsh lines.
Step 2: Painting the Silhouette
-
Sketch the outlines:
Lightly sketch the giraffe’s shape with a pencil. Place the neck slanted slightly forward and position the body in the lower right third. Add the bare tree structure on the left side. -
Start the tree trunk:
Using black ink or acrylic paint and your round brush, carefully paint the main trunk of the tree on the left. Keep the lines opaque and solid. -
Add delicate branches:
Switch to your fine detail brush or a black fine-liner pen. Draw thin, intricate branches reaching upward and outward from the main trunk, overlapping slightly to create density. -
Fill the giraffe body:
Using the black medium (ink or acrylic), fill in the giraffe’s body. I find that using acrylic here gives a more solid, opaque matte finish compared to watercolor. -
Detail the head and legs:
Use the smallest detail brush for the giraffe’s ossicones (horns), ears, and thin legs. Ensure the legs look like they are walking, with one back leg slightly lifted or bent. -
Paint the foreground ground:
Paint a solid black, uneven strip across the very bottom to ground the scene. This connects the tree and the giraffe. -
Add grass texture:
Before the ground paint dries fully, or using a fine brush afterwards, flick small, quick upward strokes along the top edge of the black ground to mimic tall savanna grass. -
Refine the edges:
Check your silhouette lines. If any edges are ragged, smooth them out carefully with the fine-liner pen. -
Reveal the border:
Once the black paint is completely dry, slowly peel away the painter’s tape at a 45-degree angle to reveal the clean, crisp edges of your sunset box.
Make It Golden
Add a touch of magic by using metallic gold watercolor for the very edges of the clouds or lightly brushing it over the sun area for a shimmering ‘golden hour’ effect.
Display your artwork near natural light to really let those sunset colors glow against the crisp white paper

PENCIL GUIDE
Understanding Pencil Grades from H to B
From first sketch to finished drawing — learn pencil grades, line control, and shading techniques.
Explore the Full Guide
Elephant Silhouette With a Glowing Sky
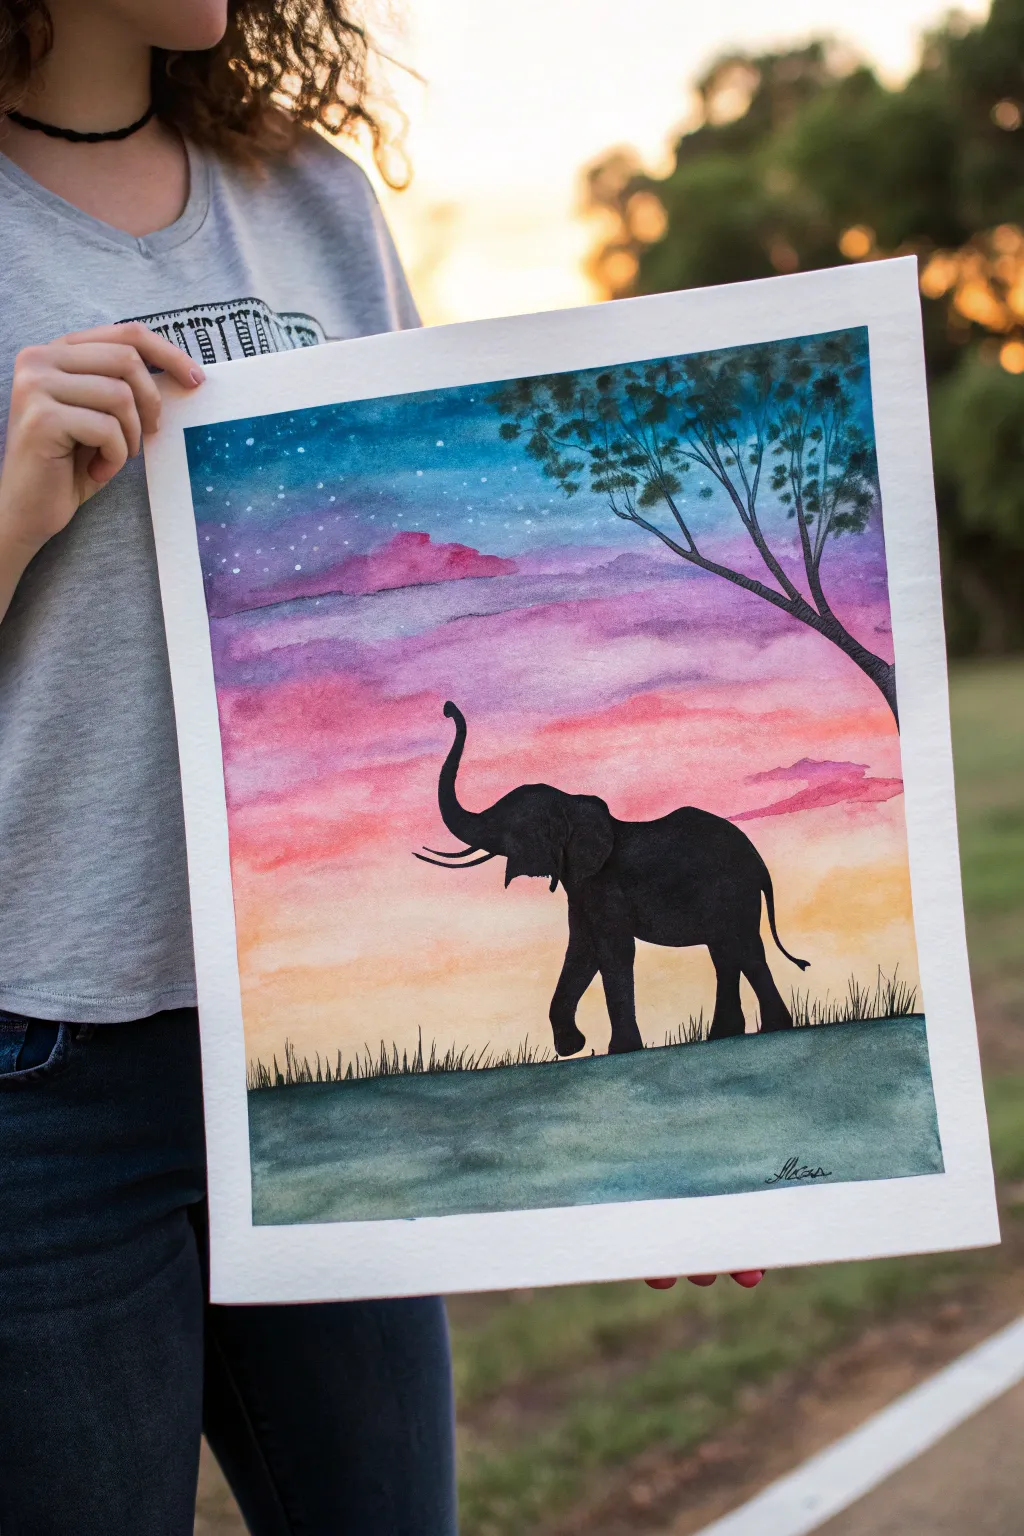
Capture the majestic beauty of the savannah with this vibrant watercolor project that contrasts a brilliant, glowing sky against a stark black silhouette. The smooth gradient background makes a perfect stage for the detailed elephant figure, creating a piece that looks complex but is surprisingly beginner-friendly.
Step-by-Step Tutorial
Materials
- Watercolor paper (cold press, at least 140lb)
- Watercolor paints (phthalo blue, purple, magenta, orange, yellow)
- Black acrylic paint or black gouache (for opacity)
- Masking tape
- Large flat wash brush
- Medium round brush
- Small detail brush (round size 0 or 1)
- Pencil and eraser
- Jar of clean water
- Paper towels
- White gel pen or white gouache
Step 1: Painting the Glowing Sky
-
Prepare your canvas:
Start by taping down all four edges of your watercolor paper to a board or table. This creates a clean white border and prevents the paper from buckling when it gets wet. -
Sketch the horizon:
Lightly draw a horizontal line about one-quarter of the way up from the bottom of the page to separate the ground from the sky. Don’t worry about drawing the elephant yet; we will add that later. -
Wet the sky area:
Using your large flat brush, apply a generous layer of clean water to the entire sky area above your horizon line. The paper should be glistening but not forming puddles. -
Apply the top blue layer:
Load your brush with a deep phthalo blue and paint the top third of the sky. Use horizontal strokes and let the paint flow downwards slightly into the wet paper. -
Blend in purple and pink:
While the blue is still wet, rinse your brush and pick up purple. Paint the middle section, allowing it to touch and bleed into the blue. Immediately follow this with magenta or pink below the purple. -
Create the sunrise glow:
Finish the bottom of the sky near the horizon line with bright orange and yellow. Blend this upwards into the pink layer to create a seamless transition. -
Add cloud texture:
While the paint is still damp, dab in a slightly more concentrated mix of pink and purple to suggest soft horizontal clouds across the middle section. The wet paper will soften the edges for you. -
Paint the ground:
Once the sky is mostly dry near the horizon, paint the ground area below the line. Use a mix of green and a touch of blue or grey to create a shadowed, grassy effect. Keep the strokes horizontal.
Smooth Blends
To avoid hard lines in your sky, work quickly while the paper is wet. If a section starts to dry, re-wet the edge slightly with clean water effectively.
Step 2: Adding the Silhouette
-
Wait for complete drying:
This is crucial: ensure the entire background is 100% bone dry before proceeding. If it’s cool to the touch, it’s still wet. -
Draft the elephant:
Lightly sketch the outline of the walking elephant in the center. Drawing the trunk raised adds a dynamic, happy feel to the composition. -
Outline the tree:
On the right side, sketch a leaning tree trunk that branches out into the upper right corner. Keep the branches thin and reaching. -
Paint the elephant body:
Using black acrylic or gouache and a medium round brush, fill in the main body of the elephant. I recommend acrylic here because it provides a solid, opaque black that stands out against the colorful background. -
Detail the tusks and tail:
Switch to your smallest detail brush to carefully paint the thin tail and the tusks. Leave a tiny sliver of negative space (or use white paint later) to distinguish the tusks from the trunk. -
Fill the tree silhouette:
Paint the tree trunk and branches black. Use a dabbing motion with the tip of your brush to create the illusion of leaves on the upper branches. -
Add grass blades:
With the detail brush and black paint, flick short, quick vertical strokes along the horizon line to create grassy texture overlapping the elephant’s feet slightly. -
Create the starry night:
Once the black paint is dry, use a white gel pen or a small dot of white gouache to add tiny stars in the dark blue section at the very top. -
Sign and reveal:
Add your signature to the bottom corner, then carefully peel away the masking tape at a 45-degree angle to reveal your crisp white border.
Creative Twist
Swap the elephant for a giraffe or a howling wolf. You can also change the sky colors to warm reds and oranges for a ‘savannah heat’ look.
Frame your artwork to highlight the brilliant contrast between the colorful sky and the dark silhouette
Owl on a Moonlit Branch
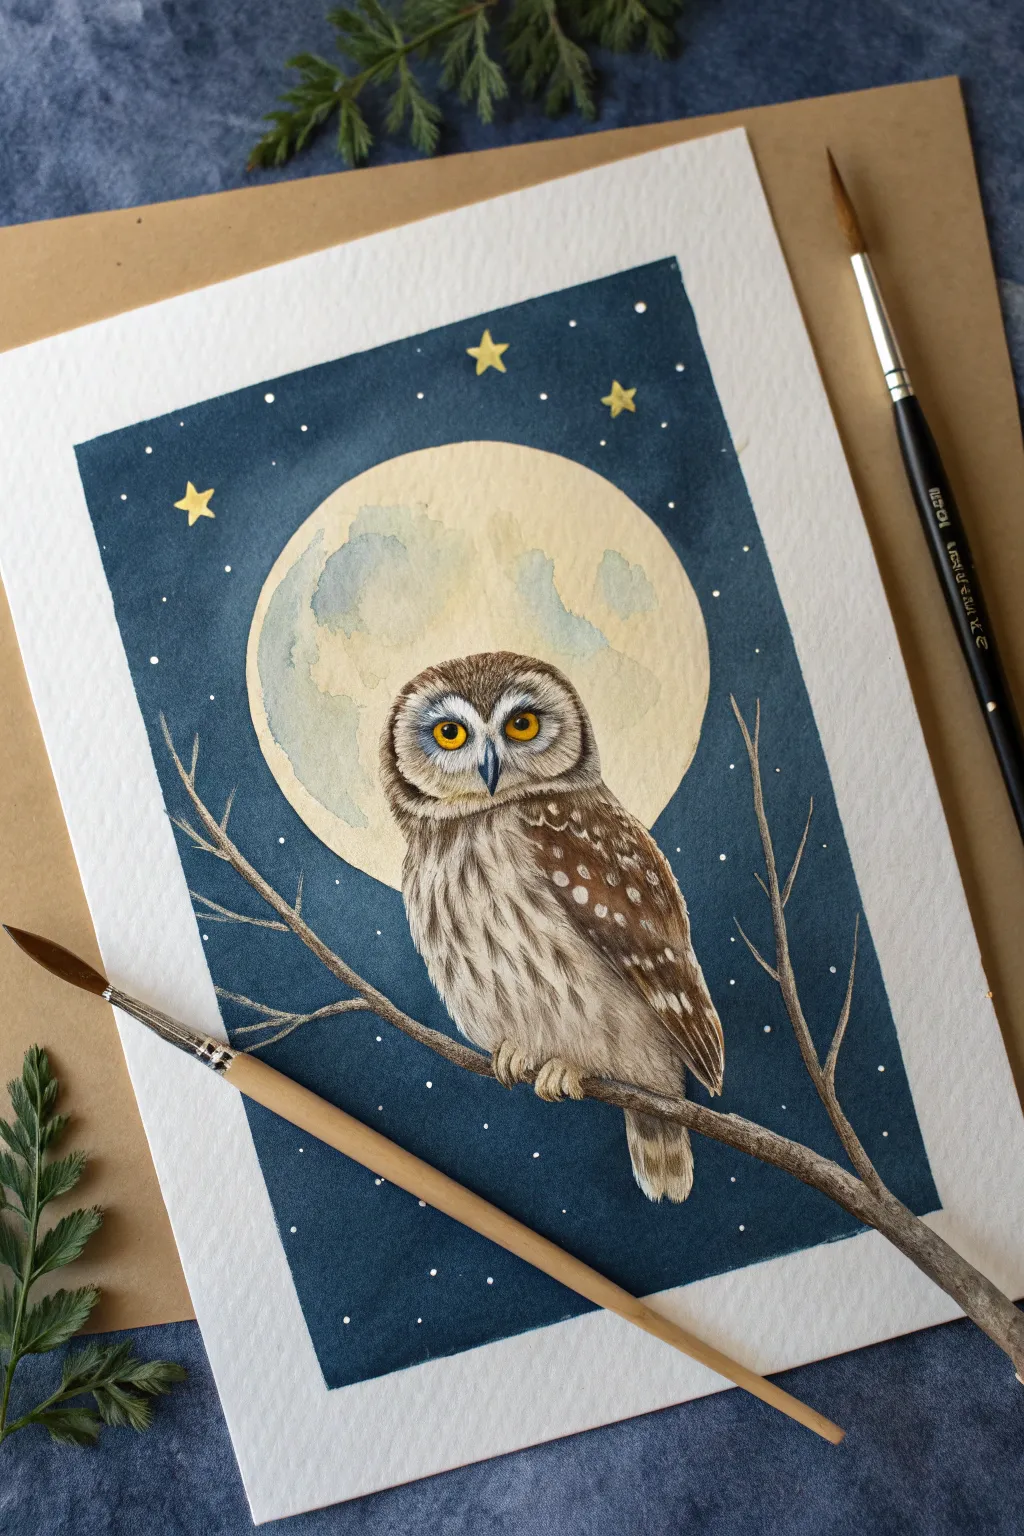
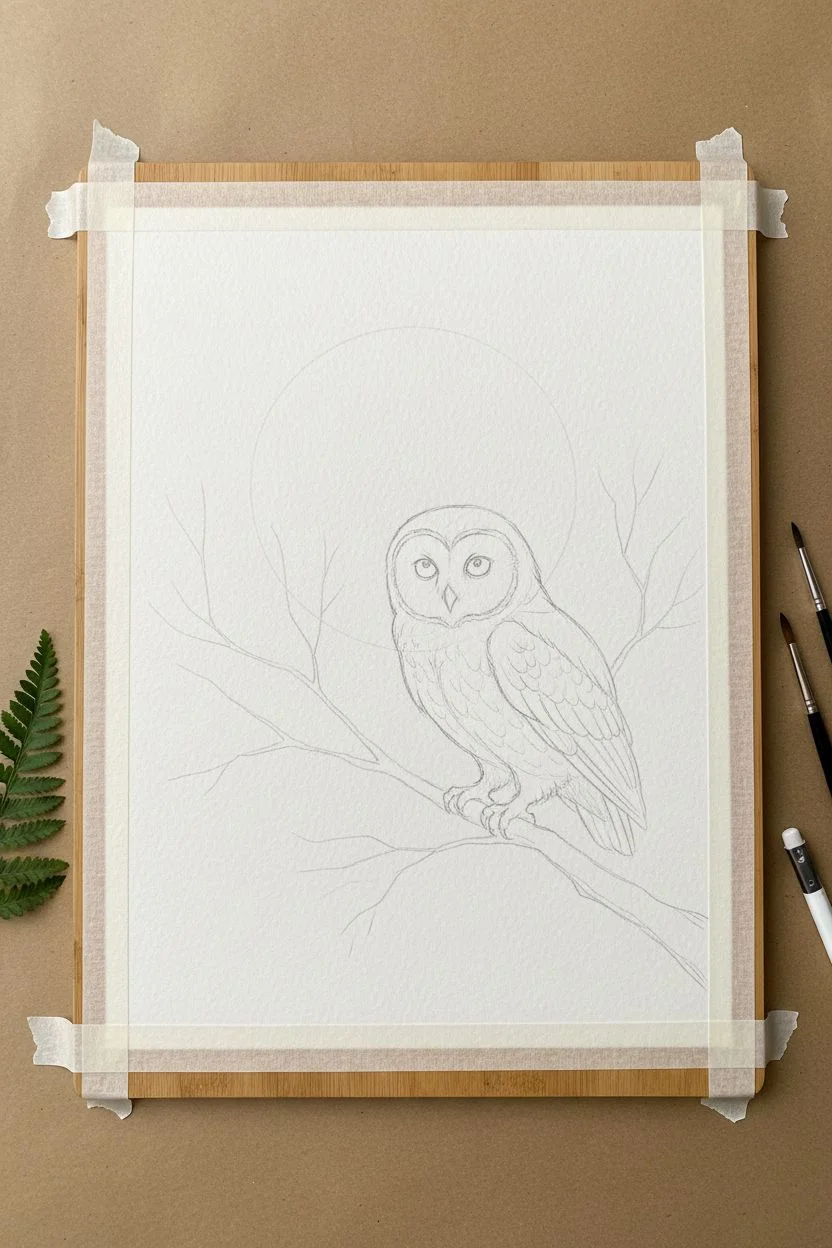
Capture the magic of a silent night with this charming watercolor tutorial featuring a watchful owl perched beneath a glowing full moon. The rich indigo background contrasts beautifully with the soft feathers and luminous lunar surface, creating a peaceful woodland scene.
Detailed Instructions
Materials
- Cold-press watercolor paper (300 gsm)
- Watercolor paints (Indigo, Yellow Ochre, Burnt Sienna, Burnt Umber, Paynes Gray, White Gouache)
- Masking tape
- Round brushes (sizes 2, 4, and 8)
- Detail brush (size 0 or 00)
- Pencil and eraser
- Compass or circular object for tracing
- Jar of clean water
- Paper towels
Step 1: Preparation & Sketching
-
Tape the borders:
Secure your watercolor paper to a board or table using masking tape on all four sides. This creates that crisp, clean white border seen in the final piece and prevents the paper from buckling when wet. -
Trace the moon:
Using a compass or a small bowl, lightly trace a perfect circle in the upper center of the paper. Keep your pencil lines faint so they don’t show through the pale moon paint later. -
Sketch the owl and branches:
Lightly sketch the owl perched on a branch that extends diagonally from the bottom right. The owl’s head should overlap the bottom portion of the moon circle. Add a few thin, bare twigs reaching upward on either side.
Uneven Sky?
If your dark blue background dries with ‘cauliflower’ blooming edges, go over it with a second layer of paint. Using less water and more pigment in the second coat usually fixes blotchiness.
Step 2: Painting the Background
-
Masking or careful edging:
If you have masking fluid, apply it over the moon, owl, and branches to protect them. If not, you’ll need to paint carefully around these shapes in the next step. -
Apply the night sky:
Mix a deep, saturated Indigo color. Using your size 8 brush, paint the entire background area around the moon and owl. I like to do this in two thin layers rather than one thick one to avoid streakiness. Let it dry completely. -
Add stars:
Using white gouache or opaque yellow watercolor, paint three small five-pointed stars. Then, create the tiny speckles by loading a brush with watered-down white gouache and gently tapping the handle against another brush to splatter ‘stars’ over the dark blue.
Glow Up
Mix a tiny amount of metallic gold watercolor into your yellow paint for the moon and the stars. It gives the piece a magical shimmer that reveals itself when the light hits the paper.
Step 3: The Moon & Branches
-
Base layer for the moon:
Dilute Yellow Ochre with plenty of water until it’s a very pale cream. Wash this over the entire moon circle. While it’s still damp, drop in tiny touches of watered-down Paynes Gray or pale blue to create soft lunar craters. -
Paint the main branch:
Mix Burnt Umber and a touch of Indigo to get a dark, woody brown. Paint the main branch, varying the pressure to make it look organic and textured. Extend thinner lines for the twigs using your smaller brush. -
Highlight the wood:
Once the brown is dry, use a detail brush with a lighter tan color to add thin, scratchy lines along the top edge of the branch, mimicking moonlight hitting the bark.
Step 4: Bringing the Owl to Life
-
Base coat for the owl:
Wash the owl’s body with a very pale mix of Burnt Sienna and water. Leave the face area slightly lighter to help define the facial disk later. -
Define the eyes:
Paint the irises with a bright, opaque Yellow Ochre. Once dry, add the black pupils in the center and a tiny dot of white gouache for the catchlight to make the eyes look alive. -
Feather texture – chest:
Switch to your size 0 detail brush. Using a mix of Sepia and Paynes Gray, paint short, downward strokes on the chest to create fluffy feathers. Keep the strokes loose and slightly curved. -
Wing details:
For the wing, use a darker Burnt Umber. Paint the wing shape, then lift out small spots with a damp brush or paint over with white gouache to create the white spotted pattern typical of owls. -
Facial features:
Outline the facial disk with fine, radiating strokes of dark brown. Paint the beak with a dark grey-blue, adding a tiny highlight on the curve. -
Final highlights:
Use white gouache to add fine details, like the soft fluff around the feet where they grip the branch, and a few bright feather strokes on the wing shoulder to increase contrast. -
Reveal the border:
Ensure the painting is 100% dry. Gently peel away the masking tape at a 45-degree angle to reveal the crisp white edge that frames your artwork.
Frame this piece in a simple wood frame to complement the natural tones of the owl alongside the deep blue sky


Llama With a Cozy Blanket Pattern

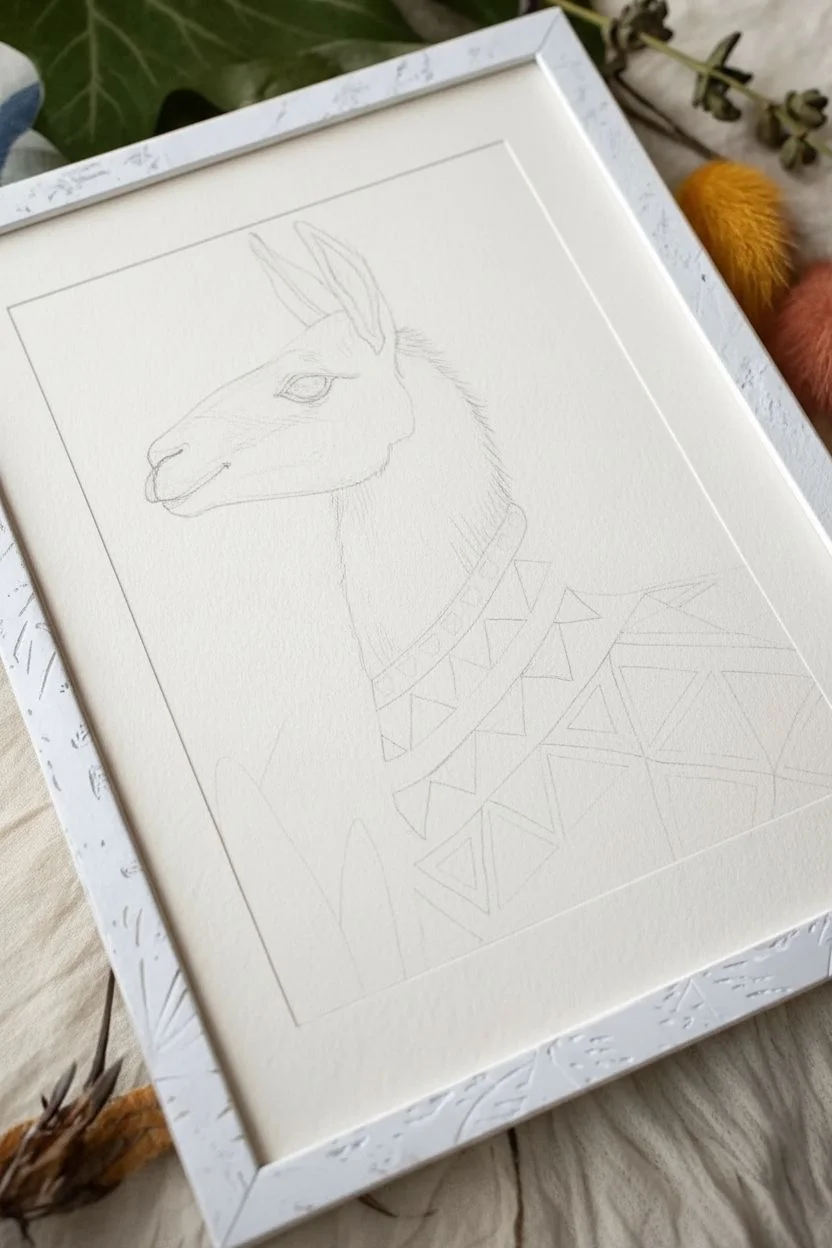
This charming project features a serene llama wrapped in a vibrant, geometrically patterned blanket. The combination of realistic animal fur textures with flat graphic design elements creates a delightful contrast perfect for intermediate watercolorists.
How-To Guide
Materials
- Cold press watercolor paper (300 gsm)
- Watercolor paints (Payne’s Grey, Burnt Umber, Yellow Ochre, Teal, Rust Red)
- Synthetic round brushes (size 2 and 6)
- Fine liner brush (size 00 or 0)
- HB pencil and kneadable eraser
- Masking fluid (optional)
- White gel pen or white gouache
- Two jars of water and paper towels
Step 1: Sketching and Preparation
-
Outline the Llama:
Start by lightly sketching the llama’s profile. Focus on the gentle curve of the neck, the pointed ears, and the distinct snout shape. Keep your pencil lines very faint so they don’t show through the paint later. -
Define the Blanket:
Draw the outline of the blanket draped over the llama’s back. Instead of drawing every single triangle now, just map out the main horizontal bands where the patterns will go to ensure the curve follows the llama’s body. -
Add Cactus Elements:
Sketch three simple, rounded shapes in the bottom left corner to represent stylized cacti or mountains. These should overlap slightly with the llama’s chest area to create depth. -
Refine the Face:
Add details to the face, specifically marking the eye shape, the nostril, and the mouth line. I find it helpful to lightly mark the direction of the fur clumps on the neck at this stage.
Step 2: Painting the Llama
-
First Fur Wash:
Mix a very watery wash of pale grey (diluted Payne’s Grey). Apply this to the face and neck, leaving the area around the eye and nose slightly lighter. -
Building Fur Texture:
Once the base is damp but not soaking, use a size 2 brush with a slightly darker grey-brown mix. Start adding directional strokes on the neck to simulate fur, flicking the brush downward. -
Detailing the Face:
Switch to your smaller brush. Use a darker grey to paint the nose and the area around the mouth. Paint the eye a deep, almost black color, leaving a tiny speck of white paper for the highlight. -
Adding Warmth:
Glaze a very light wash of Burnt Umber or Ochre on the top of the head and the back of the neck where the fur is thicker. This adds a nice warm undertone to the animal. -
Ear Details:
Darken the inside of the ears with a charcoal grey, keeping the edges soft or ‘furry’. Use short, darker strokes on the tips of the ears for definition.
Fur Texture Tip
Don’t paint every single hair. Suggest texture by clustering brush strokes in shadow areas (under the jaw/ears) and leaving highlighted areas smoother.
Step 3: Creating the Patterned Blanket
-
Base Triangle Colors:
Select a palette of earthy tones: rust red, mustard yellow, and teal. Start painting individual triangles within your sketched bands. Leave a tiny sliver of white space between shapes to keep colors from bleeding. -
Painting the Bands:
Fill in the solid bands of color separating the triangle rows. I like to use a rust red for the distinct zig-zag or striped sections to anchor the design. -
Adding Texture to Shapes:
For some of the lighter triangles (like the beige ones), dab a little extra pigment on one side while wet to create a subtle gradient or texture. -
Geometric Details:
Once the main colors are dry, use your fine liner brush to add intricate details inside the larger triangles, such as smaller nested triangles or cross-hatching. -
The Dotted Lines:
Using a very steady hand and the tip of your smallest brush (or a fine liner pen), add rows of tiny dots along the borders of the colored bands for that woven textile look.
Level Up: Metallic Pop
Swap the mustard yellow paint for gold watercolor or metallic ink in the blanket pattern. This adds a stunning shimmer that catches the light.
Step 4: Background and Final Touches
-
Painting the Foreground:
Paint the abstract cactus shapes in the bottom corner. Use a cool teal for the front shapes and a pale sandy beige for the shape in the back to suggest distance. -
Softening Edges:
If the bottom edge of the painting looks too harsh, dampen a clean brush and gently soften the paint line where the llama’s chest fades into the paper. -
Enhancing Highlights:
Use a white gel pen or opaque white gouache to add final crisp details to the blanket pattern or to re-establish the glint in the llama’s eye if it got lost. -
Final Inspection:
Check the contrast between the furry neck and the crisp blanket. If needed, deepen the shadows under the blanket edge to show it is resting on top of the fur.
Once dry, frame your piece in a white or light wood frame to complement the clean, modern aesthetic
“Peekaboo” Animal Peeking Over a Line
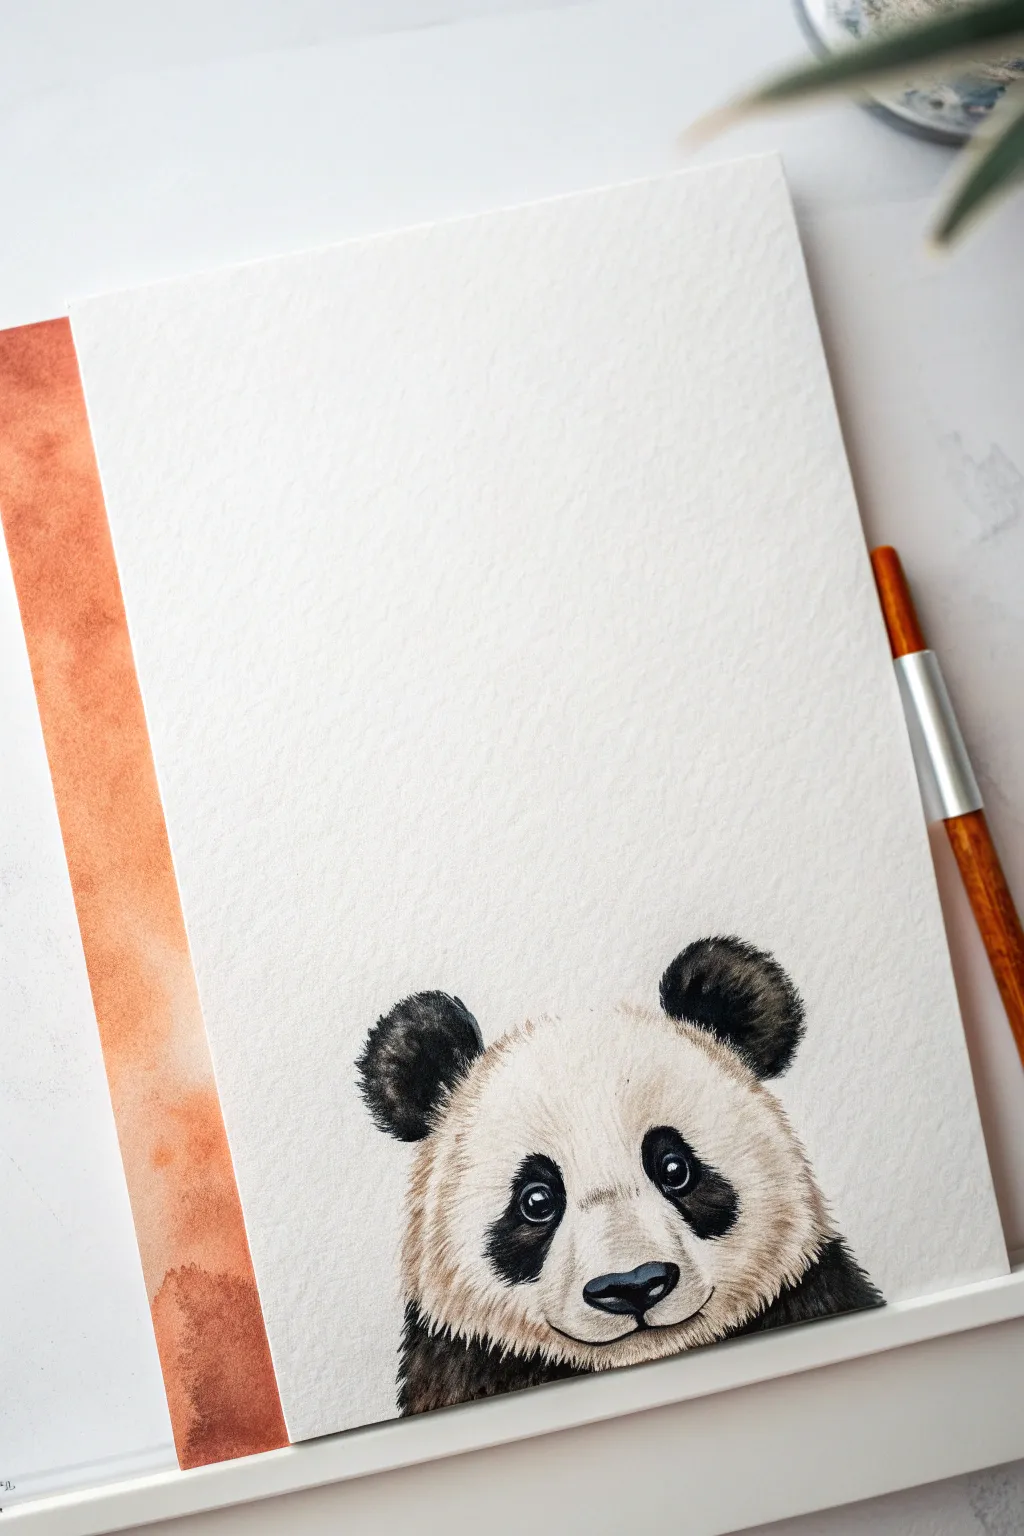
This adorable project features a realistic yet sweet panda cub peeking up from the bottom edge of your paper, creating a playful composition. The contrast between the detailed fur texture and the stark white background, framed by a soft rust-colored border, makes for a striking piece of art.
Step-by-Step
Materials
- Cold press watercolor paper (300 gsm)
- Watercolor paints (Payne’s Grey/Black, Burnt Sienna, Yellow Ochre, White Gouache)
- Round watercolor brushes (Size 4, Size 2, and Size 00 or liner)
- Masking tape (for securing paper)
- Graphite pencil (HB or H for light sketching)
- Kneadable eraser
- Paper towels
- Two jars of water (clean and dirty)
- Ruler
Step 1: Preparation and Sketching
-
Define the borders:
Begin by taping down your cold-press paper to a board. On the left side, measure about an inch from the edge and use masking tape to block off a vertical strip. This will eventually become the rust-colored decorative border later. -
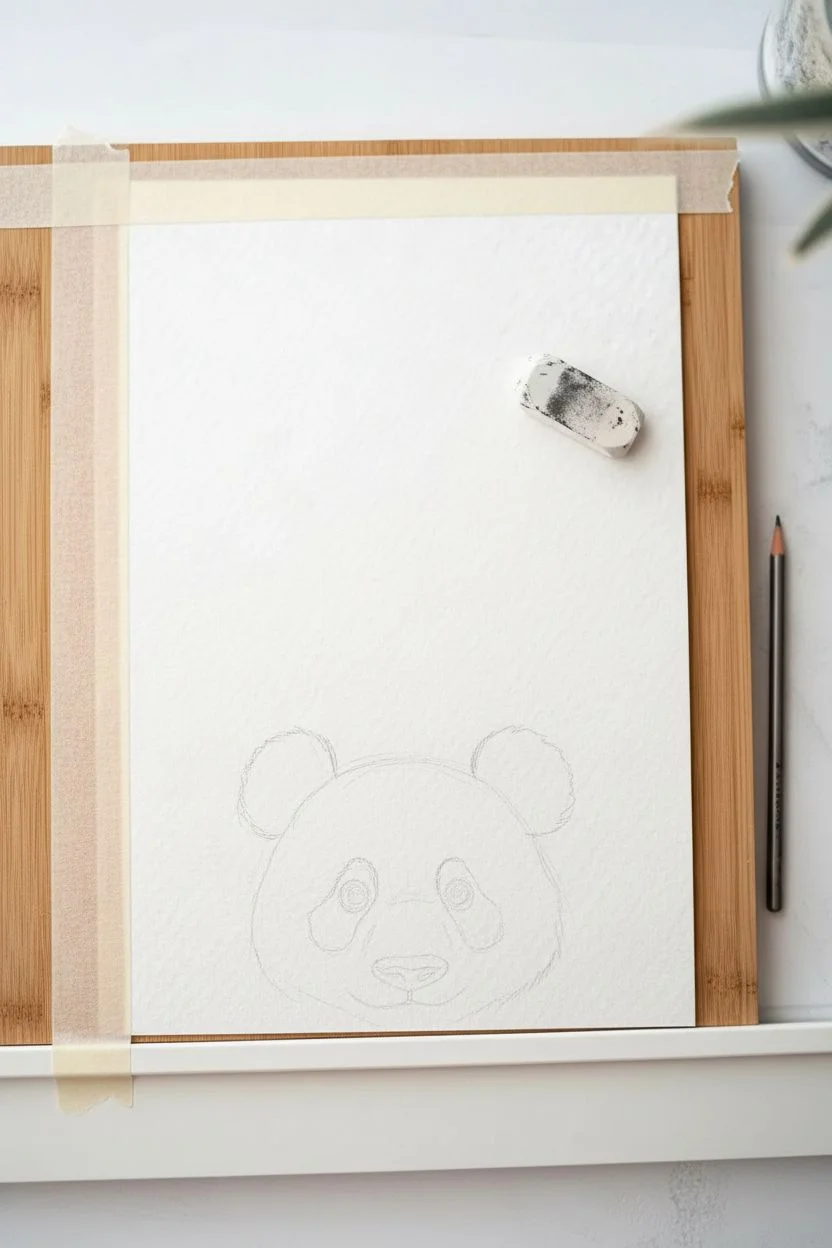
Rough placement:
Visualize the composition. The panda should be positioned in the bottom right corner. Lightly sketch a very loose oval shape for the head, ensuring the bottom of the chin is ‘cut off’ by the bottom edge of the paper to create the peeking effect. -
Refining the features:
Draw the iconic panda patches around the eyes. These should be slightly teardrop-shaped and angle downwards. Add the nose and mouth area just below the center line of the face. Sketch two rounded ears at the top corners of the head. -
Lightening the sketch:
Once you are happy with the panda’s expression, take your kneadable eraser and gently roll it over the drawing. You want the graphite guide lines to be barely visible so they don’t show through the final light fur.
Eyes Looking Dull?
If the eyes look flat, the white highlight is likely missing or too dim. Use a toothpick dipped in opaque white gouache or a white gel pen to place a crisp, bright dot in the upper corner of the pupil.
Step 2: Painting the Fur Texture
-
Base wash for the white fur:
Unlike typical watercolor where white paper is left for white areas, pandas have ‘warm’ white fur. Mix a very dilute wash of Yellow Ochre with a tiny touch of Burnt Sienna. Apply this wet-on-dry to the face, avoiding the black eye patches, nose, and ears. -
Softening edges:
While the base wash is still damp, use a clean, slightly moist brush to soften the edges where the fur meets the white background. This creates a fluffy, rather than cut-out, appearance. -
First layer of darks:
Mix a watery grey using Payne’s Grey or a mix of Ultramarine Blue and Burnt Umber. Apply this light grey base to the ears, eye patches, and the nose. This acts as an underpainting for the deeper blacks later. -
Building depth in the white fur:
Once the first tea-stained wash is dry, mix a slightly darker, cooler grey. Using a small round brush (size 2), paint directional strokes radiating from the nose outward to simulate fur texture. Keep these strokes very faint. -
Darkening the patches:
Now, engage with your deep black mix using less water. Carefully layer over the eye patches and ears. Use flicking motions at the edges of these shapes to make them look furry rather than solid geometric blobs. -
Painting the eyes:
Switch to your smallest brush (size 00 or liner). Paint the eyes a solid black, leaving a tiny pinprick of white paper for the highlight. If you accidentally cover it, you can add it back later with white gouache. -
Adding the nose details:
Paint the nose black, but leave the very top edge slightly lighter or lift a bit of pigment with a thirsty brush to show dimension. Add the little mouth line and the distinct cleft below the nose.
Step 3: Refining and Finishing
-
Creating fine fur texture:
This is the patience step. Using a dry-brush technique with your smallest brush and thick black paint, create tiny, individual hairs extending from the black patches into the lighter fur. This transition is crucial for realism. -
Adding texture to the white areas:
Using a very fine liner brush and a mix of white gouache with a tiny drop of brown, paint fine hairs over the darker shadowy areas of the face. I find this helps the panda look softer and less flat. -
Defining the shoulders:
Block in the dark fur of the shoulders at the bottom of the page. Use loose, directional strokes that fade out as they move upward towards the neck, blending into the lighter fur. -
Adding whiskers:
With a steady hand and your rigger or liner brush, flick a few very thin, long whiskers near the muzzle. Vary the pressure so the lines taper off beautifully at the ends. -
Painting the decorative border:
Ensure the panda is completely dry to avoid smudging. Remove the tape you placed on the left side earlier. Mix a saturated wash of Burnt Sienna or a rust color. -
Filling the strip:
Paint the decorative vertical strip on the left with the rust color. Let the pigment pool slightly in some areas to create a natural watercolor texture known as ‘blooms’. Let this dry completely. -
Final assessment:
Stand back and look at your piece. If the eyes need more sparkle, add a tiny dot of pure white gouache. Check that the ears look connected to the head with enough fur texture at the base.
Bamboo Accent
Enhance the scene by painting blurry, out-of-focus green bamboo leaves in the background. Wet the paper first and drop in Sap Green so the background stays soft and doesn’t compete with the panda.
Now you have a charming little companion peeking out from your sketchbook that is sure to make anyone smile
Tiger Face Hidden in Jungle Leaves
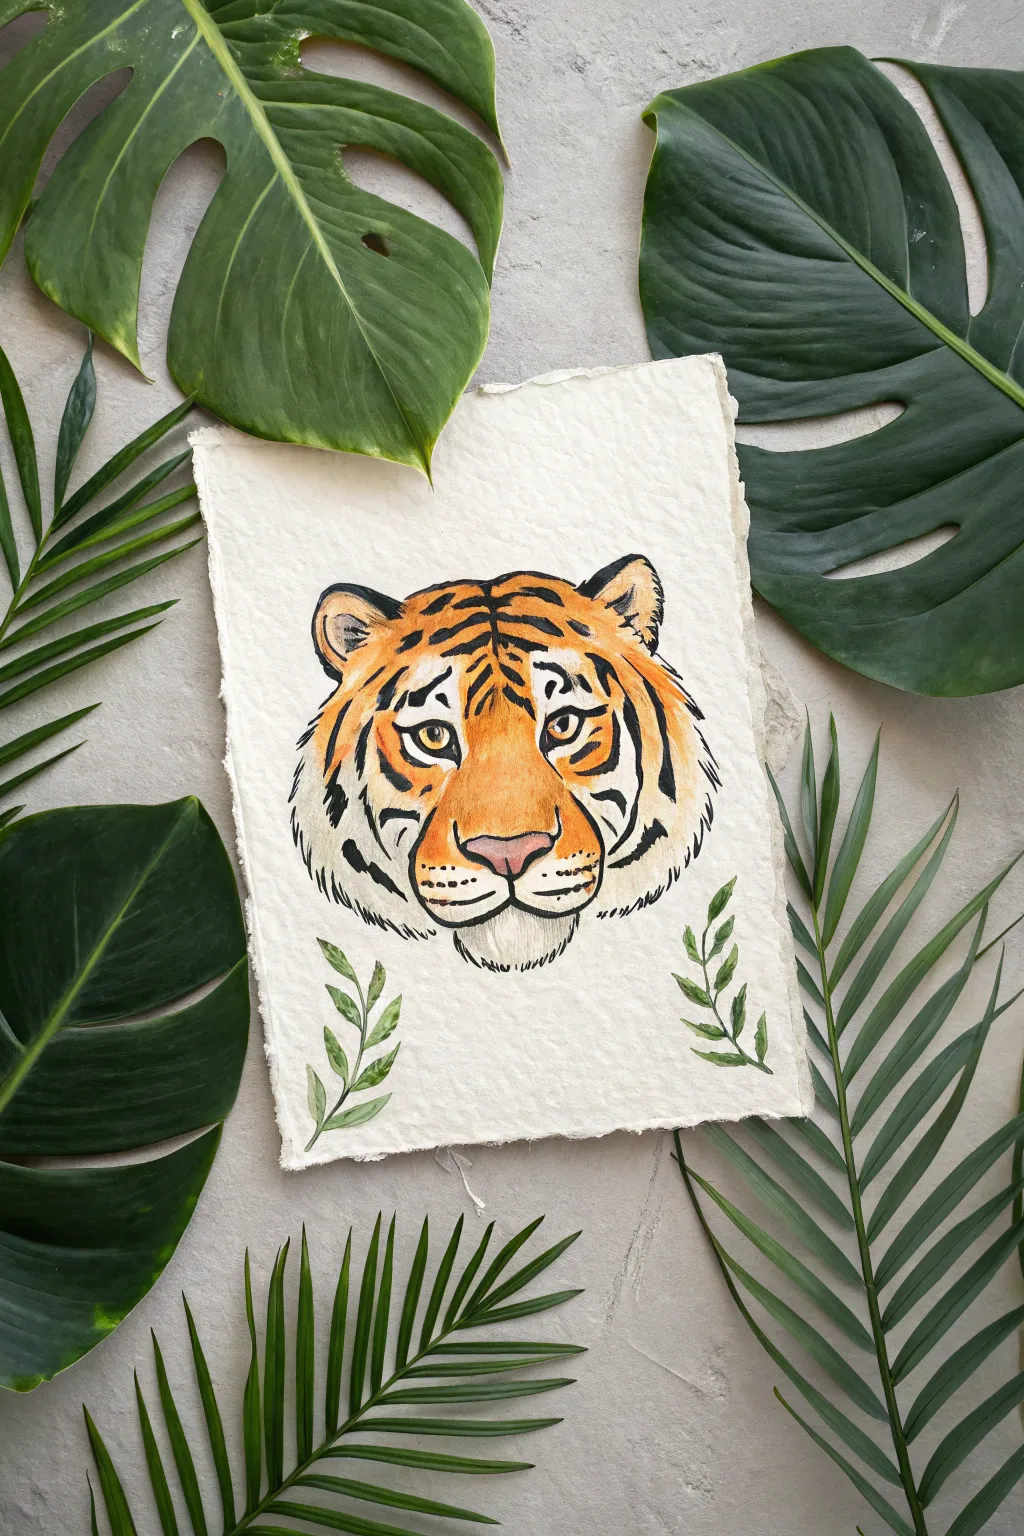
Capture the majestic gaze of a tiger with this vibrant watercolor and ink illustration. Painted on textured handmade paper and framed by real greenery, this project combines bold stripes with soft shading for a striking finish.
Detailed Instructions
Materials
- Heavyweight handmade paper (deckled edge)
- Watercolor paints (orange, yellow ochre, burnt sienna, pink)
- Fine liner pens (black, waterproof, sizes 01 and 05)
- White gouache or white gel pen
- Round watercolor brushes (sizes 2, 4, and 6)
- Pencil and eraser
- Real or faux monstera and palm leaves for styling
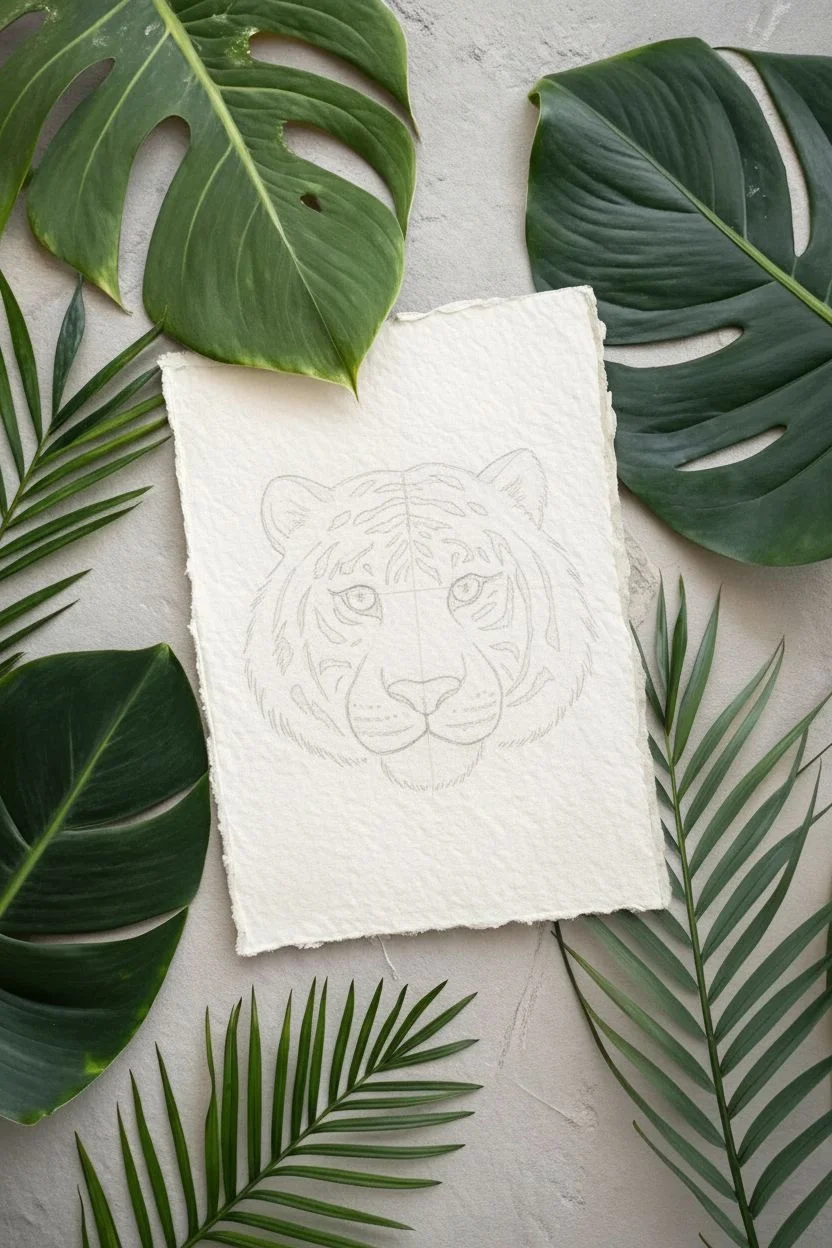
Step 1: Sketching the Guidelines
-
Center the face:
Begin by lightly sketching a wide oval shape in the center of your handmade paper. Use a vertical line to divide the face symmetrically and a horizontal line about halfway down for the eyes. -
Draft the features:
Sketch two almond-shaped eyes along the horizontal line. Add the broad nose bridge leading down to a triangular nose pad, and draw the muzzle curves underneath. -
Outline the ears and ruff:
Draw rounded ears at the top corners of the head. Lightly sketch the fluffy fur extending from the cheeks to create the tiger’s iconic face shape. -
Map the stripes:
Very lightly pencil in the main stripe patterns on the forehead and cheeks so you know where to avoid painting later. Tigers aren’t perfectly symmetrical, so don’t worry about matching sides exactly.
Natural Edge Pro Tip
If you don’t have handmade paper, tear the edges of regular watercolor paper against a ruler. This mimics the rustic ‘deckled’ look shown in the photo.
Step 2: Adding Color
-
Base wash:
Mix a vibrant orange with a touch of yellow ochre. Using a size 6 brush, apply this wash to the forehead, cheeks, and nose bridge, leaving the muzzle, eye patches, and chin white. -
Deepen the tones:
While the first layer is still slightly damp, drop in some burnt sienna near the outer edges of the face and the top of the head to create depth and roundness. -
Paint the nose:
Mix a soft, fleshy pink color. Paint the nose pad, blending it slightly darker at the top edge and leaving it lighter near the bottom. -
Eye details:
Use a golden yellow mix for the irises. I like to leave a tiny speck of white paper showing for the highlight, but you can add this with gouache later if you forget. -
Add decorative leaves:
Below the tiger’s chin, paint two simple sprigs of leaves using a dusty green watercolor mix. These should curve upward, framing the face from the bottom.
Level Up: Gold Accents
Use metallic gold watercolor or ink for the tiger’s eyes instead of yellow. It will make the gaze shimmer and catch the light beautifully.
Step 3: Inking the Details
-
Outline the eyes:
Once the paint is completely dry, use the 01 fine liner to trace the eyes. Fill in the pupils with solid black. -
Draw the stripes:
Switch to a thicker 05 pen or a brush pen for the stripes. Follow your pencil guides, varying the pressure to make the lines taper at the ends. The forehead stripes should form a loose pattern, often resembling the Chinese character for ‘King’. -
Define the fur texture:
Use short, quick flicks with the 01 pen along the outer edges of the orange paint and around the white muzzle to simulate fur texture. -
Whiskers and dots:
Add small dots on the muzzle area. Then, use quick, confident strokes to draw long whiskers extending outward from the muzzle. -
Final highlights:
Use white gouache or a white gel pen to add bright reflections to the eyes and tiny white hairs inside the ears or on the chin for extra dimension.
Step 4: Styling the Scene
-
Arrange the background:
To recreate the full jungle effect, place your finished painting on a neutral grey or concrete surface. -
Layer the leaves:
Position large monstera leaves underneath the top and bottom edges of the paper. Place slender palm fronds diagonally across the corners, ensuring they don’t cover your painted work.
Now you have a fierce yet beautiful tiger portrait ready to display in your own little jungle
Penguin Trio Built From Ovals and Blush

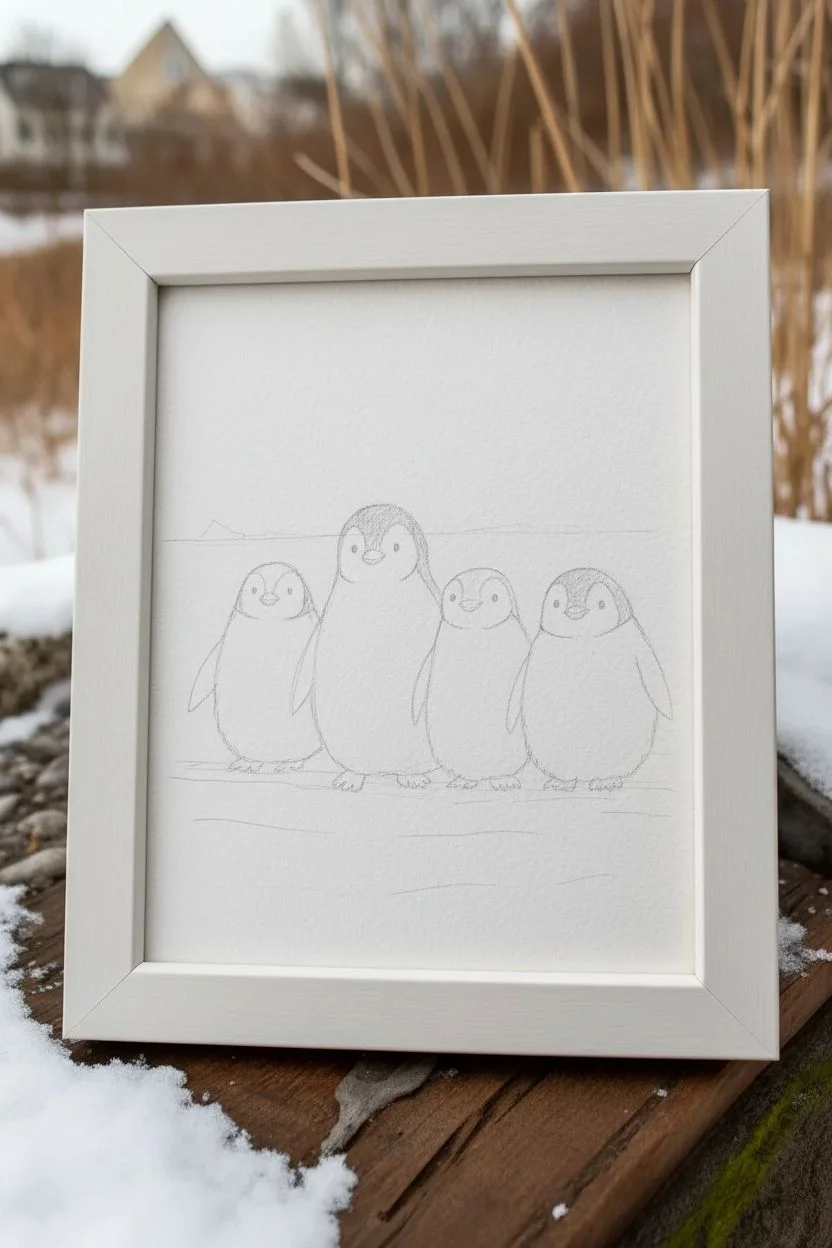
Capture the charm of winter with this adorable watercolor painting featuring a family of four fuzzy penguins. Their simple, oval-shaped bodies and expressive blushing cheeks make this a perfect project for beginners looking to practice wet-on-dry techniques and character building.
Step-by-Step Guide
Materials
- Cold Press Watercolor Paper (140lb/300gsm)
- Watercolor Paints (Payne’s Grey or Black, Orange/Burnt Sienna, Pink/Rose)
- Round Brushes (Size 6 for bodies, Size 2 for details)
- Pencil (HB or H)
- Kneaded Eraser
- Jar of Water
- Paper Towels
- White Gel Pen (optional for highlights)
Step 1: Sketching the Family
-
Map out the shapes:
Start by lightly sketching four oval shapes in a row using your HB pencil. Vary the sizes to create interest—make the second one from the left the tallest to represent a parent or older sibling, while the others can be slightly shorter and chubbier. -
Define the heads:
Within the top third of each oval, draw a curved line to separate the black head ‘hood’ from the white face. This shape should look a bit like a heart or the top of a widow’s peak. -
Add facial features:
Place two small dots for eyes in the white face area. Just below, sketch small triangular beaks. Keep the features centered but slightly low on the face for maximum cuteness. -
Sketch the flippers:
Draw resting flippers on the sides of each body. These are simple narrow elongated triangle shapes that curve slightly downward against their sides. -
Ground the penguins:
Sketch small, jagged feet at the bottom of each oval. Adding a light horizon line behind them suggests a snowy landscape without needing complex background details.
Step 2: Painting the Penguins
-
Base layer for bodies:
Mix a very dilute wash of Payne’s Grey or black—you want a pale, watery grey. Using your size 6 brush, fill in the body area below the head. Let the edges be slightly rough to mimic fluffiness. -
Darkening the sides:
While the body wash is still slightly damp, drop a tiny bit of darker grey paint along the outer edges and the bottom of the belly. This creates a natural shadow and roundness. -
Filling the flippers:
Paint the flippers using a medium-strength grey mix. They should be darker than the belly but lighter than the head to ensure they stand out. -
Painting the heads:
Switch to your size 2 brush and load it with concentrated black or dark grey. Carefully fill in the ‘hood’ area around the face, ensuring the edges are crisp against the white paper. -
Beaks and feet:
Mix a warm orange with a touch of brown. Paint the small triangular beaks and the little feet at the bottom. I find adding a tiny darker line under the beak gives it a bit of dimension. -
Adding the eyes:
With the finest point of your small brush (or a black fineliner if you prefer steadiness), dot in the eyes with solid black. Leave a microscopic speck of white paper if you can, or add it later with a gel pen.
Bleeding Colors?
If the black head paint bleeds into the white face, your paper was too wet. Let the area dry completely, then lift the mistake with a damp clean brush or cover with white gouache.
Step 3: Atmosphere and Details
-
The signature blush:
Mix a soft, watery pink or rose color. Once the face area is completely dry, gently dab two small circles on the cheeks of each penguin. This ‘blush’ gives them their charming, cold-weather personality. -
Creating texture:
Using a nearly dry brush with a little grey paint, scumble (lightly drag) some texture along the bottom edges of their bellies to look like ruffled feathers. -
Snowy shadows:
Mix a cool, watery blue-grey. Paint horizontal strokes under their feet to create cast shadows on the snow. Let these strokes fade out naturally into the white of the paper. -
Soft sky background:
Wet the paper area above the penguins just slightly with clean water. Drop in very faint touches of blue and let it spread to create a hazy, out-of-focus winter sky. -
Final touches:
Once everything is bone dry, sign your name at the bottom in a stylized script. Erase any visible pencil lines that weren’t covered by paint.
Winter Accessories
Give each penguin a unique personality by painting simple accessories like colorful knit scarves, bow ties, or little winter hats on top of their heads.
Now you have a sweet, frosty family ready to be framed or turned into a holiday card
Galaxy Background With a Wolf Howl Silhouette

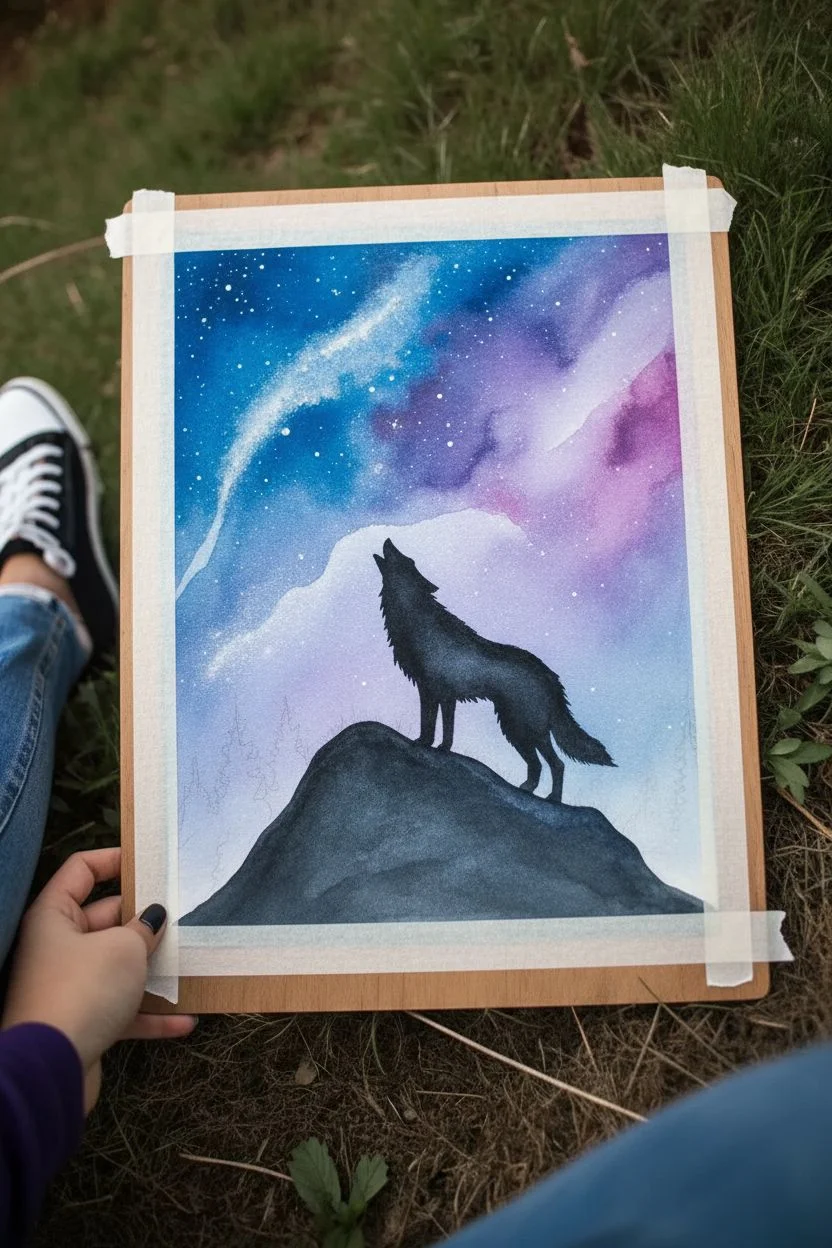
Capture the mystic beauty of the night sky with this stunning watercolor project featuring a wolf silhouette against a vibrant galaxy. The blend of deep blues, purples, and bright stars creates a magical atmosphere that’s easier to achieve than it looks.
Step-by-Step
Materials
- Cold press watercolor paper (block or taped down sheet)
- Watercolor paints (Indigo, Prussian Blue, Purple, Magenta)
- Black gouache or waterproof black ink
- White gouache or white gel pen
- Pencil and eraser
- Masking tape
- Large wash brush
- Medium round brush
- Small detail brush
- Old toothbrush (optional)
- Paper towels
- Two jars of water
Step 1: Preparing the Galaxy Sky
-
Secure your paper:
Start by taping down all four edges of your watercolor paper to a board or table with masking tape. This creates a clean white border and prevents the paper from buckling when wet. -
Sketch the outline:
Lightly sketch the contour of the rocky hill and the wolf shape near the bottom center. Keep your pencil lines faint since watercolor is transparent, though the black silhouette will cover them later. -
Wet the sky area:
Use your large clean brush to apply a layer of clear water over the entire sky area, stopping just at the hill line. The paper should be glisten but not have puddles. -
Apply base blues:
While the paper is wet, drop in concentrated Prussian Blue and Indigo at the top corners and edges. Let the paint flow and bloom naturally. -
Add purple hues:
Introduce purple and magenta into the middle section of the sky, blending them gently into the blues where they meet to create soft transitions. -
Create the milky way:
Leave a diagonal swath through the center relatively light or untouched by heavy pigment to suggest the Milky Way. You can dab this area with a clean paper towel to lift color if it gets too dark. -
Deepen the contrast:
I like to go back in with very saturated Indigo or even a touch of black watercolor while the paper is still damp to darken the outermost corners, making the center glow more. -
Initial drying:
Let this first wash dry completely. The paper must be bone dry before the next steps to prevent smudging.
Starry Splatter Tip
Cover the bottom silhouette area with a scrap piece of paper before splattering white stars to keep your hill and wolf pitch black.
Step 2: Stars and Silhouette
-
Splatter the stars:
Mix a creamy consistency of white gouache with a little water. Load an old toothbrush or stiff brush and flick the bristles to spray fine white specks across the dried sky. -
Define bright stars:
Use a small detail brush or white gel pen to add larger, cross-shaped stars in the lighter parts of the galaxy for extra twinkle. -
Paint the hill base:
Mix a dark grey or watered-down black watercolor for the hill. Paint the rocky mound, letting the texture be slightly uneven to mimic stone. -
Outline the wolf:
Using your smallest brush and black gouache (or ink), carefully outline the silhouette of the howling wolf. Focus on the jagged fur texture along the neck and tail. -
Fill the silhouette:
Fill in the wolf shape with solid black gouache. Ensure it is opaque and flat, contrasting sharply against the colorful background. -
Add trees to the horizon:
On either side of the hill, paint small pine tree silhouettes using vertically dabbing motions with the tip of your brush to suggest branches. -
Detail the grass:
Flick tiny, upward strokes along the top edge of the hill and around the wolf’s paws to create the look of wild grass blades. -
Remove tape:
Wait until the painting is 100% dry. Peel the masking tape away slowly at a 45-degree angle to reveal your crisp white edges.
Add Magic Dust
Mix a tiny pinch of iridescent watercolor medium or glitter into your purple paint for a sky that literally sparkles in the light.
Now you have a serene piece of night sky art ready to be framed or gifted


Have a question or want to share your own experience? I'd love to hear from you in the comments below!