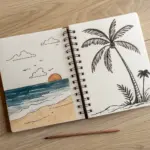
Beach scenes are my go-to when I want something relaxing, colorful, and totally beginner-friendly. These easy beach painting ideas keep the shapes simple while still giving you that dreamy seaside vibe.
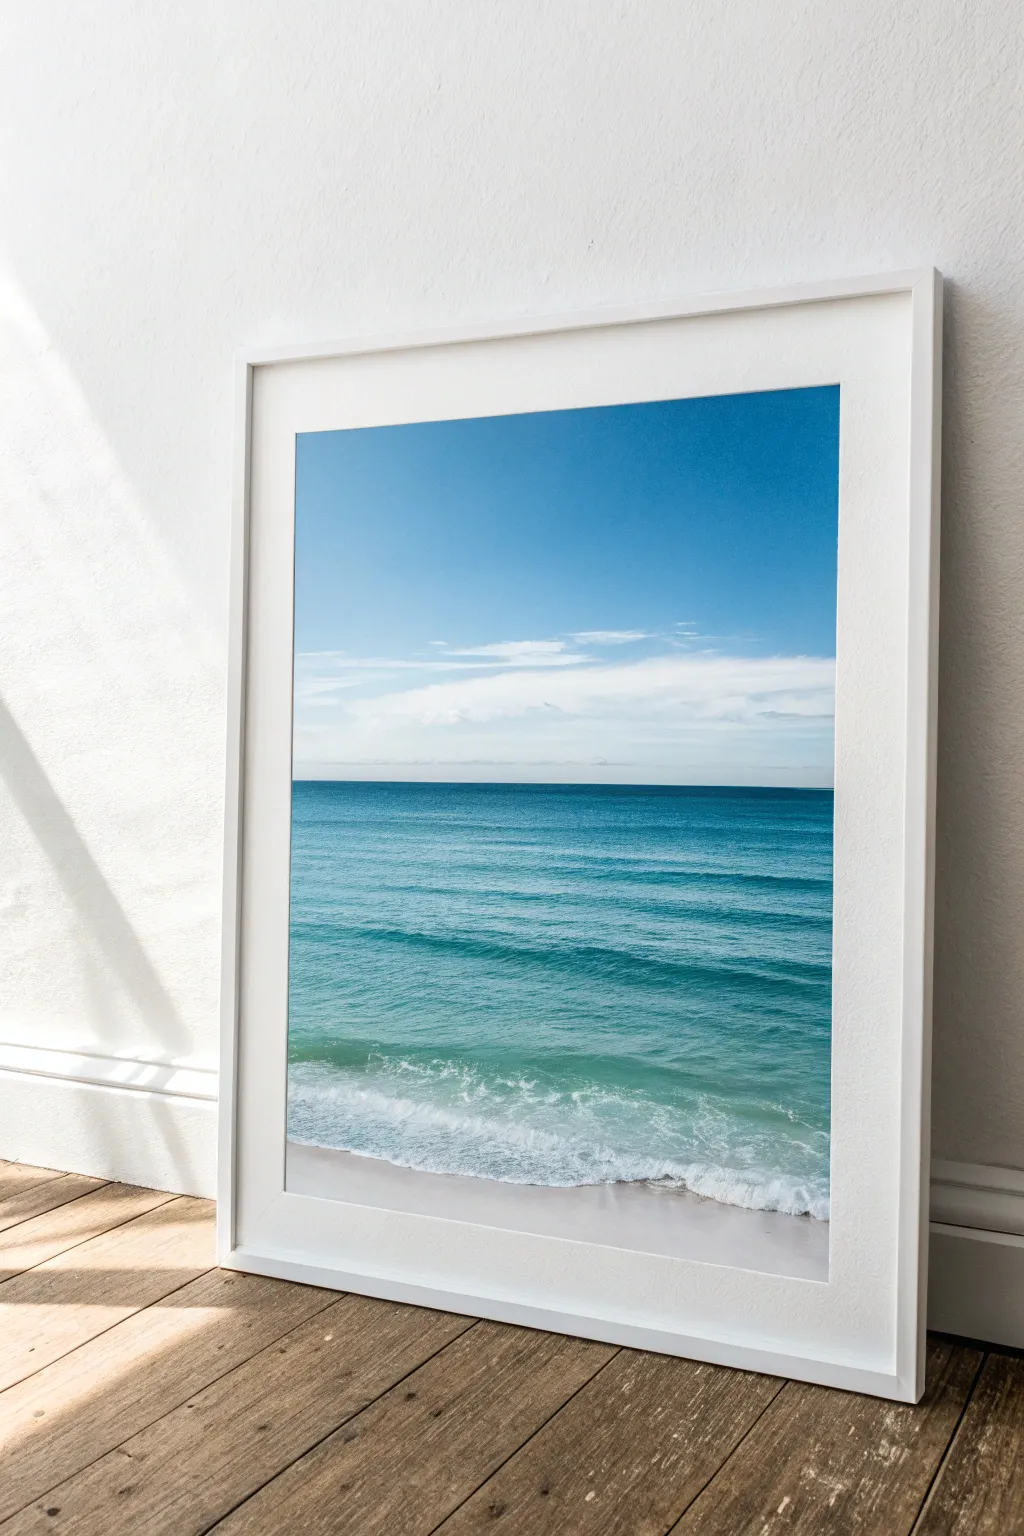
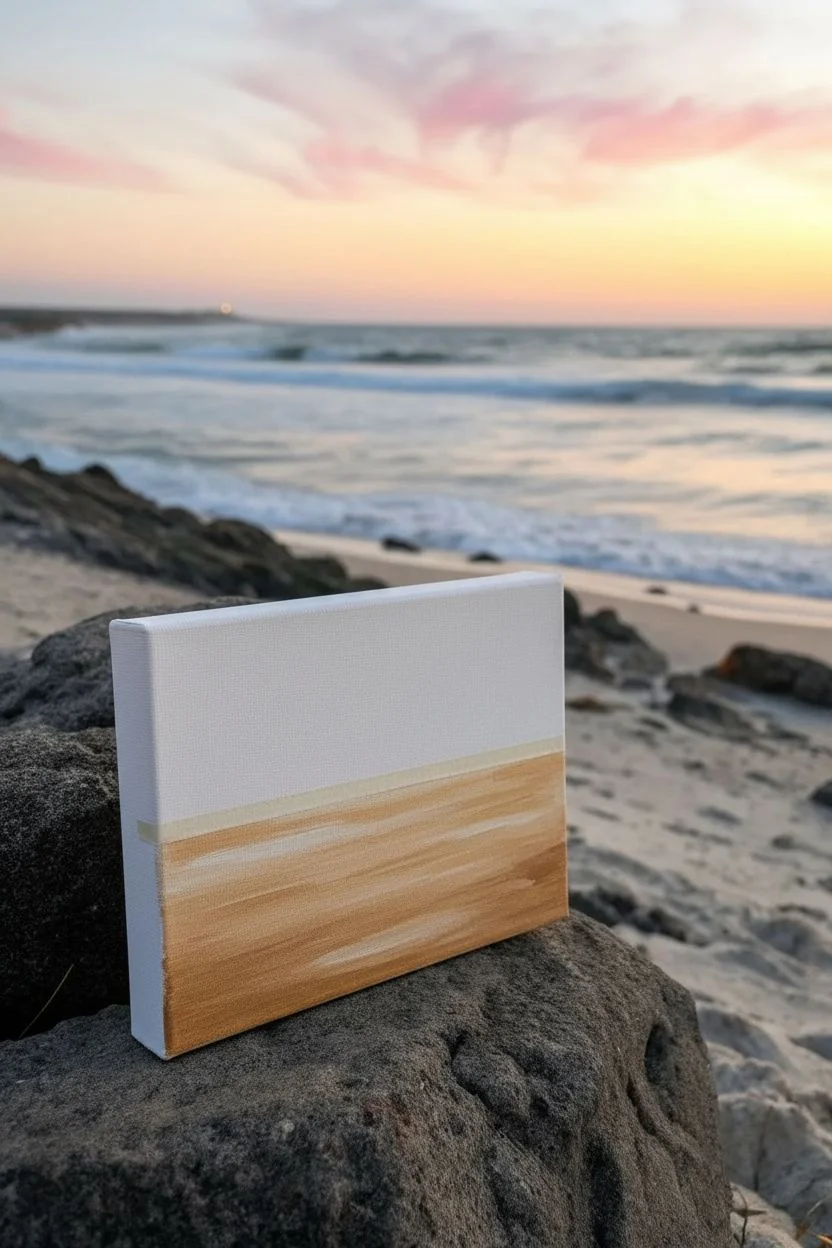
Classic Three-Band Beach Horizon
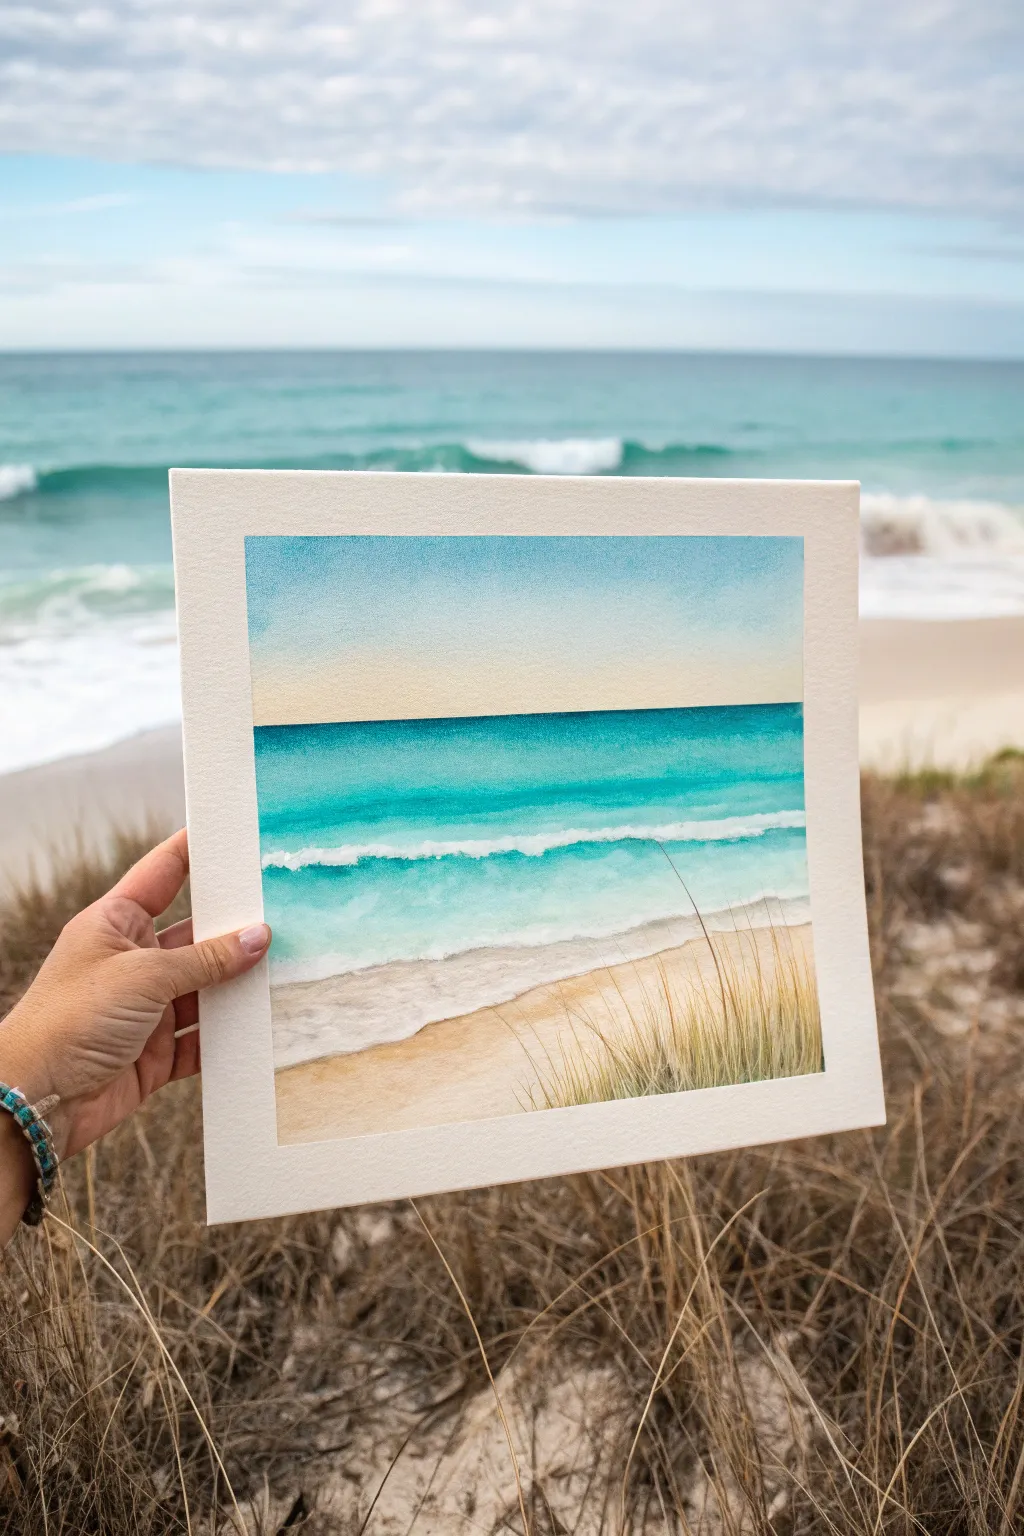
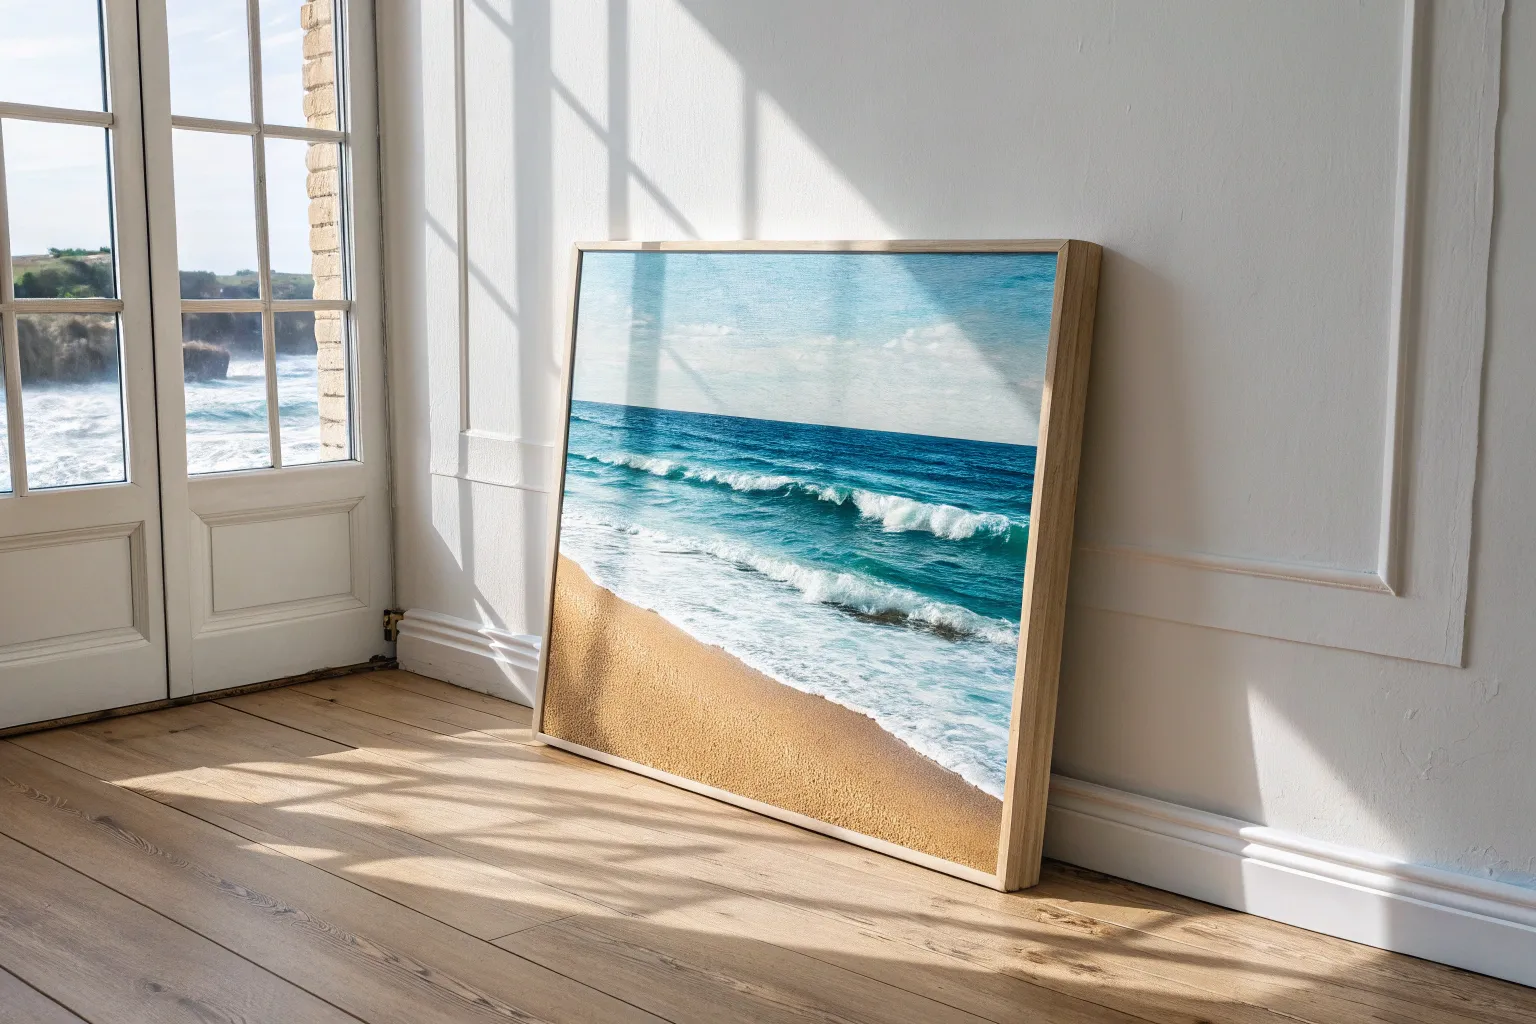
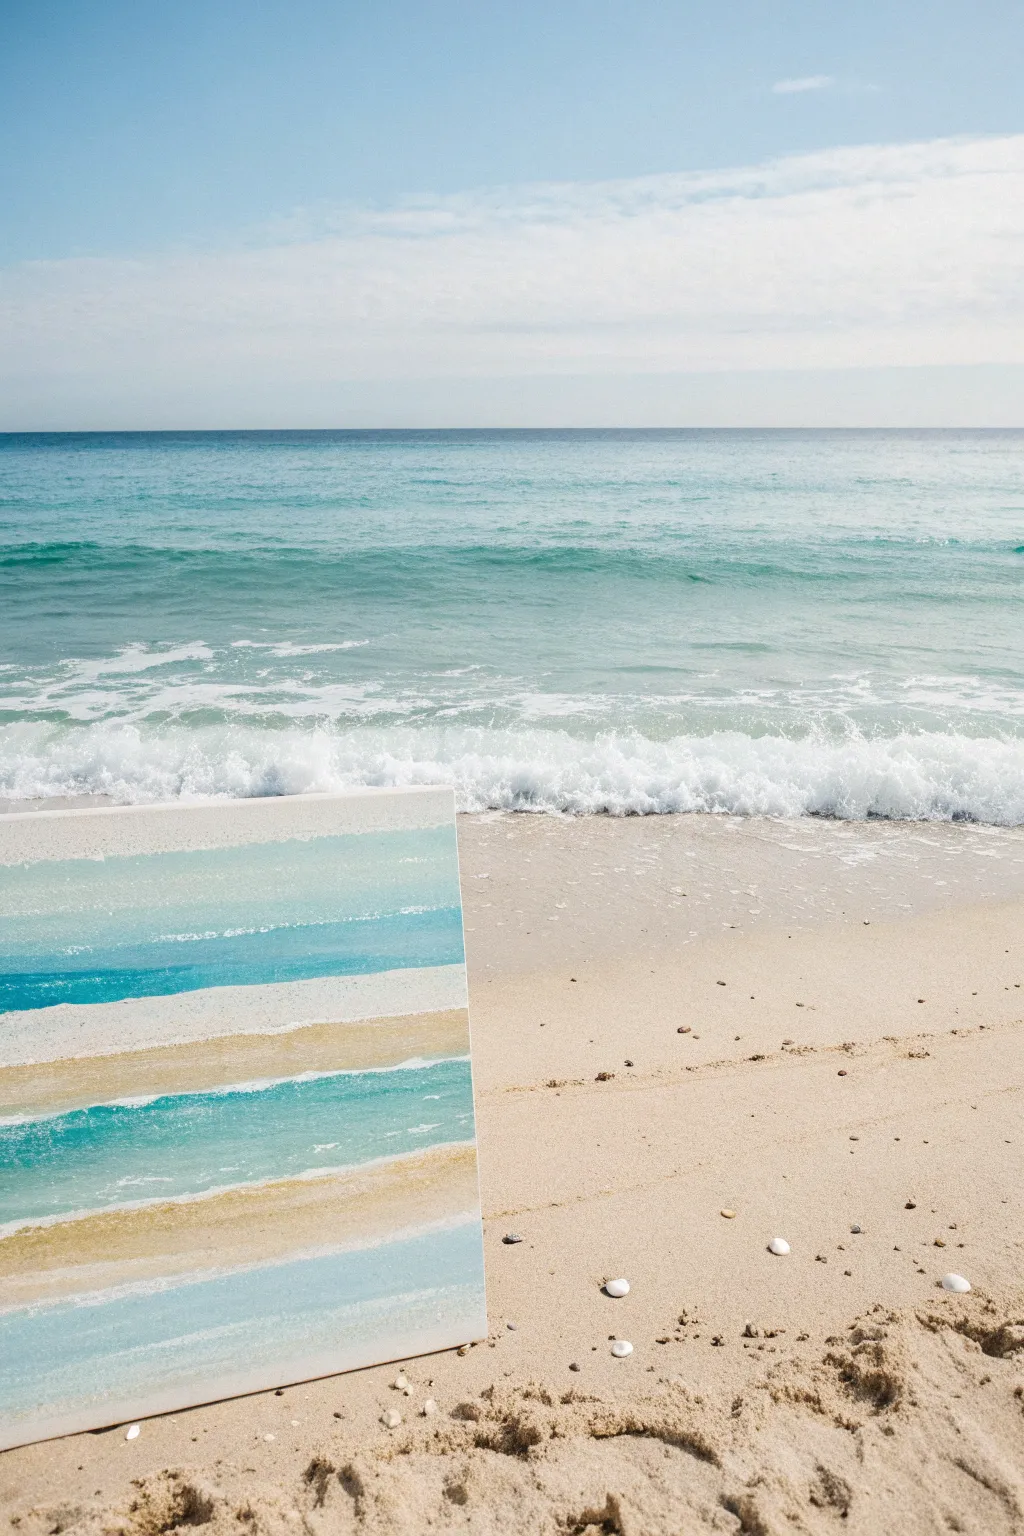
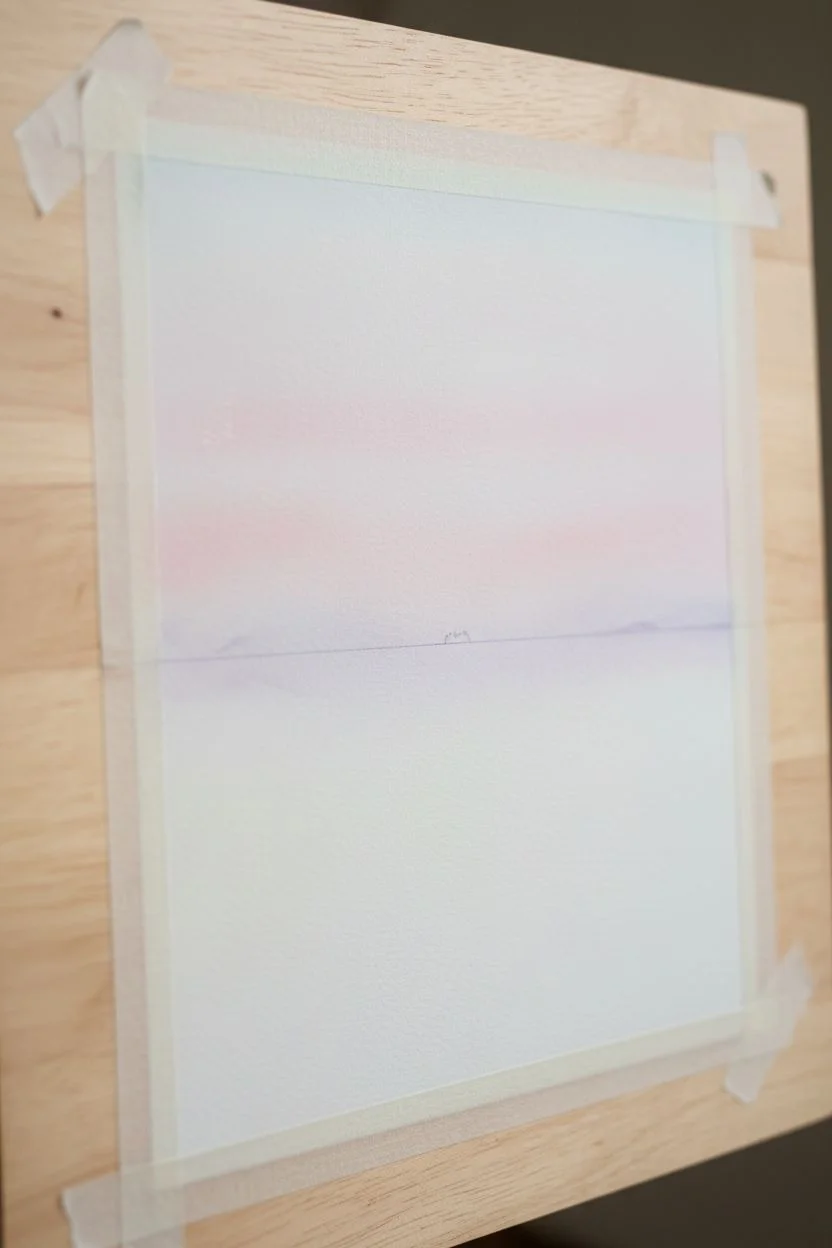
Capture the calm of a coastal afternoon with this layered watercolor landscape. By mastering a classic three-band composition of sky, sea, and sand, you’ll create a soothing piece that brings the beach right into your home.
Detailed Instructions
Materials
- Cold press watercolor paper (square format, approx. 8×8 or 10×10 inches)
- Watercolor paints: Cerulean Blue, Phthalo Turquoise, Cobalt Blue, Yellow Ochre, Burnt Sienna, White Gouache
- Masking tape
- Round brushes (sizes 4, 8, and 12)
- Fine liner brush or rigger brush
- Palette for mixing
- Two jars of water
- Paper towels
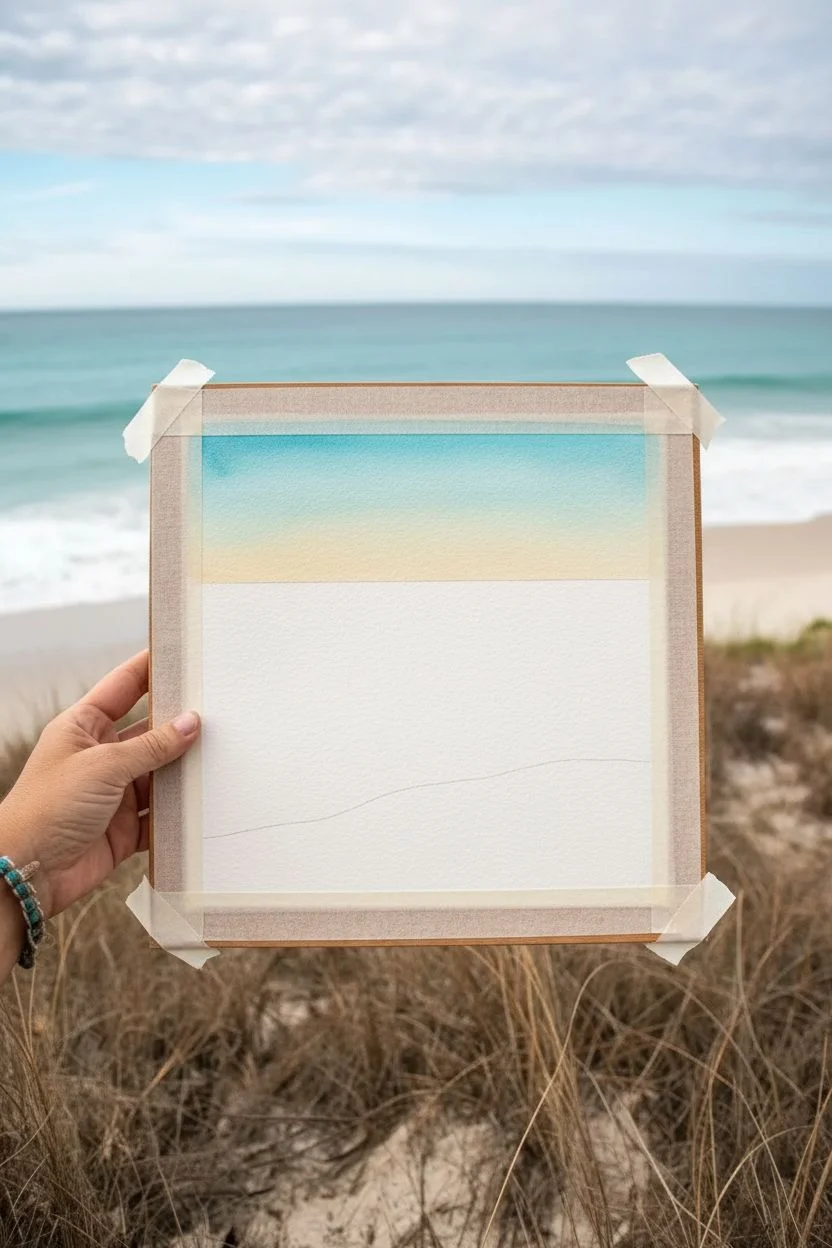
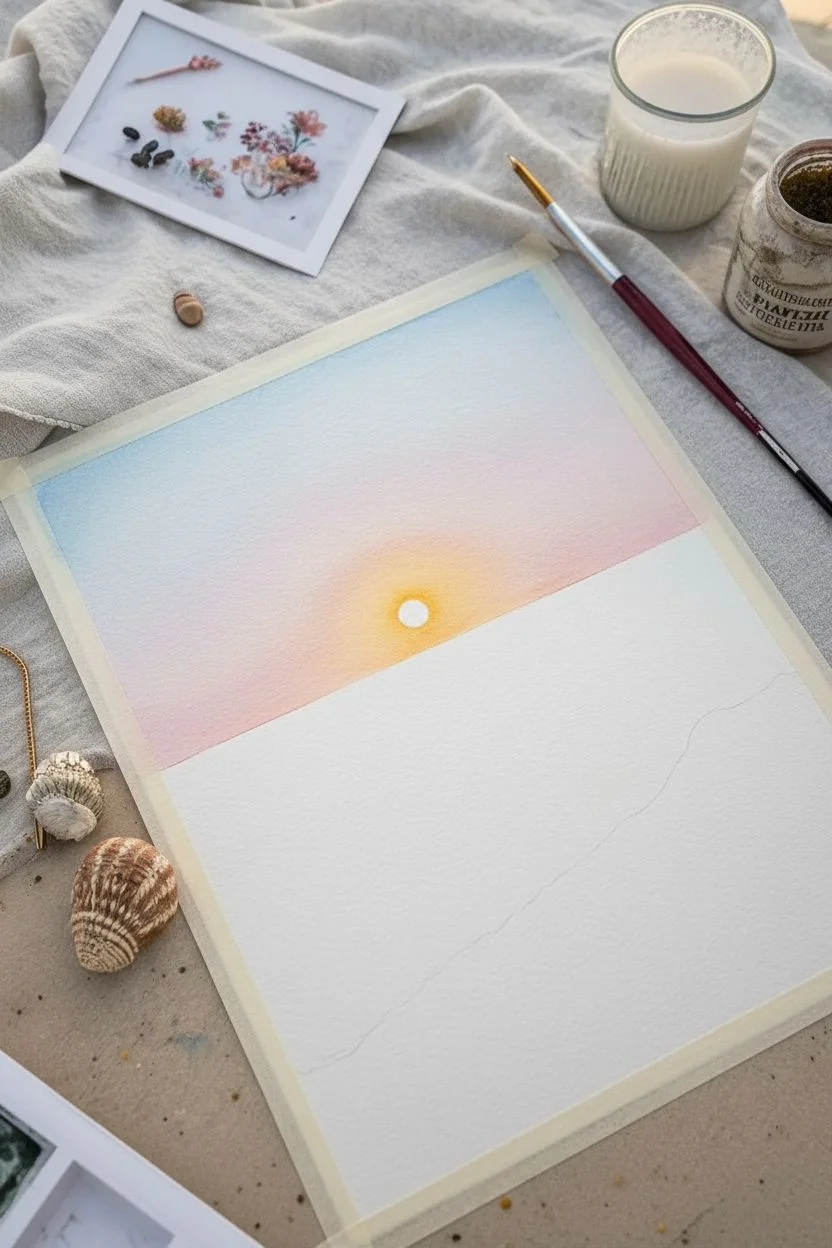
Step 1: Setting the Sky
-
Prepare your surface:
Begin by taping down all four edges of your watercolor paper to a board or table. Press the tape firmly to ensure clean, crisp white borders later. -
Sketch the horizon:
Lightly draw a straight horizontal line across the paper, positioned just slightly above the halfway point. Then, sketch a gentle, curved line near the bottom third to mark where the water meets the sand. -
Wet the sky area:
Using your largest round brush, apply clean water to the entire sky section above your horizon line. You want an even sheen, not puddles. -
Paint the gradient:
Load your brush with a watery wash of Cerulean Blue. Start painting at the very top edge and pull the color down. As you approach the horizon, add a tiny touch of Yellow Ochre to warm the sky, fading it to a pale, almost white color near the horizon line. -
Let it dry completely:
It is crucial to let this layer dry fully before moving on to the ocean to prevent the colors from bleeding into each other.
Step 2: Crafting the Turquoise Sea
-
Define the horizon:
Mix a vibrant Phthalo Turquoise with a hint of Cobalt Blue. Using a size 8 brush, paint a crisp, straight line right against your dry sky horizon. -
Create ocean depth:
Continue painting downwards with the turquoise mix. As you move closer to the shore, dilute the paint gradually with more water to make the color lighter and more transparent. -
Add wave movement:
While the ocean layer is still slightly damp, lift out horizontal streaks of pigment using a clean, thirsty brush to suggest rolling waves. -
Paint the shadows:
Mix a darker, slightly deeper turquoise. Paint thin, subtle shadows underneath the areas where you want your white crashing waves to be later.
Horizon Helper
Use a strip of masking tape directly on the paper to block off the sky while you paint the ocean. This guarantees a razor-sharp, perfectly straight horizon line every time.
Step 3: Sand and Foreground
-
Base sand layer:
Mix Yellow Ochre with a tiny touch of Burnt Sienna and plenty of water. Paint the beach area, starting darker near the bottom right corner and fading to a very pale wash near the water line. -
Wet sand effect:
Where the water meets the sand, glaze a very watery layer of your ocean turquoise over the sand color to mimic the look of wet, reflective beach. -
Adding texture:
While the sand area dries, you can splatter a very tiny amount of the Burnt Sienna mix in the bottom right corner for a sandy texture.
Did colors bleed?
If the sky bled into the sea, you didn’t wait long enough! Let it dry completely. You can fix small bleeds by lifting the mistake with a clean, damp brush and blotting with a paper towel.
Step 4: Seafoam and Grasses
-
Paint the seafoam:
Once the ocean is completely dry, use opaque White Gouache and a small brush to paint clean, organic lines for the breaking waves. Add a scumbled, dry-brush texture near the shore for foamy water. -
Start the dune grass:
Using a fine liner or rigger brush, load up a mix of Yellow Ochre and a hint of green or brown. Use quick, flicking motions starting from the bottom of the paper upwards. -
Layer grass strands:
Vary the length and direction of your grass blades. I like to make the ones in the foreground taller and thicker, while those further back should be thinner and shorter. -
Add dimension to grass:
Mix a slightly darker brown tone and add a few choice strands of grass in the thickest clumps to create shadow and depth among the reeds. -
The satisfying reveal:
Wait for every drop of paint to be bone dry. Carefully peel away the masking tape at a 45-degree angle to reveal your crisp, white border.
Frame your new seascape in a simple white mat to enhance those airy, coastal vibes


Simple Blue Sky Gradient Over the Ocean
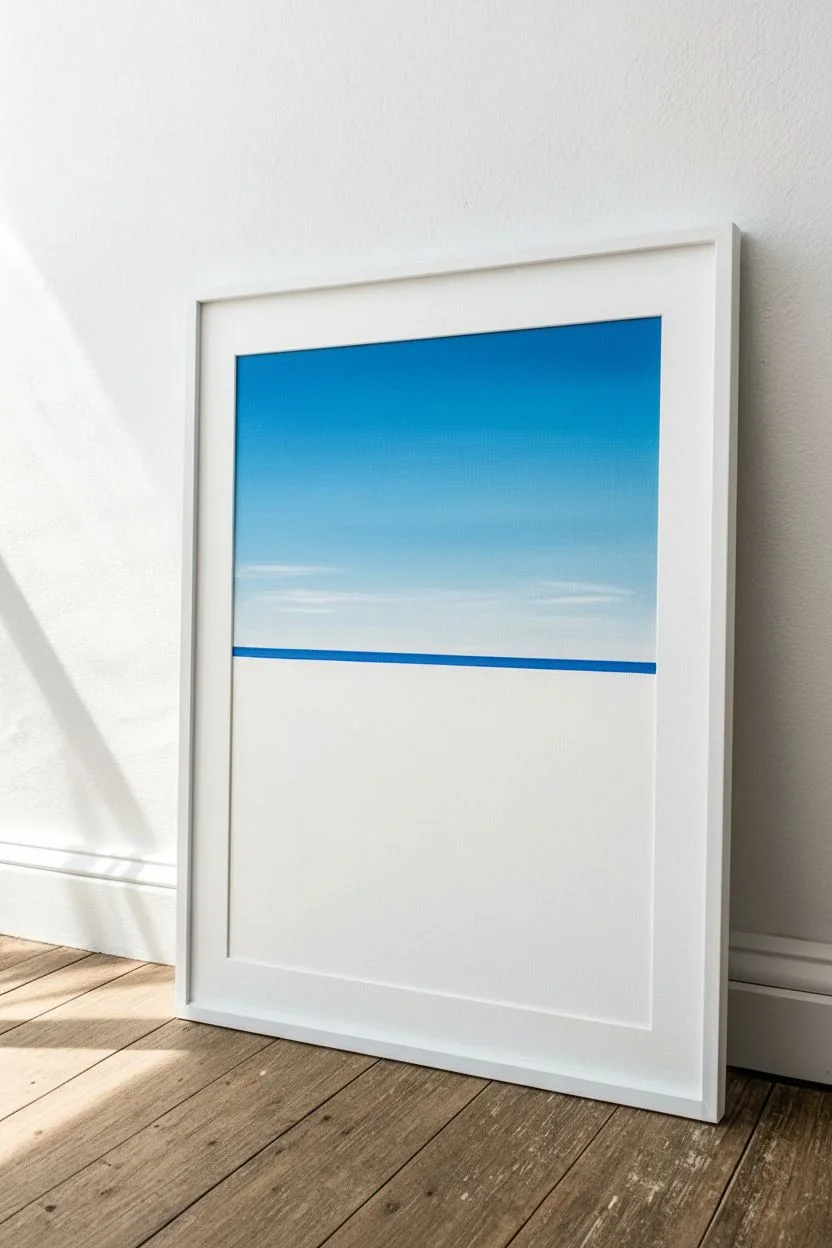
Capture the peaceful essence of a calm day at the beach with this approachable acrylic painting project. Using simple blending techniques, you’ll create a seamless transition from deep sky blue to tropical turquoise water, perfect for framing in a bright room.
Step-by-Step Tutorial
Materials
- Acrylic paints (Phthalo Blue, Titanium White, Turquoise or Teal, Burnt Umber)
- Stretched canvas or canvas board (16×20 inch recommended)
- Wide flat brush (2-inch width)
- Medium flat brush (1/2-inch width)
- Small round detail brush
- Palette or paper plate
- Cup of water
- Paper towels
- Painters tape (optional for horizon line)
- Mist spray bottle (optional)
Step 1: Painting the Sky Gradient
-
Establish the Horizon:
Decide where your sky meets the sea. For this composition, place your horizon line slightly below the middle of the canvas. You can sketch this lightly with a pencil or apply a strip of painter’s tape to ensure a perfectly straight edge. -
Mix the Deep Blue:
On your palette, squeeze out a generous amount of Phthalo Blue and a touch of Titanium White. Mix them to create a rich, vibrant summer sky color. -
Apply the Top Band:
Using your wide flat brush, paint the top third of the canvas with this dark blue mixture. swift, horizontal strokes work best here to keep the texture smooth. -
Create the Mid-Tone:
Without washing your brush, add more Titanium White to your blue pile. Paint the middle section of the sky, blending the wet edge upward into the darker blue. -
Fade to the Horizon:
Clean your wide brush thoroughly. Mix a very pale blue—mostly White with a tiny spec of Blue. Paint the area just above your horizon line, blending upward into the mid-tone so the sky looks almost white where it meets the water. -
Add Subtle Clouds:
While the sky is still tacky, use a dry, clean brush to gently drag wisps of pure Titanium White horizontally across the lower sky. Keep these extremely faint and elongated to mimic distance.
Mist for Smoothness
Acrylics dry fast. Keep a spray bottle of water handy and lightly mist your canvas while blending the large sky gradient to keep the paint workable longer.
Step 2: Creating the Ocean
-
Define the Water Line:
If you used tape, peel it off now. Mix a sharp, dark horizon color using Phthalo Blue and a tiny dot of Turquoise. carefully paint a crisp, straight line right against your pale sky. -
Block in Deep Water:
Mix Turquoise with a little Phthalo Blue. Paint a horizontal band just below the horizon line. This represents the deeper water in the distance. -
Transition to Teal:
Add Titanium White to your Turquoise mix. Paint the middle section of the water, blending softly into the darker band above. I like to keep my brush strokes horizontal here to mimic the movement of currents. -
Paint the Shallows:
For the water nearest the shore, mix a large amount of White with a drop of Turquoise. This transparent, jeweled tone shows where the water is thin over sand. -
Add Wave Textures:
Switch to your medium flat brush. Using a mix of dark blue and teal, add thin, uneven horizontal streaks in the mid-water section to suggest rolling swells. -
Highlight the Swells:
Clean the medium brush and pick up some light teal. Paint thin highlights just above your dark streaks to give the waves dimension and form.
Add a Focal Point
Once the background is fully dry, silhouette a small sailboat on the horizon or add a few distant seagulls using a fine-liner brush and dark grey paint.
Step 3: The Shore and Surf
-
Mix the Sand Color:
Create a neutral sand tone by mixing a lot of Titanium White with a very small amount of Burnt Umber. It should be a pale, cool beige. -
Paint the Beach:
Fill in the bottom sliver of the canvas with your sand mixture. Curve the top edge slightly to make the beach look natural and organic. -
Create Wet Sand:
Where the water meets the sand, glaze a slightly darker version of your sand color (add a tiny drop of water to thin the paint). This makes the sand look saturated and reflective. -
Stipple the Foam:
Using your small round brush or an old, scruffy brush, tap pure Titanium White along the edge where the water meets the sand. This stippling motion creates the look of sea foam. -
Add Foamy Trails:
Drag faint, broken lines of white back into the teal water area, suggesting foam that is being pulled back out by the tide. -
Final Highlights:
Add a few dots of pure white on the crests of the distant waves to catch the simulated sunlight.
Step back and admire your tranquil view, ready for framing and hanging in your favorite relaxation spot


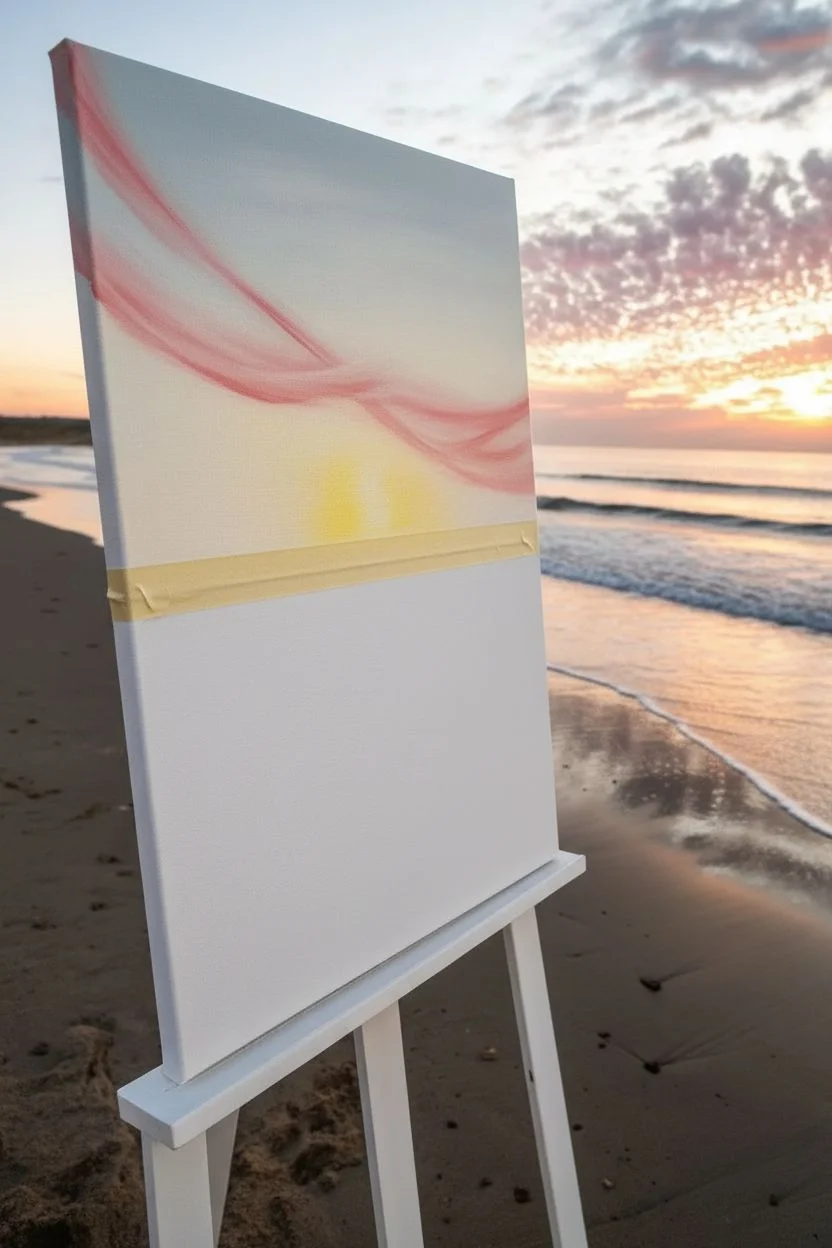
Warm Sunset Bands With a Dark Ocean Strip
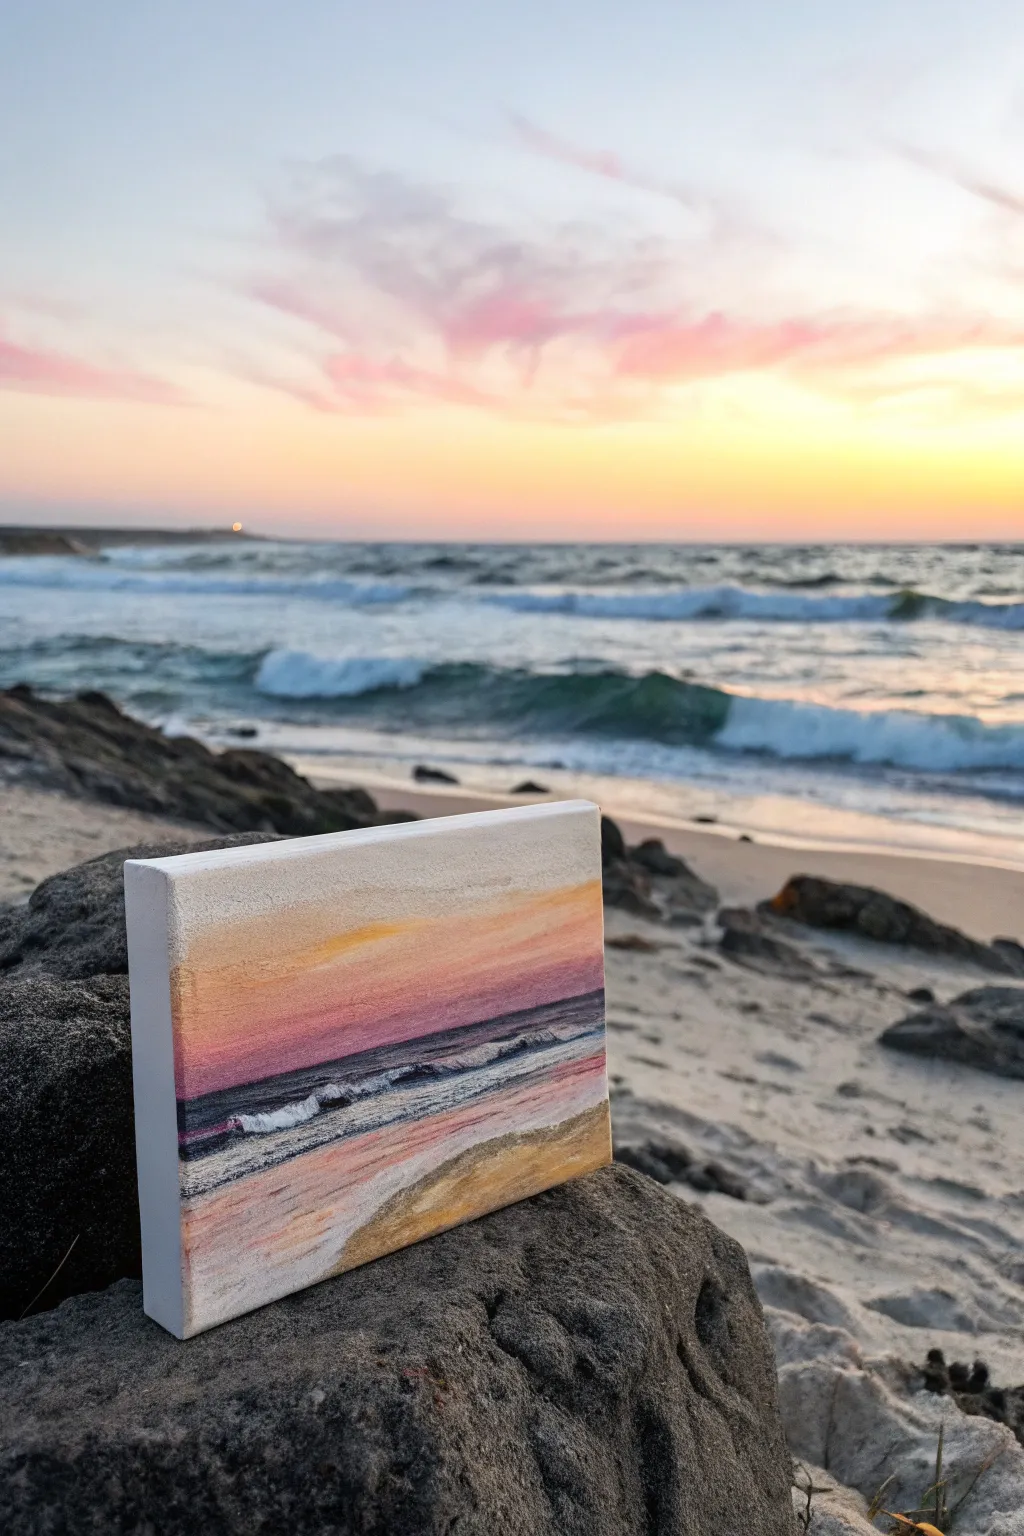
Capture the fleeting beauty of twilight with this small-scale beachscape, focusing on distinct horizontal bands of color to create depth. You will be layering warm sunset hues against a deep, moody ocean strip to replicate that magical moment just as the sun dips below the horizon.
How-To Guide
Materials
- Small rectangular canvas (approx. 4×6 or 5×7 inches)
- Heavy body acrylic paints
- Colors: Titanium White, Cadmium Yellow, Napthol Crimson (or Alizarin), Ultramarine Blue, Burnt Umber, Yellow Ochre
- Flat shader brushes (sizes 4 and 6)
- Small round detail brush (size 1 or 2)
- Palette knife (optional, for mixing)
- Water cup and paper towels
Step 1: Setting the Scene
-
Establish the Horizon:
Begin by deciding where your horizon line will sit. For this composition, place a piece of painter’s tape or draw a faint pencil line about one-third of the way up from the bottom of the canvas. -
Mix the Sand Color:
Create a warm, sandy beige by mixing Titanium White with a small touch of Yellow Ochre and a tiny speck of Burnt Umber to dull it down. -
Paint the Foreground:
Fill the bottom third of the canvas below your horizon line with this sandy mixture. Apply it with horizontal strokes using a flat brush. -
Add Depth to the Sand:
While the beige is still wet, mix a slightly darker version by adding more Burnt Umber. Gently streak this into the bottom-right corner and along the very bottom edge to simulate wet, shadowed sand.
Straight Horizons
If you struggle painting a straight horizon line freehand, stick a piece of masking tape across the canvas. Paint the sky, let it dry, remove the tape, and use that edge for the ocean.
Step 2: Painting the Sky Bands
-
Start with the Lightest Yellow:
Clean your brush thoroughly. Mix Titanium White with a small amount of Cadmium Yellow. Paint a horizontal band starting about an inch above the horizon line, leaving a gap for the ocean. -
Transition to Peach:
Add a tiny drop of Napthol Crimson to your yellow mixture to create a soft peach color. Apply this directly above the yellow band, blending the edges slightly while both paints are wet. -
Deepen to Pink:
Mix a stronger pink using White and Crimson. Paint this band at the top of the canvas, pulling the color down to meet the peach section. -
Create the Horizon Glow:
Mix a dusty rose color by taking your pink mix and adding the tiniest touch of Burnt Umber or Blue to desaturate it. Paint this in the gap you left just above the horizon line, appearing as the darkest part of the sky. -
Blend the Sky:
Use a clean, slightly damp flat brush to gently sweep back and forth horizontally across the transitions between yellow, peach, and pink to soften the bands without muddying the colors.
Step 3: The Ocean and Waves
-
Mix the Ocean Dark:
Combine Ultramarine Blue with Burnt Umber and a touch of Napthol Crimson. This should create a very deep, almost blackish-purple hue. -
Paint the Water Strip:
Using the edge of your flat brush, paint a straight, sharp line right at the horizon. Fill the space down to your sandy foreground, creating a dark wedge of ocean. -
Establish the Shoreline:
Where the dark water meets the sand, soften the edge slightly. I find it helpful to use a brush with very little paint to drag some of the dark color horizontally over the top of the dry sand paint. -
Paint the Crashing Wave:
Switch to your small round brush. Load it with pure Titanium White. Paint a distinct, rolling wave shape in the middle of the dark water strip, keeping the top edge rough and frothy. -
Add Sea Foam:
Dry brush a little bit of white paint horizontally along the shoreline where the water meets the sand to look like receding foam. -
Highlight the Water:
Mix a light lavender-grey. Add very thin, faint horizontal lines in the dark water area behind the main wave to suggest movement and distant swells.
Palette Knife Texture
For the white crashing wave, try applying the heavy body paint with a palette knife instead of a brush. The physical ridge of paint will add real 3D texture to the foam.
Step 4: Atmospheric Touches
-
Texturize the Clouds:
Mix a pale, warm white-yellow. Use the corner of a brush or a sponge to dab irregular cloud shapes lightly over overlap the pink and peach bands in the upper sky. -
Enhance the Wet Sand Reflection:
Take a diluted wash of your pink sky color and glaze it over the sandy foreground closest to the water line, mimicking the sunset reflecting on the wet beach. -
Wrap the Edges:
Since this is a thick canvas, don’t forget to extend your horizon lines, sand, and sky colors around the sides of the canvas for a finished, gallery-ready look. -
Final Varnish:
Allow the painting to dry firmly for at least 24 hours. Because of the texture, a gloss varnish works beautifully to make the dark ocean strip look wet.
Place your finished miniature on a desk or shelf to bring a permanent sunset glow into your room


Palm Tree Silhouette at Sunset
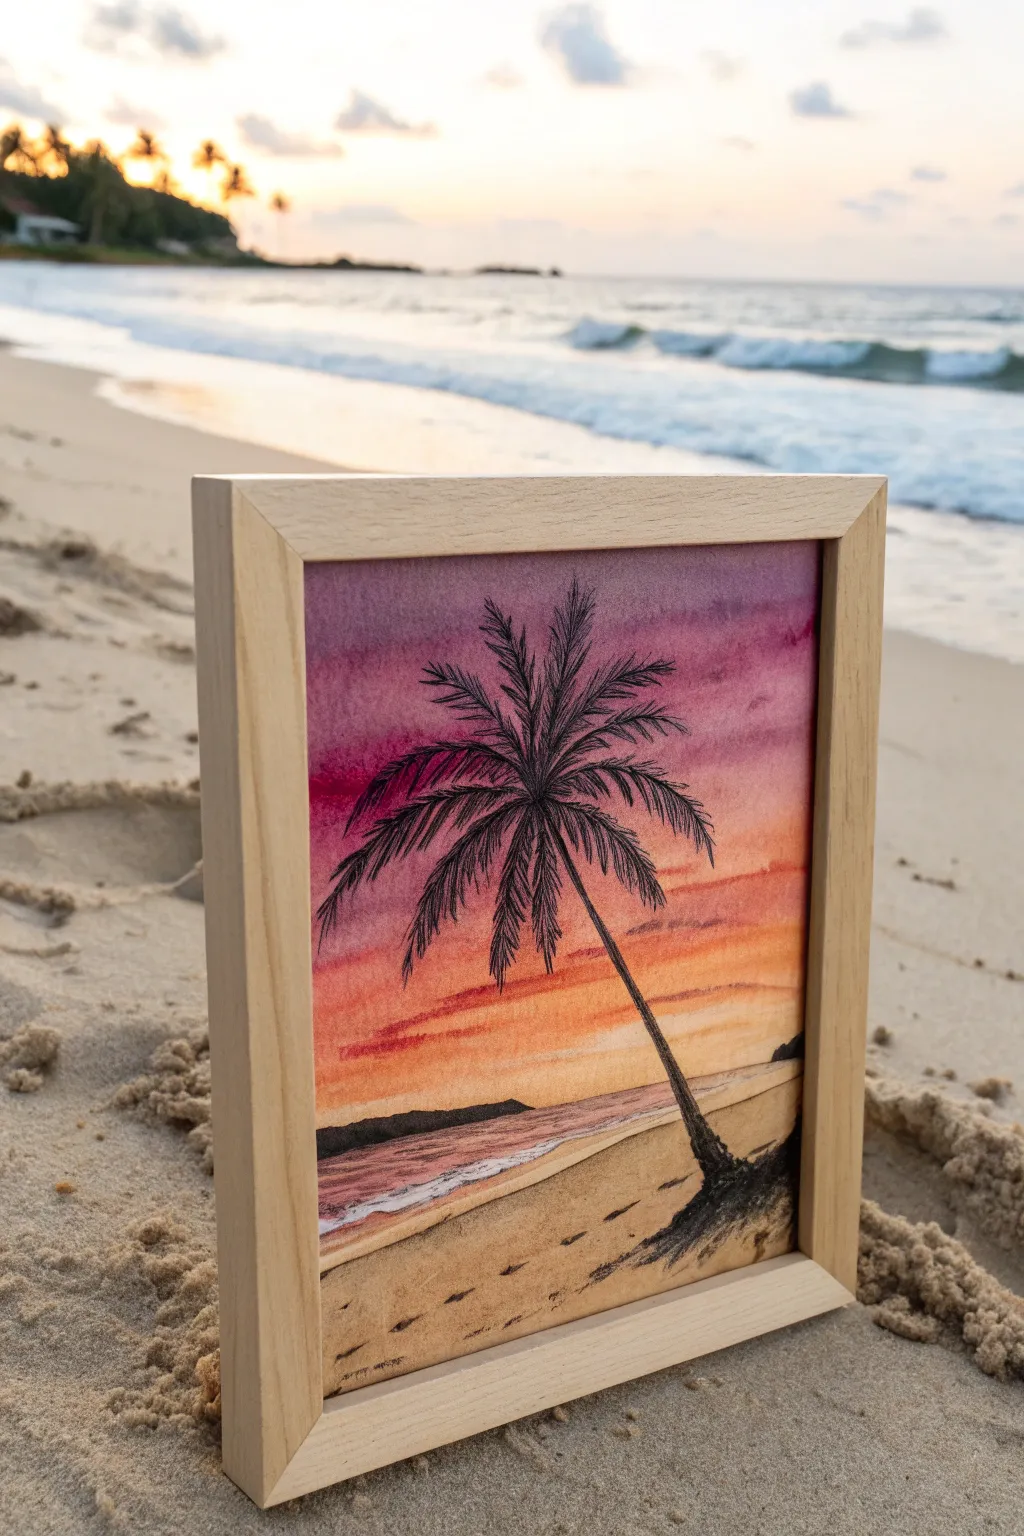
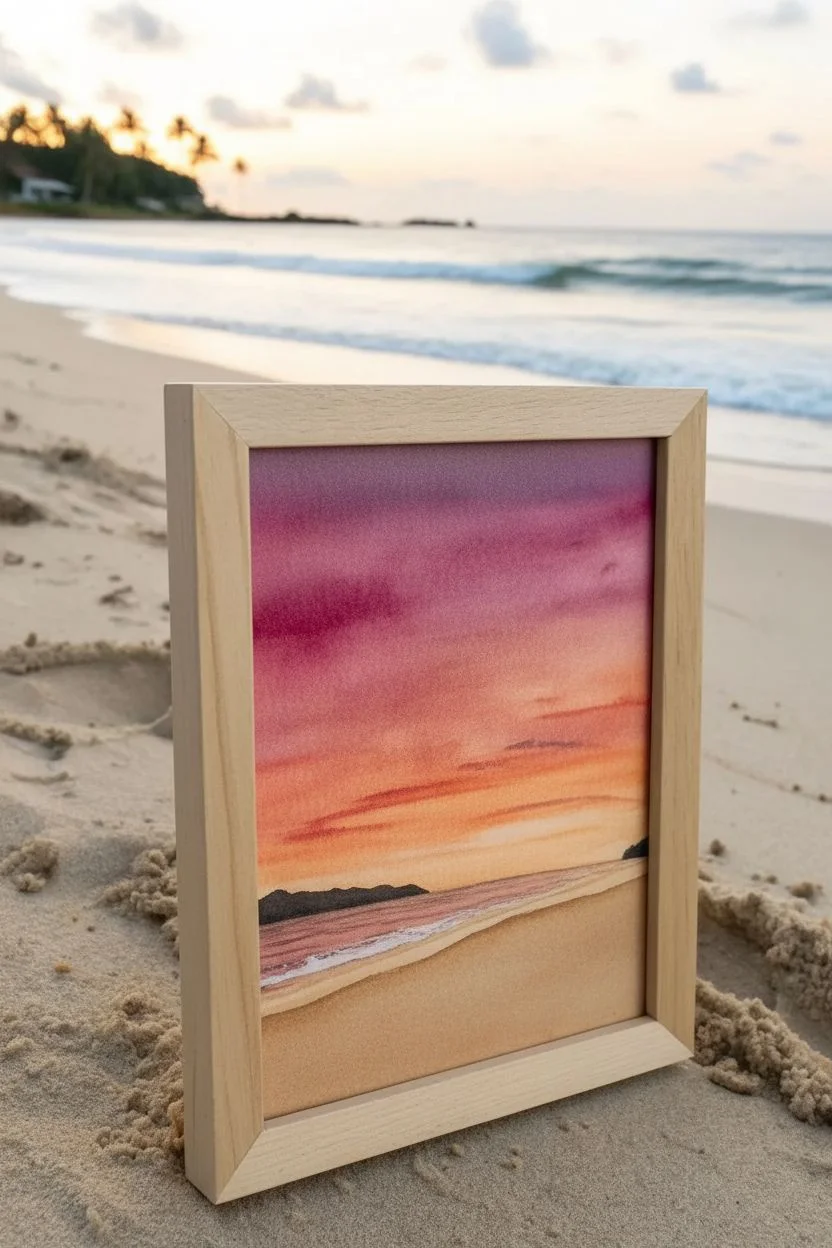
Capture the magic of twilight at the beach with this vibrant watercolor and ink project. By blending warm sky tones behind a stark palm tree silhouette, you can create a striking contrast that feels instantly tropical.
Detailed Instructions
Materials
- Watercolor paper (cold press, heavy weight)
- Watercolor paints (Purple, magenta, orange, golden yellow, burnt sienna)
- Black waterproof fine liner pen (0.5mm and 0.8mm)
- Flat wash brush (3/4 inch)
- Round detail brush (size 4 or 6)
- Paper towels
- Pencil and eraser
- Clean water jar
- Wooden frame (light finish)
Step 1: Painting the Sunset Sky
-
Prepare the wash:
Begin by lightly damping the upper two-thirds of your watercolor paper with clean water using your flat brush. This ‘wet-on-wet’ technique helps the colors blend seamlessly. -
Apply the purple:
Load your brush with a watery mix of purple and magenta. Apply this horizontally across the very top of the sky area, letting it bleed downwards slightly. -
Transition to warmth:
Clean your brush and pick up a vibrant orange. Paint the middle section of the sky, slightly overlapping the purple edge so they merge into a soft dusk hue. -
Finish the horizon:
For the bottom strip of the sky, switch to a golden yellow. Blend this into the orange above, creating a gradient from cool twilight at the top to the last light of the sun at the horizon. -
Create the water:
Using a very dilute mix of the purple and magenta you used earlier, paint horizontal strokes for the ocean water, leaving small white gaps to suggest gentle waves reflecting the light. -
Paint the sand:
Mix burnt sienna with plenty of water for a beige tone. Paint the bottom section of the paper for the beach, angling the shoreline diagonally from the bottom right towards the left. -
Let it dry completely:
This is crucial; wait until the paper is bone dry before moving to the next phase, or the ink will bleed into the damp fibers.
Keep it Loose
Don’t overthink the palm fronds. Quick, confident flicks of the pen look much more natural than slowly drawn, careful lines.
Step 2: Inking the Silhouette
-
Sketch the tree trunk:
Using a pencil very lightly, draw a curved line starting from the bottom right corner, leaning towards the center. This guides your palm tree’s posture. -
Mark the fronds:
Sketch a central starburst shape at the top of the trunk where the leaves will originate. Keep these lines faint as they are just guides. -
Ink the trunk:
Switch to your thicker waterproof pen (0.8mm). Draw over your pencil line for the trunk, but make the edges slightly rough and textured rather than perfectly smooth. -
Start the main frond spines:
Draw the central spine of each palm leaf radiating outward. Curve them naturally—some reaching up, others drooping down heavily under gravity. -
Add the leaflets:
With the finer pen (0.5mm), draw quick, flicking strokes coming off each spine. I find it helpful to start near the center and flick outward to get a tapered look. -
Build density:
Go back over the center of the palm crown and add more density with ink strokes to show where the leaves overlap and cluster together. -
Add distant land:
Paint a thin, dark strip along the horizon line using a mix of your leftover purple and a touch of black pigment or heavy ink to represent a distant island or headland. -
Detail the foreground:
At the base of the tree, stipple some dots and short dashes with the pen to simulate textured sand and roots gripping the beach. -
Add footprints:
Using a diluted brown paint and a small brush, dab small, paired oval shapes leading along the beach to look like footprints in the sand. -
Final assembly:
Once the artwork is completely dry, place it into a light wooden frame to complement the warm beach tones.
Add Sparkle
Use a white gel pen to add tiny highlights on the water ripples or the top edges of the palm leaves for extra dimension.
Hang your finished piece where it can catch a bit of light and remind you of warm summer evenings
BRUSH GUIDE
The Right Brush for Every Stroke
From clean lines to bold texture — master brush choice, stroke control, and essential techniques.
Explore the Full Guide
Beach Chairs and Umbrella Silhouette Scene
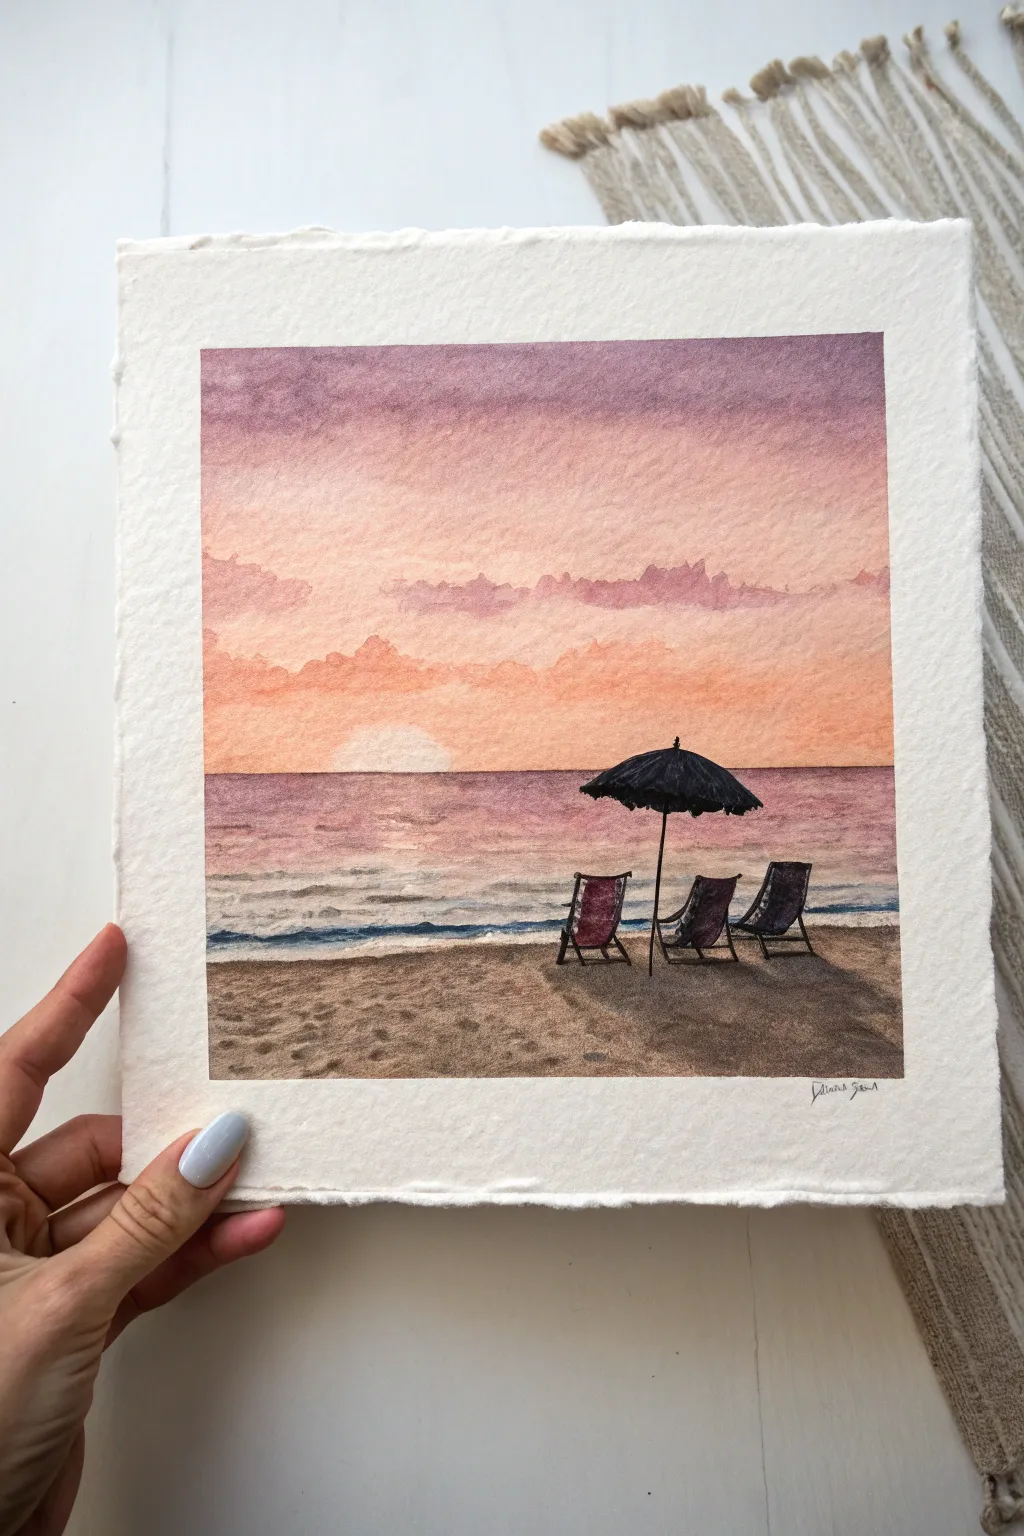
Capture the peaceful end of a beach day with this warm, inviting watercolor scene. You’ll layer soft washes to create a glowing sunset sky before grounding the composition with detailed beach chairs and a striking black umbrella.
Step-by-Step Tutorial
Materials
- Cold press watercolor paper (deckle edge optional)
- Watercolor paints (Purple, Pink, Orange, Yellow, Burnt Sienna, Payne’s Gray or Black, White Gouache)
- 2-3 Round brushes (Size 8 for washes, Size 2 for details)
- Painter’s tape or masking fluid
- Clean water jars
- Paper towels
- Pencil for sketching
Step 1: Planning and Sky
-
Sketch the Horizon:
Lightly draw a straight horizon line about one-third of the way up from the bottom of your paper. Position a faint semi-circle just above the water line for the setting sun. -
Outline the Chairs:
Pencil in the basic shapes of three beach chairs and an umbrella on the right side of the sand. Keep these lines very light so they don’t show through later. -
Wet the Sky Area:
Using your large brush and clean water, coat the sky area from the top edge down to the horizon line. Ensure the paper is glistening but not forming puddles. -
Apply the Top Sky Color:
While wet, drop a soft violet or purple mix along the very top edge. allow it to bleed downwards naturally. -
Blend the Sunset Gradient:
Quickly introduce a rose pink below the purple, blending them gently where they meet. Follow this immediately with a warm orange near the horizon, avoiding the sun shape itself. -
Create Clouds:
While the sky is still damp, lift out pigment with a clean, thirsty brush to suggest soft clouds, or dab in slightly thicker purple-pink paint for darker cloud shadows.
Muddy colors?
Wait for each layer (sky vs. sea) to dry fully before painting the next section. Wet paint bleeding into wet paint creates unplanned muddy transitions.
Step 2: Sea and Sand
-
Paint the Water Base:
Mix a dusty pink-purple for the distant water. Apply horizontal strokes just below the horizon line, leaving a gap where the sun reflection would be. -
Add Ocean Depth:
As you move closer to the shore, darken your mix with a touch of blue or indigo. Paint in horizontal ripples, becoming wider as they approach the beach. -
Reflect the Sun:
In the center of the water, use very dilute orange or leave the paper white to mimic the sun’s glittering path on the waves. -
Paint the Sand Wash:
Mix Burnt Sienna with a tiny bit of purple to desaturate it. Apply a flat wash to the beach area. -
Texture the Sand:
While the sand wash is damp, spatter a little clean water or darker brown paint to create grainy texture. Let the entire painting dry completely.
Step 3: Details and Shadows
-
Paint the Umbrella:
Using a small detail brush and thick Payne’s Gray or Black, fill in the umbrella shape. Add small, fringy strokes at the edges to give it texture. -
Detail the Chairs:
Fill in the chair frames with dark lines. Paint the fabric slings in muted reds or purples, adding stripes if you have a steady hand. -
Cast Shadows:
Mix a transparent dark brown-purple. Paint shadows stretching diagonally from the base of the chairs and umbrella to the right, mimicking the late-day sun angle. -
Enhance Water Lines:
Use a dry brush technique with white gouache or undiluted white watercolor to add sea foam edges where the waves hit the sand. -
Final Touches:
Darken the horizon line slightly for contrast and add tiny vertical specs in the sand for pebbles or texture.
Add a human touch
Paint a tiny silhouette of a person walking near the water’s edge or a pair of flip-flops kicked off near the chairs to tell a story.
Now you have a serene beach memory captured beautifully on paper to enjoy all year round
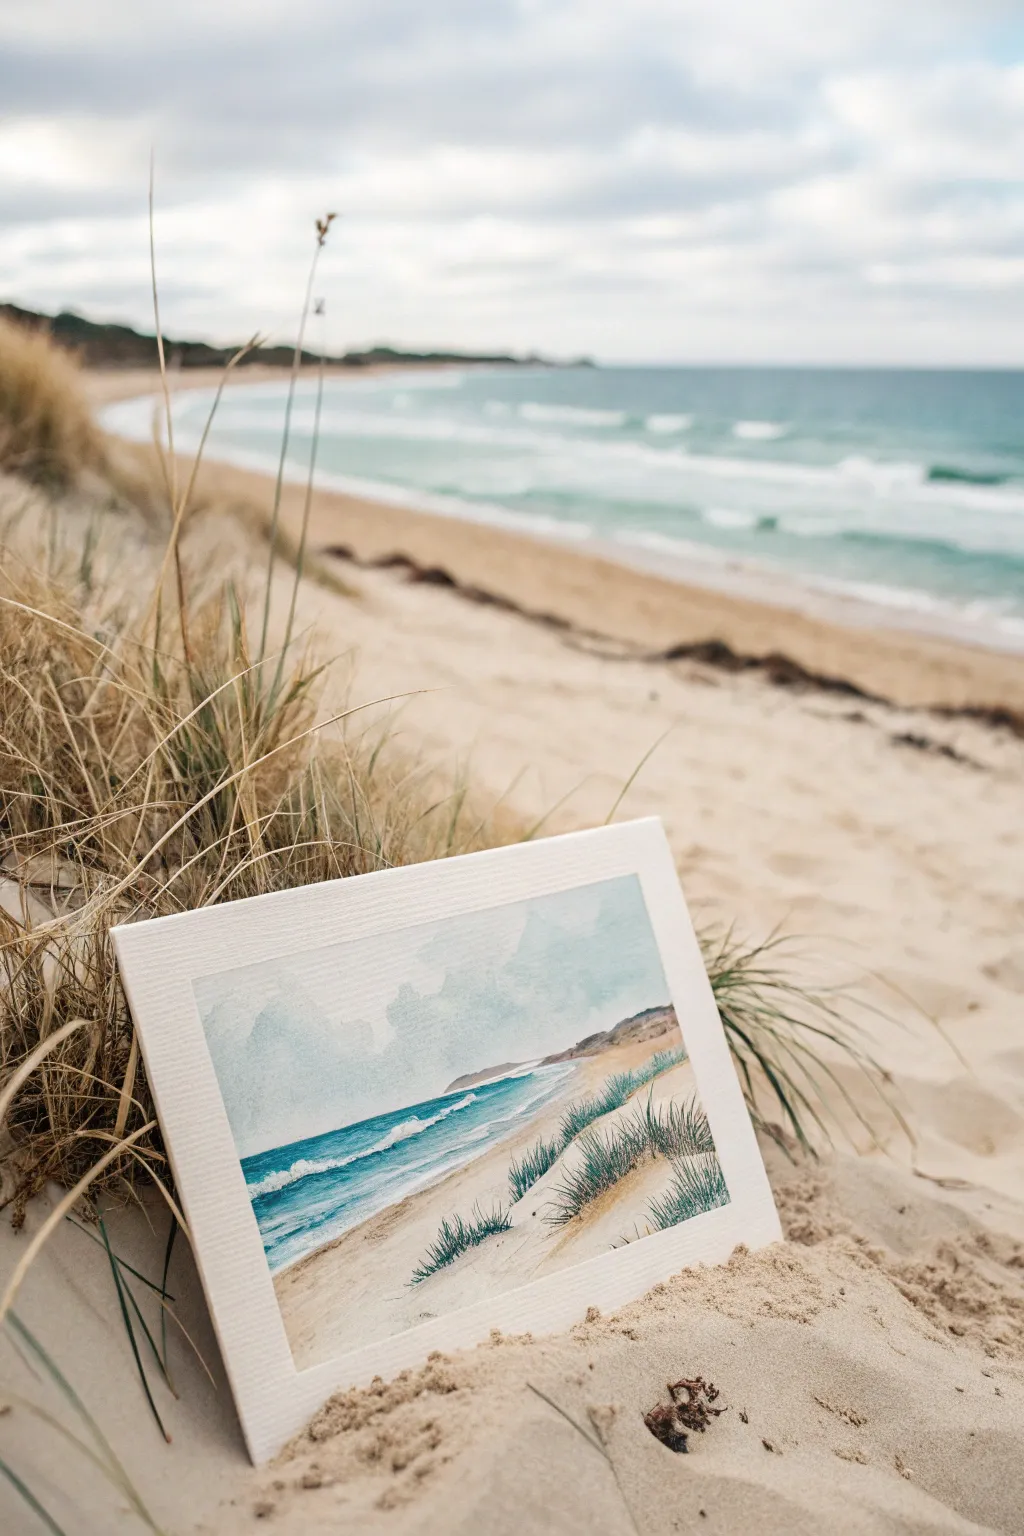
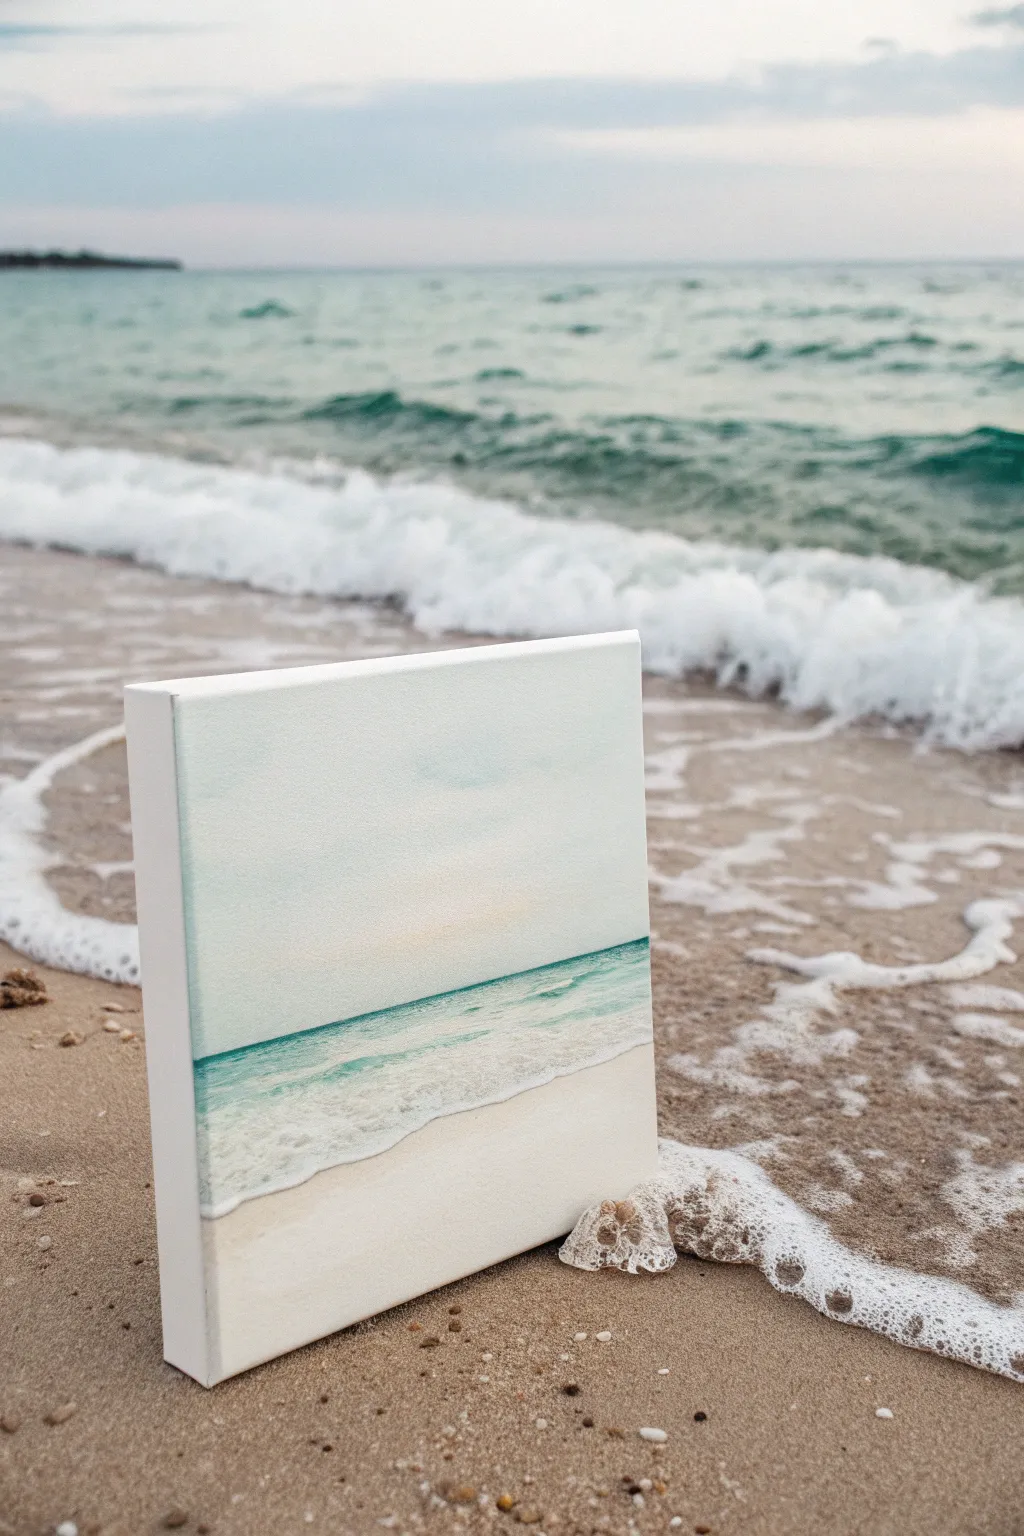
Minimalist Shoreline With One Curved Wave
Capture the hyper-realistic beauty of a tropical waterline with this minimalist yet striking project. By focusing on a single, dynamic wave crashing onto soft sand, you’ll learn to master transparency and foam textures.
Step-by-Step
Materials
- High-quality watercolor paper (cold press, at least 300gsm)
- Masking tape
- Watercolor paints (Turquoise, Phthalo Blue, Teal, Burnt Sienna, Yellow Ochre)
- White opacity medium (White gouache or Dr. Ph. Martin’s Bleed Proof White)
- Flat shader brush (1 inch)
- Round brushes (sizes 4 and 8)
- Two cups of water
- Paper towels
- Palette
- Hairdryer (optional, for speed)
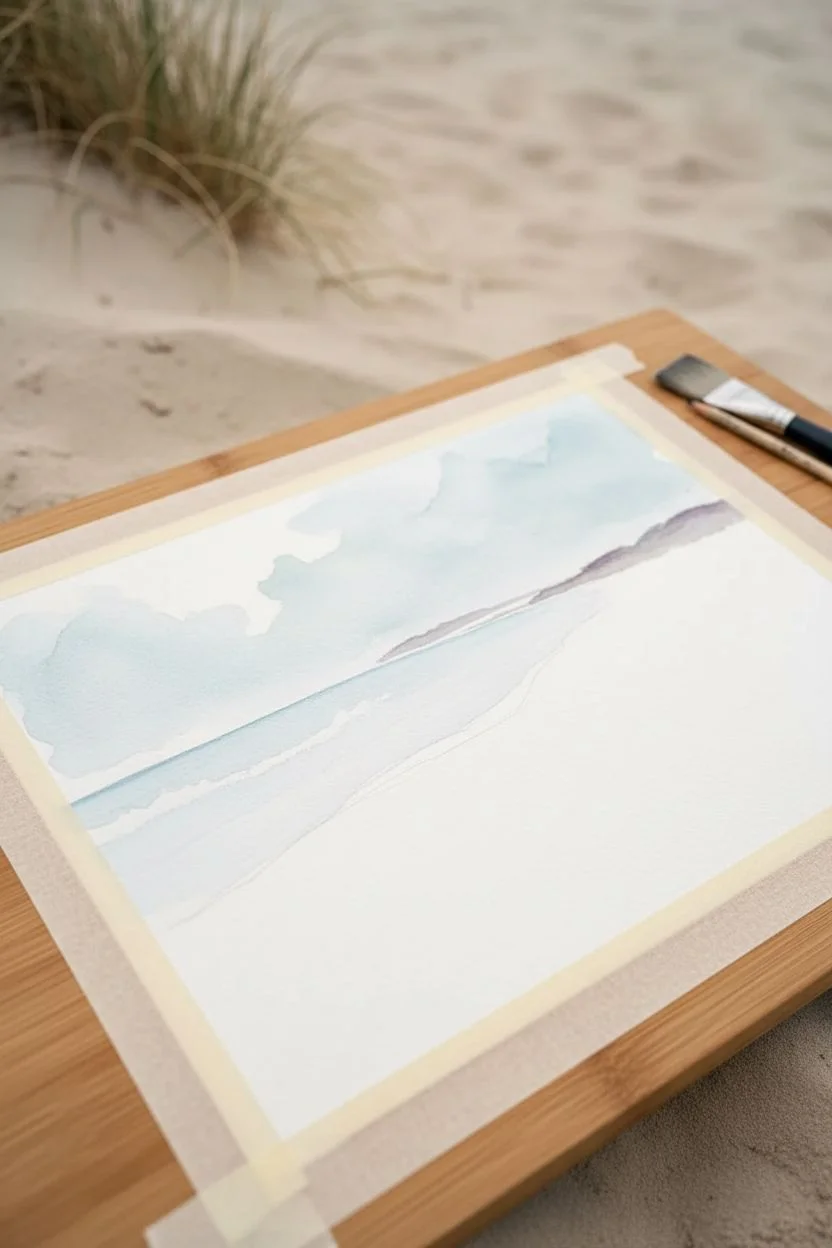
Step 1: Setting the Scene
-
Prep the Surface:
Begin by taping down all four edges of your watercolor paper to a drawing board or table. Press the tape firmly to ensure a crisp clean border later. -
Sketch the Waterline:
Lightly sketch a diagonal curved line across the paper. One side will be sand, the other ocean. Keep the line wavy and irregular to mimic nature. -
Mix the Sand Color:
Create a warm sand tone by mixing plenty of water with Burnt Sienna and a touch of Yellow Ochre. It should be a very pale, transparent wash. -
Paint the Beach:
Apply the sand wash to the bottom right section of the paper. Keep the color even, but don’t worry about the edge touching the water line as it will be covered by foam later. Let this dry completely.
Muddy colors?
If the sand and water boundaries look brown where they meet, you didn’t let the first layer dry enough. Ensure the sand is bone-dry before adding blue.
Step 2: Ocean Depths
-
Mix Ocean Hues:
Prepare a gradient of blues. You need a deep Teal or Phthalo Blue for the deep water, and a lighter Turquoise for the shallow parts. -
Wet-on-Wet Technique:
Clean your brush and apply clean water to the ocean section of the paper (top left). The paper should be glisten, but not hold puddles. -
Apply Deep Water:
Drop the darkest blue into the top left corner. Let the paint flow and spread naturally into the wet paper. -
Transition to Shallows:
As you move closer to the sand line, switch to your lighter Turquoise mix. Blend it gently into the darker blue. -
Fade Out:
Before hitting the sand line, fade the turquoise out to almost clear water so the underlying sand color would theoretically show through. Let this layer dry completely.
Add Sparkle
For a magical midday sun effect, mix a tiny pinch of iridescent medium or glitter into your white gouache before painting the sea foam highlights.
Step 3: Creating the Crash
-
The First Foam Layer:
Load a round brush with white gouache (or bleed-proof white). The consistency should be like heavy cream. -
Paint the Main Wave:
Paint a solid, thick white line following the curve where the water meets the sand. Use a stippling (dotting) motion on the ocean side to create the fizzy, aerated look of a crashing wave. -
Feather the Edge:
On the ocean side of the white line, use a damp, clean brush to soften the white paint, dragging it slightly back into the turquoise to suggest movement. -
Sea Foam Patterns:
Using a smaller brush (size 4), paint delicate, lacy patterns extending onto the sand. Think of these as interconnected bubbles or a spiderweb shape. -
Adding Depth to Foam:
Mix a tiny amount of blue with your white to create a shadow color. Paint this very thinly under the thickest parts of the white foam to make it look 3D. -
Splatter Effect:
Load a brush with watery white paint. Tap the handle against another brush over the wave area to create tiny spray droplets. Cover the sand area with paper to protect it if needed.
Step 4: Finishing Touches
-
Highlight the Wet Sand:
Mix a slightly darker version of your sand color. Paint a thin strip right next to the white foam on the sand side to show where the sand is wet and dark from the receding water. -
Enhance Transparency:
If the shallow water looks too flat, glaze a very watery layer of green-blue over the area just behind the wave. -
Final Dry:
Let the entire piece dry completely. Gouache can smudge if damp, so be patient. -
The Reveal:
Carefully peel away the masking tape at a 45-degree angle to reveal your crisp white borders.
Frame your personal slice of paradise in a simple white frame to keep the focus on those crystal clear waters

PENCIL GUIDE
Understanding Pencil Grades from H to B
From first sketch to finished drawing — learn pencil grades, line control, and shading techniques.
Explore the Full Guide
Top-Down View of Waves Meeting Sand
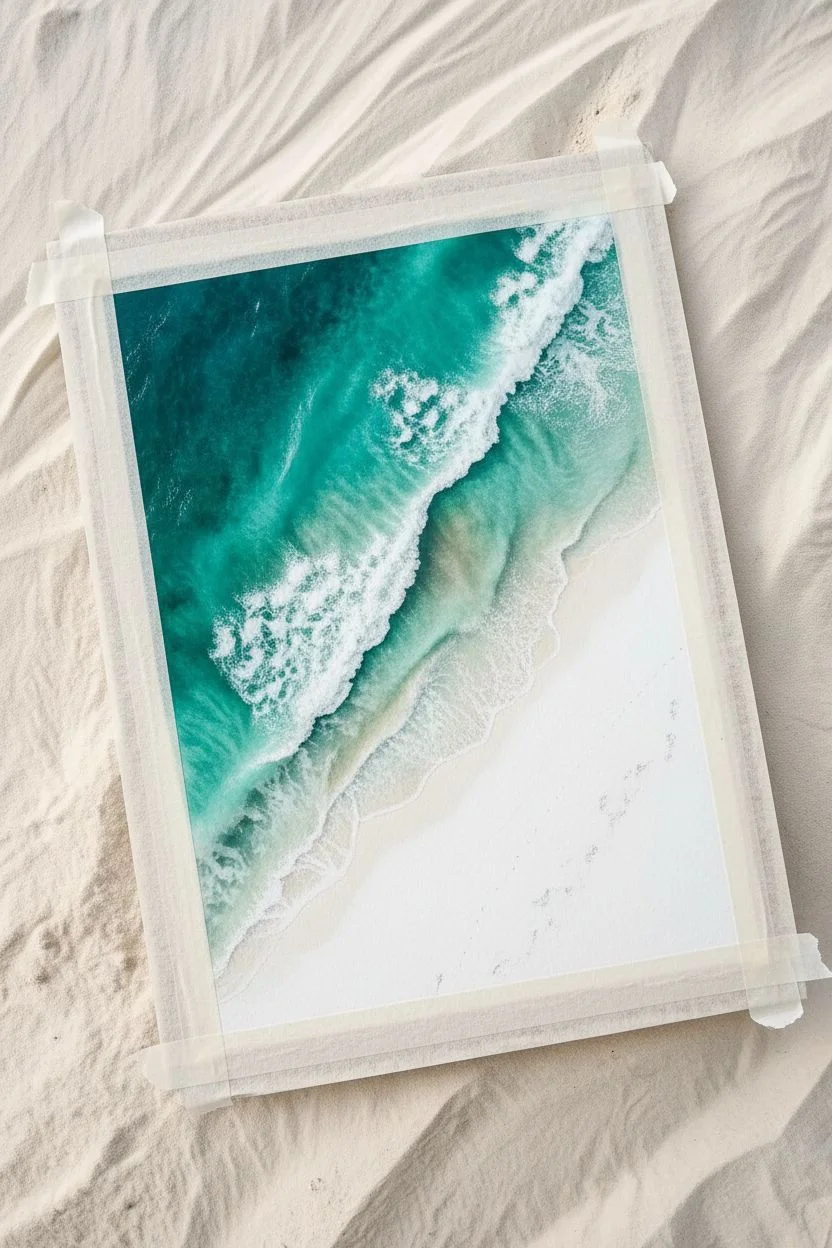
Capture the mesmerizing patterns of the sea from above with this striking top-down perspective study. Using wet-on-wet watercolor techniques, you’ll blend deep teals into foamy whites to recreate the coastline’s natural rhythm.
Step-by-Step Tutorial
Materials
- Cold press watercolor paper (300gsm, 140lb)
- Masking tape
- Watercolor paints (phthalo blue, turquoise, viridian, burnt sienna, yellow ochre)
- White gouache or white acrylic ink
- Large round brush (size 10 or 12)
- Medium round brush (size 6)
- Small detail brush or old toothbrush
- Two jars of water
- Salt (optional for texture)
Step 1: Setting the Scene
-
Prepare the canvas:
Tape down all four edges of your watercolor paper to a board. Ensure the tape is pressed firmly to create a clean, crisp border like the one in the photo. -
Sketch the waterline:
Lightly sketch a diagonal, wavy line across the bottom third of the paper. This will separate your deep water from the sandy beach.
Fixing Muddy Colors
If your blue bleeds too much into the wet sand, making it green or muddy, dab it quickly with a paper towel. Let it dry fully, then repaint the sand.
Step 2: Painting the Sand
-
Mix sand colors:
Create a watery mix of yellow ochre with a tiny touch of burnt sienna to get a warm, sandy beige. -
Apply the base wash:
Paint the bottom right corner (the beach area) with clear water first, then drop in your sand color, letting it diffuse softly. -
Add shoreline depth:
While the paint is still damp, drop a slightly more concentrated burnt sienna mix right along the pencil line where the water meets the sand. This simulates wet sand. -
Create texture:
If you wish, sprinkle a pinch of salt onto the wet sand area or splatter minimal brown specks to mimic footprints and debris. Let this section dry completely.
Step 3: The Deep Ocean
-
Mix ocean blues:
Prepare three puddles of paint: a dark phthalo blue mixed with a little green for the deepest water, a pure turquoise, and a lighter watery teal. -
Wet the ocean area:
Using your large brush, wet the entire upper area of the paper with clean water, stopping just short of the dry sand. -
Deep water application:
Start at the top left corner with your darkest blue mixture. Paint diagonally, allowing the pigment to flow and bloom in the water. -
Transitioning colors:
As you move closer to the shore, switch to the turquoise and then the teal, blending the edges softly into the previous color. -
Leave gaps:
Leave some small, irregular patches of white paper showing through the blue near the middle area. These will become the bright crests of the waves.
Add Realistic Shadows
Paint a very thin, translucent line of dark grey-blue directly under the white foam crests. This makes the waves look like they are lifted off the water.
Step 4: Creating the White Wash
-
Mix the foam:
Squeeze out some white gouache or white acrylic ink. You want a creamy consistency that is opaque enough to cover the blue. -
Paint the main wave:
Using a medium brush loaded with white, paint the major wave crash line right where the deep water transitions to the paler shallows. -
Soften the back edge:
Rinse your brush and use just damp bristles to soften the edge of the white paint that faces the deep ocean, so it looks like it’s fading into the water. -
Define the front edge:
Keep the edge of the white wave facing the beach sharp and textured to show the breaking water. -
Add sea foam details:
Using your smallest brush, paint delicate, lace-like patterns in the turquoise area behind the main wave. I like to twist the brush slightly to make these lines look organic.
Step 5: Finishing Touches
-
Splatter texture:
Dip an old toothbrush or stiff brush into the white gouache. Run your thumb over the bristles to flick tiny white droplets over the wave crests for sea spray. -
Enhance shadows:
Once the white is dry, use a very watery dark blue to add tiny shadows underneath the thickest parts of the white foam to give it 3D volume. -
Footprints (optional):
Use a tiny brush with dark brown to dab small, paired dots on the dry sand that resemble footsteps walking along the beach. -
Reveal the border:
Ensure the artwork is 100% dry before carefully peeling off the masking tape at a 45-degree angle to reveal your crisp white edges.
Step back and enjoy the calming rhythm of your aerial seascape
Scalloped Foam Lines for Gentle Rolling Waves
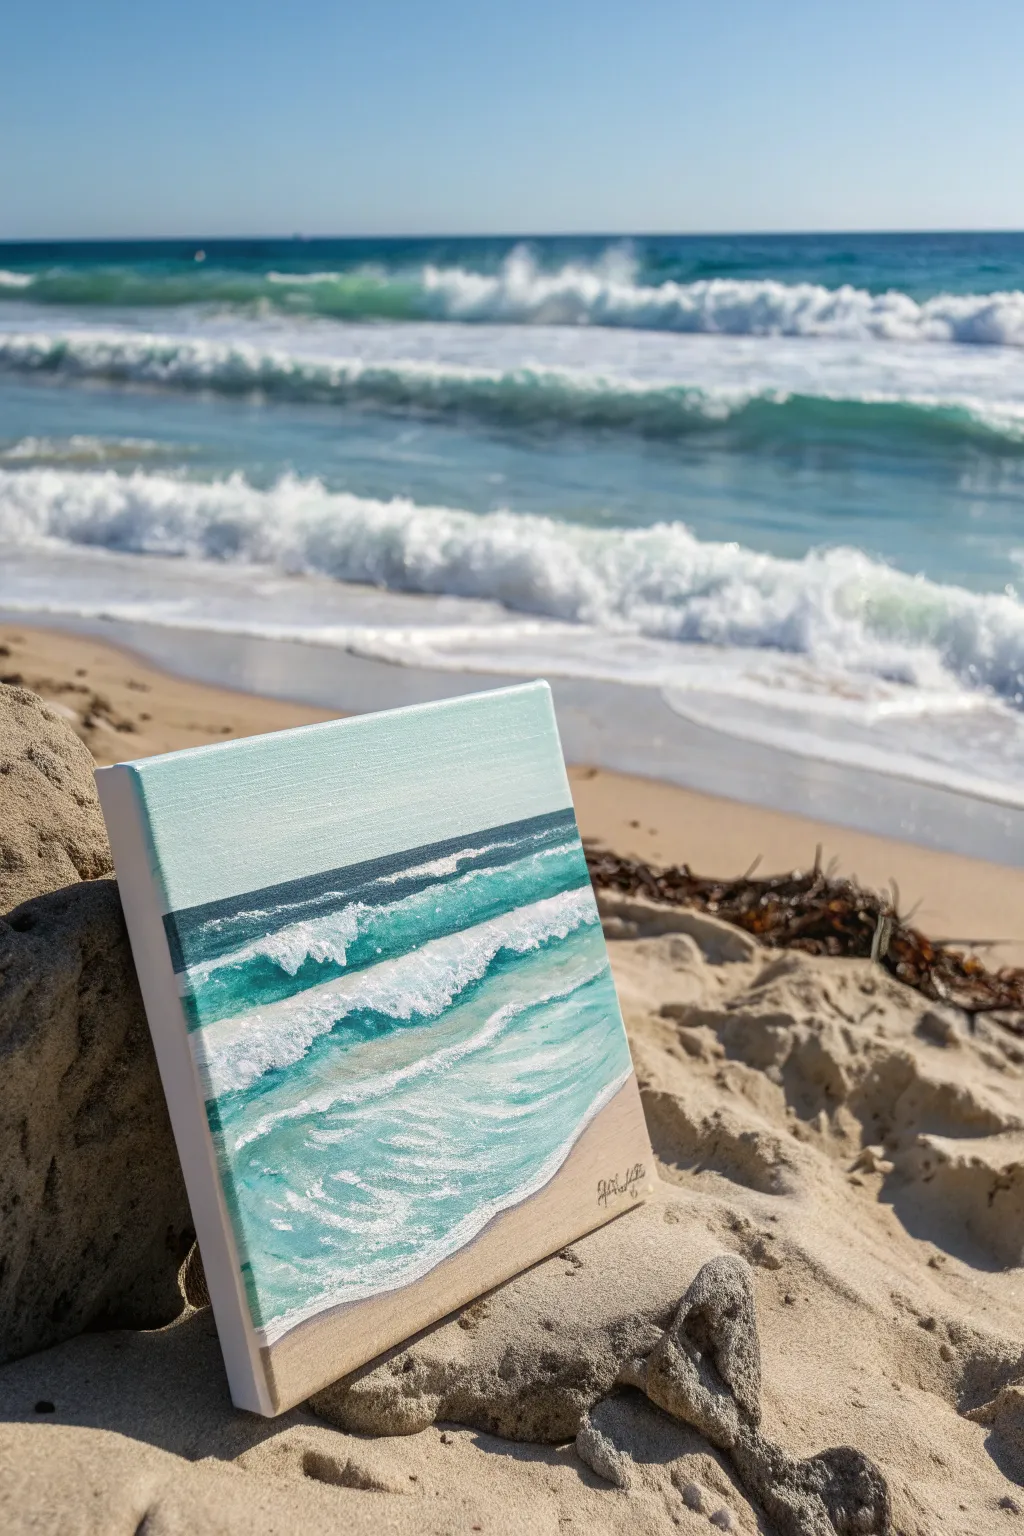
Capture the serene beauty of a shoreline with this small canvas study. Focusing on scalloped foam lines and layers of translucent turquoise creates the mesmerizing effect of gentle waves washing up on the sand.
Detailed Instructions
Materials
- Small square canvas (e.g., 6×6 or 8×8 inches)
- Acrylic paints: Titanium White, Phthalo Turquoise, Ultramarine Blue, Burnt Umber, Yellow Ochre
- Flat brush (3/4 inch)
- Small round brush (size 2 or 4)
- Fan brush (optional)
- Palette knife (optional for texture)
- Water cup and paper towels
Step 1: Setting the Scene
-
Establish the horizon:
Begin by lightly sketching a straight horizon line about two-thirds of the way up the canvas. This painting focuses heavily on the water, so give the sky less space. -
Paint the sky:
Mix a very pale wash of Phthalo Turquoise and plenty of Titanium White. Apply this to the sky area using long horizontal strokes. I recommend making it lighter near the horizon and slightly deeper at the very top edge. -
Lay the sandy foundation:
For the beach, mix Titanium White with a touch of Yellow Ochre and a tiny dot of Burnt Umber to create a warm beige. Paint the bottom right corner in a diagonal slant, representing the dry sand. -
Deep ocean layer:
Mix Ultramarine Blue with a little Phthalo Turquoise for a deep ocean color. Paint a distinct, dark band just below the horizon line. This creates depth and distance instantly.
Dry Brushing Secret
Wipe most of the paint off your brush before blending the foam down. This ‘dry brush’ technique creates a misty, diaphanous look perfect for fading sea foam.
Step 2: Creating the Water Layers
-
Mid-water gradient:
Blend Phthalo Turquoise with White to create a vibrant teal. Paint the middle section of the water, smoothing the edge where it meets the dark blue horizon line while the paint is still slightly wet. -
Shallow water transition:
As you move closer to the sand, lighten your teal mixture significantly with more White. Paint diagonal strokes that mimic the angle of the shoreline. -
Wet sand effect:
Mix a glaze of your sand color with a tiny bit of the water color and water itself to make it sheer. Brush this over the area where the water meets the sand to create that reflective, wet-sand look. -
Dry time:
Let these base layers dry completely before moving on to the foam. This ensures your crisp white lines won’t turn muddy.
Step 3: The Scalloped Foam
-
Primary wave break:
Load a small round brush with pure Titanium White. Paint a jagged, scalloped line across the middle of the turquoise section where the main wave is breaking. -
Adding body to the wave:
Underneath your scalloped line, dry-brush a little white downwards to suggest the foam tumbling forward. Don’t make this solid white; let the turquoise peek through. -
Secondary ripples:
Paint thinner, more delicate scalloped lines closer to the shore. These represent the previous waves losing energy. -
Shoreline foam:
Along the diagonal sand line, dab thick white paint to create the frothy edge where the water ends. Irregular dabs look more natural than a straight line. -
Sea spray texture:
Using an old brush or a stiff bristle brush, stipple (lightly tap) on top of your white wave lines to create fluffy texture and sea spray.
Add 3D Texture
Mix a texture paste or modeling gel into your Titanium White for the shore foam. It will physically raise off the canvas for a tactile finish.
Step 4: Final Details
-
Shadows under waves:
Mix a darker teal (turquoise + a touch of ultramarine). Use a fine brush to paint a thin shadow line directly *under* the crest of the breaking wave. This pops the white foam forward. -
Surface highlights:
Add very thin streaks of white in the deep blue water near the horizon to suggest distant movement. -
Refining the sand:
If the sand looks too flat, stipple a little bit of the darker sand mixture near the bottom corner to simulate texture. -
Final signature:
Once dry, sign your name in the bottom corner using a fine liner brush and thinned dark paint.
Place your finished piece near a window to let the natural light enhance those beautiful turquoise hues


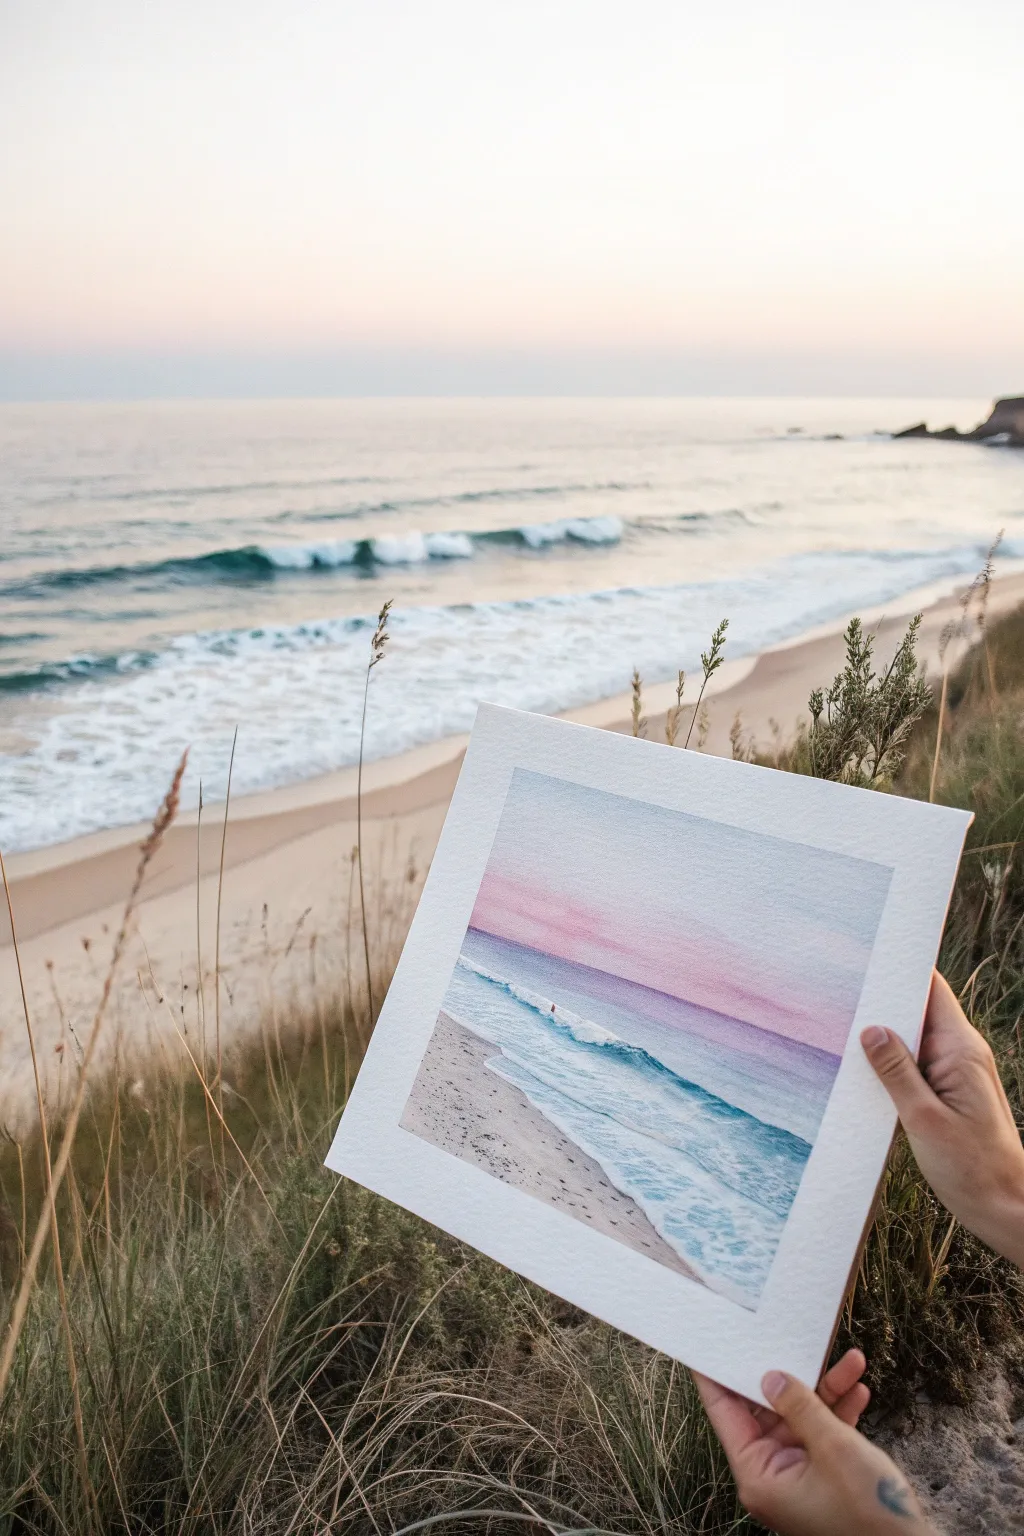
Sparkly Sun Path on the Water
Capture the magic of golden hour with this radiant watercolor painting, featuring a glowing sun path stretching across turquoise waves. The blend of soft pastel skies and crisp, grassy dunes creates a perfect balance of serenity and texture.
How-To Guide
Materials
- Cold press watercolor paper (140 lb/300 gsm)
- Masking tape or painter’s tape
- Watercolor paints (phthalo blue, turquoise, rose madder, cadmium yellow, burnt sienna, sepia)
- White gouache or white gel pen
- Round brushes (sizes 2, 6, and 10)
- Fine liner brush
- Two jars of water
- Paper towels
- Pencil and eraser
Step 1: Planning and Sky
-
Tape the borders:
Begin by taping down all four edges of your watercolor paper to a board. This ensures a clean white border later and keeps the paper flat while you work with wet washes. -
Sketch the horizon:
Lightly draw a straight horizontal line about 2/3 up the page for the horizon. Sketch a curved diagonal line near the bottom right for the sand dune area. -
Mask the sun:
Draw a small circle for the sun just above the horizon. To keep it perfectly white, carefully paint around it or apply a tiny dot of masking fluid if you have it. -
Paint the sunset sky:
Wet the sky area with clean water. Starting at the top, drop in a very pale blue, transitioning into soft pinks and purples as you move downward. -
Add the horizon glow:
While the paper is still damp, blend a warm yellow-orange right at the horizon line, letting it bleed upward into the pinks for a seamless sunset gradient.
Step 2: Ocean and Waves
-
The base ocean wash:
Once the sky is dry, wet the ocean area. Apply a mix of turquoise and phthalo blue, keeping the color darker near the horizon and lighter as you approach the shore. -
Leave the sun path:
Crucial step: Leave a vertical column of white paper unpainted directly under the sun. This negative space will become the blinding reflection on the water. -
Deepen the blues:
While the wash is wet, drop stronger blue pigment into the horizontal areas between waves to create depth, avoiding that center column of light. -
Define the waves:
Using a smaller brush and a darker teal mix, paint horizontal, slightly wiggly lines to suggest wave ripples. Curve the lines slightly near the shore to show the wave breaking. -
Refining the reflection:
Mix a warm golden yellow and very lightly glaze over parts of the white center stripe, leaving some pure white highlights to sparkle.
Sun Path Pro Tip
To make the water really sparkle, skip the white paint! Using the clean white of the paper for your brightest highlights creates the most luminous glow possible.
Step 3: Sand and Foreground
-
Paint the wet sand:
For the shoreline, mix burnt sienna with plenty of water. Paint the beach area, darkening the edge where the water meets the sand to show wetness. -
Create the sun on sand:
Just like the water, leave a lighter, reflective path on the wet sand directly in line with the sun to continue that glowing effect. -
Add seafoam texture:
Once the ocean layer is dry, take white gouache on a small brush. Paint the frothy edge of the wave breaking on the sand, stippling the paint for a bubbly texture. -
Highlight the ripples:
Use the white gouache or a gel pen to add tiny horizontal highlights across the water’s surface, concentrating them near the sun path for maximum sparkle.
Level Up: Texture
Sprinkle a tiny pinch of salt onto the wet sand wash while it’s drying. When you brush it off later, it leaves grainy textures that look just like real sand.
Step 4: The Grassy Dune
-
Block in the dune:
In the bottom right corner, paint the dune shape using a mix of sepia and blue-grey to create a shadowy, sandy mound. -
Paint the grass blades:
Switch to your finest liner brush or a size 0 round brush. Mix a dark olive green (sepia + yellow + touch of blue). -
Flick upward strokes:
Using quick, confident flicks of your wrist, paint thin blades of grass growing out of the dune. Vary the length and direction for a natural, windswept look. -
Layer the grass:
I like to add a second layer of grass using a darker brown-black mix to create density and shadow, focusing on the base of the clumps. -
Final reveal:
Wait until the painting is completely bone-dry, then slowly peel away the tape at a 45-degree angle to reveal your crisp white border.
Frame your masterpiece in a simple white mat to let those sunset colors truly shine
Sand Texture Made With Dry Brush Strokes
Capture the breezy serenity of the coast with this watercolor landscape that uses clever texture techniques for realism. By layering dry brush strokes over soft washes, you’ll create convincingly sandy dunes that seem to lift right off the paper alongside rolling turquoise surf.
Step-by-Step Guide
Materials
- Cold Press Watercolor Paper (140lb/300gsm, 8×10 inches)
- Watercolor Paints: Cerulean Blue, Viridian Green, Ultramarine, Yellow Ochre, Burnt Sienna, Sepia
- Flat Brush (3/4 inch)
- Round Brush (Size 6 or 8)
- Rigger Brush or Fine Liner (Size 1)
- Masking Tape
- Paper Towels or Rag
- Two containers of water
- Palette for mixing
Step 1: Setting the Scene
-
Tape and Prep:
Begin by taping down all four edges of your watercolor paper to a sturdy board. This creates the crisp white border seen in the example and prevents buckling. -
Light Sketching:
Using a faint H pencil, lightly sketch the horizon line about one-third down from the top. Then, draw a gentle diagonal curve starting from the bottom left to the middle right to mark where the sand dunes meet the ocean. -
Sky Wash:
Mix a very watery, pale wash of Cerulean Blue. Using your large flat brush, wet the sky area first with clean water, then drop in the blue paint unevenly to suggest soft cloud formations, leaving some areas white. -
Distant Dunes:
While the sky is drying, mix a muted purple-grey using Ultramarine and a touch of Burnt Sienna. Paint a thin, low strip of land right on the horizon line to create depth.
Tip: Testing Texture
Before dry brushing your actual painting, test the stroke heavily on a scrap piece of watercolor paper. If it’s too wet, it will just look like a stripe; blot more moisture out.
Step 2: The Ocean Layers
-
Base Ocean Color:
Mix a vibrant turquoise using Cerulean Blue and a tiny bit of Viridian. Apply this color horizontally across the ocean area, making it darker near the horizon and lighter as you approach the shore. -
Creating Waves:
While the ocean wash is still slightly damp, lift out pigment using a clean, thirsty brush to create horizontal white lines that mimic breaking waves. -
Deepening the Water:
Once the first layer is dry, mix a deeper blue-green. Add thin, horizontal strokes under the white wave lines to simulate the shadow of the wave crests. -
Wet Sand Reflection:
Where the water meets the sand, paint a strip of very pale, watery blue-grey. This area should look slick and reflective, transitioning the eye from ocean to beach.
Step 3: Sand Texture & Details
-
Sand Base Layer:
Mix a warm, light tan color using Yellow Ochre heavily diluted with water. Wash this over the entire sand dune area in the foreground and let it dry completely. -
Loading for Dry Brush:
Mix a thicker, drier consistency of Yellow Ochre and a touch of burnt sienna. Blot your round brush on a paper towel until almost no moisture remains—this is crucial for the texture effect. -
Dry Brushing Texture:
Drag the side of your brush lightly across the paper’s surface in the foreground dunes. The paint should catch only on the ‘hills’ of the paper texture, leaving white speckles that perfectly mimic grains of sand. -
Shadow Accents:
Repeat the dry brush technique with a slightly darker mix (add a tiny bit of Sepia) in the hollows of the dunes to create volume and form. -
Dune Grass Color:
Prepare a deep, cool green by mixing Viridian with Sepia. You want a paint consistency that flows easily but is opaque enough to stand out against the sand. -
Painting Grass Clumps:
Switch to your rigger or fine liner brush. Starting from the bottom of the clump, flick the brush upward quickly to create thin, tapering blades of grass. -
Varying Direction:
Ensure the grass blades curve in slightly different directions as if blown by a sea breeze. Group them in random clusters rather than a straight line for a natural look. -
Adding Finish:
Once the paint is totally bone dry, gently peel away the masking tape at a 45-degree angle to reveal your clean edges.
Troubleshooting: Blobs
If you accidentally drop a blob of water on your sky or sand, don’t rub it! Quickly dab it straight up with a thirsty brush or tissue to lift it without spreading.
Now you have a serene little slice of the beach to keep on your desk or give to a friend
Wet Sand Reflection Under a Sunset Sky
Capture the magic where the sky meets the sand with this vibrant acrylic painting tutorial. By focusing on the wet sand reflections and the dramatic streaky clouds, you’ll create a seamless transition between the warm sunset and the cool, glistening beach.
Step-by-Step Tutorial
Materials
- Stretched canvas (vertical orientation)
- Acrylic paints (Titanium White, Mars Black, Ultramarine Blue, Cadmium Red, Cadmium Yellow, Burnt Sienna)
- Large flat brush or wash brush
- Medium filbert brush
- Small round detail brush
- Palette knife (optional for texture)
- Water cup and paper towels
- Painter’s tape or masking tape (for horizon line)
Step 1: Setting the Sky
-
Establish the horizon:
Place a strip of painter’s tape horizontally across your canvas, positioned slightly below the halfway point. This will ensure your horizon line remains perfectly straight while you work on the sky. -
Base gradient:
Using a large flat brush, paint the top third of the canvas with a soft grey-blue mixture (Ultramarine Blue plus white and a touch of black). Fade this down into a creamy off-white as you approach the horizon. -
Add warmth:
While the lower sky area is still slightly damp, blend in horizontal strokes of Cadmium Yellow mixed with plenty of white. Focus the brightest yellow spot just above the center of your tape line to represent the setting sun. -
Create cloud streaks:
Mix Cadmium Red with a little white to make a salmon pink. Using the edge of a flat brush, sweep long, dramatic diagonal streaks starting from the left side, reaching toward the upper right. Keep these strokes sheer and sweeping.
Fixing Muddy Reflections
If your sand reflections look muddy, let the base sand color dry completely first. Then, apply the pink and orange reflections as a thin, transparent glaze over the top.
Step 2: The Ocean Layer
-
Remove the tape:
Gently peel off your horizon tape once the sky is touch-dry. You should have a crisp line separating sky and sea. -
Paint the distant water:
Mix a dark, muted purple using blue, red, and a tiny bit of black. Paint a thin, straight line directly underneath the sky. As you move downward, lighten this color with white and transition into a steely blue-grey. -
Add wave motion:
Switch to a smaller brush. Add horizontal streaks of white mixed with a touch of blue to suggest gentle waves rolling in. These lines should become slightly thicker and more spaced out as they get closer to the bottom of this section.
Step 3: Wet Sand and Reflections
-
Base sand color:
For the wet sand area (the bottom third of the canvas), mix Burnt Sienna, white, and a touch of blue to create a cool, wet sand tone. Apply this smoothly, painting in long diagonal strokes mirroring the shoreline. -
Mirror the sky:
This is the crucial step for realism. While the sand layer is wet, gently glaze distinct patches of your sky colors—pinks and oranges—directly onto the sand. These reflections should align vertically with the colors in the sky above. -
Deepen the foreground:
Mix a darker version of your sand color using more Burnt Sienna and a bit of black. Apply this to the bottom left corner and along the very bottom edge to simulate the texture of seaweed or darker, unreflective sand. -
Texture the shoreline:
I like to use an old brush or a stippling motion here to dab dark brown spots into the foreground, mimicking the debris and rougher texture found at the tide line.
Add Texture
Mix a pinch of real sand or texture paste into your dark brown foreground paint. Apply this mixture with a palette knife to the bottom corners for a gritty, realistic 3D beach effect.
Step 4: Final Details
-
The foam edge:
Load a round brush with pure white paint slightly thinned with water. Paint the jagged, organic line where the water meets the sand. Let the line break and vary in thickness. -
Sea foam highlights:
Add smaller, parallel white lines behind the main foam edge to show the receding water. lightly drag the brush back into the water area to create the transparency of the foam. -
Distant silhouette:
Using a very fine brush and dark grey paint, add tiny silhouettes on the horizon line if desired—perhaps a small ship or a distant piece of land to give the scene scale. -
Sunlight pop:
Add one final, small dab of pure white mixed with yellow right at the horizon where the sun is setting, and a corresponding vertical streak of highlight on the water directly below it.
Step back and admire how the warm sky colors dance across the wet sand in your finished masterpiece
Tropical Color Palette Beach With Teal Water
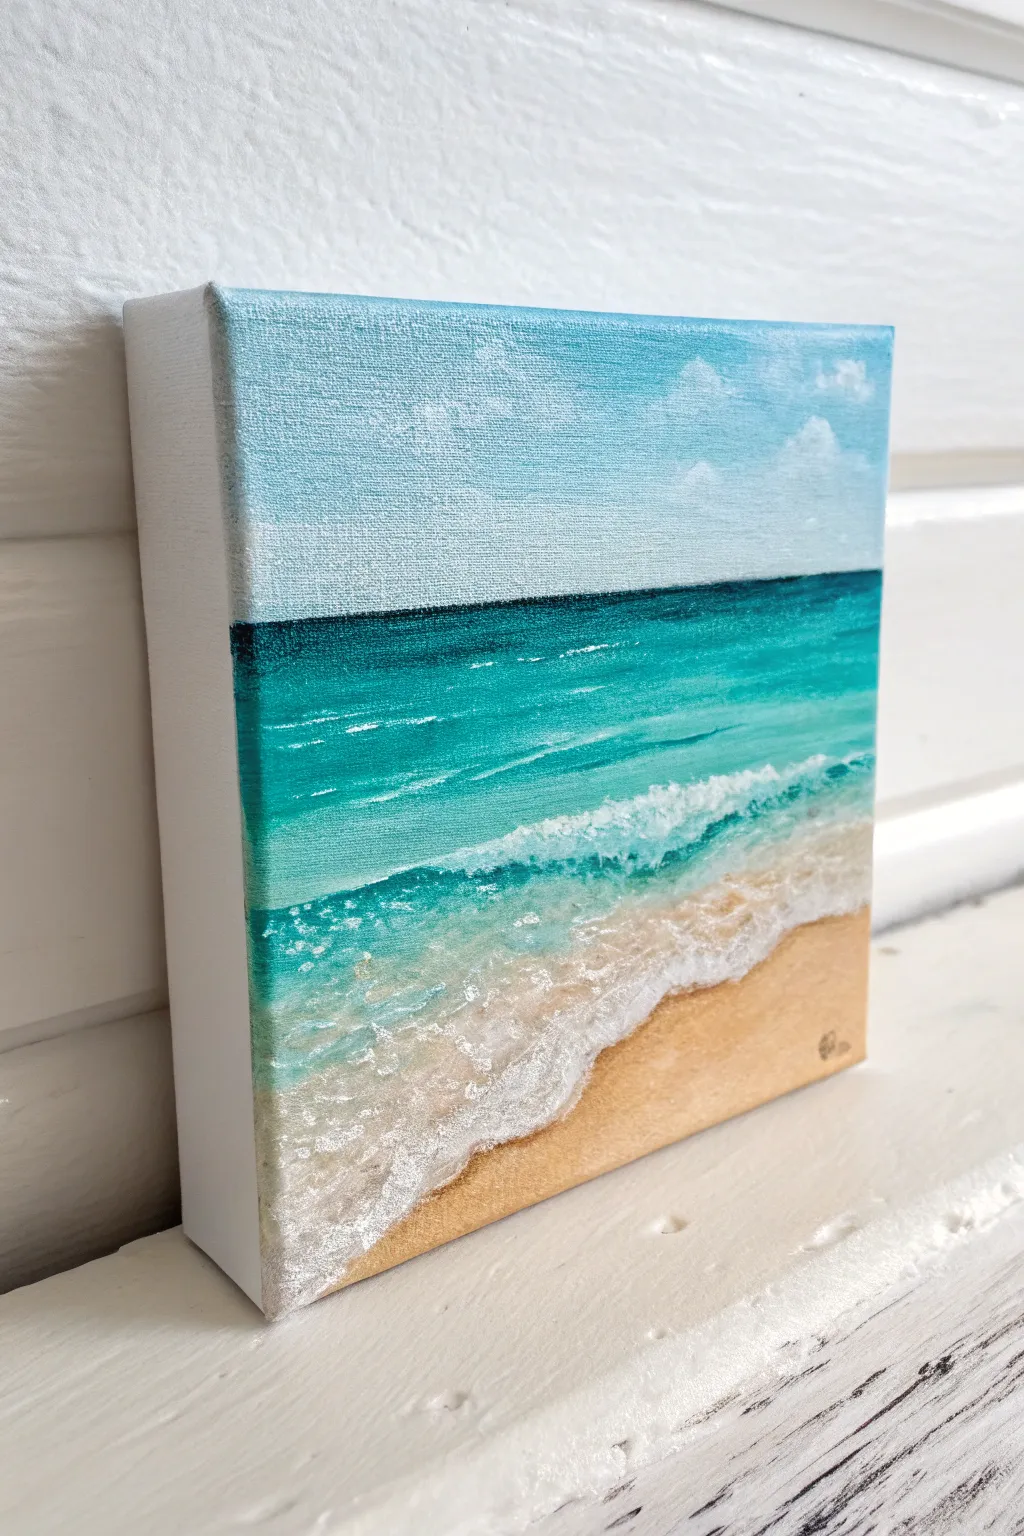

Capture the serene beauty of a tropical paradise with this vibrant acrylic painting on a mini canvas. The striking contrast between the deep teal horizon and the frothy white waves creates a stunning sense of depth for such a small scale.
How-To Guide
Materials
- Small square stretched canvas (e.g., 6×6 or 8×8 inches)
- Acrylic paints: Titanium White, Phthalo Blue (or a deep blue), Turquoise or Teal, Yellow Ochre, Burnt Sienna
- Flat brushes (1/2 inch and 1/4 inch)
- Small round detail brush
- Palette knife (optional, for mixing)
- Cup of water and paper towels
- Painter’s tape (optional)
Step 1: Setting the Scene
-
Prime the sky:
Start by mixing a very light blue using Titanium White and a tiny dot of Phthalo Blue. Using your larger flat brush, paint the upper third of the canvas. Keep your strokes horizontal and smooth to create a calm atmospheric base. -
Add soft clouds:
While the sky is still slightly wet, pick up a tiny amount of pure Titanium White on the corner of your brush. dabbing gently in irregular shapes to form soft, puffy clouds floating in the upper right. Use a dry, clean brush to soften the edges so they look wispy rather than stamped on. -
Define the horizon:
Mix a deep, dark teal by combining your Turquoise with a touch of Phthalo Blue. Draw a straight, sharp horizon line across the canvas, separating the sky from the ocean. If you struggle with straight lines, you can apply a strip of painter’s tape once the sky is 100% dry. -
Paint the deep water:
Fill the area just below the horizon with that dark teal mixture. Paint roughly an inch down, keeping the color solid and intense to represent the deep ocean.
Step 2: Creating the gradient
-
Lighten the water:
For the middle section of the water, mix some White into your teal mixture to create a medium turquoise. Blend this into the bottom edge of your dark horizon line using horizontal strokes. -
Paint the shallows:
Continue adding more White to your turquoise mix as you move down the canvas. The water should become a very pale, crystalline aqua color just before it hits where the sand will be. This gradient mimics the water getting shallower. -
Add wave movement:
Using a smaller flat brush and the medium turquoise shade, paint slight streaks/dashes in the lighter water area. These represent small ripples or swelling waves before they break.
Foam too flat?
If your sea foam looks pasted on, wait for it to dry. Then, mix a very watered-down blue glaze and lightly brush over the bottom edge of the white foam to blend it into the water.
Step 3: Painting the Shore
-
Mix the sand color:
Combine Yellow Ochre with plenty of Titanium White and a tiny speck of Burnt Sienna to create a warm, beige sand color. -
Fill the beach:
Paint the bottom wedge of the canvas with this sand mixture. Create a diagonal line where the sand meets the water, sloping down from left to right to create a dynamic composition. -
Paint wet sand:
Mix a slightly darker version of your sand color (add a touch more Burnt Sienna). Apply this right along the waterline where the waves will crash; wet sand is naturally darker than dry sand.
Level Up: Texture
Mix a textured gel medium or even a pinch of clean, fine sand into your beach paint mixture. Apply this with a palette knife for a gritty, realistic sandy texture you can feel.
Step 4: Detailed Sea Foam
-
Start the main foam line:
Using a small round brush loaded with pure Titanium White, paint a jagged, organic line right over the transition between the water and the wet sand. Don’t make it a straight line; let it wobble. -
Create the crash:
Thicken the white line in certain areas, particularly on the left side, to show the wave actively breaking. Use a stippling motion (tapping the brush tip creates texture) to mimic bubbly foam. -
Add transparency:
Mix a tiny bit of water into your white paint to make a glaze. Lightly drag this over the ‘wet sand’ area just below the thick white foam line. This makes it look like the water is thinly sliding up onto the beach. -
Paint distinct wave lines:
Go back into the turquoise water section. Paint 2-3 thin, horizontal white lines that act as ‘breaking’ waves further out in the ocean. Keep these lines broken and irregular. -
Add shadow to foam:
Mix a very watery grey-blue. Carefully paint a tiny shadow line just underneath the thickest parts of the white sea foam on the sand. This lifts the foam off the surface visually. -
Final highlights:
Once everything is dry, take a clean small brush with thick Titanium White and add tiny bright dots to the crests of the waves for that final sparkle.
Step back and enjoy the calming coastal view you’ve created from scratch
Round Format Mini Beach Painting
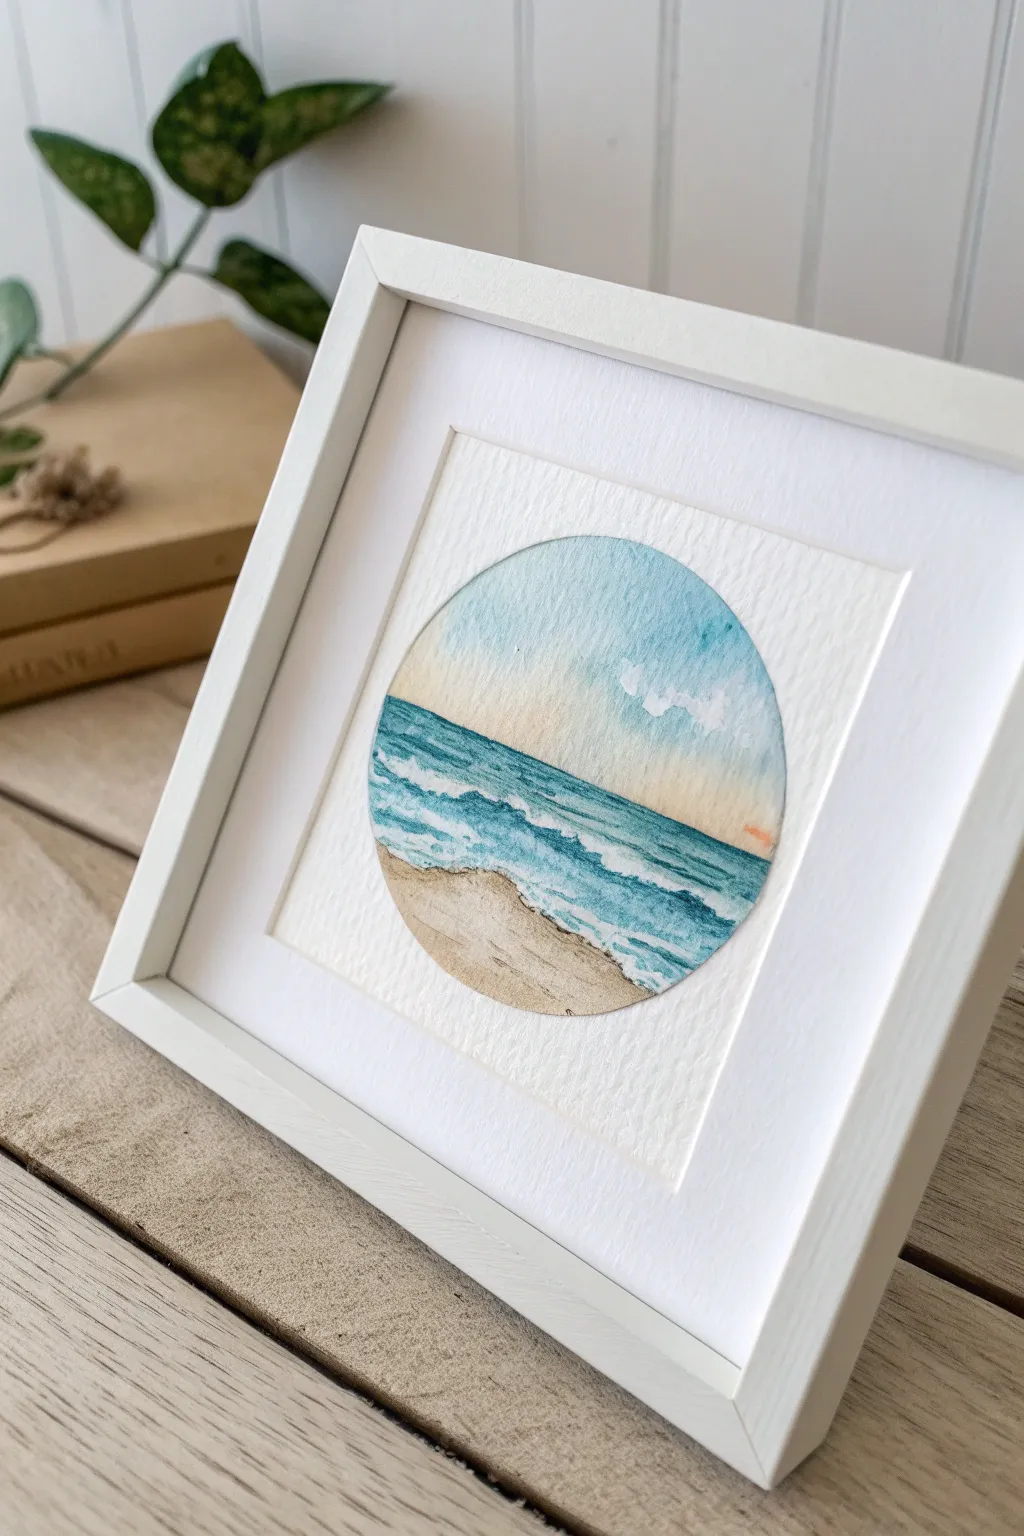
Capture the endless rhythm of the tide with this calming circular watercolor painting. The round format creates a unique, porthole-like view of the ocean, focusing the eye on gentle waves and soft sands.
How-To Guide
Materials
- Cold press watercolor paper (300 gsm)
- Watercolor paints (Cerulean Blue, Prussian Blue, Yellow Ochre, Burnt Sienna, faint orange/pink)
- Round watercolor brushes (sizes 4 and 6)
- Compass or round object to trace
- Pencil
- Masking tape or painter’s tape
- Two jars of water
- Paper towels
- White or light wood square frame with mat
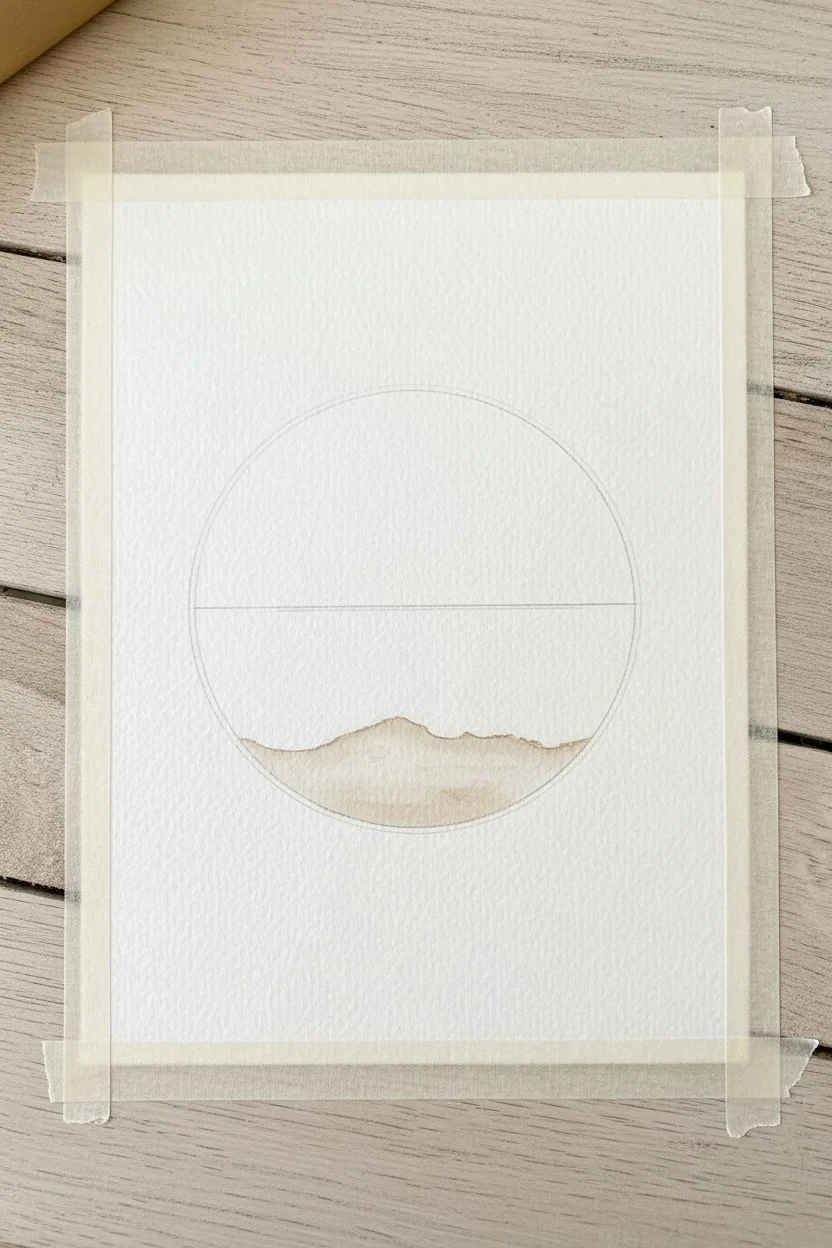
Step 1: Preparation & Sketching
-
Outline the circle:
Begin by lightly tracing a perfect circle onto your watercolor paper using a compass or by tracing around a bowl. Ensure the circle is centered if you plan to frame it without cutting the paper down later. -
Establish the horizon:
The horizon line is crucial. Lightly draw a straight horizontal line across the circle, placing it just slightly above the center point to balance the composition. -
Sketch the shoreline:
Sketch a gentle, curved line for the water’s edge in the bottom third of the circle. This line doesn’t need to be perfect; a slight wobble mimics the natural flow of foam on sand.
Step 2: Painting the Sky & Sand
-
Wet the sky area:
Using your larger clean brush, apply a glaze of clean water to the sky portion, stopping carefully at the horizon line. -
Wash in the sky:
While the paper is wet, drop in a very diluted wash of Cerulean Blue at the top curve. As you move down closer to the horizon, introduce a tiny hint of pale orange or warmth to suggest a soft light. -
Create soft clouds:
Before the sky dries completely, use a clean, thirsty brush or the corner of a paper towel to lift out small, organic shapes for clouds, revealing the white of the paper. -
Paint the sand base:
Mix a watery wash of Yellow Ochre with a touch of Burnt Sienna. Apply this to the sand area at the bottom, leaving the irregular strip between the sand and hypothetical water dry for now to represent foam.
Clean Edges Trick
Draw your circle, then cover the OUTSIDE area with masking fluid or tape before painting. Peel it off at the end for a impeccably crisp, perfect circle edge.
Step 3: Creating the Ocean
-
Lay the base ocean color:
Once the sky is fully dry, mix a vibrant teal using Cerulean and a touch of green. Paint the ocean area, starting darker at the horizon line and diluting the color as you pull it toward the shore. -
Add depth at the horizon:
Before the ocean wash dries, carefully run a line of Prussian Blue right along the horizon. Let it bleed slightly downward to create the feeling of deep, distant water. -
Define the waves:
Leave thin, jagged strips of white paper unpainted within the blue area to represent breaking wave crests. If you accidentally paint over them, you can lift the pigment with a damp brush. -
Add wave shadows:
Mix a deeper blue-grey. Underneath the white crests of the waves, paint thin, shadowy lines to give the water volume and movement.
Muddy Horizon?
If the blue ocean bleeds into the sky, your sky layer wasn’t dry enough. Wait for complete dryness between adjacent sections, or leave a hair-thin white line gap.
Step 4: Finishing Details
-
Texturize the sand:
I like to splatter a tiny bit of darker brown paint onto the dry sand area by tapping a loaded brush against my finger. This mimics the texture of pebbles and grains. -
Strengthen the shoreline:
Paint a thin, broken line of dark brown or grey right where the wet sand meets the dry sand to emphasize the tide mark. -
Refine the edges:
Check the circular perimeter. If any paint has bled outside the line, you can carefully clean it up with opaque white gouache or simply plan to cover it with a circular mat board. -
Frame the artwork:
Once absolutely dry, place your painting into a square frame. A white mat with a circular opening works best, but a standard square mat also creates a lovely contrast with the round art.
Hang your mini seascape near a window to catch the light and dream of your next beach day
Abstract Beach Stripes With Foam Accents

Capture the serene essence of the shoreline with this modern, abstract stripe painting. By layering calming blues, sandy beiges, and textured whites, you’ll create a piece that mimics the rhythmic flow of waves meeting land.
Detailed Instructions
Materials
- Stretched canvas (rectangular)
- Acrylic paints: Titanium White, Light Blue, Turquoise/Teal, Sandy Beige, Gold
- Flat paintbrushes (wide and medium)
- Palette or paper plate
- Painter’s tape or masking tape
- Palette knife (optional, for texture)
- Cup of water
- Paper towels
Step 1: Planning the Horizon
-
Prepare the canvas:
Start with a clean, dry canvas. If your canvas isn’t pre-primed, apply a coat of gesso and let it dry completely to ensure smooth color application. -
Tape your sections:
Apply strips of painter’s tape horizontally across the canvas to define your stripes. Space them unevenly to create visual interest—some bands should be wide, others narrow. -
Secure the edges:
Press down firmly along the edges of the tape with your fingernail or a credit card. -
Visualize the colors:
Plan your palette before painting. Typically, you’ll want blues at the top (sky/water) transitioning into teals (waves) and finally beiges (sand) at the bottom.
Foam Texture Tip
Use a sponge or a crumpled paper towel dipped in white paint to dab along the stripe edges. This creates a more organic, bubbly sea foam texture than a brush.
Step 2: Applying Color Layers
-
Mix your blues:
On your palette, mix a soft light blue with plenty of white. This will be your sky or distant water tone. -
Paint the upper stripes:
Fill in the top open sections between the tape with your lightest blue mixture. Use horizontal brushstrokes to maintain the calm, watery feel. -
Deepen the hue:
For the middle sections, mix a vibrant turquoise or teal. Paint these stripes, ensuring full coverage. -
Add the sand tone:
Mix beige with a touch of gold acrylic for a subtle shimmer. Apply this to the bottom stripes to represent the wet sand. -
Let it tack up:
Allow the paint to dry slightly—just until it is tacky but not fully hardened—before removing the tape. This often helps prevent peeling.
Paint Bleeding Under Tape?
If paint bled under your tape, don’t worry. Wait for it to dry, then paint over the mistake with opaque titanium white to re-establish the crisp line.
Step 3: Creating the Sea Foam Texture
-
Remove the tape:
Gently peel off the painter’s tape to reveal the crisp white canvas lines underneath. -
Prepare textured white:
Load a relatively dry brush or a palette knife with thick Titanium White paint. You want the paint to be heavy-bodied, not watery. -
Dry brush the edges:
Lightly drag the white paint along the transition lines where the color meets the white space. The goal is to create a rough, ‘foamy’ edge. -
Add organic movement:
Don’t make these white lines perfect. Let the brush skip and stutter to mimic the natural irregularity of sea foam. -
Layering highlights:
I find adding a second, lighter pass of white over the teal sections helps creating depth, making it look like crashing water. -
Blend the sand:
Where the beige meets the white, soften the edge slightly with a touch of white to show how water recedes over sand.
Step 4: Finishing Touches
-
Check for gaps:
Inspect your colored stripes. If any canvas shows through where you want solid color, apply a second coat carefully. -
Final dry:
Let the entire painting dry completely for at least a few hours. -
Varnish (optional):
Once fully cured, you can apply a gloss varnish to make the colors pop and give the water a wet look.
Now you have a tranquil piece of ocean art that brings the beach vibration into your home
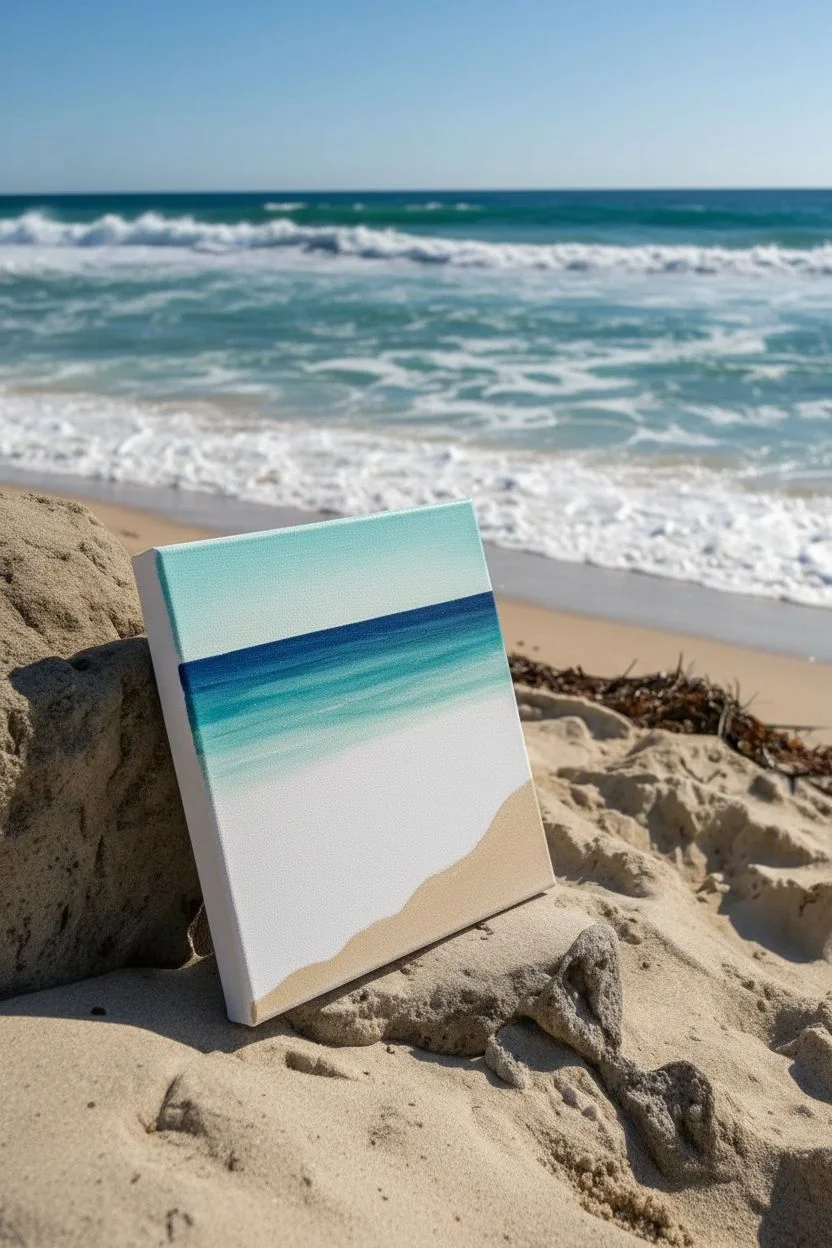
Negative Space Beach With Just a Few Lines
Capture the serenity of the shoreline with this incredibly simple painting that relies on negative space and soft blending. By leaving the bottom portion mostly untouched, you create a striking modern composition that mirrors the calming emptiness of a sandy beach.
Step-by-Step
Materials
- Square stretched canvas (8×8 or 10×10 inches)
- Acrylic paints: Titanium White, Phthalo Blue (or Turquoise), Yellow Ochre, Burnt Umber
- Large flat brush (1 inch)
- Medium flat brush
- Small round brush
- Palette or paper plate
- Cup of water and paper towels
- Masking tape (optional)
Step 1: Setting the Scene
-
Prime the Surface:
Even if your canvas is pre-primed, apply a fresh coat of Titanium White across the entire surface. This ensures a smooth blending surface and makes the subtle colors pop later. -
Define the Horizon:
Visualize where you want the water to meet the sky. For this negative space composition, aim for a line about one-third of the way up from the bottom edge. You can lightly mark this with a pencil or use a piece of masking tape for a crisp edge. -
Mix the Sky Color:
Create a very pale blue for the sky. Mix a large amount of Titanium White with the tiniest spec of Phthalo Blue. It should be barely tinted—almost white. -
Paint the Sky:
Using your large flat brush, apply the pale blue mixture starting from the top of the canvas. -
Create a Gradient:
As you work your way down toward the horizon line, dip your brush into pure white without cleaning it first. Blend this down so the sky becomes lighter and hazier as it touches the water.
Horizon Helper
If you struggle painting straight lines freehand, place a strip of painter’s tape across the canvas for the horizon. Paint the sky, let it dry, remove the tape, then paint the water.
Step 2: Painting the Water
-
Mix the Sea Color:
Create a turquoise shade by mixing Phthalo Blue with a touch of Titanium White and a very small amount of Yellow Ochre to warm it up. This will be your darkest water tone. -
Apply the Horizon Line:
Using the medium flat brush, paint a straight stripe of your turquoise mix right along your horizon guide. Keep this line crisp against the sky. -
Lighten the Water:
Add more white to your turquoise mix on the palette. Paint below the horizon line, blending slightly upward into the dark stripe while the paint is still wet. -
Fade to Foam:
Continue adding white to your brush as you move lower. By the time you reach the bottom edge of the water section, your paint should be almost pure white to represent the sea foam.
Step 3: The Sandy Shore
-
Mix the Sand Tone:
For the sand, we want a very subtle beige. Mix plenty of White with a small dot of Yellow Ochre and the tiniest pin-prick of Burnt Umber. -
Paint the Negative Space:
Cover the bottom third of the canvas with this sand mixture. I prefer to paint this area fairly solidly, ensuring the weave of the canvas is covered. -
Blend the Meeting Point:
Where the white foam meets the beige sand, use a clean, slightly damp brush to soften the transition. You don’t want a hard line here; the water should feel like it’s gently washing over the sand. -
Add Foam Detail:
Using a small round brush and pure Titanium White, tap in a gentle, scalloped line along the water’s edge to simulate the bubbly froth of a wave ending. -
Paint the Sides:
Don’t forget the edges of your canvas. Extend the horizon line, water colors, and sand tone around the sides for a professional, gallery-wrapped look.
Uneven Blending?
If acrylics are drying too fast to blend smoothly, mix a little glazing medium or water into your paint. This keeps it ‘open’ longer for softer gradients.
Allow your painting to dry completely before displaying your peaceful seascape
Whimsical Beach Color Swap (Pink Sand, Lavender Sea)
Capture the serene beauty of a twilight beach with this delicate watercolor project. By swapping traditional blues for soft pinks, lavenders, and muted teals, you’ll create a dreamy atmosphere that feels both calming and magical.
Detailed Instructions
Materials
- Cold press watercolor paper (140 lb/300 gsm)
- Masking tape
- Watercolor paints (Alizarin Crimson, Ultramarine Blue, Hooker’s Green, Burnt Umber, White Gouache)
- Flat wash brush (3/4 inch)
- Round brush (size 6 or 8)
- Small detail brush (size 0 or 2)
- Two jars of water
- Paper towels
- Pencil and eraser
Step 1: Preparation & Sky
-
Secure the paper:
Tape down all four edges of your watercolor paper to a board or table to create a clean white border and prevent buckling. -
Establish the horizon:
Lightly sketch a straight horizontal line about one-third of the way up from the bottom of the paper to mark where the sea meets the sky. -
Wet the sky area:
Using your large flat brush, apply clean water to the entire sky area above the horizon line until the paper has a gentle sheen. -
Paint the first blush:
Dilute Alizarin Crimson to a very pale, watery wash. Sweep this soft pink horizontally across the middle of the sky, leaving the very top edge extremely faint. -
Deepen the horizon color:
Mix a touch of Ultramarine Blue into your pink to create a soft lavender. Apply this color right along the horizon line while the paper is still damp, allowing it to bleed upward slightly. -
Blend the upper sky:
At the very top of the paper, add an extremely faint wash of pale blue-grey, blending it downwards into the pink to create a seamless gradient.
Step 2: Ocean & Waves
-
Base layer for the sea:
Mix a muted purple using Ultramarine Blue and a tiny dot of Alizarin Crimson. Paint a horizontal band just below the horizon line, keeping the edge crisp. -
Transition to teal:
Create a sea-green hue by mixing Hooker’s Green with plenty of water and a touch of blue. Paint the middle section of the water, blending it gently into the purple band above. -
Reserve the whites:
As you move closer to the foreground wave, leave irregular patches of white paper unpainted to represent the foam and crashing spray. -
Define the wave shape:
Using the round brush and a slightly stronger teal mix, paint the curved ‘face’ of the wave just below the preserved white foam area. -
Add wave shadows:
Mix a darker blue-grey tone. Carefully paint underneath the crest of the wave and add small, choppy strokes in the distance to suggest texture on the water’s surface.
Soften harsh lines
If your horizon line feels too sharp against the sky, run a clean, damp brush over the edge while the paint is drying to blur the transition slightly.
Step 3: Sand & Finishing Touches
-
Paint the wet sand:
Mix Burnt Umber with a lot of water and a tiny bit of the purple mix for harmony. Paint the foreground sand area. -
Reflect the water:
While the sand wash is still wet, drop in a very faint streak of the sky pink near the water’s edge to show the wet sand’s reflection. -
Enhance the foam:
Once everything is fully dry, use white gouache or undiluted white watercolor on the detail brush to vigorously dry-brush the crashing wave crests. -
Texture the beach:
Dip an old toothbrush or stiff brush into diluted brown paint and flick it lightly over the bottom corner of the sand to create realistic speckles and pebbles. -
Add the tiny surfer:
Using your smallest brush and a dark reddish-brown, paint a tiny vertical speck in the water near the wave break to represent a distant figure. -
Reveal the painting:
Wait until the painting is completely bone dry, then verify no damp spots remain. I usually touch the back of the paper to check temperature. -
Remove the tape:
Peel the masking tape away slowly at a 45-degree angle, pulling away from the painted area to ensure a crisp, clean border.
Add sparkle
Mix a tiny amount of iridescent medium into your white gouache for the sea foam. It catches the light just like real ocean spray.
Now you have a tranquil, dreamy seascape ready to bring a touch of calm to any space


Have a question or want to share your own experience? I'd love to hear from you in the comments below!