If you’ve been craving easy canvas painting ideas that actually look good without a ton of drawing skills, I’ve got you. These are the kinds of beginner-friendly paintings I teach when we want quick wins, pretty color, and that “I made this!” feeling.
Sunset Gradient Sky
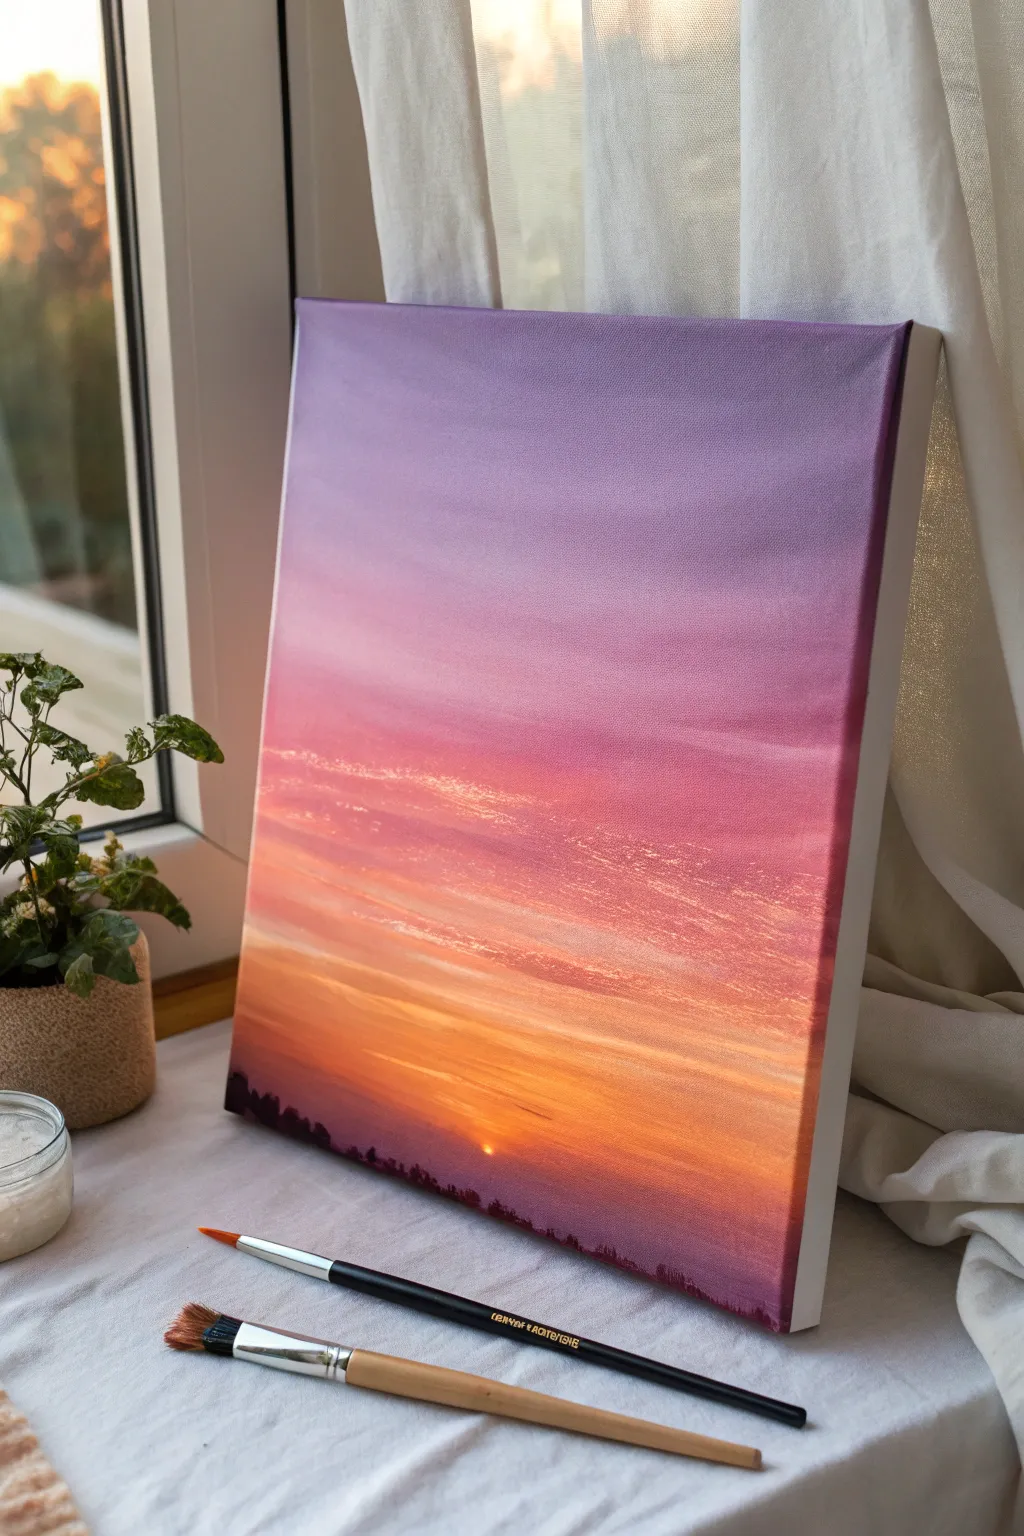
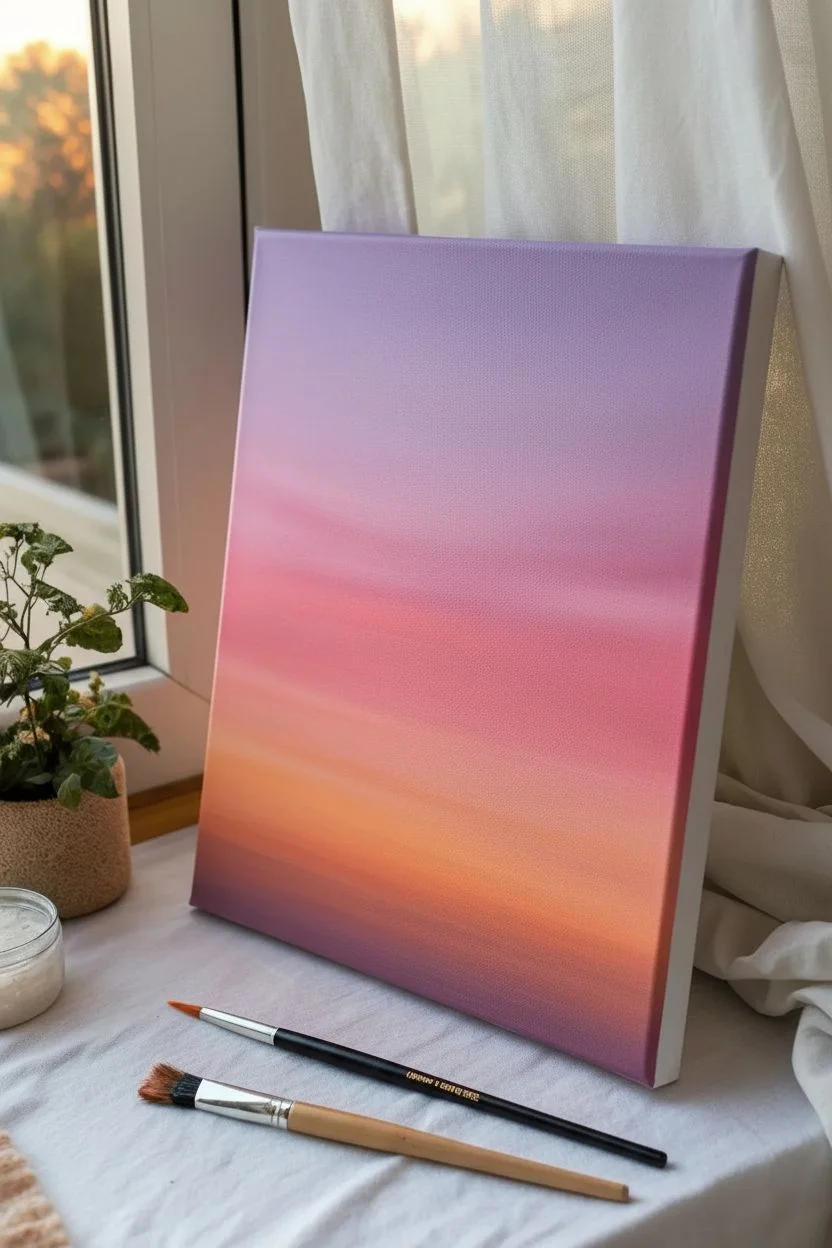
Capture the fleeting magic of twilight with this seamless gradient painting that transitions from deep violet to a glowing, fiery orange. This project focuses on smooth blending techniques to create a realistic, soft-lit sky that looks professional but is surprisingly beginner-friendly.
Step-by-Step Tutorial
Materials
- Stretched canvas (rectangular profile)
- Acrylic paints: Titanium White, Violet, Magenta, Cadmium Orange, Cadmium Yellow, Black
- Wide flat brush (1-2 inch) for blending
- Medium filbert brush
- Small fine liner brush
- Palette or mixing plate
- Cup of water and paper towels
Step 1: Setting the Background Gradient
-
Prepare the violet base:
Start by mixing a soft violet shade. Combine your violet paint with a generous amount of Titanium White to create a pastel, lavender-purple hue. This will be the dominant color for the top third of your canvas. -
Apply the top layer:
Using your wide flat brush, paint horizontal strokes across the top third of the canvas. Ensure the coverage is thick enough to hide the canvas weave slightly. Work quickly so the paint stays wet for blending. -
Mix the transition pink:
Without cleaning your brush thoroughly, dip it into Magenta and a touch more White. You want a soft, rosy pink color. -
Paint the middle section:
Apply this pink mixture directly below the violet section. Overlap the wet violet edge slightly to begin the blending process. -
Blend the purple and pink:
Clean your brush and dry it almost completely. Gently sweep the brush back and forth horizontally exactly where the purple and pink meet. I like to use a very light hand here to feather the colors together seamlessly. -
Create the orange glow:
Mix Cadmium Orange with a little Cadmium Yellow and White. Paint this vibrant band across the lower third of the canvas, just below the pink. -
Finalize the gradient blend:
Just like before, clean and dry your wide brush. Lightly sweep horizontally between the pink and orange sections until the harsh line disappears and becomes a soft transition. -
Deepen the horizon:
At the very bottom edge of the orange section, mix a tiny dot of violet into your orange to dull it slightly, creating a darker ‘haze’ right where the horizon will be.
Step 2: Adding Clouds and Sun
-
Mix the cloud highlight color:
Create a mixture of Titanium White with a tiny speck of Yellow and Orange. The goal is a pale, warm glowing white, not a stark cold white. -
Start the wispy clouds:
Using a smaller filbert brush, gently dab thin, horizontal streaks across the pink and upper orange sections. Keep the paint thin—scumbling (dry brushing) works well here to create texture. -
Refine cloud shapes:
Clean your brush and use it dry to drag the edges of your white streaks out, making them look wispy and wind-blown rather than like solid blobs. -
Add the sun:
Identify a focal point low on the horizon line. Use your finger or a small brush to dab a concentrated spot of pure Titanium White mixed with Yellow to create the sun disk peeking through. -
Enhance the sun’s glow:
Glaze a transparent layer of pure yellow around the sun disk to make it look like it is radiating heat.
Paint drying too fast?
Acrylics dry quickly! Keep a spray bottle of water handy and mist your canvas lightly while blending to keep the paint workable for longer.
Step 3: Painting the Silhouette
-
Mix the silhouette color:
Mix Black with some Violet. Pure black can look flat, so adding purple gives it a rich depth that matches the sky. -
Paint the tree line base:
Use a medium brush to paint an uneven, jagged line across the very bottom of the canvas. This represents the ground and distant foliage. -
Detail the trees:
Switch to your fine liner brush. Paint tiny vertical strokes coming up from your dark base line to represent individual treetops. Vary the heights to make it look natural. -
Connect objects:
Ensure the bottom edge is solid opaque dark color to ground the painting. -
Final touches:
Step back and assess your clouds. If they faded too much during drying, add one final layer of bright highlights to the tops of the clouds nearest the sun.
Smoother Blending
If you struggle with streaks, use a clean, dry makeup brush (like a blush brush) to gently buff the transition lines while the paint is still wet.
Allow the canvas to dry completely before signing your name in the corner of this peaceful landscape


Calm Ocean Horizon
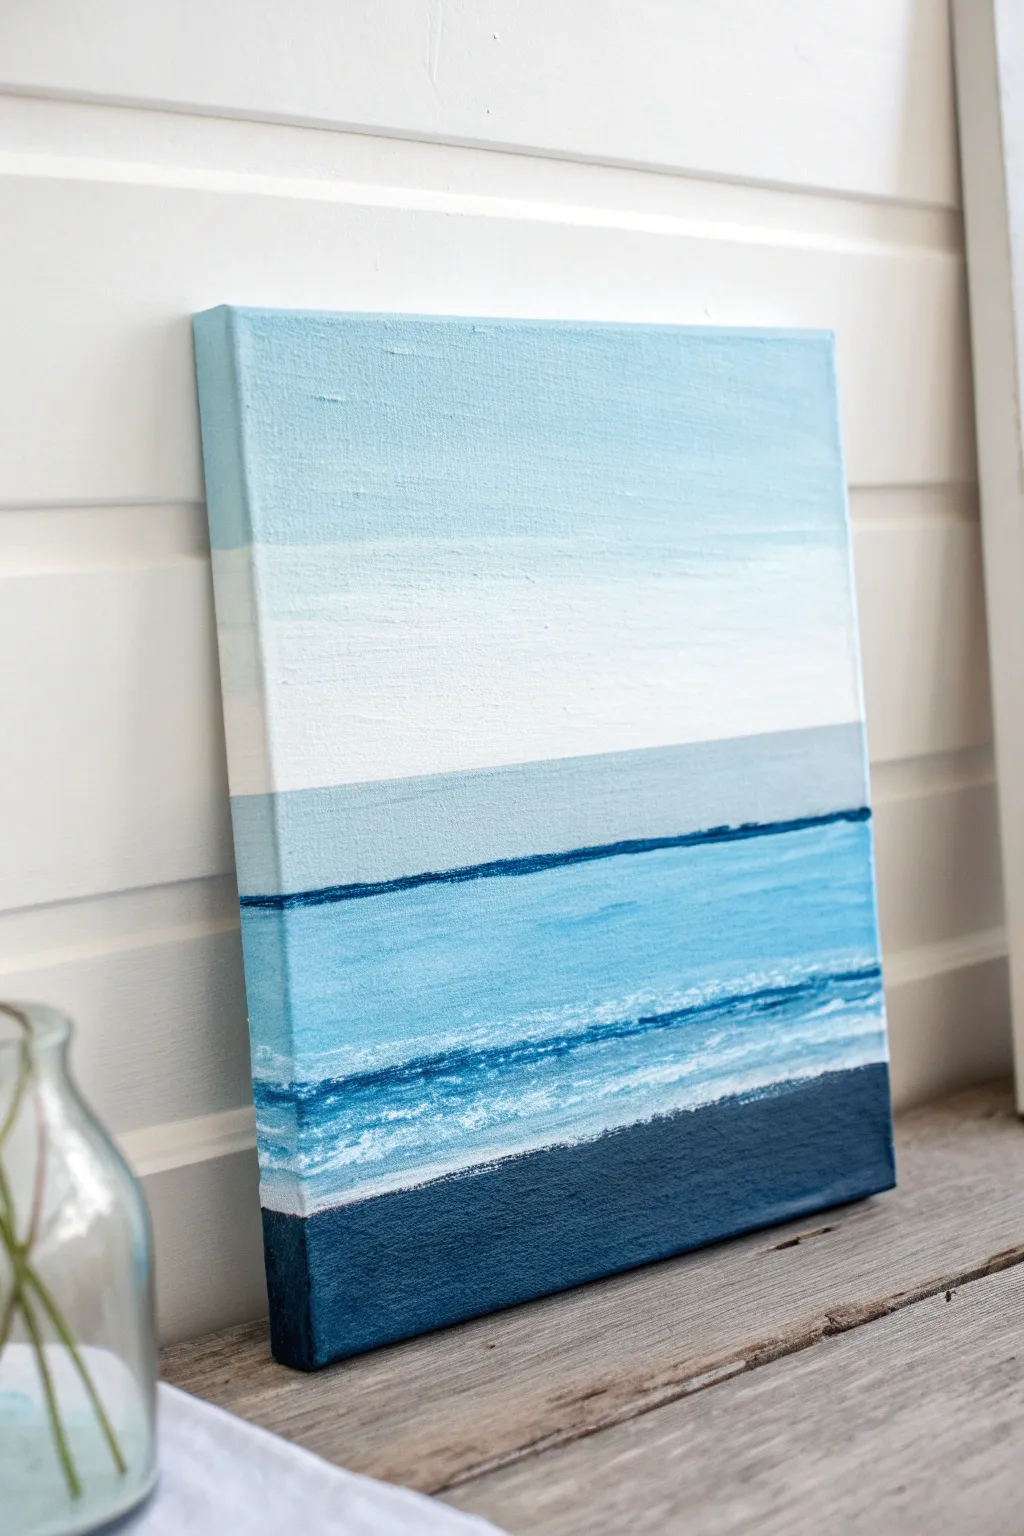
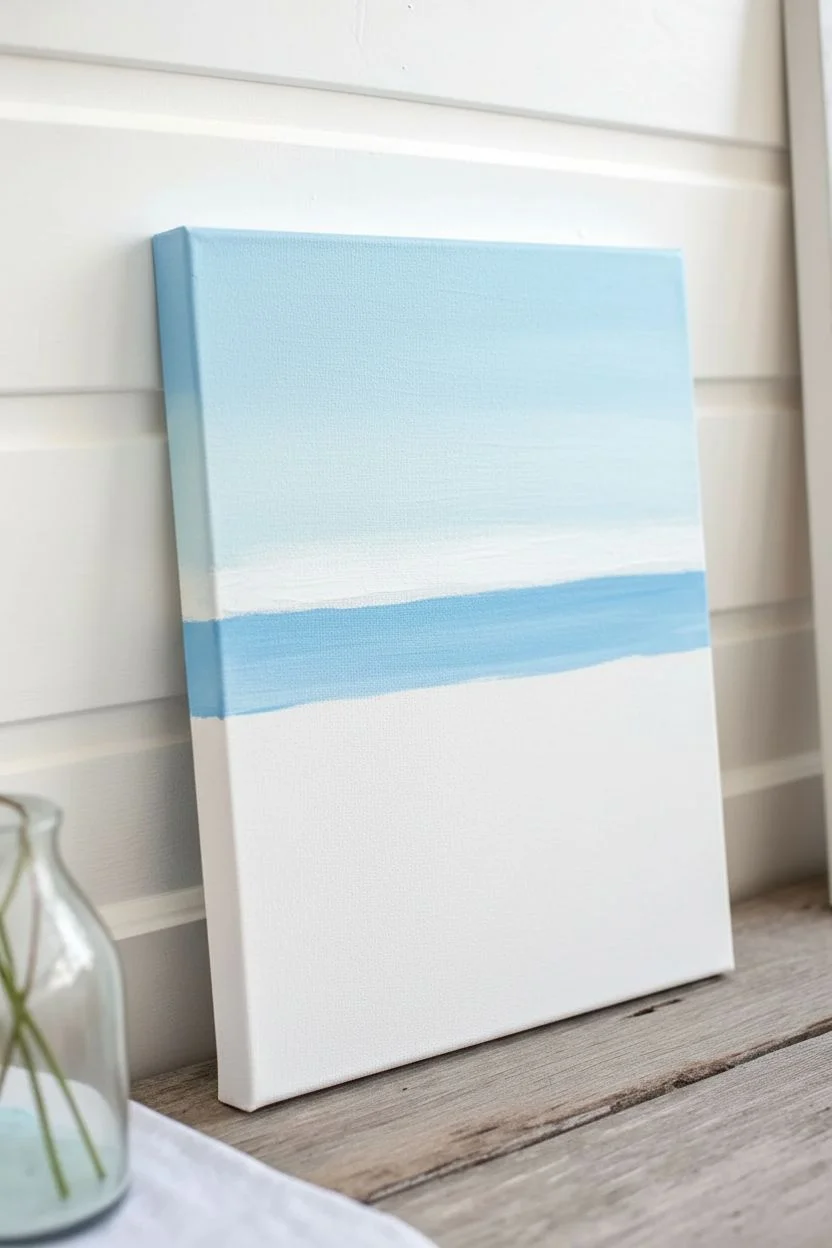
Capture the serenity of a quiet shoreline with this minimalist layered landscape. By stacking simple horizontal bands of blue and white, you’ll create a calming gradient that evokes a peaceful day at the beach.
Step-by-Step Guide
Materials
- Small rectangular stretched canvas (approx. 8×10 or 9×12)
- Acrylic paints: Phthalo Blue (or Navy), Ultramarine Blue, Sky Blue, Titanium White
- Flat shader brush (1-inch width)
- Small round or liner brush
- Palette or paper plate for mixing
- Cup of water and paper towels
Step 1: Setting the Sky
-
Mix your sky tone:
Begin by squeezing out a generous amount of Titanium White and a very small touch of Sky Blue. Mix them to create a very pale, almost-white blue. -
Apply the top band:
Using your 1-inch flat brush, paint the top third of the canvas with this pale mixture. Use long, horizontal strokes that go all the way from the left edge to the right edge. -
Paint the sides:
Don’t forget to wrap the paint around the top and side edges of the canvas for a finished, gallery-style look. This saves you from needing a frame later. -
Add the middle sky:
Without cleaning your brush, pick up a little pure White. Paint a band just below your first section, blending slightly upward where they meet to create a subtle transition. -
Create the horizon line:
Mix a slightly darker shade using Sky Blue and White. Paint a solid band just below the white section. This will serve as your distant horizon line where the sky creates a hazy separation.
Dry Brush for Foam
When painting the white wave foam, wipe most of the paint off your brush first. Use this ‘dry brush’ to drag across the canvas texture for a natural, sea-spray look.
Step 2: Deepening the Ocean
-
Mix the mid-ocean blue:
Create a medium blue tone by mixing Sky Blue with a touch of Ultramarine. This should be clearly darker than your sky tones. -
Paint the water body:
Apply a wide band of this medium blue across the middle-lower section of the canvas. Keep your strokes strictly horizontal to maintain that calm water effect. -
Define the horizon edge:
Use the edge of your flat brush to create a crisp line where the medium blue water meets the pale sky. If you want a sharper line, I sometimes use a smaller liner brush here. -
Add texture waves:
While the blue paint is still wet, dip your brush lightly into White paint (don’t mix it fully). Drag it across the blue section to create streaky, lighter highlights that mimic gentle waves.
Step 3: The Shoreline and Depths
-
Create the surf line:
Load your brush with pure White. Paint a rough, textured line below the medium blue section where the ‘waves’ are breaking. Use a dabbing motion to create a foamy texture. -
Mix the deep blue:
Combine Phthalo Blue (or Navy) with a tiny dot of black or dark grey to get a very deep, rich midnight blue. -
Paint the foreground:
Fill the bottom 1-2 inches of the canvas with this dark blue mixture. This anchors the painting and represents deep water or wet sand. -
Blend the transition:
Where the dark bottom section meets the white foam line, blend slightly upward. You want the dark blue to look like it’s receding under the white foam. -
Add final highlights:
Using a small liner brush and pure White, add a few thin, broken horizontal lines on top of the deep blue section to suggest ripples catching the light. -
Clean up edges:
Check the sides of your canvas again. Ensure the dark blue at the bottom wraps around the bottom edge and sides, matching the horizontal lines on the front. -
Dry and seal:
Let the painting dry completely for at least an hour. If desired, apply a coat of satin varnish to protect the colors and give the water a slight sheen.
Fixing Crooked Horizons
Struggling to get a straight horizon line? Place a strip of painter’s tape across the dry canvas. Paint your ocean up to the tape, let it dry slightly, then peel for a crisp edge.
Hang this piece in a spot where you need a moment of zen and enjoy your personal view of the sea


Simple Mountain Layers
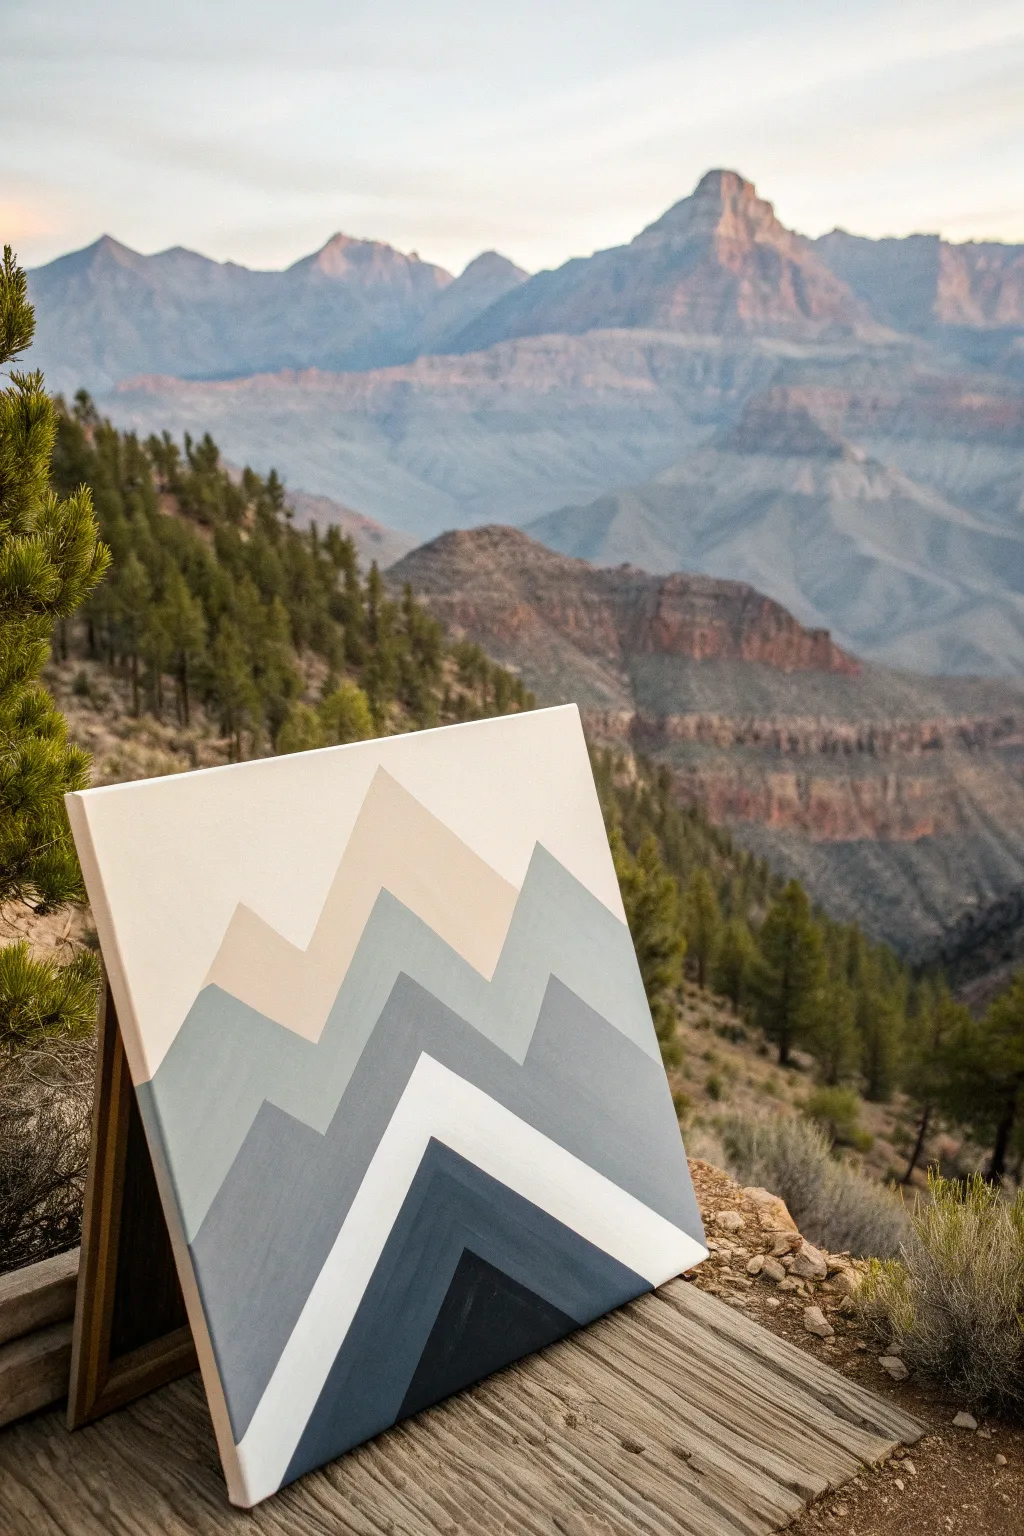
Create a serene, modern landscape using sharp geometric lines and a soothing muted color palette. This minimalist design relies on layering angular shapes to mimic the depth of a mountain range without needing complex blending skills.
How-To Guide
Materials
- Square canvas (e.g., 12×12 or 16×16 inches)
- Acrylic paints: White, Burnt Sienna, Titan Buff (or cream), Phthalo Blue, Mars Black
- Painter’s tape or masking tape (1 inch wide)
- Flat synthetic brushes (various sizes)
- Palette or paper plate
- Pencil and eraser
- Ruler
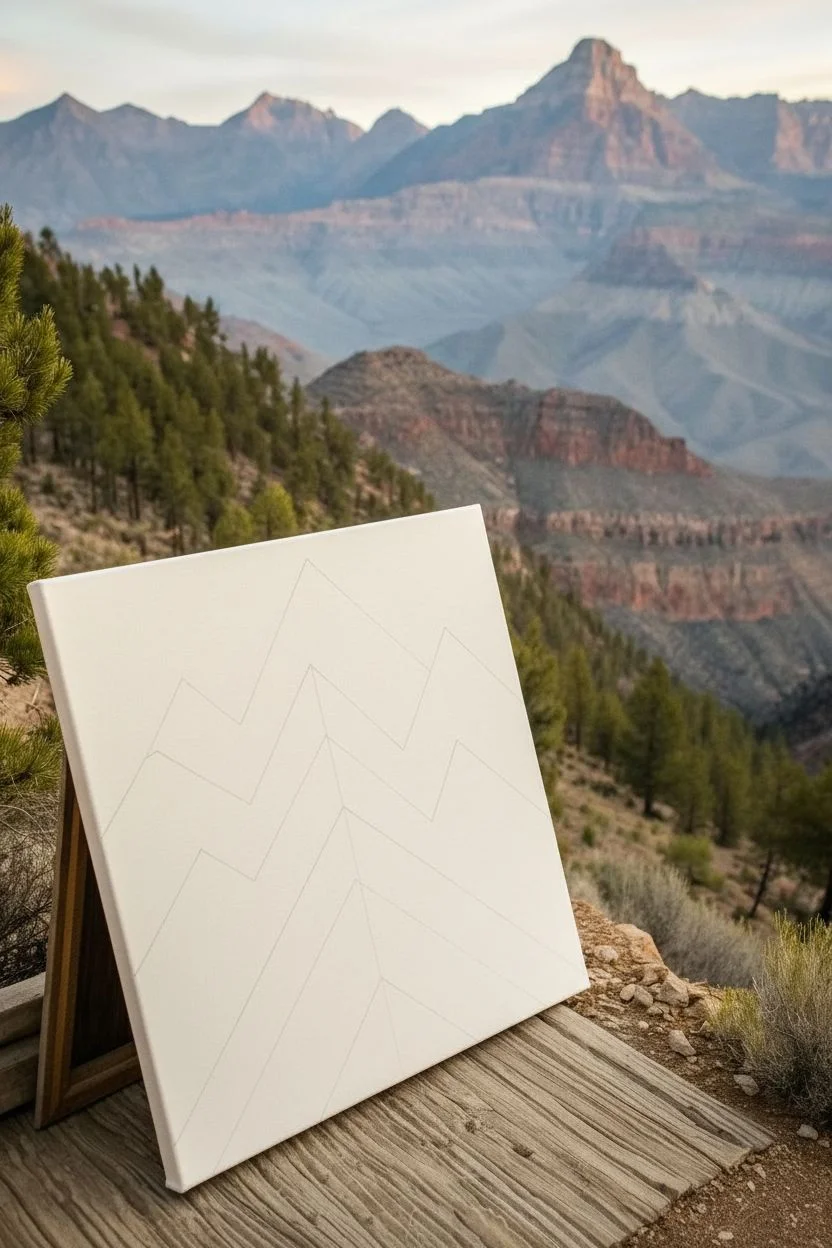
Step 1: Planning the Peaks
-
Prepare the canvas:
Start with a clean, white canvas. If you prefer a warmer undertone for your sky, paint the entire canvas with a mix of Titanium White and a tiny drop of Titan Buff. Let this base coat dry completely before moving on. -
Sketch the layout:
Using a ruler and a light pencil, draw your mountain peaks. Start from the top and work your way down. Draw a large, central peak for the highest mountain, then draw overlapping zigzag lines below it to represent the lower ranges. -
Refine the geometry:
Focus on creating sharp, angular triangles rather than organic curves. The design relies on clean geometry, so ensure your lines are straight and intersect cleanly.
Seal the Tape
Before painting a color, brush a tiny bit of the *background* color over the tape edge first. This seals the gap, so any bleed is invisible!
Step 2: Painting the Layers
-
Mix the top color:
For the highest peak (the furthest back), mix a pale beige. Combine White with a small amount of Titan Buff and a pinprick of Burnt Sienna to warm it up. -
Tape the first shape:
Apply painter’s tape along the pencil lines of your highest peak. Press the edges of the tape down firmly with your fingernail or a credit card to prevent paint bleed. -
Paint the top peak:
Fill in the taped area with your pale beige mix. Use a flat brush and stroke away from the tape edge inward to further minimize bleeding. Apply two coats if necessary for opacity. -
Remove tape and dry:
Gently peel off the tape while the paint is still slightly tacky to keep lines crisp. Allow this section to dry fully before taping over any part of it. I usually wait about 15-20 minutes here. -
Mix the second layer:
Create a soft grey-blue for the next range down. Mix White, a touch of Phthalo Blue, and a tiny bit of Black to desaturate it. It should be darker than the sky but lighter than the foreground. -
Tape and paint second layer:
Once the first layer is dry, tape off the second jagged mountain range. Ensure the tape overlaps the dried paint of the first layer precisely along the line. Paint this section with the grey-blue mix. -
Mix the middle grey:
For the third layer, modify your grey-blue mix by adding more Black and a little touch of Burnt Sienna to create a moodier, darker grey. This adds atmospheric depth. -
Paint the third layer:
Repeat the taping process for this middle section. Paint it with your darker grey mix, ensuring even coverage. Peel the tape carefully and let it dry. -
Create the white stripe:
The design features a stark white chevron near the bottom. Clean your brush thoroughly or use a fresh one. Use pure Titanium White (or your initial background color) to paint this angular strip. -
Mix the foreground blue:
For the shape nested inside the white stripe, mix a deep, rich navy. Use Phthalo Blue and Black, aiming for a strong, dark value that contrasts heavily with the white. -
Paint the navy section:
Tape off the area below the white stripe and fill it with your deep navy mix. This strong dark color anchors the composition. -
Paint the final triangle:
The very bottom center triangle is the darkest element. Mix mostly Black with a hint of Blue. Tape off this final small triangle at the bottom center and fill it in.
Step 3: Finishing Touches
-
Touch up edges:
Once all tape is removed and paint is dry, inspect your lines. If any paint bled under the tape, use a small detail brush and the appropriate color to tidy up the edges. -
Erase pencil lines:
Gently erase any visible pencil marks that weren’t covered by paint. Be sure the paint is totally cured so you don’t smudge it. -
Seal the canvas:
Protect your hard work with a coat of matte varnish. This unifies the sheen of the different paint mixes and protects the surface from dust.
Tearing Tapes?
If tape is peeling up paint, use a hairdryer to briefly warm the tape before removal, softening the adhesive. Pull slowly at a 45-degree angle.
Hang your new geometric masterpiece in a spot where you can enjoy its calming, orderly view


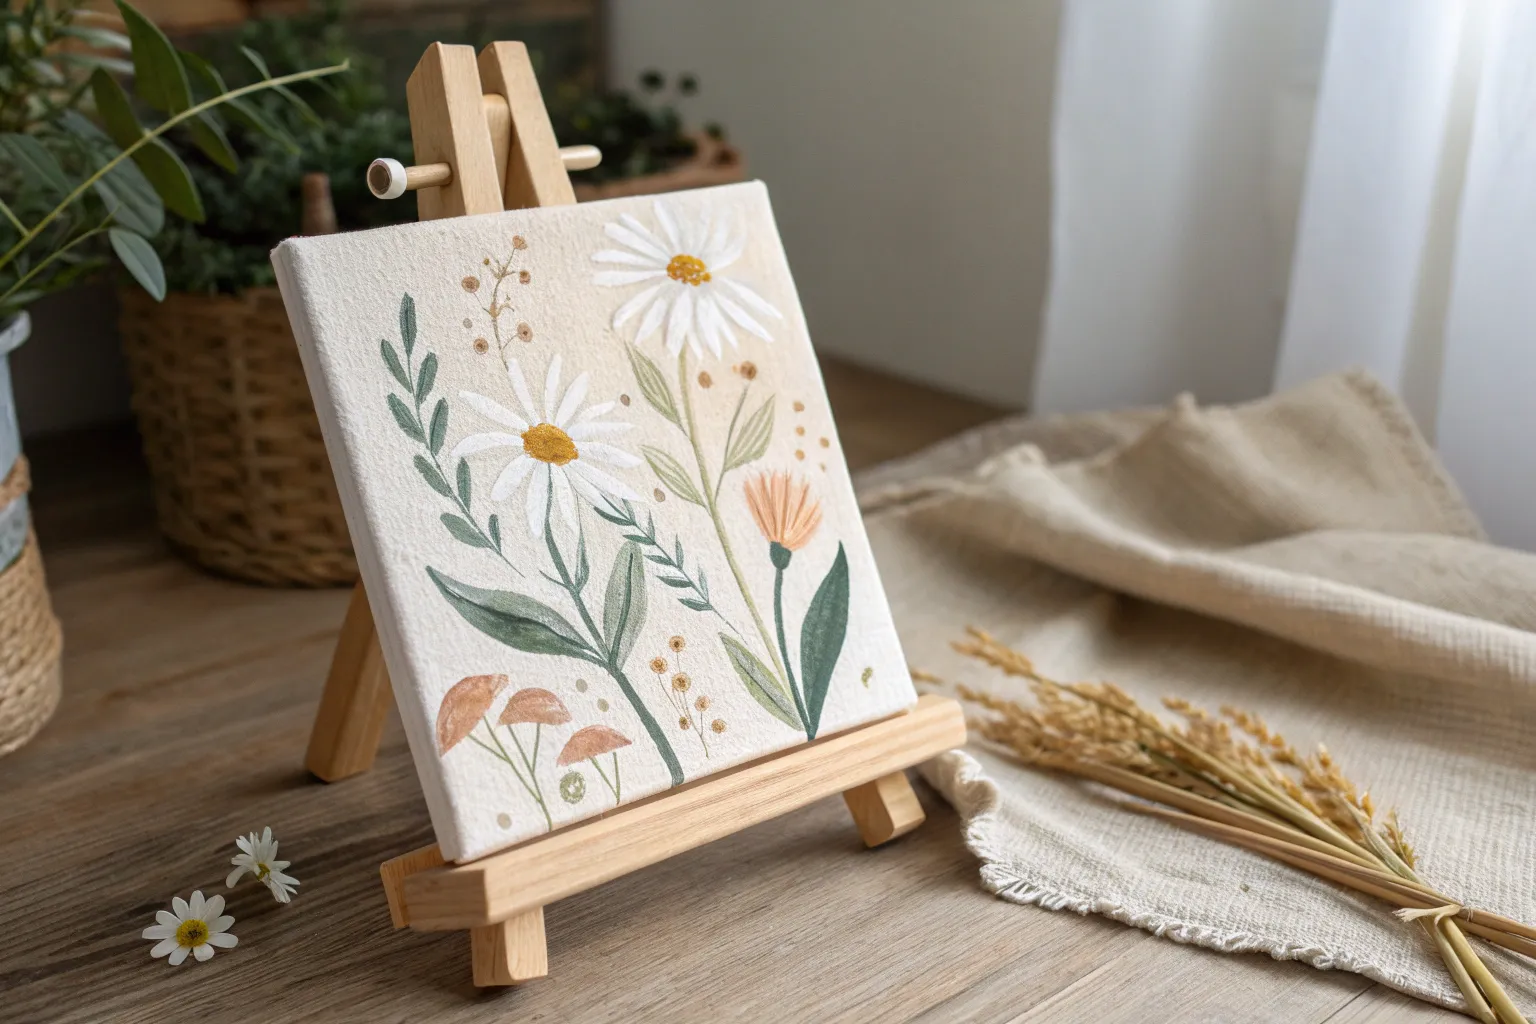
Daisy Dot Flowers
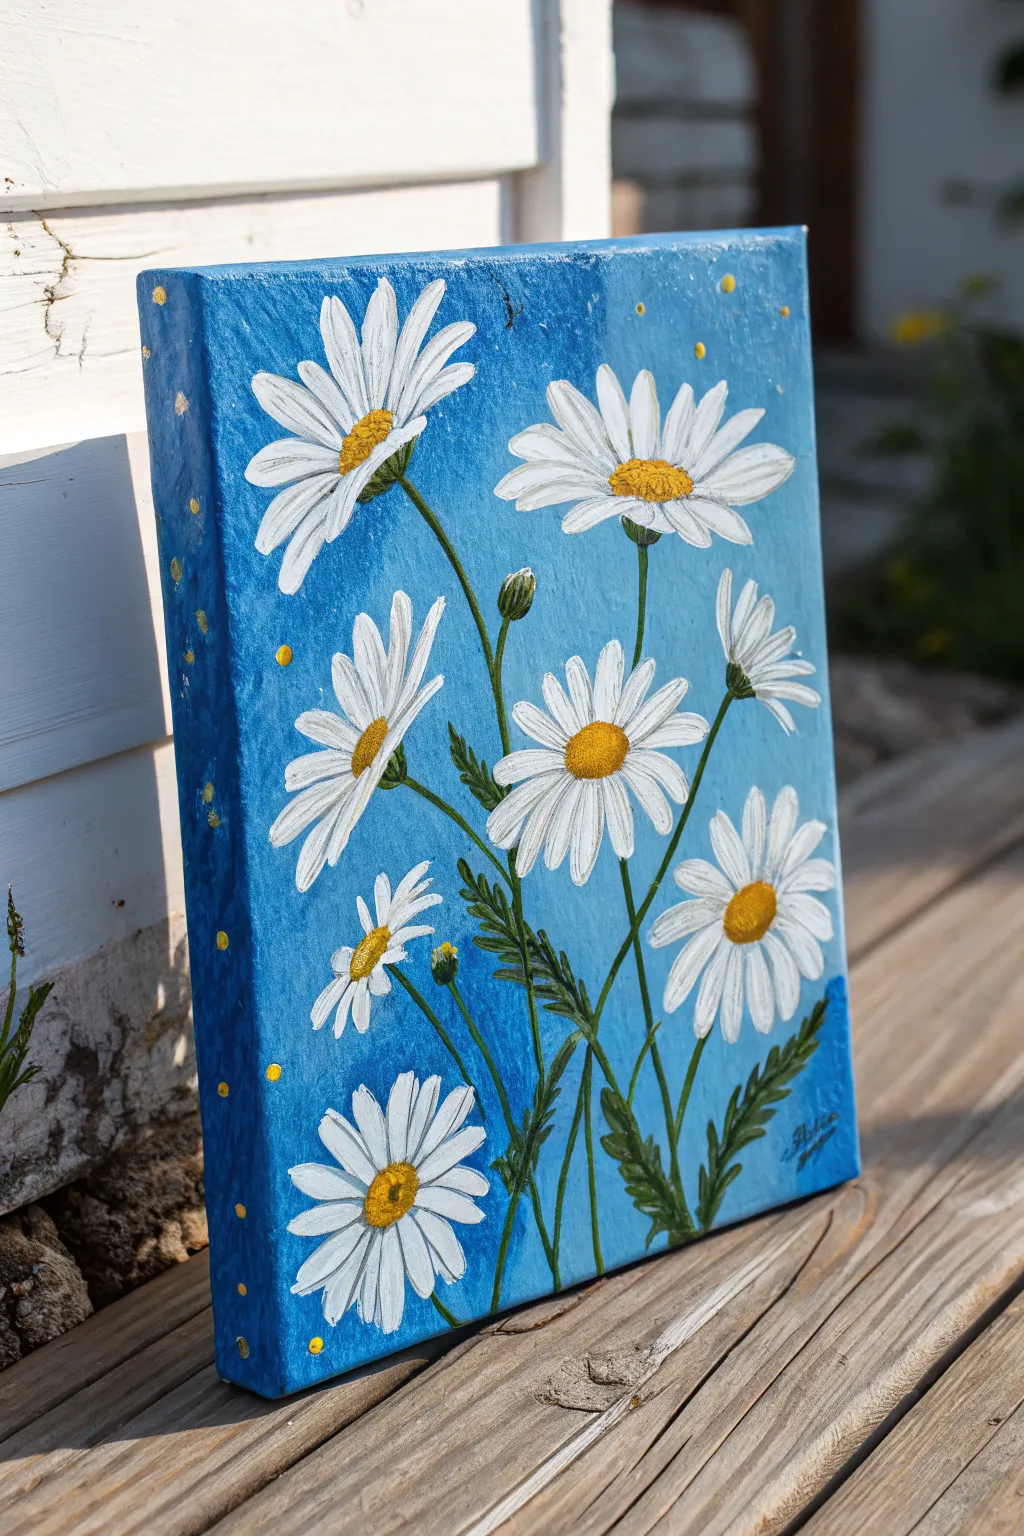

Capture the essence of a perfect summer day with this cheerful acrylic painting featuring bright white daisies dancing against a vibrant blue backdrop. The scattered yellow dots add a playful, magical touch that brings the whole composition to life.
Step-by-Step Tutorial
Materials
- Rectangular stretched canvas (e.g., 8×10 or 11×14 inches)
- Acrylic paints: Bright Blue, Cyan Blue, White, Titanium White, Golden Yellow, Raw Umber (Dark Brown), Sap Green
- Large flat brush (1 inch)
- Medium round brush (size 6 or 8)
- Small liner brush or detail brush (size 0 or 1)
- Small sponge or tissue (optional based on texture preference)
- Palette or paper plate
- Cup of water and paper towels
Step 1: Creating the Sky
-
Mix your blues:
Start by squeezing out Bright Blue and a touch of Cyan onto your palette. I like to keep them slightly separate so I can grab different variations as I paint. -
Paint the background:
Using the large flat brush, cover the entire front surface of the canvas with your blue mix. Use vertical strokes for a uniform look, but don’t worry about perfect blending; visible brush textures add character. -
Add subtle depth:
While the blue is still wet, pick up a tiny bit of white on your dirty blue brush and streak it lightly into the background in a few areas to create a soft, atmospheric variation. -
Paint the edges:
Don’t forget to paint the sides of the canvas with the same blue mixture. This gives the finished piece a polished, wrap-around look without needing a frame. -
Let it dry completely:
Allow the background to dry fully before moving on. This usually takes about 15-20 minutes for acrylics.
Petal Perfection Tip
If your white paint feels too thick or drags, mix in a single drop of water. This helps the paint flow smoothly for crisp, tapered petal tips.
Step 2: Painting the Daisies
-
Plan positions:
Visualize two main clusters of flowers—one larger group near the top right and another toward the bottom left—to create a balanced composition. You can lightly mark the center of each flower with a tiny dot of yellow paint as a guide. -
Start the petals:
Load your medium round brush with Titanium White. Starting from the outside edge of a petal, press the brush down and pull inward toward the flower center, lifting pressure as you reach the middle. -
Build the flower shape:
Repeat this stroke around your center point. Daisies aren’t perfect circles, so vary the length of the petals slightly. Some petals can overlap others. -
Angle the flowers:
For flowers that are facing sideways or upwards (like the top left one), paint shorter petals on the back side and longer petals on the front side to create perspective. -
Second coat:
Acrylic white can be translucent. Once the first layer of petals is dry to the touch, add a second coat of white to make them pop brightly against the blue. -
Paint the centers:
Using a clean round brush, dab a circle of Golden Yellow into the center of each flower. Use a stippling motion (dabbing up and down) to create a fuzzy, pollen-like texture. -
Shadow the centers:
Mix a tiny speck of Raw Umber into your yellow. Dab this darker mix onto the bottom edge of the yellow centers to give them a 3D rounded appearance.
Step 3: Stems, Leaves, and Details
-
Draw the stems:
Thoroughly rinse your small liner brush and load it with Sap Green. Paint thin, slightly curved lines extending from the bottom of each flower head down to the bottom of the canvas. -
Add sepals:
For the side-facing flowers and buds, paint a small green cup-shape (the sepal) at the base of the white petals where they meet the stem. -
Paint the leaves:
Using the green paint on your small round brush, add jagged, fern-like leaves low on the stems. Use short, flicking strokes outward from the stem to mimic the texture of daisy foliage. -
Add flower buds:
Paint small oval shapes in green on new stems to represent unopened buds. You can add a tiny sliver of white at the tip to show the petals starting to emerge. -
Create the signature dots:
Dip the handle end of a small brush into your Golden Yellow paint. Simply press the handle onto empty blue areas of the canvas to create perfect little dots. -
Add side dots:
Continue this dot pattern onto the painted sides of the canvas for a continuous decorative effect. -
Final highlights:
Add a tiny speck of pure white to the top of each yellow flower center as a highlight where the sun hits it.
Level Up: Texture
Mix a pinch of real sand or salt into the yellow paint for the flower centers before applying it. This creates a genuine gritty texture.
Step back and admire your cheerful field of daisies, ready to brighten any room.
BRUSH GUIDE
The Right Brush for Every Stroke
From clean lines to bold texture — master brush choice, stroke control, and essential techniques.
Explore the Full Guide
Cherry Blossom Branch

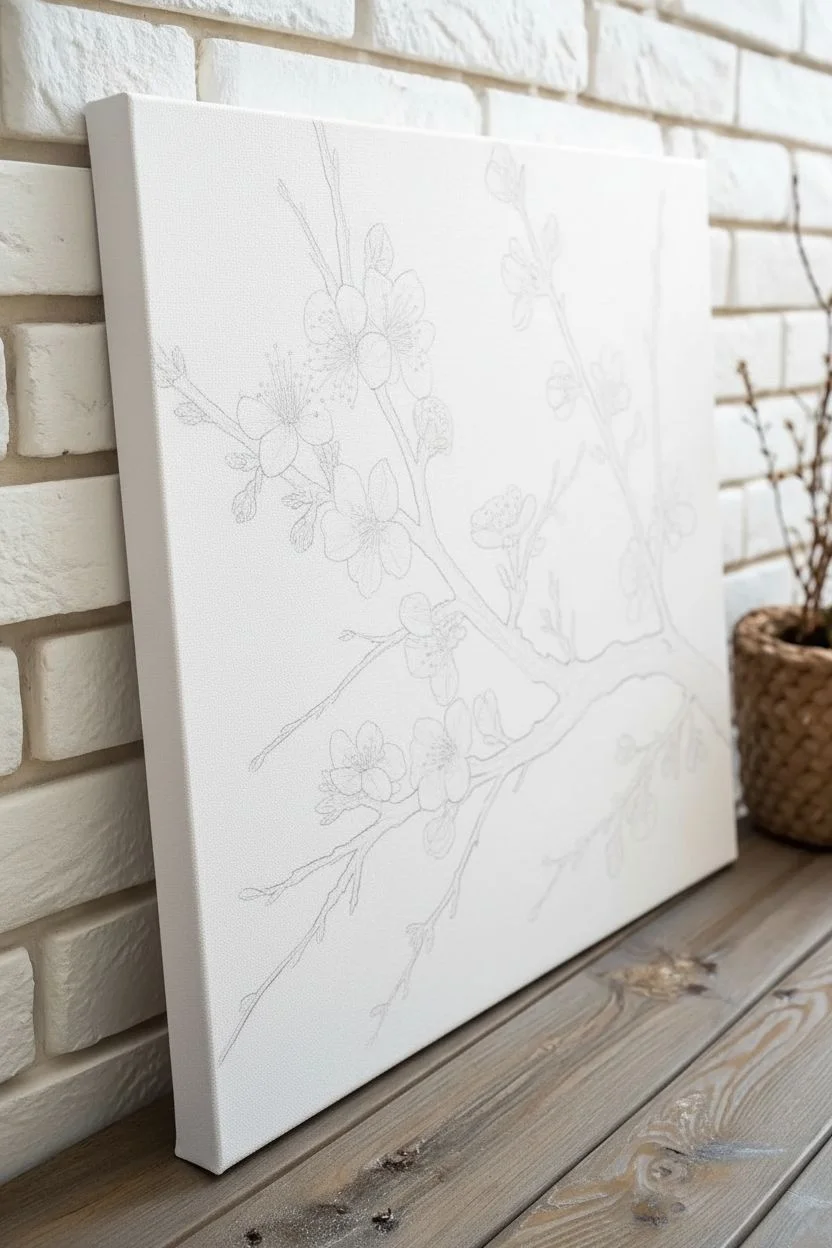
Capture the fleeting beauty of spring with this elegant cherry blossom branch on canvas. The soft pink petals contrast beautifully against the textured white background and dark, gnarled wood, creating a piece that feels both modern and timeless.
How-To Guide
Materials
- Stretched canvas (rectangular, e.g., 16×20 inch)
- Acrylic paints: Titanium White, Burnt Umber, Mars Black, Magenta or Alizarin Crimson, Yellow Ochre
- Round brushes: Sizes 2, 6, and a fine liner brush (0 or 00)
- Small flat brush (optional for background touch-ups)
- Palette or paper plate
- Water cup and paper towels
- Pencil for sketching
Step 1: Preparation & Sketching
-
Prepare the Background:
If your canvas isn’t already primed white, apply a coat of Titanium White acrylic paint to ensure a bright, clean surface. Let this dry completely before starting your sketch. -
Map Out the Main Branch:
Using a pencil, lightly sketch the main branch entering from the bottom right corner and extending diagonally upward towards the top center. Keep the lines jagged and uneven to mimic the organic growth of a real tree. -
Add Secondary Twigs:
Draw smaller twigs branching off the main limb. Let some reach high towards the top left and others droop slightly. Vary the thickness; the wood should be thickest at the base and taper into delicate tips. -
Mark Blossom Locations:
Lightly sketch small circles or oval clusters where you want your flowers to sit. Avoid making them perfectly evenly spaced; group some in tight clusters and leave other areas bare for a natural look.
Natural Petal Effect
Don’t overthink petal shapes. Use the natural shape of a round brush—press down for the belly of the petal and lift for the tip—to do the work for you.
Step 2: Painting the Wood
-
Mix the Base Wood Color:
Combine Burnt Umber with a tiny touch of Mars Black to create a deep, dark brown. If it feels too stark, warm it up with a speck of Yellow Ochre. -
Paint the Main Branch:
Using a size 6 round brush, fill in the main branch shape. Don’t worry about perfect smoothness; a slightly rough texture adds to the bark effect. -
Detail the Twigs:
Switch to a size 2 round brush to paint the thinner twigs extending outward. Use a light hand to keep the tips sharp. -
Add Highlights and Texture:
Mix a lighter brown using Burnt Umber and White. With a nearly dry brush, lightly drag this color over the top edges of the branches where light would hit. This creates dimension. -
Deepen the Shadows:
Use a liner brush with watered-down black or dark brown to add cracks, knots, and shadows on the underside of the branches.
Step 3: Creating the Blossoms
-
Mix Your Pink Spectrum:
Prepare three shades of pink on your palette: a pale pastel pink (lots of White + tiny dot of Magenta), a medium pink, and a deeper, saturated pink for the buds. -
Paint the Petals:
Dip your size 6 brush into the pale pink. Press the brush down and lift up to create teardrop or oval petal shapes. Each flower usually has 5 petals. Paint the open flowers first. -
Layering Colors:
While the first layer is still slightly wet, pick up a tiny bit of medium pink on the tip of your brush and stroke it from the center of the flower outward. This gives the petals a soft gradient. -
Adding Flower Centers:
Once the petals are tacky, dab a small dot of darker pink or red in the very center of the open blossoms to create depth. -
Painting the Buds:
For the unopened buds at the end of twigs, use the deepest pink shade. Paint small, teardrop shapes attached directly to the wood.
Flower Opacity Fix
If your pink paint is too transparent and the brown branch shows through clearly, let the pink dry completely and apply a second coat of petals for better coverage.
Step 4: Final Details
-
Add Stamens:
Using your finest liner brush and a mix of Yellow Ochre and White, paint tiny, delicate lines radiating from the center of the open flowers. I like to add tiny dots at the ends of these lines for pollen. -
Connect the Flowers:
If any flowers look like they are floating, use the liner brush with brown paint to create tiny stems connecting them back to the main branch. -
Refine the Sepals:
Paint small green or dark brownish-red leaflets (sepals) at the base of the flower buds where they attach to the branch. -
Highlight the Edges:
Add tiny slivers of pure white to the very edges of a few petals and the top of the branch to make the painting pop against the light background. -
Final Cleanup:
Step back and look at the composition. If any branch looks too straight or unnatural, thicken it slightly or add a small knot.
Hang your new canvas in a spot with natural light to let those delicate pink hues shine.
Pine Tree Silhouettes
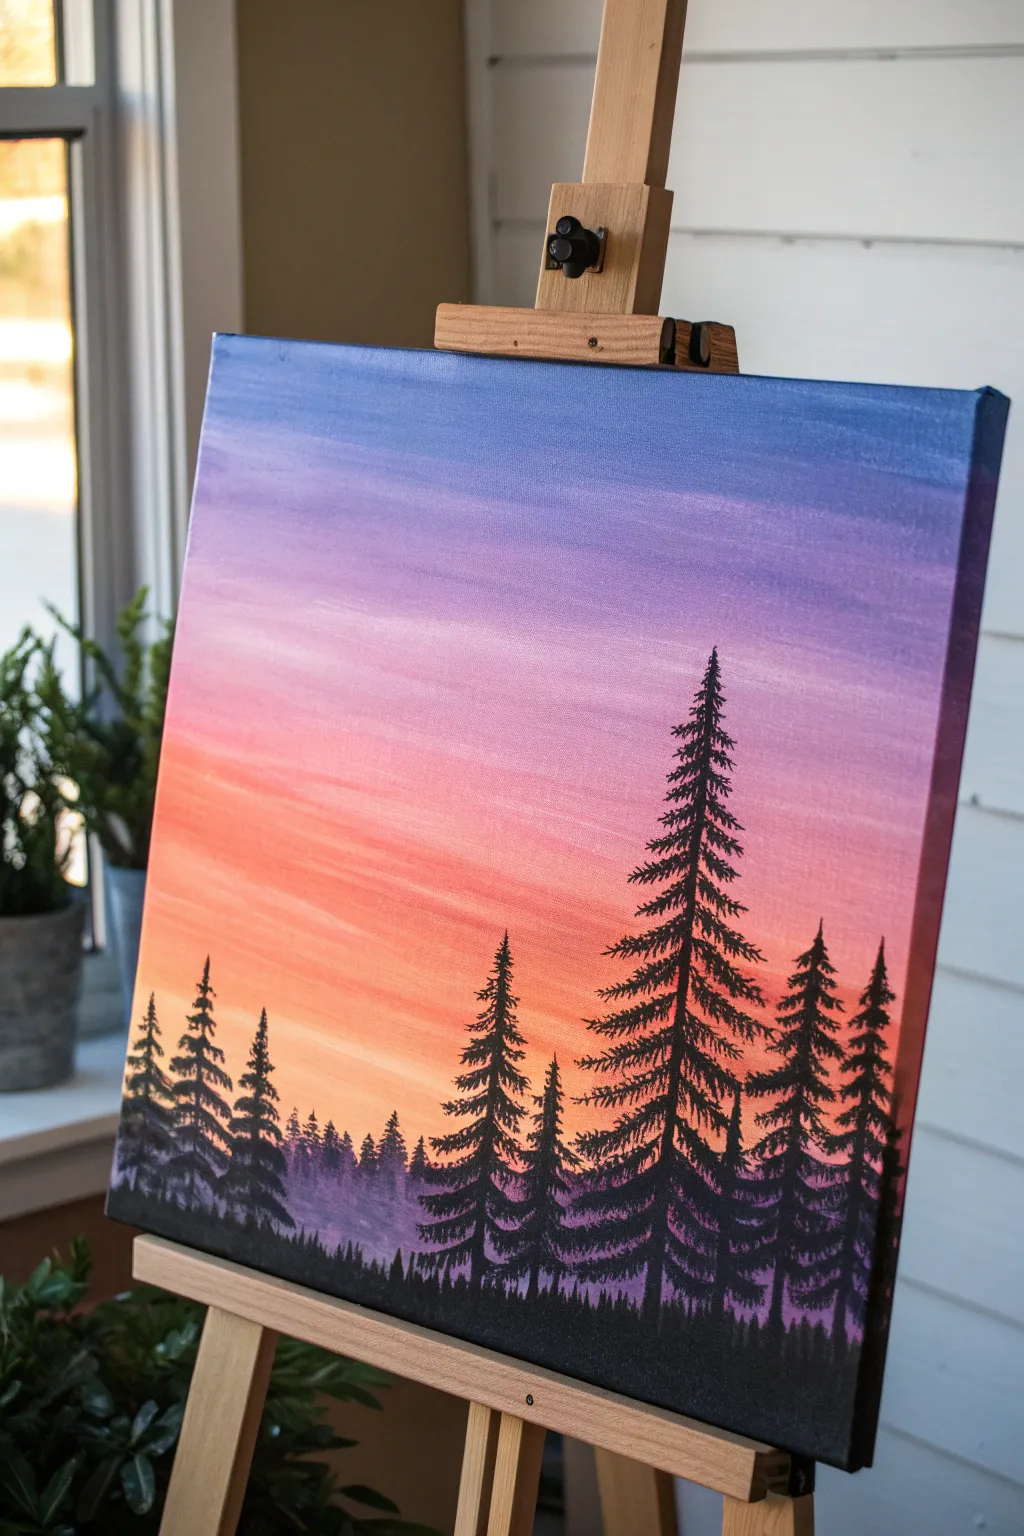
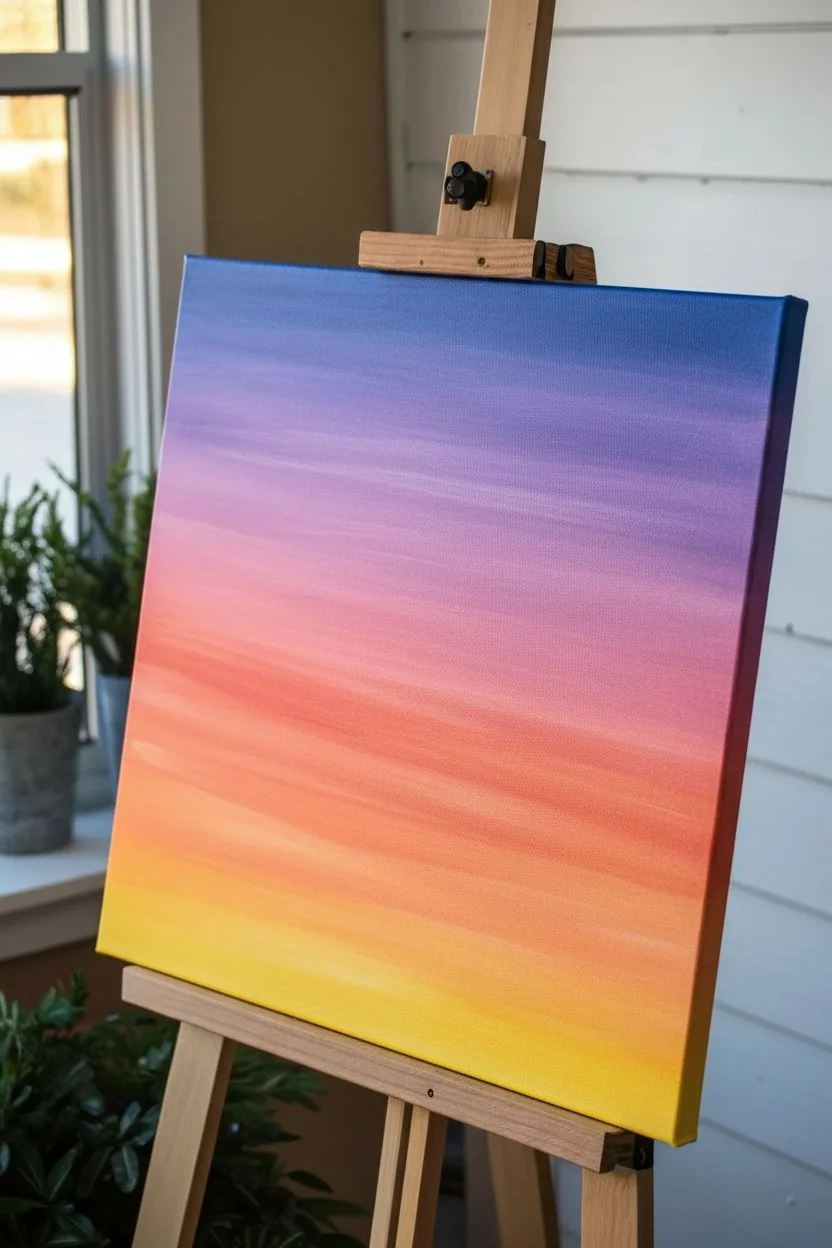
Capture the serene beauty of a twilight forest with this striking silhouette painting. You’ll master a seamless sunset gradient background that makes the stark black pine trees pop with dramatic contrast.
Step-by-Step Guide
Materials
- Stretched canvas (12×12 or 16×20 inches)
- Acrylic paints: Titanium White, Cadmium Yellow, Orange, Magenta, Violet, Phthalo Blue, Mars Black
- Large flat wash brush (1-2 inch)
- Medium flat brush
- Small round brush (size 2 or 4)
- Fine liner brush (size 0 or 00)
- Palette or paper plate
- Cup of water
- Paper towels
Step 1: Painting the Gradient Sky
-
Prepare the palette:
Squeeze out your sky colors in order: Phthalo Blue, Violet, Magenta, Orange, Cadmium Yellow, and Titanium White. Having them ready is crucial because acrylics dry fast and we need to blend while wet. -
Start at the top:
Using your large flat wash brush, load up the Phthalo Blue. Paint a horizontal band across the top 1/5th of the canvas using long, smooth left-to-right strokes. -
Transition to purple:
Without washing the brush completely (just wipe it slightly), pick up some Violet. Paint the next band below the blue, overlapping the wet blue edge slightly to encourage blending. -
Blend the upper sky:
Clean your brush, then use slightly damp bristles to work back and forth over the seam between the blue and violet until the line disappears into a soft gradient. -
Add the middle tones:
Rinse your brush well. Pick up Magenta and paint the middle section of the canvas. Blend it upward into the violet section using light horizontal strokes. -
Create the sunset glow:
Mix a little White with your Orange to make it opaque. Apply this below the pink section. The white helps the orange stand out against the blue undertones if they mix. -
Finish the horizon:
At the very bottom quarter, apply Cadmium Yellow mixed with plenty of White for a bright, glowing horizon line. Blend this upward into the orange. -
Smooth the entire sky:
Take a clean, dry brush and very lightly sweep it horizontally across the entire canvas from top to bottom to soften any harsh brushstrokes. Allow the background to dry completely—usually about 20 minutes.
Natural Branching
Avoid perfect symmetry. Nature is random! Wiggle your brush slightly as you pull outward to create crooked, realistic pine branches rather than straight lines.
Step 2: Creating the Distant Mist
-
Mix a misty gray-purple:
Mix a small amount of Mars Black with Violet and a significant amount of Titanium White. You want a pale, foggy purple-gray color. -
Paint the background treeline:
Using a worn flat brush or a scruffy round brush, tap in a low, uneven line of trees just above the bottom edge. Keep these small and faint to create the illusion of distance. -
Fade the bottoms:
While the misty trees are wet, use a clean finger or dry brush to smudge their bottoms downward, fading them into the horizon haze.
Sky Not Blending?
If paints dry too fast to blend, lightly mist the canvas with water or use a ‘slow-dry medium’ mixed into your acrylics to keep them workable longer.
Step 3: Painting the Pine Silhouettes
-
Establish the ground:
Load a medium flat brush with pure Mars Black. Paint a solid, undulating strip across the very bottom of the canvas to create the foreground earth. -
Map out the trees:
Switch to your small round brush. Paint vertical distinct lines for the trunk guides. Vary their heights and spacing—make one large “hero” tree on the right side. -
Start the treetops:
Use the fine liner brush for the very tips of the trees. Paint tiny, downward-angled dashes to start the pine shape. -
Build the branches:
Switch to your small round brush as you move down the trunk. Use a tapping or zig-zag motion, making the branches wider as you descend. -
Create texture:
I like to leave small gaps of sky showing through the branches. Don’t make the trees solid triangles; keep the edges rough and uneven. -
Fill the lower canopy:
For the bottom third of the trees, the branches should be dense and overlap with neighbor trees. Use darker, heavier strokes here. -
Add tiny details:
Go back with your liner brush and add a few stray, thin branches sticking out from the sides or tops of the trees to make them look organic. -
Final touches:
Check the bottom edge where the trees meet the ground. Add some small vertical grass blade strokes in black to integrate the trees into the earth.
Step back and admire your peaceful forest landscape.

PENCIL GUIDE
Understanding Pencil Grades from H to B
From first sketch to finished drawing — learn pencil grades, line control, and shading techniques.
Explore the Full Guide
Starry Night Splatter
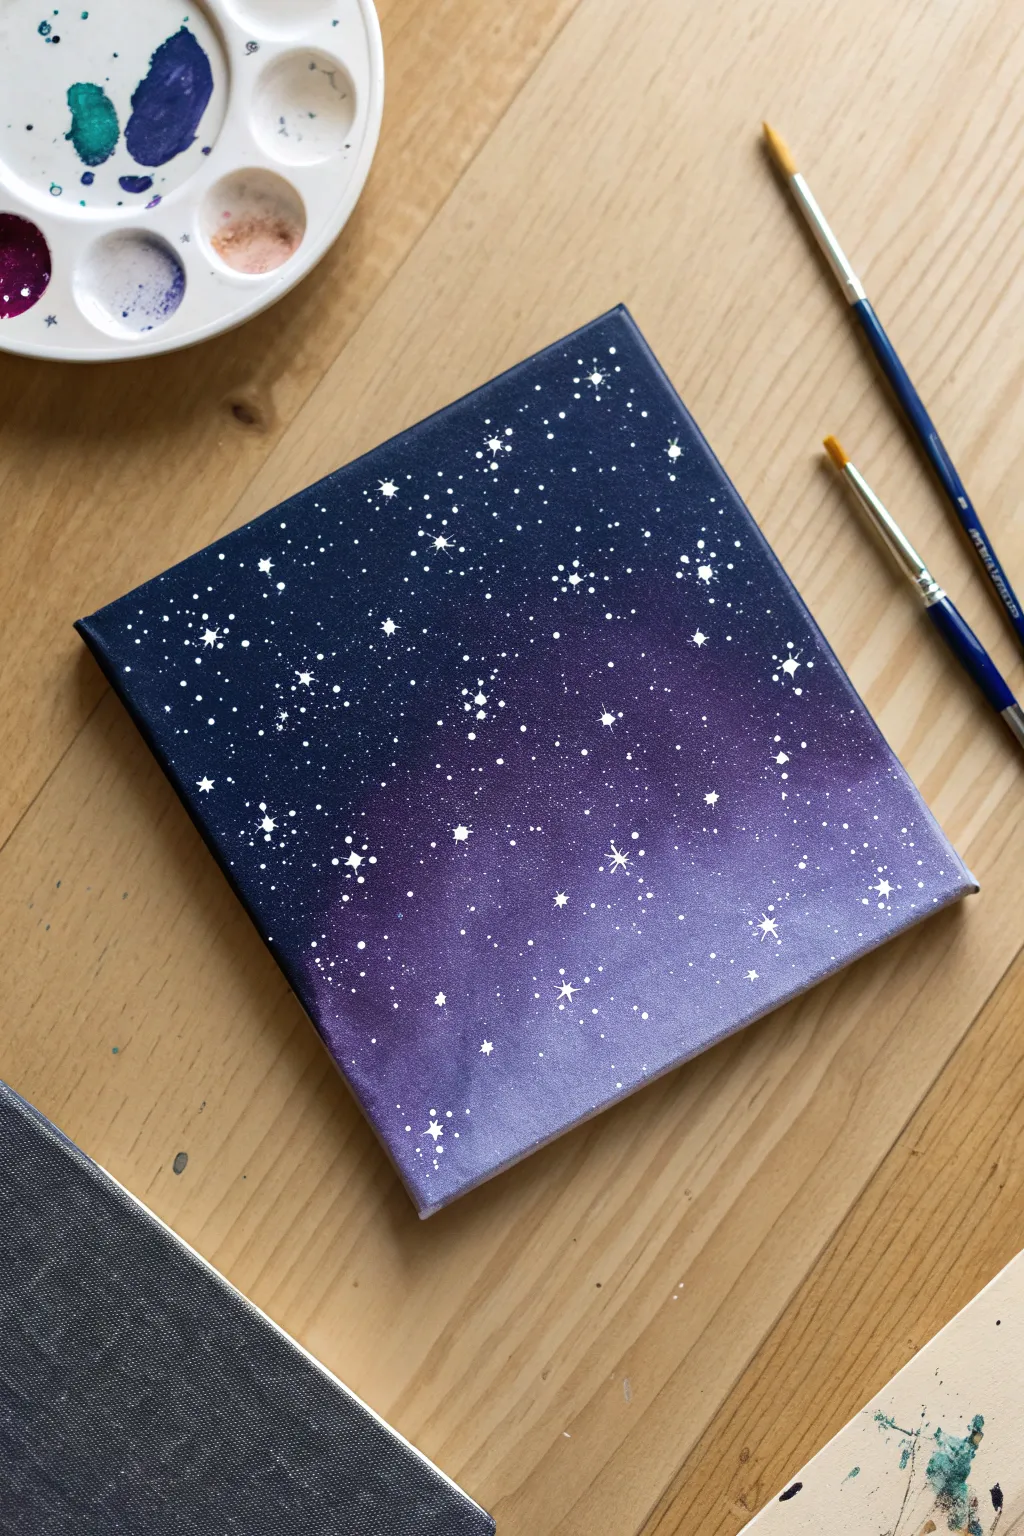
Capture the magic of a distant galaxy with this simple yet stunning starry night painting. By blending deep blues into soft lavenders, you’ll create a dreamy backdrop perfect for a scattering of bright, twinkling stars.
How-To Guide
Materials
- Small square stretched canvas (e.g., 6×6 or 8×8 inch)
- Acrylic paints: Navy Blue, Deep Purple, White, Magenta
- Flat shader brush (medium size)
- Small round detail brush (size 0 or 00)
- Old toothbrush (optional for splattering)
- Palette or paper plate
- Cup of water and paper towels
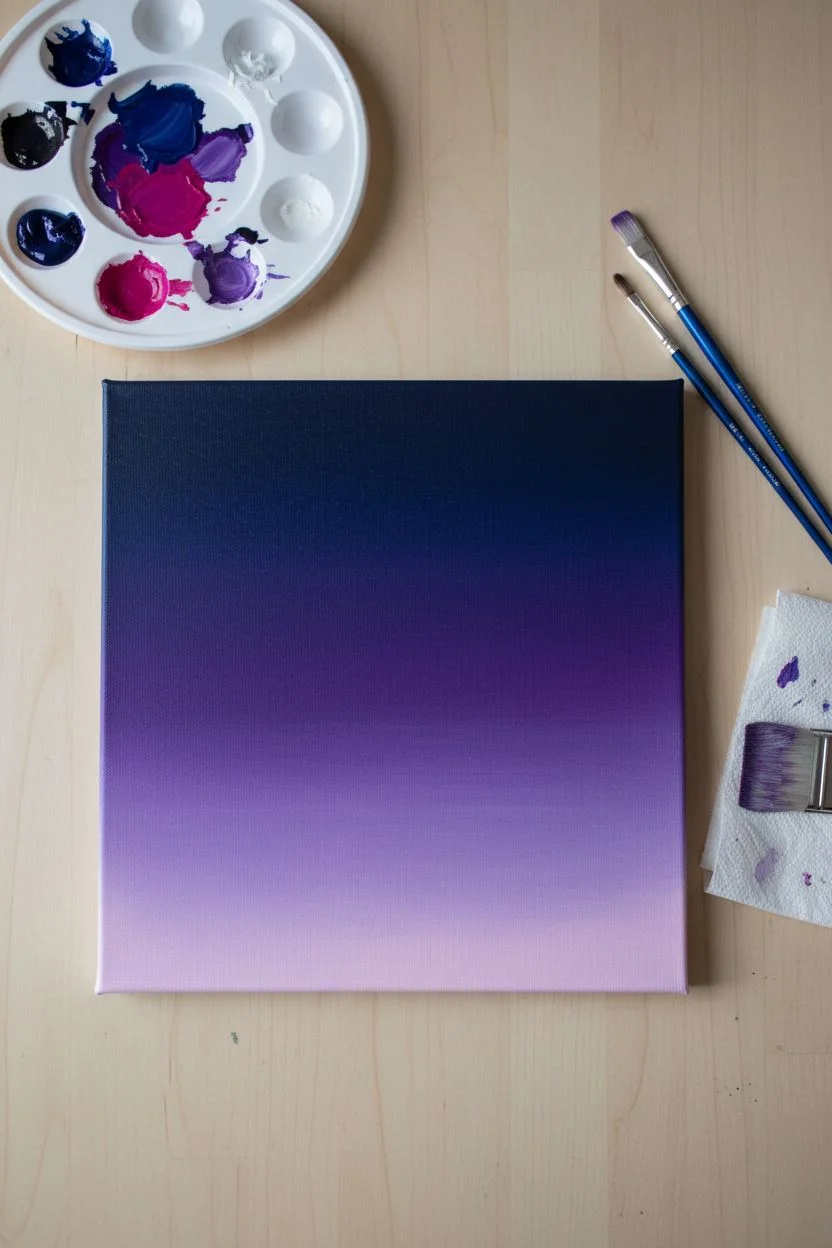
Step 1: Creating the Ombre Sky
-
Prepare your colors:
Squeeze out generous amounts of Navy Blue, Deep Purple, and White onto your palette. You’ll need to work somewhat quickly to blend acrylics while they are wet. -
Start with the darkest corner:
Dip your flat shader brush into the straight Navy Blue. Paint the top-left corner of the canvas using diagonal strokes, covering about one-third of the surface. -
Mix the mid-tone:
Without cleaning your brush fully, pick up some Deep Purple on the same brush. Blend this into the edge of the wet Navy Blue, painting diagonally towards the center of the canvas. -
Create the transition:
The goal is a seamless gradient. Use long, sweeping diagonal strokes back and forth where the blue meets the purple to soften the line until the colors merge naturally. -
Lighten the lower corner:
Wipe your brush on a paper towel to remove most of the dark paint. Pick up some White and mix it with a tiny bit of Deep Purple and Magenta on your palette to make a soft lavender. -
Finish the gradient:
Paint the remaining bottom-right corner with this pale lavender mix. Work the color upwards into the mid-tone purple, blending wet-on-wet until you have a smooth transition from dark to light. -
Refine the blend:
If any lines look too harsh, use a slightly damp, clean brush to gently feather the edges between colors. I find doing this lightly helps remove brushstrokes. -
Paint the edges:
Don’t forget to wrap your colors around the sides of the canvas for a polished look. Extend the gradient onto the edges so framing isn’t necessary later. -
Let it dry completely:
Allow the background to dry fully. It needs to be dry to the touch so your white stars stay crisp and don’t muddy into the background colors.
Oops, too many stars?
If you splattered too heavily, let the white dry. Then, mix a thin glaze of your background color (blue or purple) and gently dab it over the excess stars to push them back into the distance.
Step 2: Adding the Starlight
-
Water down your white paint:
On your palette, mix a small amount of White paint with a drop or two of water. You want an inky, fluid consistency that flows easily off a brush but isn’t dripping wet. -
Choose your splattering method:
For fine mist, dip an old toothbrush in the watered-down paint and run your thumb over the bristles. For larger drops, you can tap a loaded paintbrush handle against a second brush. -
Splatter the stars:
Hold your tool of choice over the canvas and create a random spray of white dots. Focus slightly more density in the darker navy areas for high contrast. -
Inspect the distribution:
Evaluate your star field. Is it balanced? If you need more tiny distant stars, create a second layer of very fine splatters. -
Hand-paint larger stars:
Use your smallest round detail brush (size 0) dipped in undiluted White paint. Add distinct individual dots scattered throughout the galaxy to represent brighter, closer stars. -
Create the twinkle effects:
select a few of the larger hand-painted dots to turn into twinkling stars. Paint a tiny vertical line through the center of the dot. -
Finish the cross shape:
Paint a tiny horizontal line crossing the vertical one, creating a ‘plus’ sign. Make the lines taper off to sharp points at the ends if you can. -
Add diagonal flares:
For the brightest stars, add two very short diagonal lines between the main points, creating an eight-pointed glimmer. -
Final drying time:
Let the white paint dry completely. Since some dots might be thick, give this step a little extra time to ensure nothing smears.
Add a Constellation
Personalize your galaxy by connecting specific larger stars with very faint, thin lines to form your zodiac sign or a recognizable constellation like the Big Dipper.
Now step back and admire your own piece of the infinite cosmos
Moon With Soft Clouds
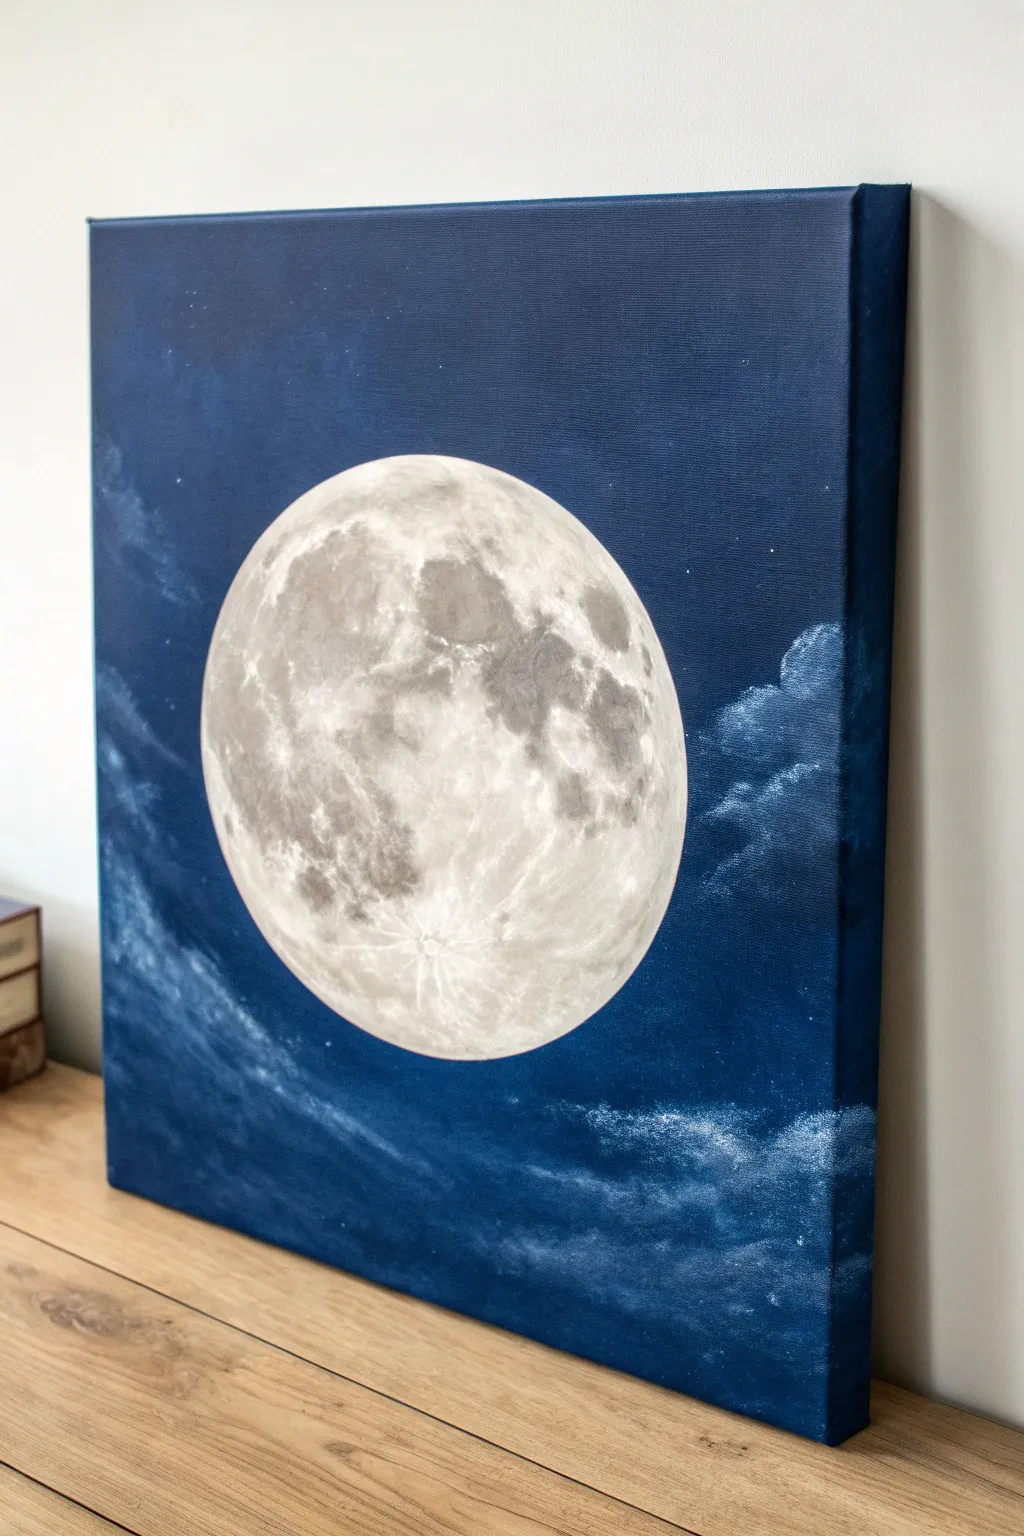
Capture the serene beauty of a full moon glowing against a deep indigo sky with this beginner-friendly acrylic painting. By layering translucent whites over dark blues, you’ll create a striking luminosity that makes the moon pop right off the canvas.
Step-by-Step Tutorial
Materials
- Square stretched canvas (e.g., 12×12 or 16×16 inches)
- Acrylic paints: Phthalo Blue (or Prussian Blue), Black, Titanium White, Raw Umber, Warm Grey
- Large flat brush (1-inch width)
- Medium flat brush
- Small round detail brush
- Small sponge or stippling brush
- Round object for tracing (plate or bowl)
- Pencil (white charcoal pencil works best on dark backgrounds)
- Palette and water cup
- Paper towels
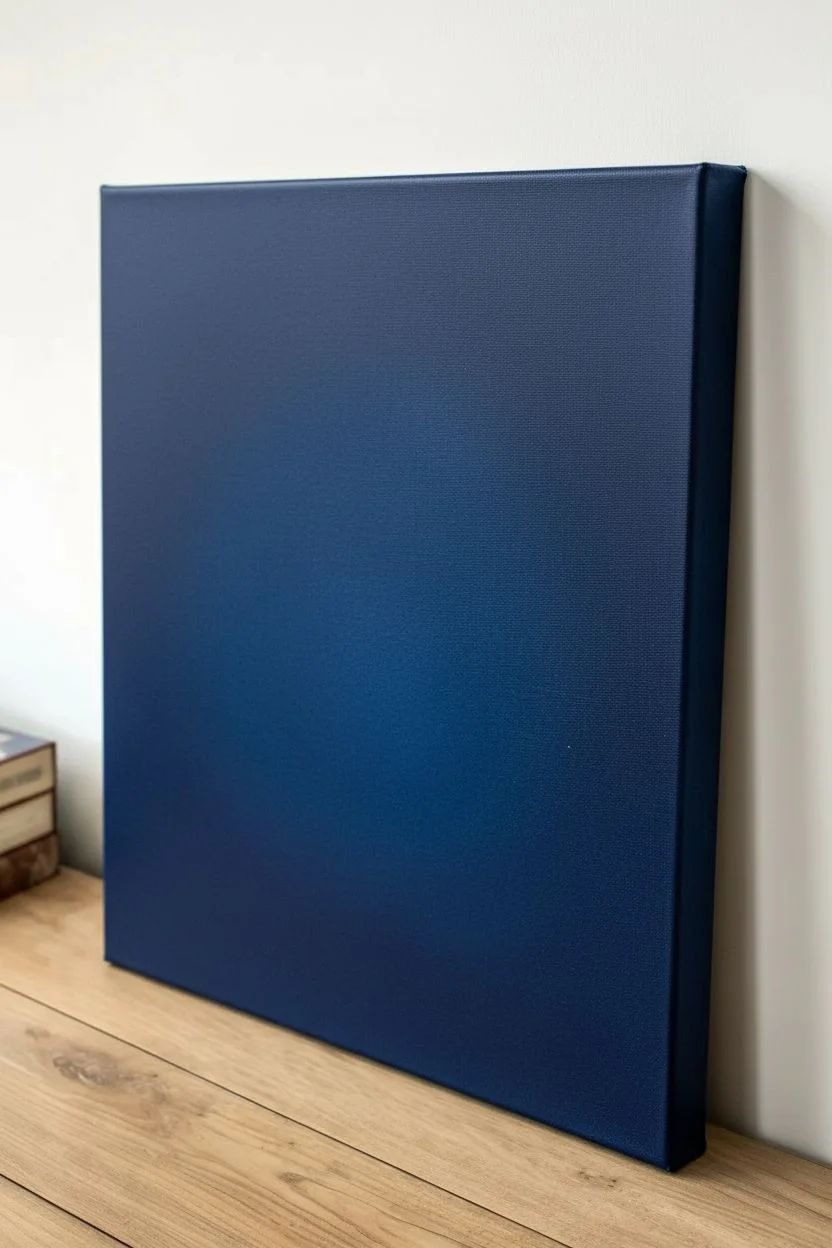
Step 1: Setting the Night Sky
-
Mix the base color:
Start by creating a very deep, midnight blue on your palette. Mix a large amount of Phthalo Blue with a touch of Black. You want it dark, but not void of color—it should still read as blue. -
Paint the background:
Using your large flat brush, cover the entire canvas with this dark blue mixture. Don’t forget to paint the sides of the canvas for a finished look without a frame. -
Add subtle variation:
While the paint is still wet, dip the corner of your brush in pure Phthalo Blue (without black) and blend it into the center areas. This creates a very subtle glow where the moon will eventually sit. -
Let it dry completely:
Allow this background layer to dry fully. Acrylics dry darker, so don’t worry if it looks lighter when wet. A hairdryer can speed this up if you’re impatient.
Step 2: Forming the Moon
-
Trace the shape:
Place your round object (like a dinner plate or bowl) in the center of the dried canvas. Lightly trace around it. If you’re using a regular graphite pencil, press hard enough to see the sheen; otherwise, a white charcoal pencil is easier to see. -
Block in the white:
Load a medium flat brush with Titanium White. Fill in the moon circle completely. It doesn’t need to be perfectly opaque yet; a slightly streaky texture is actually helpful for the lunar surface. -
Refine the edges:
Switch to a smaller brush to tidy up the edges of your circle. The moon should be crisp against the dark sky. -
Add the first grey tones:
Mix a light grey using White and a tiny dot of Black or Raw Umber. While the white base is tacky (or dry, if you prefer dry-brushing), dab this grey onto the moon in random patches to start maping out the ‘seas’ or maria.
Moon looking flat?
Add more contrast. If your moon looks like a flat sticker, deepen the darkest grey shadows and ensure your brightest whites are pure white. The contrast creates the sphere shape.
Step 3: Detailing the Craters
-
Stipple the texture:
Use a small sponge or an old, stiff brush for this step. Dip it into a slightly darker grey mix. Gently stipple (tap up and down) onto the areas you mapped out previously to build organic texture. -
Layering warmth:
I like to add a hint of warmth to keep the moon from looking like metal. Mix a very pale beige using White and a speck of Raw Umber. Glaze this thinly over some of the brighter white areas. -
Create the heavy craters:
Look at the reference image to see where the dark spots are heaviest (usually the left/bottom). Use your darker grey mix to deepen these specific patches, creating a sense of depth. -
Brighten the highlights:
With a clean small brush and pure Titanium White, tap in the brightest highlights. Focus these on the top right edge and the areas between the dark craters to make the surface look bumpy and illuminated. -
Add the Tycho crater:
Use your smallest detail brush to paint the ‘ray system’—that distinct crater near the bottom with white lines radiating outward like a starburst.
Make it mystical
Mix a tiny amount of glitter glaze or iridescent medium into your final white highlights on the clouds. It will catch the light and give the scene a magical shimmer.
Step 4: Creating Atmosphere
-
Prepare the cloud glaze:
Mix a very watery wash of Titanium White and a tiny touch of your dark blue background color. You want a translucent, milky blue-grey. -
paint the wispy shape:
Using a dry brush technique (wipe most paint off onto a paper towel first), gently scrub in the cloud shapes. Focus on the bottom corners and sweeping diagonally upwards. -
Soften the edges:
Immediatley use a clean, dry brush or your finger to smudge the edges of the clouds so they fade into the darkness. There should be no hard lines here. -
Add cloud highlights:
Take a slightly thicker white paint and dab it onto the top edges of the clouds where the moonlight would hit them. This gives them volume. -
Scumble technique:
For that ethereal look, lightly ‘scumble’ (scrub in circular motions) a very thin layer of white over parts of the dark sky, suggesting unseen mist or humidity. -
Final stars:
Dilute white paint with water until it’s ink-like.Loading a stiff brush and flicking the bristles to splatter tiny stars sparingly across the dark blue areas, avoiding the moon face itself.
Hang your new celestial artwork in a bedroom or study to add a touch of calm moonlight to your space


Geometric Tape Blocks
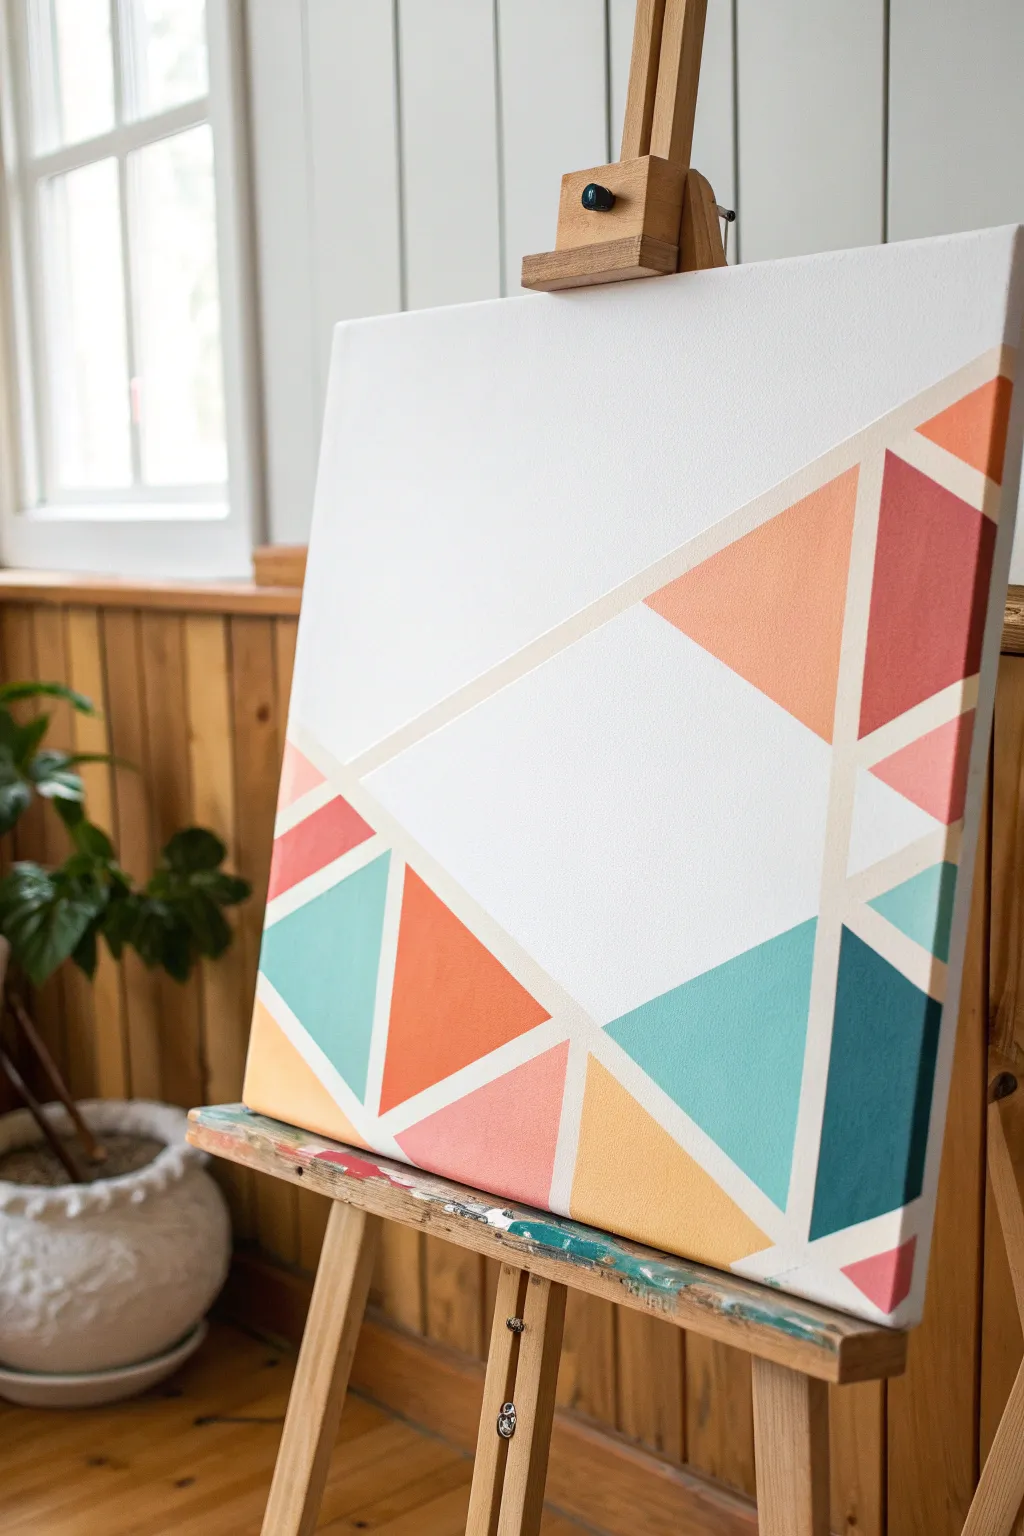
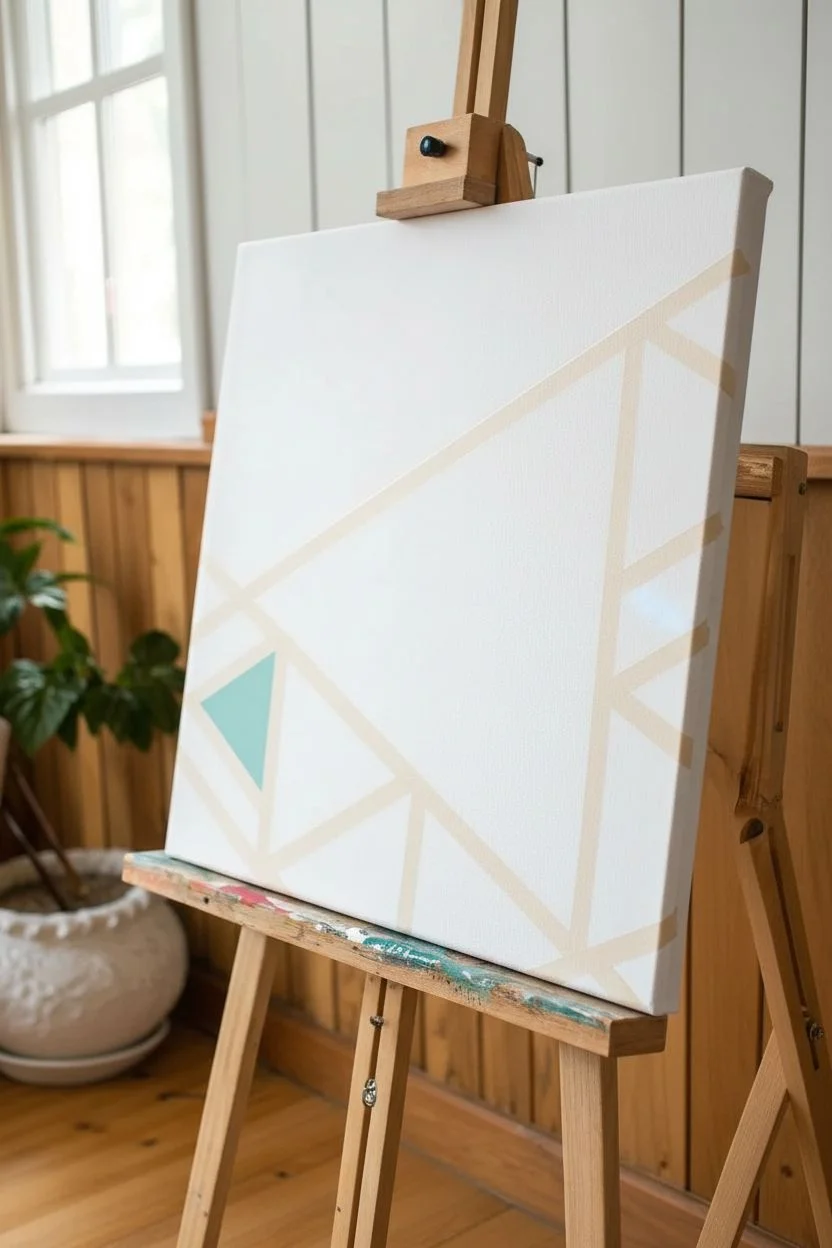
This modern geometric painting uses clean lines and vibrant blocks of color to create a striking visual impact that looks deceptively complex. By using painter’s tape to mask off sections, you can achieve crisp, professional edges and create a dynamic composition that balances negative space with saturated hues.
Step-by-Step
Materials
- Square stretched canvas (approx. 16×16 or 20×20 inches)
- White acrylic paint (gesso or heavy body)
- Acrylic paints in: coral pink, classic red, teal, dark teal, light orange, dark orange, and soft pink
- Painter’s tape or masking tape (approx. 0.5 to 0.75 inch width)
- Flat synthetic brushes (various sizes)
- Mixing palette
- Cup of water
- Paper towels
- Credit card or burnishing tool (optional)
- Hairdryer (optional, for faster drying)
Step 1: Preparation & Masking
-
Prime the canvas:
Begin by applying an even coat of white acrylic paint or gesso over the entire canvas surface. This ensures a clean, bright base for your colors. Let this layer dry completely before moving forward. -
Plan the main diagonal:
Apply your first strip of painter’s tape diagonally across the canvas. Instead of going corner-to-corner, start on the left edge about one-third up from the bottom, and angle it up toward the right edge, roughly one-third down from the top. Press it down firmly. -
Create the large triangle frame:
Add a second long strip of tape connecting to your first line. Start from the bottom edge (center-right) and angle it upwards to meet the first tape line, creating a large, open triangular space in the center of the canvas. -
Subdivide the bottom section:
Now, tackle the lower left corner. Place strips of tape to form smaller triangles. You’ll want one main vertical-ish line dropping from your main diagonal, and then smaller connecting lines to create the faceted look seen in the reference. -
Detail the right side:
move to the right side of the canvas. Create a vertical tape line that runs parallel to the canvas edge, slicing through the diagonal sections. Then, add smaller horizontal connectors to break up those long strips into manageable blocks. -
Seal the tape edges:
This is the secret to crisp lines: paint a very thin layer of your base white paint *over* the edges of the tape. This seals any microscopic gaps. If any paint bleeds under, it will be white and invisible. -
Let the seal dry:
Allow this sealing layer to dry completely. It should only take about 10-15 minutes since it’s thin.
Step 2: Painting the Color Blocks
-
Mix your palette:
Squeeze out your acrylic colors onto the palette. You want a distinct ‘warm’ group (corals, oranges, reds) and a ‘cool’ group (teals). Having them ready helps you visualize the balance before painting. -
Paint the large teal triangle:
Start with the medium teal shade. Apply this to the prominent triangle shape in the lower-right quadrant. Use a flat brush to get smooth coverage. -
Apply the dark teal accent:
Find the shape directly to the right or below your medium teal block and fill it with the darkest teal color. This contrast adds depth to the composition. -
Add the large orange block:
Locate the large triangular section on the upper right side. Fill this with your lighter, softer orange or salmon color. Ensure your brush strokes are even to avoid ridges. -
Fill the bottom details:
Looking at the bottom left, paint the triangle closest to the edge in a light yellow-orange. Adjacent to it, paint the medium-sized triangle in the medium teal color to balance the right side. -
Add the vibrant reds:
Choose a specific block on the far right edge for your deepest red. I find placing the darkest warm color here anchors the composition nicely alongside the dark teal. -
Apply the coral pinks:
Fill the remaining smaller triangles near the bottom center with the soft pink and coral shades. These act as smoother transitions between the bold teals and oranges. -
Check for coverage:
Inspect all your colored blocks. If the canvas texture is showing through too much or the colors look streaky, apply a second coat to those specific shapes. -
Dry partially:
Let the paint dry until it is tacky but not fully hardened. This usually takes about 20-30 minutes depending on thickness.
Bleeding Lines?
If paint seeped under the tape, wait for it to dry fully. Then, place a fresh piece of tape over the colored part and repaint the white line to fix the edge.
Step 3: The Reveal
-
Peel the tape slowly:
Carefully start peeling the tape off. Pull it slowly at a 45-degree angle away from the painted edge. This technique helps cut through the paint film cleanly without lifting the paint. -
Touch up white lines:
Once all tape is removed, you might find a tiny spot where paint bled or a line isn’t perfect. Use a small detail brush and your white paint to carefully clean up these crisp dividing lines.
Burnish for Perfection
After applying tape, run a credit card or your fingernail firmly along every edge. This ‘burnishing’ prevents seep-through better than finger pressing alone.
Hang your new geometric masterpiece in a spot with good lighting to let those crisp lines really stand out
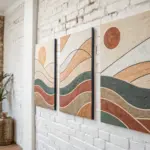
Color-Blocked Desert Scene
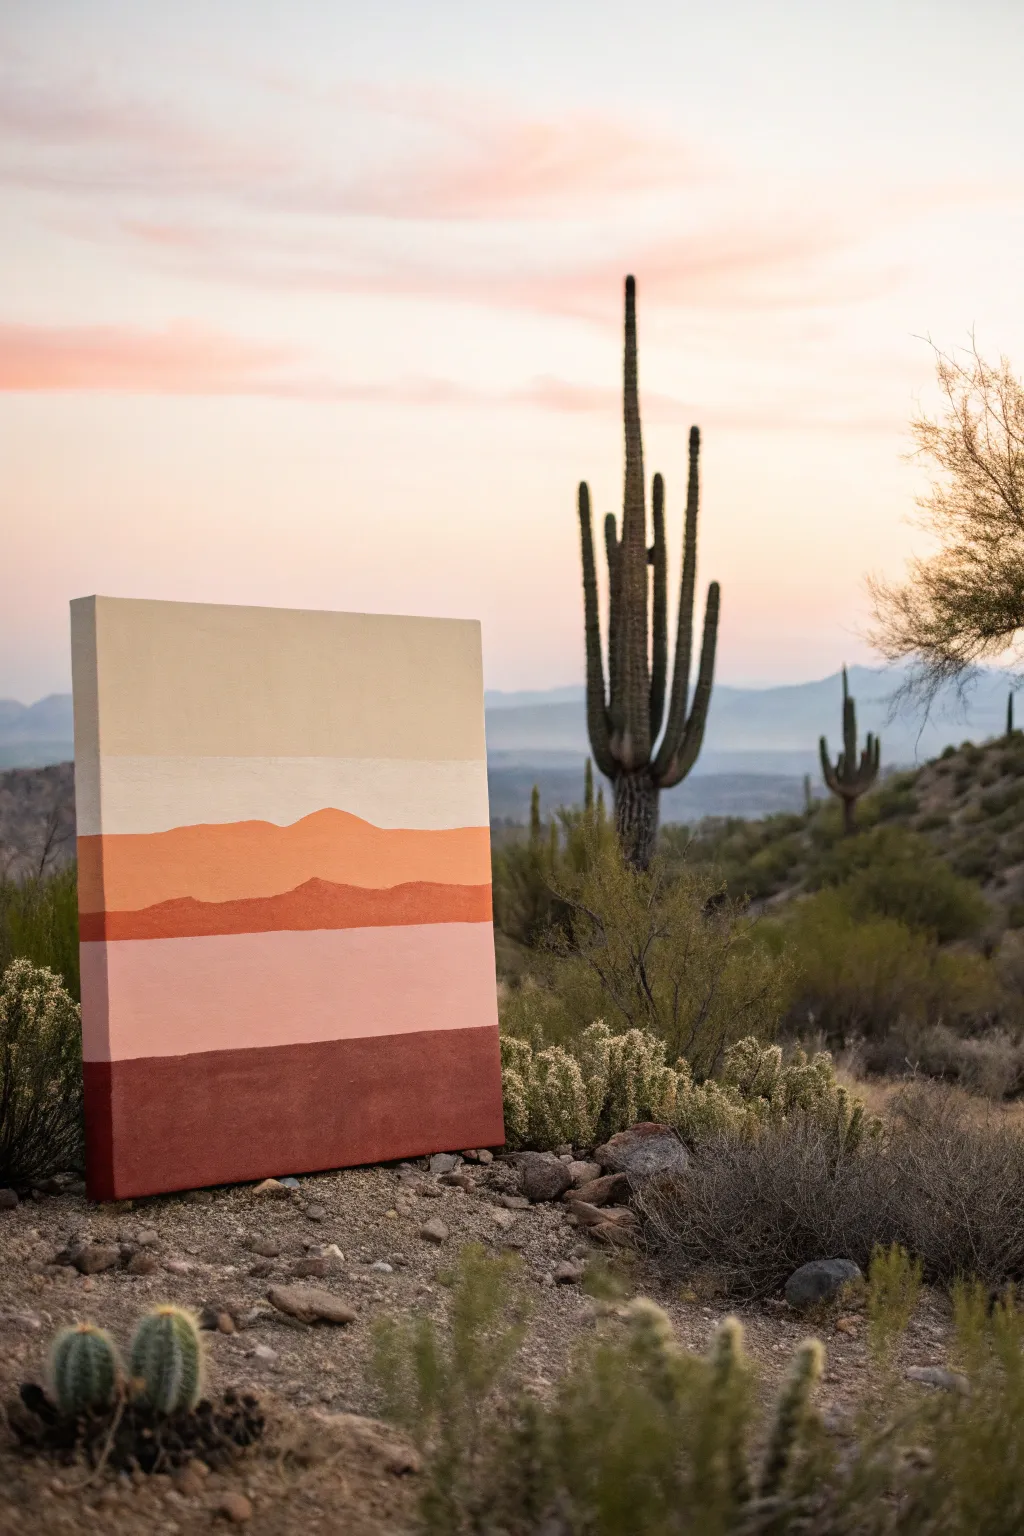
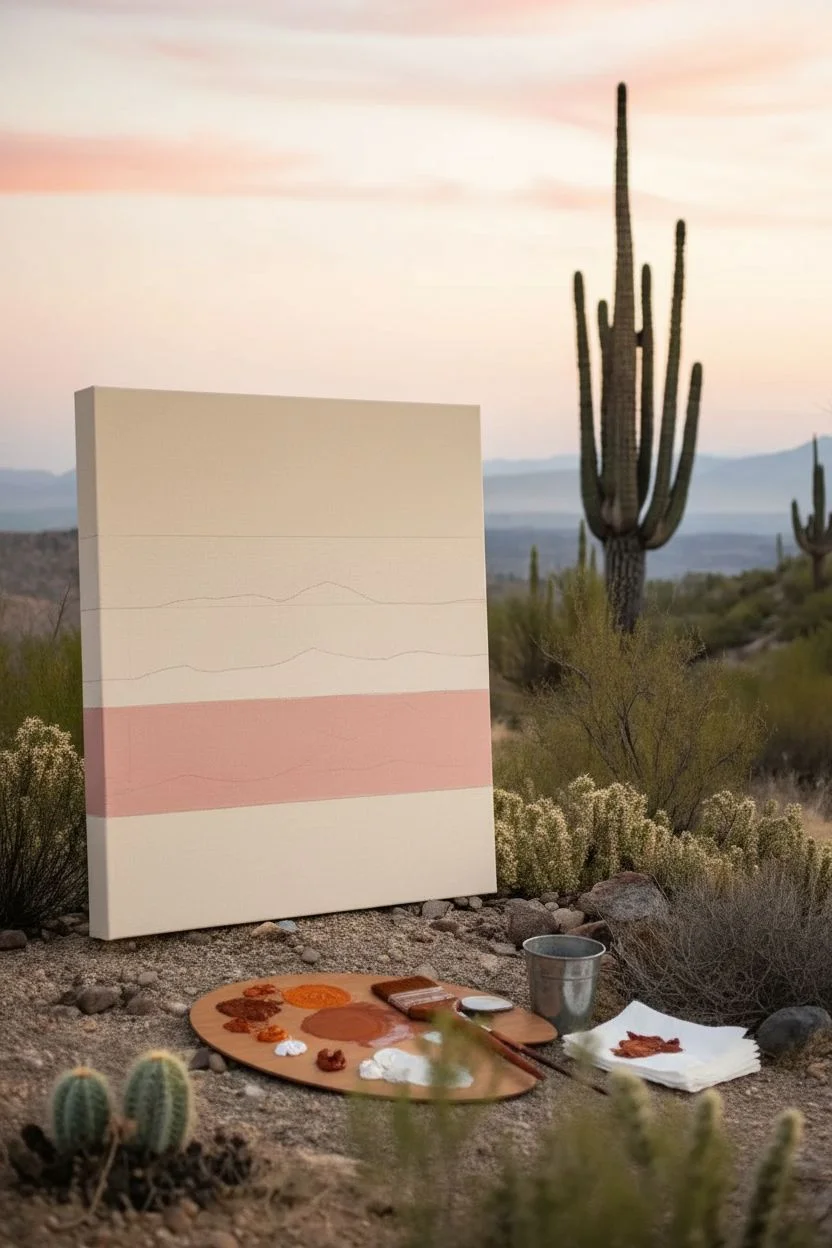
Capture the serene warmth of the desert with this minimalist, abstract landscape. Using broad bands of color and soft, earthen tones, you’ll build a tranquil sunset scene that brings a touch of the southwest into your home.
How-To Guide
Materials
- Large rectangular canvas (approx. 18×24 or similar)
- Acrylic paints: Burnt sienna, terracotta orange, dusty rose, cream/off-white, pale warm beige
- Large flat brush (1.5 to 2 inch width)
- Medium round brush
- Pencil
- Ruler or painter’s tape (optional)
- Palette or paper plate for mixing
- Cup of water and paper towels
Step 1: Planning the Layers
-
Map out the horizon:
Begin by lightly sketching horizontal lines across your canvas to demarcate the different color zones. You don’t need a ruler if you prefer a more organic look, but aim for five distinct sections. -
Sketch the mountains:
In the middle third of the canvas, draw the outlines of the two mountain ranges. The lower range should be slightly wider and grounded, while the upper range sits just behind it with gentle, rolling peaks. -
Prepare your palette:
Squeeze out generous amounts of your five key colors. You want these colors to be opaque, so don’t dilute them too much with water yet.
Pro Tip: Masking Tape
For ultra-crisp horizon lines between the straight bands of color (sky and ground), use painter’s tape. Remove it while the paint is still slightly wet.
Step 2: Painting the Ground & Sky
-
Paint the base layer:
Starting at the very bottom, use your large flat brush to fill in the lowest rectangle with the dark burnt sienna. This anchors the painting with a deep, rich earth tone. -
Paint the sides:
Don’t forget to wrap this dark color around the edges of the canvas for a polished, gallery-ready finish. I always do the edges as I go so the paint blends seamlessly. -
Create the soft band:
Wash your large brush thoroughly. Move to the section immediately above the dark brown and fill it with the dusty rose color. Paint specifically up to the bottom edge of your lowest mountain sketch. -
Paint the upper sky:
Skip the middle section for a moment and go to the very top. Fill the highest rectangular zone with your pale warm beige. Ensure your brushstrokes move horizontally for a smooth texture. -
Fill the lower sky:
Below the top beige band, paint the next section with your cream or off-white color. Let this meet the top edge of your upper mountain range sketch.
Step 3: Defining the Landscape
-
Paint the distant mountains:
Switch to a slightly smaller flat brush or the medium round brush. Paint the upper, more distant mountain range using a lighter terracotta or peach tone. -
Refine the edges:
Carefully trace the wavy top edge of this mountain shape where it meets the cream sky. A clean, crisp line here is important for that modern vector-art look. -
Paint the foreground mountains:
Mix your terracotta with a tiny touch of the burnt sienna to make it slightly darker than the distant mountains. Fill in the lower mountain shape. -
Create separation:
Ensure there is a visible distinction between the two mountain layers. If the colors are too similar, wait for them to dry and add a second coat to the front range with a bit more red mixed in.
Level Up: Texture
Mix a small amount of modeling paste or baking soda into your paint for the mountain sections to give them a gritty, rocky physical texture.
Step 4: Finishing Touches
-
Check opacity:
Step back and look at the canvas. The beauty of this style relies on solid blocks of color. If you can see the canvas weave through the lighter colors like the cream or pink, apply a second coat. -
Clean up lines:
Use a small brush with a bit of water to smooth out any ridges of paint where the color blocks meet. You want them to touch perfectly without overlapping unevenly. -
Final edge check:
Rotate the canvas and ensure all the varying colored stripes continue neatly around the sides of the frame. -
Seal (Optional):
Once fully dry (give it at least 24 hours), you can apply a matte varnish to protect the surface and unify the sheen of the different paints.
Hang your desert abstract in a well-lit room to let those warm tones radiate comfort
Campfire Under the Stars
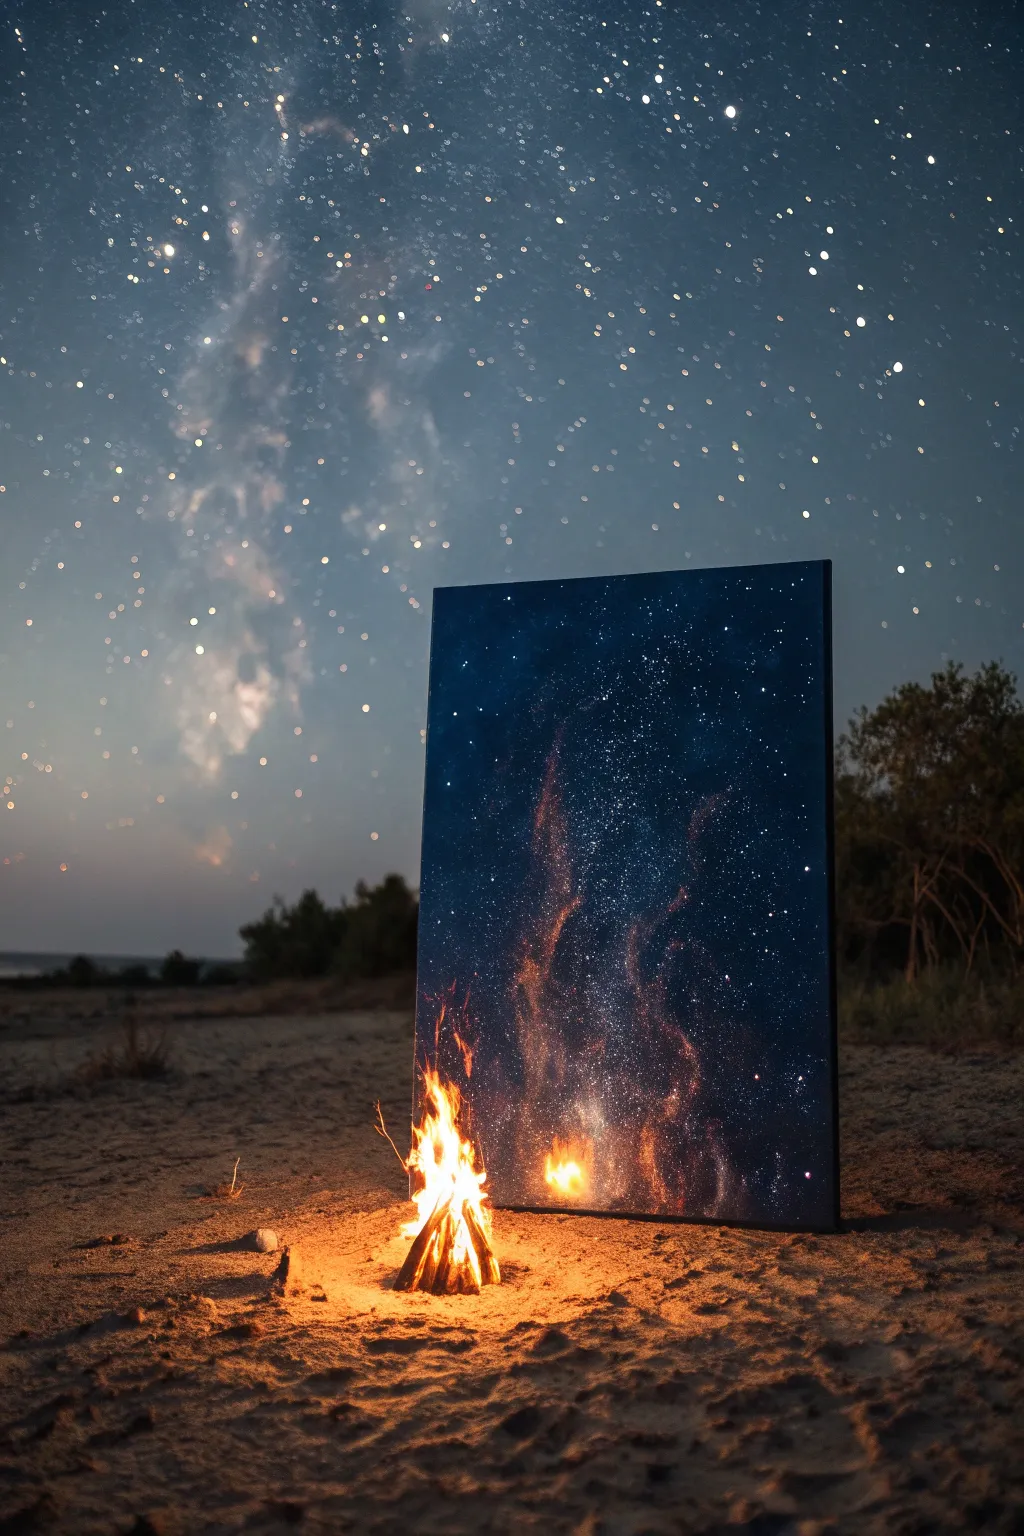
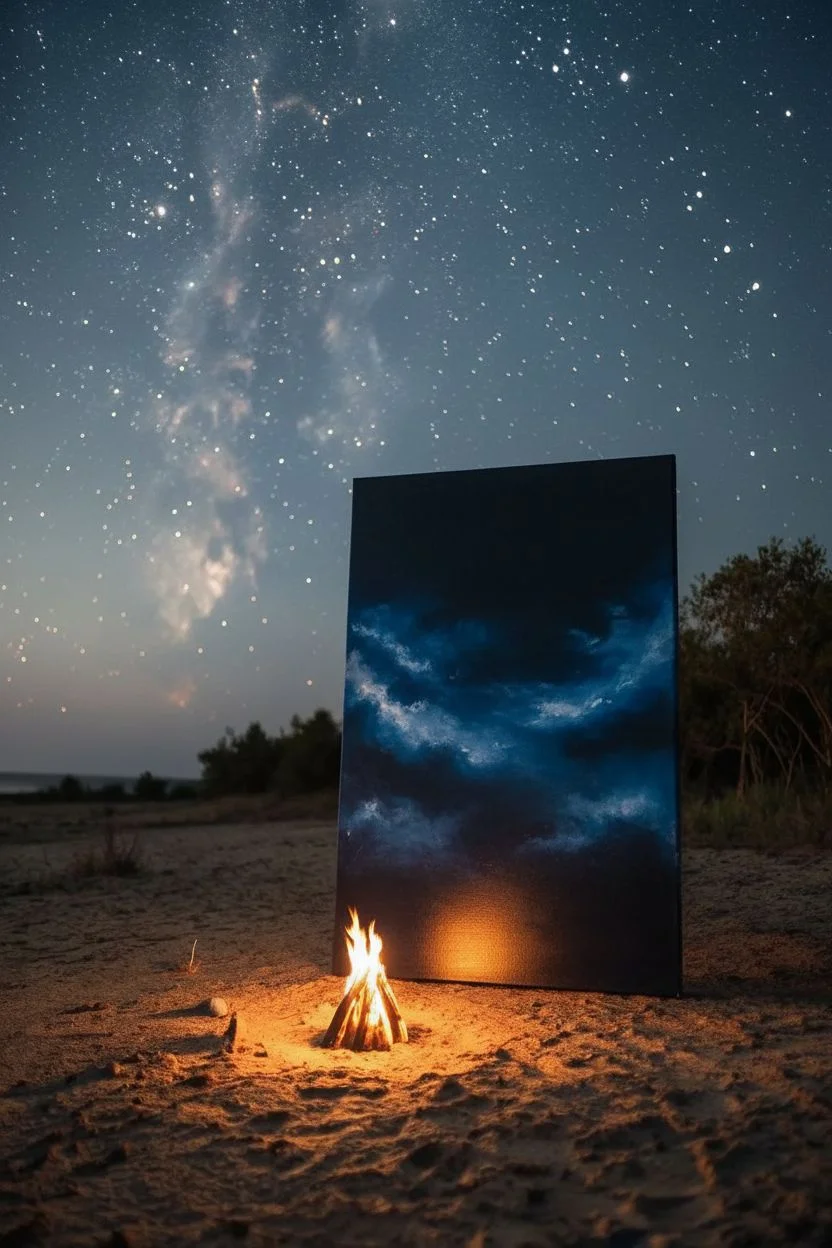
Capture the magic of a starry night by combining the warmth of a fire with the coolness of the cosmos in this striking vertical composition. This project uses blending and splattering techniques to create a nebulous, glowing effect that looks like smoke turning into stardust.
Step-by-Step Tutorial
Materials
- Rectangular stretched canvas (e.g., 16×24 inches)
- Acrylic paints: Carbon Black, Phthalo Blue, Ultramarine Blue, Titanium White, Burnt Sienna, Cadmium Orange, Cadmium Yellow
- Large flat brush (1-2 inch)
- Medium filbert brush
- Small round brush
- Old toothbrush or stiff fan brush for splatter
- Sponge or paper towels
- Water cup and palette
- Easel or flat surface protection
Step 1: Setting the Night Sky
-
Prime the background:
Begin by covering the entire canvas with a mix of Carbon Black and a touch of Phthalo Blue. Use your large flat brush and smooth strokes to create a very dark, deep midnight base. Let this base layer dry completely. -
Create the atmospheric glow:
Mix Ultramarine Blue with a tiny bit of Titanium White to create a misty mid-tone. Using a dry large brush or a sponge, gently dab this color in random, soft clouds across the middle and upper sections of the canvas. -
Deepen the shadows:
While the blue mist is still slightly tacky, blend the edges back into the black background ensuring there are no harsh lines. This creates the depth of space.
Step 2: Painting the Fire Nebula
-
Base the nebula shape:
Using a medium filbert brush, mix Burnt Sienna with a little Black. Paint a vertical, winding shape starting from the bottom center and reaching upward like rising smoke or flames. -
Add warmth:
Load your brush with pure Burnt Sienna. Scumble this over your dark base shape, leaving some of the transparent dark underlayer showing through to give the nebula volume. -
Ignite the colors:
Mix Cadmium Orange with a touch of Burnt Sienna. Apply this lighter color to the center of your rising nebula shape, focusing on the winding curves where the ‘light’ would catch the gas clouds. -
Create the hottest points:
Using a small round brush, mix Cadmium Yellow with a tiny amount of White. Highlight the very bottom center and a few distinct curves higher up to mimic the intensity of a fire source. -
Blend the edges:
With a clean, slightly damp soft brush, gently feather the orange and brown edges into the surrounding dark blue background so the fire looks like it is dissipating into space.
Star blotting
If a splatter drop lands too large, wait for it to dry slightly, then dab it with a wet Q-tip to lift the center, turning the mistake into a soft, distant galaxy.
Step 3: Creating the Stars
-
Mix the splatter paint:
Dilute Titanium White paint with water until it reaches an inky, fluid consistency. It needs to be thin enough to fly off bristles but opaque enough to show up against the black. -
Test the splatter:
I always test my splatter on a scrap piece of paper first to ensure the droplets aren’t too large or blobs. -
Apply the distant stars:
Dip an old toothbrush or stiff brush into the white mix. Flick the bristles with your thumb to spray a fine mist of stars across the entire upper 2/3 of the canvas. -
Add concentrated clusters:
Focus a heavier splatter near the top center and edges to simulate the density of the Milky Way. -
Paint major stars:
Switch to your smallest round brush. Dip the tip in pure, undiluted White and dot specific, larger stars randomly around the sky. -
Create star flares:
Select 3-5 of your largest white dots. Using a very light touch, drag the paint slightly outward in a cross shape to create a twinkling effect.
Glow in the dark
Mix phosphorescent medium with your white paint for the stars. During the day it looks normal, but at night your canvas will authentically light up.
Now you have a stunning juxtaposition of earthly fire and celestial light to hang on your wall
Easy Galaxy With Planets
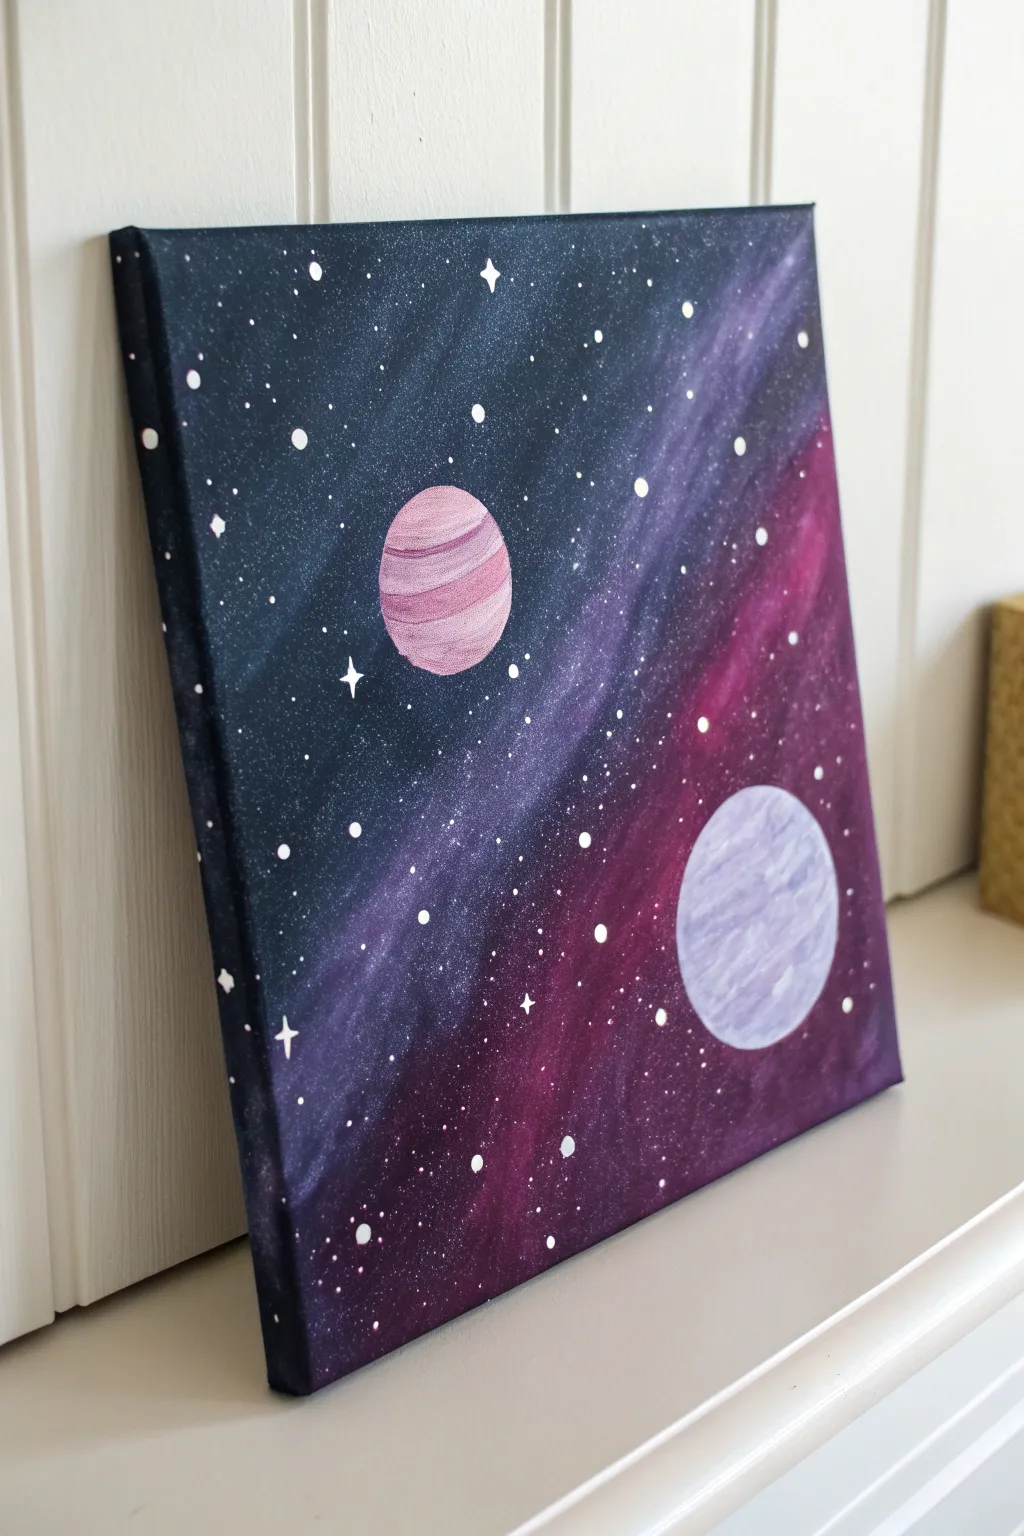
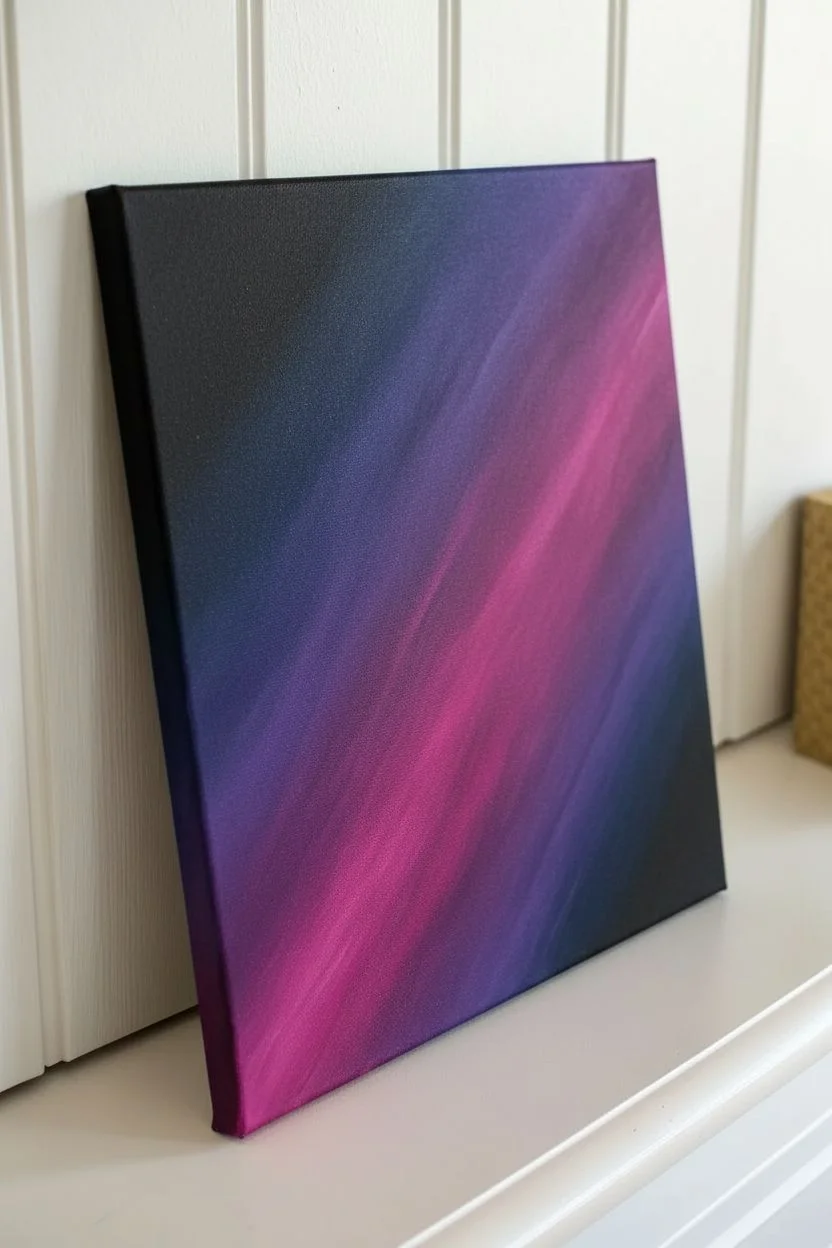
This cosmic scene brings deep space to life with a stunning diagonal gradient of dark blues, violets, and magenta. The simple addition of two textured planets and a sprinkling of stars makes this a perfect entry-level project for aspiring astronomers.
How-To Guide
Materials
- Square stretched canvas (approx. 10×10 or 12×12 inches)
- Acrylic paints: Black, Navy Blue, Purple (Violet), Magenta, White, Light Pink
- Flat paint brushes (large and medium)
- Small round detail brush (size 0 or 1)
- Circle stencils (cups, lids, or drafting compass)
- Pencil for tracing
- Paper plate or palette for mixing
- Water cup and paper towels
- Old toothbrush (optional for stars)
Step 1: Creating the Cosmic Background
-
Map out your galaxy:
Before painting, visualize a diagonal line running from the top left to the bottom right. This will be the direction of your color flow. You don’t need to draw it, just keep it in mind as your guide. -
Start with darkness:
Using a large flat brush, apply a mix of black and navy blue paint to the top left and bottom right corners of the canvas. These should be the darkest areas of your painting. -
Introduce deep purple:
While the dark paint is still wet, load your brush with purple and apply it next to the dark corners, moving toward the diagonal center. Blend the edges where the purple meets the black/navy mix using long, diagonal strokes. -
Add the vibrant core:
Clean your brush. Now, paint the center diagonal strip with magenta. Blend the edges outward into the purple areas while everything is still wet to create a smooth transition. -
Paint the sides:
Don’t forget to wrap your painting around the edges of the canvas. Extend the colors naturally over the sides so the artwork looks finished even without a frame. -
Smooth the gradient:
With a clean, slightly damp brush, gently sweep back and forth over the transition lines between colors to soften any harsh stripes. Let this background layer dry completely.
Starry Splatter Tip
Cover your freshly painted planets with the paper cutouts or lids you used for tracing before splattering the stars. This keeps the planet surfaces clean and crisp.
Step 2: Painting the Planets
-
Trace the shapes:
Once the sky is dry, position two circular objects (like a jar lid or cup) on the canvas. Place a smaller circle in the upper-left quadrant and a larger one in the lower-right. -
Outline:
Lightly trace around your objects with a pencil to create perfect circles for your planets. -
Base coat the top planet:
Mix a soft pink using magenta and white. Fill in the top smaller circle completely with this color using a medium flat brush. -
Texture the top planet:
While the pink base is wet, dip your brush into a little magenta (without cleaning it first). Drag simple horizontal streaks across the planet to create cloud bands. -
Base coat the bottom planet:
For the larger bottom planet, mix a pale lavender color using purple and a generous amount of white. Paint the entire circle with this hue. -
Add dimension:
Dip your dirty brush into a tiny bit of plain white or darker purple. Add texture by dabbing or sweeping curved strokes across the surface to make it look cratered or gaseous.
Step 3: Adding the Stars
-
Prepare splatter paint:
Mix a small amount of white paint with a few drops of water on your palette. You want a consistency similar to heavy cream or melted ice cream. -
Create the starfield:
Dip a small brush (or old toothbrush) into the watered-down white. Hold it over the canvas and tap the handle firmly against another brush to spray tiny speckles across the dark background. -
Add distinct stars:
Using your smallest detail brush and pure white paint (not watered down), place individual white dots in the darker corner areas to represent closer stars. -
Paint twinkling stars:
Select 3 or 4 of your larger white dots. With the detail brush, carefully pull tiny lines upward, downward, left, and right from the center of the dot to create a twinkling ‘cross’ shape. -
Enhance the planets:
I like to add a final touch by painting a very thin, crisp white line along the curved edge of each planet that faces the light source (imagining it’s coming from the center).
Smudged the Sky?
If you accidentally smudge a star or make a splatter too big, wait for it to dry completely. Then, touch it up with a small dab of the background color (navy or black).
Hang your finished masterpiece on the wall and enjoy the view of your personal solar system
Two Hearts and a Ring
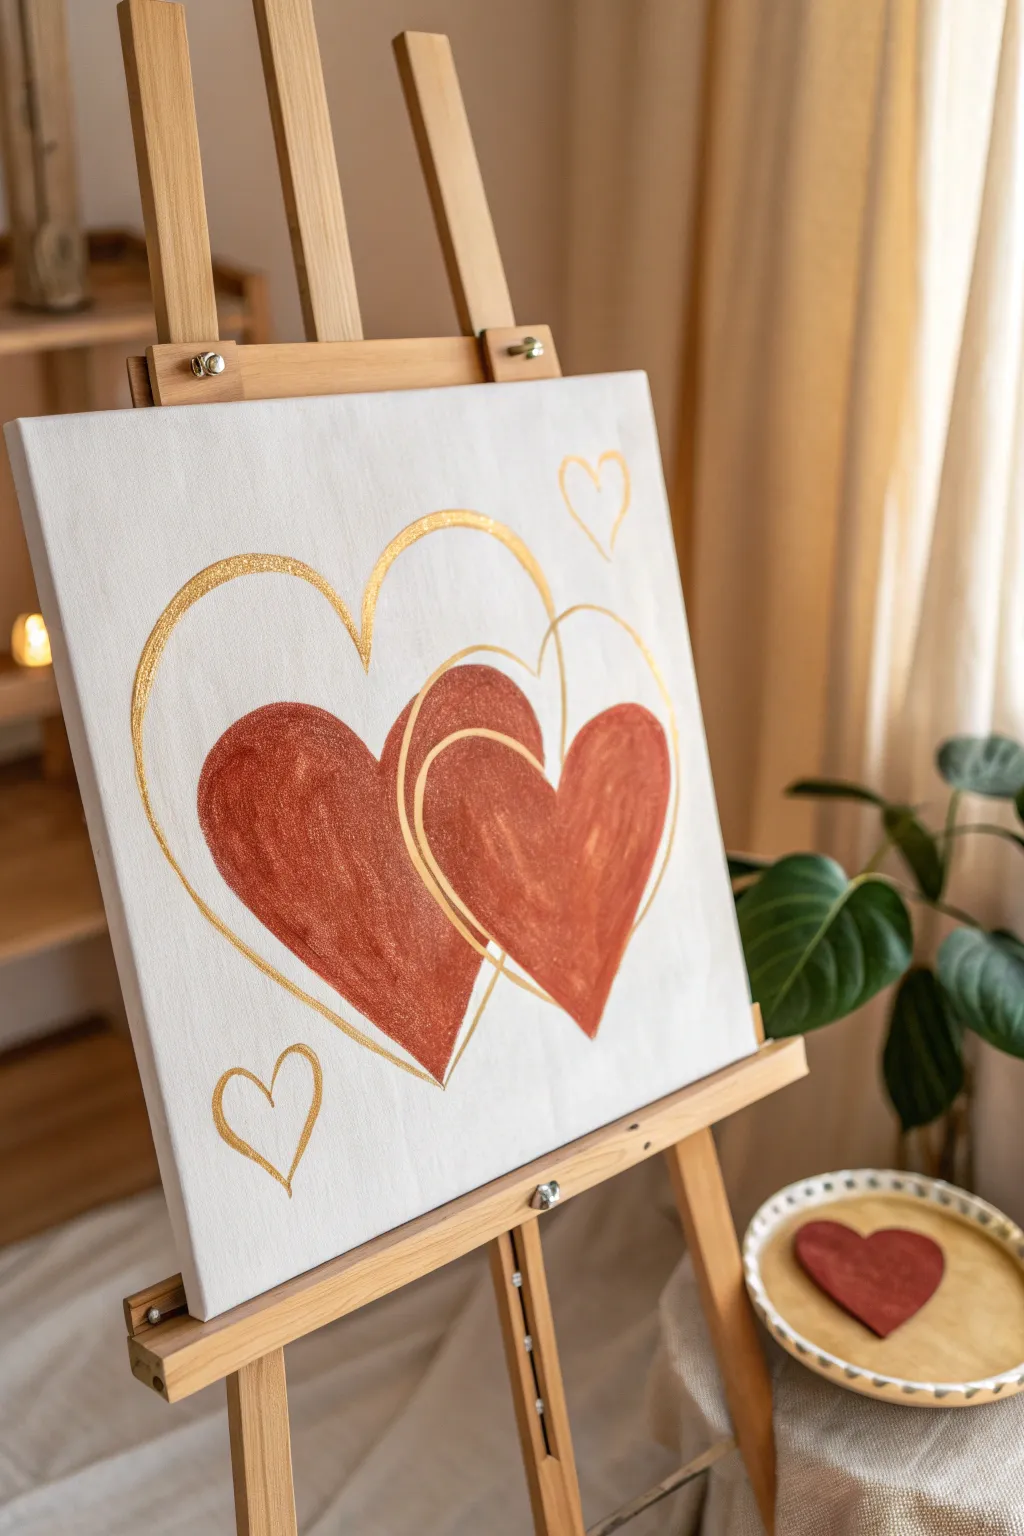
Capture the warmth of love with this elegant canvas piece featuring two textured, rust-red hearts embraced by sweeping golden outlines. This design combines rustic charm with a touch of metallic glamour, making it a perfect romantic gift or décor addition.
Step-by-Step Guide
Materials
- Square stretched canvas (approx. 12×12 or 16×16 inches)
- Acrylic paint in rust red or terracotta
- Gold metallic paint or gold glitter glue
- Medium flat brush
- Fine round brush (size 2 or 4)
- Pencil
- Eraser
- Palette for mixing
- Paper towels
- Cup of water
Step 1: Planning and Sketching
-
Prepare the canvas:
Start with a clean, dry white canvas. If you want a smoother surface, you can apply a coat of white gesso first, but the raw canvas texture works nicely for this rustic look. -
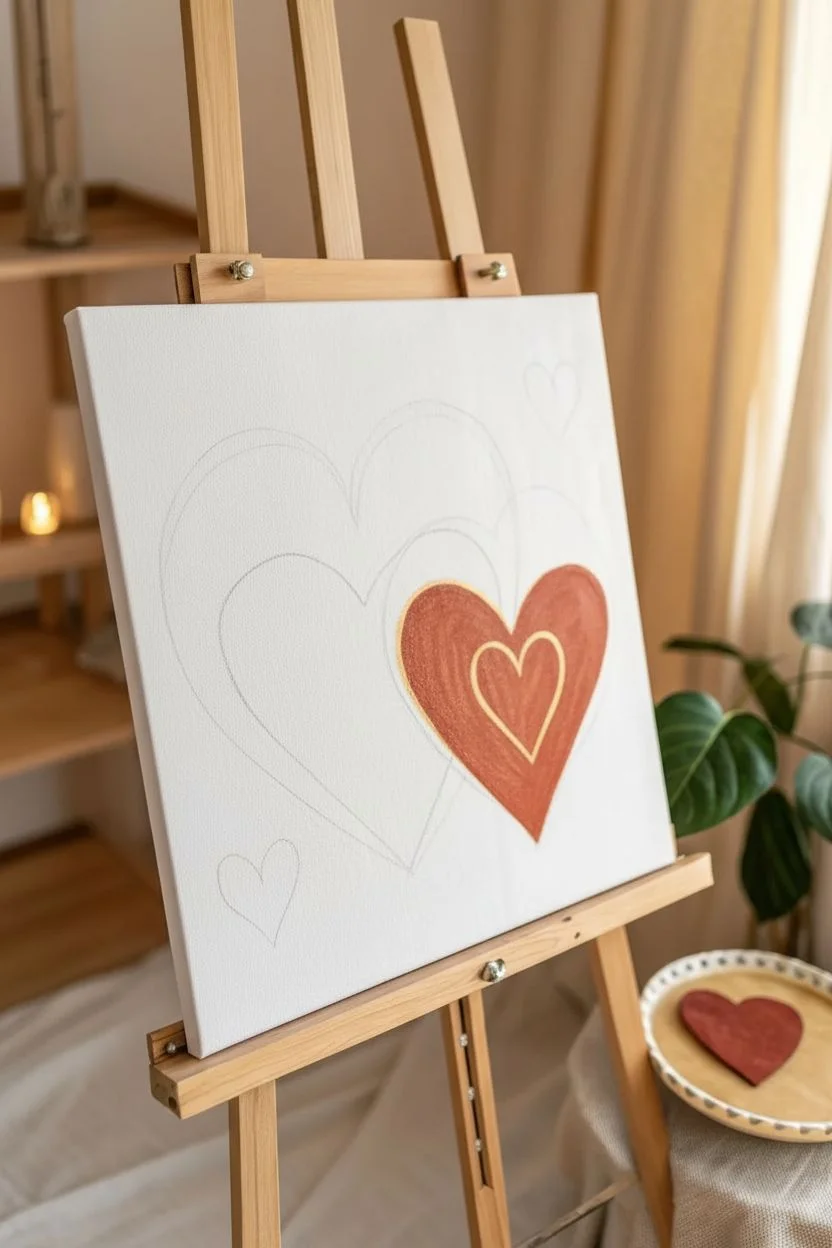
Sketch the main hearts:
Using a pencil, lightly sketch two large hearts in the center of the canvas. Position them so they overlap slightly, with the right heart appearing to be slightly in front of the left one. -
Add the outline hearts:
Draw three larger, sweeping heart shapes that will eventually be gold. One should frame top-left of the red hearts, another usually hugs the right side. Let these lines flow organically. -
Sketch the accents:
Draw two small, simple floating hearts—one near the top right corner and another near the bottom left—to balance the composition.
Clean Lines Hack
If your gold lines feel shaky, steady your painting hand by resting your pinky finger on a dry part of the canvas while you work.
Step 2: Painting the Textured Hearts
-
Load the flat brush:
Squeeze out a generous amount of rust-red or terracotta acrylic paint. You want the paint to be thick enough to create some texture. -
Fill the left heart:
Begin painting the left heart first. Use vertical strokes that follow the curve of the heart shape to mimic a sketched texture rather than a flat fill. -
Create the overlap:
Paint the right heart next. When you reach the area where the hearts overlap, ensure the right heart’s paint edge is crisp and clearly defines that it is sitting ‘on top’ of the left one. -
Add texture:
While the paint is still wet, you can dab the brush lightly to create slight unevenness, giving it a chalky or pastel-like appearance. -
Let it dry completely:
Allow the red paint to dry fully before moving on. This is crucial so you don’t smear red into your gold lines later.
Level Up: Texture
Mix a pinch of baking soda into your rust-red paint before applying. This creates a gritty, stone-like texture that looks amazing.
Step 3: Adding the Gold Details
-
Prepare the gold:
Shake your gold metallic paint or glitter glue well. If using paint, thin it slightly with a drop of water for smoother lines. -
Outline the large curves:
Using your fine round brush, trace over the large pencil outlines you drew earlier. Keep your hand steady but allow the line thickness to vary naturally for an artistic feel. -
Intertwine the shapes:
Where the gold lines interact with the red hearts, paint carefully. Some lines can go ‘behind’ the red hearts and some ‘over’ them to create depth. -
Paint the inner ring:
Notice the gold ring-like shape inside the right red heart? Paint another heart outline directly on top of the dried red paint for a layered effect. -
Detail the accents:
Paint the two small floating hearts in the corners with swift, confident strokes of gold. -
Second coat for shine:
I prefer to let the first gold layer dry and then add a second pass to make the metallic finish truly pop against the white background. -
Clean up:
Once everything is dry, gently erase any visible pencil marks that weren’t covered by paint.
Place your warm and loving artwork on a mantel or easel to bring a cozy atmosphere to any room
One Word Over a Painted Wash
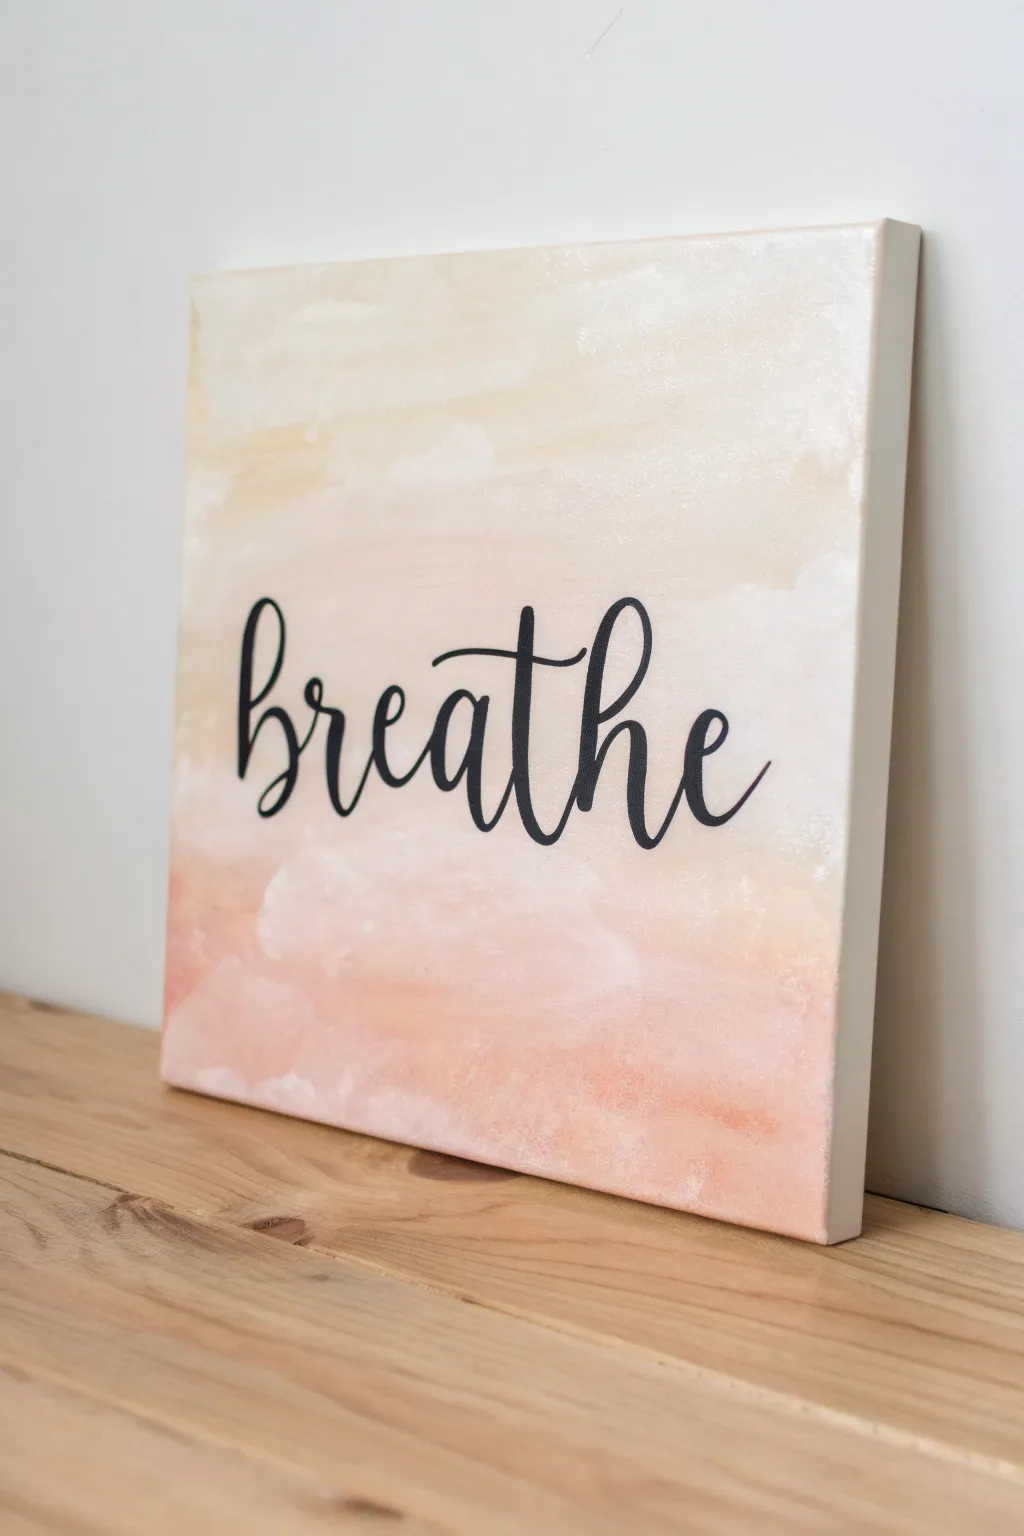
Create a calming focal point for your space with this serene canvas project featuring a soft, cloud-like background. The gentle blend of peach and cream tones provides the perfect harmonious backdrop for a bold, grounding word.
Detailed Instructions
Materials
- Square stretched canvas (e.g., 10×10 or 12×12 inches)
- Acrylic paints (Titanium White, Peach, Light Yellow/Ochre)
- Water cup
- Large flat brush or foam brush
- Small round brush (size 1 or 2) or black paint pen
- Paper towels
- Black acrylic paint
- Pencil
- Palette or paper plate
Step 1: Creating the Background Wash
-
Prepare the palette:
Squeeze out generous amounts of Titanium White, a small amount of Peach, and a tiny dot of Light Yellow onto your palette. You want very pastel, soft tones for this effect, so the white is your main base. -
Wet the canvas:
Dip your large brush into clean water and lightly dampen the entire surface of the canvas. This technique, similar to wet-on-wet watercolor, helps the acrylics blend more seamlessly. -
Apply the first color:
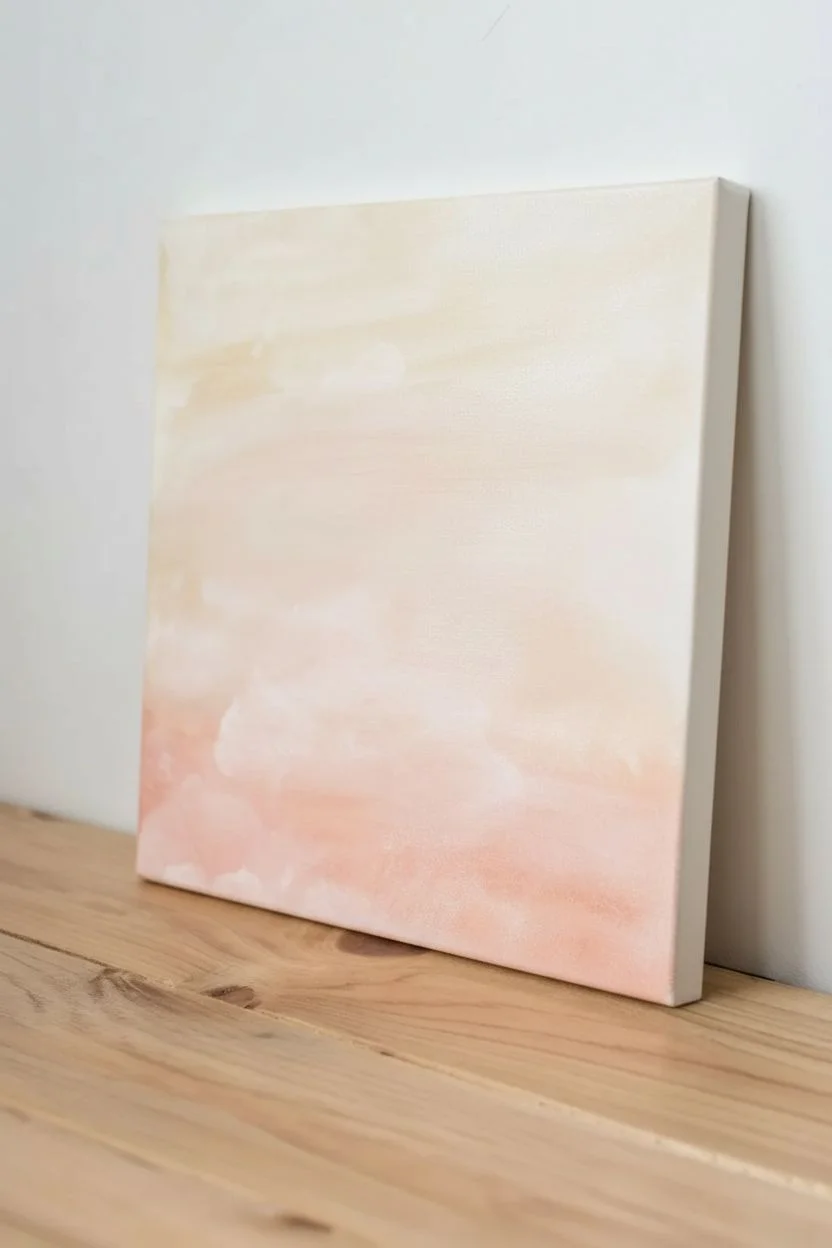
Mix a large amount of white with a tiny bit of yellow to create a cream color. Apply this to the top third of the canvas in loose, horizontal strokes, letting the edges stay uneven. -
Transition to peach:
Without cleaning your brush fully, pick up some of the peach paint mixed with white. Begin painting the bottom third of the canvas, working your way upward. -
Blend the middle:
In the center section where the cream and peach meet, use a fairly wet brush to swirl the colors together. Use light, feathery strokes to create a cloudy, ethereal look rather than sharp lines. -
Soften the edges:
Take a clean, damp paper towel and gently dab at any areas where the paint looks too heavy or the brushstrokes are too visible. This lifts a bit of pigment and creates that soft, washed texture. -
Add depth:
If the bottom looks too uniform, mix a slightly stronger peach tone (less white) and dab it into the very bottom corners, blending upwards to ground the composition. -
Paint the sides:
Don’t forget to wrap your colors around the edges of the canvas. This gives the piece a professional, finished look without needing a frame. -
Dry completely:
Let the background dry fully. Because we used water to thin the paint, this might take a bit longer than usual—about 30 to 60 minutes.
Oops! Paint too dry?
If acrylics dry too fast while blending, keep a spray bottle of water handy. A light mist over the canvas keeps the paint workable for smoother gradients.
Step 2: Adding the Lettering
-
Sketch lightly:
Using a pencil, very lightly sketch the word ‘breathe’ in the center of the canvas. Focus on a flowing, cursive style with looped ascending and descending lines. -
Check alignment:
Step back and ensure your word is centered horizontally and vertically. The ‘b’ and ‘h’ should reach high, while the rest of the letters stay grounded in the middle. -
Prepare black paint:
Squeeze a small amount of black acrylic paint onto your palette. If it feels thick, add a drop of water to make it flow like ink, which helps with smooth lettering lines. -
Start the script:
Using your small round brush (or a paint pen if you prefer more control), begin tracing your pencil lines. Start with thin pressure for the initial strokes. -
Variable width:
To mimic modern calligraphy, thicken the ‘downstrokes’ (any time your pen moves downward) by pressing harder or going over the line again. Keep the ‘upstrokes’ thin and delicate. -
Refine the edges:
Go back over any jagged edges on your letters to smooth them out. The contrast between the crisp black text and the blurry background is key. -
Erase guidelines:
Once the black paint is 100% dry (give it plenty of time so you don’t smudge), gently erase any visible pencil marks.
Make it Shimmer
Mix a tiny drop of iridescent medium or pearl white paint into your cream color for a background that catches the light beautifully.
Hang your new artwork in a quiet corner to remind yourself to take a moment of pause
Wavy Line Pattern Painting
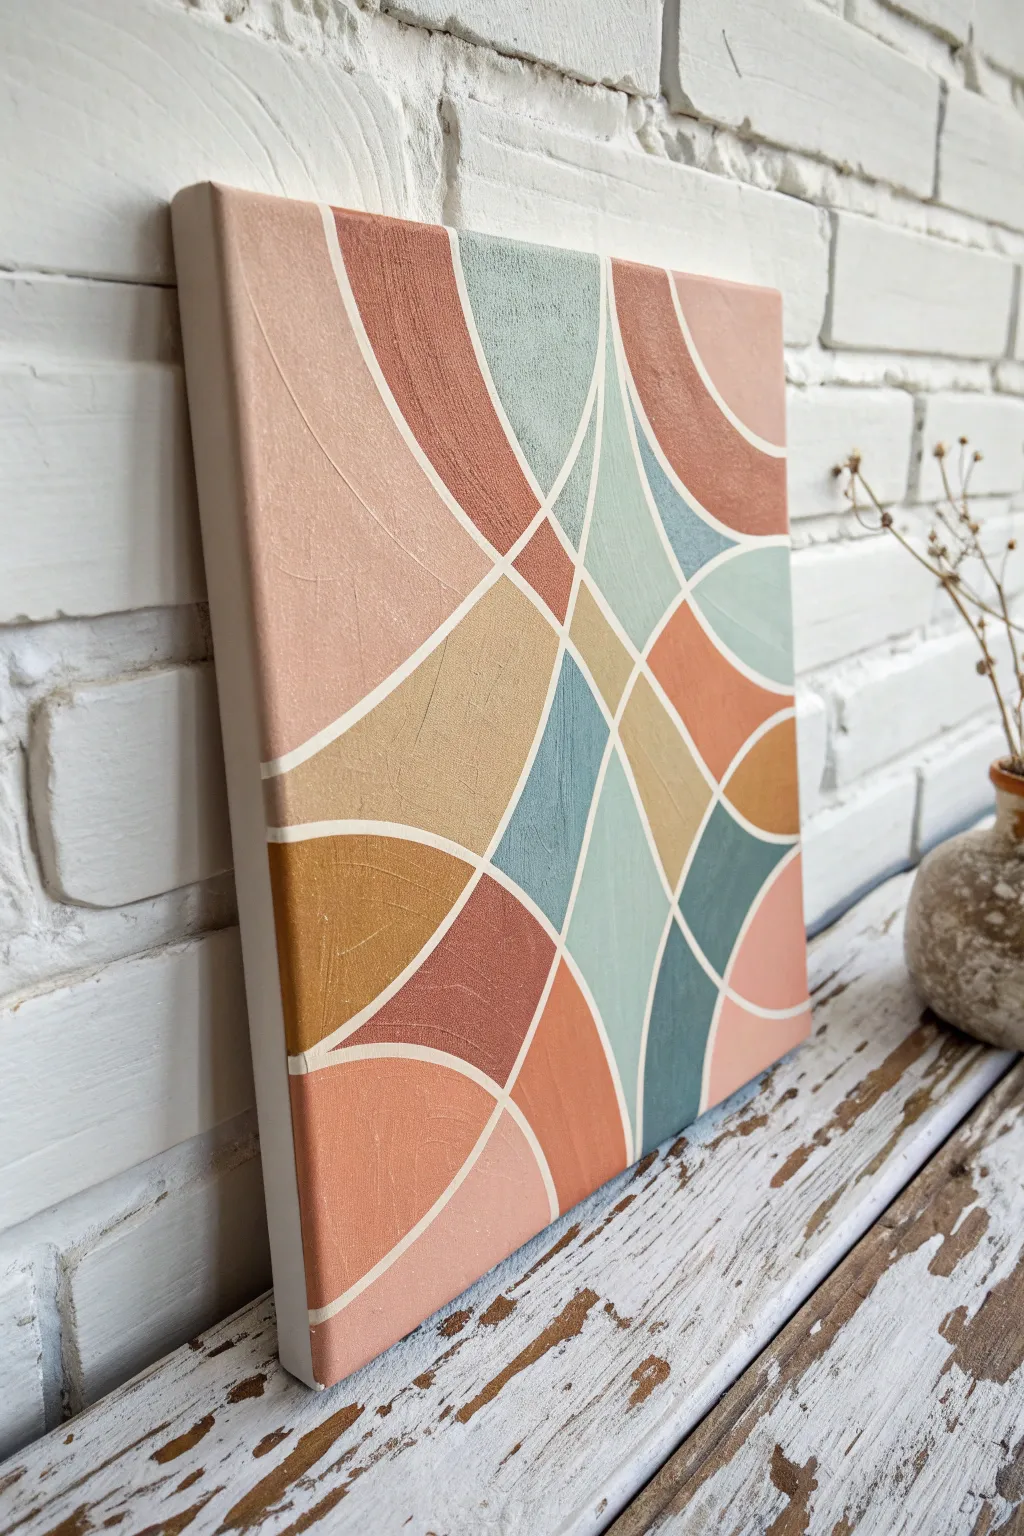
Create a calming, modern look with this geometric painting that relies on intersecting curved lines to build a beautiful mosaic. The soothing palette of muted pastels and earthy tones makes this piece perfect for adding a touch of contemporary warmth to any shelf or wall.
Step-by-Step Guide
Materials
- Square stretched canvas (10×10 or 12×12 inch)
- White gesso or white acrylic paint
- Acrylic paints (terracotta, dusty rose, teal, sage green, ochre yellow)
- Thin masking tape or painter’s tape (1/4 inch or similar)
- Flat shader brushes (medium and small)
- Round detail brush
- Pencil
- Palette for mixing
- Water cup and paper towels
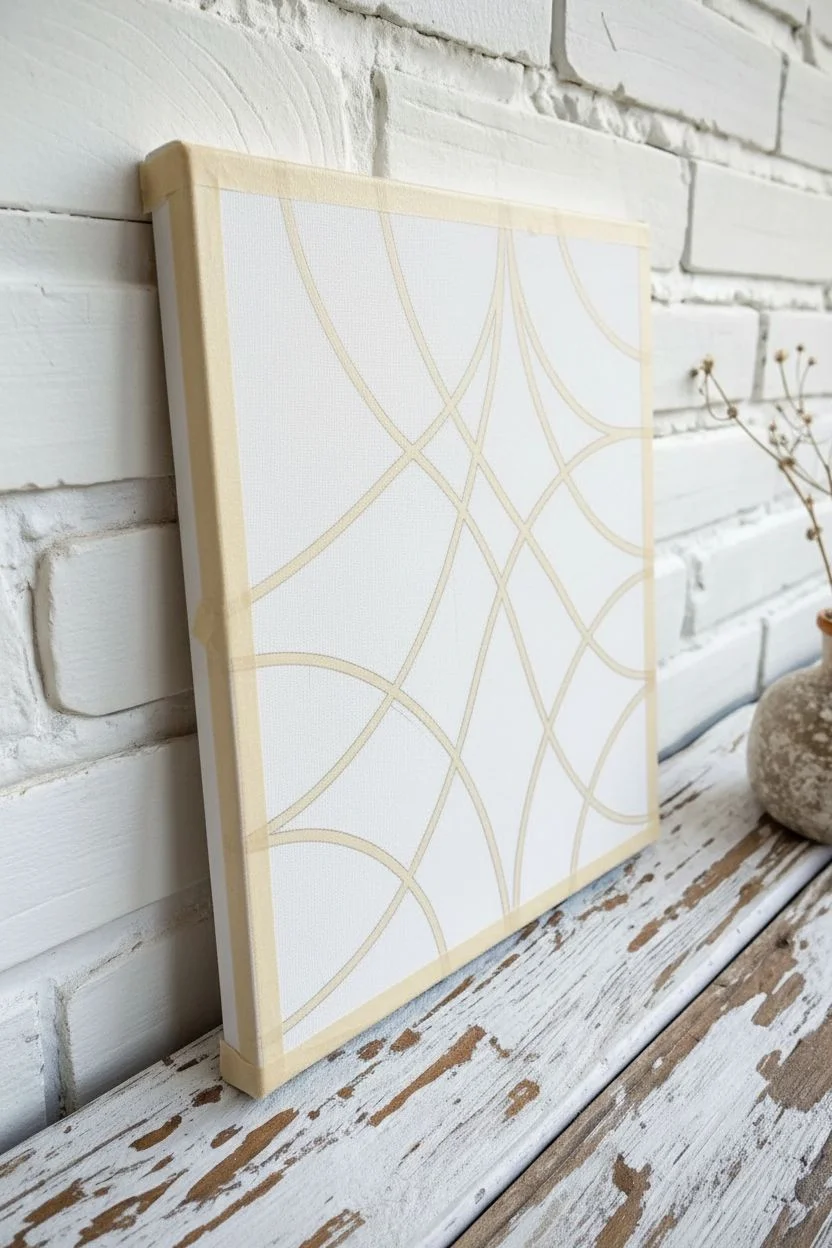
Step 1: Preparation & Design
-
Prime the Surface:
Begin by applying a smooth coat of white gesso or white acrylic paint over the entire canvas. This ensures your background lines stay crisp and bright later on. -
Draw the Main Curves:
Using a pencil, draw two large, sweeping S-curves that cross each other near the center of the canvas. These will serve as the backbone of your composition. -
Add Intersection Circles:
Sketch large semi-circles or arcs originating from the edges and corners of the canvas. Aim for these lines to intersect your main curves, creating a variety of smaller, enclosed shapes. -
Refine the Grid:
Review your pencil lines. You want a balance of large and small shapes. If an area looks too empty, add another gentle arc to split a large shape in two. -
Tape the Lines:
Now, careful apply thin masking tape directly over your pencil lines. Press the edges of the tape down firmly with your fingernail or a credit card to prevent paint bleed. -
Seal the Tape:
Apply a very thin layer of white paint over the edges of the masking tape. This is a crucial trick; if any paint seeps under, it will be white paint that matches the background, keeping your final colored edges razor-sharp.
Bleeding Lines?
If paint leaked under the tape, wait for it to dry fully. Then, take a tiny detail brush with opaque white paint and carefully trace over the line to cover the bleed.
Step 2: Color Application
-
Plan Your Palette:
Squeeze out your acrylic colors onto the palette. You want a mix of warm tones (terracotta, rose, ochre) and cool tones (teal, sage). I like to mix a tiny bit of white into the ochre to soften it. -
Paint First Shapes:
Start painting the enclosed shapes. Use a medium flat brush for larger areas. Try not to put two identical colors right next to each other. -
Work in Clusters:
Paint a few non-adjacent sections with your dusty rose color first, then clean your brush and switch to teal. Working one color at a time keeps your water cleaner and speeds up the process. -
Create Texture:
For the terracotta and darker teal sections, apply the paint slightly thicker. Subtle brushstrokes add a nice organic texture that contrasts with the clean white lines. -
Fill Small Details:
Switch to a smaller brush for the tiny triangular shapes created where multiple curves intersect. Accuracy is key here to keep the geometry clean. -
Paint the Sides:
Don’t forget the canvas edges. Carry the color from the face of the canvas down the sides for a professional, gallery-wrapped finish. -
Check Coverage:
Once the first coat is dry to the touch, inspect your work. Some lighter colors like the dusty pink or sage might need a second coat for full opacity.
Smoother Curves
For flowing curves instead of rigid angles, try using thin automotive detailing tape or nail art tape. It bends much easier than standard painter’s tape.
Step 3: The Reveal
-
Let it Set:
Allow the painting to dry thoroughly. Wait until the paint is no longer shiny and feels dry to the touch, usually about 20-30 minutes depending on thickness. -
Remove the Tape:
Gently peel back the masking tape at a 45-degree angle. Pull slowly to ensure clean lines and avoid ripping any dried paint. -
Touch Up:
Use a fine detail brush and a steady hand to fix any spots where the white lines might need sharpening or where a color needs a tiny correction.
Step back and admire how the simple intersection of lines has created a complex and harmonious piece of art for your home
Single Fruit Still Life
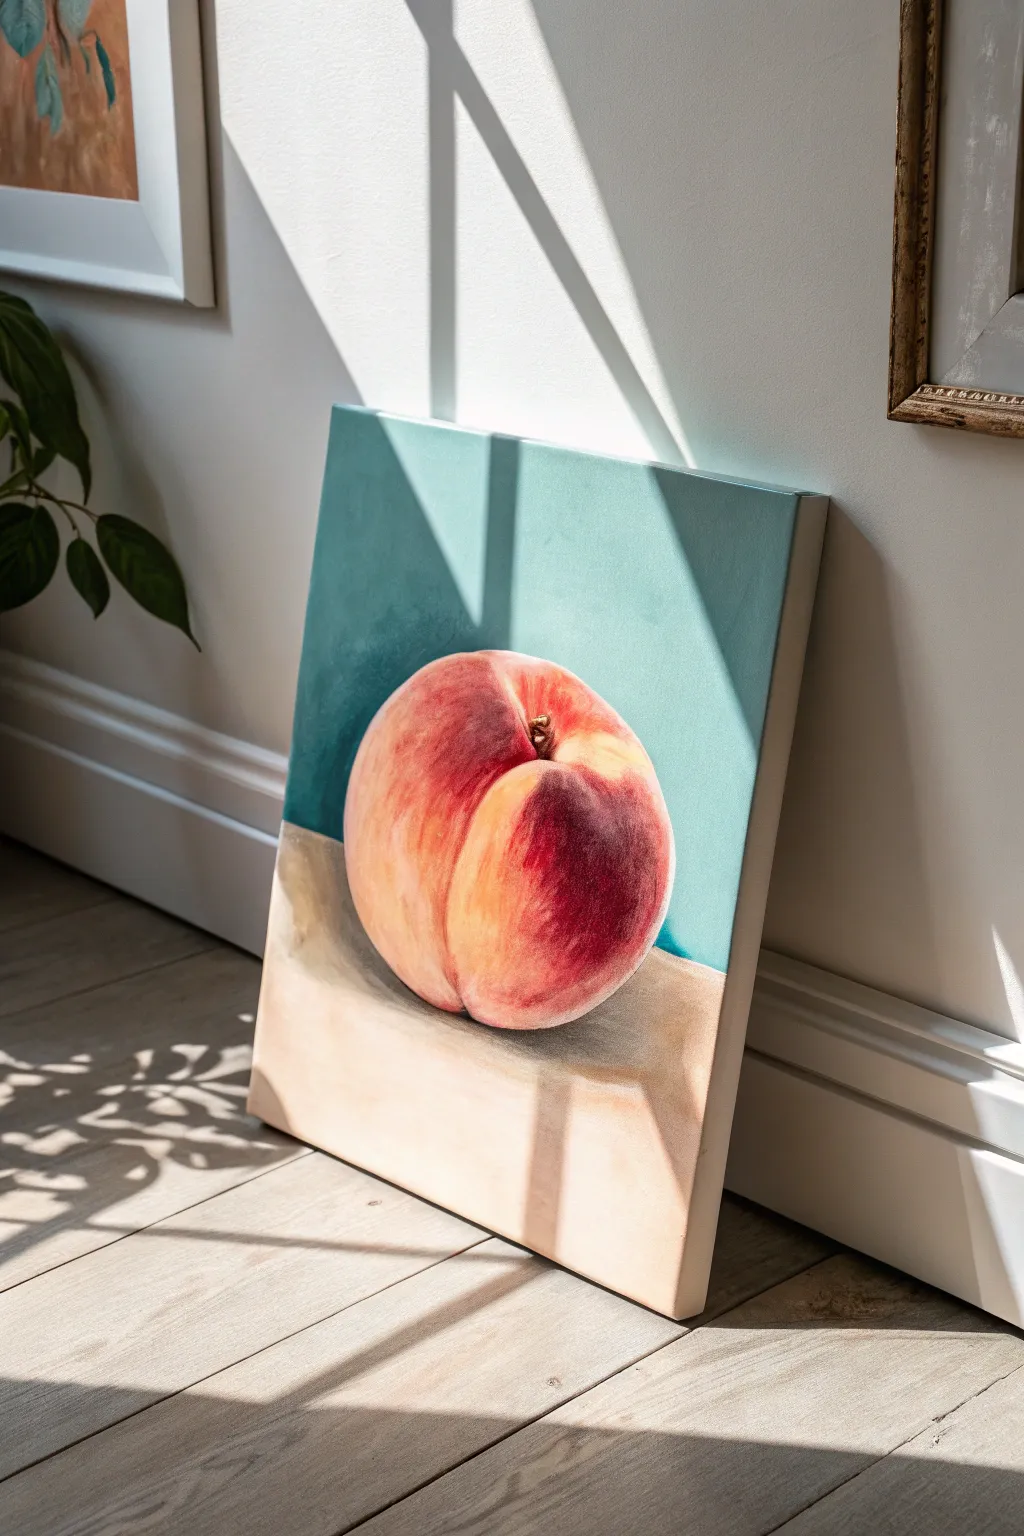
Capture the soft, fuzzy texture of a ripe peach in this elegant acrylic study. With its minimalist composition and striking teal background, this single-fruit still life makes a sophisticated yet achievable weekend painting project.
How-To Guide
Materials
- Stretched canvas (rectangular format)
- Acrylic paints: Alizarin Crimson, Cadmium Yellow Medium, Cadmium Red, Titanium White, Burnt Umber, Teal or Turquoise, Phthalo Green
- Synthetic paint brushes: medium filbert, large flat brush, small round detail brush
- Palette or paper plate
- Cup of water and paper towels
- Chalk or soft pencil for sketching
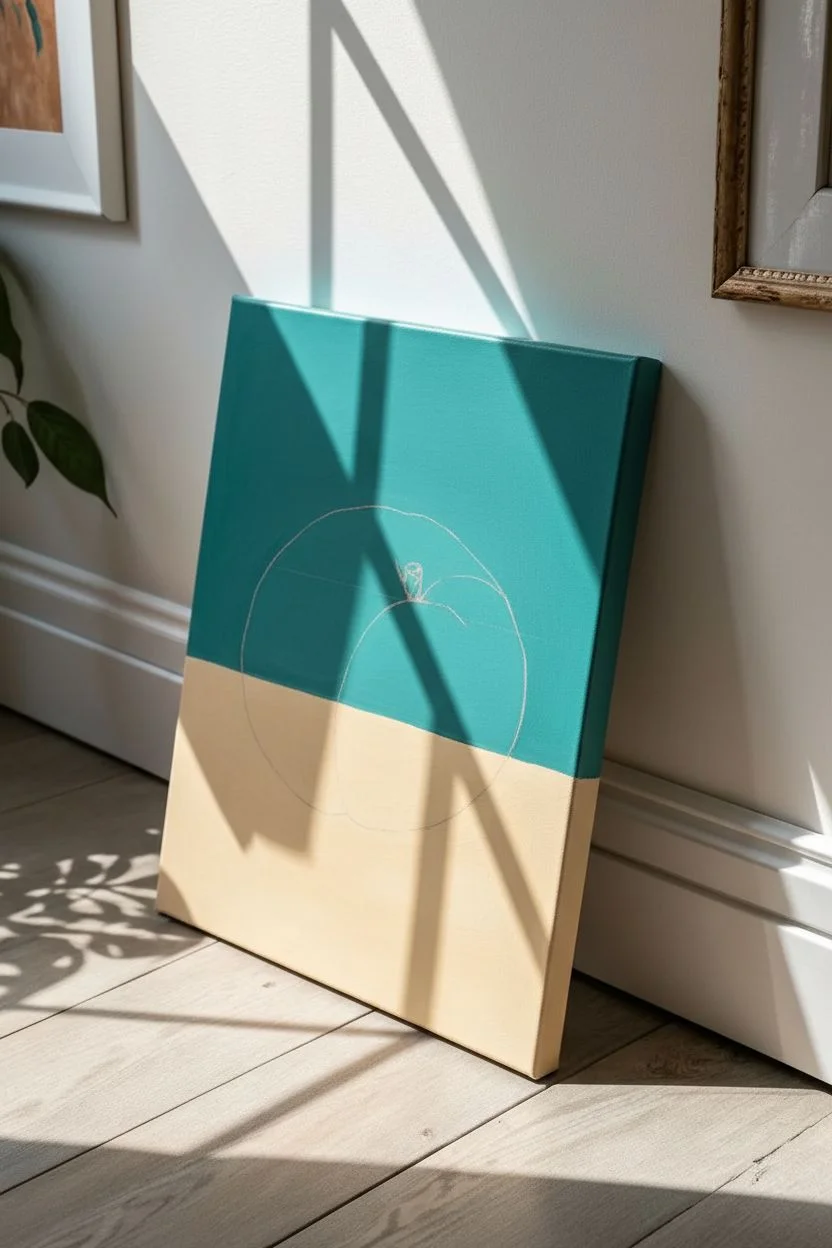
Step 1: Setting the Scene
-
Sketch the Composition:
Begin by lightly sketching the outline of your peach using chalk or a soft pencil. Place it centrally but slightly lower on the canvas. Draw a simple horizontal line across the fruit, about one-third of the way up from the bottom, to indicate the edge where the table ends and the wall begins. -
Define the Crease:
Draw the signature cleft or crease of the peach. Start from the top center and curve it downwards and to the right, ending near the bottom curve. This line is crucial for giving the fruit its recognizable shape. -
Block in the Background Wall:
Mix a vibrant teal using Teal/Turquoise with a tiny touch of Burnt Umber to dull it slightly, or use it straight from the tube if you prefer a brighter look. Using a large flat brush, paint the upper wall section, carefully cutting in around the top half of the peach outline. -
Create Depth in the Background:
While the teal is still wet, mix a slightly darker version by adding a touch more blue or green. Apply this to the left side of the wall area to suggest a subtle shadow, blending it smoothly toward the right. -
Paint the Surface:
For the table surface, mix Titanium White with a small amount of Burnt Umber and a speck of Yellow to create a warm, creamy beige. Paint the lower section of the canvas, ensuring a clean edge where it meets the teal wall.
Step 2: Layering the Fruit Colors
-
Base Tone Application:
Mix a soft, pale orange using Cadmium Yellow, a touch of Cadmium Red, and plenty of Titanium White. Apply this color to the entire peach shape as a base layer. Let this dry completely before moving on. -
Building the Blush:
Mix a deeper reddish-orange using Cadmium Red and a little Alizarin Crimson. Using a filbert brush, start applying this color to the left side of the peach and along the deep crease. Use rapid, curved brushstrokes that follow the contour of the fruit to mimic its roundness. -
Deepening Shadows:
Create a rich, dark red by mixing Alizarin Crimson with a tiny dot of Burnt Umber. Apply this to the deepest shadow areas on the bottom right side of the peach and the very center of the cleft where the stem would be. -
Adding the Glow:
For the highlight areas on the upper cheeks of the fruit, mix Cadmium Yellow with Titanium White. Blend this wet-into-wet with the orange mid-tones you applied earlier to create a soft, fuzzy transition. -
Simulating Texture:
I like to use a fairly dry brush for this part. Take your lighter orange mixture and gently scumble (brush lightly) over the darker red areas. This breaks up the hard edges and creates that characteristic ‘peach fuzz’ texture.
Blurry or Messy Blending?
If your colors are turning to mud, stop and let the layer dry. Acrylics blend best when wet, but overworking them creates gray tones. Let it dry, then add fresh color on top.
Step 3: Final Details and Shadows
-
Painting the Stem Pit:
Use your small round brush and dark Burnt Umber to paint the tiny depression at the top where the stem attaches. Add a small flick of lighter brown or tan to suggest a remnant of the stem itself. -
Cast Shadow Base:
Mix a cool grey-brown for the shadow beneath the fruit. Use Burnt Umber, a touch of Blue, and White. Paint a shadow shape on the table surface, stretching slightly to the right of the fruit. -
Refining the Cast Shadow:
The shadow should be darkest right underneath the peach. Glaze a darker version of your shadow color right at the base of the fruit to anchor it to the table. -
Table Highlights:
Add a few streaks of nearly pure Titanium White to the foreground of the table surface, blending them horizontally. This suggests light hitting the smooth table. -
Final Cleanup:
Check your edges. If any peach color went onto the background, use your teal mix and a small brush to tidy up the outline. Clean lines here make the fruit pop.
Texture Tip
To get realistic ‘peach fuzz,’ try dabbing the final highlight layers with a dry sponge or a stiff stencil brush instead of a soft paintbrush. It creates instant texture.
Step back and admire how the cool background colors make your warm fruit study truly shine on the wall
Cute Animal Peek Scene

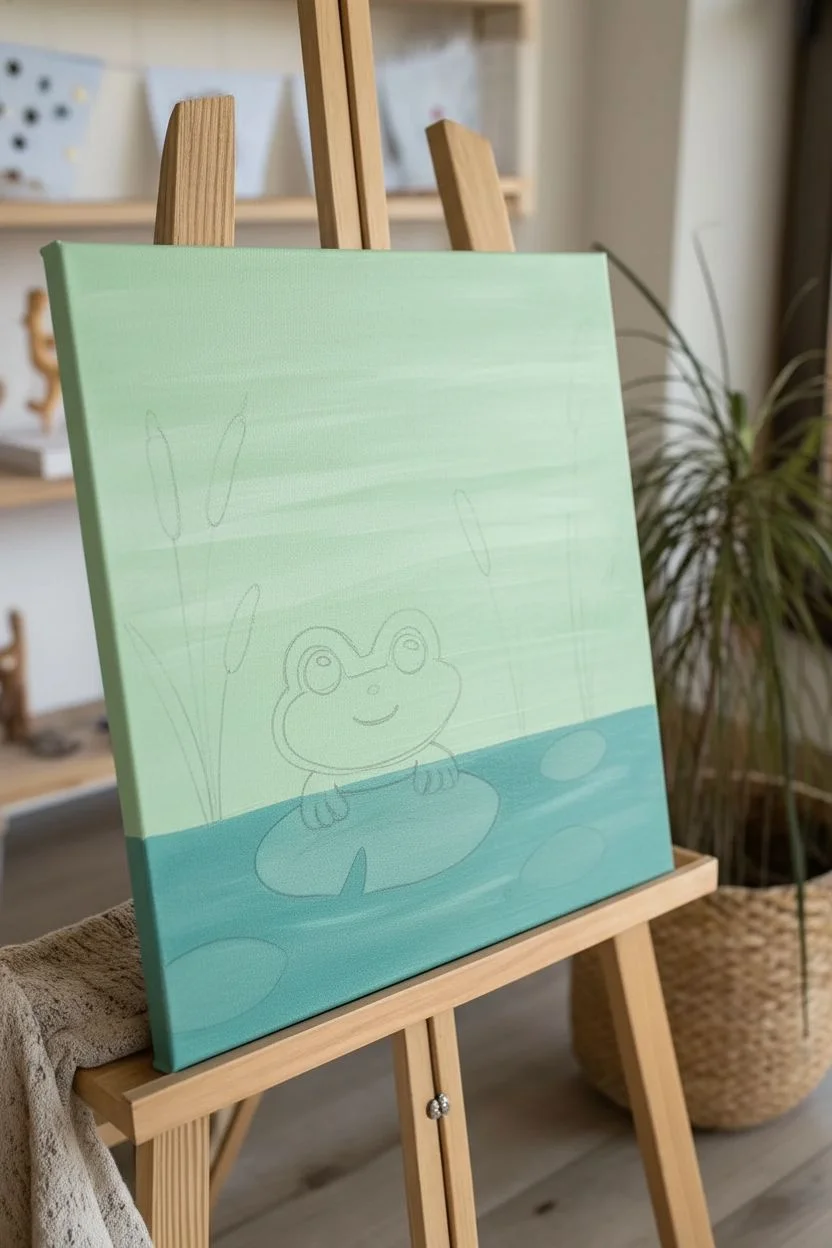
Bring a splash of charm to your walls with this delightful painting of a friendly frog peeking out from his lily pad home. The soft pastel mint background and stylized flat illustration style make this perfect for a nursery or playful workspace.
Step-by-Step Tutorial
Materials
- Square canvas (stretched or panel)
- Acrylic paints: Mint Green, Teal/Turquoise, Forest Green, Lime Green, White, Black, Golden Brown, Soft Pink, Mustard Yellow
- Paintbrushes: 1-inch flat wash brush, medium filbert brush (size 6-8), small round detail brush (size 0 or 1)
- Palette
- Water cup and paper towels
- Pencil and eraser
Step 1: Setting the Scene
-
Paint the background sky:
Start by mixing a large amount of Mint Green with a touch of White to create a soft, varied pastel shade. Use your large flat wash brush to cover the top two-thirds of the canvas with smooth, horizontal strokes. Let this layer dry completely. -
Block in the water:
For the water, mix Teal with a tiny bit of White. Using the clean flat brush, paint the bottom third of the canvas. Don’t worry about a perfectly straight horizon line, as the transition will be softened later. -
Draw the sketch:
Once the base layers are dry to the touch, lightly sketch your composition with a pencil. Draw a large oval lily pad in the center foreground, the frog’s head and hands resting on top, and tall vertical cattails on the sides. Keep your lines faint so they don’t show through the lighter paint colors.
Uneven Coverage?
If your frog’s green skin looks streaky, don’t keep brushing wet paint. Let it dry fully (about 15 mins), then apply a second smooth coat for a solid, opaque finish.
Step 2: Building the Elements
-
Paint the lily pad base:
Fill in the large lily pad shape using Forest Green and your medium filbert brush. You might need two coats here to get that rich, deep color to stand out against the teal water. -
Base coat the frog:
Mix a bright Lime Green with a hint of White. Paint the frog’s head and little hands. The shape of the head is rounded but slightly wider at the bottom cheeks. Ensure the paint is opaque; if you can see the background color through it, add a second layer after the first dries. -
Adding lily pad details:
While the main lily pad is drying, paint two smaller floating leaves in the background water using a slightly lighter green mixture. -
Painting the cattail stems:
Switch to your small round brush and dilute some Forest Green paint slightly with water to make it flow better. Paint thin, vertical lines rising from the water, varying their heights and slight curves for a natural look. -
Adding the cattail heads:
Using the Golden Brown paint and the filbert brush, press down and lift to create the cigar-shaped heads of the cattails near the tops of the stems. Add smaller, stroke-like leaves near the base using a mix of Golden Brown and Green.
Pro Tip: Depth trick
Add a darker green shadow just underneath the frog’s chin where it touches the lily pad. This small detail grounds the character so he doesn’t look like he’s floating in air.
Step 3: Character & Details
-
Detailing the lily pad:
Mix a lighter shade of green (Lime Green + a touch of Yellow). Use the small, thin brush to paint veins radiating from the center of the lily pad outward. -
Frog facial features:
Paint two large circles of White for the eyes. Once dry, add smaller Black circles inside, leaving a tiny dot of the white showing or adding a white highlight dot afterward for that spark of life. -
Cheeks and smile:
Dip your finger or a round brush into Soft Pink and stamp two rosy cheeks onto the frog. Use the fine liner brush and Black paint to carefully draw a thin, curved smile between the cheeks. -
Painting the bee:
This is my favorite little detail: create a small Mustard Yellow oval floating above the frog. Add two thin black stripes and tiny translucent white wings (use very watery white paint) to turn it into a bumblebee. -
Adding clouds:
Using a dry brush technique with White paint, gently scrub in two fluffly, semi-transparent cloud shapes in the sky area. Keep the bottoms of the clouds somewhat flat and the tops rounded. -
Water ripples:
Mix a very light Mint/White shade. Using your smallest brush, paint thin, wavy horizontal lines in the blue water section to suggest ripples and movement around the lily pad. -
Final highlights:
Add tiny dashed lines or small white dots scattered on the water surface and on the cattails to mimic light reflecting off the scene.
Let your artwork dry completely before hanging it up to enjoy your peaceful pond scene


Have a question or want to share your own experience? I'd love to hear from you in the comments below!