Charcoal is my favorite shortcut to big drama with minimal fuss—those deep blacks and soft blends do a lot of heavy lifting for you. Here are easy charcoal drawing ideas that deliver quick wins while you practice value, blending, and bold contrast.
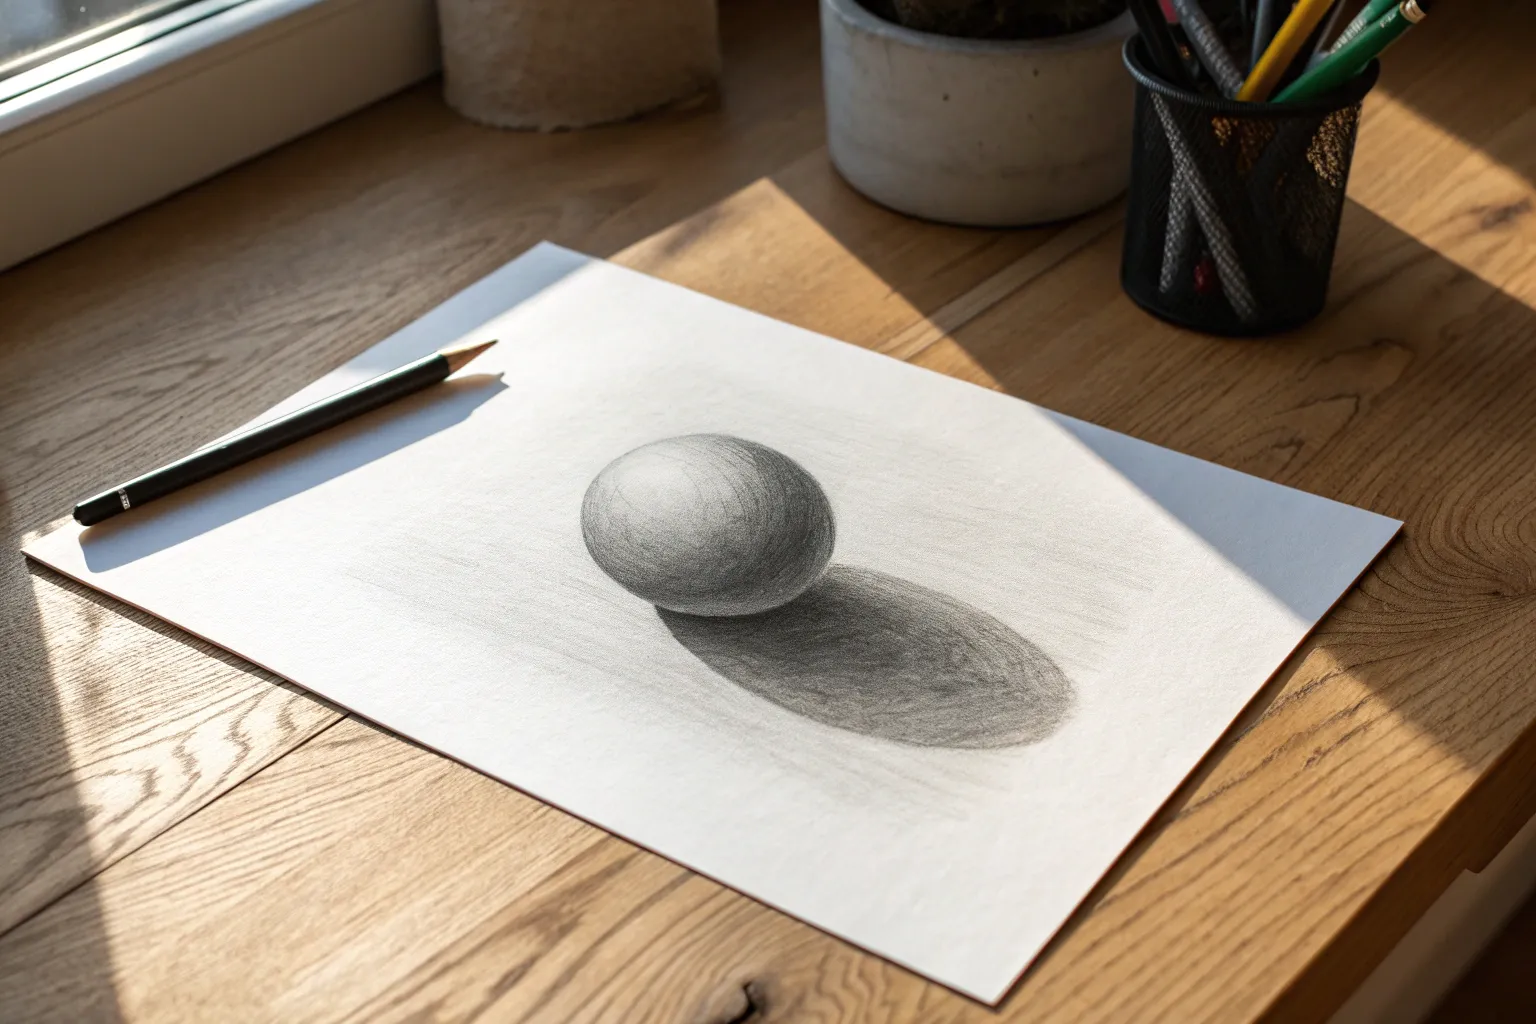
Draw a Shaded Sphere (Apple or Orange)
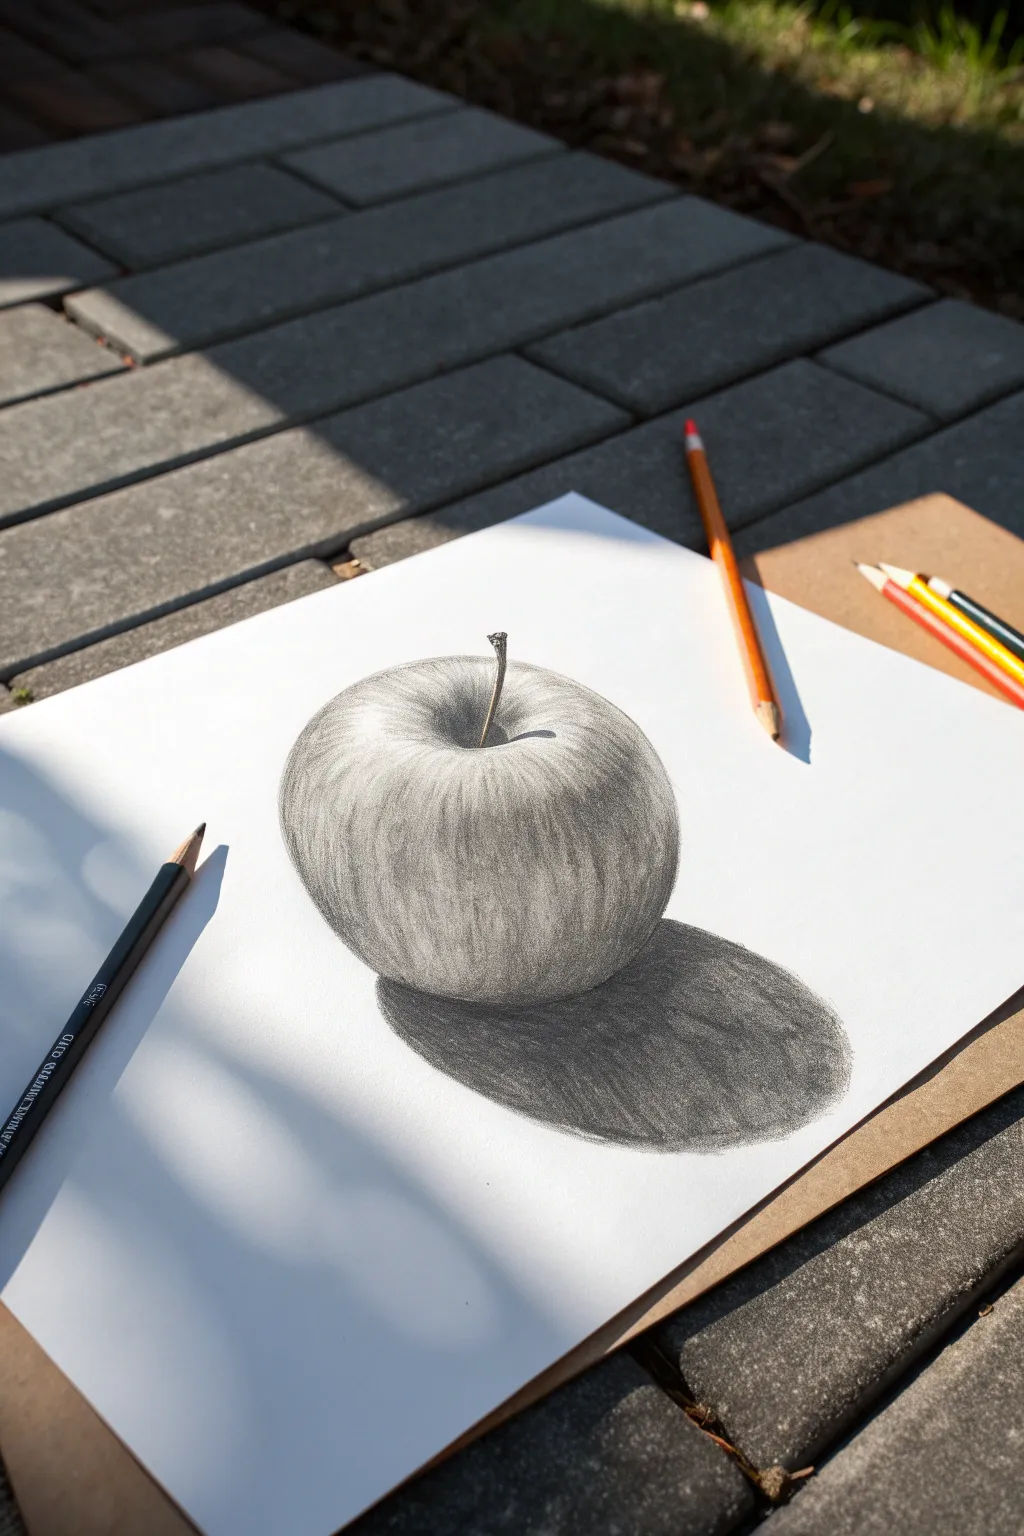
Transform a simple circle into a vibrant, three-dimensional apple using basic shading techniques. This project focuses on capturing volume through light and shadow, resulting in a striking piece of realism.
Step-by-Step Guide
Materials
- White sketch paper or drawing paper
- Soft charcoal pencil (2B or 4B)
- Hard charcoal pencil (H or HB)
- Kneaded eraser
- Blending stump or tortillon
- Clean tissue or paper towel
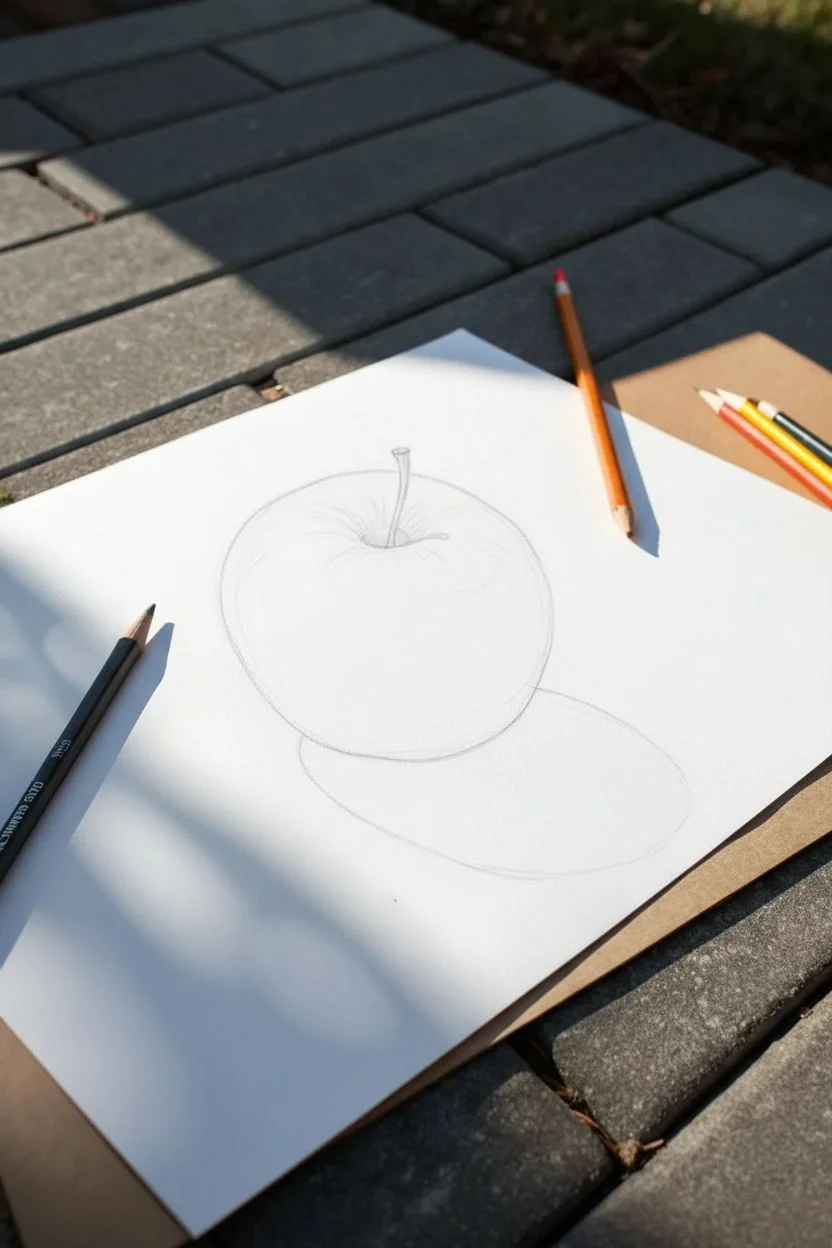
Step 1: Basic Shape and Outline
-
Sketch the perimeter:
Begin by lightly sketching a loose circle with your hard charcoal pencil. Apples aren’t perfect spheres, so flatten the bottom slightly and widen the top shoulders to create an organic shape. -
Define the dip:
At the top center of your shape, draw a small, curved dip. This indentation will house the stem and is crucial for showing the fruit’s volume. -
Add the stem:
Draw a thin, slightly curved line emerging from the center of the dip. Make the base of the stem slightly thicker where it connects to the apple, and add a tiny, textured cap at the top.
Smudge Alert
If you accidentally smear charcoal onto the white background, use a clean kneaded eraser to lift it. Slide a piece of scrap paper under your hand while drawing to prevent future smudges.
Step 2: Building Volume and Texture
-
Identify the light source:
Decide where your light is coming from; in this example, the light hits the upper left side. Mark a faint oval area on the upper left shoulder to preserve as your brightest highlight. -
Begin initial shading:
Using the side of your soft charcoal pencil, apply a light layer of grey tone across the shadow side (the right side) of the apple. Use curved strokes that follow the contour of the fruit to suggest roundness. -
Deepen the dip:
Darken the area inside the top indentation. I find that pressing harder right next to the stem base creates immediate depth. -
Create vertical texture:
Switch to sharp detailed strokes. Draw faint, vertical curved lines running from the top dip down toward the bottom. These lines mimic the natural skin patterns of the apple. -
Blend the base layer:
Take your blending stump or a tissue and gently smudge the shading you’ve applied. Blend in the direction of the apple’s curve to smooth out rough pencil marks while keeping the lighter area clean.
Pro Texture Tip
Don’t over-blend the skin! Leaving some visible, rhythmic pencil strokes creates that specific waxy texture of an apple skin better than perfectly smooth shading.
Step 3: Refining Shadows and Highlights
-
Darken the core shadow:
Apply more charcoal to the bottom right curve of the apple. This ‘core shadow’ should be the darkest part of the fruit itself, giving it weight. -
Detail the stem:
Go back to the stem with a sharpened tip. add dark shading on the shadow side of the stem and leave a tiny sliver of white on the lit side to make it look cylindrical. -
Add reflected light:
Near the very bottom edge of the shadowed side, lift up a small amount of charcoal with your kneaded eraser. This subtle lighter rim represents light bouncing off the table back onto the apple. -
Enhance texturing:
Layer vertical striations over your blended areas using varying pressures. Make the lines darker and closer together on the shadow side, and faint and sparse near the highlight. -
Clean the highlight:
Use the kneaded eraser to tap the highlighted area on the upper left shoulder, ensuring it remains the brightest white on the page.
Step 4: Cast Shadow and Final Touches
-
Map the cast shadow:
Draw an oval shape on the surface extending to the right of the apple, opposite the light source. -
Fill the shadow:
Fill this oval with a consistent, dark layer of charcoal. The shadow should be darkest directly underneath the fruit where it touches the surface. -
Blend the shadow edges:
Blend the cast shadow with your stump. Keep the edge near the apple sharp, but let the furthest edge of the shadow fade out slightly for a realistic soft focus. -
Final contrast check:
Step back and look at your drawing. Deepen the darkest shadows one last time to ensure high contrast against the white paper.
Now you have a beautifully shaded fruit study that pops right off the page


Study a Close-Up Eye With Smudged Lashes
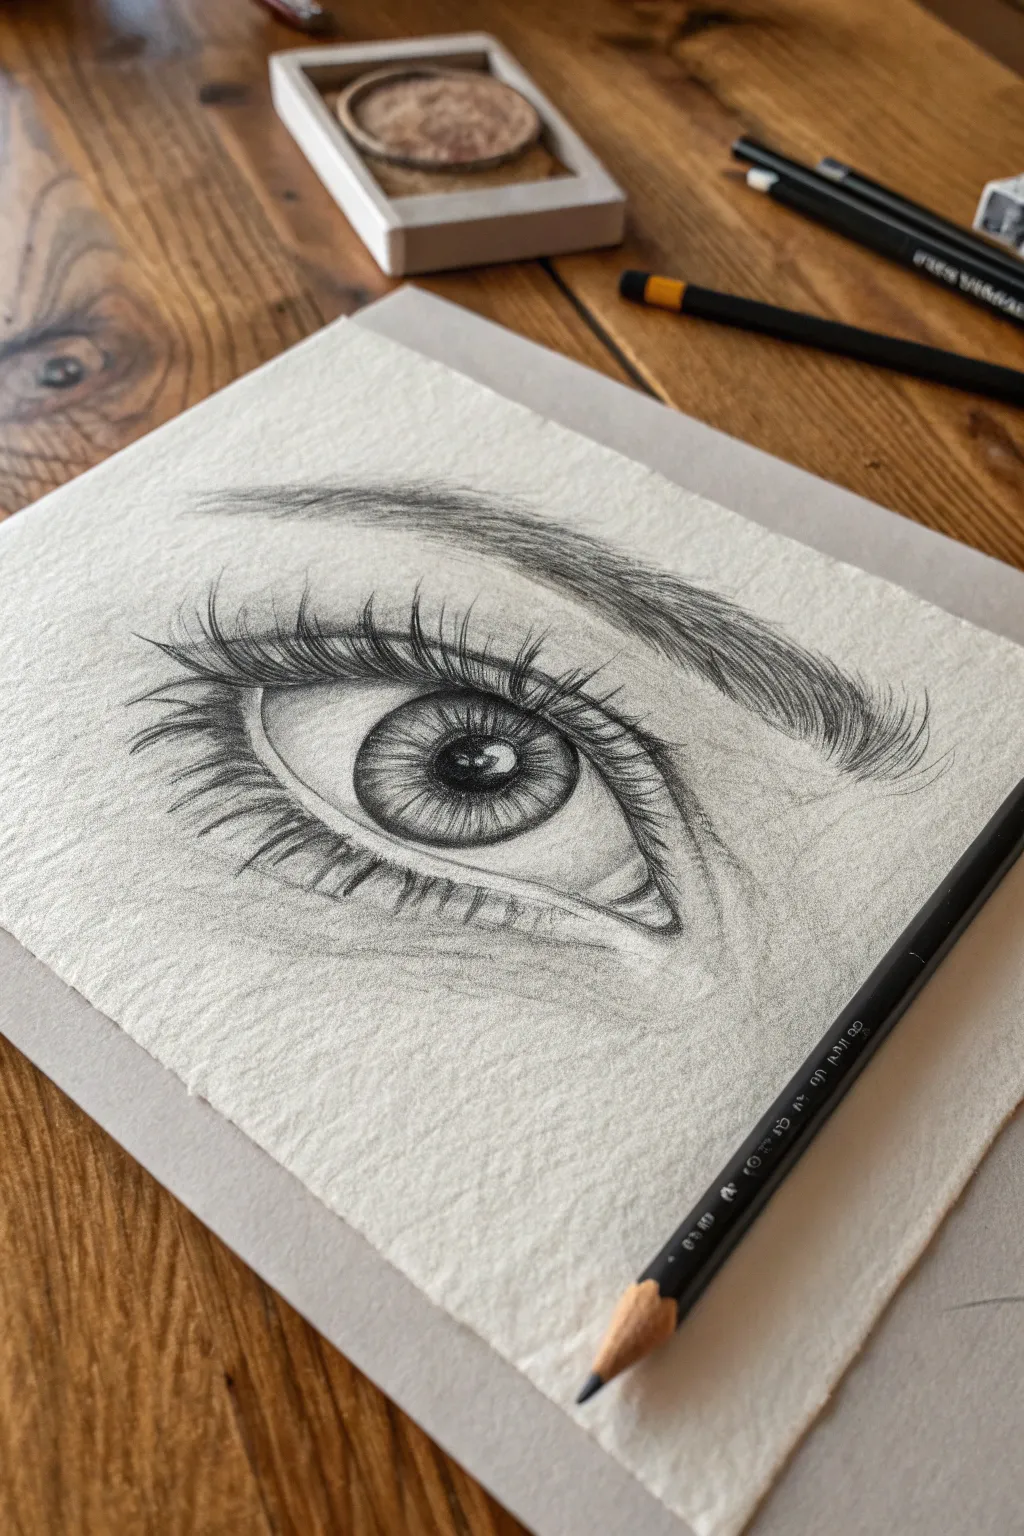
Capture the depth and emotion of a single eye in this detailed charcoal and graphite study. This project focuses on building layers of texture to create realistic lashes and a captivating, reflective iris.
Step-by-Step Tutorial
Materials
- Textured drawing paper (cold press watercolor or heavy sketch paper)
- Soft charcoal pencil (2B or 4B)
- Graphite pencil (HB or B for initial lines)
- Blending stump (tortillon)
- Kneaded eraser
- Precision eraser (eraser stick or mono zero)
- Sharpener
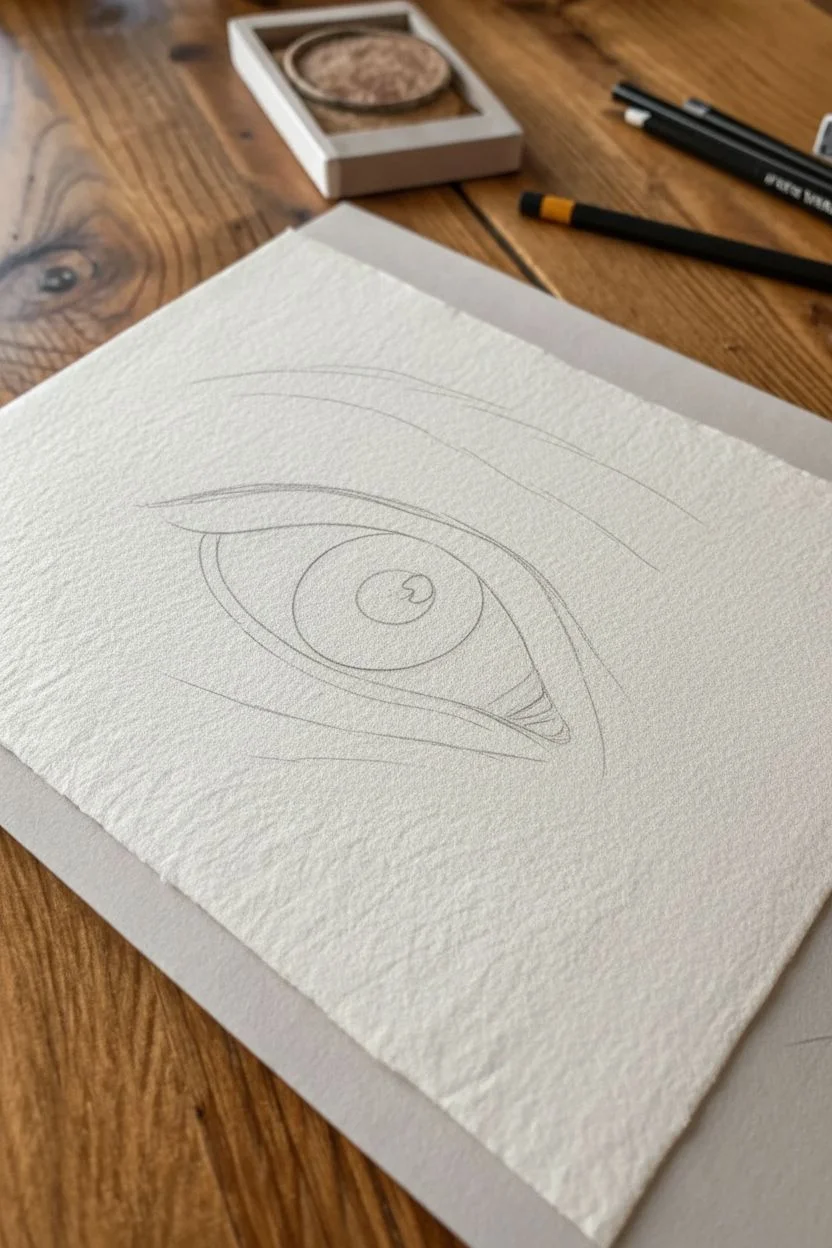
Step 1: Outlining and Iris Structure
-
Light Outline:
Begin with your HB graphite pencil, lightly sketching the basic almond shape of the eye. Locate the tear duct on the inner corner and curve the upper lid line slightly higher than the bottom. -
Iris Guide:
Draw a perfect circle within the eye shape for the iris. Note that in a relaxed gaze, the top and bottom of this circle are usually slightly covered by the eyelids. -
Pupil Placement:
Mark the center pupil with a smaller circle. Immediately draw a small, irregular rectangle or oval overlapping the pupil and iris to reserve the white highlight—this reflection brings the eye to life. -
Mapping the Crease:
Sketch the upper eyelid crease parallel to the top lash line. This line adds volume and shows that the eye is a sphere sitting in a socket.
Sharpen Up
For realistic lashes, your pencil point must be needle-sharp. Sandpaper blocks work better than standard sharpeners for getting charcoal to a fine, long point without breaking.
Step 2: Shading the Iris
-
Darkening the Pupil:
Switch to your charcoal pencil. Fill in the pupil completely, pressing firmly to get a deep, rich black, but be careful to leave your highlight shape pure white. -
Iris Spokes:
Start shading the iris by drawing lines radiating outward from the pupil like bicycle spokes. Use light flicks of the wrist. -
Outer Ring:
Darken the outer rim of the iris (the limbal ring) with charcoal. Blend this inward slightly so the edge isn’t too harsh. -
Internal Texture:
Add variance to the iris pattern by drawing squiggly, organic lines between the pupil and the outer ring. Leave some areas lighter to suggest depth and muscle fibers.
Step 3: Defining the Lids and Skin
-
Eyelid Shading:
Use your charcoal pencil to darken the upper lash line significantly. This needs to be thick and dark as it will serve as the base for the lashes. -
Soft Shadows:
Take a blending stump and gently pull some graphite/charcoal from the crease line downward and upward to create a soft gradient on the skin. -
The Tear Duct:
Lightly shade the inner corner tear duct. I usually leave a tiny speck of white here to make it look wet and realistic. -
Under-eye Detail:
Sketch a faint line beneath the lower lashes to suggest the lower lid pouch. Smudge it gently so it doesn’t look like a wrinkle, but rather a soft shadow.
Dealing with Smudges
Charcoal loves to smear. Place a clean sheet of scrap paper under your drawing hand to protect the paper oil and prevent accidentally dragging your palm through your finished work.
Step 4: Lashes and Brow
-
Upper Lashes Base:
Ensure your charcoal pencil is extremely sharp. Start drawing lashes from the upper waterline, flicking the pencil quickly upward and outward curve. -
Lash Variation:
Group the lashes slightly; they rarely grow in perfect single rows. Make some short and some long, crossing them over each other for a natural, smudged look. -
Lower Lashes:
Draw the lower lashes. These should be shorter, thinner, and spaced further apart than the top ones. Flick them downward with a lighter touch. -
Highlight Check:
If any shading has smudged into your main eye highlight, use the precision eraser to wipe it back to pure white paper. -
Brow Outline:
Above the eye, lightly outline the shape of the eyebrow. The arch usually peaks around the outer third of the eye. -
Brow Hair Strokes:
Fill the brow with short, directional strokes that mimic hair growth. Start upward near the nose, then gradually angle them sideways as you move toward the temple. -
Final Texture:
Use the side of your pencil to lightly graze the paper surface around the eye, utilizing the paper’s texture to create the look of skin pores without drawing them individually.
Step back and admire the intensity of the gaze you have created on the page


Create a Candlelight Chiaroscuro Mini Drawing
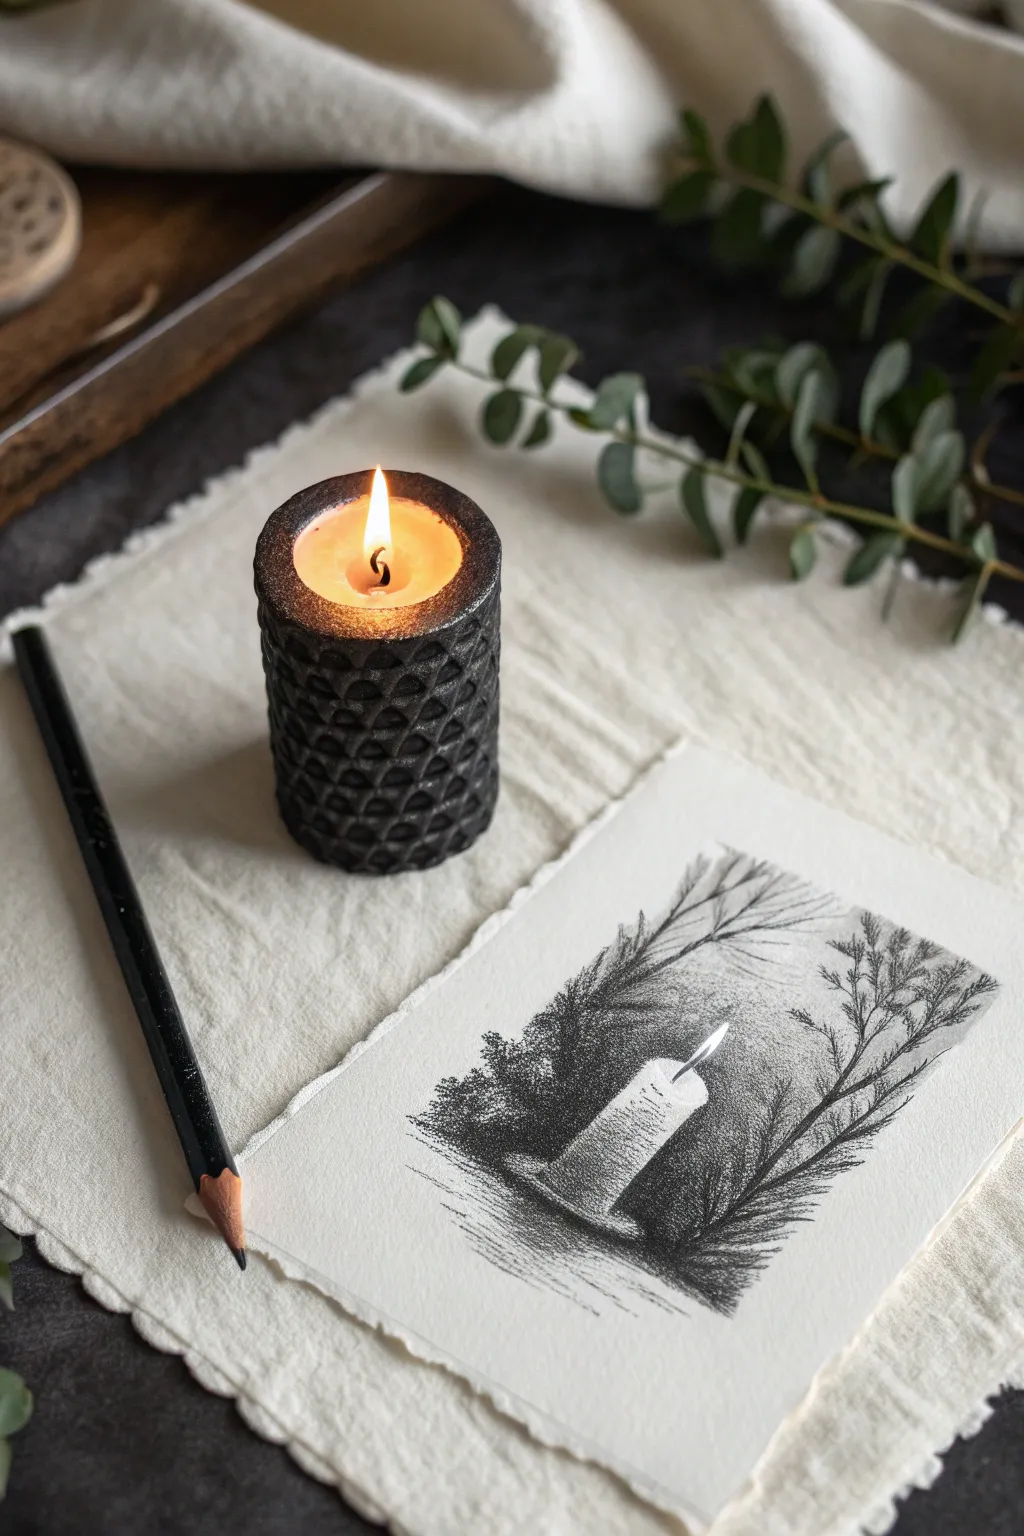
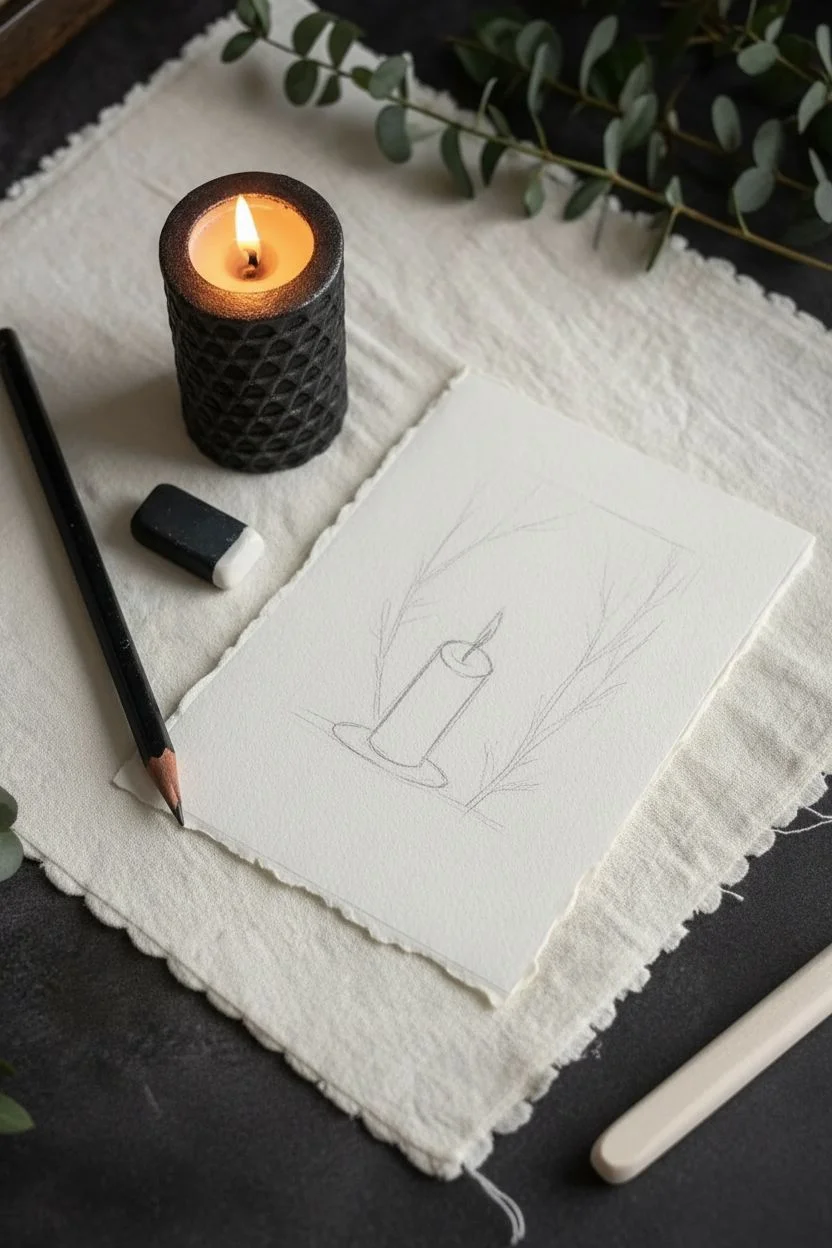
Capture the soft glow of a candle nestled among winter branches with this moody, small-scale charcoal study. The high contrast between the dark charcoal pines and the bright white paper creates a striking chiaroscuro effect that feels both cozy and dramatic.
Step-by-Step
Materials
- Small deckle-edged watercolor or printmaking paper (approx. 4×6 inches)
- Soft charcoal pencil (2B or 4B)
- Hard charcoal pencil (HB or H) for details
- Kneaded eraser
- Paper blending stump (tortillon)
- Workable fixative spray
Step 1: Setting the Scene
-
Outline the Composition:
Begin by lightly sketching the vertical edges of a simple pillar candle in the lower center of your paper using your hard charcoal pencil. -
Define the Flame:
Draw a teardrop shape for the flame floating slightly above the candle body, and curve the top surface of the candle gently to show perspective. -
Map the Branches:
Lightly sketch the main directional lines for the branches framing the candle on the left and right sides, ensuring they angle inward to lead the eye toward the flame.
Keep it Clean
Place a scrap piece of paper under your drawing hand to prevent oils from your skin transferring to the paper and to stop your palm from smudging your work.
Step 2: Building Shadows
-
Darken the Background Base:
Using the side of your soft charcoal pencil, lay down a tone around the candle shape, keeping the pressure relatively light to establish a mid-tone gray. -
Carve Out the Candle:
Intensify the darkness immediately next to the candle’s edges, which make the white of the paper ‘pop’ to represent the glowing wax. -
Establish the Ground:
Add horizontal strokes at the base of the candle to suggest the ground or table surface, fading them out as they move away from the light source. -
Create Depth on the Wax:
Very lightly shade the sides of the candle cylinder itself, leaving the center and the area nearest the flame completely white to simulate inner translucency.
Glow Not Bright Enough?
If your candle looks dull, the surrounding darks aren’t dark enough. Don’t be afraid to press hard with 4B charcoal to create true black next to the white paper.
Step 3: Drawing the Forest
-
Start the Foliage:
Switch back to the soft charcoal pencil and begin adding dense, scribbled textures to the bottom left and right corners to form bushes or low shrubs. -
Draw Tree Trunks:
Pressing firmly, draw thin, dark lines extending upward from the bushes to create the trunks of the flanking trees. -
Add Fine Branches:
Use sharp, quick flicks of the wrist to draw the smaller twigs and branches reaching toward the sky, allowing them to fade slightly as they get higher. -
Layering Contrast:
Go back over the foliage nearest the candle and darken it significantly; this high contrast is essential for the illusion of bright light.
Step 4: Refining the Glow
-
Soften the Edges:
Take your paper blending stump and gently smudge the background strokes behind the branches to create a soft, out-of-focus atmosphere. -
Shape the Flame Halo:
Use the blending stump to carefully drag a tiny amount of charcoal dust away from the flame’s outline, creating a hazy glow around the light source. -
Detail the Wick:
Sharpen your hard charcoal pencil to a fine point and draw a singular, crisp black line for the wick inside the flame shape. -
Add Texture to the Candle:
Draw faint, horizontal or diagonal hatch marks across the shadowed side of the candle to give it a textured, rustic appearance similar to the reference. -
Highlight Control:
I find the kneaded eraser crucial here; dab it onto the candle body to lift off any smudges and restore the pure white highlight where the light hits strongest. -
Final Contrast Check:
Review your drawing and deepen the darkest blacks in the lower corners one last time to anchor the composition. -
Fix the Drawing:
Spray a light coat of workable fixative over the finished piece to prevent the charcoal dust from smearing or transferring.
Display your miniature artwork on a small easel or frame it to add a touch of warmth to any corner of your home


Draw a Single Rose Using Big Value Shapes
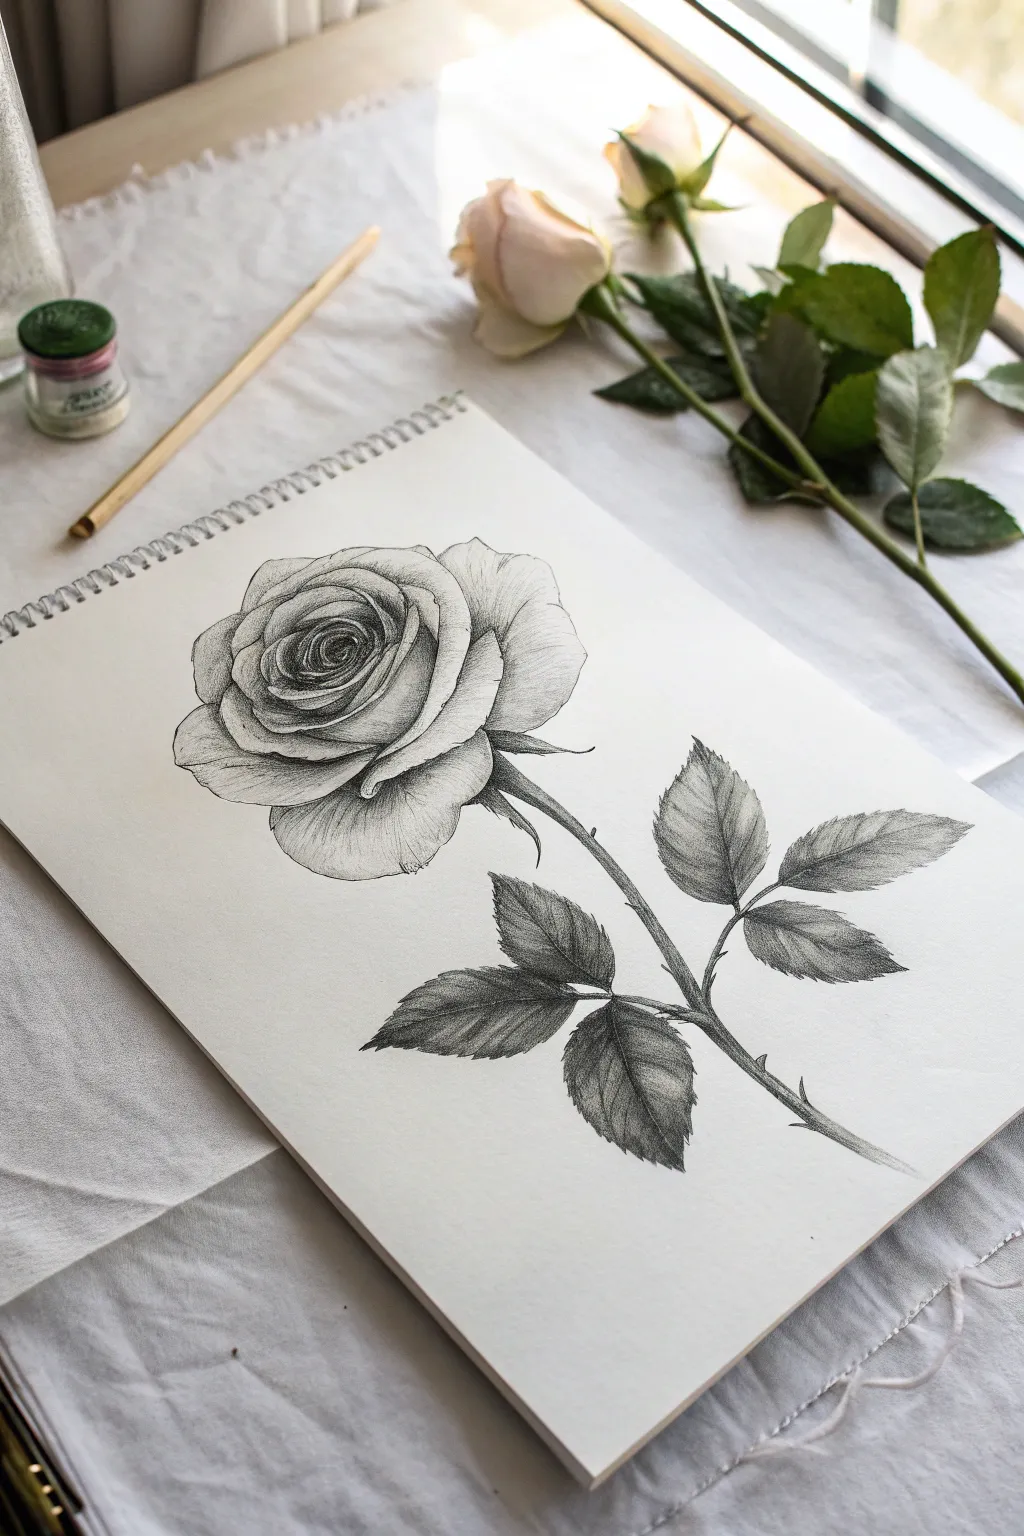

Learn to translate the delicate complexity of nature into a striking monochromatic artwork. This tutorial breaks down a realistic single rose into manageable shapes and shading techniques, perfect for building your confidence with charcoal.
Step-by-Step Guide
Materials
- High-quality drawing paper or sketchbook
- Willow or vine charcoal sticks (soft)
- Charcoal pencils (soft and medium)
- Kneaded eraser
- Blending stump or tortillon
- Graphite pencil (HB or 2B) for sketching
- Fixative spray (optional)
Step 1: Drafting the Basic Structure
-
Establish the Stem Angle:
Start by drawing a faint, sweeping line diagonally across your page with your graphite pencil. This central axis determines the flow of the stem and anchors the flower head. -
Map the Bloom’s Shape:
At the top of your axis line, sketch a loose, slightly flattened oval. This won’t be outlined in the final piece, but it acts as a boundary for the rose’s outer petals. -
Indicate Leaf Placement:
Along the stem line, sketch rough diamond or teardrop shapes where the leaves will sit. Place one pair lower down on the right and another single leaf branching off the left side of the stem. -
Define the Petal Spirals:
Inside your top oval, begin drawing the distinct spiral center of the rose. Keep your lines incredibly light here; focus on the way the petals tightly wrap around each other in the middle and unfurl outwards.
Keep It Clean
Place a scrap piece of paper under your drawing hand. This prevents the natural oils from your palm from smearing your hard work or transferring charcoal to clean areas.
Step 2: Developing the Bloom
-
Darken the Core:
Switch to a sharp charcoal pencil. Begin emphasizing the deepest shadows right in the center of the bloom. These dark crevices between the tightly packed petals create immediate depth. -
Outline the Outer Petals:
Refine the shapes of the large, drooping outer petals. Unlike the tight center, these should have softer, wavier edges to suggest softness and age. -
Apply Mid-tone Shading:
Using the side of a willow charcoal stick or a soft pencil, lightly shade the body of the petals. Avoid the very edges of each petal; leaving these paper-white creates a natural highlight effect. -
Blend for Softness:
Take your blending stump and gently smudge the shading you just laid down. Use a circular motion, pulling the charcoal from the dark shadows toward the lighter edges to create a smooth gradient. -
Lift Highlights:
Shape your kneaded eraser into a fine point. Press and lift graphite away from the curled rims of the petals to maximize contrast against the shadowed areas beneath them.
Muddy Shading?
If your drawing looks like a grey blob, you likely over-blended. Stop smoothing everything out! Use a sharpened charcoal pencil to re-establish crisp edges and distinct dark lines.
Step 3: Stem and Foliage Details
-
Thicken the Stem:
Trace over your initial stem line with charcoal, giving it thickness. Add small, sharp triangular shapes jutting out for the thorns. -
Outline Leaf Serrations:
Go back to your rough leaf shapes. Carefully draw the jagged, serrated edges that are characteristic of rose leaves, making sure the tips point away from the stem. -
Shade the Leaf Veins:
Draw a central vein down each leaf. Shade heavily on one side of the vein and lighter on the other to show the fold and dimension of the leaf. -
Texture the Leaves:
Use short, directional strokes with your charcoal pencil to mimic the texture of leaf veins branching out from the center line. -
Deepen Leaf Shadows:
The leaves are often darker than the petals. Layer more charcoal here, pressing firmer to get a rich, dark grey tone.
Step 4: Final Refinements
-
Enhance Cast Shadows:
Look at where petals overlap. Add a thin, distinct line of dark charcoal right under the edge of the top petal to show it casting a shadow on the one below. -
Refine Stem Texture:
Add tiny striations along the length of the stem to give it a woody texture, rather than a smooth plastic look. -
Clean Up Edges:
Use your kneaded eraser to clean up any smudges on the background paper. A clean perimeter makes the drawing pop. -
Assess Contrast Balance:
Step back and squint at your drawing. I find this helps reveal if the darks are dark enough; if the drawing looks washed out, re-apply shadow to the deepest crevices of the rose center and under the leaves.
Take a moment to admire the elegant contrast and depth you have achieved in your floral artwork
BRUSH GUIDE
The Right Brush for Every Stroke
From clean lines to bold texture — master brush choice, stroke control, and essential techniques.
Explore the Full Guide
Shade Your Hand With One Simple Light Source
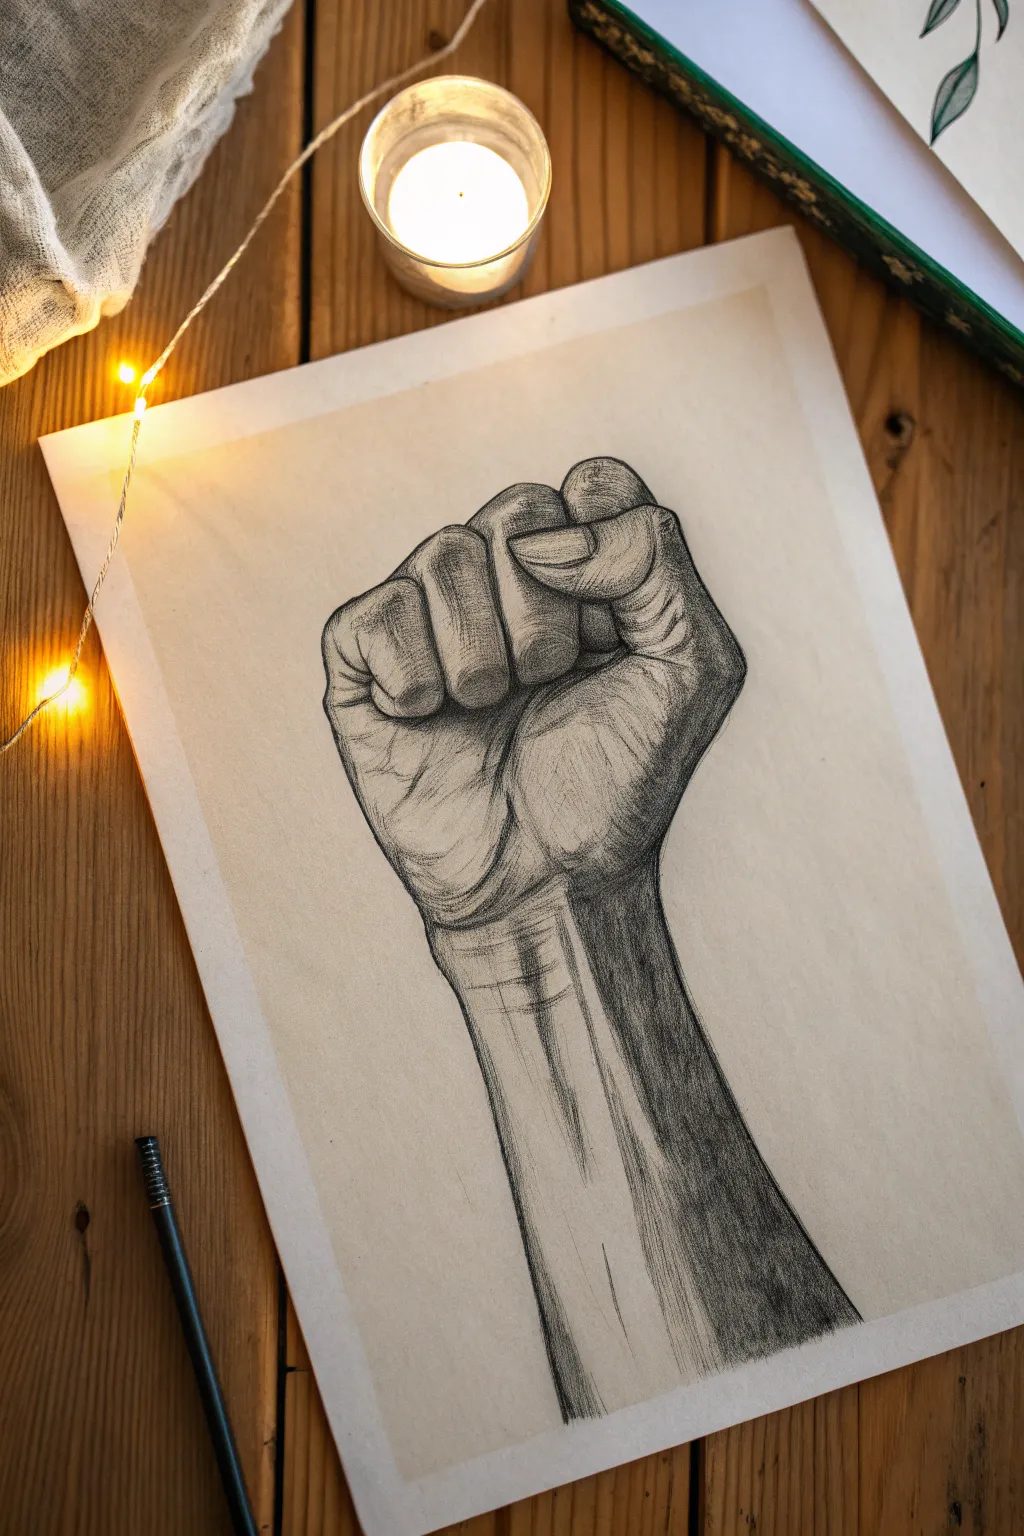
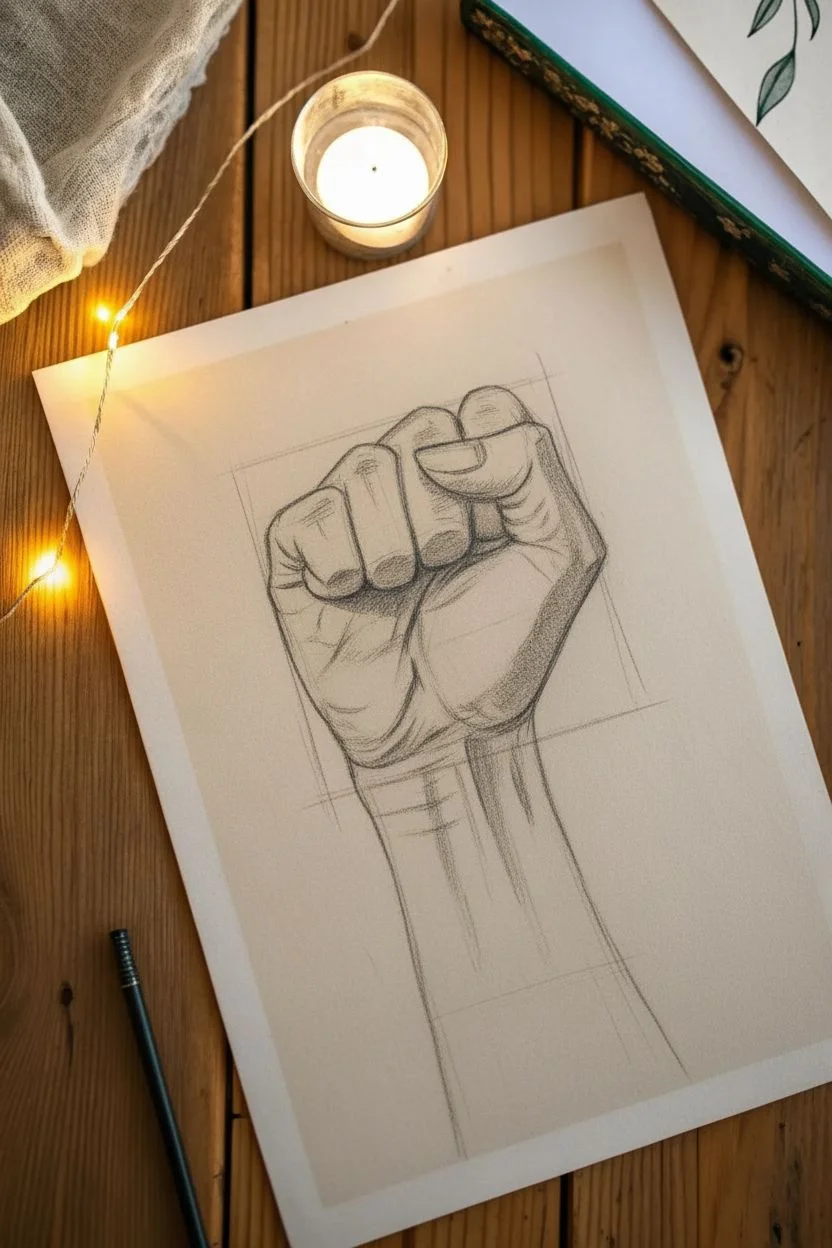
Master the art of high-contrast shading with this powerful charcoal study of a raised fist. By focusing on a single, strong light source coming from the left, you’ll learn how to render volume and muscle tension with simple yet dramatic strokes.
Step-by-Step Tutorial
Materials
- Textured drawing paper (sketchbook or resume paper)
- Vine charcoal (soft)
- Compressed charcoal stick or pencil (for darkest darks)
- Kneaded eraser
- Blending stump (tortillon) or cotton swab
- Reference photo of a fist (or your own hand in a mirror)
Step 1: Basic Structure
-
Outline the main shape:
Begin lightly with your vine charcoal. Draw a large, slightly angled rectangle for the main part of the hand and a narrower rectangle extending downwards for the wrist and forearm. -
Block in the fingers:
Divide the top rectangle into four vertical sections for the fingers. The middle finger should be the highest point, with the index and ring fingers stepping down slightly. -
Add the thumb placement:
Sketch the thumb wrapping across the front of the folded fingers. It should cross over the index and middle fingers, pressing firmly against them. -
Refine the contours:
Soften your boxy shapes into organic curves. Note the bulges of the knuckles and the slight indentation where the wrist meets the palm.
Keep it Clean
Place a scrap piece of paper under your drawing hand. This prevents your palm from smudging the charcoal work you’ve already finished.
Step 2: Defining the Forms
-
Detail the knuckles:
Draw the specific rounded shapes of the knuckles. They aren’t perfect circles; look for the bony ridges and the skin stretching over them. -
Draw skin folds:
Add the distinct creases where the fingers bend. Include the diagonal lines on the palm area below the pinky finger to show how the skin bunches up when the fist is clenched. -
Indicate the tendons:
Lightly sketch two parallel lines running down the wrist/forearm to suggest the tendons popping out due to the tension in the hand.
Step 3: Shading & Volume
-
Establish the light source:
Visualize your light coming from the upper left. This means the left side of the hand will be highlighted, and the right side will fall into deep shadow. -
Lay down the mid-tones:
Using the side of your vine charcoal, lightly shade the entire right half of the hand and wrist. Leave the far left edge of the hand and the tops of the knuckles the white of the paper. -
Deepen the core shadows:
Switch to compressed charcoal for intensity. heavily shade the right side of the forearm and the right edge of the palm. This creates the cylindrical 3D effect. -
Cast shadows between fingers:
Add dark, thin wedges of shadow between the fingers where they press together. This separates the digits and adds depth. -
Shade the thumb:
Darken the underside of the thumb and the area directly beneath it where it casts a shadow onto the fingers.
Dramatic Background
Instead of leaving the background white, rub vine charcoal over the negative space, leaving a white ‘halo’ around the fist for a glowing effect.
Step 4: Texture & Refinement
-
Enhance skin texture:
Use short, fine directional strokes on the back of the hand to mimic skin pores and wrinkles. I find following the curve of the hand with these small strokes helps emphasize the form. -
Blend selectively:
Use a blending stump to smooth out the transition from the dark shadow on the right to the mid-tones in the center. Don’t over-blend; keep some texture visible. -
Clean up highlights:
Take your kneaded eraser and press it into a sharp wedge. Lift out bright white highlights on the knuckles, the fingernail of the thumb, and the tendon on the wrist. -
Finalize contrast:
Look at your drawing from a distance. If the shadow side looks grey, go back in with compressed charcoal and make it a rich, solid black for maximum impact.
Now you have a striking, dimensional hand study that captures both strength and form
Try a Pet Silhouette Against a Light Background
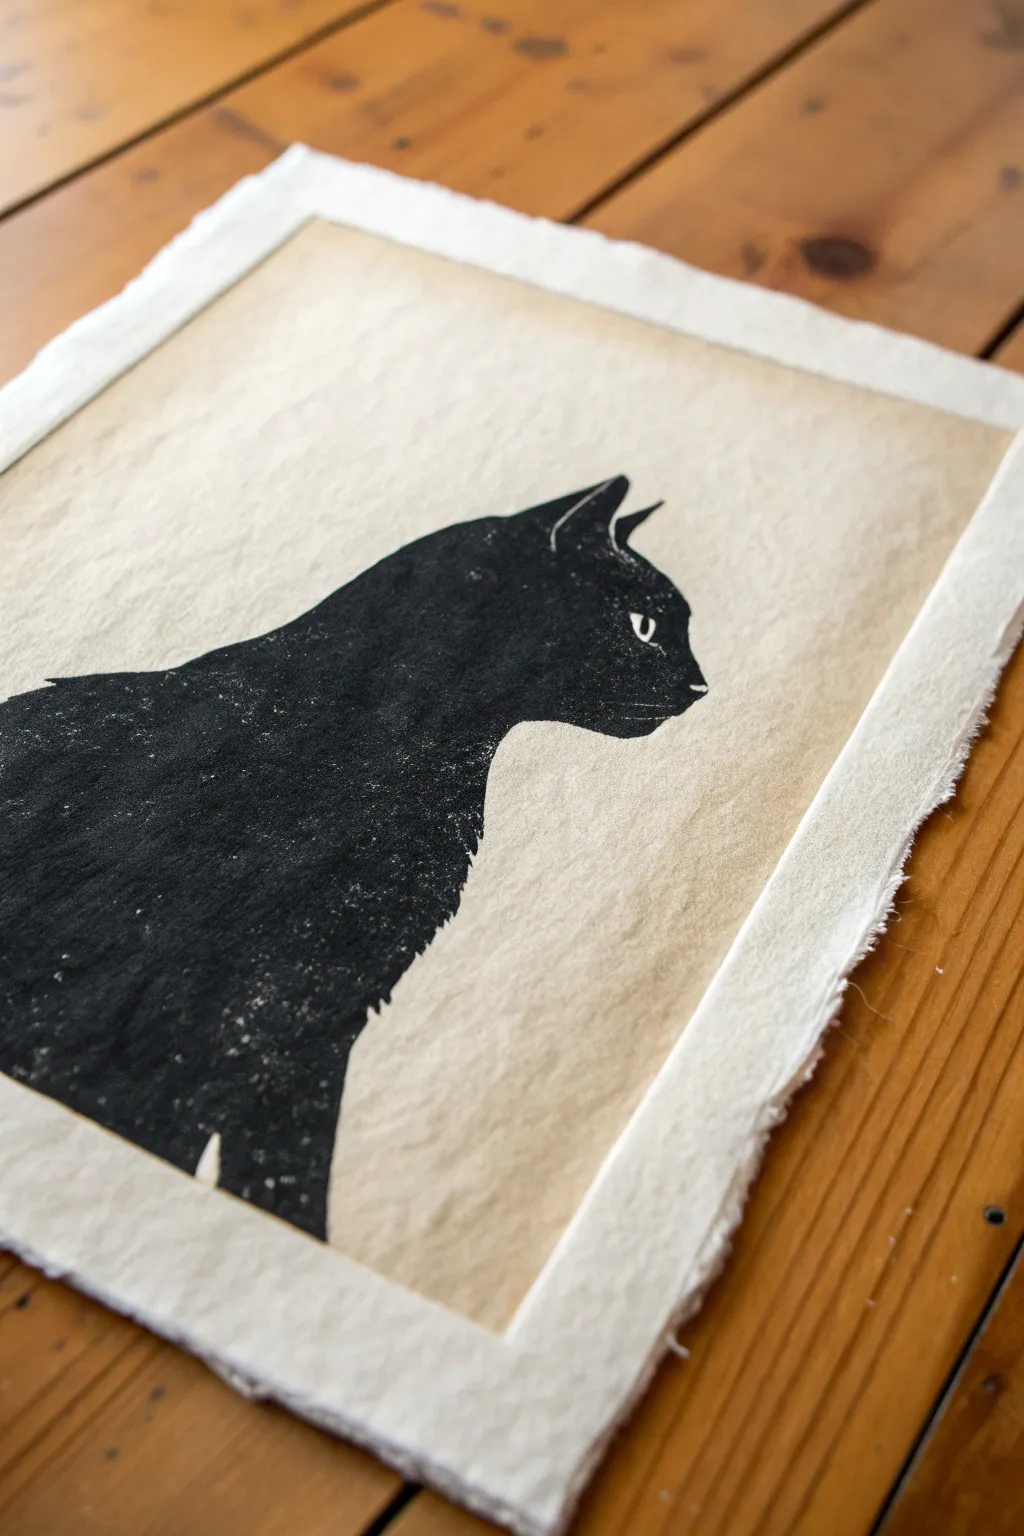

Capture the elegant mystery of your feline friend with a bold, high-contrast silhouette that relies more on shape than complex shading. Using deep charcoal on textured paper creates a print-like finish that looks both modern and timeless.
Detailed Instructions
Materials
- High-quality charcoal sticks (compressed charcoal is best for deep blacks)
- Heavyweight textured paper with deckle edge (cotton rag or handmade paper works perfectly)
- Masking tape or painter’s tape
- Soft charcoal pencil (for fine details)
- Kneaded eraser
- Workable fixative spray
- Reference photo of a cat in profile
- Pencil (HB or H)
- Tracing paper (optional)
Step 1: Preparation and Outline
-
Select your paper:
Choose a paper that has significant tooth and character. A heavy, handmade cotton paper with a deckle (torn-looking) edge provides the perfect vintage aesthetic for this project. -
Create a clean border:
Tape down your paper to a smooth board. Place the tape about an inch from the rough edge to create a crisp, rectangular frame for your drawing, leaving the beautiful deckle edge exposed outside the frame. -
Study your reference:
Look at a photo of a cat in profile. Since this is a silhouette, ignore the fur patterns and focus entirely on the outer line—the curve of the neck, the point of the ears, and the slope of the nose. -
Lightly sketch the shape:
Using your H or HB pencil, very lightly draw the outline of the cat. Keep your pressure minimal so you don’t groove the paper or create lines that are hard to erase later. -
Refine the edges:
Go back over your outline and verify the proportions. The success of a silhouette relies almost entirely on the accuracy of this single boundary line.
Step 2: Filling the Silhouette
-
Start with the edges:
Switch to a sharpened charcoal pencil or the sharp edge of a charcoal stick. Carefully trace the inner side of your pencil line to establish a crisp, dark boundary. -
Define the eye:
Before filling the body, carefully draw the eye shape. Leave the iris and pupil white (the color of the paper) for now, outlining them in dark charcoal. This negative space is crucial. -
Begin the heavy fill:
Take a stick of compressed charcoal and start filling in the large areas of the body. Compressed charcoal is essential here because it creates a denser, darker black than vine charcoal. -
Manage the texture:
As you rub the charcoal stick across the paper, you’ll see the paper’s texture separating the charcoal slightly. Don’t fight this completely; that speckled look adds organic charm. -
Layering for depth:
I like to go over the black areas at least twice. Apply one layer, smudge it slightly with your finger or a chamois to drive it into the paper’s tooth, and then apply a second layer on top for true opacity. -
Protecting the whiskers:
Be incredibly careful near the snout. If you want whiskers, you can either draw around fine lines (very difficult) or plan to lift them out later with an eraser.
Clean Edges Trick
To prevent charcoal dust from bleeding under your border tape, run a bone folder or the back of a spoon firmly over the tape’s edge before you start drawing.
Step 3: Refining Details and Finishing
-
Suggesting fur texture:
Along the back of the neck or chest, you don’t need to draw every hair. Instead, use your charcoal pencil to make tiny, jagged intentional strokes outward to suggest fluffiness rather than a smooth plastic line. -
Finalizing the eye:
Use your sharpest charcoal pencil to refine the shape of the eye, adding a tiny vertical slit for the pupil if desired, but keeping the highlight bright white. -
Clean up stray dust:
Charcoal is messy. Use a kneaded eraser to dab up any black dust that has migrated into the negative space around the cat. Keep the background pristine. -
Remove the tape:
Once you are happy with the density of the black, slowly peel away the masking tape. Pull it away from the drawing at a 45-degree angle to ensure a crisp, clean border. -
Inspect the contrast:
Step back and look at the artwork. The border should provide a sharp window effect, contrasting with the soft, organic edge of the handmade paper. -
Seal the work:
Take your drawing outside or to a ventilated area and spray it with a workable fixative. This prevents the heavy charcoal from smearing if resized or framed.
Add Whiskers Later
Instead of trying to draw around thin white whiskers, finish the whole black silhouette first, then use a white gel pen or white charcoal pencil to draw them on top.
Once framed, this stark black-and-tan contrast creates a striking piece of art that honors the quiet grace of a cat

PENCIL GUIDE
Understanding Pencil Grades from H to B
From first sketch to finished drawing — learn pencil grades, line control, and shading techniques.
Explore the Full Guide
Make a Sunset Silhouette Landscape Inside a Circle

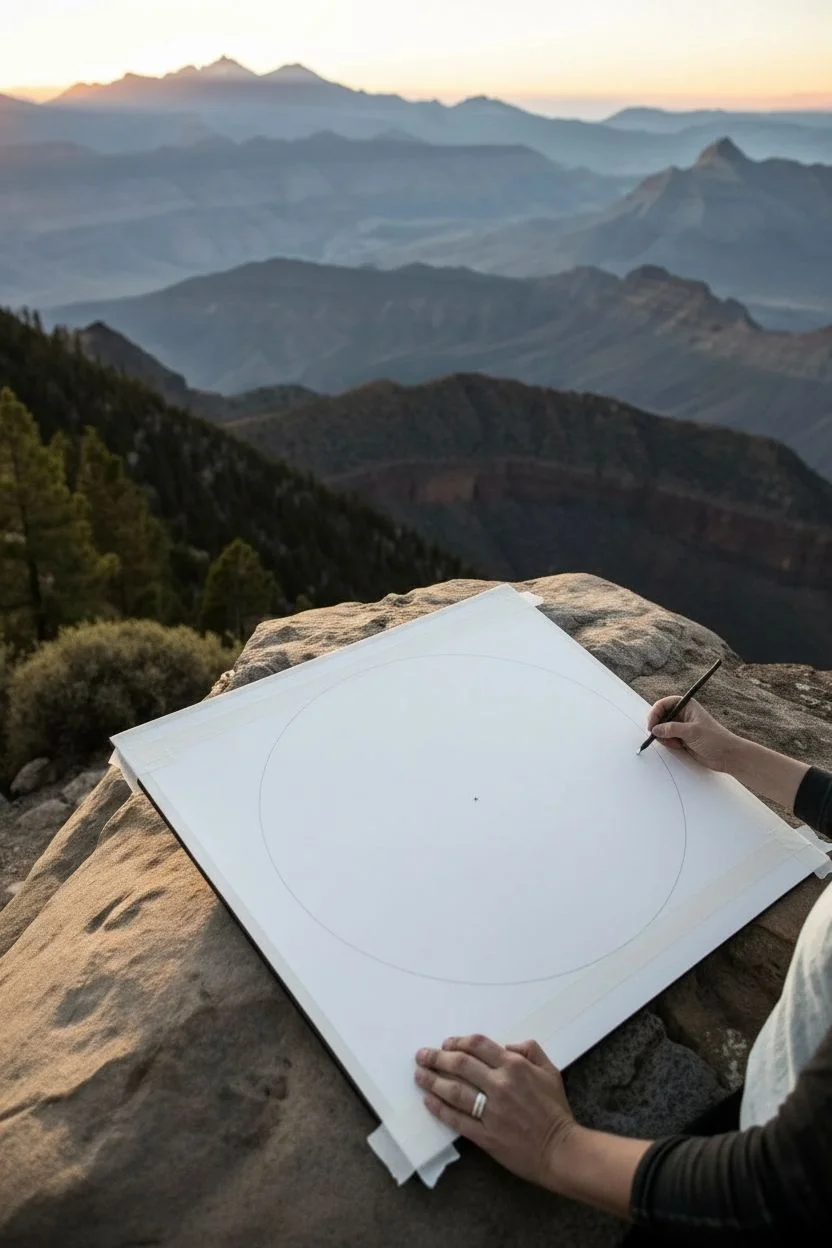
Master the fundamentals of charcoal density and pressure control with this meditative circular study. By creating a gradient that flows from a dense, dark core to a whisper-light edge, you’ll practice the essential techniques needed for atmospheric landscapes later on.
Step-by-Step Tutorial
Materials
- Large drawing paper or mixed media board (square format recommended)
- Vine charcoal sticks (soft)
- Compressed charcoal pencil or distinct charcoal stick (medium/dark)
- Large circular template (like a plate or bucket lid) or compass
- Kneaded eraser
- Blending stump (tortillon) or tissue
- Workable fixative
Step 1: Setting the Structure
-
Prepare your surface:
Secure your drawing paper to a sturdy backing board if you are working outside, or tape it down to your table. If you want the clean white border shown in the example, use artist’s tape to mask off the edges of your square paper. -
Trace the boundary:
Place your circular object or template directly in the center of the paper. Lightly trace around it with a vine charcoal stick to establish your outer boundary. Keep this line faint, as you want it to disappear into the shading eventually. -
Mark the center:
Visually locate the center of your circle. Make a small, light mark here. This will serve as the anchor point for your spiraling motion.
Pro Tip: Textural Depth
Don’t over-blend! Leaving some visible stroke marks creates a sense of movement and energy that draws the eye inward, mimicking a natural vortex or ripple.
Step 2: Building the Core
-
Start the spiral:
Using your compressed charcoal or a dark charcoal pencil, place your tip on the center mark. Begin drawing a tight spiral outward, keeping the lines very close together so they almost merge into a solid mass. -
Densify the middle:
Continue spiraling until you have filled a central circle about 3-4 inches wide. Go back over this area with more pressure to make it a deep, rich black. -
Texture the core:
Instead of smoothing this out perfectly, allow the texture of the paper to show through slightly. This gritty texture adds depth and interest to the darkest part of the drawing.
Step 3: Creating the Mid-Tones
-
Switch tools:
Transition to a softer vine charcoal stick for the next section. This allows for lighter values and easier blending than the compressed charcoal used in the center. -
Expand the spiral:
Continue the circular motion, moving outward from the dark core. As you move away from the center, slightly increase the space between your pencil strokes or apply less pressure. -
Blend the transition:
Use your finger or a blending stump to gently smudge the area where the dark core meets your new mid-tone spiral. I find this helps eliminate harsh rings and creates a smoky, gradient effect. -
Build the grey zone:
Keep working outward until you have covered about two-thirds of the total circle radius. The tone here should be a medium grey—distinctly lighter than the center but darker than the paper.
Troubleshooting: Muddy Values
If your center isn’t dark enough, layer compressed charcoal over vine charcoal. Vine is easier to erase, but compressed charcoal is essential for those deep, true blacks.
Step 4: Fading to White
-
Lighten your touch:
For the outer ring, use the side of your vine charcoal stick rather than the tip. Apply very gentle, sweeping circular motions that barely graze the paper’s surface. -
Feather the edges:
As you approach your initial boundary line, let the charcoal run out or lift your hand gradually. The goal is for the grey to fade into the white of the paper right at the edge. -
Refine the perimeter:
Check your outer edge. If the outline is too harsh, take your kneaded eraser and dab around the circumference to lift off excess dust, softening the border. -
Highlight the center:
Return to the very center of the dark core. Press a clean point of your kneaded eraser into the absolute middle and twist slightly to lift a tiny highlight, creating a vortex effect. -
Final smooth:
Assess the entire gradient. If any concentric rings look too distinct, lightly sweep a tissue in a circular motion over the transitions to unify the spiral. -
Clean up:
Use your eraser to clean up any smudges on the white paper outside the circle, ensuring a crisp presentation. -
Preserve:
Spray the drawing with a workable fixative in a well-ventilated area to prevent the charcoal dust from shifting or smudging.
This simple yet striking exercise creates a hypnotic piece of art perfect for a minimalist wall display
Draw a Big Moon Night Scene Using Negative Space
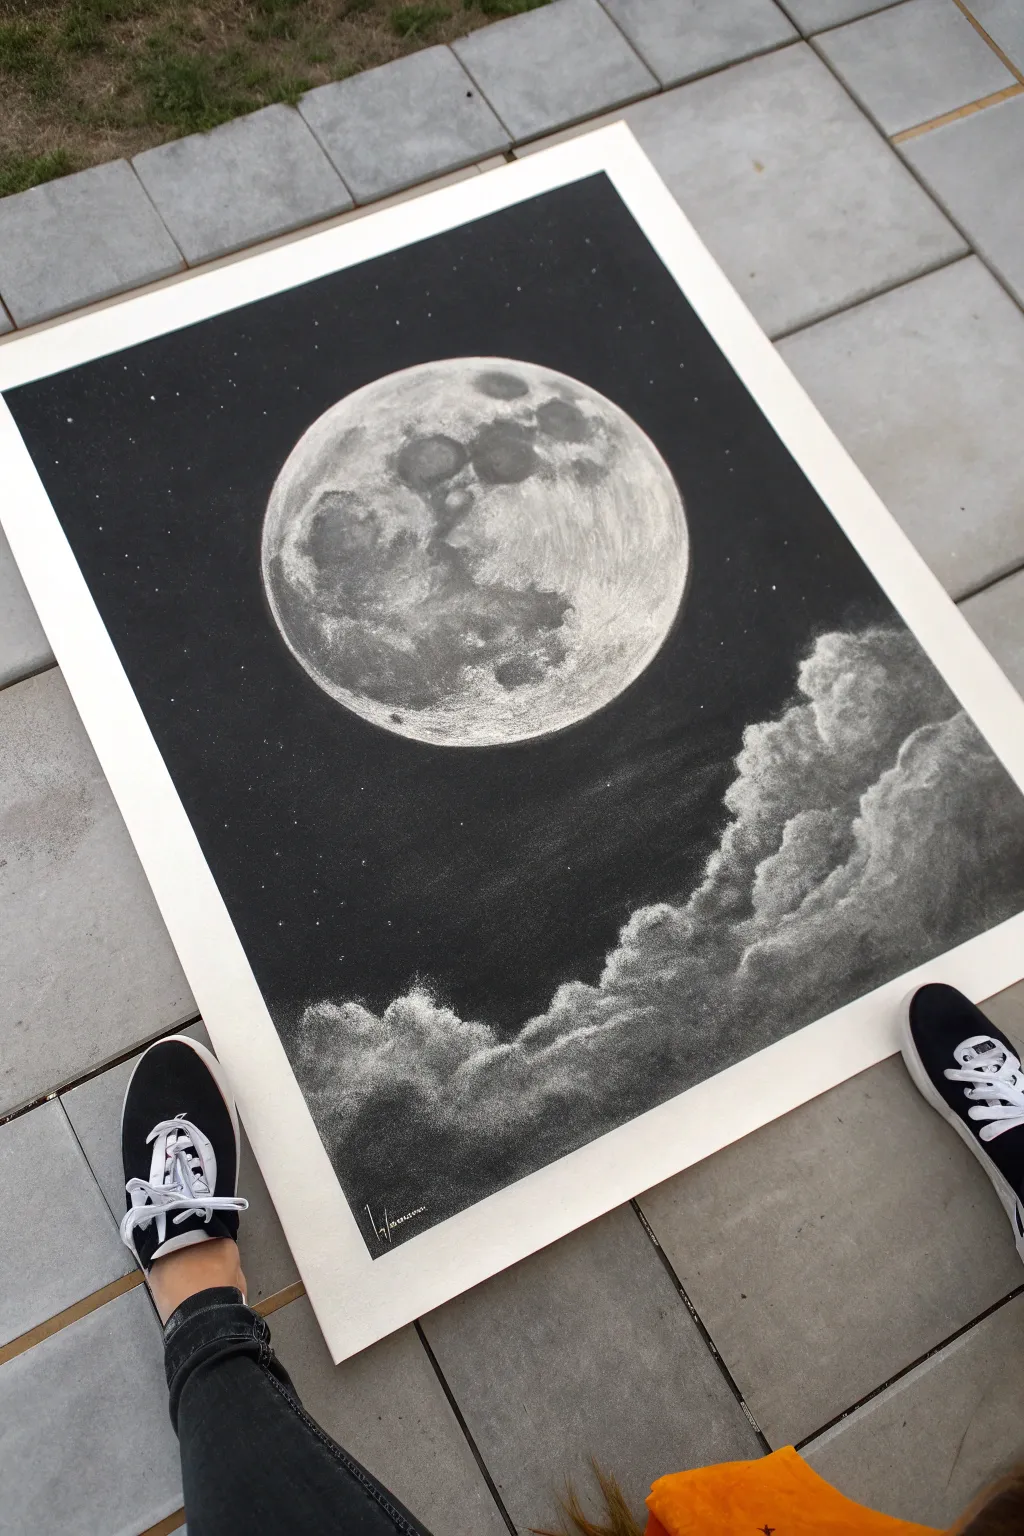

Capture the ethereal beauty of a night sky with this dramatic large-scale charcoal drawing. By focusing on high contrast between deep blacks and bright white highlights, you’ll create a luminous moon floating above billowing clouds.
Step-by-Step Guide
Materials
- Large sheet of smooth white drawing paper (heavyweight)
- Compressed charcoal sticks (soft and medium)
- Vine charcoal
- White charcoal pencil or white pastel pencil
- Kneaded eraser
- Blending stumps (tortillons)
- Tissue or soft cloth for blending
- Circular stencil or compass
- Workable fixative spray
Step 1: Planning the Composition
-
Define the moon:
Start by drawing a large, perfect circle in the upper center of your paper using a very light touch with vine charcoal. You can use a large bowl, a dinner plate, or a compass to trace this circle to ensure it is perfectly round. -
Outline the clouds:
Sketch the rough, billowing shapes of the clouds in the bottom right corner. Keep these lines faint and organic, letting them slope upwards diagonally to create a sense of movement. -
Protect the white space:
Before you start shading, it is crucial to identify which areas will remain stark white. The moon itself is the primary source of light, so keep the inside of your circle clean for now.
Smudge Control
Place a scrap piece of paper under your hand while you draw. This acts as a bridge, preventing oils from your skin from blotting the paper and dragging charcoal where it shouldn’t go.
Step 2: Establishing the Dark Background
-
Apply the base layer:
Using a stick of compressed charcoal on its side, begin filling in the large expanse of the sky. Work around your moon circle carefully. -
Deepen the blacks:
Layer the charcoal heavily to achieve a rich, deep black. I like to go over the sky area twice to ensure no paper grain shows through, creating that vast, empty space effect. -
Blend the sky:
Take a soft tissue or a clean cloth and gently blend the charcoal background. Use circular motions to push the dust into the paper’s tooth for a smooth, matte finish. -
Refine edges:
Use a blending stump to carefully tidy up the edge where the black sky meets the moon’s outline, ensuring a sharp, crisp boundary.
Pro Tip: Eraser shaping
Shape your kneaded eraser into a fine point to lift out tiny, specific highlights on crater rims or star clusters. It works like a white drawing tool rather than just a mistake corrector.
Step 3: The Moon Detail
-
Block in craters:
Switch to vine charcoal or a lighter compressed stick to lightly shade the ‘seas’ or darker distinct patches on the moon’s surface. Look at a reference photo to get the placement of the maria (craters) somewhat accurate. -
Add texture:
Use a crumpled piece of tissue or a dirty tortillon to dab texture onto the moon. This irregular shading mimics the cratered surface better than smooth drawing lines. -
Highlight the rim:
With your kneaded eraser, lift away charcoal along the edges and high points of the moon to make it glow. The contrast between bright white paper and grey shading creates the spherical form.
Step 4: Creating the Clouds
-
Draft the darks:
Apply medium pressure with charcoal near the bottom right, establishing the shadowed undersides of the clouds. Leave the tops of the cloud puffs white. -
Blend selectively:
Use your finger or a stump to smudge the charcoal upwards into the white areas. This creates a soft gradient that mimics the fluffiness of cumulus clouds. -
Define cloud tops:
The tops of the clouds should be the brightest part, reflecting the moonlight. Re-define these edges with a white charcoal pencil or by erasing back to the white paper for maximum brightness. -
Add separation:
Ensure there are distinct layers in your clouds. Darken the valleys between the puffy sections to give the cloud formation depth and volume.
Step 5: Final Touches
-
Add stars:
To create the stars, use a white charcoal pencil or white gel pen to place tiny dots randomly in the black sky. Vary the pressure so some stars look faint and distant while others shine brightly. -
Contrast check:
Step back and look at your drawing from a distance. If the sky looks grey rather than black, apply another layer of compressed charcoal. If the moon looks dull, use the kneaded eraser to reclaim the brightest highlights. -
Seal the work:
Once satisfied, spray the drawing with a workable fixative in a well-ventilated area to prevent the heavy charcoal from smudging.
Hang your finished piece in a spot that needs a touch of nighttime magic and enjoy the contrasting drama you created


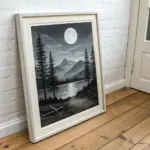
Add a Calm Lake Reflection With Vertical Smudges
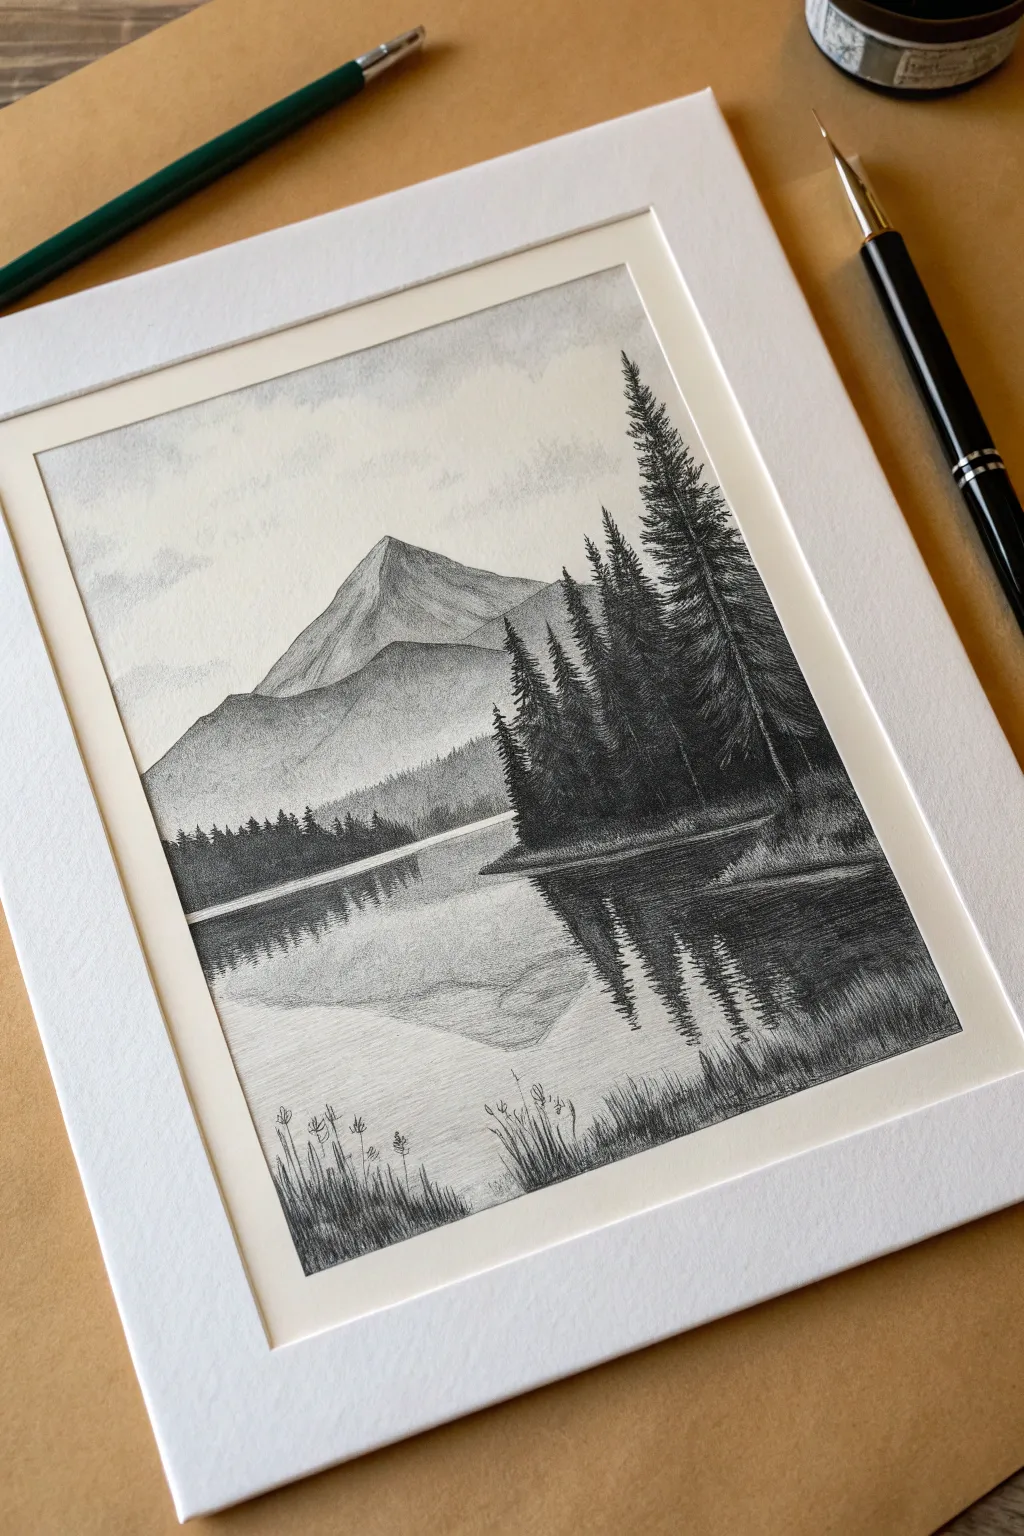
Create a peaceful landscape featuring distant mountains and a foreground of stately pines mirrored in still water. This project focuses on using vertical charcoal strokes to achieve a convincing, glass-like reflection effect.
Step-by-Step
Materials
- Smooth bristol or drawing paper (heavy weight)
- Vine charcoal (soft)
- Charcoal pencils (HB, 2B, 4B)
- Blending stump or tortillon
- Kneaded eraser
- Pencil sharpener or sandpaper block
- Tissue or soft cloth for blending
- Workable fixative (optional)
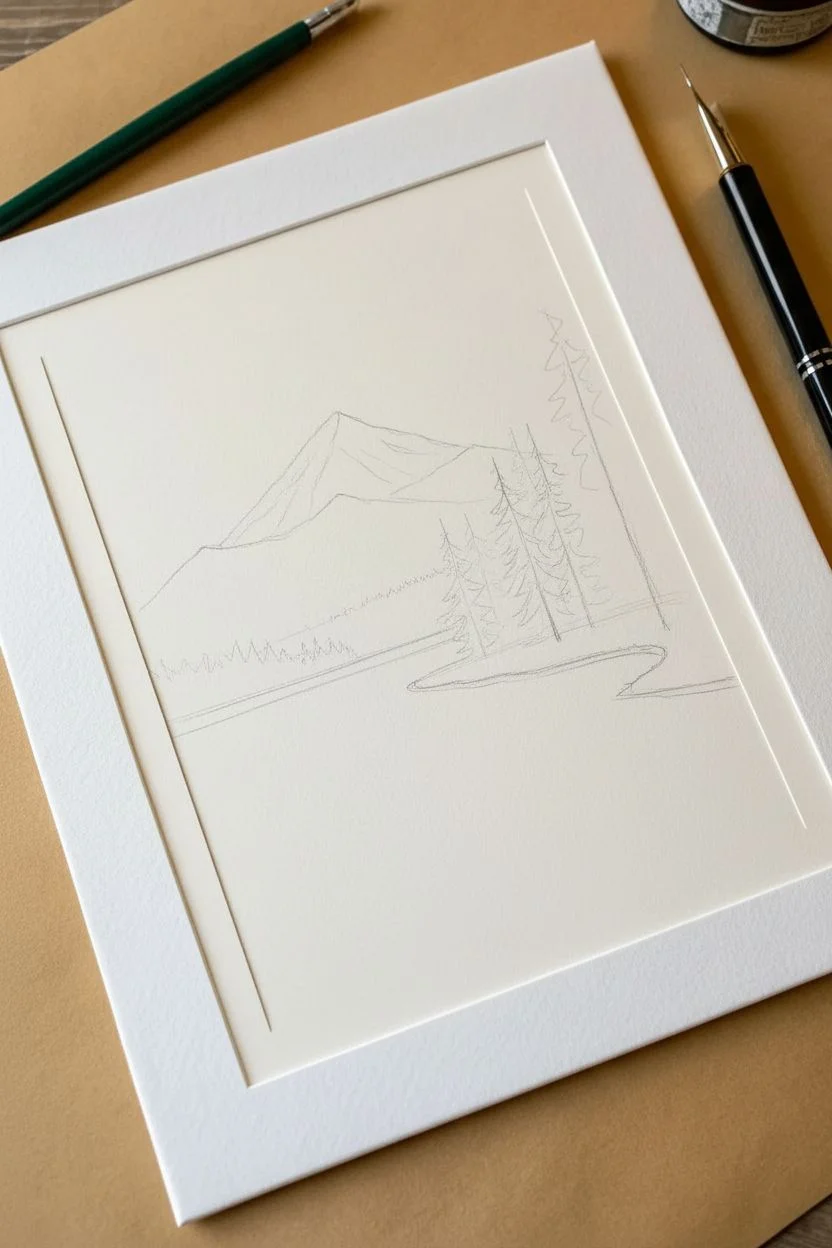
Step 1: Setting the Scene
-
Establish the horizon line:
Lightly sketch a horizontal line across your paper, positioned slightly below the vertical center. This will separate your majestic mountains from the reflective lake. -
Outline the mountain range:
Using a light hand and an HB charcoal pencil, sketch the triangular peaks of the mountains. Keep the lines somewhat jagged and organic to mimic natural rock formations. -
Mark the treeline:
On the right side of the composition, sketch a gentle curve jutting into the lake to establish the bank where your pine trees will stand. Indicate the vertical axes for the trees, varying their heights for a natural look.
Step 2: Building the Mountains
-
Shade the mountain peaks:
Use vine charcoal to gently fill in the mountain shapes. Apply slightly more pressure to the ‘shadow’ side of the peaks (usually the right or left consistently) to define the ridges. -
Create atmospheric perspective:
Blend the charcoal on the mountains using a tissue. I like to keep the distant peaks slightly lighter and hazier than the foreground elements to push them back into the distance. -
Detail the rock face:
With a sharpened 2B pencil, add subtle cracks and crevices to the mountains. Don’t overdo it; suggestions of texture are often more effective than drawing every rock.
Muddy Reflections?
If your water looks messy, you likely blended in circles. Always smudge vertically for reflections and horizontally for the flat surface, keeping the two motions separate.
Step 3: Drawing the Forest
-
Start the pine trees:
Using a 4B charcoal pencil for deep blacks, begin drawing the trunks on the right bank. The dark tonal value here is crucial for creating depth against the lighter mountains. -
Add pine branches:
Use short, quick scribbling motions to create the needles. Start narrow at the top of the tree and widen the branches as you move down the trunk, creating a classic conical shape. -
Fillo in the undergrowth:
Darken the area beneath the trees to represent dense forest shadows. Ensure the bottom edge of this bank is crisp where it meets the water. -
Create distant trees:
On the far left bank, sketch a smaller, less detailed line of trees. Keep these lighter in value, perhaps using the HB pencil, to show they are further away.
Pro Tip: Sky Value
Don’t leave the sky pure white. A very light layer of vine charcoal across the sky makes the white highlights in your water and snow-capped peaks look much brighter.
Step 4: Mastering the Reflection
-
Mirror the shapes:
Lightly sketch the inverted shapes of the trees and mountains into the water area. It doesn’t need to be a perfect mirror image, just a general approximation of mass. -
Apply vertical shading:
This is the section’s core technique: Use the side of your vine charcoal to pull vertical strokes downward from the waterline. These strokes mimic how light stretches on water. -
Smudge vertically:
Take your blending stump or tortillon and smudge the charcoal strictly in a vertical (up and down) motion. Never blend horizontally here. -
Darken the tree reflection:
Use the 4B pencil to add darker vertical streaks directly under the large pine trees. Press firmly at the waterline and lift pressure as you pull the stroke downward to fade it out. -
Define the waterline:
Draw a thin, very white line (or erase a thin line) right where the land meets the water to separate the solid ground from the fluid reflection.
Step 5: Final Details
-
Add water ripples:
Use a kneaded eraser shaped into a wedge to lift out very thin horizontal lines across the vertical reflections. These horizontal interruptions create the illusion of surface ripples. -
Plant foreground grasses:
In the immediate bottom foreground, use sharp strokes with the HB pencil to draw blades of grass and reeds. This anchors the viewer at the edge of the lake. -
Refine contrast:
Check your darkest darks (the trees) and lightest lights (the sky and water highlights). Increasing this contrast makes the drawing pop. -
Clean up borders:
Use your eraser to clean up the edges of your drawing for a crisp, finished presentation, or add a paper mat as shown in the image.
Step back and admire the tranquil atmosphere you have created with just a few simple tools
Practice Drapery Folds With a Towel or T-Shirt
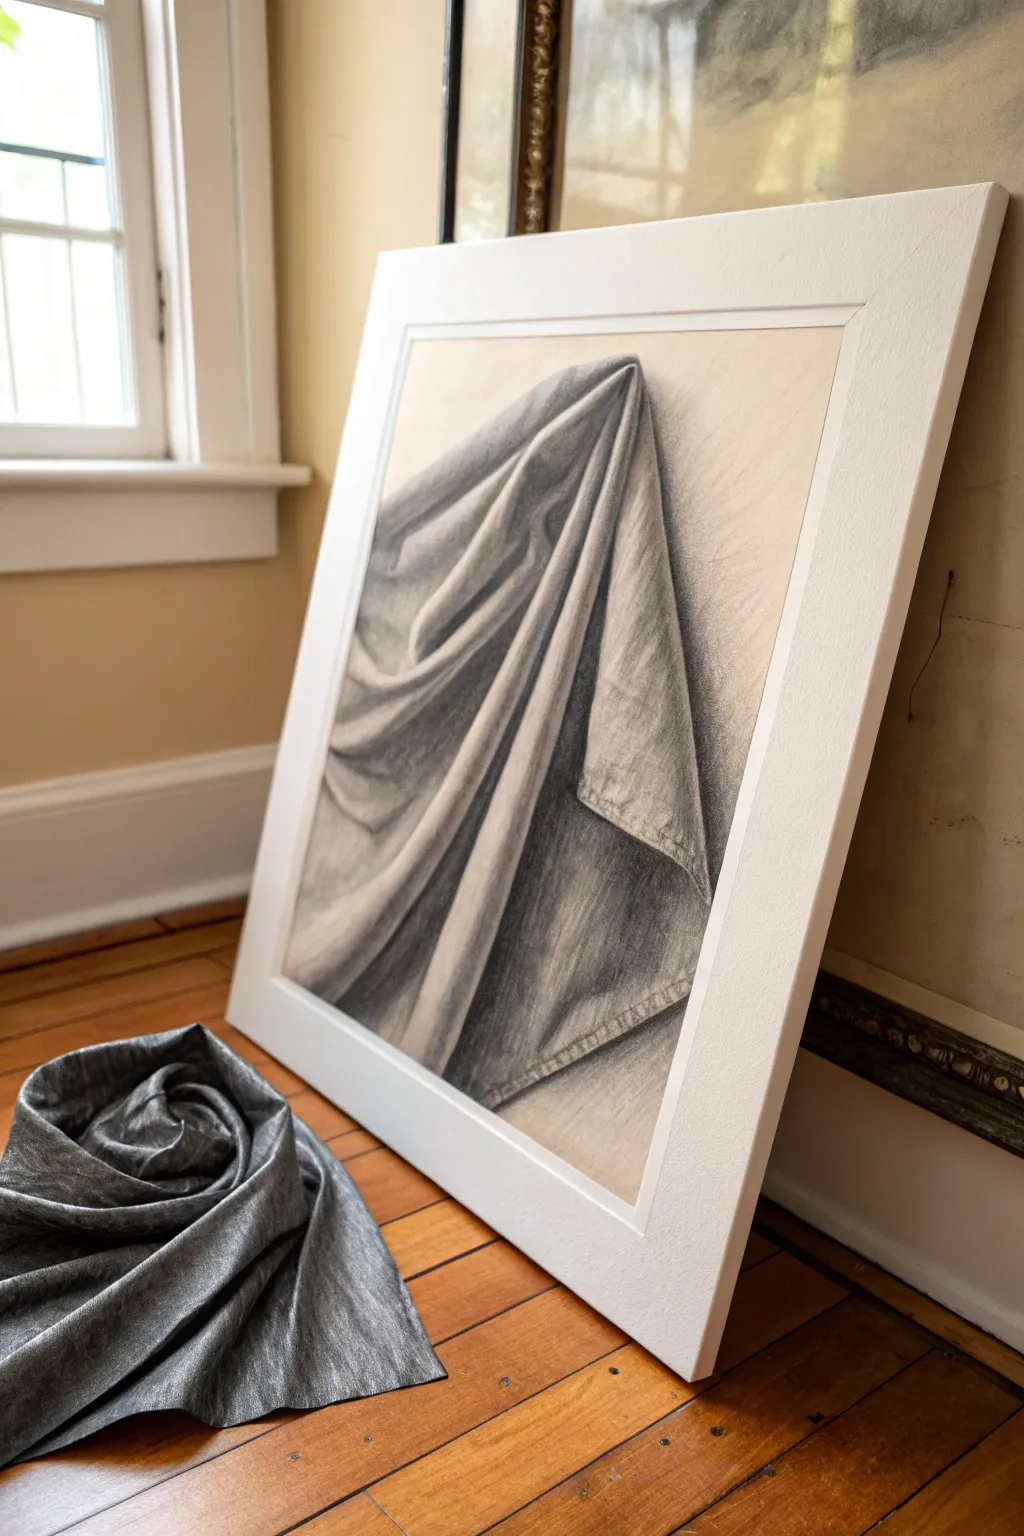
This project transforms a simple gray cloth into a study of depth, shadow, and form. By focusing on the intricate valleys and peaks of fabric, you will create a realistic charcoal rendering that highlights the beautiful complexity of everyday objects.
Step-by-Step Tutorial
Materials
- Textured charcoal paper (gray or cream toned)
- Vine charcoal sticks (soft and medium)
- Compressed charcoal (for darkest darks)
- White charcoal pencil or white pastel
- Kneaded eraser
- Blending stump (tortillon)
- Reference fabric (gray t-shirt or towel)
- Workable fixative spray
- Masking tape
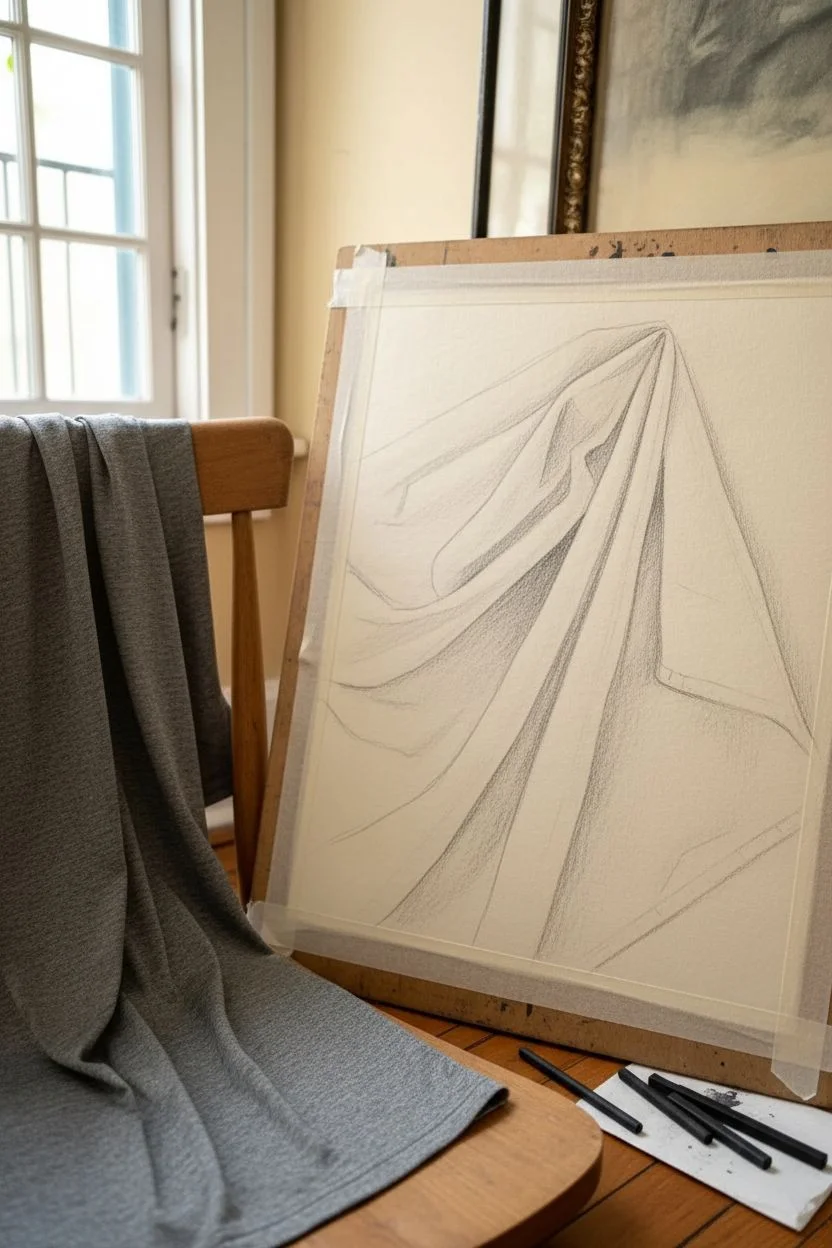
Step 1: Setting the Stage
-
Arranging the Reference:
Begin by taking your cloth—a gray t-shirt works perfectly—and dropping it naturally onto a flat surface or hanging it from a single point. Don’t overthink the arrangement; accidental folds often create the most interesting shadows. Ensure a strong light source is hitting it from one side to create distinct highlights and deep shadows. -
Paper Preparation:
Tape your textured paper to a drawing board or hard surface. Using a toned paper, especially a warm cream or light gray, gives you a mid-tone to work from immediately, saving you from having to shade the entire background. -
Mapping the Main Shapes:
Using a stick of soft vine charcoal, lightly sketch the overall triangular or cascading shape of the fabric. Focus only on the big silhouette first, ignoring the detailed wrinkles. Keep your hand loose and use your shoulder to draw, rather than just your wrist.
Step 2: Blocking in Values
-
Identifying Key Folds:
Draw the major ‘V’ and ‘Y’ shapes formed by the largest folds. I find it helpful to squint my eyes at the reference fabric here; this blurs the details and makes the primary lines of force stand out more clearly. -
Establishing the Darkest Shadows:
Switch to compressed charcoal for the deepest crevices where the light cannot reach. Lay down these darks confidently in the recessed areas under the main folds. -
Mid-tone Shading:
Using the side of your vine charcoal stick, gently sweep across the areas that are in shadow but not pitch black. This creates your transition zones. Let the grain of the paper pick up the charcoal to suggest the fabric’s texture. -
Blending the Base:
Take a blending stump or a soft tissue and gently smudge the charcoal into the paper. This establishes a soft, fluid base layer that mimics the smoothness of the cloth.
Muddy Appearance?
If your shadows look gray and muddy, you’ve likely over-blended. Stop smoothing everything out! Re-apply fresh, dark charcoal marks on top and leave them unblended for texture and crispness.
Step 3: Refining Form and Texture
-
Carving with the Eraser:
Mold your kneaded eraser into a wedge shape. Use it to lift charcoal off the paper in areas where the folds crest and catch the light. This ‘drawing with the eraser’ technique is crucial for creating volume. -
Deepening the Contrast:
Go back in with your compressed charcoal to reinforce the core shadows—the darkest part of the shadow just before the reflected light. Sharpen the edges where one fold overlaps another to create separation. -
Adding Soft Gradients:
Use the blending stump to smooth the transition between your dark shadows and the mid-tones. Cloth folds rarely have harsh lines; they are mostly soft gradients wrapping around a form. -
Refining Edges:
Check the outer edges of the fabric. Some edges should be crisp (where the cloth turns away sharply), while others should be lost or soft (where the form curves away gently). Adjust these edges with your charcoal and eraser.
Pro Tip: The Squint Test
Constantly squint at your subject while drawing. This removes distracting details (like lint or fuzz) and forces you to see only the major shapes of light and shadow, which is essential for realism.
Step 4: Highlights and Details
-
Introducing White Charcoal:
Take your white charcoal pencil and apply it strictly to the brightest peaks of the folds. Be sparing; the toned paper acts as your mid-light, so the white is only for intense highlights. -
Touching up Texture:
If your reference is denim or a rough towel, use cross-hatching or stippling with the tip of a charcoal pencil to mimic the weave. For smoother fabrics, keep your shading incredibly smooth. -
Hem and Seam Details:
Look closer at the bottom edges of your cloth. Draw the double lines that indicate a hem or stitching. These small details add a surprising amount of realism to the final piece. -
Reflected Light:
Check the darkest shadows again. Often, there is a tiny bit of light reflecting back into the shadow from the floor or nearby fold. Gently lift a small amount of pigment there with the kneaded eraser to make the forms rounder. -
Final Assessment:
Step back from your drawing. If the drawing feels flat, punch up the white highlights and the darkest blacks one last time to increase the dynamic range. -
Fixing the Image:
Once satisfied, spray the drawing with a workable fixative in a well-ventilated area. This prevents the charcoal dust from smudging when you frame or store the artwork.
Step back and admire how simple folds of cloth have transformed into a dramatic study of light and volume
Do a Soft Portrait Using Only Three Values
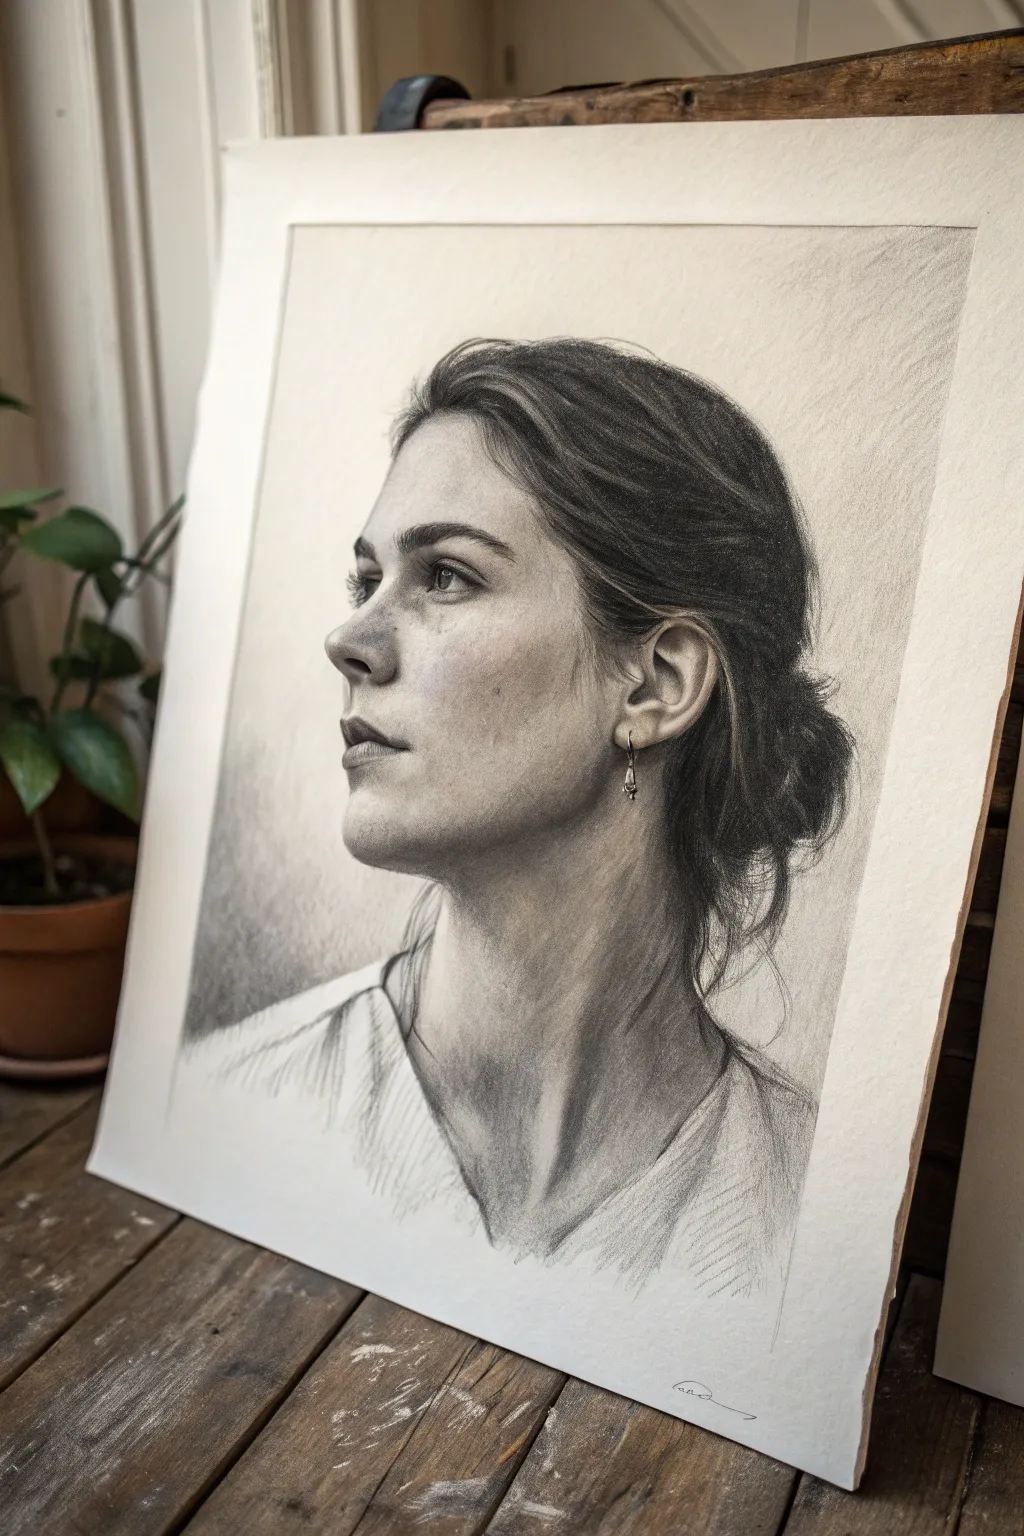
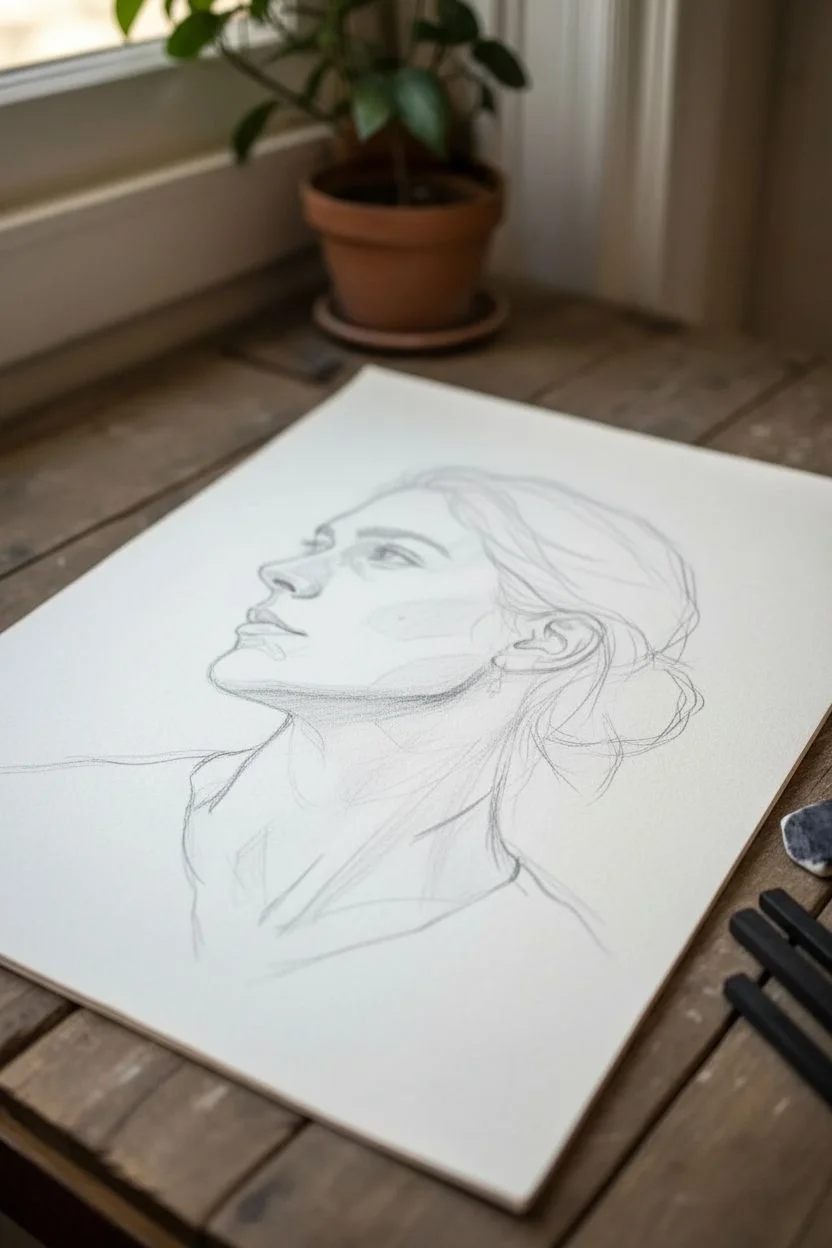
Capture the delicate strength of a side profile using just three distinct tonal values to build form and depth. This study focuses on soft transitions and realistic textures, from the wispy hair to the gentle shadows defining the jawline.
How-To Guide
Materials
- Smooth bristol or drawing paper (heavyweight)
- Vine charcoal sticks (soft)
- Compressed charcoal (medium and soft)
- Kneaded eraser
- Torchon or blending stump
- White pastel or charcoal pencil (optional for highlights)
- Fixative spray
- Soft tissue or chamois cloth
Step 1: Structural Layout
-
Map the Envelope:
Begin with a very light touch using a stick of vine charcoal. Sketch the large, general ‘envelope’ shape of the head and the swoop of the neck to establish placement on your paper. -
Place Facial Features:
Refine your outline, marking the precise angle of the nose, the line of the jaw, and the ear placement. Measure the distance from the ear to the nostril carefully, as this defines the portrait’s likeness. -
Establish the Shadow Shapes:
Squint your eyes to blur the details of your reference. Lightly map out the boundaries where light meets shadow, specifically under the chin, the eye socket, and the back of the neck.
Step 2: Establishing Values
-
Apply the Mid-Tone:
Using the side of your vine charcoal, apply a gentle, even layer of grey tone over the entire hair area and the shadow side of the face. Do not press hard; let the paper’s tooth catch the dust. -
Smooth the Base:
Take a soft tissue or chamois and gently wipe the charcoal you just applied. This pushes the particles into the paper, creating a dreamy, soft mid-tone base that serves as your skin’s shadow value. -
Deepen the Darks:
Switch to compressed charcoal for the darkest values. Lay in the pupils, the nostril, the crease of the eyelid, and the deepest shadows in the hair bun. -
Carve Out Lights:
This is where the magic happens. Take your kneaded eraser and shape it into a point. ‘Draw’ by lifting the charcoal off the paper to reveal the bridge of the nose, the cheekbone, and the forehead.
Don’t Over-Blend
Avoid blending every single area. Leaving some raw, masterful charcoal strokes visible creates visual interest and keeps the portrait from looking like plastic.
Step 3: Refining and Texturing
-
Refine the Eyes:
Sharpen a charcoal pencil to add crisp details to the eye. Define the lash line and the iris, but keep the edges slightly soft to maintain the drawing’s atmospheric quality. -
Sculpt the Ear:
The ear is complex, so treat it as a series of abstract light and dark shapes. Use your blending stump to soften the transition between the inner ear shadow and the rim. -
Build Hair Volume:
Instead of drawing individual strands, look for ribbons of hair. Use broad strokes of compressed charcoal for the dark masses in the bun, and lift out highlights with your eraser to show the curve of the skull. -
Add Flyaways:
I like to save this for the end. Use a very sharp charcoal pencil to add tiny, loose hairs escaping the bun and framing the neck. These chaotic lines add realism to the softness. -
Model the Neck:
Add subtle shading to the neck muscles (sternocleidomastoid) to show tension and turn. Keep this darker than the face to ensure the jawline pops forward. -
Create Texture on Skin:
Lightly touch a porous sponge or textured paper towel onto the shaded cheek area. This subtle lifting pattern mimics the natural texture of skin pores without drawing them explicitly. -
Add the Earring:
Draw the small earring with a sharp dark line, then use the white pastel or aggressive erasing to create the metal’s reflective glint.
Tinted Paper
Try this project on grey or tan toned paper. The paper acts as your middle value, meaning you only need to draw the dark shadows and white highlights.
Step 4: Final Touches
-
Final Contrast Check:
Step back from your easel. If the drawing looks flat, darken the recess behind the ear and the core shadow under the chin to increase the drama. -
Protect the Work:
Once satisfied, spray a light coat of fixative over the drawing. Do this outdoors or in a well-ventilated area to prevent smudging your hard work.
Now you have a stunning, atmospheric portrait that captures emotion through simple variations in tone
Create Foggy Trees With Blending and Lost Edges
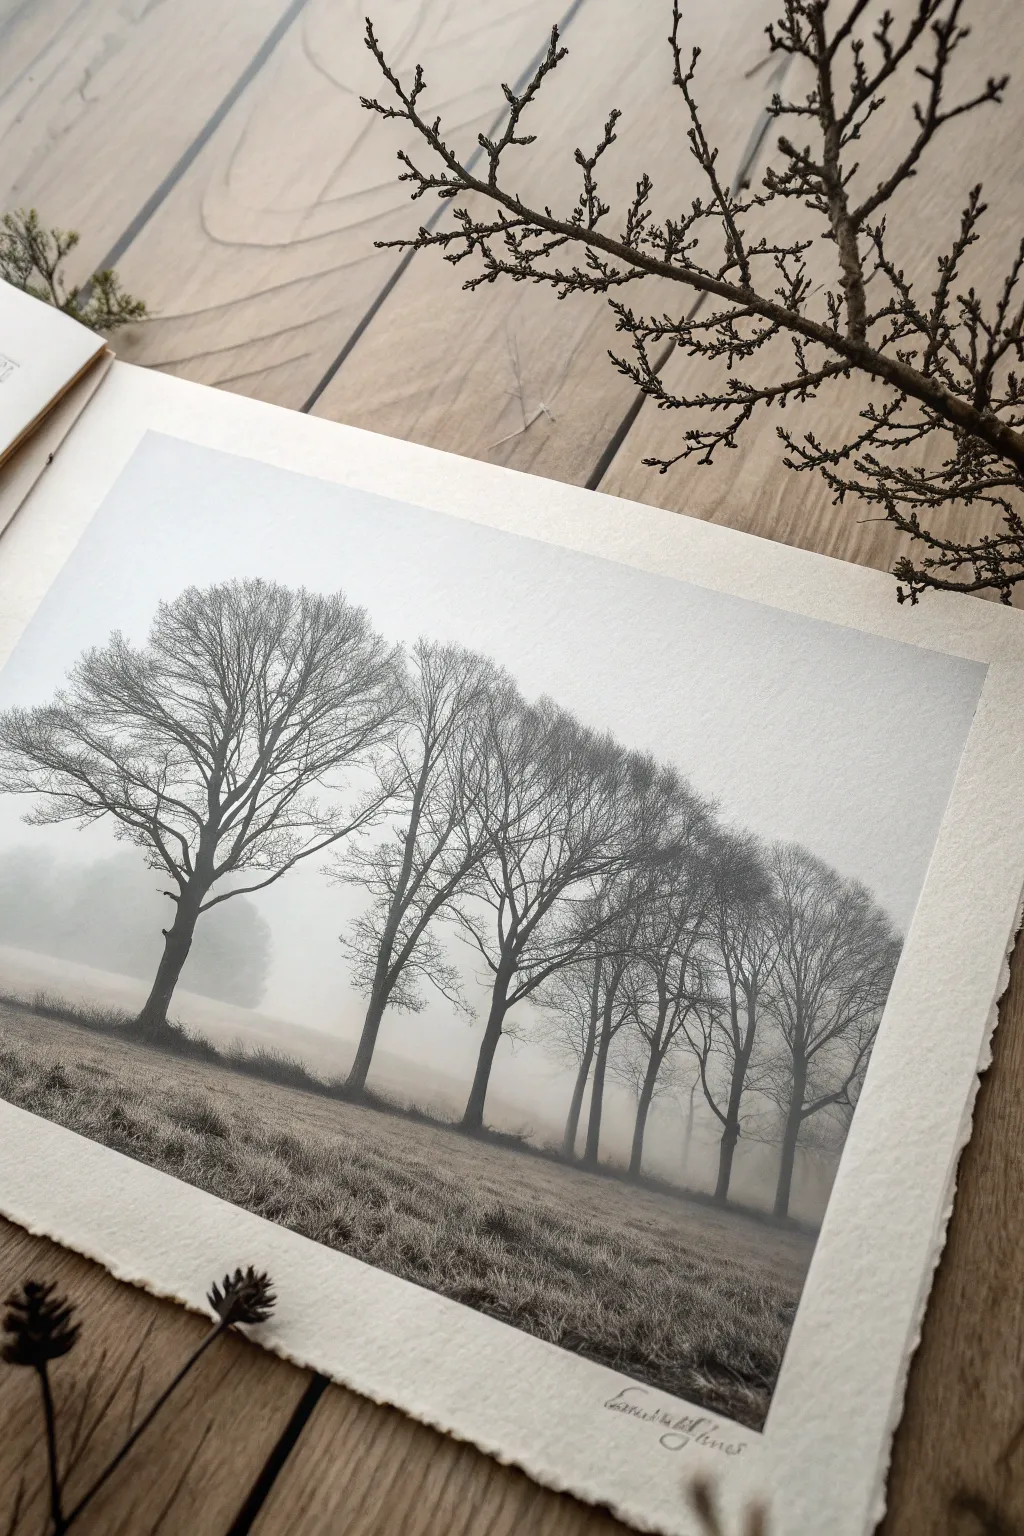
Capture the serene silence of a foggy morning with this atmospheric charcoal study. By mastering soft blending and the concept of lost edges, you’ll create a sense of depth where distant trees seem to vanish into the mist.
How-To Guide
Materials
- Textured charcoal paper or heavy drawing paper (off-white)
- Willow or vine charcoal sticks (soft and medium)
- Compressed charcoal pencil (for details)
- Blending stump (tortillon)
- Chamois cloth or soft tissue
- Kneaded eraser
- Fixative spray
- Paper tape or drafting tape
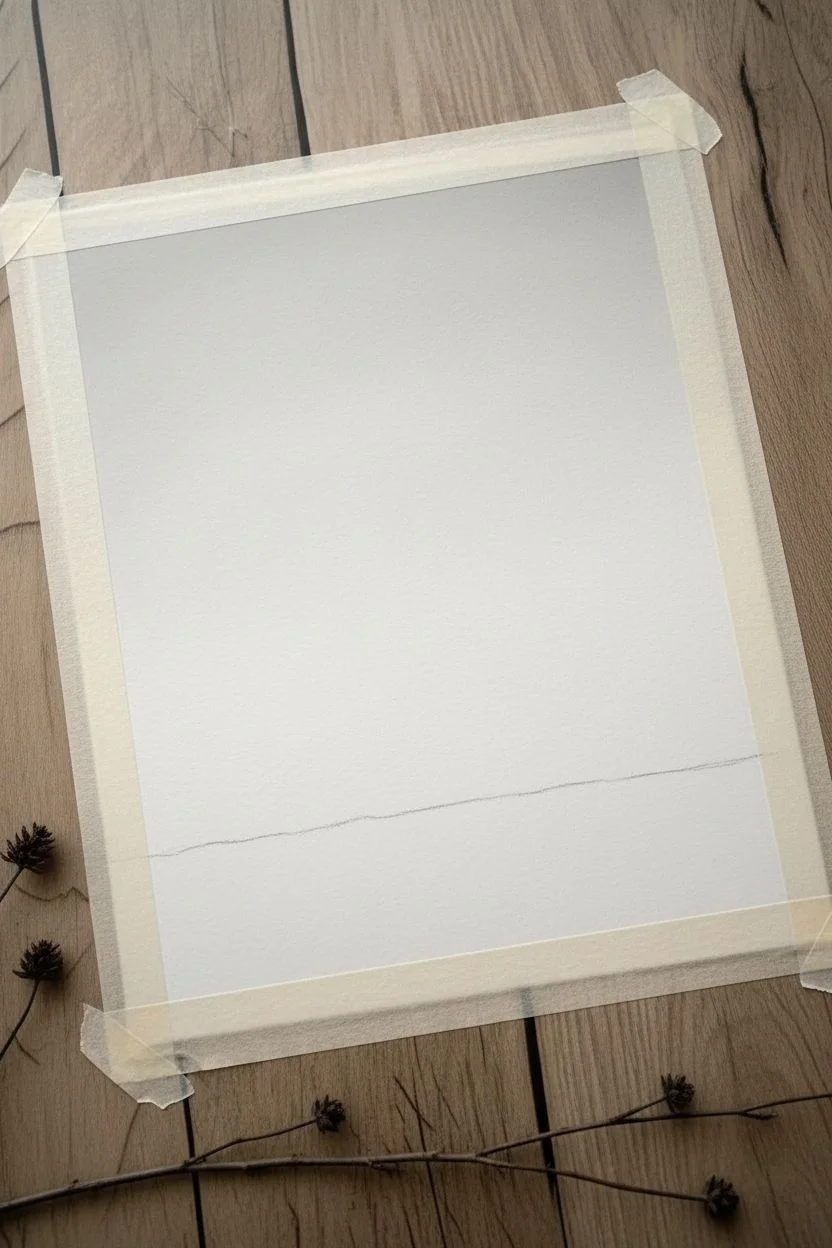
Step 1: Setting the Atmosphere
-
Paper preparation:
Begin by taping down your paper to a smooth board. This creates that clean, crisp border seen in the example and prevents the paper from shifting while you work on delicate blending. -
Initial toning:
Take a stick of vine charcoal and lay it flat on its side. Gently rub it across the upper two-thirds of the paper to create a very light, hazy gray tone. This establishes the ‘fog’ base right away. -
Smoothing the sky:
Using a chamois cloth or a soft tissue, lightly circulate over your base tone. You want this to be incredibly smooth with no visible stroke marks, fading into the white of the paper near the bottom third. -
Horizon placement:
Lightly sketch a horizontal line about a quarter of the way up from the bottom. This doesn’t need to be perfectly straight; a slight undulation suggests natural ground.
The Value of Powder
Don’t discard charcoal dust from sharpening! Dip a brush into the powder to paint soft, faint ‘ghost’ trees in the background without making hard lines.
Step 2: Building the Tree Structure
-
Drafting the main trunks:
Using a sharpened willow charcoal stick, lightly sketch the dominant vertical lines for the tree trunks. Place the largest, clearest tree on the left, and space the others irregularly to the right. -
Branch architecture:
Extend branches outward from the trunks in a ‘V’ shape pattern. Remember that oak-like trees have somewhat jagged, twisting branches, not perfect curves. -
Adding main definition:
Switch to a compressed charcoal pencil for the leftmost tree. Darken the trunk and main branches to bring them forward visually. This high contrast anchors the composition. -
Creating distance:
For the trees further to the right, use lighter pressure and stick to vine charcoal. The further back the tree, the lighter gray it should be to simulate atmospheric perspective.
Change the Season
To turn this into a spooky autumn scene, sketch just a few clinging dead leaves on the branches using tiny, dark triangular marks.
Step 3: Creating the Fog Effect
-
The lost edges technique:
This is crucial for the foggy look: take your blending stump and gently smudge the lower portions of the distant tree trunks where they meet the ground. They should disappear into the horizon line, not stop abruptly. -
Softening the canopy:
Use a clean tissue to dab at the upper branches of the background trees. You want to lift a tiny bit of charcoal and blur the sharp lines, making them look enveloped by mist. -
Ghost trees:
To suggest trees deep in the fog behind the main line, apply a very faint smudge of charcoal dust with your finger or stump, creating vague vertical shapes without distinct outlines. -
Ground cover texture:
Return to the foreground area below the trees. Use the side of your charcoal stick to create short, horizontal strokes that mimic frosty grass or field stubble. -
Ground blending:
Softly blend the ground strokes horizontally. I find that leaving some texture here helps contrast against the smooth sky.
Step 4: Refining Details
-
Foreground contrast:
Add touches of compressed charcoal to the grass in the immediate foreground (bottom edge). These darker accents help push the foggy background further away. -
Enhancing the main tree:
Sharpen your charcoal pencil and add fine twig details to the outer edges of the large left tree. These sharp lines prove the tree is close to the viewer. -
Lifting highlights:
Shape your kneaded eraser into a thin wedge. Tap it gently on the ground area to lift out bright spots, suggesting frost catching the diffuse light. -
Final atmosphere check:
Step back and squint at your drawing. If any background trees look too dark or sharp, gently pat them with your chamois to push them back into the fog. -
Signing and sealing:
Sign your name in the bottom corner with a sharp pencil. carefully remove the tape to reveal the clean border, and apply a fixative spray to protect the delicate soft charcoal.
Peeling back the tape reveals a beautifully moody landscape ready for framing
Make an Eraser-Drawn Cloud Study Over a Dark Ground
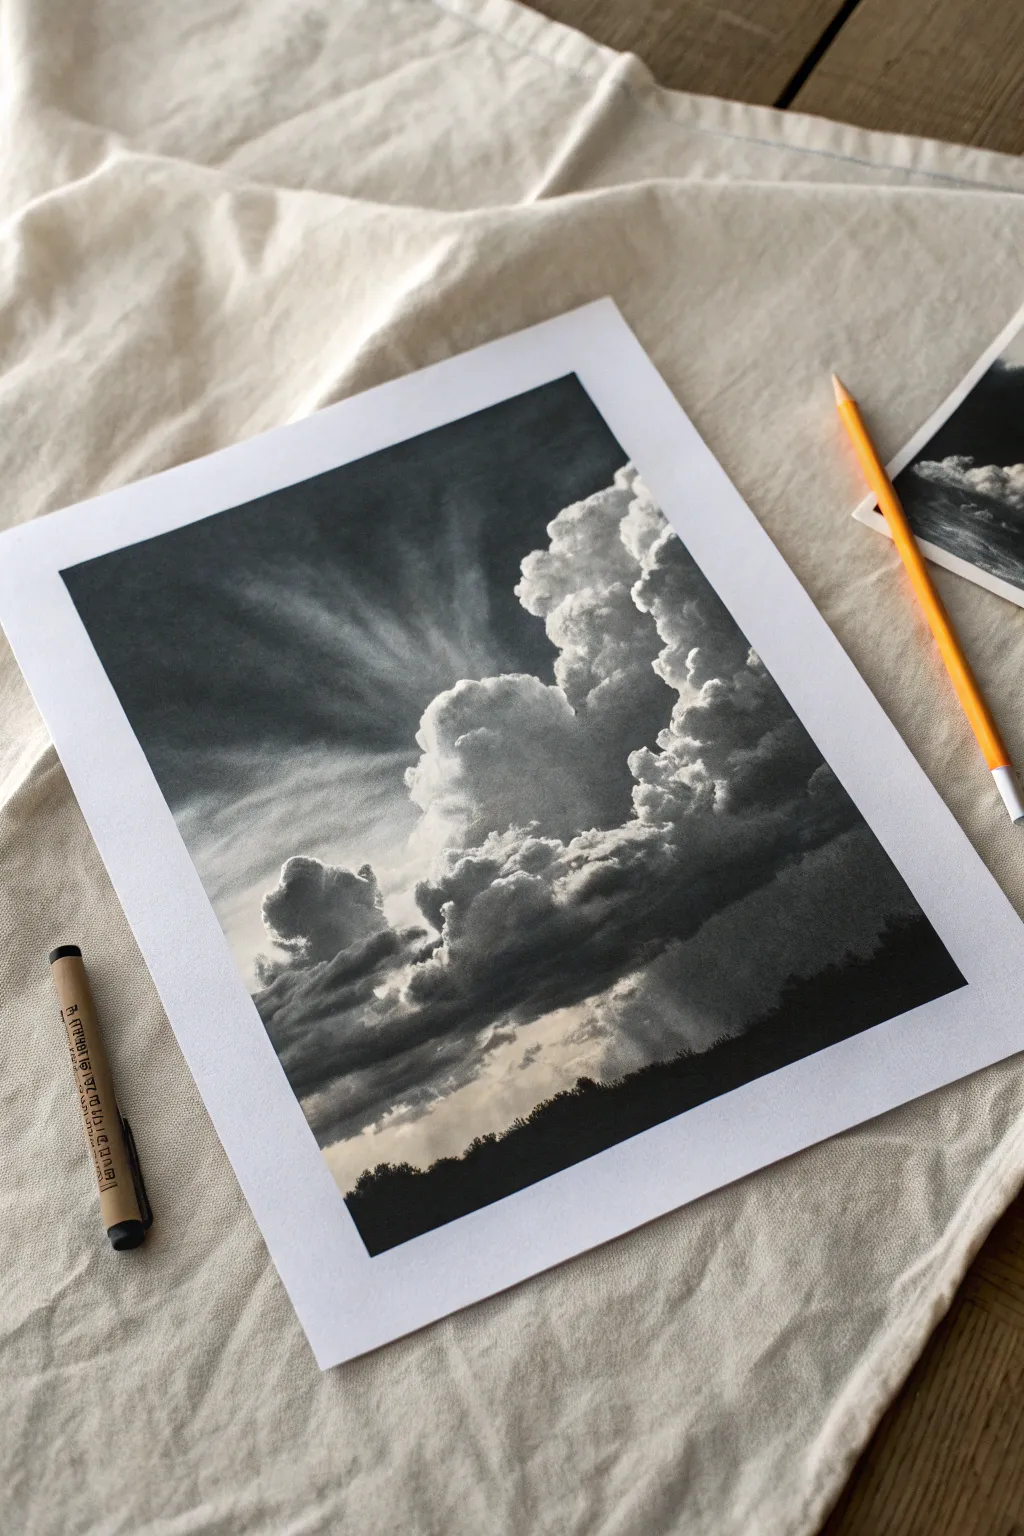
This dramatic cloud study relies on a subtractive technique where you lay down a dark ground first and lift the light out with erasers. The result is a moody, high-contrast sky with striking sunbeams that looks far more complex than the process actually is.
Detailed Instructions
Materials
- Smooth bristol board or heavyweight drawing paper
- Vine charcoal or Willow charcoal sticks
- Charcoal powder (optional, for faster coverage)
- Pressed charcoal stick or dark charcoal pencil
- Kneaded eraser
- Precision eraser pen (e.g., Mono Zero) or electric eraser
- Soft blending brush (makeup brushes work well)
- Paper towel or chamois cloth
- Workable fixative
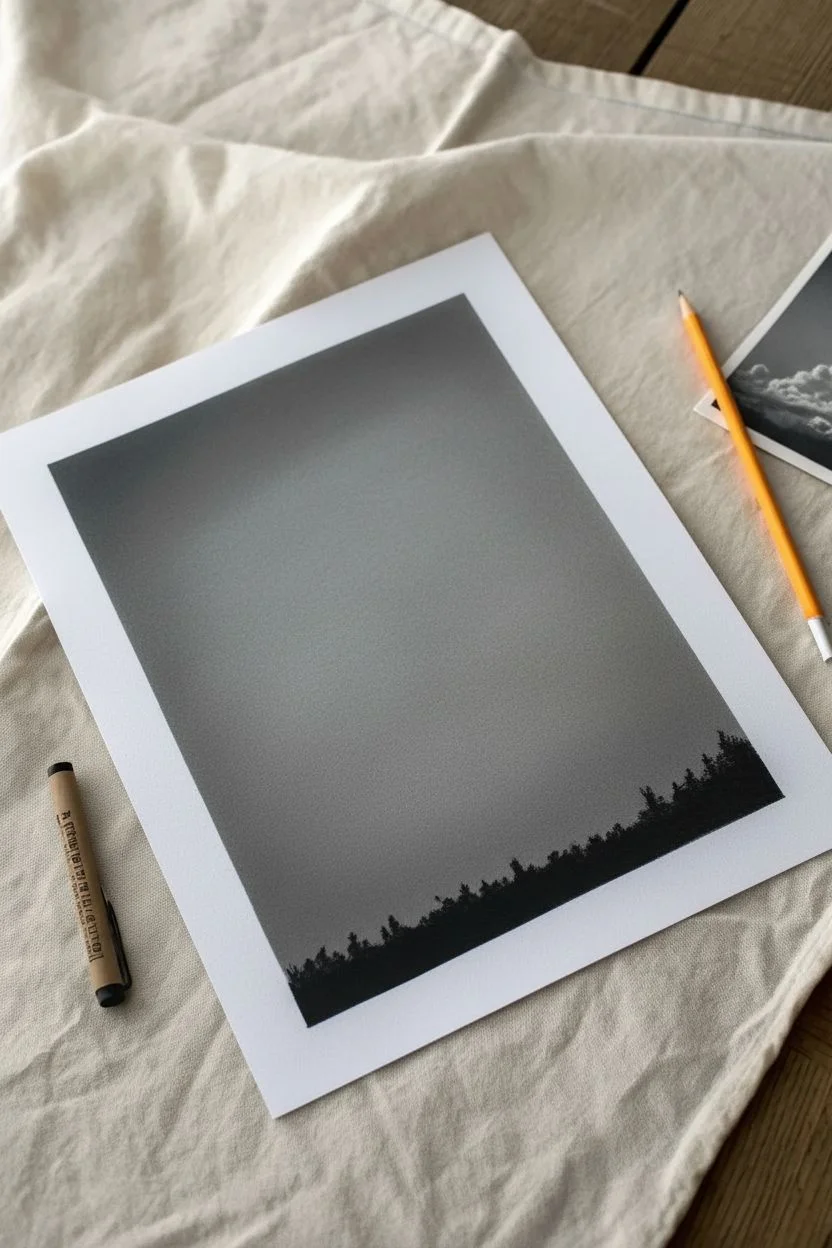
Step 1: Laying the Foundation
-
Tone the Paper:
Begin by covering your entire paper surface with a generous layer of vine charcoal or charcoal powder. You want a medium-dark gray tone, not pitch black, but dark enough to serve as the mid-tone of the sky. -
Smooth the Surface:
Use a chamois cloth or a soft paper towel to rub the charcoal into the paper grain. Blend in circular motions until you have a smooth, misty gray field with no harsh texture. -
Establish the Horizon:
Using a darker pressed charcoal stick, draw a rough, erratic line near the bottom third of the page to represent the tops of the trees. Fill in the area below completely black to ground the composition. -
Darken the Upper Corner:
The top left corner needs to be the darkest part of the sky to make the sunbeams pop. Add another layer of vine charcoal here and blend it softly downward towards the center.
Muddy Clouds?
If your eraser isn’t lifting enough white and just smearing gray, the eraser is saturated. Knead it to reveal a fresh surface or slice a dirty plastic eraser with a knife for a clean edge.
Step 2: Sculpting the Clouds
-
Map the Cloud Shapes:
Take your kneaded eraser and mold it into a rounded shape. Gently dab—don’t rub—to lift off charcoal where the main body of the cumulus cloud will sit. create a large, billowing mass on the right side. -
Refine the Edges:
As you lift out the white of the clouds, use smaller pieces of the kneaded eraser to shape the ‘cauliflower’ contours of the cloud tops. Keep the top edges crisp and the bottom edges softer where they merge with the shadow. -
Create Depth with Shadow:
Clouds are 3D objects. Go back in with a vine charcoal stick and lightly shade the undersides of the cloud puffs you just erased. This creates volume. -
Blend the Cloud Volumes:
Use a soft blending brush to gently sweep over the shadowed parts of the clouds. This integrates the darks you just added with the gray background, making the clouds look fluffy rather than rocky.
Step 3: Creating Light and Rays
-
Strike the Sunbeams:
Using a clean edge of your kneaded eraser, swipe firmly from the hidden light source (behind the clouds) outward toward the top left. Make these strokes straight and varying in width. -
Soften the Beams:
Sunbeams are intangible light. Lightly brush over your erased rays with the blending brush to soften their edges so they appear as glowing misty shafts rather than solid stripes. -
Highlight the ‘Silver Lining’:
Use a precision eraser pen (or the sharp edge of a hard white eraser) to carve out the absolute brightest white edges along the top rim of the clouds. This indicates where the sun is hitting them directly. -
Detail the Small Puffs:
Add smaller drift clouds floating in front of the main mass by erasing tiny, irregular shapes. Give them slight shadows on the bottom to match the main cloud.
Tinted Atmosphere
For a sepia or moody vintage look without color skills, try doing this same project on tan-toned paper. Use white charcoal for the highlights and black for the shadows.
Step 4: Final Contrast & Fix
-
Deepen the Darks:
Return to the tree line silhouette. Use your darkest charcoal pencil to roughen the top edge, creating the look of individual leaves and branches poking up against the bright sky. -
Add Falling Rain Effect:
Below the heavy dark cloud base on the right, use a slightly dirty kneaded eraser to make vertical, faint streaks dropping toward the horizon. This mimics distant rain sheets. -
Clean the Borders:
If you want a clean border like the photo, use tape before starting, or simply erase the margins afterward with a firm plastic eraser for a crisp finish. -
Protect the Work:
Charcoal subtractive drawings are delicate. Spray a light coat of workable fixative outdoors to prevent the dark sky from smudging.
This subtractive method allows you to capture light in a way that feels incredibly natural and atmospheric
Build a Charcoal Galaxy With Lifted Star Specks
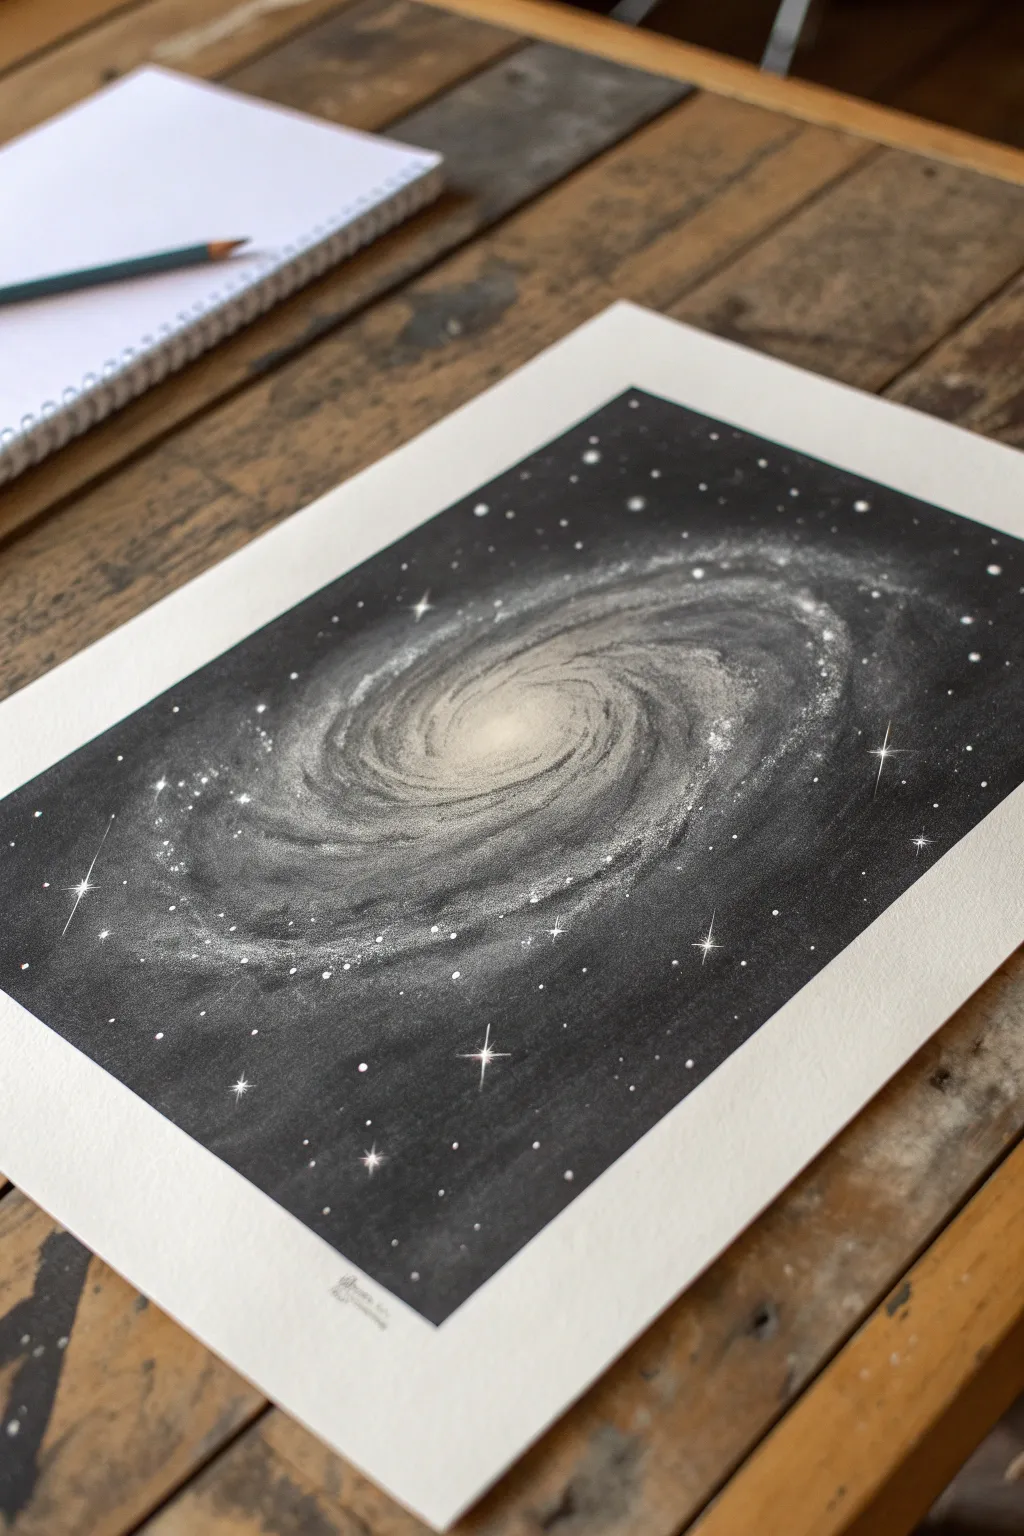
Capture the infinite mystery of space with this striking charcoal galaxy drawing. By layering deep blacks and erasing out swirling light, you’ll create a luminous spiral that pops dramatically against the dark cosmos.
Step-by-Step Tutorial
Materials
- Heavyweight drawing paper or mixed media paper
- Vine or willow charcoal sticks
- Compressed charcoal stick (for deepest blacks)
- Kneaded eraser
- Precision eraser (stick eraser or mono zero)
- White gel pen or white charcoal pencil
- Blending stump or tortillon
- Tissue or soft cloth for blending
- Workable fixative (optional)
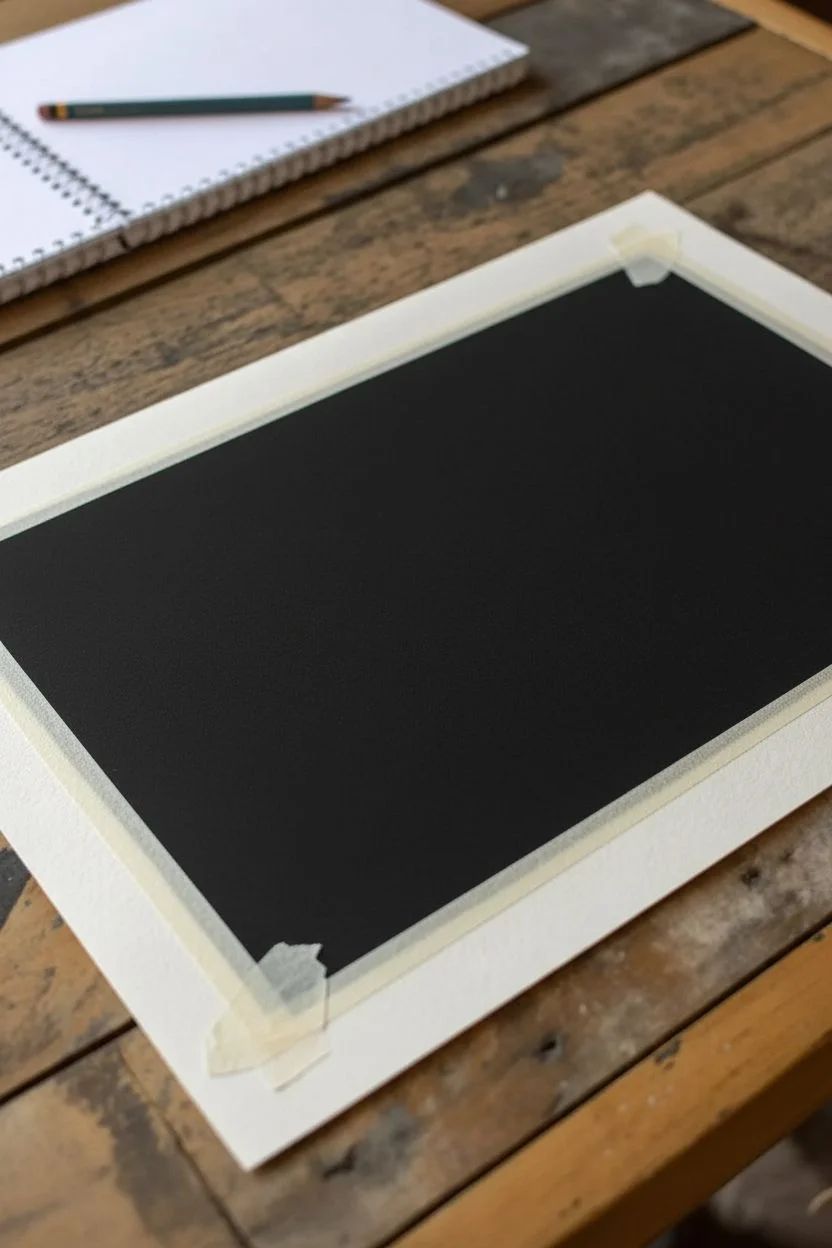
Step 1: Setting the scene
-
Define the boundaries:
Start by lightly taping off a rectangular border on your paper with masking tape or drafting tape. This ensures you’ll have those crisp, clean edges when you peel it away at the end. -
Lay the foundation:
Using a vine charcoal stick, cover the entire rectangular area with a generous layer of charcoal. Use the broad side of the stick to get coverage quickly. -
Deepen the void:
Blend this initial layer smoothly into the paper using a soft tissue or cloth. Rub in circular motions to push the charcoal into the paper’s tooth. -
Creating the abyss:
Repeat the layering process, this time introducing compressed charcoal for a richer, midnight black tone. Blend again until you have a solid, velvety dark background.
Clean Hands, Clean Art
Place a scrap sheet of paper under your drawing hand. This prevents the oils in your skin from smudging your velvety blacks and keeps your hand from dragging charcoal into the white border.
Step 2: Forming the Galaxy
-
Locate the core:
Visualize where the center of your galaxy will be. Take your kneaded eraser and gently dab a small circular area near the middle to lift some charcoal, creating a faint glow. -
The first spiral:
Mold your kneaded eraser into a wedge shape. Starting from the glowing core, gently wipe outwards in a curving motion to suggest the first spiral arm. -
Building the swirl:
Create a second arm swirling in the opposite direction. Keep your pressure light at first; you are removing darkness to reveal the ‘light’ of the paper beneath. -
Softening the arms:
Use a clean blending stump to soften the edges of your erased spiral arms. This makes them look like clouds of gas and dust rather than hard lines. -
intensifying the center:
Go back to the very center core with a precision eraser or a clean edge of your kneaded eraser. Lift more charcoal to make this the brightest, most dense part of the galaxy.
Step 3: Refining Details
-
Shadows within light:
To give the galaxy depth, use a charcoal pencil or the tip of a vine stick to add thin, dark streaks within the white spiral arms. These represent dust lanes cutting through the light. -
Adding texture:
I find that lightly tapping the blending stump over the transition areas helps create a misty, granular texture that mimics distant starlight. -
Brightening the loops:
Use your precision eraser to pick out specific highlights on the outer edges of the spiral arms, increasing contrast against the dark background.
Eraser Not Lifting?
If your kneaded eraser stops lifting charcoal, it’s saturated. Stretch and fold it repeatedly to reveal a clean, sticky surface. For stubborn dark spots, switch to a battery-operated eraser.
Step 4: Starlight and Finishing Touches
-
Standard stars:
Take a white gel pen or a sharpened white charcoal pencil and dot random stars throughout the black background. Vary their spacing to look natural. -
Cluster creation:
Add a higher concentration of tiny dots along the spiral arms themselves. This simulates the millions of stars that make up the galaxy’s visible mass. -
Creating flare:
Select 3-5 of your brightest stars to turn into ‘flares.’ carefully draw a tiny cross or asterisk shape over the white dot to give it a twinkling effect. -
Final contrast check:
Step back and look at your drawing. If the background looks grey next to the bright ink, carefully darken it with a final pass of compressed charcoal, avoiding your star field. -
The reveal:
Once you are satisfied, gently tape peel away the masking tape to reveal the sharp, clean borders that frame your cosmic scene.
Hang your new celestial masterpiece somewhere prominent to remind you of the vast beauty of the universe


Have a question or want to share your own experience? I'd love to hear from you in the comments below!