Whenever I need a painting win that looks super polished without a ton of drawing skills, I reach for geometric shapes and masking tape. These ideas are all about clean lines, bold color, and that magical moment when you peel the tape and everything snaps into place.
Tape-Resist Triangle Color Blocks
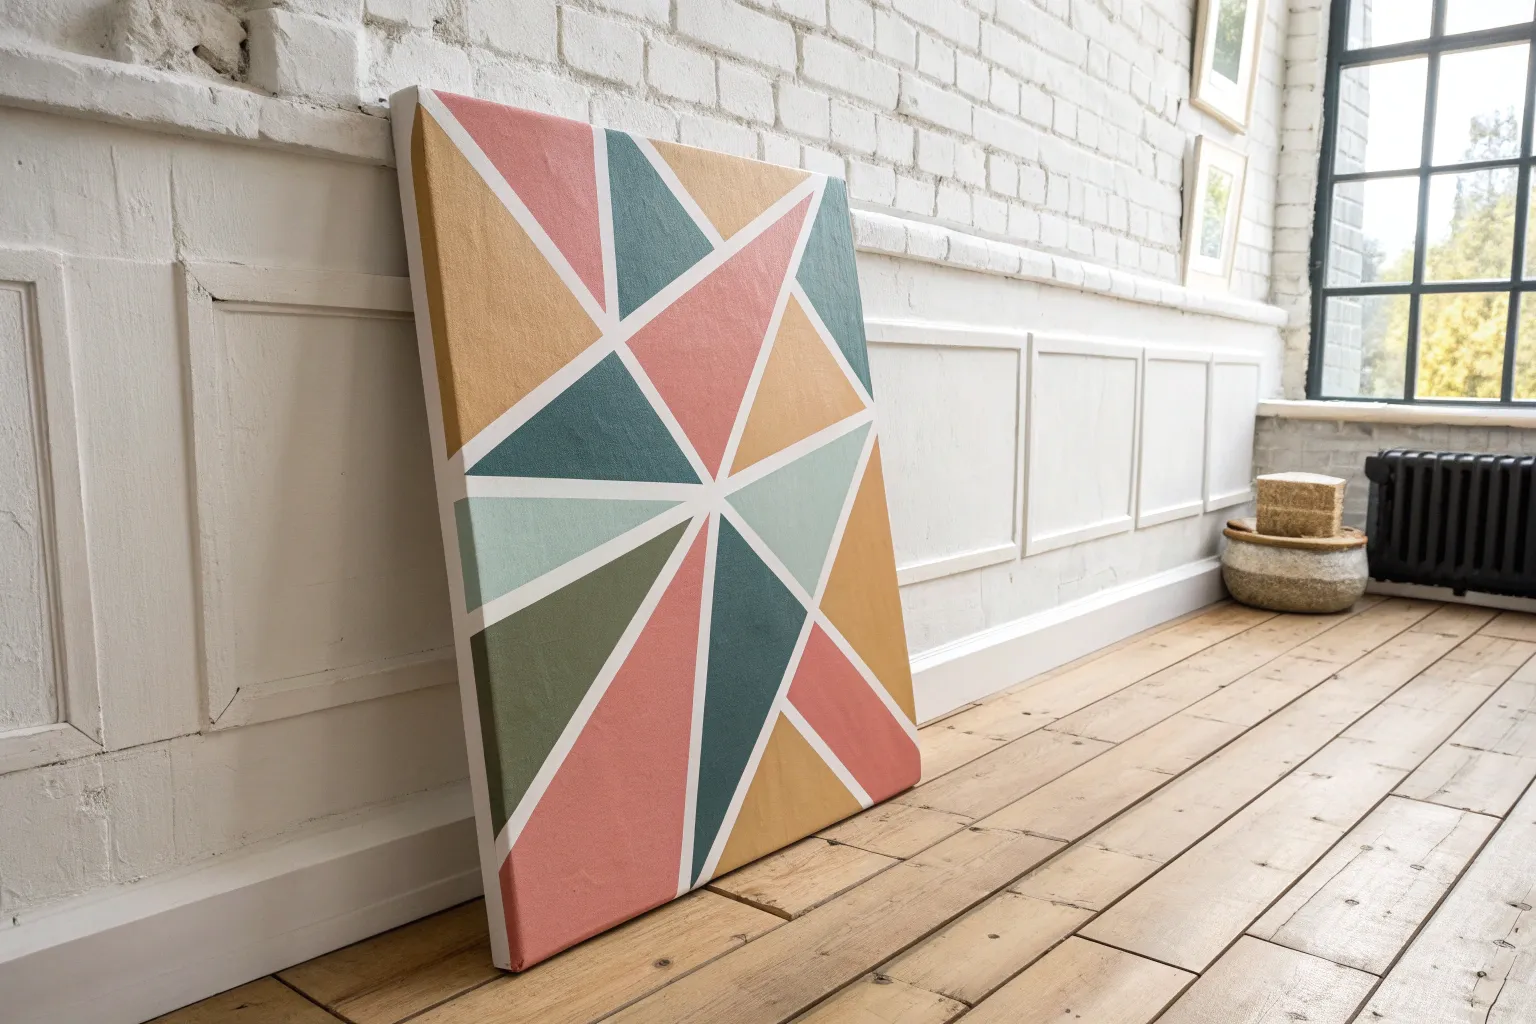
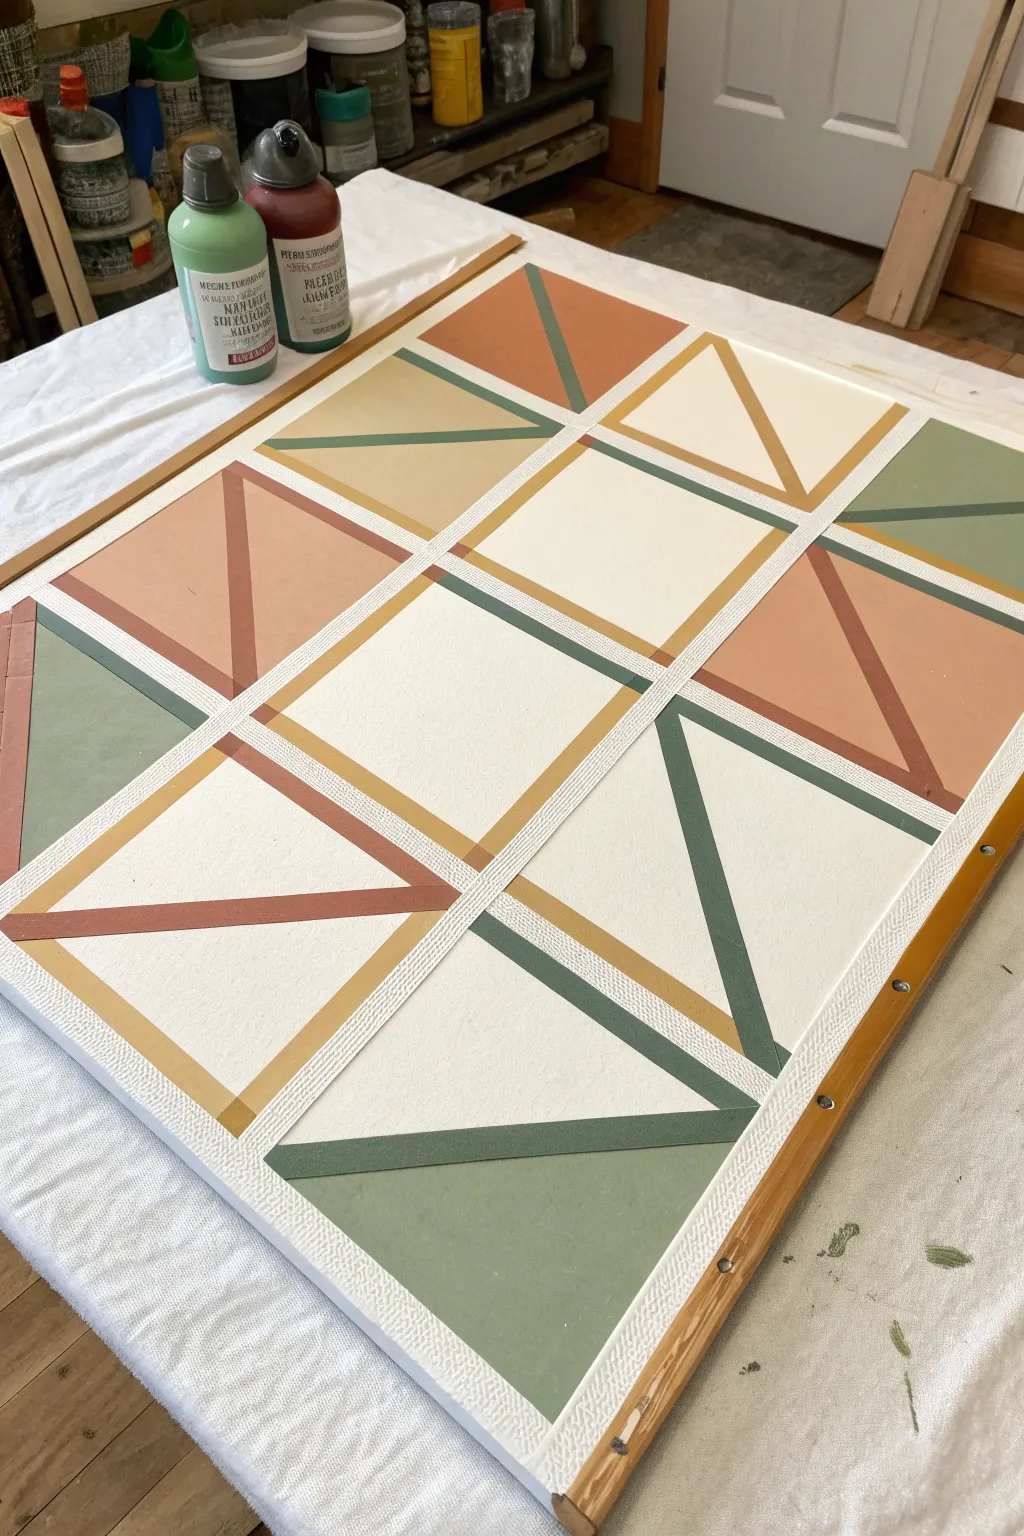
Transform a blank canvas into a stunning modern focal point with this vibrant geometric design. By creating simple taped-off sections, you’ll build a sophisticated starburst pattern featuring warm terracotta, varied mustards, and cool teal tones.
How-To Guide
Materials
- Large square stretched canvas (approx. 24″x24″ or 30″x30″)
- Painter’s tape (0.75″ or 1″ width)
- Acrylic paints (terracotta, burnt orange, mustard yellow, light yellow ochre, teal, dusty pink)
- White acrylic paint (for base coat)
- Wide flat brush (2-3 inch) for base coat
- Medium flat synthetic brushes (1 inch) for color blocks
- Ruler or yardstick
- Pencil
- Palette or paper plates
- Matte spray varnish (optional)
Step 1: Preparation & Base Coat
-
Prime the Surface:
Even if your canvas is pre-primed, apply an even coat of white acrylic paint over the entire surface. This ensures your final lines are crisp and bright white rather than the duller tone of raw gesso. -
Let it Cure:
Allow this base coat to dry completely. It must be bone dry before any tape touches it to prevent peeling later. -
Find the Center:
Using your ruler, lightly mark the exact center point of the canvas with a pencil. You can find this easily by measuring the width and height, or by lightly tracing an ‘X’ from corner to corner. -
Mark Edge Points:
Measure along the top edge to find the center point. Repeat this for the bottom, left, and right edges. These marks will guide your tape placement.
Step 2: Taping the Geometry
-
Create Vertical & Horizontal Lines:
Run a strip of painter’s tape vertically from the top center mark to the bottom center mark. Then, run a strip horizontally from left to right. Ensure the tape intersects directly over your pencil center point. -
Seal the Edges:
Run your finger firmly along the edges of the tape to seal it down. I like to double-check these seals to ensure no paint bleeds underneath. -
Add Diagonal Lines:
Place strips of tape extending from the center intersection out to the four corners of the canvas. You should now have eight triangular sections radiating from the middle. -
Check for Symmetry:
Step back and look at your taped design. The sections should look roughly equal, like slices of a pie. Adjust any tape strips if the lines don’t look straight. -
The Anti-Bleed trick:
Apply a very thin layer of white paint over the edges of your painter’s tape. This seals the tape edge with white paint, so if any bleeds occur, they will match the background and be invisible.
Clean Line Guarantee
If you missed the white-paint sealing step and get bleeding, simply use a sharp craft knife to very gently scrape away the excess dry paint, then touch up with white.
Step 3: Applying Color
-
Plan Your Palette:
Squeeze out your chosen colors onto your palette. For this specific look, you need a balance of warm tones (terracotta, pink, mustard) and one or two cool tones (teal) for contrast. -
Paint the Top Right:
Start with the top-right quadrant. Paint the upper triangle a deep mustard yellow and the lower triangle a rich reddish-brown. -
Paint the Bottom Right:
Moving clockwise, paint the upper triangle of this section a soft dusty pink and the lower triangle a bright mustard yellow. -
Paint the Bottom Left:
Continue clockwise to the next section. Paint the right-hand triangle a deep teal blue and the left-hand triangle a warm terracotta red. -
Paint the Top Left:
Finish the final quadrant. Paint the lower triangle a dark teal (or forest green) and the upper triangle a lighter yellow-ochre. -
Paint the Sides:
Don’t forget the canvas edges! Carry each color over the side of the canvas to give the artwork a professional, finished look from all angles. -
Apply a Second Coat:
Once the first layer is dry to the touch, apply a second coat to each color block to ensure opacity and vibrant saturation.
Texture Twist
Mix a small amount of baking soda or modeling paste into your acrylics before painting. This adds a subtle, gritty stone-like texture that makes the piece feel high-end.
Step 4: The Reveal
-
Peel While Slightly Damp:
Carefully peel off the tape. It is best to do this when the second coat is mostly dry but strictly speaking, not fully cured gently pulling the tape away at a 45-degree angle. -
Touch Up:
Inspect your white lines. If any paint managed to bleed through, use a small detail brush and white paint to tidy up the edges. -
Optional Protection:
Once the painting has cured for at least 24 hours, you can apply a matte spray varnish to protect the surface from dust and fading.
Hang your new masterpiece in a well-lit spot to let those crisp lines and warm colors truly pop

Shattered Glass Mosaic Triangles
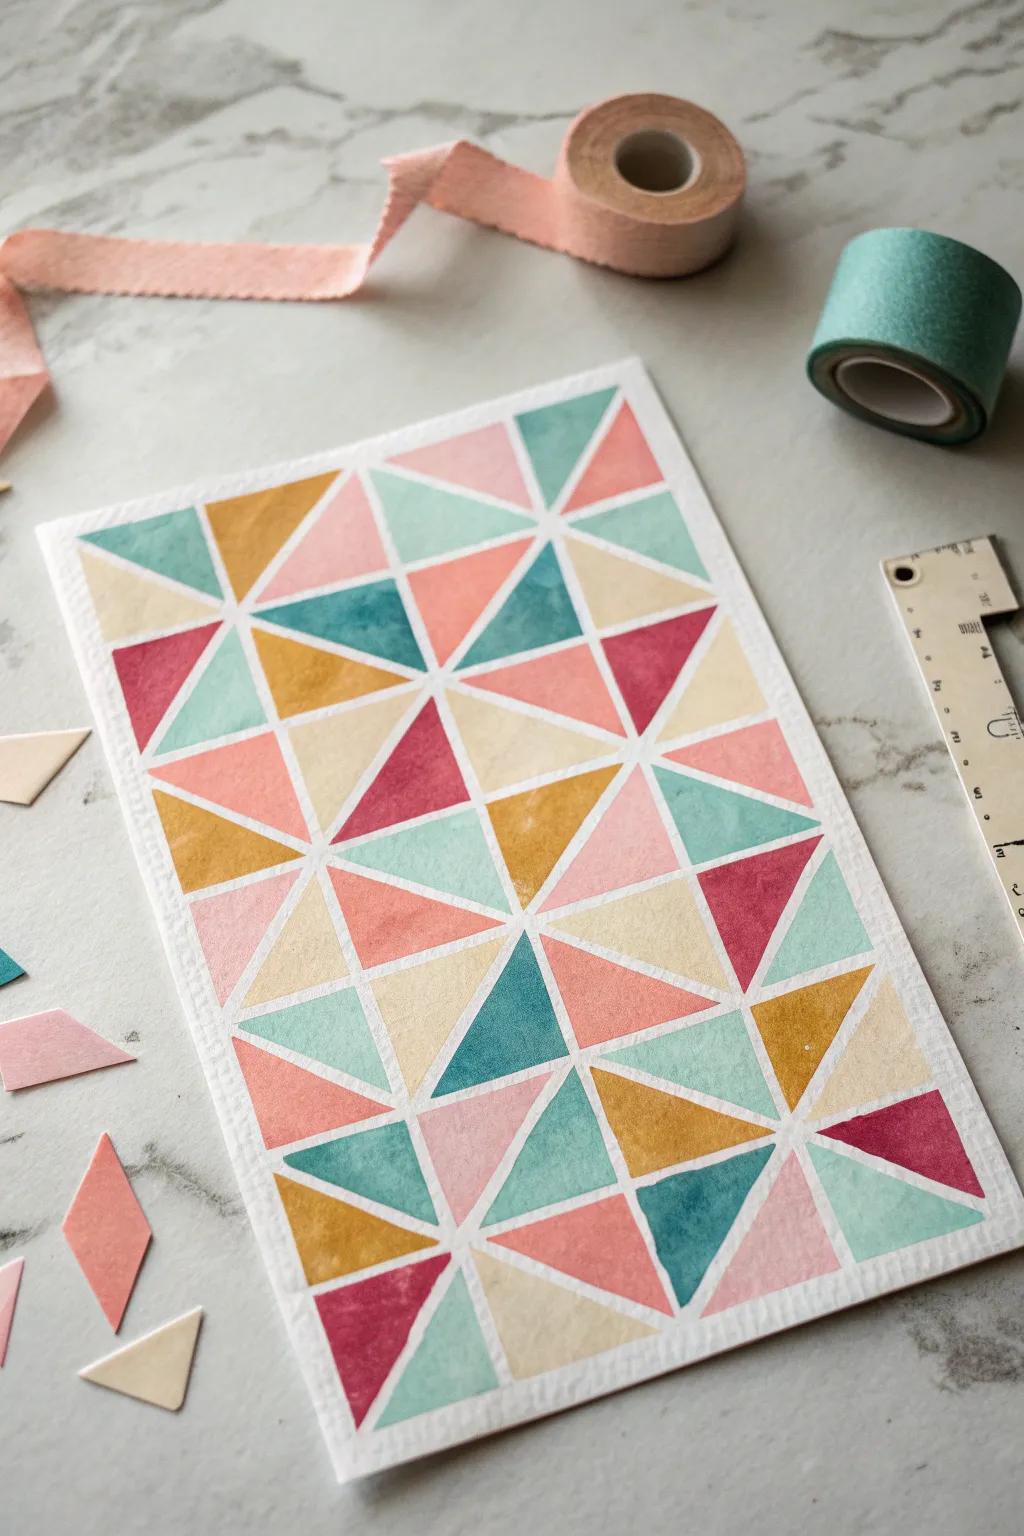
Transform a blank sheet of paper into a vibrant kaleidoscope of color with this simple geometric technique. Using basic masking and watercolor methods, you’ll create a stunning, disconnected triangle pattern that mimics the beauty of stained glass.
Step-by-Step Tutorial
Materials
- Cold press watercolor paper (A5 or similar size)
- Washi tape or low-tack painter’s tape (various widths)
- Watercolor paint set
- Synthetic smooth shader brush (size 6 or 8)
- Round detail brush (size 2)
- Ruler
- Pencil
- Paper towel
- Cup of water
Step 1: Creating the Grid
-
Prepare the paper:
Begin with a flat sheet of cold press watercolor paper. If you want a clean white border around the very edge, tape the paper down to your work surface on all four sides. -
Map the boundaries:
Using a ruler and a very light pencil touch, draw a rectangular border about half an inch inside the paper’s edge. This will be the container for your geometric pattern. -
Calculate the intersecting lines:
Lightly sketch a series of intersecting diagonal lines across the rectangle. Aim for random angles to create a variety of triangle sizes, but ensure lines go all the way from one edge to another. -
Divide larger shapes:
Look for any large, empty quadrilaterals in your sketch. Use your ruler to bisect these simply with a single line, turning them into two or more triangles. -
Plan the spacing:
The charm of this piece is the white space between shapes. You won’t be painting directly against a continuous line; instead, you need to visualize a thin white “grout” line separating every single triangle.
Step 2: Planning the Palette
-
Select your colors:
Choose a limited color palette to keep the design cohesive. For the look in the photo, mix a dusty rose, a deep magenta, a teal green, a light aqua, and a mustard yellow. -
Test the transparency:
On a scrap piece of paper, test your colors. You want them to be somewhat transparent to let the paper texture show through, but pigmented enough to be vibrant. -
Pre-mix puddles:
Mix generous puddles of your 5-6 chosen colors in your palette now so you don’t have to keep remixing while you paint, which ensures color consistency across the artwork.
Bleeding Edges?
If paint bleeds into the white gaps, wait for it to dry completely. Then use a white gel pen or opaque white gouache to paint over the mistake and restore the gap.
Step 3: Painting the Mosaic
-
Start with the first color:
Load your shader brush with the light aqua color. Choose 5-7 random triangles scattered across the grid to fill with this color, ensuring none of them touch each other. -
Mind the gap:
As you paint each triangle, do not paint all the way to your pencil line. Stop about 1-2 millimeters short of the line to assist in creating those crisp white channels between shapes. -
Rotate and dry:
Allow the first color to dry completely. I find it helpful to rotate the paper occasionally to paint comfortable angles without smudging wet areas. -
Apply warm tones:
Switch to your mustard yellow. Fill in another random set of triangles, aiming for balance so the yellow is evenly distributed across the composition. -
Deepen the contrast:
Now use the deep magenta or berry tone. Since this is a darker color, use it more sparingly on smaller triangles to create distinct focal points without overwhelming the piece. -
Fill the mid-tones:
Move on to the dusty rose and teal green colors. Use these to fill the remaining empty triangles. -
Check for adjacent colors:
Be careful not to place two identical colors right next to each other; separate them with a different hue to maintain the shattered glass effect. -
Refine edges:
Once the main shapes are filled, use your small round detail brush to sharpen the corners of any triangles that look too rounded or uneven.
Make it Metallic
Replace one of your colors (like the yellow) with gold watercolor paint. The metallic triangles will catch the light and make the piece look incredibly high-end.
Step 4: Finishing Touches
-
Erase guidelines:
Wait until the painting is bone dry—touch it with the back of your hand to be sure. Gently erase the pencil lines visible in the white gaps between the triangles. -
Flatten the paper:
If the watercolor has caused the paper to buckle slightly, place the artwork under a heavy book overnight to flatten it out.
Now you have a modern, colorful geometric piece ready to frame or turn into a greeting card


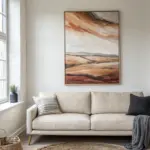
Two-Tone Diagonal Split
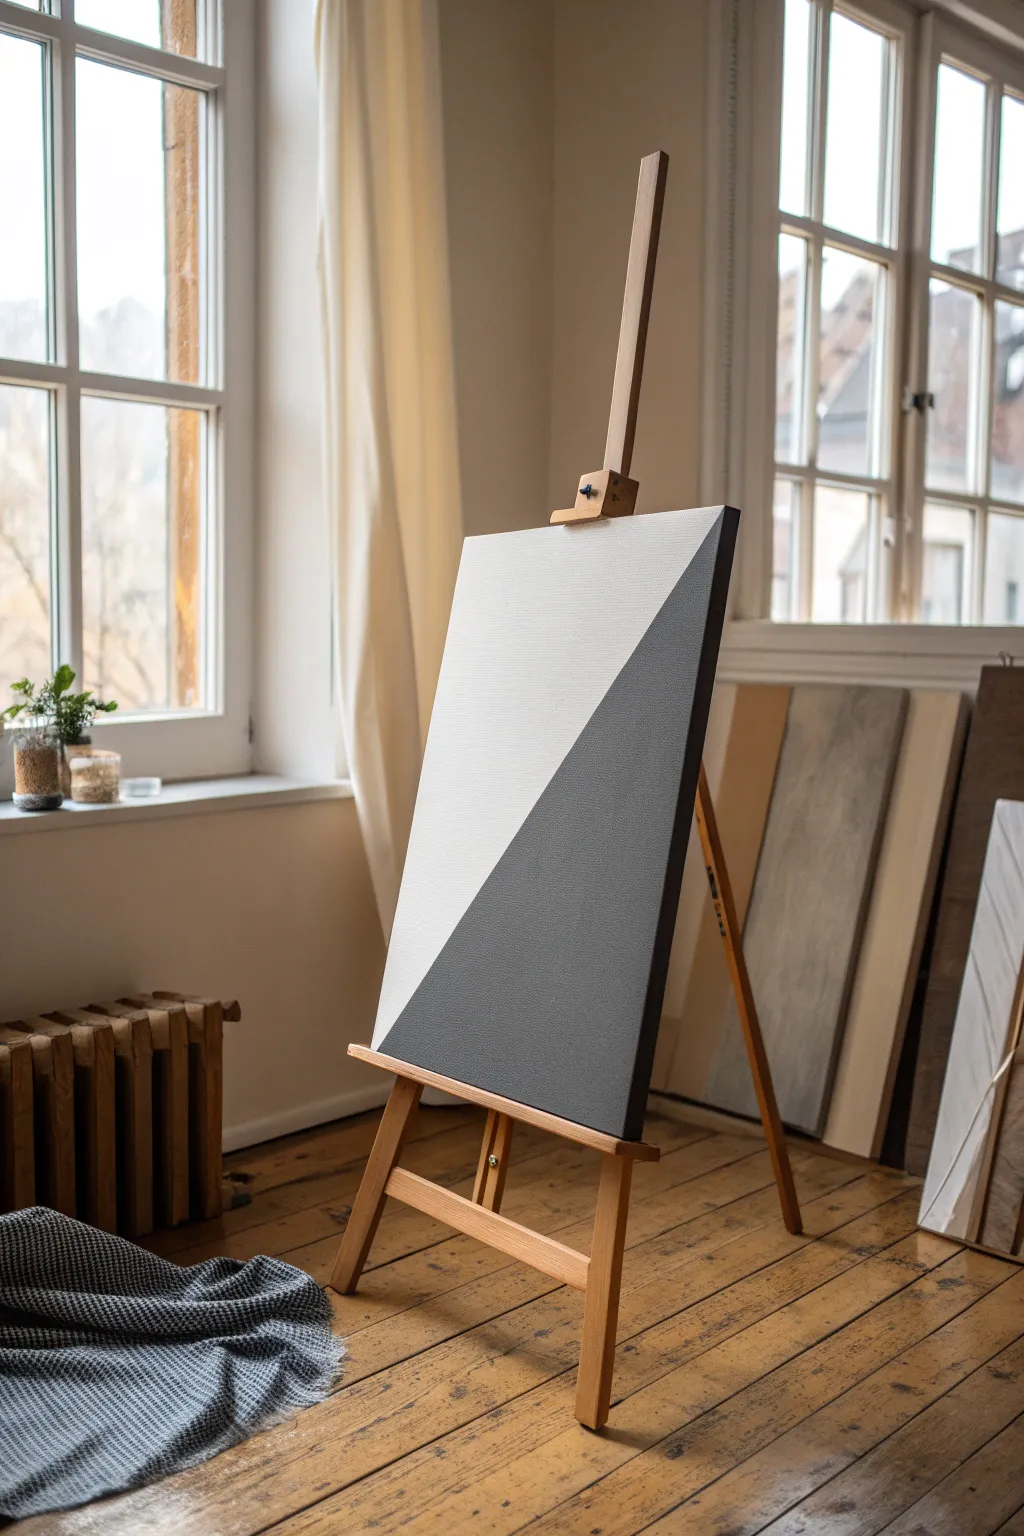
Embrace the power of negative space with this minimalist statement piece that proves art doesn’t need to be complicated to be impactful. This high-contrast diagonal split design instantly adds a clean, architectural element to any room while taking surprisingly little time to execute.
Step-by-Step
Materials
- Stretched canvas (rectangular, medium grain)
- Acrylic paint (Titanium White)
- Acrylic paint (Payne’s Grey or Charcoal)
- Painter’s tape or masking tape (approx. 1 inch width)
- Wide flat synthetic brush (2-3 inches)
- Medium flat synthetic brush
- Palette or paper plate
- Ruler or straight edge
- Pencil
- Drop cloth or newspaper
Step 1: Preparation & Base
-
Prepare the canvas:
Wipe down your canvas with a dry cloth to ensure no dust is settling on the surface before you begin. -
Prime the surface:
Even if your canvas came pre-primed, I like to apply a fresh coat of Titanium White over the entire surface. This ensures an even texture and a bright, clean foundation for your design. -
Dry completely:
Allow this base coat to dry fully. It needs to be bone-dry to the touch so the tape doesn’t pull it up later. -
Mark the corners:
Using a pencil, make a very faint mark at the top right corner and another at the bottom left corner of the canvas. These will guide your diagonal line.
Step 2: Taping the Design
-
Apply the tape:
Stretch a long piece of painter’s tape diagonally across the canvas, connecting your two pencil marks. Don’t press it down firmly just yet. -
Check alignment:
Step back and verify straightness. Since this is the only line in the painting, it needs to be perfectly straight. -
Seal the edge:
Once satisfied, press the tape down firmly, paying special attention to the edge where the paint will meet. Run your fingernail or a credit card along this edge to ensure a tight seal. -
The sealing trick:
Paint a thin layer of your base white color *over* the edge of the tape that faces the area you plan to paint grey. This seals the tape and ensures any seep-through is white-on-white, keeping your final line crisp. -
Let the seal dry:
Wait 15-20 minutes for this sealing layer to dry completely.
Pro Tip: Texture Control
For that textured look seen in the photo, don’t thin your paint with water. Use heavy body acrylics straight from the tube to keep the canvas grain visible.
Step 3: Painting the Contrast
-
Mix your dark tone:
Squeeze out your Payne’s Grey or Charcoal paint. If you want a softer look, mix in a tiny dot of white to lighten it slightly, but aim for a solid, opaque dark tone. -
Load the wide brush:
Generously load your wide flat brush with the dark paint. You want smooth coverage without having to drag the bristles too hard. -
Apply the first coat:
Start painting the bottom right section. Paint away from the tape edge first, then fill in the rest of the triangle using long, horizontal strokes for a uniform texture. -
Cover the sides:
Don’t forget to paint the sides of the canvas that correspond to the dark triangle. Wrapping the color around the edge gives the piece a professional, gallery-quality finish. -
Assess opacity:
Let the first coat dry until it loses its sheen. If you can still see the canvas grain too clearly or the color looks patchy, apply a second coat. -
Final smoothing:
For the final layer, use lighter pressure with the brush to minimize stroke marks, ensuring a velvety matte appearance.
Troubleshooting: Bleeding
If paint bled under the tape despite sealing, wait for it to dry completely. Place a fresh piece of tape over the dark side and paint white over the bleed to fix it.
Step 4: The Reveal
-
Timing the removal:
Don’t wait for the final coat to be rock hard. Peeling while the paint is slightly tacky (but not wet) usually yields the best edge. -
Peel carefully:
Slowly pull the tape away from the painted area at a 45-degree angle. Maintain a steady, slow speed to avoid ripping the paint film. -
Inspect the line:
Check your diagonal line. It should be razor-sharp thanks to the sealing step. -
Touch ups:
If there are any tiny bleeds, wait for everything to dry fully, then use a small detail brush with the appropriate color to clean up the edge. -
Clean the white side:
If any smudges occurred on the white side during the process, do a quick touch-up with your white paint to ensure high contrast.
Now hang your modern masterpiece and enjoy the sharp, clean lines of your work.

Easy Chevron Zigzag Bands
Transform simple zigzag lines into a sophisticated geometric pattern with depth and dimension using basic watercolor techniques. This project creates an optical illusion of folded ribbon bands using just two main color families and clever shading.
How-To Guide
Materials
- Cold press watercolor paper (A4 or similar size)
- Masking tape or painter’s tape (various widths)
- Watercolor paints (Teal/Blue-Green and Terracotta/Burnt Sienna)
- Round watercolor brush (size 6 or 8)
- Flat brush (optional, for washes)
- Pencil
- Ruler
- Eraser
- Two jars of water
- Paper towels
Step 1: Drawing the Grid
-
Secure the paper:
Begin by taping down your watercolor paper to a flat surface or drawing board. This prevents the paper from buckling when it gets wet and creates a clean white border around your artwork. -
Mark horizontal guides:
Using your ruler and pencil, lightly mark horizontal lines across the paper spaced about 1.5 inches apart. These will determine the height of your zigzag peaks. -
Mark vertical intervals:
Along the top and bottom edges of your paper, make small tick marks every 2 inches. Connect these lightly or use them as guides to understand where your zigzags will change direction. -
Connect the dots:
Draw your main zigzag line by connecting the diagonal points through your grid. Once you have the first line, draw a parallel line about 0.5 inches below it to create the first band. -
Internal fold lines:
To create the 3D effect, draw a vertical line straight down from every outer point of the zigzag to the parallel line below it. This vertical line indicates where the ‘ribbon’ folds.
Step 2: Painting the Shadow Planes
-
Mix your shadow colors:
Prepare a saturated mix of your teal and terracotta paints. You want these to be fairly pigmented, as these will represent the shadowed, vertical parts of the ribbon. -
Identify the vertical segments:
Locate all the small, vertical triangular or trapezoidal shapes created by your fold lines. These are the sides of the ribbon that would be ‘in shadow’. -
Paint the teal shadows:
Fill in the vertical shadow segments on the teal bands. Use the tip of your round brush to keep the edges crisp against the pencil lines. -
Paint the terracotta shadows:
Repeat the process for the orange/brown bands, filling in only those vertical fold sections with the saturated terracotta paint. -
Let it dry completely:
Wait for these small sections to be fully dry. If you paint the next section too soon, the dark color will bleed into the lighter areas.
Clean Edges Tip
For ultra-crisp lines, use thin washi tape or masking tape to block off the specific section you are painting. Move the tape only after the paint is 100% dry.
Step 3: Creating the Gradients
-
Dilute your paint:
Add more water to your existing paint puddles to create a lighter, more transparent wash of both the teal and terracotta colors. -
Start the first band:
On a long diagonal segment of a teal band, start painting at the ‘fold’ line where the dark shadow is. I like to place the most pigment right next to the fold. -
Pull the color:
Clean your brush slightly and pull that pigment across the rest of the diagonal segment, fading it out as you reach the other end. This gradient implies light hitting the flat surface. -
Alternate colors:
Move to a terracotta band and repeat the gradient technique. Apply the strongest color near the vertical fold and fade it out toward the next point. -
Work systematically:
Continue filling in the long diagonal segments. Be careful not to let wet sections touch each other if you want distinct, sharp lines. -
Refine edges:
Once dry, look for any uneven edges. You can gently re-wet slightly and lift color with a clean brush if a gradient isn’t smooth enough. -
Erase guidelines:
Wait until the painting is bone dry—warm to the touch. Gently erase any visible pencil lines that weren’t covered by paint.
Metallic Accent
Once the watercolor is dry, trace the vertical ‘fold’ lines with a gold gel pen or metallic watercolor paint to make the geometry pop even more.
Peel off your border tape carefully to reveal your crisp, dimensional artwork
BRUSH GUIDE
The Right Brush for Every Stroke
From clean lines to bold texture — master brush choice, stroke control, and essential techniques.
Explore the Full Guide
Honeycomb Hexagon Accent Row
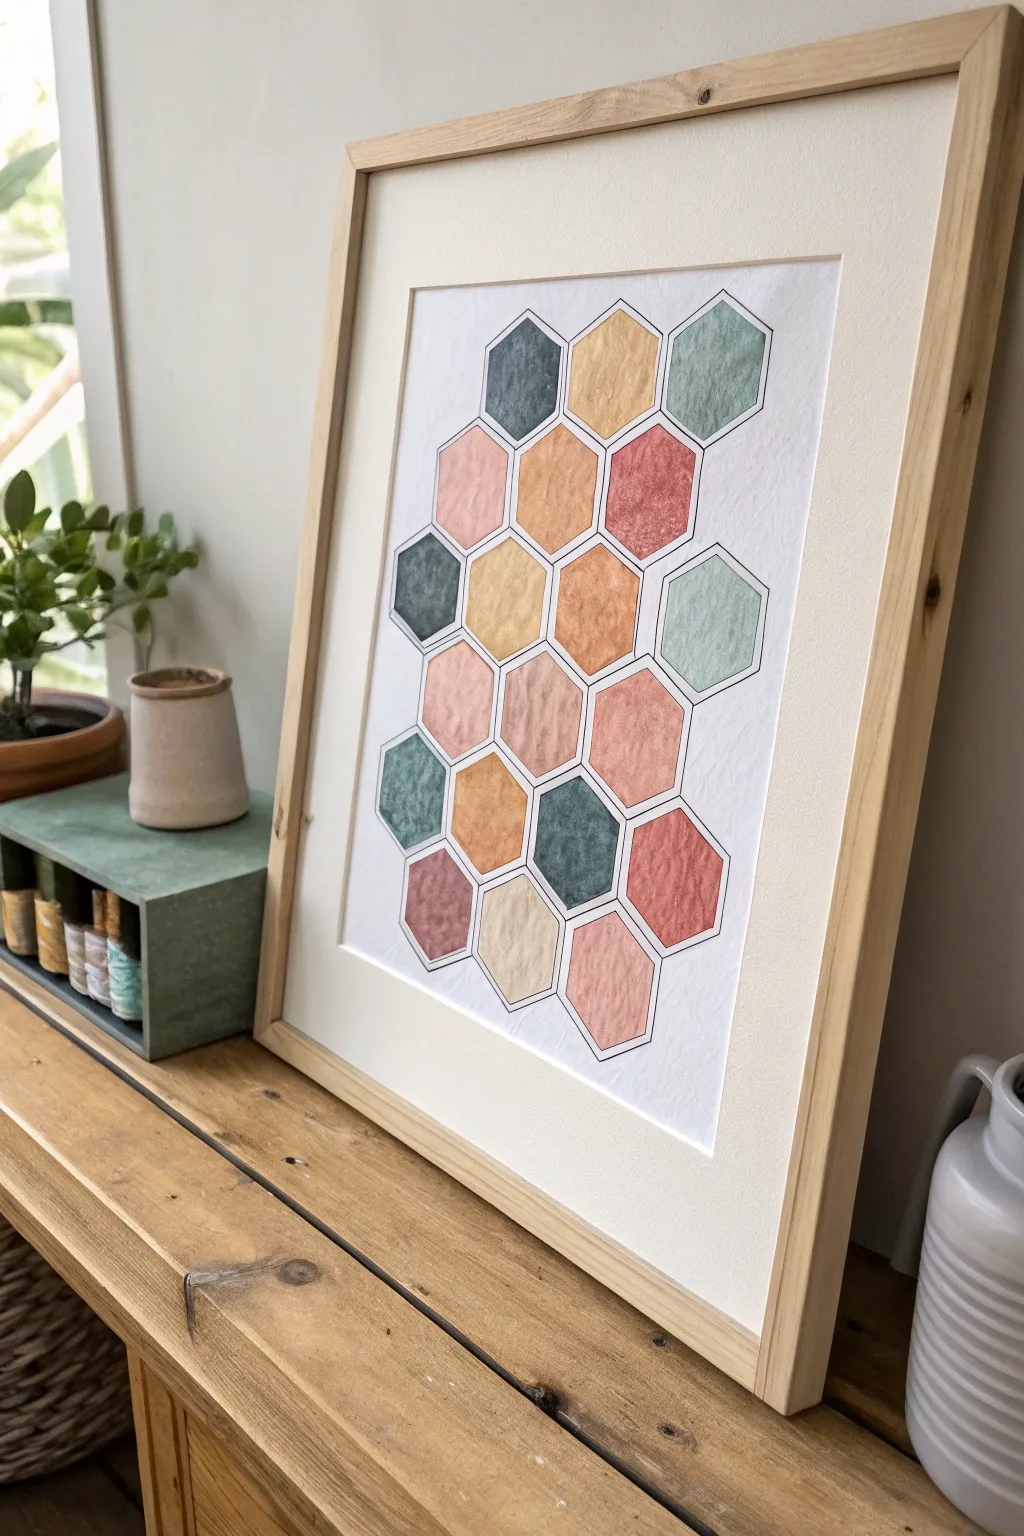
This project combines the organic beauty of watercolor textures with the clean, modern lines of geometric design. By creating a custom palette of hand-painted papers, you’ll assemble a unique honeycomb pattern that feels both structured and delightfully soft.
Step-by-Step Guide
Materials
- Heavyweight watercolor paper (cold press creates nice texture)
- Watercolor paints (tube or pan set)
- Round watercolor brushes (sizes 6 and 10)
- Pencil and eraser
- Ruler
- Hexagon stencil or a printed hexagon template
- Fine-tip black archival ink pen (0.3 or 0.5mm)
- Scissors or a sharp craft knife
- Spray adhesive or a glue stick
- Large sheet of white cardstock or Bristol board (for the background)
- Picture frame (wooden finish looks great)
Step 1: Creating the Texture Swatches
-
Prepare your palette:
Begin by selecting an earthy, muted color palette. Looking at the example, you’ll need a mix of dusty pinks, terracotta oranges, mustard yellows, sage greens, and deep slate blues. -
Map out color zones:
On your sheet of watercolor paper, lightly mark off several rectangular sections. You don’t need to be precise here; just ensure each area is large enough to cut out 3-4 hexagons later. -
Paint the wash:
Load your large round brush with water and pigment. Paint loose, uneven washes in each marked section. Don’t aim for perfect flatness; allow the pigment to pool slightly or create ‘blooms’ for that lovely mottled texture. -
Add variance:
While the paint is still damp on the paper, I like to drop in a slightly darker shade of the same color or a tiny bit of water to create more interesting organic patterns as it dries. -
Dry completely:
Let the paper dry fully. If the paper buckles, you can flatten it under a heavy book for a few hours once it’s bone dry.
Wrinkly Paper?
If your painted paper curls too much after drying, iron it on the reverse side using a low heat setting (no steam) with a thin towel centered in between.
Step 2: Shaping the Hexagons
-
Create a template:
Draw a perfect hexagon on a piece of scrap cardstock and cut it out to use as a tracer, or use a plastic stencil if you have one. -
Trace shapes on painted paper:
Position your template over the most interesting textured parts of your dried watercolor swatches. Trace the hexagon shape lightly with a pencil. -
Cut carefully:
Using sharp scissors or a craft knife and ruler, cut out your painted hexagons. You will need about 20-25 hexagons depending on the density of your final arrangement. -
Outline the shapes:
Take your fine-tip black ink pen and carefully draw an outline around the perimeter of each cut-out hexagon. This gives the shapes a crisp, finished look similar to the reference image. -
Add internal borders:
For a few details, draw an additional inner border on just one or two hexagons to mimic the illustrative style seen in the original piece.
Gold Leaf Glam
Instead of black ink outlines, use a gold paint pen or apply genuine gold leaf to a few random hexagon edges for a metallic, high-end shimmer effect.
Step 3: Assembly and Framing
-
Prepare the background:
Cut your white cardstock or Bristol board to fit the dimensions of your chosen frame. -
Dry fit the arrangement:
Lay your cut hexagons onto the background paper without glue. Arrange them in a vertical clustering pattern, staggering them like a real honeycomb. Leave a consistent white gap (about 1/8 inch) between each shape. -
Balance the colors:
Step back and squint at the arrangement. Ensure you don’t have too many dark blues or bright oranges clumped together; shuffle them until the color flow feels balanced. -
Glue the center piece:
Once happy with the layout, pick up a hexagon near the center of the composition based on your visual reference. Apply adhesive to the back and press it down firmly. -
Adhere outward:
Work outward from that central piece, gluing the adjacent hexagons. Using the first one as an anchor ensures your spacing remains consistent as the cluster grows. -
Press and set:
Place a clean sheet of paper over the artwork and rub gently with your hand to ensure all edges are adhered flat. Let the glue set. -
Frame it up:
Place your finished collage into the frame. A wide white mat board adds a professional gallery feel to the piece.
Hang your new geometric masterpiece in a bright spot where the light can catch the subtle watercolor textures
Modern Grid of Squares and Rectangles
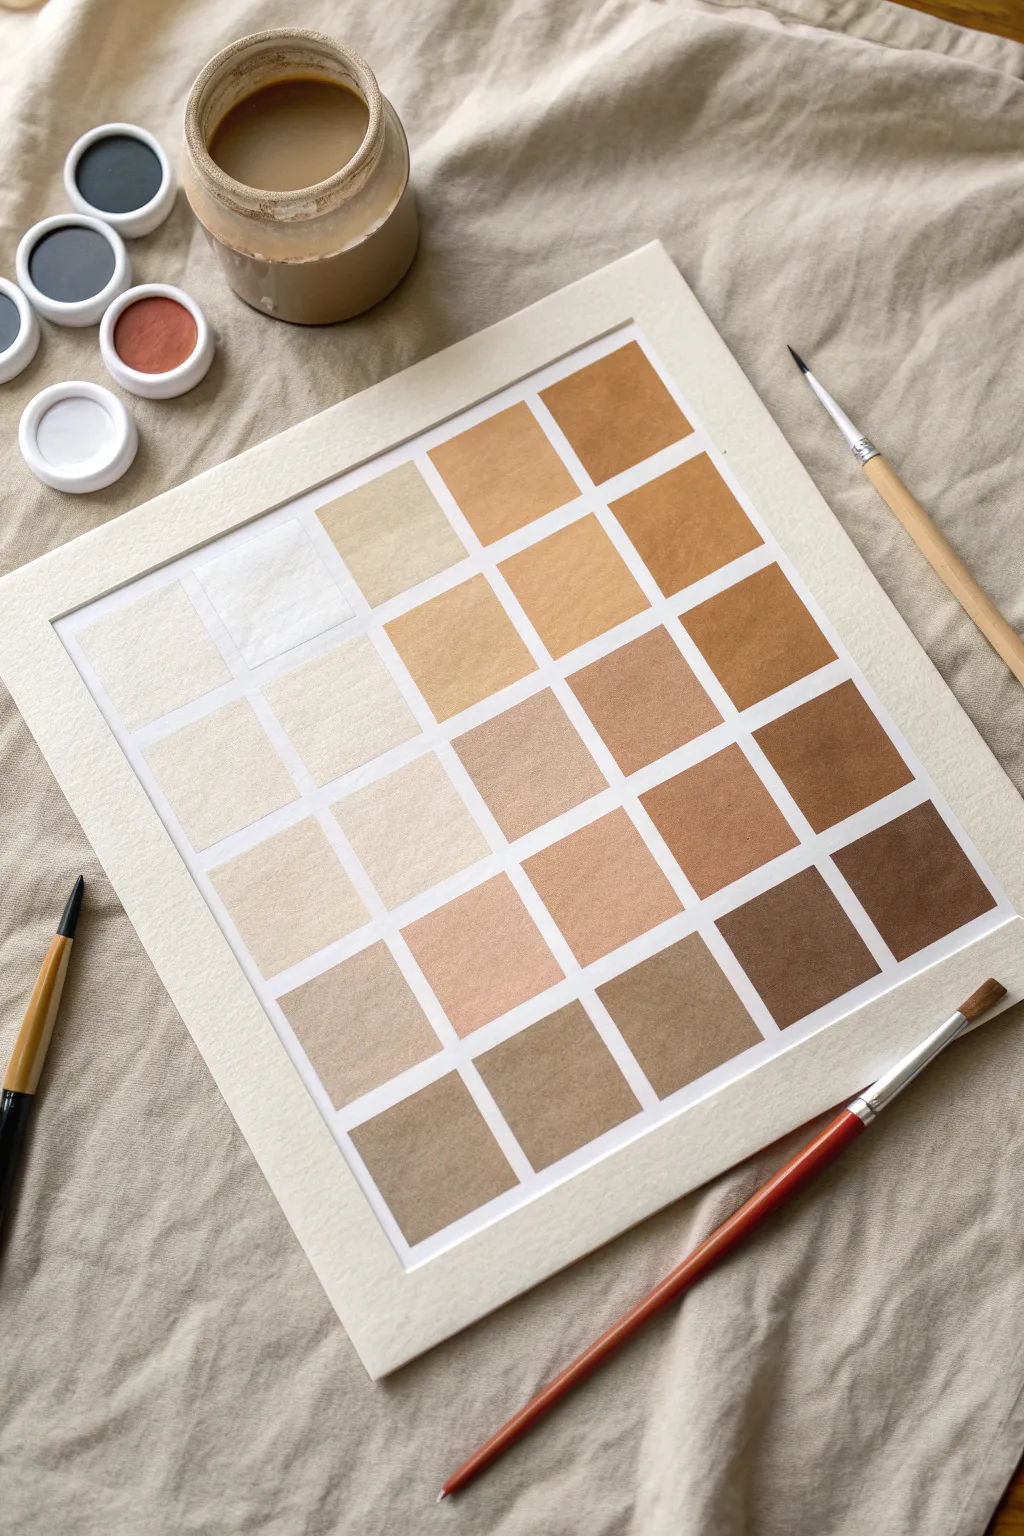
This minimalist project explores the subtle beauty of earth tones through a structured grid layout. By carefully mixing gradients of beige, tan, and brown, you will create a soothing, modern piece that doubles as a color mixing exercise.
Detailed Instructions
Materials
- Heavyweight watercolor paper (300gsm cold press recommended)
- Watercolor paints (primary set or earth tones like Burnt Sienna, Yellow Ochre, Umber)
- White gouache or watercolor (for opacity and tinting)
- Flat shader brush (size 6 or 8)
- Round detail brush (size 2)
- Ruler
- Pencil and eraser
- Artist tape or masking tape
- Mixing palette
- Jar of water
- Paper towels
Step 1: Grid Preparation
-
Measure the paper:
Cut your watercolor paper into a perfect square, approximately 8×8 or 10×10 inches, depending on your desired final size. -
Calculate grid size:
Decide on a grid layout. The example uses a 6×6 grid structure. Divide your paper width by 6 to determine the size of each individual square, leaving a small margin for the white borders between them. -
Mark the borders:
Using a ruler and a light pencil touch, mark out the locations of your grid lines. Aim for roughly 1/8-inch gaps between the squares to create that crisp, tiled look. -
Tape the grid:
Carefully apply thin artist tape or masking tape over the grid lines you just drew. Press down firmly on the edges of the tape to prevent paint from bleeding underneath later. -
Tape the border:
Frame the entire working area with tape as well to ensure a clean, sharp edge around the whole composition.
Tape Sealing Trick
Before painting color, brush a thin layer of clear water or white paint over the tape edges. This seals the gap and guarantees razor-sharp lines.
Step 2: Color Mixing
-
Create a base tone:
On your palette, mix a mid-tone brown using Burnt Sienna and a touch of Yellow Ochre. This creates a warm, neutral earth base. -
prepare the light gradient:
Take a portion of your base mix and add a significant amount of white gouache or dilute it heavily with water. This will be for the lightest squares in the top left corner. -
Prepare the dark gradient:
Take another portion of the base mix and add a tiny dot of black or dark blue (like Ultramarine) to deepen it into a rich chocolate brown for the bottom right. -
Check consistency:
Ensure all your paint mixtures have a milky consistency. They should be fluid enough to flow but opaque enough (if using gouache) to look solid.
Step 3: Painting the Gradient
-
Start with the lightest tones:
Begin painting the top-left squares. Use your palest mix, keeping the application smooth. I find that working diagonal by diagonal helps maintain the gradient logic. -
Transition to beige:
Slightly darken your mix by adding a bit more of the original base brown. Paint the next diagonal row of squares, moving outward from the corner. -
Introduce warmth:
As you move toward the center of the grid, add more Yellow Ochre or Burnt Sienna to the mix to warm up the mid-tones. -
Deepen the color:
For the bottom-right section, switch to your darker mixtures. Apply the paint confidently to avoid overworking the paper, which can cause pilling. -
Paint the darkest corner:
Finish with the bottom-rightmost squares using your deepest, richest brown mixture for a strong contrast against the pure white spacing. -
Let it dry completely:
Allow the paint to dry fully. If the paper feels cool to the touch, it is still damp deep down, so be patient.
Textural Twist
Swap smooth watercolor paper for cold press, or sprinkle salt on wet squares to create a speckled, granite-like texture in your gradient.
Step 4: Revealing the Grid
-
Remove the tape:
Once you are 100% certain the paint is dry, slowly peel back the tape. Pull it away at a 45-degree angle to minimize the risk of tearing the paper. -
Clean up edges:
If any paint bled under the tape, use a small stiff brush with a tiny bit of water to gently lift the excess pigment, or cover it with a touch of white gouache. -
Erase pencil marks:
Gently erase any visible pencil guidelines that were covered by the tape, leaving crisp white lines. -
Final inspection:
Check for any uneven patches. If a square looks too streaky, you can carefully apply a second thin layer of the same color to smooth it out.
Enjoy the satisfaction of peeling back that tape to reveal your clean, organized spectrum of color.

PENCIL GUIDE
Understanding Pencil Grades from H to B
From first sketch to finished drawing — learn pencil grades, line control, and shading techniques.
Explore the Full Guide
Overlapping Circles in Flat Color
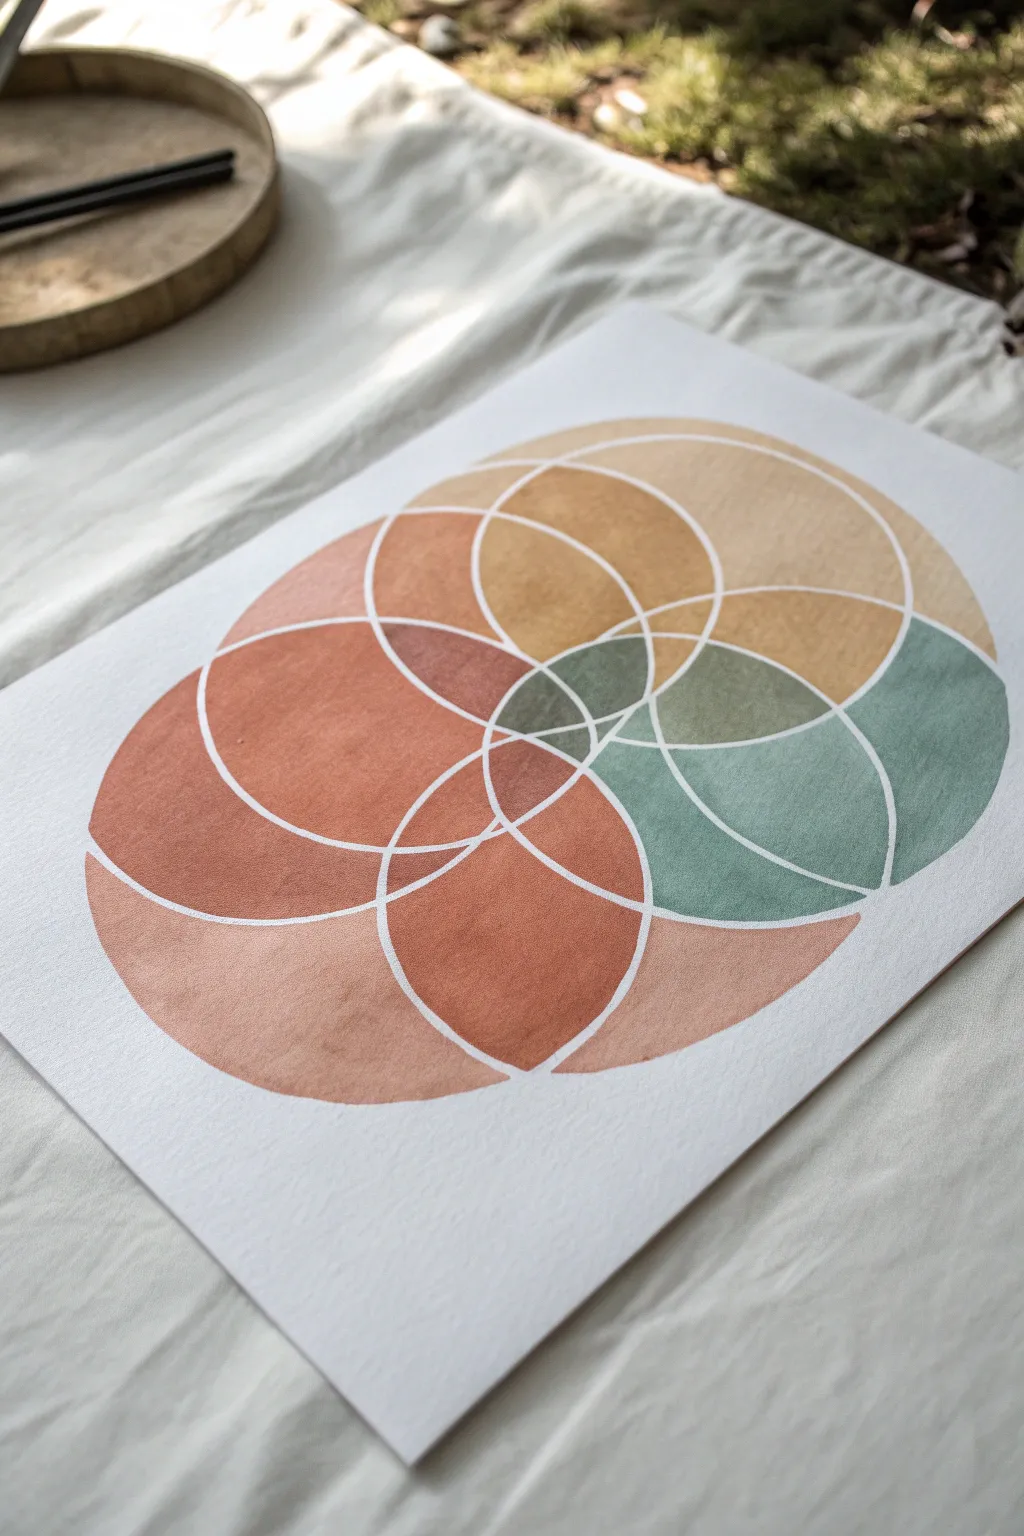
This serene geometric study uses the interplay of simple circles to create complex, segmented shapes. With a palette of warm terracotta, mustard, and sage, it offers a calming, modern aesthetic that looks much harder to achieve than it actually is.
Step-by-Step Guide
Materials
- Thick watercolor paper or cold press illustration board
- Compass or various circular objects to trace
- Pencil (HB or lighter)
- White gel pen or very fine masking fluid pen (optional but easiest)
- Gouache or acrylic paints (Terracotta, Ochre, Sage Green, Sienna, White)
- Small flat shader brush (size 4 or 6)
- Round detail brush (size 0 or 1)
- Palette and water cup
- Paper towels
Step 1: Planning the Geometry
-
Establish the center:
Begin by finding the approximate center of your paper. This doesn’t need to be mathematically perfect, but having a central anchor point helps keep the composition balanced. -
Draw the first circle:
Using a compass set to a radius of about 2-3 inches, draw your central circle. Press very lightly with your pencil so the graphite doesn’t smudge later. -
Create the overlapping ring:
Without changing the compass width, place the needle point anywhere on the edge of your first circle. Draw a second circle that overlaps the first significantly. -
Complete the flower pattern:
Continue adding circles around the perimeter. Place your compass needle at the intersection points where the previous circles met. I usually aim for about 5-6 primary overlapping circles to create that dense, flower-like intersection in the middle. -
Add outlier circles:
To break strict symmetry, add one or two circles slightly offset from the main cluster, extending the design outward creating an organic, cloud-like silhouette.
Clean Curves Secret
Turn your paper physically as you paint along the curves. Pulling the brush toward you in a natural arc is much steadier than twisting your wrist at awkward angles.
Step 2: Creating the Resist lines
-
Clean up the sketch:
Before moving to color, refine your pencil lines. If you have any heavy darker marks, dab them with a kneaded eraser until they are faint guides. -
Masking the boundaries:
The secret to those crisp white lines is defining them before painting. While you can paint carefully around the lines, the cleanest look comes from using a fine-tip masking fluid pen or a white wax resist crayon over your pencil lines. -
Alternative manual method:
If you don’t have masking fluid, don’t worry. Just rely on your steady hand and the pencil guides, leaving a consistent 1-2mm gap of white paper unpainted between every shape.
Step 3: Painting the Colors
-
Mix your palette:
Prepare your gouache or acrylics. You want smooth, creamy consistency—like heavy cream. Mix a terracotta orange, a deep burnt sienna, a mustard yellow, and a muted sage green. -
Start with the large lobes:
Begin filling in the largest distinct shapes on the outer edges. Use your flat shader brush for these wider areas. I like to start with the terracotta tones to anchor the warmth of the piece. -
Alternate colors:
As you move inward where shapes overlap, switch colors. If a terracotta circle overlaps a mustard one, paint the intersection a different shade—perhaps the sienna—to imply transparency and depth. -
Use the sage sparingly:
Introduce the sage green and blue-green tones primarily on one side or toward the center intersections. This cool tone acts as an accent against the dominant warm hues. -
Mind the edges:
When painting near your pencil lines (or masking fluid), switch to the small round detail brush. Create smooth, confident strokes to keep the geometric curves crisp. -
Check for opacity:
Gouache often dries lighter. If your colors look streaky or transparent after the first pass, let them dry completely and apply a second thin coat for that solid, matte finish.
Make it Metallic
Swap out the white dividing lines for gold. Use a gold paint pen or fine brush with metallic gold ink to trace over the gaps for a luxurious Art Deco vibe.
Step 4: Finishing Touches
-
Allow to cure:
Let the painting sit until fully dry to the touch. Gouache can reactivate with moisture, so be sure it’s bone dry before touching the surface. -
Remove masking (if used):
If you used masking fluid, gently rub it away with your finger or a rubber cement pick up to reveal the pristine white paper underneath. -
Refine the white lines:
If you painted manually and have some uneven gaps, you can use a white gel pen or white gouache on a liner brush to tidy up the separation lines, giving the artwork a polished, graphic look.
Step back and admire the sophisticated interplay of color and geometry you have created
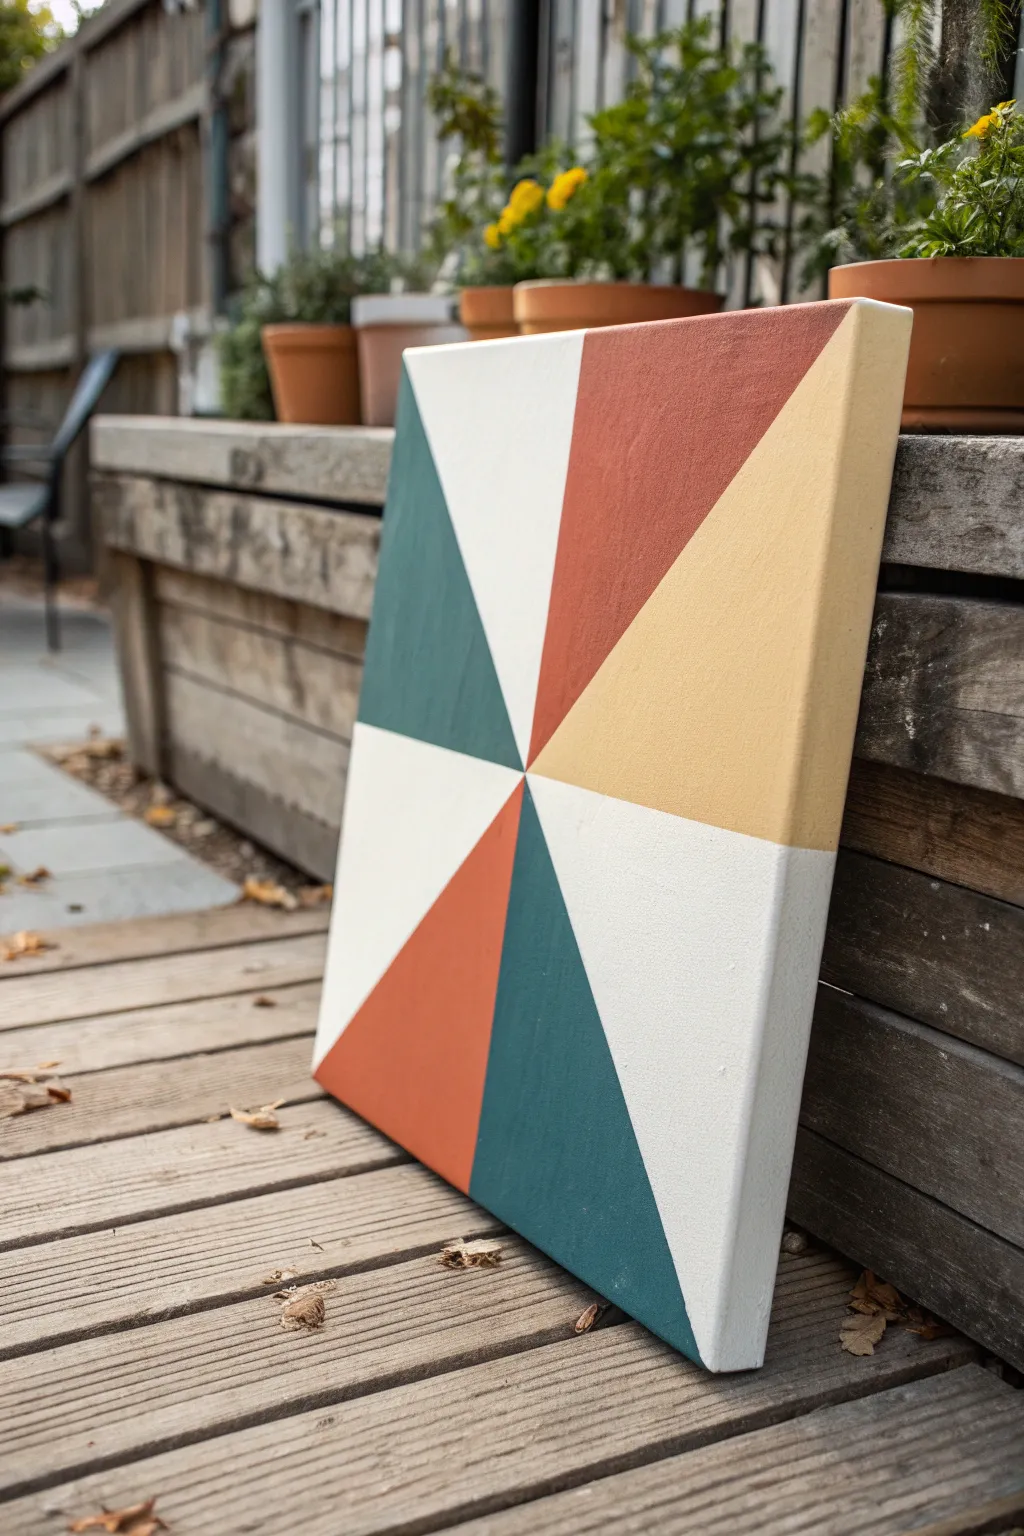
Half-and-Half Painted Canvas
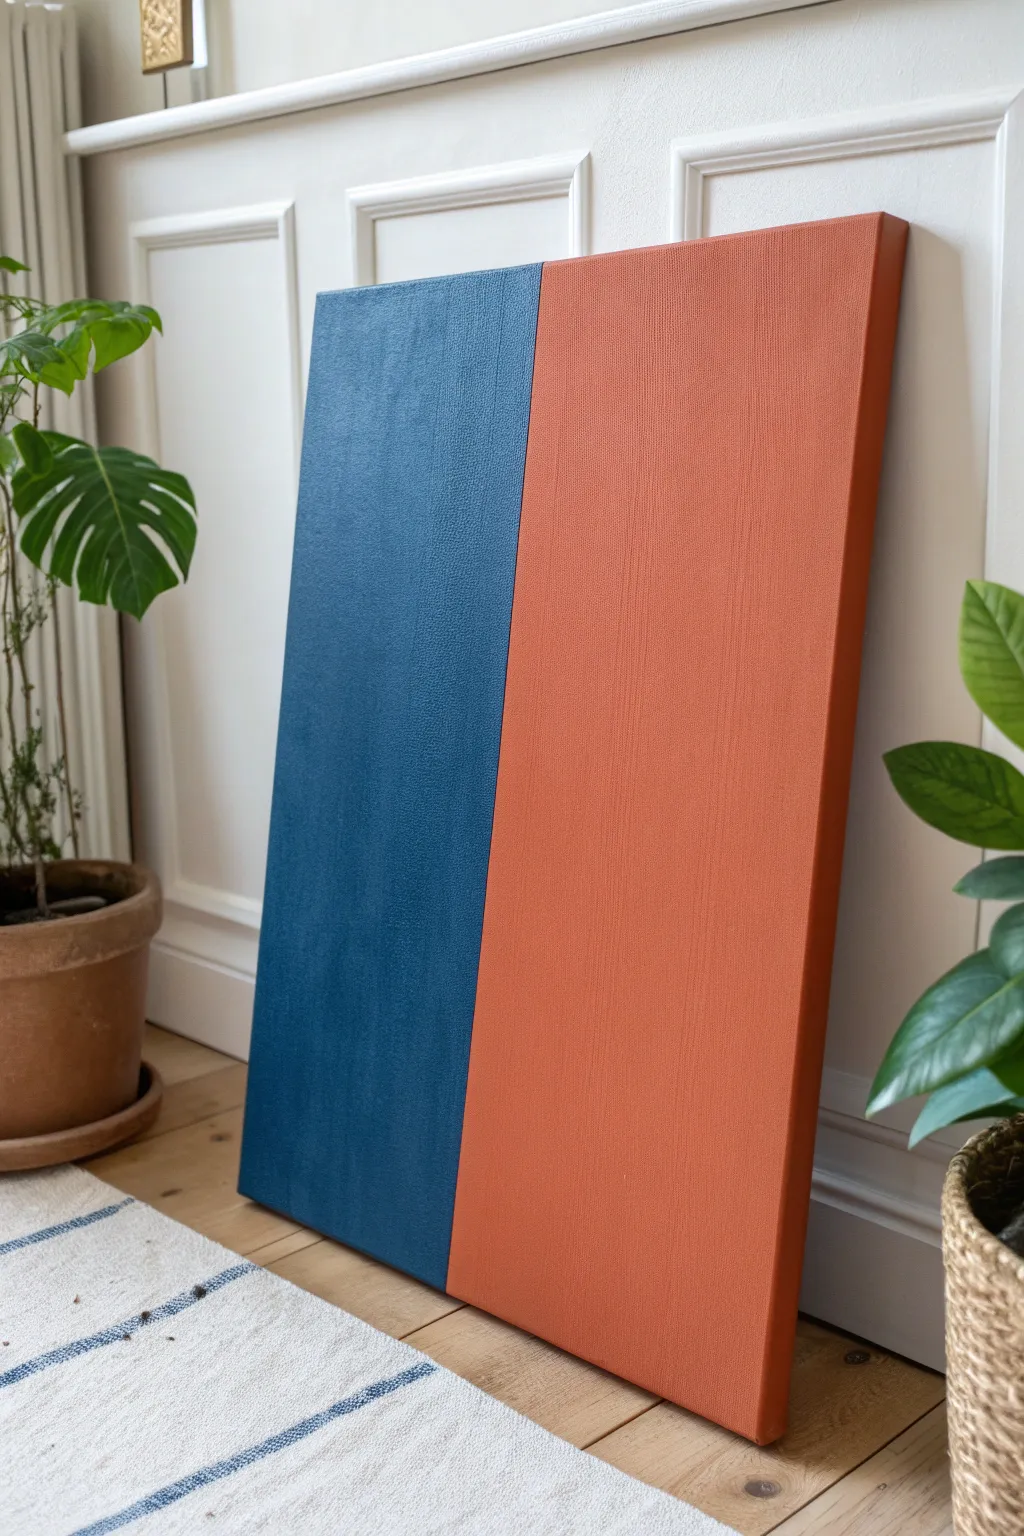
This minimalist project proves that you don’t need complex patterns to make a bold impact. By pairing deep teal with warm terracotta in a simple vertical split, you create a sophisticated, modern art piece that anchors any room.
Step-by-Step
Materials
- Rectangular stretched canvas (e.g., 24×36 inches)
- Painter’s tape or masking tape (wide width recommended)
- Pencil
- Ruler or yardstick
- Acrylic paint (deep teal/petrol blue)
- Acrylic paint (terracotta/burnt orange)
- Wide flat brush or foam brush (2-3 inches)
- Smaller flat synthetic brush (for edges)
- Gesso (optional, for priming)
- Palette or paper plate
- Drop cloth or newspaper
Step 1: Preparation & Mapping
-
Prime the Surface:
If your canvas isn’t pre-primed, apply a coat of white gesso. This ensures the colors will pop later. Even on pre-primed canvases, a fresh coat can smooth out the texture slightly. -
Find the Center:
Lay your canvas flat on a protected surface. Using a yardstick, measure the exact width of the canvas at the top and make a small tick mark with your pencil. -
Mark the Bottom:
Repeat the measuring process at the bottom edge of the canvas to find the corresponding center point. -
Connect the Dots:
Lightly draw a vertical line connecting your top and bottom marks. This guide doesn’t need to be dark; just visible enough for you to see. -
Apply the Tape:
Place a long strip of painter’s tape along your pencil line. This is crucial: decide which side visualizes the ‘center’ and adhere the tape just slightly over the line onto the side you will paint *second*. -
Seal the Edge:
Run your fingernail or a credit card firmly along the edge of the tape that faces the area you are about to paint first. This helps prevent paint bleed for a crisp line.
Bleeding Lines?
If paint bled under the tape, don’t panic. Wait for it to dry fully, then place a ruler over the line and use a tiny flat brush with the correct color to neaten the edge.
Step 2: Painting the Teal Section
-
Prepare the Teal Paint:
Squeeze a generous amount of your dark teal or petrol blue acrylic onto your palette. You want enough to cover nearly half the canvas without stopping to mix more. -
Cut in the Edge:
Using a smaller flat brush, carefully paint alongside the tape edge. Brush *away* from the tape rather than towards under it to minimize bleeding risks. -
Fill the Block:
Switch to your wide brush or foam brush. Fill the rest of the left section with long, even vertical strokes to mimic the canvas weave. -
cover the Sides:
Don’t forget the sides of the canvas! Paint the left edge and top/bottom edges up to the tape line for a professional, gallery-wrapped look. -
Apply Second Coat:
Let the first layer dry to the touch (about 15-20 minutes). Apply a second coat to ensure the color is opaque and rich, hiding any canvas white.
Step 3: Painting the Terracotta Section
-
Remove the Tape:
While the teal paint is still slightly tacky but mostly dry, slowly peel off the painter’s tape. Pull it away at a 45-degree angle to reveal your clean edge. -
Let it Cure:
Allow the teal section to dry completely. I prefer to wait at least an hour here to ensure I don’t accidentally smudge the finished side. -
Re-tape the Line:
Apply a new strip of painter’s tape, this time covering the very edge of the *teal* paint you just finished. Align it perfectly with your crisp paint line. -
Paint the Orange Side:
Repeat the painting process with your terracotta orange paint. Start near the tape, brush away from the edge, and fill the large area with smooth vertical strokes. -
Finish Side Edges:
Paint the remaining side edges of the canvas with the orange hue so the color wraps around completely. -
Final Tape Removal:
Once you’ve applied your necessary coats (usually two), carefully remove the second strip of tape to reveal the perfect seam between the two colors. -
Touch Up:
Inspect the center line. If any tiny bleeds occurred, use a very fine detail brush and the appropriate color to touch up the seam.
Seal For Sharpness
Before applying color, paint a thin layer of clear matte medium or the base color over the tape edge. This seals the seal, ensuring only a perfect line remains when peeled.
Let the canvas dry overnight before leaning it casually against a wall or hanging it up to admire your clean work


Mountains Made of Triangles
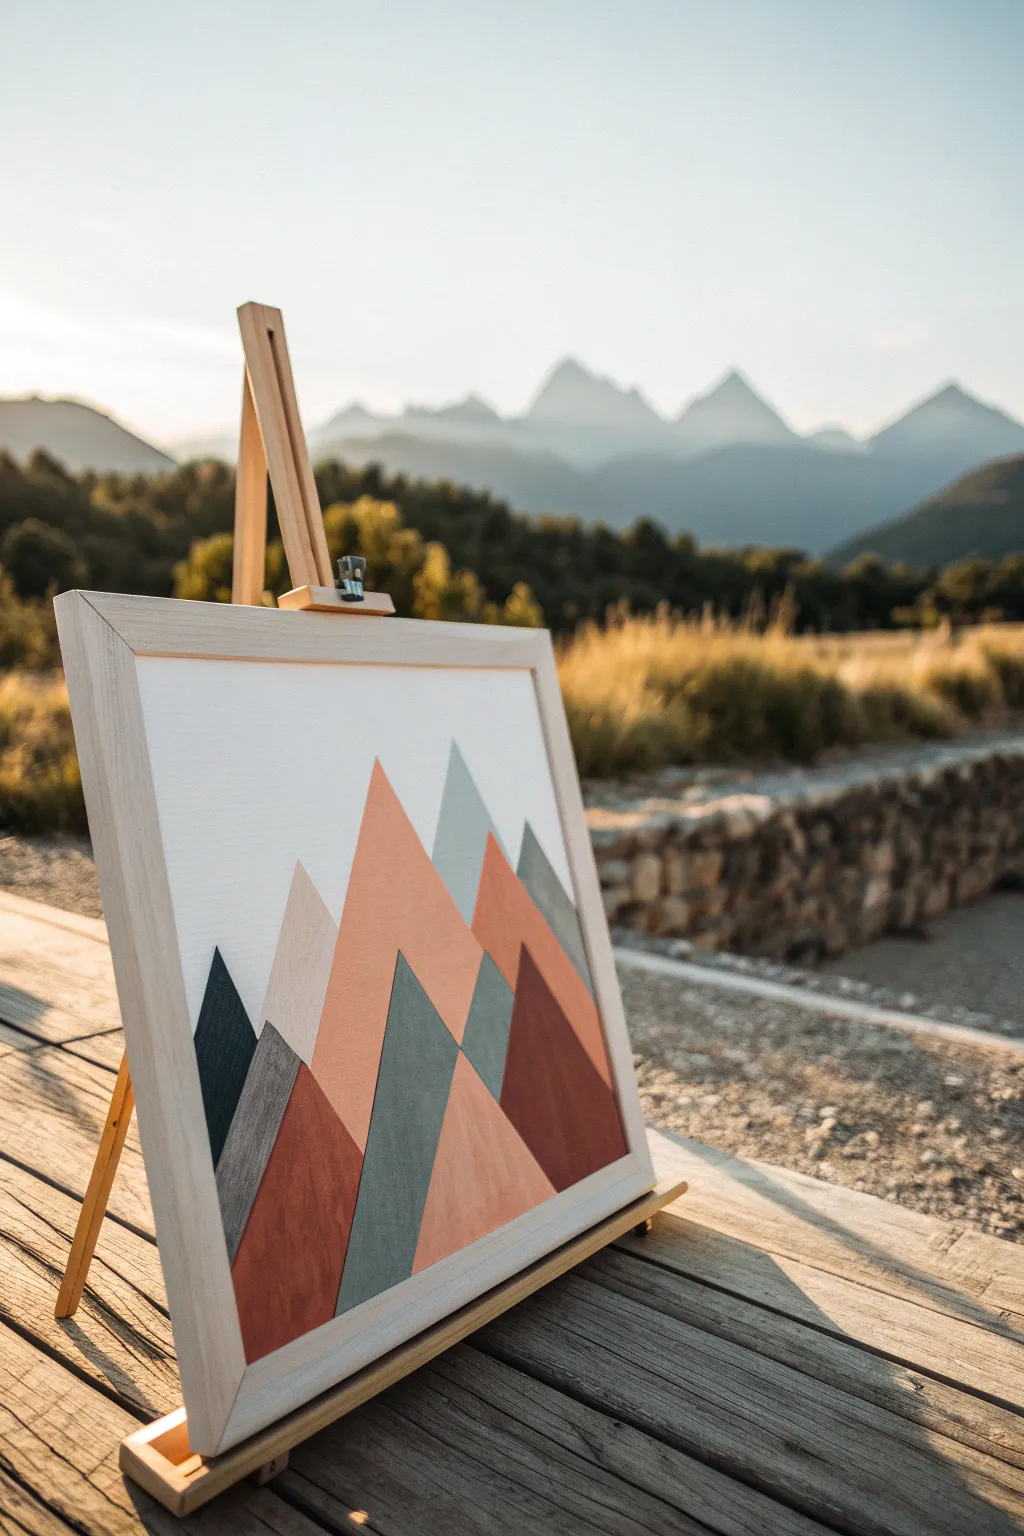
Capture the serene beauty of an alpine landscape with this modern, abstract interpretation using simple triangular forms. The muted, earthy color palette of warm terracotta, clay, slate blue, and charcoal creates a cozy yet sophisticated piece perfect for a rustic or Scandinavian-inspired space.
Detailed Instructions
Materials
- Square canvas or wood panel (approx 16×16 inches)
- Acrylic paints (Titanium White, Burnt Sienna, Yellow Ochre, Ultramarine Blue, Black, Teal)
- Painter’s tape (low tack)
- Flat synthetic brushes (various sizes: 1 inch, 1/2 inch)
- Ruler or straight edge
- Pencil
- Palette or paper plate
- Light wood floating frame (optional)
Step 1: Planning and Preparation
-
Prime the surface:
Begin by ensuring your canvas or wood panel is clean and ready. Apply a coat of gesso if using raw wood, or simply ensure your pre-primed canvas is dust-free. If you want a smoother finish, lightly sand the surface after priming. -
Paint the background:
Mix a generous amount of Titanium White with a tiny dot of Burnt Sienna to create a warm off-white or cream color. Paint the entire surface evenly. This negative space will serve as the sky and create contrast for the mountains. -
Let it cure:
Allow the background layer to dry completely. This is crucial because you will be applying tape over it, and you don’t want to peel up any paint later. -
Sketch the layout:
Using a ruler and a pencil, lightly sketch your mountain composition. Draw a series of overlapping triangles of varying heights. Start with the largest central peaks and fill in the sides with smaller triangles to create depth.
Seal Prior to Paint
Before painting a color, brush a thin layer of your background paint (or matte medium) over the tape edge. This seals the gap so only the clear medium bleeds, keeping your color lines razor sharp.
Step 2: Creating the Peaks
-
Identify color zones:
Plan which triangles will be which colors. To replicate the reference, aim for a balanced mix: a large terracotta peak in the center, flanked by slate blues, darker greys, and softer peach tones. Marking the color lightly with a pencil inside each triangle can help you stay organized. -
Tape the first set:
Apply painter’s tape along the pencil lines of your first few non-adjacent triangles. Ensure the tape is pressed down firmly, especially at the edges, to prevent paint bleed. -
Mix the terracotta:
Mix Burnt Sienna with a touch of White and Yellow Ochre to create a warm, earthy orange-red. Apply this to the large central mountain shape using a flat brush. -
Mix the slate blue:
Combine Teal, a bit of Ultramarine Blue, and a touch of Black and White. Aim for a muted, dusty blue-grey color. Paint the triangle that sits behind or adjacent to your main peak. -
Mix the charcoal:
Create a dark grey by mixing Black with a little White and Blue. This dark shade works best for the smaller, foreground peaks at the bottom corners to anchor the composition. -
Peel and wait:
While the paint is still slightly wet, carefully peel back the tape at a sharp 45-degree angle. This ensures crisp, clean lines. Allow these painted sections to dry fully before moving to the next step.
Add Texture
For a rustic look, mix a little modeling paste or sand into your acrylics before applying. This gives the mountains a tactile, stone-like quality that catches the light beautifully.
Step 3: Layering and Detailing
-
Tape the second set:
Once the first set of triangles is dry to the touch, tape off the remaining adjacent shapes. You can now tape over the previously painted dry areas safely. -
Mix lighter tones:
Create a soft peach color by adding more White to your terracotta mix. Use this for the ‘shadow’ or highlight side of a mountain to imply a light source. -
Mix a deep rust:
Add a tiny bit of Black or Dark Brown to your original terracotta mix to create a deeper, moodier rust color. Use this for the lower, heavier mountain shapes. -
Paint remaining sections:
Fill in the newly taped areas with your prepared colors. Use smooth, vertical brushstrokes to maintain a clean, modern look. -
Remove tape:
Remove the second round of tape carefully. Inspect your edges. If any paint bled under the tape, use a small detail brush and your background cream color to clean up the lines once everything is dry. -
Seal the work:
Once the entire painting has cured for at least 24 hours, apply a matte varnish. This unifies the sheen of the different paint mixes and protects the surface. -
Frame it:
Place your finished panel into a light wood floating frame to match the airy, organic aesthetic of the artwork.
Hang your new geometric landscape in a spot with good natural light to let those earthy tones bring warmth to the room
Diamond Argyle Pattern
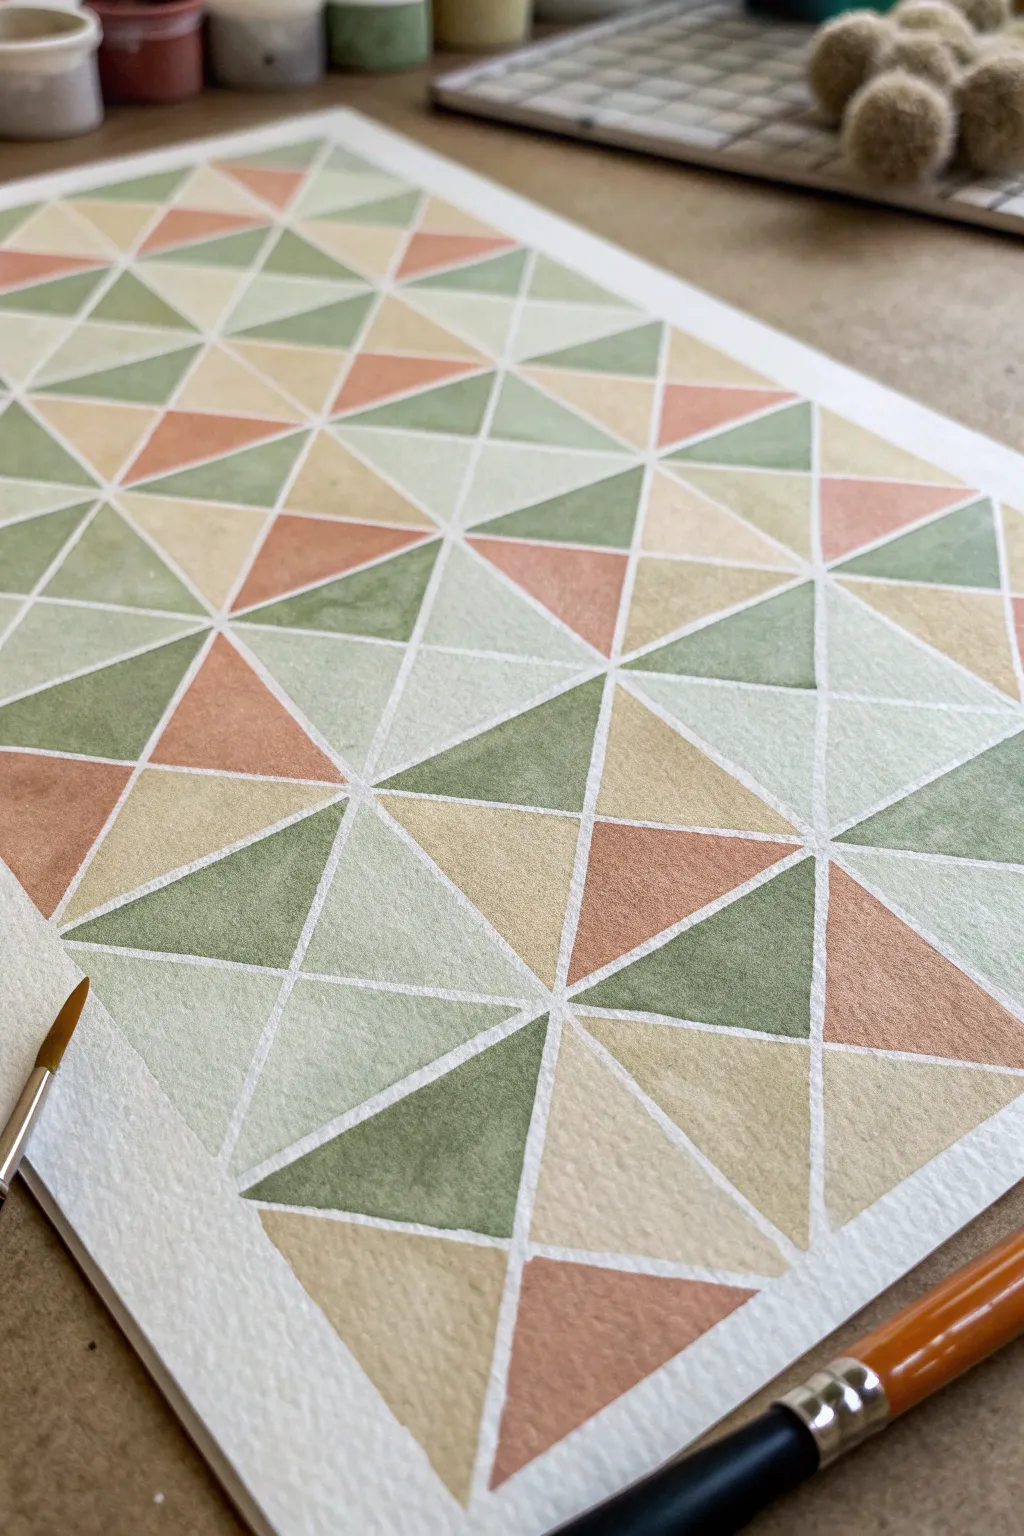
This serene geometric patterned painting plays with a soft, earthy palette of sage greens, terracotta, and cream tones to create a modern argyle effect. By using masking tape to preserve crisp white lines, you can easily achieve a structured, professional-looking piece that feels both organic and precise.
How-To Guide
Materials
- Cold press watercolor paper (140lb/300gsm)
- Artist masking tape or washi tape (1/8 inch or 3mm width)
- Watercolor paints (sage green, forest green, yellow ochre, terracotta)
- Round watercolor brushes (size 4 and 8)
- Ruler
- Pencil
- Eraser
- Jar of clean water
- Paper towels
- Palette for mixing
Step 1: Grid Preparation
-
Secure the paper:
Begin by taping down all four edges of your watercolor paper to a flat, hard surface or drawing board. This prevents the paper from buckling when it gets wet and creates a clean border. -
Mark grid points:
Using a ruler and a light pencil touch, mark intervals along the top and bottom edges of your paper every 2 inches (or your preferred width). Repeat this process along the left and right sides. -
Connect the grid:
Draw faint diagonal lines connecting your marks to form a large diamond pattern across the entire page. Then, draw vertical and horizontal lines intersecting the diamonds to break them down into smaller triangles. -
Apply masking tape:
Ideally, use thin 1/8 inch masking tape or art tape. Place lengths of tape carefully over your pencil lines. Press the edges of the tape down firmly with your thumbnail or a bone folder to ensure paint won’t seep underneath.
Bleeding Lines?
If paint seeps under the tape, it’s often because the tape wasn’t burnished enough. Next time, try sealing the tape edges with a clear matte medium before painting.
Step 2: Mixing the Palette
-
Mix the green tones:
Prepare two variations of green. For a sage tone, mix green with a touch of grey or a tiny bit of red to desaturate it. For the darker forest hue, add a little blue or payne’s grey to your base green. -
Prepare the warm tones:
Dilute yellow ochre with plenty of water for a creamy sand color. For the terracotta, mix orange with a little brown or burnt sienna to achieve that earthy, clay-like warmth. -
Test your colors:
Swipe a test stroke of each color on a scrap piece of watercolor paper. I always like to ensure the colors look harmonious together before touching the final artwork.
Paint Pooling
Watercolor naturally pools at the edges. To avoid ‘cauliflower’ blooms, don’t add water back into a drying section. Let it dry completely, then glaze a second layer if needed.
Step 3: Painting the Pattern
-
Start painting randomly:
Begin filling in the triangular tape-bordered sections. Start with your lightest color, the cream/yellow ochre, scattering it randomly across the composition to create balance. -
Add the terracotta:
Switch to your terracotta mix. Paint non-adjacent triangles, trying not to cluster too many of the same color in one area. The masking tape allows you to paint freely without worrying about staying perfectly inside the lines. -
Introduce sage green:
Wash your brush thoroughly and pick up the lighter sage green. Fill in approximately a third of the remaining white spaces. Keep the paint fluid but not so watery that it creates puddles. -
Finish with dark green:
Fill the final empty triangles with the darker forest green mix. If you notice any unbalanced areas, you can let a section dry and glaze over it with a different hue to shift the color slightly. -
Check for saturation:
While the paint is still damp, look for any triangles that seem too pale. You can drop a little extra pigment into the wet wash to create a nice gradient or deepen the value.
Step 4: The Reveal
-
Allow to dry completely:
This is the hardest part—patience. Touch the paper carefully with the back of your hand. If it feels cool to the touch, it is likely still damp inside. Wait until it is bone dry. -
Remove the tape:
Slowly peel back the masking tape at a 45-degree angle, pulling away from the painted area. This technique helps prevent the paper surface from tearing. -
Assess the lines:
Should you find any small spots where paint bled under the tape, you can often gently lift them with a clean, damp stiff brush or cover them with a tiny amount of opaque white gouache. -
Erase pencil marks:
Once the tape is gone and the paper is fully stable, gently erase any visible pencil lines that were protected by the tape, leaving crisp white channels between your colorful shapes.
Enjoy the satisfying crisp lines and soothing color palette of your new geometric artwork
Negative-Space Tape Line Web
Achieve crisp lines and a striking modern aesthetic with this geometric painting project that relies on simple tape-resist techniques. By creating a grid and subdividing it into bold shapes, you’ll create a piece that feels both structured and artistically free, using a calming palette of sage, terra cotta, and mustard.
Step-by-Step Guide
Materials
- Large square canvas or prepared wood panel
- Painter’s tape or masking tape (approx. 1/2 inch width)
- Acrylic paints (White, Sage Green, Terra Cotta/Rust, Mustard Yellow)
- Flat paintbrushes (medium and small sizes)
- Gesso (optional, for priming)
- Ruler or straight edge
- Pencil
Step 1: Preparation & Grid Layout
-
Prime the Surface:
Begin by applying an even coat of white acrylic paint or gesso to your entire canvas. This will be the color of your ‘negative space’ lines later, so ensure it looks solid and opaque. Let it dry completely. -
Create the Main Grid:
Using your painter’s tape, lay out a 3×3 grid on the canvas. Place two long vertical strips and two long horizontal strips to create nine roughly equal squares. Press the tape down firmly to prevent bleed-under. -
Add Diagonal Divisions:
Within each of the nine squares, add additional tape strips to create distinct shapes. Vary the angles—some squares can be bisected diagonally corner-to-corner, while others can have off-center intersecting lines. This variety is what gives the composition its energy. -
Seal the Tape Edges:
To ensure razor-sharp lines, paint a very thin layer of your base white color over the edges of all the tape. This seals the tape so that if any paint does seep under, it matches the background color and won’t be visible.
Bleed Patrol
If paint seeps under the tape, wait for it to dry fully. Then, lay a straight edge over the line and use a white paint pen or a liner brush to tidy the edge effortlessly.
Step 2: Planning & Painting
-
Plan Your Palette:
Before painting, visualize where your colors will go. You want to balance the heavy colors (terra cotta and sage) with lighter ones (mustard and off-white/cream) so no single area feels too visually heavy. -
Paint the Sage Sections:
Dip a medium flat brush into the sage green paint. Fill in selected triangular or quadrilateral sections. Be careful to brush away from the tape edge initially to minimize the chance of pushing paint underneath it. -
Apply Terra Cotta Tones:
Rinse your brush or switch to a clean one, then apply the terra cotta or rust color to adjacent sections. Try to ensure that two sections of the same color don’t touch directly unless that is a specific design choice you want to make. -
Fill with Mustard Yellow:
Add the mustard yellow accents. These act as bright highlights in the composition. Apply a second coat if the first layer looks streaky or translucent. -
Create Cream Contrast:
Leave several shapes unpainted (showing the bright white base) or paint them a soft cream color to add dimension. These neutral zones give the eye a place to rest within the geometric web. -
Detailing the Lines:
For certain shapes, you might want to add a contrasting painted line inside a larger shape. You can carefully freehand this or use additional small pieces of tape once the main blocks are dry.
Step 3: Finishing Touches
-
Allow to Set:
Let the paint dry until it is tacky but not fully hardened. Acrylics usually need about 20-30 minutes depending on humidity and thickness. -
The Big Reveal:
Slowly peel back the tape. Pull the tape at a 45-degree angle away from the painted edge. This technique helps cut through the paint film cleanly rather than ripping it. -
Check for Bleeding:
Inspect your white lines. If any color bled through, use a tiny detailed brush and a bit of white paint to carefully touch up the edges and restore clarity. -
Add a Frame (Optional):
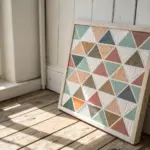
The example image features a simple wooden batten frame. You can nail thin strips of wood to the edges of your canvas or panel to give it a finished, professional gallery look.
Pro Tip: Burnishing
Run the back of a spoon or a credit card firmly over the tape edges before painting. This extra pressure activates the adhesive and creates the tightest possible seal against the canvas texture.
Hang your new geometric masterpiece in a spot that needs a touch of modern structure and earthy color
Ombre Fade Inside Geometric Shapes
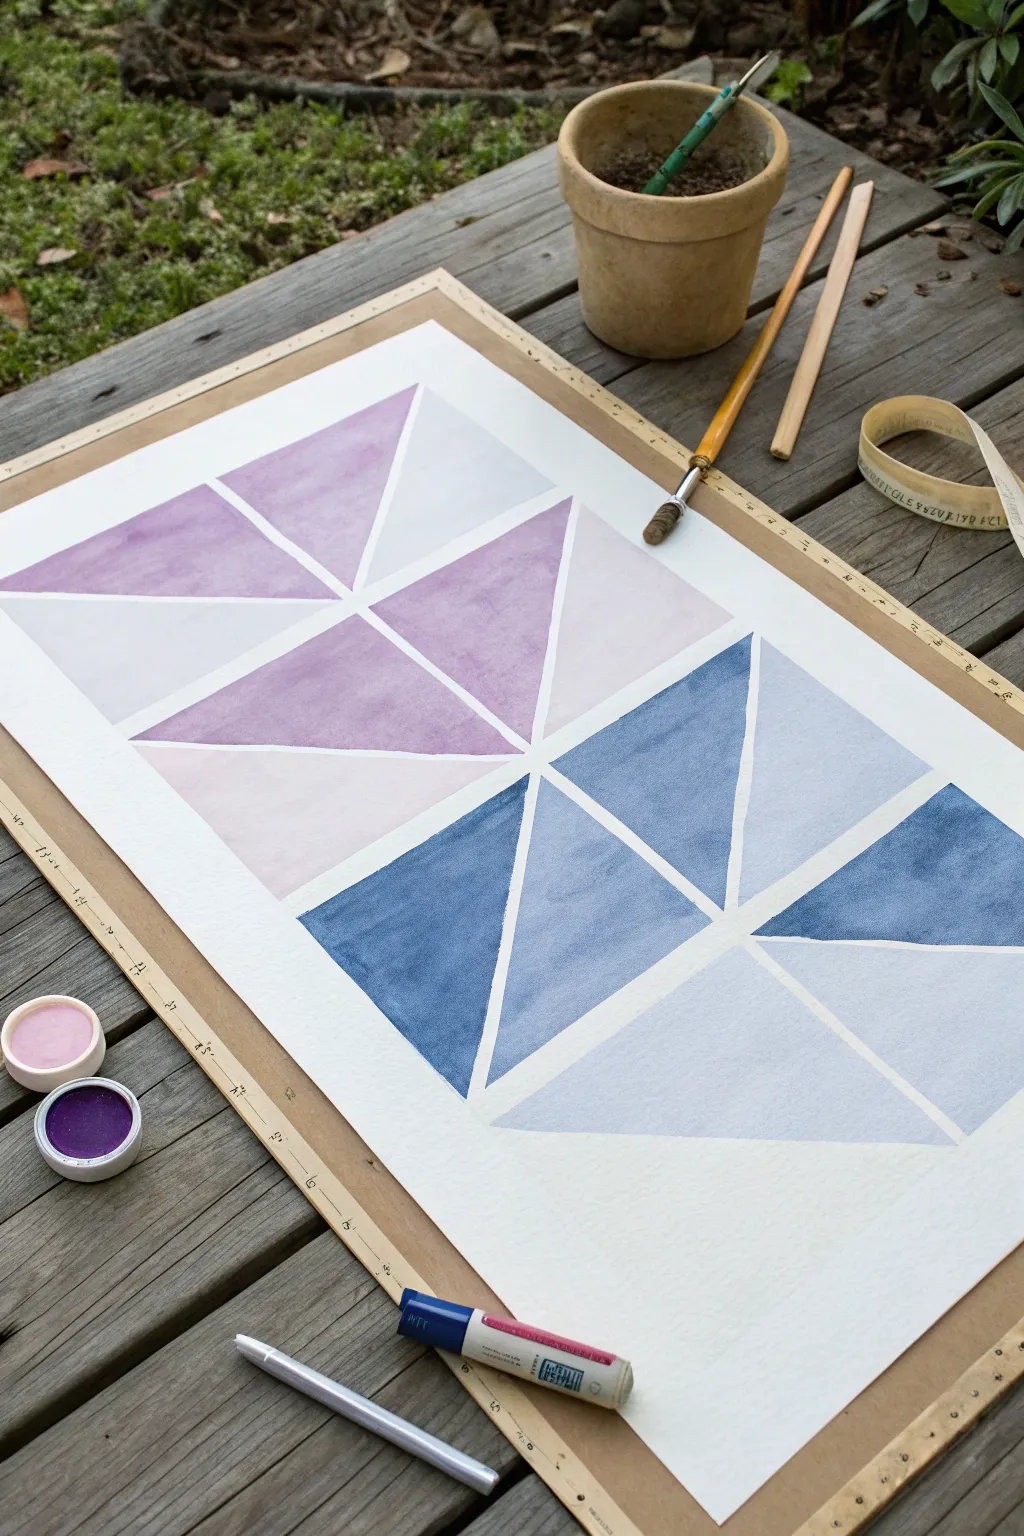
This project creates a striking modern composition using simple triangles and a soothing gradient of color. By carefully varying the saturation of purple and blue watercolors, you’ll achieve a sense of depth and rhythm that makes these flat shapes feel dimensional.
Step-by-Step
Materials
- Heavyweight watercolor paper (300gsm cold press is ideal)
- Wooden art board or drawing board
- Brown kraft paper tape (for stretching paper)
- Watercolor paints (Purple/Violet and Indigo/Prussian Blue)
- Small ceramic mixing dishes or palette
- Flat shader brush (size 6 or 8)
- Round watercolor brush (size 4)
- Ruler
- Pencil
- Artist tape or masking tape (approx 1/4 inch width)
- Jar of clean water
- Paper towels
Step 1: Preparation and Sketching
-
Secure the paper:
Begin by stretching your watercolor paper onto the wooden board using the brown kraft tape. This traditional method keeps the paper perfectly flat and prevents buckling when it gets wet. -
Mark the border:
Measure about 1-2 inches in from the edge of your paper to create a clean white negative space around your painting area. Lightly mark this boundary. -
Grid the layout:
To create the geometric pattern, lightly draw a grid. You’ll need two main horizontal rows. Divide these rows into large rectangular sections. -
Define the triangles:
Inside each rectangle, draw a diagonal line from corner to corner to split it into two right-angled triangles. Arrange these diagonals so they form larger ‘mountain’ peaks pointing up and down. -
Tape the lines:
Carefully apply your artist tape over the pencil lines to mask off the white spaces between the shapes. Press down firmly on the edges of the tape to prevent paint from bleeding underneath. I like to run the back of my fingernail along the tape edge for a perfect seal.
Step 2: Painting the Purple Row
-
Mix your base purple:
In a small dish, mix a saturated puddle of purple or violet watercolor. You want a strong, deep color to start with. -
Paint the darkest triangles:
Identify the triangles that will be the darkest (usually the central ones or alternating ones to create rhythm). Fill these in with your most saturated purple mix using the flat brush. -
create a mid-tone:
Add a few drops of water to your purple mix to dilute it slightly. Paint the next set of triangles adjacent to the dark ones. -
Paint the lightest shade:
Dilute the purple significantly more until it is a very pale lavender wash. Fill in the remaining triangles in the top row. This gradation from dark to light creates the ‘ombre fade’ effect inside the geometry. -
Allow to dry:
Wait until the top row is completely dry to the touch before moving on. This prevents accidents if your hand brushes against wet paint.
Clean Lines Secret
Before painting, brush a thin layer of clear matte medium or white gouache over the tape edges. This seals the gap so your colored paint won’t bleed underneath.
Step 3: Painting the Blue Row
-
Mix the blue tones:
Clean your brush thoroughly and prepare a rich indigo or Prussian blue in a fresh dish. Aim for the same deep saturation level as your started with for the purple. -
Apply the darkest blue:
Paint the central triangles of the bottom row with this concentrated blue pigment. The flat brush helps fill the corners sharply. -
Dilute for variation:
Just as before, water down your blue paint to create a mid-tone. Apply this to the triangles flanking the dark center. -
Finish with pale blue:
Add more water to create a barely-there blue tint for the final outer triangles. This mirrors the pattern of the purple row above. -
Check for consistency:
Look over the wet paint. If any pools of water are forming, gently lift them out with the corner of a dry paper towel to avoid uneven drying marks.
Go Metallic
Once the paint is dry, use a gold paint pen or metallic watercolor to trace over the thin white lines left by the tape. This adds a luxurious, gilded finish to the geometry.
Step 4: Finishing Touches
-
Let it dry completely:
Allow the entire painting to dry fully. Watercolor paper should feel cool to the touch if it is still damp; wait until it feels room temperature. -
Remove the masking tape:
Slowly peel back the artist tape covering your geometric lines. Pull the tape away at a 45-degree angle to ensure it doesn’t rip the paper surface. -
Clean up edges:
If any paint bled slightly under the tape, you can gently scrape it away with a craft knife or cover it with a tiny dab of white gouache. -
Remove from board:
Finally, cut or peel the brown kraft tape around the border to release your painting from the wooden board.
Hang your new modern art piece in a minimalist frame to let those crisp lines shine
Metallic Accent Triangles
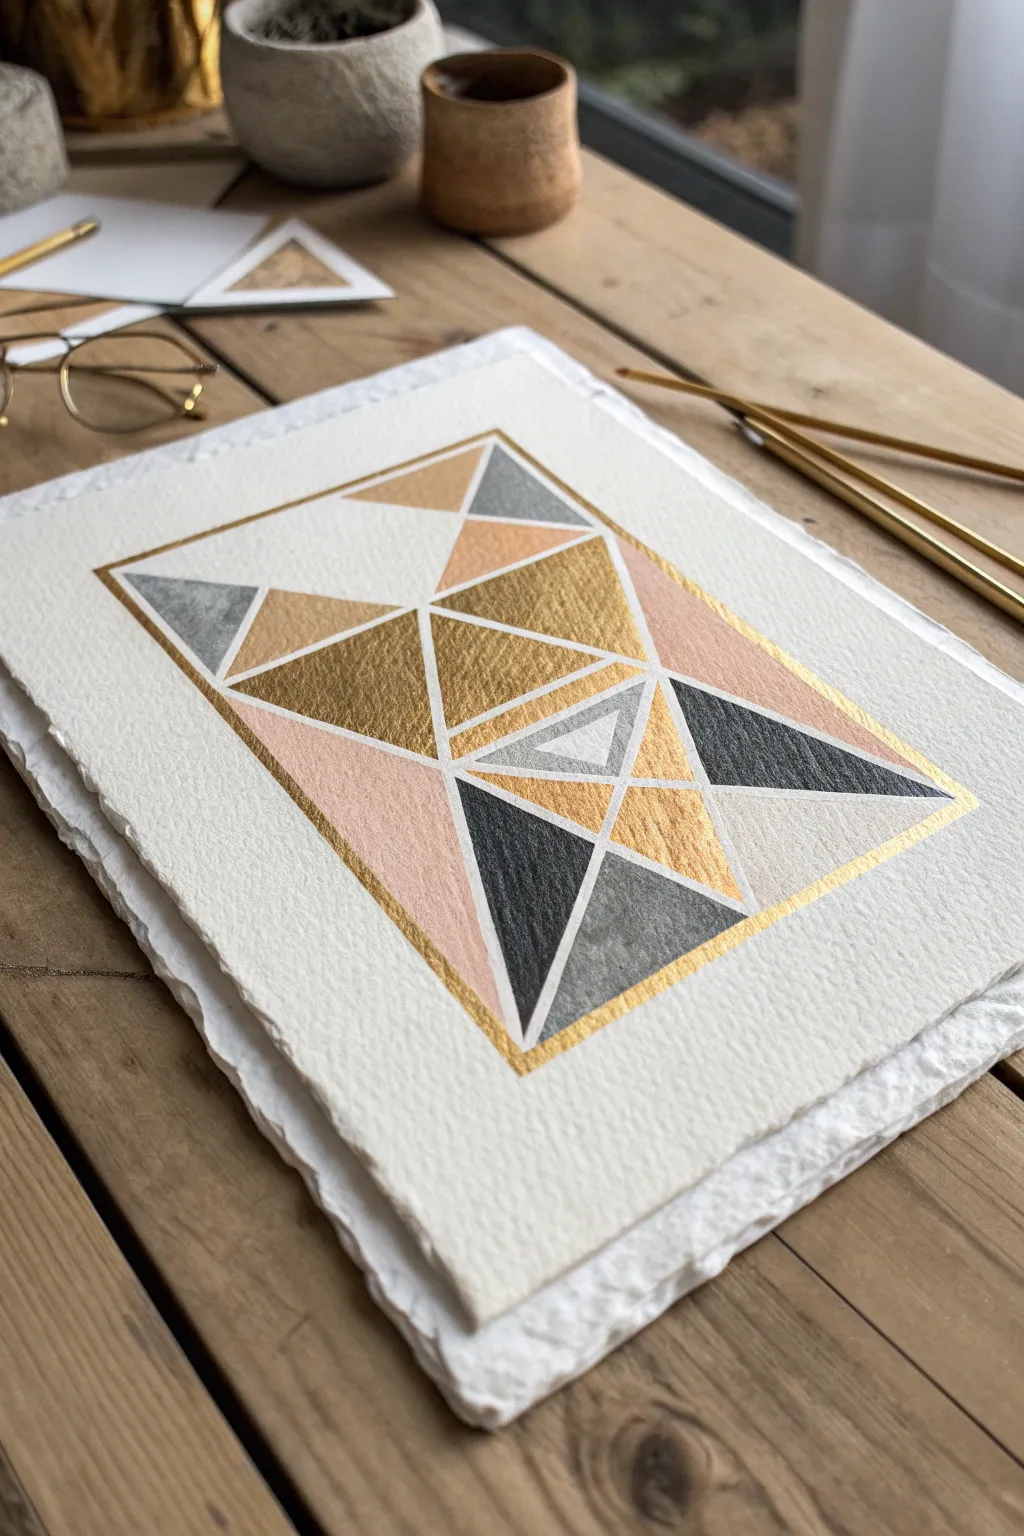
This elegant project combines the structure of Art Deco geometries with the organic texture of handmade paper. The interplay between matte gouache, soft watercolor, and shimmering metallic gold creates a sophisticated piece that looks deceptively complex but is built on simple triangles.
Step-by-Step Guide
Materials
- Heavyweight cold-press watercolor paper with deckled edges (300 gsm or higher)
- Pencil (HB or H)
- Ruler
- Compass or protractor (optional for angles)
- Fine liner masking tape (1/8 inch or 3mm width)
- Standard low-tack painter’s tape
- Watercolor paints (blush pink, warm grey, charcoal/black)
- Metallic gold paint (high-pigment gouache or watercolor)
- Fine round paintbrush (size 0 or 1)
- Medium round paintbrush (size 4 or 6)
- Clean water and paper towels
- Eraser
Step 1: Planning the Layout
-
Define the boundaries:
Begin by lightly marking a rectangular border centered on your paper. Leave a generous margin of white space (about 1.5 to 2 inches) around the edge to let that beautiful deckle texture shine. -
Tape the border:
Apply your standard painter’s tape along the outside of the pencil lines you just drew. Press the edges down firmly with your thumbnail or a spoon to prevent paint seeping underneath later. -
Sketch the primary triangles:
Using your ruler, lightly draw a large ‘X’ through the rectangle to find the center. From there, start subdividing the space into smaller triangles. Don’t worry about perfect symmetry; the design works best with a mix of large and small geometric facets. -
Create the inner grid:
Refine your sketch by drawing parallel lines inside some of your larger triangles to create nested shapes. Ensure every line connects cleanly to another line or the border.
Step 2: Masking and Preparation
-
Isolate the first shapes:
Since we want crisp white lines separating our colors, use the thin 1/8 inch masking tape to cover the pencil lines of your design. You can’t tape everything at once, so plan to work in stages. -
Select initial sections:
Apply tape to isolate non-adjacent triangles. This is crucial—if two wet sections touch, they will bleed. Taping off alternating triangles allows you to paint freely without waiting for every single shape to dry immediately. -
Seal the tape edges:
Run a clean, slightly damp brush over the edges of your tape tape, or press them down again. This extra seal is the secret to those razor-sharp lines.
Bleeding Edges?
If paint bleeds under the tape, wait for it to dry fully. Then, gently scrape the excess paint away with an X-Acto knife or cover the bleeds with opaque gouache.
Step 3: Painting the Colors
-
Mix the blush tone:
Prepare a very dilute, watery wash of blush pink. You want this layer to be semi-transparent to show the paper’s grain. I like to test the opacity on a scrap piece of paper first. -
Apply the first color:
Fill in your chosen ‘pink’ triangles. Use the medium brush and work quickly to ensure an even wash, pulling the puddle of paint across the shape. -
Mix the greys:
Create a gradient of greys on your palette: one light, watery grey and one deep, saturated charcoal. This contrast gives the piece depth. -
Paint the dark accents:
Fill in the designated dark triangles with the charcoal mix. Because this color is heavy, be careful not to overload your brush, as dark pigments take longer to dry. -
Fill the light grey areas:
Paint the remaining non-metallic sections with the lighter grey wash. Let all these initial sections dry completely before removing or shifting any tape.
Level Up: Texture
Sprinkle a pinch of kosher salt onto the wet grey watercolor sections. When dry, brush firmly to remove salt. This creates a stunning stone-like texture.
Step 4: The Golden Touch
-
Prepare the gold:
Activate your metallic gold paint. You want a creamy consistency, like melted butter, to ensure it glitters effectively and covers the paper texture. -
Paint the metallic triangles:
Find the triangles you reserved for gold and fill them in carefully. The metallic paint often sits on top of the paper more than watercolor, so give it an extra minute to set. -
Remove internal masking:
Once all paint is bone dry, strictly peel away the thin masking tape you applied inside the rectangle. Pull slowly at a 45-degree angle to avoid tearing the paper. -
Gold lining:
Now, switch to your fine detail brush (size 0). Load it with the gold paint and carefully trace over the white gaps left by the tape in specific areas to create defining gold borders. -
Outline the perimeter:
Remove the large border tape. Using a ruler and the fine brush (or a gold paint pen if you have a shaky hand), paint a precise gold line framing the entire rectangle. -
Final assessment:
Check for any uneven edges. If the gold needs a second coat for maximum shine, apply it now. Erase any visible stray pencil marks gently.
Frame your stunning geometric artwork in a floating glass frame to show off those beautiful paper edges.
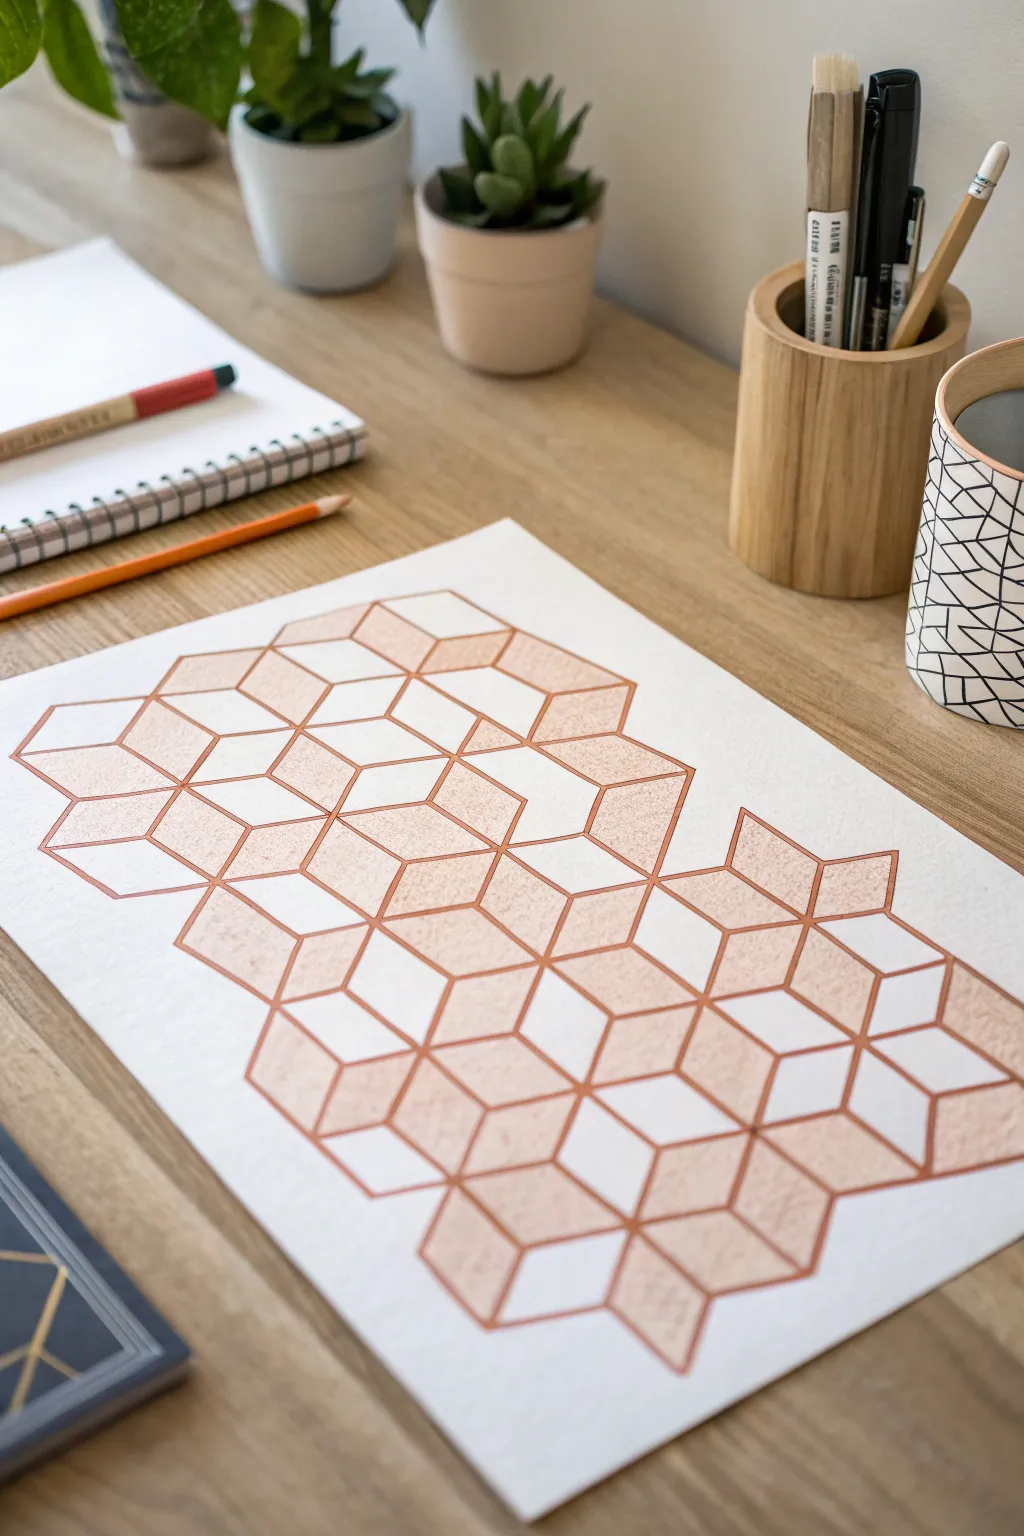
Simple 3D Isometric Cubes
This minimalist project combines the satisfying precision of isometric geometry with the warmth of metallic copper tones. By playing with negative space and textured fill, you create a floating 3D illusion that looks modern and sophisticated.
Detailed Instructions
Materials
- High-quality watercolor paper or heavy mixed media paper (A4 or A3)
- Isometric graph paper (optional, for tracing)
- Ruler or straight edge
- Pencil (HB or H)
- Fine liner pen in a terra cotta or copper tone
- Metallic copper or rose gold watercolor paint
- Small flat brush or angle shader brush
- Eraser
Step 1: Grid & Outline
-
Prepare your guide:
If you aren’t comfortable freehanding isometric shapes, slide a printed sheet of isometric dot grid paper underneath your main watercolor paper. If your paper is too thick to see through, use a light box or a sunny window to trace the guide dots lightly with a pencil. -
Sketch the central cluster:
Begin sketching your cubes lightly with a pencil. Start with a central vertical line, then draw two lines angling upwards at 30 degrees to form a ‘Y’ shape. This is the top corner of your first cube. -
Build the honeycomb:
Continue adding connecting Y-shapes and vertical lines to build a cluster of cubes. Don’t worry about making a perfect square overall; let the shape grow organically, perhaps extending further down on the right side as seen in the example. -
Define the linework:
Once your pencil sketch is complete, take your colored fine liner. A rusty orange or terra cotta color works best to mimic the copper paint used later. Carefully trace over all your pencil lines using a ruler to ensure snappy, straight edges. -
Clean up:
Allow the ink to dry completely to avoid smudging. Then, gently erase all graphite marks, leaving only the crisp colored outlines.
Keep It Crisp
Use a small piece of masking tape to tape down your ruler. This prevents it from sliding while you are inking the lines and keeps your geometry perfect.
Step 2: Painting & Texture
-
Mix your metallic wash:
Prepare your metallic copper watercolor. You want a consistency that isn’t too watery; it should be opaque enough to show the metallic sheen but fluid enough to lay flat. -
Identify light source:
Decide where your light is coming from. In this piece, the light source is top-left. This means the top faces of the cubes remain white (unpainted). -
Paint the shaded faces:
You will be painting generally the ‘right’ side faces of the cubes. Dip your brush and carefully fill these diamond shapes. I find holding the brush perpendicular to the paper helps get crisp corners. -
Add texture variation:
Instead of a flat wash, dab the paint slightly as it dries or use a slightly drier brush to create a stippled, grainy texture. This mimics the look of hammered copper. -
Select random accents:
Don’t fill every single right-facing side. Leave some entirely white to create a fading or ‘unfinished’ architectural look, particularly near the edges of the form. -
Create intermediate tones:
For the left-facing sides, you have a choice. You can leave them white, or add a very watered-down, pale wash of the copper to distinguish them from the bright white tops. -
Refine the edges:
Check the boundaries where your paint meets the pen lines. If the paint went over the line, you can sometimes gently lift it with a damp clean brush while it’s still tacky. -
Final dry:
Let the artwork sit undisturbed until the metallic particles have settled and the paint is bone dry to the touch.
Color Shift
Try a gradient effect. Start with heavy copper at the bottom of the shape and gradually dilute the paint as you move up, making the cubes look like they are fading away.
Now you have a striking piece of geometric art that catches the light beautifully
Off-Center Geometric Spotlight Shape
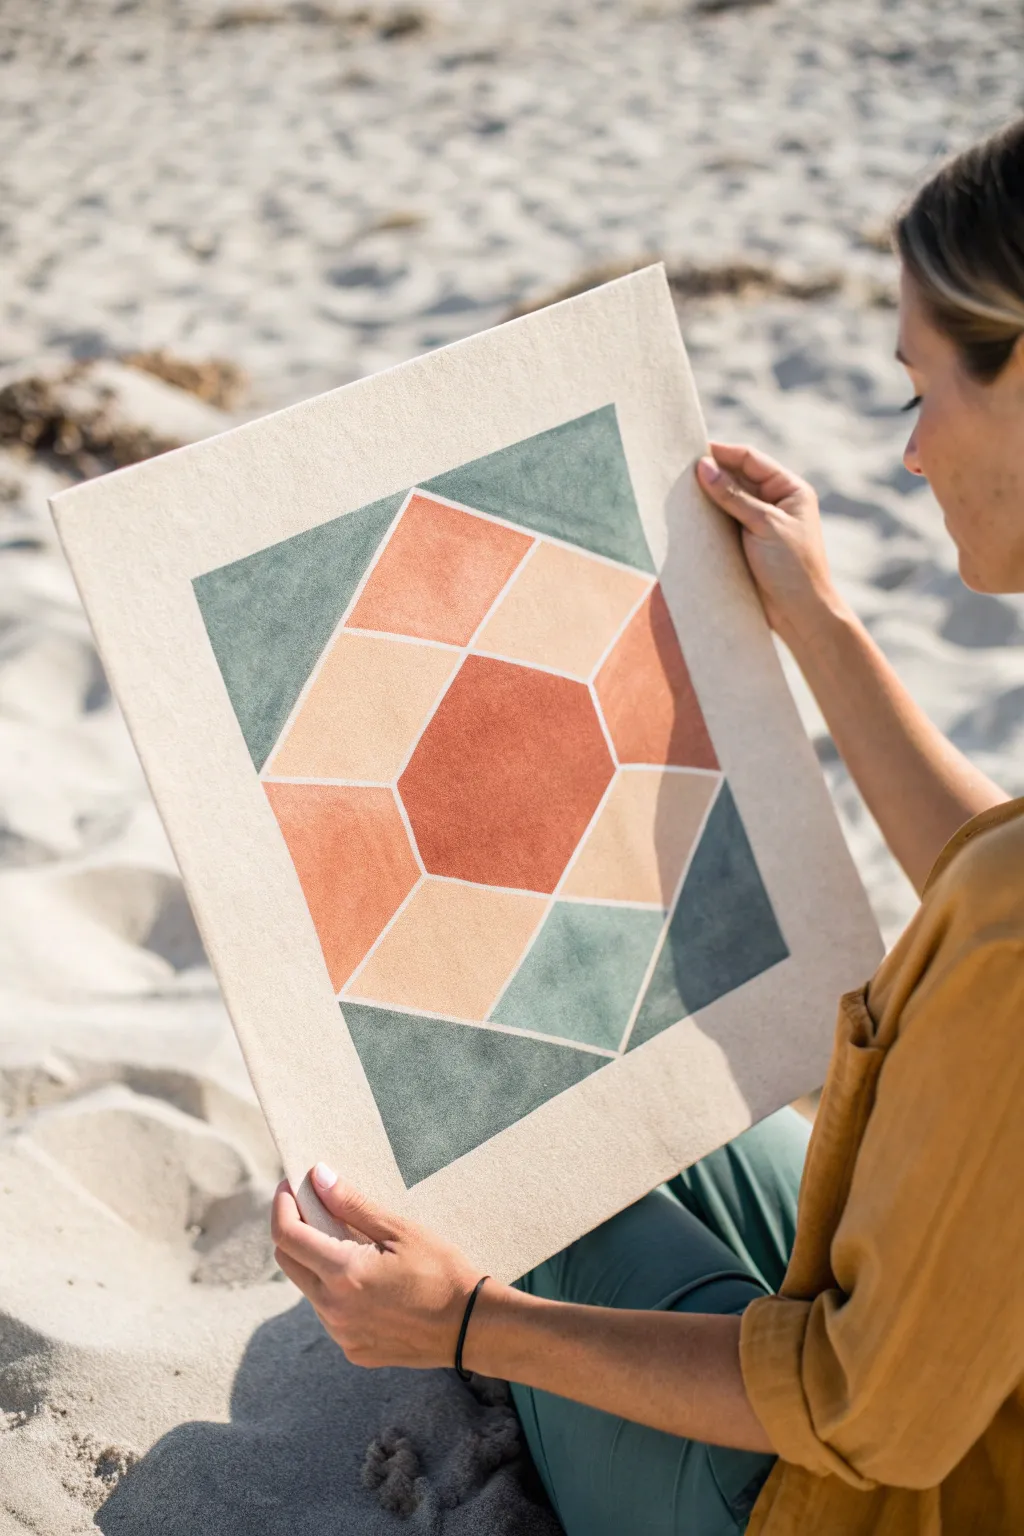
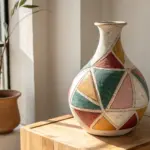
This striking geometric piece combines warm terracotta tones with cool sage greens to create a dimensional, gemstone-inspired design. The sharp lines and soft, matte finish make it a perfect modern accent for any minimalist or bohemian space.
Step-by-Step Tutorial
Materials
- Square canvas board or stretched canvas (16×20 or similar)
- Acrylic paints (terracotta, peach/beige, sage green, dark teal)
- Wide flat artist brush
- Pencil
- Ruler or straight edge
- Painter’s tape (low-tack)
- Matte varnish (optional)
- Palette for mixing
Step 1: Planning and Sketching
-
Define the borders:
Begin by measuring a wide, even border around your entire canvas. A margin of about 2-3 inches works well to frame the central design. Lightly mark this inner rectangle with your pencil. -
Mark the center:
Find the exact center of your inner rectangle by measuring the width and height. Mark this center point lightly. -
Draw the central hexagon:
Sketch a regular hexagon centered on your mark. To keep it even, you can draw a light circle first and mark six equidistant points around the circumference, then connect them with a ruler. -
Extend the radiating lines:
From each corner of your central hexagon, draw a line extending outward toward the edge of your inner border rectangle. This will create the six surrounding segments. -
Subdivide the segments:
Inside the top and bottom radiating segments, draw a horizontal line to split them into a trapezoid and a triangle. For the side segments, draw angled lines to create the varying facets seen in the reference, ensuring symmetry on the left and right sides.
Step 2: Painting the Facets
-
Mask the central shape:
Since we want crisp lines, masking is key. Apply painter’s tape along the outside edges of the central hexagon shape first. Run your fingernail over the tape edge to seal it tightly. -
Paint the core:
Mix a warm, deep terracotta color. Using your flat brush, paint the central hexagon. Apply two thin coats rather than one thick one to ensure a smooth, flat texture. -
Remove tape and dry:
Carefully peel back the tape while the paint is still slightly tacky to avoid pulling up dry flakes. Allow the center to dry completely before moving on. -
Mask the peach sections:
Select the sections surrounding the center that will be the lightest color. Apply tape around these specific geometric shapes, masking over the dry center if necessary to protect it. -
Apply the light tones:
Mix a pale peach or sandy beige hue. Paint the masked sections with your flat brush, using consistent strokes in one direction to minimize texture. -
Mask the mid-tones:
Once the previous sections are dry, re-tape to isolate the remaining side trapezoids. These will be your secondary accent colors. -
Fill with terracotta:
Use a slightly lighter variation of your central terracotta color for the side trapezoids to create depth. Paint these sections carefully.
Bleeding Lines?
If paint bleeds under the tape, wait for it to dry fully. Then, take a small stiffness brush with the background color (or the white line color) and carefully paint over the mistake to clean the edge.
Step 3: Adding Cool Tones and Borders
-
Prep the green zones:
Identify the remaining triangular and trapezoidal shapes at the top and bottom corners. Tape off their boundaries. -
Paint the sage accents:
Mix a muted sage green. Fill in the top-left and bottom-center sections with this calming hue. -
Add depth with teal:
For the bottom-right shadow area, mix a darker teal or slate blue. Paint this section to give the ‘gem’ some shadowed dimension. -
Refine the white lines:
Once all colored sections are painted and dried, you might notice the gaps where the tape was (the ‘grout’ lines) look uneven. I like to use a very fine liner brush with white or cream paint to tidy up these dividing lines, keeping them uniform in width. -
Clean up the outer border:
If any paint bled into the large outer border area, paint over the entire border with a fresh coat of stark white or cream acrylic to create a clean, purposeful frame. -
Final smooth check:
Inspect the painting for any raised ridges of paint left by the tape. You can very gently sand these down with high-grit sandpaper if needed, then touch up the paint. -
Protect the surface:
Finish the piece with a spray of matte varnish. This unifies the sheen of the different colors and protects the surface from dust.
Seal the Tape
Before painting your color, brush a tiny amount of the BACKGROUND color (or clear matte medium) over the tape edge. This seals the gap, ensuring your colored paint line is razor sharp.
Step back and admire how simple shapes can come together to form such a sophisticated, modern focal point for your room
Wrap-Around Corner Geometry
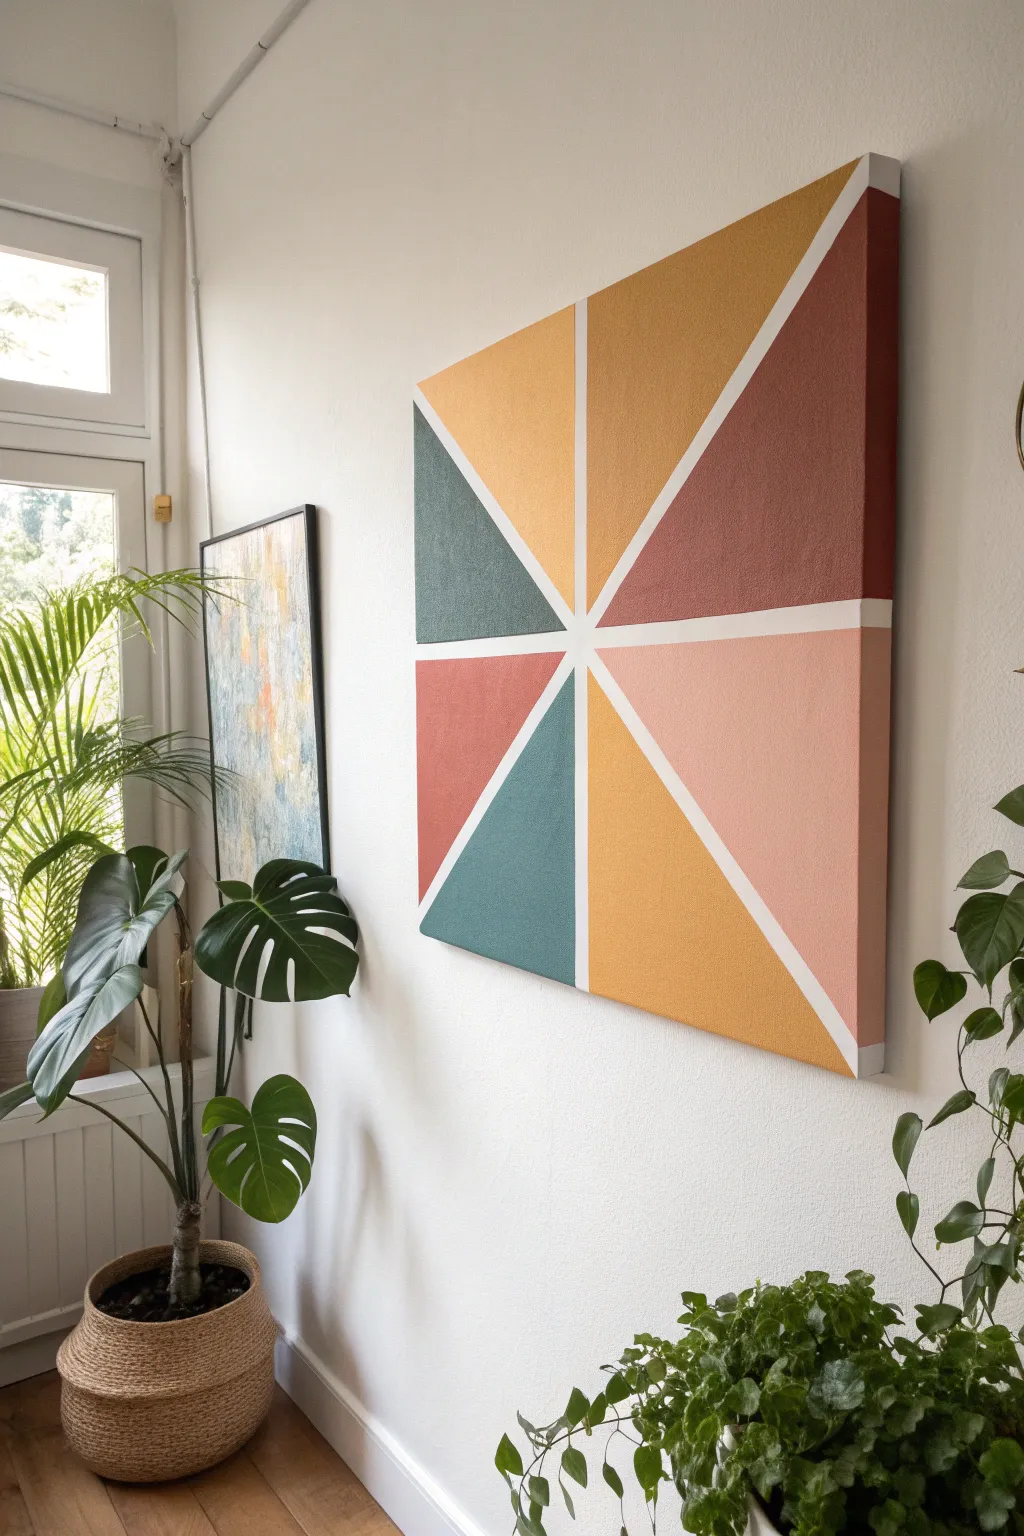
This minimalist geometric painting features an elegant eight-point pinwheel design in earthy, muted tones of teal, terracotta, mustard, and cream. The charm of this piece lies in the way the crisp triangles wrap seamlessly around the edges of the canvas, creating a sculptural, finished look from every angle.
How-To Guide
Materials
- Square stretched canvas (deep edge or gallery profile recommended)
- Acrylic paints (Teal/Dark Green, Terracotta/Burnt Orange, Mustard Yellow, Cream/Off-White)
- Painter’s tape (frog tape or high-quality masking tape)
- Ruler or straight edge
- Pencil
- Flat synthetic paintbrushes (medium and small sizes)
- White eraser
- Palette or paper plate
- Jar of water and paper towels
Step 1: Preparation & Mapping
-
Prepping the Surface:
Begin by wiping down your canvas with a dry cloth to remove any dust. If your canvas isn’t pre-primed, apply a coat of gesso and let it dry completely. -
Finding the Center:
Use your ruler to measure the width and height of the canvas. Make a small, light mark exactly in the center point where these measurements intersect. -
Drawing the Diagonals:
Place your ruler so it connects the top-left corner to the bottom-right corner, passing through your center mark. Draw a faint pencil line across the entire face. -
Completing the X:
Repeat the previous step for the opposite corners (top-right to bottom-left) to create a large ‘X’ across the canvas. -
Drafting Vertical & Horizontal Lines:
Draw a straight vertical line through the center point, top to bottom. Then, draw a straight horizontal line through the center, side to side, creating a total of eight equal triangular sections. -
Extending to the Edges:
This is crucial for the wrap-around effect: extend every pencil line down the sides of the canvas. Ensure these lines drop perfectly straight down so the geometry flows over the edge.
Bleeding Lines?
If paint bleeds under the tape, wait for it to dry fully. Then, gently scrape the excess with an X-Acto knife or touch it up with the base color using a tiny brush.
Step 2: Taping & Painting
-
Planning the Palette:
Decide on your color placement. In the example, colors alternate but are mirrored or rotated. You can mark each triangle lightly with a letter (e.g., T for Teal, C for Cream) to avoid confusion later. -
First Taping Phase:
Apply painter’s tape along the pencil lines for your first set of non-adjacent triangles. You cannot paint touching shapes simultaneously, so pick four triangles that don’t share a border. -
Sealing the Tape:
Run your fingernail or a credit card firmly along the edge of the tape to prevent paint bleed. I find this step essentially guarantees those crisp lines we want. -
Painting the First Set:
Load your flat brush with your chosen acrylic colors (e.g., the teal and the mustard sections first). Paint inside the taped areas, ensuring you paint over the edge and down the side of the canvas. -
Applying a Second Coat:
Let the first layer dry to the touch (usually 10-15 minutes). Apply a second coat to ensure the colors are opaque and solid, leaving no canvas texture showing through. -
Removing Tape Early:
Carefully peel off the tape while the second coat is still slightly damp. Pull the tape away from the wet paint at a 45-degree angle to keep the edge sharp. -
Drying Time:
Allow these sections to dry completely. Since you need to place tape over these painted areas for the next step, wait at least one hour or use a hairdryer on a cool setting. -
Second Taping Phase:
Once the first set is bone dry, tape off the remaining four triangular sections. The new tape will go over the dry paint of your finished sections. -
Painting the Second Set:
Fill in these new sections with your remaining colors (terracotta and cream). Remember to carry the paint down the sides just like before. -
Final Coat and Reveal:
Apply your second coat to these sections. Once mostly dry but still tacky, remove the final strips of tape to reveal the complete geometric pinwheel. -
Touch Ups:
inspect the center point where all lines meet. If there are any gaps or bleeds, use a tiny detail brush to correct them carefully.
Tape Sealing Trick
Paint a thin layer of the *background* color (or clear matte medium) over the tape edge first. This seals the gap, so any bleeding is invisible!
Hang your new geometric masterpiece on a wall where the side details can be fully appreciated

Have a question or want to share your own experience? I'd love to hear from you in the comments below!