
If you’ve been craving an easy ocean painting that still feels fresh and beautiful, you’re in the right place. In my studio, I lean on simple shapes, bold color blends, and a few repeatable tricks to make the sea feel alive without overthinking it.
Classic Horizon Line Seascape
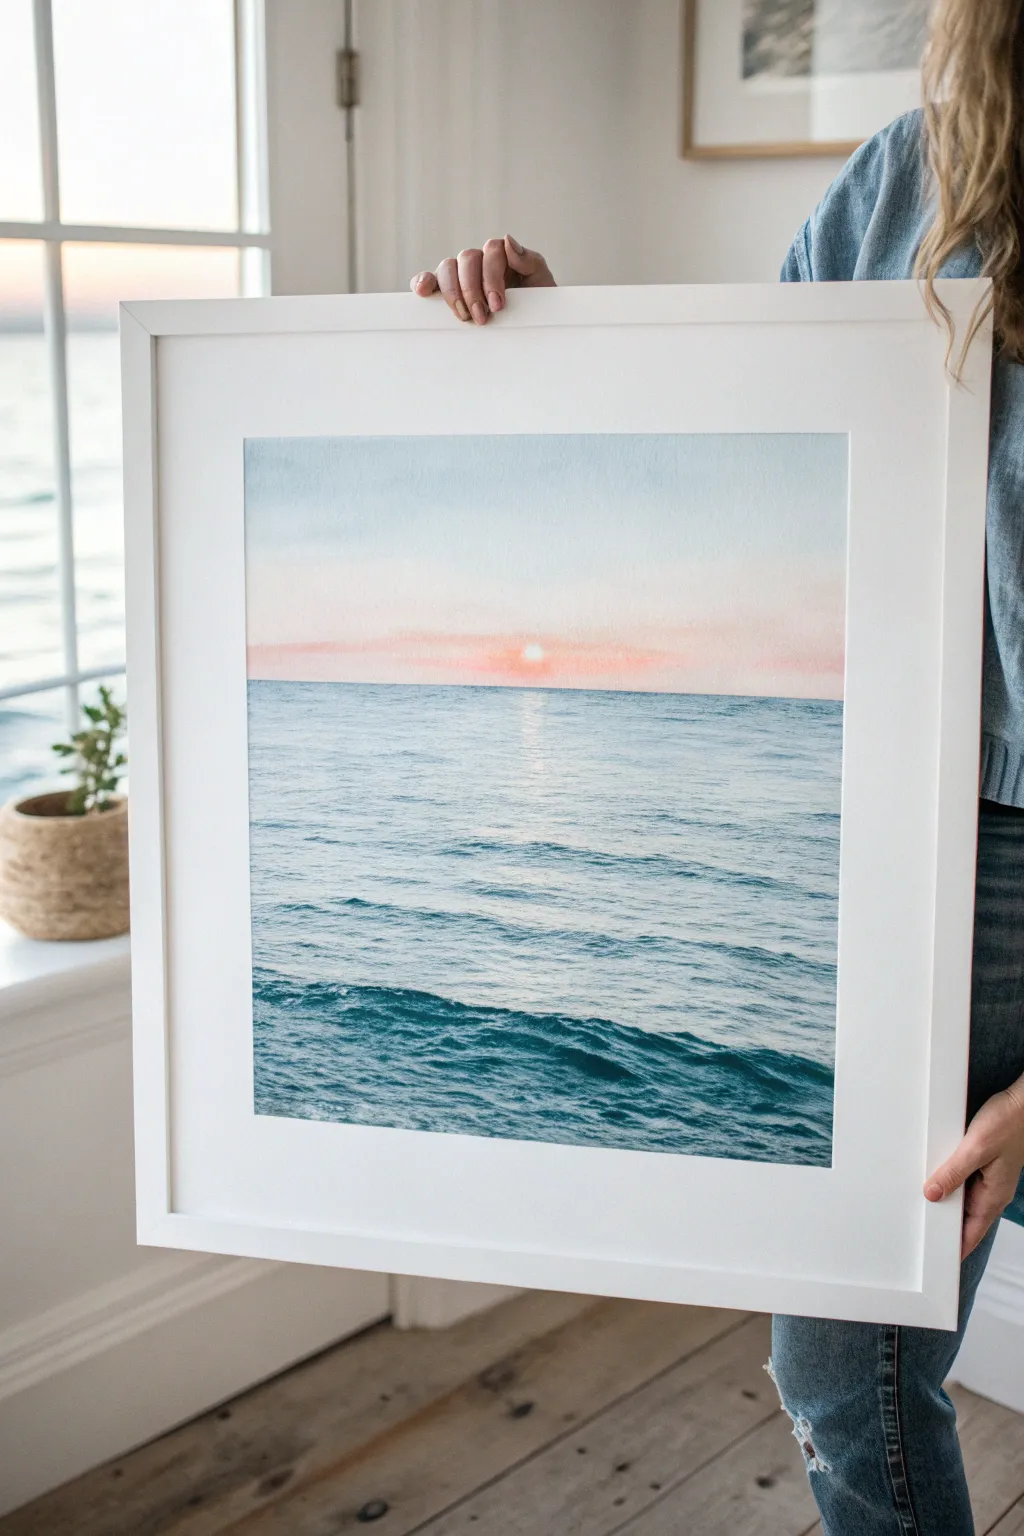
Capture the peaceful transition of day into night with this soft-focus seascape that emphasizes gentle gradients and rhythmic waves. By mastering the horizon line and subtle color blending, you’ll create a sophisticated piece that brings a breath of fresh ocean air into any room.
Step-by-Step
Materials
- High-quality watercolor paper (cold press, heavy weight)
- Watercolor paints (Cerulean Blue, Prussian Blue, Indigo, Rose Madder, Cadmium Orange, White Gouache)
- Set of soft watercolor brushes (large flat wash, medium round, fine detail)
- Painter’s tape
- Focal point ruler or straight edge
- Two jars of water (clean and dirty)
- Paper towels
- Pencil and eraser
- Large white mat and frame for finishing
Step 1: Setting the Scene
-
Paper preparation:
Begin by taping down all four edges of your watercolor paper to a sturdy board. Press the tape firmly to ensure clean, crisp borders later. -
Establishing the horizon:
Using a ruler, lightly draw your horizon line. For this composition, place it just above the vertical center of the page to give prominence to the water. -
Pre-wetting the sky:
Take your large flat brush and apply clean water to the sky area only. You want the paper glistening but not swimming in puddles.
Straight Horizon Trick
If you struggle to paint a perfectly straight horizon line freehand, place a strip of painter’s tape directly over the dry sky area to act as a mask while you paint the water.
Step 2: Painting the Sky Gradient
-
Upper sky coolness:
Load your brush with a very diluted Cerulean Blue. Start at the very top edge and paint downward using horizontal strokes, letting the color naturally fade as you approach the horizon. -
Warm sunrise tones:
While the paper is still damp, mix a pale wash of Rose Madder with a tiny touch of Cadmium Orange. Apply this near the horizon line, carefully blending it upward to meet the fading blue. -
The sun’s glow:
Lift a small circle of paint right in the center of the pink band using a clean, damp brush or a bit of paper towel to create the suggestion of the sun. -
Intensifying the horizon:
Add a slightly stronger line of the pink-orange mix right along the pencil line to define the separation between air and water. Let the sky layer dry completely before moving on.
Add Sparkle
For extra dimension, tap a dry brush with opaque white gouache lightly over the textured paper created by the foreground waves to mimic sea foam.
Step 3: Building the Ocean
-
Base water layer:
Switch to your medium round brush. Mix a light wash of Cerulean Blue and paint the entire water section, leaving the area directly under the sun slightly lighter to represent reflection. -
Distant waves:
While the base is damp, use horizontal strokes of slightly darker blue (add a touch of Prussian Blue) near the horizon. Keep these strokes very thin, straight, and close together to simulate distance. -
Mid-ground texture:
As you move down the paper, make your brushstrokes slightly wider and more wavy. This change in scale helps create depth. -
Foreground depth:
Mix Prussian Blue with a bit of Indigo for a deep, rich teal. Paint the bottom third of the water with distinctive, rolling wave shapes. -
Defining the swells:
I like to leave small slivers of the lighter under-layer showing between these darker waves; this acts as the highlight on the water’s surface.
Step 4: Refining Details
-
Sun reflection:
Using diluted white gouache or very pale pink, add vertical dashes directly under the sun location, starting narrow at the horizon and widening slightly as they come forward. -
Wave crests:
Switch to your fine detail brush. Use the dark Indigo mix to underline the belly of the foreground waves, giving them volume and shadow. -
Highlight recovery:
If you’ve lost too many bright spots in the foreground, use a stiff, damp brush to gently scrub and lift pigment off the tops of the closest waves. -
Final assessment:
Step back and check the balance. If the horizon line looks uneven, carefully straighten it with your detail brush and the dark blue mix. -
Reveal:
Once the painting is 100% bone dry, slowly peel away the painter’s tape at a 45-degree angle to reveal your crisp white edges.
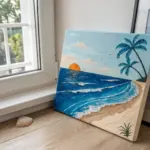
Place your finished seascape in a gallery frame with a wide mat to truly highlight the delicate colors of your handmade view


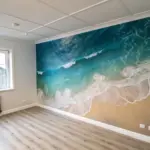

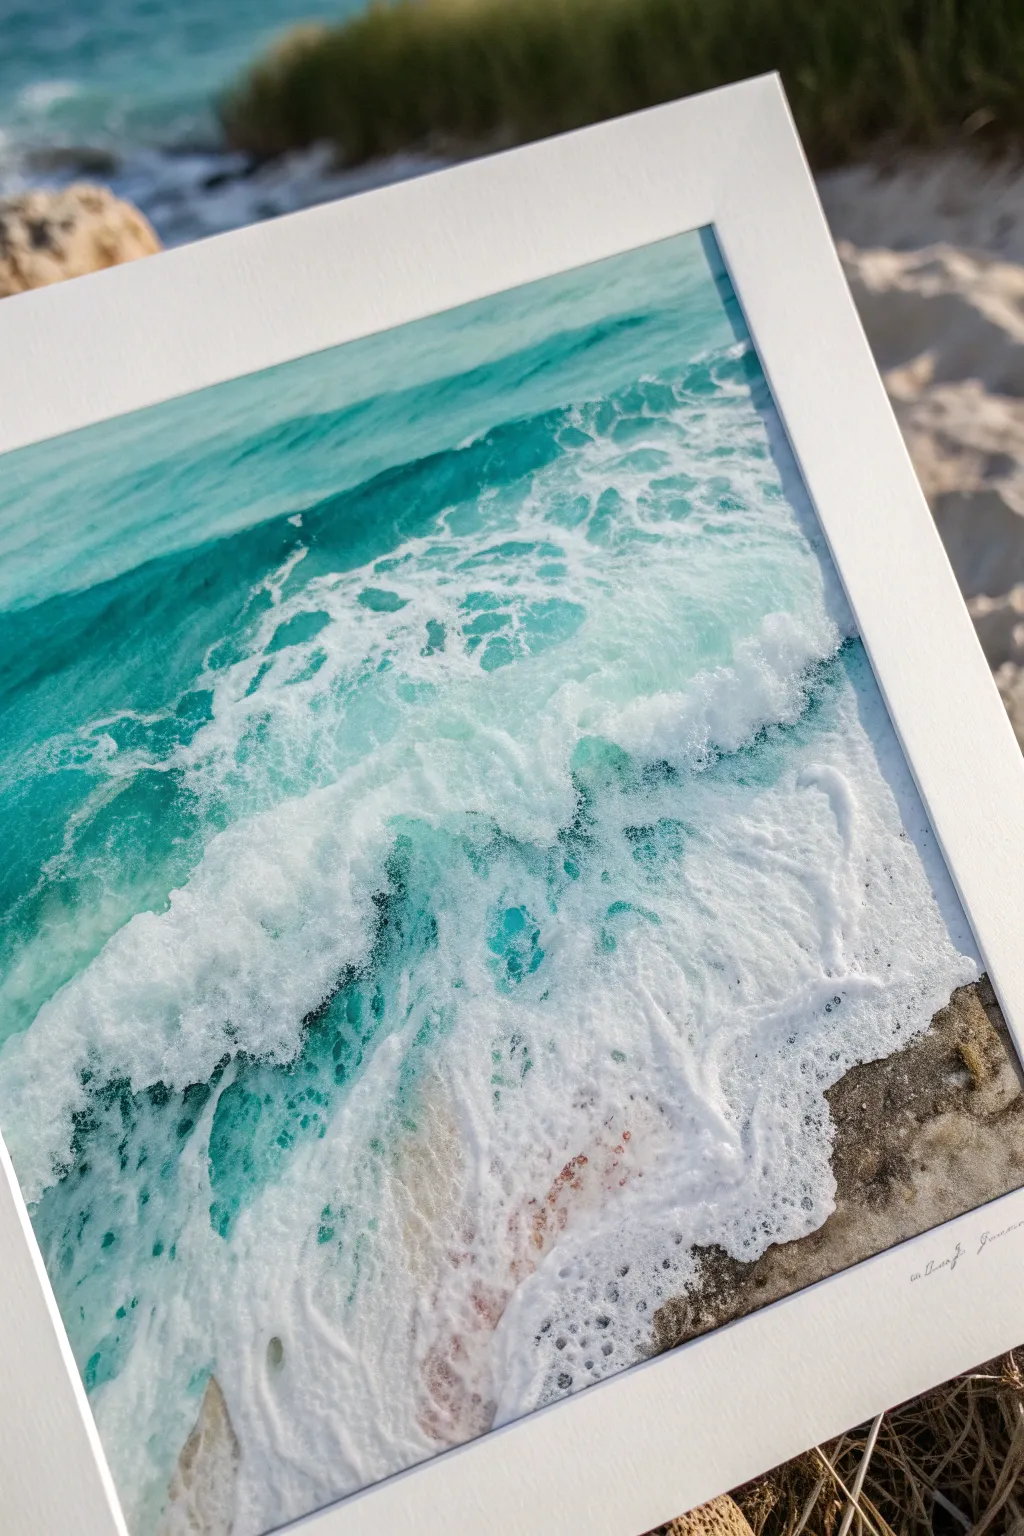
Easy Beach Shoreline Blend
Capture the soothing rhythm of the tide with this layered watercolor painting that beautifully blends sandy hues with turquoise waters. The focal point of this piece is the stunning, realistic sea foam effect created using white gouache or acrylic over a sandy wash.
Step-by-Step Guide
Materials
- Cold press watercolor paper (300 gsm)
- Watercolor paints (Turquoise, Phthalo Blue, Burnt Sienna, Yellow Ochre)
- White opacity paint (White Gouache or White Acrylic)
- Masking tape
- Flat shader brush (3/4 inch)
- Small round detail brush (size 2 or 4)
- Paper towels
- Two jars of water
Step 1: Preparation and Sky
-
Secure the paper:
Begin by taping down all four edges of your watercolor paper to a board or table. This creates that crisp, clean white border shown in the photo and prevents the paper from buckling when wet. -
Establish the horizon:
Lightly draw a straight horizontal line across the paper, positioning it about one-third of the way from the top. This separates your sky from the ocean. -
Paint a pale sky:
Dilute a tiny amount of Phthalo Blue with plenty of water until it’s almost transparent. Wash this color across the sky area, keeping it very faint to contrast with the vibrant ocean later.
Step 2: Painting the Ocean Gradient
-
Mix the deep ocean teal:
Combine Turquoise with a touch of Phthalo Blue to create a rich, deep teal color for the horizon line. -
Apply the horizon line:
Using your flat brush, paint a distinct line of this deep teal directly below the horizon pencil mark. You want a sharp edge against the sky. -
Create the gradient:
With a clean, damp brush, drag that wet teal paint downward. As you move down the paper, dip into pure Turquoise and slowly fade the color out, leaving the bottom third of the paper white for the sand. -
Feather the edge:
Where the water meets the future sand area, use water to feather the turquoise edge so there isn’t a harsh line. -
Let it dry completely:
Allow the ocean layer to dry fully. If you rush this step, the brown sand color will bleed into the blue, creating a muddy green.
Muddy Water Fix
If blue and brown mix into green, let it dry fully. Paint opaque white gouache over the mistake, let dry, then repaint the correct color.
Step 3: Adding the Sandy Shore
-
Mix the sand color:
Mix Yellow Ochre with a small drop of Burnt Sienna. Test the color on a scrap paper; it should look like warm, wet sand. -
Paint the beach:
Apply a wash of this sand color to the bottom third of the paper. Use an irregular, wavy motion where it meets the blue area to mimic the shape of a receding wave. -
Add texture while wet:
While the sand wash is still wet, drop in slightly concentrated Burnt Sienna near the bottom edge. This creates the look of heavy, wet sand. -
Dry thoroughly:
Wait until the painting is bone dry before proceeding to the foam details. This is crucial for crisp white lines.
Add Sparkle
Sprinkle a tiny pinch of fine silver glitter onto the wet turquoise paint or mix iridescent medium into the water for a sun-kissed shimmer.
Step 4: Creating Realistic Sea Foam
-
Prepare the white paint:
Squeeze out some white gouache or acrylic. You want a creamy consistency—thick enough to be opaque, but fluid enough to flow off a small brush. -
Outline the main wave:
Using your small detail brush, trace the irregular line where the sand meets the blue water. Make this line wiggly and organic, not straight. -
Form the foam lace:
Behind the main wave line (on the sand side), paint a web-like pattern of connected loops and holes. These shapes represent the bubbly ‘lace’ left behind by a wave. -
Stipple for texture:
Dip the tip of your brush in thick white paint and gently tap (stipple) over the lines you just painted to break up rigid brushstrokes and create a bubbly texture. -
Add floating foam:
Move up into the turquoise water area. Add tiny, horizontal dashes and dots of white to suggest foam floating on the surface of the deeper water. -
Highlight the water movement:
Paint very thin, faint white lines following the curve of the wave in the turquoise section to suggest the water’s movement toward the shore. -
Final reveal:
Once absolutely everything is dry, carefully peel away the masking tape at a 45-degree angle to reveal the clean white border.
Enjoy the calm atmosphere this completed seascape brings to your space


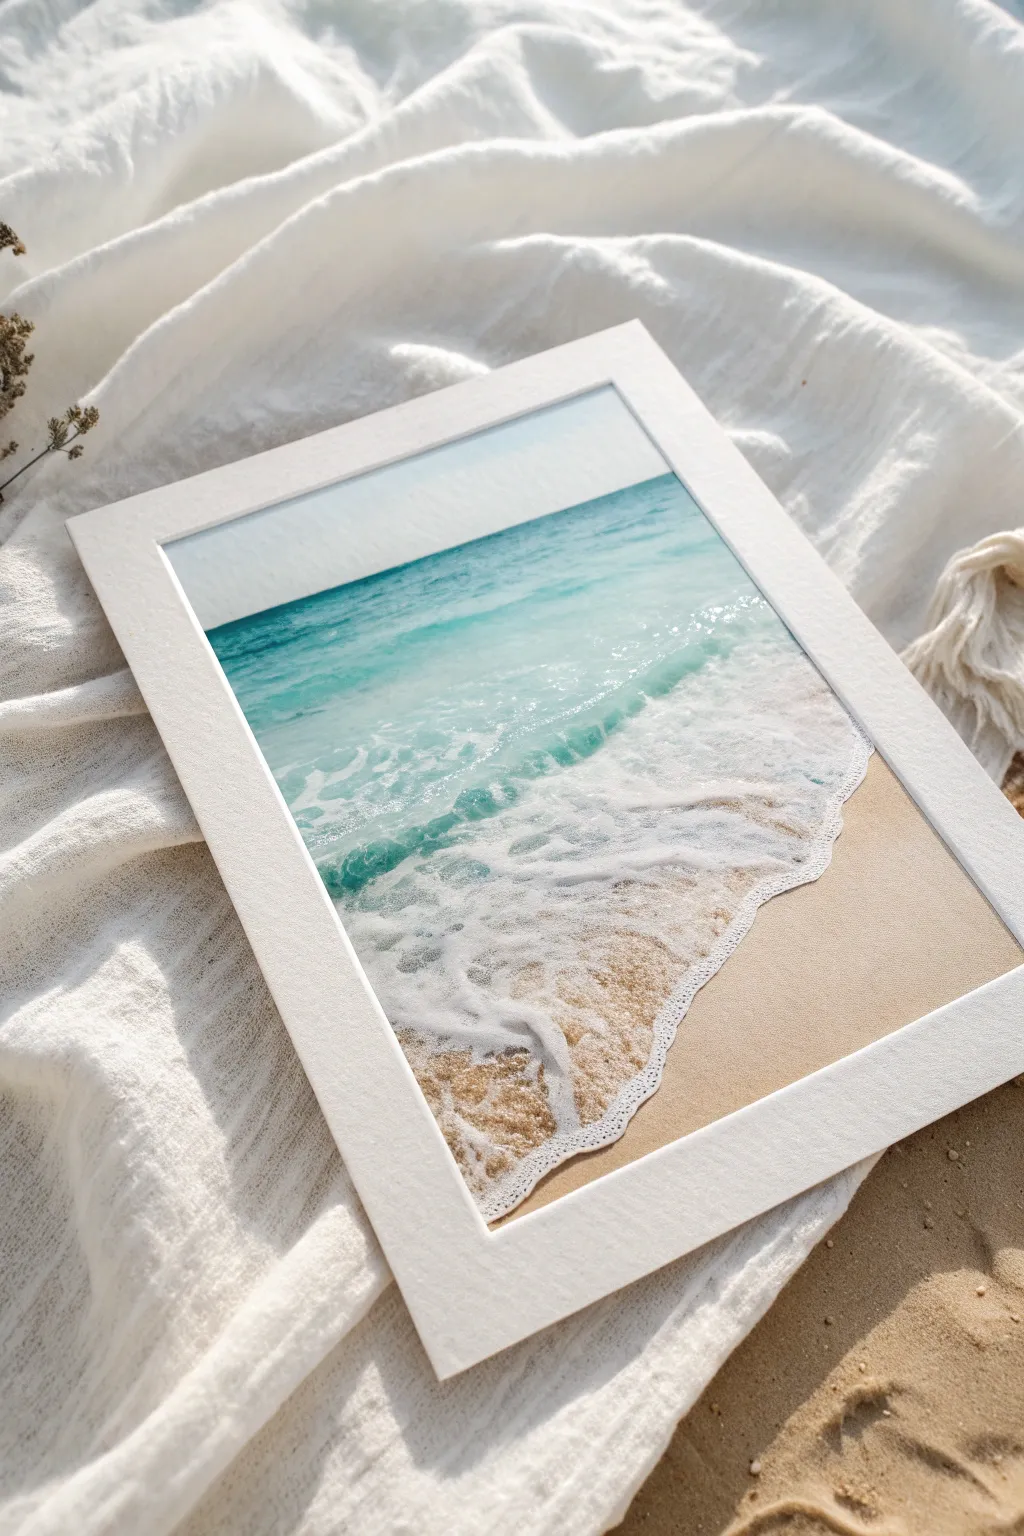
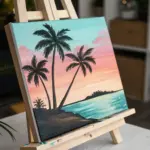
Sunset Ocean Gradient
Capture the magic of golden hour with this vibrant watercolor painting featuring a stunning gradient sky and crashing waves. This project focuses on blending warm hues into cool ocean tones to recreate a perfect sunset memory.
Step-by-Step
Materials
- Cold press watercolor paper (square format)
- Painter’s tape or masking tape
- Watercolor paints (magenta, cadmium orange, yellow, violet, phthalo blue, viridian green)
- Flat wash brush (3/4 inch)
- Round brush (size 6 or 8)
- Small detail brush (size 0 or 2)
- Clean water jar
- Paper towels
- White gouache or white gel pen
Step 1: Setting the Sky Gradient
-
Prepare the canvas:
Tape down all four edges of your watercolor paper to a board. This creates the crisp white border seen in the reference and prevents buckling. -
Wet the sky area:
Using your flat wash brush, apply clean water to the upper two-thirds of the paper, stopping exactly where you want the horizon line to be. -
Start with purple:
Load your brush with a watery mix of violet and magenta. Apply this to the very top edge of the wet paper, allowing it to bleed downwards naturally. -
Transition to warmth:
Clean your brush and pick up a bright magenta or pink. Blend this into the bottom edge of the purple section while the paper is still damp. -
Add the golden glow:
Switch to cadmium orange, painting below the pink. Finally, blend pure yellow right at the horizon line, ensuring the colors melt into each other without harsh lines. -
Create cloud textures:
While the sky is still damp but not soaking, use a thirstier, semi-dry brush to lift out horizontal streaks, or dab in slightly more concentrated violet to suggest streaky clouds.
Step 2: Painting the Ocean
-
Define the horizon:
Once the sky is bone dry, mix a deep purple-blue. Carefully paint a straight line across the horizon to separate the sky from the sea. -
Base ocean layer:
Dilute that purple-blue mix and wash it over the distant water area. As you move closer to the foreground, start mixing in phthalo blue and viridian green. -
Reserve the sun path:
Leave a vertical column of white paper or very pale yellow directly under where the sun sets. I like to keep this area mostly dry to preserve the sparkle. -
Foreground waves:
In the closest section of water, switch to a rich teal mix (viridian + phthalo blue). Paint horizontal strokes that are thicker and more textured than the distant water. -
Dry completely:
Let this base layer of water dry fully before adding details.
Tape Technique
To prevent tearing your paper when removing tape, heat it gently with a hairdryer for a few seconds first to soften the adhesive.
Step 3: Highlights and Foam
-
Deepen the water:
Using a smaller round brush and concentrated dark blue, paint thin horizontal lines in the distance to create ripples. -
The reflection:
Mix a bright orange-yellow. Carefully paint horizontal dashes across the reserved white column in the water, getting wider as they come forward. -
The sun sliver:
Paint a tiny, intense semi-circle of orange right on the horizon line where the sun is dipping. -
Crashing wave shadow:
Identify where your main wave is breaking. Paint a dark blue-green shadow underneath the white foam area to give it volume. -
Adding sea foam:
Using straight white gouache or a white gel pen, stipple and paint the crashing tip of the wave. The white should look chaotic and splashy. -
Final highlights:
Add tiny glints of white gouache on the water’s surface near the shore to mimic sparkling wet sand. -
The reveal:
Wait for everything to be perfectly dry, then slowly peel away the tape at a 45-degree angle to reveal your clean edges.
Sparkle Effect
Sprinkle a tiny pinch of salt onto the wet foreground water paint. When dry, brush it off for a unique, sandy texture.
Now you have a vibrant piece of the coast to keep with you anywhere you go


Calm Ocean With Simple Reflections
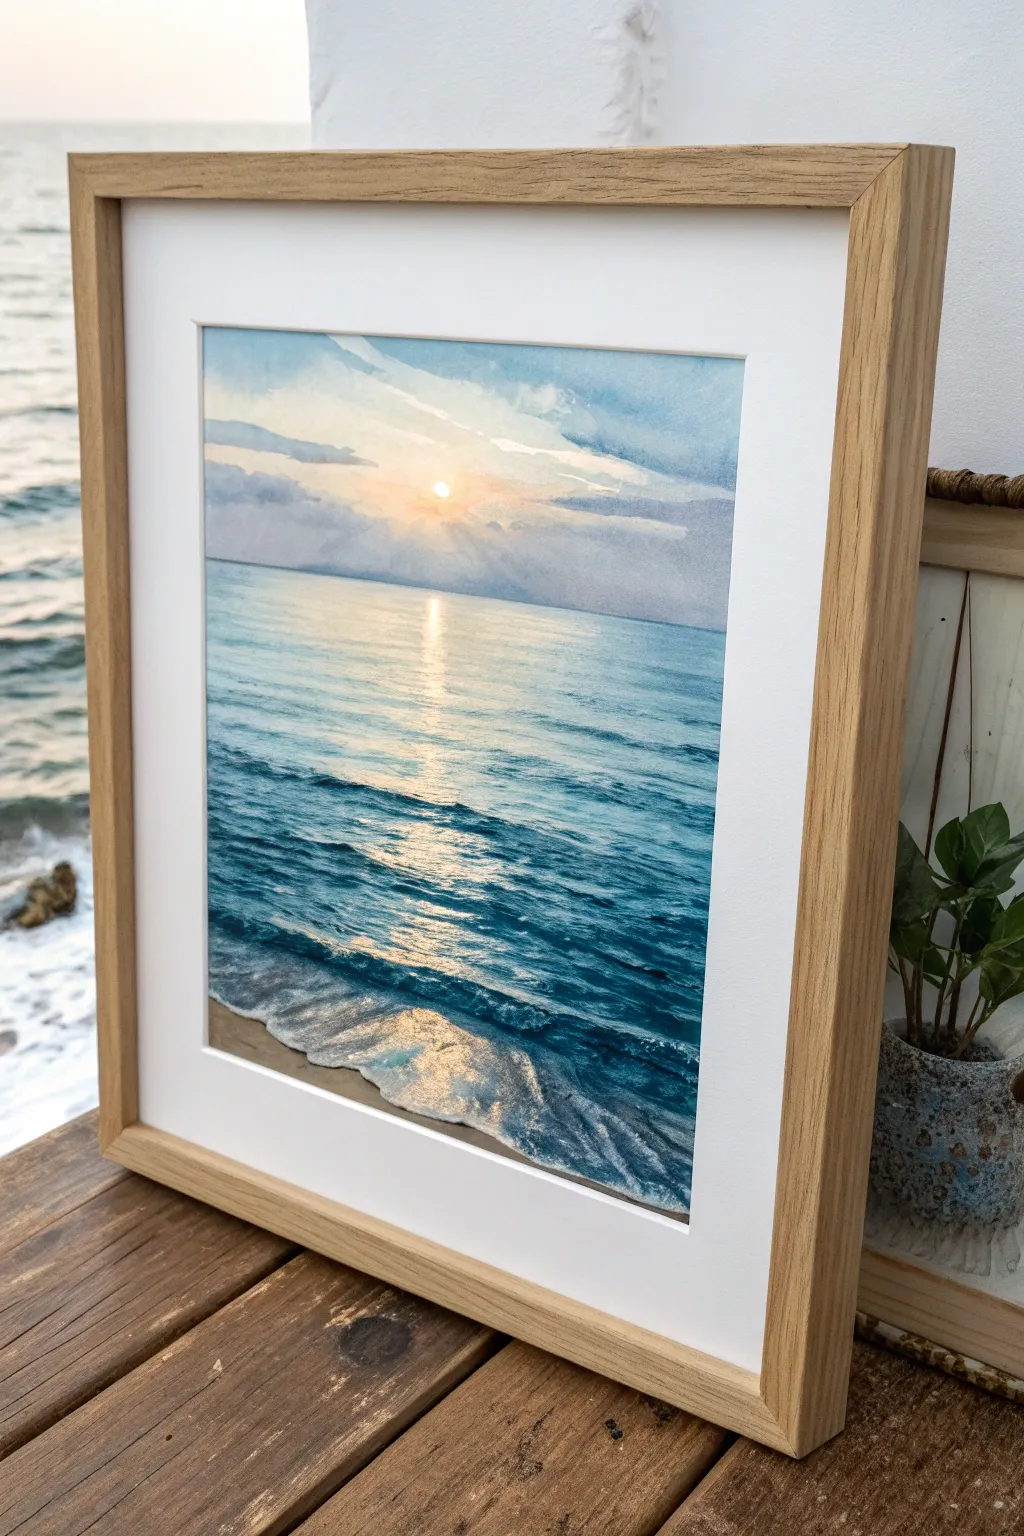
Capture the serene beauty of a calm morning sea with this soft, light-filled watercolor project. The focus is on the shimmering reflection of the sun and the gentle gradient of blue waves rolling onto the sand.
How-To Guide
Materials
- Cold press watercolor paper (300 gsm)
- Watercolor paints (phthalo blue, ultramarine, indigo, burnt sienna, yellow ochre, lemon yellow)
- Masking fluid or white gouache
- Flat wash brush (1 inch)
- Round brushes (size 4, size 8)
- Painter’s tape
- Jar of clean water
- Paper towels
- Wooden frame (optional)
Step 1: Setting the Scene
-
Secure the paper:
Tape down all four edges of your watercolor paper to a board using painter’s tape. This prevents buckling and creates that crisp white border seen in the final piece. -
Sketch the horizon:
Lightly draw a straight horizontal line about one-third of the way down from the top of the paper to mark the horizon. Add faint, wavy lines near the bottom to indicate where the foam meets the sand. -
Preserve the sun:
Apply a small dot of masking fluid exactly where the sun will sit, just above the horizon line. If you don’t have masking fluid, you will need to carefully paint around this tiny circle later.
Muddy colors?
If your ocean looks grey instead of blue, you might be overworking the paint while it’s damp. Let layers dry completely before glazing darker blue over the yellow reflection path.
Step 2: Painting the Sky
-
Wet-on-wet sky:
Using your large flat brush, wet the entire sky area with clean water. It should be glistening but not forming puddles. -
Add warmth:
Drop a very dilute mix of lemon yellow and a touch of yellow ochre around the masked sun area, letting it bleed outward into the wet paper. -
Paint the clouds:
While the paper is still damp, mix a soft grey-purple using ultramarine and a tiny bit of burnt sienna. Use the size 8 round brush to sweep in horizontal cloud streaks, leaving gaps for the light to shine through. -
Deepen the upper sky:
Add a wash of dilute phthalo blue to the very top corners of the sky, blending it down towards the horizon but stopping before you hit the yellow glow.
Level Up: Texture
Sprinkle a pinch of salt onto the wettest dark blue areas of the foreground water. As it dries, the salt pushes pigment away, creating amazing natural sea-foam texture.
Step 3: The Shimmering Ocean
-
Establish the reflection path:
Once the sky is dry, mix a very pale yellow wash. Paint a vertical stripe directly under the sun, dragging it all the way down to the shoreline. This is your base light path. -
Start the horizon line:
Mix a medium strength phthalo blue. Using the tip of your flat brush, paint the horizon line carefully. Keep it straight and sharp against the sky. -
Layering the waves:
Switch to your size 8 round brush. Using horizontal strokes, paint the blue water on either side of the yellow reflection path. Allow the blue strokes to ‘break’ and become thinner as they approach the center light, leaving plenty of white paper and yellow underpainting showing. -
Adding depth:
Mix indigo with phthalo blue for a darker ocean color. Add this to the foreground waves and the outer edges of the painting, keeping the water paler near the horizon. -
Creating movement:
Use the size 4 brush to add thinner, darker blue lines within the reflection path to suggest ripples. These lines help interrupt the light without blocking it completely.
Step 4: Shoreline and Details
-
Paint the wet sand:
Mix burnt sienna with a little yellow ochre and plenty of water. Paint the bottom strip of sand. While it’s wet, drop in a slightly darker brown near the water’s edge to look like wet sand. -
The whitewater foam:
Leave the area between the blue water and brown sand mostly white. If you painted over it, use white gouache now to paint the frothy, irregular edge of the wave crashing on the shore. -
Foam shadows:
Mix a very watery grey-blue. Paint a thin shadow line underneath the white foam created in the previous step to give the water volume and lift it off the sand. -
Reflection highlights:
Once everything is fully dry, peel off the masking fluid from the sun. If the sun looks too stark, soften the edges with a slightly damp, clean brush. -
Final sparkles:
I like to take a tiny detail brush with opaque white gouache and urge a few extra sparkles onto the tops of the nearest waves for magical realism. -
Reveal the border:
Carefully peel away the painter’s tape at a 45-degree angle to reveal your clean edges, then frame the piece.
Step back and enjoy the peaceful atmosphere you’ve created with just a few colors and simple strokes
BRUSH GUIDE
The Right Brush for Every Stroke
From clean lines to bold texture — master brush choice, stroke control, and essential techniques.
Explore the Full Guide
One Big Crashing Wave
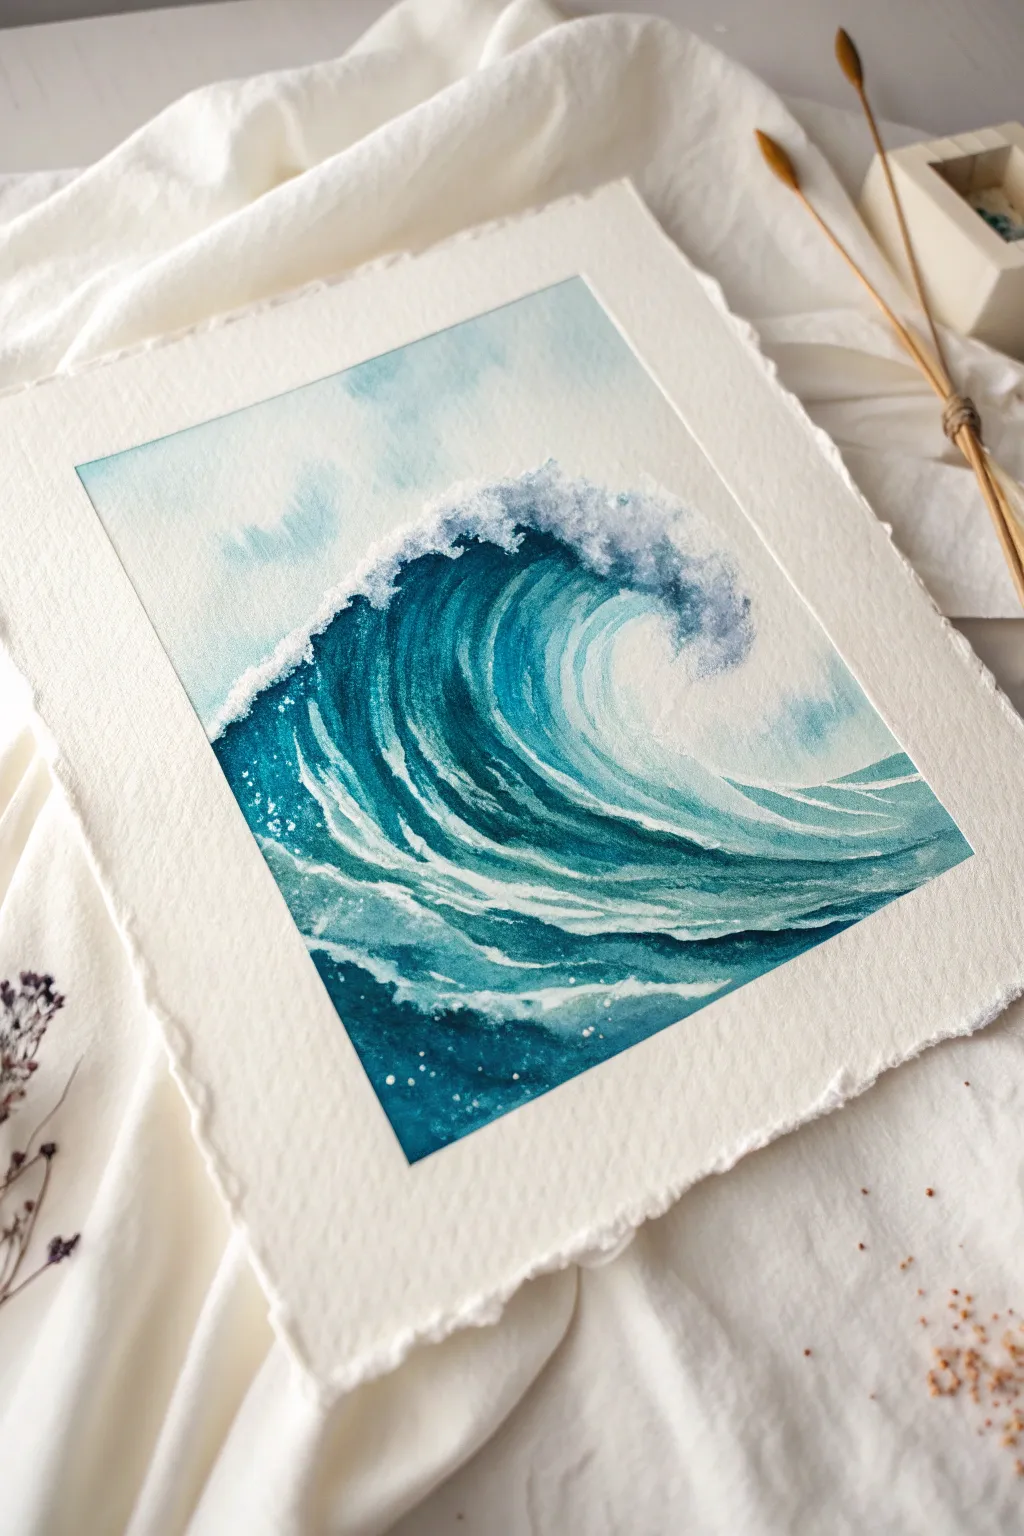
Capture the raw power of the ocean with this focused study of a single crashing wave, where deep teal depths meet frothy white sea foam. The deckle-edge paper adds an organic, authentic feel that perfectly complements the watery subject matter.
Step-by-Step Tutorial
Materials
- Cold press watercolor paper (deckle edge recommended)
- Watercolor paints: Prussian Blue, Phthalo Turquoise, Indigo, White Gouache
- Masking tape
- Round brushes: Sizes 2, 6, and 10
- Artist masking fluid (optional but helpful)
- Old toothbrush (for splatter)
- Clean water jars
- Paper towels
Step 1: Setting the Scene
-
Tape and Prep:
Secure your paper to a flat board with masking tape, creating a crisp rectangular border. If you are using paper with a raw, deckled edge like the example, tape inside the edge or simply tape the back of the paper to the board to keep the edges free. -
Sketch the Surge:
Using a very light touch and an HB pencil, draw the outline of your wave. Focus on the C-shape curve of the barrel and map out where the white foam will crash at the top and spill into the foreground. -
Preserve the Whites:
This is crucial for that bright foam: apply masking fluid to the very top edge of the wave crest and the splashy areas. If you don’t have fluid, you’ll need to paint carefully around these spots or use white gouache later.
Wet-on-Wet Magic
For the smoothest gradient inside the wave barrel, pre-wet that specific area with clean water before dropping in your dark blue pigment. It will spread naturally.
Step 2: Painting the Water
-
Sky Wash:
Mix a very dilute wash of Phthalo Turquoise with plenty of water. Paint the sky area above the wave, keeping it uneven and cloudy. Let the color fade almost to white near the horizon line behind the wave. -
Base Wave Layer:
Using your size 10 brush, lay down a light wash of turquoise across the entire body of the wave, avoiding the masked foam areas. Keep this layer wet and loose. -
Deepening the Barrel:
While the base layer is still damp, drop in stronger pigment—a mix of Prussian Blue and Turquoise—right under the curling lip of the wave. This creates the shadow inside the barrel. -
Building Form:
Switch to a size 6 brush. Use bold, sweeping strokes that follow the curve of the water. Start from the bottom right and sweep up into the curl to mimic the movement of the swell. -
Darkest Depths:
Mix Indigo with Prussian Blue for your darkest value. Paint this into the deepest part of the curl and the bottom left corner where the water is dense and heavy. -
Lifting Highlights:
While the paint is settling, take a clean, damp brush (blotted on a towel) and gently lift out pigments in stripes following the curve. This creates those translucent veins you see in moving water.
Step 3: Foam and Details
-
Foreground Flow:
Paint the water in front of the wave using horizontal, slightly jagged strokes. Leave deliberate gaps of white paper to represent sea foam floating on the surface. -
Remove Masking:
Once the painting is completely bone-dry, gently rub away the masking fluid to reveal the crisp white paper underneath. -
Softening Edges:
The revealed white shapes might look too sharp. Use a damp size 2 brush to gently soften the bottom edges of the foam, blending them slightly into the blue water. -
Adding Volume to Foam:
Mix a very watery grey-blue. Dab this lightly onto the bottom parts of the white foam crest to give the crashing water some 3D form and shadow. -
Gouache Highlights:
Squeeze out some white gouache. Paint crisp, thin white lines that follow the curve of the wave, emphasizing the surface tension and movement. -
Splatter Texture:
Dip an old toothbrush into watery white gouache. Flick the bristles with your thumb to spray fine mist onto the crest of the wave and the foreground for a realistic spray effect. -
Final Touches:
Add a few tiny dots of pure white gouache with your smallest brush tip in the darkest blue areas to represent rising bubbles.
Salty Texture
Sprinkle a pinch of table salt onto the wet foreground paint while it’s drying. Brush it off when dry for a unique, sandy sea-foam texture.
Now step back and admire the refreshing energy of your captured wave
Seafoam Dabs and Swirls
Capture the mesmerizing energy of crashing waves with this focused study on texture and translucency. By layering vibrant turquoise glazes with thick, tactile white acrylics, you’ll create frothy seafoam that virtually pops off the paper.
Step-by-Step
Materials
- Heavyweight watercolor paper or mixed media paper (cold press recommended)
- Acrylic paints: Phthalo Turquoise, Phthalo Blue, White (heavy body), Yellow Ochre, Burnt Umber
- Flat brush (1/2 inch) for blocking in color
- Round brush (size 4) for details
- Sea sponge or crumpled paper towel
- Palette knife or stiff fan brush
- Water container and mixing palette
- Masking tape (for clean borders)
Step 1: Setting the Scene
-
Prep the Surface:
Tape down your watercolor paper firmly to a board or table using masking tape. This ensures crisp white borders like the ones in the reference photo and prevents the paper from buckling under wet paint. -
Map the Horizon:
Lightly sketch a diagonal line roughly 1/3 from the top of the paper to mark where the deeper water meets the breaking wave. Add a curved line at the bottom corner for the sandy shoreline. -
Mix the Deep Ocean:
Combine Phthalo Turquoise with a tiny touch of Phthalo Blue and water. You want a flowing consistency that isn’t too thick. Apply this to the top section using horizontal strokes, letting the color be strongest at the very top edge. -
Transition to Shallows:
As you move down toward the wave line, add more water and a speck of white to your turquoise mix. This creates the lighter, translucent look of water right before it breaks. -
Paint the Sand:
Mix Yellow Ochre, a tiny dot of Burnt Umber, and plenty of White. Paint the bottom corner where the sand is visible beneath the retreating water. Keep this layer semi-transparent so it looks wet.
Foam too flat?
If your foam looks flat, mix a tiny drop of blue or purple into white to create a shadow color. Dab this under the brightest white clumps to add instant depth.
Step 2: Building the Wave Structure
-
The Dark Curve:
Mix a saturated, darker version of your turquoise (less water). Paint a distinct, curved band right under the lighter turquoise area. This represents the shadow inside the curling wave. -
Soften the Edge:
While the dark curve is still slightly wet, use a clean, damp brush to gently blend the top edge upward, creating a smooth transition into the lighter water above. -
Underpainting the Foam:
Where the white foam will eventually be, paint a very pale wash of blue-grey. It acts as a shadow for the bright white foam you’ll add later, giving the water volume.
Step 3: Creating the Seafoam Texture
-
Sponge Technique:
Dip a small sea sponge or a crumpled piece of paper towel into thick, heavy body White acrylic. Dab off the excess paint until the texture is almost dry. -
Main Crash Zone:
Stipple the sponge aggressively in the center of the painting where the wave is violently breaking. Turn the sponge as you press to avoid repetitive patterns. -
Lacy Edges:
Switch to a small round brush loaded with watered-down white paint. Paint delicate, web-like patterns extending from the main foam area out into the turquoise water. -
Dragging the Foam:
Use a dry fan brush or the side of your flat brush with very little white paint to lightly drag texture over the sandy area. This mimics the thin sheet of foam left on the beach. -
Thick Highlights:
I like to go back in with a palette knife or a heavily loaded brush for the final bright spots. Apply pure, thick white paint on the highest points of the foam for a 3D effect. -
Adding Splatter:
Dilute a bit of white paint until it’s milky. Tap your brush handle against another brush over the crash zone to create tiny droplets of spray. -
Review and Sign:
Let the painting dry completely. Carefully peel away the masking tape to reveal your clean edges, and sign your name in the corner.
Go Glossy
Once the painting is fully dry, apply a high-gloss varnish only over the wet water sections (avoiding the sand) to make it look permanently wet and shimmering.
Step back and admire the refreshing splash of color you’ve captured on the page

PENCIL GUIDE
Understanding Pencil Grades from H to B
From first sketch to finished drawing — learn pencil grades, line control, and shading techniques.
Explore the Full Guide
Rocky Coast Silhouette
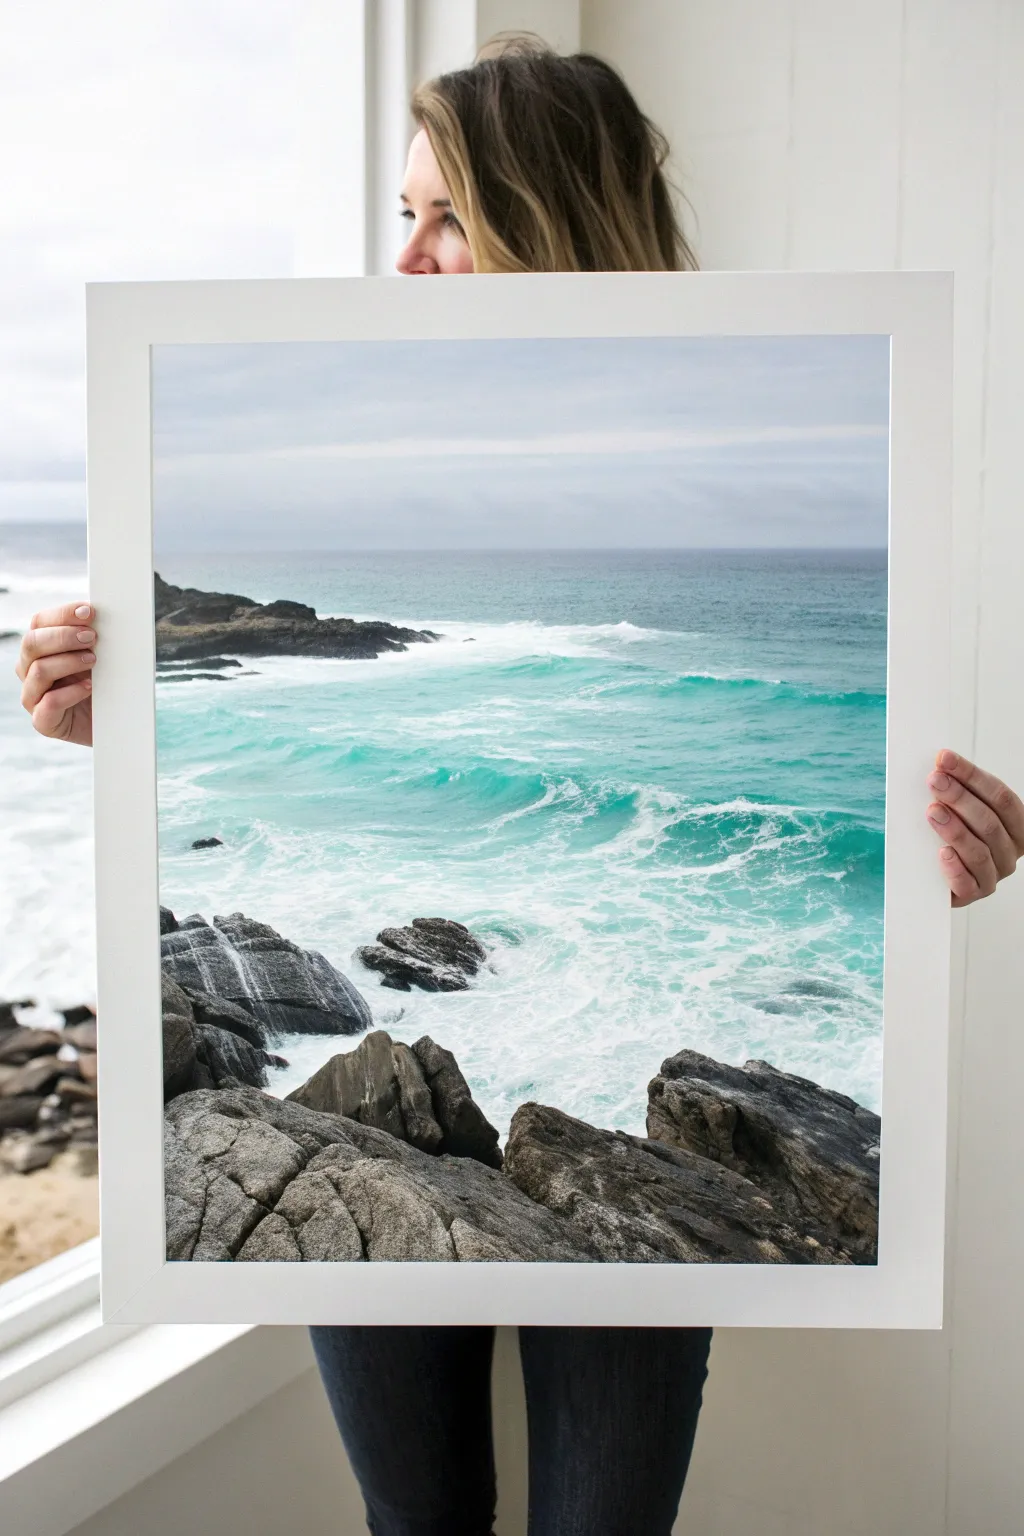
Capture the raw energy of the coast with this striking scene that juxtaposes dark, jagged rocks against vibrant turquoise waters. This painting focuses on layering textures to create foamy waves and realistic stone surfaces.
Step-by-Step Guide
Materials
- Large canvas or heavy-weight art paper (square or rectangular)
- Acrylic paints: Phthalo Blue, Turquoise, Titanium White, Mars Black, Burnt Umber, Grey
- Large flat brush (1-2 inch)
- Medium round brush
- Small detail brush or rigger brush
- Sea sponge (optional)
- Palette knife
- Cup of water and paper towels
- White mat board and frame (to fit finished work)
Step 1: Setting the Scene
-
Prime the Horizon:
Begin by establishing your horizon line about one-third of the way down from the top of your canvas. Painting a faint guide line with diluted grey paint ensures your ocean stays level. -
Paint the Sky:
Mix a very pale grey with a touch of blue and plenty of white. Use your large flat brush to sweep broad horizontal strokes across the sky area. Keep the color solid but slightly softer near the horizon to suggest distance. -
Block in Deep Water:
For the distant ocean line just below the horizon, mix a dark teal using Phthalo Blue and a tiny bit of black. Paint a straight, dark strip across the horizon line. -
Create the Gradient:
As you move closer to the foreground, gradually mix more Turquoise and White into your brush. Blend these lighter, brighter shades downwards, creating a smooth transition from deep ocean blue to tropical aquamarine.
Wave Motion Tip
When painting the white foam patterns, keep your wrist loose and let the brush wiggle. Perfect straight lines look unnatural; nature is random and organic.
Step 2: Waves and Movement
-
Rough in the Waves:
Using a mix of bright Turquoise and White, paint choppy, horizontal strokes in the middle ground. Don’t worry about perfect blending here; visible brushstrokes mimic the movement of currents. -
Add Foam Base:
Dip your medium brush into slightly diluted Titanium White. Scrub in the shapes of white water where the waves will be breaking, particularly focusing on the area where the water will meet the future rocks. -
Detail the Wave Crests:
With a smaller brush and pure Titanium White, paint sharp, jagged lines on the tops of your turquoise swells to represent breaking wave crests. Allow some lines to break and scatter. -
Sea Sponge Texture:
If you have a sea sponge, dampen it and dip it lightly in white paint. Gently dab it in the foreground water to create the chaotic, frothy texture of sea foam churned up by the rocks. -
Highlight the Water:
Mix a very pale aqua (mostly white with a dot of turquoise). Add thin, wandering lines in the foreground water to look like foam patterns stretching across the surface.
Step 3: Rock Formation
-
Outline the Foregrounds:
Using Burnt Umber mixed with black, block in the large rocky shapes in the immediate foreground and the bottom corners. These should be bold, heavy shapes that anchor the painting. -
Distant Headlands:
For the distinct rock formation on the left side of the horizon, use a slightly lighter, grey-blue tone. This atmospheric perspective makes the rocks look further away than the foreground boulders. -
Fill the Shadows:
Paint the darkest crevices of your foreground rocks with pure Mars Black. This creates deep shadows and giving the stones weight and dimension. -
Palette Knife Texture:
I prefer using a palette knife here to drag grey and light brown paint across the tops of the dry dark rocks. The paint will catch on the canvas texture, creating realistic, rugged stone surfaces.
Add Dimension
Mix a tiny amount of gloss gel medium into your final white highlights on the wet rocks. This will make them look perpetually wet and shiny, even when dry.
Step 4: Final Touches
-
Water Cascades:
Using a small detail brush and watered-down white paint, create fine lines dragging down the sides of the foreground rocks. This simulates water draining off the stones as the tide recedes. -
Mist and Spray:
Dry brush a tiny amount of white paint right at the base where the heavy rocks meet the water. This subtle mist effect softens the hard edge between stone and sea. -
Final Brightness Check:
Step back and see if your brightest whites pop. If they have dried dull, add one last touch of pure Titanium White to the brightest wave crests. -
Frame It:
Once fully dry, place your artwork behind a crisp white mat and a simple white frame to mimic the clean, modern look of the inspiration image.
Hang your finished seascape in a bright room to let those turquoise hues transport you to the ocean edge
Palm Fronds Ocean Frame
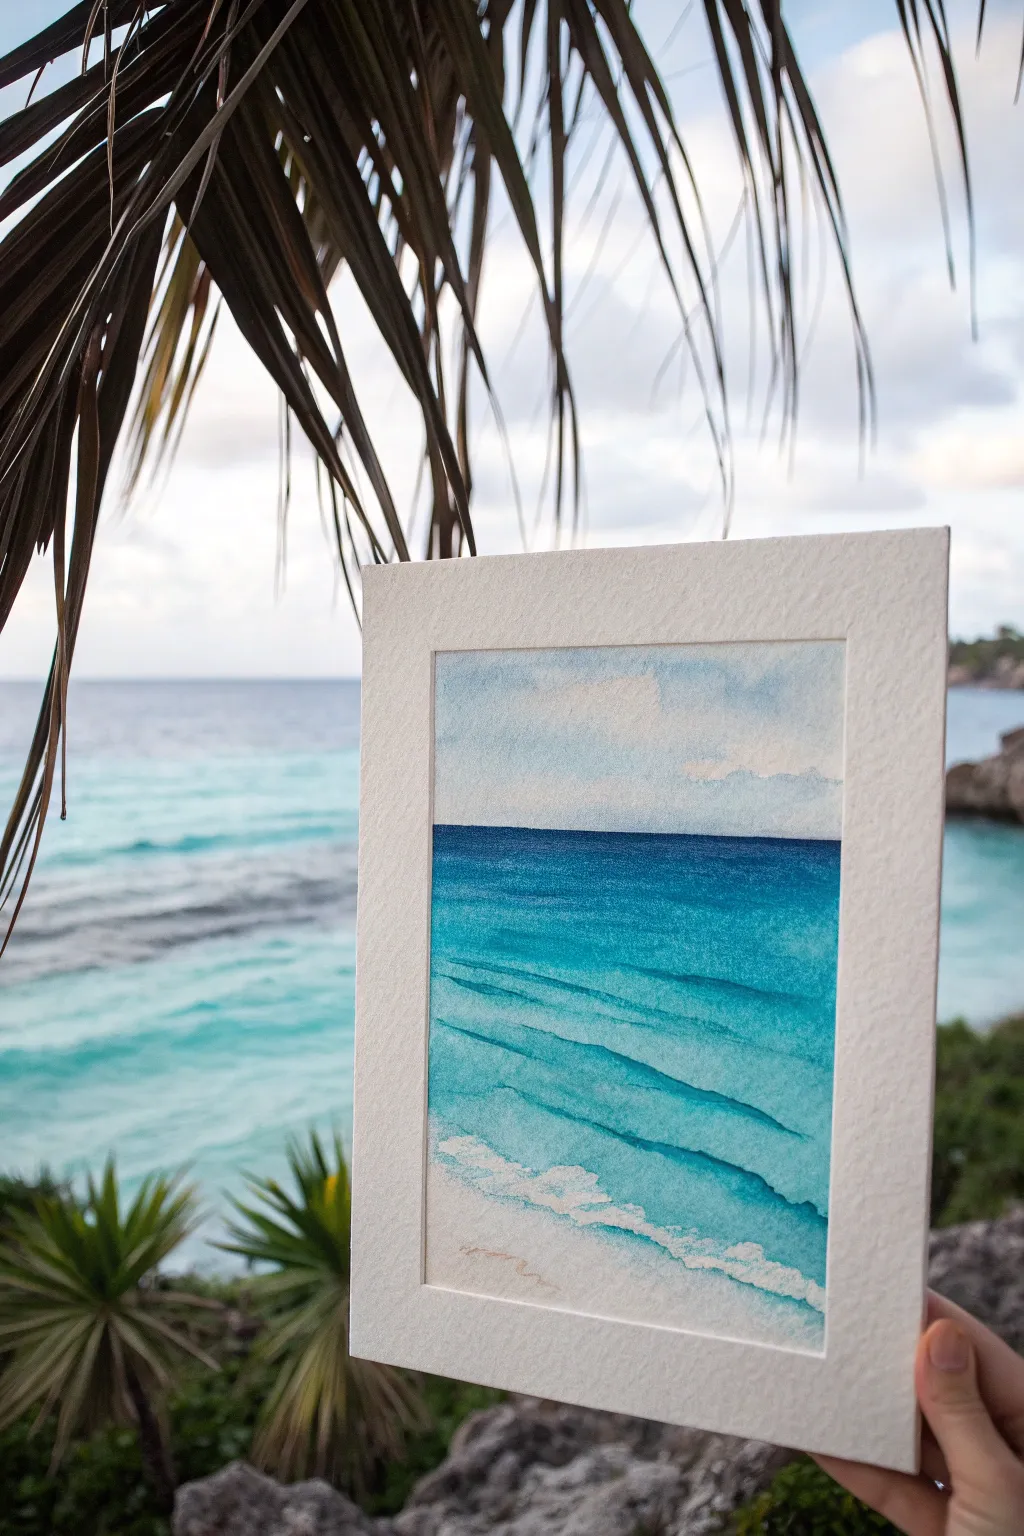
Capture the serene beauty of turquoise waters meeting the deep blue horizon in this refreshing watercolor project. By layering translucent washes, you’ll create depth and movement that mimics the gentle rhythm of a tropical tide.
Step-by-Step
Materials
- Cold press watercolor paper (300 gsm)
- Watercolor paints (Phthalo Blue, Turquoise, Ultramarine, Raw Sienna)
- White gouache or white ink
- Flat shader brush (3/4 inch)
- Round brush (size 6)
- Detail brush (size 0 or 1)
- Masking tape
- Board or clipboard
- Two jars of water
- Paper towels
Step 1: Preparation and Sky
-
Secure the paper:
Tape down all four edges of your watercolor paper to a board using masking tape. This creates that crisp white border you see in the finished piece and keeps the paper from buckling. -
Sketch the horizon:
Lightly draw a straight horizontal line across the paper, positioning it just above the halfway point. This will separate your sky from the ocean. -
Wet the sky area:
Using your flat brush, apply a clean coat of water to the area above the horizon line. You want it damp and glistening, but not soaking wet. -
Paint the sky:
Dilute a tiny amount of blue paint with plenty of water. Sweep this pale wash across the top of the sky, letting it fade almost to white as you approach the horizon line for a breezy look. -
Create soft clouds:
While the sky is still damp, lift out pigment using a clean, thirsty paper towel to suggest fluffy white clouds. Let this section dry completely.
Depth Trick
Make wave lines thinner and closer together near the horizon line, and wider apart near the bottom. This perspective trick instantly creates vast distance.
Step 2: The Deep Ocean
-
Establish the horizon line:
Mix a strong, saturated dark blue using Ultramarine and a touch of Phthalo. Using the flat brush, paint a crisp, straight line right against your pencil mark. -
Start the gradient:
Immediately below the dark horizon, blend in a purely Phthalo Blue mixture. Use horizontal strokes to pull the color downward. -
Transition to turquoise:
As you move down the paper, clean your brush slightly and introduce the Turquoise paint. Blend this into the blue while everything is still wet for a seamless ombré effect. -
Lighten the wash:
Continue painting downwards, gradually adding more water to your brush to lighten the turquoise as you reach the shallow water area near the bottom.
Step 3: Waves and Shore
-
Dry the base layer:
It is crucial to let the entire ocean gradient dry completely before moving on. The paper should feel cool to the touch but not damp. -
Define wave shadows:
Mix a medium-strength Turquoise. Using your round brush, paint gentle, scalloped horizontal lines across the water to represent the shadows underneath rolling waves. -
Soften the edges:
I like to take a clean, slightly damp brush and run it along the bottom edge of these wave lines to soften them into the water below, keeping the top edge crisp. -
Paint the sandy bottom:
At the very bottom of the page, paint an extremely pale wash of Raw Sienna or a sandy beige to represent the shoreline visible through clear water. -
Add wave foam:
Using white gouache or opaque white ink and your detail brush, paint wiggly, organic lines right on top of the crisp upper edges of your turquoise wave shadows. -
Create the shoreline foam:
Dab slightly thicker white gouache where the water meets the sand at the bottom, creating a frothy, textured appearance for the breaking shore wave. -
Add subtle highlights:
Add a few broken white lines further back in the deep blue water to suggest distant crests catching the light. -
Reveal the border:
Once the painting is 100% dry, carefully peel away the masking tape at a 45-degree angle to reveal your clean, professional edges.
Bleeding Horizon?
If your ocean bleeds into the sky, the sky wasn’t dry enough. Wait for full dryness, or use a piece of tape over the dry sky to protect it while painting the sea.
Now you have a refreshing slice of paradise ready to frame or gift


Underwater Blue Fade
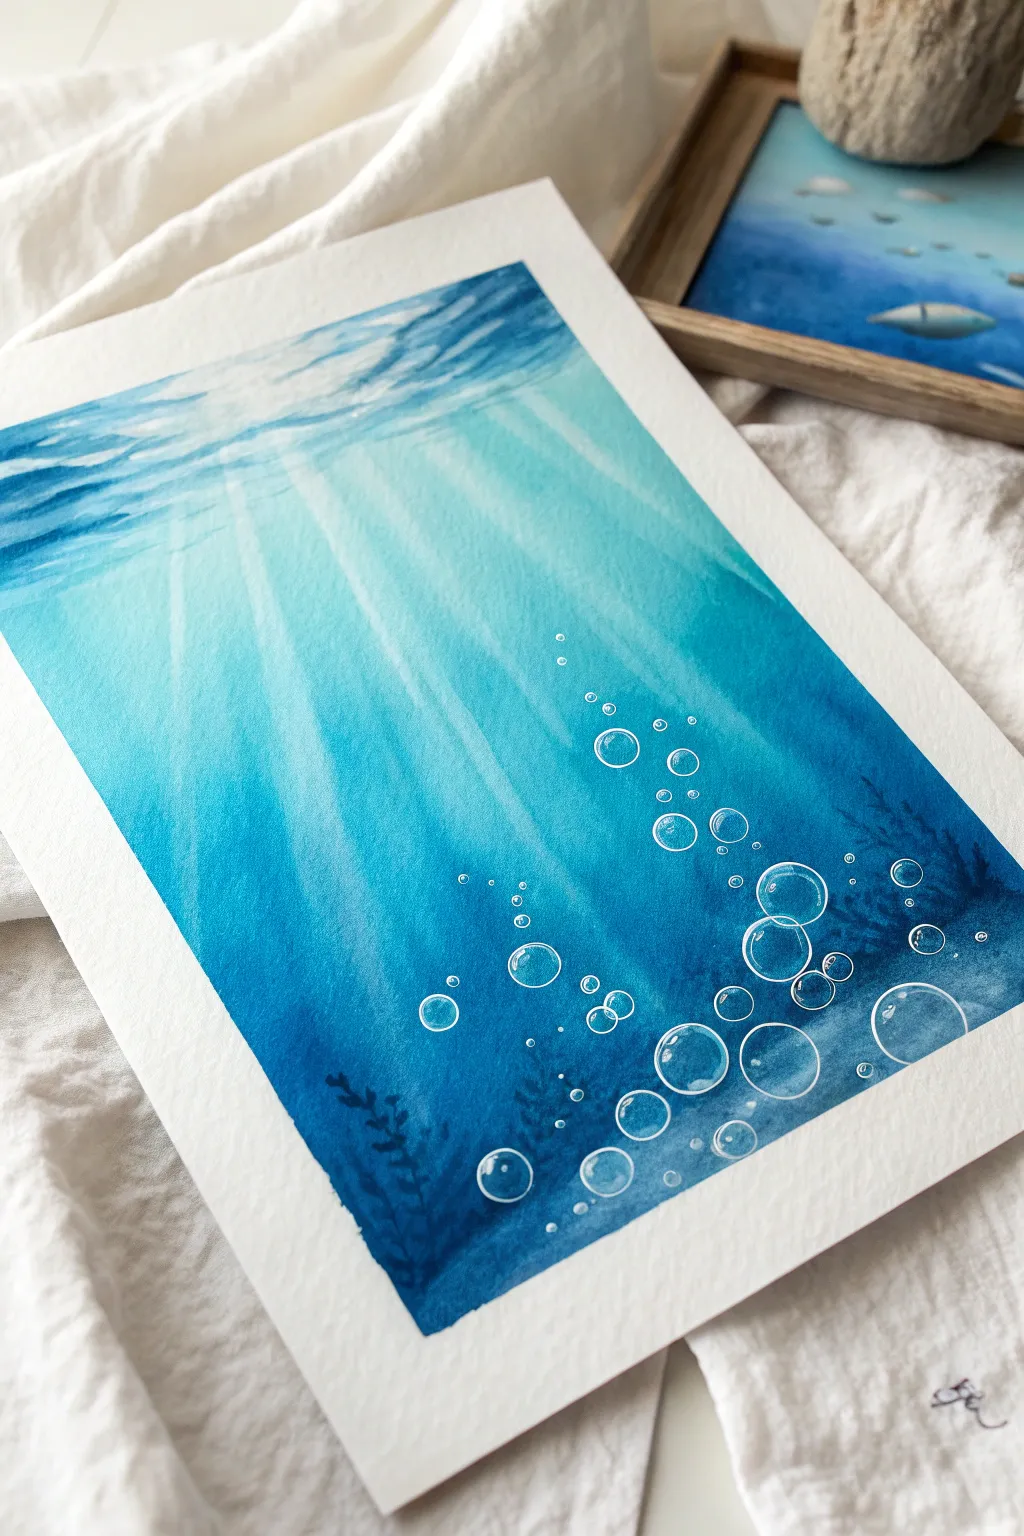
Capture the serene beauty of the deep ocean with this vertical gradient technique. This watercolor piece features striking sunbeams piercing through the depths, complemented by whimsical, rising bubbles for a magical underwater effect.
Step-by-Step Tutorial
Materials
- Cold Press Watercolor Paper (140lb/300gsm)
- Masking Tape
- Pencil
- Watercolor Paints (Turquoise, Cerulean Blue, Prussian Blue, Indigo)
- White Gouache or White Gel Pen
- Flat Wash Brush (1 inch)
- Round Detail Brush (Size 2 or 4)
- Clean Water
- Mixing Palette
- Paper Towels
Step 1: Setting the Scene
-
Tape it down:
Secure your watercolor paper to a board or table using masking tape along all four edges. This creates a crisp white border and prevents the paper from buckling during the wet-on-wet process. -
Pre-wet the paper:
Using your large flat brush, apply a generous layer of clean water over the entire paper surface. You want an even sheen that is glistening but not forming puddles.
Step 2: Creating the Gradient
-
Start with turquoise:
Load your flat brush with a watery Turquoise or light Aqua. Apply this horizontally across the top third of the paper, letting it flow naturally. -
Introduce the mid-tones:
While the paper is still wet, mix Cerulean Blue or a primary blue. Blend this into the turquoise, painting from the middle section downwards. -
Deepen the depths:
Switch to Prussian Blue or Indigo for the bottom third. Paint horizontal strokes, allowing the darker blue to bleed slightly upward into the mid-tones for a seamless transition. -
Add surface texture:
While the top area is still damp, dab a little concentrated blue pigment horizontally near the very top edge to mimic the rippling water surface seen from below.
Sunbeam Trouble?
If lifting doesn’t work because the paint dried too fast, use a stiff brush scrubbed gently with water, or paint the rays on top with diluted white gouache.
Step 3: Lifting the Light
-
Wait for the shine to fade:
Observe your paper. Wait until the water sheen disappears and the paper looks matte but feels cool and damp to the touch. -
Lift the first ray:
Using a damp, clean flat brush (blotted on a towel so it’s thirsty), firmly drag a diagonal line from the top left corner down toward the center. This lifts the pigment to create a sunbeam. -
Create multiple beams:
Repeat the lifting motion to create several radiating lines. Vary their widths slightly; some can be broad, while others are narrow shafts of light. -
Soften the edges:
If a ray looks too sharp, gently run a slightly damp brush along its edge to blur it back into the blue background. I find this softness makes the light look more ethereal. -
Dry completely:
Let the painting dry fully. This is crucial before moving on to the crisp details.
Make It 3D
Add tiny drop shadows under the bubbles using a diluted dark blue (on the side opposite the highlight) to make them pop off the page.
Step 4: Details & Bubbles
-
Paint deep silhouettes:
Mix a very concentrated Indigo or dark blue. Using your small round brush, paint subtle seaweed shapes or coral silhouettes in the bottom corners, keeping them loose and organic. -
Outline the bubbles:
Dip a fine round brush or use a white gel pen to draw circles of various sizes rising from the bottom right corner. Group some together and let others float solo. -
Add bubble highlights:
Paint a small, curved white line inside the top right or bottom left of each bubble to give them dimension and roundness. -
Enhance the sunbeams:
If your lifted rays faded too much during drying, you can glaze a very thin, watery white gouache over them to brighten the effect. -
Final speckles:
Flick a tiny amount of watery white paint or add tiny white dots near the bubbles to represent suspended particles catching the light. -
The reveal:
Once everything is bone dry, carefully peel away the masking tape at a 45-degree angle to reveal your clean white border.
Step back and admire your peaceful underwater window
School of Fish With Basic Shapes
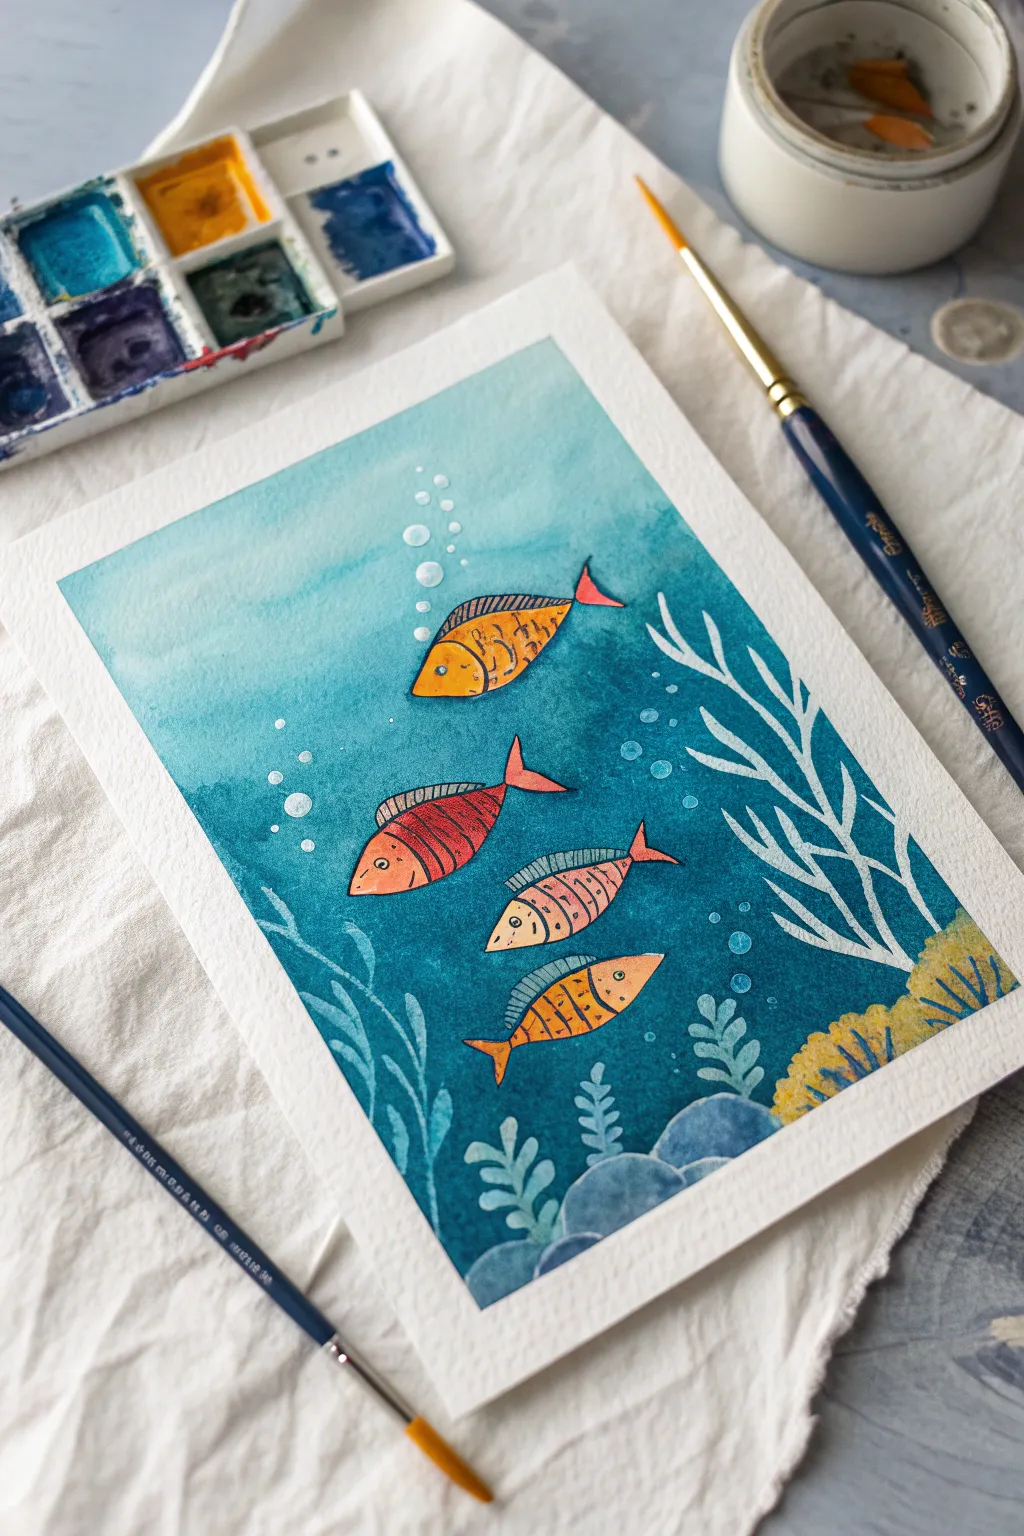
Dive into watercolor with this charming underwater scene featuring four stylized fish swimming through a deepening blue gradient. This project combines simple wet-on-wet background techniques with doodled details for a playful, illustrative look.
How-To Guide
Materials
- Cold press watercolor paper (taped down)
- Watercolor paint set (teals, blues, oranges, reds)
- Round brushes (sizes 6, 4, and a fine liner brush)
- Black waterproof fine-liner pen (0.3mm or 0.5mm)
- White gel pen or white gouache
- Clean water jar and paper towels
- Masking tape or washi tape
Step 1: Setting the Scene
-
Secure Your Paper:
Begin by taping down all four edges of your watercolor paper to a board. This keeps the paper flat when wet and creates that crisp, professional white border at the end. -
Pre-wet the Background:
Using your largest brush and clean water, gently wet the rectangular area where your ocean will be. Aim for a glistening sheen on the paper, but avoid creating puddles. -
Start the Gradient:
Load your brush with a watery, light teal or turquoise mix. Paint the top third of the paper, letting the color spread and diffuse naturally into the damp surface. -
Deepen the Depths:
Switch to a darker blue or teal. Start painting from the middle section downwards, blending it slightly into the lighter top area while the paper is still damp. -
Add the Darkest Tones:
For the bottom third, use a concentrated Prussian blue or deep turquoise to represent the deeper ocean water. Let the colors bleed together seamlessly, then allow the background to dry completely before moving on.
Step 2: Painting the Fish
-
Sketch the Outlines:
Lightly sketch four simple almond shapes for the fish bodies using a pencil. Arrange them diagonally as if they are swimming upward together, varying their sizes slightly. -
Base Color for Fish:
Fill in the fish bodes with flat washes of warm colors. Paint the top fish in orange-yellow, the second in a reddish-orange, and the bottom two in lighter orange tones. -
Fin Details:
While the bodies are drying, use a smaller brush to paint triangular shapes for the tail fins and dorsal fins. I like to use a slightly darker or reddish shade here to make them pop against the body color. -
Let the Fish Dry:
This is crucial—ensure the painted fish are 100% dry. If they are cool to the touch, they are still damp; wait until the paper feels room temperature.
Uneven Background?
If your gradient looks streaky, your paper likely dried too fast. Next time, use slightly more water in your initial wash or work faster to keep the “wet edge” active.
Step 3: Inking and Details
-
Outline the Fish:
Using your waterproof black pen, trace the outlines of the fish bodies and fins. The lines don’t need to be perfect; a sketchy quality adds character. -
Add Stripes and Scales:
Draw patterns inside the fish. Try vertical stripes on the red fish, a cross-hatch pattern on the top fish, and simple curved lines for scales on the bottom two. -
Draw the Eyes:
Add a small circle for the eye near the front of each fish, placing a tiny black dot in the center for the pupil. -
Painting Seaweed:
Mix a muted teal or blue-green shade. Using a size 4 brush, paint wavy, leafy shapes rising from the bottom left corner, layering them over the dark blue background. -
Adding Coral Shapes:
In the bottom right corner, use yellow ochre or gold paint to dab in some rounded coral or rock shapes. Add small blue curved strokes at the very bottom for rocky textures. -
White Coral Accents:
With white gouache or a gel pen, draw branching, tree-like white coral structures on the right side. The opaque white contrasts beautifully against the deep blue water. -
Adding Bubbles:
Paint or draw a column of small white circles rising from the top fish to simulate air bubbles heading to the surface. -
Final Touches:
Scatter a few tiny white dots and small circles throughout the blue water to mimic suspended particles and distant bubbles. -
The Reveal:
Once everything is completely dry, slowly peel away the masking tape at a 45-degree angle to reveal your clean edges.
Make It Pop
Add a tiny dot of white gel pen to the black pupil of each fish eye. This ‘catchlight’ instantly brings the fish to life and makes them look friendly.
Enjoy the calm feeling of your finished underwater scene
Ocean View From a Sea Cave
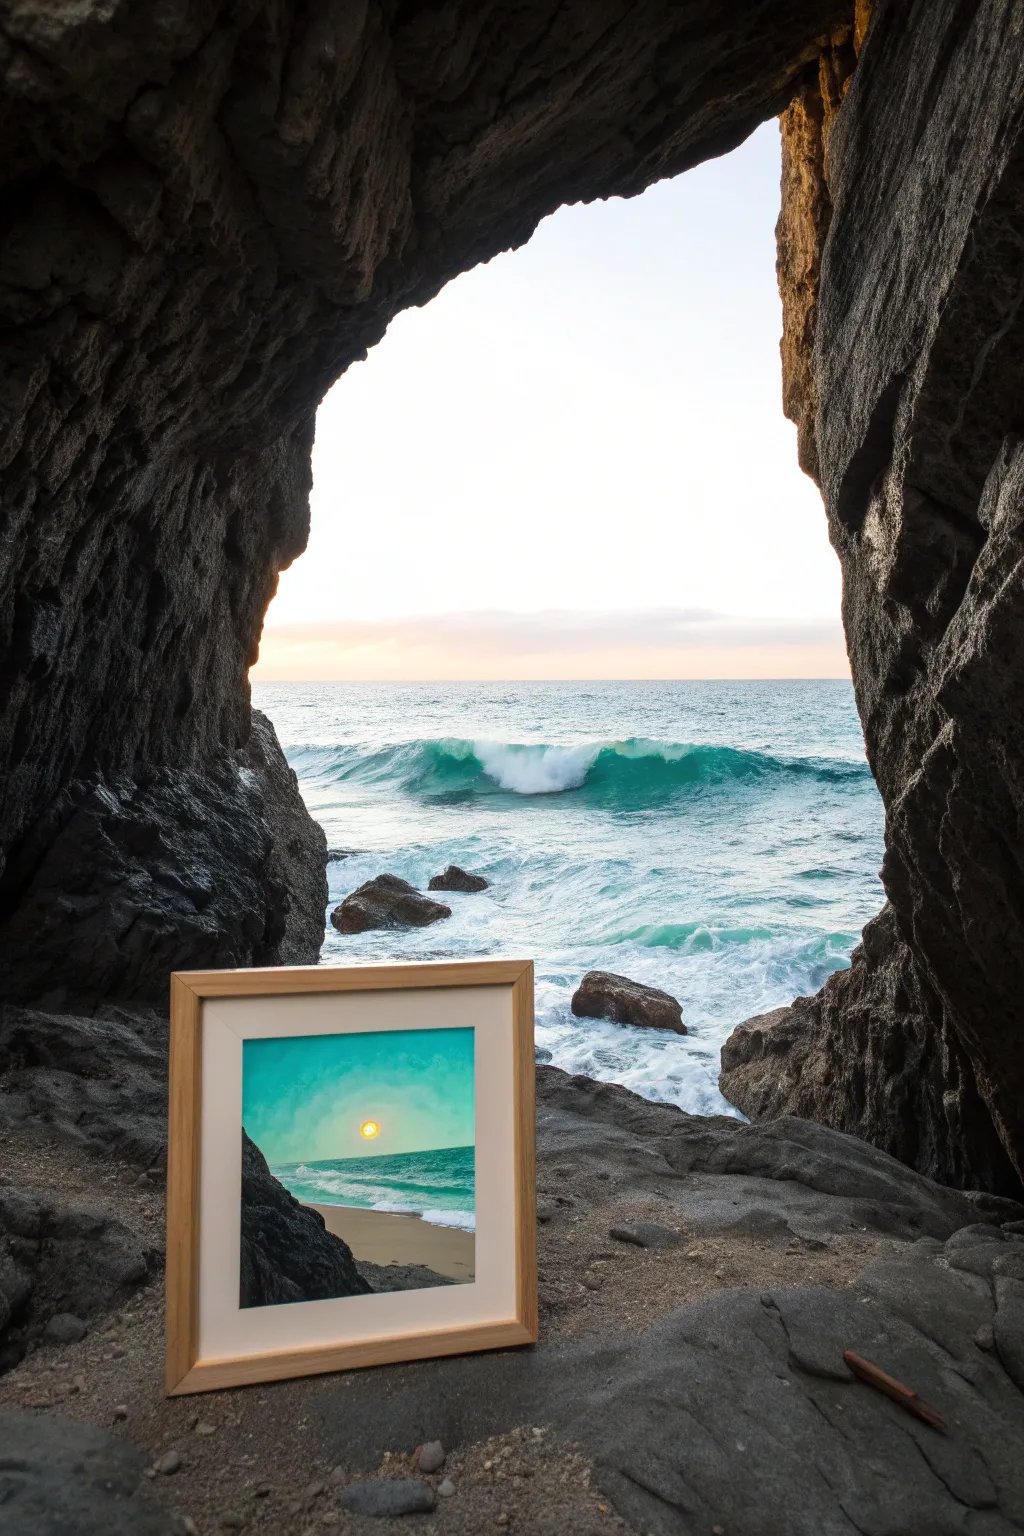
Capture the magic of looking out from a hidden cove with this vibrant acrylic painting. The striking contrast between the bright, teal-infused sky and the dark, silhouetted rocks creates a sense of depth that draws the viewer right in.
Step-by-Step Tutorial
Materials
- Square canvas or heavy watercolor paper (8×8 inches)
- Acrylic paints: Titanium White, Turquoise, Phthalo Blue, Yellow Ochre, Cadmium Yellow, Burnt Umber, Carbon Black
- Flat shader brushes (3/4 inch and 1/2 inch)
- Small round detail brush (size 1 or 2)
- Palette or mixing plate
- Cup of water and paper towels
- Painter’s tape (for clean edges)
- Light wood box frame (optional, for display)
Step 1: Setting the Scene
-
Tape the borders:
Begin by taping down the edges of your paper or canvas to a flat surface. This not only keeps the artwork steady but ensures you’ll have a crisp, white border when you peel it away later. -
Sky base coat:
Mix a generous amount of Turquoise with Titanium White to create a soft, glowing teal. Using your larger flat brush, paint the upper two-thirds of the canvas with horizontal strokes. -
Create the atmospheric gradient:
Before the teal dries, blend in a slightly darker mix of Phthalo Blue and Turquoise at the very top corners to create a vignette effect. Then, mix more White into your original teal color and blend it downwards towards the horizon line for a hazy, bright look. -
Paint the sun:
Once the sky is tacky but not fully dry, use a small round brush to place a circle of pure Titanium White near the center horizon. While wet, dab a tiny dot of Cadmium Yellow in the center and soften the edges into the surrounding sky for a glowing effect.
Uneven Horizon?
If your ocean line looks crooked, place a strip of tape across the canvas exactly where you want the horizon. Paint the water up to the tape, let dry, and peel for a perfect line.
Step 2: The Ocean and Shore
-
Darken the horizon:
Mix Phthalo Blue with a touch of Burnt Umber to create a deep sea blue. With a steady hand and a flat brush, paint a straight horizon line right below your sky area. -
Layer the water:
As you move down from the horizon, gradually mix in your sky turquoise color. The water should transition from deep blue to a lighter, jewel-toned teal as it approaches the shore. -
Paint the sand:
Mix Yellow Ochre with Titanium White and a tiny speck of Burnt Umber for a warm sand color. Fill the bottom section of the canvas, curving the shoreline slightly to look natural. -
Add the sea foam:
Using a relatively dry brush loaded with Titanium White, stipple and drag paint along the meeting point of the blue water and tan sand. Create a jagged, uneven line to mimic crashing wave foam.
Step 3: Foreground Rocks
-
Block in rock shapes:
Mix Carbon Black with Burnt Umber to create a near-black dark gray. Using the edge of a flat brush, block in a large, jagged rock formation on the left side, extending from the bottom corner up towards the sky. -
Add texture to the rocks:
While the dark paint is still wet, I like to crumple a small piece of paper towel and dab it gently against the rock shape to give it a rugged, stone-like texture. -
Highlight the stone:
Mix a medium gray using Black and White. Lightly dry-brush the top edges of your dark rocks where the sun would naturally hit them, giving them dimension and form. -
Refine the composition:
Evaluate your painting. If the foreground feels empty, add a small sliver of dark rock on the bottom right edge or tiny pebbles in the sand to balance the heavy rocks on the left. -
Final sun details:
Go back to your sun with a tiny dot of pure Cadmium Yellow right in the center if it faded during drying. This makes it pop as the focal point. -
Reveal the border:
Wait until the painting is completely bone-dry. Slowly and carefully peel away the painter’s tape at a 45-degree angle to reveal your clean white edges.
Level Up: Framing
To match the photo perfectly, float mount your artwork in a deep shadow box frame with a light wood finish. This mimics the organic feel of the sea cave setting.
Now you have a peaceful window to the sea that you can enjoy from anywhere in your home


Have a question or want to share your own experience? I'd love to hear from you in the comments below!