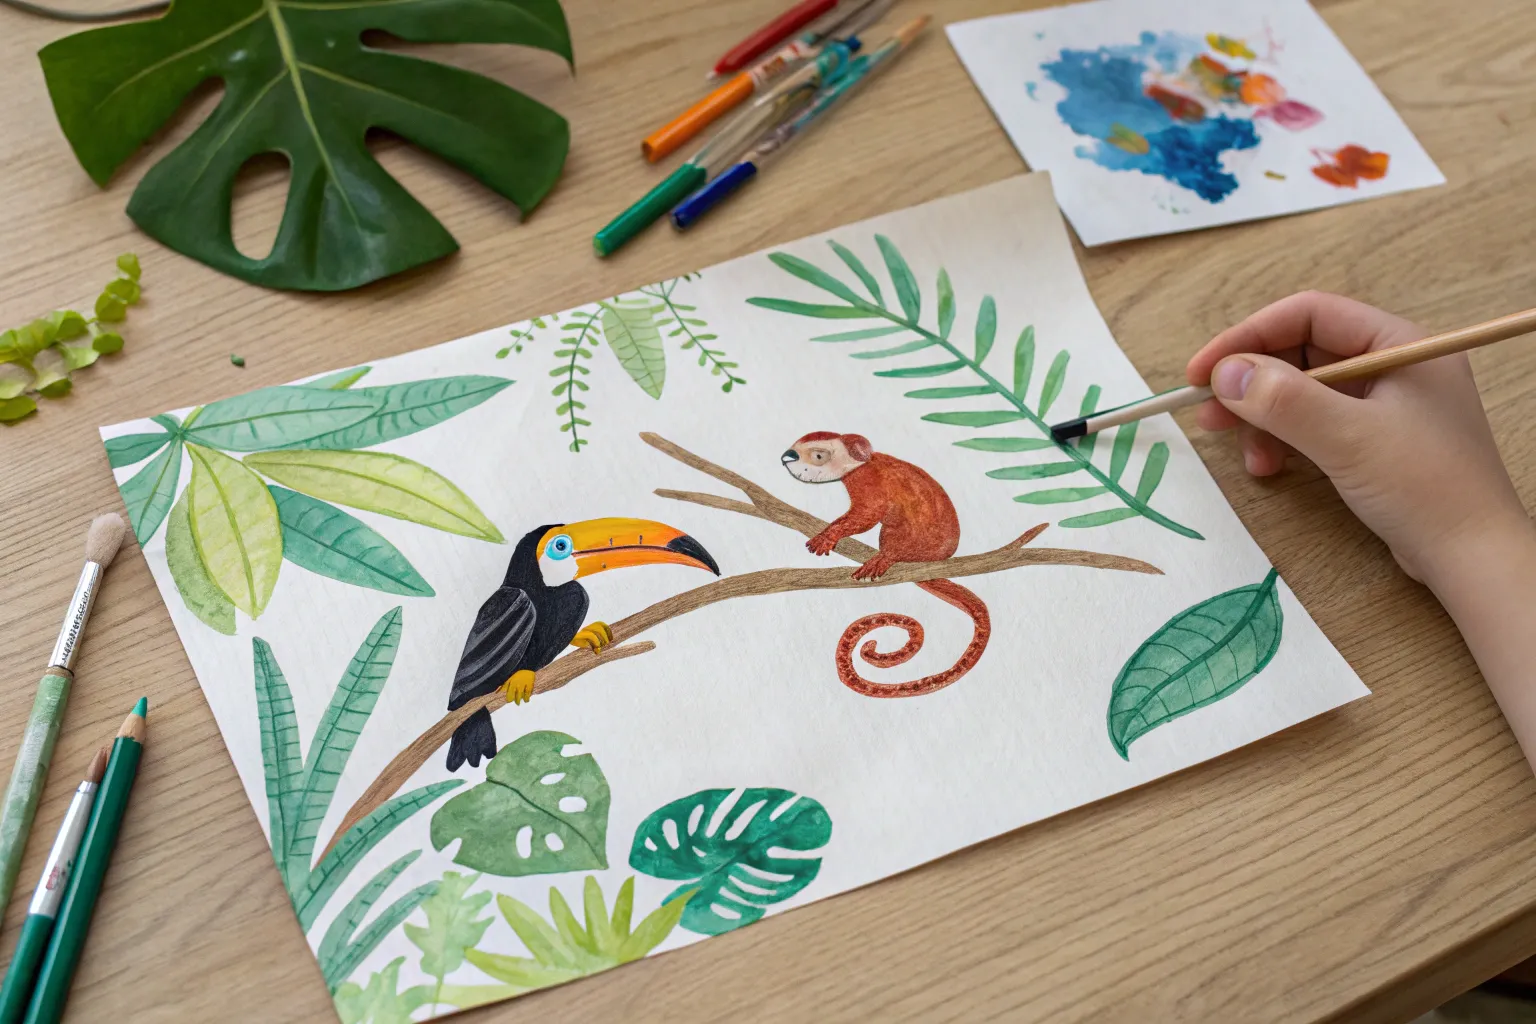
If you’re craving something lush, colorful, and totally doable, rainforest art is my go-to because you can build a whole jungle vibe with simple shapes. I pulled together my favorite easy rainforest art ideas that feel playful and classroom-ready, but still look amazing on the wall.
Layered Rainforest Paper Collage Background
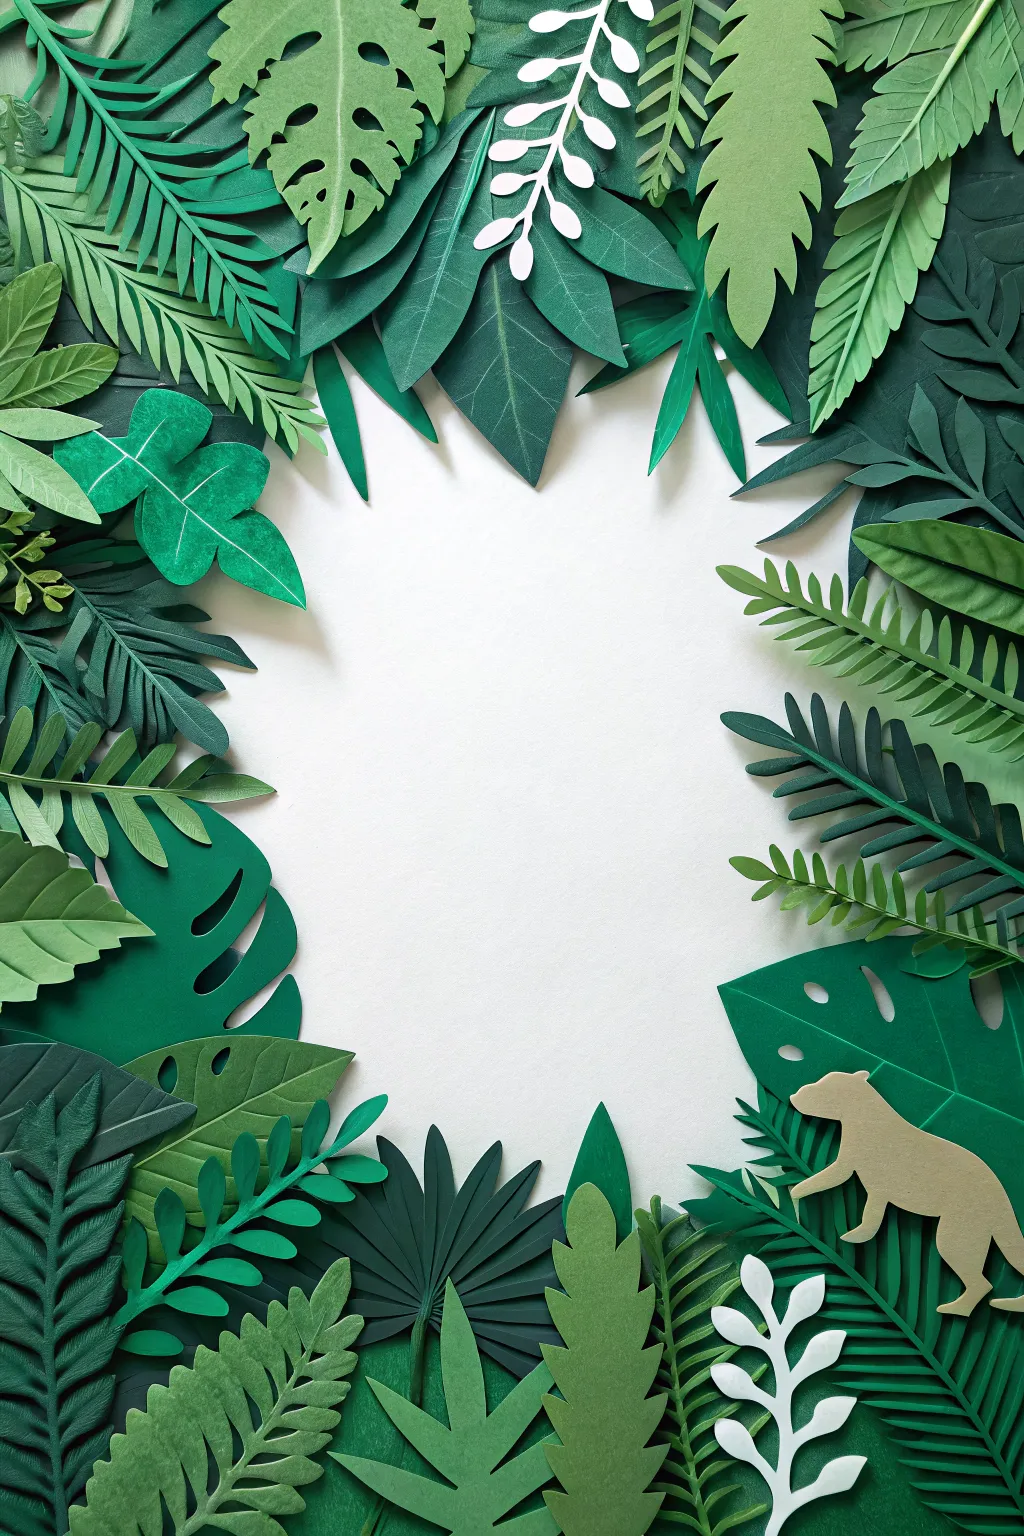
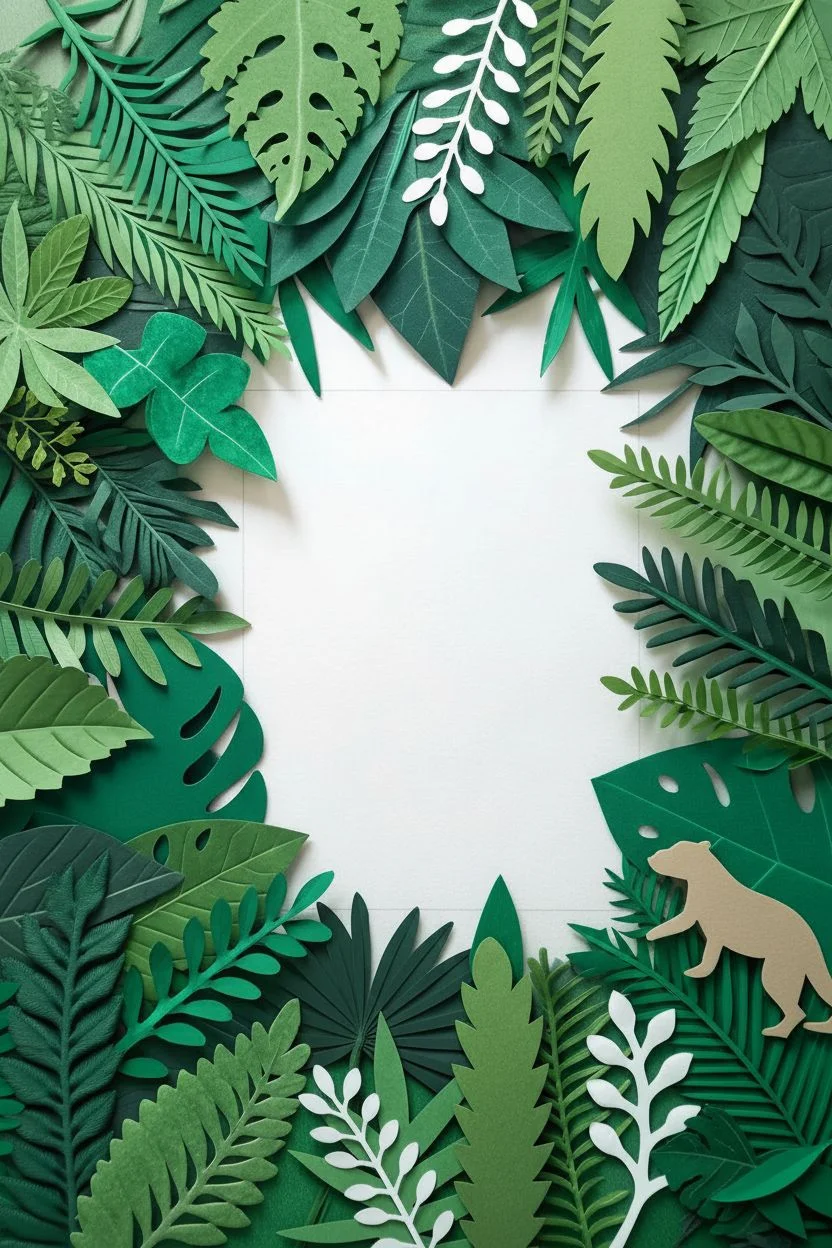
Transform simple cardstock into a vibrant, dimensional rainforest canopy with this layering technique. By arranging various leaf shapes in diverse shades of green, you’ll create a lively organic border perfect for framing photos or quotes.
Step-by-Step Tutorial
Materials
- Cardstock or construction paper (5-7 shades of green, plus white and beige)
- Small, sharp detail scissors
- Pencil for sketching
- Craft knife and cutting mat (optional but helpful)
- Glue stick or craft glue
- Foam adhesive dots or squares
- Large white backing board (A3 or 11×17 inch recommended)
Step 1: Leaf Preparation
-
Sketch your foliage:
Begin by sketching various leaf shapes on the back of your green cardstock. Aim for variety: large monstera leaves, long slender ferns, jagged palm fronds, and simple oval leaves. -
Varied palette:
Distribute your shapes across different shades of green. Use lighter greens for smaller, delicate ferns and deeper forest greens for broad, background leaves to create depth. -
Cutting phase:
Carefully cut out all your leaf shapes using detail scissors. For intricate internal spaces, like the holes in a monstera leaf, a craft knife on a cutting mat offers more precision. -
Add texture:
To make leaves look less flat, use the edge of your scissors or a bone folder to gently score a central vein down the middle of larger leaves. -
Shape and curl:
Gently fold along the score lines you just made. For the ferns and longer leaves, curl the tips slightly around a pencil to give them an organic, windswept appearance. -
Accents and animals:
Cut a few stylized fern shapes from white paper for contrast. On beige paper, sketch and cut a simple silhouette of a jungle cat or animal of your choice to inhabit your scene.
Glue Not Sticking?
Textured cardstock sometimes resists regular glue sticks. Try using tacky craft glue or double-sided tape for the heavier base layers.
Step 2: Layering and Assembly
-
Define the boundary:
Place your white backing board on a flat surface. Lightly outline a central oval or rectangle in pencil to mark the ’empty’ space you want to preserve. -
Base layer:
Start with your darkest, largest leaves. Glue them flat against the backing board, positioning them so they extend inward from the outer edges toward your central mark. -
Mid-ground volume:
Select medium-sized leaves for the next layer. Instead of gluing these flat, attach a small foam dot to the back of each leaf base before placing it. -
Creating overlap:
Place these mid-ground leaves so they slightly overlap the base layer. The foam dots will lift them up, creating natural-looking shadows. -
Detailed foreground:
Now apply your smallest, lightest leaves and the white fern accents. Focus on the corners and gaps to create density. -
Top layer lift:
For the very top leaves, you might stack two foam dots together for extra height, making the foliage feel dense and lush. -
Placing the resident:
Position your beige animal silhouette in the lower right or left corner, tucking its feet slightly behind a foreground leaf so it looks integrated into the scene. -
Final adjustments:
Evaluate your composition. If you see large gaps revealing too much white background at the edges, slip small scrap leaves underneath the top layers to fill them. -
Clean up:
Gently erase any visible pencil marks from your central negative space to keep the artwork looking crisp.
Pro Tip: Veining
For extra realism, sketch vein details on your leaves using a colored pencil one shade darker than the paper before you start folding.
Now you have a lush, three-dimensional piece of paper art that brings the rainforest into your home


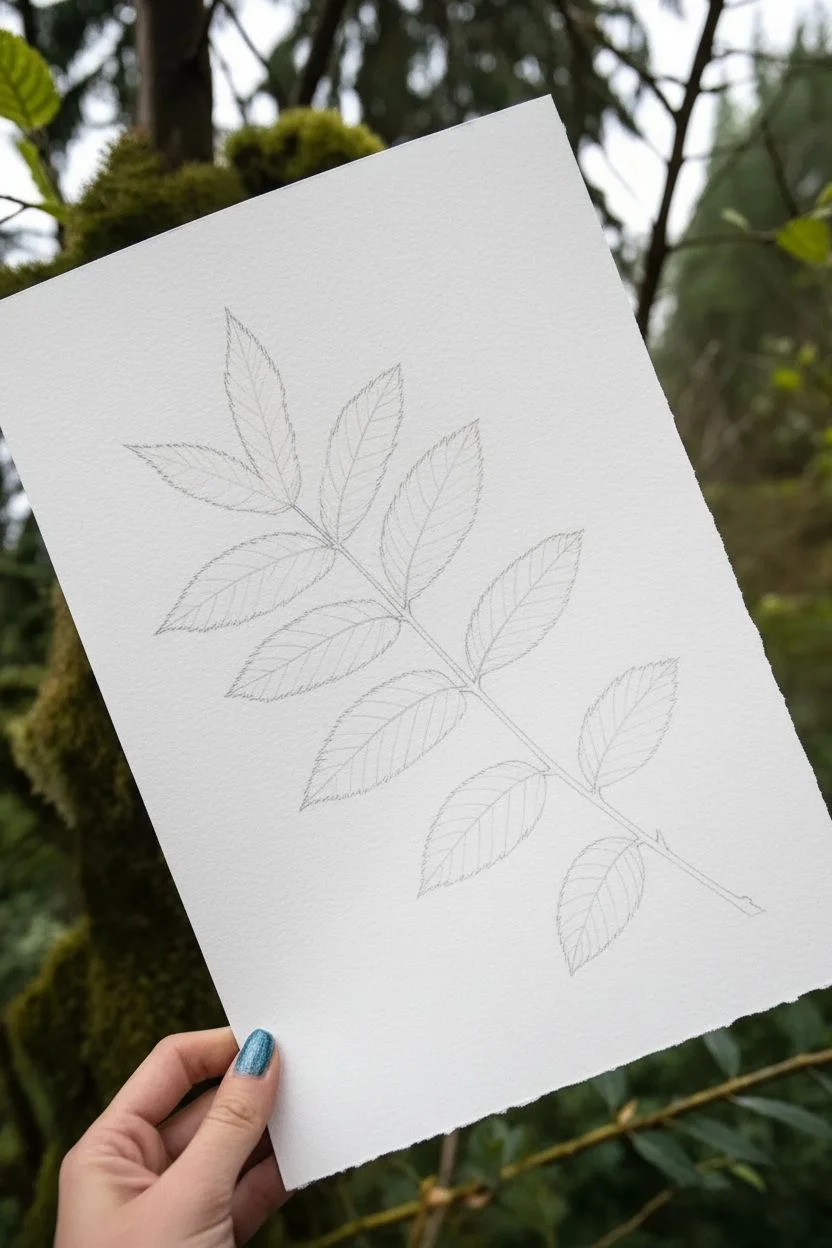
Big Tropical Leaf Painting With Vein Lines


Capture the beauty of the rainforest with this elegant watercolor study of a divided palm leaf. The striking contrast between deep green pigments and the crisp white paper veins makes this piece look professionally detailed yet deceptively simple to execute.
Detailed Instructions
Materials
- Cold press watercolor paper (A4 or larger)
- Watercolor paints (Sap Green, Hooker’s Green, and a touch of Indigo or Payne’s Gray)
- Round watercolor brush (size 6 or 8)
- Fine liner brush (optional, for details)
- Pencil (HB or lighter)
- Eraser
- Jar of clean water
- Paper towels
- Palette for mixing
Step 1: Sketching the Structure
-
Draw the central vein:
Start by lightly sketching a long, slightly curved line diagonally across your paper. This will be the midrib or central spine of your leaf. -
Outline the leaf shape:
Draw a large, elongated teardrop shape around your central line to define the overall boundary of the leaf. Keep your pencil strokes very faint so they don’t show through the paint later. -
Mark the segments:
Sketch the individual leaflets or segments. These should curve outward from the center spine toward the edge. Vary their width slightly to make the leaf look natural and organic. -
Define the gaps:
Go back over your segments and clearly mark the gaps between them. The key to this painting is leaving the white paper untouched for the veins, so sketch double lines for each vein to remind yourself where *not* to paint.
Step 2: Painting the Leaflets
-
Prepare your greens:
Mix a generous amount of medium green on your palette. I like to have a puddle of lighter yellow-green and a darker blue-green ready so I can dip into both while painting. -
Start at the top:
Begin painting the top-most leaflet. Load your round brush with the medium green water-to-paint ratio. -
Mind the gap:
Carefully paint the shape of the leaflet, stopping just short of your pencil lines for the central vein and the side veins. This preserved white space is crucial for the final look. -
Vary the saturation:
While the paint is still wet on the paper, drop in a tiny bit of darker green near the central spine and lighter green near the tip. Let them bleed together naturally. -
Continue downwards:
Move to the next leaflet segment. Paint slightly curved strokes that follow the direction of the leaf’s growth, pulling the brush from the center outward. -
Create hard edges:
Ensure the edges of your paint strokes are crisp against the white vein lines. If your brush is too wet, dab it on a paper towel to gain more control.
Paint Bleeding into Veins?
If green paint accidentally flows into your white vein lines, quickly blot it with the corner of a clean tissue. Once dry, you can use opaque white gouache to tidy up the line.
Step 3: Adding Depth and Detail
-
Darken the shadows:
Once you have filled in all the leaflets, look for areas that need more contrast. Mix your darkest green (add a touch of Indigo) and apply it to the base of the leaflets near the center spine. -
Refine the tips:
Check the outer tips of the leaves. If any look ragged, smooth them out with a confident stroke of medium-green paint. -
Paint the stem:
Using a steady hand, paint the bottom stem extending from the leaf base. It should be thin and consistent in width. -
Soften harsh lines:
If any paint lines inside the leaf segments look too harsh where you blended colors, use a clean, slightly damp brush to gently soften the transition between light and dark green. -
Erase pencil marks:
Allow the painting to dry completely—wait until the paper is barely cool to the touch. Then, gently erase any visible pencil lines in the white vein areas.
Natural Variety
Don’t make every leaf segment identical. Vary the width and curvature of the leaflets slightly. Nature is rarely perfectly symmetrical, and these irregularities add realism.
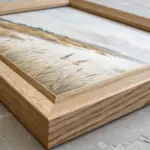
Frame your tropical masterpiece in a simple wood frame to bring a fresh, botanical vibe to your room


Handprint Parrot In Bright Color Blocks
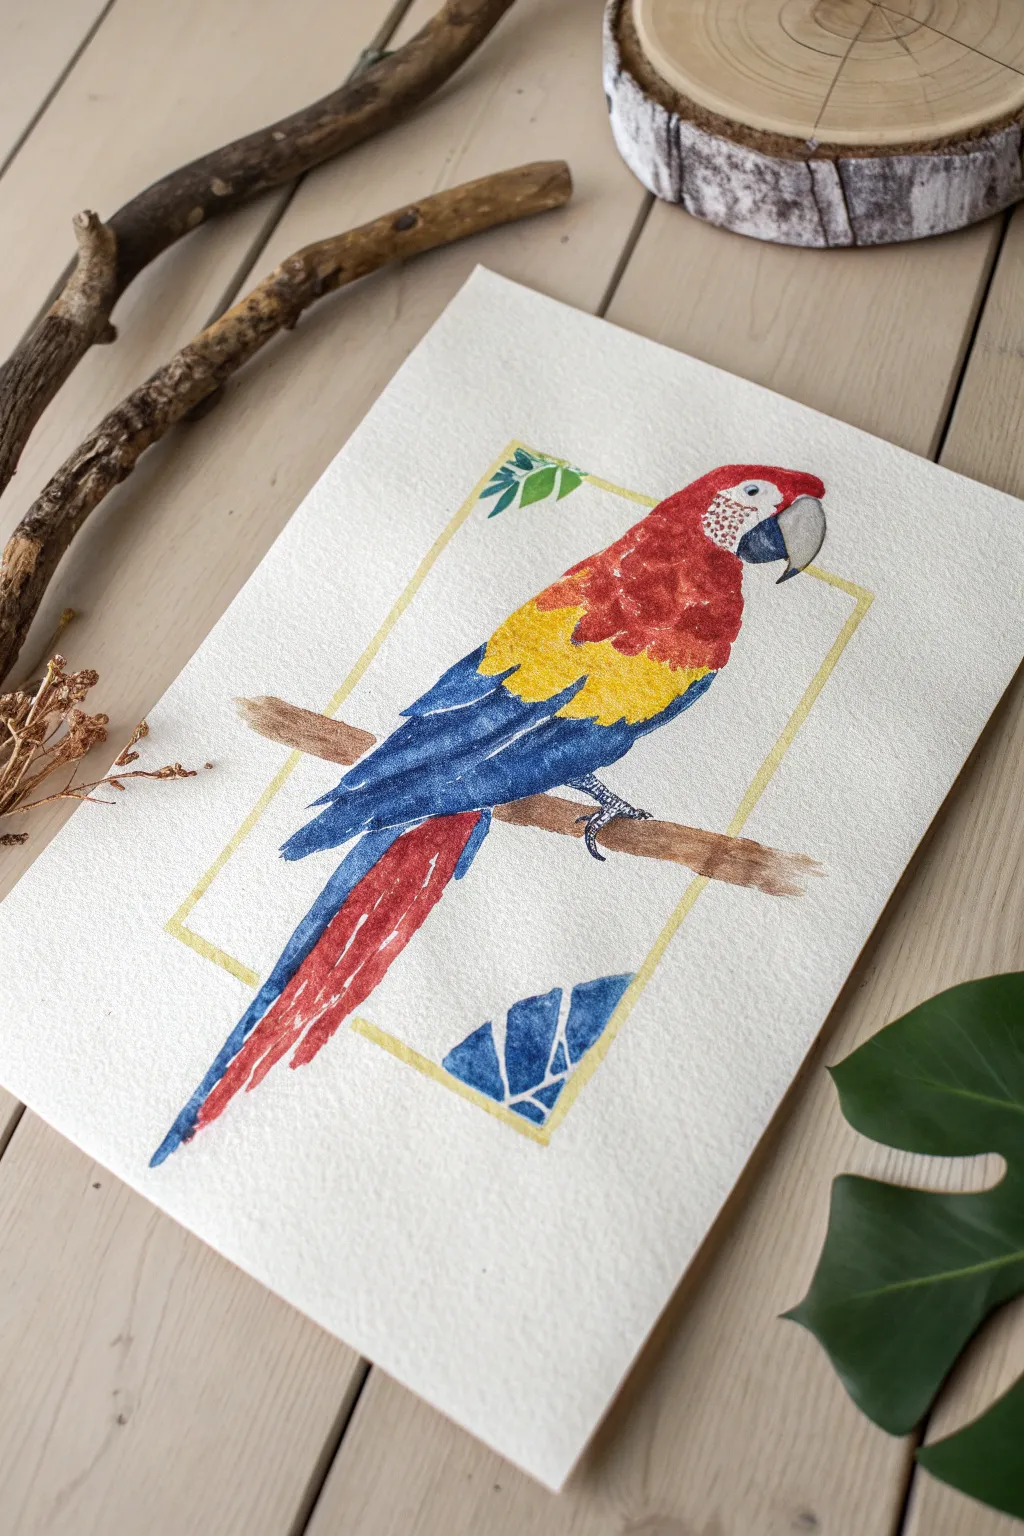
Capture the brilliant colors of the rainforest with this vibrant macaw painting, which combines classic watercolor techniques with a modern graphic border. The distinct color blocks make this an approachable project for beginners while delivering a professional, framed look.
Step-by-Step
Materials
- Cold press watercolor paper (300 gsm recommended)
- Watercolor paints (Red, Yellow, Blue, Brown, Black)
- Round watercolor brushes (sizes 4 and 8)
- Fine liner brush (size 0 or 1)
- Pencil (HB or H)
- Ruler
- Masking tape or painter’s tape
- Eraser
- Jar of water
- Paper towels
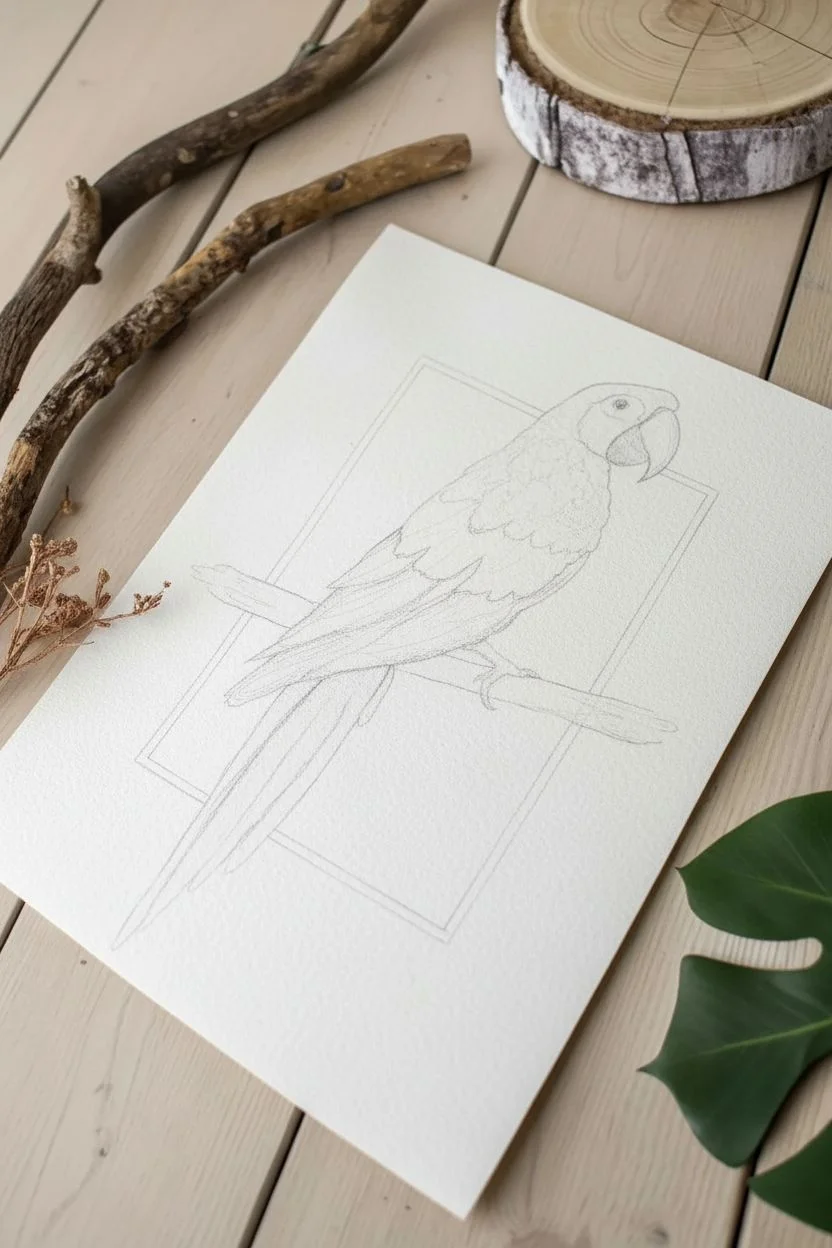
Step 1: Sketching the Layout
-
Outline the frame:
Begin by using your ruler to draw a light rectangular frame in the center of your paper. Leave the top left corner slightly ‘open’ or plan to erase it later, as we will paint some leaves extending out of it. -
Sketch the parrot shape:
Lightly sketch the contour of the macaw. Start with a rounded head shape, extending down into a long, tapered tail that breaks out of the bottom of your rectangle frame. -
Add the branch:
Draw a diagonal branch that the parrot is perched on. Ensure the branch extends past the parrot’s body on both sides, intersecting your rectangular frame lines. -
Define the color zones:
Lightly map out the distinct sections of the bird: the red head/chest, the yellow wing patch, and the blue flight feathers. Don’t press too hard with the pencil, as graphite can smudge under wet paint.
Step 2: Painting the Base Layers
-
Paint the head red:
Start with a saturated red wash. Fill in the head and chest area, carefully avoiding the eye patch and the beak. Use a dabbing motion near the neck to suggest texture. -
Apply the yellow hues:
Rinse your brush thoroughly. Paint the middle wing section with a bright yellow. Allow the red and yellow to touch slightly; if they bleed a little, it creates a nice natural orange transition. -
Fill the blue feathers:
Using a deep blue, fill in the lower wing feathers and the long tail feathers. I like to leave tiny slivers of white paper showing between some feather broad strokes to add dimension. -
Paint the beak and face:
Use a very diluted grey or black for the lower beak and a white or cream wash for the face patch. Add small red dots on the face patch for that classic macaw detail. -
Color the branch:
Mix a warm brown and paint the branch. Keep the stroke fairly rough to mimic bark texture.
Bleeding colors?
If your red and yellow are mixing too much and turning muddy, let the red section dry completely before painting the yellow section next to it.
Step 3: Details & Graphic Elements
-
Paint the frame:
Mix a yellow-ochre or gold color. Carefully paint the rectangular lines you drew earlier with a steady hand or a ruler helper. -
Create the geometric leaves:
At the bottom inside the frame, paint blue geometric shapes that suggest foliage. Use the same blue from the tail to tie the color palette together. -
Add top corner foliage:
Paint small green leaves bursting out of the top left corner of the frame for a dynamic composition. -
Define the feet:
With your fine liner brush and dark grey paint, carefully draw the claws wrapping around the branch. -
Add final textures:
Once the main colors are dry, use a slightly darker shade of blue to add thin lines on the wing feathers for definition. Do the same with a darker red on the chest to suggest plumage volume.
Make it Shine
Once the painting is fully dry, use a metallic gold pen or paint to go over the rectangular border for a shimmer that catches the sunlight.
Step back and admire your tropical masterpiece as it dries


Toilet Roll Toucan With A Giant Beak
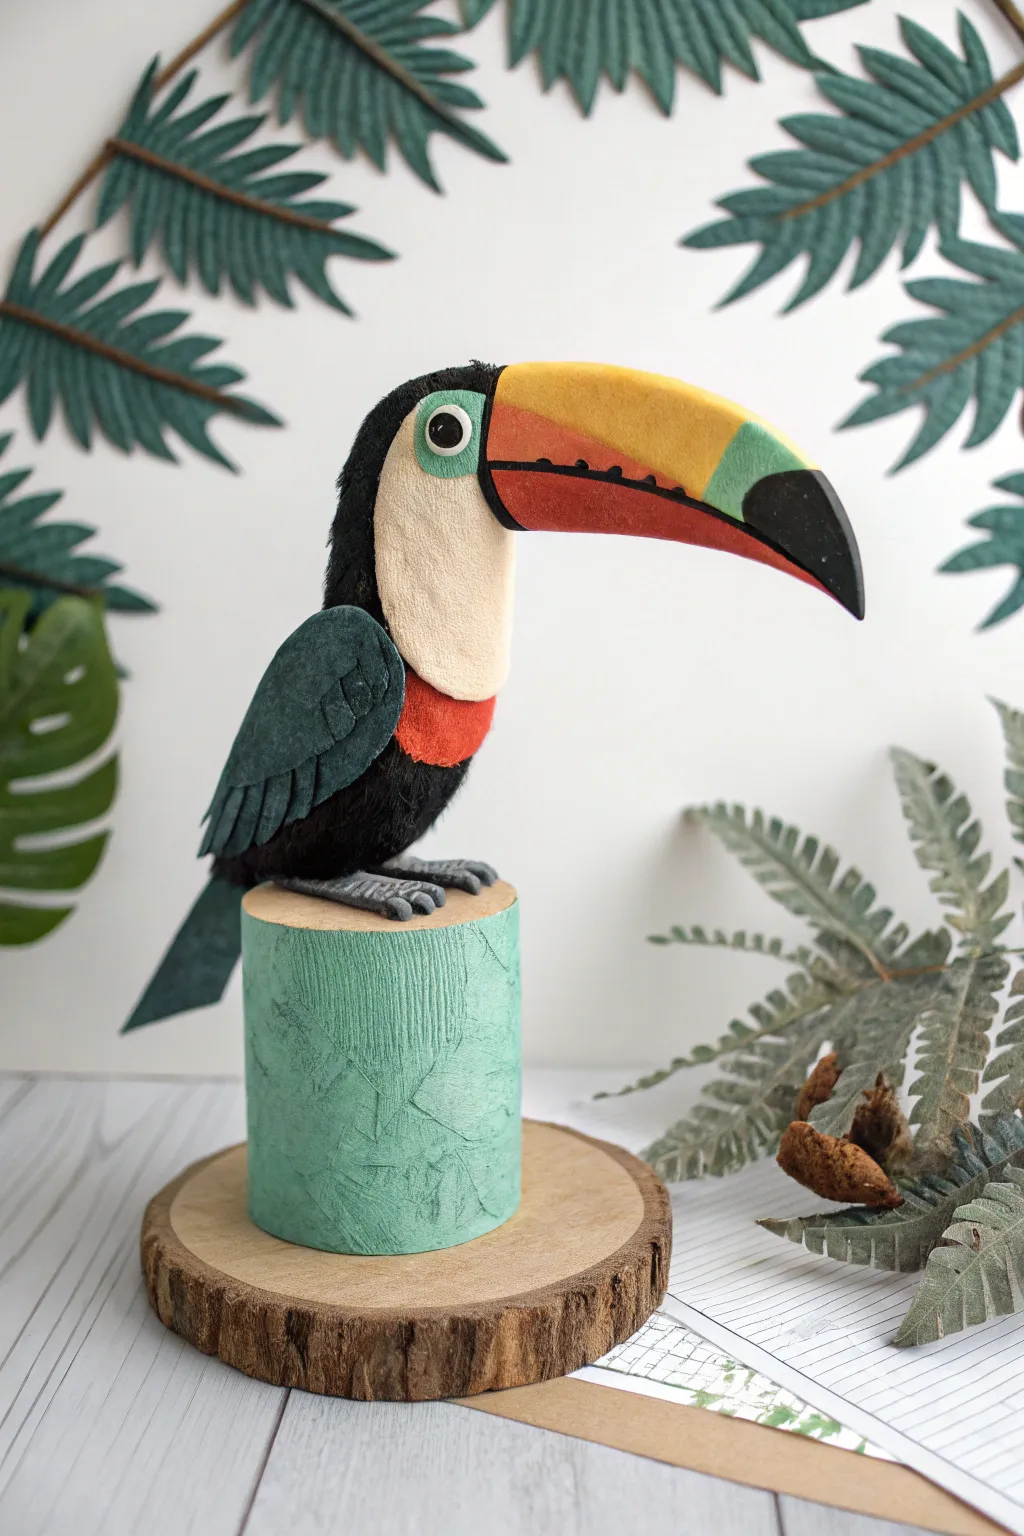
Transform a simple cardboard tube into a stunning, textured toucan that looks ready to take flight. This project combines the structure of recycled materials with the soft elegance of felt to create a surprisingly realistic rainforest friend.
Step-by-Step Guide
Materials
- Toilet paper tube or cardboard tube (approx. 4 inches tall)
- Wide cardboard cylinder or small round gift box (for the perch)
- Black, white, and red faux fur or textured felt fabric
- Stiff colored felt sheets (yellow, orange, red, green, black, dark teal)
- Aluminum foil
- Craft wire or floral wire
- Hot glue gun and glue sticks
- Fabric glue
- Scissors and detail scissors
- Teal acrylic paint
- Black embroidery thread or fine marker
- Small plastic safety eye or black bead
- Wooden coaster or wood slice base
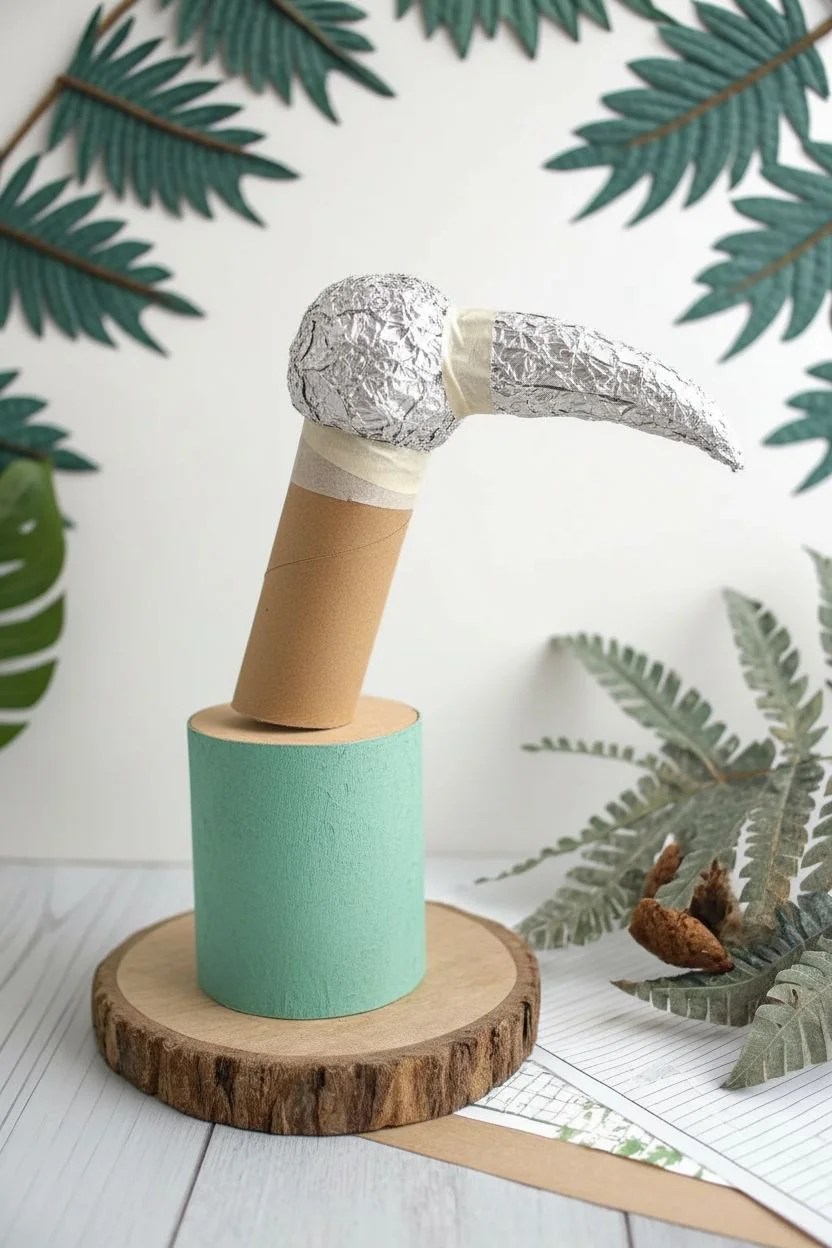
Step 1: Building the Beak and Body
-
Form the Body Core:
Cut your toilet paper tube to about 4 inches in length. To give the bird a slight posture, cut the bottom at a subtle angle so it leans back comfortably when standing. -
Sculpt the Head:
Crumple a ball of aluminum foil into a dome shape that fits perfectly on top of the cardboard tube. Glue this dome securely to the top opening to create the toucan’s rounded head. -
Create the Beak Armature:
Fold a piece of aluminum foil into a long, curved beak shape. It should be thick at the base and taper to a point. Glue the base of this beak firmly to the center of the foil head. -
Smooth the Shape:
If the transition between the foil head and cardboard body is too sharp, wrap a little masking tape or a thin layer of quilt batting around the
Glue Control
Use hot glue for the structural parts (foil, tube) but switch to tacky fabric glue for the felt pieces. Hot glue can leave lumps under the felt that spoil the smooth finish.
Step 2: Feathering the Bird
-
Base Layer Fur:
Cut a piece of black faux fur or textured felt to wrap around the back and sides of the body, leaving the chest area exposed. Glue specifically along the edges to keep the fur fluffy. -
The White Bib:
Cut an oval shape from white or cream felt for the face and chest. Glue this onto the front of the tube, tucking the edges slightly under the black fur for a seamless look. -
Adding the Red Accent:
Cut a crescent moon shape from red felt or fur. Glue this directly below the white bib, creating that classic toucan chest band. -
Constructing the Wings:
Cut two teardrop shapes from stiff dark teal felt for the wings. To add texture, I like to cut separate, smaller ‘feather’ layers and glue them overlapping onto the main wing shape. -
Attach the Wings:
Glue the finished wings to the sides of the body. Position them so they angle downwards, covering the side seams where the black and white fabrics meet. -
The Tail Feathers:
Cut a long, rectangular piece of stiff dark teal felt for the tail. Glue it to the inside back bottom edge of the tube so it extends downwards and outwards.
Step 3: The Colorful Beak & Details
-
Covering the Beak:
This step requires precision. Cut shapes of colored felt (yellow, orange, red, green, black) to fit the sections of your foil beak. Start with the yellow top section, then add the orange side stripes. -
Beak Details:
Glue the black tip onto the end of the beak. Use thin strips of black felt or a marker to draw the separation line between the upper and lower beak mandibles. -
The Eye Patch:
Cut a small circle of light mint green felt. Glue this onto the white face area, right next to the beak base. -
Adding the Eye:
Glue a plastic safety eye or a black bead into the center of the mint green circle. This instantly brings the bird to life. -
Creating Feet:
Wrap two short pieces of craft wire with grey felt or thick grey yarn to make toes. Bend them into claws and glue them to the bottom front edge of the bird’s body.
Make It Glossy
To make the beak look hard and shiny like real keratin, coat just the felt beak pieces with a layer of clear drying Mod Podge or gloss varnish after assembly.
Step 4: The Perch and Assembly
-
Prepare the Cylinder:
Take your wide cardboard cylinder or round gift box. Paint the entire surface with a shade of teal or seafoam green acrylic paint. -
Texture the Perch:
While the paint is tacky, you can press crumpled paper into it or scratch lines with a fork to simulate a bark-like texture. Let it dry completely. -
Mount the Perch:
Glue the painted green cylinder onto your wooden coaster or wood slice base to give it stability. -
Final Assembly:
Apply a generous amount of hot glue to the bottom rim of the toucan (and the wire feet). Press the bird firmly onto the top of the green perch until the glue sets.
Now your toucan is ready to oversee its own little slice of the jungle with pride
BRUSH GUIDE
The Right Brush for Every Stroke
From clean lines to bold texture — master brush choice, stroke control, and essential techniques.
Explore the Full Guide
Hanging Sloth On A Branch Collage
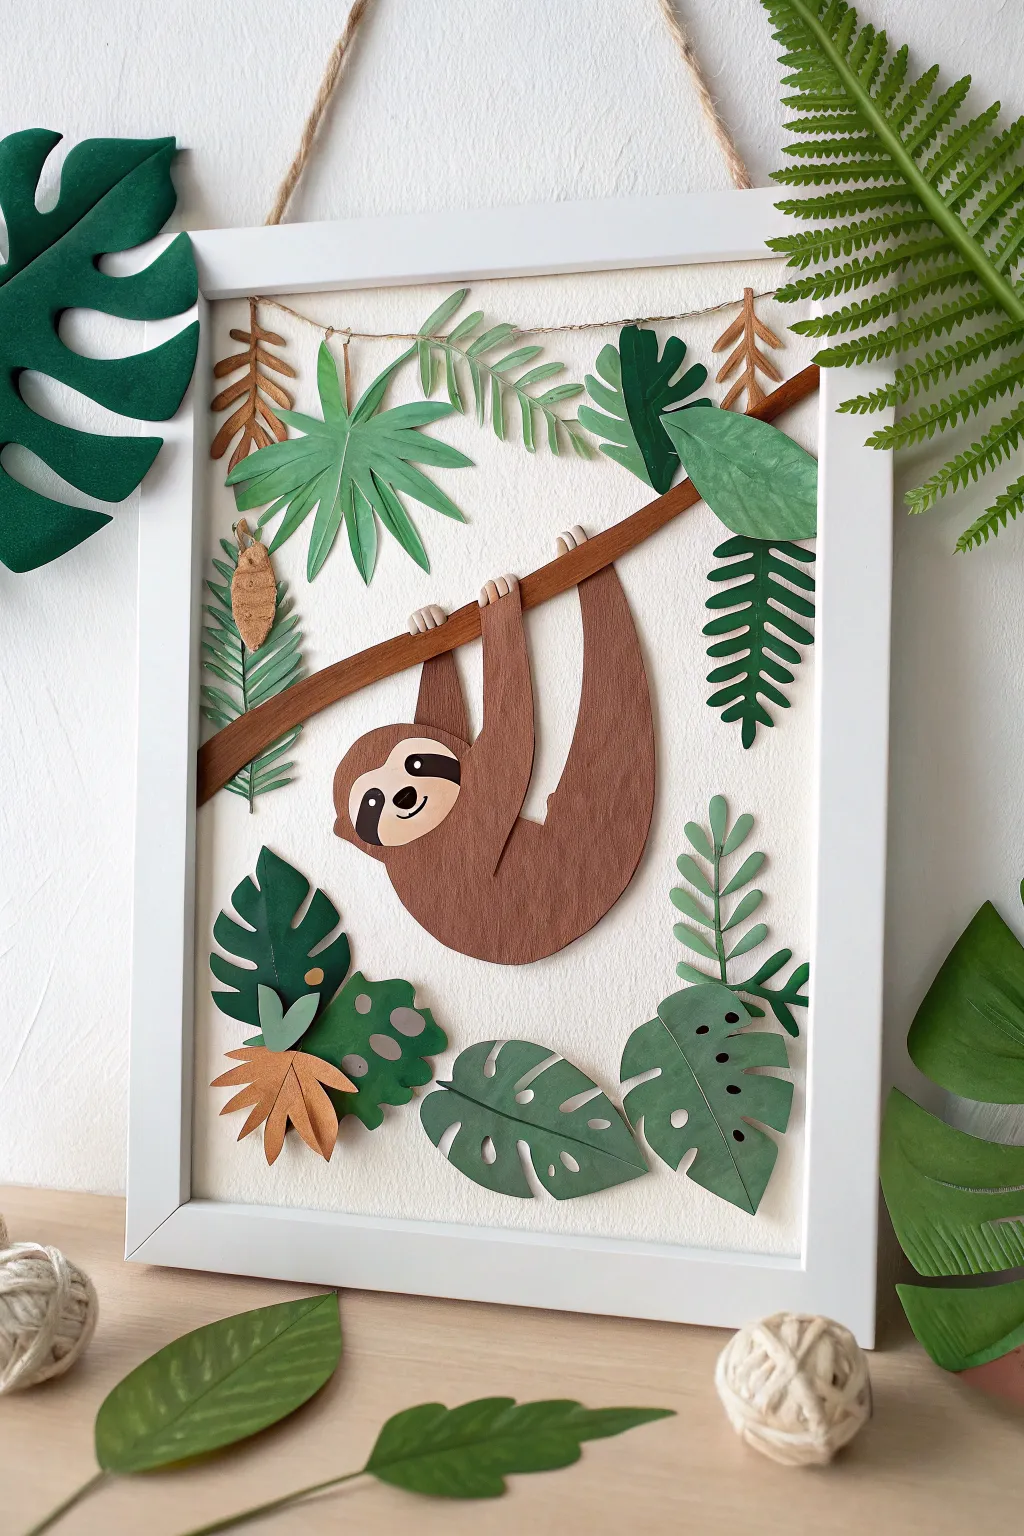
Bring the calming vibes of the rainforest into your home with this layered paper collage. By stacking different shades of green and brown cardstock, you’ll create a charming 3D scene where a happy sloth just hangs around.
How-To Guide
Materials
- White shadowbox frame (approx. 8×10 or A4)
- Textured off-white cardstock (for background)
- Cardstock in various greens (dark, lime, olive, mint)
- Brown cardstock (light tan, medium reddish-brown, dark chocolate)
- Cream or beige cardstock (for face)
- Black cardstock or fine-liner pen
- Jute twine of varying thicknesses
- Scissors and precision craft knife
- Pencil and eraser
- Double-sided foam tape or foam squares
- Clear craft glue or hot glue gun
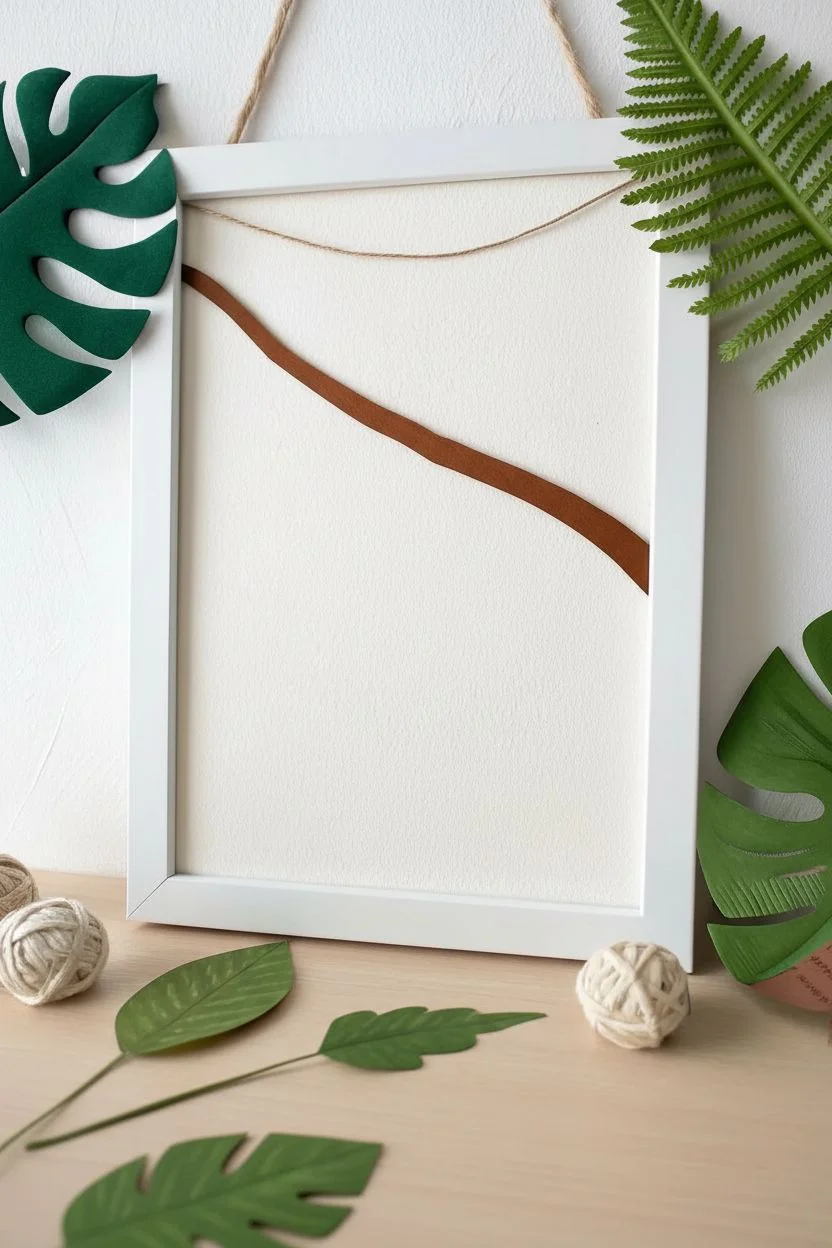
Step 1: Setting the Scene
-
Prepare the backdrop:
Cut your textured off-white cardstock to fit perfectly inside the back of your shadowbox frame. Secure it in place with a small amount of glue or tape so it doesn’t shift while you work. -
String the canopy:
Cut a piece of thin jute twine slightly longer than the width of your frame. Glue the ends to the top corners of the backing paper, letting it droop slightly in the middle to create a hanging vine effect. -
Create the main branch:
Sketch a thick, curved branch shape onto your medium-brown cardstock. It should slope downwards from left to right. Cut this out and adhere it to the center of your background using foam tape to lift it slightly off the page.
Step 2: Crafting the Sloth
-
Cut the body shape:
Draw an oval-like shape curved like a hammock on the reddish-brown cardstock. Extend two long arms upward from one side and two shorter legs from the other side. Cut this main body piece out. -
Design the face:
Cut a small, slightly flattened circle from cream cardstock. Cut a slightly smaller ‘mask’ shape from the dark chocolate brown paper to go around the eyes. Glue the mask onto the cream circle, then glue the entire face onto the sloth’s head area. -
Add facial details:
Using black cardstock, cut out two tiny almond shapes for eyes and a small nose. Glue these into place. I find using tweezers helps immensely here. Alternatively, you can draw these details with a black fine-liner for more control. -
Attach the claws:
Cut small, curved slivers of light tan paper for the claws. Glue three claws to the end of each arm and leg. -
Mount the sloth:
Using double layers of foam tape for extra height, stick the sloth onto the main branch so it looks like it is hanging. The claws should overlap the top edge of the branch.
Sticky Situation?
If small pieces like claws are hard to glue without making a mess, squeeze a puddle of glue onto scrap paper. Dip the paper piece into the puddle using tweezers rather than applying glue directly.
Step 3: Cultivating the Foliage
-
Create monstera leaves:
Sketch broad, heart-shaped leaves on dark green paper. Use your precision knife to cut out small oval holes and slits along the edges to mimic the iconic Swiss-cheese plant look. -
Make palm fronds:
Cut long, slender ovals from lime green paper. Make deep, angled cuts along both sides toward the center vein, creating a feathery texture. Fold them gently down the center to give them dimension. -
Craft fern sprigs:
Using a mint or olive green paper, cut stems with many small, repeating tear-drop shapes attached along the sides. These can be more delicate and flat. -
Layer the bottom greenery:
Arrange the monstera leaves and larger fronds at the bottom of the frame. Overlap them, using foam tape on some and glue on others to create a sense of depth and wild growth. -
Add top vines:
Glue a few smaller leaves hanging downwards from the jute twine ‘vine’ you placed at the top earlier. You can also tuck a few leaves behind the top corners of the frame. -
Include brown accents:
Cut a few stylized leaf shapes from the light tan cardstock to introduce variety. Tuck these in amongst the green leaves near the bottom left corner. -
Final assembly:
Clean up any pencil marks or glue strings. Once everything feels secure, place the glass and frame over your artwork and close up the shadowbox.
Texture Twist
Make the sloth fuzzy! Instead of plain brown cardstock, trace the body shape onto brown felt or sand lightly over the paper surface to rough up the fibers for a fur-like texture.
Hang your masterpiece on the wall and enjoy the laid-back atmosphere it brings to the room
Red-Eyed Tree Frog On A Leaf
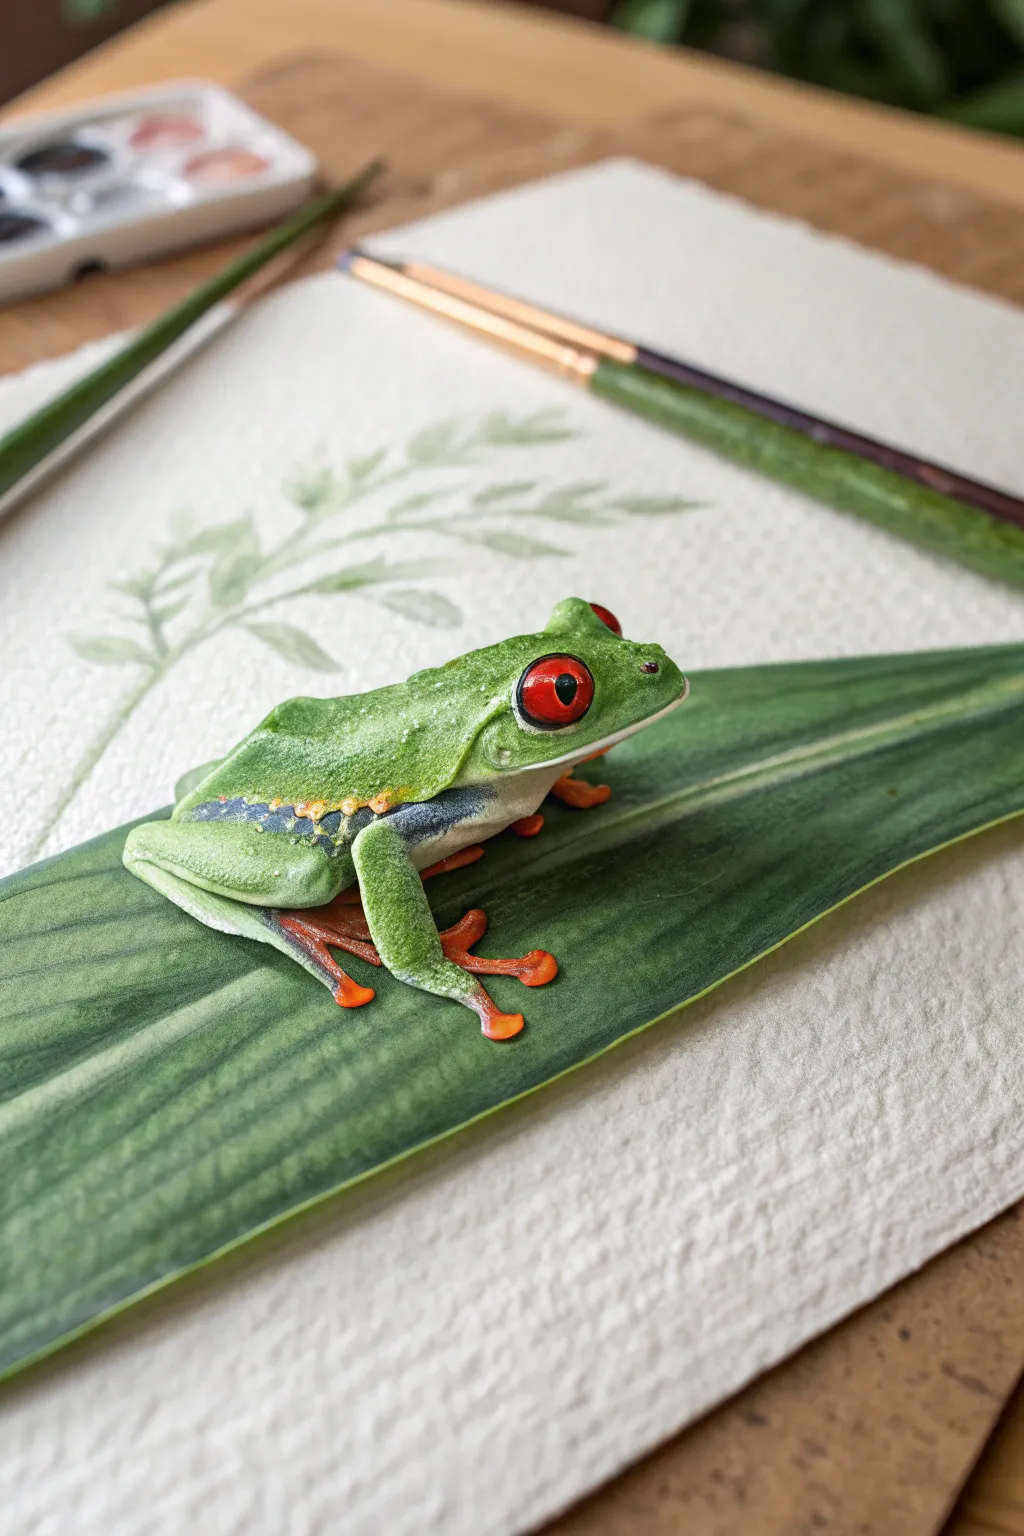
Bring the rainforest to life by sculpting a hyper-realistic red-eyed tree frog perched on a painted leaf. This project combines polymer clay modeling with delicate acrylic painting techniques to capture the frog’s vibrant colors and distinctive red eyes.
Step-by-Step
Materials
- White or translucent polymer clay
- Sculpting tools (needle tool, ball stylus)
- Heavyweight watercolor paper (cold press)
- Watercolor paints (various greens)
- Acrylic paints (bright green, orange, red, blue, black, white)
- Fine detail paintbrushes (size 0 and 00)
- Medium flat brush
- Gloss varnish or UV resin
- Aluminum foil (for armature)
- Oven for baking clay
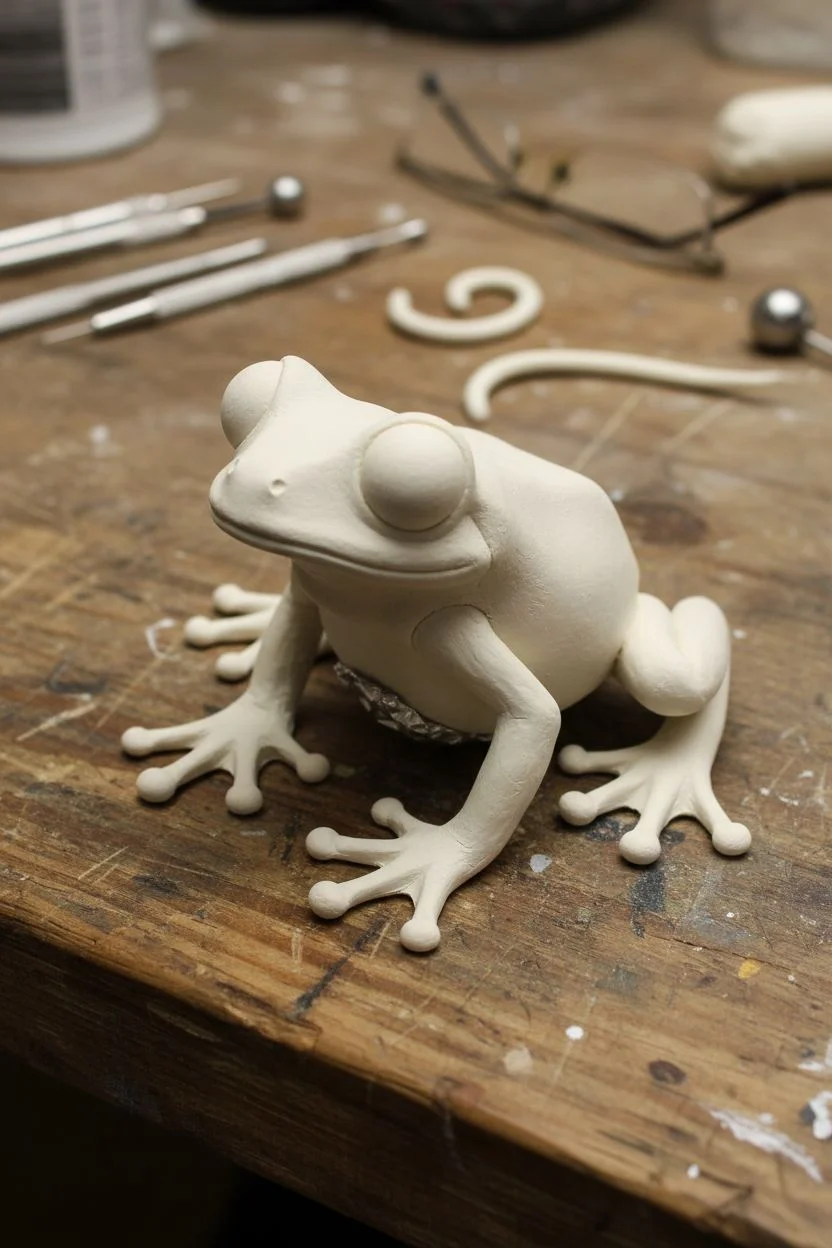
Step 1: Sculpting the Frog Base
-
Create the armature:
Crumple a small piece of aluminum foil into a compact, elongated bean shape about 2 inches long. This will act as the core for the frog’s body, helping you save clay and reducing baking time. -
Add the clay layer:
Condition your white polymer clay until soft, then roll it into a thin sheet roughly 1/8 inch thick. Wrap this sheet completely around your foil armature, smoothing out any seams with your fingers until you have a seamless organic shape. -
Form the limbs:
Roll out four clay ‘snakes’ or logs for the legs. The hind legs should be significantly longer and folded in a ‘Z’ shape, while the front legs are shorter and straighter. Attach these to the underside of the body, blending the clay where they join the torso. -
Sculpt the feet:
Flatten the ends of each leg slightly. Use a needle tool to separate and shape the long, delicate toes. Use a small ball stylus to press a tiny indentation at the tip of each toe to mimic the suction cup pads distinctive to tree frogs. -
Create the eye sockets:
On the head area, add two small balls of clay to build up the brow ridges. Blend these onto the head, leaving a hollow space or pressing a depression where the large eyes will sit. -
Insert the eyes:
Roll two smooth balls of clay for the eyeballs and press them gently into the sockets you created. They should bulge out prominently. Bake the sculpture according to your clay package’s instructions and let it cool completely.
Sticky Situation
If your clay gets too soft and fingerprints are showing, pop the sculpture in the freezer for 5-10 minutes. The cold firms it up, making it easier to smooth out imperfections before baking.
Step 2: Painting the Leaf Background
-
Trace the leaf shape:
While the frog cools, take your heavyweight watercolor paper. Lightly sketch a long, lance-shaped leaf that extends diagonally across the page. Ensure it’s wide enough to support your finished frog. -
Apply base green:
Mix a sap green watercolor wash. Using a medium flat brush, paint the entire leaf shape. I find it helpful to keep the edges crisp but let the interior color look a bit uneven for a natural texture. -
Add vein details:
While the base layer is still slightly damp, use a darker green mixture to paint parallel veins running from the center line to the edges. Let the lines bleed slightly for a soft look. -
Add shadows:
Once the first layer is dry, mix a dark olive green. Paint a subtle shadow area right where you plan to place the frog later. This grounds the object and makes the 3D effect more convincing.
Step 3: Painting the Frog
-
Base coat the body:
Paint the entire frog sculpture (except the eyes) with two coats of white acrylic paint. This creates a bright primer that will make the neon colors pop later. -
Apply bright green:
Cover the top of the head, back, and the outer surfaces of the legs with a vivid, leafy green acrylic. Leave the belly and inner thighs white for now. -
Detail the flanks:
Paint the sides of the frog’s body (the flanks) with a deep blue. While the paint is wet, dab in vertical stripes of pale yellow or cream to replicate the tree frog’s iconic pattern. -
Paint the toes:
Carefully paint the hands, feet, and toes with a bright orange acrylic. Use your smallest brush here to avoid getting orange on the green legs. -
Define the eyes:
Paint the eyeballs a bright, solid red. Once dry, paint a vertical black slit for the pupil in the center of each eye. -
Add skin texture:
Mix a slightly lighter shade of green and stipple it gently over the green back using an old, stiff brush or a piece of sponge. This mimics the slightly bumpy texture of frog skin. -
Final assembly:
Coat the eyes with a high-gloss varnish or a drop of UV resin to make them look wet and reflective. Once everything is dry, place your finished clay frog onto the painted watercolor leaf.
Glossy Gaze
For the most realistic eyes, apply several thin layers of gloss varnish rather than one thick one. Let each dry fully to build up a deep, glass-like shine that catches the light.
Now you have a stunning mixed-media piece that jumps right off the page

PENCIL GUIDE
Understanding Pencil Grades from H to B
From first sketch to finished drawing — learn pencil grades, line control, and shading techniques.
Explore the Full Guide
Bubble-Stamped Chameleon Texture Painting
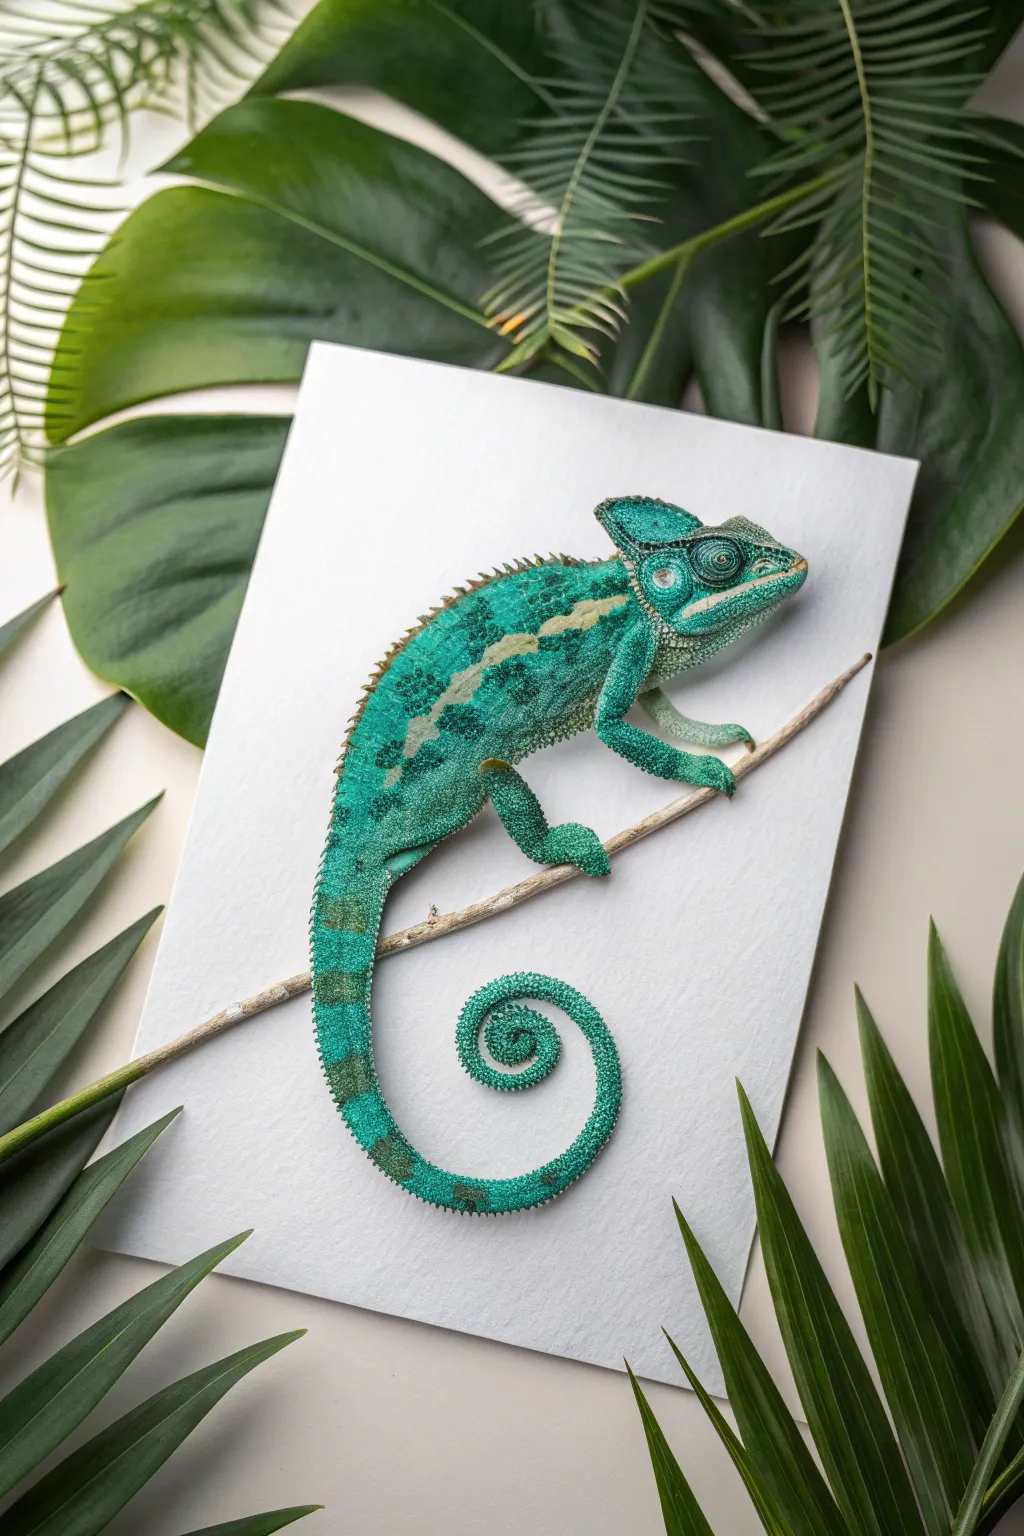
Bring the rainforest to life with this clever textured artwork that mimics the bumpy skin of a chameleon using simple bubble wrap. The result is a vibrant, dimensional reptile resting on a branch, perfect for framing or a classroom display.
Step-by-Step Tutorial
Materials
- Heavy white cardstock or watercolor paper (A4 size)
- Acrylic paints (teal, emerald green, lime green, white, brown)
- Bubble wrap (small bubbles)
- Detailed chameleon template or light pencil sketch
- Small flat paintbrush
- Fine liner brush
- Scissors
- Palette or paper plate
- Small natural twig or brown paint for the branch
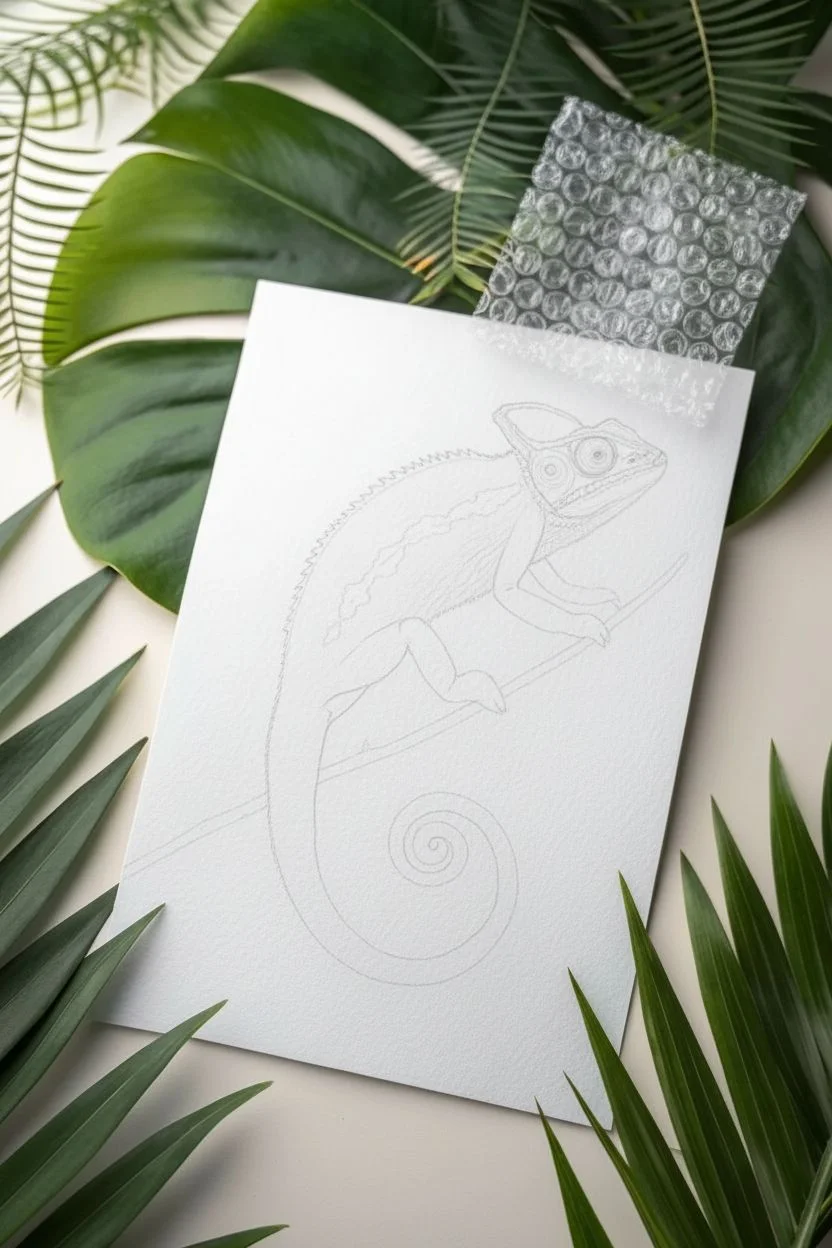
Step 1: Preparation & Base shapes
-
Prepare your canvas:
Start with a clean sheet of heavy white cardstock. Position a real twig diagonally across the paper to serve as the branch, or lightly sketch a branch line where your chameleon will sit. -
Sketch the outline:
Using a light pencil, draw the outline of a veiled chameleon. Focus on the signature casque (the helmet-like ridge on the head), the arched back, and the curled tail. If drawing isn’t your strong suit, you can trace a printed silhouette. -
Prepare the bubble wrap:
Cut a small piece of bubble wrap, roughly the size of your hand. This will be your primary texturing tool. Make sure the bubbles are intact for the best effect.
Don’t Over-Squish
Press the bubble wrap gently! If you push too hard, the bubbles will flatten completely and you’ll lose that cool reptile skin circle pattern.
Step 2: Textured Painting
-
Mix your greens:
On your palette, squeeze out teal, emerald green, and a touch of lime. Don’t mix them completely; leave them slightly marbled so the stamp picks up multiple hues at once. -
Load the texture tool:
Using a flat brush, paint directly onto the bumpy side of the bubble wrap. Apply a generous layer of the marbled green paint mixture. -
First stamping layer:
Gently press the painted bubble wrap onto the main body area of your pencil sketch. Lift it straight up to reveal a distinct honeycomb-like texture. -
Fill the body:
Repeat the stamping process to fill the entire body, reloading the bubble wrap with fresh paint as needed. Overlap the stamps slightly to ensure no large white gaps remain in the center. -
Detail areas:
For smaller areas like the legs and tail, cut a smaller strip of bubble wrap. Paint it with a slightly darker green mix and carefully stamp these narrower sections. -
Refine the edges:
The stamping might leave rough edges. Use a small brush with your teal paint to neatly fill in the outline, smoothing out the silhouette while keeping the bubbly texture intact in the center.
Step 3: Details & Highlights
-
Add dimension:
While the base layer is drying, mix a darker teal-green. Use a fine liner brush to paint small, darker scales along the spine and the underside of the belly to create a shadow effect. -
Paint the stripes:
Chameleons often have vertical banding. Using a lighter lime green or pale yellow, carefully paint thin vertical strokes or dots over the dried texture to suggest these markings. -
The eye details:
Paint a round circle for the large turret eye. I find it helpful to paint concentric circles of texture around the pupil to make it look 3D. -
Define the face:
Use white paint and a very fine brush to add the mouth line and the distinct white stripe that runs horizontally across the chameleon’s flank. -
Adding the branch:
If you sketched the branch earlier, paint it now using brown and tan acrylics. If you are using a real twig, glue it down now, positioning it so the chameleon’s feet appear to be gripping it. -
Final shading:
To make the creature pop, add a tiny bit of black to your green mix and carefully paint shadows where the legs meet the body and under the chin. -
Highlighting:
Dip a dry brush into white paint and remove most of it on a paper towel. Very lightly dust the tops of the ‘bubbles’ on the upper back to simulate light hitting the textured skin. -
The pupil:
Place a single, sharp black dot in the center of the eye using the back end of your paintbrush handle for a perfect circle.
Make It 3D
Cut out your finished painted chameleon and use foam adhesive squares to mount it onto a new background paper for a literal pop-out effect.
Step back and admire the incredible texture you’ve created with just a little packing material and paint
Rainforest Butterfly Symmetry Paint Print
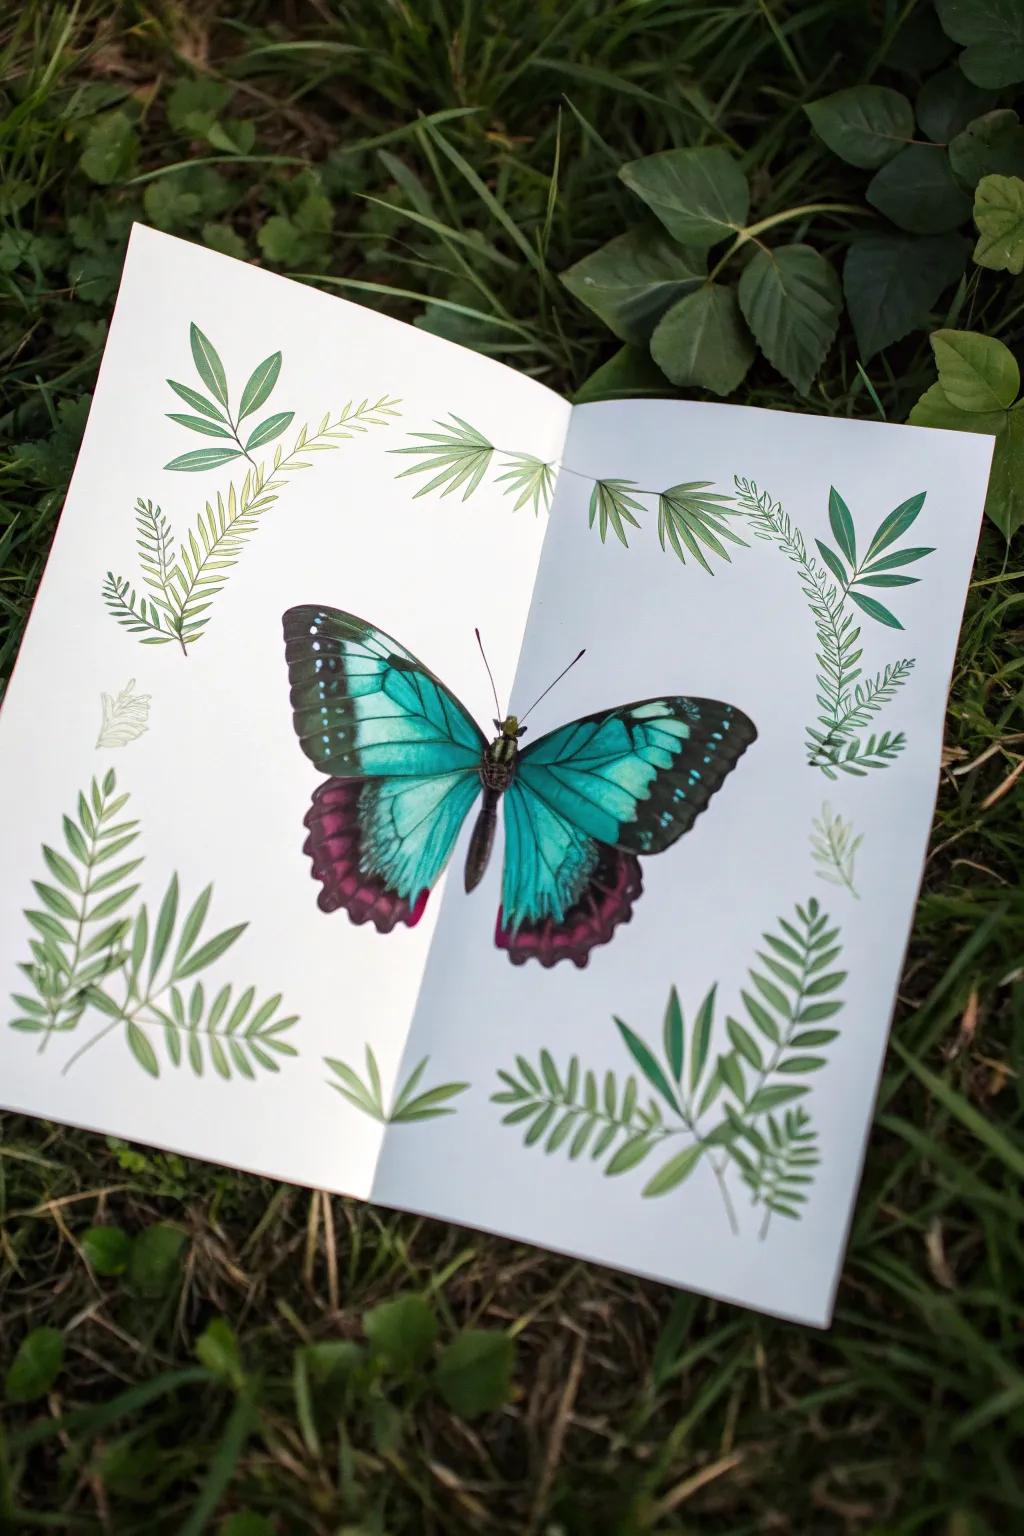
Capture the delicate symmetry of nature with this striking butterfly print project that combines painting and pressing techniques. Set against a backdrop of hand-painted ferns, the vivid teal and magenta wings create a stunning focal point that looks far more complex than it actually is.
Step-by-Step Guide
Materials
- Heavyweight white drawing paper or cardstock (folded)
- Acrylic paints (teal/cyan, black, magenta/dark pink, white)
- Fine liner brushes (size 0 and 00)
- Small round brush (size 2 or 3)
- Green watercolor or diluted acrylic
- Pencil
- Palette for mixing
- Water cup and paper towels
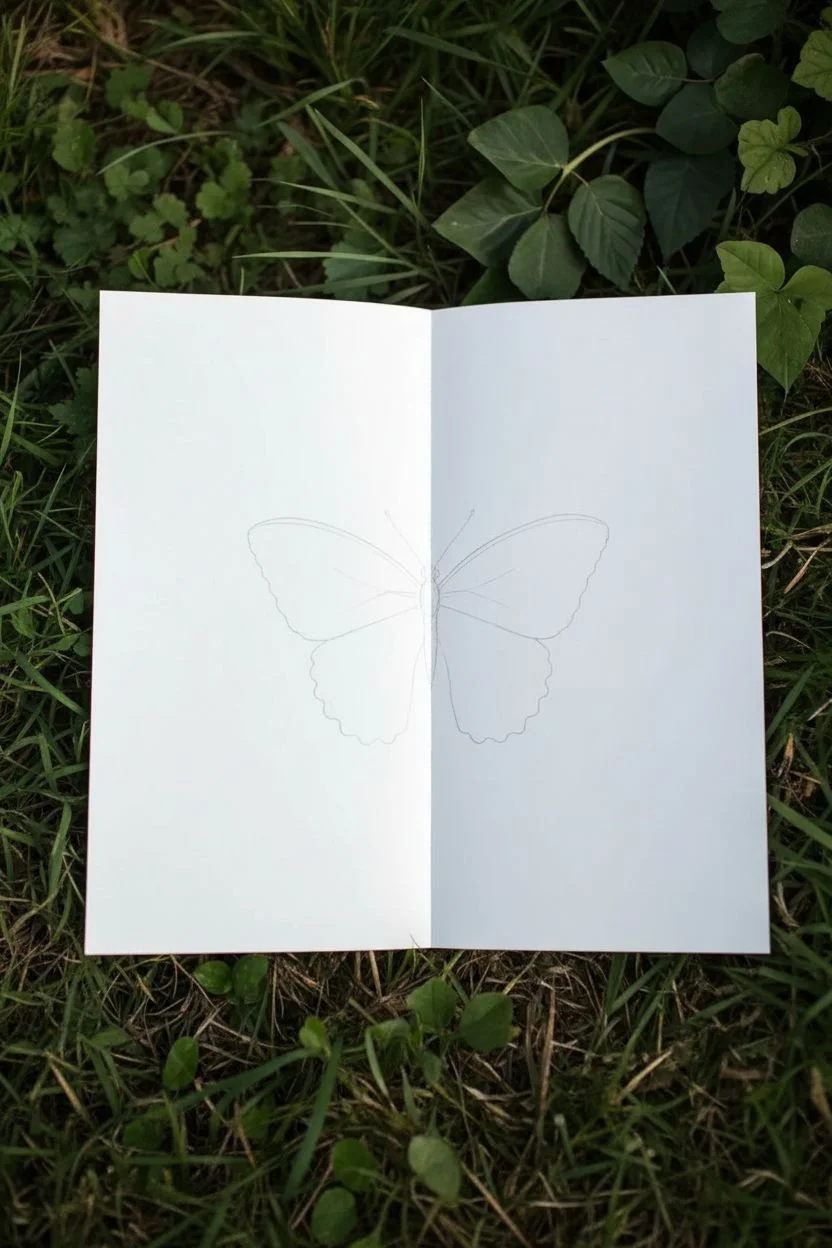
Step 1: Preparing the Canvas
-
Fold the foundation:
Start by taking your sheet of heavyweight paper and folding it precisely in half to create a crease down the center. Open it back up and lay it flat on your work surface. -
Sketch the symmetry:
Lightly sketch the outline of just the left half of the butterfly’s body and wings. Use the center crease as your guide for the body’s placement, ensuring the wing shape extends outward nicely.
Step 2: Painting the Butterfly
-
Apply base teal:
Using a small round brush, load it generously with teal or cyan acrylic paint. Paint the upper and middle sections of the wing on the left side only. You want the paint to be wet and thick, not dry or thin. -
Add magenta accents:
While the teal is still wet, clean your brush and pick up the magenta or deep pink paint. Apply this to the scalloped bottom edge of the lower wing, blending it slightly where it meets the teal area. -
Define the borders:
Take black acrylic paint and a fine liner brush. Carefully outline the outer edges of the teal and magenta sections on the left side, adding thickness to the wing tips. -
Create the body:
Paint half of the butterfly’s thorax and abdomen right along the fold line using dark grey or black paint. -
The crucial press:
While all the paint is still very wet (work quickly!), fold the right side of the paper over onto the painted left side. -
Transfer the image:
Press down firmly with your hand, rubbing over the entire back of the paper where the butterfly is located. Be careful not to shift the paper side-to-side to avoid smearing. -
Reveal the symmetry:
Slowly peel the paper open to reveal a perfectly symmetrical mirrored print of your butterfly. Let this dry completely before moving to the next steps.
Wet Paint Strategy
Work fast! If the acrylic paint starts drying before you fold the paper, mix a tiny drop of slow-drying medium or water into your colors to keep them transferable.
Step 3: Adding Details
-
Refine the edges:
Once dry, the print might have some uneven spots. I like to use a liner brush to touch up the black borders or fill in any white gaps in the colorful wings. -
Add wing patterns:
Using a tiny dot of white paint on your smallest brush, add the delicate white spots along the black edges of the upper wings. -
Draw the antennae:
With a steady hand and very fine black ink or paint, draw two thin, long antennae extending from the head of the butterfly. -
Enhance veining:
Use a diluted black paint or a fine pen to carefully draw thin vein lines through the teal sections of the wings for realistic texture.
Fixing Smudges
If the print smears during the fold, turn the smudge into a shadow or cover it later with opaque acrylic paint once the base layer is fully dry.
Step 4: Painting the Fern Border
-
Mix your greens:
Prepare two shades of green on your palette—a fresh, light leaf green and a slightly darker forest green—using watercolors or diluted acrylics for a transparent look. -
Paint fern stems:
Using a thin brush, paint curving stems framing the butterfly in a circular or oval arrangement. Vary the direction so some curve inward and some outward. -
Leaf structure:
Starting from the base of a stem, paint small, elongated almond shapes for the leaves. Angle them upward toward the tip of the stem. -
Vary the foliage:
Paint different types of leaves for variety; include some ferns with many small leaflets and other broader, simpler leaves. -
Layering depth:
Paint some lighter green leaves first, let them dry slightly, and then paint darker green leaves overlapping them to create a sense of depth and wild growth. -
Final drying:
Allow the entire border to dry completely, ensuring no wet paint touches the butterfly in the center.
Now you have a breathtaking piece of symmetrical rainforest art that celebrates both color and nature’s design


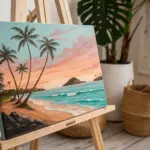
Rainforest Silhouette At Sunset
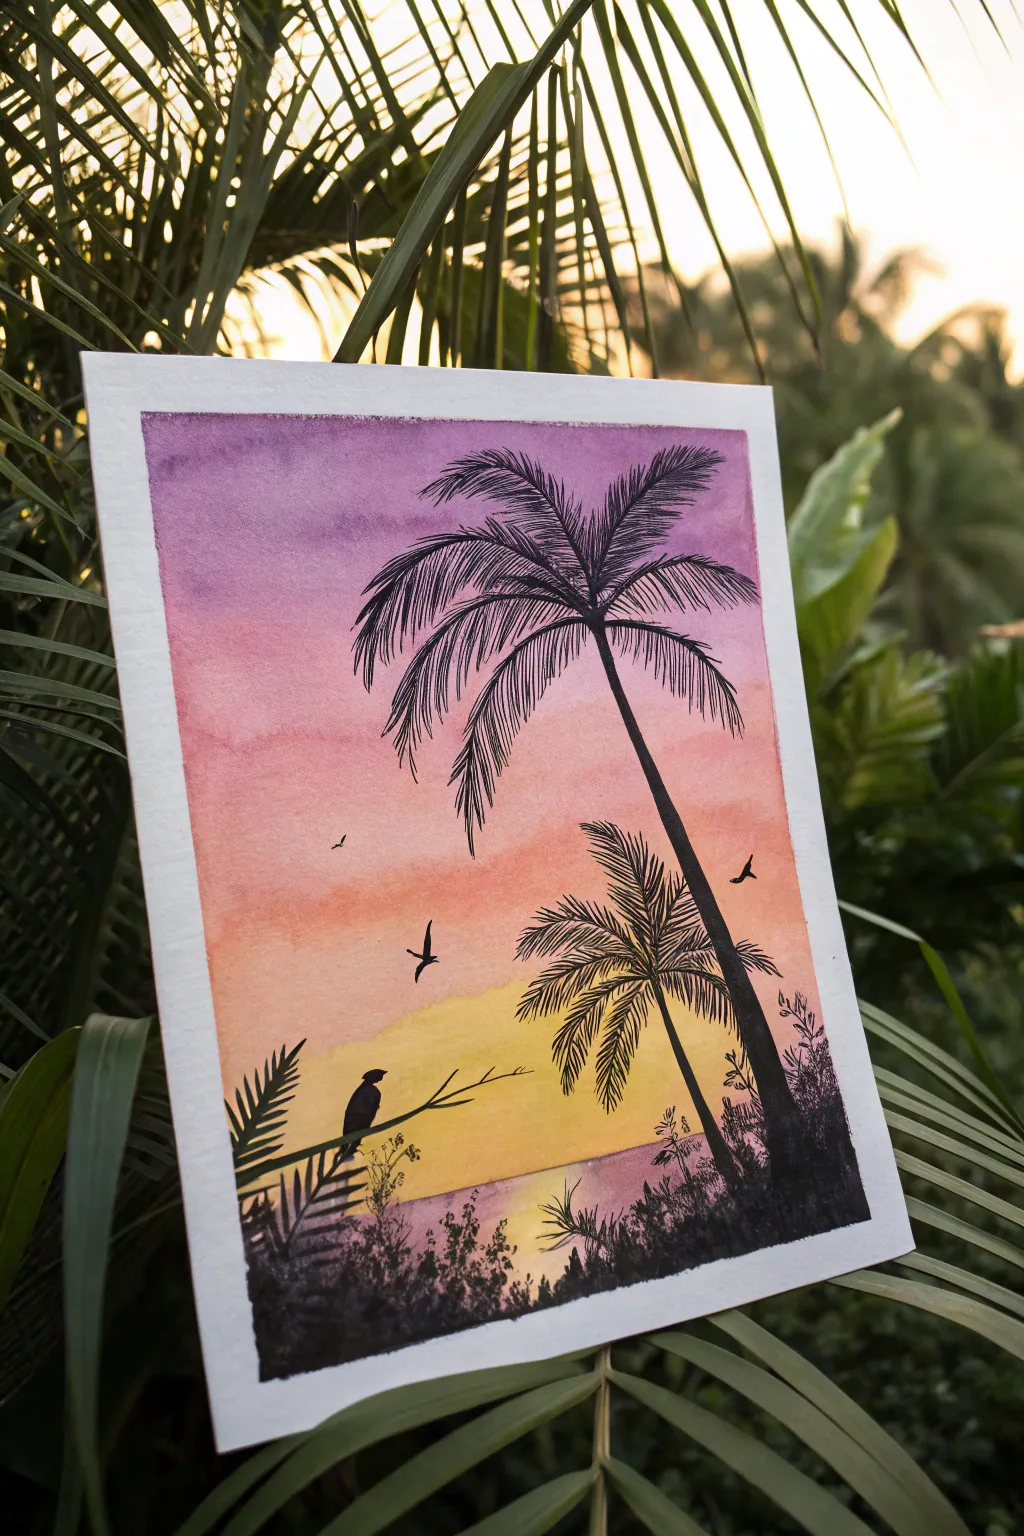
Capture the serene beauty of a rainforest coast with this vibrant watercolor and ink project. The striking contrast between the soft, warm sunset gradient and the crisp black silhouettes creates a dramatic, professional-looking result that is surprisingly simple to achieve.
Step-by-Step Tutorial
Materials
- Watercolor paper (cold press, 300 gsm)
- Masking tape or painter’s tape
- Watercolor paints (purple, pink, orange, yellow)
- Flat wash brush (large)
- Round brushes (medium and fine detail)
- Black waterproof fine liner pen (0.5mm or 0.8mm)
- Black gouache or black acrylic paint
- Jar of clean water
- Paper towels
- Pencil and eraser
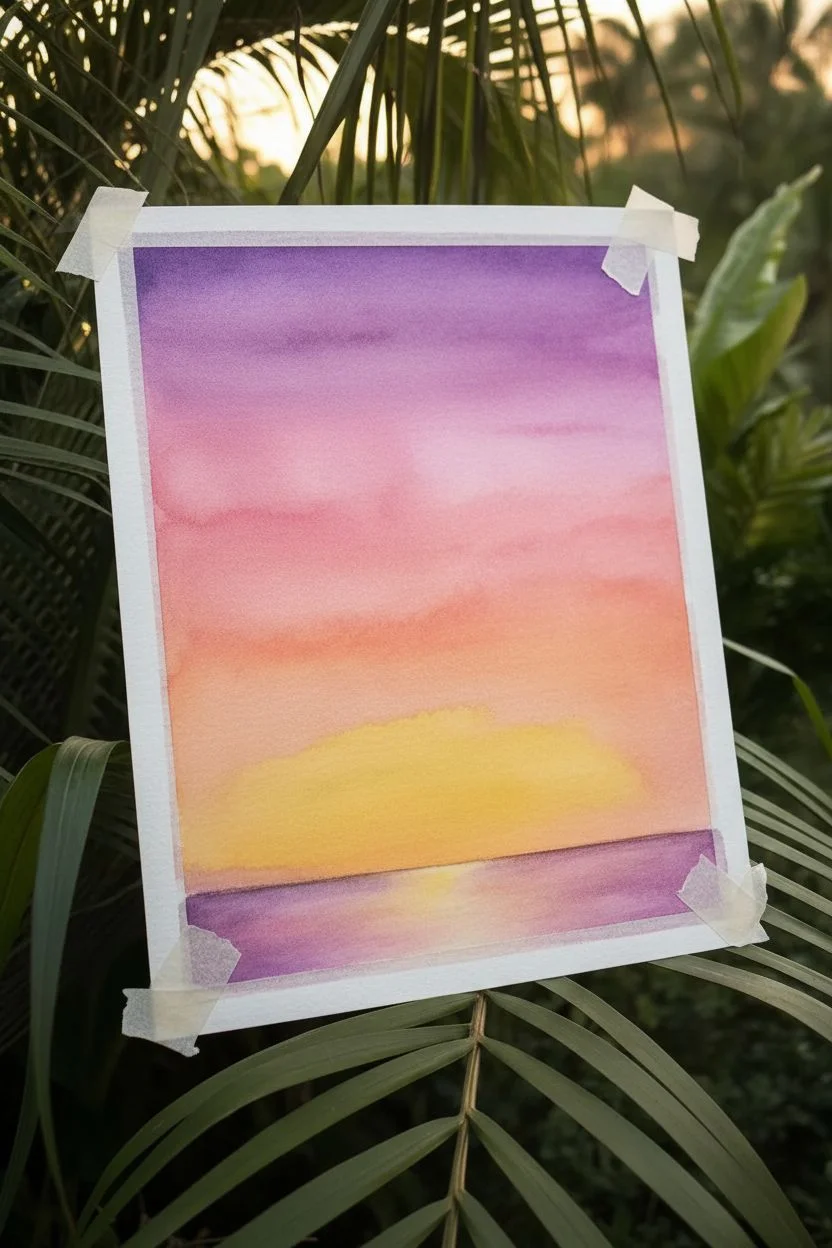
Step 1: Painting the Sky
-
Tape the edges:
Begin by taping down all four edges of your watercolor paper to a board or table. This creates that clean white border and prevents the paper from buckling while wet. -
Wet the paper:
Using your large flat brush and clean water, apply a thin, even coat of water across the entire paper surface. This wet-on-wet technique allows the colors to blend seamlessly. -
Start with purple:
Load your brush with a rich purple watercolor. Apply this to the top quarter of the paper, letting the water diffuse the pigment downwards slightly. -
Blend into pink:
Clean your brush and pick up a vibrant pink or magenta. Apply this below the purple, gently overlapping the two colors so they bleed together softly. -
Add orange tones:
Move down the page with a bright orange hue. Paint this across the middle section, blending it upwards into the pink layer carefully. -
Finish with yellow:
Fill the bottom third of the paper with a sunny yellow. Blend it into the orange above, leaving the very bottom area slightly paler to represent the glowing horizon. -
Paint the water reflection:
While the paint is still damp but not soaking, add a faint wash of purple and pink at the very bottom edge to suggest water reflecting the sky’s colors. -
Let it dry completely:
This step is crucial. Allow the paper to dry fully until it is flat and room temperature to the touch. I usually wait at least 30 minutes before sketching over it.
Step 2: Adding Silhouettes
-
Sketch the layout:
Lightly sketch the main palm tree trunk, the smaller palm tree, and the horizon line with a pencil. Keep the lines faint so they don’t show through later. -
Paint the main trunk:
Using a medium round brush and black gouache (or acrylic), paint the tall, curved trunk of the main palm tree. Make the base slightly wider than the top. -
Create palm fronds:
Switch to a finer brush or an ink pen. Draw the central spines of the palm leaves arching out from the top of the trunk. -
Detail the leaves:
With a fine liner pen or the very tip of a brush, use quick, flicking motions to draw the individual leaflets hanging down from each spine. -
Paint the smaller palm:
Repeat the process for the smaller, leaning palm tree in the background. Ensuring the leaves overlap slightly adds depth to the scene. -
Add the foreground foliage:
Along the bottom horizon line, use stippling (dotting) motions with your brush to create diverse bushy textures and wild grass shapes in solid black. -
Draw the branch and bird:
On the left side, paint a thin, jagged branch extending inwards. Silhouette a small bird sitting on it completely in black, giving it a distinct beak and tail. -
Final details:
Add small flying birds in the sky using simple ‘V’ or ‘M’ shapes. Once the ink is totally dry, slowly peel off the tape at a 45-degree angle.
Uneven Blending?
If your sky colors have hard edges, re-wet the area slightly with a clean, damp brush and gently agitate the paint where the colors meet to soften the transition.
Add Sparkle
Use a white gel pen to add tiny reflections on the water or highlights on the bird’s feathers to bring a touch of dimension to the flat silhouettes.
Display your tropical masterpiece in a simple frame to make the colors really pop
Zentangle-Style Rainforest Animal Patterns
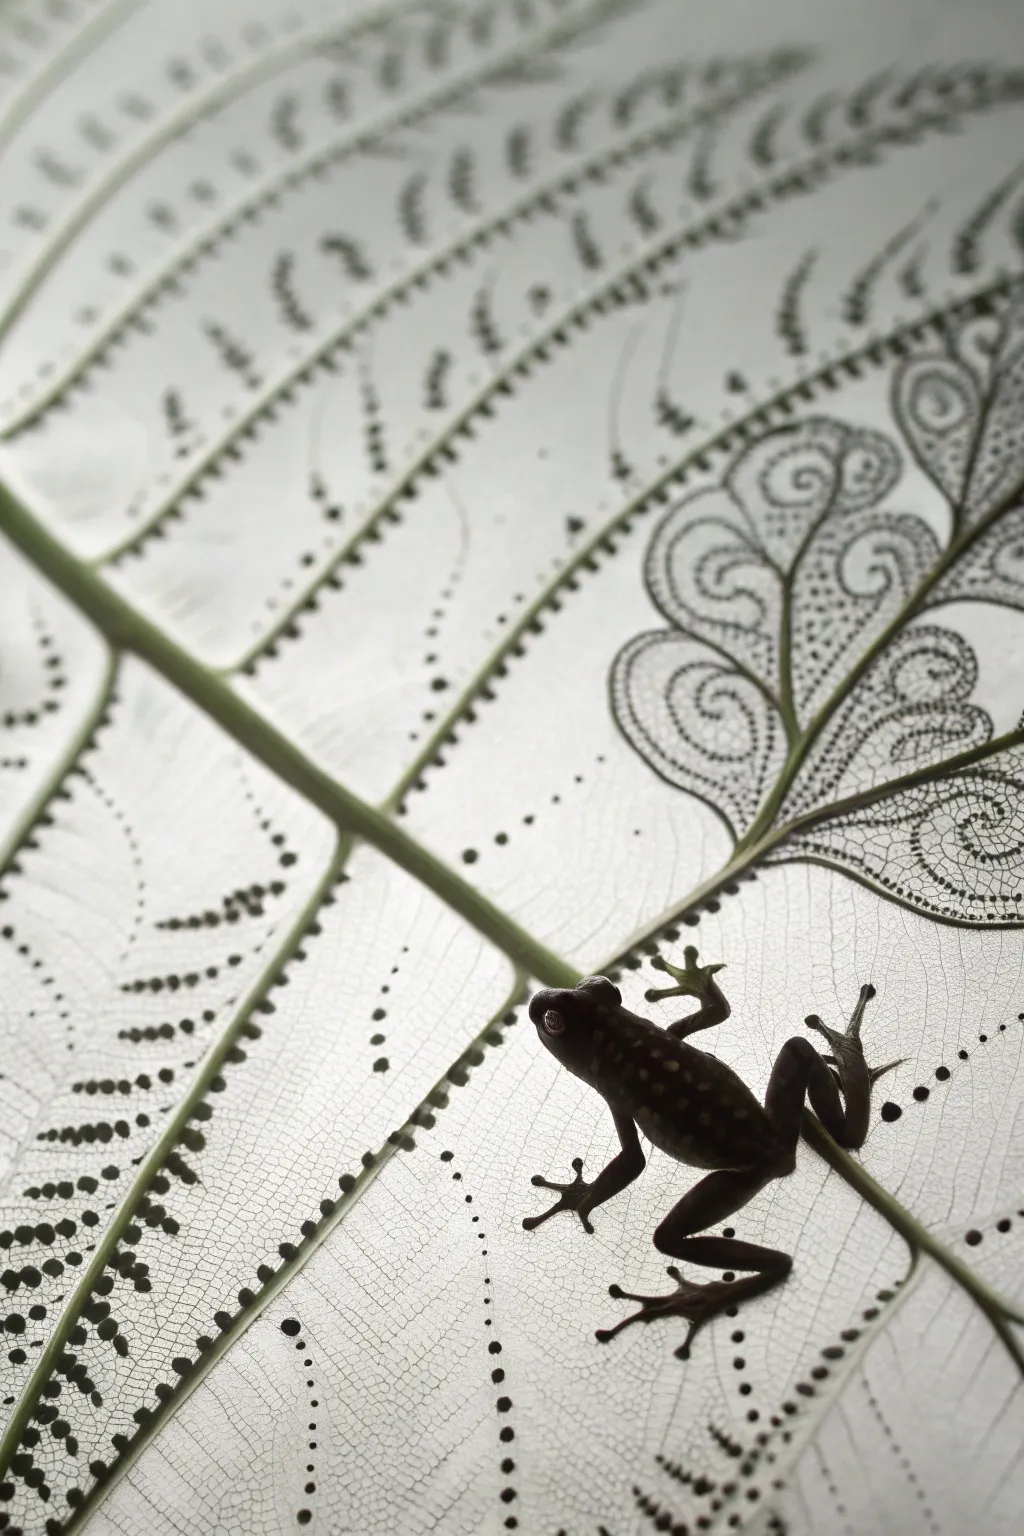
Capture the delicate beauty of a rainforest floor by combining bold silhouettes with intricate leaf skeleton patterns. This zentangle-inspired project plays with positive and negative space, using fine details to mimic the fragile veins of a decaying leaf beneath a motionless frog.
Step-by-Step Guide
Materials
- High-quality white drawing paper or Bristol board
- Pencil (HB or 2H)
- Eraser
- Fine liner pens (black, sizes 005, 01, and 03)
- Thicker black marker or brush pen
- Reference photo of a frog silhouette
- Ruler (optional)
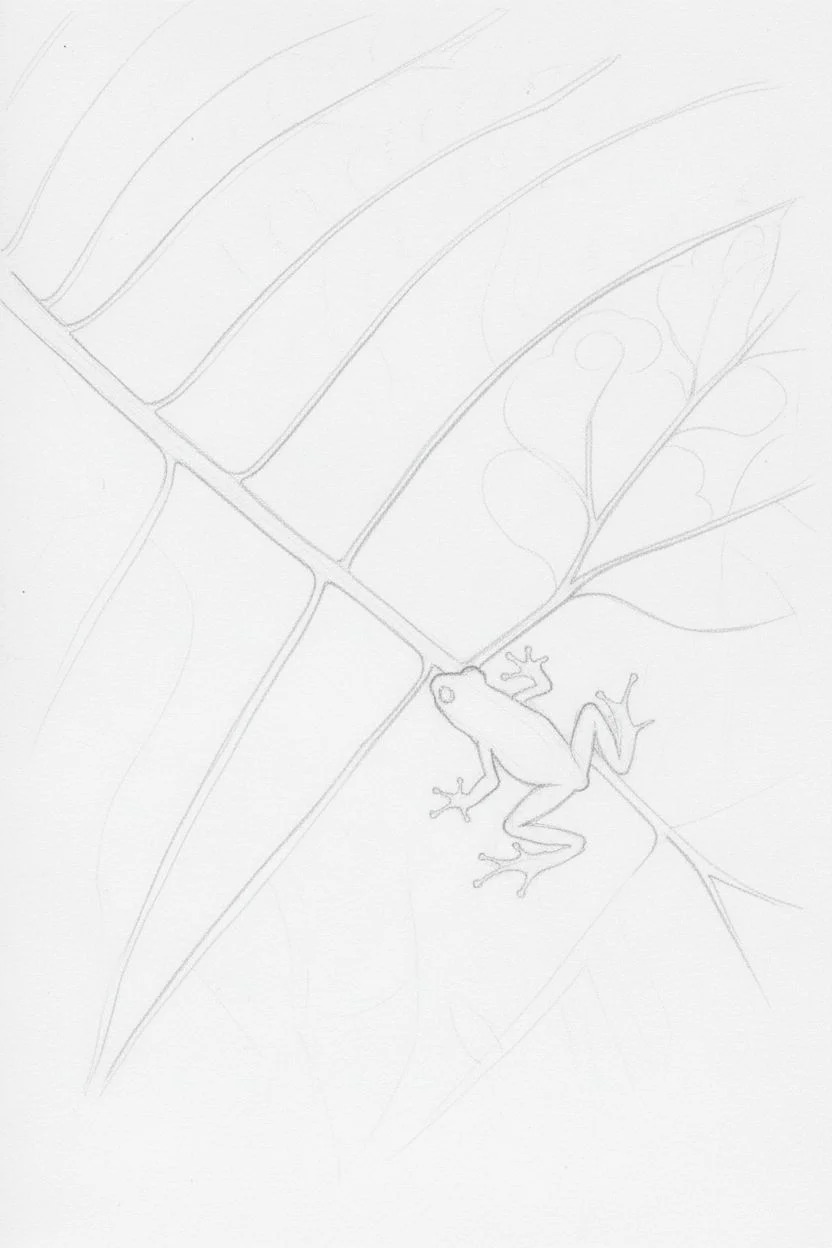
Step 1: Planning the Composition
-
Outline the leaf structure:
Start by lightly sketching the main veins of a large tropical leaf using your pencil. Draw a thick central line extending diagonally across the page to represent the midrib. -
Add secondary veins:
Branching off the midrib, sketch several secondary veins that curve gently toward the edges of your paper. These don’t need to be perfectly symmetrical; organic irregularity looks more natural. -
Sketch the frog:
Choose a spot on one of the lower leaf sections for your frog. Lightly outline the frog’s body, focusing on the pose—legs tucked in, toes gripping the ‘surface’. Keep this shape simple as it will eventually be filled in solid black.
Ink Flow Pro Tip
Keep a scrap piece of paper nearby to test your pens. Ultra-fine nibs like 005 can clog or dry quickly; scribble occasionally to ensure consistent ink flow.
Step 2: Inking the Skeleton Patterns
-
Define the veins:
Using an 03 fine liner, trace over your pencil lines for the midrib and secondary veins. I like to double up these lines slightly to give them visual weight, simulating the thickness of a real stem. -
Create the ‘cells’:
Switch to an 01 pen. Within the spaces between the main veins, begin drawing faint, irregular web-like patterns. These lines should be very thin and mimic the microscopic cell structure of a dried leaf skeleton. -
Add dotted borders:
Along the inside edges of your main veins, place a row of consistent, distinct dots. This stippling effect creates a decorative, ‘zentangle’ feeling and highlights the structure of the leaf. -
Incorporate spiral details:
In larger open spaces of the leaf, draw decorative spirals or paisley-like shapes. Outline them clearly, then fill their interiors with tiny stippled dots or fine hatching to evoke texture without solid shading. -
Connect the patterns:
Use your 005 pen to draw extremely fine lines connecting your spirals and vein borders to the background web. This integrates the decorative elements into the ‘natural’ leaf texture.
Step 3: Creating the Frog Silhouette
-
Outline the silhouette:
Take your 03 pen and carefully outline the final shape of your frog. Pay close attention to the delicate toes and the curve of the back, as these identify the animal. -
Fill with black:
Switch to your thicker marker or brush pen to fill in the frog’s body. Make the black as deep and solid as possible to create a high contrast against the delicate background. -
Leave highlights (optional):
If you want a slightly 3D look, leave tiny slivers of white paper on the curve of the back or the eye, or use a white gel pen later to add a small reflection point. -
Ground the frog:
Ensure the frog’s feet visually connect with the drawn veins. You may need to slightly thicken the vein line right under the toes to show weight.
Level Up: Translucent Layer
Draw the leaf skeleton on tracing paper or vellum, then cut out a black paper frog and glue it on top. This creates real depth and mimics the photo’s airy look.
Step 4: Final Touches
-
Review and refine:
Step back and look at the overall density. If some areas of the leaf look too empty, add more microscopic webbing lines or tiny stippling with your finest 005 pen. -
Erase pencil marks:
Wait until the ink is completely dry—give it a good 10 minutes to be safe—then gently erase all visible pencil sketches to leave a crisp black-and-white image.
Frame your intricate leaf study to bring a quiet, detailed piece of the jungle into your home
Shoebox Rainforest Diorama With Vines

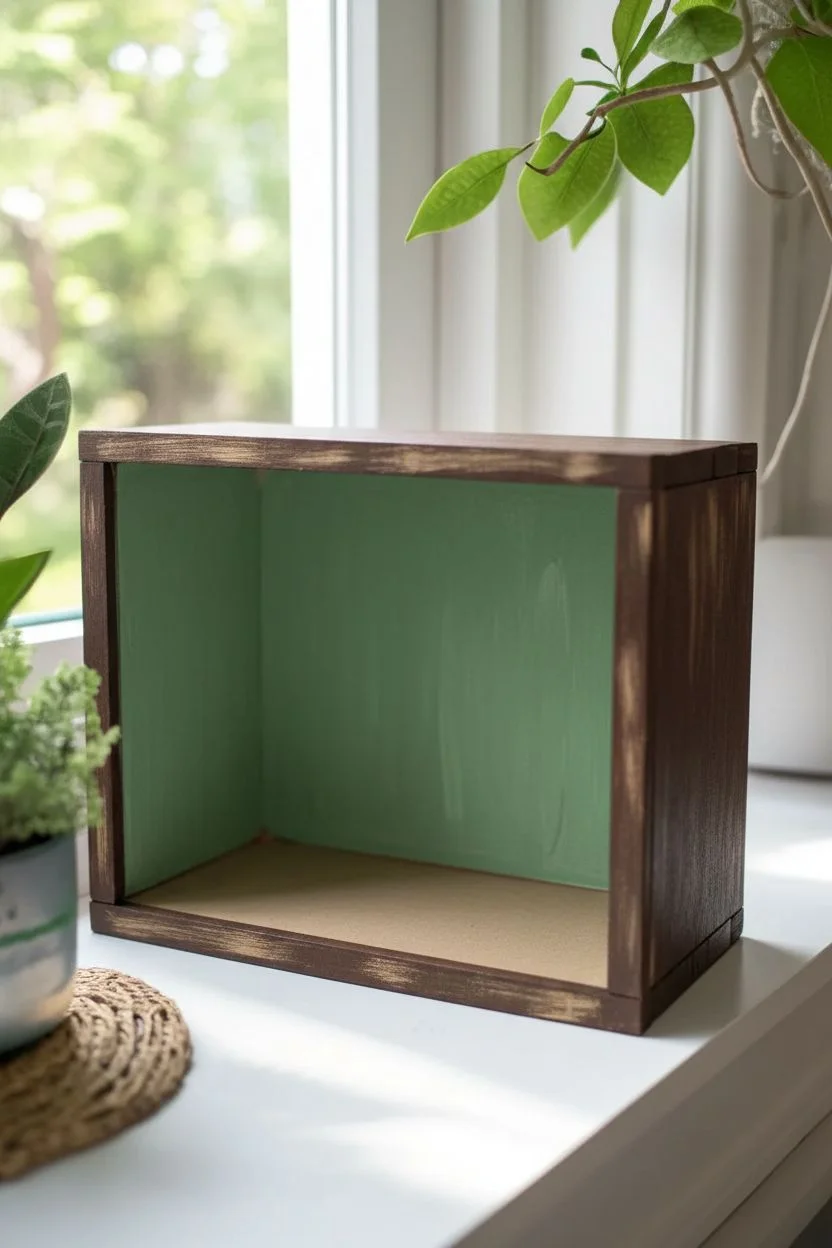
Transform a simple shadow box or sturdy shoebox into a lush, miniature ecosystem that looks surprisingly realistic. This diorama features layered greenery, a textured forest floor, and climbing vines that break the frame for an immersive 3D effect.
Step-by-Step
Materials
- Sturdy shoebox or small wooden shadow box
- Acrylic paints (dark brown, forest green, light green, tan)
- Cardboard scraps
- Brown craft paper or textured scrapbook paper
- Fake moss (sheet moss and loose clumps)
- Twine or jute cord
- Wire (floral wire or bendable craft wire)
- Green construction paper or cardstock
- Small plastic animal figurine (tapir, jaguar, or similar)
- Hot glue gun and glue sticks
- White craft glue (PVA)
- Scissors and X-acto knife
- Sand or fine dirt
Step 1: Preparing the Structure
-
Prepare the box:
If using a shoebox, remove the lid and reinforce the sides if they feel flimsy. If using a wooden shadow box like the one in the photo, lightly sand the edges. -
Create the wood finish:
Paint the entire exterior and the inner rim of the box with a dark brown acrylic paint. To mimic the wood grain texture shown, drag a dry, stiff brush with a slightly lighter tan paint over the brown once it’s tacky. -
Paint the backdrop:
Paint the interior back panel a muted, light green. For added depth, use vertical brushstrokes in a slightly darker green to suggest distant trees or rain.
Step 2: Building the Landscape
-
Lay the groundwork:
Apply a layer of white craft glue to the bottom interior of the box. Sprinkle sand or fine dirt over the glue to create a sandy riverbank or forest floor texture. -
Create the main tree trunk:
Take several strands of wire and twist them together to form a trunk shape that branches out at the top. Wrap this wire armature tightly with twine or strips of brown paper soaked in a glue-water mixture. -
Add bark texture:
Once the trunk is wrapped, paint it dark brown. I like to glue small strands of twine vertically along the trunk before painting to simulate the rooted, textured look of a rainforest tree. -
Install the tree:
Hot glue the base of your tree to the right side of the box floor. Spread the wire roots out slightly for stability.
Glue Gun Troubles?
If hot glue leaves visible strings (spiderwebs), blast them with a hair dryer for 2-3 seconds. The heat will melt the thin strings away instantly.
Step 3: Adding Foliage and Vines
-
Cut paper leaves:
Cut various sizes of leaves from green cardstock. Create simple ovals for the tree canopy and jagged fern shapes for the undergrowth. -
Assemble the canopy:
Glue the oval leaves onto the wire branches of your main tree. Clump them together to make the canopy look dense. -
Plant the undergrowth:
Fold your fern shapes slightly down the center to give them dimension. Glue these in clusters in the back left corner and around the base of the main tree. -
Add mossy details:
Glue small clumps of loose moss around the base of the tree and in the corners to hide any exposed glue and soften the landscape. -
Create the exterior vines:
Twist three pieces of twine together loosely. Hot glue this ‘vine’ so it runs up the exterior right side of the box. -
Add the moss roof:
Glue a layer of sheet moss along the top exterior edge of the box, letting it drape slightly over the front rim to connect with the vines.
Level Up: Water Feature
Paint a section of the floor blue before sanding. After adding sand, pour clear drying resin or heavy gloss gel over the blue area for a wet look.
Step 4: Finishing Touches
-
Add background trees:
Cut simple tree silhouettes from darker green paper or thin cardboard painted green. Glue these directly to the back wall behind your 3D elements to create forced perspective. -
Place the inhabitant:
Position your plastic animal figurine in the center of the sandy clearing. A dab of hot glue on the feet will keep it secure. -
Final inspection:
Check for any visible wire or large globs of glue. Cover these spots with tiny bits of moss or extra leaves.
Place your diorama near a window to let natural light filter through the leaves for a magical effect
Crayon Resist Rainstorm Over Jungle Leaves
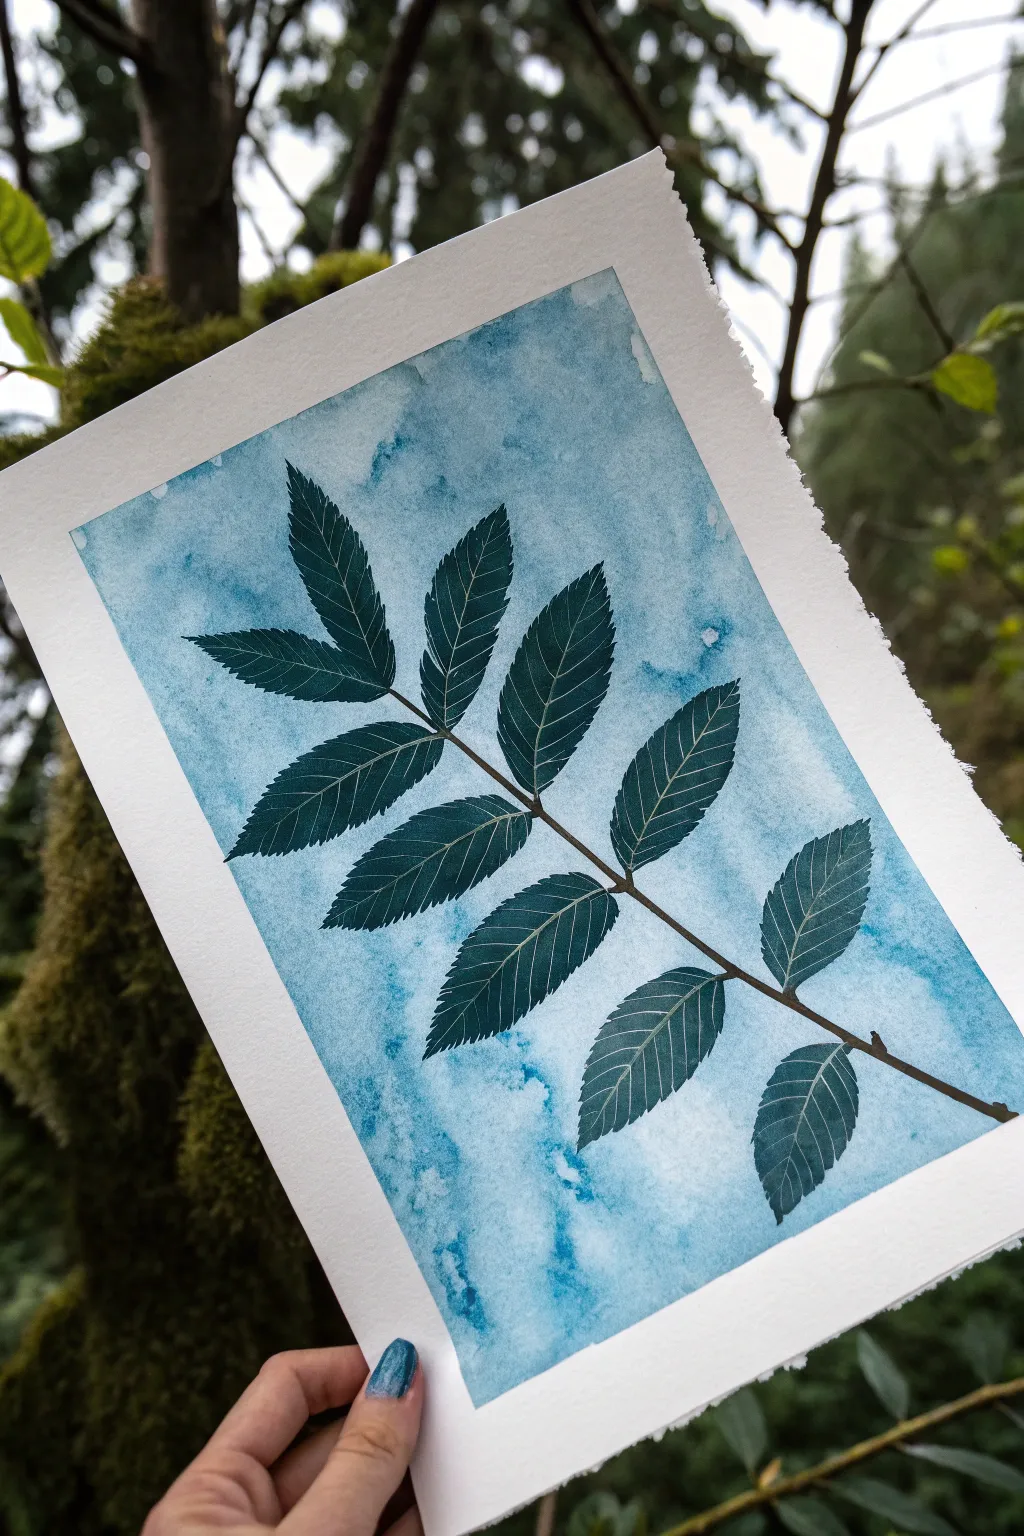
Capture the moody atmosphere of a rainforest storm with this deceptively simple resist technique. By combining precise leaf silhouettes with a beautifully unpredictable watercolor wash, you’ll create a piece that feels both organic and serene.
How-To Guide
Materials
- High-quality watercolor paper (cold press creates great texture)
- White or clear wax crayon (or oil pastel) sharpened to a point
- Liquid watercolors or pan watercolors (Teal, Cyan, Ultramarine)
- Wide watercolor brush or sponge brush
- Fine tip leaf-green or black waterproof marker (optional for outlining)
- Real rainforest leaf specimen (for reference or tracing)
- Paper towels
- Water cup
Step 1: Planning and Sketching
-
Observe your specimen:
Begin by finding a suitable rainforest-style leaf to use as a model. A pinnately compound leaf (like a fern frond or ash leaf) works perfectly because multiple small leaflets create a beautiful repeating pattern. -
Lightly sketch the stem:
Using a very light pencil, draw the central stem diagonally across your watercolor paper. This creates a more dynamic composition than placing it straight up and down. -
Outline the leaflets:
Sketch the individual leaflets coming off the main stem. Don’t worry about the veins yet; just focus on getting the jagged, serrated edges of the leaf shapes correct.
Secret Weapon
If you don’t have a white crayon, use a birthday candle! The paraffin wax works perfectly as a resist and slides smoothly over textured watercolor paper.
Step 2: Applying the Resist
-
Trace the veins with wax:
This is the crucial resist step. Take your sharpened white wax crayon or oil pastel and draw the delicate veins inside each leaf. You won’t see them clearly now, but the wax will repel the water later. -
Press firmly:
Make sure you press hard enough to leave a good deposit of wax on the paper. I suggest tilting the paper against the light occasionally so you can see the shine of the wax lines to check your progress. -
Define the serrated edges:
Trace over the jagged edges of your leaves with the wax crayon as well. This will create a crisp white barrier between your leaf color and the background sky.
Level Up Your Sky
Sprinkle a pinch of table salt onto the wet blue background paint. As it dries, the salt absorbs pigment, creating unique starburst textures that look like heavy rain.
Step 3: Painting the Stormy Background
-
Prepare the wash:
Mix a watery solution of blue watercolors. Aim for a mix of teal and varying shades of blue to mimic a humid, stormy atmosphere. -
Wet the background area:
Using clean water and a large brush, wet the paper *around* your leaf sketch. Don’t soak the leaves themselves, just the negative space. -
Drop in the blue:
Load your brush with the blue paint and touch it to the wet paper. Watch the color bloom and spread. Allow it to be uneven; this creates the look of rain and clouds. -
Add texture:
While the background is still wet, sprinkle a few drops of clean water or darker blue paint onto it. This creates ‘cauliflower’ blooms that look like water droplets on a window. -
Let it dry completely:
It is essential that the background is 100% bone dry before moving on. If you paint the leaves now, the dark green might bleed into your beautiful blue sky.
Step 4: Painting the Leaves
-
Mix a deep jungle green:
For the leaves, you want a high-contrast dark green. Mix sap green with a little bit of indigo or black to get that deep rainforest canopy shade. -
Fill in the leaf shapes:
Carefully paint inside your leaf outlines. As you brush over the areas where you drew with the wax crayon, the paint will bead up and roll off, revealing the white paper underneath as delicate veins. -
Refine the stem:
Use a darker brown or brownish-green to carefully paint the main central stem connecting all the leaves. -
Blot excess paint:
If big puddles of paint sit on top of the wax lines, gently dab them with a tissue. This helps the white veins pop more clearly against the dark green leaf.
Step 5: Finishing Touches
-
Final dry:
Allow the entire painting to dry flat to prevent buckling. -
Enhance contrast (optional):
If the edges of your leaves look a bit fuzzy, you can sharpen them up with a very fine waterproof marker or pen, but a loose look is also lovely. -
Tear the edges:
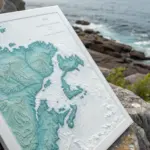
For that rustic, handmade paper look shown in the example, place a ruler along the edge of your dry paper and gently tear the excess off to create a ‘deckled’ edge.
Display your finished rainforest specimen in a floating glass frame to show off those beautiful torn edges
Night Rainforest With Firefly Dot Lights
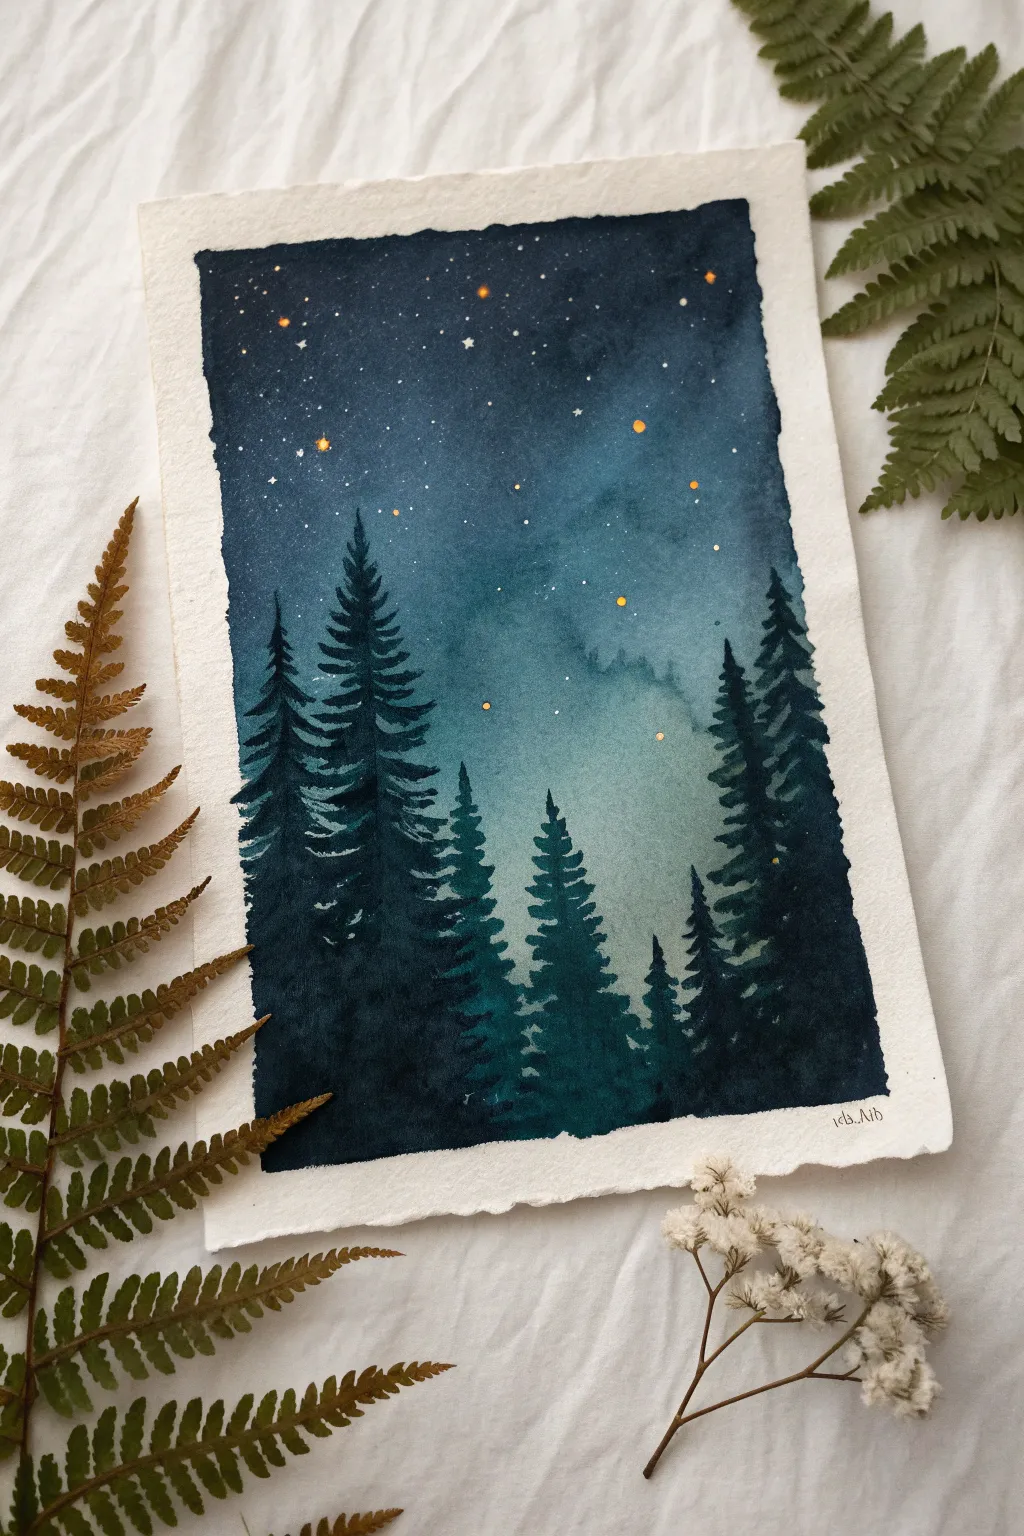
Capture the magic of a quiet forest at night with this moody watercolor piece, featuring deep indigo skies fading into a misty turquoise horizon. The scene comes alive with glowing golden fireflies dancing among silhouetted pine trees.
Step-by-Step
Materials
- Cold press watercolor paper (300gsm recommended)
- Blue painter’s tape or masking tape
- Watercolor paints: Indigo, Prussian Blue, Turquoise, Payne’s Gray
- Gouache or opaque acrylic: White and Yellow/Orange
- Round brushes: Size 8 or 10 for washes, Size 0 or 2 for details
- Clean water jar
- Paper towels
- Palette for mixing
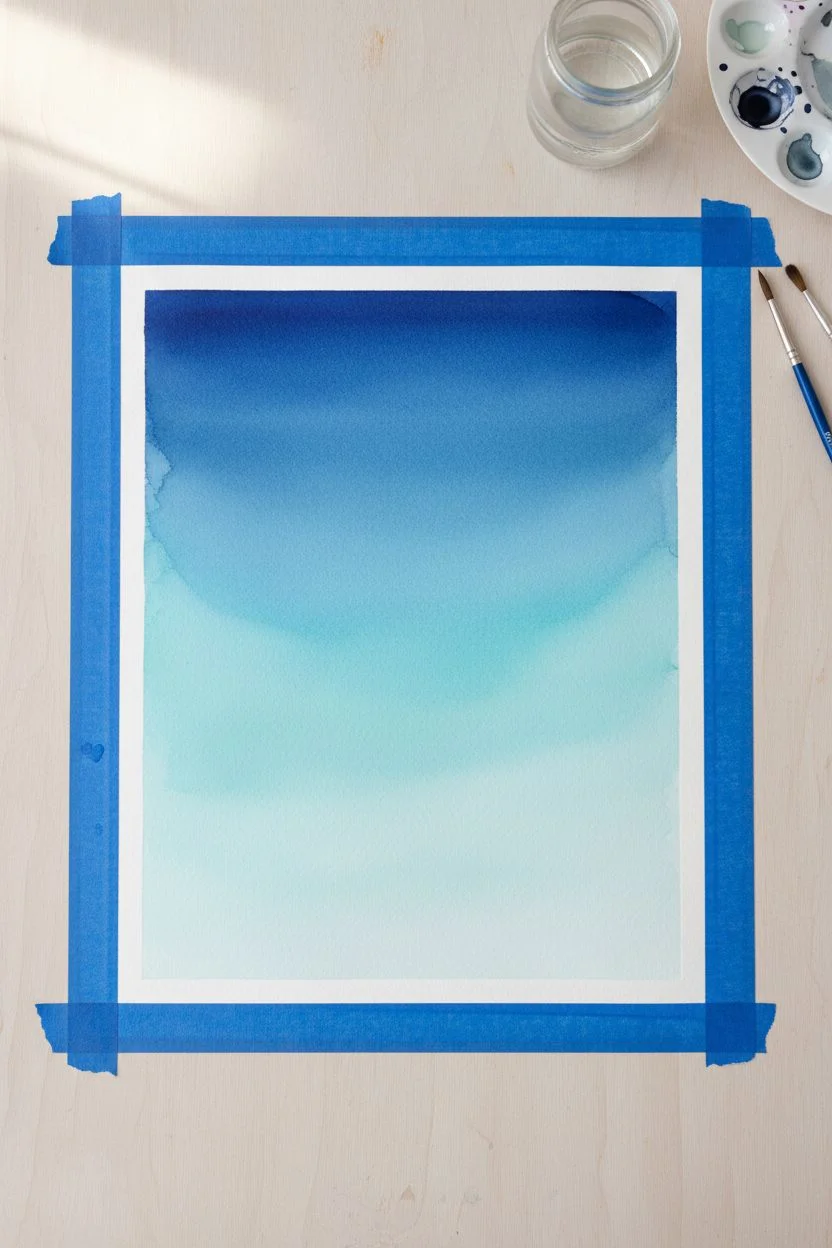
Step 1: Setting the Sky Gradient
-
Prepare your paper:
Tape down all four edges of your watercolor paper to a board or table. This creates that crisp, clean white border you see in the final piece and prevents the paper from buckling when wet. -
Mix your sky colors:
Prepare three distinct puddles of paint on your palette: a very dark Indigo for the top, a mid-tone Prussian Blue for the middle, and a watery Turquoise or Teal for the lower horizon area. -
Wet the paper:
Using your largest brush and clean water, apply an even coat of water over the entire sky area where you plan to paint. The surface should glisten but not have standing puddles. -
Apply the dark top layer:
Start at the very top with your Indigo mix. Paint horizontally across, letting the pigment flow into the wet paper. The color should be richest at the top edge. -
Blend downwards:
Clean your brush slightly and pick up the Prussian Blue. Apply this below the Indigo, gently overlapping the two zones so they bleed together seamlessly. -
Create the glowing horizon:
Rinse your brush well. Pick up the Turquoise and paint the bottom third of the sky. As you work downward, add more water to your brush to fade the color out, creating a lighter, misty effect near where the trees will be. -
Let it dry mostly:
Allow the sky wash to dry until it is no longer shiny but still cool to the touch. This semi-dry stage is perfect for adding soft background textures if desired.
Blooms & Cauliflowers
If weird textures appear in your sky, you likely added water to a drying wash. Let it dry completely, then gently glaze over it to smooth things out.
Step 2: Painting the Forest
-
Mix the tree color:
Create a very dark, opaque mixture. I prefer combining Indigo with Payne’s Gray to get a near-black that still feels harmoniously cool, rather than a flat black from the tube. -
Paint the background trees:
Start with the smaller, more distant trees in the center. Use a diluted version of your dark mix so they appear lighter and further away in the mist. Use the tip of your small brush to dab irregular pine shapes. -
Start the main silhouettes:
Once the mist layer is dry, load your brush with the full-strength dark mix. Start painting the large trees on the left and right sides. Draw a vertical line for the trunk first to guide you. -
Detail the branches:
Use a erratic, zig-zag motion to create pine branches. Start narrow at the top of the tree and get wider as you move down. Leave small gaps between branches to let the background showing through. -
Fill the dense forest floor:
As you reach the bottom of the paper, merge all the tree bottoms into a solid block of dark color to represent the dense forest undergrowth. -
Dry completely:
Wait for the trees to dry 100%. If you try to add stars or fireflies while the trees are wet, the dots will bleed and lose their crisp shape.
Step 3: Adding the Sparkle
-
Create white stars:
Dip a small brush into white gouache. You can tap the handle against another brush to splatter tiny white stars across the upper sky, or carefully dot them on by hand for more control. -
Mix the firefly glow:
Mix a small amount of yellow or orange gouache. You want a consistency that is creamy and opaque enough to stand out against the dark blue background. -
Place the fireflies:
Using your smallest detail brush, place distinct orange dots around the trees and lower sky. Vary the sizes slightly—some tiny specks and some larger glowing orbs. -
Final reveal:
Wait for every speck of paint to be bone dry. Then, carefully peel off the masking tape at a 45-degree angle to reveal your crisp white edges.
Pro Tip: Misty Effect
To make the middle trees look truly foggy, lift a little paint with a damp paper towel or use more water in your mix for transparency.
Enjoy the calm atmosphere of your beautiful new night forest painting


Have a question or want to share your own experience? I'd love to hear from you in the comments below!