Painting on stones is one of my favorite ways to unwind because nature has already done half the sculpting work for you. Let’s dive into some approachable designs that turn humble river rocks into vibrant little masterpieces.
Classic Red Ladybugs
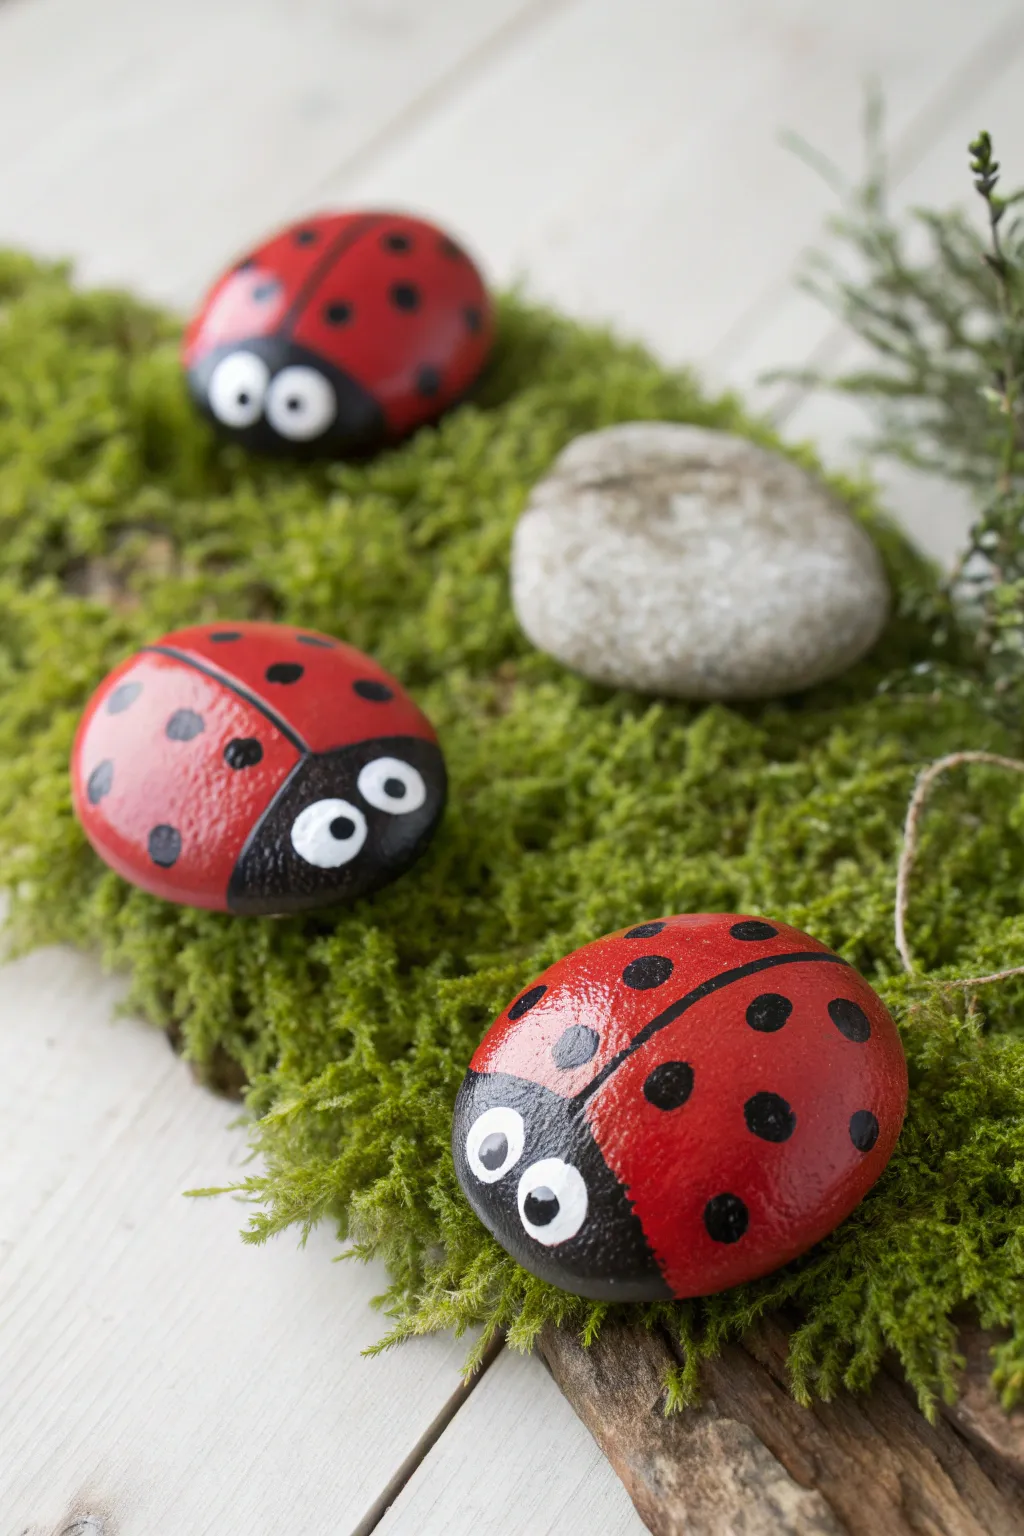
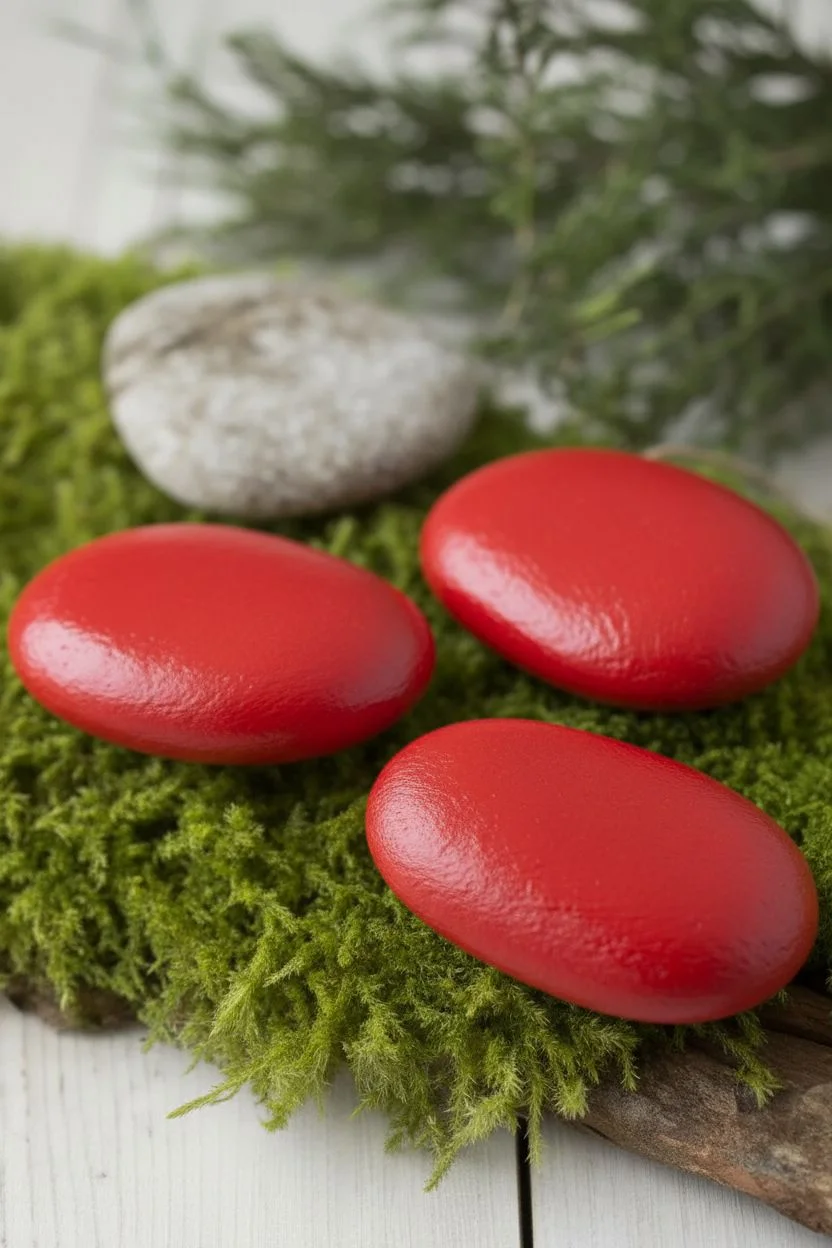
Transform smooth river stones into charming garden inhabitants with this classic rock painting project. These vibrant red ladybugs feature a high-gloss finish that makes them pop against green moss or leaves.
Step-by-Step Tutorial
Materials
- Smooth oval rocks
- Acrylic paint (Bright Red, Black, White)
- Medium flat paintbrush
- Small round detail brush
- Dotting tool (optional)
- High-gloss outdoor varnish
- Water cup and paper towels
Step 1: Preparation and Base
-
Clean surface:
Scrub your rocks with warm soapy water to remove any dirt or grit, then let them dry completely so the paint adheres properly. -
Prime palette:
Squeeze a generous amount of bright red acrylic paint onto your palette or a disposable plate. -
Apply base:
Using a medium flat brush, paint the entire top surface and sides of the rock red. -
Let dry:
Allow this first layer to dry to the touch; red pigment is often translucent, so don’t panic if it looks streaky. -
Build opacity:
Apply a second or even third coat of red until you achieve a solid, vibrant color with no rock showing through. -
Full cure:
Set the rocks aside until the red base coat is thoroughly dry to prevent colors from muddying in the next steps.
Step 2: Defining Features
-
Outline head:
Switch to black acrylic paint and use a small round brush to paint a semi-circle at the front end of the rock. -
Fill head:
Fill in the semi-circle completely with black paint to define the ladybug’s face area. -
Center line:
Using a thin liner brush or the very tip of your round brush, paint a straight line down the center of the red back. -
Dip tool:
Dip the handle end of a paintbrush or a specialized dotting tool into the black paint. -
Stamp spots:
Press the tool straight down onto the red wings to stamp perfectly round circles. -
Vary sizes:
I like to use different sized brush handles here to create a mix of large and small spots for visual interest. -
Set paint:
Give the black details ample time to dry so you don’t accidentally smudge the spots while handling the rock.
Uneven Spots?
If your painted dots look gloppy or have peaks, gently tap the bottom of the rock on the table immediately after painting so the wet paint flattens out.
Step 3: Face and Finish
-
Eye whites:
Dip a smaller tool or skewer into white paint and stamp two circles onto the black head area. -
Dry completely:
Wait for the white circles to dry completely; this is crucial so the black pupil doesn’t bleed into the white. -
Add pupils:
Using a toothpick or a fine point tool, place a tiny dot of black paint inside each white circle. -
Check dryness:
Ensure every part of the painting is bone dry before moving to the sealing step. -
Apply gloss:
Brush on a coat of high-gloss outdoor varnish to protect the paint and give the ladybugs their signature wet, shiny look. -
Final cure:
Place the finished rocks in a dust-free area to cure according to your varnish bottle’s instructions.
Tool Hack
Don’t have a dotting tool? Use household items like Q-tips, a pencil eraser, or the back end of a paintbrush handle to stamp perfect circles.
Nestle these shiny little critters into your flower pots for a delightful pop of color


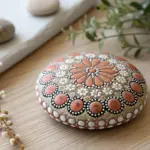
Meditative Mandala Dots
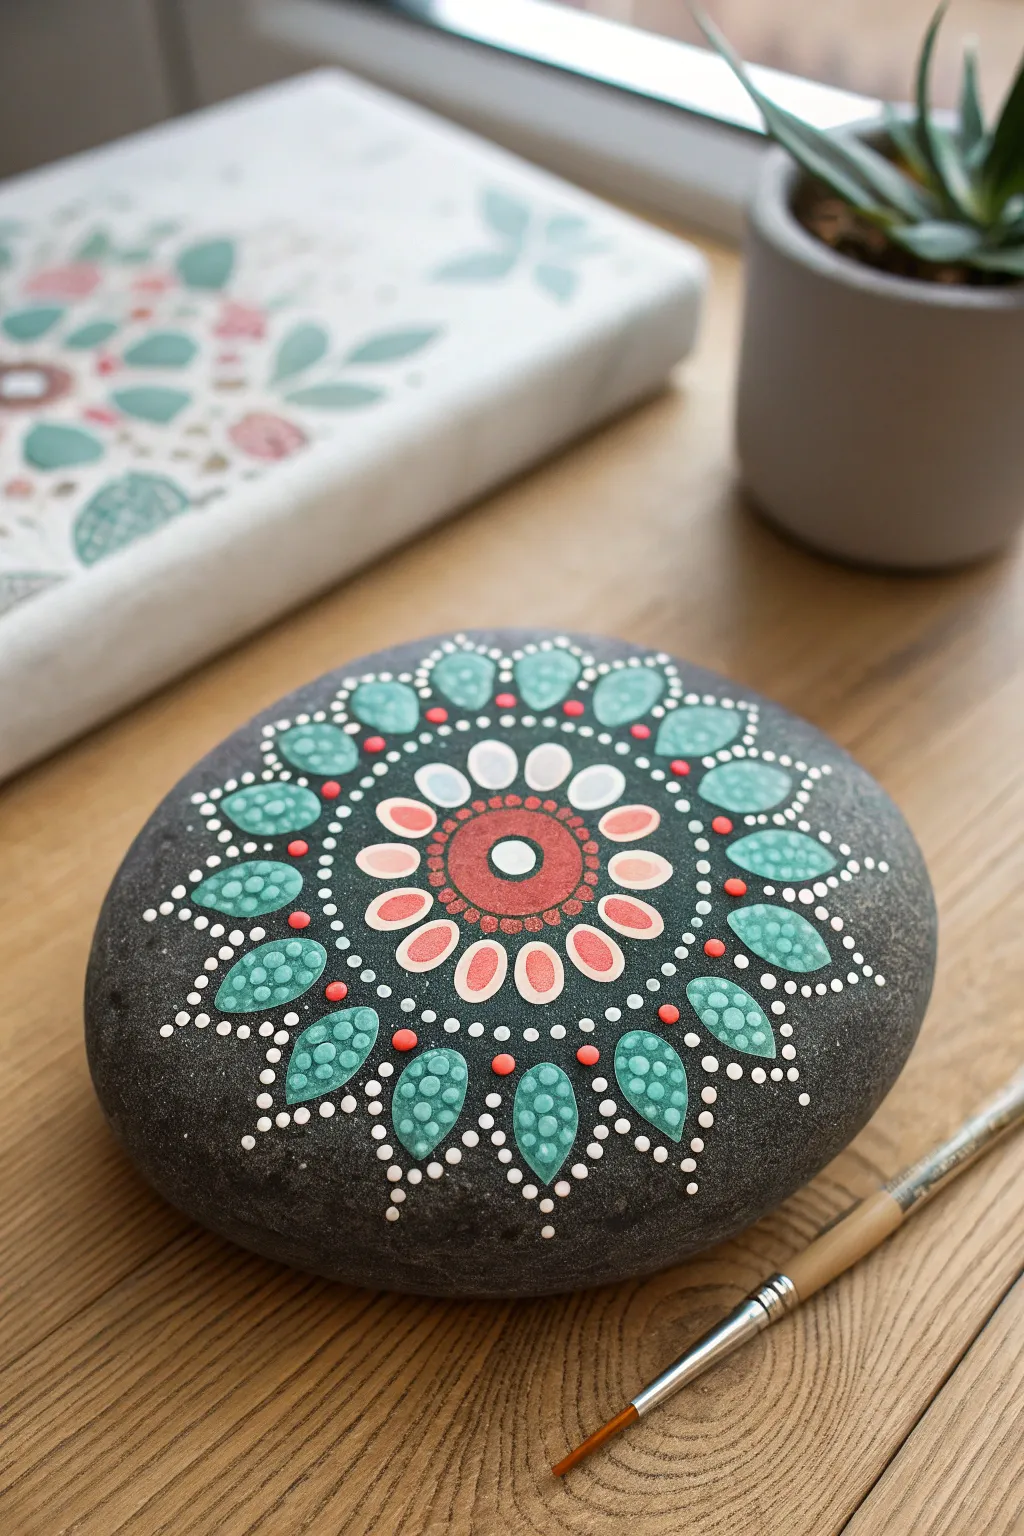
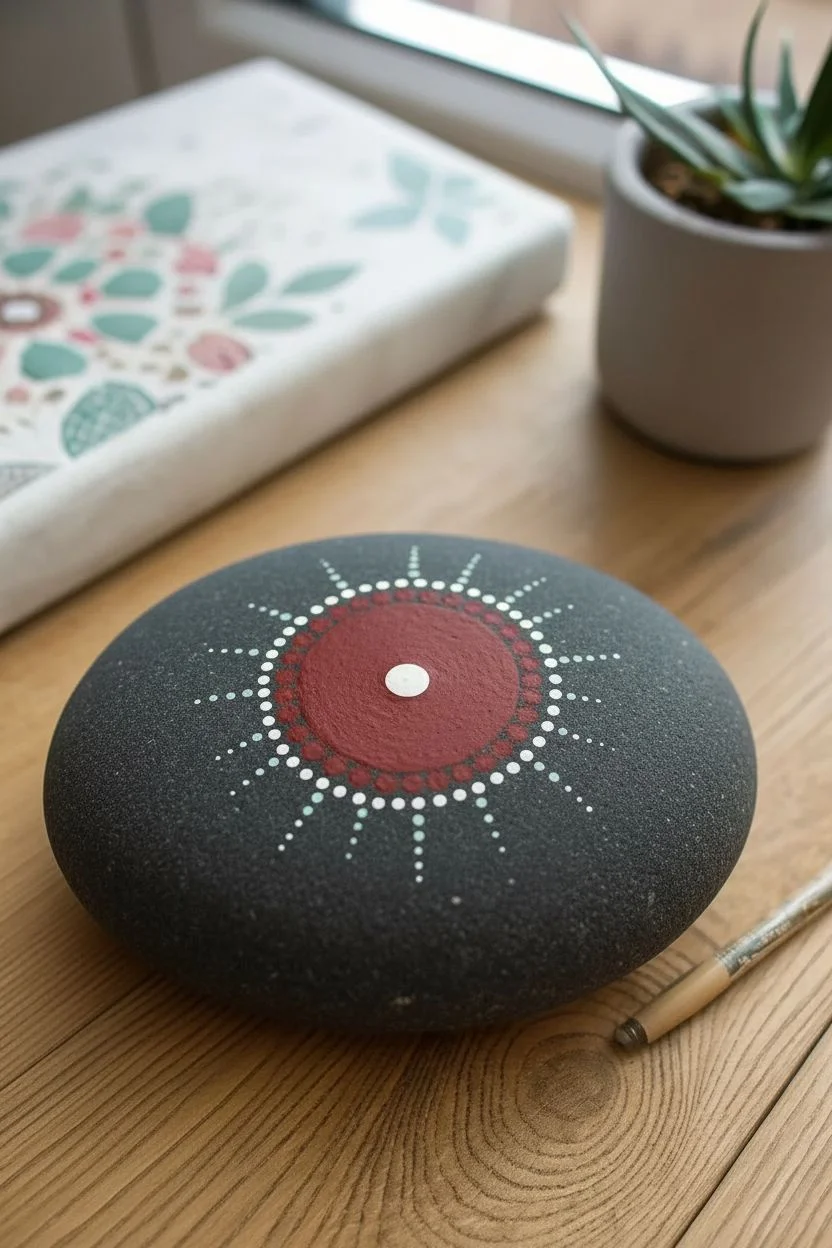
This project combines soothing symmetry with a pop of nature-inspired colors. The dark stone background makes the creamy teal and soft coral tones appear vibrant and grounded.
Detailed Instructions
Materials
- Smooth, round dark grey river rock
- Acrylic paints: White, Coral/Salmon, Teal, Dark Red/Burnt Sienna
- Set of dotting tools (various sizes)
- Fine detail liner brush (size 0 or 00)
- Palette or small tray for mixing
- Damp paper towel
- Clear spray sealant or gloss varnish
Step 1: The Centerpiece
-
Prepare the canvas:
Begin by washing your stone with soapy water and drying it completely to ensure the paint adheres properly. -
Place the center dot:
Find the approximate center of the rock. Load a medium-sized dotting tool with white paint and place a single dot. -
Paint the first ring:
Using a small brush and the Dark Red paint, create a solid circle surrounding the white center dot. It doesn’t have to be perfectly geometric; aim for a natural look. -
Decorate the red ring:
Switch to a small dotting tool. Dip it in white paint and place evenly spaced dots all around the red ring you just painted.
Step 2: The Floral Layer
-
Form the petals:
Using the Coral paint and a brush, paint oval shapes radiating outward from the center ring to create a flower shape. Aim for about 10-12 petals. -
Outline the petals:
Once the coral paint is dry to the touch, use your fine liner brush with white paint to carefully outline each oval. -
Add inner details:
If you have space within the coral petals, you can add a small white dot or line, but leaving them solid creates a nice contrast.
Pointy Dots?
If your dots dry with sharp peaks, your paint is likely too thick. Mix in a tiny drop of water or pouring medium to improve the flow, allowing the paint to settle into a smooth dome.
Step 3: The Teal Leaves
-
Paint the leaf shapes:
In the V-shaped gaps between the coral petals, paint large teardrop shapes using the Teal paint. The point of the teardrop should face outward. -
Mix a lighter shade:
I prefer to mix a little white into the teal paint on my palette to create a softer, pastel mint color for the inner details. -
Fill the leaves:
Using the lighter mix and a dotting tool, place dots inside the teal teardrops. Start with larger dots near the base and get smaller toward the tip. -
Begin the outer border:
Project the pattern outward by using a small tool to place white dots outlining each teal leaf. -
Walk the dots:
To get that tapered border effect, dip your tool in white paint once, then dot repeatedly around the curve of the leaf without re-dipping. The dots will naturally get smaller.
Level Up: Shimmer
Try mixing a small amount of metallic pearl medium into your Teal paint. This gives the large leaves a subtle, iridescent shimmer that catches the light beautifully outdoors.
Step 4: Final Accents
-
Add contrast points:
Dip a medium tool into the Dark Red paint again. Place a single accent dot in the space between the tips of the teal leaves. -
Extend the design:
Add a few tiny white dots trailing off from the red accents to help the design fade naturally into the dark stone. -
Let it cure:
Allow the stone to dry completely, preferably overnight, to ensure thick dots are hardened all the way through. -
Protect your work:
Apply a coat of clear spray sealant or brush-on varnish to protect the paint from chipping and to make the colors pop.
Place your finished mandala in a garden corner or on a desk for a daily reminder of balance and calm


Kindness Message Stones

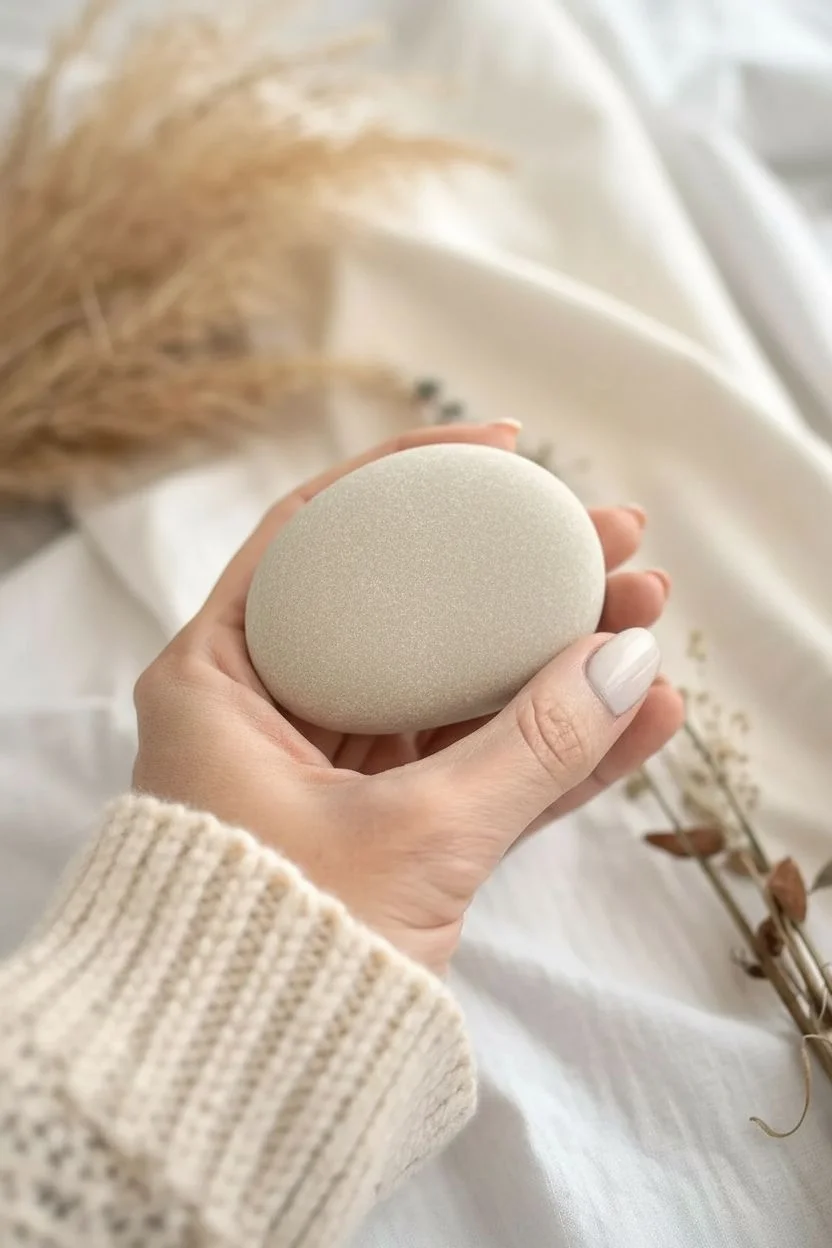
Embrace the beauty of simplicity with this elegant kindness rock that features a powerful message in classic script. Using a smooth natural stone and crisp black detailing, you will create a pocket-sized reminder of optimism.
Step-by-Step Guide
Materials
- Smooth, light-colored river rock (flat surface preferred)
- Dish soap and water
- HB Pencil
- Extra-fine tip black acrylic paint pen (0.7mm)
- Kneaded eraser
- Clear matte spray sealer or varnish
Step 1: Surface Preparation
-
Select your canvas:
Choose a stone that feels smooth to the touch and has a relatively flat face. A lighter shade of beige or grey works best to provide high contrast for the lettering. -
Clean thoroughly:
Wash the stone with warm water and a drop of dish soap to remove any oils, dirt, or dust. -
Dry completely:
Allow the stone to dry fully in the sun or use a hair dryer. Writing on a damp stone can cause ink to bleed. -
Assess the surface:
If your rock feels very porous or chalky, I prefer applying a thin layer of matte varnish now to create a sealed writing surface, though smooth river rocks often don’t need this.
Bleeding Ink?
If the paint pen ink spreads into the rock’s pores like a spiderweb, stop immediately! Let it dry, then paint a layer of clear matte medium over the area before trying again.
Step 2: Drafting the Design
-
Pencil the placement:
Using your pencil, lightly sketch a horizontal line across the center of the rock to serve as your guide. -
Sketch the word:
Write the word ‘Hope’ in a cursive style. Focus on making the ‘H’ large and looping, keeping the ‘o’, ‘p’, and ‘e’ slightly smaller but connected. -
Check spacing:
Ensure the text is centered. There should be enough room above and below the word for the heart embellishments. -
Add floating hearts:
Lightly sketch three small hearts in an arc above the text, and one larger heart centered below the word.
Step 3: Inking the Lettering
-
Prime the pen:
Shake your black extra-fine paint pen well and depress the nib on a scrap piece of paper until the ink flows smoothly. -
Trace the creative skeleton:
Go over your pencil lines with the paint pen. Keep the pressure even to create a clean, thin monoline version of the word first. -
Identifying downstrokes:
To achieve the calligraphy look, identify every stroke where your hand moved downward while writing. -
Thicken the lines:
Carefully draw a second line next to those downstrokes and fill in the gap. This adds weight and mimics a brush pen font. -
Refine the edges:
Smooth out any jagged connections where the thick parts meet the thin parts of the letters.
Make It Shine
For a subtle upgrade, use a metallic gold paint pen to add tiny dots between the hearts or to outline the large bottom heart for a mixed-metal effect.
Step 4: Embellishing and Finishing
-
Ink the top hearts:
Draw the small hearts above the text. Fill two of them in completely with black ink for a solid look. -
Create the bottom heart:
Trace the larger heart below the word ‘Hope’. Leave this one as an open outline rather than filling it in, matching the airy feel of the design. -
Add accent hearts:
Draw one or two tiny, solid black hearts near the bottom left or right to balance the composition. -
Dry and erase:
Wait 15 minutes for the paint to cure completely. Gently dab the surface with a kneaded eraser to lift any visible pencil marks. -
Seal the artwork:
Finish by applying a light coat of matte spray sealer. This protects the stone from weather if you choose to leave it outdoors.
Now you have a beautifully simple touchstone ready to inspire positive thoughts.


Visual Vegetable Garden Markers
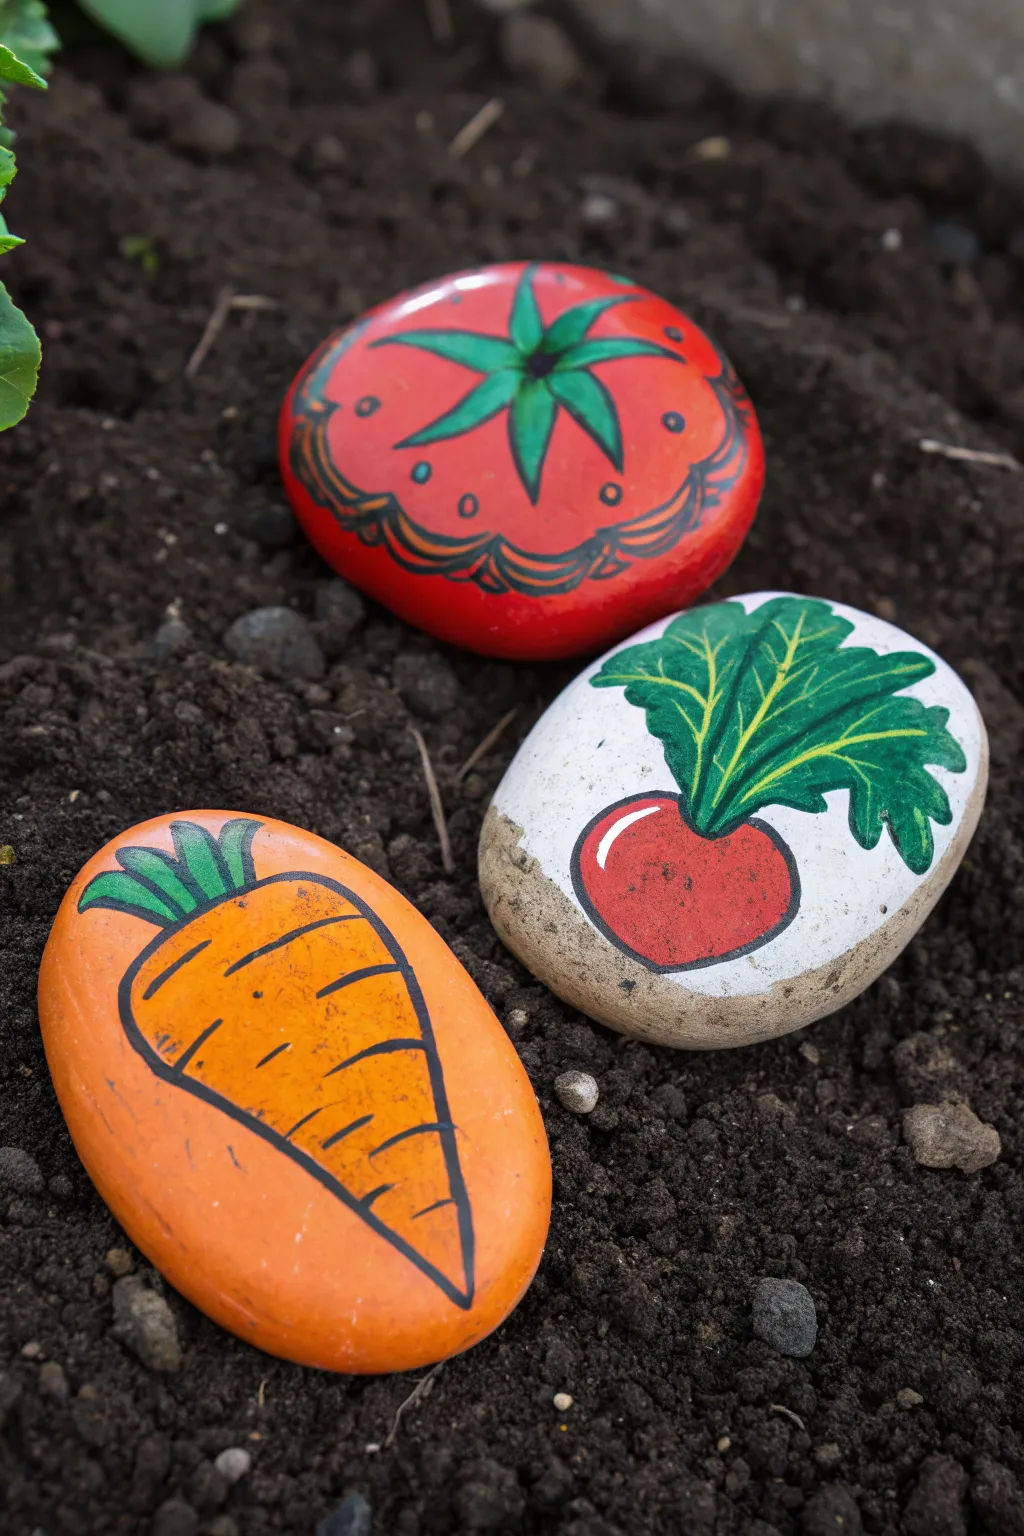
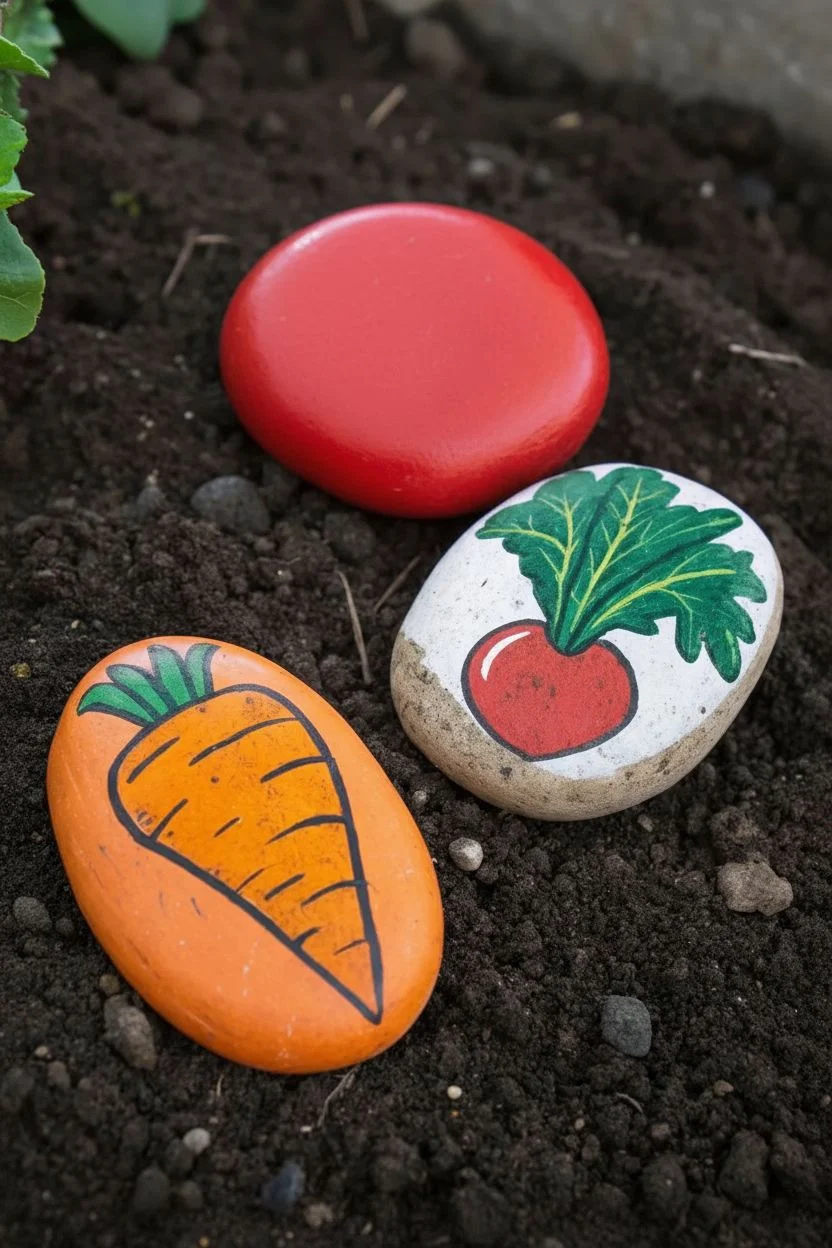
Add a splash of color and organization to your garden beds with these charming painted stones. This project turns ordinary river rocks into vibrant visual markers for your tomatoes, carrots, and radishes.
Step-by-Step Tutorial
Materials
- Smooth river rocks (various shapes)
- Acrylic craft paints (red, orange, green, white)
- Black fine-tip paint pen (or fine liner brush)
- Flat and detail paintbrushes
- Pencil
- Outdoor spray sealer or varnish
Step 1: Preparation & Base Coats
-
Clean the surface:
Scrub your rocks with warm soapy water to remove any dirt or grit and let them dry completely. -
Base the tomato:
Select a round rock for the tomato and coat the entire surface with bright red acrylic paint. -
Base the carrot:
Choose an oblong or oval rock for the carrot design and paint the entire surface vibrant orange. -
Base the radish:
For the radish marker, paint the face of a rounder rock with white paint to create a clean, bright canvas. -
Apply second coats:
Apply a second layer of paint to all rocks if needed to ensure solid, opaque coverage.
Step 2: Painting the Tomato
-
Add greenery:
Once the red base is dry, use green paint to create a five-pointed star shape on the top center to represent the leafy sepals. -
Draw decorative lines:
Take your black paint pen and draw a scalloped or wavy line around the side of the rock for a decorative touch. -
Outline the details:
Outline the green star leaves with the black pen and add a small black dot in the very center where the stems meet.
Skip the skips
If your paint pen skips over the rock’s texture, press the nib on scrap paper to re-flow the paint, or switch to a liner brush with thinned black acrylic.
Step 3: Painting the Radish
-
Paint the bulb:
Move to the white rock and paint a bright red circle on the lower half to form the radish body. -
Add leaves:
Using a detail brush, paint luscious green leaves extending upward from the top of the red radish circle. -
Highlight:
Add a small, curved white line on the upper left side of the red radish bulb to create a shiny highlight. -
Define images:
Once the paint is dry, use the black pen to outline the radish bulb and the leaves, adding a central line to the leaves for stems.
Harvest helper
Make the markers more functional by writing the specific vegetable variety name on the back of each rock so you remember exactly what you planted.
Step 4: Painting the Carrot
-
Top leaves:
On the dry orange rock, paint a small tuft of jagged green leaves on the top edge. -
Carrot shape:
Use the black paint pen to draw a large, playful carrot shape directly onto the orange surface by outlining a long, soft triangle. -
Add texture:
Draw slightly curved horizontal lines across the carrot body with the pen to represent the vegetable’s natural texture. -
Finish outlining:
Outline the green carrot leaves with your black pen to match the illustrative style of the other rocks.
Step 5: Sealing
-
Dry time:
I like to let the rocks sit for at least 24 hours before the final step to ensure absolutely no moisture is trapped under the sealer. -
Varnish:
Apply two coats of clear, outdoor-rated varnish or sealer to protect your artwork from rain and sun.
Place your finished stones near your seedlings to keep your garden organized and colorful all season long
BRUSH GUIDE
The Right Brush for Every Stroke
From clean lines to bold texture — master brush choice, stroke control, and essential techniques.
Explore the Full Guide
Buzzy Bumblebee Stripes
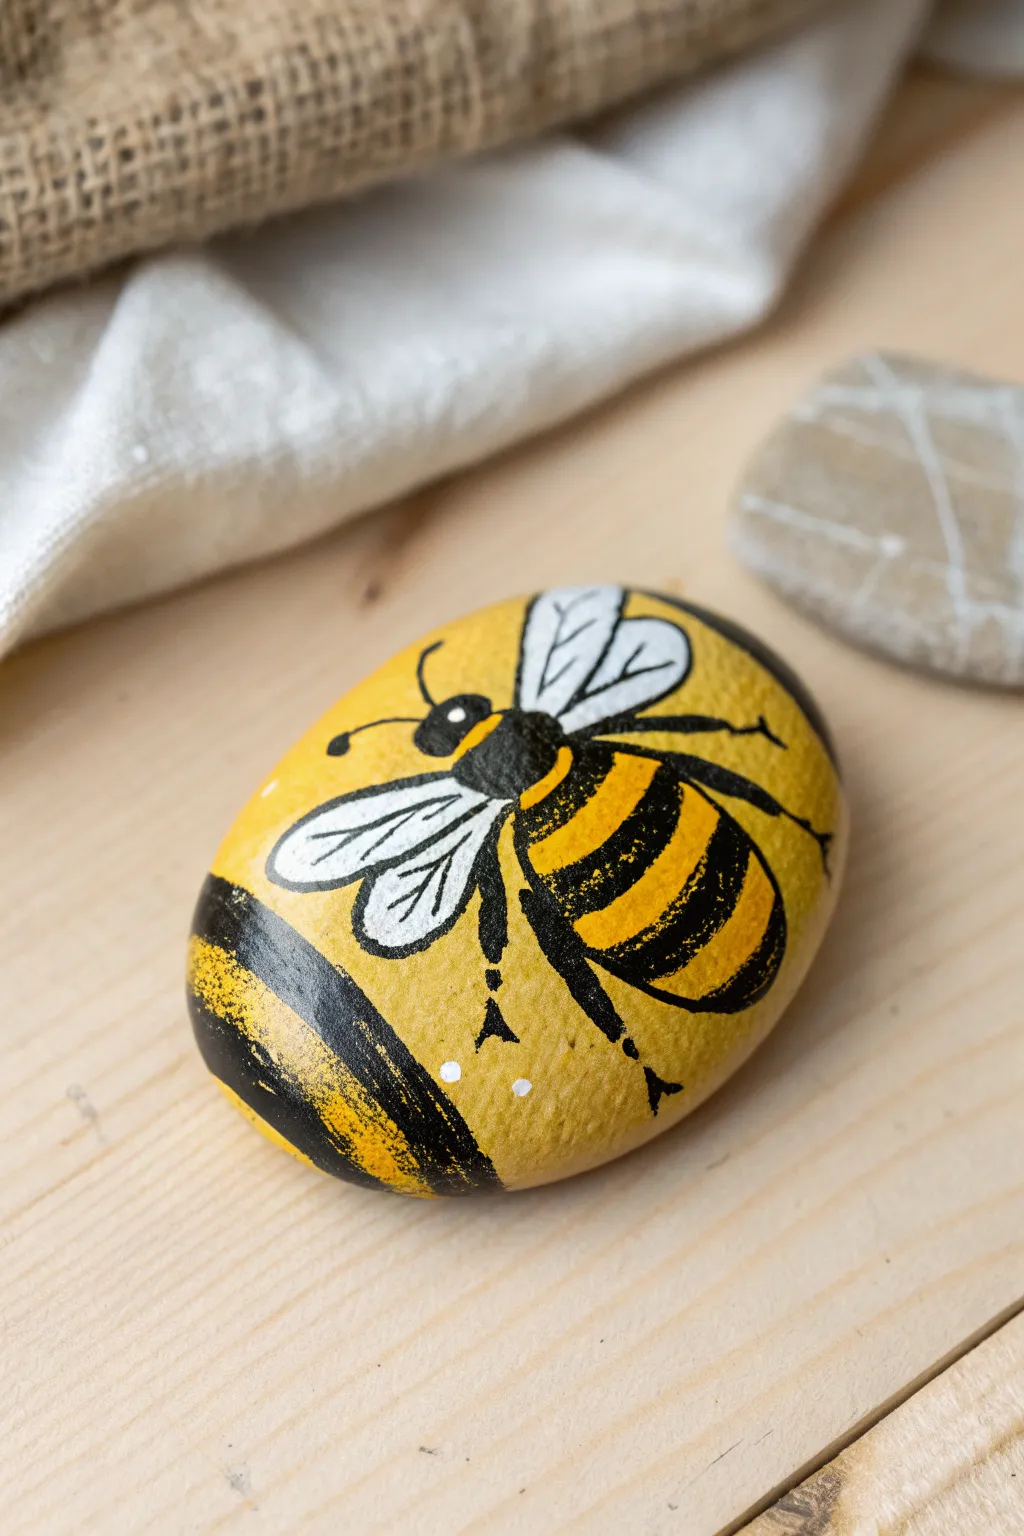
Transform a smooth river rock into a cheerful, buzzing centerpiece perfect for garden decor or a paperweight. By blending the bee’s colors with the background, you create a cohesive and sunny design that pops.
Step-by-Step Guide
Materials
- Smooth oval stone (palm-sized)
- Acrylic paint (Golden Yellow or Ochre)
- Wide flat paintbrush
- Black acrylic paint pen (extra fine tip)
- White acrylic paint pen (medium tip)
- Clear spray sealer (matte or satin)
- Pencil (optional)
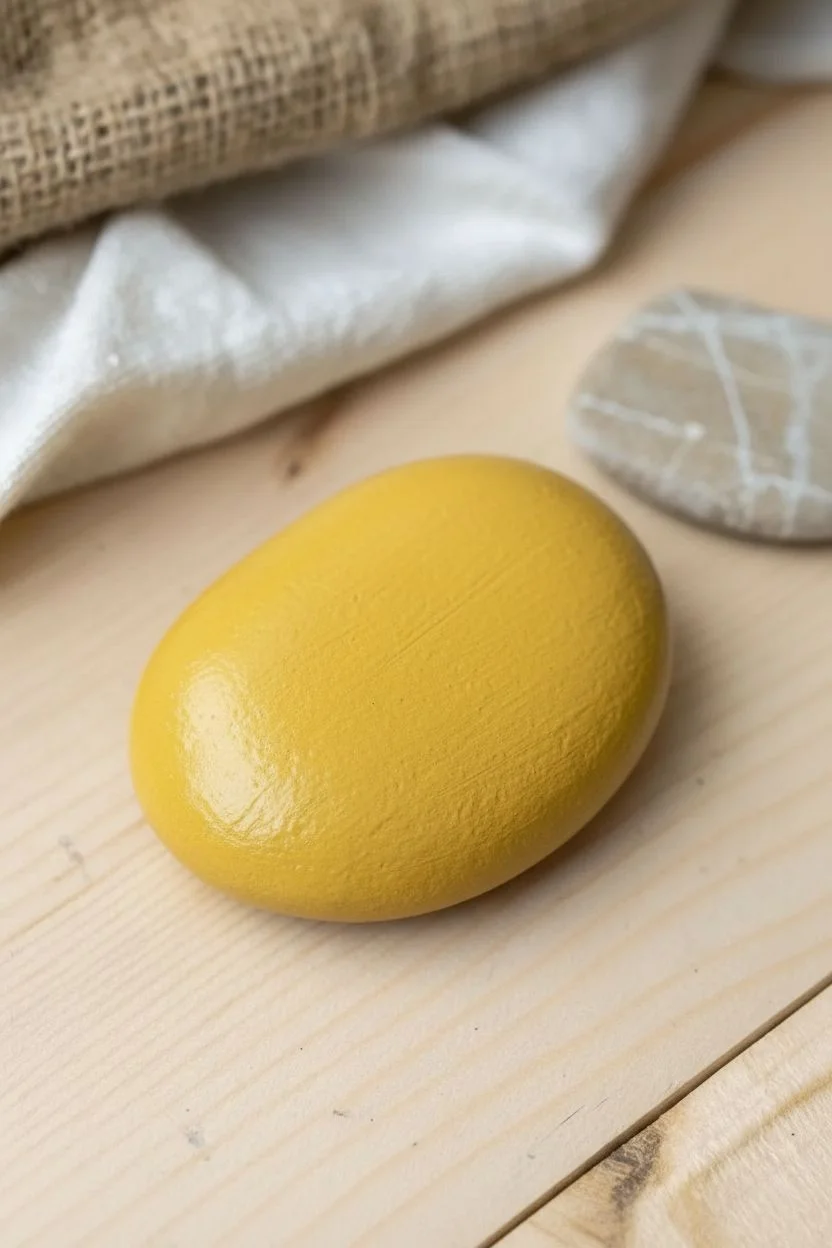
Step 1: Base Coat
-
Clean surface:
Scrub your stone with soap and water to remove any dirt or grit, then dry it completely with a towel. -
Apply yellow base:
Using your flat brush, paint the entire top surface of the rock with a warm golden yellow. -
Dry and repeat:
Let the first coat dry fully to the touch. I usually add a second coat here to ensure the color is solid and opaque.
Paint Pen Flow
Before touching the rock, press the tip of your paint pen on a scrap piece of paper a few times to get the ink flowing smoothly without blobs.
Step 2: Painting the Bee
-
Position the bee:
Visualize where you want your bee to land, slightly off-center towards the top right looks dynamic. -
Draw the head:
Using the black paint pen, draw a small, solid black circle for the bee’s head. -
Create the thorax:
Directly below the head, draw a thick, curved black band. This is the first stripe behind the head. -
Add abdomen stripes:
Leave a gap of yellow, then draw another thick curved black stripe for the middle of the body. -
Finish body:
Leave one more yellow gap and draw the final black tip of the bee at the bottom. -
Paint wing shapes:
With the white paint pen, draw two teardrop shapes extending from the upper back, overlapping the black stripes slightly. -
Fill the wings:
Fill in the teardrop shapes completely with white ink. -
Reinforce white:
If the yellow shows through the white paint, wait a moment and apply a second layer to make the wings bright.
Step 3: Details & Decoration
-
Outline wings:
Once the white is bone-dry, carefully trace the edge of the wings with your extra-fine black pen. -
Add wing veins:
Draw a faint straight line down the center of each wing to add realistic detail. -
Draw antennae:
Sketch two thin, curved lines coming off the front of the head, adding tiny dots at the tips. -
Add legs:
Draw thin, spindly legs extending from the black stripes on the body—two showing on the left, three on the right. -
Create rock stripes:
In the bottom left corner of the stone, draw two thick, curving black bands that mimic the bee’s pattern. -
Texture the stripes:
Rough up the edges of these large corner stripes slightly so they look organic rather than perfectly geometric. -
Add highlights:
Dot three tiny specks of white paint near the large bottom stripes to balance the composition. -
Seal the work:
Take the rock outside and spray a light coat of clear sealer to protect your art from the elements.
Smudged Lines?
If you accidentally smudge wet black ink onto the yellow, wait for it to dry completely, then dab a little yellow paint over the mistake to cover it.
Place your little pollinator in a plant pot or on a windowsill to enjoy sunny vibes year-round
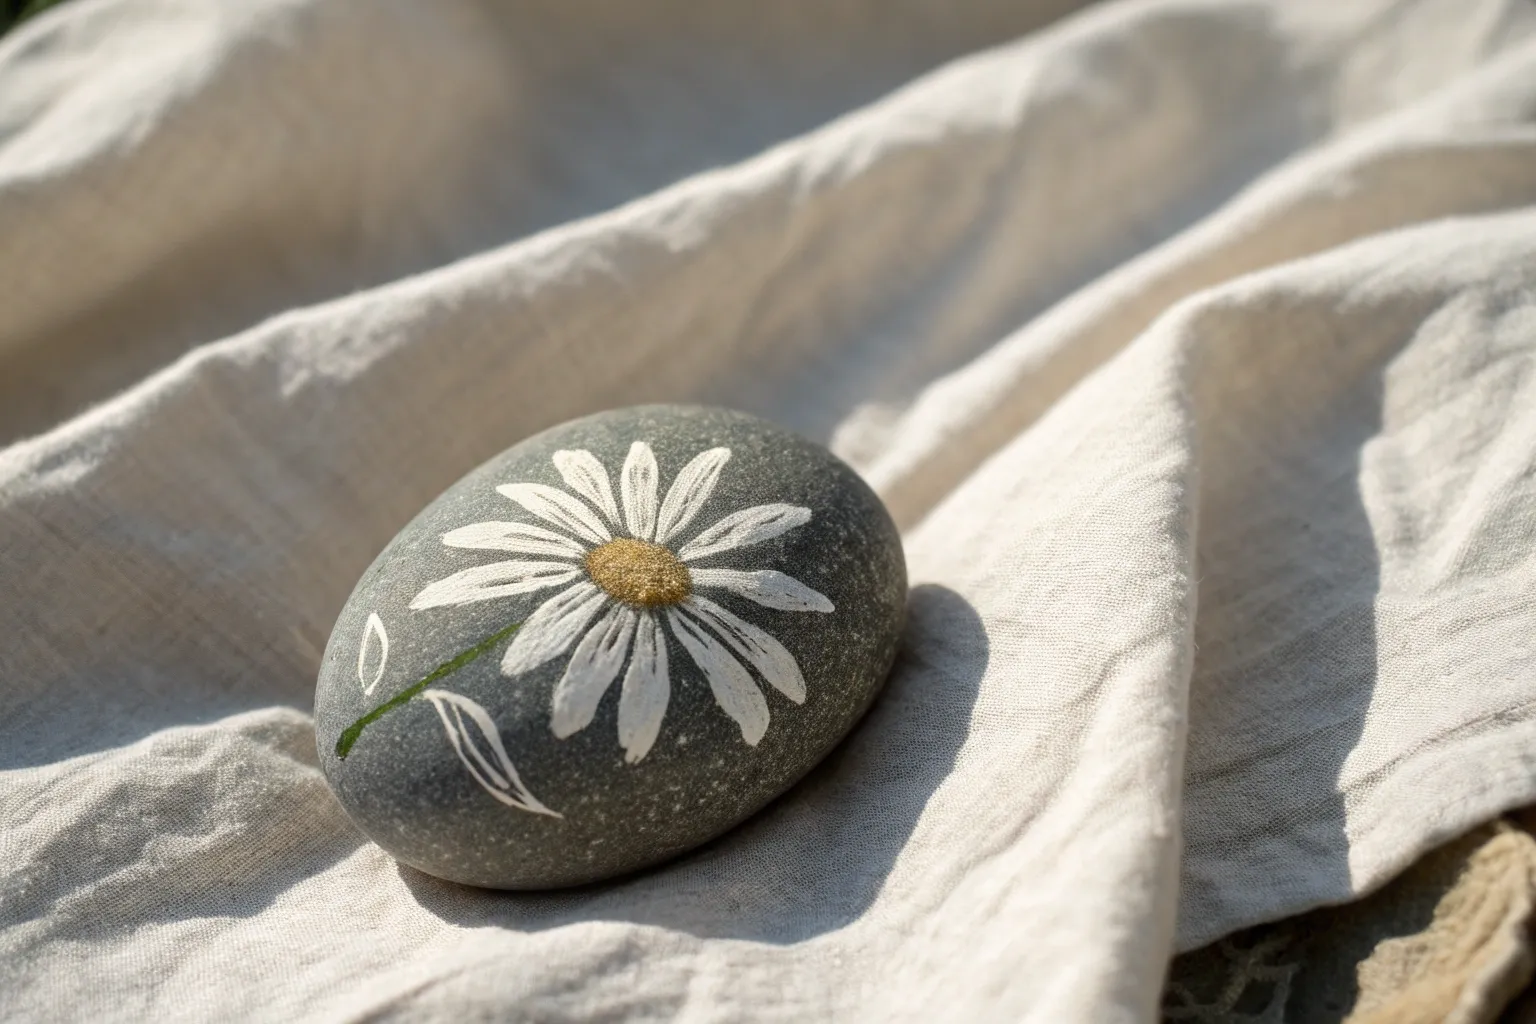
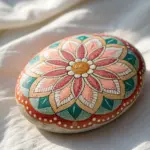
Simple Daisy Chain Patterns
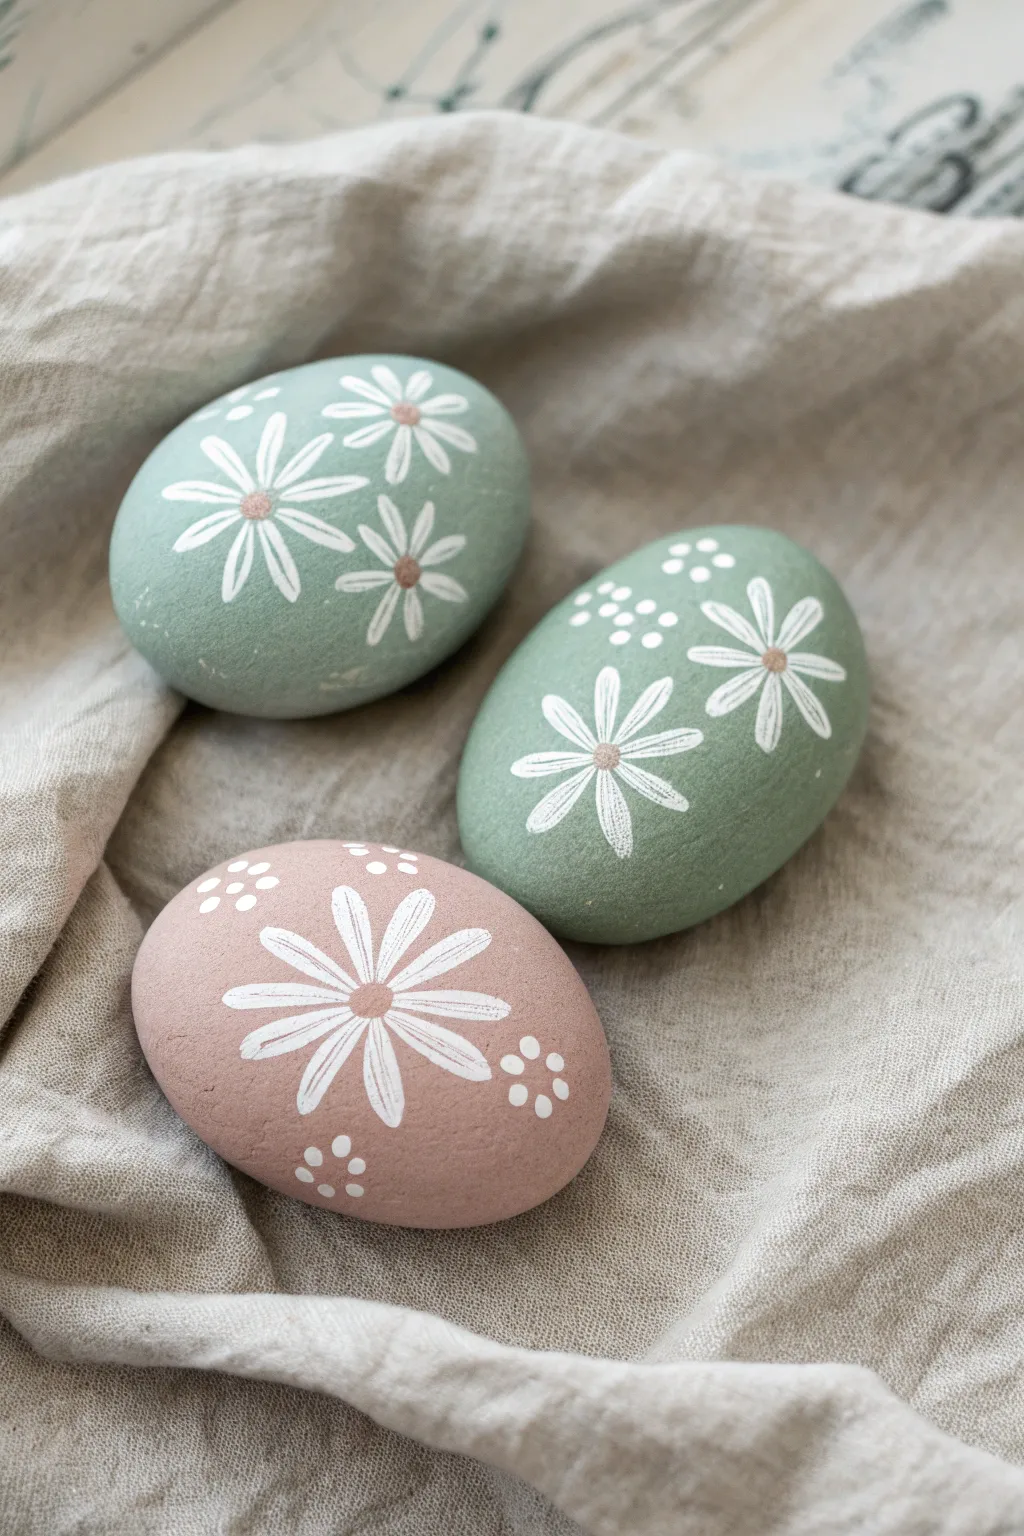

Transform ordinary smooth stones into elegant, cottage-core decor pieces with this soothing painting project. The muted sage and dusty rose palette combined with delicate white floral motifs creates a sophisticated look perfect for paperweights or garden accents.
Step-by-Step Tutorial
Materials
- Smooth oval river rocks
- Matte acrylic paints (Sage Green, Dusty Rose/Mauve, White)
- Metallic acrylic paint (Gold or Bronze)
- Flat synthetic paintbrush (size 6 or 8)
- Fine liner brush (size 00 or 0) or extra-fine white paint pen
- Palette or paper plate
- Water cup and paper towels
- Matte spray sealer or varnish
Step 1: Preparing the Canvas
-
Clean the surface:
Begin by scrubbing your collected rocks with warm soapy water to remove any dirt or oils that might repel the paint. -
Dry thoroughly:
Pat the stones dry with a towel and let them air dry completely for about 15 minutes so no moisture remains in the pores. -
Apply green base coat:
Load your flat brush with the sage green acrylic paint and cover the top surface of two of your rocks using smooth, long strokes. -
Apply pink base coat:
Repeat the process with the dusty rose paint for the third rock, ensuring an even layer of color. -
Let dry and repeat:
Allow the first coat to dry until it is smooth to the touch. I usually find that a second coat is necessary to achieve that solid, opaque matte finish shown in the photo. -
Paint the undersides:
Once the tops are fully dry, flip the rocks over and paint the bottoms so the finish looks professional from every angle.
Transparency Trouble?
If your white paint looks streaky or gray against the dark base, stop! Don’t overwork wet paint. Let it dry 100%, then dab a second layer on top. The opacity will double instantly.
Step 2: Painting the Daisies
-
Prepare proper consistency:
Mix a small amount of white acrylic paint with a tiny drop of water on your palette; it should flow like ink but remain opaque. -
Start the first flower:
Using your fine liner brush, paint a simple cross (+) shape on the rock to guide the size of your first daisy. -
Fill the diagonals:
Paint a diagonal cross (x) over the first one to create an eight-point star, which forms the skeleton of your petals. -
Round the tips:
Go back over each line, starting from the center and lifting the brush as you reach the tip to create a tapered, petal-like shape. -
Vary positioning:
Continue painting flowers across the surface. Place some near the edges so they wrap around the curve, making the pattern look continuous. -
Add partial flowers:
Paint half-daisies peeking in from the sides of the rock; this creates a more natural, printed fabric look unlike a centered decal. -
Let the white cure:
Wait for the white petals to dry completely. If the background color shows through, carefully apply a second layer of white to just the petals.
Step 3: Details & Finishing
-
Add metallic centers:
Dip the handle end of a small paintbrush into your metallic gold or bronze paint to create a perfect dotting tool. -
Place the cores:
Gently press the tool into the center of each daisy to stamp a round metallic core. -
Create dot clusters:
Wipe the brush handle clean, dip it into the white paint, and add tiny clusters of three dots in the empty spaces between flowers. -
Scale the dots:
Try vary the pressure when stamping the white dots to create slightly different sizes for a whimsical effect. -
Final dry time:
Allow the rocks to sit undisturbed for at least an hour to ensure the thick dots of paint are hardened all the way through. -
Seal the work:
Take the rocks to a well-ventilated area and apply a light coat of matte spray sealer to protect the paint without adding unwanted shine.
Textured Touch
To mimic the stone texture in the photo, try mixing a pinch of cornstarch or baking soda into your base coat paint. It creates a velvety, ceramic-like finish that feels expensive.
Arranging these together in a bowl or on a linen napkin creates a little moment of calm in any room.

PENCIL GUIDE
Understanding Pencil Grades from H to B
From first sketch to finished drawing — learn pencil grades, line control, and shading techniques.
Explore the Full Guide
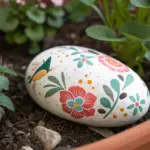
Sweet Summer Strawberries
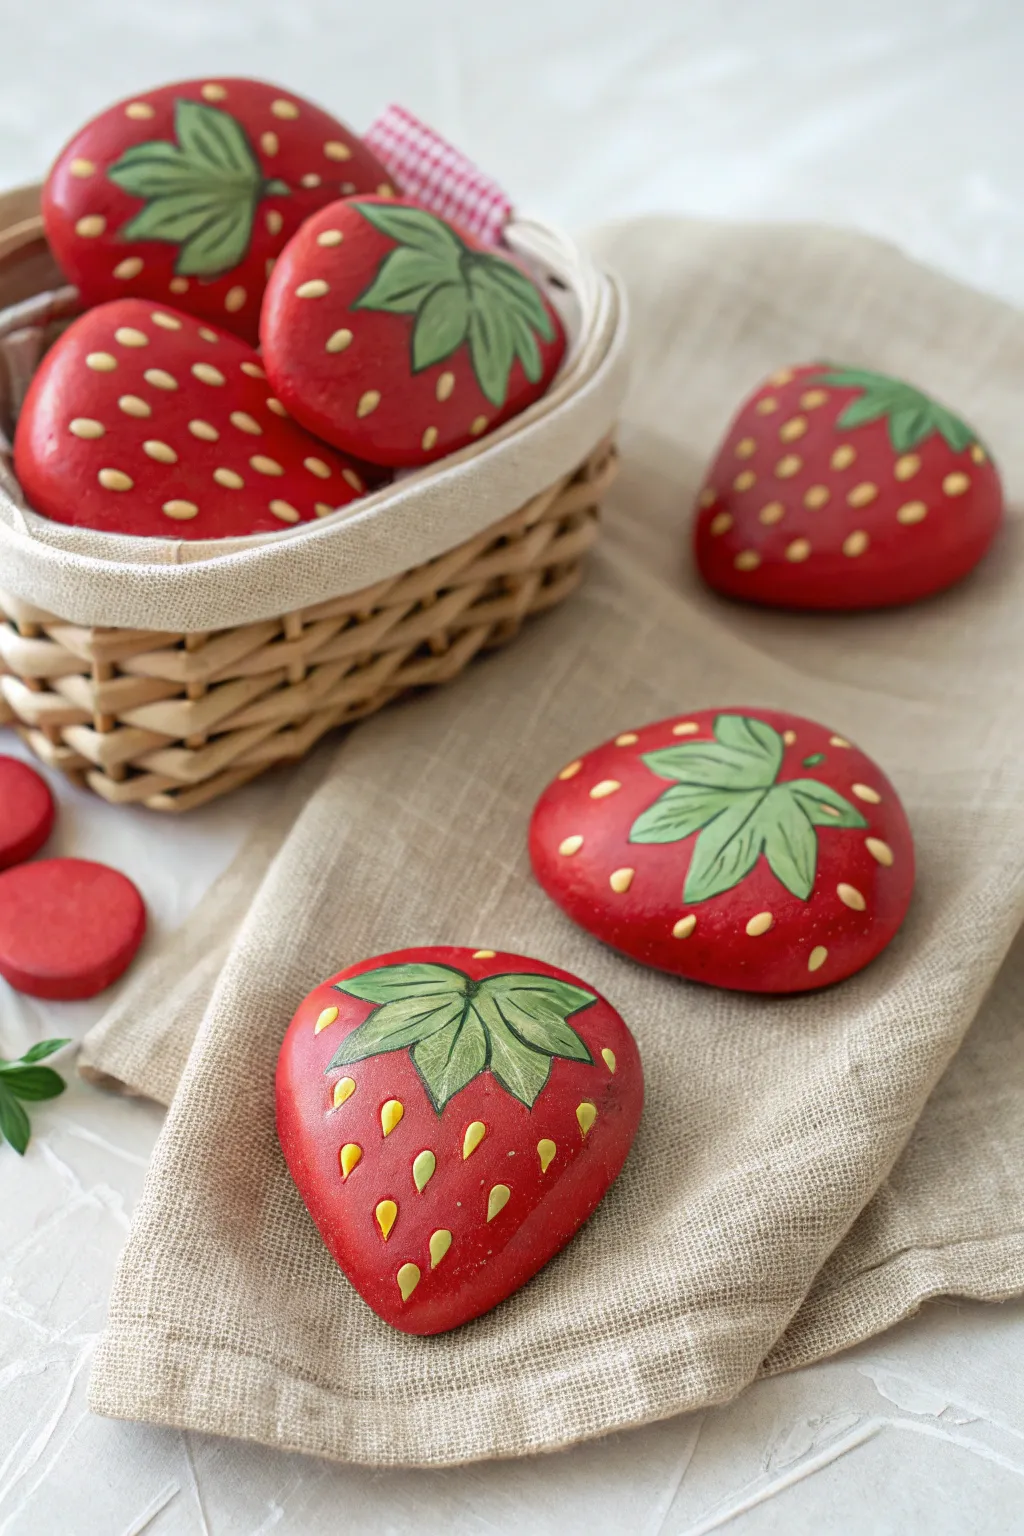
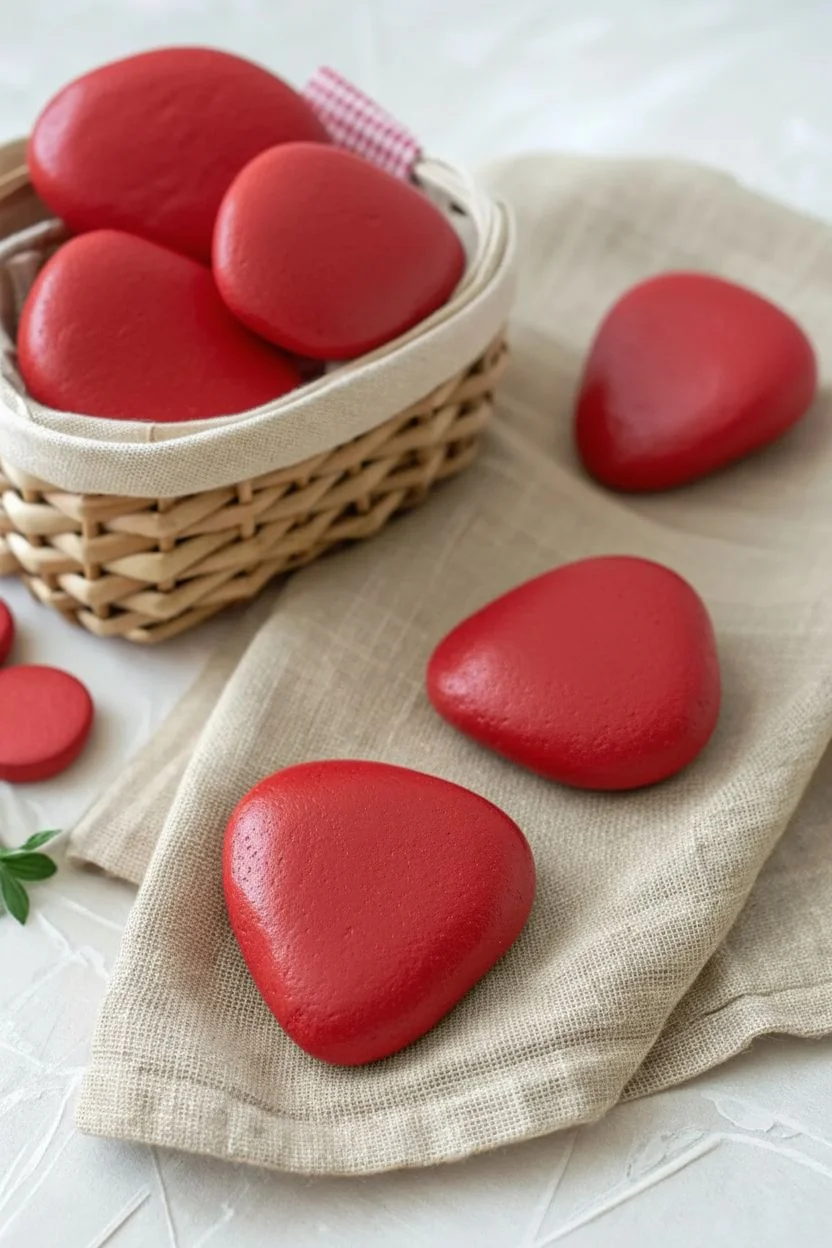
Transform ordinary garden stones into a basket of juicy, everlasting fruit with this delightful project. These painted rocks feature bright red hues and detailed green calyxes that look sweet enough to eat.
Step-by-Step Guide
Materials
- Smooth, oval or triangular river rocks
- Acrylic paint (Bright Red, Dark Green, Light Green, Yellow, Black)
- Flat paintbrush (medium size)
- Fine liner paintbrush (size 0 or 00)
- Pencil (optional)
- Glossy spray sealer or Mod Podge
Step 1: Preparing the Berry Base
-
Select your stones:
Hunt for rocks that mimic the shape of a strawberry—look for stones that are wider at the top and taper down to a rounded point. -
Clean the surface:
Wash your rocks thoroughly with soap and water to remove any dirt or grit, then let them dry completely so the paint adheres properly. -
Prime the rock:
Painting red directly on dark stone can be dull, so I recommend applying a base coat of white acrylic paint first to make the colors pop. -
Apply the red base:
Using your flat brush, cover the entire top surface of the rock with bright red acrylic paint. -
Layer for opacity:
Allow the first red coat to dry, then apply a second or third coat until the color is rich, opaque, and streak-free. -
Dry completely:
Set the rocks aside until the red paint is fully dry to the touch before moving on to the details.
Coverage Check
If your red paint looks translucent or streaky, avoid piling on one thick glob of paint. Instead, apply multiple thin layers, allowing 10-15 minutes of drying time between each coat for a smooth finish.
Step 2: Leafy Details
-
Outline the leaves:
At the wider end of the rock, lightly sketch a star-shaped leaf pattern (the calyx) using a pencil, or freehand it if you feel confident. -
Paint the base green:
Fill in your leaf sketch with dark green acrylic paint, creating jagged, serrated edges that extend slightly down the sides of the ‘berry’. -
Add highlights:
Once the dark green is dry, mix a lighter green and paint smaller leaf shapes inside the dark ones, leaving a dark border visible. -
Define the edges:
Using a very fine liner brush and black paint (slight watered down for flow), carefully outline the leaves. -
Draw the veins:
Paint a thin black line down the center of each leaf segment to create the central vein, adding to the illustrative look.
Market Fresh Display
Find a small pint-sized wooden berry punnet or a mini wicker basket. Line it with a checkered napkin and pile your painted rocks inside for an adorable summer centerpiece.
Step 3: Seeds and Finishing
-
Mix the seed color:
Prepare a small amount of yellow or golden-yellow paint. You want this to be bright enough to stand out against the red. -
Paint the first seeds:
Using the tip of your fine brush, paint small teardrop shapes near the top of the berry, just under the leaves. -
Fill the surface:
Continue painting teardrop seeds in staggered rows down the rock face. -
Check orientation:
Make sure the rounded part of the seed is at the bottom and the point faces up, or vice versa, but keep the direction consistent on each rock. -
Let the paint cure:
Allow the finished artwork to dry overnight to ensure all thick layers of paint are solid. -
Seal the deal:
Apply a coat of glossy sealer or varnish to give your strawberries a shiny, fresh-picked appearance and protect them from the elements.
Place these charming creations in your garden beds or flower pots to add a splash of color that lasts all year round.
Potted Stone Cacti
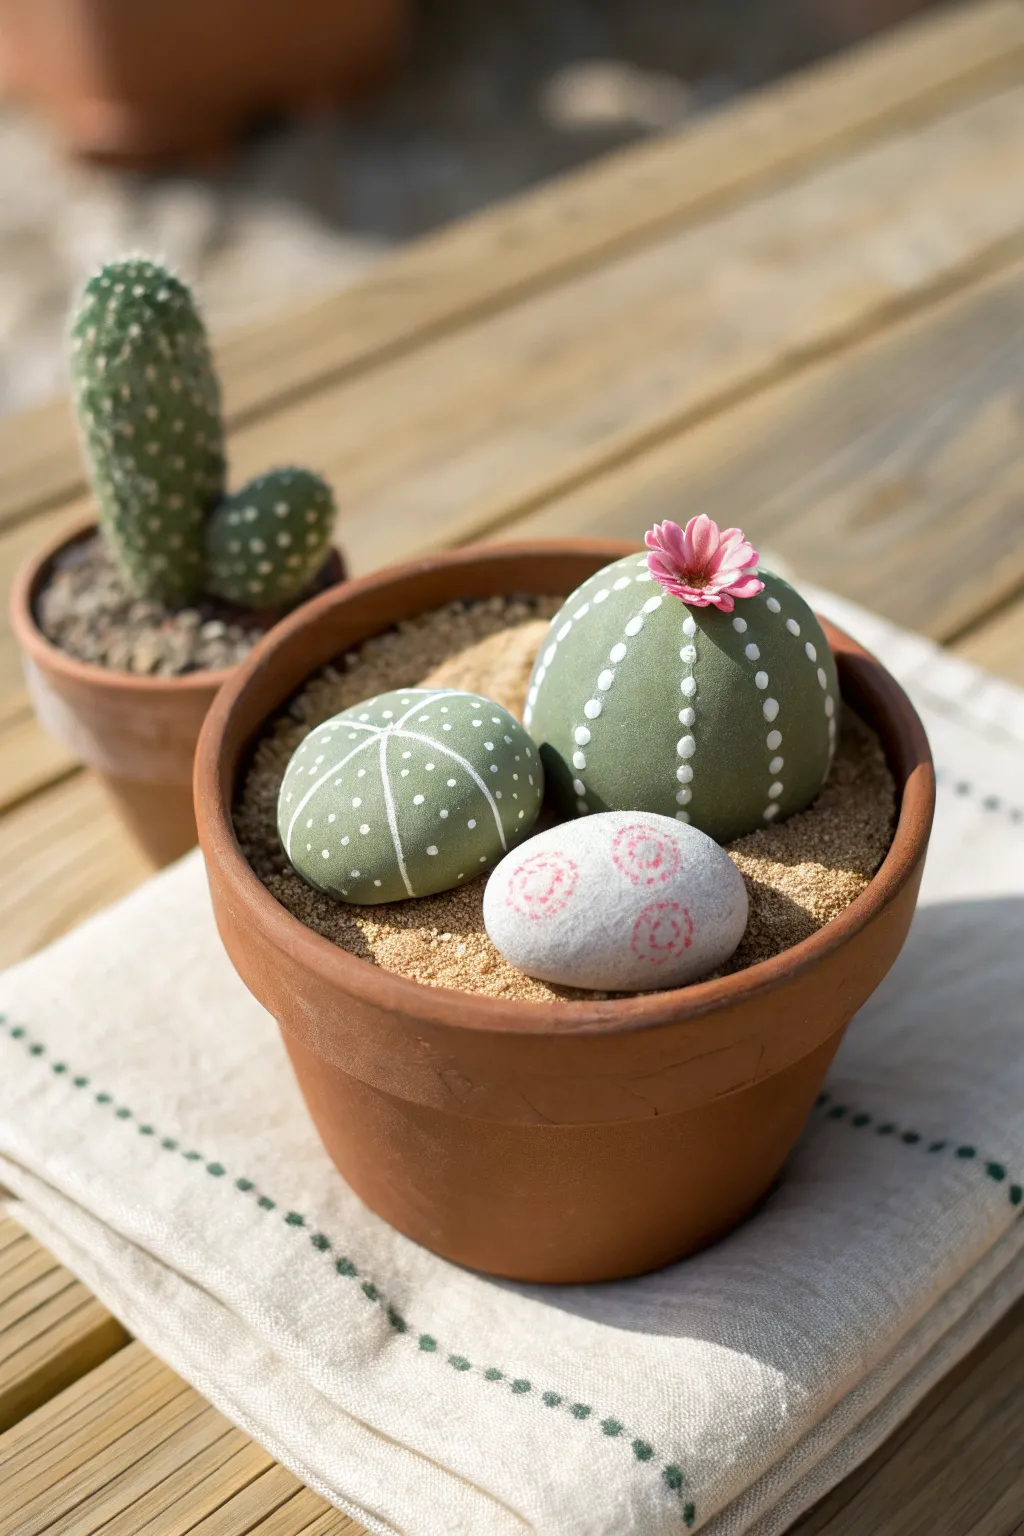
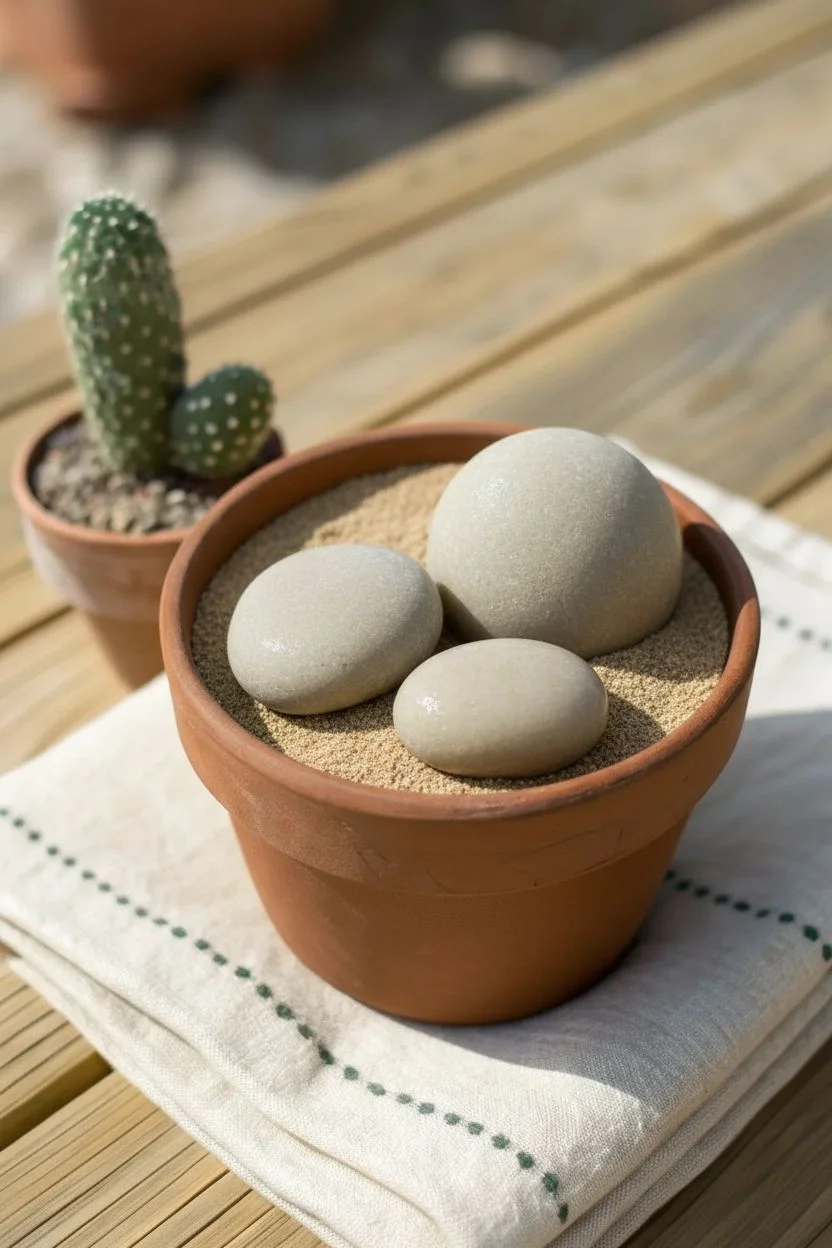
Create a fuss-free garden that never needs watering with this charming rock painting project. By transforming smooth river stones into prickly pear lookalikes, you’ll add a touch of desert greenery to your shelf that lasts forever.
Step-by-Step Tutorial
Materials
- Smooth river stones (various rounded shapes)
- Acrylic paint (Sage Green, White, Soft Pink)
- Terracotta pot (4 to 6 inch)
- Sand or fine gravel
- Fine detail paintbrush
- Dotting tool set (or toothpicks/pencil erasers)
- Small artificial flower head
- Strong craft glue or hot glue gun
Step 1: Base Preparation
-
Clean the canvas:
Scrub your river stones with soapy water to remove any dirt or grease. -
Dry thoroughly:
Pat the stones dry with a towel and let them air dry completely to ensure the paint adheres. -
Select your shapes:
Choose a large round stone for the barrel cactus, a slightly flatter round stone for the button cactus, and a smooth oval stone for the decorative accent.
Oops! Smudged a Dot?
Don’t wipe wet paint! Wait for the smudge to dry completely, then paint over it with a dab of your sage green base color before re-dotting.
Step 2: The Barrel Cactus
-
Apply base color:
Paint the largest rock entirely with sage green acrylic paint. -
Add a second coat:
Allow the first layer to dry, then apply a second coat for a solid, opaque finish. -
Create vertical ribs:
Dip a medium-sized dotting tool or the back of a paintbrush into white paint. -
Dot the spines:
Starting from the top center, stamp rows of dots running vertically down the sides of the rock to simulate cactus ribs. -
Attach the bloom:
Once the paint is dry, use a dab of strong glue to attach the small artificial pink flower to the very top center of the stone.
Level Up: Realism
Mix a tiny drop of black into your green paint. Paint thin vertical lines between the rows of white dots to create 3D shadows and depth.
Step 3: The Button Cactus
-
Paint the base:
Coat the medium-sized stone with the same sage green shade used previously. -
Plan the geometry:
Visualize a center point at the very top of the curved surface. -
Dot the cross:
Using a slightly smaller dotting tool, create two lines of white dots that intersect at the top center, forming a cross. -
Fill the gaps:
Add diagonal lines of dots between the original cross lines to create a starburst effect radiating from the top.
Step 4: The Accent Stone
-
Prepare the surface:
Leave this stone unpainted for a natural look, or apply a very translucent white wash if the stone is too dark. -
Mix the color:
Thicken your soft pink paint slightly if it feels too runny, ensuring it will hold a texture. -
Paint spirals:
Using a fine brush or toothpick, gently stipple small dots in spiral or circular patterns across the surface.
Step 5: Assembly
-
Prepare the pot:
Fill your terracotta pot about three-quarters full with sand or fine gravel. -
Plant the garden:
Nestle the large cactus into the sand first, burying the bottom slightly for stability. -
Arrange companions:
Tuck the button cactus and the spiral accent stone beside the larger rock. -
Final touch:
Smooth the sand around the base of the rocks to make them look naturally grounded.
Enjoy your zero-maintenance greenery that brings a smile to any windowsill


Sponged Galaxy Night Skies
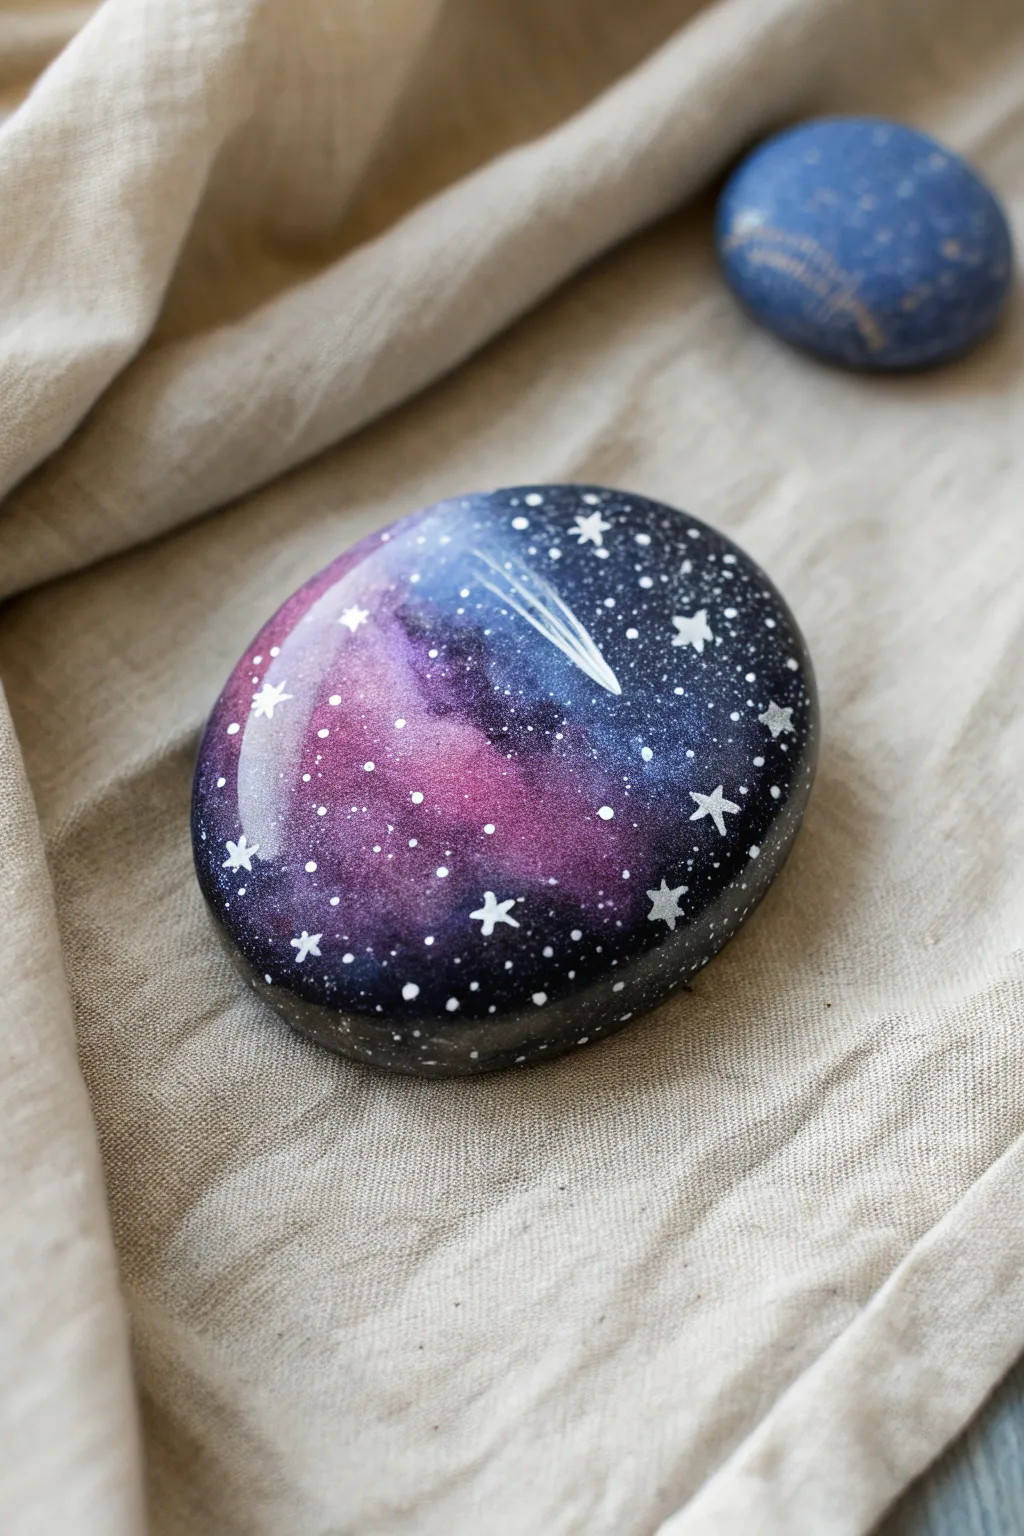
Capture the magic of deep space in the palm of your hand with this mesmerizing painted rock. By layering simple sponge dabs and bright stars, you will create a glossy, dimensional nebula that looks professionally done.
How-To Guide
Materials
- Smooth, rounded river rock
- Acrylic paints (Black, White, Dark Blue, Violet, Magenta)
- Small makeup sponge wedges or torn kitchen sponge
- Fine detail liner brush (size 0 or 00)
- Old toothbrush or stiff bristle brush
- High-gloss varnish or resin
- Paper towels
- Water based sealer (optional)
Step 1: Preparing the Void
-
Clean surface:
Scrub your rock with soap and water to remove any dirt or oils, then let it dry completely to ensure the paint adheres. -
Base coat:
Apply a base coat of black acrylic paint over the entire top surface of the rock. -
Second layer:
Once the first coat is dry to the touch, add a second layer of black to ensure an opaque, solid dark background.
Too Much Paint?
If your sponge creates solid blobs instead of misty clouds, you have too much paint on it. Dab it repeatedly on a paper towel until it is almost dry before touching the rock.
Step 2: Building the Nebula
-
Sponge preparation:
Tear a small piece off your kitchen sponge or use the corner of a makeup wedge; the rough, torn edge helps create a natural, cloud-like texture. -
Blue layer:
Dip the sponge lightly into dark blue paint and dab off most of the excess on a paper towel until it stamps almost dry. -
First sponging:
Gently tap the dark blue diagonally across the rock, creating an irregular, misty cloud shape that fades into the black edges. -
Adding violet:
Using a clean section of the sponge, repeat the process with violet paint, tapping it over the blue areas but keeping it more concentrated toward the center. -
Magenta highlights:
Switch to magenta or bright pink on a fresh sponge tip and dab this into the very center of your violet clouds to create a vibrant glowing core. -
Softening blend:
If the transition between colors looks too harsh, I like to go back with a little black on a sponge and lightly tap the outer edges to soften the nebula back into the void. -
Final glow:
Mix a tiny amount of white with your magenta to make a light pink, and add just a few very light dabs in the brightest part of the nebula for depth.
Step 3: Creating the Stars
-
Splatter mix:
Dilute a small drop of white acrylic paint with water until it is the consistency of thin ink. -
Star dust:
Dip an old toothbrush or stiff brush into the thinned white paint and run your thumb across the bristles to flick tiny specks of ‘star dust’ across the galaxy. -
Larger stars:
Load your fine detail brush with undiluted white paint and place varying sizes of distinct dots randomly around the rock, clustering a few near the nebula. -
Drawing stars:
Select 3 or 4 of your larger white dots and carefully pull five small points outward from the center to create twinkling star shapes. -
Shooting star head:
Paint a slightly larger white circle near the top right of the nebula to serve as the head of the comet or shooting star. -
Comet tails:
Using a very light touch, drag three thin, parallel lines trailing behind the comet head, lifting your brush at the end to taper them off.
Add Some Magic
For an extra dimensional effect, mix a tiny pinch of silver glitter into your gloss topcoat, or use glow-in-the-dark paint for the white stars so they shine at night.
Step 4: Finishing
-
Drying time:
Allow the rock to dry completely for at least an hour; the thickest dots of white paint will take the longest to set. -
Gloss sealing:
Apply a generous coat of high-gloss varnish or a layer of art resin to seal the design and give it that wet, glass-like shine shown in the photo.
Now you have a stunning piece of the universe that fits right in your pocket
Wide-Eyed Rock Owls
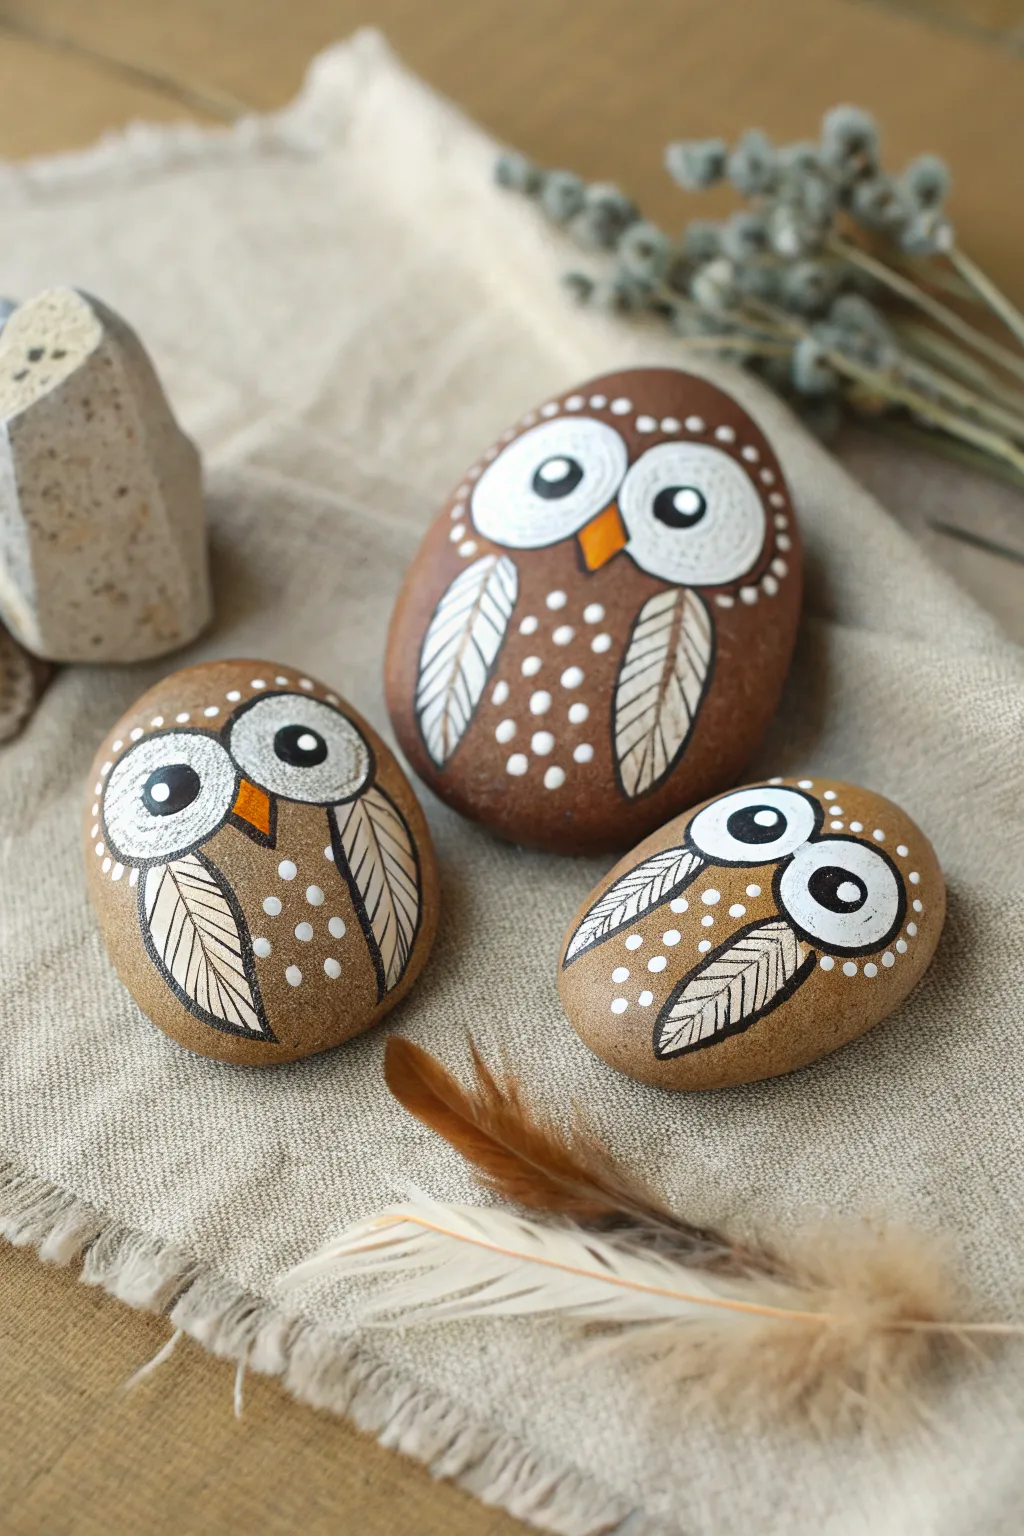
Transform ordinary smooth stones into a charming parliament of owls with this rustic painting project. Using earthy tones and crisp line work, you will create a trio of characters perfect for garden decor or paperweights.
Step-by-Step Guide
Materials
- Smooth river rocks (various sizes)
- Acrylic paints (White, Black, Orange, Burnt Sienna, Raw Umber)
- Flat paintbrush (size 4 or 6)
- Fine detail brush (size 0 or 00)
- Black fine-tip acrylic paint pen (0.7mm)
- Pencil
- Matte varnish or sealant
Step 1: Preparation & Base Coat
-
Clean the canvas:
Wash your rocks thoroughly with soap and water to remove any dirt or grease, then dry them completely. -
Apply base color:
Paint the entire surface of each rock with your chosen brown tone. I prefer to mix Burnt Sienna with a touch of white for the lighter owls, and Raw Umber for the darker one. -
Ensure coverage:
Let the first coat dry, then apply a second layer of brown to spotty areas to ensure a solid, opaque background.
Dotting Tool Hack
For perfectly round chest feathers, use the non-brush end of different sized paintbrushes. Dip the stick directly into the paint and press straight down.
Step 2: Drafting Features
-
Sketch the face:
Once the brown paint is fully dry, lightly sketch two large circles for eyes and an inverted triangle for the beak near the top center using a pencil. -
Outline wings:
Draw elongated leaf shapes on the left and right sides of the rock to represent the folded wings.
Step 3: Blocking in Color
-
Paint the eyes:
Fill in the large eye circles with white acrylic paint. You will likely need two coats to get a bright, crisp white against the brown stone. -
Fill the wings:
Paint the sketched wing shapes with a wash of white or a very light beige. It doesn’t need to be solid white; a semi-transparent layer adds texture. -
Add the beak:
Carefully paint the small triangular beak using bright orange paint and a fine detail brush.
Level Up: Family Portrait
Create an entire owl family by sourcing rocks in graduating sizes. Use slightly different shades of brown for each family member for variety.
Step 4: Pattern & Details
-
Chest spots:
Dip the handle end of a paintbrush into white paint and stamp dots onto the owl’s belly area to create the speckled feather effect. -
Brow decoration:
Using the same stamping technique but with a smaller tool or toothpick, add a row of tiny white dots following the upper curve of the eye circles. -
Pupils:
Paint large black circles inside the white eye areas, placing them slightly cross-eyed or looking sideways for a quirky expression.
Step 5: Line Work & Finishing
-
Outline the eyes:
Using a black paint pen or a very fine liner brush, trace around the outer edge of the white eye circles to define the face. -
Define the wings:
Outline the wing shapes with your black pen. Draw a central line down the wing and add angled veins to simulate feathers. -
Add highlights:
Place a tiny dot of white paint inside the black pupil of each eye. This ‘catchlight’ brings the character to life. -
Erase guidelines:
If any pencil marks are still visible around the painted areas, gently erase them once you are certain the paint is bone dry. -
Seal the artwork:
Apply a coat of matte varnish to protect the paint from chipping and to give the rocks a unified finish.
Set your finished owls together on a shelf or tuck them into a plant pot for a wise little surprise
Spooky Halloween Ghosts
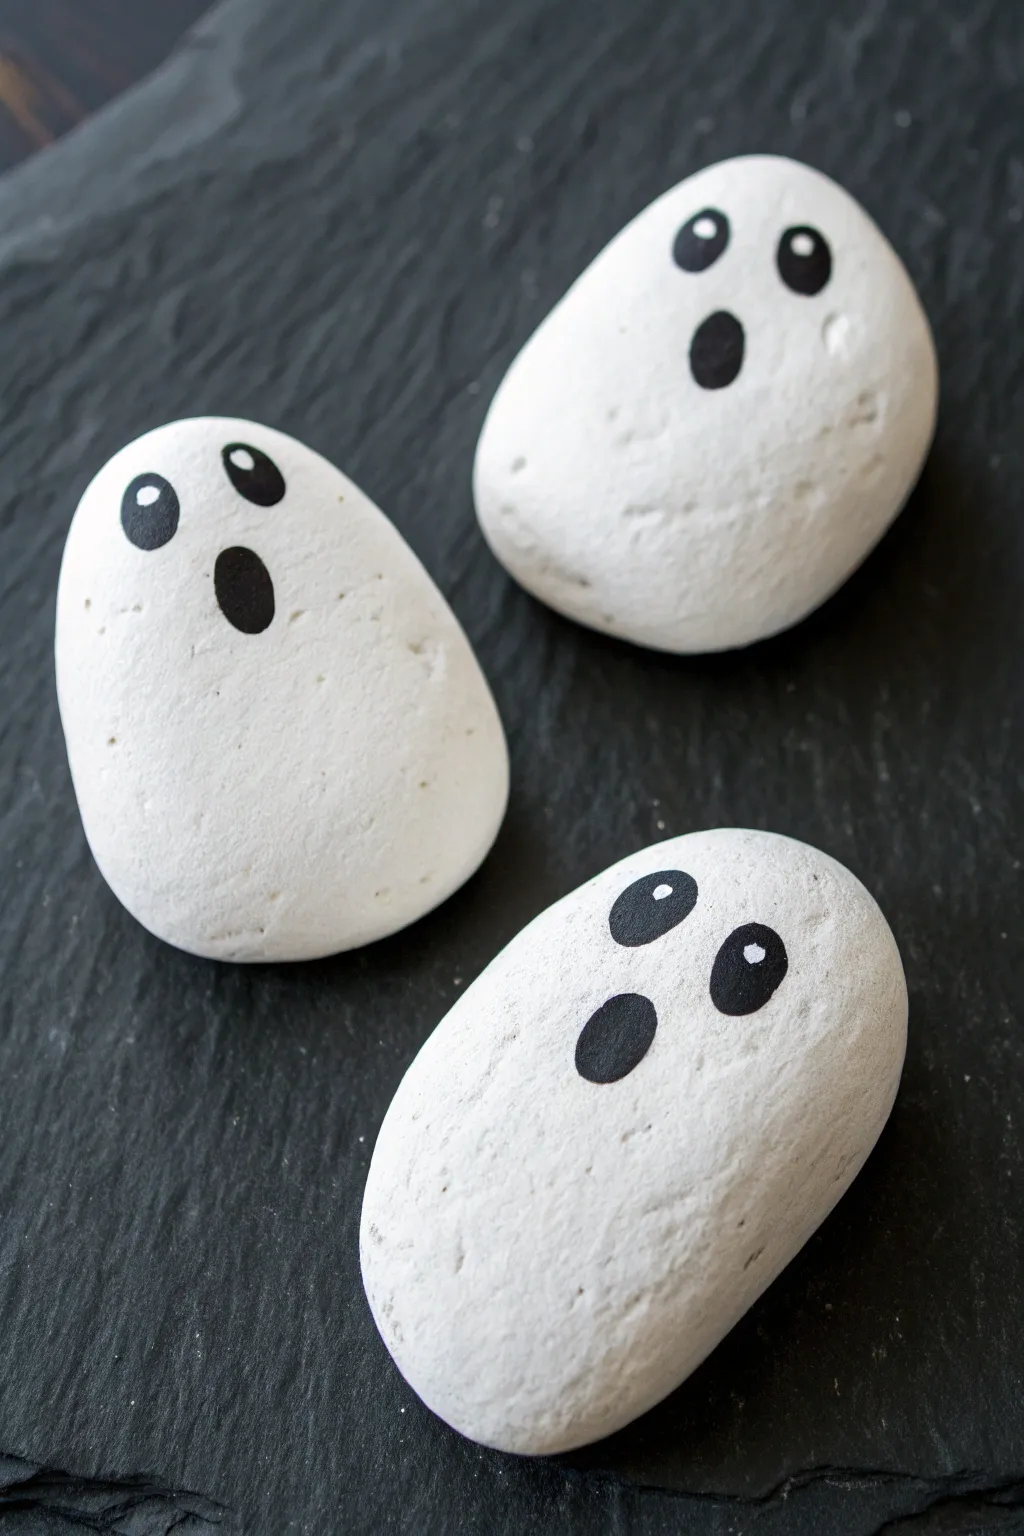
Transform ordinary smooth stones into a trio of surprised spectral friends with high-contrast acrylics. These charming ghosts rely on opaque white coverage and expressive eyes to create a spooky yet adorable decoration.
How-To Guide
Materials
- Smooth, rounded river rocks (egg-shaped works best)
- White acrylic paint (matte finish)
- Black acrylic paint or extra-fine black paint marker
- Flat synthetic paintbrush
- Fine detail paintbrush (size 0 or 00)
- Pencil
- Toothpick or dotting tool
- Matte spray sealer (optional)
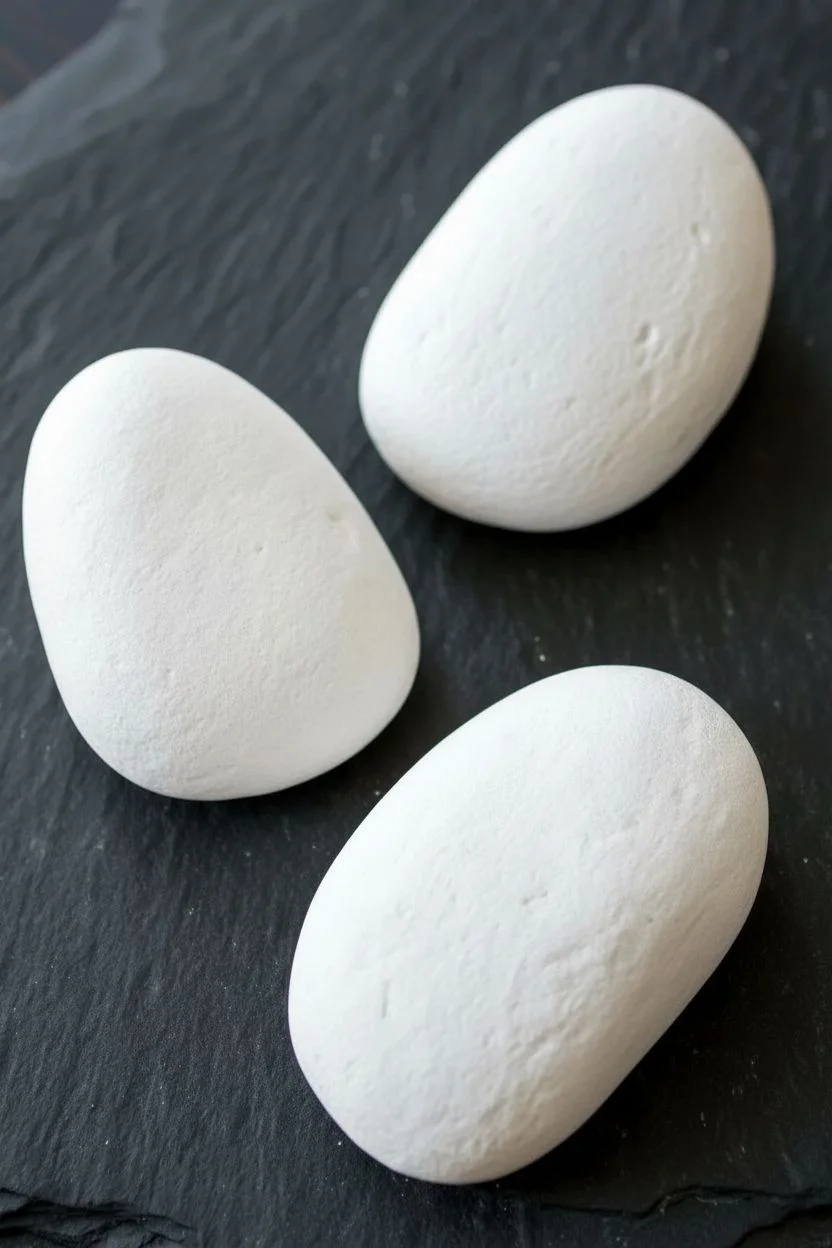
Step 1: Preparing the Base
-
Clean the surface:
Wash your rocks thoroughly with warm soapy water and a stiff brush to remove any dirt or grit, then let them dry completely. -
Apply the first coat:
Using your flat brush, paint the entire top surface of the rock with white acrylic paint. -
Watch the consistency:
Apply the paint in thin, even layers rather than one thick globs to prevent brush strokes and cracking. -
Let it cure:
Allow this first layer to dry for about 15 to 20 minutes until it is dry to the touch. -
Build opacity:
Apply a second coat of white paint, painting in the opposite direction of your first coat to create a smooth, solid finish. -
Touch up weak spots:
If you can still see the dark color of the stone through the paint, apply a third coat. I prefer to let the rocks sit for an hour at this stage to ensure the base is rock-hard.
Smooth Surface Secret
If your rocks have pitted surfaces, mix a little white glue with your first coat of white paint. It acts as a filler primer to create a smoother canvas for the face.
Step 2: Adding the Expression
-
Sketch the face:
Lightly draw the facial features with a pencil. Draw two ovals for eyes near the top and a larger vertical oval for the mouth. -
Create the eye outline:
Using a fine detail brush or a black paint marker, carefully trace the outline of your pencil sketch for the eyes. -
Fill the eyes:
Fill in the eye shapes with solid black paint. If using a brush, keep just a small amount of paint on the tip to maintain control. -
Paint the mouth:
Outline and fill the mouth shape. Ideally, the mouth should be positioned centrally below the eyes to create that classic ‘surprised’ ghost look. -
Refine the edges:
Check the edges of your black ovals. They should be crisp and smooth against the white background. -
Wait for the black to dry:
It is absolutely critical to let the black paint dry completely before the next step to prevent smudging or gray blending.
Glow Up
Swap the standard white acrylic for glow-in-the-dark paint for the final topcoat. Your ghostly garden stones will charge in the sun and emit a spooky green hae at night!
Step 3: The Final Spark
-
Prepare the highlight tool:
Dip the very tip of a toothpick or a small dotting tool into fresh white acrylic paint. -
Add eye lights:
Gently touch the tool to the upper-right or upper-left corner of the black eye ovals to create a tiny white reflection dot. -
Keep direction consistent:
Ensure the white dot is in the same position on both eyes (e.g., both top-right) so the ghost doesn’t look cross-eyed. -
Clean up stray marks:
If you made any mistakes with the black paint, you can now touch them up with a tiny bit of white paint. -
Seal the artwork:
Once fully dry (give it a few hours), spray the rocks with a matte sealer to protect the paint from chipping.
Arranging your new clan of ghosts together creates a delightful contrast on a dark table or front porch step
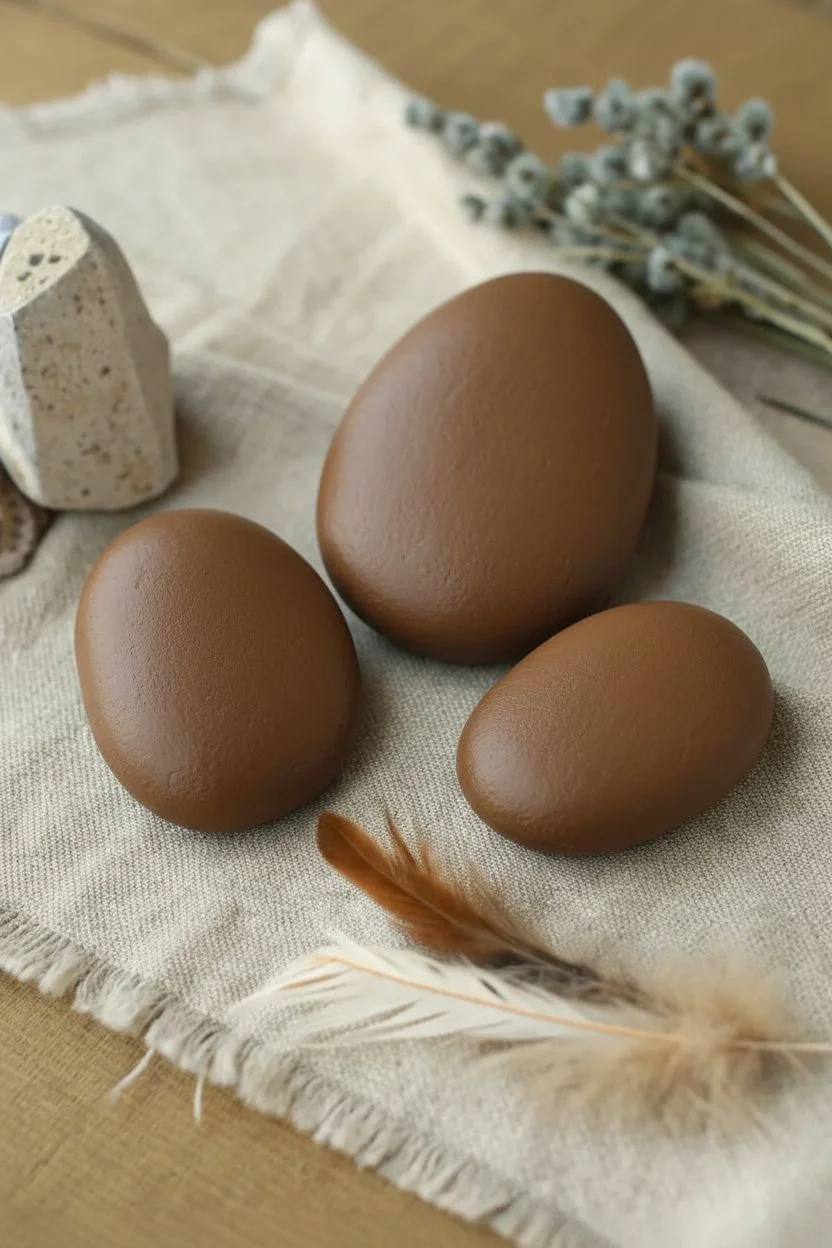
Standing Penguin Pals
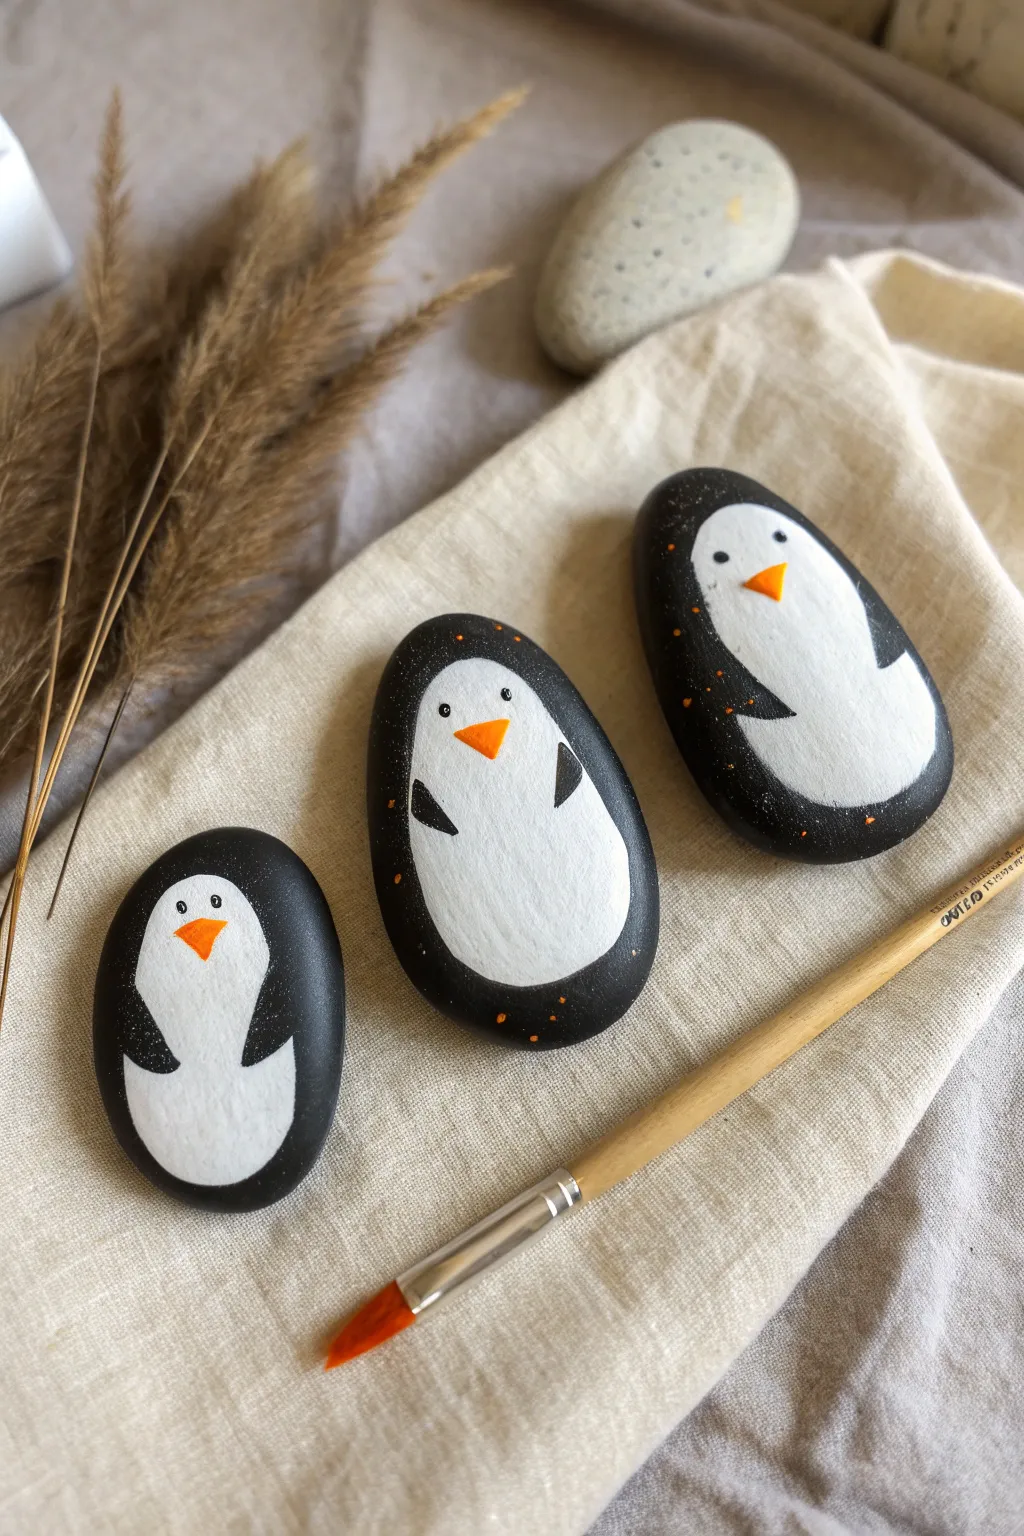
Transform ordinary river stones into adorable arctic friends with this simple painting project. The natural oval shape of river rocks makes the perfect canvas for these chubby, minimalist penguins.
Step-by-Step Tutorial
Materials
- Smooth, oval river stones
- Black acrylic paint
- White acrylic paint
- Orange acrylic paint
- Flat paintbrush
- Fine detail brush or liner brush
- Clear spray sealer or varnish
Step 1: Preparing the Base
-
Clean the canvas:
Scrub your stones with warm soapy water to remove any dirt or oil, then dry them thoroughly with a towel. -
Apply base color:
Using a flat brush, paint the entire front surface of the rock with black acrylic paint. -
Let it set:
Allow the first coat of black to dry completely to the touch. -
Second coat:
Apply a second layer of black paint to ensure a solid, opaque background with no stone showing through.
Step 2: Painting the Body
-
Outline the belly:
Load a medium brush with white paint. Visualize a large, rounded peanut or snowman shape that creates the penguin’s face and tummy. -
Fill the shape:
Paint the white area in the center of the rock, leaving things slightly wider at the bottom and narrower at the top. -
Create the border:
Ensure you leave a consistent ring of black showing around the edges of the rock to frame the penguin. -
Dry and repeat:
The white will likely look streaky or gray over the black initially. Let it dry fully. -
Build opacity:
Apply a second (and possibly third) coat of white paint until the belly is bright, crisp, and solid.
Chalk It Out
Before painting the white belly, sketch the outline lightly with a white charcoal pencil or chalk. It helps you get the symmetry right and wipes off easily if you make a mistake.
Step 3: Adding Personality
-
Paint the flippers:
Using black paint and a smaller brush, paint two small, inward-curving triangles on the sides of the white body. -
Add the eyes:
Dip the handle end of a paintbrush or a dotting tool into black paint. Dot two eyes near the top of the white face area. -
Create the beak:
Switch to a fine liner brush and orange paint. carefully draw a small, inverted triangle between and below the eyes. -
Add texture:
For a bit of whimsical flair like in the photo, dip a fine brush in orange paint and gently dab a few tiny specks onto the black outer sections. -
Clean up edges:
If any white lines are jagged, use a bit of black paint to carefully smooth out the curves of the belly.
Fixing Gray Whites
If your white paint looks gray or streaky, do not keep brushing while wet. Let the layer dry 100% first, then add a fresh coat on top for true brightness.
Step 4: Finishing Up
-
Allow to cure:
Let the rocks sit undisturbed until all paint is completely dry, which may take a few hours depending on thickness. -
Seal the deal:
Apply a layer of clear varnish or spray sealer to protect your penguins and give them a finished sheen.
Display your little flock on a shelf or hide them in the garden for a neighbor to find
Punny Gift Stones


Express your affection with a slice of creativity using this adorable pun-themed painted rock. The natural stone background contrasts perfectly with the bright red pizza edges and bold lettering, creating a gift that really delivers smiles.
How-To Guide
Materials
- Smooth, oval river rock (beige or tan)
- Acrylic paints (Red, Golden Yellow, Black)
- Black acrylic paint pen (fine tip) or liner brush
- Pencil and eraser
- Fine detail paintbrush
- Clear sealer (spray or brush-on varnish)
Step 1: Drafting the Design
-
Clean the canvas:
Start by scrubbing your rock with soap and water to remove any dirt or grease, then let it dry completely. -
Sketch the layout:
Using a pencil, lightly draft the words ‘YOU HAVE’ near the top, ‘A PIZZA’ in the middle, and ‘MY HEART’ at the bottom. -
Draw the slices:
Sketch a semi-circle shape on the far left and right edges of the stone to represent the pizza slices.
Smooth Moves
If your hand feels shaky while lettering, rest your wrist on a table or even on the rock itself (if the paint is dry) to stabilize your strokes.
Step 2: Painting the Pizza Slices
-
Base coat:
Fill in the two semi-circle shapes on the edges with bright red acrylic paint. -
Opacity check:
Let the first layer dry briefly; if the rock color shows through, add a second coat of red for vibrant coverage. -
Pepperoni dots:
Dip the handle end of a paintbrush into black paint and gently stamp small dots onto the red slices. -
Cheese accents:
Wipe the handle clean, dip it into your golden yellow paint, and stamp a few yellow dots interspersed among the black ones.
Step 3: Lettering the Pun
-
Top lettering:
Using a black paint pen or a very fine liner brush, trace over your penciled ‘YOU HAVE’ text. -
Center emphasis:
Letter the central phrase ‘A PIZZA’. I suggest making these letters slightly taller and thicker than the rest to make the pun stand out. -
Bottom lettering:
Finish the quote by tracing over ‘MY HEART’ at the bottom, keeping the font style casual and slightly uneven. -
Thicken lines:
Go back over any thin parts of your letters to ensure the black is solid and opaque.
Level Up
Place the finished rock inside a clean, mini pizza box made of cardboard for a hilarious and memorable gift presentation.
Step 4: Cheesy Details & Finishing
-
Yellow swooshes:
Load a small detail brush with golden yellow paint and create curved, comma-like strokes between the lines of text to mimic melting cheese. -
Refine the yellow:
If the yellow looks transparent against the dark rock, dab a little extra paint on top once the first layer is tacky. -
Dry time:
Allow the entire rock to dry for at least an hour to prevent smudging. -
Cleanup:
Gently erase any remaining visible pencil marks from the unpainted areas of the stone. -
Protect your art:
Apply a coat of clear sealer or varnish to protect the paint from chipping and give the rock a finished sheen.
Now you have a charming, enduring token of affection that is sure to serve up a smile
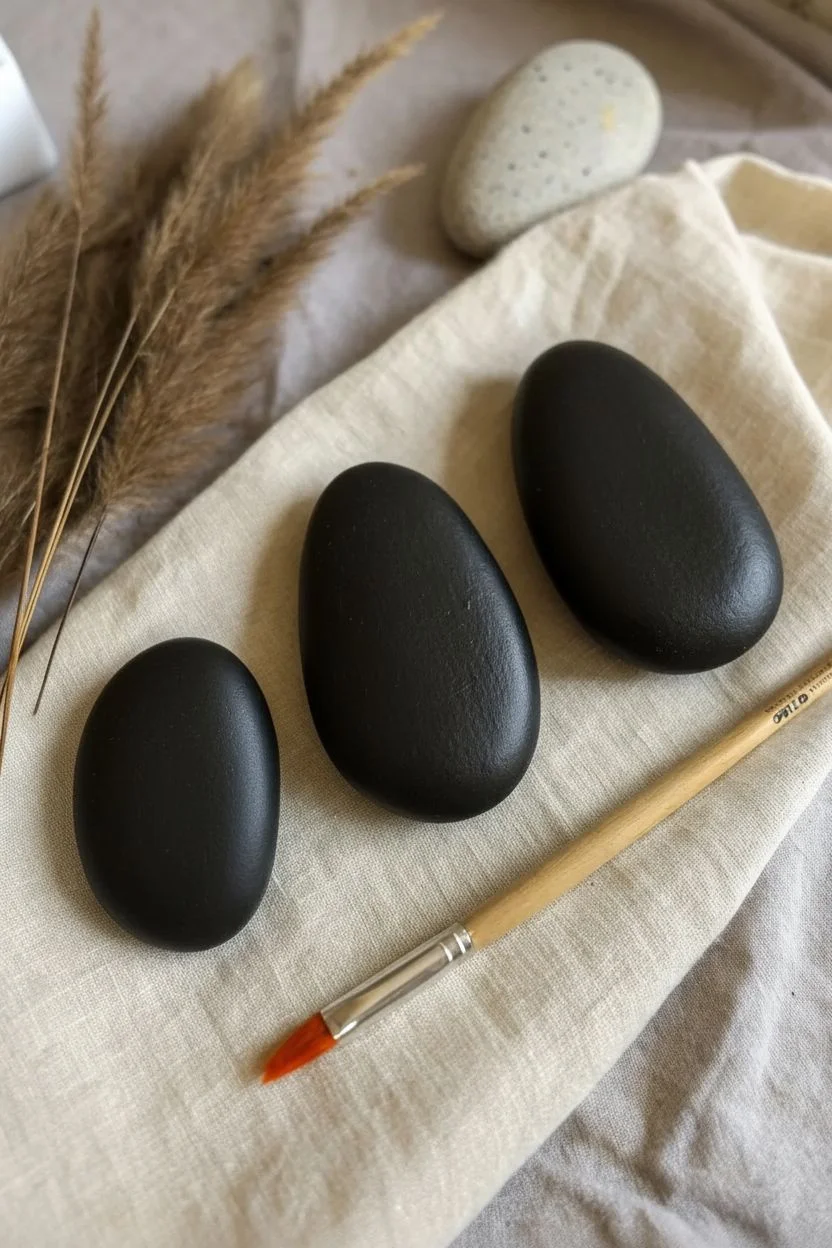
Sunset Silhouette Scenes
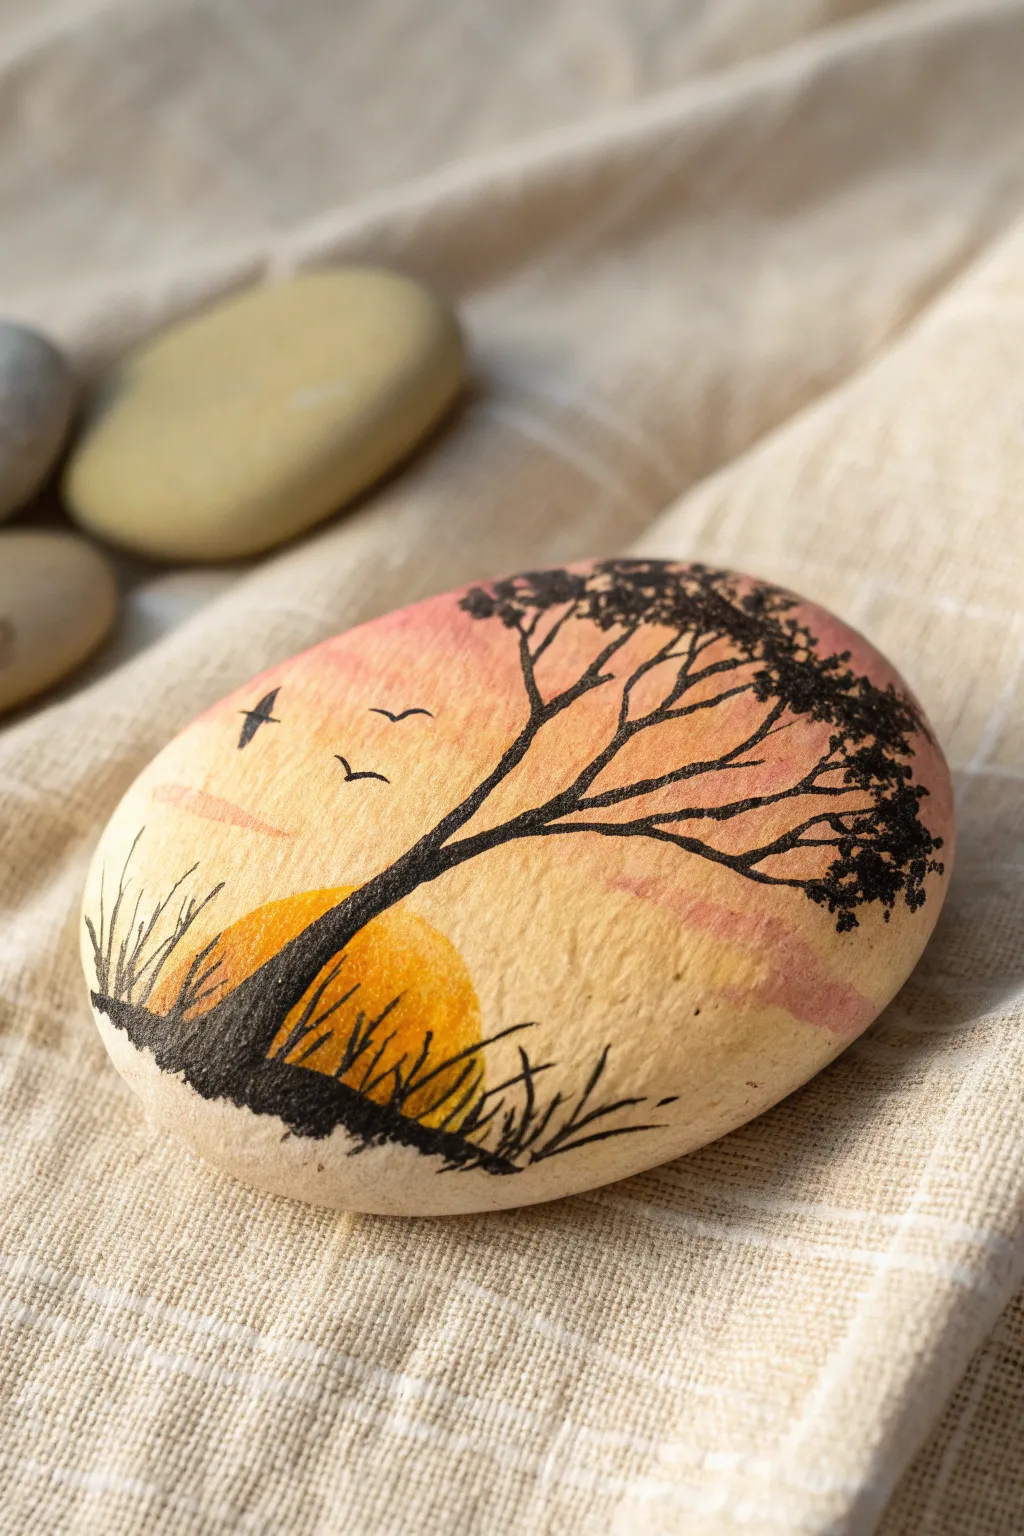
Capture the warmth of a dying day on a smooth river stone with this peaceful scene. The contrast between the soft, blended pastel sky and the stark black tree silhouette creates a striking depth that looks much harder to achieve than it actually is.
Step-by-Step Tutorial
Materials
- Smooth, flat river rock (oval shape works best)
- Acrylic paints: Titanium White, Pastel Pink/Peach, Golden Yellow, Orange, Lamp Black
- Flat shader brush (small)
- Fine liner brush (size 00 or 1)
- Pencil for sketching
- Clear matte or satin spray sealer
- Water cup and paper towels
Step 1: Setting the Sky
-
Clean canvas:
Begin by scrubbing your rock with soap and water to remove any dirt or oils, then let it dry drastically. A clean surface ensures your paint adheres properly. -
Prime the surface:
Paint a solid layer of Titanium White over the entire face of the rock. This isn’t visible in the end, but I find it crucial for making the sunset colors appear bright and true. -
Pink sky wash:
Once the primer is dry, mix a little water into your pastel pink or peach paint to create a semi-transparent wash. -
Apply the upper sky:
Brush this pink wash across the top half of the rock, brushing horizontally to create a soft, clouded texture. -
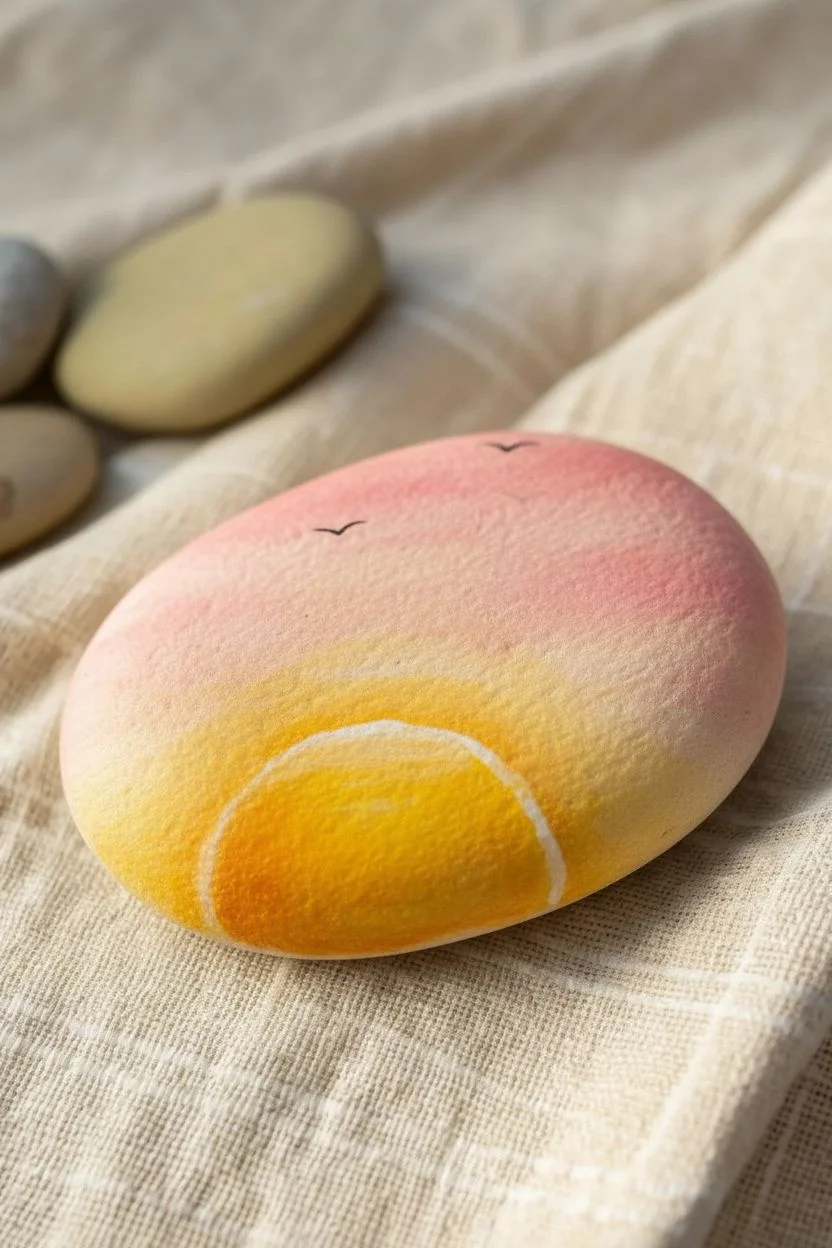
Create the sun:
Using your Golden Yellow, paint a semi-circle shape near the bottom third of the rock. This will be your setting sun. -
Blend the warmth:
Add a touch of orange to the edges of your yellow sun while the paint is still wet, blending slightly to give the sun a glowing, dimensional look. -
Connect sky and sun:
Use a very lightly dampened brush with a tiny bit of white to blend the space between the pink sky and the yellow sun, creating a creamy transition zone. -
Dry completely:
Allow the background gradient to dry fully. If it’s cool to the touch, it’s not ready for the black paint yet.
Step 2: Painting the Silhouette
-
Sketch the layout:
Lightly trace the horizon line and the main curve of the tree trunk with a pencil to guide your painting. -
Establish the ground:
Load your brush with Lamp Black and paint an uneven, slightly bumpy horizon line across the bottom of the semi-circle sun. -
Add grass texture:
Using the very tip of your fine liner brush, flick short, quick strokes upward from the black ground to mimic tall savannah grass. -
Paint the trunk:
Paint the main tree trunk starting from the left side, leaning diagonally toward the right. Press harder at the base for thickness and lift pressure as you go up. -
Branch out:
Extend several main branches from the top of the trunk. Keep your lines wiggly and organic rather than perfectly straight. -
Add intricate twigs:
From your main branches, paint thinner, smaller twigs reaching outwards to fill the canopy space. -
Create foliage:
To make the leaves, load your brush with black paint and gently dab or ‘stipple’ the bristles onto the ends of the branches. This creates irregular clusters that look like distant leaves. -
Add distant birds:
In the open pink space on the left, paint two or three tiny ‘V’ or flattened ‘M’ shapes to represent birds flying in the distance. -
Refine opacity:
If the black paint looks streaky or grey in spots, carefully retrace the silhouette with a second coat once the first is dry. -
Seal the artwork:
Once the black paint is bone dry (give it at least an hour), finish with a spray sealer to protect your sunset landscape from chipping.
Blending Woes?
If your acrylics are drying too fast to blend the sky, add a drop of ‘slow drying medium’ to your paint or keep your brush slightly damp to extend working time.
Go Wild
Customize your savannah scene by painting a tiny silhouette of a giraffe or elephant standing near the tree instead of just the grass texture.
Place your finished stone near a plant or window ledge to add a touch of golden-hour calm to your room
Interactive Storytelling Sets
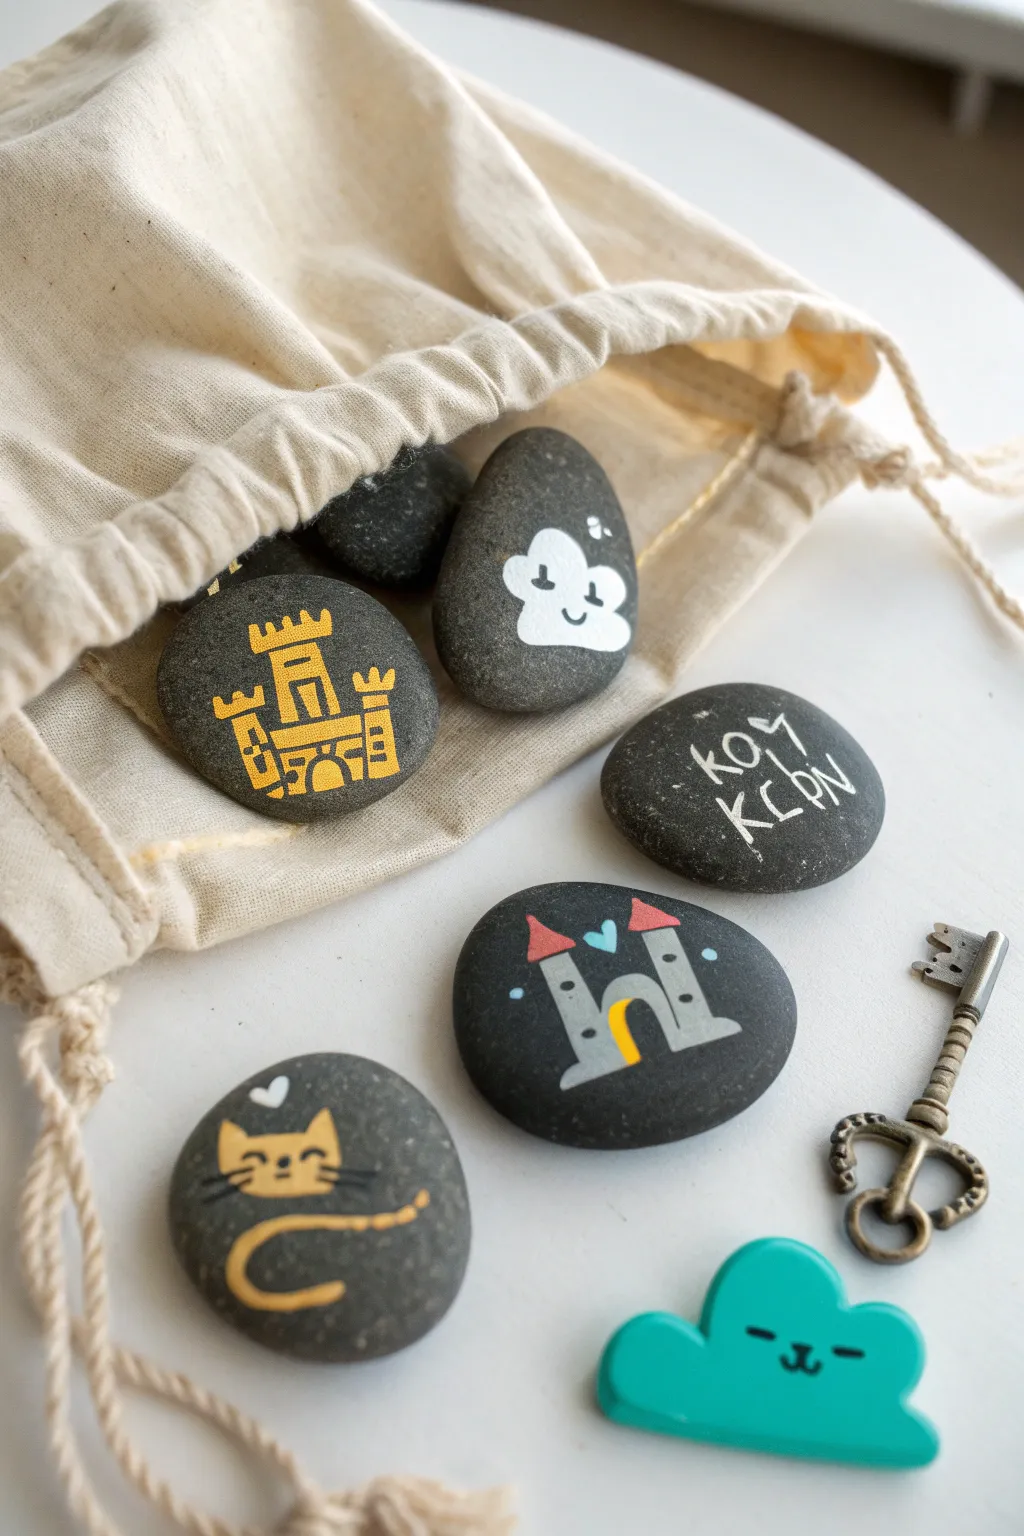
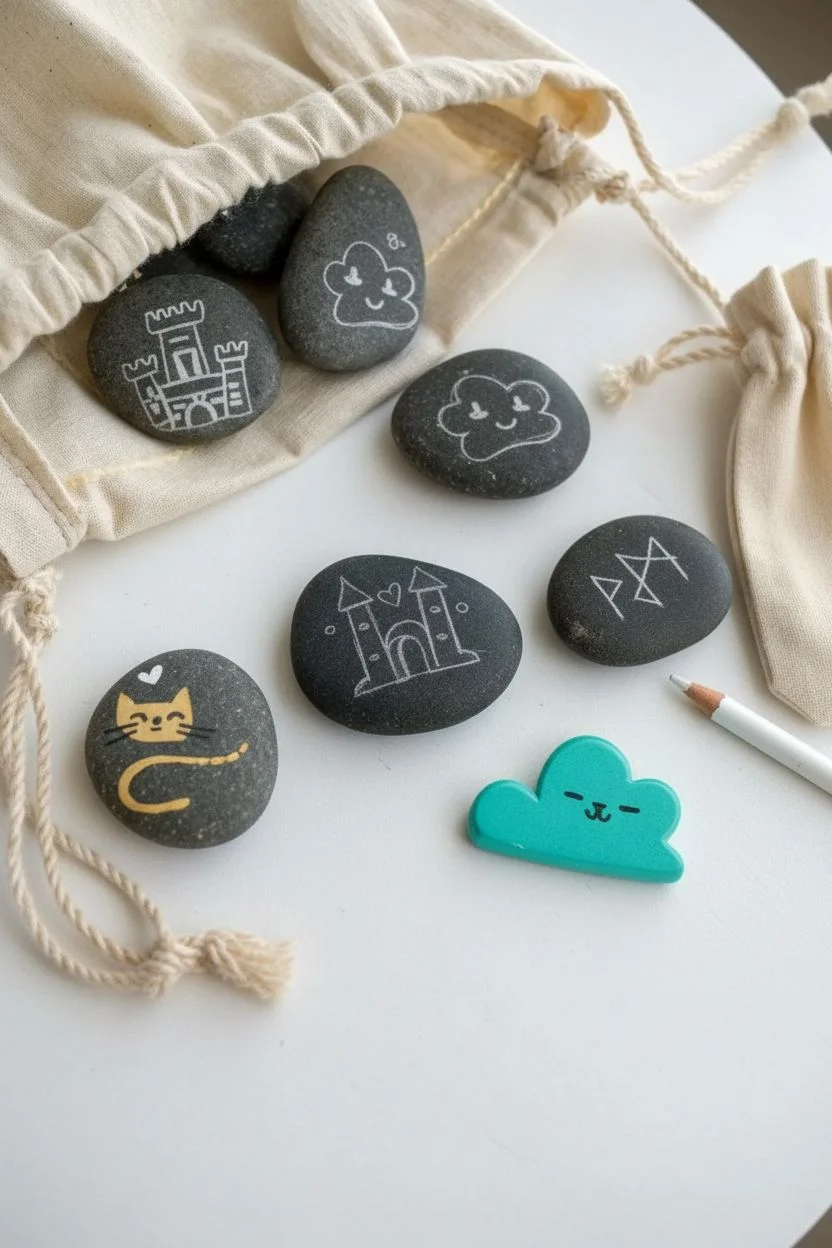
Spark endless imagination with this portable storytelling kit featuring whimsical icons painted on smooth river rocks. The contrast of bright acrylics against dark natural stone creates a striking, modern look that fits perfectly in a little canvas pouch.
How-To Guide
Materials
- Smooth, dark grey river stones (approx. 1-2 inches)
- Acrylic paint pens (extra fine and medium tips)
- Colors: Gold, White, Grey, Red, Yellow, light Blue, Black
- Small canvas drawstring bag
- White colored pencil or chalk (optional)
- Clear matte spray sealer or varnish
- Paper towels
Step 1: Preparation & Sketching
-
Clean the canvas:
Wash your stones with warm soapy water to remove any dust or dirt, which can prevent paint from sticking. -
Dry thoroughly:
Allow the stones to dry completely in the sun or with a towel before you begin. -
Plan the designs:
Roughly sketch your icon placements using a white colored pencil or chalk; this acts as a guide but wipes away easily if you make a mistake.
Step 2: The Golden Castle
-
Outline the structure:
Using a gold paint pen, draw the silhouette of a castle on a medium-sized stone, starting with a central tower and two smaller side turrets. -
Create battlements:
Add small square notches to the top of each tower to create the classic castle battlement look. -
Fill the shape:
Color in the entire castle silhouette with the gold pen, ensuring smooth, opaque coverage. -
Add definition:
Once fully dry, you can go back over the lines to sharpen the edges or use a black fine liner to add tiny window details if desired.
Prime the Surface
If your grey stones are too porous and soak up ink, paint a layer of clear matte medium or watered-down white glue on the area where you plan to draw first. This creates a sealed surface for crisp lines.
Step 3: The Friendly Cloud
-
Cloud shape:
On a rounded stone, use a white paint pen to draw a bubbly cloud shape formed by three or four connected overlapping circles. -
Solidify the white:
Fill in the cloud shape. I usually apply a second coat here after the first dries to make the white really pop against the dark stone. -
Draw the face:
Using an extra-fine black pen, draw two small dots for eyes and a tiny ‘u’ shape for a smile. -
Add sparkles:
Add a few tiny white dots or diamonds floating around the cloud to give it a magical vibe.
Level Up: Bag Design
Don’t leave the storage bag plain! Use your leftover fabric paints or markers to draw a simple title like “Story Sack” or match the castle icon on the outside of the canvas pouch.
Step 4: The Grey Fortress & Cat
-
Fortress base:
Paint a light grey ‘H’ shape or a U-shape with a high connector to form the main walls of the second castle. -
Roof details:
Paint two red triangles on top of the grey towers to serve as roofs. -
Door and accents:
Draw a small yellow arch at the bottom for the door and add a small light blue heart in the center of the wall. -
Cat head:
On a new stone, paint a yellow circle with two triangles on top for ears. -
Swooping tail:
Draw a long yellow line curving from the bottom of the head, creating a swooping tail that underlines the face. -
Cat features:
Once the yellow is dry, use your fine black pen to add whiskers, a nose, and eyes to the cat.
Step 5: Finishing Touches
-
Runes or Text:
On a smaller pebble, use a white fine liner to write a made-up word, a name, or ‘runic’ symbols to add mystery to the set. -
Curing time:
Let all the stones sit undisturbed for at least an hour to ensure the thickest paint layers are hardened. -
Seal the deal:
Apply a coat of clear matte sealer to protect the paint from chipping during play. -
Pack it up:
Place your finished story stones into the canvas drawstring bag, ready for their first adventure.
Now you have a charming, tactile set of story starters that fits right in your pocket.
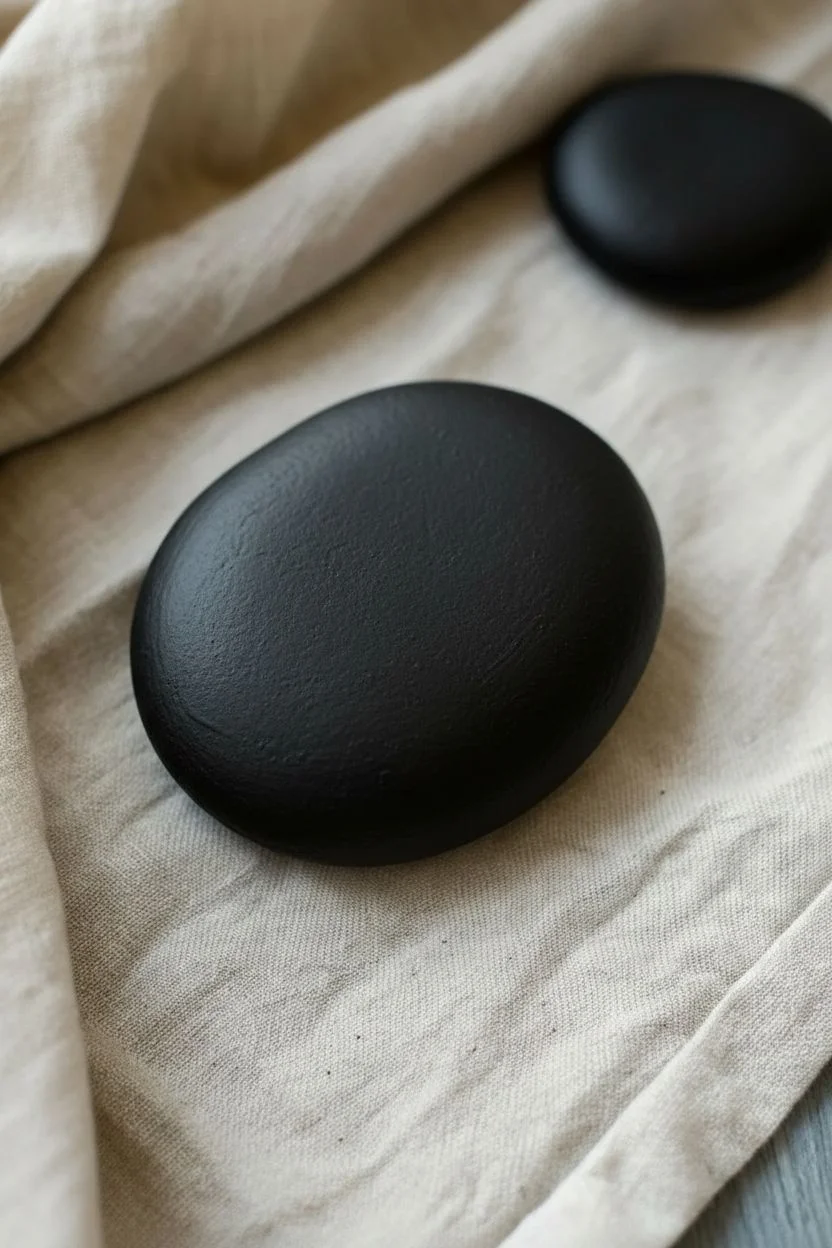
Metallic Gold Geometric Accents
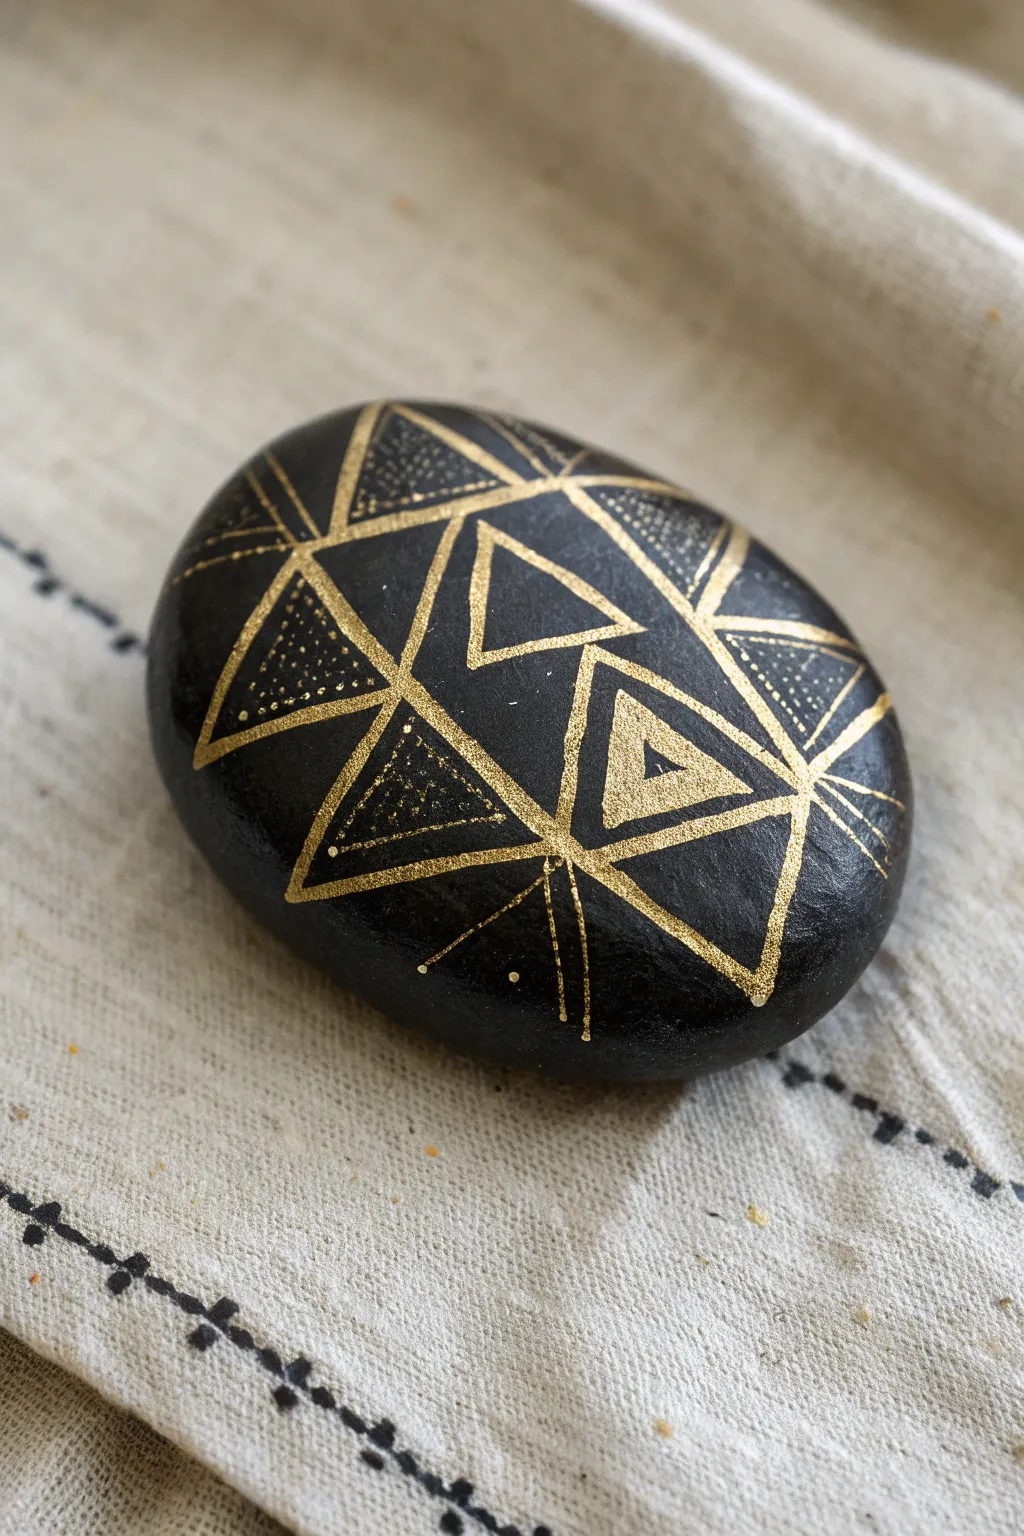
Transform a simple dark stone into a modern artifact with striking metallic contrasts. The sleek black background makes the crisp gold geometry pop, creating a sophisticated piece that looks far more complex than it actually is.
Step-by-Step Tutorial
Materials
- Smooth, oval river rock
- Black acrylic paint
- Flat paintbrush
- Gold metallic paint marker (extra fine tip)
- Spray varnish or clear sealant
- Paper towel
- Optional: Pencil
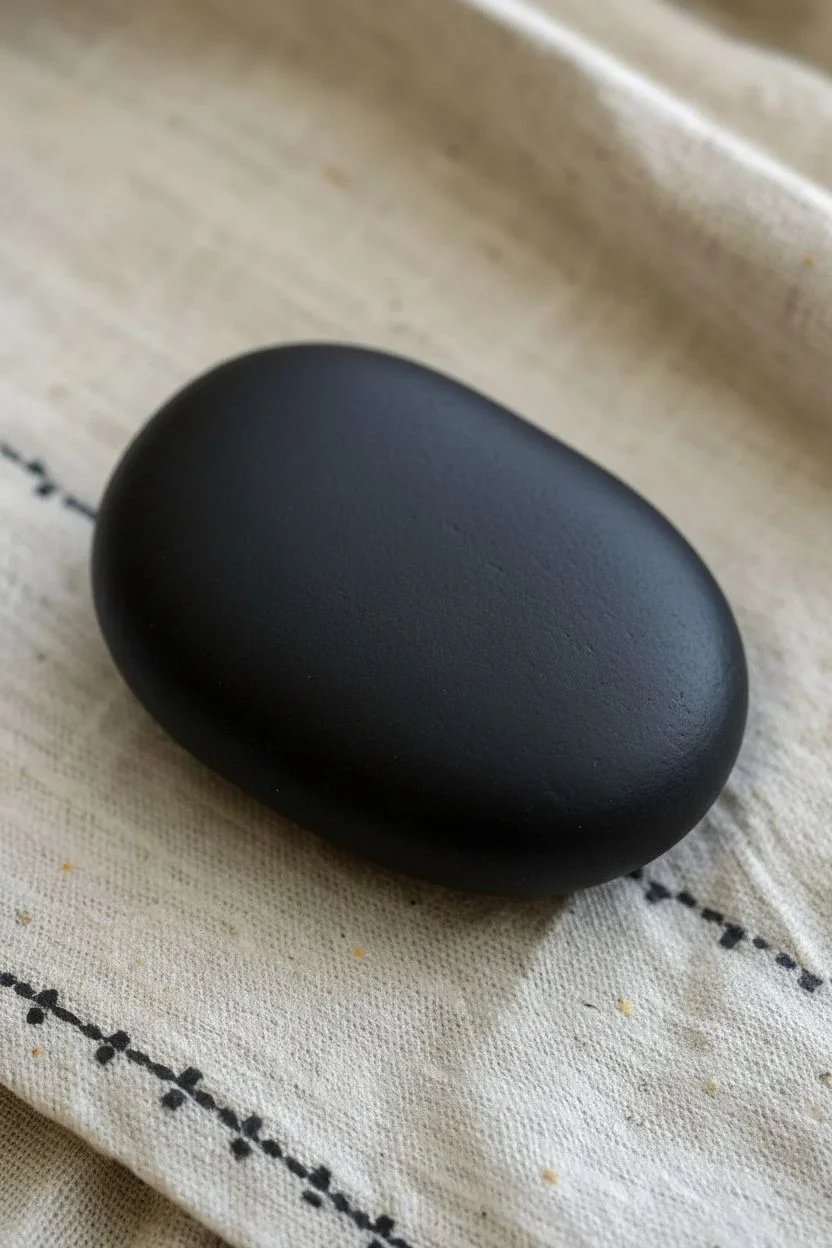
Step 1: The Dark Canvas
-
Clean the surface:
Wash your stone thoroughly with soap and water to remove any dirt or oils, then dry it completely with a cloth. -
Apply base coat:
Using a flat paintbrush, cover the entire top surface of the rock with black acrylic paint. -
Ensure opacity:
Let the first layer dry to the touch. I usually add a second coat to ensure a deep, solid black coverage with no stone showing through. -
Dry completely:
Allow the base coat to cure fully before moving on to the metallic steps, preventing the marker tip from clogging.
Oops, Smudge?
Mistakes happen! If a gold line wobbles, let it dry fully. Then, carefully paint over the error with your black base paint to erase it like magic.
Step 2: Constructing the Grid
-
Prime the marker:
Shake your gold paint marker well and press the nib on a scrap piece of paper until the ink flows smoothly. -
Draft the center:
Start near the center of the rock by drawing a medium-sized triangle. You can lightly sketch with a pencil first if you want extra precision. -
Expand the pattern:
Draw an inverted triangle directly adjacent to the first one, sharing one of its sides. -
Create the mesh:
Continue adding triangles that interconnect around the first two, building a geometric mesh that extends toward the edges of the rock. -
Double the lines:
Inside each of your main triangles, draw a smaller, parallel triangle to create a frame effect.
Step 3: Adding Texture and Detail
-
Solid gold accents:
Choose a few random inner triangles and fill them in completely with the gold marker for a bold, solid look. -
Stippling technique:
Select a different set of triangles to texturize. Gently tap the marker tip repeatedly inside these shapes to create a field of tiny gold dots. -
Vary the density:
For added visual interest, make the dots denser in the corners of the triangles and sparser toward the centers. -
Radiating lines:
Draw straight lines extending outward from the vertices of the outer triangles, letting them fade off toward the curve of the stone. -
Final embellishments:
Add small, singular dots at the ends of the radiating lines or in the open black spaces between triangle clusters.
Mix Your Metals
Level up by swapping gold for silver or copper markers on alternating triangles to create a stunning mixed-metal mosaic effect.
Step 4: Protection
-
Let it set:
Allow the metallic ink to dry completely. This usually takes longer than acrylic paint, so be patient to avoid smearing. -
Seal the work:
Apply a coat of spray varnish or a clear sealant to protect the paint and keep that gold shining bright.
Place your gilded geometric stone on a stack of books or a side table for an instant touch of modern elegance.
Realistic Eye Dragons
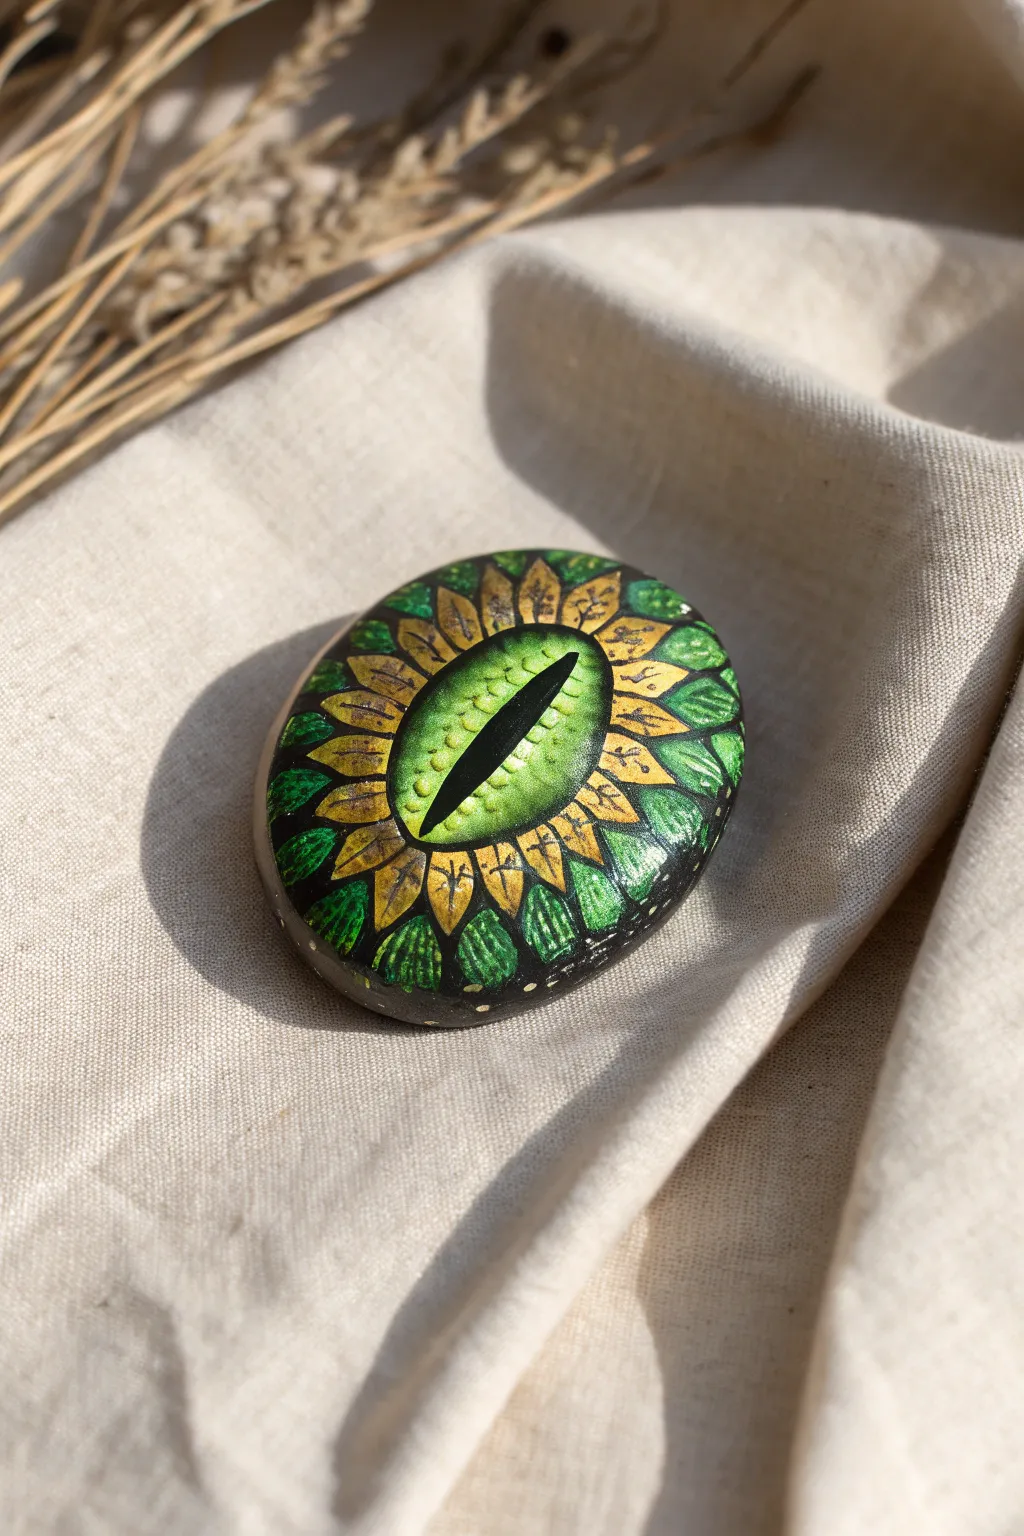
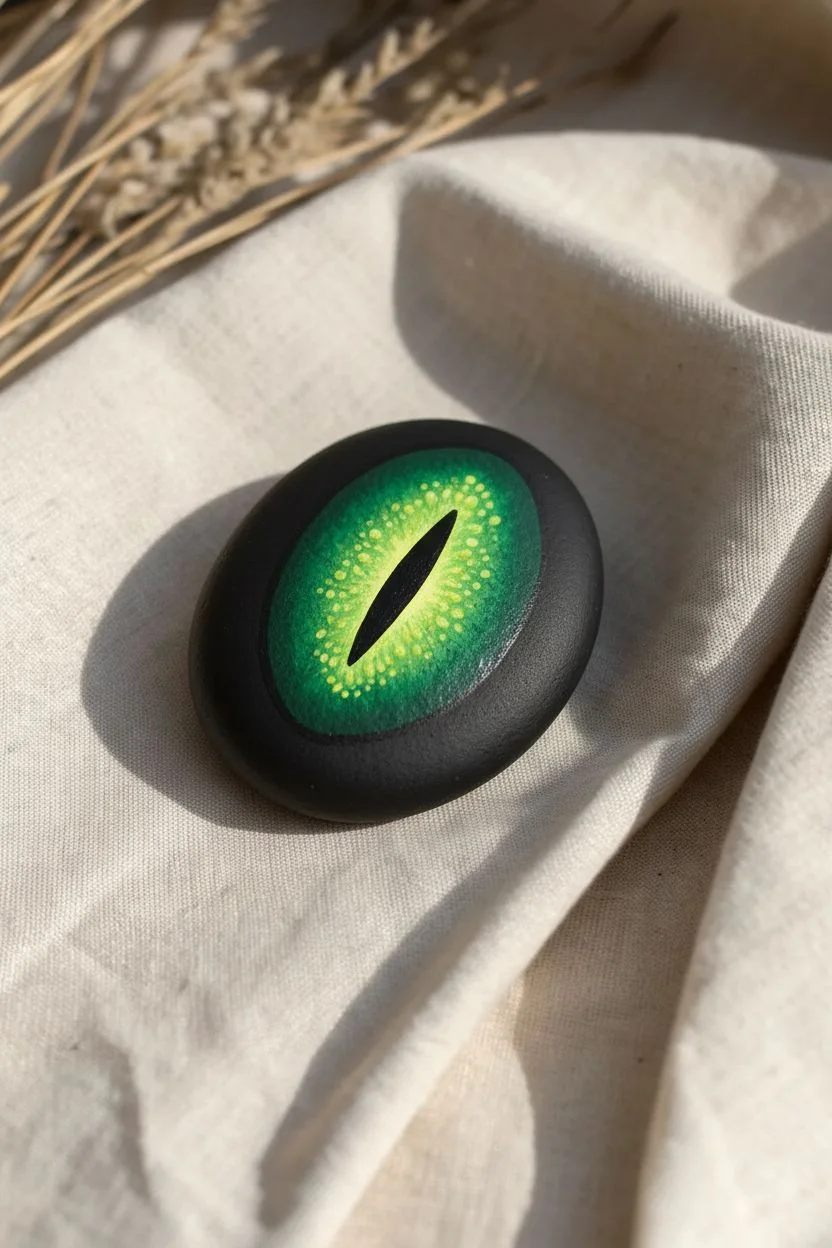
Transform a simple smooth stone into a piercing dragon’s eye surrounded by shimmering golden scales. This project combines metallic paints and careful layering to create a mystical artifact that looks like it was plucked straight from a fantasy treasure hoard.
Step-by-Step Guide
Materials
- Smooth oval stone
- Black acrylic paint (matte)
- Metallic gold and bronze acrylic paint
- Emerald green and lime green acrylic paint
- Fine detail brushes (sizes 0 and 00)
- Pencil
- High-gloss varnish
Step 1: Base & Iris
-
Prep the surface:
Scrub your stone with soap and water, dry it completely, and apply a solid base coat of black paint over the entire top surface. -
Sketch the outline:
Once the base is dry, lightly sketch a large oval in the center for the eye and a vertical diamond shape in its middle for the pupil. -
Paint the iris base:
Fill the oval area around the pupil with emerald green paint, ensuring the black pupil area stays dark. -
Create the glow:
While the emerald base is still tacky, blend lime green or neon yellow into the center of the iris, close to the pupil, to create a glowing gradient. -
Add iris texture:
Use a small brush to stipple tiny dots of yellow-green over the iris, giving it a bumpy, reptilian skin texture. -
Define the pupil:
Paint the vertical slit pupil with jet black paint, refining the edges to be sharp and pointed.
Smooth Blending Pro Tip
Mix a drop of glazing medium or water into your acrylics when painting the iris gradient. This keeps the paint wet longer, allowing for a seamless transition from dark to light green.
Step 2: Scales & Details
-
Outline the inner scales:
Sketch a ring of petal-like shapes radiating from the eye; I find it helpful to mark the four compass points first to keep them even. -
Paint the gold ring:
Fill these inner scales with metallic gold paint, leaving a thin black gap between each scale so the background shows through. -
Detail the gold scales:
Mix a tiny bit of brown with gold to paint the base of each scale for depth, then use a fine liner to paint faint veins on them. -
Outline outer scales:
Sketch a second row of scales around the gold ring, extending towards the edge of the stone. -
Paint green scales:
Fill this outer ring with emerald green, again leaving narrow black borders between individual scales. -
Highlight the leaves:
Add touches of metallic green or lime to the tips of the outer scales to make them look dimensional and curved. -
Add scale veins:
Using your finest brush and diluted black paint, draw delicate branching lines inside the green scales.
Level Up: Color Shift
Use interference or color-shifting acrylic paint for the iris. This creates a magical effect where the eye appears to change color from green to blue or gold as you move the rock.
Step 3: Finishing Touches
-
Clean up lines:
Go back with your black paint and carefully neaten the gaps between the scales if any paint went over the lines. -
Add the reflection:
Paint a small, crisp white swoosh or dot overlapping the black pupil and the green iris to simulate a wet reflection. -
Texturize the rim:
Dab tiny dots of gold or light green around the very outer rim of the stone to frame the design. -
Varnish:
Allow the rock to cure for 24 hours, then apply a thick coat of high-gloss varnish to give the eye a realistic, wet sheen.
Display your finished dragon eye on a shelf or hide it in the garden for a magical discovery


Have a question or want to share your own experience? I'd love to hear from you in the comments below!