If you’ve ever wanted big, dramatic results without painting a million tiny details, shadow painting is your new favorite playground. I love how silhouettes and simple cast shadows can turn a few confident shapes into a scene that feels instantly cinematic.
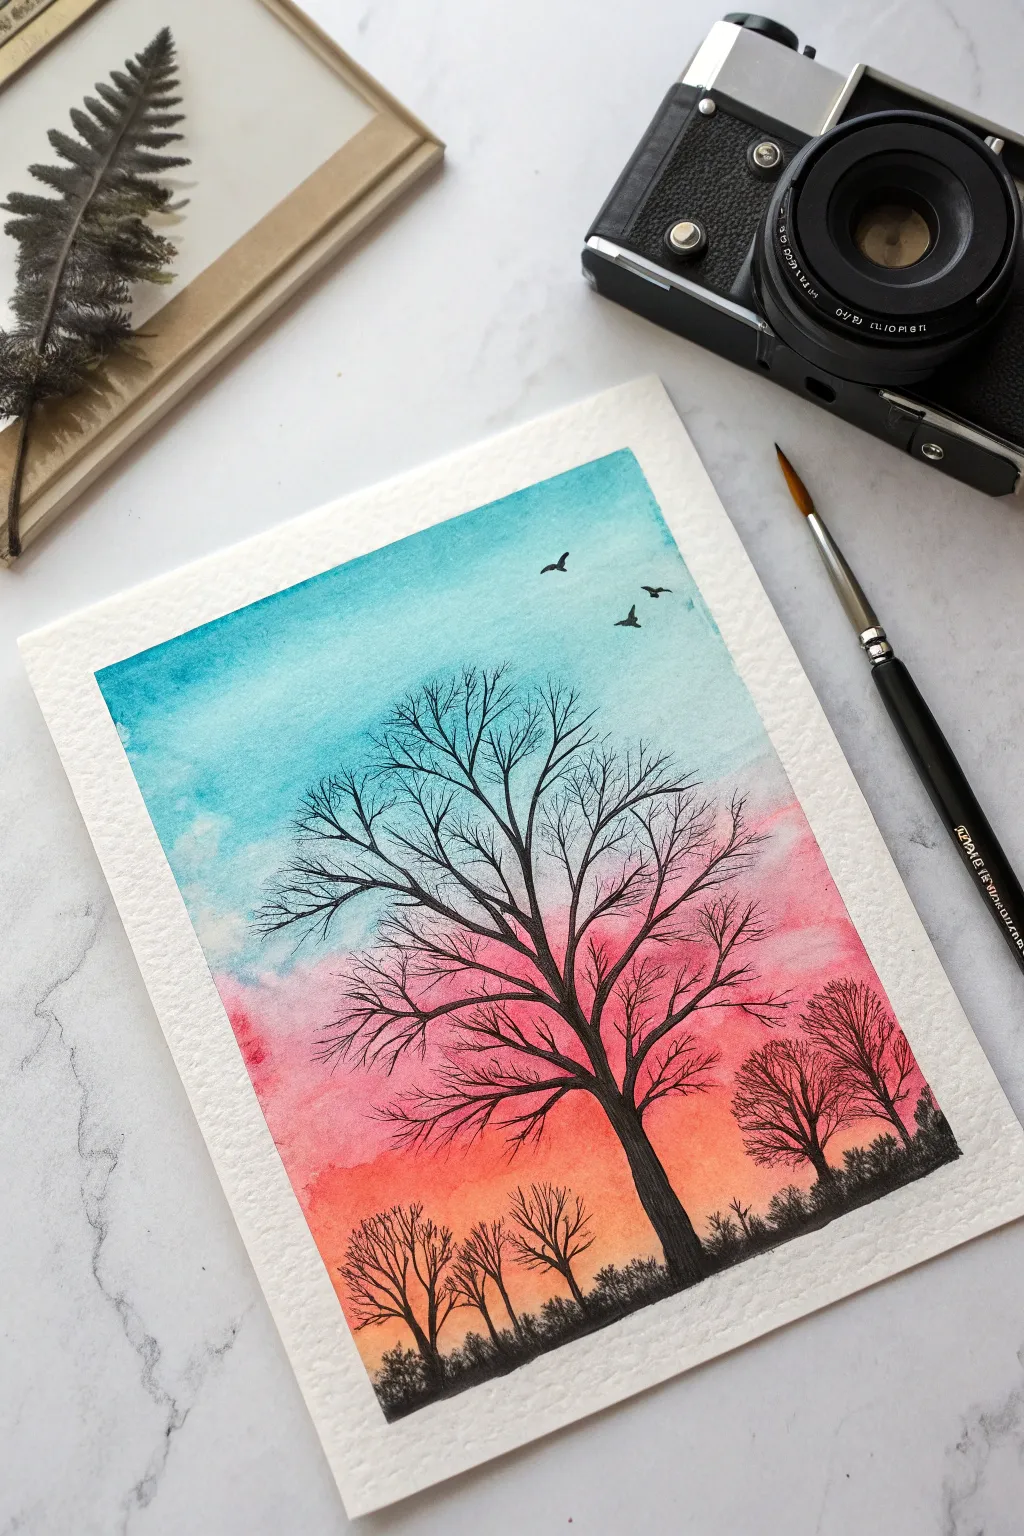
Sunset Silhouette Horizon
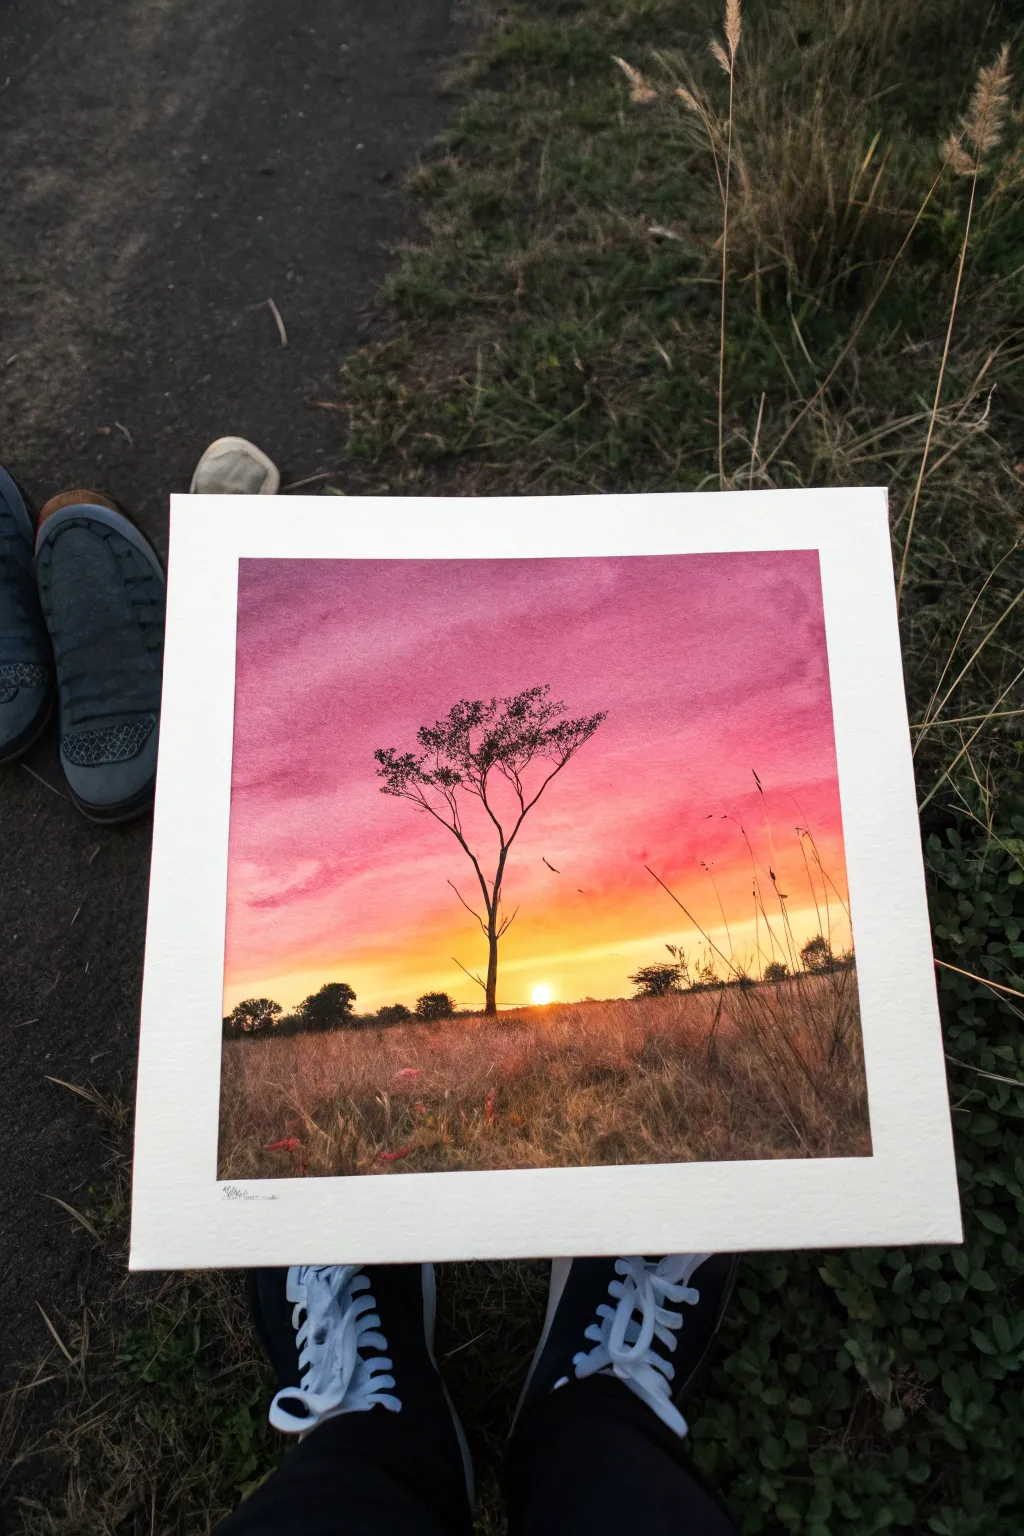
Capture the fleeting beauty of dusk with this vibrant watercolor landscape featuring a striking tree silhouette against a radiant gradient sky. This project explores wet-on-wet blending techniques to create a seamless transition from deep magenta to glowing yellow.
Step-by-Step Tutorial
Materials
- Cold-pressed watercolor paper (140lb/300gsm)
- Masking tape
- Watercolor paints (Magenta, Red, Orange, Yellow, Black/Payne’s Gray)
- Clean water jar
- Large flat wash brush
- Medium round brush
- Fine liner brush or rigger brush
- Paper towels
- Painting board or clipboard
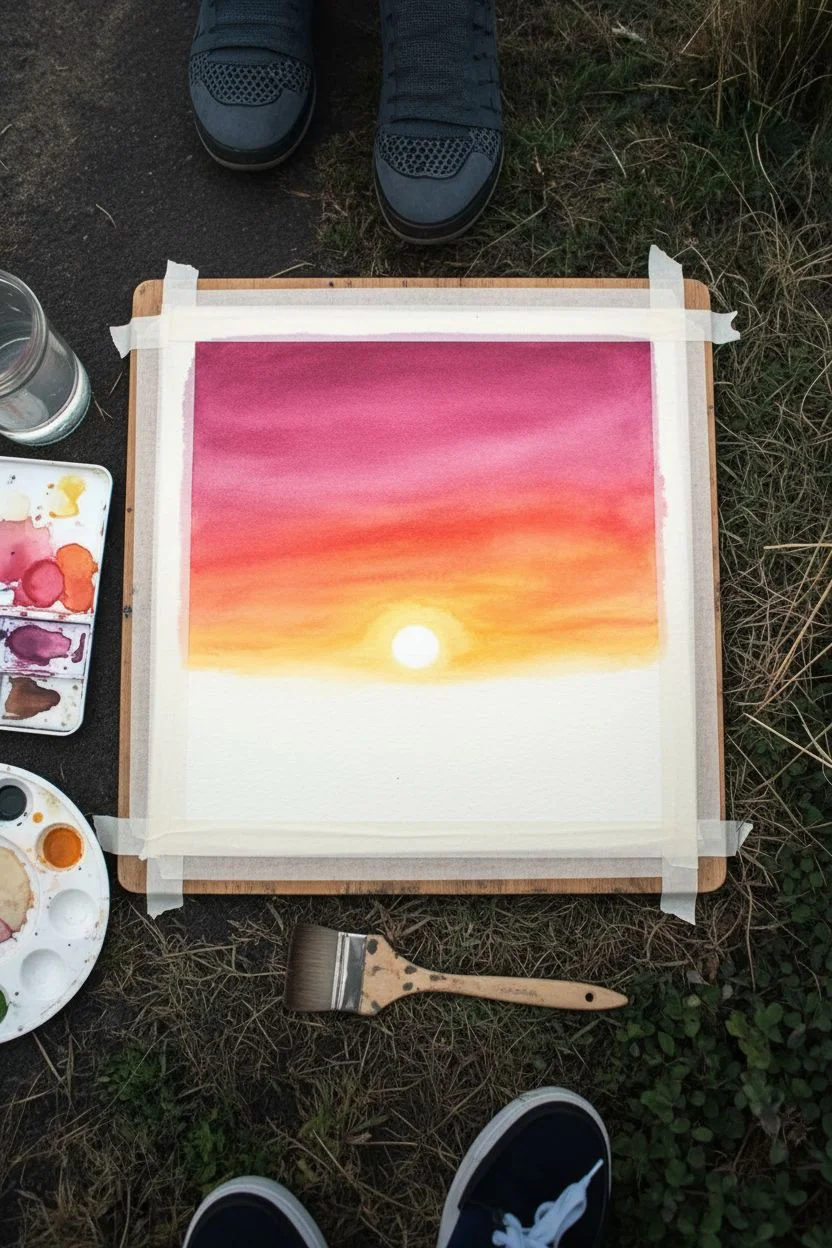
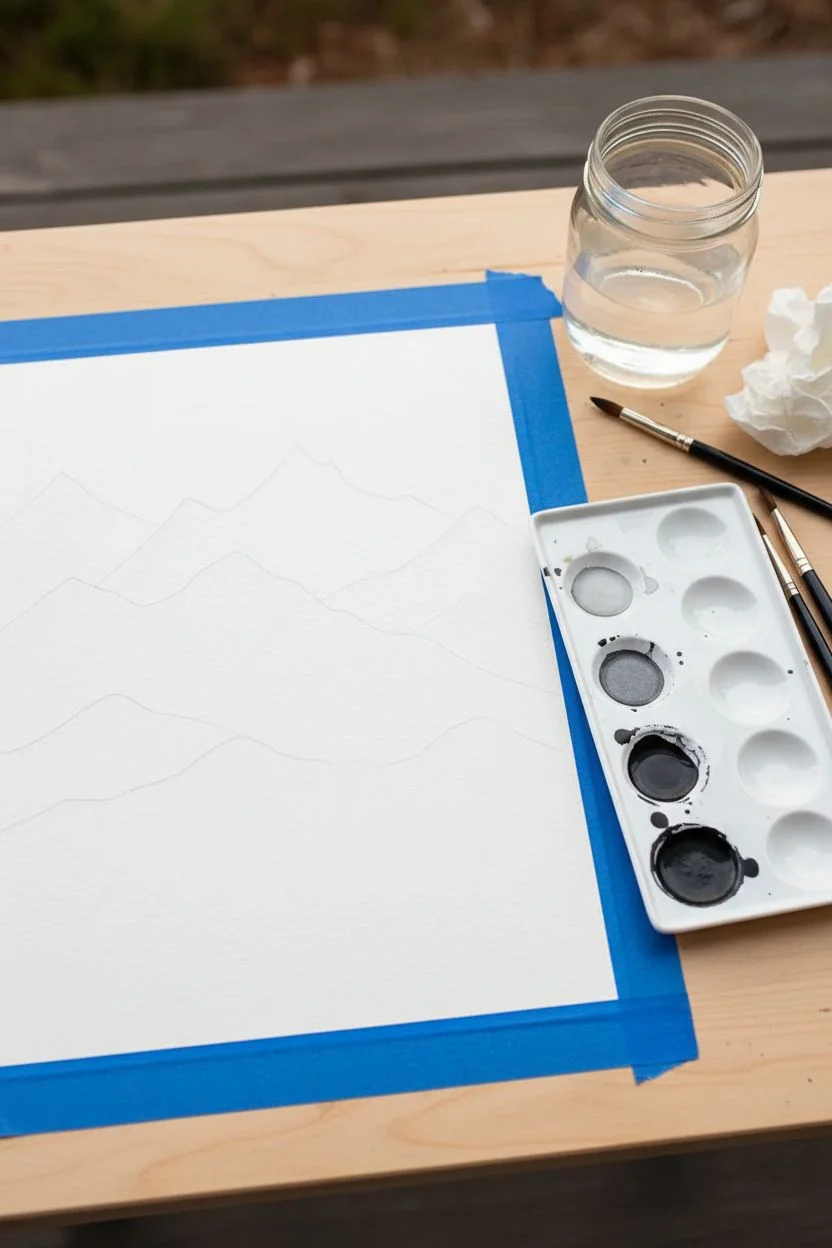
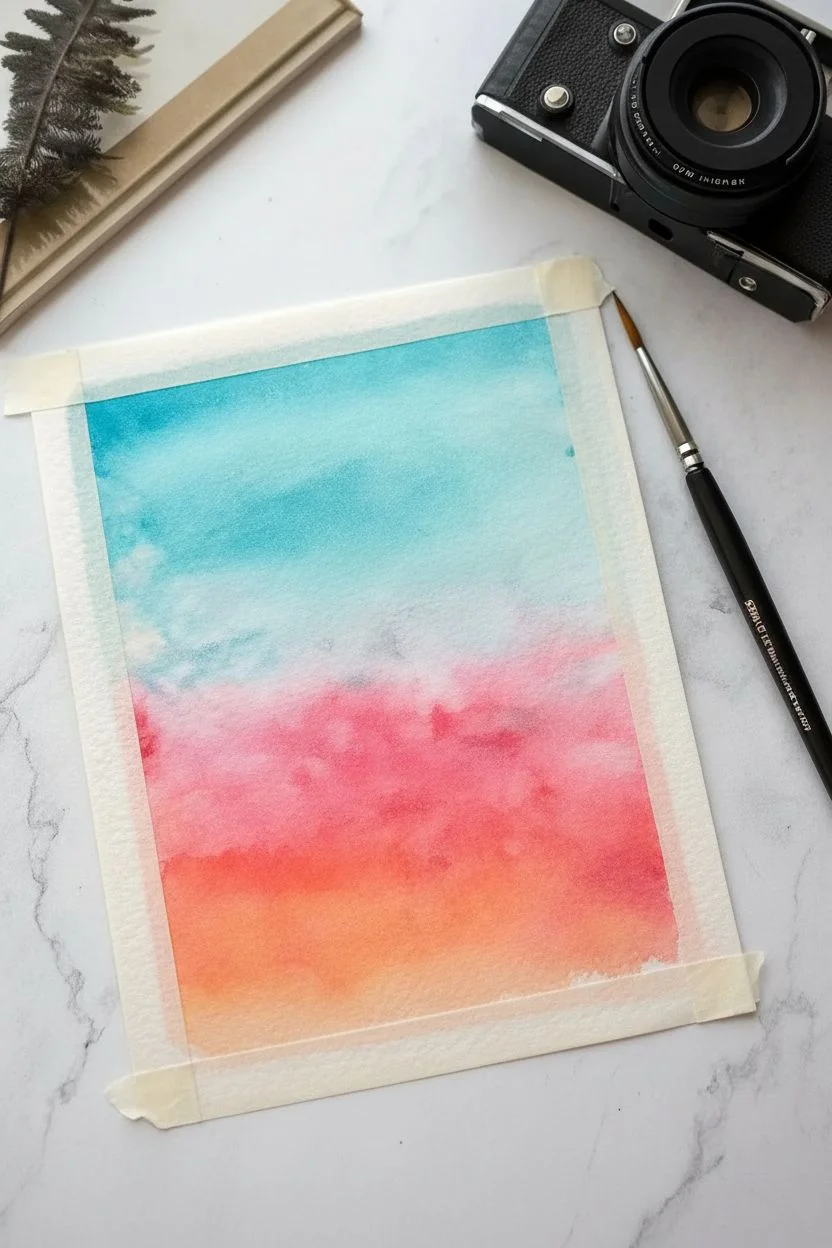
Step 1: Creating the Sunset Gradient
-
Prepare your canvas:
Tape down all four edges of your watercolor paper to a hard board. This creates a crisp white border and prevents the paper from buckling when wet. -
Hydrate the paper:
Using your large flat brush and clean water, apply an even coat of water across the entire upper two-thirds of the paper where the sky will be. The paper should glisten but not have puddles. -
Apply the top layer:
Load your brush with a deep magenta or purple-pink mix. Apply this to the very top of the wet area, using horizontal strokes to let the color bleed downward naturally. -
Transition to orange:
Clean your brush quickly and pick up a vibrant orange. Paint just below the magenta, slightly overlapping the colors so they blend on the paper. I find tilting the board slightly helps the colors merge softly. -
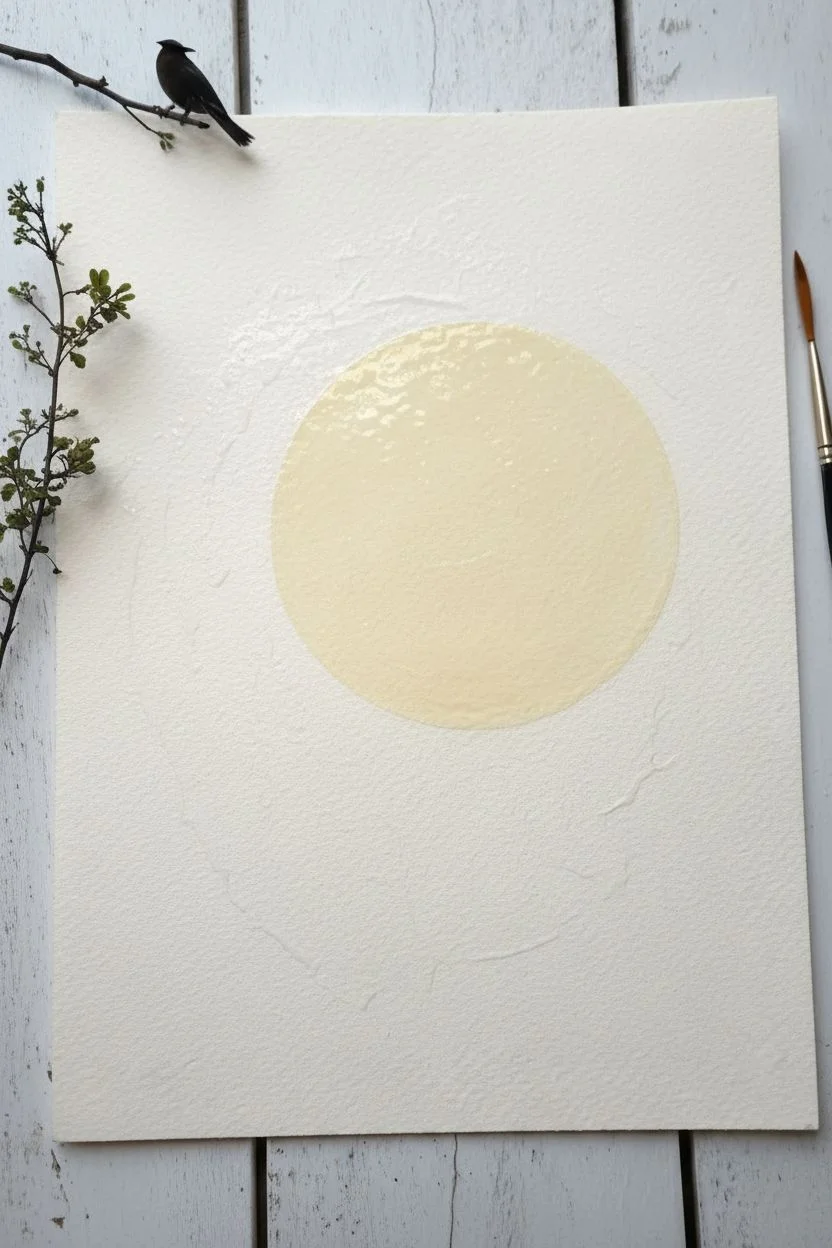
Add the golden glow:
Rinse your brush thoroughly. Load it with bright yellow and paint the area just above your intended horizon line, blending it up into the orange. Leave a tiny semi-circle of pure white paper for the sun itself. -
Soften the sun:
With a damp, clean brush, gently blur the edges of your white sun circle so it glows rather than looking like a hard cutout.
Step 2: Painting the Foreground
-
Underpainting the grass:
While the sky dries slightly, mix a diluted wash of orange and brown. Paint the bottom third of the paper for the field, keeping it lighter near the horizon and slightly darker at the bottom. -
Dry generally:
Allow the entire painting to dry completely. The paper must be bone-dry before adding silhouettes, or sharp lines will bleed into fuzzy blobs. -
Define the horizon:
Mix a concentrated black or dark Payne’s Gray. Using a medium round brush, paint an uneven, jagged line across the horizon to represent distant bushes and terrain. -
Add distant trees:
Dab small, irregular shapes along the horizon line using the tip of your brush to suggest clusters of distant trees and scrub brush.
Muddy colors?
If your yellow turns green or brown when meeting the pinks, clean your brush more often. Always wash the brush thoroughly between color transitions to keep the yellow pure.
Step 3: Detailed Silhouettes
-
Anchor the main tree:
Switch to a fine liner brush for control. Paint a thin, slightly wavering vertical line for the main tree trunk, starting from the horizon and extending into the magenta sky. -
Branch out:
extending branches outward in a ‘V’ shape from the trunk. Keep the branches delicate and tapering toward the ends. Nature isn’t perfect, so let your hand tremble slightly for organic lines. -
Add foliage:
Use the side of a small brush or a dry-brush technique to stipple tiny texture clusters on the branch tips, mimicking leaves in silhouette. -
Add floating birds:
With the very tip of your finest brush, add two or three tiny ‘v’ or tick shapes in the sky for distant birds. -
Paint foreground grass:
In the bottom field area, use quick, upward flickering strokes with a semi-dry brush to create the texture of tall, dry grass. Use a reddish-brown mix for this to connect the ground with the sunset colors. -
Include tall stalks:
Add a few prominent, tall grass stalks in the immediate foreground (bottom right or left) that reach up past the horizon line, creating depth. -
Reveal the border:
Once the paint is 100% dry, carefully peel away the masking tape at a 45-degree angle to reveal your clean white edges.
Flicker Technique
For realistic grass, hold the brush loosely at the end of the handle. Use quick, confident upward flicks with the wrist rather than slow, deliberate strokes.
Frame this serene landscape or gift it to someone who loves the quiet beauty of twilight


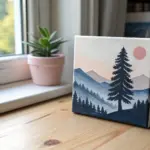
Full Moon Tree Shadow Scene

This breathtaking watercolor project captures the serene beauty of a full moon night with contrasting stark black silhouettes. By using a clever masking technique for the moon, you create a perfect glowing orb set against a deep, starry indigo sky.
Step-by-Step Guide
Materials
- Cold press watercolor paper (minimum 140lb/300gsm)
- Masking fluid or circular stencil material
- Watercolor paints: Indigo, Prussian Blue, Payne’s Grey, Lamp Black
- White gouache or white gel pen
- Round brushes: sizes 8 and 2
- Fine liner brush (size 0 or 00)
- Clean water and paper towels
- Pencil and eraser
Step 1: Setting the Scene
-
Prepare the moon mask:
Begin by deciding the placement of your large moon. It dominates the composition, sitting slightly right of center. Use a compass or trace a circular object (like a roll of tape) lightly with a pencil. -
Apply masking fluid:
Carefully fill in the entire moon circle with masking fluid. Let this dry completely before moving on to ensure you get that crisp, clean edge later. -
Pre-wet the sky:
Once the mask is dry, use your large round brush to wet the entire paper surface around the moon with clean water. The paper should be glisten, but not hold puddles.
Step 2: Painting the Atmospheric Sky
-
Apply base blues:
While the paper is wet, drop in lighter washes of Prussian Blue near the moon’s edge to suggest a glow. The paint will naturally bloom and spread. -
Deepen the gradient:
Work your way outward to the edges using Indigo and Payne’s Grey. Make the corners and the very top of the painting the darkest points to vignette the scene and focus attention on the light source. -
Create the starry expanse:
While the sky wash is still slightly damp but losing its sheen, load a toothbrush or stiff brush with white gouache (diluted slightly). Flick the bristles to spray fine mist stars across the dark blue areas. Avoid the moon area for now. -
Dry and reveal:
Allow the sky to bone dry completely. This is crucial. Gently rub away the masking fluid to reveal the stark white circle of the moon underneath.
Natural Lines Only
When painting tree branches, hold your brush at the very end of the handle. This reduces your control just enough to create jittery, organic lines that look like real wood rather than stiff drawings.
Step 3: Detailing the Moon
-
Texture the crater surface:
Mix a very dilute, watery grey wash. Using a damp brush, dab irregular, cloud-like shapes onto the white moon to create craters and maria. Keep the edges soft and leave plenty of white space for brightness.
Masking Fluid Stuck?
If masking fluid tears the paper when you remove it, the paper or fluid wasn’t dry enough. Always wait until the paper feels cool to the touch, not cold, before rubbing gently.
Step 4: Painting the Silhouette Shadows
-
Establish the ground line:
Switch to Lamp Black paint with a creamy consistency. Paint a low, uneven horizon line at the bottom, dappling the brush to create the texture of distant bushes and tall grass. -
Draw the main trunk:
Starting from the bottom left, paint the thick trunk of the tree rising upwards. It should curve slightly inward as it reaches toward the sky, tapering as it goes. -
Branch structure:
Using a size 2 brush, pull main branches out from the trunk. Some should cross in front of the moon, which creates magnificent depth. Remember, branches generally grow thinner as they move away from the trunk. -
Fine twigs:
Switch to your liner brush (size 0 or 00). Add delicate, spindly twigs extending from the larger branches. Let your hand shake slightly for a more organic, natural look. -
Add the watcher:
Locate a sturdy branch silhouetted against the bright lower half of the moon. Paint a small, simple shape of an owl or bird perched there—just a small oval with a head is enough to suggest the form. -
Final dense foliage:
Return to the bottom of the painting and stipple in more black paint to create density in the forestry at the base, merging the tree trunk seamlessly into the ground.
Step back and admire the peaceful solitude of your moonlit night scene


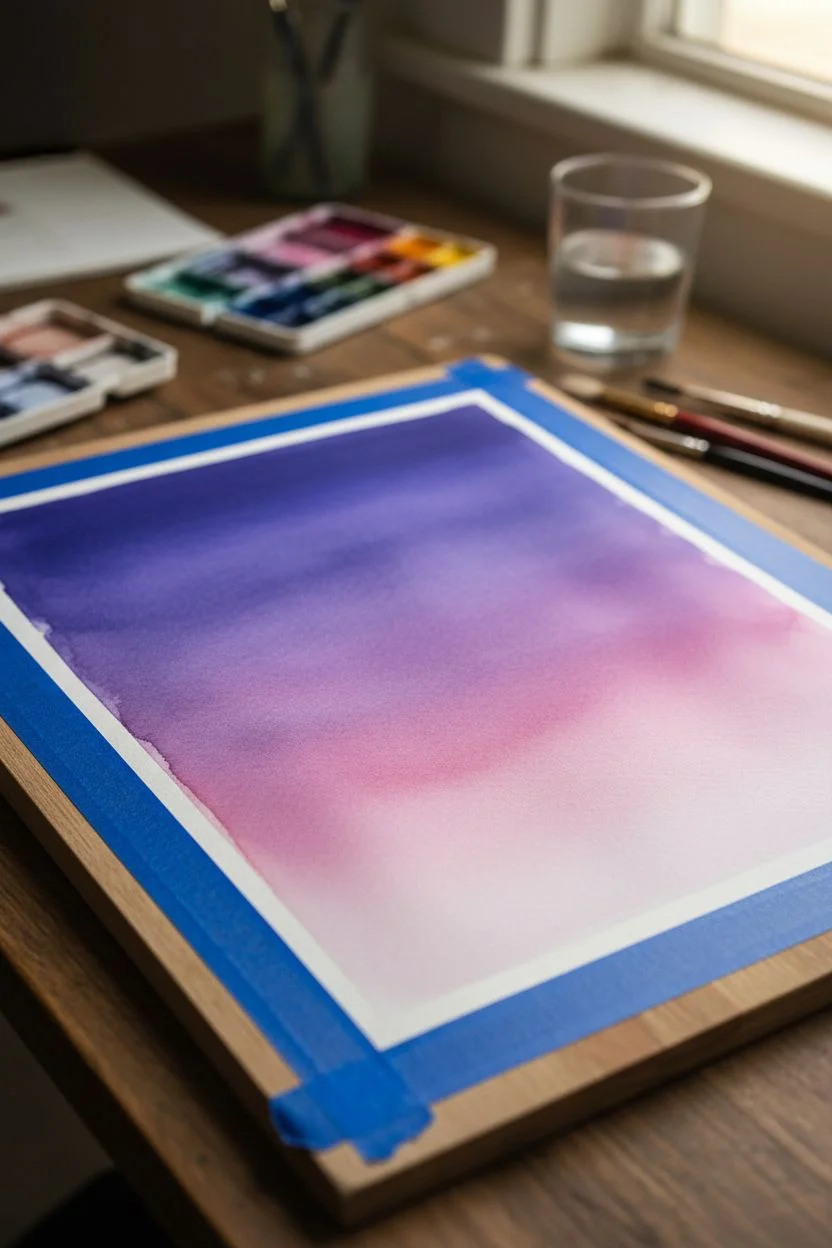
Bare Branches Against a Gradient Sky
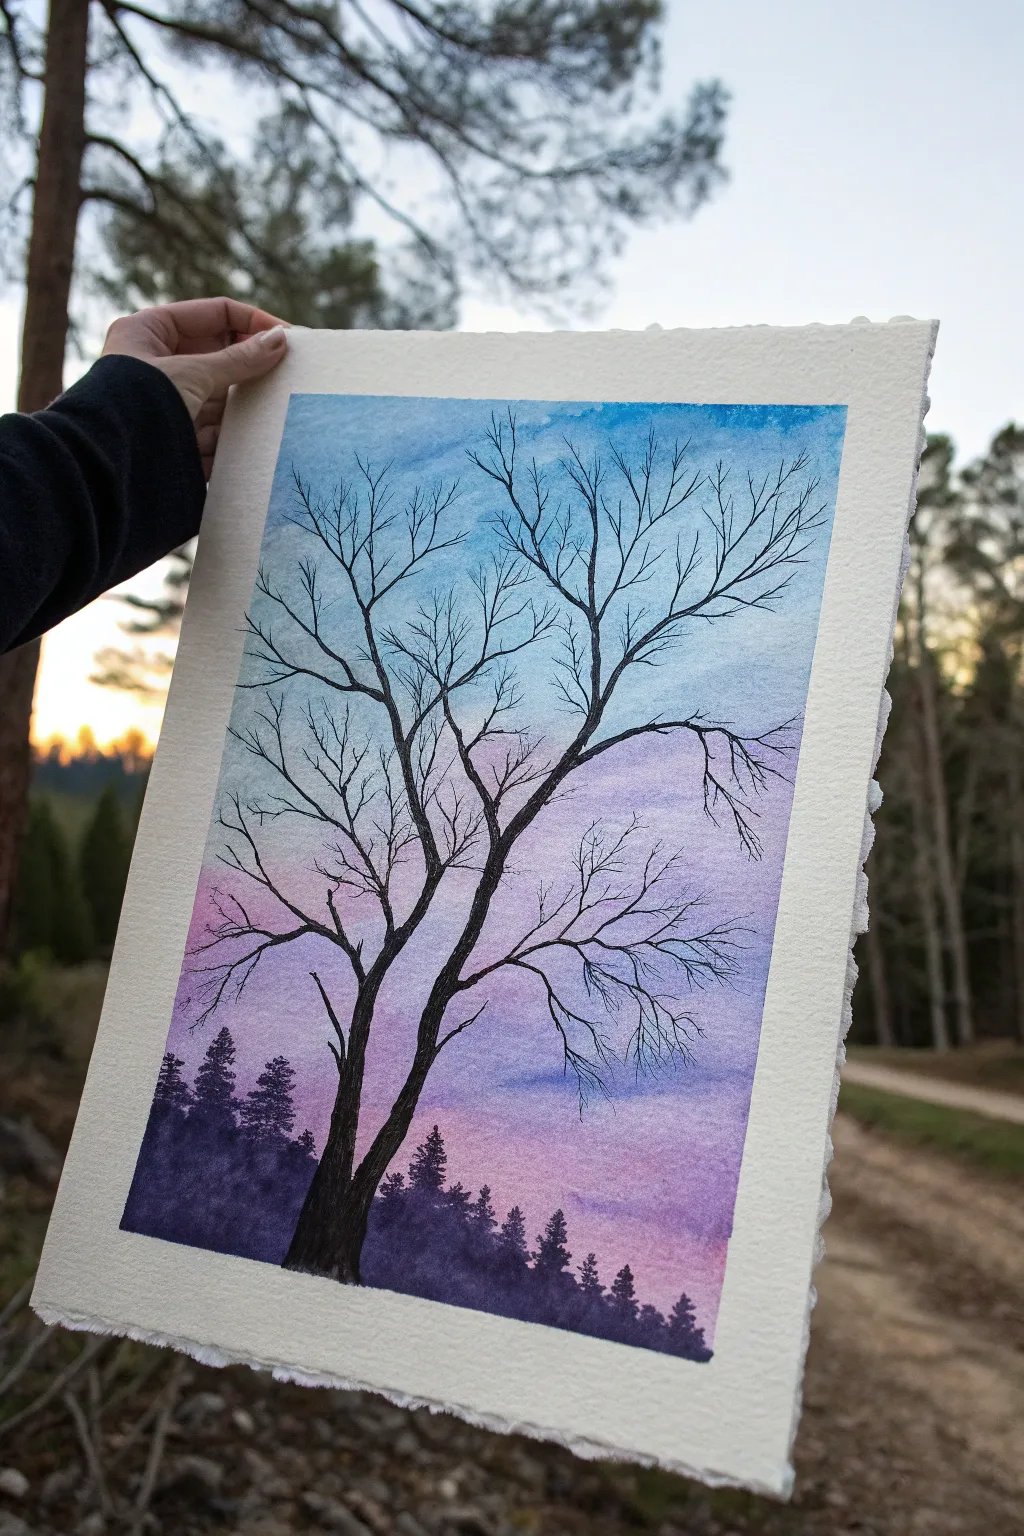

Capture the stark beauty of winter with this striking watercolor silhouette. This project relies on a seamless gradient wash to create a glowing twilight backdrop for dramatic, reaching tree limbs.
Step-by-Step Tutorial
Materials
- Cold press watercolor paper (deckle edge optional)
- Masking tape or painter’s tape
- Watercolor paints (Cobalt Blue, Alizarin Crimson, Purple/Violet, Black)
- Large flat brush or wash brush
- Medium round brush
- Small liner or rigger brush
- Clean water jars
- Paper towels
- Pencil (optional)
Step 1: Painting the Sky Gradient
-
Tape the edges:
Secure your watercolor paper to your work surface using masking tape on all four sides. This creates a clean white border and prevents the paper from buckling when wet. -
Prepare the wash water:
Using a clean, wide brush, gently wet the entire surface of the paper with clean water. The paper should be glistening but not forming puddles. -
Apply the blue sky:
Start at the very top with a watery mix of Cobalt Blue. Apply horizontal strokes across the top third of the paper, allowing the wet page to diffuse the edges. -
Transition to violet:
Rinse your brush slightly and pick up a soft purple or violet shade. Paint the middle section, slightly overlapping the blue above so the colors bleed together naturally. -
Add the pink horizon:
Clean your brush thoroughly and pick up a diluted Alizarin Crimson or rose pink. Paint the bottom third of the sky, blending it upwards into the purple. -
Refine the blend:
If the transition looks harsh, use a damp, clean brush to gently stroke the area where two colors meet to encourage a smoother gradient. -
Let it dry completely:
This is crucial; the paper must be bone dry before you add the silhouette, or the sharp black lines will bleed into the sky. Use a hairdryer on a low setting if you are impatient.
Natural Twigs
Use a liner or ‘rigger’ brush for the thinnest branches. Roll the brush slightly between your fingers as you pull the stroke to create organic, non-uniform lines.
Step 2: Creating the Silhouettes
-
Mix a deep black:
Create a rich, dark black on your palette. You can use tube black or mix ultramarine blue and burnt umber for a more organic dark tone. It needs to be fairly thick, like heavy cream. -
Paint the distant treeline:
Using a medium round brush, paint an uneven, jagged line across the very bottom of the pink section. Stipple (tap) the top edge of this shape to mimic tiny treetops. -
Fill the bottom:
Fill in everything below that jagged treeline with solid black, grounding your composition. -
Draft the main trunk (optional):
If you are nervous, lightly sketch the main crooked line of the tree trunk with a pencil. -
Paint the trunk:
Using the medium brush again, start from the bottom forest silhouette and pull a thick, winding line upwards. Let the trunk split into two main sections about a third of the way up. -
Taper the branches:
Switch to a smaller brush. Extend the main branches outward, ensuring they get thinner the further they go from the trunk. -
Add detail branches:
Switch to your liner or rigger brush. Paint delicate offshoot branches that reach towards the top corners. I find that holding the brush loosely near the end of the handle helps create natural, jittery lines. -
Fill empty spaces:
Look for large gaps in the sky and add tiny, twig-like lines crossing over each other. Nature is chaotic, so don’t worry about keeping them perfectly straight. -
Final check:
Once the black paint is dry, careful peel off the tape at a 45-degree angle to reveal your crisp white border.
Level Up: Starry Night
Before painting the black tree, load a stiff brush with white gouache or acrylic. Flick the bristles to spatter tiny white stars across the dry gradient sky.
Enjoy the peaceful contrast of your new landscape painting


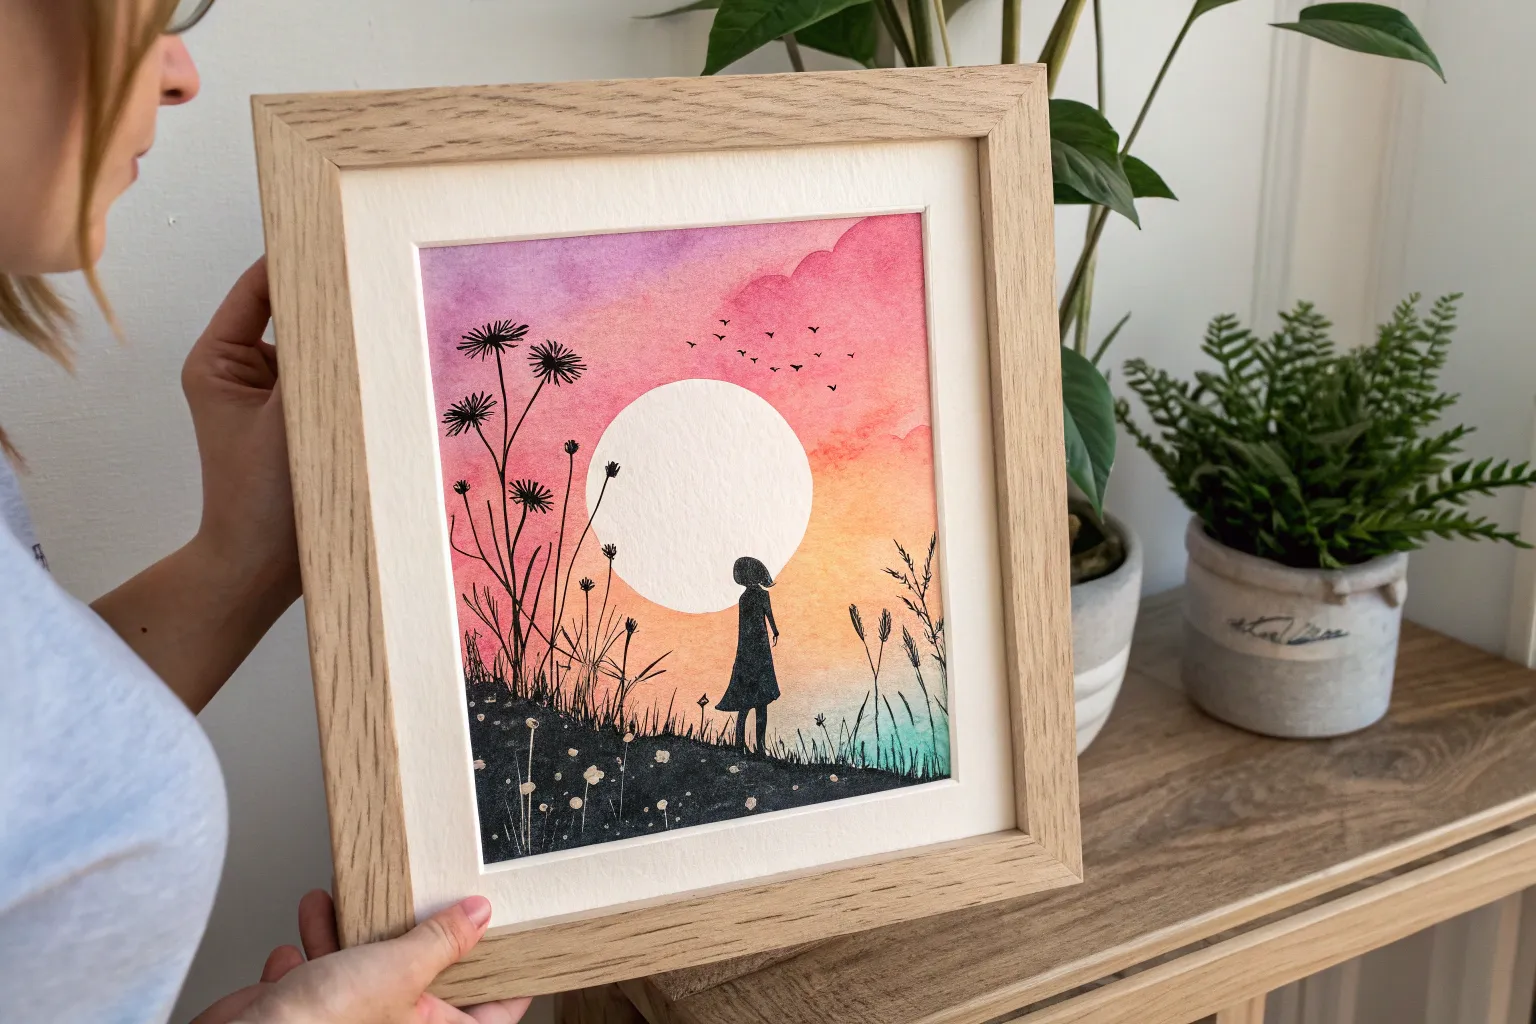
Girl on a Swing Silhouette
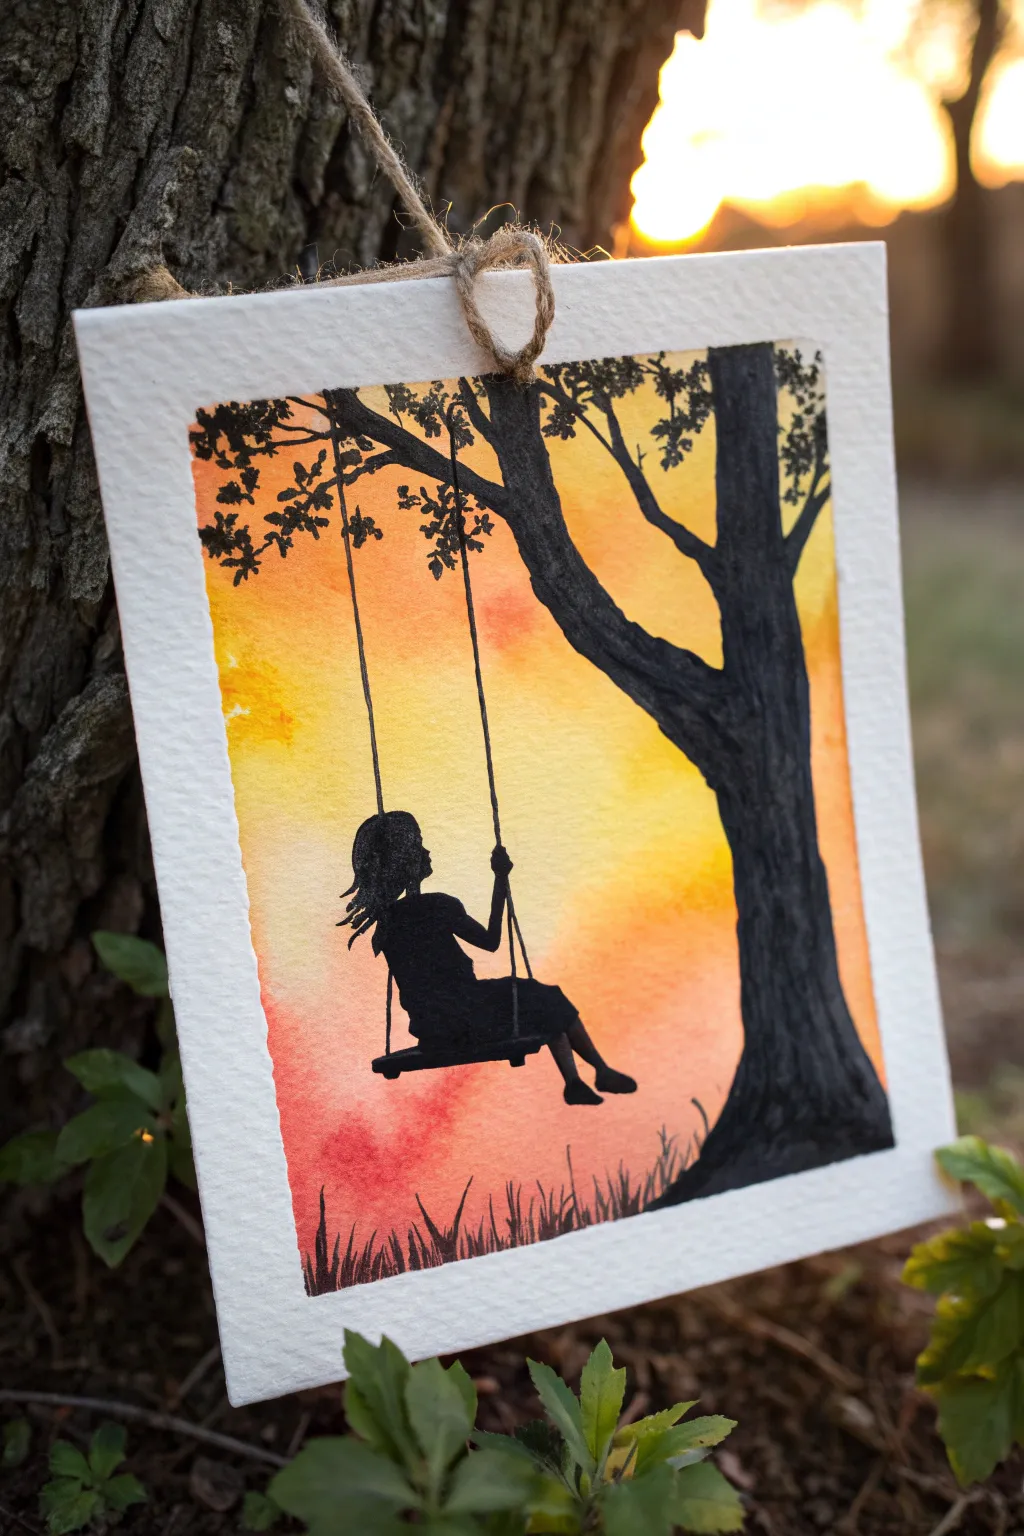
Capture the nostalgic joy of childhood with this vibrant sunset silhouette painting. The stark contrast between the black tree swing and the fiery watercolor sky creates a dramatic artwork that looks beautiful hanging from a structured backdrop.
Detailed Instructions
Materials
- Cold press watercolor paper (approx. 5×7 inches)
- Watercolor paints (Yellow, Orange, Red)
- Black acrylic paint or black gouache
- Small round brushes (Size 0 and Size 2)
- Larger flat wash brush or round brush (Size 6 or 8)
- Pencil and eraser
- Jute twine
- Scissors and hole punch
- Masking tape
- Paper towel and water cup
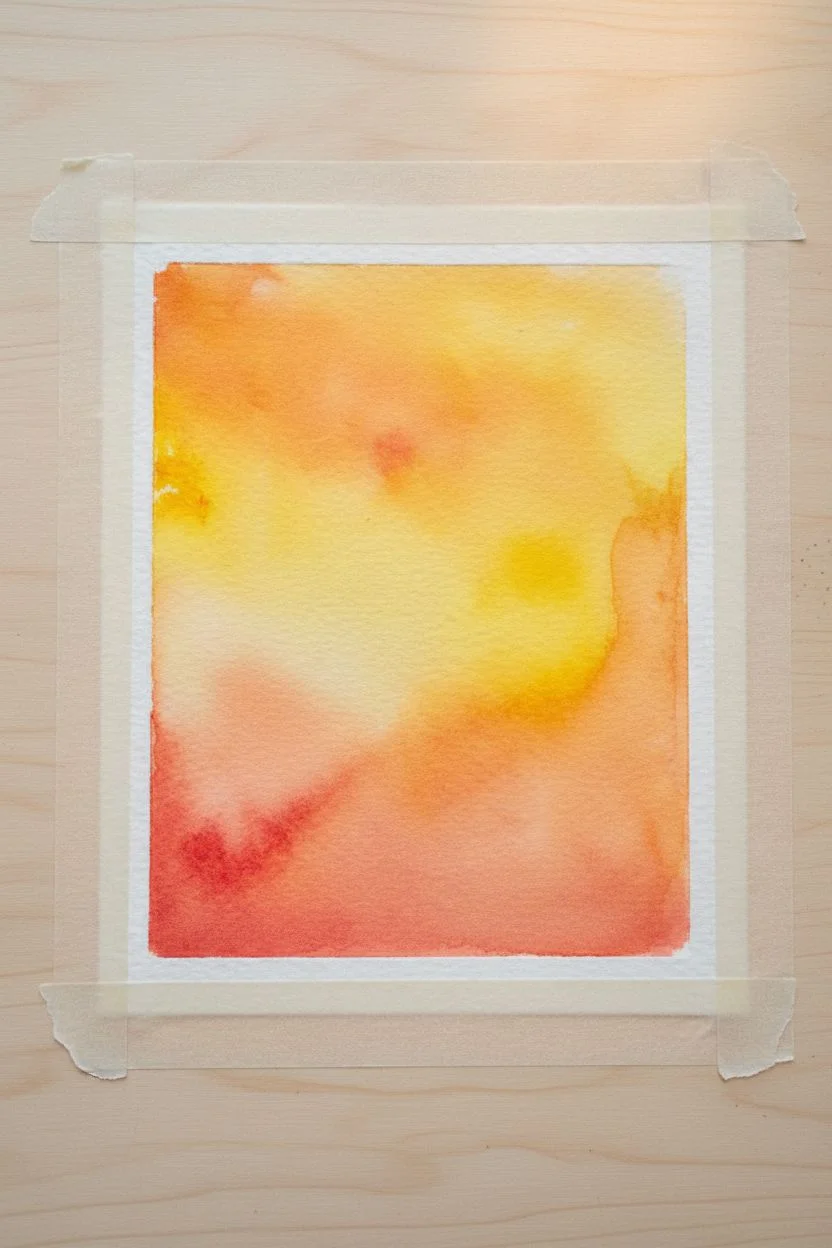
Step 1: Painting the Sunset Sky
-
Prepare the paper:
Begin by taping down the edges of your watercolor paper to a board or table to prevent warping. Leave a clean border of white paper around the edges for that framed look seen in the photo. -
Wet the surface:
Using your larger brush and clean water, lightly wet the rectangular area where the painting will go. You want the paper damp but not soaking wet. -
Apply the yellow:
While the paper is damp, paint a bright yellow wash across the middle section. Let the color flow naturally. -
Add orange tones:
Blend orange paint into the top and bottom of the yellow section while it’s still wet, creating a soft transition. -
Deepen with red:
Paint a reddish-orange hue at the very bottom and corners to intensify the sunset effect. Allow the colors to bleed together softly. -
Let it dry completely:
This is crucial—wait until the background is bone dry before moving to the silhouette. If the paper is cool to the touch, it’s still wet.
Step 2: Creating the Silhouette
-
Sketch the outline:
Lightly sketch the tree trunk on the right side and the girl on the swing with a pencil. Keep lines faint so they don’t show through the paint. -
Paint the tree trunk:
Using black acrylic or gouache and a medium brush, fill in the tree trunk on the right. Give the bark some texture by not making the edges perfectly smooth. -
Add main branches:
Extend a thick branch reaching out towards the left side, where the swing will hang. -
Add leaves and twigs:
Switch to your smallest brush to dab tiny leaf shapes and thin twigs extending from the main branches. Vary the pressure to make them look organic. -
Paint the swing ropes:
Carefully paint two thin, straight vertical lines dropping from the branch. I find holding my breath for a second helps keep the hand steady here. -
Outline the girl:
Using the size 0 brush, carefully outline the girl’s profile, hair, and dress. Pay attention to the details like the flowing hair and pointed feet. -
Fill in the figure:
Fill the girl’s silhouette with solid black paint, ensuring fully opaque coverage. -
Add the swing seat:
Paint the horizontal board of the swing beneath her, connecting it to the ropes. -
Ground the scene:
Paint uneven, grassy blades along the bottom edge of the painting using quick, upward strokes to simulate a field.
Steady Lines Hack
Struggling with the swing ropes? Use a ruler and a fine-tip black waterproof pen instead of a brush. It guarantees straight lines without the wobble.
Step 3: Finishing Touches
-
Remove the tape:
Once the black paint is fully dry, slowly peel away the masking tape at a 45-degree angle to reveal the crisp white border. -
Punch the hole:
Use a hole punch to create a hole centered in the top white border. -
Add the hanger:
Cut a length of jute twine, thread it through the hole, and tie it securely. You can knot it right at the paper or create a loop for hanging.
Golden Hour Glow
Before the background dries, sprinkle a pinch of salt on the wet yellow paint. As it dries, it creates starburst textures that look like light fractals.
Now you have a serene little masterpiece ready to hang wherever you need a moment of calm
BRUSH GUIDE
The Right Brush for Every Stroke
From clean lines to bold texture — master brush choice, stroke control, and essential techniques.
Explore the Full Guide
Couple Watching the Sunset in Shadow
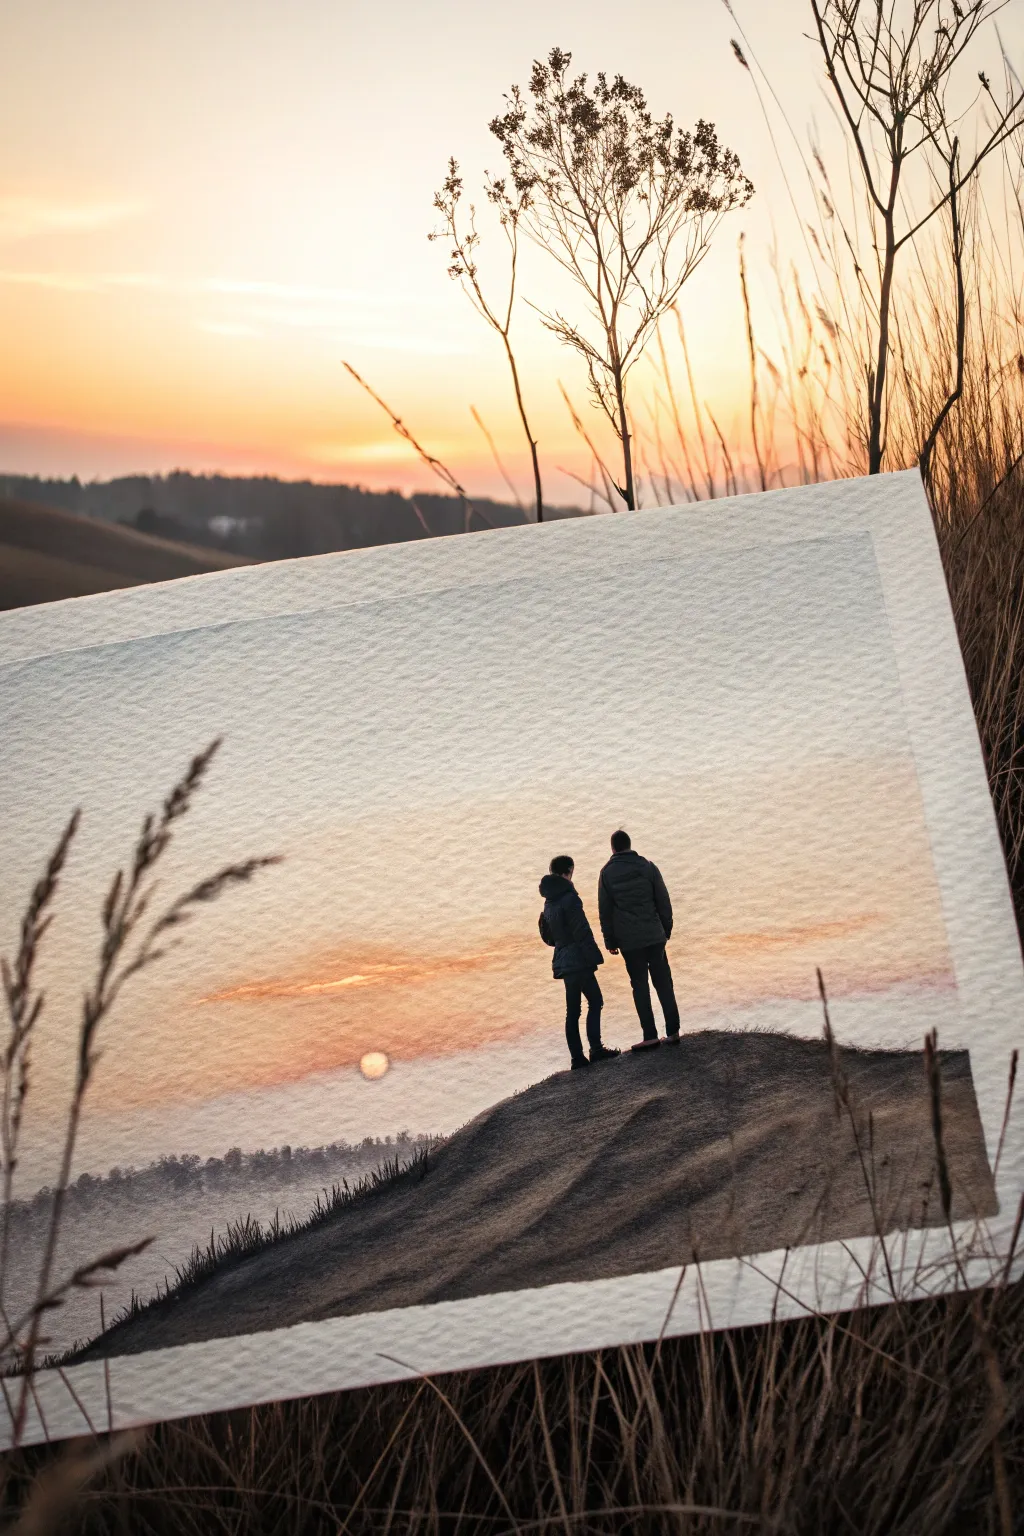
Capture a serene moment of connection with this atmospheric watercolor painting featuring two shadowed figures against a glowing sky. The soft gradient of the sunset contrasts beautifully with the stark, dark silhouettes, creating a piece that feels both personal and timeless.
Step-by-Step Guide
Materials
- Cold press watercolor paper (300 gsm)
- Watercolor paints (Cadmium Orange, Yellow Ochre, Alizarin Crimson, Ultramarine Blue, Burnt Umber, Lamp Black)
- Round watercolor brushes (Size 4, Size 8)
- Small detail brush (Size 0 or 00)
- Masking tape
- Clean water jar
- Paper towels
- Pencil (HB or H)
- Kneaded eraser
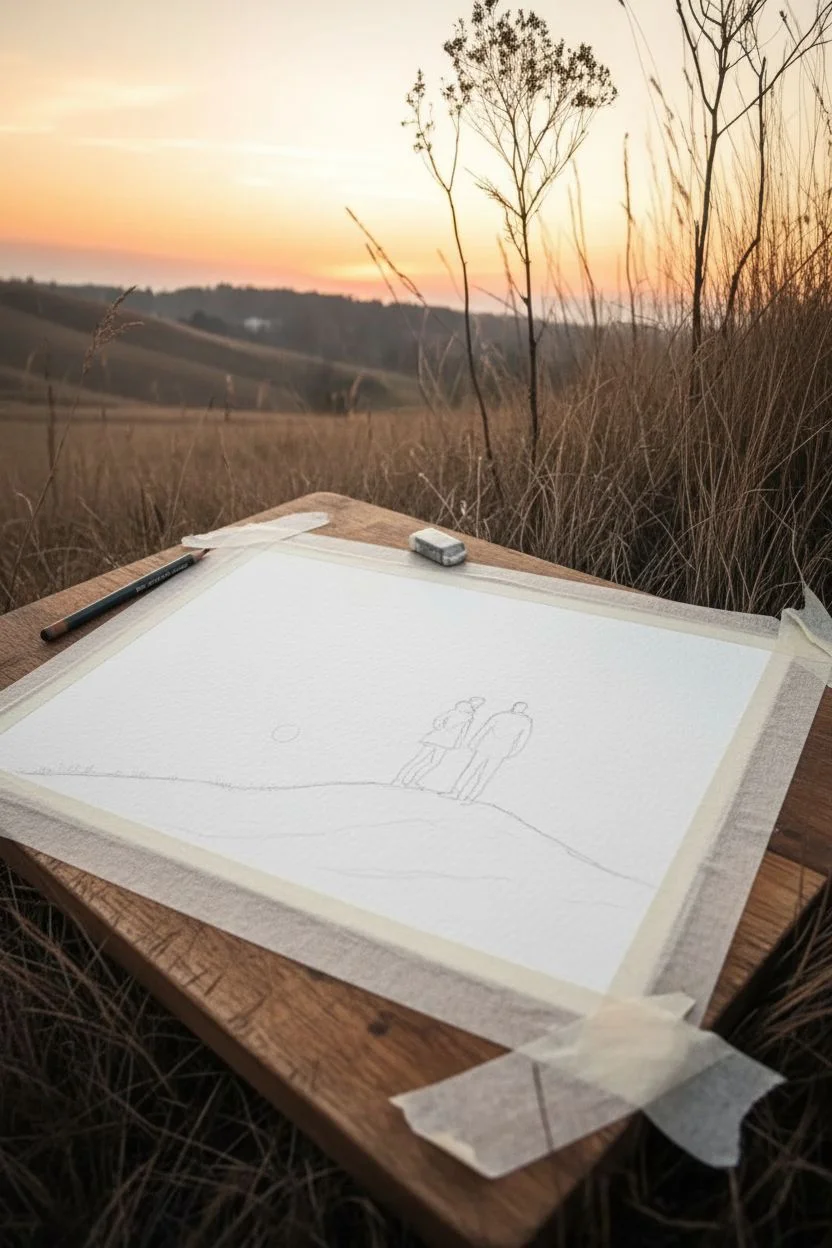
Step 1: Preparation and Sketching
-
Secure the paper:
Begin by taping down all four edges of your watercolor paper to a rigid board using masking tape. This prevents the paper from buckling when we apply wet washes later. -
Sketch the horizon:
Lightly sketch the curved hill line in the lower third of the paper. Keep the line organic and slightly uneven to mimic natural terrain. -
Outline the figures:
Sketch the outlines of the two figures standing on the crest of the hill. Focus on their posture—one slightly turned, the other facing forward—rather than details, since they will be filled in as silhouettes. -
Mark the sun:
Draw a small, faint circle where the sun will sit, just above the horizon line on the left side.
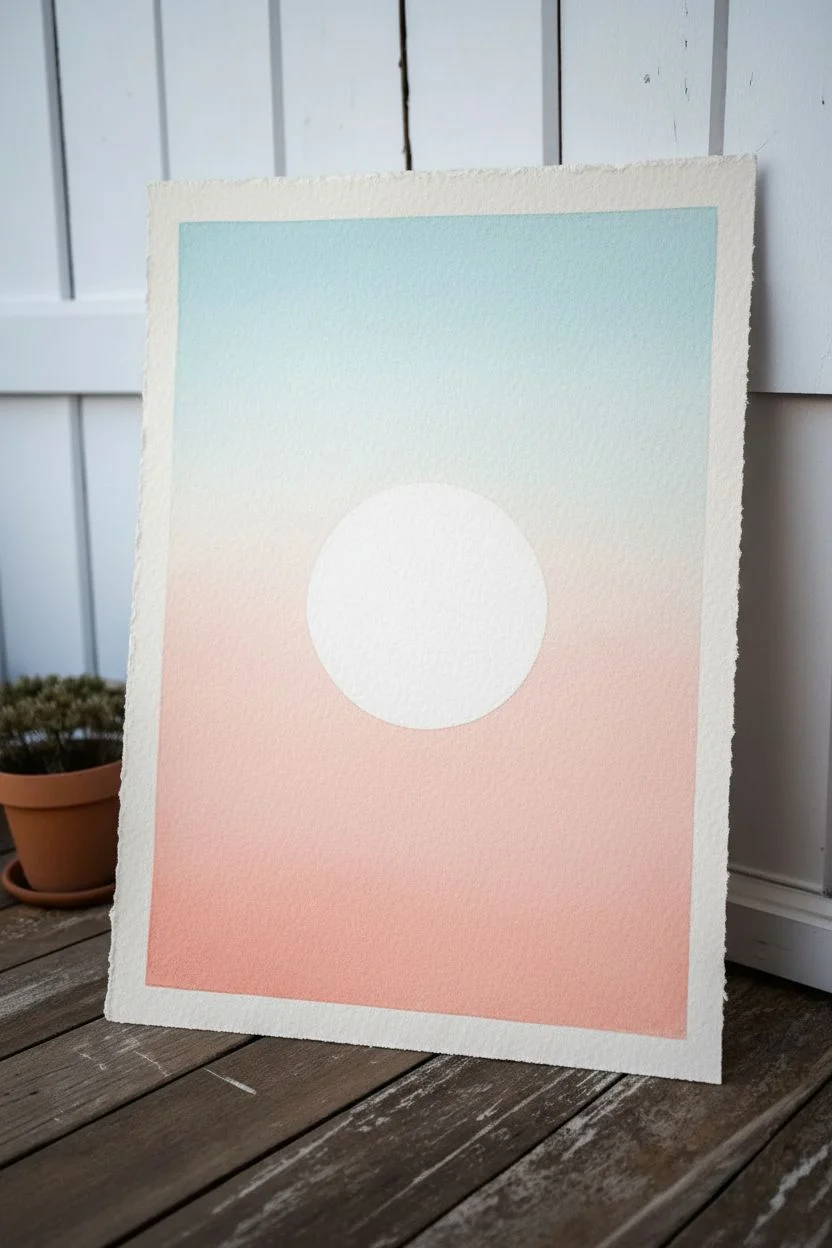
Step 2: Painting the Sky
-
Wet-on-wet base:
Use your size 8 brush to apply a coating of clean water across the entire sky area, stopping just short of your pencil lines for the hill. -
Apply the glow:
While the paper is wet, drop in a mix of Yellow Ochre and a touch of Cadmium Orange around the sun area and just above the horizon line to create the warmest light. -
Blend upwards:
As you move higher up the paper, introduce a very diluted wash of Alizarin Crimson mixed with cool water to create a soft, dusty pink transition. -
Cool the upper sky:
Near the very top, blend in an extremely faint wash of Ultramarine Blue. Let this gray-blue mix seamlessly with the pink tones to suggest the fading daylight. -
Create horizontal clouds:
While the sky is still damp but not soaking, drag a slightly drier brush with a mix of Orange and Burnt Umber horizontally across the lower sky to create soft, streaky clouds. -
Soften the sun:
Lift a tiny bit of pigment from the sun circle with a clean, damp brush or paper towel corner to ensure it stays bright. Let the entire sky layer dry completely.
Bleeding Lines?
If your black silhouette bleeds into the sky, the background wasn’t fully dry. Let it dry completely, then carefully reshape the edge with thick black paint.
Step 3: Creating the Shadowed Ground
-
Mix the ground color:
Create a dark, neutral tone using Burnt Umber and Ultramarine Blue. We want a textured, earthy dark gray, not a flat black. -
Paint the distant trees:
Using a diluted version of your dark mix, paint a faint, jagged line of trees or bushes just on the horizon line behind the main hill for depth. -
Fill the hill:
Switch to a less diluted, darker mixture of the brown and blue. Paint the main hill shape, using sweeping strokes that follow the curve of the land. -
Add texture:
While the hill is still wet, drop in simpler, darker pigment (Lamp Black mixed with Umber) along the bottom edge and randomly in the middle to create the look of uneven ground and vegetation. -
Suggest grass:
Use the tip of your brush to flick tiny, quick upward strokes along the crest of the hill to simulate tall grass blades catching the last light.
Make It Personal
Customize the silhouettes to match real people! Change the height, hair length, or add a pet’s silhouette sitting beside them for a custom portrait.
Step 4: Painting the Silhouettes
-
Mix a dense black:
Prepare a mixture of Lamp Black with a touch of Alizarin Crimson. I find adding red makes the black look richer and less flat. -
Paint the figures:
Using your smallest detail brush (size 0), carefully fill in the sketched figures. Ensure the edges are crisp against the soft sky. -
Refine the shapes:
Pay close attention to the small negative spaces, like the gap between legs or arms, to define the posture clearly. -
Ground the figures:
Make sure to connect the feet solidly to the shadowed hill beneath them so they don’t look like they are floating. -
Final grass details:
Add a few sharp, dark grass blades overlapping the bottom of their shoes or legs to integrate them into the landscape.
Peel off the tape carefully to reveal the crisp white border that frames your peaceful sunset scene
Birds Crossing a Glowing Sun

Capture the serene beauty of birds migrating across a glowing sun with this watercolor project. The soft gradient sky provides a warm, stunning backdrop for crisp black silhouettes, creating an atmosphere of calm transition.
Step-by-Step
Materials
- Heavyweight watercolor paper (300gsm or higher) with deckled edge
- Watercolor paints (Cyan, Magenta/Pink, Yellow, Black, Indigo)
- Masking fluid or geometric circle stencil
- Large flat wash brush
- Medium round brush
- Fine liner brush (size 0 or 00)
- Painter’s tape or drawing board
- Jar of clean water
- Paper towels
Step 1: Setting the Sky
-
Prepare the Sun:
Begin by deciding where your large sun will sit. You can either use a circle stencil to trace a very faint pencil outline in the center, or apply masking fluid to preserve the white paper if you want a crisp edge later. -
Wet the Paper:
Using your large wash brush, wet the entire sheet of watercolor paper with clean water, avoiding the circle area if you didn’t obscure it. The paper should be glisten but not have standing puddles. -
Apply the Blue:
Starting at the very top edge, wash a band of light cyan blue. Let the water carry the pigment downwards slightly, fading it out as you reach the upper third of the paper. -
Introduce the Warmth:
While the paper is still damp, pick up a soft peachy-pink tone. Apply this starting from the bottom third and work upwards. Where it meets the fading blue, allow them to blend into a soft, neutral violet haze. -
Deepen the Horizon:
Strengthen the pink at the bottom of the page, perhaps mixing in a tiny touch of orange to signify the warmth of the setting sun near the ground. -
Let it Dry:
This is crucial; let the background completely dry. If the paper is cold to the touch, it’s still damp. I like to use a hairdryer on a low setting to speed this up.
Clean Lines
For a perfect sun circle without masking fluid, find a jar lid of the right size, dip the rim lightly in orange paint, stamp it, and then fill it in.
Step 2: Painting the Sun
-
Fill the Sun Shape:
If you used masking fluid, rub it off gently. Now, wet the circle shape with clean water. -
Add Yellow Gradient:
Drop bright yellow paint into the top half of the wet circle. It will naturally spread. -
Add Orange Depth:
Drop a deeper orange or warm yellow into the bottom half of the circle. Tilt the paper gently to encourage the two colors to merge in the middle of the sun without over-brushing. -
Dry Again:
Wait for the sun to dry completely. The edges should be relatively sharp against the pastel sky.
Step 3: Adding Landscapes & Details
-
Paint the Distant Treeline:
Mix a watery grey-purple color. Using a medium round brush, paint a jagged, low strip across the horizon line, just below the sun. Keep the top edge uneven to mimic distant trees. -
Create the Foreground Base:
Mix a dense, dark teal or indigo color. Paint a solid, undulating strip at the very bottom of the paper for the ground. -
Add Grass Details:
Switch to your fine liner brush. Using the same dark indigo mixture, flick quick, upward strokes from the foreground base. Vary the heights and angles to make the grass look natural. -
Add Seed Heads:
On some of the taller grass stalks, add tiny dots or dashes to represent seed heads or wheat textures. -
Sketch the Birds:
With the fine liner brush and black paint (or a very dark grey), paint small ‘V’ shapes in the sky. Make the ones closer to the sun slightly larger and the distant ones smaller to create depth. -
Refine Silhouettes:
Check your bird shapes. Some should have wings fully extended, others curved. This variety suggests movement and flapping. -
Final Touches:
Inspect the foreground. If the ground looks too flat, you can drop in a little black while the indigo is arguably still damp to add shadow depth.
Level Up: Texture
Sprinkle a tiny pinch of salt onto the wet sun paint before it dries. It creates a subtle, mottled texture that looks like solar flares or heat.
Now step back and admire the peaceful sunset you’ve created from simple shapes and gradients

PENCIL GUIDE
Understanding Pencil Grades from H to B
From first sketch to finished drawing — learn pencil grades, line control, and shading techniques.
Explore the Full Guide
Simple Mountain Ridge Silhouette
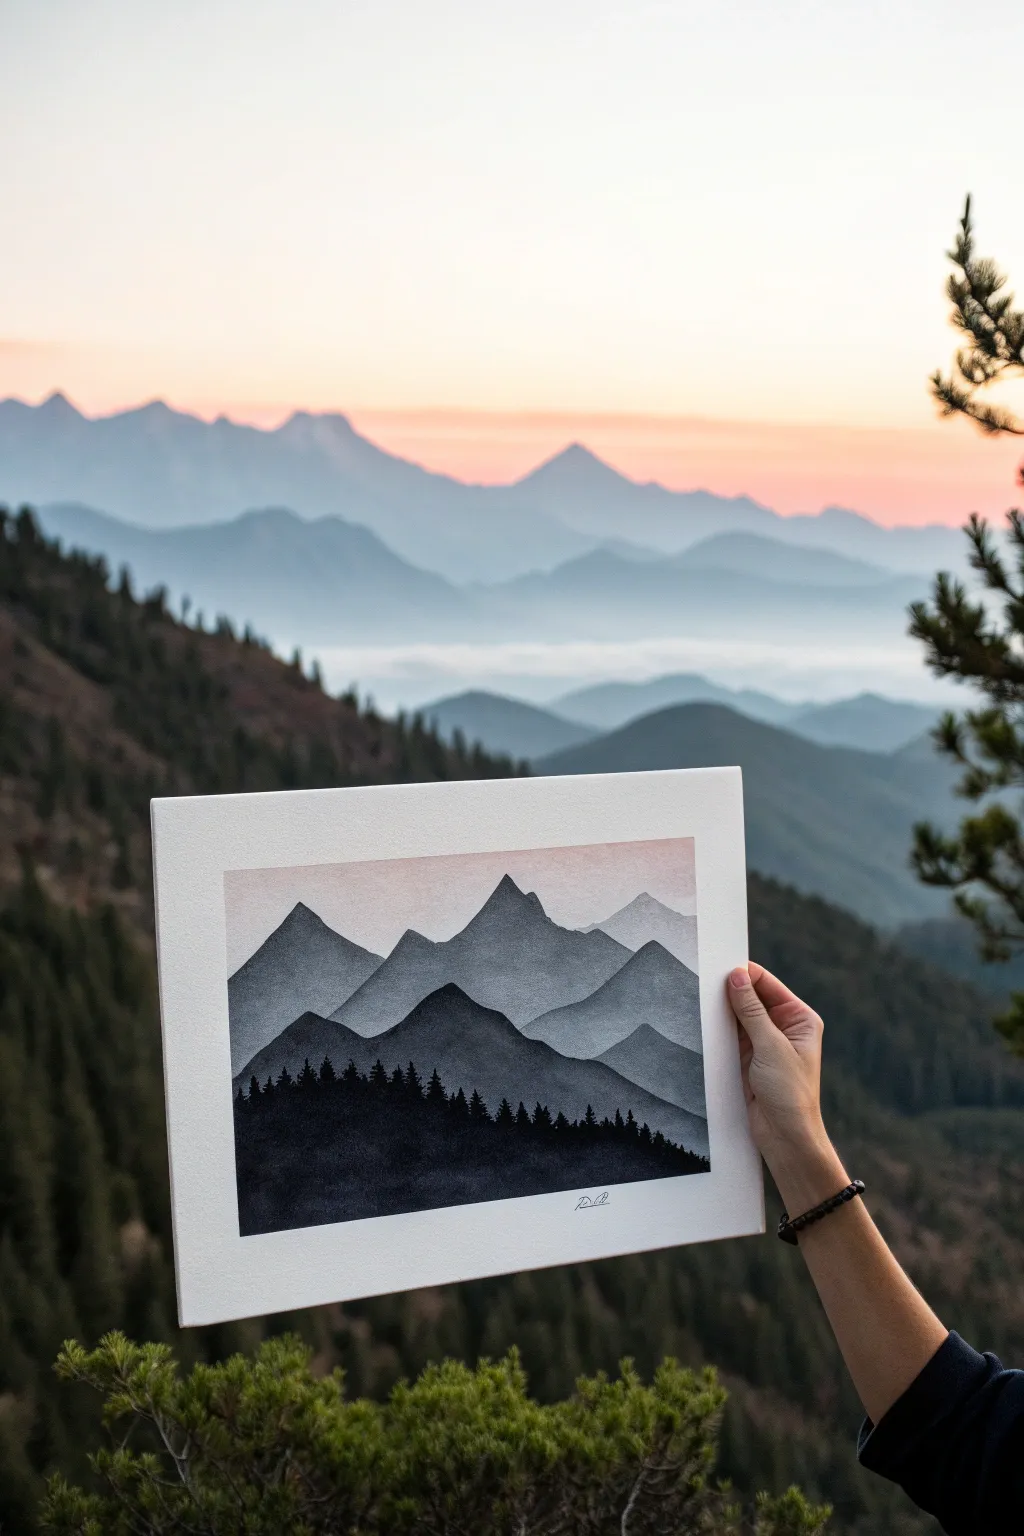
Capture the serene beauty of distant peaks with this layered watercolor-style silhouette painting. Using varying dilutions of a single color creates a breathtaking depth that mimics natural atmospheric perspective.
Step-by-Step Guide
Materials
- Heavyweight watercolor paper (300gsm cold press is ideal)
- Black watercolor paint or black India ink
- Various round brushes (Sizes 4, 8, and a fine liner)
- Clean water jar
- Palette for mixing varied dilutions
- Paper towels
- Pencil and eraser
- Masking tape
Step 1: Preparation and Sketching
-
Tape the borders:
Secure your watercolor paper to a board or table using masking tape along all four edges. This creates a clean white border and prevents the paper from buckling when wet. -
Sketch the layers:
Using a pencil, lightly sketch four or five distinct mountain ridges. Start with the highest, furthest peaks near the top, and layer them downwards. Make the lines wavy and organic, but keep the pressure very light so the pencil doesn’t show through later. -
Prepare the gradient mixes:
On your palette, prepare four distinct puddles of diluted black paint. The first should be very watery (light grey), the second slightly darker, the third a medium grey, and the fourth nearly pure black.
Uneven Watermarks?
If you get ‘blooms’ or cauliflower marks in your grey areas, it means you added water to drying paint. Next time, work faster and don’t touch a layer once it starts losing its shine.
Step 2: Painting the Distant Layers
-
Paint the sky wash:
Wet the sky area above your first mountain line with clean water. Drop in a tiny amount of the palest grey mix or a touch of pink/orange if you want a sunset glow, painting right down to the pencil line of the furthest mountains. -
Dry generally:
Allow the sky completely to dry before moving on. I like to use a hairdryer on a low setting to speed this up, as painting wet-on-wet will blur your sharp mountain edges. -
First mountain range:
Load a size 8 brush with your lightest grey mix. Paint the silhouette of the furthest mountain range, carefully following your pencil line for the top edge. Fill the shape downwards until you reach the pencil line of the *next* range. -
Fade the bottom:
Before the paint dries, rinse your brush and use clean water to soften the bottom edge of this first mountain layer, fading it out slightly where it will be covered by the next layer. -
Dry completely:
Wait for this layer to be fully dry to the touch. This patience is key to achieving that crisp, layered look. -
Second mountain range:
Using the second, slightly darker grey mix, paint the next range down. Ensure the top edge is sharp and defined against the lighter grey behind it. -
Continue layering:
Repeat this process for the third layer, using the medium-dark grey mix. Create interesting peaks and valleys that overlap the shapes behind them for a sense of scale.
Step 3: Foreground and Details
-
The darkest mountain:
Paint the final mountain shape (the one just before the trees) using a very dark grey mix. This should provide strong contrast against the previous layers. -
Add texture:
While this dark layer is still slightly damp, you can drop in tiny dots of concentrated black pigment near the bottom to create a subtle textural gradient. -
Dry thoroughly:
Ensure the entire painting is bone dry. The final tree silhouettes require sharp lines that will bleed if the paper holds any moisture. -
Paint the tree line:
Switch to your smallest fine liner brush and pure, undiluted black paint. Along the very bottom edge, paint a dense row of pine trees. -
Detailing tree tops:
Use tiny flicking motions to create the pointed tops of the pines. Vary their heights so they look natural and organic, not uniform. -
Fill the bottom:
Once the detailed tops are done, fill in the rest of the bottom area with solid black to anchor the composition. -
Reveal the border:
Once the artwork is completely dry, very slowly peel away the masking tape at a 45-degree angle to reveal your crisp white border.
Testing Values
Keep a scrap piece of watercolor paper next to you. Test every grey mix on it and let it dry (paint dries lighter!) before applying it to your main artwork to ensure perfect contrast.
Frame your misty mountain scene and enjoy the depth you’ve created with simple shades of grey.
Ocean Reflection With Shadow Palms
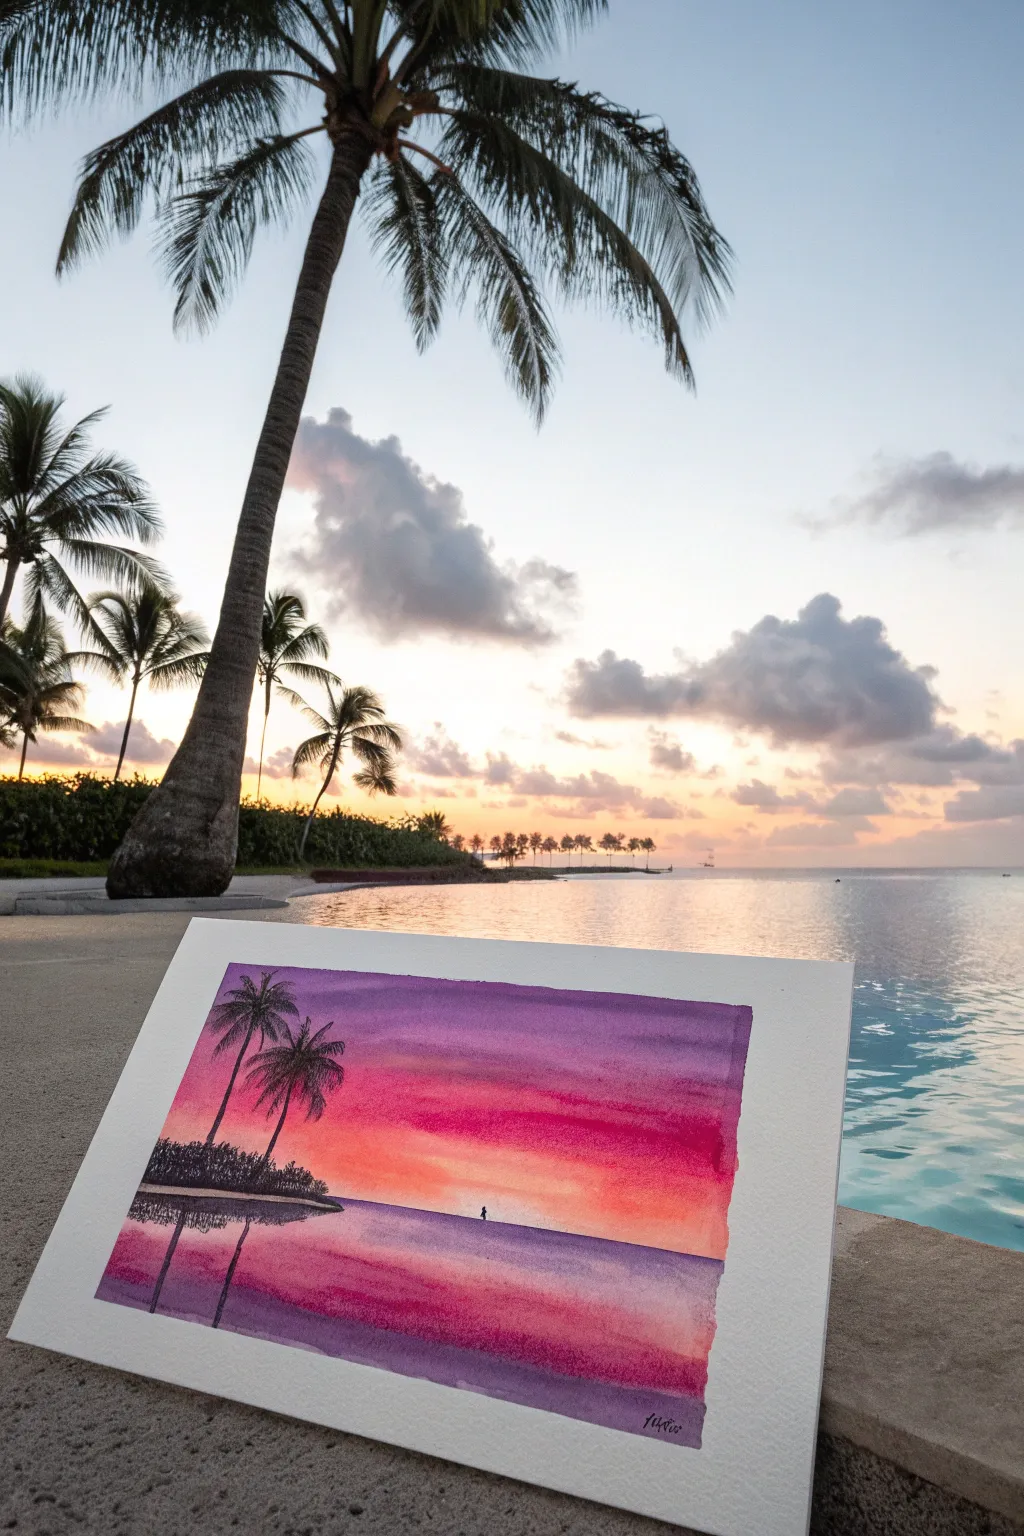
Capture the magic of twilight in the tropics with this vibrant watercolor project that focuses on striking contrasts. You’ll layer rich pinks and purples to create a glowing sky, using palm tree silhouettes and their reflections to ground the composition.
Step-by-Step Tutorial
Materials
- Watercolor paper (cold press, at least 140lb)
- Watercolor paints (Purple, Magenta, Orange, Black/Payne’s Grey)
- Masking tape
- Flat wash brush (1 inch)
- Round detail brushes (size 2 and 4)
- Clean water and paper towels
- Palette or mixing tray
- Pencil
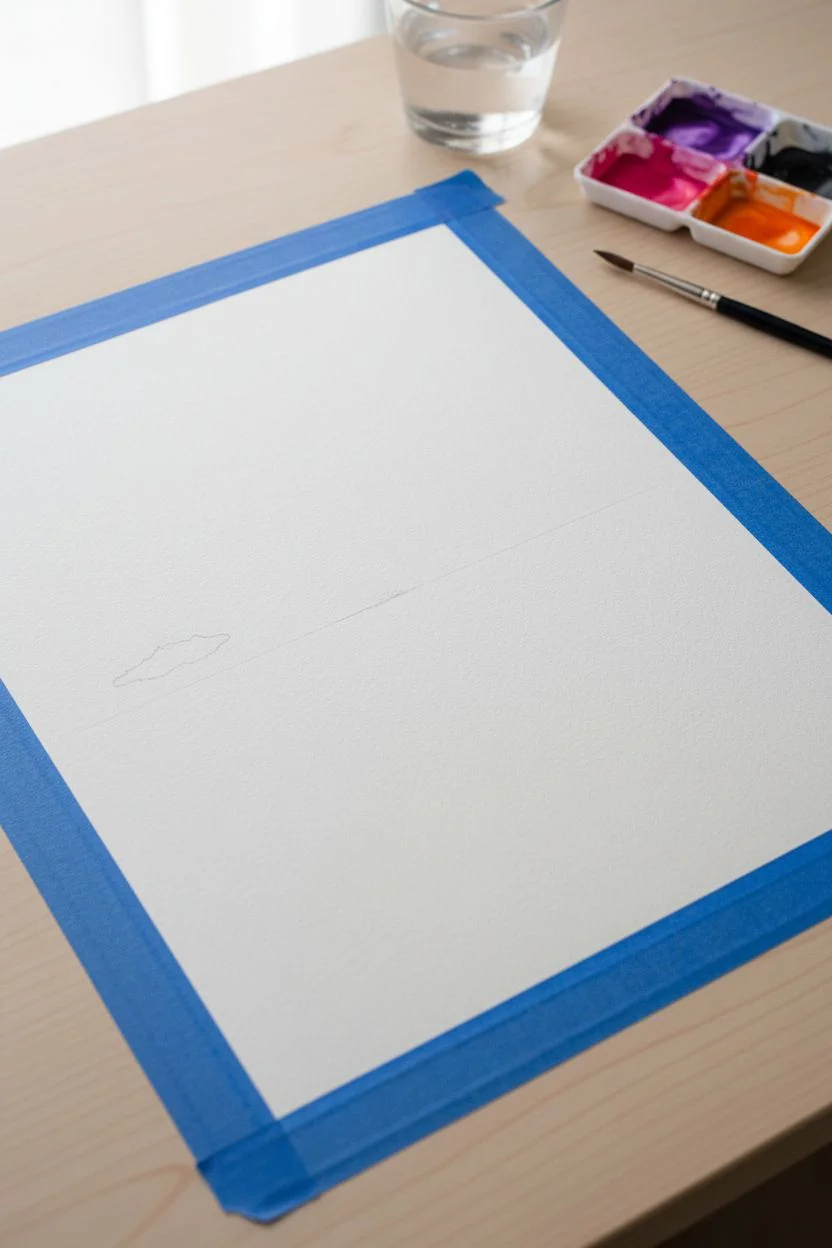
Step 1: Setting the Scene
-
Prep your surface:
Begin by taping down the edges of your watercolor paper to a board or table. This creates a crisp white border and prevents the paper from buckling when wet. -
Lightly sketch the horizon:
Use a pencil to very lightly draw a horizontal line about one-third of the way up from the bottom of the paper. This separates the sky from the water. -
Mark the island:
Sketch a small, uneven shape on the left side of the horizon line to represent the distant island where your trees will stand.
Uneven Blending?
If your sky colors aren’t blending smoothly, your paper might be drying too fast. Mist it lightly with a spray bottle before adding the next color.
Step 2: Painting the Sky
-
Wet the sky area:
With a clean flat brush, apply clear water to the entire sky area above your horizon line. The paper should be glistening but not forming puddles. -
Start with purple:
Load your brush with a deep purple mix. Apply it horizontally across the very top of the sky, letting it bleed downwards slightly. -
Add magenta warmth:
Rinse your brush and pick up vibrant magenta. Paint a broad horizontal stripe just below the purple, blending the edges where they meet while the paint is still wet. -
Create the sunset glow:
Switch to a bright orange or coral color. Apply this near the horizon line, blending it upwards into the magenta. Leave the area just above the horizon lightest for that glowing effect. -
Let the sky dry:
Allow the sky portion to dry completely before moving on. This is crucial to prevent the water colors from bleeding into the sky.
Step 3: Creating the Reflection
-
Mirror the colors:
For the water, you will reverse the gradient. Start just below the horizon line with a wash of purple and magenta, but keep the paint slightly more diluted than the sky. -
Add water texture:
While the water area is wet, drag your brush horizontally to create streaks of pink and purple, mimicking the movement of gentle waves. -
Leave highlights:
Leave a few very thin horizontal slivers of white paper showing through the water to represent light reflecting off the surface. -
Dry thoroughly:
Wait until the entire paper is bone dry. If it feels cool to the touch, it is still wet.
Smoother Gradients
Tilt your board slightly while painting the sky wash. Gravity helps pull the pigment downward, creating a seamless transition from purple to orange.
Step 4: Adding the Silhouettes
-
Paint the island base:
Using black paint or a very dark Payne’s Grey and a smaller round brush, fill in the island shape you sketched on the left horizon. Make the top edge uneven to suggest foliage. -
Draw the tree trunks:
With your smallest detail brush, paint two or three slender, curved lines rising from the island. I like to taper them so they are thinner at the top. -
Add palm fronds:
At the top of each trunk, paint outward curves for the main branches. Then, use quick, flicking strokes to add the leaves hanging down from each branch. -
Add the reflection shadows:
Directly below the island in the water section, paint a vertical, wavy reflection of the tree trunks and island mass. Keep the edges soft and slightly broken to look like they are on moving water. -
Include a focal point:
For a sense of scale, paint a tiny silhouette figure standing in the water near the center horizon line. -
Sign and peel:
Once the black paint is completely dry, sign your work in the corner and carefully peel off the masking tape at a 45-degree angle.
Step back and admire the peaceful atmosphere you have created with just a few colors and simple silhouettes


Deer in a Moonlit Meadow Silhouette
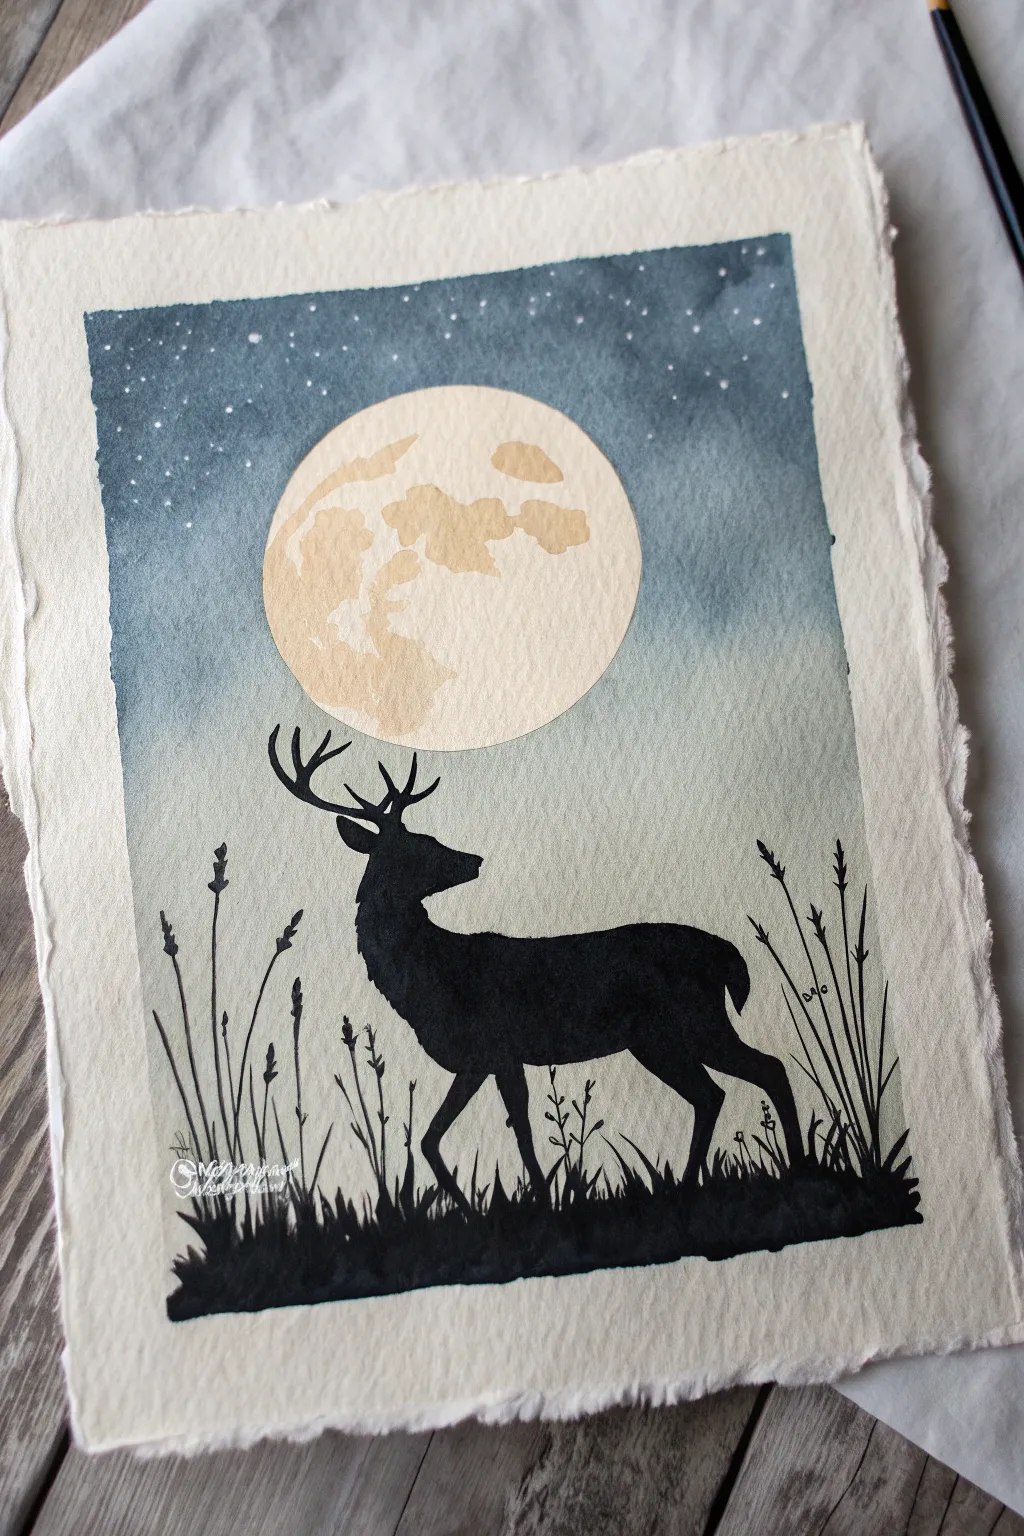
Capture the serene beauty of a quiet night with this striking watercolor silhouette. The contrast between the misty, gradient sky and the crisp black deer creates a dramatic yet peaceful composition perfect for framing.
How-To Guide
Materials
- Cold press watercolor paper (deckled edge optional)
- Masking fluid or geometric masking tape
- Watercolor paints (Indigo, Payne’s Grey, Yellow Ochre, Burnt Sienna)
- Black gouache or black India ink
- Round watercolor brushes (sizes 8 and 4)
- Fine liner brush or black micron pen (optional)
- White gel pen or opaque white gouache
- Pencil and eraser
- Circular object for tracing (like a small bowl or lid)
Step 1: Preparation and The Moon
-
Define the boundaries:
Begin by taping down the edges of your watercolor paper to a board. If you want the jagged ‘deckled’ edge look shown in the photo, you can skip taping the edges, but be careful with water warping the paper. -
Trace the moon:
Place your circular object near the upper center of the paper. Lightly trace a perfect circle with a pencil. -
Mask the moon:
Apply masking fluid carefully inside the circle to protect the moon area. Let this dry completely before moving on—it must be dry to the touch, or you risk tearing the paper later.
Pro Tip: Masking Fluid
Don’t shake the masking fluid bottle before use, or you’ll get bubbles. Use an old brush coated in dish soap to apply it, which makes clean-up much easier.
Step 2: Painting the Night Sky
-
Prepare the wash:
Mix a dark, moody blue using Indigo and a touch of Payne’s Grey. You want a gradient effect, so ensure you have clean water ready to dilute the paint as you move down. -
Apply the dark top:
Starting at the very top edge, apply your darkest concentrated blue mix. Use a larger round brush to sweep across the page horizontally. -
Create the gradient:
As you work your way down the paper, dip your brush in water to dilute the pigment. This will create a seamless fade from the dark night sky into a misty, lighter horizon near the bottom. -
Dry the background:
Allow the sky wash to dry fully. If you’re impatient like I sometimes am, a hair dryer on a low, cool setting can speed this up. -
Add the stars:
Mix a thick consistency of white gouache or use a white gel pen. Flick the brush bristles or dot the pen gently over the dark upper sky to create a field of stars.
Level Up: Metallic Magic
Instead of plain beige for the moon details, use a metallic gold watercolor paint. It adds a subtle shimmer that catches the light beautifully.
Step 3: Detailed Moon Texture
-
Remove the mask:
Once the sky is bone dry, gently rub away the masking fluid to reveal the crisp white circle underneath. -
Paint the craters:
Mix a very dilute wash of Yellow Ochre and a tiny bit of Burnt Sienna. Paint organic, patchy shapes inside the moon to represent craters and shadows, leaving some areas white for brightness.
Step 4: The Silhouette
-
Sketch the deer:
Using a pencil, very lightly sketch the outline of the deer. Focus on the antlers and the posture of the head looking up. -
Outline the body:
Switch to your black gouache or India ink. Using a smaller brush (size 4), carefully outline the deer’s body. Gouache provides that lovely matte finish shown in the example. -
Fill the form:
Fill in the body of the deer with solid black. Ensure the coverage is opaque so no background shows through. -
Detail the antlers:
Use your finest liner brush or a fine-tip brush to paint the antlers. Keep the tips 3sharp and elegant. -
Add the ground:
Paint a solid black strip along the bottom for the ground. Use uneven, upward brush strokes to simulate short grass tufts along the top edge of this strip. -
Paint tall grasses:
Using the tip of your brush or a liner, flick quick, thin lines upward from the ground to create tall reeds and dried foliage. Vary their heights and angles for a natural look. -
Final touches:
Add tiny leaf shapes or seed heads to the tops of a few grass blades to break up the lines.
Peel off your tape to reveal the clean edges and enjoy your serene nocturnal landscape
City Skyline at Dusk in Shadow
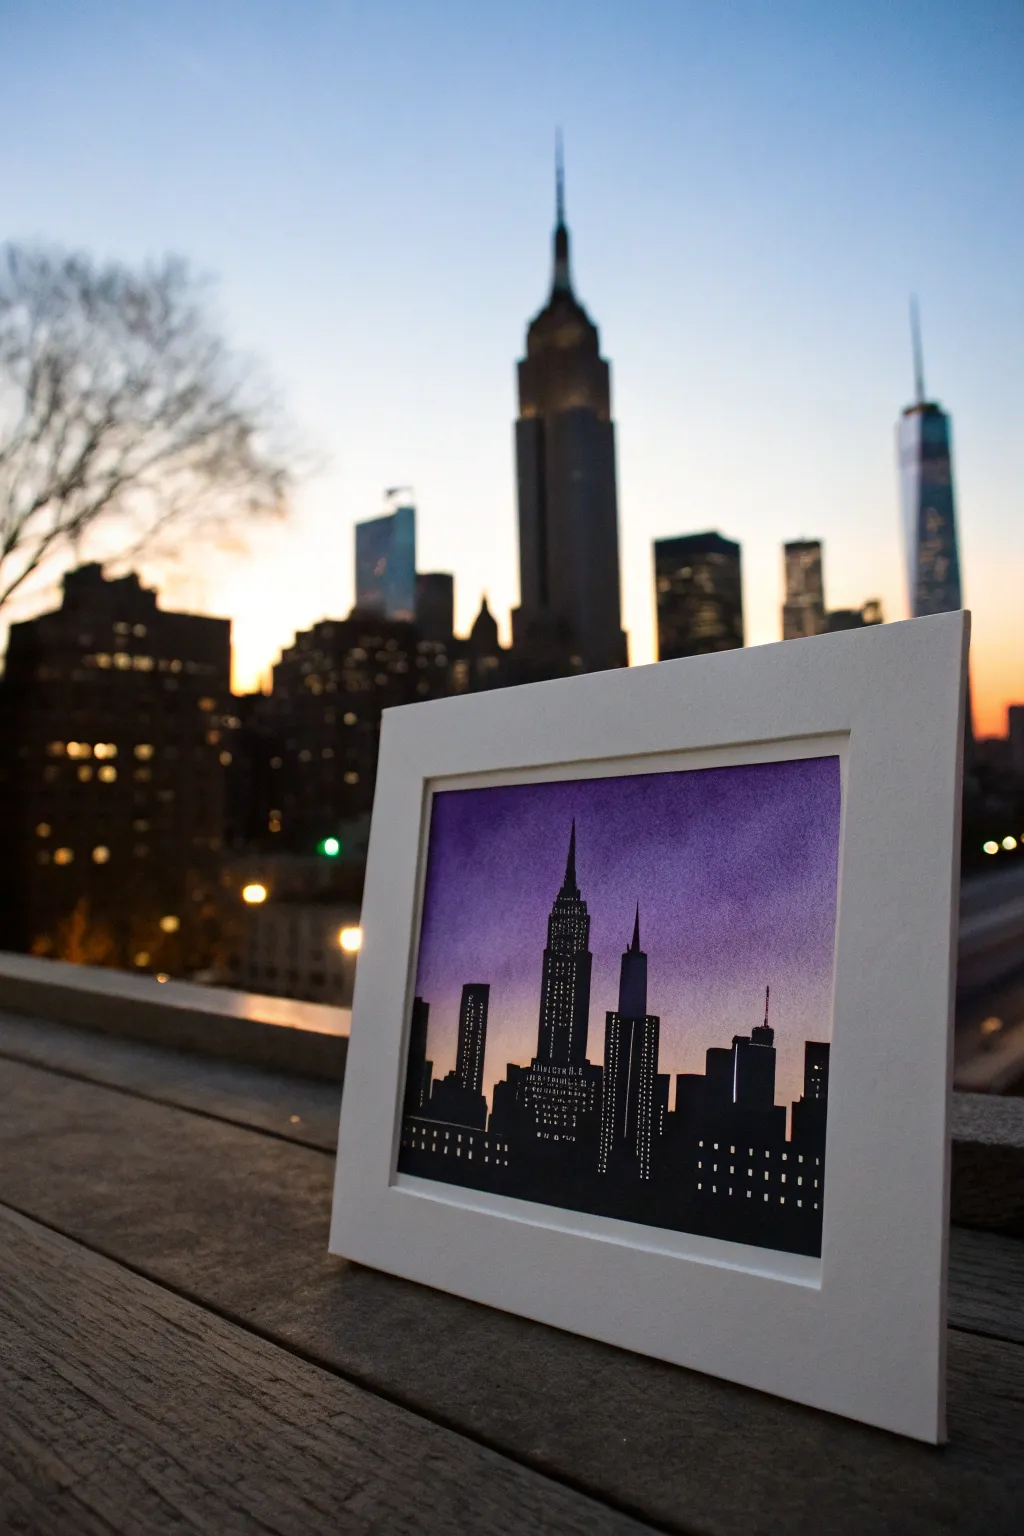
Capture the magic of the city that never sleeps with this layered skyline project. By combining a soft watercolor gradient background with crisp black paper cutouts, you’ll create a striking silhouette that looks beautifully framed against any wall.
Step-by-Step Guide
Materials
- Heavyweight watercolor paper (300 gsm)
- Black cardstock or construction paper
- Watercolor paints (purple, indigo, pink)
- Flat wash brush
- Precision craft knife (X-Acto)
- Cutting mat
- White gel pen or fine-tip paint marker
- Paper glue or double-sided tape
- Ruler
- Pencil
- White mat board picture frame
Step 1: Painting the Sky
-
Prepare the Paper:
Cut your watercolor paper to fit the opening of your frame mat. Tape down the edges with painter’s tape to a board or table to prevent buckling while painting. -
Create a Wash:
Lightly wet the entire surface of the paper with clean water using your flat brush. This “wet-on-wet” technique will help your colors blend seamlessly. -
Apply the Base Gradient:
Load your brush with a deep purple watercolor. Start painting at the very top of the paper, moving horizontally back and forth. -
Blend Downward:
As you move down the page, gradually water down your purple or mix in a tiny bit of pink to create a lighter, sunset transition. -
Finish the Horizon:
Let the color fade out almost to white or a very pale pink near the bottom third of the paper where the buildings will sit. I like to keep this area quite light to contrast with the dark skyline. -
Dry Completely:
Allow the watercolor background to dry fully. You can use a hair dryer on a low setting to speed this up, but ensure the paper remains flat.
Sharp Silhouettes
For the crispest building edges, use a fresh blade in your craft knife. A dull blade can tear the cardstock fibers, leaving fuzzy edges that ruin the sleek cityscape effect.
Step 2: Crafting the City
-
Sketch the Skyline:
On a sheet of black cardstock, lightly sketch the outline of the buildings with a pencil. You can freestyle this or print out a reference photo of the NYC skyline to trace. -
Include Iconic Shapes:
Make sure to include recognizable landmarks like the Empire State Building’s spire or the slanted roof of the Citigroup Center to give your city character. -
Cut the Outline:
Place the black cardstock on your cutting mat. carefully cut along the top edge of your building shapes using the precision craft knife. -
Trim the Base:
Cut the bottom and sides of the black paper so it is the exact same width as your watercolor background paper. -
Add Windows:
Using the white gel pen or paint marker, draw rows of tiny dots or small squares onto the black buildings. -
Vary Shadow and Light:
Don’t fill every building perfectly; leave some dark and group lights in clusters to mimic real office buildings at night. -
Create Depth:
For added detail, you can cut out tiny rectangular windows with your knife on the larger buildings instead of drawing them, letting the background color show through, though the pen method is much faster.
Step 3: Assembly
-
Layering:
Apply a thin layer of glue or double-sided tape to the back of the black cardstock cutout. -
Attach to Background:
Align the bottom edge of the black silhouette perfectly with the bottom edge of your dry watercolor painting and press down firmly. -
Clean Up:
Check for any loose edges or pencil marks. Erase any visible graphite gently. -
Mounting:
Place the artwork behind the mat board of your frame. Use a small piece of tape to secure the artwork to the back of the mat. -
Final Presentation:
Insert the matted art into the frame, close the backing, and your miniature city is ready for display.
Warped Paper?
If your watercolor paper curled after drying, place it under a heavy book overnight before attaching the silhouette. This ensures a flat surface for gluing the skyline.
Place your finished piece near a window to let natural light enhance the gradient sky
Streetlight Glow With Long Cast Shadows
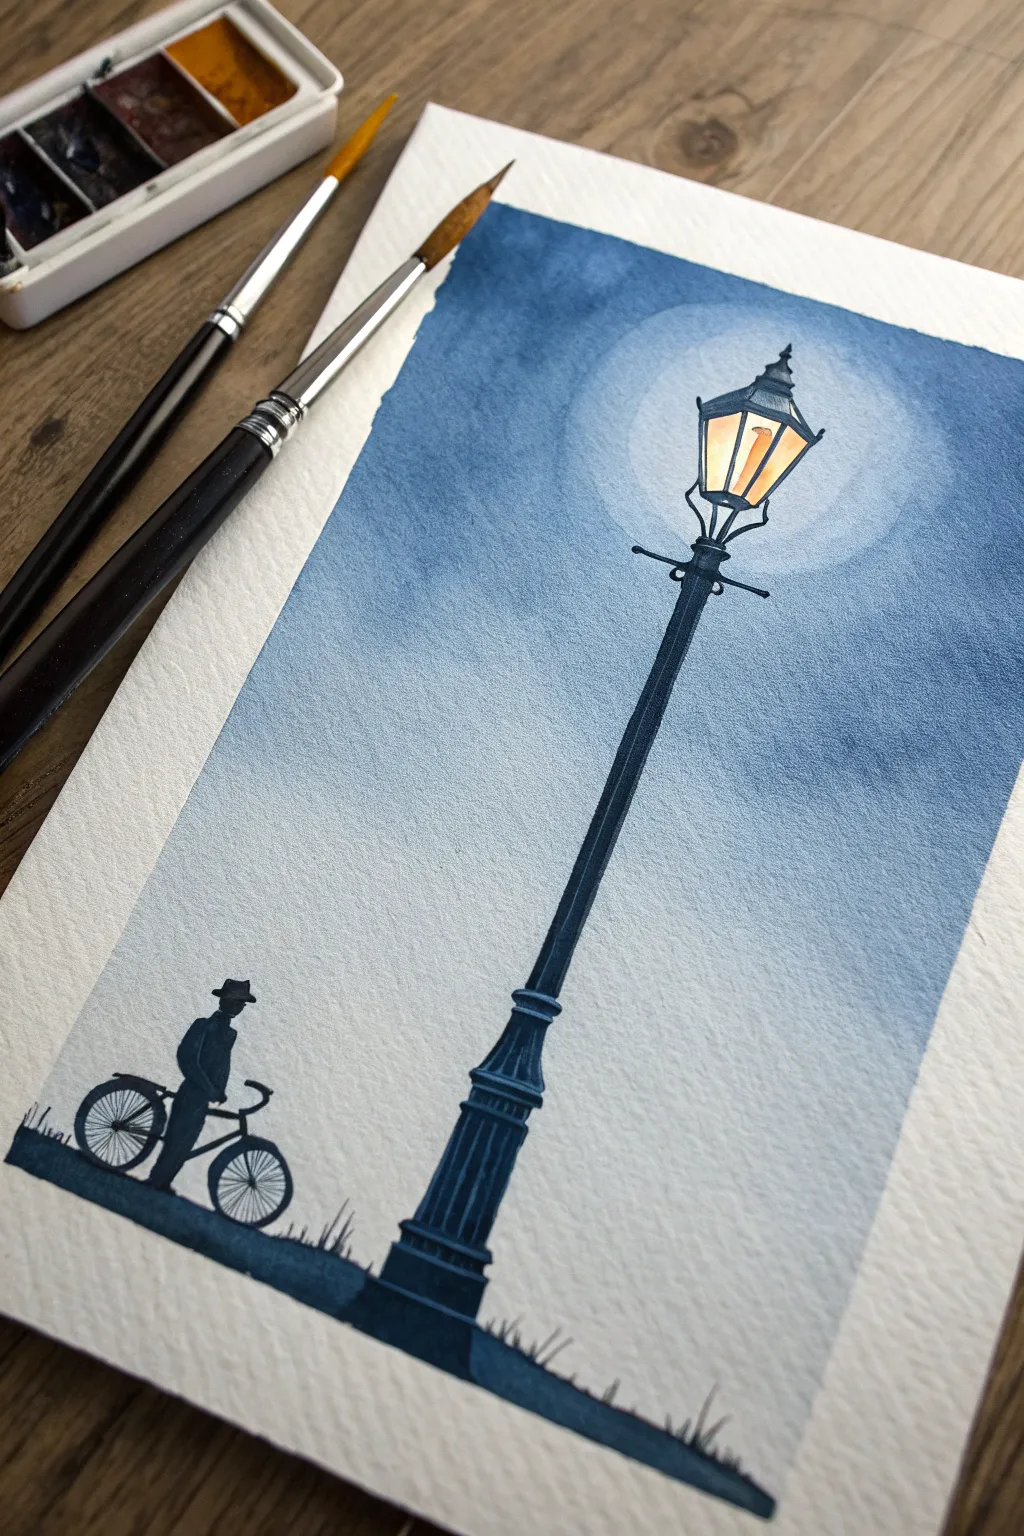

Capture the serene mood of a quiet evening with this atmospheric watercolor study. You will learn to create a convincing glowing light effect and master the art of painting long, dramatic shadows against a soft gradient sky.
Step-by-Step Tutorial
Materials
- Cold Press Watercolor Paper (300 gsm)
- Watercolor Paints (Indigo, Payne’s Gray, Lamp Black, Yellow Ochre, Cadmium Orange)
- Masking Fluid (or white gouache for touch-ups)
- Round Brushes (Size 8 for washes, Size 0 or 2 for details)
- Pencil (HB or H)
- Ruler
- Clean Water Jar
- Paper Towels
- Painter’s Tape
Step 1: Planning and Sketching
-
Secure Your Paper:
Begin by taping the edges of your watercolor paper to a board or table. This creates a clean white border and prevents the paper from buckling during the wet wash stages. -
Draft the Lamp Post:
Using a ruler, lightly draw the vertical line for the lamp post slightly off-center to the right. Sketch the decorative base and the lantern top at the upper third. Keep your pencil lines faint so they don’t show through the paint. -
Sketch the Figure:
In the lower left corner, sketch the silhouette of the man and his bicycle. Don’t worry about internal details; focus only on the outline shape, as this will later be filled in with solid dark paint. -
Mark the Horizon and Light:
Draw a faint, uneven line near the bottom for the ground. Lightly circle the area around the lantern glass where the glow will be brightest, reminding you to keep this area painting-free initially.
Step 2: Creating the Night Sky
-
Wet the Sky Area:
With a clean, large brush, apply clean water to the entire sky area, carefully avoiding the lantern glass itself. The paper should be glisten, but not hold puddles. -
Start the Gradient:
Load your brush with a diluted Indigo. Start painting from the top edges, working your way inward toward the light source. The color should be darkest at the corners and outer edges. -
Soften the Glow:
As you approach the lantern, clean your brush and use slightly damp bristles to soften the edge of the blue paint, creating a seamless fade into the white of the paper around the light. -
Deepen the Night:
While the paper is still damp, drop in concentrated Payne’s Gray or a darker Indigo mix into the top corners and the bottom horizon area to intensify the night atmosphere. -
Let it Dry:
Allow this layer to dry completely. The paper must be bone dry before you add the crisp architectural details.
Glow Controller
To get that perfect fuzzy glow, wet the paper *around* the lantern with clean water before painting the blue sky. The paint will naturally stop flowing where the paper is dry.
Step 3: The Lantern Glaze
-
First Layer of Light:
Mix a watery wash of Yellow Ochre. Paint the interior of the lantern glass, letting it bleed very slightly into the surrounding blue halo for a fuzzy, glowing effect. -
Intensify the Bulb:
While the yellow is still damp, drop a tiny amount of Cadmium Orange into the center of the lantern panes to represent the hot filament or flame.
Up the Drama
Try adding “moth” specs near the light by spattering tiny dots of white gouache or masking fluid, or make it a rainy night by painting vertical streaks in the sky.
Step 4: Silhouettes and Shadows
-
Painting the Post:
Switch to your smallest detail brush. Mix a thick, opaque consistency of Payne’s Gray and Lamp Black. Carefully paint the lamp post, using your ruler as a guide if your hand is shaky. -
Adding Post Details:
Add the decorative crossbars and the flared base of the post. Ensure the edges are crisp against the soft sky background. -
Lantern Frame:
Paint the thin metal framework around the glowing yellow glass. I find it helpful to hold my breath slightly while doing these ultra-thin lines to keep them steady. -
The Figure Silhouette:
Fill in the sketch of the man and bicycle with pure black. Ensure the connection points—like the wheels touching the ground—are solid. -
Ground and Grass:
Paint the uneven ground line in black, adding small flicks of the brush upward to suggest grass blades growing along the path. -
Cast the Long Shadow:
From the base of the lamp post and the bicycle wheels, paint a long, stretched shadow extending to the left. Since the light source is high and right, the shadows must angle downwards to the left. -
Final Touches:
For the shadow’s end, you can dilute the black slightly so it fades out, rather than stopping abruptly. Once dry, remove the tape to reveal the crisp border.
Now step back and admire how a few simple colors can create such a striking nocturnal scene
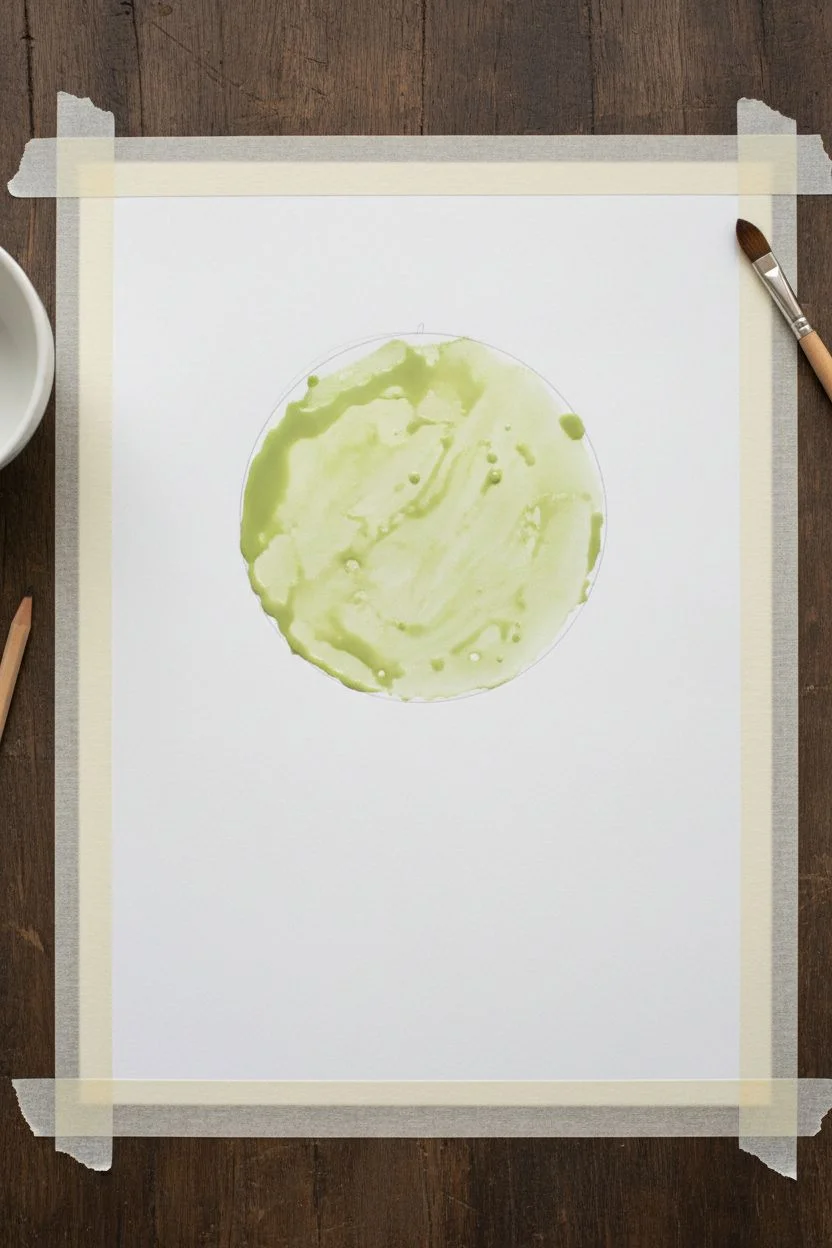
Silhouette Stencils for Super Clean Shadows
This project captures the serene beauty of dusk with a vibrant watercolor gradient background contrasted against crisp, black tree silhouettes. Using a stencil technique ensures your shadows are sharp and professional-looking without needing advanced drawing skills.
Step-by-Step
Materials
- Cold press watercolor paper (300 gsm)
- Watercolor paints (Turquoise, Pink/Magenta, Orange)
- Black ink or black acrylic paint
- Fine liner brushes (size 0 and 00)
- Large flat wash brush
- Silhouette tree stencil (store-bought or DIY)
- Masking tape
- Paper towels
- Jar of clean water
Step 1: Creating the Sunset Gradient
-
Prepare your surface:
Begin by taping down all four edges of your watercolor paper to a hard board or table. This prevents buckling and creates a beautiful clean white border when you’re finished. -
Wet the paper:
Using your large flat wash brush, apply a generous layer of clean water across the entire paper surface. You want it glistening and damp, but not forming puddles. -
Apply the sky blue:
Load your brush with turquoise or sky blue watercolor. Start painting at the very top of the page, moving horizontally back and forth, letting the color fade naturally as you reach the middle. -
Blend in the pink:
While the paper is still wet, introduce a magento or soft pink color right below where the blue fades out. Allow the edges to touch and bleed slightly into the blue to create a soft violet transition. -
Add the horizon warmth:
For the bottom third, paint a vibrant orange. Blend this upward into the pink section. Use clean water on your brush to soften any hard lines between the color bands. -
Dry completely:
This is crucial: verify the background is 100% bone dry before moving to the next phase. If the paper is cool to the touch, it’s still wet. Using a hair dryer can speed this up.
Bleeding Edges?
If paint bleeds under the stencil, don’t panic. Wait for it to dry, then use a white gel pen or gouache to carefully touch up the background color over the mistake.
Step 2: Applying the Silhouette Stencil
-
Position the main tree:
Place your large tree stencil slightly off-center to the right. This creates a more dynamic composition than placing it dead center. -
Secure the stencil:
Use small pieces of painter’s tape or a temporary spray adhesive to hold the stencil flat against the paper. Gaps can cause paint to bleed under the edges. -
Fill the stencil:
Using black acrylic paint or ink and a sponge or stiff brush, tap the color vertically into the stencil openings. Avoid brushing side-to-side, which forces paint under the stencil. -
Add secondary trees:
Once the main tree is dry, reposition your stencil (or use smaller tree stencils) to add the smaller trees in the background on the right and left sides. -
Create the ground:
Remove the stencils. Using a small brush and black paint, hand-paint an uneven, bumpy horizon line at the bottom to connect all the tree trunks.
Starry Night Twist
Before adding the trees, flick white gouache or acrylic onto the dry blue section of the sky using a toothbrush to create a field of stars for a night scene.
Step 3: Refining Details
-
Extend fine branches:
Stencils often miss the tiniest twigs. I like to use a size 00 fine liner brush to pull delicate lines outward from the stenciled branches, making the trees look more realistic. -
Add background texture:
Stipple small dots and tiny vertical lines along the horizon using the tip of your brush to simulate distant bushes or tall grass. -
Paint the birds:
Using the very tip of your fine brush, paint three small ‘V’ creates in the upper sky area to represent birds in flight. -
Reveal the border:
Once the black ink is completely dry, slowly peel away the masking tape at a 45-degree angle to reveal the crisp white frame.
Now you have a striking landscape ready to frame or gift to a friend


Have a question or want to share your own experience? I'd love to hear from you in the comments below!