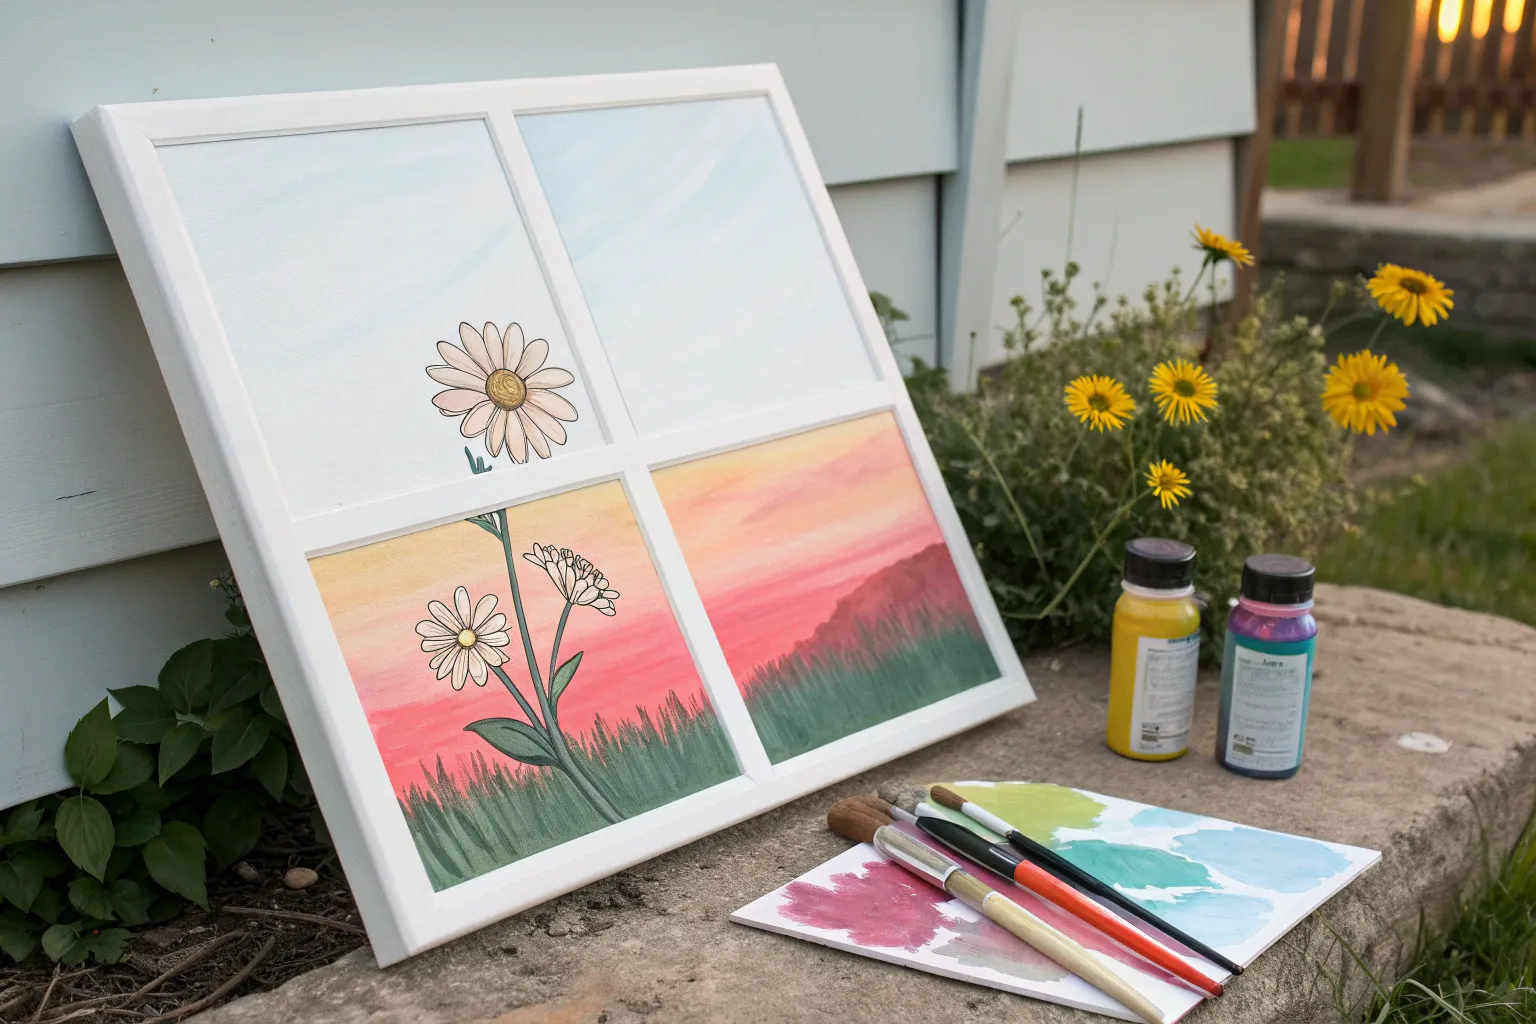
When you want a fun night that feels creative but totally low-pressure, easy sip and paint projects are my go-to—pretty results without the perfection stress. Here are beginner-friendly ideas I love using for paint nights, because they’re social, relaxing, and they look amazing even if it’s your very first canvas.
Sunset Gradient With Palm Tree Silhouette
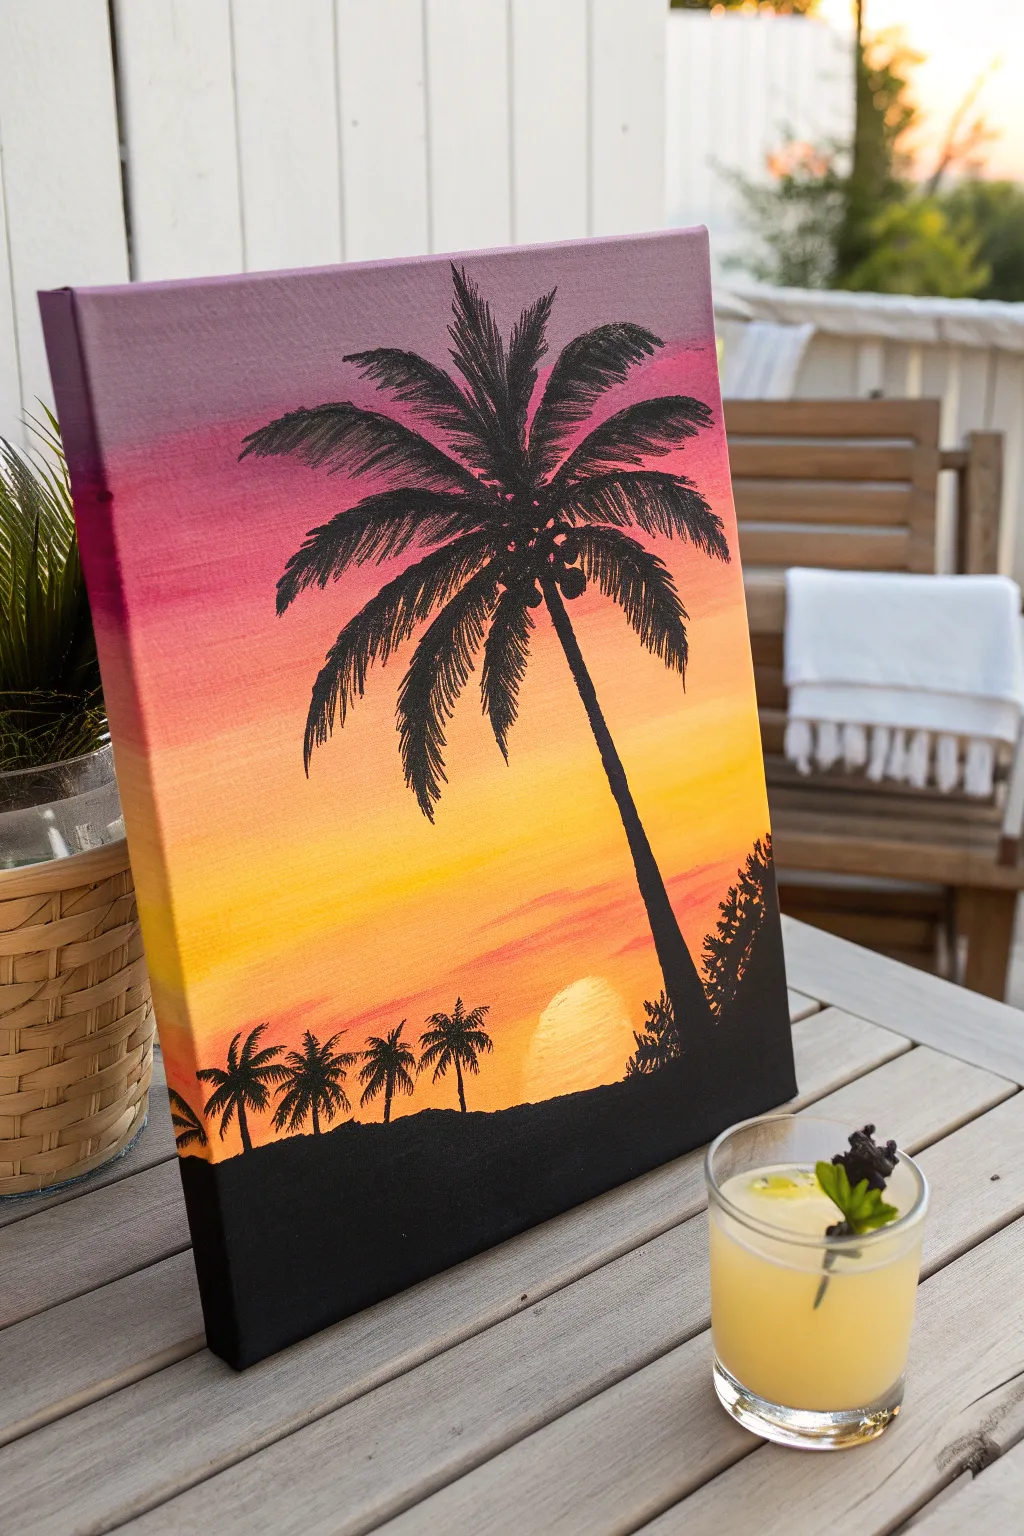
Capture the warmth of a perfect evening with this vibrant sunset gradient painting featuring bold palm tree silhouettes. The smooth transition from purple to yellow creates a stunning backdrop for simple yet striking black details.
Step-by-Step Tutorial
Materials
- Stretched canvas (11×14 or similar)
- Acrylic paints: Purple, Magenta/Pink, Orange, Yellow, Titanium White, and Black
- Large flat brush (1 inch)
- Medium flat brush
- Small round brush (for details)
- Cup of water
- Paper towels
- Palette or paper plate
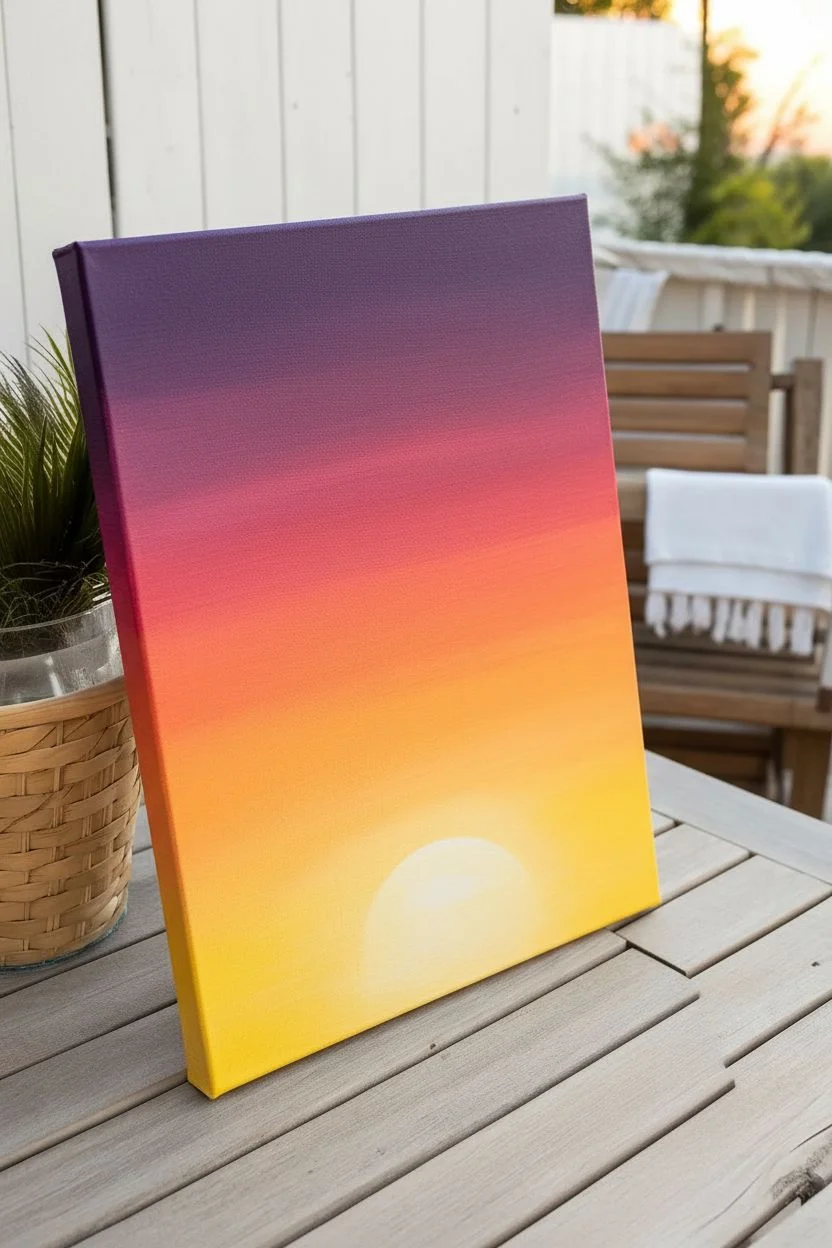
Step 1: Painting the Sunset Background
-
Prepare your colors:
Squeeze out generous amounts of purple, pink, orange, yellow, and white onto your palette. Having your colors ready is crucial because blending works best while the paint is still wet. -
Start with purple:
Using your large flat brush, apply a strip of purple paint across the very top of the canvas. Paint the top edge of the canvas too for a finished look. -
Blend in the pink:
Without cleaning your brush fully (just wipe off excess purple), pick up some pink paint. Apply this directly below the purple, brushing back and forth where the two colors meet to create a seamless transition. -
Move to orange:
Wipe your brush clean on a paper towel. Pick up the orange paint and apply a band below the pink section. Similar to before, brush upward slightly into the pink to blend the hard line away. -
Add the yellow horizon:
Clean your brush thoroughly in water this time. Load it with yellow paint and fill the remaining bottom section of the sky. Blend it gently upward into the orange. -
Brighten the sun area:
While the yellow is still wet, mix a tiny dot of white into your yellow. Paint a soft, semi-circle shape near the bottom center to suggest a glowing sun setting behind the horizon. Blend the edges outward so it glows rather than looking like a sticker. -
Let it dry completely:
This is the most important step for a crisp silhouette. Allow the background to dry fully—usually about 15-20 minutes. If the background is wet, your black paint will turn muddy.
Step 2: Creating the Silhouettes
-
Establish the ground:
Switch to a medium flat brush and load it with black paint. Paint a wavy horizon line across the bottom of the canvas, covering the bottom inch or two. Fill this area in completely with solid black. -
Position the main tree trunk:
Using the medium brush or a smaller round brush, paint a long, slightly curved line starting from the right side of the ground. Curve it upward and slightly toward the left, tapering it so it gets thinner near the top. -
Map out the palm fronds:
At the top of your trunk, use a small round brush to paint 5-7 curved lines radiating outward like fireworks. These will be the spines of your palm leaves. -
Paint the leaves:
I like to use a small round brush for this focusing on quick, flicking motions. Along each spine you just painted, flick small strokes of black paint downward and outward to create the feathery look of palm leaves. -
Add the coconuts:
Where all the fronds meet the trunk, dab three or small circles of black paint to represent coconuts nestled under the leaves. -
Add distant trees:
On the left side of the horizon line, use your smallest brush to paint tiny vertical lines for distant palm trees. Add very small, simple palm tops to these lines. They should be much smaller than your main tree to create depth. -
Paint right-side foliage:
On the far right edge near the ground, dab your brush to create textured, shrub-like silhouettes. This balances the composition and frames the scene. -
Final touch-ups:
Check your black areas for opacity. If the sunset colors are showing through the black trunk or ground, apply a second coat of black paint once the first coat is dry.
Muddy colors?
If your sunset colors are turning brown while blending, wipe your brush clean more frequently between layers. Don’t over-mix on the canvas; let the brush strokes sit side-by-side
Add some sparkle
Once everything is totally dry, you can flick a toothbrush loaded with watered-down white paint across the upper purple section to create subtle evening stars
Now you have a warm, tropical escape hanging right on your wall


Mountain Sunset With Pine Silhouettes
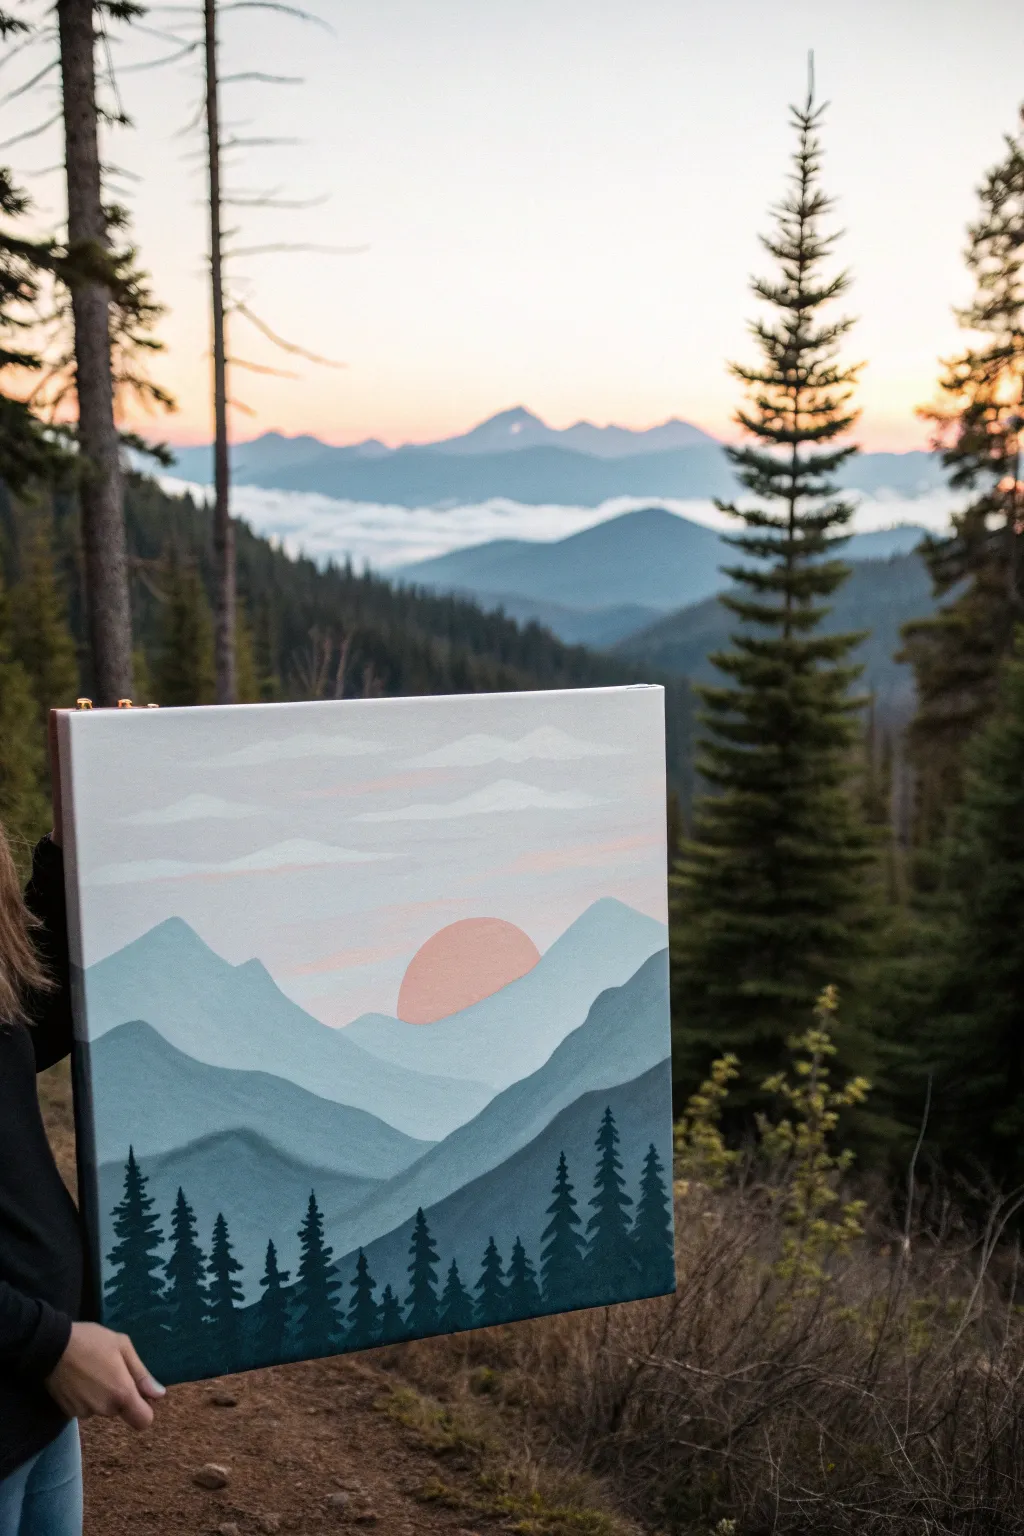
Capture the peaceful gradient of receding mountains with this monochromatic landscape study. Using simple flat layering techniques, you’ll build depth from a pale, hazy sky down to bold, silhouetted pines in the foreground.
Detailed Instructions
Materials
- Square canvas (e.g., 12×12 or 16×16 inches)
- Acrylic paints: Titanium White, Phthalo Blue (or Prussian Blue), Black, Pale Pink (or mix Red/White)
- Flat brushes: 1-inch broad brush, 1/2-inch medium brush
- Small round or liner brush for details
- Palette for mixing gradients
- Cup of water and paper towels
Step 1: Sky and Setting Sun
-
Mix the sky color:
Start by mixing a very large amount of white with just the tiniest dot of pink and a whisper of grey or blue. You want an extremely pale, almost off-white color for the main sky background. -
Paint the background:
Using your large 1-inch flat brush, cover the entire upper two-thirds of the canvas with this pale mixture. Use long, horizontal strokes to ensure a smooth, even finish. -
Add subtle clouds:
While the sky is still slightly tacky, mix a slightly darker grey-blue shade. Use the flat edge of your brush to drag horizontal, narrow cloud streaks across the sky. Keep them transparent and wispy. -
Paint the sun:
Mix a soft coral color using pink and a touch of orange or yellow. Using a medium round brush, paint a semi-circle rising from where your first mountain line will be. It doesn’t need to be perfect since the bottom edge will be covered by mountains.
Uneven Ridges?
If your mountain lines look shaky, don’t worry. Just thicken the line slightly to smooth it out. Mountains are organic shapes, so ‘mistakes’ often look like natural rocky crags.
Step 2: Layering the Mountains
-
Mix the furthest mountain shade:
Create your lightest mountain blue. This should be just a shade or two darker than your sky—a very pale, milky blue. Mix plenty of white with a small dab of blue. -
Paint the first range:
Paint a rolling, jagged line right across the middle of the sun. Fill in the area below this line for about 2-3 inches. The paint should overlap the bottom of your sun cleanly. -
Mix the second mountain shade:
Add a little more blue to your previous mixture to create a slightly deeper, medium-light blue tone. You want visible contrast, but keep it subtle. -
Paint the second range:
Starting below the first range, paint a new wavy horizon line. Let the peaks of this range interact with the valleys of the one behind it. Fill down another 2-3 inches. -
Mix the third mountain shade:
Darken your blue mix again. This time, start introducing the tiniest touch of black or grey to desaturate the color, making it look more shadowy. -
Paint the third range:
Create the third layer of mountains. These should look closer, so you can make the slopes slightly steeper or more pronounced. Fill the shape solid down to the open canvas area. -
Mix the fourth mountain shade:
Create a deep, slate blue. It should be significantly darker than the previous layers but not quite midnight blue yet. -
Paint the foreground range:
Paint the final mountain layer at the bottom. This layer will serve as the base for your trees, so make it a solid, grounding shape that covers the remaining white canvas at the bottom.
Atmospheric Perspective
To nail the depth, always add white to lessen the intensity of colors for distant objects. The further back the mountain, the paler and less detailed it should be.
Step 3: Silhouetted Pines
-
Mix the tree color:
Mix your darkest color yet: a deep forest green combined with black. It should look nearly black on the palette. -
Paint the tree trunks:
Using your smallest liner brush or the thin edge of a flat brush, paint vertical lines of varying heights along the bottom mountain ridge. Group them irregularly so they look natural. -
Add top branches:
Starting at the top of a trunk line, dab tiny horizontal dashes that get wider as you move down. Use a light touch for the very tips. -
Complete the pine shapes:
Continue working down each trunk, making your dabbing strokes wider and slightly angled downward to create the triangular pine shape. Don’t make them too perfect; scruffy edges look more realistic. -
Fill the bottom edge:
Once all trees are painted, use the dark mixture to fill in the very bottom edge of the canvas, blending the base of the trees into a solid dark shadow.
Step back and admire how simple color grading creates a vast sense of distance in your moody landscape


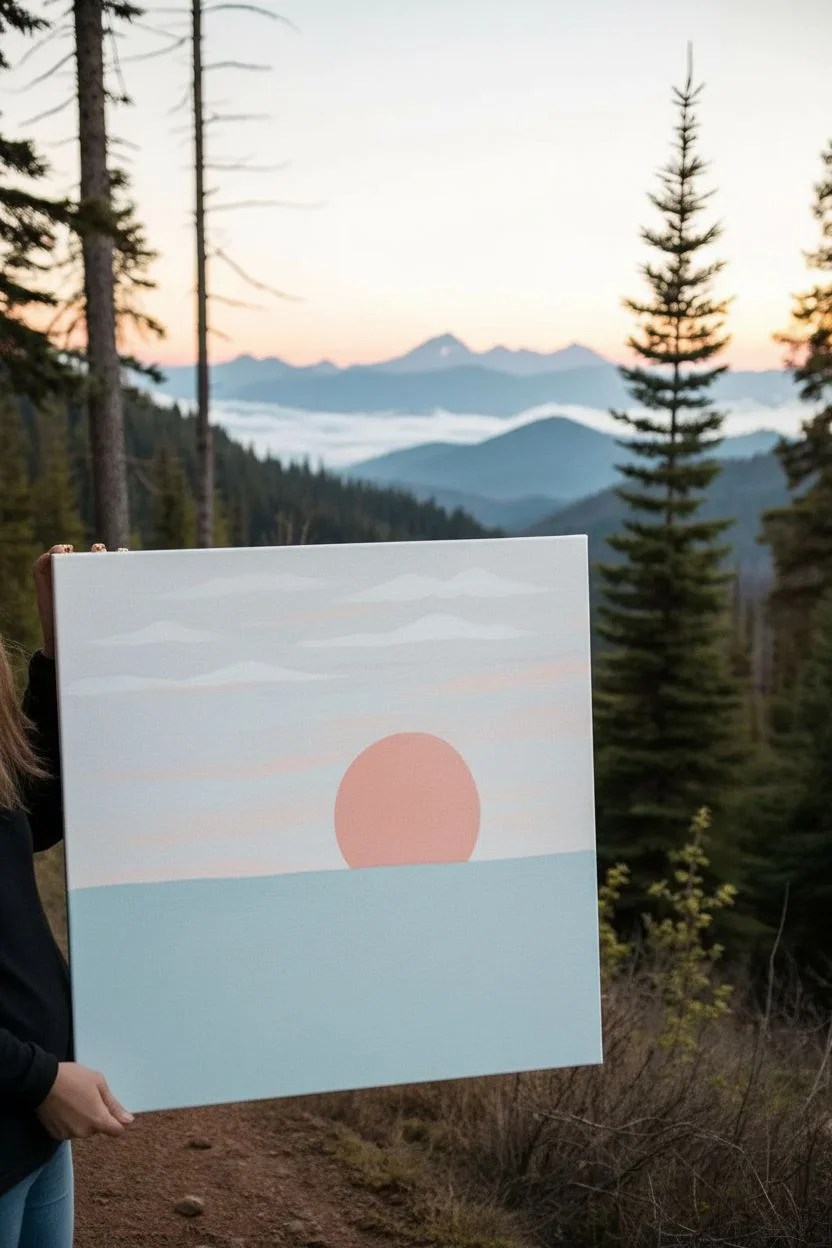
Easy Beach Horizon With a Simple Sun
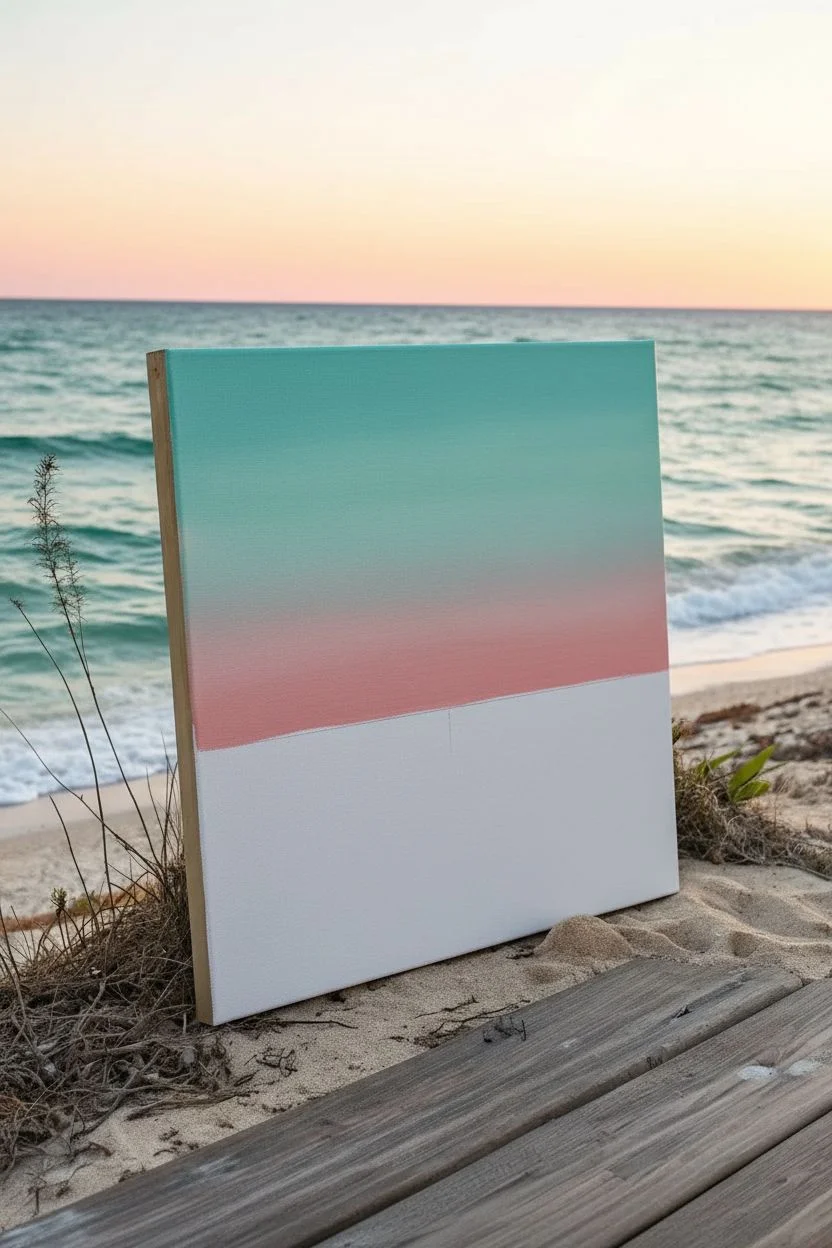
Capture the serenity of sunset at the beach with this simple yet striking landscape. By layering soft pastels and basic wave shapes, you’ll create a dreamy coastal view perfect for beginners looking to relax with a brush in hand.
Step-by-Step Guide
Materials
- Square canvas (12×12 or similar)
- Acrylic paints: Titanium White, Phthalo Blue (or Turquoise), Rose Pink (or Portrait Pink), Burnt Sienna
- Large flat brush (1-inch width)
- Medium flat brush
- Small round brush
- Paper towels
- Water cup
- Painter’s tape or a round stencil (optional, for the sun)
Step 1: Setting the Scene
-
Mix the sky base:
Start by creating a soft teal for the upper sky. Mix a generous amount of Titanium White with a very small drop of Phthalo Blue or Turquoise. You want a color that looks like clear tropical water or a high morning sky. -
Paint the upper canvas:
Using your large flat brush, apply this teal mixture to the top half of the canvas. Use long, horizontal strokes to ensure a smooth finish. Don’t worry about being perfectly straight at the bottom edge just yet. -
Lighten the transition:
While the paint is still wet, add a bit more white to your brush and blend it into the lower part of the blue section. This creates a soft gradient as you move toward the horizon line. -
Mix the sunset pink:
Clean your brush thoroughly. Now, mix a soft, dusky pink using Rose Pink and Titanium White. If the pink is too bright, a tiny speck of Burnt Sienna will calm it down into a more natural sunset hue. -
Paint the horizon band:
Apply this pink band directly below the blue sky, covering about a third of the remaining canvas. Carefully blend the top edge of the pink into the bottom of the blue while both are slightly wet to create a hazy, dreamlike transition.
Sky Blending Blues?
If your pink and blue turn purple when blending, let the blue layer dry completely first. Then, glaze a thin layer of white over the transition area before adding the pink.
Step 2: Creating the Ocean
-
Establish the water color:
For the ocean water, use a slightly darker version of your sky teal. Mix Phthalo Blue with less white this time. You want deep, rich turquoise. -
Paint the water base:
With your medium flat brush, paint horizontal stripes below the pink horizon line. This will be the ocean. Leave the bottom inch or so of the canvas bare for the sand. -
Create the horizon line:
Use the edge of your flat brush to paint a crisp, straight line where the deep turquoise water meets the pink sky. This defines your horizon and gives the painting depth. -
Add wave shadows:
Mix a tiny bit of blue into your teal to make a darker shadow color. Paint thin, horizontal streaks within the water area. These will act as the shadowed troughs between the waves.
Make it Sparkle
Once the painting is dry, add a touch of iridescent or glitter glaze specifically to the whitecaps of the waves. This mimics the way sunlight catches the ocean spray.
Step 3: Sand and Details
-
Mix a sandy beige:
Combine a dollop of Titanium White with a small amount of Burnt Sienna. You are aiming for a pale, wet-sand color. -
Paint the shoreline:
Fill the bottom empty space of the canvas with this beige mix. Blend it slightly upward into the bottom edge of the turquoise water to suggest where the water flows over the sand. -
Form the whitecaps:
Load your medium brush with pure Titanium White. Using a tapping or dabbing motion, create rows of foam across the turquoise water. The lines should be thicker towards the bottom (foreground) and thinner near the horizon. -
Blend the foam:
While the white foam is wet, gently sweep your brush horizontally over the tops of the white patches to soften them, making them look like rolling breaking waves. -
Add the sea foam on sand:
Use the small round brush and watery white paint to create spindly, organic lines on the sand area, mimicking the lace-like pattern of foam left behind by a receding wave. -
Paint the sun:
Once the pink sky is completely dry, use a small round brush (or a stencil/sticker) to paint a solid white circle just above the horizon line. I find two coats of white make it pop best. -
Final touches:
Step back and look at your waves. Add a few extra highlights of pure white on the crests of the biggest waves to make them sparkle.
Allow your painting to dry fully before displaying your peaceful seaside creation


Starry Night Sky With a Tree Line
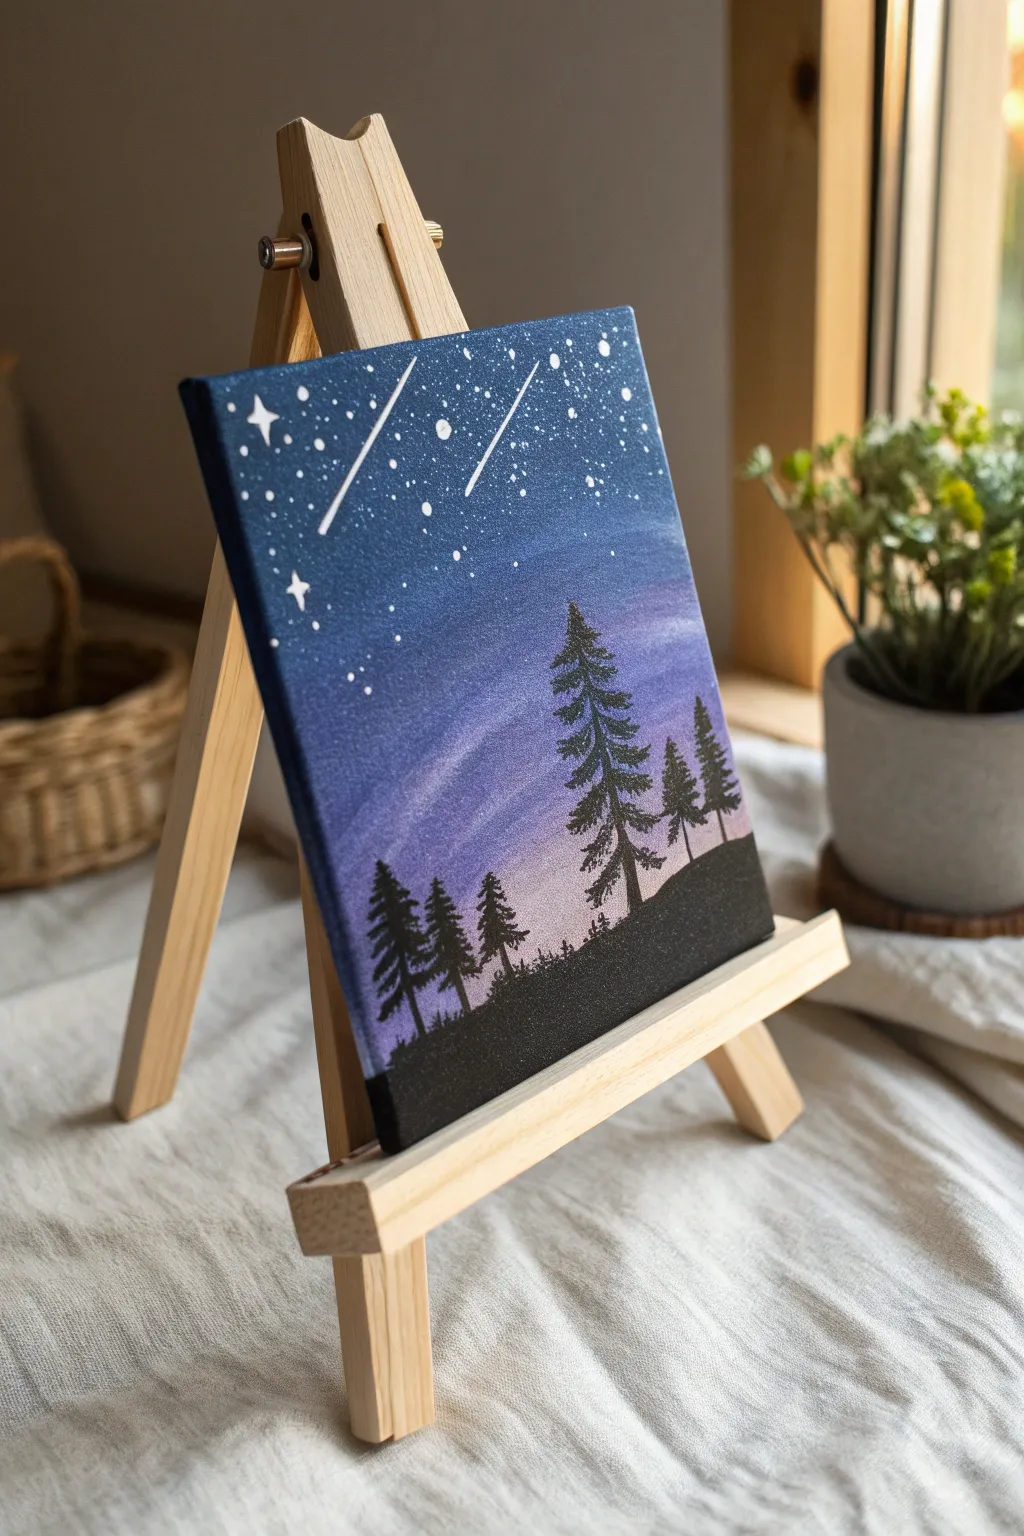
Capture the magic of a twilight forest with this serene gradient painting. Featuring a stunning fade from deep navy to soft pink, this project teaches beginner-friendly blending and silhouette techniques.
How-To Guide
Materials
- Small square canvas (e.g., 8×8 or 10×10 inches)
- Acrylic paints: Carbon Black, Titanium White, Phthalo Blue (or Navy), Violet, Magenta/Pink
- Flat brush (1/2 inch or 3/4 inch) for background
- Small round detail brush (size 0 or 1) for trees and stars
- Cup of water and paper towels
- Palette or paper plate
- Old toothbrush (optional for stars)
Step 1: Creating the Twilight Gradient
-
Prepare your palette:
Squeeze out your Phthalo Blue, Violet, Magenta, and Titanium White onto your palette. You will need a generous amount of white to create soft pastel transitions. -
Start at the top:
Using your flat brush, pick up the pure Phthalo Blue. Paint a horizontal band across the top quarter of the canvas, ensuring you paint the edges of the canvas too for a finished look. -
Blend into violet:
Without washing your brush completely, pick up some Violet paint. Apply this directly below the blue band, using long horizontal strokes to blend the two colors where they meet. -
Transition to pink:
Wipe your brush on a paper towel to remove most of the dark pigment. Mix a little Magenta with White to make a soft pink. Paint the next band below the violet, blending upwards slightly into the purple area. -
Finish with the horizon light:
Clean your brush thoroughly. Mix a lot of Titanium White with a tiny touch of Magenta (or use pure white if you prefer a brighter glow). Paint the bottom area where the tree line will sit, blending it upward into the pink layer. -
Create the atmospheric sweep:
While the paint is still wet, take a clean, slightly damp brush and make a gentle swooping motion from the bottom left upward toward the right in the pink/purple section to create that faint, cloudy ‘aurora’ effect seen in the reference. -
Let it dry completely:
This is crucial. The background must be bone-dry before you add the trees, or the black paint will turn muddy. A hair dryer can speed this up if you are impatient.
Clean Brush Pro-Tip
When blending your sky gradient from dark to light, wipe your brush on a paper towel between every color shift. This prevents the dark blue from overwhelming your delicate pinks.
Step 2: Painting the Silhouettes
-
Establish the ground:
Switch to your black paint. Using the flat brush or a round brush, paint an uneven, slightly hilly line across the very bottom of the canvas. Fill in everything below this line with solid black. -
Plant the first tree trunk:
Switch to your small detail brush. Choose a spot on the right side for your tallest tree. Paint a thin vertical line extending upward from the ground, tapering it slightly so it is thinnest at the tip. -
Add branches to the tall tree:
Starting near the top of the trunk, use tiny tapping motions to create branches. Use just the tip of the brush. As you move down the tree, make the branches slightly wider and angle them downward. -
Create texture:
I find that tapping the brush rather than stroking creates a more realistic pine needle texture. Keep the silhouette somewhat jagged and imperfect. -
Add the smaller trees:
Paint two smaller trees to the right of the main one, and a cluster of three smaller trees on the left side. Vary their heights so they don’t look like a picket fence. -
Detail the ground line:
Use the very tip of your small brush to add tiny vertical flicks of grass along the top edge of your black ground, connecting the trees to the earth.
Step 3: The Starry Sky
-
Load the brush for stars:
Clean your detail brush well. Dip it into slightly watered-down Titanium White paint. The consistency should be like heavy cream. -
Paint the shooting stars:
Identify the top left quadrant. Paint two thin diagonal lines streaking downward. Press lightly at the start and lift off quickly at the end to taper the tail. -
Add the main stars:
Use the tip of the brush to dot specific bright stars around the blue section of the sky. Add a larger ‘cross’ shape to one or two of them to create a twinkling effect. -
Create the galaxy dust:
For the tiny distant stars, you can either dot them patiently with the brush tip or use an old toothbrush dipped in white paint to gently flick a spray of fine mist over the blue area. -
Final touches:
Check your shooting stars; adding a slightly larger white dot at the ‘head’ of the streak can make them pop more.
Make It Sparkle
Mix a tiny amount of iridescent glitter medium or silver paint into your white star paint. When the light hits your finished canvas, the night sky will actually shimmer.
Place your mini masterpiece on the easel and enjoy your personal view of the cosmos
BRUSH GUIDE
The Right Brush for Every Stroke
From clean lines to bold texture — master brush choice, stroke control, and essential techniques.
Explore the Full Guide
Simple Moon Over a Lake Reflection
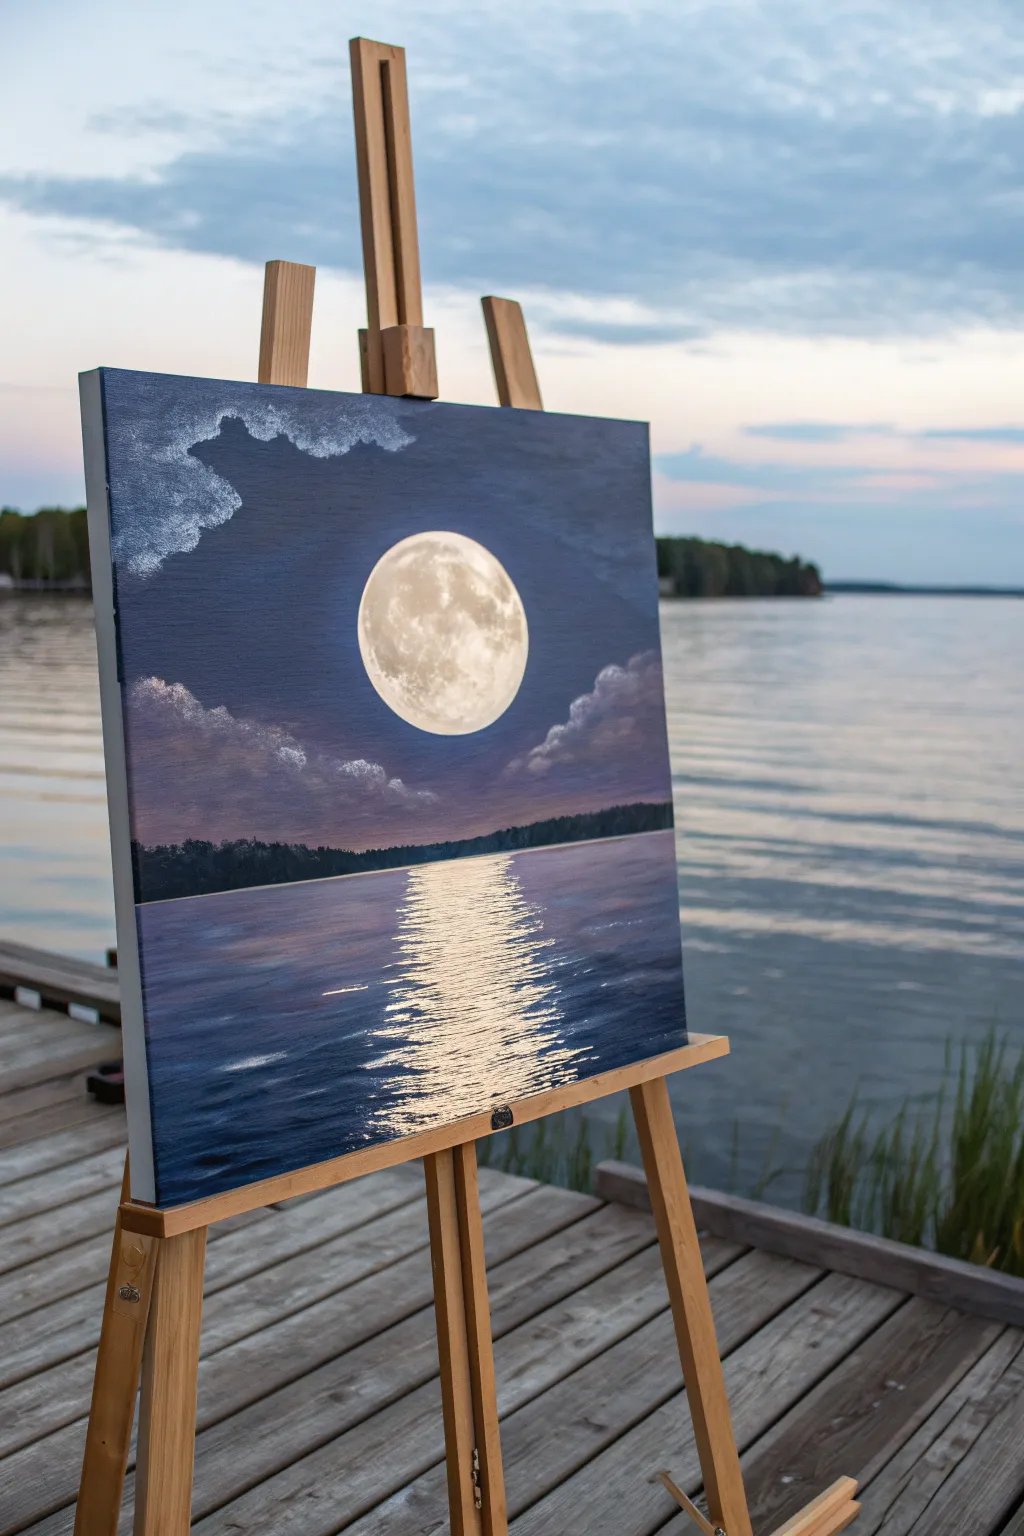
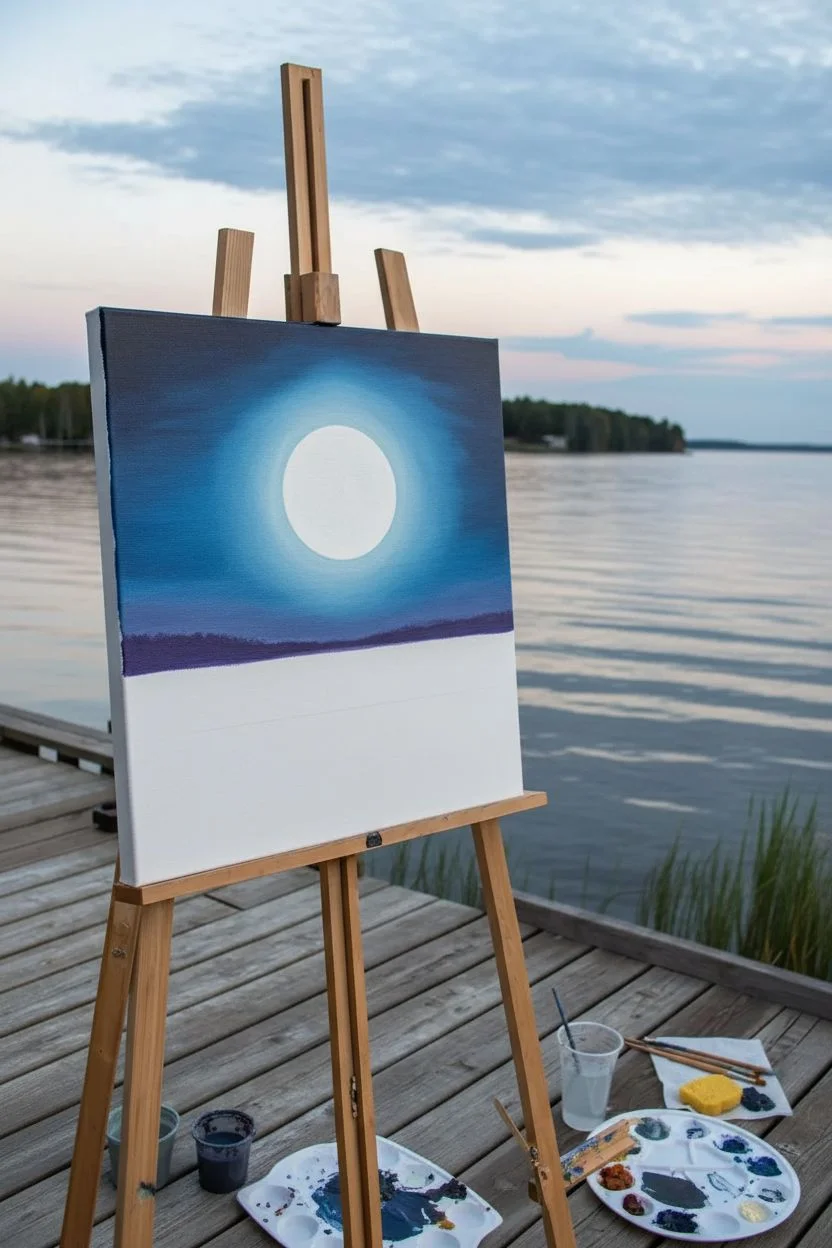
Capture the serenity of a quiet evening with this stunning acrylic painting featuring a brilliant full moon casting its reflection across still waters. Using simple blending techniques and careful layering, you will create a glowing night scene that looks deceptively complex but is perfect for beginners.
Detailed Instructions
Materials
- Canvas (16×20 inches is ideal)
- Acrylic paints: Titanium White, Mars Black, Prussian Blue, Dioxazine Purple, Burnt Umber
- Large flat brush (1 inch)
- Medium filbert brush (size 6 or 8)
- Small round detail brush (size 1 or 2)
- Small round sponge or foam pouncer (2-3 inches)
- Palette
- Water cup and paper towels
Step 1: Setting the Night Sky
-
Establish the horizon:
Begin by drawing a faint horizontal line across the canvas, slightly below the halfway point. This will separate your sky from the lake. -
Start with deep blues:
Using your large flat brush, mix Prussian Blue with a tiny touch of Mars Black. Apply this dark mixture to the top corners and edges of the sky area, leaving the center somewhat lighter. -
Blend downward:
Without cleaning your brush, pick up pure Prussian Blue and blend it into the dark corners, working your way toward the center and down toward the horizon line. -
Create a glow:
Clean your brush thoroughly. Mix white with a very small amount of blue. Paint a circle in the center of the sky where the moon will go, and blend this pale color outward into the surrounding blue to create a soft halo effect. -
Add purple hues:
Near the horizon line, blend in some Dioxazine Purple. Let this purple tone meet the blue sky above and fade gently into the horizon line below.
Step 2: Painting the Moon and Clouds
-
Paint the moon shape:
Load your round sponge or a clean brush with Titanium White. Press or paint a solid, bright white circle in the center of your glow spot. Ensure the edges are crisp. -
Add lunar texture:
While the white is still slightly wet, use a small brush with a tiny bit of grey (white mixed with a speck of black/brown). Dab faint, irregular shadows onto the moon’s surface to mimic craters. -
Form the clouds:
Using a filbert brush, mix white with a touch of purple. Gently dab cloud shapes on the left and right sides of the moon, keeping the edges soft and fluffy. -
Highlight the clouds:
Add pure white to the top edges of the clouds where the moonlight would hit them, accentuating their volume.
Pro Tip: Perfect Circles
Don’t stress about freehanding the moon. Trace a plastic cup or a roll of painter’s tape lightly with chalk before painting to ensure a perfectly round shape.
Step 3: The Distant Shore and Water
-
Paint the tree line:
Mix Mars Black with a little Burnt Umber or deep green. Using the tip of your flat brush or the filbert brush, tap a jagged line right along the horizon to suggest distant trees. -
Base coat the water:
For the water, use horizontal strokes with the large flat brush. Start with the Dioxazine Purple right under the tree line, mimicking the sky color. -
Deepen the foreground:
As you move down the canvas toward the bottom, blend Prussian Blue and eventually the dark blue-black mix you used at the top of the sky. Keep your brushstrokes strictly horizontal. -
Dry break:
Allow the water layer to dry for about 5-10 minutes. This prevents the reflection highlights from turning into a muddy grey mixture.
Troubleshooting: Chunky water?
If your water reflections look too stiff or like a ladder, use a clean, dry brush to lightly sweep horizontally over the wet paint. This softens the edges instantly.
Step 4: Creating the Reflection
-
Start the shimmer path:
Load a flat brush or small round brush with slightly thinned Titanium White. Starting directly under the moon, paint short, horizontal dashes that get wider as they come closer to the bottom edge. -
Vary the line width:
Make the lines near the horizon very thin and close together. As you move down, make the lines thicker and space them out slightly to show movement in the water. -
Add secondary highlights:
Mix a pale lavender (white + purple) and add a few subtle streaks in the water on either side of the bright white path to connect the reflection to the rest of the lake. -
Final touches:
Step back and look at your painting. If the moon needs to be brighter, add a final coat of pure white to the center.
Allow your masterpiece to dry fully before signing your name in the corner
Field of Wildflowers With Loose Dots and Dabs
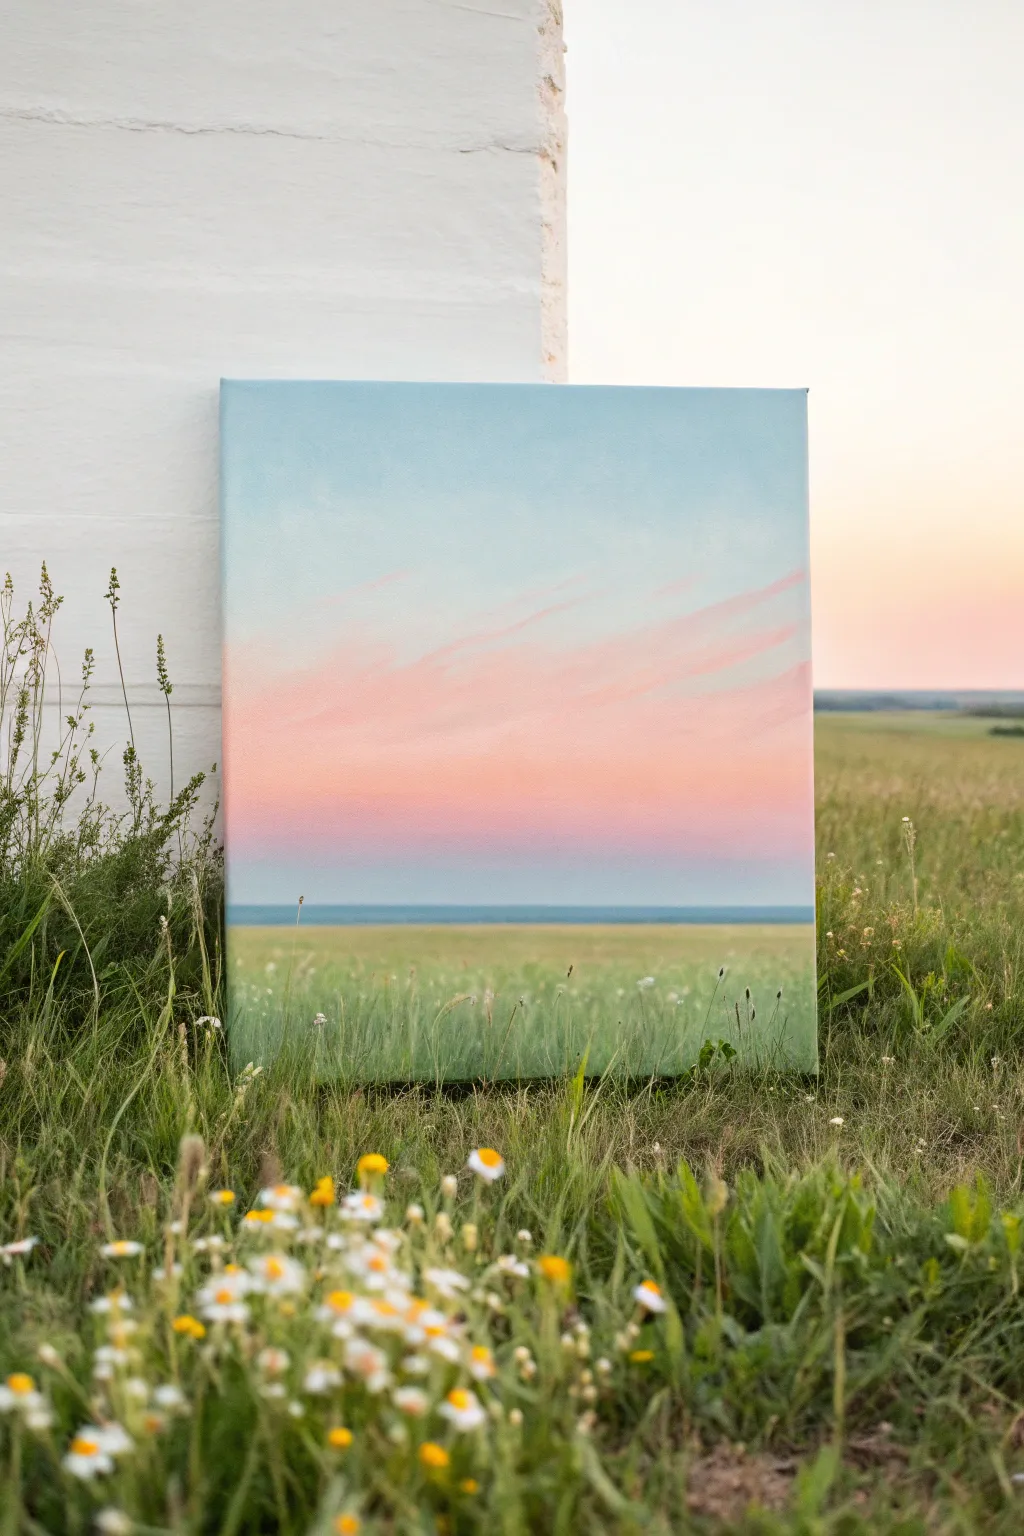
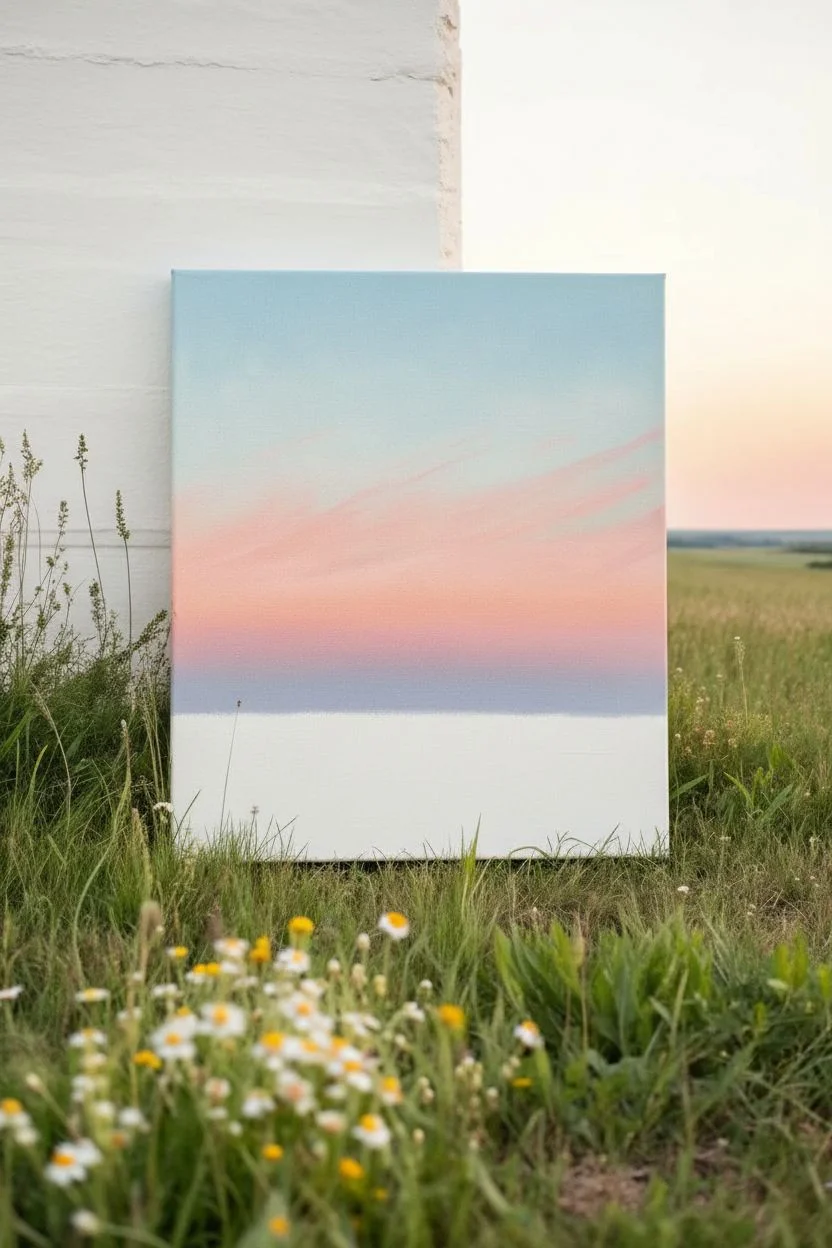
Capture the peaceful transition of day into night with this soft, gradient-heavy landscape. The painting features a dreamy, cotton-candy sky fading into a lush green field, perfect for practicing seamless blending and loose, impressionistic brushwork.
Step-by-Step Tutorial
Materials
- Canvas (rectangular, e.g., 16×20 inches)
- Acrylic paints: Titanium White, Sky Blue, Pink/Rose, Cadmium Yellow (tiny amount), Sap Green, Phthalo Blue
- Large flat brush (1-2 inch) for the sky
- Medium flat brush for the horizon
- Small round or detail brush for grass blades
- Palette or paper plate
- Cup of water and paper towels
Step 1: Planning and Sky Gradient
-
Establish the horizon:
Visualize your canvas divided into thirds. The bottom third will be the grass, and the top two-thirds will be reserved for the expansive sky. -
Begin with blue:
Mix a light Sky Blue with a generous amount of Titanium White. Using your large flat brush, apply horizontal strokes across the very top of the canvas. -
Add warmth:
While the blue is still slightly wet, wipe your brush (don’t rinse completely) and pick up some white mixed with a touch of Pink. Blend this into the lower part of the blue section to create a soft transition. -
Deepen the sunset:
Mix a stronger Pink with a tiny hint of Cadmium Yellow to create a peachy-rose tone. Paint this horizontally across the middle section of the sky area, blending upward into the pale pink-blue mix. -
Finish the horizon glow:
Near the horizon line (the top of the bottom third), mix a dusty purple-blue using your Sky Blue and Pink. Blend this softly into the bottom of the pink area to suggest distant atmosphere.
Muddy Clouds?
If your pink clouds turn purple against the blue sky, let the blue layer dry completely first. Then apply a thin layer of white, let that dry, and paint the pink on top for a pop of clean color.
Step 2: Clouds and Distance
-
Add cloud streaks:
Using a clean, smaller flat brush and a mix of Pink and White, add gentle diagonal streaks across the blue sky area to mimic wispy clouds. -
Soften the edges:
Use a dry, soft brush to lightly feather the edges of your pink clouds so they look airy rather than stuck on. -
Paint the distant ocean/hills:
Directly on the horizon line, paint a thin, straight band of deep blue (Phthalo Blue mixed with a little White and a dot of Green). This creates the illusion of a far-off ocean or distant landmass. -
Let it dry:
Allow the sky and horizon line to dry completely before starting the foreground to prevent muddy colors.
Use a Fan Brush
For the grass texture, a fan brush is a secret weapon. Load just the tips with paint and flick upward. It creates multiple blades at once for a natural, organic look.
Step 3: The Grassy Field
-
Base layer for grass:
Mix a light, yellow-green tone using Sap Green, Yellow, and White. Paint the entire bottom third of the canvas with this solid color. -
Add depth at the bottom:
While the base is wet, mix Sap Green with a tiny touch of Blue or Black to make a dark forest green. Blend this into the very bottom edge of the canvas, fading it upward. -
Create mid-ground texture:
Once the base green is tacky or dry, use a medium brush with slightly darker green paint. Dab the canvas lightly in the middle of the field area to suggest distant textures. -
paint individual blades:
Switch to your small round brush or a fan brush. Using a mix of lighter greens and yellows, flick upward strokes starting from the bottom to create tall blades of grass. -
Vary the grass height:
Make the blades at the very bottom longer and more distinct, and make them shorter and less detailed as you move toward the horizon line.
Step 4: Wildflower Details
-
Dab white flowers:
Load a small brush with pure Titanium White. Gently dot groups of small specks throughout the grass to represent distant wildflowers. -
Add flower stems:
Use the very tip of your detail brush with a pale green color to draw incredibly thin lines connecting some of your white dots to the grass below. -
Final highlights:
Add a few tiny dabs of pale yellow or light pink among the white flowers for variety, keeping them subtle so they blend with the peaceful palette.
Step back and admire the soft glow of your finished landscape

PENCIL GUIDE
Understanding Pencil Grades from H to B
From first sketch to finished drawing — learn pencil grades, line control, and shading techniques.
Explore the Full Guide
Sunflower Close-Up With Bold Center Texture
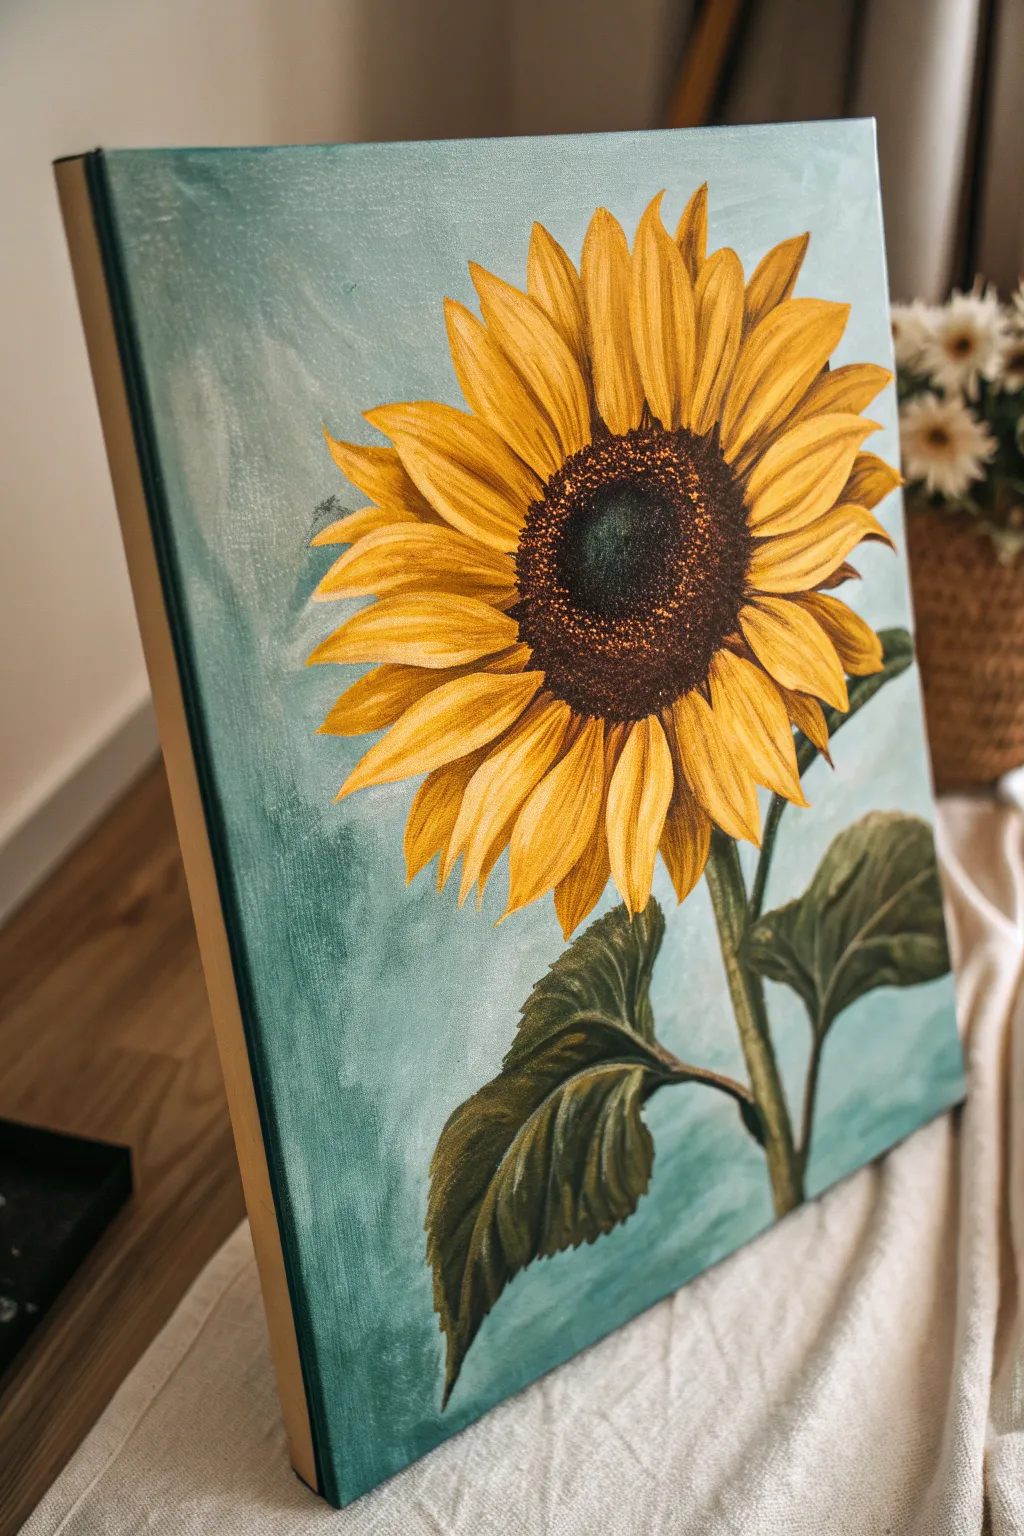
Capture the warmth of summer with this striking sunflower portrait set against a cool, teal backdrop. This project focuses on layering yellows to create depth and building a rich, textured center that really pops off the canvas.
Detailed Instructions
Materials
- Rectangular stretched canvas (e.g., 16×20 inches)
- Acrylic paints: Titanium White, Cadmium Yellow Medium, Yellow Ochre, Burnt Sienna, Burnt Umber, Mars Black, Phthalo Turquoise or Teal
- Large flat brush (1 inch) for background
- Medium filbert brush for petals
- Small round brush for details
- Old scruffy brush or sponge for texture
- Palette
- Water cup and paper towels
- Chalk or pencil for sketching
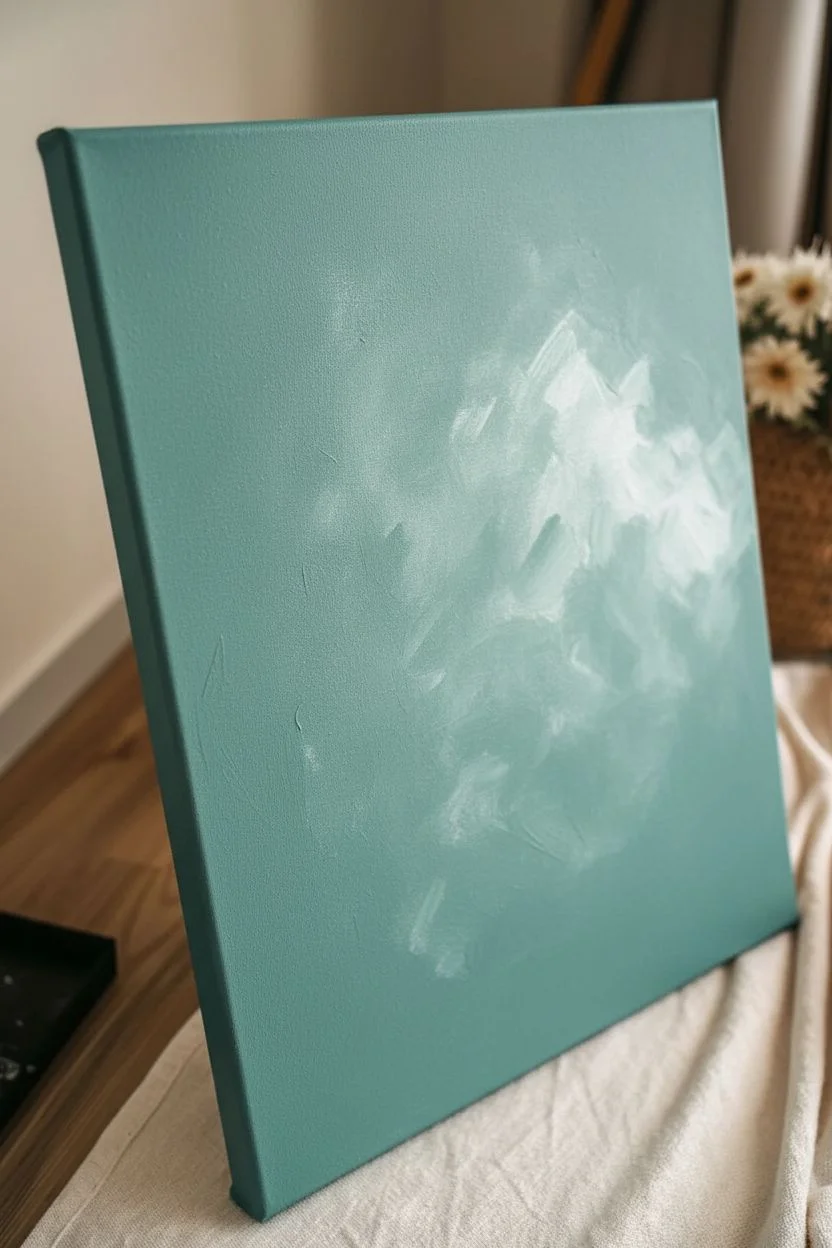
Step 1: The Cool Background
-
Mix your teal tone:
Start by mixing a lovely teal shade using Phthalo Turquoise and a significant amount of Titanium White. You want a soft, dusty look rather than a vibrant neon, so add a tiny touch of Burnt Umber or a speck of Black to desaturate it slightly if needed. -
Apply the base coat:
Using your large flat brush, cover the entire canvas with your mixed teal. Don’t worry about getting it perfectly smooth; visible brushstrokes add a nice painterly texture that mimics the sky. -
Create variation:
While the paint is still wet, dip the corner of your brush into a bit of pure White. Blend this unevenly into the teal, creating subtle clouds or lighter patches, especially near the center where the flower will sit. Let this layer dry completely.
Step 2: Sketching and Underpainting
-
Outline the shape:
With chalk or a light pencil, draw a large circle in the upper right quadrant for the sunflower center. Then, sketch long, teardrop shapes radiating outward for the petals. Make them large—let some even go off the edge of the canvas. -
Add the stem and leaves:
Draw a thick stem curving slightly upwards from the bottom center. Add two large, broad leaves branching off near the bottom. -
Block in the center:
Paint the circular center with a flat coat of Burnt Umber. It doesn’t need to be perfect, just a solid dark base to build texture on top of later. -
Base coat the petals:
Use Yellow Ochre to fill in all the petal shapes. This dark yellow base allows the brighter yellows to stand out later and acts as the shadow color.
Stippling Success Tip
Don’t smash your brush bristles flat when stippling the center. Hold the brush vertical to the canvas and use light, rapid taps to create distinct dots rather than mushy blobs.
Step 3: Petal Perfection
-
Layer the mid-tones:
Load your filbert brush with Cadmium Yellow Medium. Paint strokes starting from the tip of each petal and pulling inward toward the center, leaving some of that Ochre showing at the base and edges for shadow. -
Add highlights:
Mix Cadmium Yellow with a little White. Apply this lightest shade to the very tips and centers of the petals where the light would hit. Use confident, sweeping strokes. -
Refine the edges:
If your petals have blended too much, use a small round brush with a mix of Yellow Ochre and Burnt Sienna to define the overlapping edges, separating the front petals from the back ones.
Add a Morning Dew Look
Once fully dry, use a tiny detail brush and pure white paint to add small ‘shine’ dots on the petals or leaves to mimic morning dew drops.
Step 4: Textured Center & Leaves
-
Stipple the darks:
Switch to a small round brush or an old, scruffy brush. Mix Mars Black with Burnt Umber. Using a tapping or ‘stippling’ motion, create a ring of dark texture around the outer edge of the center circle. -
Build the center gradients:
As you move toward the middle of the flower center, mix Burnt Sienna into your dark color. Continue stippling. Finally, in the very center, add a touch of Phthalo Turquoise or Green to the dark mix for a cool, deep core tone. -
Add pollen specs:
Dip a small brush into pure Yellow Ochre or light orange. Gently tap tiny dots over the dark textured area, focusing on the ring where the center meets the petals. -
Paint the greenery:
Mix a dark green using your Turquoise, Yellow, and a bit of Black. Fill in the stem and leaves. While wet, blend in lighter green (Yellow + Turquoise) on the tops of the leaves for highlights. -
Leaf details:
Use your smallest brush with a pale green mix to paint thin veins on the leaves. Keep the lines organic and wavy rather than perfectly straight.
Step back and admire how the warm yellows vibrate against that cool teal background
Cherry Blossom Branch Against a Pastel Sky
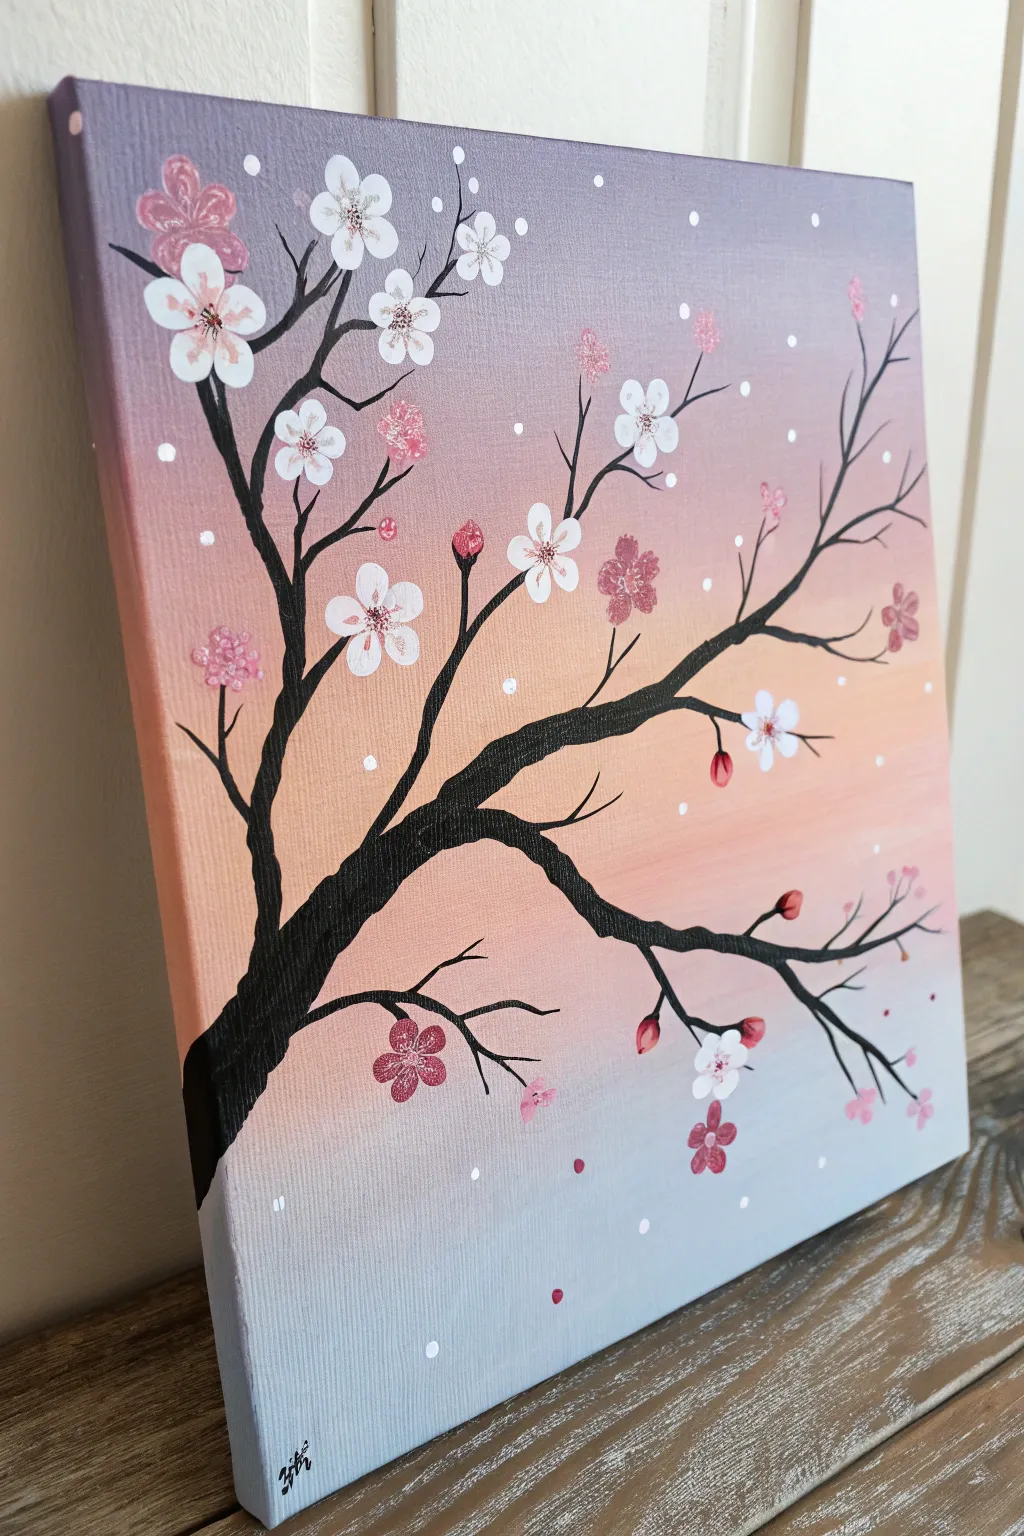
Capture the serenity of spring with this elegant cherry blossom study. You’ll master a smooth sunset gradient background and learn how to layer delicate flowers over a bold, contrasting silhouette.
Step-by-Step
Materials
- Square stretched canvas (e.g., 12×12 or similar)
- Acrylic paints: Titanium White, mars Black, Deep Violet, Peach or Coral, Light Blue or Grey
- Large flat brush (1-inch width)
- Medium round brush
- Small liner brush or detail brush
- Cup of water
- Paper towels
- Palette or paper plate
- Small sponge or cotton swab (optional for texture)
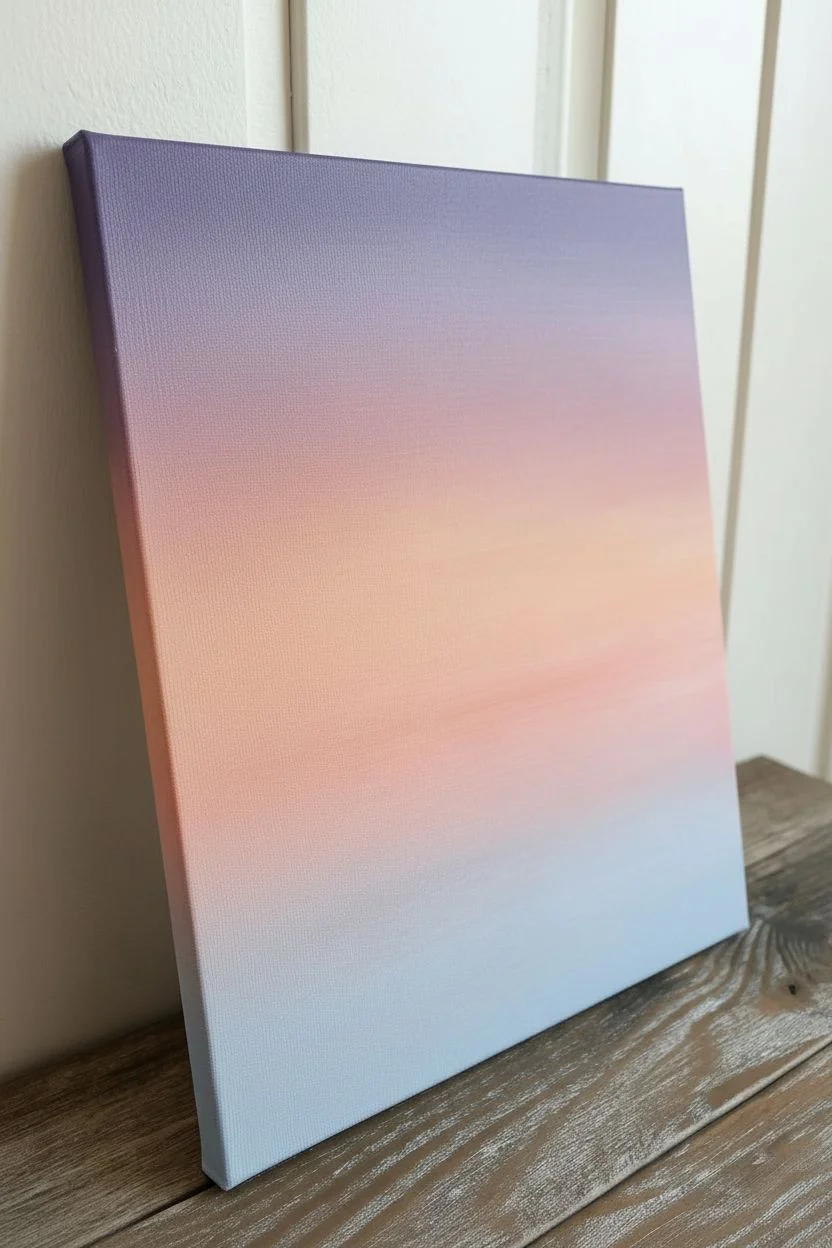
Step 1: Painting the Ombré Sky
-
Prepare the gradient palette:
Squeeze out your background colors: deep violet, peach/coral, and light blue-grey. Keep a generous amount of white nearby to soften the transitions between these zones. -
Start with the top tier:
Using your large flat brush, apply the deep violet across the top third of the canvas. Use horizontal strokes that span the entire width to ensure smooth coverage. -
Add the middle horizon:
Without cleaning the brush perfectly (a little purple residue is okay), pick up the peach or coral paint. Apply this to the middle section of the canvas, blending upward slightly into the purple while the paint is still wet to create a dusky transition. -
Finish the bottom section:
Rinse your brush thoroughly. Paint the bottom third with your light blue or grey mixture. Blend the top edge of this section into the peach band above it to create a soft, hazy horizon line. -
Refine the blend:
If distinct lines remain between colors, take a clean, slightly damp brush and run it horizontally back and forth over the meeting points to blur them together. Let the background dry completely before moving on.
Muddy Background?
If your sky colors turn brown where they meet, you are over-blending. Clean your brush often and use a tiny bit of white paint as a buffer between colors to keep the transition bright.
Step 2: Creating the Silhouette
-
Map out the main trunk:
Switch to a medium round brush and load it with black paint. Start from the bottom left quadrant, painting a thick, curved line that reaches diagonally upward toward the top right. Make the base wider than the tip. -
Add major branches:
From the main trunk, pull out two or three prominent branches. Let them curve naturally; branches rarely grow in distinct straight lines. Vary the direction so some reach high and others dip low. -
Paint the twigs:
Using your small liner brush, add fine twigs growing off the larger branches. Use a very light hand here—barely touching the canvas—to get thin, delicate ends. I like to twist the brush slightly as I pull away to create organic, knobby shapes. -
Check density:
Step back and look at your tree. Does it need balance? Add a few more thin twigs in any empty voids, but leave enough open space for your flowers.
Step 3: Blooming the Branches
-
Mix flower colors:
Prepare a pure titanium white and a soft pink (mix a tiny dot of red or violet into your white). You want two distinct shades for variety. -
Paint the white base petals:
Using a small, clean round brush, dab five small petal shapes in a circle to form a flower. Place these randomly on the branches, focusing on the tips of the twigs. Let the black branch show through slightly or paint over it opaque—it’s your choice. -
Add pink variations:
Create several flowers using your mixed pink shade. Scatter these among the white ones. Grouping two or three flowers together often looks more natural than spacing them perfectly evenly. -
Create buds:
For unbloomed buds, simply paint small teardrop shapes in pink or white attached directly to the thin twig ends. -
Detail the flower centers:
Once the flower petals are dry, use your smallest detail brush to add a tiny dot of dark pink or black in the very center of each open blossom. -
Add stamens:
Paint extremely fine lines radiating from the center dot, tipping them with microscopic specks of white or sparkly paint if you have it. This adds incredible realism.
Add Some Sparkle
Mix a pinch of loose iridescent glitter into your white paint for the flower petals. It catches the light beautifully and adds a magical shimmer without needing glue.
Step 4: Final Atmosphere
-
Drift falling petals:
To give the illusion of a breeze, paint single petals floating in the air below the branches. Use both your pink and white shades for depth. -
Add a magical drift:
Dip the handle end of a brush into white paint and dot random ‘snow’ or pollen specks across the purple and peach sections of the sky. Keep these sparse to avoid cluttering the scene. -
Sign your work:
Pick a bottom corner and sign your initials in small black or white script.
Hang your masterpiece on a wall that needs a touch of springtime calm to enjoy year-round


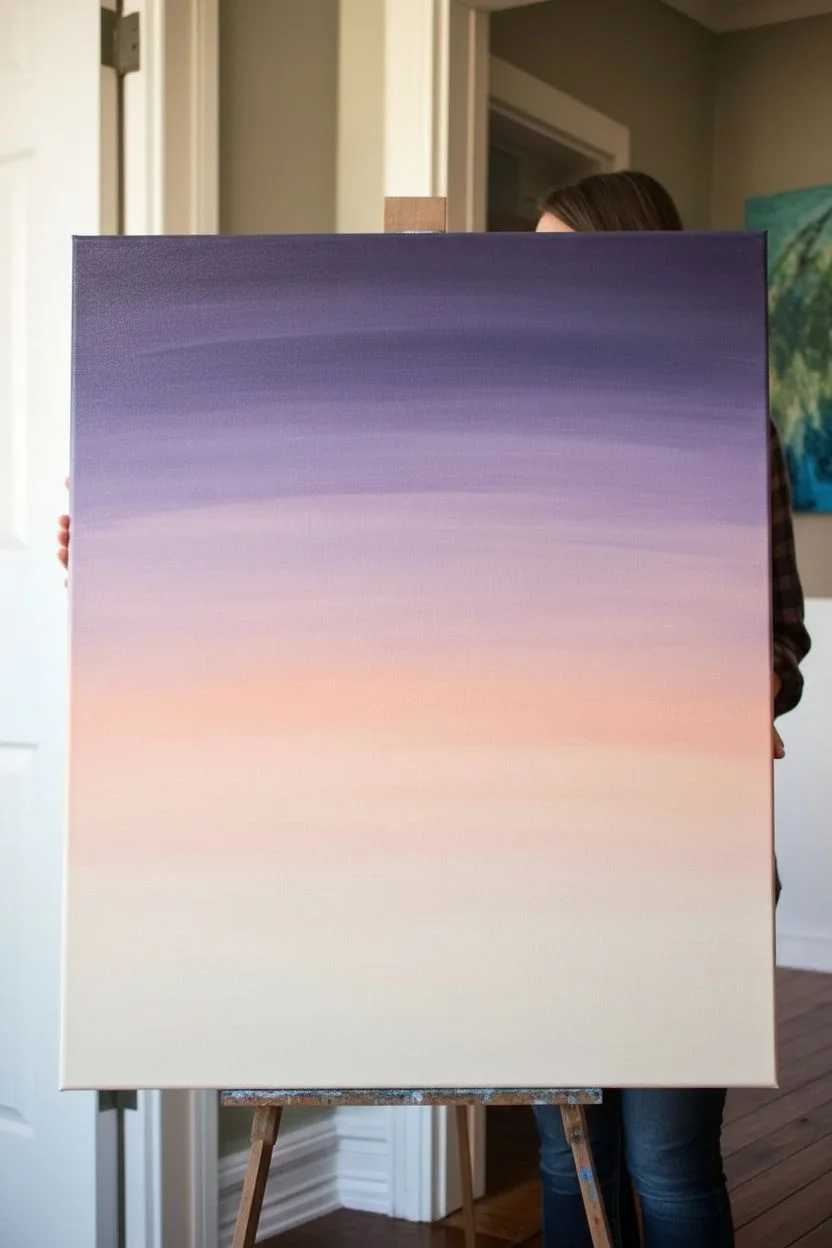
Lighthouse at Dusk With Two-Tone Waves
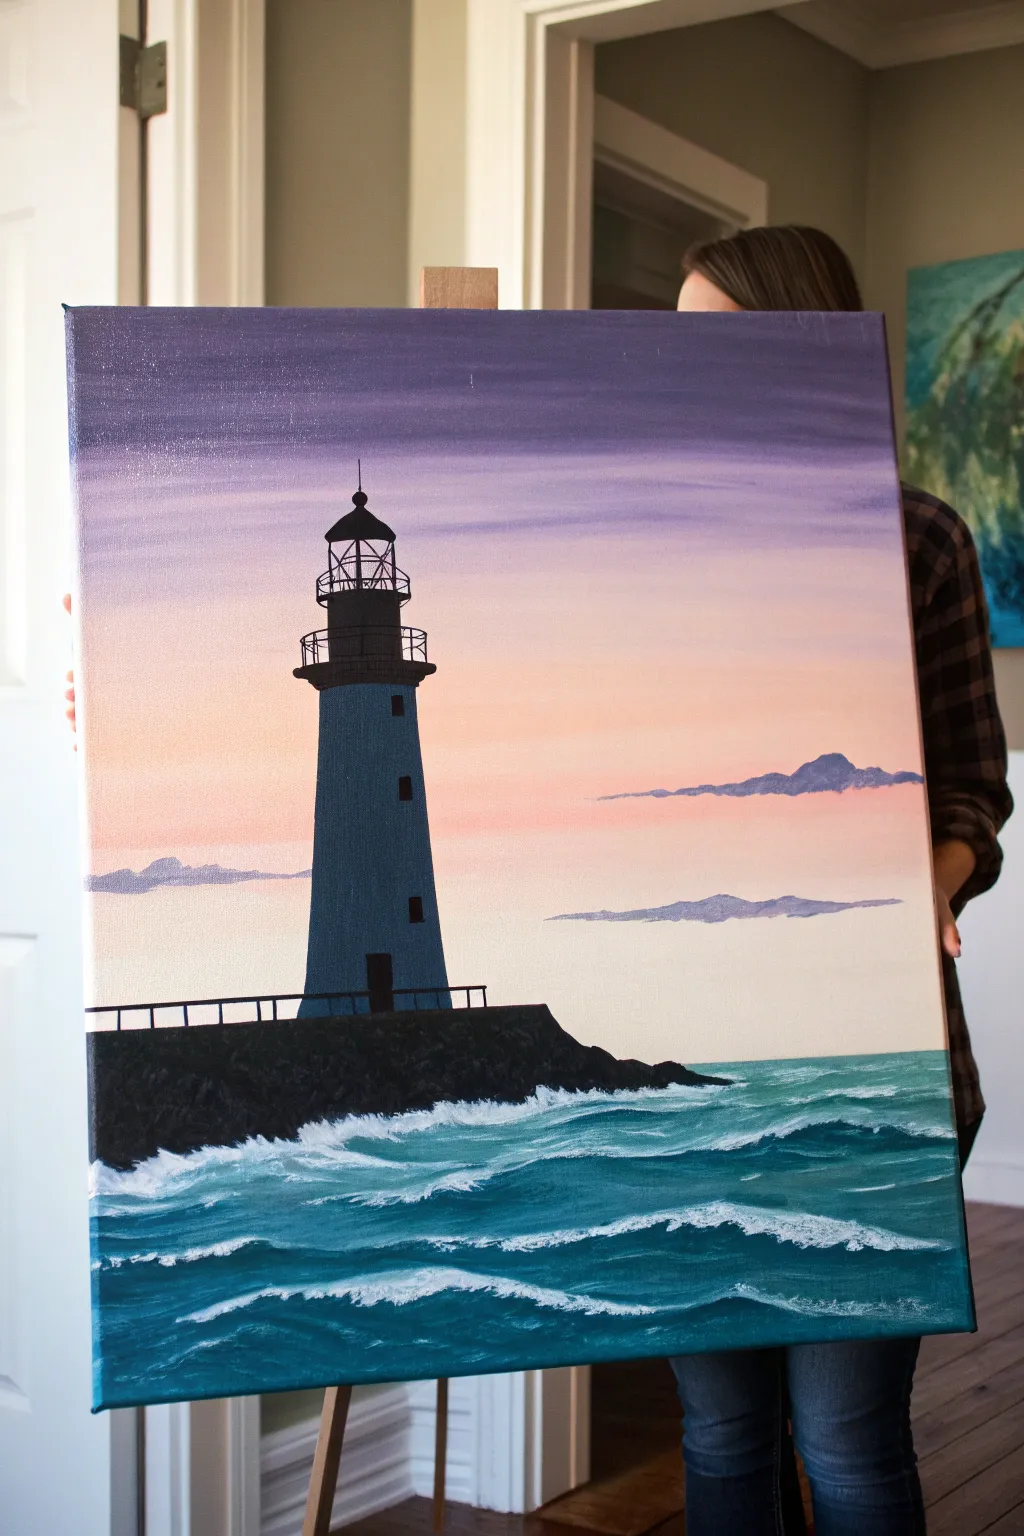
Capture the serene beauty of a coastal evening with this striking lighthouse silhouette against a soft gradient sky. The dramatic contrast between the calm pastel heavens and the energetic, churning waves makes for a captivating piece that looks more complex than it actually is.
Step-by-Step Tutorial
Materials
- Canvas (16×20 or similar)
- Acrylic paints (Titanium White, Phthalo Blue, Dioxazine Purple, Cadmium Orange, Lamp Black, Teal/Turquoise)
- Large flat wash brush (1-2 inch)
- Medium flat brush
- Small round brush
- Detail liner brush
- Palette for mixing
- Cup of water and paper towels
- Easel (optional)
Step 1: Setting the Scene
-
Create the gradient sky:
Start at the very top of your canvas with your large wash brush. Mix a dark purple using Dioxazine Purple and a touch of Phthalo Blue. Paint a horizontal band across the top. -
Blend downward:
Without cleaning your brush, pick up some white paint. Blend this into the bottom edge of your purple band, moving downward to create a lighter lavender tone. -
Add warmth:
Wipe your brush clean. Load it with white and a tiny dot of Cadmium Orange to make a pale peach color. Paint this across the middle section of the canvas, blending it slightly upward into the lavender for a seamless transition. -
Finish the horizon:
Continue adding more white to your peach mix as you move down, making the sky very pale and almost white just above where the water line will be. Let this sky layer dry completely.
Cloud Control
If your clouds look too heavy or dark, wait for them to dry, then dry-brush a thin layer of the peach sky color over them to push them back into the distance.
Step 2: The Lighthouse & Land
-
Paint the background clouds:
Using a small round brush and a light mix of purple and white, dab in slender, horizontal cloud formations just above the horizon line. Keep them soft and ethereal. -
Sketch the silhouette:
Using a small round brush and watered-down black paint, lightly outline the shape of the lighthouse tower and the rocky pier it stands on. The pier should slope downward from left to right. -
Paint the lighthouse body:
Mix a dark slate blue using black, Phthalo Blue, and a touch of white. Fill in the main column of the lighthouse. It shouldn’t be solid black yet; we want a moody, shadowy blue. -
Block in the pier:
Fill in the rocky landmass at the bottom using solid black. Create a jagged, uneven top edge to simulate rocks and boulders. -
Add lighthouse details:
Switch to your detail liner brush and pure black paint. Carefully paint the railing, the lantern room at the top, the triangular roof, and the small windows down the side of the tower. -
Install the railing:
Still using the liner brush and black paint, draw the simple railing extending to the left of the lighthouse along the pier. Use short vertical lines connected by a horizontal top rail.
Light It Up
Add a tiny dot of pale yellow or bright white inside the lantern room at the top of the lighthouse to make it look like the beacon is turned on for the evening.
Step 3: Waves & Water
-
Base coat the ocean:
Mix a rich teal color using Phthalo Blue, Teal/Turquoise, and a little white. Fill the entire bottom section of the canvas under the black pier with this base color. -
Add deep shadows:
While the teal is still wet, take your medium brush with some dark blue or purple and streak in horizontal shadows underneath where the wave crests will be. This creates depth. -
Form the wave shapes:
Using a clean medium brush and a lighter turquoise (teal plus more white), paint sweeping, curved strokes to define the rolling movement of the water. Let the water layer dry to the touch. -
Paint the sea foam:
Load a small round brush with pure titanium white. Use a ‘scumbling’ technique—scrubbing the brush lightly—to create the foamy tops of the waves. -
Highlight the shoreline:
Apply the brightest white foam right where the water meets the black rocks of the pier, showing where the waves are crashing against the land. -
Refine the movement:
Add thin, wiggly lines of white foam trailing behind the main waves to show the churn of the ocean surface. I find that keeping your wrist loose helps these lines look natural and fluid.
Step back and admire your moody, atmospheric seascape as the paint settles into its final finish
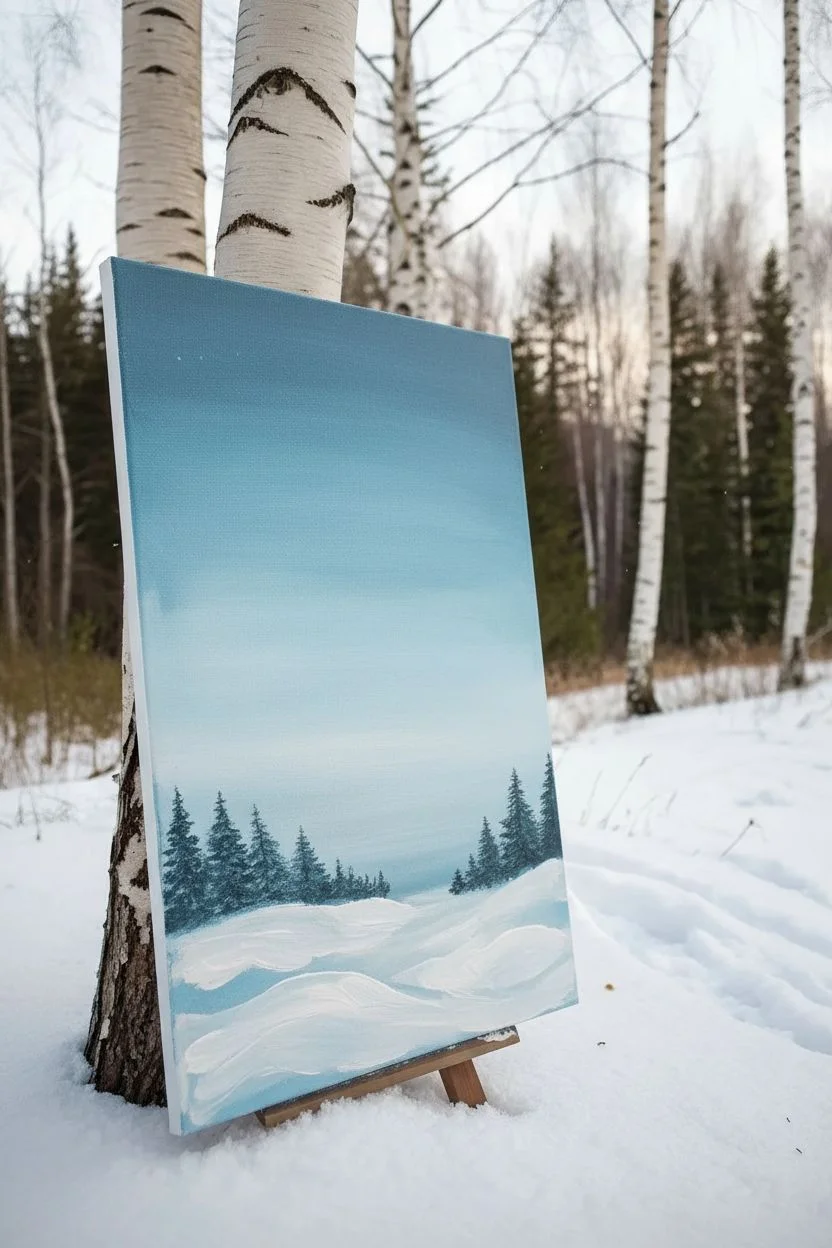
Birch Trees in Snow With Splatter Flurries
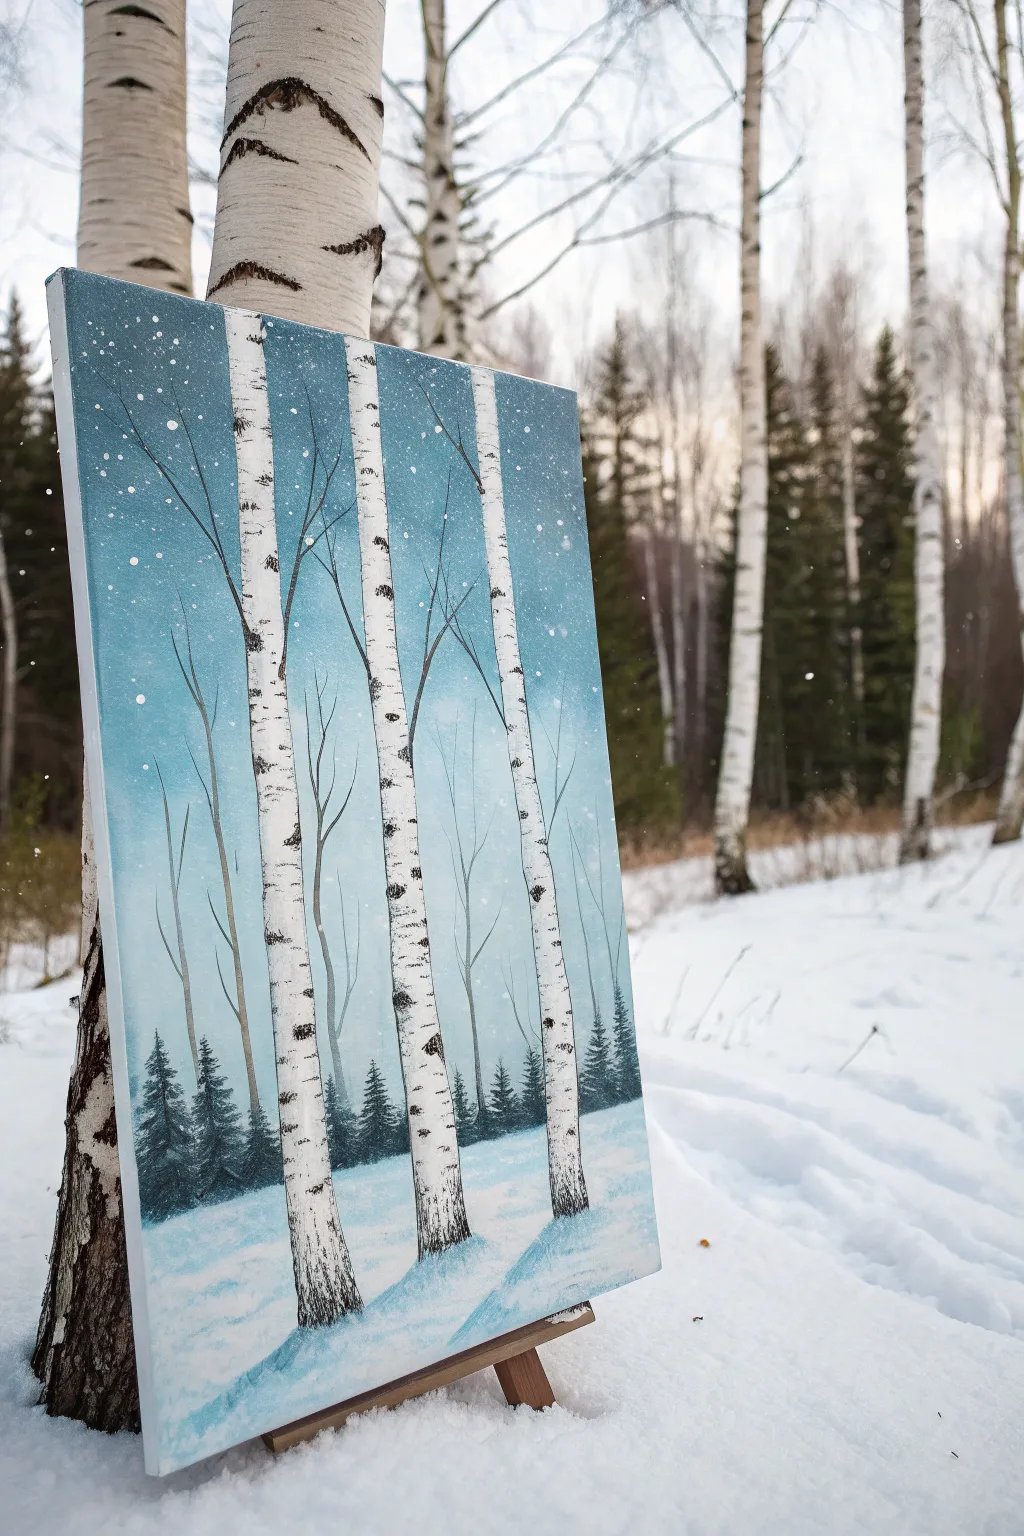
Capture the serene silence of a winter forest with this elegant acrylic painting featuring stark white birch trees against a cool, frosty sky. This project uses simple techniques like gradient blending and splatter effects to create a professional-looking landscape that is perfect for beginners.
How-To Guide
Materials
- Stretched canvas (e.g., 11×14 or 16×20 inches)
- Acrylic paints: Titanium White, Phthalo Blue (or Cerulean), Mars Black, Burnt Umber (optional)
- Large flat brush (1-inch width)
- Medium flat brush
- Small round detail brush
- Fan brush or dedicated splatter brush (optional)
- Palette or paper plate
- Cup of water and paper towels
- Painter’s tape or a straight edge (optional)
Step 1: Setting the Scene
-
Prepare the gradient background:
Start by mixing a medium blue using your white and blue paints. Use your large flat brush to paint the top third of the canvas with this shade, using long, horizontal strokes to ensure smooth coverage. -
Blend downward:
While the paint is still wet, add more white to your blue mix to create a lighter shade. Apply this to the middle section of the canvas, blending it seamlessly upward into the darker blue. -
Create the snowy horizon:
For the bottom third, transition to almost pure white with just a hint of blue. Blend this upward into the middle section to create a soft, hazy horizon line where the sky meets the snow. -
Add snowbanks:
Clean your large brush and use pure white to paint sweeping, slightly curved strokes at the bottom of the canvas to suggest uneven, drifting snow on the ground.
Step 2: Foliage and Distance
-
Mix a deep green-black:
Mix a small amount of black with blue (and a touch of yellow if you have it, or just use black and blue for a cool shadow tone) to create a dark silhouette color for the distant trees. -
Paint distant pines:
Using a small flat brush or round brush, tap in a row of small, jagged pine tree shapes along the horizon line. Keep these loose and somewhat blurry to suggest they are far away. -
Add depth to the forest:
Vary the heights of these background trees, making some slightly taller and others shorter. Let this layer dry completely before moving on to the birch trees.
Use A Card for Bark
For realistic birch bark texture, dip the edge of an old credit card or stiff cardboard into black paint and scrape it horizontally across the trunk.
Step 3: The Majestic Birches
-
Outline the trunks:
Using a medium flat brush and pure Titanium White, paint three vertical trunks. Start from the bottom snowbank and extend all the way off the top edge of the canvas. -
Vary the thickness:
Make the trunks slightly wider at the base and taper them very gradually as they go up. Don’t make them perfectly straight; a little wobble adds organic character. -
Add shadows:
Mix a very light gray-blue. Run a thin line of this shadow color down the left side of each trunk to give them a cylindrical, 3D shape.
Splatter Control
If your snow splatters are creating streaks instead of dots, your paint is too watery. Add a tiny bit more paint to thicken the mix and try again.
Step 4: Details and Texture
-
Create birch markings:
Switch to your small detail brush or the edge of a flat brush with black paint. Paint small, horizontal dashes and curved lines across the white trunks to mimic birch bark. -
Vary the markings:
Make some marks thicker and darker, while leaving other areas mostly white. Concentrate slightly heavier markings near the base of the trees. -
Add branches:
Using your finest detail brush and thinned black paint (add a drop of water to make it flow like ink), paint delicate branches reaching out from the trunks. -
Draw finer twigs:
From the main branches, pull out even thinner twigs that reach upward into the sky. A shaky hand actually helps here to make them look natural. -
Ground the trees:
Add a few vertical strokes of grass or small shrubs at the base of the trees using your black or dark blue mix, partially covered by snow.
Step 5: The Final Flurry
-
Prepare splatter paint:
Mix water into a dollop of white paint until it has the consistency of heavy cream. This is crucial for good splatter. -
create the snowfall:
Dip a dedicated brush or an old toothbrush into the thinned paint. Hold it over the canvas and tap the handle firmly against another brush handle to spray fine dots of ‘snow’ over the entire scene. -
Add larger flakes:
For a magical touch, use the back end of your paintbrush handle dipped in white paint to dot a few larger, distinct snowflakes randomly in the foreground.
Now step back and admire your crisp winter morning scene
“Cheers” Glasses With Simple Clink Sparkles

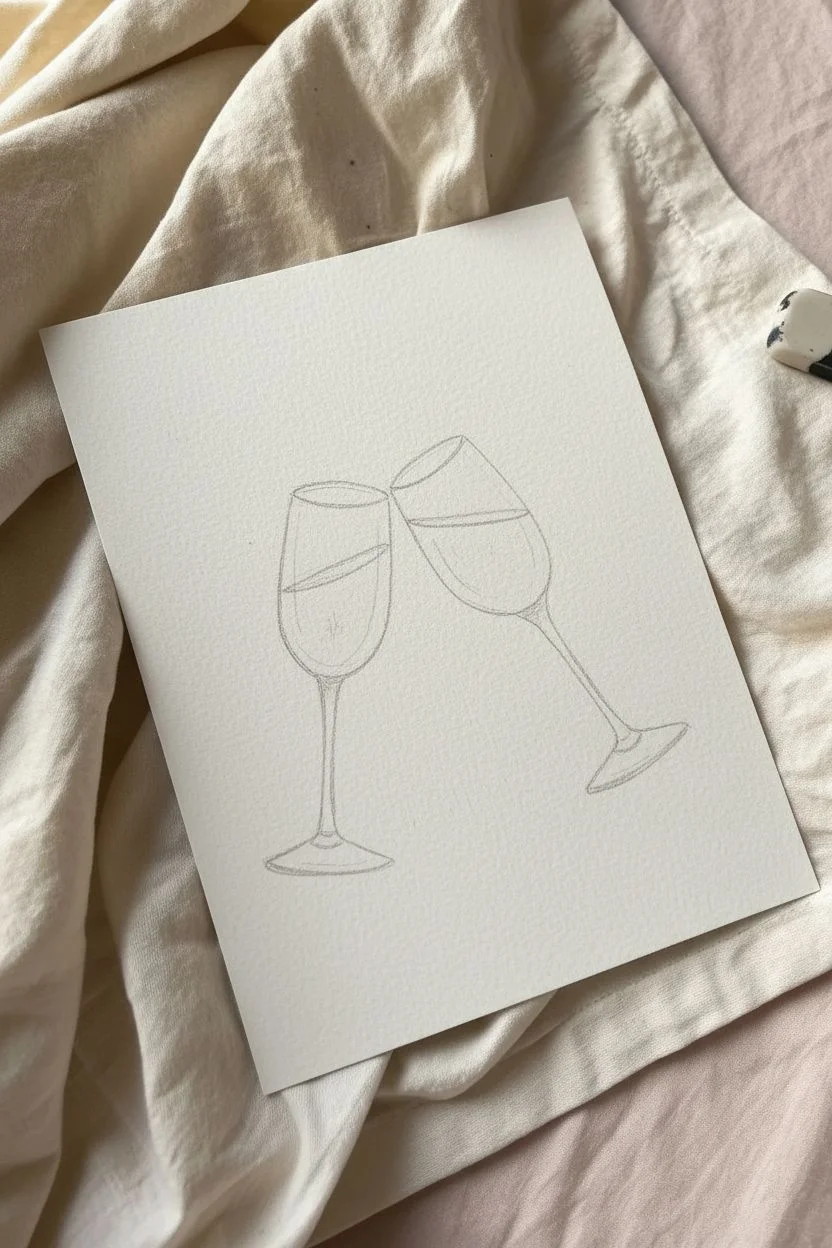
Capture the effervescent joy of a celebration with this charming illustration featuring clinking champagne flutes and scattered starlight. The delicate ink lines combined with soft rose-gold watercolor washes create an elegant yet playful aesthetic perfect for marking special moments.
Step-by-Step
Materials
- Cold press watercolor paper (A5 or 5×7 size)
- Black waterproof fine liner pen (01 or 03 size)
- Watercolor paints (Alizarin Crimson, Yellow Ochre, Burnt Sienna)
- Small round watercolor brush (size 2 or 4)
- Metallic gold paint or gold gel pen
- Pencil and eraser
- Ruler (optional)
- Cup of water and paper towels
Step 1: Sketching the Composition
-
Outline the first glass:
Start slightly to the left of your center point. Using a pencil, lightly sketch a tall U-shape for the bowl of the first glass. Add a straight stem extending downwards and a small oval base. -
Position the second glass:
Sketch the second glass to the right, tilting it at a 45-degree angle so its rim touches the first glass’s rim. This creates that classic ‘clink’ pose. -
Define the rims:
Draw narrow ellipses at the top of each U-shape to create the open mouths of the glasses. Keep your pencil pressure very light so these can be erased later. -
Add liquid levels:
Inside each bowl, draw lines to indicate the champagne level. Angle the liquid line in the tilted glass to show how gravity affects the fluid.
Uneven Wash?
If your watercolor dries with hard edges inside the glass, re-wet the area slightly with clean water and gently smooth it out with a damp brush.
Step 2: Inking the Lines
-
Trace the main shapes:
Go over your pencil sketches with a waterproof black fine liner. I recommend starting with the rims to ensure they are clean ovals. -
Double the thickness:
Create the glass thickness by drawing a second line just inside the rim and down the sides of the bowl. Do the same for the liquid line to give it dimension. -
Detail the stems:
Ink the stems and bases. You can thicken the ink lines on the shadow side (the right side of the stems) to add a subtle sense of weight. -
Erase preparatory marks:
Wait at least five minutes for the ink to dry completely, then gently erase all visible pencil lines to leave a crisp black-and-white drawing.
Step 3: Adding Color
-
Mix the champagne hue:
Create a watery mix of Alizarin Crimson with a tiny touch of Yellow Ochre. You want a very pale, translucent rosé color. -
First wash:
Fill the liquid areas of the glasses with this pale wash. Work quickly to keep the edge wet and smooth. -
Add depth:
While the paint is still damp, drop a slightly more concentrated reddish-brown (mix in a little Burnt Sienna) near the bottom of the bowl and along the liquid surface line. -
Create shadows:
Use a very watered-down grey or blue-grey to paint a thin shadow line on the empty upper parts of the glass and along the side of the stem. -
Let it dry:
Allow the watercolor layers to dry completely before adding metallic accents so the colors don’t bleed.
Make it Pop
Use actual gold leaf adhesive and foil for the stars instead of paint. The texture and high shine will make the card look professionally printed.
Step 4: Sparkle and Shine
-
Paint the stars:
Using metallic gold paint or a gold gel pen, draw small 4-point stars scattered around the glasses. -
Add the big sparkle:
Draw two larger, prominent gold stars right where the glasses touch and slightly below to emphasize the impact of the toast. -
Dot detailing:
Place tiny gold dots around the stars to create a magical dust effect. -
Radiant lines:
Switch back to your black fine liner. Draw dashed or dotted lines radiating outward from the two large ‘clink’ stars to simulate movement. -
Final bubbles:
Add tiny clusters of dots inside the liquid and floating upwards to represent fizzing carbonation.
Once dry, this festive artwork is ready to be framed or turned into a congratulatory greeting card
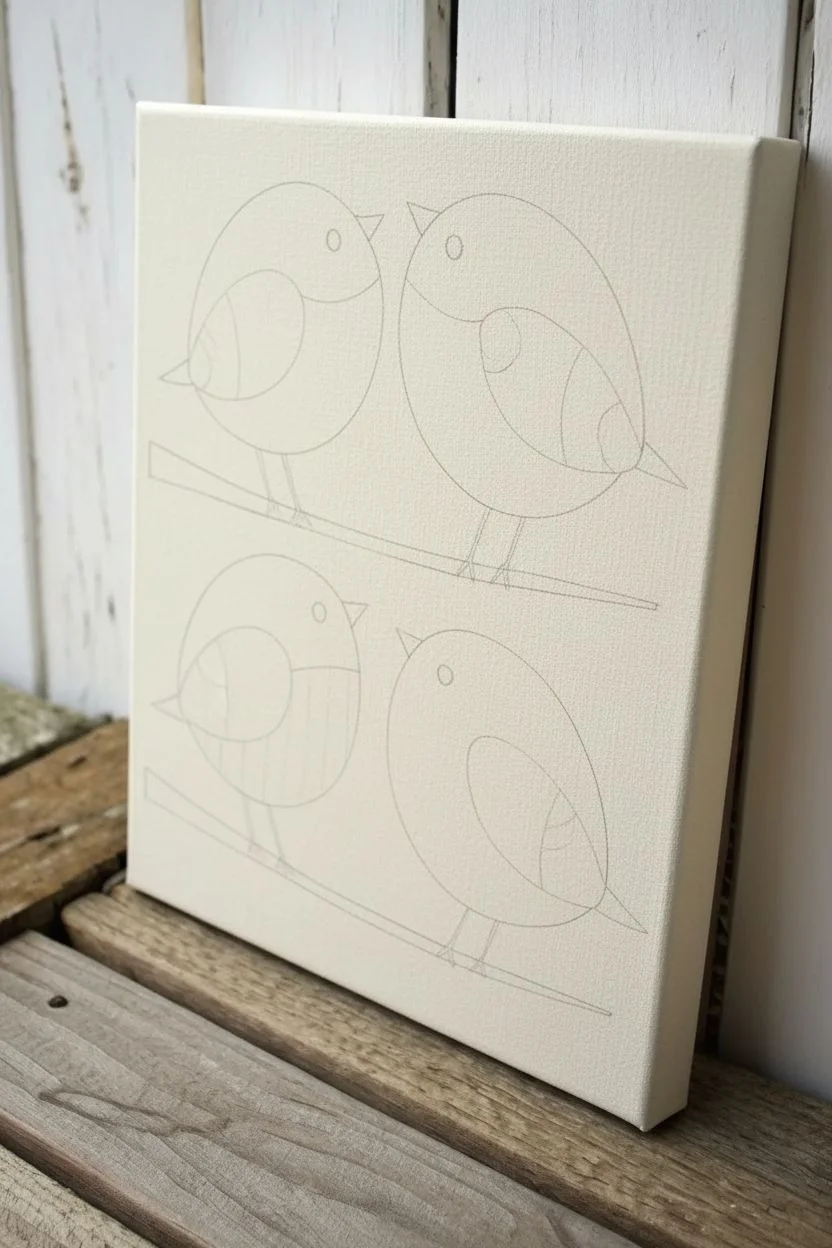
Stacked Whimsical Birds on a Branch
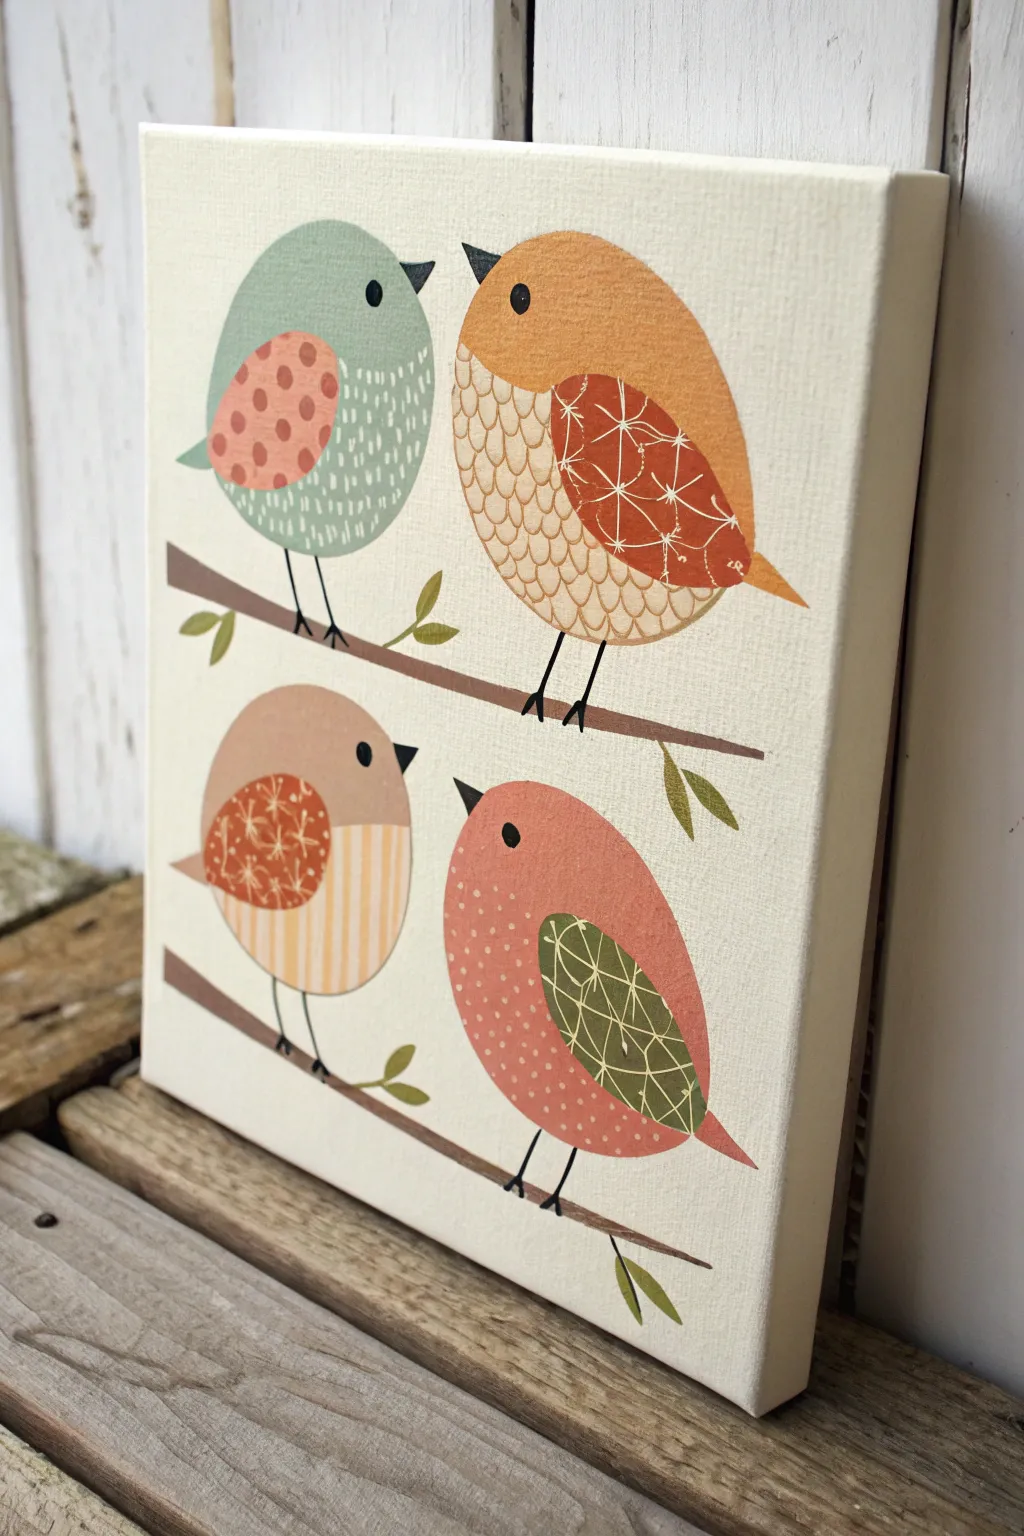
Create a charming piece of wall art featuring four stylized birds perched on branches, each showcasing unique patterns and pleasing earthy tones. This project combines simple geometric shapes with playful details for a modern folk-art aesthetic.
Step-by-Step Guide
Materials
- Small square canvas (8×10 or 10×10 inches)
- Acrylic paints: cream/off-white (background), sage green, terracotta/rust orange, light beige/tan, dark brown, white
- Flat shader brushes (medium and small)
- Fine liner brush (for details and legs)
- Pencil for sketching
- Palette or paper plate
- Cup of water and paper towels
Step 1: Preparation & Base Composition
-
Prepare the canvas:
Start by painting the entire canvas with a cream or off-white acrylic paint. This provides a warm, neutral backdrop that makes the colors pop. Let it dry completely. -
Sketch the branches:
Lightly sketch two horizontal, slightly curved lines across the canvas for the branches. Place one in the lower third and one in the upper middle section. -
Outline the bird shapes:
Draw four oval or egg-like shapes resting on the branches. Place two large birds on the top branch (facing each other) and two slightly smaller ones on the bottom branch. -
Define distinctive features:
Add small triangular beaks and sketch curving lines to separate the wings from the bodies. Vary the wing shapes—some can be semicircles, others tear-drops.
Clean Lines
For the crisp patterns on the wings, consider using a white gel pen or paint marker instead of a brush after the base paint is fully dry.
Step 2: Color Blocking
-
Paint the top left bird:
Mix a soft sage green and fill in the body of the top-left bird. For its wing, use a rusty terracotta color. -
Paint the top right bird:
Fill the top-right bird’s body with a golden-orange hue. I like to paint the belly area in a creamy beige to create contrast, leaving the wing area for later patterning. -
Paint the bottom left bird:
Use a light tan or beige for the head and back of the bottom-left bird. Paint the belly section a creamy yellow-white and the wing a deep rust orange. -
Paint the bottom right bird:
Color the final bird’s body in a muted pinkish-red (mix terracotta with a little white). Paint its wing a contrasting olive green. -
Paint the branches:
Using a flat brush and dark brown paint, fill in the branch lines. Add simple leaf shapes attached to the branches with green paint.
Shaky Hands?
If your thin lines for the legs or patterns look wobbly, anchor your pinky finger on a dry part of the canvas to stabilize your painting hand.
Step 3: Pattern & Detail Work
-
Add polka dots:
On the top-left bird’s rust-colored wing, use the handle end of a paintbrush dipped in darker orange to stamp polka dots. -
Detail the feathers:
Using a fine liner brush and white paint, add small vertical dashed lines strictly on the green belly section of the top-left bird to simulate texture. -
Create scallops:
On the beige belly of the top-right bird, paint rows of small ‘U’ shapes using a thin brown line to create a scalloped scale effect. -
Draw starburst patterns:
On the top-right bird’s rust wing, use a very fine brush with cream paint to draw thin intersecting lines, creating a geometric starburst or snowflake pattern. -
Detail the bottom birds:
Add vertical stripes to the belly of the bottom-left bird using a diluted orange paint. For its wing, paint small flower-like asterisks. -
Finish the bottom right wing:
Paint a grid pattern on the green wing of the bottom-right bird using cream paint, adding thin diagonal lines inside the squares. -
Add white speckles:
Dip a stiff brush or toothbrush in watered-down white paint and gently flick it or tap small dots onto the body of the bottom-right bird for a speckled texture.
Step 4: Final Touches
-
Paint the eyes and beaks:
Use solid black paint to fill in the small triangular beaks. Make a solid black dot for the eye on each bird. -
Add the legs:
With your finest brush and black paint, draw two thin, straight lines extending from each bird’s belly to the branch. -
Highlight the eyes:
Once the black eye dots are dry, place a tiny pin-prick of white paint in the center of each eye to bring them to life.
Hang your charming new flock on the wall or gift it to a friend who loves nature
Stained-Glass Style Desert Cactus Sunset
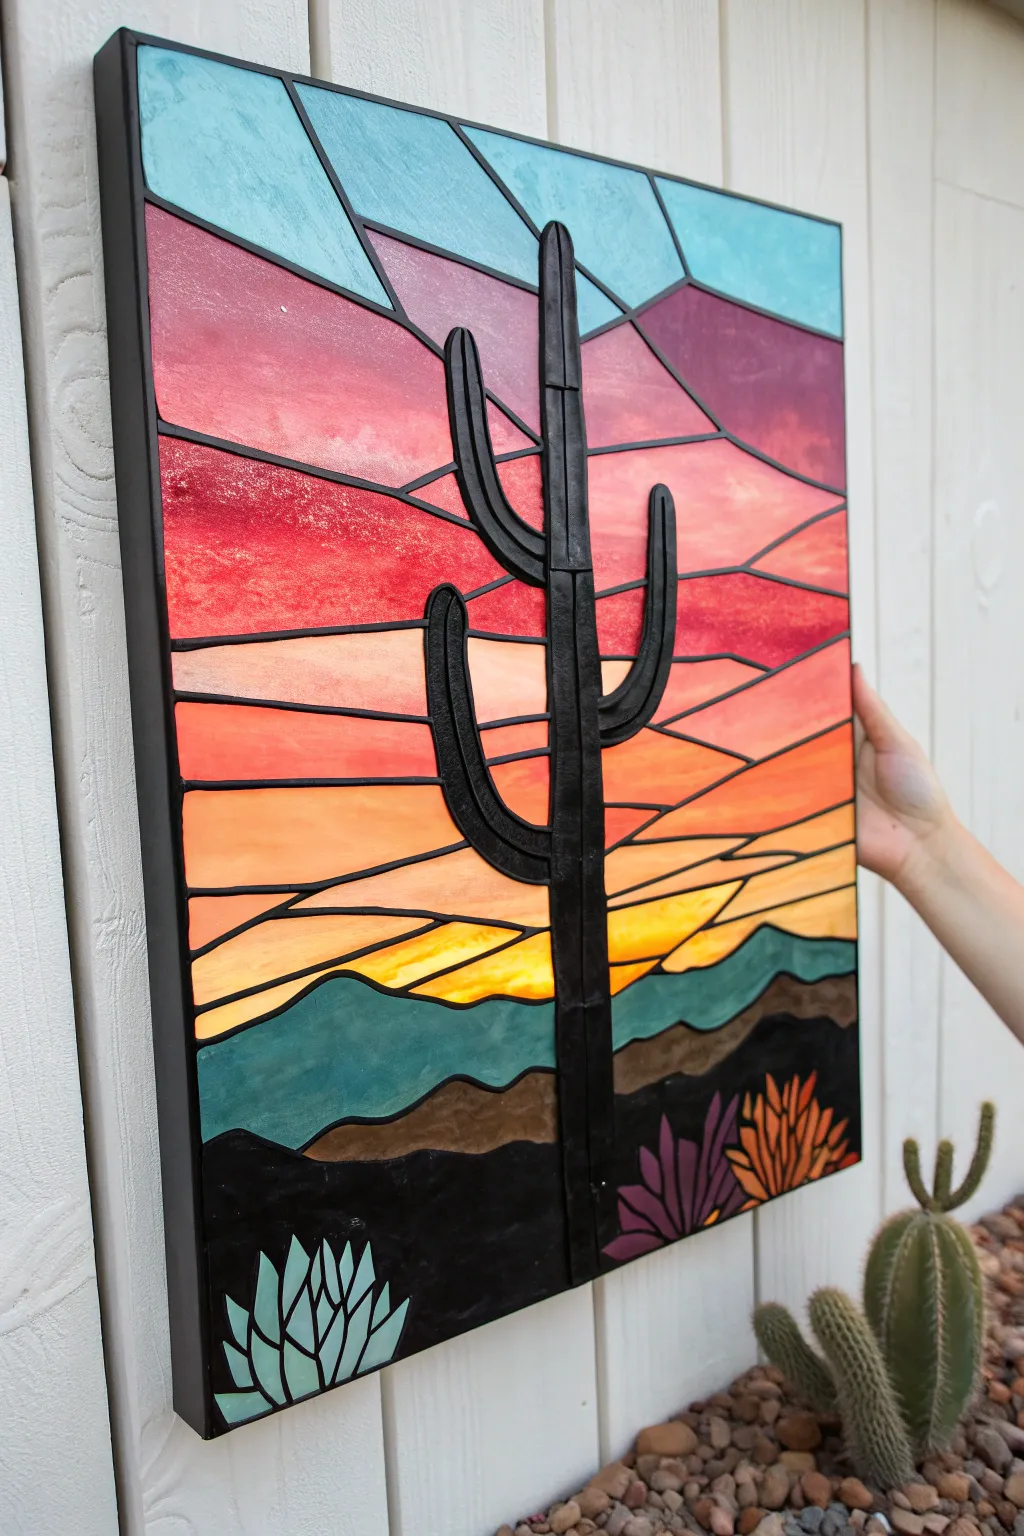
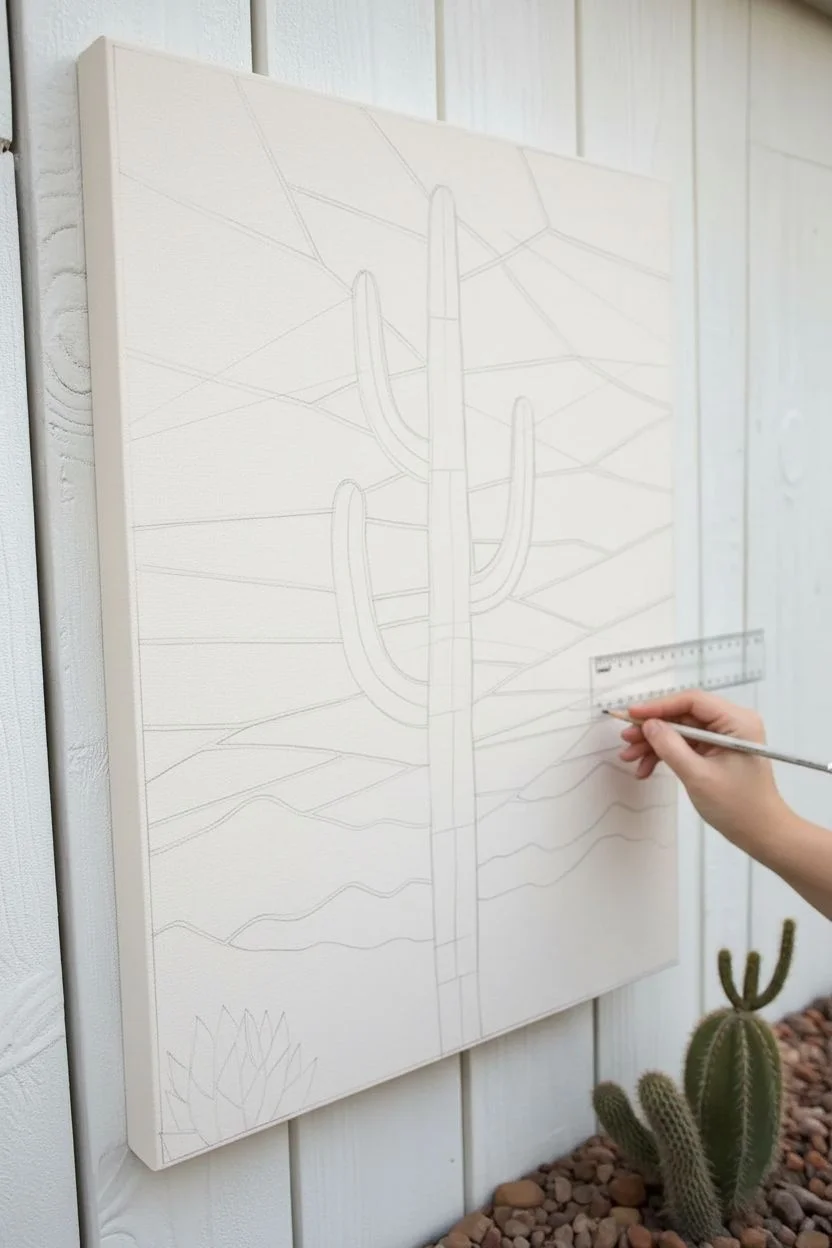
Capture the warmth of a desert sunset with this vibrant faux stained-glass masterpiece. Using bold black outlines and luminous gradient painting, you’ll create the illusion of pieced glass without cutting a single shard.
How-To Guide
Materials
- Square canvas or wood panel (approx. 16×16 inches)
- Black puff paint or dimensional fabric paint (squeeze bottle)
- Acrylic paints: teal, violet, red, orange, yellow, black, brown, sage green
- Glazing medium or gloss medium
- flat brushes (various sizes)
- Small round detail brush
- Pencil and eraser
- Ruler or straight edge
- Palette or paper plate
Step 1: Drafting the Design
-
Sketch the focal point:
Start by lightly sketching the large saguaro cactus slightly off-center to the right. Give it a main trunk and three distinct arms: two curving upward on the left and one on the right. -
Map the horizon lines:
Draw the rolling hills and mountains in the bottom third of the canvas. Create three layers: a foreground with succulents, a mid-ground of dark brown hills, and a background of teal mountains. -
Create the stained glass lattice:
Using a ruler, draw horizontal lines across the sky to represent the glass panes. Angle them slightly to create a radiating effect or keep them somewhat random. Connect these with shorter vertical or diagonal lines to form the irregular geometric shards typical of stained glass.
Step 2: Creating the Lead Lines
-
Outline the cactus:
Take your black dimensional puff paint and carefully trace over your cactus sketch. Squeeze with consistent pressure to create a raised, thick line that mimics lead came. -
Define the landscape:
Continue tracing the mountain ridges and the foreground succulent shapes with the puff paint. -
Trace the sky grid:
Go over your ruler lines in the sky section. Ensure every line connects fully to another line or the edge of the canvas to create closed ‘cells’ for painting later. I find it helps to wipe the nozzle tip occasionally to prevent globs. -
Let it cure completely:
This is crucial: allow the black outlines to dry perfectly flat and hard. This usually takes 4-6 hours or overnight, so this is a great step to do before the actual paint party.
Uneven Lines?
If your puff paint lines sputter or break, don’t wipe them while wet. Let them dry completely, peel off the mistake with tweezers, and re-pipe the line cleanly.
Step 3: Painting the Luminous Sky
-
Mix your glazes:
Mix your acrylic paints with a generous amount of glazing medium. You want the paint to be semi-transparent to mimic the luminosity of glass. -
Start at the top:
Fill the uppermost sky geometric shapes with a mix of teal and sky blue. Paint right up to the black ridges, letting the raised lines act as a barrier. -
Transition to violet:
Move to the next row of shapes below the blue, filling them with a deep violet or plum color. Blend a little blue into the top edges of these shapes for a smooth gradient. -
Add the sunset reds:
Paint the middle section of the sky with vibrant reds and magentas. Vary the saturation in different ‘cells’ to make it look like different pieces of glass. -
Paint the horizon glow:
Fill the shapes nearest the mountains with bright oranges and warm yellows. This creates the effect of the sun setting just behind the landscape.
Pro Tip: Marble Magic
Don’t over-mix your paint on the palette. Leaving streaks of white or lighter colors on your brush creates a swirled, ‘art glass’ texture inside each cell.
Step 4: Filling the Landscape and Details
-
Color the mountains:
Paint the distant mountain range with a solid, opaque teal or turquoise to contrast with the translucent sky. -
Darken the foothills:
Fill the mid-ground hills with a deep, earthy brown. You can add a touch of black to one side of the hill shapes to suggest shadow. -
Identify the foreground:
Paint the bottom-most ground area in solid black to silhouette the succulents. -
Accent the succulents:
Paint the small agave plants in the corners. Use a muted mint green for the left plant and a mix of violet and orange for the plants on the right, keeping them fairly flat and graphic. -
Fill the cactus:
Paint the main saguaro cactus entirely black. The raised outlines will still be visible, adding texture to the silhouette. -
Add a final gloss:
Once all paint is dry, brush a coat of high-gloss varnish over each colored section (avoiding the black lines if possible) to give it that true shiny glass finish.
Hang your new desert scene near a window where natural light can play across the glossy surface and mimic the real thing
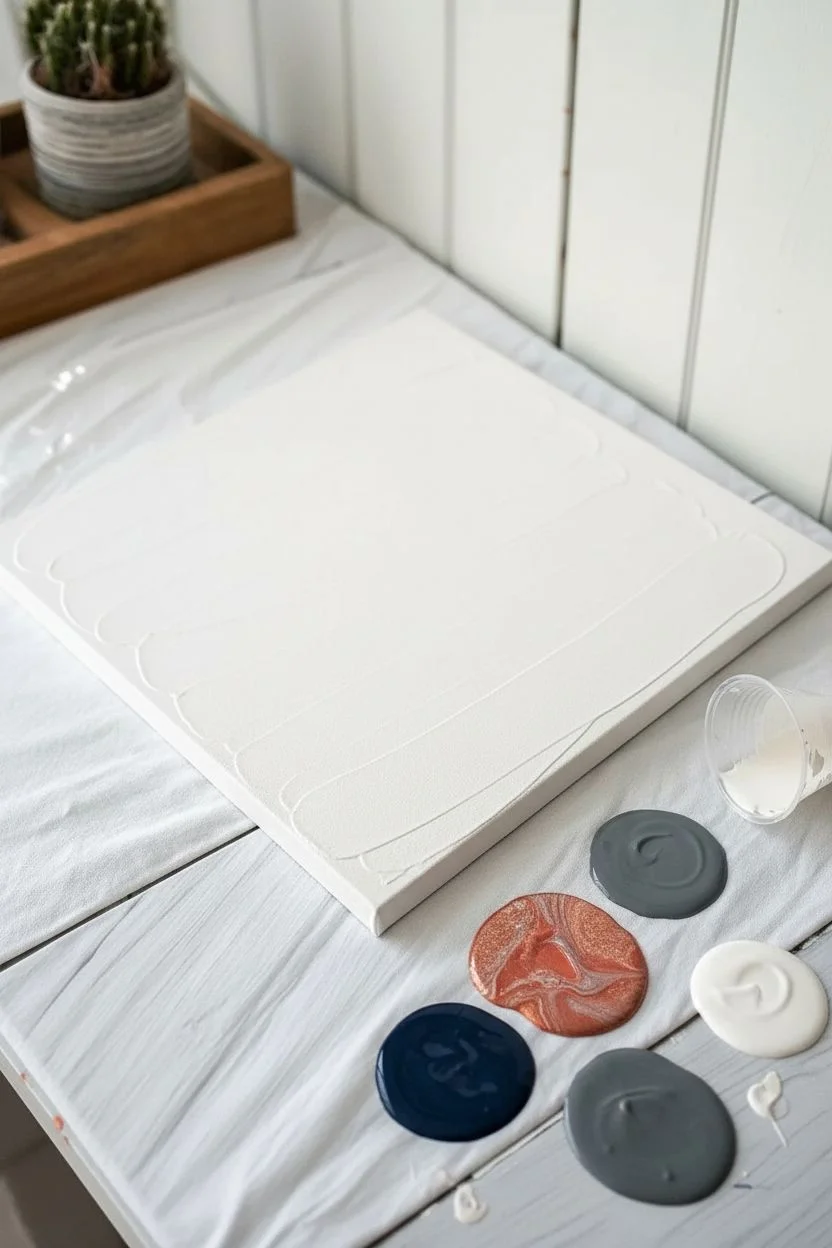
Easy Abstract Pour Look With Cup Swipe Stripes
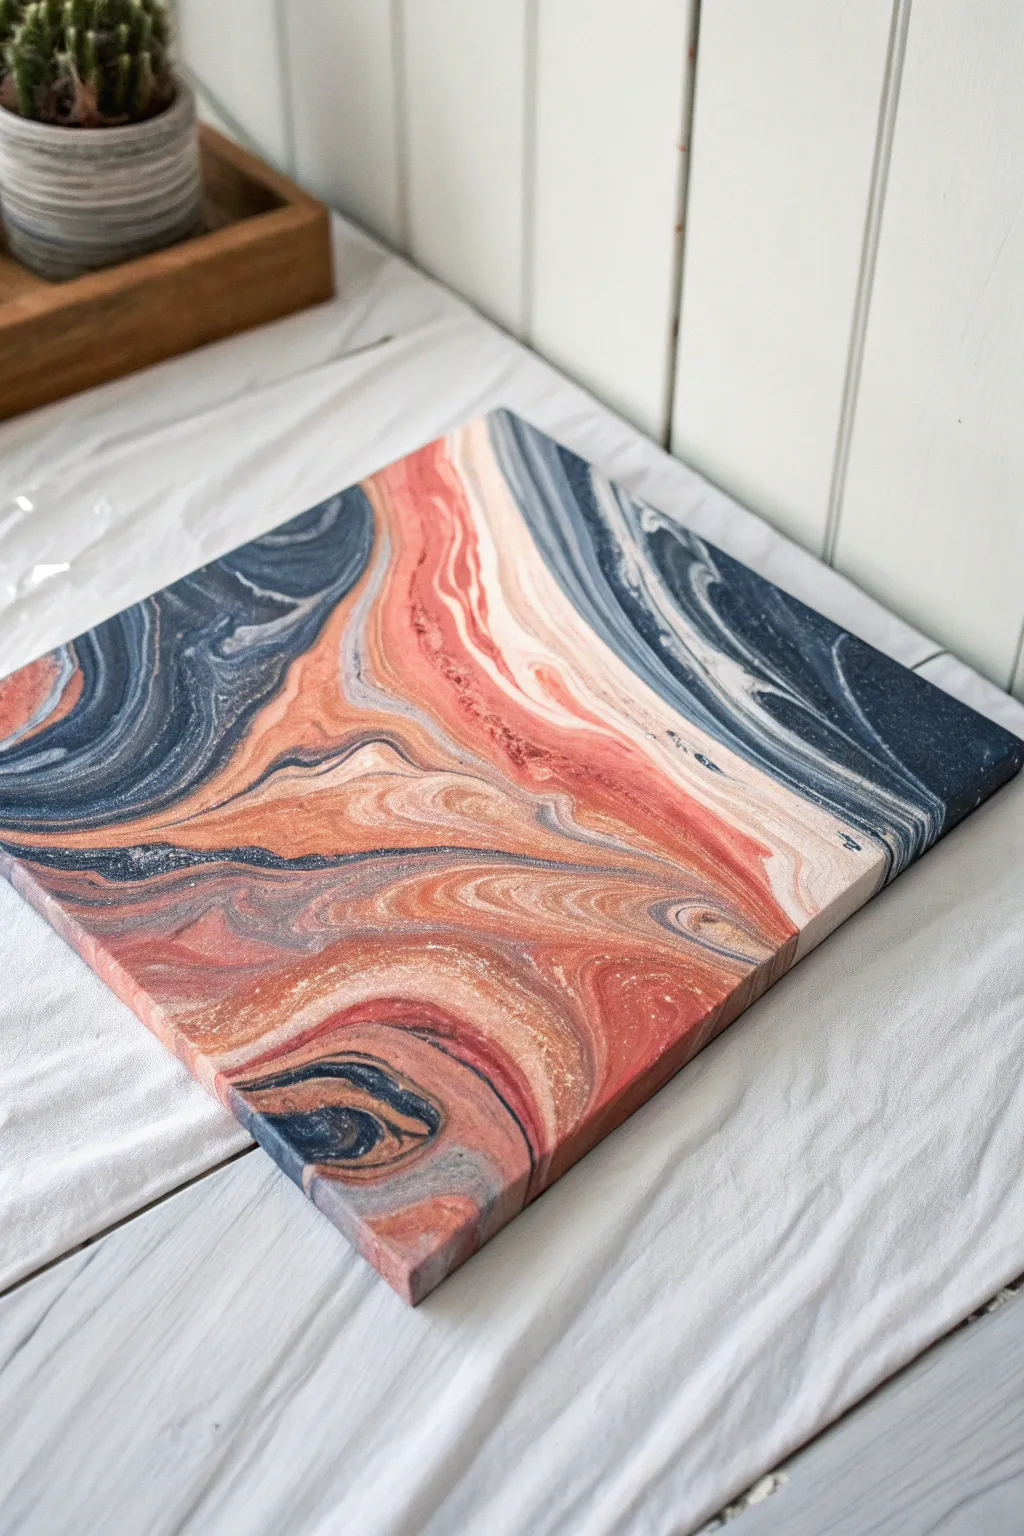
Achieve the sophisticated look of a complex acrylic pour without the mess or the need for expensive pouring mediums. By using a simple cup-dragging technique, you can create stunning organic bands of navy, slate, and terracotta that look like geological strata.
Detailed Instructions
Materials
- Square canvas (10×10 or 12×12 inches)
- Acrylic paints: Navy blue, slate grey, white, terracotta (or coral pink mixed with a little brown), and metallic copper
- Disposable plastic cups (small)
- Palette or paper plate
- Wide flat brush (for base coat)
- Plastic drop cloth or garbage bag to protect surface
- Paper towels
- Water cup for rinsing
Step 1: Preparation & Base
-
Protect your workspace:
Lay down your plastic drop cloth or an opened garbage bag. Even though this isn’t a traditional ‘pour,’ acrylics can still be messy, and you want a worry-free zone. -
Mix your custom colors:
On your palette, prepare your colors. If you don’t have a pre-mixed terracotta, blend orange with a touch of pink and a tiny dot of brown. Ensure your paints are fluid but not watery; add a drop or two of water if they are heavy body acrylics. -
Prime the canvas:
Apply a thin, even coat of white paint over the entire canvas using your wide flat brush. This ‘wet’ base helps the subsequent colors glide rather than drag.
Step 2: The Cup Swipe Technique
-
Prepare the swipe cup:
Take a small plastic cup. You aren’t filling it; you are using the rim. First, pour generous dollops of your paint colors (Navy, Terracotta, Copper, White, Slate) directly onto a palette or flat surface in a puddles, keeping them somewhat separate. -
Dip the rim:
Dip the rim of your plastic cup into the puddles of paint. You want the rim to pick up multiple colors at once, almost like stamping a cookie cutter into dough. -
The first drag:
Starting at the top left corner of the canvas, place the paint-loaded cup rim down. Gently drag the cup diagonally across the canvas towards the center. Lift the cup when you run out of paint. -
Reload and repeat:
Dip the rim back into your paint puddles. Start a new stripe right next to the first one, following the same diagonal flow. The colors will naturally mix slightly as you drag. -
Vary the pressure:
As you drag the cup, wiggle your wrist slightly or change the pressure. This creates those beautiful ‘cells’ and organic waves within the stripes rather than straight, boring lines. -
Intersecting currents:
Once you have a few diagonal lines, try dragging a new line that curves into them from a slightly different angle, like a river merging. This mimics the ‘pour’ look found in the photo. -
Fill the gaps:
Continue reloading the cup rim and dragging it across the white space. Ensure you cover the edges of the canvas for a professional, wrap-around finish.
Muddy colors?
If colors are turning brown or grey, stop overlapping them so much. Wipe the cup rim clean between swipes to keep the pigements distinct and bright.
Step 3: Refining & Detailing
-
Softening hard lines:
If you have distinct gaps between your swipe lines, use a clean, slightly damp brush to very gently feather the edges together while the paint is still wet. -
Add metallic accents:
Dip a small corner of a paper towel or a small brush into the copper paint. Lightly dab or drag it along the edges of the navy sections to make them pop. -
Create flow:
If a section looks too static, I like to tilt the canvas slightly while the paint is thick. Gravity will help the ridges of paint settle into softer curves. -
Fixing the corners:
Check the four corners of your canvas. If they look bare, use a brush to extend the nearest color pattern over the edge so the design feels infinite. -
Inspect for canvas show-through:
Look closely for any tiny white spots where the weave shows through the color. Dab a little matching paint into these divots. -
Cleaning up distinct lines:
If you want clearer separation like in the photo (where the dark blue meets the orange distinctively), you can go back in with a fine liner brush and reinforce those boundaries with fresh paint. -
Final drying:
Allow the painting to lay flat to dry for at least 24 hours. Because the paint is applied somewhat thickly, it needs time to cure completely.
Add magic cells
Add 1-2 drops of silicone oil or hair serum to your paint puddles before dipping. When you swipe, stunning cellular bubbles will appear in the stripes.
Hang your abstract masterpiece once it is fully dry and enjoy the modern vibe it brings to your space
Galaxy Pet Silhouette for a Sip and Paint Twist

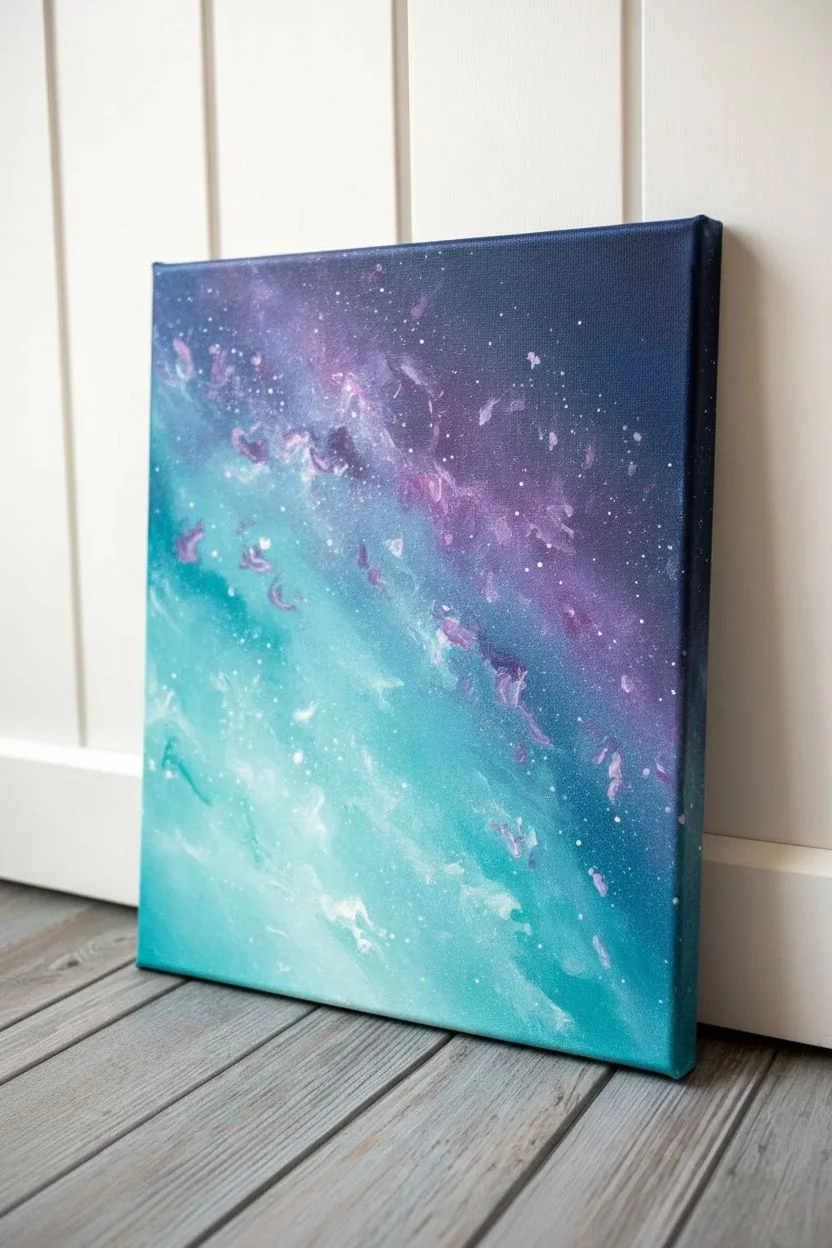
Immortalize your furry friend among the stars with this vibrant galaxy painting that combines simple blending techniques with a striking silhouette. The glowing turquoise and purple nebula creates a magical backdrop for a contemplative dog gazing up at a shooting star, making it a perfect sentimental piece.
Step-by-Step
Materials
- Square canvas (e.g., 10×10 or 12×12 inches)
- Acrylic paints: black, white, turquoise/teal, violet/purple, navy blue
- Large flat brush or sponge applicator
- Medium round brush
- Small detail brush or liner brush
- Pencil (optional for sketching)
- Old toothbrush (for splatter stars)
- Cup of water and paper towels
Step 1: Creating the Galaxy Background
-
Base gradient:
Start by applying turquoise paint to the bottom left section of the canvas, sweeping upwards in a diagonal motion. While the paint gets higher, mix in a little white to create a bright, glowing area that will sit behind the dog’s head. -
Blending transition:
While the turquoise is still wet, pick up your violet or purple paint. Apply this to the upper right section, blending it gently where it meets the turquoise to create a seamless, soft transition without making muddy colors. -
Deepening the space:
Add navy blue to the very top right corner and the edges of the purple section. Blend this inwards to create depth, making the ‘space’ look vast and deep. -
Adding texture:
Use a sponge or a dry brush to dab small amounts of lighter purple or pinkish tones randomly within the dark purple area to suggest distant nebula clouds. -
Drying time:
Allow the background to dry completely. This is crucial because if you add the stars or silhouette while it’s wet, the sharp lines will blur.
Step 2: Painting the Stars
-
Splatter stars:
Dilute a small amount of white paint with water until it has an inky consistency. Dip an old toothbrush into this mixture. -
Flicking technique:
Hold the toothbrush over the canvas and run your thumb across the bristles to spray fine white specks across the entire sky. Focus more density in the darker upper corners. -
Adding major stars:
Using your smallest detail brush and pure white paint, add a few larger, distinct dots for brighter stars. -
Drawing the shooting star:
In the upper left quadrant, paint a thin, straight line diagonally downwards. Thicken the ‘head’ of the comet slightly and let the tail taper off into nothingness. -
Star twinkles:
Select 3-4 of your larger stars and add a cross shape (+) over them with long, thin strokes to make them look like they are twinkling.
Muddy Colors?
If your turquoise and purple turn brown where they meet, let the first color dry completely, then use a very thin glaze (watery paint) of the second color to overlap.
Step 3: The Silhouette
-
Sketching the hill:
With a pencil, lightly draw a curved sloping line at the very bottom of the canvas to represent the ground. -
Outlining the dog:
Lightly sketch the dog’s shape sitting on the hill. Focus on the simple recognizable profile: the snout pointing up, the floppy ear, and the sitting posture. If sketching isn’t your strength, I recommend printing a silhouette cutout to trace. -
Painting the ground:
Load your medium brush with black acrylic paint. Fill in the hill area at the bottom, ensuring the bottom edge of the canvas is fully covered. -
Filling the silhouette:
Switch to a smaller round brush for better control. Carefully fill in the dog’s body with solid black paint, keeping your edges crisp and smooth. -
Refining the details:
Use your smallest liner brush to sharpen the tips of the ears and the tail. Add tiny tufts of grass sticking up from the black hill to give the ground texture. -
Adding the highlight:
Once the black is dry, mix a tiny bit of white into the black to make a dark grey. Paint a very subtle curved line on the dog’s thigh to suggest the bent leg. -
Final touch:
Add a tiny dot or thin line of white/grey near the dog’s eye or ear to catch the ‘starlight’ and define the face profile against the black.
Pro Tip: Make It Glow
Before painting the black silhouette, paint the area behind the dog’s head pure white and re-blend the turquoise over it. This backlight effect makes the black shape pop.
Step back and admire your celestial tribute to man’s best friend


Have a question or want to share your own experience? I'd love to hear from you in the comments below!