Snowflakes are my favorite way to get that crisp winter vibe on paper without needing perfect drawing skills. These easy snowflake painting ideas are super approachable, so you can relax, play with color, and still end up with something that looks beautifully finished.
Classic Tape-Resist Snowflake
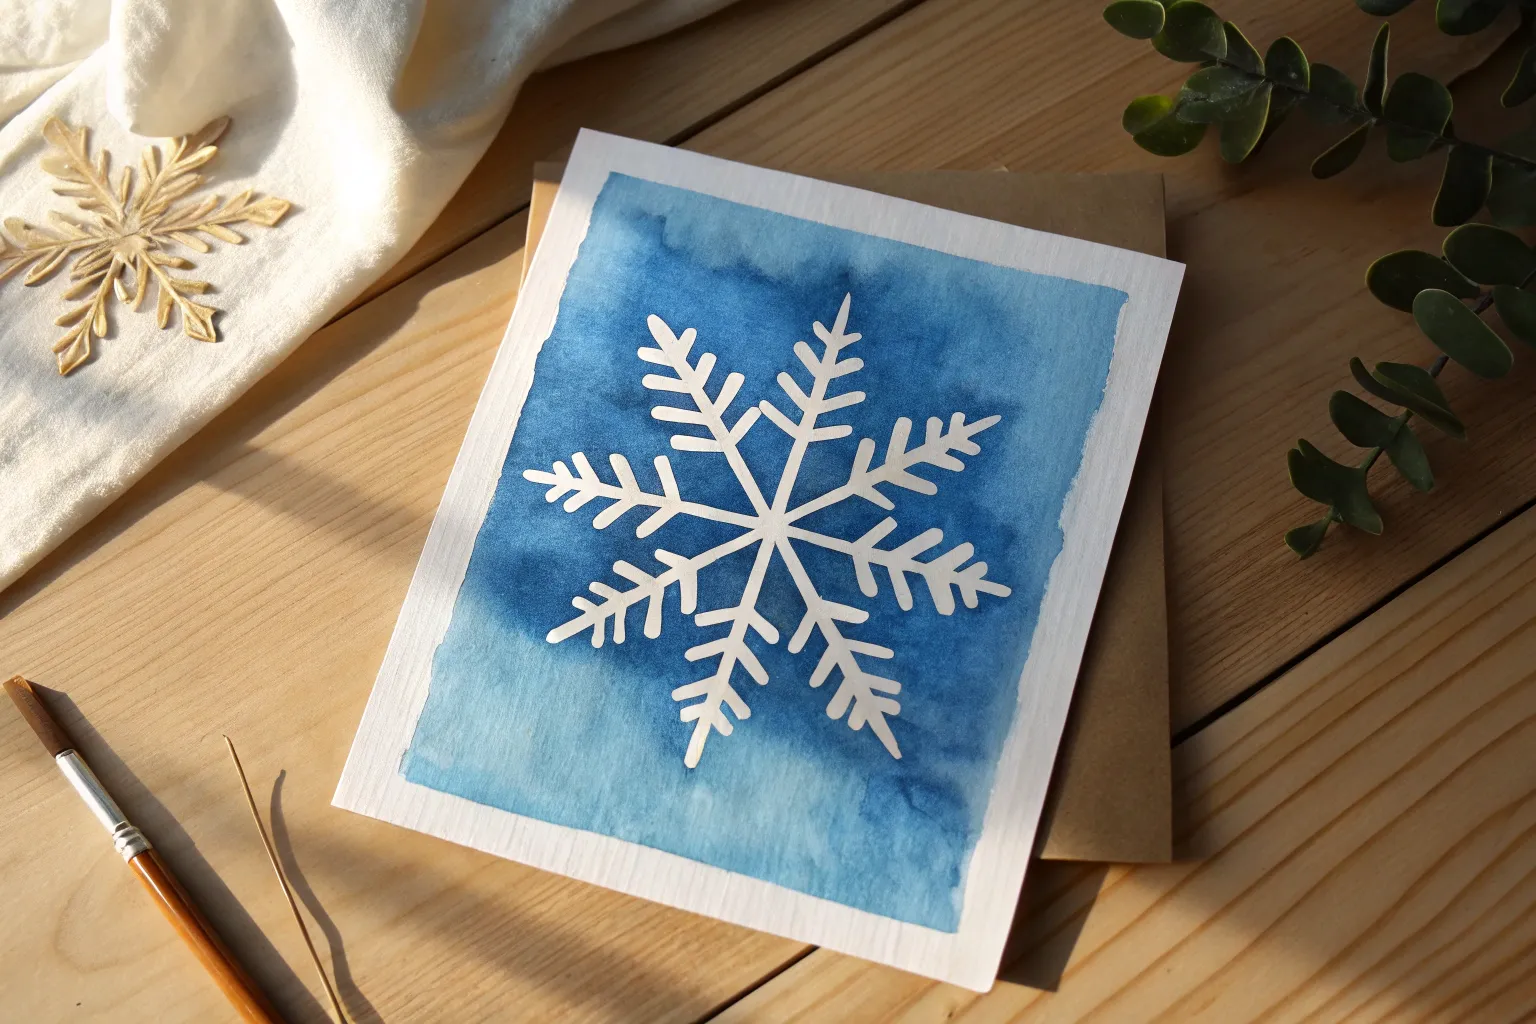
Capture the geometric beauty of winter with this striking tape-resist project that creates a crisp white snowflake against a deep winter blue. The sharp lines and contrasting border make this piece look professional, yet the process is surprisingly simple and satisfying.
Step-by-Step
Materials
- Watercolor paper (rectangular sheet)
- Painter’s tape or Washi tape (low tack)
- Watercolor paints (Indigo or Prussian Blue)
- Medium round paintbrush (size 6 or 8)
- Liquid masking fluid (optional, for finer details)
- Palette for mixing paint
- Clean water jar
- Paper towels
- Pencil (light)
- Ruler
Step 1: Preparation and Masking
-
Prepare your workspace:
Begin by securing your watercolor paper to a flat, hard surface or a wooden board. This prevents the paper from buckling when it gets wet and keeps your workspace tidy. -
Tape the main border:
Apply strips of painter’s tape along all four edges of your paper to create a clean white frame. Press down firmly to ensure paint won’t seep underneath. -
Create the inner frame:
Place a second set of tape strips about an inch inside the first border. This creates a rectangular ‘moat’ shape that you will paint later. -
Add detail masking:
Within that taped border zone, use small bits of tape or masking fluid to create tiny snowflake shapes at the corners. Allow any masking fluid to dry completely before moving on. -
Review your tape lines:
Run your fingernail or a burnishing tool along the edges of all the tape strips. A tight seal is crucial for those crisp, professional-looking lines.
Tape Sealing Trick
Paint a thin layer of clear clean water over your tape edges before applying color. This seals the gap with water, preventing blue paint from bleeding under.
Step 2: Drawing and Painting the Snowflake
-
Sketch the snowflake skeleton:
Lightly use a pencil and ruler to mark the center of your paper. Draw a simple six-pointed star as your guide: one vertical line and an ‘X’ intersecting it. -
Flesh out the design:
Draw the thickness of the snowflake arms around your guide lines. Add classic ‘V’ shapes or branches extending from each arm to create the crystalline structure. -
Mix your winter blue:
Load your palette with a deep blue watercolor, like Indigo or Prussian Blue. Add just enough water to make the paint flow smoothly, but keep the pigment concentrated for a rich color. -
Paint the snowflake body:
Carefully fill in your pencil sketch with the blue paint. Use the tip of your round brush to navigate the sharp corners and points of the snowflake. -
Paint the border frame:
While the center dries, fill in the rectangular space between your tape borders. Apply the paint evenly for a solid look, or vary the water amount for a textured, icy effect. -
Let it dry thoroughly:
Patience is key here. Allow the paint to dry completely until the paper feels room temperature to the touch—cool paper usually means it’s still damp.
Step 3: Finishing Touches
-
Second coat (optional):
If I want a truly deep midnight blue, I sometimes add a second layer of paint once the first is dry. This removes any streakiness. -
Remove the tape:
Slowly peel back the painter’s tape at a 45-degree angle pulling away from the painted area. This helps prevent the tape from ripping the paper fiber. -
Reveal the border details:
If you used masking fluid for tiny snowflakes in the border, gently rub it away with a clean finger or a rubber cement pickup tool to reveal the white paper underneath. -
Erase pencil marks:
Once you are absolutely certain the paint is bone dry, gently erase any visible pencil sketch lines from your central snowflake. -
Flatten the artwork:
If your paper curled slightly from the water, place the finished piece under a heavy book overnight to press it perfectly flat.
Make It Sparkle
While the blue paint is still wet, sprinkle a pinch of coarse salt onto the snowflake arms. As it dries, the salt pushes pigment away, creating an icy crystal texture.
Hang your finished painting near a window to let the natural light enhance those cool winter blues


White Crayon Watercolor-Resist Snowflakes
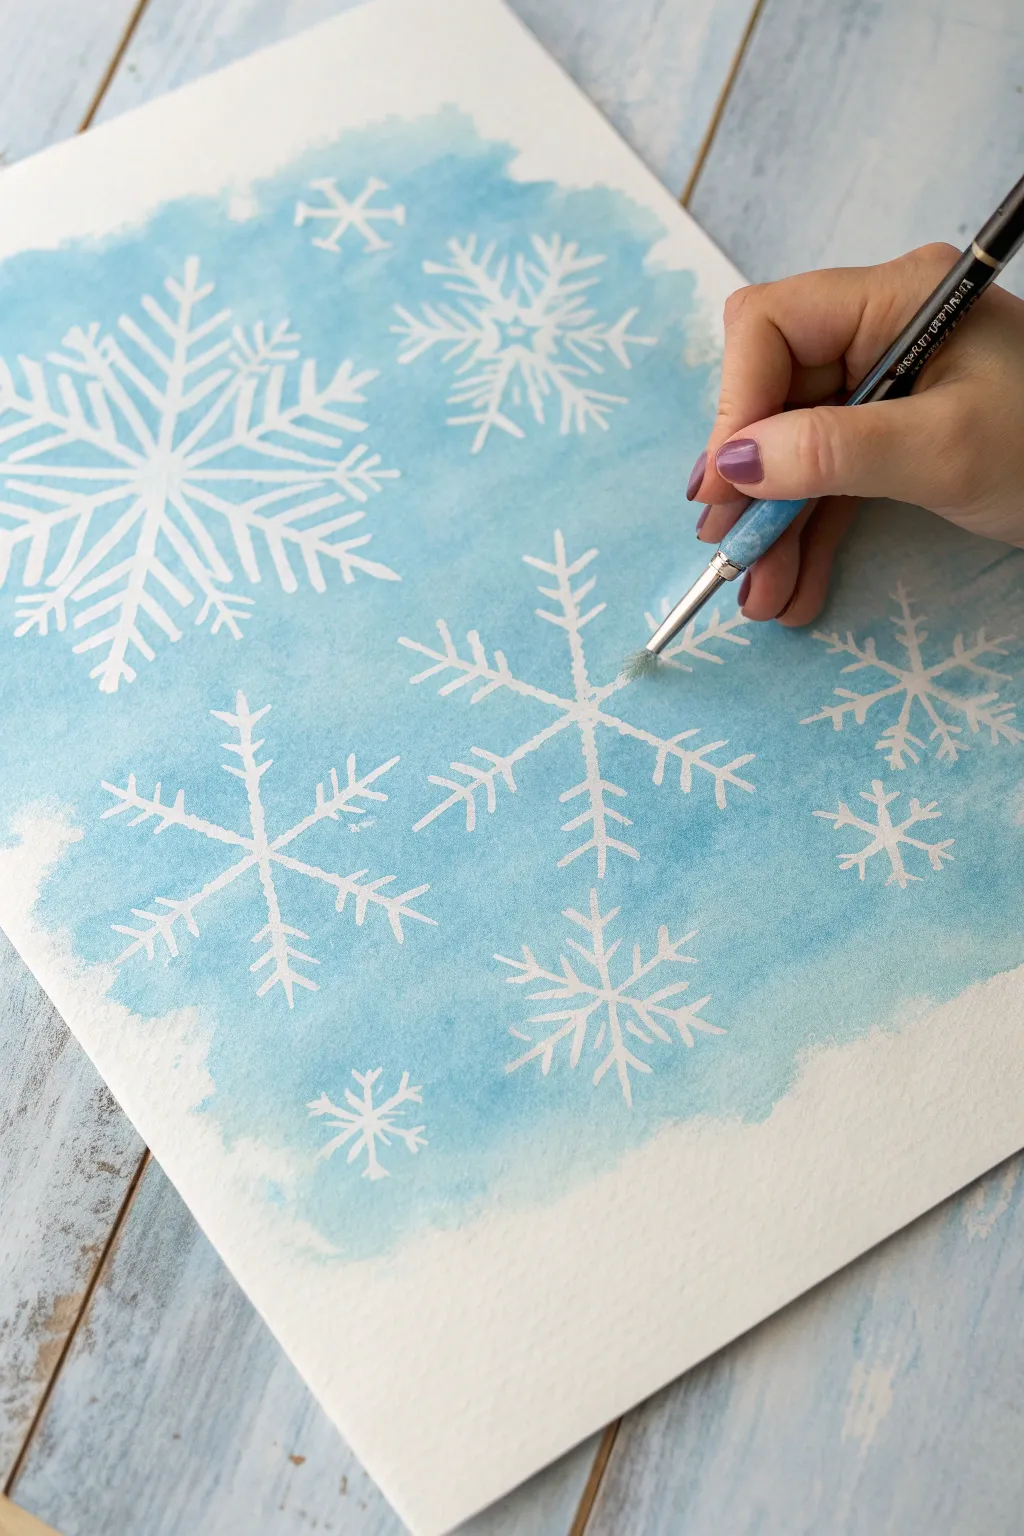
Create a magical snowy scene where intricate flakes appear like magic as you paint. This simple resist technique uses white crayon to preserve the paper’s brightness, resulting in crisp white snowflakes floating against a dreamy, icy blue watercolor wash.
Step-by-Step Tutorial
Materials
- Heavyweight watercolor paper (140lb/300gsm recommended)
- White wax crayon or white oil pastel
- Watercolor paints (shades of cyan, turquoise, or sky blue)
- Large soft round brush or wash brush
- Clean water jar
- Paper towels
- Painter’s tape or masking tape (optional to secure paper)
Step 1: Drawing the Snowflakes
-
Prepare your surface:
Set your watercolor paper on a flat surface. If you want to prevent warping, tape the edges down to your table or a drawing board using painter’s tape. -
Start the main snowflake:
Using your white crayon, press firmly and draw a large ‘X’ shape in the upper left quadrant of the paper to anchor your biggest snowflake. -
Add the crossbar:
Draw a horizontal line directly through the center of your ‘X’ to create a six-pointed star structure. -
Draw branches:
Along each of the six main arms of your snowflake, draw small ‘V’ shapes facing outward to create the feathery, crystalline branches. Vary the size of these V’s for a natural look. -
Create medium snowflakes:
Choose two or three other spots on the paper for medium-sized flakes. Draw simple six-pointed stars (a vertical line crossed by an X) in these areas. -
Detail the medium flakes:
Add smaller perpendicular dashes or tiny V-shapes to the ends of these medium flakes to give them complexity. -
Scatter small flakes:
Fill the remaining empty spaces with smaller, simpler star shapes. These can just be crossing lines without extra details. -
Check your pressure:
Go over your lines one last time if needed. The wax needs to be thick and continuous to repel the water effectively, so don’t be afraid to press hard. -
Verify visibility:
Tilt your paper under a light source. The white wax should catch the light, allowing you to check that your design is complete and well-spaced before painting.
Invisible Ink Check
Hard to see where you’ve drawn? Tilt your head so the light hits the paper at an angle. The wax will shine, revealing your hidden lines before you paint.
Step 2: Painting the Resist
-
Prepare your wash:
In your palette, mix a generous amount of watercolor paint with water. You want a fluid, watery consistency—aim for a ratio that looks like weak tea for a light effect or strong tea for deeper color. -
Load the brush:
Dip your large brush into the blue mixture, ensuring it is fully saturated. -
Begin the wash:
Start applying the blue paint over your invisible crayon drawings. I find it satisfying to watch the white lines instantly pop out as the water repels off the wax. -
Work quickly:
Continue brushing the color across the page. Work with wet edges to avoid harsh drying lines in the middle of your background. -
Vary the saturation:
As you paint, add a little more water to your brush for lighter areas, or dip into more pigment for darker, moodier patches of blue between the flakes. -
Create edges:
Allow the paint to have a rough, organic edge rather than painting all the way to the paper’s border. This gives the artwork a loose, sketchy watercolor aesthetic. -
Remove excess puddles:
If big puddles of blue paint settle directly on top of the wax lines, gently dab them with a thirsty brush or the corner of a paper towel to reveal the bright white underneath. -
Let it dry:
Leave the painting flat to dry completely. As it dries, the contrast between the matte blue paint and the shiny white wax will become even more striking.
Sparkle Finish
Sprinkle fine salt onto the wet blue paint before it dries. The salt absorbs pigment, creating beautiful crystallized ice textures for extra winter magic.
Once dry, display your frosty masterpiece in a frame or use it as a stunning handmade holiday card


Salt-Sprinkle Frost Snowflake Wash
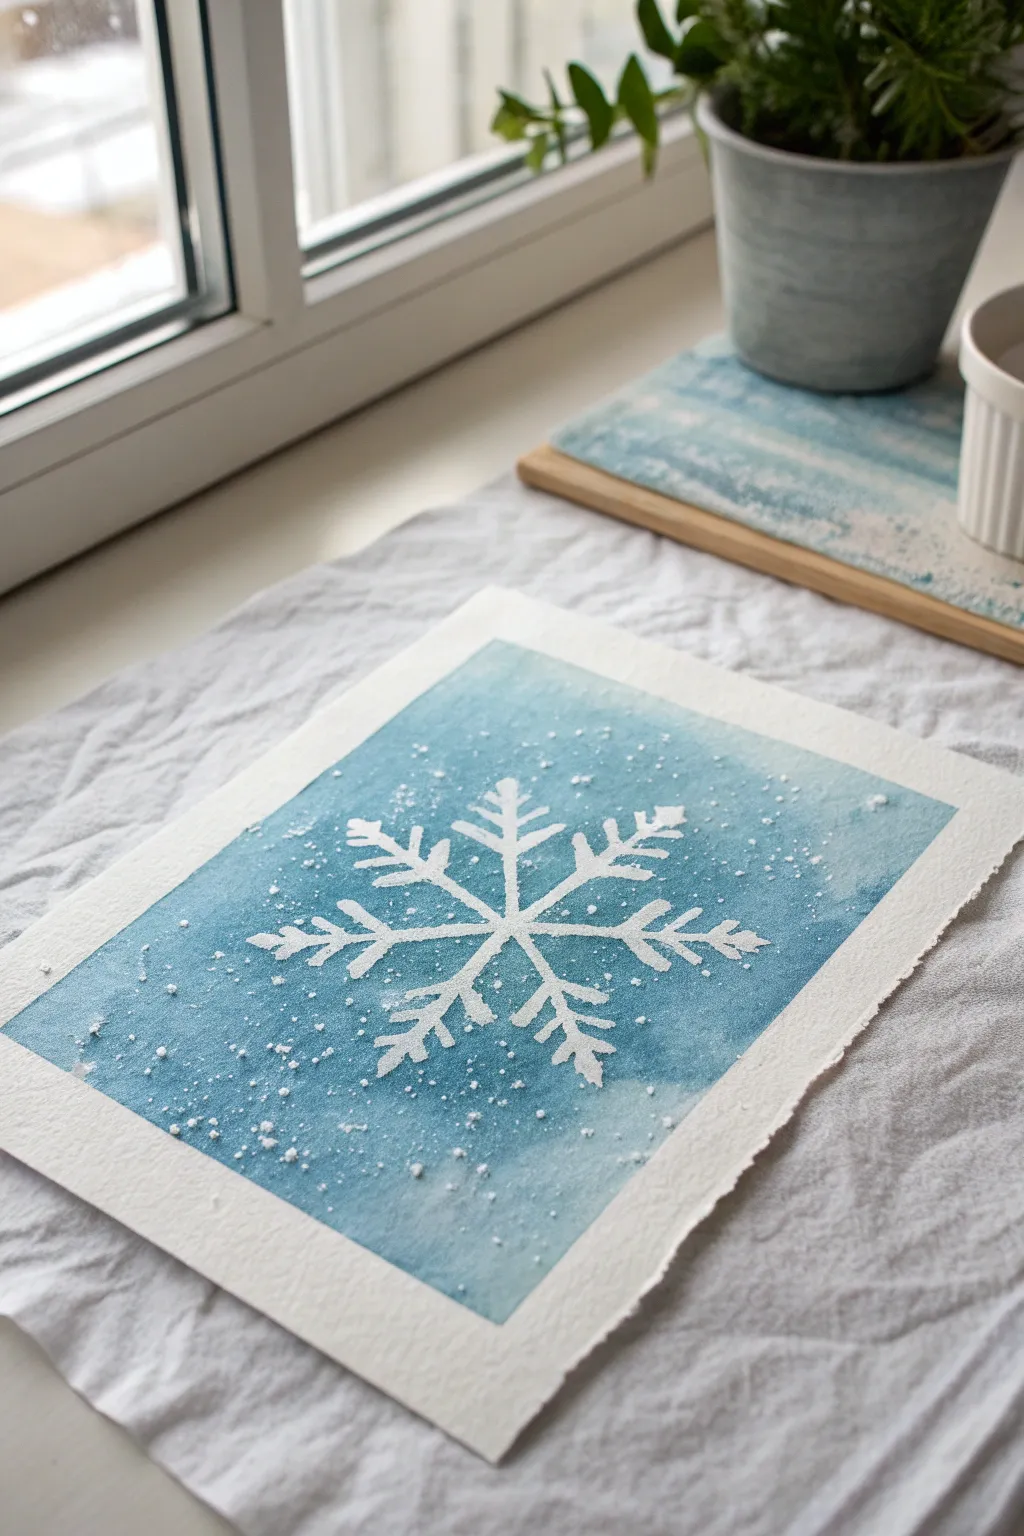
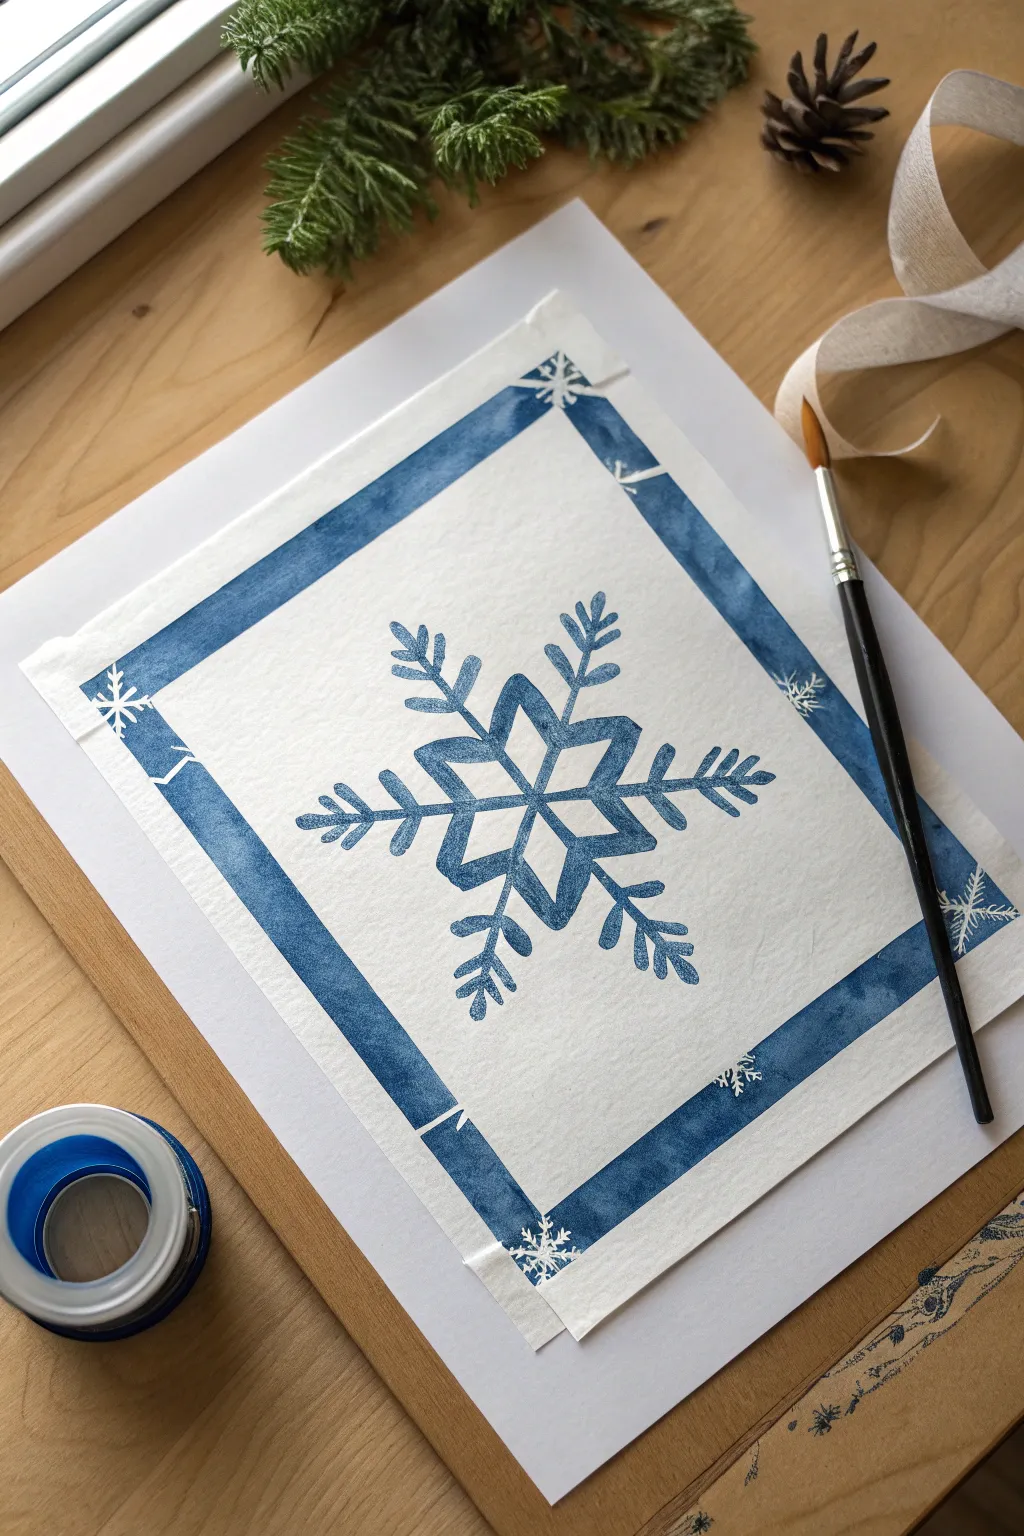
Capture the delicate beauty of winter with this striking watercolor resist project. By combining masking fluid with a salt-textured wash, you’ll create a crisp white snowflake that stands out beautifully against an icy blue backdrop.
How-To Guide
Materials
- Cold press watercolor paper (deckled edge optional)
- Masking fluid (drawing gum)
- Small round synthetic brush (for masking fluid)
- Liquid dish soap (tiny drop)
- Large round watercolor brush (size 10 or 12)
- Watercolor paints (Cerulean Blue, Prussian Blue, or Indigo)
- Table salt or sea salt
- Painter’s tape and drawing board
- Rubber cement pickup or clean fingers
Step 1: Preparation & Masking
-
Secure the Paper:
Begin by taping your watercolor paper down to a board on all four sides. If your paper has a deckled edge you want to preserve like the example, tape just inside specific margins or simply work carefully without tape to keep the raw edge aesthetic. -
Prepare the Masking Brush:
Before dipping your brush into the masking fluid, dip it into a tiny bit of dish soap. This coats the bristles and prevents the rubbery fluid from ruining your brush permanently. -
Draft the Center:
Mark a tiny dot in the absolute center of your paper with a pencil. Draw a vertical line through it, then an ‘X’ shape through the same center point to create six evenly spaced radiating arms. -
Apply the Main Arms:
Using your soap-prepped brush and masking fluid, paint over your pencil lines. Make these lines fairly thick and bold, tapering slightly as they reach the outer edges. -
Add the Branching Details:
Paint V-shapes or ‘feathers’ coming off each main arm. To match the example, place two sets of V-shapes on each arm deeply inside the structure, pointing outward. -
Include the Tips:
Add a final small V-shape or arrow at the very tip of each arm to complete the classic snowflake geometry. -
Create Falling Snow:
Dip an old toothbrush or a stiffer brush into the masking fluid and flick tiny droplets across the entire paper. This will create the small white specks that look like falling snow later. -
Let it Dry Completely:
Allow the masking fluid to dry entirely. It should turn yellowish or transparent and feel hard to the touch. Do not rush this step, or the paint will bleed under the mask.
Salt Isn’t Working?
If the salt isn’t creating blooms, the paper was likely too dry when you sprinkled it. The surface needs to be visibly shiny for the reaction to occur properly.
Step 2: The Watercolor Wash
-
Pre-wet the Paper:
Using clean water and your large round brush, coat the entire paper except for the masked areas. The paper should be glisten with a sheen but not have standing puddles. -
Mix Your Blue:
Prepare a watery mix of your chosen blue. For that icy look, I often mix a little Indigo directly into Cerulean Blue to get a deep, cold tone. -
Apply the First Layer:
Drop the blue paint onto the wet paper. Let the water carry the pigment. Keep the color lighter near the edges to create a vignette effect. -
Deepen the Contrast:
While the paper is still wet, drop more concentrated pigment close to the snowflake arms. This high contrast will make the white pop dramatically once revealed. -
Add the Salt Texture:
While the paint is wet and shiny—this timing is crucial—sprinkle salt over the painted areas. Concentrate the salt slightly more around the snowflake for a frosty texture. -
The Waiting Game:
Leave the painting flat to dry naturally. As it dries, the salt will push the pigment away, creating star-burst textures. Do not use a hairdryer, as it can blow the salt around or melt the masking fluid.
Add Some Shimmer
Mix a tiny amount of iridescent medium or pearlescent watercolor into your blue wash. This gives the ‘ice’ a subtle, magical glitter when viewed at an angle.
Step 3: The Reveal
-
Remove the Salt:
Once the paper is bone dry, gently brush off the salt crystals with your hand or a dry brush over a sink or trash bin. -
Check for Dampness:
Touching the paper should feel room temperature. If it feels cold, it’s still damp inside the fibers. Wait longer if needed. -
Remove the Masking Fluid:
Use a rubber cement pickup tool or your clean finger to gently rub the masking fluid. Start from the center and rub outwards to avoid peeling up the paper surface. -
Erase Pencil Lines:
If any of your initial pencil guides are visible inside the white shapes, gently erase them now with a soft kneaded eraser. -
Flatten the Artwork:
If the water buckled the paper slightly, place your finished (and fully dry) painting under a heavy book overnight to crisp it up.
Now you have a frosty, crystalline artwork that captures the chill of winter perfectly without the cold fingers


Simple Stencil Snowflake With Sponge Dabbing
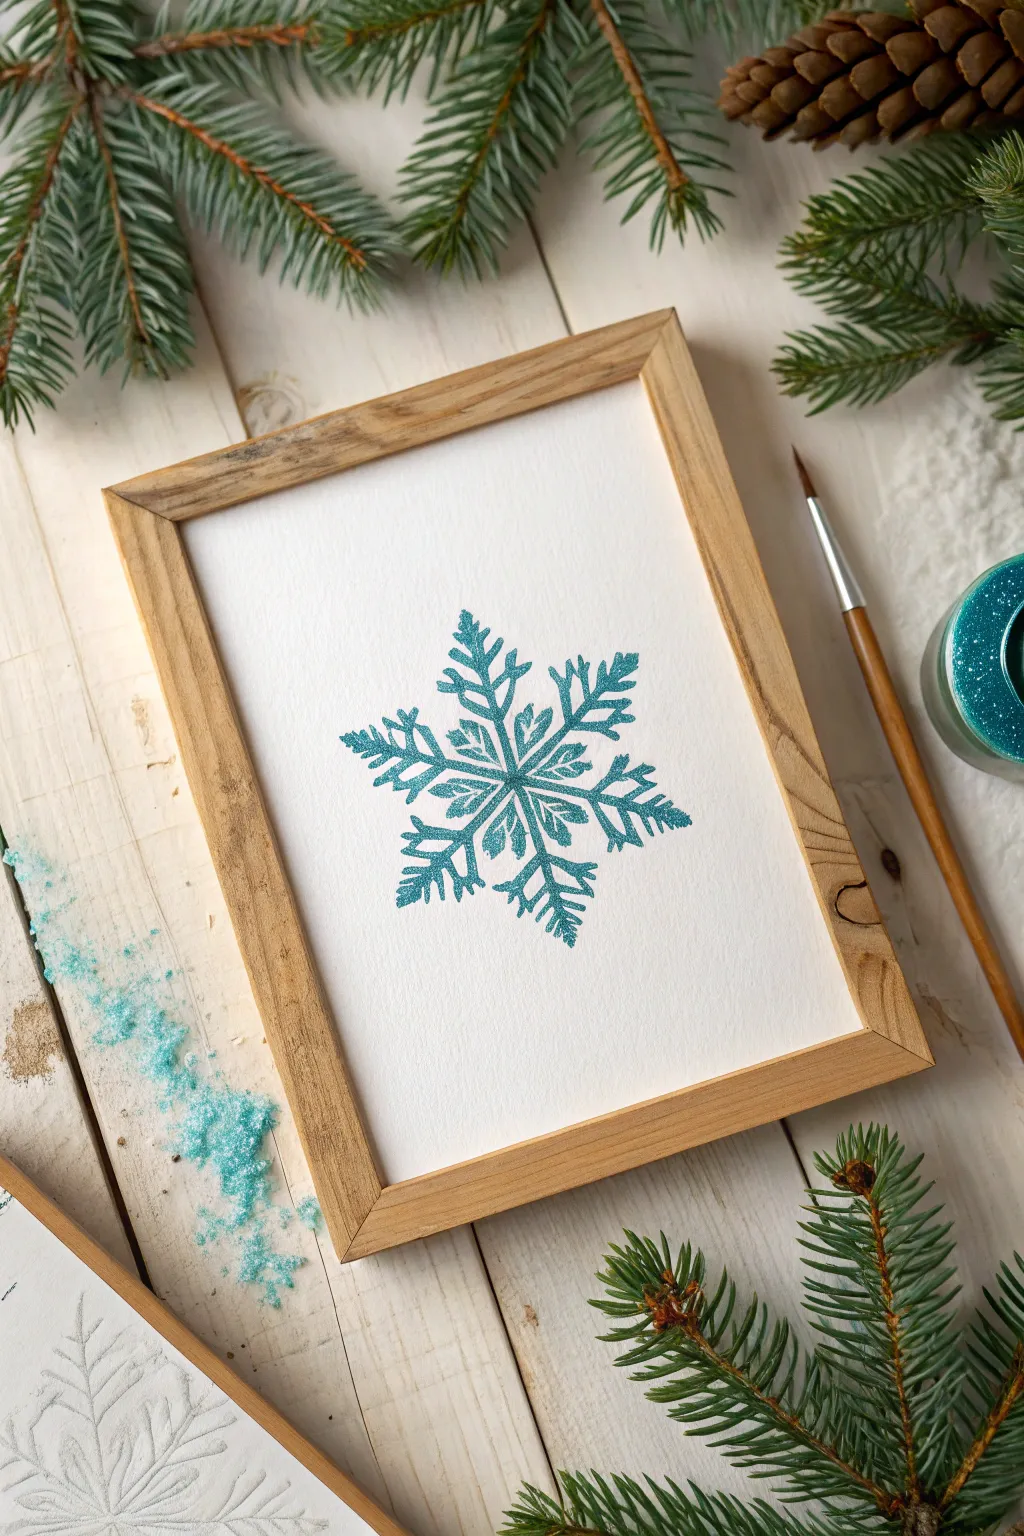
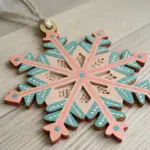
Capture the frosty elegance of winter with this shimmering teal snowflake painting. Using a simple stencil technique and a touch of glitter, you can create a crisp, professional-looking piece that sparkles just like fresh snow.
Step-by-Step Tutorial
Materials
- White watercolor paper or heavy cardstock
- Snowflake stencil (approx. 4-5 inches)
- Teal or turquoise acrylic paint
- Fine turquoise glitter
- Small painting sponge or dabber
- Painter’s tape or washi tape
- Small detail brush (round size 1 or 2)
- Wooden frame (5×7 inches)
- Paper plate or palette
Step 1: Preparation
-
Prepare your workspace:
Lay down some protective covering on your table, as glitter tends to travel. Cut your white paper to size so it fits perfectly inside your wooden frame. -
Position the stencil:
Center your snowflake stencil on the paper. Take a moment to measure the distance from the edges to ensure it is perfectly symmetrical. -
Secure the stencil:
Use small pieces of painter’s tape to hold the stencil firmly in place. This prevents it from shifting while you work, which is crucial for sharp lines.
Step 2: Applying the Base Color
-
Load the sponge:
Squeeze a small amount of teal acrylic paint onto your palette. Dip your sponge dabber into the paint, then dab it off on a clean part of the plate until the sponge is almost dry. -
Begin dabbing:
Gently press the sponge over the stencil openings using an up-and-down motion. Avoid dragging the sponge, as this can push paint under the stencil edges. -
Build coverage:
Apply a second light layer of paint if necessary to get a solid teal color. I find that two thin coats adhere better than one thick, gloppy coat.
Bleeding Edges?
If paint is seeping under the stencil, your sponge is too wet. Dab it continuously on a paper towel until barely any color comes off before touching the paper.
Step 3: Adding the Sparkle
-
Prepare the glitter mix:
While the paint is still wet on the paper, you have two options. You can sprinkle glitter directly onto the wet paint, or mix a pinch of glitter into a fresh dollop of clear acrylic medium. -
Apply the glitter:
If sprinkling, gently tap the fine turquoise glitter over the wet stencil area. Ensure the glitter covers the snowflake tips evenly. -
Press it in:
Take a clean, dry part of your sponge or a paper towel and very gently press the glitter into the wet paint to secure it. -
Remove excess:
If you used loose glitter, gently tap the paper on its side over a trash bin to shake off the loose particles that didn’t stick to the paint.
Pro Tip: Sticker Method
For ultra-crisp lines, use a vinyl sticker or adhesive stencil instead of a plastic one. Press the edges down firmly with a credit card before painting.
Step 4: Refining and Framing
-
Lift the stencil:
Carefully peel away the tape and lift the stencil straight up. Do this slowly to avoid smudging any wet edges. -
Let it dry:
Allow the artwork to dry completely for at least 30 minutes. The paint needs to be fully set before you frame it. -
Touch up edges:
Inspect the snowflake edges. If any paint bled under the stencil, use a tiny amount of white paint on a detail brush to cover the mistake, or use a craft knife to gently scrape it away. -
Add detail highlights:
Using your small detail brush, you can add tiny strokes of slightly darker teal or metallic silver to the center stems of the snowflake for extra dimension. -
Mount the artwork:
Place your dry painting into the wooden frame. Secure the back panel. -
Final clean:
Wipe the glass of the frame (if using glass) to remove any fingerprints or stray glitter specs.
Place your framed snowflake near a window or light source to catch the subtle glimmer throughout the day
BRUSH GUIDE
The Right Brush for Every Stroke
From clean lines to bold texture — master brush choice, stroke control, and essential techniques.
Explore the Full Guide
Snowflake Made From Basic Shapes
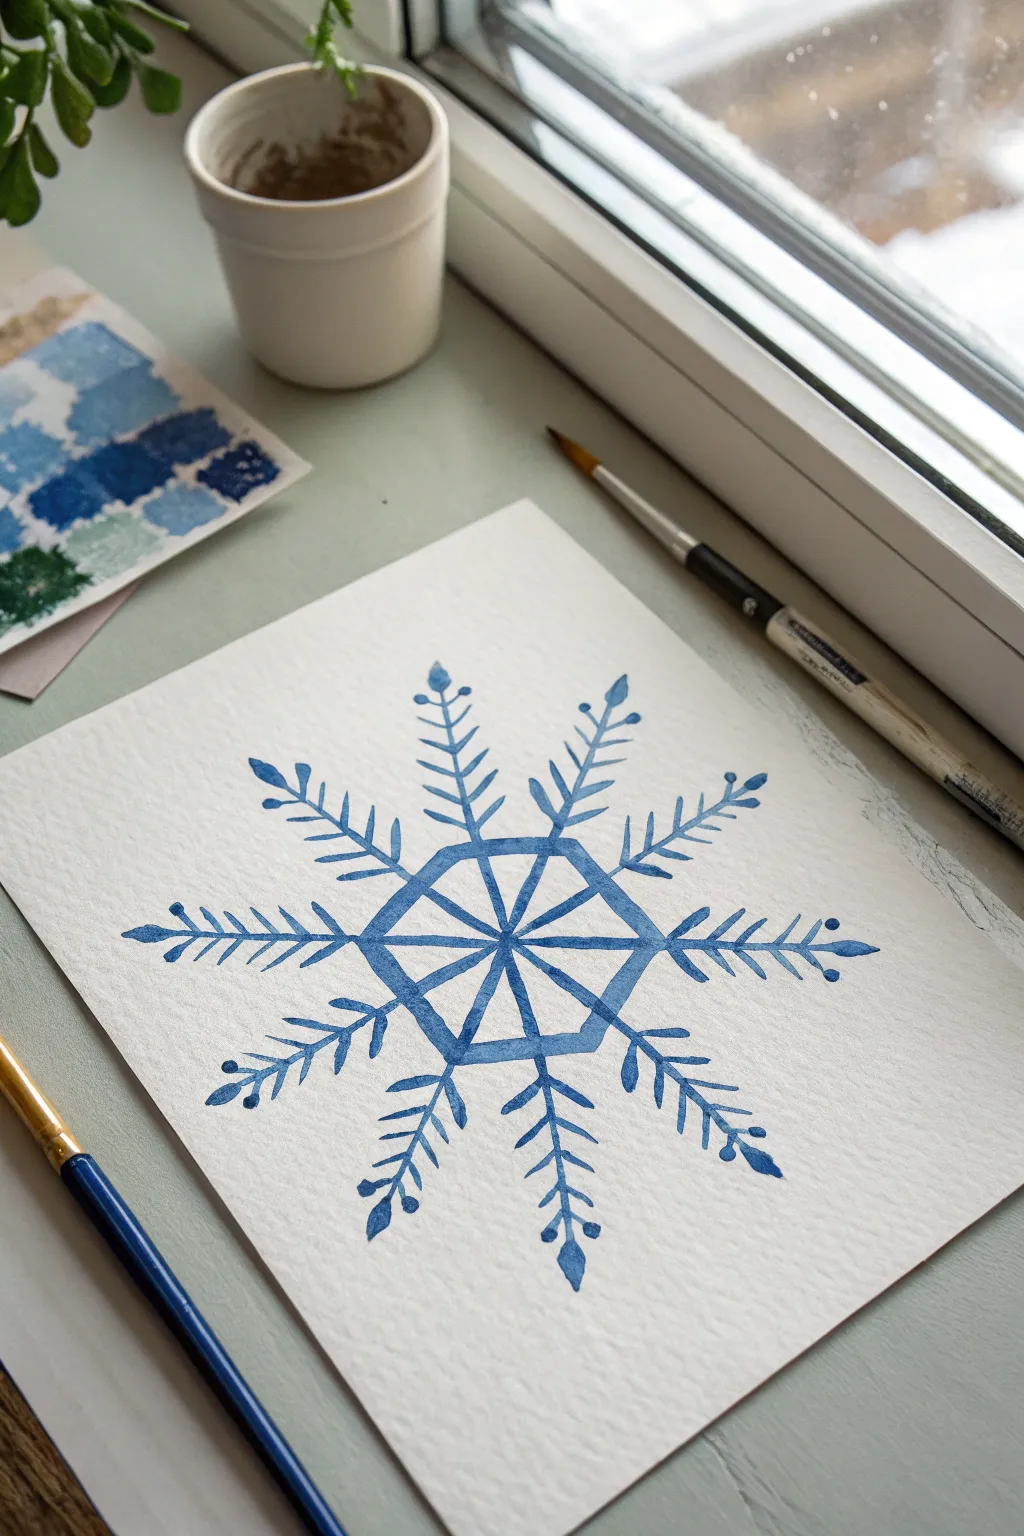
This elegant snowflake combines the fluid beauty of watercolor with crisp, geometric structure. By building the design from a central hexagon outward, you’ll create a perfectly balanced winter motif that feels both modern and traditional.
How-To Guide
Materials
- Cold press watercolor paper (cut to desired size)
- Watercolor paints (Indigo or Prussian Blue)
- Round watercolor brush (size 4 or 6)
- Fine liner brush (size 0 or 1)
- Pencil (HB or lighter)
- Ruler
- Clean water jar
- Paper towel
Step 1: Planning the Structure
-
Find the center:
Begin by finding the approximate center of your watercolor paper. Lightly mark a small dot with your pencil to anchor your design. -
Draft the hexagon:
Using a ruler, lightly sketch a small hexagon around your center dot. Aim for sides that are about 1 inch long. This central shape is the heart of your snowflake. -
Draw radiating lines:
From each of the six corners of your hexagon, draw a faint straight line extending outward towards the edge of the paper. These will be the main arms of the snowflake. -
Connect to center:
Extend these six lines inward so they meet at your central dot, creating a ‘spoked’ effect inside the hexagon.
Keep it Crisp
Use the very tip of your brush and hold it perpendicular to the paper. This vertical angle gives you maximum control for painting thin, consistent straight lines.
Step 2: Painting the Core
-
Mix your color:
Prepare a puddle of blue watercolor. I prefer using a deep Indigo or Prussian Blue for a classic wintry look. Make sure the mixture is fluid but rich in pigment. -
Paint the spokes:
Using your fine liner brush or the tip of your round brush, carefully paint over the pencil lines inside the hexagon. Start from the center and pull the brush out to the corners. -
Outline the hexagon:
With the same brush, paint the six outer edges of the hexagon. Try to keep the line thickness consistent with your spokes. -
Thicken the lines:
Go back over your hexagon outline and the internal spokes to slightly thicken them. This adds visual weight to the center so it can support the delicate outer branches.
Step 3: Creating the Branches
-
Extend the main arms:
Load your brush with more paint and trace over the long pencil lines extending outward from the hexagon corners. Taper the stroke gently at the very end for a sharp point. -
Add the first V-shapes:
Starting about half an inch up from the hexagon on one arm, paint a small ‘V’ shape branching off the main line. The tips of the V should point outward. -
Repeat all around:
Work your way around the snowflake, painting this first tier of V-shapes on all six arms to ensure symmetry. -
Add the second tier:
Move slightly further up the arm and add a second, slightly smaller ‘V’ shape above the first one. Repeat this for all six arms. -
Paint the third tier:
Add a third, even smaller set of branches near the tip of each arm. Decreasing the size as you go outward mimics the natural growth of ice crystals.
Sparkle Effect
While the blue paint is still wet, sprinkle a tiny pinch of coarse salt onto the center hexagon. Brush it off once dry for an icy, textured crystal effect.
Step 4: Refining Details
-
Add the droplets:
At the very tip of each main arm, paint a small, tear-shaped droplet. This softens the sharp ends of the lines. -
Decorate the branches:
On the first (lowest) set of V-branches only, add tiny round dots to the tips of the V’s. This adds a whimsical, decorative touch. -
Check for consistency:
Scan your painting for any pale spots. While the paint is still damp, you can carefully drop in a little more pigment to uneven areas to darken them. -
Erase guidelines:
Let the painting dry completely—wait until the paper is flat and cool to the touch. Then, very gently erase any visible pencil marks.
Once dry, this striking geometric design makes for a perfect handmade holiday card or framed winter decoration
Cotton Ball Snowfall Around a Snowflake
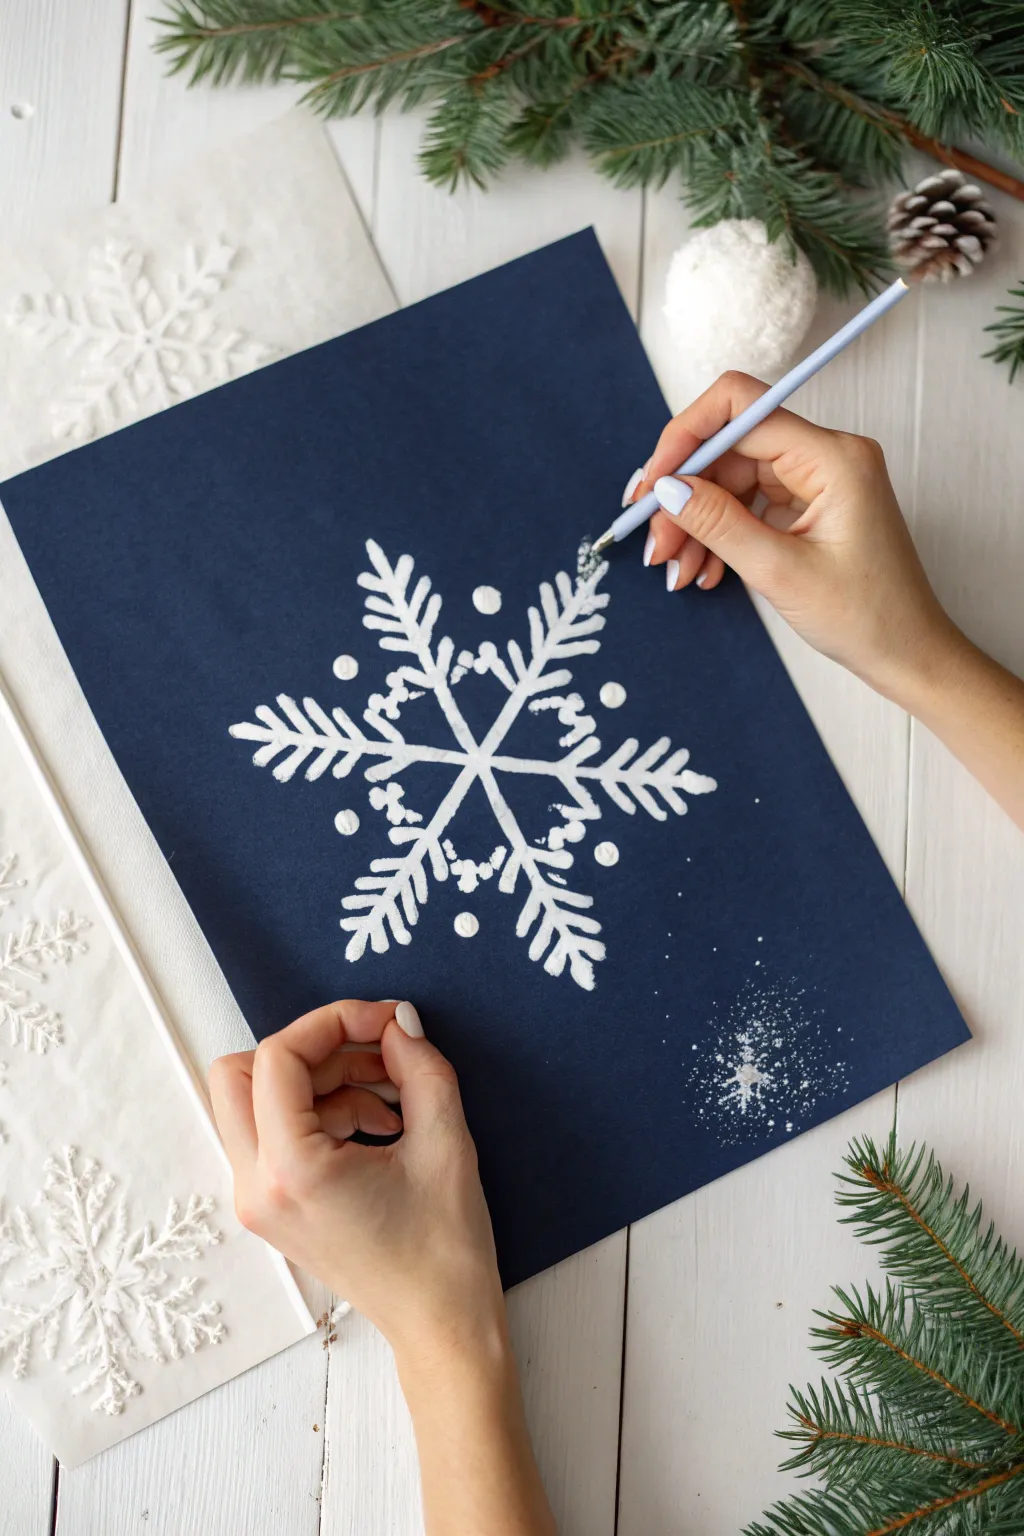
Create a stunningly crisp winter scene using a clever resist technique that gives your snowflake a frosty, textured appearance. This project combines simple painting methods with household salt to mimic the crystalline look of real snow against a deep blue sky.
Detailed Instructions
Materials
- Dark blue or navy cardstock paper
- White acrylic paint or gouache
- Fine liner paintbrush
- Pencil (for light sketching)
- Ruler
- Table salt or coarse sea salt
- Small mixing palette
Step 1: Preparation & Sketching
-
Prepare your workspace:
Lay down your dark blue cardstock on a flat surface. Ensure the paper is clean and free of dust, as dark paper shows every speck. -
Find the center:
Using a ruler, lightly mark the center point of your page with a pencil. This will be the anchor for your snowflake’s symmetry. -
Draw the main axis:
Draw a vertical line about 4 to 5 inches long through your center point. -
Add diagonal axes:
Draw an ‘X’ through the center point, creating two diagonal lines that intersect the vertical line. Try to keep the angles even so you have six total arms radiating from the middle. -
Check the lengths:
Measure quickly to ensure all six arms are roughly the same length from the center. Adjust if necessary with a soft eraser.
Paint Consistency Pro-Tip
Don’t add water to your acrylics! Using the paint straight from the tube keeps it thick enough to hold onto the salt granules securely.
Step 2: Painting the Structure
-
Load your brush:
Squeeze a small amount of white acrylic paint onto your palette. Dip your fine liner brush in, ensuring it’s fully coated but not dripping. -
Paint the central star:
Starting from the center, trace over your pencil lines for the six main arms. Keep your hand steady to create clean, straight lines. -
Create the inner star:
About one-third of the way up each arm, paint a small ‘V’ shape connecting to the adjacent arms. This creates a hexagonal star pattern near the center. -
Paint the branches:
On each of the six main arms, paint three pairs of smaller branches V-ing outward. Make the pair closest to the center the smallest, getting slightly larger as you move outward. -
Add decorative dots:
Using the tip of your brush or the handle end, place a single white dot in the empty space between each main arm to add whimsical detail.
Step 3: Adding Texture & Effects
-
Thicken the paint:
Go back over your main lines with a second, slightly thicker coat of wet paint. You need the paint to be wet for the next step. -
Sprinkle the salt:
While the distinctive white lines are still wet, carefully sprinkle a pinch of salt directly onto the painted areas. I find using my fingers gives me better control than shaking it from a container. -
Create texture bursts:
For the ‘snowfall’ effect seen in the corner, dab a cluster of wet paint spots in the lower right area of the paper. -
Salt the snowfall:
Immediately sprinkle a heavier amount of salt onto this wet cluster to create a concentrated snowy patch. -
Add scattered flurries:
Tap your brush to splatter tiny droplets of white paint randomly around the main snowflake, simulating falling snow. -
Let it dry completely:
Allow the artwork to sit undisturbed for at least one hour. The paint needs to harden fully around the salt crystals. -
Shake off excess:
Once fully dry, gently tilt the paper over a trash bin and tap the back to dislodge any loose salt that didn’t stick. -
Clean up lines:
If the salt disguised the shape too much, re-define the very tips of the snowflake arms with a tiny bit of fresh white paint.
Uneven Lines?
If your snowflake lines look shaky, thicken them intentionally. A slightly chunkier snowflake holds more salt and looks fluffier in the end.
Now you have a sparkling winter creation that captures the frosty magic of the season

PENCIL GUIDE
Understanding Pencil Grades from H to B
From first sketch to finished drawing — learn pencil grades, line control, and shading techniques.
Explore the Full Guide
Lift-Off Snowflakes on Wet Paint
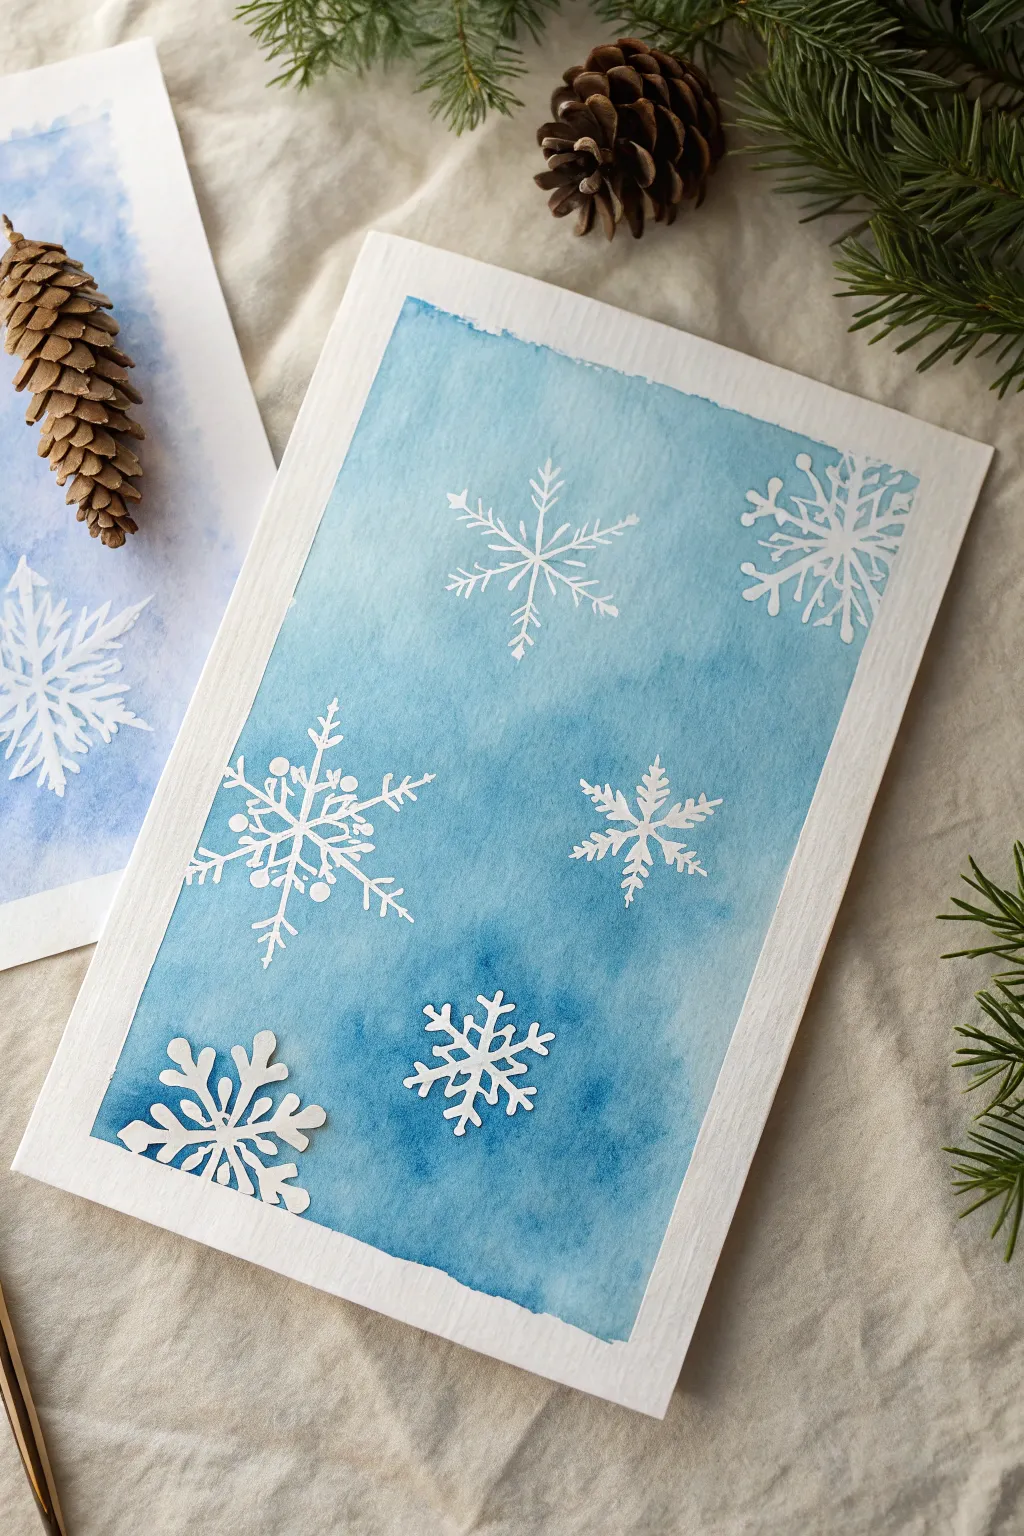
Capture the delicate beauty of a winter flurry with this clever resist technique that leaves crisp, white snowflakes dancing against a dreamy blue watercolor sky. The result is a professional-looking greeting card that balances intricate details with soft, fluid washes.
Step-by-Step Tutorial
Materials
- Heavyweight watercolor paper (300gsm/140lb)
- Light tac adhesive paper, masking fluid, or snowflake stickers
- Blue watercolor paint (Phthalo Blue or Cerulean)
- Wide flat wash brush
- Painter’s tape or masking tape
- Water container
- Paper towels
- Craft knife or electronic cutting machine (like a Cricut)
- Cutting mat
Step 1: Preparing the Mask
-
Cut your paper:
Begin by trimming your watercolor paper to your desired card front size. A standard A2 card size works beautifully, but feel free to go larger if you want more space for your flurry. -
Tape the edges:
Secure your paper to a hard board or your work surface using painter’s tape on all four sides. Leave about a quarter-inch border; this creates that lovely, clean white frame around your painting later. -
Create snowflake stencils:
If using an electronic cutting machine, cut various snowflake shapes from light-tack adhesive paper or vinyl. If you are cutting by hand, draw simple snowflake shapes on masking tape and carefully cut them out with a craft knife. -
Apply the snowflakes:
Peel the backing off your snowflake die-cuts or stickers and press them firmly onto the watercolor paper. Arrange them randomly, letting some hang partially off the edges for a natural, candid composition. -
Seal the edges:
Run your fingernail or a bone folder over the edges of every snowflake sticker. It is crucial that the edges are perfectly sealed so no paint seeps underneath.
Paint Bleeding?
If paint seeped under the sticker, use a stiff brush dampened with clean water to gently scrub the area, then blot immediately with a tissue to lift the unwanted color.
Step 2: Painting the Winter Sky
-
Prepare your wash:
Mix a generous amount of blue watercolor paint with water. You want a consistency that is fluid but still rich in pigment—think heavy cream. -
Wet the paper:
Using your flat brush, apply a layer of clean water over the entire paper, brushing right over the stickers. This ‘wet-on-wet’ technique helps the color spread evenly. -
Apply the blue:
While the paper is still glistening, load your brush with the blue paint mixture. Start applying it from the top, sweeping downwards. -
Create variations:
For a more dynamic look, drop slightly more concentrated pigment into wet areas while they are still damp. This creates beautiful blooms and texture as it dries. -
Mind the edges:
Don’t stress about painting perfectly to the tape line. A slightly uneven, organic edge adds charm to the finished piece. -
Wait for the magic:
Allow the paint to dry completely. This is the hardest part! If the paper is cool to the touch, it is still wet deep down.
Step 3: Reveal and Refine
-
Check dryness:
Verify one last time that the paint is bone dry. I like to wait an extra ten minutes just to be safe, as peeling stickers off wet paper can tear the surface. -
Remove the snowflakes:
Use the tip of your craft knife or a pin to gently lift the edge of a snowflake sticker. Peel it back slowly at a sharp angle. -
Clean up any residue:
If there is any sticky residue left behind from the adhesive, use a designated adhesive eraser to gently rub it away without damaging the paper. -
Lift the border tape:
Remove the painter’s tape from the outer edges of the card. Pull the tape away from the center of the artwork to prevent ripping. -
Mount the artwork:
Adhere your finished watercolor panel onto a folded card base using double-sided tape or a glue runner for a polished finish.
Salt for Snow
While the blue wash is still very wet, sprinkle coarse sea salt over the open areas. As it dries, the salt pushes pigment away, creating tiny star-like textures.
Once dry, you can add a handwritten holiday message in the open blue spaces to complete your custom card
Ombre Background With One Bold Snowflake
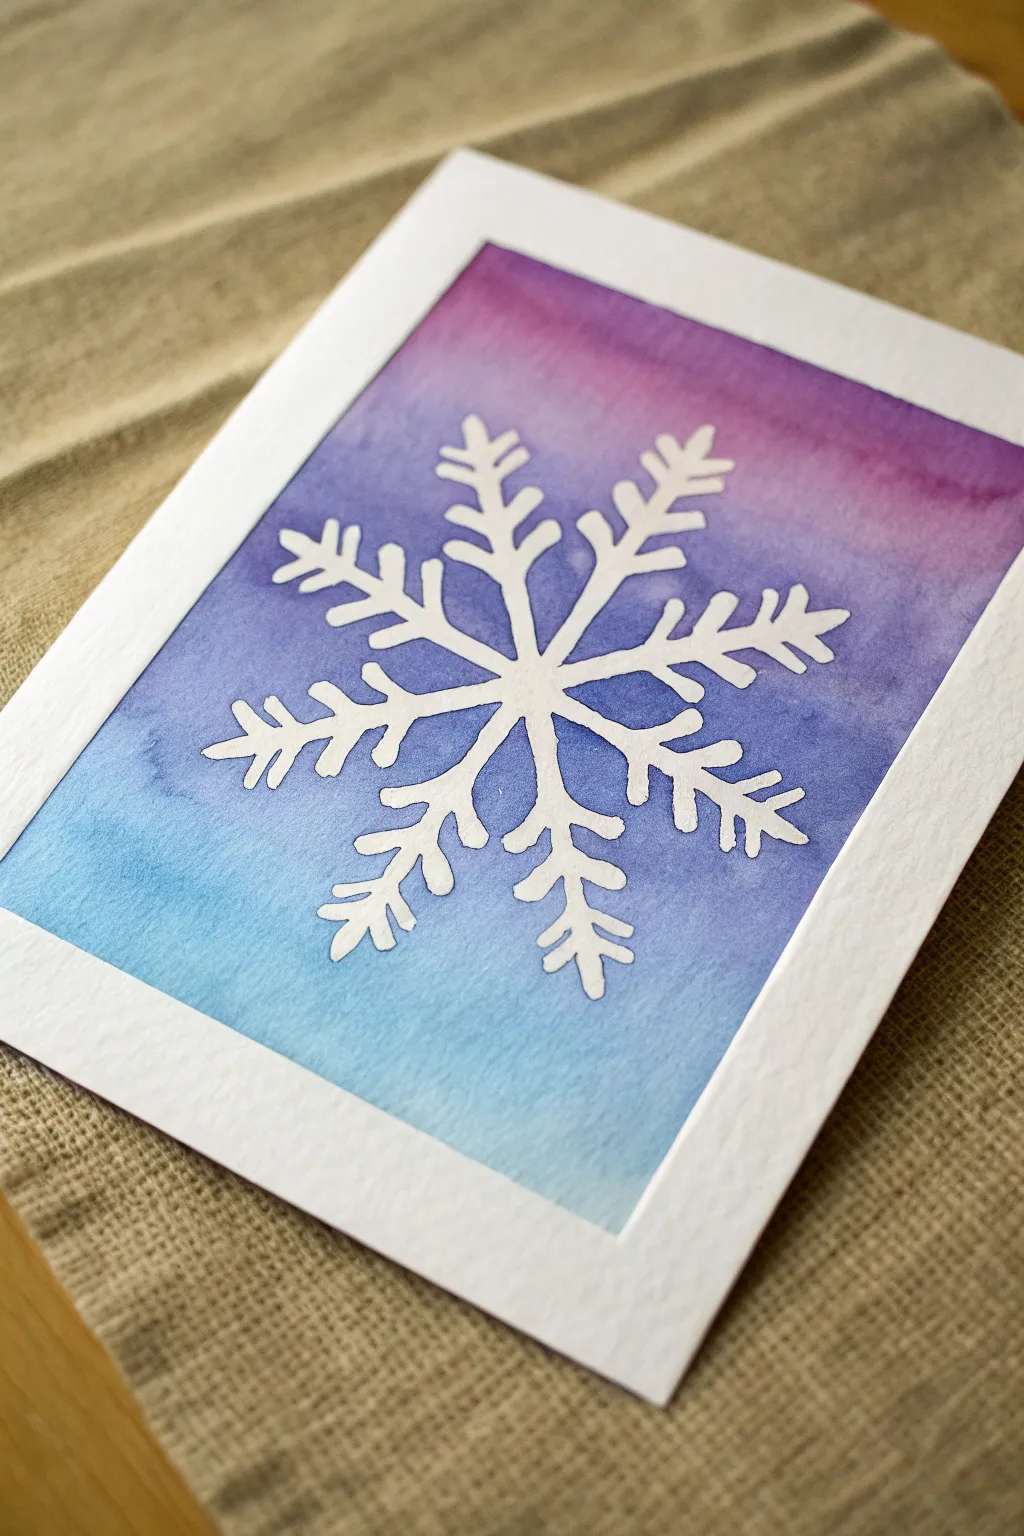
Capture the serene beauty of winter with this striking resist-method project. By masking off a single, bold snowflake shape before painting, you create a crisp white silhouette that pops against a dreamy purple-to-blue watercolor wash.
How-To Guide
Materials
- Cold press watercolor paper (approx. 5×7 inches)
- Painter’s tape or artist tape
- Liquid frisket (masking fluid) or white crayon/oil pastel (for resist)
- Small round paintbrush (size 2 or 4)
- Large flat wash brush
- Watercolor paints (Violet/Purple and Cyan/Blue)
- Cup of water and paper towels
- Pencil (optional)
- Rubber cement pick-up or clean eraser
Step 1: Preparation and Masking
-
Secure the Paper:
Begin by taping down all four edges of your watercolor paper to a board or table using painter’s tape. Create a border about 1/2 inch wide to ensure a clean white frame once finished. -
Plan the Center:
Visualize the center of your paper. If you feel more comfortable, you can lightly mark a tiny dot with a pencil as a guide, but keeping it freehand adds a natural charm. -
Draw the main spokes:
Using your masking fluid and a dedicated ‘junk’ brush (masking fluid ruins brushes), draw a vertical line and a horizontal line crossing in the center. -
Add diagonal spokes:
Draw two diagonal lines through the center point, creating an eight-pointed star shape. Try to keep the lines relatively thick for a bold look. -
Detail the branches:
Add small ‘V’ shapes along each spoke, pointing outward from the center. These create the crystalline structure of the snowflake. -
Refine the shape:
Review your masked shape. If any lines look too thin, go over them again with the masking fluid. The thicker the mask, the bolder the final snowflake will be. -
Wait for drying:
Let the masking fluid dry completely. It must be dry to the touch and slightly tacky before you add any water, otherwise it will smear.
Tape Tearing Paper?
If your tape is ripping the paper upon removal, blast it with warm air from a hair dryer for a few seconds first. This softens the adhesive for a gentle release.
Step 2: Painting the Ombre Wash
-
Pre-wet the paper:
Using your large flat brush and clean water, gently wet the entire surface of the paper inside the tape. It should be shiny but not forming puddles. -
Start with purple:
Load your brush with a rich violet or purple watercolor. Apply it horizontally across the top third of the paper, letting the wet surface help diffuse the pigment. -
Transition the color:
Dilute the purple slightly on your brush and pull the color down into the middle section. The wet-on-wet technique will help soften the edges naturally. -
Introduce blue:
Clean your brush and load it with a cool blue or cyan. Start painting from the bottom edge, moving upwards toward the purple middle. -
Blend the middle:
Where the purple and blue meet in the center, use a slightly damp brush to encourage them to mix. I like to tilt the paper slightly to let gravity help them merge seamlessly. -
Touch up saturation:
While the paper is still wet, drop in a bit more concentrated purple at the very top and deep blue at the bottom to intensify the gradient effect. -
Dry completely:
Allow the painting to dry thoroughly. The paper must be bone-dry before you attempt to remove the mask. Using a hair dryer on a low setting can speed this up.
Step 3: The Big Reveal
-
Remove the mask:
Once dry, use a rubber cement pick-up or a clean finger to gently rub away the masking fluid. Start from the center and rub outward to avoid tearing the paper. -
Clean up edges:
Brush away any rubbery crumbs from the masking fluid. Check for any pencil marks that might be visible and gently erase them if needed. -
Peel the tape:
Slowly peel off the painter’s tape, pulling it away from the painting at a 45-degree angle. This reveals the crisp white border that frames your artwork.
Add Some Sparkle
For a magical winter finish, lightly sprinkle coarse salt onto the wet paint while the background is drying. Brush it off later for a textured, icy effect.
Now you have a stunning, high-contrast winter art piece ready to display or send as a card


Negative-Space Snowflake With Painterly Edges
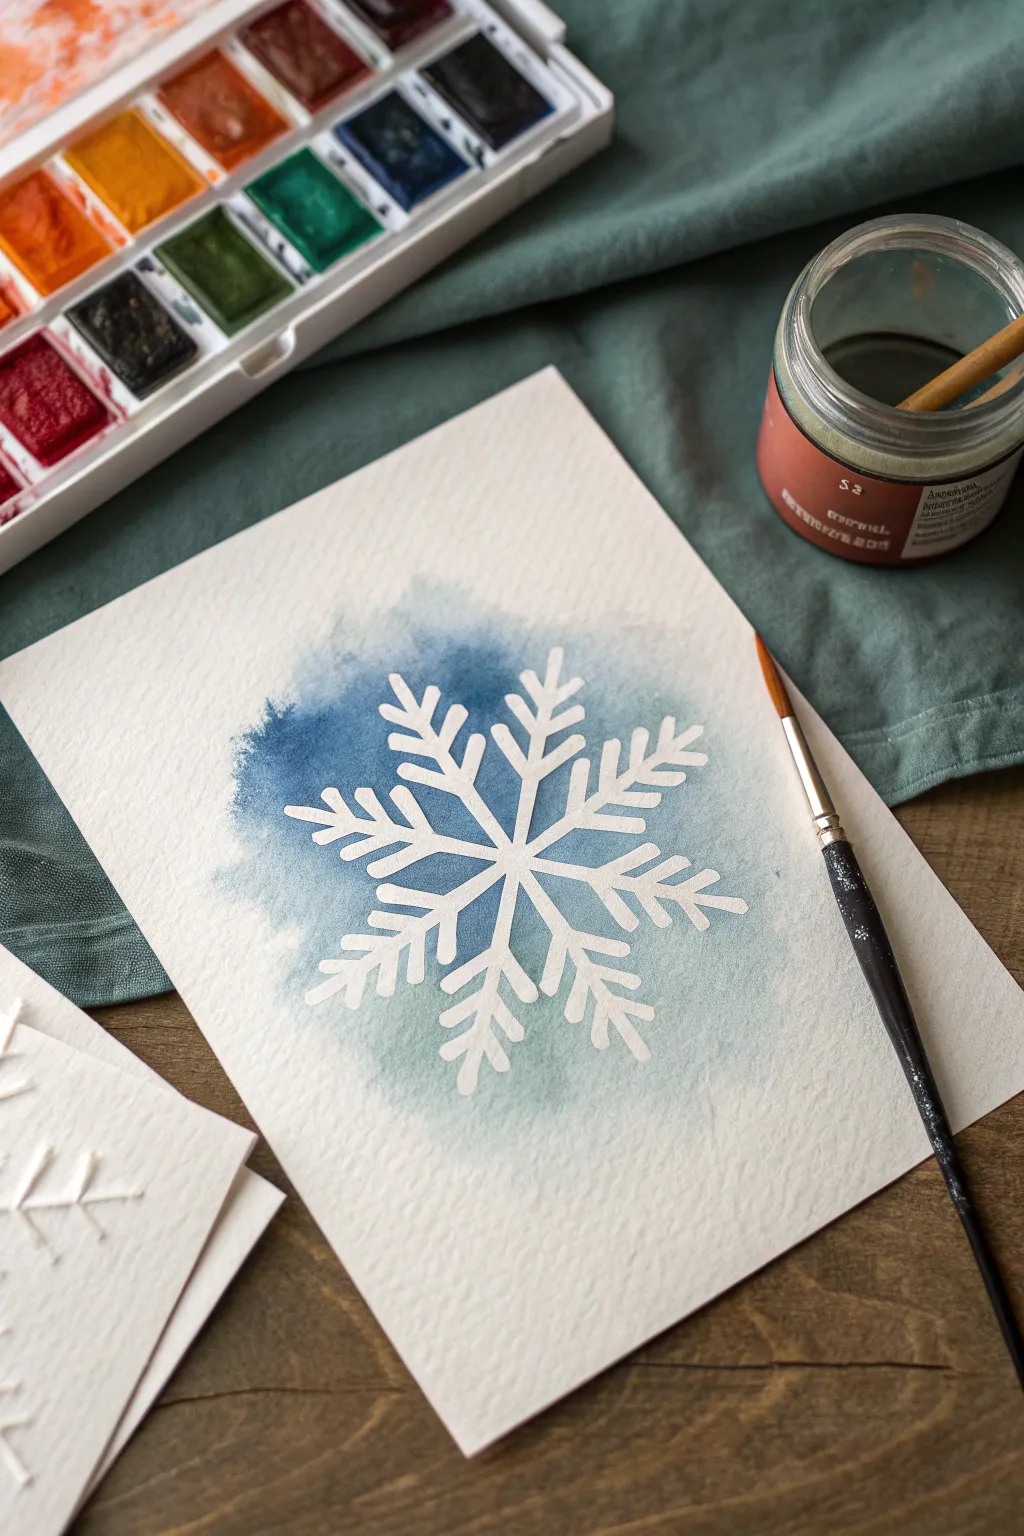
This elegant project uses a negative-space technique to make a pristine white snowflake emerge from a dreamy wash of blue and teal. It captures the crisp chill of winter without requiring complex brushwork, letting the paint do most of the work for you.
Step-by-Step Tutorial
Materials
- Cold press watercolor paper (300gsm/140lb)
- White oil pastel, white crayon, or watercolor masking fluid
- Watercolor paint set (specifically Prussian Blue or Indigo, and Emerald Green)
- Medium round brush (size 6 or 8)
- Fine liner brush (optional, for details)
- Clean water jar
- Paper towel
- Pencil and eraser (optional)
Step 1: Drawing the Base
-
Sketch the skeleton:
Begin by lightly marking a simple six-armed asterisk shape in the center of your paper using a pencil. This will serve as your guide to keep the snowflake symmetrical. -
Draw the main branches:
Using your white oil pastel or white wax crayon, trace over your pencil lines heavily. Start from the center and draw six straight lines radiating outward. -
Add the first V-shapes:
Create the classic snowflake look by drawing small V-shapes pointing outward on each of the six arms. Place these about halfway down the length of each arm. -
Add the second tier:
Draw a second set of V-shapes further out towards the tip of each arm, slightly smaller than the first set. -
Connect the center:
Draw a small hexagon or star shape connecting the base of all six arms in the very center to solidify the core of the snowflake. -
Thicken the lines:
Go over every line you’ve drawn with the white pastel again. Press firmly to ensure a thick, solid barrier of wax that will resist the water effectively. -
Clean up debris:
Gently brush away any loose crumbs of wax or pastel from the paper surface so they don’t get stuck in your paint later.
Step 2: The Watercolor Wash
-
Prepare your palette:
Mix a deep, cool blue—like Prussian Blue or Indigo—with plenty of water in your palette. In a separate spot, mix a touch of Emerald Green or Teal. -
Wet the snowflake area:
Dip your round brush in clean water and paint over the snowflake area, extending just slightly beyond where the wax lines end. -
Drop in the blue:
While the paper is still wet, load your brush with the deep blue mixture. Touch it to the wet paper right over the wax lines. Watch the paint spread but refuse to cover the wax. -
Add color variation:
Pick up a little of your teal or green mix and drop it into the wet blue areas, specifically around the outer edges of the snowflake shape for a subtle, icy glow. -
Soften the edges:
Rinse your brush and dab it on a paper towel so it is damp but clean. Use this damp brush to gently feather out the edges of the paint puddle, creating that soft, ‘cloud-like’ border. -
Intensify the contrast:
I find that adding a second drop of concentrated blue right next to the white wax lines makes the snowflake pop more. Do this while the first layer is still wet. -
Create texture:
Sprinkle a tiny pinch of salt onto the wet paint if you want extra icy crystallization textures, or simply let the water bloom naturally. -
Let it dry completely:
Allow the paper to dry undisturbed. The paint will settle into the valleys of the paper texture, creating a beautiful granular look. -
Final check:
Once fully dry, examine the edges. If you want a darker contrast, you can glaze a second light layer of blue over the center, but be careful not to disturb the first layer too much.
Paint bleeding through?
If paint covers your white lines, the wax layer wasn’t thick enough. Press harder next time, or use masking fluid for a 100% sharp seal that creates starker white lines.
Invisible Ink Trick
Drawing white on white is hard! Shine a flashlight sideways across the paper while drawing. The raking light will catch the wax texture so you can see your strokes.
Once dry, you’ll have a striking winter symbol captured in a frosty pool of blue.
Bubble-Wrap Crystal Texture Behind Snowflakes
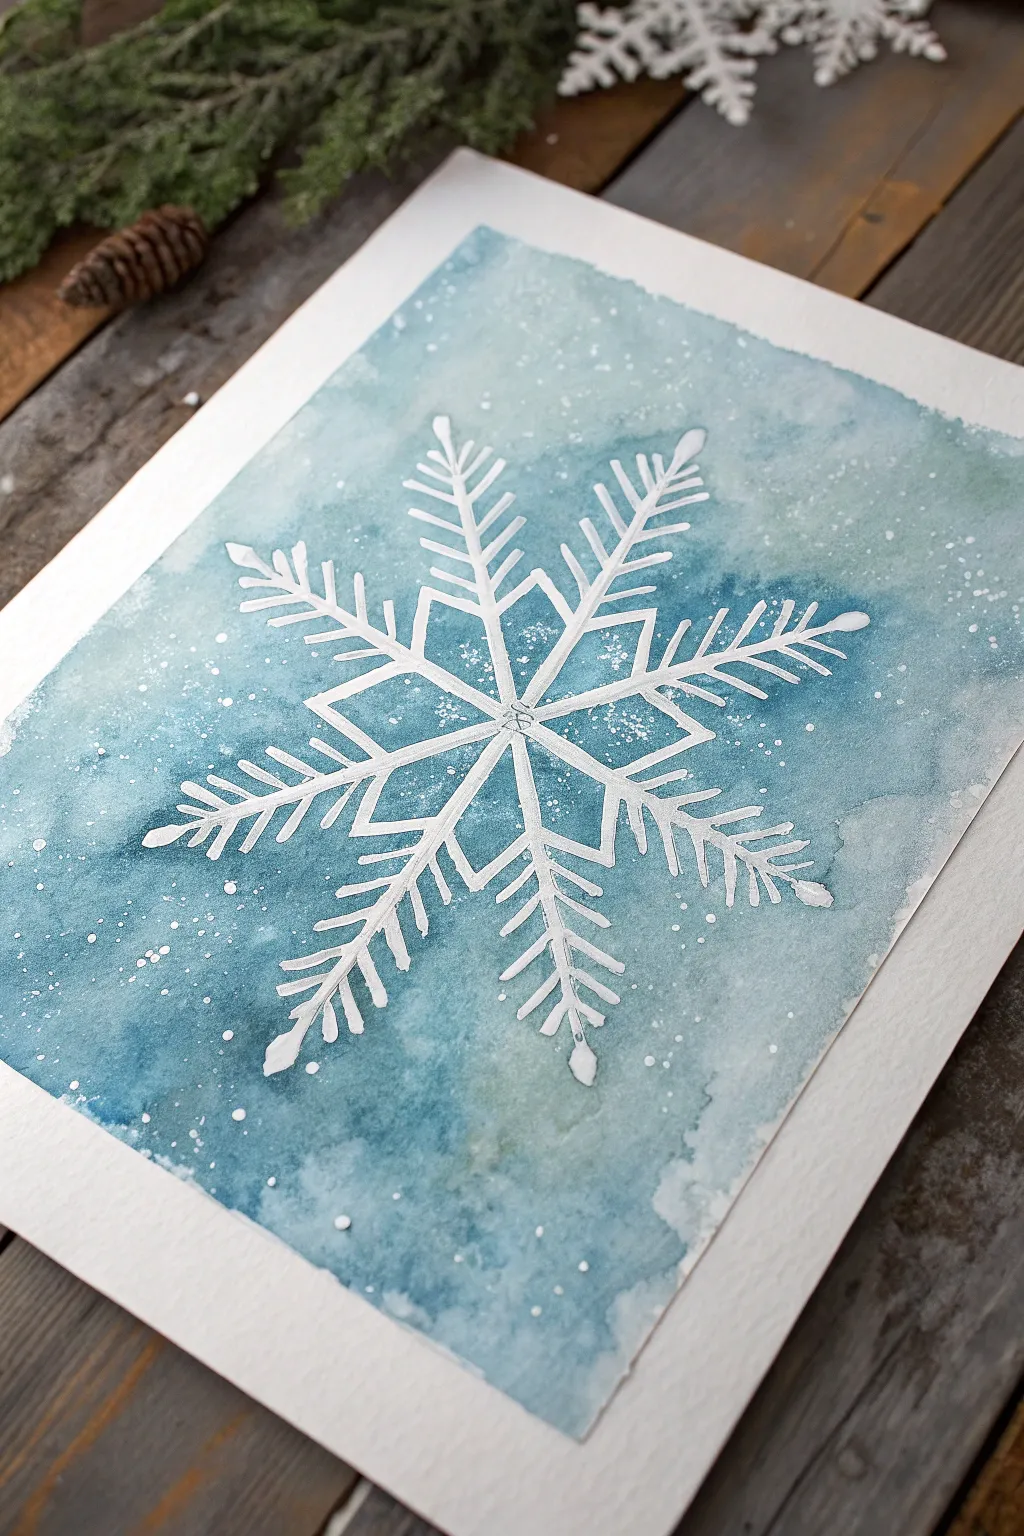
Capture the delicate frost of winter with this striking watercolor snowflake painting. Using a simple wax resist technique combined with salt for texture creates a magical, icy backdrop that makes the white snowflake pop.
Step-by-Step
Materials
- Cold press watercolor paper (140lb/300gsm is ideal)
- Painter’s tape or masking tape
- Pencil (HB or lighter)
- Masking fluid or white crayon/oil pastel (for the resist method)
- Fine detail brush (size 0 or 1)
- Medium round brush (size 6 or 8)
- Watercolor paints (Cerulean Blue, Prussian Blue, Phthalo Green/Turquoise)
- Table salt or coarse sea salt
- Clean water and paper towels
- Ruler (optional)
Step 1: Preparation and Sketching
-
Secure the paper:
Begin by taping down all four edges of your watercolor paper to a hard board or your work surface. This prevents the paper from buckling when it gets wet and creates that crisp, professional white border. -
Draft the structure:
Using a ruler and a very light pencil, draw a vertical line and a horizontal line intersecting in the middle to form a cross. Then, draw two diagonal lines intersecting the center to create an eight-pointed asterisk shape (though snowflakes naturally have six points, this stylized version uses eight for symmetry). -
Define the arms:
Flesh out the skeleton of the snowflake. I like to draw V-shapes branching off each main arm to create the classic feathery look. Keep your pencil pressure incredibly light so the graphite doesn’t smear later. -
Connect the center:
Draw connection points between the main arms near the center, creating a small star or diamond pattern that unites the structure.
Step 2: Applying the Mask
-
Apply masking fluid (Option A):
If using masking fluid, use an old or dedicated brush (dipped in soap first to protect bristles) to carefully paint over your pencil drawing. Ensure the lines are solid and thick enough to resist paint. Let this dry completely until it is hard to the touch. -
Apply wax resist (Option B):
Alternatively, firmly trace over your pencil lines with a white crayon or white oil pastel. Press down hard to ensure a heavy layer of wax covers the paper fibers.
Salt Not Working?
Timing is everything. If the paper is too dry, salt won’t react. If it’s too wet (puddles), the salt dissolves completely. Aim for a glossy sheen.
Step 3: Creating the Icy Wash
-
Prepare your palette:
Mix a few different puddles of blue paint. You’ll want a light icy blue (watered down Cerulean), a deep ocean blue (Prussian), and perhaps a hint of teal or turquoise for variety. -
Wet the paper:
Using your medium round brush, coat the entire paper area inside the tape with clean water. The paper should be glisten, but not hold standing puddles. -
Drop in color:
While the paper is wet, load your brush with the light blue and dab it randomly across the page. Immediately follow up with the darker blues, concentrating them slightly more around the snowflake shape to create contrast. -
Blend naturally:
Tilt the board slightly to let the colors bleed into one another. If the paint is too uniform, drop in a few spots of clear water to create ‘blooms’ that look like frost.
Level Up: Deep Contrast
For a dramatic look, mix a tiny bit of Payne’s Grey or Indigo into your blue right next to the white snowflake edges to really make it glow.
Step 4: Adding Texture and Finishing
-
Use the salt technique:
While the wash is still very wet and glossy—this timing is crucial—sprinkle a pinch of table salt or coarse salt over the painted areas. The salt will absorb the pigment and create beautiful starry speckles. -
Add spatter effects:
Dip a brush or toothbrush into clean water or white gouache and flick tiny droplets over the wet wash for extra snow-like texture. -
Patience is key:
Allow the painting to dry completely naturally. Do not use a hairdryer, as the force of the air might blow the salt crystals around and smear the texture. -
Remove the salt:
Once the paper is bone dry, gently brush the salt off into the trash using your hand or a dry brush. -
Reveal the snowflake:
If you used masking fluid, use a rubber cement pick-up tool or your finger to gently rub it away, revealing the pristine white paper underneath. If you used crayon, the resist is already done. -
Final touches:
Peel off the painter’s tape slowly, pulling it away from the painting at a 45-degree angle to keep the edges sharp.
Hang your finished piece in a well-lit spot to enjoy the subtle shimmer of your frosty creation


Have a question or want to share your own experience? I'd love to hear from you in the comments below!